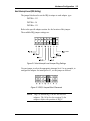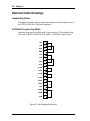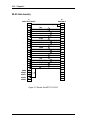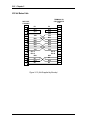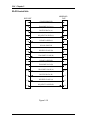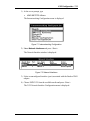
1
DCP_link Multi-Protocol Router Advanced Configuration Guide PT1054605-00, Rev A December 1995 Information contained in this document is believed to be accurate and reliable. However, Emulex Corporation assumes no responsibility for its use nor for any infringements of patents or other rights of third parties which may result from its use. Emulex Corporation reserves the right to change product specifications at any time without notice. The following trademarks of Emulex Corporation are used in this document: Emulex, DCP-286i-SBC, DCP-386i, DCP 486e, DCP_link, DCPx86i/e All other products mentioned are the trademarks of their respective companies. FCC Statement (USA) This equipment has been tested and found to comply with the limits for a Class A digital device pursuant to Part 15 of the FCC Rules. These limits are designed to provide reasonable protection against harmful interference when the equipment is operated in a commercial environment. This equipment generates, uses, and can radiate radio frequency energy and, if not installed and used in accordance with the instruction manual, may cause harmful interference to radio communications. Operation of this equipment in a residential area is likely to cause harmful interference in which case the user will be required to correct the interference at his own expense. Any changes or modifications not expressly approved by Emulex could void the user’s authority to operate this equipment. Shielded cables must be used between this equipment and attached peripheral devices. DOC Statement (Canada) Cet equipment ne depasse pas les limites de Classe A d’emission de bruits radioelectriques pour les appareils numeriques telles que perscrites par let Reglement sur le brouillage radioelectrique etabli par le ministere des Communications du Canada. L’exploitation faite en milieu residentiel peut entrainer le brouillage des receptions radio et television, ce qui obligerait le proprietaire ou l’operateur a prendre les dispositions necessaires pour en eliminer les causes. This equipment does not exceed Class A limits for radio noise emissions for digital apparatus set out in the Radio Interference Regulations of the Canadian Department of Communications. Operation in a residential area may cause unacceptable interference to radio and TV reception requiring the owner or operator to take whatever steps are necessary to correct the interference. Copyright 1995 Emulex Corporation. All rights reserved worldwide. No part of this document may be reproduced by any means nor translated to any electronic medium without the written consent of: Emulex Corporation 3535 Harbor Boulevard Costa Mesa, California 92626 Printed in U.S.A. Table of Contents Preface Product Support .................................................................................... i Audience .................................................................................... i User Guide Conventions...................................................................... ii Related Documentation ...................................................................... iii Chapter 1 Introduction Emulex DCP_link ............................................................................. 1-2 Hardware Requirements ........................................................... 1-3 Software Requirements ............................................................ 1-3 Chapter 2 Hardware Configuration Factory Default Settings ................................................................... 2-2 Base I/O Address...................................................................... 2-3 Host Interrupt Level (IRQ Settings) ......................................... 2-5 DCPx86i/e Adapter Configuration ................................................... 2-6 DCP286i-SBC Configuration ........................................................... 2-6 Jumper Settings ........................................................................ 2-6 Software Compatibility Level............................................ 2-7 Control Register 4 Read Option......................................... 2-8 Window Group Select........................................................ 2-8 Memory Size...................................................................... 2-8 Setting Data Clock Direction (DTE or DCE)........................... 2-9 DCP386i Configuration.................................................................. 2-11 Jumper Settings ...................................................................... 2-11 PC I/O Channel Check..................................................... 2-12 Window Group Select...................................................... 2-12 DCP486e Configuration ................................................................. 2-14 Jumper Settings ...................................................................... 2-14 Window Group Select...................................................... 2-14 DCP386i/486e Daughterboard Settings.......................................... 2-16 8-Port RS-232 Daughterboard................................................ 2-16 Setting DTE or DCE Operation ....................................... 2-16 8-Port RS-422/X.21 Daughterboard....................................... 2-18 Setting DTE or DCE Operation ....................................... 2-18 Table of Contents ii Chapter 3 Installation and Cabling Installing the Emulex Adapter ..........................................................3-3 Cabling Connections .........................................................................3-4 Factory Default Settings....................................................................3-4 DCP286i-SBC Adapter Cables .................................................3-4 DCP386i/DCP486e Daughterboard Cabling ............................3-4 RS-232 Cabling ..................................................................3-4 RS-422/X.21 Cabling .........................................................3-5 Optional Cable Drawings..................................................................3-6 Loopback Plug Options ............................................................3-6 RS-232/EIA-530 Loopback Plug .......................................3-6 V.35 Loopback Plug Winchester Male ..............................3-7 X.21 Loopback Plug DB15F ..............................................3-8 DCP286i-SBC Adapter Cables .........................................................3-9 RS-232 Cable Assembly ....................................................3-9 RS-422/530 Cable Assembly ...........................................3-10 RS-423 Cable Assembly ..................................................3-11 RS-485 Cable Assembly ..................................................3-12 V.35 Cable Assembly.......................................................3-13 X.21 Cable Assembly.......................................................3-14 RS-232 Standard Cable ....................................................3-15 RS-232 Null-Modem Cable (Crossover)..........................3-16 RS-423/RS-485 Null Modem Cable.................................3-17 V.35 Null Modem Cable ..................................................3-18 X.21 Null Modem Cable ..................................................3-19 DCP 386i/486e Daughterboard Cabling .................................3-20 RS-232 Cabling ................................................................3-20 RS-232 Standard Cable .........................................3-21 RS-232 Null-Modem Cable (Crossover) ...............3-22 RS-232 Three-Wire Port Cable .............................3-22 RS-422 Cabling ................................................................3-21 RS-422 Standard Cable .........................................3-24 X.21 Adapter Cable ...............................................3-25 RS-422 Null-Modem Cable...................................3-26 Troubleshooting ..............................................................................3-27 Table of Contents iii Chapter 4 Software Installation Software Installation Procedure........................................................ 4-2 Installing to Novell NetWare version 3.12............................... 4-2 Installing to Novell NetWare version 4.1................................. 4-4 Uninstall Procedures......................................................................... 4-6 Uninstall using NetWare version 3.12...................................... 4-6 Uninstall using NetWare version 4.1........................................ 4-8 Chapter 5 Software Configuration INETCFG ................................................................................ 5-2 INETCFG Menus ..................................................................... 5-2 Using Context Sensitive Help .................................................. 5-4 Configuring with INETCFG............................................................. 5-5 Chapter 6 Frame Relay Configuration Introduction ................................................................................ 6-2 Frame Relay Networks ............................................................. 6-2 Frame Relay Parameters........................................................... 6-3 Diagramming Your Frame Relay Network .............................. 6-4 Planning Your Frame Relay Network ...................................... 6-4 Configuring the Network Interface................................................... 6-6 Configuring the WAN Call Directory ............................................ 6-10 Network Protocol and Binding Configuration................................ 6-13 Configuring Protocol Parameters ........................................... 6-13 Binding Network Protocols to a WAN Interface ................... 6-14 Table of Contents iv Chapter 7 X.25 Configuration Introduction .................................................................................7-2 Virtual Circuit Service ..............................................................7-3 Logical Channel Numbers ........................................................7-4 Diagramming Your X.25 Network ...........................................7-5 Planning Your X.25 Network ...................................................7-5 Frame Level Parameters .....................................................7-5 Packet Level Parameters.....................................................7-6 Logical Channel Numbers ........................................................7-8 Emulex X.25 User Facilities .....................................................7-9 Configuring the X.25 Network Interface ........................................7-11 Modifying/Creating A Profile.................................................7-13 Local DTE Address.................................................................7-15 X.25 Authentication Options ..................................................7-15 Configuring the WAN Call Directory.............................................7-17 Expert Call Configuration.......................................................7-22 Network Protocol and Binding Configuration ................................7-24 Configuring Protocol Parameters............................................7-24 Binding Network Protocols.....................................................7-25 Chapter 8 Contacting Emulex Technical Assistance.........................................................................8-2 Prior to Your Call .....................................................................8-2 Placing the Call .........................................................................8-2 Domestic.............................................................................8-3 European.............................................................................8-3 24 - Hour Support .....................................................................8-4 Product Service 8-4 Bulletin Board System ......................................................................8-4 Internet ..............................................................................................8-6 Emufax ..............................................................................................8-7 Table of Contents v Appendix A Diagnostic Programs Diagnostic Platform......................................................................... A-2 Diagnostic Operating Requirements........................................ A-2 README.DOC....................................................................... A-2 Distribution Diskette ............................................................... A-3 Diagnostic Platform Instructions............................................. A-3 Using DCPDIAG3 For The DCP386i ............................................. A-7 Diagnostic Operating Requirements........................................ A-7 README.DOC....................................................................... A-7 Distribution Diskette ............................................................... A-7 Running the Diagnostic ........................................................... A-8 Preface Thank you for purchasing the DCP_link Multi-Protocol Router. You have joined the Emulex family of users, who have found that buying our products guarantees available performance and bandwidth while preserving resources. We value a strong relationship with our customers and seek to continually serve your needs in the years to come. Product Support Emulex products are supported by a broad range of educational and technical support services. They are available to help you maximize your system performance. Emulex Corporation (HQ) (714) 662-5600 PreSales (714) 513-8053 Technical Support (714) 513-8270 Audience for Advanced Configuration Guide The DCP_link Advanced Configuration Guide is included as a supplement to the DCP_link Quick Start User’s Guide. For most standard installations and WAN setups, the Quick Start User’s Guide should answer most start up and configuration questions. The Advanced Configuration Guide is intended to answer questions concerning WAN connectivity and planning. It also includes extensive cable pin drawings for use in designing custom cabling. ii Preface User Guide Conventions Sections of text that are marked for emphasis are formatted with the following key words: Note, Important, or Caution. For example: CAUTION: Provides the user with directions to prevent a mistake from occurring. When a command is illustrated in the user’s guide, the variable choices allowed to be changed will appear in a contrasting typeface. All command lines will begin with a triangular shaped symbol. An example of a command line is: > LOAD INETCFG DCPx86i/e Terminology Throughout this manual, DCPx86i/e is used to represent the Emulex DCP product line based on the Intel 80x86 microprocessors. These include the following: • DCP286i-SBC (Single Board Configurable, ISA bus) • DCP386i (ISA bus) • DCP486e (EISA bus) • All of these products are compatible with the Emulex DCP_link software. Preface iii Related Documentation This section is designed to assist the reader in finding third party reference manuals for the support of NetWare WAN protocols and general networking architectures and principles. NetWare Guides (Included with DCP_link) Novell NetWare MultiProtocol Router 3.0 Installation and Basic Configuration Guide Novell NetWare MultiProtocol Router 3.0 Advanced Configuration and Reference Guide Protocol Guides X.25 Explained: Protocols for Packet Switching Networks R.J. Deasington Published by Ellis Horwood, publishers ISBN 0-13-972175-4 LAN Troubleshooting Handbook Mark A. Miller M & T Publishing, Inc. ISBN 1-55-851-096-7 Internetworking with TCP/IP: Principles, Protocols and Architecture Douglas Comer Prentice Hall ISBN 0-13-470154-2 Emulex Guides Emulex ECX X.25 Packet Level Reference Manual, PT1054204 Emulex ECX X.25 Frame Level Reference Manual, PT1054205 Emulex ECX X.25 Protocol Programmer’s Guide, PT1054207 Emulex ECX X.25 Library User’s Guide, PT1054602 Introduction Chapter 1 EMULEX DCP_LINK.............................................................................................1-2 HARDWARE REQUIREMENTS ...........................................................................1-3 SOFTWARE REQUIREMENTS ............................................................................1-3 1-2 Chapter 1 Emulex DCP_link Emulex DCP_link is a multi-protocol router including WAN connectivity software and one of the DCPx86i/e family of communications adapters. DCP_link is designed to work in conjunction with the Novell NetWare Branch Link and Enterprise Router, formerly known as the Novell MultiProtocol Router (MPR 3.0). This unique adapter and software combination provides remote connectivity across numerous interfaces, protocols, network types and hardware platforms. Through Novell ODI specification compliance, Emulex DCP_link adds the integrated hardware and software components necessary for remote WAN connections on NetWare LAN environments. In addition to the WAN adapter, specialized interface modules and protocol stacks are included to allow upper-level applications the transparent network link to run over multiprotocol configurations. A copy of Novell MPR 3.0 (Branch Link or Enterprise version) is included with DCP_link, and must be installed prior to installation of DCP_link. NOTE: Please refer to the Novell MPR installation instructions outlined in Chapter 5 of the Novell NetWare MultiProtocol Router 3.0 Installation and Basic Configuration Guide included with DCP_link. Introduction 1-3 Hardware Requirements In order to successfully install the Emulex DCP_link software, you must be running NetWare on a Novell approved hardware platform, or you must first install the Runtime version of Novell NetWare that is shipped with DCP_link. If you are running on a Novell approved hardware platform, you will need the following minimum configuration. • An Intel (or equivalent) 80386 (minimum) based host server with ISA/EISA slot(s) available for WAN adapter(s). • At least 16MB of system RAM. • 80 MB of available hard disk memory. • (For CD-ROM installation only) A CD-ROM drive compatible with ISO 9660 formatted disks. • NetWare certified LAN Network Interface Card (NIC) for local routing. • A 3.5” floppy diskette drive. You will need the following communications equipment: • For analog lines, synchronous modems at both ends of the WAN connection (point-to-point configurations). • DSU/CSU, synchronous modem, PBX, or T1 multiplexer. • Cable connectors and adapters, as applicable, for RS-232C, V.35, RS422, or X.21 interfaces. Basic connectors for RS-232C and RS-422 are included with DCP_link. Software Requirements To operate properly, your system software should be configured as follows: • The system should start DOS from the hard disk. NetWare is started from DOS before it takes over the system hardware completely. • Novell DOS 7 (included), MS-DOS or PCDOS 3.1 or higher. 1-4 Chapter 1 CAUTION: The system must not load any of the following modules: - extended memory managers, such as HIMEM, QEMM, or EMM386. - disk compression utilities, such as Disk Doubler. - any terminate-and-stay-resident (TSR) programs. Verify that the Novell environment meets the following criteria: • NetWare O/S version 3.12 or version 4.1 (Runtime version included with DCP_link). • Novell MultiProtocol Router (Branch Link or Enterprise version) MPR 3.0, (included with DCP_link). • You must successfully install MPR software before attempting to install the Emulex adapter. What’s Next? After ensuring that you have the minimum hardware and software configuration for your server/router, refer to chapter 2 to: Review Hardware Configuration and determine if you are able to use the Factory Default Settings. Hardware Configuration Chapter 2 FACTORY DEFAULT SETTINGS ......................................................................2-2 BASE I/O ADDRESS .........................................................................................2-3 HOST INTERRUPT LEVEL (IRQ SETTING)........................................................2-5 DCP286I-SBC ADAPTER CONFIGURATION ..................................................2-6 JUMPER SETTINGS ...........................................................................................2-6 Software Compatibility Level .................................................................2-7 Control Register 4 Read Option ..............................................................2-8 Window Group Select .............................................................................2-8 Memory Size ...........................................................................................2-8 SETTING DATA CLOCK DIRECTION (DTE OR DCE) .......................................2-9 DCP386I ADAPTER CONFIGURATION .........................................................2-11 JUMPER SETTINGS .........................................................................................2-11 PC I/O Channel Check ..........................................................................2-12 Window Group Select ...........................................................................2-12 DCP486E ADAPTER CONFIGURATION ........................................................2-14 JUMPER SETTINGS .........................................................................................2-14 Window Group Select ...........................................................................2-14 DCP386I/486E DAUGHTERBOARD SETTINGS ............................................2-16 8-PORT RS-232 DAUGHTERBOARD ...............................................................2-16 DTE/DCE Selection ..............................................................................2-16 8-PORT RS-422/X.21 DAUGHTERBOARD ......................................................2-18 SETTING DTE OR DCE OPERATION ..............................................................2-18 2-2 Chapter 2 DCP_link features an 80x86 microprocessor based “intelligent” WAN adapter to provide powerful co-processing capabilities. The adapter utilizes 1Mb of on-board shared memory to transfer commands and data to the NetWare server. DMA channels are included to support full-duplex operation. This chapter describes the factory default configuration of the DCP286i/386i/486e and tells how to configure the board for WAN applications. Factory Default Settings This factory default configuration is correct for all WAN applications: • DCP286i, DCP386i and DCP486e compatibility level • 1 Megabyte memory size • Window Group Select 16K, 32K, 64K, 1MB • Control Register 4 Read option enabled IMPORTANT: The base I/O address and the IRQ level must not be in conflict with any other adapter on the server. Verify that both the base I/O address and the interrupt level (IRQ setting) configured on the adapter match the software configuration. For more information, refer to Chapter 6. Verify that the following factory default parameters are appropriate for your server environment. If you can use the factory default configuration, refer to the DCP_link Quick Start User’s Guide. Base I/O address 33C hex Interrupt Level (IRQ) 3 Data clock direction DTE Hardware Configuration 2-3 NOTE: The Base I/O address and IRQ settings are the same for all adapters. Data Clock Direction, DTE, is correct for all connections except V.35. Other switch or jumper settings unique to an individual adapter type (i.e., DCP286i-SBC, DCP386i, or DCP486e) are detailed in a separate section of this chapter specific to each adapter. Base I/O Address The Base I/O address is selected via switch SW1, which may be labeled CR ADDR (Control Register Address) on some adapters. The adapter requires four bytes of I/O locations for its control registers. These control registers are used by the server CPU to coordinate and service information provided by the adapter. The address of these registers depends on the setting of switches SW1-1 through SW1-4. The factory default is set to 33C hex. Figure 2-1 shows the possible settings for the Control Register 1 address. To locate the position of SW1 on the adapter, refer to the appropriate diagram in the following sections for the adapter type you are installing (i.e. 286, 386 or 486). 2-4 Chapter 2 SW1 - Base I/O Address Settings Figure 2-1 SW1 Hardware Configuration 2-5 Host Interrupt Level (IRQ Setting) The jumper block used to set the IRQ is unique to each adapter type. DCP286i - J13 DCP386i - J6 DCP486e - J11 Refer to the specific adapter section for the location of this jumper. The available IRQ jumper settings are: / IRQ 2 Figure 2-2 Host Interrupt Level Jumper Plug Settings Use one jumper to select the appropriate interrupt level. As an example, to configure the adapter for interrupt level 5, set the jumper as follows: Figure 2-3 IRQ 5 Jumper Block Placement NOTE: IRQ 9 is labeled IRQ 2 on the 386 and 486 adapters. The 16 bit bus slot required by the adapters defines this position as IRQ 9. 2-6 Chapter 2 DCPx86i/e Adapter Configuration The remainder of Chapter 2 is divided into three sections according to adapter type (DCP286i-SBC, DCP386i, or DCP486e). Please refer to the section for the adapter you are installing. DCP286i-SBC Adapter Configuration The following diagram of the DCP286i-SBC adapter shows the location of all option setting switches and jumpers: Figure 2-4 DCP286i-SBC Jumper Block Placement Jumper Settings NOTE: Jumper block J13 sets the Host Interrupt Level and SW1 sets the base I/O address for the 286 adapter. Reference the beginning of this chapter for details on these settings. Hardware Configuration 2-7 Figure 2-5 shows the factory default options for the standard adapter configuration. The factory default setting, as shown, calls for jumper blocks to be in place on each jumper, thus enabling each option: Figure 2-5 Factory Default Jumper Block Placement Figure 2-6 - Jumper Block J1 Options Software Compatibility Level Jumper J1:1-2 selects the software compatibility level of the DCP286i-SBC. In the factory default (jumper connected), an application program is able to detect that the board is a DCP286i and can take advantage of features not available in the original DCP286. 2-8 Chapter 2 Control Register 4 Read Option Set Jumper J1 to enable (J1-3 to J1-4 connected) host read access to Control Register 4. Window Group Select The DCP286i-SBC contains memory that is shared by the host. The host software can select the size of the window that is shared using jumper J1:5-6. The factory default setting (J1-5 to J1-6 connected) allows window sizes of 16K, 32K, 64K or 1MB. By removing this jumper, window sizes of 16K, 64K or 128K are made available. Memory Size The memory size on the board, 512 kB or 1MB, is selected by jumper position J1:7-8. The DCP286i-SBC is shipped with 1 MB of Dynamic RAM. Remove this jumper to select 512 kB of RAM. Hardware Configuration 2-9 Setting Data Clock Direction (DTE or DCE) J7, J8, J9 and SW-3 set the synchronous data clock direction (DTE or DCE) for port 1. Jumpers J4, J5, J6 and SW2 set the synchronous data clock direction (DTE or DCE) for Port 2. PORT 2 PORT 1 Figure 2-7 Factory Default DTE Settings All Modes Except V.35 NOTE: DTE OPERATION RS422: In the RS422 mode additional flexibility is provided to terminate receivers with 100 ohm resistors. If termination resistors are required in this mode, additional switches SW3 - 2, 3 and 4 should be CLOSED (SW2 for Port 2). PORT 2 PORT 1 Figure 2-8 DCE Settings All Modes Except V.35 NOTE: DCE OPERATION RS422 Port 1: In RS422 DCE mode, if termination resistors are required, additional switch SW3 - 2 should be CLOSED (SW2 for Port 2). 2-10 Chapter 2 PORT 2 PORT 1 Figure 2-9 DTE Settings for the V.35 Mode PORT 2 PORT 1 Figure 2-10 DCE Settings for the V.35 Mode What’s Next? After configuring the DCP286i adapter, refer to chapter 3 to: Install the DCP286i adapter in your computer. Attach cable. Hardware Configuration 2-11 DCP386i Adapter Configuration The following diagram of the DCP386i adapter shows the location of all option setting switches and jumpers: Figure 2-11 DCP386i Jumper Block Placement Jumper Settings See Figure 2-11 for the location of each jumper block. NOTE: Jumper block J6 sets the Host Interrupt Level and SW1 sets the base I/O address for the 386 adapter. Reference the beginning of this chapter for details on these settings. Jumper block J1 and J3 contain the factory default settings for the following options: • PC I/O Channel Check • Window Group Select Reference the following factory default options for the standard Wan configuration. 2-12 Chapter 2 Figure 2-12 DCP386i Factory Default Jumper Connections PC I/O Channel Check The factory default setting (J1-2 to J1-3 connected) for the DCP386i provides an interrupt line to the PC for parity errors in the shared memory. This is the I/O Channel Check signal on the PC bus. A parity error may instead interrupt the local processor at level 0 of the local 82C59. This can be done by placing the jumper in the LCL position (J1-1 to J1-2 connected). Refer to Figure 2-12 for the factory default jumper settings. Window Group Select The DCP386i contains memory that is shared by the host. The host software can select the size of the window that is shared using Jumper J3. The factory default setting (J3-1 to J3-2 connected) allows window sizes of 16K, 32K, 64K or 1M. Changing this jumper plug position (J3-2 to J3-3 connected), allows window sizes of 16K, 64K or 128K. Figure 2-13 shows the Window Group Select jumper settings. Factory Default Figure 2-13 Window Group Select Jumper Plug Settings Hardware Configuration 2-13 What’s Next? After configuring the DCP386I adapter, refer to Daughterboard Settings section later in this chapter to: Configure daughterboard. 2-14 Chapter 2 DCP486e Adapter Configuration The following diagram of the DCP486e adapter shows the location of all option setting switches and jumpers: J2 Figure 2-14 DCP486e Jumper Block Placement Jumper Settings Refer to Figure 2-14 for jumper locations. NOTE: Jumper block J11 sets the Host Interrupt Level and SW1 sets the base I/O address for the 486 adapter. Reference the beginning of this chapter for details on these settings. Jumper block J8 contains the factory default settings for the following options: • Window Group Select Reference the following factory default options for the standard WAN configuration. Window Group Select The DCP486e contains memory that is shared by the host. The host software can select the size of the window that is shared. Factory default setting (J8-1 to J8-2 connected) allows window sizes of 16K, 32K, 64K or 1 Megabyte. Hardware Configuration 2-15 Changing this jumper plug position (J8-2 to J8-3 connected), allows window sizes of 16K, 64K or 128K. Figure 2-24 shows the Window Group Select jumper settings. 1 2 3 1 2 3 Figure 2-15 Window Group Select Jumper Positions What’s Next? After configuring the DCP486E adapter, refer to Daughterboard Settings section to: Configure daughterboard. 2-16 Chapter 2 DCP386i/486e Daughterboard Settings This section provides configuration and installation instructions for the 8port RS-232 full duplex DMA daughterboard (I.D.=BC) and the 8-port RS422/X.21 daughterboard. Both daughterboards are fully compatible with the DCP386i and DCP486e adapters. 8-Port RS-232 Daughterboard The 8-port RS-232 daughterboard adds the following features to the Emulex DCP386i and DCP486e: • All 8 serial ports may be individually configured as either DTE or DCE mode. • RS232 voltage option. • Backwards-compatible with the RS-232C 4-port daughterboard DTE/DCE Selection Switches SW1 through SW4 are used to select DCE or DTE operation. These switches are placed along the board edge as shown in Figure 2-14. NOTE: Throughout this document, DCE refers to internal clocking and DTE refers to external clocking. SW2 SW1 J1 J3 SW3 SW4 J2 Figure 2-16 Switch Locations on the 8-Port RS-232 Daughterboard Each switch configures two ports, as detailed in the following table: Hardware Configuration 2-17 Switch Port # DTE DCE SW1 1 1-Closed 1-Open 2-Open 2-Closed 3-Open 3-Closed 4-Closed 4-Open 5-Open 5-Closed 6-Open 6-Closed 1-Closed 1-Open 2-Open 2-Closed 3-Open 3-Closed 4-Closed 4-Open 5-Open 5-Closed 6-Open 6-Closed 1-Closed 1-Open 2-Open 2-Closed 3-Open 3-Closed 4-Closed 4-Open 5-Open 5-Closed 6-Open 6-Closed 1-Closed 1-Open 2-Open 2-Closed 3-Open 3-Closed 4-Closed 4-Open 5-Open 5-Closed 6-Open 6-Closed 2 SW2 3 4 SW3 5 6 SW4 7 8 2-18 Chapter 2 8-Port RS-422/X.21 Daughterboard This section provides configuration and installation instructions for the eight port RS-422/X.21 Each serial port may be individually configured as either DTE or DCE with the aid of null-modem cables. All ports support RS-422A. Setting DTE or DCE Operation NOTE: Throughout this document, DCE refers to internal clocking and DTE refers to external clocking. SW1 SW2 J1 J3 SW3 SW4 J2 Figure 2-17 Switch Locations on the 8-Port RS-422/X.21 Daughterboard Hardware Configuration 2-19 DTE/DCE clock selection is determined by the following switch settings: Switch SW1 Port # 1 2 SW2 3 4 SW3 5 6 SW4 7 8 DTE DCE 1 Closed 1 Open 2-5 Open 2-5 Closed 6 Closed 6 Open 7-10 Open 7-10 Closed 1 Closed 1 Open 2-5 Open 2-5 Closed 6 Closed 6 Open 7-10 Open 7-10 Closed 1 Closed 1 Open 2-5 Open 2-5 Closed 6 Closed 6 Open 7-10 Open 7-10 Closed 1 Closed 1 Open 2-5 Open 2-5 Closed 6 Closed 6 Open 7-10 Open 7-10 Closed What’s Next? After configuring the adapter and daughterboard, refer to chapter 3 to: Install the adapter in your computer. Attach cable. Installation and Cabling Chapter 3 INSTALLING THE EMULEX ADAPTER..........................................................3-3 CABLING CONNECTIONS..................................................................................3-4 FACTORY DEFAULT SETTINGS ......................................................................3-4 DCP286I-SBC ADAPTER CABLES...................................................................3-4 DCP386I/486E DAUGHTERBOARD CABLING ..................................................3-4 RS-232 Cabling.......................................................................................3-4 RS-422/X.21 Cabling..............................................................................3-5 OPTIONAL CABLE DRAWINGS........................................................................3-6 LOOPBACK PLUG OPTIONS ..............................................................................3-6 R-S232/EIA-530 Loopback Plug (DB25F).............................................3-6 V.35 Loopback Plug Winchester Male ...................................................3-7 X.21 Loopback Plug DBI5F ...................................................................3-8 DCP286I-SBC ADAPTER CABLES .....................................................................3-9 RS-232 CABLE ASSEMBLY..............................................................................3-9 RS-422/530 CABLE ASSEMBLY ....................................................................3-10 RS-423 CABLE ASSEMBLY............................................................................3-11 RS-485 CABLE ASSEMBLY............................................................................3-12 V.35 CABLE ASSEMBLY ................................................................................3-13 X.21 CABLE ASSEMBLY ................................................................................3-14 RS-232 STANDARD CABLE ...........................................................................3-15 RS-232 NULL-MODEM CABLE (CROSSOVER)...............................................3-16 RS-423/RS-485 NULL MODEM CABLE .........................................................3-17 V.35 NULL MODEM CABLE...........................................................................3-18 X.21 NULL MODEM CABLE...........................................................................3-19 3-2 Chapter 3 DCP386I/486E DAUGHTERBOARD CABLING ............................................. 3-20 RS-232 CABLING .......................................................................................... 3-20 RS-232 Standard Cable......................................................................... 3-21 RS-232 Null-Modem Cable (Crossover) .............................................. 3-22 RS-232 Three-Wire Port Cable ............................................................ 3-22 RS-422/X.21 CABLING ................................................................................. 3-23 RS-422 Standard Cable......................................................................... 3-24 X.21 Adapter Cable .............................................................................. 3-25 RS-422 Null-Modem Cable.................................................................. 3-26 TROUBLESHOOTING ....................................................................................... 3-27 Hardware Installation 3-3 This section describes the procedure for installing the DCP286i-SBC, the DCP386i, and the DCP486e WAN adapter in your server/router. Brief troubleshooting procedures are also provided. Installing the Emulex Adapter To install the adapter perform these steps: 1) Turn off power to the system unit. Remove the power cord from the unit and the AC outlet. 2) Loosen attaching screw and remove the top cover of the system unit. 3) Remove the cover from an empty slot. The DCP286i-SBC and DCP386i may be installed in a 16-bit ISA and EISA slot. However, the DCP486e must be installed in an EISA slot. 4) Slide the board into the empty slot. Press firmly to seat the board. 5) Secure the board with the screw removed in step 3. 6) Replace the system unit cover and reconnect the power cord. 7) Connect cable. Before connecting the external device, you may want to perform a complete functional test of the unit. Refer to Section 4 for instructions on running the diagnostics. 3-4 Chapter 3 Cabling Connections Cabling specifications for each adapter type (DCP286i-SBC, DCP386i and DCP486e) are found in the following section. Cabling differences will be noticed when connecting a DTE port to a DCE device (normally a straight through cable), and when connecting a DTE port to a DTE device (normally a null modem cable). Factory setting on all cabling is DTE. Factory Default Settings DCP286i-SBC Adapter Cables The DCP286i-SBC adapter is shipped with two standard adapter cables which convert the Micro-D25 male output to a standard DB25 output. Install the adapter cable for the environment in which you are working: − RS232, Emulex part no. PT1011208-01 − V.35, Emulex part no. PT1011213-01 DCP386i/486e Daughterboard Cabling This section discusses the default cable connections between the 8-port daughterboard on the DCP386i and DCP486e adapters and external devices. RS-232 Cabling The serial ports on the 8-port daughterboard are connected to external devices via an 8-port breakout cable, also known as an Octopus cable. Each output provides a standard 25-pin male RS-232C connector for attachment to external devices. NOTE: All connections to the board should be made using shielded cables to reduce radio frequency interference. Hardware Installation 3-5 − RS232 8-port breakout cable for DCP386i and DCP486e adapter (80-pin), Emulex part no. PA1011236-01. RS-422/X.21 Cabling For RS-422/X.21 conversion, you will need a set of eight X.21 conversion cables at the end of the 8-port breakout cable. These are available from Emulex Sales Support. − RS422 8-port breakout cable for DCP386i and DCP486e adapter (100-pin), Emulex part no. PT1011205-01 Note: Be sure to securely screw in all cables to avoid any loose connections. 3-6 Chapter 3 Optional Cable Drawings Loopback Plug Options A loopback connector must be used when running external loopback tests on the DCP286i/386i/486e Platform Diagnostics. R-S232/EIA-530 Loopback Plug (DB25F) Loopback plug signals for the female 25-pin connector. This loopback plug will work for RS232, RS422/EIA530, RS423, and RS485 adapter cables. TDA 2 TDB 14 RDA 3 RDB 16 TCA 15 TCB 12 RCA 17 RCB 9 RTSA 4 CTSA 5 RTSB 19 CTSB 13 DTRA 20 DSRA 6 CDA 8 DTRB 23 DSRB 22 CDB 10 Figure 3-1 (Not Supplied by Emulex) Hardware Installation 3-7 V.35 Loopback Plug Winchester Male TDA P TDB S RDA R RDB T TCA V TCB AA RCA V RCB X RTS C CTS D DTR H DSR E CD F Figure 3-2 (Not Supplied by Emulex) 3-8 Chapter 3 X.21 Loopback Plug DBI5F TA 2 TB 9 RA 4 RB 11 CA 3 CB 10 1A 5 1B 12 7 14 SA 6 SB 13 Figure 3-3 (Not Supplied by Emulex) Hardware Installation 3-9 DCP286i-SBC Adapter Cables RS-232 Cable Assembly P1 DB25 MALE J1 MICRO-D25 FEMALE SHELL FG 1 1 2 TDB RDB CTSB DSRB CDB RCB TCB DTRB 17 12 TCA DTRA 15 20 23 23 7 RGND MODE0 MODE1 MODE2 MODE3 9 RCA 12 20 8 10 9 15 6 22 CDA 10 17 5 13 DSRA 22 8 4 19 CTSA 13 6 3 16 RTSA 19 5 2 14 RDA 16 4 RTSB TDA 14 3 SHELL SG 7 11 11 18 18 21 21 24 24 25 25 Figure 3-4 Emulex Part #PT1011208-01 3-10 Chapter 3 RS-422/530 Cable Assembly J1 MICRO-D25 FEMALE P1 DB25 MALE SHELL SHELL 1 1 2 14 3 16 4 RTSB 19 5 CTSB 13 6 DSRB 22 8 CDB 10 9 17 12 15 20 DTRB 23 7 TDA TDB RDA RDB RTSA RTSB CTSA CTSB DSWRA DSRB CDA CDB RCB RCA TCB TCA DTRA DTRB SG 2 14 3 16 4 19 5 13 6 22 8 10 9 17 12 15 20 23 7 RGND MODE0 11 11 18 18 MODE1 MODE2 MODE3 21 21 24 24 25 25 Figure 3-5 Emulex Part #PT1011209-01 Hardware Installation 3-11 RS-423 Cable Assembly J1 MICRO-D25 FEMALE P1 DB25 MALE SHELL SHELL 1 1 2 TBD RTSB DSRB CDB RCB TCB DTRB 9 RCA TCA DTRA 15 20 23 23 7 17 12 12 20 8 10 9 15 6 22 CDA 10 17 5 13 DSRA 22 8 4 19 CTSA 13 6 3 16 RTSA 19 5 CTSB RDA 16 4 2 14 14 3 RDB TDA SG RGND 7 RGND MODE0 11 18 18 MODE1 MODE2 MODE3 21 21 24 24 25 25 Figure 3-6 Emulex Part #PT1011211-01 Figure 3-3 11 3-12 Chapter 3 RS-485 Cable Assembly J1 MICRO-D25 FEMALE P1 DB25 MALE SHELL SHELL 1 1 2 14 3 16 4 RTSB 19 5 CTSB 13 6 DSRB 22 8 CDB 10 9 17 12 15 20 DTRB 23 7 TDA TDB RDA RDB RTSA RTSB CTSA CTSB DSRA DSRB CDA CDB RCB RCA TCB TCA DTRA DTRB SG 2 14 3 16 4 19 5 13 6 22 8 10 9 17 12 15 20 23 7 RGND MODE0 11 11 18 18 MODE1 MODE2 MODE3 21 21 24 24 25 25 Figure 3-7 Emulex Part #PT1011210-01 Hardware Installation 3-13 V.35 Cable Assembly J1 MICRO-D25 FEMALE J2 V.35 FEMALE SHELL SHELL A 1 2 14 3 16 4 RTSB R T C CTSA D DSRA E CDA F 10 9 17 12 15 20 DTRB RTSA S 22 8 CDB RDB P 13 6 DSRB TDB RDA 19 5 CTSB TDA RCB RCA TCB TCA DTRA X V AA Y H 23 7 RGND MODE0 11 MODE1 MODE2 MODE3 21 SG 18 24 25 Figure 3-8 Emulex Part #PT1011213-01 B 3-14 Chapter 3 X.21 Cable Assembly Figure 3-9 Emulex Part #PT1011221-01 Hardware Installation 3-15 RS-232 Standard Cable DB25 FEMALE DCP PORT MODEM OR OTHER DCE 1 1 2 3 4 5 6 7 8 15 17 20 FG TDA RDA RTSA CTSA DSRA SG CDA TCA RCA DTRA Figure 3-10 (Not Supplied by Emulex) 2 3 4 5 6 7 8 15 17 20 3-16 Chapter 3 RS-232 Null-Modem Cable (Crossover) DCP PORT DB25 FEMALE TERMINAL CHASSIS GROUND 1 2 3 4 5 6 7 8 15 17 20 TRANSMIT DATA RECEIVE DATA REQUEST TO SEND CLEAR TO SEND 1 TRANSMIT DATA RECEIVE DATA REQUEST TO SEND CLEAR TO SEND DATA SET READY DATA SET READY SIGNAL GROUND SIGNAL GROUND DATA CARRIER DETECT TRANSMIT CLOCK RECEIVE CLOCK DATA TERMINAL READY DATA CARRIER DETECT TRANSMIT CLOCK RECEIVE CLOCK DATA TERMINAL READY Figure 3-11 (Not Supplied by Emulex) 2 3 4 5 6 7 8 15 17 20 Hardware Installation 3-17 RS-423/RS-485 Null Modem Cable Figure 3-12 (Not Supplied by Emulex) 3-18 Chapter 3 V.35 Null Modem Cable TERMINAL OR OR OTHER DTE V.35 DCP PORT V.35 MALE SHELL SHELL FG FG RTS CTS RTS CTS C TDA TDB TDA TDB P RDA RDB R T RDA RDB V RCA RCA RCB TCA TCB A C D P S R X Y AA U W E F H B RCB TCA TCB ETC-A ETC-B DSR CD DTR SG A D S T V X Y AA ETC-A ETC-B DSR CD DTR SG Figure 3-13 (Not Supplied by Emulex) U W E F H B Hardware Installation 3-19 X.21 Null Modem Cable SHIELD Figure 3-14 (Not Supplied by Emulex) 3-20 Chapter 3 DCP386i/486e Daughterboard Cabling This section discusses cable connections between the 8-port daughterboard on the DCP386i and DCP486e adapters and external devices. RS-232 Cabling The serial ports on the 8-port daughterboard are connected to external devices via an 8-port breakout cable. Each port provides a standard 25-pin male RS-232C connector for attachment to external devices. To connect the port to a modem or other DCE device, use a standard straightthrough cable as shown in Figure 3-10. If you are connecting the port to a DTE device, such as a terminal or another computer, you must use the null-modem cable shown in Figure 3-11. If your device and application software do not require any modem or clock signals (async only) the three-wire cable shown in Figure 3-15 may be used. NOTE: All connections to the board should be made using shielded cables to reduce radio frequency interference. Contact Emulex Sales Support for further information regarding price and model number of any support cables. IMPORTANT: In order to provide proper strain relief it is recommended that the breakout cable not be freely suspended from the PC chassis. If this is necessary, the breakout cable should be secured to a chassis or rack. This will help prevent the loss of electrical connection between the adapter and the cable. Hardware Installation 3-21 RS-232 Standard Cable DB25 FEMALE DCP PORT 1 2 3 4 5 6 7 8 15 17 20 MODEM OR OTHER DCE FG TDA RDA RTSA CTSA DSRA SG CDA TCA RCA DTRA Figure 3-15 (Not Supplied by Emulex) 1 2 3 4 5 6 7 8 15 17 20 3-22 Chapter 3 RS-232 Null-Modem Cable (Crossover) DCP PORT DB25 FEMALE TERMINAL CHASSIS GROUND 1 2 3 4 5 6 7 8 15 17 20 1 TRANSMIT DATA TRANSMIT DATA RECEIVE DATA RECEIVE DATA REQUEST TO SEND REQUEST TO SEND CLEAR TO SEND CLEAR TO SEND DATA SET READY DATA SET READY SIGNAL GROUND SIGNAL GROUND DATA CARRIER DETECT DATA CARRIER DETECT TRANSMIT CLOCK TRANSMIT CLOCK RECEIVE CLOCK RECEIVE CLOCK DATA TERMINAL READY DATA TERMINAL READY Figure 3-16 (Not Supplied by Emulex) RS-232 Three-Wire Port Cable DCP PORT 1z 2z 3z 7z DTE CHASSIS GROUND TRANSMIT DATA TRANSMIT DATA RECEIVE DATA RECEIVE DATA SIGNAL GROUND Figure 3-17 z 1 z 2 z 3 z 7 2 3 4 5 6 7 8 15 17 20 Hardware Installation 3-23 RS-422/X.21 Cabling External devices are connected to the daughterboards on the DCP386i and DCP486e adapters via a breakout cable. This cable provides eight short cables, each with a DB25M (male) connector. The breakout cable is connected to the daughterboard via a 100-pin connector. All connections should be made using shielded cabling to reduce radio frequency interference. Emulex provides several different cables for connecting to external devices. Contact Emulex Network Systems Division for information on available cables and prices. 3-24 Chapter 3 RS-422 Standard Cable MODEM OR DCE DCP PORT 1z 2z 3z 4z 5z 7z 9z 12 z 13 z 14 z 15 z 16 z 17 z 19 z CHASSIS GROUND TRANSMIT DATA (A) RECEIVE DATA (A) REQUEST TO SEND (A) CLEAR TO SEND (A) SIGNAL GROUND RECEIVE CLOCK (B) TRANSMIT CLOCK (B) CLEAR TO SEND (B) TRANSMIT DATA (B) TRANSMIT CLOCK (A) RECEIVE DATA (B) RECEIVE CLOCK (A) REQUEST TO SEND (B) Figure 3-18 z 1 z 2 z 3 z 4 z 5 z 7 z 9 z 12 z 13 z 14 z 15 z 16 z 17 z 19 Hardware Installation 3-25 X.21 Adapter Cable DB25 MALE MALE J1 P1 SHLD SHLD 1z z1 2z TDA z2 14 z TDB z9 3z RDA z4 16 z RDB z 11 15 z TCA 12 z TCB 17 z RCA SA z6 9 z RCB z 13 4 z RTSA z3 19 z RTSB z 10 6 z DSRA 22 z DSRB z 12 8z DCDA z8 10 z DCDB 5z CTSA 13 z CTSB 7z GND IA z5 Figure 3-19 Emulex Part #PT1011204-01 3-26 Chapter 3 RS-422 Null-Modem Cable DCP PORT CHASSIS GROUND 1z 2z 3z 4z 5z TRANSMIT DATA (A) RECEIVE DATA (A) 12 z 13 z 14 z 15 z 16 z 17 z 19 z RECEIVE DATA (A) REQUEST TO SEND (A) CLEAR TO SEND (A) REQUEST TO SEND (A) CLEAR TO SEND (A) SIGNAL GROUND 7z 9z TRANSMIT DATA (A) RECEIVE CLOCK (B) TRANSMIT CLOCK (B) RECEIVE CLOCK (B) TRANSMIT CLOCK (B) CLEAR TO SEND (B) CLEAR TO SEND (B) TRANSMIT DATA (B) TRANSMIT DATA (B) TRANSMIT CLOCK (A) RECEIVE DATA (B) RECEIVE CLOCK (A) REQUEST TO SEND (B) Figure 3-20 TRANSMIT CLOCK (A) RECEIVE DATA (B) RECEIVE CLOCK (A) REQUEST TO SEND (B) z 1 z 2 z 3 z 4 z 5 z 7 z 9 z 12 z 13 z 14 z 15 z 16 z 17 z 19 Hardware Installation 3-27 Troubleshooting If you experience a problem immediately after installing the adapter, check these areas: 1) Is the device cable the correct type? Some asynchronous cables do not have enough wires to support the additional signals required for synchronous communications. 2) Is the board securely seated in the system unit? 3) Are any connections to other boards loose? 4) Are the cable connections made properly? Are the connections loose? 5) Are the factory-set jumpers and switches set correctly? 6) Is the power cord loose in the wall socket or at the rear connection to the system unit? 7) Are the external equipment connections made properly and is the equipment powered on? If the problem still remains, run the DCP286i/386i/486e diagnostic. This program performs a complete check of all functional areas on the board. Refer to Appendix A for operation of the diagnostic software. Report any errors to Emulex Technical Support by calling the phone numbers listed in the front of this guide. What’s Next? After installing the Emulex adapter and connecting external devices refer to chapter 4 to: Install Software Software Installation Chapter 4 SOFTWARE INSTALLATION PROCEDURE ..................................................4-2 Installing to Novell NetWare version 3.12 ................................................................................4-2 Installing to Novell NetWare version 4.1 ..................................................................................4-4 UNINSTALL PROCEDURES ...............................................................................4-6 Uninstall Using NetWare Version 3.12 .....................................................................................4-6 Uninstall using NetWare version 4.1 .........................................................................................4-8 4-2 Chapter 4 Software Installation Procedure This section describes the installation procedure for the Emulex DCP_link software. The software can be installed either locally on a single server or remotely on several servers. If NetWare MPR 3.0 software has been successfully loaded on your system, please continue with installation of the Emulex software. The installation procedure has been divided into two subsections based upon the version of Novell NetWare you are using (version 3.12 or 4.1): Installing to Novell NetWare version 3.12 1) At the NetWare server system console prompt, type > Load Install <Enter> The Installation Options menu appears. Figure 4-1 The Installation Options Menu 2) Select Product Options and press <Enter>. A list of currently installed products (if any) is displayed. 3) Press <Ins> to begin the installation. 4) Insert the DCP_link INSTALL diskette into a floppy disk drive and enter the drive’s letter; simply press <Enter> to accept the default drive A: Figure 4-2 Install Drive Path Software Installation 4-3 After a short delay, the Installation Options menu appears. Figure 4-3 Installation Options Menu Select Install on Local Server Only, then press <Enter>. The INSTALL program copies several files from the INSTALL diskette to a local directory. 5) When the source files have been copied, the following message is displayed: Installation was successful. Bring down and restart each server on which you installed the software to ensure that it uses the newest NLM files. <Press Enter to continue> 6) Press <Enter>. The Installation Options menu will again be displayed. 7) Select Display Log File after install to check for any installation problems. A list of files that were not installed (for any reason) will be displayed at the bottom of the Display Log File. 8) Select Display README Files for new additions or information. 9) Select <Exit> to continue the installation procedures. 10) The list of Currently Installed Products is again displayed. Verify that EMULEX WAN for NetWare has been added to the list. 11) Highlight EMULEX WAN for NetWare and press <Enter> to access the Internetworking Configuration menu. 12) You are now ready to configure the Emulex DCP_link adapter and create specific WAN links. Please turn to Chapter 5, Software Configuration to continue. 4-4 Chapter 4 Installing to Novell NetWare version 4.1 1) At the NetWare server system console prompt, type > Load Install <Enter> The Installation Options menu appears. Figure 4-4 The Installation Options Menu (v.4.1) 2) Select Product Options, then press <Enter>. The Other Installation Actions menu is displayed. Figure 4-5 Other Installation Actions Menu 3) Select the View/Configure/Remove installed products option and press <Enter>. A list of currently installed products will display. 4) Press <Ins> to begin installation. 5) Insert the Emulex DCP_link INSTALL diskette into a floppy disk drive: If you inserted the INSTALL diskette into drive A:, the default drive, simply press <Enter>. Software Installation 4-5 Note: If you inserted the INSTALL diskette into drive B: on a local server, press <F3>, replace A:\ with B:\, then press <Enter>. After a short delay, the Installation Options menu appears. Figure 4-6 The Installation Options Menu 3) Install on Local Server Only is highlighted; press <Enter>. The INSTALL program copies several files from the INSTALL diskette to a local directory. 4) When the source files have been copied, the following message is displayed: Installation was successful. Bring down and restart each server on which you installed the software to ensure that it uses the newest NLM files. <Press ENTER to continue> 5) Press <Enter>, the Installation Options menu will again be displayed. 6) Select Display Log File to check for any installation problems. A list of any files that were not installed (for any reason) is displayed at the bottom of the file. 7) Select Display README Files for new additions or information. 8) Select <Exit> to continue the installation. The list of Currently Installed Products is displayed. Verify that EMULEX WAN for NetWare has been added to the list. 4-6 Chapter 4 9) Highlight EMULEX WAN for NetWare and press <Enter> to access the Internetworking Configuration menu. 10) You are now ready to configure the Emulex DCP_link adapter and create specific WAN links. Please turn to Chapter 5, Software Configuration to continue. Uninstall Procedures If it becomes necessary to unload Emulex software from your server/router, such as during an upgrade to a newer release, perform the following steps according to the Novell NetWare version you are running (version 3.12 vs. 4.1). Uninstall Using NetWare Version 3.12 1) At the console server prompt, type: > LOAD INETCFG <Enter>. The Internetworking Configuration menu will be displayed: 2) Select Network Interfaces. Using the <Del> key, deconfigure all interfaces associated with the Emulex adapter. Figure 4-8. The Internetworking Configuration Menu 3) Press <Esc> to return to previous menu. 4) Select Boards and remove all Emulex WAN configurations by highlighting all references to the EMXMLID driver and pressing the <Delete> key. Software Installation 4-7 All protocol Binds and WAN Call Destinations will be deleted automatically. Return to the console server prompt when finished. 5) At the console server prompt, type: > Load Install <Enter>. The Installation Options menu will be displayed: Figure 4-9. The Installation Options Menu 6) Select Product Options and delete the Emulex product 7) Exit Installation Options and purge the product files from the hard disk. 8) Remove the following directories and all associated files: > sys:system\Emulex\system > sys:system\Emulex 9) Remove all associated files in: > sys:system\emx*.* also remove the following files: > sys:system\x.25_cca.nlm sys:system\fr_cca.nlm sys:system\subagent.nlm NOTE: User might have to change attributes to delete files by entering the command “attribute -r <filename>“ from the server prompt. 10) Bring down and exit the server. 4-8 Chapter 4 Uninstall using NetWare version 4.1 1) At the console server prompt, type: > LOAD INETCFG <Enter>. The Internetworking Configuration menu will be displayed: 2) Select Network Interfaces. Using the <Del> key, deconfigure all interfaces associated with the Emulex adapter. 3) Press <Esc> to return to the Internetworking Configuration menu. Figure 4-10. The Internetworking Configuration Menu 4) Select Boards and remove all configurations by highlighting all references to the EMXMLID driver and pressing the <Delete> key. You must also delete the protocol Binds and WAN Call Destinations to each interface when prompted. Return to the console server prompt when finished. 5) At the console server prompt, type: > LOAD INSTALL <Enter>. The Installation Options menu will be displayed: Figure 4-11 The Installation Options Menu Software Installation 4-9 6) Select Driver Options from the Installation Options menu, select Configure the Network Drivers and press <Enter>. 7) Using arrow keys, highlight Deselect a Selected Driver and press <Enter>. 8) Use the arrow keys to select the EMXMLID driver and press <Enter> or <Delete> to remove it. 9) Return to the Installation Options menu and select Product Options. 10) From the Other Installation Actions menu, select View/Configure/Remove Installed Products. 11) Using the arrow keys, highlight the Emulex product and press the <Delete> key to remove the product from the installation database. 12) Exit the Install utility. 13) Remove the following directories and all associated files: > sys:system\Emulex\system > sys:system\Emulex 14) Remove all associated files in: > sys:system\emx*.* also remove the following files: > sys:system\x.25_cca.nlm sys:system\fr_cca.nlm sys:system\subagent.nlm 15) Bring down and exit the server. What’s Next? After installing the DCP_link software, refer to Chapter 5 for: Software Configuration Software Configuration Chapter 5 INETCFG ...................................................................................................................5-2 INETCFG MENUS ........................................................................................................5-2 USING CONTEXT-SENSITIVE HELP ................................................................................5-4 CONFIGURING WITH INETCFG ...................................................................................5-5 5-2 Chapter 5 INETCFG The Internetworking Configuration utility (INETCFG) is a menudriven utility used to configure the Emulex software. You can run INETCFG while the router or server is operating. Each time the utility is used, it reads the existing AUTOEXEC.NCF file and optionally transfers the LOAD and BIND commands to a configuration file that is referenced at system initialization (or reinitialization). This eliminates manual reconfiguration of existing servers. Always allow INETCFG to automatically update configuration when prompted. You must use INETCFG to configure the network environment. Warning: Do not use text editors to modify the configuration. Directly editing the INETCFG files may cause the system to encounter serious problems requiring a complete reload of the Netware operating system Most configuration changes take effect only after you bring down the system and restart it. For example, if you enable or disable a board, or change parameters on a board, you must bring down the server and restart the system. INETCFG Menus INETCFG uses a series of menus, windows and dialog boxes to configure related sets of parameters. This configuration interface allows you to enter names of new interfaces, specify parameters and override defaults without having to use the command line. The items in the main Internetworking Configuration menu correspond to the basic steps used to configure Emulex DCP_link. These items should be configured in the order presented in the configuration procedures. Software Configuration 5-3 Boards - Determines which LAN and WAN boards are used in the server or router. This option allows you to add new boards, modify the hardware parameters associated with the boards, enable or disable configured boards, or delete boards. Network Interfaces - Allows you to configure media-specific Data-Link layer parameters for each interface of a WAN board. LAN drivers require no further configuration. WAN Call Directory - Specifies parameters required to establish and maintain a WAN connection to a given destination for all protocols. Protocols - Specifies global parameters for Network-layer protocols. Bindings - Enables a selected network protocol or bridge frame to be routed across a particular LAN or WAN interface. Manage Configuration - Enables you to perform the following tasks: − Configure SNMP parameters. − Export/import configuration information to or from a disk. − Configure remote access to this server. − Edit the AUTOEXEC.NCF file. View Configuration - Enables you to view the following information: − All LOAD and BIND commands. − LAN adapter LOAD and BIND commands. − WAN adapter LOAD and BIND commands. − Protocol commands. − Board interface and protocol binding information in a matrix format. The summary can be saved to a file. − Console messages captured during system restart or generated by the loaded modules. The bottom line of each INETCFG screen shows the command keys that can be used on that screen and the action that the key performs. These keys are. 5-4 Chapter 5 <Esc> key exits the current configuration window or help screen and returns you to the previous screen. Press <Esc> from the main screen to exit the program and save your configuration changes. <Enter> key allows you to view a list of configuration options or modify the selected option’s configuration. <Ins> key adds a new configuration. <Del> key deletes a configured option. <Up-arrow> and <Down-arrow> keys move the highlight bar up and down through the available choices to indicate the current selection. Other command keys available for a particular screen are displayed at the bottom of that screen. Using Context-Sensitive Help INETCFG provides three levels of context-sensitive help in most menu or parameter levels (some menus have only two levels). Level 1- “fast help” is displayed in a single line across the bottom of the screen. Level 2 - Full context sensitive help is displayed when you press the <F1> key. Level 3 - Pressing <F1> a second time while viewing the full context-sensitive help. brings a second level of help. This more general level explains the overall purpose of the menu or parameter. Press <Esc> one time to exit each level of help screens. For example, if you are in a second-level help screen, you must press <Esc> twice to exit help completely. Software Configuration 5-5 Configuring with INETCFG Important: You must use INETCFG to configure the Emulex software and hardware you have installed in your server/router. If INETCFG is not running, complete the following steps to load it: 1) At the server prompt, type > LOAD INETCFG <Enter> The Internetworking Configuration main menu is displayed. Figure 5-1 Note: The first time you run INETCFG, you will be prompted to move all commands from Autoexec.ncf to other files that INETCFG uses. Answer Yes to this prompt. 2) If the Internetworking Configuration main menu is not displayed, please refer to the Emulex DCP_link Advanced Configuration Manual for instructions on transferring LAN driver, protocol, and remote access commands. 3) Select Boards, then press <Enter>. The Configured Boards window is displayed. 5-6 Chapter 5 Figure 5-2 3) Press <Ins> to display the list of available drivers. Figure 5-3 4) From the list, select the EMXMLID driver for the Emulex DCPx86i/e adapter installed in your system. Note: Call Emulex technical support if the driver is not listed. 5) Enter a name in the Board Name field up to 10 alphanumeric characters and press <Enter>. Software Configuration 5-7 Figure 5-4 6) Review the default values in the Board Configuration menu, and makes changes as needed. NOTE: Refer to Chapter 2 of this guide to review the default configuration information used while installing the Emulex DCPx86i/e adapter. For non-standard installations, please refer to the Emulex DCP_link Advanced Configuration Manual. 7) Once you have finished reviewing the default settings, press <Esc> and select Yes to save changes to the board configuration. Note: Any conflicts with the chosen hardware parameters will cause error messages to be displayed. Please contact Emulex technical support if conflicts cannot be resolved. 8) The Configured Boards window is redisplayed with the latest configuration changes. Note that the board status is Enabled. 5-8 Chapter 5 Use the <Tab> key to toggle between Enabled and Disabled as needed. 9) Press <Esc> to return to the Internetworking Configuration menu. What’s Next? After installing and configuring the DCP_link software, refer to Chapters 6 and 7 of this manual for: Frame Relay Configuration X.25 Configuration Frame Relay Configuration Chapter 6 INTRODUCTION ................................................................................................................6-2 Frame Relay Networks ..............................................................................................................6-2 Frame Relay Parameters ............................................................................................................6-3 Diagramming Your Frame Relay Network................................................................................6-4 Planning Your Frame Relay Network........................................................................................6-4 CONFIGURING THE NETWORK INTERFACE...........................................................6-6 CONFIGURING WAN CALL DIRECTORY ................................................................6-10 NETWORK PROTOCOLS AND BINDINGS ................................................................6-13 Configuring Protocol Parameters.............................................................................................6-13 Binding Network Protocols to a WAN Interface .....................................................................6-14 6-2 Chapter 6 Introduction Emulex Frame Relay software is a streamlined, connection-oriented framemode data service based on frame-switching /relaying technology--the process of quickly transporting HDLC (High-level Data Link Control) frames through a network. This software is based on Frame Relay, a WAN telecommunications protocol standard specified by the International Consultative Committee for Telegraphy and Telephony (CCITT) and ANSI (American National Standards Institute). Frame Relay was originally specified by CCITT as an Integrated Services Digital Network (ISDN) frame-mode service. Emulex Frame Relay supports AppleTalk, Transmission Control Protocol/Internet Protocol (TCP/IP), Internetwork Packet Exchange (IPX) protocol, and the Source Route Bridge protocol of the NetWare MultiProtocol Router 3.0 software. Frame Relay Networks Private line networks permanently allocate dedicated transmission resources between communication end points, regardless of traffic conditions. The Frame Relay network uses statistical multiplexing. Transmission resources are not allocated until active communications exist. Network resources are shared dynamically among participating end points. Frame Relay networks provide the best features of TDM (time division multiplexing): high-speed, low-delay circuit switching and the statistical multiplexing and port sharing of X.25 packet-switching technologies. These advantages guarantee bandwidth according to the set committed information rate (CIR), and allow bandwidth-on-demand bursts when available. The Frame Relay network consists of Frame Relay switches, which usually are owned and administered by the carriers. The access connection to the Frame Relay network is typically provided by a Local Exchange Carrier (LEC) and can also be bundled into the Frame Relay provider's service. A network provider can be an LEC; a Metropolitan Frame Relay service, an Interexchange Carrier (IXC), an interstate, national, or global Frame Relay service. Frame Relay Configuration 6-3 Emulex Frame Relay encapsulates data frames and routes them through the Frame Relay network based on the Data-Link Connection Identifier (DLCI), which identifies the local permanent virtual circuit (PVC) end point of the router. DLCIs are defined through the configuration process or teamed through the Emulex Frame Relay link management protocol. A Frame Relay network has the following characteristics: • Transports frames transparently. The network modifies only the DLCI, congestion bits, and frame check sequence (FCS). • Detects transmission, format and operational errors. • Preserves the order of the frame transfer on individual PVCs. • Does not acknowledge or retransmit frames. Using Emulex Frame Relay, you can have a logical end-to-end link (a virtual private line) between communication end points. Although Emulex Frame Relay appears as a dedicated private network to the user, the virtual circuits and high-speed internode trunking make it a more cost-effective service than a dedicated line service, with similar performance. It is intended primarily for high-speed, burst data communications applications, such as WAN interconnections. Frame Relay Parameters Emulex Frame Relay network service parameters, which are determined at subscription time, are in effect on a per virtual circuit basis. To set up and use Emulex Frame Relay, the following parameters must be configured before Frame Relay link activation: Data Link Connection Identifiers (DLCls) are the PVC numbers that you need for data transfer (one DLCI denotes one end of a virtual circuit). Two DLCIs, one at each end of the connection, are required to form one end-to-end virtual circuit. The DLCI is also known as the virtual circuit number. When a client workstation needs access to a remote LAN, the Emulex Frame Relay router sends the frame to the local Frame Relay network switch which then sends it through the network to the remote end LAN. Minimum committed bandwidth access is enforced using the CIR protocol feature. If a user exceeds the specified CIR limit, a risk of dropped packets exists. However, users working within their set CIR are usually guaranteed delivery by the service provider. 6-4 Chapter 6 The Frame Relay network switch monitors the access rate and size of data frames transferred through the mesh network. The data throughput CIR is guaranteed by the network, but allows for excess bursts (Be) of data not to exceed the access rate (AR) of the connection. The committed burst size (Bc) sets the maximum amount of data that the network agrees to transfer in a specified time period. Bursting above the set CIR is allowed only if the connection is configured for it and the actual bandwidth is available on an end-to-end basis. This means that the entrance edge node into the Frame Relay network, the transit nodes within the network, and the exiting edge node from the network must be available before excess bursting can occur. Diagramming Your Frame Relay Network To ensure that all the desired connections to the Frame Relay network are properly diagrammed, complete these steps: 1) Diagram the existing Frame Relay network showing all router access points. 2) Draw each connection from the local router to its corresponding partner. 3) Indicate the DLCI number assigned by the network for each connection (PVC). Planning Your Frame Relay Network Specify the following parameters to ensure that all aspects of your connections to the Frame Relay network are covered:. Contact your Frame Relay network service provider and request the specific parameter values you require.The Frame Relay network provider will set up your service and assign DLCI numbers to each PVC. Frame Relay Local Router ID - Symbolic name assigned by the system administrator to identify a particular Emulex Frame Relay router. The ID is arbitrary and provides a way to track or reference a particular Emulex Frame Relay router. The Number of partner routers connected using Frame Relay is also important. Physical Type - The type of connection between the Frame Relay switch and the Emulex Frame Relay router. (for example, V.35 or RS-232). Interface Speed - External or internal. Internal speeds vary with the driver used. For example, if you have an application that must Frame Relay Configuration 6-5 communicate with three remote sites using a minimum of 32 Kbps sustained bandwidth, the physical interface must be able to support at least 3 x 32 Kbps = 96 Kbps. You should also consider traffic pattern characteristics (bursty or sustained) when specifying interface speed. Encoding Option - Corresponds to the encoding set on the physical line to which the Emulex Frame Relay router is attached. It can be NRZI (nonreturn to zero inverted) or NRZ (nonreturn to zero). Destination (Partner) - Destination name at the remote end of a PVC that connects communication partners. DLCI - Number-Data Link Connection Identifier number assigned by the Frame Relay network service provider for each PVC. When you have completed all the planning steps for the Frame Relay connections, configure your Emulex Frame Relay software as described below. 6-6 Chapter 6 Configuring the Network Interface To configure network interface parameters for Emulex Frame Relay software, load the INETCFG Internetworking Configuration menu: 1) At the server prompt, type > LOAD INETCFG <Enter> The Internetworking Configuration menu is displayed. Figure 6-1 Internetworking Configuration 2) Select Network Interfaces, then press <Enter> The Network Interfaces window is displayed. Figure 6-2 Network Interfaces 3) The network interfaces for the Emulex DCPx86i/e adapter will be displayed. Each interface is associated with a physical port. Select the port (interface) for configuration and press <Enter>. Frame Relay Configuration 6-7 4) Select Frame Relay (EMX F Relay) from the Available Media, then press <Enter>. The DCP_link Frame Relay Network lnterface Configuration menu is displayed. 5) Press <Enter> to display a list of the Emulex DCPx86i/e adapters that are installed. 6) Select the adapter you wish to configure and press <Enter>. 7) Press <Enter> to display the Interface Options menu. The PAL# will be displayed. If a different PAL# is to be used, install the corresponding files first and then select the correct PAL# from the list. 8) Press <Enter> to choose the Data Encoding option, NRZ or NRZI. 9) In the Interface Speed field, press <Enter> to display a list of line clocking rates. Choose External for modem operation. Generally, the service provider will be DCE and the default “External” will be used. 10) Interface Status: Press <Enter> to select the Interface Status (normally Enabled). NOTE: The Interface Status field is most often used to test a particular adapter configuration by disabling other adapters, which prevents them from loading. 11) DLCI Values: Displays the configured DLCI (Data Link Connection Identifier). Press <Ins> to add a new DLCI number as assigned by the Frame Relay provider. 12) Check the Parameter Group to ensure all selections match the requirements of your service provider. In general, the factory default parameters should be adequate for most applications. Most installations can limit the updates to these parameters. To make changes to the above parameters, highlight the field in the Frame Relay Network Interface Configuration menu which requires modification and select the appropriate value for that parameter: User Data Size field allows the configuration of the maximum user data frame, in bytes, that can be received. 6-8 Chapter 6 NOTE: The User Data Size should be smaller than the absolute frame size accommodated by the network, i.e., less than the Maximum Physical Packet Receive Size configured in the STARTUP.NCF file. Verify that all destinations support the same Maximum Physical Packet Receive Size. Send Queue Limit specifies the maximum number of outbound data packets that can be queued to this port for transmission. When the queue limit is exceeded, the most recently queued outbound packets are dropped. The value ranges from 0 to 512 packets with a factory default of 100 packets. Selecting 0 disables the queue limit thereby allowing unlimited queue depth. NOTE: When utilizing unlimited queue depth, monitor the server performance and total traffic constantly. Be especially careful of conditions that can impact memory usage and adversely affect buffer table allocation in the NetWare environment. Parameter Group field specifies the type of link management required. − Annex D Parameters (factory default) − LMI Parameters − No DLCI Parameters Both LMI and Annex D provide similar management facilities except that Annex D enables an unrequested status commands from the network. Select No DLCI Parameters for back-to-back or point-to-point Frame Relay configurations. The Parameter Group Configuration field applies to both Annex D and LMI link management. Frame Relay Configuration 6-9 Full Status Enquiry Counter specifies the number of standard status enquiries to exchange before issuing a full status inquiry from the network. The value ranges from 1 to 255 with a factory default of 6 enquiries. A full status enquiry response from the network updates the Frame Relay network and link information tables. Error Threshold Counter specifies the maximum number of error events detected within the most recent monitored events (specified by the Monitored Event Counter parameter). If this counter is exceeded, an alarm is generated. The counter must be less than or equal to the Monitored Event Counter. The value ranges from 1 to 10 with an LMI factory default of 3 events and an Annex D factory default of 3 events. Monitored Event Counter specifies the number of most recent consecutive exchanges to be monitored by the router. The values ranges from 1 to 10, with a factory default of 4 events. Status Polling Timer specifies the number of seconds between consecutive status enquiries initiated by the router to the network. At the specified time interval, the router requests a sequence number exchange status. If the router does not receive a status message response within the specified polling time, an error is detected. The value ranges from 5 to 30, with an LMI factory default of 10 seconds and an Annex D factory default of 10 seconds. After completing all the Frame Relay parameter modifications, press <Esc> and select Yes to save the changes to the network interface configuration. The Network Interfaces screen will be displayed showing the port as enabled. Press <Esc> to return to the Internetworking Configuration menu and continue with the following sections. 6-10 Chapter 6 Configuring WAN Call Directory The WAN Call Directory is a list of WAN Call Destination configurations to use for each virtual circuit. You must create at least one WAN Call Destination configuration for each destination. WAN Call Destination configurations contain parameters to be applied by Emulex Frame Relay software when establishing and maintaining calls to the destination. Only permanent call configurations are supported in the current Emulex Frame Relay implementation. This type of connection is suited for use with dynamic routing protocols such as RIP or the NetWare Link Services Protocol (NLSP) software. 1) If you are not already in the Internetworking Configuration menu, load INETCFG from the server prompt: Figure 6-3.Internetworking Configuration 2) Select WAN Call Directory, then press <Enter> The Configured Wan Call Destination window appears. Figure 6-4. WAN Call Destinations Frame Relay Configuration 6-11 NOTE: If a WAN Call Destination has not been configured, the list will be empty (as pictured above). 3) Press <Ins> to configure a new WAN Call Destination. The prompt New Call Destination Name allows you to enter a name of up to 47 alphanumeric characters for the new WAN Call Destination. Figure 6-5 Configure Wan Call Destinations The WAN Call Destination name entered here is used in other menu options when a WAN Call Destination name needs to be identified. You should use a descriptive name, such as the name of the remote destination or a branch office or store number. 4) Enter a name for the new WAN Call Destination, then press <Enter>. A list of supported wide area media is displayed. Figure 6-6 Choose a Supported Wide Area Medium These are media types that have been generated through the INETCFG Network Interfaces menu. If you have not yet configured a Frame Relay interface, then Frame Relay is not available for WAN Call Destinations. 6-12 Chapter 6 NOTE: If you have not configured any Network Interfaces before attempting to configure a WAN Call Destination, you receive this message: WAN network interfaces must be configured before WAN Call Destinations may be created. 5) Select EMX F Relay as the wide area medium. The Frame Relay Call Destination Configuration menu is displayed: Figure 6-7 Call Destination Configuration 6) Interface Name: Press <Enter> to select the Network interface that has been defined for EMX F Relay. 7) Circuit Type: Permanent, the default, is the only option available. 8) DLCI Number: Press <Enter> to select the local DLCI (circuit number) entered in the Network Interfaces screen. 9) After defining all the necessary parameters, press <Esc> and select Yes to save the changes to the Frame Relay WAN Call Destination Configuration. Frame Relay Configuration 6-13 Network Protocols and Bindings The following sections outline the steps necessary to configure the Network Protocols and Bindings so the interfaces can be used with the LAN and WAN connections just established. Configuration of protocols and bindings must be completed prior to using the Emulex software. Configuring Protocol Parameters 1) From the Internetworking Configuration menu, select Protocols and press <Enter>. Figure 6-8 Internetworking Configuration 2) The Protocol Configuration menu is displayed. Figure 6-9 Protocol Configuration 3) From the Protocol Configuration menu, select all desired protocols needed for support over the WAN link. Each protocol presents a unique menu for its configuration. You should accept the default settings. 6-14 Chapter 6 NOTE: Most installations can function properly with the factory default parameters. For non-standard applications, refer to the Novell NetWare MPR 3.0 Advanced Configuration and Management Guide. Binding Network Protocols to a WAN Interface After adding and configuring the desired protocols outlined above, complete the following steps to bind a given protocol, such as IPX, to the WAN interface and to select a permanent WAN Call Destination (if applicable): 1) From the Internetworking Configuration menu, select Bindings then press <Enter>. Figure 6-10 Internetworking Configuration 2) A new window displays a list of the Configured Protocol To Network Interface Bindings. Figure 6-11 Configured Protocol to Bindings 3) Press <Ins> to display a list of the configured protocols. Frame Relay Configuration 6-15 4) Select the desired protocol (e.g., IPX), then press <Enter>. 5) From the Network Interface menu, select a configured WAN interface port, then press <Enter> to bind the protocol to that port. A new window displays the parameters for binding the protocol you have chosen to the selected WAN interface. Figure 6-12 Binding IPX 6) Press <Enter> to select a Permanent WAN Call Destination. 7) Press <Ins> to add a permanent call to the interface. Figure 6-13 Wan Call Destination Entry 9) Press <Enter> to select a configured WAN call destination. The Configured WAN Call Destinations screen will be displayed reflecting the selection. 6-16 Chapter 6 Figure 6-14 Configured Wan Call Destinations NOTE: If no permanent WAN Call Destinations have been defined for this interface, an error message will be displayed. 9) Highlight the desired WAN Call Destination, then press <Enter>. Press <Esc> until you are prompted to save IPX Bind Parameters. Answer Yes to save and exit. 10) Press <Esc> again to return to the Internetworking Configuration menu. To initiate any of the newly defined bindings on the WAN interface, issue the REINITIALIZE SYSTEM command at the server/router console OR bring down the server/router and restart. To implement changes to an existing binding to a WAN interface, you must issue the UNBIND IPX FROM <interface_name> command at the server/router console, and then bring down and restart the server/router. What’s Next? After configuring the Frame Relay WAN connections, refer to chapter 7 to: Configure the X.25 WAN connections. X.25 Configuration Chapter 7 INTRODUCTION ................................................................................................................7-2 Virtual Circuit Service...............................................................................................................7-3 Logical Channel Numbers .........................................................................................................7-4 Diagramming Your X.25 Network ............................................................................................7-5 Planning Your X.25 Network ....................................................................................................7-5 Frame Level Parameters........................................................................................................7-5 Packet Level Parameters .......................................................................................................7-6 Logical Channel Numbers .........................................................................................................7-8 Emulex X.25 User Facilities......................................................................................................7-9 CONFIGURING THE X.25 NETWORK INTERFACE................................................7-10 Modifying/Creating a Profile...................................................................................................7-13 Local DTE Address .................................................................................................................7-15 X.25 Authentication Options ...................................................................................................7-15 CONFIGURING THE WAN CALL DIRECTORY .......................................................7-17 Expert Call Configuration........................................................................................................7-22 NETWORK PROTOCOL AND BINDING.....................................................................7-24 Configuring Protocol Parameters.............................................................................................7-24 Binding Network Protocols to a WAN Interface .....................................................................7-25 7-2 Chapter 7 Introduction Emulex X.25 software operates in a NetWare server or NetWare router/bridge PC environment and provides services for NetWare products and other applications (including independent developer applications) requiring wide area connectivity Emulex X.25 uses the 1984 CCITT X.25 Recommendation, which defines the interaction between data terminal equipment (DTE) and data circuitterminating equipment (DCE) of a packet-switching network. In general the end user equipment (mainframe, pad, server) is DTE and the service provider (X.25) is DCE. In the illustration we see an example of a call established between two DTE connections. IBM Compatible DTE DCE X.25 DCE Novell Server DTE DTE and DCE are both responsible for establishing, maintaining, and terminating the connection. The X.25 protocol primarily services between a DTE/DTE pair providing the DCE connection. As described earlier the Emulex X.25 implements the 1984 CCITT X.25 recommendations, including the level 1 (physical), level 2 (frame), and level 3 (packet), along with several library modules. All three levels are generally configured as either DTE or all three as DCE though exceptions can occur. For example a DCE which accepts clock signals from a modem would have level 1 configured as DTE ( interface speed set to external). Emulex X.25 interface runs in conjunction with NetWare MultiProtocol Router 3.0 and supports a wide variety of other proprietary software platforms. X.25 Configuration 7-3 Virtual Circuit Service X.25 uses two mechanisms, providing a logical path between end points, called virtual circuits. A virtual circuit provides a connection-oriented service, similar to that of circuit switching but with the following exceptions: • Limited to a connection between two end points. • Economical statistical multiplexing for establishing a logical path through the network. There are two virtual circuits types: switched virtual circuits (SVCs) and permanent virtual circuits (PVCs). An SVC is a dynamically established virtual circuit using “call setup” and “call clearing” procedures. A PVC is a permanent, network-assigned virtual circuit that requires no call setup or clearing and operates like a logical leased line. Using mixed protocols, the router can maintain multiple connections using SVCs between multiple sites. SVCs can be set up to operate automatically or on demand as data and call requests dictate. The router can automatically establish and disconnect on-demand IP connections using SVCs. The types of connections supported by Emulex X.25 for various protocols are shown in the following table. Protocol PVC Permanent SVC On-Demand SVC IPX X X X IP X X RFC 1356 APPLETALK X X X X X BRIDGE A permanent SVC is established at initialization and is left in a connected state until the user or application brings it down. An on-demand SVC is established only when data is present for the associated virtual circuit and is brought down after the data has been transmitted and the configured idle timer has expired. An on-demand SVC remains down until more data is queued up to be sent, at which time the connection is reestablished. Once a virtual circuit is established, data packets using this circuit are automatically sent to the appropriate destination 7-4 Chapter 7 Logical channels differentiate the virtual circuits supported by the packet level. Each packet is associated with a logical channel which is mapped to the appropriate destination of the virtual circuit. Multiple connections are provided simultaneously by multiplexing virtual circuits over the access line. This enables a more effective use of the access circuit for the available bandwidth and the traffic density for each logical channel. Note: Only one PVC or SVC can be established at a time on each logical channel. Logical Channel Numbers The logical channel number is embedded in a 12 bit field within the packet. For SVCs, the association between a logical channel identifier and a particular virtual circuit is accomplished at call setup time when the identifier is chosen from a pool of unused identifiers. The logical channel number is determined by the X.25 service provider for that particular network subscription. At network subscription time, the user specifies the number of logical channels needed for both SVCs and PVCs by designating ranges of logical channel numbers. Emulex X.25 configuration uses the decimal equivalent of the complete 12-bit Logical Channel Identifier in two subfields: the Logical Channel Group (4 bits) and the Logical Channel Number (8 bits). Within any of the following categories, the range of available logical channels must be continuous. Each successive range of logical channel numbers must be numerically higher than the previous range. In increasing order, the logical channel ranges are: 1) PVCs 2) SVCs supporting only calls from the network (inbound SVC) 3) SVCs supporting calls from and to the network (two-way SVC) 4) SVCs supporting only calls to the network (outbound SVC) NOTE: The total number of logical channel on all ports on an Emulex card should not exceed 255. X.25 Configuration 7-5 Diagramming Your X.25 Network To ensure that all connections to the X.25 network are properly diagrammed, complete these step: 1) Diagram the existing X.25 network showing all router access points and mark the X.25 addresses. 2) Draw each type of connection from the local router to its corresponding partner. For PVC-type connections, show the LCN assigned by the X.25 network service provider and the partner name. For SVC-type connections, list the partner names. Planning Your X.25 Network To ensure that all aspects of your planned connections to the X.25 network are covered, complete the following steps: For each location that a router attaches to the X.25 network, specify the following parameters: − Physical interface required (for example, V.35 or RS-232) − Internal interface speed required (for example, 9600 or 19200) This value is needed only when the clocking is generated internally; otherwise, clocking comes from the modem. Number of partner routers which will be connected using X.25 and whether a PVC or an SVC is required for each. − Packet size required (for example, 128 bytes or 256 bytes) Emulex X.25 Router ID (at top of page) - Symbolic name assigned by the system administrator to identify a particular Emulex X.25 router. The ID provides a way to track or reference a particular Emulex X.25 router. Frame Level Parameters Sequencing Modulo - Specifies the numbering of sequential frames allowed in a Data-Link layer window. Modulo 8 is specified for 1984 CCITT X.25 Specifications. Window Size (k) - Determines the maximum number of unacknowledged frames that can be received or sent before requiring an acknowledgment by the remote destination. 7-6 Chapter 7 Maximum Frame Size (Nl) - Determines the maximum frame size (in octets) allowed to be received on the link. It is automatically configured from the packet size and maximum packet size information. Retry Count (N2) - Determines the maximum number of times a frame should be retransmitted because of the expiration of the Retry Timer (Tl). A large value for this parameter increases the probability of a correct transfer between the DTE and DCE. A small value permits faster detection of a permanent error condition. Retry Time-out (TI) - Determines the time, in seconds, to wait for an acknowledgment of the oldest transmitted frame. If no acknowledgment is received within this set time, an attempt is made to determine the status of the remote device. Disconnect Time-out (T3) - Displays the value of the T3 timer. After attempting to connect the link by sending N2 Set Asynchronous Balanced Mode (SABM) frames on TI expiration, the Data-Link layer continues sending SABM frames when the T3 timer expires. This setting isn’t configurable. Idle Time-out (T4) - Specifies the amount of time the local DTE waits (when a link becomes idle) before attempting to poll the partner node for status. If the partner node does not respond to the polls, the link is reset and all current virtual calls are cleared or reset. This setting isn’t configurable. Frame Node Type - The X.25 frame level configures DCE/DTE protocol handshaking. Generally, an X.25 service provider will require DTE. Packet Level Parameters Local DTE Address- Specifies the X.25 address (up to 15 digits) of the local DTE. It should match the address assigned by your attached network. This address is included in the Calling Address field of the outbound Call Request packets. Version - Emulex X.25 specifically supports 1984 CCITT X.25 Recommendation Role - Determines whether you use DTE or DCE procedures for packet layer operation in the Logical Channel Number (LCN) assignment. X.25 Configuration 7-7 When establishing a connection to an X.25 network, you must set this parameter to DTE (the default value) if you are connecting to a X.25 service provider. Default Inbound/Outbound Packet Size - The Inbound Packet uses the default packet size for a inbound call unless another packet size is specified. Set this value to correspond to your network subscription. The Outbound Packet determines the maximum out going data packet size when a call is established without the Flow Control Negotiation parameter. The default Outbound Packet Size should be a value that is agreed upon by the PDN and the remote DTE. Sequencing Modulo - Control over the numbering of sequential data packets allowed in a window. Emulex X.25 only allows Modulo 8. Default Window Size - Specifies the default value of the maximum number of sequentially numbered data packets that can be transmitted by the local DTE without receiving an acknowledgment at any given time. When a virtual circuit is established without flow control negotiation, this value is used as an outbound window size. You should set this parameter to the value agreed upon by the PDN. Note: The following timers and counters are not configurable. T20 (Restart Response Timer) - Determines the amount of time, in seconds, that the local DTE waits when it issues a Restart Request packet to receive a restart confirmation or restart indication. When the time limit expires, the Restart Request packet is retransmitted. T21 (Call Response Timer) - Specifies the amount of time, in seconds, that the DTE waits for a response to an outbound Call Request packet. T22 (Reset Response Timer) - Specifies the amount of time, in seconds, that the DTE waits for a response to a Reset Request packet. T23 (Clear Response Timer - Specifies the amount of time, in seconds, that the DTE waits for a response to a Clear Request packet. T24 (Ace-Send Timer) - Specifies the amount of time, in seconds, that a DTE waits when a packet carrying a valid acknowledgment is sent. This timer is used to ensure that no acknowledgment is lost. If the timer expires, an RR (Receiver Ready) packet is sent. 7-8 Chapter 7 T25 (Data Packet Retransmission Timer) - Specifies the amount of time, in seconds, that the DTE waits for the appropriate acknowledgment after transmitting a data packet. If the T25 timer expires, the packet layer resets the virtual circuit. T26 (Interrupt Timer) - Specifies the amount of time, in seconds, that the DTE waits when an Interrupt Request packet is sent for an interrupt confirmation to be received. If the T26 timer expires, the packet layer resets the virtual circuit. R20 (Restart Retransmission Timer) - Specifies the maximum number of times the local DTE retransmits, upon expiration of the T20 timer, before notifying the user that the associated link is inoperative. R22 (Restart Retransmission Counter) - Determines the maximum number of times the local DTE retransmits a Reset Request packet, upon expiration of the T22 timer, before initiating a Clear procedure for SVC or a Restart procedure for PVC. R23 (Clear Retransmission Count) - Determines the maximum number of times the local DTE retransmits a Clear Request packet upon expiration of the T23 timer, before initiating a Restart procedure on the associated link. Logical Channel Numbers PVC, Lowest LCN - Determines the lowest LCN used for a PVC. PVC, Number of LCNs - Determines the number of logical channels supporting PVCs. This number must agree with your network subscription. Inbound SVC, Lowest LCN - Determines the lowest LCN that can be used for one-way incoming logical channels for SVCs. This value must be greater than or equal to the lowest PVC LCN parameter value. Inbound SVC, Number of LCNs - Determines the number of incoming channels assigned for inbound-only SVCs. This number must agree with your network subscription. Two Way SVC, Lowest LCN - Determines the lowest number of two- way channels assigned for SVCs that can be used for both inbound and outbound calls. X.25 Configuration 7-9 Two Way SVC, Number of LCNs - Determines the lowest LCN that can be used for two-way SVCs. This number must agree with your network subscription. Outbound, Lowest LCN - Determines the lowest LCN that can be used for outgoing logical channels for SVCs. The value must be greater than or equal to the Lowest two-way SVC LCNs value plus the Number of two-way LCNs value. Outbound, Number of LCNs - Determines the number of logical channels reserved for outbound-only SVCs. This number must agree with your network subscription. Emulex X.25 User Facilities The X.25 Recommendation addresses users' needs for versatility in their network requirements through a set of optional user facilities. These facilities give X.25 the capability of being tailored to meet varied network and user requirements and allow a network installer to fine-tune the network’s handling of such areas as security, accounting, routing, and performance. These facilities can be selectively and incrementally specified to the needs of the users on that network. Many user facilities can be used within an X.25 connection to a PDN. Some of these facilities are read-only and may not be changed. User facilities available with Emulex X.25 include the following: Flow Control Negotiation - If set to Yes, negotiates (downgrades) incoming calls containing either Window Size or Packet Size facility values that are greater than those specified. If set to No, rejects incoming calls containing either Window Size or Packet Size facility values that are greater than those specified. Negotiates, on a per-call basis. Throughput Class Negotiation - Specifies, on a per-call basis, the throughput of data that can be transferred on a virtual circuit. The range is 75 bps to 64 Kbps. Fast Select - If Yes, allows up to 128 bytes of user data to be included in Call Request packets. If No, user data is not included in Call Request packets Expands the Call and Clear user data fields from the normal 16 octets to 128 octets, enhancing the data field's usefulness for shortduration, low-volume, transaction-oriented applications. This facility is often used in the retail point-of-sale and credit card authorization terminal environment.. 7-10 Chapter 7 Reverse Charging Calls - Offers the equivalent of a collect call. It is allowed on a per-call basis and is specified in the Call Request packet by the calling DTE. Closed User Group (CUG ) - Allows the configuration of one or more virtual private networks within a larger public network. A user may gather a number of DTEs into a single logical group and restrict the group’s access ability to receive incoming calls or to make outgoing calls to the restricted “open” portion of the network. The number of CUGs is network-dependent. A single DTE can belong to one or more CUGs. Within the CUG category, you can specify whether a user connection has incoming access (CUG with Incoming Access), outgoing access (CUG with Outgoing Access), or both. If a DTE belongs to more than one CUG, you must also specify a preferred (or primary) CUG. Bilateral Closed User Group (BCUG) - Offers a finer degree of access control than CUGs. Bilateral signifies a CUG relationship that has been limited to a pair of DTEs. Access between the pair of DTEs is unrestricted; however, access to or from any other DTE is not possible. Maximum Packet Size - Specifies the largest packet size that can be negotiated on a per virtual circuit basis. Window Size - Specifies the largest value, per virtual circuit, to be negotiated in a Window Size facility parameter field. The maximum value for this parameter is dependent upon which Packet Sequencing Modulo method you selected. D-Bit Procedure Authorization - Not configurable A DTE subscription with a PDN can include a provision to allow or disallow a remotely originated, reverse-charged call from reaching that DTE (Reverse Charging Acceptance). Charged calls, that is, locally generated call requests, must specify reverse charging. Emulex X.25 additionally provides local configurable options for both of the preceding items. Regardless of a customer's PDN subscription, all inbound reverse-charged calls can be rejected and all outbound call attempts that do not specify reverse charging can be disallowed. Configuring the X.25 Network Interface To configure network interface parameters for Emulex X.25, load the INETCFG Internetworking Configuration menu: X.25 Configuration 7-11 1) At the server prompt, type > LOAD INETCFG <Enter> The Internetworking Configuration menu is displayed. Figure 7-1 Internetworking Configuration 2) Select Network Interfaces and press <Enter>. The Network Interface window is displayed. Figure 7-2 Network Interfaces 3) Select an unconfigured interface (port) associated with the Emulex WAN adapter. 4) Choose EMX X.25 from the available media and press <Enter>. The X.25 Network Interface Configuration menu is displayed: 7-12 Chapter 7 Figure 7-3 Network Interface Configuration NOTE: Network interfaces assigned to a group may require the same configuration for physical and link parameters. For example baud rate, DTE/DCE...etc 5) Card Type: Select the Emulex adapter type if not already displayed. 6) Interface Options: Press <Enter> to select Interface Options. 7) Interface Speed: Press <Enter> and select the line clocking rate (default is “External” for modem operation). 8) Interface Status: Displays the current status of the selected network interface (normally enabled). NOTE: Use the Interface Status field to test a particular board configuration by disabling other boards, which prevents their respective drivers from loading. 9) Interface Group: Assigns this interface as a member of a collective group of WAN interfaces. WAN Call Destinations can then be assigned to the same collective interface groups. This enables protocols like IPX or IP to request an X.25 virtual circuit through any available interface within the group. The WAN interface actually used for the call is dynamically determined at the time the call is made. X.25 Configuration 7-13 10) Press <Enter> to select an Interface Group. Select a group from the list or press <Ins> to create a new Interface group. Modifying/Creating a Profile 1) Press <Enter> and select the standard profile for you X.25 service provider. All X.25 installations must have detailed port profiles defined. Press <Enter> to display the available list of standard profiles for various X.25 service providers. Check with service provider for the profile name. 2) To modify or view existing parameters, press <F3> to display the X.25 Profile Configuration menu. Figure 8-4 X.25 Profile Configuration Frame Level Parameters: DTE/DCE Frame Node Type Frame Window Size (k) Retry Count (N2) Retry Time-out(T1) Packet Level Parameters: X.25 Version Support Packet Sequencing Modulo DTE/DCE Packet Layer Type Default Window Size Default Packet Size Virtual Circuit Setup Parameters: 7-14 Chapter 7 Lowest PVC LCN Number PVC LCNs Lowest Two-Way SVC LCN Number Two-Way SVC LCNs Lowest Inbound SVC LCN Lowest Outbound SVC LCN Number Inbound LCNs Number Outbound LCNs User Facility Setup Parameters: Flow Control Negotiation Closed User Group Maximum Packet Size Bilateral CUG Maximum Window Size D-Bit Authorization Incoming Refuse Charge Calls Fast Select The following parameters are for display only. Modification can be done at the frame or packet level or virtual circuit setup parameter. DTE/DCE Frame Node Type Packet Size Frame Window Size Packet Window Size Number of Virtual Circuits Configured 3) Press <Esc> to save the Profile Configuration and return to the Emulex X.25 Network Interface menu: Figure 8-5 Emulex Network Interface Configuration X.25 Configuration 7-15 Local DTE Address 1) Enter the access address provided by your local X.25 network service provider. NOTE: You can leave the configuration at this point by accepting the default values for the remaining parameters. To save this configuration and return to the Internetworking Configuration menu, press <Esc>, select Yes when prompted, then press <Enter>. 2) Statistics Period - Specifies the interval (seconds) that the network interface (port) is interrogated by the driver for statistical information. 3) Interface Queue Limit - Specifies the maximum number of data packets that can be queued to this port. The range of values is 0 (unlimited) through 1024 packets. The default value is 100 packets. Selecting 0 disables the queue limit, allowing unlimited queue depth. NOTE: The Interface Queue Limit value must be less than the Maximum Packet Receive Buffers as defined in the startup.ncf. X.25 Authentication Options Authentication on the X.25 link checks all inbound and outbound calls for proper access to the local and remote server. NOTE: If you will be using “on-demand” call destinations, you must configure the X.25 Authentication Options. 7-16 Chapter 7 Inbound Authentication - Toggle between Enabled or Disabled. Restricts incoming calls to authentication. The originator (server ID and address) of each call coming in on the X.25 link is first checked against the Authentication Database before it is given access to the server. Only those calls in the table are accepted. All other calls are rejected. Note: When Inbound Authentication is Disabled, the X.25 link will accept all inbound calls regardless of originating ID or address. Authentication Database Name - Allows for separate tables of individual remote originating ID’s and addresses for inbound X.25 calls. New tables can be constructed through this field. Authentication Database - Permits the addition and modification of individual table entries for the specific Authentication Database Name chosen. The table entry consists of a remote system ID and DTE address pair. Press <Esc> and save changes to accept the remaining default values and return to the Network Interfaces menu. Press <Esc> again to return to the Internetworking Configuration menu and continue with Configuring WAN Call Destinations, below. X.25 Configuration 7-17 Configuring the WAN Call Directory The WAN Call Directory is a list of WAN Call Destination configurations you want to use for each virtual circuit. You must create at least one WAN Call Destination configuration for each desired destination. WAN Call Destination configurations contain parameters to be applied by Emulex X.25 software when establishing and maintaining calls to the destination. Two basic types of call configurations are possible: permanent and ondemand. If the connection fails, attempts to reconnect are tried at periodic intervals. This type of connection is suited for use with dynamic routing protocols like RIP or NetWare Link Services Protocol (NLSP) software. On-demand calls specify that the connection should be established only when needed. Maintenance data such as routing updates is suppressed. These types of connections are terminated whenever the link is void of network data longer than the configured Idle Line Time-out value. A connection failure is retried only when more network data is directed to the remote destination. To configure WAN Call Destinations for X.25 interfaces, perform the following steps: 1) From the Internetworking Configuration menu, select WAN Call Directory, and press <Enter> Figure 7-6 Internetworking Configuration 7-18 Chapter 7 2) The Configured Wan Call Destinations window is displayed: Figure 7-7 Configured Wan Call Destinations If no WAN Call Destinations have been configured, the list will be blank. 3) Press <Ins> to configure a new WAN Call Destination for X.25. 4) Enter a name for the new WAN Call Destination, then press <Enter>. NOTE: WAN network interfaces must be configured before WAN Call Destinations may be created. 5) Select EMX X.25 as the wide area medium, then press <Enter>. The X.25 Call Destination Configuration window is displayed. Figure 7-8 X.25 Call Destination Configuration X.25 Configuration 7-19 6) In the Call Type field, accept the default value Permanent or press <Enter> to select On-Demand from the pop-up list. Reminder: You must configure the X.25 Authentication Options in the X.25 Profile if you select “ondemand” as the Call Type. On-Demand calls are established only when needed. The connections are terminated whenever the link is void of network data. Termination is determined by the Idle Line Time-out value. A connection failure is retried only when more network data is directed to the remote destination. On-demand calls can be placed through either a specific interface or an interface group, but not both. − You can display a list of Interface Group names by pressing <Enter>. − Select an X.25 interface group from the list, then press <Enter>. Continue with Step 7 below. OR − If an Interface Group name isn’t specified, select Interface Name, then press <Enter> to display a list of X.25 interfaces. The Select Interface pop-up window is displayed listing the configured X.25 interfaces. This read-only list allows you to select the name of the specific X.25 interface through which this WAN Call Destination can be accessed. − Select an X.25 interface from the list, then press <Enter>. Permanent - calls can be placed only through a specific interface; they cannot be directed to an interface group. 7) Interface Name: Press <Enter> and select an available Network Interface from the pop-up list. 8) In the Circuit Type field, accept the default value Switched Virtual Circuit (SVC), or press <Enter> to select Permanent Virtual Circuit (PVC). 7-20 Chapter 7 9) For SVC, enter the DTE Address in the Destination DTE Address field. For PVC, enter the PVC number (which must be configured in the X.25 Profile). Press <Enter> for a list of configured PVC numbers. NOTE: PVC Numbers may only be configured provided the Wan Call Circuit type is Permanent and the X.25 profile for that interface has been defined. The PVC number must match the Logical Channel Number (LCN) assigned by the X.25 network service provider at subscription time. 10) In the Destination DTE Address field (if Circuit Type is Switched), type the address. This is the X.121 DTE address (up to 15 digits, 0 through 9) assigned to the specific destination DTE. 11) In the Retry Mode field, accept the mode shown or press <Enter> to select another option from the pop-up list. This parameter specifies the conditions under which a failed connection is retried. All connection failures are reported to the system console and to the Call Manager utility (CALLMGR). The available options are Never Retry, Retry All Failures, Retry SelfCorrecting Failures. The default is Retry Self-Correcting Failures. 12) In the Retry Limit Handling field, press <Enter> to select the appropriate option from a pop-up list. This parameter specifies the action taken when the connection retry interval exceeds the Retry Interval Limit (described in Step 12). For permanent calls, connection retries can either continue indefinitely at the maximum retry interval (which supports unattended operation) or be terminated (the connection fails). On-demand calls can only accept Stop At Limit, which means the connection fails when the retry interval reaches the limit. 13) In the Retry Interval Limit field, accept the value shown or press <Enter> to change it. X.25 Configuration 7-21 This parameter specifies the maximum delay between attempts to establish a connection (the retry interval). The delay is set initially to 8 seconds and increases exponentially until the maximum retry interval is reached. The range of time intervals is 00:00:00 to 23:59:59 (hh:mm:ss). For permanent calls, the default value is 10 minutes (00:10:00). For ondemand calls, the default value is 2 minutes (00:02:00). 14) In the Idle Line Time-out field, if Call Type is set to On-Demand, accept the value shown or press <Enter> to change it. This parameter specifies the amount of time that an on-demand call can be inactive before closing the connection. The range of values is 00:00:00 through 23:59:59 (hh:mm:ss). The default value is 10 minutes (00:10:00). 15) In the Remote System ID field, press <Enter> to display a list of X.25 Remote System Ids. This parameter is needed only if Call Type is set to On-Demand. This parameter specifies the symbolic name (from 1 to 47 ASCII characters) of the remote peer system associated with this WAN Call Destination entry, typically the remote system server name. 16) Use the arrow keys to select a Remote System ID, then press <Enter> accept or press <Ins> to create a new Remote System ID. If you press <Ins>, enter the symbolic name (from 1 to 47 ASCII characters) of the remote peer system associated with this WAN Call Destination entry in the window that appears, then press <Enter> and repeat the first part of this step. To identify the proper WAN Call Destination the Remote System ID is accessed by the X.25 protocol stack. This is needed to restore an ondemand connection to a remote system that previously initiated a connection with this system. 7-22 Chapter 7 Expert Call Configuration 1) If Circuit Type is Switched Virtual Circuit, press <Enter> to view or modify the Expert Call Configuration parameters. Figure 8-9 X.25 Expert Call Configuration The X.25 Expert Call Configuration window is displayed. The parameters in this window are applicable only to SVC’s. The Call Destination Name field is a read-only field displaying the name of the WAN Call Destination entered in Step 4. 2) In the Request Reverse Charging field, accept the default value No, or press <Enter> to change it. 3) In the Fast Select field, accept the default value, No, or press <Enter> to change it. 4) If Fast Select has been enabled, the With Restriction field can be selected. Accept the default value, No, or, press <Enter> to change it. 5) In the Call User Data field, accept the default value, None, or press <Enter> to change it. 6) In the Generic CCITT Facilities Entry field, accept the default value, or press <Enter> to change it. 7) In the Generic National Facilities field, accept the default value, or press <Enter> to change it. 8) In the Suppress Calling DTE Address field, accept the default value, or press <Enter> to change it. 9) When you have completed all changes to the X.25 Expert Call Configuration parameters, press <Esc> to return to the X.25 Call Destination Configuration window. X.25 Configuration 7-23 10) In the Inbound Authentication Update field, accept the default value, Enabled, or press <Enter> to select Disabled. 11) Press <Esc>; if prompted, select Yes to save your changes, then press <Enter>. The WAN Call Destination you just configured appears in the list of configured WAN Call Destinations. To configure another WAN Call Destination, repeat the above steps. Press <Esc> until you return to the Internetworking Configuration menu to configure Network Protocols and Bindings. 7-24 Chapter 7 Network Protocol and Binding The following sections outline the steps necessary to configure the Network Protocols and Bindings so the interfaces can be used with the LAN and WAN connections just established. Configuration of protocols and bindings must be completed prior to using the Emulex software. Configuring Protocol Parameters 1) From the Internetworking Configuration menu, select Protocols and press <Enter>. Figure 7-9 Internetworking Configuration 2) TheProtocol Configuration menu is displayed. Figure 7-10 Protocol Configuration 3) From the Protocol Configuration menu, select all desired protocols needed for support over the WAN link. Each protocol presents a unique menu for its configuration. You should accept the default settings. X.25 Configuration 7-25 NOTE: Most installations can function properly with the factory default parameters. For non-standard applications, refer to the Novell NetWare MPR 3.0 Advanced Configuration and Management Guide. Binding Network Protocols to a WAN Interface After adding and configuring the desired protocols outlined above, complete the following steps to bind a given protocol, such as IPX, to the WAN interface and to select a permanent WAN Call Destination (if applicable): 1) From the Internetworking Configuration menu, select Bindings then press <Enter>. Figure 7-11 Internetworking Configuration 2) A new window displays a list of the Configured Protocol To Network Interface Bindings. Figure 7-12 Configured Protocol to Bindings 3) Press <Ins> to display a list of the configured protocols. 7-26 Chapter 7 4) Select the desired protocol (e.g., IPX), then press <Enter>. 5) From the Network Interface menu, select a configured WAN interface port, then press <Enter> to bind the protocol to that port. A new window displays the parameters for binding the protocol you have chosen to the selected WAN interface. Figure 7-13 Binding IPX 6) Press <Enter> to select a Permanent WAN Call Destination. 7) Press <Ins> to add a permanent call to the interface. Figure 7-14 Wan Call Destination Entry 9) Press <Enter> to select a configured WAN call destination. The Configured WAN Call Destinations screen will be displayed reflecting the selection. X.25 Configuration 7-27 Figure 7-15 Configured Wan Call Destinations NOTE: If no permanent WAN Call Destinations have been defined for this interface, an error message will be displayed. 9) Highlight the desired WAN Call Destination, then press <Enter>. Press <Esc> until you are prompted to save IPX Bind Parameters. Answer Yes to save and exit. 10) Press <Esc> again to return to the Internetworking Configuration menu. To initiate any of the newly defined bindings on the WAN interface, issue the REINITIALIZE SYSTEM command at the server/router console OR bring down the server/router and restart. To implement changes to an existing binding to a WAN interface, you must issue the UNBIND IPX FROM <interface_name> command at the server/router console, and then bring down and restart the server/router. Contacting Emulex Chapter 8 TECHNICAL ASSISTANCE..............................................................................................8-2 PRIOR TO YOUR CALL ...................................................................................................8-2 PLACING THE CALL .......................................................................................................8-2 DOMESTIC ............................................................................................................8-3 EUROPEAN ............................................................................................................8-3 24 - HOUR SUPPORT ......................................................................................................8-4 PRODUCT SERVICE .........................................................................................................8-4 BULLETIN BOARD SYSTEM...........................................................................................8-4 INTERNET ...................................................................................................................8-6 EMUFAX ...................................................................................................................8-7 8-2 Chapter 8 Technical Assistance If you experience problems and cannot resolve them, contact Emulex Technical Support. Prior to Your Call Prior to calling Technical Support, gather the following information: 1) Type of host, operating system, and release level (for example, SparcStation II with SunOS 4.1.1). 2) Network operating system (Novell, TCP/IP, etc.) and release level. 3) Contents of any error log files, such as /tmp/emlx[pid].log. NOTE: If possible, call Technical Support from a phone next to a terminal with access to the network. Placing the Call Ater you gather the requested information, contact Emulex at one of the following sites. Contacting Emulex 8-3 Domestic Emulex (USA) Technical Support 3535 Harbor Boulevard Costa Mesa, CA 92626 Telephone: (800) 854-7112, ext. 8270 or (714) 662-5600, ext 8270 FAX: (714) 513-8269 BBS (714) 662-1445 (24 hr) EmuFax (714) 513-8276 or (714) 513-8277 ftp: ftp.emulex.com (24 hr) Internet: [email protected] (24 hr) Support Services (714) 513-8061 European Emulex Limited (Europe) Technical Support Mulberry Business Park Fishponds Road Wokingham, Berkshire RG11 2QY, England Telephone: (011) 44-1-734-772-929 (8:30a.m. - 6:00 p.m.) FAX: (011) 44-1-734-773-237 (24 hr) BBS: (011) 44-1-734-773-298 (24 hr) ftp: ftp.europe.emulex.com If Emulex Technical Support personnel determine the unit is defective, they will provide information to return the product to an authorized Emulex repair center for service. If return is required, a Return Materials Authorization (RMA) number and shipping instructions will be issued. Emulex Network Systems has facilities throughout the world. Contact corporate headquarters for the closest office or regional center. 8-4 Chapter 8 24 - Hour Support Technical Support within the USA is available 24 hours a day. After normal working hours, dial one of the following numbers: Telephone: (800) 854-7112, ext. 8270 or (714) 662-5600, ext 8270 Automatic Call Distribution: (714) 513-8270 (6:00 a.m. - 5:00 p.m.) The after-hours answering service asks for a name, company name, telephone number and product type. The answering service pages the on-call technical support specialist, who will return the call as soon as possible. Product Service If a customer experiences difficulties with an Emulex product and is unable to resolve the problem with Emulex Technical Support, a Return Materials Authorization (RMA) number will be issued. Shipping instructions to the nearest Repair Center will also be provided. Following receipt of the RMA number, the customer is responsible for returning the product to Emulex, freight prepaid. For additional information please refer to the Warranty Registration Card. Bulletin Board System The Emulex Bulletin Board System (BBS) allows the user to download Emulex software and documentation files, upload files, and send or receive messages. Connection to the Emulex BBS may be made through modem or the Internet. Obtain upgrades through the BBS by using a modem and performing these steps: 1) Verify that your communication software supports one of these file transfer protocols: Xmodem, K-modem, Z-modem, SEAlink, Telink, or Kermit. 2) Configure the communication software to operate at 2400 -14.4K bps, 8 data bits, no parity, and 1 stop bit. Contacting Emulex 8-5 3) Set the software to dial one of these domestic or European numbers: − Domestic: (714) 662-1445 Auto rollover will be activated if the number is busy. If that modem becomes inactive, dial one of these numbers: (714) 662-1582 (714) 662-1630 − European: (44) 1-734 773298 The following file areas are available on the BBS: File Area Description #1 Files for Everyone #2 NETJet - Utilities & Load Image Files #3 NETJet - Additional Files #5 NETQue Mate - Utilities & Load Image Files #6 NETQue Mate - Additional Files #8 Persyst Products - Drivers #9 Persyst Products- Diagnostics #10 Persyst Products- Switch & Jumper Settings #11 DCP Products - Diagnostics #12 DCP Products - Switch & Jumper Settings #13 Technotes: Technical Bulletins #15 Performance Products - Utilities & Misc Files #18 Rconnect Files #19 LANManager Software #22 Emulex Printer Server Documentation #23 Emulex Communication Server Documentation #24 Emulex DCP Products Documentation NOTE: The file EMULEX.LST in area #1 describes the files in each area. 8-6 Chapter 8 Internet The Emulex BBS has Internet access via Anonymous ftp, an Internet service that allows connection to a remote host without being a registered user on the host. 1) Userid: Anonymous The IP address for the BBS is: − standard-name ftp.emulex.com − numeric-version 138.239.224.1 2) At the main directory, view the readme file for file locations. 3) Go to the desired directory to get the required files. The following sub-directories under J:/MAILBOX/FILES are available. NJ NETJet - Utilities and Load Image Files NJ/01 NETJet - Additional files NQ NETQue Mate - Utilities and Load Image Files NQ/01 NETQue Mate - Additional files PERSYST/DRVR Persyst Products - Drivers PERSYST/DIAGS Persyst Products - Diagnostics PERSYST/INSTL Persyst Products - Switch & Jumper Settings DCP/DIAGS DCP Products - Diagnostics DCP/INSTL DCP Products - Switch & Jumper Settings TSNOTES Technotes: Technical Bulletins XXXX Performance Products - Utilities & Misc. files RCONNECTR Connect Software LANMAN LANManager Software BBS: EVERYONE Files for Everyone MANUALS/PSERV Emulex printer server documentation MANUALS/CSERV Emulex communication server documentation MANUALS/DCP Emulex DCP products documentation Contacting Emulex 8-7 NOTE: The file EMULEX.LST in the EVERYONE directory describes the files located in each directory. EmuFax EmuFax is an automated document retrieval system that sends Emulex documents or catalogs to your fax machine. To use EmuFax, dial: (714) 513-8276 or (714) 513-8277 When prompted during the EmuFax recording, enter the document number of the desired document or catalog, along with the number of your fax machine. The document(s) requested will be faxed within minutes. Diagnostic Programs Appendix A DIAGNOSTIC PLATFORM ............................................................................................. A-2 Diagnostic Operating Requirements .........................................................................................A-2 README.DOC........................................................................................................................A-2 Distribution Diskette.................................................................................................................A-3 Diagnostic Platform Instructions ..............................................................................................A-3 Loading and Running the Diagnostic Platform ....................................................................A-3 Menus...................................................................................................................................A-4 USING DCPDIAG3 FOR THE DCP386I ......................................................................... A-7 Diagnostic Operating Requirements .........................................................................................A-7 README.DOC........................................................................................................................A-7 Distribution Diskette.................................................................................................................A-7 Running the Diagnostic ............................................................................................................A-8 A-2 Appendix A This section describes the operation of the diagnostic program. This program tests all functions of the DCPx86i/e, including on-board memory and registers, host memory, interrupts to and from the adapter, and the microprocessor. For DCP286i-SBC and DCP486e adapters, use the following DIAGNOSTIC PLATFORM. For the DCP386i adapter, go to the section entitled DCPDIAG3. Diagnostic Platform Diagnostic Operating Requirements To run diagnostics for test and verification of DCP286i-SBC and DCP486e adapters, the minimums requirements are: • IBM PC, PC/AT, PC/XT, or compatible • 640KB of RAM • A floppy diskette drive • DOS version 3.0 and above Some tests that are NOT selected by default may require loopbacks or null modems. README.DOC The README.DOC file is a non-executable file which contains an explanation of each diagnostic program on the diskette. To read the file, place the diskette in drive A and type: > A:README. DOC ⎜ MORE To scroll through the display, press the spacebar. To exit this file at any time, press <Ctrl>C. Diagnostic Programs A-3 Distribution Diskette The diagnostic diskette contains these files: • platform.exe • localx86.bin • help.txt • help.idx • readme.doc • @6141.ADF • !emu0000.cfg • !emu0008.cfg Check the diskette to make sure all these files are present, then make a backup copy of the diagnostic diskette for regular use. If you plan to run diagnostics from a hard drive, create a subdirectory on the hard disk and, copy the files into that subdirectory. Place the original Emulex diskette in a safe place. Diagnostic Platform Instructions The Diagnostic Platform can be used to configure and run diagnostics on several adapters at the same time. The boards may be all the same type or any combination of supported models. The list of tests and their order of performance are individually configurable for each board. Loading and Running the Diagnostic Platform 1) Boot the system under DOS and insert the Emulex diagnostic diskette in drive A: 2) Set the default drive path to: A: 3) At the DOS prompt, type: > A:Platform The Diagnostic Platform Main Menu appears. You are now ready to configure the Platform and run the desired diagnostics. Alternatively you may copy the diagnostics to your hard drive and load and run from the hard drive. A-4 Appendix A 1) Boot the system under DOS and insert the Emulex diagnostic diskette into drive A. 2) Create a subdirectory on the hard disk of your choice then copy the diagnostics to that sub directory. 3) At the DOS prompt, type > Platform The Diagnostic Platform Main Menu appears. You are now ready to configure the Platform and run the desired diagnostics. Menus Diagnostic configuration and operation are controlled from a series of menus containing option buttons for configuring the platform and testing of each board. A window and display bar provide configuration and testing options. NOTE: Please refer to menus displayed on your screen. Each highlighted item below corresponds to a numbered menu selection. Use the Left or Right arrow key to highlight the desired option and the Up or Down arrow key to select the menu item to which the option applies and press <Enter>. Use the arrow keys to highlight the desired parameter selection and press <enter>. To return to the previous menu and accept the parameter change, press <ESC>. The Main Menu contains a scrollable list of the adapters which are currently configured in the system and the test configuration of each adapter. The window can display 4 adapters at a time. Use the Up or Down arrow keys to scroll through the entire list. The following options can be selected from the Main Menu. Note that the option applies to the highlighted item. Diagnostic Programs A-5 • Hardware - This submenu displays the test configuration of the board highlighted in the Main Menu and allows you to change various parameters such as “Window Size,” “Window Address,” and “Interrupt Level”. In the submenu use the arrow keys to highlight the item you wish to change and the “Change Selection” option. Press <enter> and use the arrow keys to highlight the new parameter value from the displayed list. Press enter then press <ESC> to return to the Hardware submenu. Use the Accept Changes option to save the change or the Restore Changes to return the parameter to its original value. • From the Hardware submenu, select the product for the board you have installed. • Test - This submenu displays a summary of the current diagnostic settings. Here you may select diagnostic tests, the order in which they will be run, number of passes and the action to be taken if an error is encountered on the adapter. The Host or Local submenu option displays a scrollable list of tests available on the host or local side logic of the adapter under test. You may enable or disable the tests and change the order in which they are run. The test list window displays 18 tests at a time. To view or select more tests use the arrow keys to highlight the last test in the window and continue pressing the down arrow to scroll forward. To scroll backwards press the up arrow. Alternately, you may use the Page Up or Page Down key to scroll whole pages at a time. The following options are available from the Host or Local submenus: − All On - Enables all tests in the displayed list. − All Off - Disables all tests in the displayed list. − On - Enables the highlighted test. − Off - Disables the highlighted test. − Move - Allows the highlighted test to be moved to another position in the test list. − Default - Selects the default test list. The Passes option sets the number of passes that will be run on the Host side. The number of Local side passes is a selectable multiple of the number of Host side passes. A-6 Appendix A Selecting the On Error option allows you to determine what action will be taken when an error occurs on the selected adapter. Error actions can be set for each adapter independently. NOTE: You must run host test #9 Downloaded Diagnostics in order to run the local tests. This test is loaded to run automatically in the default set up. Press F1 from within the test menu for help regarding the function of each test. File - This menu displays the diagnostic control files currently in use and is used to define the control files to be used by the diagnostic program during testing. Image File - The file which is downloaded to the adapter under test to run local side diagnostics. Log File - File on the host which is used by the diagnostic to log error and other statistical information. Config File - File on the host which is used by the Platform to store diagnostic menu and test setup configuration data. Selecting the Load Configuration option loads the menu and test configuration data from the host file defined by the screen parameter CONFIG FILE. In the File submenu, selecting the Save Configuration option saves the current menu and test configuration setup to the host file defined by the screen parameter CONFIG FILE. In the File submenu, selecting the Change File Name option allows the user to change the host file name pointed to by each of the screen parameters. Status - Displays the current status of the diagnostic test(s) being run and allows the user to Abort and Continue. Selecting the Abort option terminates the testing of the adapter highlighted in the Main menu at the end of the current test cycle while Continue Testing resumes a diagnostic run which has paused on error. Run - In the Main menu, selecting the Run option starts the diagnostic execution on all adapter listed in the Main menu. When execution has started, selecting the Status Option will display the current status of the diagnostic run. Diagnostic Programs A-7 Exit - In the Main Menu, selecting the Exit option exits the Platform and returns control the PC to DOS. Using DCPDIAG3 for the DCP386i This section describes the operation of the diagnostic program supplied with the DCP386i/e. The diagnostics test all functions of the DCP386i/e, including on-board memory and registers, host memory, interrupts to and from the card, and the microprocessor. Diagnostic Operating Requirements To run diagnostics for test and verification of DCP386i adapters, these minimums are required: • IBM PC, PC/AT, PC/XT, or compatible • 512KB of RAM • A floppy diskette drive • DOS version 3.0 and above Additionally, some tests that are NOT selected by default, require either loopbacks or null modems. README.DOC The README.DOC file is a non-executable file which contains an explanation of each diagnostic program on the diskette. To read the file, place the diskette in drive A and type: > A:README.386 ⎜ MORE To scroll through the display, press the spacebar. To exit this file at any time, press <Ctrl>C. Distribution Diskette The diagnostic diskette contains the following files: • dcpdiag3.exe • dgdcp386.bin • help386.txt • readme.386 A-8 Appendix A • options.386 • dmadcp.asm • dmapc.asm • dma.equ • dcp286d.equ • mac.equ • scc.equ • assem.bat • build.bat • dmatest.bat • dmatest.doc Check the diskette to make sure all these files are present. After you have done this, make a backup copy of the diagnostic diskette for regular use. If running the diagnostics from a hard drive, create a subdirectory in your hard disk, then copy the diagnostics to that subdirectory. In both cases, place the original Emulex diskette in a safe place. Running the Diagnostic The Diagnostic Platform can be used to configure and run diagnostics on several adapters at the same time. The adapter may be all the same type or any combination of supported models. The list of tests and their order of performance are individually configurable for each adapters. To run the diagnostic program, perform these steps: 1) Boot the system under DOS and insert the Emulex diagnostic diskette in drive A: 2) Set the default drive path to: A: 3) At the DOS prompt, type: > A:dcpdiag3 The Diagnostic Main Menu appears. You are now ready to run the desired diagnostics. Diagnostic Programs A-9 NOTE: A loopback connector must be used when running external loopback tests. Refer to Chapter 3 Alternatively you may copy the diagnostics to your hard drive and load and run from the hard drive. 1) Boot the system under DOS and insert the Emulex diagnostic diskette into drive A. 2) Create a subdirectory on the hard disk of your choice then copy the diagnostics to that sub directory. 3) At the DOS prompt, type > dcpdiag3 The Diagnostic Main Menu appears. You are now ready to run the desired diagnostics.