1
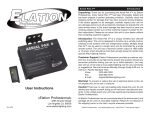
SD Disk Drive™™
Introduction
Introduction: Thank you for purchasing the SD Disk Drive™ from
Elation Professional®, the perfect companion to any Show Designer™
controller. The SD Disk Drive™ is a 19” rack mount accessory that
allows you to back-up and upload vital information to and from any
member of the Show Designer™ family (Show Designer™, Show
Designer 1™, or Show Designer 2™ ). The SD Disk Drive connects
directly to a Show Designer and provides a 3.5” floppy disk drive, a
PS-2 keyboard jack, a MIDI “IN” port, a MIDI “OUT” port, and two RS232 jacks. The MIDI connections can be used to connect to other MIDI
devices that use MIDI as a method to back-up memory.
SD DISK DRIVE
Unpacking: Every SD Disk Drive™ has been thoroughly tested and
has been shipped in perfect operating condition. Carefully check the
shipping carton for damage that may have occurred during shipping.
If the carton appears to be damaged, carefully inspect your unit for
any damage and be sure all accessories necessary to operate the unit
have arrived intact. In the event damage has been found or parts are
missing, please contact our toll free customer support number for further instructions. Please do not return this unit to your dealer without
first contacting customer support.
Customer Support: Elation Professional® provides a customer support line, to provide set up help and to answer any question should you
encounter problems during your set up or initial operation. You may
also visit us on the web at www.elationlighting.com for any comments
or suggestions. Service Hours are Monday through Friday 9:00 a.m. to
5:00 p.m. Pacific Standard Time.
Voice: (323) 582-3322 Fax: (323) 582-2610
E-mail: [email protected]
User Instructions
Elation Professional®
©
6/03
4295 Charter Street
Los Angeles Ca. 90058
www.elationlighting.com
Warning! To prevent or reduce the risk of electrical shock or fire, do
not expose this unit to rain or moisture.
Caution! There are no user serviceable parts inside this unit. Do not
attempt any repairs yourself, doing so will void your manufactures warranty. In the unlikely event your unit may require service please contact
Elation Professional.
At Elation Professional® we are concerned about the environment, and
package all our units in recyclable material. Please do not dispose of
the shipping carton in the trash, recycle whenever possible.
©Elation
Professional® www.elationlighting.com SD Disk Drive™ User Manual Page 2
SD Disk Drive™
Safety Precautions
• To reduce the risk of electrical shock or fire, do not expose this unit
rain or moisture
• Do not spill water or other liquids into or on to your unit.
• Be sure that the local power outlet match that of the required voltage for your unit.
• Do not attempt to operate this unit if the power cord has been
frayed or broken.
• Do not attempt to remove or break off the ground prong from
the electrical cord. This prong is used to reduce the risk of electrical
shock and fire in case of an internal short.
• Disconnect from main power before making any type of connection.
• Do not remove the cover under any conditions. There are no user
serviceable parts inside.
• Never operate this unit when it’s cover is removed.
• Never plug this unit in to a dimmer pack
• Always be sure to mount this unit in an area that will allow proper
ventilation. Allow about 6” (15cm) between this device and a wall.
• Do not attempt to operate this unit, if it becomes damaged.
• This unit is intended for indoor use only, use of this product outdoors voids all warranties.
• During long periods of non-use, disconnect the unit’s main power.
• Always mount this unit in safe and stable matter.
• Power-supply cords should be routed so that they are not likely to
be walked on or pinched by items placed upon or against them,
paying particular attention to cords at plugs, convenience receptacles, and the point where they exit from the appliance.
• Cleaning -The fixture should be cleaned only as recommended by
the manufacturer. See page 7 for cleaning details.
• Heat -The appliance should be situated away from heat sources
such as radiators, heat registers, stoves, or other appliances
(including amplifiers) that produce heat.
• The fixture should be serviced by qualified service personnel when:
A. The power-supply cord or the plug has been damaged.
B. Objects have fallen, or liquid has been spilled into the appliance.
C. The appliance has been exposed to rain or water.
D. The appliance does not appear to operate normally or exhibits a
marked change in performance.
©Elation
Professional® - www.elationlighting.com - SD Disk Drive™ User Manual Page 3
SD Disk Drive™
Product Registration
The SD Disk Drive carries a one year limited warranty. Please fill out
the enclosed warranty card to validate your purchase. All returned
service items whether under warranty or not, must be freight prepaid and accompany a return authorization (R.A.) number. The R.A.
number must be clearly written on the outside of the return package.
A brief description of the problem as well as the R.A. number must
also be written down on a piece of paper included in the shipping
carton. If the unit is under warranty, you must provide a copy of your
proof of purchase invoice. You may obtain a R.A. number by contacting our customer support team on our customer support number. All
packages returned to the service department not displaying a R.A.
number on the outside of the package will be returned to the shipper.
SD Disk Drive™
Optional Accessories
Keyboard (Sold Separately): You may use any off the shelf PS-2
Keyboard to name scenes, shows, and other profiles in the Show
Designers memory.
Trackball/Mouse (Sold Separately): You may connect any off the shelf
mouse or trackball to the SD Disk Drive. This allows you control the
pan and tilt movements of a selected fixture on the Show Designer.
SD Disk Drive™
General Instructions
To optimize the performance of this product, please read these
operating instructions carefully to familiarize yourself with the basic
operations of this unit. These instructions contain important safety
information regarding the use and maintenance of this unit. Please
keep this manual with the unit, for future reference.
©Elation
Professional® - www.elationlighting.com - SD Disk Drive™ User Manual Page 4
SD Disk Drive™
Set Up
For permanent installation be sure to mount the drive in a rack and
secure the unit to the rack via the built-in rack ears. If the unit is not
used in permanent installation be sure to locate the unit on a flat level
surface to prevent the unit from accidental tipping.
SD Disk Drive™
Set Up
to your Show Designer.
Connect the included DC9V 1200 mA power supply to the power inlet
connection located on the rear of the unit and plug the power supply
in to a standard wall outlet.
2) Download the latest Show Designer software from either the American DJ (www.AmericanDJ.com), Elation (www.ElationLighting.com), or
the Elation Professional (www.elationlighting.com). The software version must equal version 2.10 or greater to be affective and will down
load as “shdsXXX.txt” where XXX represents the software version. For
Example; software version 2.10 will download as “shds210.txt.”
Using the included serial link cable, connect one end of the cable to
the RS-232 output connection on the rear of your particular Show Designer version (SD, SD1, or SD2). If you have a another device already
connected to the RS-232 jack on the rear of the Show Designer, remove it for now and put it aside.
3) Rename the file to “autoload.txt” and copy this file to a blank 3.5”
floppy disk. Please note; Windows XP automatically assigns the file
suffix “.txt,” therefore you do not have to add the file suffix. If you do
run into an error while attempting to load the file try removing the “.txt”
extension and repeating the process.
If you already had a trackball or mouse connected to your Show Designer or you would like to use one now, connect it to the rear of the
SD Disk Drive via the RS-232 appropriately labeled “To Trackball”. For
more info on using a trackball or mouse see optional accessories.
4) Be sure power to the Show Designer and the SD Disk Drive is off
and insert the floppy disk that contains the renamed show designer file
in to the SD Disk Drive.
If you will be using an optional PS-2 Keyboard, connect it now via the
keyboard connector appropriately labeled “To Keyboard” on the rear
of the disk drive unit. For more info on using a keyboard see optional
accessories.
Original Show Designer Firmware Upgrade: If you are using an
original Show Designer with a software version prior to version 2.10
you must update the system firmware to accept the SD Disk Drive
prior to attempting operation between the two units. If your system
software is greater than 2.10 or you are using a Show Designer 1 or
Show Designer 2 you may skip this step, if not please follow either of
the two steps below (depending on your system software) to allow
seamless operation between your Show Designer and the SD Disk
Drive. The software version can be found in the LCD immediately upon
startup of the Show Designer.
Upgrading Firmware Versions 2.00 - 2.09 - If you are running a software version from 2.00 to 2.09 and you have internet access you can
update the firmware through the use of the SD Disk Drive. The following procedures will guide you through the software upgrade.
1) Follow the installation guide lines and connect your SD Disk Drive
©Elation
Professional® - www.elationlighting.com - SD Disk Drive™ User Manual Page 5
5) Press and hold down the “Menu” and “Erase” buttons simultaneously while turning on the power to the Show Designer. After the Show
Designer has been powered on, the LCD will read “Download new
program,” you may then release the “Menu” and “Erase” buttons.
Hold down the Show Designer “Menu”
and “Erase” to update software
6) With the Show Designer LCD reading “Download new program”
and with the floppy containing the “autoload.txt” file inserted into the
SD Disk Drive, turn on power to the SD Disk Drive. The new software
will automatically begin to load into the Show Designer and the Show
Designer LCD will change to “Receiving new program.”
If the above procedure does not work, please try the process over
and be sure to rename the downloaded Show Designer update file to
“autoload.txt.” You may also want to try removing the “.txt” file extension and repeating the upload process.
©Elation
Professional® - www.elationlighting.com - SD Disk Drive™ User Manual Page 6
SD Disk Drive™
Set Up
SD Disk Drive™
Functions
This process must only be completed once. After the software update
has been completed the SD Disk Drive can then be accessed directly
from the Show Designer and all future updates can be completed
through “Update Software” function in the Show Designer’s menu.
txt.”
3) Copy the software update file to a 3.5” floppy disk. When the file
transfer is completed, remove the disk from the computer and insert it
into the SD Disk Drive.
Upgrading Show Designers with Software Versions 1.00 - 1.11
- For Show Designers running software version 1.00 - 1.11 there is
no user update available. Any Show Designer with a firmware version
prior to 2.00 must be updated at the factory. If your Show Designer
is running software 1.00 - 1.11, please contact customer support to
make arrangement to have your unit ship in for a free hardware upgrade that will allow communication between the Show Designer and
the SD Disk Drive. After the software and hardware updates have been
completed the SD Disk Drive can then be accessed directly from the
Show Designer and all future updates can be completed through the
“Update Software” function in the Show Designer’s menu.
4) Access the Show Designer menu section and toggle through until
you reach the “Update Software” selection. Choose this selection by
pressing the “Enter” button on the Show Designer. The new software
will automatically begin to load into the Show Designer and the Show
Designer LCD will change to “Receiving new program.” Please allow
some time for the software upgrade to completely load even after the
disk drive has stopped spinning. When the software upgrade is completed the Show Designer LCD will change and will display the startup
screen in the LCD. The startup screen will then read the new software
version completing the software upgrade. Always allow the SD Disk
Drive to completely stop spinning before you attempt to remove the
disk.
SD Disk Drive™
Functions
This section will describe in detail how to perform the various operations available between the Show Designer and SD Disk Drive. Note:
If you are planning on using the SD Disk Drive with an original Show
Designer, be sure the Show Designer Software version is at least 2.10.
If not you will have to update the software to 2.10 or later to allow
proper functionality between the SD Disk Drive and the Show Designer.
Please see “Original Show Designer Software Update” in the Setup
section at the beginning of this manual.
Software Update;
This function allows you to update the Show Designers operating
system and fixture profiles. To update a Show Designer software;
1) Be sure the SD Disk Drive and Show Designer are turned on and are
connected properly as described in the set-up section of this manual.
2) Download the latest Show Designer software file from either the
American DJ (www.AmericanDJ.com), Elation (www.ElationLighting.
com), or the Elation Professional (www.elationlighting.com). The software version must equal version 2.11 or greater to be affective and will
down load as “shdsXXX.txt” where XXX represents the software version. For Example; software version 2.11 will download as “shds211.
©Elation
Professional® - www.elationlighting.com - SD Disk Drive™ User Manual Page 7
Show Designer Memory Back-Up;
This function allows the user to save the entire Show Designer memory
which includes; all settings, scenes, presets, fixture profiles, chases,
and shows. Use this function to make back-up files of a Show Designer’s memory in the event a Show Designer should fail or to transfer
memory into another Show Designer for back-up purposes. To backup the Show Designer memory:
1) Be sure the SD Disk Drive and Show Designer are turned on and
are connected properly as described in the set-up section of this
manual.
2) Insert a 3.5” floppy disk into the SD disk Drive.
3) Access the Show Designer menu section and toggle through
until you reach the “SAVE MEMORY FILE” selection. Choose this
selection by pressing the “Enter” button. You will then be prompted
to enter a file name. You may choose the default file name or use the
keyboard or Show Designer data wheel to enter a different file name.
The file name can be up to eight characters long. The file will be saved
as a .txt file and will be DOS compatible as long as you adhere to the
DOS file naming structures.
©Elation
Professional® - www.elationlighting.com - SD Disk Drive™ User Manual Page 8
SD Disk Drive™
Functions
SD Disk Drive™
Saving MIDI Files
4) After you have chosen a name for your file press the enter button
to automatically begin the saving process. When the saving process
is completed the Show Designer LCD will change and will display the
startup screen in the LCD. Always allow the SD Disk Drive to completely stop spinning before you attempt to remove the disk.
You can use the disk drive to save MIDI system exclusive files from
other devices that use MIDI as a memory backup method;
Show Designer Memory Restore;
2) Start sending the system exclusive file from the other device. The
disk drive should start running.
This function allows to load a previously stored Show Designer
memory file into the same or another Show Designer. Please note that
this process will erase the existing memory file in favor of any new file
uploaded, so be sure to back-up the existing memory file if you do not
wish to loose any pre-existing information. To restore or load a new
memory file:
1) Be sure the SD Disk Drive and Show Designer are turned on and are
connected properly as described in the set-up section of this manual.
2) Insert the 3.5” floppy disk that stores the Show Designers memory
file into the SD disk Drive.
1) Connect MIDI cables from the disk drive unit to the other device and
insert a blank disk.
3) The file will be saved to disk with the file name “midifile.bin”.
To send this file back to the other device, prepare the other device
to receive;
1) Insert the disk with the file named “midifile.bin” into the disk drive
with the power on the disk drive unit turned off.
2) Turn on the power to the disk drive unit and the file will be sent to
the MIDI connection.
The disk drive always looks for a disk with a file named
“midifile.bin” when powering up.
3) Access the Show Designer menu section and toggle through until
you reach the “LOAD MEMORY FILE” selection. Choose this selection
by pressing the “Enter” button. If the disk contains only one memory
file that file will immediately be displayed in the Show Designer’s LCD.
If the disk contains multiple memory files the first memory file found
on the disk will be displayed in the LCD. Use the data wheel or the
arrow buttons to scroll through the different file names and locate the
memory file you wish to upload into the Show Designer.
4) After you have chosen your file press the enter button a “REPLACE
CURRENT MEMORY” confirmation screen will appear in the LCD.
Choose the “Yes” button to proceed with the upload or the “no” button
to cancel the operation. If you decide to continue with the memory
upload a “RECEIVING MEMORY FILE” dialog screen and a file data
transfer log will display in the LCD as the file transfer progresses.
When the file transfer is completed the Show Designer dialog screen
and a file data transfer log will display in the LCD as the file transfer
progresses. When the file transfer is completed the Show Designer .
©Elation
Professional® - www.elationlighting.com - SD Disk Drive™ User Manual Page 9
©Elation
Professional® - www.elationlighting.com - SD Disk Drive™ User Manual Page 10
SD Disk Drive™
Warranty
ONE YEAR LIMITED WARRANTY
A. Elation Professional® hereby warrants, to the original purchaser, Elation Professional®
products to be free of manufacturing defects in material and workmanship for a period of
1 Year (365 days) from the date of purchase. This warranty shall be valid only if the product
is purchased within the United States of America, including possessions and territories.
It is the owner’s responsibility to establish the date and place of purchase by acceptable
evidence, at the time service is sought.
B. For warranty service, send the product only to the Elation Professional® factory. All
shipping charges must be pre-paid. If the requested repairs or service (including parts
replacement) are within the terms of this warranty, Elation Professional® will pay return shipping charges only to a designated point within the United States. If the entire instrument
is sent, it must be shipped in its original package. No accessories should be shipped with
the product. If any accessories are shipped with the product, Elation Professional® shall
have no liability whatsoever for loss of or damage to any such accessories, nor for the safe
return thereof.
SD Disk Drive™
Model:
Voltage*:
Dimensions:
Weight:
Warranty:
Specifications
SD Disk Drive™
AC 120v - 60v
7.25”(L) x 19”(W) x 1.75”(H)
5.5 Lbs. / 2.6 Kgs.
1 Year (365 days)
*Supplied by the controller.
Please Note: Specifications and improvements in the design
of this unit and this manual are subject to change without any
prior written notice.
C. This warranty is void if the serial number has been altered or removed; if the product is
modified in any manner which Elation Professional® concludes, after inspection, affects the
reliability of the product; if the product has been repaired or serviced by anyone other than
the Elation Professional® factory unless prior written authorization was issued to purchaser
by Elation Professional®; if the product is damaged because not properly maintained as set
forth in the User Manual.
D. This is not a service contract, and this warranty does not include maintenance, cleaning
or periodic check-up. During the period specified above, Elation Professional® will replace
defective parts at its expense, and will absorb all expenses for warranty service and repair
labor by reason of defects in material or workmanship. The sole responsibility of Elation
Professional® under this warranty shall be limited to the repair of the product, or replacement thereof, including parts, at the sole discretion of Elation Professional®. All products
covered by this warranty were manufactured after January 1, 1990, and bear identifying
marks to that effect.
E. Elation Professional® reserves the right to make changes in design and/or improvements upon its products without any obligation to include these changes in any products
theretofore manufactured.
F. No warranty, whether expressed or implied, is given or made with respect to any accessory supplied with products described above. Except to the extent prohibited by applicable
law, all implied warranties made by Elation Professional® in connection with this product,
including warranties of merchantability or fitness, are limited in duration to the warranty
period set forth above. And no warranties, whether expressed or implied, including warranties of merchantability or fitness, shall apply to this product after said period has expired.
The consumer’s and or Dealer’s sole remedy shall be such repair or replacement as is
expressly provided above; and under no circumstances shall Elation Professional® be liable
for any loss or damage, direct or consequential, arising out of the use of, or inability to use,
this product.
G. This warranty is the only written warranty applicable to Elation Professional® Products
and supersedes all prior warranties and written descriptions of warranty terms and conditions heretofore published.
©Elation
Professional® - www.elationlighting.com - SD Disk Drive™ User Manual Page 11
©Elation Professional®
Elation Professional® World Headquarters
4295 Charter Street Los Angeles, CA 90058 USA
Tel: 323-582-2650 Fax: 323-582-2610
Web: www.elationlighting.com E-mail: [email protected]