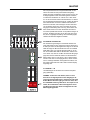
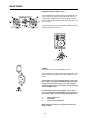
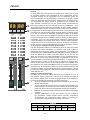
1
BEDIENUNGSANLEITUNG
OWNER‘S MANUAL
MODE D‘EMPLOI
PowerMate 600
Power Mixer
INHALT
WICHTIGE SICHERHEITSHINWEISE
WICHTIGE SERVICEHINWEISE
BESCHREIBUNG
AUSPACKEN & GARANTIE
INSTALLATIONSHINWEISE
INPUT MONO
INPUT STEREO
FX 1/2
AUX / MONO
MASTER
RÜCKSEITE
AUFBAU EINER STANDARD PA
MASTER PATCHBAY
SPECIFICATIONS / TECHNISCHE DATEN
BLOCK DIAGRAM
DIMENSIONS / ABMESSUNGEN
.......................
.......................
.......................
.......................
.......................
.......................
.......................
.......................
.......................
.......................
.......................
.......................
.......................
.......................
.......................
.......................
3
3
4
4
4
5
8
10
12
14
16
17
18
61
62
63
IMPORTANT SAFETY INSTRUCTIONS
IMPORTANT SERVICE INSTRUCTIONS
DESCRIPTION
UNPACKING AND WARRANTY
INSTALLATION
INPUT MONO
INPUT STEREO
FX 1/2
AUX /MONO
MASTER
REAR PANEL
SETTING UP A STANDARD PA-SYSTEM
MASTER PATCHBAY
SPECIFICATIONS / TECHNISCHE DATEN
BLOCK DIAGRAM
DIMENSIONS / ABMESSUNGEN
.......................
.......................
.......................
.......................
.......................
.......................
.......................
.......................
.......................
.......................
.......................
.......................
.......................
.......................
.......................
.......................
23
23
24
24
24
26
28
30
32
34
36
37
38
61
62
63
CONTENTS
TABLE DES MATIÈRES
INSTRUCTIONS DE SÉCURITÉ IMPORTANTES
INSTRUCTIONS DE RÉPARATION IMPORTANTES
INTRODUCTION
DÉBALLAGE ET GARANTIE
INSTALLATION ET BRANCHEMENTS
INPUT MONO
INPUT STEREO
EFFETS 1/2
AUX3/4
MASTER
PANNEAU ARRIÈRE
INSTALLATION SONORISATION STANDARD
SPECIFICATIONS
BLOCK DIAGRAM
DIMENSIONS
2
.......................
.......................
.......................
.......................
.......................
.......................
.......................
.......................
.......................
.......................
.......................
.......................
.......................
.......................
.......................
43
43
44
44
44
45
48
50
52
54
56
57
61
62
63
WICHTIGE SICHERHEITSHINWEISE
Das Blitzsymbol innerhalb eines gleichseitigen Dreiecks soll den Anwender auf nicht isolierte Leitungen
und Kontakte im Geräteinneren hinweisen, an denen
hohe Spannungen anliegen, die im Fall einer
Berührung zu lebensgefährlichen Stromschlägen
führen können.
Das Ausrufezeichen innerhalb eines gleichseitigen
Dreiecks soll den Anwender auf wichtige Bedienungssowie Servicehinweise in der zum Gerät gehörenden Literatur aufmerksam machen.
1.
2.
3.
4.
5.
6.
7.
Lesen Sie diese Anweisungen.
Bewahren Sie die Anleitung sorgsam auf.
Beachten Sie sämtliche Warnhinweise.
Beachten Sie die Anweisungen.
Betreiben Sie dieses Gerät nicht in der Nähe von Wasser.
Verwenden Sie zur Reinigung ausschließlich ein trockenes Tuch.
Achten Sie darauf, dass die Belüftungsöffnungen nicht versperrt sind. Beachten Sie bei der Installation des Geräts die
Anweisungen des Herstellers.
8. Setzen Sie das Gerät nicht der unmittelbaren Einwirkung von Hitzequellen, wie etwa Heizkörpern, Speicheröfen,
Herden oder anderen Wärme abstrahlenden Komponenten (inklusive Endstufen) aus.
9. Setzen Sie die Sicherheit, die Ihnen ein Stecker mit eindeutig zugeordneter Polarität oder ein Schutzkontaktstecker bieten,
nicht außer Kraft. Ein Stecker mit zugeordneter Polarität besitzt zwei Kontaktzungen, wobei die eine breiter ist als die andere.
Ein Schutzkontaktstecker besitzt neben zwei Kontakten noch einen dritten Schutzkontaktstift (Erdung). Das Steckerdesign
sowie der zusätzliche Kontakt dienen in erster Linie Ihrer Sicherheit. Falls der im Lieferumfang befindliche Stecker nicht an
der vorgesehenen Wandsteckdose angeschlossen werden kann, wenden Sie sich bitte umgehend an einen Elektrofachmann.
10. Schützen Sie das Netzkabel vor Belastungen durch Betreten und vermeiden Sie, speziell an den stecker- sowie geräteseitigen
Anschlüssen, das Kabel zu knicken oder einzuklemmen.
11. Verwenden Sie ausschließlich vom Hersteller dafür vorgesehenes Zubehör und Erweiterungen.
12. Verwenden Sie zusammen mit dieser Komponente nur vom Hersteller dazu vorgesehene oder andere geeignete Lastkarren,
Stative, Befestigungsklammern oder Tische, die Sie zusammen mit dem Gerät erworben haben. Achten Sie beim Transport
mittels Lastkarrens darauf, dass das transportierte Equipment und der Karren nicht umfallen und möglicherweise Personenund/oder Sachschäden verursachen können.
13. Trennen Sie das Gerät bei Gewitter oder, wenn Sie es über einen längeren Zeitraum nicht verwenden, vom Stromnetz.
14. Wenden Sie sich im Servicefall an einen qualifizierten Servicebetrieb. In folgenden Fällen sollten Sie sich unbedingt
umgehend an eine Servicewerkstatt wenden: das Gerät wurde in irgendeiner Art und Weise beschädigt (beispielsweise das
Netzkabel oder der Netzstecker wurden beschädigt), Flüssigkeit oder ein Fremdkörper ist in das Geräteinnere eingedrungen,
das Gerät wurde Regen oder hoher Luftfeuchtigkeit ausgesetzt, es kann nicht „normal“ betrieben werden oder es wurde fallen
gelassen.
15. Setzen Sie diese Komponente niemals Tropf- oder Spritzwasser aus und achten Sie stets darauf, dass keine mit Flüssigkeit
gefüllten Objekte – wie etwa Vasen – auf dem Gerät platziert werden.
16. Trennen Sie den Netzstecker von der Wandsteckdose, um das Gerät komplett vom Stromnetz zu trennen.
17. Der Stecker des Netzkabels sollte stets leicht zugänglich sein und sich in einem einwandfrei betriebsbereiten Zustand
befinden.
Entsorgung von gebrauchten elektrischen und elektronischen Geräten (Anzuwenden in den Ländern der
Europäischen Union und anderen europäischen Ländern mit einem separaten Sammelsystem für diese
Geräte) Das Symbol auf dem Produkt oder seiner Verpackung weist darauf hin, dass dieses Produkt nicht
als normaler Haushaltsabfall zu behandeln ist, sondern bei einem Telex Händler abgegeben werden muss.
WICHTIGE SERVICEHINWEISE
ACHTUNG:
1.
2.
3.
4.
5.
6.
7.
8.
Diese Servicehinweise sind ausschliesslich für qualifiziertes Servicepersonal vorgesehen.
Um die Gefahr eines elektrischen Schlages zu vermeiden, führen Sie keine Wartungsarbeiten durch,
die nicht in der Bedienungsanleitung beschrieben sind, ausser Sie sind hierfür qualifiziert. Überlassen
Sie sämtliche Servicearbeiten und Reparaturen einem ausgebildeten Kundendiensttechniker.
Bei Reparaturarbeiten im Gerät sind die Sicherheitsbestimmungen nach EN 60065 (VDE 0860) einzuhalten.
Bei allen Arbeiten, bei denen das geöffnete Gerät mit Netzspannung verbunden ist und betrieben wird, ist ein Netz trenntransformator zu verwenden.
Vor einem Umbau mit Nachrüstsätzen, Umschaltung der Netzspannung oder sonstigen Modifikationen ist das Gerät
stromlos zu schalten.
Die Mindestabstände zwischen netzspannungsführenden Teilen und berührbaren Metallteilen
(Metallgehäuse) bzw. zwischen den Netzpolen betragen 3 mm und sind unbedingt einzuhalten.
Die Mindestabstände zwischen netzspannungsführenden Teilen und Schaltungsteilen, die nicht mit dem Netz
verbunden sind (sekundär), betragen 6 mm und sind unbedingt einzuhalten.
Spezielle Bauteile, die im Stromlaufplan mit dem Sicherheitssymbol gekennzeichnet sind (Note), dürfen nur durch
Originalteile ersetzt werden.
Eigenmächtige Schaltungsänderungen dürfen nicht vorgenommen werden.
Die am Reparaturort gültigen Schutzbestimmungen der Berufsgenossenschaften sind einzuhalten. Hierzu gehört
auch die Beschaffenheit des Arbeitsplatzes.
Die Vorschriften im Umgang mit MOS - Bauteilen sind zu beachten.
NOTE:
SAFETY COMPONENT ( MUST BE REPLACED BY ORIGINAL PART )
3
BESCHREIBUNG
Wir möchten Ihnen zu allererst danken und Sie beglückwünschen, dass Sie sich für einen Power Mixer
von DYNACORD entschieden haben.
Die PowerMate Kompaktanlagen basieren auf mehreren Jahrzehnten Erfahrung, Forschung und Kundennähe im
professionellen Audiobereich. Mit dem PowerMate haben Sie einen Power Mixer erworben, der Ihnen eine große
Anzahl von Funktionen in einer sehr kompakten Form bietet. Vergessen Sie einfach Anpassungs- und Verkabelungsprobleme von Mischpult, Verstärker, Effektteilen und Equalizeren. Hier haben Sie ein Gerät in dem alles optimal aufeinander abgestimmt ist. Durch die ergonomische Pultform und die übersichtlich, strukturierte Anordnung der Bedienteile haben Sie immer alles im Blick und können schnell und problemlos auf jedes Detail zugreifen. Um schlechte
Lichtverhältnisse im Einsatz auszugleichen, ist eine Buchse zum Anschluss einer Schwanenhalslampe vorgesehen.
Auch beim Transport des PowerMate werden Sie bald seine Vorzüge zu schätzen wissen. Griffe links und rechts im
Seitenteil sowie das relativ geringe Gewicht erlauben Ihnen einen problemlosen Transport des Gerätes, wobei alle
empfindlichen Teile wie Knöpfe und Regler von einer stabilen Schutzhaube abgedeckt sind. Sollten Sie jedoch Ihren
PowerMate 600 lieber im Rack plazieren, kein Problem, die Kunststoffseitenteile können sehr einfach durch Metall-Rackwinkel ersetzt werden. Mit seiner großen Anzahl von Funktionen, hohen Dynamik, rauscharmen Design,
dem 24bit-Dual-Stereo-Effektteil und der starken Endstufe ist der PowerMate universell einsetzbar. Egal ob auf der
Bühne, beim Homerecording oder in der Festinstallation, zeigt sich der PowerMate als idealer Partner und wird Ihre
hohen Ansprüche, die Sie natürlich an ein professionelles Audiogerät stellen, souverän und zuverlässig erfüllen.
Natürlich wollen Sie ihren PowerMate so schnell wie möglich anschließen und ausprobieren. Aber nehmen Sie sich
bitte die Zeit um dies anhand der Bedienungsanleitung zu tun. Beginnend mit den Eingangskanälen, über den Effektund Masterbereich bis hin zur Leistungsendstufe werden Sie systematisch durch das Gerät geführt. Lesen Sie die
einzelnen Punkte aufmerksam durch, Sie werden dabei über die vielfältigen Funktionen des PowerMates informiert
und an vielen Stellen nützliche Tips finden, die Sie unmittelbar in die Praxis umsetzen können. Zusätzlich finden
Sie in dieser Bedienungsanleitung Einstellhinweise, die Sie unbedingt beachten sollten, die Beschreibung eines typischen PA-Setups, Blockschaltbild, Technische Daten, Anschlußhinweise ..... . Also es lohnt sich, lesen Sie weiter.
Auspacken und Garantie
Öffnen Sie die Verpackung und entnehmen Sie den PowerMate. Die Folie über dem Effekt-Anzeigeglas abziehen. Es liegt noch zusätzlich zu dieser Bedienungsanleitung ein Netzkabel und die Garantiekarte bei. Überprüfen
Sie bitte ob die Garantiekarte vollständig ausgefüllt ist, denn nur so können Sie etwaige Garantieansprüche geltend machen. Sie haben auf das Gerät 36 Monate Garantie, die ab dem Zeitpunkt der Aushändigung durch den
Händler gilt. Bewahren Sie zur Garantiekarte auch den Kaufbeleg, der den Termin der Übergabe festlegt, auf.
Generell gilt, wenn Sie die Originalverpackung sowie alle Dokumente sorgfältig aufbewahren, können Sie später
einen höheren Wiederverkaufspreis für das Gerät erzielen.
Aufstellen und Anschließen
Stellen Sie den PowerMate immer auf eine ebene Unterlage, damit eine ausreichende Luftzufuhr im Betrieb gewährleistet ist. Das Gerät verfügt über elektronisch geregelte Lüfter die in jedem Fall sicherstellen, dass der Leistungsblock nicht überhitzt wird. Die Belüftungsrichtung ist dabei Front to Rear, das bedeutet, dass kühle Luft im
vorderen, unteren Teil angesaugt wird und die erwärmte Luft hinten (an den Lüftungsschlitzen) austritt. Weder die
vorderen noch die hinteren Lüftungsschlitze dürfen beim Betrieb des Gerätes abgedeckt sein, weil ansonsten der
PowerMate durch thermische Überlastung in den Protect-Mode schaltet. Das Gerät nimmt zwar dadurch keinen
Schaden, aber die Darbietung wird bis zum Wiedereinschalten unterbrochen. Sollten Sie sich für einen vertikalen
Rackeinbau entschieden haben, muss in jedem Fall direkt über dem Gerät mindesten 2 H.E. und unter dem Gerät
mindestens 1.H.E. Freiraum bleiben. Die Leerräume können natürlich mit speziellen Leerblenden mit Lüftungsschlitzen abgedeckt werden. Vor dem Anschließen ans Netz stellen Sie bitte fest, ob die am Gerät im Bereich des
Netzschalters aufgedruckte Betriebsspannung Ihrer Netzspannung entspricht. Beim Einschalten des PowerMate
laufen die internen Lüfter mit voller Geschwindigkeit für ca. 2 Sekunden an. Dies soll ihnen zumal eine akustische
Information über die Betriebsbereitschaft des PowerMate geben und gleichzeitig werden lose Staubpartikel die sich
im Gerät befinden, sicher ausgeblasen. Die Lautsprecher-Ausgänge (SPEAKER OUTPUTS) auf der Rückseite des
Gerätes sind mit professionellen SPEAKON-Hochlaststeckverbindungen ausgeführt. Diese Anschlußart stellt eine
absolut sichere Verbindung zu Ihren Lautsprechern her. Die Belegung der Buchsen ist 1+ (hot) und 1- (cold).
4
INPUT MONO
1. MIC
Elektronisch symmetrische XLR-Eingänge, ( wie sie auch in großen Studio- oder Livekonsolen verwendet werden) zum Anschluss niederohmiger
Mikrofone.
Die Eingangsstufe ist extrem rausch- und brummarm, darüberhinaus weist sie einen äußerst niedrigen Klirrfaktor
(typ.<0.002%), auch bei hohen Frequenzen auf. Sie können
hier im Prinzip jedes Mikrofon anstecken, sofern Sie dabei
auf die Pin-Belegung entsprechend der nebenstehenden Abbildung achten. Falls Sie Kondensator-Mikrofone an diesen
Eingängen verwenden wollen, können Sie dies tun. Ihr Mikrofon wird dann vom Mischpult
aus mit Betriebsspannung (+24V) versorgt, und das lästige Wechseln der Batterie im Mikrofon entfällt.
Generell können sowohl dynamische Mikrofone als auch Kondensatormikrofone gemischt an
den Eingängen betrieben werden. Bitte beachten Sie aber dazu in jedem Fall die jeweilige
Bedienungsanleitung des verwendeten Mikrofons. Der MIC-Eingang ist in der Lage Pegel von
-60dBu ... + 11dBu in Abhängigkeit vom Gainregler zu verarbeiten. Durch die speziell auf Mikrofone abgestimmte niederohmige Auslegung und der Phantomspannungs-Aufschaltung, ist
der XLR-Eingang nicht geeignet für den Anschluss von weiteren Mischpulten, Effektgeräten,
Keybords oder anderen elektronischen Geräten. Benutzen Sie hierfür die LINE-Eingänge.
2. LINE
Elektronisch symmetrische Eingänge für elektronische Instrumente wie Keyboard, Drum-Computer, Gitarre und Bass mit aktiver Elektronik sowie alle anderen hochpegeligen Signalquellen
wie externe Mischpulte, Effektgerät, CD-Player usw. Der LINE-Eingang verarbeitet Signalpegel von -40dBu bis + 30dBu und kann sowohl symmetrisch als auch unsymmetrisch gespeist
werden. Verwenden Sie dazu Mono- bzw. Stereoklinkenstecker wie sie in der Abbildung gezeigt
sind. Wenn das anzuschließende Gerät eine symmetrische Ausgangsstufe besitzt, ist in jedem
Fall die symmetrische Signalführung mit Stereoklinkenkabel zu bevorzugen. Die Verbindung ist
dann wesentlich unempfindlicher auf etwaige externe Brumm- und Hochfrequenzeinstreuung.
Stecken Sie bitte nie an der LINE und MIC Buchse gleichzeitige Signalquellen an. Eine gegenseitige Belastung der Signalquellen und damit verbundener Pegelabfall wären die Folge.
Noch ein Hinweis: Betreiben Sie bitte wenn möglich keine E-Gitarre bzw. E-Bass mit
passiver Elektronik und hochohmigen Ausgang direkt an einem Mischpult Line-Eingang.
Diese Eingänge sind generell, auch bei allen andern Herstellern, für relative niedrige
Quellimpedanzen, wie sie elektronische Geräte aufweisen, ausgelegt. Das Klangergebnis wird unbefriedigend sein und der Klangcharakteristik des Instruments nicht gerecht
werden. Ausnahme ist hier natürlich, wenn Sie diesen Effekt wünschen. Benutzen Sie
für derartige Instrumente wenn möglich einen speziellen Vorverstärker mit sehr hoher
Eingangsimpedanz. Instrumente mit aktiver Elektronik (Batterie) können dagegen ohne
Bedenken direkt angeschlossen werden. Achten Sie bitte darauf, dass vor dem Anschluss
von Instrumenten die jeweiligen Kanalregler, mindestens jedoch die beiden Masterregler
geschlossen sind, oder der STANDBY-Schalter gedrückt ist. Sie ersparen sich selbst, Ihrem Publikum und Ihrem Equipment unnötige Beanspruchungen durch Knackgeräusche.
5
INPUT MONO
3. GAIN
Regler zum Abgleich der Eingangsempfindlichkeit des MIC-bzw. LINE-Eingangs, wobei die ankommenden Signale optimal auf den internen Arbeitspegel des Mischpultes angepasst werden.
Durch eine gewissenhafte Einpegelung des Signals können Sie den Signal-Rauschabstand
optimieren und die hervorragenden Audioeigenschaften des PowerMate im vollen Umfang
nutzen. Bei Verwendung der XLR-Buchse wird bei Linksanschlag des Gainreglers um 10dB
und im Rechtsanschlag um 60 dB verstärkt. Die hohe Verstärkung ist speziell bei sehr geringen
Eingangspegel von nöten, wie dies bei Sprachaufnahme mit Mikrofon und Fernbesprechung
der Fall ist. Bei Benutzung der LINE-Eingangsbuchse wird generell um 20 dB abgeschwächt,
der Regelumfang von 50 dB bleibt jedoch erhalten. Unity Gain, also Durchgangsverstärkung
0 dB, liegt für den LINE-Eingang bei der Markierung 20 dB. Im folgenden wollen wir nun eine
kurze Einstellhilfe geben, wie Sie bei der Einpegelung des Kanalzuges am besten vorgehen.
Einstellhinweis:
1.
Gainregler zudrehen und Kanalschieberegler schließen.
2.
Schließen Sie die gewünschte Quelle (Mikro, Instrument ... ) am MIC oder LINEEingang an.
3.
Spielen Sie das Signal mit der maximal zu erwartenden Lautstärke ein, bzw. Singen
oder Sprechen Sie mit voller Lautstärke, wobei Sie so nahe wie möglich am
Mikrofon stehen sollten.
4.
Gleichen Sie dabei mit dem Gainregler den Pegel so ab, dass auch bei sehr lauten
Passagen die rote PEAK-LED gerade nicht, aber die SIGNAL-LED sicher
aufleuchtet. Sie haben nun die Grundeinstellung des Kanalzuges gefunden und der
Headroom beträgt mindesten 6 dB D.h. Sie haben mindestens noch 6dB
Aussteuerungsreserve bis das Signal hörbar verzerrt wird.
Falls Sie mittels der Klangregelung noch Korrekturen am Klangbild vornehmen, sollten Sie
nocheinmal Punkt 3 und 4 ausführen, da auch diese Klangeinstellungen den Kanalpegel
beeinflussen.
4. KLANGREGELUNG
Die Klangregelung erlaubt eine sehr
umfangreiche und effektive Beeinflussung des Eingangssignals innerhalb
unterschiedlicher Frequenzbereiche.
Eine Drehung der Klangregler nach
rechts bewirkt eine Anhebung
/
Verstärkung
des
entsprechenden
Frequenzbereichs.
Eine
Drehung
nach links bewirkt eine Absenkung /
Abschwächung des entsprechenden
Frequenzbereichs. Bei der Klangeinstellung sollten Sie immer von der Neutralstellung ausgehen, d.h. alle Reglermarkierungen stehen oben in der Mitte (Raststellung). Drehen Sie die Klangregler möglichst
nicht in extreme Positionen; normalerweise ist eine geringfügige Klangkorrektur ausreichend
und bringt das beste Klangergebnis. Orientieren Sie sich an der Natürlichkeit der Wiedergabe
und verlassen Sie sich bei der Klangbeurteilung auf Ihr musikalisch geschultes Ohr. Akustische Rückkopplungen vermeiden Sie wirksam durch besonders gefühlvolle Bedienung des
Mittenreglers (MID). Vermeiden Sie starke Anhebungen gerade in diesem Frequenzbereich;
ein mehr oder weniger leichtes Absenken ermöglicht Ihnen eine wenig rückkopplungsgefährdete Verstärkung. Die Klangregelung ist so ausgelegt, dass der LO- und HI-Regler auf
Linepegelige Instrumente und Geräte ebenso effektiv wirkt wie bei Mikrofonanwendungen.
+20
+15
+10
+5
+0
-5
-10
-15
-20
20
50
100
200
500
1k
2k
5k
10k
20k
Hz
Der MID-Regler arbeitet relativ breitbandig im Bereich um 2,4 kHz. Dieses Frequenzspektrum hat sich speziell bei Mikrofonanwendung als kritischer Bereich herausgestellt, und mit
fast allen Mikrofonen können Sie mittels einer leichten Absenkung im Mittenbereich hervorragende Ergebnisse erzielen.
6
INPUT MONO
5. FX
Mit den FX-Regler können Sie das jeweilige Eingangssignal den eingebauten Digital-Effektgeräten FX1 und FX2 stufenlos zumischen. Das Original-Signal wird “post-fade” also
nach dem Kanalschieberegler abgegriffen und ist somit von dessen Einstellung abhängig.
Bei der Einstellung des Effektanteils gehen Sie immer von Regler in Mittelstellung aus
und gleichen je nach gewünschter Intensität ab. Bitte achten Sie bei der Aussteuerung
der Effektmodule auf die PEAK-LEDs in den Effektkanälen FX1/2. Die Anzeige darf nur
bei hohen Dynamikspitzen aufleuchten. Leuchtet die LED dauernd, regeln Sie bitte in den
Eingangskanälen am FX-Regler zurück. Weiter Informationen finden Sie auch in den Abschnitten EFFEKT 1/2.
6. AUX
Der AUX-Regler dient zur Erstellung einer Monitor Abmischung. Das Signal wird dazu
“pre-fade” also vor dem Kanalfader über den AUX-Regler ausgespielt. Die dabei entstehende Abmischung am AUX-Ausgang im Masterbereich ist demnach unabhängig von der
Stellung der Kanalfader. Ein zuweit aufgedrehter AUX-Regler bei Mikrofonanwendungen
kann über die Monitorboxen unangenehmes Rückkopplungspfeifen erzeugen. Gehen Sie
bitte bei der Monitorabmischung sehr vorsichtig vor.
7. PAN
Dieser Regler bestimmt die räumliche Position des Eingangssignals im Stereobild. In Mittelstellung wird das Signal zu gleichen Teilen auf die beiden Summen L und R aufgeteilt.
Die PAN-Regler Stufe ist so ausgelegt, dass egal wo der PAN-Regler steht, die Lautstärke
im Stereo Klangbild erhalten bleibt.
8. SIGNAL / PEAK- Anzeige
Die Signal-Peak Anzeige informiert Sie optisch über den aktuellen Pegel im jeweiligen
Eingangskanal und hat somit auch eine Schlüsselfunktion bei der Einpegelung der Eingangskanäle. D.h Sie sehen bereits wenn Übersteuerungsgefahr besteht und müssen die
Verzerrung nicht erst akustisch wahrnehmen, wie bei vielen anderen Herstellern, deren
Mixer entweder nur mit Peak- oder gleich ganz ohne Kanalanzeige arbeiten. Wie bereits in
den Einstellhinweisen beschrieben, sollte die SIGNAL-LED rhythmisch dem eingespielten
Signal folgen. Ist dies nicht der Fall, muss am Gainsteller nachgeregelt werden. Leuchtet
hingegen die PEAK-LED teilweise oder ständig auf, ist der Eingangskanal in akuter Übersteuerungsgefahr. Es muss in jedem Fall am Gainsteller die Verstärkung zurückgenommen werden. Die Signal-LED leuchtet ca. 30 dB, und die Peak-LED 6 dB unter der Übersteuerungsgrenze auf. Werfen Sie bitte auch im Betrieb immer wieder einmal einen Blick
auf die Anzeige, um etwaige Übersteuerung des Mischpultes durch hohe Eingangspegel
rechtzeitig entgegenzuwirken.
9. VOLUME
Mit dem Kanalschieberegler wird die Lautstärkeeinstellung des Einzelkanals vorgenommen und die Lautstärkebalance der einzelnen Eingangskanäle untereinander eingestellt.
Die Position des Kanalfaders sollte sich im Bereich zwischen -5dB und 0dB befinden.
Dies gibt Ihnen die Möglichkeit, auch relativ große Pegelunterschiede zwischen den unterschiedlichen Eingangskanälen mit einem ausreichend großen Regelweg genau genug
einzustellen. Die Lautstärkeeinstellung der Gesamtanlage erfolgt danach mit den MasterSchiebereglern. Auch wenn Sie für jeden Eingangskanal eine zusätzliche Verstärkung
von +10dB über den Kanalfader zur Verfügung haben, sollten Sie die einzelnen Fader
aber nur Ausnahmefällen über die +5 dB Markierung stellen. Wird die Summenschiene im
Mischpult von zuvielen Eingangskanälen mit derart hohen Pegeln beaufschlagt, kann trotz
der speziellen negativen Verstärkungsstruktur im Summenverstärker dieser zum Clippen
gebracht werden. Sinnvoller ist es hier, alle Kanalschieberegler um 5 dB zurückzunehmen
und dafür am Masterfader dies aufzuholen. Die Abmischung und Lautstärke bleibt so erhalten, aber die Übersteuerungsgefahr ist gebannt.
7
INPUT STEREO
10. STEREO INPUT L / MONO R
Elektronisch symmetrische Eingänge speziell für Stereo Instrumente und Geräte. Sie können hier alle elektronische Instrumente wie Keyboard, Drum-Computer, Gitarre und Bass
mit aktiver Elektronik sowie alle anderen hochpegeligen Stereo-Signalquellen wie zusätzliche Mischpulte, Effektgerät, CD-Player usw. anschließen. Der Stereo-LINE-Eingang
verarbeitet Signalpegel von -20dBu bis + 30dBu und kann sowohl symmetrisch als auch
unsymmetrisch gespeist werden. Verwenden Sie dazu Mono- bzw. Stereoklinkenstecker
wie sie in der Abbildung gezeigt sind. Wenn das anzuschließende Gerät symmetrische
Ausgangsstufen besitzt, ist in jedem Fall die symmetrische Signalführung mit Stereoklinkenkabel zu bevorzugen. Die Verbindung ist dann wesentlich unempfindlicher auf etwaige
externe Brumm- und Hochfrequenzeinstreuung.
Wenn Sie aber am Stereo-Input ein Mono-Instrument anschließen wollen, belegen Sie
einfach nur den L / MONO Eingang. Das Signal wird dann intern mit auf den rechten
Kanal gelegt.
11. LINE TRIM
Mit diesem Regler werden die Line-Eingänge im Stereokanal an den internen Arbeitspegel
des Mischpultes angepasst. Der Regelbereich liegt bei 30 dB. Die Unity Gain Position,
also 0 dB Durchgangsverstärkung, ist hier bei der Markierung 0 dB. Sie können mit diesem Regler das Signal um 10 dB abschwächen bzw. um 20 dB verstärken. Der Regelbereich ist ausreichend um die meisten professionellen, semi-professionellen und HI-FI
Quellen anzupassen. Zum Einstellen verfahren Sie genauso wie beim Gain-Regler im
Monokanal.
Wenn Sie die Stereo-Eingangskanäle von einem Keyboard aus ansteuern, achten Sie
bitte darauf, dass Ihre Tastatur dabei nicht auf L und R gesplittet ist. Es erscheint sonst
der Sound der auf die untere Tasturhälfte gelegt ist nur am linken Kanal und der Sound
auf der oberen Tastaturhälfte nur am rechten Kanal, bzw. umgekehrt. Verwenden Sie in
diesem Fall zwei Monoeingangskanäle, denn hier können Sie über die PAN-Regler die
Anpassung im Stereoklangbild vornehmen.
12. KLANGREGELUNG
Die Klangregelung erlaubt eine sehr umfangreiche und effektive Beeinflussung des Eingangssignals innerhalb unterschiedlicher Frequenzbereiche. Eine Drehung der Klangregler nach rechts bewirkt eine Anhebung / Verstärkung des entsprechenden Frequenzbereichs. Eine Drehung nach links bewirkt eine Absenkung / Abschwächung des entsprechenden Frequenzbereichs. Bei der Klangeinstellung sollten Sie immer von der Neutralstellung ausgehen, d.h. alle Reglermarkierungen stehen oben in der Mitte (Raststellung).
Drehen Sie die Klangregler möglichst nicht in extreme Positionen; normalerweise ist eine
geringfügige Klangkorrektur ausreichend und bringt das beste Klangergebnis. Orientieren
Sie sich an der Natürlichkeit der Wiedergabe und verlassen Sie sich bei der Klangbeurteilung auf Ihr musikalisch geschultes Ohr.
8
INPUT STEREO
13. FX
Mit diesem Regler wird das aus L und R summierte Signal “post-fade” auf die FXSummenschienen ausgespielt. Die generelle Funktionsweise wurde bereits im INPUT/
MONO erläutert.
14. AUX
Legt das aus L und R summierte Signal auf die AUX-Summenschiene (siehe auch
INPUT/MONO).
15. BAL
Ähnlich wie beim Panorama-Regler im Monokanal wird hier das Stereosignal pegelmäßig an die Ausgänge angepasst. Drehen Sie z.B. diesen Regler nach rechts erscheint
das rechte Signal an den rechten Ausgängen wobei gleichzeitig das linke Signal komplett unterdrückt wird. In Mittelstellung werden das L-und R-Signal mit gleicher Verstärkung an den Ausgängen zur Verfügung stehen. Bei Verwendung mit Stereo-Quellen
sollten Sie daher den BAL-Regler nur wenn nötig geringfügig aus der Mittelposition
verdrehen. Haben Sie eine Mono-Quelle angeschlossen funktioniert der BAL-Regler
genauso wie der Panorama-Regler im Monokanal.
16. SIGNAL / PEAK
Bei der Stereo SIGNAL / PEAK Schaltung werden der linke und rechte Kanal unabhängig voneinander ausgewertet, wobei immer der aktuell höchste Pegel zur Anzeige
gebracht wird. Sie können also absolut sicher sein, dass nicht bereits ein Kanal verzerrt
ohne das dies angezeigt wird. Wie Sie am effektivsten mit dieser Anzeige arbeiten finden Sie in der Beschreibung im INPUT / MONO Kanal.
17. VOLUME
Stereo-Schieberegler zur Lautstärkeeinstellung des Stereokanals. Die Funktionsweise
ist identisch mit dem Mono-Kanalschieberegler, der bereits im INPUT / MONO ausführlich behandelt wurde.
9
FX1/FX2
FX1/FX2
Der PowerMate ist mit zwei unabhängig voneinander regelbaren 24bit-StereoEffektteilen FX1 und FX2 ausgestattet. Die beiden Effektteile sind völlig identisch aufgebaut. Es stehen je Effektsektion 99 Preset-Stereo-Effektprogramme
zur Auswahl, die mit den UP/DOWN Tasten selektiert werden. Die 99 PresetProgramme sind in Sektionen entsprechend der Effektstruktur eingeteilt, wie
Sie an der aufgedruckten Tabelle erkennen können. Die Programme sind
dabei so angeordnet, dass sie mit steigender Programmnummer innerhalb
der jeweiligen Gruppe an Effekt-Intensität zunehmen. Auf den Plätzen 1-20
befinden sich High-Quality Reverbs die sowohl auf der Bühne sowie im Studio
und Homerecording optimal eingesetzt werden können. Mit den Programmnummern 21-40 stehen Echo/Reverb bzw. Chorus/Reverb Mischprogramme
zur Auswahl. An den Positionen 41-60 finden Sie unterschiedliche Delays und
die Programmnummern 61-99 sind für Programme wie Flanger, Chorus, und
Doubling sowie spezielle Reverb und Delay-Programme reserviert. Die Effektteile werden im fabrikneuen Zustand, beim Einschalten des Gerätes immer mit
der voreingestellten Programmnummer 05 (Large Hall 3 Bright) für FX1 und 55
(Delay Mono 250ms) für FX2 starten. (Die Startprogramme 05/55 können beliebig verändert werden, siehe Umstellung der Effekt-Startprogramme.)
Diese Effekte sind auf der Bühne, beim Recording und auch beim gleichzeitigen Betrieb beider Effektteile sehr gut zu verwenden. Beachten Sie bitte beim
Testen und bei der Auswahl der Effekte in jedem Fall das Beiblatt EFFEKT
PRESETS. Hier sind alle Programme mit Namen, Effektstruktur, Einsatzgebiet
und Frequenzcharakteristik aufgelistet. Nehmen Sie sich Zeit, probiern Sie die
unterschiedlichen Programme aus und entscheiden dann welches Programm
für Ihre Anwendung am besten klingt. Mit der Programmnummer 0 wählen
Sie ein Slap Back Echo an, das hauptsächlich als Service und Testprogramm
verwendet wird. Deswegen erscheint es auch nicht in der Effekttabelle auf
der Frontblende. Beachten Sie bitte auch die FOOTSWITCH-Buchse. Hier
können Sie einen Fußschalter zur Fernsteuerung der EFFEKT ON/OFF Funktion anschließen. Verfügt Ihr Fußschalter über eine LED, z.B. FS11 aus dem
DYNACORD Zubehörprogramm, dann wird diese bei EFFEKT ON leuchten.
Umstellung der Effekt-Startprogramme
Die Effektsektion startet werkseitig mit den Programmen 05/55. Sollten Sie andere Programme bevorzugen, besteht die Möglichkeit diese im Programmiermodus festzulegen und abzuspeichern. Gehen Sie zum Umprogrammieren der
Startprogramme wie folgt vor:
1. Halten Sie während des Einschalten des Gerätes die beiden DOWNTasten von FX1 und FX2 gleichzeitig gedrückt.
2. Im Display wird kurzzeitig „Prog“ angezeigt. Das Gerät befindet sich
nun im Programmiermodus. Softwarebedingt ist die Tastenreaktionszeit etwas langsamer als gewohnt.
3. Lassen Sie nun die beiden DOWN-Tasten los und stellen Sie die
gewünschten Startprogramme ein.
4. Durch Drücken der beiden UP-Tasten werden die in der Anzeige
stehenden Programme, als Startprogramme gespeichert. Das
Effektteil bestätigt das Beenden des Speichervorgangs durch
kurzzeitiges aufleuchten von „Prog“ im Display.
FX1/FX2
1.......10
11.......20
21......30
31......40
41......50
51......60
61......99
REVERB
REVERB
ECHO
CHORUS
DELAY
DELAY
SPECIAL
HALLS
PLATES
REVERB
REVERB
STEREO
MONO
PROGRAMS
18. DISPLAY
Das Display zeigt immer die aktuell eingestellte Programmnummer des jeweiligen Effektteils an. Zum Schutz vor Verkratzen ist das Displayglas bei Auslieferung mit einer Folie abgedeckt. Ziehen Sie diese bitte ab.
10
FX1/FX2
19. UP/DOWN
Mit den UP/DOWN-Tasten werden die Effektprogramme angewählt. Wenn
Sie länger auf eine dieser Tasten drücken, können Sie dadurch eine schnellen Vor- bzw. Rücklauf der Programmnummern erzeugen.
20. FX ON
Durch Drücken des Schalter wird das interne Effektteil eingeschaltet, die
grüne LED leuchtet. Beachten Sie auch, dass eine Bedienung über einen
externen Fußschalter möglich ist. Die LED zeigt auch dann immer tatsächlich an, ob das Effektteil aktiviert ist oder nicht. Wenn Sie einen Fußschalter
benutzen wollen, muss zuerst der FX ON Schalter gedrückt werden. Das
entsprechende Effektteil ist dann aktiviert und Sie können über den Fußschalter ein- und ausschalten.
21. PEAK LED
Zeigt Übersteuerungsgefahr beim eingebauten Effektteil bzw. am AUX 1/2
SEND Ausgang an. Um einen vernünftigen Signal/Rauschabstand zu erreichen gehen Sie bitte bei der Einpegelung wie folgt vor.
Einstellhinweise:
1. Mischpult “dry”, also ohne Effekt auspegeln, wie in den vorangegangenen
Einstellhinweisen beschrieben.
2. Ziehen Sie den Effekt-Return Fader des jeweiligen Effektkanals auf die
-5 dB Position.
3. Selektieren Sie über die UP/DOWN Tasten das gewünschte
Effektprogramm.
4. Drücken Sie den FX ON Schalter.
5. Spielen Sie das gewünschte Signal über den jeweiligen Eingangskanal
ein und drehen Sie dabei den AUX/FX-Regler im Eingang soweit auf
oder zu, bis die Lautstärke der Effektzumischung Ihren Vorstellungen
entspricht. Wiederholen Sie diesen Punkt für alle Eingangskanäle, die
Sie mit einem Effektsignal beaufschlagen wollen.
6. Stellen Sie nun sicher, dass die PEAK-LED nur bei sehr hohen
Dynamikspitzen aufleuchtet. Bei Übersteuerung, drehen Sie bitte die
AUX/FX-Regler in den Kanälen etwas zurück.
7. Nun können Sie über den FX to AUX-Regler das Effektsignal ihrem
jeweiligen Monitor-Mix zumischen und bei Bedarf auch auf dem
Hauptmix, über den FX-Fader, den Effektanteil verändern.
Führen Sie bei Bedarf die Punkte 2-7 auch für das zweite Effektteil durch.
Halten Sie auch beim Betrieb der Anlage die Peak-Anzeigen im Auge, um
bei Übersteuerungsgefahr eingreifen zu können.
22. EFFEKT RETURN
Stereo-Schieberegler zur Zumischung des Effektsignals zum Hauptmix.
Falls Sie mit diesem Fader weiter als über die +5dB Markierung aufziehen
müssen, prüfen Sie bitte ob das Effektteil eingangsseitig mit genügend Pegel
angesteuert wird, drehen Sie in diesem Fall den AUX/FX SEND Regler weiter auf.
11
AUX/MONO
Der AUX-Kanalzug wird im wesentlichen zum Monitoring verwendet.
23. AUX SEND
Hier schließen Sie entweder eine Monitorendstufe oder einen Aktivmonitor an. Der
Pegel an dieser Buchse kann in einem weitem Bereich bis maximal +20 dBu über den
AUX Fader geregelt werden. Die Ausgangsbeschaltung ist in Groundsensing-Technik
ausgeführt, um auch bei langen Leitungen einer etwaigen Brummeinstreuung entgegenzuwirken.
24. FX1/2 to AUX
Mit diesen Reglern kann das am entsprechenden Effektteil eingestellte Effektsignal
dem AUX Kanal zugemischt werden. Wenn Sie die AUX-Schiene als Monitorweg benutzen, können Sie damit dem Monitorsignal das Effektsignal stufenlos zumischen.
Die Erfahrung zeigt, dass auf der Monitorschiene mit einem geringeren Effektpegel
gefahren wird als auf den Hauptausgängen, was durch die räumliche Nähe der Monitorboxen zu erklären ist.
25. AUX VOLUME
Dieser Schieberegler regelt das AUX-Summensignal auf den AUX SEND-Ausgang
und ist somit beim Monitoring der Lautstärkeregler für die Monitoranlage.
26. MONO OUTPUT
Der Mono-Ausgang führt das summierte “post-fade” Master L/R Signal, und kann für
Monitoring, Sidefill, Nebenraumbeschallung, Mono-PA oder zum Anschluss einer Delay-Line verwendet werden.
Achtung: Das Signal an diesem Ausgang ist von der Stellung des MONO OUT Faders und der MASTER-Fader abhängig. Falls Sie den Mono-Ausgang unabhängig von
den Master-Reglern wünschen, kann dies intern durch eine einfache Modifikation realisiert werden. Wenden Sie sich dazu bitte an Ihren Fachhändler.
27. STANDBY
Durch das Drücken der STANDBY Taste werden alle Ausgänge, an denen Leistungsverstärker angeschlossen sein könnten, stumm geschaltet. Da dabei auch der Signalfluß zwischen dem Mischerteil und MAIN OUTPUTS unterbrochen ist, wird auch die
interne Endstufe nicht mehr mit Signalen aus dem Mischerteil versorgt. Die STANDBY
LED leuchtet, und zeigt STANDBY Betrieb an d. h. dass alle von den Eingangskanälen
kommenden Signale in den Lautsprechern nicht mehr hörbar sind. Sie können jedoch
über 2Track Return weiterhin Signale einspeisen, was beispielsweise zur Einspielung
von Pausenmusik besonders gut zu verwenden ist.
28. MONO OUT VOLUME
Dieser Schieberegler regelt das summierte Master L/R Signal auf den Monoausgang
(MONO OUTPUT). Das Signal ist abhängig von der Stellung der Master-Schieberegler.
12
EFFEKT 1/2
29. PHONES-Buchse
STEREO-Klinkenbuchse für Kopfhörer von 32 - 600 Ohm. Hier kann das “pre-fade” Mastersignal abgehört werden.
30. PHONES-Regler
Mit diesem Regler wird die Lautstärke am Kopfhörer eingestellt. ACHTUNG: Drehen Sie
den Regler immer ganz zurück, bevor Sie den Kopfhörer anschließen.
31. RECORD SEND L/R
An den Cinch Buchsen steht das “pre-fade” Master L/R-Signal. Das Ausgangssignal ist
also unabhängig von der Stellung der Masterfader. Sie können hier ein Tonbandgerät,
Cassetten-Deck oder einen DAT-Recorder zur Aufnahme anschließen. Der Nennpegel
-10dBV dieses Ausgangs ist für professionell Anwendung und Homerecording ausgelegt. Ihr Aufnahmegerät sollte dennoch vorzugsweise einen Eingangsregler zur Pegelanpassung besitzen. ACHTUNG: Die meisten Tape-Decks spielen bei der Aufnahme
gleichzeitig über den PLAYBACK-Weg das Signal wieder zurück. Sollten Sie nun zu den
REC.SEND Buchsen auch die 2TRACK RETURN Buchsen angeschlossen haben, wird
das Aufnahme-Signal bei geöffnetem 2TRACK to MASTER Regler wieder dem Hauptmix
zugeführt. Durch die unterschiedlichen Laufzeiten ergeben sich Auslöschungen oder
Klangverfälschungen. Im schlimmsten Fall kann es beim Drücken der RECORD Taste an
Ihrem Aufnahmegerät, zu äußerst unangenehmen Rückkopplungspfeifen kommen. Beugen Sie dem vor, indem Sie bei der Aufnahme den 2TRACK to MASTER- und 2TRACK to
AUX3-Regler immer ganz nach links drehen.
32. 2TRACK RETURN L/R
Hier können Sie von einem Tape-Deck, CD-Player, Tonbandgerät oder SUB-Mixer
Einspielungen vornehmen. Das Signal wird dabei nach den Masterfadern und dem
STANDBY-Schalter eingespeist. Diese Betriebsart ist sehr nützlich wenn Sie während
des Soundchecks mit Kopfhörer oder in Pausen Hintergrundmusik einspielen wollen. Sie
drücken dazu einfach den STANDBY-Schalter und alle Eingangskanäle sind in Bezug auf
den Hauptausgang und den Monitorweg stummgeschalten.
33. 2TRACK
ReturnMit diesem Regler wird das 2TRACK Signal dem MASTER-Kanal “post-fade”
zugemischt. Achtung: Gehen Sie beim Einpegeln des am 2TRACK RETURN angeschlossenen externen Gerätes wie z.B. CD-Player oder Tape-Deck immer vom Regler im
Linksanschlag aus, da z.B. je nach Qualität der Aufnahme relativ schnell eine sehr hohe
Endstufenausgangsleistung erzeugt werden kann.
34. 2TRACK to AUX
Das über den 2TRACK RETURN eingespielte Signal wird summiert und kann dann über
den 2TRACK to AUX Regler der Monitor- bzw. AUX- Schiene zugemischt werden. Die
Summierung erfolgt dabei vor dem 2TRACK to MASTER Regler, das Signal am AUXAusgang ist also von dieser Stellung unabhängig.
35. MAIN OUTPUTS
Diese Ausgänge sind nach den Masterfader L/R und dem 7-Band Stereo EQ angeordnet
und werden hauptsächlich zum Anschluss von zusätzlichen Leistungsverstärkern benutzt.
Hier können Sie auch aktive Frequenzweichen bzw. aktive SUB-Woofer zum Aufbau
eines 2-Wege-Systems anschließen. Wenn Sie die internen Endstufen z.B. für den Hochtonkanal benutzen wollen schleifen Sie das Hochtonsignal von der aktiven Frequenzweiche über die Power Amp In Buchsen wieder zum internen Leistungsverstärker zurück.
36. POWER AMP INPUTS
Elektronisch symmetrischen Eingang mit Unterbrechungsfunktion. Sobald Sie an dieser
Buchse einen Klinkenstecker anschließen, wird der Signalpfad vom Master zu den internen Endstufen unterbrochen. Sie können nun die internen Endstufen über den POWER
AMP INPUT bedienen.
37. FX1/2 FOOTSWITCH
Klinkenbuchse zum Anschluss eines Fußschalters FS11, der die eingebauten Effektgeräte ein- oder ausschaltet. Die Schalter FX1 bzw. FX2 müssen dabei gedrückt sein um die
Effektteile über Fußschalter ein- bzw. auszuschalten.
13
MASTER
38. STATUS ANZEIGE
Diese Anzeigen informieren Sie über den aktuellen Zustand des Leistungsverstärkers im PowerMate.
PROTECT leuchtet dann auf, wenn eine der umfangreichen Schutzschaltung wie Übertemperatur-,
Hochfrequenz-, Gleichspannungs-, oder SOAR-Schutzschaltung im Leistungsverstärker aktiv ist. Um die Leistungsverstärker vor Zerstörung zu schützen, werden im
Protect Mode die Lautsprecher abgeschalten und der
Eingang der Endstufe kurzgeschlossen. Ist dies der Fall,
überprüfen Sie bitte zuerst ob nicht etwa die Zu- oder
Abluftschlitze vorne und hinten am Gerät abgedeckt
sind. Eventuell haben Sie auch mehr als drei 8 Ohm
Boxen je Endstufenausgang angeschlossen. Überprüfen Sie auch die Verkabelung, ob nicht etwa ein Kurzschluss am Lautsprecherausgang besteht. Entfernen
Sie dazu die SPEAKON-Lautsprecherkabel vom Gerät.
Beim Einschalten des Gerätes wird die PROTECT LED
für ca. 2 Sekunden aufleuchten. Dies ist normal und
zeigt Ihnen, dass alle Schutzmechanismen aktiviert
sind.
LIMIT zeigt beim Aufleuchten an, dass sie aktuell im
Grenzbereich des Leistungsverstärkers fahren. Kurzzeitiges Aufleuchten ist unkritisch, da der Limiter im
Leistungsverstärker Verzerrungen ausregelt. Dauerndes
Aufleuchten könnte zu Klangeinbusen führen und sollte
durch Reduzierung der Ausgangslautstärke vermieden
werden.
POWER leuchtet immer wenn der PowerMate eingeschaltet ist. Sollte die LED nach dem Einschalten nicht
leuchten, prüfen Sie zuerst ob das Netzkabel angesteckt ist. Wenn dies der Fall ist und die LED trotzdem
nicht leuchtet, kontaktieren Sie bitte Ihren Fachhändler.
39. 7-BAND STEREO GRAPHIC EQUALIZER
Der PM600 verfügt über einen 7-Band Stereo Graphic Equalizer der fest im Masterweg L/R integriert
ist. Sieben Frequenzbänder, mit je 10 dB Anhebung/
Absenkung die nächträgliche klangliche Bearbeitung
der Abmischung, bzw. eine Anpassung des Klangereignisses an die jeweilige Raumakustik.
+20
+15
+10
+5
+0
-5
-10
-15
-20
20
50
100
200
500
1k
Hz
14
2k
5k
10k
20k
MASTER
Die Frequenzbereiche und Regelcharakteristik der einzelnen EQ-Fader ist sehr praxisorientiert ausgelegt.
Wollen Sie einen strahlenden, klaren Sound und z.B. den
Schlagzeugbecken mehr Durchsetzungskraft verleihen,
so heben Sie im Bereich von 12kHz- bzw. 6 kHz etwas
an. Ist der Sound sehr nasal und mittenbetont, so senken
Sie im Mittenfrequenzbereich leicht ab. Wollen Sie jedoch
einen bassreichen Sound und vielleicht die Bassdrum
besser hervorheben, dann bewegen Sie den 63Hz bzw.
125 Hz Regler etwas nach oben. Erscheint der Sound
hingegen zu basslastig oder wummrig, dann ziehen Sie
diese Fader etwas nach unten. Bedenken Sie aber immer, dass speziell beim Einsatz von Equalizer weniger oft
mehr ist. Probieren Sie also erst ob Sie nicht ganz ohne
EQ, durch sorgfältige Einstellung der Kanal-Klangregler,
vielleicht ein besseres Ergebnis erzielen.
40. MASTER LED-DISPLAY
Die Aussteuerungsanzeige im PowerMate besteht aus
zwei LED-Ketten für den rechten bzw. linken Kanal mit je
8 LEDs pro Kette. Der Anzeigebereich liegt bei 33 dB und
stellt den Pegel in dBu am MAIN OUT bzw. am POWER
AMP INPUT dar. D.h. zeigt die Anzeige 0 dB an, so stehen am POWER AMP INPUT aktuell 0 dBu. Steuern Sie
noch weiter aus, wird bei +6 dBu der maximale Eingangspegel der internen Endstufe erreicht und die Endstufenblöcke liefern dann ca. 300 W an 4 Ohm. Höhere Pegel
werden nicht mehr zur Anzeige gebracht, da der Prozessor im Leistungsverstärker das Signal dann limitert, was
durch das Aufleuchten der LIMIT LED im Status-Display
angezeigt wird.
41. MASTER L + R
Lautstärkeregler für den linken und rechten Hauptausgang (MASTER).
HINWEIS : Achten Sie bitte darauf, dass vor dem
Anschluss der Signalquellen an den Eingängen die
jeweiligen Kanalschieberegler, mindestens jedoch die
beiden Master-Schieberegler geschlossen sind, oder
der STANDBY Schalter gedrückt ist. Sie ersparen sich
selbst, Ihrem Publikum und Ihrem Equipment unnötige Beanspruchungen durch Knackgeräusche oder
Rückkopplungspfeifen.
15
RÜCKSEITE
SPEAKER OUTPUTS RIGHT / LEFT
Der PowerMate 600 ist mit professionellen SPEAKONHochlaststeckverbindungen ausgestattet. Diese mechanisch und elektrisch sichere Verbindung wird allen Sicherheitsanforderungen gerecht und erlaubt die Verwendung
von Hochleistungslautsprecherkabeln von bis zu 4 x
2,5mm2 Querschnitt.
Im DYNACORD-Zubehörprogramm finden Sie Einzelstecker und Kupplungen sowie Hochleistungslautsprecherkabel.
POWER
Netzschalter zum Ein- und Ausschalten des Gerätes.
Das Gerät ist betriebsbereit, wenn die POWER ON - LED
aufleuchtet und die Leistungsrelais die Endstufen auf die
Lautsprecherausgänge geschaltet haben.
Achten Sie bitte darauf, dass beim Anschalten des
Gerätes die beiden Master-Schieberegler geschlossen
sind, oder die STANDBY-Taste gedrückt ist. Sie ersparen sich selbst, Ihrem Publikum und Ihrem Equipment
unnötige Beanspruchungen durch ungewollte Signalverstärkung oder sogar Rückkopplungen.
Falls zusätzliche Leistungsverstärker und andere elektronische Geräte wie z.B. Effektgeräte am PowerMate
angeschlossen sind, verfahren Sie bitte bei der Inbetriebnahme der Anlage wie folgt:
1. Effektteile einschalten.
2. PowerMate einschalten.
3. Zusätzliche Leistungsverstärker einschalten.
Beim Ausschalten der Anlage gehen Sie genau umgekehrt vor.
16
AUFBAU EINER STANDARD-PA
Verkabelung
Das Netzkabel haben Sie mit dem PowerMate erhalten. Für alle anderen Kabel sind Sie selbst verantwortlich und
je sorgfältiger Sie bei der Auswahl der Kabel vorgehen, um so weniger Probleme sind später im Einsatz zu erwarten. Wir können hier nur einige Empfehlungen geben mit denen Sie einen störungsfreien Betrieb Ihres Aufbaus
erreichen.
Lautsprecherkabel
Aus unserer Erfahrung, auch als Boxenhersteller, stellt eine flexible Gummischlauchleitung mit 2.5mm2 Querschnitt je Ader in Verbindung mit SPEAKON Steckern und Buchsen die optimale Verkablungsart für Lautsprecher
dar. Die SPEAKON-Stecker werden entsprechend dem Schaubild an der Rückseite des PowerMate angeschlossen, wobei Sie dabei aber gleich ein 4 adriges Kabel verwenden sollten, an dem Sie auch 2+ und 2- durchverbinden, da diese Kabel dann auch in aktiv 2-Weg-Systemen verwendet werden können. Lautsprecherkabel mit
SPEAKON Steckern können Sie über den Fachhandel aus dem DYNACORD-Zubehörprogramm beziehen. Auch
alle anderen Kabel und Stecker sind dort erhältlich.
NF-Verbindungskabel, symmetrisch oder unsymmetrisch ?
Als NF-Verbindung, also alle Leitungen auf denen keine hohen Ströme fließen, wählen Sie am besten symmetrisch ausgelegte Kabel (2 Signaladern + Schirmgeflecht) mit XLR- oder Stereo-Klinkenstecker. Das Kabel sollte
trittfest und in jedem Fall abgeschirmt sein. Wählen Sie die Kabellänge entsprechend Ihrer Anwendung, aber in
jedem Fall nur so lange wie nötig. Sie vermeiden dadurch unnötigen “Kabelsalat” und verringern die Störanfälligkeit. Natürlich können Sie alle Ein- und Ausgänge am PowerMate unsymmetrisch z.B. mit Mono-Klinkenstecker
belegen und werden in den meisten Fällen, aufgrund des optimal ausgelegten Massesystems im PowerMate,
keine Probleme mit Einstreuungen haben. Aber da bleibt immer noch das berüchtigte eine Prozent. Generell stellt
ein symmetrisch ausgeführtes NF-Verbindungskabel die bessere Alternative zu einer unsymmetrischen Verbindung, wie es z.B. ein Mono-Klinkenkabel ist, dar. Die meisten Audiogeräte wie Endstufen, Equalizer, Effektgeräte,
Mischpulte und auch einige Keyboards verfügen über symmetrisch, aufgebaute Eingänge bzw. Ausgänge. Der
Schirm im Kabel verbindet bei symmetrischer Signalführung alle metallischen Gehäuse und verhindert dadurch
lückenlos ein Einkoppeln von externen Störsignalen, im wesentlichen Brummen, auf den Audiosignalpfad. Ferner
werden Resteinstreuungen durch die symmetrische Leitungsführung in Verbindung mit der Gleichtaktunterdrückung der Eingangsstufe wirkungsvoll eleminiert. Im PowerMate sind alle Eingänge symmetrisch und mit hoher
Gleichtaktunterdrückung ausgeführt. Die Ausgänge wie AUX, MAIN, usw., im Mischerteil des PowerMate sind
generell in GND-SENSING Technik ausgelegt. Dies ist eine widerstandssymmetrische Beschaltung der Ausgangsbuchsen, die im wesentlichen die Vorteile der symmetrischen Ausgangsbeschaltung aufweist, aber auch
ohne Probleme unsymmetrisch mit Monoklinken benutzt werden kann. Wenn Sie diese Ausgänge z.B. mit langen Leitungen verkabeln wollen, ist wiederum die symmetrische Signalführung mit Stereoklinken aus besagten
Gründen von Vorteil. Nachfolgend finden Sie einige Kabelkonfigurationen, die Sie sinnvoll in Verbindung mit dem
PowerMate einsetzen können.
Mikrofone
symmetrisch
MIC INPUT
Unsymmetrisch
Externe Geräte mit XLR
Ein- und Ausgangsbuchsen
Alle Klinken
Ein-und Ausgänge am
PowerMate
Symmetrisch
Unsymmetrisch
Alle Klinken
Ein-und Ausgänge am
PowerMate
Externe Geräte
mit Klinke Einund Ausgangsbuchsen
Symmetrisch
17
AUFBAU EINER STANDARD-PA
Im folgenden wollen wir erklären, wie Sie mit dem PowerMate ein passiv Standard-PA mit Monitorsystem aufbauen und einstellen. An PA-Equipment haben wir vorgesehen:
1
1
2
2
2
2
4
1
PowerMate600-2
Monitorendstufe z.B. 2x250W
Hochtonboxen z.B. 12“ 3-Weg
Bassboxen z.B. 15“
Hochständer oder 2 Zwischenstangen
Monitorboxen
SPEAKON-Kabel 8m, 2 SPEAKON-Kabel 2m
NF-Kabel Stereoklinke-XLR Stecker
Aufbau
•
•
•
•
•
•
Stellen Sie den PowerMate und die Monitorendstufe so auf, dass Sie auch im Betrieb leichten Zugriff
haben und schließen Sie die Netzkabel an.
Suchen Sie die günstigste Position für Ihre PA-Boxen. Die Bassboxen sollen dabei immer unten am
Boden stehen und die Hochtonboxen wenn möglich direkt darüber. Beachten Sie aber, dass die
Unterkante der Hochtonboxen immer in Kopfhöhe ihres Publikums oder darüber ist. Verwenden Sie
entweder die Zwischenstangen, die Sie in die Bassbox schrauben oder, wenn dies nicht ausreichend ist
bzw. keine Bassboxen benötigt werden, die Hochständer.
Stellen Sie die linke und rechte PA-Boxen-Kombination nur so weit auseinander wie nötig. Der Sound
wird dadurch kompakter.
Verkabeln Sie die Bassboxen und Monitorboxen wie in der Abbildung gezeigt mit den SPEAKON-Kabeln
zum PowerMate bzw. zu der Monitorendstufe. Achten Sie darauf, dass Sie dabei links und rechts nicht
vertauschen. Mit den kurzen SPEAKON-Kabeln können dann die Hochtonboxen zu den Bassboxen
parallel geschlossen werden. Die beiden Monitorboxen werden an je einem Endstufenausgang der
Monitorendstufe betrieben. Die Eingänge werden dabei parallel bzw. auf Mono geschalten. Sie haben
trotzdem noch die Möglichkeit die Lautstärke jeder Monitorbox über die Levelregler an der Monitorendstufe anzupassen.
Achten Sie darauf, dass die PA-Boxen der Hauptanlage wenn möglich nicht hinter den Mikrofonen steht,
weil sonst bei höheren Lautstärken Rückkopplungspfeifen zu erwarten ist.
Nachdem Sie die Mikrofonständer aufgebaut und Ihre Mitmusiker alle einen Platz gefunden haben,
positionieren Sie die Monitorboxen am besten vor den Musikern oder Interpreten. Achten Sie dabei
darauf, dass nicht eines der Mikrofone direkt auf die Monitore zielt. Beachten Sie auch die Charakteristik
der verwendeten Mikrofone.
Verbinden Sie mit dem Stereoklinken-XLR-Kabel den AUX Ausgang mit dem Eingang der
Monitorendstufe.
18
AUFBAU EINER STANDARD-PA
•
•
•
Schließen Sie nun alle Mikrofone bevorzugt an den Monokanälen, und die Instrumente usw. an den
verbleibenden Kanälen des PowerMate an.
Ziehen Sie alle Fader nach unten und drücken die STANDBY-Taste am PowerMate. Sie verhindern
dadurch etwaiges Rückkopplungspfeifen beim Einschalten.
Schalten Sie zuerst den PowerMate und dann die Monitorendstufe ein. Schalten Sie mit dem STANDBYSchalter den PowerMate betriebsbereit.
Soundcheck
•
Zuerst werden die Mikrofone an den Monokanälen eingepegelt. Gehen Sie dabei wie folgt vor:
1.
2.
3.
•
Wenn Sie auch die Stereo-Eingangskanäle belegt haben, pegeln Sie diese wie folgt ein.
1.
2.
3.
•
2.
3.
4.
5.
•
LINE-TRIM zudrehen und Kanalschieberegler schließen.
Spielen Sie mit dem jeweiligen Instrument mit der maximal zu erwartenden Lautstärke.
Gleichen Sie dabei mit dem LINE-TRIM den Pegel so ab, dass auch bei sehr lauten Passagen
die rote PEAK-LED gerade nicht, aber die SIGNAL-LED sicher aufleuchtet.
Nun wird die Kanalklangregelung an den Eingangskanälen eingestellt:
1.
•
Gain-Regler zudrehen und Kanalschieberegler schließen.
Sprechen oder singen Sie mit der maximal zu erwartenden Lautstärke auf das Mikrofon.
Gleichen Sie dabei mit dem Gain-Regler den Pegel so ab, dass auch bei sehr lauten Passagen
die rote PEAK-LED gerade nicht, aber die SIGNAL-LED sicher aufleuchtet.
Ziehen Sie den Kanalfader und Masterfader etwas auf, Sie hören nun das Signal auf der
Haupt-PA
Stellen Sie die EQ-Regler auf Mittelstellung
Spielen Sie das gewünschte Signal ein.
Ausgehend von der Mittelstellung, können Sie nun die Klangcharakteristik entsprechend Ihrer
Vorstellung abgleichen. Beachten Sie bitte, dass starke Abweichung aus der Mittelstellung dem
Sound eher abträglich sind. Speziell bei Klangregelungen gilt: weniger ist oft mehr
Wiederholen Sie die Punkte 2-4 für alle belegten Kanäle.
Falls Sie an den Monokanälen Instrumente angeschlossen haben, verfahren Sie wie bei der
Mikrofoneinstellung beschrieben
Überprüfen Sie nun, ob bei allen nicht benötigten Eingängen die Kanalfader und die Gain- bzw. LINETRIM-Regler geschlossen sind. Sie vermeiden dadurch unnötiges Rauschen auf den Ausgängen.
Hauptmix
•
•
•
•
Stellen Sie nun die Lautstärkeverhältnisse über die jeweiligen Kanalschieberegler so ein, dass die
Abmischung der Klangquellen Ihrer Vorstellung entspricht.
Der günstigste Bereich für die Kanalfader liegt zwischen -5dB und 0 dB. Dadurch steht genügend
Regelbereich nach oben sowie nach unten zur Verfügung.
Stellen Sie mit den Masterschiebereglern die Lautstärke der Haupt-PA ein.
Falls eine Effektzumischung gewünscht wird, verfahren Sie wie folgt:
1.
2.
3.
4.
5.
Ziehen Sie den Effekt-Return Fader des FX1-Kanals auf die -5 dB Position.
Selektieren Sie über die UP/DOWN Tasten das gewünschte Effektprogramm.
Drücken Sie den FX ON Schalter.
Spielen Sie das gewünschte Signal über den jeweiligen Eingangskanal ein und drehen Sie
dabei den Fx-Regler soweit auf, bis der Effektanteil Ihren Vorstellungen entspricht. Wiederholen
Sie diesen Punkt für alle Eingangskanäle, die Sie mit einem Effektsignal beaufschlagen wollen.
Beachten Sie bitte, dass die PEAK-LED im Effektkanal nicht oder nur bei extremen
Dynamikspizen aufleuchtet.
19
AUFBAU EINER STANDARD-PA
Monitormix
•
AUX-Fader im Masterbereich zurückziehen
•
Alle AUX-Regler in den belegten Eingangskanälen in Mittelstellung drehen.
•
AUX-Fader vorsichtig aufziehen.
•
Ziehen Sie den AUX-Fader nur soweit auf wie nötig, um auch bei ungünstiger Mikrofonposition noch
genügend Reserve zur Koppelgrenze zu haben.
•
Über die Regler FX to AUX kann nun das Effektsignal unabhängig vom Hauptmix zugemischt werden.
Beachten Sie aber, dass auf dem Monitor generell weniger Effeksignal nötig ist als auf der Haupt-PA.
Spielen Sie nun im komplett Setup und hören Sie die Haupt-PA aus unterschiedlichen Positionen ab. Falls Sie den
Einduck gewinnen, dass noch Klangkorrekturen nötig sind, können Sie mit dem Master 7-band EQ den Sound
optimal abgleichen. Bedenken Sie aber, dass sich das Klangbild, und hier vorallem die Raumhall- und Basskomponente bei besetztem Saal je nach baulicher Beschaffenheit, noch stark verändern kann. Wenn möglich sollten
Sie den Sound und die Lautstärke im Saal während der Darbietung nocheinmal überprüfen und gegebenenfalls
Korrekturen vornehmen.
Ansonsten können wir Ihnen nur noch viel Spaß und Erfolg mit Ihrem neuen PowerMate wünschen.
20
OWNER‘S MANUAL
PowerMate 600
Power Mixer
CONTENTS
IMPORTANT SAFETY INSTRUCTIONS
IMPORTANT SERVICE INSTRUCTIONS
DESCRIPTION
UNPACKING AND WARRANTY
INSTALLATION
INPUT MONO
INPUT STEREO
EFFECT 1/2
AUX / MONO
MASTER
REAR PANEL
SETTING UP A STANDARD PA-SYSTEM
MASTER PATCHBAY
SPECIFICATIONS / TECHNISCHE DATEN
BLOCK DIAGRAM
DIMENSIONS / ABMESSUNGEN
22
.......................
.......................
.......................
.......................
.......................
.......................
.......................
.......................
.......................
.......................
.......................
.......................
.......................
.......................
.......................
.......................
23
23
24
24
24
26
28
30
32
34
36
37
38
61
62
63
IMPORTANT SAFETY INSTRUCTIONS
The lightning flash with arrowhead symbol, within an
equilateral triangle is intended to alert the user to the
presence of uninsulated “dangerous voltage“ within the
product’s enclosure that may be of sufficient magnitude
to constitute a risk of electric shock to persons.
The exclamation point within an equilateral triangle is
intended to alert the user to the presence of important
operating and maintenance (servicing) instructions in
the literature accompanying the appliance.
1.
2.
3.
4.
5.
6.
7.
8.
9.
10.
11.
12.
13.
14.
15.
16.
17.
Read these instructions.
Keep these instructions.
Heed all warnings.
Follow all instructions.
Do not use this apparatus near water.
Clean only with a dry cloth.
Do not block any ventilation openings. Install in accordance with the manufacture’s instructions.
Do not install near heat sources such as radiators, heat registers, stoves, or other apparatus
(including amplifiers) that produce heat.
Do not defeat the safety purpose of the polarized or the grounding-type plug. A polarized plug has two blades
with one wider than the other. A grounding type plug has two blades and a third grounding prong. The wide
blade or the third prong are provided for your safety. If the provided plug does not fit into your outlet, consult an
electrican for replacement of the obsolete outlet.
Protect the power cord from being walked on or pinched particularly at plugs, convenience receptacles,
and the point where they exit from the apparatus.
Only use attachments/accessories specified by the manufacturer.
Use only with the cart, tripod, bracket, or table specified by the manufacturer, or sold with the apparatus. When a
cart is used, use caution when moving the cart/apparatus combination to avoid injury from tip-over.
Unplug this apparatus during lightning storms or when unused for a long period of time.
Refer all servicing to qualified service personnel. Servicing is required when the apparatus has been damaged
in any way, such as power-supply cord or plug is damaged, liquid has been spilled or objects have fallen into the
apparatus, the apparatus has been exposed to rain or moisture, does not operate normally, or has been dropped.
Do not expose this equipment to dripping or splashing and ensure that no objects filled with liquids, such as vases,
are placed on the equipment.
To completely disconnect this equipment from the AC Mains, disconnect the power plug from the AC receptacle.
The mains plug of the power supply cord shall remain readily operable.
Management of WEEE (waste electrical and electronic equipment) (applicable in Member States of the European
Union and other European countries with individual national policies on the management of WEEE) The symbol
on the product or on its packaging indicates that this product may not be treated as regular household waste, but
has to be disposed through returning it at a Telex dealer.
IMPORTANT SERVICE INSTRUCTIONS
CAUTION:
1.
2.
3.
4.
5.
6.
7.
8.
These servicing instructions are for use by qualified personnel only. To reduce the risk of
electric shock, do not perform any servicing other than that contained in the Operating
Instructions unless you are qualified to do so. Refer all servicing to qualified service personnel.
Security regulations as stated in the EN 60065 (VDE 0860 / IEC 65) and the CSA E65 - 94 have to be obeyed when
servicing the appliance.
Use of a mains separator transformer is mandatory during maintenance while the appliance is opened, needs to be
operated and is connected to the mains.
Switch off the power before retrofitting any extensions, changing the mains voltage or the output voltage.
The minimum distance between parts carrying mains voltage and any accessible metal piece (metal enclosure),
respectively between the mains poles has to be 3 mm and needs to be minded at all times. The minimum distance
between parts carrying mains voltage and any switches or breakers that are not connected to the mains (secondary
parts) has to be 6 mm and needs to be minded at all times.
Replacing special components that are marked in the circuit diagram using the security symbol (Note) is only
permissible when using original parts.
Altering the circuitry without prior consent or advice is not legitimate.
Any work security regulations that are applicable at the location where the appliance is being serviced have to be
strictly obeyed. This applies also to any regulations about the work place itself.
All instructions concerning the handling of MOS - circuits have to be observed.
NOTE:
SAFETY COMPONENT ( MUST BE REPLACED BY ORIGINAL PART )
23
DESCRIPTION
First of all, we would like to thank you and congratulate you to your purchase of a DYNACORD power
mixer.
The PowerMate compact power mixers incorporate profound know-how, based on our research, development and
inter-communication with our customers in the professional audio market, for decades. With a PowerMate you
own a power mixer that offers a wide range of functionality in a very compact frame. Forget about the troubling
experiences with cabling and matching mixers, amplifiers, FX units, and equalizers. You now own a device with
optimally matched components. The mixer’s ergonomic console shape and clearly structured controls provide
perfect overview for instant access at all times. A gooseneck litlight can be easily plugged into the provided socket
to compensate for insufficient lighting conditions. Also during the transport you will quickly learn to appreciate the
PowerMate’s superiority: recessed handles on the sides, compact dimensions and low weight, plus the sturdy
cover that protects the controls from being damaged. However, if you would rather like to install your PowerMate
1000 in a 19” rack shelf, no problem. The only thing you have to do is to replace the plastic side panels by a pair of
metal rack mount ears. Through its multiple functions, its high dynamic capacity, and extremely low-noise design
in combination with its 24-bit Dual-Stereo effect unit and the high-performance power amplifier, the PowerMate is
best equipped for universal use. No matter, whether on-stage, in a home recording environment or in a permanent
installation, your PowerMate is the ideal partner to meet your expectations of a professional audio device – effective
and reliable. Of course, you want to install and operate your new PowerMate as quickly as possible. Nevertheless,
please take the time to do this by means of this user’s manual. Starting with input channels, effects and master
areas up to the power amp, every section is explained systematically and in detail within this owner’s manual.
Through the careful perception of the manual you will learn about all functions and find some useful and practical
tips for the daily operation of the PowerMate. Even more important, you will find some adjustment guidelines that
should be painstakingly carried out; plus the description of a typical sound reinforcement installation, a block
diagram, specifications, connection guidelines, etc.… So, take your time and keep on reading.
Unpacking and Warranty
Open the packaging and take out the PowerMate. Remove the FX unit displays’ protective foil. In addition to
this owner’s manual you will find the mains supply cord and the warranty card. Please check, if the warranty
registration form is filled out correctly. Only when this form is completed, you will be able to apply for warranty
claims. DYNACORD grants 36 months of warranty, starting with the date when you received the appliance from
your local dealer. Therefore, we would like to ask you to also keep the original certificate of purchase together with
the warranty certificate.
Keeping all papers and the original packaging of the device is generally recommendable, since they come in
handy re-selling an appliance.
Installation and Connections
Do not cover the ventilation louvers in the bottom plate of the appliance. Always place the PowerMate on an even
surface to allow for sufficient airflow during the operation. The device is equipped with electronically controlled
ventilators to protect the power amplifier against thermal overload. The direction of the airflow is front-to-rear. Fresh,
cold air enters the mixer at its lower front side and warm air leaves the device through the ventilation louvers in the
rear panel. Do not cover the frontal or the rear ventilation louvers. Otherwise the PowerMate automatically enters
protect mode to prevent thermal overload. While the protect mode prevents that the device is being damaged,
regular operation is impossible during the period of time it is activated. In case the PowerMate is installed in a 19”
rack system (vertically), you have to allow at least 2 HU of free space above and 1 HU below the mixer. Of course
you can cover the empty space with special blind plates that also have ventilation louvers. Before establishing the
mains supply connection, please make sure that the device matches the voltage and frequency of your local mains
supply. Check the label next to the mains switch. When switching the power on, the internal fans will run for about 2
seconds at full speed to give you an acoustical signal that the PowerMate is ready to be operated. In addition dust
particles that might have gotten into the device get blown out. For a secure connection the SPEAKER OUTPUTS
on the rear panel of the PowerMate are provided through professional standard high-performance SPEAKON
connectors. The pin assignment of these sockets is 1+ (hot) and 1- (cold).
24
INPUT MONO
1. MIC
Electronically balanced XLR-type inputs for the connection of low impedance microphones,
likewise the ones that are featured in major studio and live
mixing consoles. This type of input stage provides extraordinary low noise signal conversion at an extremely low distortion rate (typical .002%) even in the high frequency range.
Generally, any type of microphone can be connected as long
as its pin assignment is in accordance to the diagram shown
aside. Connecting condenser microphones is no problem.
The microphone gets its operational power supply (+24V)
through the mixer and you can forget about battery replacement times.
The connection of condenser type microphones and dynamic microphone models at the
same time is possible and does generally not lead to any trouble. Before you do so, please
refer to the owner’s manual of the microphone. The MIC input is laid out for levels between
-60dBu ... +11dBu - depending on the setting of the corresponding gain control. Because of
their low impedance design and the phantom power these XLR-type inputs are not meant for
cascading other mixing consoles or the connection of FX units, keyboards or other electronic
equipment. When connecting this kind of equipment, please utilize the LINE level inputs.
2. LINE
Electronically balanced inputs for the connection of electronic instruments, such as keyboards, drum computers, E-guitars and E-basses with an active output, as well as all other
high level signal sources, like additional mixers, FX units, CD player, etc. The LINE input is
laid out for levels between -40dBu ... +30dBu. The connection of balanced or unbalanced signal sources is established through monaural or stereo phone plugs, assigned according to the
diagram below. If the device that you are going to connect provides a balanced output stage,
using balanced cables with stereo phone plugs is certainly preferable. This type of connection
is greatly insensitive to the induction of external noise or HF interference.
Do not connect signal sources to a channel’s MIC and the LINE inputs at the same time,
since the signals cause mutual interference, resulting in a level reduction.
One more note: If possible, please, do not connect E-guitars or E-basses with passive,
high impedance outputs directly to one of the mixing console’s LINE inputs. The LINE inputs
of the PowerMate - like the Line level inputs of mixers from other manufacturers - are meant for the connection of relatively low source impedance as they are found with electronic
instruments. The reproduction of the instrument’s original sound characteristics will be unsatisfactory - unless this effect is intended. Those instruments should be connected using
a special transformer or pre-amplifier with very high input impedance. Musical instruments
that are equipped with an active electronic output stage (battery) can be connected without
second thoughts.
25
INPUT MONO
3. GAIN
Rotary control to adjust the MIC or LINE inputs’ sensitivity. These controls let you optimally
adjust the incoming signals to the mixer’s internal operation level. Cautious adjusting offers the benefits of an improved S/N-ration and provides you with the full bandwidth of the
PowerMate’s outstanding sound capabilities. On the XLR-type connectors an amplification of
+10dB is achieved when the control is set all the way to the left and +60dB when the control
is set to its maximum position to the right. Especially when dealing with very low input levels,
like they occur during vocal recordings or when the sound source is located in a distance, the
high gain is extremely profitable. Using the LINE-input, the signal is generally attenuated by
-20 dB, while the total adjustment range of 50dB is maintained. The LINE-input’s unity gain no amplification (0 dB) - is achieved at the 20dB mark.The following is meant as a short note
for your assistance on how to determine the correct input level:
Note on how to adjust the input level:
1.
Set the gain control and the corresponding channel fader to their lowest setting.
2.
Connect the desired sound source (microphone, musical instrument, etc.) to the
corresponding MIC or LINE input.
3.
Play the sound source at its highest volume setting - respectively, sing or speak as
loud as possible directly into the microphone.
4.
While you are playing the sound source or singing into the microphone, adjust the
input level using the gain control, so that during the loudest passages the PEAK
LED is just not lit, but the SIGNAL-present LED lights constantly. This is the basic
channel setting, leaving you with at least 6dB of headroom. Which means, you have
at least a range of 6dB before signal clipping.
In case you intend to make further adjustments to the channel’s EQ setting, you should perform steps 3. and 4. again afterwards, since changes in the sound shaping section also influence the channel’s overall level.
4. EQ SECTION
The mixer’s EQ section allows very
differentiated shaping of the incoming
audio signal within miscellaneous frequency bands. Turning one of the EQ
level controls to the right enhances/
amplifies the corresponding frequency
range while turning it to the left lowers/
attenuates the signal of the specific
frequency band. Before you begin to
alter the sound, all EQ controls should
be set to their neutral position; that is:
their markers point straight up (detent
position). Do not set the EQ controls to
extreme positions. Usually, minor changes are totally sufficient and produce the best results
in the overall sound. You should use the natural reproduction as an orientation mark and rely
on your musically trained ear, being the perfect instrument to judge the sound quality. The
moderate use of the MID control is the best remedy to avoid acoustical feedback. Especially
in this frequency range you should try to avoid excessive enhancement. Lowering the level
more or less in this band will provide you with high amplification rates without feedback.
The EQ section’s LO- and HI-controls are designed to work equally effective on both - MIC
and LINE -level input sources.
+20
+15
+10
+5
+0
-5
-10
-15
-20
20
50
100
200
500
1k
2k
5k
10k
20k
Hz
The MID-control is most effective in a relatively wide band around the center frequency of 2.4
kHz. As a matter of fact, especially in microphone applications this specific band turned out
to be a critical range. Thus, with almost any microphone it is good advice to slightly reduce
the level in this range to gain optimal results.
26
INPUT MONO
5. FX
The FX-controls are used to adjust individual amounts of the channel signals to be routed
to the FX1 and/or the FX2 unit. The split point of the “dry” signal is POST FADE or in other
words: the fader setting also influences the signal that is fed to the FX units.Before you
start to establish the effect mix, these controls should be set at their center position. From
this point you can increase or reduce the effect’s intensity, depending on your personal
preferences.Please monitor the PEAK LEDs in the FX1/2 channels during a performance.
The indicator should only light briefly at the occurrence of high program peaks. If the indicator is constantly lit, please lower the affected channels’ send levels at their FX controls.
For further information, please refer also to the paragraphs on the FX1/2 units.
6. AUX
The AUX-control is primarily meant for establishing a monitor mix.
The signal is split PRE FADER. The resulting mix - controlled via the AUX-controls and
present at the AUX-output in the master section - is not affected by the setting of the channel faders.Especially in microphone applications, operating with moderate AUX-control
settings prevents that the monitor signal is acoustically fed back to the microphones.
7. PAN
This control determines the position of the corresponding input signal within the stereo
image. When this control is set at its center position, the audio signal is fed with equal
levels to the left and the right master busses. Through the extensive PAN section circuitry the essential sound pressure level always stays the same, no matter to what position
within the stereo image the PAN control is set.
8. SIGNAL / PEAK indicator
The Signal / Peak indicator has a key function during input level adjustment of the corresponding channel, offering optical information of the actual signal level. It provides the
possibility to detect the risk of occurring overdrive before you would actually hear the
distortion; unlike the mixers of many other manufacturers that either only provide a PEAK
indicator or no channel indicator at all. As described before, the SIGNAL “present” LED
should blink in the rhythm of the incoming signal. If this is not the case, you have to increase the gain. If the PEAK LED, on the other hand, blinks frequently or lights up constantly,
the corresponding channel is likely to enter clipping and you have to reduce amplification
using the gain control. The signal “present” LED lights at levels -30dB below clipping
while the peak LED lights at a level of -6dB below the occurrence of overdrive. It is also a
good idea to keep an eye on these indicators during a performance, to prevent the mixing
console’s input channels form clipping caused by increasing volumes.
9. VOLUME
The channel fader is used to set the volume of a single channel and to establish an accurately proportioned mix of all input signals. The channel faders should be positioned within
the range of -5dB to 0dB, leaving you with a degree of control that allows precise matching
of relative big differences in the channels’ level settings. The overall volume is set through
the use of the master faders. Even though the channel faders offer an additional gain of
+10dB, it is good advise not to exceed the +5dB mark. Despite its special negative gain
structure, if the PowerMate’s main bus gets “overloaded” with too many “high level” input
channels, the summing amplifier could be driven into clipping. It is more reasonable to
lower the setting of all faders by about -5dB and increase the overall output level by elevating the master faders. The proportion of the mix and the overall volume stay the same
while the risk of clipping is prohibited.
27
INPUT STEREO
10. STEREO INPUT L/MONO R
Electronically balanced inputs for the connection of musical instruments with stereo output, like keyboards, drum computers, E-guitars and E-basses with an active output as well
as any equivalent sound source that provides a high level output; like additional mixing
consoles, effect units, compact disc players, etc.
The stereo LINE input is meant for balanced or unbalanced sound sources with levels
between –20dBu and +30dBu. For the connection of external devices you can use monaural or stereo phone plugs which are in accordance to the diagram below. If the external
appliance is equipped with a balanced output stage, you should preferably use balanced
cables and plugs, since this type of connection provides better shielding against RF induction and external noise.
In case you want to connect a monaural signal source to one of the stereo input channels,
you just have to plug it into the L/MONO input. The signal is internally linked to both channels.
11. LINE TRIM
These controls serve to match the incoming line level signals of a stereo channel to the
PowerMate’s internal operation level. The total adjustment range is 30dB. Unity gain – no
amplification (0 dB) – is achieved at the 0dB mark. The control allows to attenuate or
amplify the signal level in the range of -10dB to +20dB. This range is sufficient for matching most professional, semi professional, and even hi-fi signal sources.Adjustment is
performed in accordance to the description of the gain control within the monaural input
channel.
If you are using a keyboard as signal source and you have it connected to one of the
stereo inputs, please make sure not to set split zones or layers with channel separation.
Otherwise the stereo channel mapping will appear like it is set on the keyboard and you
will not have the opportunity to re-position the sound in the overall stereo image, using the
controls of the mixer. The better alternative to connect a keyboard with pre-programmed
channel mapping is to use two adjacent monaural input channels, leaving you the option
of placing the sound in the final mix via the PAN controls.
12. TONE CONTROL SECTION
The mixer’s tone control section allows very differentiated shaping of the incoming audio
signals within miscellaneous frequency bands. Turning one of the EQ level controls to the
right enhances/amplifies the corresponding frequency range while turning them to the left
lowers/attenuates the signal of the specific frequency band. Before you begin to alter the
sound, all tone controls should be set to their neutral position; i. e.: their marker points
straight up (detent position). Do not set the EQ controls to extreme positions. Usually,
minor changes are totally sufficient and produce the best results in the overall sound. You
should use the natural reproduction as an orientation mark and rely on your musically
trained ear, being the perfect instrument to judge the sound quality.
28
INPUT STEREO
13. FX
These controls determine the amount of the summed L and R signals that are sent to
the FX bus. The signal split is POST FADER. For more details on the functioning of
these controls, please refer to the INPUT/MONO section of this owner’s manual.
14. AUX
These controls determine the amount of the summed L and R signals that are sent to
the AUX bus. For more details on the functioning of these controls, please refer to the
INPUT/MONO section of this owner’s manual.
15. BAL
The function of the stereo channels’ BAL controls is equivalent to the PAN controls’
function of the monaural channels. If you turn the rotary control all the way to the right,
the right signal is outputted to the right output while the signal of the left channel is entirely muted. When the control is set to its center position, the L/R signals are present
with their equal intensity on the corresponding outputs. Whenever stereo signal sources
are connected to a stereo channel, it is good advice to leave the BAL controls at their
center position or make only minor adjustments in either direction. In case a microphone or another monaural audio signal source is connected, the BAL controls function
absolutely identical to the PAN controls of the monaural input section.
16. SIGNAL/PEAK
For the stereo SIGNAL/PEAK indicator function, the left and the right channels are monitored independently. The respective highest level reading is indicated, assuring that
neither one is already driven into clipping. For further descriptions on how to use this
indicator most efficiently, please refer to the previous chapter – INPUT/MONO.
17. VOLUME
The channel fader is used to simultaneously adjust the two volume levels of the stereo
signal simultaneously. The functioning is totally identical to the monaural channel fader,
as described in chapter INPUT/MONO.
29
FX1/FX2
FX1/FX2
The PowerMate offers two independently controllable, identically configured 24bit stereo effect units – FX1 and FX2. Each unit provides 99 program presets,
which are selected by the use of the UP/DOWN buttons. The 99 presets are
divided into groups according to their different effect structure, as shown on a
printed listing. The programs within each preset group are sorted in ascending
order, where higher numbers provide the same FX type with increased intensity.
Presets 1 - 20 offer high quality reverberation effect programs that are equally
suitable for live performance, recording studio or home recording applications.
Program numbers 21 - 40 provide mixed effect types of echo/reverb and chorus/
reverb while the numbers 41 - 60 offer different delay effects. The last group
from 61 - 99 provides different flanger, chorus, and doubling effects presets as
well as special delay and reverb programs. During the initialization of the FX
units (when switching on the power of the PowerMate), preset 05 (Large Hall
3 Bright) is selected for the FX1 while the FX2 unit is set to preset 55 (Delay
Mono 250ms). These two effects are similarly suitable for live performances
and recording applications. This is the factory-preset configuration that can
be changed any time. For further information, please refer to the paragraph
Changing FX Start Programs.
The two effect programs are equally suitable for live performance or recording
applications and can be used separately or together. For testing, evaluating and
selecting effect programs, please also refer to the supplementary information
form EFFECT PRESETS, which provides detailed description of all effect
presets. This listing contains all preset names together with the corresponding
effect structure, field of application, and frequency characteristics. Take your
time to test all presets and select the ones that are best suited for your specific
application. Program number “0” selects a Slap Back Echo, which is mainly for
servicing and testing only, and therefore is not included in the effects listing on
the front panel. Also provided is a FOOTSWITCH connector, which allows the
connection of a footswitch pedal to remotely control the FX units’ EFFECT ON/
OFF function. If your footswitch features a LED – like the optionally available
DYNACORD FS 11 does – this indicator will light when the effect is activated
(EFFECT ON).
Changing FX Start Programs
In the factory shipping state, the FX units start with the programs 05/55. If you
prefer different programs, you can change and store the new settings in the
programming mode. To assign new start programs, please proceed as follows:
1. Hold down the two DOWN buttons of FX1 and FX2 simultaneously while
switching on the PowerMate.
2. “Prog” appears briefly on the display. Programming mode is now active.
A software-related side effect is that all buttons behave a bit slower than
usual.
3. Release the two DOWN buttons and select the desired start programs.
4. Press the two UP buttons to store the displayed effect numbers as your
new start programs. The FX unit acknowledges the save procedure by
briefly indicating “Prog” on the display.
FX1/FX2
1.......10
11.......20
21......30
31......40
41......50
51......60
61......99
REVERB
REVERB
ECHO
CHORUS
DELAY
DELAY
SPECIAL
HALLS
PLATES
REVERB
REVERB
STEREO
MONO
PROGRAMS
18. DISPLAY
The display always indicates the actually selected program number of the
corresponding FX unit. The display screen is covered with a protective foil to
prevent it from being damaged during shipment. Please remove the foil.
30
FX1/FX2
19 . UP/DOWN
The UP/DOWN buttons are for selecting effect presets. Keeping a button
pressed continuously lets you step quickly through the program numbers.
20. FX ON
This switch switches an internal FX unit on and the green LED lights. Please
keep in mind that you can also use an external footswitch for the switching
of the FX unit. In this case, the LED also shows the actual operational status
of the FX unit. If you want to use a footswitch, the FX ON switch has to be
engaged first. The corresponding FX unit is activated and you can use the
footswitch to switch the selected effect program on or off.
21. PEAK LED
These indicators signal if the internal FX units or the AUX 1/2 SEND signals
are on the verge of clipping. To achieve an adequate S/N ratio, please adjust
the FX units’ input level as follows:
Setting Instructions:
1.
Establish a “dry” mix – without effect settings – according to the
previous descriptions.
2.
Position the effect return fader of the corresponding effect channel at
the –5dB mark.
3.
Use the UP/DOWN buttons to select the desired FX program preset.
4.
Press the FX ON switch.
5.
Play (start the reproduction of) the sound source connected to the
desired input channel and adjust the desired amount of the FX signal,
using the AUX/FX controls of this input channel. Repeat this step for all
input channels that you want to include in your effect mix.
6.
Monitor the Peak LED so that it only lights frequently at highly dynamic
signal peaks. When clipping occurs, reduce the AUX/FX controls in the
channels.
7.
Use the FX to AUX control to add the effect mix to the monitor mix. Use
the FX return faders to add the desired amount of the FX signal to the
main mix.
In case you are using a different effect setting for the second FX unit, you
have to repeat steps 2 - 7, respectively. Pay some attention to the peak
indicators when operating your PowerMate to be able to quickly interact
when the signal levels exceed the normal range and enter clipping.
22. EFFEKT RETURN
These stereo faders are used to determine the effect amount added to
the main mix. In case you have to set these faders at a position above the
+5dB mark, please check if the FX unit’s input signals are adjusted properly.
Otherwise use the AUX/FX SEND controls to increase the input levels.
31
AUX/MONO
Generally, the AUX channel is used as monitor bus.
23. AUX SEND
This output serves for the connection of a monitoring power amplifier or active stage
monitors. Using the AUX fader, the output level can be adjusted in a wide range up to
+20dBu. The AUX send output is designed in Ground Sensing technology to prevent
the induction of external noise, even when longer cables are involved.
24. FX1/2 to AUX
These controls allow to add the effect signal that is set at the corresponding effect unit
to the AUX bus. In case you are using the AUX bus for monitoring purposes, you are
able to include the effect signals at the desired levels in the monitor mix. The experience in mixing has shown that the effect level in the monitor mix has to be lower than
the level in the main mix, since the distance between the monitor speakers and the
artists is much shorter.
25. AUX VOLUME
This fader controls the AUX SEND output level. So when the AUX bus is used for monitoring, this fader lets you control the monitor system’s overall volume setting.
26. MONO OUTPUT
At the monaural output the summed, “post-fade” L/R signal of the master is present. It
can be used for additional monitoring, side fill, “next door” and Mono-Pa applications,
or to establish a delay-line.
CAUTION:
The outputted signal is affected by the setting of the MONO OUT fader as well as
the MASTER faders’ setting.In case you would prefer to control the MONO OUTPUT
signal independent from the MASTER faders’ setting, this can be achieved by some
minor internal modification.Please consult your dealer for assistance.
27. STANDBY
Pressing the STANDBY button mutes all outputs to which amplifiers could be connected to the PowerMate. Because this interrupts the signal flow between the mixing stage and the MAIN OUTPUTS, the internal power amplifier’s signal is also muted. The
STANDBY LED indicates that the stand-by mode is engaged and the input channel
signals are not heard over the speaker systems. But, the 2Track Return signal is still
fed to the power outputs, providing you with a very comfortable solution to play intermission music during performance breaks.
28. MONO OUT VOLUME
This fader controls the output level of the summed L/R master signal at the MONO
OUTPUT.The output level is also influenced by the setting of the MASTER faders.
32
EFFECT 1/2
29. PHONES
Stereo phone jack for the connection of headphones with an impedance of 32 – 600
ohms which lets you listen to the PFL master signal.
30. PHONES
This control is used to adjust the headphone’s volume. CAUTION: Make sure to turn the
control all the way to the left (minimum setting) before connecting the headphones.
31. RECORD SEND L/R
These RCA-type connectors carry the “pre-fader” master L/R signal. The signal is not
affected by the setting of the master faders and therefore mostly used for the connection
of cassette decks, open reel tape decks or DAT recorders for recording purposes. The
nominal level of the outputs is –10dBV which matches the professional industry standard
and home recording applications. Nevertheless, you should use the input gain control
of your recording device - as far as it is provided. CAUTION: On most tape decks the
incoming signal is directly carried through to the PLAYBACK outputs. In case you have
connected the REC. SENDS and the 2TRACK RETURNS and the PowerMate’s 2TRACK
to MASTER control is set to anything but its lowest setting, the recorded signal is again
included into the main mix. The delay difference in delay of the two signals is responsible
for occurring drop-outs and a general degradation of the sound. In the worst case, activating the RECORD button on your tape deck could lead to very unpleasant feedback
noise. To prevent this from happening make sure to set the 2TRACK to MASTER and the
2TRACK to AUX controls to their lowest settings during a recording.
32. 2TRACK RETURN L/R
These connectors let you connect a tape deck, a CD player, an open reel or an additional
SUB-mixer. The signal is post master fader and post STANDBY switch providing you with
the possibility to play intermission music during performance breaks or check the mix during the rehearsal, using the headphones. You just have to engage the STANDBY switch
to mute all channel signals at the main outputs and the monitor bus.
33. 2TRACK
ReturnThis control is used to mix the 2TRACK signal to the main mix (MASTER); postfader of the master controls. CAUTION: When adjusting the level of the device that is
connected to the 2TRACK RETURNS – CD player, tape deck, etc. – always start with the
control adjusted at its minimal setting. Otherwise, depending on the quality of the recording, the outputted volume can cause relative high levels at the power amplifier outputs.
34. 2TRACK to AUX
The signal coming from the 2TRACK RETURNS is internally summed and can be added
to the AUX or the monitor bus. The signal’s level is set with the 2TRACK to AUX rotary
control. Signal summing is done pre-fader to the 2TRACK to MASTER control, i. e. the
signal is fed to the AUX output without being influenced by the 2TRACK to MASTER
control’s setting.
35. MAIN OUTPUTS
The signals at the MAIN OUTPUTS are post L/R master fader and post the 7-band stereo EQ. They are mainly utilized for the feeding of additional, external power amplifiers.
Through these outputs it is also possible to establish a two way active system set-up by
either connecting an active frequency crossover or active sub woofers. If you want to
use the internal power amplifier to supply the high frequency cabinets, the treble signal
coming from the crossover has to be fed back to the PowerMate via the POWER AMP IN
connectors.
36. POWER AMP INPUTS
These inputs are provided via electronically balanced phone jacks with breaker function.
When inserting a phone plug, the signal path is split up between the master and the internal power amplifier. This provides the opportunity to operate the internal power amplifiers
from the POWER AMP INPUTS.
37. FX1/2 FOOTSWITCH
Phone jack for the connection of a DYNACORD FS11 foot switch, to switch the internal
FX units on or off. To accomplish this function, the switches FX1 and FX2 have to be
engaged.
33
MASTER
38. STATUS INDICATOR
These indicators are to inform you about the momentary
operational status of the PowerMate’s internal power
amplifier.
The PROTECT indicator lights when one of the power
amplifier’s extensive protection functions – against
thermal overload, HF-induction, DC at the outputs, and
SOAR-protection – is activated. When the PowerMate
is in protect mode, the speaker outputs are muted and
the inputs of the power amplifier are short-circuited to
prevent the amplifier from being damaged. In this case
you should first check if the frontal and/or rear ventilation louvres are blocked. Another cause could be, that
you have connected more than three 8ohms speaker
systems per power output. Please also disconnect the
SPEAKON connectors and check the speaker cables for
short circuits.During the power-on operation, the PROTECT LED always lights for about two seconds. This
is normal. It indicates that the PowerMate’s protection
circuitry is operational.
The LIMIT indicator signals that your operating the
PowerMate at the internal amplifier’s limit. Frequent
blinking of the LED is acceptable, since the amplifier’s
incorporated limiter prevents the occurrence of distortion. Continuous lighting indicates that a degradation in
the outputted sound is likely to happen. In that case, the
master level should be reduced.
The POWER ON indicator is always lit when the
PowerMate is in operational mode - i. e. it is switched
on. If, after switching on the power, the LED is not lit,
please make sure that the PowerMate’s mains cord is
plugged in correctly. If this is the case and the LED is
still not lit, please contact your dealer.
39. 7-BAND STEREO GRAPHIC EQUALIZER
The PM600’s integrated 7-band stereo graphic equalizer
is located in the L/R master channel section. The seven
frequency bands - each providing ±10dB amplification/
attenuation - offer the possibility to optimally match the
overall sound to the acoustic conditions of different locations or shape it according to your personal taste.
+20
+15
+10
+5
+0
-5
-10
-15
-20
20
50
100
200
500
1k
Hz
34
2k
5k
10k
20k
MASTER
The frequency ranges as well as the characteristics of the
EQ-faders are designed very praxis-oriented. In case you
intend to have a clear and highly intelligible sound, which,
as a side effect, provides the cymbals with more crisp, you
should increase the level setting of the 6 kHz or 12 kHz
band a bit. If the MIDs are nasaling, try attenuating the mid
range by some decibels. If you like to provide your sound
with more bass and the kick drum with more punch, you
have to boost the low frequency range, using the 63 Hz or
the 125 Hz controls. On the opposite, if the overall sound
is undefined with too much bass, lowering the levels of these two frequency bands will solve the problem.
Especially when using the equalizer, you should be aware
of the fact that in most cases less adjustment provides the
better result. Thus, your first choice should be to establish
the mix without involving the graphic EQ, using only the
tone controls in the input channels and see if you get a
satisfactory result.
40. MASTER LED-DISPLAY
The PowerMate offers two 8-segment LED-chains to monitor the output levels of the L/R master signals. The LEDmeter’s indication range is 33dB, displaying the levels in
dBu which are present at the MAIN OUTPUT respectively
at the POWER AMP INPUT. In other words: the meter’s
0dB mark is referenced to an output signal of 0dBu at the
POWER AMP INPUT. Further increasing this level, the
power amplifier’s maximum input level is reached at the
+6dB mark, which equals an output power of 300 watts at
4 ohms per channel. Higher levels are not displayed, since the power amplifier’s processor limits the signal at this
point which is indicated by the lighting of the LIMIT LED in
the status indicator section.
41. MASTER L + R
Level controls to adjust the output signals of the left and
right main outputs (MASTER).
NOTE: Please, make sure that the corresponding input
channel faders or at least the master faders are set to
their minimal position or the STANDBY switch is engaged, before connecting an external signal source to
one of the inputs of the PowerMate. This will save you,
your audience, and the equipment from unnecessary
stress resulting from switching or feedback noise.
35
REAR PANEL
SPEAKER OUTPUTS RIGHT / LEFT
The PowerMate 600 provides professional SPEAKON connectors, offering an electrical and mechanical secure connection which complies to all security regulations allowing
the use of high quality speaker cables with a diameter of up
to 4 x 2.5mm2.
The DYNACORD accessory assortment includes all recommended cables and connectors.
POWER
mains switch to switch the PowerMate on or off.
The PowerMate is operational when the POWER ON - LED
lights and the power outputs of thepower amplifier are activated.
Please make sure to set the master faders to their minimal position or engage the STANDBY switch before turning the power on. This will save you, your audience,
and the equipment from unnecessary stress (switching
and/or feedback noise).
In case additional external equipment - like an effect
unit - is connected to the PowerMate, please proceed in
the following order when switching your equipment on:
1.
2.
3.
external effect unit
PowerMate
external power amplifiers
When switching the power off, please proceed in the
opposite order.
36
STANDARD-PA
CABLING
The mains cord is supplied with your PowerMate. The quality of all other cables is left to your responsibility. Carefully chosen high quality cables are the best precaution to prevent problems from occurring during the later operation. In the following we would like to provide you with some recommendations for the trouble-free operation of
your setup.
SPEAKER CABLES
Our experience as a manufacturer of loudspeaker systems has taught us that flexible cables with a rubber jacket
and a diameter of 2.5mm2 per conductor, used in combination with SPEAKON plugs and sockets, are the best
choice to guarantee the optimal connection of loudspeaker systems. The connection of the SPEAKON plugs
to the corresponding connectors on the PowerMate’s rear panel has to be in accordance to the corresponding
diagram below. We recommend the use 4-wire cables where also the pins 2+ and 2- are connected through.
This provides you with the possibility to use these cables in an active 2-way system configuration, as well.
DYNACORD speaker cables with SPEAKON connectors and all other cables, plugs, and sockets are available at
your professional audio dealer.
LF-CABLES – BALANCED OR UNBALANCED?
For LF-cabling – all the low current wiring – your best choice are balanced cables (2 signal conductors + ground
shielding) with XLR-type connectors or stereo phone jacks and plugs. The cables should be step proof, shielded,
and never longer than absolutely necessary. Too many too long cables mostly lead to confusion and generate
unnecessary problems. Of course, you can also connect unbalanced cables with monaural phone plugs to the
PowerMate’s in- and outputs and because of its superb grounding managing system, in most cases no interference will occur. Still, there is a minimal risk that problems could arise. Generally spoken, if you have the choice,
balanced LF-cables are always the better solution and they should be preferred. Today’s modern audio equipment – like amplifiers, equalizers, FX units, mixing consoles, and even some keyboards – offers balanced in- and
outputs. In a balanced signal path, the cable screen provides a gapless connection of all metal parts, offering
efficient shielding against the induction of external noise. The balanced cabling in conjunction with the commonmode rejection of the PowerMate’s input stage effectively eliminates even existing artifacts of interference. All
inputs of the PowerMate provide balanced audio connections and high common-mode rejection. The mixing stage
outputs – AUX, MAIN, etc. – are laid out in GND-SENSING technology – a special, impedance-balanced pin assignment of the output jacks, offering all advantages of the balanced signal transmission, but lets you also connect
monaural phone plugs, without a problem. Nevertheless – as mentioned above – when longer cables are involved, using stereo phone plugs and balanced cables are the better alternative. The diagrams below show the pin
assignments of plugs and cables like they can be used with the PowerMate.
balanced connection of microphones
MIC INPUT
unbalanced
external equipment
with XLR-type in/
output jacks
balanced
All phone jack
in/outputs of the
PowerMate
unbalanced
external equipment
with phone jack
in/output jacks
balanced
All phone jack
in/outputs of the
PowerMate
37
STANDARD-PA
In the following we would like to explain to you how to install a typical sound reinforcement system in passive configuration with incorporated stage monitors. The necessary equipment is:
1
1
2
2
2
2
4
1
PowerMate 600-2
Power amplifier for the monitor signal – for i. e. 2x250 watts
Hi cabinets – i. e. 12“, 3-way loudspeaker systems
Lo cabinets – i. e. 15“ woofers
Speaker pole-stands or 2 connection rods
Stage monitor speakers systems
SPEAKON cables (8m) and 2 SPEAKON cables (2m)
LF-cable with a stereo phone plug on one and an XLR-type connector on the other end
Setting up
•
•
•
•
•
•
Place the PowerMate and the external monitor power amplifier in a way that allows their unobstructed
operation and connect the mains cord.
Try to locate the best position for the loudspeaker systems. If possible, the woofers should be placed
on the floor while the Hi cabinets’ most favorable position is above the Lo cabinets. Please keep in mind,
that it is important to have the lower edge of the Hi cabinets approximately at the same height level as
the heads of the audience. Either use the connection rods to mount the Hi cabinets on top of the woofers
or, if this kind of installation is not possible or if your application does not employ woofers, use separate
speaker pole-stands.
Do not place the left and the right speakers further apart than necessary. The less distance there is bet
ween the two speaker “clusters” – the more compact the sound.
According to the above diagram, use the SPEAKON cables to connect the woofers and the monitor
speakers to the PowerMate and the monitor power amplifier respectively. Make sure not to confuse the
channels by accident. Use the short SPEAKON cables to connect the Hi cabinets to the woofer outputs
(parallel connection). The two monitor speakers are connected to either one output of the external power
amplifier. Set the amplifier inputs to parallel or monaural operation. The amplifier’s volume controls provi
de the possibility to adjust the output levels independently.
Try to avoid the positioning of the main loudspeaker systems behind the imaginary line of the
microphones. Otherwise, if you have to drive the system at higher sound levels, the risk of feedback is
very likely.
After you have installed all microphone stands and all artists have found their seat on the stage, the best
place to install the monitor speakers is up front facing the musicians. Nevertheless, please make sure
that no microphone is directly pointing in the direction of a monitor. You should also be aware of the indi
vidual characteristics of the utilized microphones.
Using the stereo plug-to-XLR-type connector NF-cable, connect the AUX output of the PowerMate with
the external amplifier’s input.
38
STANDARD-PA
•
•
•
Connect all microphones – preferably to the monaural inputs of the PowerMate – and the keyboards and
other comparable audio signal sources to the rest of the available inputs.
Pull all faders down and engage the PowerMate’s STANDBY button. This measure prevents unwanted
feedback noise when switching the equipment on.
First, switch the PowerMate on and then the external amplifier. Then activate the PowerMate’s
operational mode through pressing the STANDBY button again.
SOUND CHECK
•
First, adjust the input levels of the microphones that are connected to the monaural inputs of the
PowerMate. Please proceed as follows:
1.
2.
3.
•
In case you are also using the stereo input channels, you can adjust their levels as follows:
1.
2.
3.
•
2.
3.
4.
5.
•
Set the LINE TRIM controls and the channel faders to their lowest setting.
Play the corresponding signal source at the highest volume that is to be expected during the
performance.
Use the LINE TRIM control to adjust the level, so that even at loud passages the red PEAK
LED is not lit but the green SIGNAL present LED lights constantly.
or adjusting the EQ of the input channels, please proceed as follows:
1.
•
Set the corresponding gain controls and the channel faders to their lowest position.
Speak or sing as loud as possible into the microphone.
Use the gain control to adjust the level, so that even at loud passages the red PEAK LED is not
lit but the green SIGNAL present LED lights constantly.
Slide the channel fader and the master faders a bit up, so that you can hear the sound over the
main speakers.
Adjust the EQ controls at their center position.
Play the corresponding signal source.
Starting from the center position, you can adjust the controls until the sound is to your liking.
Please, keep in mind that major alteration of the EQ-setting does not necessarily result in an
improvement of the overall sound. Especially when sound shaping is concerned, less can be
more.
Repeat the steps 2 - 4 for all input channels in use.
If you have musical instruments connected directly to the monaural inputs, follow the descriptions above
for the adjustment of the microphones.
Make sure, that all channel faders, gain controls, and LINE TRIM controls of unused input channels are
at their minimal setting. In this way you avoid unnecessary noise at the output.
MAIN MIX
•
•
•
•
Establish a basic mix, using the channel faders, so that the individual sound levels relate to each other
according to your personal taste.
The best range for the channel faders to be set to is in the area of –5dB to 0dB. In this way you are
provided with sufficient tolerance for later adjustments.
Use the master faders to adjust the overall volume of your sound system.
In case you are using the FX units, please proceed as follows:
1.
2.
3.
4.
5.
Adjust the FX1 return fader at the –5dB mark.
Use the UP/DOWN buttons to select the desired effect preset.
Press the FX ON button.
Play the signal source of the desired input channel and adjust the desired amount of the FX
signal, using the FX controls of this specific input channel. Repeat this step for all input
channels that you want to include in your effect mix.
Please make sure that the effect channel Peak LEDs only light frequently at highly dynamic
signal peaks.
39
STANDARD-PA
MONITOR MIX
•
Lower the setting of the AUX fader within the master section.
•
Adjust the AUX faders of all input channels that are momentarily in use at their center position.
•
Push the AUX fader up as far as absolutely necessary. In this way you have enough headroom before
feedback, even when the microphone are not optimally positioned.
•
Use the FX to AUX control to add the effect mix to the monitor mix, without influencing the main mix.
Please keep in mind that normally, the monitor mix needs less effect than the main mix.
Let the artists perform some and check the sound of the system from different angles and distances. If you come
to the conclusion that some corrections in the overall sound image are necessary, activate the 7-band stereo
equalizer in the master section and match the sound to your liking. By doing so, you should also remember, that
during the performance the sound is going to be altered because the audience is present. This circumstance has
a major effect on the acoustical condition of the location and its absorption of low frequencies. If possible, check
the “sound in the house” during the performance and – if necessary – make adjustments to compensate for the
changed conditions.
And for the rest, we like to wish you lots of fun and success with your new PowerMate mixer.
40
MODE D‘EMPLOI
PowerMate 600
Power Mixer
TABLE DES MATIÈRES
INSTRUCTIONS DE SÉCURITÉ IMPORTANTES
INSTRUCTIONS DE RÉPARATION IMPORTANTES
INTRODUCTION
DÉBALLAGE ET GARANTIE
INSTALLATION ET BRANCHEMENTS
INPUT MONO
INPUT STEREO
EFFETS 1/2
AUX3/4
MASTER
PANNEAU ARRIÈRE
INSTALLATION SONORISATION STANDARD
SPECIFICATIONS
BLOCK DIAGRAM
DIMENSIONS
42
.......................
.......................
.......................
.......................
.......................
.......................
.......................
.......................
.......................
.......................
.......................
.......................
.......................
.......................
.......................
43
43
44
44
44
45
48
50
52
54
56
57
61
62
63
INSTRUCTIONS DE SÉCURITÉ IMPORTANTES
Le symbole représentant un éclair fléché dans un
triangle équilatéral a pour but d’alerter l’utilisateur
de la présence d’une „tension dangereuse“ non
isolée à l’intérieur du boîtier, pouvant être d’une force
suffisante pour constituer un risque d’électrocution.
Le point d’exclamation dans un triangle
équilatéral a pour but d’alerter l’utilisateur de la
présence d’instructions importantes concernant
le fonctionnement et la maintenance, dans la
documentation qui accompagne l’appareil.
1.
2.
3.
4.
5.
6.
7.
8.
Veuillez lire ces instructions.
Conservez ces instructions.
Respectez toutes les consignes de sécurité.
Suivez scrupuleusement toutes les instructions.
N’utilisez pas cet appareil près d’un point d’eau.
Utilisez uniquement un chiffon sec pour le nettoyer.
N’obstruez aucune des ouïes de ventilation. Installez-le en respectant les instructions du fabricant.
Ne l’installez pas près de sources de chaleur tels que radiateurs, panneaux chauffants, étuves, ou autres appareils
produisant de la chaleur (dont les amplificateurs).
9. Ne pas utiliser d’adaptateur pour supprimer la prise de terre des prises à trois fiches. Si la prise fournie ne peut pas être
branchée dans la prise électrique, adressez-vous à un électricen qui remplacera la prise obsolète.
10. Protégez le cordon secteur afin que l’on ne marche pas dessus et qu’il ne soit pas pincé, surtout au niveau des prises, ou à
l’endroit où il sort de l’appareil.
11. Utilisez exclusivement des fixations et des accessoires recommandés par le fabricant.
12. Utilisez l’appareil uniquement avec le chariot, le trépied, le support ou la table spécifiés par le fabricant, ou vendus avec
l’appareil. Si un chariot est utilisé, prenez toutes les précautions nécessaires lorsque vous devez déplacer l’ensemble
(chariot et appareil) afin qu’ils ne se renversent pas.
13. Débranchez l’appareil en période d’orage ou s’il doit rester inutilisé pendant longtemps.
14. Confiez toutes les réparations et interventions à un personnel qualifié. Une intervention est nécessaire si l’appareil a été
endommagé d’une façon ou d’une autre, si son cordon ou sa prise secteur ont été endommagés, si du liquide a été
renversé ou si des objets sont tombés à l’intérieur, ou encore si l’appareil a été exposé à la pluie ou à l’humidité, s’il ne
fonctionne pas normalement, ou s’il est tombé.
15. N’exposez pas cet équipement aux éclaboussures et veillez à ce qu’aucun récipient rempli de liquide, verre ou vase, ne
soit posé dessus.
16. Pour déconnecter complètement cet équipement du secteur, débranchez la prise secteur de la prise électrique.
17. La prise secteur doit toujours rester directement accessible.
Gestion du REEE (recyclage des équipements électriques et électroniques) (applicable dans les états membres
de l‘Union Européenne et autres pays Européens, avec des réglementations nationales spécifiques sur la gestion
du REEE). Le symbole apposé sur le produit ou sur son emballage indique que ce produit ne peut pas être traité
comme un déchet domestique normal, mais doit être conditionné et retourné à son revendeur d’origine.
INSTRUCTIONS DE RÉPARATION IMPORTANTES
CAUTION:
1.
2.
3.
4.
5.
6.
7.
8.
Ces instructions de réparation ne s‘adressent qu‘à un personnel qualifié. Afin de réduire le risque
d‘électrocution, ne pas procéder à des réparations autres que celles mentionnées dans les Instructions
de Fonctionnement à moins que vous ne soyez qualifié pour le faire. Faites faire les réparations par un
personnel qualifié.
La règlementation concernant la sécurité stipulée dans les articles EN 60065 (VDE 0860 / IEC 65) et CSA E65 - 94 doit
être respectée lors des réparations.
L’utilisation d’un transformateur d’isolation est obligatoire pendant la maintenance lorsque l‘appareil est ouvert et qu‘il doit
fonctionner en étant branché sur le secteur.
Mettez l’appareil hors tension avant d’installer des extensions, de changer la tension secteur ou la tension de sortie.
La distance minimum entre des éléments conduisant la tension secteur et toute pièce de métal accessible (boîtier
métallique), doit toujours être de 3 mm et ce impérativement.
La distance minimum entre des éléments véhiulant une tension secteur et tout commutateur ou interrupteur n‘étant pas
connecté au courant secteur (pièces secondaires) doit toujours être de 6 mm et ce impérativement.
Le remplacement des composants spéciaux qui sont marqués d’un symbole de sécurité (voir Note) dans le schéma de
principe n‘est autorisé qu‘en employant des pièces d‘origine.
Il n’est pas permis de modifier les circuits sans consentement ou avis préalable
La règlementation concernant la sécurité du travail applicable dans le pays où l‘appareil est réparé doit être strictement
observée. Ceci s‘applique également à toute règlementation du travail sur le lieu lui-même.
Toutes les instructions concernant la manipulation des circuits MOS doivent être respectées.
REMARQUE:
COMPOSANT DE SÉCURITÉ (DOIT ÊETRE REMPLACÉ PAR UNE PIÈCE
D‘ORIGINE)
43
INTRODUCTION
Nous souhaitons tout d’abord vous remercier et vous féliciter d’avoir acheté une console amplifiée
DYNACORD.
Les consoles compactes amplifiées PowerMate bénéficient d’un grand savoir-faire, acquis depuis des années
grâce à nos recherches et nos développements ainsi que notre dialogue avec nos utilisateurs du monde de
l’audio professionnel. Avec une PowerMate, vous avez en main une console amplifiée qui offre de nombreuses
possibilités dans un format très compact. Finis les soucis de câblage et d’adaptation entre les consoles, les
amplis, les racks d’effets et les égaliseurs ! Vous possédez désormais une configuration parfaitement homogène.
La forme ergonomique du pupitre et la disposition claire de tous les contrôles offrent une vue d’ensemble parfaite
garantissant un accès très rapide dans toutes les situations. Vous pouvez facilement ajouter une lampe „col de
cygne“ en l’insérant dans l’embase prévue à cet effet pour pallier des conditions d’éclairage insuffisantes. Vous
apprécierez également la supériorité de la PowerMate pour ce qui est du transport : poignées encastrées sur
chaque coté, dimensions compactes et faible poids en plus du robuste capot prévu pour protéger les boutons
et faders contre tout dommage. De plus, si vous préférez placer votre PowerMate 600 dans un rack 19“, pas de
problème ! Tout ce que vous aurez à faire sera de remplacer les montants latéraux en plastique par des oreilles
de rack en métal. Grâce à ses nombreuses fonctions, sa grande dynamique audio, son excellent rapport signal/
bruit combinés à sa double section d’effets stéréo 24 bits et son amplificateur de puissance ultra performant, la
PowerMate est parfaitement équipée pour une utilisation universelle.
Sur scène, en home-studio ou en installation fixe, elle sera votre partenaire idéal et répondra à vos attentes en
matière de matériel audio professionnel : efficacité et fiabilité. Naturellement, vous voulez maintenant installer et
utiliser votre nouvelle PowerMate le plus tôt possible. Cependant, prenez le temps de le faire en suivant ce mode
d’emploi. Chaque section y est expliquée méthodiquement et en détails, en commençant par les voies d’entrée,
les sections des effets et Master jusqu’à l’ampli de puissance. Grâce à l’attention particulière que vous porterez à
ce manuel, vous apprendrez toutes les fonctions et profiterez de conseils utiles et pratiques qui faciliteront votre
utilisation quotidienne de la PowerMate. Plus important encore, nous vous indiquerons des réglages qui devront
être scrupuleusement respectés. Vous trouverez enfin la description d’une configuration de sonorisation typique,
un schéma de principe, les caractéristiques techniques, des indications sur les branchements etc… alors prenez
votre temps de poursuivre cette lecture.
Déballage et garantie
Ouvrez le carton et sortez-en la PowerMate. Enlevez la feuille de plastique qui protège l’écran de la partie Effets
(FX). En plus de ce manuel d’utilisation, vous trouverez le câble d’alimentation secteur et la carte de garantie.
Veuillez vérifier que celle-ci est remplie correctement. Ce n’est que lorsque vous l’aurez vous-même complétée
qu’elle deviendra valable pour toute application de la garantie. DYNACORD offre 36 mois de garantie à partir de la
date d’achat/réception auprès de votre revendeur. Nous vous invitons donc à conserver la facture d’achat originale
avec le certificat de garantie.
Il est généralement recommandé de conserver tous les documents ainsi que l’emballage d’origine de l’appareil car
ceux-ci peuvent s’avérer utiles en cas de revente du matériel.
Installation et Branchements
N’obturez pas les grilles de ventilation situées à l’arrière de la console. Placez toujours la PowerMate sur une
surface plane pour permettre un flux d’air suffisant durant l’utilisation. Celle-ci est équipée de ventilateurs contrôlés
électroniquement pour protéger l’amplificateur contre d’éventuelles surchauffes. Le flux d’air se fait de l’avant vers
l’arrière. L’air frais entre par l’avant de l’appareil et l’air chaud est évacué grâce aux grilles de ventilation situées
à l’arrière. N’obturez jamais les grilles de ventilation avant ou arrière. Le cas échéant, la PowerMate entrera
automatiquement en mode de protection pour empêcher toute surchauffe. Si le mode de protection empêche
l’appareil d’être endommagé, toute opération avec la PowerMate est rendue impossible pendant son temps
d’action. Si la PowerMate est installée dans un rack 19“ (verticalement), vous devrez laisser au moins l’espace de
deux unités au-dessus et une unité en dessous de la console. Vous pouvez bien sûr combler ces espaces vides
par des plaques spéciales munies de grilles d’aération. Avant de relier l’appareil au secteur, vérifiez sur l’étiquette
située à coté de l’interrupteur principal de la PowerMate que la tension et la fréquence correspondent aux normes
électriques locales. A l’allumage, les ventilateurs internes s’activent pendant environ deux secondes à plein régime,
vous donnant ainsi un signal audible du bon fonctionnement de la PowerMate et permettant d’autre part d’évacuer
toute poussière éventuellement présente. Pour des connexions fiables, les embases des sorties haut-parleurs
situées à l’arrière de la PowerMate sont au format professionnel SPEAKON. L’assignation des broches de ces
prises est 1+ (point chaud) et 1- (point froid).
44
ENTRÉE MONO
1. MIC
Entrées XLR symétrisées électroniquement pour la connexion de microphones à basse
impédance, identiques à celles que l’on trouve sur les
consoles professionnelles de studio ou de scène. Ce type
d’étage d’entrée garantit une conversion du signal à très
faible bruit et un taux de distorsion extrêmement bas (typique
<0.002%) même dans les fréquences aiguës. Généralement,
tout type de micro peut être connecté du moment que ses
broches sont câblées tel que l’indique le schéma ci-dessous.
Avec les micros à condensateurs (ou électrostatiques), pas de
problème. C’est la console qui alimentera le micro à la tension requise (+24V) vous évitant
ainsi de nombreux remplacements de piles.
La connexion simultanée de microphones de types différents, à condensateur et dynamiques,
et ne pose généralement aucun problème. Avant cela, consultez le mode d’emploi des
microphones concernés. L’entrée MIC accepte des niveaux compris entre –60dBu et +11dBu
selon le réglage du potentiomètre de gain. En raison de leur conception «basse impédance»
et de l’alimentation fantôme, ces entrées XLR ne sont pas prévues pour la connexion en
cascade d’autres consoles ni pour le branchement de processeurs d’effets, claviers ou autre
matériel électronique. Pour ce genre d’équipement, utilisez plutôt les entrées LINE.
2. LINE (Ligne)
Entrées symétrisées électroniquement pour la connexion d’instruments électroniques comme
les claviers, boites à rythmes, guitares et basses électriques actives ainsi que toute autre
source sonore générant un signal de haut niveau comme les tables de mixage additionnelles,
les processeurs d’effets, les lecteurs CD etc. L’entrée LINE accepte des niveaux compris
entre –40dBu et +30dBu. La connexion de sources symétriques ou asymétriques s’effectue
grace à des prises/câbles mono ou stéréo, câblés comme dans le schéma ci-dessous. Si
l’appareil que vous souhaitez connecter dispose d’une sortie symétrique, utilisez-la via un
câble et des connecteurs symétriques car ce type de connexion est bien moins sensible aux
parasites ou interférences HF.
Ne connectez pas simultanément une même source aux entrées MIC et LINE car les deux
signaux interféreraient l’un l’autre ce qui en réduirait le niveau.
Encore une remarque : Ne connectez pas directement de guitares ou basses électriques
passives/haute impédance à une entrée LINE. Les entrées LINE de la PowerMate, au même
titre que celles des consoles d’autres marques, sont prévues pour recevoir des instruments
électroniques à impédance de sortie relativement faible. La reproduction du son d’origine de
l’instrument ne serait pas satisfaisante. Connectez d’abord ces instruments à des boîtiers de
direct (DI Box) ou des préamplificateurs à impédance d’entrée très élevée. Les instruments à
sortie électronique active (alimentés par piles) peuvent être connectés sans problèmes.
Lorsque vous connectez des sources audio, n’oubliez pas de baisser entièrement les faders
des voies concernées ou au minimum ceux des sorties générales (Master Faders) ou encore
d’appuyer sur le bouton STANDBY. Ceci vous évitera d’endommager vos oreilles, celles de
votre public…et tout votre équipement !
45
ENTRÉE MONO
3. GAIN
Potentiomètre rotatif pour ajuster la sensibilité des entrées MIC/LINE. Ce potentiomètre vous
permet de faire correspondre au mieux les signaux entrants avec le niveau de fonctionnement
interne de la console. Un réglage précis permet de bénéficier du meilleur rapport signal/bruit
et de toute l’incroyable dynamique qu’offre la PowerMate. Pour les entrées XLR, un placement
du potentiomètre à l’extrême gauche n’appliquera aucune amplification du signal (0 dB) tandis
qu’un placement à l’extrême droite appliquera +60 db d’amplification. Cette marge supérieure
est extrêmement utile en particulier avec des sources de très faible niveau comme lors des
enregistrements vocaux ou lorsque la source est assez éloignée. Pour l’entrée LINE, le signal
est généralement atténué de –20 dB tout en conservant la marge totale de réglage de 60 dB.
Le gain unitaire (pas d’amplification/0 dB) de l’entrée LINE s’obtient sur le repère 20 dB. Ce
qui suit est destiné à vous aider à ajuster le bon niveau d’entrée :
Conseils de réglage :
1.
Placez le potentiomètre de gain et le fader de la voie sur leur valeur minimale.
2.
Connectez les sources sonores (micros, instruments, etc.) sur les entrées
correspondantes MIC ou LINE.
3.
«Envoyez le son» avec le volume maximal possible et souhaité - parlez ou chantez
aussi fort que vous pouvez devant le micro (assez proche !).
4.
Tout en écoutant la source sonore ou en chantant devant le micro, ajustez le niveau
d’entrée avec le potentiomètre de gain de façon à ce que le témoin d’écrêtage PEAK
LED ne s’allume pas pendant les passages les plus forts mais que le témoin de signal
SIGNAL LED s’allume en permanence.
Ceci correspond au réglage de base d’une voie, qui vous laisse 6 dB de réserve (headroom)
c’est-à-dire qu’il vous reste au moins une réserve de 6 dB avant qu’une distorsion du signal
n’intervienne. Si vous êtes amené ensuite à ajuster l’égalisation de cette voie, reprenez les
étapes 3 et 4 car les modifications apportées à ce niveau ont également une influence sur le
niveau général de la voie.
+20
4. SECTION EQ (Égaliseur)
La section d’égalisation de la console
permet d’appliquer des courbes d’EQ
très différentes aux différents signaux
audio entrants grâce à ses diverses
bandes de fréquences. Le fait de
tourner l’un des potentiomètres de gain
de l’égaliseur vers la droite accentue la
bande de fréquences correspondante
tandis que le mouvement inverse
atténue cette dernière. Avant de
commencer à modifier le son, tous
les potentiomètres de l’EQ doivent être placés en position «neutre» c’est-à-dire leur repère
vers le haut. Essayez de ne pas régler les contrôles d’EQ sur des positions «extrêmes» car
généralement des modifications mineures s’avèrent amplement suffisantes et produisent
les meilleurs résultats sur le son d’ensemble. Privilégiez le coté «naturel» du son et faites
confiance à vos oreilles. Un usage modéré du contrôle des médiums (MID) étant le meilleur
moyen d’éviter les accrochages, évitez donc les accentuations excessives dans cette bande
de fréquences. Atténuer plus ou moins le niveau dans cette bande permettra d’obtenir des taux
d’amplification supérieurs sans accrochage. Les contrôle des graves (LO) et des aigus (HI)
sont conçus pour travailler aussi efficacement sur les deux niveaux d’entrée, MIC et LINE.
La section d’égalisation des médiums (MID) est la plus efficace sur une large bande autour de
la fréquence centrale de 2,4 kHz. En fait, surtout lorsqu’il s’agit de microphones, cette bande
se révèle être un point sensible. Il vaut mieux donc, avec la plupart des microphones, réduire
légèrement le niveau de cette bande afin d’obtenir des résultats optimum.
+15
+10
+5
+0
-5
-10
-15
-20
20
50
100
200
500
1k
Hz
46
2k
5k
10k
20k
ENTRÉE MONO
5. FX (Effets)
Les contrôles FX permettent, pour chaque voie, de définir la quantité de signal à envoyer
aux processeurs d’effets intégrés FX1 ou FX2. Le trajet du signal passe après le fader de
volume (post-fader) de façon à ce que les réglages du fader influencent aussi la quantité
de signal envoyé aux processeurs d’effets. Pour déterminer l’intensité désirée pour chaque
effet, commencez par placer les contrôles en position centrale et ajustez à partir de cette
base. Vérifiez toujours les témoins d’écrêtage PEAK des voies FX1/2. Ils ne doivent
s’allumer que brièvement lors des passages les plus forts. Si ces indicateurs s’allument
en permanence, il est préférable de baisser les niveaux d’envoi des voies qui produisent
ces écrêtages. Pour plus d’informations, veuillez lire le paragraphe sur les processeurs FX
1/2.
6. AUX
Le contrôle AUX sert principalement à établir un mixage de monitoring (contrôle).
Le signal est prélevé avant le fader (PRE-FADER). Le mixage résultant, contrôlé via les
potentiomètres AUX et présent àa lasortie AUX, n‘est donc pas affecté par le réglage des
faders de voie. Il est recommandé de régler avec modération les potentiomètres AUX,
surtout avec les microphones, afin d‘éviter de produire des accrochages.
7. PAN
Ce contrôle détermine la position de la source sonore dans l‘image stéréo. Lorsque ce
potentiomètre est placé au centre, le signal audio est envoyé avec un niveau égal aux bus
principaux L et R (Gauche/Droite). La section de contrôle du panoramique est prévue pour
maintenir le même niveau de pression sonore, quelle que soit la position du contrôle PAN.
8. Indicateur SIGNAL/PEAK
L‘indicateur Signal/Peak joue un rôle-clé lors du réglage des niveaux d‘entrée. Contrairement
aux consoles de nombreuses autres marques qui ne proposent qu‘un indicateur de crêtes
voire pas d’indicateur du tout, le témoin PK (Peak) de la PowerMate offre une indication
visuelle du risque de saturation avant même que vous n’entendiez vraiment la distorsion
dans votre système d’amplification. Comme nous l’avons vu dans les instructions de réglage,
le témoin de signal doit idéalement clignoter «au rythme» du signal entrant. Si ce n’est pas
le cas, vous devez augmenter le gain correspondant. Cependant, si le témoin d’écrêtage
(PK) clignote fréquemment ou s’allume continuellement, c’est que la voie correspondante
est à la limite de la saturation et que vous devez tourner le contrôle de gain légèrement vers
la gauche. Le témoin de signal (SIG) s’allume à partir des niveaux de –30 dB en dessous de
l’écrêtage tandis que le témoin PK s’allume à un niveau de –6 dB avant l’apparition de toute
saturation. C’est une bonne habitude que de surveiller régulièrement cet indicateur durant
un spectacle car certains interprètes au jeu «musclé» ou certains changements de sons de
clavier peuvent facilement conduire à saturer une voie, dégradant ainsi le son général.
9. VOLUME
Les faders de voie règlent le volume des voies correspondantes permettant un mixage
parfaitement équilibré. Les faders de voie doivent idéalement être placés entre –5 dB et
0 dB, ce qui vous donne une marge de contrôle qui vous permet de faire correspondre
avec précision les différences relativement importantes des réglages de niveau des voies.
Ce sont les faders généraux (Master Faders) qui permettent de définir le volume général.
Même si les faders de voie permettent une amplification supplémentaire de +10 dB, nous
vous conseillons néanmoins de ne dépasser le repère +5 dB que dans des cas très
exceptionnels. Malgré leur conception spéciale, si les circuits généraux de la PowerMate
sont «saturés» par trop de voies d’entrée à fort niveau, l’amplificateur pourrait se retrouver
en surcharge. Si vous vous rendez compte que certains faders de voie sont placés audessus du repère 0 dB, la meilleure solution consiste à baisser le niveau de chacun d’eux
d’environ –5 dB puis d’augmenter le niveau de sortie général en remontant les faders
généraux. L’équilibre du mixage et le volume général resteront identiques tout en annulant
le risque d’écrêtage.
47
ENTRÉE STEREO
10. STEREO INPUT L/MONO R
Entrées symétriques pour la connexion d’instruments de musique à sortie stéréo comme
les claviers, les boites à rythmes, les guitares et basses électriques à sortie active ainsi que
toute autre source sonore équivalente à haut niveau de sortie comme les tables de mixage
additionnelles, les processeurs d’effets, les lecteurs CD etc.
L’entrée stéréo LINE accepte des sources symétriques ou asymétriques avec des niveaux
compris entre –20 dB et + 30 dB. Pour connecter vos appareils externes, vous pouvez
utiliser des fiches jack mono ou stéréo, câblées selon le schéma ci-dessous. Si l’appareil
externe dispose de sorties symétriques, l’utilisation de câbles et de fiches symétriques sera
préférable car ce type de liaison offre une meilleure isolation contre les bruits «parasites»
induits par les HF et contre les bruits externes.
Au cas où vous souhaiteriez connecter une source mono à une voie d’entrée stéréo,
insérez-la dans l’entrée L/MONO. Le circuit de la console répartira le signal sur les deux
canaux.
11. LINE TRIM
Ces contrôles permettent de faire correspondre les signaux d‘entrée ligne avec le niveau
opérationnel de la PowerMate. La marge totale d‘ajustement est de 30 dB. Le gain
unitaire – pas d’amplification (0 dB) - s’obtient sur le repère 0 dB. Ce contrôle permet une
atténuation de niveau de –10 dB et une amplification de +20 dB. Cette marge est suffisante
pour la plupart des appareils professionnels et semi-pro ainsi que les sources Hi-Fi. Pour
plus de détails sur la façon de régler le contrôle LINE TRIM, veuillez vous reporter à la
description du contrôle GAIN de la section mono.
Si vous utilisez un clavier comme source de signal et que vous l’avez connecté sur une
des entrées stéréo, assurez-vous que des zones de Split (séparation du clavie) ou des
couches (Layers) ne soient pas affectés à des sorties différentes. Cette répartition se
retrouverait sans cela traitée par la console comme définie dans le clavier - les sons de la
partie inférieure du clavier sur le canal gauche et ceux de la partie supérieure sur le canal
droit. Vous n’auriez plus la possibilité de replacer les sons dans l’image stéréo générale
en utilisant les commandes de la console. Il vaut mieux connecter le clavier ayant une
répartition pré-programmé de son clavier à deux voies d’entrée mono adjacentes puis de
répartir le son dans le mix général via les potentiomètres PAN.
12. SECTION DE CONTRÔLE DU SON (TONE)
La section de contrôle du son de la console permet de modeler le signal audio d’entrée
de façon complète et efficace grâce à diverses bandes de fréquence. Le fait de tourner
l’un des contrôles de niveau «EQ level» vvers la droite augmente la bande de fréquences
correspondante tandis que le mouvement inverse atténue cette dernière. Avant de
commencer à modifier le son, tous les potentiomètres de l’EQ doivent être placés sur leur
position neutre, c’est-à-dire avec leur repère vers le haut (position cranté). N’essayez pas de
régler les contrôles d’EQ sur des positions «extrêmes» car généralement, des modifications
mineures s’avèrent amplement suffisantes et produisent les meilleurs résultats sur le son
d’ensemble. Privilégiez le coté «naturel» du son et faites confiance à vos oreilles pour juger
de la qualité sonore.
48
ENTRÉE STEREO
13. FX
Ces contrôles déterminent la quantité de signal gauche/droite „cumulée“ qui sera
envoyée (Post-fader) au circuit FX. Pour plus de détails sur le fonctionnement de ces
contrôles, veuillez vous reporter à la section INPUT/MONO de ce mode d‘emploi.
14. AUX
Ces contrôles déterminent la quantité de signal gauche/droite „cumulée“ qui sera
envoyée au circuit AUX. Pour plus de détails sur le fonctionnement de ces contrôles,
veuillez vous reporter à la section INPUT/MONO de ce mode d‘emploi.
15. BAL
Le fonctionnement du potentiomètre BAL des voies stéréo est identique à la fonction PAN
des voies mono. Si vous le tournez complètement vers la droite, le signal du canal droit
(R) sera émis sur la sortie droite alors que le signal du canal gauche ne sera pas émis.
Lorsque le potentiomètre est placé au centre, les signaux gauche et droit seront émis aux
sorties correspondantes avec une égale intensité. Pour toute source stéréo connectée à
une entrée stéréo, laissez le contrôle BAL au centre puis effectuez seulement quelques
ajustements mineurs dans un sens ou dans l’autre. Si vous connectez un microphone ou
une autre source mono, la fonction du potentiomètre BAL sera absolument identique au
potentiomètre PAN d’une entrée mono.
16. SIGNAL/PEAK
L‘indicateur stéréo SIGNAL/PEAK offre une analyse indépendante des signaux audio des
canaux gauche et droit d’une voie. La lecture respective de leur plus haut niveau vous
indique si l’un d’eux provoque un écrêtage. Pour plus d’informations sur la façon d’utiliser
cet indicateur le plus efficacement, veuillez vous reporter au paragraphe équivalent dans
la partie INPUT/MONO.
17. VOLUME
Le fader de voie sert à ajuster simultanément les deux niveaux (G/D) du signal stéréo.
Le fonctionnement et les caractéristiques sont parfaitement similaires à celui du fader de
voie mono, déjà décrit dans INPUT/MONO.
49
FX1/FX2
FX1/FX2
La PowerMate offre deux processeurs d’effets stéréo 24 bits (FX1 et FX2)
de conception identique mais contrôlables de façon indépendante. Chaque
processeur dispose de 99 programmes que l’on sélectionne grâce aux
boutons UP/DOWN. Ces 99 présélections sont divisées en groupes, classés
selon leurs différentes structures d’effets, comme indiqué sur la liste fournie.
Les programmes de chaque groupe de présélections sont organisés par
ordre croissant c’est-à-dire que les plus grands chiffres correspondent au
même type d’effet mais avec une intensité accrue. Les présélections 1 à 20
offrent des programmes d’effet de réverbération de haute qualité, utilisables
indifféremment pour la scène, le studio ou le home-studio. Les programmes 21
à 40 proposent des effets mixtes de type écho/réverb ou chorus/réverb et les
programmes 41 à 60 offrent divers effets de retard (delays). Le dernier groupe
(61 à 99) est composé de différentes présélections d’effets de doublage,
flangers, chorus ainsi que de programmes spéciaux de delays et de réverb.
Lors de l’initialisation des processeurs d’effets FX1 et FX2 (à l’allumage de la
PowerMate), ceux-ci se voient respectivement assignés les présélections 05
(Large Hall 3 Bright) et 55 (Delay Mono 250ms). Ces deux effets «standard»
conviennent pour la scène comme pour le studio. Il s’agit d’une configuration
d’usine que vous pouvez modifier librement. Pour plus d’informations, veuillez
lire le paragraphe «Changer les effets de démarrage».
Ces deux programmes d’effets sont utilisables à la fois sur scène et en studio
et peuvent être utilisés séparément ou ensemble. Pour tester, évaluer et
sélectionner des programmes d’effets, veuillez également vous reporter à la
feuille d’information supplémentaire EFFECT PRESETS qui décrit précisément
toutes les présélections d’effets. Cette liste indique le nom de tous les
effets, leur structure, leur champ d’application et leurs caractéristiques en
fréquences. Prenez le temps d’essayer toutes ces présélections pour choisir
les plus adaptées à vos besoins spécifiques d’utilisation. Le programme n° 0
«Slap Back Echo» est plus un outil de test et de calibrage et n’apparaît donc
pas sur la liste située sous les écrans LCD des effets. La PowerMate vous
offre également une entrée FOOTSWITCH pour la connexion d’une pédaleinterrupteur afin de commander à distance la fonction EFFECT ON/OFF des
processeurs d’effets. Si votre pédale dispose d’un témoin lumineux, comme
par exemple la DYNACORD FS 11 optionnelle, il s’allumera lorsque l’effet sera
activé (EFFECT ON).
Changer les effets de démarrage
Par défaut, les processeurs d’effets proposent les programmes 5 et 55. Si
vous préférez d’autres programmes, vous pouvez en changer et enregistrer
les nouveaux réglages grâce au mode de programmation. Pour assigner de
nouveaux programmes de démarrage, procédez comme ceci :
1.
Appuyez simultanément sur les deux boutons DOWN de FX1 et FX2 et
allumez la PowerMate.
2.
„Progr“ s’affiche brièvement sur l’écran. Le mode de programmation est
maintenant actif. Un processus lié à l’informatique fait que le temps de
réaction de tous les boutons est légèrement plus lent que d’habitude.
3.
Relâchez les boutons DOWN et sélectionnez les effets de démarrage
souhaités.
4.
Appuyez simultanément sur les deux boutons UP pour enregistrer
les programmes d’effets affichés comme nouveaux programmes
de démarrage. Les processeurs d’effets valident la procédure de
sauvegarde en indiquant brièvement «Progr» sur l’écran.
FX1/FX2
1.......10
11.......20
21......30
31......40
41......50
51......60
61......99
REVERB
REVERB
ECHO
CHORUS
DELAY
DELAY
SPECIAL
HALLS
PLATES
REVERB
REVERB
STEREO
MONO
PROGRAMS
50
FX1/FX2
18. AFFICHEUR
L’afficheur indique toujours le numéro de programme actuellement sélectionné
pour chacun des processeurs d’effets. L’écran est recouvert d’une feuille de
protection pour éviter tout dommage lors du transport. Vous pouvez l’enlever.
19. UP/DOWN
Les boutons UP/DOWN permettent de sélectionner les présélections d’effets.
Pour faire avancer les numéros de programmes plus rapidement, maintenez
le bouton appuyé.
20. FX ON
Ce bouton met en marche le processeur d’effet correspondant et le témoin
vert s’allume. N’oubliez pas que vous pouvez aussi commuter un processeur
d’effet avec une pédale-footswitch externe. Dans ce cas, le témoin indique
également le statut ON/OFF du processeur. Si vous utilisez une pédale,
le bouton FX ON doit préalablement être appuyé. Le processeur d’effets
correspondant est activé et la pédale sert alors à activer/désactiver le
programme d’effet sélectionné.
21. TEMOIN PEAK
Ce témoin indique si les signaux des processeurs d’effets internes ou ceux du
départ d’AUX 1/2 (Send) sont à la limite de l’écrêtage. Pour obtenir un rapport
signal/bruit adéquat, ajustez le niveau d’entrée des processeurs d’effets
comme ceci :
Instructions de réglage :
1.
Faites un mixage „brut“ c‘est-à-dire sans effets, en tenant compte des
précédentes explications.
2.
Placez le fader de retour d’effet (Effet Return) de la voie d’effet
correspondante sur le repère –5 dB.
3.
Utilisez les boutons UP/DOWN pour choisir la présélection de
programme d’effet souhaitée.
4.
Appuyez sur le bouton FX ON.
5.
Commencez la reproduction de la source sonore connectée à la
voie d’entrée choisie et ajustez la quantité souhaitée de signal d’effet
grâce aux potentiomètres AUX/FX de cette même voie. Répétez cette
procédure pour toutes les voies d’entrée que vous voulez inclure dans
votre mixage d’effets.
6.
Vérifiez que le témoin Peak (PK) ne s’allume que sur les transitoires du
signal (les plus forts impacts sonores). Si l’écrêtage se produit, baissez
légèrement les potentiomètres AUX/FX des voies.
7.
Utilisez le potentiomètre FX to AUX pour ajouter le mixage d’effet au
mixage de monitoring/retours. Utilisez les faders de retour d’effets pour
ajouter la quantité d’effet souhaité au mixage principal.
Si vous utilisez un réglage d’effet différent avec le second processeur d’effets,
répétez les étapes 2 à 7. Restez attentif aux témoins d’écrêtage lorsque vous
utilisez votre PowerMate afin de pouvoir intervenir rapidement lorsque le
niveau du signal excède la valeur normale et provoque l’écrêtage.
22. EFFECT RETURN (RETOUR D’EFFET)
Ces faders stéréo servent à déterminer la quantité d’effet à ajouter au mixage
principal. Si vous êtes amené à placer ces faders au-dessus du repère +5 dB,
vérifiez si les signaux aux entrées des processeurs d’effets sont suffisamment
importants. Si ce n’est pas le cas, utilisez les contrôles AUX/FX SEND pour
augmenter les niveaux d’entrée.
51
AUX/MONO
Généralement la voie AUX est affectée au circuit des retours.
23. AUX SEND
Cette sortie permet de relier un amplificateur de puissance ou encore un système de
retours de scène amplifiés. Le fader AUX permet de régler le niveau de sortie avec
une grande marge et jusqu’à +20 dB. Les départs (send) d’AUX bénéficient de la
technologie «Ground Sensing» qui empêche tout parasitage de bruit externe, même
sur de longues distances de câbles.
24. FX1/2 to AUX
Ces potentiomètres permettent d’ajouter le signal de sortie des FX1 ou FX2 au circuit
de monitoring. Si vous utilisez le circuit AUX pour les retours, vous pouvez inclure les
signaux avec effets au niveau désiré dans le mixage des retours. L’expérience a prouvé
que le niveau d’un effet dans le mixage de monitoring/retour doit être plus faible que
dans le mixage principal car la distance entre les retours de scène et les artistes est
moins importante.
25. AUX VOLUME
Ce fader contrôle le signal audio global à la sortie AUX SEND. Lorsqu‘il sert au
monitoring, ce fader permet de contrôler le volume général des haut-parleurs du
système de monitoring.
26. MONO OUTPUT
Sortie monophonique regroupant les signaux principaux gauche/droite „post-fader“,
pouvant servir à la connexion de retours supplémentaires, d‘autres systèmes de
sonorisation, latéraux, annexes ou mono, ou encore pour installer une ligne à retard.
ATTENTION :
Le signal restitué est affecté par le réglage du fader MONO OUT ainsi que par celui
des faders MASTER. Si vous préférez contrôler le signal de la SORTIE MONO
indépendamment du réglage des faders MASTER, il vous suffira de procéder à
quelques modifications internes mineures. Veuillez vous adresser à votre revendeur qui
vous fournira une assistance technique.
27. STANDBY
Appuyer sur le bouton STANDBY coupe toutes les sorties auxquelles des amplificateurs
pourraient être connectés. Comme le flux du signal entre l‘étage de mixage et les
sorties générales (MAIN OUTPUTS) est interrompu, le signal arrivant à l‘amplificateur
de puissance interne est aussi interrompu. Le témoin STANDBY s‘allume pour indiquer
que le mode Standby est engagé et que les signaux des voies d‘entrée ne passent plus
par les haut-parleurs. Toutefois, les signaux audio connectés via 2Track Return sont
toujours restitués en sortie, ce qui vous offre une solution très pratique pour diffuser une
musique d‘ambiance pendant les pauses du spectacle.
28. MONO OUT VOLUME
Ce fader contrôle le niveau de sortie du signal général L/R cumulé sur la sortie MONO
OUTPUT. Le niveau de sortie est également influencé par le réglage des faders
MASTER.
52
EFFECT 1/2
29. PHONES (Sortie casques)
Embase jack stéréo pour la connexion de casques dont l’impédance est comprise entre
32 et 600 ohms, vous permettant d’écouter le signal général PFL.
30. PHONES
Ce potentiomètre règle le volume de la sortie casques.
ATTENTION: Veuillez à baisser complètement ce contrôle avant de connecter un
casque.
31. RECORD SEND L/R
Ces connecteurs de type RCA (cinch) véhiculent le signal principal G/D (pre-fader).
Ce signal n’est pas affecté par le réglage des faders principaux, ce qui le destine
principalement à des enregistrements sur des magnétophones à cassette, à bandes ou
DAT. Le niveau de sortie nominal de –10 dBV est conforme au standard de l’industrie
professionnelle audio ainsi qu’à la plupart des applications de home-studio. Cependant,
vous devrez utiliser le contrôle du gain d’entrée de votre appareil d’enregistrement, s’il
en dispose. ATTENTION : Sur la plupart des magnétophones, le signal d’entrée est
directement renvoyé aux sorties. Si vous avez à la fois connecté la sortie RECORD
SEND et l’entrée 2TRACK RETURNS et que le potentiomètre 2TRACK to MASTER
de la PowerMate est poussé (même peu !), le signal qui s’enregistre sera réintroduit
dans le mixage principal. Le délai entre les deux signaux induit par ce processus sera
responsable de certaines annulations de fréquences et d’une dégradation générale du
son. Dans le pire des cas, le fait d’activer l’enregistrement sur le magnétophone peut
engendrer un accrochage extrêmement déplaisant. Pour éviter ce problème, veillez à
baisser entièrement les potentiomètres 2TRACK to MASTER et 2TRACK to AUX.
32. 2TRACK RETURN L/R (Retour 2 Pistes)
Prises pour la connexion des sorties d’un lecteur K7, CD, un magnétophone à bandes
ou un pré mixage externe. Le signal est envoyé après le fader principal et le bouton
STANDBY, ce qui permet de diffuser de la musique d’ambiance aux entractes ou de
vérifier un mixage au casque pendant les répétitions. Vous devez simplement appuyer
sur le bouton STANDY pour couper les signaux de toutes les voies sur les sorties
principales et le circuit de retour.
33. 2TRACK RETURN
Ce potentiomètre sert à mélanger le signal 2TRACK au mixage principal en mode
post-fader des contrôles principaux. ATTENTION : Lorsque vous ajustez le niveau de
l’appareil connecté à l’entrée 2TRACK RETURNS (Lecteur CD, K7 etc.), commencez
toujours par placer ce potentiomètre sur sa position minimale. Sans cela et selon le
niveau de sortie de l’appareil connecté, le volume émis pourrait être assourdissant.
34. 2TRACK to AUX
Les signal G/D provenant de l’entrée 2TRACK RETURN est cumulé et peut être ajouté
au circuit de monitoring/retours via le potentiomètre AUX. Le cumul du signal est effectué
avant le potentiomètre 2TRACK to MASTER, c’est-à-dire que le signal arrive à la sortie
AUX sans être influencé par le réglage du potentiomètre 2TRACK to MASTER
35. MAIN OUTPUTS (Sorties générales)
Le signal des sorties générales est placé après les faders principaux et après l‘égaliseur
7 bandes stéréo. Il est principalement utilisé pour alimenter des amplificateurs de
puissance externes supplémentaires. Grâce à ses sorties, il est possible d’obtenir
un système actif «deux voies». Dans ce cas, les filtres crossover actifs – en fait
les caissons de basse actifs – devront être connectés aux sorties générales MAIN
OUTPUTS. Si vous souhaitez utiliser l’amplificateur de puissance interne pour alimenter
les haut-parleurs des aigus, le signal des fréquences hautes venant du filtre crossover
doit être réinjecté dans la PowerMate via les connecteurs POWER AMP IN.
36. POWER AMP INPUTS (Entrées Amplificateur)
Ces entrées sont fournies sur des prises jack à coupure symétrisées électroniquement.
Lorsque vous insérez un jack, le parcours du signal est réparti entre la section générale
Master et l’amplificateur interne, ce qui revient à pouvoir utiliser l’amplificateur de la
PowerMate via les entrées POWER AMP INPUTS.
37. FX1/2 FOOTSWITCH
Prise pour le branchement d‘une pédale DYNACORD FS11, permettant d‘activer ou non
les unités d‘effets internes. Pour que cela fonctionne, il faut que les sélecteurs FX1 et FX2
soient engagés.
53
MASTER
38. TÉMOINS INDICATEURS D‘ÉTAT
Ils vous informent de l‘état de fonctionnement actuel de
l‘amplificateur de puissance interne de la PowerMate.
Le témoin PROTECT s‘allume si un des nombreux
circuits de protection contre la surchauffe, l‘induction HF,
la présence de composantes DC en sortie et le système
de protection SOAR, s’est activé. Lorsque la PowerMate
est en mode Protect, les sortie HP sont coupées et les
entrées de l’amplificateur sont court-circuitées pour
éviter tout dommage à l’ampli de puissance. Dans ce
cas vous devez d’abord vérifier si les ouies de ventilation
situées à l’avant ne sont pas obstruées. Une autre cause
peut être la connexion de plus de trois systèmes de
haut-parleurs 8 ohms par sortie de puissance. Veuillez
aussi débrancher les connecteurs SPEAKON et vérifier
qu’il n’y a pas de court-circuit dans un câble de hautparleur. Pendant la phase de mise sous tension le témoin
PROTECT s’allume toujours pendant deux secondes et
les ventilateurs internes tournent à plein régime, pour
signaler que les circuits de protection de la PowerMate
sont opérationnels.
Le témoin LIMIT signale que la PowerMate fonctionne à
la limite des possibilités de l’amplificateur de puissance
interne. Un clignotement fréquent de cette LED est
acceptable, puisque le limiteur intégré à l’amplificateur
évite toute distorsion. S’il reste allumé en continu,
il indique que vous devez veiller à une éventuelle
dégradation du signal ; dans ce cas il vous faudra réduire
le volume général.
Le témoin POWER ON est toujours allumé lorsque la
PowerMate est opérationnelle. Si cette LED ne s’allume
pas à la mise sous tension, il faut vérifier que le cordon
secteur de PowerMate est correctement branché. Si
c’est le cas et que ce témoin reste malgré tout éteint,
veuillez contacter votre revendeur.
39. ÉGALISEUR GRAPHIQUE STÉRÉO 7 BANDES
L‘égaliseur graphique stéréo 7 bandes intégré à la
PM600 se trouve dans la section générale MASTER
L/R. Les sept bandes de fréquence offrent chacune
une atténuation/accentuation de ±10 dB et permettent
un remodelage du son général afin qu‘il convienne à
vos préférences personnelles ou qu‘il soit adapté aux
conditions acoustiques des différents lieux.
+20
+15
+10
+5
+0
-5
-10
-15
-20
20
50
100
200
500
1k
Hz
54
2k
5k
10k
20k
MASTER
Les bandes de fréquences ainsi que les caractéristiques
des faders d‘EQ sont très orientés „pratique“. Si vous
désirez obtenir un son clair et très intelligible, ce qui
donnera également des cymbales plus précises, vous
devez pousser légèrement le niveau des bandes 6 kHz ou
12 kHz. Si les medium sont nasillards vous devez atténuer
les fréquences moyennes de quelques décibels. Pour
donner plus punch au pied de grosse caisse, il vous faudra
accentuer les basses à l‘aide des faders 63 Hz ou 125 Hz.
Au contraire, si le son dans sa globalité vous paraît mal
défini avec trop de basses, réduire le niveau de ces deux
bandes de fréquences résoudra le problème.
Toutefois, surtout avec l‘égalisation, il faut se souvenir que
dans la plupart des cas, moins vous ferez de réglages
drastiques mieux ce sera. Ainsi, votre première démarche
doit être d‘établir le mixage en utilisant uniquement les
contrôles des voies d‘entrée et essayer d‘obtenir un résultat
satisfaisantsans faire intervenir l‘EQ graphique.
40. ÉCHELLE DE LED MASTER
La PowerMate est équipée de deux échelles de LED 8
segments pour la surveillance visuelle des niveaux de
sortie des signaux généraux gauche (L) et droit (R). La
course de ce vu-mètre est de 33 dB, indiquant en dBu
les niveaux qui sont présents, respectivement, à la sortie
générale et à l‘entrée POWER AMP INPUT. Le repère 0 dB
fait référence à un signal de 0 dB à la sortie de la console.
Augmenter davantage le niveau conduit à un niveau de
sortie maximum de l‘amplificateur de puissance de +6dB,
équivalent à une puissance de sortie de 300 watts sous
4 ohms, par canal. Bien que des niveaux plus élevés soient
affichés, le processeur de l‘ampli de puissance a déjà
limité le signal, ce qui est indiqué par le témoin LIMIT qui
s‘allume.
41. MASTER L+R
Contrôles de niveau permettant de régler les signaux de la
sortie générale, gauche et droite (MASTER).
REMARQUE : Veuillez régler les faders de voies
d‘entrée ou au moins les faders généraux en position
minimum, ou engager l‘interrupteur STANDBY, avant
de brancher une source sonore externe sur l‘une des
entrées de la PowerMate. Vous vous éviterez, ainsi qu‘à
l‘auditoire et au matériel un stress inutile.
55
PANNEAU ARRIÈRE
SPEAKER OUTPUTS RIGHT/LEFT (Sorties HP gauche/
droite)
La PowerMate 600 est équipée de connecteurs
professionnels SPEAKON hautes performances, offrant une
connexion électrique et mécanique sécurisée, satisfaisant
à toutes les normes de sécurité et autorisant l’usage de
câbles de haut-parleur de qualité, ayant un diamètre de
4 x 2,5 mm2.
L’assortiment des accessoires DYNACORD inclut tous les
câbles et connecteurs recommandés.
POWER
Interrupteur secteur pour la mise sous/hors tension de la
PowerMate.
La PowerMate est opérationnelle lorsque le témoin à LED
POWER ON s‘allume et que les sorties de puissance sont
activées.
Veuillez vous assurer que les faders généraux sont en
position minimum ou engager le switch STANDBY avant
de procéder à la mise sous tension. Ceci vous évitera,
ainsi qu‘à l‘auditoire et aux appareils de subir un stress
inutile.
Si d‘autres appareils sont connectés à la PowerMate,
par ex. amplis de puissances, unités d‘effets, égaliseurs,
etc., veuillez respecter l‘ordre suivant lors de leur mise
sous tension :
1.
Allumez d’abord les unités d’effets
2.
Allumez la PowerMate
3.
Puis allumez les amplis de puissance externes.
Pour la mise hors tension, procédez dans l’ordre
inverse.
56
INSTALLATION D‘UN SYSTÈME DE SONORISATION STANDARD
Câblage
Un cordon secteur est fourni avec la PowerMate. La qualité de tous les autres câbles est sous votre responsabilité.
Des câbles de bonne qualité choisis avec soin sont la meilleure des précautions contre de futurs problèmes
survenant dans des situations Live. Les choix de câblage suivants sont recommandés pour avoir un fonctionnement
sans problème de tout votre système.
Câbles de haut-parleur
Partant de notre expérience de fabricant de haut-parleurs, nous savons que des câbles flexibles gainés de
caoutchouc et d‘un diamètre de 2,5 mm2 par conducteur, associés à des prises et embases SPEAKON sont
le meilleur choix pour garantir un branchement optimal des haut-parleurs. Connectez les prises SPEAKON en
respectant le schéma correspondant figurant sur le panneau arrière de la PowerMate. Nous recommandons
l’usage de câbles à 4 brins où les broches 2+ et 2– sont aussi connectées. Ceci donne la possibilité d’utiliser
également ces câbles dans une configuration active à deux voies. L’assortiment des accessoires DYNACORD
comprend différents câbles de haut-parleurs munis de connecteurs SPEAKON et tous les autres câbles, prises et
embases sont disponibles auprès de votre revendeur local de matériel audio professionnel.
Câbles basse fréquence – Symétrisés ou non symétrisés ?
Pour le câblage basse fréquence (audio), il faut mieux choisir des câbles symétrisés (2 conducteurs de signal
+ tresse de masse) munis de connecteurs de type XLR ou jack stéréo. Ces câbles doivent être protégés des
lieux de passages, blindés et jamais plus longs que nécessaire. Trop de câbles trop longs conduit à la confusion
et génère des problèmes inutiles. Il est bien sûr possible d‘utiliser des câbles non symétriques munis de prise
mono pour connecter les entrées et sorties de la PowerMate et dans la plupart des cas aucune interférence ne
se produira grâce à son superbe système de gestion de la masse. En général, si vous avez le choix, des câbles
audio symétrisés sont toujours la meilleure solution. Les équipements audio modernes d‘aujourd‘hui, tels que les
amplificateurs, égaliseurs, unités d‘effets, consoles de mixage et même certains claviers, disposent d‘entrées et de
sorties symétrisées. Dans un parcours du signal symétrisé, le blindage du câble fournit une connexion sans faille de
toutes les parties métalliques, offrant ainsi une protection efficace contre l‘induction de bruits externes. Un câblage
symétrisé associé au facteur de différence (CMR, Common-mode Rejection) de l‘étage d‘entrée de la PowerMate
éliminent efficacement toute interférence indésirable. Toutes les entrées de la PowerMate disposent de connexions
audio symétrisées et du facteur de différence. Les sorties de l‘étage de mixage – AUX, MAIN etc. – bénéficient
de la technologie GROUND-SENSING, un brochage spécial des jacks de sortie offrant tous les avantages de la
transmission de signal symétrisée, mais permettant de connecter des prises mono sans aucun problème. Quoiqu’il
en soit, comme mentionné ci-dessus, si des câbles assez longs doivent être employés, l’usage de jacks stéréo et
de câbles symétrisés est la meilleure solution. Les schémas ci-dessous montrent le brochage des prises et des
câbles utilisés avec la PowerMate.
Branchement de
microphones en
symétrique
ENTREE
MICRO
Appareil externe
asymétrique/
symétrique équipé
de connecteurs
XLR
Toutes entrées/
sorties sur jack de
la PowerMate
Appareil externe
asymétrique/
symétrique équipé
de connecteurs
jacks
Toutes entrées/
sorties sur jack de
la PowerMate
57
INSTALLATION D‘UN SYSTÈME DE SONORISATION STANDARD
Dans ce qui suit, nous allons expliquer comment installer un système de sonorisation typique dans une configuration
passive. Les équipements nécessaires sont les suivants :`
1
1
2
2
2
2
4
1
PowerMate 1000
amplificateur de puissance, par ex. 2x250 watts
enceintes d’aigus, par ex. HP 12» 3 voies
enceintes basses, par ex. woofer 15»
pieds pour haut-parleur ou deux tringles de montage
moniteurs de scène
câbles SPEAKON de 8 m, deux câbles SPEAKON de 2 m
câble audio avec jack stéréo d’un côté et connecteur XLR de l’autre
Installation
•
•
•
•
•
•
•
Placez la PowerMate et l’amplificateur de puissance externe de manière à pouvoir les faire fonctionner sans
gêne et branchez le cordon secteur.
Essayez de repérer le meilleur endroit pour placer les haut-parleurs. Si possible, placez les woofers sur le
sol et les enceintes aiguës sur les enceintes basses, sur le même axe vertical. Il est important que le bas
des enceintes aiguës soit approximativement à la hauteur ou légèrement au-dessus des têtes de l’auditoire.
Vous pouvez soit utiliser les tringles de montage pour fixer les enceintes aiguës sur les woofers, soit, si ce
n’est pas possible, ou si vous n’utilisez pas de woofer, utiliser des pieds de haut-parleurs séparés.
N’éloignez pas les haut-parleurs gauche et droit plus que nécessaire. Plus la distance est réduite entre deux
ensembles de haut-parleurs, plus le son sera compact.
Établissez les branchements selon le schéma ci-dessus. Utilisez les différents câbles SPEAKON pour
connecter les woofers et les enceintes moniteur haut-parleurs aux sorties de puissance de la PowerMate
ou à celle de l’amplificateur de puissance externe. Veillez à ne pas confondre les canaux. Utilisez les câbles
SPEAKON courts pour connecter en parralèle les enceintes aiguës et basses (branchement en parallèle).
Les deux moniteurs seront connectés aux sorties de l’ampli de puissance de monitoring. Réglez les entrées
de l’amplificateur sur un fonctionnement en parallèle ou monaural. Les contrôles de volume de l’amplificateur
offent la possibilité de régler les niveaux de sortie indépendamment.
Essayez d’éviter de placer les haut-parleurs principaux derrière la ligne imaginaire des microphones. Sinon
vous risquez d’avoir des phénomènes d’accrochage si vous devez monter le volume un peu plus fort.
Après avoir installé tous les pieds de microphones et que tous les artistes ont trouvé leur place, le meilleur
endroit pour placer les moniteurs (bains de pieds) est face aux musiciens et aux chanteurs. Quoiqu’il en soit,
vérifiez qu’aucun microphone ne pointe directement vers un moniteur. Si c’est le cas, changer sa position.
Vous devez aussi faire attention aux caractéristiques de chaque microphone employé.
Connectez la sortie AUX de la PowerMate à l’entrée de l’amplificateur de monitoring à l’aide d’un câble audio
muni d’un jack stéréo d’un côté et connecteur XLR de l’autre.
58
INSTALLATION D‘UN SYSTÈME DE SONORISATION STANDARD
•
•
•
•
Connectez tous les microphones de préférence aux entrées mono de la PowerMate et les claviers et autres
sources sonores du même type sur le reste des entrées disponibles.
Baissez tous les faders au minimum et engagez le bouton STANDBY de la PowerMate pour éviter tout
accrochage intempestif.
Mettez d’abord sous tension la PowerMate puis l’amplificateur de puissance externe.
Puis, enclenchez le fonctionnement de la PowerMate en pressant à nouveau le bouton STANDBY.
If necessary, repeat steps 1 - 5 for the second internal FX unit (FX2).
Sound Check
•
Tout d’abord réglez les niveaux d’entrée des microphones qui sont connectés aux entrées mono de la
PowerMate. Procédez comme ceci :
1. Réglez les contrôles de Gain et les faders de voie correspondants en position minimum.
2. Parlez ou chantez aussi fort que possible dans le microphone.
3. Utilisez les contrôles de Gain pour régler le niveau, afin que même lors des passages les plus forts, la
LED rouge PEAK ne s’allume pas, mais que la LED verte SIGNAL s’allume constamment.
•
Si vous utilisez aussi des voies d’entrée stéréo, vous pouvez régler leur niveau de façon similaire :
1. Réglez les contrôles LINE TRIM et le fader de voie en position minimum.
2. Jouez sur la source sonore correspondante au plus fort volume pouvant se produire durant le
spectacle.
3. Utilisez le contrôle LINE TRIM pour réglez le niveau, afin que même lors des passages le plus forts, la
LED rouge PEAK ne s’allume pas, mais que la LED verte SIGNAL s’allume constamment.
•
ou réglez l’égalisation des voies d’entrée stéréo :
1. Poussez un peu le fader de voie et les faders généraux afin d’entendre le son provenant des hautparleurs principaux.
2. Mettez les contrôles EQ en position centrale.
3. Jouez sur la source sonore correspondante.
4. En commençant par leur position centrale, régler les contrôles EQ jusqu’à ce que le son vous convienne.
N’oubliez pas que des altérations profondes du réglage d’EQ n’améliorent pas forcément le son dans sa
globalité. Surtout lorsqu’il s’agit de remodeler le son, le mieux est souvent l’ennemi du bien.
5. Répétez les étapes 2 à 4 pour toutes les voies d’entrée stéréo utilisées.
•
Si des instruments de musique sont connectés directement aux entrées mono, suivez les instructions cidessus, décrivant le réglage des microphones.
Vérifiez que tous les faders de voies, les contrôles de gain et LINE TRIM des voies d’entrée non utilisées
sont réglés à leur minimum. Vous éviterez ainsi tout bruit de fond indésirable.
•
MIXAGE PRINCIPAL
•
•
•
•
Réalisez un mixage de base, en utilisant seulement les faders de voie, afin que les niveaux sonores soient
équilibrés selon vos goûts personnels.
La meilleure fourchette de réglage des faders de voie se situe dans la zone –5dB à 0dB. Vous vous réservez
ainsi suffisamment de marge pour les réglages ultérieurs.
Utilisez les faders Master pour régler le volume général de l’ensemble du système de son.
Si vous utilisez les unités d’effet, veuillez procéder comme ceci :
1. Réglez le fader de retour FX1 sur le repère –5dB.
2. Utilisez les boutons UP/DOWN pour choisir le préréglage d’effet désiré.
3. Pressez le bouton FX ON.
4. Faites jouer la source sonore connectée à la voie d’entrée choisie et ajustez la quantité souhaitée de
signal d’effet grâce aux potentiomètres FX de cette même voie. Répétez cette procédure pour toutes
les voies d’entrée que vous voulez inclure dans votre mixage d’effets.
5. Vérifiez que le témoin Peak (PK) ne s’allume que sur les transitoires du signal (les plus forts impacts
sonores).
59
INSTALLATION D‘UN SYSTÈME DE SONORISATION STANDARD
MIXAGE DU CIRCUIT MONITEUR
•
Baissez le fader AUX situé dans la section générale.
•
Réglez les faders AUX de toutes les voies d’entrée utilisées en position centrale.
•
Poussez le fader AUX autant que possible. Vous aurrez ainsi suffisamment de réserve avant que ne se
produise un accrochage pendant le spectacle, même si certains microphones sont placés dans des positions
désavantageuses.
•
Utilisez les contrôles FX to AUX pour ajouter le mixage des effets au mixage monitor, sans influencer le
mixage principal. Normalement, le mixage monitor nécessite moins d’effets que le mixage principal.
Laissez les artistes jouez quelques morceaux et vérifiez le son du système à différents angles et à différentes
distances. Si vous arrivez à la conclusion que quelques corrections de l’image sonore générale sont nécessaires,
activez l’égaliseur 7 bandes et adapter le son pour qu’il vous convienne. En faisant cela, n’oubliez pas que pendant
le spectacle le son sera modifié par la présence des spectateurs, ce qui a un effet majeur sur les caractéristiques
acoustiques du lieu, l’intensité des réflexions primaires et l’absorption des fréquences basses. Si possible, vérifiez
le son pendant le début du spectacle et, si nécessaire, adaptez-le aux nouvelles conditions.
Et pour le reste, nous vous souhaitons beaucoup de plaisir et de succès avec votre nouvelle console PowerMate.
60
SPECIFICATIONS
Technical Specifications PowerMate600 Mixing desk in rated condition, Unity Gain (MIC Gain 20 dB), all faders
position 0 dB,
all pots in mid position, master fader + 6dB, amplifier rated output power into 8 Ohms, dual channel, unless
otherwise specified.
Maximum Midband Output Power, 1 kHz, THD=1%, Dual Channel
into 4 Ohms
into 8 Ohms
Rated Output Power, THD=0.1%, Single Channel
into 4 Ohms
into 8 Ohms
Maximum Midband Output Power, 1 kHz, THD=1%, Single Channel
into 4 Ohms
into 8 Ohms
Maximum Output Voltage of power amplifier, no load
THD at 1kHz, MBW=80kHz
MIC input to Main L/R output, +16 dBu, typical
Power amplifier input to Speaker L/R output
DIM 30, power amplifier
IMD-SMPTE, power amplifier, 60Hz, 7 kHz
Frequency Response, -3dB ref. 1kHz
Any input to any Mixer output
Any input to Speaker L/R output
Crosstalk, 1kHz
Fader and AUX-Send attenuation
Channel to channel
CMRR, MIC input, 1kHz
Input Sensitivity, all level controls in max. position
MIC input
LINE Input (Mono)
LINE Input (Stereo)
Power Amplifier Input
Maximum Level, mixing desk
MIC inputs
Mono Line inputs
Stereo Line inputs
All other inputs
Record Send output
All other outputs
Input Impedances
MIC
Insert Return
EQ Input and 2 Track Return
All other inputs
Output Impedances
Record Send
Phones
All other outputs
Equivalent Input Noise, MIC Input, A-weighted, 150 Ohms
Noise, Channel inputs to Main L/R outputs, A-weighted
Master fader down
Master fader 0 dB, Channel fader down
Master fader 0 dB, Channel fader 0 dB, Channel gain unity
Signal/Noise-Ratio, power amplifier, A-weighted
Equalization
LO Shelving
MID Peaking, mono inputs
MID Peaking, stereo inputs
HI Shelving
Master EQ, 2x7-band, 63, 125, 400, 1k, 2k5, 6k, 12k Hz
Power Consumption at 1/8 maximum output power, 4 Ohms
Dimensions, (WxHxD), mm
Weight, without lid
Optional
RMK-600 (Rack-Mount-Kit PowerMate600)
Gooseneck Lamp, 12V/2.4W, 12“, XLR
FS11 (Footswitch)
61
2 x 270 W
2 x 180 W
2 x 300 W
2 x 150 W
2 x 340 W
2 x 200 W
43 Vrms
< 0.006%
< 0.08%
< 0.03%
< 0.2%
15Hz ... 60kHz
30Hz ... 40kHz
> 80 dB
> 70 dB
> 80 dB
-74 dBu (155 μV)
-54 dBu (1.55 mV)
-34 dBu (15.5 mV)
+6 dBu (1.55 V)
+ 11 dBu
+ 30 dBu
+ 20 dBu
+ 20 dBu
+ 14 dBu
+ 20 dBu
1.8 kOhms
10 kOhms
15 kOhms
> 15 kOhms
1 kOhm
47 Ohms
75 Ohms
-130 dBu
-90 dBu
-89 dBu
-83 dBu
105 dB
± 15 dB / 60 Hz
± 15 dB / 2.4 kHz
± 15 dB / 2.4 kHz
± 15 dB / 12 kHz
± 10 dB
450 W
461.5 x 176.5 x 366.5
13kg
112 741
112 700
110 693
BLOCK DIAGRAM
62
DIMENSIONS
63
Bosch Communications Systems
Americas–Headquarter Americas
Telex Communications, Inc.
12000 Portland Ave South,
Burnsville, MN 55337, USA
USA–Ph: 1-800-392-3497
Fax: 1-800-955-6831
Canada–Ph: 1-866-505-5551
Fax: 1-866-336-8467
Latin America–Ph: 1-952-887-5532
Fax: 1-952-736-4212
Europe, Africa & Middle-East
Headquarter EAME
EVI Audio GmbH
Hirschberger Ring 45, D-94315,
Straubing, Germany
Phone: +49 9421 706-0,
Fax: +49 9421 706-265
Asia & Pacific Rim–Headquarter Asia
Singapore: Telex Communications (SEA) Pte Ltd
38C Jalan Pemimpin
Singapore 577180
Tel: (65) 6319 0621
Fax: (65) 6319 0620
Japan: EVI Audio Japan Ltd.
5-3-8 Funabashi, Setagaya-Ku,
Tokyo, Japan 156-0055
Phone: +81 3-5316-5020,
Fax: +81 3-5316-5031
Hong Kong: Telex EVI Audio (HK) Ltd.
Unit 5,1/F, Topsail Plaza
11 On Shum Street
Shek Mun,Shatin HK
Phone: +852 2351-3628,
Fax: +852 2351-3329
Bosch Communications Systems
Telex EVI Audio (Shanghai)Co., Ltd.
Room 3105-3109, No.1 Building, No. 218, Tian Mu West Road.
Shanghai, China.
Postal Code: 200070
Tel: 86 21-63172155
Fax: 86 21-63173023
EVI AUDIO GmbH
www.eviaudio.de
Subject to change without prior notice.
Printed in Germany
10 /09 /2007 / D 363657