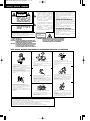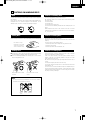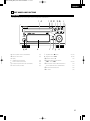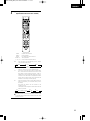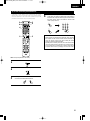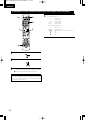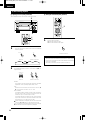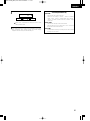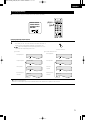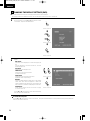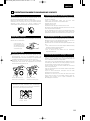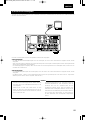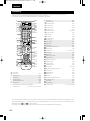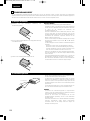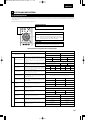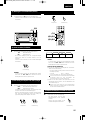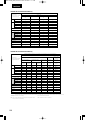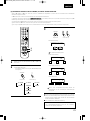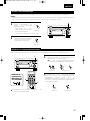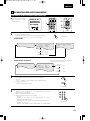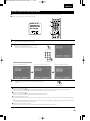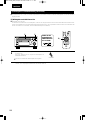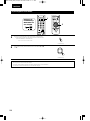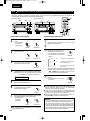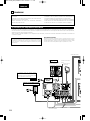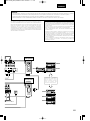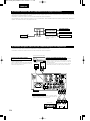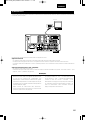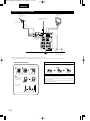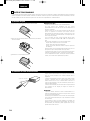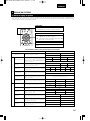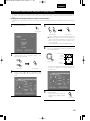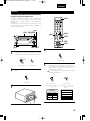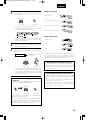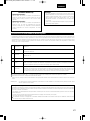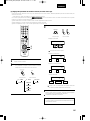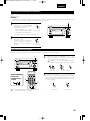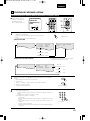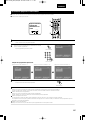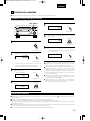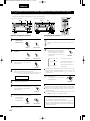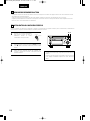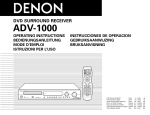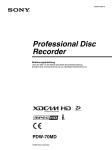
1
1ADV-M71E2_ENG p1-60 03.12.25 1:05 PM ページ 1 DVD SURROUND RECEIVER ADV-M71 OPERATING INSTRUCTIONS BEDIENUNGSANLEITUNG MODE D’EMPLOI OFF SLEEP ON VCR REC NTSC/PAL TITLE TV IN T V ENTER A-B REPEAT CHARAC. SLIDE MODE EDIT/MENU ZOOM SOURCE CLEAR TV CH RDS PROG/DIRECT PTY REPEAT MODE 5 6 + - AUTO DECODE TUNER 8 9 2 7 DIRECT SURROUND / SELECT D.AUX 3 TAPE /LINE-2 4 DVD SURROUND RECEIVER ADV-M71 TUNING / TV VOL 5CH STEREO 1 B + BAND TUNER MD/LINE-1 TV CH CT CD SRS RT RANDOM SEARCH MODE MEMO DVD TIME - STEREO + CH VIRTUAL CALL 0/10 +10 - TEST TONE INPUT MODE SURROUND FUNCTION PUSH - PARAM. TUNER TV / VCR DVD IN/SURR. A/V SYSTEM IN/SURR. MD CDR TAPE - + BAND MENU / SET TONE / SDB 1 2 + DVD 8 9 VOLUME 6 - 7 FUNCTION STATUS 3 MUTING ON / STANDBY PHONES SETUP TONE /SDB ENTER SURROUND PARAMETER CH SELECT DISPLAY RETURN ANGLE MENU AUDIO VCR CH + TOP MENU SUB TITLE RC-966 FOR ENGLISH READERS PAGE 3 ~ PAGE 115 2 We greatly appreciate your purchase of this unit. 2 To be sure you take maximum advantage of all the features this unit has to offer, read these instructions carefully and use the set properly. Be sure to keep this manual for future reference should any questions or problems arise. “SERIAL NO. PLEASE RECORD UNIT SERIAL NUMBER ATTACHED TO THE REAR OF THE CABINET FOR FUTURE REFERENCE” FÜR DEUTSCHE LESER SEITE 116 ~ SEITE 227 2 Wir danken Ihnen dafür, dass Sie sich für den Kauf dieses Gerätes entschieden haben. 2 Lesen Sie diese Anleitung sorgfältig durch, damit sichergestellt werden kann, dass Sie sämtliche Funktionen ausnutzen, die dieses Gerät zu bieten hat, und damit Sie das Gerät ordnungsgemäß verwenden. Stellen Sie sicher, dass Sie dieses Handbuch für ein zukünftiges Nachschlagen aufbewahren, falls Sie irgendwelche Fragen oder Probleme habe sollten. “SERIAL NO. PLEASE RECORD UNIT SERIAL NUMBER ATTACHED TO THE REAR OF THE CABINET FOR FUTURE REFERENCE” POUR LES LECTEURS FRANCAIS PAGE 228 ~ PAGE 339 2 Nous vous remercions pour l’achat de cet appareil. 2 Pour être sûr de profiter au maximum de toutes les caractéristiques qu’offre cet appareil, lire avec soin ces instructions et bien utiliser l’appareil. Toujours conserver ce mode d’emploi pour s’y référer ultérieurement en cas de question ou de problème. “NO. DE SERIE PRIERE DE NOTER LE NUMERO DE SERIE DE L’APPAREIL INSCRIT A L’ARRIERE DU COFFRET DE FAÇON A POUVOIR LE CONSULTER EN CAS DE PROBLEME.” 1ADV-M71E2_ENG p1-60 03.12.25 1:05 PM ページ 2 ENGLISH DEUTSCH FRANCAIS The lightning flash with arrowhead symbol, within an equilateral triangle, is intended to alert the user to the presence of uninsulated “dangerous voltage” within the product’s enclosure that may be of sufficient magnitude to constitute a risk of electric shock to persons. CAUTION RISK OF ELECTRIC SHOCK DO NOT OPEN CAUTION: TO REDUCE THE RISK OF ELECTRIC SHOCK, DO NOT REMOVE COVER (OR BACK). NO USER SERVICEABLE PARTS INSIDE. REFER SERVICING TO QUALIFIED SERVICE PERSONNEL. The exclamation point within an equilateral triangle is intended to alert the user to the presence of important operating and maintenance (servicing) instructions in the literature accompanying the appliance. WARNING: TO PREVENT FIRE OR SHOCK HAZARD, DO NOT EXPOSE THIS APPLIANCE TO RAIN OR MOISTURE. ATTENZIONE: QUESTO APPARECCHIO E’ DOTATO DI DISPOSITIVO OTTICO CON RAGGIO LASER. L’USO IMPROPRIO DELL’APPARECCHIO PUO’ CAUSARE PERICOLOSE ESPOSIZIONI A RADIAZIONI! ,, CLASS 1 ,, LASER PRODUCT CLASS 1 LASER PRODUCT LUOKAN 1 LASERLAITE KLASS 1 LASERAPPARAT ADVARSEL:USYNLIG LASERSTRÅLING VED ÅBNING, NÅR SIKKERHEDSAFBRYDERE ER UDE AF FUNKTION. UNDGÅ UDSAETTELSE FOR STRÅLING. VAROITUS! LAITTEEN KÄYTTÄMINEN MUULLA KUIN TÄSSÄ KÄYTTÖOHJEESSA MAINITULLA TAVALLA SAATTAA ALTISTAA KÄYTTÄJÄN TURVALLISUUSLUOKAN 1 YLITTÄVÄLLE NÄKYMÄTTÖMÄLLE LASERSÄTEILYLLE. • DECLARATION OF CONFORMITY We declare under our sole responsibility that this product, to which this declaration relates, is in conformity with the following standards: EN60065, EN55013, EN55020, EN61000-3-2 and EN61000-3-3. Following the provisions of 73/23/EEC, 89/336/EEC and 93/68/EEC Directive. • ÜBEREINSTIMMUNGSERKLÄRUNG Wir erklären unter unserer Verantwortung, daß dieses Produkt, auf das sich diese Erklärung bezieht, den folgenden Standards entspricht: EN60065, EN55013, EN55020, EN61000-3-2 und EN61000-3-3. Entspricht den Verordnungen der Direktive 73/23/EEC, 89/336/EEC und 93/68/EEC. • DECLARATION DE CONFORMITE Nous déclarons sous notre seule responsabilité que l’appareil, auquel se réfère cette déclaration, est conforme aux standards suivants: EN60065, EN55013, EN55020, EN61000-3-2 et EN61000-3-3. D’après les dispositions de la Directive 73/23/EEC, 89/336/EEC et 93/68/EEC. VARNING- OM APPARATEN ANVÄNDS PÅ ANNAT SÄTT ÄN I DENNA BRUKSANVISNING SPECIFICERATS, KAN ANVÄNDAREN UTSÄTTAS FÖR OSYNLIG LASERSTRÅLNING SOM ÖVERSKRIDER GRÄNSEN FÖR LASERKLASS 1. NOTE ON USE / HINWEISE ZUM GEBRAUCH /OBSERVATIONS RELATIVES A L’UTILISATION • Avoid high temperatures. Allow for sufficient heat dispersion when installed on a rack. • Vermeiden Sie hohe Temperaturen. Beachten Sie, daß eine ausreichend Luftzirkulation gewährleistet wird, wenn das Gerät auf ein Regal gestellt wird. • Eviter des températures élevées Tenir compte d’une dispersion de chaleur suffisante lors de l’installation sur une étagère. • Keep the set free from moisture, water, and dust. • Halten Sie das Gerät von Feuchtigkeit, Wasser und Staub fern. • Protéger l’appareil contre l’humidité, l’eau et lapoussière. • Unplug the power cord when not using the set for long periods of time. • Wenn das Gerät eine längere Zeit nicht verwendet werden soll, trennen Sie das Netzkabel vom Netzstecker. • Débrancher le cordon d’alimentation lorsque l’appareil n’est pas utilisé pendant de longues périodes. • Handle the power cord carefully. Hold the plug when unplugging the cord. • Gehen Sie vorsichtig mit dem Netzkabel um. Halten Sie das Kabel am Stecker, wenn Sie den Stecker herausziehen. • Manipuler le cordon d’alimentation avec précaution. Tenir la prise lors du débranchement du cordon. • (For sets with ventilation holes) Do not obstruct the ventilation holes. • Die Belüftungsöffnungen dürfen verdeckt werden. • Ne pas obstruer les trous d’aération. nicht CAUTION • The ventilation should not be impeded by covering the ventilation openings with items, such as newspapers, table-cloths, curtains, etc. • No naked flame sources, such as lighted candles, should be placed on the apparatus. • Please be care the environmental aspects of battery disposal. • The apparatus shall not be exposed to dripping or splashing for use. • No objects filled with liquids, such as vases, shall be placed on the apparatus. 2 • Do not let foreign objects in the set. • Keine fremden Gegenstände in das Gerät kommen lassen. • Ne pas laisser des objets étrangers dans l’appareil. • Do not let insecticides, benzene, and thinner come in contact with the set. • Lassen Sie das Gerät nicht mit Insektiziden, Benzin oder Verdünnungsmitteln in Berührung kommen. • Ne pas mettre en contact des insecticides, du benzène et un diluant avec l’appareil. • Never disassemble or modify the set in any way. • Versuchen Sie niemals das Gerät auseinander zu nehmen oder auf jegliche Art zu verändern. • Ne jamais démonter ou modifier l’appareil d’une manière ou d’une autre. 1ADV-M71E2_ENG p1-60 03.12.25 1:05 PM ページ 3 ENGLISH 2 INTRODUCTION Thank you for choosing the DENON ADV-M71 DVD Surround Receiver. This remarkable component has been engineered to provide superb surround sound listening with home theater sources such as DVD, as well as providing outstanding high fidelity reproduction of your favorite music sources. As this product is provided with an immense array of features, we recommend that before you begin hookup and operation that you review the contents of this manual before proceeding. TABLE OF CONTENTS z x c v b n m , . ⁄0 ⁄1 ⁄2 BEFORE USING ..........................................................................................4 CAUTIONS ON INSTALLATION ..................................................................4 CAUTIONS ON HANDLING ........................................................................4 FEATURES...................................................................................................5 DISCS ..........................................................................................................6 CAUTIONS ON HANDLING DISCS.............................................................7 CONNECTIONS ....................................................................................8~14 PART NAMES AND FUNCTIONS .......................................................15~19 REMOTE CONTROL UNIT..................................................................20~28 SETTING UP THE SYSTEM ................................................................29~38 PLAY BACK .........................................................................................39~44 OPERATING THE SURROUND FUNCTIONS......................................44~46 ⁄3 ⁄4 ⁄5 ⁄6 ⁄7 ⁄8 ⁄9 ¤0 ¤1 ¤2 ¤3 ¤4 DOLBY / DTS SURROUND.................................................................47~49 SURROUND PLAYBACK.....................................................................50~62 LISTENING TO THE RADIO................................................................63~67 ON-SCREEN DISPLAY ..............................................................................68 USING THE ON-SCREEN DISPLAY ....................................................69~86 USING THE TIMER .............................................................................87~93 CHANGING THE DEFAULT SETTINGS (DVD)...................................94~106 SYSTEM FUNCTIONS ....................................................................107~111 LAST FUNCTION MEMORY ...................................................................112 INITIALIZATION OF THE MICROPROCESSOR ......................................112 TROUBLESHOOTING .....................................................................113, 114 SPECIFICATIONS ....................................................................................115 2 ACCESSORIES ADV-M71 Check that the following parts are included in addition to the main unit: q Operating instructions ........................................1 r R6P/AA batteries ................................................2 e w Service station list ..............................................1 t AM loop antenna ................................................1 r t e Remote control unit (RC-966) .............................1 y FM indoor antenna .............................................1 y 2 3 1ADV-M71E2_ENG p1-60 03.12.25 1:05 PM ページ 4 ENGLISH 1 BEFORE USING Pay attention to the following before using this unit: • Moving the set To prevent short circuits or damaged wires in the connection cords, always unplug the power cord and disconnect the connection cords between all other audio components when moving the set. • Store this instructions in a safe place. After reading, store this instructions along with the warranty in a safe place. • Before turning the power switch on Check once again that all connections are proper and that there are not problems with the connection cords. Always set the power switch to the standby position before connecting and disconnecting connection cords. • Note that the illustrations in this instructions may differ from the actual set for explanation purposes. 2 CAUTIONS ON INSTALLATION DVD SURROUND RECEIVER UNIT Noise or disturbance of the picture may be generated if this unit or any other electronic equipment using microprocessors is used near a tuner or TV. If this happens, take the following steps: • Install this unit as far as possible from the tuner or TV. • Set the antenna wires from the tuner or TV away from this unit’s power cord and input/output connection cords. • Noise or disturbance tends to occur particularly when using indoor antennas or 300 Ω/ohms feeder wires. We recommend using outdoor antennas and 75 Ω/ohms coaxial cables. 10 cm/4 inch or more B 10 cm/4 inch or more For heat dispersal, leave at least 10 cm/4 inch of space between the top, back and sides of this unit and the wall or other components. Wall 3 CAUTIONS ON HANDLING DVD SURROUND RECEIVER UNIT • Switching the input function when input jacks are not connected A clicking noise may be produced if the input function is switched when nothing is connected to the input jacks. If this happens, either turn down the MASTER VOLUME control or connect components to the input jacks. • Muting of PRE OUT jacks, HEADPHONE jack and SPEAKER terminals The PRE OUT jacks, HEADPHONE jacks and SPEAKER terminals include a muting circuit. Because of this, the output signals are greatly reduced for several seconds after the power switch is turned on or input function, surround mode or any other-set-up is changed. If the volume is turned up during this time, the output will be very high after the muting circuit stops functioning. Always wait until the muting circuit turns off before adjusting the volume. 4 • Whenever the power switch is in the STANDBY state, the apparatus is still connected on AC line voltage. Please be sure to unplug the cord when you leave home for, say, a vacation. 1ADV-M71E2_ENG p1-60 03.12.25 1:05 PM ページ 5 ENGLISH 4 FEATURES The ADV-M71 combines an AV amplifier and DVD player, the core components of a home theater system, into a single compact, stylish body. The system takes up little space, and the aluminum front panel and half mirror of the display make for an elegant design that blends in nicely with the décor in your room. 1. 2-channel power amplifier with Dolby Virtual Speaker compatibility The ADV-M71 is equipped with two 35W (6 Ω/ohms 1kHz, T.H.D. 10%) power amplifiers that make it compatible with new Dolby Virtual Speaker technology for recreating a 5.1-channel environment virtually using a 2-channel configuration. (Dolby Virtual Speaker is an proprietary technology of Dolby Laboratories.) A high performance digital signal processor enables playback of Dolby Digital and DTS multi-channel surround signals in the Dolby Virtual Speaker mode. Surround sound can be achieved with the Dolby Virtual Speaker mode for CDs and other 2-channel sources in combination with the Dolby Pro Logic II decoder. 2. 3.1-channel pre-out terminals allowing expansion into a 5.1channel surround system When used in combination with a commercially available subwoofer with built-in amplifier and power amplifier, the ADVM71 can be expanded into a 5.1-channel surround system. The ADV-M71 not only recreates an accurate sound field for multichannel sources, it is also compatible with wide mode playback in the Dolby Virtual Speaker mode. 5. High performance DVD drive for progressive image output compatibility The ADV-M71 is compatible with various functions offered by DVD sources, including multiple audio (up to 8 languages), multiple subtitle (up to 32 languages), multiple angle playback, viewing restriction, etc. 6. Quick setup and on-screen display compatibility DVDs can be enjoyed simply by selecting the TV and speaker configuration to be used. Even with a 5.1-channel speaker configuration, standard parameters can be set automatically simply by selecting the size of the room in which the system is being used and the listening position. The system can be set up using an on-screen display function. 7. Remote control unit with preset memory function The ADV-M71 comes with a remote control unit equipped with a preset memory function including the remote control operation codes for D-M31 series MD recorders, cassette decks and DENON remote control compatible components as well as the remote control operation codes of other major brands of TVs and video decks. 8. Convenient system functions When system connections are made with a D-M31 series MD recorder and cassette deck, such system functions as auto function selection, synchronized recording and timer recording/playback can be performed easily. 3. Dolby Pro Logic II decoder for expanding sound field playback The ADV-M71 is equipped with a Dolby Pro Logic II decoder for expanding sound field playback for Dolby Surround and stereo music sources. 4. DENON’s unique sound field simulation using the DSP The ADV-M71 is compatible with the Rock Arena, Jazz Club and Video Game modes with a 2-channel configuration. In a 5.1channel configuration, it is also compatible with the 5-Channel Stereo, Mono Movie and Matrix modes. 5 1ADV-M71E2_ENG p1-60 03.12.25 1:05 PM ページ 6 ENGLISH 5 DISCS • The types of discs listed on the table below can be used on the ADV-M71. The marks are indicated on the disc labels or jackets. Usable discs For example: Recorded signals Mark (logo) Disc size Track 1 DVD video DVD audio (NOTE 1) DVD-R DVD-RW (NOTE 2) Track 3 Track 4 Track 5 12 cm Digital audio + digital video (MPEG2) R R 2 The following types of discs cannot be played on the ADV8 cm R W RW 12 cm Digital audio + digital video (MPEG1) Video CD 8 cm 12 cm Digital audio MP3 WMA Digital picture (JPEG) CD CD-R CD-RW (NOTE 3) Recordable 8 cm ReWritable Digital picture (JPEG) Picture CD 12 cm 2 Disc terminology • Titles and chapters (DVD-videos) DVD-videos are divided into several large sections called “titles” and smaller sections called “chapters”. Numbers are allotted to these sections. These numbers are called “title numbers” and “chapter numbers”. For example: Title 1 Chapter 1 Chapter 2 Title 2 Chapter 3 Chapter 1 M71: • DVDs with region numbers other than “2” or “ALL” • DVD audio discs (NOTE 1) • DVD-ROM/RAMs • CVD • CD-ROMs (Only MP3/WMA file can be played) • VSDs • CDVs (Only the audio part can be played.) • CD-Gs (Only the audio is output.) • Photo CDs (NEVER play such discs on the ADV-M71) If you attempt to play photo CDs, the data on the disc may be damaged. NOTE 1: Video part which based on DVD-video specification only can be played. NOTE 2: Playing DVD-R and DVD-RW discs DVD-R and DVD-RW discs recorded in video format on a DVD recorder can be played on the ADV-M71. Discs that have not be finalized cannot be played. Depending on the disc’s recording status, the disc may not be accepted or may not be played normally (the picture or sound may be not be smooth, etc.). NOTE 3: According to recording quality, some CD-R/RW cannot be played. • Playback control (video CDs) Video CDs including the words “playback control” on the disc or jacket are equipped with a function for displaying menus on the TV screen for selecting the desired position, displaying information, etc., in dialog fashion. In this manual, playing video CDs using such menus is referred to “menu playback”. Video CDs with playback control can be used on the ADV-M71. Chapter 2 • Tracks (video and music CDs) Video and music CDs are divided into sections called “tracks”. Numbers are allotted to these sections. These numbers are called “track numbers”. 6 Track 2 NOTE: • This DVD video player is designed and manufactured to respond to the Region Management Information that is recorded on a DVD disc. If the Region number described on the DVD disc does not correspond to the Region number of this DVD video player, this DVD video player cannot play this disc. The Region number for this DVD video player is 2. 2 1ADV-M71E2_ENG p1-60 03.12.25 1:05 PM ページ 7 ENGLISH 6 CAUTIONS ON HANDLING DISCS Discs Cautions on Handling Discs Only the discs including the marks shown on page 6 can be played on the ADV-M71. Note, however, that discs with special shapes (heart-shaped discs, hexagonal discs, etc.) cannot be played on the ADV-M71. Do not attempt to play such discs, as they may damage the player. Holding Discs Cautions on Storing Discs Avoid touching the surface of discs when loading and unloading them. Be careful not to get fingerprints on the signal surface (the side which shines in rainbow colors). Cleaning Discs • Always eject discs after playing them. • Keep discs in their cases to protect them from dust, scratches and warping. • Do not put discs in the following places: 1. Places exposed to direct sunlight for long periods of time 2. Humid or dusty places 3. Places exposed to heat from heaters, etc. Cautions on Loading Discs 2 Fingerprints or dirt on the disc may lower sound and picture quality or cause breaks in playback. Wipe off fingerprints or dirt. 2 Use a commercially available disc cleaning set or a soft cloth to wipe off fingerprints or dirt. Wipe gently from the middle outwards. • Do not get fingerprints, grease or dirt on discs. • Be especially careful not to scratch discs when removing them from their cases. • Do not bend discs. • Do not heat discs. • Do not enlarge the center hole. • Do not write on the labeled (printed) side with a ball-point pen or a pencil. • Water droplets may form on the surface if the disc is moved suddenly from a cold place to a warm one. Do not use a hairdryer, etc., to dry the disc. • Only load one disc at a time. Loading one disc on top of another may result in damage or scratch the discs. • Load 8 cm discs securely in the disc guide, without using an adapter. If the disc is not properly loaded, it may slip out of the guide and block the disc tray. • Be careful not to let your fingers get caught when the disc tray is closing. • Do not place anything but discs in the disc tray. • Do not load cracked or warped discs or discs that have been fixed with adhesive, etc. • Do not use discs on which the adhesive part of cellophane tape or glue used to attach the label is exposed, or discs with traces of tape or labels that have been peeled off. Such discs may get stuck inside the player, resulting in damage. Do not wipe with a circular motion. NOTE: • Do not use record spray or antistatic. Also do not use volatile chemicals such as benzene or thinner. Record spray Thinner Benzene 7 1ADV-M71E2_ENG p1-60 03.12.25 1:05 PM ページ 8 ENGLISH 7 CONNECTIONS • Do not plug in the AC cord until all connections have been completed. • Be sure to connect the left and right channels properly (left with left, right with right). • Insert the plugs securely. Incomplete connections will result in the generation of noise. • Note that binding pin plug cords together with AC cords or placing them near a power transformer will result in generating hum or other noise. • Noise or humming may be generated if a connected audio equipment is used independently without turning the power of this unit on. If this happens, turn on the power of the this unit. (1) Connecting the audio components (D-M31 series) • The ADV-M71 can be used connected in a system with the D-M31 series MD recorder (DMD-M31) and cassette deck (DRR-M31). • For instructions on operating the separately sold MD recorder (DMD-M31) and cassette deck (DRR-M31), refer to their respective operating instructions. • Only the DMD-M31 MD recorder and DRR-M31 cassette deck can be connected directly to the ADV-M71 using system connections. NOTE: • This system includes digital circuitry which may cause interference such as color blotching or changes in the color on TVs. If this happens, move the system and the TV as far apart as possible. Connecting the speaker systems Connect the speaker system for the left channel (the left side as seen from the front) to the L terminals, the speaker system for the right channel to the R terminals. Refer to the instructions supplied with the speaker system for details. Be sure to use speaker systems with an impedance of 6 Ω/ohms or greater. Stereo audio cord FM indoor antenna (included) Speaker system SC-M51 Or commercially available speaker The ADV-M71 includes a built-in clock function, so plug its power cord into a wall power outlet to which electricity is supplied constantly. (R) (L) ADV-M71 DVD surround receiver AC CORD AC 230 V, 50 Hz AM loop antenna (included) Speaker cords Commercially available subwoofer with built-in amplifier R R L R L R Audio cord Optical transmission cables 8 System cords L R L 1ADV-M71E2_ENG p1-60 03.12.25 1:05 PM ページ 9 ENGLISH CAUTION: • Only one MD recorder and one cassette deck can be connected to the ADV-M71 using system connections. System operations cannot be performed properly if two MD recorders or two cassette decks are connected using system connections. • Whenever the power operation switch is in the STANDBY position, the unit is still connected to AC line voltage. • Please be sure to unplug the power cord when you leave home for, e.g.,a vacation, etc. System operations Such system operations as the timer and the auto power on functions, as well as remote control operations cannot be performed unless all the RCA pin-plug cords and system connector cords are connected between the units, so be sure to make all the connections properly as shown in the diagram. Also, disconnecting system connectors while the system is operating may result in malfunctions. Be sure to unplug the power cord before changing connections. NOTES: • Do not plug the power cord into the power outlet until all connections are completed. Be sure to interconnect the channels (L to L (white) and R to R (red)) properly, as shown on the diagram. • Use the AC OUTLET for audio equipment only. Do not use them for hair driers, etc. • Insert the plugs securely. Incomplete connections may result in noise. • Be sure to connect the speaker cords between the speaker terminals and the speaker systems with the same polarities ( + to +, – to – ). If the polarities are switched, the sound at the center will be weak, the position of the different instruments will be unclear, and the stereo effect will be lost. • After unplugging the power cord, wait about 5 seconds before plugging it back in. • Note that setting the connection cords (pin-plug cords) next to the power cords may result in humming or other noise. MD recorder (DMD-M31) (sold separately) DMD-M31 18Tr02m 46s 1 L dB -60 -40 -30 -20 -12 -6 -2 0 R B SURROUND / SELECT DVD SURROUND RECEIVER ADV-M71 PUSH - PARAM. - + BAND MENU/ SET ADV-M71 TONE / SDB DRR-M31 VOLUME FUNCTION ON / STANDBY PHONES (Horizontal installation) Cassette deck (DRR-M31) (sold separately) Install the sets as shown in one of these diagrams. In either case, be sure that the DVD surround receiver’s ventilation holes are not obstructed. B SURROUND / SELECT DVD SURROUND RECEIVER ADV-M71 PUSH - PARAM. - R L R L + BAND MENU/ SET ADV-M71 TONE / SDB VOLUME FUNCTION ON / STANDBY PHONES DMD-M31 18Tr02m 46s 1 L dB -60 -40 -30 -20 -12 -6 -2 0 R Stereo audio cord DRR-M31 (Vertical installation) 9 1ADV-M71E2_ENG p1-60 03.12.25 1:05 PM ページ 10 ENGLISH (2) Connecting the PRE OUT terminals (only with multi-channel settings) • When used in combination with a commercially available subwoofer with built-in amplifier and power amplifier, the ADV-M71 can be expanded into a 5.1-channel surround system. • When making connections, also refer to the operating instructions of the other components. • To make the 5.1-channel setting, set the speakers to “5.1 CH SURROUND” in the quick system setup and select “Room Setting” and “Listening Position”. (See pages 31 to 32.) IN IN IN IN SUBWOOFER • Connect the subwoofer with built-in amplifier. POWER AMPLIFIER (for center ch) Center Speaker POWER AMPLIFIER (for Surround ch) Surround (L) Speaker • Connect the power amplifier for center and surround speaker system. Surround (R) Speaker (3) Connecting the Audio Signals of a Digital Satellite Tuner and VCR • Connect the video signals directly to the TV and switch the picture on the TV. • When making connections, also refer to the operating instructions of the other components. Digital satellite/cable tuner Connection to the optical digital input terminal • Only audio signals are input to the optical digital input terminal. • Use a commercially available optical transmission cable for connection to the optical transmission terminal (OPTICAL). B OPTICAL OUT AUDIO OUT R L R Connection of a digital satellite/cable tuner • For tuners equipped with an optical digital output terminal, connect the digital output terminal to the DIGITAL D.AUX IN terminal on the ADV-M71 using an optical transmission cable. • To connect the audio output terminals, use whatever of the ADV-M71’s LINE-1 or LINE-2 terminals are open. L L R L R L R L R L R L OUT R Connection of a video deck • Connect the video deck’s audio output and audio input terminals to whatever of the ADV-M71’s LINE-1 or LINE-2 terminals are open using pin-plug cords. R Video deck AUDIO 10 L IN 1ADV-M71E2_ENG p1-60 03.12.25 1:05 PM ページ 11 ENGLISH (4) Connecting a TV • Use the commercially 21-pin SCART cable to connect the TV’s 21-pin SCART terminal to the ADV-M71’s 21-pin SCART terminal (AV1). Monitor TV • The audio and video signals for the function selected on the set are output. Audio output signals • The tuner and DVD audio playback signals and the audio signals input to the AUDIO INPUT jacks are output. • When Dolby Digital and DTS DVD are played, the audio signals are converted to 2-channel signals before being output. • The audio output level is fixed. If you do not wish to play the sound on the connected TV, turn the TV’s volume down to the minimum. Video output signals (Function “DVD” only) • The DVD video playback signals is output. • The selection of the VIDEO, S-VIDEO and RGB video signals is set at “AV1 VIDEO OUTPUT” system setup item. (By default all are set to “VIDEO”. See page 29.) NOTES: • • Connect this unit video outputs to the TV either directly. Do not connect it via a VCR (video cassette recorder). Some discs contain copy prohibit signals. If such discs are played via a VCR, the copy prohibit system may cause disturbance in the picture. • Set the “TV TYPE” in “VIDEO SETUP” in “DVD SETUP” to comply with your TV’s video format. When the TV is PAL formated, set to PAL. (See page 29.) The factory default is “PAL”. When in the stop mode with the function set to “DVD”, the setting can also be switched with the “NTSC/PAL” button on the remote control unit. If the setting does not match your TV’s video format, switch it from the remote control unit, then set “TV TYPE” under “VIDEO SETUP” at “DVD SETUP” to the setting match your TV’s video format. 11 1ADV-M71E2_ENG p1-60 03.12.25 1:05 PM ページ 12 ENGLISH (5) Connecting the antenna terminals DIRECTION OF BROADCASTING STATION AM LOOP ANTENNA (Supplied) FM INDOOR ANTENNA (Supplied) FM ANTENNA 75 Ω/ohms COAXIAL CABLE FM ANTENNA ADAPTER (Option) GROUND AM OUTDOOR ANTENNA • An F-type FM antenna cable plug can be connected directly. • If the FM antenna cable’s plug is not of the F-type, connect using the F-type antenna adapter (Option). AM loop antenna assembly Connection of AM antennas Connect to the AM antenna terminals. 1 4 2 Remove the vinyl tie and take out the connection line. 2. Insert the conductor. 3. Return the lever. 3 Bend in the reverse direction. a. With the antenna on top any stable surface. Mount b. With the antenna attached to a wall. Installation hole Mount on wall, etc. 12 1. Push the lever. NOTES: • Do not connect two FM antennas simultaneously. • Even if an external AM antenna is used, do not disconnect the AM loop antenna. • Make sure AM loop antenna lead terminals do not touch metal parts of the panel. 1ADV-M71E2_ENG p1-60 03.12.25 1:05 PM ページ 13 ENGLISH (6) Sound output from this unit digital and analog audio output connectors 2 When a disc is played on the ADV-M71 (DIGITAL OUT) Settings Audio recording format Refer to page Digital audio data output Dolby Digital bitstream Digital out : Normal Dolby Digital 2 channels PCM data (48 kHz/16bit) Digital out : PCM conversion 101 Digital out : Normal DTS bitstream Digital out : PCM conversion 2 channels PCM data (48 kHz/16bit) DTS Digital out : Normal DVD video DVD audio (video part only) MPEG audio 2 channels PCM data (48 kHz/16bit) 101 Digital out : PCM conversion 2 channels PCM data (48 kHz/16bit) LPCM conversion mode : OFF 48 kHz/16 ~24 bit PCM Linear PCM 48 kHz LPCM conversion mode : ON 96 kHz LPCM conversion mode : ON 48 kHz/16 bit PCM 101 48 kHz/16 bit PCM CP : ON LPCM conversion mode : OFF 48 kHz/16 bit PCM (when copy-protected) CP : OFF LPCM conversion mode : OFF 96 kHz PCM (when not copy-protected) Video CD MPEG 1 44.1 kHz/16 bit PCM Music CD Linear PCM 44.1 kHz/16 bit PCM MP3/WMA CD MP3/WMA 32 ~ 48 kHz/16 bit PCM • Linear PCM audio is the signal recording format used for music CDs. While the signals are recorded at 44.1 kHz/16 bit for music CDs, for DVDs they are recorded at 48 kHz/16 bit to 96 kHz/24 bit, providing higher sound quality than music CDs. 2 About the LINE-1 and LINE-2 analog recording outputs When the DVD or the D.AUX digital input is selected: • Dolby Digital, DTS and PCM digital signals are automatically converted to 2-channel stereo signals before being output (except when in the Dolby Headphone mode) and can be recorded in analog. (For what happens in the Dolby Headphone mode, see below.) When TUNER, LINE-1 or LINE-2 is selected: • The selected analog audio signals from the tuner or from the device connected to the LINE-1 or LINE-2 analog input terminals (IN) are output unchanged, regardless of the ADV-M71’s input mode or surround mode. (The same is true for the device connected to the D.AUX terminals when “LINE-2” under “⁄0 SETTING UP THE SYSTEM – (3) Detailed system setup – [6] Function settings” is set to “D.AUX”.) Recording output during playback of a DVD or D.AUX digital input source in the Dolby Headphone mode: • In the Dolby Headphone mode with a DVD or a digital input selected, the Dolby Headphone mode analog audio signals currently being played are output and can be recorded in analog. (See pages 58 and 59.) Cautions during analog recording of DVDs or digital input sources: • Do not switch the ADV-M71’s input mode, surround mode or surround parameters during recording. Doing so will interrupt the sound being recorded. We recommend setting the surround mode to “STEREO” or “DIRECT”. • When using headphones, recording is automatically performed in the Dolby Headphone mode. Do not disconnect the headphones or switch the headphones mode during recording. 13 1ADV-M71E2_ENG p1-60 03.12.25 1:05 PM ページ 14 ENGLISH (7) Speaker system connections Be sure to turn the amplifier’s power off when connecting the speaker systems. • Use the included cables to connect the input terminals on the back of the speaker systems (see diagram) to the amplifier’s speaker output terminals. Connect the speaker system for the left channel amplifier’s “L” terminals, the one for the right channel to the amplifier’s “R” terminals, matching the polarities (“≈” and “√” marks). Inverting the polarities will result in unnatural sound, with the phase off or no low bass sound. Also check that all two terminal knobs are tightly fastened. Connecting the speaker cords Use the included connection cords to connect the input terminals on the backs of the speaker systems (see the diagram at the right) to the ADV-M71’s speaker output terminals. • Connect the speaker system for the left channel to the “L” terminals, the speaker system for the right channel to the “R” terminals, and be sure the polarities (“+” and “–”) are properly interconnected. • Note that if the polarities are inverted, the phase may be off and the bass sound may be missing, resulting in an unnatural sound. Also check that both the speaker terminal’s screws are tightly screwed. Either twist the core wires firmly or terminate the wires. Connections (The red terminals on the right side are the “≈” terminals, the black ones on the left side the “√” terminals.) Loosen the terminals knobs, insert the cables’ core wires, then tighten the knobs. Connect to amplifier’s “≈” side. (Copper color) Connect to amplifier’s “√” side. (Silver color) qTurn the speaker terminal counterclockwis e to loosen it. wInsert the cord’s core wires. eTurn clockwise to tighten the terminal. NOTE: Make sure the core wires do not touch each other. Protector circuit • This unit is equipped with a high-speed protection circuit. The purpose of this circuit is to protect the speakers under circumstances such as when the output of the power amplifier is inadvertently short-circuited and a large current flows, when the temperature surrounding the unit becomes unusually high, or when the unit is used at high output over a long period which results in an extreme temperature rise. When the protection circuit is activated, the speaker output is cut off and the power supply indicator LED flashes. Should this occur, please follow these steps: be sure to switch off the power of this unit, check whether there are any faults with the wiring of the speaker cables or input cables, and wait for the unit to cool down if it is very hot. Improve the ventilation condition around the unit and switch the power back on. If the protection circuit is activated again even though there are no problems with the wiring or the ventilation around the unit, switch off the power and contact a DENON service center. Note on speaker impedance • The protector circuit may be activated if the set is played for long periods of time at high volumes when speakers with an impedance lower than the specified impedance (for example speakers with an impedance of lower than 4 Ω/ohms) are connected. If the protector circuit is activated, the speaker output is cut off. Turn off the set’s power, wait for the set to cool down, improve the ventilation around the set, then turn the power back on. Cautions on connecting • With this unit’s speaker outputs, signals with the reverse phase of the “+” side output terminal’s signals are also output from the “-” side output terminal. Do not connect to a device for switching between multiple speakers (a speaker selector or audio channel selector) or connect in ways other than described in this manual. Doing so will result in damage. 14 1ADV-M71E2_ENG p1-60 03.12.25 1:05 PM ページ 15 ENGLISH 8 PART NAMES AND FUNCTIONS Front Panel • For details on the functions of these parts, refer to the pages given in parentheses ( ). !4 B !3 !2 !1 !0 o i SURROUND / SELECT DVD SURROUND RECEIVER ADV-M71 PUSH - PARAM. - + BAND MENU / SET TONE / SDB VOLUME FUNCTION ON / STANDBY PHONES qw e q Power operation switch (ON/STANDBY)..................................(30) w Remote control sensor.............................................................(20) e Display r Headphones jack (PHONES) ....................................................(58) t Function selector (FUNCTION).................................................(44) y Tone/super dynamic bass button (TONE/SDB) ........................(46) u Volume control (VOLUME) .......................................................(42) r ty u i Stop/band button ( 2 BAND)..............................................(42, 63) o Play/pause button ( 13 ) ...................................................(41, 43) !0 Open/close button ( 5 ) ..........................................................(41) !1 Skip backward and forward buttons ( 8 / – and + / 9 ) .....................................................(43, 63) !2 Surround/select knob (SURROUND/SELECT) ..........................(50) Surround parameter button (PARAMETER) .............................(51) !3 Menu/set button (MENU/SET) .................................................(65) !4 Disc holder ...............................................................................(40) 15 1ADV-M71E2_ENG p1-60 03.12.25 1:05 PM ページ 16 ENGLISH Remote control unit • For details on the functions of these parts, refer to the pages given in parentheses ( ). • Some of the buttons on the remote control unit have some functions. The functions are switched using the remote control mode selector switches. @4 q w e r t y u i o !0 !1 OFF ON VCR REC NTSC/PAL SLEEP SOURCE ENTER A-B REPEAT CLEAR TITLE TIME TV IN T V CHARAC. SLIDE MODE TV CH RDS PROG/DIRECT REPEAT PTY EDIT/MENU ZOOM - RANDOM TV CH + CT CD SRS RT SEARCH MODE MODE MEMO BAND DVD TUNER D.AUX 1 2 3 MD/LINE-1 TAPE /LINE-2 4 5 6 + - 5CH STEREO AUTO DECODE TUNER TUNING / TV VOL + 7 8 9 DIRECT STEREO VIRTUAL CALL 0/10 +10 - TEST TONE INPUT MODE SURROUND FUNCTION CH TUNER TV / VCR DVD IN/SURR. A/V SYSTEM IN/SURR. MD CDR TAPE !2 !3 !4 !5 !6 !7 !8 1 2 9 6 7 @0 @1 @2 @3 #3 #4 #5 #6 - STATUS 3 MUTING SETUP TONE /SDB ENTER !9 #2 + DVD 8 @5 @6 @7 @8 @9 #0 #1 #7 #8 #9 $0 SURROUND PARAMETER CH SELECT RETURN DISPLAY ANGLE MENU AUDIO RC-966 VCR CH + TOP MENU SUB TITLE $1 $2 $3 $4 $5 q Transmission indicator w Sleep timer button ...................................................................(93) e NTSC/PAL button .....................................................................(11) r Clear button..............................................................................(73) t A-B repeat button.....................................................................(72) y Program/direct..........................................................................(73) u Repeat button...........................................................................(71) i Input source/surround mode selector button o Call button ................................................................................(73) !0 Test tone button .......................................................................(36) !1 Input mode selector button......................................................(44) !2 DVD play button .......................................................................(41) !3 DVD stop button ......................................................................(42) !4 DVD skip buttons .....................................................................(43) !5 DVD search buttons ...........................................................(43, 44) !6 DVD pause button....................................................................(43) !7 Status button............................................................................(45) !8 Setup button.............................................................................(30) !9 Channel select button ..............................................................(36) @0 Return button ...........................................................................(42) @1 Display button ..........................................................................(69) @2 Angle button.............................................................................(83) @3 Audio selector button...............................................................(81) @4 Remote control signal transmission window...........................(20) @5 Power button............................................................................(30) @6 * System buttons.........................................................(18, 21, 22) @7 Zoom button.............................................................................(86) @8 Slide mode button....................................................................(80) @9 Search mode button.................................................................(43) #0 Random button.........................................................................(74) #1 Tuner tuning +/– buttons ..........................................................(63) #2 Tuner preset +/– buttons..........................................................(64) #3 Function selector button ..........................................................(44) #4 Surround mode selector button ...............................................(45) #5 Mode selector switches.....................................................(17, 18) #6 Main volume control buttons ...................................................(42) #7 Muting button...........................................................................(46) #8 Tone/SDB button ......................................................................(46) #9 Enter button .............................................................................(29) $0 Cursor button ...........................................................................(29) $1 Surround parameter button......................................................(50) $2 Top menu button ......................................................................(84) $3 Menu button.............................................................................(85) $4 Subtitle button..........................................................................(82) $5 * System buttons...................................................(18, 21, 22, 28) * System buttons ......................................(18, 19, 21, 22, 23, 28) • For details on the function and operation of the various parts, refer to the pages indicated in (parentheses). • Buttons indicated are DVD control buttons and can be operated when the remote control mode selector switch is set to the position. • The functions of the system buttons (*) are switched using the remote control mode selector switch. 16 A/V and DVD 1ADV-M71E2_ENG p1-60 03.12.25 1:05 PM ページ 17 ENGLISH Names and functions of remote control unit buttons on the ADV-M71 • Buttons in sections q ~ e can be operated regardless of the position of mode switches 1 and 2. • Consider A / V and DVD as standard positions, and switch as necessary to operate. q OFF ON VCR REC NTSC/PAL SLEEP TITLE SOURCE TIME TV IN ENTER A-B REPEAT CLEAR T V CHARAC. SLIDE MODE TV CH - RDS PROG/DIRECT 3 q 1 PTY REPEAT RANDOM MODE MEMO BAND DVD TUNER D.AUX 3 EDIT/MENU ZOOM TV CH + CT CD SRS RT SEARCH MODE TUNING / TV VOL 1 2 MD/LINE-1 TAPE /LINE-2 4 5 6 + - 5CH STEREO AUTO DECODE TUNER + 7 8 9 DIRECT STEREO VIRTUAL CALL 0/10 +10 - TEST TONE INPUT MODE SURROUND FUNCTION CH TUNER TV / VCR DVD IN/SURR. A/V SYSTEM IN/SURR. MD CDR TAPE 1 2 8 2 + DVD w e 9 6 - 7 STATUS 3 MUTING SETUP TONE /SDB q ENTER SURROUND PARAMETER CH SELECT DISPLAY RETURN ANGLE MENU AUDIO VCR CH + TOP MENU SUB TITLE RC-966 1 Set mode switch 1 to the “A/V” position. q Surround amplifier control buttons ON : Turns the ADV-M71’s power on. OFF : Turns the ADV-M71’s power off. FUNCTION : Function selection (in order) SURROUND : Surround mode selection INPUT MODE : Input mode selection TEST TONE : Test tone on/off + : Main volume up – : Main volume down MUTING : Muting on/off STATUS : Status display selection TONE/SDB : Tone/SDB selection and setting SURROUND : Surround parameter selection and setting PARAMETER SET UP : Setup mode on/off CH SELECT : Channel level selection and setting •, ª, 0, 1 : Cursor up, down, left and right ENTER : Enter setting w DVD control buttons 1 : Play (auto power on and auto function selection) 2 : Stop 8, 9 : Skip (cueing) 6, 7 : Search (fast-reverse and fast-forward) 3 : Pause and frame-by-frame e Tuner control buttons CH +/– : Preset channel up/down (auto power on and auto function selection) A/V SYSTEM 2 Set mode switch 2 to the position of the function you want to operate (DVD, TUNER or IN/SURR.). TUNER TV / VCR DVD IN/SURR. 17 1ADV-M71E2_ENG p1-60 03.12.25 1:05 PM ページ 18 ENGLISH 3 Operate the ADV-M71. [1] Surround amplifier system buttons (Operated with mode switch 2 set to “IN/SURR.”) • These operations are possible with mode switch 1 at any position. The operations in gray print can be performed. OFF ON VCR REC NTSC/PAL SLEEP ENTER A-B REPEAT TITLE SOURCE CLEAR REPEAT PTY RANDOM MODE MEMO BAND DVD TUNER D.AUX 3 + RDS PROG/DIRECT TUNING / TV VOL 1 2 TAPE /LINE-2 4 5 6 + - 5CH STEREO AUTO DECODE TUNER ENTER A-B REPEAT TITLE T V EDIT/MENU ZOOM TV CH + REPEAT PTY RANDOM MODE MEMO BAND DVD TUNER D.AUX 3 1 2 MD/LINE-1 TAPE /LINE-2 4 5 6 + - 5CH STEREO AUTO DECODE TUNER 8 9 7 8 9 STEREO VIRTUAL DIRECT STEREO VIRTUAL 0/10 +10 - CALL 0/10 +10 - TEST TONE INPUT MODE SURROUND FUNCTION TEST TONE INPUT MODE SURROUND FUNCTION CH TUNER TV / VCR DVD IN/SURR. 1 2 8 9 6 7 SYSTEM 9 6 MUTING MUTING SETUP TONE /SDB ENTER ENTER SURROUND PARAMETER DISPLAY MENU AUDIO VCR CH 18 SURROUND PARAMETER CH SELECT + - TOP MENU Sleep on/off Function DVD Function TUNER Function D.AUX Function MD/LINE-1 Function TAPE/LINE-2 5-channel stereo surround mode (when “5.1CH” selected in setup) 2-channel mode switching when auto decode surround mode set (when “5.1CH” selected in setup) 2-channel mode switching when Dolby Virtual Speaker or Dolby VS surround mode set Stereo mode Direct mode DISPLAY RETURN SUB TITLE ANGLE RC-966 : : - 7 3 TONE /SDB CH SELECT STEREO DIRECT + STATUS SETUP : 2 DVD 8 - 3 ANGLE IN/SURR. MD CDR TAPE 1 + STATUS RETURN CH TUNER TV / VCR DVD IN/SURR. A/V IN/SURR. MD DVD VIRTUAL + 7 CDR TAPE AUTO DECODE : TUNING / TV VOL CALL SYSTEM : : : : : : : + CT CD SRS RT SEARCH MODE DIRECT A/V SLEEP DVD TUNER D.AUX MD/LINE-1 TAPE/LINE-2 5CH STEREO TIME TV IN CHARAC. SLIDE MODE TV CH - CT CD SRS RT SEARCH MODE MD/LINE-1 ON VCR REC NTSC/PAL SLEEP T V EDIT/MENU ZOOM TV CH - RDS PROG/DIRECT OFF TIME TV IN CHARAC. SLIDE MODE TV CH SOURCE CLEAR [2] DVD system buttons (Operated with mode switch 2 set to “DVD”) MENU AUDIO VCR CH + TOP MENU SUB TITLE RC-966 NTSC/PAL : ZOOM : SLIDE MODE : A-B REPEAT : CLEAR : SEARCH MODE: RANDOM : REPEAT : PROG/DIRECT : CALL : 0 ~ 9, +10 : TOP MENU : MENU : DISPLAY : RETURN : SUBTITLE : AUDIO : ANGLE : NTSC/PAL selection Zoom on/off JPEG image slide mode selection A-B repeat playback setting Program clear Title and chapter search selection Random play on/off Repeat play setting Program/direct play selection Program call Number buttons Top menu call Menu call Display call/selection Menu return Subtitle language selection Audio language selection Angle selection 1ADV-M71E2_ENG p1-60 03.12.25 1:05 PM ページ 19 ENGLISH 3 [3] Tuner system buttons (Operated with mode switch 2 set to “TUNER”) OFF ON VCR REC NTSC/PAL SLEEP TITLE SOURCE ENTER A-B REPEAT CLEAR TIME TV IN T V CHARAC. SLIDE MODE TV CH EDIT/MENU ZOOM TV CH - RDS PROG/DIRECT REPEAT MODE MEMO DVD + CT CD SRS RT RANDOM SEARCH MODE PTY BAND TUNING / TV VOL TUNER D.AUX 1 2 3 MD/LINE-1 TAPE /LINE-2 4 5 6 + - 5CH STEREO AUTO DECODE TUNER + 7 8 9 DIRECT STEREO VIRTUAL CALL 0/10 +10 - TEST TONE INPUT MODE SURROUND FUNCTION CH TUNER TV / VCR DVD IN/SURR. A/V SYSTEM IN/SURR. MD CDR TAPE 1 2 + DVD 8 9 6 - 7 STATUS 3 MUTING SETUP TONE /SDB ENTER SURROUND PARAMETER CH SELECT DISPLAY RETURN ANGLE MENU AUDIO VCR CH + TOP MENU SUB TITLE RC-966 BAND MEMO MODE TUNER +/– 1 ~ 10, +10 RDS : : : : : FM/AM band selection Preset memory FM auto/mono mode selection Tuning up/down Preset channel number buttons : Use this button to automatically tune to stations using the radio data system. 1 PTY RDS 1 PTY OFF 1 TP 0 : Press this button after selecting“PTY” with the RDS button to select one of the 29 program types. : Use this to correct the time of the clock on the ADVM71. Press this button when the time service of an RDS station is being properly received. “TIME” is displayed for 2 seconds and the ADV-M71’s clock is corrected. “NO TIME DATA” is displayed if the RDS station does not offer a time service and when the broadcast is not being received properly. : Press this button when receiving RDS stations to select the frequency, PS (or Station name), PTY or RT display. Note that this button will not function if the reception is poor. The display mode changes as follows each time the button is pressed. CT RT 1 1 RT PS (or Station name) Frequency 0 1 PTY The station name is displayed with priority instead of the PS display when a channel whose station name has been preset is tuned in. 19 1ADV-M71E2_ENG p1-60 03.12.25 1:05 PM ページ 20 ENGLISH 9 REMOTE CONTROL UNIT • The included remote control unit (RC-966) can be used to operate not only this unit but other remote control compatible DENON components as well. In addition, the memory contains the control signals for other remote control units, so it can be used to operate non-DENON remote control compatible products. (1) Inserting the batteries q Remove the remote control unit’s rear cover. w Set three R6P/AA batteries in the battery compartment in the indicated direction. Notes on Batteries • Use R6P/AA batteries in the remote control unit. • The batteries should be replaced with new ones approximately once a year, though this depends on the frequency of usage. • Even if less than a year has passed, replace the batteries with new ones if the set does not operate even when the remote control unit is operated nearby the set. (The included battery is only for verifying operation. Replace it with a new battery as soon as possible.) • When inserting the batteries, be sure to do so in the proper direction, following the “≈” and “√” marks in the battery compartment. • To prevent damage or leakage of battery fluid: • Do not use a new battery together with an old one. • Do not use two different types of batteries. • Do not short-circuit, disassemble, heat or dispose of batteries in flames. • Remove the batteries from the remote control unit when you do not plan to use it for an extended period of time. • If the battery fluid should leak, carefully wipe the fluid off the inside of the battery compartment and insert new batteries. • When replacing the batteries, have the new batteries ready and insert them as quickly as possible. e Put the rear cover back on. (2) Using the remote control unit B Approx. 7m / 22 feet 30° SLEEP SOURCE 9 R ENTE - VCR TOP SUB TITLE 20 CH MENU + SURROUN PARAMET ER D DVD - MENU A-B ENTER REPEAT D.AUX 3 E-2 6 ON TITLE TV SLIDECHARAC. IN MODE TV TIME CH RANDOM EDIT/MENT V ZOOM BAND TV U SEARCH CD CH SRS MODE TUNING TV VOL / + DECODE TUNER CH - + DISPLAY AUDIO / VCR IN/SURR. REPEAT MEMO TUNER AUTO FUNCTION IN/SURR. 2 TAPE/LIN 5 STEREO VIRTUAL + /V B RETURN ANGLE RC-93 6 TAPE - A D TUNER CDR + +10 SURROUN MUTING TONE/SD TV MD 2 9 7 STATUS SELECT - 8 STEREO MODE SYSTEM 1 DVD 8 6 3 SETUP CH OFF NTSC/PAL RECVCR CLEAR PROG/DIR MODE ECT INPUT 1 5CH 0 /10 TONE DVD 1 MD/LINE- 4 7 DIRECT CALL TEST • Point the remote control unit at the remote sensor on the main unit as shown on the diagram. • The remote control unit can be used from a straight distance of approximately 7 meters/22 feet from the main unit, but this distance will be shorter if there are obstacles in the way or if the remote control unit is not pointed directly at the remote sensor. • The remote control unit can be operated at a horizontal angle of up to 30 degrees with respect to the remote sensor. 30° NOTES: • It may be difficult to operate the remote control unit if the remote sensor is exposed to direct sunlight or strong artificial light. • Do not press buttons on the main unit and remote control unit simultaneously. Doing so may result in malfunction. • Neon signs or other devices emitting pulse-type noise nearby may result in malfunction, so keep the set as far away from such devices as possible. 1ADV-M71E2_ENG p1-60 03.12.25 1:05 PM ページ 21 ENGLISH • The included remote control unit (RC-966) can be used to operate not only the ADV-M71 but also to perform system operations for the D-M31 series and to operate other remote control compatible DENON products. In addition, the remote control operation codes of other major brands of TVs and video decks are also stored in the remote control unit, so the unit can be used to operate these TVs and video decks as well. 3 [1] MD recorder system buttons (operated with mode switch 2 set to “MD”) OFF SLEEP ON VCR REC NTSC/PAL TITLE TV IN T V ENTER A-B REPEAT CHARAC. SLIDE MODE EDIT/MENU ZOOM SOURCE CLEAR TV CH RDS PROG/DIRECT (3) Operating DENON audio components • Turn on the power of all the components before operating them. • Depending on the model and year of make of your component, some of the keys may not work. REPEAT MEMO BAND DVD TUNER D.AUX 3 TITLE SOURCE ENTER A-B REPEAT TIME RDS PROG/DIRECT T V EDIT/MENU ZOOM TV CH REPEAT PTY RANDOM MODE MEMO BAND DVD TUNER D.AUX 1 2 TAPE /LINE-2 4 5 6 + - 5CH STEREO AUTO DECODE TUNER 8 9 STEREO VIRTUAL CALL 0/10 +10 - TEST TONE INPUT MODE SURROUND FUNCTION CH TUNER TV / VCR DVD IN/SURR 3 2 TAPE /LINE-2 5 6 + - 5CH STEREO AUTO DECODE TUNER 8 9 + STEREO 0/10 +10 - INPUT MODE SURROUND FUNCTION TUNER TV / VCR DVD IN/SURR. IN/SURR. MD CDR TAPE 2 2 + DVD 8 9 6 - 7 STATUS 3 MUTING SETUP TONE /SDB ENTER SURROUND PARAMETER CH SELECT DISPLAY RETURN ANGLE MENU VCR CH + TOP MENU SUB TITLE AUDIO MENU AUDIO + TOP MENU SUB TITLE CH VIRTUAL CALL SYSTEM DISPLAY ANGLE VCR CH RC-966 TEST TONE A/V SURROUND PARAMETER RETURN TUNING / TV VOL 4 1 RC-966 1 + 7 DIRECT - CT CD SRS RT SEARCH MODE 1 DIRECT 3 TUNING / TV VOL MD/LINE-1 + MD/LINE-1 7 1 + CT CD SRS RT SEARCH MODE CH SELECT TV IN CHARAC. SLIDE MODE TV CH - 3 TV CH ON VCR REC NTSC/PAL CLEAR RANDOM MODE A/V OFF SLEEP PTY TIME - Set mode switch 1 to the “SYSTEM” position. (Blue print) TIME TITLE REC : Disc time display : Name display : Recording (multi-recording function with the DMDM31) SOURCE : MD power on/off EDIT/MENU : Edit mode selection CHARAC : Selection of characters when inputting names ENTER : Entering of edited values CD SRS : CD synchronized recording (DMD-M31 system function) CLEAR : Program clearing RANDOM : Random play on/off REPEAT : Repeat play setting PROG/DIRECT : Program/direct playback selection CALL : Program calling 1~10, +10 : Track number selection 8, 9 : Auto search (cueing) 6, 7 : Manual search (fast-reverse and fast-forward) 1 (/ 3) : Play (play/pause, auto power on and auto function selector with the DMD-M31) 3 : Pause 2 : Stop A/V SYSTEM 2 Set mode switch 2 to the position for the component to be operated (MD, CDR or TAPE). (Blue print) TUNER TV / VCR DVD IN/SURR. IN/SURR. MD CDR TAPE 3 Operate the audio component. • For details, refer to the component’s operating instructions. Operation may not be possible for some models. 21 1ADV-M71E2_ENG p1-60 03.12.25 1:05 PM ページ 22 ENGLISH [2] CD recorder system buttons (operated with mode switch 2 set to “CDR”) OFF SLEEP ON OFF VCR REC NTSC/PAL TITLE TIME SLEEP TV IN T V SOURCE ENTER A-B REPEAT CHARAC. SLIDE MODE EDIT/MENU ZOOM CLEAR SOURCE CLEAR TV CH RDS PROG/DIRECT REPEAT PTY - RANDOM MODE MEMO BAND DVD TUNER D.AUX TV CH + 5 6 + - AUTO DECODE TUNER 7 8 9 + DIRECT STEREO VIRTUAL CALL 0/10 +10 - SURROUND FUNCTION 2 TEST TONE 3 INPUT MODE PTY TIME TV CH RANDOM MODE MEMO BAND DVD TUNER D.AUX + CT CD SRS RT SEARCH MODE TUNING / TV VOL SURROUND PARAMETER RETURN DISPLAY ANGLE MENU AUDIO VCR CH + TOP MENU SUB TITLE RC-966 SURROUND PARAMETER RETURN DISPLAY ANGLE MENU AUDIO VCR CH + TOP MENU REC CD SRS SUB TITLE RC-966 6, 7 1 0 TAPE : Disc time display : Name display and selection of characters when inputting names REC : Recording SOURCE : CD recorder power on/off EDIT/MENU : Menu selection ENTER : Entering of menu items CLEAR : Program clearing RANDOM : Random play on/off REPEAT : Repeat play setting PROG/DIRECT : Program/direct playback selection CALL : Program calling 1~10, +10 : Track number selection 8, 9 : Auto search (cueing) 6, 7 : Manual search (fast-reverse and fast-forward) 1 (/ 3) : Play (play/pause, auto power on and auto function selection with the CDR-M30) 3 : Pause 2 : Stop 22 REPEAT CH CH SELECT TIME TITLE T V EDIT/MENU ZOOM - CH SELECT TUNER TV / VCR DVD IN/SURR A/V TITLE TV IN CHARAC. SLIDE MODE RDS PROG/DIRECT TUNING / TV VOL TAPE /LINE-2 4 ON VCR REC NTSC/PAL ENTER A-B REPEAT TV CH CT CD SRS RT SEARCH MODE 5CH STEREO 1 MD/LINE-1 [3] Tape deck system button (operated with mode switch 2 set to “TAPE”) : Recording : CD synchronized recording (DRR-M31 system function) : Rewind and fast-forward : Forward direction play : Reverse direction play (0 and 1: auto power on and auto function selection with the DRR-M31) 1ADV-M71E2_ENG p1-60 03.12.25 1:05 PM ページ 23 ENGLISH (4) TV and video deck preset memories • Components of other brands can be operated with the included remote control unit by storing their codes in the preset memory. Note that depending on the model some operations may not be possible and some buttons may not operate properly. 3 4 OFF ON VCR REC NTSC/PAL SLEEP ENTER A-B REPEAT CLEAR REPEAT MODE T V EDIT/MENU ZOOM TV CH PTY DVD + TUNER D.AUX 1 2 3 TAPE /LINE-2 5 6 5CH STEREO AUTO DECODE TUNER 8 9 + STEREO VCR REC NTSC/PAL 0/10 +10 - INPUT MODE SURROUND FUNCTION IN/SURR. MD CDR TAPE 1 2 2 + DVD 9 6 - 7 STATUS 3 MUTING SETUP D.AUX 2 3 TAPE /LINE-2 4 5 6 5CH STEREO AUTO DECODE 8 9 7 STEREO TUNER TV / VCR DVD IN/SURR. SYSTEM DVD CH VIRTUAL CALL A/V TUNER 1 MD/LINE-1 0/10 TEST TONE 8 T V TUNING / TV VOL + - DIRECT TIME BAND MD/LINE-1 7 3 4 Press the TV button to preset a TV, the VCR button to preset a video deck, then input the 3-digit number corresponding to the brand of the component whose signals are to be stored in the preset memory (refer to the tables of remote control codes on pages 24 to 27). CT CD SRS RT RANDOM SEARCH MODE MEMO 4 1 TIME TV IN CHARAC. SLIDE MODE TV CH - RDS PROG/DIRECT 4 TITLE SOURCE 4 TONE /SDB ENTER NOTES: • When buttons are pressed while setting the preset memory, their signals are sent from the remote control transmitter, so cover the remote control sensor when setting the preset memory to prevent accidental operation. • Depending on the model and year of make, some of the remote control codes for the brands included on the tables may not operate properly. • For some brands there are multiple types of remote control codes. If an operation does not work, try changing to one of the other codes. SURROUND PARAMETER CH SELECT DISPLAY RETURN ANGLE VCR CH MENU AUDIO + TOP MENU SUB TITLE RC-966 2 Not set upon shipment from the factory. 1 Set mode switch 1 to the “A/V” position. A/V SYSTEM 2 Set mode switch 2 to the “TV/VCR” position. TUNER TV / VCR DVD IN/SURR. IN/SURR. MD CDR TAPE 3 Press the power ON button and the OFF button simultaneously. • The transmission LED (indicator) flashes. OFF ON 23 1ADV-M71E2_ENG p1-60 03.12.25 1:05 PM ページ 24 ENGLISH Combinations of preset codes for different brands TV Admiral 045, 121 Fujitsu Adventura 122 Funai 004, 062 Aiko 054 Futuretech 004 Akai 016, 027, 046 GE 020, 036, 037, 040, 044, 058, 066, 088, 119, 120, Alleron 062 A-Mark 007 Goldstar 015, 029, 031, 039, 048, 051, 056, 057, 067, 125, 147 068, 069, 116, 165 Amtron 061 Anam 006, 007, 036 Grundy 062 Anam National 061, 147 Hitachi 029, 031, 051, 052, 070, 111, 112, 113, 124, 134 AOC 003, 007, 033, 038, 039, 047, 048, 049, 133 Hitachi Pay TV 151 Archer 007 Infinity 017, 071 Audiovox 007, 061 Janeil 122 Bauer 155 JBL 017, 071 Belcor 047 JC Penny 020, 034, 039, 040, 041, 044, 048, 050,058, 066, Bell & Howell 045, 118 Bradford 061 JCB 046 Brockwood 003, 047 JVC 019, 051, 052, 072, 073, 091, 117, 126 Candle 003, 030, 031, 032, 038, 047, 049, 050, 122 Kawasho 018, 046 Capehart 003 Kenwood 038, 056, 057 Celebrity 046 Kloss 010, 032 Circuit City 003 Kloss Novabeam 005, 122, 127, 131 069, 076, 088, 090, 095, 125, 136, 159 029, 030, 031, 032, 034, 038, 047, 049, 050, 054, KTV 074, 123 061, 095, 122, 123 Loewe 071 031, 047, 049 Logik 144 Colortyme 003, 047, 049, 135 Luxman 031 Contec 013, 051, 052, 061 LXI Cony 051, 052, 061 Craig 004, 061 Citizen Concerto 24 004, 062 008, 014, 017, 024, 040, 044, 063, 071, 075, 076, 077, 118, 125 Magnavox 005, 010, 017, 030, 033, 038, 050, 056, 071, 078, 079, 085, 089, 108, 109, 110, 127, 131, 132, 145 Crown 029 Curtis Mathes 029, 034, 038, 044, 047, 049, 053, 095, 118 Marantz 015, 017, 071, 080 Daewoo 027, 029, 039, 048, 049, 054, 055, 106, 107, 137 Matsui 027 Daytron 003, 049 Memorex 014, 027, 045, 083, 118, 144 Dimensia 044 Metz 160, 161, 162, 163, 164 Dixi 007, 015, 027 MGA 001, 039, 048, 056, 057, 058, 065 081, 083 Electroband 046 Midland 125 Electrohome 029, 056, 057, 058, 147 Minutz 066 Elta 027 Mitsubishi 001, 016, 039, 048, 056, 057, 058, 065, 081, 082, Emerson 029, 051, 059, 060, 061, 062, 118, 123, 124, 139, 148 083, 105 Envision 038 Montgomery Ward 011, 020, 144, 145, 146 Etron 027 Motorola Fisher 014, 021, 063, 064, 065, 118 MTC 031, 034, 039, 048, 095 Formenti 155 NAD 008, 075, 076, 128 Fortress 012 National 002, 036, 061, 147 121, 147 1ADV-M71E2_ENG p1-60 03.12.25 1:05 PM ページ 25 ENGLISH National Quenties 002 Sharp NEC 031, 038, 039, 048, 057, 084, 086, 135, 147 Siemens 013 Nikko 054 Signature 045, 144 NTC 054 Simpson 050 Optimus 128 Sony 043, 046, 138, 146, 150 Optonica 011, 012, 093, 121 Soundesign 030, 050, 062 Orion 004, 139 Spectricon 007, 033 Panasonic 002, 009, 017, 036, 037, 071, 141, 143, 147 Squareview 004 Philco 005, 010, 030, 050, 051, 056, 079, 085, 127, 131, Supre-Macy 032, 122 132, 145, 147 Supreme 046 005, 015, 017, 050, 051, 056, 078, 087, 088, 089, Sylvania 005, 010, 017, 030, 078, 079, 085, 089, 101, 127, Philips 131, 132, 147 011, 012, 013, 026, 093, 099, 100, 104, 121 131, 132, 145, 155 Pioneer 124, 128, 142 Symphonic 004, 148 Portland 054 Tandy 012, 121 Price Club 095 Tatung 036, 124 Proscan 040, 044, 125 Technics 037 Proton 035, 051, 092, 129 Teknika 001, 030, 032, 034, 052, 054, 078, 083, 095, 144, 035, 129 Pulsar 042 Quasar 036, 037, 074, 141 Tera Radio Shack 011, 044, 063, 093, 118 Toshiba RCA 040, 044, 125, 130, 137, 151, 152 Realistic 014, 063, 093, 118 Universal 020, 066, 088 Saisho 027 Victor 019, 073, 126 Samsung 003, 015, 034, 053, 055, 057, 094, 095, 136,153 Video Concepts 016 Sansui 139 Viking 032, 122 Sanyo 013, 014, 021, 022, 063, 064, 081, 096 Wards SBR 015 Schneider 015 Zenith 042, 114, 115, 140, 144, 149 Scott 062 Zonda 007 Sears 008, 014, 021, 022, 023, 024, 025, 040, 052, 057, 156, 157 008, 014, 034, 063, 075, 076, 095, 097, 136, 158, 159 005, 045, 066, 078, 085, 088, 089, 093, 102, 103, 131, 132, 148 062, 063, 064, 065, 073, 075, 076, 097, 098, 125, 159 25 1ADV-M71E2_ENG p1-60 03.12.25 1:05 PM ページ 26 ENGLISH VCR Admiral 081 JVC Aiko 095 Kenwood 004, 005, 006, 026, 029, 033, 045, 085, 090 Aiwa 009 Kodak 088 Akai 026, 027, 070, 072, 082, 083, 084 Lloyd 009, 094 055 LXI 088 Amstrad 009 Magnavox 015, 016, 042, 049, 063, 106 ASA 042 Magnin 087 Asha 087 Marantz 004, 005, 006, 015, 042, 049, 085, 090 Audio Dynamic 005, 085 Marta 088 Audiovox 088 MEI 049 Beaumark 087 Memorex 009, 033, 049, 053, 060, 081, 087, 088, 091, 094, Broksonic 086, 093 Calix 088 Metz 123, 124, 125, 126, 127, 128 Candle 006, 087, 088, 089, 090 MGA 001, 017, 027, 041, 097 Canon 049, 057 MGN Technology 087 Capehart 025, 055, 056, 071 Midland Carver 015 Minolta 013, 023 CCE 095 Mitsubishi 001, 003, 008, 013, 014, 017, 027, 029, 039, 040, Citizen 006, 007, 087, 088, 089, 090, 095 Alba 115 011 041, 045, 097 Craig 007, 087, 088, 091, 115 Motorola Curtis Mathes 006, 049, 073, 080, 087, 090, 092 Montgomery Ward 001, 002, 007, 009, 049, 063, 081, 115, 117 Cybernex 087 MTC 009, 087, 094 Daewoo 025, 055, 059, 074, 089, 093, 095, 096 Multitech 007, 009, 011, 087, 090, 094 Daytron 025, 055 NAD 038 DBX 005, 085 NEC 004, 005, 006, 018, 026, 029, 045, 061, 062, 085 Dumont 053 Nikko 088 009 Noblex 087 Electrohome 001, 088, 097 Optimus 081, 088 Electrophonic 088 Optonica 021 Emerson 001, 009, 017, 027, 086, 088, 089, 092, 093, 097, Panasonic 024, 049, 064, 066, 067, 068, 069, 107 100, 101, 102, 103, 104, 117 Perdio 009 Fisher 009, 028, 031, 053, 054, 091, 098, 099, 115 Pentax 006, 013, 023, 058, 090 GE 007, 011, 049, 050, 051, 052, 073, 080, 087 Philco 015, 016, 049 047, 048 Philips 015, 021, 042, 049, 105 Goldstar 006, 012, 062, 088, 129 Pilot 088 Gradiente 094 Pioneer 005, 013, 029, 036, 037, 038, 045, 085 Grundig 042 Portland 025, 055, 090 Harley Davidson 094 Proscan 063, 080 Harman Kardon 040, 062 Pulsar 060 Hi-Q 091 Quartz 033 Hitachi 009, 013, 023, 026, 058, 108, 109, 110, 111 Quasar 034, 035, 049 JC Penny 004, 005, 007, 023, 028, 049, 062, Radio Shack 001, 002, 021, 081, 087, 088, 091, 094, 097, 098, Radix 088 Dynatech Go Video Jensen 013, 026 081 115 085, 087, 088 26 004, 005, 006, 026, 029, 043, 044, 045, 046, 085 1ADV-M71E2_ENG p1-60 03.12.25 1:05 PM ページ 27 ENGLISH Randex 088 Symphonic 009, 094 RCA 007, 013, 019, 023, 058, 063, 064, 065, 073, 080, Tandy 009 082, 087 Tashiko 009, 088 009, 021, 031, 033, 049, 053, 081, 087, 088, 091, Tatung 004, 026, 030 094, 097, 098 Teac 004, 009, 026, 094 Ricoh 055 Technics 024, 049 Salora 033, 041 Teknika 009, 010, 022, 049, 088, 094 Samsung 007, 011, 051, 059, 070, 083, 087, 089, 113 TMK 087, 092 Sanky 081 Toshiba 013, 017, 020, 041, 059, 089, 098, 099, 117 Sansui 005, 026, 029, 045, 061, 085, 114 Totevision 007, 087, 088 Sanyo 032, 033, 053, 087, 091, 115, 116 Unirech 087 SBR 042 Vecrtor Research 005, 062, 085, 089, 090 Scott 017, 020, 086, 089, 093, 117 Victor 005, 045, 046, 085 Sears 013, 023, 028, 031, 033, 053, 054, 088, 091, 098, Video Concepts 005, 027, 085, 089, 090 099, 115 Videosonic 007, 087 055 Wards 013, 021, 023, 087, 088, 089, 091, 094, 097, 118, Realistic Sentra Sharp 001, 002, 021, 097 Shogun 087 XR-1000 094 Sony 075, 076, 077, 078, 079, 121, 122 Yamaha 004, 005, 006, 026, 062, 085 STS 023 Zenith 060, 078, 079 Sylvania 009, 015, 016, 017, 041, 049, 094 119, 120 27 1ADV-M71E2_ENG p1-60 03.12.25 1:05 PM ページ 28 ENGLISH (5) Operating the TV/video deck after storing its remote control signals in the preset memory OFF 3-w ON VCR REC NTSC/PAL SLEEP ENTER A-B REPEAT CLEAR TIME TV IN T V CHARAC. SLIDE MODE TV CH EDIT/MENU ZOOM TV CH - RDS PROG/DIRECT PTY MODE DVD REPEAT RANDOM MEMO BAND TUNER D.AUX 3 + TUNING / TV VOL 1 2 TAPE /LINE-2 4 5 6 + - 5CH STEREO AUTO DECODE TUNER 8 9 + DIRECT STEREO 3-q CH VIRTUAL CALL 0/10 +10 - TEST TONE INPUT MODE SURROUND FUNCTION TUNER TV / VCR DVD IN/SURR. A/V SYSTEM IN/SURR. MD CDR TAPE 1 2 2 9 6 - 7 STATUS 3 MUTING SETUP TONE /SDB ENTER SURROUND PARAMETER CH SELECT DISPLAY RETURN 3-w ANGLE VCR CH MENU AUDIO + TOP MENU SUB TITLE RC-966 1 Set mode switch 1 to the “A/V” position. A/V SYSTEM 2 Set mode switch 2 to the “TV/VCR” position. TUNER TV / VCR DVD IN/SURR. IN/SURR. MD CDR TAPE 3 Operate the video component. • For details, refer to the component’s operating instructions. It may not be possible to operate some models. NOTE: • The TV’s “TV (POWER)” and “TV IN” buttons can be operated as long as mode switch 1 is set to the “A/V” position, regardless of the position of mode switch 2. 28 3 Monitor TV (TV) and video deck (VCR) system buttons q TV system buttons TV 0~9 TV IN TV VOL +, – TV CH +, – : : : : : Power on/off Channel numbers TV input switching Volume up/down Channel switching w Video deck system buttons + DVD 8 3-q CT CD SRS RT SEARCH MODE MD/LINE-1 7 1 TITLE SOURCE VCR : Power on/off VCR CH +, – : Channel switching 6, 7 : Manual search (fast-forward and fast-backward) 1 : Play 3 : Pause 2 : Stop 1ADV-M71E2_ENG p1-60 03.12.25 1:05 PM ページ 29 ENGLISH 10 SETTING UP THE SYSTEM (1) System setup items • Once all connections with other AV components have been completed as described in “CONNECTIONS” (see pages 8 to 14), make the various settings described below on the monitor screen using the ADV-M71’s on-screen display function. • Use the following buttons to set up the system: SYSTEM SETUP button 6 Press this to display the system setup menu. - 7 STATUS 3 MUTING SETUP TONE /SDB CURSOR buttons 1 and 0:Use these to move the cursors (1 and 0) to the left and right on the screen. ENTER SURROUND PARAMETER CH SELECT RETURN DISPLAY ANGLE VCR CH AUDIO + TOP MENU MENU SUB TITLE • and ª: Use these to move the cursors (• and ª) to the up and down on the screen. ENTER button Press this to switch the display. Also use this button to complete the setting. System setup items and default values (set upon shipment from the factory) Setup Quick set up Speaker Configuration System Setup Delay Time Channel Level Speaker 4:3 PS 2CH Virtual Set the screen size and the speaker system. Input the combination of speakers in your system and their corresponding sizes (SMALL for regular speakers, LARGE for full-size, full-range) to automatically set the composition of the signals output from the speakers and the frequency response. Front Sp. Center Sp. Surround Sp. Sub Woofer Large “__” “__” “__” Sw Freq. = 150 Hz This parameter is for optimizing the timing with which the audio signals are produced from the speakers and subwoofer according to the listening position. At the listening position, listen to the test tones output from the different speakers and set so that the playback level from the different speakers is equal. AV1 VIDEO OUTPUT To select whether composite video signals or S video signals or RGB signals will be output from the AV1 SCART terminals. DVD auto power off setting The power automatically switches to standby if no operation is performed for 30 minutes while in the stop mode with the function set to DVD. Function Assignment Set the LINE-1 and LINE-2 function names and turn the analog recording output (REC OUT) on or off. Disc Setup Default settings TV Aspect Set the audio language, subtitle language and disc menu language for when playing discs. Front & Subwoofer Center 2.7m (9ft) “__” Surround “__” Front L Center Front R Surround R Surround L Sub Woofer 0 dB “__” 0 dB “__” “__” “__” VIDEO OUTPUT VIDEO power does not turn off automatically LINE-1 LINE-2 MD TAPE ON Dialog Subtitle Disc Menu English English English REC OUT Wall Paper OSD Setup Set the wallpaper for the setup and operation screens. DVD Setup Blue Video Setup TV Type 4 : 3 PS PAL Black level Set the screen size and video system for the TV being used. Audio Setup Set the digital audio signal format and the linear PCM sampling frequency and bit conversion. Ratings Make the playback restriction setting for DVDs with restricted viewing and set the password required for changing the setting. Other Setup TV Aspect Make the closed caption setting for DVDs. (A commercially available decoder is required to display the closed captions.) Digital Out DARKER LPCM Select Normal OFF Rating Level Pass Word Change No Limit 0000 (Default) Closed Caption Slide Show OFF 5SEC 29 1ADV-M71E2_ENG p1-60 03.12.25 1:05 PM ページ 30 ENGLISH (2) Quick setup procedure • Refer to “Connections” (pages 8 to 14) and check that all the connections are correct. B 1 SURROUND / SELECT DVD SURROUND RECEIVER ADV-M71 PUSH - PARAM. - + BAND MENU / SET TONE / SDB Turn on the power. • The power indicator (LED) lights green, the power turns on and the display lights. VOLUME FUNCTION ON / STANDBY Green ON / STANDBY PHONES ON 1 Main unit OFF ENTER A-B REPEAT CLEAR 1 ON VCR REC NTSC/PAL SLEEP TITLE SOURCE TIME TV IN T V CHARAC. SLIDE MODE TV CH EDIT/MENU ZOOM TV CH - RDS PROG/DIRECT REPEAT PTY RANDOM MODE MEMO BAND DVD TUNER D.AUX 3 + CT CD SRS RT SEARCH MODE TUNING / TV VOL 1 2 MD/LINE-1 TAPE /LINE-2 4 5 6 + - 5CH STEREO AUTO DECODE TUNER + 7 8 9 DIRECT STEREO VIRTUAL CALL 0/10 +10 - TEST TONE INPUT MODE SURROUND FUNCTION Remote control unit Several seconds are required from the time the power button is pressed until the power turns on. This is due to the built-in muting circuit that turns off (mutes) the sound when the power is turned on and off. The power indicator flashes green while the muting circuit is activated. Even when the power button has been pressed again and the power has been set to the standby mode, power is still supplied to some circuits. When leaving home or traveling, be sure to unplug the power cord from the power outlet. In the standby mode, the power indicator is lit red. The indicator is orange when the timer is set. CH TUNER TV / VCR DVD IN/SURR. A/V SYSTEM 2 IN/SURR. MD CDR TAPE 1 2 + DVD 8 Press the SETUP button to display the setup screen. 9 6 - 7 Remote control unit STATUS 3 2,12 SETUP MUTING SETUP TONE /SDB ENTER SURROUND PARAMETER CH SELECT DISPLAY RETURN ANGLE MENU AUDIO VCR CH 4,6,8,11 3,5,7,9,10 + TOP MENU SUB TITLE RC-966 3 Use the • and ª cursor buttons to select “Quick Setup”. • The selected item is displayed in yellow. Remote control unit 30 1ADV-M71E2_ENG p1-60 03.12.25 1:05 PM ページ 31 ENGLISH 4 Press the ENTER button to display the menu’s setting screen. On the setting screen, the selected item is displayed in yellow and the values of the other items are displayed in green. ENTER 6 [2] Speaker system settings Remote control unit [1] TV screen size setting • “Return” is displayed in yellow. • The currently set value is displayed in green. • If you do not want to change the setting, press the ENTER button at “Return”. The screen in step 2 reappears. • To change the setting, proceed to step 7 below. 7 • The currently set value is displayed in yellow. 5 Use the • and ª cursor buttons to select the desired TV screen size and display type. The selected TV screen size is displayed in yellow and the description is displayed in green. Use the • and ª cursor buttons to select the speaker system to be used. Remote control unit Remote control unit 8 Press the ENTER button to set the selected setting. • For settings other than “5.1-chanel surround”, the setup screen in step 2 reappears. /The setup mode is quit in step 12. The setup mode can also be quit by using the • and ª cursor buttons at the setup screen to select “EXIT SETUP” then pressing the ENTER button. • If “5.1-chanel surround” is selected, the screen shown below appears. ENTER Remote control unit [3] Room and Seating position settings 6 Press the ENTER button to set the selected setting. • The screen shown below appears. ENTER Remote control unit • The currently set value is displayed in green. 31 1ADV-M71E2_ENG p1-60 03.12.25 1:05 PM ページ 32 ENGLISH 9 About the speaker system settings Use the • and ª cursor buttons to select “ROOM SPACE”, then use the 0 and 1 cursor buttons to set the size of the room. • The set size is displayed in yellow. B 2CH VIRTUAL Select this when only using with the two speakers for the front channels. B 2CH VIRTUAL & SW Select this when using two speakers for the front channels and a subwoofer with built-in amplifier. • Settings Front : Small Subwoofer : Yes Subwoofer frequency : 150 Hz Set the front speakers and subwoofer at equal distances. B 5.1CH SURROUND Select this when using two speakers for the front channels, a center speaker, two speakers for the surround channels and a subwoofer with built-in amplifier. • Settings Front : Small 2.7m (9ft) Center : Small 2.4m (8ft) Surround : Small 2.1m (7ft) Subwoofer : Yes 2.7m (9ft) Subwoofer frequency : 150 Hz The room setting is set to “MED.”, the listening position to “BACK”. Remote control unit 10 Use the • and ª cursor buttons to select “SEATING POSITION”, then use the 0 and 1 cursor buttons to set the position. • The set position is displayed in yellow. Remote control unit 11 Press the ENTER button to end the settings. • The screen in step 2 reappears. ENTER Remote control unit 12 32 Press the SETUP button to quit the setup mode. The setup mode can also be quit by using use the • and ª cursor buttons at the setup screen to select “EXIT SETUP” then pressing the ENTER button. SETUP Remote control unit NOTE: • The speaker system is set to “2CH VIRTUAL” upon shipment from the factory. If using speakers for the two front channels and a subwoofer, change the setting to “2CH VIRTUAL & SW”. 1ADV-M71E2_ENG p1-60 03.12.25 1:05 PM ページ 33 ENGLISH (3) Detailed system setup (changing the system settings) • The quick system settings and original settings set upon shipment from the factory are changed using the system setting changing menu. The settings are stored in the memory until they are changed the next time, and remain valid even when the power is turned off. [1] Speaker settings (type of speaker and whether or not the speaker is connected) • The output component of the different channels and properties are adjusted automatically according to the combination of speakers actually used. 1 Press the SETUP button to display the setup screen. SETUP 3 ENTER Remote control unit Remote control unit Remote control unit When the cursor is at a tag icon on the system setting changing menu screen, the settings screen can also be selected by pressing the ª cursor button. You can return to the tag icon by pressing the • cursor button. • The speaker settings screen in step 4 appears. 4 Use the •, ª, 0 and 1 cursor buttons to select whether or not the various speakers are connected, their size and other parameters. CENTER SPEAKER 2 Use the • and ª cursor buttons to select “SYSTEM SETUP” under “<ADVANCED SETUP>”, then press the ENTER button. FRONT SPEAKERS SUB WOOFER Remote control unit ENTER SURROUND SPEAKERS • The item currently being set is displayed in yellow, and the setting values for other items are displayed in green. Remote control unit 3 Remote control unit At the system setting changing menu, use the 0 and 1 cursor buttons to select the “SPEAKER CONFIGURATION” tag icon, then press the ENTER button. 5 Press the ENTER button to enter the settings. • The next screen in the system setting changing menu appears. ENTER Remote control unit 33 1ADV-M71E2_ENG p1-60 03.12.25 1:05 PM ページ 34 ENGLISH NOTE: • Select the speaker size not by the physical size of the speaker but by the speaker’s capacity to reproduce low frequencies of 100 Hz or less. If you do not know, determine the best setting by comparing the sound when the setting is set to “Small” and “Large”, keeping the volume low enough to prevent damage to the speaker. Subwoofer (SW FREQ.) frequency • For the subwoofer frequency at the speaker setting screen, set the bass crossover frequency for playback from the subwoofer. • Select “80 Hz”, “120 Hz”, “150 Hz” or “180 Hz” (-6 dB for each). Bass sound below these frequencies is played from the subwoofer. (This is set to “150 Hz” by factory default.) NOTE: • Select “Large” or “Small” not according to the actual size of the speaker but according to the speaker’s capacity for playing low frequency (approximately 100 Hz and below) signals. If you do not know, try comparing the sound at both settings (setting the volume to a level low enough so as not to damage the speakers) to determine the proper setting. Assignment of low frequencies • In the Dolby Digital, Dolby Pro Logic II, DTS, and virtual surround modes, the low frequency signals for channels whose speaker settings are set to “Small” are assigned to the subwoofer. The low frequencies of channels set to “Large” are played from those channels. (If set to “120 Hz”, channels set to “Small” play sounds of 120 Hz and greater, while bass frequencies of under 120 Hz are played from the subwoofer.) • In surround modes other than the ones listed above, low frequencies below the frequency set at the subwoofer frequency setting are played from the subwoofer regardless of whether the speakers are set to “Large” or “Small”. • Set the subwoofer frequency according to the low frequency playback abilities of your speakers and subwoofer. Parameters Large…… Select this when using speakers that can fully reproduce low sounds of below 100 Hz. Small…… Select this when using speakers that do not provide sufficient volume for playing low frequencies of 100 Hz and less. When this setting is made, frequencies below the frequency set at the subwoofer frequency setting are assigned to the subwoofer. None…… Select this when no speakers are installed. Yes/No…. Select “Yes” when a subwoofer is installed, “No” when a subwoofer is not installed. If the subwoofer has sufficient low frequency playback capacity, good sound can be achieved even when “Small” is set for the front, center and surround speakers. For the majority of speaker system configurations, using the SMALL setting for all five main speakers and Subwoofer On with a connected subwoofer will yield the best results. 34 Subwoofer mode • The subwoofer mode setting is only valid when “LARGE” is set for the front speakers and “YES” is set for the subwoofer in the “SPEAKER CONFIGURATION” settings. • When the “LFE+MAIN” playback mode is selected, the low frequency signal range of channels set to “LARGE” are produced simultaneously from those channels and the subwoofer channel. In this playback mode, the low frequency range expand more uniformly through the room, but depending on the size and shape of the room, interference may result in a decrease of the actual volume of the low frequency range. • Selection of the “LFE ” play mode will play the low frequency signal range of the channel selected with “LARGE” from that channel only. Therefore, the low frequency signal range that are played from the subwoofer channel are only the low frequency signal range of LFE (only during Dolby Digital or DTS signal playback) and the channel specified as “SMALL” in the setup menu. • Select the play mode that provides bass reproduction with body. • When the subwoofer is set to “YES”, bass sound is output from the subwoofer regardless of the subwoofer mode setting in surround modes other than Dolby/DTS. 1ADV-M71E2_ENG p1-60 03.12.25 1:05 PM ページ 35 ENGLISH [2] Delay time (distance setting) • Input the distances from the listening position and the various speakers to set the surround delay time. • Upon shipment from the factory default the delay time is set to the default values in step 3 below. Preparation: Measure the distance from the listening position to the various speakers. FL Center SL FR L1: Distance between center speaker and listening position L2: Distance between front speakers and listening position L3: Distance between surround speakers and listening position SR Listening position 1 2 If you are not at the system setting changing menu screen, read step 1 and 2 on page 33. 4 At the system setting changing menu screen, use the 0 and 1 cursor buttons to select “DELAY TIME”, then press the ENTER button. Use the • and ª cursor buttons to select the speaker, then use the 0 and 1 cursor buttons to set the distance between the speaker and the listening position. • The distance changes by 0.1 meters (or 1 foot when the unit is set to feet) each time the 0 and 1 cursor button is pressed. Select the value closest to the measured distance. ENTER Remote control unit Remote control unit • The delay time setting screen appears. Make sure the difference in the distances set for the various speakers is no greater than 3.0 meters (10 feet). If an inappropriate distance is set, “CAUTION: OUT OF SETTING RANGE” is displayed. Change the position of the speaker and make the setting over. 5 • The unit for the distance can be switched between “m” (meters) and “ft” (feet) using the 0 and 1 cursor buttons. If you do not want to change the unit, press the ª cursor button to proceed to the next step. 3 Press the ENTER button to enter the settings. • The next screen in the system setting changing menu appears. ENTER Remote control unit At “Default”, select “Yes” to set the delay times for the different speakers to the default values. B B Yes: The values are set to the defaults. No: The current settings are retained. 35 1ADV-M71E2_ENG p1-60 03.12.25 1:05 PM ページ 36 ENGLISH [3] Adjusting the channel level • Adjust so that the playback levels of the different channels are equal. • Make this adjustment by listening to the test tones output from the speakers at the listening position. • By factory default all the levels of all the channels are set to 0 dB. • This adjustment can also be made directly from the remote control unit. (CH SELECT Button) 1 2 If you are not at the system setting changing menu screen, read step 1 and 2 on page 33. 6 q When “Auto” is selected at “Test Tone”: At the system setting changing menu screen, use the 0 and 1 cursor buttons to select “Channel Level”, then press the ENTER button. ENTER Remote control unit Remote control unit • The channel level adjustment screen appears. • Test tones are automatically output from the speakers at intervals of 4 seconds for two of the cycles shown below, then at intervals of 2 seconds from the third cycle on. Front left Subwoofer Center Surround left Front right Surround right Use the 0 and 1 cursor buttons to adjust the channel levels so that the volume of the test tones output from the different speakers sounds the same. • The level changes in units of 1 dB each time the 0 and 1 cursor button is pressed. The level can be adjusted in the range –12 dB to +12 dB. w When “Manual” is selected at “Test Tone”: 3 Use the 0 and 1 cursor buttons to select “Auto” or “Manual” for the “Test Tone” mode. • The selected setting is displayed in yellow. Remote control unit B B 4 Use the • and ª cursor buttons to select the speaker from which the test tone is to be output, then use the 0 and 1 cursor buttons to adjust the channel levels so that the volume Yes: The level settings for all the speakers are set to 0 dB. No: The currently set level settings are retained. the same. • The level changes in units of 1 dB each time the 0 and 1 cursor button is pressed. The level can be adjusted in the range –12 dB to +12 dB. B 36 Adjust the levels listening to test tones automatically output from the different speakers. Manual: Select the speakers from which the test tones are output when adjusting the levels. Detailed settings can be made when this is set to “Manual” first. When “Yes” is selected at “Level Clear”, the level settings for all the speakers are set to 0 dB. B 5 Auto: Adjust the channel levels in the test tone mode. Use the • and ª cursor buttons to select the “Test Tone Start” mode, then use the 0 cursor button to select “Yes”. The test tone is output. Use the MASTER VOLUME control on the main unit or the VOLUME buttons on the remote control unit to adjust the volume of the test tone to a level at which it is easy to make this adjustment. of the test tones output from the different speakers sounds 1ADV-M71E2_ENG p1-60 03.12.25 1:05 PM ページ 37 ENGLISH 7 Press the ENTER button to enter the settings. • The next screen in the system setting changing menu appears. ENTER Remote control unit To cancel the settings after the adjustments have been made Display the channel level adjustment screen, then use the •, ª, 0 and 1 cursor buttons to select “Level Clear” and select “Yes”. The level settings for all the speakers are set to 0 dB. [5] DVD Auto Power Off setting • The ADV-M71 is equipped with a function for automatically setting the power to the standby mode if no operation is performed for 30 minutes when the function is set to DVD. Here set whether to use this function or not. • By factory default this is set to “No”. 1 2 If you are not at the system setting changing menu screen, read step 1 and 2 on page 33. At the system setting changing menu screen, use the 0 and 1 cursor buttons to select “DVD AUTO POWER OFF”, then press the ENTER button. NOTE: When the channel levels are adjusted at the channel level settings, the adjusted values are applied to all playback modes. ENTER [4] Setting the AV1 video output (DVD only) • To select whether composite video signals or S video signals or RGB signals will be output from the AV1 SCART terminals. • The factory default setting is “VIDEO”. 1 2 Remote control unit Remote control unit • The DVD auto power off setting screen appears. If you are not at the system setting changing menu screen, read step 1 and 2 on page 33. At the “SYSTEM SETUP MENU” screen, select “AV1 VIDEO OUTPUT” and press the ENTER button. ENTER Remote control unit Remote control unit • Switch to the “AV1 VIDEO OUT” screen. 3 Use the 0 and 1 cursor buttons to select the “Auto Power Off” mode. B B 4 Yes: The function for automatically turning the power off when the function is set to DVD is activated. No: The auto power off function is not activated. Press the ENTER button to enter the settings. • The next screen in the system setting changing menu appears. ENTER Remote control unit 3 Select “VIDEO OUTPUT”. • VIDEO: Composite video signals will be output. • S-VIDEO: S video signals will be output. • RGB: RGB signals will be output. 4 Press the ENTER button to enter the settings. • The next screen in the system setting changing menu appears. ENTER Remote control unit 37 1ADV-M71E2_ENG p1-60 03.12.25 1:05 PM ページ 38 ENGLISH [6] Function settings • Set the LINE-1 and LINE-2 function names and turn the analog recording output (REC OUT) on or off. • When used in combination with the D-M31 series, set according to the components being used and make system connections for convenient system functions. • It is also possible to assign the D.AUX digital input to LINE-2. 1 2 If you are not at the system setting changing menu screen, read step 1 and 2 on page 33. At the system setting changing menu screen, use the 0 and 1 cursor buttons to select “FUNCTION ASSIGNMENT”, then press the ENTER button. ENTER Remote control unit Remote control unit • The input function setting screen appears. Input function settings • LINE-1 and LINE-2 can be set as described below. LINE-1 : “MD”, “CD-R”, “MD/CD-R” or “AUX” can be selected. (“MD/CD-R” can only be set when a system MD recorder, cassette deck and CD recorder are all connected and system operations are being used.) LINE-2 : This can be set to “TAPE”, “MD”, “AUX” or “D.AUX”. (Set “D.AUX” to use the D.AUX digital input in combination with the LINE-2 analog input.) • The setting for LINE-1 has priority. Once a function is set for LINE-1, it is not possible to set the same function for LINE-2. (For example, if “MD” is selected for LINE-1, “MD” is no longer offered as one of the choices for LINE-2.) LINE-1/LINE-2 analog recording output setting • Normally set this to “On”. • With the DVD or D.AUX exclusive digital input function, set this to “Off” if noise is generated when playing sources with high bit rates in the Dolby Virtual Speaker mode. • This setting is only valid in the Dolby Virtual Speaker mode for the DVD or D.AUX exclusive digital input function. (In surround modes other than the Dolby Virtual Speaker mode and with other input functions, analog recording signals are output, regardless of this setting.) • Analog recording is not possible when this is set to “Off”. To record, use a mode other than the Dolby Virtual Speaker mode (stereo, for example). (4) After changing the system settings • This completes the procedure for changing the system settings. Once the speaker settings, delay times and channel levels have been set, there is no need to change the settings again unless the connected AV components or speakers are changed or the speakers are moved to different positions. • DVD auto power off and function settings as necessary. 3 Use the • and ª cursor buttons to select the item to be set, then use the 0 and 1 cursor buttons to make the settings. B LINE-1 Function name selection (“MD” by default) AUX B CD-R MD MD/CD-R LINE-2 Function name selection (“TAPE” by default) TAPE AUX D.AUX 1 At the system setting changing menu screen, press the SETUP button. • The new settings are entered and the on-screen display turns off. SETUP Remote control unit The setup procedure can be quit at any point by pressing this button. LINE-1/LINE-2 REC OUT : Set whether to turn the recording output during playback in the Dolby Virtual Speaker mode when the function set to DVD or the D.AUX exclusive digital input on or off. On : The signals are output in stereo. (Factory default) Off : The signals are not output. (Recording is not possible.) B 4 Press the ENTER button to enter the settings. • The next screen in the system setting changing menu appears. ENTER Remote control unit 38 NOTE: • When system settings have been changed with the system setting changing menu and a speaker system is selected with the quick system settings, the speaker settings and delay time settings are changed to the values preset for the quick system settings. 1ADV-M71E2_ENG p1-60 03.12.25 1:05 PM ページ 39 ENGLISH 11 PLAY BACK (1) Before Operating B SURROUND / SELECT DVD SURROUND RECEIVER ADV-M71 PUSH - PARAM. - + BAND MENU / SET TONE / SDB FUNCTION VOLUME 1 2 Refer to “CONNECTIONS” (pages 8 to 14) and check that all connections are correct. Turn on the power. Press the POWER button. ON / STANDBY Light (green) ON / STANDBY ON PHONES 2 Main unit OFF ENTER A-B REPEAT CLEAR 2 ON VCR REC NTSC/PAL SLEEP TITLE SOURCE TIME TV IN T V CHARAC. SLIDE MODE TV CH EDIT/MENU ZOOM TV CH - RDS PROG/DIRECT REPEAT PTY RANDOM MODE MEMO BAND DVD TUNER D.AUX 3 + CT CD SRS RT SEARCH MODE TUNING / TV VOL 1 2 MD/LINE-1 TAPE /LINE-2 4 5 6 + - 5CH STEREO AUTO DECODE TUNER Remote control unit When pressed, the power turns on and the display lights. The sound is muted for several seconds, after which the unit operates normally. When pressed again, the power turns off, the standby mode is set and the display turns off. Whenever the ON/STANDBY button is in the STANDBY state, the apparatus is still connected on AC line voltage. Please be sure to unplug the cord when you leave home for, say, a vacation. + 7 8 9 DIRECT STEREO VIRTUAL CALL 0/10 +10 - TEST TONE INPUT MODE SURROUND FUNCTION CH TUNER TV / VCR DVD IN/SURR. A/V SYSTEM IN/SURR. MD CDR TAPE 1 2 + DVD 8 9 6 - 7 STATUS 3 MUTING SETUP TONE /SDB ENTER SURROUND PARAMETER CH SELECT DISPLAY RETURN ANGLE MENU AUDIO VCR CH + TOP MENU SUB TITLE RC-966 39 1ADV-M71E2_ENG p1-60 03.12.25 1:05 PM ページ 40 ENGLISH (2) Loading Disc 2 Set discs in the disc tray with the labeled (printed) side facing up. (2) Loading Discs • Pick up the disc carefully so as not to touch the signal surface and hold it with the labeled side facing up. • With the disc tray fully open, set the disc in the disc tray. • Set 12 cm discs in the outer tray guide (Figure 1), 8 cm discs in the inner tray guide (Figure 2). • Press the OPEN/CLOSE button. The disc is automatically loaded. • The disc tray can also be closed automatically to load the disc by pressing the PLAY button. 12 cm disc guide 8 cm disc guide Disc tray Figure 1 NOTE: • Do not move the this unit while a disc is playing. Doing so may scratch the disc. Outer disc tray (1) Opening and Closing the Disc Tray q Turn on the power. w Press the OPEN/CLOSE button. 12 cm disc OPEN/CLOSE button Figure 2 Inner disc tray Disc tray NOTES: • Even when the power is in the standby mode, when the OPEN/CLOSE button is pressed, the ADV-M71’s power turns on and the disc tray operates. (Auto power on function) • Even if the function is set to something other than DVD, when the OPEN/CLOSE button is pressed, the function switches to DVD and the disc tray operates. (Auto function select function) • Do not strike on the button with a pencil, etc. 40 8 cm disc NOTES: • If a foreign object is caught in the disc tray during closing, simply press the OPEN/CLOSE button again and the tray will open. • Do not press the disc tray in by hand when the power is off. Doing so will damage it. • Do not place foreign objects in the disc tray. Doing so will damage it. 1ADV-M71E2_ENG p1-60 03.12.25 1:05 PM ページ 41 ENGLISH (3) Playback IMPORTANT SETUP INFORMATION This set has the following presettings: “DISC SETUP”, “OSD SETUP”, “VIDEO SETUP”, “AUDIO SETUP”, “RATINGS”, and “OTHER SETUP”. These presettings have been preset upon shipment from the factory. If you wish to change them to suit your specific purposes, refer to pages 94 to 106. (3)-3 OFF ENTER A-B REPEAT CLEAR T V REPEAT PTY RANDOM MEMO BAND DVD TUNER D.AUX 3 + CT CD SRS RT SEARCH MODE TUNING / TV VOL 1 2 MD/LINE-1 TAPE /LINE-2 4 5 6 + - 5CH STEREO AUTO DECODE TUNER + 7 8 9 DIRECT STEREO VIRTUAL CALL 0/10 +10 - TEST TONE INPUT MODE SURROUND FUNCTION CH TUNER TV / VCR DVD IN/SURR. SURROUND / SELECT DVD SURROUND RECEIVER ADV-M71 TIME EDIT/MENU ZOOM TV CH MODE A/V B TITLE TV IN CHARAC. SLIDE MODE TV CH - RDS PROG/DIRECT (3)-5 (3)-2,(3)-4 (3)-1 ON VCR REC NTSC/PAL SLEEP SOURCE SYSTEM PUSH - PARAM. IN/SURR. MD (4)-1 CDR TAPE - BAND MENU / SET TONE / SDB (3)-5 + 1 2 + DVD 8 VOLUME - FUNCTION 6 (3)-8 9 7 ON / STANDBY PHONES STATUS 3 MUTING SETUP TONE /SDB (3)-7 (3)-6 ENTER (3)-1 (3)-8 (4)-1 SURROUND PARAMETER CH SELECT - 1 Turn on the power. • Press the power button, the power indicator lights and the power turns on. ON / STANDBY Light (green) 4 VCR CH + Press the OPEN/CLOSE button. ON Main unit Main unit 2 Remote control unit Press the OPEN/CLOSE button to open the disc tray. 5 Press the PLAY button. • For many interactive DVDs and video CDs with playback control, a menu screen appears. In this case use the procedure in step 6 to select the desired item. Interactive DVDs are DVDs including multiple angles, stories, etc. 1 Main unit 3 Set the disc in the disc tray. DVD Main unit Example: For DVDs with menu screens TOP MENU Apple Banana Orange Strawberry Peach Pineapple Remote control unit Example: For video CDs with playback control 1. Opening 2. 1st movement 3. 2nd movement 4. 3rd movement 5. Ending 41 1ADV-M71E2_ENG p1-60 03.12.25 1:05 PM ページ 42 ENGLISH 6 Use the cursor buttons (•, ª, 0 and 1) to select the desired item. • For some discs there is a second menu screen. If so, press the 9 button to display the next menu screen. (See the disc’s jacket.) 8 Either turn the main unit’s main volume control or use the main volume control buttons on the remote control unit to adjust the volume. The volume is shown on the display. M.VOLUME -20 The cursor buttons (•, ª, 0 and 1) do not work for video CDs. Use the number buttons to select the desired item. + VOLUME Main unit Remote control unit Remote control unit 7 For detailed instructions on operations for the surround modes and surround parameters, see “12 Operating the Surround Functions” on pages 44 to 46. Press the ENTER button. • The desired item is selected and playback starts. • You can return to the menu screen by pressing the TOP MENU button while the DVD is playing, though this depends on the disc. • Press the RETURN button during playback of a video CD to return to the menu screen. • In the “AUTO” input mode, the signals of the disc being played are identified, Dolby Digital, DTS or PCM decoding is selected automatically and the disc is played. • In the Dolby Virtual Speaker surround mode, the signals of the disc being played are automatically decoded in Dolby Digital or DTS then played in the Dolby Virtual Speaker surround mode. • In the “AUTO DECODE” surround mode when a 5.1channel speaker system is set, the signals of the disc being played are identified and automatically decoded in Dolby Digital, DTS or Auto Stereo and the disc is played. ENTER Example: When “Apple” is selected Remote control unit NOTES: TOP MENU • If Apple Banana Orange Strawberry Peach Pineapple Apple appears on the TV screen while buttons are being operated, that operation is not possible on the ADV-M71 or with that disc. • Set the disc in the disc guide. • Only set one disc in the tray. • The disc keeps turning while the menu screen is displayed on the TV screen. (4) Stopping Playback 1 During playback, press the STOP button on the main unit or the remote control unit, playback stops and wall paper is displayed. <Resume play memory function (DVD only)> • With the ADV-M71, when the STOP button is pressed, that position is stored in the memory. At this time, “1” flashes on the display. When the PLAY button is pressed after pressing the STOP button, playback resumes from the position at which it was stopped.The resume play memory function is canceled if the disc tray is opened or the STOP button is pressed a second time. About the DVD standby function When the ADV-M71’s function is set to DVD, the DVD standby mode is set automatically if the disc remains in the stop mode for approximately 10 minutes. • In the DVD standby mode, the DVD section’s power is off and output of the video signals is also off. The ADV-M71’s display reads “DVD standby” at this time. • When in the DVD standby mode, the power of the sections other than the DVD section is on and function switching and other operations can be performed on the main unit and remote control unit. When a DVD control button (the play/pause and button open/close buttons on the main unit, the play button on the remote control unit, etc.) is operated, the DVD section’s power turns on automatically and disc playback and opening/closing of the disc holder can be performed. 42 BAND Main unit 2 Remote control unit The resume play memory function only works for discs for which the elapsed time is shown on the display during playback. Auto power off function. • The ADV-M71 is equipped with a function that automatically switches the power to standby if no operation is performed for 30 minutes while in the stop mode with the function set to DVD. • This function is set to off upon shipment from the factory. If you wish to turn it on, set the “DVD AUTO POWER OFF” setting to “YES” as described on page 37. NOTE: • The DVD standby function only turns off the power of the DVD section. It is different from the DVD auto power off function set with the system settings in Setup in that the DVD section remains functional. 1ADV-M71E2_ENG p1-60 03.12.25 1:05 PM ページ 43 ENGLISH (5) Playing Still Pictures (Pausing) 1 During playback, press the 13 button on the main unit or the 3 button on the remote control unit. • Press the PLAY button to resume normal playback. 3 Main unit (5)-1 (7)-1 Remote control unit + 7 8 9 DIRECT STEREO VIRTUAL CALL 0/10 +10 - TEST TONE INPUT MODE SURROUND FUNCTION CH TUNER TV / VCR DVD IN/SURR. A/V SYSTEM IN/SURR. MD CDR TAPE B (7)-1 SURROUND / SELECT DVD SURROUND RECEIVER ADV-M71 PUSH - PARAM. 1 + (6)-1,(9)-1 BAND TONE / SDB VOLUME FUNCTION + DVD 8 MENU / SET 2 6 9 - 7 STATUS 3 MUTING ON / STANDBY PHONES (5)-1,(8)-1 SETUP TONE /SDB ENTER SURROUND PARAMETER CH SELECT - VCR CH + (6) Forward / Reverse Searching 1 During playback, press one of the 6 / 7 buttons on the remote control unit. 6 : Reverse direction 7 : Forward direction • When pressed again, the search speed increases (DVD, VIDEO CD in seven steps, CD in four steps). • Press the PLAY button to resume normal playback. 6 Playing position Chapter/Track Chapter/Track Chapter/Track Reverse direction , / Forward direction (direction of playback) NOTE: • In some cases the menu screen may reappear when one of the 8 / 9 buttons is pressed during menu playback on a video CD. 7 Searching using the number buttons q During playback, press the search mode button on the remote control unit. • The mode switches as shown below each time the button is pressed: For DVDs : Title , / Chapter For CDs and video CDs : Track (no switching) The search mode set by pressing the search mode button is stored in the memory until the power is turned off. w Use the number buttons on the remote control unit to input the number of the title, chapter or track to be played. Some DVDs or video CDs may be designed to operate in special ways and will not operate as described here. Remote control unit NOTE: • In some cases the menu screen may reappear when one of the 6 / 7 buttons is pressed during menu playback on a video CD. (7) Skipping to the Beginning of Chapters or Tracks 1 During playback, press one of the skip buttons on the main unit or the remote control unit. 8/ : Reverse direction (PREVIOUS) 9/ : Forward direction (NEXT) • A number of chapters or tracks equal to the number of times the button is pressed is skipped. • When the skip back button is pressed once, the pickup returns to the beginning of the currently playing chapter or track. - + Chapter/Track 8 (8) Playing Frame by Frame (for DVDs and video CDs only) 1 During playback, press the 3 button on the remote control unit. • The picture moves forward one frame each time the button is pressed. • Press the PLAY button to resume normal playback. 9 3 Main unit Remote control unit Remote control unit 43 1ADV-M71E2_ENG p1-60 03.12.25 1:05 PM ページ 44 ENGLISH (9) Slow Playback (for DVDs and video CDs only) 6 1 In the still mode, press one of the 6 / 7 buttons on the remote control unit. 6 : Reverse direction 7 : Forward direction • When pressed again, the slow play speed increases. (Four step) (Three step on video CDs) • Press the PLAY button to resume normal playback. 7 Remote control unit NOTE: • Reverse slow play is not possible on video CDs. 12 OPERATING THE SURROUND FUNCTIONS 5 6 - 5CH STEREO AUTO DECODE TUNER 7 8 9 DIRECT STEREO VIRTUAL CALL 0/10 +10 - TEST TONE INPUT MODE SURROUND FUNCTION 4 B + CH SURROUND / SELECT DVD SURROUND RECEIVER ADV-M71 PUSH - PARAM. + - BAND MENU / SET TONE / SDB 2 TUNER TV / VCR DVD IN/SURR. A/V VOLUME SYSTEM 1 3 IN/SURR. MD CDR TAPE FUNCTION 1 ON / STANDBY 2 + PHONES DVD 8 6 5 9 - 7 STATUS 3 13 5 MUTING SETUP TONE /SDB ENTER SURROUND (1) Input mode setting 1 Press the FUNCTION button to select the input function to be played. FUNCTION FUNCTION Main unit Remote control unit • The function switches as shown below. • Factory default (LINE 1) = MD, (LINE 2) = TAPE DVD 2 TUNER (LINE1) (LINE2) D.AUX When DVD, D.AUX was selected as the input function, press the remote control unit’s INPUT MODE button to select the input mode. INPUT MODE Remote control unit AUTO PCM DTS ANALOG • “ANALOG” cannot be selected when DVD or D.AUX was selected as the input function. • “ANALOG” can be selected when “LINE-2” is set to “D.AUX” at “FUNCTION ASSIGNMENT” under “SYSTEM SETUP” in the detailed settings. 44 Input mode selection function • The input mode can be selected when the input function is set to DVD, D.AUX. • Different input modes can be selected for each input function. The selected input mode is stored in the memory for the individual input functions. • When the input function is set to something other than the above, “ANALOG ONLY” is displayed and the input mode cannot be selected. q AUTO (auto mode) In this mode, the type of signal being input to the digital and analog input terminals is detected and the program in the set’s surround decoder is switched automatically to play the signals for the selected input function. The presence or absence of digital signals is detected, the signals input to the digital input are identified and decoding and playback are performed automatically in DTS, Dolby Digital or PCM (2 channel stereo) format. If no digital signal (LINE1) = MD is being input, the analog input jacks are selected. Use this mode to play Dolby Digital signals. w PCM (exclusive PCM signal playback mode) Decoding and playback are only performed when PCM signals are being input. e DTS (exclusive DTS signal playback mode) Decoding and playback are only performed when DTS signals are being input. r ANALOG (exclusive analog audio signal playback mode) The signals input to the analog input jacks are played. (This cannot be selected in the DVD mode.) The input mode automatically switches to “AUTO” if you switch the input function to DVD from anything other than DVD. 1ADV-M71E2_ENG p1-60 03.12.25 1:05 PM ページ 45 ENGLISH 3 Either turn the SURROUND/SELECT dial or press the SURROUND button on the remote control unit to select the surround mode. Input mode display Lit • In the AUTO mode SURROUND / SELECT One of these lights, depending on the input signal. SURROUND PUSH - PARAM. • In the DIGITAL PCM mode Main unit Remote control unit • The function switches as shown below. • The function only changes in the “Æ” direction when operated from the remote control unit. DOLBY VS STEREO DIRECT *5CH STEREO *MONO MOVIE JAZZ CLUB DOLBY VS VIDEO GAME • In the DIGITAL DTS mode • In the ANALOG mode *AUTO DECODE ROCK ARENA *MATRIX Input signal display • The modes marked “*” can be selected when “5.1channel surround” is selected in the quick system setup. • DOLBY DIGITAL 4 Start playback on the selected component. • For operating instructions, refer to the component’s manual. • DTS 5 Either turn the MASTER VOLUME dial on the main unit or use the VOLUME buttons on the remote control unit to adjust the volume. • PCM The volume level is displayed on the display. M.VOLUME -20 + • “DIG” lights when digital signals are input properly. If “DIG” is flashing, check whether the connections are proper and whether the input component’s power is on. VOLUME Main unit Remote control unit • The volume can be adjusted within the range –60 to 0 to +18 dB. Note that depending on the input signal, surround mode, speaker settings and channel level setting, it may not be possible to adjust the volume up to +18 dB. 2 To check the currently playing program source, etc. Press the MENU/SET button. Display “STATUS” then turn the SURROUND/SELECT control. MENU / SET Main unit SURROUND / SELECT PUSH - PARAM. Main unit Input mode when playing CD sources • When playing CDs containing recordings of live concerts, etc., in the “AUTO” mode, the sound may be slightly broken at the beginning. If this happens, switch to the “PCM” mode. Input mode when playing DTS sources • If DTS-compatible CDs are played in the “PCM” mode, noise is output because DTS playback is not possible. To play a DTS-compatible source, be sure to set the input mode to “AUTO” or “DTS”. • Noise may be generated at the beginning of playback and while searching during DTS playback in the AUTO mode. If so, play in the DTS mode. STATUS Remote control unit To perform this operation on the remote control unit, press the STATUS button. The current program source and surround settings are shown on the display each time the button is pressed or turned. (When the function is set to DVD, the information is also displayed on the TV screen.) 45 1ADV-M71E2_ENG p1-60 03.12.25 1:05 PM ページ 46 ENGLISH (2) After starting playback [1] Adjusting the sound quality (TONE/SDB) [2] Turning the sound off temporarily (MUTING) The TONE/SDB function will not work in the direct mode. TEST TONE 2 INPUT MODE SURROUND FUNCTION TUNER TV / VCR DVD IN/SURR. A/V SYSTEM IN/SURR. MD CDR TAPE B 1 2 + SURROUND / SELECT DVD SURROUND RECEIVER ADV-M71 PUSH - PARAM. DVD TONE / SDB 8 9 6 7 - + BAND MENU / SET VOLUME STATUS 3 FUNCTION MUTING ON / STANDBY SETUP PHONES TONE /SDB 1 ENTER SURROUND PARAMETER CH SELECT 1 DISPLAY RETURN MENU VCR CH + TOP MENU STATUS ANGLE 3 TONE /SDB 1 2 ENTER RETURN DISPLAY MENU VCR CH + TOP MENU Press the TONE/SDB button. • The tone switches as follows each time the TONE/SDB button is pressed. TONE /SDB TONE / SDB Main unit 2 1 SURROUND PARAMETER CH SELECT DEFEAT Remote control unit SDB (ON/OFF) BASS TREBLE With the name of the volume to be adjusted selected, turn the SURROUND/SELECT knob or cursor button ( 0, 1 ) to adjust the level. SURROUND / SELECT PUSH - PARAM. Main unit Remote control unit DEFEAT • The signals do not pass through the SDB, bass and treble adjustment circuits, providing higher quality sound. SDB • Either turn the FUNCTION / SELECT dial or use the ( 0, 1 ) cursor buttons to select “ON” or “OFF”. BASS, TREBLE • To increase the bass or treble: Turn the control clockwise or press the cursor button. (The bass or treble sound can be increased to up to +10 dB in steps of 2 dB.) • To decrease the bass or treble: Turn the control clockwise or press the cursor button. (The bass or treble sound can be decreased to up to –10 dB in steps of 2 dB.) When TONE/SDB is displayed, the item can be switched using the • and ª buttons on the remote control unit. If no operation is performed within 4 seconds, the display switches back to what was previously displayed. 46 SUB TITLE MUTING SETUP 1 AUDIO Use this to turn off the audio output temporarily. Press the MUTING button. Cancelling MUTING mode. Press the MUTING button again. MUTING Remote control unit NOTES: • The mute mode is canceled when the main unit’s main volume control or one of the main volume control buttons on the remote control unit is operated. • The setting is canceled if the set’s power is turned off. 1ADV-M71E2_ENG p1-60 03.12.25 1:05 PM ページ 47 ENGLISH 13 DOLBY / DTS SURROUND Surround This unit is equipped with a digital signal processing circuit that lets you play program sources in the surround mode to achieve the same sense of presence as in a movie theater. Dolby Surround (1) Dolby Digital (Dolby Surround AC-3) Dolby Digital is the multi-channel digital signal format developed by Dolby Laboratories. Dolby Digital consists of up to “5.1” channels - front left, front right, center, surround left, surround right, and an additional channel exclusively reserved for additional deep bass sound effects (the Low Frequency Effects – LFE – channel, also called the “.1” channel, containing bass frequencies of up to 120 Hz). Unlike the analog Dolby Pro Logic format, Dolby Digital’s main channels can all contain full range sound information, from the lowest bass, up to the highest frequencies – 22 kHz. The signals within each channel are distinct from the others, allowing pinpoint sound imaging, and Dolby Digital offers tremendous dynamic range from the most powerful sound effects to the quietest, softest sounds, free from noise and distortion. 2 Dolby Digital and Dolby Pro Logic Comparison of home surround systems Dolby Digital Dolby Pro Logic 5.1 ch 2 ch No. recorded channels (elements) 5.1 ch 4 ch L, R, C, SL, SR, SW L, R, C, S (SW - recommended) Digital discrete processing Dolby Digital (AC-3) encoding/decoding Analog matrix processing Dolby Surround 20 kHz 7 kHz No. playback channels Playback channels (max.) Audio processing High frequency playback limit of surround channel 2 Dolby Digital compatible media and playback methods Marks indicating Dolby Digital compatibility: and . The following are general examples. Also refer to the player’s operating instructions. Media Dolby Digital output jacks Playback method (reference page) LD (VDP) Coaxial Dolby Digital RF output jack 1 Set the input mode to “AUTO”. (Page 44, 45) DVD Optical or coaxial digital output (same as for PCM) 2 Set the input mode to “AUTO”. (Page 44, 45) Others (satellite broadcasts, CATV, etc.) Optical or coaxial digital output (same as for PCM) Set the input mode to “AUTO”. (Page 44, 45) 1 Use a commercially available adapter to connect Dolby Digital RF (AC-3RF) output signals to the digital input terminals. (Refer to the adapter’s operating instructions.) Please refer to the instruction manual of the adapter when making connection. 2 To play in Dolby Digital Surround on the ADV-M71, set “DVD SUTUP” – “AUDIO SETUP” – “DIGITAL OUT” to “Normal” in the setup. (The factory default is “Normal”.) (2) Dolby Pro Logic II • Dolby Pro Logic II is a new multi-channel playback format developed by Dolby Laboratories using feedback logic steering technology and offering improvements over conventional Dolby Pro Logic circuits. • Dolby Pro Logic II can be used to decode not only sources recorded in Dolby Surround ( ) but also regular stereo sources into five channels (front left, front right, center, surround left and surround right) to achieve surround sound. • Whereas with conventional Dolby Pro Logic the surround channel playback frequency band was limited, Dolby Pro Logic II offers a wider band range (20 Hz to 20 kHz or greater). In addition, the surround channels were monaural (the surround left and right channels were the same) with previous Dolby Pro Logic, but Dolby Pro Logic II they are played as stereo signals. • Various parameters can be set according to the type of source and the contents, so it is possible to achieve optimum decoding (see page 60). Sources recorded in Dolby Surround These are sources in which three or more channels of surround have been recorded as two channels of signals using Dolby Surround encoding technology. Dolby Surround is used for the sound tracks of movies recorded on DVDs, LDs and video cassettes to be played on stereo VCRs, as well as for the stereo broadcast signals of FM radio, TV, satellite broadcasts and cable TV. Decoding these signals with Dolby Pro Logic makes it possible to achieve multi-channel surround playback. The signals can also be played on ordinary stereo equipment, in which case they provide normal stereo sound. There are two types of DVD Dolby surround recording signals. q 2-channel PCM stereo signals w 2-channel Dolby Digital signals Regardless of the signal being played, when the 2-channel decode mode is set to the “Pro Logic II” mode in the “AUTO DECODE” mode, the surround mode is automatically set to “Dolby Pro Logic II”. 47 1ADV-M71E2_ENG p1-60 03.12.25 1:05 PM ページ 48 ENGLISH 2 Sources recorded in Dolby Surround are indicated with the logo mark shown below. Dolby Surround support mark: Manufactured under license from Dolby Laboratories. “Dolby”, “Pro Logic” and the double-D symbol are trademarks of Dolby Laboratories. DTS Digital Surround Digital Theater Surround (also called simply DTS) is a multi-channel digital signal format developed by Digital Theater Systems. DTS offers the same “5.1” playback channels as Dolby Digital (front left, front right and center, surround left and surround right) as well as the stereo 2-channel mode. The signals for the different channels are fully independent, eliminating the risk of deterioration of sound quality due to interference between signals, crosstalk, etc. DTS features a relatively higher bit rate as compared to Dolby Digital (1234 kbps for CDs and LDs, 1536 kbps for DVDs) so it operates with a relatively low compression rate. Because of this the amount of data is great, and when DTS playback is used in movie theaters, a separate CDROM synchronized with the film is played. With LDs and DVDs, there is of course no need for an extra disc; the pictures and sound can be recorded simultaneously on the same disc, so the discs can be handled in the same way as discs with other formats. Other media include CDs recorded in DTS. These are the same discs as conventional CDs (recorded in 2 channels) but include 5.1 channel surround signals. They do not include images, but they do permit surround playback on the ADV-M71 and on CD players.DTS surround track playback offers the same intricate, grand sound as in a movie theater, right in your own listening room. 2 DTS compatible media and playback methods Marks indicating DTS compatibility: and . The following are general examples. Also refer to the player’s operating instructions. Media DTS Digital output jacks CD Optical or coaxial digital output (same as for PCM) 2 Set the input mode to “AUTO” or “DTS” (page 44, 45). Never set the mode to “ANALOG” or “PCM”. 1 Playback method (reference page) LD (VDP) Optical or coaxial digital output (same as for PCM) 2 Set the input mode to “AUTO” or “DTS” (page 44, 45). Never set the mode to “ANALOG” or “PCM”. 1 DVD Optical or coaxial digital output (same as for PCM) 3 Set the input mode to “AUTO” or “DTS” (page 44, 45). 1 DTS signals are recorded in the same way on CDs and LDs as PCM signals. Because of this, the un-decoded DTS signals are output as random “hissy” noise from the CD or LD player’s analog outputs. If this noise is played with the amplifier set at a very high volume, it may possibly cause damage to the speakers. To avoid this, be sure to switch the input mode to “AUTO” or “DTS” before playing CDs or LDs recorded in DTS. Also, never switch the input mode to “ANALOG” or “PCM” during playback. The same is true when playing CDs and LDs recorded in DTS on the ADV-M71 or on LD/DVD compatible players. With DVDs, the DTS signals are recorded with a special recording method so there is no problem. For DVDs, the DTS signals are recorded in a special way so this problem does not occur. 2 The signals provided at the digital outputs of a CD or LD player may undergo some sort of internal signal processing (output level adjustment, sampling frequency conversion, etc.). In this case the DTS-encoded signals may be processed erroneously, in which case they cannot be decoded by this unit, or may only produce noise. Before playing DTS signals for the first time, turn down the master volume to a low level, start playing the DTS disc, then check whether the DTS indicator on this unit (see page 45) lights before turning up the master volume. 3 To play in DTS Digital Surround on the ADV-M71, set “DVD SETUP” — “AUDIO SETUP” — “DIGITAL OUT” to “Normal” in the setup. (The factory default is “Normal”.) “DTS” and “DTS Digital Surround” are registered trademarks of Digital Theater Systems, Inc. 48 1ADV-M71E2_ENG p1-60 03.12.25 1:05 PM ページ 49 ENGLISH Dolby Virtual Speaker Dolby Virtual Speaker technology uses proprietary technology of Dolby Laboratories to create a virtual surround sound field using only two speakers for the front channels, allowing the user to experience sound as if surround speakers were actually being used. 2 Features of Dolby Virtual Speaker sound B B B B Accurate surround sound field positioning The virtual surround speakers are positioned at 105° to the left and 105° to the right. Multi-channel programs played according to the producer’s intentions The sound of the different channels is played in the position set upon mixing. For example, sound set at the rear left is heard from the rear left. Stereo programs played in surround The Dolby Pro Logic II circuit is used together with the Dolby Virtual Speaker circuitry to create a rich virtual surround sound field with stereo programs as well. Selecting the listening mode Two listening modes are provided: Reference and Wide. : 2 front channels : Virtual sound field created with the Dolby Virtual Speaker mode Reference mode Wide mode With the ADV-M71, playback in the Dolby Virtual Speaker mode is possible with other speaker configurations as well. • 3 speakers (2 front channels + center) : Reference/Wide modes • 4 speakers (2 front channels + 2 surround channels) : Wide mode • 5 speakers (2 front channels + center + 2 surround channels) : Wide mode Dolby Headphone Dolby Headphone is a 3D sound technology developed jointly by Dolby Laboratories and Lake Technology of Australia achieving surround sound with regular headphones. Normally when using headphones all the sounds are sounded in the head, making it uncomfortable to listen with headphones for long periods of time. Dolby Headphone simulates speaker playback in a room and positions the sound sources to the front or the sides, outside of the head, achieving a powerful sound similar to that of a movie theater or home theater. This technology is aimed mainly at multi-channel audio or video equipment including Dolby Digital or Dolby Pro Logic Surround decoding functions and operates inside a high performance digital signal processing chip (DSP). The Dolby Headphone mode can be used not only with multi-channel sources but also with stereo programs. 49 1ADV-M71E2_ENG p1-60 03.12.25 1:05 PM ページ 50 ENGLISH 14 SURROUND PLAYBACK (1) Playing in the Dolby Virtual Speaker mode • The Dolby Virtual Speaker mode is a mode using 3D sound technology from Dolby Laboratories to achieve multi-channel surround sound using only two speakers for the front channels. • With two speakers for the front channels, one of two modes can be selected: Reference or Wide. • The Dolby Virtual Speaker mode can be used not only with Dolby Digital and DTS multi-channel sources but also with 2-channel sources. With 2-channel sources, one of two 2-channel modes can be selected: Virtual 1 (Dolby Pro Logic II Cinema) and Virtual 2 (Dolby Pro Logic). • With a multi-channel speaker configuration (for example 5.1 channels), the Dolby Virtual Speaker mode provides different effects according to the speaker configuration. [1] Playing Dolby Digital and DTS surround sound (with digital inputs only) B Applicable sources • Digital input (D.AUX functions, including DVD playback discs) Dolby Digital multi-channel sources DTS sources 3 Set the surround mode to “DOLBY VIRTUAL SPEAKER”. SURROUND / SELECT SURROUND PUSH - PARAM. 3,5,6 Main unit B PUSH - PARAM. - BAND VOLUME 4 FUNCTION ON / STANDBY PHONES + 7 8 9 STEREO VIRTUAL CALL 0/10 +10 - TEST TONE INPUT MODE SURROUND FUNCTION 2 CH 1 SYSTEM CDR TAPE 1 2 + DVD 8 6 - 7 5 STATUS MUTING SETUP TONE /SDB 6 5 ENTER SURROUND PARAMETER CH SELECT - VCR CH + When the function is set to DVD, this is displayed on the screen as well. SURROUND / SELECT PUSH - PARAM. Main unit Main unit FUNCTION Remote control unit Set the input mode to “AUTO”. DTS sources can also be played with the input mode set to “DTS”. INPUT MODE Remote control unit 50 Display the surround parameters for that source. SURROUND PARAMETER Select the digital input function (DVD or D.AUX digital input). FUNCTION 2 Lit 9 3 1 Lit This switches automatically according to the format of the playback source. IN/SURR. MD or • The DTS indicator lights when playing DTS sources. 3 TUNER TV / VCR DVD IN/SURR. A/V Play a program source including the mark. • The Dolby Digital indicator lights when playing Dolby Digital sources. 1 DIRECT Lit + MENU / SET TONE / SDB Remote control unit • In the Dolby Virtual Speaker mode, this indicator lights. SURROUND / SELECT DVD SURROUND RECEIVER ADV-M71 Remote control unit 1ADV-M71E2_ENG p1-60 03.12.25 1:05 PM ページ 51 ENGLISH 6 Select and set the surround parameters. (On the remote control unit, use the 0 , 1 cursor buttons to set the parameters.) Surround parameters (1) SURROUND / SELECT PUSH - PARAM. If nothing is done for 6 seconds from when the parameter is displayed, the normal display reappears. B Main unit D.COMP. (Dynamic range compression) • This parameter adjusts the dynamic range of the Dolby Digital sound. When listening with the volume turned relatively low, at night for example, set this to the “HI” side to lower the peak of the sound and amplify the quieter sounds, narrowing the dynamic range and making the sound easier to listen to. Set to “OFF” to turn this function off. Setting the DOLBY VS mode VS REF WIDE The selected mode flashes. The mode is not displayed if it cannot be selected. B D.COMP. setting OFF LOW , MID / HI Setting the LFE level LFE -10 OFF Wide D.COMP. OFF B DOLBY VS (Dolby Virtual Speaker mode) • REF (Reference mode) This is the standard mode. • WIDE (Wide mode) This mode expands the front channel sound field. ... 0dB ... -5 , / 0 LOW MID Dynamic range HI Narrow LFE (Low Frequency Effect): • Program source and adjustment range 1. Dolby Digital : –10 dB to 0 dB 2. DTS Surround : –10 dB to 0 dB • When Dolby Digital encoded software is played, it is recommended that the LFE LEVEL be set to 0 dB for correct Dolby Digital playback. • When DTS encoded movie software is played, it is recommended that the LFE LEVEL be set to 0 dB for correct DTS playback. • When DTS encoded music software is played, it is recommended that the LFE LEVEL be set to –10 dB for correct DTS playback. The LFE level can be adjusted in steps of 1 dB between 10 dB and 0 dB. B DEFAULT setting DEFAULT YES , Y/N NO / When “YES” is selected, the settings are restored to the factory defaults. When the surround parameters are displayed, use the • and ª cursor buttons on the remote control unit to switch to previous or following items. Once the surround parameters have been set, stop operating the buttons. After several seconds, the normal display reappears and the settings are automatically entered. 51 1ADV-M71E2_ENG p1-60 03.12.25 1:05 PM ページ 52 ENGLISH [2] 2-channel mode settings • When 2-channel signals are input, one of two playback modes can be selected and set according to the 2-channel mode setting, Virtual 1 or Virtual 2. (The Virtual 1 mode is set by factory default.) Virtual 1 : 2-channel sources are played in virtual surround using Dolby Pro Logic II Cinema processing. Virtual 1 : 2-channel sources are played in virtual surround using Dolby Pro Logic processing. 1,2,3 B 1 SURROUND / SELECT DVD SURROUND RECEIVER ADV-M71 PUSH - PARAM. - + BAND MENU / SET TONE / SDB Set the surround mode to “DOLBY VIRTUAL SPEAKER” (“DOLBY VS”). • The normal display reappears after the surround mode is displayed. VOLUME SURROUND / SELECT FUNCTION SURROUND PUSH - PARAM. ON / STANDBY PHONES Main unit TEST TONE INPUT MODE SURROUND TUNER TV / VCR DVD IN/SURR. A/V SYSTEM 1 IN/SURR. MD CDR TAPE 1 2 + DVD 8 Remote control unit FUNCTION 2 Press the SURROUND PARAMETER button and select the 2-channel mode. SURROUND / SELECT PUSH - PARAM. 9 6 - 7 2 VIRTUAL 1 STATUS 3 MUTING SETUP Main unit TONE /SDB ENTER SURROUND PARAMETER CH SELECT DISPLAY RETURN ANGLE MENU AUDIO VCR CH + This can be selected if there is no digital input signal, if the digital input is a PCM or Dolby Digital 2channel signal and if the input is analog. 3 2 TOP MENU SUB TITLE Remote control unit RC-966 NOTES: • The 2-channel mode cannot be set when Dolby Digital or DTS 5.1-channel signals. • The 2-channel mode is set and stored in the memory individually for the different functions. SURROUND PARAMETER 3 Turn the SURROUND/SELECT control on the main unit or use the 0 and 1 cursor buttons on the remote control unit to select the desired 2-channel mode. SURROUND / SELECT PUSH - PARAM. Main unit VIRTUAL 1 Remote control unit VIRTUAL 2 Once the surround parameters have been set, stop operating the buttons. After several seconds, the normal display reappears and the settings are automatically entered 52 1ADV-M71E2_ENG p1-60 03.12.25 1:05 PM ページ 53 ENGLISH Surround parameters (2) 1. VIRTUAL1 (Virtual 1 mode) In this mode, 2-channel sources are played with Dolby Pro Logic II Cinema processing. This mode is suited for playing movie sources recorded in Dolby Surround and regular stereo sources. 2. VIRTUAL2 (Virtual 2 mode) In this mode, 2-channel sources are played with Dolby Pro Logic processing. This mode is compatible with regular Dolby Pro Logic playback. With it, the recorded playback image of sources recorded in Dolby Surround is recreated faithfully. NOTE: • If noise is generated for interactive and other high bit rate sources when playing DVDs or D.AUX digital input signals in the Dolby Virtual Speaker mode, set “LINE-1/LINE-2 REC OUT” under “[6] Function settings” at “SYSTEM SETUP” on pages 38 to “Off”. (When this is done, analog recording in the Dolby Virtual Speaker mode is not possible.) (2) Playing in the DENON original surround modes • This unit is equipped with a high performance DSP (Digital Signal Processor) which uses digital signal processing to synthetically recreate the sound field. One of 6 preset surround modes can be selected according to the program source and the parameters can be adjusted according to the conditions in the listening room to achieve a more realistic, powerful sound. These surround modes can also be used for program sources not recorded in Dolby Surround Pro Logic or Dolby Digital. *1 MONO MOVIE (NOTE 1) Select this when watching monaural movies for a greater sense of expansion. *2 ROCK ARENA Use this mode to achieve the feeling of a live concert in an arena with reflected sounds coming from all directions. *3 JAZZ CLUB This mode creates the sound field of a live house with a low ceiling and hard walls. This mode gives jazz a very vivid realism. *4 VIDEO GAME Use this to enjoy video game sources. *5 MATRIX Select this to emphasize the sense of expansion for music sources recorded in stereo. Signals consisting of the difference component of the input signals (the component that provides the sense of expansion) processed for delay are output from the surround channel. *6 5CH STEREO In this mode, the signals of the front left channel are output from the left surround channel, the signals of the front right channel are output from the right surround channel, and the same (in-phase) component of the left and right channels is output from the center channel. This mode provides all speaker surround sound, but without directional steering effects, and works with any stereo program source. Surround modes indicated “*” can be selected when the speaker setting is set to 5.1 channels. Depending on the source being played, the effect may not be very strong. In such cases, try other surround modes without paying too much attention to their names and choose the one you feel is best. NOTE 1: When playing sources recorded in monaural, the sound is one-sided if only one channel (left or right) is input, so input signals to both channels. Personal Memory Plus This set is equipped with a personal memorize function that automatically memorizes the surround modes and input modes selected for the input different sources. When the input source is switched, the modes set for that source last time it was used are automatically recalled. • Settings automatically stored in the memory for the individual input functions using the Personal Memory Plus function: q Surround mode (including 2-channel decode mode and Dolby Pro Logic II mode settings) w Input mode selection function The surround parameters, TONE/SDB control settings and playback level balance for the different output channels are memorized for each surround mode. 53 1ADV-M71E2_ENG p1-60 03.12.25 1:05 PM ページ 54 ENGLISH [1] DSP Surround simulation 2,4,5 B 4 SURROUND / SELECT DVD SURROUND RECEIVER ADV-M71 PUSH - PARAM. - + BAND MENU / SET TONE / SDB VOLUME FUNCTION ON / STANDBY PHONES 1 5 6 - 5CH STEREO AUTO DECODE TUNER 7 8 9 DIRECT STEREO VIRTUAL CALL 0/10 +10 - TEST TONE INPUT MODE SURROUND FUNCTION 4 + SYSTEM MONO MOVIE ROCK ARENA JAZZ CLUB VIDEO GAME MATRIX ROOM SIZE DELAY EFFECT DEFAULT SURROUND PARAMETER Remote control unit CH 1 2 TUNER TV / VCR DVD IN/SURR. A/V To enter the surround parameter setting mode, press the SURROUND mode. • The surround parameter switches in the following order each time the SURROUND button is pressed for the different surround modes. DEFAULT IN/SURR. MD CDR TAPE 1 2 8 There is no 5-channel stereo mode. + DVD 9 6 - 7 5 STATUS 3 MUTING SETUP TONE /SDB ENTER SURROUND PARAMETER CH SELECT DISPLAY RETURN ANGLE MENU AUDIO VCR CH + Display the parameter you want to adjust. • Use the cursor buttons (•, ª) to select the surround parameter. 5 4 SURROUND / SELECT PUSH - PARAM. TOP MENU SUB TITLE Main unit Remote control unit RC-966 • ROOM SIZE setting R.SIZE 1 MED Select the input source. FUNCTION FUNCTION SMALL MED-S MED MED-L LARGE , / • EFFECT LEVEL setting Main unit 2 EFECT Remote control unit 10 Select the surround mode for the input channel. 1 SURROUND / SELECT SURROUND PUSH - PARAM. 10 , 15 / • DELAY TIME setting DELAY Main unit • The surround mode switches in the following order each time the SURROUND MODE button is pressed: DOLBY VS STEREO DIRECT *5CH STEREO *MONO MOVIE JAZZ CLUB DOLBY VS VIDEO GAME *AUTO DECODE ROCK ARENA *MATRIX • The modes marked “*” can be selected when “5.1channel surround” is selected in the quick system setup. 3 54 30ms Remote control unit Play a program source. • Refer to instruction manual for handling. 0ms 30ms 110ms , / 1ADV-M71E2_ENG p1-60 03.12.25 1:05 PM ページ 55 ENGLISH 5 • DEFAULT setting Surround parameters (3) DEFAULT Y/N Y/N YES , NO / ROOM SIZE: • This sets the size of the sound field. There are five settings: “SMALL”, “MED-S” (mediumsmall), “MED”, “MED-L” (medium-large) and “LARGE”. “SMALL” recreates a small sound field, “LARGE” a large sound field. When “YES” is selected, the settings are reset to their factory default values. EFFECT LEVEL: • This sets the strength of the surround effect. The level can be set in 15 steps from 1 to 15. Lower the level if the sound seems distorted. Stop operating buttons once the surround parameter settings have been completed. After several seconds the normal display reappears and the settings are automatically set. DELAY TIME: • In the MATRIX mode only, the delay time can be set within the range of 0 to 110 ms. 55 1ADV-M71E2_ENG p1-60 03.12.25 1:05 PM ページ 56 ENGLISH 2 Table of Surround Mode Parameters (1) Presence/absence of signals and controllability in the various modes Surround Mode DVS: Dolby Virtual Speaker DHP: Dolby Headphone Channel output CENTER SURROUND L/R SUB-WOOFER REFERENCE C B E B WIDE C B B B DH1 C (H/P ONLY) E E E DH2 C (H/P ONLY) E E E DH3 C (H/P ONLY) E E E BYPASS C (H/P ONLY) E E E STEREO C E E B DIRECT DHP DVS FRONT L/R E E B C B B B DTS SURROUND C B B B DOLBY PL II C B B B AUTO STEREO C E E B 5CH STEREO C B B B MONO MOVIE C B B B ROCK ARENA C B B B JAZZ CLUB C B B B VIDEO GAME C B B B MATRIX C B B B AUTO DECODE C DOLBY DIGITAL 2 Table of Surround Mode Parameters (2) Presence/absence of signals and controllability in the various modes Playback signals and surround modes for the various input functions Surround Mode DVS: Dolby Virtual Speaker DHP: Dolby Headphone (D.AUX / L2) LINE1 / LINE2 / TUNER When playing PCM signals When playing analog signals When playing analog signals DVD / D.AUX (D.AUX / L2) When playing Dolby Digital signals When playing DTS signals Multichannel 2-channel Multichannel 2-channel 2-channel 2-channel REFERENCE 4PL II C 4PL II C 4PL II 4PL II 4PL II WIDE 4PL II C 4PL II C 4PL II 4PL II 4PL II DH1 4PL II C 4PL II C 4PL II 4PL II 4PL II DH2 4PL II C 4PL II C 4PL II 4PL II 4PL II DH3 4PL II C 4PL II C 4PL II 4PL II 4PL II C C D.MIX C C D.MIX C C C STEREO C C D.MIX C C D.MIX C C C DIRECT C C D.MIX C C D.MIX C C C DOLBY DIGITAL C C E E E E E DTS SURROUND E E E C E E E 4PL II E 4PL II E 4PL II 4PL II 4PL II 4 E 4 E 4 4 E 5CH STEREO C C C C C C C MONO MOVIE C C C C C C C ROCK ARENA C C C C C C C JAZZ CLUB C C C C C C C VIDEO GAME C C C C C C C MATRIX C C C C C C C DHP DVS 2-channel AUTO DECODE BYPASS DOLBY PL II AUTO STEREO B: Can be either present or absent, depending on speaker configuration setting. : Only usable when center or surround speakers set to be used with the speaker configuration setting. C : Signal present or controllable. D.MIX: Compatible with down-mixing. PL II: Compatible with PL II processing. 4 : Can be selected with 2-channel decode mode. E : No signal or not controllable. 56 1ADV-M71E2_ENG p1-60 03.12.25 1:05 PM ページ 57 ENGLISH 2 Table of Surround Mode Parameters (3) Presence/absence of signals and controllability in the various modes Surround Mode DVS: Dolby Virtual Speaker DHP: Dolby Headphone Surround parameter – default value indicated in (parentheses) TONE CONTROL SDB 2ch DECODE MODE Pro Logic II Music mode only PANORAMA DIMENSION CENTER WIDTH E E E E E E E E E E E E E E E C (OFF) WIDE C (OFF) C (OFF) DH1 C (OFF) C (OFF) DH2 C (OFF) C (OFF) DH3 C (OFF) C (OFF) BYPASS C (OFF) C (OFF) E E E E STEREO C (OFF) C (OFF) E E E E DIRECT E E E E E E DOLBY DIGITAL C (OFF) C (OFF) E E E DTS SURROUND C (OFF) C (OFF) E E E DOLBY PL II C (OFF) C (OFF) C (OFF) C (3) C (3) AUTO STEREO AUTO DECODE DHP DVS REFERENCE C (OFF) C (VIRTUAL1) C *2 (CINEMA) C *1 (AUTO STEREO) C (OFF) C (OFF) E E E 5CH STEREO C (OFF) C (OFF) E E E E MONO MOVIE C (OFF) C (OFF) E E E E ROCK ARENA C (OFF) C (OFF) E E E E JAZZ CLUB C (OFF) C (OFF) E E E E VIDEO GAME C (OFF) C (OFF) E E E E MATRIX C (OFF) C (OFF) E E E E 2 Table of Surround Mode Parameters (4) Presence/absence of signals and controllability in the various modes Surround Mode DVS: Dolby Virtual Speaker DHP: Dolby Headphone Surround parameter – default value indicated in (parentheses) Dolby Digital/DTS signal EFFECT LEVEL DELAY TIME D. COMP. LFE REFERENCE E E E C (OFF) C (0dB) WIDE E E E C (OFF) C (0dB) DH1 E E E C (OFF) C (0dB) DH2 E E E C (OFF) C (0dB) DH3 E E E C (OFF) C (0dB) BYPASS E E E C (OFF) C (0dB) STEREO E E E C (OFF) C (0dB) DIRECT E E E C (OFF) C (0dB) DOLBY DIGITAL E E E C (OFF) C (0dB) DTS SURROUND E E E C (OFF) C (0dB) DOLBY PL II E E E C (OFF) C (0dB) AUTO STEREO E E E E E E E E C (OFF) C (0dB) AUTO DECODE DHP DVS ROOM SIZE 5CH STEREO MONO MOVIE C (MEDIUM) C (10) E C (OFF) C (0dB) ROCK ARENA C (MEDIUM) C (10)) E C (OFF) C (0dB) JAZZ CLUB C (MEDIUM) C (10) E C (OFF) C (0dB) VIDEO GAME C (MEDIUM) C (10) E C (OFF) C (0dB) E E C (30ms) C (OFF) C (0dB) MATRIX : Only usable when center or surround speakers set to be used with the speaker configuration setting. C : Signal present or controllable. E : No signal or not controllable. *1 : Auto Stereo mode or Dolby PL II mode (Cinema, Music or Dolby PL mode) selectable. *2 : Dolby PL II mode (Cinema, Music or Music 2 mode) selectable. D.MIX: Compatible with down-mixing. ( ): Parameter’s default value 57 1ADV-M71E2_ENG p1-60 03.12.25 1:05 PM ページ 58 ENGLISH (3) Playback using the Dolby Headphone mode • The ADV-M71 is equipped with the Dolby Headphone mode, a technology developed jointly by Dolby Laboratories and Lake Technology for achieving 3D sound over regular headphones. • The Dolby Headphone mode is set when headphones are connected to the ADV-M71’s headphones jack. • There are actually four Dolby Headphone modes creating different sound field effects: DH1, DH2, DH3 and Bypass (normal stereo playback). • The Dolby Headphone mode is compatible with Dolby Digital and DTS multi-channel sources. With 2-channel sources, playback in the Cinema, Music 1 and Music 2 modes can be selected with the 2-channel mode setting. 3 2,3 B Set the various surround parameters. If nothing is done for 6 seconds from when the parameter is displayed, the normal display reappears. SURROUND / SELECT DVD SURROUND RECEIVER ADV-M71 PUSH - PARAM. - + SURROUND / SELECT BAND MENU / SET PUSH - PARAM. TONE / SDB VOLUME FUNCTION ON / STANDBY PHONES Main unit 1 • Dolby H mode setting H TEST TONE INPUT MODE SURROUND Remote control unit DH1 FUNCTION TUNER TV / VCR DVD IN/SURR. A/V SYSTEM DH1 IN/SURR. MD CDR TAPE 1 2 DH2 , + DVD 8 DH3 / BYPASS 9 6 - 7 • 2-channel mode setting STATUS 3 MUTING SETUP 2 TONE /SDB ENTER SURROUND PARAMETER CH SELECT DISPLAY RETURN ANGLE MENU AUDIO VCR CH + 3 2 CINEMA • The mode switches as shown below each time a button is operated. TOP MENU SUB TITLE CINEMA MUSIC2 RC-966 1 Connect headphones (sold separately) to the headphones jack. • When headphones are plugged in, the output to the speakers is automatically turned off and no sound is produced from the speakers. Press the surround parameter button and display the surround parameters. When the function is set to DVD, this is also shown on the display. SURROUND / SELECT PUSH - PARAM. Main unit 58 Can be selected when there is no signal or when playing a 2-channel source. There are also the same parameters as those described under “(2) Playing in the Dolby Virtual Speaker mode”, namely: B D.COMP. setting B LFE level setting B DEFAULT setting When the surround parameters are displayed, use the • and ª cursor buttons on the remote control unit to switch to previous or following items. PHONES 2 MUSIC1 SURROUND PARAMETER Remote control unit 1ADV-M71E2_ENG p1-60 03.12.25 1:05 PM ページ 59 ENGLISH Surround parameters (4) DOLBY H (Dolby Headphone modes) DH1 ..............Reference room (small room with little reverberation) DH2 ..............Live room (room with more reverberation than DH1) DH3 ..............Large room (Larger room than DH1. Use this mode to achieve a sense of distance and diffusion of the sound.) BYPASS ........Stereo playback. 2-channel modes These can be selected when playing 2-channel sources (analog, PCM, etc.). The signals are processed by one of the following decoders to achieve multiple channels then played in the Dolby Headphone mode. In the Bypass mode, these are not displayed. CINEMA .......Dolby Pro Logic II Cinema mode MUSIC1 ........Dolby Pro Logic II Music mode MUSIC2 ........Signals played in the Dolby Headphone mode with 2 channels. 2 Recording When playing digital input sources, including function DVDs, signals encoded in the Dolby Headphone mode are output from the recording output terminals and can be recorded on other recording devices. q Connect headphones to the headphones jack. w Signals encoded in the Dolby Headphone mode are output from the recording output terminals (in analog). e Select the parameters, set the desired mode and start recording. NOTES: • Dolby Headphone processing makes the analog recording output level lower than the normal stereo recording output level. • Do not change the parameters or unplug the headphones during recording. Doing so will cause interruptions in the recorded sound. • Dolby Headphone signals cannot be recorded during playback of analog sources. The analog input signals are output as such from the recording output terminals. (4) Playing in the Auto Decode Mode (only with multi-channel speaker settings) • The auto decode mode can be selected when the ADV-M71 is used in combination with a subwoofer with built-in amplifier and power amplifier, center or surround speaker system and a multi-channel speaker configuration (5.1 channels, etc.) is set. • To make the 5.1-channel setting, set the speakers to “5.1CH SURROUND” in the quick system setup and select “Room Setting” and “Listening Position”. (See pages 31 to 32.) • In the auto decode mode, multi-channel playback of multi-channel sources (Dolby Digital or DTS) can be performed automatically according to the format of the input signals. • For 2-channel sources as well, playback is possible in the Auto Stereo, Dolby Pro Logic II Cinema, Dolby Pro Logic II Music or Dolby Pro Logic mode, as set by the 2-channel mode setting. (Two channels of stereo signals are played in the Auto Stereo mode. In other modes playback is multi-channel.) [1] Dolby Digital and DTS surround playback (for digital inputs only) • The applicable sources and procedures are the same as those described at “[1] Playing Dolby Digital and DTS surround sound” under “(1) Playing in the Dolby Virtual Speaker mode”. • At step 3, set the surround mode to “AUTO DECODE”. The sound is played according to the format of the input signals. • At step 6 there are no Dolby Virtual Speaker mode surround parameters. [2] 2-channel mode setting • With the auto decode mode, one of four multi-channel playback modes, namely stereo 2-channel playback in the Auto Stereo mode (factory default), Dolby Pro Logic II Cinema, Dolby Pro Logic II Music and Dolby Pro Logic, can be selected and set for 2-channel sources. “Auto Stereo” mode cannot be selected for with functions only analog inputs (TUNER, LINE-1, LINE-2). To play such signals in stereo, set the surround mode to “STEREO”. (See page 45.) • Operations are the same as those described at “[2] 2-channel mode settings” under “(1) Playing in the Dolby Virtual Speaker mode” on page 52. • At step 1, set the surround mode to “AUTO DECODE”. • The 2-channel modes selectable at step 3 are as follows: AUTO ST PLII CINEMA PRO LOGIC PLII MUSIC Auto Stereo can be selected when the function is set to DVD or D.AUX. • For the 2-channel mode surround parameters in the auto decode mode, refer to “Surround parameters (5)” (auto decode 2-channel mode). 59 1ADV-M71E2_ENG p1-60 03.12.25 1:05 PM ページ 60 ENGLISH Surround parameters (5) (2-channel mode) AUTO-ST (auto stereo) mode 2-channel sources are played in 2-channel stereo. When this mode is selected in the auto decode mode, multi-channel sources (DVD, BS digital, etc.) are played in the multi-channel mode, while 2-channel sources (CDs, etc.) are automatically played in stereo. PLII CINEMA / PLII MUSIC / PRO LOGIC mode Even 2-channel sources undergo Dolby Pro Logic II processing and are played in the multi-channel mode. Dolby Digital Pro-Logic II processing is applied to 2-channel sources as well to play them in the multi-channel mode. When this mode is selected in the auto decode mode, multi-channel sources (DVD, BS digital, etc.) are played in the multi-channel mode, and 2-channel sources (CDs, etc.) are also automatically processed with Dolby Digital Pro-Logic II and played in the multi-channel mode. • PLII CINEMA (Dolby Pro Logic II CINEMA) mode This mode is suited for playing movies recorded in Dolby Surround as well as regular sources recorded in stereo. A high precision decoder decodes the signals into 5 channels, resulting in uniform 360 degree surround sound even with 2-channel sources. The MUSIC mode may be more effective for sources containing a high ratio of stereo music. Try both and choose the most effective mode. • PLII MUSIC (Dolby Pro Logic II MUSIC) mode This mode is suited for surround playback of stereo music signals. The inverted phase signals (the reverberation component of the music signals contains a high ratio of these) are played from the surround channel, and at the same time the frequency response of the surround channel is optimized to achieve a natural sound with a sense of expansion. With music signals, the sound field expansion differs greatly according to the type of music, the recording conditions (live, etc.) and the contents of the signal source. Because of this, the MUSIC mode includes optional parameters for further adjusting the sound field. • PANORAMA The front stereo sound field image is extended to the surround channel. This is effective if under normal conditions the stereo image is narrow and the surround effect seems weak. • DIMENSION This shifts the center of the sound field image to the front or surround side. The playback balance of the different channels can be adjusted regardless of the amount of reverberation component in the source. If the sound field image is biased towards the front or surround side, this optional parameter can be used to correct it. • CENTER WIDTH This adjusts the method of playback of the center signal component from the center channel only to the front channel only. When the center channel is played in a way prioritizing separation, the position of the front channel sound field is clearer but the overall sound field image concentrates at the center and the relationship between the different channels seems weaker. This parameter can be adjusted to improve the sense of stability of the sound field image and achieve natural horizontal expansion. • PRO LOGIC (Dolby Pro Logic) mode This is the conventional Dolby Pro Logic compatible mode. In this mode sources recorded in Dolby Surround are decoded with a playback image faithful to the original recording. • In the auto decode mode, the play mode switches automatically as shown below according to the content of the disc being played or program being received. (When the input mode is set to “AUTO” and the 2-channel mode is set to “AUTO ST”) Source DVD CD ( 60 Content Play mode 5.1/6.1-channel Dolby Digital 5.1-channel playback 2-channel Dolby Digital (including 2-channel Dolby Surround) Stereo playback ( 5.1/6.1-channel DTS digital 5.1-channel playback PCM stereo Stereo playback ( ) ) ) To play 2-channel surround (Dolby Surround) or stereo sources in the 5.1-channel surround mode, set the 2-channel mode to something other than “AUTO ST”. 1ADV-M71E2_ENG p61-p115 03.12.25 1:08 PM ページ 61 ENGLISH [3] Setting the parameters in the PLII Cinema, PLII Music and Pro Logic modes • When PLII Cinema, PLII Music or Pro Logic is selected for the 2-channel mode, detailed parameters can be set for each of these modes. PLII Music mode: Make the settings using the procedure below. mark and CDs and other 2-channel sources are decoded with Dolby Pro Logic II • Program sources including the processing and played in the multi-channel mode. q PLII Cinema mode: This mode is suited for movies and other Dolby Surround programs. w PLII Music mode: This mode is suited for stereo music programs. e Pro Logic compatible mode: This is the original Dolby Surround Pro Logic mode. RDS PROG/DIRECT REPEAT PTY RANDOM MODE MEMO BAND DVD TUNER D.AUX 1 2 3 MD/LINE-1 TAPE /LINE-2 CT CD SRS RT SEARCH MODE 5 6 + - 5CH STEREO AUTO DECODE TUNER 9 + 4 3 TUNING / TV VOL 7 8 DIRECT STEREO VIRTUAL Set the various surround parameters. SURROUND / SELECT PUSH - PARAM. CH CALL 0/10 +10 - TEST TONE INPUT MODE SURROUND FUNCTION TUNER TV / VCR DVD IN/SURR. A/V SYSTEM Main unit IN/SURR. MD Remote control unit CDR TAPE 1 2 DVD 8 • Panorama setting + 9 6 - 7 PANORA ON OFF STATUS 3 MUTING SETUP TONE /SDB ON 3 2 ENTER SURROUND PARAMETER CH SELECT DISPLAY RETURN ANGLE MENU AUDIO + VCR CH OFF , / The selected setting flashes. TOP MENU SUB TITLE • Dimension setting RC-966 DIMENSION 1 2 Select “PLII C”, “PLII M” or “PRO LOGIC” for the 2-channel mode setting. Set the surround parameters for the selected mode. • The parameters switch as shown below each time one of the buttons is pressed. SURROUND PARAMETER ... 3 , 6 / • Center Width setting CNTR WIDTH ... 0 SURROUND / SELECT PUSH - PARAM. ... 0 3 ... 3 , 3 7 / • Default setting Main unit Remote control unit PL CINEMA PL MUSIC PRO LOGIC DEFAULT PANORAMA DEFAULT DIMENSION CNTR WIDTH DEFAULT DEFAULT YES , Y/N Y/N / NO When “YES” is selected, the settings are restored to the factory defaults. Once the surround parameters have been set, stop operating the buttons. After several seconds, the normal display reappears and the settings are automatically entered. This completes the setting of the parameters. NOTE: • The 2-channel mode is set and stored in the memory individually for the different functions. 61 1ADV-M71E2_ENG p61-p115 03.12.25 1:08 PM ページ 62 ENGLISH [4] Playing in the Dolby Pro Logic II mode (all functions) • The source is played according to the settings that have been made for the 2-channel mode and the parameters in the PLII Cinema, PLII Music and Pro Logic modes. • Applicable sources • Digital input signals (D.AUX functions, including DVD playback discs) Dolby Digital 2-channel sources PCM 2-channel sources • 2-channel analog input signals (TUNER, LINE-1 and LINE-2) 1 FUNCTION 2 B FUNCTION Main unit SURROUND / SELECT DVD SURROUND RECEIVER ADV-M71 Select the input function. - + BAND MENU / SET TONE / SDB Remote control unit In the “DTS” input mode with the function set to a digital input (DVD or D.AUX), it is not possible to play in the Dolby Pro Logic II mode. PUSH - PARAM. VOLUME FUNCTION ON / STANDBY PHONES 2 Set the surround mode to “AUTO DECODE”. SURROUND / SELECT SURROUND PUSH - PARAM. 1 OFF ENTER A-B REPEAT CLEAR TITLE T V EDIT/MENU ZOOM TV CH REPEAT PTY RANDOM MODE MEMO BAND DVD TUNER D.AUX 1 2 3 TUNING / TV VOL 5 6 + - AUTO DECODE TUNER TAPE /LINE-2 8 9 STEREO VIRTUAL CALL 0/10 +10 - TEST TONE INPUT MODE SURROUND FUNCTION CH TUNER TV / VCR DVD IN/SURR. SYSTEM 1 2 2 + DVD 8 9 6 7 Lit PRO LOGIC II IN/SURR. MD CDR TAPE 1 Play a program source including the mark or a 2-channel source. • The source is played according to the Dolby Pro Logic II mode settings. • In the Cinema and Music modes, the Dolby Pro Logic II indicator lights. + 7 DIRECT A/V 3 + CT CD SRS RT SEARCH MODE 5CH STEREO 4 Remote control unit TIME TV IN CHARAC. SLIDE MODE TV CH - RDS PROG/DIRECT MD/LINE-1 Main unit ON VCR REC NTSC/PAL SLEEP SOURCE • In the Dolby Pro Logic mode, the Dolby Pro Logic indicator lights - STATUS 3 MUTING SETUP PRO LOGIC TONE /SDB ENTER SURROUND PARAMETER CH SELECT DISPLAY RETURN ANGLE MENU AUDIO RC-966 VCR CH + TOP MENU SUB TITLE 4 4 Lit Set the surround parameters according to the selected mode. SURROUND PARAMETER Refer to steps 1 to 3 under “Setting the parameters in the PLII Cinema, PLII Music and Pro Logic modes” (page 61). Remote control unit 62 1ADV-M71E2_ENG p61-p115 03.12.25 1:08 PM ページ 63 ENGLISH 15 LISTENING TO THE RADIO (1) Tuning 3 OFF ON VCR REC NTSC/PAL SLEEP TITLE SOURCE ENTER A-B REPEAT CLEAR T V CHARAC. SLIDE MODE EDIT/MENU ZOOM TV CH B RDS PROG/DIRECT SURROUND / SELECT DVD SURROUND RECEIVER ADV-M71 PUSH - PARAM. - + BAND MENU / SET TONE / SDB VOLUME FUNCTION ON / STANDBY PHONES Set the remote control selector switches to A/V and TUNER. TUNER TV / VCR DVD IN/SURR. A/V SYSTEM IN/SURR. MD CDR TAPE 1 REPEAT PTY - MEMO BAND DVD TUNER D.AUX 1 2 3 4 TV CH TUNING / TV VOL 5 6 + - 5CH STEREO AUTO DECODE TUNER TAPE /LINE-2 8 9 DIRECT STEREO VIRTUAL CALL 0/10 +10 - TEST TONE INPUT MODE SURROUND FUNCTION CH TUNER TV / VCR DVD IN/SURR. A/V SYSTEM 1 2 + DVD 6 FUNCTION Main unit 2 Main unit 3 Remote control unit Select “FM” or “AM”. • The selected “FM AUTO”, “FM MONO” or “AM” is displayed. • When using the remote control, the mode button is used to select FM AUTO and MONO. BAND RANDOM PROG/DIRECT BAND MODE Remote control unit Adjust the receiving frequency. • When a station is received, the “TUNED” indication will light. TUNING / - + Main unit 9 7 - STATUS Press the FUNCTION button and select “TUNER”. FUNCTION 1 IN/SURR. MD CDR TAPE 8 1 2 2 3 + 7 2 Example: Tuning in FM/AM stations + CT CD SRS RT RANDOM SEARCH MODE MODE MD/LINE-1 TIME TV IN + - Remote control unit NOTE: A humming sound may be heard when using a TV nearby while receiving AM programs. If this happens, move the system as far from the TV as possible. Auto tuning • When one of the Tuning +/– button is pressed, the frequency changes in steps of 50 kHz in the FM band, 9 kHz in the AM band. • If one of the Tuning +/– button is held for over 1 second, the frequency continues to change when the button is released (auto tuning) and stops when a station is tuned in.Tuning will not stop at stations whose reception is poor. • To stop the auto tuning function, press the Tuning +/– button once. FM Stereo Reception • When a program being broadcast in “FM AUTO” is received, the “ST” indicator lights and the program is received in stereo. • If reception is poor and there is much noise in the stereo signals, press the BAND or MODE button to set the FM MONO mode. About the tuning mode and the preset mode • The function of the “–” and “+” buttons - + on the main unit can be switched so that they can be used for either tuning (selecting the reception frequency) or for selecting preset stations. Main unit • The buttons are set to the tuning mode BAND upon shipment. The mode can be switched to the preset mode by pressing the “+” button while pressing in the BAND button. (When this is done, “PRESET” is flashes for Main unit approximately 5 seconds.) • Press the “–” button while pressing in the BAND button to switch to the tuning mode. (When this is done, “TUNING” is flashes for approximately 5 seconds.) 63 1ADV-M71E2_ENG p61-p115 03.12.25 1:08 PM ページ 64 ENGLISH (2) Presetting stations that have been tuned in and giving names to stations (remote control unit only) 2 A total of 40 stations (including both FM and AM stations) can be preset. 2 Preset stations can be given names with up to 8 characters (letters, numbers and symbols). 2 Preset stations using the including remote control unit. SLEEP Set the remote control selector switches to A/V and TUNER. CLEAR 2,3, 4,6 TUNER TV / VCR DVD IN/SURR. A/V SYSTEM IN/SURR. MD REC NTSC/PAL TITLE TV IN T V ENTER A-B REPEAT CHARAC. SLIDE MODE EDIT/MENU ZOOM SOURCE CDR TAPE TV CH RDS PROG/DIRECT REPEAT MODE DVD PTY - TIME TV CH MEMO BAND TUNING / TV VOL TUNER D.AUX 1 2 3 MD/LINE-1 TAPE /LINE-2 4 5 6 + - 5CH STEREO AUTO DECODE TUNER 8 9 STEREO VIRTUAL CALL 0/10 +10 - TEST TONE INPUT MODE SURROUND FUNCTION 1 Tune in the station you want to preset. 2 Press the MEMO button twice in a row. • The name input mode is set. Press the MEMO button twice in a row to enter the station name you have input. • The preset number indicator, “P”, flashes. REPEAT MEMO P0- + 7 DIRECT A/V 4 + CT CD SRS RT RANDOM SEARCH MODE CH FM-DENON 3,5 TUNER TV / VCR DVD IN/SURR Remote control unit 5 Use the “+” and “–” preset buttons to select the preset number. TUNER + CH P0- FM 92.50M P03 - FM-DENON Remote control unit The preset number can also be input directly using the +10 and 1 to 10 buttons on the numeric keypad. REPEAT P0- _ MEMO Remote control unit Press the MEMO button to enter the preset number. • The preset number, band and reception frequency are displayed, then the station name appears. P03 FM MEMO P03 TUNER + 92.50M REPEAT Use the “+” and “–” preset buttons to select the character, then press the MEMO button to input that character. \ 3 6 FM-DENON Remote control unit CH Remote control unit To stop in the middle of the procedure, press the MODE button before pressing the MEMO button at step 4. Everything you have input is cleared. To clear a station name that has been set in the memory, call out that station, set the name input mode in step 2, then press the Remote control unit MODE button. The station name is cleared and the preset channel frequency is displayed. If you only want to preset a station, press the MEMO button once while the station is tuned in. The preset number indicator, “P”, flashes, and the preset number input mode is set. Use the “+” and “–” preset buttons to select the preset number then press the MEMO button again to store that station at the selected number. (The number can also be specified directly using the +10 and 1 to 10 buttons on the numeric keypad.) PROG/DIRECT MODE • When the “+” TUNING button or the MEMO button is pressed, the selected character is entered, the cursor moves to the next position and the next character can be input. • Use the “–” TUNING button to move back to the previous position. Use this to correct characters that have already been input. P0- F REPEAT MEMO \ P0- F_ Remote control unit TUNER + REPEAT CH MEMO Remote control unit 64 Remote control unit 1ADV-M71E2_ENG p61-p115 03.12.25 1:08 PM ページ 65 ENGLISH (3) Auto tuner presets Use this to automatically search for FM broadcasts and store up to 40 stations at preset channels 1 to 40. NOTE: • If an FM station cannot be preset automatically due to poor reception, use the “Manual tuning” operation to tune in the station, then preset it using the manual “Preset memory” operation. 2 Using the TUNER function, press and hold the MENU/SET button of the main unit for 2 seconds or longer. • “AUTO PRESET?” and “–: NO/+: START” will alternately appear on the display of the main unit. 1 MENU / SET B PUSH - PARAM. - + BAND MENU / SET TONE / SDB Main unit VOLUME FUNCTION ON / STANDBY • Press the TUNING – button to cancel. PHONES Use the TUNING + button to select “START”. “SEARCH” flashes on the display and searching begins. “COMPLETED” appears once searching is completed. 2 SURROUND / SELECT DVD SURROUND RECEIVER ADV-M71 + 1 Main unit (4) Listening to preset stations Example: Listening to the station preset at number P03 (This operation is only possible from the remote control unit.) 1 1 B SURROUND / SELECT DVD SURROUND RECEIVER ADV-M71 PUSH - PARAM. + - Use the “+” and “–” preset buttons to select preset number “3” or press the “3” button on the numeric keypad to display preset number “P03”. The “+” and “–” buttons on the main unit can be selected when the preset mode has been set. BAND MENU / SET TONE / SDB VOLUME TUNER + FUNCTION - ON / STANDBY PHONES + D.AUX 3 CH Main unit OFF SLEEP TITLE ENTER A-B REPEAT CHARAC. SLIDE MODE SOURCE Set the remote control selector switches to A/V and TUNER. TUNER TV / VCR DVD IN/SURR. A/V SYSTEM CLEAR MODE CDR TAPE PTY T V - RANDOM MEMO BAND TV CH + TUNING / TV VOL TUNER D.AUX 2 3 TAPE /LINE-2 4 5 6 + - 5CH STEREO AUTO DECODE TUNER + 7 8 9 DIRECT STEREO VIRTUAL 0/10 +10 - INPUT MODE SURROUND FUNCTION CALL TEST TONE The functions of the “+” and “–” buttons on the main unit change according to whether the tuning or preset mode is set. When the tuning mode is set, you can switch to the preset mode by pressing the “+” button while pressing the BAND button. EDIT/MENU ZOOM CT CD SRS RT SEARCH MODE 1 IN/SURR. MD REPEAT MD/LINE-1 DVD 1 TIME TV IN TV CH RDS PROG/DIRECT Remote control unit ON VCR REC NTSC/PAL CH 1 BAND + TUNER TV / VCR DVD IN/SURR. A/V SYSTEM IN/SURR. MD CDR TAPE Main unit Main unit The preset buttons on the remote control unit (TUNER CH “+” and “–”) can be used at any time. 65 1ADV-M71E2_ENG p61-p115 03.12.25 1:08 PM ページ 66 ENGLISH (5) RDS (Radio Data System) RDS (works only on the FM band) is a broadcasting service which allows station to send additional information along with the regular radio program signal. The following three types of RDS information can be received on this unit: 2 Program Type (PTY) PTY identifies the type of RDS program. The program types and their displays are as follows: NEWS News ROCK M Rock Music PHONE IN Phone In AFFAIRS Affairs EASY M Easy Listening TRAVEL Travel & Touring INFO Information LIGHT M Light Classical LEISURE Leisure & Hobby SPORT Sports CLASSICS Serious Classical JAZZ Jazz Music EDUCATE Education OTHER M Other Music COUNTRY Country Music DRAMA Drama WEATHER Weather & Meteorological NATION M National Music CULTURE Culture FINANCE Finance OLDIES Oldies Music SCIENCE Science CHILDREN Children’s Progs FOLK M Folk Music VARIED Varied SOCIAL Social Affairs DOCUMENT Documentary POP M Pop Music RELIGION Religion 2 Traffic Program (TP) TP identifies programs that carry traffic announcements. This allows you to easily find out the latest traffic conditions in your area before you leaving home. 2 Radio Text (RT) RT allows the RDS station to send text messages that appear on the display. NOTE: The operations described below using the RDS, PTY and RT buttons will not function in areas in which there are no RDS broadcasts. (6) RDS search Use this function to automatically tune to FM stations that provide RDS service. 1 Set the band to “FM”. Set the remote control selector switches to A/V and TUNER. RANDOM BAND Remote control unit TUNER TV / VCR DVD IN/SURR. A/V SYSTEM 2 Press the RDS button until “RDS SEARCH” appears on the display. IN/SURR. MD CDR TAPE CLEAR OFF SLEEP ON VCR REC NTSC/PAL TITLE TV IN T V ENTER A-B REPEAT CHARAC. SLIDE MODE EDIT/MENU ZOOM SOURCE 2 Remote control unit 3 Press the TUNING + (UP) or – (DOWN) button to automatically begin the RDS search operation. CLEAR TV CH RDS PROG/DIRECT + - 4 When a broadcast station is found, that station’s name appears on the display. • If no RDS station is found when all the frequencies are searched, “NO PROGRAMME” is displayed. 66 RANDOM MEMO BAND DVD TUNER D.AUX 1 2 3 4 7 DIRECT TV CH + CT CD SRS RT SEARCH MODE 5 6 5CH STEREO AUTO DECODE TUNER 8 9 + TAPE /LINE-2 STEREO 3 CH VIRTUAL CALL 0/10 +10 - TEST TONE INPUT MODE SURROUND FUNCTION TUNER TV / VCR DVD IN/SURR. SYSTEM 1 TUNING / TV VOL + - A/V Remote control unit PTY MODE MD/LINE-1 TUNING / TV VOL REPEAT TIME - IN/SURR. MD CDR TAPE 1ADV-M71E2_ENG p61-p115 03.12.25 1:08 PM ページ 67 ENGLISH (7) PTY search Use this function to find RDS stations broadcasting a designated program type (PTY). For a description of each program type, refer to “Program Type (PTY)”. 1 Set the band to “FM”. RANDOM BAND 4 Press the TUNING + (UP) or – (DOWN) button to automatically begin the PTY search operation. Remote control unit 2 Press the RDS button until “PTY SEARCH” appears on the display. CLEAR Remote control unit 3 Watching the display, press the PTY button to call out the desired program type. TUNING / TV VOL + Remote control unit 5 The station name is displayed on the display after searching stops. • If no station broadcasting the designated program type is found when all the frequencies are searched, “NO PROGRAMME” is displayed. ENTER A-B REPEAT REPEAT Remote control unit (8) TP search Use this function to find RDS stations broadcasting traffic program (TP stations) 1 Set the band to “FM”. RANDOM BAND 3 Remote control unit 2 Press the RDS button until “TP SEARCH” appears on the display. CLEAR Press the TUNING + (UP) or – (DOWN) button TP search begins. TUNING / TV VOL + Remote control unit 4 The station name is displayed on the display after searching stops. • If no TP station is found when all the frequencies are searched, “NO PROGRAMME” is displayed. Remote control unit (9) RT (Radio Text) “RT” appears on the display when radio text data is received. 1 To turn the RT mode on, press the RT button on the remote control unit until the RT indicator is lit. EDIT/MENU ZOOM TV CH + Remote control unit 2 When the station currently tuned in is offering a radio text message service, the message scrolls on the display. • When the RT mode is turned on while an RDS radio station not offering an RT service is tuned in, “NO TEXT DATA” is displayed on the display, then the mode automatically switches to the PS mode. • In the same way, the mode automatically switches to the PS mode when the RT service is finished. In this case, the mode automatically switches from the PS mode back to the RT mode when an RT broadcast is resumed. • The RT mode cannot be set in the AM band or for FM stations not offering RDS broadcasts. • To turn the RT mode off, press the RT button and switch to the desired display mode. (Refer to page 66.) 67 1ADV-M71E2_ENG p61-p115 03.12.25 1:08 PM ページ 68 ENGLISH 16 ON-SCREEN DISPLAY • The ADV-M71 is equipped with an on-screen display (“OSD”) function that displays various types of information on the surround functions and the disc on the screen when the function is set to DVD. q Setup screen • This is used to select the speaker system being used (quick system setting) and to change the function of the ADV-M71 and various settings when playing discs (system setting change and DVD setting change). • The setup screen can be used regardless of the currently set function. w Display of disc information • When the function is set to DVD, the OSD displays information on the disc and appears when various playback functions are operated. e Display of surround function • When the function is set to DVD, information on the surround amplifier is also displayed and can be operated. • The OSD for the surround function (AV OSD) can be turned on and off. (The OSD for the setup screen and DVD disc information cannot be set to “OFF”.) Set to “ON” upon shipment from the factory. 1 2 1 B SURROUND / SELECT DVD SURROUND RECEIVER ADV-M71 PUSH - PARAM. - + BAND MENU / SET TONE / SDB VOLUME With the function set to DVD, press the STATUS button of the remote control for at least 2 seconds. Press in the MENU/SET button on the main unit, then press the MENU/SET button again for at least 2 seconds while “STATUS” is displayed. • “AV OSD ON 0:1 OFF” is displayed. FUNCTION ON / STANDBY PHONES STATUS MENU / SET OFF ENTER A-B REPEAT CLEAR Main unit ON VCR REC NTSC/PAL SLEEP TITLE SOURCE T V EDIT/MENU ZOOM TV CH - RDS PROG/DIRECT REPEAT PTY RANDOM MODE MEMO BAND DVD TUNER D.AUX 3 TUNING / TV VOL 1 2 TAPE /LINE-2 4 5 6 + - 5CH STEREO AUTO DECODE TUNER 8 9 + DIRECT STEREO 2 + CT CD SRS RT SEARCH MODE MD/LINE-1 7 0/10 +10 - INPUT MODE SURROUND FUNCTION SURROUND / SELECT PUSH - PARAM. Main unit TUNER TV / VCR DVD IN/SURR. SYSTEM Turn the AV OSD on or off. CH VIRTUAL CALL TEST TONE A/V Remote control unit TIME TV IN CHARAC. SLIDE MODE TV CH Remote control unit IN/SURR. MD CDR TAPE 1 2 + DVD 8 or 0 :ON 9 6 - 7 STATUS 3 MUTING SETUP TONE /SDB 2 ENTER SURROUND PARAMETER CH SELECT DISPLAY RETURN ANGLE MENU AUDIO RC-966 68 1 VCR CH or 1 :OFF After several seconds, the display turns off and the setting is made. + TOP MENU SUB TITLE NOTES: • Depending on the disc being played, the picture may be disturbed when the OSD turns on. This is not a malfunction. If this should happen, set the AV OSD to “OFF”. • The OSD is also output to the VCR video output terminals. Do not perform setup or OSD operations while recording with a video deck. 1ADV-M71E2_ENG p61-p115 03.12.25 1:08 PM ページ 69 ENGLISH 17 USING THE ON-SCREEN DISPLAY (1) Operating using the disc information OSD SLEEP 2 Use this function to display and change information on the disc (titles, chapters, time, etc.) Set the remote control selector switches to A/V and DVD. CLEAR TITLE TV IN T V CHARAC. SLIDE MODE EDIT/MENU ZOOM TV CH RDS PROG/DIRECT 3 TUNER TV / VCR DVD IN/SURR. A/V SYSTEM TIME - PTY REPEAT RANDOM MODE MEMO BAND DVD TUNER D.AUX 3 TV CH 1 2 TAPE /LINE-2 4 5 6 + - 5CH STEREO AUTO DECODE TUNER 7 8 9 + DIRECT STEREO VIRTUAL CALL 0/10 +10 - TEST TONE INPUT MODE SURROUND FUNCTION In the play mode, press the DISPLAY button. • The On-Screen Display appears. • The picture on the TV screen switches each time the button is pressed. • The items displayed differ from disc to disc. Example: For DVDs MUTING SETUP TONE /SDB 2 TUNING / TV VOL MD/LINE-1 A/V STATUS 3 + CT CD SRS RT SEARCH MODE IN/SURR. MD CDR TAPE 1 NTSC/PAL ENTER A-B REPEAT SOURCE ENTER SURROUND PARAMETER CH SELECT 3 1 CH DISPLAY RETURN ANGLE TUNER TV / VCR DVD IN/SURR. MENU AUDIO VCR CH + TOP MENU SUB TITLE RC-966 DISPLAY Remote control unit T I T LE 01 / 1 0 T I T LE T IME P I C TURE MODE CHAPT ER 01/10 00 : 00 : 01 STANDARD T I T LE REMAI N 01 : 10 : 59 CHAPT ER T IME 00 : 00 : 01 CHAPT ER REMAI N 00 : 40 : 59 SUBT ITLE 1/2 : DOLBY D 3/2/1 ENGLISH AUDI O : OFF • For the on-screen display for video CDs and music CDs, only the disc time changes. Example: For video and music CDs TOTAL TIME TRACK S I NGL E T IME P I C TURE MODE 2 01 / 10 26 : 11 STANDARD S I NGL E REMAIN 03 : 17 TOTAL TIME 06 : 15 TOTAL REMAIN 32 : 05 Use the and •, ª cursor buttons to select the item you wish to change. • The selected item is displayed with a yellow frame. q For DVDs “TITLE”, “CHAPTER”, “TITLE ELAPSED” can be selected. w For video and music CDs “TRACK” can be selected. Remote control unit 3 q Changing the elapsed time Input using the number buttons, then press the ENTER button. Example: For 1 minute 26 seconds / “00126” w Changing the title, track or chapter • For DVDs Input using the number buttons, then press the ENTER button. (For some discs it is not possible to change the title or chapter.) • For video and music CDs Input using the number buttons. Playback starts from that track. DVD TUNER D.AUX 1 2 3 MD/LINE-1 TAPE /LINE-2 4 5 6 5CH STEREO AUTO DECODE 7 8 9 STEREO VIRTUAL 0/10 +10 Remote control unit 69 1ADV-M71E2_ENG p61-p115 03.12.25 1:08 PM ページ 70 ENGLISH (2) Adjusting the picture quality • The quality of the picture when playing discs can be adjusted. STATUS Set the remote control selector switches to A/V and DVD. 3 SYSTEM 1,2 ENTER SURROUND PARAMETER CH SELECT - 1 IN/SURR. MD TONE /SDB 1,2,3 TUNER TV / VCR DVD IN/SURR. A/V MUTING SETUP DISPLAY RETURN ANGLE MENU AUDIO VCR CH + TOP MENU SUB TITLE CDR TAPE 1 When playing a disc with the function set to DVD, press the DISPLAY button to turn on the on-screen display, use the • and ª cursor buttons to select “PICTURE MODE”, then press the ENTER button. • The picture quality adjustment screen appears. • The on-screen display also turns on when the DISPLAY button is pressed in the stop mode. ENTER DISPLAY \ \ Remote control unit Remote control unit Remote control unit 2 Use the 0 and 1 cursor buttons to select the item, then press the ENTER button. Standard: Both the picture quality and functions are set back to the standard settings set upon shipment from the factory. Anime: This sets a brighter more vivid picture quality. Cinema: This sets a mellower picture quality. Memory 1 to 3: Picture quality settings you have adjusted can be stored at three memory positions. (Set at step 3) 3 Selecting and adjusting the picture quality Use the 0 and 1 cursor buttons to select the picture quality item, then use the • and ª cursor buttons to adjust the value. • All the adjustments are stored in the memory. Contrast (–6 to +6) (factory default: 0): This adjusts the contrast between light and dark portions of the picture. Brightness (0 to +12) (factory default: 0): This adjust the brightness (vividness) of the picture. Color density (–6 to +6) (factory default: 0): This adjusts the color density. Hue (–6 to +6) (factory default: 0): This adjusts the balance between green and red. (This setting does not affect progressive scan outputs.) ENTER \ Remote control unit Remote control unit To complete the picture quality adjustment: Press the DISPLAY button again. NOTE: • Depending on the disc being played, the picture or sound may be disturbed when the on-screen display is displayed. This is not a malfunction. 70 1ADV-M71E2_ENG p61-p115 03.12.25 1:08 PM ページ 71 ENGLISH (3) Playing Repeatedly 2 Use this function to play your favourite audio or video sections repeatedly. OFF ON SLEEP VCR REC NTSC/PAL TITLE TV IN T V ENTER A-B REPEAT CHARAC. SLIDE MODE EDIT/MENU ZOOM SOURCE [2]-1,2 Set the remote control selector switches to A/V and DVD. [1]-1 TUNER TV / VCR DVD IN/SURR. A/V SYSTEM CLEAR TV CH RDS PROG/DIRECT PTY REPEAT TIME - RANDOM MODE MEMO BAND DVD TUNER D.AUX 3 TV CH + CT CD SRS RT SEARCH MODE TUNING / TV VOL 1 2 MD/LINE-1 TAPE /LINE-2 4 5 6 + - 5CH STEREO AUTO DECODE TUNER + 7 8 9 DIRECT STEREO VIRTUAL CALL 0/10 +10 - TEST TONE INPUT MODE SURROUND FUNCTION CH IN/SURR. MD CDR TAPE TUNER TV / VCR DVD IN/SURR. A/V SYSTEM IN/SURR. MD CDR TAPE 1 2 + DVD 8 9 [1] Playing Repeatedly (Repeat Playback) 1 In the play mode, press the REPEAT button. • The display on the TV screen switches each time the button is pressed, and the corresponding repeat play or stop mode is set. lights on the display when the repeat play mode is set. “ALL” lights when the all repeat play mode is set. q For DVDs REPEAT MEMO Remote control unit w For video and music CDs • Normal playback • Normal playback • Chapter repeated CHAPTER REPEAT • Track repeated TRACK REPEAT • Title repeated TITLE REPEAT • Entire disc repeated DISC REPEAT • Repeat playback cancelled REPEAT OFF • Repeat playback cancelled REPEAT OFF To return to normal playback: Return to normal playback by pressing the REPEAT button until “REPEAT OFF” appears on the TV screen. 71 1ADV-M71E2_ENG p61-p115 03.12.25 1:08 PM ページ 72 ENGLISH [2] Playing a Certain Section Repeatedly (A-B Repeat Playback) 1 During playback, press the A-B REPEAT button. • This sets start point A. ENTER A-B REPEAT A TO B SET A Remote control unit 2 Press the A-B REPEAT button again. • This sets end point B, and repeat playback of the A-B section starts. ENTER A-B REPEAT A TO B SET B Remote control unit To return to normal playback: Press the A-B REPEAT button until “A TO B CANCELLED” appears on the TV screen. NOTES: • Repeat playback may not work for some DVDs. • The repeat playback and A-B repeat playback functions will not work for DVDs and video CDs for which the elapsed time is not shown on the display during playback. • In some cases, subtitles may not be displayed near the A and B points during A-B repeat playback. 72 1ADV-M71E2_ENG p61-p115 03.12.25 1:08 PM ページ 73 ENGLISH (4) Playing Tracks in the Desired Order 2 Use this function with video and music CDs to play the tracks in the desired order. 2 This function does not affect with DVD. SLEEP REC NTSC/PAL TITLE TV IN T V ENTER A-B REPEAT CHARAC. SLIDE MODE EDIT/MENU ZOOM SOURCE CLEAR TV CH RDS PROG/DIRECT 1 Set the remote control selector switches to A/V and DVD. MODE TUNING / TV VOL TUNER D.AUX 2 3 TAPE /LINE-2 4 5 6 + - 5CH STEREO AUTO DECODE TUNER + 7 8 9 DIRECT STEREO VIRTUAL CALL 0/10 +10 - TEST TONE INPUT MODE SURROUND FUNCTION CH TUNER TV / VCR DVD IN/SURR. IN/SURR. MD + BAND 1 A/V SYSTEM TV CH MD/LINE-1 TUNER TV / VCR DVD IN/SURR. A/V TIME - CT CD SRS RT RANDOM SEARCH MODE MEMO DVD 2 REPEAT PTY SYSTEM IN/SURR. MD CDR TAPE CDR TAPE 3 1 2 + DVD 8 6 9 7 - STATUS 1 2 Press the PROG/DIRECT button once in the stop mode. • The program selection screen appears. Use the number buttons to select the number you want to program. • Up to 20 tracks can be programmed. PROG/DIRECT MODE Remote control unit TUNER D.AUX 1 2 3 MD/LINE-1 DVD TAPE /LINE-2 4 7 5 6 5CH STEREO AUTO DECODE 8 9 STEREO VIRTUAL 0/10 +10 Remote control unit Example: To program tracks 5 and 12 Press number button “+10”. Press number button “5”. \ 3 Press the play button. • The tracks start playing in the programmed order. Press number button “2”. \ 1 DVD Remote control unit To return to normal playback: Press the stop button to stop programmed playback, then press the PROG/DIRECT button. When the play button is next pressed, normal playback begins from the beginning of the disc. Clearing individual tracks from the program: Press the stop button to stop programmed playback. Now press the CLEAR button to clear the last track programmed. Clearing the entire program: The entire program is cleared when the power is turned off or the disc is unloaded. The entire program can also be cleared by pressing the stop button to stop programmed playback then pressing the PROG/DIRECT button. Checking the programmed tracks: Press the CALL button to display the programmed tracks in steps. 73 1ADV-M71E2_ENG p61-p115 03.12.25 1:09 PM ページ 74 ENGLISH (5) Playing Tracks in the Random Order 2 Use this function with video and music CDs to play the tracks in random order. 2 This function does not affect with DVD. SLEEP NTSC/PAL TITLE TV IN T V ENTER A-B REPEAT CHARAC. SLIDE MODE EDIT/MENU ZOOM SOURCE CLEAR TV CH RDS PROG/DIRECT Set the remote control selector switches to A/V and DVD. RANDOM MEMO BAND DVD TUNER D.AUX 1 2 3 MD/LINE-1 TAPE /LINE-2 CDR TAPE + CT CD SRS RT SEARCH MODE 1 TUNING / TV VOL 5 6 5CH STEREO AUTO DECODE TUNER + 7 8 9 DIRECT STEREO VIRTUAL CALL 0/10 +10 - TEST TONE INPUT MODE SURROUND FUNCTION CH TUNER TV / VCR DVD IN/SURR. A/V IN/SURR. MD IN/SURR. MD TV CH + - SYSTEM SYSTEM PTY MODE 4 TUNER TV / VCR DVD IN/SURR. A/V REPEAT TIME - CDR TAPE 2 1 2 + DVD 8 9 6 7 - STATUS 3 1 MUTING In the stop mode, press the RANDOM button. • The random play screen appears. RANDOM BAND RANDOM ON Remote control unit 2 Press the PLAY (1) button. • The tracks start playing in random order. 1 DVD Main unit • Random playback is not possible for some discs. To return to normal playback: Press the STOP (2) button to stop random playback, then press the RANDOM button once. 74 Remote control unit 1ADV-M71E2_ENG p61-p115 03.12.25 1:09 PM ページ 75 ENGLISH (6) MP3 WMA Playback [1] Listening to Recorded MP3 CD/CD-R/CD-RW 2 There are many music distribution sites on the internet from which music files in MP3 format can be downloaded. Music downloaded as instructed on the site and written onto a CD-R/RW disc can be played on the ADV-M71. If music recorded on commercially available music CDs is converted on a computer into MP3 files using an MP3 encoder (conversion software), the data on a 12 cm CD is reduced into about 1/10 the amount of the original data. Thus, when written in MP3 format, the data of about 10 music CDs can fit onto a single CD-R/RW disc. A single CD-R/RW disc can contain over 100 tracks. Values when 5-minute tracks are converted with a standard bit rate of 128 kbps into MP3 files and using a CD-R/RW disc with a capacity of 650 MB. 1 1 3 CALL 0/10 +10 - TEST TONE INPUT MODE SURROUND FUNCTION TUNER TV / VCR DVD IN/SURR. A/V SYSTEM B CDR TAPE PUSH - PARAM. 3 - 1 2 + DVD + BAND MENU / SET TONE / SDB IN/SURR. MD SURROUND / SELECT DVD SURROUND RECEIVER ADV-M71 8 9 - VOLUME 6 7 FUNCTION STATUS ON / STANDBY PHONES 3 MUTING SETUP TONE /SDB 2,3 ENTER SURROUND PARAMETER CH SELECT DISPLAY RETURN ANGLE 1 VCR CH MENU AUDIO + TOP MENU SUB TITLE Load the CD-R/RW disc on which the MP3 format music files have been written into this unit. (See page 40.) • When the disc is loaded in the ADV-M71, the disc information screen appears. • If there are multiple folders, proceed to step 2. • If there are no folders on the disc (if the disc only contains MP3 files), proceed to step 3. All the folders recorded on the disc are displayed. (The folders are not displayed by layer.) 2 Use the • and ª cursor buttons to select the folder containing the file(s) you want to play, then press the ENTER button. To change the folder Use the • cursor button to select “ROOT” at the upper right of the screen, then press the ENTER button. The screen in step 1 reappears. Select the desired folder. ENTER \ Remote control unit Remote control unit 75 1ADV-M71E2_ENG p61-p115 03.12.25 1:09 PM ページ 76 ENGLISH 3 Use the • and ª cursor buttons to select the MP3 file you want to play, then press the PLAY (1) button or ENTER button. • Playback starts. The display can be switched between the single elapsed time and the single remaining time by pressing the DISPLAY button. Remote control unit Programmed playback is not possible with MP3 discs. To change the MP3 file Press the STOP button, then use the • and ª cursor buttons to reselect the desired MP3 file. To set the random play mode In the stop mode, press the RANDOM button. Then press the PLAY (1) button or ENTER button. To set the repeat mode The repeat mode changes each time the REPEAT button is pressed. NORMAL Æ TRACK REPEAT Æ FOLDER REPEAT ≠ 1 \ DVD Main unit Remote control unit \ ENTER Remote control unit To return to the initial disc information screen Press the STOP (2) button, use the • cursor button to select “ROOT” at the upper right of the screen, then press the ENTER button. NOTES: • The ADV-M71 is compatible with the “MPEG-1 Audio Layer 3” standards (sampling frequency of 32, 44.1 or 48 kHz). It is not compatible with such other standards as “MPEG-2 Audio Layer 3”, “MPEG-2.5 Audio Layer 3”, MP1, MP2, etc. • It may not be possible to play some CD-R/RW discs due to disc properties, dirt, warping, etc. • The digital signals output when playing MP3 files are MP3 signals converted into PCM, regardless of whether the audio output presenting is set to “normal” or “PCM conversion”. The signals are output with the same sampling frequency as that of the music source. • In general, the higher an MP3 file’s bit rate, the better the sound quality. On the ADV-M71, we recommend using MP3 files recorded with bit rates of 128 kbps or greater. • MP3 files may not be played in the expected order, since the writing software may change the position of the folders and the order of the files when writing them on the CD-R/RW. • Manual search and programmed playback are not possible with MP3 discs. • When writing MP3 files on CD-R/RW discs, select “ISO9660 level 1” as the writing software format. This may not be possible with some types of writing software. For details, refer to the writing software’s usage instructions. • With the ADV-M71 it is possible to display folder names and file names on the screen like titles. The ADV-M71 can display up to 11 characters, consisting of numbers, capital letters, and the “_” (underscore) mark. • If recorded in a format other than “ISO9660 level 1”, normal display and playback may not be possible. In addition, folder and file names including other symbols will not be displayed properly. • Be sure to add the extension “.MP3” to MP3 files. Files cannot be played if they have any extension other than “.MP3” or if they have no extension. (with Macintosh computers, MP3 files can be played by adding the extension “.MP3” after the file name consisting of up to 8 capital or numbers and recording the files on the CD-R/RW.) • Do not apply stickers, tape, etc., to either the label side or the signal side of CD-R/RW discs. If adhesive gets on the surface of a disc, the disc may get stuck inside the ADV-M71 and be impossible to eject. • The ADV-M71 is not compatible with packet write software. • The ADV-M71 is not compatible with ID3-Tag. • The ADV-M71 is not compatible with play lists. 76 1ADV-M71E2_ENG p61-p115 03.12.25 1:09 PM ページ 77 ENGLISH [2] Listening to Recorded WMA (Windows Media Audio) CD-R/CD-RW • This unit can play CD-R/RW music files that have been recorded in the WMA (Windows Media Audio)* audio compression format. Windows Media, and the Windows logo are trademarks, or registered trademarks of Microsoft Corporation in the United States and/or other countries. WMA (Windows Media Audio): New audio coding of Microsoft Corporation (U.S.A.) • Uses of recordings you have made other than for your personal enjoyment are not permitted under the Copyright Law without permission of the copyright holder. • The method of playback is the same as “[1] Listening to Recorded MP3 CD/CD-R/CD-RW” on Pages 75 and 76. • In the file display of the disc information screen, WMA files will be displayed with the “WMA” icon instead of the “MP3” icon. (Files for which the “WMA” icon is not displayed cannot be played.) NOTES: • Files recorded with a sampling frequency (fs) of 32, 44.1, and 48 kHz are supported. • Programmed playback cannot be performed with WMA files. • The digital output at the time of WMA file playback is converted to PCM regardless of the initial settings. • Please use discs that have been recorded in conformity with the ISO 9660 level 1/level 2 CD-ROM file system. (Extended formats are excluded.) • Copyright protected files cannot be played. Also note that depending on the writing software and conditions, playback might not be possible, or the files might not be displayed properly. • Playback of the CD-R/RW might not be possible depending on the disc characteristics, soiling, scratches, and other factors. • Bit rates of 64 k to 160 kbps are supported for WMA files that have an extension of “.wma” or “.WMA”. • This unit can display the folder names and file names on the screen. Up to 11 half-width alphanumeric upper case characters and symbols (including the underscore symbol) can be displayed. • While in the stop condition, the DISPLAY button of the remote control can be used to switch and display the title names and the artist names. (One folder has a capacity of up to 99 files.) • Recorded discs with no more than 99 files per folder are recommended. Multiple folder configurations are possible; however, depending on the configuration, playback of all the folders and files might not be possible. • Multi-session discs and CD-R/RW that have not been finalized can also be played back; however, playback of discs that have had session closure within 10 sessions or have been finalized is recommended. • Direct track selection using the remote control numerical keys (0 to 9, and +10) can specify up to 179 tracks (179 files) per folder. When 179 tracks are exceeded, while the unit is stopped use the cursor buttons at the disc information screen to select the files, and use the play button of the ENTER button to play. 77 1ADV-M71E2_ENG p61-p115 03.12.25 1:09 PM ページ 78 ENGLISH (7) Playing still picture files (JPEG format) 2 JPEG files stored on Kodak picture CDs, CD-Rs and CD-RWs can be played as a slide show and enjoyed on the ADV-M71. [1] Playing Kodak picture CDs 2 Playing Picture CDs The ADV-M71 can play Kodak Picture CDs, so you can view the photographs stored on them on a TV screen. (Picture CDs are CDs containing photographs taken on conventional silver film cameras which have been converted into digital data. For details on Picture CDs, please contact a store providing Kodak development services.) 8 1 B 1 PUSH - PARAM. - + BAND MENU / SET TONE / SDB - 7 STATUS 3 SURROUND / SELECT DVD SURROUND RECEIVER ADV-M71 9 6 VOLUME Set the remote control selector switches to A/V and DVD. MUTING SETUP TONE /SDB 1-w ENTER SURROUND PARAMETER CH SELECT - FUNCTION ON / STANDBY PHONES TUNER TV / VCR DVD IN/SURR. A/V DISPLAY RETURN ANGLE SYSTEM MENU AUDIO IN/SURR. MD CDR TAPE RC-966 1 Load the Picture CDs into the set. • For Picture CDs: Playback of the still pictures starts automatically when the disc is loaded. Press the stop button to stop playback. • “KODAK” is the registered trademark of Eastman kodak Co. 78 Main unit VCR CH + TOP MENU SUB TITLE 1ADV-M71E2_ENG p61-p115 03.12.25 1:09 PM ページ 79 ENGLISH [2] Playing still pictures stored on CD-Rs/RWs 1 B 3 SURROUND / SELECT DVD SURROUND RECEIVER ADV-M71 PUSH - PARAM. - + BAND MENU / SET TONE / SDB VOLUME PHONES 0/10 +10 - INPUT MODE SURROUND FUNCTION TUNER TV / VCR DVD IN/SURR. A/V Set the remote control selector switches to A/V and DVD. SYSTEM IN/SURR. MD CDR TAPE 3 1 2 + DVD 8 6 9 - 7 STATUS 3 FUNCTION ON / STANDBY CALL TEST TONE TUNER TV / VCR DVD IN/SURR. A/V SYSTEM MUTING SETUP TONE /SDB 2,3 IN/SURR. MD CDR TAPE ENTER SURROUND PARAMETER CH SELECT - 1 Load the CD-R/RW on which the still pictures have been written into the ADV-M71. • When the disc is loaded in the ADV-M71, the disc information screen appears. + B D I SC I NF ORMATI ON ROOT • If there are multiple folders, proceed to step 2. • If there are no folders on the disc, proceed to step 3. P L AY MODE S I GNAL E L APSED S I NGL E : 2 VCR CH ROOT 0 JPEG 1 1 JPEG 2 2 JPEG 3 3 JPEG 4 4 JPEG 5 5 F OL DE R : --:-DEC I S I ON : ENTER BUT TON Use the • and ª cursor buttons to select the folder containing the file(s) you want to play, then press the ENTER button. B D I SC I NF ORMATI ON To change the folder Use the • cursor button to select “ROOT” at the upper right of the screen, then press the ENTER button. The screen in step 1 reappears. Select the desired folder. Remote control unit ROOT •• 0 JPEG 1 A 1 JPEG 2 B 2 JPEG 3 C 3 JPEG 4 D 4 JPEG 5 E 5 P L AY MODE ENTER S I GNAL E L APSED S I NGL E : F OL DE R : --:-DEC I S I ON : ENTER BUT TON Remote control unit 3 Use the • and ª cursor buttons on the remote control unit to select the still picture file from which you want to start the slide show, then press the PLAY button or the ENTER button on the remote control unit. • The slide show starts. • Only the still picture files in the selected folder are played. B D I SC I NF ORMATI ON Once all the still picture files in the folder have been Remote control unit ROOT •• 0 JPEG 1 A 1 JPEG 2 B 2 JPEG 3 C 3 JPEG 4 D 4 JPEG 5 E 5 P L AY MODE S I GNAL E L APSED S I NGL E : F OL DE R : --:-DEC I S I ON : ENTER BUT TON 1 ENTER DVD Main unit Remote control unit 79 1ADV-M71E2_ENG p61-p115 03.12.25 1:09 PM ページ 80 ENGLISH To view several of the still pictures stored on the disc at once: • Press the STOP button to display up to 9 still pictures at once. • To select and view a still picture (to start the slide show from a specific still picture), use the cursor buttons (ª, •, 0 and 1) to select the desired still picture, then press the ENTER button. To temporarily stop the slide show: • Press the PAUSE button. • To resume the slide show, press the PLAY button. To cue a still picture you want to view (from which you want to start the slide show): • During the slide show, press one of the SKIP (8,9) buttons. Press the SKIP 8 button to cue back to the previous still picture, the SKIP 9 button to cue ahead to the next still picture. Flipping and rotating still pictures: • Use the cursor buttons (ª, •, 0 and 1) to flip the still picture. The currently displayed still picture is flipped vertically. • cursor button: The currently displayed still picture is flipped horizontally. ª cursor button: 0 cursor button: 1 cursor button: The currently displayed still picture is rotate 90° counterclockwise. The currently displayed still picture is rotate 90° clockwise. Play the image in the zoom mode. • When the ZOOM button is pressed while playing a JPEG image (“ZOOM ON” is displayed on the screen at this time) zoom in and zoom out using the search keys. (6: zoom out, 7: zoom in) • When the image is zoomed, use the cursor buttons (ª, •, 0 and 1) to move the zoomed picture. • Continuous playback (SLIDE SHOW) is not possible in the zoom mode. The way of switching to the next image during continuous JPEG image playback (SLIDE SHOW) can be selected. • Press the SLIDE MODE button on the remote control unit. • Select from SLIDE SHOW MODE 1 to MODE 11, MODE RAND and MODE NONE. Special play modes for MP3/WMA and JPEG files Use the 0 and 1 cursor buttons to select the play mode, the • and ª cursor buttons to select the special play mode. • FOLDER (the MP3/WMA and JPEG files in the folder are played in order starting from the selected file) • • • • FOLDER REPEAT (all the MP3/WMA and JPEG files in the folder are played repeatedly starting from the selected file) DISC (all the MP3/WMA and JPEG files on the disc are played in order starting from the selected file) DISC REPEAT (all the MP3/WMA and JPEG files on the disc are played repeatedly starting from the selected file) RANDOM ON (all the MP3/WMA and JPEG files in the folder are played in random order starting from the selected file) • TRACK REPEAT (the select MP3/WMA or JPEG file is played repeatedly) NOTES: • The ADV-M71 is compatible with image data stored in JPEG format, but Denon does not guarantee that all image data stored in JPEG format can be viewed. • Pictures with resolutions of up to 2048 x 1536 pixels can be displayed. • It may not be possible to play some CD-Rs/RWs due to disc properties, dirt, scratches, etc. • When storing JPEG files on the CD-R/RW, set the writing program to store the files in the “ISO9660 level 1” format. • Be sure to give JPEG files the extension “.JPG” and “.JPE”. Files with other extensions or with no extensions cannot be viewed on the ADV-M71. • Do not apply stickers, tape, etc., to either the label side or the signal side of CD-R/RW discs. If adhesive gets on the surface of a disc, the disc may get stuck inside the ADV-M71 and be impossible to eject. • Do not play CD-R/RW discs containing any files other than music CD files (in CDA format), MP3/WMA and JPEG files. Doing so may result in malfunction or damage, depending on the type of file. • JPEG files written using Macintosh computers cannot be played. 80 1ADV-M71E2_ENG p61-p115 03.12.25 1:09 PM ページ 81 ENGLISH (8) Using the Multiple Audio, Subtitle and Angle Functions [1] Switching the Audio Language (Multiple Audio Function) 2 With DVDs containing multiple audio language signals, the audio language can be switched during playback. CDR TAPE 1 2 + DVD 8 9 6 Set the remote control selector switches to A/V and DVD. - 7 STATUS 3 MUTING SETUP TONE /SDB 2 ENTER SURROUND PARAMETER CH SELECT TUNER TV / VCR DVD IN/SURR. A/V DISPLAY RETURN SYSTEM MENU VCR CH + TOP MENU IN/SURR. MD CDR TAPE ANGLE AUDIO SUB TITLE 1 RC-966 1 During playback, press the AUDIO button. • The current audio language number is displayed. AUDIO AUDIO 1/3:DOLBY D3/2/.1 ENG Remote control unit 2 Use the • and ª cursor buttons to select the desired language. • The display turns off when the AUDIO button is pressed. AUDIO 2/3:DOLBY D3/2/.1 FRA Remote control unit NOTES: • With some discs it is not possible to change the audio language during playback. In such cases, select from the DVD menu. (See page 96.) • If the desired language is not set after pressing the • and ª cursor buttons several times, the disc does not include that language. • The language selected in the default settings is set when the power is turned on and when the disc is replaced. 81 1ADV-M71E2_ENG p61-p115 03.12.25 1:09 PM ページ 82 ENGLISH [2] Switching the Subtitle Language (Multiple Subtitle Function) 2 With DVDs containing multiple subtitle language signals, the subtitle language can be switched during playback. CDR TAPE 1 2 + DVD 8 9 6 Set the remote control selector switches to A/V and DVD. - 7 STATUS 3 MUTING SETUP TONE /SDB 2 ENTER SURROUND PARAMETER CH SELECT TUNER TV / VCR DVD IN/SURR. A/V DISPLAY RETURN SYSTEM MENU + VCR CH TOP MENU IN/SURR. MD CDR TAPE ANGLE AUDIO SUB TITLE 1 RC-966 1 During playback, press the SUBTITLE button. • The current subtitle language number is displayed. SUB TITLE SUBTITLE 01/03:ENG SUBTITLE 02/03:FRA Remote control unit 2 Use the • and ª cursor buttons to select the desired language. • The display turns off when the SUBTITLE button is pressed. Remote control unit NOTES: • If the desired language is not set after pressing the • and ª cursor buttons several times, the disc does not include that language. • The subtitle language set with the default settings is set when the power is turned on and when the disc is replaced. If that language is not included on the disc, the disc’s default language is set. • When the subtitle language is changed, several seconds may be required for the new language to appear. • When a disc supporting the closed caption is played, the subtitle and the closed caption may overlap each other on the TV monitor. In this case, turn the subtitle off. 82 1ADV-M71E2_ENG p61-p115 03.12.25 1:09 PM ページ 83 ENGLISH [3] Switching the Angle (Multiple Angle Function) 2 With DVDs containing multiple angle signals, the angle can be switched during playback. CDR TAPE 1 2 + DVD 8 9 6 Set the remote control selector switches to A/V and DVD. - 7 STATUS 3 MUTING SETUP TONE /SDB 2 ENTER SURROUND PARAMETER CH SELECT TUNER TV / VCR DVD IN/SURR. A/V DISPLAY RETURN SYSTEM IN/SURR. MD CDR TAPE 1 ANGLE MENU AUDIO VCR CH + TOP MENU SUB TITLE RC-966 1 During playback, press the ANGLE button. • The current angle number is displayed. 3/5 ANGLE Remote control unit 2 Use the • and ª cursor buttons to select the desired angle. • The display turns off when the ANGLE button is pressed. 4/5 Remote control unit NOTES: • The multiple angle function only works with discs on which multiple angles are recorded. • At scenes where multiple angles are recorded, the angle can be switched. 83 1ADV-M71E2_ENG p61-p115 03.12.25 1:09 PM ページ 84 ENGLISH (9) Using the Menus [1] Using the Top Menu 2 For DVDs containing multiple titles, the desired title can be selected and played from the top menu. CDR TAPE OFF SLEEP TITLE TV IN T V ENTER A-B REPEAT CHARAC. SLIDE MODE EDIT/MENU ZOOM SOURCE CLEAR TV CH Set the remote control selector switches to A/V and DVD. RDS PROG/DIRECT 2 TUNER TV / VCR DVD IN/SURR. A/V SYSTEM IN/SURR. MD 1 ON VCR REC NTSC/PAL REPEAT PTY RANDOM MODE MEMO BAND DVD TUNER D.AUX 3 TV CH - 7 STATUS TUNING / TV VOL 2 TAPE /LINE-2 4 5 6 + - 5CH STEREO AUTO DECODE TUNER 8 9 + STEREO 9 6 CT CD SRS RT SEARCH MODE 1 DIRECT 8 + MD/LINE-1 7 + DVD TIME - 2 3 SETUP 0/10 +10 - INPUT MODE SURROUND FUNCTION TONE /SDB 3 2 ENTER SURROUND PARAMETER CH SELECT CH VIRTUAL CALL TEST TONE MUTING DISPLAY RETURN MENU VCR CH + 1 TOP MENU CDR TAPE TUNER TV / VCR DVD IN/SURR. A/V SYSTEM ANGLE AUDIO SUB TITLE IN/SURR. MD CDR TAPE 1 2 DVD 8 1 RC-966 + 9 During playback, press the TOP MENU button. • The top menu appears. Example: TOP MENU TOP MENU Apple Banana Orange Strawberry Peach Pineapple Remote control unit 2 Use the cursor or number buttons to select the desired title. • If you select the title number using the number buttons, skip step 3 below. DVD TUNER D.AUX 1 2 3 MD/LINE-1 TAPE /LINE-2 4 5 6 5CH STEREO AUTO DECODE 7 8 9 STEREO VIRTUAL 0/10 +10 Remote control unit Remote control unit Example: When “Orange” is selected TOP MENU 3 Press the ENTER button. • Playback starts. • Playback also starts if the PLAY (1) button is pressed. Apple Banana Orange Strawberry Peach Pineapple ENTER Remote control unit 84 1ADV-M71E2_ENG p61-p115 03.12.25 1:09 PM ページ 85 ENGLISH [2] Using the DVD Menu 2 Some DVDs include special menus called DVD menus. For example, DVDs with complex contents may contain guide menus, and DVDs with multiple languages may contain audio and subtitle language menus. These menus are called “DVD menus”. Here we describe the general procedure for using DVD menus. CDR TAPE OFF SLEEP TITLE TV IN T V ENTER A-B REPEAT CHARAC. SLIDE MODE EDIT/MENU ZOOM SOURCE CLEAR TV CH Set the remote control selector switches to A/V and DVD. TUNER TV / VCR DVD IN/SURR. A/V SYSTEM IN/SURR. MD RDS PROG/DIRECT 2 1 ON VCR REC NTSC/PAL REPEAT PTY - RANDOM MODE MEMO BAND DVD TUNER D.AUX 3 TV CH 6 - 7 STATUS 2 TAPE /LINE-2 4 5 6 + - 5CH STEREO AUTO DECODE TUNER 8 9 + STEREO + 9 + TUNING / TV VOL 1 DIRECT 8 CT CD SRS RT SEARCH MODE MD/LINE-1 7 2 DVD TIME 3 SETUP 0/10 +10 - INPUT MODE SURROUND FUNCTION TONE /SDB 3 2 ENTER SURROUND PARAMETER CH SELECT CH VIRTUAL CALL TEST TONE MUTING DISPLAY RETURN MENU VCR CH + 1 TOP MENU CDR TAPE TUNER TV / VCR DVD IN/SURR. A/V SYSTEM ANGLE AUDIO SUB TITLE IN/SURR. MD CDR TAPE 1 2 DVD 8 1 RC-966 + 9 During playback, press the MENU button. • The DVD menu appears. Example: DVD MENU 1. SUB TITLE MENU 2. AUDIO 3. ANGLE Remote control unit 2 Use the cursor or number buttons to select the desired item. • If you select the item using the number buttons, skip step 3 below. DVD TUNER D.AUX 1 2 3 MD/LINE-1 TAPE /LINE-2 4 7 5 6 5CH STEREO AUTO DECODE 8 9 STEREO VIRTUAL 0/10 +10 Remote control unit Remote control unit Example: “AUDIO” is selected DVD MENU 1. SUB TITLE 2. AUDIO 3. ANGLE 3 Press the ENTER button. • The selected item is set. • If more menus appear, repeat steps 2 and 3. ENTER Remote control unit 85 1ADV-M71E2_ENG p61-p115 03.12.25 1:09 PM ページ 86 ENGLISH (10) Playing in the zoom mode CDR TAPE OFF SLEEP TITLE TV IN T V ENTER A-B REPEAT CHARAC. SLIDE MODE EDIT/MENU ZOOM SOURCE CLEAR TV CH Set the remote control selector switches to A/V and DVD. TUNER TV / VCR DVD IN/SURR. A/V SYSTEM IN/SURR. MD RDS PROG/DIRECT 1 ON VCR REC NTSC/PAL REPEAT PTY - RANDOM MODE MEMO BAND DVD TUNER D.AUX 3 TV CH 2 + DVD TIME + CT CD SRS RT SEARCH MODE 8 1 9 6 - 7 STATUS TUNING / TV VOL 1 2 MD/LINE-1 TAPE /LINE-2 4 5 6 + - 5CH STEREO AUTO DECODE TUNER 3 MUTING SETUP TONE /SDB 8 9 STEREO VIRTUAL CALL 0/10 +10 - TEST TONE INPUT MODE SURROUND FUNCTION 2 ENTER + 7 DIRECT CH SURROUND PARAMETER CH SELECT DISPLAY RETURN MENU VCR CH + TOP MENU CDR TAPE TUNER TV / VCR DVD IN/SURR. A/V SYSTEM ANGLE AUDIO SUB TITLE IN/SURR. MD CDR TAPE 1 2 DVD 8 1 + RC-966 9 In the play or pause mode, press the ZOOM button. • The zoom rate increases each time the ZOOM button is pressed. For DVD video discs and video CDs: OFF Æ x1.5 Æ x2 Æ x4 Æ OFF EDIT/MENU ZOOM TV CH + Remote control unit 2 Use the cursor buttons (ª, •, 0 and 1) to move the zoomed picture. Remote control unit NOTES: • Zooming is not possible with some discs. • The zoom function may not work properly at some scenes. • Zooming is not possible at the top menu or the menu screen. 86 1ADV-M71E2_ENG p61-p115 03.12.25 1:09 PM ページ 87 ENGLISH 18 USING THE TIMER 2 Timer and system operations are possible once the setup procedure has been completed. (1) Setting the clock (24-hour display) Example: Setting the current time to “19:30” 4,6 2,3,5,7 B 5 SURROUND / SELECT DVD SURROUND RECEIVER ADV-M71 PUSH - PARAM. - Adj 19 : 0 0 MENU / SET + BAND MENU / SET TONE / SDB Press the MENU/SET button. VOLUME FUNCTION Main unit ON / STANDBY PHONES 6 1 1 Turn the SURROUND/SELECT knob to move to the minutes position. Adj 19 : 3 0 SURROUND / SELECT PUSH - PARAM. Turn on the power. ON / STANDBY Main unit Main unit 2 7 Press the MENU/SET button at the sound of a time signal, etc. • The “30” in the minutes place stops flashing and the current time is displayed. Press the MENU/SET button to display “Time”. Time Time 0:00 19 : 3 0 MENU / SET MENU / SET Main unit Main unit • If the time has not yet been set or if there has been a power shortage, the time display flashes. • If the time has been set, the current time is displayed. 3 Press the MENU/SET button and hold it in for over 2 seconds. • The hours position flashes. Adj 0:00 MENU / SET Main unit 4 Turn the SURROUND/SELECT knob to set the hours. To check the current time when the regular display is displayed, press the MENU/SET button once. The current time remains displayed until some other operation is performed. The time can be displayed by pressing the MENU/SET button when the power is in the standby mode. (When this is done, the set is no longer in the low power consumption standby mode.) When pressed twice while the time is displayed, the display turns off and the set is put back in the low power consumption standby mode. The current time can also be set when the power is in the standby mode by pressing the MENU/SET button to display the time then performing steps 3 to 7. The clock runs by synchronizing with the power supply frequency. The time may be off by 2 to 3 minutes per month. If so, reset the time. SURROUND / SELECT Adj 19:00 PUSH - PARAM. Main unit Before setting the timer 2 Be sure to set the current time. If the current time is not set, the timer standby indicator does not light and the timer will not function. 2 Be sure to preset the broadcast station before setting the timer. (See page 64.) 2 Everyday timer: The power is switched on and off (standby) once at the same time each day. Once timer: The power is switched on and off (standby) at the specified time once only. Sleep timer: The power can be set to turn off in 120 minutes, 90 minutes, or between 60 and 10 minutes in 10 minute steps. 2 If the times set for the everyday timer, once timer and sleep timer overlap, the sleep timer has priority. The once time has priority if the everyday timer and once timer times overlap. 2 It is not possible to set the timer start and stop times to the same time. 87 1ADV-M71E2_ENG p61-p115 03.12.25 1:09 PM ページ 88 ENGLISH (2) Setting the everyday timer and once timer 2 Be sure to set the current time before setting the timer. (See page 87.) 2 Use the everyday timer to switch the power on and off (standby) once at the same time each day. Use the once timer to switch the power on and off (standby) at the specified time once only. 2 With the ADV-M71 it is possible to play the tuner, a DVD or a CD with the timer. 2 It is possible to play a DVD, CD, tape, the tuner, MD or the device connected to the AUX terminals with the timer and to record the tuner or the device connected to the AUX terminals onto an MD recorder or cassette deck using the timer. Timer playback is not possible for some DVDs. (Most DVDs stop at the menu screen.) Example 1: Listening to preset station “3” (FM 92.5 MHz) from 12:35 to 12:56 with the everyday timer 2,3,4,6,8, 3,5,7,9,11, 13,15,17 10,12,14,16 B 5 Turn the SURROUND/SELECT knob and set the function to “TUNER”. SURROUND / SELECT PUSH - PARAM. E TUNER SURROUND / SELECT DVD SURROUND RECEIVER ADV-M71 PUSH - PARAM. Main unit - + BAND MENU / SET TONE / SDB VOLUME The function switches as shown below each time the surround button is pressed. Functions marked “*” differ according to whether “LINE1” or “LINE-2” is set. FUNCTION ON / STANDBY PHONES DVD 1,18 1 *AUX *TU Turn on the power. ON / STANDBY Main unit 2 2) *(LINE2) *TU (LINE1) (LINE1 or (LINE2) *(LINE1) :Clockwise turn :Counterclockwise turn 6 Press the MENU/SET button. MENU / SET Press the MENU/SET button to display “TIMER”. Main unit TIMER MENU / SET 7 Turn the SURROUND/SELECT knob to display “EVERYDAY”, then press the MENU/SET button. • The display switches as follows each time the SURROUND/SELECT SURROUND / SELECT PUSH - PARAM. knob is turned: EVERYDAY Turn the SURROUND/SELECT knob and select preset number “P03”. SURROUND / SELECT Main unit 3 TUNER P03 FM 92.50M PUSH - PARAM. Main unit 8 Main unit Press the MENU/SET button. • The data for the selected station is stored in the memory and the unit is set to the timer start time setting mode. • “E” and “on” are displayed. MENU / SET The display switches as follows each time the SURROUND/SELECT knob is turned: ONCE 4 EVERYDAY FUNC 0:00 9 <Setting the timer start time> Turn the SURROUND/SELECT knob to set the hours place to “12”. MENU / SET SURROUND / SELECT E Main unit 88 on Main unit Main unit Press the MENU/SET button. E E MENU / SET on 12:00 PUSH - PARAM. Main unit 1ADV-M71E2_ENG p61-p115 03.12.25 1:09 PM ページ 89 ENGLISH 10 Press the MENU/SET button. • The “12” in the hours place is stored in the memory. E on 12:00 17 MENU / SET Main unit 11 Turn the SURROUND/SELECT knob to display “Eon”. • The everyday timer is turned on and SURROUND / SELECT PUSH - PARAM. the timer standby indicator lights. This completes the setting of the timer. For more details, see “Turning the Main unit everyday timer and once timer on and off” on page 88. 1 Turn the SURROUND/SELECT knob and set the minutes place to “35”. off/E on SURROUND / SELECT PUSH - PARAM. E on 12:35 Main unit 12 Press the MENU/SET button. • The start time is stored in the memory and the unit is set to the timer stop time setting mode. • “E” and “off” light. MENU / SET E off 0:00 Main unit 13 <Setting the timer stop time> Turn the SURROUND/SELECT knob to set the hours place to “12”. SURROUND / SELECT 18 Turn off the power. • The standby mode is set. (The power indicator turns orange.) • When the timer start time is reached, the timer operates. ON / STANDBY Main unit If you make a mistake when setting the BAND timer • Press the stop button at any point between steps 4 and 15. (The display returns to as it was in step 3.) • Press the MENU/SET button repeatedly Main unit to display the item you want to correct, then correct the item. • After correcting the item, press the MENU/SET button again repeatedly to proceed to step 18 and complete the setting of the timer. PUSH - PARAM. E off 12:00 Main unit 14 NOTE: • The timer standby indicator does not light if the current time has not been set. Set the current time before setting the timer. (See page 87.) Press the MENU/SET button. • The “12” in the hours place is stored in the memory. E off 12:00 MENU / SET Main unit 15 Turn the SURROUND/SELECT knob and set the minutes place to “56”. SURROUND / SELECT PUSH - PARAM. E off 12:56 Main unit 16 Press the MENU/SET button. • The stop time is stored in the memory. MENU / SET Main unit 89 1ADV-M71E2_ENG p61-p115 03.12.25 1:09 PM ページ 90 ENGLISH Example 2: Listening to a CD with the once timer 2 4,6 4 2 Turn the SURROUND/SELECT knob to display “ONCE”, then press the MENU/SET button. SURROUND / SELECT PUSH - PARAM. B ONCE SURROUND / SELECT DVD SURROUND RECEIVER ADV-M71 PUSH - PARAM. - + BAND MENU / SET TONE / SDB VOLUME The display switches as follows each time the SURROUND/SELECT knob is turned: FUNCTION ON / STANDBY PHONES 3,4,5,7 1 ONCE Main unit MENU / SET EVERYDAY Main unit 1 Turn on the power. ON / STANDBY 5 Press the MENU/SET button. • The once timer time setting mode is set. • “1” (once) lights. MENU / SET 1 FUNC Main unit 2 Open the disc holder, load the CD, then close the disc holder. Main unit 6 Turn the SURROUND/SELECT knob and set the function to “DVD”. SURROUND / SELECT 1 DVD PUSH - PARAM. Main unit 3 Press the MENU/SET button to display “TIMER”. Main unit MENU / SET TIMER 7 Press the MENU/SET button. • Timer function, “DVD”, is stored in the memory. MENU / SET Main unit Main unit 8 Now follow steps 9 to 18 under “Setting the everyday timer and once timer” (pages 88 and 89). • “1” and “on” light when setting the start time. “1” and “off” light when setting the stop time. • Turn the once timer on at step 17. 2 Timer playback and recording can be performed when system connections are made between the ADV-M71 and the D-M31 series MD recorder (DMD-M31) or cassette deck (DRR-M31). (Both the everyday and once timer can be used.) • Timer playback of the cassette deck (when TAPE is set for LINE-2) • Timer playback of the MD recorder (when MD is set for LINE-1 or LINE-2) • Timer playback of the device connected to the AUX input terminals (when AUX is set for LINE-1 or LINE-2) • Timer recording of radio programs from the ADV-M71 onto the cassette deck (when TAPE is set for LINE-1) • Timer recording of radio programs from the ADV-M71 onto the MD recorder (when MD is set for LINE-1) • Timer recording from the device connected to the AUX input terminals onto the cassette deck (when AUX is set for LINE-1 and TAPE is set for LINE-2) • Timer recording from the device connected to the AUX input terminals onto the MD recorder (when AUX and MD are set for LINE-1 and LINE-2) Timer recording onto the device connected to the AUX input terminals is not possible. The timer function changes automatically according to the function set for LINE-1 and LINE-2. NOTE: • For timer recording and playback using the device connected to the AUX input terminals, note that the ADV-M71 cannot control the power of the device or playback operations on it. Make the settings accordingly. 90 1ADV-M71E2_ENG p61-p115 03.12.25 1:09 PM ページ 91 ENGLISH (3) Turning the everyday timer and once timer on and off • After the timer has been set using the procedure described under “(2) Setting the everyday timer and once timer” (pages 88 to 89), turn the everyday timer and/or once timer on so that the set operations will be performed. 2 B • If only the once timer is set, the setting changes as shown below each time the SURROUND/SELECT knob is turned. SURROUND / SELECT DVD SURROUND RECEIVER ADV-M71 PUSH - PARAM. - + BAND MENU / SET TONE / SDB 1on/E off 1 o f f / E o ff SURROUND / SELECT PUSH - PARAM. Main unit VOLUME FUNCTION • If only the everyday timer is set, the setting changes as follows: ON / STANDBY PHONES 1off/E 1 1 MENU / SET on/E 1 o f f / E o ff NOTES: • The timer standby indicator Press the MENU/SET button to set the timer standby setting mode. • The current settings are displayed. 1 on on does not light if the current time has not been set. Set the current time before setting the timer. (See page 87.) • If the times set for the everyday timer and once timer overlap, the once time has priority. • Be sure to set the power to the standby mode when you want the timer to operate. Main unit 2 Turn the SURROUND/SELECT knob and select the timer to be operated. SURROUND / SELECT PUSH - PARAM. • The display switches as follows each time the SURROUND/SELECT knob is turned: Main unit on Both the once timer and everyday timer are activated. 1 on/E 1 off/E on Only the everyday timer is activated. 1 on/E Only the once timer is activated. 1 off/E off off Neither the once timer nor the everyday timer are activated. • When either the once or everyday timer is activated, the timer standby indicator lights. The display returns to normal about 4 seconds after the timer standby indicator is displayed. The timer operation is performed when the SURROUND/SELECT knob has been turned and the timer standby indicator has been lit. If you do not want the timer to operate, turn the SURROUND/SELECT knob to turn the timer standby indicator off. SURROUND / SELECT PUSH - PARAM. Main unit 91 1ADV-M71E2_ENG p61-p115 03.12.25 1:09 PM ページ 92 ENGLISH (4) Everyday timer and once timer priority • If the times set for the everyday timer and once timer overlap, the once time has priority. (5) About the everyday timer and once timer 2 Checking the timer settings • Use the same procedure as when setting the timer to check the timer settings. q Press the MENU/SET button to display “TIMER”. w Turn the SURROUND/SELECT knob to display “EVERYDAY” or “ONCE”. e The display switches between the set function, start time, stop time and timer standby indicator each time the MENU/SET button is pressed. r The display returns to as it was before the everyday timer or once timer was set about 4 seconds after the timer standby indicator is displayed. 2 Changing the timer settings • Reset the timer from the start using the desired settings. The new settings overwrite the previous settings. • To change a setting during the process of setting the timer, press the stop button (2) to return to the “EVERYDAY” or “ONCE” display, then redo the operation from there. 2 Clearing the timer settings q Press the MENU/SET button to display “TIMER”. w Turn the SURROUND/SELECT knob to display “EVERYDAY” or “ONCE” (the timer whose settings you want to clear). e While “EVERYDAY” or “ONCE” is displayed, press the stop button (2) and hold it in for at least 2 seconds. Those timer settings are cleared. 2 Quitting the timer setting (turning the operation of the timer off) • Operate as described under “(3) Turning the everyday timer and once timer on and off” (page 88) and change the setting to the mode in which neither the once timer nor the everyday timer are activated (“1off/Eoff”). 2 If there is a power failure) • If there is a power failure or the power cord is unplugged from the power outlet, the time display flashes when the power comes back on. Reset the current time. • The once timer settings are deleted. Remake the settings. • If the everyday timer settings and the tuner presettings have been deleted, reset them. 92 1ADV-M71E2_ENG p61-p115 03.12.25 1:09 PM ページ 93 ENGLISH (6) Setting the sleep timer (remote control unit only) • The included remote control unit can be used to turn the power to the standby mode after a maximum of 120 minutes. (Sleep timer) • Use this function to automatically switch the power to the standby mode after a specific amount of time (minutes). Example: To set the power to the standby mode in 50 minutesaccording to the clock. Be sure to correct the current time setting. Set the remote control selector switches to A/V and IN/SURR.. OFF SLEEP 2,3 SYSTEM CLEAR ENTER A-B REPEAT CHARAC. SLIDE MODE CDR TAPE TIME TV IN TV CH IN/SURR. MD TITLE SOURCE RDS PROG/DIRECT TUNER TV / VCR DVD IN/SURR. A/V ON VCR REC NTSC/PAL REPEAT PTY T V EDIT/MENU ZOOM - RANDOM MODE MEMO BAND DVD TUNER D.AUX 3 TV CH + CT CD SRS RT SEARCH MODE TUNING / TV VOL 1 2 MD/LINE-1 TAPE /LINE-2 4 5 6 + - 5CH STEREO AUTO DECODE TUNER + 7 8 9 DIRECT STEREO VIRTUAL CALL 0/10 +10 - TEST TONE INPUT MODE SURROUND FUNCTION NOTES: • If the SLEEP button is pressed while the sleep timer is operating, the setting returns to 120 minutes. Make the setting over. • If the sleep timer and everyday timer settings overlap, the sleep timer has priority. 20:00 CH Everyday timer once timer setting 21:00 22:00 ON OFF + 1 Select and play the desired function. 2 Press the SLEEP button. Sleep timer setting ON OFF If the timers overlap like this, the timer operates as follows: 20:00 • “120” is displayed and the “SLEEP” indicator flashes. 21:00 ON 22:00 OFF Does not operate • Also, the everyday timer will not operate if its start time is set within the time during which the sleep timer is operating. SLEEP SOURCE 120 Timer operation SLEEP 20:00 Remote control unit 21:00 22:00 Does not operate Everyday timer once timer setting ON OFF + The display switches as follows each time the SLEEP button is pressed: 120 90 60 50 40 30 20 Sleep timer setting ON OFF • The remaining time of the sleep timer can be checked with the STATUS button. 10 “SLEEP” indicator off 3 When the “SLEEP” indicator is flashing, press the SLEEP button again until “50” is displayed. • “50” is displayed and the “SLEEP” indicator flashes. 50 SLEEP SOURCE SLEEP Remote control unit • After 4 seconds, the display returns to as it was before the sleep timer was set, and the “SLEEP” indicator stops flashing, remaining lit. (This completes the sleep timer setting.) 4 The power is set to the standby mode 50 minutes later. To turn the sleep timer off, press the SLEEP button repeatedly until the “SLEEP” indicator turns off. The sleep timer can also be turned off by press the power button on the main unit or the remote control unit to turn the entire system’s power to the standby mode. ON / STANDBY SLEEP OFF SOURCE Remote control unit Main unit Remote control unit 93 1ADV-M71E2_ENG p61-p115 03.12.25 1:09 PM ページ 94 ENGLISH 19 CHANGING THE DEFAULT SETTINGS (DVD) 2 The initial setting that was set prior to shipping from the factory can be changed. The setting contents are maintained until they are next changed even when the power is switched off. 1 In the stop mode, press the SETUP button. At the Setup Menu, use the • and ª cursor buttons to select “DVD SETUP” and press the ENTER button. SETUP Remote control unit d Remote control unit d ENTER Remote control unit 2 The setup (default settings) screen “DVD SETUP MENU” appears. • DISC SETUP Use this to set the language to be used when playing the disc. If the set language is not offered on that disc, the discs default language is set. • OSD SETUP Use this to set the wall paper color. • VIDEO SETUP Use this to set this unit screen mode. (TV aspect and TV type.) • AUDIO SETUP Use this to set this unit audio output mode. (Digital and LPCM output settings.) • RATINGS Use this to disable playback of adult DVDs so that children cannot watch them. Note that playback of adult DVDs cannot be disabled if the rating level is not recorded on the DVD, but that it is possible to disable playback of all DVDs. • OTHER SETUP Closed captions (subtitles) and the time interval for playing still pictures can be set. Remote control unit d ENTER Remote control unit Use the 0 and 1 cursor buttons to select the desired setting item, then press the ENTER button. To exit the DVD setup mode Use the 0 and 1 cursor buttons to select “EXIT SETUP”, then press the ENTER button. It is also possible to quit by pressing the SETUP button on the remote control unit. 94 1ADV-M71E2_ENG p61-p115 03.12.25 1:09 PM ページ 95 ENGLISH (1) “DISC SETUP” is selected 1 See page 94. 2 3 Use the 0 and 1 cursor buttons to select the “DISC SETUP”, then press the ENTER button. • DIALOG Use this to set the language of the sound output from the speakers. • SUBTITLE Use this to set the language of the subtitles displayed on the TV. • DISC MENUS Use this to set the language of the menus recorded on the disc (top menu, etc.). To exit the disc setup mode Use the • and ª cursor buttons to select “> NEXT DVD MENU”, then press the ENTER button. Remote control unit d ENTER Remote control unit 4 Use the • and ª cursor buttons to select the desired setting, then press the ENTER button. 2 When “DIALOG” is selected: • ENGLISH (Factory default) Select this when you want to play the DVD with the sound in English. • FRENCH Select this when you want to play the DVD with the sound in French. • SPANISH Select this when you want to play the DVD with the sound in Spanish. • GERMAN Select this when you want to play the DVD with the sound in German. • JAPANESE Select this when you want to play the DVD with the sound in Japanese. • OTHERS The sound is played in the language input with the number buttons. (See the table of language numbers on page 97.) Remote control unit d ENTER Remote control unit 95 1ADV-M71E2_ENG p61-p115 03.12.25 1:09 PM ページ 96 ENGLISH 4 To exit the dialog mode Press the ENTER button, you can go back to the previous screen. 2 When “SUBTITLE” is selected: • OFF Select this if you do not want to display the subtitles. (For some discs it is not possible to turn off the subtitle display.) • ENGLISH (Factory default) Select this when you want to play the DVD with the subtitles in English. • FRENCH Select this when you want to play the DVD with the subtitles in French. • SPANISH Select this when you want to play the DVD with the subtitles in Spanish. • GERMAN Select this when you want to play the DVD with the subtitles in German. • JAPANESE Select this when you want to play the DVD with the subtitles in Japanese. • OTHERS Subtitles are played in the language input with the number buttons. (See the table of language numbers on page 97.) Remote control unit d ENTER Remote control unit To exit the subtitle mode Press the ENTER button, you can go back to the previous screen. 2 When “DISC MENUS” is selected: • ENGLISH (Factory default) Select this when you want to display the menus in English. • FRENCH Select this when you want to display the menus in French. • SPANISH Select this when you want to display the menus in Spanish. • GERMAN Select this when you want to display the menus in German. • JAPANESE Select this when you want to display the menus in Japanese. • OTHERS The menu screen is played in the language input with the number buttons. (See the table of language numbers on page 97.) To exit the disc menus mode Press the ENTER button, you can go back to the previous screen. 96 Remote control unit d ENTER Remote control unit 1ADV-M71E2_ENG p61-p115 03.12.25 1:09 PM ページ 97 ENGLISH Language code list Language Code Code Language Code Language Language Code 6565 Afar 7079 Faroese 7678 Lingala 8375 Slovak 6566 Abkhazian 7082 French 7679 Laothian 8376 Slovenian 6570 Afrikaans 7089 Frisian 7684 Lithuanian 8377 Samoan 6577 Ameharic 7165 Irish, Scots 7686 Latvian, Lettish 8378 Shona 6582 Arabic 7168 Gaelic 7771 Malagasy 8379 Somali 6583 Assamese 7176 Galician 7773 Maori 8381 Albanian 6588 Aymara 7178 Guarani 7775 Macedonish 8382 Serbian 6590 Azerbaijani 7185 Gujarati 7776 Malayalam 8385 Sundanese 6665 Bashkir 7265 Hausa 7778 Mongolian 8386 Swedish 6669 Byelorussian 7273 Hindi 7779 Moldavian 8387 Swahili 6671 Bulgarian 7282 Croatian 7782 Marathi 8465 Tamil 6672 Bihari 7285 Hungarian 7783 Malay 8469 Telugu 6678 Bengali; Bangla 7289 Armenian 7784 Maltese 8471 Tajik 6679 Tibetan 7365 Interlingua 7789 Burmese 8472 Thai 6682 Breton 7378 Indonesian 7865 Nauru 8473 Tigrinya 6765 Catalan 7383 Icelandic 7869 Nepali 8475 Turkmen 6779 Corsican 7384 Italian 7876 Dutch 8476 Tagalog 6783 Czech 7387 Hebrew 7879 Norwegian 8479 Tonga 6789 Welsh 7465 Japanese 7982 Oriya 8482 Turkish 6865 Danish 7473 Yiddish 8065 Panjabi 8484 Tatar 6869 German 7487 Javanese 8076 Polish 8487 Twi 6890 Bhutani 7565 Georgian 8083 Pashto, Pushto 8575 Ukrainian 6976 Greek 7575 Kazakh 8084 Portuguese 8582 Urdu 6978 English 7576 Greenlandic 8185 Quechua 8590 Uzbek 6979 Esperanto 7577 Cambodian 8277 Rhaeto-Romance 8673 Vietnamese 6983 Spanish 7578 Kannada 8279 Romanian 8679 Volapük 6984 Estonian 7579 Korean 8285 Russian 8779 Wolof 6985 Basque 7583 Kashmiri 8365 Sanskrit 8872 Xhosa 7065 Persian 7585 Kurdish 8368 Sindhi 8979 Yoruba 7073 Finnish 7589 Kirghiz 8372 Serbo-Croatian 9072 Chinese 7074 Fiji 7665 Latin 8373 Singhalese 9085 Zulu 97 1ADV-M71E2_ENG p61-p115 03.12.25 1:09 PM ページ 98 ENGLISH (2) When “OSD SETUP” is selected 1 If you are not at the DVD setting screen, read steps 1 and 2 on page 94. 2 3 Use the 0 and 1 cursor buttons to select the “OSD SETUP” tag icon, then press the ENTER button. • WALL PAPER The image displayed when in the stop mode or when playing a CD can be selected. Remote control unit d ENTER Remote control unit 4 Use the • and ª cursor buttons to select the setting to be set, then press the ENTER button. 2 When “WALL PAPER” has been selected • Use the • and ª cursor buttons to select the wallpaper. • BLUE (Factory default) The wallpaper is set to blue. • GRAY The wallpaper is set to gray. • BLACK The wallpaper is set to black. • PICTURE The wallpaper is set to a picture. To complete the “WALL PAPER” setting Press the ENTER button. Remote control unit d ENTER Remote control unit 98 1ADV-M71E2_ENG p61-p115 03.12.25 1:09 PM ページ 99 ENGLISH (3) “VIDEO SETUP” is selected 1 See page 94. 2 3 Use the 0 and 1 cursor buttons to select the “VIDEO SETUP”, then press the ENTER button. • TV ASPECT Use this to set the shape of your TV’s screen. • TV TYPE Use this to set your TV’s video format (NTSC, PAL or MULTI). • BLACK LEVEL The picture’s black level can be set to “lighter” or “darker”. To exit the video setup mode Use the • and ª cursor buttons to select “> NEXT DVD MENU”, then press the ENTER button. Remote control unit d ENTER Remote control unit 4 Use the • and ª cursor buttons to select the desired setting, then press the ENTER button. 2 When “TV ASPECT” is selected: • 4:3 PS (Factory default) Select this to play wide DVDs in the pan & scan mode (with the sides of the picture cut off). Discs for which pan & scan is not specified are played in the letter box mode. • 4:3 LB Select this to play wide DVDs in the letter box mode (with black strips at the top and bottom). • WIDE (16:9) Select this to play wide DVDs in the full-screen mode. Remote control unit d ENTER To exit the TV aspect mode Press the ENTER button, you can go back to the previous screen. Remote control unit 99 1ADV-M71E2_ENG p61-p115 03.12.25 1:09 PM ページ 100 ENGLISH 4 2 When “TV TYPE” is selected: • NTSC Select this when your TV’s video format is NTSC. If NTSC is selected, output format is fixed to NTSC. • PAL (Factory default) Select this when your TV’s video format is PAL. If PAL is selected, output format is fixed to PAL. • MULTI Select this when your TV is compatible with both the NTSC and PAL formats. NTSC signals are output from the video output jacks when discs recorded in NTSC format are played, and PAL signals are output from the video output jacks when discs recorded in PAL format are played. To exit the TV type mode Press the ENTER button, you can go back to the previous screen. Remote control unit d ENTER Remote control unit 2 When “BLACK LEVEL” has been selected • Use the • and ª cursor buttons to select the black level. • DARKER (Factory default) This sets the black level of the output signals to the standard level. • LIGHTER This raises the standard level for the black level. Set this if the picture displayed on the TV is extremely dark. Remote control unit To complete the “BLACK LEVEL” setting Press the ENTER button. d ENTER Remote control unit 100 1ADV-M71E2_ENG p61-p115 03.12.25 1:09 PM ページ 101 ENGLISH (4) “AUDIO SETUP” is selected 1 See page 94. 2 3 Use the 0 and 1 cursor buttons to select the “AUDIO SETUP”, then press the ENTER button. • DIGITAL OUT Use this to select the digital output’s signal format. • LPCM (44.1 kHz / 48 kHz) Use this to set the digital audio output when playing DVDs recorded in linear PCM audio. To exit the audio setup mode Use the • and ª cursor buttons to select “> NEXT DVD MENU”, then press the ENTER button. • The screen returns to as it was in step 2. Remote control unit d ENTER Remote control unit 4 Use the • and ª cursor buttons to select the desired setting, then press the ENTER button. 2 When “DIGITAL OUT” is selected. • NORMAL (Factory default) Make the selection when playing back in surround playback a DVD that has been recorded with Dolby Digital or DTS on this unit. The Dolby Digital or DTS digital signal is also output from the digital output jacks. • PCM DVDs that were recorded in Dolby Digital DTS are converted to linear PCM 48 kHz/16 bit (2 channels). Make the selection when making a digital recording. To exit the digital out mode Press the ENTER button, you can go back to the previous screen. Remote control unit d ENTER Remote control unit 101 1ADV-M71E2_ENG p61-p115 03.12.25 1:09 PM ページ 102 ENGLISH 4 2 “LPCM SELECT (96 kHz / 48 kHz)” is selected. • OFF (Factory default) Make the selection when playing back to a decoder DVDs that were recorded with this unit using linear PCM 48 kHz/20/24 bit and 96 kHz modes. Note that DVDs with Copyright Protection are converted to 48 kHz/16 bits and played back. The same signal is output from the digital output jacks. • ON DVDs that were recorded with linear PCM 48 kHz/20/24 bit and 96 kHz modes are all converted to 48 kHz/16 bits. Make this selection at the time of digital recording. Remote control unit d ENTER To exit the LPCM select mode Press the ENTER button, you can go back to the previous screen. Remote control unit NOTES: • When playing Dolby Digital/DTS surround DVDs or 96 kHz linear PCM DVDs on the ADV-M71, be sure to set “Digital Output” to “Normal” and “LPCM Conversion Mode” to “Do Not Convert”. • When and only when you want to output the signals of the Dolby Digital/DTS surround DVD being played on the ADV-M71 to a digital PCM device, set “Digital Output” to “PCM Conversion”. With this setting, DVDs cannot be played on the ADV-M71 in the Dolby Digital/DTS surround mode. (The surround mode is set to the mode in which PCM 2-channel signals can be played.) • When and only when you want to make a digital recording of the signals of a 48 kHz/20-bit/24-bit or 96 kHz linear PCM DVD being played on the ADV-M71 onto a digital recorder, set the “LPCM Conversion” to “Convert”. With this setting it is not possible to decode and play 48 kHz/20-bit/24-bit or 96 kHz linear PCM signals on the ADV-M71 during recording. (Decoding and playback is in 48 kHz/16-bit linear PCM format.) 102 1ADV-M71E2_ENG p61-p115 03.12.25 1:09 PM ページ 103 ENGLISH (5) “RATINGS” is selected 1 2 3 See page 94. Use the 0 and 1 cursor buttons to select the “RATINGS”, then press the ENTER button. • RATING LEVEL Use this to restrict playback of adult DVDs you do not want children to view. Note that even with adult DVDs, viewing cannot be restricted unless the restriction level is recorded on the disc. It is however possible to disable playback of all DVDs. • PASSWORD Use this to change the password. The set’s password is set to “0000” by default. Remote control unit d ENTER To exit the rating setup mode Use the • and ª cursor buttons to select “> NEXT DVD MENU”, then press the ENTER button. Remote control unit 4 Use the • and ª cursor buttons to select the desired setting, then press the ENTER button. 2 When “RATING LEVEL” is selected. • Level 0 (LOCK ALL) Select this to disable playback of all DVDs. Use this for example to disable playback of adult DVDs on which the rating level is not recorded. • Level 1 Select this to play only DVDs for children. (Adult and general audience DVDs cannot be played.) • Level 2 to Level 7 Select this to play DVDs for general audiences and children. Adult DVDs cannot be played. • NO LIMIT (Factory default) Select this to play all DVDs. Remote control unit d ENTER Remote control unit 103 1ADV-M71E2_ENG p61-p115 03.12.25 1:09 PM ページ 104 ENGLISH 4 Use the number buttons to input a 4-digit password, then press the ENTER button. Be sure to set the DVD mode using the remote control mode selector buttons. The set's password is set to “0000" by default. Do not forget the password. The setting cannot be changed without inputting the correct password. DVD TUNER D.AUX 1 2 3 MD/LINE-1 TAPE /LINE-2 4 7 5 6 5CH STEREO AUTO DECODE 8 9 STEREO VIRTUAL 0/10 +10 Remote control unit d ENTER When the password has been forgotten or when a RATING LEVEL setting change is suspended, press the ENTER button several times and terminate the rating setup mode. Remote control unit 2 When “PASSWORD CHANGE” is selected. Use the number buttons to input a 4-digit password, then press the ENTER button. Be sure to set the DVD mode using the remote control mode selector buttons. Do not forget the password. The setting cannot be changed without inputting the correct password. The set’s password is set to “0000” by default. DVD TUNER D.AUX 1 2 3 MD/LINE-1 TAPE /LINE-2 4 5 6 5CH STEREO AUTO DECODE 7 8 9 STEREO VIRTUAL 0/10 +10 Remote control unit 104 1ADV-M71E2_ENG p61-p115 03.12.25 1:09 PM ページ 105 ENGLISH (6) “OTHER SETUP” is selected NOTES: • An English caption decoder is required to display English captions. • DVDs with caption signals are indicated by the , , , mark. English captions cannot be displayed when playing DVDs which do not contain caption signals. • The characters in which the captions are displayed (capital letters, small letters, italics, etc.) depend on the DVD and cannot be selected with this unit. 1 2 3 See page 94. Use the 0 and 1 cursor buttons to select the “OTHER SETUP”, then press the ENTER button. • CAPTIONS Set whether or not to display the closed captions (subtitles) recorded on the DVD. (A caption decoder (commercially available) is required to display captions.) • SLIDE SHOW Set the time interval for switching to the next still image (in JPEG format) when playing slides. To exit the other setup mode Use the • and ª cursor buttons to select “> NEXT DVD MENU”, then press the ENTER button. Remote control unit d ENTER Remote control unit 4 Use the • and ª cursor buttons to select the desired setting, then press the ENTER button. 2 When “CAPTIONS” is selected: • OFF (Factory default) Select this when you do not want to display the captions on the screen when playing DVDs containing English captions. • ON Select this to display the captions on the screen when playing DVDs containing English captions. To exit the captions mode Press the ENTER button, you can go back to the previous screen. Remote control unit d ENTER Remote control unit 105 1ADV-M71E2_ENG p61-p115 03.12.25 1:09 PM ページ 106 ENGLISH 4 2 When “SLIDE SHOW” has been selected • Use the • and ª cursor buttons to set the time. • The interval can be set from 5 to 15 seconds in steps of 1 second. (Factory default: 5 seconds) Remote control unit d ENTER Remote control unit 106 1ADV-M71E2_ENG p61-p115 03.12.25 1:09 PM ページ 107 ENGLISH 20 SYSTEM FUNCTIONS 2 Making system connections between the ADV-M71 and the D-M31 series MD recorder (DMD-M31) or cassette deck (DRR-M31) makes operation even easier. (For instructions on connections, refer to “Connecting to D-M31 Series System Components” on pages 8 to 9.) 2 System functions will not work properly if the input/output function settings are not right for the connected components. Be sure to set the input/output functions for the components being used. (See page 29.) The setting contents are maintained until they are next changed even when the power is switched off. (1) Auto power on function • When the play/pause button on the main unit ( 1/3 ) or the DVD play button on the remote control unit ( 1 ) is pressed while the power is in the standby mode, the ADV-M71’s power turns on automatically, and if a disc is loaded in the ADV-M71 the disc is played. 1 1 B SURROUND / SELECT DVD SURROUND RECEIVER ADV-M71 PUSH - PARAM. - + BAND MENU / SET TONE / SDB When the ADV-M71 is in the standby mode, the power can be turned on simply by pressing the play/pause button on the main unit or the DVD play button on the remote control unit. If a disc is loaded, playback starts. 1 VOLUME FUNCTION DVD ON / STANDBY PHONES Main unit DIRECT STEREO The auto power on function also turns the power on when the disc holder is opened while the ADV-M71 is in the standby mode. CH VIRTUAL CALL 0/10 +10 - TEST TONE INPUT MODE SURROUND FUNCTION Remote control unit TUNER TV / VCR DVD IN/SURR. A/V SYSTEM IN/SURR. MD CDR TAPE 1 1 2 + DVD 8 9 6 7 Main unit - • To listen to a radio program, simply press one of the tuner preset buttons (“+” or “–”) on the remote control unit. The power turns on and a station is tuned in. • The power on function works in the same way when system connections are made with the D-M31 series MD recorder (DMDM31) or cassette deck (DRR-M31). For details, refer to the respective component’s operating instructions. STATUS 3 MUTING SETUP TONE /SDB ENTER TUNER + CH Remote control unit (2) Auto function selection • At the touch of a button, the function switches automatically to “DVD” and disc playback begins. 1 B SURROUND / SELECT DVD SURROUND RECEIVER ADV-M71 PUSH - PARAM. 1 Press the play/pause button on the ADV-M71 or the DVD play button on the remote control unit while a component than the D-M31 series (cassette deck or MD recorder) is playing. • Playback on the other component stops, the ADV1 M71’s function switches to “DVD” and if a disc is loaded Main unit Remote control unit playback of the disc starts. DVD - + BAND MENU / SET TONE / SDB FUNCTION ON / STANDBY PHONES VOLUME • To listen to a radio program, simply press one of the tuner preset buttons (“+” or “–”) + on the remote control unit. • Auto function selection works in the same way when system connections are made with the D-M31 series MD recorder (DMDM31) or cassette deck (DRR-M31). For Remote control unit details, refer to the respective component’s operating instructions. • Auto function selection does not work for components connected using the AUX or D.AUX input/output terminals. TUNER DIRECT STEREO CH VIRTUAL CALL 0/10 +10 - TEST TONE INPUT MODE SURROUND FUNCTION TUNER TV / VCR DVD IN/SURR. A/V SYSTEM IN/SURR. MD CDR TAPE 1 1 2 + DVD 8 6 9 7 - STATUS 3 SETUP MUTING CH TONE /SDB 107 1ADV-M71E2_ENG p61-p115 03.12.25 1:09 PM ページ 108 ENGLISH (3) CD Æ MD recording (when the ADV-M71 and DMD-M31 are connected with a system cord) • CDs can easily be recorded onto MiniDiscs. Check and adjust the recording input selection (analog or digital) and the recording level beforehand. Main unit (ADV-M71) OFF MD recorder (DMD-M31) SLEEP 3,e 3,e CLEAR TITLE TV IN T V CHARAC. SLIDE MODE EDIT/MENU ZOOM 7 5 ,t TV CH 5 ,t RDS PROG/DIRECT MODE B SURROUND / SELECT DVD SURROUND RECEIVER ADV-M71 MINIDISC RECORDER DMD-M31 PUSH - PARAM. POWER LOADING MECHANISM - CHARACTER/ MEMORY REC + BAND MENU/SET TONE / SDB EDIT REPEAT PTY TIME - TV CH + CT CD SRS RT RANDOM SEARCH MODE MEMO BAND TUNER D.AUX 1 2 3 MD/LINE-1 TAPE /LINE-2 4 5 6 + - 5CH STEREO AUTO DECODE TUNER DVD TUNING / TV VOL + 7 8 9 DIRECT STEREO VIRTUAL CALL 0/10 +10 - TEST TONE INPUT MODE SURROUND FUNCTION TIME/INPUT CD SRS VOLUME 1,q ON VCR REC NTSC/PAL ENTER A-B REPEAT SOURCE CH MULTI REC FUNCTION ON / STANDBY ON / STANDBY PHONES 8 18Tr02m 46s 1 L dB -60 -40 -30 -20 -12 -6 -2 PUSH ENTER 0 R 2,w 9 TUNER TV / VCR DVD IN/SURR. A/V SYSTEM IN/SURR. MD CDR TAPE 7 1 2 + DVD 1,q 6 2,w y u 8 9 6 7 STATUS 3 [1] Synchronized recording function 1 Turn on the ADV-M71’s power. • The system’s ON / STANDBY power turns on. ADV-M71 2 ADV-M71 3 q ~ t ON y FUNCTION Remote control unit Open the ADV-M71’s disc holder, load the CD, then close the disc holder. 5 6 u 53:20 Load the MD onto which you want to record into the MD recorder’s MD slot. Press the recording button on the MD recorder once to set the recording standby mode. MULTI REC DMD-M31 7 Press the play/pause button on the ADV-M71 or the DVD play button on the remote control unit. • Recording of the CD starts 1 automatically. DVD ADV-M71 Remote control unit The recording standby mode is set once playback of the CD ends. 108 Press the CD SRS button on the MD recorder to select the synchronized recording mode. • The mode switches as shown below each time the button is pressed. CD SRS DMD-M31 SRS1disc Rec? The entire CD is recorded. SRS Make Gp? The entire CD is recorded and registered as a group. SRS1Tr Rec? Only the first track on the CD is recorded. Synchronized recording of a specific track is possible by selecting the track number using the 8 and 9 buttons on the ADV-M71 then selecting ”SRS 1Tr Rec?” on the MD recorder. Check that the total number of tracks and total playing time on the CD appear on the display. Example: For a CD with a total of 16 tracks and a total playing time of 53 minutes, 20 seconds 16Tr Perform the same operations as for steps 1 to 5 above. Remote control unit ADV-M71 4 MUTING [2] Synchronized CD recording (CD SRS) Press the FUNCTION button and switch the function to “DVD”. FUNCTION - Press the MD recorder’s ENTER button. • Recording of the CD starts automatically. PUSH ENTER DMD-M31 Once all the tracks on the CD have been played, both the ADVM71 and MD recorder are automatically set to the stop mode. Even if the entire CD has not yet been played, both the ADV-M71 and MD recorder are automatically set to the stop mode once the MD is full. To stop synchronized recording, press the stop button (2) on the ADV-M71 or the MD recorder. NOTES: • Synchronized recording does not work when the ADV-M71 is set to a function other than DVD. • Synchronized recording does not work when in the programmed play mode. When in the random play or repeat play mode, the respective mode is canceled when synchronized recording starts. 1ADV-M71E2_ENG p61-p115 03.12.25 1:09 PM ページ 109 ENGLISH (4) CD Æ TAPE recording (when the ADV-M71 and DRR-M31 are connected with a system cord) • CDs can easily be recorded onto cassette tapes. OFF Main unit (ADV-M71) Cassette deck (DRR-M31) SLEEP CLEAR 3,e B 3,e 5 ,t SURROUND / SELECT DVD SURROUND RECEIVER ADV-M71 RDS PROG/DIRECT 5 ,t CASSETTE DECK DRR-M31 PUSH - PARAM. T V EDIT/MENU ZOOM + CD SRS DOLBY NR ON OFF FUNCTION ON / STANDBY ON / STANDBY RANDOM BAND TUNER D.AUX 1 2 3 MD/LINE-1 TAPE /LINE-2 TV CH + CT CD SRS RT SEARCH MODE TUNING / TV VOL 5 6 + - 5CH STEREO AUTO DECODE TUNER 8 DIRECT BAND VOLUME PTY MEMO DVD 4 PLAY REPEAT TIME - MODE 7 MENU/SET TONE / SDB TITLE TV IN CHARAC. SLIDE MODE TV CH 7 1 ,q ON VCR REC NTSC/PAL ENTER A-B REPEAT SOURCE + 9 STEREO CH VIRTUAL CALL 0/10 +10 - TEST TONE INPUT MODE SURROUND FUNCTION 2 ,w REC CD SRS REC 0 PLAY 1 REVERSE MODE PHONES TUNER TV / VCR DVD IN/SURR. A/V SYSTEM IN/SURR. MD CDR TAPE 7 1 2 + DVD 8 1,q 6 2,w Turn on the ADV-M71’s power. • The system’s ON / STANDBY power turns on. ADV-M71 2 7 - STATUS MUTING [2] Synchronized CD recording (CD SRS) q ~ t ON Perform the same operations as for steps 1 to 5 above. Remote control unit Press the FUNCTION button and switch the function to “DVD”. FUNCTION 6 3 [1] Synchronized recording function 1 y 9 FUNCTION y Press the CD SRS button on the cassette deck. • Recording of the CD starts automatically. CD SRS DRR-M31 ADV-M71 3 Remote control unit Open the ADV-M71’s disc holder, load the CD, then close the disc holder. ADV-M71 4 Check that the total number of tracks and total playing time on the CD appear on the display. Example: For a CD with a total of 16 tracks and a total playing time of 53 minutes, 20 seconds 16Tr 5 53:20 Once all the tracks on the CD have been played, both the ADVM71 and cassette deck are automatically set to the stop mode. Even if the entire CD has not yet been played, both the ADV-M71 and cassette deck are automatically set to the stop mode once the cassette tape is full. To stop synchronized recording, press the stop button ( 2 ) on the ADV-M71 or the cassette deck. NOTES: • Synchronized recording does not work when the ADV-M71 is set to a function other than DVD. • Synchronized recording does not work when in the programmed play mode. When in the random play or repeat play mode, the respective mode is canceled when synchronized recording starts. Open the cassette holder, load the cassette tape onto which you want to record, then close the cassette holder. DRR-M31 6 Press the recording button on the cassette deck once to set the recording standby mode. REC DRR-M31 7 Press the play/pause button on the ADV-M71 or the play button on the remote control unit. • Recording of the 1 CD starts automatically. DVD ADV-M71 Remote control unit The recording standby mode is set once playback of the CD ends. 109 1ADV-M71E2_ENG p61-p115 03.12.25 1:09 PM ページ 110 ENGLISH (5) Edited recording (when the ADV-M71 and DRR-M31 are connected with a system cord) • The tracks on the CD can be automatically divided into sides A and B for recording according to the length of the cassette tape (tape time). (For CDs only) • Edited recording is possible for CDs containing up to 25 tracks. For CDs with 26 tracks or more, editing is not possible. Example: Recording a CD with 16 tracks and a total playing time of 56 minutes onto a C-60 (60-minute) cassette tape Main unit ADV-M71 B 4 4 6 4 Open the ADV-M71’s disc holder, load the CD, then close the disc holder. 16Tr 56:00 SURROUND / SELECT DVD SURROUND RECEIVER ADV-M71 PUSH - PARAM. - + BAND MENU/SET TONE / SDB VOLUME ADV-M71 FUNCTION ON / STANDBY PHONES 5 3 1 Cassette deck (DRR-M31) 2 2 CASSETTE DECK DRR-M31 PLAY ON OFF REC CD SRS REC 0 PLAY MENU Remote control unit TapeEdit C-60 CD SRS DOLBY NR ON / STANDBY Press the MENU button on the remote control unit and set the length of the cassette tape onto which you are going to record. • For example, for a 60-minute cassette tape, press the edit button twice. (The length of the cassette tape is the total time for sides A and B.) 1 REVERSE MODE The display switches as follows each time the MENU button is pressed. OFF SLEEP CLEAR TITLE TV IN T V CHARAC. SLIDE MODE EDIT/MENU ZOOM TV CH RDS PROG/DIRECT REPEAT PTY RANDOM MEMO BAND DVD TUNER D.AUX 1 2 3 4 TIME - MODE MD/LINE-1 1 ON VCR REC NTSC/PAL ENTER A-B REPEAT SOURCE TV CH + TUNING / TV VOL 5 6 + - 5CH STEREO AUTO DECODE TUNER 9 + TAPE /LINE-2 7 8 DIRECT STEREO VIRTUAL CALL 0/10 TEST TONE INPUT MODE SYSTEM About 4 seconds after setting the length of the cassette tape, the numbers of the tracks to be recorded on side A and the remaining time for side A on the cassette tape are displayed. (Ex.: When tracks 1 to 9 will be recorded on side A and the remaining time for side A is 2 minutes 40 seconds) CH +10 - SURROUND FUNCTION TUNER TV / VCR DVD IN/SURR. A/V Edited recording canceled CT CD SRS RT SEARCH MODE 3 IN/SURR. MD CDR TAPE 6 1 2 + DVD 8 9 6 7 E 01-09A02:40 - STATUS 1 After this, the display switches every few seconds between the numbers of the tracks and remaining time for side B and the numbers of the tracks and remaining time for side A. (Ex.: When tracks 10 to 16 will be recorded on side B and the remaining time for side B is 1 minute 20 seconds) Turn on the ADV-M71’s power. • The system’s power turns on. ON / STANDBY E ON ADV-M71 2 3 Open the cassette holder, load the cassette tape onto which you want to record, then close the cassette holder. Load the cassette tape with side A facing up. Remote control unit DRR-M31 Press the FUNCTION button and switch the function to “DVD”. FUNCTION FUNCTION If “OVER” is displayed for the remaining time, it is not possible to record all the tracks. Change the cassette tape length. To set the cassette tape length to anything other than 46, 60 or 90, use the numeric keypad and +10 button on the remote control unit while “ ” is displayed to input the time. The time can be set to up to 99 minutes. The time is input in the same way as when searching for CD tracks directly. Example: To set the time to 54 minutes While “ +10 , 4. ADV-M71 110 Remote control unit 10-16B01:20 ” is displayed, press +10 , +10 , +10 , +10 , 1ADV-M71E2_ENG p61-p115 03.12.25 1:09 PM ページ 111 ENGLISH 6 Press the play/pause button on the ADV-M71 or the DVD play button on the remote control unit. • Playback of the CD and recording onto the cassette tape start simultaneously. 01Tr ADV-M71 00:01 1 DVD Remote control unit To quit the edited recording function, press the ADV-M71’s stop button. BAND 2 ADV-M71 Remote control unit NOTES: • The edited recording function cannot be used with CDs containing 26 tracks or more. • Load the cassette tape onto which you want to record into the cassette deck’s cassette tray with side A facing up before performing the edited recording procedure. The tape is automatically wound to the beginning of the recordable section before recording starts. • When using an already recorded cassette tape for edited recording, if the tape is longer than the set time, recording stops in the middle of side B and the previous recording remains on the rest of the tape. Because of this, erase the cassette tape before using it. • If the cassette deck’s reverse mode is set to cassette deck’s reverse mode to when using the edited recording function, recording will stop after side A. Set the . • Because the tracks are divided into sides A and B, it may not be possible to record all the tracks from the CD onto the cassette tape, even if the tape is slightly longer than the CD’s total playing time. • The 9, 8, 7 and 6 buttons do not work during edited recording. 2 About synchronized recording onto the MD recorder (DMD-M31) and cassette deck (DRR-M31) • Synchronized recording is possible with discs other than CDs (DVDs, video CDs, discs containing MP3 or WMA files, etc.). • For digital and analog recoding during disc playback, see page 13. • The synchronized recording function may not work properly for some discs. If so, record the disc manually by setting the recording mode after start playback of the disc. • The CD SRS function and the function for edited recording onto tapes only works with CDs. 111 1ADV-M71E2_ENG p61-p115 03.12.25 1:09 PM ページ 112 ENGLISH 21 LAST FUNCTION MEMORY • This unit is equipped with a last function memory which stores the input and output setting conditions as they were immediately before the power is switched off. This function eliminates the need to perform complicated resettings when the power is switched on. • The unit is also equipped with a back-up memory. This function provides memory storage when the power switch is off and with the power cord disconnected. 22 INITIALIZATION OF THE MICROPROCESSOR When the indication of the display is not normal or when the operation of the unit does not shows the reasonable result, the initialization of the microprocessor is required by the following procedure. 1 Press the power button to set the standby mode, then unplug the set’s power cord from the wall power outlet. 2 2 ON / STANDBY Red B SURROUND / SELECT DVD SURROUND RECEIVER ADV-M71 PUSH - PARAM. - + BAND MENU / SET TONE / SDB VOLUME FUNCTION ON / STANDBY PHONES 2 3 112 Hold the following PLAY/PAUSE (1/3) button and STOP (2) button after 30 second, and plug the AC cord into the outlet. Check that the entire display is flashing with an interval of about 1 second, and release your fingers from the 2 buttons and the microprocessor will be initialized. 1 NOTES: • If step 3 does not work, start over from step 1. • If the microprocessor is reset, all the buttons and the setup settings are reset to the factory default values. 1ADV-M71E2_ENG p61-p115 03.12.25 1:09 PM ページ 113 ENGLISH 23 TROUBLESHOOTING Check again before assuming the player is malfunctioning 2 Are all the connections correct ? 2 Are you following the instructions in the manual ? 2 Are the speakers and other components operating properly ? If this unit does not seem to be functioning properly, check the table below. If this does not solve the problem, this unit may be damaged. Turn off the power, unplug the power cord from the power outlet, and contact your store of purchase or nearest Denon sales office. Remote control unit Common problems when listening to the discs, tapes and FM broadcasts, etc. Symptom Measures Page • Power cord not plugged in securely. • Check the insertion of the power cord plug. 8 • Connect securely. • Set to a suitable position. 8 44 DISPLAY lit but sound not produced. • Speaker cords not securely connected. • Improper position of the audio function button. • Volume control set to minimum. • MUTING is on. • Digital signals not input Digital input selected. • Turn volume up to suitable level. • Switch off MUTING. • Input digital signals or select input jacks to which digital signals are being input. 42 46 47 • Check whether the connections are correct. 11 Monitor doesn't display an image. • Connections between the video output jack of this unit and the input connector of the monitor are incomplete. • The input setting of the monitor TV is different. • Set the input switching of the TV to the jack to which the video input is connected. — The program cannot be copied from DVD to the VCR. • Almost all movie software contains a copy prevention signal. • A copy cannot be made. — • Power is not being supplied to the subwoofer. • The subwoofer setting is made to "No" in the setup. • Switch on the power of the subwoofer. — The subwoofer does not produce sound. • Change the setting to “Subwoofer” in the setup. 29 • Replace with new batteries. • Move closer. • Remove obstacle. 20 20 20 This unit does not operate properly when remote control unit is used. • Batteries dead. • Remote control unit too far from this unit. • Obstacle between this unit and remote control unit. • Different button is being pressed. • < and > ends of battery inserted in reverse. • The mode selection of the remote control is not properly selected. The DVD mode, AV mode, or audio mode is not properly selected. • Press the proper button. • Insert batteries properly. • Press the remote control mode selection button for the item you wish to operate. To operate this unit, use with the DVD mode. 16 20 17 DISPLAY not lit and sound not produced when power switch set to on. Cause 113 1ADV-M71E2_ENG p61-p115 03.12.25 1:09 PM ページ 114 ENGLISH DVD operation Symptom — 6 7 Menu playback of video CD’s is not possible. • Menu playback is not possible with anything but video CDs with playback control. — Picture is disturbed during the search operation. • Some disturbance is normal. — Buttons do not operate. • Some operations are disabled for some discs. 42 No subtitles are displayed. • Subtitles are not displayed for DVDs not containing subtitles. • Subtitles are turned off. Turn the subtitles setting on. • The audio (or subtitle) language does not switch for discs which do not include multiple audio (or subtitle) languages. • For some discs the audio (or subtitle) language cannot be switched when the operation to switch it is performed, but can be switched on the menu screens. 95 Audio (or subtitle) language does not switch. Angle does not switch. • The angle cannot be switched for DVDs which do not contain multiple angles. In some cases multiple angles are only recorded for specific scenes. 83 — 95, 96 95 • Check the “RATINGS SETUP” setting. 103, 104 • While the player is in the stop mode, hold the FUNCTION button and the MENU/SET button down simultaneously for longer than 3 seconds (until “INITIALIZE” disappears from the TV monitor). The lock will be released and the DVD all default settings and picture settings will return to the default values. 103, 104 The disc is not played with the audio or subtitle language set as the default setting. • The disc does not play with the selected audio or subtitle language if that audio or subtitle language is not included on that DVD. 95 Picture is not displayed in 4:3 (or 16:9). • Set the “TV ASPECT” default setting to the proper setting for the connected TV. Menu screen messages for the desired language do not display. • Check the default setting for the disc language’s menu language. Continuous noise is heard when receiving FM programs • Antenna cable is not properly connected. • Connect the antenna cable properly. • Connect an outdoor antenna. 12 • This may be noise from a TV or interference from a radio station. • Turn off the TV. • Change the position and direction of the AM loop antenna. 12 • The radio waves transmitted over the power cord are being modulated. • Unplug the power cord, flip the plug over in the opposite direction, then plug the cord back in. 12 The password for rating level has been forgotten. Reset all the DVD setting to Factory Preset. Tuner Page • Is there condensation on the disc or player ? (Let stand for 1 or 2 hours.) • Discs other than DVDs, video CDs and music CDs cannot be played. • Disc is dirty. Wipe off the dirt. Playback does not start when the title is selected. Hissing or continuous noise is heard when receiving AM programs Humming noise is heard when receiving AM programs 114 Check Playback does not start when PLAY button is pressed. Playback stops immediately. 99 96, 97 1ADV-M71E2_ENG p61-p115 03.12.25 1:09 PM ページ 115 ENGLISH 24 SPECIFICATIONS 2 2 2 Audio Section • Power Amplifier Section Rated output: Output terminals: • Analog Section Input sensitivity/Input impedance: Frequency response: Signal-to-noise ratio: Rated output: Tuner Section Reception frequency range: Receiving sensitivity: FM stereo separation: • Digital Section Digital input/output: Video Section • AV1 connector Front: 35 W + 35 W (6 Ω/ohm load, 1 kHz, T.H.D. 10 %) Speaker impedance: 6 to 16 Ω/ohms 200 mV/47 kΩ/kohms 10 Hz to 50 kHz: +0, –3 dB (2 Channel setting, direct mode) 98 dB (Direct mode) 0.6 V (Preamplifier output) FM: 87.5 MHz to 108 MHz FM: 1.5 µV/75 Ω/ohms 35 dB (1 kHz) Format — Digital audio interface Video output S-video output RGB output Audio output 2 2 2 2 DVD Section Signal Format: Supported Discs: Analog Audio Output: Clock/Timer Section Clock method: Timer: General Power supply: Power consumption: Maximum external dimensions: Weight: Remote Control Unit Remote control method: Power supply: AM: 522 kHz to 1611 kHz AM: 20 µV 1 Vp-p, 75 Ω/ohms Y (brightness) signal — 1 Vp-p, 75 Ω/ohms C (color) signal — 0.3 Vp-p, 75 Ω/ohms R/G/B signal — 0.7 Vp-p, 75 Ω/ohms L/R (Fixed output) NTSC/PAL (1) DVD-VIDEO discs 12 cm single side 1 layer, 12 cm single side 2 layers, 12 cm both sides 2 layers (single side 1 layer), 8 cm single side 1 layer, 8 cm single side 2 layers, 8 cm both sides 2 layers (single side 1 layer) (2) CompactDisc (CD-DA, VIDEO CD) 12 cm discs, 8 cm discs Output level: 1.1 Vrms (LINE-1, LINE-2 OUT) Power line frequency synchronized method Everyday/Once timer: One system each Sleep timer: 120 minutes, maximum 230 V AC, 50 Hz 75 W (At standby: Approximately 1 W) 210 (W) x 95 (H) x 367 (D) mm (including feet, knobs, and connectors) 3.5 kg RC-966 IR pulse method 3 V DC, using two AA batteries This product incorporates copyright protection technology that is protected by method claims of certain U.S. patents and other intellectual property rights owned by Macrovision Corporation and other rights owners. Use of this copyright protection technology must be authorized by Macrovision Corporation, and is intended for home and other limited viewing uses only unless otherwise authorized by Macrovision Corporation. Reverse engineering or disassembly is prohibited. ✽ Design and specifications are subject to change without notice in the course of product improvement. 115 2ADV-M71E2_GER p116-174 03.12.25 1:11 PM ページ 116 DEUTSCH INHALT z x c v b n m , . ⁄0 ⁄1 ⁄2 VOR INBETRIEBNAHME ........................................................................116 VORSICHTSMASSNAHMEN ZUR INSTALLATION .................................116 VORSICHTSMASSNAHMEN ZUR HANDHABUNG ................................117 HAUPTMERKMALE ................................................................................117 DISCS ......................................................................................................118 VORSICHTSMASSNAHMEN ZUR HANDHABUNG VON DISCS ............119 ANSCHLÜSSE.................................................................................120~126 BAUTEILBEZEICHNUNGEN UND FUNKTIONEN ...........................127~131 FERNBEDIENUNGSGERÄT ............................................................132~140 AUFSTELLUNG DES SYSTEMS .....................................................141~150 WIEDERGABE ................................................................................151~156 BETRIEB DER SURROUND-FUNKTIONEN ....................................156~158 ⁄3 ⁄4 ⁄5 ⁄6 ⁄7 ⁄8 ⁄9 ¤0 ¤1 ¤2 ¤3 ¤4 DOLBY / DTS SURROUND .............................................................159~161 SURROUND WIEDERGABE ...........................................................162~174 RADIO HÖREN ...............................................................................175~179 BILDSCHIRMANZEIGE ...........................................................................180 VERWENDUNG DER BILDSCHIRMANZEIGE ................................181~198 VERWENDUNG DES TIMERS ........................................................199~205 DIE VOREINSTELLUNGEN ÄNDERN (DVD) ..................................206~218 SYSTEMFUNKTIONEN ...................................................................219~223 SPEICHERUNG DER LETZTEN FUNKTION ............................................224 INITIALISIERUNG DES MIKROPROZESSORS .......................................224 FEHLERSUCHE ...............................................................................225, 226 TECHNISCHE DATEN .............................................................................227 2 ZUBEHÖRS ADV-M71 Stellen Sie sicher, daß die nachfolgend aufgeführten Zubehörteile dem Hauptgerät beiliegen: q Betriebsanleitung ................................................1 r R6P/AA-Batterien ................................................2 w MW-Rahmenantenne..........................................1 t UKW-Raumantenne ............................................1 e r e Fernbedienungsgerät (RC-966) ...........................1 y UKW-Antennenadapter .......................................1 t y 2 1 VOR INBETRIEBNAHME Beachten Sie vor der Inbetriebnahme des Gerätes die nachfolgend aufgeführten Hinweise: • Transport des Gerätes Um sowohl Kurzschlüsse als auch eine Beschädigung der Drähte in den Anschlußkabeln zu vermeiden, müssen vor einem Transport des Gerätes sowohl das Netzkabel als auch alle Anschlußkabel zwischen den einzelnen Audio-Komponenten abgetrennt sein. • Vor dem Einschalten des Netzschalters Vergewissern Sie sich noch einmal, daß alle Anschlüsse richtig ausgeführt worden sind und es keinerlei Probleme mit den Anschlußkabeln gibt. Stellen Sie den Netzschalter vor dem Anschließen bzw. Abtrennen von Anschlußkabeln stets auf die Standby-Position. • Bewahren Sie diese Betriebsanleitung an einem sicheren Ort auf. Bewahren Sie diese Betriebsanleitung nach dem Durchlesen zusammen mit der Garantiekarte an einem sicheren Ort auf. • Beachten Sie bitte, daß die Abbildungen in dieser Betriebsanleitung für Erklärungszwecke vom aktuellen Gerätemodell abweichen können. 2 VORSICHTSMASSNAHMEN ZUR INSTALLATION DVD-SURROUND-RECEIVERGERÄT Ton- und Bildstörungen können auftreten, wenn dieses Gerät oder ein anderes Mikroprozessor anwendendes Elektrogerät in der Nähe eines Tuners oder Fernsehgerätes betrieben wird. Verfahren Sie in einem derartigen Fall wie nachfolgend aufgeführt: • Installieren Sie das Gerät in größtmöglicher Entfernung zum Tuner oder Fernsehgerät. • Verlegen Sie die Antennendrähte vom Tuner oder Fernsehgerät in ausreichender Entfernung sowohl zum Netzkabel als auch zu den Eingangs-/Ausgangsanschlußkabeln dieses Gerätes. • Ton- und Bildstörungen treten insbesondere bei Benutzung einer Innenantenne oder beim Anschluß von 300 Ω/Ohm Zuleitungen auf. Wir empfehlen die Verwendung von Außenantennen und 75 Ω/Ohm Koaxialkabeln. 10 cm oder mehr B 10 cm oder mehr Wand Zur Gewährleistung einer ausreichenden Wärmeabfuhr, sollte oberhalb, seitlich sowie hinter dem Gerät ein Mindestabstand von 10 cm zur Wand oder zu anderen Komponenten eingehalten werden. 116 2ADV-M71E2_GER p116-174 03.12.25 1:11 PM ページ 117 DEUTSCH 3 VORSICHTSMASSNAHMEN ZUR HANDHABUNG DVD-SURROUND-RECEIVERGERÄT • Umschalten der Eingangsfunktion, wenn keine Eingangsbuchsen angeschlossen sind Wenn die Eingangsfunktion umgeschaltet wird, wenn nichts an die Eingangsbuchsen angeschlossen wurde, ist möglicherweise ein Klicken zu hören. Drehen Sie in einem derartigen Fall entweder den MASTER VOLUME-Regler herunter oder schließen Sie Komponenten an die Eingangsbuchsen an. • Wann immer sich der Netzschalter in STANDBY-Position befindet, bleibt das Gerät dennoch an die Wechselstromleitung angeschlossen. Trennen Sie unbedingt das Netzkabel ab, wenn Sie für einen längeren Zeitraum, z.B. im Urlaub, nicht zuhause sind. • Stummschalten der PRE OUT-Buchsen und SPEAKERAnschluß-klemmen Die PRE OUT-Buchsen und SPEAKER-Anschlußklemmen beinhalten eine Stummschaltung. Aufgrund dieser Schaltung werden die Ausgangssignale nach Einschalten des Netzschalters oder Umschalten der Eingangsfunktion bzw. des Surround-Modus oder bei Änderung einer anderen Einrichtungsfunktion einige Sekunden lang stark reduziert. Wenn die Lautstärke während dieser Zeit erhöht wird, ist der Ausgang nach Ausschalten der Stummschaltung extrem hoch. Sie sollten die Lautstärke daher erst dann einstellen, wenn die Stummschaltung nicht mehr aktiv ist. 4 HAUPTMERKMALE Der ADV-M71 ist eine Kombination aus AV-Verstärker und DVDPlayer, in der die Hauptkomponenten eines Heimkinos in einem einzigen kompakten, platzsparenden und stilvollen Gerät vereint sind. Aufgrund der Aluminium-Blende sowie des halbdurchlässigen Spiegeldisplays fügt sich dieses Gerät harmonisch in die Ästhetik Ihres Raumes ein. 1. 2-Kanal Leistungsverstärker mit Dolby Virtual-LautsprecherKompatibilität Der ADV-M71 ist mit zwei 35 W (6 Ω/Ohm 1 kHz, Klirrfaktor 10 %) Leistungsverstärkern ausgestattet. Dadurch ist die Kompatibilität mit der neuen Dolby Virtual Speaker-Technologie gegeben, mit der Sie mit nur 2 Lautsprechern eine virtuelle 5.1-Kanalwiedergabe erleben können. (Dolby Virtual Speaker ist ein Erzeugnis der Dolby Laboratories.) Ein hochwertiger Digitalsignalprozessor ermöglicht die Wiedergabe von Dolby Digital- und Multikanal-Surround-Signalen im Dolby Virtual Speaker-Modus. Dieser Modus ermöglicht in Kombination mit einem Dolby Pro Logic II-Dekoder die Surround-Wiedergabe sowohl von CDs als auch von anderen Stereoquellen. 2. 3,1-Kanal-Vorverstärker-Anschlüsse ermöglichen die Erweiterung zu einem 5,1-Kanal-Surround-System Bei der gleichzeitigen Verwendung eines handelsüblichen Subwoofers mit eingebautem Verstärker und Leistungsverstärker kann der ADV-M1 zu einem 5,1-Kanal-Surround-System erweitert werden. Der ADV-M71 erstellt nicht nur ein genaues Klangfeld für Multikanalquellen, sondern ist darüber hinaus mit der Weit-ModusWiedergabe im Dolby Virtual Speaker-Modus kompatibel. 3. Dolby Pro Logic II-Decoder zur Erweiterung der KlangfeldWiedergabe 5. Hochwertiges DVD-Laufwerk für progressive BildausgabeKompatibilität Der ADV-M71 ist mit verschiedenen von DVD-Quellen angebotenen Funktionen kompatibel; einschließlich multipler Audioauswahl (bis zu 8 Sprachen), multipler Untertitel-Funktion (bis zu 32 Sprachen), multipler Winkel-Funktion, WiedergabeSperrfunktion usw. 6. Quick Setup und Bildschirmanzeige-Kompatibilität Die DVD-Wiedergabe ist einfach durch Auswählen der verwendeten Fernsehgerät- und Lautsprecher-Konfiguration möglich. Selbst bei einer 5,1-Kanal-Lautsprecher-Konfiguration können die Standard-Parameter automatisch durch Auswählen der Raumgröße und Zuhörposition eingestellt werden. Die Systemeinstellungen lassen sich bequem mit Hilfe der Bildschirmanzeigen ausführen. 7. Fernbedienung mit Vorwahlspeicher-Funktion Dem ADV-M71 liegt eine Fernbedienung mit integrierter Vorwahlspeicher-Funktion bei. Die Fernbedienungs-Befehlcodes für MD-Recorder der D-M31-Serie, für Kassettendecks und andere zur Fernbedienung ausgelegten DENON-Komponenten sowie für Fernsehgeräte und Videodecks von anderen großen Herstellern sind im Speicher vorprogrammiert. 8. Praktische Systemfunktionen Wenn dieses System an einen MD-Recorder der D-M31-Serie und ein Kassettendeck angeschlossen wird, können Systemfunktionen wie die automatische Funktionswahl, die synchronisierte Aufnahme und Timer-Aufnahme/-Wiedergabe schnell und einfach ausgeführt werden. Der ADV-M71 ist zur Erweiterung der Klangfeld-Wiedergabe für Dolby Surround- und Stereo-Tonquellen mit einem Dolby Pro Logic II-Decoder ausgestattet. 4. DENONs einzigartige Klangfeld-Simulation mit Hilfe von DSP Bei der Verwendung von 2 Lautsprechern ist der ADV-M71 mit den Rock Arena-, Jazz Club- und Video Game-Modi und bei der 5,1Kanal-Konfiguration zusätzlich mit den Stereo-, Mono Movie- und Matrix-Modi kompatibel. 117 2ADV-M71E2_GER p116-174 03.12.25 1:11 PM ページ 118 DEUTSCH 5 DISCS • Die in nachfolgender Tabelle aufgeführten Discs können mit dem ADV-M71. verwendet werden. Die entsprechenden Zeichen sind auf den Disc-Etiketten oder an den Buchsen aufgeführt. Anwendb are Discs Aufgenomme ne Signale Markierung (logo) DiscGröße Titel 1 DVD-Video DVD-Audio (HINWEIS 1) DVD-R DVD-RW (HINWEIS 2) Titel 2 Titel 3 Titel 4 Titel 5 12 cm Digital-Audio + Digital-Video (MPEG2) R R 2 Die nachfolgend aufgeführten Disc-Typen können nicht auf 8 cm R W RW Video-CD CD CD-R CD-RW (HINWEIS 3) Recordable Digital-Audio + Digital-Video (MPEG1) 12 cm Digital-Audio MP3 WMA Digital immagine (JPEG) 12 cm 8 cm 8 cm ReWritable CD immagin Digital picture (JPEG) 12 cm 2 Disc-Terminologie • Titel und Kapitel (DVD-Videos) DVD-Videos sind in verschiedene große und kleine Abschnitte unterteilt. Die großen Abschnitte bezeichnet man als “Titel” und die kleinen als “Kapitel”. Diesen Abschnitten sind Zahlen zugeordnet. Diese Zahlen bezeichnet man als “Titelnummern” und “Kapitelnummern”. Beispiel: Titel 1 Kapitel 1 Kapitel 2 Title 2 Kapitel 3 Kapitel 1 Kapitel 2 • Titel (Video- und Musik-CDs) Video- und Musik-CDs sind in Abschnitte unterteilt, die man als “Titel” bezeichnet. Diesen Abschnitten sind Zahlen zugeordnet. Diese Zahlen bezeichnet man als “Titelnummern”. 118 Beispiel: dem ADV-M71 abgespielt werden: • DVDs mit anderen Regionnummern als “2” oder “ALL” • DVD-Audio-Discs (HINWEIS 1) • DVD-ROM/RAMs • CVD • CD-ROMs (Es können ausschließlich MP3/WMA-Datein wiedergegeben werden.) • VSDs • CDVs (Nur der Audioteil kann wiedergegeben werden.) • CD-Gs (Nur der Audioteil kann wiedergegeben werden.) • Foto-CDs (Spielen Sie NIEMALS Foto-CDs auf dem ADV-M71 Bei dem Versuch eine Foto-CD abzuspielen, können die sich auf der Disc befindlichen Daten beschädigt werden. HINWEIS 1: Es kann nur der Videoteil wiedergegeben werden, der auf den DVD-Video-Spezifikationen basiert. HINWEIS 2: Wiedergabe von DVD-R- und DVD-RW-Discs DVD-R- und DVD-RW-Discs, die auf einem DVDRecorder im Videoformat aufgenommen wurden, können auf dem ADV-M71 abgespielt werden. Nicht fertiggestellte Discs können nicht abgespielt werden. Je nach Disc-Aufnahmestatus wird die Disc möglicherweise nicht akzeptiert oder werden nicht einwandfrei wiedergegeben (das Bild oder der Ton ist nicht eben, usw.). HINWEIS 3: Entsprechend der Aufnahme-Qualität können einige CD-R/RWs nicht wiedergegeben werden. • Wiedergabesteuerung (Video-CDs) Video-Discs, bei denen entweder auf der Disc oder an der Buchse das Wort “Wiedergabesteuerung” zu lesen ist, verfügen über eine Funktion zum Anzeigen von Menüs auf dem Fernsehschirm. Mit Hilfe dieser Menüs können Sie gewünschte Positionen anwählen, Informationen in Dialogform anzeigen lassen usw. Informationen über die Wiedergabe von Video-CDs mit Hilfe derartiger Menüs finden Sie in dieser Betriebsanleitung im Kapitel “Menü-Wiedergabe”. Video-CDs mit Wiedergabesteuerung können auf diesem ADVM71 abgespielt werden. HINWEIS: • Dieser DVD wurde konstruiert und hergestellt, um den auf der DVD-Disc aufgenommenen Region Management Informationen zu entsprechen. Wenn die auf der DVD-Disc beschriebene Regionnummer nicht der Regionnummer dieses DVD-Videospielers entspricht, kann dieser DVD-Videospieler die Disc nicht abspielen. Die Regionnummer für diesen DVDVideospieler lautet 2. 2 2ADV-M71E2_GER p116-174 03.12.25 1:11 PM ページ 119 DEUTSCH 6 VORSICHTSMASSNAHMEN ZUR HANDHABUNG VON DISCS Vorsichtsmaßnahmen zur Handhabung von Discs Discs Auf dem ADV-M71 können nur die Discs abgespielt werden, die mit dem auf Seite 50 aufgeführten Zeichen versehen sind. Beachten Sie darüber hinaus, daß Discs mit besonderer Form (z.B. herzförmige Discs, sechseckige Discs usw.) nicht auf dem ADV-M71 abgespielt werden können. Der Versuch derartige Discs wiederzugeben kann Beschädigungen des Gerätes verursachen. Vorsichtsmaßnahmen zur Aufbewahrung von Discs Handhabung von Discs Vermeiden Sie beim Einlegen und Herausnehmen von Discs das Berühren der Disc-Oberflächen. Achten Sie darauf, daß keine Fingerabdrücke auf die Signalfläche gelangen (die in Regenbogenfarben schimmernde Seite). Reinigung von Discs 2 Fingerabdrücke oder Staub auf der Disc können zu einer Verschlechterung der Ton- und Bildqualität führen und Wiedergabeausfälle verursachen. Beseitigen Sie möglicherweise vorhandene Fingerabdrücke und Schmutz mit einem Tuch. 2 Verwenden Sie für die Reinigung ein im Handel erhältliches Reinigungsset oder wischen Sie Fingerabdrücke und Schmutz einfach mit einem weichen Tuch ab. Wischen Sie sanft von der Mitte der Disc nach außen hin. • Achten Sie darauf, daß weder Fingerabdrücke, Fett noch Schmutz auf die Discs gelangen. • Achten Sie insbesondere darauf, daß die Discs beim Herausnehmen aus ihrer Box nicht zerkratzt werden. • Verbiegen Sie Discs nicht. • Erhitzen Sie Discs nicht. • Vergrößern Sie die Öffnung in der Mitte der Disc nicht. • Beschriften Sie die etikettierte (bedruckte) Seite der Disc nicht mit einem Kugelschreiber oder Bleistift. • Auf der Oberfläche der Disc können sich Wassertropfen bilden, wenn die Disc plötzlich von einem kalten an einen warmen Ort gebracht wird. Benutzen Sie in der Nähe von Discs keinen Fön usw. Wischen Sie nicht in kreisförmigen Bewegungen. • Werfen Sie Discs nach der Wiedergabe immer aus dem Gerät aus. • Bewahren Sie Discs in ihren dazugehörigen Boxen auf, um sie so vor Staub, Kratzern und Verformungen zu schützen. • Bewahren Sie Discs an keinem der nachfolgend aufgeführten Orte auf: 1. Orte, an denen die Discs über einen längeren Zeitraum hinweg direktem Sonnenlicht ausgesetzt wären. 2. An feuchten oder staubigen Orten. 3. Orte, an denen die Discs Wärme von z.B. Heizkörpern ausgesetzt wären usw. Vorsichtsmaßnahmen zur Einlegen von Discs • Legen Sie immer nur eine Disc zur Zeit ein. Das Einlegen von mehreren Discs übereinander kann sowohl Beschädigungen als auch ein Zerkratzen der Discs zur Folge haben. • Legen Sie 8 cm Discs ohne Zuhilfenahme eines Adapters fest in die Disc-Führung ein. Wenn die Disc nicht richtig eingelegt ist, kann sie aus der Führung rutschen und das Disc-Fach blockieren. • Achten Sie darauf, daß Sie sich beim Schließen des Disc-Faches nicht die Finger klemmen. • Legen Sie ausschließlich Discs und keinerlei anderen Gegenstände in das Disc-Fach ein. • Legen Sie weder zerbrochene, verbogene noch mit Klebe reparierte Discs in das Gerät ein. • Verwenden Sie keine Discs, bei denen der Kleber vom Etikett freiliegt oder bei denen sich das Etikett teilweise gelöst hat. Derartige Discs könnten sich im Spieler verklemmen und Beschädigungen verursachen. HINWEIS: • Verwenden Sie weder Schallplatten- noch Antistatiksprays. Auch flüchtige Chemikalien wie z.B. Benzin oder Farbverdünner dürfen nicht für die Reinigung benutzt werden. Schallplatt Farbveren-spray dünner Benzin 119 2ADV-M71E2_GER p116-174 03.12.25 1:11 PM ページ 120 DEUTSCH 7 ANSCHLÜSSE • Schließen Sie das Netzkabel erst dann an, wenn alle Anschlüsse vorgenommen wurden. • Vergewissern Sie sich, dass der linke und rechte Kanal richtig angeschlossen ist (links mit links, rechts mit rechts). • Stecken Sie die Stecker fest ein. Unvollständige Anschlüsse erzeugen Rauschen. • Beachten Sie, dass das Zusammenbinden von Stiftsteckerkabeln mit Netzkabeln neben einem Leistungstransformator Brummen oder Rauschen erzeugt. • Brummen und Rauschen kann erzeugt werden, wenn ein angeschlossenes Audiogerät einzeln verwendet wird, ohne dass die Stromversorgung dieser Einheit eingeschaltet ist. Schalten Sie in solch einem Fall dieses Gerät ein. (1) Anschluss der Audiokomponenten (D-M31 Series) • Der ADV-M71 kann an einen MD-Recorder der D-M31-Serie (DMD-M31) und ein Kassettendeck (DRR-M31) angeschlossen werden. • Bedienungshinweise zum als Zubehör erhältlichen MD-Recorder (DMD-M31) und zum Kassettendeck (DRR-M31) finden Sie in der entsprechenden Bedienungsanleitung. • Nur der MD-Recorder DMD-M31 und das Kassettendeck DRR-M31 können mit Hilfe der Systemanschlüsse direkt an den ADV-M71 angeschlossen werden. HINWEIS: • Dieses Gerät enthält digitale Schaltkreise, deren Signale die Farbwiedergabe von Fernsehgeräten beeinträchtigen können. Wenn dieser Effekt auftritt, muß für eine möglichst große Distanz zwischen Gerät und Fernseher gesorgt werden. Lautsprecheranschluß Schließen Sie das Lautsprechersystem für den linken Kanal (von vorne betrachtet) an den mit “L” bezeichneten Klemmen und das Lautsprechersystem für den rechten Kanal an den mit “R” bezeichneten Klemmen an. Beachten Sie etwaige nähere Hinweise in der Bedienungsanleitung zu Ihrem Lautsprechersystem. Achten Sie darauf, daß die Impedanz der Lautsprecher mindestens 6Ω/Ohm beträgt. Stereo-Audiokabel UKW-Zimmerantenne Lautsprechersysteme (im Lieferumfang MWSC-M51 enthalten ) Rahmenantenne Oder als Zubehör erhältlicher (im Lieferumfang Lautsprecher enthalten) Der ADV-M71 hat eine integrierte Uhr-Funktion. Daher sollte der Netzstecker an eine Steckdose angeschlossen werden, die kontinuierlich Spannung führt. (R) (L) NETZKABEL 230 V Wechselstrom, 50 Hz ADV-M71 DVDSurroundReceiver Lautsprecherkabel Als Zubehör erhältlicher Subwoofer mit integriertem Verstärker R L R L Audiokabel Optische Übertragungskabel 120 Systemkabel R L R L 2ADV-M71E2_GER p116-174 03.12.25 1:11 PM ページ 121 DEUTSCH ACHTUNG: • Mit Hilfe der Systemanschlüsse kann nur ein MD-Recorder und ein Kassettendeck an den ADV-M71 angeschlossen werden. Die Systemfunktionen können nicht einwandfrei ausgeführt werden, wenn zwei MD-Recorder oder zwei Kassettendecks mit Hilfe der Systemanschlüsse angeschlossen worden sind. • Wenn sich der Netzschalter des Geräts in Bereitschaftsstellung (STANDBY) befindet, ist das Gerät mit Netzspannung verbunden. • Ziehen Sie daher unbedingt den Netzstecker aus der Steckdose, wenn Sie beispielsweise verreisen. Systemfunktionen Systemoperationen, wie Timer- und autom. Einschaltfunktion, und Fernbedienungsoperationen können nur dann ausgeführt werden, wenn alle Cinch-Stiftsteckerkabel und Systemanschlusskabel zwischen den Geräten angeschlossen sind; vergewissern Sie sich, dass alle Anschlüsse ordnungsgemäß wie im Diagramm gezeigt ausgeführt werden. Das Abziehen von Steckern bei laufender Anlage kann Funktionsstörungen hervorrufen. Ziehen Sie immer erst den Netzstecker ab, bevor Änderungen an den Anschlüssen vorgenommen werden. HINWEISE: • Schließen Sie den Netzstecker erst an, nachdem alle übrigen Anschlüsse komplett hergestellt wurden. Achten Sie darauf, daß der Anschluß der Lautsprecherkanäle (L zu L (weiß) und R zu R (rot)) gemäß obigem Schema vorgenommen wird. • Schließen Sie ausschließlich Audiogeräte an den AC OUTLET-Anschluss an. Hier dürfen keine Haartrockner usw. angeschlossen werden. • Achten Sie auf festen Sitz der Steckverbinder. Lose Stecker können Störgeräusche verursachen. • Achten Sie darauf, daß die Lautsprecher-Anschlußkabel am Lautsprecher und am Gerät mit gleicher Polarität angeschlossen werden (+ an +, – an –). Bei falscher Polung ist der Ton im Mittelbereich schwach, die Positionen der einzelnen Instrumente sind nicht eindeutig auszumachen und der Stereoeffekt geht verloren. • Warten Sie nach dem Abziehen des Netzsteckers etwa 5 Sekunden, bevor dieser wieder eingesteckt wird. • Verbindungskabel (Kabel mit RCA-Stecker) sollten nicht unmittelbar neben spannungsführenden Kabeln verlegt werden, da dies zu Brumm- oder sonstigen Störgeräuschen führen kann. MD-Recorder (DMD-M31) (als Zubehör erhältlich) DMD-M31 18Tr02m 46s 1 L dB -60 -40 -30 -20 -12 -6 -2 0 R B SURROUND / SELECT DVD SURROUND RECEIVER ADV-M71 PUSH - PARAM. - ADV-M71 + BAND MENU/ SET TONE / SDB DRR-M31 VOLUME FUNCTION ON / STANDBY PHONES (Horizontale Installation) Kassettendeck (DRR-M31) (als Zubehör erhältlich) Nehmen Sie die Montage gemäß einer dieser Skizzen vor. Achten Sie in jedem Fall darauf, daß die Belüftungsöffnungen des CD/Tuner-Geräts nicht verschlossen werden. B SURROUND / SELECT DVD SURROUND RECEIVER ADV-M71 PUSH - PARAM. - R L R L + BAND MENU/ SET ADV-M71 TONE / SDB VOLUME FUNCTION ON / STANDBY PHONES DMD-M31 18Tr02m 46s 1 L dB -60 -40 -30 -20 -12 -6 -2 0 R DRR-M31 Stereo-Audiokabel (Vertikale Installation) 121 2ADV-M71E2_GER p116-174 03.12.25 1:11 PM ページ 122 DEUTSCH (2) Anschluss der PRE OUT-Anschlüsse (nur bei Multikanal-Einstellungen) • Bei der gleichzeitigen Verwendung eines handelsüblichen Subwoofers mit integriertem Verstärker und Leistungsverstärker kann der ADV-M71 zu einem 5,1-Kanal-Surround-System erweitert werden. • Lesen Sie bei der Durchführung der Anschlüsse auch die Bedienungsanleitungen der anderen Komponenten. • Stellen Sie die Lautsprecher zur Durchführung der 5,1-Kanal-Einstellung im Quick System-Setup auf “5.1 CH SURROUND” und wählen Sie “Room Setting” und “Listening Position”. (Siehe die Seiten 143 bis 144.) IN POWER AMPLIFIER (für Center-Kanal) IN IN IN SUBWOOFER • Schließen Sie den Subwoofer mit integriertem Verstärker an. POWER AMPLIFIER (für Surround-Kanal) • Schließen Sie den Leistungsverstärker für das Center- und SurroundLautsprechersystem an. Center-Lautsprecher Surround-Lautsprecher (L) Surround-Lautsprecher (R) (3) Anschluss der Audiosignale eines digitalen Satelliten-Tuners und VCRs • Schließen Sie die Videosignale direkt an das Fernsehgerät an und schalten Sie das Fernsehbild um. • Lesen Sie bei der Durchführung der Anschlüsse auch die Bedienungsanleitungen der anderen Komponenten. Digitaler Satelliten-/Kabeltuner Anschluss an den optischen Digitaleingangsanschluss • In den optischen Digitaleingangsanschluss werden nur Audiosignale eingegeben. • Verwenden Sie für den Anschluss an den optischen Übertragungsanschluss (OPTICAL) ein handelsübliches optisches Übertragungskabel. B OPTICAL OUT AUDIO OUT R L R Anschluss eines digitalen Satelliten-/Kabeltuners • Schließen Sie bei Tunern mit integrierten optischen Digitalausgangs-Anschlüssen den Digitalausgangs-Anschluss mit Hilfe eines optischen Übertragungskabels an den DIGITAL D.AUX IN-Anschluss des ADV-M71 an. • Schließen Sie die Audioausgangs-Anschlüsse beliebig entweder an den unbelegten LINE-1- oder LINE-2-Anschluss des ADV-M71 an. L L R L R L R R L Anschluss eines Videodecks • Schließen Sie die Audioausgangs- und AudioeingangsAnschlüsse mit Hilfe eines Stiftsteckerkabels beliebig entweder an den LINE-1- oder LINE-2-Anschluss des ADVM71 an. R L Videodeck R L OUT R 122 L IN AUDIO 2ADV-M71E2_GER p116-174 03.12.25 1:11 PM ページ 123 DEUTSCH (4) Anschluss eines Fernsehgerätes • Verwenden Sie ein im Handel erhältliches 21-pol. SCART-Kabel, um den 21-pol. SCART-Anschluss des TV an den 21-pol. SCART-Anschluss des ADV-M71’s (AV1) anzuschließen. Monitor TV • Die Audio- und Videosignale für die am Gerät gewählte Funktion werden ausgegeben. Audioausgangssignale • Die Tuner- und DVD-Audiowiedergabe-Signale sowie die Audiosignale, die an den AUDIO INPUT-Buchsen eingegeben werden, werden ausgegeben. • Wenn eine Dolby Digital-DVD abgespielt wird, werden die Audiosignale vor der Ausgabe in 2-Kanal-Signale konvertiert. (Audiosignale werden während der DTS-Wiedergabe nicht ausgegeben.) • Der Audioausgangspegel ist festgelegt. Wenn Sie den Sound nicht mit dem angeschlossenen TV wiedergeben wollen, stellen Sie die TVLautstärke auf ein Minimum ein. Videoausgangssignale • Die DVD-Videowiedergabe-Signale und die Videosignale, die an den VIDEO- oder S-VIDEO INPUT-Buchsen eingegeben werden, werden ausgegeben. • Die Wahl der VIDEO-, S-VIDEO- und DVD RGB-Videosignale wird unter dem Systemsetup-Punkt “AV1 VIDEO OUTPUT” vorgenommen. (Werkseitig sind sie alle auf “VIDEO” eingestellt. Siehe Seite 141.) HINWEISE: • Die Werkseinstellung lautet auf “PAL”. Wenn diese Funktion bei aktiviertem Stoppmodus auf “DVD” eingestellt ist, kann die Einstellung auch mit der “NTSC/PAL”-Taste auf der Fernbedienung geändert werden. Falls die Einstellung vom • Stellen Sie den “TV TYPE” unter “VIDEO SETUP” im “DVD Videoformat Ihres Fernsehgerätes abweicht, können Sie das SETUP” ein, damit es zu einer Übereinstimmung mit dem TVVideoformat von der Fernbedienung aus umschalten. Stellen Sie Videoformat kommt. Wenn der TV PAL-formatiert ist, stellen Sie den “TV TYPE“ unter “VIDEO SETUP” im “DVD SETUP” auf PAL ein. (Siehe Seite 141.) die dem Videoformat Ihres Fernsehgerätes entsprechende Position. • Schließen Sie die Videoausgänge dieses Gerätes direkt und nicht über einen VCR (Videokassettenrecorder) an das Fernsehgerät an. 123 2ADV-M71E2_GER p116-174 03.12.25 1:11 PM ページ 124 DEUTSCH (5) Anschluss von Antennen MWRAHMENANTENNE (mitgeliefert) RICHTUNG DES SENDERS UKW-INNENANTENNE (mitgeliefert) UKW-ANTENNE 75 Ω/Ohm KOAXIALKABEL ADAPTER FÜR UKWINNENANTENNE (Zusatzausstattung) ERDE MWAUSSENANTENNE • Ein UKW-Antennenkabelstecker des Typs F kann direkt angeschlossen werden. • Wenn kein UKW-Antennenkabelstecker des Typs F zur Verfügung steht, nehmen Sie den Anschluss mit dem beiliegenden Antennenadapter vor (Zusatzausstattung). MW-Rahmenantennenbaugruppe Anschluß der MW-Antennen Schließen Sie an den MWAntennenanschlüssen an. 1 4 2 Entfernen Sie den Plastikbinder und ziehen Sie die Verbindungsleitung auseinander. 2. Führen Sie die Antennen-leitung ein. 3. Lassen Sie den Hebel wieder los. 3 Biegen Sie in Gegenrichtung. a. Mit der Antennenach oben auf eine ebene Fläche Stellen b. Montage der Antenne an der Wand. Mittels den Installationsbohrungen an der Wand, etc. befestigen 124 1. Drücken Sie den Hebel. HINWEISE: • Schließen keine zwei UKW-Antennen gleichzeitig an. • Selbst wenn eine externe MW-Antenne angeschlossen ist, entfernen Sie nicht die MW-Rahmenantenne. • Stellen Sie sicher, daß keine blanke Antennenanschlußdrähte die Metallteile des Anschlußfeldes berühren. 2ADV-M71E2_GER p116-174 03.12.25 1:11 PM ページ 125 DEUTSCH (6) Tonausgang von den digitalen Audioausgangsanschlüssen dieses Gerätes 2 Bei Wiedergabe einer Disc mit dem ADV-M71 (Digital Out) Einstellungen: Siehe Seite Digitaler Audiodatenausgang Audioaufnahmeformat Dolby Digital-Bitfluss Digital-Ausgang : Normal Dolby Digita 2 Kanäle PCM-Daten (48 kHz/16 Bit) Digital-Ausgang : PCM-Konversion 213 Digital-Ausgang : Normal DTS-Bitfluss Digital-Ausgang : PCM-Konversion 2 Kanäle PCM-Daten (48 kHz/16 Bit) DTS Digital-Ausgang : Normal 2 Kanäle PCM-Daten (48 kHz/16 Bit) 213 MPEG audio DVD-Video DVD-Audio (nur Video-Teil) Digital-Ausgang : PCM-Konversion 2 Kanäle PCM-Daten (48 kHz/16 Bit) LPCM-Konversionsmodus : AUS 48 kHz/16 ~24 Bit PCM Linear PCM 48 kHz LPCM-Konversionsmodus : EIN 96 kHz LPCM-Konversionsmodus : EIN 48 kHz/16 Bit PCM 213 48 kHz/16 Bit PCM CP : EIN LPCM-Konversionsmodus : AUS 48 kHz/16 Bit PCM (bei Kopierschutz) CP : AUS LPCM-Konversionsmodus : AUS 96 kHz PCM (ohne Kopierschutz) Video CD MPEG 1 44,1 kHz/16 Bit PCM Music CD Linear PCM 44,1 kHz/16 Bit PCM MP3/WMA CD MP3/WMA 32 ~ 48 kHz/16 Bit PCM • Linear-PCM-Audio ist das Signalaufnahmeformat, das bei Musik-CDs verwendet wird. Während die Signale bei 44,1 kHz/16 Bit für Musik-CDs aufgenommen werden, werden DVDs bei 48 kHz/16 Bit bis 96 kHz/24 Bit aufgenommen, wodurch eine höhere Soundqualität als bei Musik-CDs erzielt wird. 2 Über die analogen Aufnahmeausgänge LINE-1 und LINE-2 Wenn der DVD- oder D.AUX-Digitaleingang ausgewählt wurde: • Dolby Digital-, DTS- und PCM-Digitalsignale werden vor der Ausgabe automatisch in 2-Kanal-Stereosignale konvertiert (außer im Dolby Headphone-Modus) und können analog aufgenommen werden. (Einzelheiten über den Dolby Headphone-Modus finden Sie nachfolgend.) Wenn TUNER, LINE-1 oder LINE-2 ausgewählt wurde: • Die vom Tuner oder einem anderen an die LINE-1 oder LINE-2 analogen Eingangsanschluss (IN) angeschlossenem Gerät ausgewählten Analogaudio-Signale werden unabhängig vom Eingangs- oder Surround-Modus des ADV-M71 unverändert ausgegeben. (Dasselbe gilt für das an die D.AUX-Anschlüsse angeschlossene Gerät, wenn “LINE-2” unter “⁄0 AUFSTELLUNG DES SYSTEMS – (3) Detailliertes System-Setup – [6] Funktionseinstellungen” auf “D.AUX” eingestellt ist.) Aufnahmeausgang während der Wiedergabe einer DVD- oder D.AUX-Digitaleingangsquelle im Dolby Headphone-Modus: • Wenn im Dolby Headphone-Modus ein DVD- oder Digitaleingang ausgewählt wurde, werden die zu dem Zeitpunkt wiedergegebenen analogen Audiosignale ausgegeben und können analog aufgenommen werden. (Siehe die Seiten 170 und 171.) Vorsichtsmaßnahmen während der analogen Aufnahme von DVDs oder Digitaleingangsquellen: • Ändern Sie während der Aufnahme weder den Eingangsmodus, Surround-Modus noch die Surround-Parameter des ADV-M71. Dies würde kurze Aufnahmeton-Ausfälle verursachen. Wir empfehlen die Surround-Einstellung “STEREO” oder “DIRECT”. • Bei der Verwendung der Kopfhörer wird die Aufnahme automatisch im Dolby Headphone-Modus ausgeführt. Trennen Sie während der Aufnahme nicht die Kopfhörer ab, und ändern Sie auch nicht den Kopfhörer-Modus. 125 2ADV-M71E2_GER p116-174 03.12.25 1:11 PM ページ 126 DEUTSCH (7) Lautsprechersystem-Anschlüsse Schalten Sie vor dem Anschuss der Lautsprechersysteme unbedingt deren Stromversorgung aus. • Schließen Sie die sich auf der Rückseite der Lautsprechersysteme befindlichen Eingangsanschlüsse (siehe Abbildung) mit den im Lieferumfang enthaltenen Kabeln an die LautsprecherAusgangsanschlüsse des Verstärkers an. Schließen Sie das Lautsprechersystem für den linken Verstärkerkanal an die “L”Anschlüsse und das für den rechten Verstärkerkanal an die “R”Anschlüsse an. Achten Sie dabei auf die richtige Ausrichtung der Polarität (“≈” und “√”). Zeichen). Eine vertauschte Polarität hat einen unnatürlichen Klang mit ausgeschalteter Phase oder keinem niedrigen Tiefenklang zur Folge. Stellen Sie darüber hinaus sicher, dass beide Anschlussknöpfe richtig fest sind. Anschluss der Lautsprecherkabel Schließen Sie die sich auf der Rückseite der Lautsprechersysteme befindlichen Eingangsanschlüsse (siehe Abbildung rechts) mit den im Lieferumfang enthaltenen Kabeln an die LautsprecherAusgangsanschlüsse des ADV-M71 an. • Schließen Sie das Lautsprechersystem für den linken Kanal an die “L”-Anschlüsse und das Lautsprechersystem für den rechten Kanal an die “R”-Anschlüsse an. Achten Sie dabei auf die richtige Ausrichtung der Polarität (“+” und “-“). • Beachten Sie, dass bei vertauschter Polarität die Phase möglicherweise ausgeschaltet ist und der Tiefenklang fehlt, was einen unnatürlichen Klang zur Folge hätte. Stellen Sie darüber hinaus sicher, dass beide Schrauben der Lautsprecheranschlüsse festgezogen sind. Drehen Sie die Kerndrähte entweder fest zusammen oder spannen Sie sie ab. Anschlüsse (Bei den roten Anschlüssen auf der rechten Seite handelt es sich um die “≈”, Anschlüsse, bei den Anschlüssen auf der linken Seite um die“√”Anschlüsse.) Lösen Sie die Anschlussknöpfe, setzen Sie die Kerndrähte der Kabel ein und ziehen Sie die Knöpfe fest. Schließen Sie an die “≈” Seite des Verstärkers an (kupferfarben). Schließen Sie an die “√” Seite des Verstärkers an (silberfarben). qDrehen Sie den Lautsprecheranschluss zum Lösen entgegen dem Uhrzeigersinn. wSetzen Sie die Kerndrähte des Kabels ein. eDrehen Sie den Lautsprecheranschluss zum Festziehen im Uhrzeigersinn. HINWEIS: Stellen Sie sicher, dass sich die Kerndrähte nicht gegenseitig berühren. Schutzschaltung • Dieses Gerät ist mit einer Hochgeschwindigkeits-Schutzschaltung ausgestattet. Zweck dieser Schutzschaltung ist es, die Lautsprecher unter bestimmten Umständen zu schützen; z.B. wenn der Ausgang des Leistungsverstärkers versehentlich kurzgeschlossen wurde und aufgrund dessen Starkstrom fließt, wenn die Umgebungstemperatur des Gerätes unnatürlich hoch ist oder wenn das Gerät über einen längeren Zeitraum hinweg mit hoher Lautstärke betrieben wird, was einen extremen Temperaturanstieg zur Folge hat. Wenn die Schutzschaltung aktiviert ist, wird der Lautsprecher-Ausgang ausgeschaltet und das Netz-LED blinkt. Verfahren Sie in einem derartigen Fall wie folgt: Schalten Sie das Gerät aus, überprüfen Sie, ob irgendwelche Fehler mit der Verdrahtung der Lautsprecherkabel oder Eingangskabel vorliegen und lassen Sie das Gerät im Falle einer starken Erhitzung abkühlen. Verbessern Sie die Belüftungsbedingungen und schalten Sie das Gerät wieder ein. Wird die Schutzschaltung erneut aktiviert, obwohl weder die Verdrahtung noch Belüftung Grund zur Beanstandung gibt, schalten Sie das Gerät aus und kontaktieren Sie einen DENON-Kundendienst. Hinweis zur Lautsprecher-Impedanz • Die Schutzschaltung wird möglicherweise aktiviert, wenn das Gerät über einen langen Zeitraum hinweg mit hoher Lautstärke betrieben wird und Lautsprecher mit einer niedrigeren als der angegebenen Impedanz angeschlossen sind (z.B. Lautsprecher mit einer niedrigeren Impedanz als 4 Ω/Ohm). Bei aktivierter Schutzschaltung ist der Lautsprecher-Ausgang ausgeschaltet. Schalten Sie das Gerät aus, lassen Sie die Anlage abkühlen, verbessern Sie die Belüftungsbedingungen und schalten Sie das Gerät wieder ein. Vorsichtsmaßnahmen zum Anschluss • Bei den Lautsprecherausgängen dieses Gerätes werden Signale mit der entgegengesetzten Phase der “+”-Seiten-AusgangsanschlussSignale auch vom “-“-Seiten-Ausgangsanschluss ausgegeben. Führen Sie keinen Anschluss an ein Gerät zum Umschalten zwischen mehreren Lautsprechern (einem Lautsprecherwähler oder Audiokanalwähler) aus und wenden Sie ausschließlich das in diesem Handbuch beschriebene Anschlussverfahren an. Andernfalls könnten Beschädigungen die Folge sein. 126 2ADV-M71E2_GER p116-174 03.12.25 1:11 PM ページ 127 DEUTSCH 8 BAUTEILBEZEICHNUNGEN UND FUNKTIONEN Frontteil • Einzelheiten hinsichtlich Funktionen dieser Bestandteile können den in Klammern ( ) stehenden Seiten entnommen werden. !4 B !3 !2 !1 !0 o i SURROUND / SELECT DVD SURROUND RECEIVER ADV-M71 PUSH - PARAM. - + BAND MENU / SET TONE / SDB VOLUME FUNCTION ON / STANDBY PHONES qw e q ON/STANDBY taste................................................................(142) w Fernbedienungssignalsensor..................................................(132) e Display r Kopfhörerbuchse (PHONES) ..................................................(170) t FUNCTION taste ....................................................................(156) y TONE/SDB taste.....................................................................(158) u Lautstärke-Regler (VOLUME) .................................................(154) r ty u i 2 BAND taste ...............................................................(154, 175) o 13 taste .......................................................................(153, 155) !0 5 taste ..................................................................................(153) !1 8 / – und + / 9 taste ...........................................(155, 175) !2 SURROUND/SELECT taste ....................................................(162) PARAMETER taste .................................................................(163) !3 MENU/SET taste ....................................................................(177) !4 Disc-Fach................................................................................(152) 127 2ADV-M71E2_GER p116-174 03.12.25 1:11 PM ページ 128 DEUTSCH Fernbedienung • Einzelheiten hinsichtlich Funktionen dieser Bestandteile können den in Klammern ( ) stehenden Seiten entnommen werden. • Einige der sich auf der Fernbedienung befindlichen Tasten besitzen zwei Funktionen. Die Funktionen werden mithilfe der Betriebswahltasten der Fernbedienung gewechselt. @4 q w e r t y u i o !0 !1 OFF ON VCR REC NTSC/PAL SLEEP SOURCE ENTER A-B REPEAT CLEAR TITLE TIME TV IN T V CHARAC. SLIDE MODE TV CH RDS PROG/DIRECT REPEAT PTY EDIT/MENU ZOOM - RANDOM MODE MEMO BAND DVD TUNER D.AUX 1 2 3 MD/LINE-1 TAPE /LINE-2 TV CH + CT CD SRS RT SEARCH MODE TUNING / TV VOL 5 6 + - 5CH STEREO AUTO DECODE TUNER 7 8 9 + DIRECT STEREO VIRTUAL CALL 0/10 +10 - TEST TONE INPUT MODE SURROUND FUNCTION 4 CH TUNER TV / VCR DVD IN/SURR. A/V SYSTEM IN/SURR. MD CDR TAPE !2 !3 !4 !5 !6 !7 !8 1 2 - 7 STATUS 3 MUTING SETUP TONE /SDB ENTER !9 @0 @1 @2 @3 #3 #4 #5 #6 9 6 #2 + DVD 8 @5 @6 @7 @8 @9 #0 #1 #7 #8 #9 $0 SURROUND PARAMETER CH SELECT RETURN DISPLAY ANGLE MENU AUDIO VCR CH SUB TITLE RC-966 + TOP MENU $1 $2 $3 $4 $5 q LED Anzeige w SLEEP taste............................................................................(205) e NTSC/PAL taste......................................................................(123) r CLEAR taste ...........................................................................(185) t A-B REPEAT taste ..................................................................(184) y PROGRAM/DIRECT taste.......................................................(185) u REPEAT taste .........................................................................(183) i Eingangsquellen-/Surroundmodus-Auswahltaste o CALL taste..............................................................................(185) !0 TEST TONE taste ...................................................................(148) !1 INPUT MODE taste................................................................(156) !2 DVD PLAY taste .....................................................................(153) !3 DVD STOP taste.....................................................................(154) !4 DVD SKIP taste ......................................................................(155) !5 DVD SEARCH taste........................................................(155, 156) !6 DVD PAUSE taste...................................................................(155) !7 STATUS taste .........................................................................(157) !8 SETUP taste ...........................................................................(142) !9 CH.SELACT taste ...................................................................(148) @0 RETURN taste ........................................................................(154) @1 DISPLAY taste ........................................................................(181) @2 ANGLE taste...........................................................................(195) @3 AUDIO taste ...........................................................................(193) @4 Fernbedienungssignalsender .................................................(132) @5 POWER taste .........................................................................(142) @6 SYSTEM taste ........................................................(130, 133, 134) @7 ZOOM taste ...........................................................................(198) @8 SLIDE taste ............................................................................(192) @9 SEARCH MODE taste ............................................................(155) #0 RANDOM taste ......................................................................(186) #1 TUNING/TV VOL taste............................................................(175) #2 TUNING/TV taste....................................................................(176) #3 FUNCTION taste ....................................................................(156) #4 SURROUND taste ..................................................................(157) #5 Moduswähler ..................................................................(129, 130) #6 Lautstärke-Hauptbedienungstasten ............................................(154) #7 MUTING taste ........................................................................(158) #8 TONE/SDB taste.....................................................................(158) #9 ENTER taste ...........................................................................(141) $0 CURSOR ................................................................................(141) $1 SURROUND PARAMETER taste............................................(162) $2 TOP MEMU taste...................................................................(196) $3 MENU taste............................................................................(197) $4 SUBTITLE taste ......................................................................(194) $5 * SYSTEM taste.............................................(130, 133, 134, 140) * SYSTEM taste.............................(130, 131, 133, 134, 135, 140) • Lesen Sie hinsichtlich der Einzelheiten über die Funktion und Bedienung der verschiedenen Bauteile die (in Klammern) angegebenen Seiten. • Bei den angegebenen Tasten Tasten handelt es sich um DVD-Bedienungstasten, die in Funktion sind, wenn der Fernbedienungsmodus- Wahlschalter auf die A / V und DVD Position gestellt ist. • Die Funktionen der Systemtasten (*) werden mit Hilfe des Fernbedienungsmodus-Wahlschalters umgeschaltet. 128 2ADV-M71E2_GER p116-174 03.12.25 1:11 PM ページ 129 DEUTSCH Bauteilbezeichnungen und Funktionen der Fernbedienungstasten am ADV-M71 • Die Tasten in den Abschnitten q ~ e sind unabhängig von der Position der Modus-Schalter 1 und 2 in Funktion. • Betrachten Sie A / V und DVD als Standard-Positionen und schalten Sie die Position je nach Bedarf um. q OFF ON VCR REC NTSC/PAL SLEEP TITLE SOURCE TIME TV IN ENTER A-B REPEAT CLEAR T V CHARAC. SLIDE MODE TV CH - RDS PROG/DIRECT 3 q 1 PTY REPEAT RANDOM MODE MEMO BAND DVD TUNER D.AUX 3 EDIT/MENU ZOOM TV CH + CT CD SRS RT SEARCH MODE TUNING / TV VOL 1 2 MD/LINE-1 TAPE /LINE-2 4 5 6 + - 5CH STEREO AUTO DECODE TUNER + 7 8 9 DIRECT STEREO VIRTUAL CALL 0/10 +10 - TEST TONE INPUT MODE SURROUND FUNCTION CH TUNER TV / VCR DVD IN/SURR. A/V SYSTEM IN/SURR. MD CDR TAPE 1 2 8 2 + DVD w e 9 6 - 7 STATUS 3 MUTING SETUP TONE /SDB q ENTER SURROUND PARAMETER CH SELECT DISPLAY RETURN ANGLE MENU AUDIO VCR CH + TOP MENU SUB TITLE RC-966 1 Stellen Sie den Modus-Schalter 1 auf die “A/V”-Position. w DVD-Bedienungstasten 1 : Wiedergabe (automatisches Einschalten der Stromversorgung und automatische Funktionswahl) 2 : Stopp 8, 9 : Überspringen (Suche mit Bild) 6, 7 : Suche (Schnellrücklauf und Schnellvorlauf) 3 : Pause und Bild-für-Bild A/V SYSTEM 2 q Bedienungstasten des Surround-Verstärkers ON : Zum Einschalten der Stromversorgung des ADV-M71. OFF : Zum Ausschalten der Stromversorgung des ADV-M71. FUNCTION : Zum Auswählen der Funktion (nacheinander) SURROUND : Zum Auswählen des Surround-Modus INPUT MODE : Zum Auswählen des Eingangsmodus TEST TONE : Zum Ein-/Ausschalten des Testtons + : Zum Erhöhen der Hauptlautstärke – : Zum Senken der Hauptlautstärke MUTING : Zum Ein-/Ausschalten der Stummschaltung STATUS : Zum Auswählen der Statusanzeige TONE/SDB : Zum Auswählen und Einstellen von Klang/DSB SURROUND : Zum Auswählen und Einstellen der SurroundPARAMETER Parameter SET UP : Zum Ein-/Ausschalten des Setup-Modus CH SELECT : Zum Auswählen und Einstellen des Kanalpegels •, ª, 0, 1 : Cursor nach oben, nach unten, nach links und nach rechts ENTER : Zum Eingeben der Einstellung e Tuner-Bedienungstasten CH +/– : Vorwahlkanal auf/ab (automatisches StromEinschalten und automatische Funktionswahl) Stellen Sie den Modus-Schalter 2 auf die Position der Funktion, die Sie ausführen möchten. (DVD, TUNER oder IN/SURR.). TUNER TV / VCR DVD IN/SURR. 129 2ADV-M71E2_GER p116-174 03.12.25 1:11 PM ページ 130 DEUTSCH 3 Bedienung des ADV-M71. [1] Surround-Verstärker-Systemtasten (sind in Funktion, wenn der Modus-Schalter 2 auf “IN/SURR” gestellt ist) • Für die Ausführung dieser Funktionen ist die Position des Modus-Schalters 1 unerheblich. Die in Grau dargestellten Funktionen können ausgeführt werden. OFF ON VCR REC NTSC/PAL SLEEP ENTER A-B REPEAT TITLE SOURCE CLEAR REPEAT PTY RANDOM MODE MEMO BAND DVD TUNER D.AUX 3 1 2 MD/LINE-1 TAPE /LINE-2 4 5 + + - AUTO DECODE 7 8 9 + DIRECT STEREO VIRTUAL 5CH STEREO SURROUND /10 TEST TONE INPUT MODE SYSTEM REPEAT PTY T V RANDOM MODE MEMO BAND DVD TUNER D.AUX 3 1 2 TAPE /LINE-2 4 5 6 + - 5CH STEREO AUTO DECODE TUNER 9 7 9 VIRTUAL - CALL 0/10 +10 - FUNCTION TEST TONE INPUT MODE SURROUND FUNCTION SYSTEM + 9 6 - 7 STATUS MUTING 3 TONE /SDB MUTING SETUP TONE /SDB ENTER ENTER SURROUND PARAMETER CH SELECT DISPLAY MENU AUDIO VCR CH SURROUND PARAMETER CH SELECT + - TOP MENU : Zum Ein-/Ausschalten der EinschlafFunktion DVD : DVD-Funktion TUNER : TUNER-Funktion D.AUX : D.AUX-FunktionMD/LINE-1-Funktion MD/LINE-1 : MD/LINE-1-Funktion TAPE/LINE-2 : TAPE/LINE-2-Funktion 5CH STEREO : 5-Kanal-Stereo-Surround-Modus (wenn im Setup “5.1 CH” ausgewählt wurde) AUTO DECODE : 2-Kanal-Modus-Umschaltung, wenn der automatische Entschlüsselungs-SurroundModus eingestellt ist (wenn im Setup “5.1CH” ausgewählt wurde) VIRTUAL : 2-Kanal-Modus-Umschaltung, wenn der Dolby Virtual Speaker- oder Dolby VSSurround-Modus eingestellt ist STEREO : Stereo-Modus DIRECT : Direkt-Modus DISPLAY RETURN SUB TITLE ANGLE RC-966 130 2 DVD 8 - STATUS SLEEP IN/SURR. MD CDR TAPE 1 + 3 ANGLE CH TUNER TV / VCR DVD IN/SURR. A/V IN/SURR. MD SETUP RETURN + 8 DVD 6 TUNING / TV VOL STEREO 2 8 + CT CD SRS RT SEARCH MODE MD/LINE-1 CDR TAPE 1 TIME EDIT/MENU ZOOM TV CH 7 TUNER TV / VCR DVD IN/SURR. A/V TITLE TV IN CHARAC. SLIDE MODE TV CH DIRECT CH +10 0 CALL RDS PROG/DIRECT TUNING / TV VOL TUNER ENTER A-B REPEAT - CT CD SRS RT SEARCH MODE 6 ON VCR REC NTSC/PAL SLEEP T V EDIT/MENU ZOOM TV CH - RDS PROG/DIRECT OFF TIME TV IN CHARAC. SLIDE MODE TV CH SOURCE CLEAR [2] DVD-Systemtasten (sind in Funktion, wenn der Modus-Schalter 2 auf “DVD” gestellt ist) MENU AUDIO VCR CH + TOP MENU SUB TITLE RC-966 NTSC/PAL ZOOM SLIDE MODE A-B REPEAT : : : : CLEAR : SEARCH MODE: RANDOM : REPEAT : PROG/DIRECT : CALL 0 ~ 9, +10 TOP MENU MENU DISPLAY RETURN SUBTITLE AUDIO ANGLE : : : : : : : : : Zum Auswählen von NTSC/PAL Zum Ein-/Ausschalten des Zooms Zum Auswählen des JPEG-Bild-Dia-Modus Zur Einstellung der A-BWiedergabewiederholung Zum Löschen eines Programms Zum Auswählen der Spur- und Kapitelsuche Zum Ein-/Ausschalten der Zufallswiedergabe Zur Einstellung der Wiedergabewiederholung Zum Auswählen der programmierten/direktenWiedergabe Zum Aufrufen eines Programms Zifferntasten Zum Aufrufen des Top-Menüs Zum Aufrufen von Menüs Zum Anzeigen des Aufrufes/der Auswahl Zum Zurückkehren zum Menü Zum Auswählen der Untertitelsprache Zum Auswählen der Audiosprache Zum Auswählen des Winkels 2ADV-M71E2_GER p116-174 03.12.25 1:11 PM ページ 131 DEUTSCH 3 [3] Tuner-Systemtasten (sind in Funktion, wenn der Modus-Schalter 2 auf “TUNER” gestellt ist) OFF ON VCR REC NTSC/PAL SLEEP TITLE SOURCE ENTER A-B REPEAT CLEAR TIME TV IN T V CHARAC. SLIDE MODE TV CH EDIT/MENU ZOOM TV CH - RDS PROG/DIRECT REPEAT MODE MEMO DVD + CT CD SRS RT RANDOM SEARCH MODE PTY BAND TUNING / TV VOL TUNER D.AUX 1 2 3 MD/LINE-1 TAPE /LINE-2 4 5 6 + - 5CH STEREO AUTO DECODE TUNER + 7 8 9 DIRECT STEREO VIRTUAL CALL 0/10 +10 - TEST TONE INPUT MODE SURROUND FUNCTION CH TUNER TV / VCR DVD IN/SURR. A/V SYSTEM IN/SURR. MD CDR TAPE 1 2 + DVD 8 9 6 - 7 STATUS 3 MUTING SETUP TONE /SDB ENTER SURROUND PARAMETER CH SELECT DISPLAY RETURN ANGLE MENU AUDIO VCR CH + TOP MENU SUB TITLE RC-966 BAND : Zum Auswählen des UKW-/MWFrequenzbereiches MEMO : Vorwahlspeicher MODE : Zum Auswählen des UKW-Auto-/MonoModus TUNER +/– : Senderabstimmung auf/ab 1 ~ 10, +10 : Vorwahlkanal-Zifferntasten RDS : Stimmen Sie mit dieser Taste Sender automatisch mit Hilfe des Radiodatensystems ab. 1 PTY RDS 1 PTY OFF 1 TP 0 : Drücken Sie diese Taste, nachdem Sie mit der RDSTaste “PTY” ausgewählt haben, um eine der 29 Programmsparten auszuwählen. : Korrigieren Sie mit dieser Taste die Uhrzeit am ADVM71. Drücken Sie diese Taste, wenn der UhrzeitService eines RDS-Senders einwandfrei empfangen wird. “TIME” wird für 2 Sekunden angezeigt und die Uhr des ADV-M71 wird korrigiert. “NO TIME DATA” wird angezeigt, wenn der RDS-Sender keinen Uhrzeit-Service unterstützt und der Empfang nicht einwandfrei ist. : Drücken Sie beim Empfang von RDS-Sendern diese Taste, um die Frequenz-, PS- (oder Sendername), PTY- oder RT-Anzeige auszuwählen. Beachten Sie, dass diese Taste bei schlechtem Empfang außer Funktion ist. Bei jedem Drücken der Taste ändert sich der Anzeigemodus wie folgt. CT RT 1 1 RT PS (oder Sendername) Frequency 0 1 PTY Anstatt der PS-Anzeige wird vorrangig der Sendername angezeigt, wenn ein Sender abgestimmt wird, dessen Sendername vorprogrammiert wurde. 131 2ADV-M71E2_GER p116-174 03.12.25 1:11 PM ページ 132 DEUTSCH 9 FERNBEDIENUNGSGERÄT • Mit dem mitgelieferten Fernbedienungsgerät (RC-966) kann nicht nur der ADV-M71 sondern es können auch andere zur Fernbedienung ausgelegte DENON-Komponenten gesteuert werden. Zusätzlich beinhaltet der Speicher die Steuersignale für andere Fernbedienungsgeräte, so dass damit auch fernbedienbare Geräte betrieben werden können, die nicht von Denon hergestellt wurden. (1) Einlegen der Batterien q Entfernen Sie die Fernbedienungsgerätes. rückwärtige Abdeckung des w Legen Sie die drei R6P/AA-Batterien in der angegebenen Richtung in das Batteriefach ein. e Setzen Sie die rückwärtige Abdeckung wieder auf. Hinweise zu Batterien • Verwenden Sie im Fernbedienungsgerät R6P/AA-Batterien. • Die Batterien sollten ca. einmal jährlich gegen neue ausgetauscht werden. Wie oft ein Batteriewechsel jedoch tatsächlich erforderlich ist, hängt von der Häufigkeit der Benutzung des Fernbedienungsgerätes ab. • Tauschen Sie die Batterien auch vor Ablauf eines Jahres aus, wenn sich das Gerät selbst aus nächster Entfernung nicht mit dem Fernbedienungsgerät bedienen läßt. (Die mitgelieferte Batterie ist ausschließlich für Testzwecke vorgesehen. Tauschen Sie die Batterie so bald wie möglich aus.) • Achten Sie beim Einlegen der Batterien unbedingt auf die richtige Ausrichtung der Polaritäten. Folgen Sie den “<” und “>” Zeichen im Batteriefach. • Um Beschädigungen oder ein Auslaufen von Batterieflüssigkeit zu vermeiden: • Verwenden Sie keine neuen und alten Batterien zusammen. • Verwenden Sie keine verschiedenen Batterietypen gleichzeitig. • Schließen Sie Batterien nicht kurz, zerlegen und erhitzen Sie sie nicht und werfen Sie Batterien niemals in offenes Feuer. • Nehmen Sie die Batterien aus dem Fernbedienungsgerät heraus, wenn Sie beabsichtigen, es über einen längeren Zeitraum hinweg nicht zu benutzen. • Sollte einmal Batterieflüssigkeit ausgelaufen sein, so wischen Sie das Batteriefach sorgfältig aus und legen Sie neue Batterien ein. • Beim Austauschen der Batterien sollten Sie sofort neue Batterien zur Hand haben und diese so schnell wie möglich einlegen. (2) Fernbedienungsbetrieb B Ca. 7 m/22 Fuß 30° SLEEP SOURCE 9 A-B ENTER REPEAT D.AUX 3 E-2 6 ON TITLE TV SLIDECHARAC. IN MODE TV TIME CH RANDOM EDIT/MENT V ZOOM BAND TV U SEARCH CD CH SRS MODE TUNING TV VOL / + DECODE TUNER CH DVD - + - SELECT / VCR IN/SURR. REPEAT MEMO TUNER AUTO FUNCTION IN/SURR. 2 TAPE/LIN 5 STEREO VIRTUAL + /V MUTING CH TAPE - A D CDR + +10 SURROUN TUNER TV MD 2 9 7 STATUS - 8 STEREO MODE 1 DVD 8 6 3 SETUP OFF NTSC/PAL RECVCR CLEAR PROG/DIR MODE ECT INPUT 1 5CH 0 /10 TONE DVD 1 MD/LINE- 4 7 DIRECT CALL TEST SYSTEM • Richten Sie das Fernbedienungsgerät - wie im Diagramm gezeigt auf den Fernbedienungssensor am Hauptgerät. • Die Reichweite des Fernbedienungsgerätes beträgt aus gerader Entfernung vom Hauptgerät ca. 7 Meter./22 Fuß Diese Entfernung verkürzt sich jedoch, wenn Gegenstände im Weg liegen oder das Fernbedienungsgerät nicht direkt auf den Fernbedienungssensor gerichtet wird. • Das Fernbedienungsgerät kann in einem horizontalen Winkel von bis zu 30 Grad zum Fernbedienungssensor betrieben werden. 30° TONE/SD R ENTE B RETURN ANGLE DISPLAY MENU AUDIO - VCR TOP CH + MENU TITLE 132 SUB RC-93 6 SURROUN PARAMET ER D HINWEISE: • Der Betrieb des Fernbedienungsgerätes ist möglicherweise schwierig, wenn der Fernbedienungssensor direktem Sonnenlicht oder starkem künstlichem Licht ausgesetzt ist. • Drücken Sie keine Tasten am Hauptgerät und auf dem Fernbedienungsgerät gleichzeitig, da dies in einer Fehlfunktion resultieren würde. • Neonschilder oder andere sich in der Nähe befindliche impulsartige Störungen ausstrahlende Geräte können Fehlfunktionen verursachen. Halten Sie die Anlage soweit wie möglich von derartigen Einrichtungen fern. 2ADV-M71E2_GER p116-174 03.12.25 1:11 PM ページ 133 DEUTSCH • Mit der im Lieferumfang enthaltenen Fernbedienung (RC-966) kann nicht nur der ADV-M71, sondern können auch die Systemfunktionen für Geräte der D-M31-Serie gesteuert werden. Darüber hinaus ist mit dieser Fernbedienung der Betrieb von anderen zur Fernbedienung ausgelegten DENON-Komponenten möglich. Zusätzlich beinhaltet der Speicher die FernbedienungsBefehlscodes von anderen großen Fernsehgerät- und VideodeckHerstellern, so dass auch diese Geräte mit dieser Fernbedienung gesteuert werden können. 3 [1] MD-Recorder-Systemtasten (sind in Funktion, wenn der Modus-Schalter 2 auf “MD” gestellt ist) OFF SLEEP ON VCR REC NTSC/PAL TITLE TV IN T V ENTER A-B REPEAT CHARAC. SLIDE MODE EDIT/MENU ZOOM SOURCE CLEAR TV CH RDS PROG/DIRECT REPEAT MODE • Schalten Sie vor der Inbetriebnahme die Stromversorgung aller Komponenten ein. • Je nach Modell und Herstellungsjahr Ihrer Komponente sind einige Tasten möglicherweise nicht funktionsfähig. RANDOM MEMO DVD (3) Bedienung der DENON-Audiokomponenten PTY TITLE SOURCE TUNER D.AUX 1 2 3 TAPE /LINE-2 4 5 6 + - 5CH STEREO AUTO DECODE TUNER 8 9 STEREO VIRTUAL CALL 0/10 +10 - TEST TONE INPUT MODE SURROUND FUNCTION REPEAT PTY RANDOM MODE MEMO BAND DVD TUNER D.AUX TUNER TV / VCR DVD IN/SURR SURROUND PARAMETER CH SELECT MENU VCR CH 3 + TOP MENU + 2 TAPE /LINE-2 5 6 + - 5CH STEREO AUTO DECODE TUNER 7 8 9 + DIRECT STEREO VIRTUAL RC-966 TIME TITLE REC CH CALL 0/10 +10 - TEST TONE INPUT MODE SURROUND FUNCTION TUNER TV / VCR DVD IN/SURR. SYSTEM IN/SURR. MD CDR TAPE 2 2 + DVD 9 6 - 7 STATUS 3 MUTING SETUP TONE /SDB ENTER SURROUND PARAMETER CH SELECT DISPLAY RETURN ANGLE MENU VCR CH + TOP MENU SUB TITLE AUDIO SUB TITLE TUNING / TV VOL 4 A/V AUDIO EDIT/MENU ZOOM TV CH 1 8 RC-966 1 DISPLAY ANGLE CT CD SRS RT SEARCH MODE MD/LINE-1 1 3 CH T V CHARAC. SLIDE MODE TV CH - 1 + 7 DIRECT A/V TIME TV IN ENTER A-B REPEAT RDS PROG/DIRECT 3 TUNING / TV VOL ON VCR REC NTSC/PAL CLEAR + CT CD SRS RT SEARCH MODE MD/LINE-1 RETURN OFF TV CH BAND - SLEEP TIME - Stellen Sie den Modus-Schalter 1 auf die “SYSTEM”-Position (in Blau dargestellt). A/V : Zum Anzeigen der Disc-Spielzeit : Zum Anzeigen des Namens : Für die Aufnahme (Multi-Aufnahmefunktion mit dem DMD-M31) SOURCE : Zum Ein-/Ausschalten der MD-RecorderStromversorgung EDIT/MENU : Zum Auswählen des Bearbeitungsmodus CHARAC : Zum Auswählen der Zeichen bei der Namenseingabe ENTER : Zum Eingeben von bearbeiteten Werten CD SRS : CD-synchronisierte Aufnahme (DMD-M31Systemfunktion) CLEAR : Zum Löschen eines Programms RANDOM : Zum Ein-/Ausschalten der Zufallswiedergabe REPEAT : Zum Einstellen der Wiedergabewiederholung PROG/DIRECT : Zum Auswählen der programmierten/direkten Wiedergabe CALL : Zum Aufrufen eines Programms 1~10, +10 : Zum Auswählen einer Spurnummer 8, 9 : Automatik-Suche (Suche mit Bild) 6, 7 : Manuelle Suche (Schnellrücklauf und Schnellvorlauf) 1 (/ 3) : Wiedergabe (Wiedergabe/Pause, automatisches Strom-Einschalten und automatische Funktionswahl mit dem DMD-M31) 3 : Pause 2 : Stopp SYSTEM 2 Stellen Sie den Modus-Schalter 2 auf die Position für die zu bedienende Komponente (MD, CDR oder TAPE) (in Blau dargestellt). TUNER TV / VCR DVD IN/SURR. IN/SURR. MD CDR TAPE 3 Betreiben Sie die Audiokomponente. • Lesen Sie hinsichtlich der Einzelheiten die Bedienungsanleitung der Komponente. Einige Modelle können möglicherweise nicht betrieben werden. 133 2ADV-M71E2_GER p116-174 03.12.25 1:11 PM ページ 134 DEUTSCH [2] CD-Recorder-Systemtasten (sind in Funktion, wenn der Modus-Schalter 2 auf “CDR” gestellt ist) OFF SLEEP ON OFF VCR REC NTSC/PAL TITLE TIME SLEEP TV IN T V SOURCE ENTER A-B REPEAT CHARAC. SLIDE MODE EDIT/MENU ZOOM CLEAR SOURCE CLEAR TV CH RDS PROG/DIRECT REPEAT PTY - RANDOM MODE MEMO BAND DVD TUNER D.AUX 3 TV CH + 2 TAPE /LINE-2 4 5 6 + - 5CH STEREO AUTO DECODE TUNER 7 8 9 + DIRECT STEREO VIRTUAL CALL 0/10 +10 - SURROUND FUNCTION INPUT MODE PTY TIME TV CH RANDOM MODE MEMO BAND DVD TUNER D.AUX + CT CD SRS RT SEARCH MODE TUNING / TV VOL SURROUND PARAMETER RETURN DISPLAY ANGLE MENU AUDIO VCR CH + TOP MENU SUB TITLE RC-966 SURROUND PARAMETER RETURN DISPLAY ANGLE MENU AUDIO VCR CH + TOP MENU REC CD SRS SUB TITLE RC-966 6, 7 1 0 TAPE : Zum Anzeigen der Disc-Spielzeit : Zum Anzeigen des Namens und zum Auswählen von Zeichen bei der Namenseingabe REC : Für die Aufnahme SOURCE : Zum Ein-/Ausschalten der CD-RecorderStromversorgung EDIT/MENU : Zum Auswählen der Menüs ENTER : Zum Eingeben von Menüfunktionen CLEAR : Zum Löschen eines Programms RANDOM : Zum Ein-/Ausschalten der Zufallswiedergabe REPEAT : Zur Einstellung der Wiedergabewiederholung PROG/DIRECT : Zum Auswählen der programmierten/direkten Wiedergabe CALL : Zum Aufrufen eines Programms 1~10, +10 : Zum Auswählen einer Spurnummer 8, 9 : Automatik-Suche (mit Bild) 6, 7 : Manuelle Suche (Schnellrücklauf und Schnellvorlauf)) 1 (/ 3) : Wiedergabe (Wiedergabe/Pause, automatische Strom-Einschaltung und automatische Funktionswahl mit dem CDR-M30) 3 : Pause 2 : Stopp 134 REPEAT CH CH SELECT TIME TITLE T V EDIT/MENU ZOOM - CH SELECT TUNER TV / VCR DVD IN/SURR A/V TITLE TV IN CHARAC. SLIDE MODE RDS PROG/DIRECT TUNING / TV VOL 1 ON VCR REC NTSC/PAL ENTER A-B REPEAT TV CH CT CD SRS RT SEARCH MODE MD/LINE-1 TEST TONE [3] Kassettendeck-Systemtasten (sind in Funktion, wenn der Modus-Schalter 2 auf “TAPE” gestellt ist) : Für die Aufnahme : CD-synchronisierte Aufnahme (DRR-M31Systemfunktion) : Für den Rücklauf und Schnellvorlauf : Für die Vorwärts-Wiedergabe : Für die Rückwärts-Wiedergabe (0 und 1 automatisches Strom-Einschalten und automatische Funktionswahl mit dem DRR-M31) 2ADV-M71E2_GER p116-174 03.12.25 1:11 PM ページ 135 DEUTSCH (4) Fernsehgerät- und Videodeck-Vorwahlspeicher • Mit der im Lieferumfang enthaltenen Fernbedienung können Komponenten von anderen Herstellern betrieben werden, indem ihre entsprechenden Codes im Vorwahlspeicher gespeichert werden. Beachten Sie, dass je nach Modell möglicherweise einige Funktionen nicht ausgeführt werden können und dass einige Tasten unter Umständen nicht einwandfrei funktionieren. 3 4 OFF ON VCR REC NTSC/PAL SLEEP ENTER A-B REPEAT CLEAR 1 TIME T V CHARAC. SLIDE MODE TV CH EDIT/MENU ZOOM TV CH - RDS PROG/DIRECT 4 TITLE TV IN SOURCE REPEAT PTY RANDOM + MEMO BAND DVD TUNER D.AUX 1 2 3 MD/LINE-1 TAPE /LINE-2 4 5 6 + - 5CH STEREO AUTO DECODE TUNER 7 8 9 + STEREO VIRTUAL CALL 0/10 +10 - INPUT MODE SURROUND FUNCTION 2 2 + DVD 9 - 7 STATUS MUTING SETUP TONE /SDB ENTER SURROUND PARAMETER CH SELECT DISPLAY RETURN ANGLE VCR CH MENU AUDIO D.AUX 2 3 TAPE /LINE-2 7 5 6 5CH STEREO AUTO DECODE 8 9 0/10 IN/SURR. MD 3 DVD STEREO CDR TAPE 6 TUNER 1 MD/LINE-1 4 VCR REC NTSC/PAL TUNER TV / VCR DVD IN/SURR. 1 T V CH TEST TONE 8 TIME TUNING / TV VOL DIRECT SYSTEM Drücken Sie zur Vorprogrammierung eines Fernsehgerätes die TV-Taste, zur Vorprogrammierung eines Videodecks die VCR-Taste, und geben Sie dann die 3-stellige Zahl entsprechend des Herstellers der Komponente ein, deren Signale Sie im Vorwahlspeicher speichern möchten (sehen Sie sich dazu die Tabelle der Fernbedienungscodes auf den Seiten 136 bis 139 an). CT CD SRS RT SEARCH MODE MODE A/V 3 4 4 + TOP MENU SUB TITLE HINWEISE: • Wenn Sie während der Einstellung des Vorwahlspeichers eine Taste drücken, werden deren Signale vom Fernbedienungssensor gesendet. Sie sollten den Fernbedienungssensor daher bei der Einstellung des Vorwahlspeichers abdecken, um eine versehentliche Bedienung zu vermeiden. • Je nach Modell und Herstellungsjahr funktionieren einige Fernbedienungscodes für die in der Tabelle aufgeführten Hersteller möglicherweise nicht einwandfrei. • Bei einigen Herstellern gibt es mehrere Arten von Fernbedienungscodes. Falls eine Bedienung nicht funktioniert, versuchen Sie es noch einmal mit einem der anderen Codes. RC-966 2 Keine Werkseinstellungen. 1 Stellen Sie den Modus-Schalter 1 auf die “A/V”-Position. A/V SYSTEM 2 Stellen Sie den Modus-Schalter 2 auf die “TV/VCR”-Position. TUNER TV / VCR DVD IN/SURR. IN/SURR. MD CDR TAPE 3 Drücken Sie gleichzeitig die Netztasten ON und OFF. • Das Übertragungs-LED (Anzeige) blinkt. OFF ON 135 2ADV-M71E2_GER p116-174 03.12.25 1:11 PM ページ 136 DEUTSCH Combinations of preset codes for different brands TV Admiral 045, 121 Fujitsu Adventura 122 Funai 004, 062 004, 062 Aiko 054 Futuretech 004 Akai 016, 027, 046 GE 020, 036, 037, 040, 044, 058, 066, 088, 119, 120, Alleron 062 A-Mark 007 Goldstar 015, 029, 031, 039, 048, 051, 056, 057, 067, 125, 147 068, 069, 116, 165 Amtron 061 Anam 006, 007, 036 Grundy 062 Anam National 061, 147 Hitachi 029, 031, 051, 052, 070, 111, 112, 113, 124, 134 AOC 003, 007, 033, 038, 039, 047, 048, 049, 133 Hitachi Pay TV 151 Archer 007 Infinity 017, 071 Audiovox 007, 061 Janeil 122 Bauer 155 JBL 017, 071 Belcor 047 JC Penny 020, 034, 039, 040, 041, 044, 048, 050,058, 066, Bell & Howell 045, 118 Bradford 061 JCB 046 Brockwood 003, 047 JVC 019, 051, 052, 072, 073, 091, 117, 126 Candle 003, 030, 031, 032, 038, 047, 049, 050, 122 Kawasho 018, 046 Capehart 003 Kenwood 038, 056, 057 Celebrity 046 Kloss 010, 032 Circuit City 003 Kloss Novabeam 005, 122, 127, 131 069, 076, 088, 090, 095, 125, 136, 159 029, 030, 031, 032, 034, 038, 047, 049, 050, 054, KTV 074, 123 061, 095, 122, 123 Loewe 071 031, 047, 049 Logik 144 Colortyme 003, 047, 049, 135 Luxman 031 Contec 013, 051, 052, 061 LXI Cony 051, 052, 061 Craig 004, 061 Citizen Concerto 008, 014, 017, 024, 040, 044, 063, 071, 075, 076, 077, 118, 125 Magnavox 005, 010, 017, 030, 033, 038, 050, 056, 071, 078, 079, 085, 089, 108, 109, 110, 127, 131, 132, 145 Crown 029 Curtis Mathes 029, 034, 038, 044, 047, 049, 053, 095, 118 Marantz 015, 017, 071, 080 Daewoo 027, 029, 039, 048, 049, 054, 055, 106, 107, 137 Matsui 027 Daytron 003, 049 Memorex 014, 027, 045, 083, 118, 144 Dimensia 044 Metz 160, 161, 162, 163, 164 Dixi 007, 015, 027 MGA 001, 039, 048, 056, 057, 058, 065 081, 083 Electroband 046 Midland 125 Electrohome 029, 056, 057, 058, 147 Minutz 066 Elta 027 Mitsubishi 001, 016, 039, 048, 056, 057, 058, 065, 081, 082, Emerson 029, 051, 059, 060, 061, 062, 118, 123, 124, 139, 148 083, 105 Envision 038 Montgomery Ward 011, 020, 144, 145, 146 Etron 027 Motorola Fisher 014, 021, 063, 064, 065, 118 MTC 031, 034, 039, 048, 095 Formenti 155 NAD 008, 075, 076, 128 Fortress 012 National 002, 036, 061, 147 136 121, 147 2ADV-M71E2_GER p116-174 03.12.25 1:11 PM ページ 137 DEUTSCH National Quenties 002 Sharp NEC 031, 038, 039, 048, 057, 084, 086, 135, 147 Siemens 013 Nikko 054 Signature 045, 144 NTC 054 Simpson 050 Optimus 128 Sony 043, 046, 138, 146, 150 Optonica 011, 012, 093, 121 Soundesign 030, 050, 062 Orion 004, 139 Spectricon 007, 033 Panasonic 002, 009, 017, 036, 037, 071, 141, 143, 147 Squareview 004 Philco 005, 010, 030, 050, 051, 056, 079, 085, 127, 131, Supre-Macy 032, 122 132, 145, 147 Supreme 046 005, 015, 017, 050, 051, 056, 078, 087, 088, 089, Sylvania 005, 010, 017, 030, 078, 079, 085, 089, 101, 127, Philips 131, 132, 147 011, 012, 013, 026, 093, 099, 100, 104, 121 131, 132, 145, 155 Pioneer 124, 128, 142 Symphonic 004, 148 Portland 054 Tandy 012, 121 Price Club 095 Tatung 036, 124 Proscan 040, 044, 125 Technics 037 Proton 035, 051, 092, 129 Teknika 001, 030, 032, 034, 052, 054, 078, 083, 095, 144, 035, 129 Pulsar 042 Quasar 036, 037, 074, 141 Tera Radio Shack 011, 044, 063, 093, 118 Toshiba RCA 040, 044, 125, 130, 137, 151, 152 Realistic 014, 063, 093, 118 Universal 020, 066, 088 Saisho 027 Victor 019, 073, 126 Samsung 003, 015, 034, 053, 055, 057, 094, 095, 136,153 Video Concepts 016 Sansui 139 Viking 032, 122 Sanyo 013, 014, 021, 022, 063, 064, 081, 096 Wards SBR 015 Schneider 015 Zenith 042, 114, 115, 140, 144, 149 Scott 062 Zonda 007 Sears 008, 014, 021, 022, 023, 024, 025, 040, 052, 057, 156, 157 008, 014, 034, 063, 075, 076, 095, 097, 136, 158, 159 005, 045, 066, 078, 085, 088, 089, 093, 102, 103, 131, 132, 148 062, 063, 064, 065, 073, 075, 076, 097, 098, 125, 159 137 2ADV-M71E2_GER p116-174 03.12.25 1:11 PM ページ 138 DEUTSCH VCR Admiral 081 JVC Aiko 095 Kenwood 004, 005, 006, 026, 029, 033, 045, 085, 090 Aiwa 009 Kodak 088 Akai 026, 027, 070, 072, 082, 083, 084 Lloyd 009, 094 055 LXI 088 Amstrad 009 Magnavox 015, 016, 042, 049, 063, 106 ASA 042 Magnin 087 Asha 087 Marantz 004, 005, 006, 015, 042, 049, 085, 090 Audio Dynamic 005, 085 Marta 088 Audiovox 088 MEI 049 Beaumark 087 Memorex 009, 033, 049, 053, 060, 081, 087, 088, 091, 094, Broksonic 086, 093 Calix 088 Metz 123, 124, 125, 126, 127, 128 Candle 006, 087, 088, 089, 090 MGA 001, 017, 027, 041, 097 Canon 049, 057 MGN Technology 087 Capehart 025, 055, 056, 071 Midland Carver 015 Minolta 013, 023 CCE 095 Mitsubishi 001, 003, 008, 013, 014, 017, 027, 029, 039, 040, Citizen 006, 007, 087, 088, 089, 090, 095 Alba 004, 005, 006, 026, 029, 043, 044, 045, 046, 085 115 011 041, 045, 097 Craig 007, 087, 088, 091, 115 Motorola Curtis Mathes 006, 049, 073, 080, 087, 090, 092 Montgomery Ward 001, 002, 007, 009, 049, 063, 081, 115, 117 Cybernex 087 MTC 009, 087, 094 Daewoo 025, 055, 059, 074, 089, 093, 095, 096 Multitech 007, 009, 011, 087, 090, 094 Daytron 025, 055 NAD 038 DBX 005, 085 NEC 004, 005, 006, 018, 026, 029, 045, 061, 062, 085 Dumont 053 Nikko 088 009 Noblex 087 Electrohome 001, 088, 097 Optimus 081, 088 Electrophonic 088 Optonica 021 Emerson 001, 009, 017, 027, 086, 088, 089, 092, 093, 097, Panasonic 024, 049, 064, 066, 067, 068, 069, 107 100, 101, 102, 103, 104, 117 Perdio 009 Fisher 009, 028, 031, 053, 054, 091, 098, 099, 115 Pentax 006, 013, 023, 058, 090 GE 007, 011, 049, 050, 051, 052, 073, 080, 087 Philco 015, 016, 049 047, 048 Philips 015, 021, 042, 049, 105 Goldstar 006, 012, 062, 088, 129 Pilot 088 Gradiente 094 Pioneer 005, 013, 029, 036, 037, 038, 045, 085 Grundig 042 Portland 025, 055, 090 Harley Davidson 094 Proscan 063, 080 Harman Kardon 040, 062 Pulsar 060 Hi-Q 091 Quartz 033 Hitachi 009, 013, 023, 026, 058, 108, 109, 110, 111 Quasar 034, 035, 049 JC Penny 004, 005, 007, 023, 028, 049, 062, Radio Shack 001, 002, 021, 081, 087, 088, 091, 094, 097, 098, Radix 088 Dynatech Go Video 115 085, 087, 088 Jensen 138 013, 026 081 2ADV-M71E2_GER p116-174 03.12.25 1:11 PM ページ 139 DEUTSCH Randex 088 Symphonic 009, 094 RCA 007, 013, 019, 023, 058, 063, 064, 065, 073, 080, Tandy 009 082, 087 Tashiko 009, 088 009, 021, 031, 033, 049, 053, 081, 087, 088, 091, Tatung 004, 026, 030 094, 097, 098 Teac 004, 009, 026, 094 Ricoh 055 Technics 024, 049 Salora 033, 041 Teknika 009, 010, 022, 049, 088, 094 Samsung 007, 011, 051, 059, 070, 083, 087, 089, 113 TMK 087, 092 Sanky 081 Toshiba 013, 017, 020, 041, 059, 089, 098, 099, 117 Sansui 005, 026, 029, 045, 061, 085, 114 Totevision 007, 087, 088 Sanyo 032, 033, 053, 087, 091, 115, 116 Unirech 087 SBR 042 Vecrtor Research 005, 062, 085, 089, 090 Scott 017, 020, 086, 089, 093, 117 Victor 005, 045, 046, 085 Sears 013, 023, 028, 031, 033, 053, 054, 088, 091, 098, Video Concepts 005, 027, 085, 089, 090 099, 115 Videosonic 007, 087 055 Wards 013, 021, 023, 087, 088, 089, 091, 094, 097, 118, Realistic Sentra Sharp 001, 002, 021, 097 Shogun 087 XR-1000 094 Sony 075, 076, 077, 078, 079, 121, 122 Yamaha 004, 005, 006, 026, 062, 085 STS 023 Zenith 060, 078, 079 Sylvania 009, 015, 016, 017, 041, 049, 094 119, 120 139 2ADV-M71E2_GER p116-174 03.12.25 1:11 PM ページ 140 DEUTSCH (5) Bedienung des Fernsehgerätes/Videodecks nach dem Speichern der Fernbedienungssignale im Vorwahlspeicher OFF 3-w ON VCR REC NTSC/PAL SLEEP SOURCE ENTER A-B REPEAT CLEAR TIME T V CHARAC. SLIDE MODE TV CH - RDS PROG/DIRECT PTY REPEAT RANDOM MODE MEMO BAND DVD TUNER D.AUX 1 2 3 MD/LINE-1 EDIT/MENU ZOOM TV CH + 5 6 AUTO DECODE TUNER TAPE /LINE-2 3-q + 7 8 9 DIRECT STEREO VIRTUAL CALL 0/10 +10 - TEST TONE INPUT MODE SURROUND FUNCTION CH TUNER TV / VCR DVD IN/SURR. SYSTEM IN/SURR. MD CDR TAPE 1 2 9 6 - 7 STATUS 3 MUTING SETUP TONE /SDB ENTER SURROUND PARAMETER CH SELECT DISPLAY RETURN 3-w ANGLE VCR CH MENU AUDIO + TOP MENU SUB TITLE RC-966 1 Stellen Sie den Modus-Schalter 1 auf die “A/V”-Position. A/V SYSTEM 2 Stellen Sie den Modus-Schalter 2 auf die “TV/VCR”-Position. TUNER TV / VCR DVD IN/SURR. IN/SURR. MD CDR TAPE 3 Bedienen Sie die Videokomponente. • Lesen Sie hinsichtlich der Einzelheiten die Bedienungsanleitung der Komponente. Einige Modelle können möglicherweise nicht bedient werden. HINWEIS: • Die “TV (POWER)”- und “TV IN”-Tasten des Fernsehgerätes können – unabhängig von der Position des Modus-Schalters 2 so lange bedient werden wie der Modus-Schalter 1 auf die “A/V”-Position gestellt ist. 140 und Videodeck- (VCR) : Zum Ein-/Ausschalten der FernsehgerätStromversorgung 0~9 : Kanalnummern TV IN : Zum Umschalten des Fernsehgerät-Eingangs TV VOL +, – : Zum Anheben/Senken der Lautstärke TV CH +, – : Zum Umschalten des Kanals w Videodeck-Systemtasten 2 + DVD 8 Monitor-Fernsehgerät- (TV) Systemtasten. q Fernsehgerät-Systemtasten TV TUNING / TV VOL 5CH STEREO A/V 3-q 3 CT CD SRS RT SEARCH MODE + - 4 1 TITLE TV IN VCR : Zum Ein-/Ausschalten der VCR-Stromversorgung VCR CH +, – : Zum Umschalten des Kanals 6, 7 : Für die manuelle Suche (Schnellvorlauf und Schnellrücklauf) 1 : Wiedergabe 3 : Pause 2 : Stopp 2ADV-M71E2_GER p116-174 03.12.25 1:11 PM ページ 141 DEUTSCH 10 AUFSTELLUNG DES SYSTEMS (1) Systemsetup-Punkte • Wenn alle Anschlüsse mit anderen AV-Komponenten, wie im Abschnitt “ANSCHLÜSSE” (siehe Seite 120 bis 126) beschrieben, abgeschlossen sind, nehmen Sie mittels der Bildschirmanzeigefunktion des ADV-M71’s die verschiedenen, unten auf dem Monitorbildschirm beschriebenen Einstellungen vor. • Richten Sie das System mit den folgenden Tasten ein: SYSTEM SETUP-Taste 6 Drücken Sie diese Taste, um das Systemsetup-Menü anzeigen zu lassen. - 7 STATUS 3 MUTING SETUP TONE /SDB CURSOR Taste 1 und 0: Bewegen Sie die Cursor (1 und 0) mit diesen ENTER SURROUND PARAMETER CH SELECT RETURN DISPLAY ANGLE VCR CH AUDIO + TOP MENU MENU SUB TITLE Tasten auf dem Bildschirm nach links und rechts. • und ª : Bewegen Sie die Cursor (• und ª) mit diesen Tasten auf dem Bildschirm nach oben und unten. ENTER Taste Drücken Sie diese Taste, um die Anzeige zu wechseln. Schließen Sie mit dieser Taste auch die Einstellung ab. Systemsetup-Punkte und voreingestellte Werte (werkseitig eingestellt) Setup QUICK SETUP SPEAKER CONFIGURATION DVD SETUP SYSTEM SETUP DERAY TIME CHANNEL KEVEL Voreinstellungen Stellen Sie die Bildschirmgröße und das Lautsprechersystem ein. Geben Sie die Lautsprecher-Kombination und das entsprechende Format (KLEIN für reguläre Lautsprecher, GROSS für normale, Vollbereich) in Ihr System ein, um die Zusammensetzung der von den Lautsprechern ausgegebenen Signale und den Frequenzgang automatisch einzustellen. Dieser Parameter ist für die Optimierung des Takts bestimmt, mit dem die Audiosignale von den Lautsprechern und dem Subwoofer gemäß der Hörposition produziert werden. Hören Sie sich in der Hörposition die Prüftöne an, die von den verschiedenen Lautsprechern ausgegeben werden, und nehmen Sie eine solche Einstellung vor, dass der Wiedergabepegel von den verschiedenen Lautsprechern gleich ist. AV1 VIDEO OUTPUT Die Stromversorgung schaltet automatisch in Bereitschaft, wenn im Stopp-Modus und bei aktivierter DVD-Funktion 30 Minuten lang keine Bedienung erfolgt. DVD AUTO POWER OFF Für die Auswahl, ob Videomischsignale oder S-Videosignale oder RGB-Signale von den AV1 SCART-Anschlüssen ausgegeben werden sollen. FUNCTION ASSIGNMENT Geben Sie die LINE-1- und LINE-2 Funktionsbezeichnungen ein und schalten Sie den analogen Aufnahmeausgang (REC OUT) ein oder aus. DISC SETUP Stellen Sie die Audiosprache, die Untertitelsprache und die Disc-Menüsprache für die Disc-Wiedergabe ein. OSD SETUP Stellen Sie das Hintergrundbild für das Setup und den Betriebsbildschirm ein. VIDEO SETUP Stellen Sie das Bildschirmformat und das Videosystem für die Verwendung eines TV ein. TV Aspect Speaker 4:3 PS 2CH Virtual Front Sp. Center Sp. Surround Sp. Sub Woofer Large “__” “__” “__” Sw Freq. = 150 Hz Front & Subwoofer Center 2.7m (9ft) “__” Surround “__” Front L Center Front R Surround R Surround L Sub Woofer 0 dB “__” 0 dB “__” “__” “__” VIDEO OUTPUT VIDEO Die Stromversorgung schaltet sich nicht automatisch aus. LINE-1 LINE-2 MD TAPE ON Dialog Subtitle Disc Menu English English English REC OUT Wall Paper Blue TV Aspect TV Type 4 : 3 PS PAL Digital Out Black level DARKER LPCM Select AUDIO SETUP Stellen Sie das digitale Audiosignalformat, die Linear-PCMAbtastfrequenz und die Bit-Konversion ein. Normal OFF Rating Level Pass Word Change RATINGS Nehmen Sie eine Wiedergabe-Sperreinstellung für DVDs mit Zugriffsbeschränkung vor, und stellen Sie das für die Einstellungsänderung erforderliche Kennwort ein. No Limit 0000 (Default) Closed Caption Slide Show DTHER SETUP ehmen Sie die Sperrinsert-Einstellung für DVDs vor. (Ein im Handel erhältlicher Decoder ist für die Anzeige der Sperrinserts erforderlich.) OFF 5SEC 141 2ADV-M71E2_GER p116-174 03.12.25 1:12 PM ページ 142 DEUTSCH (2) Quick Setup • Lesen Sie den Abschnitt “Anschlüsse” (auf den Seiten 120 bis 126) und stellen Sie sicher, dass alle Anschlüsse richtig ausgeführt worden sind. B 1 SURROUND / SELECT DVD SURROUND RECEIVER ADV-M71 PUSH - PARAM. - + BAND MENU / SET TONE / SDB Schalten Sie die Stromversorgung ein. • Die Netzanzeige (LED) leuchtet grün, das Gerät schaltet sich ein und die Anzeige leuchtet. VOLUME FUNCTION ON / STANDBY Leuchtet (grün) ON / STANDBY PHONES 1 Haupteinheit OFF ENTER A-B REPEAT CLEAR TITLE TIME TV IN T V CHARAC. SLIDE MODE TV CH EDIT/MENU ZOOM TV CH - RDS PROG/DIRECT REPEAT PTY RANDOM MODE MEMO BAND DVD TUNER D.AUX 3 + CT CD SRS RT SEARCH MODE TUNING / TV VOL 1 2 MD/LINE-1 TAPE /LINE-2 4 5 6 + - 5CH STEREO AUTO DECODE TUNER + 7 8 9 DIRECT STEREO VIRTUAL CALL 0/10 +10 - TEST TONE INPUT MODE SURROUND FUNCTION CH TUNER TV / VCR DVD IN/SURR. A/V SYSTEM Fernbedienung Nach dem Drücken der Netztaste dauert es einige Sekunden, bis sich das Gerät einschaltet. Dies liegt in der integrierten Stummschaltung begründet, die den Ton beim Ein- und Ausschalten ausblendet (stumm schaltet). Bei aktivierter Stummschaltung blinkt die Netzanzeige grün. Selbst wenn die Netztaste noch einmal gedrückt wurde und der Standby-Modus aktiviert ist, werden einige Schaltungen noch immer mit Strom versorgt. Vergewissern Sie sich bitte, dass das Netzkabel von der Netzsteckdose abgetrennt ist, wenn Sie das Haus verlassen oder in den Urlaub fahren. Im Standby-Modus leuchtet die Netzanzeige rot. Wenn der Timer eingestellt ist, leuchtet die Anzeige orange. 1 ON VCR REC NTSC/PAL SLEEP SOURCE ON IN/SURR. MD CDR TAPE 1 2 + DVD 8 2 9 6 - 7 Drücken Sie zur Anzeige des SetupBildschirms die SETUP-Taste. SETUP STATUS 3 2,12 MUTING SETUP TONE /SDB ENTER SURROUND PARAMETER CH SELECT DISPLAY RETURN ANGLE MENU AUDIO VCR CH Fernbedienung 4,6,8,11 3,5,7,9,10 + TOP MENU SUB TITLE RC-966 3 Wählen Sie mit den • und ª CursorTasten “Quick Setup”. • Die ausgewählte Funktion wird in Gelb angezeigt. Fernbedienung 142 2ADV-M71E2_GER p116-174 03.12.25 1:12 PM ページ 143 DEUTSCH 4 Drücken Sie die ENTER-Taste, um das Einstellungsmenü anzeigen zu lassen. Im Einstellungsmenü wird die ausgewählte Funktion in Gelb angezeigt und die Werte der anderen Funktionen erscheinen in Grün. ENTER 6 [2] Lautsprecher-Einstellungen Fernbedienung [1] Einstellung der Fernsehschirmgröße • “Return” wird in Gelb angezeigt. • Der derzeit eingestellte Wert wird in Grün angezeigt. • Falls Sie die Einstellung nicht ändern möchten, drücken Sie bei “Return” die ENTER-Taste. Es erscheint wieder der Bildschirm wie in Schritt 2. • Um die Einstellung zu ändern, fahren Sie mit dem nachfolgend beschriebenen Schritt 7 fort. • Der gegenwärtig eingestellte Wert wird in Gelb angezeigt. 5 6 Wählen Sie mit den • und ª CursorTasten die gewünschte Fernsehschirmgröße und die Anzeigeart aus. Die ausgewählte FernsehbildschirmGröße wird in Gelb angezeigt und die Beschreibung in Grün. Drücken Sie zur Eingabe der ausgewählten Einstellung die ENTERTaste. • Der nachfolgend dargestellte Bildschirm erscheint 7 Wählen Sie mit den • und ª CursorTasten das verwendete Lautsprechersystem. Fernbedienung Fernbedienung ENTER 8 Drücken Sie zur Eingabe der ausgewählten Einstellung die ENTERTaste. • Für andere als die “5.1-channel surround”-Einstellungen erscheint wieder der Setup-Bildschirm wie in Schritt 2. /Der Setup-Modus wird in Schritt 12 beendet. Sie können den Setup-Modus auch beenden, indem Sie auf dem SetupBildschirm mit den • und ª CursorTasten “EXIT SETUP” auswählen und anschließend die ENTER-Taste drücken. • Falls “5.1-channel surround” ausgewählt wurde, erscheint der nachfolgend dargestellte Bildschirm. ENTER Fernbedienung [3] Raum- und Sitzposition-Einstellungen Fernbedienung • Der gegenwärtig eingestellte Wert wird in Grün angezeigt. 143 2ADV-M71E2_GER p116-174 03.12.25 1:12 PM ページ 144 DEUTSCH 9 10 Wählen Sie mit den • und ª Cursor-Tasten “SEATING POSITION”, und geben Sie dann mit den 0 und 1 Cursor-Tasten die Raumgröße ein. • Die eingegebene Größe wird in Gelb angezeigt. Wählen Sie mit den • und ª Cursor-Tasten “SEATING POSITION”, und geben Sie dann mit den 0 und 1 Cursor-Tasten die Position ein. • Die eingegebene Position wird in Gelb angezeigt. Wissenswertes über die LautsprechersystemEinstellungen B 2CH VIRTUAL Wählen Sie diese Einstellung, wenn Sie das Gerät nur mit den beiden Lautsprechern für die vorderen Kanäle verwenden. B 2CH VIRTUAL & SW Wählen Sie diese Einstellung, wenn Sie zwei Lautsprecher für die vorderen Kanäle und einen Subwoofer mit integriertem Verstärker verwenden. • Einstellungen Frontlautsprecher : Klein Subwoofer : Ja Subwoofer-Frequenz : 150 Hz Stellen Sie die Frontlautsprecher und den Subwoofer im gleichen Abstand auf. B 5.1CH SURROUND Wählen Sie diese Einstellung, wenn Sie zwei Lautsprecher für die vorderen Kanäle, einen Center-Lautsprecher, zwei Lautsprecher für die Surround-Kanäle und einen Subwoofer mit integriertem Verstärker verwenden. • Einstellungen Frontlautsprecher : Klein 2.7m (9ft) Center-Lautsprecher : Klein 2.4m (8ft) Surround-Lautsprecher : Klein 2.1m (7ft) Subwoofer : Ja 2.7m (9ft) Subwoofer-Frequenz : 150 Hz Die Raumgröße ist auf “MED” eingestellt und die Zuhörposition auf “BACK”. Fernbedienung Fernbedienung HINWEIS: • Das Lautsprechersystem wurde werkseitig auf “2CH VIRTUAL” eingestellt. Falls Sie Lautsprecher für die beiden vorderen Kanäle und einen Subwoofer verwenden, ändern Sie diese Einstellung auf “2CH VIRTUAL & SW”. 11 Drücken Sie zum Beenden der Einstellungen die ENTER-Taste. • Es erscheint wieder der Bildschirm wie in Schritt 2. ENTER Fernbedienung 12 144 Drücken Sie zum Beenden des SetupModus die SETUP-Taste. Sie können den Setup-Modus auch beenden, indem Sie auf dem SetupBildschirm mit den • und ª CursorTasten “EXIT SETUP” auswählen und anschließend die ENTER-Taste drücken. SETUP Fernbedienung 2ADV-M71E2_GER p116-174 03.12.25 1:12 PM ページ 145 DEUTSCH (3) Detailliertes System-Setup (Änderung der Systemeinstellungen) • Die Einstellungen aus dem Quick System-Setup und die werkseitigen Original-Einstellungen werden im Systemeinstellungs-Änderungsmenü geändert. Die Einstellungen bleiben bis zur nächsten Änderung im Speicher gespeichert, auch wenn zwischenzeitlich die Stromversorgung ausgeschaltet wird. [1] Lautsprecher-Einstellungen (Lautsprechertyp und ob der Lautsprecher angeschlossen ist) • Die Ausgangskomponente der verschiedenen Kanäle und deren Eigenschaften werden je nach verwendeter Lautsprecher-Kombination automatisch eingestellt. 1 Drücken Sie die SETUP-Taste, um sich den Setup-Bildschirm anzeigen zu lassen. SETUP 3 ENTER Fernbedienung Fernbedienung Fernbedienung Wenn sich der Cursor an einem Tag-Symbol im Systemeinstellungs-Änderungsmenü befindet, kann der Einstellungsbildschirm auch durch Drücken der ª CursorTaste ausgewählt werden. Durch Drücken der • CursorTaste können Sie zum Tag-Symbol zurückkehren. • Es erscheint der in Schritt 4 dargestellte LautsprecherEinstellungsbildschirm. 4 2 Wählen Sie mit den •, ª, 0 und 1 Cursor-Tasten, ob die verschiedenen Lautsprecher angeschlossen sind, und zudem ihre Größe und weitere Parameter. Wählen Sie mit den • und ª Cursor-Tasten “SYSTEM SETUP” unter “<ADVANCED SETUP>”, und drücken Sie dann die ENTER-Taste. CENTER-LAUTSPRECHER FRONTLAUTSPRECHER SUBWOOFER ENTER Fernbedienung Fernbedienung 3 Fernbedienung SURROUND LAUTSPRECHER • Die gerade eingestellte Funktion wird in Gelb und die Einstellwerte für die anderen Funktionen werden in Grün angezeigt. Wählen Sie im Systemeinstellungs-Änderungsmenü mit den 0 und 1 Cursor-Tasten das “SPEAKER CONFIGURATION”Tag-Symbol, und drücken Sie dann die ENTER-Taste. 5 Drücken Sie zur Eingabe der Einstellungen die ENTER-Taste. • Der nächste Bildschirm im Systemeinstellungs-Änderungsmenü erscheint. ENTER Fernbedienung 145 2ADV-M71E2_GER p116-174 03.12.25 1:12 PM ページ 146 DEUTSCH HINWEIS: • Wählen Sie die Lautsprechergröße nicht nach den LautsprecherAbmessungen, sondern nach der Kapazität zur Wiedergabe von Niederfrequenzen (mehr als 100 Hz oder weniger) aus. Wenn Sie keine Kenntnis über die Kapazität haben, bestimmen Sie die Einstellung, indem Sie den Klang in den beiden Einstellungen “Small” und “Large” vergleichen. Dabei sollte die Lautstärke niedrig genug eingestellt sein, so dass die Lautsprecher nicht beschädigt werden. HINWEIS: • Wählen Sie “Groß” oder “Klein” aus - gemeint ist nicht die tatsächliche Größe des Lautsprechers, sondern die Kapazität bei der Wiedergabe von Niederfrequenzsignalen (ca. 100 Hz und darunter). Wenn Sie darüber nicht Bescheid wissen, versuchen Sie, den Sound in beiden Einstellungen zu vergleichen (die Lautstärke auf einen Pegel einstellen, der niedrig genug ist, so dass die Lautsprecher nicht beschädigt werden), um die korrekte Einstellung zu bestimmen. Parameter Groß…… Wählen Sie diese Einstellung, wenn Lautsprecher verwendet werden, die leise Töne von unter 100 Hz vollständig reproduzieren können. Klein…… Wählen Sie diese Einstellung, wenn Lautsprecher verwendet werden, die nicht ausreichend Lautstärke erzeugen, wenn Niederfrequenzen von 100 Hz und weniger wiedergegeben werden. Wenn diese Einstellung gewählt wird, werden Frequenzen, die unterhalb der in der Subwoofer-Frequenzeinstellung eingestellten Frequenz liegen, dem Subwoofer zugeteilt. Keine…... Wählen Sie diese Einstellung, wenn keine Lautsprecher installiert sind. Ja/Nein… Wählen Sie “Ja”, wenn ein Subwoofer installiert ist; wählen Sie “Nein”, wenn kein Subwoofer installiert ist. IWenn der Subwoofer ausreichende NiederfrequenzWiedergabekapazität bietet, kann guter Sound erzielt werden, auch wenn “Klein” bei den Front-, Center- und SurroundLautsprechern eingestellt ist. Bei den meisten Lautsprechersystem-Konfigurationen wird die KLEIN-Einstellung für alle fünf Hauptlautsprecher und Subwoofer verwendet, wobei mit einem angeschlossenen Subwoofer die besten Ergebnisse erzielt werden. 146 Subwoofer-Frequenz (SW FREQ.) • Stellen Sie bei der Subwoofer-Frequenz im Lautsprechereinstellungs-Bildschirm die BassÜberschneidungsfrequenz für den Subwoofer-Ausgang ein. • Wählen Sie “80 Hz”, “120 Hz”, “150 Hz” oder “180 Hz” (–6 dB für jeden). Bass-Sound unterhalb dieser Frequenzen wird vom Subwoofer ausgegeben. (Werkseitig ist “150 Hz” eingestellt.) Zuteilung der Niederfrequenzen • Im Dolby Digital-, Dolby Pro Logic II-, DTS-, und dem virtuellen Surround-Modus werden die Niederfrequenzsignale für Kanäle, deren Lautsprechereinstellungen auf “Klein” gestellt sind, dem Subwoofer zugeteilt. Die Niederfrequenzen der Kanäle mit der Einstellung “Groß” werden von diesen Kanälen wiedergegeben. (Bei einer Einstellung von “120 Hz” geben die Kanäle mit einer “Klein”-Einstellung Sound von 120 Hz und mehr wieder, während Bass-Frequenzen unter 120 Hz vom Subwoofer ausgegeben werden.) • In den Surround-Modi, die oben nicht aufgelistet sind, werden Niederfrequenzen, die unterhalb der in der SubwooferFrequenzeinstellung eingestellten Frequenz liegen, vom Subwoofer ausgegeben - dabei ist es egal, ob die Lautsprecher auf “Groß” oder “Klein” eingestellt sind. • Stellen Sie die Subwoofer-Frequenz entsprechend der Niederfrequenz-Wiedergabefähigkeit Ihrer Lautsprecher und Ihres Subwoofers ein. Subwoofer-Modus (SW MODE) • Die Subwoofer-Moduseinstellung ist nur gültig, wenn “LARGE” für die Front-Lautsprecher und “YES” für den Subwoofer in den “SPEAKER CONFIGURATION”-Einstellungen eingestellt ist. • Wenn der “LFE+MAIN”-Wiedergabemodus angewählt ist, werden die Niederfrequenzsignale der auf “LARGE” eingestellten Kanäle gleichzeitig von diesen Kanälen und dem Subwoofer-Kanal produziert. Bei diesem Wiedergabemodus dehnen sich die Niederfrequenzsignale gleichmäßiger über den Raum aus. Abhängig von der Größe und dem Schnitt des Raumes können jedoch Interferenzen auftreten, die eine Reduzierung der tatsächlichen Lautstärke der Niederfrequenzsignale zur Folge haben kann. • Wenn der “LFE”-Wiedergabemodus angewählt ist, werden die Niederfrequenzsignale des mit “LARGE” angewählten Kanals nur von dem Kanal wiedergegeben. Daher handelt es sich bei den vom Subwoofer-Kanal wiedergegeben Niederfrequenzsignalen, nur um den NiederfrequenzSignalbereich von LFE (nur während der Dolby Digital- oder DTSSignalwiedergabe) und der im Einrichtungsmenü als “SMALL” spezifizierten Kanäle. • Wählen Sie den Wiedergabemodus, der eine Basswiedergab mit Herz ermöglicht. • Wenn der Subwoofer auf “YES” gestellt ist, wird Bass, ungeachtet der Subwoofer-Moduseinstellung in einem anderen Surround-Modus als dem Dolby/DTS, vom Subwoofer ausgegeben. 2ADV-M71E2_GER p116-174 03.12.25 1:12 PM ページ 147 DEUTSCH [2] Verzögerungszeit (Abstandseinstellung) • Geben Sie die Abstände zwischen der Hörposition und den Lautsprechern ein und bestimmen Sie die Surround-Verzögerungszeit. • Werkseitig wurde die Verzögerungszeit auf die im nachfolgenden Schritt 3 angegebenen Standardwerte eingestellt. Vorbereitende Schritte: Messen Sie die Abstände zwischen der Hörposition und den Lautsprechern. FL Center FR SL L1: Abstand zwischen dem Centerlautsprecher und der Hörposition zwischen dem L2: Abstand Centerlautsprecher und der Hörposition L3: Abstand zwischen dem SurroundLautsprecher und der Hörposition SR Hörposition 1 Lesen Sie sich die auf Seite 145 beschriebenen Schritte 1 und 2 durch, wenn das Systemeinstellungs-Änderungsmenü derzeit nicht angezeigt wird. 2 Wählen Sie im Systemeinstellungs-Änderungsmenü mit den 0 und 1 Cursor-Tasten “DELAY TIME”, und drücken Sie dann die ENTER-Taste. 4 Wählen Sie mit den • und ª Cursor-Tasten den Lautsprecher aus und geben Sie dann mit den 0 und 1 Cursor-Tasten den Abstand zwischen dem leweiligen Lautsprecher und der Zuhörposition ein. • Der Abstand ändert sich bei jedem Drücken der 0 und 1 Cursor-Tasten um 0,1 Meter. Wählen Sie den Wert, der dem gemessenen Abstand am nächsten kommt. ENTER Fernbedienung Fernbedienung • Es erscheint der Verzögerungszeit-Einstellungsbildschirm. Stellen Sie sicher, dass die für die verschiedenen Lautsprecher eingestellte Abstandsabweichung nicht mehr als 3,0 Meter beträgt. Wenn ein nicht anwendbarer Abstand eingestellt wurde, wird “CAUTION: OUT OF SETTING RANGE” angezeigt. Ändern Sie die Lautsprecherposition und nehmen Sie eine neue Einstellung vor. • Die Maßeinheit für den Abstand kann mit den 0 und 1 Cursor-Tasten zwischen “m” (Meter) und “ft” (Fuß) geändert werden. Falls Sie die Maßeinheit nicht ändern möchten, drücken Sie die ª Cursor-Taste, um mit dem nächsten Schritt fortzufahren. 3 5 Drücken Sie zur Eingabe der Einstellungen die ENTER-Taste. • Der nächste Bildschirm im Systemeinstellungs-Änderungsmenü erscheint. ENTER Fernbedienung Wählen Sie “Yes” als “Default”, um die Verzögerungszeiten für die verschiedenen Lautsprecher auf die Standardwerte einzustellen. B B Yes: Die Standardwerte werden eingestellt. No: Die gegenwärtigen Einstellungen beibehalten. werden 147 2ADV-M71E2_GER p116-174 03.12.25 1:12 PM ページ 148 DEUTSCH [3] Einstellung des Kanalpegels • Führen Sie die Einstellung so aus, dass die Wiedergabepegel der verschiedenen Kanäle gleich sind. • Führen Sie die Einstellung aus, während Sie sich die von den Lautsprechern ausgegebenen Testtöne von der Zuhörposition aus anhören. • Die Werkseinstellung aller Kanäle liegt bei 0 dB. • Diese Einstellung kann auch direkt von der Fernbedienung aus vorgenommen werden. (CH SELECT-Taste) 1 2 Lesen Sie sich die auf Seite 145 beschriebenen Schritte 1 und 2 durch, wenn das Systemeinstellungs-Änderungsmenü derzeit nicht angezeigt wird. 6 q Wenn “Auto” in “Test Tone” ausgewählt wurde: Wählen Sie im Systemeinstellungs-Änderungsmenü mit den 0 und 1 Cursor-Tasten “Channel Level” aus, und drücken Sie dann die ENTER-Taste. ENTER Fernbedienung Fernbedienung • Der Kanalpegel-Einstellungsbildschirm erscheint. • Testtöne werden automatisch von den Lautsprechern ausgegeben; zunächst in 4-sekündigen Intervallen für die beiden nachfolgend dargestellten Zyklen, und dann immer in 2-sekündigen Intervallen. Vorne links Subwoofer Center Surround links Vorne rechts Surround rechts Stellen Sie die Kanalpegel mit den 0- und 1-Cursor-Tasten so ein, dass die Lautstärke der von den verschiedenen Lautsprechern ausgegebenen Testtöne gleich ist. • Bei jedem Drücken der 0- und 1-Cursor-Taste ändert sich die Lautstärke um jeweils 1 dB. Der Pegel kann in einem Bereich von -12 dB bis +12 dB eingestellt werden. w Wenn “Manual” in “Test Tone” ausgewählt wurde: 3 Wählen Sie mit den 0 -und 1 Tasten “Auto” oder “Manual” für den “Test Tone”-Modus. • Die ausgewählte Einstellung wird in Gelb angezeigt. Fernbedienung B B 4 B 148 Hier werden die Pegel der von den Lautsprechern ausgegebenen Testtöne automatisch eingestellt. Manual: Wählen Sie während der Einstellung der Pegel die Lautsprecher, von denen die Testtöne ausgegeben werden. Wenn zunächst “Manual” eingestellt wird, können detaillierte Einstellungen ausgeführt werden. Wenn “Yes ” in “Level Clear” ausgewählt wurde, werden die Pegeleinstellungen für alle Lautsprecher auf 0 dB eingestellt. B 5 Auto: Yes: Die Pegeleinstellungen für alle Lautsprecher werden auf 0 dB eingestellt. No: Die gegenwärtigen Pegeleinstellungen werden beibehalten. Stellen Sie die Kanalpegel im Testton-Modus ein. Wählen Sie mit den •-und ª-Cursor-Tasten den “Test Tone Start”-Modus, und wählen Sie dann mit der 0-Cursor-Taste “Yes ”. Der Testton wird ausgegeben. Stellen Sie die Testton-Lautstärke mit dem MASTER VOLUME-Regler an der Haupteinheit oder mit den VOLUME-Tasten auf der Fernbedienung auf einen Pegel ein, der eine leichte Einstellung ermöglicht. Wählen Sie mit den •- und ª-Cursor-Tasten den Lautsprecher, von dem der Testton ausgegeben werden soll, und stellen Sie die Kanalpegel dann mit den 0- und 1-Cursor-Tasten so ein, dass die Lautstärke der von den verschiedenen Lautsprechern ausgegebenen Testtöne gleich ist. • Bei jedem Drücken der 0- und 1-Cursor-Taste ändert sich die Lautstärke um jeweils 1 dB. Der Pegel kann in einem Bereich von –12 dB bis +12 dB eingestellt werden. 2ADV-M71E2_GER p116-174 03.12.25 1:12 PM ページ 149 DEUTSCH 7 Drücken Sie zur Eingabe der Einstellungen die ENTER-Taste. • Der nächste Bildschirm im Systemeinstellungs-Änderungsmenü erscheint. ENTER Fernbedienung Der “Kanalpegel”-Bildschirm wird wieder angezeigt. Um die Einstellung nach der Justierung zu verlassen Lassen Sie den Kanalpegel-Einstellbildschirm anzeigen, wählen Sie anschließend mit den Cursor-Tasten •, ª, 0 und 1 “LEVEL CLEAR” und “YES”. Die Pegeleinstellung aller Lautsprecher lautet 0 dB. [5] DVD-Einstellung der automatischen DVD-StromAusschaltfunktion • Der ADV-M71 ist mit einer Funktion ausgestattet, mit deren Hilfe das Gerät automatisch in den Standby-Modus geschaltet wird, wenn bei aktivierter DVD-Funktion 30 Minuten lang keine Bedienung erfolgt. Geben Sie hier ein, ob diese Funktion ein- oder ausgeschaltet werden soll. • Die Werkseinstellung lautet auf “No”. 1 Lesen Sie sich die auf Seite 33 beschriebenen Schritte 1 und 2 durch, wenn das Systemeinstellungs-Änderungsmenü derzeit nicht angezeigt wird. 2 Wählen Sie im Systemeinstellungs-Änderungsmenü mit den 0-und 1-Cursor-Tasten “DVD AUTO POWER OFF”, und drücken Sie dann die ENTER-Taste. HINWEIS: Wenn die Kanalpegel in den Kanalpegel-Einstellungen eingestellt worden sind, werden die eingestellten Werte in allen Wiedergabemodi angewendet. ENTER [4] Einstellung des AV1-Videoausgangs • Für die Auswahl, ob Videomischsignale oder S-Videosignale oder RGB-Signale von den AV1 SCART-Anschlüssen ausgegeben werden sollen. • Die Werkseinstellung lautet auf “VIDEO”. 1 Lesen Sie sich die auf Seite 145 beschriebenen Schritte 1 und 2 durch, wenn das Systemeinstellungs-Änderungsmenü derzeit nicht angezeigt wird. 2 Wählen Sie im “SYSTEM SETUP MENU”-Bildschirm “AV1 VIDEO OUTPUT” und drücken Sie die ENTER-Taste. Fernbedienung Fernbedienung • Der Bildschirm zur Einstellung der automatischen DVDStrom-Ausschaltung erscheint. ENTER Fernbedienung Fernbedienung • Wechseln Sie zum “AV1 VIDEO OUT”-Bildschirm. 3 Wählen Sie mit den 0- und 1-Cursor-Tasten den “Auto Power Off”-Modus. B B 4 Yes: Die automatische Strom-Ausschaltfunktion ist bei eingestellter DVD-Funktion aktiviert. No: Die automatische Strom-Ausschaltfunktion ist deaktiviert. Drücken Sie zur Eingabe der Einstellungen die ENTER-Taste. • Der nächste Bildschirm im Systemeinstellungs-Änderungsmenü erscheint ENTER Fernbedienung 3 Wählen Sie “VIDEO OUTPUT”. • VIDEO: Zusammengesetzte Videosignale werden ausgegeben. • S-VIDEO: S-Videosignale werden ausgegeben. Wählen Sie “DVD RGB OUTPUT”. • RGB: Es werden RGB-Signale ausgegeben. 4 Drücken Sie zur Eingabe der Einstellungen die ENTER-Taste. • Der nächste Bildschirm im Systemeinstellungs-Änderungsmenü erscheint. ENTER Fernbedienung 149 2ADV-M71E2_GER p116-174 03.12.25 1:12 PM ページ 150 DEUTSCH [6] Funktionseinstellungen • Geben Sie die LINE-1- und LINE-2 Funktionsbezeichnungen ein und schalten Sie den analogen Aufnahmeausgang (REC OUT) ein oder aus. • Nehmen Sie die Einstellungen bei gleichzeitiger Verwendung eines Gerätes der D-M31-Serie entsprechend der verwendeten Komponenten vor und führen Sie die Systemanschlüsse für die praktischen Systemfunktionen aus. • Der D.AUX-Digitaleingang kann LINE-2 zugeordnet werden. 1 Lesen Sie sich die auf Seite 145 beschriebenen Schritte 1 und 2 durch, wenn das Systemeinstellungs-Änderungsmenü derzeit nicht angezeigt wird. 2 Wählen Sie im Menü mit den 0- und 1-Cursor-Tasten “FUNCTION ASSIGNMENT” aus, und drücken Sie dann die ENTER-Taste. ENTER Fernbedienung Fernbedienung • Der Eingangsfunktions-Einstellungsbildschirm erscheint. Eingangsfunktions-Einstellungen • LINE-1 und LINE-2 können wie nachfolgend beschrieben eingestellt werden. LINE-1 : Hier können Sie zwischen “MD”, “CD-R”, “MD/CD-R” oder “AUX” auswählen. (“MD/CD-R” kann nur ausgewählt werden, wenn sowohl ein MD-Recorder, ein Kassettendeck als auch ein CD-Recorder angeschlossen ist und die Systemfunktionen angewendet werden.) LINE-2 : Hier können Sie zwischen “TAPE”, “MD”, “AUX” oder “D.AUX” auswählen. (Wählen Sie die Einstellung “D.AUX”, um den Digitaleingang D.AUX zusammen mit dem Analogeingang LINE-2 zu verwenden.) • Die Einstellung für LINE-1 hat Priorität. Wenn einmal eine Funktion für LINE-1 eingestellt wurde, kann dieselbe Funktion nicht für LINE-2 eingestellt werden. (Wenn z. B. “MD” für LINE1 ausgewählt wurde, steht “MD” für LINE-2 nicht mehr zur Verfügung.) LINE-1/LINE-2 Einstellung des analogen Aufnahmeausgangs • Wählen Sie normalerweise die Einstellung “On”. • Wählen Sie die Einstellung “Off”, wenn die DVD-Funktion oder die exklusive Digitaleingangs-Funktion D.AUX eingestellt ist, sofern bei der Wiedergabe von Tonquellen mit hohen Bitraten im Dolby Virtual Speaker-Modus Störungen auftreten. • Diese Einstellung wird ausschließlich im Dolby Virtual SpeakerModus für die DVD-Funktion oder die exklusive DigitaleingangsFunktion D.AUX angewendet. (In anderen Surround-Modi mit anderen Eingangsfunktionen werden – unabhängig von dieser Einstellung – analoge Aufnahmesignale ausgegeben.) • Die analoge Aufnahme ist nicht möglich, wenn die Einstellung “Off” ausgewählt wurde. Wählen Sie für die Aufnahme einen anderen Modus als den Dolby Virtual Speaker-Modus (zum Beispiel Stereo). (4) Nach der Änderung der Systemeinstellungen 3 Wählen Sie mit den •- und ª-Cursor-Tasten den einzustellenden Punkt und führen Sie die Einstellungen dann mit den 0- und 1-Cursor-Tasten aus. B LINE-1 Auswahl der Funktionsbezeichnung Werkseinstellung lautet auf "MD”.) AUX B CD-R MD MD/CD-R LINE-2 Auswahl der Funktionsbezeichnung Werkseinstellung lautet auf “TAPE”.) TAPE AUX (Die (Die D.AUX • Hiermit ist die Änderung der Systemeinstellungen abgeschlossen. Wenn die Lautsprecher-Einstellungen, die Verzögerungszeiten und die Kanalpegel einmal eingestellt worden sind, müssen diese Einstellungen nicht mehr geändert werden, bis die angeschlossenen AV-Komponenten oder Lautsprecher ausgetauscht werden oder der Aufstellungsort der Lautsprecher verändert wird. • Automatische DVD-Strom-Ausschaltung und Funktionseinstellungen nach Bedarf 1 Drücken Sie im SystemeinstellungsÄnderungsmenü die SETUP-Taste. • Die neuen Einstellungen wurden eingegeben und die Bildschirmanzeige schaltet sich aus. SETUP Fernbedienung LINE-1/LINE-2 REC OUT : Geben Sie ein, ob der Aufnahmeausgang während der Wiedergabe im Dolby Virtual Speaker-Modus ein- oder ausgeschaltet werden soll, wenn die DVD-Funktion oder die exklusive Digitaleingangs-Funktion D.AUX eingestellt ist. On : Die Signale werden in Stereo ausgegeben. (Werkseinstellung) Off : Die Signale werden nicht ausgegeben. (Es ist keine Aufnahme möglich.) B 4 Drücken Sie zur Eingabe der Einstellungen die ENTER-Taste. • Der nächste Bildschirm im Systemeinstellungs-Änderungsmenü erscheint. ENTER Fernbedienung 150 Das Setup-Verfahren kann durch Drücken dieser Taste jederzeit beendet werden. HINWEIS: • Wenn die Systemeinstellungen im SystemeinstellungsÄnderungsmenü geändert worden sind und im Quick SystemSetup ein Lautsprecher ausgewählt wurde, werden die Lautsprecher- und Verzögerungszeit-Einstellungen auf die für den Quick System-Setup vorprogrammierten Werte geändert. 2ADV-M71E2_GER p116-174 03.12.25 1:12 PM ページ 151 DEUTSCH 11 WIEDERGABE (1) Vor dem Betrieb B SURROUND / SELECT DVD SURROUND RECEIVER ADV-M71 PUSH - PARAM. - + BAND MENU / SET TONE / SDB FUNCTION ON / STANDBY PHONES 2 VOLUME 1 2 Siehe “ANSCHLÜSSE” (Seite 120 bis 126) und prüfen Sie, ob alle Anschlüsse korrekt sind. Schalten Sie die Stromversorgung ein. Betätigen Sie den POWER-Schalter (Taste). ON / STANDBY Leuchtet (grün) Haupteinheit OFF ENTER A-B REPEAT CLEAR 2 ON VCR REC NTSC/PAL SLEEP TITLE SOURCE TIME TV IN T V CHARAC. SLIDE MODE TV CH EDIT/MENU ZOOM TV CH - RDS PROG/DIRECT REPEAT PTY RANDOM MODE MEMO BAND DVD TUNER D.AUX 3 + CT CD SRS RT SEARCH MODE TUNING / TV VOL 1 2 MD/LINE-1 TAPE /LINE-2 4 5 6 + - 5CH STEREO AUTO DECODE TUNER + 7 8 9 DIRECT STEREO VIRTUAL CALL 0/10 +10 - TEST TONE INPUT MODE SURROUND FUNCTION CH ON Fernbedienung Bei Betätigung wird die Stromversorgung eingeschaltet und das Display erleuchtet. Der Sound wird für einige Sekunden ausgeblendet, danach arbeitet das Gerät normal. Bei nochmaliger Betätigung wird die Stromversorgung ausgeschaltet, der Bereitschaftsmodus wird aktiviert und das Display wird ebenfalls ausgeschaltet. Bei jeder Betätigung der ON/STANDBY-Taste im STANDBYStatus ist das Gerät immer noch an Wechselspannung angeschlossen. Vergewissern Sie sich bitte, dass das Netzkabel herausgezogen ist, wenn Sie das Haus verlassen und beispielsweise in den Urlaub fahren. TUNER TV / VCR DVD IN/SURR. A/V SYSTEM IN/SURR. MD CDR TAPE 1 2 + DVD 8 9 6 - 7 STATUS 3 MUTING SETUP TONE /SDB ENTER SURROUND PARAMETER CH SELECT DISPLAY RETURN ANGLE MENU AUDIO VCR CH + TOP MENU SUB TITLE RC-966 151 2ADV-M71E2_GER p116-174 03.12.25 1:12 PM ページ 152 DEUTSCH (2) Disc einlegen 2 Legen Sie die Discs in das Disc-Fach mit der Schriftseite nach oben weisend ein. 12 cm Disc-Führung 8 cm Disc-Führung Disc-Fach HINWEIS: • Bewegen Sie dieses Gerät nicht, wenn eine Disc abgespielt wird. Anderenfalls kann die Disc zerkratzt werden. (2) Discs einlegen • Nehmen Sie die Disc vorsichtig aus der Hülle, berühren Sie dabei nicht die Signaloberfläche und halten Sie sie mit der Schriftseite nach oben weisend in der Hand. • Legen Sie die Disc bei vollständig geöffnetem Disc-Fach in das Fach. • Legen Sie 12 cm-Discs in die äußere Fach-Führung (Abbildung 1), 8 cm-Discs in die innere Fach-Führung (Abbildung 2). • Drücken Sie die OPEN/CLOSE-Taste. Die Disc wird automatisch geladen. • Das Disc-Fach wird auch durch Drücken der PLAY-Taste automatisch geschlossen, um die Disc zu laden. Abbildung 1 Äußeres Disc-Fach (1) Disc-Fach öffnen und schließen q Schalten Sie die Stromversorgung ein. w Drücken Sie die OPEN/CLOSE-Taste. OPEN/CLOSE-Taste 12 cm-Disc Abbildung 2 Inneres Disc-Fach Disc-Fach HINWEISE: • Auch wenn die Stromversorgung in den Bereitschaftsmodus geschaltet ist, wird die Stromversorgung des ADV-M71 nach Drücken der OPEN/CLOSE-Taste eingeschaltet und das DiscFach aktiviert. (Autom. Strom-Einschaltfunktion) • Auch wenn eine andere Funktion als DVD eingestellt ist,wechselt die Funktion nach Drücken der OPEN/CLOSE-Tastezu DVD und das Disc-Fach wird aktiviert. (Autom.Funktionswahl-Betrieb) • Berühren Sie die Taste nicht mit einem Stift, usw. 152 8 cm-Disc HINWEISE: • Wenn ein Fremdkörper beim Schließen in das Disc-Fach gelangt, drücken Sie einfach erneut auf die OPEN/CLOSETaste, damit sich das Fach wieder öffnet. • Drücken Sie das Disc-Fach nicht mit der Hand zurück, wenn die Stromversorgung ausgeschaltet ist. Anderenfalls wird das Fach beschädigt. • Legen Sie keine Fremdkörper in das Disc-Fach hinein. Anderenfalls wird das Fach beschädigt. 2ADV-M71E2_GER p116-174 03.12.25 1:12 PM ページ 153 DEUTSCH (3) Wiedergabe WICHTIGE SETUP-INFORMATIONEN Dieses Gerät besitzt folgende Voreinstellungen: “DISC SETUP”, “OSD SETUP”, “VIDEO SETUP”, “AUDIO SETUP”, “RATINGS” und “OTHER SETUP”. Diese Einstellungen wurden werkseitig ausgeführt. Wenn Sie sie auf Ihre Bedürfnisse zuschneiden wollen, lesen Sie bitte Seite 206 bis 218. (3)-3 B OFF TIME TV IN T V CHARAC. SLIDE MODE TV CH EDIT/MENU ZOOM TV CH - RDS PROG/DIRECT (3)-5 (3)-2,(3)-4 SURROUND / SELECT DVD SURROUND RECEIVER ADV-M71 TITLE ENTER A-B REPEAT CLEAR REPEAT PTY RANDOM MODE MEMO BAND DVD TUNER D.AUX 3 + CT CD SRS RT SEARCH MODE TUNING / TV VOL 1 2 MD/LINE-1 TAPE /LINE-2 4 5 6 + - 5CH STEREO AUTO DECODE TUNER + 7 8 9 DIRECT STEREO VIRTUAL CALL 0/10 +10 - TEST TONE INPUT MODE SURROUND FUNCTION CH TUNER TV / VCR DVD IN/SURR. A/V PUSH - PARAM. (3)-1 ON VCR REC NTSC/PAL SLEEP SOURCE SYSTEM IN/SURR. MD (4)-1 CDR TAPE - + (3)-5 BAND MENU / SET TONE / SDB VOLUME 1 2 + DVD FUNCTION 8 ON / STANDBY - PHONES 6 (3)-8 9 7 STATUS 3 MUTING SETUP (3)-1 (3)-8 (4)-1 TONE /SDB SURROUND PARAMETER CH SELECT - 1 Schalten Sie die Stromversorgung ein. • Drücken Sie die Power-Taste; die Stromanzeige leuchtet und die Stromversorgung wird eingeschaltet. ON / STANDBY Leuchtet (grün) (3)-7 (3)-6 ENTER 4 VCR CH + Drücken Sie die OPEN/CLOSE-Taste. ON Haupteinheit Haupteinheit 2 Fernbedienung Drücken Sie die OPEN/CLOSE-Taste, um das Disc-Fach zu öffnen. 5 Drücken Sie die PLAY-Taste. • Bei vielen interaktiven DVDs und Video-CDs mit Wiedergabesteuerung erscheint ein Menü-Bildschirm. Führen Sie in diesem Fall das Verfahren unter Punkt 6 aus, um den gewünschten Punkt auszuwählen. Interaktive DVDs beinhalten mehrere Winkel, Stories, usw. 1 Haupteinheit 3 DVD Legen Sie die Disc in das Disc-Fach ein. Haupteinheit Beispiel: Bei DVDs mit Menü-Bildschirmen TOP MENU Apple Banana Orange Strawberry Peach Pineapple Fernbedienung Beispiel: Bei Video-CDs mit Wiedergabesteuerung 1. Opening 2. 1st movement 3. 2nd movement 4. 3rd movement 5. Ending 153 2ADV-M71E2_GER p116-174 03.12.25 1:12 PM ページ 154 DEUTSCH 6 Wählen Sie mit den Cursor-Tasten (•, ª, 0 und 1) den gewünschten Punkt aus. • Bei einigen Disc ist ein zweiter Menü-Bildschirm vorhanden. Wenn dies der Fall ist, drücken Sie die 9Taste, um den nächsten MenüBildschirm anzeigen zu lassen. (Siehe Disc-Hülle.) Die Cursor-Taste (•, ª, 0 und 1) können bei Video-CDs nicht verwendet werden. Wählen Sie mit den Nummerntasten den gewünschten Punkt aus. 7 8 - Fernbedienung Haupteinheit • Im “AUTO”-Eingangsmodus werden die Signale der wiedergegebenen Disc identifiziert, und die Dolby Digital-, DTS- oder PCM-Entschlüsselung wird automatisch ausgewählt und die Disc wird wiedergegeben. • Im Dolby Virtual Speaker-Surround-Modus werden die Signale der wiedergegebenen Disc automatisch in Dolby Digital oder DTS entschlüsselt und dann im Dolby Virtual Speaker-Surround-Modus wiedergegeben. • Wenn im “AUTO DECODE”-Surround-Modus ein 5,1Kanal-Lautsprecher eingestellt wurde, werden die Signale der wiedergegebenen Disc automatisch in Dolby Digital, DTS oder Auto Stereo entschlüsselt, und die Disc wird wiedergegeben. TOP MENU Banana Strawberry Peach Pineapple Fernbedienung Lesen Sie hinsichtlich der Einzelheiten über die SurroundModi und Surround-Parameter den Abschnitt “12 Surround-Funktionen” auf den Seiten 156 bis 158. Fernbedienung Orange + VOLUME Wenn “Apfel” ausgewählt wird Apple Die Lautstärke wird auf der Anzeige angezeigt. M.VOLUME -20 Drücken Sie die ENTER-Taste. • Der gewünschte Punkt wird ausgewählt und die Wiedergabe startet. • Die können zum Menü-Bildschirm zurückkehren, indem die TOP MENU-Taste während der DVDWiedergabe gedrückt wird; dies hängt jedoch von der Disc ab. ENTER • Drücken Sie während der Wiedergabe einer Video-Disc die RETURN-Taste, um zum Menü-Bildschirm zurückzukehren. Beispiel: Stellen Sie die Lautstärke entweder mit dem LautstärkeRegler an der Haupteinheit oder mit den LautstärkeBedienungstasten auf der Fernbedienung ein. Apple HINWEISE: • Wenn während der Tastenbedienung auf dem TVBildschirm erscheint, ist dieser Betrieb mit dem ADV-M71 oder mit dieser Disc nicht möglich. • Legen Sie die Disc in die Disc-Führung. • Legen Sie nur eine Disc in das Disc-Fach. • Die Disc dreht sich, während der Menü-Bildschirm auf dem TVBildschirm angezeigt wird. (4) Wiedergabe stoppen 1 154 Drücken Sie während der Wiedergabe die STOP-Taste auf der Haupteinheit oder der Fernbedienung, um die Wiedergabe zu stoppen und das Hintergrundbild anzeigen zu lassen. <Wiedergabefortsetzungs-Speicherfunktion (nur DVD)> • Wenn beim ADV-M71 die STOP-Taste gedrückt wird, wird diese Position im Speicher gespeichert. Zu diesem Zeitpunkt blinkt “1” auf dem Display. Wenn nach Drücken der STOPTaste die PLAY-Taste gedrückt wird, wird die Wiedergabe an der Position fortgesetzt, an der zuvor die Wiedergabe gestoppt wurde. Die Wiedergabefortsetzungs-Speicherfunktion wird aufgehoben, sobald das Disc-Fach geöffnet oder die STOPTaste ein zweites Mal gedrückt wird. Über die DVD-Standby-Funktion Wenn die Funktion des ADV-M71 auf DVD gestellt ist, wird der DVD-Standby-Modus automatisch eingestellt, wenn die Disc ungefähr 10 Minuten im Stopp-Modus verbleibt. • Im DVD-Standby-Modus ist sowohl die Stromversorgung des DVD-Bereiches als auch der Videosignal-Ausgang ausgeschaltet. Auf der Anzeige des ADV-M71 wird zu diesem Zeitpunkt “DVD standby” angezeigt. • Wenn der DVD-Standby-Modus aktiviert ist, bleibt die Stromversorgung der anderen Bereiche eingeschaltet, und die Funktionsumschaltung und andere Bedienungen können am Hauptgerät oder auf der Fernbedienung ausgeführt werden. Beim Drücken einer DVDBedienungstaste (die Wiedergabe-/Pausetaste und die Öffnen-/Schließen-Taste am Hauptgerät, die Wiedergabetaste auf der Fernbedienung usw.) schaltet sich die Stromversorgung des DVD-Bereiches automatisch ein, und die Disc-Wiedergabe und das Öffnen-/Schließen des Disc-Halters kann ausgeführt werden. BAND Haupteinheit 2 Fernbedienung Die Wiedergabefortsetzungs-Speicherfunktion kann nur bei Disc aktiviert werden, bei denen die verstrichene Zeit während der Wiedergabe auf dem Display angezeigt wird. Autom. Strom-Ausschaltfunktion • Der ADV-M71 ist mit einer Funktion ausgestattet, mit der die Stromversorgung in Bereitschaft geschaltet wird, wenn im Stopp-Modus und bei aktivierter DVD-Funktion 30 Minuten lang keine Bedienung erfolgt. • Diese Funktion ist werkseitig ausgeschaltet. Wenn Sie sie einschalten möchten, stellen Sie die “DVD autom. Strom-Ausschalteinstellung” auf “YES”, wie auf Seite 149 beschrieben. HINWEIS: • Die DVD-Standby-Funktion schaltet nur die Stromversorgung des DVD-Bereiches aus. Diese Funktion unterscheidet sich von der automatischen DVD-Strom-Ausschaltfunktion, die mit den Systemeinstellungen im Setup ausgeführt worden sind und bei der der DVD-Bereich funktionsfähig bleibt. 2ADV-M71E2_GER p116-174 03.12.25 1:12 PM ページ 155 DEUTSCH (5) Wiedergabe von Standbildern (Pause) 1 Drücken Sie während der Wiedergabe die 13-Taste auf der Haupteinheit oder die 3-Taste auf der Fernbedienung. • Drücken Sie die PLAY-Taste, um die normale Wiedergabe fortzusetzen. 3 Haupteinheit (5)-1 Fernbedienung + 7 8 9 DIRECT STEREO VIRTUAL CALL 0/10 +10 - TEST TONE INPUT MODE SURROUND FUNCTION (7)-1 CH TUNER TV / VCR DVD IN/SURR. A/V SYSTEM IN/SURR. MD CDR TAPE B (7)-1 SURROUND / SELECT DVD SURROUND RECEIVER ADV-M71 PUSH - PARAM. 1 + (6)-1,(9)-1 BAND TONE / SDB VOLUME + DVD 8 MENU / SET 2 6 9 - 7 STATUS FUNCTION 3 MUTING ON / STANDBY PHONES (5)-1,(8)-1 SETUP TONE /SDB ENTER SURROUND PARAMETER CH SELECT - VCR CH + (6) Suche vorwärts/rückwärts 1 Drücken Sie während der Wiedergabe eine der 6 / 7Tasten auf der Haupteinheit oder der Fernbedienung. 6 : Rückwärtsrichtung 7 : Vorwärtsrichtung • Bei erneuter Betätigung wird die Suchgeschwindigkeit erhöht (DVD, VIDEO CD in sieben Schritten, CD in vier Schritten). • Drücken Sie die PLAY-Taste, um die normale Wiedergabe fortzusetzen. 6 Wiedergabeposition Kapitel/Titel Suche mit Hilfe der Zifferntasten q Drücken Sie während der Wiedergabe die SuchmodusTaste auf der Fernbedienung. • Der Modus ändert sich bei jedem Drücken der Taste wie nachfolgend gezeigt: Für DVDs : Spur , / Kapitel Für CDs und Video-CDs: Spur (keine Umschaltung) Der durch Drücken der Suchmodus-Taste eingestellte Suchmodus bleibt bis zum Ausschalten der Stromversorgung im Speicher gespeichert. w Geben Sie die Titel-, Kapitel- oder Spurnummer, die Sie wiedergeben lassen möchten, mit den Zifferntasten auf der Fernbedienung ein. Einige DVDs oder Video-CDs sind möglicherweise anders konstruiert und funktionieren auf eine andere als die hier beschriebene Weise.. Fernbedienung (7) Zum Anfang eines Kapitels oder Titels springen - + Haupteinheit 8 9 Fernbedienung Kapitel/Titel HINWEIS: • In einigen Fällen erscheint der Menü-Bildschirm wieder, wenn eine der 8 / 9 Tasten während der MenüWiedergabe einer Video-CD gedrückt wird. 7 Drücken Sie während der Wiedergabe eine der ÜberspringenTasten auf der Haupteinheit oder der Fernbedienung. 8/ : Rückwärtsrichtung (PREVIOUS) 9/ : Vorwärtsrichtung (NEXT) • Die Anzahl von Kapiteln oder Titeln, die übersprungen wird, entspricht der Anzahl der Tastenbetätigungen. • Wenn die Überspringen-Taste rückwärts einmal gedrückt wird, kehrt der Aufnahmekopf zurück zum Anfang des gegenwärtig abgespielten Kapitels oder Titels. Kapitel/Titel Rückwärtsrichtung , / Vorwärtsrichtung (Wiedergaberichtung) HINWEIS: • In einigen Fällen erscheint der Menü-Bildschirm wieder, wenn eine der 6 / 7-Tasten während der MenüWiedergabe einer Video-CD gedrückt wird. 1 Kapitel/Titel (8) Repetitionswiedergabe (nur bei DVDs und Video-CDs) 1 Drücken Sie während der Wiedergabe die 3-Taste auf der Haupteinheit oder der Fernbedienung. • Das Bild bewegt sich bei jeder Tastenbetätigung einen Rahmen vorwärts. 3 • Drücken Sie die PLAY-Taste, um die normale Wiedergabe fortzusetzen. Fernbedienung 155 2ADV-M71E2_GER p116-174 03.12.25 1:12 PM ページ 156 DEUTSCH (9) Wiedergabe in Zeitlupe (nur bei DVDs und Video-CDs ) 1 6 Drücken Sie im Standbild-Modus eine der 6 / 7-Tasten auf der Fernbedienung. 6 : Rückwärtsrichtung 7 : Vorwärtsrichtung • Wenn diese Taste erneut gedrückt wird, nimmt die Geschwindigkeit der langsamen Wiedergabe zu. (Vier Schritte) (Drei Schritte bei Video-CDs) • Drücken Sie die PLAY-Taste, um die normale Wiedergabe fortzusetzen. 7 Fernbedienung HINWEIS: • Die Zeitlupen-Wiedergabe in Rückwärtsrichtung ist bei Video-CDs nicht möglich. 12 BETRIEB DER SURROUND-FUNKTIONEN 5 6 - 5CH STEREO AUTO DECODE TUNER 7 8 9 DIRECT STEREO VIRTUAL CALL 0/10 +10 - TEST TONE INPUT MODE SURROUND FUNCTION 4 B SURROUND / SELECT DVD SURROUND RECEIVER ADV-M71 PUSH - PARAM. - + BAND MENU / SET TONE / SDB VOLUME 2 + CH TUNER TV / VCR DVD IN/SURR. A/V 1 3 FUNCTION SYSTEM IN/SURR. MD ON / STANDBY CDR TAPE PHONES 1 2 + DVD 8 6 9 7 - 5 STATUS 13 5 3 SETUP MUTING TONE /SDB (1) Eingangsmodus-Einstellung 1 Wählen Sie die Eingangsfunktion für die Wiedergabe durch Drücken der FUNCTION-Taste. FUNCTION FUNCTION Haupteinheit Fernbedienung • Die Funktion wird wie folgt gewechselt. • Werkseinstellung (LINE 1) = MD, (LINE 2) = TAPE DVD 2 TUNER (LINE1) (LINE2) D.AUX Wenn als Eingangsfunktion DVD oder D.AUX ausgewählt worden ist, wählen Sie den Eingangsmodus aus, indem Sie die INPUT MODE-Taste auf dem Fernbedienungsgerät drücken. INPUT MODE Fernbedienung AUTO PCM DTS ANALOG • “ANALOG” kann nicht ausgewählt werden, wenn als Eingangsfunktion “DVD” ausgewählt worden ist. • Die Option “ANALOG” kann ausgewählt werden, wenn “LINE-2” in “FUNCTION ASSIGNMENT” unter “SYSTEM SETUP” in den detaillierten Einstellungen auf “D.AUX” gestellt wurde. 156 Eingangsmodus-Wahlfunktion • Der Eingangsmodus kann ausgewählt werden, wenn die Eingangsfunktion auf DVD oder D.AUX gestellt worden ist. • Für jede Eingangsfunktion können verschiedene Eingangsmodi ausgewählt werden. Die für die einzelnen Eingangsfunktionen ausgewählten Eingangsmodi können im Speicher gespeichert werden. • Wenn eine andere als die oben genannte Eingangsfunktion eingestellt wurde, wird “ANALOG ONLY” angezeigt und der Eingangsmodus kann nicht ausgewählt werden. q AUTO (Automatik-Modus) Bei diesem Modus wird der Typ des zu den digitalen oder analogen Eingangsbuchsen eingegebenen Signals erkannt und das Programm im Surround-Dekoder der Anlage wird automatisch umgeschaltet, um die Signale für die ausgewählte Eingangsfunktion wiederzugeben. Das Vorhandensein oder Nichtvorhandensein digitaler Signale wird erkannt, die bei den digitalen Eingangsbuchsen eingehenden Signale werden identifiziert und die Dekodierung und Wiedergabe erfolgen automatisch im DTS-, Dolby Digital- oder PCM-Format (2Kanal Stereo). Wenn kein digitales Signal (LINE1) = MD eingeht, werden die analogen Eingangsbuchsen gewählt. Verwenden Sie diesen Modus, um Dolby Digital-Signale wiederzugeben. w PCM (exklusiver PCM-Signalwiedergabemodus) Die Dekodierung und Wiedergabe erfolgen nur, wenn PCMSignale eingehen. e DTS (exklusiver DTS-Signalwiedergabemodus) Die Dekodierung und Wiedergabe erfolgen nur, wenn DTSSignale eingehen. r ANALOG (exklusiver AnalogaudiossignalWiedergabemodus) Signale, die an den analogen Eingangsbuchsen eingehen, werden dekodiert und wiedergegeben. (Diese Wahl ist im DVD-Modus nicht möglich.) Der Eingangsmodus wird automatisch auf “AUTO” gestellt, wenn der Eingang auf DVD umgeschaltet wird. 2ADV-M71E2_GER p116-174 03.12.25 1:12 PM ページ 157 DEUTSCH 3 Drehen Sie zur Auswahl des Surround-Modus entweder den SURROUND/SELECT-Regler oder drücken Sie die SURROUND-Taste auf der Fernbedienung. Eingangsmodus-Display Leuchtet • Im AUTO-Modus SURROUND / SELECT Je nach Eingangssignal leuchtet eine dieser Leuchten. SURROUND PUSH - PARAM. • Im DIGITAL PCM-Modus Haupteinheit Fernbedienung • Die Funktion wird wie folgt gewechselt. • Die Funktion wechselt nur in der “Æ”-Richtung, wenn sie mit der Fernbedienung gewählt wird. DOLBY VS STEREO DIRECT *5CH STEREO *MONO MOVIE JAZZ CLUB DOLBY VS VIDEO GAME *AUTO DECODE ROCK ARENA • Im DIGITAL DTS-Modus • Im ANALOG-Modus *MATRIX • Die mit “*” gekennzeichneten Modi können ausgewählt werden, wenn “5.1-channel surround” im Quick SystemSetup ausgewählt wurde. Eingangssignal-Display • DOLBY DIGITAL 4 Starten Sie die Wiedergabe der ausgewählten Komponente. • Lesen Sie hinsichtlich der Bedienungsanleitung das Handbuch der Komponente. • DTS 5 Drehen Sie entweder den MASTER VOLUME-Wähler auf der Haupteinheit oder drücken Sie die VOLUME-Tasten auf der Fernbedienung, um die Lautstärke einzustellen. • PCM Der Lautstärkepegel wird auf dem Display angezeigt. M.VOLUME -20 + VOLUME Haupteinheit Fernbedienung • Die Lautstärke ist innerhalb des Bereiches -60 bis 0 bis 18 dB einstellbar. Beachten Sie bitte, dass die Lautstärke abhängig von dem Eingangssignal, dem Surround-Modus, den Lautsprecher-Einstellungen und der KanalpegelEinstellung, möglicherweise nicht auf bis zu 18 dB erhöht werden kann. 2 Überprüfen der gegenwärtig wiedergegebenen Programmquelle usw. Drücken Sie die MENU/SET-Taste. Lassen Sie sich “STATUS” anzeigen und drehen Sie am SURROUND/SELECT-Regler. MENU / SET Haupteinheit SURROUND / SELECT PUSH - PARAM. Haupteinheit STATUS • Bei der einwandfreien Eingabe von Digitalsignalen leuchtet “DIG”. Falls “DIG” blinkt, überprüfen Sie die Anschlüsse und stellen Sie außerdem sicher, dass die Stromversorgung der Eingangskomponente eingeschaltet wurde. Eingangsmodus bei der Wiedergabe von CD-Quellen • Bei der Wiedergabe von CDs, die Aufnahmen wie LiveKonzerte usw. enthalten, im “AUTO”-Modus, treten am Anfang möglicherweise kurze Tonausfälle auf. Schalten Sie in einem deratigen Fall auf den “PCM”-Modus um. Eingangsmodus bei der Wiedergabe von DTS-Quellen • Wenn DTS-kompatible CDs im “PCM”-Modus wiedergegeben werden, treten Geräusche auf, da keine DTS-Wiedergabe möglich ist. Um eine DTS-kompatible Quelle wiedergeben zu können, müssen Sie den Eingangsmodus auf “AUTO” oder “DTS” stellen. • Rauschen kann bei Beginn der Wiedergabe und während der Suche bei der DTS-Wiedergabe im AUTOModus erzeugt werden. Ist dies der Fall, führen Sie die Wiedergabe im DTSModus aus. Fernbedienung Durch Drücken der STATUS-Taste können Sie diesen Betrieb auf der Fernbedienung ausführen. Bei jeder Betätigung der Taste werden auf dem Display die aktuelle Programmquelle sowie die Surround-Einstellungen angezeigt. (Wenn die Funktion auf DVD gestellt ist, erscheint diese Information ebenfalls auf dem Fernsehbildschirm.) 157 2ADV-M71E2_GER p116-174 03.12.25 1:12 PM ページ 158 DEUTSCH (2) Nach dem Wiedergabestart [1] Die Soundqualität einstellen (TONE/SDB) [2] Den Ton vorübergehend ausschalten (MUTING) Die TONE/SDB-Funktion funktioniert nicht im Direkt-Modus. TEST TONE 2 INPUT MODE SURROUND FUNCTION TUNER TV / VCR DVD IN/SURR. A/V SYSTEM IN/SURR. MD CDR TAPE B 1 2 + SURROUND / SELECT DVD SURROUND RECEIVER ADV-M71 PUSH - PARAM. DVD TONE / SDB 8 9 6 7 - + BAND MENU / SET VOLUME STATUS 3 FUNCTION MUTING ON / STANDBY SETUP PHONES TONE /SDB 1 ENTER SURROUND PARAMETER CH SELECT 1 DISPLAY RETURN MENU VCR CH + TOP MENU STATUS ANGLE 3 SUB TITLE MUTING SETUP TONE /SDB 1 2 ENTER 1 SURROUND PARAMETER CH SELECT RETURN 1 AUDIO DISPLAY MENU VCR CH + TOP MENU Drücken Sie die TONE/SDB-Taste. • Der Ton ändert sich bei jeder Betätigung der Taste TONE/SDB. Verwenden Sie diese Funktion, um den Audioausgang vorübergehend zu deaktivieren. Drücken Sie die MUTE-Taste. Den MUTE-Modus abbrechen. Drücken Sie die MUTE-Taste erneut. MUTING TONE /SDB TONE / SDB Fernbedienung Fernbedienung Haupteinheit DEFEAT 2 SDB (ON/OFF) BASS TREBLE Wenn die Bezeichnung der einzustellenden Lautstärke gewählt ist, drehen Sie den SURROUND/SELECT-Knopf oder drücken Sie die Cursor-Taste ( 0, 1 ), um den Pegel einzustellen. SURROUND / SELECT PUSH - PARAM. Haupteinheit Fernbedienung DEFEAT • Diese Signale passieren nicht den SDB, die Tiefenund Höheneinstellungsschaltungen, was bessere Soundqualität bietet. SDB • Drehen Sie entweder den FUNCTION / SELECTWähler oder drücken Sie die Cursor-Tasten ( 0, 1 ), um “EIN” oder “OFF” zu wählen. TIEFEN, HÖHEN • Zum Erhöhen der Höhen oder Tiefen: Drehen Sie den Regler im Uhrzeigersinn oder drücken Sie die Cursor-Taste. (Der Sound der Tiefen oder Höhen kann in 2 dB-Schritten auf bis zu +10 dB erhöht werden.) • Zum Verringern der Höhen oder Tiefen: Drehen Sie den Regler im Uhrzeigersinn oder drücken Sie die Cursor-Taste. (Der Sound der Tiefen oder Höhen kann in 2 dB-Schritten auf bis zu –10 dB verringert werden.) Wenn TONE/SDB angezeigt wird, kann der Menüpunkt mit den •- und ª-Tasten auf der Fernbedienung geändert werden. Wenn innerhalb von 4 Sekunden keine Bedienung erfolgt, wechselt das Display zurück zum vorherig angezeigten Display. 158 HINWEISE: • Der Stummschaltungs-Modus wird deaktiviert, wenn der Lautstärke-Regler an der Haupteinheit oder eine der Hauptlautstärke-Tasten auf der Fernbedienung betätigt wird. • Die Einstellung wird deaktiviert, wenn die Stromversorgung der Anlage ausgeschaltet wird. 2ADV-M71E2_GER p116-174 03.12.25 1:12 PM ページ 159 DEUTSCH 13 DOLBY / DTS SURROUND Surround Der ADV-M71 ist mit einer digitalen Signalbearbeitungsschaltung ausgestattet, die die Wiedergabe von Programmquellen im Surround-Modus ermöglicht, um Ihnen das Gefühl zu verleihen, sich inmitten eines Filmtheaters zu befinden. Dolby Surround (1) Dolby Digital (Dolby Surround AC-3) Bei Dolby Digital handelt es sich um ein von Dolby Laboratories entwickeltes mehrkanaliges Digitalsignal-Format. Dolby Digital besteht aus bis zu “5,1”- Kanälen - vorn links, vorn rechts, Mitte, Surround links, Surround rechts und einem zusätzlichen Kanal, der ausschließlich für zusätzliche Tiefenbaß-Klangeffekte reserviert ist (der Niederfrequenz-Effektkanal - LFE -, der auch als “,1”-Kanal bezeichnet wird und Baßfrequenzen von bis zu 120 Hz beinhaltet). Im Gegensatz zum analogen Dolby Pro Logic-Format können alle Hauptkanäle von Dolby Digital Klanginformationen für den Gesamtbereich enthalten - vom niedrigsten Baß bis hin zu den höchsten Frequenzen – 22 kHz. Die Signale innerhalb jedes einzelnen Kanals lassen sich von den anderen unterscheiden und ermöglichen ein sehr genaues Klangbild. Dolby Digital bietet einen fantastischen Dynamikbereich von den lautesten Klangeffekten bis zu den leisesten, sanften Tönen. Und all dies ohne störende Nebengeräusche und Verzerrungen. 2 Dolby Digital und Dolby Pro Logic Vergleich von Heim-Surround-Systemen Dolby Digital Dolby Pro Logic Anzahl aufgenommener Kanäle(Elemente) 5.1 Kanäle 2 Kanäle Anzahl Wiedergabekanäle 5.1 Kanäle 4 Kanäle Wiedergabekanäle (max.) Audio-Bearbeitung L, R, C, SL, SR, SW L, R, C, S (SW - empfohlen) Digitale getrennte Bearbeitung - Dolby Digital (AC-3) Kodierung/Entschlüsselung Analoge Matrix-Bearbeitung Dolby Surround 20 kHz 7 kHz High frequenBegrenzung der HochfrequenzWiedergabe des Surround-Kanals 2 Dolby Digital kompatible Medien und Wiedergabeverfahren Zeichen für die Dolby Digital-Kompatibilität: und . Beziehen Sie sich auch auf die Betriebsanleitung des entsprechenden Spielers. Medium Dolby Digita-Ausgangsbuchsen Wiedergabever fahren (Referenzseite) LD (VDP) Koaxiale dolby Digital RF-Ausgangsbuchse 1 Stellen Sie den Eingangsmodus auf “AUTO”. (Seite 156, 157.) DVD Optischer oder koaxialer Digital-Ausgang (wie für PCM) 2 Stellen Sie den Eingangsmodus auf “AUTO”. (Seite 156, 157.) Andere (Satellitensender, CATV usw.) Optischer oder koaxialer Digital-Ausgang (wie für PCM) Stellen Sie den Eingangsmodus auf “AUTO”. (Seite 156, 157.) 1 Verwenden Sie für den Anschluss der Dolby Digital RF (AC-3RF)-Ausgangssignale an den digitalen Eingangsanschlüssen einen im Handel erhältlichen Adapter. (Lesen Sie diesbezüglich die Bedienungsanleitung des Adapters. Lesen Sie beim Durchführen des Anschlusses bitte die Bedienungsanleitung des Adapters. 2 Stellen Sie im Setup für die Wiedergabe von Dolby Digital Surround beim ADV-M71 die Einstellungen “DVDEinstellungsänderungen” – “Audio-Einstellungen” – “Digitalausgang” auf “Normal”. (Die werkseitige Einstellung ist “Normal”.) (2) Dolby Pro Logic II • Dolby Pro Logic II ist ein neues von Dolby Laboratories entwickeltes Multi-Kanal-Wiedergabeformat, das die Feedback Logic SteeringTechnologie anwendet und gegenüber den herkömmlichen Dolby Pro Logic-Schaltungen verbessert wurde. • Dolby pro Logic II kann nicht nur zum Entschlüsseln von in Dolby Surround ( ) aufgenommenen Tonquellen, sondern auch zur Entschlüsselung von herkömmlichen Stereoquellen in fünf Kanäle (vorne links, vorne rechts, Mitte, Surround links und Surround rechts) angewendet werden, um in den Genuss von Surroundklang zu gelangen. • Wo mit herkömmlichem Dolby Pro Logic der Surroundkanal-Wiedergabe-Frequenzbereich begrenzt worden ist. Dolby Pro Logic II bietet einen breiteren Frequenzbereich (20 Hz bis 20 kHz oder mehr). Darüber hinaus waren die Surround-Kanäle beim vorherigen Dolby Pro Logic einkanalig (die Surround-Kanäle links und rechts waren identisch); bei Dolby Pro Logic II hingegen werden die Kanäle als Stereosignale wiedergegeben. • Verschiedene Parameter können entsprechend der Art der Tonquelle und des Inhaltes eingestellt werden, so dass eine optimale Dekodierung möglich ist (siehe Seite 172). In Dolby Surround aufgenommene Tonquellen Hierbei handelt es sich um Tonquellen, in die drei oder mehr Surround-Kanäle aufgenommen wurde wie 2 Signal-Kanäle mit Hilfe der Dolby Surround Decoding-Technologie. Dolby Surround wird für die Soundtracks von auf DVD aufgenommenen Filmen', LDs und Videocassetten, die auf Stereo-VCRs wiedergegeben werden sollen, sowie für Stereo-Rundfunksignale vom UKW-Radio, TV, Satellitensender und Kabelfernseher verwendet. Durch die Entschlüsselung dieser Signale mit Hilfe von Dolby Pro Logic wird eine Multi-Kanal-Surround-Wiedergabe möglich. 159 2ADV-M71E2_GER p116-174 03.12.25 1:12 PM ページ 160 DEUTSCH Die Signale können auch auf herkömmlichen Stereogeräten wiedergegeben werden. In einem solchen Fall wird normaler Stereoklang geliefert. Dies sind zwei Arten von DVD-Dolby Surround Aufnahmesignalen. q 2-Kanal PCM-Stereosignale w 2-Kanal Dolby Digital-Signale Unabhängig vom Signal, das wiedergegeben wird, wird der Surroundmodus automatisch auf “Dolby Pro Logic II” gestellt, wenn der 2Kanal-Decodierungsmodus im Modus “AUTO DECODE” auf den Modus “Pro Logic II” gestellt worden ist. 2 In Dolby Surround aufgenommene Tonquellen sind mit dem nachfolgend dargestellten Logo gekennzeichnet. Dolby Surround-Zeichen: Hergestellt unter der Lizenz von Dolby Laboratories. “Dolby”, “Pro Logic” und das DD-Symbol sind Warenzeichen von Dolby Laboratories. DTS-Digital Surround Digitaler Theater Surround (einfach DTS) ist ein von Digital Theater Systems entwickeltes mehrkanaliges Digitalsignal-Format. DTS bietet die gleichen “5,1” Wiedergabe-Kanäle wie Dolby Digital (vorn links, vorn rechts und Mitte, Surround links und Surround rechts) sowie den Stereo 2-Kanal-Modus. Die Signale für die verschiedenen Kanäle sind völlig unabhängig voneinander, wodurch die Gefahr eliminiert wird, daß aufgrund von Interferenzen zwischen den Signalen bzw. aufgrund von Überlagerungen Klangqualitätsverluste auftreten. Im Vergleich zu Dolby Digital ist DTS mit einer relativ hohen Bitzahl ausgestattet (1234 kbps für CDs und LDs, 1536 kbps für DVDs), so daß es mit einer relativ geringen Kompressionsrate arbeitet. Aufgrund dessen ist die Datenmenge groß und bei der DTS Wiedergabe in Filmtheatern wird eine separate mit dem Film synchronisierte CD-ROM abgespielt. Bei LDs und DVDs wird natürlich keine Extra-Disc benötigt; die Bilder und der Ton können gleichzeitg auf dieselbe Disc aufgenommen werden. Die Discs können also genauso behandelt werden wie Discs mit anderen Formaten. Andere Medien enthalten in DTS aufgenommene CDs. Dabei handelt es sich um die selben Discs wie herkömmliche CDs (in 2 Kanälen aufgenommen), die allerdings zusätzlich 5,1-Kanal-Surroundsignale enthalten. Sie enthalten keinerlei Bilder, aber sie ermöglichen eine SurroundWiedergabe beim ADV-M71 und auf CD-Playern. Die DTS Surround-Spurwiedergabe bietet Ihnen in Ihrem Wohnzimmer den selben komplexen und großartigen Sound, den Sie von Kinos kennen. 2 DTS-kompatible Medien und Wiedergabeverfahren Zeichen der DTS-Kompatibilität: und . Nachfolgend finden Sie eine Reihe von allgemeinen Beispielen. Beziehen Sie sich für Einzelheiten auf die Betriebsanleitung des entsprechenden Spielers. Medium DTS-Digitalausgangsbuchsen Wiedergabeverfahren (Referenzseite) CD Optischer oder koaxialer Digital-Ausgang (wie für PCM) 2 Stellen Sie den Eingangsmodus auf “AUTO” oder “DTS” (Seite156, 157). Stellen Sie den Modus niemals auf “ANALOG” oder “PCM”. 1 LD (VDP) Optischer oder koaxialer Digital-Ausgang (wie für PCM) 2 Stellen Sie den Eingangsmodus auf “AUTO” oder “DTS” (Seite156, 157). Stellen Sie den Modus niemals auf “ANALOG” oder “PCM”. 1 DVD Optischer oder koaxialer Digital-Ausgang (wie für PCM) 3 Stellen Sie den Eingangsmodus auf “AUTO” oder “DTS” (Seite156, 157). 1 DTS-Signale werden auf gleiche Weise wie PCM-Signale auf CDs und LDs aufgenommen. Daher werden die unentschlüsselten DTSSignale als zufälliges “Bandlauf”-Rauschen von den analogen Ausgängen des CD- oder LD-Spielers ausgegeben. Wenn das Rauschen bei am Verstärker hoch eingestellter Lautstärke wiedergegeben wird, könnten die Lautsprecher beschädigt werden. Um dies zu vermeiden, müssen Sie den Eingangsmodus vor der Wiedergabe von in DTS aufgenommenen CDs oder LDs unbedingt auf “AUTO” oder “DTS” stellen. Stellen Sie den Eingangsmodus während der Wiedergabe also niemals auf “ANALOG” oder “PCM”. Das gleiche gilt für die Wiedergabe von CDs oder LDs auf einem DVD-Spieler oder einem LD/DVD-kompatiblen Spieler. Bei DVDs werden die DTS-Signale auf bestimmte Weise aufgenommen, so daß das eben beschriebene Problem nicht auftritt. 2 Die an den digitalen Ausgängen eines CD- oder LD-Spielers anliegenden Signale werden möglicherweise einer Arten von interner Signalbearbeitung (Ausgangspegel-Einstellung, Sampling-Frequenz-Konvertierung usw.) unterzogen. In einem derartigen Fall werden DTSverschlüsselte Signale irrtümlicherweise bearbeitet und können dann nicht vom ADV-M71 entschlüsselt werden oder produzieren nur Nebengeräusche. Stellen Sie die Hauptlautstärke vor der ersten Wiedergabe von DTS-Signalen auf einen niedrigen Wert ein, starten Sie die Wiedergabe der DTS-Disc und überprüfen Sie dann vor dem Erhöhen der Lautstärke, ob die DTS-Anzeige am ADV-M71 (siehe Seite 157) leuchtet. 3 Stellen Sie im Setup für die Wiedergabe von DTS Digital Surround beim ADV-M71 die Einstellungen “DVDEinstellungsänderungen” – “Audio-Einstellungen” – “Digitalausgang” auf “Normal”. (De fabrieksinstelling ist “Normal”.) “DTS” und “DTS Digital Surround” sind eingetragene Warenzeichen der Digital Theater Systems, Inc. 160 2ADV-M71E2_GER p116-174 03.12.25 1:12 PM ページ 161 DEUTSCH Dolby Virtual Speaker Die Dolby Virtual Speaker-Technologie wendet eine von Dolby Laboratories entwickelte Technologie zur Erstellung eines virtuellen SurroundKlangfeldes mit nur zwei Lautsprechern für die vorderen Kanäle an. Dadurch kommt der Zuhörer in den Genuss eines Klangerlebnisses, das sonst nur bei der Verwendung von Surround-Lautsprechern möglich ist. 2 Merkmale des Dolby Virtual Speaker-Klanges B B B B Genaue Surround-Klangfeld-Positionierung Die virtuellen Surround-Lautsprecher werden in einem Winkel von 105° nach links und 105° nach rechts aufgestellt. Multikanal-Programme werden nach den Vorstellungen der Produzenten wiedergegeben Der Ton der verschiedenen Kanäle wird in der beim Mischen eingegebenen Position wiedergegeben. So wird zum Beispiel ein Ton, der für den hinteren linken Lautsprecher eingegeben wurde, auch vom hinteren linken Lautsprecher ausgegeben. In Surround wiedergegebene Stereo-Programme Die gleichzeitig verwendeten Dolby Pro Logic II- und Dolby Virtual Speaker-Schaltungen schaffen auch bei Stereo-Programmen gemeinsam ein reichhaltiges virtuelles Surround-Klangfeld. Auswahl des Zuhörmodus Sie können zwischen zwei Zuhörmodi wählen: Referenz und Weit. : 2 vordere Kanäle : Von Dolby erstelltes virtuelles Klangfeld Virtual Speaker-Modus Referenz-Modus Weit-Modus Mit dem ADV-M71 ist die Wiedergabe im Dolby Virtual Speaker-Modus auch mit anderen Lautsprecher-Konfigurationen möglich. • 3 Lautsprecher (2 vordere Kanäle + Center): Referenz-/Weit-Modi • 4 Lautsprecher (2 vordere Kanäle + 2 Surround-Kanäle): Weit-Modus • 5 Lautsprecher (2 vordere Kanäle + Center + 2 Surround-Kanäle): Weit-Modus Dolby Headphone Dolby Headphone ist eine von Dolby Laboratories und Lake Technology of Australia gemeinsam entwickelte dreidimensionale Klangtechnologie, mit der Surround-Klang mit Hilfe von handelsüblichen Kopfhörern erzeugt wird. Früher, als bei der Verwendung von Kopfhörern der Ton im Kopf widerhallte, war das Hören mit Kopfhörern über einen langen Zeitraum hinweg unangenehm. Dolby Headphone simuliert die Lautsprecher-Wiedergabe in einem Raum und platziert den Schall vorne oder an den Seiten außerhalb des Kopfes, um einen kräftigen Kino- oder Heimkino-Ton zu erzielen. Diese Technologie wird hauptsächlich für Multikanal-Audio-/VideoAnlagen mit Dolby Digital oder Dolby Pro Logic Surround-Entschlüsselungsfunktionen verwendet und arbeitet mit einem HochleistungsDigitalsignalverarbeitungs-Chip (DSP). Der Dolby Headphone-Modus kann nicht nur bei Multikanal-Quellen, sondern auch bei Stereo-Programmen effektiv eingesetzt werden. 161 2ADV-M71E2_GER p116-174 03.12.25 1:12 PM ページ 162 DEUTSCH 14 SURROUND WIEDERGABE (1) Wiedergabe im Dolby Virtual Speaker-Modus • Beim Dolby Virtual Speaker-Modus handelt es sich um einen Modus, der mit Hilfe einer von Dolby Laboratories entwickelten dreidimensionalen Technologie einen Multikanal-Surroundklang mit nur zwei Lautsprechern für die vorderen Kanäle erzielt. • Bei der Verwendung von zwei Lautsprechern für die vorderen Kanäle können Sie zwischen zwei Modi wählen: Referenz oder Weit. • Der Dolby Virtual Speaker-Modus kann nicht nur bei Dolby Digital- und DTS-Multikanal-Quellen, sondern auch bei 2-Kanal-Quellen effektiv eingesetzt werden. Bei 2-Kanal-Quellen können Sie zwischen zwei 2-Kanal-Modi wählen: Virtual 1 (Dolby Pro Logic II Cinema) und Virtual 2 (Dolby Pro Logic). • Bei einer Multikanal-Lautsprecherkonfiguration (z. B. bei 5,1 Kanälen) offeriert der Dolby Virtual Speaker-Modus entsprechend der jeweiligen Lautsprecherkonfiguration verschiedene Effekte. [1] Wiedergabe von Dolby Digital und DTS-Surround-Klang (nur bei Digitaleingängen) B Anwendbare Quellen • Digitaleingang (D.AUX-Funktionen, einschließlich DVDWiedergabediscs) Dolby Digital-Multikanal-Quellen DTS-Quellen 3 Stellen Sie den Surround-Modus auf “DOLBY VIRTUAL SPEAKER”. SURROUND / SELECT PUSH - PARAM. SURROUND 3,5,6 Haupteinheit B PUSH - PARAM. - BAND VOLUME 4 FUNCTION ON / STANDBY PHONES 2 + 7 8 9 STEREO VIRTUAL CALL 0/10 +10 - TEST TONE INPUT MODE SURROUND FUNCTION CH 1 SYSTEM IN/SURR. MD CDR TAPE 1 2 6 9 - 7 STATUS 3 5 MUTING SETUP TONE /SDB SURROUND PARAMETER - 1 VCR CH + Haupteinheit SURROUND / SELECT PUSH - PARAM. Haupteinheitt FUNCTION Fernbedienung Stellen Sie den Eingangsmodus auf “AUTO”. DTS-Quellen können auch wiedergegeben werden, wenn der Eingangsmodus auf “DTS” gestellt ist. 162 für SURROUND PARAMETER Wählen Sie die Digitaleingangs-Funktion (DVD oder D.AUXDigitaleingang). FUNCTION 2 Lassen Sie sich die Surround-Parameter entsprechende Quelle anzeigen. die Wenn die DVD-Funktion eingestellt ist, wird dies auch auf dem Bildschirm angezeigt. 6 5 ENTER CH SELECT Leuchtet Diese Anzeige wechselt entsprechend dem WiedergabeQuellen-Format automatisch. + DVD 8 - Leuchtet • Die DTS-Anzeige leuchtet bei der Wiedergabe von DTSQuellen. 3 TUNER TV / VCR DVD IN/SURR. A/V Lassen Sie sich eine Programmquelle mit dem oder -Zeichen wiedergeben. • Die Dolby Digital-Anzeige leuchtet bei der Wiedergabe von Dolby Digital-Quellen. 1 DIRECT Leuchtet + MENU / SET TONE / SDB Fernbedienung • Im Dolby Virtual Speaker-Modus leuchtet diese Anzeige. SURROUND / SELECT DVD SURROUND RECEIVER ADV-M71 INPUT MODE Fernbedienung Fernbedienung 2ADV-M71E2_GER p116-174 03.12.25 1:12 PM ページ 163 DEUTSCH 6 Wählen Sie die Surround-Parameter aus und geben Sie sie ein. (Stellen Sie die Parameter auf der Fernbedienung mit den 0, 1-CursorTasten ein.) Wenn nach der Anzeige der Parameter 6 Sekunden lang keine Bedienung erfolgt, erscheint wieder die normale Anzeige. B Surround-Parameter (1) SURROUND / SELECT PUSH - PARAM. Haupteinheit Einstellung des DOLBY VS-Modus VS REF WIDE Der ausgewählte Modus blinkt. Der Modus wird nicht angezeigt, wenn er nicht ausgewählt werden kann. B D.COMP.-Einstellung D.COMP. OFF OFF B LOW , MID / HI Einstellung des LFE-Pegels LFE -10 0dB ... , ... -5 / 0 DOLBY VS (Dolby Virtual Speaker-Modus) • REF (Referenzmodus) Hierbei handelt es sich um den Standard-Modus. • WIDE (Weit-Modus) Dieser Modus dehnt das Klangfeld des vorderen Kanals aus. D.COMP. (Dynamikbereichskompression): • Dieser Parameter stellt den Dynamikbereich des Dolby Digital Sounds ein. Stellen Sie diesen Parameter bei relativ niedrig eingestellter Lautstärke wie z.B. nachts auf die “HI”Seite, um die Soundspitze zu senken und die leiseren Töne zu verstärken. Dadurch verengt sich sich der Dynamikbereich, was das Zuhören erleichtert. Stellen Sie auf “OFF”, um diese Funktion auszuschalten. OFF Wide (Weit) LOW MID Dynamic range (Dynamikbereich) HI Narrow (Eng) LFE (Niederfrequenz-Effekt): • Programmquelle und Einstellbereich 1. Dolby Digital: –10 dB bis 0 dB 2. DTS-Surround: –10 dB bis 0 dB • Wenn Dolby Digital-kodierte Software abgespielt wird, ist es für eine korrekte Dolby Digital-Wiedergabe empfehlenswert, den LFE-PEGEL auf 0 dB einzustellen. • Wenn DTS-kodierte Film-Software abgespielt wird, ist es für eine korrekte DTS-Wiedergabe empfehlenswert, den LFEPEGEL auf 0 dB einzustellen. • Wenn DTS-kodierte Musik-Software abgespielt wird, ist es für eine korrekte DTS-Wiedergabe empfehlenswert, den LFE-PEGEL auf –10 dB einzustellen. Der LFE-Pegel kann in 1 dB-Schritten zwischen -10 dB und 0 dB eingestellt werden. B DEFAULT-Einstellung DEFAULT YES , Y/N NO / Wenn “YES” ausgewählt wurde, werden die Einstellungen zurück auf die Werkseinstellungen gestellt. Schalten Sie bei der Anzeige der Surround-Parameter mit Hilfe der •- und ª-Cursor-Tasten auf der Fernbedienung zu den vorherigen oder nachfolgenden Punkten um. Drücken Sie nach Beendigung der Surround-Parameter-Einstellung keinerlei Tasten mehr. Nach einigen Sekunden erscheint wieder die normale Anzeige, und die Einstellungen werden automatisch eingegeben. 163 2ADV-M71E2_GER p116-174 03.12.25 1:12 PM ページ 164 DEUTSCH [2] Wiedergabe im Dolby Pro-Logic II-Modus • Bei der Eingabe von 2-Kanal-Signalen können Sie zwischen zwei Wiedergabemodi wählen und die Einstellung entsprechend der 2-Kanal-ModusEinstellung Virtual 1 oder Virtual 2 vornehmen. (Die Werkseinstellung lautet auf Virtual 1-Modus.) Virtual 1 : 2-Kanal-Quellen werden mit Hilfe des Dolby Pro Logic II Cinema-Verfahrens in Virtual Surround wiedergegeben. Virtual 1 : 2-Kanal-Quellen werden mit Hilfe des Dolby Pro Logic-Verfahrens in Virtual Surround wiedergegeben. 1,2,3 B 1 SURROUND / SELECT DVD SURROUND RECEIVER ADV-M71 PUSH - PARAM. - + BAND MENU / SET TONE / SDB Stellen Sie den Surround-Modus auf “DOLBY VIRTUAL SPEAKER” (“DOLBY VS”). • Nachdem der Surround-Modus angezeigt wurde, erscheint wieder die normale Anzeige. VOLUME SURROUND / SELECT FUNCTION SURROUND PUSH - PARAM. ON / STANDBY PHONES Haupteinheit TEST TONE INPUT MODE SURROUND TUNER TV / VCR DVD IN/SURR. A/V SYSTEM 1 IN/SURR. MD CDR TAPE 1 2 + DVD 8 Fernbedienung FUNCTION 2 Drücken Sie die SURROUND PARAMETER-Taste und wählen Sie den 2-Kanal-Modus. SURROUND / SELECT PUSH - PARAM. 9 6 - 7 2 VIRTUAL 1 STATUS 3 MUTING SETUP Haupteinheit TONE /SDB ENTER SURROUND PARAMETER CH SELECT DISPLAY RETURN ANGLE MENU AUDIO VCR CH + Dieser kann gewählt werden, wenn der Digitaleingang aus keinem Signal, keinen PCMSignalen, Dolby Digital 2Kanalsignalen besteht und wenn der Analogeingang ausgewählt wird. 3 2 TOP MENU SUB TITLE RC-966 HINWEISE: • Der 2-Kanal-Dekodiermodus kann nicht eingestellt werden, wenn Dolby Digital 5,1-Kanalsignale oder DTS Signale eingehen. • Der 2-Kanal-Dekodiermodus wird für die DVD-, TV/DBSund V.AUX-Modi getrennt gespeichert. 3 SURROUND PARAMETER Fernbedienung Wählen Sie den gewünschten 2-Kanal-Modus entweder durch Drehen des SURROUND/SELECT-Reglers am Hauptgerät oder durch Drücken der 0- und 1-Cursor-Tasten auf der Fernbedienung. SURROUND / SELECT PUSH - PARAM. Haupteinheit VIRTUAL 1 Fernbedienung VIRTUAL 2 Wenn die Surround-Parameter einmal eingestellt sind, sollten die Tasten nicht mehr bedient werden. Nach einigen Sekunden ist die Anzeige auf dem Display wieder normal und die Einstellungen werden automatisch aktualisiert. 164 2ADV-M71E2_GER p116-174 03.12.25 1:12 PM ページ 165 DEUTSCH Surround-Parameter (2) 1. VIRTUAL1 (Virtual 1-Modus) In diesem Modus werden 2-Kanal-Quellen mit Hilfe des Dolby Pro Logic II Cinema-Verfahrens wiedergegeben. Dieser Modus eignet sich für die Wiedergabe von in Dolby Surround aufgenommenen Filmquellen und herkömmlichen Stereoquellen. HINWEIS: • Wenn bei interaktiven Quellen oder bei anderen Quellen mit hoher Bitrate bei der Wiedergabe von DVD- oder D.AUXDigitaleingangs-Signalen im Dolby Virtual Speaker-Modus Störungen auftreten, stellen Sie bitte “LINE-1/LINE-2 REC OUT” unter “[6] Funktionseinstellungen” im “System-Setup” auf Seite 150 auf “Off”. (Bei dieser Einstellung ist die analoge Aufnahme im Dolby Virtual Speaker-Modus nicht möglich.) 2. VIRTUAL2 (Virtual 2-Modus) In diesem Modus werden 2-Kanal-Quellen mit Hilfe des Dolby Pro Logic-Verfahrens wiedergegeben. Dieser Modus ist mit der herkömmlichen Dolby Pro Logic-Wiedergabe kompatibel. Hierbei wird das aufgenommene Wiedergabebild von in Dolby Surround aufgenommenen Quellen naturgetreu wiedergegeben. (2) Surround-Modi und ihre Funktionen • Dieses Gerät ist mit einem Hochleistungs-DSP (Digital Signal Processor) ausgestattet, der durch Digitalsignalaufbereitung das Schallfeld synthetisch wiederherstellt. Einer der 6 voreingestellten Modi kann entsprechend der Programmquelle ausgewählt und Parameter entsprechend der in dem Raum herrschenden Bedingungen eingestellt werden, um einen realistischeren, kraftvollen Sound zu erzielen. Diese Surround-Modi können auch bei Programmquellen verwendet werden, die nicht mit Dolby Surround Pro Logic oder Dolby Digital aufgenommen sind. *1 MONO MOVIE (HINWEIS 1) Wählen Sie diesen Modus, um monaural aufgenommenen Filmen mehr Fülle zu geben. *2 ROCK ARENA Verwenden Sie diesen Modus, um das Gefühl eines Live-Konzerts in einem Station zu erhalten, mit reflektierten Tönen, die aus allen Richtungen kommen. *3 JAZZ CLUB Dieser Modus erzeugt das Schallfeld eines Live-Events - mit einer niedrigen Decke und starken Wänden. Dieser Modus gibt Jazz einen sehr lebhaften Realismus. *4 VIDEO GAME Wählen Sie diesen Modus für Videospiele. *5 MATRIX Wählen Sie diesen Modus, und die Ausdehnung der Musikquellen in Stereo zu verstärken. Signale, die aus unterschiedlichen Komponenten der Eingangssignale bestehen (Komponente für die Ausdehnung) und für die Verzögerung aufgearbeitet werden, werden vom Surround-Kanal ausgegeben. 5CH STEREO In diesem Modus werden die Signale des vorderen linken Kanals vom linken Surround-Kanal ausgegeben; die Signale des vorderen rechten Kanals werden vom rechten Surround-Kanal ausgegeben und die gleiche (synchrone) Komponente des linken und rechten Kanals wird vom mittleren Kanal ausgegeben. Mithilfe dieses Modus wird Surroundsound von allen Lautsprechern ausgegeben, allerdings ohne richtungsabhängige Steuereffekte; ferner kann er bei jeder Stereo-Programmquelle aktiviert werden. *6 Die mit “*” gekennzeichneten Surround-Modi können ausgewählt werden, wenn die Lautsprecher-Einstellung auf 5,1 Kanäle gestellt wurde. Je nach wiedergegebener Programmquelle ist der Effekt möglicherweise nicht wahrnehmbar. Verwenden Sie in diesem Fall andere Surround-Modi, ohne dabei auf ihre Bezeichnungen zu achten, um ein Schallfeld Ihres Geschmacks zu erzeugen. HINWEIS 1: Bei der Wiedergabe von monaural aufgenommenen Quellen, ist der Sound einseitig, wenn Signale nur an einem Kanal (links oder rechts) eingehen; geben Sie deshalb Signale an beiden Kanälen ein. Personal Memory Plus Dieses Gerät ist mit einer Personal-Speicher-Funktion ausgestattet, die die für die Eingabe der unterschiedlichen Quellen ausgewählten Surround-Modi und Eingangsmodi automatisch speichert. Wenn die Eingangsquelle gewechselt wird, werden die Modi automatisch aufgerufen, die für diese Quelle als letztes eingestellt wurden. • Einstellungen für die einzelnen Eingangsfunktionen werden mittels der Personal Memory Plus-Funktion automatisch im Speicher gespeichert: q Surround-Modus (einschließlich 2-Kanal-Dekodier- und Dolby Pro Logic II -Moduseinstellungen) w Eingangsmodus-Auswahlfunktion Die Surround-Parameter, SDB/Ton-Steuereinstellungen und die Wiedergabepegelbalance für die vier unterschiedlichen Ausgangskanäle werden für jeden Surround-Modus gespeichert. 165 2ADV-M71E2_GER p116-174 03.12.25 1:12 PM ページ 166 DEUTSCH [1] DSP Surround simulation 2,4,5 B 4 SURROUND / SELECT DVD SURROUND RECEIVER ADV-M71 PUSH - PARAM. Drücken Sie die SURROUNDTaste, um den SurroundParametereinstellungsmodus zu aktivieren. • Die Surround-Parameter der verschiedenen Surround-Modi werden bei jeder Betätigung der SURROUNDTaste in der folgenden Reihenfolge gewechselt. SURROUND PARAMETER - + BAND MENU / SET TONE / SDB VOLUME FUNCTION ON / STANDBY PHONES 1 5 6 - 5CH STEREO AUTO DECODE TUNER 7 8 9 DIRECT STEREO VIRTUAL CALL 0/10 +10 - TEST TONE INPUT MODE SURROUND FUNCTION 4 + SYSTEM MATRIX ROOM SIZE DELAY EFFECT DEFAULT CH 1 2 TUNER TV / VCR DVD IN/SURR. A/V Fernbedienung MONO MOVIE ROCK ARENA JAZZ CLUB VIDEO GAME DEFAULT IN/SURR. MD CDR TAPE 1 2 8 Es gibt kein 5-Kanal-Stereomodus. + DVD 9 6 - 7 5 STATUS 3 MUTING SETUP TONE /SDB 5 4 ENTER SURROUND PARAMETER CH SELECT DISPLAY RETURN ANGLE MENU AUDIO VCR CH Lassen Sie die Parameter anzeigen, die Sie einstellen wollen. • Wählen Sie die Surround-Parameter mit den Cursor-Tasten (•, ª). + SURROUND / SELECT PUSH - PARAM. TOP MENU SUB TITLE Haupteinheit Fernbedienung RC-966 • ROOM SIZE-Einstellung R.SIZE 1 MED Wählen Sie die Eingangsquelle. FUNCTION SMALL MED-S MED MED-L LARGE , / FUNCTION • EFFECT LEVEL-Einstellung Haupteinheit 2 EFECT Fernbedienung 10 Wählen Sie den Surround-Modus für den 1 SURROUND / SELECT SURROUND PUSH - PARAM. 10 , 15 / • DELAY TIME-Einstellung DELAY Haupteinheit • Der Surround-Modus wechselt bei jeder Betätigung der SURROUND MODE-Taste in der folgenden Reihenfolge: DOLBY VS STEREO DIRECT *5CH STEREO *MONO MOVIE JAZZ CLUB DOLBY VS VIDEO GAME *AUTO DECODE ROCK ARENA *MATRIX • Die mit “*” gekennzeichneten Modi können ausgewählt werden, wenn “5.1-channel surround” im Quick System Setup ausgewählt wurde. 3 166 30ms Fernbedienung Geben Sie eine Programmquelle wieder. • Lesen Sie hinsichtlich Handhabung Anleitungshandbuch. das 0ms 30ms 110ms , / 2ADV-M71E2_GER p116-174 03.12.25 1:12 PM ページ 167 DEUTSCH 5 • DEFAULT-Einstellung DEFAULT Surround-Parameter (3) Y/N Y/N YES , NO / ROOM SIZE: • Hier wird die Größe des Schallfelds eingestellt. Es gibt fünf Einstellmöglichkeiten: “klein”, “med.s” (mittelklein), “mittel”, “med.l” (mittel-groß) und “groß”. Bei der Einstellung “klein” wird ein kleines Schallfeld erzeugt; bei der Einstellung “groß” wird ein großes Schallfeld erzeugt. Wenn “YES” ausgewählt wird, dann werden die Einstellungen auf die werkseitigen Voreinstellungen rückgestellt. EFFECT LEVEL: • Hier wird die Stärke des Surround-Effektes eingestellt. Der Pegel kann in 15 Abstufungen, 1 bis 15, eingestellt werden. Betätigen Sie keine Tasten mehr, wenn die SurroundParametereinstellungen abgeschlossen sind. Nach einigen Sekunden wird das normale Display wieder angezeigt und die Einstellungen werden automatisch aktiviert. DELAY TIME: • Die Verzögerungszeit kann nur im Matrix-Modus zwischen 0 und 110 ms eingestellt werden. 167 2ADV-M71E2_GER p116-174 03.12.25 1:12 PM ページ 168 DEUTSCH 2 Tabelle der Surround-Modus-Parameter (1) Vorhandensein/Nichtvorhandensein von Signalen und Steuerfähigkeit in den verschiedenen Modi Surround-Modus DVS: Dolby Virtual Speaker DHP: Dolby Headphone Kanalausgang CENTER SURROUND L/R SUB-WOOFER REFERENCE C B E B WIDE C B B B DH1 C (nur H/P) E E E DH2 C (nur H/P) E E E DH3 C (nur H/P) E E E BYPASS C (nur H/P) E E E STEREO C E E B DIRECT DHP DVS FRONT L/R E E B C B B B DTS SURROUND C B B B DOLBY PL II C B B B AUTO STEREO C E E B 5CH STEREO C B B B MONO MOVIE C B B B ROCK ARENA C B B B JAZZ CLUB C B B B VIDEO GAME C B B B MATRIX C B B B AUTO DECODE C DOLBY DIGITAL 2 Tabelle der Surround-Modus-Parameter (2) Vorhandensein/Nichtvorhandensein von Signalen und Steuerfähigkeit in den verschiedenen Modi Wiedergabesignale und Surround-Modi für die verschiedenen Eingangsfunktionen Surround-Modus DVS: Dolby Virtual Speaker DHP: Dolby Headphone (D.AUX / L2) LINE1 / LINE2 / TUNER Wiedergabe vonPCMSignalenBei der Wiedergabe vonAnalogsignalen When playing analog signals DVD / D.AUX (D.AUX / L2) Bei der Wiedergabevon Dolby Digital-Signalen Wiedergabe vonDTSSignalenBei der Mehrkanal 2-Kanal Mehrkanal 2-Kanal 2-Kanal 2-Kanal 4PL II C 4PL II C 4PL II 4PL II 4PL II WIDE 4PL II C 4PL II C 4PL II 4PL II 4PL II DH1 4PL II C 4PL II C 4PL II 4PL II 4PL II DH2 4PL II C 4PL II C 4PL II 4PL II 4PL II DH3 4PL II C 4PL II C 4PL II 4PL II 4PL II C C D.MIX C C D.MIX C C C STEREO C C D.MIX C C D.MIX C C C DIRECT C C D.MIX C C D.MIX C C C DOLBY DIGITAL C C E E E E E DTS SURROUND E E E C E E E 4PL II E 4PL II E 4PL II 4PL II 4PL II 4 E 4 E 4 4 E 5CH STEREO C C C C C C C MONO MOVIE C C C C C C C ROCK ARENA C C C C C C C JAZZ CLUB C C C C C C C VIDEO GAME C C C C C C C MATRIX C C C C C C C DHP DVS 2-Kanal REFERENCE AUTO DECODE BYPASS DOLBY PL II AUTO STEREO B: Kann je nach der Lautsprecherkonfigurations-Einstellung entweder vorhanden oder nicht vorhanden sein. : Nur anwendbar, wenn bei der Lautsprecher-Konfigurations-Einstellung die Verwendung von Center- und Surround-Lautsprechern eingegeben wurde. C : Signal vorhanden oder steuerfähig. D.MIX: Abwärtswandel-kompatibel. PL II: Kompatibel mit dem PL II-Verfahren. 4 : Kann mit dem 2-Kanal-Entschlüsselungsmodus ausgewählt werden. E : Kein Signal oder nicht steuerfähig. 168 2ADV-M71E2_GER p116-174 03.12.25 1:12 PM ページ 169 DEUTSCH 2 Tabelle der Surround-Modus-Parameter (3) Vorhandensein/Nichtvorhandensein von Signalen und Steuerfähigkeit in den verschiedenen Modi Surround-Modus DVS: Dolby Virtual Speaker DHP: Dolby Headphone Surround-Parameter – Standardwert angezeigt (in Klammern) TONE CONTROL SDB 2ch DECODE MODE nur Pro Logic II Music-Modus PANORAMA DIMENSION CENTER WIDTH E E E E E E E E E E E E E E E C (OFF) WIDE C (OFF) C (OFF) DH1 C (OFF) C (OFF) DH2 C (OFF) C (OFF) DH3 C (OFF) C (OFF) BYPASS C (OFF) C (OFF) E E E E STEREO C (OFF) C (OFF) E E E E DIRECT E E E E E E DOLBY DIGITAL C (OFF) C (OFF) E E E DTS SURROUND C (OFF) C (OFF) E E E DOLBY PL II C (OFF) C (OFF) C (OFF) C (3) C (3) AUTO STEREO AUTO DECODE DHP DVS REFERENCE C (OFF) C (VIRTUAL1) C *2 (CINEMA) C *1 (AUTO STEREO) C (OFF) C (OFF) E E E 5CH STEREO C (OFF) C (OFF) E E E E MONO MOVIE C (OFF) C (OFF) E E E E ROCK ARENA C (OFF) C (OFF) E E E E JAZZ CLUB C (OFF) C (OFF) E E E E VIDEO GAME C (OFF) C (OFF) E E E E MATRIX C (OFF) C (OFF) E E E E 2 Tabelle der Surround-Modus-Parameter (4) Vorhandensein/Nichtvorhandensein von Signalen und Steuerfähigkeit in den verschiedenen Modi Surround-Modus DVS: Dolby Virtual Speaker DHP: Dolby Headphone Surround-Parameter – Standardwert angegeben (in Klammern) Dolby Digital/DTS signal EFFECT LEVEL DELAY TIME D. COMP. LFE REFERENCE E E E C (OFF) C (0dB) WIDE E E E C (OFF) C (0dB) DH1 E E E C (OFF) C (0dB) DH2 E E E C (OFF) C (0dB) DH3 E E E C (OFF) C (0dB) BYPASS E E E C (OFF) C (0dB) STEREO E E E C (OFF) C (0dB) DIRECT E E E C (OFF) C (0dB) DOLBY DIGITAL E E E C (OFF) C (0dB) DTS SURROUND E E E C (OFF) C (0dB) DOLBY PL II E E E C (OFF) C (0dB) AUTO STEREO E E E E E E E E C (OFF) C (0dB) AUTO DECODE DHP DVS ROOM SIZE 5CH STEREO MONO MOVIE C (MEDIUM) C (10) E C (OFF) C (0dB) ROCK ARENA C (MEDIUM) C (10)) E C (OFF) C (0dB) JAZZ CLUB C (MEDIUM) C (10) E C (OFF) C (0dB) VIDEO GAME C (MEDIUM) C (10) E C (OFF) C (0dB) E E C (30ms) C (OFF) C (0dB) MATRIX : Nur anwendbar, wenn bei der Lautsprecher-Konfigurations-Einstellung die Verwendung von Center- und Surround-Lautsprechern eingegeben wurde. C : Signal vorhanden oder steuerfähig. E : Kein Signal oder nicht steuerfähig. *1 : Sie können zwischen dem Auto Stereo-Modus und dem Dolby PL II-Modus (Cinema-, Music- oder Dolby PL-Modus) auswählen. *2 : Der Dolby PL II-Modus (Cinema-, Music- oder Music 2-Modus) kann ausgewählt werden. D.MIX: Abwärtswandel-kompatibel ( ): Parameter-Standardwert 169 2ADV-M71E2_GER p116-174 03.12.25 1:12 PM ページ 170 DEUTSCH (3) Wiedergabe mit Hilfe des Dolby Headphone-Modus • Der ADV-M71 ist mit dem Dolby Headphone-Modus ausgestattet, einer von den Dolby Laboratories und Lake Technology gemeinsam entwickelten Technologie, mit der dreidimensionaler Klang mit Hilfe von handelsüblichen Kopfhörer erzeugt wird. • Der Dolby Headphone-Modus ist eingestellt, wenn Kopfhörer an die Kopfhörerbuchse des ADV-M71 angeschlossen worden sind. • Es stehen derzeit vier Dolby Headphone-Modi zur Erstellung verschiedener Klangfeld-Effekte zur Verfügung: DH1, DH2, DH3 und Bypass (normale Stereo-Wiedergabe). • Der Dolby Headphone-Modus ist mit Dolby Digital- und DTS-Multikanal-Quellen kompatibel. Bei 2-Kanal-Quellen kann die Wiedergabe in den Cinema-, Music 1- und Music 2-Modi mit der 2-Kanal-Modus-Einstellung ausgewählt werden. 3 2,3 B SURROUND / SELECT DVD SURROUND RECEIVER ADV-M71 PUSH - PARAM. - Geben Sie die verschiedenen Surround-Parameter ein. Wenn nach der Anzeige der Parameter 6 Sekunden lang keine Bedienung erfolgt, erscheint wieder die normale Anzeige. + SURROUND / SELECT BAND MENU / SET PUSH - PARAM. TONE / SDB VOLUME FUNCTION ON / STANDBY PHONES Haupteinheit 1 H TEST TONE INPUT MODE SURROUND Fernbedienung • Dolby H-Modus-Einstellung DH1 FUNCTION TUNER TV / VCR DVD IN/SURR. A/V SYSTEM DH1 IN/SURR. MD CDR TAPE 1 2 8 DH2 , + DVD DH3 / BYPASS 9 6 - 7 • 2-Kanal-Modus-Einstellung STATUS 3 MUTING SETUP 2 TONE /SDB ENTER SURROUND PARAMETER CH SELECT DISPLAY RETURN ANGLE MENU AUDIO VCR CH + 3 2 TOP MENU CINEMA • Bei jedem Drücken der Taste ändert sich der Modus wie nachfolgend gezeigt. SUB TITLE CINEMA RC-966 1 MUSIC2 Schließen Sie Kopfhörer (als Zubehör erhältlich) an die Kopfhörerbuchse an. • Wenn Kopfhörer angeschlossen wurden, wird der Lautsprecher-Ausgang automatisch ausgeschaltet und von den Lautsprechern wird kein Ton ausgegeben. Drücken Sie die Surround-Parameter-Taste und lassen Sie sich die Surround-Parameter anzeigen. Wenn die DVD-Funktion eingestellt wurde, wird dies auch auf der Anzeige angezeigt. SURROUND / SELECT PUSH - PARAM. Haupteinheit 170 Kann ausgewählt werden, wenn kein Signal vorhanden ist oder eine 2-Kanal-Quelle wiedergegeben wird. Es stehen darüber hinaus dieselben Parameter wie die unter “(2) Wiedergabe im Dolby Virtual Speaker-Modus” beschriebenen zur Verfügung, und zwar: B D.COMP.-Einstellung B LFE-Pegel-Einstellung B DEFAULT-Einstellung Schalten Sie bei der Anzeige der Surround-Parameter mit Hilfe der •- und ª-Cursor-Tasten auf der Fernbedienung zu den vorherigen oder nachfolgenden Punkten um. PHONES 2 MUSIC1 SURROUND PARAMETER Fernbedienung 2ADV-M71E2_GER p116-174 03.12.25 1:12 PM ページ 171 DEUTSCH Surround-Parameter (4) DOLBY H (Dolby Headphone-Modi) DH1 ..............Referenz-Raum (kleiner Raum mit schwachem Nachhall) DH2 ..............Live-Raum (Raum mit stärkerem Nachhall als DH1) DH3 ..............Großer Raum (größerer Raum als DH1. Dieser Modus bietet einen Hauch von Distanz und Schallstreueffekten.) BYPASS ........Stereo-Wiedergabe. 2-Kanal-Modi Diese Modi können bei der Wiedergabe von 2-Kanal-Quellen (analog, PCM usw.) ausgewählt werden. Die Signale werden von einem der nachfolgenden Decoder bearbeitet, um Multikanäle zu erzeugen, die dann im Dolby Headphone-Modus wiedergegeben werden Im Bypass-Modus werden diese nicht angezeigt. CINEMA .......Dolby Pro Logic II Cinema-Modus MUSIC1 ........Dolby Pro Logic II Music-Modus MUSIC2 ........Im Dolby Headphone-Modus mit 2 Kanälen wiedergegebene Signale 2 Aufnahme Bei der Wiedergabe von digitalen Eingangsquellen, einschließlich DVDs, werden im Dolby Headphone-Modus codierte Signale von den Aufnahme-Ausgangsanschlüssen ausgegeben und können auf andere Aufnahmegeräte aufgenommen werden. q Schließen Sie Kopfhörer an die Kopfhörerbuchse an. w Im Dolby Headphone-Modus codierte Signale werden von den Aufnahme-Ausgangsanschlüssen ausgegeben (analog). e Wählen Sie die Parameter, stellen Sie den gewünschten Modus ein und starten Sie die Aufnahme. HINWEISE: • Durch Anwendung des Dolby Headphone-Verfahrens wird der analoge Aufnahme-Ausgangspegel niedriger geschaltet als der normale Stereo-Aufnahme-Ausgangspegel. • Ändern Sie während der Aufnahme nicht die Parameter und trennen Sie die Kopfhörer nicht ab. Dies würde kurze AufnahmetonAusfälle verursachen. • Dolby Headphone-Signale können während der Wiedergabe von analogen Quellen nicht aufgenommen werden. Die analogen Eingangssignale werden als solche von den AufnahmeAusgangsanschlüssen ausgegeben. (4) Wiedergabe im Auto Decode-Modus (nur bei Multikanal-Lautsprecher-Einstellungen) • Der automatische Entschlüsselungsmodus kann ausgewählt werden, wenn der ADV-M71 zusammen mit einem Subwoofer mit integriertem Verstärker und Leistungsverstärker sowie einem Center- oder Surround-Lautsprechersystem verwendet wird und eine MultikanalLautsprecherkonfiguration (5,1 Kanäle usw.) eingegeben wurde. • Stellen Sie zur Durchführung der 5,1-Kanal-Einstellung die Lautsprecher im Quick System Setup auf “5.1CH SURROUND”, und wählen Sie “Room Setting” und “Listening Position”. (Siehe Seiten 143 bis 144.) • Im automatischen Entschlüsselungsmodus kann die Multikanal-Wiedergabe von Multikanal-Quellen automatisch entsprechend dem Eingangssignalformat (Dolby Digital oder DTS) ausgeführt werden. • Auch 2-Kanal-Quellen können – entsprechend der Einstellung im 2-Kanal-Modus – im Auto Stereo-, Dolby Pro Logic II Cinema-, Dolby Pro Logic II Music- oder Dolby Pro Logic-Modus wiedergegeben werden. (Im Auto Stereo-Modus werden zwei Kanäle der Stereosignale wiedergegeben. Für die anderen Modi gilt die Multikanal-Wiedergabe.) [1] Dolby Digital- und DTS-Surround-Wiedergabe (nur für Digitaleingänge) • Die anwendbaren Quellen und Verfahren sind identisch mit denen unter “[1] Wiedergabe von Dolby Digital- und DTS-Surroundklang” unter “(1) Wiedergabe im Dolby Virtual Speaker-Modus” beschriebenen. • Stellen Sie in Schritt 3 den Surround-Modus auf “AUTO DECODE”. Die Wiedergabe erfolgt entsprechend dem Eingangssignalformat. • In Schritt 6 stehen keine Dolby Virtual Speaker-Modus-Surround-Parameter zur Verfügung. [2] 2-Kanal-Modus-Einstellung • Beim automatischen Entschlüsselungsmodus kann einer von vier Multikanal-Wiedergabemodi – und zwar die 2-Kanal-Wiedergabe im Auto Stereo-Modus (Werkseinstellung), Dolby Pro Logic II Cinema, Dolby Pro Logic II Music und Dolby Pro Logic – ausgewählt und für 2-KanalQuellen eingestellt werden. Der “Auto Stereo”-Modus kann nicht für analoge Eingangssignale (TUNER, LINE-1, LINE-2) eingestellt werden. Um solche Signale in Stereo wiederzugeben, stellen Sie den Surround-Modus bitte auf “STEREO”. (Siehe Seite 157.) • Die Bedienungen sind mit den in “[2] 2-Kanal-Modus-Einstellungen” unter “(1) Wiedergabe im Dolby Virtual Speaker-Modus” auf Seite 164 beschriebenen Bedienungen identisch. • Stellen Sie in Schritt 1 den Surround-Modus auf “AUTO DECODE”. • In Schritt 3 können die nachfolgenden 2-Kanal-Modi ausgewählt werden: AUTO ST PLII CINEMA PRO LOGIC PLII MUSIC Auto Stereo kann ausgewählt werden, wenn die DVD- oder D.AUX-Funktion eingestellt wurde. • Lesen Sie hinsichtlich der Surround-Modus-Parameter für den 2-Kanal-Modus im automatischen Entschlüsselungsmodus den Abschnitt “Surround-Parameter (5)” (automatische Entschlüsselung im 2-Kanal-Modus). 171 2ADV-M71E2_GER p116-174 03.12.25 1:12 PM ページ 172 DEUTSCH Surround-Parameter (1) (2-Kanal-Dekodiermodus) AUTO-ST-Modus (Automatik-Stereo) 2-Kanalquellen werden in 2-Kanal-Stereo wiedergegeben. Wenn dieser Modus im automatischen Entschlüsselungsmodus ausgewählt ist, werden Mehrkanal-Quellen (DVD, BS digital usw.) im Mehrkanal-Modus wiedergegeben, während 2-Kanal-Quellen (CDs usw.) automatisch in stereo wiedergegeben werden. PLII CINEMA/PLII MUSIC/PRO LOGIC-Modus Auch 2-Kanal-Quellen unterziehen sich der Dolby Pro Logic II -Aufarbeitung und werden im Mehrkanal-Modus wiedergegeben. Auch 2-Kanal-Quellen werden mit Dolby Digital Pro-Logic II bearbeitet, um diese im Mehrkanal-Modus wiederzugeben. Wenn dieser Modus im automatischen Entschlüsselungsmodus ausgewählt ist, werden Mehrkanal-Quellen (DVD, BS digital usw.) im Mehrkanal-Modus wiedergegeben und 2-Kanal Quellen (CDs usw.) werden auch automatisch mit Dolby Digital Pro-Logic II bearbeitet und im Mehrkanal-Modus wiedergegeben. • PLII CINEMA-Modus (Dolby Pro Logic II CINEMA) Dieser Modus ist für die Wiedergabe von Filmen, die mit Dolby-Surround aufgenommen wurden, sowie normaler Stereo-Quellen geeignet. Ein Hochpräzisions-Decoder dekodiert die Signale in 5 Kanäle, was einen gleichmäßigen 360-Grad-Surroundsound mit nur 2Kanal-Quellen produziert. Der MUSIC-Modus ist möglicherweise bei den Quellen effektiver, die viel Stereomusik enthalten. Probieren Sie beide Modi aus und wählen Sie den effektivsten. • PLII MUSIC-Modus (Dolby Pro Logic II MUSIC) Dieser Modus ist für die Surround-Wiedergabe von Stereomusiksignalen geeignet. Die invertierten Phasensignale (die WiderhallKomponente der Musiksignale enthält viele dieser Signale) werden vom Surround-Kanal ausgegeben, gleichzeitig wird der Frequenzgang des Surround-Kanals optimiert, damit ein natürlicher, voller Sound produziert wird. Aufgrund der Musiksignale weicht die Schallfelddehnung beträchtlich ab, dies hängt von der Musikart, den Aufnahmebedingungen (Live, usw.) und dem Inhalt der Signalquelle ab. Deswegen ist der MUSIC-Modus für eine weitere Einstellung des Schallfelds mit zusätzlichen Parametern ausgestattet. • PANORAMA Das vordere Stereoschallfeldbild dehnt sich auf den Surround-Kanal aus. Dies ist effektiv, wenn unter normalen Bedingungen das Stereo-Bild schmaler ist und der Surround-Effekt schwach erscheint. • DIMENSION Damit wird die Mitte des Schallfeldbilds nach vorne oder zur Surround-Seite bewegt. Die Wiedergabebalance der verschiedenen Kanäle kann ungeachtet der Anzahl der Widerhall-Komponenten der Quelle eingestellt werden. Wenn das Schallfeldbild nach vorne oder zur Surround-Seite tendiert, kann dies mit diesem optionalen Parameter korrigiert werden. • CENTER WIDTH Damit wird die Wiedergabemethode der Centersignalkomponente nur vom mittleren Kanal zum vorderen Kanal eingestellt. Wenn der mittlere Kanal wiedergegeben wird und dabei die Trennung vorzieht, ist die Position des Schallfelds des vorderen Kanals klarer; das gesamte Schallfeldbild konzentriert sich allerdings auf die Mitte und das Verhältnis zwischen den verschiedenen Kanälen erscheint schwächer. Durch diese Parameter-Einstellung kann die Stabilität des Schallfeldbilds verstärkt und eine natürliche horizontale Ausdehnung erzielt werden. • PRO LOGIC-MODUS (DOLBY PRO LOGIC) Dies ist der konventionelle Dolby f-kompatible Modus. In diesem Modus werden Quellen, die mit Dolby Surround aufgenommen wurden, dekodiert und Bilder wiedergegeben, die der Originalaufnahme entsprechen. • Im automatischen Entschlüsselungsmodus ändert sich der Wiedergabemodus – entsprechend dem Inhalt der wiedergegebenen Disc oder entsprechend dem empfangenen Programm – automatisch in der nachfolgenden Reihenfolge (wenn der Eingangsmodus auf “AUTO” und der 2-Kanal-Modus auf “AUTO ST” eingestellt wurde). Inhalt Wiedergabemodus 5,1/6,1-Kanal Dolby Digital 5,1-Kanal-Wiedergabe 22-Kanal Dolby Digital (einschließlich 2-Kanal Dolby Surround) Stereo-Wiedergabe ( 5,1/6,1-Kanal DTS digital 5,1-Kanal-Wiedergabe PCM-Stereo Stereo-Wiedergabe ( Quelle DVD CD ( 172 ) ) ) Um 2-Kanal-Surround- (Dolby Surround) oder Stereo-Quellen im 5,1-Kanal-SurroundModus wiederzugeben, muss der 2-Kanal-Modus auf etwas anderes als “AUTO ST” gestellt werden. 2ADV-M71E2_GER p116-174 03.12.25 1:12 PM ページ 173 DEUTSCH [3] Einstellen der Parameter in den PLII CINEMA-, PLII MUSIC- und PRO LOGIC-Modi • Wenn PLII CINEMA, PLII MUSIC oder PRO LOGIC im 2-Kanal-Modus ausgewählt ist, können für die verschiedenen Modi detailliertere Parameter eingegeben werden. PLII MUSIC-Modus: Führen Sie die Einstellungen wie nachfolgend beschrieben aus. und 2-Kanal-Quellen (CDs usw.) werden mit Hilfe der Dolby Pro-Logic II- • In Klammern stehende Programmquellen Bearbeitung entschlüsselt und im Mehrkanal-Modus wiedergegeben. q Cinema-Modus (PLII CINEMA): Dieser Modus eignet sich für Filme und andere Dolby-Surround-Programme. w Music-Modus (PLII MUSIC): Dieser Modus eignet sich für Stereo-Musikprogramme. e Pro Logic kompatibler Modus (PRO LOGIC): Hierbei handelt es sich um den herkömmlichen Dolby Surround Pro-Logic-Modus. RDS PROG/DIRECT REPEAT PTY RANDOM MODE MEMO BAND DVD TUNER D.AUX 1 2 3 MD/LINE-1 TAPE /LINE-2 CT CD SRS RT SEARCH MODE 5 6 + - 5CH STEREO AUTO DECODE TUNER 9 + 4 3 TUNING / TV VOL 7 8 DIRECT STEREO VIRTUAL Stellen Sie die verschiedenen Surround-Parameter ein. SURROUND / SELECT PUSH - PARAM. CH CALL 0/10 +10 - TEST TONE INPUT MODE SURROUND FUNCTION TUNER TV / VCR DVD IN/SURR. A/V SYSTEM Haupteinheit IN/SURR. MD CDR TAPE 1 2 + DVD 8 Fernbedienung • Panorama-Einstellung. 9 6 - 7 PANORA STATUS 3 ON OFF MUTING SETUP TONE /SDB SURROUND PARAMETER DISPLAY RETURN ANGLE MENU AUDIO + VCR CH ON 3 2 ENTER CH SELECT OFF , TOP MENU / Die gewählte Einstellung blinkt. SUB TITLE • Dimension-Einstellung RC-966 DIMENSION 1 2 Wählen Sie bei der 2-Kanal-Einstellung PLII C, PLII M oder PRO LOGIC. Stellen Sie die Surround-Parameter entsprechend des ausgewählten Modus ein. • Die Parameter ändern sich bei jeder Tastenbetätigung wie unten gezeigt. ... 0 PUSH - PARAM. 6 / • Center Width-Einstellung CNTR WIDTH ... 0 SURROUND / SELECT ... 3 , 3 SURROUND PARAMETER ... 3 , 3 7 / • Default-Einstellung Haupteinheit Fernbedienung PL CINEMA PL MUSIC PRO LOGIC DEFAULT PANORAMA DEFAULT DIMENSION CNTR WIDTH DEFAULT DEFAULT YES , Y/N Y/N / NO Wenn “YES” ausgewählt wird, dann werden die Einstellungen auf die werkseitigen Voreinstellungen rückgestellt. Wenn die Surround-Parameter einmal eingestellt sind, sollten die Tasten nicht mehr betätigt werden. Nach einigen Sekunden ist die Anzeige auf dem Display wieder normal und die Einstellungen werden automatisch aktualisiert. Dies komplettiert die Parameter-Einstellung. HINWEIS: • Die 2-Kanal-Modus-Einstellung wird Funktionen im Speicher gespeichert. für die einzelnen 173 2ADV-M71E2_GER p116-174 03.12.25 1:12 PM ページ 174 DEUTSCH [4] Wiedergabe im Dolby Pro-Logic II-Modus • Die Quelle wird entsprechend den Einstellungen wiedergegeben, die für den 2Kanal-Modus und die Parameter in den PLII Cinema-, PLII Musicund Pro Logic-Modi ausgeführt wurden. • Verwendbare Quellen • Digitaleingänge (TV/DBS- und V.AUX-Funktion, einschließlich DVD-Wiedergabediscs) Dolby Digital 2-Kanal-Quellen PCM 2-Kanal-Quellen • PCM 2-Kanal-Quellen (TUNER, LINE-1 und LINE-2) 1 Wählen Sie die Eingangsquelle. FUNCTION 2 B Haupteinheit SURROUND / SELECT DVD SURROUND RECEIVER ADV-M71 FUNCTION - + BAND MENU / SET TONE / SDB Fernbedienung Wenn der Eingangsmodus bei eingestelltem “DTS”Eingangsmodus auf einen Digitaleingang gestellt wird (DVD oder D.AUX), ist die Wiedergabe im Dolby Pro Logic II-Modus nicht möglich. PUSH - PARAM. VOLUME FUNCTION ON / STANDBY PHONES 2 Stellen Sie den AUTO DECODE-Surround-Modus ein. 1 OFF ENTER A-B REPEAT TITLE TIME RDS PROG/DIRECT REPEAT PTY T V EDIT/MENU ZOOM TV CH RANDOM MODE MEMO BAND DVD TUNER D.AUX 1 2 3 5 6 AUTO DECODE TUNER 8 9 + TAPE /LINE-2 DIRECT STEREO 0/10 +10 - INPUT MODE SURROUND FUNCTION TUNER TV / VCR DVD IN/SURR. SYSTEM Spielen Sie eine Programmquelle mit der Kennzeichnung oder eine 2-Kanal- Quelle ab. • Die Quelle wird entsprechend der Dolby Pro Logic II Moduseinstellung wiedergegeben. • Die Dolby Pro-Logic II-Anzeige leuchtet, wenn die CINEMAund MUSIC-Modi aktiviert sind. CH VIRTUAL CALL TEST TONE A/V 3 TUNING / TV VOL 5CH STEREO 7 Fernbedienung + CT CD SRS RT SEARCH MODE + - 4 Haupteinheit TV IN CHARAC. SLIDE MODE TV CH - MD/LINE-1 SURROUND PUSH - PARAM. ON VCR REC NTSC/PAL SLEEP SOURCE CLEAR SURROUND / SELECT 1 2 IN/SURR. MD CDR TAPE 1 2 + DVD 8 Leuchtet PRO LOGIC II 9 6 - 7 • Im Dolby Pro-Logic-Modus leuchtet die Dolby Pro-LogicAnzeige. STATUS 3 MUTING SETUP TONE /SDB PRO LOGIC Leuchtet ENTER SURROUND PARAMETER CH SELECT DISPLAY RETURN ANGLE MENU AUDIO RC-966 174 VCR CH + TOP MENU SUB TITLE 4 4 Stellen Sie die Surround-Parameter entsprechend des ausgewählten Modus ein. Beziehen Sie sich auf die Schritte 1 bis 3 im Abschnitt “Einstellen der Parameter in den PLII CINEMA-, PLII MUSIC- und PRO LOGICModi“ (Seite 173). SURROUND PARAMETER Fernbedienung 2ADV-M71E2_GER p175-p227 03.12.25 1:16 PM ページ 175 DEUTSCH 15 RADIO HÖREN (1) Abstimmung 3 OFF ON VCR REC NTSC/PAL SLEEP TITLE SOURCE ENTER A-B REPEAT CLEAR T V CHARAC. SLIDE MODE EDIT/MENU ZOOM TV CH B RDS PROG/DIRECT SURROUND / SELECT DVD SURROUND RECEIVER ADV-M71 PUSH - PARAM. - + BAND MENU / SET TONE / SDB VOLUME FUNCTION ON / STANDBY PHONES Stellen Sie die FernbedienungsWahlschalter auf A/V und DVD. TUNER TV / VCR DVD IN/SURR. A/V SYSTEM IN/SURR. MD CDR TAPE 1 REPEAT PTY - MEMO BAND DVD TUNER D.AUX 1 2 3 4 TV CH TUNING / TV VOL 5 6 + - 5CH STEREO AUTO DECODE TUNER TAPE /LINE-2 8 9 DIRECT STEREO VIRTUAL CALL 0/10 +10 - TEST TONE INPUT MODE SURROUND FUNCTION CH TUNER TV / VCR DVD IN/SURR. A/V SYSTEM 1 2 + DVD 6 FUNCTION Haupteinheit 2 Haupteinheit 3 Fernbedienung Wählen Sie “FM” oder “AM”. • FM AUTO”, “FM MONO” oder “AM” wirdangezeigt. • Bei Verwendung der Fernbedienung, wird FM AUTO und MONO mit der Modus-Taste ausgewählt. BAND 9 7 - STATUS Drücken Sie die FUNCTION-Taste und wählen Sie “TUNER”. FUNCTION 1 IN/SURR. MD CDR TAPE 8 1 2 2 3 + 7 2 Beispiel: UKW/MW-Sender abstimmen + CT CD SRS RT RANDOM SEARCH MODE MODE MD/LINE-1 TIME TV IN RANDOM PROG/DIRECT BAND MODE Fernbedienung Adjust the receiving frequency. • Wenn ein Sender empfangen wird, leuchtet die “TUNED”Anzeige. HINWEIS: Wenn sich ein TV in der Nähe befindet, kann es sein, dassein Brummen während des Empfangs von MWProgrammengehört wird. Wenn dies geschieht, stellen Siedie Anlage so weit wie möglich vom TV entfernt auf. Autom. Abstimmung • Wenn eine der Abstimm-Tasten +/– gedrückt wird,ändert sich die Frequenz im UKW-Band bei jederBetätigung um 50 KHz und im MW-Band um 9 kHz. • Wenn eine der Abstimm-Tasten +/– länger als 1Sekunde gedrückt wird, ändert sich die Frequenz auchnach Loslassen der Taste (autom. Abstimmung)fortlaufend und stoppt erst bei Einstellung einesSenders. Die Abstimmung stoppt nicht bei Sendern mitzu einem schwachen Empfang. • Drücken Sie einmal die Abstimm-Taste +/–, um dieautom. Abstimmfunktion zu beenden. UKW-Stereoempfang • Wenn ein übertragenes Programm in “FM AUTO”empfangen wird, leuchtet die “ST”-Anzeige und dasProgramm wird in Stereo empfangen. • Wenn der Empfang schlecht ist und die Stereosignalsehr gestört sind, drücken Sie die BAND- oder MODETaste,um den FM MONO-Modus einzustellen. TUNING / - + Haupteinheit + - Fernbedienung Über den Senderabstimmungs- und Vorwahl-Modus • Die Funktion der “–”- und “+”-Tasten an - + der Haupteinheit kann umgeschaltet werden, so dass mit den Tasten entweder Sender abgestimmt (Auswahl der Empfangsfrequenz) oder Haupteinheit vorprogrammierte Sender ausgewählt BAND werden können. • Die Werkseinstellung lautet auf Senderabstimmungs-Modus. Der VorwahlModus kann durch gleichzeitiges Drücken Haupteinheit der “+”-Taste und der BAND-Taste eingestellt werden.(Wenn diese Einstellung ausgeführt wurde, blinkt für ungefähr 5 Sekunden “PRESET”.) • Drücken Sie bei gedrückter BAND-Taste die “–”-Taste, um zum Senderabstimmungs-Modus umzuschalten. (Wenn diese Einstellung ausgeführt wurde, blinkt für ungefähr 5 Sekunden “TUNING”.) 175 2ADV-M71E2_GER p175-p227 03.12.25 1:16 PM ページ 176 DEUTSCH (2) Vorwahl von abgestimmten Sendern und Senderbenennung (nur Fernbedienung) 2 Es können insgesamt 40 Sender (sowohl UKW- als auch MW-Sender) vorprogrammiert werden. 2 Vorprogrammierten Sendern können aus bis zu 8 Zeichen (Buchstaben, Zahlen und Symbole) bestehende Namen zugeordnet werden. 2 Führen Sie die Sender-Vorprogrammierung mit der im Lieferumfang enthaltenen Fernbedienung aus. SLEEP Stellen Sie die FernbedienungsWahlschalter auf A/V und DVD. CLEAR 2,3, 4,6 SYSTEM IN/SURR. MD CDR TAPE T V EDIT/MENU ZOOM TV CH RDS PROG/DIRECT MODE REPEAT PTY RANDOM MEMO BAND TUNER D.AUX 1 2 3 TAPE /LINE-2 4 5 DVD TIME - MD/LINE-1 TV CH 4 + CT CD SRS RT SEARCH MODE TUNING / TV VOL 6 + - AUTO DECODE TUNER 8 9 STEREO VIRTUAL CALL 0/10 +10 - TEST TONE INPUT MODE SURROUND FUNCTION MEMO P0CH FM FM-DENON 3,5 TUNER TV / VCR DVD IN/SURR Stellen Sie den Sender ein, den Sie vorprogrammieren möchten. P0- Drücken Sie zweimal hintereinander die MEMO-Taste und geben Sie den eingegebenen Sendernamen ein. • Die Vorwahlnummern-Anzeige “P” blinkt. REPEAT + 7 DIRECT A/V 1 TITLE TV IN CHARAC. SLIDE MODE 5CH STEREO TUNER TV / VCR DVD IN/SURR. A/V REC NTSC/PAL ENTER A-B REPEAT SOURCE Fernbedienung 5 Wählen Sie die Vorwahlnummer mit den “+”- und “–”-Vorwahltasten aus. TUNER + CH P03 92.50M - FM-DENON Fernbedienung 2 Drücken Sie zweimal hintereinander die MEMO-Taste. • Der Namenseingabe-Modus wurde eingestellt REPEAT P0- _ MEMO Fernbedienung 3 Wählen Sie mit den “+”- und “–”-Vorwahltasten ein Zeichen aus, und drücken Sie dann zur Eingabe des Zeichens die MEMO-Taste. Sie können die Vorwahlnummer auch direkt mit Hilfe der +10- und 1- bis 10-Tasten auf dem Ziffernfeld eingegeben. 6 Drücken Sie zur Eingabe der Vorwahlnummer die MEMOTaste. • Die Vorwahlnummer, der Wellenbereich und die Empfangsfrequenz werden angezeigt. Anschließend erscheint der Sendername. P03 FM 92.50M REPEAT MEMO \ TUNER + CH Fernbedienung P03 FM-DENON Fernbedienung Um den Vorgang vorzeitig abzubrechen, müssen Sie vor dem Drücken der MEMOTaste in Schritt 4 die MODE-Taste drücken. Alle bisher gemachten Eingaben werden Fernbedienung gelöscht. Um einen bereits im Speicher eingegebenen Sendernamen zu löschen, rufen Sie bitte den entsprechenden Sender zunächst auf, stellen den Namenseingabe-Modus wie in Schritt 2 beschrieben ein und drücken dann die MODE-Taste. Der Sendername wird gelöscht und die Frequenz des Vorwahlkanals wird angezeigt. Falls Sie nur einen Sender vorprogrammieren möchten, drücken Sie einmal die MEMO-Taste, wenn der Sender eingestellt ist. Die Vorwahlnummern-Anzeige “P” blinkt, und der VorwahlnummernEingabemodus wurde eingestellt. Wählen Sie mit den “+”- und “–”-Tasten die Vorwahlnummer aus und drücken Sie dann noch einmal die MEMO-Taste, um den entsprechenden Sender in der ausgewählten Nummer zu speichern. (Die Nummer kann auch direkt mit Hilfe der +10 und 1 bis 10Tasten auf dem Ziffernfeld eingegeben werden.) PROG/DIRECT MODE • Beim Drücken der “+”-TUNING-Taste oder der MEMOTaste wird das ausgewählte Zeichen eingegeben, der Cursor geht zur nächsten Position weiter und das nächste Zeichen kann eingegeben werden. • Mit der “–”TUNING-Taste gelangen Sie zurück zur vorherigen Position. Korrigieren Sie mit dieser Taste bereits eingegebene Zeichen. P0- F REPEAT MEMO \ P0- F_ Fernbedienung TUNER + REPEAT CH MEMO Fernbedienung 176 Fernbedienung 2ADV-M71E2_GER p175-p227 03.12.25 1:16 PM ページ 177 DEUTSCH (3) Autom. Tuner-Voreinstellungen Suchen Sie hiermit automatisch nach UKW-Sendungen; ferner können Sie bis zu 40 Sender in den Speicherplätzen 1 bis 40speichern. HINWEIS: • Wenn ein UKW-Sender aufgrund schlechten Empfangs nicht automatisch gespeichert werden kann, verwenden Sie die“Manuelle Abstimm”Funktion, um den Sender einzustellen; speichern Sie ihn danach mit der manuellen “Vorwahlspeicher”-Funktion. 2 Drücken Sie bei aktivierter TUNERFunktion die TastenTUNING + und TUNING - auf der Haupteinheit 2Sekunden oder länger. • AUTO PRESET?” und “–: NO/+: START”erscheinen abwechselnd auf dem Display derHaupteinheit. 1 MENU / SET B SURROUND / SELECT DVD SURROUND RECEIVER ADV-M71 PUSH - PARAM. - + BAND MENU / SET TONE / SDB Haupteinheit VOLUME FUNCTION ON / STANDBY PHONES • Drücken Sie für die Beendigung die TUNING – Taste. 2 Wählen Sie mit der Taste TUNING+ “START” aus.“SEARCH” blinkt auf dem Bildschirm und derSuchvorgang beginnt. “COMPLETED” ein einziges Mal. 1 + Haupteinheit (4) Anhören von vorprogrammierten Sendern Beispiel: Anhören des unter Nummer P03 vorprogrammierten Senders (diese Bedienung kann nur über die Fernbedienung erfolgen.) 1 1 B SURROUND / SELECT DVD SURROUND RECEIVER ADV-M71 PUSH - PARAM. + - Wählen Sie mit den “+”- und “–”-Vorwahltaten “3” oder drücken Sie die Taste “3” auf dem Ziffernfeld, um die Vorwahlnummer “P03” anzeigen zu lassen. Die “+”- und “–”-Tasten an der Haupteinheit können nach der Einstellung des Vorwahlmodus ausgewählt werden. BAND MENU / SET TONE / SDB VOLUME TUNER + FUNCTION - ON / STANDBY PHONES + D.AUX 3 CH Haupteinheit OFF SLEEP TITLE ENTER A-B REPEAT CHARAC. SLIDE MODE SOURCE Stellen Sie die FernbedienungsWahlschalter auf A/V und TUNER. TUNER TV / VCR DVD IN/SURR. A/V SYSTEM CLEAR MODE CDR TAPE PTY T V - RANDOM MEMO BAND TV CH + TUNING / TV VOL TUNER D.AUX 2 3 TAPE /LINE-2 4 5 6 + - 5CH STEREO AUTO DECODE TUNER + 7 8 9 DIRECT STEREO VIRTUAL 0/10 +10 - INPUT MODE SURROUND FUNCTION CALL TEST TONE Die Funktionen der “+”- und “–”-Tasten an der Haupteinheit ändern sich je nach dem, ob der Senderabstimmungs- oder Vorwahl-Modus eingestellt wurde. Wenn der Senderabstimmungs-Modus eingestellt ist, können Sie durch Drücken der “+”-Taste bei heruntergedrückter BAND-Taste zum Vorwahl-Modus umschalten. EDIT/MENU ZOOM CT CD SRS RT SEARCH MODE 1 IN/SURR. MD REPEAT MD/LINE-1 DVD 1 TIME TV IN TV CH RDS PROG/DIRECT Fernbedienung ON VCR REC NTSC/PAL CH 1 BAND + TUNER TV / VCR DVD IN/SURR. A/V SYSTEM IN/SURR. MD CDR TAPE Die Vorwahltasten auf der Fernbedienung (TUNER CH “+” und “–”) können jederzeit gedrückt werden. Haupteinheit Fernbedienung 177 2ADV-M71E2_GER p175-p227 03.12.25 1:16 PM ページ 178 DEUTSCH (5) RDS (Radio-Data-System) RDS funktioniert nur im UKW-Band und ist ein Service der Radiosender, der die Übertragung zusätzlicher Informationen mit dem regulären Sendesignal ermöglicht. Folgende drei RDS-Informationstypen können von diesem Gerät empfangen werden: 2 Programmtyp (PTY) PTY identifiziert den Typ eines RDS-Prgrammes. Die Programmtypen und ihre Anzeigen sind: NEWS Nachrichten ROCK M Rock-Musik PHONE IN Höreranrufe AFFAIRS Affären EASY M Easy Listening TRAVEL INFO Information LIGHT M Leichte Klassik LEISURE Reisen &Wandern Freizeit &Hobby SPORT Sport CLASSICS Ernste Klassik JAZZ Jazz-Musik EDUCATE Ausbildung OTHER M Andere Musik COUNTRY Country-Musik DRAMA Drama WEATHER Wetterberichte &Meteorologisches NATION M Volksmusik CULTURE Kultur FINANCE Finanzen OLDIES Oldies SCIENCE Technik CHILDREN Kinderprogra mme FOLK M Folk-Musik VARIED Verschiedenes SOCIAL Soziales DOCUMENT Dokumentationen POP M Popmusik RELIGION Religion 2 Verkehrsfunk (TP)) TP identifiziert Programme, die Verkehrsnachrichten übertragen. Dies erlaubt Ihnen auf einfache Art, die aktuelle Verkehrslage abzuhören, bevor Sie Ihr Haus verlassen. 2 Radiotext (RT) RT ermöglicht der RDS-Station Textnachrichten zu übertragen, die dann auf dem Display erscheinen. HINWEIS: Die nachfolgend mit den RDS-, PTY- und RT-Tasten ausgeführten Funktionen können nicht in Regionen aktiviert werden,in denen es keine RDS-Sender gibt. (6) RDS-Suche Verwenden Sie diese Funktion, um automatisch UKW-Stationen zu empfangen, die den RDS-Service aufweisen. 1 Stellen Sie das Band auf “FM”. Stellen Sie die FernbedienungsWahlschalter auf A/V und DVD. RANDOM BAND Fernbedienung TUNER TV / VCR DVD IN/SURR. A/V SYSTEM 2 Drücken Sie die RDS-Taste bis die“RDSSuche (RDS SEARCH)” aufdem Display erscheint. IN/SURR. MD CDR TAPE CLEAR OFF SLEEP ON VCR REC NTSC/PAL TITLE TV IN T V ENTER A-B REPEAT CHARAC. SLIDE MODE EDIT/MENU ZOOM SOURCE 2 Fernbedienung 3 Drücken Sie die TUNING + (UP)-oder – (DOWN)-Taste, um den RDS-Suchlauf automatisch zustarten. CLEAR TV CH RDS PROG/DIRECT + - 4 Wenn eine Sendestation gefunden wurde, erscheint der Name dieser Station auf dem Display. • “NO PROGRAMME” wird angezeigt, wenn nach derDurchsuchung aller Frequenzen kein Sender gefunden wird,der die Programmsparte sendet. 178 RANDOM MEMO BAND DVD TUNER D.AUX 1 2 3 4 7 DIRECT TV CH + CT CD SRS RT SEARCH MODE 5 6 5CH STEREO AUTO DECODE TUNER 8 9 + TAPE /LINE-2 STEREO 3 CH VIRTUAL CALL 0/10 +10 - TEST TONE INPUT MODE SURROUND FUNCTION TUNER TV / VCR DVD IN/SURR. SYSTEM 1 TUNING / TV VOL + - A/V Fernbedienung PTY MODE MD/LINE-1 TUNING / TV VOL REPEAT TIME - IN/SURR. MD CDR TAPE 2ADV-M71E2_GER p175-p227 03.12.25 1:16 PM ページ 179 DEUTSCH (7) Programmtyp-Suche (PTY) Verwenden Sie diese Funktion, um RDS-Stationen zu finden, die den gewünschten Programmtyp (PTY) senden. Für die Beschreibung der Programmtypen lesen Sie das Kapitel “Programmtyp (PTY)”. 1 Stellen Sie das Band auf “FM”. RANDOM BAND 4 Drücken Sie die TUNING + (UP)-oder – (DOWN)-Taste, um den RDS-Suchlauf automatisch zustarten. Fernbedienung 2 Drücken Sie die RDS-Taste bis die“Programmtyp-Suche (PTYSEARCH)” auf dem Displayerscheint. CLEAR Fernbedienung 3 Sehen Sie auf das Display undwählen Sie mit der PTY-Taste dengewünschten Programmtyp aus. TUNING / TV VOL + Fernbedienung 5 Wenn eine Sendestation gefunden wurde, erscheint der Name dieser Station auf dem Display. • “NO PROGRAMME” wird angezeigt, wenn nach der Durchsuchung aller Frequenzen kein Sender gefunden wird,der die Programmsparte sendet. ENTER A-B REPEAT REPEAT Fernbedienung (8) Verkehrsfunk-Suche (TP) Verwenden Sie diese Funktion, um automatisch UKW-Stationen zu empfangen, die den RDS-Service aufweisen. 1 Stellen Sie das Band auf “FM”.BAND RANDOM BAND 3 Fernbedienung 2 Drücken Sie die RDS-Taste bis die“RDSSuche (RDS SEARCH)” aufdem Display erscheint. CLEAR Drücken Sie die TUNING + (UP) oder – (DOWN)-Taste, um denRDS-Suchlauf automatisch zustarten. TUNING / TV VOL + Fernbedienung 4 Wenn eine Sendestation gefunden wurde, erscheint derName dieser Station auf dem Display. • “NO PROGRAMME” wird angezeigt, wenn nach der Durchsuchung aller Frequenzen keine RDS-Station gefundenwird. Fernbedienung (9) RT (Radiotext) Auf dem Display erscheint “RT”, wenn Textnachrichten empfangen werden. 1 Drücken Sie für die Aktivierungdes RTModus die RT-Taste auf derFernbedienung, bis die RT-Anzeigeleuchtet. EDIT/MENU ZOOM TV CH + Fernbedienung 2 Wenn der gegenwärtig abgestimmte Sender denRadiotextService unterstützt, läuft die Meldung überdas Display. • “NO TEXT DATA” erscheint auf dem Display, wenn der RTModusaktiviert und ein RDS-Radiosender eingestellt ist, derden RTService nicht unterstützt; der Modus wechseltautomatisch in den PS-Modus. • Der Modus wechselt auf die gleiche Weise automatisch inden PSModus, wenn der RT-Service endet. In diesem Fallwechselt der Modus vom PS-Modus automatisch zurück inden RT-Modus, wenn die RT-Übertragung fortgesetzt wird. • Der RT-Modus kann nicht im MW-Band oder bei UKWSenderneingestellt werden, die die RDS-Funktion nichtunterstützen. • Drücken Sie für die Deaktivierung des RT-Modus die RT-Tasteund wechseln Sie in den gewünschten Display-Modus.(Lese Sie Seite 178.) 179 2ADV-M71E2_GER p175-p227 03.12.25 1:16 PM ページ 180 DEUTSCH 16 BILDSCHIRMANZEIGE • Der ADV-M71 ist mit einer Bildschirmanzeige-Funktion (“OSD”) ausgestattet, die bei aktivierter DVD-Funktion die verschiedenenInformationsarten hinsichtlich der Surround-Funktionen und der Disc auf dem Bildschirm anzeigt. q Setup-Bildschirm • Hier wird das verwendete Lautsprechersystem (Schnellsystem-Einstellung) ausgewählt und die Funktion des ADV-M71 unddie verschiedenen Einstellungen geändert, wenn Discs wiedergegeben werden (System-Einstellungsänderung und DVDEinstellungsänderung). • Der Setup-Bildschirm kann ungeachtet der gegenwärtig eingestellten Funktion verwendet werden, allerdings kann er nichtwährend der Wiedergabe einer Disc bedient werden. Aktivieren Sie zuerst den Stopp-Modus. w Lassen Sie die Disc-Information anzeigen. • Wenn die DVD-Funktion aktiviert ist, zeigt das OSD Informationen hinsichtlich der Disc an und erscheint bei Aktivierunganderer Wiedergabefunktionen. e Lassen Sie die Surround-Funktion anzeigen. • Wenn die DVD-Funktion aktiviert ist, werden auch Informationen hinsichtlich des Surround-Verstärkers angezeigt, derbedient werden kann. • Das OSD für die Surround-Funktion (AV OSD) kann ein- und ausgeschaltet werden. (Das OSD für den Setup-Bildschirm und der DVD-Disc-Information kann nicht auf “OFF” gestellt werden.) Ist werkseitig auf“ON” gestellt. Ist werkseitig auf “ON” gestellt. 1 2 1 B SURROUND / SELECT DVD SURROUND RECEIVER ADV-M71 PUSH - PARAM. - + BAND MENU / SET TONE / SDB VOLUME Drücken Sie bei aktivierter DVD-Funktion die STATUSTastemindestens 2 Sekunden lang. Drücken Sie die MENU/SET-Taste auf dem Hauptgerät hinein, und drücken Sie anschließend die MENU/SET-Taste erneut für mindestens 2 Sekunden, während “STATUS“ angezeigt wird. • “AV OSD ON 0:1 OFF“ wird angezeigt. FUNCTION ON / STANDBY PHONES STATUS MENU / SET OFF ENTER A-B REPEAT CLEAR Haupteinheit ON VCR REC NTSC/PAL SLEEP TITLE SOURCE T V EDIT/MENU ZOOM TV CH - RDS PROG/DIRECT REPEAT MODE PTY RANDOM MEMO DVD D.AUX 3 TUNING / TV VOL 1 2 MD/LINE-1 TAPE /LINE-2 4 5 6 + - 5CH STEREO AUTO DECODE TUNER 8 9 + 7 DIRECT 2 + CT CD SRS RT SEARCH MODE BAND TUNER STEREO 0/10 +10 - INPUT MODE SURROUND FUNCTION SURROUND / SELECT PUSH - PARAM. Haupteinheit TUNER TV / VCR DVD IN/SURR. SYSTEM Schalten Sie das AV OSD ein oder aus. CH VIRTUAL CALL TEST TONE A/V Fernbedienung TIME TV IN CHARAC. SLIDE MODE TV CH Fernbedienung IN/SURR. MD CDR TAPE 1 2 + DVD 8 oder 0 :ON 9 6 - 7 STATUS 3 MUTING SETUP TONE /SDB 2 ENTER SURROUND PARAMETER CH SELECT DISPLAY RETURN ANGLE MENU AUDIO RC-966 180 1 VCR CH oder 1 :OFF Nach einigen Sekunden wird das Display ausgeschaltet unddie Einstellung vorgenommen. + TOP MENU SUB TITLE HINWEISE: • Je nach wiedergegebener Disc kann das Bild gestörtsein, wenn das OSD eingeschaltet wird. Dies ist keineFehlfunktion. Wenn dies geschieht, stellen Sie AV OSDauf ”OFF“. • Das OSD wird ebenfalls an den VCR-Videoausgangsanschlüssen ausgegeben. Führen Sie während des Aufnahmebetriebs mit einem VideoDeck keine Setup- oder OSD-Einstellungen aus. 2ADV-M71E2_GER p175-p227 03.12.25 1:16 PM ページ 181 DEUTSCH 17 VERWENDUNG DER BILDSCHIRMANZEIGE (1) Betrieb mit der Disc-Informations-Bildschirmanzeige SLEEP 2 Verwenden Sie diese Funktion, um Informationen der Disc(Titel, Kapitel, Zeit, usw.) . NTSC/PAL TITLE TV IN T V ENTER A-B REPEAT CHARAC. SLIDE MODE EDIT/MENU ZOOM SOURCE Stellen Sie die FernbedienungsWahlschalter auf A/V und DVD. CLEAR TV CH RDS PROG/DIRECT 3 TUNER TV / VCR DVD IN/SURR. A/V SYSTEM PTY REPEAT RANDOM MODE MEMO BAND DVD TUNER D.AUX 3 TV CH 1 2 TAPE /LINE-2 4 5 6 + - 5CH STEREO AUTO DECODE TUNER 7 8 9 + DIRECT STEREO VIRTUAL CALL 0/10 +10 - TEST TONE INPUT MODE SURROUND FUNCTION Drücken Sie im Wiedergabe-Modus die DISPLAY-Taste. • Die Bildschirmanzeige erscheint. • Das Bild auf dem TV-Bildschirm ändert sich bei jederTastenbetätigung. • Die angezeigten Punkte sind von Disc zu Discunterschiedlich. Beispiel: Bei DVDs MUTING SETUP TONE /SDB 2 TUNING / TV VOL MD/LINE-1 A/V STATUS 3 + CT CD SRS RT SEARCH MODE IN/SURR. MD CDR TAPE 1 TIME - ENTER SURROUND PARAMETER CH SELECT 3 1 CH DISPLAY RETURN ANGLE TUNER TV / VCR DVD IN/SURR. MENU AUDIO VCR CH + TOP MENU SUB TITLE RC-966 DISPLAY Fernbedienung T I T LE 01 / 1 0 T I T LE T IME P I C TURE MODE CHAPT ER 01/10 00 : 00 : 01 STANDARD T I T LE REMAI N 01 : 10 : 59 CHAPT ER T IME 00 : 00 : 01 CHAPT ER REMAI N 00 : 40 : 59 SUBT ITLE 1/2 : DOLBY D 3/2/1 ENGLISH AUDI O : OFF • Bei der OSD-Anzeige von Video-CDs und MusikCDsändert sich nur die Disc-Zeit. Beispiel: Bei Video- und Musik-CDs TOTAL TIME TRACK S I NGL E T IME P I C TURE MODE 2 01 / 10 26 : 11 STANDARD S I NGL E REMAIN 03 : 17 TOTAL TIME 06 : 15 TOTAL REMAIN 32 : 05 Wählen Sie den Punkt, den Sie ändern wollen, mit den Cursor-Tasten • und ª aus. • Der ausgewählte Punkt wird in einem gelben Rahmen angezeigt. q Bei DVDs “TITLE”, “CHAPTER”, “TITLE ELAPSED” kann ausgewählt werden. w Für Video- und Musik-CDs “TRACK” kann ausgewählt werden. Fernbedienung 3 q Änderung der verstrichenen Zeit Nehmen Sie die Eingabe mit den Nummerntasten vor, drücken Sieanschließend die ENTER-Taste. Beispiel: 1 Minute 26 Sekunden / “00126” w Änderung des Titels, der Spur oder des Kapitels • Bei DVDs Nehmen Sie die Eingabe mit den Nummerntasten vor, drücken Sieanschließend die ENTER-Taste. (Bei einigen Discs kann der Titel oder das Kapitel nicht geändertwerden.) • Bei Video- und Musik-CDs Nehmen Sie die Eingabe mit den Nummerntasten vor. DieWiedergabe DVD TUNER D.AUX 1 2 3 MD/LINE-1 TAPE /LINE-2 4 5 6 5CH STEREO AUTO DECODE 7 8 9 STEREO VIRTUAL 0/10 +10 Fernbedienung 181 2ADV-M71E2_GER p175-p227 03.12.25 1:16 PM ページ 182 DEUTSCH (2) Einstellen der Bildqualität • Die Bildqualität kann während der Disc-Wiedergabe eingestellt werden. STATUS Stellen Sie die FernbedienungsWahlschalter auf A/V und DVD. 3 SYSTEM 1,2 ENTER SURROUND PARAMETER CH SELECT - 1 IN/SURR. MD TONE /SDB 1,2,3 TUNER TV / VCR DVD IN/SURR. A/V MUTING SETUP DISPLAY RETURN ANGLE MENU AUDIO VCR CH + TOP MENU SUB TITLE CDR TAPE 1 Drücken Sie, wenn bei der Wiedergabe einer Disc die DVDFunktioneingestellt ist, die DISPLAY-Taste, um dasBildschirm-Display einzuschalten. Wählen Sie dann mit den • und ªCursor-Tasten “PICTURE MODE” (Bildqualität) aus und drücken Sie anschließend die ENTER-Taste. • Der Bildschirm zur Einstellung der Bildqualität erscheint. • Das Bildschirm-Display schaltet sich auch ein, wenn imStoppmodus die DISPLAY-Taste gedrückt wird. ENTER DISPLAY \ \ Fernbedienung Fernbedienung Fernbedienung 2 Wählen Sie mit den und Cursor-Tasten den Einstellungspunktaus 0 und 1 drücken Sie dann die ENTER-Taste. Standard: Sowohl die Bildqualität als auch die Funktionen werden auf ihre Werkseinstellungen zurückgesetzt.. Anime: Mit dieser Einstellung erhalten Sie ein helleres, lebendigeres Bild. Cinema: Mit dieser Einstellung erhalten Sie ein weicheres Bild. Memory 1 bis 3: Die von Ihnen (in Schritt 3) ausgeführten Bildeinstellungen können in drei Speicherpositionen gespeichert werden. 3 Wählen Sie mit den 0 und 1 Cursor-Tasten den Bildqualitätspunkt, und stellen Sie dann mit den • und ª Cursor-Tasten den Wert ein. • Alle Einstellungen werden im Speicher gespeichert. Contrast (-6 bis +6) (Werkseinstellung: 0): Stellt den Kontrast zwischen den hellen und dunklen Bildteilen ein. Brightness (0 bis +12) (Werkseinstellung: 0): Stellt die Bildhelligkeit (Lebendigkeit) ein. Color density (-6 bis +6) (Werkseinstellung: 0): Stellt die Farbdichte ein.. Hue (-6 bis +6) (Werkseinstellung: 0): Stellt die Balance zwischen Rot und Grün ein. (Diese Einstellung hat keinen Einfluss auf progressive Scan-Ausgänge.) ENTER \ Fernbedienung Fernbedienung Beenden der Bildqualitäts-Einstellung: Drücken Sie noch einmal die DISPLAY-Taste. HINWEIS: • Abhängig von der wiedergegebenen Disc treten während der Anzeige des Bildschirm-Displays möglicherweise Bild- oderTonstörungen auf. Hierbei handelt es sich nicht um eine Fehlfunktion 182 2ADV-M71E2_GER p175-p227 03.12.25 1:16 PM ページ 183 DEUTSCH (3) Wiedergabe wiederholen 2 Verwenden Sie diese Funktion, um Ihre Lieblingsaudio- und videoabschnitte wiederholt abzuspielen. OFF SLEEP ON VCR REC NTSC/PAL TITLE TV IN T V ENTER A-B REPEAT CHARAC. SLIDE MODE EDIT/MENU ZOOM SOURCE [2]-1,2 Stellen Sie die FernbedienungsWahlschalter auf A/V und DVD. [1]-1 TUNER TV / VCR DVD IN/SURR. A/V SYSTEM CLEAR TV CH RDS PROG/DIRECT PTY REPEAT TIME - RANDOM MODE MEMO BAND DVD TUNER D.AUX 3 TV CH + CT CD SRS RT SEARCH MODE TUNING / TV VOL 1 2 MD/LINE-1 TAPE /LINE-2 4 5 6 + - 5CH STEREO AUTO DECODE TUNER + 7 8 9 DIRECT STEREO VIRTUAL CALL 0/10 +10 - TEST TONE INPUT MODE SURROUND FUNCTION CH IN/SURR. MD CDR TAPE TUNER TV / VCR DVD IN/SURR. A/V SYSTEM IN/SURR. MD CDR TAPE 1 2 DVD 8 + 9 [1] Wiedergabe wiederholen (Wiederholen Sie die Wiedergabe) 1 Drücken Sie im Wiedergabe-Modus die REPEAT-Taste. • Die Anzeige auf dem TV-Bildschirm ändert sich bei jederTastenbetätigung REPEAT MEMO und der entsprechendeWiedergabewiederholungs- oder Stopp-Modus wirdaktiviert. Wenn der Wiedergabe-Modus eingestellt wurde, leuchtet _ auf der Anzeige. Wenn der Gesamt-Wiedergabewiederholungs-Modus Fernbedienung eingestellt ist, leuchtet “ALL”. q Bei DVDs w Bei Video- und Musik-CDs • Normale • Normale Wiedergabe Wiedergabe • Kapitel wird CHAPTER REPEAT • Titel TITLE REPEAT wirdwiederholt • Wiedergabewiederholung wird abgebrochen • Spur wird TRACK REPEAT wiederholt wiederholt REPEAT OFF • Gesamte Disc wird wiederholt • Wiedergabewiederholung wird abgebrochen DISC REPEAT REPEAT OFF Zurück zur normalen Wiedergabe: Kehren Sie zur normalen Wiedergabe zurück, indem die REPEAT A-B-Taste gedrückt wird, bis “REPEAT OFF” auf dem TVBildschirm erscheint. 183 2ADV-M71E2_GER p175-p227 03.12.25 1:16 PM ページ 184 DEUTSCH [2] Einen bestimmten Abschnitt wiederholt wiedergeben (A-B-Wiedergabewiederholung) 1 Drücken Sie während der Wiedergabe die A-B REPEAT-Taste. • Der Startpunkt A wird festgelegt. ENTER A-B REPEAT A TO B SET A Fernbedienung 2 Drücken Sie die A-B REPEAT-Taste erneut. • Der Endpunkt B wird festgelegt, und die Wiedergabedes A-BAbschnitts wird wiederholt. ENTER A-B REPEAT A TO B SET B Fernbedienung Zurück zur normalen Wiedergabe: Drücken Sie die A-B REPEAT-Taste, bis “A TO B CANCELLED” auf dem TV-Bildschirm erscheint. HINWEISE: • Die Wiedergabewiederholung funktioniert bei einigen DVDs möglicherweise nicht. • Die Funktionen Wiedergabewiederholung und A-B-Wiedergabewiederholung können bei DVDs und Video-CDs nicht aktiviertwerden, bei denen die verstrichene Zeit während der Wiedergabe nicht auf dem Display angezeigt wird. • In einigen Fällen können während der A-B-Wiedergabewiederholung keine Untertitel neben den A- und B-Punkten angezeigt werden. 184 2ADV-M71E2_GER p175-p227 03.12.25 1:16 PM ページ 185 DEUTSCH (4) Titel in gewünschter Reihenfolge abspielen 2 Verwenden Sie diese Funktion bei Video- und Musik-CDs, um Titel in gewünschterReihenfolge wiederzugeben. 2 Diese Funktion kann nicht bei DVDs aktiviert werden. SLEEP REC NTSC/PAL TITLE TV IN T V ENTER A-B REPEAT CHARAC. SLIDE MODE EDIT/MENU ZOOM SOURCE CLEAR TV CH 1 Stellen Sie die FernbedienungsWahlschalter auf A/V und DVD. 2 RDS PROG/DIRECT MODE REPEAT + BAND TUNING / TV VOL TUNER D.AUX 1 2 3 TAPE /LINE-2 4 5 6 + - 5CH STEREO AUTO DECODE TUNER DVD + 7 8 9 DIRECT STEREO VIRTUAL CALL 0/10 +10 - TEST TONE INPUT MODE SURROUND FUNCTION CH TUNER TV / VCR DVD IN/SURR. IN/SURR. MD TV CH MD/LINE-1 A/V SYSTEM TIME - CT CD SRS RT RANDOM SEARCH MODE MEMO TUNER TV / VCR DVD IN/SURR. A/V PTY SYSTEM IN/SURR. MD CDR TAPE CDR TAPE 3 1 2 + DVD 8 6 9 7 - STATUS 1 2 Drücken Sie im Stoppmodus einmal die PROG/DIRECT-Taste. • Der Programmauswahl-Bildschirm erscheint. Wählen Sie die Titelnummer, die Sie programmieren möchten, mit den Nummerntasten aus. • Es können bis zu 20 Spuren programmiert werden. PROG/DIRECT MODE Fernbedienung DVD TUNER D.AUX 1 2 3 MD/LINE-1 TAPE /LINE-2 4 7 5 6 5CH STEREO AUTO DECODE 8 9 STEREO VIRTUAL 0/10 +10 Fernbedienung Z.B. Titel 5 und Titel 12 programmieren: Drücken Sie die(Nummerntaste)+10 Drücken Sie die(Nummerntaste)5 \ 3 Drücken Sie die PLAY-Taste. • Die Wiedergabe der Spuren in der programmierten Reihenfolge beginnt. Drücken Sie die(Nummerntaste)2 \ 1 DVD Fernbedienung Zurück zur normalen Wiedergabe: Drücken Sie die STOP-Tast (2), um die programmierte Wiedergabe zu stoppen, drücken Sie anschließend diePROG/DIRECT-Taste. Drücken Sie jetzt die PLAY-Taste (1), um die normale Wiedergabe ab dem Disc-Anfang zu starten. Titel aus dem Programm löschen: Drücken Sie die STOP-Tast (2), um die programmierte Wiedergabe zu stoppen. Drücken Sie die CLEAR-Taste, um denletzten Titel im Programm zu löschen. Das gesamte Programm löschen: Das gesamte Programm wird gelöscht, wenn die Stromversorgung ausgeschaltet, die Funktion gewechselt oder die Discausgeworfen wird. Das gesamte Programm kann auch gelöscht werden, indem Sie zunächst die Stopptaste zum Beenden der programmierten Wiedergabe und anschließend die PROG/DIRECT-Taste drücken. Überprüfung der programmierten Spuren: Drücken Sie die CALL-Taste, um sich die programmierten Spuren nacheinander anzeigen zu lassen. 185 2ADV-M71E2_GER p175-p227 03.12.25 1:16 PM ページ 186 DEUTSCH (5) Titel in zufälliger Reihenfolge abspielen 2 Verwenden Sie diese Funktion bei Video- und Musik-CDs, um Titel in zufälligerReihenfolge wiederzugeben. 2 Diese Funktion kann nicht bei DVDs aktiviert werden. SLEEP NTSC/PAL TITLE TV IN T V ENTER A-B REPEAT CHARAC. SLIDE MODE EDIT/MENU ZOOM SOURCE CLEAR TV CH RDS PROG/DIRECT Stellen Sie die FernbedienungsWahlschalter auf A/V und DVD. PTY RANDOM MODE MEMO BAND DVD TUNER D.AUX 1 2 3 MD/LINE-1 TAPE /LINE-2 4 TUNER TV / VCR DVD IN/SURR. A/V REPEAT CDR TAPE + CT CD SRS RT SEARCH MODE 1 TUNING / TV VOL 5 6 5CH STEREO AUTO DECODE TUNER + 7 8 9 DIRECT STEREO VIRTUAL CALL 0/10 +10 - TEST TONE INPUT MODE SURROUND FUNCTION CH TUNER TV / VCR DVD IN/SURR. A/V IN/SURR. MD IN/SURR. MD TV CH + - SYSTEM SYSTEM TIME - CDR TAPE 2 1 2 + DVD 8 6 9 7 - STATUS 3 1 MUTING Drücken Sie im Stopp-Modus die RANDOM-Taste. • Der Random-Wiedergabe-Bildschirm erscheint. RANDOM BAND RANDOM ON Fernbedienung 2 Drücken Sie die PLAY-Taste (1). • Die Titelwiedergabe in zufälliger Reihenfolge beginnt. 1 DVD Haupteinheit Fernbedienung • Bei einigen Discs kann die Random-Wiedergabe nicht aktiviert werden. Zurück zur normalen Wiedergabe: Drücken Sie die STOP-Taste (2), um die Random-Wiedergabe zu stoppen, drücken Sie anschließend die RANDOM-Taste eineinziges Mal. 186 2ADV-M71E2_GER p175-p227 03.12.25 1:16 PM ページ 187 DEUTSCH (6) MP3-Wiedergabe [1] Wiedergabe von bespielten MP3-CDs/CD-Rs/CD-RWs 2 Im Internet gibt es viele Distributions-Sites, von denen Musikdateien im MP3-Format heruntergeladen werden können. Vondiesen Sites heruntergeladene und auf CD-R/RW-Discs geschriebene Musik kann mit dem ADV-M71 abgespielt werden. Wenn die auf im Handel erhältlichen Musik-CDs aufgenommene Musik auf einem Computer mittels eines MP3Encoders(Konversionssoftware) in MP3-Dateien konvertiert wird, werden die Daten auf einer 12 cm-Disc auf etwa 1/10 der Originaldatenreduziert. Folglich können Daten von etwa 10 Musik-CDs im MP3-Format auf eine einzige CD-R/RW-Disc geschrieben werden. Auf einer einzigen CD-R/RW-Disc können mehr als 100 Titel enthalten sein. Werte, wenn 5 Minuten lange Titel mit einer Standard-Birate von 128 kbps in MP3-Dateien konvertiert werden und eine CDR/RW-Disc mit einer Kapazität von 650 MB verwendet wird. 1 1 3 CALL 0/10 +10 - TEST TONE INPUT MODE SURROUND FUNCTION TUNER TV / VCR DVD IN/SURR. A/V SYSTEM B CDR TAPE PUSH - PARAM. 3 - 1 2 + DVD + BAND MENU / SET TONE / SDB IN/SURR. MD SURROUND / SELECT DVD SURROUND RECEIVER ADV-M71 8 9 - VOLUME 6 7 FUNCTION STATUS ON / STANDBY PHONES 3 MUTING SETUP TONE /SDB 2,3 ENTER SURROUND PARAMETER CH SELECT DISPLAY RETURN ANGLE 1 Legen Sie die CD-R/RW-Disc, auf der Musik im MP3Format gespeichert ist, in dieses Gerät ein. (Siehe Seite 152.) • Wenn die Disc im ADV-M71 eingelegt ist, erscheintder Discinformations-Bildschirm. • Fahren Sie mit Schritt 2 fort, wenn mehrere Ordnervorhanden sind. • Wenn keine Ordner auf der Disc vorhanden sind(wenn die Disc nur MP3-Dateien enthält), fahren Siemit Schritt 3 fort. Alle auf der Disc gespeicherten Ordner werdenangezeigt. (Die Ordner werden nicht 2 Wählen Sie den Ordner, der die Datei(en) enthält, die Sieabspielen möchten, mit den Cursor-Tasten • und ª aus, drücken Sie anschließend die ENTER-Taste. Ordner wechselnr Wählen Sie mit der Cursor-Taste • “ROOT” obenrechts im Bildschirm, drücken Sie anschließend dieENTER-Taste. Der Bildschirm, der bei Schritt 1 angezeigt wurde, erscheint wieder. Wählen Sie den gewünschten Ordner aus. VCR CH MENU AUDIO + TOP MENU SUB TITLE ENTER \ Fernbedienung Fernbedienung 187 2ADV-M71E2_GER p175-p227 03.12.25 1:16 PM ページ 188 DEUTSCH 3 Wählen Sie die MP3-Datei, die Sie abspielen möchten,mit den Cursor-Tasten • und ª aus, drücken Sieanschließend die PLAY-Taste (1) oder die ENTER-Taste. • Die Wiedergabe startet. Das Display kann durch Drücken der DISPLAYTastezwischen der verstrichenen Zeit und derverbleibenden Zeit gewechselt werden. Die programmierte Wiedergabe ist bei MP3-Discsnicht möglich. Die MP3-Datei wechseln Drücken Sie die STOP-Taste, und verwenden Siedie Cursor-Tasten • und ª , um die gewünschteMP3-Datei auszuwählen. Den Random-Wiedergabemodus aktivieren Drücken Sie im Stopp-Modus die RANDOM-Taste. Drücken Sie anschließend die PLAY-Taste (1) oderdie ENTER-Taste. Wiederholungs-Modus aktivieren Der Wiederholungs-Modus wird bei jederTastenbetätigung von REPEAT gewechselt. NORMAL Æ TRACK REPEAT Æ FOLDER REPEAT ≠ 1 \ DVD Haupteinheit Fernbedienung Fernbedienung \ ENTER Fernbedienung Rückkehr zum anfänglichen DiscinformationsBildschirm Drücken Sie die STOP-Taste (2), wählen Sie mit der Cursor-Taste • “ROOT” oben rechts im Bildschirm aus und drücken Sie danach die ENTERTaste. Der Bildschirm, der bei Schritt 1 angezeigt wurde,erscheint wieder. HINWEISE: • Der ADV-M71 ist mit den “MPEG-1 Audio Layer 3”-Standards kompatibel (Abtastfrequenz von 32, 44,1 oder 48 kHz). Erist nicht kompatibel mit anderen Standards, wie “MPEG-2 Audio Layer 3”, “MPEG-2.5 Audio Layer 3”, MP1, MP2, usw. • Möglicherweise können einige CD-R/RW-Discs aufgrund der Disc-Eigenschaften, Schmutz, Verformung, usw. nichtabgespielt werden. • Die während der Wiedergabe von MP3-Dateien ausgegebenen Digitalsignale sind MP3-Signale, die in PCM konvertiertsind, dabei ist es egal, ob der Audioausgang auf “normal” oder “PCM-Konvertierung” eingestellt ist. Die Signale werdenmit der gleichen Abtastfrequenz ausgegeben, wie die von der Musikquelle. • Allgemein ausgedrückt, je höher die Bitrate einer MP3-Datei, desto besser die Tonqualität. Wir empfehlen MP3-Dateien mitBitraten von 128 kbps oder größer mit dem ADV-M71 wiederzugeben. • MP3-Dateien werden möglicherweise nicht in der erwarteten Reihenfolge wiedergegeben, da die Schreibsoftware beimSchreiben auf eine CD-R/RW-Disc die Position der Datei-Ordner ändern kann. • Bei MP3-Discs ist keine manuelle Suche und programmierte Wiedergabe möglich. • Wählen Sie beim Schreiben von MP3-Dateien auf CD-R/RW-Discs “ISO9660 level 1” als Schreibsoftware-Format aus. Diesist • • • • • • • 188 möglicherweise bei einigen Schreibsoftware-Typen nicht möglich. Lesen Sie hinsichtlich Einzelheiten dieBedienungsanleitung der Schreibsoftware. Beim ADV-M71 ist es möglich, Ordnernamen und Dateinamen wie Titel auf dem Bildschirm anzeigen zu lassen. Der ADV-M71 kann bis zu 11 Zeichen anzeigen, die aus Zahlen, Großbuchstaben und dem “_”-Zeichen (Unterstreichnungszeichen)bestehen können. Wenn die Aufnahme mit einem anderen Format als “ISO9660 level 1” erfolgt, ist möglicherweise keine normale Anzeigeund Wiedergabe möglich.Ferner werden Ordner- und Dateinamen nicht einwandfrei angezeigt, wenn sie andere Symboleenthalten. Erweitern Sie die MP3-Dateien unbedingt mit dem Zusatz “.MP3”. Dateien können nicht angezeigt werden, wenn sie eineandere Erweiterung enthalten als “.MP3” oder gar keine Erweiterung besitzen. (bei Macintosh-Computern können MP3-Dateien wiedergegeben werden, indem “.MP3” hinter dem Dateinamen, der aus bis zu 8 Großbuchstaben oder Zahlenbesteht, hinzugefügt wird und die Dateien auf einer CD-R/RW aufgenommen werden.) Kleben Sie keine Aufkleber, Klebeband, usw. auf die Schriftseite oder Signalseite der CD-R/RW-Discs. Wenn Kleber auf dieDiscOberfläche gelangt, kann die Disc im Innern des ADV-M71 stecken bleiben und nicht mehr ausgeworfen werden. Der ADV-M71 ist nicht mit der Paket-Schreibsoftware kompatibel. Der ADV-M71 ist nicht mit ID3-Tag kompatibel. Der ADV-M71 ist nicht mit Wiedergabelisten kompatibel. 2ADV-M71E2_GER p175-p227 03.12.25 1:16 PM ページ 189 DEUTSCH [2] Wiedergabe von bespielten WMA- (Windows Media Audio) CD-Rs/CD-RWs • Mit diesem Gerät können Sie CD-R/RW-Musikdateien wiedergeben lassen, die im WMA (Windows Media Audio)*-AudioKomprimierungsformat aufgenommen worden sind. Windows Media und das Windows-Logo sind Warenzeichen oder eingetragene Warenzeichen der Microsoft Corporation in den Vereinigten Staaten und/oder in anderen Ländern. WMA (Windows Media Audio): Neues Audio-Codierungsverfahren der Microsoft Corporation (USA) • Die Verwendung Ihrer Aufnahmen für andere als private Zwecke ohne die vorherige Genehmigung des Urheberrechtsinhabers kann gegen bestehende Urheberrechte verstoßen. • Das Wiedergabeverfahren ist mit dem auf den Seiten 187 und 188 unter “[1] Wiedegabe von bespielten MP3-CDs/CD-Rs/CD-RWs” beschriebenen Verfahren identisch. • In der Dateianzeige des Disc-Informationsbildschirmes werden WMA-Dateien anstatt des “MP3”-Symbols mit dem “WMA”-Symbol angezeigt. (Dateien ohne das “WMA”-Symbol können nicht angezeigt werden.) HINWEISE: • Mit einer Abtastfrequenz von 32, 44,1 und 48 kHz aufgenommene Dateien werden unterstützt. • Bei WMA-Dateien ist keine programmierte Wiedergabe möglich. • Bei der Wiedergabe einer WMA-Datei wird der Digitalausgang unabhängig von den Anfangseinstellungen in PCM konvertiert. • Bitte verwenden Sie Discs, die entsprechend dem ISO 9660 Level 1/Level 2 CD-ROM-Dateisystem aufgenommen worden sind. (Erweiterte Formate sind ausgeschlossen.) • Urheberrechtlich geschützte Dateien können nicht wiedergegeben werden. Beachten Sie ferner, dass – je nach Schreibsoftware und Bedingungen – möglicherweise keine Wiedergabe möglich ist, oder die Dateien nicht einwandfrei angezeigt werden. • Die Wiedergabe der CD-R/RW ist unter Umständen – je nach Disc-Eigenschaften, Schmutz, Kratzern und anderen Faktoren – nicht möglich. • Bitraten von 64 k bis 160 kbps werden bei WMA-Dateien mit einer Erweiterung von “wma” oder “.WMA” unterstützt. • Dieses Gerät kann die Ordner- und Dateinamen auf dem Bildschirm anzeigen. Es können bis zu 11 halbwertbreite Zeichen angezeigt werden, die aus Ziffern, Großbuchstaben und Symbolen (einschließlich dem Unterstrich) bestehen. • Im Stoppmodus können Sie mit der DISPLAY-Taste der Fernbedienung die Titel- und Künstlernamen ändern. (Ein Ordner verfügt über eine Kapazität von bis zu 99 Dateien.) • Bespielte Discs sollten nicht mehr als 99 Dateien enthalten. Es sind mehrere Ordner-Konfigurationen möglich; dennoch können aufgrund der Konfiguration unter Umständen nicht alle Ordner und Dateien wiedergegeben werden. • Nicht finalisierte Multi-Session-Discs und CD-Rs/RWs können auch wiedergegeben werden; dennoch empfehlen wir die Wiedergabe von Discs, deren Session innerhalb von 10 Sessions geschlossen wurde und die finalisiert wurden. • Bei der direkten Spurwahl mit Hilfe der Fernbedienungs-Zifferntasten (0 bis 9 und +10) können bis zu 179 Spuren (179 Dateien) pro Ordner festgelegt werden. Wählen Sie bei mehr als 179 Spuren im Stoppmodus mit den Cursor-Tasten im Informations-Bildschirm die Dateien aus, und starten Sie die Wiedergabe mit der Wiedergabetaste der ENTER-Taste. 189 2ADV-M71E2_GER p175-p227 03.12.25 1:16 PM ページ 190 DEUTSCH (7) Wiedergabe von Standbild-Dateien (JPEG-Format) 2 Auf Kodak Picture CDs, CD-Rs und CD-RWs aufgenommene JPEG-Dateien können als Diashow wiedergegeben und auf dem ADV-M71 angezeigt werden. [1] Wiedergabe von Kodak Picture CDs 2 Wiedergabe von Picture CDs Der ADV-M71 kann Kodak Picture CDs wiedergeben, so dass Sie sich die gespeicherten Fotos auf einem Fernseh-Bildschirm ansehen können. (Picture CDs beinhalten mit einer herkömmlichen Kamera aufgenommene Fotos, die in Digitaldaten konvertiert worden sind. Einzelheiten über Picture CDs erfahren Sie in Geschäften, die den Kodak-Entwicklungsservice anbieten.) 8 1 B 1 PUSH - PARAM. - + BAND MENU / SET TONE / SDB - 7 STATUS 3 SURROUND / SELECT DVD SURROUND RECEIVER ADV-M71 9 6 VOLUME Stellen Sie die FernbedienungsWahlschalter auf A/V und DVD. MUTING SETUP TONE /SDB 1-w ENTER SURROUND PARAMETER CH SELECT - FUNCTION ON / STANDBY PHONES TUNER TV / VCR DVD IN/SURR. A/V DISPLAY RETURN ANGLE SYSTEM MENU AUDIO IN/SURR. MD CDR TAPE RC-966 1 Legen Sie die Picture CDs in die Anlage ein. • Für Picture CDs: Nach dem Einlegen der Disc beginnt die Wiedergabe der Standbilder automatisch. Drücken Sie zum Beenden der Wiedergabe die Stopptaste. • “KODAK” ist ein eingetragenes Warenzeichen der Eastman Kodak Co. 190 Haupteinheit VCR CH + TOP MENU SUB TITLE 2ADV-M71E2_GER p175-p227 03.12.25 1:16 PM ページ 191 DEUTSCH [2] Wiedergabe von auf CD-Rs/RWs gespeicherten Standbildern 1 B 3 SURROUND / SELECT DVD SURROUND RECEIVER ADV-M71 PUSH - PARAM. - + BAND MENU / SET TONE / SDB VOLUME PHONES 0/10 +10 - INPUT MODE SURROUND FUNCTION TUNER TV / VCR DVD IN/SURR. A/V Stellen Sie die FernbedienungsWahlschalter auf A/V und DVD. SYSTEM IN/SURR. MD CDR TAPE 3 1 2 + DVD 8 6 9 - 7 STATUS 3 FUNCTION ON / STANDBY CALL TEST TONE TUNER TV / VCR DVD IN/SURR. A/V SYSTEM MUTING SETUP TONE /SDB 2,3 IN/SURR. MD CDR TAPE ENTER SURROUND PARAMETER CH SELECT - 1 Legen Sie die CD-R/RW ein, auf der die Standbilder in den ADV-M71 geschrieben worden sind. • Nach dem Einlegen der Disc in den ADV-M71 erscheint der Disc-Informations-Bildschirm. + B D I SC I NF ORMATI ON ROOT • Fahren Sie mit Schritt 2 fort, wenn die Disc mehrere Ordner enthält. • Fahren Sie mit Schritt 3 fort, wenn die Disc keine Ordner enthält. P L AY MODE ROOT 0 JPEG 1 1 JPEG 2 2 JPEG 3 3 JPEG 4 4 JPEG 5 5 F OL DE R S I GNAL E L APSED S I NGL E : 2 VCR CH : --:-DEC I S I ON : ENTER BUT TON Wählen Sie mit den • und ª Cursor-Tasten den Ordner, der die Datei(en) enthält, die Sie wiedergeben lassen möchten, und drücken Sie dann die ENTER-Taste. B D I SC I NF ORMATI ON Ändern des Ordners Wählen Sie mit der • cursor Taste oben rechts auf dem Bildschirm “ROOT”, und drücken Sie dann die ENTER-Taste. Es erscheint wieder der Bildschirm wie in Schritt 1. Wählen Sie den gewünschten Ordner aus. Fernbedienung ROOT •• 0 JPEG 1 A 1 JPEG 2 B 2 JPEG 3 C 3 JPEG 4 D 4 JPEG 5 E 5 P L AY MODE ENTER F OL DE R S I GNAL E L APSED S I NGL E : : --:-DEC I S I ON : ENTER BUT TON Fernbedienung 3 Wählen Sie mit den • und ª Cursor-Tasten auf der Fernbedienung die Standbild-Datei, von der aus Sie die Diashow beginnen möchten, und drücken Sie dann die PLAY-Taste oder die ENTER-Taste auf der Fernbedienung. • Die Diashow beginnt. • Es werden nur die Standbild-Dateien im ausgewählten Ordner wiedergegeben. Nach der Wiedergabe aller im Ordner enthaltenen Standbild-Dateien erscheint wieder der DiscInformationsbildschirm. B D I SC I NF ORMATI ON Fernbedienung ROOT •• 0 JPEG 1 A 1 JPEG 2 B 2 JPEG 3 C 3 JPEG 4 D 4 JPEG 5 E 5 P L AY MODE F OL DE R S I GNAL E L APSED S I NGL E : : --:-DEC I S I ON : ENTER BUT TON ENTER 1 DVD Haupteinheit Fernbedienung 191 2ADV-M71E2_GER p175-p227 03.12.25 1:16 PM ページ 192 DEUTSCH Wenn Sie sich mehrere der auf der Disc gespeicherte Standbilder gleichzeitig ansehen möchten: • Drücken Sie die STOP-Taste, um 9 Standbilder gleichzeitig anzeigen zu lassen. • Um ein Standbild auszuwählen und anzeigen zu lassen (zum Starten der Diashow von einem bestimmten Standbild aus), wählen Sie das gewünschte Standbild mit den Cursor-Tasten (ª, •, 0 und 1), und Sie drücken dann die ENTER-Taste. Zum vorübergehenden Unterbrechen der Diashow: • Drücken Sie die PAUSE-Taste. • Drücken Sie zum Fortsetzen der Diashow die PLAY-Taste. Suche nach einem Standbild, das angezeigt werden soll (von dem aus Sie die Diashow starten möchten): • Drücken Sie während der Diashow die SKIP (8, 9)-Tasten. Drücken Sie die SKIP 8 -Taste, um an das vorherige Standbild zu gelangen, und die SKIP -9 -Taste, um sich das nächste Standbild anzeigen zu lassen. Umkehren und Drehen von Standbildern: • Kehren Sie das Standbild mit den Cursor-Tasten (ª, •, 0 und 1) um. Das gegenwärtig angezeigte Standbild wird vertikal umgekehrt. • Cursor-Taste: Das gegenwärtig angezeigte Standbild wird horizontal umgekehrt. ª Cursor-Taste: 0 Cursor-Taste: 1 Cursor-Taste: Das gegenwärtig angezeigte Bild wird um 90° entgegen dem Uhrzeigersinn gedreht. Das gegenwärtig angezeigte Bild wird um 90° im Uhrzeigersinn gedreht. Wiedergabe des Bildes im Zoom-Modus. • Wenn während der Wiedergabe eines JPEG-Bildes (zu diesem Zeitpunkt wird “ZOOM ON” auf dem Bildschirm angezeigt) die ZOOM-Taste gedrückt wird, kann das Bild mit Hilfe der Suchtasten ein- und ausgezoomt (vergrößert und verkleinert) werden. (6: auszoomen, 7: einzoomen) • Das gezoomte Bild kann mit den Cursor-Tasten (ª, •, 0 und 1) verschoben werden. • Im Zoom-Modus ist keine fortlaufende Wiedergabe (SLIDE SHOW) möglich. Die Art, wie während der fortlaufenden JPEG-Bildwiedergabe (SLIDE SHOW) zum nächsten Bild umgeschaltet werden soll, kann ausgewählt werden. • Drücken Sie die SLIDE MODE-Taste auf der Fernbedienung. • Wählen Sie zwischen SLIDE SHOW MODE 1, MODE 11, MODE RAND und MODE NONE. Spezielle Wiedergabemodi für MP3/WMA- und JPEG-Dateien Wählen Sie mit den 0 und 1 -Cursor-Tasten den Wiedergabemodus, und mit den ª und •-Cursor-Tasten den speziellen Wiedergabemodus. • FOLDER (Die im Ordner enthaltenen MP3/WMA- und JPEG-Dateien werden – beginnend mit der ausgewählten Datei – nacheinander wiedergegeben.) • FOLDER REPEAT (Alle im Ordner enthaltenen MP3/WMA- und JPEG-Dateien werden – beginnend mit der ausgewählten Datei – noch einmal wiedergegeben.) • DISC (Alle auf der Disc enthaltenen MP3/WMA- und JPEG-Dateien werden – beginnend mit der ausgewählten Datei – nacheinander wiedergegeben.) • DISC REPEAT (Alle auf der Disc enthaltenen MP3/WMA- und JPEG-Dateien werden – beginnend mit der ausgewählten Datei – noch einmal wiedergegeben.) • RANDOM ON (Alle im Ordner enthaltenen MP3/WMA- und JPEG-Dateien werden – beginnend mit der ausgewählten Datei – in zufälliger Reihenfolge wiedergegeben.) • TRACK REPEAT (Die ausgewählte MP3/WMA- oder JPEG-Datei wird noch einmal wiedergegeben.) HINWEISE: • Der ADV-M71 ist mit im JPEG-Format gespeicherten Bilddaten kompatibel. Dennoch kann Denon nicht garantieren, dass alle im JPEGFormat gespeicherten Bilddaten angezeigt werden können. • Bilder mit einer Auflösung von bis 2048 x 1536 Pixel können angezeigt werden. • Einige CD-Rs/RWs können möglicherweise aufgrund ihrer Disc-Eigenschaften, Schmutz, Kratzern usw. nicht wiedergegeben werden. • Beim Speichern von JPEG-Dateien auf CD-Rs/RWs muss das Schreibprogramm auf das Format “ISO9660 level 1” gestellt werden. • Die JPEG-Dateien müssen über die Erweiterung “.JPG” und “.JPE” verfügen. Dateien mit anderen Erweiterungen können auf dem ADVM71 nicht angezeigt werden. • Kleben Sie weder auf die Schriftseite noch auf die Signalseite von CD-R/RW-Discs Aufkleber, Klebeband usw. Wenn Kleber auf die DiscOberfläche gelangt, kann die Disc im Inneren des ADV-M71 stecken bleiben und nicht mehr ausgeworfen werden. • Lassen Sie sich keine CD-R/RW-Discs wiedergeben, die andere Dateien als Music CD-Dateien (im CDA-Format), MPW/WMA- und JPEGDateien enthalten. Dies könnte – je nach Dateityp – sowohl Fehlfunktionen als auch Beschädigungen verursachen. • Mit Hilfe von Macintosh-Computern geschriebene JPEG-Dateien können nicht wiedergegeben werden. 192 2ADV-M71E2_GER p175-p227 03.12.25 1:16 PM ページ 193 DEUTSCH (8) Verwendung der Multiplen Audio-, Untertitel- und Winkelfunktionen [1] Audiosprache wechseln (Multiple Audiofunktion) 2 Bei DVDs, die multiple Audiosprachsignale enthalten, kann die Audiosprache während der Wiedergabe gewechselt werden. CDR TAPE 1 2 + DVD 8 9 6 Stellen Sie die FernbedienungsWahlschalter auf A/V und DVD. - 7 STATUS 3 MUTING SETUP TONE /SDB 2 ENTER SURROUND PARAMETER CH SELECT TUNER TV / VCR DVD IN/SURR. A/V DISPLAY RETURN SYSTEM MENU VCR CH + TOP MENU IN/SURR. MD CDR TAPE ANGLE AUDIO SUB TITLE 1 RC-966 1 Drücken Sie während der Wiedergabe die AUDIO-Taste. • Die Anzahl der aktuellen Audiosprachen wirdangezeigt. AUDIO AUDIO 1/3:DOLBY D3/2/.1 ENG Fernbedienung 2 Wählen Sie mit den Cursor-Tasten • und ª diegewünschte Sprache aus. • Das Display wird ausgeschaltet, wenn die AUDIOTastegedrückt wird AUDIO 2/3:DOLBY D3/2/.1 FRA Fernbedienung HINWEISE: • Bei einigen Discs ist es nicht möglich, die Audiosprache während der Wiedergabe zu wechseln. Wählen Sie sie in solchen Fälle mithilfe des DVD-Menüs aus. (Siehe Seite 208.) • Wenn die gewünschte Sprache nicht eingestellt ist, nachdem die Cursor-Tasten und einige Male gedrückt wurden,ist diese Sprache nicht auf der Disc enthalten. • Die in den Voreinstellungen ausgewählte Sprache wird aktiviert, wenn die Stromversorgung eingeschaltet und die Discausgetauscht wird. 193 2ADV-M71E2_GER p175-p227 03.12.25 1:16 PM ページ 194 DEUTSCH [2] Untertitel-Sprache wechseln (Multiple Untertitelfunktion) 2 Bei DVDs, die multiple Untertitel-Sprachsignale enthalten, kann die Untertitel-Sprache während der Wiedergabe gewechseltwerden. CDR TAPE 1 2 + DVD 8 9 6 Stellen Sie die FernbedienungsWahlschalter auf A/V und DVD. - 7 STATUS 3 MUTING SETUP TONE /SDB 2 ENTER SURROUND PARAMETER CH SELECT TUNER TV / VCR DVD IN/SURR. A/V DISPLAY RETURN SYSTEM MENU + VCR CH TOP MENU IN/SURR. MD CDR TAPE ANGLE AUDIO SUB TITLE 1 RC-966 1 Drücken Sie während der Wiedergabe die SUBTITLETaste. • Die Anzahl der aktuellen Untertitel-Sprachen wirdangezeigt. SUB TITLE SUBTITLE 01/03:ENG SUBTITLE 02/03:FRA Fernbedienung 2 Wählen Sie mit den Cursor-Tasten und die gewünschte Sprache aus. • Das Display wird ausgeschaltet, wenn die SUBTITLE-Taste gedrückt wird. Fernbedienung HINWEISE: • Wenn die gewünschte Sprache nicht eingestellt ist, nachdem die Cursor-Tasten und einige Male gedrückt wurden,ist diese Sprache nicht auf der Disc enthalten. • Die in den Voreinstellungen ausgewählte Untertitel-Sprache wird aktiviert, wenn die Stromversorgung eingeschaltet und dieDisc ausgetauscht wird. Wenn diese Sprache nicht auf der Disc enthalten ist, wird die auf der Disc voreingestellte Spracheaktiviert. • Wenn die Untertitel-Sprache gewechselt wird, kann es einige Sekunden dauern, bis die neue Sprache erscheint. • Wenn eine Disc, die Sperrinsert-Funktion unterstützt, wiedergegeben wird, erscheinen die Untertitel und die Sperrinsertsauf dem TVBildschirm übereinander. Schalten Sie in diesem Fall die Untertitel-Funktion aus. 194 2ADV-M71E2_GER p175-p227 03.12.25 1:16 PM ページ 195 DEUTSCH [3] Den Winkel wechseln (Multiple Winkelfunktion) 2 Bei DVDs, die multiple Winkelsignale enthalten, kann der Winkel während der Wiedergabe gewechselt werden. CDR TAPE 1 2 + DVD 8 9 6 Stellen Sie die FernbedienungsWahlschalter auf A/V und DVD. - 7 STATUS 3 MUTING SETUP TONE /SDB 2 ENTER SURROUND PARAMETER CH SELECT TUNER TV / VCR DVD IN/SURR. A/V DISPLAY RETURN SYSTEM IN/SURR. MD CDR TAPE 1 ANGLE MENU AUDIO VCR CH + TOP MENU SUB TITLE RC-966 1 Drücken Sie während der Wiedergabe die ANGLE-Taste. • Die Anzahl der aktuellen Winkel wird angezeigt. 3/5 ANGLE Fernbedienung 2 Wählen Sie mit den Cursor-Tasten • und ª dengewünschten Winkel aus. • Das Display wird ausgeschaltet, wenn die ANGLETastegedrückt wird. 4/5 Fernbedienung HINWEISE: • Die multiple Winkelfunktion kann nur bei Discs aktiviert werden, auf der multiple Winkel aufgenommen sind. • Bei Szenen, die in multiplen Winkeln aufgenommen worden sind, kann der Winkel gewechselt werden. 195 2ADV-M71E2_GER p175-p227 03.12.25 1:16 PM ページ 196 DEUTSCH (9) Verwendung der Menüs [1] Verwendung des Hauptmenüs 2 Bei DVDs, die mehrere Titel enthalten, kann der Titel aus dem Hauptmenü ausgewählt und wiedergegeben werden. CDR TAPE OFF SLEEP TITLE TV IN T V ENTER A-B REPEAT CHARAC. SLIDE MODE EDIT/MENU ZOOM SOURCE CLEAR TV CH Stellen Sie die FernbedienungsWahlschalter auf A/V und DVD. TUNER TV / VCR DVD IN/SURR. A/V SYSTEM IN/SURR. MD RDS PROG/DIRECT 2 1 ON VCR REC NTSC/PAL REPEAT PTY RANDOM MODE MEMO BAND DVD TUNER D.AUX 3 TV CH - 7 STATUS TUNING / TV VOL 2 TAPE /LINE-2 4 5 6 + - 5CH STEREO AUTO DECODE TUNER 8 9 + STEREO 9 6 CT CD SRS RT SEARCH MODE 1 DIRECT 8 + MD/LINE-1 7 + DVD TIME - 2 3 SETUP 0/10 +10 - INPUT MODE SURROUND FUNCTION TONE /SDB 3 2 ENTER SURROUND PARAMETER CH SELECT CH VIRTUAL CALL TEST TONE MUTING DISPLAY RETURN MENU VCR CH + 1 TOP MENU CDR TAPE TUNER TV / VCR DVD IN/SURR. A/V SYSTEM ANGLE SUB TITLE AUDIO IN/SURR. MD CDR TAPE 1 2 DVD 8 1 RC-966 + 9 Drücken Sie während der Wiedergabe die TOP MENUTaste. • Das Hauptmenü erscheint. Beispiel: TOP MENU TOP MENU Apple Banana Orange Strawberry Peach Pineapple Fernbedienung 2 Wählen Sie den gewünschten Titel mit den Cursor- oderden Nummerntasten aus. • Wenn Sie die Titelnummer mit den Nummerntastenwählen, übergehen Sie den unten stehenden Schritt 3. DVD TUNER D.AUX 1 2 3 MD/LINE-1 TAPE /LINE-2 4 5 6 5CH STEREO AUTO DECODE 7 8 9 STEREO VIRTUAL 0/10 +10 Fernbedienung Fernbedienung Beispiel: Wenn “Orange” ausgewählt wird TOP MENU 3 Drücken Sie die ENTER-Taste. • Die Wiedergabe startet. • Die Wiedergabe starten ebenfalls, wenn die PLAY Taste gedrückt wird. Apple Banana Orange Strawberry Peach Pineapple ENTER Fernbedienung 196 2ADV-M71E2_GER p175-p227 03.12.25 1:16 PM ページ 197 DEUTSCH [2] Verwendung des Hauptmenüs 2 DVDs mit einem komplexen Inhalt können z. B. Führungsmenüs enthalten und DVDs mit multiplen Sprachen können AudioundUntertitelSprachen-Menüs enthalten. Diese Menüs werden “DVD-Menüs” genannt. Hier beschreiben wir das allgemeine Verfahren für die Verwendung der DVD-Menüs. CDR TAPE OFF SLEEP TITLE TV IN T V ENTER A-B REPEAT CHARAC. SLIDE MODE EDIT/MENU ZOOM SOURCE CLEAR TV CH Stellen Sie die FernbedienungsWahlschalter auf A/V und DVD. RDS PROG/DIRECT 2 TUNER TV / VCR DVD IN/SURR. A/V SYSTEM IN/SURR. MD 1 ON VCR REC NTSC/PAL REPEAT PTY - RANDOM MODE MEMO BAND DVD TUNER D.AUX 3 TV CH 6 - 7 STATUS 2 TAPE /LINE-2 4 5 6 + - 5CH STEREO AUTO DECODE TUNER 8 9 + STEREO + 9 + TUNING / TV VOL 1 DIRECT 8 CT CD SRS RT SEARCH MODE MD/LINE-1 7 2 DVD TIME 3 SETUP 0/10 +10 - INPUT MODE SURROUND FUNCTION TONE /SDB 3 2 ENTER SURROUND PARAMETER CH SELECT CH VIRTUAL CALL TEST TONE MUTING DISPLAY RETURN MENU VCR CH + 1 TOP MENU CDR TAPE TUNER TV / VCR DVD IN/SURR. A/V SYSTEM ANGLE SUB TITLE AUDIO IN/SURR. MD CDR TAPE 1 2 DVD 8 1 RC-966 + 9 Drücken Sie während der Wiedergabe die MENU-Taste. • Das DVD-Menü erscheint. Beispiel: DVD MENU 1. SUB TITLE MENU 2. AUDIO 3. ANGLE Fernbedienung 2 Wählen Sie den gewünschten Punkt mit den Cursoroderden Nummerntasten aus. • Wenn Sie den Punkt mit den Nummerntastenwählen, übergehen Sie den unten stehenden Schritt 3. DVD TUNER D.AUX 1 2 3 MD/LINE-1 TAPE /LINE-2 4 5 6 5CH STEREO AUTO DECODE 7 8 9 STEREO VIRTUAL 0/10 +10 Fernbedienung Fernbedienung Beispiel: “TON” wird ausgewählt DVD MENU 1. SUB TITLE 2. TON 3. ANGLE 3 Drücken Sie die ENTER-Taste. • Der ausgewählte Punkt wird eingestellt. • Wenn mehrere Menüs erscheinen, wiederholen Siedie Schritte 2 und 3. ENTER Fernbedienung 197 2ADV-M71E2_GER p175-p227 03.12.25 1:16 PM ページ 198 DEUTSCH (10) Wiedergabe im Zoom-Modus CDR TAPE OFF SLEEP TITLE TV IN T V ENTER A-B REPEAT CHARAC. SLIDE MODE EDIT/MENU ZOOM SOURCE CLEAR TV CH Stellen Sie die FernbedienungsWahlschalter auf A/V und DVD. TUNER TV / VCR DVD IN/SURR. A/V SYSTEM IN/SURR. MD RDS PROG/DIRECT 1 ON VCR REC NTSC/PAL REPEAT PTY - RANDOM MODE MEMO BAND DVD TUNER D.AUX 3 TV CH 2 + DVD TIME + CT CD SRS RT SEARCH MODE 8 1 9 6 - 7 STATUS TUNING / TV VOL 1 2 MD/LINE-1 TAPE /LINE-2 4 5 6 + - 5CH STEREO AUTO DECODE TUNER 3 MUTING SETUP TONE /SDB 8 9 STEREO VIRTUAL CALL 0/10 +10 - TEST TONE INPUT MODE SURROUND FUNCTION 2 ENTER + 7 DIRECT CH SURROUND PARAMETER CH SELECT DISPLAY RETURN MENU VCR CH + TOP MENU CDR TAPE TUNER TV / VCR DVD IN/SURR. A/V SYSTEM ANGLE AUDIO SUB TITLE IN/SURR. MD CDR TAPE 1 2 DVD 8 1 + RC-966 9 Drücken Sie im Wiedergabe- oder Pausemodus die ZOOM-Taste. • Der Zoom-Faktor erhöht sich bei jedem Drücken der ZOOM-Taste. Bei DVD-Videodiscs und Video-CDs: OFF Æ x1.5 Æ x2 Æ x4 Æ OFF EDIT/MENU ZOOM TV CH + Fernbedienung 2 Verschieben Sie das gezoomte Bild mit den Cursor-Tasten (ª, •, 0 und 1). Fernbedienung HINWEISE: • Bei einigen Discs ist kein Zoomen möglich. • In einigen Szenen arbeitet die Zoom-Funktion möglicherweise nicht einwandfrei. • Im Top-Menü oder Menü-Bildschirm ist kein Zoomen möglich. 198 2ADV-M71E2_GER p175-p227 03.12.25 1:16 PM ページ 199 DEUTSCH 18 VERWENDUNG DES TIMERS 2 Nach Beendigung des Setups können sowohl Timer- als auch Systemfunktionen ausgeführt werden. (1) Einstellung der aktuellen Uhrzeit (24-Stunden-Anzeige) Beispiel: Einstellung der aktuellen Uhrzeit auf “19:30” 4,6 2,3,5,7 B 5 SURROUND / SELECT DVD SURROUND RECEIVER ADV-M71 PUSH - PARAM. - Adj 19 : 0 0 MENU / SET + BAND MENU / SET TONE / SDB Drücken Sie die MENU/SET-Taste. VOLUME FUNCTION Haupteinheit ON / STANDBY PHONES 6 1 1 Drehen Sie den SURROUND/SELECT-Wähler, um zur Minuten-Position zu gelangen. Adj 19 : 3 0 SURROUND / SELECT PUSH - PARAM. Schalten Sie die Stromversorgung ein. ON / STANDBY Haupteinheit Haupteinheit 2 Drücken Sie die MENU/SET-Taste, um “Time” sich anzeigen zu lassen. 7 Drücken Sie beim Ertönen eines Zeitsignals o. Ä. die MENU/SET-Taste. • Die “30” in der Minuten-Position hört auf zu blinken, und die aktuelle Uhrzeit wurde eingestellt. Time 19 : 3 0 MENU / SET MENU / SET Time 0:00 Haupteinheit Haupteinheit • Falls die Uhrzeit noch nicht eingestellt wurde oder es einen Stromausfall gegeben hat, blinkt die Zeitanzeige. • Falls die Uhrzeit eingestellt wurde, wird die aktuelle Uhrzeit angezeigt. 3 Halten Sie die MENU/SET-Taste für länger als 2 Sekunden gedrückt. • Die Stunden-Position blinkt. MENU / SET Adj 0:00 Haupteinheit 4 Drehen Sie den SURROUND/SELECT-Wähler, um die Stunden einzustellen. SURROUND / SELECT PUSH - PARAM. Adj 19:00 Um während der normalen Anzeige die aktuelle Uhrzeit zu überprüfen, drücken Sie einmal die MENU/SET-Taste. Die aktuelle Uhrzeit bleibt so lange angezeigt, bis eine andere Funktion ausgeführt wird. Die Uhrzeit kann angezeigt werden, wenn Sie die MENU/SETTaste drücken, während sich das Gerät im Standby-Modus befindet. (Danach befindet sich das Gerät nicht länger im Energiesparmodus.) Wenn Sie diese Taste zweimal drücken, während die Uhrzeit angezeigt wird, schaltet sich die Anzeige aus, und das Gerät setzt sich wieder in den energiesparenden StandbyModus. Die aktuelle Uhrzeit kann auch im Standby-Modus eingestellt werden, indem zunächst die MENU/SET-Taste zum Anzeigen der Uhrzeit gedrückt wird und anschließend die Schritte 3 bis 7 ausgeführt werden. Die Uhr läuft durch die Synchronisierung mit der Spannungsversorgungs-Frequenz. Möglicherweise verliert die Uhr pro Monat 2 bis 3 Minuten. Stellen Sie die Uhrzeit in einem solchen Fall neu ein. Haupteinheit Vor der Einstellung des Timers 2 Stellen Sie unbedingt die aktuelle Uhrzeit ein. Wenn die aktuelle Uhrzeit nicht eingestellt ist, leuchtet die Timer-Standby-Anzeige nicht und der Timer funktioniert nicht. 2 Programmieren Sie vor der Einstellung des Timers unbedingt den Rundfunksender vor. (Siehe Seite 176.) 2 Täglicher Timer: Die Stromversorgung wird einmal täglich zur gleichen Zeit ein- und ausgeschaltet (Standby) Einmal-Timer: Die Stromversorgung wird einmal zu einer bestimmten Zeit ein- und ausgeschaltet (Standby). Schlaf-Timer: Dieser Timer kann so eingestellt werden, dass sich die Stromversorgung nach 120 Minuten, nach 90 Minuten oder in 10-MinutenSchritten zwischen 60 und 10 Minuten ausschaltet. 2 Falls sich die für den Täglichen Timer, den Einmal-Timer und den Schlaf-Timer eingestellten Uhrzeiten überschneiden, hat der Schlaf-Timer Priorität. Der Einmal-Timer hat Priorität, wenn sich die für den Täglichen Timer und Einmal-Timer eingestellten Zeiten überschneiden. 2 Die Start- und Endzeiten des Timers dürfen nicht identisch sein. 199 2ADV-M71E2_GER p175-p227 03.12.25 1:16 PM ページ 200 DEUTSCH (2) Einstellung des Täglichen Timers und Einmal-Timers 2 Stellen Sie vor der Einstellung des Timers unbedingt die aktuelle Uhrzeit ein. (Siehe Seite 199.) 2 Bei der Verwendung des Täglichen Timers wird die Stromversorgung einmal täglich zur gleichen Zeit ein- und ausgeschaltet (Standby). Mit dem Einmal-Timer wird die Stromversorgung einmal zu einer bestimmten Zeit ein- und ausgeschaltet (Standby). 2 Mit dem ADV-M71 kann mit Hilfe der Timer-Funktion ein Rundfunksender, eine DVD oder eine CD wiedergegeben werden. 2 Mit dem Timer kann eine DVD, eine CD, ein Kassettenband, ein Rundfunksender, eine MD oder von einem an die AUX-Anschlüsse angeschlossenen Gerät wiedergegeben werden. Darüber hinaus kann vom Tuner oder vom an die AUX-Anschlüsse angeschlossenen Gerät mit Hilfe des Timers auf einen MD-Recorder oder ein Kassettendeck aufgenommen werden. Bei einigen DVDs ist die Timer-Wiedergabe nicht möglich. (Die meisten DVDs stoppen im Menü-Bildschirm.) Beispiel 1: Wiedergabe des vorprogrammierten Senders “3” (UKW 92,5 MHz) von 12:35 bis 12:56 mit dem Täglichen Timer 2,3,4,6,8, 3,5,7,9,11, 13,15,17 10,12,14,16 5 Drehen Sie den SURROUND/SELECT-Regler und stellen Sie die “TUNER”-Funktion ein. SURROUND / SELECT PUSH - PARAM. E B TUNER SURROUND / SELECT DVD SURROUND RECEIVER ADV-M71 PUSH - PARAM. - Haupteinheit + BAND MENU / SET TONE / SDB VOLUME Bei jedem Drücken der Surround-Taste ändert sich die Funktion wie nachfolgend gezeigt. Die mit “*” gekennzeichneten Funktionen unterscheiden je nach dem, ob “LINE-1” oder “LINE-2” eingestellt wurde. FUNCTION ON / STANDBY PHONES 1,18 DVD *AUX 1 Schalten Sie die Stromversorgungein. *TU ON / STANDBY TUNER 2) *(LINE2) *TU (LINE1) (LINE1 ou (LINE2) *(LINE1) :Drehen im Uhrzeigersinn :Drehen entgegen dem aUhrzeigersinn Haupteinheit 2 6 Drücken Sie die MENU/SET-Taste. MENU / SET Drücken Sie die MENU/SET-Taste, um sich “TIMER” anzeigen zu lassen. MENU / SET Haupteinheit TIMER Haupteinheit 7 Drehen Sie den SURROUND/SELECT-Regler und wählen Sie die Vorwahlnummer “P03”. SURROUND / SELECT 3 Drehen Sie den SURROUND/SELECT-Regler, um “EVERYDAY” sich anzeigen zu lassen, und drücken Sie dann die MENU/SET-Taste. • Bei jedem Drehen des SURROUND / SELECT S U R R O U N D / S E L E C T- R e g l e r s PUSH - PARAM. ändert sich die Anzeige wie folgt: EVERYDAY P03 92.50M PUSH - PARAM. Haupteinheit 8 Haupteinheit Bei jedem Drehen des SURROUND/SELECT-Reglers ändert sich die Anzeige wie folgt: FM Drücken Sie die MENU/SET-Taste. • Die Daten für den ausgewählten Sender werden im Speicher gespeichert, und das Gerät wird in den TimerStartzeit-Eingabemodus umgeschaltet. • “E” und “on” wird angezeigt. MENU / SET E MENU / SET on 0:00 Haupteinheit ONCE 4 EVERYDAY Haupteinheit 9 Drücken Sie die MENU/SET-Taste. E FUNC MENU / SET SURROUND / SELECT E Haupteinheit 200 <Einstellen der Timer-Startzeit > Drehen Sie den SURROUND/SELECT-Regler, um die Stunden-Position “12” einzugeben. on 12:00 PUSH - PARAM. Haupteinheit 2ADV-M71E2_GER p175-p227 03.12.25 1:16 PM ページ 201 DEUTSCH 10 Drücken Sie die MENU/SET-Taste. • “12” wird im Speicher gespeichert. E on 12:00 17 MENU / SET Haupteinheit 11 Drehen Sie den SURROUND/SELECT-Regler, um die Minuten auf “35” einzustellen. Drücken Sie den SURROUND/SELECT-Regler, um “Eon” anzeigen zu lassen. SURROUND / SELECT PUSH - PARAM. • Der Tägliche Timer wird eingeschaltet und die TimerStandby-Anzeige Damit ist die Haupteinheit Timer-Einstellung beendet. Lesen Sie hinsichtlich der Einzelheiten den Abschnitt “Einund Ausschalten des Täglichen Timers und des EinmalTimers” auf Seite 200. 1 off/E on SURROUND / SELECT PUSH - PARAM. E on 12:35 Haupteinheit 12 Drücken Sie die MENU/SET-Taste. • Die Startzeit wird im Speicher gespeichert und das Gerät wird in den Timer-Endzeit-Eingabemodus umgeschaltet. • “E” und “off” leuchten. MENU / SET E off 0:00 Haupteinheit 13 <Einstellung der Timer-Endzeit > Drehen Sie den SURROUND/SELECT-Regler, um die Stunden auf “12” einzustellen. SURROUND / SELECT PUSH - PARAM. E off 12:00 18 Schalten Sie die Stromversorgung aus. • Der Standby-Modus ist eingestellt. (Die Netzanzeige wechselt auf Orange.) • Beim Erreichen der Timer-Startzeit setzt sich der Timer in Betrieb. ON / STANDBY Haupteinheit Falls Ihnen bei der Timer-Einstellung ein BAND Fehler unterläuft. • Drücken Sie innerhalb der Schritte 4 und 15 jederzeit die Stopptaste. (Es erscheint wieder die Anzeige wie in Schritt 3.) • Drücken Sie mehrmals hintereinander Haupteinheit die MENU/SET-Taste, um sich den Punkt anzeigen zu lassen, den Sie korrigieren möchten, und führen Sie dann die gewünschte Korrektur aus. • Drücken Sie nach der Korrektur des Punktes noch einmal mehrmals hintereinander die MENU/SET-Taste, um mit Schritt 18 fortzufahren, und beenden Sie die Timer-Einstellung. Haupteinheit 14 Drücken Sie die MENU/SET-Taste. • “12” wird im Speicher gespeichert. E off 12:00 HINWEIS: • Wenn die aktuelle Uhrzeit nicht eingestellt wurde, leuchtet die Timer-Standby-Anzeige nicht. (Siehe Seite 199.) MENU / SET Haupteinheit 15 Drehen Sie den SURROUND/SELECT-Regler, um “56” als Minuten einzustellen. SURROUND / SELECT PUSH - PARAM. E off 12:56 Haupteinheit 16 Drücken Sie die MENU/SET-Taste. • Die Endzeit wird im Speicher gespeichert. MENU / SET Haupteinheit 201 2ADV-M71E2_GER p175-p227 03.12.25 1:16 PM ページ 202 DEUTSCH Beispiel 2: Wiedergabe einer CD mit dem Einmal-Timer 2 B 4,6 4 2 Drehen Sie den SURROUND/SELECT-Regler, um sich “ONCE” anzeigen zu lassen, und drücken Sie dann die SURROUND / SELECT MENU/SET-Taste. PUSH - PARAM. ONCE SURROUND / SELECT DVD SURROUND RECEIVER ADV-M71 PUSH - PARAM. - + BAND MENU / SET TONE / SDB VOLUME Haupteinheit FUNCTION Bei jedem Drehen des SURROUND/SELECT-Reglers ändert sich die Anzeige wie folgt: ON / STANDBY PHONES 3,4,5,7 1 ONCE MENU / SET EVERYDAY Haupteinheit 1 Schalten Sie die Stromversorgung ein. ON / STANDBY 5 Drücken Sie die MENU/SET-Taste. • Der Zeiteinstellungs-Modus für den Einmal-Timer wurde eingestellt. MENU / SET • “1” (einmal) leuchtet. 1 FUNC Haupteinheit 2 Öffnen Sie den Disc-Halter, legen Sie eine CD ein und schließen Sie dann den Disc-Halter. Haupteinheit 6 Drehen Sie den SURROUND/SELECT-Regler und stellen Sie die “DVD”-Funktion ein. SURROUND / SELECT 1 DVD PUSH - PARAM. Haupteinheit 3 Öffnen Sie den Disc-Halter, legen Sie eine CD ein und schließen Sie dann den Disc-Halter. Haupteinheit MENU / SET TIMER 7 Drücken Sie die MENU/SET-Tastc. • Die Timer-Funktion “DVD” wird im Speicher gespeichert. MENU / SET Haupteinheit Haupteinheit 8 Folgen Sie jetzt den Schritten 9 bis 18 unter “Einstellung des Täglichen Timers und des Einmal-Timers” (Seiten 200 und 201). • “1” und “on” leuchten bei der Eingabe der Startzeit. “1” und “off” leuchten bei der Eingabe der Endzeit. • “Schalten Sie den Einmal-Timer in Schritt 17 ein. 2 Die Timer-Wiedergabe und -Aufnahme ist möglich, wenn zwischen dem ADV-M71 und dem MD-Recorder der D-M31-Serie (DMD-31) oder dem Kassettendeck (DRR-M31) Systemanschlüsse ausgeführt worden sind. (Sowohl der Tägliche Timer als auch der Einmal-Timer kann verwendet werden.) • Timer-Wiedergabe des Kassettendecks (wenn TAPE für LINE-2 eingestellt wurde ) • Timer-Wiedergabe des MD-Recorders (wenn MD für LINE-1 oder LINE-2 eingestellt wurde) • Timer-Wiedergabe des an die AUX-Eingangsanschlüsse angeschlossenen Gerätes (wenn AUX für LINE-1 oder LINE-2 eingestellt wurde) • Timer-Aufnahme von Rundfunkprogrammen vom ADV-M71 auf das Kassettendeck (wenn TAPE für LINE-1 eingestellt wurde) • Timer-Aufnahme von Rundfunkprogrammen vom ADV-M71 auf den MD-Recorder (wenn MD für LINE-1 eingestellt wurde) • Timer-Aufnahme vom an die AUX-Eingangsanschlüsse angeschlossenen Gerät auf das Kassettendeck (wenn AUX für LINE-1 und TAPE für LINE-2 eingestellt wurde) • Timer-Aufnahme vom an die AUX-Eingangsanschlüsse angeschlossenen Gerät auf einen MD-Recorder (wenn AUX und MD für LINE-1 und LINE-2 eingestellt worden sind) Die Timer-Aufnahme auf das an die AUX-Eingangsanschlüsse angeschlossene Gerät ist nicht möglich. Die Timer-Funktion ändert sich entsprechend der für LINE-1 und LINE-2 eingestellten Funktion. HINWEIS: • Bezüglich der Timer-Aufnahme und -Wiedergabe mit Hilfe des an die AUX-Eingangsanschlüsse angeschlossenen Gerätes ist zu beachten, dass der ADV-M71 weder die Stromversorgung noch die Wiedergabe-Funktionen des Gerätes steuern kann. Führen Sie die Einstellungen entsprechend aus. 202 2ADV-M71E2_GER p175-p227 03.12.25 1:16 PM ページ 203 DEUTSCH (3) Ein- und Ausschalten des Täglichen Timers und Einmal-Timers • Nachdem der Timer wie unter “(2) Einstellung des Täglichen Timers und Einmal-Timers” (Seiten 200 bis 201) eingestellt wurde, schalten Sie den Täglichen Timer und/oder den Einmal-Timer so ein, dass die eingestellten Funktionen ausgeführt werden. 2 B • Falls nur der Einmal-Timer eingestellt wurde, ändern sich die Einstellungen bei jedem Drehen des SURROUND/SELECTReglers wie nachfolgend gezeigt. SURROUND / SELECT DVD SURROUND RECEIVER ADV-M71 PUSH - PARAM. - + BAND MENU / SET TONE / SDB 1on/E PHONES 1off/E 1 on 1 o f f / E o ff HINWEISE: • Die Timer-Standby-Anzeige Drücken Sie die MENU/SET-Taste, um den Timer-StandbyEinstellungs-Modus einzustellen. • Bei jedem Drehen des S U R R O U N D / S E L E C T- R e g l e r s MENU / SET ändert sich die Anzeige wie folgt: on/E Haupteinheit • Falls nur der Tägliche Timer eingestellt wurde, ändert sich die Einstellung wie folgt: ON / STANDBY 1 1 o f f / E o ff PUSH - PARAM. VOLUME FUNCTION 1 off SURROUND / SELECT on Haupteinheit leuchtet nicht, falls die aktuelle Uhrzeit nicht eingestellt wurde. Stellen Sie vor der TimerEinstellung die aktuelle Uhrzeit ein. (Siehe Seite 199.) • Wenn sich die für den Täglichen Timer und den Einmal-Timer eingegebenen Uhrzeiten überschneiden, hat der Einmal-Timer Priorität. • Um die Timer-Funktionen ausführen zu können, muss die Stromversorgung unbedingt in den Standby-Modus umgeschaltet werden. 2 Drehen Sie den SURROUND/SELECT-Regler und wählen Sie den Timer aus, den Sie verwenden möchten.SURROUND / SELECT PUSH - PARAM. • Bei jedem Drehen des SURROUND/SELECT-Reglers ändert sich die Anzeige wie folgt: Haupteinheit on Sowohl der Einmal-Timer als auch der Tägliche Timer wurde aktiviert. 1 on/E 1 off/E on Nur der Tägliche Timer wurde aktiviert. 1 on/E 1 off/E off Nur der Einmal-Timer wurde aktiviert. Weder der Einmal-Timer noch der Tägliche Timer wurde aktiviert. off • Wenn entweder der Einmal-Timer oder der Tägliche Timer aktiviert wurde, leuchtet die Timer-Standby-Anzeige 4 Sekunden nach dem Erscheinen der Timer-StandbyAnzeige erscheint wieder die normale Anzeige. Nach dem Drehen des SURROUND/SELECT-Reglers und nach dem Aufleuchten der Timer-Standby-Anzeige wird die TimerFunktion ausgeführt. Falls Sie die Timer-Funktion nicht anwenden möchten, drehen Sie den SURROUND/SELECT-Regler, um die TimerStandby-Anzeige auszuschalten. SURROUND / SELECT PUSH - PARAM. Haupteinheit 203 2ADV-M71E2_GER p175-p227 03.12.25 1:16 PM ページ 204 DEUTSCH (4) Täglicher Timer- und Einmal-Timer-Priorität • Falls sich die für den Täglichen Timer und den Einmal-Timer eingestellten Uhrzeiten überschneiden, hat der Einmal-Timer Priorität. (5) Über den Täglichen Timer und Einmal-Timer 2 Überprüfung der Timer-Einstellungen • Verfahren Sie zum Überprüfen der Timer-Einstellungen auf gleiche Weise wie bei der Timer-Einstellung. q Drücken Sie die MENU/SET-Taste, um sich “TIMER” anzeigen zu lassen. w Drehen Sie den SURROUND/SELECT-Wähler, um sich “EVERYDAY” oder “ONCE” anzeigen zu lassen. e Die Anzeige wechselt bei jedem Drücken der MENU/SET-Taste zwischen der eingestellten Funktion, der Startzeit, der Endzeit und der TimerStandby-Anzeige. r 4 Sekunden nach dem Anzeigen der Timer-Standby-Anzeige erscheint wieder die gleiche Anzeige wie vor der Einstellung des Täglichen Timers oder des Einmal-Timers. 2 Änderung der Timer-Einstellungen • Stellen Sie den Timer noch einmal neu mit den gewünschten Einstellungen ein. Die vorherigen Einstellungen werden durch die neuen Einstellungen überschrieben. • Wenn Sie während der Timer-Einstellung eine Einstellung ändern möchten, drücken Sie die Stopptaste (2), um sich wieder “EVERYDAY” oder “ONCE” anzeigen zu lassen, und führen Sie die Einstellungen anschließend noch einmal aus 2 Löschen der Timer-Einstellungen q Drücken Sie die MENU/SET-Taste, um sich “TIMER” anzeigen zu lassen. w Drehen Sie den SURROUND/SELECT-Regler, um sich “EVERYDAY” oder “ONCE” (den Timer, dessen Einstellungen Sie löschen möchten) anzeigen zu lassen. e Drücken Sie, während “EVERYDAY” oder “ONCE” angezeigt wird, mindestens 2 Sekunden lang die Stopptaste (2). Die entsprechenden Timer-Einstellungen werden gelöscht. 2 Beenden der Timer-Einstellung (Ausschalten der Timer-Funktion) • Verfahren Sie wie unter “(3) Ein- und Ausschalten des Täglichen Timers und des Einmal-Timers” (Seite 200) beschrieben, und stellen Sie einen Modus ein, in dem weder der Einmal-Timer noch der Täglich-Timer aktiviert ist (“1off/Eoff”). 2 Im Falle eines Stromausfalls • Nach einem Stromausfall oder nach dem Abtrennen des Netzkabels von der Netzsteckdose blinkt nach dem Wiedereinschalten der Stromversorgung die Zeitanzeige. Stellen Sie die aktuelle Uhrzeit neu ein. Die Einstellungen des Einmal-Timers wurden gelöscht. Führen Sie die Einstellungen noch einmal aus. • Die Einstellungen des Einmal-Timers wurden gelöscht. Führen Sie die Einstellungen noch einmal aus. • Falls die Einstellungen des Täglichen Timers und die Tuner-Vorprogrammierungen gelöscht worden sind, müssen diese neu eingestellt werden. 204 2ADV-M71E2_GER p175-p227 03.12.25 1:16 PM ページ 205 DEUTSCH (6) Einstellung des Sleep-Timers (nur Fernbedienung) • Mit der beiliegenden Fernbedienung kann die Stromversorgung nach maximal 120 Minuten in den Bereitschaftsmodusgeschaltet werden. (Sleep-Timer) • Verwenden Sie diese Funktion, um die Stromversorgung nach einem bestimmten Zeitraum (Minuten) automatisch in denBereitschaftsmodus zu schalten. Beispiel: Die Stromversorgung in 50 Minuten in den Bereitschaftsmodus schalten. Korrigieren Sie unbedingt die aktuelle Uhrzeit-Einstellung. Stellen Sie die FernbedienungsWahlschalter auf A/V und DVD. OFF 2,3 SYSTEM ENTER A-B REPEAT CHARAC. SLIDE MODE SOURCE CLEAR CDR TAPE TIME TV IN TV CH IN/SURR. MD TITLE RDS PROG/DIRECT TUNER TV / VCR DVD IN/SURR. A/V ON VCR REC NTSC/PAL SLEEP REPEAT PTY T V EDIT/MENU ZOOM - RANDOM MODE MEMO BAND DVD TUNER D.AUX 3 TV CH + CT CD SRS RT SEARCH MODE TUNING / TV VOL 1 2 MD/LINE-1 TAPE /LINE-2 4 5 6 + - 5CH STEREO AUTO DECODE TUNER + 7 8 9 DIRECT STEREO VIRTUAL CALL 0/10 +10 - TEST TONE INPUT MODE SURROUND FUNCTION CH HINWEISE: • Wenn die SLEEP-Taste während des Sleep-Timerbetriebs gedrückt wird, wird die Einstellung auf120 Minuten rückgesetzt. Nehmen Sie eine neueEinstellung vor. • Wenn sich die Einstellungen des Sleep-Timers und destäglichen Timers überlappen, hat der Sleep-TimerPriorität. Einstellung des täglichen TimersEinstellung des 20:00 21:00 22:00 ON OFF + 1 Wählen Sie die gewünschte Funktion und starten Siedie Wiedergabe. 2 Drücken Sie die SLEEP-Taste. Sleep-Timers ON OFF Wenn sich die Timer auf diese Weise überlappen, ist der 20:00 21:00 22:00 Timer-Betrieb • “120” wird angezeigt und die “SLEEP”-Anzeige blinkt. OFF Does not operate • Der tägliche Timer arbeitet nicht, wenn seine Startzeitinnerhalb der Zeit liegt ist, in der der Sleep-Timerbetrieberfolgt. SLEEP SOURCE 120 ON SLEEP Fernbedienung Einstellung des täglichen TimersEinstellung des 20:00 21:00 22:00 Does not operate ON OFF + Das Display ändert sich bei jeder Tastenbetätigungvon SLEEP. 120 90 60 50 40 30 20 Sleep-Timers ON OFF • Die verbleibende Zeit des Sleep-Timers kann mit derSTATUSTaste geprüft werden. 10 “SLEEP”-Anzeigeausgeschaltet 3 Die “SLEEP”-Anzeige blinkt, drücken Sie die SLEEP-Taste erneut, bis “50” angezeigt wird. • Wenn die “SLEEP”-Anzeige blinkt, drücken Sie dieSLEEPTaste erneut, bis “50” angezeigt wird. 50 SLEEP SOURCE SLEEP Fernbedienung • Nach 4 Sekunden kehrt das Display zu dem Displayzurück, das vor der Einstellung des Sleep-Timersangezeigt wurde; die “SLEEP”-Anzeige hört auf zublinken und bleibt erleuchtet. (Damit ist dieEinstellung des Sleep-Timers 4 Die Stromversorgung schaltet 50 Minuten später in denBereitschaftsmodus. Drücken Sie für die Ausschaltung des Sleep-Timerswiederholt die SLEEP-Taste, bis die “SLEEP”-Anzeigeausgeschaltet wird. Der Sleep-Timer kann auch dadurcausgeschaltet werden, dass die Netztaste auf derHaupteinheit oder der Fernbedienung gedrückt wird, umdie Stromversorgung des gesamten Systems in denBereitschaftsmodus zu schalten. ON / STANDBY SLEEP OFF SOURCE Fernbedienung Haupteinheit Fernbedienung 205 2ADV-M71E2_GER p175-p227 03.12.25 1:16 PM ページ 206 DEUTSCH 19 DIE VOREINSTELLUNGEN ÄNDERN (DVD) 2 Die werkseitige Anfangseinstellung kann geändertwerden. Der Einstellungsinhalt bleibt bis zur nächstenÄnderung gespeichert, auch wenn dieStromversorgung ausgeschaltet wird. 1 Drücken Sie im Stopp-Modus die SETUP-Taste. Wählen Sie im Setup-Menü “DVD SETUP” mit denCursorTasten • und ª aus und drücken Sie dieENTER-Taste. SETUP Fernbedienung d Fernbedienung d ENTER Fernbedienung 2 Der Setup-Bildschirm (Voreinstellungen) “DVDSETUP MENU” erscheint. • DISC SETUP Stellen Sie hier die Sprache ein, die bei der DiscWiedergabe verwendet werden soll. Wenn die gewählte Sprache auf der Disc nichtenthalten ist, wird die auf der Discvoreingestellte Sprache eingestellt. • OSD SETUP Stellen Sie hiermit die Hintergrundfarbe ein. • VIDEO SETUP Stellen Sie hier den Bildschirmmodus für diesesGerät ein. (TV-Aspekt und TV-Typ.) • AUDIO SETUP Stellen Sie hier den Audioausgangsmodus fürdieses Gerät ein. (Digital- und LPCM-Ausgangseinstellungen.) • RATINGS Deaktivieren Sie hier die Wiedergabe von fürErwachsene bestimmte DVDs, so dass sichKinder diese DVDs nicht anschauen können.Beachten Sie, dass die Wiedergabe von fürErwachsene bestimmte DVDs nicht deaktiviertwerden kann, wenn das Bewertungsniveau aufder DVD nicht gespeichert ist; allerdings kanndie Wiedergabe aller DVDs gesperrt werden. • OTHER SETUP Untertitel und das Zeitintervall für die Standbild-Wiedergabe können eingegeben werden. Fernbedienung d ENTER Fernbedienung Wählen Sie mit den Cursor-Tasten und diegewünschte Einstellung aus. Punkt 3, drücken Sieanschließend die ENTER-Taste. Den DVD-Setupmodus verlassen Wählen Sie mit den 0 und 1 Cursor-Tasten “EXIT SETUP” an, und drücken Sie dann die SELECT-Taste. Sie können die Funktion auch durch Drücken der ENTER-Taste auf der Fernbedienung verlassen. 206 2ADV-M71E2_GER p175-p227 03.12.25 1:16 PM ページ 207 DEUTSCH (1) “DISC SETUP” wird ausgewählt 1 Lesen Sie die Seite 206 2 3 Wählen Sie mit den Cursor-Tasten • und ª diegewünschte Einstellung aus, drücken Sieanschließend die ENTER-Taste. • DIALOG Stellen Sie hier die Sprache für die Tonausgabe über die Lautsprecher ein. • SUBTITLE Stellen Sie hier die Sprache der Untertitel ein, die auf dem TV-Bildschirm angezeigt werden. • DISC MENUS Stellen Sie hier die Sprache für die auf der Disc gespeicherten Menüs (Hauptmenü, usw.) ein. Den Disc-Setupmodus verlassen Wählen Sie mit den Cursor-Tasten • und ª “>NEXT DVD MENU” aus, drücken Sieanschließend die ENTER-Taste. Fernbedienung d ENTER Fernbedienung 4 Wählen Sie mit den Cursor-Tasten • und ª diegewünschte Einstellung aus, drücken Sieanschließend die ENTER-Taste. 2 Wenn “DIALOG” ausgewählt wird: • ENGLISHENGLISH (werkseitige Voreinstellung) Wählen Sie diese Einstellung, wenn Sie eineDVD in englisch wiedergeben möchten. • FRENCH Wählen Sie diese Einstellung, wenn Sie eineDVD in französisch wiedergeben möchten. • SPANISH Wählen Sie diese Einstellung, wenn Sie eineDVD in spanisch wiedergeben möchten. • GERMAN Wählen Sie diese Einstellung, wenn Sie eineDVD in deutsch wiedergeben möchten • JAPANESE Wählen Sie diese Einstellung, wenn Sie sich eine DVD mit japanischem Ton wiedergeben lassen möchten. • OTHERS Die Tonwiedergabe erfolgt in der mit den Zifferntasten eingegebenen Sprache. (Siehe die Tabelle der Sprachennummern auf Seite 209.) Fernbedienung d ENTER Fernbedienung 207 2ADV-M71E2_GER p175-p227 03.12.25 1:16 PM ページ 208 DEUTSCH 4 Den Dialog-Modus verlassen Durch Drücken der ENTER-Taste oder der RETURN-Taste können Sie zu dem zuvorangezeigten Bildschirm zurückkehren. 2 Wenn “SUBTITLE” ausgewählt wird: • OFF Wählen Sie diese Einstellung, wenn Sie keineUntertitel anzeigen lassen wollen. (Bei einigenDiscs kann die Untertitel-Anzeige nichtausgeschaltet werden.) • ENGLISH (werkseitige Voreinstellung) Wählen Sie diese Einstellung, wenn Sie eineDVD mit englischen Untertiteln wiedergebenmöchten. • FRENCH Wählen Sie diese Einstellung, wenn Sie eineDVD mit französischen Untertiteln wiedergebenmöchten. • SPANISH Wählen Sie diese Einstellung, wenn Sie eineDVD mit spanischen Untertiteln wiedergebenmöchten. • GERMAN Wählen Sie diese Einstellung, wenn Sie eineDVD mit deutschen Untertiteln wiedergebenmöchten. • JAPANESE Wählen Sie diese Einstellung, wenn die DVD mit japanischen Untertiteln wiedergegeben werden soll. • OTHERS Die Untertitel erscheinen in der mit den Zifferntasten eingegebenen Sprache. (Siehe die Tabelle der Sprachennummern auf Seite 209.) Den Untertitel-Modus verlassen Durch Drücken der ENTER-Taste können Siezum vorher angezeigten Bildschirmzurückkehren. 2 Wenn “DISC MENUS” ausgewählt wird: • ENGLISH (werkseitige Voreinstellung) Wählen Sie diese Einstellung, wenn Sie dieMenüs in englisch anzeigen lassen wollen. • FRENCH Wählen Sie diese Einstellung, wenn Sie dieMenüs in französische anzeigen lassen wollen. • SPANISH Wählen Sie diese Einstellung, wenn Sie dieMenüs in spanisch anzeigen lassen wollen. • GERMAN Wählen Sie diese Einstellung, wenn Sie dieMenüs in deutsch anzeigen lassen wollen. • JAPANESE Wählen Sie diese Einstellung, wenn die Menüs in japanischer Sprache angezeigt werden sollen. • OTHERS Der Menü-Bildschirm erscheint in der mit den Zifferntasten eingegeben Sprache. (Siehe die Tabelle der Sprachennummern auf Seite 209.) Den Disc-Menüs-Modus verlassen Durch Drücken der ENTER-Taste können Siezum vorher angezeigten Bildschirmzurückkehren. 208 Fernbedienung d ENTER Fernbedienung Fernbedienung d ENTER Fernbedienung 2ADV-M71E2_GER p175-p227 03.12.25 1:16 PM ページ 209 DEUTSCH Sprachencode-Tabelle Sprache Code Sprache Code Code Sprache Sprache Code 6565 Afar 7079 Faröesisch 7678 Lingala 8375 Slowakisch 6566 Abchasisch 7082 Französisch 7679 Laotisch 8376 Slowenisch 6570 Afrikaans 7089 Frisisch 7684 Litauisch 8377 Samoanisch 6577 Ameharisch 7165 Irisch, Schottisch 7686 Lettisch 8378 Shona 6582 Arabisch 7168 Gälisch 7771 Malagassi 8379 Somali 6583 Assamesisch 7176 Galizisch 7773 Maori 8381 Albanisch 6588 Aymara 7178 Guarani 7775 Mazedonisch 8382 Serbisch 6590 Aserbaidschanisch 7185 Gujarati 7776 Malayalam 8385 Sundanesisch 6665 Baschkiri 7265 Hausa 7778 Mongolisch 8386 Schwedisch 6669 Weißrussisch 7273 Hindi 7779 Moldawisch 8387 Swahili 6671 Bulgarisch 7282 Kroatisch 7782 Marathi 8465 Tamil 6672 Bihari 7285 Ungarisch 7783 Malayisch 8469 Telugu 6678 Bengali; Bangla 7289 Armenisch 7784 Maltesisch 8471 Tajik 6679 Tibetisch 7365 Interlingua 7789 Burmesisch 8472 Thai 6682 Bretonisch 7378 Indonesisch 7865 Nauru 8473 Tigrinya 6765 Katalanisch 7383 Isländisch 7869 Nepalesisch 8475 Turkmenisch 6779 Korsisch 7384 Italienisch 7876 Holländisch 8476 Tagalog 6783 Tschechisch 7387 Hebräisch 7879 Norwegisch 8479 Tonga 6789 Walisisch 7465 Japanisch 7982 Oriya 8482 Türkisch 6865 Dänisch 7473 Jiddisch 8065 Panjab 8484 Tatarisch 6869 Deutsch 7487 Javanesisch 8076 Polnisch 8487 Twi 6890 Bhutan 7565 Georgisch 8083 Paschto, Puschto 8575 Ukrainisch 6976 Griechisch 7575 Kasachisch 8084 Portuguiesisch 8582 Urdu 6978 Englisch 7576 Grönländisch 8185 Quechua 8590 Usbekisch 6979 Esperanto 7577 Kambodschanisch 8277 Rätoromanisch 8673 Vietnamesisch 6983 Spanisch 7578 Kannada 8279 Rumänisch 8679 Volapük 6984 Estnisch 7579 Koreanisch 8285 Russisch 8779 Wolof 6985 Baskisch 7583 Kaschmirisch 8365 Sanskrit 8872 Xhosa 7065 Persisch 7585 Kurdisch 8368 Sindhi 8979 Yoruba 7073 Finnisch 7589 Kirgisisch 8372 Serbokroatisch 9072 Chinese 7074 Fidschi 7665 Latein 8373 Singhalesisch 9085 Zulu 209 2ADV-M71E2_GER p175-p227 03.12.25 1:16 PM ページ 210 DEUTSCH (2) Wenn “OSD SETUP” ausgewählt wurde 1 Lesen Sie die Seite 206 2 3 Wählen Sie mit den 0 und 1 Cursor-Tasten das “OSD SETUP”-Tag-Symbol, und drücken Sie dann die ENTERTaste. • WALL PAPER Hier können Sie das Bild auswählen, das im Stoppmodus oder bei der Wiedergabe einer CD angezeigt werden soll. Fernbedienung d ENTER Fernbedienung 4 Wählen Sie mit den • und ª Cursor-Tasten die gewünschte Einstellung, und drücken Sie dann die ENTER-Taste. 2 Wenn “WALL PAPER” ausgewählt wurde • Wählen Sie mit den • und ª Cursor-Tasten das Hintergrundbild. • BLUE (Factory default) Es erscheint ein blauer Hintergrund. • GRAY Es erscheint ein grauer Hintergrund. • BLACK Es erscheint ein schwarzer Hintergrund. • PICTURE Es erscheint ein Bild als Hintergrund. Fernbedienung d ENTER Beenden der “WALL PAPER”-Einstellung Drücken Sie die ENTER-Taste. Fernbedienung 210 2ADV-M71E2_GER p175-p227 03.12.25 1:16 PM ページ 211 DEUTSCH (3) “VIDEO SETUP” wird ausgewählt 1 Lesen Sie die Seite 206 2 3 Wählen Sie mit den Cursor-Tasten 0 und 1 “VIDEO SETUP” aus, drücken Sieanschließend die ENTER-Taste. • TV ASPECT Stellen Sie hier die Form Ihres TV-Bildschirms • TV TYPE Stellen Sie hier das Videoformat Ihres TVs ein(NTSC, PAL oder MULTI). • BLACK LEVEL Der Schwarzpegel des Bildes kann auf “lighter” oder “darker” eingestellt werden. Den Video-Setupmodus verlassen Wählen Sie mit den Cursor-Tasten • und ª “>NEXT DVD MENU” aus, drücken Sieanschließend die ENTER-Taste. Fernbedienung d ENTER Fernbedienung 4 Wählen Sie mit den Cursor-Tasten • und ª cdiegewünschte Einstellung aus, drücken Sieanschließend die ENTER-Taste. 2 Wenn “TV ASPECT” ausgewählt wird: • 4:3 PS (werkseitige Voreinstellung) Wählen Sie diese Einstellung, um Breitbild-DVDs im Pan & Scan-Modus abzuspielen (beideSeiten des Bildes sind abgeschnitten). Discs,bei denen die Pan &Scan-Funktion nichtspezifiziert ist, werden im LetterboxModuswiedergegeben. • 4:3 LB Wählen Sie diese Einstellung, um Breitbild-DVDs im Letterbox-Modus abzuspielen(schwarzer Streifen oben und unten). • WIDE (16:9) Wählen Sie diese Einstellung, um Breitbild-DVDs im Vollbildschirm-Modus abzuspielen. Fernbedienung d ENTER Fernbedienung Den TV-Aspekt-Modus verlassen Durch Drücken der ENTER-Taste können Siezum vorher angezeigten Bildschirmzurückkehren. 211 2ADV-M71E2_GER p175-p227 03.12.25 1:17 PM ページ 212 DEUTSCH 4 2 Wenn “TV TYP” ausgewählt wird: • NTSC Wählen Sie diese Einstellung, wenn dasVideoformat Ihres TVs NTSC ist. Wenn NTSC ausgewählt wird, wird dasAusgabeformat auf NTSC festgelegt. • PAL (Factory default) Wählen Sie diese Einstellung, wenn dasVideoformat Ihres TVs PAL ist. Wenn PAL ausgewählt wird, wird dasAusgabeformat auf PAL festgelegt. • MULTI Wählen Sie diese Einstellung, wenn Ihr TV mit beiden Formaten, NTSC und PAL, kompatibel ist. NTSC-Signals werden von den Videoausgangsbuchsen ausgegeben, wenn NTSC-formatierte Discs wiedergegeben werden; PAL-Signale werden von den Videoausgangsbuchsen ausgegeben, wenn PAL-formatierte Discs wiedergegeben werden. Fernbedienung d ENTER Fernbedienung Den TV-Typ-Modus verlassen Durch Drücken der ENTER-Taste oder der RETURN-Taste können Sie zu dem zuvor angezeigten Bildschirm zurückkehren. 2 Wenn “BLACK LEVEL” ausgewählt wurde • Wählen Sie mit den • und ª Cursor-Tasten den Schwarzpegel. • DARKER (Werkseinstellung) Hiermit wird der Schwarzpegel des Ausgangssignals auf den Standardwert gestellt. • LIGHTER Diese Einstellung erhöht den Standardwert des Schwarzpegels. Wählen Sie diese Einstellung, wenn das auf dem Fernseh-Bildschirm angezeigte Bild extrem dunkel ist. Beenden der “BLACK LEVEL”-Einstellung Drücken Sie die ENTER-Taste. 212 Fernbedienung d ENTER Fernbedienung 2ADV-M71E2_GER p175-p227 03.12.25 1:17 PM ページ 213 DEUTSCH (4) “AUDIO SETUP” wird ausgewählt 1 Lesen Sie die Seite 206 2 3 Wählen Sie mit den Cursor-Tasten 0 und 1 “AUDIO SETUP” aus, drücken Sieanschließend die ENTER-Taste. • DIGITAL OUT Wählen Sie hier das Signalformat desDigitalausgangs aus. • LPCM (44.1 kHz / 48 kHz) Wählen Sie hier den Digitalaudioausgang aus,wenn mit Linear-PCM-Audio aufgenommeneDVDs abgespielt werden. Den Audio-Setupmodus verlassen Wählen Sie mit den Cursor-Tasten • und ª “>NEXT DVD MENU” aus, drücken Sieanschließend die ENTER-Taste. • Der gleiche Bildschirm wie bei Schritt 2 wird angezeigt. Fernbedienung d ENTER Fernbedienung 4 Wählen Sie mit den Cursor-Tasten • und ª cdiegewünschte Einstellung aus, drücken Sieanschließend die ENTER-Taste. 2 Wenn “DIGITAL OUT” ausgewählt wird. • NORMAL (werkseitige Voreinstellung) Nehmen Sie die Auswahl bei Wiedergabe einerDVD im Surround-Modus vor, die mit diesemGerät im Dolby Digital- oder DTS-Modusaufgenommen wurde.Das Dolby Digital- oder DTS-Digitalsignal wirdebenfalls von den digitalen Ausgangsbuchsenausgegeben. • PCM DVDs, die in Dolby Digital aufgenommenwurden, werden in Linear-PCM 48 kHz/16 Bit (2Kanäle) konvertiert. Nehmen Sie die Auswahlwährend einer digitalen Aufnahme vor. DVDs,die mit DTS aufgenommen wurden, werdennicht konvertiert; ferner ist keine digitaleAufnahme möglich. Fernbedienung d ENTER Fernbedienung Den Digitalausgangs-Modus verlassen Durch Drücken der ENTER-Taste können Siezum vorher angezeigten Bildschirmzurückkehren. 213 2ADV-M71E2_GER p175-p227 03.12.25 1:17 PM ページ 214 DEUTSCH 4 2 “LPCM SELECT (96 kHz / 48 kHz)” wird ausgewählt. • OFF (werkseitige Voreinstellung) Nehmen Sie die Auswahl bei Wiedergabe von DVDs mit einem Decoder vor, die mit diesemGerät im PCM 48 kHz/20/24 Bit- und 98 kHz-Modus aufgenommen wurden. Beachten Sie, dass DVDs mit Urheberrechtsschutz auf 48 kHz/16 Bits konvertiert und wiedergegebenwerden. Das gleiche Signal wird von den digitalen Ausgangsbuchsen ausgegeben. • ON DVDs, die mit dem Linear-PCM 48 kHz/20/24Bit- und 98 kHz-Modus aufgenommen wurden,werden alle auf 48 kHz/16 Bits konvertiert. Nehmen Sie diese Auswahl während einerdigitalen Aufnahme vor. Den LPCM-Wahl-Modus verlassen Durch Drücken der ENTER-Taste können Siezum vorher angezeigten Bildschirm Fernbedienung d ENTER Fernbedienung HINWEISE: • Stellen Sie bei der Wiedergabe von Dolby Digital/DTS-Surround-DVDs oder 96 kHz linear PCM DVDs auf dem ADV-M71, unbedingt “Digital Output” auf “Normal” und “LPCM Conversion Mode” auf “Do Not Convert”. • Stellen Sie “Digital Output” nur dann auf “PCM Conversion”, wenn Sie die Signale einer auf dem ADV-M71 wiedergegebenen Dolby Digital/DTS-Surround-DVD zu einem digitalen PCM-Gerät ausgeben möchten. Bei dieser Einstellung können DVDs nicht im Dolby Digital/DTS-Surround-Modus auf dem ADV-M71 wiedergegeben werden. (Der Surround-Modus wird auf den Modus eingestellt, in dem 2-Kanal-Signale wiedergegeben werden können.) • Wenn Sie auf einem digitalen MD-Recorder eine digitale Aufnahme von den Signalen einer auf dem ADV-M71 wiedergegebenen 48 kHz/20-Bit/24-Bit- oder 96 kHz linear PCM DVD erstellen möchten, stellen Sie “LPCM Conversion” auf “Convert”. Bei dieser Einstellung ist die Entschlüsselung und Wiedergabe von 48 kHz/20-Bit/24-Bit-oder 96 kHz linearen PCM-Signalen auf dem ADVM71 während der Aufnahme nicht möglich. (Die Entschlüsselung und Wiedergabe wird im 48 kHz/16-Bit linearen PCM-Format ausgeführt.) 214 2ADV-M71E2_GER p175-p227 03.12.25 1:17 PM ページ 215 DEUTSCH (5) “RATINGS” wird ausgewählt 1 2 3 Lesen Sie die Seite 206 Wählen Sie mit den Cursor-Tasten 0 und 1 “RATINGS” aus, drücken Sieanschließend die ENTER-Taste. • RATING LEVEL Beschränken Sie hier für Kinder Wiedergabe der nurfür die Erwachsenen bestimmten DVDs. Beachten Sie,dass bei den für Erwachsene bestimmten DVDs dieWiedergabe nicht beschränkt werden kann, wenn aufder Disc kein Beschränkungsniveau gespeichert ist.Es ist jedoch möglich, die Wiedergabe aller DVDs zudeaktivieren. Es ist jedoch möglich, die Wiedergabe aller DVDs zu deaktivieren. • PASSWORD Ändern Sie hiermit das Kennwort.Das Kennwort für das Gerät ist werkseitig auf“0000” eingestellt. Fernbedienung d ENTER Fernbedienung Den Bewertungs-Setupmodus verlassen Wählen Sie mit den Cursor-Tasten • und ª “>NEXT DVD MENU” aus, drücken Sieanschließend die ENTER-Taste. 4 Wählen Sie mit den Cursor-Tasten • und ª cdiegewünschte Einstellung aus, drücken Sieanschließend die ENTER-Taste. 2 Wenn “RATING LEVEL” ausgewählt wird. • Level 0 (LOCK ALL) Wählen Sie diese Einstellung, um die Wiedergabealler DVDs zu deaktivieren Deaktivieren Sie hiermitz. B. die Wiedergabe von nur für Erwachsenebestimmte DVDs, auf denen keinBewertungsniveau aufgezeichnet ist. • Level 1 Wählen Sie diese Einstellung, um nur für Kinderbestimmte DVDs abzuspielen. (DVDs fürErwachsene und allgemeines Publikum könnennicht abgespielt werden.) • Level 2 bis Level 7 Wählen Sie diese Einstellung, um DVDs für Kinderund allgemeines Publikum abzuspielen. DVDs fürErwachsene können nicht abgespielt werden. • NO LIMIT (werkseitige Voreinstellung) Wahlen Sie diese Einstellung, um alle DVDs abzuspielen. Fernbedienung d ENTER Fernbedienung 215 2ADV-M71E2_GER p175-p227 03.12.25 1:17 PM ページ 216 DEUTSCH 4 Geben Sie mit den Nummerntasten ein 4-stelliges Kennwort ein, drücken Sieanschließend die ENTERTaste. Vergewissern Sie sich, dass der DVDBetriebmit den Fernbedienungs-Betriebswahltasten eingestellt wird. Das Kennwort für das Gerät istwerkseitig auf “0000” eingestellt. Vergessen Sie das Kennwort nicht. Die Einstellung kann nicht ohne Eingabedes korrekten Kennworts geändertwerden. DVD TUNER D.AUX 1 2 3 MD/LINE-1 TAPE /LINE-2 4 7 5 6 5CH STEREO AUTO DECODE 8 9 STEREO VIRTUAL 0/10 +10 Fernbedienung d ENTER Wenn das Kennwort vergessen wurde,oder wenn eine RATING LEVELEinstellungsänderungunterbrochenwird, dann drücken Sie mehrmals dieENTER-Taste und verlassen Sie denBewertungs-Setupmodus. Fernbedienung 2 Wenn “PASSWORD CHANGE”ausgewählt wird. Geben Sie mit den Nummerntasten ein 4-stelliges Kennwort ein, drücken Sieanschließend die ENTER-Taste. Vergewissern Sie sich, dass der DVDBetriebmit den FernbedienungsBetriebswahltasten eingestellt wird. Vergessen Sie das Kennwort nicht. Die Einstellung kann nicht ohne Eingabedes korrekten Kennworts geändertwerden. Das Kennwort für das Gerät istwerkseitig auf “0000” eingestellt. 216 DVD TUNER D.AUX 1 2 3 MD/LINE-1 TAPE /LINE-2 4 5 6 5CH STEREO AUTO DECODE 7 8 9 STEREO VIRTUAL 0/10 +10 Fernbedienung 2ADV-M71E2_GER p175-p227 03.12.25 1:17 PM ページ 217 DEUTSCH (6) “OTHER SETUP” wird ausgewählt HINWEISE: • Ein Englisch-Insert-Decoder ist für die Anzeige vonenglischen Inserts erforderlich. • DVDs mit Insert-Signalen sind durch , , , gekennzeichnet. Englische Inserts können nicht angezeigt werden, wenn DVDs abgespielt werden, die keine Insert-Signalenthalten. • Die Zeichen, in denen die Insert angezeigt werden (Großbuchstaben, Kleinbuchstaben, kursiv, usw.), sindvon DVD zu DVD verschieden und können mit diesem Gerät nicht ausgewählt werden. 1 2 3 Lesen Sie die Seite 206 Wählen Sie mit den Cursor-Tasten • und ª cdiegewünschte Einstellung aus, drücken Sieanschließend die ENTER-Taste. • CAPTIONS Stellen Sie hier ein, ob die auf den DVDsaufgezeichneten Inserts angezeigt werden sollenoder nicht. • SLIDE SHOW Geben Sie hier das Zeitintervall für die Umschaltung zum nächsten Standbild (im JPEG-Format) bei der DiaWiedergabe ein. Den Sonstige Setups-Modus verlassen Wählen Sie mit den Cursor-Tasten • und ª “>NEXT DVD MENU” aus, drücken Sieanschließend die ENTER-Taste. Fernbedienung d ENTER Fernbedienung 4 Wählen Sie mit den Cursor-Tasten • und ª cdiegewünschte Einstellung aus, drücken Sieanschließend die ENTER-Taste. 2 Wenn “CAPTIONS” ausgewählt wird: • OFF (werkseitige Voreinstellung) Wählen Sie diese Einstellung, wenn Sie beiWiedergabe von DVDs, die englische Insertsenthalten, diese Inserts nicht auf dem Bildschirmanzeigen lassen wollen. • ON Wählen Sie diese Einstellung, wenn Sie bei Wiedergabe von DVDs, die englische Inserts enthalten, diese Inserts anzeigen lassen wollen. Den Insert-Modus verlassen Durch Drücken der ENTER-Taste können Siezum vorher angezeigten Bildschirmzurückkehren. Fernbedienung d ENTER Fernbedienung 217 2ADV-M71E2_GER p175-p227 03.12.25 1:17 PM ページ 218 DEUTSCH 4 2 Wenn “SLIDE SHOW” ausgewählt wurde • Geben Sie mit den .• und ª-Cursor-Tasten die Zeit. • Das Intervall kann in 1-Sekunden-Schritten zwischen 5 und 15 Sekunden eingestellt werden. (Werkseinstellung: 5 Sekunden) Fernbedienung d ENTER Fernbedienung 218 2ADV-M71E2_GER p175-p227 03.12.25 1:17 PM ページ 219 DEUTSCH 20 SYSTEMFUNKTIONEN 2 Systemanschlüsse zwischen dem ADV-M71 und dem MD-Recorder der D-M31-Serie (DMD-M31) oder dem Kassettendeck (DRR-M31) vereinfachen die Bedienung noch mehr. (Einzelheiten zur Durchführung der Anschlüsse finden Sie im Abschnitt “Anschluss an SystemKomponenten der D-M31-Serie” auf den Seiten 120 und 121.) 2 Die Systemfunktionen arbeiten nur dann einwandfrei, wenn die Eingänge und Ausgänge der angeschlossenen Komponenten richtig angeschlossen worden sind. Stellen Sie unbedingt die Eingangs-/Ausgangsfunktionen für die verwendeten Komponenten ein. (Siehe Seite 141.) Die ausgeführten Einstellungen bleiben selbst beim Ausschalten der Stromversorgung so lange erhalten, bis sie geändert werden. (1) Automatische Strom-Einschaltfunktion • Wenn im Standby-Modus die Wiedergabe-/Pause-Taste am Hauptgerät ( 1/3 ) oder die DVD-Wiedergabetaste auf der Fernbedienung ( 1) gedrückt wird, schaltet sich die Stromversorgung des ADV-M71 automatisch ein. Falls eine Disc in den ADV-M71 eingelegt ist, beginnt die Wiedergabe dieser Disc. 1 1 B SURROUND / SELECT DVD SURROUND RECEIVER ADV-M71 PUSH - PARAM. - + BAND MENU / SET TONE / SDB Wenn sich der ADV-M71 im Standby-Modus befindet, kann die Stromversorgung einfach durch Drücken der Wiedergabe/Pausetaste an der Haupteinheit oder der DVDWiedergabetaste auf der Fernbedienung eingeschaltet werden. Falls eine Disc eingelegt ist, beginnt die Wiedergabe. VOLUME 1 FUNCTION DVD ON / STANDBY PHONES Haupteinheit DIRECT STEREO Die automatische Strom-Einschaltfunktion schaltet sich auch dann ein, wenn der DiscHalter geöffnet wird, während sich der ADV-M71 im Standby-Modus befindet. CH VIRTUAL CALL 0/10 +10 - TEST TONE INPUT MODE SURROUND FUNCTION TUNER TV / VCR DVD IN/SURR. A/V SYSTEM Haupteinheit IN/SURR. MD CDR TAPE 1 1 2 + DVD 8 • Um sich ein Rundfunkprogramm anzuhören, drücken Sie einfach die Senderspeichertasten (“+” oder “–”) auf der Fernbedienung. Die Stromversorgung schaltet sich ein und ein Sender wird eingestellt. • Die automatische Strom-Einschaltfunktion arbeitet auf gleiche Weise, wenn Systemanschlüsse mit dem MD-Recorder der D-M31-Serie (DMD-M31) oder dem Kassettendeck (DRR-M31) durchgeführt worden sind. Lesen Sie hinsichtlich der Einzelheiten die Bedienungsanleitung der entsprechenden Komponente. 9 6 - 7 STATUS 3 MUTING SETUP Fernbedienung TONE /SDB ENTER TUNER + CH Fernbedienung (2) Automatische Funktionswahl • Mit einem Tastendruck wechselt die Funktion automatisch zu “DVD”, und die Disc-Wiedergabe beginnt. 1 B SURROUND / SELECT DVD SURROUND RECEIVER ADV-M71 PUSH - PARAM. 1 Drücken Sie während der Wiedergabe einer Komponente der D-M31-Serie (Kassettendeck oder MD-Recorder) die Wiedergabe-/Pausetaste am ADV-M71 oder die DVDWiedergabetaste auf der Fernbedienung. • Die Wiedergabe auf der anderen Komponente stoppt, 1 die Funktion des ADV-M71 wechselt zu “DVD”, und falls eine Disc eingelegt ist, beginnt die Wiedergabe. DVD - + BAND MENU / SET TONE / SDB FUNCTION ON / STANDBY VOLUME Haupteinheit Fernbedienung PHONES • Um sich ein Rundfunkprogramm anzuhören, drücken Sie einfach die Senderspeichertasten (“+” oder “–”) auf der Fernbedienung. + • Die automatische Strom-Einschaltfunktion arbeitet auf gleiche Weise, wenn Systemanschlüsse mit dem MD-Recorder der D-M31-Serie (DMD-M31) oder dem Kassettendeck (DRR-M31) durchgeführt wurden. Lesen Sie hinsichtlich der Einzelheiten die Fernbedienung Bedienungsanleitung der entsprechenden Komponente. • Die automatische Funktionswahl kann nicht für Komponenten angewendet werden, die über die D.AUX-Eingangs/Ausgangsanschlüsse angeschlossen sind. TUNER CH DIRECT STEREO CH VIRTUAL CALL 0/10 +10 - TEST TONE INPUT MODE SURROUND FUNCTION TUNER TV / VCR DVD IN/SURR. A/V SYSTEM IN/SURR. MD CDR TAPE 1 1 2 + DVD 8 6 9 7 - STATUS 3 SETUP MUTING TONE /SDB 219 2ADV-M71E2_GER p175-p227 03.12.25 1:17 PM ページ 220 DEUTSCH (3) CD Æ MD-Aufnahme (wenn ADV-M71 und DMD-M31 über ein Systemkabel miteinander verbunden sind) • CDs können problemlos auf Mini-Discs überspielt werden. Prüfen Sie zunächst den Aufnahme-Eingang (analog oder digital) und den Aufnahmepegel, und führend Sie die entsprechenden Einstellungen aus. Haupteinheit (ADV-M71) OFF MD-Recorder (DMD-M31) SLEEP 3,e 3,e CLEAR TITLE TV IN T V CHARAC. SLIDE MODE EDIT/MENU ZOOM 7 5 ,t TV CH 5 ,t RDS PROG/DIRECT MODE B SURROUND / SELECT DVD SURROUND RECEIVER ADV-M71 MINIDISC RECORDER DMD-M31 PUSH - PARAM. POWER LOADING MECHANISM - CHARACTER/ MEMORY REC + BAND MENU/SET TONE / SDB EDIT REPEAT PTY TIME - TV CH + CT CD SRS RT RANDOM SEARCH MODE MEMO BAND TUNER D.AUX 1 2 3 MD/LINE-1 TAPE /LINE-2 4 5 6 + - 5CH STEREO AUTO DECODE TUNER DVD TUNING / TV VOL + 7 8 9 DIRECT STEREO VIRTUAL CALL 0/10 +10 - TEST TONE INPUT MODE SURROUND FUNCTION TIME/INPUT CD SRS VOLUME 1,q ON VCR REC NTSC/PAL ENTER A-B REPEAT SOURCE CH MULTI REC FUNCTION ON / STANDBY ON / STANDBY PHONES 8 18Tr02m 46s 1 L dB -60 -40 -30 -20 -12 -6 -2 PUSH ENTER 0 R 2,w 9 TUNER TV / VCR DVD IN/SURR. A/V SYSTEM IN/SURR. MD CDR TAPE 7 1 2 + DVD 1,q 6 2,w y u 8 9 6 7 STATUS 3 [1] Synchronisierte Aufnahme-Funktion 1 ON 2 ADV-M71 3 q ~ t y FUNCTION Fernbedienung Öffnen Sie den Disc-Halter des ADVM71, legen Sie die CD ein und schließen Sie dann den Disc-Halter. ADV-M71 4 5 6 u 53:20 Legen Sie die MD, auf die Sie aufnehmen möchten, in den MD-Einschub des MD-Recorders ein. Drücken Sie einmal die Aufnahmetaste am MD-Recorder, um den AufnahmeStandby-Modus einzustellen. MULTI REC DMD-M31 7 Drücken Sie die Wiedergabe-/Pausetaste am ADV-M71 oder die DVD-Wiedergabetaste auf der Fernbedienung. • Die Aufnahme der CD beginnt 1 automatisch. DVD ADV-M71 Fernbedienung Nach Beendigung der CD-Wiedergabe wird der AufnahmeStandby-Modus eingestellt. 220 Wählen Sie den synchronisierten Aufnahmemodus durch Drücken der CD SRS-Taste am MD-Recorder aus. • Bei jedem Drücken der Taste ändert sich der Modus wie nachfolgend gezeigt. CD SRS DMD-M31 SRS1disc Rec? Die gesamte CD wird aufgenommen. SRS Make Gp? Die gesamte CD wird aufgenommen und als Gruppe registriert. SRS1Tr Rec? Nur die erste Spur auf der CD wird aufgenommen. Die synchronisierte Aufnahme einer bestimmten Spur ist möglich, indem zunächst die Spurnummer mit Hilfe der 8 und 9-Tasten am ADV-M71 und dann ”SRS 1Tr Rec?” am MD-Recorder ausgewählt wird. Stellen Sie sicher, dass die Gesamtanzahl der Spuren und die Gesamtspielzeit der CD auf der Anzeige angezeigt werden. Beispiel: Bei einer CD mit insgesamt 16 Spuren und einer Gesamtspielzeit von 53 Minuten, 20 Sekunden 16Tr Verfahren Sie auf die gleiche Weise wie in den oben beschriebenen Schritten 1 bis 5. Fernbedienung Drücken Sie die FUNCTION-Taste und schalten Sie zur “DVD”-Funktion“ um. FUNCTION MUTING [2] Synchronized CD recording (CD SRS) Schalten Sie die Stromversorgung des ADV-M71 ein. • Die ON / STANDBY Stromversorgung des Systems schaltet sich ein. ADV-M71 - Drücken Sie die ENTER-Taste des MDRecorders. • Die Aufnahme der CD beginnt automatisch. PUSH ENTER DMD-M31 Nach der Wiedergabe aller sich auf der CD befindlichen Spuren werden sowohl der ADV-M71 als auch der MD-Recorder automatisch in den Stoppmodus geschaltet. Selbst wenn noch nicht die gesamte CD wiedergegeben wurde, schalten sich sowohl der ADV-M71 als auch der MD-Recorder automatisch in den Stoppmodus, wenn die MD voll ist. Drücken Sie zum Beenden der synchronisierten Aufnahme die Stopptaste (2) am ADV-M71 oder am MD-Recorder. HINWEISE: • Die synchronisierte Aufnahme ist nicht möglich, wenn der ADVM71 auf eine andere Funktion als DVD eingestellt wurde. • Die synchronisierte Aufnahme ist nicht möglich, wenn der Modus für die programmierte Wiedergabe eingestellt wurde. Wenn der Zufallswiedergabe- oder WiedergabewiederholungsModus eingestellt wurde, wird der entsprechende Modus beim Starten der synchronisierten Aufnahme deaktiviert. 2ADV-M71E2_GER p175-p227 03.12.25 1:17 PM ページ 221 DEUTSCH (4) CD Æ TAPE-Aufnahme (wenn ADV-M71 und DRR-M31 über ein Systemkabel miteinander verbunden sind) • CDs können problemlos auf Kassettenbänder aufgenommen werden. OFF Haupteinheit (ADV-M71) Kassettendeck (DRR-M31) SLEEP CLEAR 3,e B 3,e 5 ,t SURROUND / SELECT DVD SURROUND RECEIVER ADV-M71 RDS PROG/DIRECT 5 ,t CASSETTE DECK DRR-M31 PUSH - PARAM. T V EDIT/MENU ZOOM + CD SRS DOLBY NR ON OFF FUNCTION ON / STANDBY ON / STANDBY RANDOM BAND TUNER D.AUX 1 2 3 MD/LINE-1 TAPE /LINE-2 TV CH + CT CD SRS RT SEARCH MODE TUNING / TV VOL 5 6 + - 5CH STEREO AUTO DECODE TUNER 8 DIRECT BAND VOLUME PTY MEMO DVD 4 PLAY REPEAT TIME - MODE 7 MENU/SET TONE / SDB TITLE TV IN CHARAC. SLIDE MODE TV CH 7 1 ,q ON VCR REC NTSC/PAL ENTER A-B REPEAT SOURCE + 9 STEREO CH VIRTUAL CALL 0/10 +10 - TEST TONE INPUT MODE SURROUND FUNCTION 2 ,w REC CD SRS REC 0 PLAY 1 REVERSE MODE PHONES TUNER TV / VCR DVD IN/SURR. A/V SYSTEM IN/SURR. MD CDR TAPE 7 1 2 + DVD 8 1,q 6 2,w ON 2 STATUS MUTING q ~ t Verfahren Sie auf gleiche Weise wie in den oben beschriebenen Schritten 1 bis 5. Fernbedienung Drücken Sie die FUNCTION-Taste und schalten Sie zur “DVD”-Funktion um. FUNCTION 7 - [2] Synchronisierte CD-Aufnahme (CD SRS) Schalten Sie die Stromversorgung des ADV-M71 ein. • Die ON / STANDBY Stromversorgung des Systems schaltet sich ein. ADV-M71 6 3 [1] Synchronisierte Aufnahme-Funktion 1 y 9 FUNCTION y Drücken Sie die CD SRS-Taste am Kassettendeck. • Die Aufnahme der CD beginnt automatisch. CD SRS DRR-M31 ADV-M71 3 Fernbedienung Öffnen Sie den Disc-Halter des ADVM71, legen Sie die CD ein und schließen Sie dann den Disc-Halter. ADV-M71 4 Stellen Sie sicher, dass die Gesamtanzahl der Spuren und die Gesamtspielzeit der CD auf der Anzeige angezeigt werden. Beispiel: Bei einer CD mit insgesamt 16 Spuren und einer Gesamtspielzeit von 53 Minuten, 20 Sekunden 16Tr 5 53:20 Öffnen Sie den Kassettenhalter, legen Sie das Kassettenband, auf das Sie aufnehmen möchten ein, und schließen Sie den Kassettenhalter. Nach der Wiedergabe aller sich auf der CD befindlichen Spuren werden sowohl der ADV-M71 als auch das Kassettendeck automatisch in den Stoppmodus geschaltet. Selbst wenn noch nicht die gesamte CD wiedergegeben wurde, schalten sich sowohl der ADV-M71 als auch das Kassettendeck automatisch in den Stoppmodus, wenn das Kassettenband voll ist. Drücken Sie zum Beenden der synchronisierten Aufnahme die Stopptaste (2) am ADV-M71 oder am Kassettendeck. HINWEISE: • Die synchronisierte Aufnahme ist nicht möglich, wenn der ADVM71 auf eine andere Funktion als DVD eingestellt wurde. • Die synchronisierte Aufnahme ist nicht möglich, wenn der Modus für die programmierte Wiedergabe eingestellt wurde. Wenn der Zufallswiedergabe- oder WiedergabewiederholungsModus eingestellt wurde, wird der entsprechende Modus beim Starten der synchronisierten Aufnahme deaktiviert. DRR-M31 6 Drücken Sie einmal die Aufnahmetaste am Kassettendeck, um den AufnahmeStandby-Modus einzustellen. REC DRR-M31 7 Drücken Sie die Wiedergabe-/Pausetaste am ADV-M71 oder die Wiedergabetaste auf der Fernbedienung. • Die Aufnahme der 1 CD beginnt automatisch. DVD ADV-M71 Fernbedienung Nach Beendigung der CD-Wiedergabe wird der AufnahmeStandby-Modus eingestellt. 221 2ADV-M71E2_GER p175-p227 03.12.25 1:17 PM ページ 222 DEUTSCH (5) Bearbeitete Aufnahme (wenn ADV-M71 und DRR-M31 über ein Systemkabel miteinander verbunden sind) • Die sich auf der CD befindlichen Spuren können für die Aufnahme – je nach Länge des Kassettenbandes (Kassettenband-Spielzeit) – automatisch auf die Seiten A und B verteilt werden. (nur bei CDs) • Die bearbeitet Aufnahme ist bei CDs möglich, die bis zu 25 Spuren beinhalten. CDs mit mehr als 26 Spuren können nicht bearbeitet werden. Beispiel: Aufnahme einer CD mit 16 Spuren und einer Gesamtspielzeit von 56 Minuten auf ein C-60-Kassettenband (60 Minuten Spielzeit) Haupteinheit ADV-M71 B 4 4 Öffnen Sie den Disc-Halter des ADV-M71, legen Sie die CD ein und schließen Sie dann den Disc-Halter. 16Tr 4 6 56:00 SURROUND / SELECT DVD SURROUND RECEIVER ADV-M71 PUSH - PARAM. - ADV-M71 + BAND MENU/SET TONE / SDB VOLUME FUNCTION 5 ON / STANDBY PHONES 3 1 Kassettendeck (DRR-M31) 2 2 CASSETTE DECK DRR-M31 PLAY ON OFF MENU Fernbedienung TapeEdit C-60 CD SRS DOLBY NR Drücken Sie die MENU-Taste auf der Fernbedienung und stellen Sie die Länge des Kassettenbandes ein, auf das Sie aufnehmen möchten. • Drücken Sie z. B. für ein 60-MinutenKassettenband zweimal die Bearbeitungstaste. (Bei der angegebenen Kassettenband-Länge handelt es sich jeweils um die Gesamtspielzeit der Seiten A und B.) REC ON / STANDBY CD SRS REC 0 PLAY 1 REVERSE MODE Bei jedem Drücken der MENU-Taste ändert sich die Anzeige wie folgt: OFF SLEEP CLEAR TITLE TV IN T V CHARAC. SLIDE MODE EDIT/MENU ZOOM TV CH RDS PROG/DIRECT MODE DVD REPEAT PTY TIME - TV CH MEMO BAND TUNING / TV VOL TUNER D.AUX 1 2 3 TAPE /LINE-2 4 5 6 + - 5CH STEREO AUTO DECODE TUNER 7 8 CH VIRTUAL 0/10 +10 - INPUT MODE SURROUND FUNCTION TUNER TV / VCR DVD IN/SURR. SYSTEM Ungefähr 4 Sekunden nach der Einstellung der Kassettenband-Länge werden die Anzahl der Spuren, die auf die Seite A des Kassettenbandes aufgenommen werden sollen, und die Restzeit für die Seite A angezeigt. (Bsp.: Wenn die Spuren 1 bis 9 auf die Seite A aufgenommen werden sollen und die Restzeit für die Seite A 2 Minuten und 40 Sekunden beträgt) + 9 STEREO CALL TEST TONE A/V Bearbeitete Aufnahme deaktiviert + CT CD SRS RT RANDOM SEARCH MODE MD/LINE-1 DIRECT 1 ON VCR REC NTSC/PAL ENTER A-B REPEAT SOURCE 3 IN/SURR. MD E CDR TAPE 6 1 2 + DVD 8 6 7 - STATUS 1 01-09A02:40 9 Schalten Sie die Stromversorgung des ADV-M71 ein. • Die Stromversorgung des Systems schaltet sich ein. Anschließend wird alle paar Sekunden abwechselnd die Anzahl der Spuren, die Restzeit für die Seite B, die Anzahl der Spuren und die Restzeit für die Seite A angezeigt. (Bsp.: Wenn die Titel 10 bis 16 auf die Seite B aufgenommen werden und die Restzeit für die Seite B 1 Minute und 20 Sekunden beträgt) ON / STANDBY ON ADV-M71 2 3 Öffnen Sie den Kassettenhalter, legen Sie das Kassettenband, auf das Sie aufnehmen möchten ein, und schließen Sie den Kassettenhalter. Legen Sie das Kassettenband mit der Seite A nach oben zeigend ein. Fernbedienung DRR-M31 Drücken Sie die FUNCTION-Taste und schalten Sie zur “DVD”-Funktion um. FUNCTION E 10-16B01:20 Falls für die Restzeit “OVER” angezeigt wird, können nicht alle Spuren aufgenommen werden. Ändern Sie die Kassettenband-Länge. Wenn Sie eine andere Kassettenband-Länge als 46, 60 oder 90 einstellen möchten, geben Sie die gewünschte Kassettenband-Länge über das Zifferntastenfeld und mit der +10-Taste auf der Fernbedienung ein, während “ ” angezeigt wird. Die Zeit kann auf bis zu 99 Minuten eingestellt werden. Die Zeit wird auf gleiche Weise wie bei der direkten Suche nach CD-Spuren eingegeben. FUNCTION Beispiel: Einstellen der Zeit auf 54 Minuten ADV-M71 222 Fernbedienung Drücken Sie, während “ +10 , +10 , +10 , 4. ” angezeigt wird, +10 , +10 , 2ADV-M71E2_GER p175-p227 03.12.25 1:17 PM ページ 223 DEUTSCH 6 Drücken Sie die Wiedergabe/Pausetaste am ADV-M71 oder die DVD-Wiedergabetaste auf der Fernbedienung. • Die Wiedergabe der CD und die Aufnahme auf das Kassettenband beginnen gleichzeitig. 01Tr 00:01 ADV-M71 1 DVD Fernbedienung Drücken Sie zum Verlassen der bearbeiteten AufnahmeFunktion die Stopptaste des ADV-M71. BAND ADV-M71 2 Fernbedienung HINWEISE: • Die bearbeitete Aufnahme-Funktion kann nicht für CDs mit 26 oder mehr Spuren angewendet werden. • Legen Sie vor der Durchführung der bearbeiteten Aufnahme zunächst das Kassettenband, auf das Sie aufnehmen möchten, mit der Seite A nach oben zeigend in das Kassettenfach ein. Das Kassettenband wird vor dem Aufnahmestart automatisch zum Anfang des bespielbaren Bereiches gespult.o Wenn Sie • länger ist als die eingestellte Zeit, stoppt die Aufnahme in der Mitte von Seite B und die vorherige Aufnahme bleibt auf dem restlichen Kassettenband erhalten. Daher sollten Sie bereits bespielte Kassettenbänder vor der erneuten • • Falls der Rückwärts-Modus des Kassettendecks bei der bearbeiteten Aufnahme auf von Seite A. Stellen Sie den Rückwärts-Modus des Kassettendecks auf löschen. eingestellt ist, stoppt die Aufnahme am Ende ein. • Da die Spuren auf die Seiten A und B verteilt werden, können möglicherweise nicht alle Spuren von einer CD auf das Kassettenband aufgenommen werden und dies ist unter Umständen selbst dann nicht möglich, wenn das Kassettenband etwas länger ist als die Gesamtspielzeit der CD. • Die 9, 8, 7und 6-Tasten sind während der bearbeiteten Aufnahme außer Funktion. 2 Über die synchronisierte Aufnahme auf einen MD-Recorder (DMD-M31) und ein Kassettendeck (DRR-M31) • Die synchronisierte Aufnahme ist mit anderen Discs als CDs (DVDs, Video-CDs, Discs mit MP3- oder WMA-Dateien usw.) möglich. • Lesen Sie hinsichtlich der digitalen und analogen Aufnahme während der Disc-Wiedergabe Seite 125. • Mit einigen Discs ist möglicherweise keine einwandfreie synchronisierte Aufnahme möglich. Bespielen Sie die Disc in einem solchen Fall manuell, indem Sie den Aufnahmemodus nach dem Beginn der Disc-Wiedergabe einstellen. • Die CD SRS-Funktion und die Funktion für die bearbeitete Aufnahme auf Kassettenbänder kann nur mit CDs angewendet werden. 223 2ADV-M71E2_GER p175-p227 03.12.25 1:17 PM ページ 224 DEUTSCH 21 SPEICHERUNG DER LETZTEN FUNKTION • Dieses Gerät ist mit einem “Last Function memory” ausgestattet, der den Eingangs- und Ausgangseinstellungsstatus speichert,der vor dem Ausschalten der Stromversorgung eingestellt war. Mit dieser Funktion sind komplizierte Neueinstellungen nach Einschalten der Stromversorgung nicht mehr notwendig. • Das Gerät ist ebenfalls mit einem Sicherungsspeicher ausgestattet. Mithilfe dieser Funktion bleibt der Speicherinhalt gespeichert, auch wenn die Stromversorgung ausgeschaltet und das Netzkabel abgezogen wird. 22 INITIALISIERUNG DES MIKROPROZESSORS Wenn die Display-Anzeige nicht normal erscheint oder der Gerätebetrieb nicht einwandfrei läuft, muss die Initialisierung desMikroprozessors mithilfe des folgenden Verfahrens ausgeführt werden. 1 Drücken Sie die Netztaste, umden Bereitschaftsmodusaufzurufen, ziehen Sie danach dasNetzkabel des Gerätes auf derNetzsteckdose. 2 2 ON / STANDBY Rot B SURROUND / SELECT DVD SURROUND RECEIVER ADV-M71 PUSH - PARAM. - + BAND MENU / SET TONE / SDB VOLUME FUNCTION ON / STANDBY PHONES 2 Halten Sie die PLAY/PAUSE-Taste (1/3) und die STOP-Taste (2)gedrückt und stecken Sie das Netzkabel wieder in die Steckdose. 3 Prüfen Sie, ob das gesamte Display in einem Intervallvon etwa 1 Sekunde blinkt; lassen Sie die zwei Tastenwieder los damit ist der Mikroprozessor initialisiert. 224 1 HINWEISE: • Wenn Schritt 3 nicht funktioniert, wiederholen Sie dasVerfahren ab Schritt 1. • Wenn der Mikroprozessor rückgesetzt ist, werden alleTasten und Setup-Einstellungen auf die voreingestelltenWerte rückgesetzt. 2ADV-M71E2_GER p175-p227 03.12.25 1:17 PM ページ 225 DEUTSCH 23 FEHLERSUCHE Nehmen Sie erneut eine Prüfung vor, bevor Sie annehmen, dass der Player eine Fehlfunktion hat 2 Sind alle Anschlüsse korrekt? 2 Befolgen Sie die im Handbuch beschriebenen Anleitungen? 2 Funktionieren die Lautsprecher und die anderen Komponenten einwandfrei? Wenn das Gerät nicht einwandfrei zu funktioniert scheint, siehe die Tabelle unten. Wenn das Problem dadurch nicht behoben werden kann, ist das Gerät möglicherweise beschädigt. Schalten Sie die Stromversorgung aus, ziehen Sie das Netzkabel ab und wenden Sie sich an den Händler, bei dem Sie das Gerät erworben haben, oder an eine Denon-Verkaufsstelle in der Nähe. Fernbedienung Allgemeine Probleme beim Hören von Discs, Tapes und UKW-Übertragungen, usw. Symptom Ursache Abhilfe Seite • Prüfen Sie den Anschluss des Netzkabelsteckers. 120 • Richtig anschließen. 120 • Stellen Sie eine geeignete Position ein. • Stellen Sie die Lautstärke auf einengeeigneten Pegel. • Schalten Sie die STUMMSCHALTUNG aus. • Geben Sie Digitalsignale ein oderwählen Sie Eingangsbuchsen, an denen Digitalsignale eingehen. 156 154 DISPLAY leuchtet, aber kein Tonwird ausgegeben, wenn derNetzschalter eingeschaltet ist. • Das Netzkabel ist locker eingesteckt. DISPLAY leuchtet, es wird aber keinTon ausgegeben. • Die Lautsprecherkabel sind nicht festangeschlossen. • Falsche Position der Audio-Funktionstaste. • Der Lautsprecherregler ist auf einMinimum eingestellt. • Die STUMMSCHALTUNG ist aktiviert. • Digitalsignale werden nichteingegeben; Digitaleingang istausgewählt. • Prüfen Sie, ob die Anschlüsse korrektsind. 123 Auf dem Monitor wird kein Bildangezeigt. • Die Anschlüsse zwischen der VideoAusgangsbuchse dieses Gerätes unddem Eingangsanschluss des Monitorssind nicht vollständig. • Die Eingangseinstellung des Monitor-TVs ist unterschiedlich. • Schließen Sie die TV Eingangsumschaltungan die Buchsean, an der der Videoeingangangeschlossen ist. — • Fast jede Filmsoftware einUrheberrechtsschutz-Signal. • Es kann keine Kopie erstellt werden. — Sie die Stromversorgung • Schalten desSubwoofers ein. • Ändern Sie die Einstellung“Subwoofer” im Setup. — Das Programm kann nicht von der DVD auf den VCR kopiert werden. enthält • Es liegt kein Strom am Subwoofer an. Der Subwoofer produziert keinenTon aus. Dieses Gerät funktioniert nichteinwandfrei, wenn es mir derFernbedienung gesteuert wird. • Die Subwoofer-Einstellung im Setupsteht auf “None”. • Die Batterien sind leer. • Die Fernbedienung ist vom Gerät zuweit entfernt. • Es befindet sich ein Hindernis zwischendiesem Gerät und der Fernbedienung. • Es wird eine andere Taste gedrückt. • Die Enden < und > der Batterie sindverkehrt herum eingelegt. • Die Modus-Auswahl der Fernbedienungist nicht richtig eingestellt. Der DVD Modus,AV-Modus der Audio-Modus istnicht richtig eingestellt. 158 159 141 • Ersetzen Sie die Batterien durch neue. • Gehen Sie mit der Fernbedienung näherheran. • Entfernen Sie das Hindernis. 132 132 • Drücken Sie die richtige Taste. • Legen Sie die Batterien richtig herumein. 128 132 • Drücken Sie die FernbedienungsModusauswahltaste für den Punkt, denSie aufrufen wollen. Betreiben Siedieses Gerät zusammen mit dem DVD Modus. 129 132 225 2ADV-M71E2_GER p175-p227 03.12.25 1:17 PM ページ 226 DEUTSCH Maßnahme Tuner DVD-Betrieb Symptom • Befindet sich Kondensation auf der Disc oder dem Player? (Bedienen Sie das Gerät 1oder 2 Stunden lang nicht.) • Es können keine anderen Discs als DVDs, Video-CDs und Music-CDs abgespieltwerden. • Die Disc ist schmutzig. Wischen Sie den Schmutz weg. Die Menü-Wiedergabe ist nur bei VideoCDs mit Wiedergabesteuerung möglich. • Die Menü-Wiedergabe von Video-CDs ist nicht möglich. — Das Bild ist während desSuchbetriebs gestört. • Kleine Störungen sind normal. — Die Tasten funktionieren nicht. • Einige Betriebsfunktionen sind bei einigen Discs deaktiviert. Es werden keine Untertitelangezeigt. • Es werden keine Untertitel bei DVDs angezeigt, die keine Untertitel enthalten. • Die Untertitel-Funktion ist ausgeschaltet. Schalten Sie die Untertitel-Einstellung ein. • Die Audiosprache (oder Untertitel-Sprache) kann bei Discs, auf denen keine multiplenAudiosprachen (oder Untertitel-Sprachen) enthalten sind, nicht gewechselt werden. • Bei einigen Discs kann die Audiosprache (oder Untertitel-Sprache) beim Ausführen desWechselbetriebs nicht geändert werden; allerdings kann sie auf den Menü-Bildschirmen gewechselt werden.Der Winkel kann nicht gewechseltwerden. 207 Die Audiosprache (oder UntertitelSprache) kann nicht gewechseltwerden. Der Winkel kann nicht gewechseltwerden. • Der Winkel kann bei DVDs nicht gewechselt werden, auf denen keine multiplen Winkelenthalten sind. In einigen Fällen sind nur spezifische Szenen in multiplen Winkelnaufgenommen worden. 195 Die Wiedergabe startet nicht, wennder Titel ausgewählt ist. • Prüfen Sie die “RATINGS SETUP”-Einstellung. 215, 216 Das Kennwort für dasBewertungsniveau wurdevergessen. Stellen Sie alle Einstellungen aufdie werkseitigen Vorgabenzurück. • Halten Sie, währen sich der Player im Stopp-Modus befindet, die SKIP-Taste (8) unddie PAUSE-Taste (3) des Players gleichzeitig länger als 3 Sekunden gedrückt (bis“INITIALIZE” vom TV-Monitor verschwindet). Die Sperrung wird aufgehoben und alle Voreinstellungen und Bildeinstellungen werdenauf die werkseitigen Werte rückgesetzt. 215, 216 Die Disc wird nicht in der in denVoreinstellungen eingestelltenAudiooder Untertitel-Sprachewiedergegeben. • Die Disc wird nicht mit der ausgewählten Audio- oder Untertitel-Sprachewiedergegeben, wenn diese Audio- oder Untertitel-Sprache nicht auf dieser DVDenthalten ist. 207 Es wird bei aktivierter 4:3-Funktion(oder 16:9) kein Bild angezeigt. • Stellen Sie die “TV ASPECT”-Voreinstellung auf die richtige, für den angeschlossenenTV geeignete Einstellung. 211 Es werden keine MenüBildschirmmeldungen für diegewünschte Sprache angezeigt. • Prüfen Sie die Voreinstellung der Disc-Menüsprache. Beim Empfang von UKW-Programmen treten kontinuierliche Störungen auf • Das Antennenkabel angeschlossen. richtig • Schließen Sie das Antennenkabel richtig an • Schließen Sie eine Außenantenne an. 124 Beim Empfang von MW-Programmen treten Bandlaufgeräusche oder andere kontinuierliche Störungen auf • Hierbei kann es sich um Störungen von einem Fernsehgerät oder um Interferenzen von einer Rundfunkstation handeln. • Schalten Sie das Fernsehgerät aus. • Ändern Sie die Position und Ausrichtung der MW-Rahmenantenne. 124 • Die über das Netzkabel gesendeten Radiowellen werden gedämpft. • Trennen Sie das Netzkabel ab, drehen Sie den Stecker um und schließen Sie das Kabel wieder an. 124 Beim Empfang von MW-Programmen ist ein Brummen zu hören. 226 Seite Die Wiedergabe startet nicht, wenndie PLAY-Taste gedrückt wird. Die Wiedergabe stoppt augenblicklich. ist nicht — 118 119 154 — 207, 208 207 208, 209 2ADV-M71E2_GER p175-p227 03.12.25 1:17 PM ページ 227 DEUTSCH 24 TECHNISCHE DATEN 2 2 2 Ausgangsleistung • Audio-Bereich Hauptverstärker Ausgangsrate: Leistungsverstärker: • Analog-Bereich Eingangsempfindlichkeit/ Eingangsimpedanz: Frequenzgang: Rauschabstand: Hauptverstärker Ausgangsrate: Tuner-Bereich Empfangsbereich: Verwendbare Empfindlichkeit: UKW - Stereo - Kanaltrennung: • Digital-Bereich Digitaler Eingang/Ausgang: Video-Bereich • AV1-Anschluss Front: 35 W + 35 W (6 Ω/ohm load, 1 kHz, T.H.D. 10 %) Speaker Impedanz: 6 bis 16 Ω/ohms 200 mV/47 kΩ/kohms 10 Hz bis 50 kHz: +0, –3 dB (2-kanal-Einstellung, direct-modus) 98 dB (Direct-Modus) 0.6 V (Preamplifier-Ausgang) UKW: 87.5 MHz bis 108 MHz MW: 522 kHz bis 1611 kHz UKW: 1.5 µV/75 Ω/ohms MW: 20 µV 35 dB (1 kHz) Format — Digitalaudio-Interface Video-Ausgang S-video-Ausgang RGB-Ausgang Audio-Ausgang 2 2 2 2 DVD-Bereich Signalsystem: Verwendbare Discs: Analog Audio-Ausgang: Uhr-, Timer-Bereich Uhr-System Timer-Funktionen: Allgemein Stromversorgung: Leistungsaufnahme: MaximaleAußenabmessungen: Masse: Fernbedienung: Remote control method: Stromversorgung: 1 Vp-p, 75 Ω/ohms Y (brightness) signal — 1 Vp-p, 75 Ω/ohms C (Farbe) signal — 0.3 Vp-p, 75 Ω/ohms R/G/B signal — 0.7 Vp-p, 75 Ω/ohms L/R (festgelegter Ausgang) NTSC/PAL (1) DVD-Videodiscs einfach beschichtete, einseitige 12-cm-Discs, doppelt beschichtete, einseitige 12-cm-Discs, doppelt beschichtete zweiseitige 12-cm-Discs (single side 1 layer), 8 cm single side 1 layer, 8 cm single side 2 layers, 8 cm both sides 2 layers (eine Schicht pro Seite) (2) Compact-Discs (CD-DA, VIDEO CD) 12 cm Discs, 8 cm Discs Output level: 1.1 Vrms (LINE-1, LINE-2 OUT) Stromquellen-Synchronsystem Täglich/Einmal timer: 1 Einstellung Sleep-Timer: maximal 120 min. 230 V Wechselstrom, 50 Hz 75 W (Bereitschaft 1 W) 210 (Breite) x 95 (Höhe) x 367 (Tiefe) mm 3.5 kg RC-966 IR pulse method 3 V Gleichstrom, 2 “R6P/AA”-Batterien Dieses Produkt enthält die Urheberrechtsschutz-Technologie, die durch Verfahrensansprüche bestimmter U.S.-Patente undandere geistigen Eigentumsrechte, die im Besitz der Macrovision Corporation und anderer Rechtsinhaber sind, geschützt ist. Die Nutzung dieser Urheberrechtsschutz-Technologie muss durch die Macrovision Corporation autorisiert sein und ist nur zuPrivatzwecken erlaubt, soweit nicht anders von der Macrovision Corporation autorisiert. Unsachgemäßer Einsatz oderDemontage ist verboten ✽ Design und technischen Daten können zwecks Produktverbesserung ohne vorherige Ankündigung geändert werden. 227 3ADV-M71E2_FRA p228-284 03.12.25 1:20 PM ページ 228 FRANCAIS TABLE DES MATIERES z x c v b n m , . ⁄0 ⁄1 ⁄2 AVANT L’UTILISATION ............................................................................228 PRECAUTIONS D’INSTALLATION ..........................................................228 PRECAUTIONS DE MANIPULATION......................................................229 CARACTERISTIQUES..............................................................................229 DISQUES.................................................................................................230 PRECATIONS DE MANIPULATION DES DISQUES ................................231 CONNEXIONS.................................................................................232~238 APPELLATION DES PIECES ET FONCTIONS ................................239~243 UNITE DE TELECOMMANDE ........................................................244~252 REGLAGE DU SYSTEME................................................................253~262 LECTURE ........................................................................................263~268 FONCTIONNEMENT DES FONCTIONS AMBIANCE .....................268~270 ⁄3 ⁄4 ⁄5 ⁄6 ⁄7 ⁄8 ⁄9 ¤0 ¤1 ¤2 ¤3 ¤4 DOLBY / DTS SURROUND.............................................................271~273 LECTURE ACCOUSTIQUE (SURROUND) ......................................274~286 ECOUTER LA RADIO......................................................................287~291 AFFICHAGE A L’ECRAN .........................................................................292 UTILISATION DE L’AFFICHAGE A L’ECRAN ..................................293~310 UTILISATION DE LA MINUTERIE...................................................311~317 CHANGER LES REGLAGES PAR DEFAUT (DVD) ..........................318~330 FONCTION DU SYSTEME ..............................................................331~335 MEMOIRE DE DERNIERE FONCTION ...................................................336 INITIALISATION DU MICROPROCESSEUR............................................336 LOCALISATION DES PANNES........................................................337, 338 SPECIFICATIONS ....................................................................................339 2 ACCESSOIRES ADV-M71 Veuillez contrôler que les articles suivants sont bien joints à l’appareil principal dans le carton: q Mode d’emploi....................................................1 r Piles R6P/AA.......................................................2 w Liste des centres d’entretien) ...............................1 t Antenne-cadre AM..............................................1 e r e Télécommande (RC-966) ....................................1 y Antenne intérieure FM ....................................…1 t y 2 1 AVANT L‘UTILISATION Faire attention au points suivants avant d’utiliser cet appareil: • Déplacement de l’appareil Pour éviter des court-circuits ou des fils endommagés dans les câbles de connexion, toujours débrancher le cordon d’alimentation, et déconnecter les câbles de connexion entre tous les autres composants audio lors du déplacement de l’appareil. • Avant de mettre sous tension Vérifier une nouvelle fois si toutes les connexions sont bonnes et s’il n’y a pas de problèmes avec les câbles de connexion. Toujours placer l’interrupteur de mise sous tension en position d’attente avant de connecter et de déconnecter les câbles de connexion. • Ranger ces instructions dans un endroit sûr Après les avoir lues, ranger ces instructions en même temps que la garantie dans un endroit sûr. • Noter que les illustrations de ces instructions peuvent varier de l’appareil actuel dans un but d’explication. 2 PRECAUTIONS D’INSTALLATION RECEPTEUR DVD SURROUND L’utilisation simultanée de cet appareil ou d’autres appareils électroniques à microprocesseur avec un tuner ou un téléviseur peut produire des parasites dans le son ou l’image. Si cela se produit, prendre les mesures suivantes: • Installer cet appareil aussi loin que possible du tuner ou du téléviseur. • Eloigner les câbles d’antenne du tuner ou du téléviseur aussi loin que possible du cordon d’alimentation et des câbles de connexion d’entrée/sortie de cet appareil. • Ce problème est fréquemment rencontré lors de l’utilisation d’antennes intérieures ou de câbles d’arrivée de 300 Ω/ohms. L’utilisation d’antennes extérieures et de câbles coaxiaux de 75 Ω/ohms est recommandée. Pour permettre la dissipation de la chaleur, laisser un espace d’au moins 10 cm entre le haut, l’arrière et les flancs de cet appareil et le mur ou d’autres composants. 228 10 cm ou plus B 10 cm ou plus Mur 3ADV-M71E2_FRA p228-284 03.12.25 1:20 PM ページ 229 FRANCAIS 3 PRECAUTIONS DE MANIPULATION RECEPTEUR DVD SURROUND • Commutation de la fonction d’entrée lorsque les prises d’entrée ne sont pas connectées Un déclic peut être produit si la fonction d’entrée est commutée lorsque rien n’est connecté aux prises d’entrée. Dans ce cas, abaisser la commande MASTER VOLUME (volume de la gamme entière) ou connecter des composants aux prises d’entrée. • Chaque fois que l’interrupteur de mise sous tension est en position STANDBY, l’appareil est toujours connecté à une tension de ligne secteur. Toujours débrancher le câble pour aller, par exemple, en vacances. • Mise en sourdine des prises PRE OUT, HEADPHONE et de la borne SPEAKER Les prises PRE OUT, HEADPHONE et les bornes SPEAKER sont équipées d’un circuit de sourdine. Pour cette raison, les signaux de sortie sont fortement réduits pendant plusieurs secondes après que l’interrupteur de mise sous tension ait été allumé ou après le changement de fonction d’entrée, de mode d’ambiance ou de toute autre installation. Si le volume est augmenté pendant cet instant, la sortie sera très élevée après l’arrêt du circuit de mise en sourdine. Toujours attendre que le circuit de mise en sourdine se désactive avant de régler le volume. 4 CARACTERISTIQUES Le ADV-M71 associe un amplificateur AV et un lecteur DVD, les composants centraux d’un système home cinéma, dans un seul ensemble compact et élégant. Le système prend peu de place, et le panneau frontal en aluminium et le demi-miroir de l’affichage lui assurent un design élégant qui s’accorde joliment avec la décoration de votre pièce. 1. Amplificateur 2 canaux compatible avec Dolby Virtual Speaker Le ADV-M71 est équipé de deux amplificateurs 35W (6 Ω/ohms 1kHz, T.H.D. 10%) qui le rendent compatible avec la nouvelle technologie Dolby Virtual Speaker pour recréer un environnement 5.1 canaux utilisant virtuellement une configuration 2 canaux. (Dolby Virtual Speaker est une technologie propriétaire de Dolby Laboratories.) Un processeur de signaux numériques à haute performance permet la reproduction de signaux ambiance multicanaux Dolby Digital et DTS dans le mode Dolby Virtual Speaker. Le son ambiance peut être obtenu avec le mode Dolby Virtual Speaker pour les CD et les autres sources à 2 canaux en association avec le décodeur Dolby Pro Logic II. 2. Prises de pré-sortie 3.1 canaux autorisant une expansion en système ambiance 5.1 canaux Quand il est utilisé avec un subwoofer avec amplificateur intégré et amplificateur de puissance disponible dans le commerce, le ADV-M71 peut être étendu en système ambiance 5.1 canaux. Le ADV-M71 ne recrée pas seulement un champ sonore précis pour sources multi-canaux, il est aussi compatible avec une reproduction de mode large dans le mode Dolby Virtual Speaker. 5. Lecteur DVD à haute performance pour une compatibilité de sortie de l’image progressive Le ADV-M71 est compatible avec les diverses fonctions offertes par les sources DVD, y compris l’audio multiple (jusqu’à 8 langues), sous-titres multiples (jusqu’à 32 langues), reproduction à angle multiple, restriction de la vision, etc. 6. Installation rapide et compatibilité de l’affichage sur l’écran Les DVD peuvent être appréciés en sélectionnant simplement la configuration de la télévision et des enceintes à utiliser. Même avec une configuration d’enceintes 5.1 canaux, les paramètres standard peuvent être réglés automatiquement en sélectionnant simplement la taille de la pièce dans laquelle le système est utilisé et la position d’écoute. Le système peut être réglé en utilisant la fonction d’affichage à l’écran. 7. Unité de télécommande avec fonction de mémorisation préréglée Le ADV-M71 est fourni avec une télécommande équipée d’une fonction de mémorisation préréglée incluant les codes d’opération de télécommande pour des séries D-M31, les platines cassette et les composants avec télécommandes compatibles DENON aussi bien que codes d’opération de télécommandes des autres principales marques de télévisions et lecteurs vidéo. 8. Fonctions système commodes Lorsque les connexions au système sont effectuées avec une platine à cassettes de série D-M31, les fonctions de système comme la sélection automatique de fonction, l’enregistrement synchronisé et l’enregistrement/la lecture programmé peuvent être réalisées facilement. 3. Décodeurs Dolby Pro Logic II pour une extension de la reproduction du champ sonore Le ADV-M71 est équipé d’un décodeur Dolby Pro Logic II pour une extension de la reproduction du champ sonore pour le Dolby Surround et les sources musicales stéréo. 4. Simulation du champ sonore utilisant le DSP en exclusivité DENON Le ADV-M71 est compatible avec les modes Rock Arena, Jazz Club et Video Game modes avec une configuration 2 canaux. Dans une configuration 5.1 canaux, il est aussi compatible avec les modes 5-Channel Stereo, Mono Movie et Matrix. 229 3ADV-M71E2_FRA p228-284 03.12.25 1:20 PM ページ 230 FRANCAIS 5 DISQUES • Les types de disques énumérés dans le tableau ci-dessous peuvent être utilisés sur le ADV-M71. Les marques de disque sont indiquées sur les étiquettes ou boîtiers de disque. Par exemple: Disques utilisables Marque (logo) Signaux enregistrés Dimension du disque Piste 1 DVD-vidéo DVD-audio (REMARQUE 1) DVD-R DVD-RW (REMARQUE 2) Piste 3 Piste 4 Piste 5 12 cm R R Audio numérique + vidéo numérique (MPEG2) 8 cm R W RW Video CD CD CD-R CD-RW (REMARQUE 3) Recordable Audio numérique + vidéo numérique (MPEG1) 12 cm Audionumérique MP3 WMA Photo numérique (JPEG) 12 cm 8 cm 8 cm ReWritable Photo numérique (JPEG) CD de photos Par exemple: Titre 1 Chapitre 1 Chapitre 2 Chapitre 3 2 Les types de disques suivants ne peuvent pas être lus sur le ADV-M71: • Les DVD avec des nombres de région autres que “2” ou “ALL” (TOUS) • Les disques DVD audio (REMARQUE 1) • Les DVD-ROM/RAM • CVD • Les CD-ROM (Seul les fichiers MP3/WMA peuvent être joués.) • Les VSD • Les CDV (Seule la bande son peut être lue) • Les CD-G (Seul le son est reproduit) • Les CD photo (Ne jamais lire ce type de disque sur le ADV-M71.) Toute tentative de lecture de CD photo risque d’endommager les données du disque. REMARQUE 1: Seules les sections vidéo conformes à la norme vidéo DVD peuvent être jouées. REMARQUE 2: Lecture de disques DVD-R et DVD-RW Les disques DVD-R et DVD-RW enregistrés en format vidéo sur un enregistreur DVD peuvent être lus sur le ADV-M71. Les disques qui n’ont pas été finalisés ne peuvent pas être lus. Selon l’état d’enregistrement du disque, le disque risque de ne pas être accepté ou lu normalement (l’image ou le son risque de ne pas être normal, etc.). 12 cm 2 La terminologie du disque • Titres et chapitres (DVD-vídeo) Les DVD-vídeo sont divisés en plusieurs grandes sections appelées “Titres” et en sections plus petites appelées “Chapitres”. Des numéros sont attribués à ces sections. Ces numéros sont appelés “Numéros de titre” et “Numéros de chapitre”. Titre 2 Chapitre 1 Chapitre 2 • Les pistes (CD vidéo et audio) Les CD vidéo et audio sont divisés en sections appelées “pistes”. Des numéros sont attribués à ces sections. Ces numéros sont appelés “numéros de piste”. 230 Piste 2 REMARQUE 3: Suivant la qualité d’enregistrement, certains CDR/RW ne peuvent être joués. • Commande de lecture (CD vidéo) Les CD vidéo comportant la mention “Menu de commande” (“playback control”) sur le disque ou le boîtier possèdent une fonction permettant d’afficher des menus sur l’écran de télévision pour sélectionner les pistes ou afficher des informations, etc., en mode interactif. Dans ce manuel, la lecture de CD vidéo faisant appel à de tels menus est appelée “Lecture par menus”. Les CD vidéo avec menus de commande peuvent être utilisés sur le ADV-M71. REMARQUE: • Ce lecteur DVD est conçu et fabriqué pour prendre en compte les informations de gestion de région (Region Management Information) enregistrées sur les disques DVD. Ce lecteur vidéo DVD ne peut lire que les disques DVD dont le numéro de région est identique au sien. Le numéro de région de ce lecteur vidéo DVD est le 2. 2 3ADV-M71E2_FRA p228-284 03.12.25 1:20 PM ページ 231 FRANCAIS 6 PRECAUTIONS DE MANIPULATION DES DISQUES Disques Précautions de manipulation des disques Seuls les disques de marques énumérées page 114 peuvent être joués sur le ADV-M71. Remarque, les disques de forme particulière (disques en forme de cœur, disques hexagonaux, etc.) ne peuvent pas être lus sur le ADVM71. Ne pas tenter leur lecture car ils peuvent endommager le lecteur. Manipulation des disques • Eviter toute empreinte digitale, graisse ou salissure sur les disques. • Prendre particulièrement soin de ne pas rayer les disques en les sortant de leur boîtier. • Ne pas tordre les disques. • Ne pas chauffer les disques. • Ne pas agrandir le trou central. • Ne pas écrire sur les étiquettes (imprimées) de disque avec un stylo à bille ou un crayon. • Des gouttelettes de l’eau de condensation peuvent se former sur la surface si le disque est soudainement déplacé d’un endroit froid à un endroit chaud. Ne pas utiliser de sèche-cheveux, etc., pour sécher le disque. Précautions de rangement des disques Eviter de toucher la surface du disque lors du chargement et déchargement. Prendre soin de pas laisser d’empreintes digitales sur la face des données (le côté qui brille comme un arc-en-ciel). • Toujours éjecter les disques une fois la lecture terminée. • Remettre les disques dans leur boîtier pour les protéger de la poussière, des rayures et des déformations. • Ne pas placer les disques dans les endroits suivants : 1. Exposés longtemps au soleil 2. Exposés à l’humidité ou à la poussière 3. Exposés à la chaleur d’appareils de chauffage, etc. Nettoyage des disques 2 Les empreintes digitales ou salissures sur le disque peuvent entamer la qualité du son et de l’image ou causer des coupures lors de la lecture. Enlever toute empreinte de doigt ou salissures. 2 Utiliser un nécessaire de nettoyage de disque disponible dans le commerce ou un chiffon doux pour nettoyer toute empreinte de doigt ou salissures. Nettoyer avec précaution à partir du centre vers l’extérieur. Précautions lors du chargement des disques • Charger un seul disque à la fois. L’empilage de disques les uns sur les autres peut les abîmer ou les rayer. • Charger les disques de 8 cm de manière sûre dans le guide de disque, sans adaptateur. Si le disque n’est pas mis en place correctement, il peut glisser hors du guide et bloquer le tiroir du disque. • Faire attention aux doigts quand le tiroir de disque se referme. • Ne pas mettre autre chose que des disques dans le tiroir de disque. • Ne pas charger de disques fêlés, déformés ou réparés avec de l’adhésif, etc. • Ne pas utiliser de disques s’ils portent du ruban adhésif, si une partie de la colle de l’étiquette est exposée, si l’étiquette a été décollée. De tels disques peuvent rester coincés à l’intérieur du lecteur et causer des dommages. Ne pas faire de mouvement circulaire. REMARQUE: • Ne pas utiliser d’aérosol pour disque ou antistatique. Ne pas utiliser non plus de solvant chimique volatile tel que le benzène ou le dissolvant. Aérosol Dissolvant Benzène pour disque 231 3ADV-M71E2_FRA p228-284 03.12.25 1:20 PM ページ 232 FRANCAIS 7 CONNEXIONS • Ne pas brancher le cordon CA avant d’avoir effectuer toutes les connexions. • S’assurer de connecter les canaux gauche et droit correctement (le gauche à gauche et le droit à droite). • Insérer fermement les prises. Des connexions inachevées risquent de générer du bruit. • Noter que le fait de lier les cordons à fiches de jack mâles ensemble ou de les placer à proximité d’un transformateur de puissance entraînera un bourdonnement ou d’autres bruits. • Du bruit ou un bourdonnement risque de se produire si le matériel audio connecté est utilisé indépendamment sans que cet appareil ait été mis sous tension. Le cas échéant, activer cet appareil. (1) Connections aux composants des séries D-M31 • Le ADV-M71 peut être connecté à un système avec une platine cassette (DRR-M31) et un enregistreur MD des séries D-M31 (DMD-M31). • Pour les instructions concernant la mise en marche de la platine cassette (DRR-M31) et de l’enregistreur MD (DMD-M31) vendus séparément, référez-vous à leurs modes d’emploi respectifs. • Seuls une platine cassette DRR-M31 et un enregistreur MD DMD-M31, peuvent être connectés directement au ADV-M71 en utilisant les connexions système. REMARQUE: • Ce système contient des circuits numériques qui peuvent provoquer des interférences, un brouillage des couleurs ou des changements de couleur sur les téléviseurs. Si cela se produit, éloignez le système le plus possible du téléviseur. Raccordement des enceintes Raccordez l’enceinte du canal gauche (située sur la gauche lorsque du système de face) aux bornes L (gauche) et l’enceinte du canal droit aux bornes R (droite). Pour plus d’informations, reportez-vous au mode d’emploi des enceintes. Veillez à ce que celles-ci aient une impédance égale ou supérieure à 6 Ω/ohms. Cordon audio stéréo Enceintes système SC-M51 Ou enceintes disponibles dans le commerce Le ADV-M71 inclut une fonction horloge intégrée, branchez donc son cordon d’alimentation à une prise d’alimentation murale reliée en permanence à l’électricité. CORDON CA AC 230 V, 50 Hz Antenne boucle AM (inclue) (R) (L) Récepteur ambiance DVD ADV-M71 Antenne FM intérieure (inclue) Cordons d’enceintes Subwoofer avec amplificateur intégré disponible dans le commerce R R L R L R Cordon audio Câbles de transmission optique 232 Cordons système L R L 3ADV-M71E2_FRA p228-284 03.12.25 1:20 PM ページ 233 FRANCAIS ATTENTION: • Une seule platine cassette et un seul enregistreur peuvent être connectés au ADV-M71 en utilisant les connexions système. Le système ne fonctionnera pas correctement si deux enregistreurs MD ou deux platines cassettes sont connectés aux connexions système. • Quand l’interrupteur d’alimentation est en position de veille (STANDBY), le système demeure sous tension. • Veillez à débrancher le cordon d’alimentation pendant votre absence, lorsque vous partez en vacances, par exemple. Fonctionnement du système Les opérations du système telles que les fonctions de minuterie et de mise sous tension automatique ainsi que les opérations avec la télécommande ne peuvent pas être exécutées si tous les cordons des prise à broches RCA et les cordons des connecteurs système ne sont pas raccordés entre les unités. Assurez-vous donc de réaliser toutes les connexions correctement conformément à ce qu’indique le schéma. Le débranchement des connecteurs du système alors que celle-ci est en mode de marche risque d’altérer son bon fonctionnement. N’oubliez donc jamais de débrancher le cordon d’alimentation avant de modifier les raccordements. REMARQUES: • Ne branchez pas le cordon d’alimentation sur la prise d’alimentation aussi longtemps que tous les raccordements ne sont pas terminés. N’oubliez pas de raccorder correctement les canaux (L à L (blanc) et R à R (rouge)), de la manière illustrée. • Utiliser les prises AC OUTLET seulement pour des appareils audio. Ne jamais les utiliser pour des sèche-cheveux ou d’autres appareils. • Insérez correctement les fiches. Tout mauvais raccordement risque de provoquer du bruit. • N’oubliez pas de raccorder les cordons des enceintes entre les bornes d’enceinte et les enceintes, en respectant la polarité (+ à +, – à –). En cas d’nversion des polarités, le son reproduit au centre sera faible et la position des différents instruments ne sera pas claire. L’effet stéréo sera perdu. • Si vous débranchez le cordon d’alimentation, attendez environ 5 secondes avant de le rebrancher. • Si vous rassemblez les cordons de raccordement (cordons avec fiche à broche) à proximité des enceintes, ils risquent de provoquer des ronflements ou du bruit. Enregistreur MD (vendue séparément) DMD-M31 18Tr02m 46s 1 L dB -60 -40 -30 -20 -12 -6 -2 0 R B SURROUND / SELECT DVD SURROUND RECEIVER ADV-M71 PUSH - PARAM. - + BAND MENU/ SET ADV-M71 TONE / SDB DRR-M31 VOLUME FUNCTION ON / STANDBY PHONES (Installation horizontale) Platine cassette (DRR- M31) (vendue séparément) Installez les appareils de la manière illustrée sur ces schémas. Dans les deux cas, veillez à ce que les orifices de ventilation de l’amplituner avec récepteur DVD surround ne soient pas obstrués. B SURROUND / SELECT DVD SURROUND RECEIVER ADV-M71 PUSH - PARAM. - R L R L + BAND MENU/ SET ADV-M71 TONE / SDB VOLUME FUNCTION ON / STANDBY PHONES DMD-M31 18Tr02m 46s 1 L dB -60 -40 -30 -20 -12 -6 -2 0 R Cordon audio stéréo DRR-M31 (Installation verticale) 233 3ADV-M71E2_FRA p228-284 03.12.25 1:20 PM ページ 234 FRANCAIS (2) Connexion des bornes PRE OUT (uniquement avec les réglages multi-canaux) • Quand il est utilisé avec un subwoofer avec amplificateur intégré et amplificateur de puissance disponible dans le commerce, le ADV-M71 peut être étendu en système ambiance 5.1 canaux. • En faisant les connexions, référez-vous aussi au mode d’emploi des autres composants. • Pour le réglage 5.1 canaux, réglez les enceintes sur “5.1CH SURROUND” dans l’installation rapide du système et sélectionnez “Réglages de la pièce” et “Position d’écoute”. (Voir pages 235 à 236.) IN D’enceintes Centrales POWER AMPLIFIER (Pour le canal central) IN IN IN SUBWOOFER • Connecter le subwoofer à l’amplificateur intégré. POWER AMPLIFIER (Pour le canal surround) D’enceintes D’amblance (L) • Connecter l’amplificateur de puissance pour les enceintes centrale et surround. D’enceintes D’amblance (R) (3) Connexion des signaux audio d’une radio satellite numérique et d’un magnétoscope • Connectez les signaux vidéo directement à la télévision et changez l’image sur l’écran. • En faisant les connexions, référez-vous aussi au mode d’emploi des autres composants. Satellite numérique/radio câble Connexion à la prise d’entrée numérique optique • Seuls les signaux audio sont acceptés à la prise d’entrée numérique optique. • Utilisez un câble de transmission optique disponible dans le commerce pour la connexion à la prise de transmission optique (OPTICAL). B OPTICAL OUT AUDIO OUT R L R Connexion d’un satellite numérique/radio câble • Pour les radios équipées d’une prise de sortie numérique optique, connectez la prise de sortie numérique à la prise DIGITAL D.AUX IN du ADV-M71 en utilisant un câble de transmission optique. • Pour connecter les prises de sortie audio, utilisez n’importe laquelle des prises LINE-1 ou LINE-2 ouvertes du ADV-M71. L L R L R L R L R L R L OUT R Connexion d’un lecteur vidéo • Connectez les prises de sortie audio et d’entrée audio à n’importe laquelle des prises LINE-1 ou LINE-2 ouvertes du ADV-M71 en utilisant des cordons à broches. R Lecteur vidéo AUDIO 234 L IN 3ADV-M71E2_FRA p228-284 03.12.25 1:20 PM ページ 235 FRANCAIS (4) Brancher un TV • Utilisez le câble SCART à 21 broches vendu dans le commerce afin de connecter la borne SCART à 21 broches du téléviseur à la borne SCART à 21 broches du AV-M71 (AV1). Ecran de TV • Les signaux audio et vidéo de la fonction sélectionnée sur l’appareil sont sortis. Signaux de sortie audio • Les signaux de lecture audio DVD et tuner et les signaux audio entrés aux prises AUDIO INPUT sont sortis. • Lorsque des DVD Dolby Digital et DTS sont lus, les signaux audio sont convertis en signaux à deux canaux avant d’être sortis. • Le niveau de sortie audio est déterminé. Si vous ne souhaitez pas avoir le son sur le téléviseur connecté, baissez le volume du téléviseur au minimum. Signaux de sortie vidéo (Fonction “ DVD ” uniquement) • Les signaux de lecture vidéo DVD sont sortis. • La sélection des signaux vidéo RGB, S-VIDEO et VIDEO est réglée sur l’élément d’installation du système “ AV1 VIDEO OUTPUT ”. (Tous réglés sur “ VIDEO ” par défaut. Voir page 253.) REMARQUES: • Brancher les sorties vidéo de cet appareil directement sur la TV. Ne pas les connecter par l’intermédiaire d’un magnétoscope. Certains disques contiennent des signaux d’interdiction de reproduction. Si de tels disques sont lus par un magnétoscope, le système d’interdiction de reproduction risque de déformer l’image. • Réglez “ TV TYPE ” de “ VIDEO SETUP ” dans “ DVD SETUP ” de façon à correspondre au format vidéo TV. Lorsque le format TV est PAL, réglez sur PAL. (Voir page 253) • Le réglage par défaut est “ PAL ”. En mode d’arrêt avec la fonction réglée sur “ DVD ”, le réglage peut également être commuté à l’aide de la touche “ NTSC/PAL ” de la télécommande. Si le réglage ne correspond pas au format vidéo TV, commutez-le à partir de la télécommande, puis réglez “ TV TYPE ” de “ VIDEO SETUP ” dans “ DVD SETUP ” afin que le réglage corresponde au format vidéo TV. 235 3ADV-M71E2_FRA p228-284 03.12.25 1:20 PM ページ 236 FRANCAIS (5) Brancher les bornes de l’antenne ANTENNE INTERIEURE FM (Fournie) CADRE D’ANTENNE AM (Fourni) ANTENNE INTERIEURE FM (Fournie) ANTENNE FM CABLE COAXIAL 75 Ω/ohms ADAPTATEUR D’ANTENNE FM (Option) ANTENNE EXTERIEURE AM MASSE • Une prise de câble d’antenne FM de type F peut être connectée directement. • Si la fiche du câble d’antenne FM n’est pas de type F, connecter à l’aide de l’adaptateur d’antenne de type F (Option). Ensemble d’antenne-cadre AM Connexion des antennes AM Connecter aux bornes d’antenne AM. 1 4 2 Défaire le noeud en vinyle et sortir la ligne de connexion. 2. Insérer le conducteur. 3. Insérer le conducteur. 3 Plier dans la direction inverse. a.Avec l’antenne sur le haut de toute surface stable. Monter b.Avec l’antenne fixée au mur. Trou d’installation Monter au mur, etc. 236 1. Appuyer sur le levier. REMARQUES: • Ne pas connecter simultanément deux antennes FM. • Même si une antenne extérieure AM est utilisée, ne pas déconnecter l’antenne-cadre AM. • Vérifier que les bornes de fil d’antenne-cadre AM ne touchent pas les parties métalliques du panneau. 3ADV-M71E2_FRA p228-284 03.12.25 1:20 PM ページ 237 FRANCAIS (6) Sortie sonore des connecteurs de sortie audio numériques et analogiques de cet appareil 2 Lorsqu’un disque est lu avec le ADV-M71 (DIGITAL OUT) Format d’enregistrement audio Réglages Se référer à la page Sorties de données audio numériques Flux de bits Dolby Digital Sortie numérique : Normal Dolby Digital 2 canaux données PCM (48 kHz/16bits) DSortie numérique : Conversion PCM 325 Sortie numérique : Normal Flux de bits DTS Sortie numérique : Conversion PCM 2 canaux données PCM (48 kHz/16bits) DTS Sortie numérique : Normal DVD video DVD audio (Partie vidéo uniquement) MPEG audio 2 canaux données PCM (48 kHz/16bits) 325 Sortie numérique : Conversion PCM 2 canaux données PCM (48 kHz/16bits) Mode de conversion LPCM : OFF 48 kHz/16 ~24 bits PCM PCM linéaire 48 kHz CD vidéo CD musical CD MP3/WMA Mode de conversion LPCM : ON 96 kHz Mode de conversion LPCM : ON 48 kHz/16 bits PCM 325 48 kHz/16 bits PCM PC : MARCHE Mode de conversion LPCM : OFF 48 kHz/16 bits PCM (lorsque protégé contre la reproduction) PC : ARRET Mode de conversion LPCM : OFF 96 kHz PCM (lorsqu’il n’y a pas protection contre la reproduction) MPEG 1 44,1 kHz/16 bits PCM PCM linéaire 44,1 kHz/16 bits PCM MP3/WMA 32 ~ 48 kHz/16 bits PCM • Le son MIC linéaire est le signal de format d’enregistrement utilisé pour les CD musicaux. Alors que les signaux sont enregistrés à 44,1 kHz/16 bits pour les CD musicaux, en ce qui concerne les DVD, ils sont enregistrés de 48 kHz/16 bits à 96 kHz/24 bits, fournissant ainsi une meilleure qualité sonore que les CD musicaux. 2 A propos des sorties d’enregistrement analogiques LINE-1 et LINE-2 Lorsque l’on a sélectionné le DVD ou l’entrée numérique D.AUX: • Les signaux numériques Dolby Digital, DTS, AAC et PCM sont automatiquement convertis en signaux stéréo 2 canaux avant d’être générés (sauf en mode Casque Dolby) et peuvent être enregistrés en analogique. (Pour connaître ce qui se passe en mode Casque Dolby, voir point 3 ci-dessous.) Lorsque l’on a sélectionné TUNER, LINE-1 ou LINE-2: • Les signaux audio analogiques sélectionnés depuis le tuner ou l’appareil connecté aux bornes d’entrée (IN) analogiques LINE-1 ou LINE-2 sont générée de manière inchangée, indépendamment du mode d’entrée ou mode surround de l’ADV-M71. (Il en est de même pour l’appareil connecté aux bornes D.AUX lorsque “LINE-2” dans “⁄0 REGLAGE DU SYSTEME – (3) Installation système détaillée – [6] Réglages des fonctions” est réglé sur “D.AUX”.) Sortie d’enregistrement pendant la lecture d’une source d’entrée numérique DVD, D.AUX ou LINE-1 en mode Casque Dolby: • En mode Casque Dolby lorsque l’on a sélectionné un DVD ou une entrée numérique, les signaux audio analogiques du mode Casque Dolby reproduits sont générés et peuvent être enregistrés en analogique. (Voir pages 282et 283.) Précautions lors de l’enregistrement analogique de DVD ou de sources d’entrée numériques: • Ne pas activer le mode d’entrée de l’ADV-M71, le mode surround ou les paramètres surround pendant l’enregistrement. Cela interromprait le son en cours d’enregistrement. Nous recommandons de régler le mode surround sur “STEREO” ou “DIRECT”. • Lors de l’utilisation d’un casque, l’enregistrement est automatiquement réalisé en mode Casque Dolby. Ne pas débrancher le casque ou activer le mode casque pendant l’enregistrement. 237 3ADV-M71E2_FRA p228-284 03.12.25 1:20 PM ページ 238 FRANCAIS (7) Connexions des enceintes S’assurer de bien éteindre l’amplificateur lors de la connexion des enceintes. • Utiliser les câbles fournis pour connecter les bornes d’entrées à l’arrière des enceintes (voir schéma) sur les bornes de sortie de l’amplificateur. Connecter le canal gauche des enceintes sur les bornes “L” de l’amplificateur et le canal droit sur les bornes “R”de l’amplificateur, en respectant les polarités (marques “≈” et “√”). Le fait d’inverser les polarités créera un son pas naturel, la phase étant inactivée ou aucun son de graves n’étant émis. Vérifier également que les deux molettes des bornes sont solidement serrées. Brancher les câbles d’enceinte Utiliser les câbles d’enceinte fournis pour brancher les bornes d’entrée à l’arrière des systèmes d’enceinte (voir le diagramme à droite) aux bornes de sortie d’enceinte de l’ADV-M71. • Brancher le système d’enceinte pour le canal gauche aux bornes “L”, le système d’enceinte pour le canal droit aux bornes “R” et s’assurer que les polarités (“+” et “-”) sont bien respectées. • Remarquer que si les polarités sont inversées, la phase peut être désactivée et les basses peuvent être absentes, ce qui produirait un son non naturel. Vérifier également que les deux vis de la borne d’enceinte sont serrées fermement. Tordre fermement les fils à noyau ou bien arrêter les câbles. Connexions (Les bornes rouges du côté droit sont les bornes “≈”, les noires du côté gauche sont les bornes “√”.) Desserrer les molettes des bornes, insérer les fils centraux puis serrer les molettes. Connecter au côté “≈” de l’amplificateur. (couleur cuivrée) Connecter au côté “√” de l’amplificateur. (couleur argentée) wInsérer les fils à qTourner la borne d’enceinte dans le noyau du câble. sens inverse des aiguilles d’une montre pour la desserrer. eTourner dans le sens des aiguilles d’une montre pour serrer la borne. REMARQUE: S’assurer que les fils centraux ne se touchent pas. Circuit de protection • Cet appareil est équipé d’un circuit de protection haute vitesse. Le but de ce circuit est de protéger les enceintes contre des situations telles que lorsque la sortie de l’amplificateur de puissance est accidentellement court-circuitée et qu’un fort courant passe, lorsque la température avoisinant l’appareil devient anormalement élevée, ou lorsque l’appareil est utilisé à puissance élevée pendant une longue durée, ce qui entraîne une augmentation de température extrême. Lorsque le circuit de protection est activé, la sortie des enceintes est coupée, et la DEL du témoin d’alimentation clignote. Dans ce cas, suivre ces étapes: toujours couper l’alimentation de cet appareil, vérifier s’il y a des défauts de connexion des cordons d’enceintes ou des câbles d’entrée, et attendre que l’appareil refroidisse, s’il est très chaud. Améliorer la ventilation autour de l’appareil, et remettre sous tension. Si le circuit de protection est à nouveau activé bien qu’il n’y ait pas de problème de câblage ou de ventilation autour de l’appareil, couper l’alimentation, et contacter un centre d’entretien DENON. Remarque sur l’impédance des enceintes • Le circuit de protection peut être activé si l’appareil est utilisé pendant une longue durée à un volume élevé lorsque des enceintes d’une impédance inférieure à celle spécifiée (par exemple, enceintes ayant une impédance inférieure à 4 Ω/ohms) sont connectées. Si le circuit de protection est activé, la sortie des enceintes est coupée. Couper l’alimentation de l’appareil, attendre qu’il refroidisse, améliorer la ventilation autour de lui, puis remettre sous tension. Cautions on connecting • Avec les sorties d’enceinte de cet appareil, les signaux ayant la phase inversée des signaux de la borne de sortie “+” sont également envoyés de la borne de sortie “–“. • Ne pas connecter à un appareil pour commuter entre enceintes multiples (un sélecteur d’enceinte ou un sélecteur de canal audio) ou connecter d’une autre manière que décrite dans ce manuel. Ceci risque de causer des dommages. 238 3ADV-M71E2_FRA p228-284 03.12.25 1:20 PM ページ 239 FRANCAIS 8 APPELLATION DES PIECES ET FONCTION Face avant • Pour plus de détails sur les fonctions de ces pièces, se référer aux pages indiquées entre parenthèses ( ). !4 B !3 !2 !1 !0 o i SURROUND / SELECT DVD SURROUND RECEIVER ADV-M71 PUSH - PARAM. - + BAND MENU / SET TONE / SDB VOLUME FUNCTION ON / STANDBY PHONES qw e q Touche d’alimentation (ON/STANDBY)...................................(254) w Capteur de la télécommande .................................................(244) e Affichage r Prise écouteurs (PHONES).....................................................(282) t Fonction sélecteur (FUNCTION).............................................(268) y Touche tonalité/basse super dynamique (TONE/SDB) ...........(270) u Commande de volume (VOLUME).........................................(266) r ty u i Touche arrêt/bande ( 2 BAND) ......................................(266, 287) o Touche lecture/pause ( 1 / 3).........................................(265,267) !0 Touche ouverture/fermeture ( 5 ) .........................................(265) !1 Touches d’avance et de retour ( 8 / – et + / 9 ) ....................................................(267, 287) !2 Bouton ambiance/sélection (SURROUND/SELECT)...............(274) Touche de paramétrage ambiance (PARAMETER).................(275) !3 Touche menu/réglage (MENU/SET)........................................(289) !4 Plateau du disque...................................................................(264) 239 3ADV-M71E2_FRA p228-284 03.12.25 1:20 PM ページ 240 FRANCAIS Télécommande • Pour plus de détails sur les fonctions de ces pièces, se référer aux pages indiquées entre parenthèses ( ). • Certaines touches de la télécommande ont plusieurs fonctions. La commutation entre les différentes fonctions s’effectue à l’aide des sélecteurs de mode de la télécommande. @4 q w e r t y u OFF ENTER A-B REPEAT CLEAR TITLE TIME TV IN T V CHARAC. SLIDE MODE TV CH RDS PROG/DIRECT i o !0 !1 @5 @6 @7 @8 @9 #0 #1 ON VCR REC NTSC/PAL SLEEP SOURCE REPEAT PTY EDIT/MENU ZOOM - RANDOM TV CH + CT CD SRS RT SEARCH MODE MODE MEMO BAND DVD TUNER D.AUX 1 2 3 MD/LINE-1 TAPE /LINE-2 4 5 6 + - 5CH STEREO AUTO DECODE TUNER TUNING / TV VOL + 7 8 9 DIRECT STEREO VIRTUAL CALL 0/10 +10 - TEST TONE INPUT MODE SURROUND FUNCTION #2 CH #3 #4 #5 TUNER TV / VCR DVD IN/SURR. A/V SYSTEM IN/SURR. MD CDR TAPE !2 !3 !4 !5 1 2 + DVD 8 9 6 7 #6 - STATUS !6 3 MUTING SETUP !7 !8 #7 #8 #9 $0 TONE /SDB ENTER !9 SURROUND PARAMETER CH SELECT @0 @1 @2 @3 RETURN DISPLAY ANGLE VCR CH MENU AUDIO $1 + $2 $3 $4 $5 TOP MENU SUB TITLE RC-966 q Indicateur de transmission w Touche de coupure avec minuteur.........................................(317) e Touche NTSC/PAL ..................................................................(235) r Touche d’annulation ...............................................................(297) t Touche répétition A-B.............................................................(296) y Programme/direct...................................................................(297) u Touche de répétition...............................................................(295) i Touche de sélecteur de mode source d’entrée/ambiance o Touche d’appel .......................................................................(297) !0 Touche de test tonalité...........................................................(260) !1 Touche de sélecteur de mode d’entrée .................................(268) !2 Touche de lecture DVD ..........................................................(265) !3 Touche d’arrêt DVD ................................................................(266) !4 Touches d’avance et de retour DVD ......................................(267) !5 Touches de recherche DVD ...........................................(267, 268) !6 Touches de recherche DVD ...................................................(267) !7 Touche d’état..........................................................................(269) !8 Touche de réglage ..................................................................(254) !9 Touche de sélection de canal .................................................(260) @0 Touche de retour ....................................................................(266) @1 Touche d’affichage .................................................................(293) @2 Touche d’angle .......................................................................(307) @3 Touche de sélecteur audio .....................................................(305) @4 Fenêtre de transmission de signal de la télécommande .......(244) @5 Touche d’alimentation ............................................................(254) @6 * Touches système ................................................(242, 245, 246) @7 Touche zoom ..........................................................................(310) @8 Touche de mode défilement ..................................................(304) @9 Touche de mode recherche ...................................................(267) #0 Touche de lecture aléatoire ....................................................(298) #1 Touches de réglage de la radio +/– ........................................(287) #2 Touches de préréglage de la radio +/– ...................................(288) #3 Touche du sélecteur de fonction............................................(268) #4 Touche du sélecteur de mode ambiance ...............................(269) #5 Commutateurs de sélecteur de mode ...........................(241, 242) #6 Touches de commande du volume principal..........................(266) #7 Touche silence........................................................................(270) #8 Touche tonalité/SDB ...............................................................(270) #9 Touche d’entrée .....................................................................(253) $0 Touche curseur .......................................................................(253) $1 Touche de paramétrage ambiance .........................................(274) $2 Touche menu de démarrage ..................................................(308) $3 Touche menu..........................................................................(309) $4 Touche sous-titres ..................................................................(306) $5 * Touches système ........................................(242, 245, 246, 252) * Touches système........................(242, 243, 245, 246, 247, 252) • Pour de plus amples détails sur les fonctions et opérations des diverses parties, référez-vous aux pages indiquées entre (parenthèses). • Les touches indiquées sont les touches de commande du DVD et peuvent être utilisées quand le sélecteur de mode de commande de la télécommande est placé en position A/V et DVD . • Les fonctions des touches système (*) sont changées en utilisant le sélectionneur de mode de la télécommande. 240 3ADV-M71E2_FRA p228-284 03.12.25 1:20 PM ページ 241 FRANCAIS Noms et fonctions des touches de la télécommande sur l’ADV-M71 • Les touches des sections q ~ e peuvent être utilisées quelle que soit la position des commutateurs de mode 1 et 2. • Considérer A / V et DVD comme des positions standard, et les commuter comme il se doit pour l’utilisation. q OFF ON VCR REC NTSC/PAL SLEEP TITLE SOURCE TIME TV IN ENTER A-B REPEAT CLEAR T V CHARAC. SLIDE MODE TV CH - RDS PROG/DIRECT 3 q 1 PTY REPEAT RANDOM MODE MEMO BAND DVD TUNER D.AUX 3 EDIT/MENU ZOOM TV CH + CT CD SRS RT SEARCH MODE TUNING / TV VOL 1 2 MD/LINE-1 TAPE /LINE-2 4 5 6 + - 5CH STEREO AUTO DECODE TUNER + 7 8 9 DIRECT STEREO VIRTUAL CALL 0/10 +10 - TEST TONE INPUT MODE SURROUND FUNCTION CH TUNER TV / VCR DVD IN/SURR. A/V SYSTEM IN/SURR. MD CDR TAPE 1 2 8 2 + DVD w e 9 6 - 7 STATUS 3 MUTING SETUP TONE /SDB q ENTER SURROUND PARAMETER CH SELECT DISPLAY RETURN ANGLE MENU AUDIO VCR CH + TOP MENU SUB TITLE RC-966 1 Mettre le commutateur de mode 1 dans la position “A/V”. A/V SYSTEM 2 q Touches de commande de l’amplificateur surround ON : Met l’ADV-M71 sous tension. OFF : Met l’ADV-M71 hors tension. FUNCTION : Sélection de fonction (dans l’ordre) SURROUND : Sélection du mode surround INPUT MODE : Sélection du mode d’entrée TEST TONE : Activation/Désactivation de la tonalité de test + : Augmentation du volume principal – : Diminution du volume principal MUTING : Activation/Désactivation de la sourdine STATUS : Sélection de l’affichage de l’état TONE/SDB : Sélection et réglage de la tonalité/SDB SURROUND : Sélection et réglage du paramètre surround PARAMETER SET UP : Activation/ Désactivation du mode de configuration CH SELECT : Sélection et réglage du niveau de canal •, ª, 0, 1 : Déplacement du curseur vers le haut, le bas, la gauche et la droite ENTER : Réglage d’entrée w Touches de commande du DVD 1 : Lecture (mise sous tension automatique et sélection de fonction auto) 2 : Arrêt 8, 9 : Saut (repérage) 6, 7 : Recherche (retour rapide et avance rapide) 3 : Pause et image par image e Touches de commande tuner CH +/– : Parcours des canaux préréglés vers le haut/bas (mise sous tension automatique et sélection de fonction auto) Mettre le commutateur de mode 2 dans la position de la fonction que l’on désire utiliser (DVD, TUNER ou IN/SURR). TUNER TV / VCR DVD IN/SURR. 241 3ADV-M71E2_FRA p228-284 03.12.25 1:20 PM ページ 242 FRANCAIS 3 Faire fonctionner l’ADV-M71. [1] Touches du système d’amplificateur surround (Utilisé avec le commutateur de mode 2 réglé sur “IN/SURR.”) • Ces opérations sont possibles avec le commutateur de mode 1 dans n’importe quelle position. Les opérations en gris peuvent être réalisées. OFF ON VCR REC NTSC/PAL SLEEP ENTER A-B REPEAT TITLE REPEAT PTY SOURCE EDIT/MENU ZOOM TV CH CLEAR + CT CD SRS RT RANDOM SEARCH MODE MODE MEMO BAND DVD TUNER D.AUX 3 TUNING / TV VOL 1 2 MD/LINE-1 TAPE /LINE-2 4 5 6 + - 5CH STEREO AUTO DECODE TUNER + ON VCR REC NTSC/PAL SLEEP T V CHARAC. SLIDE MODE TV CH - RDS PROG/DIRECT OFF TIME TV IN SOURCE CLEAR [2] Touches système DVD (Utilisé avec le commutateur de mode 2 réglé sur “DVD”) ENTER A-B REPEAT TITLE T V EDIT/MENU ZOOM TV CH - RDS PROG/DIRECT REPEAT PTY MODE MEMO BAND DVD TUNER D.AUX 3 1 2 MD/LINE-1 TAPE /LINE-2 4 5 6 + - 5CH STEREO AUTO DECODE TUNER 8 9 7 8 9 STEREO VIRTUAL DIRECT STEREO VIRTUAL 0/10 +10 - CALL 0/10 +10 - TEST TONE INPUT MODE SURROUND FUNCTION TEST TONE INPUT MODE SURROUND FUNCTION CH TUNER TV / VCR DVD IN/SURR. 1 2 8 9 6 7 SYSTEM 9 6 MUTING MUTING SETUP TONE /SDB ENTER ENTER SURROUND PARAMETER DISPLAY MENU AUDIO VCR CH 242 SURROUND PARAMETER CH SELECT + TOP MENU SUB TITLE RC-966 : : - 7 3 TONE /SDB CH SELECT STEREO DIRECT + STATUS SETUP : 2 DVD 8 - 3 ANGLE IN/SURR. MD CDR TAPE 1 + STATUS RETURN CH TUNER TV / VCR DVD IN/SURR. A/V IN/SURR. MD DVD VIRTUAL + 7 CDR TAPE AUTO DECODE : TUNING / TV VOL CALL SYSTEM : : : : : : : + CT CD SRS RT RANDOM SEARCH MODE DIRECT A/V SLEEP DVD TUNER D.AUX MD/LINE-1 TAPE/LINE-2 5CH STEREO TIME TV IN CHARAC. SLIDE MODE TV CH Activation/désactivation repos Fonction DVD Fonction TUNER Fonction D.AUX Fonction MD/LINE-1 Fonction TAPE/LINE-2 mode surround stéréo 5 canaux (lorsque “5.1CH” est sélectionné dans la configuration) commutation du mode 2 canaux lorsque le mode surround de décodage automatique est activé (lorsque “5.1CH” est sélectionné dans la configuration) commutation du mode 2 canaux lorsque le mode surround Enceinte Virtuelle Dolby ou Dolby VS est activé Mode stéréo Mode direct DISPLAY RETURN ANGLE MENU AUDIO VCR CH + TOP MENU SUB TITLE RC-966 NTSC/PAL : Sélection NTSC/PAL ZOOM : Activation/désactivation du zoom SLIDE MODE : Sélection du mode diaporama d’images JPEG A-B REPEAT : Réglage de la lecture de répétition A-B CLEAR : Effacement du programme SEARCH MODE: Sélection de la recherche de titre et chapitre RANDOM : Activation/désactivation de la lecture aléatoire REPEAT : Réglage de la répétition de lecture PROG/DIRECT : Sélection de lecture programmée/directe CALL : Appel programme 0 ~ 9, +10 : Touches numériques TOP MENU : Appel du menu principal MENU : Appel de menu DISPLAY : Appel/sélection de l’affichage RETURN : Retour au menu SUBTITLE : Sélection de la langue des sous-titres AUDIO : Sélection de la langue audio ANGLE : Sélection de l’angle 3ADV-M71E2_FRA p228-284 03.12.25 1:20 PM ページ 243 FRANCAIS 3 [3] Touches du système tuner (Utilisé avec le commutateur de mode 2 réglé sur “TUNER”) OFF ON VCR REC NTSC/PAL SLEEP TITLE SOURCE ENTER A-B REPEAT CLEAR TIME TV IN T V CHARAC. SLIDE MODE TV CH EDIT/MENU ZOOM TV CH - RDS PROG/DIRECT REPEAT + CT CD SRS RT RANDOM SEARCH MODE PTY MODE MEMO BAND DVD TUNER D.AUX 3 TUNING / TV VOL 1 2 MD/LINE-1 TAPE /LINE-2 4 5 6 + - 5CH STEREO AUTO DECODE TUNER + 7 8 9 DIRECT STEREO VIRTUAL CALL 0/10 +10 - TEST TONE INPUT MODE SURROUND FUNCTION CH TUNER TV / VCR DVD IN/SURR. A/V SYSTEM IN/SURR. MD CDR TAPE 1 2 + DVD 8 9 6 - 7 STATUS 3 MUTING SETUP TONE /SDB ENTER SURROUND PARAMETER CH SELECT DISPLAY RETURN ANGLE MENU AUDIO VCR CH + TOP MENU SUB TITLE RC-966 BAND MEMO MODE TUNER +/– 1 ~ 10, +10 : : : : : Sélection de la bande FM/AM Mémoire de présélection Sélection du mode auto/mono FM Synchronisation tuner vers le haut/bas Touches numériques des canaux préréglés RDS : Utiliser cette touche pour vous orienter dans les stations en utilisant le système de données radio. 1 PTY CT RT 1 RDS 1 PTY OFF 1 TP 0 : Appuyer sur cette touche après avoir sélectionné “PTY” avec la touche RDS pour choisir un des 29 types de programme. : Utiliser ceci pour corriger l'heure de l'horloge du ADV-M71. Appuyer sur cette touche quand le service de remise à l'heure d'une station RDS est correctement reçu. “TIME” s'affiche pendant 2 secondes et l'horloge du ADV-M71 est corrigée. “NO TIME DATA” s'affiche si la station RDS n'offre pas de service de remise à l'heure et quand l'émission n'est pas correctement reçue. : Appuyer sur cette touche pendant la réception de stations RDS pour sélectionner la fréquence, PS (ou le nom de la station), PTY ou RT s'affiche. Noter que cette touche ne fonctionne pas si la réception est mauvaise. Le mode d'affichage change comme suit chaque fois que la touche est pressée. PS (ou le nom de la station) Fréquence 1 RT 1 PTY 0 Le nom de la station est affiché en priorité à la place de l'affichage de PS quand un canal dont le nom de la station a été préréglé est ajusté. 243 3ADV-M71E2_FRA p228-284 03.12.25 1:20 PM ページ 244 FRANCAIS 9 UNITE DE TELECOMMANDE • L’unité de télécommande comprise (RC-966) peut être utilisée pour actionner non seulement cet appareil, mais également d’autres composants DENON compatibles avec télécommande. En addition, la mémoire contient les signaux de commande pour d'autres télcommandes, alors elle peut être utilisée pour faire fonctionner des produits non de Danon mais compatibles avec la télécommande. (1) Insertion des piles q Déposer le couvercle arrière de l’unité de télécommande. w Placer les trois piles R6P/AA dans le compartiment à piles dans la direction indiquée. e Remettre le couvercle arrière en place. Remarques sur les piles • Utiliser des piles R6P/AA dans l’unité de télécommande. • Les piles doivent être remplacées par des neuves approximativement une fois par an, bien que cela dépende de la fréquence d’utilisation. • Même si moins d’un an s’est écoulé, remplacer les piles par des neuves si l’appareil ne fonctionne pas lorsque l’unité de télécommande est actionnée à proximité. (La pile fournie ne sert que pour la vérification du fonctionnement. La remplacer par une neuve le plus tôt possible.) • Lors de l’insertion des piles, toujours procéder dans la bonne direction, en suivant les marques “<” et“>” du compartiment à piles. • Pour éviter des dommages ou une fuite du liquide de pile: • Ne pas utiliser de pile neuve avec une ancienne. • Ne pas utiliser deux types de pile différents. • Ne pas court-circuiter, démonter, chauffer ou jeter les piles dans des flammes. • Enlever les piles de l’unité de télécommande chaque fois que vous prévoyez de ne pas l’utiliser pendant une longue durée. • Si le liquide de pile devait fuir, essuyer soigneusement le liquide de l’intérieur du compartiment à piles, et insérer de nouvelles piles. • Lors du remplacement des piles, avoir les piles neuves à portée de la main, et les insérer aussi rapidement que possible. (2) Utilisation de l’unité de télécommande B Approx. 7m / 22 pieds 30° SLEEP SOURCE 9 R ENTE - VCR TOP CH SUB MENU + SURROUN PARAMET ER D DVD - MENU A-B ENTER REPEAT D.AUX 3 E-2 6 ON TITLE TV SLIDECHARAC. IN MODE TV TIME CH RANDOM EDIT/MENT V ZOOM BAND TV U SEARCH CD CH SRS MODE TUNING TV VOL / + DECODE TUNER CH - + DISPLAY AUDIO / VCR IN/SURR. REPEAT MEMO TUNER AUTO FUNCTION IN/SURR. 2 TAPE/LIN 5 STEREO VIRTUAL + /V B RETURN ANGLE TITLE RC-93 6 TAPE - A D TUNER CDR + +10 SURROUN MUTING TONE/SD TV MD 2 9 7 STATUS SELECT - 8 STEREO MODE SYSTEM 1 DVD 8 6 3 SETUP CH OFF NTSC/PAL RECVCR CLEAR PROG/DIR MODE ECT INPUT 1 5CH 0 /10 TONE DVD 1 MD/LINE- 4 7 DIRECT CALL TEST 30° • Diriger l’unité de télécommande vers le capteur de télécommande situé sur l’unité principale de la manière indiquée dans le diagramme. • L’unité de télécommande peut être utilisée d’une distance droite d’environ 7 mètres/22 pieds de l’unité principale, mais cette distance sera raccourcie s’il y a un obstacle dans le chemin ou si l’unité de télécommande n’est pas directement pointée vers le capteur de télécommande. • L’unité de télécommande peut être actionnée à un angle horizontal d’un maximum de 30 degrés par rapport au capteur de télécommande. REMARQUES: • Il peut être difficile d’actionner l’unité de télécommande si le capteur de télécommande est exposé aux rayons directs du soleil ou à une forte lumière artificielle. • Ne pas appuyer simultanément sur les touches de l’unité principale et de l’unité de télécommande pour ne pas entraîner de mauvais fonctionnement. • Des enseignes au néon ou autres appareils qui génèrent des parasites de type impulsionnel peuvent entraîner des erreurs de fonctionnement, par conséquent, garder l’appareil aussi loin que possible de tels tubes au néon. 244 3ADV-M71E2_FRA p228-284 03.12.25 1:20 PM ページ 245 FRANCAIS • La télécommande inclue (RC-966) peut être utilisée pour actionner pas seulement le ADV-M71 mais aussi les opérations système pour les séries D-M31 et pour actionner les autres les autres appareils DENON à télécommande compatible. De plus, les codes d’opération de télécommande des autres principales marques de télévision et lecteurs vidéo sont aussi stockés dans la télécommande, qui peut donc aussi être utilisée pour actionner ces télévisions et lecteurs vidéo. 3 [1] Touches système d'enregistreur MD (Actionnées avec le commutateur de mode 2 réglé sur "MD") OFF SLEEP ON VCR REC NTSC/PAL TITLE TV IN T V ENTER A-B REPEAT CHARAC. SLIDE MODE EDIT/MENU ZOOM SOURCE CLEAR TV CH RDS PROG/DIRECT REPEAT MODE • Allumez l’alimentation de tous les composants avant de les faire fonctionner. • Selon le modèle et l’année de fabrication de votre composant, certaines clés peuvent ne pas fonctionner. RANDOM MEMO DVD (3) Fonctionnement des composants audio DENON PTY TIME - TV CH BAND TUNING / TV VOL TUNER D.AUX 1 2 3 MD/LINE-1 TAPE /LINE-2 4 5 6 + - 5CH STEREO AUTO DECODE TUNER + 7 8 9 DIRECT STEREO VIRTUAL CALL 0/10 +10 - TEST TONE INPUT MODE SURROUND FUNCTION CH TUNER TV / VCR DVD IN/SURR A/V SURROUND PARAMETER CH SELECT OFF ON VCR REC NTSC/PAL SLEEP TITLE SOURCE ENTER A-B REPEAT CLEAR TIME 1 REPEAT PTY - TV IN T V CHARAC. SLIDE MODE TV CH EDIT/MENU ZOOM TV CH - RDS PROG/DIRECT 3 MODE MEMO BAND DVD TUNER D.AUX 1 2 3 MD/LINE-1 TAPE /LINE-2 4 5 6 + - 5CH STEREO AUTO DECODE TUNER 9 VIRTUAL CALL 0/10 +10 - TEST TONE INPUT MODE SURROUND FUNCTION TIME TITLE REC CH TUNER TV / VCR DVD IN/SURR. IN/SURR. MD CDR TAPE 8 2 2 + 9 6 - 7 STATUS 3 MUTING SETUP TONE /SDB ENTER SURROUND PARAMETER CH SELECT DISPLAY RETURN ANGLE MENU VCR CH + TOP MENU SUB TITLE AUDIO RC-966 1 + TOP MENU SUB TITLE + 8 STEREO 1 MENU AUDIO RC-966 7 SYSTEM DISPLAY ANGLE TUNING / TV VOL DIRECT A/V RETURN VCR CH + CT CD SRS RT RANDOM SEARCH MODE DVD 3 + CT CD SRS RT SEARCH MODE Réglez le commutateur 1 de mode dans la position “SYSTEM”. (Caractère bleu) : Affichage de la durée du disque : Affichage du nom : Enregistrement (fonction enregistrement multiple avec le DMD-M31) SOURCE : Alimentation on/off du MD EDIT/MENU : sélection du mode Edit CHARAC : Sélection des caractères pendant l'entrée de noms ENTER : Introduction des valeurs éditées CD SRS : Enregistrement synchronisé d'un CD (Fonction système du DMD-M31) CLEAR : Annulation du programme RANDOM : Lecture aléatoire REPEAT : Réglage de la lecture répétée PROG/DIRECT : Sélection de la lecture Programme/Direct CALL : Appel d'un programme 1~10, +10 : Sélection du numéro de la piste 8, 9 : Recherche automatique (suggestion) 6, 7 : Recherche manuelle (retour rapide et avance rapide) 1 (/ 3) : Lecture (lecture/pause, allumage automatique et sélecteur de fonction automatique avec le DMDM31) 3 : Pause 2 : Arrêt A/V SYSTEM 2 Réglez le commutateur de mode 2 dans la position qui permet d’actionner le composant (MD, CDR ou TAPE). (Caractère bleu) TUNER TV / VCR DVD IN/SURR. IN/SURR. MD CDR TAPE 3 Actionnez le composant audio. • Pour plus de détails, référez-vous au mode d’emploi du composant. Le fonctionnement pourrait ne pas être possible sur certains modèles. 245 3ADV-M71E2_FRA p228-284 03.12.25 1:20 PM ページ 246 FRANCAIS [2] Touches système de l’enregistreur CD (actionnées avec le commutateur de mode 2 en position “CDR”) OFF SLEEP ON OFF VCR REC NTSC/PAL TITLE TIME SLEEP TV IN T V SOURCE ENTER A-B REPEAT CHARAC. SLIDE MODE EDIT/MENU ZOOM SOURCE CLEAR TV CH RDS PROG/DIRECT REPEAT PTY - RANDOM MODE MEMO BAND DVD TUNER D.AUX 3 TV CH 2 TAPE /LINE-2 5 6 + - 5CH STEREO AUTO DECODE TUNER 7 8 9 + DIRECT STEREO VIRTUAL CALL 0/10 +10 - SURROUND FUNCTION REPEAT PTY TIME TV CH RANDOM MODE MEMO BAND DVD TUNER D.AUX + CT CD SRS RT SEARCH MODE TUNING / TV VOL SURROUND PARAMETER RETURN DISPLAY ANGLE MENU AUDIO VCR CH + TOP MENU SUB TITLE RC-966 SURROUND PARAMETER RETURN DISPLAY ANGLE MENU AUDIO VCR CH + TOP MENU SUB TITLE RC-966 REC CD SRS 6, 7 1 0 TAPE : Affichage de la durée du disque : Affichage du nom et sélection des caractères pour rentrer des noms REC : Enregistrement SOURCE : Alimentation activée/désactivée de l’enregistreur CD EDIT/MENU : Sélection du menu ENTER : Entrée des éléments du menu CLEAR : Annulation du programme RANDOM : Lecture aléatoire activée/désactivée REPEAT : Réglage de la lecture répétée g PROG/DIRECT : Sélection de la lecture programme/direct CALL : Appel du programme 1~10, +10 : Sélection du numéro de la piste 8, 9 : Recherche auto (suggestion) 6, 7 : Recherche manuelle (retour rapide et avance rapide) 1 (/ 3) : Lecture (lecture/pause, sélecteur de fonction automatique et alimentation automatique avec le CDR-M30) 3 : Pause 2 : Arrêt 246 EDIT/MENU ZOOM - CH CH SELECT TIME TITLE T V CHARAC. SLIDE MODE CH SELECT TUNER TV / VCR DVD IN/SURR A/V TITLE TV IN ENTER A-B REPEAT RDS PROG/DIRECT TUNING / TV VOL 4 ON VCR REC NTSC/PAL TV CH CT CD SRS RT SEARCH MODE 1 INPUT MODE CLEAR + MD/LINE-1 TEST TONE [3] Touches système de la platine casette (actionnées avec le commutateur de mode 2 en position “TAPE”) : Enregistrement : Enregistrement synchronisé de CD (fonction système du DRR-M31) : Retour et avance rapide : Lecture en sens avant : Lecture en sens inverse (0 et 1: sélection de fonction automatique et alimentation automatique avec le DRR-M31) 3ADV-M71E2_FRA p228-284 03.12.25 1:20 PM ページ 247 FRANCAIS (4) Mémoires préréglées des télévisions et lecteurs vidéo • Des composants d’autres marques peuvent être actionnés avec la télécommande inclue en stockant leurs codes dans la mémoire préréglée. Veuillez noter que selon le modèle, certaines opérations peuvent ne pas être possibles et certaines touches peuvent ne pas fonctionner correctement. 3 4 OFF ON VCR REC NTSC/PAL SLEEP ENTER A-B REPEAT CLEAR REPEAT MODE T V CHARAC. SLIDE MODE TV CH EDIT/MENU ZOOM TV CH PTY DVD + TUNER D.AUX 1 2 3 TAPE /LINE-2 5 6 5CH STEREO AUTO DECODE TUNER 8 9 STEREO VIRTUAL CALL 0/10 +10 - TEST TONE INPUT MODE D.AUX 2 3 MD/LINE-1 TAPE /LINE-2 4 SURROUND FUNCTION SYSTEM 2 + DVD 9 - 7 STATUS MUTING SETUP TONE /SDB ENTER SURROUND PARAMETER CH SELECT DISPLAY VCR CH MENU AUDIO 6 AUTO DECODE 8 9 0/10 IN/SURR. MD 2 3 5 5CH STEREO CH CDR TAPE 1 7 STEREO TUNER TV / VCR DVD IN/SURR. A/V ANGLE TUNER 1 VCR REC NTSC/PAL + 7 DIRECT RETURN DVD T V TUNING / TV VOL + - 6 TIME BAND MD/LINE-1 8 3 4 Appuyez sur la touche TV pour prérégler une télévision, sur la touche VCR pour prérégler un lecteur vidéo, puis entrez le numéro à trois chiffres correspondant à la marque du composant dont les signaux doivent être stockés dans la mémoire préréglée (référez-vous aux tableaux de codes de la télécommande pages 248 à 251). CT CD SRS RT RANDOM SEARCH MODE MEMO 4 1 TIME TV IN - RDS PROG/DIRECT 4 TITLE SOURCE 4 + TOP MENU REMARQUES: • Quand les touches sont appuyées pendant le réglage de la mémoire préréglée, leurs signaux sont envoyés du transmetteur de la télécommande, couvrez donc le capteur de la télécommande pendant le réglage de la mémoire préréglée afin d’éviter une manipulation accidentelle. • Selon le modèle et l’année de fabrication, certains codes de la télécommande pour les marques inclues dans les tableaux peuvent ne pas fonctionner correctement. • Pour certaines marques, il existe de nombreux types de codes de télécommande. Si une opération ne fonctionne pas, essayez de changer pour un des autres codes. SUB TITLE RC-966 2 Non réglé en usine. 1 Réglez le commutateur de mode 1 en position “A/V”. A/V SYSTEM 2 Réglez le commutateur de mode 2 en position “TV/VCR”. TUNER TV / VCR DVD IN/SURR. IN/SURR. MD CDR TAPE 3 Appuyez sur la touche alimentation ON et la touche OFF simultanément. • Le LED de transmission (indicateur) clignote. OFF ON 247 3ADV-M71E2_FRA p228-284 03.12.25 1:20 PM ページ 248 FRANCAIS Combinaisons de codes préréglés pour différentes marques TV Admiral 045, 121 Fujitsu Adventura 122 Funai 004, 062 004, 062 Aiko 054 Futuretech 004 Akai 016, 027, 046 GE 020, 036, 037, 040, 044, 058, 066, 088, 119, 120, Alleron 062 A-Mark 007 Goldstar 015, 029, 031, 039, 048, 051, 056, 057, 067, 125, 147 068, 069, 116, 165 Amtron 061 Anam 006, 007, 036 Grundy 062 Anam National 061, 147 Hitachi 029, 031, 051, 052, 070, 111, 112, 113, 124, 134 AOC 003, 007, 033, 038, 039, 047, 048, 049, 133 Hitachi Pay TV 151 Archer 007 Infinity 017, 071 Audiovox 007, 061 Janeil 122 Bauer 155 JBL 017, 071 Belcor 047 JC Penny 020, 034, 039, 040, 041, 044, 048, 050,058, 066, Bell & Howell 045, 118 Bradford 061 JCB 046 Brockwood 003, 047 JVC 019, 051, 052, 072, 073, 091, 117, 126 Candle 003, 030, 031, 032, 038, 047, 049, 050, 122 Kawasho 018, 046 Capehart 003 Kenwood 038, 056, 057 Celebrity 046 Kloss 010, 032 Circuit City 003 Kloss Novabeam 005, 122, 127, 131 069, 076, 088, 090, 095, 125, 136, 159 029, 030, 031, 032, 034, 038, 047, 049, 050, 054, KTV 074, 123 061, 095, 122, 123 Loewe 071 031, 047, 049 Logik 144 Colortyme 003, 047, 049, 135 Luxman 031 Contec 013, 051, 052, 061 LXI Cony 051, 052, 061 Craig 004, 061 Citizen Concerto 008, 014, 017, 024, 040, 044, 063, 071, 075, 076, 077, 118, 125 Magnavox 005, 010, 017, 030, 033, 038, 050, 056, 071, 078, 079, 085, 089, 108, 109, 110, 127, 131, 132, 145 Crown 029 Curtis Mathes 029, 034, 038, 044, 047, 049, 053, 095, 118 Marantz 015, 017, 071, 080 Daewoo 027, 029, 039, 048, 049, 054, 055, 106, 107, 137 Matsui 027 Daytron 003, 049 Memorex 014, 027, 045, 083, 118, 144 Dimensia 044 Metz 160, 161, 162, 163, 164 Dixi 007, 015, 027 MGA 001, 039, 048, 056, 057, 058, 065 081, 083 Electroband 046 Midland 125 Electrohome 029, 056, 057, 058, 147 Minutz 066 Elta 027 Mitsubishi 001, 016, 039, 048, 056, 057, 058, 065, 081, 082, Emerson 029, 051, 059, 060, 061, 062, 118, 123, 124, 139, 148 083, 105 Envision 038 Montgomery Ward 011, 020, 144, 145, 146 Etron 027 Motorola Fisher 014, 021, 063, 064, 065, 118 MTC 031, 034, 039, 048, 095 Formenti 155 NAD 008, 075, 076, 128 Fortress 012 National 002, 036, 061, 147 248 121, 147 3ADV-M71E2_FRA p228-284 03.12.25 1:20 PM ページ 249 FRANCAIS National Quenties 002 Sharp NEC 031, 038, 039, 048, 057, 084, 086, 135, 147 Siemens 013 Nikko 054 Signature 045, 144 NTC 054 Simpson 050 Optimus 128 Sony 043, 046, 138, 146, 150 Optonica 011, 012, 093, 121 Soundesign 030, 050, 062 Orion 004, 139 Spectricon 007, 033 Panasonic 002, 009, 017, 036, 037, 071, 141, 143, 147 Squareview 004 Philco 005, 010, 030, 050, 051, 056, 079, 085, 127, 131, Supre-Macy 032, 122 132, 145, 147 Supreme 046 005, 015, 017, 050, 051, 056, 078, 087, 088, 089, Sylvania 005, 010, 017, 030, 078, 079, 085, 089, 101, 127, Philips 131, 132, 147 011, 012, 013, 026, 093, 099, 100, 104, 121 131, 132, 145, 155 Pioneer 124, 128, 142 Symphonic 004, 148 Portland 054 Tandy 012, 121 Price Club 095 Tatung 036, 124 Proscan 040, 044, 125 Technics 037 Proton 035, 051, 092, 129 Teknika 001, 030, 032, 034, 052, 054, 078, 083, 095, 144, 035, 129 Pulsar 042 Quasar 036, 037, 074, 141 Tera Radio Shack 011, 044, 063, 093, 118 Toshiba RCA 040, 044, 125, 130, 137, 151, 152 Realistic 014, 063, 093, 118 Universal 020, 066, 088 Saisho 027 Victor 019, 073, 126 Samsung 003, 015, 034, 053, 055, 057, 094, 095, 136,153 Video Concepts 016 Sansui 139 Viking 032, 122 Sanyo 013, 014, 021, 022, 063, 064, 081, 096 Wards SBR 015 Schneider 015 Zenith 042, 114, 115, 140, 144, 149 Scott 062 Zonda 007 Sears 008, 014, 021, 022, 023, 024, 025, 040, 052, 057, 156, 157 008, 014, 034, 063, 075, 076, 095, 097, 136, 158, 159 005, 045, 066, 078, 085, 088, 089, 093, 102, 103, 131, 132, 148 062, 063, 064, 065, 073, 075, 076, 097, 098, 125, 159 249 3ADV-M71E2_FRA p228-284 03.12.25 1:20 PM ページ 250 FRANCAIS VCR Admiral 081 JVC Aiko 095 Kenwood 004, 005, 006, 026, 029, 033, 045, 085, 090 Aiwa 009 Kodak 088 Akai 026, 027, 070, 072, 082, 083, 084 Lloyd 009, 094 055 LXI 088 Amstrad 009 Magnavox 015, 016, 042, 049, 063, 106 ASA 042 Magnin 087 Asha 087 Marantz 004, 005, 006, 015, 042, 049, 085, 090 Audio Dynamic 005, 085 Marta 088 Audiovox 088 MEI 049 Beaumark 087 Memorex 009, 033, 049, 053, 060, 081, 087, 088, 091, 094, Broksonic 086, 093 Calix 088 Metz 123, 124, 125, 126, 127, 128 Candle 006, 087, 088, 089, 090 MGA 001, 017, 027, 041, 097 Canon 049, 057 MGN Technology 087 Capehart 025, 055, 056, 071 Midland Carver 015 Minolta 013, 023 CCE 095 Mitsubishi 001, 003, 008, 013, 014, 017, 027, 029, 039, 040, Citizen 006, 007, 087, 088, 089, 090, 095 Alba 004, 005, 006, 026, 029, 043, 044, 045, 046, 085 115 011 041, 045, 097 Craig 007, 087, 088, 091, 115 Motorola Curtis Mathes 006, 049, 073, 080, 087, 090, 092 Montgomery Ward 001, 002, 007, 009, 049, 063, 081, 115, 117 Cybernex 087 MTC 009, 087, 094 Daewoo 025, 055, 059, 074, 089, 093, 095, 096 Multitech 007, 009, 011, 087, 090, 094 Daytron 025, 055 NAD 038 DBX 005, 085 NEC 004, 005, 006, 018, 026, 029, 045, 061, 062, 085 Dumont 053 Nikko 088 009 Noblex 087 Electrohome 001, 088, 097 Optimus 081, 088 Electrophonic 088 Optonica 021 Emerson 001, 009, 017, 027, 086, 088, 089, 092, 093, 097, Panasonic 024, 049, 064, 066, 067, 068, 069, 107 100, 101, 102, 103, 104, 117 Perdio 009 Fisher 009, 028, 031, 053, 054, 091, 098, 099, 115 Pentax 006, 013, 023, 058, 090 GE 007, 011, 049, 050, 051, 052, 073, 080, 087 Philco 015, 016, 049 047, 048 Philips 015, 021, 042, 049, 105 Goldstar 006, 012, 062, 088, 129 Pilot 088 Gradiente 094 Pioneer 005, 013, 029, 036, 037, 038, 045, 085 Grundig 042 Portland 025, 055, 090 Harley Davidson 094 Proscan 063, 080 Harman Kardon 040, 062 Pulsar 060 Hi-Q 091 Quartz 033 Hitachi 009, 013, 023, 026, 058, 108, 109, 110, 111 Quasar 034, 035, 049 JC Penny 004, 005, 007, 023, 028, 049, 062, Radio Shack 001, 002, 021, 081, 087, 088, 091, 094, 097, 098, Radix 088 Dynatech Go Video 115 085, 087, 088 Jensen 250 013, 026 081 3ADV-M71E2_FRA p228-284 03.12.25 1:20 PM ページ 251 FRANCAIS Randex 088 Symphonic 009, 094 RCA 007, 013, 019, 023, 058, 063, 064, 065, 073, 080, Tandy 009 082, 087 Tashiko 009, 088 009, 021, 031, 033, 049, 053, 081, 087, 088, 091, Tatung 004, 026, 030 094, 097, 098 Teac 004, 009, 026, 094 Ricoh 055 Technics 024, 049 Salora 033, 041 Teknika 009, 010, 022, 049, 088, 094 Samsung 007, 011, 051, 059, 070, 083, 087, 089, 113 TMK 087, 092 Sanky 081 Toshiba 013, 017, 020, 041, 059, 089, 098, 099, 117 Sansui 005, 026, 029, 045, 061, 085, 114 Totevision 007, 087, 088 Sanyo 032, 033, 053, 087, 091, 115, 116 Unirech 087 SBR 042 Vecrtor Research 005, 062, 085, 089, 090 Scott 017, 020, 086, 089, 093, 117 Victor 005, 045, 046, 085 Sears 013, 023, 028, 031, 033, 053, 054, 088, 091, 098, Video Concepts 005, 027, 085, 089, 090 099, 115 Videosonic 007, 087 055 Wards 013, 021, 023, 087, 088, 089, 091, 094, 097, 118, Realistic Sentra Sharp 001, 002, 021, 097 Shogun 087 XR-1000 094 Sony 075, 076, 077, 078, 079, 121, 122 Yamaha 004, 005, 006, 026, 062, 085 STS 023 Zenith 060, 078, 079 Sylvania 009, 015, 016, 017, 041, 049, 094 119, 120 251 3ADV-M71E2_FRA p228-284 03.12.25 1:20 PM ページ 252 FRANCAIS (5) Fonctionnement du lecteur vidéo/télévision après avoir stocké leurs signaux de télécommande dans la mémoire préréglée OFF 3-w ON VCR REC NTSC/PAL SLEEP ENTER A-B REPEAT CLEAR TIME TV IN T V CHARAC. SLIDE MODE TV CH EDIT/MENU ZOOM TV CH - RDS PROG/DIRECT PTY MODE DVD REPEAT RANDOM MEMO BAND TUNER D.AUX 3 + TUNING / TV VOL 1 2 TAPE /LINE-2 4 5 6 + - 5CH STEREO AUTO DECODE TUNER 8 9 + DIRECT STEREO 3-q CH VIRTUAL CALL 0/10 +10 - TEST TONE INPUT MODE SURROUND FUNCTION TUNER TV / VCR DVD IN/SURR. A/V SYSTEM IN/SURR. MD CDR TAPE 1 2 2 9 6 - 7 STATUS 3 MUTING SETUP TONE /SDB ENTER SURROUND PARAMETER CH SELECT DISPLAY RETURN 3-w ANGLE VCR CH MENU AUDIO + TOP MENU SUB TITLE RC-966 1 Réglez le commutateur de mode 1 en position “A/V”. A/V SYSTEM 2 Réglez le commutateur de mode 2 en position “TV/VCR”. TUNER TV / VCR DVD IN/SURR. IN/SURR. MD CDR TAPE 3 Actionnez le composant vidéo. • Pour plus de détails, référez-vous au mode d’emploi du composant. Il peut ne pas être possible de faire fonctionner certains modèles. REMARQUE: • Les touches de la télévision “TV (POWER)” et “TV IN” peuvent être actionnées tant que le commutateur de mode 1 est réglé en position “A/V”, quelle que soit la position du commutateur de mode 2. 252 3 Touches système du téléviseur (TV) et du lecteur vidéo (VCR) q Touches système de la télévision TV 0~9 TV IN TV VOL +, – TV CH +, – : : : : : Alimentation activée/désactivée Numéros de chaîne Commutation de l’entrée télévision Augmentation/diminution du volume Commutation des chaînes w Touches système du lecteur vidéo + DVD 8 3-q CT CD SRS RT SEARCH MODE MD/LINE-1 7 1 TITLE SOURCE VCR : Alimentation activée/désactivée VCR CH +, – : Commutation des chaînes 6, 7 : Recherche manuelle (avance rapide et retour rapide) 1 : Lecture 3 : Pause 2 : Arrêt 3ADV-M71E2_FRA p228-284 03.12.25 1:20 PM ページ 253 FRANCAIS 10 REGLAGE DU SYSTEME (1) Articles de réglage du système • Une fois que toutes les connexions avec les autres composants vidéo ont été effectuées comme décrit dans la section “CONNEXIONS” (voir pages 232 à 238), effectuer les diverses connexions décrites ci-dessous pour l’écran en utilisant la fonction d’affichage à l’écran du ADV-M71. • Utiliser les touches suivantes pour installer le système: Touche ENTER 6 Appuyer sur cette touche pour commuter l’affichage. Utiliser également cette touche pour achever le réglage. - 7 STATUS 3 MUTING SETUP TONE /SDB Touches du CURSOR 1 et 0: Utiliser ces touches pour déplacer les curseurs (1 et 0) à gauche et à droite sur l’écran. ENTER SURROUND PARAMETER CH SELECT RETURN DISPLAY ANGLE MENU AUDIO VCR CH Utiliser ces touches pour déplacer les curseurs (• et ª) en haut et en bas sur l’écran. + TOP MENU SUB TITLE • et ª: Touche SYSTEM SETUP Appuyer sur cette touche pour afficher le menu d’installation du système. Items d’installation du système et valeurs par défaut (réglées à la sortie de l’usine) Installation QUICK SETUP SPEAKER CONFIGURATION Installation DVD Installation du système DELAY TIME CHANNEL LEVEL Réglages par défaut Aspect TV Enceinte 4:3 PS Virtuel et SW bicanal Régler la taille de l’écran et les enceintes. Entrer la combinaison des enceintes dans votre système et leur taille correspondante (petit (SMALL) pour les enceintes normales, grand (LARGE) pour les grandes) afin de régler automatiquement la composition des signaux envoyés par les enceintes et la réponse en fréquence. Ce paramètre sert à optimiser la relation de temps selon laquelle les signaux audio sont produits par les enceintes et le subwoofer selon la position d’écoute. Enceinte avant Enceinte centrale Enceinte acoustique d’ambiance Subwoofer Small “__” “__” “__” Fréq. Sw = 150 Hz Avant et subwoofer Center 9ft (2,7 m) “__” En position d’écoute, écouter les tonalités de test Avant gauche envoyées par les différentes enceintes et effectuer le réglage de sorte que le niveau de lecture des différentes 0 dB enceintes soit égal. AV1 VIDEO OUTPUT Pour sélectionner si les signaux vidéo composites ou les signaux S vidéo ou les signaux RGB sortiront des bornes AV1 SCART. DVD AUTO POWER OFF L’alimentation passe automatiquement en veille si aucune opération n’est effectuée pendant 30 minutes en mode stop et en fonction DVD. FUNCTION SETTING Régler les noms de fonction de LINE-1 et LINE-2 et activer ou inactiver la sortie d’enregistrement analogique (REC OUT). DISC SETUP Régler la langue du son, la langue des sous-titres et la langue du menu de disque pour la lecture de disques. OSD SETUP Régler le papier peint pour les écrans d’installation et de fonctionnement. VIDEO SETUP Régler la taille de l’écran correspondants à la TV utilisée. et le système vidéo Surround “__” Centre Avant droit Surround droit Surround gauche Subwoofer “__” 0 dB “__” “__” “__” VIDEO OUTPUT VIDEO L’appareil ne s’arrête pas automatiquement LINE-1 LINE-2 MD TAPE ON Dialogue Sous-titres Menu de disque English English English REC OUT Papier peint Blue Aspect TV Type TV Niveau du noir 4 : 3 PS PAL PLUS SOMBRE Régler le format de signal audio numérique et la fréquence d’échantillonnage MIC linéaire ainsi que la conversion de bits. Sortie numérique Normal OFF Niveau d’indice Changement de mot de passe RATINGS Effectuer les réglages de restriction de lecture pour les DVD avec un accès limité et entrer le mot de passe nécessaire pour modifier le réglage. Pas de limite 0000 (Défaut) Sous-titres Diaporama OTHER SETUP Effectuer le réglage de sous-titres codés pour les DVD. (Un décodeur disponible dans le commerce est nécessaire pour afficher les sous-titres codés.) OFF 5SEC AUDIO SETUP Sélection LPCM 253 3ADV-M71E2_FRA p228-284 03.12.25 1:20 PM ページ 254 FRANCAIS (2) Procédure d’installation rapide • Référez-vous aux “Connexions” (pages 232 à 238) et vérifiez que toutes les connexions sont correctes. B 1 SURROUND / SELECT DVD SURROUND RECEIVER ADV-M71 PUSH - PARAM. - + BAND MENU / SET TONE / SDB Allumez l’alimentation. • L’indicateur d’alimentation (LED) produit une lumière verte, l’alimentation s’allume et l’affichage s’allume. VOLUME FUNCTION ON / STANDBY Vert ON / STANDBY PHONES ON 1 Unité principale OFF ENTER A-B REPEAT CLEAR 1 ON VCR REC NTSC/PAL SLEEP TITLE SOURCE TIME TV IN T V CHARAC. SLIDE MODE TV CH EDIT/MENU ZOOM TV CH - RDS PROG/DIRECT REPEAT PTY RANDOM MODE MEMO BAND DVD TUNER D.AUX 3 + CT CD SRS RT SEARCH MODE TUNING / TV VOL 1 2 MD/LINE-1 TAPE /LINE-2 4 5 6 + - 5CH STEREO AUTO DECODE TUNER + 7 8 9 DIRECT STEREO VIRTUAL CALL 0/10 +10 - TEST TONE INPUT MODE SURROUND FUNCTION CH TUNER TV / VCR DVD IN/SURR. A/V SYSTEM IN/SURR. MD CDR TAPE 1 2 + DVD 8 2 9 6 - 7 STATUS 3 2,12 Télécommande Plusieurs secondes sont nécessaires entre le moment où l’on appuie sur le bouton d’alimentation et celui où l’alimentation s’allume. Ceci est dû au circuit intégré silencieux qui éteint (coupe) le son quand l’alimentation est allumée ou éteinte. L’indicateur d’alimentation clignote d’une couleur verte pendant que le circuit silencieux est activé. Même quand la touche d’alimentation a été enfoncée de nouveau et que l’alimentation a été réglée en mode veille, l’alimentation pourvoit toujours certains circuits. Quand vous quittez votre maison ou voyagez, assurez-vous d’avoir débranché le cordon d’alimentation de la prise d’alimentation. En mode veille, l’indicateur d’alimentation est allumé en rouge. L’indicateur est orange si le minuteur est réglé. Appuyez sur la touche SETUP pour afficher l’écran d’installation. SETUP MUTING SETUP TONE /SDB ENTER SURROUND PARAMETER CH SELECT DISPLAY RETURN ANGLE MENU AUDIO VCR CH Télécommande 4,6,8,11 3,5,7,9,10 + TOP MENU SUB TITLE RC-966 3 Utilisez les touches curseurs • et ª pour sélectionner “Quick System Setup”. • L’élément sélectionné est affiché en jaune. Télécommande 254 3ADV-M71E2_FRA p228-284 03.12.25 1:20 PM ページ 255 FRANCAIS 4 Appuyez sur la touche ENTER pour afficher l’écran de réglage du menu. Sur l’écran de réglage, l’élément sélectionné est affiché en jaune et les valeurs des autres éléments sont affichées en vert. ENTER 6 [2] Réglages du système d’enceintes Télécommande [1] Réglage de la taille de l’écran de télévision • “Return” est affiché en jaune. • La valeur réglée actuellement est affichée en vert. • Si vous ne voulez pas changer le réglage, appuyez sur la touche ENTER à “Return”. L’écran de l’étape 2 réapparaît. • Pour changer le réglage, procédez à l’étape 7 ci-dessous. • La valeur réglée actuellement est affichée en jaune. 5 Utilisez les touches curseurs • et ª pour sélectionner la taille d’écran de télévision souhaitée et le type d’affichage. La taille d’écran de télévision sélectionnée est affichée en jaune et la description est affichée en vert. 7 Utilisez les touches curseurs • et ª pour sélectionner le système d’enceintes à utiliser. Télécommande Télécommande 8 Appuyez sur la touche ENTER pour régler la disposition sélectionnée. • Pour des réglages autres que “5.1 chanel surround”, l’écran d’installation de l’étape 2 réapparaît. /Le mode d’installation est quitté à l’étape 12. Le mode d’installation peut aussi être quitté en utilisant les touches curseurs • et ª sur l’écran d’installation pour sélectionner “EXIT SETUP” puis appuyez sur la touche ENTER. • Si “5.1-chanel surround” est sélectionné, l’écran ci-dessous apparaît. ENTER Télécommande [3] Réglages de la pièce et de la position d’écoute 6 Appuyez sur la touche ENTER pour régler la disposition sélectionnée. • L’écran montré ci-dessous apparaît. ENTER Télécommande • La valeur réglée actuellement est affichée en vert. 255 3ADV-M71E2_FRA p228-284 03.12.25 1:20 PM ページ 256 FRANCAIS 9 10 11 Utilisez les touches curseurs • et ª pour sélectionner “Room Settings”, puis utilisez les touches curseurs 0 et 1 pour régler la taille de la pièce. • La taille réglée est affichée en jaune. Utilisez les touches curseurs • ª pour sélectionner et “Listening Position”, puis utilisez les touches curseurs 0 et 1 pour régler la position. • La position réglée est affichée en jaune. Appuyez sur la touche ENTER pour finir les réglages. • L’écran de l’étape 2 réapparaît. A propos des réglages du système d’enceintes 256 Appuyez sur la touche SETUP pour quitter le mode d’installation. Le mode d’installation peut aussi être quitté en utilisant les touches curseurs • et ª dans l’écran d’installation pour sélectionner “EXIT SETUP” puis pressez la touche ENTER. 2CH VIRTUAL Sélectionnez ceci quand vous utilisez seulement les deux enceintes pour les canaux frontaux. B 2CH VIRTUAL & SW Sélectionnez ceci quand vous utilisez deux enceintes pour les canaux frontaux et un subwoofer avec amplificateur intégré. • Réglages Frontal : Petit Subwoofer : Oui Fréquence du subwoofer : 150 Hz Disposez les enceintes frontales et le subwoofer à distance égale. B 5.1CH SURROUND Sélectionnez ceci quand vous utilisez deux enceintes pour les canaux frontaux, une enceinte centrale, deux enceintes pour les canaux ambiance et un subwoofer avec amplificateur intégré. • Réglages Frontal : Petit 9pieds (2,7m) Central : Petit 8pieds (2,4m) Ambiance : Petit 7pieds (2,1m) Subwoofer : Oui 9pieds (2,7m) Fréquence du Subwoofer : 150 Hz La disposition de la pièce est réglée sur “MED.”, la position d’écoute sur “BACK”. Télécommande Télécommande ENTER Télécommande 12 B SETUP Télécommande REMARQUE: • Le système d'enceintes est réglé sur “2CH VIRTUAL” à l'usine. Si vous utilisez des enceintes pour les deux canaux avant et un subwoofer, changez le réglage sur “2CH VIRTUAL & SW”. 3ADV-M71E2_FRA p228-284 03.12.25 1:20 PM ページ 257 FRANCAIS (3) Installation système détaillée (changement des réglages système) • Les réglages système rapide et les réglages d’origine établis en usine sont changés en utilisant le menu de changement de réglage système. Les réglages sont stockés dans la mémoire jusqu’à ce qu’ils soient changés la fois suivante, et restent valides même quand l’alimentation est éteinte. [1] Réglages des enceintes (type d’enceintes et connexion ou non des enceintes) • Le composant de sortie des différents canaux et les propriétés sont ajustés automatiquement selon la combinaison d’enceintes actuellement utilisée. 1 Appuyez sur la touche SETUP pour afficher l’écran de réglage. SETUP 3 ENTER Télécommande Télécommande Télécommande Quand le curseur est sur l’icône dans l’écran de menu de changement de réglage système, l’écran de réglages peut aussi être sélectionné en appuyant sur la touche curseur ª. Vous pouvez retourner à l’icône en appuyant sur la touche curseur •. • L’écran de réglages d’enceintes de l’étape 4 apparaît. 4 2 Utilisez les touches curseurs •, ª, 0 et 1 pour sélectionner si oui ou non les différentes enceintes sont connectées, leur taille et autres paramètres. ENCEINTE CENTRALE Utilisez les touches curseurs • et ª pour sélectionner “SYSTEM SETUP” sous “<ADVANCED SETUP>”, puis appuyez sur la touche ENTER. ENCEINTE FRONTALE SUBWOOFER ENTER Télécommande 3 Télécommande ENCEINTE D’AMBIANCE • L’élément qui est actuellement réglé est affiché en jaune et les valeurs de réglage pour les autres éléments sont affichées en vert. Télécommande Dans le menu de changement de réglage système, utilisez les touches curseurs 0 et 1 pour sélectionner l’icône “SPEAKER CONFIGURATION”, puis appuyez sur la touche ENTER. 5 Appuyez sur la touche ENTER pour entrer les réglages. • L’écran suivant dans le menu de changement des réglages système apparaît. ENTER Télécommande 257 3ADV-M71E2_FRA p228-284 03.12.25 1:20 PM ページ 258 FRANCAIS REMARQUE: • Sélectionnez la taille des enceintes non d’après la taille réelle des enceintes mais d’après la capacité des enceintes à reproduire des basses fréquences de 100 Hz ou moins. Si vous ne la connaissez pas, déterminez le meilleur réglage en comparant le son quand le réglage est disposé sur “Small” et “Large”, en gardant le volume assez bas pour éviter d’endommager les enceintes. Fréquence du Subwoofer (SW FREQ.) • Pour la fréquence du subwoofer à l’écran de réglage des enceintes, régler la fréquence de recouvrement des basses pour la lecture à partir du subwoofer. • Sélectionner “80 Hz”, “120 Hz”, “150 Hz” ou “180 Hz” (–6 dB pour chacun). Les basses inférieures à ces fréquences sont reproduites par le subwoofer. (Réglage par défaut à la sortie d’usine : “150 Hz”.) REMARQUE: • Sélectionner “Large” (Grand) ou “Small” (Petit), non pas en ce qui concerne la taille de l’enceinte mais selon la capacité de l’enceinte à reproduire les signaux de basse fréquence (environ 100 Hz et moins). Si vous ne savez pas de quoi il s’agit, essayer de comparer le son selon les deux réglages (en réglant le volume sur une faible position, de sorte à ne pas endommager les enceintes) afin de déterminer le réglage approprié. Répartition des basses fréquences • Dans les modes Dolby numérique, Dolby Pro Logic II, DTS, et surround virtuel, les signaux des basses fréquences pour les canaux dont les réglages de l’enceinte ont été effectués sur “ Petit” sont reproduits par le subwoofer. Les basses fréquences des canaux réglés sur “Grand” sont reproduits par ces canaux. (Si le réglage a été effectué sur “120 Hz”, les canaux réglés sur “Small” reproduisent les sons de 120 Hz et plus, alors que les fréquences basses de moins de 120 Hz sont reproduites par le subwoofer.) • Dans les modes surround autres que ceux énumérés ci-dessus, les basses fréquences inférieures à la fréquence réglée pour la fréquence du subwoofer sont reproduites par le subwoofer sans tenir compte du fait que les enceintes aient été réglées sur “Large” ou sur “Small”. • Régler la fréquence du subwoofer selon les capacités de reproduction des basses fréquences de vos enceintes et de votre subwoofer. Paramètres Large....... Sélectionner cette fonction lors de l’utilisation d’enceintes pouvant reproduire complètement de faibles sons inférieurs à 100 Hz. Small….... Sélectionner cette fonction lors de l’utilisation d’enceintes ne fournissant pas un volume suffisant pour reproduire les fréquences basses de 100 Hz ou moins. Lorsque ce réglage est effectué, les fréquences inférieures à la fréquence réglée au subwoofer sont assignées au subwoofer. None…… Sélectionner cette fonction lorsque aucune enceinte n’est installée. Yes/No.… Sélectionner “Oui” lorsqu’un subwoofer est installé, et “Non” lorsque aucun subwoofer n’est installé. Si le subwoofer a une capacité de reproduction des fréquences basses suffisante, un bon son peut être obtenu même lorsque la fonction “Small” (Petit) a été sélectionnée pour les enceintes avant, centrale et surround. Pour la majorité des configurations d’enceintes, le fait d’utiliser le réglage SMALL pour les cinq enceintes principales et d’activer le subwoofer procurera les meilleurs résultats. 258 Mode subwoofer (SW MODE) • Le réglage du mode subwoofer n’est valide que lorsque “LARGE” est sélectionné pour les enceintes avant et que “YES” est réglé pour le subwoofer dans les réglages de “SPEAKER CONFIGURATION” • Lorsque le mode “LFE + Main” est sélectionné, les signaux des basses fréquences des canaux pour lesquels “Large” a été spécifié, sont reproduits par ces canaux et également par le canal du subwoofer. Le canal du subwoofer reproduit les signaux LFE et les signaux de basse fréquence des principaux canaux réglés sur “Large”. • Le son des basses est plus uniformément réparti dans la pièce lorsque ce mode est sélectionné, mais selon la taille et la forme de la pièce, des interférences peuvent en fait provoquer une diminution du volume des basses. • Lorsque le mode “LFE” est sélectionné, les signaux de basse fréquence des canaux pour lesquels “Large” a été spécifié ne sont reproduits que par ces canaux. Uniquement les signaux LFE sont reproduits par le canal du subwoofer. • Ce mode permet d’éviter les interférences des basses dans la pièce. • Lorsque le subwoofer est réglé sur “YES”, les basses sont émises par le subwoofer sans tenir compte du réglage du mode du subwoofer dans les modes surround autres que Dolby/ DTS. 3ADV-M71E2_FRA p228-284 03.12.25 1:20 PM ページ 259 FRANCAIS [2] Durée du délai (réglage de la distance) • Entrez les distances de la position d’écoute et des différents enceintes pour régler la durée du délai ambiance. • Le réglage d’usine de la durée du délai est réglé aux valeurs par défaut dans l’étape 3 ci-dessous. Préparation: Mesurez la distance de la position d’écoute aux différentes enceintes. FL Center SL FR L1: Distance entre l’enceinte centrale et la position d’écoute L2: Distance entre les enceintes frontales et la position d’écoute L3: Distance entre les enceintes d’ambiance et la position d’écoutesition SR Position d’écoute 1 2 Si vous n’êtes pas sur l’écran de menu de changement de réglage système, lisez l’étape 1 et 2 page 257. 4 Sur l’écran de menu de changement de réglage système, utilisez les touches curseurs 0 et 1 pour sélectionner “DELAY TIME (Distance)”, puis appuyez sur la touche ENTER. Utilisez les touches curseurs • et ª pour sélectionner les enceintes, puis utilisez les touches curseurs 0 et 1 pour régler la distance entre les enceintes et la position d’écoute. • La distance change par intervalles de 0,1 mètre (ou 1 pied quand l’unité de mesure est réglée sur pieds) chaque fois que la touche curseur 0 ou 1 est enfoncée. Sélectionnez la valeur la plus proche de la distance mesurée. ENTER Télécommande Télécommande • L’écran de réglage de la durée de délai apparaît. Assurez-vous que l’écart de distance réglée pour les différentes enceintes n’est pas supérieur à 3 mètres (10 pieds). Si une distance inappropriée est réglée, “CAUTION: OUT OF SETTING RANGE” est affiché. Changez la position des enceintes et achevez le réglage. 5 • L’unité de distance peut être commutée entre “m” (mètres) et “ft” (pieds) en utilisant les touches curseurs 0 et 1. Si vous ne voulez pas changer d’unité de mesure, appuyez sur la touche curseur ª pour procéder à l’étape suivante. 3 Appuyez sur la touche ENTER pour entrer les réglages. • L’écran suivant dans le menu de changement de réglage système apparaît. ENTER Télécommande Dans “Default Value”, sélectionnez “Yes” pour régler les durées de délai des différentes enceintes aux valeurs par défaut. B B Yes: Les valeurs sont réglées par défaut. No: Les réglages actuels sont maintenus. 259 3ADV-M71E2_FRA p228-284 03.12.25 1:20 PM ページ 260 FRANCAIS [3] Ajustement du niveau des canaux • Ajustez de façon que les niveaux de lecture des différents canaux soient égaux. • Faites cet ajustement en écoutant la sortie de test de tonalités depuis les enceintes en position d’écoute. • Tous les niveaux de chaque canal sont réglés par défaut à l’usine à 0 dB. • Cet ajustement peut aussi être effectué directement depuis la télécommande. (Touche CH SELECT) 1 2 Si vous n’êtes pas sur l’écran de menu de changement de réglage système, lisez l’étape 1 et 2 page 257. 6 q Quand “Auto” est sélectionné dans “Test Tone”: Sur l’écran de menu de changement de réglage système, utilisez les touches curseurs 0 et 1 pour sélectionner “Channel Level Adjustment”, puis appuyez sur la touche ENTER. ENTER Télécommande Télécommande • L’écran d’ajustement du niveau de canal apparaît. • Les tests de tonalité sont automatiquement sortis depuis les enceintes à des intervalles de 4 secondes pour deux des cycles montrés ci-dessous, puis à des intervalles de 2 secondes à partir du troisième cycle. Frontal gauche Subwoofer Central Ambiance gauche Frontal droit Ambiance droit Utilisez les touches curseurs 0 et 1 pour ajuster les niveaux des canaux de façon que le volume de sortie du test de tonalités des différentes enceintes ait le même son. • Le niveau change par unité de 1 dB chaque fois que la touche curseur 0 ou 1 est enfoncée. Le niveau peut être ajusté dans l’intervalle de –12 dB à +12 dB. w Quand “Manual” est sélectionné dans “Test Tone”: 3 Utilisez les touches curseurs 0 et 1 pour sélectionner “Auto” ou “Manual” pour le mode “Test Tone”. • Le réglage sélectionné est affiché en jaune. B B 4 B 260 Ajustez les niveaux en écoutant la sortie automatique de test de tonalités depuis les différentes enceintes. Manual: Sélectionnez les enceintes depuis lesquelles le test de tonalités sort quand vous ajustez les niveaux. Les réglages détaillés peuvent être effectués quand ceci est d’abord réglé sur “Manual”. Quand “Yes” est sélectionné dans “Level Clear”, les réglages de niveau pour toutes les enceintes sont réglés à 0 dB. B 5 Télécommande Auto: Yes: Les réglages de niveau pour toutes les enceintes sont réglés à 0 dB. No: Les réglages de niveau actuellement choisis sont maintenus. Ajustez les niveaux des canaux en mode test de tonalité. Utilisez les touches curseurs • et ª pour sélectionner le mode “Test Tone Start”, puis utilisez la touche curseur 0 pour sélectionner “Yes”. Le test de tonalité est en sortie. Utilisez la commande MASTER VOLUME de l’unité principale ou les touches VOLUME sur la télécommande pour ajuster le volume du test de tonalité à un niveau auquel il est facile d’effectuer cet ajustement. Utilisez les touches curseurs • et ª pour sélectionner l’enceinte depuis laquelle le test de tonalités doit sortir, puis utilisez les touches curseurs 0 et 1 pour ajuster les niveaux des canaux de façon que le volume de sortie du test de tonalités des différentes enceintes ait le même son. • Le niveau change par unité de 1 dB chaque fois que la touche curseur 0 ou 1 est enfoncée. Le niveau peut être ajusté dans l’intervalle de –12 dB à +12 dB. 3ADV-M71E2_FRA p228-284 03.12.25 1:20 PM ページ 261 FRANCAIS 7 Appuyez sur la touche ENTER pour mémoriser les réglages. • L’écran suivant dans le menu de changement de réglage système apparaît. ENTER Télécommande Pour annuler les réglages après que les ajustements ont été effectués Affichez l’écran d’ajustement de niveau de canaux, puis utilisez les touches curseurs •, ª, 0 et 1 pour sélectionner “Level Clear” et sélectionnez “Yes”. Les réglages de niveau pour toutes les enceintes sont réglés à 0 dB. [5] Réglage de l’extinction automatique du DVD • Le ADV-M71 est équipé d’une fonction pour activer automatiquement le mode veille si aucune opération n’est effectuée pendant 30 minutes quand la fonction est réglée sur DVD. Ici réglez si vous voulez ou non utiliser cette fonction. • Ceci est réglé par défaut à l’usine sur “No”. 1 2 Si vous n’êtes pas sur l’écran de menu de changement de réglage système, lisez l’étape 1 et 2 page 257. Sur l’écran de menu de changement de réglage système, utilisez les touches curseurs 0 et 1 pour sélectionner “DVD AUTO POWER OFF”, puis appuyez sur la touche ENTER. REMARQUE: Quand les niveaux des canaux sont ajustés dans les réglages de niveau des canaux, les valeurs ajustées sont appliquées à tous les modes de lecture. ENTER [4] Réglage de la sortie vidéo AV1 (DVD seulement) • Pour sélectionner si les signaux vidéo composites ou les signaux S vidéo ou les signaux RGB sortiront des bornes AV1 SCART. • Le réglage d'usine par défaut est “VIDEO”. 1 2 Télécommande Télécommande • L’écran de réglage d’extinction automatique du DVD apparaît. Si vous n'êtes pas à l'écran de menu de changement des réglages système, lisez les étapes 1 et 2 page 257. Su l'écran “SYSTEM SETUP MENU”, sélectionner “AV1 VIDEO OUTPUT” et appuyer sur la touche ENTER. ENTER Télécommande Télécommande • Commuter vers l'écran “AV1 VIDEO OUT”. 3 Utilisez les touches curseurs 0 et 1 pour sélectionner le mode “Auto Power Off”. B B 4 Yes: La fonction pour éteindre automatiquement l’alimentation quand la fonction est réglée sur DVD, est activée. No: La fonction d’extinction automatique n’est pas activée. Appuyez sur la touche ENTER pour entrer les réglages. • L’écran suivant dans le menu de changement de réglage système apparaît. ENTER Télécommande 3 Sélectionner “VIDEO OUTPUT”. • VIDEO : Les signaux vidéo composites sortiront. • S-VIDEO : Les signaux S vidéo sortiront. • RGB : Les signaux RGB sortiront. 4 Appuyer sur la touche ENTER pour entrer les réglages. • L'écran suivant dans le menu de changement des réglages système apparaît. ENTER Télécommande 261 3ADV-M71E2_FRA p228-284 03.12.25 1:20 PM ページ 262 FRANCAIS [6] Réglages des fonctions • Réglez les noms des fonctions LINE-1 et LINE-2 et allumez ou éteignez la sortie d’enregistrement analogique (REC OUT). • Quand il est utilisé en combinaison avec les séries D-M31, réglez selon les composants utilisés pour les fonctions système adéquates. • Il est aussi possible d’assigner l’entrée numérique D.AUX à LINE-2. 1 2 Si vous n’êtes pas sur l’écran de menu de changement de réglage système, lisez l’étape 1 et 2 page 257. Sur l’écran de menu de changement de réglage système, utilisez les touches curseurs 0 et 1 pour sélectionner “FUNCTION ASSIGNMENT”, puis appuyez sur la touche ENTER. ENTER Télécommande Télécommande • L’écran de réglage de la fonction d’entrée apparaît. Réglages de la fonction d’entrée • LINE-1 et LINE-2 peuvent être réglés comme décrit ci-dessous. LINE-1 : “MD”, “CD-R”, “MD/CD-R” ou “AUX” peuvent être sélectionnés. (“MD/CD-R” peut être réglé seulement quand un enregistreur MD, une platine cassette et un enregistreur CD sont tous connectés et que les opérations système sont utilisées.) LINE-2 : Ceci peut être réglé sur “TAPE”, “MD”, “AUX” ou “D.AUX”. (Réglez “D.AUX” pour utiliser l’entrée numérique D.AUX en combinaison avec l’entrée analogique de LINE-2.) • Le réglage pour LINE-1 est prioritaire. Une fois qu’une fonction est réglée pour LINE-1, il n’est pas possible de régler la même fonction pour LINE-2. (Par exemple, si “MD” est sélectionné pour LINE-1, “MD” n’est plus disponible parmi les choix pour LINE-2.) Réglage de la sortie d’enregistrement analogique LINE-1/LINE-2 • Réglez ceci normalement sur “On”. • Avec la fonction d’entrée numérique exclusive DVD ou D.AUX , réglez ceci sur “Off” si un bruit est généré quand vous lisez des sources avec une cadence de bits élevée en mode Dolby Virtual Speaker. • Ce réglage est valide seulement en mode Dolby Virtual Speaker pour la fonction d’entrée numérique exclusive DVD ou D.AUX. (Dans les modes ambiance autres que le mode Dolby Virtual Speaker et avec les autres fonctions d’entrée, les signaux d’enregistrement analogique sont en sortie, quel que soit le réglage.) • L’enregistrement analogique n’est pas possible quand ceci est réglé sur “Off”. Pour enregistrer, utilisez un mode autre que le mode Dolby Virtual Speaker (stéréo, par exemple). (4) Après avoir changé les réglages système • Ceci achève la procédure pour changer les réglages système. Une fois que les réglages des enceintes, des durées de delai et les niveaux des canaux ont été réglés, il n’y a plus besoin de changer les réglages de nouveau à moins que les composants AV connectés ou que les enceintes soient déplacés dans une position différente. • Arrêt automatique du DVD et réglages de fonction si nécessaire. 3 Utilisez les touches curseurs • et ª pour sélectionner l’élément à régler, puis utilisez les touches curseurs 0 et 1 pour effectuer les réglages. B LINE-1 Sélection des noms de fonctions (“MD” par défaut) AUX CD-R MD MD/CD-R 1 Sur l’écran de menu de changement de réglage système, appuyez sur la touche SETUP. • Les nouveaux réglages sont entrés et l’affichage d’écran s’éteint. SETUP Télécommande B LINE-2 Sélection des noms de fonctions (“TAPE” par défaut) TAPE AUX D.AUX LINE-1/LINE-2 REC OUT : Réglez l’allumage ou l’extinction de la sortie d’enregistrement pendant la lecture en mode Dolby Virtual Speaker quand la fonction est réglée sur l’entrée numérique exclusive DVD ou D.AUX. Activé : Les signaux sont sortis en stéréo. (Par défaut usine) Désactivé : Les signaux ne sont pas sortis. (L’enregistrement n’est pas possible.) B 4 Appuyez sur la touche ENTER pour entrer les réglages. • L’écran suivant dans le menu de changement de réglage système apparaît. ENTER Télécommande 262 La procédure d’installation peut être quittée à n’importe quel point en appuyant sur cette touche. REMARQUE: • Quand les réglages système ont été changés avec le menu de changement de réglage système et qu’un système d’enceintes est sélectionné avec les réglages système rapide, les réglages des enceintes et les réglages des durées de délai sont changés pour les valeurs préréglées pour les réglages système rapide. 3ADV-M71E2_FRA p228-284 03.12.25 1:20 PM ページ 263 FRANCAIS 11 LECTURE (1) Avant le fonctionnement B SURROUND / SELECT DVD SURROUND RECEIVER ADV-M71 PUSH - PARAM. - + BAND MENU / SET TONE / SDB FUNCTION ON / STANDBY PHONES 2 VOLUME 1 2 Se référer à “CONNEXIONS” (pages 232 à 238) et vérifier que toutes les connexions sont correctes. Activer l’appareil. Appuyez sur la touche POWER (Bouton d’alimentation). ON / STANDBY Allumé (verte) Unité principale OFF ENTER A-B REPEAT CLEAR 2 ON VCR REC NTSC/PAL SLEEP TITLE SOURCE TIME TV IN T V CHARAC. SLIDE MODE TV CH EDIT/MENU ZOOM TV CH - RDS PROG/DIRECT REPEAT PTY RANDOM MODE MEMO BAND DVD TUNER D.AUX 3 + CT CD SRS RT SEARCH MODE TUNING / TV VOL 1 2 MD/LINE-1 TAPE /LINE-2 4 5 6 + - 5CH STEREO AUTO DECODE TUNER ON Télécommande Lorsque cette touche est activée, l’appareil est mis sous tension et l’affichage s’allume. Le son reste silencieux pendant quelques secondes, puis l’appareil fonctionne normalement. Lorsque cette touche est activée à nouveau, l’appareil est mis hors tension, passe en mode de veille et l’affichage s’éteint. Lorsque la touche ON/STANDBY est dans l’état STANDBY, l’appareil est toujours connecté à la tension de la ligne CA. S’assurer de débrancher le cordon lorsque par exemple vous partez en vacances. + 7 8 9 DIRECT STEREO VIRTUAL CALL 0/10 +10 - TEST TONE INPUT MODE SURROUND FUNCTION CH TUNER TV / VCR DVD IN/SURR. A/V SYSTEM IN/SURR. MD CDR TAPE 1 2 + DVD 8 9 6 - 7 STATUS 3 MUTING SETUP TONE /SDB ENTER SURROUND PARAMETER CH SELECT DISPLAY RETURN ANGLE MENU AUDIO VCR CH + TOP MENU SUB TITLE RC-966 263 3ADV-M71E2_FRA p228-284 03.12.25 1:20 PM ページ 264 FRANCAIS (2) Le chargement de disques 2 Placer un disque dans le plateau à disque avec la face comportant l’étiquette (imprimée) tournée vers le haut. (2) Chargement des disques • Prendre le disque avec précaution, de sorte à ne pas toucher la surface comportant les signaux et le tenir avec la face imprimée tournée vers le haut. • Lorsque le plateau à disque est complètement ouvert, placer le disque sur le plateau. • Placer les disques de 12 cm dans le guide de plateau extérieur (Figure 1), et les disques de 8 cm dans le guide de plateau intérieur (Figure 2). • Appuyez sur la touche OPEN/CLOSE. Le disque est automatiquement chargé. • Le plateau à disque peut également être fermé automatiquement pour charger le disque en appuyant sur la touche PLAY. Guide du disque de 12 cm Guide du disque de 8 cm Plateau à disque Plateau à disque Figure 1 REMARQUE: • Ne pas déplacer l’appareil lorsqu’un disque est en train d’être lu. Ceci pourrait rayer le disque. Plateau à disque extérieur (1) Ouverture et fermeture du plateau à disque q Mettre l’appareil sous tension. w Appuyez sur la touche OPEN/CLOSE Disque de 12 cm Touche OPEN/CLOSE Figure 2 Plateau à disque intérieur Plateau à disque REMARQUES: • Même lorsque l’appareil est en mode de veille, lorsque la touche OPEN/CLOSE est activée, l’ADV-M71 se met en marche et le plateau à disque fonctionne. (Fonction de mise en marche automatique) • Même si la fonction est réglée sur une option autre que DVD, lorsque la touche OPEN/CLOSE est activée, la fonction passe en mode DVD et le plateau à disque fonctionne. (Fonction de sélection automatique de la fonction) • Ne pas appuyez sur la touche avec un crayon, etc. 264 Disque interne de 8 cm REMARQUES: • Si un corps étranger est accroché au plateau à disque lors de la fermeture, appuyer simplement de nouveau sur la touche OPEN/CLOSE et le plateau s’ouvrira. • Ne pas pousser le plateau à disque avec la main lorsque l’appareil est éteint. Ceci endommagerait l’appareil. • Ne pas placer de corps étrangers dans le plateau à disque. Ceci endommagerait l’appareil.. 3ADV-M71E2_FRA p228-284 03.12.25 1:20 PM ページ 265 FRANCAIS (3) Lecture INFORMATIONS D’INSTALLATION IMPORTANTES Cet appareil comporte les pré-réglages suivant: “DISC SETUP” (initialisation disque), “OSD SETUP (initialisation de l’affichage)”, “SETUP VIDEO (installation video)”, “AUDIO SETUP (installation audio)”, “RATINGS (indices)” et “OTHER SETUP (autre installation)”. Les pré-réglages ont été effectués avant de quitter l’usine. Si vous souhaitez les modifier pour les adapter à vos besoins spécifiques, se référer aux pages 318 à 330. (3)-3 OFF (3)-5 (3)-2,(3)-4 REPEAT PTY RANDOM MEMO BAND TUNER D.AUX 3 TUNING / TV VOL 1 2 TAPE /LINE-2 4 5 6 + - 5CH STEREO AUTO DECODE TUNER + 7 8 9 DIRECT STEREO VIRTUAL CALL 0/10 +10 - TEST TONE INPUT MODE SURROUND FUNCTION CH TUNER TV / VCR DVD IN/SURR. IN/SURR. MD (4)-1 CDR TAPE 1 2 + DVD 6 + (3)-8 9 - 7 STATUS BAND 3 TONE / SDB + CT CD SRS RT SEARCH MODE MD/LINE-1 8 - T V DVD SYSTEM PUSH - PARAM. MENU / SET TIME EDIT/MENU ZOOM TV CH MODE A/V SURROUND / SELECT DVD SURROUND RECEIVER ADV-M71 TITLE TV IN CHARAC. SLIDE MODE TV CH - RDS PROG/DIRECT (3)-5 B ENTER A-B REPEAT CLEAR (3)-1 ON VCR REC NTSC/PAL SLEEP SOURCE MUTING VOLUME SETUP FUNCTION TONE /SDB (3)-7 (3)-6 ON / STANDBY PHONES ENTER SURROUND PARAMETER CH SELECT - (3)-1 1 VCR CH + (3)-8 (4)-1 Mettre l’appareil sous tension. • Appuyez sur la touche d’alimentation, le témoin d’alimentation s’allume et l’appareil est mis sous tension. ON / STANDBY Allumé (verte) 4 Appuyez sur la touche OPEN/CLOSE. ON Unité principale Unité principale 2 Télécommande Appuyez sur la touche OPEN/CLOSE pour ouvrir le plateau à disque. 5 Appuyez sur la touche PLAY. • Pour de nombreux DVD interactifs et CD vidéo avec une commande de lecture, un écran de menu apparaît. Le cas échéant suivre la procédure de l’étape 6 afin de sélectionner le point souhaité. Les DVD interactifs sont des DVD incluant des angles multiples, des histoires, etc. 1 DVD Unité principale 3 Placer le disque sur le plateau à disque. Unité principale Télécommande Exemple: Pour les DVD avec écrans de menu Exemple: Pour les CD vidéo avec commande de lecture TOP MENU Apple Banana Orange Strawberry Peach Pineapple 1. Opening 2. 1st movement 3. 2nd movement 4. 3rd movement 5. Ending 265 3ADV-M71E2_FRA p228-284 03.12.25 1:20 PM ページ 266 FRANCAIS 6 Utiliser les touches de curseur (•, ª, 0 et 1) pour sélectionner l’item souhaité. • Certains disques comprennent un deuxième écran de menu. Dans ce cas, appuyez sur la touche 9 afin d’afficher l’écran de menu suivant. (Voir pochette du disque.) 8 Tournez la commande de volume principal de l’unité ou bien utilisez les touches de commande de volume principal sur la télécommande pour ajuster le volume. Le volume est indiqué à l’affichage. M.VOLUME -20 Les touches de curseur (•, ª, 0 et 1) ne fonctionnent pas pour les CD vidéo. Utiliser les touches avec les chiffres afin de sélectionner l’item souhaité. + VOLUME Unité principale Télécommande 7 Appuyez sur la touche ENTER. • L’item souhaité est sélectionné et la lecture commence. • Il est possible de restituer l’écran de menu en appuyant sur la touche TOP MENU lors de la lecture du DVD, bien que cela dépende du disque. • Appuyez sur la touche RETURN lors de la lecture d’un CD vidéo pour restituer l’écran de menu. ENTER Exemple: Lorsque “Apple” est sélectionné. Banana Orange Strawberry Peach Pineapple • En mode d’entrée “AUTO”, les signaux du disque qui est lu sont identifiés, le décodage PCM, DTS, Dolby Digital ou DTS est sélectionné et le disque est lu. • En mode ambiance Dolby Virtual Speaker, les signaux du disque qui est lu sont automatiquement décodés en Dolby Digital ou DTS puis lus en mode ambiance Dolby Virtual Speaker. • En mode ambiance “AUTO DECODE” quand un système d’enceintes 5.1 canaux est réglé, les signaux du disque qui est lu sont identifiés et automatiquement décodés en Dolby Digital, DTS ou Auto Stereo et le disque est lu. Télécommande REMARQUES: TOP MENU Apple Télécommande Pour des instructions détaillées sur les opérations pour les modes ambiance et les paramètres ambiance, lisez “12 Utilisation des fonctions ambiance” pages 268 à 270. Apple • Si cela apparaît sur l’écran de TV lorsque les touches sont utilisées, cette opération n’est pas possible sur le ADV-M71 ou avec ce disque. • Placer le disque dans le guide de disque. • Ne placer qu’un seul disque sur le plateau. • Lorsque l’écran de menu est affiché sur l’écran de TV, le disque continue à tourner. (4) Interrompre la lecture 1 Pendant la lecture, appuyez sur la touche STOP de l’unité principale ou de la télécommande, la lecture s’arrête et le papier peint est affiché. <Fonction de mémoire de reprise de lecture (DVD uniquement)> • Avec le ADV-M71, lorsque la touche STOP est activée, cette position est enregistrée dans la mémoire. A cet instant, “1” clignote sur l’affichage. Lorsque la touche PLAY est activée après avoir appuyé sur la touche STOP, la lecture reprend à l’endroit où elle a été interrompue. La fonction de mémoire de reprise de lecture est annulée si le plateau à disque est ouvert ou si la touche STOP est activée une seconde fois. A propos de la fonction de veille du DVD Lorsque la fonction de l’ADV-M71 est réglée sur DVD, le mode de veille du DVD est réglé automatiquement si le disque reste en mode d’arrêt pendant 10 minutes environ. • En mode de veille du DVD, l’alimentation de la section DVD est désactivée, de même que la sortie des signaux vidéo. A ce moment, l’affichage de l’ADV-M71 affiche “DVD standby”. • En mode DVD, l’alimentation des sections autres que la section DVD est activée et la commutation de fonction et les autres opérations peuvent être effectuées sur l’unité principale et la télécommande. Lorsqu’une touche de commande du DVD (les touches play/pause et open/close sur l’unité principale, la touche play sur la télécommande, etc.) est actionnée, l’alimentation de la 266 BAND Unité principale 2 Télécommande La fonction de mémoire de reprise de lecture ne fonctionne que pour les disques pour lesquels le temps écoulé est affiché pendant la lecture. Fonction arrêt automatique. • L’ADV-M71 est équipé d’une fonction qui active automatiquement le mode de veille si aucune opération n’est effectuée pendant 30 minutes en mode stop et dans la fonction DVD. • Cette fonction est inactivée lorsque l’appareil quitte l’usine. Si vous souhaitez l’activer, régler la fonction “DVD AUTO POWER OFF” sur “YES” comme il est décrit à la page 261. REMARQUE: La fonction de veille du DVD ne désactive que l’alimentation de la section DVD. Elle diffère de la fonction de désactivation d’alimentation réglée dans les réglages système de Réglage car la section DVD demeure active. 3ADV-M71E2_FRA p228-284 03.12.25 1:20 PM ページ 267 FRANCAIS (5) Lecture de vues fixes (Pause) 1 Pendant la lecture, appuyer sur la touche 13 de l’unité principale ou sur la touche 3 de la télécommande. • Appuyez sur la touche PLAY pour reprendre la lecture normale. 3 Unité principale (5)-1 (7)-1 Télécommande + 7 8 9 DIRECT STEREO VIRTUAL CALL 0/10 +10 - TEST TONE INPUT MODE SURROUND FUNCTION CH TUNER TV / VCR DVD IN/SURR. A/V SYSTEM IN/SURR. MD CDR TAPE B (7)-1 SURROUND / SELECT DVD SURROUND RECEIVER ADV-M71 PUSH - PARAM. 1 + (6)-1,(9)-1 BAND TONE / SDB VOLUME FUNCTION + DVD 8 MENU / SET 2 6 9 - 7 STATUS 3 MUTING ON / STANDBY PHONES (5)-1,(8)-1 SETUP TONE /SDB ENTER SURROUND PARAMETER CH SELECT - VCR CH + (6) Recherche avant/arrière 1 Pendant la lecture, appuyer sur l’une des touches 6 / 7 de la télécommande. 6 : Sens arrière 7 : Sens avant • Lorsque cette touche est de nouveau activée, la vitesse de recherche augmente (DVD, CD VIDEO en sept pas, CD en quatre pas). • Appuyez sur la touche PLAY pour reprendre la lecture normale. 6 Position de lecture Chapitre/Plage Chapitre/Plage Chapitre/Plage Chapitre/Plage Sens arrière , / Sens avant (sens de lecture) REMARQUE: • Dans certains cas, l’écran de menu réapparaît lorsque l’une des touches 8 / 9 est activée pendant la lecture de menu d’un CD vidéo. 7 Recherche en utilisant les touches numérotées q Durant la lecture, appuyez sur la touche de mode recherche sur la télécommande. • Le mode commute comme montré ci-dessous chaque fois que la touche est enfoncée: Pour les DVD : Titre , / Chapitre Pour les CD et les CD vidéo : Piste (Pas de commutation) Le mode recherche réglé en appuyant sur la touche de mode recherche est mémorisé jusqu’à ce que l’alimentation soit éteinte. w Utilisez les touches numérotées de la télécommande pour entrer le numéro du titre, du chapitre ou de la piste à lire. Certains DVD ou CD vidéo peuvent être conçus pour fonctionner de façons spéciales et ne fonctionneront pas comme décrit ici. Télécommande REMARQUE: • Dans certains cas, l’écran de menu réapparaîtra lorsque l’une des touches 6 / 7 est activée lors de la lecture du menu d’un CD vidéo. (7) Saut en début de chapitre ou de plage 1 Pendant la lecture, appuyer sur l’une des touches de saut de l’unité principale ou de la télécommande 8/ : Sens arrière (PREVIOUS) 9/ : Sens avant (NEXT) • Le nombre de chapitres ou de plages équivalent au nombre de fois où la touche est activée est sauté. • Lorsque la touche de saut en arrière est activée une fois, la tête de lecture retourne au début de la plage ou du chapitre en cours. - + 8 (8) Lecture cadre par cadre (pour les DVD et les CD vidéo uniquement) 1 Pendant la lecture, appuyer sur la touche 3 de la télécommande. • L’image avance d’un cadre chaque fois que la touche est activée. • Appuyez sur la touche PLAY pour reprendre la lecture normale. 9 3 Unité principale Télécommande Télécommande 267 3ADV-M71E2_FRA p228-284 03.12.25 1:20 PM ページ 268 FRANCAIS (9) Ralenti (pour les DVD et les CD vidéo uniquement) 6 1 En mode pause, appuyer sur l’une des touches 6 / 7 de la télécommande. 6 : Sens arrière 7 : Sens avant • Lorsque la touche est activée à nouveau, la vitesse du ralenti augmente. (Quatre étapes) (Trois étapes pour les CD vidéo) • Appuyez sur la touche PLAY pour reprendre la lecture normale. 7 Télécommande REMARQUE: • Le ralenti en arrière n’est pas compatible avec les CD vidéo. 12 FONCTIONNEMENT DES FONCTIONS AMBIANCE 5 6 - 5CH STEREO AUTO DECODE TUNER 7 8 9 DIRECT STEREO VIRTUAL CALL 0/10 +10 - TEST TONE INPUT MODE SURROUND FUNCTION 4 B + CH SURROUND / SELECT DVD SURROUND RECEIVER ADV-M71 PUSH - PARAM. + - BAND MENU / SET TONE / SDB 2 TUNER TV / VCR DVD IN/SURR. A/V VOLUME SYSTEM 1 3 IN/SURR. MD CDR TAPE FUNCTION 1 ON / STANDBY 2 + PHONES DVD 8 6 5 9 - 7 STATUS 3 13 5 MUTING SETUP TONE /SDB ENTER SURROUND (1) Réglage du mode d’entrée 1 Appuyer sur la touche FUNCTION pour sélectionner la fonction d’entrée devant être lue. FUNCTION FUNCTION Unité principale Télécommande • La fonction change comme indiqué ci-dessous. • Réglages par défaut effectués à l’usine (LINE 1) = MD, (LINE 2) = TAPE DVD 2 TUNER (LINE1) (LINE2) D.AUX Lorsque DVD, D.AUX a été sélectionné comme fonction d’entrée, appuyez sur la touche INPUT MODE de la télécommande pour sélectionner le mode d’entrée. INPUT MODE Télécommande AUTO PCM DTS ANALOG • “ANALOG” ne peut pas être sélectionné lorsque DVD ou D.AUX a été sélectionné comme fonction d’entrée. • “ANALOG” peut être sélectionné quand “LINE-2” est réglé sur “D.AUX” dans “FUNCTION ASSIGNMENT” sous “SYSTEM SETUP” dans les réglages détaillés. 268 Fonction de sélection du mode d’entrée • Le mode d’entrée peut être sélectionné lorsque la fonction d’entrée est réglée sur DVD, D.AUX. • Différents modes d’entrée peuvent être sélectionnés pour chaque fonction d’entrée. Le mode d’entrée sélectionné est stocké dans la mémoire pour les différentes fonctions d’entrée. • Lorsque la fonction d’entrée est réglée sur un autre paramètre que ceux ci-dessus, “ANALOG ONLY” est affiché et le mode d’entrée ne peut pas être sélectionné. q AUTO (mode automatique) Dans ce mode, le type de signal en cours d’entrée aux bornes d’entrée numériques et analogiques est détecté et le programme dans le décodeur d’ambiance de l’appareil est commuté automatiquement pour la lecture les signaux pour la fonction d’entrée sélectionnée. La présence ou l’absence de signaux numériques est détectée, les signaux reçus par les prises d’entrée numérique sont identifiés et le décodage et la lecture sont automatiquement lancés dans les format DTS, Dolby numérique ou PCM (stéréo bi canal). Si aucun signal numérique (LINE1) = MD n’est reçu, les prises d’entrée analogiques sont sélectionnées. Utiliser ce mode pour lire des signaux Dolby numérique. w PCM (mode de lecture de signal PCM exclusif) Le décodage et la lecture ne sont effectués que lorsque les signaux PCM sont reçus. A noter qu’il est possible qu’un bruit soit généré lorsque ce mode est utilisé pour lire des signaux autres que les signaux PCM. e DTS (Mode de lecture de signal DTS exclusif) Le décodage et la lecture ne sont effectués que lorsque les signaux DTS sont reçus. r ANALOG (Mode de lecture de signal audio analogique exclusif) Les signaux reçus par les prises d’entrée analogiques sont décodés et lus. (Cette fonction ne peut pas être sélectionnée en mode DVD.) Le mode d’entrée est automatiquement réglé sur “AUTO” lorsque l’entrée est commutée sur DVD. 3ADV-M71E2_FRA p228-284 03.12.25 1:20 PM ページ 269 FRANCAIS 3 Tourner le cadran SURROUND/SELECT ou appuyez sur la touche SURROUND de la télécommande pour sélectionner le mode surround. Affichage du mode d’entrée Allumé • En mode AUTO SURROUND / SELECT L’un s’allume en fonction du signal d’entrée SURROUND PUSH - PARAM. • En mode DIGITAL PCM (numérique) Unité principale Télécommande • La fonction change comme indiqué ci-dessous. • La fonction ne change que dans le sens “Æ” lorsque elle est commandée depuis la télécommande. DOLBY VS STEREO DIRECT *5CH STEREO *MONO MOVIE JAZZ CLUB DOLBY VS VIDEO GAME • En mode DIGITAL DTS (numérique) • En mode ANALOG (analogique) *AUTO DECODE ROCK ARENA *MATRIX Affichage du signal d’entrée • Les modes marqués par “*” peuvent être sélectionnés quand “5.1-channel surround” est sélectionné dans l’installation système rapide. • DOLBY DIGITAL 4 Débuter la lecture du composant sélectionné. • Pour les instructions de fonctionnement, se référer aux manuels des composants. • DTS 5 Tourner la molette MASTER VOLUME de l’unité principale ou bien utiliser les touches VOLUME de la télécommande pour régler le volume. • PCM Le niveau de volume est affiché sur l’affichage. M.VOLUME -20 + • Le témoin “DIG” s’allume lorsque les signaux numériques sont reçus correctement. Si la DEL ne s’allume pas, vérifier si l’installation du composant d’entrée numérique et les connexions sont correctes et si les composants sont sous tension. VOLUME Unité principale Télécommande • Le volume peut être ajusté dans l’intervalle limite de -60 à 0 à +18 dB. Noter qu’en fonction du signal d’entrée, du mode d’ambiance, des réglages d’enceinte et du réglage du niveau des canaux, il peut s’avérer impossible d’ajuster le volume jusqu’à +18 dB. 2 Pour vérifier la source de programme en cours de lecture, etc. Appuyez sur la touche MENU/SET. Afficher “STATUS” puis tourner la commande surround/sélection. MENU / SET Unité principale SURROUND / SELECT PUSH - PARAM. Unité principale Mode d’entrée lors de la lecture de source CD • Lors de la lecture de CD contenant des enregistrements de concerts en direct, etc., en mode “AUTO”, le son risque d’être légèrement cassé au début. Si cela se produit, commuter au mode “PCM”. Mode d’entrée lors de la lecture de source DTS • Si des CD compatibles DTS sont lus en mode “PCM”, du bruit est émis parce qu’il n’est pas possible d’effectuer la lecture DTS. Pour lire une source compatible DTS, s’assurer de régler le mode d’entrée sur “AUTO” ou “DTS”. • Il est possible qu’un bruit soit généré au début de la lecture et lors de la recherche en mode AUTO lors de la lecture DTS. Dans ce cas, effectuer la lecture en mode DTS. STATUS Télécommande Pour effectuer cette opération sur la télécommande, appuyez sur la touche STATUS. La source de programme actuelle et les réglages d’ambiance sont indiqués sur l’affichage chaque fois que la touche est enfoncée. (Lorsque la fonction est réglée sur DVD, l’information est également affichée sur l’écran TV.) 269 3ADV-M71E2_FRA p228-284 03.12.25 1:20 PM ページ 270 FRANCAIS (2) Après avoir débuté la lecture [1] Réglage de la qualité du son (TONE/SDB) [2] Inactiver temporairement le son (MUTING) La fonction TONE/SDB ne fonctionnera pas en mode direct. TEST TONE 2 INPUT MODE SURROUND FUNCTION TUNER TV / VCR DVD IN/SURR. A/V SYSTEM IN/SURR. MD CDR TAPE B 1 2 + SURROUND / SELECT DVD SURROUND RECEIVER ADV-M71 PUSH - PARAM. DVD TONE / SDB 8 9 6 7 - + BAND MENU / SET VOLUME STATUS 3 FUNCTION MUTING ON / STANDBY SETUP PHONES TONE /SDB 1 ENTER SURROUND PARAMETER CH SELECT 1 DISPLAY RETURN MENU VCR CH + TOP MENU STATUS ANGLE 3 TONE /SDB 1 2 ENTER RETURN DISPLAY MENU VCR CH + TOP MENU Appuyez sur la touche TONE/SDB. • La tonalité change comme ceci, chaque fois que la touche TONE/SDB est activée. TONE /SDB TONE / SDB Unité principale 2 1 SURROUND PARAMETER CH SELECT DEFEAT SDB (ON/OFF) Télécommande BASS TREBLE Lorsque le nom du volume à ajuster est sélectionné, tourner la molette SURROUND ou utiliser les touches de curseur ( 0, 1 ) pour régler le niveau. SURROUND / SELECT PUSH - PARAM. Unité principale Télécommande DEFEAT (par défaut) • Les signaux ne passent pas par les circuits de réglages du SDB, des graves et des aiguës, produisant ainsi un son de meilleure qualité. SDB • Tourner la molette FONCTION/SELECT ou utiliser les touches de curseur ( 0, 1 ) afin de sélectionner “ON” ou “OFF”. BASS, TREBLE (graves, aiguë) • Pour augmenter les graves ou les aiguës : Tourner la commande dans le sens des aiguilles d’une montre ou appuyez sur la touche de curseur. (Le son des graves ou des aiguës peut être augmenté jusqu’à +10 dB par pas de 2 dB.) • Pour diminuer les graves ou les aiguës: Tourner la commande dans le sens des aiguilles d’une montre ou appuyez sur la touche de curseur. (Le son des graves ou des aiguës peut être diminué jusqu’à –10 dB par pas de 2 dB.) Quand TONE/SDB est affiché, l’élément peut être commuté en utilisant les touches • et ª de la télécommande. Si aucune opération n’est réalisée pendant 4 secondes, l’affichage retourne à ce qui était précédemment affiché. 270 SUB TITLE MUTING SETUP 1 AUDIO Utiliser cette fonction afin d’inactiver temporairement la sortie audio. Appuyez sur la touche MUTING. Annuler le mode silence (MUTING). Appuyer de nouveau sur la touche MUTING. MUTING Télécommande REMARQUES: • Le mode silence est annulé quand la commande du volume principal de l’unité principale ou une des touches de commande du volume principal sur la télécommande est actionnée. • Le réglage est annulé si l’appareil est mis hors tension. 3ADV-M71E2_FRA p228-284 03.12.25 1:20 PM ページ 271 FRANCAIS 13 DOLBY / DTS SURROUND Ambiance Cet appareil est équipé d’un circuit de traitement du signal numérique, qui permet de lire des sources de programme en mode d’ambiance pour obtenir la même sensation de présence comme dans une salle de cinéma. Dolby Surround (1) Dolby Digital (Dolby Surround AC-3) Dolby Digital est le format de signaux numériques de canaux multiples développé par Dolby Laboratories. Dolby Digital comprend jusqu’à “5.1” canaux – avant gauche, avant droit, central, gauche d’ambiance, droit d’ambiance, et un canal supplémentaire exclusivement réservé pour les effets supplémentaires des sons de graves profondes (le canal LFE – effet de basse fréquence, également appelé le canal “.1”, contenant de basses fréquences jusqu’à 120 Hz). Contrairement au format analogique Dolby Pro Logic, les principaux canaux de Dolby Digital peuvent tous contenir des informations sonores pleine gamme, des graves les plus basses jusqu’aux fréquences les plus élevées – 22 kHz. Les signaux de chaque canal sont distincts des autres, permettant de repérer l’imagerie sonore, et Dolby Digital offre une formidable gamme dynamique, des effets sonores les plus puissants aux sons les plus doux, les plus calmes, sans bruit ni distorsion. 2 Dolby Digital et Dolby Pro Logic Comparaison de systèmes d’ambiance domestiques Nbre. de canaux enregistrés (éléments) Nbre. de canaux de lecture Canaux de lecture (max.) Dolby Digital Dolby Pro Logic 5.1 ch 2 ch 5.1 ch 4 ch L, R, C, SL, SR, SW L, R, C, S (SW - recommandé) Traitement numérique discret Encodage/décodage Dolby Digital (AC-3) Traitement audio Limite de reproduction haute fréquence de canal d’ambiance 20 kHz Traitement à matrice analogique Dolby Surround 7 kHz 2 Méthodes de lecture et média compatibles Dolby Digital Marques indiquant la compatibilité Dolby Digital: et . Voici quelques exemples généraux. Se reporter également aux instructions d’utilisation du lecteur. Média Prises de sortie Dolby Digital Méthodes de lecture (page de référence) LD (VDP) Prise de sortie RF coaxiale Dolby Digital 1 Régler le mode d’entrée à “AUTO”. (Page 268, 269) DVD Sortie numérique optique ou coaxiale (comme pour PCM) 2 Régler le mode d’entrée à “AUTO”. (Page 268, 269) Autres (émissions par satellite, CATV, etc.) Sortie numérique optique ou coaxiale (comme pour PCM) Régler le mode d’entrée à “AUTO”. (Page 268, 269) 1 Utiliser un adaptateur vendu séparément pour connecter les signaux de sortie de FR du Dolby numérique (CA-3FR) aux bornes d’entrée numérique. (Se reporter aux instructions de fonctionnement de l’adaptateur.). Veuillez consulter le manuel d’utilisation de l’adaptateur lors des connexions. 2 Pour effectuer une lecture en mode Dolby numérique surround avec l’ADV-M71, régler les fonctions “DVD SETUP” – “AUDIO SETUP” – “DIGITAL OUT” sur “Normal” lors de l’installation. (Le réglage par défaut effectué à l’usine est “Normal”.) 2) Dolby Pro Logic II • Dolby Pro Logic II est un nouveau format de lecture multi-canaux développé par les Laboratoires Dolby utilisant la technologie de commande par rétroaction logique et offrant des nombreuses améliorations par rapport aux circuits conventionnels Dolby Pro Logic. • Dolby Pro Logic II peut être utilisé pour décoder non seulement des sources enregistrées en Dolby Surround ( ), mais également des sources stéréo normales en cinq canaux (avant gauche, avant droit, central, surround gauche et surround droit) pour parvenir à un son d'environnement surround. • Alors que pour un système Dolby Pro Logic conventionnel, la bande de fréquences du canal d'environnement surround était réduite, le Dolby Pro Logic II apporte une gamme de fréquences plus large (20 Hz à 20 kHz ou plus). De plus, alors que les canaux surround étaient monoauraux (les canaux surround gauche et droit étant les mêmes) dans les anciens systèmes Dolby Pro Logic, ils sont reproduits comme signaux stéréo par le système Dolby Pro Logic II. • Il est possible de régler de nombreux paramètres selon le type de source et de contenu, de façon à parvenir à un décodage optimal (voir page 284). Sources enregistrées en Dolby Surround Ce sont des sources pour lesquelles trois ou quatre canaux surround ont été enregistrées comme deux canaux en utilisant la technologie de codage Dolby Surround. 271 3ADV-M71E2_FRA p228-284 03.12.25 1:20 PM ページ 272 FRANCAIS Le Dolby Surround est utilisé pour les bandes sonores de films enregistrés sur DVDs, LDs et cassettes vidéo pouvant être reproduites sur des magnétoscopes stéréo, de même que pour les émissions de radio en stéréo FM, de télévision, de transmission par satellite et de télévision par câble. Le décodage de ces signaux par la technologie Dolby Pro Logic rend la reproduction de son d'environnement multi-canaux possible. Ces signaux peuvent également être reproduits sur un dispositif stéréo ordinaire; néanmoins, dans ce cas, le son sera de type stéréo normal. Il y a deux types de signaux d'enregistrement de son d'environnement DVD Dolby. q Les signaux PCM stéréo à 2 canaux w Les signaux Dolby Digital à 2 canaux Sans tenir compte du signal lu, lorsque le mode de décodage bicanal est réglé sur le mode “Pro Logic II” dans le mode de “AUTO DECODE” (décodage automatique), le mode surround est automatiquement réglé sur ”Dolby Pro Logic II”. 2 Les sources enregistrées en Dolby Surround sont désignées par le logo indiqué ci-dessous. Signe du support Dolby Surround: Fabriqué sous licence des Dolby Laboratories. “Dolby”, “Pro Logic” et le symbole D double sont les marques de fabrique enregistrées des Dolby Laboratories. DTS Digital Surround Digital Theater Surround (également appelé simplement DTS) est un format de signaux numériques de canaux multiples développé par Digital Theater Systems. DTS offre les mêmes canaux de lecture “5.1” que Dolby Digital (avant gauche, avant droit et central, gauche et droit d’ambiance) ainsi que le mode stéréo deux canaux. Les signaux des différents canaux sont entièrement indépendants, éliminant le risque de détérioration de qualité sonore à cause d’interférences entre signaux, diaphonie, etc. DTS se caractérise par un débit binaire relativement plus élevé comparé à Dolby Digital (1234 kbps pour CD et LD, 1536 kbps pour DVD), donc il fonctionne avec un taux de compression relativement bas. Pour cette raison, la quantité de données est grande, et lorsque la lecture DTS est utilisée dans les salles de cinéma, un CD-ROM séparé synchronisé sur le film est joué. Avec les LD et les DVD, il n’y a, bien sûr, pas besoin d’un disque supplémentaire; les images et le son peuvent être simultanément enregistrés sur le même disque, donc les disques peuvent être manipulés de la même manière que des disques d’autres formats. Ce sont également des CD enregistrés en DTS. Ces CD comprennent les signaux d’ambiance 5.1 canaux (comparés aux deux canaux sur les CD actuels). Elles ne comprennent pas les données image, mais offrent une lecture d’ambiance sur des lecteurs de CD équipés de sorties numériques (sortie numérique type PCM nécessaire). La lecture de pistes DTS surround offre le même grand son compliqué que dans une salle de cinéma, simplement dans votre propre salon. 2 Méthodes de lecture et média compatibles DTS Marques indiquant la compatibilité Dolby Digital DTS: et . Voici quelques exemples généraux. Se reporter également aux instructions d’utilisation du lecteur. Média Prises de sortie numérique DTS Méthode de lecture (page de référence) CD Sortie numérique optique ou coaxiale (comme pour PCM) 2 Régler le mode d’entrée à “AUTO” ou “DTS”. (Page 268, 269). Ne jamais régler le mode à “ANALOG” ou “PCM” 1 LD (VDP) Sortie numérique optique ou coaxiale (comme pour PCM) 2 Régler le mode d’entrée à “AUTO” ou “DTS”. (Page 268, 269). Ne jamais régler le mode à “ANALOG” ou “PCM”. 1 DVD Sortie numérique optique ou coaxiale (comme pour PCM) 3 Régler le mode d’entrée à “AUTO” ou “DTS”. (Page 268, 269). 1 Les signaux DTS sont enregistrés de la même manière sur les CD et les LD que les signaux PCM. Pour cette raison, les signaux DTS non décodés sont sortis comme parasites “sifflants” par les sorties analogiques du lecteur de CD ou de LD. Si ce parasite est reproduit avec l’amplificateur réglé à un volume très élevé, il peut éventuellement endommager les enceintes. Pour éviter ceci, toujours changer le mode d’entrée à “AUTO” ou “DTS” avant de reproduire des CD ou des LD enregistrés en DTS. De même, ne jamais changer le mode d’entrée à “ANALOG” ou “PCM” pendant la lecture. Ceci s’applique également en cas de reproduction de CD ou de LD sur un lecteur de DVD ou de LD/DVD compatible. Pour les DVD, les signaux DTS sont enregistrés d’une manière spéciale, donc ce problème ne se pose pas. 2 Les signaux fournis aux sorties numériques d’un lecteur de CD ou de LD peuvent subir un certain type de traitement de signal interne (réglage de niveau de sortie, conversion de fréquence d’échantillonnage, etc.). Si cela se produit les signaux codés DTS peuvent être traités de façon erronée, et ne peuvent pas être décodes par cet appareil ou risquent générer uniquement du bruit. Avant de lire de signaux DTS pour la première fois, tourner la commande de volume global au minimum, commencer la lecture du disque DTS, ensuite vérifier si l’indicateur DTS de cet appareil (voir page 269) s’allume avant d’augmenter le volume global. 3 Pour effectuer une lecture en mode Dolby numérique surround avec l’ADV-M71, régler les fonctions “DVD SETUP” – “AUDIO SETUP” – “DIGITAL OUT” sur “Normal” lors de l’installation. (Le réglage par défaut effectué à l’usine est “Normal”.) “DTS” et “DTS Digital Surround” sont des marques déposées de Digital Theater Systems, Inc 272 3ADV-M71E2_FRA p228-284 03.12.25 1:20 PM ページ 273 FRANCAIS Dolby Virtual Speaker La technologie Dolby Virtual Speaker utilise une technologie propriété des Laboratoires Dolby pour créer un champ sonore d’ambiance virtuel en utilisant seulement deux enceintes pour les canaux frontaux, permettant à l’utilisateur d’expérimenter des sons comme si des enceintes d’ambiance étaient véritablement utilisées. 2 Caractéristiques du son Dolby Virtual Speaker B Positionnement précis du champ sonore d’ambiance Les enceintes d’ambiance virtuelle sont positionnées à 105° vers la gauche et 105° vers la droite. B Programmes multi-canaux lus selon les intentions du fabricant Le son des différents canaux est lu dans la position réglée sur mixage. Par exemple, le son réglé à l’arrière gauche est entendu de l’arrière gauche. B Programmes stéréo lus en ambiance Le circuit Dolby Pro Logic II est utilisé en combinaison avec le circuit électrique du Dolby Virtual Speaker pour créer un riche champ sonore d’ambiance virtuel également avec des programmes stéréo. B Sélection du mode d’écoute Deux modes d’écoute sont prévus : Référence et Large. : 2 canaux frontaux : Champ sonore virtuel crée avec le mode Dolby Virtual Speaker Mode référence Mode large Avec le ADV-M71, la lecture en mode Dolby Virtual Speaker est également possible avec d’autres configurations d’enceintes. • 3 enceintes (2 canaux frontaux + central) : Modes référence/Large • 4 enceintes (2 canaux frontaux + 2 canaux d’ambiance) : Mode large • 5 enceintes (2 canaux frontaux + central + 2 canaux d’ambiance) : Mode large Dolby Headphone Dolby Headphone est une technologie sonore 3D développée conjointement par les Laboratoires Dolby et Lake Technology of Australia produisant un son d’ambiance avec des écouteurs classiques. Normalement, quand vous utilisez des écouteurs, tous les sons se font entendre dans la tête, rendant l’écoute prolongée avec des écouteurs inconfortable. Dolby Headphone simule une reproduction sonore à partir d’enceintes dans une pièce et les positions des sources sonores à l’avant ou sur les côtés à l’extérieur de la tête produisent un son puissant similaire à celui d’un cinéma ou d’un home cinéma. Cette technologie est destinée principalement aux équipements audio ou vidéo à multi-canaux incluant des fonctions de décodage Dolby Digital ou Dolby Pro Logic Surround et fonctionne avec un processeur de signal numérique de haute performance (DSP). Le mode Dolby Headphone peut être utilisé non seulement avec des sources multi-canaux mais aussi avec des programmes stéréo. 273 3ADV-M71E2_FRA p228-284 03.12.25 1:20 PM ページ 274 FRANCAIS 14 LECTURE ACCOUSTIQUE (SURROUND) (1) Lecture en mode Dolby Virtual Speaker • Le mode Dolby Virtual Speaker est un mode qui utilise une technologie sonore 3D des Laboratoires Dolby pour produire un son d’ambiance multi-canaux en utilisant seulement deux enceintes pour les canaux frontaux. • Avec deux enceintes pour les canaux frontaux, un des deux modes peut être sélectionné : Référence ou Large. • Le mode Dolby Virtual Speaker peut aussi être utilisé non seulement avec des sources Dolby Digital et DTS multi-canaux mais aussi avec des sources à 2 canaux. Avec les sources 2 canaux, un des deux modes 2 canaux peut être sélectionné : Virtuel 1 (Dolby Pro Logic II Cinema) et Virtuel 2 (Dolby Pro Logic). • Avec une configuration d’enceintes multi-canaux (par exemple des canaux 5.1), le mode Dolby Virtual Speaker produit différents effets selon la configuration des enceintes. [1] Reproduction des sons d’ambiance DTS et Dolby Digital (avec des entrées numériques seulement) B Sources applicables • Entrée numérique (LINE-1 et fonctions D.AUX, y compris les disques de lecture DVD) Sources multi-canaux Dolby Digital Sources DTS 3 SURROUND / SELECT PUSH - PARAM. 3,5,6 B Unité principale PUSH - PARAM. - 4 ON / STANDBY PHONES 1 2 8 9 STEREO VIRTUAL CH CALL 0/10 +10 - TEST TONE INPUT MODE SURROUND FUNCTION SYSTEM 3 CDR TAPE 1 2 6 Allumé + DVD 8 Allumé Ceci commute automatiquement selon le format de la source de lecture. IN/SURR. MD ou . • L’indicateur DTS s’allume quand des sources DTS sont lues. 1 TUNER TV / VCR DVD IN/SURR. A/V Lisez une source programme avec la marque • L’indicateur Dolby Digital s’allume quand des sources Dolby Digital sont lues. + 7 Allumé BAND VOLUME FUNCTION DIRECT Télécommande + MENU / SET TONE / SDB SURROUND • En mode Dolby Virtual Speaker, cet indicateur s’allume. SURROUND / SELECT DVD SURROUND RECEIVER ADV-M71 Réglez le mode d’ambiance sur “DOLBY VIRTUAL SPEAKER”. 5 9 - 7 STATUS 3 MUTING SETUP Affichez les paramètres d’ambiance pour cette source. Quand la fonction est réglée sur DVD, ceci s’affiche aussi sur l’écran. TONE /SDB SURROUND / SELECT SURROUND PARAMETER - 1 VCR CH + Sélectionnez la fonction entrée numérique (DVD ou LINE-1 ou entrée numérique D.AUX). FUNCTION Unité principale 2 PUSH - PARAM. 6 5 ENTER CH SELECT FUNCTION Télécommande Réglez le mode d’entrée sur “AUTO”. Des sources DTS peuvent aussi être lues avec le mode d’entrée réglé sur “DTS”. INPUT MODE Télécommande 274 Unité principale SURROUND PARAMETER Télécommande 3ADV-M71E2_FRA p228-284 03.12.25 1:20 PM ページ 275 FRANCAIS 6 Sélectionnez et réglez les paramètres d’ambiance. (Sur la télécommande, utilisez les touches curseurs 0 et 1 pour régler les paramètres.) Si rien n’est fait pendant 6 secondes à partir de l’affichage des paramètres, l’affichage normal réapparaît. B Paramètres ambiance (1) SURROUND / SELECT PUSH - PARAM. Unité principale Réglage du mode DOLBY VS VS REF WIDE Le mode sélectionné clignote. Le mode ne s’affiche pas s’il ne peut pas être sélectionné. B Réglage de D.COMP. B LOW , MID / HI Réglage du niveau LFE LFE -10 ... 0dB ... -5 , / 0 Le niveau LFE peut être ajusté par intervalles de 1 dB entre -10 dB et 0 dB. B D.COMP. (Compression de plage dynamique): • Ce paramètre ajuste la gamme dynamique du son Dolby Digital. Lors de l’écoute avec un volume relativement bas, par exemple la nuit, régler ce paramètre sur “HI” afin d’abaisser la crête sonore et d’amplifier les sons moins forts, en réduisant la gamme dynamique et en rendant l’écoute du son plus facile. Régler sur “OFF” pour désactiver cette fonction. OFF Wide D.COMP. OFF OFF DOLBY VS (Mode Dolby Virtual Speaker) • REF (Mode référence) Ceci est le mode standard. • WIDE (Mode large) Ce mode étend le champ sonore du canal frontal. LOW MID Dynamic range (Gamme dynamique large) HI Narrow (éroite) LFE (Effet de basse fréquence): • Source de programme et plage de réglage 1. Dolby Digital : –10 dB à 0 dB 2. DTS Surround : –10 dB à 0 dB • Lorsque le logiciel codé Dolby numérique est lu, il recommandé de régler le niveau LFE sur 0 dB pour lecture Dolby numérique correcte. • Lorsque un logiciel de film codé DTS est lu, il recommandé de régler le LFE LEVEL sur 0 dB pour lecture DTS correcte. • Lorsque un logiciel musical codé DTS est lu, il recommandé de régler le LFE LEVEL sur –10 dB pour lecture DTS correcte. est une est une est une Réglage DEFAULT DEFAULT YES , Y/N NO / Quand “YES” est sélectionné, les réglages d’usine par défaut sont restaurés. Quand les paramètres d’ambiance sont affichés, utilisez les touches curseurs • et ª de la télécommande pour commuter vers les éléments précédents ou suivants. Une fois que les paramètres d’ambiance ont été réglés, arrêtez d’actionner les touches. Après plusieurs secondes, l’affichage normal réapparaît et les réglages sont automatiquement entrés. 275 3ADV-M71E2_FRA p228-284 03.12.25 1:20 PM ページ 276 FRANCAIS [2] Réglages du mode 2 canaux • Quand les signaux 2 canaux sont entrés, un des deux modes de lecture peut être sélectionné et réglé en fonction du réglage de mode des 2 canaux, Virtuel 1 ou Virtuel 2. (Le mode Virtuel 1 est réglé en usine par défaut.) Virtuel 1 : Les sources 2 canaux sont lues en ambiance virtuelle en utilisant le procédé Dolby Pro Logic II Cinema. Virtuel 1 : Les sources 2 canaux sont lues en ambiance virtuelle en utilisant le procédé Dolby Pro Logic. 1,2,3 B 1 SURROUND / SELECT DVD SURROUND RECEIVER ADV-M71 PUSH - PARAM. - + BAND MENU / SET TONE / SDB Réglez le mode d’ambiance sur “DOLBY VIRTUAL SPEAKER” (“DOLBY VS”). • L’affichage normal réapparaît après que le mode d’ambiance est affiché. VOLUME FUNCTION SURROUND / SELECT SURROUND PUSH - PARAM. ON / STANDBY PHONES Unité principale TEST TONE INPUT MODE SURROUND A/V SYSTEM 1 IN/SURR. MD CDR TAPE 1 2 + DVD 8 Télécommande FUNCTION TUNER TV / VCR DVD IN/SURR. 2 Appuyez sur la touche SURROUND PARAMETER et sélectionnez le mode 2 canaux. SURROUND / SELECT PUSH - PARAM. 9 6 - 7 2 STATUS 3 VIRTUAL 1 MUTING SETUP TONE /SDB ENTER SURROUND PARAMETER CH SELECT DISPLAY RETURN ANGLE MENU AUDIO VCR CH + Unité principale 3 2 Ceci peut être sélectionné s’il n’y a pas de signal d’entré numérique, si l’entrée numérique est un signal 2 canaux Dolby Digital ou PCM et si l’entrée est analogique. TOP MENU SUB TITLE Télécommande RC-966 REMARQUES: • Le mode bicanal ne peut pas être sélectionné en présence des signaux Dolby numérique ou DTS à 5.1 canaux. • Le mode 2 canaux est réglé et stocké dans la mémoire indépendamment des autres fonctions. SURROUND PARAMETER 3 Tournez la commande SURROUND/SELECT sur l’unité principale ou utilisez les touches curseurs 0 et 1 de la télécommande pour sélectionner le mode 2 canaux souhaité. SURROUND / SELECT PUSH - PARAM. Unité principale VIRTUAL 1 Télécommande VIRTUAL 2 Une fois que les paramètres d’ambiance ont été réglés, arrêtez d’actionner les touches. Après plusieurs secondes, l’affichage normal réapparaît et les réglages sont automatiquement entrés. 276 3ADV-M71E2_FRA p228-284 03.12.25 1:20 PM ページ 277 FRANCAIS Paramètres ambiance (2) 1. VIRTUAL1 (mode virtuel 1) Dans ce mode, des sources à 2 canaux sont reproduites en Dolby Pro Logic II Cinema. Ce mode convient pour lire des sources films en Dolby Surround et des sources stéréo normales. 2. VIRTUAL2 (mode virtuel 2) Dans ce mode, des sources à 2 canaux sont reproduites en Dolby Pro Logic. Ce mode est compatible avec la lecture normale en Dolby Pro Logic. II permet de récréer fidèlement l’image enregistrée des sources enregistrées en Dolby Surround. REMARQUE: • En cas de génération d’un bruit pour les sources avec un taux élevé de battement et sources interactives lors de la lecture des signaux d’entrée numérique DVD ou D.AUX en mode Dolby Virtual Speaker, réglez “LINE-1/LINE-2 REC OUT” sur “[6] Réglages des fonctions” à “SYSTÈME SETUP” aux pages 262 et sur “Off”. (Dans ce cas, l’enregistrement analogique n’est pas possible en mode Dolby Virtual Speaker.) (2) Lecture avec les modes ambiance DENON originaux • Cet appareil est équipé d’un DSP (Processeur de signaux numériques) très performant qui utilise le traitement des signaux numériques pour recréer le champ acoustique de façon synthétique. Un mode surround préréglé peut être sélectionné parmi 6 modes en accord avec la source de programme et les paramètres peuvent être ajustés selon les conditions d’écoute dans la pièce pour obtenir un son plus puissant et plus réaliste. Ces modes surround peuvent également être utilisés pour des sources de programme n’étant pas enregistrées en mode Dolby surround Pro Logic ni Dolby numérique. *1 MONO MOVIE (REMARQUE 1) Sélectionner cette fonction lorsque vous regardez des films en mode monaural pour une sensation d’expansion fantastique. *2 ROCK ARENA Utiliser ce mode pour retrouver les sensations d’un concert live dans une arène avec des sons réfléchis provenant de toutes les directions. *3 JAZZ CLUB Ce mode crée le champ acoustique d’une maison au plafond bas et aux murs épais. Ce mode donne au jazz un réalisme très vif. *4 VIDEO GAME Utiliser ce mode pour mieux apprécier les jeux vidéo. *5 MATRIX Sélectionner cette fonction afin d'accroître la sensation d’expansion pour les sources musicales enregistrées en stéréo. Les signaux composés des différents composants des signaux d’entrée (le composant qui permet la sensation d’expansion) prévus pour le retard, sont envoyés par le canal surround. *6 5CH STEREO Dans ce mode, les signaux du canal avant gauche sont envoyés par le canal surround gauche, les signaux du canal avant droit sont envoyés par le canal surround droit, et le même composant (en phase) des canaux gauche et droit est envoyé par le canal central. Ce mode fournit un son acoustique d’ambiance pour toutes les enceintes, mais sans effets de détournement directionnel et fonctionne avec toutes les sources de programme stéréo. Les modes ambiance marqués par “*” peuvent être sélectionnés lorsque le réglage des enceintes est réglé sur 5.1 canaux. En fonction de la source lue, l’effet peut ne pas être très marqué. Dans de tels cas, essayez d’autres modes ambiance sans guère prêter attention à leur dénomination et choisissez celui qui vous convient le mieux. REMARQUE 1: Lors de la lecture de sources enregistrées en monaural, le son sera unilatéral si un seul canal (droit ou gauche) est entré, entrez alors les signaux aux deux canaux. Mémoire personnalisée plus Cet appareil est équipé d’une fonction de mémoire personnalisée qui enregistre automatiquement les modes surround et les modes d’entrée sélectionnés pour les différentes sources d’entrée. Lorsque la source d’entrée est commutée, les modes réglés pour cette source la dernière fois qu’elle fut utilisée sont restitués. • Les réglages sont automatiquement enregistrés dans la mémoire pour les fonctions d’entrée individuelles grâce à la fonction de mémoire personnalisée plus: q Mode Surround (incluant mode de décodage bicanal et les réglages du mode Dolby Pro Logic II) w Fonction de sélection du mode d’entrée Les paramètres surround, les réglages de la commande TONE/SDB et la balance du niveau de lecture pour les différents canaux de sortie sont mémorisés pour chaque mode surround. 277 3ADV-M71E2_FRA p228-284 03.12.25 1:20 PM ページ 278 FRANCAIS [1] Simulation DSP surround 2,4,5 B 4 SURROUND / SELECT DVD SURROUND RECEIVER ADV-M71 PUSH - PARAM. - + BAND MENU / SET TONE / SDB VOLUME FUNCTION ON / STANDBY PHONES 1 5 6 - 5CH STEREO AUTO DECODE TUNER 7 8 9 + DIRECT STEREO VIRTUAL 4 CH CALL 0/10 +10 - TEST TONE INPUT MODE SURROUND FUNCTION 1 2 TUNER TV / VCR DVD IN/SURR. A/V SYSTEM Pour accéder au mode de réglage des paramètres surround, appuyez sur la touche de SURROUND MODE. • Le paramètre surround commute dans l’ordre suivant à chaque fois que la touche SURROUND est activée pour les différents modes surround. MONO MOVIE ROCK ARENA JAZZ CLUB VIDEO GAME MATRIX ROOM SIZE DELAY EFFECT DEFAULT 2 DEFAULT + DVD 8 Il n’y a pas de mode stéréo à 5 canaux. 9 6 - 7 5 STATUS 3 MUTING SETUP TONE /SDB 5 4 ENTER SURROUND PARAMETER CH SELECT DISPLAY RETURN Télécommande IN/SURR. MD CDR TAPE 1 SURROUND PARAMETER ANGLE MENU AUDIO VCR CH + Afficher les paramètres que vous souhaitez régler. • Utiliser les touches de curseur (•, ª) pour sélectionner le paramètre surround. SURROUND / SELECT PUSH - PARAM. TOP MENU SUB TITLE RC-966 Unité principale Télécommande • Réglage ROOM SIZE (taille pièce) 1 Sélectionner la source d’entrée. R.SIZE FUNCTION MED FUNCTION SMALL MED-S MED MED-L LARGE , / Unité principale 2 Télécommande • Réglage EFFECT LEVEL (niveau effet) EFECT 10 Sélectionner le mode surround pour le canal d’entrée. 1 SURROUND / SELECT SURROUND PUSH - PARAM. 10 , 15 / • Réglage DELAY TIME (temps retard) DELAY Unité principale • Le mode surround commute dans l’ordre suivant à chaque fois que la touche de SURROUND MODE est activée: DOLBY VS STEREO DIRECT *5CH STEREO *MONO MOVIE JAZZ CLUB DOLBY VS VIDEO GAME *AUTO DECODE ROCK ARENA *MATRIX • Les modes marqués par “*” peuvent être sélectionnés quand “5.1-channel surround” est sélectionné dans l’installation système rapide. 3 278 30ms Télécommande Lire une source de programme. • Se référer au manuel d’instruction avant de procéder. 0ms 30ms 110ms , / 3ADV-M71E2_FRA p228-284 03.12.25 1:20 PM ページ 279 FRANCAIS 5 Paramètres ambiance (3) • Réglage DEFAULT (par défaut) DEFAULT Y/N Y/N YES , NO / ROOM SIZE (taille pièce): • Cette fonction règle la taille du champ acoustique. Il existe cinq réglages : “SMALL” (petit), “MED-S” (moyenpetit), “MED” (moyen), “MED-L” (moyen-grand) et “LARGE” (grand). “SMALL” recrée un petit champ acoustique, “LARGE” un grand champ acoustique. Lorsque “YES” est sélectionné, les réglages par défaut effectués à l’usine sont restitués. EFFECT LEVEL (niveau effet): • Cette fonction règle la puissance de l’effet surround. Le niveau peut être réglé en 15 étapes, de 1 à 15. Abaisser le niveau si le son semble déformé. Arrêter d’utiliser les touches une fois que les réglages de paramètres surround sont achevés. Après quelques secondes, l’affichage normal réapparaît et les réglages sont automatiquement mémorisés. DELAY TIME (temps retard): • En mode MATRIX uniquement, le temps de retard peut être réglé à l’intérieur d’une plage de 0 à 110 ms. 279 3ADV-M71E2_FRA p228-284 03.12.25 1:20 PM ページ 280 FRANCAIS 2 Tableau des paramètres de mode ambiance (1) Présence/absence de signaux et contrôle des différents modes Mode ambiance DVS: Dolby Virtual Speaker DHP: Dolby Headphone Sortie de canal CENTER SURROUND L/R SUB-WOOFER REFERENCE C B E B WIDE C B B B DH1 C (H/P ONLY) E E E DH2 C (H/P ONLY) E E E DH3 C (H/P ONLY) E E E BYPASS C (H/P ONLY) E E E STEREO C E E B DIRECT DHP DVS FRONT L/R E E B C B B B DTS SURROUND C B B B DOLBY PL II C B B B AUTO STEREO C E E B 5CH STEREO C B B B MONO MOVIE C B B B ROCK ARENA C B B B JAZZ CLUB C B B B VIDEO GAME C B B B MATRIX C B B B AUTO DECODE C DOLBY DIGITAL 2 Tableau des paramètres de mode ambiance (2) Présence/absence de signaux et contrôle des différents modes Signaux de lecture et modes ambiance pour les différentes fonctions d’entrée Mode ambiance DVS: Dolby Virtual Speaker DHP: Dolby Headphone (D.AUX / L2) MD / LINE1 TAPE / LINE2 / TUNER Lors de la reproduction de signaux PCM Lors de la reproduction de signaux analogiques Lors de la reproduction de signaux analogiques DVD / D.AUX / MD / LINE1 Lors de la reproduction de signaux Dolby Digital Lors de la reproduction de signaux DTS Multi-canaux 2 canaux Multi-canaux 2 canaux 2 canaux 2 canaux 4PL II C 4PL II C 4PL II 4PL II 4PL II WIDE 4PL II C 4PL II C 4PL II 4PL II 4PL II DH1 4PL II C 4PL II C 4PL II 4PL II 4PL II DH2 4PL II C 4PL II C 4PL II 4PL II 4PL II DH3 4PL II C 4PL II C 4PL II 4PL II 4PL II C C D.MIX C C D.MIX C C C STEREO C C D.MIX C C D.MIX C C C DIRECT C C D.MIX C C D.MIX C C C DOLBY DIGITAL C C E E E E E DTS SURROUND E E E C E E E 4PL II E 4PL II E 4PL II 4PL II 4PL II 4 E 4 E 4 4 E 5CH STEREO C C C C C C C MONO MOVIE C C C C C C C ROCK ARENA C C C C C C C JAZZ CLUB C C C C C C C VIDEO GAME C C C C C C C MATRIX C C C C C C C DHP DVS 2 canaux REFERENCE AUTO DECODE BYPASS DOLBY PL II AUTO STEREO B: Présent ou absent, en fonction de la configuration des enceintes. : Utilisable seulement si les enceintes centrales et d’ambiance sont réglées pour être utilisées avec la configuration d’enceintes. C : Signal présent ou contrôlable. D.MIX: Compatible avec un mixage bas. PL II: Compatible avec la reproduction PL II. 4 : Peut être sélectionné avec le mode de décodage 2 canaux. E : Pas de signal ou incontrôlable. 280 3ADV-M71E2_FRA p228-284 03.12.25 1:20 PM ページ 281 FRANCAIS 2 Tableau des paramètres de mode ambiance (3) Présence/absence de signaux et contrôle des différents modes Mode ambiance DVS: Dolby Virtual Speaker DHP: Dolby Headphone Paramètre ambiance – la valeur par défaut est indiquée entre (parenthèses) SDB TONE CONTROL 2ch DECODE MODE Mode Pro Logic II Music uniquement PANORAMA DIMENSION CENTER WIDTH E E E E E E E E E E E E E E E C (OFF) WIDE C (OFF) C (OFF) DH1 C (OFF) C (OFF) DH2 C (OFF) C (OFF) DH3 C (OFF) C (OFF) BYPASS C (OFF) C (OFF) E E E E STEREO C (OFF) C (OFF) E E E E DIRECT E E E E E E DOLBY DIGITAL C (OFF) C (OFF) E E E DTS SURROUND C (OFF) C (OFF) E E E DOLBY PL II C (OFF) C (OFF) C (OFF) C (3) C (3) AUTO STEREO AUTO DECODE DHP DVS REFERENCE C (OFF) C (VIRTUAL1) C *2 (CINEMA) C *1 (AUTO STEREO) C (OFF) C (OFF) E E E 5CH STEREO C (OFF) C (OFF) E E E E MONO MOVIE C (OFF) C (OFF) E E E E ROCK ARENA C (OFF) C (OFF) E E E E JAZZ CLUB C (OFF) C (OFF) E E E E VIDEO GAME C (OFF) C (OFF) E E E E MATRIX C (OFF) C (OFF) E E E E 2 Tableau des paramètres de mode ambiance (4) Présence/absence de signaux et contrôle des différents modes Mode ambiance DVS: Dolby Virtual Speaker DHP: Dolby Headphone Paramètre ambiance – la valeur par défaut est indiquée entre (parenthèses) Signal Dolby Digital/DTS EFFECT LEVEL DELAY TIME D. COMP. LFE REFERENCE E E E C (OFF) C (0dB) WIDE E E E C (OFF) C (0dB) DH1 E E E C (OFF) C (0dB) DH2 E E E C (OFF) C (0dB) DH3 E E E C (OFF) C (0dB) BYPASS E E E C (OFF) C (0dB) STEREO E E E C (OFF) C (0dB) DIRECT E E E C (OFF) C (0dB) DOLBY DIGITAL E E E C (OFF) C (0dB) DTS SURROUND E E E C (OFF) C (0dB) DOLBY PL II E E E C (OFF) C (0dB) AUTO STEREO E E E E E E E E C (OFF) C (0dB) AUTO DECODE DHP DVS ROOM SIZE 5CH STEREO MONO MOVIE C (MEDIUM) C (10) E C (OFF) C (0dB) ROCK ARENA C (MEDIUM) C (10)) E C (OFF) C (0dB) JAZZ CLUB C (MEDIUM) C (10) E C (OFF) C (0dB) VIDEO GAME C (MEDIUM) C (10) E C (OFF) C (0dB) E E C (30ms) C (OFF) C (0dB) MATRIX : Utilisable uniquement lorsque les enceintes centrales et ambiance sont réglées pour être utilisées avec la configuration d’ambiance. C : Signal présent ou contrôlable. E : Aucun signal ou non contrôlable. *1 : Mode Auto Stéréo ou mode Dolby PL II (mode Cinema, Music ou Dolby PL) sélectionnable. *2 : Mode Dolby PL II (mode Cinema, Music ou Music 2) sélectionnable. D.MIX: Compatible avec un mixage bas. ( ): Valeur par défaut des paramètres 281 3ADV-M71E2_FRA p228-284 03.12.25 1:20 PM ページ 282 FRANCAIS (3) Lecture à l’aide du mode Dolby Headphone • Le ADV-M71 est équipé d’un mode Dolby Headphone, une technologie développée conjointement par Dolby Laboratories et Lake Technology pour obtenir un son 3D avec des écouteurs normaux. • Le mode Dolby Headphone est réglé lorsque les écouteurs sont connectés dans la prise d’écouteurs du ADV-M71. • Il existe actuellement quatre modes Dolby Headphone créant différents effets de champ sonore : DH1, DH2, DH3 et Bypass (lecture stéréo normale). • Le mode Dolby Headphone est compatible avec les sources multi-canaux DTS et Dolby Digital. Pour les sources 2 canaux, la lecture en modes Cinema, Music 1 et Music 2 peut être sélectionnée à l’aide du réglage de mode 2 canaux. 3 2,3 B SURROUND / SELECT DVD SURROUND RECEIVER ADV-M71 PUSH - PARAM. - + BAND MENU / SET TONE / SDB Réglez les différents paramètres ambiance. Si aucune opération n’est effectuée pendant 6 secondes alors que le paramètre est affiché, l’affichage normal revient. VOLUME SURROUND / SELECT PUSH - PARAM. FUNCTION ON / STANDBY PHONES Unité principale 1 TEST TONE INPUT MODE SURROUND Télécommande • Réglage du mode Dolby H H FUNCTION DH1 TUNER TV / VCR DVD IN/SURR. A/V SYSTEM IN/SURR. MD CDR TAPE 1 2 8 DH1 + DVD DH2 , 9 6 - 7 DH3 / BYPASS STATUS 3 • Réglage du mode 2 canaux MUTING SETUP TONE /SDB 2 ENTER SURROUND PARAMETER CH SELECT DISPLAY RETURN ANGLE MENU AUDIO VCR CH + 3 2 TOP MENU • Le mode se commute comme indiqué ci-dessous à chaque fois que la touche est utilisée. SUB TITLE CINEMA RC-966 MUSIC2 1 Connecter les écouteurs (vendus séparément) à la prise d’écouteurs. • Lorsque les écouteurs sont branchés, la sortie vers les enceintes est automatiquement coupée et aucun son ne sera reproduit par les enceintes. Appuyez sur la touche de paramètre ambiance et affichez les paramètres ambiance. Lorsque la fonction est réglée sur DVD, cela est aussi indiqué sur l’affichage. SURROUND / SELECT PUSH - PARAM. Unité principale 282 MUSIC1 Peut être sélectionné lorsque qu’il n’y a aucun signal ou lors de la lecture d’une source 2 canaux. Il existe les mêmes paramètres que ceux décrit dans “(2) Lecture en mode Dolby Virtual Speaker”, c’est à dire: B Réglage D.COMP. B Réglage gauche LFE B Réglage DEFAULT Lorsque les paramètres sont affichés, utilisez les touches curseurs • et ª de la télécommande pour passer au réglage précédent ou suivant. PHONES 2 CINEMA SURROUND PARAMETER Télécommande 3ADV-M71E2_FRA p228-284 03.12.25 1:20 PM ページ 283 FRANCAIS 2 Enregistrement Paramètres ambiance (4) DOLBY H (modes Dolby Headphone) DH1 ..............Pièce de référence (petite pièce avec peu de résonance) DH2 ..............Pièce moyenne (pièce avec une résonance plus importante que pour DH1) DH3 ..............Grande pièce (Plus grande que DH1. Utilisez ce mode pour réaliser un réglage de la distance et de la diffusion du son.) BYPASS ........Lecture stéréo. Modes 2 canaux Peuvent être sélectionnés lors de la lecture de sources 2 canaux (analogique, PCM, etc.). Les signaux sont traités par l’un des décodeurs suivants afin d’obtenir un son multi-canaux reproduit en mode Dolby Headphone. En mode Bypass, ceux-ci se sont pas affichés. CINEMA .......mode Dolby Pro Logic II Cinema MUSIC1 ........mode Dolby Pro Logic II Music MUSIC2 ........Signaux lus en mode Dolby Headphone à 2 canaux. Lors de la lecture de sources d’entrée numériques, dont la fonction DVD, les signaux encodés en mode Dolby Headphone sont sortis aux prises de sortie d’enregistrement et peuvent être enregistrés sur un autre appareil d’enregistrement. q Connectez les écouteurs à la prise d’écouteurs. w Les signaux encodés en mode Dolby Headphone sont sortis aux prises de sortie d’enregistrement (analogique). e Sélectionnez les paramètres, réglez le mode souhaité et commencez l’enregistrement. REMARQUES: • L’utilisation de Dolby Headphone rend le niveau de sortie pour enregistrement analogique plus faible que le niveau de sortie pour enregistrement stéréo normal. • Ne modifiez pas les paramètres ou ne débranchez pas les écouteurs pendant l’enregistrement. Cela provoquerait des interruptions dans le son enregistré. • Les signaux Dolby Headphone ne peuvent être enregistrés lors de la lecture de sources analogiques. Les signaux d’entrée analogiques sont sortis depuis les prises de sortie d’enregistrement. (4) Lecture en mode Auto Decode (réglages d’enceintes multi-canaux) • Le mode de décodage automatique peut être sélectionné lorsque l’ADV-M71 est associé à un subwoofer avec un amplificateur de puissance et un amplificateur intégré, des enceintes centrale ou surround et lorsqu’une configuration multicanale des enceintes est réalisée ( à 5.1 canaux, etc.). • Pour le réglage 5.1 canaux, réglez les enceintes sur “5.1CH SURROUND” dans l’installation rapide du système et sélectionnez “Réglages de la pièce” et “Position d’écoute”. (Voir pages 255 à 256.) • En mode de décodage automatique, la lecture multi-canaux des sources multi-canaux (Dolby Digital ou DTS) peut se faire automatiquement en fonction du format des signaux d’entrée. • De même, pour les sources 2 canaux, la lecture est possible en mode Auto Stereo, Dolby Pro Logic II Cinema, Dolby Pro Logic II Music ou Dolby Pro Logic, réglé en mode 2 canaux. (Les deux canaux des signaux stéréo sont lus en mode Auto Stereo. Pour les autres modes, la lecture est multi-canaux.) [1] Lecture ambiance Dolby Digital et DTS (pour les entrées numériques uniquement) • Les sources et les procédures applicables sont les mêmes que celles décrites dans “[1] Lecture d’un son ambiance Dolby Digital et DTS” dans “(1) Lecture en mode Dolby Virtual Speaker”. • A l’étape 3, réglez le mode ambiance sur “AUTO DECODE”. Le son est reproduit suivant le format des signaux d’entrée. • A l’étape 6, il n’y a pas les paramètres ambiance du mode Dolby Virtual Speaker. [2] Réglage du mode 2 canaux • Avec le mode de décodage automatique, l’un des quatre modes de lecture multi-canaux, c’est-à-dire, la lecture en mode Auto Stéréo (réglage d’usine par défaut), Dolby Pro Logic II Cinema, Dolby Pro Logic II Music et Dolby Pro Logic, peut être sélectionné et réglé comme sources 2 canaux. Mode “Auto Stéréo” ne peut être sélectionné pour les fonctions d’entrée analogique (TUNER, LINE-2, etc.). Pour lire de tels signaux en stéréo, réglez le mode ambiance sur “STEREO”. (Voir page 269.) • Les procédures sont les mêmes que celles décrites dans “[2] Réglages du mode 2 canaux” sous “(1) Lecture en mode Dolby Virtual Speaker” page 276. • A l’étape 1, réglez le mode ambiance sur “AUTO DECODE”. • Les modes 2 canaux sélectionnables à l’étape 3 sont les suivants : AUTO ST PLII CINEMA PRO LOGIC PLII MUSIC Auto Stereo peut être sélectionné lorsque la fonction est réglée sur DVD, LINE-1 ou D.AUX. • Pour les paramètres ambiance du mode 2 canaux en mode de décodage automatique, reportez-vous à “Paramètres ambiance (5)” (mode 2 canaux de décodage automatique). 283 3ADV-M71E2_FRA p228-284 03.12.25 1:20 PM ページ 284 FRANCAIS Paramètres ambiance (5) (mode de bicanal) Mode AUTO-ST (stéréo automatique) Les sources bicanales sont lues en stéréo bicanal. Lorsque ce mode est sélectionné en mode de décodage auto, les sources multi-canaux (DVD, BS numérique, etc.) sont lues en mode multicanaux, tandis que les sources à 2 canaux (CD, etc.) sont lues automatiquement en stéréo. Mode PLII CINEMA / PLII MUSI / PRO LOGIC Même les sources bicanales subissent le procédé Dolby Pro Logic II et sont lues en mode multicanal. Le traitement Dolby Digital Pro-Logic II est appliqué aux sources à 2 canaux ainsi qu’à leur lecture en mode multi-canaux. Lorsque ce mode est sélectionné en mode de décodage auto, les sources multi-canaux (DVD, BS numérique, etc.) sont lues en mode multicanaux, et les sources à 2 canaux (CD, etc.) sont également traitées automatiquement avec le Dolby Digital Pro-Logic II et lues en mode multi-canaux. • Mode PLII CINEMA (Dolby Pro Logic II CINEMA) mode Ce mode est adapté à la lecture de films enregistrés en Dolby surround ainsi que des sources normales enregistrées en stéréo. Un décodeur de haute précision décode les signaux dans 5 canaux, produisant un son acoustique d’ambiance uniforme et à 360 degrés même avec des sources bicanales. Le mode MUSIC peut s’avérer plus efficace pour les sources contenant un important rapport de musique stéréo. Les essayer les deux, et choisir le mode le plus efficace. • Mode PLII MUSIC (Dolby Pro Logic II MUSIC) Ce mode est adapté à la lecture surround de signaux musicaux en stéréo. Les signaux de phase inversés (le composant de réverbération des signaux musicaux en contient un rapport important) sont lus à partir du canal surround, et en même temps, la réponse en fréquence du canal surround est optimisée pour obtenir un son naturel avec une sensation d’expansion. Avec les signaux musicaux, l’expansion du champ acoustique varie beaucoup selon le type de musique, les conditions d’enregistrement (live, etc.) et le contenu de la source des signaux. C’est pour toutes ces raisons que le mode MUSIC inclut des paramètres optionnels pour régler le champ acoustique en finesse. • PANORAMA L’image stéréo du champ acoustique avant est étendue au canal surround. Cette fonction est efficace si dans des conditions normales, l’image stéréo est étroite et l’effet surround paraît faible. • DIMENSION Cette fonction fait passer le centre de l’image du champ acoustique à l’avant ou du côté du surround. La balance de lecture des différents canaux peut être réglée sans tenir compte de la quantité de composant de réverbération dans la source. Si l’image du champ acoustique est altérée vers l’avant ou du côté du surround, ces paramètres en option peuvent être utilisés pour corriger ceci. • CENTER WIDTH (largeur du centre) Ce mode règle la méthode de lecture du composant du signal du centre à partir du canal central uniquement et seulement vers le canal avant. Lorsque le canal central est lu de façon donnant priorité à la séparation, la position du champ acoustique du canal avant est plus claire mais l’image générale du champ acoustique se concentre sur le centre et la relation entre les différents canaux semble plus faible. Ce paramètre peut être réglé pour améliorer la sensation de stabilité de l’image du champ acoustique et obtenir une expansion horizontale naturelle. • Mode PRO LOGIC (Dolby Pro Logic) Ceci est le mode compatible avec Dolby Pro Logic conventionnel. Dans ce mode, les sources enregistrées en Dolby Surround sont décodées avec une image de lecture fidèle à l’enregistrement original. • Dans le mode de décodage automatique, le mode de lecture se commute automatiquement comme indiqué ci-dessous, en fonction du contenu du disque lu ou du programme reçu. (Lorsque le mode d’entrée est réglé sur “AUTO” et le mode 2 canaux est réglé sur “AUTO ST”) Source DVD CD ( 284 Contenu Mode de lecture Dolby Digital 5.1/6.1 canaux Lecture 5.1 canaux Dolby Digital 2 canaux (comprenant Dolby Surround 2 canaux) Lecture en stéréo ( DTS numérique 5.1/6.1 canaux Lecture 5.1 canaux PCM stéréo Lecture en stéréo ( ) ) ) Pour lire des sources d’ambiance 2 canaux (Dolby Surround) ou des sources stéréo en mode ambiance 5.1 canaux, réglez le mode 2 canaux sur autre chose que “AUTO ST”. 3ADV-M71E2_FRA p285-p339 03.12.25 1:23 PM ページ 285 FRANCAIS [3] Réglages des paramètres des modes PLII Cinema, PLII Music et Pro Logic • Lorsque PLII Cinema, PLII Music ou Pro Logic est sélectionné pour le mode 2 canaux, différents paramètres peuvent être sélectionnés pour chacun de ces modes. Mode PLII Music: Faites les réglages en suivant la procédure ci-dessous. • Les sources de programme avec la marque , les CD et les autres sources à 2 canaux sont décodés avec le système Dolby Pro Logic II et lus en mode multi-canaux. q Mode PLII Cinema: Ce mode convient aux films et autres programmes Dolby Surround. w Mode PLII Music: Ce mode convient aux programmes musicaux en stéréo. e Mode compatible Pro Logic: C’est le mode original Dolby Surround Pro Logic. RDS PROG/DIRECT REPEAT PTY RANDOM MODE MEMO BAND DVD TUNER D.AUX 1 2 3 MD/LINE-1 CT CD SRS RT SEARCH MODE 5 6 + - 5CH STEREO AUTO DECODE TUNER 9 + TAPE /LINE-2 4 3 TUNING / TV VOL 7 8 DIRECT STEREO VIRTUAL Réglez les différents paramètres ambiance. SURROUND / SELECT PUSH - PARAM. CH CALL 0/10 +10 - TEST TONE INPUT MODE SURROUND FUNCTION TUNER TV / VCR DVD IN/SURR. A/V SYSTEM Unité principale IN/SURR. MD Télécommande CDR TAPE 1 2 + DVD 8 9 6 7 • Réglage du panorama - PANORA ON OFF STATUS 3 MUTING SETUP TONE /SDB ON 3 2 ENTER SURROUND PARAMETER CH SELECT DISPLAY RETURN ANGLE MENU AUDIO + VCR CH OFF , / TOP MENU Le réglage sélectionné clignote. SUB TITLE • Réglage de la dimension RC-966 DIMENSION 1 2 Sélectionnez “PLII C”, “PLII M” ou “PRO LOGIC” pour le réglage du mode 2 canaux. Réglez les paramètres ambiance pour le mode sélectionné. • Les paramètres changent comme indiqué ci-dessous chaque fois que l’une des touches est enfoncée. SURROUND PARAMETER ... 3 , 6 / • Réglage de la largeur centrale CNTR WIDTH ... 0 SURROUND / SELECT PUSH - PARAM. ... 0 3 ... 3 , 3 7 / • Réglage par défaut Unité principale Télécommande PL CINEMA PL MUSIC PRO LOGIC DEFAULT PANORAMA DEFAULT DIMENSION DEFAULT YES , Y/N Y/N / NO Lorsque “YES” est sélectionné, les réglages reviennent aux valeurs par défaut réglées à la sortie d’usine. CNTR WIDTH DEFAULT Une fois les paramètres ambiance réglés, arrêtez d’utiliser les touches. Après plusieurs secondes, l’affichage normal réapparaît et les réglages sont automatiquement mémorisés. Le réglage des paramètres est terminé. REMARQUES: • Le mode 2 canaux est réglé et mémorisé indépendamment pour les différentes fonctions. 285 3ADV-M71E2_FRA p285-p339 03.12.25 1:23 PM ページ 286 FRANCAIS [4] Lecture en mode Dolby Pro Logic II (toutes les fonctions) • La source est lue suivant les réglages effectués pour le mode 2 canaux et les paramètres pour les modes PLII Cinema, PLII Music et Pro Logic. • Sources applicables • Signaux d’entrée numérique (fonctions LINE-1 et D.AUX, y compris les disques de lecture DVD) Sources 2 canaux Dolby Digital Sources 2 canaux PCM • Signaux d’entrée analogique 2 canaux (TUNER, LINE-1 et LINE-2) 1 Sélectionnez la fonction d’entrée. FUNCTION FUNCTION 2 Unité principale B Télécommande SURROUND / SELECT DVD SURROUND RECEIVER ADV-M71 PUSH - PARAM. - En mode d’entrée “DTS” avec la fonction réglée sur une entrée numérique (DVD ou D.AUX), il est impossible de lire en mode Dolby Pro Logic II. + BAND MENU / SET TONE / SDB VOLUME FUNCTION ON / STANDBY PHONES 2 1 OFF SURROUND / SELECT SURROUND PUSH - PARAM. ON VCR REC NTSC/PAL SLEEP TITLE SOURCE ENTER A-B REPEAT CLEAR Réglez le mode ambiance sur “AUTO DECODE”. TIME TV IN T V CHARAC. SLIDE MODE TV CH EDIT/MENU ZOOM TV CH - RDS PROG/DIRECT REPEAT PTY RANDOM MODE MEMO BAND DVD TUNER D.AUX 1 2 3 MD/LINE-1 TAPE /LINE-2 3 TUNING / TV VOL 5 6 + - 5CH STEREO AUTO DECODE TUNER 4 + 7 8 9 DIRECT STEREO VIRTUAL CALL 0/10 +10 - TEST TONE INPUT MODE SURROUND FUNCTION CH TUNER TV / VCR DVD IN/SURR. A/V SYSTEM Unité principale Télécommande + CT CD SRS RT SEARCH MODE 1 2 Lisez une source de programme avec la marque ou une source 2 canaux. • La source est lue suivant les réglages du mode Dolby Pro Logic II. • Dans les modes Cinema et Music, le voyant Dolby Pro Logic II est allumé. IN/SURR. MD CDR TAPE 1 2 DVD 8 Allumé PRO LOGIC II + 9 6 - 7 • En mode Dolby Pro Logic, le voyant Dolby Pro Logic est allumé. STATUS 3 MUTING SETUP TONE /SDB PRO LOGIC Allumé ENTER SURROUND PARAMETER CH SELECT DISPLAY RETURN ANGLE MENU AUDIO RC-966 286 VCR CH + TOP MENU SUB TITLE 4 4 Réglez les paramètres ambiance suivant le mode sélectionné. Reportez-vous aux étapes 1 à 3 du paragraphe “Réglage des paramètres en modes PLII Cinema, PLII Music et Pro Logic” (page 285). SURROUND PARAMETER Télécommande 3ADV-M71E2_FRA p285-p339 03.12.25 1:23 PM ページ 287 FRANCAIS 15 ECOUTER LA RADIO (1) Réglage de fréquences 3 OFF ON VCR REC NTSC/PAL SLEEP TITLE SOURCE ENTER A-B REPEAT CLEAR T V CHARAC. SLIDE MODE EDIT/MENU ZOOM TV CH B RDS PROG/DIRECT SURROUND / SELECT DVD SURROUND RECEIVER ADV-M71 PUSH - PARAM. - + BAND MENU / SET TONE / SDB VOLUME FUNCTION ON / STANDBY PHONES Réglez les commutateurs de sélection de la télécommande sur A/V et TUNER. TUNER TV / VCR DVD IN/SURR. A/V SYSTEM IN/SURR. MD CDR TAPE 1 REPEAT PTY - MEMO BAND DVD TUNER D.AUX 1 2 3 4 TV CH TUNING / TV VOL 5 6 + - 5CH STEREO AUTO DECODE TUNER TAPE /LINE-2 8 9 DIRECT STEREO VIRTUAL CALL 0/10 +10 - TEST TONE INPUT MODE SURROUND FUNCTION CH TUNER TV / VCR DVD IN/SURR. A/V SYSTEM 1 2 + DVD 6 Télécommande Sélectionner “FM” ou “AM”. • La fonction sélectionnée; “FM AUTO”, “FM MONO”, ou “AM” est affichée. • Lors de l’utilisation de la télécommande, la touche de mode est utilisée pour sélectionner FM AUTO et MONO. BAND Unité principale 3 RANDOM PROG/DIRECT BAND MODE Télécommande Régler la fréquence de réception. • Lorsqu’une station est reçue, l’indication “TUNED” s’affichera. TUNING / - 7 - REMARQUE: Un bourdonnement peut se faire entendre lors de l’utilisation d’une TV à proximité lors de la réception de programmes AM. Dans ce cas, déplacer le système aussi loin que possible de la TV. FUNCTION Unité principale 2 9 STATUS Appuyer sur la touche FUNCTION et sélectionner “TUNER”. FUNCTION 1 IN/SURR. MD CDR TAPE 8 1 2 2 3 + 7 2 Exemple: Réglage de stations FM/AM. + CT CD SRS RT RANDOM SEARCH MODE MODE MD/LINE-1 TIME TV IN + Unité principale + - Télécommande Recherche automatique • Lorsque l’une des touches Tuning +/– est activée, la fréquence change par pas de 0,2 MHz sur la bande FM et 10 kHz sur la bande AM. • Si l’une des touches Tuning +/– est maintenue enfoncée pour plus d’une seconde, la fréquence continue à changer lorsque la touche est relâchée (recherche automatique) et s’arrête lorsqu’une station est détectée. La recherche automatique ne s’arrête pas sur les stations ayant une mauvaise réception. • Pour arrêter la fonction de recherche automatique, appuyer une seule fois sur la touche Tuning +/–. Réception stéréo FM • Lorsqu’un programme radiodiffusé en mode “FM AUTO” est reçu, le témoin “ST” s’allume et le programme est reçu en stéréo. • Si la réception est de mauvaise qualité et qu’il y a beaucoup de bruit sur les signaux stéréo, appuyez sur la touche BAND ou MODE pour régler le mode FM MONO. À propos du mode de synchronisation tuner et du mode de présélection - + • La fonction des touches “–” et “+” de l’unité principale peut être changée afin qu’elles puissent être utilisées soit pour la synchronisation tuner (sélection de la Unité principale fréquence de réception) soit pour la BAND sélection de stations préréglées. • À leur livraison, les touches sont réglée en mode tuner. Le mode peut être passé au mode présélection en appuyant sur la Unité principale touche “+” tout en appuyant sur la touche BAND. (Lorsque l’on fait cela, “PRESET” clignote pendant environ 5 secondes.) • Appuyer sur la touche “–” tout en appuyant sur la touche BAND pour passer au mode tuner. (Lorsque l’on fait cela, “TUNING” clignote pendant environ 5 secondes.) 287 3ADV-M71E2_FRA p285-p339 03.12.25 1:23 PM ページ 288 FRANCAIS (2) Préréglage des stations syntonisées et dénomination des stations (télécommande uniquement) 2 Un total de 40 stations (comprenant les stations FM et AM) peut être préréglagené. 2 Les stations préréglagenées peuvent être dénommées avec un mot de 8 caractères (lettres, chiffres et symboles). 2 Préréglez les stations à l’aide de la télécommande. Réglez les commutateurs de sélection de la télécommande sur A/V et TUNER. SLEEP CLEAR 2,3, 4,6 TUNER TV / VCR DVD IN/SURR. A/V SYSTEM IN/SURR. MD CDR TAPE TITLE TV IN T V CHARAC. SLIDE MODE EDIT/MENU ZOOM TV CH RDS PROG/DIRECT MODE DVD REPEAT PTY MEMO - TIME TV CH 4 + CT CD SRS RT RANDOM SEARCH MODE BAND TUNING / TV VOL TUNER D.AUX 1 2 3 MD/LINE-1 TAPE /LINE-2 4 5 6 + - 5CH STEREO AUTO DECODE TUNER 8 9 STEREO VIRTUAL CALL 0/10 +10 - TEST TONE INPUT MODE SURROUND FUNCTION MEMO P0CH FM FM-DENON 3,5 TUNER TV / VCR DVD IN/SURR Télécommande 5 Syntonisez la station que vous souhaitez prérégler. P0- Appuyez sur la touche MEMO deux fois de suite pour mémoriser le nom de la station que vous avez entrée. • Le voyant du numéro de préréglage “P” clignote. REPEAT + 7 DIRECT A/V 1 REC NTSC/PAL ENTER A-B REPEAT SOURCE Utilisez les touches de préréglage “+” et “–” pour sélectionner le numéro de préréglage. P03 92.50M TUNER + CH - FM-DENON Télécommande 2 Appuyez sur la touche MEMO deux fois de suite. • Le mode d’entrée des noms est sélectionné. Le numéro de préréglage peut également être entré directement en utilisant les touches +10 et 1 à 10 du clavier décimal. REPEAT MEMO P0- _ Télécommande 3 Utilisez les touches de préréglage “+” et “–” pour sélectionner le caractère, puis appuyez sur la touche MEMO pour entrer le caractère. 6 Appuyez sur la touche MEMO pour entrer le numéro de préréglage. • Le numéro de préréglage, la bande et la fréquence de réception sont affichés, puis le nom de la station apparaît. P03 FM 92.50M REPEAT MEMO TUNER \ + CH - P03 FM-DENON Télécommande Télécommande • Lorsque la touche TUNING “+” ou la touche MEMO est enfoncée, le caractère sélectionné est entré, le curseur se déplace à la position suivante et le caractère suivant peut être saisi. • Utiliser la touche TUNING “–” pour revenir à la position précédente. Utiliser cette fonction pour corriger des caractères déjà saisis. P0- F REPEAT MEMO \ P0- F_ Télécommande Pour s’arrêter en cours de procédure, appuyez sur la touche MODE avant d’appuyer sur la touche MEMO à l’étape 4. Tout ce que vous avez entré, est effacé. Pour effacer le nom d’une station qui a été entré en mémoire, appelez cette station, réglez le mode d’entrée de dénomination à Télécommande l’étape 2, puis appuyez sur la touche MODE. Le nom de la station est effacé et la fréquence du canal préréglagené est affichée. Si vous souhaitez seulement prérélger une station, appuyez sur la touche MEMO une fois lorsque la station est syntonisée. Le voyant du numéro de préréglage, “P”, clignote et le mode d’entrée du nombre de préréglage est réglé. Utilisez les touches “+” et “–” de préréglage pour sélectionner le numéro de préréglage puis appuyez sur la touche MEMO de nouveau pour mémoriser cette station au numéro sélectionné. (Le numéro peut également être directement spécifié en utilisant les touches +10 et 1 à 10 du clavier décimal.) PROG/DIRECT MODE TUNER + REPEAT CH MEMO Télécommande 288 Télécommande 3ADV-M71E2_FRA p285-p339 03.12.25 1:23 PM ページ 289 FRANCAIS (3) Présélections automatiques du syntoniseur. Utiliser cette fonction pour rechercher automatiquement des stations FM de radiodiffusion et enregistrer jusqu’à 40 stations sur des canaux préréglés, de 1 à 40. REMARQUE: • Si une station FM ne peut pas être préréglée automatiquement en raison d’une mauvaise réception, utiliser la fonction “Manual Tuning” pour trouver la station, puis la prérégler à l’aide de la fonction manuelle “Preset memory”. 1 2 En utilisant la fonction TUNER, maintenir enfoncées les touche MENU/SET simultanément de l’unité principale pendant 2 secondes ou plus. • “AUTO PRESET?” et “–: NO/+: START” apparaîtront alternativement sur l’affichage de l’unité principale. MENU / SET B SURROUND / SELECT DVD SURROUND RECEIVER ADV-M71 PUSH - PARAM. - + BAND MENU / SET TONE / SDB Unité principale VOLUME FUNCTION ON / STANDBY PHONES • Appuyez sur la touche “TUNING –” pour annuler. 2 Utiliser la touche TUNING + pour sélectionner “START”. “SEARCH” clignote sur l’affichage et la recherche commence. “COMPLETED” apparaît une fois que la recherche est terminée. 1 + Unité principale (4) Ecoute de stations préréglées. Exemple: Ecouter la station préréglée sur le numéro P03 (L’opération n’est possible qu’avec la télécommande). 1 1 B SURROUND / SELECT DVD SURROUND RECEIVER ADV-M71 PUSH - PARAM. + - BAND MENU / SET TONE / SDB Utilisez les touches de préréglage “+” et “–” pour sélectionner le numéro “3” ou appuyez sur la touche “3” du clavier décimal pour afficher le chiffre “P03”. Les touches “+” et “–” de l’unité principale peuvent être sélectionnées lorsque le mode de préréglage a été réglé. VOLUME TUNER + FUNCTION - ON / STANDBY PHONES + D.AUX 3 CH Unité principale OFF SLEEP TITLE ENTER A-B REPEAT CHARAC. SLIDE MODE SOURCE Réglez les commutateurs de sélection de la télécommande sur A/V et TUNER. TUNER TV / VCR DVD IN/SURR. A/V SYSTEM CLEAR MODE CDR TAPE PTY T V - RANDOM MEMO BAND TV CH + TUNING / TV VOL TUNER D.AUX 2 3 TAPE /LINE-2 4 5 6 + - 5CH STEREO AUTO DECODE TUNER + 7 8 9 DIRECT STEREO VIRTUAL 0/10 +10 - INPUT MODE SURROUND FUNCTION CALL TEST TONE Les fonctions des touches “+” et “–” sur l’unité principale changent en fonction du mode de préréglage et de syntonisation réglé. Lorsque le mode de syntonisation est réglé, vous pouvez commuter au mode de préréglage en appuyant sur la touche “+” et sur la touche BAND. EDIT/MENU ZOOM CT CD SRS RT SEARCH MODE 1 IN/SURR. MD REPEAT MD/LINE-1 DVD 1 TIME TV IN TV CH RDS PROG/DIRECT Télécommande ON VCR REC NTSC/PAL CH 1 BAND + TUNER TV / VCR DVD IN/SURR. A/V SYSTEM IN/SURR. MD CDR TAPE Les touches de préréglage de la télécommande (TUNER CH “+” et “–”) peuvent être utilisées à tout moment. Unité principale Unité principale 289 3ADV-M71E2_FRA p285-p339 03.12.25 1:23 PM ページ 290 FRANCAIS (5) RDS (Radio Data System) RDS (fonctionne seulement sur la bande FM) est service de radiodiffusion qui permet à la station d'envoyer des informations supplémentaires avec le signal de programme radio normal. Les trois types suivants d'informations RDS peuvent être reçus sur cet appareil : 2 Type de programme (PTY) PTY identifie le type de programme RDS. Les types de programme et leur affichage sont comme suit : NEWS Nouvelles ROCK M Musique Rock PHONE IN Tribune téléphonique AFFAIRS Economie EASY M Easy listening TRAVEL Voyage et Tourisme LEISURE Loisir et Hobby INFO Information LIGHT M Inspiration Classique SPORT Sports CLASSICS Classique JAZZ Jazz Music Autres musiques Temps et Météorologie COUNTRY Musique Country NATION M Musique Nationale OLDIES Musique Rétro FOLK M Musique Folk DOCUMENT Documentaire EDUCATE Education OTHER M DRAMA Théâtre WEATHER CULTURE Culture FINANCE SCIENCE Science CHILDREN VARIED Varié SOCIAL POP M Musique Pop RELIGION Finance Programmes pour Enfants Affaires Sociales Religion 2 Programme trafic (TP) TP identifie les programmes qui transmettent des annonces de trafic. Ceci vous permet de trouver facilement les dernières informations sur le trafic avant de partir de chez vous. 2 Texte radio (RT) RT permet à la station RDS d'envoyer des messages texte qui apparaissent à l'affichage. REMARQUE :Tles opérations utilisant les touches RDS, PTY et RT décrites ci-dessous, ne fonctionneront pas dans les zones où il n'y a pas d'émission RDS. (6) Recherche RDS Utiliser cette fonction pour ajuster automatiquement les stations FM qui proposent le service RDS. 1 Positionner la bande sur “FM“. Réglez les commutateurs de sélection de la télécommande sur A/V et TUNER. RANDOM BAND Télécommande TUNER TV / VCR DVD IN/SURR. A/V SYSTEM 2 Appuyer sur la touche RDS jusqu'à ce que “RDS SEARCH“ apparaisse à l'affichage. IN/SURR. MD CDR TAPE CLEAR OFF SLEEP ON VCR REC NTSC/PAL TITLE TV IN T V ENTER A-B REPEAT CHARAC. SLIDE MODE EDIT/MENU ZOOM SOURCE 2 Télécommande 3 Appuyer sur la touche TUNING + (UP) ou – (DOWN) pour commencer automatiquement l'opération de recherche RDS. CLEAR TV CH RDS PROG/DIRECT + - 4 Quand une station émettrice est trouvée, le nom de cette station apparaît à l'affichage. • Si aucune station RDS n'est trouvée alors que toutes les fréquences ont été essayées, “NO PROGRAMME“ s'affiche. Positionner les touches de sélection de la télécommande sur A/V et TUNER. 290 RANDOM MEMO BAND DVD TUNER D.AUX 1 2 3 4 7 DIRECT TV CH + CT CD SRS RT SEARCH MODE 5 6 5CH STEREO AUTO DECODE TUNER 8 9 + TAPE /LINE-2 STEREO 3 CH VIRTUAL CALL 0/10 +10 - TEST TONE INPUT MODE SURROUND FUNCTION TUNER TV / VCR DVD IN/SURR. SYSTEM 1 TUNING / TV VOL + - A/V Télécommande PTY MODE MD/LINE-1 TUNING / TV VOL REPEAT TIME - IN/SURR. MD CDR TAPE 3ADV-M71E2_FRA p285-p339 03.12.25 1:23 PM ページ 291 FRANCAIS (7) Recherche PTY Utiliser cette fonction pour trouver des stations RDS émettant un type de programme désigné (PTY). Pour une description de chaque type de programme, se référer à “Program Type (PTY)“. 1 Positionner la bande sur “FM“. RANDOM BAND 4 Appuyer sur la touche TUNING + (UP) ou – (DOWN) pour commencer automatiquement l'opération de recherche TPY. Télécommande 2 Appuyer sur la touche RDS jusqu'à ce que “PTY SEARCH“ apparaisse à l'affichage. CLEAR Télécommande 3 En regardant l'affichage, appuyer sur la touche TPY pour appeler le type de programme souhaité. TUNING / TV VOL + Télécommande 5 Le nom de la station s'affiche sur l'écran après la fin de la recherche. • Si aucune station émettant le type de programme désigné n’est trouvée alors que toutes les fréquences ont été essayées, “NO PROGRAMME“ s'affiche. ENTER A-B REPEAT REPEAT Télécommande (8) Recherche TP Utiliser cette fonction pour trouver des stations RDS émettant des programmes trafic (Stations TP). 1 Positionner la bande sur “FM“. RANDOM BAND 3 Télécommande 2 Appuyer sur la touche RDS jusqu'à ce que “TP SEARCH“ apparaisse à l'affichage. CLEAR Appuyer sur la touche TUNING + (UP) ou - (DOWN) pour commencer la recherche TP. TUNING / TV VOL + Télécommande 4 Le nom de la station s'affiche sur l'écran après la fin de la recherche. • Si aucune station RDS n'est trouvée alors que toutes les fréquences ont été essayées, "NO PROGRAMME" s'affiche. Télécommande (9) RT ( Texte Radio) “RT” apparaît à l'affichage quand une information en texte radio est reçue. 1 Pour activer le mode RT, appuyer sur la touche RT de la télécommande jusqu'à ce que le voyant RT s'allume. EDIT/MENU ZOOM TV CH + Télécommande 2 Quand la station actuellement ajustée propose un service de message texte radio, ce message défile à l'affichage. • Quand le mode RT est activé alors qu'une station radio RDS ne proposant pas de service RT est ajustée, “NO TEXT DATA“ s'affiche sur l'écran, puis le mode passe automatiquement en mode PS. • De la même façon, le mode passe automatiquement en mode PS quand le service RT est fini. Dans ce cas, le mode repasse automatiquement du mode PS au mode RT quand une émission RT reprend. • Le mode RT ne peut pas être sélectionné sur la bande AM ou pour les stations FM ne proposant pas d'émissions RDS. • Pour désactiver le mode RT, appuyer sur la touche RT et passer au mode d'affichage souhaité. (Se référer à la page 290 .) 291 3ADV-M71E2_FRA p285-p339 03.12.25 1:23 PM ページ 292 FRANCAIS 16 AFFICHAGE A L’ECRAN • L’ADV-M71 est équipé d’une fonction d’affichage à l’écran (OSD) qui affiche les différents types d’informations sur les fonctions surround et sur le disque lorsque la fonction est réglée sur DVD. q Ecran d’installation • Il est utilisé pour sélectionner les enceintes utilisées (réglage de système rapide) et pour changer les fonctions de l’ADV-M71 ainsi que les différents réglages lors de la lecture de disques (changement du réglage de système et changement des réglages DVD). • L’écran d’installation peut être utilisé sans tenir compte de la fonction choisie. w Affichage des informations sur le disque • Lorsque la fonction est réglée sur DVD, l’OSD fournit des informations sur le disque et apparaît lorsque diverses fonctions de lecture sont utilisées. e Affichage de la fonction surround • Lorsque la fonction est réglée sur DVD, les informations concernant l’amplificateur surround sont également affichées et peuvent être utilisées. • L’OSD pour la fonction surround (OSD AV) peut être activé ou désactivé. (l’OSD pour l’écran d’installation et pour les informations concernant le DVD ne peut pas être réglé sur “OFF”.) Réglage par défaut effectué à l’usine: “ON”. 1 2 1 B Appuyer sur la touche menu/réglage sur l’unité principale puis appuyer de nouveau sur la touche menu/réglage pendant au moins 2 secondes pendant que “STATUS” est affiché. • “AV OSD ON 0:1 OFF” est affiché. SURROUND / SELECT DVD SURROUND RECEIVER ADV-M71 PUSH - PARAM. - + BAND MENU / SET TONE / SDB Lorsque la fonction est réglée sur DVD, appuyer sur la touche STATUS de la télécommande pendant au moins 2 secondes. VOLUME FUNCTION ON / STANDBY PHONES STATUS MENU / SET OFF ON VCR REC NTSC/PAL SLEEP TITLE SOURCE ENTER A-B REPEAT CLEAR TIME TV IN T V CHARAC. SLIDE MODE TV CH EDIT/MENU ZOOM TV CH - RDS PROG/DIRECT REPEAT MODE PTY MEMO BAND TUNER D.AUX 1 2 3 MD/LINE-1 TAPE /LINE-2 DVD 2 TUNING / TV VOL 5 6 + - 5CH STEREO AUTO DECODE TUNER 9 + 4 Unité principale Télécommande + CT CD SRS RT RANDOM SEARCH MODE 7 8 DIRECT STEREO VIRTUAL CALL 0/10 +10 - TEST TONE INPUT MODE SURROUND FUNCTION Activer ou désactiver l’OSD AV. SURROUND / SELECT PUSH - PARAM. CH TUNER TV / VCR DVD IN/SURR. A/V SYSTEM IN/SURR. MD Unité principale CDR TAPE 1 2 DVD 8 Télécommande + 9 6 ou 0 :ON - 7 STATUS 3 MUTING SETUP TONE /SDB SURROUND PARAMETER CH SELECT DISPLAY ANGLE MENU AUDIO RC-966 292 ou 1 :OFF 2 ENTER RETURN 1 VCR CH + Après quelques secondes, l’affichage s’éteint et le réglage est mémorisé. TOP MENU SUB TITLE REMARQUES: • Selon le disque lu, il se peut que l’image soit déformée lorsque l’OSD est activé. Ceci n’est pas un dysfonctionnement. Si cette éventualité se produit, régler l’OSD AV sur “OFF”. • L’OSD est également envoyé aux bornes de sortie vidéo du magnétoscope. Ne pas procéder à l’installation ni effectuer d’opérations avec l’affichage à l’écran lors d’un enregistrement avec un magnétoscope. 3ADV-M71E2_FRA p285-p339 03.12.25 1:23 PM ページ 293 FRANCAIS 17 UTILISATION DE L’AFFICHAGE A L’ECRAN (1) Fonctionnement en utilisant l’OSD des informations concernant le disque SLEEP 2 Utiliser cette fonction afin d’afficher et de modifier les informations du disque. (titres, chapitres, temps, etc.) NTSC/PAL TITLE TV IN T V ENTER A-B REPEAT CHARAC. SLIDE MODE EDIT/MENU ZOOM SOURCE Réglez les commutateurs de sélection de la télécommande sur A/V et DVD. CLEAR TV CH RDS PROG/DIRECT 3 TUNER TV / VCR DVD IN/SURR. A/V SYSTEM PTY REPEAT RANDOM MODE MEMO BAND DVD TUNER D.AUX 3 TV CH MUTING SETUP 1 2 TAPE /LINE-2 4 5 6 + - 5CH STEREO AUTO DECODE TUNER 7 8 9 + DIRECT STEREO VIRTUAL CALL 0/10 +10 - TEST TONE INPUT MODE SURROUND FUNCTION TONE /SDB 2 TUNING / TV VOL MD/LINE-1 A/V STATUS 3 + CT CD SRS RT SEARCH MODE IN/SURR. MD CDR TAPE 1 TIME - ENTER SURROUND PARAMETER CH SELECT 3 1 CH DISPLAY RETURN ANGLE TUNER TV / VCR DVD IN/SURR. En mode de lecture, appuyez sur la touche DISPLAY. • L’affichage à l’écran apparaît. • L’image sur l’écran de TV change chaque fois que la touche est activée. • Les items affichés varient d’un disque à l’autre. Exemple: Pour les DVD MENU AUDIO VCR CH + TOP MENU SUB TITLE RC-966 DISPLAY Télécommande T I T LE 01 / 1 0 T I T LE T IME P I C TURE MODE CHAPT ER 01/10 00 : 00 : 01 STANDARD T I T LE REMAI N 01 : 10 : 59 CHAPT ER T IME 00 : 00 : 01 CHAPT ER REMAI N 00 : 40 : 59 SUBT ITLE 1/2 : DOLBY D 3/2/1 ENGLISH AUDI O : OFF • Pour l’affichage à l’écran des CD vidéo et musicaux, uniquement la durée du disque change. Exemple: Pour les CD vidéo et musicaux TOTAL TIME TRACK S I NGL E T IME P I C TURE MODE 2 3 01 / 10 26 : 11 STANDARD Utiliser les touches de curseur • et ª pour sélectionner l’item que vous souhaitez changer. • L’item sélectionné est affiché avec un cadre jaune. q Pour les DVD “TITLE”, “CHAPTER”, “TITLE ELAPSED” peuvent être sélectionnés. w Pour les CD vidéo et musicaux “TRACK” peut être sélectionné. q Modifier le temps écoulé Entrer les données à l’aide des touches à chiffres, puis appuyez sur la touche ENTER. Exemple: Pour 1 minute 26 seconde / “00126” w Modifier le titre, la plage ou le chapitre • Pour les DVD Entrer les données à l’aide des touches à chiffres, puis appuyez sur la touche ENTER. (Pour certains disques, il n’est pas possible de modifier le titre ou les chapitres.) • Pour les CD vidéo et musicaux Entrer les données à l’aide des touches à chiffre. La lecture débute à partir de cette plage. S I NGL E REMAIN 03 : 17 TOTAL TIME 06 : 15 TOTAL REMAIN 32 : 05 Télécommande TUNER D.AUX 1 2 3 MD/LINE-1 DVD TAPE /LINE-2 4 7 5 6 5CH STEREO AUTO DECODE 8 9 STEREO VIRTUAL 0/10 +10 Télécommande 293 3ADV-M71E2_FRA p285-p339 03.12.25 1:23 PM ページ 294 FRANCAIS (2) Ajustement de la qualité de l’image • La qualité de l’image lors de la lecture de disques peut être ajustée. STATUS Réglez les commutateurs de sélection de la télécommande sur A/V et DVD. 3 SYSTEM 1,2 ENTER SURROUND PARAMETER CH SELECT - 1 IN/SURR. MD TONE /SDB 1,2,3 TUNER TV / VCR DVD IN/SURR. A/V MUTING SETUP DISPLAY RETURN ANGLE MENU AUDIO VCR CH + TOP MENU SUB TITLE CDR TAPE 1 2 Lors de la lecture d’un disque avec la fonction réglée sur DVD, appuyez sur la touche DISPLAY pour allumer l’affichage sur écran, utiliser les touches de déplacement du curseur • et ª pour sélectionner “PICTURE MODE” (qualité de l’image), puis appuyez sur la touche ENTER. • L’écran de réglage de la qualité de l’image apparaît. • L’affichage sur écran s’allume également lorsque la touche DISPLAY est enfoncée en mode d’arrêt. ENTER DISPLAY \ \ Télécommande Télécommande Télécommande Utiliser les touches du curseur 0 et 1 pour sélectionner l’élément, puis appuyez sur la touche ENTER. Standard: La qualité d’image et les fonctions sont rétablis à leurs réglages standards réglés en usine. Animation: Cela paramètre une qualité d’image plus claire et plus vivante. Cinéma: Cela paramètre une qualité d’image plus moelleuse. Mémoire 1 à 3: Les réglages de la qualité d’image qui ont été réalisés peuvent être mémorisés dans trois positions de mémoire. (Réglage à l’étape 3) 3 Sélectionner et régler la qualité d’image Utiliser les touches du curseur 0 et 1 pour sélectionner l’élément de qualité d’image puis utiliser les touches du curseur • et ª pour ajuster la valeur. ENTER \ • Tous les réglages sont stockés dans la mémoire. Contraste (-6 à +6) (paramétrage d’usine par défaut: 0): Cela règle le contraste entre les portions claires et sombres de l’image. Luminosité (0 à +12) (paramétrage d’usine par défaut: 0): Cela règle la luminosité (vivacité) de l’image. Densité couleur (-6 à +6) (paramétrage d’usine par défaut: 0): Cela règle la densité de couleur. Télécommande Télécommande Teinte (-6 à +6) (paramétrage d’usine par défaut: 0): Cela règle l’équilibre entre le vert et le rouge. (Ce réglage n’affecte pas les sorties de balayage progressif.) Pour terminer le réglage de la qualité d’image: Appuyer de nouveau sur la touche DISPLAY. REMARQUE: • En fonction du disque en cours de lecture, l’image ou le son risque d’être détérioré lorsque l’affichage sur écran s’affiche. Ceci n’est pas un mauvais fonctionnement. 294 3ADV-M71E2_FRA p285-p339 03.12.25 1:23 PM ページ 295 FRANCAIS (3) Lecture en répétition 2 Utiliser cette fonction pour lire en répétition vos sections audio ou vidéo préférées. OFF SLEEP ON VCR REC NTSC/PAL TITLE TV IN T V ENTER A-B REPEAT CHARAC. SLIDE MODE EDIT/MENU ZOOM SOURCE Réglez les commutateurs de sélection de la télécommande sur A/V et DVD. [2]-1,2 [1]-1 TUNER TV / VCR DVD IN/SURR. A/V SYSTEM CLEAR TV CH RDS PROG/DIRECT PTY REPEAT TIME - RANDOM MODE MEMO BAND DVD TUNER D.AUX 3 TV CH + CT CD SRS RT SEARCH MODE TUNING / TV VOL 1 2 MD/LINE-1 TAPE /LINE-2 4 5 6 + - 5CH STEREO AUTO DECODE TUNER + 7 8 9 DIRECT STEREO VIRTUAL CALL 0/10 +10 - TEST TONE INPUT MODE SURROUND FUNCTION CH IN/SURR. MD CDR TAPE TUNER TV / VCR DVD IN/SURR. A/V SYSTEM IN/SURR. MD CDR TAPE 1 2 DVD 8 + 9 [1] Lecture en répétition (Lecture répétée) 1 En mode de lecture, appuyez sur la touche REPEAT (REPETITION). • L’affichage sur l’écran de TV change chaque fois que la touche est activée, et le mode correspondant, soit de répétition de lecture, soit d’arrêt est sélectionné. s’allume sur l’affichage lorsque le mode de lecture répétée est réglé. “ALL” s’allume lorsque le mode de lecture répétée complète est réglé. q Pour les DVD REPEAT MEMO Télécommande w Pour les CD vidéo et musicaux • Lecture normale • Lecture normale • Répétition de chapitre CHAPTER REPEAT • Répétition de plage TRACK REPEAT • Répétition de titre TITLE REPEAT • Répétition du disque entier DISC REPEAT • Annulation de la lecture en répétition REPEAT OFF • Annulation de la lecture en répétition REPEAT OFF Pour restituer la lecture normale: Restituer la lecture normale en appuyant sur la touche REPEAT jusqu’à ce que “REPEAT OFF” apparaisse sur l’écran de TV. 295 3ADV-M71E2_FRA p285-p339 03.12.25 1:23 PM ページ 296 FRANCAIS [2] Lire une certaine section en répétition (Lecture répétée A-B) 1 Pendant la lecture, appuyez sur la touche REPEAT A-B • Cette opération règle le point de départ sur A. ENTER A-B REPEAT A TO B SET A Télécommande 2 Appuyer de nouveau sur la touche REPEAT A-B. • Cette opération règle le point de fin de lecture sur B et la ENTER A-B REPEAT A TO B SET B lecture en répétition de la section A-B débute. Télécommande Pour restituer la lecture normale: Appuyez sur la touche REPEAT A-B jusqu’à ce que la mention “A TO B CANCELED” apparaisse sur l’écran de TV. REMARQUES: • Il se peut que la lecture en répétition ne fonctionne pas avec certains DVD. • Les fonctions de lecture en répétition et de répétition de la section A à la section B ne fonctionneront pas pour les CD vidéo ou les DVD pour lesquels le temps écoulé n’est pas affiché pendant la lecture. • Dans certains cas, les sous-titres ne seront pas affichés près des points A et B pendant la lecture en répétition de la section A-B. 296 3ADV-M71E2_FRA p285-p339 03.12.25 1:23 PM ページ 297 FRANCAIS (4) Lecture des plages dans l’ordre souhaité 2 Utiliser cette fonction avec les CD vidéo et musicaux pour lire les plages dans l’ordre souhaité. 2 Cette fonction n’affecte pas les DVD. SLEEP REC NTSC/PAL TITLE TV IN T V ENTER A-B REPEAT CHARAC. SLIDE MODE EDIT/MENU ZOOM SOURCE CLEAR TV CH RDS PROG/DIRECT 1 Réglez les commutateurs de sélection de la télécommande sur A/V et DVD. MODE TUNING / TV VOL TUNER D.AUX 2 3 TAPE /LINE-2 4 5 6 + - 5CH STEREO AUTO DECODE TUNER + 7 8 9 DIRECT STEREO VIRTUAL CALL 0/10 +10 - TEST TONE INPUT MODE SURROUND FUNCTION CH TUNER TV / VCR DVD IN/SURR. IN/SURR. MD + BAND 1 A/V SYSTEM TV CH MD/LINE-1 TUNER TV / VCR DVD IN/SURR. A/V TIME - CT CD SRS RT RANDOM SEARCH MODE MEMO DVD 2 REPEAT PTY SYSTEM IN/SURR. MD CDR TAPE CDR TAPE 3 1 2 + DVD 8 6 9 7 - STATUS 1 2 Appuyer une fois sur la touche PROG/DIRECT en mode arrêt. • L’écran de sélection de programme apparaît. Utiliser les touches numériques pour sélectionner le numéro que l’on souhaite programmer. PROG/DIRECT MODE • On peut programmer jusqu’à 20 pistes. Télécommande DVD TUNER D.AUX 1 2 3 MD/LINE-1 TAPE /LINE-2 4 7 5 6 5CH STEREO AUTO DECODE 8 9 STEREO VIRTUAL 0/10 +10 Télécommande Exemple: Pour programmer les pistes 5 et 12 Appuyer sur la touche numérique “5”. \ 3 Appuyer sur la touche numérique “2”. Appuyer sur la touche numérique “+10”. Appuyer sur la touche de lecture. • Les pistes sont lues dans l’ordre programmé. \ 1 DVD Télécommande Pour retourner à la lecture normale: Appuyer sur la touche d’arrêt pour arrêter la lecture programmée, puis appuyer sur la touche PROG/DIRECT. Lorsque l’on appuie de nouveau sur la touche de lecture, la lecture normale commence au début du disque. Effacer certaines pistes du programme: Appuyer sur la touche d’arrêt pour arrêter la lecture programmée. Ensuite, appuyer sur la touche CLEAR pour effacer la dernière piste programmée. Effacer le programme tout entier: Le programme tout entier est effacé lorsque l’appareil est mis hors tension ou que le disque est retiré du plateau. Le programme tout entier peut également être effacé en appuyant sur la touche d’arrêt pour arrêter la lecture programmée puis en appuyant sur la touche PROG/DIRECT. Vérifier les pistes programmées: Appuyer sur la touche CALL pour afficher les pistes programmées les unes après les autres. 297 3ADV-M71E2_FRA p285-p339 03.12.25 1:23 PM ページ 298 FRANCAIS (5) Lecture aléatoire de plages 2 Utiliser cette fonction avec les CD vidéo et musicaux pour lire les plages dans un ordre choisi au hasard. 2 Cette fonction n’affecte pas les DVD. SLEEP NTSC/PAL TITLE TV IN T V ENTER A-B REPEAT CHARAC. SLIDE MODE EDIT/MENU ZOOM SOURCE CLEAR TV CH RDS PROG/DIRECT Réglez les commutateurs de sélection de la télécommande sur A/V et DVD. RANDOM MEMO BAND DVD TUNER D.AUX 1 2 3 MD/LINE-1 TAPE /LINE-2 CDR TAPE + CT CD SRS RT SEARCH MODE 1 TUNING / TV VOL 5 6 5CH STEREO AUTO DECODE TUNER + 7 8 9 DIRECT STEREO VIRTUAL CALL 0/10 +10 - TEST TONE INPUT MODE SURROUND FUNCTION CH TUNER TV / VCR DVD IN/SURR. A/V IN/SURR. MD IN/SURR. MD TV CH + - SYSTEM SYSTEM PTY MODE 4 TUNER TV / VCR DVD IN/SURR. A/V REPEAT TIME - CDR TAPE 2 1 2 + DVD 8 6 9 7 - STATUS 3 1 MUTING En mode stop, appuyez sur la touche RANDOM. • L’écran de lecture aléatoire apparaît. RANDOM BAND RANDOM ON Télécommande 2 Appuyez sur la touche PLAY (1). • La lecture des plages dans un ordre choisi au hasard débute. 1 DVD Unité principale Télécommande • La lecture aléatoire n’est pas possible pour certains disques. Pour restituer la lecture normale: Appuyez sur la touche STOP (2) pour arrêter la lecture au hasard, puis appuyer une fois sur la touche RANDOM. 298 3ADV-M71E2_FRA p285-p339 03.12.25 1:23 PM ページ 299 FRANCAIS (6) Lecture MP3 WMA [1] L’écoute de CD/CD-R/CD-RW MP3 2 Il existe de nombreux sites Internet de distribution de musique à partir desquels il est possible de télécharger des fichiers musicaux en format MP3. Les morceaux de musique téléchargés selon les instructions du site et gravés sur des disques CD-R/RW peuvent être lus sur l’ADV-M71. Si des morceaux de musique ont été enregistrés sur des CD musicaux disponibles dans le commerce et qu’ils ont été convertis dans les fichiers MP3 d’un ordinateur à l’aide d’un encodeur MP3 (logiciel de conversion), les données contenues sur un disque de 12 cm sont réduites environ au 1/10 des données originales. Ainsi, lorsque des données sont gravées sur un CD dans le format MP3, il est possible d’inscrire environ 10 fois plus de données sur un disque CD-R/RW. Un seul disque CD-R/RW peut contenir plus de 100 plages. Valeurs prises lorsque des plages de 5 minutes sont converties avec un débit binaire standard de 128 Kbit/s en fichiers MP3 et en utilisant un disque CD-R/RW d’une capacité de 650 MB. 1 1 3 CALL 0/10 +10 - TEST TONE INPUT MODE SURROUND FUNCTION TUNER TV / VCR DVD IN/SURR. A/V SYSTEM B CDR TAPE PUSH - PARAM. 3 - 1 2 + DVD + BAND MENU / SET TONE / SDB IN/SURR. MD SURROUND / SELECT DVD SURROUND RECEIVER ADV-M71 8 9 - VOLUME 6 7 FUNCTION STATUS ON / STANDBY PHONES 3 MUTING SETUP TONE /SDB 2,3 ENTER SURROUND PARAMETER CH SELECT DISPLAY RETURN ANGLE 1 VCR CH MENU AUDIO + TOP MENU SUB TITLE Charger le disque CD-R/RW sur lequel les fichiers musicaux en format MP3 ont été inscrits dans cet appareil. (Voir page 264.) • Lorsque le disque est chargé dans le ADV-M71, l’écran d’informations du disque apparaît. • S’il existe plusieurs dossiers, passer à l’étape 2. • Si le disque ne contient pas de dossiers (s’il ne contient que des fichiers MP3), passer à l’étape 3. Tous les dossiers enregistrés sur le disque sont affichés. (Les dossiers ne sont pas affichés par couche.) 2 Utiliser les touches de curseur • et ª afin de sélectionner le dossier contenant le(s) fichier(s) que vous souhaitez lire, puis appuyez sur la touche ENTER. ENTER \ Télécommande Pour changer de dossier Utiliser la touche de curseur • afin de sélectionner “ROOT” en haut à droite de l’écran, appuyer ensuite sur la touche ENTER. L’écran de l’étape 1 réapparaît. Sélectionner le dossier souhaité. Télécommande 299 3ADV-M71E2_FRA p285-p339 03.12.25 1:23 PM ページ 300 FRANCAIS 3 Utiliser les touches de curseurse • et ª pour sélectionner le fichier MP3 que vous souhaitez lire, puis appuyez sur la touche PLAY (1) ou sur la touche ENTER. • La lecture commence. 1 \ L’affichage peut être inversé entre le temps écoulé de la plage et le temps restant de la plage, en appuyant sur la touche DISPLAY. La lecture programmée n’est pas possible avec les disques MP3. DVD Unité principale Télécommande Télécommande \ ENTER Pour changer de fichier MP3 Appuyez sur la touche STOP, puis utiliser les touches de curseur • et ª pour re-sélectionner le fichier MP3 Télécommande souhaité. Pour sélectionner le mode de lecture aléatoire En mode stop, appuyez sur la touche RANDOM. Appuyer ensuite sur la touche PLAY (1) ou sur la touche ENTER. Pour sélectionner le mode de répétition Le mode de répétition change à chaque fois que la touche REPEAT est activée. NORMAL Æ TRACK REPEAT Æ FOLDER REPEAT ≠ Pour restituer l’écran d’informations du disque initial Appuyez sur la touche STOP (2), utiliser les touches de curseur • afin de sélectionner “ROOT” en haut, à droite de l’écran et appuyez sur la touche ENTER. REMARQUES: • L’ADV-M71 est compatible avec les normes “MPEG-1 Audio Layer 3” (fréquence d’échantillonnage de 32, 44.1 ou 48 kHz). Il n’est pas compatible avec d’autres normes telles que “MPEG-2 Audio Layer 3”, “MPEG-2.5 Audio Layer 3”, MP1, MP2, etc. • En raison des propriétés du disque mais aussi de saletés et de gondolements, etc., il ne sera peut être pas possible de lire certains disques CD-R/RW. • Les signaux numériques envoyés lors de la lecture de fichiers MP3, sont des signaux MP3 convertis en MIC, sans tenir compte du fait que la sortie audio soit réglée sur “normal” ou sur “conversion MIC”. Les signaux sont envoyés avec la même fréquence d’échantillonnage que ceux de sources musicales. • En général, plus le débit binaire du fichier MP3 est élevé, meilleure est la qualité du son. Pour l’ADV-M71, nous recommandons l’utilisation de fichiers MP3 enregistrés avec un débit binaire de 128 Kbit/s ou plus. • Il est possible que les fichiers MP3 ne soient pas lus dans l’ordre attendu, car le logiciel d’inscription peut modifier la position des dossiers et l’ordre des fichiers lors de l’écriture sur le disque CD-R/RW. • La recherche manuelle et la lecture programmée ne sont pas possibles avec les fichiers MP3. • Lors de l’écriture de fichiers MP3 sur des disques CD-R/RW, sélectionner “ISO9660 niveau 1” comme format du logiciel d’inscription. Cette opération ne sera peut être pas possible avec certains types de logiciels d’inscription. Pour plus d’informations, se reporter aux instructions d’utilisation du logiciel d’inscription. • Avec l’ADV-M71, il est possible d’afficher les noms de fichiers et de dossiers comme des titres. L’ADV-M71 peut afficher jusqu’à 11 caractères, comprenant des nombres, des lettres majuscules et le trait de soulignement “ _ ”. • Si l’enregistrement a été effectué dans un format autre que “ISO 9660 niveau 1”, l’affichage et la lecture normale ne seront peut être pas possibles. De plus les noms de fichiers et de dossiers comportant d’autres symboles ne seront pas affichés correctement. • S’assurer d’ajouter l’extension “MP3” aux fichiers MP3. Les fichiers ne peuvent pas être lus s’ils comportent une extension autre que “.MP3” ou s’ils n’ont pas d’extension. (Pour les ordinateurs Macintosh, les fichiers MP3 peuvent être lus en ajoutant l’extension “.MP3” après le nom du fichier comprenant 8 lettres majuscules ou nombres et en enregistrant les fichiers sur le disque CD-R/RW). • Ne pas coller d’autocollants, de ruban adhésif, etc., ni sur la face imprimée ni sur la face enregistrée des disques CD-R/RW. Si de l’adhésif est placé sur la surface du disque, le disque risque de rester coincé dans l’ADV-M71 et de ne pas pouvoir être éjecté. • L’ADV-M71 n’est pas compatible avec les logiciels d’inscription paquets. • L’ADV-M71 n’est pas compatible avec ID3-Tag. • L’ADV-M71 n’est pas compatible avec les listes de lecture. 300 3ADV-M71E2_FRA p285-p339 03.12.25 1:23 PM ページ 301 FRANCAIS [2] Ecoute de CD-R/CD-RW WMA (Windows Media Audio) enregistrés • Cet appareil peut lire des fichiers musicaux CD-R/RW enregistrés en format de compression audio WMA (Windows Media Audio)*. Windows Media et le logo Windows sont des marques ou des marques déposées appartenant à Microsoft Corporation (U.S.A.) aux Etats-Unis et dans d’autres pays. WMA (Windows Media Audio): Nouveau codage audio de Microsoft Corporation (Etats-Unis) • L’utilisation d’enregistrements autres que pour votre plaisir personnel n’est pas autorisée sans la permission du détenteur des droits d’auteurs, conformément à la loi sur les droits d’auteurs. • La méthode de lecture est la même que pour “[1] L’écoute de CD/CD-R/CD-RW MP3” enregistrés » figurant aux pages 299et 300. • Dans l’affichage de fichiers de l’écran d’informations du disque, les fichiers WMA seront affichés avec l’icône “WMA” au lieu de l’icône “MP3”. (Les fichiers pour lesquels l’icône “WMA” n’est pas affichée ne peuvent pas être lus.) REMARQUES: • Les fichiers enregistrés avec une fréquence d’échantillonnage (fs) de 32; 44,1 et 48 kHz sont compatibles. • La lecture programmée ne peut pas être effectuée avec des fichiers WMA. • La sortie numérique lors de la lecture de fichiers WMA est convertie en modulation par impulsions et codage (PCM) sans tenir compte des réglages initiaux. • Veuillez utiliser des disques enregistrés conformément au système de fichier de CD-ROM ISO 9660 de niveau 1/niveau 2. (Les formats étendus sont exclus.) • Les fichiers protégés par droits d’auteurs ne peuvent pas être lus. Noter également qu’en fonction du fichier d’écriture et des conditions, il se peut que la lecture soit impossible ou que les fichiers ne soient pas affichés correctement. • La lecture du CD-R/RW risque de ne pas être possible en fonction des caractéristiques du disque ou en présence de salissures, de rayures ou d’autres facteurs. • Les débits binaires de 64 k à 160 kbps sont compatibles avec les fichiers WMA ayant une extension “.wma” ou “.WMA”. • Cet appareil peut afficher les noms de dossiers et de fichiers sur l’écran. Jusqu’à 11 caractères alphanumériques majuscules demi-largeur et symboles peuvent être affichés (y compris le symbole de soulignement). • A l’arrêt, la touche DISPLAY de la télécommande peut être utilisée pour commuter et afficher les noms des titres et des artistes. (Un dossier a une capacité de 99 fichiers au maximum.) • Il est recommandé d’utiliser des disques enregistrés avec moins de 99 fichiers par dossier. Les configurations de plusieurs dossiers sont possibles; cependant en fonction de la configuration, la lecture de tous les dossiers et fichiers risque de ne pas être possible. • Les disques et CD-R/RW multisessions n’ayant pas été finalisés peuvent également être lus. Il est cependant recommandé de lire des disques ayant eu une fermeture de session au sein de 10 sessions ou ayant été finalisés. • La sélection directe de plage à l’aide des touches numériques de la télécommande (0 à 9, et +10) peut spécifier jusqu’à 179 plages (179 fichiers) par dossier. En présence de plus de 179 plages, alors que l’appareil est à l’arrêt, utiliser les flèches sur l’écran d’informations du disque pour sélectionner les fichiers et utiliser la touche de lecture ou la touche ENTER pour lancer la lecture. 301 3ADV-M71E2_FRA p285-p339 03.12.25 1:23 PM ページ 302 FRANCAIS (7) Lecture de fichiers d’image fixe (format JPEG ) 2 Les fichiers JPEG mémorisés sur des CD, CD-R et CD-RW d’image Kodak peuvent être lus comme un diapositive et lus sur le ADV-M71. [1] Lecture de CD image (Kodak picture CD) 2 Lire des Picture CD L’ADV-M71 peut lire des Kodak Picture CD, pour permettre de visionner les photos qui s’y trouvent sur un écran de télévision. (Les Picture CD sont des CD contenant des photos prises sur des appareils photo traditionnels qui ont été converties en données numériques. Pour avoir des détails sur les Picture CD, contacter un magasin offrant des services de développement Kodak.) 8 1 B 3 PUSH - PARAM. - + BAND MENU / SET TONE / SDB - 7 STATUS SURROUND / SELECT DVD SURROUND RECEIVER ADV-M71 9 6 1 VOLUME Réglez les commutateurs de sélection de la télécommande sur A/V et DVD. MUTING SETUP TONE /SDB 1-w ENTER SURROUND PARAMETER CH SELECT - FUNCTION ON / STANDBY PHONES TUNER TV / VCR DVD IN/SURR. A/V DISPLAY RETURN ANGLE SYSTEM MENU AUDIO IN/SURR. MD CDR TAPE RC-966 1 Charger les Picture CD dans l’appareil. • Pour les Picture CD: La lecture d’image fixes commence automatiquement lorsque le disque est inséré. Unité principale Appuyer sur la touche d’arrêt pour arrêter la lecture. “KODAK” est la marque déposée de Eastman kodak Co. 302 VCR CH + TOP MENU SUB TITLE 3ADV-M71E2_FRA p285-p339 03.12.25 1:23 PM ページ 303 FRANCAIS [2] Lecture d’images fixes mémorisées sur des CD-R/RW 1 3 CALL 0/10 +10 - TEST TONE INPUT MODE SURROUND FUNCTION TUNER TV / VCR DVD IN/SURR. A/V Réglez les commutateurs B de sélection de la télécommande sur A/V SURROUND / SELECT DVD SURROUND RECEIVER ADV-M71 PUSH - PARAM. - IN/SURR. MD CDR TAPE 3 1 2 + DVD 8 9 - + BAND MENU / SET TONE / SDB SYSTEM VOLUME et DVD. 6 3 FUNCTION ON / STANDBY PHONES 7 STATUS TUNER TV / VCR DVD IN/SURR. A/V SYSTEM MUTING SETUP TONE /SDB 2,3 IN/SURR. MD CDR TAPE ENTER SURROUND PARAMETER CH SELECT - 1 + Charger le CD-R/RW sur lesquel les images fixes ont été gravées dans le ADV-M71. B D I SC I NF ORMATI ON • Lorsque le disque est chargé dans le ADV-M71, l’écran contenant des informations sur le disque apparaît. ROOT • S’il y a plusieurs dossiers, passez à l’étape 2. • Si le disque ne contient aucun dossier, passez à l’étape 3. P L AY MODE ROOT 0 JPEG 1 1 JPEG 2 2 JPEG 3 3 JPEG 4 4 JPEG 5 5 F OL DE R S I GNAL E L APSED S I NGL E : 2 VCR CH : --:-DEC I S I ON : ENTER BUT TON Utiliser les curseurs • et ª pour sélectionner le dossier comprenant le(s) fichier(s) que vous souhaitez écouter, puis appuyez sur la touche ENTER. B D I SC I NF ORMATI ON Pour changer de fichier Utiliser le curseur • afin de sélectionner “RACINE” dans la partie supérieure droite de l’écran, puis appuyez sur la touche ENTER. L’écran de l’étape 1 apparaît à nouveau. Sélectionnez le dossier souhaité. Télécommande ROOT •• 0 JPEG 1 A 1 JPEG 2 B 2 JPEG 3 C 3 JPEG 4 D 4 JPEG 5 E 5 P L AY MODE ENTER F OL DE R S I GNAL E L APSED S I NGL E : : --:-DEC I S I ON : ENTER BUT TON Télécommande 3 Utiliser les touches de déplacement du curseur • et ª de la télécommande pour sélectionner le fichier d’image fixe à partir desquels on veut commencer la présentation de diapositives, ensuite appuyez sur la touche PLAY ou sur la touche ENTER de la télécommande. • La présentation de diapositives commence. • Seuls les fichiers d’image fixe dans le dossier sélectionné sont lus. B D I SC I NF ORMATI ON Télécommande ROOT •• 0 JPEG 1 A 1 JPEG 2 B 2 JPEG 3 C 3 JPEG 4 D 4 JPEG 5 E 5 P L AY MODE S I GNAL E L APSED S I NGL E : Dès que tous les fichiers d’image fixe dans le dossier ont été lus, l’écran d’information sur le F OL DE R : --:-DEC I S I ON : ENTER BUT TON ENTER 1 DVD Unité principale Télécommande 303 3ADV-M71E2_FRA p285-p339 03.12.25 1:23 PM ページ 304 FRANCAIS Pour visualiser instantanément plusieurs images fixes mémorisées sur le disque: • Appuyez sur la touche STOP pour afficher simultanément 9 images fixes. • Pour sélectionner et visualiser une image fixe (pour commencer la présentation de diapostives à partir d’une image fixe spécifique), utiliser les touches de déplacement du curseur (ª, •, 0 et 1) pour sélectionner image fixe désirée, ensuite appuyez sur la touche ENTER. Pour arrêter momentanément la présentation de diapositives: • Appuyez sur la touche PAUSE. • Pour reprendre la présentation de diapositives, appuyez sur la touche PLAY. Pour repérer une image fixe à visualiser (à partir de la quelle on veut commencer la présentation de diapositives): • Pendant la présentation de diapositives, appuyer sur une des touches SKIP (8,9). Appuyez sur la touche SKIP 8 pour un repérage en arrière vers l’image fixe précédente,appuyez sur la touche SKIP 9 pour un repérage en avant vers l’image fixe suivante. Basculement et rotation d’images fixes: • Utiliser les touches de déplacement du curseur (ª, •, 0 et 1) pour bacsuler l’image fixe. Touche de • curseur: L’image fixe en cours d’affichage est basculée verticalement. Touche de ª curseur: L’image fixe en cours d’affichage est basculée horizontalement. L’image fixe en cours d’affichage est tournée 90° dans le sens contraire des aiguilles d’une montre. Touche de 0 curseur: L’image fixe en cours d’affichage est tournée 90° dans le sens des aiguilles d’une montre. Touche de 1 curseur: Lire l’image en mode de zoom. • Si la touche de ZOOM est enfoncée lors de lal ecture d’une image JPEG (“ZOOM ACTIVE” est affichée à l’écran à ce moment-là) l’agrandissement et le rétrécissement à l’aide des touches de recherche. (6: rétrécissement, 7: agrandir) • Lors du zoom de l’image, utiliser les touches du curseur (ª, •, 0 et 1) pour déplacer l’image zoomée. • La lecture en continu (SLIDE SHOW) n’est pas possible en mode de zoom. Il est possible de choisir la méthode de commutation vers la prochaine image durant une lecture en continu d’images JPEG (SLIDE SHOW). • Appuyez sur la touche SLIDE MODE sur la télécommande. • Sélectionner parmi SLIDE SHOW MODE 1 à MODE 11, MODE RAND et MODE NONE. Modes de lecture spéciaux pour les fichiers MP3/WMA et JPEG Utiliser les touches de déplacement du curseur 0 et 1 pour sélectionner le mode de lecture, appuyer sur les touches de déplacement du curseur • et ª pour sélectionner le mode de lecture spécial. • FICHIER (les fichiers MP3/WMA et JPEG dans le dossier sont lus dans l’ordre en commençant par le fichier sélectionné) • RÉPÉTITION DE FICH (tous les fichiers MP3/WMA et JPEG dans le dossier sont lus répétitivement en commençant par le fichier sélectionné) • DISQUE (tous les fichiers MP3/WMA et JPEG sur le disque sont lus dans l’ordre en commençant par le fichier sélectionné) • RÉPÉTITION DE DISQ (tous les fichiers MP3/WMA et JPEG sur le disque sont lus répétitivement en commençant par le fichier sélectionné) • ALÉATOIRE: OUI (tous les fichiers MP3/WMA et JPEG dans le dossier sont lus dans un ordre aléatoire en commençant par le fichier sélectionné) • RÉPÉTITION DE PLAG (le fichier MP3/WMA ou JPEG sélectionné est lu répétitivement) REMARQUES: • Le ADV-M71 est compatible avec des données d’image mémorisées en format JPEG, mais Denon ne garantit pas que toutes les données d’image mémorisées en format JPEG peuvent être visualisées. • Des images avec des résolutions jusqu’à 2048 x 1536 pixels peuvent être affichées. • Il peut être impossible de lire certains CD-R/RW due aux propriétés du disque, la saleté, les rayures, etc. • Lors de la mémorisation des fichiers JPEG sur le CD-R/RW, régler le programme d’écriture pour mémoriser les fichiers en format “ISO9660 niveau 1”. • S’assurer d’attriber aux fichiers JPEG l’extension “.JPG” et “.JPE”. Des fichiers avec d’autres extensions ou sans extension ne peuvent pas être visualisés sur le ADV-M71. • Ne collez pas d’autocollants, d’adhésif, etc. sur les disques CD-R/RW; ni sur la face comportant l’étiquette ni sur la face comportant les signaux. Si la face d’un disque est recouverte d’adhésif, le disque risque de rester coincé dans le ADV-M71 et de ne pas pouvoir etre éjecté. • Ne pas lire des disques CD-R/RW contenant des fichiers autres que des fichiers de CD musique (en format CDA), les fichiers MP3/WMA et JPEG. A défaut d’une telle précaution, le lecteur risque de mal fonctionner ou d’être endommagé, selon le type de fichier. • Les fichiers JPEG créés sur Macintosh ne peuvent pas être lus. 304 3ADV-M71E2_FRA p285-p339 03.12.25 1:23 PM ページ 305 FRANCAIS (8) Utilisation des fonctions Angle, Sous-titre et sons multiples [1] Changer la langue audio (Fonction sons multiples) 2 Pour les DVD contenant des signaux de langue audio multiples, la langue audio peut être changée pendant la lecture. CDR TAPE 1 2 + DVD 8 9 6 Réglez les commutateurs de sélection de la télécommande sur A/V et DVD. - 7 STATUS 3 MUTING SETUP TONE /SDB 2 ENTER SURROUND PARAMETER CH SELECT TUNER TV / VCR DVD IN/SURR. A/V DISPLAY RETURN SYSTEM MENU VCR CH + TOP MENU IN/SURR. MD CDR TAPE ANGLE AUDIO SUB TITLE 1 RC-966 1 Pendant la lecture, appuyez sur la touche AUDIO. • Le numéro de le langue audio en cours est affiché. AUDIO AUDIO 1/3:DOLBY D3/2/.1 ENG Télécommande 2 Utiliser les touches de curseur • et ª pour sélectionner la langue souhaitée. AUDIO 2/3:DOLBY D3/2/.1 FRA • L’affichage s’éteint lorsque la touche AUDIO est activée. Télécommande REMARQUES: • Avec certains disques, il n’est pas possible de modifier la langue audio pendant la lecture. Dans ce cas, la sélectionner à partir du menu du DVD (Voir page 320.) • Si la langue souhaitée n’est pas sélectionnée après avoir appuyé plusieurs fois sur les touches de curseur • et ª, alors le disque ne comporte pas cette langue. • La langue choisie dans les réglages par défaut est sélectionnée lorsque l’appareil est mis sous tension et lorsque le disque est remplacé. 305 3ADV-M71E2_FRA p285-p339 03.12.25 1:23 PM ページ 306 FRANCAIS [2] Changer la langue des sous-titres (Fonction sous-titres multiples) 2 Pour les DVD comportant des signaux de langues de sous-titres multiples, la langue des sous-titres peut être modifiée pendant la lecture. CDR TAPE 1 2 + DVD 8 9 6 - 7 STATUS Réglez les commutateurs de sélection de la télécommande sur A/V et DVD. 3 MUTING SETUP TONE /SDB 2 ENTER SURROUND PARAMETER CH SELECT TUNER TV / VCR DVD IN/SURR. A/V DISPLAY RETURN SYSTEM MENU + VCR CH TOP MENU IN/SURR. MD CDR TAPE ANGLE AUDIO SUB TITLE 1 RC-966 1 Pendant la lecture, appuyez sur la touche SUBTITLE. • Le numéro de la langue des sous-titre en cours est affiché. SUB TITLE SUBTITLE 01/03:ENG SUBTITLE 02/03:FRA Télécommande 2 Utiliser les touches de curseur • et ª afin de sélectionner la langue souhaité. • L’affichage s’éteint lorsque la touche SUBTITLE est activée. Télécommande REMARQUES: • Si la langue souhaitée n’est pas sélectionnée après avoir appuyé plusieurs fois sur les touches de curseur • et ª, alors le disque ne comporte pas cette langue. • La langue des sous-titres réglée dans les réglages par défaut est sélectionnée lorsque l’appareil est mis sous tension et lorsque le disque est remplacé. Si le disque ne comprend pas cette langue, la langue par défaut du disque est sélectionnée. • Lorsque la langue des sous-titres est modifiée, plusieurs secondes peuvent être nécessaire pour que la nouvelle langue apparaisse. • Lorsqu’un disque comportant des sous-titres codés est lu, les sous-titres normaux et codés peuvent se superposer sur l’écran. Dans ce cas, inactiver la fonction des sous-titres. 306 3ADV-M71E2_FRA p285-p339 03.12.25 1:23 PM ページ 307 FRANCAIS [3] Changer l’angle (Fonction angles multiples) 2 Pour les DVD contenant des signaux d’angles multiples, l’angle peut être modifié pendant la lecture. CDR TAPE 1 2 + DVD 8 9 6 Réglez les commutateurs de sélection de la télécommande sur A/V et DVD. - 7 STATUS 3 MUTING SETUP TONE /SDB 2 ENTER SURROUND PARAMETER CH SELECT TUNER TV / VCR DVD IN/SURR. A/V DISPLAY RETURN SYSTEM IN/SURR. MD CDR TAPE 1 ANGLE MENU AUDIO VCR CH + TOP MENU SUB TITLE RC-966 1 Pendant la lecture, appuyez sur la touche ANGLE. 3/5 • Le numéro de l’angle en cours est affiché. ANGLE Télécommande 2 Utiliser les touches de curseur • et ª pour sélectionner l’angle souhaité. • L’affichage s’éteint lorsque la touche ANGLE est activée. 4/5 Télécommande REMARQUES: • La fonction angles multiples ne fonctionnent qu’avec les disques sur lesquels des angles multiples ont été enregistrés. • Pour les scènes où des angles multiples ont été enregistrés, l’angle peut être modifié. 307 3ADV-M71E2_FRA p285-p339 03.12.25 1:23 PM ページ 308 FRANCAIS (9) Utilisation des menus [1] Utilisation du menu de début 2 Pour les DVD comprenant des titres multiples, le titre souhaité peut être sélectionné et lu à partir du menu de début. CDR TAPE OFF SLEEP TITLE TV IN T V ENTER A-B REPEAT CHARAC. SLIDE MODE EDIT/MENU ZOOM SOURCE CLEAR TV CH Réglez les commutateurs de sélection de la télécommande sur A/V et DVD. RDS PROG/DIRECT 2 TUNER TV / VCR DVD IN/SURR. A/V SYSTEM IN/SURR. MD 1 ON VCR REC NTSC/PAL REPEAT PTY RANDOM MODE MEMO BAND DVD TUNER D.AUX 3 TV CH - 7 STATUS TUNING / TV VOL 2 TAPE /LINE-2 4 5 6 + - 5CH STEREO AUTO DECODE TUNER 8 9 + STEREO 9 6 CT CD SRS RT SEARCH MODE 1 DIRECT 8 + MD/LINE-1 7 + DVD TIME - 2 3 SETUP 0/10 +10 - INPUT MODE SURROUND FUNCTION TONE /SDB 3 2 ENTER SURROUND PARAMETER CH SELECT CH VIRTUAL CALL TEST TONE MUTING DISPLAY RETURN MENU VCR CH + 1 TOP MENU CDR TAPE TUNER TV / VCR DVD IN/SURR. A/V SYSTEM ANGLE SUB TITLE AUDIO IN/SURR. MD CDR TAPE 1 2 DVD 8 1 RC-966 + 9 Example: Pendant la lecture appuyez sur la touche TOP MENU. • Le menu de début apparaît. TOP MENU TOP MENU Apple Banana Orange Strawberry Peach Pineapple Télécommande 2 Utiliser le curseur ou les touches à chiffres pour sélectionner le titres souhaité. • Si vous sélectionnez le numéro du titre à l’aide des touches à chiffres, omettre l’étape 3 ci-dessous. DVD TUNER D.AUX 1 2 3 MD/LINE-1 TAPE /LINE-2 4 5 6 5CH STEREO AUTO DECODE 7 8 9 STEREO VIRTUAL 0/10 +10 Télécommandet Télécommande Exemple: Lorsque “Orange” est sélectionné. TOP MENU 3 Appuyez sur la touche ENTER. • La lecture débute. Apple Banana Orange Strawberry Peach Pineapple ENTER • La lecture commence également si la touche PLAY (1) est activée. Télécommande 308 3ADV-M71E2_FRA p285-p339 03.12.25 1:23 PM ページ 309 FRANCAIS [2] Utilisation du menu de DVD. 2 Certains DVD comportent des menus spéciaux appelés menus de DVD. Par exemple, les DVD avec un contenu complexe peuvent parfois contenir des menus de guide, et les DVD avec plusieurs langues peuvent également comprendre des menus audio et de langues de sous-titres. Ces menus sont appelés “Menus de DVD”. Nous décrivons ici la procédure générale pour utiliser des menus de DVD. CDR TAPE OFF SLEEP TITLE TV IN T V ENTER A-B REPEAT CHARAC. SLIDE MODE EDIT/MENU ZOOM SOURCE CLEAR TV CH Réglez les commutateurs de sélection de la télécommande sur A/V et DVD. RDS PROG/DIRECT 2 TUNER TV / VCR DVD IN/SURR. A/V SYSTEM IN/SURR. MD 1 ON VCR REC NTSC/PAL REPEAT PTY - RANDOM MODE MEMO BAND DVD TUNER D.AUX 3 TV CH 6 - 7 STATUS 2 TAPE /LINE-2 4 5 6 + - 5CH STEREO AUTO DECODE TUNER 8 9 + STEREO + 9 + TUNING / TV VOL 1 DIRECT 8 CT CD SRS RT SEARCH MODE MD/LINE-1 7 2 DVD TIME 3 SETUP 0/10 +10 - INPUT MODE SURROUND FUNCTION TONE /SDB 3 2 ENTER SURROUND PARAMETER CH SELECT CH VIRTUAL CALL TEST TONE MUTING DISPLAY RETURN MENU VCR CH + 1 TOP MENU CDR TAPE TUNER TV / VCR DVD IN/SURR. A/V SYSTEM ANGLE SUB TITLE AUDIO IN/SURR. MD CDR TAPE 1 2 DVD 8 1 RC-966 + 9 Example: Pendant la lecture, appuyez sur la touche MENU. • Le menu du DVD apparaît. DVD MENU 1. SUB TITLE MENU 2. AUDIO 3. ANGLE Télécommande 2 Utiliser le curseur ou les touches à chiffres afin de sélectionner l’item souhaité. • Si vous sélectionnez l’item à l’aide des touches à chiffres, omettre l’étape 3 DVD TUNER D.AUX 1 2 3 MD/LINE-1 TAPE /LINE-2 4 5 6 5CH STEREO AUTO DECODE 7 8 9 STEREO VIRTUAL 0/10 +10 Télécommande Télécommande Exemple: “AUDIO” est sélectionné DVD MENU 1. SUB TITLE 2. AUDIO 3. ANGLE 3 Appuyez sur la touche ENTER. • L’item choisi est sélectionné. • Si d’autres menus apparaissent, répéter les étapes 2 et 3. ENTER Télécommande 309 3ADV-M71E2_FRA p285-p339 03.12.25 1:23 PM ページ 310 FRANCAIS (10) Lecture en mode zoom CDR TAPE OFF SLEEP TITLE TV IN T V ENTER A-B REPEAT CHARAC. SLIDE MODE EDIT/MENU ZOOM SOURCE CLEAR TV CH Réglez les commutateurs de sélection de la télécommande sur A/V et DVD. TUNER TV / VCR DVD IN/SURR. A/V SYSTEM IN/SURR. MD 1 ON VCR REC NTSC/PAL RDS PROG/DIRECT REPEAT PTY - RANDOM MODE MEMO BAND DVD TUNER D.AUX 3 TV CH 2 + DVD TIME + CT CD SRS RT SEARCH MODE 8 1 9 6 - 7 STATUS TUNING / TV VOL 1 2 MD/LINE-1 TAPE /LINE-2 4 5 6 + - 5CH STEREO AUTO DECODE TUNER 3 MUTING SETUP TONE /SDB 8 9 STEREO VIRTUAL CALL 0/10 +10 - TEST TONE INPUT MODE SURROUND FUNCTION 2 ENTER + 7 DIRECT CH SURROUND PARAMETER CH SELECT DISPLAY RETURN MENU VCR CH + TOP MENU CDR TAPE TUNER TV / VCR DVD IN/SURR. A/V SYSTEM ANGLE AUDIO SUB TITLE IN/SURR. MD CDR TAPE 1 2 DVD 8 1 + En mode de lecture ou de pause, appuyez sur la touche ZOOM. • La vitesse du zoom augmente chaque fois que la touche ZOOM est enfoncée. Pour les disques DVD vidéo et CD vidéo: DESACTIVE Æ x1.5 Æ x2 Æ x4 Æ OFF 2 RC-966 9 EDIT/MENU ZOOM TV CH + Télécommande Utiliser les touches du curseur (ª, •, 0 et 1) pour déplacer l’image zoomée. Télécommande REMARQUES: • Il n’est pas possible de faire un zoom avec certains disques. • La fonction zoom risque de ne pas fonctionner correctement sur certaines scènes. • Le zoom n’est pas possible sur le menu supérieur ou sur l’écran du menu. 310 3ADV-M71E2_FRA p285-p339 03.12.25 1:23 PM ページ 311 FRANCAIS 18 UTILISATION DE LA MINUTERIE 2 L’utilisation du système et du minuteur sont possibles une fois la procédure d’installation terminée. (1) Réglage de l’horloge (Affichage sur 12 heures) Exemple: Réglage de l’heure sur “7:30 p.m.” 4,6 2,3,5,7 B 5 SURROUND / SELECT DVD SURROUND RECEIVER ADV-M71 PUSH - PARAM. - Adj 19 : 0 0 MENU / SET + BAND MENU / SET TONE / SDB Appuyez sur la touche MENU/SET. VOLUME FUNCTION Unité principale ON / STANDBY PHONES 6 1 1 Tournez le bouton SURROUND/SELECT pour vous déplacer vers les minutes. Adj 19 : 3 0 SURROUND / SELECT PUSH - PARAM. Mettez l’appareil sous tension. ON / STANDBY Unité principale Unité principale 2 Appuyez sur la touche MENU/SET pour afficher “Time”. Time 0:00 7 Appuyez sur la touche MENU/SET au son du signal horaire, etc. • “30” à la place des minutes s’arrête de clignoter et l’heure actuelle est affichée. Time 19 : 3 0 MENU / SET MENU / SET Unité principale Unité principale • Si l’heure n’a pas encore été réglée ou s’il y a eu une coupure de courant, l’affichage de l’heure clignote. • Si l’heure a été réglée, l’heure actuelle est affichée. 3 Appuyez sur la touche MENU/SET et maintenez-la appuyée plus de 2 secondes. • Les heures clignotent. MENU / SET Adj 0:00 Unité principale 4 Tournez le bouton SURROUND/SELECT pour régler les SURROUND / SELECT heures. PUSH - PARAM. Adj Pour vérifier l’heure actuelle lorsque l’affichage normal est affiché, appuyez une fois sur la touche MENU/SET. L’heure actuelle reste affichée jusqu’à ce qu’une autre opération soit effectuée. L’heure peut être affichée en appuyant sur la touche MENU/SET lorsque l’appareil est en mode de veille. (Une fois cette manipulation effectuée, l’appareil n’est plus en mode de veille d’économie d’énergie.) En appuyant deux fois lorsque l’heure est affichée, l’affichage s’éteint et l’appareil se remet en mode de veille d’économie d’énergie. L’heure peut aussi être réglée lorsque l’alimentation est en mode de veille en appuyant sur la touche MENU/SET pour afficher l’heure et effectuer les étapes 3 à 7. L’horloge marche en se synchronisant à la fréquence de l’alimentation électrique. L’heure peut s’arrêter 2 ou 3 minutes par mois. Si c’est le cas, régler de nouveau l’heure. 19:00 Unité principale Avant de régler le minuteur 2 Assurez-vous de régler l’heure actuelle. Si l’heure n’est pas réglée, le voyant de veille du minuteur ne s’allume pas et le minuteur ne fonctionnera pas. 2 Assurez-vous de bien préréglagener la station avec de régler le minuteur. (Voir page 288.) 2 Minuteur occasionnel: L’alimentation s’allume et se coupe (veille) à l’heure spécifiée une fois seulement. Minuteur de coupure: L’alimentation peut être réglée de façon à se couper au bout de 120 minutes, 90 minutes, ou entre 60 et 10 minutes par intervalles de 10 minutes. 2 Si les heures réglées pour le minuteur quotidien, occasionnel et de coupure se chevauchent, le minuteur de coupure est prioritaire. Le minuteur occasionnel est prioritaire si les minuteurs occasionnel et quotidien se chevauchent. 2 Il n’est pas possible de régler la mise en marche et la coupure du minuteur à la même heure. 311 3ADV-M71E2_FRA p285-p339 03.12.25 1:23 PM ページ 312 FRANCAIS (2) Réglage des minuteurs quotidien et occasionnel 2 Assurez-vous de bien régler l’heure actuelle avant de régler le minuteur. (Voir page 311.) 2 Utilisez le minuteur quotidien pour allumer et couper (veille) l’alimentation une fois à la même heure chaque jour. Utilisez le minuteur occasionnel pour allumer et couper (veille) l’alimentation à l’heure spécifiée une fois seulement. 2 Avec le ADV-M71, il est possible de mettre en marche avec le minuteur la radio, un DVD et un CD. 2 Il est possible de lire un DVD, un CD, une cassette, un MD, de mettre en marche la radio ou un appareil connecté aux prises AUX avec le minuteur. Il est possible d’enregistrer la radio ou un appareil connecté aux prises AUX sur un enregistreur MD ou une platine cassette en utilisant le minuteur. La lecture avec le minuteur n’est pas possible pour tous les DVD. (La plupart des DVD s’arrêtent sur l’écran du menu.) Exemple 1: Ecoute de la station préréglagenée “3” (FM 92.5 MHz) de p.m.12:35 à p.m.12:56 à l’aide du minuteur quotidien 2,3,4,6,8, 3,5,7,9,11, 13,15,17 10,12,14,16 B 5 Tournez le bouton SURROUND/SELECT et réglez la fonction sur “TUNER”. SURROUND / SELECT PUSH - PARAM. E TUNER SURROUND / SELECT DVD SURROUND RECEIVER ADV-M71 PUSH - PARAM. Unité principale - + BAND MENU / SET TONE / SDB VOLUME La fonction se commute comme indiqué ci-dessous chaque fois que la touche d’ambiance est enfoncée. Les fonctions marquées “*” sont différentes suivant si “LINE-1” ou “LINE-2” est réglée. FUNCTION ON / STANDBY PHONES DVD 1,18 1 *AUX *TU Mettez l’appareil sous tension. 2 6 (LINE1) Appuyez sur la touche MENU/SET. MENU / SET MENU / SET Tournez le bouton SURROUND/SELECT pour afficher “EVERYDAY”, puis appuyez sur la touche MENU/SET. • L’affichage se commute comme SURROUND / SELECT PUSH - PARAM. suit à chaque fois que vous tournez le bouton SURROUND/SELECT: SURROUND / SELECT ONCE EVERYDAY 8 MENU / SET FUNC 92.50M PUSH - PARAM. Appuyez sur la touche MENU/SET. • Les données de la station sélectionnée sont mémorisées et l’appareil est en mode de réglage de l’heure de mise en marche du minuteur. • “E” et “on” sont affichés. MENU / SET E on 0:00 Unité principale Unité principale Appuyez sur la touche MENU/SET. E FM Unité principale Unité principale L’affichage se commute comme suit à chaque fois que vous tournez le bouton SURROUND/SELECT: Tournez le bouton SURROUND/SELECT et sélectionnez le numéro de préréglage “P03”. P03 EVERYDAY 9 <Réglage de l’heure de mise en marche du minuteur> Tournez le bouton SURROUND/SELECT pour régler les heures sur “PM12”. MENU / SET SURROUND / SELECT E Unité principale 312 *TU Unité principale TIMER Unité principale 4 *(LINE2) Appuyez sur la touche MENU/SET pour afficher “TIMER”. 7 3 2) (LINE1 ou (LINE2) *(LINE1) :Tourne dans le sens des aiguilles d’une montre :Tourne dans le sens contraire des aiguilles d’une montre ON / STANDBY Unité principale TUNER on 12:00 PUSH - PARAM. Unité principale 3ADV-M71E2_FRA p285-p339 03.12.25 1:23 PM ページ 313 FRANCAIS 10 Appuyez sur la touche MENU/SET. • Le “PM12” à l’emplacement des heures est mémorisé. E on 12:00 17 MENU / SET Unité principale 11 Tournez le bouton SURROUND/SELECT et réglez les minutes sur “35”. Tournez le bouton SURROUND/SELECT pour afficher “Eon”. • Le minuteur quotidien est activé et SURROUND / SELECT PUSH - PARAM. le voyant de veille du minuteur s’allume. Le réglage du minuteur est terminé. Pour de plus amples détails, voir Unité principale “Mise en marche et coupure des minuteurs quotidien et occasionnel” à la page 312. 1 off/E on SURROUND / SELECT PUSH - PARAM. E on 12:35 Unité principale 12 Appuyez sur la touche MENU/SET. • L’heure de mise en marche est mémorisée et l’appareil est en mode de réglage de l’heure de coupure du minuteur. • “E” et “off” s’allument. MENU / SET E off 0:00 Unité principale 13 <Réglage de l’heure de coupure du minuteur> Tournez le bouton SURROUND/SELECT pour régler les heures sur “PM12”. SURROUND / SELECT PUSH - PARAM. E off 12:00 Unité principale 14 Appuyez sur la touche MENU/SET. • Le “PM12” à l’emplacement des heures est mémorisé. E off 12:00 18 Coupez l’alimentation. • Le mode de veille est réglé. (Le voyant d’alimentation devient orange.) • Lorsque l’heure de mise en marche du minuteur est atteinte, le minuteur se met en marche. ON / STANDBY Unité principale Si vous faites une erreur pendant le réglage du minuteur BAND • Appuyez sur la touche d’arrêt à n’importe quel moment entre les étapes 4 et 15. (L’affichage revient à l’étape 3.) • Appuyez sur la touche MENU/SET Unité principale plusieurs fois afin d’afficher l’élément que vous voulez corriger, puis corrigez-le. • Une fois la correction effectuée, appuyez de nouveau plusieurs fois sur la touche MENU/SET pour procéder à l’étape 18 et terminez le réglage du minuteur. REMARQUE: • Le voyant de veille du minuteur ne s’allume pas si l’heure actuelle n’a pas été réglée. Réglez l’heure actuelle avant de régler le minuteur. (Voir page 311.) MENU / SET Unité principale 15 Tournez le bouton SURROUND/SELECT et réglez les minutes sur “56”. SURROUND / SELECT PUSH - PARAM. E off 12:56 Unité principale 16 Appuyez sur la touche MENU/SET. • L’heure de coupure est mémorisée. MENU / SET Unité principale 313 3ADV-M71E2_FRA p285-p339 03.12.25 1:23 PM ページ 314 FRANCAIS Exemple 2: Ecoute d’un CD à l’aide du minuteur occasionnel 2 B 4,6 4 2 Tournez le bouton SURROUND/SELECT pour afficher “ONCE”, puis appuyez sur la touche MENU/SET. ONCE SURROUND / SELECT DVD SURROUND RECEIVER ADV-M71 PUSH - PARAM. - PUSH - PARAM. BAND MENU / SET TONE / SDB SURROUND / SELECT + VOLUME FUNCTION L’affichage se commute comme suit chaque fois que le bouton SURROUND/SELECT est tourné: ON / STANDBY PHONES 3,4,5,7 1 ONCE Unité principale MENU / SET EVERYDAY Unité principale 1 Mettez l’appareil sous tension. ON / STANDBY 5 Appuyez sur la touche MENU/SET. • Le mode de réglage du minuteur occasionnel est réglé. • “1” (une fois) s’allume. 1 FUNC Unité principale 2 Unité principale 6 Ouvrez le plateau du disque, chargez le CD puis fermez le plateau du disque. MENU / SET Tournez le bouton SURROUND/SELECT et sélectionnez la fonction “DVD”. SURROUND / SELECT 1 DVD PUSH - PARAM. Unité principale 3 Appuyez sur la touche MENU/SET pour afficher “TIMER”. Unité principale MENU / SET TIMER 7 Unité principale Appuyez sur la touche MENU/SET. • La fonction du minuteur, “DVD”, est mémorisée. MENU / SET Unité principale 8 Suivez maintenant les étapes 9 à 18 du “Réglage des minuteurs quotidien et occasionnel ” (pages 312 et 313). • “1” et “on” s’allument lors du réglage de l’heure de mise en marche. “1” et “off” s’allument lors du réglage de l’heure de coupure. • Mettez le minuteur occasionnel en marche à l’étape 17. 2 La lecture et l'enregistrement avec minuteur peuvent être effectués quand les connexions système sont faites entre le ADV-M71 et l'enregistreur MD de la série D-M31 (DMD-M31) ou avec une platine cassette (DRR-M31). (Le minuteur quotidien et le minuteur occasionnel peuvent être tous deux utilisés.) • Lecture avec minuteur de la platine cassette (lorsque TAPE est réglé sur LINE-2) • Lecture avec minuteur de l'enregistreur MD (quand MD est sélectionné pour LINE-1 ou LINE-2) • Lecture avec minuteur d’un appareil connecté aux prises d’entrée AUX (lorsque AUX est réglé sur LINE-1 ou LINE-2) • Enregistrement avec minuteur d’émissions de radio depuis le ADV-M71 sur la platine cassette (lorsque TAPE est réglé sur LINE-1) • Enregistrement avec minuteur de programmes radio du ADV-M71 vers un enregistreur MD (quand MD est sélectionné pour LINE-1) • Enregistrement avec minuteur d’un appareil connecté aux prises d’entrée AUX sur la platine cassette (lorsque AUX est réglée sur LINE-1 et TAPE sur LINE-2) • Enregistrement avec minuteur de l'appareil connecté aux bornes d'entrée AUX vers un enregistreur MD (quant AUX et MD sont sélectionnés pour LINE-1 et LINE-2) L’enregistrement avec minuteur sur l’appareil connecté aux prises d’entrée AUX n’est pas possible. La fonction du minuteur change automatiquement suivant la fonction réglée pour LINE-1 et LINE-2. REMARQUE: • Pour l’enregistrement et la lecture avec minuteur utilisant un appareil connecté aux prises AUX, notez que le ADV-M71 ne peut commander l’alimentation de l’appareil et de ses opérations de lecture. Effectuez les réglages en conséquence. 314 3ADV-M71E2_FRA p285-p339 03.12.25 1:23 PM ページ 315 FRANCAIS (3) Mise en marche et coupure des minuteurs quotidien et occasionnel • Une fois le minuteur réglé à l’aide de la procédure décrite dans “(2) Réglage des minuteurs quotidien et occasionnel” (pages 312 à 313), mettez en marche le minuteur quotidien et/ou occasionnel pour effectuer les opérations de réglage. 2 B • Si le minuteur occasionnel est réglé, le réglage change comme indiqué ci-dessous chaque fois que vous tournez le bouton SURROUND/SELECT. SURROUND / SELECT DVD SURROUND RECEIVER ADV-M71 PUSH - PARAM. - + BAND MENU / SET TONE / SDB VOLUME 1on/E off SURROUND / SELECT PUSH - PARAM. Unité principale 1 o f f / E o ff FUNCTION • Si le minuteur quotidien est réglé, le réglage change comme suit: ON / STANDBY PHONES 1off/E 1 1 MENU / SET on/E on Unité principale 2 1 o f f / E o ff REMARQUES: • Le voyant de veille du minuteur Appuyez sur la touche MENU/SET pour régler le mode de réglage de veille du minuteur. • Les réglages actuels sont affichés. 1 on ne s’allume pas si l’heure actuelle n’a pas été réglée. Réglez l’heure actuelle avant de régler le minuteur. (Voir page 311.) • Si les heures réglées pour les minuteurs quotidien et occasionnel se chevauchent, le minuteur occasionnel est prioritaire. • Assurez-vous de bien régler l’alimentation sur le mode de veille si vous voulez que le minuteur fonctionne. Tournez le bouton SURROUND/SELECT et sélectionnez le minuteur à faire fonctionner. SURROUND / SELECT PUSH - PARAM. • L’affichage se commute comme suit chaque fois que vous tournez le bouton SURROUND/SELECT: Unité principale on Les deux minuteurs, quotidien et occasionnel, sont activés. 1 on/E 1 off/E on Seul le minuteur quotidien est activé. 1 on/E Seul le minuteur occasionnel est activé. 1 off/E off off Aucun des minuteurs, quotidien ou occasionnel, n’est activé. • Lorsque l’un des minuteurs, quotidien ou occasionnel est activé, le voyant de veille du minuteur s’allume. L’affichage revient à la normale environ 4 secondes après que le voyant de veille du minuteur s’est affiché. Le minuteur fonctionne lorsque le bouton SURROUND/SELECT a été tourné et que le voyant de veille du minuteur Si vous ne voulez pas que le minuteur fonctionne, tournez le bouton SURROUND/SELECT pour éteindre le voyant de veille du minuteur . a été allumé. SURROUND / SELECT PUSH - PARAM. Unité principale 315 3ADV-M71E2_FRA p285-p339 03.12.25 1:23 PM ページ 316 FRANCAIS (4) Priorité des minuteurs quotidien et occasionnel • Si les heures réglées pour les minuteurs quotidien et occasionnel se chevauchent, le minuteur occasionnel est prioritaire. (5) A propos des minuteurs quotidien et occasionnel 2 Vérification des réglages du minuteur • Pour vérifier les réglages du minuteur, utilisez la même procédure que lors du réglage du minuteur. q Appuyez sur la touche MENU/SET pour afficher “TIMER”. w Tournez le bouton SURROUND/SELECT pour afficher “EVERYDAY” ou “ONCE”. e L’affichage commute entre la fonction réglée, l’heure de mise en marche, l’heure de coupure et le voyant de veille du minuteur chaque fois que la touche MENU/SET est enfoncée. r L’affichage revient à ce qu’il affichait avant que le minuteur quotidien ou occasionnel ne soit réglé environ 4 secondes après que le voyant de veille du minuteur s’est affiché. 2 Modification des réglages du minuteur • Réinitialisez le minuteur en utilisant les réglages souhaités. Les nouveaux réglages remplacent les réglages précédents. • Pour modifier un réglage pendant le réglage du minuteur, appuyez sur la touche d’arrêt (2) pour revenir à l’affichage “EVERYDAY” ou “ONCE”, puis recommencez la procédure à partir de cette étape. 2 Annulation des réglages du minuteur q Appuyez sur la touche MENU/SET pour afficher “TIMER”. w Tournez le bouton SURROUND/SELECT pour afficher “EVERYDAY” ou “ONCE” (le minuteur dont vous souhaitez annuler les réglages). e Lorsque “EVERYDAY” ou “ONCE” est affiché, appuyez sur la touche d’arrêt (2) et maintenez-la appuyée pendant au moins 2 secondes. Les réglages de ce minuteur sont annulés. 2 Quitter le réglage du minuteur (désactivation du minuteur) • Effectuez la procédure décrite dans “(3) Mise en marche et coupure des minuteurs quotidien et occasionnel” (page 312) et modifiez le réglage pour le mode dans lequel aucun des minuteurs, quotidien et occasionnel, n’est activé (“1off/Eoff”). 2 S’il se produit une coupure de courant • S’il se produit une coupure de courant ou que le cordon d’alimentation est débranché de la prise, l’affichage du minuteur clignote lorsque le courant revient. Réglez de nouveau l’heure actuelle. • Les réglages du minuteur occasionnel sont effacés. • Si les réglages du minuteur quotidien et les préréglages de la radio ont été effacés, réglez-les de nouveau. 316 3ADV-M71E2_FRA p285-p339 03.12.25 1:23 PM ページ 317 FRANCAIS (6) Réglage de la minuterie de sommeil (télécommande uniquement) • La télécommande de cet appareil peut être utilisée pour mettre l’appareil en mode de veille après une durée maximum de 120 minutes. (Minuterie de sommeil) • Utiliser cette fonction afin d’activer automatiquement le mode de veille après une durée spécifiée (minutes). Exemple: Déclencher le mode de veille dans 50 minutes selon l’horloge. S’assurer que le réglage de l’heure est correct. Réglez les commutateurs de sélection de la télécommande sur A/V et IN/SURR.. OFF SLEEP 2,3 CLEAR SYSTEM IN/SURR. MD ENTER A-B REPEAT TITLE TIME TV IN T V CHARAC. SLIDE MODE TV CH RDS PROG/DIRECT TUNER TV / VCR DVD IN/SURR. A/V ON VCR REC NTSC/PAL SOURCE CDR TAPE REPEAT PTY EDIT/MENU ZOOM - RANDOM MODE MEMO BAND DVD TUNER D.AUX 3 TV CH + CT CD SRS RT SEARCH MODE TUNING / TV VOL 1 2 MD/LINE-1 TAPE /LINE-2 4 5 6 + - 5CH STEREO AUTO DECODE TUNER + 7 8 9 DIRECT STEREO VIRTUAL CALL 0/10 +10 - TEST TONE INPUT MODE SURROUND FUNCTION REMARQUES: • Si la touche SLEEP est activée lorsque la minuterie de sommeil fonctionne, le réglage repasse sur 120 minutes. Recommencer le réglage. • Si les réglages de la minuterie journalière et de la minuterie de sommeil entrent en conflit, la minuterie de sommeil a priorité. 20:00 CH Réglage de la minuterie quotidienne, de la minuterie normale 21:00 22:00 ON OFF + 1 Sélectionner et lire la fonction souhaité. 2 Appuyez sur la touche SLEEP. Réglage de la minuterie de sommeil ON OFF Si les minuteries se superposent comme ceci, la minuterie fonctionne comme ce qui est indiqué ci-dessous: 20:00 Fonctionnement de la minuterie • “120” est affiché et le témoin “SLEEP” clignote. 21:00 ON 22:00 OFF Ne fonctionne pas • De même, la minuterie journalière ne fonctionnera pas si l’heure de début est réglée lors du fonctionnement de la minuterie de sommeil. SLEEP SOURCE 120 SLEEP 20:00 Télécommande 21:00 Réglage de la minuterie quotidienne, de la minuterie normale 22:00 Ne fonctionne pas ON OFF + L’affichage change comme indiqué ci-dessous à chaque fois que la touche SLEEP est activée: 120 90 60 50 40 30 20 ON OFF • Le temps restant de la minuterie de sommeil peut être vérifié en appuyant sur la touche STATUS. 10 Témoin “SOMMEIL” inactivé 3 Réglage de la minuterie de sommeil Lorsque le témoin “SLEEP” clignote, appuyer de nouveau sur la touche SLEEP jusqu’à ce que “50” soit affiché. • “50” est affiché et le témoin “SLEEP” clignote. 50 SLEEP SOURCE SLEEP Télécommande • 4 secondes plus tard, l’affichage reprend son aspect initial et le témoin “SLEEP” arrête de clignoter et reste allumé. (Cette opération achève le réglage de la minuterie de sommeil.) 4 50 minutes plus tard, l’alimentation passe en mode de veille. Pour inactiver la minuterie de sommeil, appuyer de façon répétée sur la touche SLEEP, jusqu’à ce que le témoin “SLEEP” s’éteigne. La minuterie de sommeil peut également être inactivée en appuyant sur la touche d’alimentation de l’unité principale ou de la télécommande afin de mettre l’appareil en mode de veille. ON / STANDBY SLEEP OFF SOURCE Télécommande Unité principale Télécommande 317 3ADV-M71E2_FRA p285-p339 03.12.25 1:23 PM ページ 318 FRANCAIS 19 CHANGER LES REGLAGES PAR DEFAUT (DVD) 2 Le réglage initial réglé avant de quitter l’usine peut être modifié. Le contenu des réglages est conservé jusqu’au prochain changement même lorsque l’appareil est mis hors tension. 1 Dans le mode stop, appuyez sur la touche SETUP. Lors du menu d’installation, appuyer sur les touches de curseur • et ª pour sélectionner “DVD SETUP” et appuyez sur la touche ENTER. SETUP Télécommande d Télécommande d ENTER Télécommande 2 L’écran d’installation (réglages par défaut) “DVD SETUP MENU” apparaît. • DISC SETUP (REGLAGE DISQUE) Utiliser cette fonction pour régler la langue à utiliser lors de la lecture du disque. Si la langue choisie ne figure pas sur ce disque, la langue par défaut du disque est sélectionnée. • OSD SETUP (INITIALISATION DE L’AFFICHAGE A L’ECRAN) L’utiliser pour régler la couleur du papier peint. • VIDEO SETUP (REGLAGE VIDEO) Utiliser cette fonction pour régler le mode de l’écran de cet appareil. (Aspect de la TV et type de TV.) • AUDIO SETUP (REGLAGE AUDIO) Utiliser cette fonction pour régler le mode de sortie audio de cet appareil. (Réglage de sortie LPCM et numérique.) • RATINGS (INDICES) Utiliser cette fonction pour empêcher la lecture des DVD pour adultes de sorte que les enfants ne puissent pas les regarder. Il est important de noter que les DVD pour adultes ne peuvent pas être mis hors service si le niveau de l’indice n’est pas enregistré sur le DVD, mais il est possible d’empêcher la lecture de tous les DVD. • OTHER SETUP (AUTRE INSTALLATION) Télécommande d ENTER Télécommande Les textes (sous-titres) et l’intervalle de temps de lecture des arrêts sur image peuvent être réglés. Utiliser les touches de curseur 0 et 1 afin de sélectionner le réglage souhaité, puis appuyez sur la touche ENTER. Pour sortir du mode d’installation du DVD Utiliser les touches de curseur 0 et 1 afin de sélectionner “EXIT SETUP” et appuyez sur la touche ENTER. Il est également possible de quitter ce mode en appuyant sur la touche SETUP de la télécommande. 318 3ADV-M71E2_FRA p285-p339 03.12.25 1:23 PM ページ 319 FRANCAIS (1) “DISC SETUP (réglage disque)” est sélectionné 1 Voir page 318. 2 3 Utiliser les touches des flèches 0 et 1 pour sélectionner “DISC SETUP” et appuyer sur la touche ENTER. • DIALOGUE (dialogue) Utiliser cette fonction pour sélectionner la langue du son émis par les enceintes. • SUBTITLE (sous-titres) Utiliser cette fonction pour sélectionner la langue des sous-titres affichés sur l’écran de TV. • DISC MENUS (menus de disque) Utiliser cette fonction pour sélectionner la langue des menus enregistrés sur le disque (menu de début, etc.). Pour sortir du mode d’installation du disque Utiliser les touches de curseur • et ª pour sélectionner “> NEXT DVD MENU” et appuyer ensuite sur la touche ENTER. Télécommande d ENTER Télécommande 4 Utiliser les touches de curseur • et ª pour sélectionner le réglage souhaité, appuyer ensuite sur la touche ENTER. 2 Lorsque “DIALOG” est sélectionné: • ENGLISH (ANGLAIS) (Réglage par défaut) Sélectionner cette fonction lorsque vous souhaitez lire le DVD avec le son en anglais. • FRENCH (FRANÇAIS) Sélectionner cette fonction lorsque vous souhaitez lire le DVD avec le son en français • SPANISH (ESPAGNOL) Sélectionner cette fonction lorsque vous souhaitez lire le DVD avec le son en espagnol. • GERMAN (ALLEMAND) Sélectionner cette fonction lorsque vous souhaitez lire le DVD avec le son en allemand. • JAPANESE (JAPONAIS) Sélectionner cette fonction lorsque vous souhaitez lire le DVD avec le son en japonais. • OTHERS (Autres) Le son est dans la langue entrée à l’aide des touches numérotées. (Voir le tableau des numéros de langues à la page 321.) Télécommande d ENTER Télécommande 319 3ADV-M71E2_FRA p285-p339 03.12.25 1:23 PM ページ 320 FRANCAIS 4 Pour sortir du mode de dialogue Appuyez sur la touche ENTER, l’écran précédent est restitué. 2 Lorsque “SUBTITLE” est sélectionné: • OFF (Réglage par défaut) Sélectionner cette fonction si vous ne souhaitez pas afficher les sous-titres. (Pour certains disques, il n’est pas possible d’inactiver les sous-titres.) • ENGLISH (ANGLAIS) Sélectionner cette fonction lorsque vous souhaitez lire le DVD avec les sous-titres en anglais. • FRENCH (FRANCAIS) Sélectionner cette fonction lorsque vous souhaitez lire le DVD avec les sous-titres en français. • SPANISH (ESPAGNOL) Sélectionner cette fonction lorsque vous souhaitez lire le DVD avec les sous-titres en espagnol. • GERMAN (ALLEMAND) Sélectionner cette fonction lorsque vous souhaitez lire le DVD avec les sous-titres en allemand. • JAPONAIS Sélectionner cette fonction lorsque vous souhaitez lire le DVD avec les sous-titres en japonais. • OTHERS (Autres) Les sous-titres sont dans la langue entrée à l’aide des touches numérotées. (Voir le tableau des numéros de langues à la page 321. Télécommande d ENTER Télécommande Pour sortir du mode de sous-titres Appuyez sur la touche ENTER, l’écran précédent est restitué. 2 Lorsque “DISC MENU” est sélectionné: • ENGLISH (ANGLAIS) (Réglage par défaut) Sélectionner cette fonction lorsque vous souhaitez afficher les menus en anglais. • FRENCH (FRANÇAIS) Sélectionner cette fonction lorsque vous souhaitez afficher les menus en français. • SPANISH (ESPAGNOL) Sélectionner cette fonction lorsque vous souhaitez afficher les menus en espagnol. • GERMAN (ALLEMAND) Sélectionner cette fonction lorsque vous souhaitez afficher les menus en allemand. • JAPANESE (JAPONAIS) Sélectionner cette fonction lorsque vous souhaitez afficher les menus en japonais. • OTHERS (Autres) L’écran de menu est dans la langue entrée à l’aide des touches numérotées. (Voir le tableau des numéros de langues à la page 321.) Télécommande d ENTER Télécommande Pour sortir du mode de menus de disque Appuyez sur la touche ENTER, l’écran précédent est restitué. 320 3ADV-M71E2_FRA p285-p339 03.12.25 1:23 PM ページ 321 FRANCAIS Liste des codes de langue Language Code Code Language Code Language Language Code 6565 Afar 7079 Faroese 7678 Lingala 8375 Slovak 6566 Abkhazian 7082 French 7679 Laothian 8376 Slovenian 6570 Afrikaans 7089 Frisian 7684 Lithuanian 8377 Samoan 6577 Ameharic 7165 Irish, Scots 7686 Latvian, Lettish 8378 Shona 6582 Arabic 7168 Gaelic 7771 Malagasy 8379 Somali 6583 Assamese 7176 Galician 7773 Maori 8381 Albanian 6588 Aymara 7178 Guarani 7775 Macedonish 8382 Serbian 6590 Azerbaijani 7185 Gujarati 7776 Malayalam 8385 Sundanese 6665 Bashkir 7265 Hausa 7778 Mongolian 8386 Swedish 6669 Byelorussian 7273 Hindi 7779 Moldavian 8387 Swahili 6671 Bulgarian 7282 Croatian 7782 Marathi 8465 Tamil 6672 Bihari 7285 Hungarian 7783 Malay 8469 Telugu 6678 Bengali; Bangla 7289 Armenian 7784 Maltese 8471 Tajik 6679 Tibetan 7365 Interlingua 7789 Burmese 8472 Thai 6682 Breton 7378 Indonesian 7865 Nauru 8473 Tigrinya 6765 Catalan 7383 Icelandic 7869 Nepali 8475 Turkmen 6779 Corsican 7384 Italian 7876 Dutch 8476 Tagalog 6783 Czech 7387 Hebrew 7879 Norwegian 8479 Tonga 6789 Welsh 7465 Japanese 7982 Oriya 8482 Turkish 6865 Danish 7473 Yiddish 8065 Panjabi 8484 Tatar 6869 German 7487 Javanese 8076 Polish 8487 Twi 6890 Bhutani 7565 Georgian 8083 Pashto, Pushto 8575 Ukrainian 6976 Greek 7575 Kazakh 8084 Portuguese 8582 Urdu 6978 English 7576 Greenlandic 8185 Quechua 8590 Uzbek 6979 Esperanto 7577 Cambodian 8277 Rhaeto-Romance 8673 Vietnamese 6983 Spanish 7578 Kannada 8279 Romanian 8679 Volapük 6984 Estonian 7579 Korean 8285 Russian 8779 Wolof 6985 Basque 7583 Kashmiri 8365 Sanskrit 8872 Xhosa 7065 Persian 7585 Kurdish 8368 Sindhi 8979 Yoruba 7073 Finnish 7589 Kirghiz 8372 Serbo-Croatian 9072 Chinese 7074 Fiji 7665 Latin 8373 Singhalese 9085 Zulu 321 3ADV-M71E2_FRA p285-p339 03.12.25 1:23 PM ページ 322 FRANCAIS (2) “OSD SETUP” est sélectionné 1 2 3 Si vous n’êtes pas sur l’écran de réglage DVD, reportez-vous aux étapes 1 et 2 de la page 318. Utilisez les touches curseurs 0 et 1 pour sélectionner l’icône “OSD SETUP” puis appuyez sur la touche ENTER. • WALL PAPER (Fond d’écran) L’image affichée en mode d’arrêt ou lors de la lecture d’un CD peut être sélectionnée. Télécommande d ENTER Télécommande 4 Utilisez les touches curseurs • et ª pour sélectionner le réglage à effectuer, puis appuyez sur la touche ENTER. 2 Lorsque "WALL PAPER" a été sélectionné • Utilisez les touches curseurs • et ª pour sélectionner le fond d’écran. • BLEU (Réglage par défaut) Le fond d’écran est bleu. • GRAY (Gris) Le fond d’écran est gris. • BLACK (Noir) Le fond d’écran est noir. • PICTURE (Image) Le fond d’écran est une image. Pour terminer le réglage "WALL PAPER" Appuyez sur la touche ENTER. 322 Télécommande d ENTER Télécommande 3ADV-M71E2_FRA p285-p339 03.12.25 1:23 PM ページ 323 FRANCAIS (3) “VIDEO SETUP” est sélectionné 1 Voir page 318. 2 3 Utiliser les touches des flèches 0 et 1 pour sélectionner “VIDEO SETUP” et appuyer sur la touche ENTER. • TV ASPECT (forme de la TV) Utiliser cette fonction pour sélectionner la forme de votre écran de TV. • TV TYPE (type de TV) Utiliser cette fonction pour sélectionner le format vidéo de votre TV (NTSC, PAL ou MULTI). • VIDEO MODE (Mode vidéo) Utiliser cette fonction pour sélectionner le mode vidéo. (AUTO, FILM, VIDEO) • BLACK LEVEL (Niveau de noir) Le niveau de noir de l’image peu être réglé sur “lighter” ou “darker”. Pour sortir du mode de réglage vidéo Utiliser les touches de curseur • et ª pour sélectionner “> NEXT DVD MENU” puis appuyez sur la touche ENTER. 4 Utiliser les touches de curseur • et ª pour sélectionner le réglage souhaité et appuyez sur la touche ENTER. 2 Lorsque “TV ASPECT” est sélectionné: • 4:3 PS (Réglage par défaut) Sélectionner ce mode pour lire les DVD grand écran en mode recadrage automatique (avec les cotés de l’image coupés). Les disques pour lesquels la fonction recadrage automatique n’est pas spécifiée sont lus en mode boîte aux lettres. • 4:3 LB Sélectionner ce mode pour lire les DVD grand écran en mode boîte aux lettres (avec des bandes noires en haut et en bas). • WIDE (16:9) (grand écran) Sélectionner cette fonction pour lire les DVD grand écran dans le mode plein écran. Télécommande d ENTER Télécommande Télécommande d ENTER Télécommande Pour sortir du mode d’aspect TV Appuyez sur la touche ENTER, l’écran précédent est restitué. 323 3ADV-M71E2_FRA p285-p339 03.12.25 1:23 PM ページ 324 FRANCAIS 4 2 Lorsque “TV TYPE” est sélectionné: • NTSC (Réglage par défaut) Sélectionner cette fonction lorsque le format de votre TV est NTSC. Si NTSC est sélectionné, le format de sortie est fixé sur NTSC. • PAL Sélectionner cette fonction lorsque le format de votre TV est PAL. Si NTSC est sélectionné, le format de sortie est fixé sur PAL. • MULTI Sélectionner cette fonction lorsque votre TV est compatible à la fois avec le format NTSC et le format PAL. Les signaux NTSC sont envoyés par les prises de sortie vidéo lorsque des disques enregistrés en format NTSC sont lus et les signaux PAL sont envoyés par les prises de sortie vidéo lorsque des disques enregistrés en format PAL sont lus. Télécommande d ENTER Télécommande Pour sortir du mode du type TV Appuyez sur la touche ENTER, l’écran précédent est restitué. 2 Lorsque “BLACK LEVEL” a été sélectionné • Utilisez les touches curseurs • et ª pour sélectionner le niveau de noir. • DARKER (Sombre) Ceci règle le niveau de noir des signaux de sortie au niveau standard. • LIGHTER (Clair) (Réglage par défaut) Ceci augmente le niveau standard du niveau de noir. Réglez ainsi si l’image affichée sur le téléviseur est extrêmement noire. Pour terminer le réglage “BLACK LEVEL” Appuyez sur la touche ENTER. 324 Télécommande d ENTER Télécommande 3ADV-M71E2_FRA p285-p339 03.12.25 1:23 PM ページ 325 FRANCAIS (4) AUDIO SETUP” est sélectionné 1 Voir page 318. 2 3 Utiliser les touches des flèches 0 et 1 pour sélectionner “AUDIO SETUP” et appuyer sur la touche ENTER. • DIGITAL OUT (sortie numérique) Utiliser cette fonction pour sélectionner le format du signal de sortie numérique. • LPCM (lpcm) (44,1 kHz / 48 kHz) Sélectionner cette fonction pour régler la sortie audio numérique lors de la lecture de DVD enregistrés en mode audio PCM linéaire. Pour sortir du mode d’installation audio Utiliser les touches de curseur • et ª pour sélectionner “> NEXT DVD MENU” puis appuyez sur la touche ENTER. • L’écran retrouve sa configuration de l’étape 2. 4 Utiliser les touches de curseur • et ª pour sélectionner le réglage souhaité et appuyez sur la touche ENTER. 2 Lorsque “DIGITAL OUT” est sélectionné. • NORMAL (Réglage par défaut) Effectuer la sélection lors de la lecture en mode surround d’un DVD enregistré en Dolby numérique ou en DTS. Le signal numérique Dolby numérique ou DTS est également envoyé à partir des prises de sortie numérique. • PCM Les DVD enregistrés en mode Dolby numérique DTS sont convertis en PCM linéaire 48 kHz/16 bits (bicanal). Effectuer la sélection lors d’un enregistrement numérique. Pour quitter le mode de sortie numérique Appuyez sur la touche ENTER, l’écran précédent est restitué. Télécommande d ENTER Télécommande Télécommande d ENTER Télécommande 325 3ADV-M71E2_FRA p285-p339 03.12.25 1:23 PM ページ 326 FRANCAIS 4 2 “LPCM SELEC (96 kHz Æ 48 kHz)” est sélectionné. • OFF (Réglage par défaut) Effectuer la sélection lors de la lecture sur un décodeur de DVD enregistrés avec cet appareil dans les modes PCM linéaires 48 kHz/20/24 bits et 96 kHz. Il est important de noter que les DVD comportant une protection des droits d’auteur sont convertis en 48 kHz/16 bits et sont lus. Le même signal est envoyé par les prises de sortie numérique. • ON Les DVD enregistrés dans les modes PCM linéaires 48 kHz/20/24 bits et 96 kHz sont tous convertis en 48 kHz/16 bits. Effectuer cette sélection lors de l’enregistrement numérique. Télécommande d ENTER Télécommande Pour sortir du mode de sélection LPCM Appuyez sur la touche ENTER, l’écran précédent est REMARQUES: • Lors de la lecture de DVD Dolby Digital/DTS ambiance ou PCM linéaire 96 kHz sur le ADV-M71, assurez-vous de bien régler “Digital Output” sur “Normal” et “LPCM Conversion Mode” sur “Do Not Convert”. • Lorsque vous souhaitez, et seulement dans ce cas, sortir des signaux d’un DVD Dolby Digital/DTS ambiance lu sur le ADV-M71 sur un appareil numérique PCM, réglez “Digital Output” sur “PCM Conversion”. Avec ce réglage, les DVD ne peuvent être lus sur le ADV-M71 en mode Dolby Digital/DTS ambiance. (Le mode ambiance est réglé sur le mode dans lequel les signaux 2 canaux PCM peuvent être lus.) • Lorsque vous souhaitez, et seulement dans ce cas, faire un enregistrement numérique des signaux d’un DVD PCM linéaire 96 kHz ou 48 kHz/20-bit/24-bit lu sur le ADV-M71 sur un enregistreur numérique, réglez “LPCM Conversion” sur “Convert”. Avec ce réglage, il est impossible de décoder et de lire les signaux PCM linéaire 96 kHz ou 48 kHz/20-bit/24-bit sur le ADV-M71 lors de l’enregistrement. (Le décodage et la lecture sont en format PCM linéaire 16 bit/48 kHz.) 326 3ADV-M71E2_FRA p285-p339 03.12.25 1:23 PM ページ 327 FRANCAIS (5) “RATINGS” est sélectionné 1 2 3 Voir page 318. Utiliser les touches des flèches 0 et 1 pour sélectionner “RATINGS” et appuyer sur la touche ENTER. • RATING LEVEL (niveau d’indice) Utiliser cette fonction pour restreindre la lecture de DVD pour adultes que vous ne souhaitez pas que les enfants voient. Il est important de noter que même pour les DVD pour adultes, la visualisation ne peut pas être restreinte sauf si le niveau de restriction est enregistré sur le disque. Il est cependant possible de mettre hors service la lecture de tous les DVD. • PASSWORD (Mot de passe actuel) Utiliser cette fonction pour changer le mot de passe. Le mot de passe est réglé par défaut sur “0000”. Pour sortir du mode d’installation de l’indice Utiliser les touches de curseur • et ª pour sélectionner “> NEXT DVD MENU” puis appuyez sur la touche ENTER. 4 Utiliser les touches de curseur • et ª pour sélectionner le réglage désiré, et appuyez sur la touche ENTER. 2 Lorsque “RATING LEVEL” est sélectionné. • Niveau 0 (LOCK ALL (tous verrouilles)) Sélectionner cette fonction pour empêcher la lecture de tous les DVD. A utiliser par exemple pour empêcher la lecture de DVD pour adultes ne comportant pas de niveau d’indice. • Niveau 1 Sélectionner cette fonction pour lire uniquement les DVD pour enfants. (Les DVD pour adultes et pour un large public ne peuvent pas être lus.) • Niveau 2 à niveau 7 Sélectionner cette fonction pour lire des DVD pour un large public et pour enfants. Les DVD pour adultes ne peuvent pas être lus. • NO LIMIT (sans limite) (Réglage par défaut) Sélectionner cette fonction pour la lecture de tous les DVD. Télécommande d ENTER Télécommande Télécommande d ENTER Télécommande 327 3ADV-M71E2_FRA p285-p339 03.12.25 1:23 PM ページ 328 FRANCAIS 4 Utiliser les touches à chiffres pour saisir un mot de passe à 4 chiffres, et appuyez sur la touche ENTER. S’assurer de sélectionner le mode DVD à l’aide des touches de sélection de mode de la télécommande. Le mot de passe est réglé sur “0000” par défaut. Ne pas oublier le mot de passe. Les réglages ne peuvent pas être modifiés sans le bon mot de passe. DVD TUNER D.AUX 1 2 3 MD/LINE-1 TAPE /LINE-2 4 7 “PASSWORD CHANGE” 6 AUTO DECODE 8 9 STEREO VIRTUAL 0/10 +10 Télécommande d ENTER Lorsque le mot de passe a été oublié ou lorsqu’un changement de réglage du RATING LEVEL est suspendu, appuyer plusieurs fois sur la touche ENTER et terminer le mode d’installation de l’indice. 2 Lorsque 5 5CH STEREO Télécommande est sélectionné Utiliser les touches à chiffres pour saisir un mot de passe à 4 chiffres, et appuyez sur la touche ENTER. S’assurer de sélectionner le mode DVD à l’aide des touches de sélection de mode de la télécommande. Ne pas oublier le mot de passe. Les réglages ne peuvent pas être modifiés sans le bon mot de passe. Le mot de passe est réglé sur “0000” par défaut. 328 DVD TUNER D.AUX 1 2 3 MD/LINE-1 TAPE /LINE-2 4 5 6 5CH STEREO AUTO DECODE 7 8 9 STEREO VIRTUAL 0/10 +10 Télécommande 3ADV-M71E2_FRA p285-p339 03.12.25 1:23 PM ページ 329 FRANCAIS (6) “OTHER SETUP” est sélectionné REMARQUES: • Un décodeur de sous-titres en anglais est nécessaire pour afficher les sous-titres en anglais. • Les DVD comportant des signaux de sous-titres sont indiqués par les symboles , , . Les sous-titres en anglais ne peuvent pas être affichés lors de la lecture de DVD ne contenant pas de signaux de sous-titres. • Les caractères des sous-titres (lettres majuscules, minuscules, italiques, etc.) dépendent du DVD et ne peuvent pas être choisis avec cet appareil. 1 2 3 Voir page 318. Utiliser les touches des flèches 0 et 1 pour sélectionner “OTHER SETUP” et appuyer sur la touche ENTER. • CAPTIONS (Textes) Réglez si vous souhaitez afficher ou non les textes (soustitres) enregistrés sur le DVD. (Un décodeur de textes (disponible dans le commerce) est nécessaire pour afficher les textes.) • SLIDE SHOW (Intervalle de défilement) Réglez l’intervalle pour passer à l’image suivante (format JPEG) lors de la lecture image par image. Télécommande d ENTER Pour sortir du mode autre installation Utiliser les touches de curseur • et ª afin de sélectionner “> NEXT DVD MENU”, et appuyer ensuite sur la touche ENTER. 4 Télécommande Utiliser les touches de curseur • et ª pour sélectionner le réglage souhaité et appuyez sur la touche ENTER. 2 Lorsque “CAPTIONS” est sélectionné: • OFF (arrêt) (Réglage par défaut) Sélectionner cette fonction lorsque vous ne souhaitez pas afficher les sous-titres à l’écran pour les DVD contenant des sous-titres en anglais. • ON (marche) Sélectionner cette fonction pour afficher les sous-titres à l’écran lors de la lecture de DVD contenant des sous-titres en anglais. Pour sortir du mode de sous-titres Appuyez sur la touche ENTER, l’écran précédent est restitué. Télécommande d ENTER Télécommande 329 3ADV-M71E2_FRA p285-p339 03.12.25 1:23 PM ページ 330 FRANCAIS 4 2 Lorsque "SLIDE SHOW” a été sélectionné • Utilisez les touches curseurs • et ª pour régler la durée. • L’intervalle peut être de 5 à 15 secondes par étape d’une seconde. (Réglage d’usine par défaut: 5 secondes) Télécommande d ENTER Télécommande 330 3ADV-M71E2_FRA p285-p339 03.12.25 1:23 PM ページ 331 FRANCAIS 20 FONCTION DU SYSTEME 2 Le fait d’établir des connexions de système entre l’ADV-M71 et la platine à cassettes de série D-M31 (DDR-M31) facilite le fonctionnement. (Pour consulter les consignes de connexion, se reporter à “Connexions aux composants du système de série D-M31” pages 232 et 233.) 2 Les fonctions système ne fonctionneront pas correctement si les réglages de fonction entrée/sortie ne correspondent pas aux composants connectés. Assurez-vous de bien régler les fonctions d’entrée/sortie pour les composants utilisés. (Voir page 253.) (1) Fonction de mise sous tension automatique • Lorsque la touche de lecture/pause de l’unité principale ( 1/3 ) ou la touche de lecture DVD de la télécommande ( 1 ) est enfoncée alors que l’alimentation est en mode de veille, le ADV-M71 est mis automatiquement sous tension, et si un disque est chargé dans le ADV-M71, il sera lu. 1 1 B SURROUND / SELECT DVD SURROUND RECEIVER ADV-M71 PUSH - PARAM. - + BAND MENU / SET TONE / SDB Lorsque le ADV-M71 est en mode de veille, la mise sous tension peut s’effectuer en appuyant simplement la touche de lecture/pause de l’unité principale ou la touche de lecture DVD de la télécommande. Si un disque est chargé, la lecture commence. 1 VOLUME FUNCTION DVD ON / STANDBY PHONES Unité principale DIRECT STEREO La fonction de mise sous tension automatique est également disponible si le plateau du disque est ouvert et le ADV-M71 est en mode de veille. CH VIRTUAL CALL 0/10 +10 - TEST TONE INPUT MODE SURROUND FUNCTION TUNER TV / VCR DVD IN/SURR. A/V SYSTEM Télécommande IN/SURR. MD CDR TAPE 1 1 2 + DVD 8 9 6 7 Unité principale - • Pour écouter une émission radio, appuyez simplement sur les touches de préréglage de la radio (“+” ou “–”) de la télécommande. La mise sous tension s’effectue et la station est syntonisée. • La fonction de mise en marche fonctionne de la même façon quand les connexions + système sont faites avec l'enregistreur MD de la série D-M31 (DMD-M31) ou avec la platine cassette (DRR-M31). Pour plus de détails, se référer au mode d'emploi des composants respectifs. Télécommande STATUS 3 MUTING SETUP TONE /SDB TUNER ENTER CH (2) Sélection de la fonction automatique • En pressant une touche, la fonction se commute automatiquement sur “DVD” et la lecture du disque commence. 1 B SURROUND / SELECT DVD SURROUND RECEIVER ADV-M71 PUSH - PARAM. + BAND MENU / SET TONE / SDB FUNCTION PHONES Appuyer sur la touche lecture/pause du ADV-M71 ou sur la touche lecture DVD de la télécommande pendant la lecture d'un composant autre que de la série D-M31 (platine cassette ou enregistreur MD). • La lecture sur l’autre composant 1 s’interrompt, la fonction du ADVM71 se commute sur “DVD” et si un Télécommande disque est chargé, Unité principale sa lecture commence. DVD - ON / STANDBY 1 VOLUME • Pour écouter une émission radio, appuyez simplement sur l’une des touches de + préréglage de la radio (“+” ou “–”) sur la télécommande. • La sélection de fonction automatique fonctionne de la même façon quand les connexions système sont faites avec l'enregistreur MD de la série D-M31 (DMDTélécommande M31) ou avec la platine cassette (DRRM31). Pour plus de détails, se référer au mode d'emploi des composants respectifs. • La sélection de fonction automatique ne fonctionne pas pour les composants connectés à l’aide des prises d’entrée/sortie AUX ou D.AUX. TUNER CH DIRECT STEREO VIRTUAL CALL 0/10 +10 - TEST TONE INPUT MODE SURROUND FUNCTION TUNER TV / VCR DVD IN/SURR. A/V SYSTEM IN/SURR. MD CDR TAPE 1 1 2 + DVD 8 6 9 7 - STATUS 3 SETUP MUTING TONE /SDB CH 331 3ADV-M71E2_FRA p285-p339 03.12.25 1:23 PM ページ 332 FRANCAIS (3) CD Æ Enregistreur MD (lorsque les ADV-M71 et DMD-M31 sont connectés par un cordon système) • Les CD peuvent facilement être enregistrés sur des Mini disques. Contrôlez et ajustez préalablement la sélection d'entrée de l'enregistrement (analogique ou numérique) et le niveau d'enregistrement. OFF Unité principale (ADV-M71) 3,e B Enregistreur MD (DMD-M31) SLEEP 3,e CLEAR 7 TITLE TV IN T V CHARAC. SLIDE MODE EDIT/MENU ZOOM TV CH 5 ,t 5 ,t RDS PROG/DIRECT SURROUND / SELECT DVD SURROUND RECEIVER ADV-M71 PUSH - PARAM. - POWER LOADING MECHANISM + CHARACTER/ MEMORY REC BAND MENU/SET VOLUME ON / STANDBY ON / STANDBY PHONES 8 18Tr02m 46s 1 L dB -60 -40 -30 -20 -12 -6 -2 BAND D.AUX 2 3 MD/LINE-1 TAPE /LINE-2 TV CH + CT CD SRS RT SEARCH MODE TUNING / TV VOL 5 6 + - 5CH STEREO AUTO DECODE TUNER 8 + 9 STEREO CH VIRTUAL CALL 0/10 +10 - TEST TONE INPUT MODE SURROUND FUNCTION 2,w 9 TUNER TV / VCR DVD IN/SURR. A/V PUSH ENTER 0 R RANDOM TUNER 1 DIRECT CD SRS MULTI REC PTY MEMO DVD 7 EDIT TIME/INPUT TONE / SDB FUNCTION REPEAT TIME - MODE 4 MINIDISC RECORDER DMD-M31 1,q ON VCR REC NTSC/PAL ENTER A-B REPEAT SOURCE SYSTEM IN/SURR. MD CDR TAPE 7 1 2 + DVD 1,q 2,w 6 y u 8 9 6 7 STATUS 3 [1] Fonction d’enregistrement synchronisé 1 Mettez sous tension le ADV-M71. • L’alimentation du ON / STANDBY système s’allume. ADV-M71 2 ADV-M71 3 MUTING [2] Enregistrement CD synchronisé q ~ t ON Effectuez les mêmes opérations que pour les étapes 1 à 5 cidessus. Télécommande Appuyez sur la touche FUNCTION et commutez la fonction sur “DVD”. FUNCTION - y FUNCTION Télécommande Ouvrez le plateau à disque du ADVM71, chargez le CD, puis fermez le plateau à disque. Appuyer sur la touche CD SRS de l'enregistreur MD pour sélectionner le mode d'enregistrement synchronisé. • Le mode change comme indiqué cidessous chaque fois que la touche est pressée. CD SRS DMD-M31 SRS1disc Rec? Le CD entier est enregistré. SRS Make Gp? Le CD entier est enregistré et inscrit comme un groupe. SRS1Tr Rec? Seule la première piste du CD est enregistrée. ADV-M71 4 Vérifiez que le nombre total de pistes et la durée de lecture totale du CD apparaissent bien à l’affichage. Exemple: Pour un CD avec un total de 16 pistes et une durée de lecture totale de 53 minutes, 20 secondes 16Tr 5 6 u 53:20 Insérez le MD sur lequel vous souhaitez enregistrer dans la fente MD de l'enregistreur MD. Appuyer une fois sur la touche d'enregistrement de l'enregistreur MD pour sélectionner le mode d'attente d'enregistrement. MULTI REC DMD-M31 7 Appuyez sur la touche de lecture/pause du ADV-M71 ou sur la touche de lecture de la télécommande. • L’enregistrement du CD commence 1 automatiquement. DVD ADV-M71 Télécommande Une fois la lecture du CD terminée, l’appareil se met en mode de veille d’enregistrement. 332 L'enregistrement synchronisé d'une piste spécifique est possible en sélectionnant le numéro de la piste avec les touches (-) et (-) du ADV-M71, puis en sélectionnant “SRS 1 Tr Rec?“ sur l'enregistreur MD. Appuyer sur la touche ENTER de l'enregistreur MD. • L'enregistrement du CD commence automatiquement. PUSH ENTER DMD-M31 Une fois que toutes les pistes du CD ont été lues, le ADV-M71 et la platine cassette sont automatiquement réglés en mode d’arrêt. Même si le CD n’a pas été lu en entier, le ADV-M71 et la platine cassette sont automatiquement réglés en mode d’arrêt si la cassette est pleine. Pour arrêter l’enregistrement synchronisé, appuyez sur la touche d’arrê ( 2 ) du ADV-M71 ou de la platine cassette. REMARQUES: • L’enregistrement synchronisé ne fonctionne pas lorsque le ADVM71 est réglé sur une fonction autre que DVD. • L’enregistrement synchronisé ne fonctionne pas si vous êtes en mode de lecture programmée. En mode de lecture aléatoire ou répétée, le mode respectif est annulé lorsque l’enregistrement synchronisé commence. 3ADV-M71E2_FRA p285-p339 03.12.25 1:23 PM ページ 333 FRANCAIS (4) Enregistrement CD Æ TAPE (Quand le ADV-M71 et le DRR-M31 sont connectés par un cordon système) • Les CD peuvent facilement être enregistrés sur des cassettes. OFF Unité principale ADV-M71 Platine cassette (DRR-M31) SLEEP CLEAR 3,e B 3,e 5 ,t SURROUND / SELECT DVD SURROUND RECEIVER ADV-M71 RDS PROG/DIRECT 5 ,t CASSETTE DECK DRR-M31 PUSH - PARAM. T V EDIT/MENU ZOOM + CD SRS DOLBY NR ON OFF FUNCTION ON / STANDBY ON / STANDBY RANDOM BAND TUNER D.AUX 1 2 3 MD/LINE-1 TAPE /LINE-2 TV CH + CT CD SRS RT SEARCH MODE TUNING / TV VOL 5 6 + - 5CH STEREO AUTO DECODE TUNER 8 DIRECT BAND VOLUME PTY MEMO DVD 4 PLAY REPEAT TIME - MODE 7 MENU/SET TONE / SDB TITLE TV IN CHARAC. SLIDE MODE TV CH 7 1 ,q ON VCR REC NTSC/PAL ENTER A-B REPEAT SOURCE + 9 STEREO CH VIRTUAL CALL 0/10 +10 - TEST TONE INPUT MODE SURROUND FUNCTION 2 ,w REC CD SRS REC 0 PLAY 1 REVERSE MODE PHONES TUNER TV / VCR DVD IN/SURR. A/V SYSTEM IN/SURR. MD CDR TAPE 7 1 2 + DVD 8 1,q 6 2,w Mettez sous tension le ADV-M71. • L’alimentation du ON / STANDBY système s’allume. ADV-M71 2 ADV-M71 3 q ~ t ON FUNCTION Télécommande Ouvrir le plateau du disque du ADVM71, insérer le disque, puis fermer le plateau. Vérifier que le nombre total de pistes et la durée totale de lecture sur le CD apparaissent à l'affichage. Exemple : Pour un CD avec un total de 16 pistes une durée totale de lecture de 53 minutes, 20 secondes. 16Tr 5 STATUS MUTING Effectuez les mêmes opérations que pour les étapes 1 à 5 cidessus. Télécommande ADV-M71 4 7 - [2] Enregistrement CD synchronisé Appuyer sur la touche FUNCTION et commuter la fonction sur “DVD”. FUNCTION 6 3 [1] Fonction d’enregistrement synchronisé 1 y 9 53:20 y Appuyez sur la touche d’enregistrement synchronisé CD de la platine cassette. • L’enregistrement du CD commence automatiquement. CD SRS DRR-M31 Une fois que toutes les pistes du CD ont été lues, le ADV-M71 et la platine cassette sont automatiquement réglés en mode d’arrêt. Même si le CD n’a pas été lu en entier, le ADV-M71 et la platine cassette sont automatiquement réglés en mode d’arrêt si la cassette est pleine. Pour arrêter l’enregistrement synchronisé, appuyez sur la touche d’arrê ( 2 ) du ADV-M71 ou de la platine cassette. REMARQUES: • L’enregistrement synchronisé ne fonctionne pas lorsque le ADVM71 est réglé sur une fonction autre que DVD. • L’enregistrement synchronisé ne fonctionne pas si vous êtes en mode de lecture programmée. En mode de lecture aléatoire ou répétée, le mode respectif est annulé lorsque l’enregistrement synchronisé commence. Ouvrez le compartiment à cassette, chargez la cassette sur laquelle vous voulez effectuer l’enregistrement, puis fermez le compartiment à cassette. DRR-M31 6 Appuyer une fois sur la touche d'enregistrement de la platine cassette pour sélectionner le mode d'attente d'enregistrement REC DRR-M31 7 Appuyez sur la touche de lecture/pause sur le ADV-M71 ou sur la touche de lecture DVD de la télécommande. • L'enregistrement 1 du CD commence automatiquement. DVD ADV-M71 Télécommande Une fois la lecture du CD terminée, l’appareil se met en mode de veille d’enregistrement. 333 3ADV-M71E2_FRA p285-p339 03.12.25 1:23 PM ページ 334 FRANCAIS (5) Enregistrement édité (lorsque les ADV-M71 et DRR-M31 sont connectés par un cordon système) • Les pistes sur le CD peuvent être automatiquement réparties entre les faces A et B afin d’effectuer un enregistrement respectant la longueur de la cassette (durée de la cassette). (Uniquement pour les CD) • L’enregistrement édité est possible pour les CD comprenant jusqu’à 25 pistes. Pour les CD comprenant plus de 26 pistes, l’édition n’est pas possible. Exemple: Enregistrement d’un CD avec 16 pistes et une durée totale de 56 minutes sur une cassette C-60 (60 minutes) Unité principale ADV-M71 B 4 4 4 6 Ouvrez le plateau à disque du ADV-M71, chargez le CD puis fermez le plateau à disque. 16Tr 56:00 SURROUND / SELECT DVD SURROUND RECEIVER ADV-M71 PUSH - PARAM. - + BAND MENU/SET TONE / SDB ADV-M71 VOLUME FUNCTION ON / STANDBY PHONES 5 3 1 Platine cassette (DRR-M31) 2 2 CASSETTE DECK DRR-M31 PLAY ON OFF REC CD SRS REC 0 PLAY MENU Télécommande TapeEdit C-60 CD SRS DOLBY NR ON / STANDBY Appuyez sur la touche MENU de la télécommande et réglez la longueur de la cassette sur laquelle vous allez effectuer l’enregistrement. • Par exemple, pour une cassette de 60 minutes, appuyez deux fois sur la touche d’édition. (La longueur de la cassette est la durée totale pour les faces A et B.) 1 REVERSE MODE L’affichage se commute comme suit à chaque fois que la touche MENU est enfoncée. OFF SLEEP CLEAR TITLE TV IN T V CHARAC. SLIDE MODE EDIT/MENU ZOOM TV CH RDS PROG/DIRECT REPEAT PTY RANDOM MEMO BAND DVD TUNER D.AUX 1 2 3 4 7 DIRECT TIME - MODE MD/LINE-1 1 ON VCR REC NTSC/PAL ENTER A-B REPEAT SOURCE TV CH CT CD SRS RT SEARCH MODE TUNING / TV VOL 5 6 + - 5CH STEREO AUTO DECODE TUNER 8 9 + TAPE /LINE-2 STEREO 0/10 +10 - INPUT MODE SURROUND FUNCTION TUNER TV / VCR DVD IN/SURR. SYSTEM Environ 4 secondes après avoir réglé la longueur de la cassette, les numéros de pistes à enregistrer sur la face A et le temps restant sur la face A de la cassette sont affichés. (Ex.: lorsque les pistes 1 à 9 seront enregistrées sur la face A et que le temps restant sur la face A sera de 2 minutes 40 secondes) CH VIRTUAL CALL TEST TONE A/V Fichier édité annulé + 3 IN/SURR. MD CDR TAPE 6 1 2 6 E + DVD 8 7 - STATUS 1 Après cela, l’affichage se commute, pendant un intervalle de quelques secondes, entre les numéros de pistes et le temps restant de la face B, et les numéros des pistes et le temps restant de la face A. (Ex.: Lorsque les pistes 10 à 16 seront enregistrées sur la face B et que le temps restant sur la face B sera de 1 minute 20 secondes) Mettez sous tension le ADV-M71. • L’alimentation du système s’allume. ON / STANDBY E ON ADV-M71 2 3 Ouvrez le compartiment à cassette, chargez la cassette sur laquelle vous voulez effectuer l’enregistrement, puis fermez le compartiment à cassette. Chargez la cassette avec la face A visible. Télécommande DRR-M31 Appuyez sur la touche FUNCTION et commutez la fonction sur “DVD”. FUNCTION FUNCTION Exemple: Pour régler la durée sur 54 minutes +10 , +10 , 4. ADV-M71 Télécommande 10-16B01:20 Si “OVER” est affiché pour le temps restant, il est impossible d’enregistrer toutes les pistes. Changez la longueur de la cassette. Pour régler la longueur de la cassette sur autre chose que 46, 60 ou 90, utilisez le clavier décimal et la touche +10 de la télécommande jusqu’à ce que “ ”soit affiché et entrez la durée. La durée peut être réglée jusqu’à 99 minutes. La durée est entrée de la même façon que lors de la recherche directe des pistes du CD. Lorsque “ 334 01-09A02:40 9 ” est affiché, appuyez sur +10 , +10 , +10 , 3ADV-M71E2_FRA p285-p339 03.12.25 1:23 PM ページ 335 FRANCAIS 6 Appuyez sur la touche de lecture/pause sur le ADV-M71 ou sur la touche de lecture DVD de la télécommande. • La lecture du CD et l’enregistrement sur la cassette commencent simultanément. ADV-M71 1 01Tr 00:01 DVD Télécommande Pour quitter la fonction d’enregistrement édité, appuyez sur la touche d’arrêt du ADV-M71. BAND ADV-M71 2 Télécommande REMARQUES • La fonction d’enregistrement édité ne peut être utilisée avec un CD comprenant 26 pistes ou plus. • Chargez la cassette sur laquelle vous souhaitez faire l’enregistrement dans la platine cassette avec la face A visible avant d’effectuer la procédure d’enregistrement édité. La cassette est automatiquement enroulée au début de la section enregistrable avant le début de l’enregistrement. • Lors de l’utilisation, pour l’enregistrement édité, d’une cassette déjà enregistrée, si la cassette est plus longue que le temps réglé, l’enregistrement s’arrêtera au milieu de la face B et l’enregistrement précédent restera sur le reste de la bande. Pour éviter cela, effacez la cassette avant de l’utiliser. • Si le mode de changement de face de la platine cassette est réglé sur lors de l’utilisation de la fonction d’enregistrement édité, l’enregistrement s’arrêtera à la fin de la face A. Réglez le mode de changement de face de la platine cassette sur . • Puisque les pistes sont réparties entre les faces A et B, il peut ne pas être possible d’enregistrer toutes les pistes d’un CD sur la cassette, même si la cassette est légèrement plus longue que la durée d’écoute totale du CD. • Les touches 9, 8, 7 et 6 ne fonctionnent pas pendant l’enregistrement édité. 2 A propos de l’enregistrement synchronisé sur une platine cassette (DRR-M31) • L’enregistrement synchronisé est possible avec des disques autres que des CD (DVD, CD vidéo, disques contenant des fichiers MP3 ou WMA, etc.). • Pour un enregistrement numérique ou analogique lors de la lecture d’un disque, voir page 237. • La fonction d’enregistrement synchronisé peut ne pas fonctionner correctement pour certains disques. Dans ce cas, enregistrez le disque manuellement en réglant le mode d’enregistrement une fois la lecture du disque commencée. 335 3ADV-M71E2_FRA p285-p339 03.12.25 1:23 PM ページ 336 FRANCAIS 21 MEMOIRE DE DERNIERE FONCTION • Cet appareil comporte une mémoire de dernière fonction qui enregistre les conditions de réglage d’entrée et de sortie exactement comme elles étaient avant d’éteindre l’appareil. Cette fonction élimine la nécessité de procéder à des réglages compliqués, chaque fois que l’appareil est mis sous tension. • L’appareil possède également une mémoire de sauvegarde. Cette fonction fournit un stockage de mémoire lorsque l’appareil est mis hors tension et que le cordon d’alimentation est débranché. 22 INITIALISATION DU MICROPROCESSEUR Lorsque l’indication de l’affichage est anormale ou lorsque le fonctionnement de l’appareil n’indique pas le résultat attendu, l’initialisation du microprocesseur s’impose et doit être réalisée en suivant la procédure ci-dessous. 1 Appuyez sur la touche d’alimentation pour passer en mode de veille, et débrancher ensuite le cordon d’alimentation de la prise murale. 2 2 ON / STANDBY Rouge B SURROUND / SELECT DVD SURROUND RECEIVER ADV-M71 PUSH - PARAM. - + BAND MENU / SET TONE / SDB VOLUME FUNCTION ON / STANDBY PHONES 2 3 336 Maintenir enfoncée la touche PLAY/PAUSE (1/3) et la touche STOP (2) après 30 secondes et brancher le cordon CA dans la prise. Vérifier que tout l’affichage clignote par intervalle de 1 seconde, et relâcher les 2 touches, le Microprocesseur est désormais initialisé. 1 REMARQUES: • Si l’étape 3 ne fonctionne pas, reprendre la procédure à partir de l’étape 1. • Lorsque le microprocesseur est réinitialisé, toutes les touches et les réglages d’installation repassent sur leurs valeurs par défaut. 3ADV-M71E2_FRA p285-p339 03.12.25 1:23 PM ページ 337 FRANCAIS 23 LOCALISATION DES PANNES Avant de déclarer un dysfonctionnement de l’appareil, veuillez vérifier ce qui suit 2 Toutes les connexions sont-elles correctes ? 2 Avez-vous suivi les instructions du manuel ? 2 Est-ce que les enceintes et les autres composants fonctionnement correctement ? Si cet appareil ne semble pas fonctionner normalement, vérifier le tableau ci-dessous. Si cela ne résout pas le problème, l’appareil est peut être défectueux. Inactiver l’appareil, débrancher le cordon d’alimentation de la prise de courant, et contacter le magasin où l’appareil a été acheté ou le point de vente Denon le plus proche. Télécommande Problèmes communs lors de l’écoute de disques, de cassettes, de radiodiffusion FM, etc. Symptôme AFFICHAGE pas allumé et aucun son n’est produit lorsque l’appareil est mis sous tension. AFFICHAGE allumé mais pas de son. L’écran n’affiche aucune image. Le programme ne peut pas être copié du DVD à un magnétoscope. Le subwoofer ne produit aucun son. Cet appareil ne fonctionne pas correctement lors de l’utilisation de la télécommande. Cause Mesures Page • Le cordon d’alimentation n’est pas fermement connecté. • Vérifier la mise en place de la fiche du cordon d’alimentation. 232 • Les cordons des enceintes ne sont pas fermement connectés. • Une mauvaise position de la touche de fonction audio. • La commande de volume est réglée sur le minimum. • La fonction silence (MUTING) est activée. • Les signaux numériques ne reçoivent pas l’entrée numérique sélectionnée. • Connecter fermement. 232 • Régler sur une position convenable. 268 • Augmenter le volume jusqu’à un niveau convenable. • Eteindre la fonction silence (MUTING). • Recevoir des signaux numériques ou sélectionner les prises d’entrée qui reçoivent les signaux numériques. 266 • Les connexions entre la prise de sortie vidéo de cet appareil et le connecteur d’entrée de l’écran sont incomplètes. • Le réglage d’entrée de l’écran de TV est différent. • Vérifier si les connexions sont correctes. 235 • Régler la commutation d’entrée de la TV sur la prise sur laquelle l’entrée vidéo est connectée. — • Quasiment tous les logiciels de film contiennent un signal de prévention contre la reproduction. • Il est impossible de produire une copie. — • Le subwoofer n’est pas alimenté. • Mettre le subwoofer sous tension. — • Le réglage du subwoofer a été effectué sur “No” lors de l’installation. • Effectuer le réglage sur “Subwoofer” dans l’installation. 253 • Les piles sont épuisées. • La télécommande est trop éloignée de l’appareil. • Il y a un obstacle entre la télécommande et l’appareil. • Une touche différente est activée. • Les extrémités < et > de la pile ont été inversées lors de la mise en place. • La sélection de mode de la télécommande n’a pas été correctement sélectionnée. Le mode DVD, AV ou audio n’est pas correctement sélectionné. • Insérer des piles neuves. • Rapprocher. 244 244 • Retirer l’obstacle. 244 • Appuyer sur la bonne touche. • Insérer les piles correctement. 240 244 • Appuyez sur la touche de sélection de la télécommande pour sélectionner l’article que vous souhaitez utiliser. Pour faire fonctionner cet appareil, choisir le mode DVD. 241 270 271 337 3ADV-M71E2_FRA p285-p339 03.12.25 1:23 PM ページ 338 FRANCAIS Fonctionnement DVD Symptôme Tuner Page • Il y a-t-il de la condensation sur le disque ou sur le lecteur ? (Laisser reposer 1 à 2 heures.) • Les disques autres que les DVD, CD vidéo ou musicaux ne peuvent pas être lus. • Le disque est sale. L’essuyer. — 230 231 La lecture du menu des CD vidéo n’est pas possible. • La lecture de menu n’est possible que pour les CD vidéo avec une commande de lecture. — L’image est déformée pendant la recherche. • Il est normal qu’il y ait quelques parasites. — Les touches ne fonctionnent pas. • Certaines opérations sont mises hors service pour certains disques. Aucun sous-titre n’est affiché. • Les sous-titres ne sont pas affichés pour les DVD ne contenant pas de sous-titres. • Les sous-titres sont inactivés. Les activer. • La langue audio (ou des sous-titres) ne peut pas être changée pour les disques ne contenant pas des langues audio (ou de sous-titres) multiples. • Pour certains disques, la langue audio (ou des sous-titres) ne peut être changée qu’en utilisant les écrans de menu. 319 La langue audio (ou des sous-titres) ne change pas. L’angle ne change pas. • L’angle ne peut pas être modifié pour les DVD ne comprenant pas des angles multiples. Dans certains cas, les angles multiples ne sont enregistrés que pour des scènes particulières. 307 266 — 319, 320 319 La lecture ne commence pas lorsque le titre est sélectionné. • Vérifier le réglage de l’ “RATINGS SETTING” (installation des indices). 327, 328 Le mot de passe pour le niveau d’indice a été oublié. Réinitialiser tous les réglages pour qu’ils retrouvent leur valeur par défaut. • Lorsque le lecteur est en mode stop, maintenir enfoncées les touches FUNCTION et MENU/SET du lecteur simultanément pendant plus de 3 secondes (jusqu’à ce que “INITIALIZE” disparaisse de l’écran de TV). Le verrouillage sera relâché et tous les réglages par défaut et réglages de l’image reprendront leurs valeurs par défaut. 327, 328 Le disque n’est pas lu avec la langue audio ou des sous-titres par défaut. • Le disque n’est pas lu avec la langue audio ou de sous-titres sélectionnée si le DVD ne comprend pas cette langue. 319 L’image n’est pas affiché en format 4:3 (ou 16:9). • Régler le réglage par défaut de la fonction “TV ASPECT” sur le réglage approprié pour la TV connectée. 323 Les messages des écrans de menu pour la langue souhaitée ne sont pas affichés. • Vérifier le réglage par défaut pour la langue du menu de langues. 320, 321 • Le câble de l’antenne n’est pas connecté correctement. • Connectez le câble de l’antenne correctement. • Connectez une antenne extérieure. 236 On entend un bruit continu ou un sifflement lors de la réception d’émissions radio AM • Cela peut provenir d’un téléviseur ou d’une interférence d’une station radio. • Coupez le téléviseur. • Changez la position et la direction de l’antenne boucle AM. 236 On entend un bourdonnement lors de la réception d’émissions AM • Les ondes radio transmises par le cordon d’alimentation sont modulées. • Débranchez le cordon d’alimentation, secouez la prise puis rebranchez le cordon. 236 On entend un bruit continu lors de la réception d’émissions radio FM 338 Vérification La lecture ne commence pas lorsque la touche LECTURE est activée. La lecture s’arrête immédiatement. 3ADV-M71E2_FRA p285-p339 03.12.25 1:23 PM ページ 339 FRANCAIS 24 SPECIFICATIONS 2 2 2 Section audio • Section amplificateur de puissance Sortie maximale pratique: Bornes de sortie: • Section analogique Préatténuation/Impédance d’entrée: Réponse en fréquence: Rapport signal sur bruit: Sortie nominale: Section tuner Réception de la bande de fréquences: Sensibilité de réception: Séparation des deux canaux FM: • Section numérique Entrée/sortie numérique: Section vidéo • Connecteur AV 1 Avant: 35 W + 35 W (charge de 6 Ω/ohms, 1 kHz, T.H.D.10%) Impédance des enceintes: 6 à 16 Ω/ohms 200 mV/47 kΩ/kohms 10 Hz à 50 kHz: +0, –3 dB (2 réglage bicanal, mode direct) 98 dB (mode direct) 0,6 V (sortie du préamplificateur) FM: 87,5 MHz à 108 MHz FM: 1,5 µV/75 Ω/ohms 35 dB (1 kHz) Format: — interface audio numérique Sortie vidéo Sortie S-vidéo Sortie RGB Sortie audio 2 2 2 2 Section DVD Format de signal: Disques compatibles: Sortie audio analogique: Section horloge/minuterie Méthode de l’horloge: Timer: Généralités Alimentation électrique: Consommation électrique: Dimensions externes maximales: Poids: Télécommande Méthode de la télécommande: Alimentation électrique: AM: 522 kHz à 1611 kHz AM: 20 µV 1 Vp-p/75 Ω/ohms Signal Y (luminosité) — 1 Vp-p/75 Ω/ohms Signal C (couleur) — 0.3 Vp-p/ 75 Ω/ohms Signal R/G/B — 0.7 Vp-p/75 Ω/ohms L/R (Sortie établie) NTSC/PAL (1) Disques DVD-VIDEO 12 cm face unique 1 couche, 12 cm face unique 2 couches, 12 cm double faces 2 couches (face unique 1 couche), 8 cm face unique 1 couche, 8 cm face unique 2 couches, 8 cm double faces 2 couches (face unique 1 couche) (2) Disque compact (CD-DA, CD VIDEO) Disques de 12 cm, disques de 8 cm Niveau de sortie: 1,1 Vrms (LINE-1, LINE-2 OUT) Méthode synchronisée sur la fréquence du réseau Minuterie quotidienne/minuterie occasionnelle: un système chacune Minuterie de sommeil: 120 minutes, maximum 230 V CA, 50 Hz 75 W (En veille: environ 1 W) 210 (L) x 95 (H) x 367 (P) mm (incluant les pieds, les boutons et les connecteurs) 3,5 kg RC-966 Méthode d’impulsions à infra rouges 3 V CC, avec deux piles AA Ce produit incorpore une technologie de protection du copyright qui est protégée par les déclarations de méthode de certains brevets américains et autres droits de propriété intellectuelle possédés par Macrovision Corporation et d'autres propriétaires de droits. L'utilisation de cette technologie de protection du copyright doit être autorisée par Macrovision Corporation et est destinée à un usage privé et autres utilisations de portée limitée à moins d'une autorisation spécifique de Macrovision Corporation. Le changement de la mécanique ou le démontage sont interdits. ✽ Le design et les spécifications sont susceptibles de changements sans avertissement en vue d'améliorer le produit. 339 4Backpage 03.12.25 1:26 PM ページ 1 16-11, YUSHIMA 3-CHOME, BUNKYO-KU, TOKYO 113-0034, JAPAN Telephone: (03) 3837-5321 Printed in China 511 4122 109