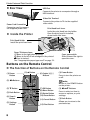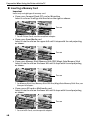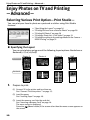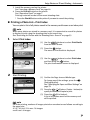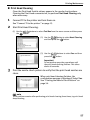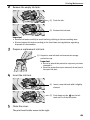
1
T2202D_PPG_US_Cover.fm Page 1 Tuesday, July 20, 2004 4:19 PM Photo Printing Guide The following ink tank is compatible with DS700. For details on ink tank replacement, refer to “Replacing an Ink Tank” in this guide. QA7-3336-V01 XXXXXX ©CANON INC.2004 PRINTED IN THAILAND T2202D_PPG_US_Cover.fm Page 2 Tuesday, July 20, 2004 4:19 PM Exif Print This printer supports Exif 2.2 (also called “Exif Print”). Exif Print is a standard for enhancing the communication between digital cameras and printers. By connecting to an Exif Print-compliant digital camera, the camera’s image data at the time of shooting is used and optimized, yielding extremely high quality prints. International ENERGY STAR® Program As an ENERGY STAR® Partner, Canon Inc. has determined that this product meets the ENERGY STAR guidelines for efficiency. The International ENERGY STAR® Office Equipment Program is a global program that promotes energy saving through the use of computer and other office equipment. The program backs the development and dissemination of products with functions that effectively reduce energy consumption. It is an open system in which business can participate voluntarily. The targeted products are office equipment such as computers, monitors, printers, faxes and copiers. Their standards and logos are uniform among participating nations. Power Requirements Never use a power supply voltage other than that supplied in the country of purchase. Using the incorrect voltage could cause a fire or electric shock. The correct power supply voltages and frequencies are as follows: AC 110-120 V, 50/60 Hz AC 220-240 V, 50/60 Hz Trademark Notices • Canon is a registered trademark of Canon Inc. • BJ and SELPHY are trademarks of Canon Inc. • Microsoft® and Windows® are registered trademarks of Microsoft Corporation in the U.S. and other countries. • Apple, Mac, Macintosh are trademarks of Apple Computer, Inc., registered in the U.S. and other countries. • Compact Flash is a trademark of SanDisk Corp. • Microdrive is a trademark of IBM Corp. • Memory Stick, MagicGate Memory Stick, Memory Stick PRO and Memory Stick Duo are trademarks of Sony Corp. • SD (Secure Digital) Memory Card is a trademark of Toshiba Corp., Matsushita Electric Industrial Co., Ltd,. and SanDisk Corp. • miniSD Card is a trademark of SD Association. • MultiMediaCard is a trademark of Infineon Technologies AG. • SmartMedia is a trademark of Toshiba Corp. • xD-Picture Card is a trademark of Fuji Photo Film Co., Ltd. • All other trademarks and registered trademarks appearing in this Quick Start Guide are the property of their respective owners. Copyright© 2004 CANON INC. All rights reserved. No part of this publication may be transmitted or copied in any form whatsoever without the express written permission. Contents Easy Setup Instructions..................................................................................3 Unpack the Printer ........................................................................................................3 Preparing the Printer.....................................................................................................4 Installing the Print Head ...............................................................................................5 Installing an Ink Tank ....................................................................................................6 Printer Parts and Their Function......................................................................7 Printer ..........................................................................................................................7 Buttons on the Remote Control......................................................................................8 Menu Screen...............................................................................................................11 Preparation When Using the Printer with the TV............................................13 Displaying a Photo on TV.............................................................................................13 Using a Memory Card ..................................................................................................15 Loading Paper.............................................................................................................18 Enjoy Photos on TV and Printing —Basic— ...................................................21 Viewing and Printing from the TV Overview .................................................................21 Enjoy Photos on TV and Printing —Advanced—.............................................26 Selecting Various Print Option—Print Studio—............................................................26 Handy Functions and Settings.....................................................................................33 Printing Photographs Directly from a Digital Camera ....................................39 Connecting to a Digital Camera ...................................................................................39 Direct Printing from PictBridge-compatible Digital Cameras ........................................41 Printing Photographs Directly from a Canon Bubble Jet Direct Compatible Digital Camera ............................................................................................................43 Printing Photos with Infrared Compatible Mobile Phones .............................44 Requirements for Infrared Communication with the Mobile Phone...............................44 Setting the Media Type, Page Size, and Layout............................................................44 Performing Infrared Printing........................................................................................46 Printing with the computer...........................................................................49 Installing the Printer Driver .........................................................................................49 How to View the User’s Guide......................................................................................54 Printing Maintenance ...................................................................................55 When Printing Becomes Faint or Colors are Incorrect ...................................................55 Replacing an Ink Tank .................................................................................................60 1 Troubleshooting...........................................................................................64 Nothing is Displayed on TV/Image is Poor ...................................................................64 The Remote Control is not Working..............................................................................65 A Message is Displayed on TV .....................................................................................65 Handling Error Messages ............................................................................................67 Paper Does Not Feed Properly .....................................................................................68 Printing is Blurred/Colors are Wrong/White Streaks appear ........................................69 Printed Surface is Scratched or Ink Blots.....................................................................70 Printer Does Not Start or Printer Stops During Print Jobs .............................................72 Cannot Print Properly from the Digital Camera.............................................................73 Cannot Install the Printer Driver ..................................................................................75 Appendix .....................................................................................................76 Specifications .............................................................................................................76 Safety Precautions......................................................................................................78 Regulatory Information ...............................................................................................80 Introduction This Photo Printing Guide uses the following symbols to indicate important information. Always observe the instructions indicated by these symbols. Instructions that, if ignored, could result in death or serious personal injury caused by incorrect operation of the equipment. These must be observed for safe operation. Instructions that, if ignored, could result in personal injury or material damage caused by incorrect operation of the equipment. These must be observed for safe operation. Also read the Safety Precautions. Observe the warnings and cautions to avoid personal injury or damage to the printer. 2 Easy Setup Instructions Easy Setup Instructions Unpack the Printer Check that all the following items are in the box. If anything is missing or is damaged, contact a Canon service representative. Power Cord Video Cable (RCA) Documentation and Setup Software & User’s Guide CD-ROM Ink Tank BCI-16 Color Remote Control Printer Lithium coin cell battery Print Head note See “Using the Remote Control” on page 9 for instructions on setting the lithium coin cell battery in the remote control. 3 Easy Setup Instructions Preparing the Printer 1 Place the printer on a flat surface. * Important * During printing, part of the sheet is ejected from the back of the printer. Leave at least 8cm (3.1in), clear space at the back of the printer. 2 Remove the tape from the printer. The tape position is subject to change. 3 4 Plug the power cord into the back of the printer and connect the other end to a power outlet. Press the POWER button. The printer will initialize. Warning • Never attempt to plug the power cord into the power outlet or unplug the power cord when your hands are wet. • Never damage, modify, stretch, or excessively bend or twist the power cord. Do not place heavy objects on the power cord. • Never use any power supply other than the standard power supply available in the country of purchase. Using the incorrect voltage and frequency could cause a fire or electric shock. • Always push the plug all the way into the power outlet. 4 Easy Setup Instructions Installing the Print Head 1 Slide the cover open switch toward the right to open the cover. The print head holder moves to the center. 2 Press the lock button, then raise the lock lever. Do not touch internal parts other than the lock lever. 3 Remove the protective cap from the print head. note • Do not touch the print head nozzles. • Do not attempt to reattach the protective cap once it has been removed. print head nozzles 4 Place the print head in the holder. print head print head holder 5 Easy Setup Instructions 5 Lock the print head into place by lowering the lever. Press down the lock button until it clicks. Do not touch the lock lever once the print head has been installed. Installing an Ink Tank Caution • For safety reasons, store an ink tank out of the reach of small children. • Do not drop or shake an ink tank as this may cause the ink to leak out and stain your clothes and hands. 1 2 Ink ports Take out the ink tank. Hold the ink tank as shown in the diagram and remove the protective cap. note • Do not touch the ink port. • Do not attempt to reattach the protective cap once it has been removed. 3 4 5 Insert the ink tank slant into the slot aligning the X mark with the W mark. Press the place. until it clicks into Close the cover. note Wait until the preparatory operation is complete: it takes about 80 seconds. 6 Printer Parts and Their Function Printer Parts and Their Function This section describes the components of the printer, the remote control and the menus displayed when using the printer with a TV. Printer Front View Remote control receiver/ Infrared port Receives the button signal from the remote control or data sent from the mobile phone via infrared communication. Cover Open to replace the ink tank or remove jammed paper. Direct Print Port Connects the printer to a digital camera or digital video camcorder. For instructions, See “Printing Photographs Directly from a Digital Camera” on page 39. Operation Panel Card Slot Set the memory card from a digital camera here. For instructions, See “Using a Memory Card” on page 15. Indicator Lamp This lamp will turn on when the memory card is set. It will blink while reading or writing from the card. Paper Output Tray The printed paper will be ejected. Paper Support Open and pull out before printing to support paper. Auto Sheet Feeder Load paper here. Paper Guide When loading paper, ensure that the left edge just touches this guide. Print All Button Prints each of all photos. See “How to Print All Photos without Connecting to TV” on page 30. RESUME/CANCEL Button Press to resume printing once an error has been resolved. The printer will then initialize ready for printing. Also, to cancel printing in progress, press this button. POWER Button POWER Lamp Press to turn the printer on or off. Off: the printer is turned off. Green: the printer is ready to print. Flashing green: the printer is preparing to print, or is currently printing. Flashing orange: an error has occurred and the printer is not ready to print. Flashing orange and green alternately: an error has occurred that may require a service call. 7 Printer Parts and Their Function Rear View USB Port Connects the printer to a computer through a USB interface. Power Cord Connection Connector used to connect the supplied power cord. Inside the Printer Video Out Terminal Connects the printer to TV via the supplied video cable. Print Head Lock Lever Locks the print head into the holder. Once the print head is installed, do not touch this lever. Print Head Holder Install the print head here. Paper Thickness Lever Move to the right when printing. Move to the left if ink smudges or the printed surface is stained. See “Inappropriate paper type used” on page 70. Cover open switch Slide it toward the right to open the cover. Buttons on the Remote Control The Function of Buttons on the Remote Control (1) Power Button (2) S Button (6) Copies [+][–] Buttons (2) WXButtons (1) Power Button Press to turn the printer on or off. note Works as the POWER button on the printer. (2) T Button (3) Back Button (4) Search Button (5) Settings Button 8 (7) OK Button (8) Menu Button (9) Rotate Button (10) Zoom Button (11) Cancel Button (12) Print Button (2) WXST Buttons Press to select an item in menus or options, or print settings. (3) Back Button Allows you to return to the previous step. Printer Parts and Their Function (4) Search Button Looks up target photos in the memory card using the shooting date as the search key. See “Searching for Photos with the Shooting Date—Search” on page 35. (9) Rotate Button Rotates the photo displayed on TV 90 degrees. This button is effective even if you are displaying a slide show, or zooming a photo. (5) Settings Button Allows you to set the Paper Size, Paper Type, Bordered/Borderless printing, printing with the date, etc. See “Specifying the Paper and Other Settings” on page 33. (10) Zoom Button Press to enlarge or reduce the photo being displayed. (6) Copies [+][–] Buttons Specifies the number of copies to print in such as the print confirmation screen. (7) OK Button Allows you to make a selection. For example, selecting a photo to be printed, selecting a menu item or other setting. (11) Cancel Button Press to cancel the settings you have made. If this button is pressed during printing, the printer aborts printing. (8) Menu Button Displays menu options on TV. (12) Print Button Press to start printing according to the settings displayed on TV. Using the Remote Control Operating the Remote Control When you operate the remote control, make sure of the following: • Use the remote control within a distance of approximately 13.1 feet/ 4 m from the remote control receiver on the printer. 13.1 feet/ 4m • Use the remote control within an angle of 30 degrees from right to left or up and down, aiming at the remote control receiver on the printer. 9 Printer Parts and Their Function note Setting or Replacing the Battery Set the battery in the remote control first. Replace the battery in the remote control when the remote control becomes inoperative or its effective range becomes shorter. The lithium coin cell battery CR2025 is available for this remote control. Purchase the commercial battery for replacement. 1 Remove the cover from the back of the remote control. 2 Push down the battery stopper tab and remove the battery from the remote control. 3 Replace the new battery with its positive (+) ends facing up. 4 Replace the cover. note Using the Remote Control • The remote control may operate improperly if strong light such as sunlight or inverted fluorescent light hits the remote control receiver. Keep the remote control away more than 19.69inch/50cm from inverted fluorescent light. • Do not drop or apply strong impact on the remote control. • Keep out of direct sunlight, high temperature, and fire. • Do not disassemble or modify the remote control. • Do not handle the remote control with wet hands. note Using a Battery • The lithium coin cell battery CR2025 is available for this remote control. • Do not use other types of battery. • Place the battery with its positive (+) ends facing up. Never place the battery with its negative (–) end facing up. • Remove the battery from the remote control if it will not be used for a long period of time. • See “Safety Precautions” on page 78 for additional cautions. CLASS1 LED PRODUCT 10 Printer Parts and Their Function Menu Screen The following menu can be selected when a memory card is inserted in the memory card slot and the printer and the TV are connected. You can select the following functions in each menu. Photo Gallery View each photo and print. You can automatically display photos (slide show) on the full TV screen. See “Viewing Each Photo on TV and Printing—Photo Gallery” on page 21. Photo Print Select photos and specify the number of copies to print. See “Specifying the number of copies to print for each photo —Photo Print” on page 24. Layout print Print Studio Select to display the following menus. Prints the specified photo in the specified layout (Borderless or Bordered ×2/×4/×8/half). See “Specifying the Layout” on page 26. Sticker print Prints stickers from a favorite photo. See “Printing Stickers from a Favorite Photo” on page 28. Print all Prints all photos. See “Printing All Photos” on page 30. Print index Prints an index of all photos. See “Printing a Photo List—Print Index” on page 31. DPOF print Prints according to the DPOF settings, if available. See “Printing According to the settings Made on the Camera —DPOF Printing” on page 32. 11 Printer Parts and Their Function Tool Box Displays the following menus. Nozzle check Prints a nozzle check pattern to ensure that ink is output correctly. See “Printing the Nozzle Check Pattern” on page 56. Ink counter reset Resets the ink counter so that it is correctly synchronized with the actual ink level when the ink tank is replaced. See “Resetting the Ink Counter” on page 62. Head cleaning Cleans the print head when nozzles are clogged. See “Print Head Cleaning” on page 57. Date display format Changes the format of date printing. See “Setting the Date Display Format” on page 36. Deep cleaning If print quality does not improve after standard head cleaning, use Deep Cleaning. See “Print Head Deep Cleaning” on page 58. Color adjust Adjusts the brightness, contrast and color hue of the photo at printing. See “When the color is different from what is displayed on the TV or when it is not printed with your favorite color” on page 69. Head alignment Align the print head. See “Aligning the Print Head” on page 59. Head alignment print Prints the current settings of the print head position. See “Printing the current setting of the print head position” on page 60. Display photo received via infrared Specifies whether to display a photo on TV when it is sent from a mobile phone via the infrared communication. See “Printing a Photo by Displaying it on TV” on page 47. Remaining ink level indicator setting Specifies whether to display the remaining ink level in the print confirmation screen. See “Accompanied by ink tank icon with '?'” on page 66. Infrared print Selects media type and layout when you print a photo sent from a mobile phone via the infrared communication. See “Setting the Media Type, Page Size, and Layout” on page 44. Ink drying wait time Sets time to dry ink on the printing surface. Set longer time in case print surface becomes dirty. See “Sets time to dry ink on the printing surface.” on page 71. Reset Returns the settings other than languages and the print head position to the factory settings. See “Resetting All Settings” on page 38. Languages Sets the language displayed on TV. See “Changing the Language Displayed” on page 37. 12 Preparation When Using the Printer with the TV Preparation When Using the Printer with the TV Displaying a Photo on TV This section describes the method to connect the printer to the TV with the attached video cable (RCA) and to turn on/off the printer and TV. Connecting to TV 1 Check the following before connecting the printer to the TV. • Both the printer and the TV are turned off. • A battery is installed in the remote control. See “Using the Remote Control” on page 9. • Print head and ink tank are installed in the printer. See “Easy Setup Instructions” on page 3. 2 Connect TV to the printer. (1) Ensure that the printer is turned off and connect the attached video cable to the video out terminal (2) Ensure that the TV is turned off and connect the attached video cable to the video input terminal. note See the TV manual for the location of the video input terminal and the instruction on selecting the video input. 13 Preparation When Using the Printer with the TV Turning on TV and the Printer for Displaying the Menu Screen Follow the procedure below to turn on TV and the printer. 1 Connect to TV. See “Connect TV to the printer.” on page 13. 2 Turn on TV and the printer. (1) Turn on TV. (2) Press the POWER button. The POWER lamp flashes while the printer warms up and changes to steady (non-flashing) green when the printer is ready. (3) Select the video input mode. The menu screen appears on the TV screen. See “Viewing Each Photo on TV and Printing—Photo Gallery” on page 21 for the instruction on selecting among menus and displaying a photo stored in a memory card. note • You can turn the printer on by pressing the POWER button on the remote control. • If the POWER lamp changes to orange and begins flashing, refer to the section “Handling Error Messages” on page 67. Turning off TV and the printer Follow the procedure below to turn off TV and the printer. 1 Check the following before turning off TV and the printer. • The Indicator lamp of the memory card is not flashing. * Data in the memory card may be damaged if you remove the memory card or turn off the printer when the Indicator lamp is flashing. • The POWER lamp is not flashing in green. • The printer is not printing. 2 Turn off TV and the printer. (1) Turn off the printer by pressing the POWER button. note • You can also turn off the printer by pressing the POWER button on the remote control. • Before unplugging the power cord, turn off the printer and ensure that the green lamp has gone out. (2) Turn TV off. (3) Unplug the connected video cable. * Unplug the video cable after turning off TV and the printer. 14 Preparation When Using the Printer with the TV Using a Memory Card Let's take a look at different types of memory cards and how to insert and remove them. Memory Cards Supported by this printer Supported memory cards are as follows: Memory Cards which can be inserted directly Memory Cards which can be used through a special adapter • CompactFlash (CF) card • Microdrive * Supports TYPE I/ TYPE II (3.3V) • xD-Picture Card • Memory Stick • Memory Stick PRO • MagicGate Memory Stick • Memory Stick Duo • Memory Stick PRO Duo • MagicGate Memory Stick Duo *1 *2 • SD Memory Card • Multimedia Card • miniSD Card • SmartMedia * Supports 3.3V card only (1 MB and 2 MB cards not supported) *1 *2 *2 Purchase the Compact Flash Card Adapter for xD-Picture Card separately. Use the special adapter supplied with the card. Important • This printer supports JPEG (DCF/CIFF/Exif 2.21 or earlier/JFIF), TIFF (Exif compliant), and DPOF (Ver. 1.00 compliant). • Photos stored in a memory card not supported by the digital camera may fail in loading or be damaged. For types of memory cards supported by the digital camera, refer to your digital camera user’s manual. • Use the digital camera to format a memory card. Memory card data formats may not be compatible with computer-specific formats. • Images edited on the computer may result in improper printing. 15 Preparation When Using the Printer with the TV Inserting a Memory Card Important Insert only a single type of memory card. • If you use a Compact Flash (CF) card or Microdrive Insert it as far as it will go into the slot on the right as shown. Turn on * For xD-Picture Card, use the compliant adapter. • If you use a SmartMedia card Insert it into the slot on the upper left until it stops with its end projecting as shown. Turn on • If you use a Memory Stick/Memory Stick PRO/Magic Gate Memory Stick Insert it into the slot on the lower left until it stops with its end projecting as shown. Turn on * For Memory Stick Duo/Memory Stick PRO Duo/MagicGate Memory Stick Duo, use the special adapter. • If you use an SD card or Multimedia card Insert it into the slot on the lower left until it stops with its end projecting as shown. Turn on * For a miniSD Card, use the special adapter. 16 Preparation When Using the Printer with the TV Removing a Memory Card note If you use the printer connected to your computer, follow the instructions for removal of the memory card from the computer. For the procedure, refer to the on-screen User’s Guide. 1 Ensure that the Indicator lamp is not flashing, then remove the memory card. Important Removing the memory card or turning off the printer while the Indicator lamp is flashing can damage the data stored in the memory card. • If you use CompactFlash (CF) card/Microdrive/xD-Picture card Ensure that the Indicator lamp is not flashing, then press the card eject button to remove the memory card. Card eject button Indicator lamp • If you use other cards Ensure that the Indicator lamp is not flashing, then hold the exposed portion of the memory card with your fingers to remove the memory card. 17 Preparation When Using the Printer with the TV Loading Paper Print Media to Avoid Do not use the following types of paper. Using such paper will not only produce unsatisfactory results, but can also cause the printer to jam or malfunction. • • • • Folded, curled or wrinkled paper Damp paper Paper that is too thin (less than 64 gsm or 17 lb) Paper that is too thick* (more than 105 gsm or 28 lb) * non-Canon branded paper • Picture postcards • Postcards with an affixed photo or sticker Loading the Print Media note Refer to “Media Types for Card Direct Printing” on page 20 for compatible paper. 1 Turn on the printer. (1) Press the POWER button. (2) Open the paper support. 2 Flatten the four corners of the paper before loading it. note If paper is curled, gently bend the corners in the opposite direction until the paper becomes completely flat. 18 Preparation When Using the Printer with the TV 3 Prepare to load paper. (1) Slide the cover open switch toward the right to open the cover. (2) Ensure that the paper thickness lever is set to the right. note Set the lever on the left only if ink smudges or the printed surface is stained. (3) Close the cover. 4 Load the paper. (1) Insert the paper into the paper support with print side facing up. When loading the credit card sized paper, load sheets in the portrait position (feed from the short side) * Important (3) Slide the paper guide against the left side of the stack of paper. • 101.6 × 152.4mm/ 4"×6" paper * During printing, part of sheet is ejected from the back of the printer. Leave at least 8cm (3.1 in) clear space at the back of the printer. (2) Align the paper with the right edge of the paper support and insert the paper until it is fully inserted. • Photo stickers Shorter margin note • Do not stack more than 10 sheets in the paper output tray. • Do not touch the printed surface until the ink dries. For specific drying times, refer to the instructions packaged with your media. 19 Preparation When Using the Printer with the TV Media Types for Card Direct Printing Media Type Photo Paper Pro Paper support Load Limit Page size Media type 101.6×152.4 mm/ [101.6×152.4 mm]/ [Photo Paper Pro] 4"×6": up to 20 sheets [4"×6"] Photo Paper Plus 101.6×152.4 mm/ [101.6×152.4 mm]/ [Photo Paper Plus Glossy 4"×6": up to 20 sheets [4"×6"] Glossy] Photo Paper Plus 101.6×152.4 mm/ [101.6×152.4 mm]/ [Photo Paper Plus Semi-gloss 4"×6": up to 20 sheets [4"×6"] Glossy] Glossy Photo Paper 101.6×152.4 mm/ [101.6×152.4 mm]/ [Glossy Photo Paper] 4"×6": up to 20 sheets [4"×6"] Credit Card: up to 20 sheets [Credit Card] [Glossy Photo Paper] Matte Photo Paper 101.6×152.4mm/ [101.6×152.4mm]/ [Matte Photo Paper] 4"×6": up to 20 sheets [4"×6"] Photo Stickers 101.6×152.4 mm/ 4"×6": up to 1 sheet —* — * Select Sticker print from Print Studio when you print. See “Printing Stickers from a Favorite Photo” on page 28. You can print a photo taken with a mobile phone by selecting Sticker as the paper size in Infrared print. See “Printing on Photo Stickers” on page 45. note For instructions on how to display and set these settings, See “Specifying the Paper and Other Settings” on page 33. 20 Enjoy Photos on TV and Printing —Basic— Enjoy Photos on TV and Printing —Basic— Viewing and Printing from the TV Overview You can display photos stored in a memory card on TV by connecting printer and TV and inserting the memory card in the printer. You can print your favorite photos one by one, or display a list of the photos and specify the number of copies to print for each photo listed. Viewing Each Photo on TV and Printing—Photo Gallery note Displays photos stored in a memory card on TV. You can display one photo at a time or display photos automatically (slide show). 1 Connect the printer to TV. See “Connect TV to the printer.” on page 13. 2 Turn on TV and the Printer and display the Menu Screen. See “Turning on TV and the Printer for Displaying the Menu Screen” on page 14. (1) Turn TV on. (2) Turn on the printer. (3) Select the video input mode. The menu screen appears on the TV screen. note The Menu screen is displayed when TV and the printer are connected and turned on. Change the language displayed on the Menu screen. * See “Changing the Language Displayed” on page 37. 3 Loading the Paper. See “Loading Paper” on page 18. 4 Install the memory card in the card slot. See “Inserting a Memory Card” on page 16. The menu screen is displayed. 21 Enjoy Photos on TV and Printing —Basic— note Menu Screen The Menu screen is displayed when TV and the printer are connected and turned on. Tool Box is the only available menu at the moment. All menu options can be viewed when a memory card with stored photos is inserted into the printer card slot. Press the Menu button to display the Menu screen if the other screen is displayed. • The menu displayed when the power is on. • The menu displayed when a memory card is set. The number of photos stored in the memory card. 5 Select Photo Gallery. (1) Use the WX buttons to select Photo Gallery. (2) Press the OK button. The stored photo is displayed on TV. (3) Press the X button and the W button to display the next photo and the previous photo, respectively. 6 Select the photo to print. (1) Using the WX buttons, select the image to print. (2) Press the Print button. The print confirmation screen is displayed. note When many photos are stored in a memory card, it is convenient to search for photos to display or print using the shooting date as the search key. See “Searching for Photos with the Shooting Date—Search” on page 35. 22 Enjoy Photos on TV and Printing —Basic— 7 Confirm the settings. (1) Confirm the Page size and Media type. To change any of the settings, press the Settings button. See “Specifying the Paper and Other Settings” on page 33. (2) Press the Copies +/Copies – buttons to specify the number of copies to print. 8 Start printing. (1) Ensure that the paper is loaded in the print confirmation screen. (2) Press the Print button. note Displaying Photos Automatically at the Full TV Screen—Slide Show You can automatically display photos stored in a memory card at the full TV screen. 1 Start a photo gallery to display photos stored in a memory card. 2 Press the OK button. The confirmation message is displayed. 3 Select Yes and then press the OK button. The slide show is started and the photos are switched automatically at a certain interval. Press the OK button to stop switching photo during the slide show. Press the OK button again to restart the slide show. 4 Press the Cancel button or the Back button. It stops the slide show and returns to the Photo Gallery screen. 23 Enjoy Photos on TV and Printing —Basic— Specifying the number of copies to print for each photo —Photo Print You can display 9 photos stored in a memory card on the TV screen at a time and specify the number of copies to print for each photo. 1 Prepare to print. (1) Connect TV to the printer and turn them on. See “Connect TV to the printer.” on page 13. (2) Load the paper See “Loading Paper” on page 18. (3) Insert the memory card into the card slot. See “Inserting a Memory Card” on page 16. The menu screen is displayed. Press the Menu button if the screen other than the menu screen appears on the screen. 2 Select Photo Print. (1) Use the WX buttons to select Photo Print. (2) Press the OK button. The screen for specifying the number of images is displayed. 24 Enjoy Photos on TV and Printing —Basic— 3 Specify the number of copies to print. (1) Use the WXST buttons, select the photo you wish to print. (2) Use the Copies +/Copies – buttons to specify the number of copies to print. (3) Repeat steps 1 and 2 and specify the number of copies for each photo you wish to print. (4) Press the Print button. The print confirmation screen is displayed. Number of copies to print note • Place the cursor on the Cancel all, Previous, or Next button displayed at the bottom of the screen and press the OK button to: Cancel all Reset the specify the number of copies to print for all photos. << Previous Display the previous page if more than 10 photos are stored in the memory card. Next >> Display the next page if more than 10 photos are stored in the memory card. • When many photos are stored in a memory card, it is convenient to search for photos to display or print using the shooting date as the search key. See “Searching for Photos with the Shooting Date—Search” on page 35. 4 Start printing. (1) Confirm the Page size and Media type. To change any of the settings, press the Settings button. See “Specifying the Paper and Other Settings” on page 33. (2) Ensure that the paper is loaded in the print confirmation screen. (3) Press the Print button. The specified number of copies for each image will be printed. 25 Enjoy Photos on TV and Printing —Advanced— Enjoy Photos on TV and Printing —Advanced— Selecting Various Print Option—Print Studio— You can print your favorite photo as a postcard or sticker using Print Studio features. • • • • • “Specifying the Layout” on page 26 “Printing Stickers from a Favorite Photo” on page 28 “Printing All Photos” on page 30 “Printing a Photo List—Print Index” on page 31 “Printing According to the settings Made on the Camera — DPOF Printing” on page 32 Specifying the Layout You can print photos using one of the following layout options: Borderless or Bordered (×2/×4/×8/half). Photo×2 Photo×4 Photo×8 Half Borderless Bordered 1 Prepare to print. (1) Connect TV to the printer and turn them on. See “Connect TV to the printer.” on page 13. (2) Load the paper. See “Loading Paper” on page 18. (3) Insert the memory card into the card slot. See “Inserting a Memory Card” on page 16. The menu screen is displayed. Press the (Menu button) if the screen other than the menu screen appears on the screen. 26 Enjoy Photos on TV and Printing —Advanced— 2 Select Layout print. (1) Use the buttons to select Print Studio. (2) Press the button. The menu of Print Studio is displayed. (3) Use the buttons to select Layout print and then press the button. The screen for specifying the layout is displayed. 3 Specify the layout. (1) Use the buttons to specify the layout. (2) Press the button. The screen for specifying the paste method is displayed. 4 Select the paste method. (1) Use the and buttons to select the paste method, and then press the button. Paste all All the photos in the memory card are pasted automatically in the selected layout. Print confirmation screen is displayed. Proceed to step 6. Paste one by one Paste photos one by one on the specified layout. Proceed to step 5. note When many photos are stored in a memory card, it is convenient to search for photos to display or print using the shooting date as the search key. See “Searching for Photos with the Shooting Date—Search” on page 35. 27 Enjoy Photos on TV and Printing —Advanced— 5 Paste photos one by one. (1) Press the and button to display the photo you want to paste. (2) Press the button. The photo is pasted on the layout. Press the (Back button) to cancel pasting the specified photo. (3) Repeat steps (1) and (2) for each photo you wish to print. (4) Press the (Print button). The print confirmation screen is displayed. note You cannot paste photos on more than one page. Start printing once you have pasted photos on one page. 6 Start Printing. (1) Confirm the Page size and Media type. To change any of the settings, press the (Settings button). See “Specifying the Paper and Other Settings” on page 33. (2) Press the print. (Copies +/Copies – buttons) to specify the number of copies to (3) Press the (Print button). Printing the photos pasted on the specified layout is started. Printing Stickers from a Favorite Photo You can print your favorite photo on the Canon Photo Stickers. Stickers ×16 28 Enjoy Photos on TV and Printing —Advanced— 1 Select Sticker print. (1) Use the buttons to select Print Studio from the menu screen. (2) Press the button. The menu of Print Studio is displayed. (3) Use the buttons to select Sticker print and then press the button. The screen for specifying the layout is displayed. (4) When printing on the Canon Photo Stickers, select Stickers x 16. The screen for specifying the photo to print is displayed. 2 Select the photo to print. (1) Use the buttons to select the photo you wish to print. (2) Press the button. The print confirmation screen is displayed. note When many photos are stored in a memory card, it is convenient to search for photos to display or print using the shooting date as the search key. See “Searching for Photos with the Shooting Date—Search” on page 35. 3 Start Printing. (1) Confirm the Page size. (2) Press the print. (Copies +/Copies – buttons) to specify the number of copies to (3) Press the (Print button). Specified photo will be printed on the Photo Stickers. 29 Enjoy Photos on TV and Printing —Advanced— Printing All Photos You can print all photos saved on a memory card. note When many photos are stored in a memory card, it is convenient to search for photos to display or print using the shooting date as the search key. See “Searching for Photos with the Shooting Date—Search” on page 35. 1 Select Print all. (1) Use the buttons to select Print Studio from the menu screen. (2) Press the button. The menu of Print Studio is displayed. (3) Use the buttons to select Print all and then press the button. The print confirmation screen is displayed. 2 Start Printing. (1) Confirm the Page size and Media type. To change any of the settings, press the (Settings button). See “Specifying the Paper and Other Settings” on page 33. (2) Press the (Copies +/Copies –) buttons to specify the number of copies to print. (3) Press the (Print button). All photos saved on the memory card will be printed. note How to Print All Photos without Connecting to TV You can print all photos saved in the memory card without connecting TV and the printer with the key operation on the printer. 1 Turning on the printer. 2 Load paper. See “Loading Paper” on page 18. * Adjust to the paper size you loaded, and print borderless on the whole paper with Date print Off and Media type Photo Paper Plus Glossy. 30 Enjoy Photos on TV and Printing —Advanced— 3 Install the memory card on the printer. See “Inserting a Memory Card” on page 16. 4 Press the Print all button on the printer. See “Operation Panel” on page 7. Printing is started in order of the recent shooting date. * Press the Print All button on the printer if you want to cancel the printing. Printing a Photo List—Print Index You can print a list of all photos saved in the memory card known as an index print. note When many photos are stored in a memory card, it is convenient to search for photos to display or print using the shooting date as the search key. See “Searching for Photos with the Shooting Date—Search” on page 35. 1 Select Print index. (1) Use the buttons to select Print Studio from the menu screen. (2) Press the button. The menu of Print Studio is displayed. (3) Use the buttons to select Print index and then press the button. The print confirmation screen is displayed. 2 Start Printing. (1) Confirm the Page size and Media type. To change any of the settings, press the (Settings button). See “Specifying the Paper and Other Settings” on page 33. (2) Press the (Copies +/Copies – buttons) to specify the number of copies to print. (3) Press the (Print button). A list of all photos saved on the memory card will be printed. note For index printing, numbers of images printed on one sheet are as follows according to the paper size. 4"×6"/101.6×152.4 mm : 24 images credit card : 6 images 31 Enjoy Photos on TV and Printing —Advanced— Printing According to the settings Made on the Camera —DPOF Printing If DPOF (Digital Print Order Format) settings are made on the camera, photos are printed automatically according to those settings. note • This printer allows you to make the following DPOF settings: – Image format: CIFF, Exif (JPEG), JFIF, and Exif (Tiff) – Print type - Standard: The Photos for which you specified “Standard” using the DPOF function are printed. – Print type - Index: The photos for which you specified “Index” using the DPOF function are printed according to the index print layout. – Photos to Print: Only the photos specified using the DPOF function is printed (photos cannot be specified from the menu.) – Copies: photos are printed according to the numbers of copies specified using the DPOF function (numbers of copies cannot be specified from the menu). – Date Print: Date of DPOF on/off setting (date print cannot be specified from the menu). – Other functions (addition of comments, trimming/rotation, etc.) are not supported. • Photos are automatically scaled according to the paper size. The upper, lower, left, and/or right portion(s) of the photo may be missing depending on the size of the paper you use. 1 Select DPOF print. (1) Use the buttons to select Print Studio from the menu screen. (2) Press the button. The menu of Print Studio is displayed. (3) Use the buttons to select DPOF print and then press the button. The print confirmation screen is displayed. note You cannot select the menu if DPOF information is not saved on the installed memory card. For instructions on setting DPOF, refer to the user’s manual for your digital camera. 2 Start Printing. (1) Confirm the Page size and Media type. To change any of the settings, press the (Settings button). See “Specifying the Paper and Other Settings” on page 33. (2) Press the (Print button). The photos will be printed according to the DPOF information on the memory card. 32 Enjoy Photos on TV and Printing —Advanced— Handy Functions and Settings This section describes the functions of the buttons, such as the (Settings button) and the (Search button), used at each printing operation and the common operations, such as to change the language displayed or to set the date display format. • • • • • “Specifying the Paper and Other Settings” on page 33 “Searching for Photos with the Shooting Date—Search” on page 35 “Setting the Date Display Format” on page 36 “Changing the Language Displayed” on page 37 “Resetting All Settings” on page 38 Specifying the Paper and Other Settings You can use the (Settings button) to set the following items: Page Size or Media Type, Bordered or Borderless print, and Date print. 1 Press (Settings button). The Settings screen is displayed. note You can display the Settings screen from any screen only by pressing (Settings button). 2 Select an item to set. (1) Press the and setting items. button to move among (2) Press the and button to display the selected item.Repeat the same steps to set the necessary items. (3) Confirm the settings and press the button. (4) The screen returns to the state before the (Settings button) was pressed. 33 Enjoy Photos on TV and Printing —Advanced— Other Setting Items Basic settings • Page size Select the paper size for the print job. • Media type Select the Media type. note For information on available media types and on setting Page size and Media type, refer to “Media Types for Card Direct Printing” on page 20. • Borderless print Borderless .........Prints on the whole paper without a border. Bordered ...........Prints with a border. • Date print On .....................Prints the date the photo was taken. Off .....................Does not print the date the photo was taken. note You can change the date display format. See “Setting the Date Display Format” on page 36. Optimizer • POP On ..................... Photo Optimizer PRO function (automatically corrects the image brightness and color) is used together. Face brightener...Activates Photo Optimizer PRO function and Face brightener function. Face brightener function brightenes a darkened face on the photo taken against the light. Off .....................No Photo Optimizer PRO functions are performed. • Vivid Photo On .....................Vivid Photo function (Greens and blue are printed more brightly) is used. Off .....................No Vivid Photo functions are performed. • Noise reduction On .....................Digital camera noise (which may be seen in dark areas or areas such as sky) is reduced. Off .....................No Noise reduction functions are performed. 34 Enjoy Photos on TV and Printing —Advanced— Searching for Photos with the Shooting Date—Search When there are many photos stored on the memory card, you can select photos to display or print by specifying the shooting date with the search function. note Displaying/Printing Photos Shot Yesterday Specify the date of yesterday in Start of range and End of range in the search function. • Select Photo Gallery to display photos that were shot yesterday. • Select Print all or Print index to print photos that were shot yesterday. 1 Press the (Search button). The search screen is displayed. note You can display the Search screen from any screen by pressing the (Search button). For example, you can display the Search screen even if you are pasting photos during the layout print operation. See “Specifying the Layout” on page 26. 2 Specify the target range. (1) Press the and button to specify the earliest shooting date in Start of range. (2) Press the of range. button to move the cursor on End (3) Press the and button to specify the latest shooting date in End of range. 3 Press the button. You can display or print the photos that are shot within the specified range of date. In the search mode, the photo number field is inverted. note To cancel the search mode, follow the procedure below 1 Press the (Search) button. The search screen is displayed. 2 Press the (Cancel) button. The search mode is canceled and all the photos in the memory card can be displayed and printed. Removing the memory card also cancel the search mode. 35 Enjoy Photos on TV and Printing —Advanced— Setting the Date Display Format You can change the format of data printing. 1 Select Tool Box from the menu. (1) Use the buttons to select Tool Box from the menu screen. (2) Press the button. (3) Use the button to select Date display format and then press the button. The Date display format screen is displayed. 2 Select Date format. (1) Use the buttons to select date format. YYYY/MM/DD Prints the date the photo was taken in the format YYYY/MM/DD (2004/10/22). MM/DD/YYYY Prints the date in the format MM/DD/YYYY (10/22/2004). DD/MM/YYY Prints the date in the format DD/MM/YYYY (22/10/2004). (2) Press the button. The date will be printed with the specified date display format. 36 Enjoy Photos on TV and Printing —Advanced— Changing the Language Displayed You can change the language displayed on TV. 1 Select Tool Box from the menu. (1) Use the buttons to select Tool Box from the menu screen. (2) Press the (3) Use the button. button to select languages and then press the 2 button. Select a language for display. (1) Use the language. buttons to select a note Languages are displayed differently depending on region. (2) Press the button. The menu, selection items, and messages will be displayed in the language you select. 37 Enjoy Photos on TV and Printing —Advanced— Resetting All Settings You can reset all settings other than the display language and the print head position to the initial state. 1 Select Tool Box from the menu. (1) Use the buttons to select Tool Box from the menu screen. (2) Press the button. (3) Use the then press the 2 Use the button to select Resetting and button. button to select Yes and then press the button. All settings other than the display language and the print head position have been reset to the initial state. 38 Printing Photographs Directly from a Digital Camera Printing Photographs Directly from a Digital Camera Connecting a digital camera or camcorder to printer allows you to print recorded images directly without using a computer. Connect the USB cable that came with your digital camera. note • This printer supports PictBridge. PictBridge is an Industry standard enabling a range of digital photo solutions, including the direct printing of photos from a digital still cameras or camcorders* without the need to use a computer. • This printer supports Canon Bubble Jet Direct. It allows you to print photos from a Canon Bubble Jet Direct compatible (PictBridge incompatible) digital camera or digital camcorder without a computer by simply connecting the digital camera or digital camcorder to this printer. * Hereafter, the digital still camera and digital video camcorder are collectively called a digital camera or camera. PictBridge- compatible digital cameras. on page 41. Canon Bubble Jet Direct compatible digital cameras. on page 43. Connecting to a Digital Camera To connect a digital camera to this printer, use the USB cable supplied with the digital camera for connection to a computer. Do not connect any equipment other than the camera ready for PictBridge or Canon Bubble Jet Direct to the Direct Print Port of the printer. Otherwise, electric shock, fire, or damage to the camera could result. 39 Printing Photographs Directly from a Digital Camera note • When printing photos with the digital camera connected to the printer, it is advisable to use the AC adapter supplied with the camera. If you use the camera battery, be sure to charge it fully. • Depending on the model or brand of your camera, you may have to select a mode of printing photos in compliance with PictBridge before connecting the camera. • You may also have to turn on the camera or select Play mode manually after connecting the camera to the printer. Perform necessary operations according to the Instruction Manual supplied with your camera. • When printing from your PC, be sure to unplug the cable connecting the digital camera. • The printer performs printing with its print speed decreased to improve its print quality as much as possible when the print head has not been aligned. The print speed may be increased if you perform the print head alignment. see “Aligning the Print Head” on page 59. 1 2 3 Turn on the printer. Load the 101.6×152.4mm/4"×6" paper into the paper support in the portrait position (feed from the short side) and the print side facing up. Connect the digital camera to the printer. (1) Make sure the camera is turned off. (2) Connect the camera to the printer using the USB cable (for connection to computer) supplied with the camera. (3) Turn on and Set up the camera for direct printing. When the connection between the camera and printer has been established, the Power lamp on the printer flashes once. * The power-on sequence may differ depending on the model or brand of the camera. The icon will display on the LCD display of the digital camera when the printer is correctly connected. : A PictBridge-compliant digital camera. : A Canon Bubble Jet Direct compatible digital camera. 40 Printing Photographs Directly from a Digital Camera Direct Printing from PictBridge-compatible Digital Cameras When operating the camera, be sure to follow the instructions given in the Instruction Manual supplied with the camera. Let’s take a look at the paper size, paper type, layout, image optimization modes, and date printing modes that can be set on the PictBridge-compatible camera connected to the printer. Confirming or Changing the Camera Settings The settings below can be changed by pressing the “Settings” button when the camera is connected. However, changes can be made in the properties screen only when the corresponding items below are in the “Default Setting” (selections based on the printer setting) using the controls of the camera. – Paper size – Paper type – Layout – Image optimize note About the Settings Explained Below The settings explained below cannot be made depending on the brand or model of your camera. If any setting cannot be made, the default setting explained above is used. Names of settings that are displayed on Canon PictBridge-compatible cameras are used in the description given below. Different names may be displayed on your camera depending on the brand or model. About “Paper size” and “Paper type” When you have select the “Default setting” (selections based on the printer setting), the printer operates based on the “Page size” and the “Media type” settings made using the remote control. note To print on Photo Paper Pro, select “Fast Photo” from “Paper type” on the display of the camera. Select “Photo” for Photo Paper Plus Glossy or other media types. The following sizes and types of paper can be loaded in the printer by selecting options in “Paper size” and “Paper type”. “Paper size” setting “Paper type” setting Paper loaded in printer 10×15 cm / 4"×6" Photo Photo Paper Plus Glossy Fast Photo Photo Paper Pro Photo Photo Paper Plus Semi-gloss Glossy Photo Paper Photo Stickers 5.4×8.6 cm / Credit Card Photo Glossy Photo Paper Credit Card Size 41 Printing Photographs Directly from a Digital Camera About “Layout” When “Default setting” (selections based on the printer setting) is selected, the printer operates based on the “Borderless Printing” setting made using the remote control. When 10×15cm/4"×6" is selected from “Paper size”, “2-up”, “4-up”, “9-up”, and “16-up” options may be available in “Layout”. note Printing on Photo Stickers Specify the Paper size, Paper type, and layout for the Photo Stickers provided by Canon. Paper size: 10×15cm/4"×6" Paper type: Photo layout: 16-up For instructions on how to load Photo Stickers, see “Loading Paper” on page 18. About “Image optimize” When “Default setting” (selections based on the printer setting) is selected, the printer operates based on the “POP” and “VIVID Photo”, “Noise reduction”, “Color Adjust” settings made using the remote control. If you use a Canon PictBridge- compatible camera, you can select “VIVID”, “NR”, or “VIVID+NR”. (Note that these options cannot be selected for some models.) note • When “POP” (Photo Optimizer PRO) is selected, automatically corrects the image brightness and color. • When “VIVID” is selected, green and blue portions of photos are printed vividly. • When “NR” (Noise Reduction) is selected, noise in blue portions, such as the sky, and dark portions is removed. • When “VIVID+NR” is selected, functions of both “VIVID” and “NR” are performed. About “Date print” “Date Print” depends on the settings made using the controls of the camera. note • This printer can handle only Exif/JPEG image data to produce photos using PictBridge. • Never disconnect the USB cable during printing. • When disconnecting the USB cable between the digital camera and printer, follow the instructions given in the Instruction Manual of the camera. • Controls of the digital camera cannot be used for the following: – Print quality setting – Printer maintenance 42 Printing Photographs Directly from a Digital Camera Printing Photographs Directly from a Canon Bubble Jet Direct Compatible Digital Camera Let’s take a look at the media types that can be set on the Canon Bubble Jet Direct compatible digital camera. Media Types for Digital Camera When you connect a digital camera, you can use the following media: Digital Camera Setting Media Type Card #1 Photo Paper Pro 4"×6" / 101.6×152.4 mm Card #2 Photo Paper Plus Glossy 4"×6" / 101.6×152.4 mm Photo Paper Plus Semi-gloss 4"×6" / 101.6×152.4 mm Glossy Photo Paper 4"×6" / 101.6×152.4 mm Card #3 Not supported LTR Not supported A4 Not supported note • For the digital camera operation method and troubleshooting, refer to your digital camera manual. • For print error messages, refer to“Cannot Print Properly from the Digital Camera” on page 73. • By operating the digital camera, you can make the following prints: – You can make a standard print from the image displayed in the single display mode or in the index display mode. – You can print specified numbers of images, or make an index print by editing the DPOF. – For the images taken with an Exif 2.2-compatible digital camera, the Photo Optimizer PRO function can be used. – If date printing is set from the operation panel of the digital camera, the date when the photograph was taken is to be printed (excluding the index print). – Images will be scaled automatically according to the image size set on the digital camera and the size of the media set on the printer. • The digital camera does not support the following functions: – Print quality setting – Maintenance • Images other than Exif may not be index printed. 43 Printing Photos with Infrared Compatible Mobile Phones Printing Photos with Infrared Compatible Mobile Phones Using this printer, you can print a photo taken with a mobile phone in the specified layout on a specified media through infrared communication. Requirements for Infrared Communication with the Mobile Phone To carry out printing through infrared communication with a mobile phone: – The mobile phone must have an IrDA port and support IrMC ver. 1.1. – Only JPEG images are supported. note • Following limitations apply on transmittable data: – It does not support printing downloaded photos or other content or a photo attached to an email for security reason. – It does not support printing video files. – Depending on your device, the Fine print quality option may not be available due to the restriction on the infrared transfer capacity. – Depending on your device, it may not print data stored in a memory card. – It automatically sets the photo quality and orientation (portrait or landscape) according to the photo. – It automatically sets the margin according to the photo size. – Depending on the amount of image data, it may take a while for this printer to start to print after starting the infrared transfer. Setting the Media Type, Page Size, and Layout You can select the media type, page size, layout and borderless printing in the Infrared print screen when printing from a mobile phone. * The default settings are printing borderless on the whole paper according to the paper size loaded with Date print Off and Media type Photo Paper Plus Glossy. * You can specify the layout by displaying the photo on TV and performing settings in the print confirmation screen. See “Displaying and Setting the Infrared print Screen” on page 44. Displaying and Setting the Infrared print Screen 1 Prepare settings. Connect TV to the printer and turn them on. See “Connect TV to the printer.” on page 13. 44 Printing Photos with Infrared Compatible Mobile Phones 2 Select Infrared print. (1) Use the buttons to select Tool Box from the menu screen. (2) Press the button. The Tool Box menu is displayed. (3) Use the button to select Infrared print and then press the button. The Infrared print screen is displayed. 3 Select an item to set. (1) Press the and button to select the desired setting item. (2) Press the and button to display the selected item. (3) Set the required setting items and press the button. Other Setting Items • Page size Select the Page size for the print job. • Media type Select the Media type. note For information on setting “Page size” and “Media type”, See “Media Types for Card Direct Printing” on page 20. • Layout Specify the number of copies to print the same photo on one page. note Printing on Photo Stickers Specify the Page size, Media type, and layout for the Canon Photo Stickers. Page size: Sticker Media Type: Photo Paper Plus Glossy or Photo Paper Pro Layout: Photo ×16 45 Printing Photos with Infrared Compatible Mobile Phones Performing Infrared Printing There are two methods to print a photo taken with a mobile phone via infrared communication. • Printing the photo with the mobile phone and the printer. • Printing the photo by displaying it on TV. When performing infrared communication, also refer to your mobile phone manual. Printing a Photo with a Mobile Phone and the Printer You can print a photo with a mobile phone and the printer without connecting a TV to the printer. 1 Prepare to print. (1) Turn on the printer. (2) Load the paper. See “Loading Paper” on page 18. (3) Check or change the media type and layout if required. See “Specifying the Paper and Other Settings” on page 33. When you do not specify a setting, printing will be borderless on the whole paper according to the paper size you loaded with Date print Off and Media type Photo Paper Plus Glossy. 2 Start Infrared Communication. (1) Align the infrared port of a mobile phone to that of the printer at a distance of less than 7.9 inch (20 cm). note The effective angle of the infrared port of the printer is about 10° from the central axis in both vertical and horizontal directions. The allowable distance of communication with the printer depends on the mobile phone you use. For this distance, refer to your mobile phone manual. Infrared port of printer Less than 7.9 inch (20 cm) (Do not block with any obstacle.) Effective angle (in both vertical and horizontal direction): About 10° (2) Select the photo you want to print and send the data with the infrared file transfer function on the mobile phone. The POWER lamp flashes in green if the printer successfully receives data. Printing is started once the data has been transferred. Do not move the mobile phone and the printer until the printing starts. 46 Printing Photos with Infrared Compatible Mobile Phones Printing a Photo by Displaying it on TV You can display a photo taken with a mobile phone and check the photo in the print confirmation screen before printing. 1 Prepare to print. (1) Connect TV to the printer and turn them on. See “Connect TV to the printer.” on page 13. (2) Load the paper. See “Loading Paper” on page 18. 2 Display a photo taken with a mobile phone on TV. (1) Use the (2) Press the buttons to select Tool Box. button. (3) Use the button to select Display Photo received via infrared and then press the button. The Display Photo received via infrared screen is displayed. (4) Use the press the buttons to select On and then button. It sets the printer to display the photo taken with the mobile phone on TV. note The Display Photo received via infrared setting is enabled until the printer is turned off. Set the settings again when you turn off the printer. 47 Printing Photos with Infrared Compatible Mobile Phones 3 Start Infrared Communication. (1) Align the infrared port of a mobile phone to that of the printer at a distance of less than 7.9 inch (20 cm). See “Start Infrared Communication.” on page 46. (2) Select the photo you want to print and send the data with the infrared file transfer function on the mobile phone. “Receiving a photo from a mobile phone via infrared.” message is displayed if the printer successfully receives data. When the data transfer is completed, the photo is displayed on TV. 4 Start Printing. (1) Check the photo whether it is the photo you want to print on TV and press the (Print button). The print confirmation screen is displayed. (2) Confirm the Page size and Media type. To change any of the settings, press the (Settings button). See “Specifying the Paper and Other Settings” on page 33. (3) Press the print. (Copies +/Copies – buttons) to specify the number of copies to (4) Press the (Print button). The photo from the mobile phone is printed. note • When printing from a mobile phone, refer to your mobile phone manual. • Do not place anything between the infrared port on the printer and the infrared port on the mobile phone. It may cause the data transfer failure. • Do not terminate the infrared communication between the printer and the mobile phone during the data transfer. If such is the case, turn off the printer and cancel the print job. 48 Printing with the computer Printing with the computer Installing the Printer Driver Installing the Printer Driver—Windows note • Use a computer equipped on which Windows XP or Windows 2000 can operate. • Do not disconnect the cable or remove the CD-ROM during the installation. The driver cannot be correctly installed. • The screens below refer to Windows XP installation. Screens may differ depending on the operating system you are using. • When installing the printer driver in Windows XP or Windows 2000, log on to the system as a member of the Administrators group. • If the following screen appears automatically, click Cancel to quit the screen and turn off the printer. Next, remove and replace the USB cable connected to your computer. Then follow steps 3 to 12 to install the printer driver. 1 Prepare the Printer. See “Easy Setup Instructions” on page 3. 2 Ensure that the printer and computer are turned off. OFF 3 Turn on the computer and start Windows. If any applications automatically run, quit them. Disable any anti-virus programs. Do NOT turn the printer on at this stage. 4 Place the Setup Software & User’s Guide CD-ROM in the CD-ROM drive. 49 Printing with the computer note • If the installer in the CD-ROM does not run automatically, click Start and select My Computer, then double-click the CD-ROM icon. For Windows 2000 users, double-click My Computer in the Windows screen, then double-click the CD-ROM icon. • If the language selection screen appears, select a language, then click OK. • If the place selection message appears, select your place of residence, then click Next. 5 Follow the instructions displayed on screen. When the screen shown on the right is displayed, click Easy Install. note Select Easy Install in order to install application software, electronic manuals and printer driver. Select Custom Install in order to choose the options you would like to install. 6 7 When the list of applications to install appears, verify the contents, click Install, and then follow the instructions on the screen. Read the License Agreement, then click Yes to continue. Installation will begin. 8 Connect your USB cable when the Printer Connection screen appears. (1) Connect one end of a USB cable to the computer, the other to the printer. (2) Turn the printer on. If the printer is recognized, the printer driver will be automatically installed. note If the connection is not recognized, refer to the section “Cannot Install the Printer Driver” on page 75. 50 Printing with the computer 9 When the “Installation Results” window appears, click OK. note For U.S. customer only Follow the on-screen instructions to register your product. For more information, refer to the attached leaflet. 10 When the “On-screen Manual” screen appears, click Next. 11 When the “Print Head Alignment Recommended” screen appears, click Next. 12 When the “Installation completed successfully” window appears, click Exit. When Restart is displayed, ensure the Restart the system now (recommended) check box is selected, then click Restart. Installing the Printer Driver—Macintosh note • The steps described in this section reflect Mac OS X v.10.3.x. • Mac OS X v.10.3 x is recommended. • Do not remove or insert the USB cable during installation, as this may result in the computer or printer not operating normally. • Before installing the driver, disable all anti-virus programs and automatically loading programs or remove them from your system folder. • The Setup Software & User’s Guide CD-ROM contains the application software, Easy-PhotoPrint, to import and print image data. If you want to install EasyPhotoPrint, double-click the application folder, then double-click the EasyPhotoPrint folder, and Installer. • The steps described in this section are for installing in Mac OS X v.10.3.x. 1 2 3 Turn on the Mac. Place the Setup Software & User’s Guide CD-ROM in the CD-ROM drive. Double-click the Printer Driver folder. 51 Printing with the computer 4 Double-click SELPHY DS700 xxx.pkg. note XXX after the model name (SELPHY DS700) is the version number. 5 6 7 8 9 When the “Welcome to the BJ printer driver Installer” screen appears, click Continue. Read the License Agreement and click Continue, then click Agree. Select a destination to where you want to install the printer driver, and click Continue. Click Install. Enter an administrator name and a password, then click OK. note If you have forgotten the administrator name and/or password, click and follow the instructions in Mac Help. 10 A message asking for your confirmation to restart your computer appears on the screen. Read the message, then click Continue Installation. Software installation will start. 11 Software installation is complete. Restart your computer. 12 Double-click the Memory Card Utility folder. 52 Printing with the computer 13 Double-click Memory Card Utility 300.mpkg. 14 Click Continue. 15 Read the License Agreement and click Continue, then click Agree. 16 Select a destination to where you want to install the memory card utility, and click Continue. 17 Click Install. 18 Enter an administrator name and a password, then click OK. note When you have forgotten the administrator name and/ or password, click mark and follow the instructions in Mac Help. 19 A message asking for your confirmation to restart your computer is displayed on the screen. Read the message, then click Continue Installation. Software installation will start. 20Software installation is complete. Restart your computer. note For U.S. customer only Double-click on the Product Registration icon, found in the Mac OS X folder, to register your product. For more Information, refer to the attached leaflet. note After your computer is restarted, check the Print Setup Utility (Print Center for Mac OS X v.10.2.x) to ensure that the printer is added. If it is not added, add the printer. For more information, refer to the Mac Help. 53 Printing with the computer How to View the User’s Guide The User’s Guide is the manual displayed on the computer screen. Refer to the User’s Guide when you want to connect the printer to your computer or encounter with a problem that is not described on the Photo Printing Guide. How to View the User’s Guide—Windows 1 Double-click the DS700 User’s Guide short-cut icon on the desktop. note • You can display the User’s Guide from the Start menu. Click Start and select All Programs (or Programs), Canon SELPHY DS700 Manual and User’s Guide. • To uninstall the User’s Guide or Photo Application Guide, click Start and select All Programs (or Programs), SELPHY DS700 Guide and Uninstall. It uninstalls all the document you installed. How to View the User’s Guide—Macintosh 1 2 3 4 5 Load the CD-ROM in your computer, and double-click the OS X folder. Double-click the Manual folder. Select a language folder. Double-click the User’s Guide folder. Double-click the icon for the DS700_UG_ENG.htm file. User’s Guide Table of Contents Your printer’s User’s Guide offers detailed information on the following topics. How to Use This Manual Basic Printing Printing Photographs Opening the Printer Properties Dialog Box (Windows) Printing Media Compatible Media Types Photo Paper Pro PR-101 Photo Paper Plus Glossy PP-101 Photo Paper Plus Semi-Gloss SG-101 Glossy Photo Paper GP- 401 Checking the Status of the Printer BJ Status Monitor Functions (Windows) Printer Setup Utility (Macintosh) Routine Maintenance Troubleshooting 54 Appendix Printing Area Using the Memory Card Utility Uninstalling Drivers Uninstalling the Electric Manuals (Windows) Printer Driver Functions (Windows) Printer Driver Functions (Macintosh) BJ Printer Utility (Macintosh) Index Printing Maintenance Printing Maintenance When Printing Becomes Faint or Colors are Incorrect When printing becomes faint or colors are incorrect, even if ink remains in the ink tanks, the print head nozzles are probably clogged. Follow the procedures below to clean the nozzles. Step 1 “Printing the Nozzle Check Pattern” on page 56 If the pattern is printed normally, select All A. After print head cleaning, print the nozzle check pattern. If the print quality is poor, perform print head cleaning. Step 2 “Print Head Cleaning” on page 57 If the problem remains after performing print head cleaning three times Step 3 “Print Head Deep Cleaning” on page 58 Still the problem remains Step 4 “Replacing an Ink Tank” on page 60 note • If the print quality is poor, adjust the print head position. It may solve the problem. See “Aligning the Print Head” on page 59. • If ink tank replacement does not resolve the problem, the print head may be worn out. Contact a Canon service representative. 55 Printing Maintenance Printing the Nozzle Check Pattern Print the nozzle check pattern to determine whether the ink ejects properly from the print head nozzles. Use this function when printed results are blurred or the color is incorrect. 1 Prepare to print. (1) Connect TV to the printer and turn them on. See “Connect TV to the printer.” on page 13. (2) Load the supplied paper or Canon 4"×6"/ 101.6×152.4mm paper into the paper support. See “Loading Paper” on page 18. 2 Print the Nozzle Check Pattern. (1) Use the buttons to select Tool Box and then press the button. (2) Use the button to select Nozzle check and then press the button. (3) Use the press the buttons to select Yes and then button. The nozzle check pattern is printed. 3 Examining the nozzle check pattern. • When all print check patterns are successfully printed: Select All A and then press the button. When no white stripes appear • When there is more than one white stripe on the print check patterns: Select Also B and then press the button. When White stripes appear The confirmation screen of Head Cleaning is displayed. Select YES to start the head cleaning. See “Print Head Cleaning” on page 57. 56 Printing Maintenance Print Head Cleaning Clean the Print Head if white stripes appear in the nozzle check pattern. Cleaning the Print Head consumes ink, so perform Print Head Cleaning only when necessary. 1 Connect TV to the printer and turn them on. See “Connect TV to the printer.” on page 13. 2 Start Print Head Cleaning. (1) Use the buttons to select Tool Box from the menu screen and then press the button. (2) Use the button to select Head Cleaning and then press the button. (3) Use the press the buttons to select Yes and then button. Important Do not perform any other operations until the print head cleaning finishes. This takes about 40 seconds. 3 Print the nozzle check pattern to verify that the print head nozzles are clean. When print head cleaning finishes, the confirmation message is displayed. Select Yes. See “Printing the Nozzle Check Pattern” on page 56. note If the problem remains after performing print head cleaning three times, try print head deep cleaning. 57 Printing Maintenance Print Head Deep Cleaning If print quality does not improve by standard print head cleaning, try print head deep cleaning, which is a more powerful process. Print head deep cleaning consumes ink, so perform this procedure only when necessary. 1 Prepare settings. Connect TV to the printer and turn them on. See “Connect TV to the printer.” on page 13. 2 Start Print Head Deep Cleaning. (1) Use the buttons to select Tool Box from the menu screen and then press the button. (2) Use the button to select Deep Cleaning and then press the button. (3) Use the press the buttons to select Yes and then button. Important Do not perform any other operations until the print head deep cleaning finishes. This takes about one minute. When print head deep cleaning finishes, the confirmation message is displayed. Select Yes. note After print head deep cleaning finishes, print the nozzle check pattern to verify that the print head nozzles are clean. See “Printing the Nozzle Check Pattern” on page 56. If the problem remains, replace the ink tank. See “Replacing an Ink Tank” on page 60. If ink tank replacement does not resolve the problem, the print head may be worn out. Contact a Canon service representative. 58 Printing Maintenance Aligning the Print Head If print quality is poor, adjust the print head position. It may solve the problem. 1 Prepare to print. (1) Connect TV to the printer and turn them on. See “Connect TV to the printer.” on page 13. (2) Load the supplied paper or Canon 4"×6"/ 101.6×152.4mm paper into the paper support. See “Loading Paper” on page 18. 2 Print the Pattern. (1) Use the buttons to select Tool Box from the menu screen and then press the button. (2) Use the button to select Head alignment and then press the button. The pattern print confirmation screen is displayed. (3) Use the press the buttons to select Yes and then button. The pattern is printed. (4) When the confirmation message is displayed, select Yes and then press the button. 3 Align the Print Head. (1) Look at the print out. From the patterns on the column A, select the most even, least irregular patterns and press the and button to select the number that corresponds. (2) Press the button to move the cursor on the column B and select the most even, least irregular patterns and press the and button to select the number that corresponds. Repeat the operation for the column C and D. 59 Printing Maintenance (3) Press the button. The print head position is adjusted. note Printing the current setting of the print head position 1 Connect TV to the printer and turn them on. See “Connect TV to the printer.” on page 13. 2 Load the supplied paper or Canon 4"×6"/101.6 x 152.4mm Size paper into the paper support. 3 Select Tool Box and then press the button. 4 Select Head alignment print and then press the button. The pattern print confirmation screen is displayed. 5 Select Yes and then press the button. The Head alignment value is printed. Replacing an Ink Tank When replacing an ink tank, check the model number very carefully. The printer will not print properly if the wrong ink tank is used. • Ink tank: BCI-16 Color Replacing an Ink Tank When an ink tank runs out of ink, replace it using the following steps. 1 Open the cover. (1) Ensure that the printer is on. (2) Slide the cover open switch toward the right to open the cover. The print head holder moves to the center. 60 Printing Maintenance 2 Remove the empty ink tank. (1) Push the tab. (2) Remove the ink tank. Important • Handle ink tanks carefully to avoid staining clothing or the surrounding area. • Discard empty ink tanks according to the local laws and regulations regarding disposal of consumables. 3 Prepare a replacement ink tank. (1) Unpack a new ink tank and remove the orange protective cap. Important • Do not re-attach the protective cap once you have removed it. • Once the protective cap is removed, do not touch the open ink port. 4 Insert the ink tank. (1) Insert a new ink tank with it slightly slanted. (2) Push down on the on the ink tank until it clicks into place. 5 Close the cover. The print head holder moves to the right. 61 Printing Maintenance note • To maintain optimal print quality, use an ink tank within six months of its first use. • Once an ink tank has been used, do not remove it from the printer and leave it out in the open. This will cause the ink tank to dry out and the printer may not function properly if it is reinstalled. • Color ink is consumed in the head cleaning and deep cleaning, which are necessary to maintain the printer’s capabilities. • When an ink tank runs out of ink, replace the ink tank with a new one immediately. • If printing is continued with no ink in the ink tank, a problem may occur. Resetting the Ink Counter When an ink tank is replaced, the ink counter must be reset. The low ink warning is only displayed properly if the ink counter is reset. Message Prompting Confirmation of Ink Tank Replacement If an ink tank is removed, the printer will output a message prompting you to confirm replacement of the ink tank at the start of the next print job. When an ink tank has been replaced, follow the procedure below to reset the ink counter. The low ink warning is only displayed properly if the ink counter is reset. 1 Reset the ink counter. (1) Check the message, select Yes and then press the button. This returns the ink level of the ink counter full. Mistakenly selecting No, instead, will prevent the low ink warning from functioning properly. If such is the case, select Ink counter reset from Tool Box to reset the ink counter. note To reset the ink counter from Tool Box 1 Connect TV to the printer and turn them on. See “Connect TV to the printer.” on page 13. 2 Select Tool Box and then press the button 3 Select Ink counter reset and then press the button. The Ink counter reset confirmation screen is displayed. 4 Select Yes and then press the button. 62 Printing Maintenance How Low Ink Warning Setting Works The low ink warning notifies you of low ink levels during printing. The Low Ink Warning has been preset to be automatically displayed. When you reset the ink counter, it will assume that the ink tank is full regardless of how much ink actually remains. The reset is the only way to match the counter value with an actual ink volume. Reset the ink counter when installing a new ink tank. Low Ink Warning Display The '!' shows a low ink level in the ink tank. A new ink tank should be prepared. How to Display Low Ink Warning Correctly • Reset the ink counter every time you install a new ink tank. The ink counter cannot work correctly unless you synchronize it with the actual ink level. The ink counter can only be adjusted when it is reset at the time a new ink tank is installed. Do not reset the ink counter of an ink tank in use. Synchronization of the counter and the actual ink level will not work properly. Important If you did not reset the counter when you installed the current ink tank, the low ink warning may not function correctly, until the next time you replace the ink tank. Refer to “Accompanied by ink tank icon with '?'” on page 66. 63 Troubleshooting Troubleshooting Let's take a look at countermeasures against problems which may occur during use of the printer. note Here, we will discuss errors indicated on TV, problems that might occur during direct printing from the digital camera. If you cannot find the symptom corresponding to a certain problem, refer to the User’s Guide. • “Nothing is Displayed on TV/Image is Poor” on page 64 • “The Remote Control is not Working” on page 65 • “A Message is Displayed on TV” on page 65 • “Handling Error Messages” on page 67 • “Paper Does Not Feed Properly” on page 68 • “Printing is Blurred/Colors are Wrong/White Streaks appear” on page 69 • “Printed Surface is Scratched or Ink Blots” on page 70 • “Printer Does Not Start or Printer Stops During Print Jobs” on page 72 • “Cannot Print Properly from the Digital Camera” on page 73 • “Cannot Install the Printer Driver” on page 75 Nothing is Displayed on TV/Image is Poor Possible Cause Try This The power cord/video cable is not connected. • Ensure that the power cables for the printer and TV are connected to the power outlet. • Ensure that the video output on the printer and the video input on TV are connected with the video cable. See “Connect TV to the printer.” on page 13. The printer or TV is turned off. Ensure that the TV is turned on and press the power button on the remote control attached to the printer. The video input mode is Select the video input mode on TV. not selected. There are no photos taken with a digital camera or camcorder. Only JPEG images taken with the digital cameras or digital camcorders can be displayed on TV. The data edited or modified on the computer must be printed from the computer. There could be a problem with TV. Connect a device such as a game device or VCR to the video input on TV to see if graphics are displayed properly on TV. 64 Troubleshooting The Remote Control is not Working Possible Cause Try This The distance between the remote control and the printer is too long/ there is an obstruction • Aim the remote control at the remote control receiver on the printer and bring it closer. • Remove the obstruction if there is any impediment between the remote control and the printer. • The remote control may operate improperly if strong light such as sunlight hits the remote control receiver. Change the installation location, or reduce the light with curtains. The battery is out of use. Replace with the new battery if the remote control does not work. See “Setting or Replacing the Battery” on page 10. The lithium coin cell battery CR2025 is available for this remote control. Purchase the commercial battery for replacement. A Message is Displayed on TV If a message is displayed on TV, take the corresponding countermeasure described below. Message/Error Try This No photos stored in a memory card. Photo data edited or processed on the computer should be printed from the computer, not from the camera. Ink tank may have been • If the ink tank has been replaced with a new one. replaced. Select Yes to reset the ink counter. See “Resetting the Ink Counter” on page 62. • If the ink tank has been removed for a certain period (the ink tank has not been replaced) Select No on the dialog box described above. Ink is almost empty. The '!' show a low ink level in the ink tank. A new ink tank (BCI-16 Color) should be prepared. Waste ink absorber* almost full. Press the RESUME/CANCEL button to recover from the error. You can print photos for a while but you cannot print any more photos when the waste ink absorber becomes full. Contact a Canon service representative. Read-write mode enabled. The memory card utility started on the computer has write-enabled the card slot. When the card slot is write-enabled, the printer cannot print photos. When you have finished writing data to the card, select the readonly mode. For the cancellation procedure, refer to the on-screen User’s Guide. Cannot communicate Disconnect the camera cable, press the printer's RESUME/CANCEL with a connected device. button and reconnect the cable. If the error is still unresolved, there is a possibility that you are using a digital camera or digital video camcorder that is not supported by this printer. Use digital cameras or video camcorders that are compatible with this printer. 65 Troubleshooting Message/Error Try This Error code Disconnect the cable from the printer, and then turn the printer off and unplug the printer from the power supply. After waiting 10 minutes, plug the power cord back in and turn on the printer. If the same error persists, contact a Canon service representative. * The waste ink absorber absorbs ink used at cleaning. note Accompanied by ink tank icon with '?' The ink tank level accompanied by the ink tank icon with the “?” indicates ink tank is not synchronized with its ink counter. Always be sure to reset the ink counter when you replace ink tank. See “Resetting the Ink Counter” on page 62. A “?” is displayed next to the Ink counter between the time one ink tank is removed and the ink counter is reset when the next one is installed. Display of the “?” can be disabled by changing the settings on Remaining ink level indicator setting. 1 Connect TV to the printer and turn them on. See “Connect TV to the printer.” on page 13. 2 Select Tool Box and then press the OK button. 3 Select Remaining ink level indicator setting and then press the OK button. The confirmation screen is displayed. 4 Select Off and then press the OK button. 66 Troubleshooting Handling Error Messages When a printer error occurs, the POWER lamp flashes. The number of flashes indicates the type of error that has occurred. Count the flashes and take the appropriate action to correct the error. Number of Flashes Possible Cause Try This Two flashes Printer is out of paper Reload paper and press the RESUME/CANCEL button. Three flashes Paper jam If a paper jam occurs, clear the jammed paper; reload paper in the printer, then press the RESUME/CANCEL button. See “Paper Jams” on page 68. Five flashes Install print head. See “Installing the Print Head” on page 5. If the print head is already installed, press the POWER button to turn off the printer, and press the POWER button again to turn on the printer. If the same error occurs, the print head may be defective. Contact a Canon service representative. Print head not installed/Defective print head Eight flashes Waste ink absorber* The printer has a built-in waste ink absorber to hold the almost full ink consumed during print head cleaning. Eight flashes indicate that this absorber is nearly full. Press the RESUME/CANCEL button to clear the error so printing can continue. Contact a Canon service representative. Nine flashes A specified period of time has lapsed without receiving a response from the digital camera/The digital camera connected is not compatible with this printer Disconnect the camera cable, press the printer’s RESUME/CANCEL button and reconnect the cable. If the error is still unresolved, there is a possibility that you are using a digital camera or digital video camcorder that is not supported by this printer. Use digital cameras or video camcorders that are compatible with this printer. Twelve flashes Ink tank is not installed If an ink tank is not installed, install it. If an ink tank is installed, push the PUSH mark on the ink tank to ensure it has snapped firmly into place. 67 Troubleshooting note POWER lamp flashes alternately green and orange An error that requires contacting a Canon service representative may have occurred. Disconnect the cable from the printer, and then turn the printer off and unplug the printer from the power supply. After waiting 10 minutes, plug the power cord back in and turn on the printer. If the problem remains, contact a Canon service representative. Paper Does Not Feed Properly Possible Cause Try This Inappropriate paper type Check to see if the paper you are printing on is too thin or curled. used See “Print Media to Avoid” on page 18. Paper feed roller is dirty Follow the steps described below to clean the paper feed rollers. If post cards do not feed properly, even after correcting any paper curl, clean the paper feed roller. 1. Ensure that the printer is turned on. 2. Load a few sheet of Canon 4"×6"/101.6×152.4 mm paper with print side facing down. 3. Hold the RESUME/CANCEL button down and release after the POWER lamp flashes three times, then feed all of the paper. After feeding all of the paper, the printer operates for few minutes and stops. If the situation is not improved, repeat the same operation for a few times. Paper Jams 68 (1)Slowly pull the paper out from the back of the printer or, from the front of the printer. • If the paper does not come out from the front of the printer or the back of the printer, or the paper tears and some of it is left in the printer, turn the printer off, then open the cover and remove the piece of paper. Do not touch internal parts in the printer. • If you cannot extract the paper, turn the printer off, and then turn it back on. The remaining paper will be ejected automatically. (2)Close the cover and reload the paper into the paper support, then press the RESUME/CANCEL button on the printer. • If you have turned on the power again, redo the printing. • If you cannot reach or remove the torn paper, do not attempt to disassemble the printer yourself. Contact a Canon service representative. Troubleshooting Printing is Blurred/Colors are Wrong/White Streaks appear Possible Cause Try This Ink tank is not installed If an ink tank is not installed, install it. If an ink tank is installed, push the PUSH mark on the ink tank to ensure it has snapped firmly into place. Media type is not selected properly Ensure that the media type selected in the Settings screen is the same type as the media type loaded on the printer. See “Specifying the Paper and Other Settings” on page 33. Print head nozzles clogged/Print head is misaligned Print the nozzle check pattern to check for uneven ink output. See “Printing the Nozzle Check Pattern” on page 56. • When a specific color is missing from the nozzle check pattern, clean the print head. If ink supply is uneven: See “Print Head Cleaning” on page 57. • Print head is misaligned. Align the print head. See “Aligning the Print Head” on page 59. If this does not solve the problem, ink tank may run out of ink. Replace the vacant ink tank. See “Replacing an Ink Tank” on page 60. Media not loaded with the print-side up Check that your paper is loaded with the correct print side facing up. note Follow the instructions packaged with your specialty media for loading and handling. note When the color is different from what is displayed on the TV or when it is not printed with your favorite color You can adjust the brightness, contrast, color hue when you print a photo. 1 Select Tool Box from the menu and then press the button. 2 Select Color adjust and then press the button. The Color adjust screen is displayed. 3 Press the and button to move among setting items. 4 Press the and button to display the selected item. 5 Press the button when the settings are completed. You can now print a photo with specified brightness and contrast. and button to print a photo brighter and darker. Brightness ........... Press the You can print a photo brighter in the + direction and darker in the - direction. and button to print a photo with higher contrast Contrast ............... Press the and lower contrast. You can print a photo with higher contrast in the + direction and lower contrast in the - direction. Color hue..............Press the button to enhance the red colors and the button to enhance the yellow colors at the print. You can print a photo with the yellow colors enhanced in the Yellow direction and with the red colors enhanced in the Red direction. 69 Troubleshooting Printed Surface is Scratched or Ink Blots Possible Cause Try This There are ink blots on the printed surface. Clean the paper feed roller. See “Paper Does Not Feed Properly” on page 68. There are ink blots on the back side of the printed surface. If the protrusions inside the printer are stained, open the cover of the printer and then wipe ink off the protrusions using a swab or the like as shown. Important Before cleaning, be sure to turned off the printer. Printed on the back side of the sheet/The roller inside the printer is extremely dirty Follow the steps described below to clean the inside of the printer. 1. Ensure that the printer is turned on. 2. Load the Glossy Photo paper (4"×6"/ 101.6×152.4mm paper). 3. Hold the RESUME/CANCEL button down and release after the POWER lamp flashes five times, then feed the sheet of paper. After the cleaning is operated for a few seconds, the paper comes out. note If the problem remains after performing, repeat this procedure starting with step 1. If the problem remains, contact a Canon service representative. Important Check that your paper is loaded with the correct print side facing up. Inappropriate paper type Check to see if the paper you are printing on is too thick or curled. used See “Print Media to Avoid” on page 18. Note that smudging may occur at the top and bottom edges of the paper when using Borderless Printing. note If this does not solve the problem, set the paper thickness lever on the left. See “Paper Thickness Lever” on page 8. * Replace the paper thickness lever on the right after printing. 70 Troubleshooting Possible Cause Try This Curled paper used If all four corners or the printing surface of the paper is curled, the paper may become dirty or the paper may not feed properly. Use the paper after correcting paper curl as follows. (1)Face up the printing surface*1, and cover it with a non-printing regular paper to avoid damaging the surface. (2)Roll up the paper in a direction opposite to paper curl as the figure below. (1) (2) *1 (3)Check the printing paper if paper curl is corrected within approximately 2 to 5 mm *2. It is recommended to print the curl-corrected paper one sheet at a time. *1 *2 note Sets time to dry ink on the printing surface. In case the ink is still wet and the print surface becomes dirty, set longer time to dry ink. 1 Select Tool Box from the menu. 2 Select Ink drying wait time. 3 Select Long or Longer and then press the OK button. 71 Troubleshooting Printer Does Not Start or Printer Stops During Print Jobs Possible Cause Try This Print head has overheated due to long periods of continuous printing Stop printing and turn the printer off for at least 15 minutes to allow the print head to cool down. The print head tends to overheat when printing continuously for long periods of time. The print head is designed to automatically pause at line breaks before resuming printing in order to cool down. Caution The area around the print head can become extremely hot during extended print operation. Always avoid touching the print head and its peripheral components. Printing high-resolution Wait until the print job finishes. photographs The POWER lamp flashes green while the print data is being processed. Printing photographs can take time. The infrared communication distance or the infrared port angle is incorrect 72 Place the printer at a distance of 7.9 inch/20 cm from the mobile phone. Ensure that the infrared ports are at a proper angle and there are no obstacles between them. Retry printing. The allowable distance and angle for infrared communication depend on the functions of the mobile phone in addition to environmental conditions. See “Printing Photos with Infrared Compatible Mobile Phones” on page 44. Troubleshooting Cannot Print Properly from the Digital Camera The following are the possible errors that may occur when printing directly from a digital still camera or digital video camcorder*, and the countermeasures to eliminate them. * Hereafter, the digital still camera and digital video camcorder are collectively called a digital camera or camera. note • PictBridge or Canon Bubble Jet Direct compatible digital cameras can be connected to your printer for direct printing. • This section describes errors that are indicated on Canon-brand PictBridge- or Bubble Jet Direct-compatible cameras. The error messages and operations may vary depending on the camera you are using. For errors on non-Canon PictBridge-compatible cameras, count the number of flashes the POWER lamp on the printer makes and check for the cause of the error and take the appropriate action. For details, See “Handling Error Messages” on page 67. • Connecting a digital camera not compatible with “PictBridge” or “Bubble Jet Direct” makes the POWER lamp on your printer flash nine times. In such a case, unplug the cable connecting the camera to the printer, press the RESUME/CANCEL button on the printer. • A communication time out occurs if printing takes a long time or if it takes too much time to send data. This may stop printing. In such a case, disconnect the cable between the printer and the camera, press the RESUME/CANCEL button on the printer, and reconnect the cable between the printer and the camera. Then, turn the camera on, if it does not automatically turn on. If the problem is still unresolved, select some other photo and check if it can be printed or not. • The print head nozzles may be clogged if printing becomes faint or colors are incorrect. See “When Printing Becomes Faint or Colors are Incorrect” on page 55. • If the paper is curled or its surface is scratched during printing, make sure that you are using the correct type of paper. If printed surface is scratched even if the appropriate media type is used, set the paper thickness lever on the left. See “Printing Maintenance” on page 55. • For the errors indicated on the camera and their solution, also refer to the user’s manual of the camera. For other troubles on the digital camera, contact the manufacturer. 73 Troubleshooting Camera Error Message Try This Printer in use/Printer warming up • Photos are being printed from the computer. Wait until printing ends. The printer automatically starts printing the photos from the camera after completing the current printing. • Wait until warm-up ends. When it is ready, the printer starts printing automatically. No paper/Paper error Load the paper, and select Continue*1 in the display on your camera. Paper Jam Select Stop in the display on your camera to stop printing. Remove the jammed paper, load new paper, and press the RESUME/CANCEL button on the printer and retry printing. Printer cover open Close the cover on the printer. No print head The print head is defective or not installed. (The POWER lamp on the printer flashes five times.) Install a print head. See “Installing the Print Head” on page 5. If the print head has already been installed, press the POWER button to turn off the printer, and press the POWER button again to turn on the printer. If the same error occurs, the print head may be defective. Contact a Canon service representative. Waste tank (ink absorber*2) full The printer has a built-in waste ink absorber to hold the ink used during print head cleaning. This error message indicates that the waste ink absorber is nearly full. You can continue printing for a while by selecting Continue*1 in the display on your camera. However, because printing is disabled once the waste ink absorber becomes completely full, you are recommended to contact a Canon service representative as early as possible. No Ink Install an ink tank. Be sure to press the PUSH mark on the ink tank to ensure it is firmly seated. Printer error An error requiring servicing might have occurred (the POWER lamp on the printer flashes alternately orange and green). Select Stop in the display on your camera to stop printing. Disconnect the cable between the printer and the camera, turn off the printer, and unplug the power cord of the printer from the power supply. After a while, plug the power cord of the printer back in, turn on the printer, and then reconnect the camera to the printer. If the same error occurs, contact a Canon service representative. *1: To resume printing, you can press the RESUME/CANCEL button on the printer instead of selecting Continue. *2: The waste ink absorber absorbs ink used at cleaning. Check the printer for proper operation. 74 Troubleshooting Cannot Install the Printer Driver Possible Cause Unable to proceed beyond the Printer Port Screen Other applications running in the background Try This Reinstall the printer driver 1. Click Cancel. 2. Click Start Over on the Installation Failure screen. 3. Click Back on the Easy Install screen. 4. Click Exit on the Welcome screen, then remove the CD-ROM. 5. Turn the printer off. 6. Restart the computer. 7. Carefully follow the procedures described and reinstall the driver. See “Installing the Printer Driver” on page 49. Other applications opened on your computer can interfere with the installation routine. Close all open software applications before reinstalling the printer driver. See “Installing the Printer Driver” on page 49. Installation does not start automatically when the If printer driver installation did not start automatically when you CD-ROM is inserted into inserted the CD-ROM into the CD-ROM drive: the drive 1. Click Start and select My Computer. 2. Double-click the CD-ROM icon. For Windows 2000, open the My Computer window, and then double-click the CD-ROM icon. Double-click the CD-ROM icon on your desktop to start installation. Installation CD-ROM not Ensure that there are no problems with the Setup Software & User’s working properly Guide CD-ROM. Use Windows Explorer to ensure that the CD-ROM can be read. Installation procedure not followed correctly Ensure that the CD-ROM icon is displayed on the desktop. If there is any problem with the CD-ROM, contact a Canon service representative. Install the printer driver again if you did not follow the installation procedure properly. See “Installing the Printer Driver” on page 49. If the installer was forced to terminate due to an error, remove the CD-ROM from the CD-ROM drive and restart your computer. Reinstall the printer driver. If this problem persists, contact a Canon service representative. Not supported OS is used Use a computer equipped on which Windows XP or Windows 2000 can operate. Use a Macintosh series computer equipped with USB interface on Mac OS X v.10.2.1 to v.10.3.x can operate. 75 Appendix Appendix Specifications Printer Printing resolution: 4800×1200 dpi. max. (Ink droplets can be placed in a pitch of 1/4800 inch at minimum. Supported only when printing with a computer.) Print speed Approx. 85 seconds * Based on printing Canon standard pattern on 4"×6"/101.6×152.4mm Photo Paper Plus Glossy with borderless print. Print speed may vary according to conditions of use such as print mode and image. Print width: 94.8mm max. (3.732in) (for Borderless Printing: 101.6mm/ 4.0 in) Resident print control mode: Canon extended mode Receive buffer: 42 KB Interface: USB/IrDA Ver. 1.2/ Direct Print Port/Video Out (NTSC model/PAL model) Acoustic noise level: Approx. 39 dB (A) (in the highest print quality mode) Operating environment: Temperature: 5 to 35°C (41 to 95°F) Humidity: 10 to 90%RH (no condensation) Storage environment: Temperature: 0 to 40°C (32 to 104°F) Humidity: 5 to 95% RH (no condensation) Power supply: AC 110-120 V, 50/60 Hz AC 220-240 V, 50/60 Hz Power consumption: Off: Approx. 1W Standby: Approx. 3 W Printing: Approx. 12 W Dimensions (with the paper support and paper output tray retracted): 215mm/8.465in (W)×217mm/8.543in (D)×79mm/3.11in (H) Weight: Approx. 1.8 kg (4 lb.) Print Head: Cyan, Magenta, Yellow: 128 nozzles per each color (600 dpi) Ink Tank: Capacity (pages): Color (BCI-16 Color) approx. 75 *1 *1 Based on printing continuously Canon 24 standard images taken with the digital camera on 4"×6"/101.6×152.4mm paper with borderless print. Capacity (pages) may vary according to conditions of use such as print mode and image. Supported recording media: Compact Flash, Microdrive, Smart Media, Memory Stick, MagicGate Memory Stick, Memory Stick PRO, SD card, Multimedia card, xD-Picture Card*, Memory Stick DUO*, miniSD Card* * Can be used with the addition of a special adapter sold separately. Supported recording formats: JPEG (DCF/CIFF/Exif2.2 or earlier/JFIF), TIFF (Exif compliant), DPOF compliant 76 Appendix Camera Direct Print Canon Bubble Jet Direct Compatible Paper: Card #1 (Photo Paper Pro 4"×6" /101.6×152.4 mm), Card #2(Photo Paper Plus Glossy Photo Paper Plus Semi-gloss or Glossy Photo Paper 4"×6" /101.6×152.4 mm), Card #3(not applicable), LTR (not applicable), A4 (not applicable) Layout Print: Standard: Borderless / with border, Index Print: 15-80 images Print Quality: Standard Image Optimize: Exif Print Date Print: Supported DPOF Functions: Ver. 1.00 compatible (Index print, number of copies, select images, print special characters (date)) PictBridge Paper size: Default (selections based on the printer setting), 10×15cm/4"×6" (Photo Paper Plus Glossy/Photo Paper Pro/Glossy Photo Paper/Photo Stickers), 5.4×8.6cm/Credit Card (Glossy Photo Paper Credit Card Size)* Paper type: Default (selections based on the printer setting), Photo (Photo Paper Plus Glossy), Fast (Photo Paper Pro) Layout: Default (selections based on the printer setting), Borderless, Bordered When 4"×6" is selected from “Paper size”, 2-up, 4-up, 9-up, and 16-up options may be available in “Layout”. Image optimize: Default (selections based on the printer setting), “VIVID”*, “NR” (Noise Reduction)*, “VIVID+NR”* * If using a Canon PictBridge-compatible camera, you can select it. Date print Default (Off: No printing) BJ Printer Driver Systems Requirements • Use a computer equipped on which Windows XP • Use a Macintosh series computer equipped with USB interface on Mac OS X v.10.2.1 to v.10.3.x or Windows 2000 can operate. can operate. • USB interface • Available hard-disk space for printer driver • Available hard-disk space for printer driver installation:100 MB installation (including temporary files) • The following functions are not supported when :50MB (including the capacity for the electric using Mac OS X v.10.2.1 to v.10.3.x manual) - Photo Optimizer PRO USB operation can only be guaranteed on a PC with - Poster Printing preinstalled Windows XP or Windows 2000. (This - Fit to Page Printing includes Windows XP or Windows 2000 upgraded - Reverse Order Printing (except for Mac OS X from pre-installed Windows 98 or later) v.10.3.x) Additional Systems Requirements for Electronic User’s Guide • 15 MB free hard disk space • Windows: Microsoft® Internet Explorer 5.0 or later. • Mac OS: Microsoft® Internet Explorer 5.0 or later, Safari 1.0 or later. 77 Appendix Safety Precautions Please read the safety warnings and cautions provided in this manual to ensure that you use your printer safely. Do not attempt to use printer in any way not described in this manual. Warning You may cause an electric shock/fire or damage the printer if you ignore any of these safety precautions. Choosing a Location Do not place the printer close to flammable solvents such as alcohol or thinners. Never attempt to plug in or unplug the printer from the power supply when your hands are Power supply wet. Always push the plug all the way into the power outlet. Never damage, modify, stretch or excessively bend or twist the power cord. Do not place heavy objects on the power cord or universal AC Adapter. Never plug the printer into a power socket that is shared with other equipment (extension lead/cord, 2- or 3-way adapter, etc.). Never use the printer if the power cord is bundled or knotted. If you detect smoke, unusual smells or strange noises around the printer, immediately unplug the printer at the power supply and call for service. Periodically, unplug the printer and use a dry cloth to wipe off any dust or dirt collected on the plug and the power outlet. If the printer is placed at a location exposed to a lot of dust, smoke, or high humidity, the dust collected on the plug absorbs moisture and may cause insulation failure and fire. Cleaning the printer Maintaining the printer Working around the printer 78 Use a damp cloth to clean the printer. Never use flammable solvents such as alcohol, benzene or thinners. If flammable solvents come in contact with electrical components inside the printer, it could cause a fire or electric shock. Always unplug the printer from the power outlet before cleaning the printer. If you accidentally switch the printer on while cleaning it, you could injure yourself or damage the printer. Do not attempt to disassemble or modify the printer. There are no user serviceable parts inside the printer. The printer contains high-voltage components. Never attempt any maintenance procedure not described in this guide. Do not use flammable sprays near the printer. This could cause a fire or electric shock if the spray comes into contact with electrical components inside the printer. Appendix About the Lithium Coin Cell Battery CR2025 Use a lithium coin cell battery CR2025. If you use an incorrect one, an explosion may occur. Discard used batteries according to the local laws and regulations. Do not heat or throw the battery into a fire or soak it into water. It may cause fire or personal injury due to a battery explosion or liquid leakage. Do not disassemble, modify, or heat a battery. It may cause personal injury due to liquid leakage. If battery leakage occurs, thoroughly wash the affected skin and clothes. Keep battery acid away from your eyes and mouth. Keep a battery away from children. If your child swallows the battery, contact your doctor immediately. It may cause severe damage to stomach and intestinal tissue. Before you discard a battery, cover the terminals with tape or other insulators to prevent direct contact with other objects. Contact with the metallic components of other materials in waste containers may lead to fire or explosions. Caution You may cause injury or damage the printer if you ignore any of these safety precautions. Choosing a location Power supply Do not install the printer in a location that is unstable or subject to excessive vibration. Do not install the printer in locations that are very humid or dusty, in direct sunlight, outdoors, or close to a heating source. To avoid the risk of fire or electric shocks, install the printer in a location with an ambient temperature range of 5°C to 35°C (41°F to 95°F) and humidity of 10% to 90% (condensation free). Do not place the printer on a thick rug or carpet. Ensure that the area around the power outlet is kept clear at all times so you can easily unplug the power cord if necessary. Never remove the plug by pulling on the cord. Do not use an extension lead/ cord. Working around the printer Print heads and ink tanks Never use a power supply source other than the one rated for the printer in the country where you purchased the printer. AC 110-120 V, 50/60 Hz AC 220-240 V, 50/60 Hz Never put your hands or fingers in the printer while it is printing. Do not place metal objects (paper clips, staples, etc.) or containers of flammable solvents (alcohol, thinners, etc.) on top of the printer. If any foreign object (metal or liquid) fall into the printer, unplug the power cord and call for service. For safety reasons store print heads and ink tanks out of the reach of small children. If a child ingests any ink, consult a doctor immediately. Do not shake print heads or ink tanks. Ink may leak out and stain clothing or the surrounding area. 79 Appendix Regulatory Information Color Printer Model: K10248 (DS700) This device complies with Part 15 of the FCC Rules. Operation is subject to the following two conditions: (1) This device may not cause harmful interference, and (2) this device must accept any interference received, including interference that may cause undesired operation. Note: This equipment has been tested and found to comply with the limits for a Class B digital device, pursuant to Part 15 of the FCC Rules. These limits are designed to provide reasonable protection against harmful interference in a residential installation. This equipment generates, uses and can radiate radio frequency energy and, if not installed and used in accordance with the instructions, may cause harmful interference to radio communications. However, there is no guarantee that interference will not occur in a particular installation. If this equipment does cause harmful interference to radio or television reception, which can be determined by turning the equipment off and on, the user is encouraged to try to correct the interference by one or more of the following measures: • Reorient or relocate the receiving antenna. • Increase the separation between the equipment and receiver. • Connect the equipment into an outlet on a circuit different from that to which the receiver is connected. • Consult the dealer or an experienced radio/TV technician for help. Use of a shielded cable is required to comply with Class B limits in Subpart B of Part 15 of the FCC Rules. Do not make any changes or modifications to the equipment unless otherwise specified in the manual. If such changes or modifications should be made, you could be required to stop operation of the equipment. Canon U.S.A., Inc. One Canon Plaza Lake Success, NY 11042 1-516-328-5600 For 220-240V, 50/60Hz model This device complies with Part 15 of the FCC Rules. Operation is subject to the following two conditions: (1) This device may not cause harmful interference, and (2) this device must accept any interference received, including interference that may cause undesired operation. Note: This equipment has been tested and found to comply with the limits for a Class A digital device, pursuant to Part 15 of the FCC Rules. These limits are designed to provide reasonable protection against harmful interference when the equipment is operated in a commercial environment. This equipment generates, uses, and can radiate radio frequency energy and, if not installed and used in accordance with the instruction manual, may cause harmful interference to radio communications. Operation of this equipment in a residential area is likely to cause harmful interference in which case the user will be required to correct the interference at his own expense. Do not make any changes or modifications to the equipment unless otherwise specified in the manual. If such changes or modifications should be made, you could be required to stop operation of the equipment. 80 Appendix Remote Control: K30240 (RC-10) NOTE: This equipment has been tested and found to comply with the limits for a Class B digital device, pursuant to Part 15 of the FCC Rules. These limits are designed to provide reasonable protection against harmful interference in a residential installation. This equipment generates, uses and can radiate radio frequency energy and, if not installed and used in accordance with the instructions, may cause harmful interference to radio communications. However, there is no guarantee that interference will not occur in a particular installation. If this equipment does cause harmful interference to radio or television reception, which can be determined by turning the equipment off and on, the user is encouraged to try to correct the interference by one or more of the following measures: • Reorient or relocate the receiving antenna. • Increase the separation between the equipment and receiver. • Connect the equipment into an outlet on a circuit different from that to which the receiver is connected. • Consult the dealer or an experienced radio/TV technician for help. Do not make any changes or modifications to the equipment unless otherwise specified in the manual. If such changes of modifications should be made, you could be required to stop operation the equipment. Canadian Radio Interference Regulations This digital apparatus does not exceed Class B limits for radio noise emissions from a digital apparatus as set out in the interference-causing equipment standard entitled “Digital Apparatus”, ICES-003 of the Industry Canada. Cet appareil numérique respecte les limites de bruits radio éléctiques applicables aux appareils numériques de Classe B prescrites dans la norme sur le matériel brouilleur: “Appareils Numériques”, NMB-003 édictée par l’Industrie Canada. 81 Index Index Numerics D 101.6 × 152.4mm/ 4"×6" paper ................... 19 Date display format ................................. 12, 36 Date print ......................................................34 Date print (PictBridge) ...................................42 Deep Cleaning ......................................... 12, 58 Direct Print Port ...............................................7 Direct Printing from PictBridge-compatible Digital Cameras .........................................41 Display Photo received via infrared ......... 12, 47 Displaying a Photo on TV ...............................13 Displaying Photos Automatically at the Full TV Screen ............................................23 DPOF print ............................................... 11, 32 DS700 User’s Guide ......................................54 A A Message is Displayed on TV ....................... 65 Accompanied by ink tank icon with '?' ........... 66 Additional Systems Requirements for Electronic User’s Guide ............................. 77 Aligning the Print Head ................................. 59 B Back Button .................................................... 8 Basic settings ............................................... 34 BCI-16 Color ................................................. 60 BJ Printer Driver Systems Requirements ........ 77 Borderless print ............................................ 34 Borderless Printing (PictBridge) .................... 42 Brightness .................................................... 69 Bubble Jet Direct ......................................39, 43 Bubble Jet Direct (Specifications) .................. 77 Bubble Jet Direct (Troubleshooting) .............. 73 C Cancel all ...................................................... 25 Cancel Button (Remote Control) ...................... 8 Cancel the search mode ................................ 35 Cannot Install the Printer Driver .................... 75 Cannot Print Properly from the Digital Camera .......................................... 73 Card Slot ........................................................ 7 Changing the Language Displayed ................ 37 Clean the inside of the printer ....................... 70 Clean the paper feed rollers .......................... 68 Cleaning ....................................................... 57 Color adjust .............................................12, 69 Color hue ...................................................... 69 CompactFlash (CF) card ................................. 15 Confirming or Changing the Camera Settings (PictBridge) ............................................... 41 Connecting to a Digital Camera ..................... 39 Connecting to TV ........................................... 13 Contrast ....................................................... 69 Copies [+][-] Buttons ....................................... 8 Correcting paper curl .................................... 71 Cover .............................................................. 7 Cover open switch .......................................... 8 Custom Install .............................................. 50 82 E Easy Install ....................................................50 Error code ......................................................66 Examining the nozzle check pattern ..............56 F Face brightener .............................................34 G Glossy Photo Paper .......................................20 H Handling Error Messages ...............................67 Handy Functions and Settings .......................33 Head alignment ....................................... 12, 59 Head alignment print ............................... 12, 60 Head Cleaning ......................................... 12, 57 How Low Ink Warning Setting Works ..............63 How to Print All Photos without Connecting to TV .......................................30 How to View the User’s Guide— Macintosh ....54 How to View the User’s Guide— Windows ......54 I Image optimize (PictBridge) ..........................42 Indicator Lamp ................................................7 infrared communication ................................44 infrared communication (Troubleshooting) ....72 Infrared port ..................................................46 Infrared print ........................................... 12, 45 Ink counter reset ..................................... 12, 62 Index Ink drying wait time .................................12, 71 Ink tank .....................................................6, 60 Ink Tank BCI-16 Color ................................3, 60 Inserting a Memory Card ............................... 16 Installing an Ink Tank ...................................... 6 Installing the Print Head ................................. 5 Installing the Printer Driver— Macintosh ....... 51 Installing the Printer Driver— Windows ......... 49 IrDA .............................................................. 44 L Languages ...............................................12, 37 Layout (Infrared print) ................................... 45 Layout (PictBridge) ....................................... 42 Layout print .............................................11, 27 Lithium coin cell battery ................................. 3 Lithium coin cell battery CR2025 .................. 10 Lithium Coin Cell Battery CR2025 (Safety Precautions) .................................. 79 Loading the Print Media ................................ 18 Low Ink Warning ........................................... 63 M MagicGate Memory Stick .............................. 15 MagicGate Memory Stick Duo ....................... 15 Media Type ..............................................20, 34 Media Type (Infrared print) ........................... 45 Media Types for Digital Camera (Bubble Jet Direct) ..................................... 43 Memory Card Utility ...................................... 52 Memory Cards Supported by this printer ....... 15 Memory Stick ............................................... 15 Memory Stick Duo ........................................ 15 Memory Stick PRO ........................................ 15 Memory Stick PRO Duo ................................. 15 Menu Button ................................................... 8 Menu Screen ................................................ 11 Microdrive .................................................... 15 miniSD Card ................................................. 15 Mobile Phone ............................................... 44 Mobile phone (Troubleshooting) ................... 72 Multimedia Card ........................................... 15 N Next .............................................................. 25 Noise reduction ............................................ 34 Nothing is Displayed on TV/Image is Poor ..... 64 Nozzle check ...........................................12, 56 O OK Button ....................................................... 8 Operating the Remote Control .........................9 Operation Panel ..............................................7 Optimizer ......................................................34 P Page size ................................................. 20, 34 Page size (Infrared print) ...............................45 Paper Does Not Feed Properly ........................68 Paper Guide ....................................................7 Paper jam ......................................................67 Paper Jams ....................................................68 Paper Output Tray ...........................................7 Paper size (PictBridge) ..................................41 Paper Support .................................................7 Paper support Load Limit ...............................20 Paper Thickness Lever ............................... 8, 19 Paper type (PictBridge) ..................................41 Paste all ........................................................27 Paste one by one ...........................................27 Photo Gallery .......................................... 11, 21 Photo Paper Plus Glossy ................................20 Photo Paper Plus Semi-gloss .........................20 Photo Paper Pro ............................................20 Photo Print .............................................. 11, 24 Photo Stickers ......................................... 19, 20 PictBridge ............................................... 39, 41 PictBridge (Specifications) ............................77 PictBridge (Troubleshooting) .........................73 POP ...............................................................34 POWER Button .................................................7 Power Button (Remote Control) ........................8 Power Cord ......................................................3 Power Cord Connection ...................................8 POWER Lamp ............................................. 7, 68 POWER Lamp (Troubleshooting) ....................67 Preparing the Printer .......................................4 Previous ........................................................25 Print all ................................................... 11, 30 Print All Button .......................................... 7, 31 Print Button (Remote Control) ..........................8 Print Head ................................................... 3, 5 Print Head Cleaning .......................................57 Print Head Deep Cleaning ..............................58 Print Head Holder ........................................ 5, 8 Print Head Lock Lever ......................................8 Print Index .............................................. 11, 31 Print Media to Avoid ......................................18 Print Studio ............................................. 11, 26 Printed Surface is Scratched or Ink Blots .......70 Printer Does Not Start or Printer Stops During Print Jobs .......................................72 Printer Driver (Troubleshooting) ....................75 83 Index Printer Parts and Their Function ...................... 7 Printing a Photo by Displaying it on TV (Infrared print) .......................................... 47 Printing a Photo List ..................................... 31 Printing a Photo with a Mobile Phone and the Printer ................................................ 46 Printing According to the settings Made on the Camera .......................................... 32 Printing All Photos ........................................ 30 Printing is Blurred/Colors are Wrong/White Streaks appear ......................................... 69 Printing Maintenance ................................... 55 Printing on Photo Stickers (Infrared print) ..... 45 Printing on Photo Stickers (PictBridge) ......... 42 Printing Photographs Directly from a Canon Bubble Jet Direct Compatible Digital Camera ... 43 Printing Stickers ........................................... 28 Printing the Nozzle Check Pattern ................. 56 Printing with the computer ........................... 49 R Regulatory Information ................................. 80 Remaining ink level indicator setting .......12, 66 Remote Control ............................................... 3 Remote Control (The function of buttons) ........ 8 Remote Control (Troubleshooting) ................ 65 Remote control receiver/Infrared port ............. 7 Removing a Memory Card ............................. 17 Replacing an Ink Tank ................................... 60 Requirements for Infrared Communication with the Mobile Phone .............................. 44 Reset .......................................................12, 38 Resetting ...................................................... 38 Resetting All Settings ................................... 38 Resetting the Ink Counter ............................. 62 RESUME/CANCEL Button ................................. 7 Rotate Button ................................................. 8 Slide Show ....................................................23 SmartMedia ..................................................15 Specifications ...............................................76 Specifying the Layout ....................................26 Specifying the number of copies to print for each photo ...........................................24 Specifying the Paper and Other Settings .......33 Sticker print ............................................ 11, 29 Stickers ×16 ..................................................28 T The Remote Control is not Working ................65 Tool Box ........................................................12 Troubleshooting ............................................64 Turning off TV and the printer ........................14 Turning on TV and the Printer ........................14 U Unpack the Printer ..........................................3 USB Port .........................................................8 User’s Guide Table of Contents ......................54 Using a Memory Card ....................................15 V Video Cable (RCA) ............................................3 Video Out Terminal ..........................................8 Viewing Each Photo on TV and Printing ..........21 Vivid Photo ....................................................34 W Waste ink absorber .......................................67 When Printing Becomes Faint or Colors are Incorrect ....................................................55 X xD-Picture Card .............................................15 S Z Safety Precautions ........................................ 78 SD Memory Card ........................................... 15 Search .......................................................... 35 Search Button ............................................8, 35 Searching for Photos with the Shooting Date 35 Selecting Various Print Option ...................... 26 Sets time to dry ink on the printing surface ... 71 Setting or Replacing the Battery ................... 10 Setting the Date Display Format .................... 36 Setting the Media Type, Paper Size, and Layout (Infrared print) .......................................... 44 Settings button ............................................. 33 Zoom Button ...................................................8 84 T2202D_PPG_US_Cover.fm Page 1 Tuesday, July 20, 2004 4:19 PM Photo Printing Guide The following ink tank is compatible with DS700. For details on ink tank replacement, refer to “Replacing an Ink Tank” in this guide. QA7-3336-V01 XXXXXX ©CANON INC.2004 PRINTED IN THAILAND