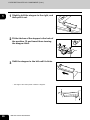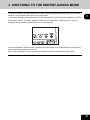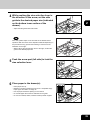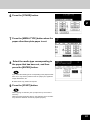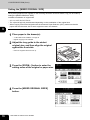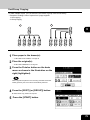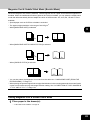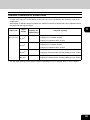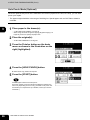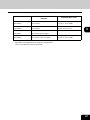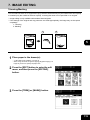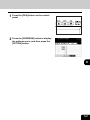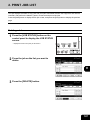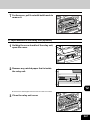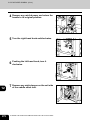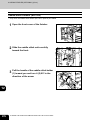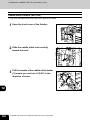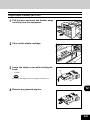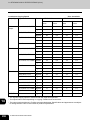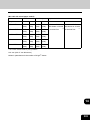
1
EPA ENERGY STAR ® (MFD)
The United States Environmental Protection Agency (EPA) has introduced a voluntary programme, the
ENERGY STAR programme, to encourage the widespread and voluntary use of energy-efficient
technologies that enhance the workplace, improve product performance and prevent pollution. As an
ENERGY STAR Partner, the TOSHIBA TEC CORPORATION has determined that this copier model meets
the ENERGY STAR guidelines for energy efficiency.
For Copier/Printer + Fax models, ENERGY STAR guidelines require ENERGY STAR multifunction copiers
to have a ‘Sleep Mode’ feature that automatically makes the copier enter the sleep mode after a period of
inactivity. The copier must also automatically change to a ‘Low Power Mode’ (Automatic Energy Save) after
a period of time since the last usage.
e-STUDIO3511/4511 Copier/Printer + Fax model (multifunction model)
‘Sleep Mode’
The copier consumes less than 80 watts (e-STUDIO3511)/90 watts (e-STUDIO4511) in the ‘Sleep
Mode’.
‘Sleep Mode’ Default TimeThe default time while in ‘Sleep Mode’ is 60 minutes (e-STUDIO3511)/90 minutes
(e-STUDIO4511).
‘Automatic Energy Save’The copier consumes less than 184.75 watts (e-STUDIO3511)/223.25 watts (e-STUDIO4511) while
in ‘Energy Save Mode’.
‘Automatic Energy Save’ Default TimeThe default time before switching to ‘Automatic Energy Save Mode’ is 15 minutes.
Note 1- The default setting for ‘Sleep Mode’ and ‘Automatic Energy save’ can be changed.
Note 2- In the sleep mode, if the Fax or printer data is received, the copier starts warming itself up and
prints out the data when it becomes ready. Also, when the start button or the energy saver button
on the control panel is pressed, the copier starts warming itself up.
In accordance with EPA ENERGY STAR programme guidelines, Toshiba recommends the following
recycled paper.
Great White MultiUse 20 paper
Great White MultiUse 24 paper
If you have any questions regarding the use of recycled paper or some recommended types of recycled
paper, please contact your authorized Toshiba dealer.
ENERGY STAR is a U.S. registered mark.
TABLE OF CONTENTS
NOTICE TO USERS................................................................................................................................5
TOSHIBA QUALITY IS SECOND TO NONE ..........................................................................................6
PREFACE ................................................................................................................................................8
FEATURES OF THE e-STUDIO3511/4511 .............................................................................................9
GENERAL PRECAUTIONS...................................................................................................................10
When Installing or Moving .....................................................................................................................10
• When Using the Multifunctional Digital Colour Systems ....................................................................13
• During Maintenance or Inspection .....................................................................................................15
• When Handling Supplies ....................................................................................................................16
DISCLAIMER NOTICE ..........................................................................................................................17
FORGERY PREVENTION FUNCTION/STORAGE OF COLOUR COPIES .........................................18
1. BEFORE USING EQUIPMENT ............................................................................................................19
1. DESCRIPTION OF EACH COMPONENT .......................................................................................20
• Main Components..........................................................................................................................20
• Optional Equipment .......................................................................................................................21
• Control Panel .................................................................................................................................23
• Adjustment of the Angle of the Control Panel................................................................................25
• Touch Panel ...................................................................................................................................27
2. TURNING ON THE POWER SWITCH ............................................................................................30
• Turning on/off the Power................................................................................................................30
• Controlling the Use of the Copier with Department Codes ............................................................32
3. SWITCHING TO THE ENERGY-SAVING MODE ............................................................................33
2. HOW TO MAKE COPIES......................................................................................................................35
1. SETTING COPY PAPER .................................................................................................................36
• Acceptable Copy Paper Types and Sizes......................................................................................36
• Toshiba-Recommended Paper/Handling and Storing Paper .........................................................37
• Changing the Paper Size of the Drawer/Setting the Drawer for Special Uses ..............................38
2. SETTING ORIGINALS.....................................................................................................................45
• Acceptable Original Types and Sizes/Maximum Number of Sheets that can be Stored ...............45
• When Placing an Original on the Glass .........................................................................................47
• When Using the Reversing Automatic Document Feeder (optional) .............................................49
3. GENERAL COPYING PROCEDURES............................................................................................52
4. AUTO JOB START (JOB PRESET).................................................................................................55
5. INTERRUPT COPYING ...................................................................................................................57
6. STOPPING THE COPY OPERATION .............................................................................................58
7. BYPASS COPYING .........................................................................................................................59
• Bypass Copying.............................................................................................................................59
3. SETTING OF BASIC COPY MODES....................................................................................................65
1. PAPER SELECTION........................................................................................................................66
• Automatic Paper Selection (APS)..................................................................................................66
• Manual Paper Selection.................................................................................................................68
• Setting the [OTHER SIZE] button ..................................................................................................69
• Setting the [MIXED ORIGINAL SIZE] ............................................................................................70
2. BLACK-AND-WHITE/COLOUR COPY MODE SELECTION...........................................................72
3. REDUCTION AND ENLARGEMENT COPYING .............................................................................73
4. SELECTING FINISHING MODES ...................................................................................................77
• Finishing Modes and Finishers (Optional) .....................................................................................77
1
• Sort/Group Copying .......................................................................................................................79
• Rotate Sort Mode...........................................................................................................................80
• Staple Sorting ................................................................................................................................81
• Magazine Sort & Saddle Stitch Mode (Booklet Mode)...................................................................83
• Hole Punch Mode (Optional) .........................................................................................................86
5. DUPLEX COPYING .........................................................................................................................88
• For Making 1-sided, 2-sided and Book-type Copies......................................................................88
6. ORIGINAL MODE ............................................................................................................................94
7. COPY DENSITY ADJUSTMENT .....................................................................................................96
4. IMAGE EDITING AND IMAGE ADJUSTMENT ....................................................................................97
1. COLOUR BALANCE (YMCK ADJUSTMENT).................................................................................98
2. RGB ADJUSTMENT ........................................................................................................................99
3. ONE-TOUCH ADJUSTMENT ........................................................................................................100
4. BACKGROUND ADJUSTMENT ....................................................................................................101
5. SHARPNESS ADJUSTMENT........................................................................................................102
6. TWIN (2-COLOUR) COPYING ......................................................................................................103
5. USING THE EDITING FUNCTIONS....................................................................................................107
1. IMAGE SHIFT ................................................................................................................................108
2. EDGE ERASE................................................................................................................................ 111
3. BOOK CENTRE ERASE................................................................................................................ 112
4. DUAL-PAGE .................................................................................................................................. 113
5. 2 IN 1/4 IN 1................................................................................................................................... 115
6. MAGAZINE SORT (FROM THE EDITING MENU) ........................................................................ 117
7. IMAGE EDITING............................................................................................................................ 119
• Trimming/Masking ....................................................................................................................... 119
• Mirror Image ................................................................................................................................121
8. X-Y ZOOM .....................................................................................................................................122
9. COVER COPYING.........................................................................................................................123
10. SHEET INSERTION MODE...........................................................................................................126
11. TIME & DATE STAMP....................................................................................................................128
12. PAGE NUMBERING ......................................................................................................................129
13. JOB BUILD ....................................................................................................................................131
14. DIRECTION OF COPY IMAGES IN “1 TO 2” AND “2 TO 1” .........................................................134
15. DIRECTION OF DUPLEX COPY IMAGES IN “2 TO 2”.................................................................136
16. CONTINUOUS/SINGLE ORIGINAL FEEDING .............................................................................137
6. STORING ORIGINALS .......................................................................................................................139
1. STORE TO e-FILING .....................................................................................................................140
2. COPY & FILE.................................................................................................................................143
3. ENTERING LETTERS ...................................................................................................................146
7. SCANNING THE IMAGES ..................................................................................................................147
1. SCAN SETTING IN THE TOUCH PANEL .....................................................................................148
2. SCAN TO e-FILING .......................................................................................................................150
3. SCAN TO FILE ..............................................................................................................................154
4. SCAN TO E-MAIL ..........................................................................................................................158
8. INTERNET FAX...................................................................................................................................163
1. INTERNET FAX .............................................................................................................................164
2. SENDING INTERNET FAX............................................................................................................166
• Setting the Transmission Conditions ...........................................................................................166
2
• Specifying the Recipients.............................................................................................................169
• Advanced Function ......................................................................................................................180
3. RECEIVING INTERNET FAX ........................................................................................................183
9. JOB STATUS ......................................................................................................................................185
1. JOB STATUS .................................................................................................................................186
2. PRINT JOB LIST............................................................................................................................187
3. PROOF PRINT JOB ......................................................................................................................190
4. PRIVATE PRINT JOB ....................................................................................................................192
5. WHEN USING THE DEPARTMENT CODES ................................................................................194
6. CONFIRMING THE STATUS OF FAX/INTERNET FAX JOB ........................................................196
7. CONFIRMING THE STATUS OF SCAN ........................................................................................197
8. LOG LIST.......................................................................................................................................198
• LOG .............................................................................................................................................198
9. ADDRESS REGISTRATION FROM LOG LISTS...........................................................................201
10. PRINTING SEND/RECEIVE LOG LIST OF FAX ...........................................................................203
11. STATUS .........................................................................................................................................204
12. ERROR CODE...............................................................................................................................206
10.e-FILING .............................................................................................................................................217
1. e-FILING FUNCTIONS ..................................................................................................................218
2. SETTING UP BOX.........................................................................................................................220
3. CHANGING INPUT DATA..............................................................................................................222
4. DELETING BOX ............................................................................................................................224
5. PRINTING STORED DOCUMENT ................................................................................................225
11.TEMPLATE .........................................................................................................................................229
1. TEMPLATE ....................................................................................................................................230
2. RECALLING TEMPLATE ...............................................................................................................231
3. REGISTERING TEMPLATE ..........................................................................................................234
4. CHANGING INPUT DATA..............................................................................................................239
5. DELETING TEMPLATE .................................................................................................................243
12.WHEN THE GRAPHIC SYMBOLS BLINK ON THE TOUCH PANEL ...............................................247
1. DESCRIPTION OF THE BLINKING GRAPHIC SYMBOLS...........................................................248
2. ADD PAPER SYMBOL ..................................................................................................................250
• Adding Paper to the Drawers.......................................................................................................250
• Adding Paper to the Large Capacity Feeder (Optional)...............................................................251
3. REPLACE TONER CARTRIDGE SYMBOL...................................................................................252
4. REPLACE TONER BAG SYMBOL ................................................................................................259
5. CLEAR PAPER SYMBOL ..............................................................................................................260
6. ADDING STAPLES (OPTIONAL)...................................................................................................274
7. REMOVING JAMMED STAPLES (OPTIONAL).............................................................................280
8. DISPOSING OF THE PUNCHED PAPER BITS (OPTIONAL).......................................................287
9. CALL SERVICE SYMBOL/PERIODIC MAINTENANCE MESSAGE .............................................288
13.MAINTENANCE..................................................................................................................................289
1. DAILY INSPECTION ......................................................................................................................290
2. SIMPLE TROUBLESHOOTING.....................................................................................................291
14.SPECIFICATIONS & OPTIONS..........................................................................................................295
1. e-STUDIO3511/4511 SPECIFICATIONS .......................................................................................296
2. SPECIFICATIONS OF OPTIONS ..................................................................................................299
3. PACKING LIST ..............................................................................................................................307
4. COPYING FUNCTION COMBINATION MATRIX ..........................................................................308
3
• Combination Matrix 1/2................................................................................................................308
• Combination Matrix 2/2................................................................................................................309
5. IMAGE QUALITY ADJUSTMENT COMBINATION MATRIX .........................................................310
4
NOTICE TO USERS
Warning:
This is a Class A product. In a domestic environment this product may cause radio interference in which
case the user may be required to take adequate measures.
1 Do not touch the connector terminal when disconnecting the cables of peripheral equipment.
2 Before opening any covers or removing any parts from the copier, discharge the static electricity from
your body by touching a metal part of the copier. This product is carrying the CE-Mark in accordance
with the related European Directives. Responsible for CE-marking is TOSHIBA TEC GERMANY
IMAGING SYSTEMS GmbH, Carl-Schurz-Str. 7, 41460 Neuss, Germany.
E-mail: [email protected]
Machine Noise Information
Ordinance3. GSGV, January 18, 1991: The maximum sound pressure level is equal to or less than
70dB(A) according to EN27779.
After a suitable place has been selected for the installation of the e-STUDIO, please do not change it.
Avoid excessive heat, dust, vibration and direct sunlight. Also, provide proper ventilation as the copier
emits a small amount of ozone.
5
TOSHIBA QUALITY IS SECOND TO NONE
e-STUDIO3511/4511 Toner Cartridges.
It is recommended that genuine TOSHIBA supplies and parts be used to obtain optimum results.
6
Supplies/Parts
- Dependability
Genuine Toshiba supplies are subjected to the strictest of inspections so that every supply you receive
will perform at optimal levels.
- High Productivity
Genuine Toshiba supplies are created to meet the demands of our competitive world and provide highspeed reliable trouble-free copies when you need them.
- Stable Image Quality
Genuine Toshiba supplies are designed to provide consistently stable image output.
- Copier Kind
Genuine Toshiba supplies are designed to keep the copier and all its parts in trouble-free working order.
Reduction of machine wear is due to Toshiba's intimate knowledge of the copier's characteristics ensuring
the highest standard of care.
- Machine Balance
From the beginning Toshiba supplies and machines were made for each other. Whenever Toshiba
designs a new machine, it also designs a new toner that is made just for that machine. By using Genuine
Toshiba supplies with Toshiba copiers, you are guaranteed optimum performance.
Toner
- Optimum image Quality
Toshiba toner is manufactured using ultra-fine quality materials under precisely controlled conditions to
ensure that your Toshiba copiers will continually generate sharp high-quality images.
- Cost Advantage
Genuine Toshiba toner provides value. Only the proper amount of toner is used during the reproduction
process thereby enabling the machine to continue to operate until all the toner has been used. In this way
you get the full value from each cartridge used.
- Environmental Harmony
Genuine Toshiba toner is manufactured with the environment in mind. To care for Mother Earth, we use
embossed or plastic labels making our toner fully recyclable. In addition, harmful dust and ozone levels
have been reduced to improve the working environment.
- User Friendly
Genuine Toshiba toner is people-friendly. Before approving our toners for sale, we test them to be sure
that they pass the strictest of health standards. This takes the worry out of handling the toner.
General
- ISO 9000 and ISO 14000
Toshiba TEC toner plants are ISO 9001 or ISO 14001 certified. Our toners are of the highest quality and
are environmental friendly.
- Service and Support Benefits
Toshiba's Service engineers are certified to keep your copier performing at optimum levels.To ensure
continuous image quality, utilize an authorized Toshiba Service provider to care for and perform periodical
maintenance on your copier.
7
PREFACE
Thank you for purchasing the Toshiba Multifunctional Digital Colour Systems e-STUDIO3511/4511. This
Operator’s Manual describes the following:
- How to use the Multifunctional Digital Colour Systems.
- How to inspect and carry out maintenance on the Multifunctional Digital Colour Systems.
- How to remedy mechanical and copying problems.
Before using the Multifunctional Digital Colour Systems, thoroughly read and understand this Operator’s
Manual. To ensure that clean copies are made at all times and to keep your Multifunctional Digital Colour
Systems in optimum working order, this Operator’s Manual should be readily available for future reference.
To ensure correct and safe use of the Toshiba Multifunctional Digital Colour Systems e-STUDIO3511/
4511, this Operator’s Manual describes safety precautions according to the following three levels of
warning:
Before reading this Operator’s Manual, you should fully understand the meaning and importance of these
signal words.
- Warning
Indicates a potentially hazardous situation which, if not avoided, could result in death, serious injury, or
serious damage, or fire in the equipment or surrounding assets.
- Caution
Indicates a potentially hazardous situation which, if not avoided, may result in minor or moderate injury,
partial damage of the equipment or surrounding assets, or loss of data.
- Note
Indicates a procedure you should follow to ensure the optimal performance of the Multifunctional Digital
Colour Systems and problem-free copying.
- Tip
Describes handy information that is useful to know when operating the Multifunctional Digital Colour
Systems.
- Advice
Describes an operation you should follow to keep the Multifunctional Digital Colour Systems in good
working order.
8
FEATURES OF THE e-STUDIO3511/4511
The e-STUDIO3511/4511 is a Multifunctional Digital Colour Systems that combines black-and-white and
colour copy modes and is capable of using each function via networks. The e-STUDIO3511/4511 also has
various optional paper handling devices to meet the needs of your office.
The e-STUDIO3511/4511 offers the following convenient features, functions and options.
- The black-and-white copying speed is 35 copies (A4) per minute for e-STUDIO3511, 45 copies (A4) per
minute for the e-STUDIO4511. The colour copying speed is 11 copies for both.
- Warm-up time has been drastically shortened to approximately 40 seconds.
- An all-in-one controller, as standard equipment, is installed to perform the effective network functions.
- The input/output interface is designed for internet connection (access) environment.
- A 1/2 VGA wide panel improves operability and efficiency.
- A universal design is adopted for the control panel whose angle can be changed.
- The e-Filing function allows you to scan, save, reuse, and re-edit the original data via client PCs from the
scanning section.
- Received Fax documents can be stored in the e-Filing without printing them.
- Scanned originals can be sent via Fax (optional) and E-mail simultaneously.
- Electric sorting improves both colour and black-and-white copying productivity.
- Comes with rich editing functions such as trimming, masking and mirror.
- Loading the page memory and hard disc as standard equipment enables 2 in 1/4 in 1, Electronic sorting
and magazine sorting, etc.
- A fixing system that uses less oil reduces the amount of oil affixed to the paper.
- By simply replacing the cartridge, you can add toner without dirtying your hands.
- A wide variety of media from thick paper (up to 209 g/m2), sticker labels, OHP films, etc. is acceptable.
The image quality technology offers up to 999 successive stable copy images.
- Installing an optional finisher offers quick automatic sorting, stapling and hole punching (optional) of
copies.
- Installing a finisher with an optional saddle stitching function attached allows you to select the saddle
stitching mode which will automatically staple the centre of the documents just like a book.
- Two energy-saving features are available: 1. ENERGY SAVER MODE: Unnecessary electricity at
READY status is cut off, 2. SLEEP MODE: The minimum power consumption is kept if the equipment is
not used for the specified period.
9
GENERAL PRECAUTIONS
When Installing or Moving
Warning
- This multifunctional digital colour systems requires 220-240 V AC, 8 A 50/60 Hz electric power. For Saudi
Arabia 100V version, it requires 100-127 V AC, 12 A 50/60 Hz electric power.
DO NOT use a power supply with a voltage other than that specified.
Avoid multiple connections in the same outlet. This could cause a fire or give you an electric shock. If you
are considering increasing the number of outlets, contact an electrician.
- ALWAYS connect this multifunctional digital colour systems to an outlet with a ground connection to avoid
the danger of fire or electric shock in case of short-circuiting. Contact your service representative for the
details. Be sure to use a 3-conductor, grounded wall outlet.
In areas where a 2-pin plug is used, the multifunctional digital colour systems must be grounded for
safety. Never ground it to a gas pipe, a water pipe, or any other object not suitable for grounding.
- Plug the power cord securely into the outlet. If it is not plugged in properly, it could heat up and cause a
fire or give you an electric shock.
- DO NOT damage, break or attempt to repair the power cord.
The following things should not be done to the power cord.
- Twisting it
- Bending it
- Pulling it
- Placing anything on it
- Making it hot
- Situating it near radiators or other heat sources
This could cause a fire or give you an electric shock. If the power cord is damaged, contact your service
representative.
- When removing the plug from the outlet, DO NOT PULL the power cord. ALWAYS hold the plug when
removing it from the outlet. If the power cord is pulled, the wires may become broken and this could cause
a fire or give you an electric shock.
- Make sure that the ventilation holes are not blocked up.
If the temperature within the multifunctional digital colour systems becomes too high, a fire could result.
- DO NOT move the multifunctional digital colour systems to another building, up and down the stairs or
for any great distance.
This could cause an injury or give you and electric shock. When lifting or moving the multifunctional digital
colour systems, contact your service representative.
- DO NOT move the multifunctional digital colour systems with optional equipment, such as the finisher,
attached. This could cause a fire or give you an electric shock. When lifting or moving the multifunctional
digital colour systems, contact your service representative.
- When moving the multifunctional digital colour systems, be sure to shut down the power prior to pulling
out the plug from the outlet. If the power cord is damaged, this could cause a fire or give you an electric
shock.
- The socket outlet should be near the equipment and be easily accessible.
- Pull out the plug from the outlet more than once a year to clean around the prongs. Accumulating dust
and dirt could cause a fire due to the heat released by electric leakage.
10
Caution
- DO NOT tilt the multifunctional digital colour systems more than 10 degrees when moving it. If it falls, this
could result in personal injury.
- Avoid placing the multifunctional digital colour systems in a place unsuitable for its weight and also make
sure the surface is level.
Remember that if the multifunctional digital colour systems falls over, serious injuries could result.
Weight of the multifunctional digital colour systems: approx. 112 kg
- There are 4 adjusters (stoppers) on both sides (2 adjusters each) and 2 safety stoppers in front at the
bottom of the paper feed pedestal and the large capacity feeder. After moving and installing the
equipment, be sure to turn the adjusters clockwise to fix them firmly on the floor as shown in the
illustration. Then fix the safety stoppers in the same way.
If they are not adjusted correctly and the equipment falls, this could result in personal injury
To move the equipment, turn the safety stoppers and the adjusters anticlockwise.
- When connecting the optional equipment and interface cable to the multifunctional digital colour systems,
be sure to turn the power OFF. If the power is not turned off, you could get an electric shock.
To turn the power OFF, see "Turning off the Power (Shutting down)" Page 30.
11
GENERAL PRECAUTIONS (Cont.)
Other Points
- Make sure that there is enough space around the system to facilitate changing of parts and maintenance.
If there is insufficient space, some operations, such as bypass feeding, will become difficult and the
multifunctional digital colour systems could even break down.
To insure optimal operation, allow clearances of at least 80 cm on the right, and 10 cm on the left and
behind (refer to the illustration below).
10 cm
10 cm
80 cm
- Adverse environmental conditions may affect the safe operation and performance of the multifunctional
digital colour systems, and the multifunctional digital colour systems could break down.
- Avoid locations near windows or with exposure to direct sunlight.
- Avoid locations with drastic temperature fluctuations.
- Avoid too much dust.
- Avoid location that suffer from vibration.
- Allow the air to flow freely and make sure there is a ventilator.
With inadequate ventilation, the unpleasant odor released by ozone will begin to dominate the
atmosphere.
12
When Using the Multifunctional Digital Colour Systems
Warning
- DO NOT place metallic objects or containers with water (flower vases, coffee cups, etc.) on or near the
multifunctional digital colour systems. And keep paper clips and staples away from the air vent. This could
cause a fire or give you an electric shock.
- If the multifunctional digital colour systems becomes excessively hot, smoke comes out of it or there is
an odd smell or noise, proceed as follows.
Turn the main switch OFF and remove the plug from the outlet, then contact your service representative.
- If the multifunctional digital colour systems will not be used for more than one month, remove the plug
from the outlet for safety purposes during that time.
This could cause a fire or give you an electric shock if an insulation failure occurs.
Caution
- DO NOT place heavy objects (4 kg or more) on the original glass and do not press on it with force.
Breaking the glass could cause personal injury.
- DO NOT place heavy objects (4 kg or more) on the multifunctional digital colour systems. If the objects
fall off, this could cause injury.
- DO NOT remove or connect the plug with wet hands, as this could give you an electric shock.
- DO NOT touch the fuser unit and the metal area around it. Since they are very hot, you could be burned
or the shock could cause you to get your hand injured in the machine.
- When changing the angle of the control panel, be careful not to let your hands be caught in the gap
between the equipment and the control panel. This could cause personal injury.
- DO NOT place 3 kg or more of objects on an optional work table. Breaking the work table could cause
personal injury.
1
2
3
4
5
1: Warning for high temperature areas (Ventilation holes)
2: Warning for high temperature areas (Fuser unit) - The labels are attached on 3 places.
3: Warning for handling Transfer belt
13
GENERAL PRECAUTIONS (Cont.)
- DO NOT touch the metal portion of the guide board in the automatic duplexer as it could burn you.
Other Points
- Be very careful to treat the touch panel gently and never hit it. Breaking the surface could cause
malfunctions.
- DO NOT turn the power OFF with jammed paper left inside the multifunctional digital colour systems.
This could cause malfunctions when the main switch is turned ON next time.
To turn the power OFF, see "Turning off the Power (Shutting down)" Page 30.
- Be sure to turn the power OFF when leaving the office or if there is a power outage. However, DO NOT
turn the power OFF if the weekly timer is in use.
To turn the power OFF, see "Turning off the Power (Shutting down)" Page 30.
- The paper exit areas as well as the paper itself immediately after exiting are both very hot. Be careful
when you handle them.
14
During Maintenance or Inspection
Warning
- NEVER attempt to repair, disassemble or modify the multifunctional digital colour systems by yourself.
You could cause a fire or get an electric shock.
ALWAYS contact your Service representative for maintenance or repair of the internal parts of the
multifunctional digital colour systems.
- ALWAYS keep the plug and outlet clean. Prevent them from accumulating dust and dirt. This could cause
a fire and give you an electric shock due to the heat released by electric leakage.
- DO NOT let liquids such as water and oil get into the system when cleaning the floor. This could cause a
fire and give you an electric shock.
Caution
- DO NOT touch the stapling area. The actual needle point could cause you personal injury. "Saddle-Stitch
Finisher (MJ-1024)" Page 282
Other Points
- DO NOT use such solvents as thinner or alcohol when cleaning the surface of the multifunctional digital
colour systems.
- This could warp the shape of the surface or leave it discoloured.
- When using a chemical cleaning pad to clean it, pay attention to any cautionary points.
15
GENERAL PRECAUTIONS (Cont.)
When Handling Supplies
Caution
- NEVER attempt to incinerate toner cartridges. This could cause an explosion. DO NOT dispose of used
toner cartridges. Your service technician will collect them. "3.REPLACE TONER CARTRIDGE SYMBOL"
Page 252
16
DISCLAIMER NOTICE
The following notice sets out the exclusions and limitations of liability of TOSHIBA TEC CORPORATION
(including its employees, agents and sub-contractors) to any purchaser or user (‘User’) of the eSTUDIO3511/4511, including its accessories, options and bundled software (‘Product’).
1 The exclusion and limitations of liability referred to in this notice shall be effective to the fullest extent
permissible at law. For the avoidance of doubt, nothing in this notice shall be taken to exclude or limit
TOSHIBA TEC CORPORATION’s liability for death or personal injury caused by TOSHIBA TEC
CORPORATION’s negligence or TOSHIBA TEC CORPORATION‘s fraudulent misrepresentation.
2 All warranties, conditions and other terms implied by law are, to the fullest extent permitted by law,
excluded and no such implied warranties are given or apply in relation to the Products.
3 TOSHIBA TEC CORPORATION shall not be liable for any loss, cost, expense, claim or damage
whatsoever caused by any of the following:
(a) use or handling of the Product otherwise than in accordance with the manuals, including but not
limited to Operator’s Manual, User‘s Guide, and/or incorrect or careless handling or use of the Product;
(b) any cause which prevents the Product from operating or functioning correctly which arises from or
is attributable to either acts, omissions, events or accidents beyond the reasonable control of TOSHIBA
TEC CORPORATION including without limitation acts of God, war, riot, civil commotion, malicious or
deliberate damage, fire, flood, or storm, natural calamity, earthquakes, abnormal voltage or other
disasters;
(c) additions, modifications, disassembly, transportation, or repairs by any person other than service
technicians authorized by TOSHIBA TEC CORPORATION; or
(d) use of paper, supplies or parts other than those recommended by TOSHIBA TEC CORPORATION.
4 Subject to paragraph 1, TOSHIBA TEC CORPORATION shall not be liable to Customer for:
(a) loss of profits; loss of sales or turnover; loss of or damage to reputation; loss of production; loss of
anticipated savings; loss of goodwill or business opportunities; loss of customers; loss of, or loss of use
of, any software or data; loss under or in relation to any contract; or
(b) any special, incidental, consequential or indirect loss or damage, costs, expenses, financial loss or
claims for consequential compensation;
whatsoever and howsoever caused which arise out of or in connection with the Product or the use or
handling of the Product even if TOSHIBA TEC CORPORATION is advised of the possibility of such
damages.
TOSHIBA TEC CORPORATION shall not be liable for any loss, cost, expense, claim or damage caused
by any inability to use (including, but not limited to failure, malfunction, hang-up, virus infection or other
problems) which arises from use of the Product with hardware, goods or software which TOSHIBA TEC
CORPORATION has not directly or indirectly supplied
17
FORGERY PREVENTION FUNCTION/STORAGE OF COLOUR COPIES
FORGERY PREVENTION FUNCTION
This copier has a forgery prevention function.
Please ensure that your digital full-colour copier is not used for making copies of prohibited items.
STORAGE OF COLOUR COPIES
1 The copies should be kept in a place which is not exposed to light to prevent fading when they are
stored for a long time.
2 If copies are kept pressed between plastics made of chloroethylene for a long time, the toner may melt
and stick to the plastic due to high pressure and high temperature. Keep them in polyethylene binders.
3 When a colour copy is folded, the toner at the fold can become separated.
4 The toner on the copies may melt if it touches solvent. If the ink on the copies has not completely dried,
the toner may also melt. Keep copies away from solvent.
5 When copies are kept near an extremely high temperature such as a heater, the toner may melt. Keep
them at room temperature and do not allow this to vary very much.
18
1. BEFORE USING
EQUIPMENT
1
1. DESCRIPTION OF EACH COMPONENT ...........................................................................20
Main Components ................................................................................................................20
Optional Equipment .............................................................................................................21
Control Panel .......................................................................................................................23
Adjustment of the Angle of the Control Panel ......................................................................25
Touch Panel .........................................................................................................................27
2. TURNING ON THE POWER SWITCH ................................................................................30
Turning on/off the Power ......................................................................................................30
Controlling the Use of the Copier with Department Codes ..................................................32
3. SWITCHING TO THE ENERGY-SAVING MODE ................................................................33
19
1. DESCRIPTION OF EACH COMPONENT
Main Components
1
1: Front cover
2: Drawers
3: Operator’s manual pocket (back side)
4: Power switch
5: Automatic duplexer
6: Bypass tray
7: Original scale
8: Inner tray
9: Colour of toner (Cyan/Magenta/Yellow)
10: Control panel
11: Touch panel
12: Touch panel contrast adjustment volume
13: Black toner
14: Used toner bag
*1, *2: Optional
*2
3
4
1
5
2
6
*1
7
10
8
13
9
20
1.BEFORE USING EQUIPMENT
14
(12)
(11)
Optional Equipment
1
1
6
2
9
7
3
4
5
8
1 : Original cover (KA-3511)
Holds an original.
2 : Reversing automatic document feeder (MR-3015)
Automatically feeds a placed stack of originals one by one to have them copied.
3 : Large capacity feeder (KD-1012)
Feeds up to 2,500 sheets of A4 paper (80 g/m2) (recommended by Toshiba) continuously.
4 : Paper feed pedestal (KD-1011)
Adds one drawer to the equipment.
5 : Additional drawer module (MY-1021)
Enables one drawer to be added to the paper feed pedestal.
6 : Saddle-stitch finisher (MJ-1024)
Enables the saddle stitching in addition to the sort/group mode and stapling. (Hole punch unit can be
installed.) Requires the relay unit (sold separately) for the installation.
7 : Multi-staple finisher (MJ-1023)
Enables the sort/group mode and stapling. (Hole punch unit can be installed.) Requires the relay unit
(sold separately) for the installation.
8 : Single-staple finisher (MJ-1022) (for e-STUDIO3511 only)
Enables the sort/group mode and stapling. Requires the relay unit (sold separately) for the installation.
21
1.DESCRIPTION OF EACH COMPONENT (Cont.)
1
9 : Hole punch unit (MJ-6004)
Makes punching holes on output pages.
We have other options: Work table (KK-3511), Fax board (GD-1150), Fax board 2nd line (GD-1160),
Expansion memory (GC-1180), Wireless LAN adapter (GN-1010), Scrambler board (GP-1030)
Contact your service technician or representative for the details.
22
1.BEFORE USING EQUIPMENT
Control Panel
When operating the equipment and specifying the various settings through the equipment itself, use the
buttons on the control panel.
1
1 : [HELP] button
When pressing this button, appropriate operation procedures are displayed.
2 : [USER FUNCTIONS] button
Press this button to set the paper size of the drawer, the drawer for special use, or to set/register the
settings including such as the change of the default setting of the copy, scan and Fax functions.
See the [User Functions Guide].
3 : [TEMPLATE] button
Use this button to store and recall the various settings that are frequently used for copy, scan and Fax
functions.
4 [EXTENSION] button
This is the button to extend functions in the future. It is invalid at present.
5 : [e-FILING] button
Use this button to access the saved image data.
6 : [SCAN] button
Press this button to use the scanning function.
7 : [COPY] button
Press this button to use the copy function.
8 : [FAX] button
Press this button to use the Fax/Internet Fax function.
23
1.DESCRIPTION OF EACH COMPONENT (Cont.)
1
9 : PRINT DATA/MEMORY RX/FAX communication
If these lamps light, they show the status of receiving data, receiving original(s) standing by to be printed
and currently used telephone line (1 or 2).
10: [INTERRUPT] button
Use this button to interrupt the copying job in process and to perform another copying job.
You can resume the interrupted copying job by pressing this button again.
11: [JOB STATUS] button
Use this button to confirm each status of print or scan or Fax, and journal for TX or RX of Fax.
"1.JOB STATUS" Page 186
12: [ACCESS] button
Use this button when the department codes have been set.
If this button is pressed after copying, the next user cannot use the copy function without keying in the
registered department code. (See the [User Functions Guide].)
13: [ENERGY SAVER] button
If you are not going to use the equipment for a while, press this button. The equipment enters the energy
saving mode and all the display lamps are turned off.
14: [FUNCTION CLEAR] button
When this button is pressed, all selected functions are cleared and returned to the default settings.
"3.GENERAL COPYING PROCEDURES" Page 52
*Automatic Function Clear
Even if you do not press the [FUNCTION CLEAR] button, within the specified period of time after copying
is finished or after the last button is pressed in a copy procedure, the automatic function clear mode will
clear all settings to defaults, and the basic screen will be displayed. While the department management
function is being operated, the display returns to the access code input screen.
15: [STOP] button
Use this button to stop an ongoing scan and copy operation.
16: [START] button
Press this button to start copying, scanning and Fax operation.
17: Digital keys
Use these keys to enter the number of copies you want to make and so on.
18: [CLEAR] button
Use this button to correct numbers entered with the digital keys such as an incorrect copy quantity.
19: ERROR lamp
ERROR lamp lights in red when an error occurs and the equipment needs some actions.
20: [MONITOR/PAUSE] button
This button is used when the copier is used as a Fax (optional). (See the [Operator’s Manual for Facsimile
Function] for detail.)
21: Touch Panel
The state of a copier and directions for its operation are expressed as characters and illustrations.
24
1.BEFORE USING EQUIPMENT
Adjustment of the Angle of the Control Panel
When Adjusting the Angle of the Control Panel
1
The angle of the control panel is adjustable at any angle from 5 to 45 degrees from the horizontal position
(at the time of installation).
* When changing the angle of the control panel, be careful not to let your hands be caught in the gap
between the equipment and the control panel. This could injure you.
When Fixing the Angle of the Control Panel
When you want to fix the angle of the control panel (at 7 degrees from the horizontal position), move the
stopper attached on the backside of the control panel from the position (1) to (2).
Perform the following procedure to move the stopper.
1: The position where the angle is adjustable.
2: The position where the angle is fixed.
(1)
(2)
25
1.DESCRIPTION OF EACH COMPONENT (Cont.)
1
shift the stopper to the right, and
1 Slightly
then pull it out.
the latches of the stopper in the hole of
2 Fit
the position (2) and insert them turning
the stopper itself.
3 Shift the stopper to the left until it clicks.
- The angle of the control panel is fixed at 7 degrees.
26
1.BEFORE USING EQUIPMENT
Touch Panel
When the power is turned on, and ‘READY’ is displayed, the basic screen of the copy function is shown on
the touch panel.
On the screen, currently set functions, selected functions and the copier status are shown via messages
and illustrations.
1
* The contents of the touch panel screens in this manual show the equipment with all options.
1: Message
6: Date and time
2: Reproduction ratio
7: Set functions confirmation button
3: Total copy quantity
8: Function setting area
4: Currently selected drawer size
9: Index buttons
5: Remaining paper level
2
3
4
5
6
1
9
7
8
Message Display
The following information is shown on the touch panel:
Equipment status, operational instructions, cautionary messages, reproduction ratios, total copy quality,
paper size of a selected drawer, amount of paper in a selected drawer and the date and time.
Touch-buttons
The various function items are touch-button selectable. Press any buttons lightly with your finger.
- Index buttons
This button is used for switching the menu. The type and the number of the index buttons varies
depending on each function of Copy, Scan and Fax.
- Function setting area
This is an area for selecting and setting each function.
27
1.DESCRIPTION OF EACH COMPONENT (Cont.)
1
- [SETTINGS] (set functions confirmation) button
This button allows you to confirm the functions that have been set.
(An example is shown below.)
- The icons displayed on the screen are as follows (some icons may not appear on the screen):
28
1.BEFORE USING EQUIPMENT
Clearing the Functions Selected
1
If you press any button that is half-tone shaded, the function selected is cleared. Also, if the copier is left
inactive for a while, the automatic function clear works and the setting will be cleared.
- Automatic Function Clear
Even if you do not press the [FUNCTION CLEAR] button, within the specified period of time (default
setting: 45 seconds) after outputting is finished or after the last button is pressed in a procedure, the
automatic function clear mode will work to clear all settings, and the basic screen of the copy function will
be displayed. While the department management function is being operated, the display returns to the
department code input screen.
The period for the automatic function clear is selectable. (See the [User Functions Guide].)
29
2. TURNING ON THE POWER SWITCH
Turning on/off the Power
1
Turning on the Power Switch
the switch cover, and then turn ON
1 Open
the power switch.
- “Wait Warming Up” appears on the Basic screen on the touch
panel.
40 seconds later, the equipment
2 About
will be ready.
- “READY” appears on the Basic screen.
- While the copier is warming up, you can use the Auto Job Start
function. "4.AUTO JOB START (JOB PRESET)" Page 55
- “POWER FAILURE” message:
When restarting the equipment due to the power failure, etc.,
“POWER FAILURE” appears at the upper right of the screen. To
clear it, press the [FUNCTION CLEAR] button twice.
The job in progress at the time of the power failure is deleted.
Turning off the Power (Shutting down)
When turning off the power of the equipment, perform the following shutdown procedure.
DO NOT turn off the power by switching off the power switch of the equipment as it can cause the failure of
the hard disc.
Before turning off the power, be sure that the following 3 conditions are satisfied.
- No jobs are left in the printing job list. See "1.JOB STATUS" Page 186.
- Make sure that none of PRINT DATA, MEMORY RX and FAX communication lamps is blinking.
- No PCs access the equipment via network.
the [USER FUNCTIONS] button on
1 Press
the control panel.
30
1.BEFORE USING EQUIPMENT
the [USER] button to enter the user
2 Press
setting menu, and then press the
1
[SHUTDOWN] button.
job will be deleted. Are you
3 “Processing
sure you want to shutdown?” appears on
the screen. Press the [YES] button.
- To cancel the shutdown operation, press the [NO] button.
in progress” appears on the
4 “Shutdown
screen, and then the equipment is shut
down.
- The power switch automatically returns to the OFF position.
31
2.TURNING ON THE POWER SWITCH (Cont.)
Controlling the Use of the Copier with Department Codes
1
With the use of the department codes, you can restrict users as well as manage copy volumes made by
individual groups or departments of your company. See the [User Functions Guide].
the department management
1 When
function has been set, the screen shown
on the right appears after the power
switch is turned on.
- The same screen is displayed when the [ACCESS] button is
pressed or the automatic function clear mode is activated.
in a registered department code (52 Key
digit).
- The copier will be ready for copying.
If “Enter Department Code” remains, the department code you have
entered may be incorrect. Press the [RESET] button, and then key
in the correct code.
- After Copying is finished.
If the department control function is in use, be sure to press the
[ACCESS] button on the control panel after finishing the use of
the equipment. The display returns to the department code input
screen and the department management function will remain
active.
32
1.BEFORE USING EQUIPMENT
3. SWITCHING TO THE ENERGY-SAVING MODE
If you are not going to use the equipment for a while, press the [ENERGY SAVER] button on the control
panel for a few seconds to enter the energy saving mode.
In this mode, the display and lighted button on the control panel are turned off and the [ENERGY SAVER]
button lights in green. To start the equipment again, press the [ENERGY SAVER] button (or [COPY],
[SCAN], [FAX], [e-FILING], [START] button on the control panel).
1
Even if the [ENERGY SAVER] button is pressed, the power supply to the printer board (and optional Fax
board when being installed) is not cut off.
When a job for printing (or Fax) is received, the equipment becomes automatically ready status.
33
1
34
1.BEFORE USING EQUIPMENT
2. HOW TO MAKE COPIES
2
1. SETTING COPY PAPER .....................................................................................................36
Acceptable Copy Paper Types and Sizes ............................................................................36
Toshiba-Recommended Paper/Handling and Storing Paper ...............................................37
Changing the Paper Size of the Drawer/Setting the Drawer for Special Uses.....................38
2. SETTING ORIGINALS .........................................................................................................45
Acceptable Original Types and Sizes/Maximum Number of Sheets that can be Stored......45
When Placing an Original on the Glass ...............................................................................47
When Using the Reversing Automatic Document Feeder (optional)....................................49
3. GENERAL COPYING PROCEDURES ................................................................................52
4. AUTO JOB START (JOB PRESET) .....................................................................................55
5. INTERRUPT COPYING .......................................................................................................57
6. STOPPING THE COPY OPERATION .................................................................................58
7. BYPASS COPYING .............................................................................................................59
35
1. SETTING COPY PAPER
Acceptable Copy Paper Types and Sizes
Feeder
2
Paper Type
Drawers
Plain Paper
(The optional
(64-80 g/m2)
drawers included)
Thick 1
2
(81-105 g/m )
Paper Size
Maximum sheet capacity
(Standard Size)
A/B format: A3, A4, A4-R, A5-R, B4,
B5, B5-R, FOLIO (210 x 330 mm)
LT format:
600 sheets (64 g/m2)
LD (11” x 17”), LG (8 1/2” x 14”),
* Height: approx. 60.5 mm
550 sheets (80 g/m2)
450 sheets (81-105 g/m2)
LT (11” x 8 1/2”), LT-R (8 1/2” x 11”),
ST-R (5 1/2” x 8 1/2”),
COMP (10 1/8” x 14”),
13” LG (8 1/2” x 13”),
8.5” SQ (8 1/2” x 8 1/2”),
8K, 16K, 16K-R
Large capacity
feeder (Option)
Plain Paper
(64-80
g/m2)
(Standard Size)
A4 only
Thick 1
(81-105
Bypass Tray
3,000 sheets (64 g/m2)
2,500 sheets (80 g/m2)
2,000 sheets (81-105 g/m2)
g/m2)
* Height: approx. 137.5 mm
Plain paper
(Standard Size)
A/B format: A3, A4, A4-R, A5-R,
(64-80
A6-R, B4, B5, B5-R,
Thick 1
FOLIO (210 x 330 mm)
(81-105 g/m2) LT format: LD, LG, LT, LT-R,
ST-R, COMP, 13” LG, 8.5” SQ,
Thick 2
A3 wide (305 x 457 mm)
(106-163 g/m2)
8K, 16K, 16K-R
g/m2)
Thick 3
Sticker labels
(Non-Standard size)
Length: 100-297 mm
Width: 148-432 mm
OHP
(Standard Size) A4 only
(164-209 g/m2)
100 sheets (64-80 g/m2)
* Height: approx. 11 mm
80 sheets (81-105 g/m2)
* Height: approx. 11 mm
40 sheets (106-163 g/m2)
* Height: approx. 11 mm *1
30 sheets (164-209 g/m2)
* Height: approx. 11 mm *1
* Height: approx. 11 mm *2
30 sheets
* Height: approx. 11 mm *1
*1. Automatic duplex copying is not available.
*2. Use Thick 2 mode for Sticker Labels.
* “Maximum capacity” refers to the number of sheets when the paper recommended by Toshiba is set.
* Paper between 90-209 g/m2 can be copied if the thick mode is used.
* The values shown in the parenthesis are rounded off below a decimal point.
* LT format is the standard size for only use in North America.
Abbreviations for paper sizes:
LT: Letter, LD: Ledger, LG: Legal, ST: Statement, COMP: Computer, SQ: Square
36
2.HOW TO MAKE COPIES
Toshiba-Recommended Paper/Handling and Storing Paper
The recommended paper
To make copies with a fine image, the following sheets are recommended.
If you use copy paper other than the recommended types, ask your service technician.
Paper Type
Toshiba Recommendation
Paper Weight
Plain Paper
TGIS Paper/Neusiedler
80 g/m2
Thick 1
Colour Copy/Neusiedler
90 g/m2
Colour Copy/Neusiedler
100 g/m2
Colour Copy/Neusiedler
120 g/m2
Colour Copy/Neusiedler
160 g/m2
Thick 3
Colour Copy/Neusiedler
200 g/m2
Sticker Labels
3478/ZWECK-AVERY
-
OHP Film
BG78/FOLEX (Colour)
-
Thick 2
2
* An OHP film should surely be used in the Toshiba-recommended film. Using other film may cause a
malfunction.
Handling and Storing Paper
Pay attention to the following points:
- Avoid using paper that is specially treated or previously printed on another machine, and also avoid
performing double copying on the same side of paper; this may cause a malfunction
- Do not use paper with creases, wrinkles, curled paper, paper prone to curling, smooth paper, or tough
paper; this may cause paper misfeeds.
- Paper should be wrapped in its wrapping paper and stored in a damp-free place.
- To prevent paper from being folded or bent, store it evenly on a flat surface.
37
1.SETTING COPY PAPER (Cont.)
Changing the Paper Size of the Drawer/Setting the Drawer for Special Uses
The paper size of the drawer can be changed. The drawers can also be set for cover sheet, insertion, thick
paper 1, Fax and special sheets.
2
Changing the Paper Size of the Drawer
out the drawer carefully until it comes
1 Pull
to a stop.
the lower part of the width guide in
2 Push
the direction of the arrow to remove it;
then reinstall the width guide at the
desired paper size (indicated on the
bottom inner surface of the drawer).
the arrow part (right side) of the size
3 Push
selection lever to unlock it.
38
2.HOW TO MAKE COPIES
pushing the size selection lever in
4 While
the direction of the arrow, set the side
guide to the desired paper size (indicated
on the bottom inner surface of the
drawer).
2
- Adjust the side guides with both hands.
If the side guide's shape on the front side of the drawer and its
operation differ from those in this Operator's Manual depending on
the production timing, perform the following in reference to the
illustration on the right.
- While pushing the size selection lever to the right, set the side
guide to the desired paper size.
the arrow part (left side) to lock the
5 Push
size selection lever.
6 Place paper in the drawer(s).
- Place paper face up.
- Maximum number of sheets that can be set. "Acceptable Copy
Paper Types and Sizes" Page 36
- Fan the paper well before placing it in the drawer.
- Do not add paper above the line indicated on the guide.
- Do not use creased, folded, wrinkled or damp sheets of paper.
39
1.SETTING COPY PAPER (Cont.)
2
Make sure that a gap of approx. 0.5 mm (less than 1 mm in total) is
left between the paper and the side guide. If there is no gap, this
could cause paper misfeeding.
the drawer straight into the copier
7 Push
until it comes to a stop.
- Be sure to push the drawer fully in.
Be careful not to let your fingers be caught when closing the drawer.
This could injure you.
the size mark plate to match with
8 Change
the size of paper that has been set.
the [USER FUNCTIONS] button on
9 Press
the control panel.
40
2.HOW TO MAKE COPIES
0.5mm
(0.02’’)
the [USER] button, then press the
10 Press
[GENERAL] button on the touch panel.
2
11 Press the [DRAWER] button.
Press the drawer icon corresponding to
12 the
one which the paper size has been
changed, and then press the button
indicating the new paper size.
41
1.SETTING COPY PAPER (Cont.)
Setting the Drawer for Special Uses
2
You can set the drawer for various uses (cover sheet, sheet insertion, thick paper, Fax paper, special
sheets).
- Acceptable copy paper "1.SETTING COPY PAPER" Page 36
- Drawer for cover sheet "9.COVER COPYING" Page 123
- Drawer for sheet insertion "10.SHEET INSERTION MODE" Page 126
- Drawer for special sheets. Coloured paper, paper with a watermark, etc.
1 Place paper face up in the drawer(s).
the [USER FUNCTIONS] button on
2 Press
the control panel.
the [USER] button to enter the user
3 Press
menu and then press the [GENERAL]
button.
4 Press the [DRAWER] button.
42
2.HOW TO MAKE COPIES
the drawer button corresponding to
5 Press
the one in which the paper size has been
changed, and then press the button
indicating the new paper type.
2
- If you want to select the [COVER] or [INSERT] button, make sure
that paper with the same size as that for the COVER or INSERT
is set in the other drawer including the optional large capacity
feeder.
- Press [THICK 1] depending on the paper weight of the cover
sheet, sheet insertion, and special sheet.
In the case of cover sheet or sheet insertion,
is displayed in
the drawer button corresponding to the one in which the paper
has been set.
* For example, when inserting 90 g/m2 paper, press the
[INSERT] button, and press the [THICK 1] button.
- The setting is completed as shown on the right.
43
1.SETTING COPY PAPER (Cont.)
2
- 2 drawers can be set for the sheet insertion.
- After having set INSERT 1, press the drawer button
corresponding to the one in which the paper for INSERT 2 has
been set, and press the [INSERT] button.
Clearing the Drawer for Special Uses
the drawer button corresponding to
1 Press
the one which is set for the special use,
then press the corresponding button
(thick, insert, cover, etc.) on the bottom
line of the display.
- If you clear INSERT 1 when both INSERT 1 and INSERT 2 are
set, the drawer for INSERT 2 changes to INSERT 1.
- Each of the buttons toggles the associated drawer on/off.
- Replace the paper set in the drawer as required.
44
2.HOW TO MAKE COPIES
2. SETTING ORIGINALS
Acceptable Original Types and Sizes/Maximum Number of Sheets that can be Stored
Acceptable Original Types and Sizes
Setting place
Glass
Types of originals
Sheets
*1 3-dimensional
objects
Books
Maximum size
Width: 297 mm
Length: 432 mm
2
Sizes capable of automatic detection
(Standard size)
A/B format:
A3, A4, A4-R, A5-R, B4, B5, B5-R
LT format:
LD (11” x 17”), LG (8 1/2” x 14”)
LT (11” x 8 1/2”), LT-R (8 1/2” x 11”)
ST-R (5 1/2 x 8 1/2”)
Reversing
automatic
document
feeder
(optional)
Plain paper
Recycled paper:
1-sided Original:
Width: 297 mm
Length: 432 mm
50-127 g/m2
2-sided Original:
*2
50-105 g/m2
(Standard size)
A/B format:
A3, A4, A4-R, A5-R, B4, B5, B5-R,
FOLIO (210 x 330 mm)
LT format:
LD, LG, LT, LT-R, ST-R,
COMP (10 1/8” x 14”)
*3
*1.Do not place any heavy object (4 kg or over) on the glass.
*2.Even if listed under “Types of originals”, some of the originals may not be used depending on paper quality.
*3.Automatic detection cannot be worked when the different paper formats are mixed.
* LT format is the standard size used in the North America.
* When the original of LT format is placed on the glass, the automatic detection may not work correctly.
Maximum number of sheets (all sizes) that can be set in the reversing automatic document feeder
(optional): 100 sheets (50-80 g/m2) or less than 16 mm in height.
45
2.SETTING ORIGINALS (Cont.)
Maximum Number of Sheets that can be Stored
2
46
Up to 1,000 sheets of A4 size can be stored per 1 job during copy, or until the memory becomes full.
When exceeding the above limit during the scanning, the following screen is displayed. The scanned data
is printed by pressing the [YES] button and it is deleted by pressing the [NO] button.
2.HOW TO MAKE COPIES
When Placing an Original on the Glass
Sheet Originals
the original cover or the reversing
1 Raise
automatic document feeder (optional),
and place the original face down on the
glass.
2
(A)
- Raise it 60 degrees or more for detecting the original.
- A: Original
the original against the left rear
2 Align
corner of the glass.
the original cover or the reversing
3 Lower
automatic document feeder (optional)
slowly.
- When copying originals with high transparency, such as OHP
films and tracing paper, place a blank sheet of paper, the size of
the original or larger, over the original.
- A: Original
- B: Blank sheet
(B)
(A)
47
2.SETTING ORIGINALS (Cont.)
Book-type Originals
2
the original cover or the reversing
1 Raise
automatic document feeder (optional),
and place the original in the direction
shown in the illustration.
- When using the Book-type Originals to 2-sided Copies ("5. Booktype Originals to 2-Sided Copies" Page 92) or the Dual-Page
("4.DUAL-PAGE" Page 113) function, centre the book original
on the yellow indicator line.
the original cover or the reversing
2 Lower
automatic document feeder (optional)
slowly.
- Do not try to force the original cover or the reversing automatic
document feeder to fully close over a very thick original, such as
a big book. Copies can be made even if the cover or feeder does
not close fully.
- During copying, an intense light may leak out. Do not look at the
original glass surface.
48
2.HOW TO MAKE COPIES
When Using the Reversing Automatic Document Feeder (optional)
Precautions for Using the Reversing Automatic Document Feeder
1
2
3
4
5
6
7
Do not use the following type 1 to 7 of originals as they may misfeed or become damaged:
: Badly wrinkled or folded originals; in particular, originals whose leading edge is curled may fail to be
correctly fed.
: Originals with carbon paper
: Taped, pasted or clipped (cut out) originals
: Clipped or stapled originals
: Originals with holes or tears ones
: Damp originals
: OHP film originals
* Do not use tracing paper, permeable paper and coating paper (coating with wax, etc.).
2
Also, the following type 8 and 9 of originals should be handled carefully:
8 : Originals, 2 of which, when pinched between 2 fingers, cannot be moved, or originals that are surfacetreated may fail to separate properly.
9 : Folded or curled originals should be smoothed before being used.
* The different sized originals are limited for setting. "Setting the [MIXED ORIGINAL SIZE]" Page 70
2
1
4
5
7
8
3
6
9
If the scanning area and guide area are dirty, it may cause black streaks, etc. on the printed paper. Cleaning
them preferably once a week is recommended. See "Weekly Maintenance" Page 290
49
2.SETTING ORIGINALS (Cont.)
In the Continuous Feed Mode
* See "Continuous Feed Mode" Page 137
2
* To set originals with the different size, see "Setting the [MIXED ORIGINAL SIZE]" Page 70
aligning the edges of originals, place
1 After
the originals face up and align the slides
to their width.
- Align the originals in order from the top because they will be fed
from the top.
- One original sheet is also acceptable.
- Maximum number of sheets (all sizes) that can be set in the
reversing automatic document feeder: 100 sheets (50-80 g/m2) or
less than 16 mm in height.
- To set the mixed-sized originals, see "Setting the [MIXED
ORIGINAL SIZE]" Page 70.
- Use the original stopper as required.
When the number of originals is too large to be set at one time, you
can divide the originals into several sets and set them one after
another. To do so, place the first set of originals first and press the
[CONTINUE] button while the scanning is in progress. After they
have been scanned, place the next set of originals.
50
2.HOW TO MAKE COPIES
Inside the Single-feed Mode
See "Single-feed Mode" Page 138
1
Align the slides to the desired original
size.
2
the original with its face up and
2 Insert
straight along the slides, it will be pulled
in automatically.
- When the original starts being pulled in, let go of it.
51
3. GENERAL COPYING PROCEDURES
After placing or confirming paper in the drawers, place the originals. When the [START] button is pressed
with any settings unchanged, copies are made in the initial (default) settings. You can make copies as
desired by setting different copy modes.
2
Initial (default) Settings
The copy modes that are automatically set when the power is turned on, when the energy-saving mode is
cleared or when the [FUNCTION CLEAR] button is pressed on the control panel are called the initial
(default) settings. The initial setting when installing the equipment is as follows:
* The initial setting can be changed. See the [User Functions Guide] for details.
Item
Initial (default) setting
Black-and-white/colour mode
Black mode
Reproduction ratio
100%
Copy quantity
1
Paper selection
Automatic paper selection
Original
1-sided
Copy
Exposure
Auto Exposure
Image quality
TEXT/PHOTO mode
Finishing mode
Placing original on the original glass:
Non-sort/non-staple mode
Placing the reversing automatic document feeder
(optional): Sort mode
Installing the reversing automatic document feeder
(optional):
Continuous original feed mode
Copying Procedure
1 Place paper in the drawer(s).
- "Changing the Paper Size of the Drawer" Page 38
- "Acceptable Copy Paper Types and Sizes" Page 36
When the desired paper is not placed in any of the drawers or the
large capacity feeder:
- Setting the drawer "Changing the Paper Size of the Drawer/
Setting the Drawer for Special Uses" Page 38
- "Bypass Copying" Page 59
52
1 sided
2.HOW TO MAKE COPIES
2 Place the original(s).
- "Acceptable Original Types and Sizes/Maximum Number of
Sheets that can be Stored" Page 45
- "When Placing an Original on the Glass" Page 47
- "When Using the Reversing Automatic Document Feeder
(optional)" Page 49
2
When the reversing automatic document feeder (optional) is
installed and the single feed mode is selected, place the original(s)
after the copy mode is set.
3 Select the copy modes as required.
- Copy modes cannot be changed after the [START] button is
pressed (including the case when originals are divided into
multiple sets when fed).
- Selecting multiple copy modes may be restricted depending on
their combination.
4 Press the [START] button.
- Copying starts.
To copy the original, which is placed on the original glass, after
scanning and storing it in the memory (sort mode, 1-side original to
2-sided copies, etc.), follow step 5 and 6.
53
3.GENERAL COPYING PROCEDURES (Cont.)
the next original, and press the
5 Place
[START] button.
2
- Set the first page of your originals first.
- You can also press the [YES] button to perform the same
operation.
- Repeat this step for the subsequent originals.
the final original has been scanned,
6 Once
press the [FINISHED] button.
- Copying starts. The paper exits with its copied side down.
The paper exit areas as well as the paper itself immediately after
exiting are both very hot. Be careful when you handle them.
When Coming Across the Situations below
To make multiple sets of copies:
- Key in the copy quantity.
- To correct the input copy quantity, press the [CLEAR] button.
- Raise the stopper as required.
If the paper runs out in the middle of copying:
- The [JOB STATUS] button blinks. Press this button to check which drawer is flashing and add paper.
To stop a copy operation:
"6.STOPPING THE COPY OPERATION" Page 58
When “Wait” appears:
The copier may automatically go into the adjustment mode. It will soon start working. Do not turn OFF the
power. Just wait for a while.
54
2.HOW TO MAKE COPIES
4. AUTO JOB START (JOB PRESET)
While warming up or multi-copying, you can reserve the copy.
Setting Auto Job Start
2
1 Place the original(s).
2 Select the copy mode.
Be sure that the job starts in the previous copy mode if you do not
select the copy mode.
3 Press the [START] button.
- Up to 6 jobs can be stored in the memory. Place the originals of
the 6th job on the original glass or the reversing automatic
document feeder (optional) and press the [START] button. Then
“Auto Start” appears:
- Up to 1,000 sheets of A4 size can be stored per 1 job, or until the
memory becomes full. (For the screen when the maximum
number of sheets exceeded, see "Maximum Number of Sheets
that can be Stored" Page 46.)
55
4.AUTO JOB START (JOB PRESET) (Cont.)
Confirming and Canceling Auto Job Start
2
- Confirming auto job start and canceling the job waiting to be copied.
Press the [JOB STATUS] button on the control panel to display the job list for confirming and canceling
the data.
See "1.JOB STATUS" Page 186 for canceling the job.
- Canceling auto job start.
Press the [STOP] button on the control panel to cancel the job during the scanning or in the status that
the 6th job is being received to be stored.
56
2.HOW TO MAKE COPIES
5. INTERRUPT COPYING
While multi-copying is in progress, you can interrupt and make copies from different originals.
*
-
The following modes cannot be used with interrupt copying:
Cover sheet copying
Sheet insertion copying
Scan to e-filing/Save as file
2
1 Press the [INTERRUPT] button.
- “Job interrupted job 1 saved” appears.
- Interrupt copying is available while copying is in progress.
When “Auto Start” is displayed, you cannot make interrupt copying.
2 Replace the original with a new one.
- "2.SETTING ORIGINALS" Page 45
z Select other copy modes as required.
3 Press the [START] button.
you have finished interrupt copying,
4 After
press the [INTERRUPT] button again.
- “READY to resume job 1” appears.
Without performing step 4, the interrupt copying mode will
automatically be cancelled by the automatic function clear and the
previously interrupted copy job will resume in a certain period of time
after the interrupt copying has finished.
57
6. STOPPING THE COPY OPERATION
If you want to stop the operation during scanning or multi-copying, the [STOP] button is used.
2
the [STOP] button on the
1 Press
operational panel during the scanning or
multi-copying.
the menu on the right is displayed,
2 When
press the [MEMORY CLEAR] button.
- During scanning: the data is deleted.
- During multi-copying: the data is deleted and its operation stops.
If the waiting data remains, it starts to be outputted.
58
2.HOW TO MAKE COPIES
7. BYPASS COPYING
Bypass Copying
When you want to make copies on thick paper, OHP film, tracing paper, sticker labels or other special sheet,
use the sheet bypass. (Only Thick 1 paper can be set in the drawer "Setting the Drawer for Special Uses"
Page 42).
If the desired size of paper (standard size) is not set in the drawers, or if you want to make copies on nonstandard size paper, make bypass copies.
The modes below are available even in bypass copying if the paper size is specified:
- Dual-page
- Duplex copying
- Image shift
- Edge erase
In these cases, the setting procedures of the following 2 sizes of paper are different.
- Bypass copying on standard size paper
- Bypass copying on non-standard size paper "Bypass Copying on Non-Standard-Size Paper" Page 62
2
* When copying is finished, the lamp of the [FUNCTION CLEAR] button lights. The bypass copying mode
automatically returns to the default mode by pressing the [FUNCTION CLEAR] button or after a while the
automatic function clear mode works and the settings will be cleared.
* The copier stops its operation when the paper set on the bypass tray has run out even if there is the same
size of copy paper in the drawer. The copier starts again when adding the paper on the bypass tray.
Bypass Copying on Standard Size Paper
paper on the bypass tray, and then
1 Place
holding the knob (A), align the guides with
the size of the paper.
- “Ready for bypass feeding” appears.
- Acceptable paper type for bypass copy "Acceptable Copy Paper
Types and Sizes" Page 36
- Place the paper with the side to be copied facing down.
- If you put several sheets on the bypass tray at a time, fan the
paper well before placing it.
- Place the paper so as not to exceed the line indicated on the
guides.
- Do not push the paper forcibly into the entrance of bypass
feeding. It may cause a paper jam.
(A)
59
7.BYPASS COPYING (Cont.)
2
- Draw the triple paper holder depending on the paper size.
- Raise (B) before placing A3/LD size or larger.
2 Place the original(s).
the button that represents the size
3 Press
of the paper that has been set for A3, A4,
B4 and B5.
When the paper size is not specified, the copying speed may be
lower due to the cleaning operation inside the copier.
the standard size paper other than
4 When
A3, A4, B4 and B5 is set, press the
[OTHER SIZE] button.
- See "Setting the [OTHER SIZE] button" Page 69.
the paper size button
5 Press
corresponding to the paper that has been
set.
60
2.HOW TO MAKE COPIES
(B)
6 Press the [OTHER] button.
2
the [MEDIA TYPE] button when the
7 Press
paper other than plain paper is set.
Select the media type corresponding to
8 the
paper that has been set, and then
press the [ENTER] button.
If you select the media type not corresponding to the paper that has
been set, it may cause a problem such as a paper jam, significant
image deterioration, etc.
z Select other copy modes as required.
9 Press the [START] button.
When copying on OHP film, pick up copies one by one from the
inner tray.
When the exited copies are piled up, they will have more curl and it
may cause this OHP film cannot be projected property.
61
7.BYPASS COPYING (Cont.)
Bypass Copying on Non-Standard-Size Paper
2
Non-standard paper falls within the following ranges:
A (Length): 100-297 mm, B (Width): 148-432 mm
B
A
steps 1 to 2 on "Bypass Copying"
1 Follow
Page 59.
2 Press the [NON STANDARD] button.
in each dimension (length and width),
3 Key
or recall the data stored in MEMORY, and
then press the [ENTER] button.
- When using the digital keys to key in the size:
Key in the length and press the [SET] button. Similarly, set the
value for the width.
62
2.HOW TO MAKE COPIES
- Press the [MEMORY 1] (or [MEMORY 2], [MEMORY 3],
[MEMORY 4]) button, the paper size memorized in the MEMORY
1 appears.
The non-standard size frequently used can be stored in the memory.
Press the [MEMORY 1] (or [MEMORY 2], [MEMORY 3], [MEMORY
4]) button which you want to store, key in the size of length and width
and press the [MEMORY] button.
Data is overwritten.
2
z Select other copy modes as required.
4 Press the [START] button.
Storing a Non-Standard Size in MEMORY
It is convenient to store a frequently used non-standard-size paper in memory.
steps 1 to 2 on "Bypass Copying"
1 Follow
Page 59.
2 Press the [NON STANDARD] button.
the desired memory number
3 Press
button.
63
7.BYPASS COPYING (Cont.)
2
- When the paper size is '0 mm', the selected memory number
button is vacant.
- When the paper size is displayed, a non-standard size is already
stored in the selected memory number. To delete the settings,
follow step 4. New settings will be rewritten and stored on that
memory number.
in each dimension using the digital
4 Key
keys, and then press the [MEMORY]
button.
- Key in the length and press the [SET] button. Similarly, set the
value for the width.
- The paper size is stored in the highlighted Memory Number.
64
2.HOW TO MAKE COPIES
3. SETTING OF BASIC COPY
MODES
3
1. PAPER SELECTION............................................................................................................66
Automatic Paper Selection (APS) ........................................................................................66
Manual Paper Selection .......................................................................................................68
Setting the [OTHER SIZE] button ........................................................................................69
Setting the [MIXED ORIGINAL SIZE] ..................................................................................70
2. BLACK-AND-WHITE/COLOUR COPY MODE SELECTION ...............................................72
3. REDUCTION AND ENLARGEMENT COPYING .................................................................73
4. SELECTING FINISHING MODES ....................................................................................... 77
Finishing Modes and Finishers (Optional) ...........................................................................77
Sort/Group Copying .............................................................................................................79
Rotate Sort Mode ................................................................................................................. 80
Staple Sorting.......................................................................................................................81
Magazine Sort & Saddle Stitch Mode (Booklet Mode) .........................................................83
Hole Punch Mode (Optional)................................................................................................86
5. DUPLEX COPYING .............................................................................................................88
For Making 1-sided, 2-sided and Book-type Copies ............................................................88
6. ORIGINAL MODE ................................................................................................................94
7. COPY DENSITY ADJUSTMENT .........................................................................................96
65
1. PAPER SELECTION
Automatic Paper Selection (APS)
When you place regular-sized originals on the glass or in the reversing automatic document feeder
(optional), the size of the originals is automatically detected, which helps the copier select paper that is the
same size as the originals.
* Depending on the condition of the original, Automatic Paper Selection may not work correctly. In that
case, select the paper size manually. "Manual Paper Selection" Page 68
* This mode can only be used for actual-size (100%) copying.
3
* Original sizes available for automatic detection "Acceptable Original Types and Sizes/Maximum Number
of Sheets that can be Stored" Page 45
1 Place paper in the drawer(s).
- "1.SETTING COPY PAPER" Page 36
2 Place the original(s).
- "2.SETTING ORIGINALS" Page 45
that the automatic paper
3 Confirm
selection mode (default setting) is
selected on the basic menu.
- If the automatic paper selection mode is not selected, press the
[ZOOM...] button, and then press the [APS] button on the next
screen.
- If “Change direction of original” and “CHANGE DRAWER TO
CORRECT PAPER SIZE” appear, proceed as directed:
66
3.SETTING OF BASIC COPY MODES
When the selected drawer size and the original size are the same,
the copier rotates the original data by 90o and makes a copy which
is the same size as the original --- even if those directions differ
(e.g.an A4-size original is set while the same size paper is set in R
direction).
z Select other copy modes as required.
3
4 Press the [START] button.
67
1.PAPER SELECTION (Cont.)
Manual Paper Selection
Automatic Paper Selection cannot be used for highly transparent originals such as OHP films and tracing
paper, wholly dark originals or originals with dark borders, or irregular sized originals such as newspapers
and magazines. For these types of originals, use manual paper selection.
* When the desired size of paper is not set in any of the drawers, you can change the paper size of the
drawer ("Changing the Paper Size of the Drawer/Setting the Drawer for Special Uses" Page 38) or
use the bypass copying ("Bypass Copying" Page 59)
3
1 Place paper in the drawer(s).
- "1.SETTING COPY PAPER" Page 36
- When using this mode in bypass copying "Bypass Copying" Page 59, be sure to specify the paper size.
2 Place the original(s).
- "2.SETTING ORIGINALS" Page 45
the drawer icon representing the
3 Press
desired paper size or select the paper size
with
button.
- Or press the [ZOOM...] button to enter the next screen, and press
the button of the desired paper size.
- "Setting the [OTHER SIZE] button" Page 69
z Select other copy modes as required.
4 Press the [START] button.
68
3.SETTING OF BASIC COPY MODES
Setting the [OTHER SIZE] button
When the original or the paper size is specified and you want to use the paper size not displayed on the
menu (except for non-standard size), press the [OTHER SIZE] button to select the size. This function allows
the [OTHER] button to recognize the size you use.
- The initial setting for this button is COMP.
the [ZOOM...] button to enter the
1 Press
setting menu of the original or paper size,
3
and then press the [OTHER SIZE] button.
the [PAPER SIZE] button of the
2 Press
paper corresponding to the size that will
be used.
- If you select 'LT', the [OTHER] button (for both the original and the
paper size) is recognized as LT size.
69
1.PAPER SELECTION (Cont.)
Setting the [MIXED ORIGINAL SIZE]
When placing different size originals on the reversing automatic document feeder, copy can be made by
setting the [MIXED ORIGINAL SIZE].
Available combination of original size
- A3, A4, A4-R, B4, B5, FOLIO
3
* The copied image may be dislocated depending on the combination of the original size.
- When copying mixed-sized originals with the Automatic Paper Selection (APS), make sure that the
papers that are the same size as each original are set in the drawers.
1 Place paper in the drawer(s).
- "1.SETTING COPY PAPER" Page 36
- Bypass copying is not available.
the tray guide to the widest
2 Adjust
original size, and then align the original
against the front side.
- Place the originals with their face up.
the [ZOOM...] button to enter the
3 Press
setting menu of the original or paper size.
the [MIXED ORIGINAL SIZES]
4 Press
button.
70
3.SETTING OF BASIC COPY MODES
either the Automatic Paper
5 Select
Selection ("Automatic Paper Selection
(APS)" Page 66) or Automatic
Magnification Selection mode
("Automatic Magnification Selection
(AMS)" Page 73)
- To make duplex copying, select the automatic magnification
mode.
- You cannot enlarge the copy size from A4 (horizontal) to A3
(vertical) and from LT (horizontal) to LD (vertical).
- When using AMS with Mixed Original Sizes, a “Change direction
of original” message may be displayed.
If this message is displayed proceed as directed.
3
z Select other copy modes as required.
6 Press the [START] button.
71
2. BLACK-AND-WHITE/COLOUR COPY MODE SELECTION
This function allows you to select the Full colour mode, the Black mode and the Auto colour mode.
the [FULL COLOUR], [BLACK] or
1 Press
[AUTO COLOUR] button.
3
- [FULL COLOUR]: Regardless of colour, all originals are colourcopied.
- [BLACK]: Regardless of colour, all originals are copied in blackand-white (default setting).
- [AUTO COLOUR]: The type of original is automatically
distinguished. Coloured originals are colour-copied and blackand-white originals are copied in black-and-white.
When using the “AUTO COLOUR” mode, pay attention to the
following points.
- In the “AUTO COLOUR” mode, if the colour area is too small or
the colours are close to black or they are too light, colour originals
may be copied in black-and-white. In this case, select the “FULL
COLOUR” mode. Yellowish originals or originals with a coloured
background may be automatically copied in colour even though
they are black-and- white. To be sure to make the copies in the
desired mode, select “FULL COLOUR” or “BLACK”.
72
3.SETTING OF BASIC COPY MODES
3. REDUCTION AND ENLARGEMENT COPYING
When placing originals on the original glass, you can copy them at the reducing and enlarging rate of 25 to
400%. For the reversing automatic document feeder (optional), you can make copy at the reducing and
enlarging rate of 25 to 200%.
There are 3 ways of making copies in the Reduction and Enlargement mode:
- Using Automatic Magnification Selection (AMS)
- Specifying both original size and copy size separately
- Using the reduction/enlargement zoom buttons or the one-touch zoom buttons
* Automatic Magnification Selection cannot be used for highly transparent originals such as OHP films and
tracing paper, wholly dark originals or originals with dark borders, or irregular sized originals such as
newspapers and magazines. For these types of originals, use the other reduction/enlargement modes.
Original sizes available for Automatic Magnification Selection (automatic detection) "Acceptable Original
Types and Sizes/Maximum Number of Sheets that can be Stored" Page 45
3
* Set the paper size for the “OTHER” button as required ("Setting the [OTHER SIZE] button" Page 69).
When the set originals or paper are a non-standard size other than A3, A4, B4 or B5, you will select the
[OTHER] button on the screen of step 3 below. Before pressing it, you need to make the [OTHER] button
recognize the same size as the originals or paper that have been set.
Automatic Magnification Selection (AMS)
1 Place paper in the drawer(s).
- "1.SETTING COPY PAPER" Page 36
the desired drawer (or ,
2 Press
button), and then press the [ZOOM]
button.
- The copy paper size is selectable on the menu in step 3 as well.
73
3.REDUCTION AND ENLARGEMENT COPYING (Cont.)
3 Press the [AMS] button.
- "Setting the [OTHER SIZE] button" Page 69
4 Place the original(s).
3
- "2.SETTING ORIGINALS" Page 45
- The built-in sensors automatically detect the size of the original(s)
and compute the reproduction ratio with the specified paper size
respectively.
- If “Change direction of original” appear, proceed as directed:
z Select other copy modes as required.
5 Press the [START] button.
Specifying Both Original Size and Copy Size
1 Place paper in the drawer(s).
- "1.SETTING COPY PAPER" Page 36
2 Place the original(s).
- "2.SETTING ORIGINALS" Page 45
the desired drawer (or ,
3 Press
button), and then the [ZOOM] button.
- The copy paper size is selectable on the menu in step 4 as well.
74
3.SETTING OF BASIC COPY MODES
the [ORIGINAL SIZE] button that
4 Press
represents the size of the original.
- Using the original size and copy size, the correct reproduction
ratio is computed and displayed on the screen.
- "Setting the [OTHER SIZE] button" Page 69
z Select other copy modes as required.
5
Press the [START] button.
3
Using the Reduction/Enlargement Zoom Buttons or One-touch Zoom Buttons
1 Place paper in the drawer(s).
- "1.SETTING COPY PAPER" Page 36
2 Place the original(s).
- "2.SETTING ORIGINALS" Page 45
the drawer icon (or ,
button)
3 Press
representing the desired copy paper size,
and then press the [ZOOM] button.
- The copy paper size is selectable on the screen in step 4 as well.
75
3.REDUCTION AND ENLARGEMENT COPYING (Cont.)
the [UP] (or [DOWN]) button to set
4 Press
the desired reproduction ratio.
3
- Each time you press either button, the reproduction ratio changes
by 1%. Holding down the button changes it continuously.
- You can select the reproduction ratio by pressing the [400%],
[200%], [100%], [50%] or [25%] button directly. (When placing the
originals on the reversing automatic document feeder (optional),
you cannot select [400%] button.)
- "Setting the [OTHER SIZE] button" Page 69
z Select other copy modes as required.
5 Press the [START] button.
76
3.SETTING OF BASIC COPY MODES
4. SELECTING FINISHING MODES
Finishing Modes and Finishers (Optional)
The functions available differ depending on whether a finisher is installed and which type of finisher (MJ1022, MJ-1023 and MJ-1024) it is.
* The touch panel used in this chapter appears when the optional saddle-stitch finisher (MJ-1024) with hole
punch unit (MJ-6004) is installed in your copier.
3
Type of Finishing Mode
-
MJ-1024: Saddle-stitch finisher
MJ-1023: Multi-staple finisher
MJ-1022: Single-staple finisher
MJ-6004: Hole punch unit
Confirm the finishing mode type of your equipment with the following table.
Y: Available
N: Not available
Finishing
Type of finishing mode
Sort/
Group
Rotate
sort
Staple
sort
Magazine
sort
Magazine sort
+ Saddle stitch
Saddle
stitch
Hole
punch
MJ-1024 + MJ-6004
Y
Y
Y
Y
Y
Y
Y
MJ-1024
Y
Y
Y
Y
Y
Y
N
MJ-1023 + MJ-6004
Y
Y
Y
Y
N
N
Y
MJ-1023
Y
Y
Y
Y
N
N
N
MJ-1022
Y
Y
Y
Y
N
N
N
No finisher
Y
Y
N
Y
N
N
N
77
4.SELECTING FINISHING MODES (Cont.)
Names of each Finisher (Optional)
1: Trays
2: Upper cover
3: Hole punch unit (MJ-6004)
4: Front cover
5: Saddle stitch tray
3
2
MJ-1024
1
MJ-1023
3
1
2
3
4
4
5
MJ-1022
1
When the finisher trays reach their maximum loading capacity ("2.SPECIFICATIONS OF OPTIONS" Page 299), “Remove paper from the finisher” appears.
Remove the copied paper from the trays and the copier automatically resumes making copies.
78
3.SETTING OF BASIC COPY MODES
Sort/Group Copying
To make multiple copies, you can select the sort mode or group mode as necessary.
- Example of making 5 sets of copies from 5-page originals
1: Sort copying
2: Group copying
2
1
1
2
3
4
5
1
2
3
4
5
1
2
3
4
5
1
2
3
4
5
1
2
3
4
5
1
2
3
4
5
1
2
3
4
5
1
1
1
1
1
2
2
2
2
2
3
3
3
3
3
4
4
4
4
4
3
5
5
5
5
5
1 Place paper in the drawer(s).
- "1.SETTING COPY PAPER" Page 36
2 Place the original(s).
- "2.SETTING ORIGINALS" Page 45
the Finisher button on the basic
3 Press
menu as shown in the illustration on the
right (highlighted).
When originals are placed in the reversing automatic document
feeder (optional), the sort mode is automatically selected.
4 Press the [SORT] (or [GROUP]) button.
z Select other copy modes as required.
5
Press the [START] button.
79
4.SELECTING FINISHING MODES (Cont.)
Rotate Sort Mode
In this copying mode, as sets of copies are output to the internal tray, the sets are alternated -lengthwise
and crosswise- on top of each other. (Optional drawer) A4/A4-R, B5/B5-R, LT/LT-R paper is available in this
mode.
3
* This mode cannot be used in the Automatic Paper Selection mode.
1 Place paper in the drawer(s).
- "1.SETTING COPY PAPER" Page 36
2 Place the original(s).
- "2.SETTING ORIGINALS" Page 45
the Finisher button on the basic
3 Press
menu as shown in the illustration on the
right (highlighted).
4 Press the [ROTATE SORT] button.
z Select other copy modes as required.
5 Press the [START] button.
80
3.SETTING OF BASIC COPY MODES
Staple Sorting
When the finisher (optional) is installed, you can perform automatic stapling for every set. 3 staple positions
can be selected when installing saddle-stitch finisher (MJ-1024) or multi-staple finisher (MJ-1023).
* The paper weight should be in the range of 64-105 g/m2 for the saddle-stitch finisher (MJ-1024) or multistaple finisher (MJ-1023), and 64-80 g/m2 for the single-staple finisher (MJ-1022). Special paper such as
OHP films or labels is excluded.
* Stapling will not work when copied paper of different widths are mixed.
3
- Example of selecting the [FRONT STAPLE-1] button
AB
AB
BA
Setting Staple Sort Mode
1 Place paper in the drawer(s).
- "1.SETTING COPY PAPER" Page 36
- When using this mode in bypass copying ("Bypass Copying" Page 59), be sure to specify the paper size.
2 Place the original(s).
- "2.SETTING ORIGINALS" Page 45
the Finisher button on the basic
3 Press
menu as shown in the illustration on the
right (highlighted).
81
4.SELECTING FINISHING MODES (Cont.)
the [FRONT STAPLE-1] (or
4 Press
[DOUBLE STAPLE], [REAR STAPLE])
button.
- Only the [FRONT STAPLE-1] button is available when installing
the single-staple finisher (MJ-1022).
3
z Select other copy modes as required.
5 Press the [START] button.
If the paper quantity exceeds the maximum number of sheets that
can be stapled, the finisher automatically enters the sort mode.
Maximum Number of Sheets that can be Stapled
- Saddle-stitch finisher (MJ-1024) and multi-staple finisher (MJ-1023)
When Plain paper and Thick 1 paper are loaded, the maximum number of sheets that can be stapled is
the same as that of Thick 1 paper.
Paper size
Paper type (weight)
Plain paper (64-80 g/m2)
Thick 1 (81-105 g/m2)
A4, B5, LT
50 sheets
30 sheets
A3, A4-R, B4, FOLIO, LD, LG, LT-R
30 sheets
15 sheets
- Single-staple finisher (MJ-1022)
Paper size
Paper type (weight)
Plain paper (64-80 g/m2)
A4, A4-R, B5, LT, LT-R
30 sheets
B4, LG
20 sheets
A3, FOLIO, LD, COMP
15 sheets
* Tray load capacity "2.SPECIFICATIONS OF OPTIONS" Page 299
82
3.SETTING OF BASIC COPY MODES
Magazine Sort & Saddle Stitch Mode (Booklet Mode)
When the Magazine Sort mode is selected, 1-sided originals can be copied and bound like magazines or
booklets. When the saddle-stitch finisher (optional, MJ-1024) is installed, you can select the saddle stitch
mode that will automatically fold and staple the centre of the document. A3, A4-R, B4, LD and LT-R are
available.
* Special paper such as OHP films or labels is excluded.
* The paper weight should be in the range of 64-105 g/m2.
- When [MAGAZINE SORT] is selected
3
1
6
2
7
4
3
9
11
2
12
- When [MAGAZINE SORT & SADDLE STITCH] is selected
1
2
6
7
3
12
- When [SADDLE STITCH] is selected
12
10
8
1
6
3
7
5
* You can also select the Magazine Sort mode from the edit menu. "6.MAGAZINE SORT (FROM THE
EDITING MENU)" Page 117
* When placing the portrait original in short edge feed direction in the reversing automatic document feeder,
copies can be made correctly with Image Direction setting. See "14.DIRECTION OF COPY IMAGES IN
“1 TO 2” AND “2 TO 1”" Page 134.
Setting Magazine Sort & Saddle Stitch Mode
1 Place paper in the drawer(s).
- "1.SETTING COPY PAPER" Page 36
83
4.SELECTING FINISHING MODES (Cont.)
2 Set the paper size.
- For drawer feeding "Manual Paper Selection" Page 68, step 3
- For bypass feeding "Bypass Copying on Standard Size Paper" Page 59, step 4
3 Place the original(s).
3
- "2.SETTING ORIGINALS" Page 45
- When placing originals in the reversing automatic document
feeder (optional), set them by referring to the order of previous
pages in the illustrations.
- When placing them on the glass, place the first page of the
originals first if the [MAGAZINE SORT] or the [MAGAZINE SORT
& SADDLE STITCH] is selected. If the [SADDLE STITCH] is
selected, set them in the order of pages 12-1, (2-11), 10-3 (4-9),
then 8-5, (6-7) by referring to the illustration above as an example.
the Finisher button on the basic
4 Press
menu as shown in the illustration on the
right (highlighted).
the [MAGAZINE SORT] (or
5 Press
[MAGAZINE SORT & SADDLE STITCH] or
[SADDLE STITCH]) button.
When the saddle stitch mode is used for A3, B4 and LD size, that is,
when the [MAGAZINE SORT & SADDLE STITCH] button or the
[SADDLE STITCH] button is selected, raise the stopper of the
saddle stitch tray.
z Select other copy modes as required.
6 Press the [START] button.
- When placing original(s) on the glass, follow steps 5 to 6 on page
"When Coming Across the Situations below" Page 54.
84
3.SETTING OF BASIC COPY MODES
Available Conditions for Saddle Stitch
- A cover of 64-209 g/m2 can be added. In this case, the cover is included in the maximum capacity for
saddle stitch.
- When paper of different weights is loaded, the maximum number of sheets that can be stapled is that of
the paper with the highest weight.
Paper size
Paper
weight
Maximum
capacity for
saddle stitch
Tray load capacity
A3, A4-R,
Plain paper 15 sheets
B4, LD, LT-R 64 g/m2
Copying of 11-15 sheets: 10 sets
Copying of 6-11 sheets: 20 sets
Copying of 5 sheets or less: 25 sets
Plain paper 15 sheets
Copying of 11-15 sheets: 10 sets
Copying of 6-11 sheets: 20 sets
Copying of 5 sheets or less: 25 sets
80 g/m
2
Thick 1
90 g/m
10 sheets
Copying of 6-11 sheets: 15 sets (Adding a cover: 5 sets)
Copying of 5 sheets or less: 25 sets (adding a cover: 5 sets)
10 sheets
Copying of 6-10 sheets: 15 sets (Adding a cover: 5 sets)
Copying of 5 sheets or less: 25 sets (Adding a cover: 5 sets)
2
Thick 1
2
105 g/m
3
* The tray load capacity for the weight of 64 g/m2 and 80 g/m2 is not changed when a cover is added.
85
4.SELECTING FINISHING MODES (Cont.)
Hole Punch Mode (Optional)
When the optional hole punch unit is attached to the finisher (Optional: MJ-1024, MJ-1023), you can hole
punch your copies.
* The paper weight should be in the range of 64-209 g/m2. Special paper such as OHP files or labels is
excluded.
3
1 Place paper in the drawer(s).
- "1.SETTING COPY PAPER" Page 36
- When using this mode in bypass copying ("Bypass Copying" Page 59), be sure to specify the paper size.
2 Place the original(s).
- "2.SETTING ORIGINALS" Page 45
the Finisher button on the basic
3 Press
menu as shown in the illustration on the
right (highlighted).
4 Press the [HOLE PUNCH] button.
z Select other copy modes as required.
5 Press the [START] button.
Available paper sizes for the hole punch:
Since the number of punch holes and the distance between the
holes vary depending on the country, purchase a hole punch unit
that meets your requirements. (For details, consult your service
technician.)
86
3.SETTING OF BASIC COPY MODES
Number of punch holes and hole
diameter
Available paper sizes
Japan and most of Europe
2 holes
A3, A4, A4-R, B4, B5, B5-R, FOLIO,
(MJ-6004E)
(6.5 mm dia.)
LD, LG, LT, LT-R, COMP
North America
2/3 holes switchable
2 holes: A4-R, LG, LT-R
(MJ-6004N)
(8.0 mm dia.)
3 holes: A3, A4, LD, LT
France
4 holes
A3, A4, LD, LT
(MJ-6004F)
(6.5 mm dia.: 80 mm pitch)
Sweden
4 holes
A3, A4, A4-R, B4, B5, B5-R, FOLIO,
(MJ-6004S)
(6.5 mm dia.: 70.21 mm pitch)
LD, LG, LT, LT-R, COMP
3
* The paper mentioned above is Toshiba-recommended paper.
Specifications and appearance are subject to change without
notice in the interest of product improvement
87
5. DUPLEX COPYING
For Making 1-sided, 2-sided and Book-type Copies
This function allows you to set the type of originals (1-sided, 2-sided or book-type) and the desired type of
copying (1-sided or 2-sided). Duplex copying is available for the plain paper (64-80 g/m2) and thick 1 paper
(81-105 g/m2).
1
3
2
3
4
5
-3-1-31
-12-
88
-15-
3.SETTING OF BASIC COPY MODES
-12-
-13-
-15-
1. 1-Sided Originals to 1-Sided Copies (default setting)
1 Place paper in the drawer(s).
- "1.SETTING COPY PAPER" Page 36
2 Place the original(s).
- "2.SETTING ORIGINALS" Page 45
3
Confirm that the [1 1 SIMPLEX] mode is
selected in the basic menu.
3
- If the “1-SIDED
1-SIDED” mode is not selected, press the
button (highlighted) in the menu on the right, and then press the
[1
1 SIMPLEX] button on the next screen.
z Select other copy modes as required.
4 Press the [START] button.
2. 1-Sided Originals to 2-Sided Copies
The use of Image Direction will create the booklet output when copying landscape oriented originals. See
"14.DIRECTION OF COPY IMAGES IN “1 TO 2” AND “2 TO 1”" Page 134 for details.
1 Place paper in the drawer(s).
- "1.SETTING COPY PAPER" Page 36
- When using this mode in bypass copying ("Bypass Copying" Page 59), be sure to specify the paper size.
2 Place the original(s).
- "2.SETTING ORIGINALS" Page 45
89
5.DUPLEX COPYING (Cont.)
the basic menu, press the highlighted
3 On
button on the right.
3
4 Press the [1
2 DUPLEX] button.
z Select other copy modes as required.
5 Press the [START] button.
- When placing an original on the glass, follow step 5 to 6 on page
"Copying Procedure" Page 52 continuously.
3. 2-Sided Originals to 2-Sided Copies
1 Place paper in the drawer(s).
- "1.SETTING COPY PAPER" Page 36
- When using this mode in bypass copying ("Bypass Copying" Page 59), be sure to specify the paper size.
2 Place the original(s).
- "2.SETTING ORIGINALS" Page 45
the basic menu, press the highlighted
3 On
button on the right.
90
3.SETTING OF BASIC COPY MODES
4 Press the [2
2 DUPLEX] button.
z Select other copy modes as required.
5 Press the [START] button.
- When placing an original on the glass, follow step 5 to 6 on page
"Copying Procedure" Page 52 continuously.
3
4. 2-Sided Originals to 1-Sided Copies
Starting Image Direction can be used if the orientation of the output is alternating between pages when
using landscape originals. See "14.DIRECTION OF COPY IMAGES IN “1 TO 2” AND “2 TO 1”" Page
134 for details.
1 Place paper in the drawer(s).
- "1.SETTING COPY PAPER" Page 36
2 Place the original(s).
- "2.SETTING ORIGINALS" Page 45
the basic menu, press the highlighted
3 On
button on the right.
4 Press the [2
1 SPLIT] button.
z Select other copy modes as required.
5 Press the [START] button.
- When placing the original on the glass, copy the one side of the
original and turn it over to copy the other side.
91
5.DUPLEX COPYING (Cont.)
5. Book-type Originals to 2-Sided Copies
* Acceptable paper size for this function are A4 or B5 only.
1 Place paper in the drawer(s).
3
- "1.SETTING COPY PAPER" Page 36
- When using this mode in bypass copying ("Bypass Copying" Page 59), be sure to specify the paper size.
the basic menu, press the highlighted
2 On
button on the right.
3 Press the [BOOK
2] button.
4 Select the book copying type.
- Press the [RIGHT
RIGHT] button if copying should start at a
right-hand page and end at a right-hand page and also choose
from among the [RIGHT LEFT], [LEFT LEFT] and [LEFT
RIGHT] buttons as well.
92
3.SETTING OF BASIC COPY MODES
5 Select A4 or B5 copy size.
you need a binding space, select the
6 Ifbook
margin mode from the Image Shift
function ("Creating a Bookbinding
Margin" Page 109).
z Select other copy modes as required.
3
the first page(s) on the glass, and
7 Place
then press the [START] button.
- If you do not copy your originals from the first page, the copies will
not be arranged in the same order as the original.
- Centre the book on the yellow indicator line with its bottom toward
you. "Book-type Originals" Page 48
to the next page, set the book again
8 Turn
and press the [START] button.
- Pressing the [YES] button and then the [START] button also
continues copying.
- Repeat the procedure above until all the originals have been
scanned.
all the originals are scanned, press
9 After
the [FINISHED] button.
- Press the [COPY FINAL PAGE] button if the last original has only
one page.
93
6. ORIGINAL MODE
By selecting an original mode according to the type of your originals, you can make copies with the suitable
image.
* Be sure to select the original mode after having selected the black-and-white or colour mode.
3
1 Place paper in the drawer(s).
- "1.SETTING COPY PAPER" Page 36
2 Place the original(s).
- "2.SETTING ORIGINALS" Page 45
the basic menu, press the highlighted
3 On
button on the right.
to the type of your original,
4 According
choose the most suitable image type
mode by pressing one of the following
buttons:
- [TEXT/PHOTO]: Original with text and printed image mixed
(default setting)
- [TEXT]: Original with text only (or text and line artwork)
- [PRINTED IMAGE]: Original with printed photos using half tone
dot patterns
- [PHOTO]: Original with photos printed on photographic paper
- [MAP]: Original with fine illustrations and text
- [IMAGE SMOOTHING]: Original with text and printed image
mixed, which is available for the black mode
It is used especially when you want to improve the photo
reproducibility.
- FULL COLOUR
94
3.SETTING OF BASIC COPY MODES
- BLACK
3
- AUTO COLOUR
95
7. COPY DENSITY ADJUSTMENT
There are 2 types of image density adjustments: automatic mode and manual mode.
In the automatic mode, the density of each original is detected automatically and the optimum image density
is selected. In the manual mode, you can select the desired level of image density. Adjust the density with
this mode depending on the original condition.
* Default setting: Manual density for colour mode, Automatic density for black mode.
3
Automatic Copy Density Modes
1 Place paper in the drawer(s).
- "1.SETTING COPY PAPER" Page 36
2 Place the original(s).
- "2.SETTING ORIGINALS" Page 45
3 Press the [AUTO] button.
z Select other copy modes as required.
4 Press the [START] button.
Manual Copy Density Mode
1 Place paper in the drawer(s).
- "1.SETTING COPY PAPER" Page 36
2 Place the original(s).
- "2.SETTING ORIGINALS" Page 45
either the
or
button to adjust
3 Press
the copy density to the desired level.
- Each time you press either the
or
become lighter or darker respectively.
z Select other copy modes as required.
4 Press the [START] button.
96
3.SETTING OF BASIC COPY MODES
button, your copies will
4. IMAGE EDITING AND
IMAGE ADJUSTMENT
1. COLOUR BALANCE (YMCK ADJUSTMENT) .....................................................................98
2. RGB ADJUSTMENT ............................................................................................................99
3. ONE-TOUCH ADJUSTMENT ............................................................................................100
4
4. BACKGROUND ADJUSTMENT ........................................................................................101
5. SHARPNESS ADJUSTMENT............................................................................................102
6. TWIN (2-COLOUR) COPYING ..........................................................................................103
97
1. COLOUR BALANCE (YMCK ADJUSTMENT)
This function allows you to adjust the colour balance by changing the toner amount of Yellow (Y), Magenta
(M), Cyan (C) and Black (K).
* It is available only for the full colour mode.
1 Place paper in the drawer(s).
- "1.SETTING COPY PAPER" Page 36
4
2 Place the original(s).
- "2.SETTING ORIGINALS" Page 45
the [IMAGE] button to enter the
3 Press
image menu, and then press the
[COLOUR BALANCE] button.
the or
4 Press
colour balance.
- Pressing the
pressing the
button to adjust the
button enhances the tint of the colour, while
button decreases the tint of the colour.
5 Press the [ENTER] button.
z Select other copy modes as required.
6 Press the [START] button.
Canceling the colour Balance Adjustment
There are 2 ways for clearing the setting.
- Press the
or
button on the column you want to cancel to
move the indicator to 0, then press the [ENTER] button.
- If you want to cancel all the 4 adjustments, press the [DEFAULT]
button, and then press the [ENTER] button.
98
4.IMAGE EDITING AND IMAGE ADJUSTMENT
2. RGB ADJUSTMENT
This function allows you to adjust the colour balance by changing the strength of Red (R), Green (G) and
Blue (B) at the time of scanning original.
It is available only in the full colour mode.
1 Place paper in the drawer(s).
- "1.SETTING COPY PAPER" Page 36
2 Place the original(s).
- "2.SETTING ORIGINALS" Page 45
3
Press the [IMAGE] button to enter the
image menu, and then press the [RGB
ADJUSTMENT] button.
the or
4 Press
colour balance.
- Pressing the
pressing the
4
button to adjust the
button enhances the tint of the colour, while
button decreases the tint of the colour.
5 Press the [ENTER] button.
z Select other copy modes as required.
6 Press the [START] button.
Canceling the RGB Adjustment
There are 2 ways for clearing the setting.
- Press the
or
button on the column you want to cancel to
move the indicator to 0, then press the [ENTER] button.
- If you want to cancel all the 3 adjustments, press the [DEFAULT]
button, and then press the [ENTER] button.
99
3. ONE-TOUCH ADJUSTMENT
You can make the image quality “warm”, “cool”, “vivid” or “clear” with just one touch.
It is available only in the full colour mode.
1 Place paper in the drawer(s).
- "1.SETTING COPY PAPER" Page 36
2 Place the original(s).
- "2.SETTING ORIGINALS" Page 45
4
the [IMAGE] button to enter the
3 Press
image menu, and then press the [ONE
TOUCH ADJUSTMENT] button.
the [COOL] ([WARM], [VIVID], or
4 Press
[CLEAR]) button.
z Select other copy modes as required.
5 Press the [START] button.
100
4.IMAGE EDITING AND IMAGE ADJUSTMENT
4. BACKGROUND ADJUSTMENT
This function allows you to adjust the density of the original’s background or to avoid copying the back side
of originals.
* It is available only in the full colour mode.
* Background Adjustment and Automatic Copy Density mode cannot be used together.
1 Place paper in the drawer(s).
- "1.SETTING COPY PAPER" Page 36
2 Place the original(s).
- "2.SETTING ORIGINALS" Page 45
4
the [IMAGE] button to enter the
3 Press
image menu, and then press the
[BACKGROUND ADJUSTMENT] button.
the [LIGHT] (or [DARK]) button to
4 Press
adjust the density.
5 Press the [ENTER] button.
z Select other copy modes as required.
6 Press the [START] button.
Canceling the Background Adjustment
There are 2 ways for clearing the setting.
- Press the [LIGHT] or [DARK] button on the Background column
to move the indicator to 0, and then press the [ENTER] button.
- Press the [DEFAULT] button, and then press the [ENTER] button.
101
5. SHARPNESS ADJUSTMENT
This function allows you to emphasize the letters and edges of images. This function is available in the
black-and-white mode as well.
1 Place paper in the drawer(s).
- "1.SETTING COPY PAPER" Page 36
2 Place the original(s).
- "2.SETTING ORIGINALS" Page 45
4
the [IMAGE] button to enter the
3 Press
image menu, and then press the
[SHARPNESS] button.
4 Press the [SOFT] (or [SHARP]) button.
- Pressing the [SOFT] button suppresses the moire fringe, while
pressing the [SHARP] button emphasizes the letters and
sharpens the fine lines.
5 Press the [ENTER] button.
z Select other copy modes as required.
6 Press the [START] button.
Canceling the Sharpness Adjustment
There are 2 ways for clearing the setting.
- Press the [SOFT] or [SHARP] button on the Sharpness column to
move the indicator to 0, and then press the [ENTER] button.
- Press the [DEFAULT] button, and then press the [ENTER] button.
102
4.IMAGE EDITING AND IMAGE ADJUSTMENT
6. TWIN (2-COLOUR) COPYING
You can make a copy with 2 colours from a coloured original.There are 2 ways of doing this:
- Making 2-colour copies with 2 manually-selected colours:
The coloured original can be copied in selected colour for the black part and in another selected colour
for the other part.
- Making 2-colour copies using red and black:
The coloured original can be copied in red for the red part and in black for the other part.
Twin (2-colour) Copy with Selected Colours
1
Place paper in the drawer(s).
4
- "1.SETTING COPY PAPER" Page 36
2 Place the original(s).
- "2.SETTING ORIGINALS" Page 45
the [IMAGE] button to enter the
3 Press
image menu, and then press the [TWIN
COLOUR COPY] button.
the [TWIN COLOUR SELECTABLE]
4 Press
button.
103
6.TWIN (2-COLOUR) COPYING (Cont.)
a colour for the black areas on the
5 Select
original.
- After pressing the [CHANGE BLACK TO] button, select the
desired colour.
4
a colour for the parts other than
6 Select
black on the original.
- After pressing the [SECOND COLOUR] button, select the desired
colour.
selecting [CHANGE BLACK TO] and
7 After
[SECOND COLOUR], press the [ENTER]
button.
z Select other copy mode as required.
8 Press the [START] button.
104
4.IMAGE EDITING AND IMAGE ADJUSTMENT
Twin (2-Colour) Copying with Red and Black
1 Place paper in the drawer(s).
- "1.SETTING COPY PAPER" Page 36
2 Place the original(s).
- "2.SETTING ORIGINALS" Page 45
the [IMAGE] button to enter the
3 Press
image menu, and then press the [TWIN
COLOUR COPY] button.
4
4 Press the [RED & BLACK] button.
5 Press the [ENTER] button.
z Select other copy modes as required.
6 Press the [START] button.
105
4
106
4.IMAGE EDITING AND IMAGE ADJUSTMENT
5. USING THE EDITING
FUNCTIONS
1. IMAGE SHIFT ....................................................................................................................108
2. EDGE ERASE.................................................................................................................... 111
3. BOOK CENTRE ERASE.................................................................................................... 112
4. DUAL-PAGE....................................................................................................................... 113
5. 2 IN 1/4 IN 1 ....................................................................................................................... 115
5
6. MAGAZINE SORT (FROM THE EDITING MENU) ............................................................ 117
7. IMAGE EDITING ................................................................................................................ 119
Trimming/Masking.............................................................................................................. 119
Mirror Image.......................................................................................................................121
8. X-Y ZOOM .........................................................................................................................122
9. COVER COPYING.............................................................................................................123
10.SHEET INSERTION MODE...............................................................................................126
11. TIME & DATE STAMP........................................................................................................128
12.PAGE NUMBERING ..........................................................................................................129
13.JOB BUILD ........................................................................................................................131
14.DIRECTION OF COPY IMAGES IN “1 TO 2” AND “2 TO 1” .............................................134
15.DIRECTION OF DUPLEX COPY IMAGES IN “2 TO 2”.....................................................136
16.CONTINUOUS/SINGLE ORIGINAL FEEDING..................................................................137
107
1. IMAGE SHIFT
A margin for binding is created by shifting the original image to either the right or left side. You can also
create binding margins in the centre (inner margin) when using Book-Type Originals to 2-sided copies (see
"5. Book-type Originals to 2-Sided Copies" Page 92).
5
Creating a Right or Left Margin
1 Place paper in the drawer(s).
- "1.SETTING COPY PAPER" Page 36
- When using this mode in bypass copying ("Bypass Copying" Page 59), be sure to specify the paper size.
2 Place the original(s).
- "2.SETTING ORIGINALS" Page 45
the [EDIT] button to enter the edit
3 Press
menu, and then press the [IMAGE SHIFT]
button.
the [LEFT] (or [RIGHT]) button
4 Press
according to your desired binding side.
108
5.USING THE EDITING FUNCTIONS
the width of binding margin, and
5 Adjust
then press the [ENTER] button.
- The default width of the margin is 7 mm.
- To adjust the width, press the [0mm] or [30mm] button to select
the desired number, and then press the [ENTER] button.
- In duplex copying, margins on the back are created on the other
side of those in the front.
"5.DUPLEX COPYING" Page 88
z Select other copy modes as required.
6 Press the [START] button.
Creating a Bookbinding Margin
5
When Book Margin is selected, use it in conjunction with the Duplex Copying mode from book-type originals
("5. Book-type Originals to 2-Sided Copies" Page 92).
Acceptable paper sizes for this function are A4, B5 and LT only.
the [EDIT] button to enter the edit
1 Press
menu, and then press the [IMAGE SHIFT]
button.
2 Press the [BOOK] button.
109
1.IMAGE SHIFT (Cont.)
the width of the margin, and then
3 Adjust
press the [ENTER] button.
- The default width of the margin is 7 mm (Book binding margin is
14 mm.).
- To adjust the width, press the [2 mm] or [30 mm] button to select
the desired number, and then press the [ENTER] button.
5
110
5.USING THE EDITING FUNCTIONS
2. EDGE ERASE
If your original has a dirty or torn edge, it may be reproduced as a black stain on the copy. In that case, use
Edge Erase Copying. A white border is created along the edges of the copy, eliminating those black stains.
* This function is available in only case of the standard-size original.
5
1 Place paper in the drawer(s).
- "1.SETTING COPY PAPER" Page 36
- When using this mode in bypass copying ("Bypass Copying" Page 59), be sure to specify the paper size.
2 Place the original(s).
- "2.SETTING ORIGINALS" Page 45
the [EDIT] button to enter the edit
3 Press
menu, and then press the [EDGE ERASE]
button.
the width of the white border, and
4 Adjust
then press the [ENTER] button.
- The default width of the white border is 5 mm.
- To adjust the width, press the [5 mm] or [20 mm] button to select
the desired number, and then press the [ENTER] button.
z Select other copy modes as required.
5 Press the [START] button.
111
3. BOOK CENTRE ERASE
This feature allows you to erase the shadow in the centre of a book original.
1: Before
2: After the book centre has been erased
1
5
1 Place paper in the drawer(s).
- "1.SETTING COPY PAPER" Page 36
- When using this mode in bypass copying ("Bypass Copying" Page 59), be sure to specify the paper size.
2 Place the original(s).
- "2.SETTING ORIGINALS" Page 45
the [EDIT] button to enter the edit
3 Press
menu, and then press the [BOOK CENTRE
ERASE] button.
the width of the book centre erase
4 Adjust
margin, and then press the [ENTER]
button.
- The default width of the book centre erase margin is 10 mm.
- To adjust the width, press the [2 mm] or [50 mm] button to select
the desired number, and then press the [ENTER] button.
z Select other copy modes as required.
5 Press the [START] button.
112
5.USING THE EDITING FUNCTIONS
2
4. DUAL-PAGE
Utilizing this feature allows the facing pages of a book or magazine to be copied page by page onto 2
separate sheets of paper or duplex-copied on one sheet. There is no need to move the original on the glass.
You can also place a pair of A4 (or B5, LT) sized originals side by side and copy them on separate sheets
of paper.
* Acceptable paper sizes for this function are A4, B5 and LT only.
-12-
-13-
-12-
-13-
5
1 Place paper in the drawer(s).
- "1.SETTING COPY PAPER" Page 36
- When using this mode in bypass copying ("Bypass Copying" Page 59), be sure to specify the paper size.
the [EDIT] button to enter the edit
2 Press
menu, and then press the [DUAL PAGE]
button.
3 Press the [1 SIDE] (or [2 SIDE]) button.
- Select the [1 SIDE] button to make copies of the facing pages on
2 separate sheets of paper page by page. Select the [2 SIDE]
button to make duplex copies of them on one sheet.
need a binding margin, set the right
4 Iforyou
left margin.
- "Creating a Right or Left Margin" Page 108
the [BASIC] button to enter the
5 Press
basic menu, and then select A4 (or B5, LT)
copy size.
z Select other copy modes as required.
113
4.DUAL-PAGE (Cont.)
the first page(s) to be copied on the
6 Place
glass, and then press the [START] button.
- If you do not copy your originals from the first page, the copies will
not be arranged in the same order as the original.
- Centre the book on the yellow indicator line with the bottom
toward you. "Book-type Originals" Page 48
to the next page, set the book again,
7 Turn
and then press the [START] button.
- Repeat the above procedure until all the originals have been
scanned.
5
all the originals have been scanned,
8 After
press the [FINISHED] button.
- Press the [COPY FINAL PAGE] button if the last original is 1sided page.
114
5.USING THE EDITING FUNCTIONS
5. 2 IN 1/4 IN 1
This feature allows multiple originals to be reduced and copied onto a single sheet of paper. There are 2
modes: 2 IN 1 copying, where 2 originals are copied onto a single sheet, and 4 IN 1 copying, where 4
originals are copied onto a single sheet. In addition, duplex 2 IN 1/4 IN 1 modes are available, where four/
eight originals can be copied to 2 sides of a single sheet of paper.
* This mode cannot be used in combination with reduction/enlargement copying.
- 2 IN 1
- 4 IN 1
5
- 2 IN 1 DUPLEX (a: Side 1, b: Side 2)
* When a copy is turned with the line as a pivot, originals are printed on Side 2 (back face) as shown.
a
a
b
b
- 4 IN 1 DUPLEX (a: Side 1, b: Side 2)
* When a copy is turned with the line as a pivot, originals are printed on Side 2 (back face) as shown.
a
b
a
b
115
5.2 IN 1/4 IN 1 (Cont.)
1 Place paper in the drawer(s).
- "1.SETTING COPY PAPER" Page 36
- When using this mode in bypass copying ("Bypass Copying" Page 59), be sure to specify the paper size.
To make copies onto paper which is not the same size as originals,
press the [ZOOM...] button to display the screen on the right, and
then press the desired paper size and the [AMS] button.
2 Place the original(s).
- "2.SETTING ORIGINALS" Page 45
5
the [EDIT] button to enter the edit
3 Press
menu, and then press the [2 IN 1/4 IN 1]
button.
4 Select the type of image combination.
- Press the [2 IN 1] (or [4 IN 1], [2 IN 1 DUPLEX] or [4 IN 1
DUPLEX]) button.
5 Select the type of the original.
- Press the [1 SIDE] (or [2 SIDE]) button.
z Select other copy modes as required.
6 Press the [START] button.
- When placing an original on the glass, follow the steps 5 to 6 on
"Copying Procedure" Page 52 continuously.
116
5.USING THE EDITING FUNCTIONS
6. MAGAZINE SORT (FROM THE EDITING MENU)
The magazine sort mode allows 1-sided originals to be copied and sorted so that they can be folded and
bound along a centre line like typical magazines or booklets.
Example of copying a 12-page document
1
6
2
7
4
3
2
12
9
11
- If used in combination with the optional finisher (MJ-1024) equipped with saddle stitch, copies can be
automatically folded in half and stapled along their centre line. (A3, A4-R, B4, LD and LT-R are available.)
5
1
2
6
7
3
12
* 2 Magazine Sort procedures are available. For this function operated from the BASIC menu when the
finisher (optional) is installed, see "Magazine Sort & Saddle Stitch Mode (Booklet Mode)" Page 83
* When placing the portrait original in short edge feed direction in the reversing automatic document feeder,
copies can be made correctly with Image Direction setting. See "14.DIRECTION OF COPY IMAGES IN
“1 TO 2” AND “2 TO 1”" Page 134.
1 Place paper in the drawer(s).
- "1.SETTING COPY PAPER" Page 36
2 Select the paper type.
- For drawer feeding "Manual Paper Selection" Page 68, step 3
- For bypass feeding "Bypass Copying on Standard Size Paper" Page 59, step 4
3 Place the original(s).
- "2.SETTING ORIGINALS" Page 45
- When placing them in the reversing automatic document feeder
(optional), set them by referring to the order of pages in the
illustrations above.
- When placing them on the glass, place the first page of the
originals first.
117
6.MAGAZINE SORT (FROM THE EDITING MENU) (Cont.)
the [EDIT] button to enter the edit
4 Press
menu, and then press the [MAGAZINE
SORT] button.
5
the binding margin, and then press
5 Adjust
the [ENTER] button.
- The default width of the margin is 2 mm.
- To adjust the width, press the [2 mm] or [30 mm] button to select
the desired number, and then press the [ENTER] button.
- If the optional finisher (MJ-1024) equipped with the saddle stitch
is installed, copied paper can be automatically stapled along their
centre line. Press the [STAPLE ON] button to staple it.
- Maximum number of sheets that can be stapled. "Available
Conditions for Saddle Stitch" Page 85
z Select other copy modes as required.
6 Press the [START] button.
- When placing an original on the glass, follow steps 5 to 6 on
"Copying Procedure" Page 52 continuously.
118
5.USING THE EDITING FUNCTIONS
7. IMAGE EDITING
Trimming/Masking
You can select an area on an original and copy it with the area trimmed (only the inside of the area copied)
or masked (only the outside of the area copied). 4 rectangular areas can be specified on an original.
* Image editing is only available with standard sized originals.
* If the settings of the original and copy sizes are not made appropriately, the image may not be copied
completely.
1: Trimming
2: Masking
1
2
5
1 Place paper in the drawer(s).
- "1.SETTING COPY PAPER" Page 36
- When using this mode in bypass copying ("Bypass Copying" Page 59), be sure to specify the paper size.
the [EDIT] button to enter the edit
2 Press
menu, and then press the [EDITING]
button.
3 Press the [TRIM] (or [MASK]) button.
119
7.IMAGE EDITING (Cont.)
an original on the glass to specify
4 Place
the area.
- Set the original face up with the bottom toward you, fit its top left
corner against the top left corner of the glass, and align it with the
original scale.
5
the original scale on the left and the
5 Using
inner (top) scale, read the position of the
desired area as follows:
- X1 Distance from the top left to the left edge of the specified area.
- X2 Distance from the top left to the right edge of the specified
area.
- Y1 Distance from the top left to the upper edge of the specified
area.
- Y2 Distance from the top left to the lower edge of the specified
area.
4 rectangular areas can be specified on an original.
the distance values read in step 5
6 Enter
for the specified area.
- Key in the value for X1 with the digital keys and press the [SET]
button.
- Similarly, set the values for X2, Y1 and Y2.
- When setting X1, X2, Y1 and Y2, the original scale automatically
changes to the next original scale. Set the next original scale
similarly.
7 Press the [ENTER] button.
8 Place the original(s).
- "2.SETTING ORIGINALS" Page 45
- Place the original(s) on the glass with its face down, with its
bottom toward you, with its top left aligned against the original
scale on the left side.
z Select other copy modes as required.
9 Press the [START] button.
120
5.USING THE EDITING FUNCTIONS
Mirror Image
Copies are made with images completely reversed (right and left).
1 Place paper in the drawer(s).
- "1.SETTING COPY PAPER" Page 36
- When using this mode in bypass copying ("Bypass Copying" Page 59), be sure to specify the paper size.
5
2 Place the original(s).
- "2.SETTING ORIGINALS" Page 45
the [EDIT] button to enter the edit
3 Press
menu, and then press the [EDITING]
button.
4 Press the [MIRROR] button.
z Select other copy modes as required.
5 Press the [START] button.
121
8. X-Y ZOOM
You can make copies with different reproduction ratios set for the X (horizontal) and Y (vertical) directions
in the range of 25 to 400% respectively.
In the following cases, set the reproduction ratio in the range of 25 to 200%.
- When setting the “full colour”, “auto colour”, “twin colour” or “image smoothing” mode.
- When placing the original(s) on the reversing automatic document feeder (optional).
100%
200%
100%
200%
5
1 Place paper in the drawer(s).
- "1.SETTING COPY PAPER" Page 36
2 Place the original(s).
- "2.SETTING ORIGINALS" Page 45
the [EDIT] button to enter the edit
3 Press
menu, and then press the [XY ZOOM]
button.
the reproduction ratios for the X
4 Set
(horizontal) and Y (Vertical) directions
respectively.
- Using the [25%] and [400%] buttons on the screen, set the
reproduction ratio for X and press the [SET] button. Similarly, set
the reproduction ratio for Y.
5 Press the [ENTER] button.
z Select other copy modes as required.
6 Press the [START] button.
122
5.USING THE EDITING FUNCTIONS
9. COVER COPYING
A top cover and /or back cover (special sheets, e.g, coloured paper) can be added to each set of copies.
1: Adding a blank cover
2: Adding a copied cover
3: Adding a blank cover and a blank back cover
4: Adding a copied cover and blank back cover
1
1
2
3
RE
P
20 ORT
03
RE
P
20 ORT
03
2
1
2
5
3
3
1
2
RE
P
20 ORT
03
4
RE
P
20 ORT
03
3
1
2
3
When using the cover feature, make sure all paper sources have the same orientation and size.
The cover sheets are placed in the drawer for cover sheet or on the bypass tray.
123
9.COVER COPYING (Cont.)
the cover sheet in the drawer for
1 Place
cover sheet or on the bypass tray.
- When placing it in the drawer for the cover sheet, it is necessary
to set the paper type (cover sheet), size and weight. Setting the
drawer for special use. "Setting the Drawer for Special Uses" Page 42
- When placing it on the bypass tray, it is necessary to set the paper
size and weight. "Bypass Copying on Standard Size Paper" Page 59
paper (other than cover paper) in
2 Place
the drawer(s).
5
- "Setting the Drawer for Special Uses" Page 42
- Place the paper of the same size and the same direction as that
of cover.
3 Place the original(s).
- "2.SETTING ORIGINALS" Page 45
- When placing an original on the glass, place the first page of your
originals first.
the [EDIT] button to enter the edit
4 Press
menu, and then press the [COVER
SHEET] button.
5 Select the desired cover sheet button:
-
124
To add a blank top cover: [TOP BLANK]
To add a copied top cover: [TOP COPIED]
To add blank top and back covers: [BOTH BLANK]
To add copied top and blank back covers: [TOP COPIED BACK
BLANK]
5.USING THE EDITING FUNCTIONS
the [BASIC] button to enter the
6 Press
basic menu, and then select the paper
source of the same size and direction as
the cover sheet paper.
- Setting the drawer for cover sheet. "Changing the Paper Size of
the Drawer/Setting the Drawer for Special Uses" Page 38
5
- Setting the bypass tray. "Bypass Copying" Page 59
z Select other copy modes as required.
7 Press the [START] button.
When [TOP COPIED] button or [TOP COPIED BACK BLANK]
button is selected, the cover sheet can be copied only on the top
face (single-side) though 1-Sided Original to 2-Sided Copy is used.
125
10. SHEET INSERTION MODE
Special sheets of paper (such as coloured paper) are inserted into a set of copies at the specified pages.
There are 2 types of sheet insertion modes:
1 : Inserting blank sheets before the specified pages
2 : Inserting copied sheets at the specified pages
1
1
2
20 RT
03
2
3
4
RE
RE
P
20 ORT
03
5
1
2
3
4
PO
2
1
3
To make sheet copies, you have to set 2 or 3 drawers (the large capacity feeder can also be used) to the
same paper size and orientation (1 or 2 for special insertion sheets and the other for normal sheets of copy
paper).
sheets of paper in the drawer for the
1 Place
sheet insertion.
- "Changing the Paper Size of the Drawer/Setting the Drawer for
Special Uses" Page 38
plain paper in the drawer(s). (The
2 Place
same size and direction in step 1)
3 Place the original(s).
- "2.SETTING ORIGINALS" Page 45
the [EDIT] button to enter the edit
4 Press
menu, and then press the [SHEET
INSERTION] button.
126
5.USING THE EDITING FUNCTIONS
5 Press [COPIED] or [BLANK] button.
- To insert copied sheet at the specified page: [COPIED]
- To insert blank sheet before the specified paper: [BLANK]
in the desired page number (no more
6 Key
than 3 digits) for insertion and press the
[SET] button.
5
- On the screen, the page where the first sheet will be inserted is
shown. The example on the right shows the first sheet inserted at
(or before) page 10.
- To specify the next and subsequent pages, repeat step 6. Up to
15 pages can be specified.
- To have different sheets inserted than Insert source 1, select
[INSERT SOURCE 2] and similarly key in the pages where you
want the sheets inserted, then press the [SET] button. In this
case, up to 15 pages in all can be specified for the source 1 and 2.
you have finished specifying the
7 After
insertion pages, press the lower [ENTER]
button.
8 Key in the number of sets (or copies).
z Select other copy modes as required.
9 Press the [START] button.
127
11. TIME & DATE STAMP
The time and date of the scanning can be added to the copies.
1: Printed at the bottom of the portrait copy
2: Printed at the top of the landscape copy
2
1
28.01.2004 14:54
28.01.2004 14:54
5
1 Place paper in the drawer(s).
- "1.SETTING COPY PAPER" Page 36
2 Place the original(s).
- "2.SETTING ORIGINALS" Page 45
the [EDIT] button to enter the edit
3 Press
menu, and then press the [TIME STAMP]
button.
the orientation ([Short edge] or
4 Select
[Long edge]) and position (UPPER or
LOWER) of the date and time to be
printed, and then press the [ENTER]
button.
z Select other copy modes as required.
5 Press the [START] button.
128
5.USING THE EDITING FUNCTIONS
12. PAGE NUMBERING
This feature allows numbers to be added at specified positions on copies.
1: Page number printed at the bottom centre on the portrait copy.
2: Page number printed at the top right on the landscape copy.
2
1
1
2
3
1
2
3
5
1 Place paper in the drawer(s).
- "1.SETTING COPY PAPER" Page 36
2 Place the original(s).
- "2.SETTING ORIGINALS" Page 45
the [EDIT] button to enter the edit
3 Press
menu, and then press the [PAGE
NUMBER] button.
the orientation ([Short edge] or
4 Select
[Long edge]) and position of the page
number to be printed, and then press the
[ENTER] button.
129
12.PAGE NUMBERING (Cont.)
5
Key in the starting page number.
- If the start page number is ''1'', just press the [ENTER] button.
z Select other copy modes as required.
6 Press the [START] button.
5
130
5.USING THE EDITING FUNCTIONS
13. JOB BUILD
This feature allows you to scan up to 1000 pages of originals with the optimum original mode and image
adjustment respectively, and then copy and store them as a single job.
* Automatic paper selection, Book to 2, Image editing, X-Y zoom, Cover copying, Magazine Sort, 2IN1/
4IN1, Sheet insertion mode and TWIN COPYING cannot be selected.
5
1 Place the originals of the 1st job.
- When an original is placed on the original glass, one page is
regarded as one job.
- When originals are placed on the reversing automatic document
feeder or mixed sized originals are set, see the following page.
the [EDIT] button to enter the edit
2 Press
menu, and then press the [JOB BUILD]
button.
131
13.JOB BUILD (Cont.)
the [ENTER] button on the screen
3 Press
to set JOB BUILD.
5
“Press START button to copy after
4 After
changing settings” appears, press the
[BASIC] button.
the Basic screen, set the copy mode,
5 On
e-filing/file function, and finishing mode
you want to use for the 1st job.
- Press the [SETTINGS] button to confirm the settings.
- To change the settings, press the [FC] button, and then start the
procedure again from step 1.
Note that the settings for mixed sized originals, paper size to be
copied, finishing mode (unselectable for mixed sized originals),
image shift, book centre erase, time & date stamp, page numbering,
image direction in 2-sided copying, book ↔ tablet, e-filing/file
function cannot be changed for each job, from the 2nd job or later.
6 Press the [START] button.
- Scanning the originals of the 1st job starts.
scanning is completed, the [JOB
7 After
FINISH] button is displayed on the screen.
Each button has the following functions.
- [JOB FINISH] button: All of the scanned originals are outputted as
the settings, they are stored if this was set, and then the settings
of JOB BUILD are released.
132
5.USING THE EDITING FUNCTIONS
8 Place the originals of the 2nd job.
the Basic screen, set the settings for
9 On
the 2nd job.
- The settings for the 2nd job or later can be changed with regard
to the following functions.
Reproduction ratio, automatic magnification selection, original
size, other size
Scanning mode
Image adjustment mode
Edge erase, dual-page
- When the 1st job is set and 2-sided copying (or 1-sided copying)
is selected, the setting cannot be changed to 1-sided copying (or
2-sided copying) from the 2nd job.
5
- Press the [SETTING] button to confirm the settings.
- To change the settings, press the [FC] button, and then start the
procedure again from step 1.
- Be aware that copying will be performed in the same modes as
those of the 1st job if the copy modes are not changed.
having completed the settings,
10 After
press the [START] button.
- Scanning the originals starts.
- For the 3rd job or later, repeat from step 7 to 10.
- Any number of jobs can be set until the total number of scanned
original pages reaches 1000.
having completed all the settings
11 After
and scanning of the originals, press the
[JOB FINISH] button on the Basic screen.
- When copy and e-file/file function are set, storing starts.
133
14. DIRECTION OF COPY IMAGES IN “1 TO 2” AND “2 TO 1”
When a lengthwise A3, A5 or B4 original is copied under the mode of 1-Sided Originals to 2-Sided Copies,
2-Sided Originals to 1-Sided Copies, this function allows you to adjust the direction for 'open to left' opening.
* This function is not necessary for copying in the direction of 'vertical' opening.
1: Set
2: Non set
1
5
1 Place paper in the drawer(s).
- "1.SETTING COPY PAPER" Page 36
2 Place the original(s).
- "2.SETTING ORIGINALS" Page 45
1-Sided Originals to 2-Sided
3 Select
Copies (or 2-Sided Originals to 1-Sided
Copies).
- "5.DUPLEX COPYING" Page 88
the [EDIT] button to enter the edit
4 Press
menu, and then press the [IMAGE
DIRECTION] button.
- If the desired function buttons are not displayed, press the [Next]
button to change the menu.
134
5.USING THE EDITING FUNCTIONS
2
5 Press the [ENTER] button.
z Select other copy modes as required
6 Press the [START] button.
5
135
15. DIRECTION OF DUPLEX COPY IMAGES IN “2 TO 2”
When copying under the mode of 2-Sided Originals to 2-Sided-Copies, this function allows you to rotate the
backside of the original to be copied by 180. It is useful when 'open to left' (Book) originals need to be copied
in 'open to top' (Tablet), and the opposite condition is available.
5
1 Place paper in the drawer(s).
- "1.SETTING COPY PAPER" Page 36
2 Place the original(s).
- "2.SETTING ORIGINALS" Page 45
the [2
3 Press
menu.
2 DUPLEX] in the basic
- "5.DUPLEX COPYING" Page 88
the [EDIT] button to enter the edit
4 Press
menu, and then press the [BOOK
TABLET] button.
- If the desired function buttons are not displayed, press the [Next]
button to change the menu.
5 Press the [ENTER] button.
z Select other copy modes as required
6 Press the [START] button.
136
5.USING THE EDITING FUNCTIONS
16. CONTINUOUS/SINGLE ORIGINAL FEEDING
When using the optional reversing automatic document feeder, you can select the continuous feed mode
(default setting) so that multiple (or single) originals are continuously fed in one by one, or the single feed
mode where an original is automatically pulled in when you insert it and starts being copied.
* When setting the different size of originals "Setting the [MIXED ORIGINAL SIZE]" Page 70
Continuous Feed Mode
1 Place paper in the drawer(s).
- "1.SETTING COPY PAPER" Page 36
the original(s) on the reversing
2 Place
automatic document feeder (optional).
5
- "When Using the Reversing Automatic Document Feeder
(optional)" Page 49
the [EDIT] button to enter the edit
3 Press
menu, and then press the [ADF] button.
- If the desired function buttons are not displayed, press the [NEXT]
button to change the menu screen.
4 Press the [ADF] button.
z Select other copy modes as required.
5 Press the [START] button.
When the number of originals is too large to be set at one time, you
can divide the originals into 2 to 10 sets and set them one after
another. To do so, place the first set of originals first, and press the
[CONTINUE] button while the scanning is in progress. After they
have been scanned, place the next set of originals that should be
scanned.
137
16.CONTINUOUS/SINGLE ORIGINAL FEEDING (Cont.)
Single-feed Mode
1 Place paper in the drawer(s).
- "1.SETTING COPY PAPER" Page 36
the [EDIT] button to enter the edit
2 Press
menu, and then press the [ADF] button.
- If the desired function buttons are not displayed, press the [NEXT]
button or [Prev] button to change the menu.
5
3 Press the [SADF] button.
z Select other copy modes as required.
the original on the reversing
4 Place
automatic document feeder (optional).
- "Inside the Single-feed Mode" Page 51
- The original is automatically pulled in and the screen changes as
shown on the right.
- If there are more originals, set them in the same way. (The same
operation is performed whether or not you press the [YES]
button.)
all originals have been fed through
5 After
the reversing automatic document feeder,
press the [FINISHED] button.
- Copying begins.
138
5.USING THE EDITING FUNCTIONS
6. STORING ORIGINALS
1. STORE TO e-FILING .........................................................................................................140
2. COPY & FILE .....................................................................................................................143
3. ENTERING LETTERS .......................................................................................................146
6
139
1. STORE TO e-FILING
In this function, the copied original data can be stored in the e-Filing. During copying, you can print it at the
same time, as required. After storing the original data, you can print it at any time.
To store the original data, you can specify the public box or one of user boxes. The public box is a pre-set
box since the installation of the equipment, and it will be used to store documents that any user may need
to work with. The user box is the one created by the user, and, if password is set, you need to enter the
password correctly.
Before storing the original data in e-Filing, you need to set up the user boxes. For setting up the user boxes
and printing the stored documents, see "2.SETTING UP BOX" Page 220 and "5.PRINTING STORED
DOCUMENT" Page 225.
* It is recommended to back up the data on the equipment's hard disc to prevent loss of data. You can back
it up with the client PC using the File Downloader. See the [e-Filing Guide] for details.
You can also store the scanned original data in the e-Filing using the scanning operation. ("2.SCAN TO eFILING" Page 150) When you use the original data with the client PC via network, it is recommended to
store the original data using the scanning operation rather than using the copy operation explained here.
6
1 Place the original(s).
- "2.SETTING ORIGINALS" Page 45
- If there is not enough space in the hard disc, the number of
originals that can be stored may be restricted.
- When you want to store and copy the original(s) simultaneously,
select the copy modes as required.
the [E-FILING/FILE] button on the
2 Press
basic screen to enter the filing menu.
3 Press the [STORE TO E-FILING] button.
140
6.STORING ORIGINALS
4 Press the [BOX/FOLDER] button.
- The box list is displayed.
the box in which you want to store
5 Select
the data, and then press the [ENTER]
button.
- Select either the “Public box” or the “User box”.
- See the procedure of “e-FILING” for setting a new user box.
"2.SETTING UP BOX" Page 220
6
document list in the selected box is
6 The
displayed. When you want to store the
original(s) in an existing folder, select the
folder and press the [OPEN FOLDER]
button. If you have no folder to be
selected, press the [ENTER] button.
- If you want to store the data in the user box, password entry may
be required to display the list.
- Creating the folder can be performed only via TopAccess. See the
[e-Filing Guide].
the [DOCUMENT NAME] button to
7 Press
enter the name of the scanned data.
- The letter entry menu ("3.ENTERING LETTERS" Page 146) is
displayed. A document name can contain up to 64 letters.
141
1.STORE TO e-FILING (Cont.)
8 Press the [ENTER] button.
“PRINT THIS DOCUMENT?”
9 When
appears, press the [YES] button to store
and print the document.
6
- If you want to store the document without printing, press the [NO]
button.
10 Press the [START] button.
- Storing the original starts.
ORIGINAL?” appears. If you have
11 “NEXT
the other originals to be stored, press the
[YES] button. If not, press the [FINISHED]
button.
- When the original is set on the reversing automatic document
feeder (optional) to be scanned in the Continuous Feed mode,
this screen is not displayed.
the [FUNCTION CLEAR] button to
12 Press
finish this job.
142
6.STORING ORIGINALS
2. COPY & FILE
In this COPY & FILE function, the copied original data can be sent and stored to the Share folder of the hard
disc in the equipment or the specified PC. You can access the data stored in the Share folder directly from
the client PC via network.
* The network administrator has to make settings for storing the original data to the PCs. For details, see
the [Network Administrator's Guide].
* It is recommended to back up the data stored in the Share folder of the hard disc with the client PC via
network.
1 Place the original(s).
- "2.SETTING ORIGINALS" Page 45
- If there is not enough space in the hard disc, the number of
originals that can be stored may be restricted.
- Select the copy mode as required. Colour is not available with this
function.
the [E-FILING/FILE] button on the
2 Press
basic screen to enter the filing menu.
6
3 Press the [COPY & FILE] button.
143
2.COPY & FILE (Cont.)
the [FILE NAME] button to enter the
4 Press
file name of the stored data.
- The letter entry menu is displayed.
A file name can contain up to 64 letters.
5 Select the desired location.
6
- [MFP LOCAL]: Select when the originals should be stored in the
hard disc in the main equipment. The original data will be stored
under the directory path shown on the screen.
- [REMOTE 1], [REMOTE 2]: Select when the originals should be
stored in the hard disc of user's PC via server.
The administrator has to make settings to select “REMOTE 1” or
“REMOTE 2” using the TopAccess.
For details, see the [Network Administrator’s Guide].
6 Select the desired file format.
- The SCAN folder is automatically created and the original data
will be stored into this folder. If you select “TIFF (SINGLE)”, an
additional folder with the name you entered in step 4 is further
created, and each page will be stored into this folder. You can
access the original data with the client PC via network, by opening
the FILE_SHARE folder in the equipment’s hard disc.
all the settings have been made,
7 After
press the [ENTER] button.
8 Press the [START] button.
144
6.STORING ORIGINALS
ORIGINAL?” appears. If you have
9 “NEXT
the other originals to be stored, press the
[YES] button. If not, press the [FINISHED]
button.
- This screen is displayed when the scanning is performed from the
original glass. It is not displayed from the reversing automatic
document feeder (optional).
6
145
3. ENTERING LETTERS
The following screen is provided for entering letters.
* To enter numbers, use the digital keys on the control panel.
6
146
The following buttons are used to enter letters.
- [CapsLock] Press this button to switch capital letters and small letters.
- [B Space] Press this button to delete the letter before the cursor.
- [Space]
Press this button to enter a space.
- [ENTER]
- [Cancel]
- [Next]
- [Shift]
Press these buttons to move the cursor.
Press this button to fix all entered letters.
Press this button to cancel entry of letters.
Press this button to display the special characters.
Press this button to enter capital letters.
6.STORING ORIGINALS
7. SCANNING THE IMAGES
1. SCAN SETTING IN THE TOUCH PANEL .........................................................................148
2. SCAN TO e-FILING ...........................................................................................................150
3. SCAN TO FILE...................................................................................................................154
4. SCAN TO E-MAIL ..............................................................................................................158
7
147
1. SCAN SETTING IN THE TOUCH PANEL
If the scanning function is used, originals set on the reversing automatic document feeder (optional) or on
the original glass can easily be scanned as image data.
The scanned image data can be sent or stored to the destinations of “SCAN TO e-FILING”, “SCAN TO
FILE” or “SCAN TO E-MAIL”.
* See the [e-Filing Guide] about how to save the data to PCs.
Scanning Procedure
1 Place the original(s).
- "2.SETTING ORIGINALS" Page 45
- Originals acceptable to be set "2.SETTING ORIGINALS" Page 45
- When placing an original on the glass "When Placing an Original
on the Glass" Page 47
- When placing the original on the reversing automatic document
feeder (optional) "16.CONTINUOUS/SINGLE ORIGINAL
FEEDING" Page 137
7
the [SCAN] button on the control
2 Press
panel to enter the scan menu.
- The basic scan menu is displayed.
the desired scan mode and press
3 Select
the button.
- The screen on the right is displayed as an example of selecting
SCAN TO E-FILING.
- To select SCAN TO E-FILING "2.SCAN TO e-FILING" Page
150
To select SCAN TO FILE "3.SCAN TO FILE" Page 154
To select SCAN TO E-MAIL "4.SCAN TO E-MAIL" Page 158
148
7.SCANNING THE IMAGES
the scanning conditions using the
4 Set
buttons on the touch panel and the digital
keys.
- Press the [Next] or [Prev] button to switch the screen and make
necessary settings. After having completed all the settings, press
the [ENTER] button.
5 Press the [SCAN!] button.
7
continue, place document on glass.
6 “To
And press the Scan!” appears. If you want
to continue scanning, press the [SCAN!]
button. If you want to finish scanning,
press the [JOB FINISH] button.
- When the original is set on the reversing automatic document
feeder (optional) to be scanned in the Continuous Feed mode,
this screen is not displayed.
- If you want to cancel the storage of the scanned data, press the
[JOB CANCEL] button.
- You can change the setting of the original type and scanning
conditions using the [EDIT] button before pressing the [SCAN!]
button.
149
2. SCAN TO e-FILING
In this function, the scanned original data can be stored in the e-Filing. You can scan up to 200 sheets of
A4 size per 1 job. During scanning, you can perform the SCAN TO e-FILING or the SCAN TO E-MAIL
simultaneously, as required. After storing the original data, you can print it at any time.
To store the original data, you can specify the public box or one of user boxes. The public box is a pre-set
box since the installation of the equipment, and it will be used to store documents that any user may need
to work with. The user box is the one created by the user, and, if password is set, you need to enter the
password correctly.
Before storing the original data in e-Filing, you need to set up the user boxes. For setting up the user boxes
and printing the stored documents, see "2.SETTING UP BOX" Page 220 and "5.PRINTING STORED
DOCUMENT" Page 225.
* It is recommended to back up the data on the equipment's hard disc to prevent loss of data. You can back
it up with the client PC using the File Downloader. See the [e-Filing Guide] for details.
You can also store the copied original data in the e-Filing using the copy operation. ("1.STORE TO eFILING" Page 140) However, when you use the original data with the client PC via network, it is
recommended to store the original data using the scanning operation explained here, rather than using the
copy operation.
7
1 Place the original(s).
- "2.SETTING ORIGINALS" Page 45
- If there is not enough space in the hard disc, the number of
originals that can be scanned may be restricted.
The reversing automatic document feeder (optional) enables
consecutive scanning of more than one original.
the [SCAN] button on the control
2 Press
panel to enter the scan menu.
150
7.SCANNING THE IMAGES
3 Press the [SCAN TO E-FILING] button.
4 Press the [BOX/FOLDER] button.
- The box list is displayed.
7
the box in which you want to store
5 Select
the data and press the [ENTER] button.
- Select either the “Public box” or the “User box”.
- See the procedure of “e-FILING” for setting the user box.
"2.SETTING UP BOX" Page 220
document list in the selected box is
6 The
displayed. When you want to store the
original(s) in an existing folder, select the
folder and press the [OPEN FOLDER]
button. If you have no folder to be
selected, press the [ENTER] button.
- If you want to store the data in the user box, password entry may
be required to display the list.
- Setting the folder can be made only when this equipment is
connected with the TopAccess. See the [e-Filing Guide].
151
2.SCAN TO e-FILING (Cont.)
the [DOCUMENT NAME] button to
7 Press
enter the name of the scanned data.
- The letter entry menu (see "3.ENTERING LETTERS" Page
146) is displayed. A document name can contain up to 64 letters.
- Press the [ENTER] button on the letter entry menu.
the [EDIT] button to set the original
8 Press
type and size, and the scanning
conditions.
7
- Press the [Next] or the [Prev] button to switch the screen and
make necessary settings. After having completed all the settings,
press the [ENTER] button.
9 Press the [ENTER] button.
152
7.SCANNING THE IMAGES
10 Press the [SCAN!] button.
If the “SCAN TO FILE” or the “SCAN TO E-MAIL” button is pressed
to make the setting before pressing the [SCAN!] button, the
specified 2 jobs can be performed simultaneously.
continue, place document on glass.
11 “To
And press Scan!” appears. If you want to
finish scanning, press the [JOB FINISH]
button.
- If you want to continue scanning, press the [SCAN!] button.
- When the original is set on the reversing automatic document
feeder (optional) to be scanned in the Continuous Feed mode,
this screen is not displayed.
7
- You can change the original size, type and scanning conditions by
pressing the [EDIT] button for the next scanning.
- If you want to cancel the storage of the scanned data, press the
[JOB CANCEL] button.
153
3. SCAN TO FILE
In this SCAN TO FILE function, the scanned original data can be sent and stored to the Share folder of the
hard disc in the equipment or the specified PC. You can scan up to 1,000 sheets of A4 size per 1 job. You
can access the data stored in the Shared folder directly from the client PC via network.
* The network administrator has to make settings for storing the original data to the PCs. For details, see
the [Network Administrator's Guide].
* It is recommended to back up the data stored in the Share folder of the hard disc with the client PC via
network.
1 Place the original(s).
- "2.SETTING ORIGINALS" Page 45
- If there is not enough space in the hard disc, the number of
originals that can be scanned may be restricted.
The reversing automatic document feeder (optional) enables
consecutive scanning of more than one original.
7
the [SCAN] button on the control
2 Press
panel to enter the scan menu.
3 Press the [SCAN TO FILE] button.
154
7.SCANNING THE IMAGES
the [FILE NAME] button to enter the
4 Press
file name of the scanned data.
- The letter entry menu is displayed. A file name can contain up to
45 letters.
- After entering the letters, be sure to press the [ENTER] button.
5 Select the desired location.
- [MFP LOCAL]: Select when the originals should be stored in the
hard disc in the main equipment. The original data will be stored
under the directory path shown on the screen.
- [REMOTE 1], [REMOTE 2]: Select when the originals should be
stored in the hard disc of user’s PC via server.
The administrator has to make settings to select [REMOTE 1] or
[REMOTE 2] using the TopAccess.
For details, see the [Network Administrator’s Guide].
You can select 2 locations to store the data from [MFP LOCAL],
[REMOTE 1] and [REMOTE 2].
6 Select the file format.
7
- The SCAN folder is automatically created and the original data
will be stored into this folder. If you select “TIFF (SINGLE)”, an
additional folder with the name you entered in step 4 is further
created, and each page will be stored into this folder. You can
access the original data with the client PC via network, by opening
the FILE_SHARE folder in the equipment’s hard disc.
the [EDIT] button, set the original
7 Press
type and the scanning conditions, and
then press the [ENTER] button.
155
3.SCAN TO FILE (Cont.)
- Press the [Next] or [Prev] button to switch the screen and make
necessary settings.
8 Press the [ENTER] button.
7
9 Press the [SCAN!] button.
If the [SCAN TO E-FILING] or the [SCAN TO FILE] button is pressed
to make the setting before pressing the [SCAN!] button, the
specified 2 jobs can be performed simultaneously.
continue, place document on glass.
10 “To
And press Scan!” appears. If you want to
finish scanning, press the [JOB FINISH]
button.
- If you want to continue scanning, press the [SCAN!] button.
- When the original is set on the reversing automatic document
feeder (optional) to be scanned in the Continuous Feed mode,
this screen is not displayed.
156
7.SCANNING THE IMAGES
- You can change the original size, type and scanning conditions by
pressing the [EDIT] button for the next scanning.
- If you want to cancel the storage of the scanned data, press the
[JOB CANCEL] button.
7
157
4. SCAN TO E-MAIL
In this function, the scanned data can be sent to the specified E-mail address as an attached file.
After finishing the setting for the E-mail transmission, the settings for SCAN TO E-FILING or SCAN TO FILE
can be made and the data can be scanned simultaneously.
* To use SCAN TO E-MAIL, the configuration of the equipment needs to be set by the network
administrator.
1 Place the original(s).
- "2.SETTING ORIGINALS" Page 45
- If there is not enough space in the hard disc, the number of
originals that can be scanned may be restricted. According to the
network environment, available data amount may be restricted.
The reversing automatic document feeder (optional) enables
consecutive scanning of more than one original.
the [SCAN] button on the control
2 Press
panel to enter the scan menu.
7
3 Press the [SCAN TO E-MAIL] button.
158
7.SCANNING THE IMAGES
the [E-MAIL TO] button and select
4 Press
the address.
- Press the [E-MAIL ADDRESS] button when you want to enter the
address directly with the soft keyboard.
See steps 5 and 6 in "Direct Entry" Page 169 for details.
- In the address book, select the address you want to send to.
- Select the address you want to send to after pressing the
[GROUP] button.
See steps 5 and 6 in "Group Entry" Page 171 for details.
- Select the address you want to send to after pressing the
[KNOWN ID] button.
See steps 5 to 7 in "Searching by ID Number" Page 173 for
details.
- Select the address you want to send to after pressing the
[SEARCH ADDRESS] button.
See steps 5 to 9 in "Searching by Address" Page 174 for
details.
- After pressing the [SEARCH ADRESS] button, select the address
registered in the LDAP (Lightweight Directory Access Protocol)
server without using the address book in this equipment. To
enable this function, it is required to register the LDAP server
name via network beforehand. You can also set the default LDAP
sever that you want to select. (Ask your network administrator for
details.)
See steps 3 to 5 in "Searching Address Using LDAP Server" Page 176 for details.
- In the address book, you can select 2 or more addresses. Also,
you can combine the address book and group entry to select the
address you want to send to.
- See the [User Functions Guide] for entering and setting the
address.
- To return the SCAN TO E-MAIL menu from the address book,
press the [RETURN] button.
7
the [SUBJECT] button and enter the
5 Press
subject of the E-mail.
- A subject can contain up to 256 letters.
"3.ENTERING LETTERS" Page 146
159
4.SCAN TO E-MAIL (Cont.)
the [BODY] button and enter the
6 Press
text body, etc.
- A body can contain up to 1,000 letters.
the [FILE NAME] button and name
7 Press
the scanned data.
- A file name can contain up to 64 letters.
"3.ENTERING LETTERS" Page 146
7
8 Select the file format.
160
7.SCANNING THE IMAGES
the [EDIT] button and set the
9 Press
original size and type.
- After step 9 is finished, press the [NEXT] button.
7
10 Set the size of the attached data.
- Image data are divided into some small blocks to be sent.
FRAGMENT MESSAGE SIZE (KB): NONE, 64 KB, 128 KB, 256
KB, 512 KB, 1024 KB, 2048 KB
Press the [Next] or [Prev] button to switch the screen and make
necessary settings.
The volume of the high-resolution image data may be very large.
When sending E-mail, be careful not to exceed the mail server
capacity of both the transmitter and the receiver.
- If the software for E-mail is not able to divide the data properly,
resend it after setting smaller fragment message size.
- If the data size exceeds the specified size, it is divided into the
specified size to be sent.
- If the E-mail receiver uses a different controller and the attached
file is PDF format, the attached file can not be printed.
161
4.SCAN TO E-MAIL (Cont.)
the [FROM ADDRESS] button to
11 Press
enter the sender's address, and then
press the [ENTER] button.
- Entering Letters "3.ENTERING LETTERS" Page 146
the [FROM NAME] button to enter
12 Press
the sender's name, and then press the
[ENTER] button.
- Entering Letters "3.ENTERING LETTERS" Page 146
7
all the settings are entered, press
13 After
the [ENTER] button.
14 Press the [SCAN!] button.
- If the [SCAN TO E-FILING] or the [SCAN TO E-MAIL] button is
pressed to make the setting before pressing the [SCAN!] button,
the specified 2 jobs can be performed simultaneously.
162
7.SCANNING THE IMAGES
8. INTERNET FAX
1. INTERNET FAX .................................................................................................................164
2. SENDING INTERNET FAX ................................................................................................166
Setting the Transmission Conditions..................................................................................166
Specifying the Recipients ...................................................................................................169
Advanced Function ............................................................................................................180
3. RECEIVING INTERNET FAX ............................................................................................183
8
163
1. INTERNET FAX
Internet Fax function provides the ability to transmit a scanned original as an E-mail, with an attached TIFFS file. Since an Internet line is used instead of a phone line, the communication cost can be reduced.
In this function, an E-mail address is specified in place of a phone number to transmit a scanned original to
the Internet Fax equipment or the client computers.
When the Internet Fax is received, it is automatically output like regular Fax.
* The administrator needs to configure the network settings for Internet Fax to function. See the [Network
Administrator’s Guide].
Precaution for Internet Transmission
Transmissions using the Internet Fax function are the same as E-mail transmissions.
Before you start to use the Internet Fax function, it is recommended that you read this section and
understand the precautions for Internet transmission.
8
- The Internet Fax sends a document to the E-mail server of Internet and it does not send via the PSTN*
alike regular facsimile transmissions.
- Internet transmission has low security. It is recommended that you use regular facsimile transmission
when confidential document is sent.
- It may take a considerable amount of time for the recipient to receive the document because of the line
traffic in the Internet.
- If the document being transmitted has a large amount of data, it may not be successfully sent due to the
configuration of the E-mail server.
* PSTN (Public Switched Telephone Network) is a global telephone system enables to communicate in
worldwide using copper wires to transmit analog data.
Internet Fax Transmission Overview
The following is an overview of the various transmissions that can be performed using the Internet Fax
function.
164
8.INTERNET FAX
- Internet Fax to Internet Fax
The equipment can send a document to another Internet Fax equipment through the Internet or Intranet.
The document is sent as an E-mail.
e-STUDIO3511/4511
e-STUDIO3511/4511
- Internet Fax to/from Client Computers
The equipment can send a document as an E-mail to client computers through the Internet or Intranet.
The client computers can send an E-mail to the equipment as well.
8
e-STUDIO3511/4511
- The client computer receives TIFF-S images when the equipment sends a document using the Internet
Fax function.
- The equipment can only print out text files and TIFF images. When sending E-mail from the client
computer to this equipment using the E-mail application, files other than text or TIFF images cannot be
sent. For Available Format, see "Receiving Modes" Page 183.
165
2. SENDING INTERNET FAX
Setting the Transmission Conditions
Set the resolution, the image quality mode, exposure, original size, subject and body of originals. Whenever
a transmission is completed, the condition will automatically return to the default setting. The following
describes the setting of each item.
- Resolution:
Set the resolution before you scan the original to be sent.
STANDARD, FINE, U-FINE
* For the Internet Fax, the original is sent in FINE though U-FINE is selected.
- Image Quality Mode:
Set the image quality mode before you scan the original to be sent.
TEXT, PHOTO/TEXT, TEXT
* The transmission time may be longer than usual in case the PHOTO/TEXT or the PHOTO mode is
selected.
- Exposure:
Set the image density according to the contrast of the original to be sent.
AUTO, MANUAL (11 steps)
* In the automatic exposure mode, the copier automatically judges the contrast of the original, and selects
the optimum contrast.
* In the manual exposure mode, you can adjust the contrast manually in 11 steps.
8
- Original Size:
Set the scanning size of the original to be sent.
AUTO: The size of the original is automatically determined before it is scanned.
SPECIFIED SIZE: The original is scanned in the specified size regardless of its actual size. Use this mode
when you are using non-standard size paper or you want to limit the area of the original to sent.
* When originals are placed in the reversing automatic document feeder, they are scanned in the AUTO
mode. You can specify the size only when the original is placed on the original glass.
* For the Internet Fax, all originals are sent in A4 size. The larger original than A4 size is reduced to A4
size, and the smaller original than A4 size is put with a margin.
- Subject/Body:
Subject and body can be added to the originals to be sent.
166
8.INTERNET FAX
the [FAX] button on the control
1 Press
panel.
the [ADDRESS] button to display
2 Press
the address menu, and then press the
[OPTION] button.
8
167
2.SENDING INTERNET FAX (Cont.)
selecting each transmission
3 After
condition, press the [ENTER] button.
- Press the [Prev] or [Next] button to switch the menu.
- The buttons shaded in the menu on the right are the default
settings.
8
168
8.INTERNET FAX
Specifying the Recipients
-
Direct entry: You can enter the E-mail address directly with the letter entry menu to send the original.
Address book entry: You can specify the other party that has been registered into the address book.
Group entry: Originals are sent to the recipients that have been already specified as a group at a time.
Multi-address transmission: The same original can be sent to 2 or more recipients in a single operation.
Direct Entry
the [FAX] button on the control
1 Press
panel.
2 Place the original(s).
- "2.SETTING ORIGINALS" Page 45
the [OPTION] button and set the
3 Press
transmission conditions.
- "Setting the Transmission Conditions" Page 166
4 Set the advanced function as required.
- "Advanced Function" Page 180
the [ADDRESS] button to display
5 Press
the address menu, and then press the [E-
8
MAIL ADDRESS] button.
6 Enter the E-mail address.
- Entering letters "3.ENTERING LETTERS" Page 146
7 Press the [START] button.
169
2.SENDING INTERNET FAX (Cont.)
Address Book Entry
- It is necessary to previously register the address book.
See the [User Functions Guide] for registering the address book.
the [FAX] button on the control
1 Press
panel.
2 Place the original(s).
- "2.SETTING ORIGINALS" Page 45
the [OPTION] button and set the
3 Press
transmission conditions.
- "Setting the Transmission Conditions" Page 166
4 Set the advanced function as required.
- "Advanced Function" Page 180
the [ADDRESS] to display the
5 Press
address menu.
8
- 1 screen can show 8 destinations.
To view the destinations not displayed on the screen, press the
[Prev] or [Next] button to scroll through the screens.
- If a group list is displayed, press the [ADDRESS BOOK] button.
6 Press the [E-MAIL] button of destination.
- You can search for the recipient by ID number or Address.
- Searching by ID Number "Searching by ID Number" Page 173
Searching by Address "Searching by Address" Page 174
7 Press the [START] button.
170
8.INTERNET FAX
Group Entry
- It is necessary to previously enter the recipients into the group.
See the [User Functions Guide] for creating groups.
the [FAX] button on the control
1 Press
panel.
2 Place the original(s).
- "2.SETTING ORIGINALS" Page 45
the [OPTION] button and set the
3 Press
transmission conditions.
- "Setting the Transmission Conditions" Page 166
4 Set the advanced function as required.
- "Advanced Function" Page 180
the [ADDRESS] to display the
5 Press
address menu, and then press the
[GROUP] button.
- 1 screen can show 8 destinations.
To view the destinations not displayed on the screen, press the
[Prev] or [Next] button to scroll through the screens.
8
171
2.SENDING INTERNET FAX (Cont.)
the recipient group you want to
6 Press
send to. To check the specified group
member, press the [CONTENTS] button.
- You can search for the recipient by ID number or group.
- Searching by ID Number "Searching by ID Number" Page 173
Searching by Group "Searching by Address" Page 174
7 Press the [START] button.
8
172
8.INTERNET FAX
Searching by ID Number
When selecting the recipient entered in the address and the group, you can immediately search them by
the ID number on the screen.
the [FAX] button on the control
1 Press
panel.
2 Place the original(s).
- "2.SETTING ORIGINALS" Page 45
the [OPTION] button and set the
3 Press
transmission conditions.
- "Setting the Transmission Conditions" Page 166
4 Set the advanced function as required.
- "Advanced Function" Page 180
the [ADDRESS] button to display
5 Press
the address menu, and then press the
[KNOWN ID] button.
8
in the desired ID number using the
6 Key
digital keys, and press the [ENTER]
button.
173
2.SENDING INTERNET FAX (Cont.)
7 Press the [E-MAIL] button of destination.
- 1 screen can show 8 destinations.
To view the destinations not displayed on the screen, press the
[Prev] or [Next] button to scroll through the screens.
- To continue searching by the ID number, press the [KNOWN ID]
button.
- To continue searching by the address ("Searching by Address" Page 174), press the [SEARCH ADDRESS] button.
8 Press the [START] button.
Searching by Address
When selecting the recipient entered in the address and group, pressing a letter button displays the
recipient whose names start with the letter on the screen, which makes it easy to choose the desired
recipient.
the [FAX] button on the control
1 Press
panel.
8
2 Place the original(s).
- "2.SETTING ORIGINALS" Page 45
the [OPTION] button and set the
3 Press
transmission conditions.
- "Setting the Transmission Conditions" Page 166
4 Set the advanced function as required.
- "Advanced Function" Page 180
the [ADDRESS] button to display
5 Press
the address menu, and then press the
[SEARCH ADDRESS] button.
174
8.INTERNET FAX
the button of item that you want to
6 Press
search.
the letter or the number, and then
7 Enter
press the [ENTER] button.
- Entering Letters "3.ENTERING LETTERS" Page 146
8 Press the [SEARCH] button.
8
the [E-MAIL] button of destination,
9 Press
and then press the [ENTER] button.
- 1 screen can show 8 destinations.
To view the destinations not displayed on the screen, press the
[Prev] or [Next] button to scroll through the screens.
- To continue searching by the address, press the [SEARCH
ADDRESS] button. (See Step 5.)
- To continue searching by the ID number ("Searching by ID
Number" Page 173), press the [KNOWN ID] button. (See Step
5 of “Searching by ID Number”)
10 Press the [START] button.
175
2.SENDING INTERNET FAX (Cont.)
Searching Address Using LDAP Server
Without using the address book in this equipment, you can select the recipients registered in the address
book of the LDAP (Lightweight Directory Access Protocol) server via network. In this case, it is required to
register the directory search name using TopAccess via network beforehand. You can also set the default
LDAP server that you want to select. Ask your network administrator for details.
the [FAX] button on the control
1 Press
panel.
- "Setting the Transmission Conditions" Page 166
2 Place the original(s).
- "2.SETTING ORIGINALS" Page 45
the [ADDRESS] button to display
3 Press
the address menu, and then press the
[SEARCH ADDRESS] button.
8
- If you LDAP server has already been set, go to step 6.
4 Press the [DIR SERVICE] button.
176
8.INTERNET FAX
the directory search name that you
5 Press
want to search, and then press the
[ENTER] button.
6 Search the recipient, and then send it.
- Perform steps 6 to 10 in "Searching by Address" Page 174
* Searching using the LDAP server is available for Fax number
and E-mail.
Multi-address Transmission
The multi-address transmission function allows you to send the same original to 2 or more recipients in a
single operation, which can be done by combining direct, address book and group entry.
The following show the number of destinations that can be entered according to how the recipient is
specified:
- By direct entry only: 400 destinations
- By address book entry only: 400 destinations
- By group entry only: 200 groups (400 destinations per 1 group)
- By combining direct, address book and group entry: 400 destinations
1
Press the [FAX] button on the control
panel.
8
2 Place the original(s).
- "2.SETTING ORIGINALS" Page 45
the [OPTION] button and set the
3 Press
transmission conditions.
- "Setting the Transmission Conditions" Page 166
4 Set the advanced function as required.
- "Advanced Function" Page 180
177
2.SENDING INTERNET FAX (Cont.)
5 Specify the recipient.
- To continuously enter E-mail address after having specified them
by means of entering directly, press the [MULTI] button, and then
enter the next address. You do not need to press the [MULTI]
button for the address book or the group entry.
- The selected destinations can be confirmed by selecting the
[DESTINATION] button. "Confirming the Destinations" Page
179
- To cancel the other party’s address during the direct entry, press
the [CLEAR] button on the control panel.
- To cancel the other party specified by the address or the group,
press the highlighted button again. To cancel all specified
recipient, press the [ALL CLEAR] button.
- To cancel the other party specified by the direct entry, press the
[DESTINATION] button to enter the destination menu, and then
cancel it. "Confirming the Destinations" Page 179
6 Press the [START] button.
8
178
8.INTERNET FAX
Confirming the Destinations
After specifying of the multiple destinations by such as Multi-address Transmitting, you can confirm these
addresses in the list by pressing the [DESTINATION] button. Also, you can delete the addresses by
pressing the [DELETE] button.
1 Press the [DESTINATION] button.
- 1 screen can show 8 destinations.
- To view destinations which are not displayed on the screen, press
the [Prev] or [Next] button to scroll through the screens.
the destination that you want to
2 Select
delete, and then press the [DELETE]
button.
8
179
2.SENDING INTERNET FAX (Cont.)
Advanced Function
The following advanced function can be used.
- 2-sided original TX: 2-sided originals can be sent using the reversing automatic document feeder.
- Priority TX: You can send originals prior to the reserved transmissions.
Sending 2-sided Originals
You can scan and send 2-sided originals using the reversing automatic document feeder (optional).
Whenever a transmission is completed, the condition will automatically return to the default setting.
To send the 2-sided originals, the reversing automatic document feeder (optional) needs to be installed in
this equipment.
- Setting originals when sending LT/A4 2-sided originals
To set the originals on the reversing automatic document feeder (optional), change the direction of
original feeding depending on the bound position.
1: 2-sided originals bound with open to left
2: 2-sided originals bound with open to top
1
8
the [FAX] button on the control
1 Press
panel.
2 Place the original(s).
- "2.SETTING ORIGINALS" Page 45
the [OPTION] button and set the
3 Press
transmission conditions.
- "Setting the Transmission Conditions" Page 166
180
8.INTERNET FAX
2
the [ADVANCED] button to display
4 Press
the advanced menu, and then press the
[2-SIDED SCAN] button.
the original type either the [BOOK]
5 Select
or [TABLET] button, and then press the
[ENTER] button.
6 Specify the recipient.
- "Specifying the Recipients" Page 169
7 Press the [START] button.
Priority Transmission
8
Priority TX allows you to execute a transmission prior to the other reserved transmissions.
- You can use 'Direct Entry' and 'Address Dialing' to specify the recipients.
- Priority TX can be performed only for 1 transmission.
the [FAX] button on the control
1 Press
panel.
2 Place the original(s).
- "2.SETTING ORIGINALS" Page 45
the [OPTION] button and set the
3 Press
transmission conditions.
- "Setting the Transmission Conditions" Page 166
181
2.SENDING INTERNET FAX (Cont.)
the [ADVANCED] button to display
4 Press
the advanced menu, and then press the
[PRIORITY RESERVE] button.
5 Press the [ENTER] button.
6 Specify the recipient.
- "Specifying the Recipients" Page 169
7 Press the [START] button.
8
182
8.INTERNET FAX
3. RECEIVING INTERNET FAX
Receiving Modes
The methods to receive an Internet Fax vary according to the type of protocols used for receiving an E-mail.
When POP3* is selected for the Receive Mode:
- The equipment accesses the E-mail server at specified intervals to check whether any E-mail has been
delivered. If an E-mail has been delivered, the equipment will automatically retrieve and print out the Email.
- When the [CHECK E-MAIL] button is pressed, the equipment manually accesses the E-mail server to
check whether any E-mail has been delivered. If an E-mail has been delivered, the equipment receives
and prints out the E-mail.
* POP (Post Office Protocol) is a protocol to retrieve the E-mail message from a mail server. Most E-mail
applications use POP. POP3 is a newer version of the POP protocol.
When SMTP* is selected for Receive Mode
- When SMTP is selected for Receive Mode, the [CHECK E-MAIL] button is disabled. As soon as an Email is received by the E-mail server via the internet, the mail server will transfer the E-mail to this
equipment. For more details, see “Receiving from SMTP server”.
* SMTP (Simple Mail Transfer Protocol) is a server protocol to transfer the E-mail message between
servers. Most E-mail system uses SMTP to transfer the E-mail messages over the Internet.
For how to set the receiving mode and how to print the received Internet Fax, see the [Network
Administrator's Guide]
8
Available Format:
The TIFF-FX images, TIFF images scanned by the scanner and the text data can be printed. In addition,
the resolution of the TIFF-FX image must be 8 x 3.85, 8 x 7.7 or 8 x 15.4 (dot/mm). The resolution of the
TIFF images scanned by the scanner must be 200 x 100, 200 x 200, 200 x 400, 400 x 400 or 600 x 600
(dpi). If the received E-mail contains files that are not the ones described above, an error message will be
displayed in the receive log.
To avoid such a case, you can print the report when an error occurs for E-mail printing and also forwarding
this E-mail to another E-mail address can be set.
If you want to print the report when an error occurs for E-mail printing, set up “Enable Print E-mail Error”.
If you want to forward the E-mail to another E-mail address when an error occurs, set up “Enable E-mail
Error Forward” and “E-mail Error Transfer Address”.
See the “Setting up the E-mail Print” in the [Network Administrator’s Guide].
183
3.RECEIVING INTERNET FAX (Cont.)
Receiving from POP3 Server
To automatically receive the Internet Fax from the E-mail server, set up the “POP3 Time”.
Checking whether any E-mail has been delivered at specified intervals will be performed automatically.
(Default setting: every 5 minutes)
For setting the “POP3 Time”, see the [Network Administrator's Guide].
the [USER FUNCTIONS] button on
1 Press
the control panel.
the [USER] button, and then press
2 Press
the [CHECK E-MAIL].
8
- Checking whether any E-mail has been delivered starts.
3 Checking completes.
- If the Internet Fax is received, “RECEIVING E-mail” appears on
the screen upper right. Next, “NEW E-mail RECEIVED” appears
for 2 seconds. Then, printing the Internet Fax starts.
- If no Internet Fax is received, “CURRENTLY NO E-mail” appears
on the screen upper right for 2 seconds.
Receiving from SMTP Server
Once an E-mail is sent to this equipment or an E-mail is delivered through the Internet, this equipment will
automatically retrieve E-mail from the SMTP server using the SMTP transmission.
When the Receive Mode is set to SMTP, the sub-domain for this equipment must be assigned at the SMTP
server to receive E-mail or enable the Offramp Gateway transmission. In this case, this equipment works
as one of the E-mail servers.
When the SMTP server receives an E-mail intended for the sub-domain of this equipment, the SMTP server
will transfer the E-mail to this equipment using the SMTP transmission. If an E-mail is sent to the E-mail
address of this Internet Fax equipment, it will print the E-mail out.
Please see the OFFRAMP GATEWAY SETUP (See the [Network Administrator’s Guide]) for further details.
When the Receive Mode is set to SMTP the equipment cannot retrieve an E-mail from the mail server
manually.
184
8.INTERNET FAX
9. JOB STATUS
1. JOB STATUS .....................................................................................................................186
2. PRINT JOB LIST................................................................................................................187
3. PROOF PRINT JOB ..........................................................................................................190
4. PRIVATE PRINT JOB ........................................................................................................192
5. WHEN USING THE DEPARTMENT CODES ....................................................................194
6. CONFIRMING THE STATUS OF FAX/INTERNET FAX JOB ............................................196
7. CONFIRMING THE STATUS OF SCAN ............................................................................197
8. LOG LIST ...........................................................................................................................198
LOG ...................................................................................................................................198
9. ADDRESS REGISTRATION FROM LOG LISTS...............................................................201
10.PRINTING SEND/RECEIVE LOG LIST OF FAX ...............................................................203
11. STATUS .............................................................................................................................204
12.ERROR CODE...................................................................................................................206
9
185
1. JOB STATUS
[JOB STATUS] enables:
- To show the list of printing, Internet Fax and scanning jobs in the waiting status
- To show the print, transmission, reception and scan logs
- To perform the execution, pause, deletion and movement of the waiting jobs
- To print the send and receive logs
4 jobs are listed on each screen (page). The jobs for 250 pages (1,000 jobs) are available to display. Press
the [Next] button to display the 5th job or later, and press the [Prev] button to display the previous page.
A
B
9
186
- Items of list
User Name: Name of registered user
Date, Time: Date and time the job was received
Paper: Paper size to be printed
Pages: Number of pages to be printed
Sets: Number of sets to be printed
Status: Status of jobs or specified time for Delayed TX Reservation
- Buttons
The display of buttons (B) are changed by selecting a job from the list. Buttons (A) select the type of print
jobs to view.
9.JOB STATUS
2. PRINT JOB LIST
Print job displays the status of copy jobs and print jobs transmitted between the equipment and network
controller, and perform the deletion, pause, movement and print of the jobs.
Press the [Next] button to display the 5th job or later, and press the [Prev] button to display the previous
page.
Deleting a Job
the [JOB STATUS] button on the
1 Press
control panel to display the JOB STATUS
screen.
- Displayed screen is the print job list screen.
the job on the list you want to
2 Press
delete.
9
3 Press the [DELETE] button.
187
2.PRINT JOB LIST (Cont.)
OK?” appears. Press the
4 “Delete
[DELETE] button to delete the job.
Pause/Resume
the user name on the list you want
1 Press
to interrupt.
2 Press the [PAUSE] button.
resume the job, press the [RELEASE]
3 To
button.
9
188
9.JOB STATUS
Moving a Print Job
the user name on the list you want
1 Press
to move.
2 Press the [MOVE] button.
3 Specify the position of the order.
9
- (Ex.)
Press the 1st user name to move the target job to the 2nd.
189
3. PROOF PRINT JOB
This function performs the proof print when the [PROOF] button is previously specified with the application.
The print job specified for proof print is listed. 1 set is printed as a proof print before the specified number
of sets are printed. After it completes, remaining print job is performed as the normal print job. In addition,
before performing as the normal print job, changing the number of sets and deleting a job are available.
* For the Proof print, see the [Print Guide].
Performing the Proof Print
1 Press the [PROOF] button.
print job list is displayed. Press the
2 Proof
user name on the list you want to print.
9
- If the relevant job is not displayed, press the [Next] or [Prev]
button to switch the screen.
the [RELEASE] button. The job is
3 Press
moved to the normal print job to print it.
190
9.JOB STATUS
After confirming the printed paper of the proof print, press the [EDIT]
button and key in the desired number to change the number of sets.
And then press the [RELEASE] button to continue the normal print
job.
Deleting a Job
1 Press the [PROOF] button.
print job list is displayed. Press the
2 Proof
user name on the list which you want to
9
delete.
3 Press the [DELETE] button.
OK?” appears. Press the
4 “Delete
[DELETE] button to delete the job.
191
4. PRIVATE PRINT JOB
Private print enables to print the desired documents by entering the password which has been set on the
application.
* For the Private print, see the [Print Guide].
Private Print
the [PRIVATE] button to display the
1 Press
private print job list.
the user name on the list you want
2 Press
to start with.
- If the relevant job is not displayed, press the [Next] or [Prev]
button to switch the screen.
3 Press the [RELEASE] button.
4 Key in the password.
5 Press the [ENTER] button.
- The private print job is moved to the print job list to start printing.
9
192
9.JOB STATUS
Deleting a Private Print
the [PRIVATE] button to display the
1 Press
private print job list.
the user name on the list you want
2 Press
to delete.
3 Press the [DELETE] button.
in the password, and then press the
4 Key
[ENTER] button.
9
OK?” appears. Press the
5 “Delete
[DELETE] button to delete the job.
193
5. WHEN USING THE DEPARTMENT CODES
Jobs sent to the equipment without a Department Code or not a registered Department Code will appear in
the Invalid Queue of Job status.
To Restore the Invalid Code (print error) to the Normal Print
the [INVALID] button to display the
1 Press
list.
the user name on the list you want
2 Press
to print.
3 Press the [RELEASE] button.
9
department code entry screen is
4 The
displayed. Key in the correct department
code.
5 Press the [ENTER] button.
194
9.JOB STATUS
Deleting a Job from the List
the [INVALID] button to display the
1 Press
list.
the user name on the list you want
2 Press
to delete.
3 Press the [DELETE] button.
OK?” appears. Press the
4 “Delete
[DELETE] button to delete the job.
9
195
6. CONFIRMING THE STATUS OF FAX/INTERNET FAX JOB
Fax (optional)/Internet Fax JOB displays its status and allows the deletion or releasing of a job. 4 jobs are
listed on each screen (page). The jobs for 250 pages (1,000 jobs) are available to display. Press the [Next]
button to display the 5th job or later, and press the [Prev] button to display the previous page.
* For the Fax function, see the [Network Fax Guide].
9
- Items of list
File No.: Number of accepted job order
To: Recipient
Date, Time: Date and time at the time of registration
Pages: Number of pages to be sent
Status: Status of jobs
- Buttons
[Delete]: The job is deleted when this button is pressed after transmission job is selected.
[RESERVATION LIST]: To print the pending job list (including Delayed TX Reservation job), press this
button.
[RELEASE]: The button becomes active when the job for Delayed TX Reservation (Fax only) is selected.
Pressing this key will send the Delayed TX.
To cancel the Delayed TX Reservation, press this button.
See the [Operator’s Manual for Facsimile Function] for Delayed TX Reservation.
196
9.JOB STATUS
7. CONFIRMING THE STATUS OF SCAN
SCAN JOB displays its status and enables to delete the job. 4 jobs are listed on each screen. The jobs for
250 pages (1,000 jobs) are available to display. Press the [Next] button to display the 5th job or later, and
press the [Prev] button to display the previous page.
* For the SCAN function, see the [SCANNING THE IMAGES]. "1.SCAN SETTING IN THE TOUCH
PANEL" Page 148
- Items of list
To: The name of the file created or the e-mail address of the recipient
Agent: Function used for the scan job
Date, Time: Date and time of the scan job
Pages: Number of pages scanned or sent via e-mail
Status: Status of jobs
- Buttons
[Delete]: The button becomes active when the deletable job is selected.
When this button is pressed, the job is deleted.
9
197
8. LOG LIST
LOG
LOG allows you to list the jobs that have finished being copied, printed, sent/received Fax, sent/received
Internet Fax, sent/received E-mail and scanned to confirm the results. You can also register the Fax number
and E-mail address from the send/receive Fax, sent/received Internet Fax and scan (*1) log to the address
book.
*1 E-mail address used in the E-mail transmission
Print Log
When pressing the [PRINT] button on the log menu, the copying or printing status is displayed.
9
- Items of list
User Name: Sender’s name
Date, Time: Date and time at the time of copying or printing
Paper: Paper size
Pages: Number of pages
Sets: Number of sets
- Buttons
[Return]: To return to the log menu, press this button.
198
9.JOB STATUS
Send/Receive Log
When pressing the [SEND] button on the log menu, the sending status of Fax or Internet Fax is displayed.
When pressing the [RECEIVE] button on the log menu, the receiving status of Fax, Internet Fax or E-mail
is displayed.
9
- Items of list
File No.: Number of accepted job order
To: Recipient’s Fax number or recipient’s E-mail address
From: Sender’s Fax number or sender’s E-mail address
Date, Time: Date and time at the time of sending or receiving Fax or Internet Fax, or receiving E-mail
Pages: Number of pages of sent or received Fax or Internet Fax, or receiving E-mail
Status: Status of job displayed with ‘OK’ or ‘Error code’ "12.ERROR CODE" Page 206
- Buttons
[JOURNAL]: To print the sending/receiving status, press this button. See "10.PRINTING SEND/RECEIVE
LOG LIST OF FAX" Page 203 for details.
[ENTRY]: To register the Fax number or E-mail address in the sending/receiving status to the address
book, press this button. See "9.ADDRESS REGISTRATION FROM LOG LISTS" Page 201 for details.
[RETURN]: To return to the log menu, press this button.
199
8.LOG LIST (Cont.)
Scan Log
When pressing the [SCAN] button on the log menu, the scanning status of the following items is displayed.
- Storing status in e-Filing or Share folder (SAVE AS FILE) by copying
- Storing status in e-Filing or Share folder (SCAN TO FILE) by scanning
- Sending status of E-mail (SCAN TO E-MAIL) by scanning
- Items of list
To: The storing location of the scanned data or E-mail address of the recipient
Agent: Scanned job in the scan menu
Date, Time: Date and time at the time of scanning
Pages: Number of pages scanned or sent E-mail
Status: Status of job displayed with ‘OK’ or ‘Error code’ "12.ERROR CODE" Page 206
9
200
- Buttons
[ENTRY]: To register the E-mail address in the scanning status to the address book, press this button.
See "9.ADDRESS REGISTRATION FROM LOG LISTS" Page 201 for details.
[RETURN]: To return to the log menu, press this button.
9.JOB STATUS
9. ADDRESS REGISTRATION FROM LOG LISTS
You can register the recipient (or sender) in the address book from the SEND /RECEIVE LOG list or the
SCAN LOG list by selecting the recipient (or sender) and pressing the [ENTRY] button.
* For the address book, see the [User Functions Guide].
the [LOG] button and then press the
1 Press
[SEND] (or [RECEIVE] or [SCAN]) button.
LOG list (or RECEIVE LOG list or
2 SEND
SCAN LOG list) is displayed.
9
the recipient (or sender or
3 Select
recipient) you want to register in the
address book.
201
9.ADDRESS REGISTRATION FROM LOG LISTS (Cont.)
4 Press the [ENTRY] button.
ENTRY screen is displayed.
5 ADDRESS
Press each button on the touch panel to
enter following contact information
- [FIRST NAME] - Enter the first name of the contact.
- [LAST NAME] - Enter the last name of the contact. This name will
appear in the address book list on the touch panel.
- [FAX NO.] - ENter the fax number of the contact.
- [2ND FAX] - Enter the second fax number of the contact.
- [E-MAIL] - Enter the E-mail address of the contact.
- [CORP.] - Enter the company name of the contact.
- [DEPT.] - Enter the department name of the contact.
- [KEYWORD] - Enter the keyword of the contact. This keyword
can be used to search for this contact.
9
You must at least enter either the [FIRST NAME] or [LAST NAME]
button, and either the [FAX NO.] or [E-MAIL] button to register the
contact.
When you press each button, the input screen is displayed. Enter
the value using the keyboard and digital keys and press the
[ENTER] button to set the entry.
- Entering letters "3.ENTERING LETTERS" Page 146
6 Press the [ENTER] button.
202
9.JOB STATUS
10. PRINTING SEND/RECEIVE LOG LIST OF FAX
Up to 120 logs (3 pages) and 1 selected SEND (or RECEIVE) LOG are available to print in the SEND/
RECEIVE LOG list of Fax.
* Either 40 logs (1 page) or 120 logs (3 pages) can be set to print the log list. See the [User Functions
Guide] for details.
the [LOG] button, and then press
1 Press
the [SEND] (or [RECEIVE]) button.
the [JOURNAL] button to print the
2 Press
SEND/RECEIVE LOG.
9
203
11. STATUS
STATUS displays the drawer's size of the equipment and highlights the active drawer during printing. When
pressing the [STATUS] during stopping of the print job due to an error, the drawer's size and the active
drawer can be changed in case of paper shortage and no applicable drawer.
Releasing the Print Error
When the drawer for the specified size paper is not prepared, the print job error occurs and the [JOB
STATUS] button blinks. To release the error, follow the procedure below.
9
1 Press the blinking [JOB STATUS] button.
2 Select the drawer to be changed.
- To select the drawer, press the drawer, or the
or
button
on the screen.
the paper size of the drawer to the
3 Change
specified size.
- Changing the paper size of the drawer "Changing the Paper Size
of the Drawer/Setting the Drawer for Special Uses" Page 38
204
9.JOB STATUS
the paper size button you set by
4 Press
pressing the paper size button on the
screen.
5 Press the [START] button.
9
205
12. ERROR CODE
If an error occurs while using the Fax (including the Internet Fax) or scan, the error code is displayed in the
status of each log. Take an appropriate action with reference to the following.
Fax/Internet Fax
Error Code
Cause & Message
Corrective Action
Fax
0011
Paper jam
Clear the jammed printing paper.
0012
Original jam
Clear the jammed original.
0013
Door open
Firmly close the open door.
0020
Power interruption
Check the power interruption report.
0030
Reset
(Transmission is cancelled.)
0033
Polling Error
Check polling options setup (Security Code,
etc.), and check if the polling document exists.
0042
Memory full
Make sure that there is sufficient memory
before making the call again.
0050
Line busy
Retry communications.
0053
Security Mismatch in Relay or Mail Box
transmission
Confirm the remote party’s Security Code,
system password, and your setup.
Signal Error or Line Condition Error
Retry communications. Frequent failures may
indicate a phone line problem. If possible,
move the unit to another line and try your
communications again.
00E8
HDD error
Retry communications. If the error still occurs,
contact your service representative.
00F0
Software failure
Retry communications. If the error still occurs,
contact your service representative.
00F1
Hardware noise
Retry communications. If the error still occurs,
contact your service representative.
1C10
System access abnormality
Turn the power OFF and then back ON.
Perform the job in error again. If the error still
occurs, contact your service representative.
1C11
Insufficient memory
When there are running jobs, perform the job
in error again after the completion of the
running jobs. If the error still occurs, turn the
power OFF and then back ON, and perform
the job again.
1C12
Message reception error
Turn the power OFF and then back ON.
Perform the job in error again.
00B0-00B5
00C0-00C4
00D0-00D2
9
Internet Fax
206
9.JOB STATUS
Error Code
Cause & Message
Corrective Action
1C13
Message transmission error
Turn the power OFF and then back ON.
Perform the job in error again.
1C14
Invalid parameter
When a template is used, form the template
again. If the error still occurs, turn the power
OFF and then back ON, and perform the job
again.
1C15
Exceeding file capacity
Ask your administrator to change the
“Fragment Page Size” setting for the Internet
Fax setting, or reduce the number of pages
and perform the job again.
1C20
System management module access
abnormality
Turn the power OFF and then back ON.
Perform the job in error again. If the recovery
is still not completed, contact your service
representative.
Job control module access abnormality
Turn the power OFF and then back ON.
Perform the job in error again. If the recovery
is still not completed, contact your service
representative.
1C30
Directory creation failure
Check if the access privilege to the storage
directory is writable. Check if the server or
local disc has a sufficient space in disc
capacity.
1C31
File creation failure
Check if the access privilege to the storage
directory is writable. Check if the server or
local disc has a sufficient space in disc
capacity.
1C32
File deletion failure
Turn the power OFF and then back ON.
Perform the job in error again. If the error still
occurs, contact your service representative.
1C33
File access failure
Check if the access privilege to the storage
directory is writable. Check if the server or
local disc has a sufficient space in disc
capacity.
1C40
Image conversion abnormality
Turn the power OFF and then back ON.
Perform the job in error again. If the error still
occurs, contact your service representative.
1C60
HDD full failure during processing
Reduce the number of pages of the job in error
and perform the job again. Check if the server
or local disc has a sufficient space in disc
capacity.
1C21-1C22
9
207
12.ERROR CODE (Cont.)
Error Code
Cause & Message
1C61
Address Book reading failure
Turn the power OFF and then back ON.
Perform the job in error again.
Reset the data in the Address Book and
perform the job again.
If the error still occurs, contact your service
representative.
1C62
Memory acquiring failure
Turn the power OFF and then back ON.
Perform the job in error again. If the error still
occurs, contact your service representative.
1C63
Terminal IP address unset
Ask your administrator to set the IP address of
the equipment.
1C64
Terminal mail address unset
Ask your administrator to set the E-mail
address of the equipment.
1C65
SMTP address unset
Ask your administrator to set the SMTP server
address.
1C66
Server time time-out error
Check if the SMTP server is operating
properly.
1C67
NIC time time-out error
Turn the power OFF and then back ON.
Perform the job in error again. If the error still
occurs, contact your service representative.
1C68
NIC access error
Turn the power OFF and then back ON.
Perform the job in error again. If the error still
occurs, contact your service representative.
1C69
SMTP server connection error
Ask your administrator to set the login name or
password of SMTP server and perform the job
again. Check if the SMTP server is operating
properly.
1C6A
HOST NAME error
Ask your administrator to check if there is an
illegal character in the device name. Delete
the illegal character and reset the appropriate
device name.
1C6B
Terminal mail address error
Ask your administrator to check if there is an
illegal character in the E-mail address of the
equipment. Delete the illegal character and
reset the appropriate E-mail address, then
perform the job again.
1C6C
Destination mail address error
Check if there is an illegal character in the
Destination E-mail address. Delete the illegal
character and reset the appropriate
Destination E-mail address, then perform the
job again.
9
208
Corrective Action
9.JOB STATUS
Error Code
Cause & Message
Corrective Action
1C6D
System error
Turn the power OFF and then back ON.
Perform the job in error again. If the error still
occurs, contact your service representative.
1C70
SMTP client OFF
Ask your administrator to enable the SMTP
Client and perform the job again.
1C80
Internet Fax transmission failure when
processing E-mail job received
Confirm the “Received Internet Fax Forward”
settings.
1C81
Onramp Gateway transmission failure
Confirm the mail box settings.
1C82
Internet Fax transmission failure when
processing Fax job received
Confirm the “Received Fax Forward” setting.
1CC1
Power failure
Check if the power cable is connected
properly and it is inserted securely. Check if
the power voltage is unstable.
MIME format error
Ask the sender to resend the E-mail in the
MIME1.0 format.
E-mail process error
Ask the sender to resend the E-mail.
3A30
Partial E-mail timeout error
Ask the sender to resend the E-mail, or
change the Partial Wait time setting.
3A40
Invalid partial E-mail received
Ask the sender to resend the partial E-mail in
the RFC2046 format.
3A50-3A52
HDD full error
Ask the sender to resend the E-mail by
separating it to several E-mails. If this error
occurs because the paper empty occurs and
too much waiting jobs are stored in the hard
disc, add the paper to activate other jobs.
3A60-3A62
HDD full alert
Ask the sender to resend the E-mail by
separating it to several E-mails. If this error
occurs because the paper empty occurs and
too much waiting jobs are stored in the hard
disc, add the paper to activate other jobs.
Interrupt partial E-mail reception
Ask your administrator to enable the Enable
Partial E-mail setting and ask the sender to
resend the E-mail.
3A80-3A82
Partial E-mail disabled
Ask your administrator to enable the Enable
Partial E-mail setting and ask the sender to
resend the E-mail.
3B10-3B12
E-mail format error
Ask your administrator to enable the Enable
Partial E-mail setting and ask the sender to
resend the E-mail.
3A10-3A12
3A20-22
3A70
9
209
12.ERROR CODE (Cont.)
Error Code
Cause & Message
3B20-3B22
Context-Type error
Ask the sender to resend the E-mail with
attached files that are the TIFF format.
3B30-3B32
Invalid character set
Ask the sender to resend the E-mail in the
ISO-8559-1/2 format.
3B40-3B42
E-mail decode error
Ask the sender to resend the E-mail.
3C10-3C13
TIFF analysis error
Ask the sender to resend the E-mail with
attached files that are the TIFF format.
3C20-3C22
TIFF compression error
Ask the sender to resend the E-mail with
attached TIFF files in the MH, MR, MMR, or
JBIG compression.
3C30-3C32
TIFF resolution error
Ask the sender to resend the E-mail with
attached TIFF files whose resolution is either
200 x 100, 200 x 200, 200 x 400, 300 x 300, or
400 x 400 dpi.
3C40-3C42
TIFF paper size error
Ask the sender to resend the E-mail with
attached TIFF files that can be printed on the
paper available for this equipment.
3C50-3C52
Offramp transmission error
Ask the sender to specify the correct fax
numbers and resend the E-mail.
3C60-3C62
Offramp security error
Confirm the fax numbers that are specified in
the received offramp gateway job and ask the
sender to resend the E-mail with correct fax
numbers.
3C70
Power failure
Confirm the job is recovered or not. If not, ask
the sender to resend the E-mail.
3D10
Destination address error
Ask your administrator whether the DNS and
mail server settings are correctly set. If they
are correctly set, ask the sender to confirm the
destination address is correct.
3D20
Exceeding maximum offramp
destinations
Ask the sender to specify up to 40 destinations
for one offramp gateway job. The equipment
cannot perform the offramp gateway
transmission for more than 40 destinations.
3D30
Fax unit is not installed
Make sure the Fax unit is installed, or
connected correctly.
3E10
POP3 server communication error
Ask your administrator that the POP3 server
address is correctly set, or the POP3 server
works properly.
3E20
POP3 server communication timeout
Ask your administrator that the POP3 server
works properly and the LAN cable is
connected to the server.
9
210
Corrective Action
9.JOB STATUS
Error Code
3E30
3F00, 3F10,
3F20, 3F30,
3F40
Cause & Message
Corrective Action
POP3 login error
Ask your administrator that the POP3 user
name and password is set correctly.
File I/O error
Ask the sender to resend the E-mail. If the
error still occurs, contact your service
representative.
Scan Job
Error Code
Cause & Message
Corrective Action
SCAN TO E-MAIL
2C10, 2C12, Illegal Job status
2C13,
2C20-2C22
A system error has occurred during sending
an E-mail. Retry it. If the error still occurs,
contact your service representative.
2C11, 2C62
Not enough memory
Make sure there is enough memory to send
the scan job.
2C14
Invalid parameter specified
Make sure you specify the settings correctly
and try again.
2C15
Message size exceeded limit or
maximum size
You are sending too many documents at a
time. Send your documents separately.
2C30
Failed to create directory
Make sure that the access privilege to the
storage directory is writable and the server or
local disc has a sufficient space. Then retry the
scan.
2C31, 2C33
Failed to create file
Make sure that the access privilege to the
storage directory is writable and the server or
local disc has a sufficient space. Then retry the
scan.
2C32
Failed to delete file
Turn the power OFF and then back ON. Retry
the scan.
2C40
Failed to convert image file format
Turn the power OFF and then back ON. Retry
the scan. If the error still occurs, contact your
service representative.
2C61
Failed to read AddressBook
Turn the power OFF and then back ON. Retry
the job in error. Reset the data in the Address
Book and retry it. If the error still occurs,
contact your service representative.
Invalid Domain Address
Ask your administrator to set the IP address.
2C63, 2C64
2C65, 2C66, Failed to connect to SMTP server
2C69
9
Make sure the SMTP server is correctly
working, or the SMTP server address has
been set correctly. Then retry the scan.
211
12.ERROR CODE (Cont.)
Error Code
2C67, 2C68
2C6A
9
Cause & Message
Failed to send E-Mail message
Turn the power OFF and then back ON. Retry
the scan. If the error still occurs, contact your
service representative.
2C6B
Invalid address specified in From: field
Make sure that there is an illegal character in
the Terminal mail address. Delete the illegal
character and reset the appropriate Terminal
mail address, then retry it.
2C6C
Invalid address specified in To: field
Make sure that there is an illegal character in
the Destination mail address. Delete the illegal
character and reset the appropriate
Destination mail address, then retry it.
2C6D
NIC system error
Contact your dealer for support.
2C70
SMTP service is not available
Ask your administrator whether the SMTP
service is enabled.
2C80
Failed to process received E-mail job
Ask your administrator to confirm whether the
Received Internet Fax Forward is set.
2C81
Failed to process received Fax job
Ask your administrator to confirm whether the
Received Fax Forward is set.
2CC0
Job canceled
(Job was canceled.)
2CC1
Power failure occurred
Make sure that the power cable is connected
properly and it is inserted securely. Resend
the job.
Save as file
2D10, 2D12, Illegal Job status
2D13,
2D20-2D22
2D11
Turn the power OFF and then back ON. Retry
sending. If the error still occurs, contact your
service representative.
Not enough memory
Make sure there are enough memory to save
the scan job.
2D14, 2D61
Invalid parameter specified
Make sure you specify the settings correctly
and try again.
2D15, 2D65
There are too many documents in the
folder. Failed in creating new document.
Delete the data in the local shared folder in the
equipment and retry the scan.
Failed to create directory
Make sure that the access privilege to the
storage directory is writable and the server or
local disc has a sufficient space. Then retry the
scan.
Failed to create file
Make sure that the access privilege to the
storage directory is writable and the server or
local disc has a sufficient space in disc
capacity. Then retry the scan.
2D30
2D31, 2D33
212
Corrective Action
9.JOB STATUS
Error Code
Cause & Message
Corrective Action
2D32
Failed to delete file
Turn the power OFF and then back ON. Retry
the scan.
2D40
Failed to convert image file format
Turn the power OFF and then back ON. Retry
the scan. If the error still occurs, contact your
service representative.
2D60
Failed to copy file
Turn the power OFF and then back ON. Retry
the scan. If the error still occurs, contact your
service representative.
2D62
Failed to connect to network destination.
Check destination path.
Make sure that the network path is correct,
and retry the scan. If the error still occurs, ask
your administrator to confirm whether the IP
address or path of the server is correct. Also
make sure that the server is operating
properly.
2D63
Specified network path is invalid. Check
destination path.
Make sure you specify correct network folder
and retry the scan.
2D64
Logon to file server failed. Check
username and password.
Make sure you specify correct user name and
password to logon the file server and retry the
scan.
2D66
Failed to process your job. Insufficient
disc space.
Delete the data in the local shared folder in the
equipment and retry the scan.
2D67
FTP service is not available.
Ask your administrator whether the FTP
service is configured correctly.
2D68
File Sharing service is not available.
Ask your administrator whether the SMB
protocol is enabled.
2DC0
Job canceled
Job was canceled.
2DC1
Power failure occurred
Make sure that the power cable is connected
properly and it is inserted securely. Resend
the job.
9
Store to e-Filing
2B10
There was no applicable job.
Retry the scan.
2B11
Job status failed.
Retry the scan. The system could not store the
scan job.
2B20
Failed to access file.
Retry the scan. The system could not store the
scan job.
2B30
Insufficient disc space.
Delete unnecessary documents in e-Filing and
try again.
213
12.ERROR CODE (Cont.)
Error Code
9
214
Cause & Message
Corrective Action
2B31
Failed to access Electronic Filing.
2B32
Failed to print Electronic Filing document. Make sure that the specified document exists.
(If not, this error would not occur.). Delete the
specified document. Retry the job in error. If
the specified document cannot be deleted,
contact your service representative.
2B50
Failed to process image.
Turn the power OFF and then back ON. Retry
the scan. If the error still occurs, contact your
service representative.
2B51
Failed to process print image.
Make sure that the Function List can be
printed out. Retry the print. If the error still
occurs, contact your service representative.
2B60
Duplicate error. Changed folder name
automatically.
There is the same named folder in the
selected box. The system automatically
renames the folder.
2B70
Duplicate error. Changed document
name automatically.
There is the same named document in the
selected box or folder. The system
automatically renames the document.
2B90
Insufficient Memory.
Turn the power OFF and then back ON. Retry
the scan. If the error still occurs, contact your
service representative.
2BA0
Invalid Box password specified.
Make sure that the password is correct and
retry the scan, or reset the password and retry
the scan. When this error occurs for the print
of the data in the e-Filing, perform the print
with the administrator's password. If the
recovery is still not completed or in case of
invalid password for the operation other than
printing (opening the file, etc.), contact your
service representative.
2BB0
Job canceled
(Job was canceled by the user.)
2BB1
Power failure occurred
Make sure that the power cable is connected
properly and it is inserted securely.
2BC0
System fatal error.
Turn the power OFF and then back ON. Retry
the print. If the error still occurs, contact your
service representative.
9.JOB STATUS
Make sure that the specified e-Filing or folder
exists. (If not, this error would not occur.).
Delete the specified e-Filing or folder and
reset them. Retry the job in error. If the
specified e-Filing or folder cannot be deleted,
contact your service representative.
Error Code
Cause & Message
Corrective Action
2BC1
Failed to acquire resource.
Turn the power OFF and then back ON. Retry
the print. If the error still occurs, contact your
service representative.
2B60
ERRCD_SCAN_BOX_FOLDER_DUPLI
CATE
Check the folder to be made.
2B70
ERRCD_SCAN_BOX_DOCUMENT_DU
PLICATE
Check the data to be stored.
2B71
ERRCD_SCAN_BOX_DOCUMENT_EX
PIRE
Check the storage period.
2B80
ERRCD_SCAN_BOX_HDD_NEARFUL
L
Delete the unnecessary data in HDD.
2BD0
ERRCD_SCAN_BOX_RESTORE_FAIL
ED
Check the power cable.
2BE0
ERRCD_SCAN_BOX_MCNTBL_ERRO
R
Turn the power OFF and then back ON to print
again.
2BF0
ERRCD_SCAN_BOX_MAX_PAGE
Reduce the pages to be inserted, and print
them.
2BF1
ERRCD_SCAN_BOX_MAX_DOCUMEN Backup the document in the Box or the folder
T
to PC, or delete them.
2BF2
ERRCD_SCAN_BOX_MAX_FOLDER
Backup the document in the Box or the folder
to PC, or delete them.
9
Printer
Error Code
Cause & Message
Corrective Action
402F
PM size error
Memory full. Contact your service
representative.
4030
No print enabler/invalid
Check if the print enabler is connected
properly and it is inserted securely. Or check if
the trial period is expired.
4031
HDD full for printing
Too many jogs of Private print and Department
code print are stored in HDD. Perform the jobs
or delete them.
A221
Print job cancel
Print job is canceled. Retry the print.
A222
Print Job power interruption
Power failure occurred. Retry the print.
215
12.ERROR CODE (Cont.)
RFC related
Error Code
Cause & Message
2500
Syntax error, command unrecognized:
HOST NAME error, Destination mail
address error, Terminal mail address
error
Check if the Terminal mail address and
Destination mail address are correct. Check if
the mail server is operating properly. Turn the
power OFF and then back ON. Perform the job
in error again.
2501
Syntax error in parameters or arguments:
HOST NAME error, Destination mail
address error, Terminal mail address
error
Check if the Terminal mail address and
Destination mail address are correct. Check if
the mail server is operating properly. Turn the
power OFF and then back ON. Perform the job
in error again.
2503
Destination mail address error
Check if the mail server is operating properly.
Turn the power OFF and then back ON.
Perform the job in error again. If the error still
occurs, Contact your service representative.
2504
HOST NAME error
Check if the mail server is operating properly.
Turn the power OFF and then back ON.
Perform the job in error again. If the error still
occurs, Contact your service representative.
2550
Destination mail address error
Check the state of the mail box in the mail
server.
2551
Destination mail address error
Check if the mail server is operating properly.
Turn the power OFF and the back ON.
Perform the job in error again. If the error still
occurs, Contact your service representative.
2552
Terminal/Destination mail address error
Turn the power OFF and the back ON.
Perform the job in error again. If the error still
occurs, Contact your service representative.
2553
Destination mail address error
Check if there is an illegal character in the mail
box in the mail server.
9
216
Corrective Action
9.JOB STATUS
10. e-FILING
1. e-FILING FUNCTIONS ......................................................................................................218
2. SETTING UP BOX .............................................................................................................220
3. CHANGING INPUT DATA..................................................................................................222
4. DELETING BOX ................................................................................................................224
5. PRINTING STORED DOCUMENT ....................................................................................225
10
217
1. e-FILING FUNCTIONS
In this e-Filing functions, the documents obtained by copying, scanning, printing, Fax receiving (when an
option is installed), Internet Fax and E-mail reception can be managed in the e-Filing (hard disc) inside the
equipment. Before you use the e-Filing, you need to set up it. The e-Filing consists of one public box and
user boxes up to 200. You can store a number of documents in each box, and then print the stored
documents later as required.
- e-filing can be operated with the equipment or a client PC via network. For the operation via network, see
the [e-Filing Guide].
* If the preservation period for documents is specified for a user box in the e-Filing web utility, the stored
documents will be deleted after that period has passed. Before that, you need to print the documents, or
download them with a client PC using the File Downloader. See the [e-Filing Guide] for details.
* It is recommended to back up the data on the equipment's hard disc to prevent loss of data. You can back
it up with the client PC using the File Downloader. See the [e-Filing Guide] for details.
The following figure shows the functional diagram of the e-Filing.
1 : Store the document.
2 : Add the printing settings to the stored documents as required.
3 : Print the documents.
4 : The documents can be viewed, edited, merged (Copy/Paste), and printed by the e-Filing web utility via
network. Also, the documents can be downloaded by the File Downloader, and imported into TWAINcompliant applications by the TWAIN driver. See the [e-Filing Guide] for details.
2
HDD
1
10
4
218
10.e-FILING
3
With the equipment, documents can be stored in the e-Filing as the original data by copying or scanning.
("1.STORE TO e-FILING" Page 140, "2.SCAN TO e-FILING" Page 150) The documents stored in
the e-Filing can be printed by specifying some pages or “All Pages” after adding/changing printing settings
as required. Also, unnecessary documents can be deleted from the specified user box.
The following table shows the main difference between the operation by the equipment and that by a client
PC using the e-Filing web utility via network.
Function
Equipment (Touch Panel)
Client PC
Creating the user box
Yes
Yes
Creating the folder in the user box
No
Yes
Deleting the user box
Yes
Yes
Deleting the folder or document in the user box
No
Yes
Editing the documents (combining, switching, etc.)
No
Yes
The following shows the basic configuration of the e-Filing.
Public box
Shared document 1, Shared document 2, ...
User box 001
Document 1
Document 2
Folder 1
Document 1
Document 2
The public box is a pre-set box by default in the equipment. Use it to store documents that any user may
need to work with. Up to 200 user boxes can be registered. It can be registered as a password-protected
user box by setting the password. Before storing documents in e-Filing, prepare the user boxes to manage
documents efficiently.
- Up to 100 folders per one box can be created (can only be set via the network). See the [e-Filing Guide]
for details.
- Up to 400 documents can be stored in a box or a folder. The Maximum page number of a document is
200.
10
219
2. SETTING UP BOX
The e-Filing consists of one public box and user boxes up to 200. The public box is a pre-set box since the
installation of the equipment, and no setting up is required. The user box can be set/registered by giving a
box name. If the password is set, the box is protected and important documents can be stored safely. Up
to 200 user boxes can be set/registered.
* Before storing documents in the e-Filing, we recommend you to prepare user boxes and folders (can only
be set in the network) to manage documents efficiently. See the [e-Filing Guide] for details.
the [e-FILING] button on the control
1 Press
panel.
the blank buttons numbered from
2 Select
001 to 200, and then press the [SETUP]
button.
10
the “BOX NAME”. Then, set the
3 Set
“Password” as required.
- When pressing the [BOX NAME] button, the letter entry menu
("3.ENTERING LETTERS" Page 146) is displayed. A box
name can contain up to 32 letters.
- Key in the 5-digit identical number in both “Password” and
“Retype Password”. Press the [SET] button after entering the
password.
220
10.e-FILING
4 Press the [ENTER] button.
- A box is newly set.
10
221
3. CHANGING INPUT DATA
The “registered box name” and “password” of the user box can be changed.
* You cannot change the folder name with the equipment. Change it with a client PC using the e-Filing web
utility via network, if required. See the [e-Filing Guide] for details.
the [e-FILING] button on the control
1 Press
panel.
the box you want to change, and
2 Select
then press the [EDIT] button.
- Switch to the applicable menu using the [Prev] or the [Next]
button.
- To display the applicable menu immediately, key in the number of
the desired box you want to change.
in the “Password” (5 digits) for the
3 Key
selected box, and then press the [ENTER]
button.
- If the password has not been set at the box registration, skip to
step 4.
10
the data of the “BOX NAME” and
4 Change
the “Password”.
- When pressing the [BOX NAME] button, the letter entry menu
("3.ENTERING LETTERS" Page 146) is displayed. A box
name can contain up to 32 letters.
- Key in the 5-digit identical number in both “Password” and
“Retype Password”. Press the [SET] button after entering the
password.
222
10.e-FILING
5 Press the [ENTER] button.
- The box settings are updated.
10
223
4. DELETING BOX
The unnecessary user box can be deleted. In this case, all the documents in a user box are also deleted.
* The public box cannot be deleted.
* You cannot delete the folder in a user box with the equipment. Delete it with a client PC using the e-Filing
web utility via network, if required. See the [e-Filing Guide] for details.
the [e-FILING] button on the control
1 Press
panel.
the box you want to delete, and
2 Select
then press the [DELETE] button.
- Switch to the applicable menu using the [Prev] or the [Next]
button.
- To display the applicable menu immediately, key in the number of
the desired box you want to change.
in the “Password” (5 digits) for the
3 Key
selected box, and then press the [ENTER]
button.
- If the password has not been set at the box registration, skip to
step 4.
10
you sure you want to delete this
4 “Are
BOX?” appears. Press the [YES] button to
delete the box.
- The selected box is deleted.
224
10.e-FILING
5. PRINTING STORED DOCUMENT
Documents stored in the box or the folder can be printed.
State of finishing can be selected. And to confirm the printing content, test printing can also be performed.
Print the whole Document.
All the pages of the document will be printed. If printing multiple copies is desired, see "Printing the Stored
Document with Added/Changed Settings" Page 227.
the [e-FILING] button on the control
1 Press
panel.
the box which has the desired
2 Select
printing document stored, and then press
the [ENTER] button.
- Switch to the applicable menu using the [Prev] or the [Next]
button.
- To display the applicable menu immediately, key in the number of
the desired box you want to change.
in the “Password” (5 digits) for the
3 Key
selected box, and then press the [ENTER]
button.
- If the password has not been set at the box registration, skip to
step 4.
10
4 Select the document to be printed.
- When you want to select the document in the folder, select the
folder and press the [OPEN FOLDER] button. And then select the
desired document.
225
5.PRINTING STORED DOCUMENT (Cont.)
When printing the color scanning image, press the [USER
FUNCTION] button to enter the user menu and press the [eFILLING] button to set the printing image.
5 Press the [PRINT] button.
- Printing of the whole document starts.
When you want to stop the print of the stored document during the
operation, select the job you want to stop from the PRINT JOB
screen or SCAN JOB screen and then press the [DELETE] button.
For details, see the JOB STATUS.
"Deleting a Job" Page 187
"7.CONFIRMING THE STATUS OF SCAN" Page 197
Execute Test Printing
A part can be printed from a document that consists of several pages.
10
steps 1 to 4 of the “Print the
1 Perform
whole Document”.
2 Press the [TEST PRINT] button.
226
10.e-FILING
in the number of the first and the last
3 Key
pages to specify the printing page.
- After keying them in, press the [ENTER] button.
- To correct the page, press the [CANCEL] button.
- When printing all pages are desired, press the [ALL PAGES]
button.
4 Press the [PRINT] button.
- Printing the set page starts.
When you want to stop the print of the stored document during the
operation, select the job you want to stop from the PRINT JOB
screen or SCAN JOB screen and then press the [DELETE] button.
For details, see the JOB STATUS.
"Deleting a Job" Page 187
"7.CONFIRMING THE STATUS OF SCAN" Page 197
Printing the Stored Document with Added/Changed Settings
The following settings can be added (or changed) to the stored document in the filing box.
1: Setting the feeding source (Press the cassette area of the feeding source)
2: Setting the number of printing (Key in by the digital key)
3: Setting single-side printing/duplex printing.
4: Setting the finishing mode setting (Selection of the mode is limited depending on the installed option
equipment)
5: Setting the paper exit (Can be set when an optional finisher is installed.)
6: Setting the image shift position
7: Setting the added date and time position
8: Setting of page number position
1
2
3
10
4
6
7
8
5
227
5.PRINTING STORED DOCUMENT (Cont.)
steps 1 to 4 of the “Print the
1 Perform
whole Document”.
2 Press the [SETTINGS] button.
3 Set printing as required.
- See the previous page for details. As for the settings of 3 to 8,
press the button, select the desired button in the menu and press
the [ENTER] button.
4 Press the [PRINT] button.
- Printing starts.
When you want to stop the print of the stored document during the
operation, select the job you want to stop from the PRINT JOB
screen or SCAN JOB screen and then press the [DELETE] button.
For details, see the JOB STATUS.
"Deleting a Job" Page 187
"7.CONFIRMING THE STATUS OF SCAN" Page 197
10
228
10.e-FILING
11. TEMPLATE
1. TEMPLATE ........................................................................................................................230
2. RECALLING TEMPLATE ...................................................................................................231
3. REGISTERING TEMPLATE...............................................................................................234
4. CHANGING INPUT DATA..................................................................................................239
5. DELETING TEMPLATE .....................................................................................................243
11
229
1. TEMPLATE
A combination of functions frequently used can be registered as a template and recalled as required
* You can register the setting combination of copy functions, scan functions or facsimile functions (optional)
as a template and retrieve it.
The combinations are registered in either “PUBLIC TEMPLATE GROUP” or “USER GROUP (Up to 200
groups are available.)” in the menu of template. Up to 60 combinations can be registered in 1 group.
1 : Register the combination of the functions.
2 : Place the original.
3 : Retrieve the desired template.
2
90 %
2004.3.15
11
230
11.TEMPLATE
2004.3.15
HDD
3
2004.3.15
2004.3.15
1
2. RECALLING TEMPLATE
All you have to do is to press the [START] button (the [SCAN] button on the touch panel for scanning) after
recalling the required template.
* Before recalling templates, you need to register them. See "3.REGISTERING TEMPLATE" Page 234.
When Recalling Template in the Public Group
1 Place paper in the drawer(s).
- "1.SETTING COPY PAPER" Page 36
2 Place the original(s).
- "2.SETTING ORIGINALS" Page 45
the [TEMPLATE] button on the
3 Press
control panel.
- Menu for recalling template is displayed.
4 Press the “PUBLIC TEMPLATE GROUP”.
11
5 Select the desired template.
231
2.RECALLING TEMPLATE (Cont.)
that “Updated the template
6 Confirm
setting” is displayed on the screen.
z Select other copy mode as required.
7 Press the [START] button.
When Recalling Template in the User Group
1 Place paper in the drawer(s).
- "1.SETTING COPY PAPER" Page 36
2 Place the original(s).
- "2.SETTING ORIGINALS" Page 45
the [TEMPLATE] button on the
3 Press
control panel.
- Menu for recalling template is displayed.
the group registered the template
4 Press
you want to recall.
- Switch to the applicable menu using the [Prev] or the [Next]
button.
- To display the applicable menu immediately, key in the number of
the desired user group.
11
in the Password (5 digits) of the
5 Key
selected group, and then press the
[ENTER] button.
- If the password has not been set at the group registration, skip
this procedure and go to step 6.
232
11.TEMPLATE
6 Select the desired template.
in the Password (5 digits) of the
7 Key
selected template, and then press the
[ENTER] button.
- If the password has not been set at the group registration, skip
this procedure and go to step 8.
that “Updated the template
8 Confirm
setting” is displayed on the screen.
z Select other copy mode as required.
9 Press the [START] button.
11
233
3. REGISTERING TEMPLATE
To recall the template, you need to first register the setting combination as a template.
The template is registered either in “PUBLIC TEMPLATE GROUP” or “USER GROUP” depending on your
purpose.
- PUBLIC TEMPLATE GROUP:
Anyone can use the template when the setting combination of the functions frequently used throughout
the company or organization have been registered in this group. Up to 60 combinations (templates) are
available in this group. According to the purpose of use, you can restrict the use by entering the password.
- USER GROUP:
Each department, section or person controls one user group and registers it as a template. It is easier to
control it if you set the password for group registration. Up to 200 groups can be set and up to 60
combinations (templates) are available in this group.
* When registering the template in the public template group, keying in the “Admin Password” is required.
Registering the Template in the Public Template Group
1 Set every function you want to combine.
- Ex.: Setting “Image shift”, “90% Reduction” and “10 sets of
copies” of the copy function.
the [TEMPLATE] button on the
2 Press
control panel.
3 Press the [REGISTRATION] button.
11
“PUBLIC TEMPLATE GROUP”, and
4 Select
then press the [ENTER] button.
234
11.TEMPLATE
in the “Admin Password” (6 digits),
5 Key
and then press the [ENTER] button.
the blank key in the template menu,
6 Press
and then press the [SAVE] button.
7 Enter the data for registering template.
- Although either the “NAME 1” or the “NAME 2” must be entered,
the “USER NAME” and the “PASSWORD” are entered as
required.
- When pressing the [NAME 1] button, the menu of entering letters
("3.ENTERING LETTERS" Page 146) is displayed, so enter
the name with up to 11 letters.
- Enter the name with up to 11 letters for “NAME 2” and with up to
30 letters for “USER NAME” as the above manner.
pressing the [PASSWORD] button
8 When
on the menu of step 7, the menu is
11
switched as shown on the right. Key in a
5-digit identical number in both
“Password” and “Retype Password”, and
then press the [ENTER] button.
- Press the [ENTER] button after entering the password.
235
3.REGISTERING TEMPLATE (Cont.)
9 Press the [SAVE] button.
- The menu returns to step 1. (the menu before pressing the
[TEMPLATE] button on the control panel.)
Registering the Template in the User Group
1 Set every function you want to combine.
- Ex: Setting “Image shift”, “90% Reduction” and “10 sets of copies”
of the copy function.
the [TEMPLATE] button on the
2 Press
control panel.
3 Press the [REGISTRATION] button.
11
the “USER GROUP” of blank
4 Select
buttons from 001 to 200, and then press
the [ENTER] button.
- When selecting the unregistered “USER GROUP”, follow step 5.
236
11.TEMPLATE
- When selecting the registered “USER GROUP”, key in “GROUP
PASSWORD” (5 digits) on the next menu, and then skip to step 8.
the data for registering the new user
5 Enter
group.
- Although the “NAME” must be entered, the “USER NAME” and
the “PASSWORD” are entered as required.
- When pressing the [NAME] button, the menu of entering letters
("3.ENTERING LETTERS" Page 146) is displayed, so enter
the name with up to 20 letters.
- Enter the name with up to 30 letters for the [USER NAME] as the
above manner.
pressing the [PASSWORD] button
6 When
on the menu of step 5, the menu is
switched as shown on the right. Key in a
5-digit identical number in both
“Password” and “Retype Password”, and
then press the [ENTER] button.
- Press the [SET] button after entering the password.
the empty [TEMPLATE] button, and
7 Press
then press the [SAVE] button.
11
237
3.REGISTERING TEMPLATE (Cont.)
8 Enter the data requested.
- Although either the “NAME 1” or the “NAME 2” must be entered,
the “USER NAME” and the “PASSWORD” are entered as
required.
- When pressing the [NAME 1] button, the menu of entering letters
("3.ENTERING LETTERS" Page 146) is displayed, so enter
the name with up to 11 letters.
- Enter the name with up to 11 letters for “NAME 2” and with up to
30 letters for “USER NAME” as the above manner.
pressing the [PASSWORD] button
9 When
on the menu of step 9, the menu is
switched as shown on the right. Key in a
5-digit identical number in both
“Password” and “Retype Password”, and
then press the [ENTER] button.
- Press the [ENTER] button after entering the password.
10 Press the [SAVE] button.
- The menu returns to step 1, which is the menu seen before
pressing the [TEMPLATE] button on the control panel.
11
238
11.TEMPLATE
4. CHANGING INPUT DATA
The registered name, user name, password of template/user group can be changed.
Changing the Data of Template
the [TEMPLATE] button on the
1 Press
control panel.
2 Press the [REGISTRATION] button
the group (in which the template
3 Select
was registered) that you want to change,
and then press the [ENTER] button.
- Switch to the applicable menu using the [Prev] or the [Next]
button.
- To display the applicable menu immediately, key in the number of
desired user group.
selecting the [PUBLIC TEMPLATE
4 When
GROUP] button, key in the “Admin
Password” (6 digits), and then press the
[ENTER] button. When selecting a user
group, key in the selected group’s
“Password” (5 digits), and then press the
[ENTER] button.
11
- If the password has not been set at the user group registration,
skip to step 5.
239
4.CHANGING INPUT DATA (Cont.)
the template you want to change,
5 Select
and then press the [EDIT] button.
in the “Password” (5 digits) for the
6 Key
selected template, and then press the
[ENTER] button.
- If the password has not been set at the template registration, skip
to step 7.
the button of “NAME 1”, “NAME 2”
7 Press
and/or “USER NAME”.
- When pressing the [NAME 1] button, the menu of entering letters
("3.ENTERING LETTERS" Page 146) is displayed, so enter
the name with up to 11 letters.
- Enter the name with up to 11 letters for the “NAME 2” and with up
to 30 letters for the “USER NAME” as the above manner.
- To change the password only, skip step 7.
11
pressing the [PASSWORD] button
8 When
on the menu of step 7, the menu is
switched as shown on the right. Key in the
changed number (5-digits identical
number) in both “Password” and “Retype
Password”, then press the [ENTER]
button.
- Press the [ENTER] button after entering the password.
- Not to change the password, skip step 8.
240
11.TEMPLATE
9 Press the [ENTER] button.
- The data of template are changed.
Changing the Data of User Group
Those of public group cannot be changed.
the [TEMPLATE] button on the
1 Press
control panel.
2 Press the [REGISTRATION] button.
the “USER GROUP” you want to
3 Select
change, and then press the [EDIT] button.
11
- Switch to the applicable menu using the [Prev] or the [Next]
button.
- To display the applicable menu immediately, key in the number of
the desired user group using the digital keys.
241
4.CHANGING INPUT DATA (Cont.)
in the “Password” (5 digits) for
4 Key
selected group, and then press the
[ENTER] button.
- If the password has not been set at the group registration, skip to
step 5.
the [NAME] button and/or the
5 Press
[USER NAME] button.
- When pressing the NAME button, the menu of entering letters
("3.ENTERING LETTERS" Page 146) is displayed, so enter
the name with up to 20 letters.
- Enter the name with up to 30 letters for the “USER NAME” as the
above manner.
- To change the password only, skip step 5.
pressing the [PASSWORD] button
6 When
on the menu of step 5, the menu is
switched as shown on the right. Key in the
changed number (5-digit identical
number) in both “Password” and “Retype
Password”, then press the [ENTER]
button.
- Not to change the password, skip step 5.
11
7 Press the [ENTER] button.
- The data of user group are changed.
242
11.TEMPLATE
5. DELETING TEMPLATE
Unnecessary templates can be deleted. You can also delete user groups.
Deleting a Template
the [TEMPLATE] button on the
1 Press
control panel.
2 Press the [REGISTRATION] button.
the group (in which the template
3 Select
was registered) that you want to delete,
then press the [ENTER] button.
- Switch to the applicable menu using the [Prev] or the [Next]
button.
- To display the applicable menu immediately, key in the number of
desired user group.
selecting the [PUBLIC TEMPLATE
4 When
GROUP] button, key in the “Admin
Password” (6 digits) using the digital
keys, and then press the [ENTER] button.
When selecting a user group, key in the
selected group “Password” (5 digits)
using the digital keys, and then press the
[ENTER] button.
11
- If the password has not been set at the user group registration,
skip to step 5.
243
5.DELETING TEMPLATE (Cont.)
the template you want to delete,
5 Select
then press the [DELETE] button.
in the “Password” (5 digits) for the
6 Key
selected template, and then press the
[ENTER] button.
- If the password has not been set at the user group registration,
skip to step 7.
7 Press the [DELETE] button.
- The selected template is deleted.
11
244
11.TEMPLATE
Deleting a User Group
the [TEMPLATE] button on the
1 Press
control panel.
2 Press the [REGISTRATION] button.
the user group you want to delete,
3 Select
and then press the [DELETE] button.
- Switch to the applicable menu using the [Prev] or the [Next]
button.
- To display the applicable menu immediately, key in the number of
desired user group.
in the “Password” (5 digits) for the
4 Key
selected group, and then press the
[ENTER] button.
- If the password has not been set at the user group registration,
skip to step 5.
11
245
5.DELETING TEMPLATE (Cont.)
5 Press the [DELETE] button.
- The selected user group is deleted.
11
246
11.TEMPLATE
12. WHEN THE GRAPHIC
SYMBOLS BLINK ON THE
TOUCH PANEL
1. DESCRIPTION OF THE BLINKING GRAPHIC SYMBOLS...............................................248
2. ADD PAPER SYMBOL.......................................................................................................250
Adding Paper to the Drawers .............................................................................................250
Adding Paper to the Large Capacity Feeder (Optional) .....................................................251
3. REPLACE TONER CARTRIDGE SYMBOL.......................................................................252
4. REPLACE TONER BAG SYMBOL ....................................................................................259
5. CLEAR PAPER SYMBOL ..................................................................................................260
6. ADDING STAPLES (OPTIONAL).......................................................................................274
7. REMOVING JAMMED STAPLES (OPTIONAL).................................................................280
8. DISPOSING OF THE PUNCHED PAPER BITS (OPTIONAL)...........................................287
9. CALL SERVICE SYMBOL/PERIODIC MAINTENANCE MESSAGE .................................288
12
247
1. DESCRIPTION OF THE BLINKING GRAPHIC SYMBOLS
The graphic symbol on the touch panel shows the status of the equipment. When one of the graphic
symbols blinks, take the appropriate action referring to the page shown.
1
2
3
13
4
12
5
11
6
7
10 9
8
1 : CHECK ORIGINALS symbol
Blinks when an original misfeed occurs inside the reversing automatic document feeder.
"1. Paper Misfeed in the Reversing Automatic Document Feeder (optional)" Page 260
2 : RELAY UNIT MISFEED symbol
Blinks when a paper misfeed occurs in the relay unit.
"8. Paper Misfeed in the Relay Unit (optional)" Page 267
3 : FUSER MISFEED symbol
Blinks when a paper misfeed occurs in the fuser unit.
"7. Paper Misfeed in the Fuser Unit" Page 265
4 : DUPLEXER MISFEED symbol
Blinks when a paper misfeed occurs inside the automatic duplexer.
"5. Paper Misfeed in the Automatic Duplexer" Page 264
5 : BYPASS MISFEED symbol
Blinks when a sheet of paper fails to be fed into the equipment during bypass copying.
"4. Paper Misfeed on the Bypass Feed Unit" Page 264
12
6 : DRAWER MISFEED symbol
Blinks when paper fed from one of the drawers is misfed.
"2. Paper Misfeed in the Drawer Feeding Area" Page 262
7 : OPTIONAL FEEDER MISFEED symbol
Blinks when paper fed from the large capacity feeder (optional) is misfed.
"3. Paper Misfeed in the Large Capacity Feeder (optional)" Page 263
8 : JAM RELEASING UNIT MISFEED symbol
Blinks when a misfeed occurs in the jam releasing unit.
"6. Paper Misfeed in the Jam Releasing Unit" Page 265
248
12.WHEN THE GRAPHIC SYMBOLS BLINK ON THE TOUCH
9 : REPLACE TONER CARTRIDGE symbol
Blinks when the toner cartridge runs out of toner.
"3.REPLACE TONER CARTRIDGE SYMBOL" Page 252
10: REPLACE TONER BAG symbol
Blinks when the toner bag becomes full of used toner.
"4.REPLACE TONER BAG SYMBOL" Page 259
11: SADDLE STITCHING UNIT MISFEED symbol
Blinks when a paper misfeed occurs inside the saddle stitch unit of the finisher (optional).
"12. Paper Misfeed in the Saddle-Stitch Finisher (optional: MJ-1024)" Page 271
12: FINISHER/HOLE PUNCH UNIT MISFEED symbol
Blinks when a paper misfeed occurs inside the finisher (optional) or hole punch unit (optional).
"9. Paper Misfeed in the Hole Punch Unit (optional)" Page 268
13: CALL SERVICE symbol
Blinks when inspection and maintenance by a service technician are necessary.
"Call Service Symbol" Page 288
12
249
2. ADD PAPER SYMBOL
Adding Paper to the Drawers
When the paper in the selected drawer or the large capacity feeder (optional) runs out, the drawer or large
capacity feeder on the screen blinks, and “Add paper” appears. Add paper as the following procedure.
out the drawer carefully until it comes
1 Pull
to a stop.
2 Place paper in the drawer(s).
- Place paper face up.
- Maximum number of sheets that can be set. "Acceptable Copy
Paper Types and Sizes" Page 36
- Fan the paper well before placing it in the drawer.
- Do not add paper above the line indicated on the guide.
- Do not use creased, folded, wrinkled or damp sheets of paper.
Make sure that a gap of approx. 0.5 mm (less than 1 mm in total) is
left between the paper and the side guide. If there is no gap, this
could cause paper misfeeding.
the drawer straight into the
3 Push
equipment until it comes to a stop.
12
- Be sure to push the drawer carefully and fully in.
- This procedure can be used to add paper to any of the drawers in
the paper feed pedestal (optional) as well.
Be careful not to let your fingers be caught when closing the drawer.
This could injure you.
250
12.WHEN THE GRAPHIC SYMBOLS BLINK ON THE TOUCH
0.5mm
(0.02’’)
Adding Paper to the Large Capacity Feeder (Optional)
out the large capacity feeder carefully
1 Pull
until it comes to a stop.
2 Set paper aligned in tray (A) and tray (B).
- Place paper face up.
- Maximum number of sheets that can be set. "Acceptable Copy
Paper Types and Sizes" Page 36
- Fan the paper well, then set it for (A) to the right side, and set it
for (B) to the left side. (The paper can be set neatly if you pile up
the paper little by little alternately in the tray (A) and (B).) Be sure
that the centre lever is not open. (Refer to the labels attached in
the large capacity feeder.)
- Do not add paper above the line indicated on the guide.
- Paper starts being fed from the elevator tray (A) at first, and when
it runs out, the paper on the tray (B) moves to the position (A).
- Do not use creased, folded, wrinkled or damp sheets of paper.
(A)
(B)
the drawer of the large capacity
3 Push
feeder straight into the equipment until it
comes to a stop.
- Close it completely. The elevator tray automatically moves up to
the paper feeding position.
Be careful not to let your fingers be caught when closing the drawer.
This could injure you.
12
251
3. REPLACE TONER CARTRIDGE SYMBOL
When the toner in the cartridge runs out, the REPLACE TONER CARTRIDGE symbol blinks.
When the black toner runs out, “Install new Black toner cartridge” appears.
When the yellow, magenta or cyan toner runs out, “Install new ***** toner cartridge. Press *** button.”
appears. Then press the [***] button.
12
252
12.WHEN THE GRAPHIC SYMBOLS BLINK ON THE TOUCH
Recommendation for Original Toner
At Toshiba we strive to provide you with the highest quality images. Please use genuine Toshiba toner to
ensure that you continue to receiving quality output that is environmentally safe.
12
253
3.REPLACE TONER CARTRIDGE SYMBOL (Cont.)
Replacing the Black (K) Toner Cartridge
1 Open the front cover.
pushing on the latch, lower the
2 While
cartridge holder toward you.
3 Pull the cartridge out carefully.
- If you cannot pull it straight out, pull it out rotating it clockwise.
If it cannot be pulled out, close the front cover, turn the power OFF
and then ON again. When “Install new Black toner cartridge”
appears, start the procedure again from step 1.
To turn the power OFF, see "Turning off the Power (Shutting down)"
Page 30.
12
NEVER attempt to incinerate toner cartridges. This could cause an
explosion.
DO NOT dispose of used toner cartridges. Your service technician
will collect them.
254
12.WHEN THE GRAPHIC SYMBOLS BLINK ON THE TOUCH PANEL
and shake the new toner cartridge
4 Tap
well to loosen the toner inside.
the toner cartridge upright, and pull
5 Stand
out the seal in the direction of the arrow.
6 Insert the cartridge completely.
- Match the label (orange) on the equipment with the shutter
(orange) on the toner cartridge, then insert it.
- If the cartridge becomes dirty with toner, clean it before inserting
it.
the cartridge holder to its original
7 Return
position.
12
255
3.REPLACE TONER CARTRIDGE SYMBOL (Cont.)
8 Close the front cover.
- “Wait adding toner” appears. The equipment automatically starts
supplying toner.
Replacing the Yellow (Y), Magenta (M), Cyan (C) Toner Cartridge
* When you want to replace a cartridge before the REPLACE TONER CARTRIDGE symbol blinks, see the
[User Functions Guide].
* When replacing a toner cartridge, the procedures are displayed on the screen. Follow them by pressing
and
buttons to switch the screen.
the colour toner cartridge becomes
1 When
empty, the screen for replacing it is
12
displayed. Press the button
corresponding to the colour to be
replaced.
- The empty toner cartridge of Yellow (Y), Magenta (M) or Cyan (C)
automatically moves to the appropriate position to be replaced.
- However, if the toner cartridge is not replaced, the screen for
replacing it is displayed every time after the specified automatic
function clear time passes.
- When the colour cartridge is empty, outputting in the black-andwhite mode is available.
256
12.WHEN THE GRAPHIC SYMBOLS BLINK ON THE TOUCH PANEL
cartridge is moved to the appropriate
2 The
position to be replaced.
3 Open the front cover.
on the latch, and then pull out the
4 Push
cartridge.
NEVER attempt to incinerate toner cartridges. This could cause an
explosion.
DO NOT dispose of used toner cartridges. Your service technician
will collect them.
the new toner cartridge well to
5 Shake
loosen the toner inside.
12
257
3.REPLACE TONER CARTRIDGE SYMBOL (Cont.)
the new toner cartridge, pull out
6 Holding
the seal in the direction of the arrow.
7 Insert the cartridge completely.
8 Close the front cover.
12
258
9 Press the [FINISH] button.
- When 2 or more cartridges are empty, repeat the above
procedure from step 1 to 8.
- “Wait adding toner” appears. The equipment automatically starts
supplying toner.
12.WHEN THE GRAPHIC SYMBOLS BLINK ON THE TOUCH PANEL
4. REPLACE TONER BAG SYMBOL
When the toner bag becomes full of used toner, the REPLACE TONER BAG symbol blinks and “Dispose
of used toner” appears.
1 Open the front cover.
2 Pull the toner bag out carefully.
NEVER attempt to incinerate toner bags. This could cause an
explosion.
DO NOT dispose of used toner bags. Your service technician will
collect them.
3 Put the lid on the toner bag.
a new toner bag, and then close the
4 Set
front cover.
12
259
5. CLEAR PAPER SYMBOL
When a paper misfeed occurs in the equipment, the
or
symbol on the touch panel blinks in the
positions where the paper is misfed. In that case, remove the misfed paper using the following procedure
referring to the illustration below.
1
8
7
5
9 10 11
4
12
2
3
6
1. Paper Misfeed in the Reversing Automatic Document Feeder (optional)
the button on the reversing
1 Push
automatic document feeder to open the
upper cover.
- Remove any misfed originals.
12
260
12.WHEN THE GRAPHIC SYMBOLS BLINK ON THE TOUCH
the green knob to remove any
2 Rotate
misfed originals.
misfed original still remains, rotate
3 Ifthethegreen
knob to the opposite direction
against the step 2. Then remove it.
4 Lift the green handle.
- Remove any misfed originals.
the green knob on your side in the
5 Rotate
direction of the arrow and remove any
misfed originals.
12
261
5.CLEAR PAPER SYMBOL (Cont.)
the original feeding tray and remove
6 Lift
any misfed originals.
the original feeding tray, move the
7 Lower
green knob toward the front and open the
cover.
8 Remove any misfed paper.
9 Close the upper and lower cover.
12
2. Paper Misfeed in the Drawer Feeding Area
1 Open the cover.
262
12.WHEN THE GRAPHIC SYMBOLS BLINK ON THE TOUCH PANEL
2 Remove any misfed paper.
3 Close the cover.
3. Paper Misfeed in the Large Capacity Feeder (optional)
1 Open the cover.
2 Remove any misfed paper.
12
Paper Misfeed in the Paper Feed Pedestal (optional)
-Open the cover as shown on the right, and remove any misfed
paper.
3 Close the cover.
263
5.CLEAR PAPER SYMBOL (Cont.)
4. Paper Misfeed on the Bypass Feed Unit
1 Pull out misfed paper on the bypass tray.
5. Paper Misfeed in the Automatic Duplexer
sure that the bypass tray is opened,
1 Make
and then open the automatic duplexer.
- Be careful not to let your fingers be caught between the
equipment and the automatic duplexer.
This could injure you.
- Do not touch the metal portion of a guide board as it could burn
you.
the paper guide as indicated by the
2 Lift
arrow and remove any misfed paper.
the paper guide and return the
3 Lower
automatic duplexer to the original
position.
12
264
- Be sure to close both sides of the Automatic Duplexer firmly.
12.WHEN THE GRAPHIC SYMBOLS BLINK ON THE TOUCH PANEL
6. Paper Misfeed in the Jam Releasing Unit
sure that the bypass tray and the
1 Make
automatic duplexer are open. Put your
fingers into (A), push it up to release the
lock and open the jam releasing unit
cover.
(A)
the green knob as indicated by the
2 Rotate
arrow toward the inside and remove any
misfed paper.
the jam releasing unit cover, the
3 Return
automatic duplexer and the bypass tray to
the original positions.
- Be sure to close both sides of the automatic duplexer firmly.
7. Paper Misfeed in the Fuser Unit
sure that the bypass tray, the
1 Make
automatic duplexer and the jam releasing
unit are open, and push down the 2 fuser
pressure release levers until they come to
a stop.
12
Be sure to perform step 1 without fail.
DO NOT touch the fuser unit and the metal area around it. Since
they are very hot, you could be burned or the shock could cause an
injury to your hand in the equipment.
265
5.CLEAR PAPER SYMBOL (Cont.)
2 Open the fuser unit cover.
the knob (A), open the transport
3 Holding
guide.
(A)
any misfed paper inside the fuser
4 Remove
unit.
the transport guide and the fuser
5 Close
unit cover. Push up the fuser pressure
release lever to return the jam releasing
unit cover, the automatic duplexer and the
bypass tray to the original positions.
12
the lever toward you to loose the
6 Pull
misfed paper. Hook a finger under the
(1)
loosen part of it, and then pull it out.
(2)
266
12.WHEN THE GRAPHIC SYMBOLS BLINK ON THE TOUCH PANEL
pull it out with both hands to
7 Furthermore,
remove it.
8. Paper Misfeed in the Relay Unit (optional)
the cover handle of the relay unit,
1 Holding
open the cover.
any misfed paper that is inside
2 Remove
the relay unit.
12
z Remove the misfed paper from the fuser unit side if it is easier.
3 Close the relay unit cover.
267
5.CLEAR PAPER SYMBOL (Cont.)
9. Paper Misfeed in the Hole Punch Unit (optional)
the front cover of the hole punch
1 Open
unit (optional).
2 Raise the Hole Punch Unit.
the green knob to locate the arrow
3 Rotate
within the area on the label.
- Under this condition, the punchers are up, allowing the paper
shown in the illustration to be removed.
- If the misfed paper still remains, open the upper cover of the
finisher to remove it.
the hole punch unit to the original
4 Return
position and close the front cover.
12
268
12.WHEN THE GRAPHIC SYMBOLS BLINK ON THE TOUCH PANEL
10. Paper Misfeed in the Finisher (optional: MJ-1024/1023)
the upper cover of the finisher until
1 Open
it locks.
- Remove any misfed paper.
Hold up the guide and remove any misfed
2 paper
in the paper exit area.
3 Close the upper cover.
12
269
5.CLEAR PAPER SYMBOL (Cont.)
11. Paper Misfeed in the Single-staple Finisher (optional: MJ-1022)
the lever and move the finisher
1 Pull
carefully away from the copier.
the green lever and remove any
2 Lift
misfed paper.
Remove any misfed paper in the paper
3 exit
area.
4 Install the finisher to the equipment.
Be careful not to let your fingers be caught between the equipment
and the finisher (optional).
This could injure you.
12
270
12.WHEN THE GRAPHIC SYMBOLS BLINK ON THE TOUCH PANEL
12. Paper Misfeed in the Saddle-Stitch Finisher (optional: MJ-1024)
* Only when the saddle-stitch finisher (MJ-1024, optional) is installed
the front cover of the saddle-stitch
1 Open
finisher.
the green handle toward the right
2 Slide
and remove the misfed paper.
the lower portion of the green
3 Press
handle.
12
271
5.CLEAR PAPER SYMBOL (Cont.)
any misfed paper and return the
4 Remove
handle to its original position.
5 Turn the right-hand knob anticlockwise.
the left-hand knob, turn it
6 Pushing
clockwise.
12
272
any misfed paper on the exit side
7 Remove
of the saddle stitch unit.
12.WHEN THE GRAPHIC SYMBOLS BLINK ON THE TOUCH PANEL
the lever and open the exit cover of
8 Raise
the saddle stitch unit.
- Remove any misfed paper.
9 Close the exit cover and the front cover.
12
273
6. ADDING STAPLES (OPTIONAL)
When the staple in the cartridge runs out, “Check staple cartridge” appears.
Add staples to the cartridge according to the procedure below.
Saddle-Stitch Finisher (MJ-1024)/Multi-Staple Finisher (MJ-1023)
1 Open the front cover of the finisher.
- When MJ-1024 is installed
- When MJ-1023 is installed
2 Take out the staple cartridge.
12
274
12.WHEN THE GRAPHIC SYMBOLS BLINK ON THE TOUCH
out the empty staple case from the
3 Take
staple cartridge.
4 Pull out the seal holding the staples.
- Be careful that the staples are not misaligned.
the new staple case into the staple
5 Push
cartridge until it clicks.
the staple cartridge to its original
6 Return
position.
- Insert the cartridge until it is caught by the latch and fixed with a
click sound.
12
7 Close the front cover of the finisher.
If “Check staple cartridge” remains, repeat the above procedure
from step 1 to 7.
275
6.ADDING STAPLES (OPTIONAL) (Cont.)
Saddle-Stitch Finisher (MJ-1024)
* Only when the saddle-stitch finisher (MJ-1024, optional) is installed
1 Open the front cover of the finisher.
the saddle stitch unit carefully
2 Slide
toward the front.
the handle of the saddle stitch holder
3 Pull
(1) toward you and turn it (2) 90º in the
direction of the arrow.
(2)
(1)
12
276
12.WHEN THE GRAPHIC SYMBOLS BLINK ON THE TOUCH PANEL
the empty staple case and
4 Remove
replace it with a new one.
- Replace both staple cases with new ones.
the saddle staple to its original
5 Return
position.
- Pull the handle of the saddle stitch holder (1) toward you and turn
it (2) 90º in the direction of the arrow.
(2)
(1)
the saddle stitch unit to its original
6 Return
position.
sure that A3, A4-R or B4 paper is
7 Make
set.
- If any of the above paper sizes is not set, test stapling cannot be
performed.
the front cover of the finisher. Then,
8 Close
test stapling is automatically performed
on a blank sheet.
- This is performed to avoid empty stitching.
12
If there is a test stapling failure and “Check staple cartridge”
remains, repeat the above procedure from step 1 to 8.
277
6.ADDING STAPLES (OPTIONAL) (Cont.)
Single-Staple Finisher (MJ-1022)
the lever and move the finisher away
1 Pull
carefully from the equipment.
2 Take out the staple cartridge.
the empty staple case from the
3 Remove
staple cartridge.
12
4 Set the new staple case.
- Push a new staple case into the staple cartridge until it clicks.
- Do not remove the seal holding the staples before the staple case
is set in the cartridge.
278
12.WHEN THE GRAPHIC SYMBOLS BLINK ON THE TOUCH PANEL
out the seal holding the staples
5 Pull
straight upward.
the staple cartridge to its original
6 Return
position.
- Insert the cartridge until it is caught by the latch and fixed with a
click sound.
If “Check staple cartridge” remains, repeat the above procedure
from step 1 to 6.
7 Install the finisher to the equipment.
Be careful not to let your fingers be caught between the equipment
and the finisher (optional).
This could injure you.
12
279
7. REMOVING JAMMED STAPLES (OPTIONAL)
If copies have not been stapled in the staple mode, “Examine stapler” appears.
This shows that the staples are jammed. Remove them as described below.
Saddle-Stitch Finisher (MJ-1024)/Multi-Staple Finisher (MJ-1023)
1 Open the front cover of the finisher.
- When MJ-1024 is installed
- When MJ-1023 is installed
2 Take out the staple cartridge.
12
280
12.WHEN THE GRAPHIC SYMBOLS BLINK ON THE TOUCH
the staple cover while holding the
3 Lower
knob.
(A)
- A: stapler
Do not touch the stapling area. The stapler could injure you.
4 Remove any jammed staples.
the staple cover to its original
5 Return
position while holding the knob.
the staple cartridge to its original
6 Return
position.
12
- Insert the cartridge until it is caught by the latch and fixed with a
click sound.
7 Close the front cover of the finisher.
281
7.REMOVING JAMMED STAPLES (OPTIONAL) (Cont.)
Saddle-Stitch Finisher (MJ-1024)
* Only when the saddle-stitch finisher (MJ-1024, optional) is installed
1 Open the front cover of the finisher.
the saddle stitch unit carefully
2 Slide
toward the front.
the handle of the saddle stitch holder
3 Pull
(1) toward you and turn it (2) 90º in the
direction of arrow.
(1)
12
282
(2)
12.WHEN THE GRAPHIC SYMBOLS BLINK ON THE TOUCH PANEL
the staple cases from the staple
4 Remove
cartridges.
pushing down on the lever (1), pull
5 While
up the knob (2).
(1)
(2)
any jammed staples, and then
6 Remove
return the knob (2) to its original position.
(2)
Do not touch the stapling area. The stapler could injure you.
the staple cases to their original
7 Return
position.
12
283
7.REMOVING JAMMED STAPLES (OPTIONAL) (Cont.)
the saddle staple to its original
8 Return
position.
- Pull the handle of the saddle stitch holder (1) toward you and turn
it (2) 90º in the direction of the arrow.
(2)
(1)
the saddle stitch unit to its original
9 Return
position.
sure that A3, A4-R or B4 paper is
10 Make
set.
- If any of the above paper sizes is not set, test stapling cannot be
performed.
the front cover of the finisher. Then
11 Close
test stapling is automatically performed
on a blank sheet.
- This is performed to avoid empty stitching.
If there is a test stapling failure and “Check staple cartridge”
remains, repeat the above procedure from step 1 to 11.
12
284
12.WHEN THE GRAPHIC SYMBOLS BLINK ON THE TOUCH PANEL
Single-Staple Finisher (MJ-1022)
the lever and move the finisher away
1 Pull
carefully from the equipment.
2 Take out the staple cartridge.
the staple cover while holding the
3 Lower
knob.
(A)
- A: stapler
Do not touch the stapling area. The stapler could injure you.
4
Remove any jammed staples.
12
285
7.REMOVING JAMMED STAPLES (OPTIONAL) (Cont.)
the staple cover to its original
5 Return
position while holding the knob.
the staple cartridge to its original
6 Return
position.
- Insert the cartridge until it is caught by the latch and fixed with a
click sound.
7 Install the finisher to the equipment.
Be careful not to let your fingers be caught between the equipment
and the finisher (optional).
This could injure you.
12
286
12.WHEN THE GRAPHIC SYMBOLS BLINK ON THE TOUCH PANEL
8. DISPOSING OF THE PUNCHED PAPER BITS (OPTIONAL)
When paper bits punched from copies have accumulated to a certain level, “READY (HOLE PUNCH DUST
BIN IS FULL)” appears. Dispose of the paper bits as described below.
the front cover of the hole punch
1 Open
unit.
out the black case, and then dispose
2 Pull
of the paper bits.
3 Return the case to its original position.
the front cover of the hole punch
4 Close
unit.
12
287
9. CALL SERVICE SYMBOL/PERIODIC MAINTENANCE MESSAGE
Call Service Symbol
Never attempt to repair, disassemble or modify the equipment by yourself. You could cause a fire or get an
electric shock.
Always contact your service representative for maintenance or repair of the internal parts of the copier.
When the CALL SERVICE
symbol blinks and “Misfeed in copier Press HELP” appears, output is no
longer possible. Contact your service technician.
When the CALL SERVICE
or CLEAR PAPER
symbol is blinking, if you press the [CLEAR] button
and the digital key [8] together before you turn off the power, the corresponding error code will appear at
the output quantity display area only while both are held down. Please provide the error code when you ask
for service.
12
Since heaters are used to fix toner images to the paper, a heat-sensing safety circuit is incorporated in this
equipment. After you turn ON the power switch, if a certain temperature is not attained within a specified
period of time, the safety circuit assumes that something abnormal has happened and it stops the
equipment’s operation.
This can happen when the temperature is low even if the equipment is not malfunctioning. If this occurs,
turn the power OFF and then ON again. ("Turning off the Power (Shutting down)" Page 30) Repeat this
procedure twice, and if the problem still persists, turn OFF the power and contact your service technician.
Periodic Maintenance Message
When “Time for periodic maintenance” appears on the touch panel, the assistance from a qualified service
technician is required. Contact your service technician.
288
12.WHEN THE GRAPHIC SYMBOLS BLINK ON THE TOUCH
13. MAINTENANCE
1. DAILY INSPECTION ..........................................................................................................290
2. SIMPLE TROUBLESHOOTING.........................................................................................291
13
289
1. DAILY INSPECTION
Items for Daily Check
Power ON/OFF status
We recommend that you turn the power switch ON at the startup everyday so as to use whenever needed.
Also, be sure to turn the power OFF ("Turning off the Power (Shutting down)" Page 30) when you leave
the office, except in the following cases:
- When the off-mode (or sleep mode) is set;
- When the weekly timer is in use;
- When the Fax (optional) is installed;
Weekly Maintenance
Cleaning the original glass, the original cover, the scanning area and the guide area.
To scan the original in good condition, we recommend that you clean the following items weekly.
(1) Scanning area
Do not use solvents such as alcohol. Clean the surface with a dried cloth or cloth moistened with a
small amount of water.
(2) Original glass
(3) Guide
(4) Original cover
Clean the surface with a cloth moistened with a small amount of water, alcohol or neutral detergent,
then wipe with a dry cloth over the surface.
- Be careful not to scratch the parts that you are cleaning.
(2)
(3)
(4)
(1)
13
290
DO NOT use such solvents as thinner or alcohol when cleaning the surface of the equipment.
-This could warp the shape of the surface or leave it discoloured.
-When using a chemical cleaning pad to clean it, pay attention to any cautionary points.
13.MAINTENANCE
2. SIMPLE TROUBLESHOOTING
Check the following items and, if the problem still occurs, call your service representative for assistance.
NEVER attempt to repair, disassemble or modify the equipment by yourself. You could cause a fire or get
an electric shock.
ALWAYS contact your service representative for maintenance or repair of the internal parts of the
equipment.
Equipment does not Start
Item to be checked
Countermeasure
Reference page
Is the power cord plug securely
inserted in the outlet?
Insert the power cord plug until
it comes to a stop.
-
Is the front cover firmly closed? Close the cover properly.
"1.DESCRIPTION OF EACH
COMPONENT" Page 20
Display does not Change when Buttons or Icons are Pressed
Item to be checked
Is the copier in the energy
saving mode (Automatic
Energy Saving mode)?
Countermeasure
Press the [ENERGY SAVER] or
[START] button on the control
panel to clear the mode.(It takes
a while for the copier to become
ready.)
Reference page
"Control Panel" Page 23,
"3.SWITCHING TO THE ENERGYSAVING MODE" Page 33
Is the power ‘OFF’ because
Press the [START] button to
the weekly timer is functioned? return the power ‘ON’.
See the [User Functions Guide].
Is the department code keyed
in?
Key in the correct department
code.
"Controlling the Use of the Copier with
Department Codes" Page 32
Is the “Warming up” message
displayed?
Wait until the copier becomes
ready.
"2.TURNING ON THE POWER
SWITCH" Page 30
13
291
2.SIMPLE TROUBLESHOOTING (Cont.)
Image Density is too Low
Items to be checked
Countermeasure
Reference page
Has the message “Install new
toner cartridge” appeared on
the screen?
Replace the toner cartridge.
"3.REPLACE TONER CARTRIDGE
SYMBOL" Page 252
Is the image density or the
background adjustment set
lighter than is standard?
Use the manual density buttons
or the background adjustment
function to adjust the image
density properly.
"Manual Copy Density Mode" Page 96, "4.BACKGROUND
ADJUSTMENT" Page 101
Image Density is too High
Items to be checked
Is the image density or the
background adjustment set
darker than standard?
13
292
13.MAINTENANCE
Countermeasure
Use the manual density buttons
or the background adjustment
function to adjust the image
density properly.
Reference page
"Manual Copy Density Mode" Page 96, "4.BACKGROUND
ADJUSTMENT" Page 101
Images are Stained
Items to be checked
Countermeasure
Reference page
Is the original cover or the
Close the cover or the feeder
optional reversing automatic
properly to shut out any outer
document feeder firmly closed? light.
"When Placing an Original on the
Glass" Page 47
Are the original glass, the
original cover and the scanning
area dirty?
Clean them up.
"Weekly Maintenance" Page 290
Is the image density set
properly?
Adjust the image density
properly with the [AUTO] button
or manual density buttons.
"7.COPY DENSITY ADJUSTMENT"
Page 96
Are 2-sided originals used?
As the other side of the originals
can be seen, adjust the image
density properly (lighter) with the
background adjustment
function.
"4.BACKGROUND ADJUSTMENT"
Page 101
Are originals with high
transparency used?
Place a blank sheet of paper
with originals of the same size or
larger over the original.
"When Placing an Original on the
Glass" Page 47
Images are Blurred
Items to be checked
Countermeasure
Reference page
Does the entire originals lie
properly on the surface of the
glass?
Place the original on the glass
or the reversing automatic
document feeder and close the
original cover firmly.
-
Is the paper moist?
Replace it with new paper.
"2.ADD PAPER SYMBOL" Page
250
13
293
2.SIMPLE TROUBLESHOOTING (Cont.)
Images are Partially Missing
Item to be checked
Countermeasure
Reference page
Are the original size and
direction, as well as the
reproduction ratio suitable for
the paper size?
Select copy paper of the same
size as the original, or set the
reproduction ratio suitable for
the paper size.
"1.PAPER SELECTION" Page 66,
"3.REDUCTION AND
ENLARGEMENT COPYING" Page 73
Is the margin on the copy set
properly?
Adjust the image shift value.
"1.IMAGE SHIFT" Page 108
Functions cannot be Set
Item to be checked
Countermeasure
Are there functions that cannot
be combined set together?
See the Copying Function
Combination and Image Quality
Adjustment Combination
Matrices and set again.
Reference page
"4.COPYING FUNCTION
COMBINATION MATRIX" Page
308, "5.IMAGE QUALITY
ADJUSTMENT COMBINATION
MATRIX" Page 310
Desired Colour does not Appear
Item to be checked
13
294
Countermeasure
Reference page
Has the message “Install new
toner cartridge” appeared on
the screen?
Replace the toner cartridge.
"3.REPLACE TONER CARTRIDGE
SYMBOL" Page 252
Has the “CALL SERVICE”
message appeared on the
screen?
Call your service technician.
"9.CALL SERVICE SYMBOL/
PERIODIC MAINTENANCE
MESSAGE" Page 288
Is the paper moist?
Replace with new paper.
"2.ADD PAPER SYMBOL" Page
250
Is the level of the image
density and colour adjustment
correct?
Reset the image density and
colour adjustment to the
standard settings. If the colour
still deviates slightly, perform
calibration.
See the [User Functions Guide].
13.MAINTENANCE
14. SPECIFICATIONS &
OPTIONS
1. e-STUDIO3511/4511 SPECIFICATIONS ...........................................................................296
2. SPECIFICATIONS OF OPTIONS ......................................................................................299
3. PACKING LIST...................................................................................................................307
4. COPYING FUNCTION COMBINATION MATRIX ..............................................................308
Combination Matrix 1/2 ......................................................................................................308
Combination Matrix 2/2 ......................................................................................................309
5. IMAGE QUALITY ADJUSTMENT COMBINATION MATRIX .............................................310
14
295
1. e-STUDIO3511/4511 SPECIFICATIONS
14
Model Name
FC-3511/FC-4511
Type
Desktop type
Original Glass
Fixed
Printing (Copying) System
Indirect electrophotographic method
Developing System
2-component magnetic brush developing
Fixing Method
Heat roller + belt fusing (Twin separated IH coil)
Photosensor Type
OPC
Original Scanning System
Flat surface scanning system
(When the reversing automatic document feeder is installed: Fixed
scanning system by feeding the original)
Original Scanning Sensor
Linear CCD sensor
Scanning Light Source
Xenon lamp
Resolution
Scanning
600 dpi x 600 dpi
Writing
Black-and-white: 2,400 dpi x 600 dpi (Smoothing process), 1 bit
Colour, Image smoothing: 600 dpi x 600 dpi, 8 bits
Acceptable Originals
Sheets, books and 3-dimensional objects
Acceptable Original Size
Max. A3
Acceptable
Copy Paper
Size
Drawer
A3, A4, A4-R, A5-R, A6-R, B4, B5-R, FOLIO, LD, LG, LT, LT-R, ST-R,
COMP, 13” LG, 8.5” SQ, 8K, 16K, 16K-R
Bypass
Paper size within 100-305 mm (Length), 148-457 mm (Width)
Acceptable
Copy Paper
Weight
Drawer
64-105 g/m2
Bypass
64-209 g/m2
Warm-up Time
Approx. 40 seconds
First Copy Time
Black-and-white: Approx. 6.8, Colour: 16.2 seconds or less
Continuous Copy Speed
See “Continuous Copying Speed”.
Multiple Copying
Up to 999 copies (digital key entry)
Excluded
Image Width
Black-andwhite
Leading edge: 3.0±2.0 mm, Trailing edge: 3.0±2.0 mm,
Both edge: 2.0±2.0 mm
Colour
Leading edge: 5.0±2.0 mm, Trailing edge: 5.0±2.0 mm,
Both edge: 2.0±2.0 mm
Printer
Leading edge: 5.0±2.0 mm, Trailing edge: 5.0±2.0 mm,
(Black-andBoth edge: 5.0±2.0 mm
white/Colour)
Reproduction Ratio
Actual size: 100±0.5%
Zoom: 25-400% (in 1% increments)
For the reversing document feeder 25-200% (in 1% increments)
296
14.SPECIFICATIONS & OPTIONS
Paper
Supply
Drawer
600 sheets (64 g/m2)
Bypass
100 sheets (64 g/m2)
Toner Density Adjustment
Black (K): Magnetic auto-toner system
Yellow (Y)/Magenta (M)/Cyan (C): Optical auto-toner system
Exposure Control
Automatic plus manual selection from 11 exposure step
Environment
(for normal use)
Temperature: 10-30ºC, Humidity: 20-80% (No Condensation)
Power Requirements
220-240 V ±10%, 8 A (50/60 Hz)
110-127 V ±10%, 12 A (50/60 Hz) (for Saudi Arabia 100V version only)
Power Consumption
At least 1.7 kW (including optional equipments)
At least 1.5 kW (including optional equipments) (for Saudi Arabia 100V
version only)
Dimensions
(equipment only)
660 mm (W) x 700 mm (D) x 739 mm (H)
Weight
Approx. 112 kg (equipment including developer and drum)
Space Occupied
(equipment only)
1,007 mm (W) x 764 mm (D)
Storage Capacity
Max. 1,000 sheets or until the memory is full (Toshiba’s own chart)
14
297
1.e-STUDIO3511/4511 SPECIFICATIONS (Cont.)
Continuous Copying Speed
Paper Type Paper size
Unit: sheets/min.
Feeder
e-STUDIO3511
Black-andwhite
Plain
Paper
11
45
11
Bypass
35
11
45
11
Drawer
28
5.4
32
5.4
Bypass
28
5.4
32
5.4
Drawer
24
5.4
26
5.4
Bypass
24
5.4
26
5.4
Drawer
21
5.4
22
5.4
Bypass
21
5.4
22
5.4
A4, A5-R, B5, LT, ST-R Drawer
30
11
30
11
Bypass
30
11
30
11
Drawer
23
5.4
23
5.4
Bypass
23
5.4
23
5.4
Drawer
19
5.4
19
5.4
Bypass
19
5.4
19
5.4
Drawer
16
5.4
16
5.4
Bypass
16
5.4
16
5.4
A4, A5-R, B5, LT, ST-R Bypass
20
6.7
20
6.7
A4-R, B5-R, LT-R
Bypass
14
3.1
14
3.1
B4, FOLIO, LG, COMP
Bypass
11
3.0
11
3.0
A3, LD
Bypass
10
2.9
10
2.9
A4, A5-R, B5, LT, ST-R Bypass
20
2.8
20
2.8
A4-R, B5-R, LT-R
Bypass
14
2.7
14
2.7
B4, FOLIO, LG, COMP
Bypass
11
2.7
11
2.7
A3, LD
Bypass
10
2.5
10
2.5
A4
Bypass
10
3.2
10
3.2
A3, LD
A4-R, B5-R, LT-R
B4, FOLIO, LG, COMP
A3, LD
Thick 3
OHP Film
Twin colour/
Colour
35
B4, FOLIO, LG, COMP
Thick 2
Twin colour/ Black-andColour
white
A4, A5-R, B5, LT, ST-R Drawer
A4-R, B5-R, LT-R
Thick 1
e-STUDIO4511
* The bypass copying speed is measured with the paper size specified.
14
298
* This specification varies depending on copying condition and environment.
* The paper mentioned above is Toshiba-recommended paper. Specifications and appearance are subject
to change without notice in the interest of product improvement.
14.SPECIFICATIONS & OPTIONS
2. SPECIFICATIONS OF OPTIONS
Reversing Automatic Document Feeder
Model Name
MR-3015
Copy Sides
1-side, Duplex
Number of Originals (A4)
100 originals (50-80 g/m2)
Feeding Speed
Black-and-white: 105-420 mm/s
Acceptable Originals
A3 - A5-R, LD - ST-R (A5 and ST are not acceptable)
Paper Weight
50-127 g/m2 (1-sided original), 50-105 g/m2 (2-sided original)
Power Source
Power supplied from the equipment
Dimensions
557 mm (W) x 530 mm (D) x 165 mm (H)
Weight
Approx.15 kg
Power Consumption
43.6 W max.
Colour: 52.5-210 mm/s
Large Capacity Feeder
Model Name
KD-1012
Acceptable Paper Size
A4
Paper Weight
64-105 g/m2
Maximum Capacity
2,500 sheets (80 g/m2) (Height: approx. 137 mm x 2)
Power Source
5 V, 24 V (supplied from the equipment)
Dimensions
623 mm (W) x 657 mm (D) x 307.5 mm (H) (incl. Stabilizer)
Weight
Approx. 27 kg
Power Consumption
50 W max.
Paper Feed Pedestal (1 drawer type)
Model Name
KD-1011
Acceptable Paper Size
A3 - A5-R, LD - ST-R, 8K, 16K, 16K-R
(A5, ST and non-standard size are not acceptable)
Paper Weight
64-105 g/m2
Maximum Capacity
550 sheets (80 g/m2)
Dimensions
623 mm (W) x 657 mm (D) x 320 mm (H)
Weight
Approx. 21.5 kg
14
299
2.SPECIFICATIONS OF OPTIONS (Cont.)
Additional Drawer Module
Model Name
MY-1021
Acceptable Paper Size
A3 - A5-R, LD - ST-R, 8K, 16K, 16K-R
(A5, ST and non-standard size are not acceptable)
Paper Weight
64-105 g/m2
Maximum Capacity
550 sheets (80 g/m2)
Dimensions
526 mm (W) x 569.5 mm (D) x 107 mm (H)
Weight
Approx. 3.8 kg
Saddle-Stitch Finisher (MJ-1024)
Model Name
MJ-1024
Type
Floor type (Console type)
Acceptable Paper Size
A3, A4, A4-R, A5-R, B4, B5, B5-R, FOLIO, LD, LG, LT, LT-R, ST-R, COMP
Acceptable Paper Weight
60-256 g/m2
Number of Copies Stapled at
a time
(Including 2 covers
Paper Size
60-80 g/m2
81-90 g/m2
91-105 g/m2
A4, A5-R, B5, LT, ST-R
50 sheets
30 sheets
30 sheets
(200-256 g/m2))
A3, A4-R, B4, B5-R,
FOLIO, LD, LG, LT-R,
COMP
30 sheets
15 sheets
15 sheets
Stapling Position
Front, Rear, Double
Stitching Capacity
(Including 2 covers
Paper Size
60-80 g/m2
81-90 g/m2
91-105 g/m2
A3, A4-R, B4, LD, LT-R
15 sheets
10 sheets
10 sheets
(200-256 g/m2))
Power Source
Supplied from the equipment
Dimensions
649 mm (W) x 657 mm (D) x 1,086 mm (H)
Weight
Approx. 70 kg
Power Consumption
170 W max.
14
300
14.SPECIFICATIONS & OPTIONS
Tray Loading Capacity: (See "Available Conditions for Saddle Stitch" Page 85)
(MJ-1024 with mixed paper not loaded)
Mode
Non-Sort
Tray No.
1
A4, A5-R, B5, LT,
ST-R,
147
147
(1,000) (1,000)
2
Sort/Group
Staples loaded
1
1
2
73.5
(500)
147
(1,000 sheets or 30
147
147
147
(1,000) (1,000) (1,000 sheets or 30
sets)
A3, A4-R, B4, B5- 73.5
R, FOLIO, LD, LG, (500)
LT-R, COMP
2
73.5
(500)
73.5
(500)
*1
73.5
(500 sheets or 30
sets)
sets)
*1
73.5
(500 sheets or 30
*1
sets)
*1
*1.The value reached earlier by using condition
Unit: mm (with ±7 mm allowance)
Values in parentheses is the number of 80 g/m2 sheets.
Sort/Group/Staple is not available with A5-R, ST-R, B5-R.
(MJ-1024 with mixed paper loaded)
Mode
Non-Sort
Sort/Group
Staples loaded
Tray No.
1
2
1
2
1
2
LD and LT
73.5
(500)
73.5
(500)
73.5
(500)
73.5
(500)
73.5
(500 sheets or 30
73.5
(500 sheets or 30
LG and LT-R
73.5
(500)
73.5
(500)
73.5
(500)
73.5
(500)
sets)
A4-R and FOLIO
73.5
(500)
73.5
(500)
73.5
(500)
73.5
(500)
A3 and A4
73.5
(500)
73.5
(500)
73.5
(500)
73.5
(500)
B4 and B5
73.5
(500)
73.5
(500)
73.5
(500)
73.5
(500)
*1
sets)
*1
*1.The value reached earlier by using condition
Unit: mm (with ±7 mm allowance)
Values in parentheses is the number of 80 g/m2 sheets.
14
301
2.SPECIFICATIONS OF OPTIONS (Cont.)
Multi-Staple Finisher (MJ-1023)
Model Name
MJ-1023
Type
Floor type (Console type)
Acceptable Paper Size
A3, A4, A4-R, A5-R, B4, B5, B5-R, FOLIO, LD, LG, LT, LT-R, ST-R, COMP
Acceptable Paper Weight
60-256 g/m2
Number of Copies Stapled at
a time
(Including 2 covers
Paper Size
60-80 g/m2
81-90 g/m2
91-105 g/m2
A4, A5-R, B5, LT, ST-R
50 sheets
30 sheets
30 sheets
(200-256 g/m2))
A3, A4-R, B4, B5-R,
FOLIO, LD, LG, LT-R,
COMP
30 sheets
15 sheets
15 sheets
Stapling Position
Front, Rear, Double
Power Source
Supplied from the equipment
Dimensions
536 mm (W) x 657 mm (D) x 1,086 mm (H)
Weight
Approx. 39 kg
Power Consumption
70 W max.
Tray Loading Capacity:
(MJ-1023 with mixed paper not loaded)
Mode
Non-Sort
Tray No.
1
A4, A5-R, B5, LT,
ST-R
147
147
147
147
147
(1,000) (1,000) (1,000) (1,000) (1,000 sheets or 30
2
Sort/Group
Staples loaded
1
1
2
sets)
A3, A4-R, B4, B5- 73.5
R, FOLIO, LD,
(500)
LG, LT-R, COMP
73.5
(500)
73.5
(500)
73.5
(500)
*1.The value reached earlier by using condition
Unit: mm (with ±7 mm allowance)
Values in parentheses is the number of 80 g/m2 sheets.
Sort/Group/Staple is not available with A5-R, ST-R, B5-R.
14
302
14.SPECIFICATIONS & OPTIONS
2
147
(1,000 sheets or 30
*1
*1
73.5
(500 sheets or 30 sets)
73.5
(500 sheets or 30
sets)
sets)
*1
*1
(MJ-1023 with mixed paper loaded)
Mode
Non-Sort
Sort/Group
Staples loaded
Tray No.
1
2
1
2
1
2
LD and LT
73.5
(500)
73.5
(500)
73.5
(500)
73.5
(500)
Whichever 73.5 mm,
500 sheets or 30 sets
Whichever 73.5 mm,
500 sheets or 30 sets
LG and LT-R
73.5
(500)
73.5
(500)
73.5
(500)
73.5
(500)
is reached first.
A4-R and FOLIO
73.5
(500)
73.5
(500)
73.5
(500)
73.5
(500)
A3 and A4
73.5
(500)
73.5
(500)
73.5
(500)
73.5
(500)
B4 and B5
73.5
(500)
73.5
(500)
73.5
(500)
73.5
(500)
*1
is reached first.
*1
*1.The value reached earlier by using condition
Unit: mm (with ±7 mm allowance)
Values in parentheses is the number of 80 g/m2 sheets.
14
303
2.SPECIFICATIONS OF OPTIONS (Cont.)
Single-Staple Finisher (MJ-1022)
Model Name
MJ-1022
Type
Hanging-type
Acceptable Paper Size
A3, A4, A4-R, B4, B5, B5-R, A5-R, FOLIO, LD, LG, LT, LT-R, ST-R, COMP
Acceptable Paper Weight
50-209 g/m2
Number of Copies Stapled at A4, A4-R, B5, LT, LT-R
a time
B4, LG
Acceptable weight for staple:
A3, FOLIO, LD, COMP
64-80 g/m2
30 sheets
20 sheets
15 sheets
Stapling Position
Rear
Power Source
Supplied from the copier
Dimensions
451 mm (W) x 539 mm (D) x 590 mm (H)
Weight
Approx. 17 kg
Power Consumption
40 W max.
Tray Loading Capacity:
(MJ-1022 with mixed paper not loaded)
Mode
Non-Sort
Tray No.
1
2
ST-R, A5-R,
B5-R
30
(200)
99
(700)
LT, LT-R,
A4, A4-R, B5
30
(200)
99
(700)
30
(200)
99
(700)
170 sheets or 30 sets 600 sheets or 50 sets
B4, LG
20
(140)
70
(490)
20
(140)
70
(490)
110 sheets or 30 sets 400 sheets or 50 sets
15
(100)
49
(350)
15
(100)
49
(350)
80 sheets or 30 sets
A3, FOLIO, LD,
COMP
Sort/Group
Staples loaded
1
1
2
-
-
*1.The value reached earlier by using condition
Unit: mm (with ±7 mm allowance)
Values in parentheses is the number of 80 g/m2 sheets.
14
304
14.SPECIFICATIONS & OPTIONS
2
-
-
*1
*1
*1
*1
*1
300 sheets or 50 sets
*1
(MJ-1022 with mixed paper loaded)
Mode
Non-Sort
Tray No.
1
2
Combination of
different width
paper
15
(100)
49
(350)
LD and LT
15
(100)
49
(350)
15
(100)
49
(350)
80 sheets or 15 sets
*1
*1
15
(100)
49
(350)
15
(100)
49
(350)
110 sheets or 15 sets
400 sheets or 15 sets
*1
*1
15
(100)
49
(350)
15
(100)
49
(350)
80 sheets or 15 sets
*1
*1
15
(100)
49
(350)
15
(100)
49
(350)
110 sheets or 15 sets
400 sheets or 15 sets
*1
*1
LG and LT-R
A3 and A4
B4 and B5
Sort/Group
Staples loaded
1
1
2
-
-
2
-
-
300 sheets or 15 sets
300 sheets or 15 sets
*1.The value reached earlier by using condition
Unit: mm (with ±7 mm allowance)
Values in parentheses is the number of 80 g/m2 sheets.
14
305
2.SPECIFICATIONS OF OPTIONS (Cont.)
Bridge Unit
Model Name
KN-3511
Dimensions
466 mm (W) x 454 mm (D) x 175 mm (H) (incl. cover)
Weight
Approx. 3.8 kg
Hole Punch Unit
Model Name
MJ-6004
Acceptable Paper Size
A3, A4, A4-R, B4, B5, B5-R, FOLIO, LD, LG, LT, LT-R, COMP
Acceptable Paper Weight
60-256 g/m2 (OHP film and specially treated paper are not available)
Dimensions
112 mm (W) x 617 mm (D) x 378 mm (H)
Weight
Approx. 9 kg
Number of punch holes and hole
diameter
Available paper sizes
Japan and most of Europe
MJ-6004E
2 holes (6.5 mm dia.)
A3, A4, A4-R, B4, B5, B5-R,
FOLIO, LT, LT-R, LD, LG, COMP
France
MJ-6004F
4 holes
(6.5 mm dia.; 80 mm pitch)
A3, A4, LD, LT
Sweden
MJ-6004S
4 holes
(6.5 mm dia.; 70,21 mm pitch)
A3, A4, A4-R, B4, B5, B5-R,
FOLIO, LD, LG, LT, LT-R, COMP
* The paper mentioned above is Toshiba-recommended paper. Specifications and appearance are subject
to change without notice in the interest of product improvement.
14
306
14.SPECIFICATIONS & OPTIONS
3. PACKING LIST
Packing List
Photoconductive Drum
Operator’s Manual Pocket
Unpacking Instructions
Operator’s Manual
Setup Report
Customer satisfaction card
CS (4 pcs.)
14
307
14
308
14.SPECIFICATIONS & OPTIONS
YES
Rotate sort
YES
YES
SADF
Image direction
YES
YES
YES
YES
YES
YES
2IN1/4IN1
Book centre erase
XY zoom
Dual page
Mirror
Trim/Mask
YES
Page number
The function set first takes precedence.
*5
YES
YES
YES
YES
YES
YES
YES
YES
YES
NO
YES
NO
YES
YES
YES
*1
YES
YES
YES
YES
--
YES
NO
YES
NO
NO
YES
YES
YES
YES
*1
*1
*1
*1
2 to 1
Split
*5
YES
YES
YES
YES
YES
YES
YES
YES
YES
NO
YES
NO
YES
YES
YES
YES
YES
YES
YES
YES
--
YES
YES
YES
YES
YES
YES
YES
YES
YES
*1
*1
*1
*1
2 to 2
Duplex
(YES): The result is not guaranteed although the function are operable.
The functions can be combined.
NO:
*5
YES
YES
YES
YES:
*5
YES
Date stamp
Job build
YES
YES
YES
YES
YES
YES
YES
YES
YES
YES
YES
YES
YES
YES
YES
*1
YES
YES
YES
(YES)
--
YES
NO
YES
YES
YES
YES
YES
YES
YES
*1
*1
*1
*1
1 to 2
Duplex
YES
Sheet insertion
Top copied back lank
Cover Top copied
sheet Both blank
YES
YES
Image shift
Top blank
YES
Edge erase
*1
YES
ADF
Book - Tablet
YES
Mixed original sizes
--
NO
Saddle stitch
Rotate copier (A4,B5,A5,LT)
NO
NO
Magazine sort
YES
YES
Staple sort
Hole punch
YES
Magazine sort & Saddle stitch
YES
Group
*1
Book to 2
Sort
*1
2 to 2 Duplex
YES
*1
2 to 1 Split
Non-sort/Non-staple
*1
1 to 1
Simplex
1 to 2 Duplex
Already setting
1 to 1 Simplex
Next setting
NO
YES
YES
NO
NO
NO
NO
NO
NO
NO
NO
NO
NO
NO
YES
YES
NO
YES
--
--
NO
--
NO
NO
YES
NO
NO
YES
YES
YES
YES
*1
*1
*1
*1
*3
YES
YES
NO
NO
NO
NO
NO
YES
YES
YES
YES
YES
YES
YES
YES
YES
YES
YES
YES
YES
--
*1
*1
YES
NO
*1
*1
*1
*1
YES
YES
YES
YES
YES
*3
YES
YES
YES
YES
YES
YES
YES
YES
YES
YES
YES
YES
YES
YES
YES
YES
YES
YES
YES
YES
--
*1
*1
YES
*1
*1
*1
*1
*1
YES
YES
YES
YES
YES
Non-sort/
Sort
Book to 2 Nonstaple
*3
YES
YES
NO
NO
NO
NO
NO
YES
YES
YES
YES
YES
YES
YES
YES
YES
YES
YES
YES
YES
--
*1
*1
YES
*1
*1
*1
*1
*1
YES
YES
YES
YES
YES
Group
NO
YES
YES
NO
NO
NO
YES
YES
NO
NO
NO
NO
NO
NO
NO
YES
NO
YES
YES
YES
NO
YES
*1
*1
NO
*1
*1
*1
*1
*1
NO
YES
NO
YES
*1
NO
YES
YES
NO
NO
NO
YES
YES
NO
NO
NO
NO
NO
NO
NO
YES
NO
YES
YES
YES
NO
YES
*1
*1
NO
*1
*1
*1
*1
*1
NO
YES
NO
YES
*1
*3
YES
YES
YES
YES
YES
YES
YES
YES
YES
YES
YES
NO
YES
YES
YES
YES
YES
YES
YES
(YES)
YES
NO
NO
NO
NO
YES
YES
YES
YES
YES
YES
YES
YES
YES
Magazine
Magazine sort &
Hole
sort
Saddle
punch
stitch
*3
NO
NO
NO
NO
NO
YES
YES
NO
NO
NO
NO
NO
NO
NO
YES
NO
YES
YES
YES
NO
YES
*1
NO
*1
*1
*1
*1
*1
*1
*1
YES
*1
*1
*1
Saddle
stitch
*3
YES
YES
NO
NO
NO
NO
NO
YES
YES
NO
NO
YES
YES
YES
YES
YES
YES
YES
YES
NO
YES
*1
NO
*1
*1
*1
*1
*1
*1
NO
YES
YES
YES
YES
Rotate
sort
--
--
--
--
--
--
--
--
--
--
--
--
--
--
--
--
--
--
--
--
--
--
--
--
--
--
--
--
--
--
--
--
--
--
--
Rotate
copier
(A4,B5,
A5,LT)
*3
NO
NO
YES*2
YES*2
YES*2
YES*2
YES*2
NO
NO
NO
NO
NO
NO
NO
NO
YES
YES
YES
YES
YES
YES
NO
(YES)
NO
NO
(YES)
YES
YES
YES
NO
YES
YES
(YES)
YES
Mixed
original
sizes
YES
YES
YES
YES
YES
YES
YES
YES
YES
YES
YES
YES
YES
YES
YES
YES
YES
YES
*1
YES
YES
YES
YES
YES
YES
YES
YES
YES
YES
YES
YES
YES
YES
YES
YES
ADF
YES
YES
YES
YES
YES
YES
YES
YES
YES
YES
--
YES
--
YES
YES
YES
YES
YES
*1
YES
YES
YES
YES
YES
YES
YES
YES
YES
YES
YES
--
YES
YES
YES
YES
SADF
*5: The type of original (1-side or 2-side) can be changed.
*4: The setting cannot be changed from 2nd job or later.
*3: Bookbinding margin setting in the image sift functions cannot be combined with the dual page setting.
*2: Only AMS (Automatic Magnification Selection).
*1: The function set last takes precedence.
*3
YES
YES
YES
YES
YES
YES
YES
YES
YES
YES
YES
YES
YES
YES
YES
YES
YES
YES
YES
(YES)
--
*1
*1
YES
*1
*1
*1
*1
*1
(YES)
YES
YES
YES
YES
Staple
sort
4. COPYING FUNCTION COMBINATION MATRIX
Combination Matrix 1/2
YES
NO
YES
YES
YES
YES
NO
NO
YES
NO
YES
YES
YES
YES
YES
YES
YES
YES
YES
YES
YES
YES
YES
YES
YES
YES
YES
YES
YES
Book to 2
Non-sort/Non-staple
Magazine sort
Magazine sort & Saddle stitch
Rotate sort
Rotate copier (LT,A4,B5,A5)
Mixed original sizes
YES
*4
YES
NO
*4
YES
YES
*4
YES
YES
NO
NO
NO
NO
NO
NO
NO
YES
YES
YES
YES
YES
YES
YES
NO
NO
NO
YES
YES
YES
NO
NO
NO
NO
NO
NO
NO
NO
NO
NO
YES*3
YES
NO
YES
--
--
NO
YES
NO
NO
YES
NO
NO
YES
YES
YES
YES
NO
NO
NO
NO
YES
YES
YES
YES
YES
YES
YES
--
NO
NO
YES
NO
YES
NO
YES
YES
YES
YES
NO
YES
YES
NO
YES
NO
NO
YES
YES
YES
YES
NO
YES
YES
YES
YES
Mirror
NO
YES
YES
YES
YES
YES
YES
YES
--
NO
NO
NO
NO
YES
NO
YES
YES
YES
YES
NO
YES
YES
NO
YES
NO
NO
YES
YES
YES
YES
NO
YES
YES
YES
YES
Trim/
Mask
NO
YES
YES
YES
(YES): The result is not guaranteed although the function are operable.
--
--
--
YES
YES
NO
YES
NO
NO
YES
YES
YES
YES
YES
YES
NO
YES
NO
YES
YES
YES
YES
YES
NO
YES
*1
NO
YES
YES
YES
YES
NO
YES
YES
YES
--
--
--
YES
YES
NO
YES
NO
NO
YES
YES
YES
YES
YES
YES
NO
YES
NO
NO
YES
NO
NO
YES
NO
YES
*1
NO
YES
YES
YES
YES
NO
YES
YES
YES
--
--
--
YES
YES
NO
YES
NO
NO
YES
YES
YES
YES
YES
YES
NO
YES
NO
NO
YES
NO
NO
YES
NO
YES
*1
NO
YES
YES
YES
YES
Top
copied
back
blank
NO
YES
YES
YES
YES
YES
YES
YES
YES
NO
YES
NO
NO
YES
YES
YES
YES
YES
YES
NO
YES
NO
NO
YES
NO
NO
YES
NO
YES
*1
NO
YES
YES
YES
YES
Sheet
insertion
*5: The type of original (1-side or 2-side) can be changed.
*4: The setting cannot be changed from 2nd job or later.
*4
YES
YES
YES
YES
YES
YES
YES
YES
YES
YES
YES
YES
YES
YES
NO
YES
YES
YES
NO
YES
YES
NO
YES
YES
YES
YES
YES
YES
YES
YES
YES
YES
YES
YES
Date
stamp
*3: Bookbinding margin setting in the image shift functions cannot be combined with the dual page setting.
NO
YES
YES
YES
--
--
--
YES
YES
NO
YES
NO
NO
YES
YES
YES
YES
YES
YES
NO
YES
NO
YES
YES
YES
YES
YES
NO
YES
*1
NO
YES
YES
YES
YES
Both blank
Cover sheet
Top
Top blank
copied
*2: Only AMS (Automatic Magnification Selection).
*4
*4
YES
YES
YES
NO
YES
YES
NO
YES
YES
YES
YES
YES
YES
NO
*1
NO
NO
YES
NO
NO
YES
YES
YES
YES
NO
YES
YES
*1
*1
Dual
page
*1: The function set last takes precedence.
NO
YES
YES
YES
NO
NO
NO
NO
NO
NO
NO
YES
NO
YES
NO
NO
YES
--
--
NO
*1
YES
NO
NO
NO
NO
YES
YES
YES
YES
NO
NO
NO
YES
YES
XY zoom
The function set first takes precedence.
NO
YES
YES
YES
YES
YES
YES
YES
YES*3
NO
NO
YES
YES
NO
YES
YES
YES
NO
YES
YES
NO
YES
NO
NO
YES
YES
YES
YES
NO
*1
*1
YES
YES
Book
centre
erase
The functions can be combined.
YES
YES
YES
YES
YES
YES
NO
NO
YES
YES
YES
YES
YES
NO
YES
YES
YES
NO
*1
YES
NO
YES
NO
NO
YES
YES
YES
YES
YES
YES
YES
*1
*1
2IN1/
4IN1
NO:
YES
YES
YES
YES
YES
YES
YES
YES
YES
YES
YES
NO
YES
YES
YES
NO
YES
YES
YES
YES
NO
YES
YES
YES
YES
YES
YES
YES
YES
YES
YES
YES
YES
YES
YES
YES
Image
shift
YES:
Job build
Page number
Date stamp
Sheet insertion
Top copied back blank
Cover Top copied
sheet Both blank
Top blank
Trim/Mask
Mirror
Dual page
NO
YES
YES
Book centre erase
YES
NO
YES
XY zoom
NO
YES
YES
YES
2IN1/4IN1
Image shift
Edge erase
Book - Tablet
Image direction
SADF
ADF
Saddle stitch
Hole punch
Staple sort
Group
Sort
YES
YES
YES
YES
2 to 2 Duplex
YES
*1
YES
YES
2 to 1 Split
1 to 2 Duplex
*1
YES
Edge
erase
*1
Book Tablet
YES
Image
direction
YES
Already setting
1 to 1 Simplex
Next setting
*4
YES
YES
YES
YES
YES
YES
YES
YES
YES
YES
YES
YES
YES
YES
NO
YES
YES
YES
NO
YES
YES
NO
YES
YES
YES
YES
YES
YES
YES
YES
YES
YES
YES
YES
Page
number
*4
*4
NO
NO
NO
NO
NO
NO
NO
YES
NO
*4
NO
*4
YES
*4
*4
YES
YES
*3
--
*3
*3
*3
NO
NO
*3
*3
*3
*3
NO
*5
*5
*5
*5
Job
build
Combination Matrix 2/2
14
309
14
310
14.SPECIFICATIONS & OPTIONS
One-touch
adjustment
*1
*1
YES
YES
The function set first takes precedence.
YES
Cool
YES
YES
Black
*1
*1
*1
*1
*1
YES
*1
*1
*1
*1
*1
YES
Colour mode
The functions can be combined.
YES
Warm
*1
*1
YES
YES
YES
YES
*1
*1
*1
YES
Full colour
NO:
YES
*1
YES
*1
*1
*1
*1
*1
YES
ACS
YES:
YES
YES
Background
Clear
YES
Sharpness
Vivid
YES
RGB adjustment
YES
Twin colour
YES
YES
Black
Colour balance
Colour mode
YES
YES
Full colour
Density
Manual/Auto
ACS
Density Manual/Auto
Already setting
Next setting
NO
NO
NO
NO
NO
YES
NO
NO
*1
*1
*1
YES*2
Twin
colour
NO
NO
NO
NO
YES*3
YES
NO
NO
NO
YES
NO
YES*3
Colour
balance
NO
NO
NO
NO
YES
YES
YES
YES
YES
YES
YES
YES
Sharpness
NO
NO
NO
NO
YES
YES
YES
NO
NO
YES
NO
YES
Background
--
--
--
NO
NO
NO
NO
NO
NO
YES
NO
YES*3
Vivid
--
--
--
NO
NO
NO
NO
NO
NO
YES
NO
YES*3
Clear
--
--
--
NO
NO
NO
NO
NO
NO
YES
NO
YES*3
Warm
One-touch adjustment
*3: Full colour only
--
--
--
NO
NO
NO
NO
NO
NO
YES
NO
YES*3
Cool
*2: When the Manual Copy Density mode is set, it is switched to the Automatic Copy Density mode.
*1: The function set last takes precedence.
NO
NO
NO
NO
YES*3
YES
NO
NO
NO
YES
NO
YES*3
RGB
adjustment
5. IMAGE QUALITY ADJUSTMENT COMBINATION MATRIX
INDEX
Numerics
1-Sided Originals to 1-Sided Copies
(default setting) ................................................. 89
BLACK-AND-WHITE/COLOUR COPY
MODE SELECTION ..........................................72
1-Sided Originals to 2-Sided Copies ................. 89
BOOK CENTRE ERASE ................................. 112
2 IN 1/4 IN 1 .....................................................115
Bookbinding margin .........................................109
2-Sided Originals to 1-Sided Copies ................. 91
Booklet mode .....................................................83
2-Sided Originals to 2-Sided Copies ................. 90
Book-type Originals ...........................................48
A
Acceptable Copy Paper Types and Sizes ......... 36
Bridge Unit .......................................................306
Acceptable Original Types and Sizes ............... 45
Acceptable Original Types and Sizes/Maximum
Number of Sheets that can be Stored ............... 45
Bypass Copying on Non-Standard-Size Paper ..62
BLINKING GRAPHIC SYMBOLS ....................248
Book-type Originals to 2-Sided Copies ..............92
BYPASS COPYING ...........................................59
Bypass Copying on Standard Size Paper ..........59
Acceptable paper size ....................................... 92
bypass feeding ..............................12, 59, 84, 117
ACCESS button ................................................ 24
BYPASS MISFEED ..........................................248
ADD PAPER SYMBOL ................................... 250
Bypass tray ........................................................20
Adding a blank cover ...................................... 123
Adding a copied cover .................................... 123
Adding Paper to the Drawers .......................... 250
Adding Paper to the Large Capacity Feeder ... 251
ADDING STAPLES (OPTIONAL) .................... 274
Address Book Entry ........................................ 170
ADDRESS REGISTRATION
FROM LOG LISTS .......................................... 201
Admin Password .................... 234, 235, 239, 243
Advanced Function ......................................... 180
C
CALL SERVICE SYMBOL ...............................249
Call Service Symbol ........................................288
CALL SERVICE SYMBOL/
PERIODIC MAINTENANCE MESSAGE .........288
Caution ................................................................8
CHANGING INPUT DATA ...................... 222, 239
Changing the Data of Template .......................239
Changing the Data of User Group ...................241
AUTO COLOUR ................................................ 72
Changing the Paper Size of the Drawer ............38
Changing the Paper Size of the Drawer/
Setting the Drawer for Special Uses ..................38
Auto Exposure .................................................. 52
CHECK ORIGINALS .......................................248
Advice ................................................................. 8
Auto Job Start .......................................30, 55, 56
CLEAR button ........................................... 24, 100
AUTO JOB START (JOB PRESET) .................. 55
CLEAR PAPER SYMBOL ................................260
Automatic Copy Density Modes ........................ 96
Clearing the Drawer for Special Uses ................44
Automatic duplexer ........................................... 20
Clearing the Functions Selected ........................29
Automatic Function Clear ............................ 24, 29
Automatic Magnification Selection (AMS) ......... 73
Colour Adjustment ...........................................294
COLOUR BALANCE .................................. 98, 99
Automatic Paper Selection (APS) ..................... 66
Colour mode ......................................................94
Available Conditions for Saddle Stitch .............. 85
Colour of toner (Cyan/Magenta/Yellow) .............20
Available paper size .......................................... 87
Coloured paper ................................. 42, 123, 126
Available paper sizes for the hole punch .......... 86
Confirming and Canceling Auto Job Start ..........56
B
BACKGROUND ADJUSTMENT ..................... 101
Confirming the Destinations ............................179
CONFIRMING THE STATUS OF FAX/
INTERNET FAX JOB .......................................196
basic screen ................................................ 24, 27
Black mode ....................................................... 52
Black toner ........................................................ 20
CONFIRMING THE STATUS OF SCAN ..........197
INDEX
Continuous Copying Speed .............................298
Continuous Feed Mode ............................ 50, 137
311
INDEX (Cont.)
Continuous original feed mode ......................... 52
CONTINUOUS/SINGLE ORIGINAL
FEEDING ........................................................ 137
drawer feeding ...........................................84, 117
Control Panel .............................................. 20, 23
Controlling the Use of the Copier
with Department Codes .................................... 32
Drawer for cover sheet ..................... 42, 124, 125
COPY & FILE .................................................. 143
DRAWER MISFEED ........................................248
Drawer for sheet insertion .................................42
Drawer for special sheets. .................................42
COPY button ..................................................... 23
Drawers .............................................................20
COPY DENSITY ADJUSTMENT ...................... 96
DUAL-PAGE .................................................... 113
Copy paper ................................................. 36, 42
Copying function combination ......................... 294
COPYING FUNCTION COMBINATION
MATRIX ........................................................... 308
Copying Procedure ........................................... 52
Cost Advantage .................................................. 7
COVER COPYING .......................................... 123
Dual-page ..........................................................59
DUPLEX COPYING ...........................................88
DUPLEXER MISFEED ....................................248
During Maintenance or Inspection .....................15
E
EDGE ERASE ................................................. 111
Cover sheet copying ......................................... 57
Edge erase ........................................................59
Creating a Bookbinding Margin ....................... 109
Edge Erase Copying ........................................ 111
Creating a Right or Left Margin ....................... 108
e-FILING ..........................................................217
Currently selected drawer size .......................... 27
e-FILING button .................................................23
D
DAILY INSPECTION ....................................... 290
ENERGY SAVER button ..................... 24, 33, 291
Date and time .................................................... 27
default setting .............................................. 23, 24
Deleting a Job ......................................... 187, 191
Deleting a Job from the List ............................ 195
Deleting a Private Print ................................... 193
Deleting a User Group .................................... 245
DELETING BOX ............................................. 224
DELETING TEMPLATE .................................. 243
department code ............................................... 32
Dependability ...................................................... 7
DESCRIPTION OF EACH COMPONENT ........ 20
DESCRIPTION OF THE BLINKING
GRAPHIC SYMBOLS ..................................... 248
INDEX
DISPOSING OF THE PUNCHED PAPER
BITS (OPTIONAL) ...........................................287
e-FILING FUNCTIONS ....................................218
Enlargement copying .................................73, 115
Entering Letters ...............................................146
Environmental Harmony ......................................7
Equipment does not Start ................................291
ERROR lamp .....................................................24
e-STUDIO 3511/4511 SPECIFICATIONS ........296
Execute Test Printing .......................................226
Exit cover .........................................................273
EXTENSION button ...........................................23
F
FAX button .........................................................23
Features of the e-STUDIO3511/4511 ..................9
Feeder ...................................................... 36, 298
Desired colour does not appear ...................... 294
Finisher (optional MJ-1022) .............................270
DIGITAL KEYS .................................................. 24
Finisher (optional MJ-1024/1023) ....................269
Direct Entry ..................................................... 169
DIRECTION OF COPY IMAGES IN
“1 TO 2” AND “2 TO 1” .................................... 134
DIRECTION OF DUPLEX COPY IMAGES IN
“2 TO 2” ........................................................... 136
FINISHER/HOLE PUNCH UNIT MISFEED .....249
DISCLAIMER NOTICE ..................................... 17
Finishing Modes and Finishers (Optional) .........77
For Making 1-sided, 2-sided and
Book-type Copying ............................................88
Front cover ................................................. 20, 78
FULL COLOUR mode .......................................72
FUNCTION CLEAR button ................................24
312
Functions cannot be set .................................. 294
J
JAM RELEASING UNIT MISFEED .................248
FUSER MISFEED ........................................... 248
JOB BUILD ......................................................131
Function setting area ........................................ 27
Fuser Unit ....................................................... 265
G
General ............................................................... 7
JOB STATUS .......................................... 185, 186
JOB STATUS button ............................. 24, 54, 56
GENERAL COPYING PROCEDURES ............. 52
L
Large Capacity Feeder ........................... 263, 299
GENERAL PRECAUTIONS .............................. 10
LOG LIST ........................................................198
Group copying ................................................... 79
Group Entry ..................................................... 171
H
Handling and Storing Paper .............................. 37
HELP button ...................................................... 23
High Productivity ................................................. 7
Hole Punch Mode (Optional) ............................. 86
Hole Punch Unit .............................................. 306
Hole punch unit (MJ-6004) ................................ 78
HOW TO MAKE COPIES .................................. 35
M
Machine Balance .................................................7
MAGAZINE SORT ........................................... 117
Magazine Sort ...........................................83, 117
MAGAZINE SORT &
SADDLE STITCH button ............................ 83, 84
Magazine Sort & Saddle Stitch Mode
(Booklet Mode) ..................................................83
Main Components ..............................................20
MAINTENANCE ..............................................289
Manual Copy Density Mode ..............................96
I
Image Density is too High ............................... 292
Manual Paper Selection ....................................68
Image Density is too Low ................................ 292
Maximum capacity for saddle stitch ...................85
Maximum number of sheets
that can be set .................................. 39, 250, 251
Maximum Number of Sheets
that can be Stapled ............................................82
Maximum Number of Sheets
that can be Stored .............................................46
IMAGE EDITING ..............................................119
IMAGE QUALITY ADJUSTMENT
COMBINATION MATRIX ................................. 310
IMAGE SHIFT ................................................. 108
Image shift ........................................59, 234, 236
Images are Blurred ......................................... 293
Images are partially missing ........................... 294
Images are Stained ......................................... 293
In the Continuous Feed Mode ........................... 50
Initial (default) Settings ..................................... 52
Inner tray ........................................................... 20
INSERT 1 .......................................................... 44
INSERT 2 .......................................................... 44
INSERT SOURCE 2 ....................................... 127
Inside the Single-feed Mode ............................. 51
INTERNET FAX ...................................... 163, 164
Internet Fax Transmission Overview ............... 164
INTERRUPT button .................................... 24, 57
INTERRUPT COPYING .................................... 57
Items for Daily Check ...................................... 290
Masking ........................................................... 119
Maximum sheet capacity ...................................36
Message Display ...............................................27
Mirror Image ....................................................121
MJ-1022 with mixed paper loaded ...................305
MJ-1022 with mixed paper not loaded .............304
MJ-1023 with mixed paper loaded ...................303
MJ-1023 with mixed paper not loaded .............302
MJ-1024 with mixed paper loaded ...................301
MJ-1024 with mixed paper not loaded .............301
MONITOR/PAUSE button ..................................24
Moving a Print Job ...........................................189
Multi-address Transmission .............................177
Multi-Staple Finisher (MJ-1023) .......................302
INDEX
N
NOTICE TO USERS ............................................5
313
INDEX (Cont.)
Number of punch holes and
hole diameter ............................................ 87, 306
O
ONE-TOUCH ADJUSTMENT ......................... 100
Operator’s Manual Pocket ........................ 20, 307
Optimum image Quality ...................................... 7
Optional ............................................................. 20
OPTIONAL FEEDER MISFEED ..................... 248
ORIGINAL MODE ............................................. 94
Priority Transmission .......................................181
Original scale .................................................... 20
Private Print .....................................................192
P
PACKING LIST ............................................... 307
PAGE NUMBERING ....................................... 129
PRIVATE PRINT JOB ......................................192
PROOF PRINT JOB ........................................190
Paper Feed Pedestal (1 drawer type) ............. 299
R
RECALLING TEMPLATE .................................231
Paper Misfeed in the Automatic Duplexer ....... 264
Receiving from POP3 Server ..........................184
Paper Misfeed in the Drawer Feeding Area .... 262
Paper Misfeed in the Finisher
(optional MJ-1024/1023) ................................. 269
Receiving from SMTP Server ..........................184
Paper Misfeed in the Fuser Unit ..................... 265
Paper Misfeed in the Hole Punch Unit
(optional) ......................................................... 268
Recommendation for original toner .................253
REDUCTION AND ENLARGEMENT
COPYING ..........................................................73
Paper Misfeed in the Jam Releasing Unit ....... 265
Paper Misfeed in the Large Capacity Feeder
(optional) ......................................................... 263
REGISTERING TEMPLATE ............................234
Registering the template in the Public
Template Group ...............................................234
Paper Misfeed in the Relay Unit (optional) ..... 267
Paper Misfeed in the Reversing Automatic
Document Feeder (optional) ........................... 260
Paper Misfeed in the Saddle-Stitch Finisher
(optional MJ-1024) .......................................... 271
Paper Misfeed in the Single-staple Finisher
(optional MJ-1022) .......................................... 270
Registering the template in the User Group ....236
Paper Misfeed on the Bypass Feed Unit ........ 264
PAPER SELECTION ......................................... 66
Paper Size ........................................................ 36
paper with a watermark ..................................... 42
Pause/Resume ............................................... 188
Performing the Proof Print .............................. 190
Periodic Maintenance Message ...................... 288
Photoconductive Drum .................................... 307
Power switch ..................................................... 20
314
PRINT JOB LIST .............................................187
Print the whole document ................................225
PRINTING SEND/
RECEIVE LOG LIST OF FAX ..........................203
PRINTING STORED DOCUMENT ..................225
Printing the Stored Document with Added/
Changed Settings ............................................227
Optional Equipment .......................................... 21
INDEX
PREFACE ............................................................8
PRINT DATA/MEMORY RX/
FAX communication ...........................................24
Precaution for Internet Transmission .............. 164
Precautions for Using the Reversing
Automatic Document Feeder ............................ 49
RECEIVING INTERNET FAX ..........................183
Receiving Modes .............................................183
RELAY UNIT MISFEED ...................................248
Remaining paper level .......................................27
REMOVING JAMMED STAPLES
(OPTIONAL) ....................................................280
REPLACE TONER BAG SYMBOL ......... 249, 259
REPLACE TONER CARTRIDGE ....................249
REPLACE TONER CARTRIDGE SYMBOL ....252
Replacing the Black (K) Toner Cartridge .........254
Replacing the Yellow (Y), Magenta (M),
Cyan (C) Toner Cartridge ................................256
Reproduction ratio ...................................... 27, 52
Reversing Automatic Document Feeder ..........299
RGB ADJUSTMENT ..........................................99
Rotate Sort Mode ...............................................80
S
SADDLE STITCHING UNIT MISFEED ...........249
Saddle-Stitch Finisher (MJ-1024) ... 276, 282, 300
Saddle-Stitch Finisher (MJ-1024)/
Multi-Staple Finisher (MJ-1023) .............. 274, 280
SCAN button ............................................. 23, 231
STOPPING THE COPY OPERATION ...............58
STORE TO e-FILING .......................................140
Storing a Non-Standard Size in the MEMORY ..63
SCAN SETTING IN THE TOUCH PANEL ...... 148
STORING ORIGINALS ....................................139
SCAN TO e-FILING ........................................ 150
Supplies/Parts ......................................................7
SWITCHING TO THE ENERGY-SAVING
MODE ................................................................33
SCAN TO E-MAIL ........................................... 158
SCAN TO FILE ............................................... 154
Scanning Procedure ....................................... 148
SCANNING THE IMAGES .............................. 147
Searching Address Using LDAP Server ......... 176
Searching by Address ..................................... 174
Searching by ID Number ................................. 173
SELECTING FINISHING MODES .................... 77
Sending 2-sided Originals ............................... 180
SENDING INTERNET FAX ............................. 166
Service and Support Benefits ............................. 7
SETTING COPY PAPER .................................. 36
Setting Magazine Sort & Saddle Stitch Mode ... 83
SETTING OF BASIC COPY MODES ............... 65
SETTING ORIGINALS ...................................... 45
Setting Staple Sort Mode .................................. 81
Setting the Drawer for Special Uses ........... 38, 42
T
TEMPLATE ............................................. 229, 230
TEMPLATE button ............................ 23, 232, 234
TEXT/PHOTO mode ..........................................52
The recommended paper ..................................37
Thick 1 ......................................... 36, 37, 43, 298
Thick 2 ........................................................ 36, 37
Thick 3 ........................................................ 36, 37
TIME & DATE STAMP .....................................128
Tip ........................................................................8
To Restore the Invalid Code (print error)
to the Normal Print ...........................................194
Toner ....................................................................7
TOP COPIED button ............................... 124, 125
SETTING UP BOX .......................................... 220
TOSHIBA QUALITY IS SECOND TO NONE ......6
Toshiba-recommended paper/Handling
and Storing Paper ..............................................37
Setup Report ................................................... 307
Total copy quantity .............................................27
SHARPNESS ADJUSTMENT ......................... 102
TOUCH PANEL .................................... 20, 24, 27
Setting the Transmission Conditions ............... 166
SHEET INSERTION MODE ............................ 126
Touch panel contrast adjustment volume ..........20
Sheet Originals ................................................. 47
Touch-buttons ....................................................27
SIMPLE TROUBLESHOOTING ...................... 291
Tray load capacity ....................................... 82, 85
Single-feed Mode ...................................... 51, 138
Single-Staple Finisher (MJ-1022) ....278, 285, 304
Sort copying ...................................................... 79
Trays ..................................................................78
Trimming .......................................................... 119
Trimming/Masking ........................................... 119
Sort/Group Copying .......................................... 79
TURNING ON THE POWER SWITCH ..............30
SPECIFICATIONS & OPTIONS ...................... 295
Twin (2-colour) Copy with Selected Colours ....103
SPECIFICATIONS OF OPTIONS ................... 299
TWIN (2-COLOUR) COPYING ........................103
Specifying Both Original Size and Copy Size ... 74
Twin (2-Colour) Copying with Red and Black ..105
Specifying the Recipients ................................ 169
Types of originals ...............................................45
Stable Image Quality ........................................... 7
Staple Sort ........................................................ 81
Staple Sorting .................................................... 81
START button .................................................... 24
STATUS .......................................................... 204
Sticker labels ...........................................9, 36, 59
STOP button ..................................................... 24
U
Unpacking Instructions ....................................307
Upper cover .......................................................78
Used toner bag ..................................................20
INDEX
User Friendly .......................................................7
USER FUNCTIONS button ................................23
315
INDEX (Cont.)
USING THE EDITING FUNCTIONS ............... 107
Using the Reduction/
Enlargement Zoom Buttons or
One-touch Zoom Buttons .................................. 75
W
Warning ............................................................... 8
Weekly Maintenance ....................................... 290
When Coming Across the Situations below ...... 54
When Handling Supplies ................................... 16
When Installing or Moving ................................. 10
When Placing an Original on the Glass ............ 47
When recalling Template in the Public Group . 231
When recalling Template in the User Group ... 232
WHEN THE GRAPHIC SYMBOLS BLINK
ON THE TOUCH PANEL ................................ 247
WHEN USING THE DEPARTMENT CODES . 194
When using the Multifunctional digital
colour system .................................................... 13
When Using the Reversing Automatic
Document Feeder ............................................. 49
X
X-Y ZOOM ...................................................... 122
INDEX
316
Printed in China
FC-3511/4511
OME030008C0