1
Miray
RAM Drive
Manual
miray-software.com
Miray RAM Drive
Manual
Table of Contents 3
Table of Contents
1Introduction . . . . . . . . . . . . . . . . . . . . . . . . . . . . . . . . . . . . . . . . . . . . . . . . . . 6
1.1 Chapter summary . . . . . . . . . . . . . . . . . . . . . . . . . . . . . . . . . . . . . . . . . . 6
1.2 Terminology used . . . . . . . . . . . . . . . . . . . . . . . . . . . . . . . . . . . . . . . . . . . 7
1.3 Explanation of the symbols . . . . . . . . . . . . . . . . . . . . . . . . . . . . . . . . . . 7
1.4 Product description . . . . . . . . . . . . . . . . . . . . . . . . . . . . . . . . . . . . . . . . . 7
1.4.1 Miray RAM Drive . . . . . . . . . . . . . . . . . . . . . . . . . . . . . . . . . . . . 7
1.4.2 Miray RAM Drive Plus . . . . . . . . . . . . . . . . . . . . . . . . . . . . . . . . 8
1.4.3 Miray RAM Drive Pro . . . . . . . . . . . . . . . . . . . . . . . . . . . . . . . . . 8
1.4.4 Miray RAM Drive Server . . . . . . . . . . . . . . . . . . . . . . . . . . . . . . 8
1.4.5 Editions comparison . . . . . . . . . . . . . . . . . . . . . . . . . . . . . . . . . . 8
1.5 Technical specifications . . . . . . . . . . . . . . . . . . . . . . . . . . . . . . . . . . . . . . 9
1.5.1 Supported systems . . . . . . . . . . . . . . . . . . . . . . . . . . . . . . . . . . . 9
1.5.2 Minimum requirements . . . . . . . . . . . . . . . . . . . . . . . . . . . . . . . 9
2 Quick start . . . . . . . . . . . . . . . . . . . . . . . . . . . . . . . . . . . . . . . . . . . . . . . . . . . 10
3Installation . . . . . . . . . . . . . . . . . . . . . . . . . . . . . . . . . . . . . . . . . . . . . . . . . . . 11
3.1 Installation package . . . . . . . . . . . . . . . . . . . . . . . . . . . . . . . . . . . . . . . . . 11
3.2 Setup . . . . . . . . . . . . . . . . . . . . . . . . . . . . . . . . . . . . . . . . . . . . . . . . . . . . . . 11
3.2.1 Components . . . . . . . . . . . . . . . . . . . . . . . . . . . . . . . . . . . . . . . . 11
3.2.2 Progress bar . . . . . . . . . . . . . . . . . . . . . . . . . . . . . . . . . . . . . . . . . 12
3.2.3 Final steps . . . . . . . . . . . . . . . . . . . . . . . . . . . . . . . . . . . . . . . . . . 12
3.2.4 Other dialogs . . . . . . . . . . . . . . . . . . . . . . . . . . . . . . . . . . . . . . . . 12
3.3 Uninstall . . . . . . . . . . . . . . . . . . . . . . . . . . . . . . . . . . . . . . . . . . . . . . . . . . . 13
3.4 Installing updates/upgrades . . . . . . . . . . . . . . . . . . . . . . . . . . . . . . . . . . 13
4 Start the program . . . . . . . . . . . . . . . . . . . . . . . . . . . . . . . . . . . . . . . . . . . . . 14
4.1 Start options . . . . . . . . . . . . . . . . . . . . . . . . . . . . . . . . . . . . . . . . . . . . . . . 14
4.2 Autostart . . . . . . . . . . . . . . . . . . . . . . . . . . . . . . . . . . . . . . . . . . . . . . . . . . 14
4.3 Activity monitor . . . . . . . . . . . . . . . . . . . . . . . . . . . . . . . . . . . . . . . . . . . . 14
4.4 Close the program . . . . . . . . . . . . . . . . . . . . . . . . . . . . . . . . . . . . . . . . . . 15
5 Program window . . . . . . . . . . . . . . . . . . . . . . . . . . . . . . . . . . . . . . . . . . . . . . 16
5.1 Inactive RAM drive . . . . . . . . . . . . . . . . . . . . . . . . . . . . . . . . . . . . . . . . . . 16
5.1.1 Adjust the capacity . . . . . . . . . . . . . . . . . . . . . . . . . . . . . . . . . . 16
5.1.2 Turning on the RAM drive . . . . . . . . . . . . . . . . . . . . . . . . . . . . . 17
5.1.3 InstantOn . . . . . . . . . . . . . . . . . . . . . . . . . . . . . . . . . . . . . . . . . . . 17
5.2 Active RAM drive . . . . . . . . . . . . . . . . . . . . . . . . . . . . . . . . . . . . . . . . . . . 17
5.2.1 Status display . . . . . . . . . . . . . . . . . . . . . . . . . . . . . . . . . . . . . . . 18
4 Table of Contents
5.2.2 Opening the RAM drive . . . . . . . . . . . . . . . . . . . . . . . . . . . . . . 18
5.2.3 Formatting . . . . . . . . . . . . . . . . . . . . . . . . . . . . . . . . . . . . . . . . . . 18
5.2.4 Turning off the RAM drive . . . . . . . . . . . . . . . . . . . . . . . . . . . . 18
5.3 Inactive RAM drive (persistence) . . . . . . . . . . . . . . . . . . . . . . . . . . . . . 19
5.3.1 Setting the capacity (persistence) . . . . . . . . . . . . . . . . . . . . . 20
5.3.2 Turning on the RAM drive (persistence) . . . . . . . . . . . . . . . . 20
6 Tray icon . . . . . . . . . . . . . . . . . . . . . . . . . . . . . . . . . . . . . . . . . . . . . . . . . . . . . 21
6.1 Activity monitor . . . . . . . . . . . . . . . . . . . . . . . . . . . . . . . . . . . . . . . . . . . . 21
6.2 Open the program window . . . . . . . . . . . . . . . . . . . . . . . . . . . . . . . . . . 21
7 Context menu . . . . . . . . . . . . . . . . . . . . . . . . . . . . . . . . . . . . . . . . . . . . . . . . 22
7.1 Help . . . . . . . . . . . . . . . . . . . . . . . . . . . . . . . . . . . . . . . . . . . . . . . . . . . . . . 22
7.2 About Miray RAM Drive . . . . . . . . . . . . . . . . . . . . . . . . . . . . . . . . . . . . . 22
7.3 Autostart . . . . . . . . . . . . . . . . . . . . . . . . . . . . . . . . . . . . . . . . . . . . . . . . . . 22
7.4 InstantOn . . . . . . . . . . . . . . . . . . . . . . . . . . . . . . . . . . . . . . . . . . . . . . . . . . 22
7.5 Advanced Settings . . . . . . . . . . . . . . . . . . . . . . . . . . . . . . . . . . . . . . . . . . 23
7.5.1 Confirmations . . . . . . . . . . . . . . . . . . . . . . . . . . . . . . . . . . . . . . . 23
7.5.2 Drive Layout . . . . . . . . . . . . . . . . . . . . . . . . . . . . . . . . . . . . . . . . 23
7.5.3 Persistence . . . . . . . . . . . . . . . . . . . . . . . . . . . . . . . . . . . . . . . . . 24
7.6 Additional Features . . . . . . . . . . . . . . . . . . . . . . . . . . . . . . . . . . . . . . . . . . 24
8 Additional functions . . . . . . . . . . . . . . . . . . . . . . . . . . . . . . . . . . . . . . . . . . . 25
8.1 Autostart and InstantOn . . . . . . . . . . . . . . . . . . . . . . . . . . . . . . . . . . . . . 25
8.2 Extended memory . . . . . . . . . . . . . . . . . . . . . . . . . . . . . . . . . . . . . . . . . . 25
8.3 Drive Layout . . . . . . . . . . . . . . . . . . . . . . . . . . . . . . . . . . . . . . . . . . . . . . . 26
8.4 Persistence . . . . . . . . . . . . . . . . . . . . . . . . . . . . . . . . . . . . . . . . . . . . . . . . . 26
8.5 Automation (CLI) . . . . . . . . . . . . . . . . . . . . . . . . . . . . . . . . . . . . . . . . . . . 27
9 Application areas . . . . . . . . . . . . . . . . . . . . . . . . . . . . . . . . . . . . . . . . . . . . . . 28
9.1 General notes . . . . . . . . . . . . . . . . . . . . . . . . . . . . . . . . . . . . . . . . . . . . . . 28
9.2 Temporary files . . . . . . . . . . . . . . . . . . . . . . . . . . . . . . . . . . . . . . . . . . . . . 28
9.3 Cache . . . . . . . . . . . . . . . . . . . . . . . . . . . . . . . . . . . . . . . . . . . . . . . . . . . . . 28
9.4 Full RAM usage . . . . . . . . . . . . . . . . . . . . . . . . . . . . . . . . . . . . . . . . . . . . . 28
9.5 Converting data . . . . . . . . . . . . . . . . . . . . . . . . . . . . . . . . . . . . . . . . . . . . 29
9.6 Database . . . . . . . . . . . . . . . . . . . . . . . . . . . . . . . . . . . . . . . . . . . . . . . . . . 29
9.7 Web server . . . . . . . . . . . . . . . . . . . . . . . . . . . . . . . . . . . . . . . . . . . . . . . . 29
9.8 Data security . . . . . . . . . . . . . . . . . . . . . . . . . . . . . . . . . . . . . . . . . . . . . . . 29
9.9 Development and testing . . . . . . . . . . . . . . . . . . . . . . . . . . . . . . . . . . . . 30
9.10 Just for fun . . . . . . . . . . . . . . . . . . . . . . . . . . . . . . . . . . . . . . . . . . . . . . . . . 30
10Troubleshooting . . . . . . . . . . . . . . . . . . . . . . . . . . . . . . . . . . . . . . . . . . . . . . . 31
10.1 Memory problems . . . . . . . . . . . . . . . . . . . . . . . . . . . . . . . . . . . . . . . . . . 31
10.1.1 Insufficient memory (at startup) . . . . . . . . . . . . . . . . . . . . . . . 31
Table of Contents 5
10.1.2 Slider showing too little memory . . . . . . . . . . . . . . . . . . . . . . . 31
10.1.3 Insufficient memory (switching on) . . . . . . . . . . . . . . . . . . . . 32
10.2 Driver and service problems . . . . . . . . . . . . . . . . . . . . . . . . . . . . . . . . . 32
10.2.1 Service not started . . . . . . . . . . . . . . . . . . . . . . . . . . . . . . . . . . . 32
10.2.2 Driver missing . . . . . . . . . . . . . . . . . . . . . . . . . . . . . . . . . . . . . . . 33
10.2.3 Service not installed . . . . . . . . . . . . . . . . . . . . . . . . . . . . . . . . . . 33
10.3 Persistence file problems . . . . . . . . . . . . . . . . . . . . . . . . . . . . . . . . . . . . . 33
10.3.1 Error creating persistence file . . . . . . . . . . . . . . . . . . . . . . . . . 33
10.3.2 Insufficient disk space . . . . . . . . . . . . . . . . . . . . . . . . . . . . . . . . 34
10.3.3 Error opening persistence file . . . . . . . . . . . . . . . . . . . . . . . . . 34
10.3.4 Persistence file damaged . . . . . . . . . . . . . . . . . . . . . . . . . . . . . 34
10.3.5 Persistence file not found . . . . . . . . . . . . . . . . . . . . . . . . . . . . . 35
10.3.6 Error saving the persistence file . . . . . . . . . . . . . . . . . . . . . . . . 35
10.4 Other sources of errors . . . . . . . . . . . . . . . . . . . . . . . . . . . . . . . . . . . . . . 36
10.4.1 Persistence file stored in the Programs directory . . . . . . . . . 36
10.4.2 The RAM drive is slow . . . . . . . . . . . . . . . . . . . . . . . . . . . . . . . . 36
10.4.3 RAM cannot be fully used . . . . . . . . . . . . . . . . . . . . . . . . . . . . 36
11Help and support . . . . . . . . . . . . . . . . . . . . . . . . . . . . . . . . . . . . . . . . . . . . . . 38
11.1 Program help . . . . . . . . . . . . . . . . . . . . . . . . . . . . . . . . . . . . . . . . . . . . . . . 38
11.2 Manual . . . . . . . . . . . . . . . . . . . . . . . . . . . . . . . . . . . . . . . . . . . . . . . . . . . . 38
11.3 Online forum . . . . . . . . . . . . . . . . . . . . . . . . . . . . . . . . . . . . . . . . . . . . . . . 38
11.4 Technical support . . . . . . . . . . . . . . . . . . . . . . . . . . . . . . . . . . . . . . . . . . . 38
11.5 Product inquiries . . . . . . . . . . . . . . . . . . . . . . . . . . . . . . . . . . . . . . . . . . . . 38
11.6 Feedback . . . . . . . . . . . . . . . . . . . . . . . . . . . . . . . . . . . . . . . . . . . . . . . . . . 39
11.7 Manufacturer information . . . . . . . . . . . . . . . . . . . . . . . . . . . . . . . . . . . . 39
12Appendix . . . . . . . . . . . . . . . . . . . . . . . . . . . . . . . . . . . . . . . . . . . . . . . . . . . . 40
12.1 Software package . . . . . . . . . . . . . . . . . . . . . . . . . . . . . . . . . . . . . . . . . . . 40
12.2 Genuine software . . . . . . . . . . . . . . . . . . . . . . . . . . . . . . . . . . . . . . . . . . . 40
12.3 Updates . . . . . . . . . . . . . . . . . . . . . . . . . . . . . . . . . . . . . . . . . . . . . . . . . . . 40
12.4 Disclaimer . . . . . . . . . . . . . . . . . . . . . . . . . . . . . . . . . . . . . . . . . . . . . . . . . 41
12.5 Security mechanisms . . . . . . . . . . . . . . . . . . . . . . . . . . . . . . . . . . . . . . . . 41
12.6 License model . . . . . . . . . . . . . . . . . . . . . . . . . . . . . . . . . . . . . . . . . . . . . . 41
12.6.1 Editions and types of use . . . . . . . . . . . . . . . . . . . . . . . . . . . . . 41
12.6.2 Available license types . . . . . . . . . . . . . . . . . . . . . . . . . . . . . . . 41
12.6.3 Counseling . . . . . . . . . . . . . . . . . . . . . . . . . . . . . . . . . . . . . . . . . . 42
13Glossary . . . . . . . . . . . . . . . . . . . . . . . . . . . . . . . . . . . . . . . . . . . . . . . . . . . . . 43
6 Introduction
1 Introduction
Thank you for using Miray RAM Drive. This application has been developed with
the objective to equip a software, sophisticated and powerful inside, with effortless and intuitive usability.
Nevertheless, if you require any assistance with your Miray RAM Drive, or you
feel that it does not fit your needs, our team is here to help; please refer to
411.7 Manufacturer information.
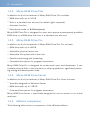
1.1 Chapter summary
The following chapters of the manual provide guidance, information and assistance with regards to Miray RAM Drive. They are organized as follows:
{{
{{
{{
{{
{{
{{
{{
{{
{{
{{
{{
1 Introduction
General information about the product and about this manual.
2 Quick start
A quick guide to using Miray RAM Drive instantly.
3 Installation
How to set up Miray RAM Drive on your PC.
4 Start the program
How to start and stop Miray RAM Drive.
5 Program window
Creating a new RAM drive and turning it on and off.
6 Tray icon
How to access your Miray RAM Drive once it has been started.
7 Context menu
Allows you to access the advanced features.
8 Additional functions
Benefits of the additional functions.
9 Application areas
Common usage scenarios of Miray RAM Drive.
10 Troubleshooting
What to do if Miray RAM Drive does not work properly.
11 Help and support
Product description 7
How to access more information and support from Miray.
{{
{{
12 Appendix
General, legal and other information.
13 Glossary
Explanations of terms used.
1.2 Terminology used
Some of the terms used in this manual may require further explanation, or an
explanation of how they are to be understood in the context of Miray RAM
Drive. They can be found in the 413 Glossary.
1.3 Explanation of the symbols
In this manual, keys on the keyboard are depicted with an inverted background
color, for example Esc or Return . Some keys are represented by an icon, for
example for the arrow up key. The controls you can see on the screen, in
particular the buttons, are depicted in italics and using a line below above, for
example OK, and Cancel. Display elements, such as window titles or labels, are
represented within single quotation marks in bold type, for example ‚Window
Title‘.
1.4 Product description
Miray RAM Drive is the easiest and quickest solution for creating a RAM drive
under Windows. A RAM drive is an in-memory virtual drive, which is usually several times faster than hard disks, SSDs and other storage media. Miray RAM Drive
can be used by any Windows program just like a normal, physical disk. It is freely
adjustable in size from 20 MB to 8 GB (or more, depending on the edition used).
There are several editions of Miray RAM Drive, providing extended functionality
for special areas of use; they are all described in this manual.
1.4.1 Miray RAM Drive
The Standard Edition offers a quick and easy-to-use RAM drive:
{{
Simple 3-click interface
{{
Maximum performance and minimum latency
{{
RAM drive with up to 8 GB (4 GB on 32-bit Windows)
{{
Ready for immediate use due to automatic formatting
8 Introduction
1.4.2 Miray RAM Drive Plus
In addition to all of the features of Miray RAM Drive, Plus includes:
{{
RAM drive with up to 24 GB
{{
Runs in a standard user account (no admin rights required)
{{
Autostart function
{{
Persistence mode (48.4 Persistence)
Miray RAM Drive Plus is designed for users who require a permanently available
RAM drive, or a RAM drive that runs in a standard user account.
1.4.3 Miray RAM Drive Pro
In addition to all of the features of Miray RAM Drive Plus, Pro includes:
{{
RAM drive with up to 48 GB
{{
Adjustable physical sector size
{{
Selectable file system and cluster size
{{
Flexible partitioning and formatting
{{
Command line option for program automation
Miray RAM Drive Pro is designed for professional users and developers. It can
simulate physical disks in test scenarios or other applications, significantly reducing testing and development time.
1.4.4 Miray RAM Drive Server
In addition to all of the features of Miray RAM Drive Plus, Sever includes:
{{
Specially designed for Windows Server
{{
RAM drive with up to 128 GB
{{
Command line option for program automation
Miray RAM Drive Server is specifically designed for use on servers or on virtual
machines.
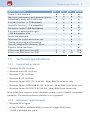
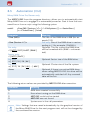
1.4.5 Editions comparison
The following table shows a comparison of the different editions.
Technical specifications 9
Feature Overview
Std
●
Simple 3-click interface
●
Maximum performance and minimum latency
●
Immediately ready with AutoFormat
Plus
Pro
Server
●
●
●
●
●
●
●
●
●
Autostart function (47.3 Autostart)
●
●
●
●
InstantOn function (47.4 InstantOn)
○
●
●
●
Persistence mode (48.4 Persistence)
Runs without administrator rights
○
●
●
●
○
●
●
●
48.5 Automation (CLI)
Sector size adjustable
Selectable file system and cluster size
Flexible partitioning and formatting
Specially designed for Windows Server
Supports virtual machines
32-bit: max. RAM drive size (GB)
64-bit: max. RAM drive size (GB)
○
○
●
●
○
○
●
○
○
○
●
○
○
○
●
○
○
○
○
●
○
○
○
●
4
8
4
24
4
48
128
128
1.5 Technical specifications
1.5.1 Supported systems
{{
Windows XP (32- & 64-bit)
{{
Windows Vista (32- & 64-bit)
{{
Windows 7 (32- & 64-bit)
{{
Windows 8 (32- & 64-bit)
{{
Windows Server 2003 (32- & 64-bit) - Miray RAM Drive Server only
{{
Windows Server 2008/2008 R2 (32- & 64-bit) - Miray RAM Drive Server only
{{
Windows Server 2012/2012 R2 (64-bit) - Miray RAM Drive Server only
Miray RAM Drive supports 64-bit Windows systems only on Intel64-compatible
hardware. The Itanium processor platform is not supported.
1.5.2 Minimum requirements
{{
Windows XP or higher
{{
At least 50 MB of available RAM (or more for a larger RAM drive)
{{
10 MB of available disk space
10 Quick start
2 Quick start
Complete the following steps for a quick start of Miray RAM Drive:
1. Start the installation program (SETUP.EXE) and follow the on-screen instructions. Accept the proposed settings.
2. Miray RAM Drive will be started automatically once the installation process
is complete. Alternatively, it can be started from the Start Menu.
3. In the program window, use the slider to set the desired capacity of the RAM
drive. Once complete, turn on the RAM drive (45.1.2 Turning on the RAM
drive) using the green switch.
4. For further operation, the program's icon will show in the system tray (46
Tray icon). A standard mouse click on the program icon opens the program
window; with a right-click you access the 47 Context menu, which offers
more control options. Press F1 on your keyboard for 47.1 Help.
Setup 11
3 Installation
3.1 Installation package
Miray RAM Drive for Windows comes in the form of an installation package (SETUP.EXE). The installation package contains the following components:
{{
Software files
{{
Driver
{{
Windows service (Miray RAM Drive Plus/Pro/Server editions only)
{{
Windows Help file
{{
Product Manual (PDF)
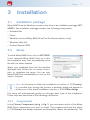
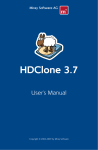
3.2 Setup
To install Miray RAM Drive, click on SETUP.EXE.
If you received Miray RAM Drive on a disk,
the installation may start automatically once
the disk has been inserted.
Select your preferred from the first window
displayed and follow the on-screen instructions to complete the setup. You can start
Miray RAM Drive immediately as soon as the
setup is finished.
Fig. 1: Miray RAM Drive setup
Note: As the setup includes the installation of a driver (413 Glossary),
it is possible that, during that process a windows dialog will appear to
inform you of the driver installation; see also 43.2.4 Other dialogs.
The setup will automatically guide you through each step of the installation.
These steps are described in the following subsections.
3.2.1 Components
In the Choose Components dialog (4Fig. 1) you can select which of the Miray
RAM Drive components you wish to install. The program itself and the driver
(413 Glossary) are always required, and therefore cannot be deselected. The
12 Installation
following are optional components:
{{
{{
{{
{{
{{
Executable from a standard user account (Miray RAM Drive Plus/Pro/Server only)
Installs a system service (413 Glossary), which allows Miray RAM Drive to run
without administrator rights. This is necessary if you wish to use it from a standard user account
Automatically start on system startup (Miray RAM Drive Plus/Pro/Server only)
Activates the Autostart function (47.3 Autostart).
Start Menu Group
Creates a program group in the Start menu.
Desktop Shortcut
Creates a shortcut on your desktop.
Quick start bar (Windows XP/Vista and Server 2003 only)
Creates a shortcut in the Windows quick start bar.
By default, all components are ready selected as they require only minimal resources. Only deselect a component if you are sure you are not going to need
it.
3.2.2 Progress bar
The Installing dialog shows the installation status using a progress bar. Click Show
details to see further details of the installation process. The setup automatically
enters the final dialog after the installation is complete.
3.2.3 Final steps
The Finish installation dialog indicates that the installation was successful. You
can use the check box Run Miray RAM Drive to start Miray RAM Drive automatically after the installation. Click Finish to exit the setup.
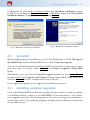
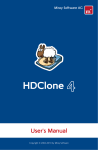
3.2.4 Other dialogs
The setup also installs a device driver
(Miray memory controller), which integrates the RAM drive into the system. Therefore, the Windows
Security dialog (4Fig. 2) will appear
during the installation process. Click
Install, to confirm the installation of
the device driver.
Fig. 2: Windows dialog driver installation
Installing updates/upgrades 13
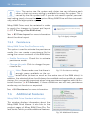
In Windows XP, you need to further confirm the Hardware Installation popup
(4Fig. 3) by clicking on Continue Anyway. If Windows opens the Found New
Hardware Wizard (4Fig. 4), close it by clicking Cancel.
Fig. 3: Windows Hardware installation
Fig. 4: Windows Hardware wizard
3.3 Uninstall
Before beginning the uninstallation, turn off the RAM drive (45.2.4 Turning off
the RAM drive) and exit Miray RAM Drive (44.4 Close the program).
You can uninstall and remove the Miray RAM Drive and all its components at any
time you want. To do this, select Uninstall from Start » Programs » Miray RAM
Drive.
Alternatively, you can use the Uninstall program feature on your Control Panel
located within the Programs and Features dialog. Select Miray RAM Drive and
click the Uninstall button, situated at the top of the list.
The program will guide you through the uninstallation process.
3.4 Installing updates/upgrades
If you have Miray RAM Drive already installed and you want to install an update
or a different edition, simply run the SETUP.EXE of the new version. The installation program uninstalls the existing version for you, ensuring the avoidance a
versioning conflict. Your selected program settings are automatically transferred
to the new version.
14 Start the program
4 Start the program
4.1 Start options
To start Miray RAM Drive, use the program icon created on the desktop during
the installation. If you have opted not to create a desktop icon during installation,
access the application via the Start Menu. In the program folder Miray RAM
Drive (or the name that you have opted to use during setup), click Run Miray
RAM Drive; the program window will open and the program icon will appear in
the system tray (46 Tray icon).
Note: Miray RAM Drive can be started only once. If attempting to start
the program more than once, a popup message will appear to inform
you of this. An already active RAM drive will not be affected.
4.2 Autostart
If set the Autostart option during the 43 Installation or using the 47 Context
menu, Miray RAM Drive will be invoked automatically when Windows is started.
The program icon can be found in the System Tray (46 Tray icon).
For more information about the Autostart mode, see 47.3 Autostart.
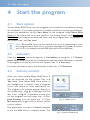
4.3 Activity monitor
Once you have started Miray RAM Drive, it
can be accessed via the System Tray (46
Tray icon). Since Miray RAM Drive works in
the background, it doesn't have a program
icon in the taskbar as other applications do.
The program icon instead appears directly in
the system tray (4Fig. 6) or amongst the hidden icons (4Fig. 5). A standard mouse click
on the program icon will open the 45 Program window; you can reach the 47 Context menu with a right click, to access further
control options.
The application icon also indicated whether
or not the RAM drive is currently active. The
Fig. 5: Hidden icons
Fig. 6: Inactive RAM drive
Close the program 15
brightly colored icon (4Fig. 5) shows that the drive is active, whilst the darker
shaded icon (4Fig. 6) denotes an inactive RAM drive. See 46 Tray icon for
more information regarding the system tray.
4.4 Close the program
You can exit the application by clicking Quit
Miray RAM Drive on the context menu
(4Fig. 7); this will also remove the application icon from the system tray.
If the RAM drive is still active, you will be
asked to confirm your request to quit the
application (4Fig. 8). This confirmation is
required since all stored data is be lost once
Miray RAM Drive is closed. This is also the
case when the RAM drive is switched off.
Fig. 7: Context menu
Fig. 8: Security query
16 Program window
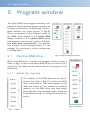
5 Program window
The Miray RAM Drive program window is displayed at startup and can always be accessed
from the system tray (46 Tray icon). The program window has three layouts (4Fig. 9),
which correspond to the different states of
the RAM drive: Active (45.2 Active RAM
drive), inactive (45.1 Inactive RAM drive)
and inactive in persistence mode (45.3 Inactive RAM drive (persistence)). The application window is not displayed when it is not
needed. You can open it via the system tray
(46 Tray icon).
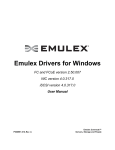
5.1 Inactive RAM drive
Fig. 9: Program window states
Whilst the RAM drive is inactive, the program window shows a
slider (4Fig. 11) next to the Miray RAM Drive icon and the On/
Off button; the slider can be used to adjust the capacity of the
RAM drive.
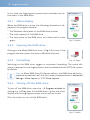
5.1.1 Adjust the capacity
The capacity of the RAM drive can be adjusted with the slider (4Fig. 11), before the RAM
drive is switched on. The value markers on the
slider are based on the maximum available
memory for the RAM drive, and they adapt
automatically to the available space. There are
three different ways of setting the desired capacity:
Fig. 10: Inactive
Fig. 11: Slider
Active RAM drive 17
{{
Click on the slider label to select the capacity.
{{
Click anywhere on the slider to set an arbitrary intermediate value.
{{
{{
Hold down the arrow button with your mouse and drag it to the desired value.
In this case, the arrow shows the exact value, thus allowing a precise setting.
Miray RAM Drive Plus/Pro/Server editions only: right-clicking on the arrow
button opens a small box which enables you to specify the desired size in MB
(Plus/Pro/Server) or in sectors (Pro).
Once the desired value is set, you can activate the RAM drive (45.1.2 Turning
on the RAM drive) using the On/Off button.
5.1.2 Turning on the RAM drive
The RAM drive can be turned on using the button located at
the bottom of the program window (4Fig. 12). Before turning
it on, select the desired capacity of the RAM drive, as this cannot be changed afterwards.
Fig. 12: On/Off
When switching on the RAM drive, it will be automatically initialized, partitioned and formatted (45.2.3 Formatting), so that it is ready for immediate use. Meanwhile, the power button displays an animation, letting you
know the initialization is on-going. Once the power button turns green, the RAM
drive is active and therefore ready to use.
5.1.3 InstantOn
Miray RAM Drive Plus/Pro/Server editions only
If you have set the option InstantOn in the 47 Context menu, the Miray RAM
Drive is turned on immediately after starting the program, with the last selected
settings. In combination with 47.3 Autostart, the RAM drive is available immediately after starting Windows.
See 47.4 InstantOn for more information regarding this function.
5.2 Active RAM drive
Once the RAM drive is on, formatted and ready to use, the program window
changes its display from the slider to a RAM drive status information.
18 Program window
In this state, the bright green power button indicates the active status of the RAM drive.
5.2.1 Status display
When the RAM drive is active, the following information is displayed in the program window:
{{
The Windows drive letter of the RAM drive volume.
{{
The total capacity of the RAM drive.
{{
The free space on the RAM drive, as a value and as a bar
graph.
Fig. 13: Active
5.2.2 Opening the RAM drive
Clicking on the Miray RAM Drive icon (4Fig. 14) on top of the
program window, opens the drive in Windows Explorer.
5.2.3 Formatting
Fig. 14: Open
Switching on the RAM drive triggers its automatic formatting. The entire disk
space is reserved in one single partition and formatted with the NTFS file system
by default.
Note: In Miray RAM Drive Pro/Server editions, the RAM drive will be formatted automatically with the file system predetermined in Advanced
Settings » Drive Layout (47.5.2 Drive Layout).
5.2.4 Turning off the RAM drive
To turn off the RAM drive, open the 45 Program window by
clicking the 46 Tray icon. If the RAM drive is active, the status
display and the bright green power button will be shown.
Click the button to turn off the RAM drive.
Fig. 15: Active
Inactive RAM drive (persistence) 19
You will be asked to confirm your request to
quit the driver; this is required due to all stored
data being lost once it is turned off.
After confirming, a waiting animation will appear on the power button. The symbol then
changes to dark green once the RAM drive is
turned off and all previously allocated resources are deallocated.
Fig. 16: Security check
The program window now replaces the status display with the slider, again allowing you to adjust the capacity of your RAM drive (45.1.1 Adjust the capacity).
You can now turn on the RAM drive again (45.1.2 Turning on the RAM drive)
with a different capacity. If you leave the RAM drive turned off, it will only require minimal resources and is accessible via the System Tray.
5.3 Inactive RAM drive (persistence)
Miray RAM Drive Plus/Pro/Server editions only
Using the persistence mode, the content of an existing RAM drive is not lost
when exiting Miray RAM Drive or when shutting down the operating system. The
RAM drive is thus permanently available (persistent memory), see also 48.4 Persistence.
The capacity of the RAM drive cannot be changed in persistence mode, not
even when the drive is turned off; thus, there is another state of the program
window (4Fig. 17). Instead of the usual slider for adjusting the capacity, the window will show the amount of persistent memory defined in the persistence settings (45.3.1 Setting the capacity (persistence)). If the RAM drive is turned on,
the keyword ‘Persistent’ is no longer displayed, and the drive is shown as an 45.2
Active RAM drive.
For more information about persistence, see chapter 48.4 Persistence. To enable the persistence mode, check Persistence in the context menu, under
Advanced Settings, 47.5.3 Persistence.
20 Program window
5.3.1 Setting the capacity (persistence)
Changing the capacity of a persistent RAM
drive causes the deletion of that drive and the
setting up of a new one with the desired capacity; thus, any data previously saved on the
drive is lost. Please follow these steps, if you
wish to change the capacity of the drive in
persistence mode:
{{
{{
{{
{{
Disable the persistence mode (47.5.3 Persistence).
Switch off the RAM drive.
Fig. 17: Persistence settings
The program window displays the slider: set the new desired capacity (45.1.1
Adjust the capacity).
Turn on the RAM drive again and reactivate persistence mode; you will be
presented with a new blank RAM drive with the new capacity.
Note: If required, back up or copy your data before turning off the RAM
drive. The data can be restored on the new RAM drive after resizing.
5.3.2 Turning on the RAM drive (persistence)
The program window appears different in persistence mode
than without persistence when the RAM drive is inactive. The
RAM drive can be turned on using the button from the bottom of the window (4Fig. 18).
Fig. 18: On/Off
In persistence mode, Miray RAM Drive automatically loads the
data from the persistence file to the RAM drive. After the transfer is complete,
the RAM drive is available with the same content it had before being switched
off.
Open the program window 21
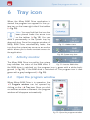
6 Tray icon
When the Miray RAM Drive application is
started, the program icon appears in the system tray, on the lower right side of the taskbar
(4Fig. 20).
Note: You may find that the icon has
been placed under the arrow icon
on the taskbar (4Fig. 19). You can
store it permanently in the system tray by
drag and drop. Since the program window of
Miray RAM Drive automatically fades, the
icon from the system tray serves as an anchor
which allows you to have constant access to
the application.
Fig. 19: Hidden icons
Fig. 20: System tray icon
6.1 Activity monitor
The Miray RAM Drive icon within the system
Fig. 21: Inactive RAM drive
tray indicates the status of the RAM drive. If
the RAM drive is switched on, the program icon is green with a white background (4Fig. 20). If the RAM drive is switched off, the program icon is dark
green with a gray background (4Fig. 20).
6.2 Open the program window
When Miray RAM Drive is in operation, the
45 Program window can be opened by
clicking on the 46 Tray icon. Once you click
on another window or element, the program
window will disappear automatically.
Fig. 22: Open the program window
22 Context menu
7 Context menu
The basic control functions of Miray RAM
Drive, such as setting the capacity and turning
it on and off, are performed via the 45 Program window. Other commands and functions are accessible via the context menu.
The context menu can be opened by right
clicking inside the program window or on the
application icon in the system tray (4Fig. 23
and 46 Tray icon).
Fig. 23: Context menu
7.1 Help
The Miray RAM Drive program contains a built-in Help section; this is, accessible
using the F1 key on your keyboard or via the context menu by clicking Help.
7.2 About Miray RAM Drive
This window (4Fig. 24) contains information
about Miray RAM Drive, detailing the used
edition, version and license. It also contains
two buttons; one leads you directly to the
homepage of Miray RAM Drive and the other
is used to check for updates.
7.3 Autostart
The Autostart function automatically starts
Miray RAM Drive during system startup. Click
Autostart in the context menu to enable or
disable Autostart.
Fig. 24: About Miray RAM Drive
A check mark next to the menu item indicates that Autostart is active.
7.4 InstantOn
InstantOn switches the RAM drive on immediately after starting the program, including the last setting selected. On the context menu click InstantOn to enable
Advanced Settings 23
or disable the InstantOn function.
A check mark next to the menu item indicates that InstantOn is active.
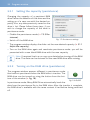
7.5 Advanced Settings
This menu item opens the Advanced Settings window; the settings are grouped
in tabs, as described in the below subsections.
7.5.1 Confirmations
In the Confirmations tab you can activate the
security prompts previously deactivated.
When turning off the RAM drive, when the
program ends (4Fig. 26) and when Windows
shuts down, the security prompts are displayed, to prevent the unintentional termination of the active RAM drive; this helps to
avoid the loss of data stored on the RAM
drive.
You can deactivate these questions by choosing the Do not ask me in the future option
(4Fig. 26). You can activate them again, by
checking the respective boxes in the
Confirmations tab (4Fig. 25).
Fig. 25: Confirmations settings
7.5.2 Drive Layout
Miray RAM Drive Pro/Server editions only
Fig. 26: Quit Miray RAM Drive
This tab allows you to specify format and layout preferences for the RAM drive.
{{
{{
{{
Sector size (Pro edition only): Select the
desired size for the physical sectors on the
RAM drive.
File system: Specify the file system which
will be used to format the RAM drive.
Cluster size (Pro edition only): This value
determines the size of the logical blocks
within the file system.
Fig. 27: Drive Layout settings
24 Context menu
Note: The sector size, file system and cluster size can influence each
other so that not every setting is available for every file system. This is
caused by the file system itself. If you do not need a special, personalized setting simply choose the Auto option, Miray RAM Drive will then automati
cally select the appropriate options.
Miray RAM Drive must be restarted in order
to apply the changes to format and layout
(45.1.2 Turning on the RAM drive).
See 48.3 Drive Layout for more information
about the drive Layout.
Fig. 28: Apply changes
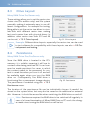
7.5.3 Persistence
Miray RAM Drive Plus/Pro/Server only
This option is used to activate the persistence
mode. You can create a persistence file for
saving the current contents of the RAM drive.
{{
{{
Enable Persistence: Check this to activate
persistence mode.
Change file path: Click to change the persistence file.
Fig. 29: Persistence settings
Note: Please make sure that there is
enough space available on the selected drive (at least as much as the entire size of the RAM drive). In
addition, the selected drive should always be available and accessible at system
startup; this is especially important when using persistence together with the Autostart function (44.2 Autostart). If these conditions are not met, persistence
mode may not function as expected.
See 48.4 Persistence for more information.
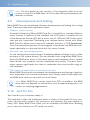
7.6 Additional Features
Miray RAM Drive Standard edition only
This window displays information about the
Miray RAM Drive license. It also links to the
product pages of Miray RAM Drive Plus, Pro
and Server, which provide additional features.
Fig. 30: Additional Features
Extended memory 25
8 Additional functions
8.1 Autostart and InstantOn
By combining the 47.3 Autostart and the 47.4 InstantOn functions, the RAM
drive is turned on automatically at the startup of Windows. This is useful for applications such as caching (49.3 Cache) or for the dropping of temporary files:
after the system starts, a fresh RAM drive is available for temporary data. Data
from the previous session is automatically and ultimately deleted.
In combination with 48.4 Persistence, there is another application: in this case
the RAM drive can also be used for non-volatile data (for example, work files, or
files that are delivered through a 49.7 Web server).
Activate the Autostart function as described in 44.2 Autostart and the InstantOn
function as described in 45.1.3 InstantOn.
8.2 Extended memory
For 32-bit Windows systems, Miray RAM Drive Server can use the upper half of
the 4GB limit, too. The size of the usable memory depends on your version of
Windows:
{{
Windows XP
(0,5 – 4 GB)
{{
Server 2008
(8 – 64 GB)
{{
Server 2003
(4 – 64 GB)
{{
Windows 7
(2 – 4 GB)
{{
Windows Vista (1 – 4 GB)
{{
Windows 8
(2 – 4 GB)
Hint: A Windows kernel patch that removes the 4 GB limit for 32-bit
versions of Windows Vista/7/8 can be found at http://wj32.org/
wp/2012/12/26/pae-patch-updated-for-windows-8/.
The 64-bit versions of Windows support 8-4,000 GB of memory. Details on the
supported memory are available on the Microsoft website at: http://msdn.microsoft.com/en-us/library/windows/desktop/aa366778.aspx.
For 64-bit Windows systems, Miray RAM Drive can use the memory according to
the corresponding edition (see 41.4.5 Editions comparison).
Important: It may be necessary to manually activate the Windows PAE
mechanism on 32-bit Windows systems, in order to use more than 4 GB
of memory (410.4.3 RAM cannot be fully used).
26 Additional functions
8.3 Drive Layout
Miray RAM Drive Pro/Server only
These settings allow you to set the sector size,
cluster size (Pro edition only) and file system
manually, making it extremely easy to use different configurations, for example for testing.
Being able to set the sector size allows to simulate disks with different sector sizes, making
test much easier than with physical drives. In
addition, other sector sizes than 512 and 4K
can be set (47.5.2 Drive Layout).
Fig. 31: Drive Layout
Example: Different drive layouts, especially the sector size, can be used
to test software for compatibility with these layouts; see also 49.9 Development and testing.
8.4 Persistence
Miray RAM Drive Plus/Pro/Server only
Since the RAM drive is located in the PC's
memory, it is volatile, meaning it will lose its
contents after being switched off. It can however be made persistent for cases in which
the content needs to be preserved. Its content is saved the when you turn it off, and will
be available again when you turn the RAM
drive on. Consequently, the RAM drive is
functioning like a permanent storage device.
The persistence is enabled using the 47.5.3
Persistence menu.
Fig. 32: Persistence
The location of the persistence file can be individually chosen. It needn't be
stored on the system drive, but may also be saved on an additional or external
disk. However, it should be accessible when switching the RAM drive on and off.
Note: Persistence requires the RAM drive to be switched off regularly. In
case of a forced termination of Miray RAM Drive or PC crash, the changes made since turning the RAM drive on will be lost.
Automation (CLI) 27
8.5 Automation (CLI)
Miray RAM Drive Pro/Server only
The MRDCLI.EXE from the program directory, allows you to automatically start
Miray RAM Drive or to engage it in automated processes. Start it from the command line or from a script using the following syntax:
mrdcli
<Size (MB | Sectors+"s")> [-f <FileSystem>] [-s <SectorSize>]
[-c <ClusterSize>] [-force]
Parameter
<Size (MB)>
<Size (Sectors+"s")>
Pro only:
-f [ NTFS | FAT | ExFAT | RAW ]
Server only:
-f [ NTFS | ReFS ]
Pro only:
-s [ 512 | 1K | 2K | 4K ]
Pro only:
-c [ 512 | 1K | 2K | 4K | … | 64K ]
-force
Meaning
The size of the RAM drive in MB (for example 512)
Pro only: Size of the RAM drive in sectors
ending in 's' (for example, 256000s)
Optional: The file system the RAM drive
will be formatted with (RAW = unformatted).
Optional: Sector size of the RAM drive.
Optional: Cluster size of the file system.
Optional: If there is an active RAM drive
when calling MRDCLI.EXE, this drive will be
automatically switched off. Any unsaved
data will be lost.
The following return values are provided by MRDCLI.EXE after execution:
Parameter
0
1
2
3
4
Meaning
RAM drive created successfully.
Error when turning on the RAM drive.
MRD.EXE could not be started.
MRD.EXE was not found.
Syntax error in the call parameters.
Note: Settings that are saved automatically by the graphical version of
the Miray RAM Drive for the next program start, will not be changed by
the command line version.
28 Application areas
9 Application areas
9.1 General notes
Miray RAM Drive is designed for universal usage and works even faster than
SSDs. The following sections describe some specific scenarios that particularly
benefit from the usage of Miray RAM Drive. However, the use of Miray RAM
Drive is not limited to these scenarios.
9.2 Temporary files
Some programs or processes create temporary files that are no longer needed
after their termination. However, storing these files on a RAM drive can accelerate their execution. When the RAM drive is switched off, the data will be deleted
automatically.
Note: For temporary data that is needed over a longer period of time
(for example, browser cache 49.3 Cache), Miray RAM Drive Plus allows
you to create a persistent RAM drive (48.4 Persistence).
9.3 Cache
All operating systems have a built-in cache, a memory buffer meant to accelerate the work. The built-in cache is automatic, meaning users are not able to
specify the data they would prefer to be cached. This is exactly what you can
achieve with a RAM drive. All data stored on the RAM drive benefit from extremely fast access.
9.4 Full RAM usage
Miray RAM Drive Server / 32-bit Windows systems only
For 32-bit systems with more than 2.5 GB of RAM, the upper half of the memory
area is not available for programs as linear addressable memory. This limitation
can be further decreased to a maximum of 3.5 GB of addressable memory.
Miray RAM Drive can use this memory space, and further increase it to more
than 4 GB in the Miray RAM Drive Server edition. For example, if your system has
8 GB of RAM, you can use the entire upper half as a RAM drive for caching (49.3
Cache), swapping and 49.2 Temporary files, thus speeding up the entire system. Server functions can also be accelerated by buffering file data or databases
in a RAM drive.
Data security 29
Note: A prerequisite for the support of more than 4 GB of RAM is that
the Windows operating system is equipped with the required mechanisms (48.2 Extended memory).
9.5 Converting data
A RAM drive can optimize the process of converting photos, music or videos into
several different formats. Usually, the source data will be read again for every
new format generated. Putting them onto a RAM drive first will clearly accelerate
the subsequent data processing. This principle is, of course, also applicable for
any other types of data.
9.6 Database
You can use Miray RAM Drive to run a file-based database as an in-memory database: copying it to a RAM drive and running them from there can improve access time and transfer rates by a factor of 10-100. Do not forget to activate
48.4 Persistence mode, in order to save the data.
Note: For servers running a Windows Server operating system, Miray
RAM Drive Server is required.
9.7 Web server
Miray RAM Drive can help you speed up your Windows web server and thus increase the number of simultaneous requests. The small latency of the RAM drive
is particularly useful when accessing static data or a 49.6 Database, allowing
your web server to utilize its full potential; just ensure to store your data files on
a persistent RAM drive.
Note: For servers running a Windows Server operating system, Miray
RAM Drive Server is required.
9.8 Data security
Files that are used infrequently (see 49.2 Temporary files) and should not remain on your computer for security reasons, a RAM drive ensures that these files
are not only deleted, but are completely removed after switching off the PC.
The files cannot be restored after deletion.
30 Application areas
Hint: This also applies to user sessions: if the temporary data of a user
session is stored on a RAM drive, all of this data will be permanently deleted at shutdown.
9.9 Development and testing
Miray RAM Drive can accelerate software development and testing, thus saving
time. There are three main application areas:
{{
{{
{{
Different sector formats
A beneficial feature of Miray RAM Drive Pro is the ability to simulate different
sector formats. In addition to the standard size (512 bytes), it enables the use
of the Advanced Format (AF) with a sector size of 1 KB and 4 KB. Other sector
sizes are also supported. Simulating your desired sector format with Miray
RAM Drive Pro allows you to test your software (see also 47.5.3 Persistence).
From the internal perspective of the program to be tested, the RAM drive behaves identically to a physical drive with this sector format.
Disk tools and special applications
For the development and testing of hardware-related software (such as data
recovery or file system drivers), you can benefit from using Miray RAM Drive.
Since the RAM drive works in the same way as real hardware (but is several
times faster), test scenarios can be completed very quickly. The tests themselves require significantly less time to undertake than they would using actual hardware.
Disk-intensive applications and endurance tests
Miray RAM Drive can also accelerate the development and testing of applications, especially if this involves endurance tests. Simply save the test data onto
the RAM drive, and your tests will run much faster.
Hint: Miray RAM Drive is even faster than SSDs. In addition, the RAM
drive does not depend on mechanisms such as wear-leveling and is not
subject to creeping degeneration.
9.10 Just for fun
Test how fast your computer really is!
The hard disk is often the bottleneck when it comes to the speed of your computer. On top-notch systems, fast processors and chipsets, this even applies to
many SSDs. Miray RAM Drive offers you an incredibly fast RAM drive, allowing
you to see just how fast your PC really can work!
Memory problems 31
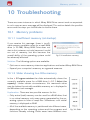
10 Troubleshooting
There are some instances in which Miray RAM Drive cannot work as expected;
in such cases an error message will be displayed. This section details the possible
errors and the steps you should take to resolve them.
10.1 Memory problems
10.1.1 Insufficient memory (at startup)
If you receive this message, there is insufficient memory available, even for a small RAM
drive (< 20 MB). Miray RAM Drive does not
start in this instance; not only because it could
run out of memory, but also because the
overall ability of the operating system could
be adversely affected.
Fig. 33: Insufficient memory
Solution: The following options are available:
{{
Quit one or more memory-intensive applications and restart Miray RAM Drive.
{{
Expand your computer's memory, as a general measure.
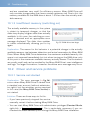
10.1.2 Slider showing too little memory
In the 45 Program window the slider automatically shows the
currently available space for a RAM drive (45.1.1 Adjust the
capacity). Under certain circumstances, this maximum value
may be below the actually available memory, as is displayed in
the Windows task manager.
Explanation: There are two possible reasons for this:
{{
{{
Only actual (real) memory can be used for a RAM drive, that
is, no virtual memory such swap space, generated by the operating system in form of swap files. Sometimes, such virtual
memory is displayed as RAM.
All of the available memory is partitioned into different areas,
depending on the operating system and the programs and
functions already running; these areas have different sizes
Fig. 34: Slider
32 Troubleshooting
and are sometimes very small. For efficiency reasons, Miray RAM Drive will
only consider storage areas that have a certain minimum size. Due to this, the
memory available for the RAM drive is about 1-5% less than the actually available memory.
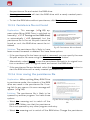
10.1.3 Insufficient memory (switching on)
The actually available memory in the system
is subject to temporal changes, so that the
slider may display a higher value than actually
available. In this case, the switching-on command is aborted and an appropriate error
message displayed. The slider then updates
its values automatically, allowing you to try
again.
Fig. 35: RAM drive too large
Explanation: The reason for this behavior is a potential change in the actually
available memory size between detection and actual reservation by Miray RAM
Drive. When Miray RAM Drive determines the maximum available memory, this
space is not reserved immediately, but just when turning on the RAM drive; only
at this point is the maximum available memory actually known. The fluctuations
are usually small, and can be avoided by the Miray RAM Drive’s own intelligence
and logic. For larger fluctuations, however, the above error message may occur.
10.2 Driver and service problems
10.2.1 Service not started
Explanation: This error message (4Fig. 36)
occurs when Miray RAM Drive is started from
a standard user account (without administrator rights), but the windows service required
in this case (the Miray RAM Drive Service) is
not started.
Solution: There are three ways to fix this:
{{
{{
Fig. 36: Service not started
If you have previously stopped the service
manually, restart it before starting Miray RAM Drive.
You can start Miray RAM Drive with administrator privileges (Elevated Mode,
right-click + Run as administrator). This is particularly necessary if you unchecked the Install service option during the Miray RAM Drive installation.
Persistence file problems 33
{{
If you do not know the cause of the problem, or you want to install the service
straightaway, simply reinstall Miray RAM Drive (43.2 Setup).
10.2.2 Driver missing
Explanation: This error message (4Fig. 37)
indicates a missing Miray RAM Drive Adapter
driver. It is normally installed automatically
during the installation of Miray RAM Drive.
Solution: Reinstall Miray RAM Drive (43.2
Setup).
Fig. 37: Driver missing
10.2.3 Service not installed
Explanation: This error message (4Fig. 38)
occurs if Miray RAM Drive was started from a
standard user account (without administrator
rights), but the required windows service
(Miray RAM Drive Service) is not installed.
Solution: There are two ways to fix this:
{{
{{
Fig. 38: Service not installed
You can start Miray RAM Drive with administrator privileges (Elevated Mode, right-click + Run as administrator). This is
particularly necessary if you have unchecked the Install service option during
the Miray RAM Drive installation.
If you do not know the cause of the problem, or you want to install the service
straightaway, simply reinstall Miray RAM Drive (43.2 Setup).
10.3 Persistence file problems
10.3.1 Error creating persistence file
Explanation: If persistence mode is active,
Miray RAM Drive immediately generates the
persistence file to check whether it is possible
and if the file is accessible. If it is not possible,
this error message will appear (4Fig. 39).
Solution: Select a different location for the
persistence file, one that is always accessible.
Fig. 39: Error creating persistence file
34 Troubleshooting
10.3.2 Insufficient disk space
Explanation: In order to make the RAM drive
persistent, its contents will be saved to the
persistence file when switching it off. This file
has the same size as the RAM drive. If there is
not enough free space on the specified drive,
this error message will appear (4Fig. 40).
Solution: There are two ways to fix this:
{{
{{
Create enough free space on the specified
drive, for example by deleting files.
Fig. 40: Persistence file too large
Change the location of the persistence file to another drive with sufficient free
disk space.
10.3.3 Error opening persistence file
Explanation: When the persistence mode is
enabled and Miray RAM Drive is started
(manually or automatically), it will immediately attempt to open the persistence file in order to initialize the RAM drive. If the persistence file is available, but it cannot be
accessed, this error message will appear
(4Fig. 41).
Fig. 41: Problem opening the file
Solution: The persistence file is likely to have
been opened by another application. Make sure that the persistence file is
closed and turn on the RAM drive again.
10.3.4 Persistence file damaged
Explanation: If the persistence file is available
and accessible, but the data stored within is
invalid, for example, because the file has
been modified by another program or has become corrupted, this error message will appear (4Fig. 42).
Solution: You have three options:
{{
Click Cancel to restore the original state of
Fig. 42: Persistence file damaged
Persistence file problems 35
the persistence file and restart the RAM drive.
{{
{{
Create persistence file will start the RAM drive with a newly created persistence file.
To start the RAM drive without persistence, click Deactivate persistence.
10.3.5 Persistence file not found
Explanation: This message (4Fig. 43) appears when Miray RAM Drive is switched on
manually (45.1.2 Turning on the RAM drive)
or automatically (44.2 Autostart), but the
persistence file in the set file path cannot be
found; as such, the RAM drive cannot be initialized.
Fig. 43: Persistence file not found
Solution: The persistence file is likely to have
been moved, renamed or deleted. You have three options:
{{
{{
{{
If the persistence file has been moved or renamed, you can specify the new
file path and/or file name using the Persistence settings button.
Alternatively, select Cancel, move the persistence file back to its original location or rename it with its original name, and restart the RAM drive.
If the persistence file was deleted, select the Create persistence file, button to
start the RAM drive with a newly created persistence file.
10.3.6 Error saving the persistence file
Explanation: When quitting Miray RAM Drive
in persistence mode, the contents of the RAM
drive are saved in the persistence file. If saving fails for any reason, this error message will
appear (4Fig. 44).
Solution: The persistence file is likely to be
opened by another program. You have three
options:
{{
{{
Fig. 44: Error saving the persistence
file
Select No, meaning not to switch off the
RAM drive. Make sure that the persistence
file is not opened by any other program, and retry.
Select No, meaning not to switch off the RAM drive. Change the persistence
36 Troubleshooting
file location or name using the Advanced Settings (47.5.3 Persistence) and
then retry.
{{
Select Yes to turn off the RAM drive. The data stored on will then be lost and
the persistence mode will be disabled.
10.4 Other sources of errors
10.4.1 Persistence file stored in the Programs directory
In persistence mode (48.4 Persistence), the contents of the RAM drive are
saved in the persistence file when turning it off. To set or change the location of
the persistence file, use the Advanced Settings in the context menu, under
47.5.3 Persistence.
Important: You should not save the persistence file in the folders
Windows or Programs, because Windows has a protective function
built in for these folders (see also Virtual Store in 413 Glossary). This
function prevents Miray RAM Drive from accessing files in these folders. Therefore, the persistence mode does not work properly if the persistence file is saved
in one of these folders or subfolders.
10.4.2 The RAM drive is slow
Windows XP-64 and Server 2003 (x32 + x64)
Windows XP (64-bit) and Server 2003 (32 and 64 bit) allow, by default, only a
slow access to the RAM drive. Use the official patch KB932755, to install a faster
access method: http://support.microsoft.com/kb/932755/de.
Note: After installing KB932755 you need to reinstall Miray RAM Drive
(43.2 Setup). The same applies when uninstalling KB932755.
10.4.3 RAM cannot be fully used
32-bit Windows systems
If you cannot use the full memory, ensure that the Windows PAE mechanism is
activated. Perform the following steps:
Windows XP and Server 2003
{{
Make sure that you have administrator rights.
{{
Disable the option Hide protected operating system files (recommended)
Other sources of errors 37
from My Computer » Extras » Options » View.
{{
{{
{{
{{
Open the system drive (for example C: \) and remove the write protection
from the BOOT.INI file by opening right-click » Properties.
Open BOOT.INI in Notepad and look for lines with this pattern:
multi(0)disk(0)rdisk(0)partition(2)\%systemroot%="Windows XP"
Change this by appending /PAE to:
multi(0)disk(0)rdisk(0)partition(2)\%systemroot%="Windows XP" /PAE
and save the file. If necessary, you can revert by removing the modification.
Restart Windows for the change to take effect.
Windows Vista/7/8 & Server 2008
{{
{{
{{
Open the command shell as administrator. Click on Start and type cmd within
the search box. Right click on cmd.exe in the search results, and select Run as
administrator from the context menu.
Type the command bcdedit /set PAE forceenable. If necessary to revert, use
the deactivation command bcdedit /set PAE forcedisable.
Restart Windows for the changes to take effect.
38 Help and support
11 Help and support
When developing Miray RAM Drive, our focus was to produce a program that is
both, reliable and easy to use. Nevertheless, should you have questions or encounter any problems, with Miray RAM Drive, the sources listed below will help
you find a solution.
11.1 Program help
You can access the program's Help section by pressing F1 on your keyboard
or by selecting Help from the context menu. The Help section includes a brief
description of the program’s functions and error message troubleshooting.
11.2 Manual
If 47.1 Help does not provide the resolution or information required, please refer to this manual for detailed descriptions and additional information on all aspects of the program.
11.3 Online forum
For user or system specific problems that are not described in the Help section
or within this manual, you can find useful information our online forum at http://
www.miray-software.com/forum/index.php. If you do not find an answer to your
problem there, please feel free to post it.
11.4 Technical support
Users of Miray RAM Drive Plus, Pro and Server can access our online support system for individual technical support. Please create a ticket for your problem at
http://www.miray-software.com/support/index.html.
11.5 Product inquiries
Please do not hesitate to contact us with any questions you have regarding
Miray RAM Drive, purchases or licensing conditions.
{{
Questions about the license
General information about the license terms can be found in 412.6 License
model. In addition, we are more than happy to provide you with help and advice regarding any specific questions you may have.
Manufacturer information 39
{{
Other questions
You can find answers to questions regarding the product, application areas,
compatibility, technical data, etc. within this manual or online at the Miray
RAM Drive product page (miray-software.com/mrd).
If you do not find the answer satisfactory answer or solution to your problem using these sources, please contact us directly:
E-mail
[email protected]
Phone
+49 (0) 89 72013-643
(Monday-Friday, 9 am to 5 pm CET / CEST)
11.6 Feedback
We are very keen to receive feedback and welcome both, criticism and appraisal with regards to our product. We would like to know, for example, if you find
bugs in the system, if you have any suggestions for improvement and to listen to
your experiences with the program, our website and our service. Please send
your feedback to:
{{
[email protected] or alternatively use our feedback form:
{{
http://www.miray-software.com/solutions/customerservice/feedback.html.
11.7 Manufacturer information
Miray RAM Drive is a product of Miray Software AG..
Internet
miray-software.com
E-Mail
[email protected]
Postal address Miray Software AG
Gaissacher Str. 18
81371 Munich
Germany
40 Appendix
12 Appendix
12.1 Software package
Miray RAM Drive is supplied as an 43.1 Installation package. You may receive
the installation package in one of the following forms:
{{
Via download
{{
On CD/DVD
{{
On USB stick
Please follow the instructions in section 412.2 Genuine software, to ensure that
you use the genuine product.
12.2 Genuine software
There are several ways to ensure that you software package contains genuine
software:
{{
{{
Download: Please make sure you download the software (Miray RAM Drive
Plus/Pro/Server) with your original license key. You should download Miray
RAM Drive standard, which is available for free for private users, only from our
website (miray-software.com) or from other trusted sites, such as cnet.com,
softpedia.com, Download.com or tomsguide.com.
CDs/DVDs or USB sticks: An original disk contains a security hologram or an
engraved serial number.
If you are unsure whether or not your package contains genuine software,
please contact us (411.7 Manufacturer information). We will verify this for you.
In the unlikely event that you do have a counterfeit product, by no fault of your
own, we will endeavor to find a suitable solution.
12.3 Updates
Miray RAM Drive will automatically download newer versions if it has access to
the Internet. However, you can also manually check for updates (47.2 About
Miray RAM Drive) and follow the steps described in 43.4 Installing updates/upgrades, for installing the newer version.
License model 41
12.4 Disclaimer
Although Miray RAM Drive was created with the utmost care and was subject to
extensive testing, we do not guarantee the proper functioning of the program,
nor are we liable for any damages resulting from its use subject to gross negligence or willful misconduct.
12.5 Security mechanisms
Miray RAM Drive is equipped with a mechanism, to ensure that the software is
not used without a proper licensing. We are constantly striving to implement appropriate mechanisms, ensuring that they involve minimal data exchange, work
without the exchange of users' personal data, and with the least possible interference of the software. The mechanism requires the exchange of two 24-character strings. This is done automatically when an online connection is available,
after confirmation from the user. Without an online connection, the strings can
be manually exchanged using another device with an online connection. Please
follow the instructions provided by the program.
12.6 License model
Miray RAM Drive is generally licensed on a per installation on a computer or on
a virtual machine basis.
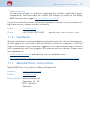
12.6.1 Editions and types of use
This table shows both payable and free licenses:
Private use
Miray RAM Drive
Other use*
free
chargeable
Miray RAM Drive Plus
chargeable
chargeable
Miray RAM Drive Pro
chargeable
chargeable
Miray RAM Drive Server
chargeable
chargeable
*) any non-private use (for example businesses, companies, institutions etc.)
12.6.2 Available license types
We offer a variety of license types with our standard products. It is possible that
not all of them are always available for each of the products. Please contact us
(412.6.3 Counseling) if the product you require is distributed under a license
that is not suitable for your needs.
42 Appendix
{{
{{
{{
{{
{{
{{
Single License
For the installation of the software on one computer only.
Workplace License
For the installation of the software on two computers.
Maintenance license
For using the software on multiple, arbitrary computers.
Technician license
Combines a Workplace License with a Maintenance License.
Volume license
Includes a certain volume of Single Licenses.
Utilization licenses
Licensed based on duration or frequency of use.
12.6.3 Counseling
We will gladly assist you with any general licensing questions you may have. In
addition, if you have any questions about the licensing for a particular scenario,
we will help you to find the best and cheapest solution. We will gladly make you
an individual offer.
Email
[email protected]
Phone
+49 (0) 89 72013-643
(Monday-Friday, 9 am to 5 pm CET / CEST)
Glossary 43
13 Glossary
File system
A partition or volume must be formatted with a specific file system (for example,
NTFS or FAT) so that the files can be stored on it. In common usage, the file system is often equated with the partition in which it is located (for example, NTFS
partition). Technically, however, a partition and file system are two different
structures.
Disk
The term 'disk' includes the entire storage medium, as well in case of a removable medium (physical medium, for example CD/DVD) as in case of integrated
drives (physical drive, for example hard disks). A disk can contain several partitions. They are accessible through different drive letters (for example, C:, D: and
E:), although they are located on the same physical drive.
Service
A service is a program that runs in the background and provides certain functions
for other (application) programs. As opposed to a driver, a service does not run
in the operating system kernel.
Context menu
Selection menu that appears on an item or icon when right clicking.
Drive/Disk
The terms drive or disk have differing meanings in common usage, identifying
either a physical storage device or a logical volume (partition).
Partition (Volume)
Partition or volume (logical drive) denotes a contiguous area on a disk. Multiple
partitions can be created on a single disk. In Windows, every partition is associated with a drive letter (for example, C:), under which it appears in the system.
However, a partition can only be used for storing files when a file system is created on it.
Persistence
The data from the RAM drive is permanently stored, even after the RAM drive is
switched off (48.4 Persistence).
Persistence file
User-defined file in which the data of the RAM drive is stored in persistence
mode, whilst the RAM drive is off.
44 Glossary
Persistence mode
The mode in which Miray RAM Drive is in when 48.4 Persistence is activated.
Program window
A window of the program, from which the program’s functions can be controlled.
RAM drive
Designated virtual disk created in memory.
System tray
Area in the Windows taskbar (bottom right), displaying the icons for the programs running in the background and the date and time.
System service
A system service is a service that runs with elevated privileges (on the Windows
system account), so that it can access all files, processes, and other resources just
like the operating system itself.
Driver
A driver is program code that (under Windows) runs directly in the operating
system kernel. A driver handles the connection of hardware devices so that they
can be used in the operating system. The driver of Miray RAM Drive reserves the
desired amount of memory and interfaces it as a RAM drive in the operating system. This way, the RAM drive behaves exactly like a physical drive, and can be
used as such by any program.
Virtual Store
Windows supports the Virtual Store concept, starting with Windows Vista. From
the user's perspective, a Virtual Store looks just like a folder in the file system. In
contrast to a pure access control, where the access is either allowed or prohibited, read and write operations are monitored by the Windows Virtual Store and
automatically redirected to other folders. Examples are the 'Windows' and 'Program files' folders: when a normal program attempts to write a file in one of
these folders, this file is automatically stored in a different directory, ensuring that
no program can directly alter or damage any of the installed programs. Attempts
to access C:\WINDOWS\ can be redirected, for example, to: C:\USER\% USERNAME%\APPDATA\LOCAL\VIRTUALSTORE\WINDOWS\ - or similar when accessing other system folders.