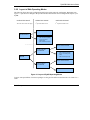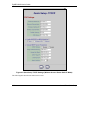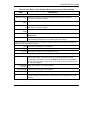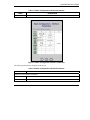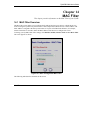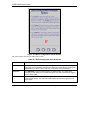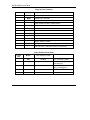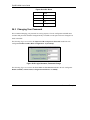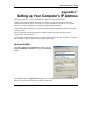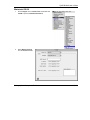
1
ZyAIR B-5000
Outdoor Access Point & Bridge
User's Guide
Version 1.5.8.200
February 2004
ZyAIR B-5000 User’s Guide
Copyright
Copyright © 2004 by ZyXEL Communications Corporation.
The contents of this publication may not be reproduced in any part or as a whole, transcribed, stored in a
retrieval system, translated into any language, or transmitted in any form or by any means, electronic,
mechanical, magnetic, optical, chemical, photocopying, manual, or otherwise, without the prior written
permission of ZyXEL Communications Corporation.
Published by ZyXEL Communications Corporation. All rights reserved.
Disclaimer
ZyXEL does not assume any liability arising out of the application or use of any products, or software
described herein. Neither does it convey any license under its patent rights nor the patent rights of others.
ZyXEL further reserves the right to make changes in any products described herein without notice. This
publication is subject to change without notice.
Trademarks
Other trademarks mentioned in this publication are used for identification purposes only and may be
properties of their respective owners.
ii
Copyright
ZyAIR Wireless Gateway Series User’s Guide
Federal Communications Commission
(FCC) Interference Statement
This device complies with Part 15 of FCC rules. Operation is subject to the following two conditions:
•
This device may not cause harmful interference.
•
This device must accept any interference received, including interference that may cause undesired
operations.
This equipment has been tested and found to comply with the limits for a Class B digital device pursuant to
Part 15 of the FCC Rules. These limits are designed to provide reasonable protection against harmful
interference in a commercial environment. This equipment generates, uses, and can radiate radio frequency
energy, and if not installed and used in accordance with the instructions, may cause harmful interference to
radio communications.
If this equipment does cause harmful interference to radio/television reception, which can be determined by
turning the equipment off and on, the user is encouraged to try to correct the interference by one or more of
the following measures:
1.
Reorient or relocate the receiving antenna.
2.
Increase the separation between the equipment and the receiver.
3.
Connect the equipment into an outlet on a circuit different from that to which the receiver is connected.
4.
Consult the dealer or an experienced radio/TV technician for help.
Notice 1
Changes or modifications not expressly approved by the party responsible for compliance could void the
user's authority to operate the equipment.
Certifications
Refer to the product page at www.zyxel.com.
FCC Statement
iii
ZyAIR B-5000 User’s Guide
ZyXEL Limited Warranty (Warranty)
ZyXEL warrants to the original end user (purchaser) that this product is free from any defects in materials
or workmanship for a period of up to two years from the date of purchase. During the warranty period, and
upon proof of purchase, should the product have indications of failure due to faulty workmanship and/or
materials, ZyXEL will, at its discretion, repair or replace the defective products or components without
charge for either parts or labor, and to whatever extent it shall deem necessary to restore the product or
components to proper operating condition. Any replacement will consist of a new or re-manufactured
functionally equivalent product of equal value, and will be solely at the discretion of ZyXEL. This warranty
shall not apply if the product is modified, misused, tampered with, damaged by an act of God, or subjected
to abnormal working conditions.
Note
Repair or replacement, as provided under this warranty, is the exclusive remedy of the purchaser. This
warranty is in lieu of all other warranties, express or implied, including any implied warranty of
merchantability or fitness for a particular use or purpose. ZyXEL shall in no event be held liable for indirect
or consequential damages of any kind of character to the purchaser.
To obtain the services of this warranty, contact ZyXEL's Service Center for your Return Material
Authorization number (RMA). Products must be returned Postage Prepaid. It is recommended that the unit
be insured when shipped. Any returned products without proof of purchase or those with an out-dated
warranty will be repaired or replaced (at the discretion of ZyXEL) and the customer will be billed for parts
and labor. All repaired or replaced products will be shipped by ZyXEL to the corresponding return address,
Postage Paid. This warranty gives you specific legal rights, and you may also have other rights that vary
from country to country.
iv
ZyXEL Warranty
ZyAIR Wireless Gateway Series User’s Guide
Customer Support
Please have the following information ready when you contact customer support.
•
•
•
•
Product model and serial number.
Warranty Information.
Date that you received your device.
Brief description of the problem and the steps you took to solve it.
METHOD
E-MAIL
SUPPORT/SALES
TELEPHONE/FAX
WEB SITE/ FTP SITE
REGULAR MAIL
LOCATION
WORLDWIDE
[email protected]
+886-3-578-3942
www.zyxel.com
www.europe.zyxel.com
ftp.zyxel.com
[email protected]
+886-3-578-2439
ftp.europe.zyxel.com
NORTH
AMERICA
[email protected]
+1-800-255-4101
www.us.zyxel.com
[email protected]
+1-714-632-0858
ftp.us.zyxel.com
SCANDINAVIA
[email protected]
+45-3955-0700
www.zyxel.dk
[email protected]
+45-3955-0707
ftp.zyxel.dk
GERMANY
[email protected]
+49-2405-6909-0
www.zyxel.de
[email protected]
+49-2405-6909-99
Customer Support
ZyXEL Communications Corp.,
6 Innovation Road II, ScienceBased Industrial Park, Hsinchu
300, Taiwan.
ZyXEL Communications
Inc.1130 N. Miller St.
Anaheim, CA 92806, U.S.A.
ZyXEL Communications A/S,
Columbusvej 5, 2860 Soeborg,
Denmark
ZyXEL Deutschland GmbH.
Adenauerstr. 20/A2 D-52146
Wuerselen, Germany
v
ZyAIR B-5000 User’s Guide
vi
ZyAIR B-5000 User’s Guide
Table of Contents
Outdoor Access Point & Bridge
Chapter 1 Getting to know your ZyAIR ....................................................................................................1-1
1.1 ZyAIR Features............................................................................................................................1-1
1.1.1 10 Auto-negotiating Ethernet/Fast Ethernet Interface................................................................1-1
1.1.2 10 Auto-crossover Ethernet/Fast Ethernet Interface ..................................................................1-1
1.1.3 802.11b Wireless LAN Standard................................................................................................1-1
1.1.4 Firewall ......................................................................................................................................1-2
1.1.5 IEEE 802.1x Network Security ..................................................................................................1-2
1.1.6 Wireless LAN MAC Address Filtering......................................................................................1-2
1.1.7 WEP Encryption.........................................................................................................................1-2
1.1.8 Deny Clients...............................................................................................................................1-2
1.1.9 PPPoE Support (RFC2516)........................................................................................................1-2
1.1.10 Network Address Translation (NAT) /(PAT).............................................................................1-3
1.1.11 DHCP (Dynamic Host Configuration Protocol).........................................................................1-3
1.1.12 SNMP.........................................................................................................................................1-3
1.1.13 Full Network Management.........................................................................................................1-3
1.1.14 Embedded TFTP Client Address................................................................................................1-3
Chapter 2 Web Configurator Overview .....................................................................................................2-1
2.1 Web Configurator Overview .......................................................................................................2-1
2.2 Accessing the ZyAIR Web Configurator....................................................................................2-1
2.3 Resetting the ZyAIR ....................................................................................................................2-5
Chapter 3 Quick Setup ................................................................................................................................3-1
3.1 Quick Setup Overview .................................................................................................................3-1
3.1.1 PPPoE.........................................................................................................................................3-1
3.1.2 IP Address ..................................................................................................................................3-1
3.1.3 Bridge.........................................................................................................................................3-1
3.1.4 Router.........................................................................................................................................3-1
3.2 Configuring the ZyAIR Using the Quick Setup.........................................................................3-2
3.2.1 Common Screen Command Buttons ..........................................................................................3-2
3.2.2 Layout of Web Operating Modes...............................................................................................3-3
Chapter 4 Access Point Quick Setup ..........................................................................................................4-1
4.1 Access Point Operation Mode .....................................................................................................4-1
4.2 Quick Setup – TCP/IP..................................................................................................................4-2
4.2.1 IP Address Assignment ..............................................................................................................4-2
4.2.2 IP Address and Subnet Mask .....................................................................................................4-3
4.2.3 DNS Server Address Assignment ..............................................................................................4-3
4.2.4 Network Address Translation (NAT).........................................................................................4-4
4.2.5 DHCP (Dynamic Host Configuration Protocol).........................................................................4-4
4.3 Quick Setup – Static Route........................................................................................................4-12
Table of Contents
vii
ZyAIR B-5000 User’s Guide
4.4 Quick Setup – Wireless..............................................................................................................4-13
4.4.1 Wireless LAN Basics...............................................................................................................4-13
4.4.2 Channel ....................................................................................................................................4-13
4.4.3 RTS/CTS Threshold.................................................................................................................4-13
4.4.4 Fragmentation Threshold .........................................................................................................4-15
4.4.5 ESS ID .....................................................................................................................................4-15
4.4.6 WEP Encryption ......................................................................................................................4-15
4.5 Quick Setup – Configuration Review.......................................................................................4-18
4.6 Quick Setup – Restart System...................................................................................................4-20
Chapter 5 Bridge Quick Setup....................................................................................................................5-1
5.1 Bridge Operation Mode...............................................................................................................5-1
5.1.1 Central Wireless Operation Mode..............................................................................................5-2
5.1.2 Remote Wireless Operation Mode.............................................................................................5-4
5.2 Quick Setup – TCP/IP .................................................................................................................5-5
5.3 Quick Setup – Wireless..............................................................................................................5-17
5.4 Quick Setup – Configuration Review.......................................................................................5-18
5.5 Quick Setup – Restart System...................................................................................................5-20
Chapter 6 Basic Configuration – System Setup ........................................................................................6-1
6.1 Basic Configuration .....................................................................................................................6-1
6.2 Configuring System Setup...........................................................................................................6-3
Chapter 7 Interface Parameters .................................................................................................................7-1
7.1 Interface Parameters Overview..................................................................................................7-1
Chapter 8 Configuration Parameters ........................................................................................................8-5
8.1 Configuration Parameters Overview .........................................................................................8-5
Chapter 9 ISP Parameters...........................................................................................................................9-1
9.1 ISP Parameters Overview ...........................................................................................................9-1
Chapter 10 DHCP Parameters .................................................................................................................10-1
10.1 DHCP Overview .........................................................................................................................10-1
10.2 General DHCP Server Parameters ............................................................................................10-1
10.3 IP Pool Setup................................................................................................................................10-1
10.4 Fixed Host Entry .........................................................................................................................10-1
10.5 Configuring DHCP Parameters .................................................................................................10-1
10.6 DHCP Host Entry ........................................................................................................................10-4
Chapter 11 Server Mapping...................................................................................................................... 11-1
11.1 TCP ............................................................................................................................................... 11-1
11.2 UDP............................................................................................................................................... 11-1
11.3 Server Mapping ........................................................................................................................... 11-1
Chapter 12 Wireless...................................................................................................................................12-1
12.1 Wireless Overview .......................................................................................................................12-1
12.1.1 IBSS.........................................................................................................................................12-1
12.1.2 BSS ..........................................................................................................................................12-1
viii
Table of Contents
ZyAIR B-5000 User’s Guide
12.1.3 ESS...........................................................................................................................................12-2
12.1.4 RTS/CTS..................................................................................................................................12-3
12.1.5 Fragmentation Threshold .........................................................................................................12-3
12.2 Configuring Wireless ...................................................................................................................12-3
12.3 WEP Overview .............................................................................................................................12-4
12.3.1 Data Encryption .......................................................................................................................12-4
Chapter 13 IEEE 802.1x, RADIUS...........................................................................................................13-1
13.1 IEEE 802.1x Overview ................................................................................................................13-1
13.2 Introduction to RADIUS .............................................................................................................13-1
13.2.1 EAP Authentication Overview.................................................................................................13-2
13.3 Dynamic WEP Key Exchange.....................................................................................................13-3
13.4 Configuring IEEE 802.1x ............................................................................................................13-3
13.4.1 Local 802.1X User Add ...........................................................................................................13-5
Chapter 14 MAC Filter .............................................................................................................................14-1
14.1 MAC Filter Overview..................................................................................................................14-1
14.1.1 MAC Address Pool ..................................................................................................................14-2
Chapter 15 Configuration Overview, Save, Restart................................................................................15-1
15.1 Configuration Overview..............................................................................................................15-1
15.2 Basic Configuration Save and Restart .......................................................................................15-1
Chapter 16 Advanced Configuration........................................................................................................16-1
16.1 Advanced Configuration Overview ............................................................................................16-1
Chapter 17 Static Route.............................................................................................................................17-1
17.1 Static Route Overview .................................................................................................................17-1
17.2 Configuring IP Static Route ........................................................................................................17-1
17.3 Configuring Route Entry ............................................................................................................17-3
Chapter 18 Bridging Parameters..............................................................................................................18-1
19.1 Bridging Overview.......................................................................................................................18-1
18.2 Configuring Bridging Parameters..............................................................................................18-1
Chapter 19 SNMP ......................................................................................................................................19-1
19.1 SNMP Overview...........................................................................................................................19-1
19.2 Configuring SNMP ......................................................................................................................19-1
19.3 Supported MIBs...........................................................................................................................19-2
19.4 SNMP Community Parameters Configuration .........................................................................19-2
19.4 SNMP Community Parameters Modify ...................................................................................19-4
19.5 SNMP Trap Overview..................................................................................................................19-5
19.6 SNMP Trap Parameters Configuration .....................................................................................19-5
19.6 SNMP Trap Modify .................................................................................................................19-7
Chapter 20 Configuration, Save & Restart..............................................................................................20-1
20.1 Advanced Configuration Setup Overview .................................................................................20-1
Chapter 21 Configuration Scenarios ........................................................................................................21-1
21.1 Network Topology: Access Point.................................................................................................21-1
Table of Contents
ix
ZyAIR B-5000 User’s Guide
21.1.1 Configure the ZyAIR as a Wireless Access Bridge .................................................................21-1
21.1.2 Configure the ZyAIR as a Wireless Access Router with PPP over Ethernet (PPPoE) ............21-2
21.1.3 Configure the ZyAIR as a Wireless Access Router with Dynamic IP Address (DHCP).........21-4
21.1.4 Configure the ZyAIR as a Wireless Access Router with Static IP Address (Fixed IP) ...........21-5
21.2 Network Topology: Wireless Bridge...........................................................................................21-8
21.2.1 Configure the ZyAIR ...............................................................................................................21-8
21.2.2 Configure the ZyAIR as a Central Wireless Bridge.................................................................21-9
21.2.3 Configure the ZyAIR as a Central Wireless Router with PPP over Ethernet (PPPoE)..........21-10
21.2.4 Configure the ZyAIR as a Central Wireless Router with Dynamic IP Address (DHCP). .....21-10
21.2.5 Configure the ZyAIR as a Central Wireless Router with Static IP Address (Fixed IP).........21-11
21.2.6 Configure the ZyAIR as a Remote Wireless Bridge ..............................................................21-12
21.2.7 Configure the ZyAIR as a Remote Wireless Router ..............................................................21-14
21.2.8 Remote Wireless Bridge-to-Central Wireless Bridge ............................................................21-15
21.2.9 Remote Wireless Router-to-Central Wireless Bridge ............................................................21-16
21.2.10Remote Wireless Bridge-to-Central Wireless Router ...........................................................21-17
21.2.11Remote Wireless Router-to-Central Wireless Router ...........................................................21-18
Chapter 22 Utility ......................................................................................................................................22-1
22.1 Utility Overview...........................................................................................................................22-1
22.2 Utility Tutorial Screen .................................................................................................................22-1
22.3 General System Information ......................................................................................................22-2
22.4 Uploading Software .....................................................................................................................22-4
22.4.1 TFTP ........................................................................................................................................22-4
22.4.2 Uploading a software file.........................................................................................................22-4
22.5 Wireless Link Info .......................................................................................................................22-6
Chapter 23 Accessing the ZyAIR via Telnet or Console Port.................................................................23-1
23.1 Telnet Overview ...........................................................................................................................23-1
23.2 Using Telnet Example..................................................................................................................23-1
23.3 Console Overview ........................................................................................................................23-3
23.3.1 Console Port Connections........................................................................................................23-3
23.4 Accessing the ZyAIR via HyperTerminal Example ..................................................................23-3
Chapter 24 SMT Main Screen ..................................................................................................................24-1
24.1 SMT Main Screen Overview.......................................................................................................24-1
24.2 SMT Navigation Controls ...........................................................................................................24-2
24.3 SU Mode .......................................................................................................................................24-3
24.4 System Information .....................................................................................................................24-3
24.5 Ping Test .......................................................................................................................................24-4
Chapter 25 Supervisor Mode ....................................................................................................................25-1
25.1 Supervisor Mode Overview ........................................................................................................25-1
25.1.1 Enable configuration mode ......................................................................................................25-3
Chapter 26 Command Examples..............................................................................................................26-1
26.1 Command Syntax ........................................................................................................................26-1
x
Table of Contents
ZyAIR B-5000 User’s Guide
26.2 Commands Summary ..................................................................................................................26-1
26.3 Changing Your Password ..........................................................................................................26-10
Chapter 27 Firmware and Configuration File Maintenance..................................................................27-1
27.1 Filename Conventions .................................................................................................................27-1
27.1.1 TFTP and Telnet over WAN Will Not Work When ................................................................27-2
27.2 Backup Configuration .................................................................................................................27-2
27.2.1 Backup Configuration Example Using HyperTerminal ...........................................................27-3
27.3 Restore Configuration Example Using HyperTerminal ...........................................................27-5
27.4 Uploading Software .....................................................................................................................27-7
27.5 Example 1K Xmodem Firmware Upload Using HyperTerminal ............................................27-7
27.6 Example 1K Xmodem Image File Upload Using HyperTerminal ...........................................27-9
27.7 Resetting Your ZyAIR ...............................................................................................................27-10
Chapter 28 Firewall ...................................................................................................................................28-1
28.1 Background Information ............................................................................................................28-1
28.2 Firewall Overview........................................................................................................................28-1
28.3 Introduction to ZyXEL’s Firewall ..............................................................................................28-2
28.4 Denial of Service ..........................................................................................................................28-2
28.4.1 Basics .......................................................................................................................................28-3
28.4.2 Types of DoS Attacks ..............................................................................................................28-3
28.5 Enabling the Firewall ..................................................................................................................28-6
28.6 Firewall Access Control...............................................................................................................28-7
28.6.1 TCP ..........................................................................................................................................28-8
28.6.2 UDP..........................................................................................................................................28-8
28.6.3 ICMP........................................................................................................................................28-8
28.6.4 IP ..............................................................................................................................................28-8
28.6.5 Configuring Firewall Access Control.......................................................................................28-8
28.7 Anti – Denial of Service .............................................................................................................28-11
Appendix A Site Planning...........................................................................................................................A-1
Appendix B Site Installation ......................................................................................................................B-1
Appendix C Setting up Your Computer’s IP Address ..............................................................................C-1
Appendix D Wireless LAN With IEEE 802.1x .........................................................................................D-1
Appendix E Types of EAP Authentication ................................................................................................E-1
Appendix F Troubleshooting ...................................................................................................................... F-1
Appendix G Technical Specifications ....................................................................................................... G-1
Appendix H Power Specifications............................................................................................................. H-1
Appendix I Approvals .................................................................................................................................. I-1
Appendix J Packaging Specifications.........................................................................................................J-1
Index............................................................................................................................................................ K-1
Table of Contents
xi
ZyAIR B-5000 User’s Guide
xii
Table of Contents
ZyAIR B-5000 User’s Guide
List of Figures
Figure 2-1 Web Browser Address Field ......................................................................................................... 2-1
Figure 2-2 Password Screen........................................................................................................................... 2-2
Figure 2-3 Operating Mode............................................................................................................................ 2-3
Figure 2-4 Tutorial Screen ............................................................................................................................. 2-4
Figure 3-1 Layout of ZyAIR Operating Modes ............................................................................................. 3-3
Figure 4-1 Access Point Operation Mode ...................................................................................................... 4-1
Figure 4-2 Quick Setup TCP/IP Settings (Wireless Access Bridge Mode) .................................................... 4-4
Figure 4-3 Quick Setup TCP/IP Settings (Wireless Access Router PPPoE Mode) ........................................ 4-6
Figure 4-4 Quick Setup TCP/IP Settings (Wireless Access Router DHCP Mode)......................................... 4-8
Figure 4-5 Quick Setup TCP/IP Settings (Wireless Access Router Static IP Mode).................................... 4-10
Figure 4-6 Quick Setup Static Route............................................................................................................ 4-12
Figure 4-7 RTS/CTS .................................................................................................................................... 4-14
Figure 4-8 Quick Setup Wireless ................................................................................................................. 4-16
Figure 4-9 Quick Setup Configuration Review............................................................................................ 4-19
Figure 4-10 Restart screen ........................................................................................................................... 4-20
Figure 5-1 Bridge Operation Mode................................................................................................................ 5-1
Figure 5-2 Central Wireless Operation Mode ................................................................................................ 5-3
Figure 5-3 Remote Wireless Operation.......................................................................................................... 5-4
Figure 5-4 Quick Setup TCP/IP Settings (Central Wireless Bridge Mode).................................................... 5-6
Figure 5-5 Quick Setup TCP/IP Settings (Central Wireless Router PPPoE Mode)........................................ 5-8
Figure 5-6 Quick Setup TCP/IP Settings (Central Wireless Router DHCP Mode) ...................................... 5-10
Figure 5-7 Quick Setup TCP/IP Settings (Central Wireless Router Static IP Mode) ................................... 5-12
Figure 5-8 Quick Setup TCP/IP Settings (Remote Wireless Bridge Mode)................................................. 5-14
Figure 5-9 Quick Setup TCP/IP Settings (Remote Wireless Router Mode)................................................. 5-16
Figure 5-10 Quick Setup Wireless ............................................................................................................... 5-18
Figure 5-11 Quick Setup Configuration Review.......................................................................................... 5-19
Figure 5-12 Restart screen ........................................................................................................................... 5-20
Figure 6-1 Basic Configuration Tutorial ........................................................................................................ 6-2
Figure 6-2 Basic Configuration System Setup ............................................................................................... 6-3
Figure 7-1 Basic Configuration Interface Parameters .................................................................................... 7-1
Figure 7-2 Basic Configuration Interface Parameters .................................................................................... 7-3
Figure 8-1 Basic Configuration Parameters ................................................................................................... 8-5
Figure 8-2 Basic Configuration User Profile ................................................................................................. 8-8
Figure 9-1 Basic Configuration ISP Parameters ............................................................................................ 9-1
Figure 9-2 Basic Configuration ISP Parameters Edit..................................................................................... 9-2
Figure 10-1 Basic Configuration DHCP Parameters.................................................................................... 10-2
Figure 10-2 Basic Configuration DHCP Parameters Edit ............................................................................ 10-4
Figure 11-1 Basic Configuration Server Mapping ........................................................................................11-2
Figure 11-2 Basic Configuration Server Mapping Add.................................................................................11-4
List of Figures
xiii
ZyAIR B-5000 User’s Guide
Figure 12-2 IBSS (Ad-hoc) Wireless LAN...................................................................................................12-1
Figure 12-3 Basic Service set .......................................................................................................................12-2
Figure 12-4 Extended Service Set.................................................................................................................12-3
Figure 12-5 Basic Configuration Wireless LAN...........................................................................................12-5
Figure 13-2 EAP Authentication...................................................................................................................13-2
Figure 13-3 Basic Configuration 802.1x ......................................................................................................13-4
Figure 13-4 Basic Configuration Local 802.1X User Add............................................................................13-6
Figure 14-1 Basic Configuration MAC Filter...............................................................................................14-1
Figure 14-2 Basic Configuration MAC Filter Add .......................................................................................14-3
Figure 15-1 Basic Configuration Overview..................................................................................................15-1
Figure 15-2 Basic Configuration Save & Restart .........................................................................................15-2
Figure 16-1 Advanced Configuration Tutorial..............................................................................................16-2
Figure 17-1 Example of Static Routing Topology ........................................................................................17-1
Figure 17-2 Advanced Configuration Static Route Parameters ....................................................................17-2
Figure 17-3 Static Route Parameters Modify................................................................................................17-3
Figure 18-1 Advanced Configuration Bridging Parameters..........................................................................18-1
Figure 19-1 SNMP Management Model.......................................................................................................19-1
Figure 19-2 Advanced Configuration SNMP Community............................................................................19-3
Figure 19-3 Advanced Configuration SNMP Community Modify...............................................................19-4
Figure 19-4 Advanced Configuration SNMP Trap .......................................................................................19-6
Figure 19-5 Advanced Configuration SNMP Trap Modify...........................................................................19-7
Figure 20-1 Advanced Configuration Overview...........................................................................................20-2
Figure 20-2 Advanced Configuration Save & Restart ..................................................................................20-3
Figure 22-1 Wireless Access Bridge .............................................................................................................21-2
Figure 22-2 Wireless Access Router with PPP over Ethernet (PPPoE) ........................................................21-4
Figure 22-3 Wireless Access Router with Dynamic IP Address (DHCP Client) ..........................................21-5
Figure 22-4 Wireless Access Router with Static IP Address (Fixed IP)........................................................21-7
Figure 22-5 Configure the ZyAIR as a Remote Wireless Bridge ...............................................................21-13
Figure 22-6 Remote Wireless Bridge-to-Central Wireless Bridge..............................................................21-15
Figure 22-7 Remote Wireless Router-to-Central Wireless Bridge..............................................................21-16
Figure 22-8 Remote Wireless Bridge-to-Central Wireless Router..............................................................21-17
Figure 22-9 Remote Wireless Router-to-Central Wireless Router..............................................................21-18
Figure 22-1 Utility Tutorial Screen...............................................................................................................22-2
Figure 22-2 Utility General System Information..........................................................................................22-3
Figure 22-3 Utility Software Upgrade ..........................................................................................................22-5
Figure 22-4 Utility Wireless Link Info Screen..............................................................................................22-7
Figure 23-1 Telnet Window ..........................................................................................................................23-1
Figure 23-2 Login via Telnet ........................................................................................................................23-2
Figure 23-3 Main Screen via Telnet..............................................................................................................23-2
Figure 23-4 HyperTerminal Access ..............................................................................................................23-4
Figure 23-5 Connection Description.............................................................................................................23-5
xiv
List of Figures
ZyAIR B-5000 User’s Guide
Figure 23-6 COM1 PORT............................................................................................................................ 23-5
Figure 23-7 COM1 Properties...................................................................................................................... 23-6
Figure 23-8 HyperTerminal.......................................................................................................................... 23-7
Figure 23-9 Starting Console/Telnet Configuration ..................................................................................... 23-8
Figure 23-10 System Status ......................................................................................................................... 23-9
Figure 23-11 Enter HyperTerminal Console Configuration....................................................................... 23-10
Figure 24-1 SMT Main Screen via Telnet or HyperTerminal ...................................................................... 24-1
Figure 24-2 Sys_info Mode ......................................................................................................................... 24-3
Figure 24-3 Ping Test ................................................................................................................................... 24-4
Figure 25-1 Supervisor Mode ...................................................................................................................... 25-2
Figure 25-2 Enable Configuration Mode ..................................................................................................... 25-4
Figure 26-1 PingTest.................................................................................................................................... 26-2
Figure 26-2 SU Setup................................................................................................................................... 26-2
Figure 26-3 SU Upgrade .............................................................................................................................. 26-3
Figure 26-4 SU Enable................................................................................................................................. 26-3
Figure 26-5 SU Monitor............................................................................................................................... 26-3
Figure 26-6 SU *System .............................................................................................................................. 26-3
Figure 26-7 SU *Interface............................................................................................................................ 26-3
Figure 26-8 SU Packet Filter........................................................................................................................ 26-4
Figure 26-9 SU *PPP ................................................................................................................................... 26-5
Figure 26-10 SU *ISP .................................................................................................................................. 26-5
Figure 26-11 SU *IP_Share ......................................................................................................................... 26-5
Figure 26-12 SU *DHCP ............................................................................................................................. 26-6
Figure 26-13 SU *DHCP clt ........................................................................................................................ 26-6
Figure 26-14 SU *DNS_proxy..................................................................................................................... 26-7
Figure 26-15 SU *SNMP............................................................................................................................. 26-7
Figure 26-16 SU *TFTP .............................................................................................................................. 26-7
Figure 26-17 SU *Route .............................................................................................................................. 26-7
Figure 26-18 *Bridge ................................................................................................................................... 26-7
Figure 26-19 SU WLAN.............................................................................................................................. 26-8
Figure 26-20 SU Configuration ................................................................................................................... 26-8
Figure 26-21 SU *Show............................................................................................................................... 26-9
Figure 26-22 Login Username, Password Change..................................................................................... 26-10
Figure 26-23 SMT Username, Password Change .......................................................................................26-11
Figure 27-1 File Download .......................................................................................................................... 27-3
Figure 27-2 Receive File Select Protocol..................................................................................................... 27-4
Figure 27-3 Receive Filename ..................................................................................................................... 27-4
Figure 27-4 File Backup Complete .............................................................................................................. 27-5
Figure 27-5 File Restore .............................................................................................................................. 27-6
Figure 27-6 File Restore Confirmation ........................................................................................................ 27-6
Figure 27-7 File Upload............................................................................................................................... 27-8
List of Figures
xv
ZyAIR B-5000 User’s Guide
Figure 27-8 Example Firmware Upload .......................................................................................................27-9
Figure 27-9 Example Image File Upload....................................................................................................27-10
Figure 27-10 Resetting Your ZyAIR...........................................................................................................27-10
Figure 27-11 Resetting To Default..............................................................................................................27-11
Figure 28-1 Firewall Tutorial Screen............................................................................................................28-2
Figure 28-2 Three-Way Handshake ..............................................................................................................28-4
Figure 28-3 SYN Flood ................................................................................................................................28-5
Figure 28-4 Smurf Attack .............................................................................................................................28-6
Figure 28-5 Firewall General Parameters .....................................................................................................28-7
Figure 28-6 Firewall Config Access Control ................................................................................................28-9
Figure 28-7 Firewall Config Denial of Service ..........................................................................................28-11
xvi
List of Figures
ZyAIR B-5000 User’s Guide
List of Tables
Table 3-1 Configuration Commands .............................................................................................................. 3-2
Table 4-1 Access Point Operation Mode........................................................................................................ 4-2
Table 4-2 Private IP Address Ranges ............................................................................................................. 4-2
Table 4-3 Quick Setup TCP/IP Settings (Wireless Access Bridge Mode)...................................................... 4-5
Table 4-4 Quick Setup TCP/IP Settings (Wireless Access Router PPPoE Mode).......................................... 4-6
Table 4-5 Quick Setup TCP/IP Settings (Wireless Access Router DHCP Mode) .......................................... 4-8
Table 4-6 Quick Setup TCP/IP Settings (Wireless Access Router Static IP Mode) ..................................... 4-10
Table 4-7 Quick Setup Static Route ............................................................................................................. 4-12
Table 4-8 Quick Setup Wireless ................................................................................................................... 4-16
Table 5-1 Bridge Operation Mode ................................................................................................................. 5-2
Table 5-2 Central Wireless Operation Mode.................................................................................................. 5-3
Table 5-3 Remote Wireless Operation Mode ................................................................................................. 5-5
Table 5-4 Quick Setup TCP/IP Settings (Central Wireless Bridge Mode) ..................................................... 5-6
Table 5-5 Quick Setup TCP/IP Settings (Central Wireless Router PPPoE Mode) ......................................... 5-8
Table 5-6 Quick Setup TCP/IP Settings (Central Wireless Router DHCP Mode)........................................ 5-10
Table 5-7 Quick Setup TCP/IP Settings (Central Wireless Router Static IP Mode)..................................... 5-12
Table 5-8 Quick Setup TCP/IP Settings (Remote Wireless Bridge Mode) .................................................. 5-14
Table 5-9 Quick Setup TCP/IP Settings (Remote Wireless Router Mode) .................................................. 5-16
Table 6-1 Basic Configuration System Setup................................................................................................. 6-3
Table 7-1 Basic Configuration Interface Parameters...................................................................................... 7-2
Table 7-2 Basic Configuration Interface Parameters...................................................................................... 7-3
Table 8-1 Basic Configuration Parameters..................................................................................................... 8-6
Table 8-2 Basic Configuration User profile ................................................................................................... 8-8
Table 9-1 Basic Configuration ISP Parameters .............................................................................................. 9-1
Table 9-2 Basic Configuration ISP Parameters Edit ...................................................................................... 9-2
Table 10-1 Basic Configuration DHCP Parameters ..................................................................................... 10-2
Table 10-2 Basic Configuration DHCP Parameters Edit.............................................................................. 10-4
Table 11-1 Services and Port Numbers .........................................................................................................11-1
Table 11-2 Basic Configuration Server Mapping..........................................................................................11-3
Table 11-3 Basic Configuration Server Mapping Add ..................................................................................11-4
Table 12-1 Basic Configuration Wireless LAN ........................................................................................... 12-6
Table 13-1 Basic Configuration 802.1x ....................................................................................................... 13-4
Table 13-2 Basic Configuration Local 802.1X User Add ............................................................................ 13-6
Table 14-1 Basic Configuration MAC Filter................................................................................................ 14-2
Table 14-2 Basic Configuration MAC Filter Add ........................................................................................ 14-3
Table 15-1 Basic Configuration Save & Restart .......................................................................................... 15-2
Table 17-1 Advanced Configuration Static Route Parameters ..................................................................... 17-2
Table 17-2 Static Route Parameters Modify ................................................................................................ 17-4
Table 18-1 Advanced Configuration Bridging Parameters........................................................................... 18-2
List of Tables
xvii
ZyAIR B-5000 User’s Guide
Table 19-1 Advanced Configuration SNMP Community .............................................................................19-3
Table 19-2 Advanced Configuration SNMP Community Modify ................................................................19-4
Table 19-3 SNMP Traps................................................................................................................................19-5
Table 19-4 Ports and Interface Types............................................................................................................19-5
Table 19-5 Advanced Configuration SNMP Trap .........................................................................................19-6
Table 19-6 Advanced Configuration SNMP Trap Modify ............................................................................19-7
Table 20-1 Advanced Configuration Save & Restart....................................................................................20-3
Table 22-1 Utility General System Information............................................................................................22-3
Table 22-2 Utility Software Upgrade............................................................................................................22-5
Table 22-3 Utility Wireless Link Info ...........................................................................................................22-7
Table 24-1 SMT Main Screen via Telnet or HyperTerminal.........................................................................24-2
Table 24-2 SMT Navigation Controls...........................................................................................................24-2
Table 24-3 Sys_info Mode............................................................................................................................24-4
Table 26-1 Password Information...............................................................................................................26-11
Table 27-1 Filename Conventions ................................................................................................................27-1
Table 28-1 Common IP Ports........................................................................................................................28-3
Table 28-2 Firewall General Parameters.......................................................................................................28-7
Table 28-3 Firewall Config Access Control..................................................................................................28-9
Table 28-4 Firewall Config Denial of Service ............................................................................................28-11
xviii
List of Tables
ZyAIR B-5000 User’s Guide
Preface
Congratulations on your purchase from the ZyAIR B-5000 Outdoor Access Point & Bridge.
A wireless gateway is an access point and router rolled into one. It is a cost-effect solution to share Internet
access with multiple computers and expand your wired network.
This User’s Guide is designed to guide you through the configuration of your ZyAIR using the web
configurator or the SMT.
Related Documentation
Supporting Disk
Refer to the included CD for support documents.
Quick Installation Guide
Our Quick Installation Guide is designed to help you get up and running right away. It contains
information on the configuration of key features and hardware connections and installation.
ZyXEL Web Site
The ZyXEL download library at www.zyxel.com contains additional documentation. Please also
refer to www.zyxel.com for an online glossary of networking terms.
Syntax Conventions
•
“Enter” means for you to type one or more characters (and press the carriage return). “Select” or
“Choose” means for you to use one predefined choices.
•
[Enter], or carriage return, key; [ESC] means the escape key and [SPACE BAR] means the space bar.
[UP] and [DOWN] are the up and down arrow keys.
•
Mouse action sequences are denoted using a comma. For example, “click the Apple icon, Control
Panels and then Modem” means first click the Apple icon, then point your mouse pointer to Control
Panels and then click Modem.
•
For brevity’s sake, we will use “e.g.,” as a shorthand for “for instance”, and “i.e.,” for “that is” or “in
other words” throughout this manual.
•
The ZyAIR B-5000 may be referred to simply as the ZyAIR in the user’s guide.
User Guide Feedback
Help us help you. E-mail all User Guide-related comments, questions or suggestions for improvement to
[email protected] or send regular mail to The Technical Writing Team, ZyXEL Communications
Corp., 6 Innovation Road II, Science-Based Industrial Park, Hsinchu, 300, Taiwan. Thank you.
Preface
xix
ZyAIR B-5000 User’s Guide
xx
Preface
OVERVIEW
Part I:
OVERVIEW
This part introduces the main features and applications of the ZyAIR and shows how to access
the web configurator and use the Quick Setup screens for initial configuration.
I
ZyAIR B-5000 User’s Guide
Chapter 1
Getting to know your ZyAIR
This chapter introduces the main features and applications of the ZyAIR.
1.1
ZyAIR Features
1.1.1 10 Mbps Ethernet Interface
This auto-negotiating feature allows the ZyAIR to detect the speed of incoming transmissions and adjust
appropriately without manual intervention. It allows data transfer of either 10 Mbps in either half-duplex or
full-duplex mode depending on your Ethernet network.
1.1.2 10 Mbps Auto-crossover Ethernet Interface
The LAN interface automatically adjusts to either a crossover or straight-through Ethernet cable.
1.1.3 802.11b Wireless LAN Standard
ZyAIR products containing the letter “B” in the model name, such as ZyAIR B-5000, comply with the
802.11b wireless standard.
The 802.11b data rate and corresponding modulation techniques are as follows. The modulation technique
defines how bits are encoded onto radio waves.
802.11b
Data Rate (Mbps)
Modulation
1
DBPSK (Differential Binary Phase Shift Keyed)
2
DQPSK (Differential Quadrature Phase Shift Keying)
5.5 / 11
CCK (Complementary Code Keying)
Getting to know your ZyAIR
1-1
ZyAIR B-5000 User’s Guide
The ZyAIR may be prone to RF (Radio Frequency) interference from other 2.4 GHz
devices such as microwave ovens, wireless phones, Bluetooth enabled devices,
and other wireless LANs.
1.1.4 Firewall
The ZyAIR’s firewall provides DoS (Denial of Service) protection. By default, when the firewall is activated,
all incoming traffic from the WAN to the LAN is blocked unless it is initiated from the LAN. The ZyAIR
firewall supports TCP/UDP inspection.
1.1.5 IEEE 802.1x Network Security
The ZyAIR supports the IEEE 802.1x standard to enhance user authentication. Use the built-in user profile
database to authenticate users using MD5 encryption. Use an EAP-compatible RADIUS (RFC2138, 2139 Remote Authentication Dial In User Service) server to authenticate a limitless number of users using EAP
(Extensible Authentication Protocol). EAP is an authentication protocol that supports multiple types of
authentication.
1.1.6 Wireless LAN MAC Address Filtering
On a local area network (LAN) or other network, the MAC (Media Access Control) address is a wireless
LAN client’s unique hardware number (On an Ethernet LAN, it's the same as your Ethernet address). Your
ZyAIR checks the MAC address of a wireless station against a list of allowed or denied MAC addresses.
1.1.7 WEP Encryption
WEP (Wired Equivalent Privacy) encrypts data frames before transmitting them over the wireless network to
help keep network communications private.
1.1.8 Deny Clients
You can set the ZyAIR to block access for wireless LAN clients that have the SSID set to “any” or
“ANY”.
1.1.9 PPPoE Support (RFC2516)
PPPoE (Point-to-Point Protocol over Ethernet) emulates a dial-up connection. It allows your ISP to use their
existing network configuration with newer broadband technologies such as ADSL. The PPPoE driver on the
ZyAIR is transparent to the computers on the LAN, which see only Ethernet and are not aware of PPPoE thus
saving you from having to manage PPPoE clients on individual computers.
1-2
Getting to know your ZyAIR
ZyAIR B-5000 User’s Guide
1.1.10 Network Address Translation (NAT) /(PAT)
NAT (Network Address Translation - NAT, RFC 1631) or PAT (Port Address Translation) allows the
translation of an IP address used within one network to different IP addresses known within another network.
1.1.11 DHCP (Dynamic Host Configuration Protocol)
DHCP (Dynamic Host Configuration Protocol) allows the individual clients (computers) to obtain the
TCP/IP configuration at start-up from a centralized DHCP server. The ZyAIR has built-in DHCP server
capability disabled by default. This can be changed at the initial configuration to enable DHCP. It can assign
IP addresses, an IP default gateway and DNS servers to DHCP clients.
1.1.12 SNMP
SNMP (Simple Network Management Protocol) is a protocol used for exchanging management information
between network devices. SNMP is a member of the TCP/IP protocol suite. Your ZyAIR supports SNMP
agent functionality, which allows a manager station to manage and monitor the ZyAIR through the network.
The ZyAIR supports SNMP version 1 (SNMPv1) and version 2c (SNMPv2c).
1.1.13 Full Network Management
The embedded web configurator is an all-platform web-based utility that allows you to easily access the
ZyAIR’s management settings. Most functions of the ZyAIR are also software configurable via the SMT
(System Management Terminal) interface. The SMT is a menu-driven interface that you can access from a
terminal emulator through the console port or over a telnet connection.
1.1.14 Embedded TFTP Client Address
The ZyAIR’s embedded TFTP Client address facility enables fast firmware upgrades as well as configuration
file backups and restoration.
Getting to know your ZyAIR
1-3
ZyAIR B-5000 User’s Guide
Chapter 2
Web Configurator Overview
This chapter describes how to access the ZyAIR web configurator and provides an overview of its
screens.
2.1
Web Configurator Overview
The web configurator makes it easy to configure and manage the ZyAIR. The screens you see in the web
configurator may vary somewhat from the ones shown in this document due to differences between firmware
versions. The IP address of your computer will need to be set if you are configuring the ZyAIR for the first
time, see Setting Up Your Computer’s IP Address in the appendix of this User’s Guide.
2.2
Accessing the ZyAIR Web Configurator
Step 1.
Make sure your ZyAIR hardware is properly connected (refer to the Quick Installation Guide).
Step 2.
Prepare your computer to connect to the ZyAIR (refer to Setting Up Your Computer’s IP Address
in the appendix of this User’s Guide).
Address field.
Figure 2-1 Web Browser Address Field
Step 3.
Launch your web browser.
Step 4.
Type "192.168.1.1:2000" as the URL.
Step 5.
Type the User Name, ‘admin’ is the factory default and Password, “1234” is the factory default
and click OK.
Web Configurator Overview
2-1
ZyAIR B-5000 User’s Guide
Figure 2-2 Password Screen
Step 6.
You should now see the web configurator Operating Mode screen. Choose whether you want to
use the ZyAIR as an access point or as a bridge (See Quick Installation Guide Applications
section.
Access Point Application
Internet Service Providers (ISPs) can use the ZyAIR to provide wireless Internet access to users
that are outdoors or in different buildings. A company with many employees working outdoors
can also use the ZyAIR to extend the existing network without expensive network cables.
Wireless stations can move freely anywhere in the coverage area and use resources on the wired
network.
Wireless Bridge Application
You can use the ZyAIR as a bridge or router to form a wireless point-to-point or point-tomultipoint backbone connection.
With the bridge mode, you configure each ZyAIR to act as either a central bridge or a remote
bridge. For point-to-multipoint applications, all communications between network systems go
through the central bridge.
Select either Access Point or Bridge. Click Apply.
2-2
Web Configurator Overview
ZyAIR B-5000 User’s Guide
Figure 2-3 Operating Mode
Step 7.
You should now see the Quick Setup web configuration Tutorial screen.
The following summarizes how to navigate the web configurator from the Tutorial screen.
Web Configurator Overview
2-3
ZyAIR B-5000 User’s Guide
Follow the instructions you see in the Tutorial screen or click the
icon (located
in the top right corner of most screens) to view online help.
The
icon does not appear in the MAIN MENU screen.
Click Quick Setup for initial
configuration including Operation
Mode, TCP/IP, WIRELESS and
CONFIGURATION REVIEW.
Click BASIC CONFIG to configure
basic features such as System,
Interface, Telnet/Console, ISP,
DHCP, Server Mapping, Wireless
LAN (802.1X Access Control, MAC
Filter), Configuration Review and
SAVE & RESTART.
Click ADVANCED CONFIG to
configure advanced features such
as STATIC ROUTE, BRIDGING,
SNMP COMMUNITY, SNMP TRAP,
CONFIGURATION, OVERVIEW,
SAVE & RESTART.
Click UTILITY to view information
about your ZyAIR, SYSTEM INFO,
SOFTWARE UPGRADE or
WIRELESS LINK INFO.
Click FIREWALL for GENERAL
Firewall setup and click ACCESS
CONTROL to configure user
management accessibility. Click
ANTI-DENIAL OF SERVICE to
access denial of services setup.
2-4
Figure 2-4 Tutorial Screen
Web Configurator Overview
ZyAIR B-5000 User’s Guide
The ZyAIR automatically times out after three minutes of inactivity. Simply log
back into the ZyAIR if this happens to you.
2.3
Resetting the ZyAIR
If you forget your password or cannot access the ZyAIR, you will need to reload the factory-default
configuration file. Uploading this configuration file replaces the current configuration file with the factorydefault configuration file. This means that you will lose all configurations that you had previously and the
speed of the console port will be reset to the default of 115200bps with 8 data bit, no parity, one stop bit and
flow control set to none. The password will be reset to “1234”, also. For more information, see the Telnet and
Console chapters in this User’s Guide.
Web Configurator Overview
2-5
ZyAIR B-5000 User’s Guide
Chapter 3
Quick Setup
This chapter provides information on the Quick Setup screens in the web configurator.
3.1
Quick Setup Overview
The web configurator’s quick setup helps you configure your ZyAIR for use as an Access Point for wireless
stations to access your wired LAN or for use as a wireless Bridge. This can be done in the Operating Mode
screen.
3.1.1 PPPoE
An ADSL modem bridges a PPP session over Ethernet (PPP over Ethernet, RFC 2516) from your PC to an
ATM PVC (Permanent Virtual Circuit), which connects to a DSL Access Concentrator where the PPP
session terminates (see the next figure). One PVC can support any number of PPP sessions from your LAN.
PPPoE provides access control and billing functionality in a manner similar to dial-up services using PPP.
See the appendices for more information on PPPoE.
3.1.2 IP Address
Routers “route” based on the network number. The router that delivers the data packet to the correct
destination host uses the host ID. See the appendices for more information on IP Addressing.
3.1.3 Bridge
This is a networking device that forwards packets from one LAN to another. It uses the MAC address of an
incoming packet to determine whether to drop or forward it. It allows the LANs to see each other’s devices,
thus it is not as private or secure as a router.
3.1.4 Router
A device that connects two networks together. Routers monitor, direct and filter information that passes
between these networks.
Quick Setup
3-1
ZyAIR B-5000 User’s Guide
3.2
Configuring the ZyAIR Using the Quick Setup
The Quick Setup consists of a series of screens to help you configure your ZyAIR for wireless stations to
access your wired LAN and set up Internet access.
3.2.1 Common Screen Command Buttons
The following table shows common command buttons found on many web configurator screens.
LABEL
DESCRIPTION
Back
Click Back to return to the previous screen.
NEXT
Click NEXT to save your changes back to the ZyAIR.
Help
Click Help to go to the Tutorial - Quick Setup screen.
Table 3-1 Configuration Commands
3-2
Quick Setup
ZyAIR B-5000 User’s Guide
3.2.2 Layout of Web Operating Modes
The following figure shows the configuration path for the Quick Setup web configurator. Beginning from
Figure 3-1 you can move through to the operation modes and select the chosen configuration setup for your
ZyAIR.
OPERATING MODE
OPERATION MODE
This is the first screen after login
st
1 Operation Mode screen
OPERATION MODE
2nd Operation Mode screen
WIRELESS ACCESS BRIDGE
ACCESS POINT
WIRELESS ACCESS ROUTER
•
PPP over Ethernet (PPPoE)
•
Dynamic IP Address
(DHCP Client)
•
Static IP Address (Fixed IP)
TUTORIAL-QUICK SETUP
CENTRAL WIRELESS BRIDGE
CENTRAL WIRELESS
ROUTER/BRIDGE
CENTRAL WIRELESS ROUTER
•
PPP over Ethernet (PPPoE)
•
Dynamic IP Address (DHCP
Client)
•
Static IP Address (Fixed IP)
BRIDGE
REMOTE WIRELESS BRIDGE
REMOTE WIRELESS
ROUTER/BRIDGE
REMOTE WIRELESS ROUTER
Figure 3-1 Layout of ZyAIR Operating Modes
To show some possibilities of wireless topologies see the Quick Installation Guide and Part IV of this User’s
Guide.
Quick Setup
3-3
ZyAIR B-5000 User’s Guide
Chapter 4
Access Point Quick Setup
Use this chapter to quickly set up your ZyAIR as a wireless access point.
4.1
Access Point Operation Mode
Use this screen to set the operation mode on the ZyAIR to a Wireless Access Bridge or Wireless Access
Router (For the Wireless Access Router option, the Ethernet connection type will have to be specified), see
Figure 2-3 for an overview of the configurator operating modes and see Figure 4-1 to get to the first Quick
Setup - Operation Mode screen. An access point in bridge mode can function as a wireless network bridge
allowing you to connect two wired network segments. The peer device also must be in bridge mode.
Figure 4-1 Access Point Operation Mode
Access Point Quick Setup
4-1
ZyAIR B-5000 User’s Guide
Table 4-1 Access Point Operation Mode
LABEL
DESCRIPTION
Wireless Access
Bridge/Router
If you select Access Point in Operating Mode, see Figure 2-3, then you can
select either Wireless Access Bridge or Wireless Access Router in Operation
Mode (for the Wireless Access Router option, the Ethernet connection type will
have to be specified).
PPP over Ethernet
(PPPoE)
Point-to-Point Protocol over Ethernet (PPPoE) functions as a dial-up connection.
Therefore you’ll also need a username and password and possibly the PPPoE
service name. Your ISP will give you all needed information.
Dynamic IP Address
(DHCP Client)
Choose Dynamic IP Address (DHCP Client) if you would like the ZyAIR to obtain
an IP address automatically each time you log on.
Static IP Address
(Fixed IP)
The ZyAIR is assigned a static IP address in this case. IP addresses for the inside
hosts can be either static or dynamically assigned by the ISP.
Back
Click Back to go to the tutorial screen.
NEXT
Click NEXT to continue.
4.2
Quick Setup – TCP/IP
Use this screen to configure the TCP/IP screen.
4.2.1 IP Address Assignment
Every computer on the Internet must have a unique IP address. If your networks are isolated from the
Internet, for instance, only between your two branch offices, you can assign any IP addresses to the hosts
without problems. However, the Internet Assigned Numbers Authority (IANA) has reserved the following
three blocks of IP addresses specifically for private networks.
Table 4-2 Private IP Address Ranges
10.0.0.0
-
10.255.255.255
172.16.0.0
-
172.31.255.255
192.168.0.0
-
192.168.255.255
You can obtain your IP address from the IANA, from an ISP or have it assigned by a private network. If you
belong to a small organization and your Internet access is through an ISP, the ISP can provide you with the
Internet addresses for your local networks. On the other hand, if you are part of a much larger organization,
you should consult your network administrator for the appropriate IP addresses.
4-2
Access Point Quick Setup
ZyAIR B-5000 User’s Guide
Regardless of your particular situation, do not create an arbitrary IP address;
always follow the guidelines above. For more information on address assignment,
please refer to RFC 1597, Address Allocation for Private Internets and RFC 1466,
Guidelines for Management of IP Address Space.
4.2.2 IP Address and Subnet Mask
Similar to the way houses on a street share a common street name, so too do computers on a LAN share one
common network number.
Where you obtain your network number depends on your particular situation. If the ISP or your network
administrator assigns you a block of registered IP addresses, follow their instructions in selecting the IP
addresses and the subnet mask.
If the ISP did not explicitly give you an IP network number, then most likely you have a single user account
and the ISP will assign you a dynamic IP address when the connection is established. If this is the case, it is
recommended that you select a network number from 192.168.0.0 to 192.168.255.0 and you must enable the
Network Address Translation (NAT) feature of the ZyAIR. The Internet Assigned Number Authority
(IANA) reserved this block of addresses specifically for private use; please do not use any other number
unless you are told otherwise. Let's say you select 192.168.1.0 as the network number; which covers 254
individual addresses, from 192.168.1.1 to 192.168.1.254 (zero and 255 are reserved). In other words, the first
three numbers specify the network number while the last number identifies an individual computer on that
network.
Once you have decided on the network number, pick an IP address that is easy to remember, for instance,
192.168.1.1, for your ZyAIR, but make sure that no other device on your network is using that IP address.
The subnet mask specifies the network number portion of an IP address. Your ZyAIR will compute the
subnet mask automatically based on the IP address that you entered. You don't need to change the subnet
mask computed by the ZyAIR unless you are instructed to do otherwise.
4.2.3 DNS Server Address Assignment
Use DNS (Domain Name System) to map a domain name to its corresponding IP address and vice versa. The
DNS server is extremely important because without it, you must know the IP address of a computer before
you can access it. There are two ways that an ISP disseminates the DNS server addresses.
1.
The ISP tells you the DNS server addresses, usually in the form of an information sheet, when you sign
up. If your ISP gives you DNS server addresses, enter them in the DNS server fields in Quick Setup
TCP/IP General DHCP server parameters.
2.
Leave the DNS server fields in DHCP Setup blank (for example 0.0.0.0). The ZyAIR acts as a DNS
proxy when this field is blank.
Access Point Quick Setup
4-3
ZyAIR B-5000 User’s Guide
4.2.4 Network Address Translation (NAT)
NAT (Network Address Translation - NAT, RFC 1631) or PAT (Port Address Translation) allows the
translations of multiple IP addresses used within one network to different IP addresses known within another
network.
4.2.5 DHCP (Dynamic Host Configuration Protocol)
DHCP (Dynamic Host Configuration Protocol) allows the individual clients (computers) to obtain the
TCP/IP configuration at start-up from a centralized DHCP server. The ZyAIR has built-in DHCP server
capability. It can assign IP addresses, an IP default gateway and DNS servers to DHCP clients. The ZyAIR
also acts as a surrogate DHCP server (DHCP Relay) where it relays IP address assignment from the actual
real DHCP server to the clients.
Figure 4-2 Quick Setup TCP/IP Settings (Wireless Access Bridge Mode)
4-4
Access Point Quick Setup
ZyAIR B-5000 User’s Guide
The following table describes the labels in this screen.
Table 4-3 Quick Setup TCP/IP Settings (Wireless Access Bridge Mode)
LABEL
DESCRIPTION
TCP/IP Settings
Bridge IP Address
Bridge Subnet
Mask
Default Gateway
DNS Server
Type the IP address of your ZyAIR in dotted decimal notation, for example,
192.168.1.1 is the factory default.
Type the subnet mask assigned to you by your ISP (if given).
Enter the IP address of the default gateway.
ISP dynamically assigns DNS server information (and the ZyAIR's WAN IP address).
The field displays the DNS server IP address that the ISP assigns.
General DHCP Server Parameters
DHCP Service
Select Enable or Disable to activate or deactivate DHCP Service, Disable is the
factory default. When configured as a server, the ZyAIR provides the TCP/IP
configuration for the clients. If this is set to Disable, DHCP service will be disabled
and you must have another DHCP server on your LAN, or else the computers must
be manually configured.
Assign Default
Gateway
Enter the IP address of the default gateway.
Assign net Mask
DHCP Start/End IP
Apply Interface
The DHCP server assigns a Subnet Mask.
DHCP Start IP and End IP provide a range of addresses for your network.
Use the drop-down list to select WLAN to make DHCP services available for the
wireless network or select Ethernet, to make DHCP services available for the wired
network.
Back
Click Back to return to the previous screen.
NEXT
Click NEXT to continue.
Access Point Quick Setup
4-5
ZyAIR B-5000 User’s Guide
Figure 4-3 Quick Setup TCP/IP Settings (Wireless Access Router PPPoE Mode)
The following table describes the labels in this screen.
4-6
Access Point Quick Setup
ZyAIR B-5000 User’s Guide
Table 4-4 Quick Setup TCP/IP Settings (Wireless Access Router PPPoE Mode)
LABEL
DESCRIPTION
TCP/IP Settings
Ethernet Interface
IP
Ethernet Subnet
Mask
Wireless Interface
IP
Wireless Subnet
Mask
Type the IP address of your ZyAIR in dotted decimal notation, for example,
192.168.1.1 is the factory default.
Type the subnet mask assigned to you by your ISP (if given).
Type the IP address of your ZyAIR in dotted decimal notation, for example,
192.168.1.1 is the factory default.
Type the subnet mask assigned to you by your ISP (if given).
PPPoE Username
Specify your PPPoE user name exactly as the ISP provided it to you.
PPPoE Password
Specify your PPPoE user name exactly as the ISP provided it to you.
Confirm Password
Retype the PPPoE password to confirm.
NAT (PAT) allows the translation of an Internet protocol address used within one network to a different IP
address known within another network.
None
Wireless LAN
Ethernet
PPPoE
Select this to disable NAT on all interfaces.
Select this to activate NAT on the wireless LAN interface.
Select this to activate NAT on the Ethernet interface.
Select this to activate NAT on the PPP over Ethernet interface.
General DHCP Server Parameters
DHCP Service
Select Enable or Disable to activate or deactivate DHCP Service, Disable is the
factory default. When configured as a server, the ZyAIR provides the TCP/IP
configuration for the clients. If this is set to Disable, DHCP service will be disabled
and you must have another DHCP server on your LAN, or else the computers must
be manually configured.
Assign Default
Gateway
Enter the IP address of the default gateway.
Assign net Mask
DHCP Start/End IP
Apply Interface
The DHCP server assigns a Subnet Mask.
DHCP Start IP and End IP provide a range of addresses for your network.
Use the drop-down list to select WLAN to make DHCP services available for the
wireless network or select Ethernet, to make DHCP services available for the wired
network.
Access Point Quick Setup
4-7
ZyAIR B-5000 User’s Guide
LABEL
DESCRIPTION
Back
Click Back to return to the previous screen.
NEXT
Click NEXT to continue.
Figure 4-4 Quick Setup TCP/IP Settings (Wireless Access Router DHCP Mode)
The following table describes the labels in this screen.
4-8
Access Point Quick Setup
ZyAIR B-5000 User’s Guide
Table 4-5 Quick Setup TCP/IP Settings (Wireless Access Router DHCP Mode)
LABEL
DESCRIPTION
TCP/IP Settings
Wireless Interface
IP
Wireless Subnet
Mask
Type the IP address of your ZyAIR in dotted decimal notation, for example,
192.168.1.1 is the factory default.
Type the subnet mask assigned to you by your ISP (if given).
NAT (PAT) allows the translation of an Internet protocol address used within one network to a different IP
address known within another network.
None
Wireless LAN
Ethernet
Select this to disable NAT on all interfaces.
Select this to activate NAT on the wireless LAN interface.
Select this to activate NAT on the Ethernet interface.
General DHCP Server Parameters
DHCP Service
Select Enable or Disable to activate or deactivate DHCP Service, Disable is the
factory default. When configured as a server, the ZyAIR provides the TCP/IP
configuration for the clients. If this is set to Disable, DHCP service will be disabled
and you must have another DHCP server on your LAN, or else the computers must
be manually configured.
Assign Default
Gateway
Enter the IP address of the default gateway.
Assign net Mask
DHCP Start/End IP
Apply Interface
The DHCP server assigns a Subnet Mask.
DHCP Start IP and End IP provide a range of addresses for your network.
Use the drop-down list to select WLAN to make DHCP services available for the
wireless network or select Ethernet, to make DHCP services available for the wired
network.
Back
Click Back to return to the previous screen.
NEXT
Click NEXT to continue.
Access Point Quick Setup
4-9
ZyAIR B-5000 User’s Guide
Figure 4-5 Quick Setup TCP/IP Settings (Wireless Access Router Static IP Mode)
The following table describes the labels in this screen.
4-10
Access Point Quick Setup
ZyAIR B-5000 User’s Guide
Table 4-6 Quick Setup TCP/IP Settings (Wireless Access Router Static IP Mode)
LABEL
DESCRIPTION
TCP/IP Settings
Ethernet Interface
IP
Ethernet Subnet
Mask
Wireless Interface
IP
Type the IP address of your ZyAIR in dotted decimal notation, for example,
192.168.1.1 is the factory default.
Type the subnet mask assigned to you by your ISP (if given).
Type the IP address of your ZyAIR in dotted decimal notation, for example,
192.168.1.1 is the factory default.
Wireless Subnet
Mask
Type the subnet mask assigned to you by your ISP (if given).
Default Gateway
Enter the IP address of the default gateway. This applies to Wireless Access
Bridge mode.
DNS Server
ISP dynamically assigns DNS server information (and the ZyAIR's WAN IP address).
The field displays the DNS server IP address that the ISP assigns.
NAT (PAT) allows the translation of an Internet protocol address used within one network to a different IP
address known within another network.
None
Wireless LAN
Ethernet
Select this to disable NAT on all interfaces.
Select this to activate NAT on the wireless LAN interface.
Select this to activate NAT on the Ethernet interface.
General DHCP Server Parameters
DHCP Service
Select Enable or Disable to activate or deactivate DHCP Service, Disable is the
factory default. When configured as a server, the ZyAIR provides the TCP/IP
configuration for the clients. If this is set to Disable, DHCP service will be disabled
and you must have another DHCP server on your LAN, or else the computers must
be manually configured.
Assign Default
Gateway
Enter the IP address of the default gateway.
Assign net Mask
DHCP Start/End IP
Apply Interface
The DHCP server assigns a Subnet Mask.
DHCP Start IP and End IP provide a range of addresses for your network.
Use the drop-down list to select WLAN to make DHCP services available for the
wireless network or select Ethernet, to make DHCP services available for the wired
network.
Access Point Quick Setup
4-11
ZyAIR B-5000 User’s Guide
LABEL
DESCRIPTION
Back
Click Back to return to the previous screen.
NEXT
Click NEXT to continue.
4.3
Quick Setup – Static Route
Static routes tell routing information that a networking device cannot learn automatically through other
means. The need for static routing can arise in cases where RIP (Routing Information Protocol) is disabled on
the LAN or a remote network is beyond the one that is directly connected to a remote node.
Use the Quick Setup – Static Route screen to configure static routes. This screen only applies to the ZyAIR
set up as an access point.
Figure 4-6 Quick Setup Static Route
The following table describes the labels in this screen.
Table 4-7 Quick Setup Static Route
LABEL
DESCRIPTION
Static Route Settings
Index
4-12
This is the static route number.
Access Point Quick Setup
ZyAIR B-5000 User’s Guide
Network Address
This is the IP address of the static route network.
Subnet mask
This is the subnet mask of the static route network.
Gateway
This is the IP address of the gateway.
Add
Click this to add a new static route.
Back
Click Back to go to the previous screen.
NEXT
Click NEXT to continue.
4.4
Quick Setup – Wireless
Use the next Quick Setup screen to set up the wireless LAN.
4.4.1 Wireless LAN Basics
A wireless LAN (WLAN) provides a flexible data communications system that you can use to access various
services (navigating the Internet, email, printer services, etc.) without the use of a cabled connection. In
effect a wireless LAN environment provides you the freedom to stay connected to the network while roaming
around in the coverage area.
4.4.2 Channel
The range of radio frequencies used by IEEE 802.11b wireless devices is called a “channel”. Channels
available depend on your geographical area. You may have a choice of channels (for your region) so you
should use a different channel than an adjacent AP to reduce interference. Interference occurs when radio
signals from different access points overlap causing interference and degrading performance.
Adjacent channels partially overlap however. To avoid interference due to overlap, your AP should be on a
channel at least five channels away from a channel that an adjacent AP is using. For example, if your region
has 11 channels and an adjacent AP is using channel 1, then you need to select a channel between 6 or 11.
4.4.3 RTS/CTS Threshold
A hidden node occurs when two stations are within range of the same access point, but are not within range
of each other. The following figure illustrates a hidden node. Both stations (STA) are within range of the
access point (AP) or wireless gateway, but out-of-range of each other, so they cannot “hear” each other, that
is they do not know if the channel is currently being used. Therefore, they are considered hidden from each
other.
Access Point Quick Setup
4-13
ZyAIR B-5000 User’s Guide
Figure 4-7 RTS/CTS
When station A sends data to the ZyAIR, it might not know that station B is already using the channel. If
these two stations send data at the same time, collisions may occur when both sets of data arrive at the AP at
the same time, resulting in a loss of messages for both stations.
RTS/CTS is designed to prevent collisions due to hidden nodes. An RTS/CTS defines the biggest size data
frame you can send before an RTS (Request To Send)/CTS (Clear to Send) handshake is invoked.
When a data frame exceeds the RTS/CTS value you set (between 0 to 2432 bytes), the station that wants to
transmit this frame must first send an RTS (Request To Send) message to the AP for permission to send it.
The AP then responds with a CTS (Clear to Send) message to all other stations within its range to notify
them to defer their transmission. It also reserves and confirms with the requesting station the time frame for
the requested transmission.
Stations can send frames smaller than the specified RTS/CTS directly to the AP without the RTS (Request
To Send)/CTS (Clear to Send) handshake.
You should only configure RTS/CTS if the possibility of hidden nodes exists on your network and the “cost”
of resending large frames is more than the extra network overhead involved in the RTS (Request To
Send)/CTS (Clear to Send) handshake.
If the RTS/CTS value is greater than the Fragmentation Threshold value (see next), then the RTS (Request
To Send)/CTS (Clear to Send) handshake will never occur as data frames will be fragmented before they
reach RTS/CTS size.
4-14
Access Point Quick Setup
ZyAIR B-5000 User’s Guide
Enabling the RTS Threshold causes redundant network overhead that could
negatively affect the throughput performance instead of providing a remedy.
4.4.4 Fragmentation Threshold
A Fragmentation Threshold is the maximum data fragment size (between 256 and 2346 bytes) that can be
sent in the wireless network before the ZyAIR will fragment the packet into smaller data frames.
A large Fragmentation Threshold is recommended for networks not prone to interference while you should
set a smaller threshold for busy networks or networks that are prone to interference.
If the Fragmentation Threshold value is smaller than the RTS/CTS value (see previously) you set, then the
RTS (Request To Send)/CTS (Clear to Send) handshake will never occur as data frames will be fragmented
before they reach RTS/CTS size.
4.4.5 ESS ID
An Extended Service Set (ESS) is a group of access points or wireless gateways connected to a wired LAN
on the same subnet. An ESS ID uniquely identifies each set. All access points or wireless gateways and their
associated wireless stations in the same set must have the same ESSID.
4.4.6 WEP Encryption
WEP (Wired Equivalent Privacy) encrypts data frames before transmitting over the wireless network. WEP
encryption scrambles the data transmitted between the wireless stations and the access points to keep network
communications private. It encrypts unicast communications in a network. Both the wireless stations and the
access points must use the same WEP key for data encryption and decryption.
Access Point Quick Setup
4-15
ZyAIR B-5000 User’s Guide
Figure 4-8 Quick Setup Wireless
4-16
Access Point Quick Setup
ZyAIR B-5000 User’s Guide
The wireless stations and ZyAIR must use the same ESSID, channel ID and WEP
encryption key (if WEP is enabled) for wireless communication.
Table 4-8 Quick Setup Wireless
LABEL
DESCRIPTION
Channel
The range of radio frequencies used by IEEE 802.11b wireless devices is called a
channel.
Domain
Select the user domain based on your geographical location.
RTS
Threshold
Enter a value between 0 and 250. See section 4.4.3 for more information.
Fragmentation
Threshold
Enter a value between 256 and 2346. It is the maximum data fragment size that can be
sent.
ESSID
(Extended Service Set Identity) The ESSID identifies the Service Set with which a
wireless station is associated. Wireless stations associating to the access point (AP)
must have the same ESSID. Enter a descriptive name in hexadecimals 0 ~ 9 and A ~F
for the wireless LAN.
If you are configuring the ZyAIR from a computer connected to
the wireless LAN and you change the ZyAIR’s ESSID or WEP
settings, you will lose your wireless connection when you click
FINISH. You must then change the wireless settings of your
computer to match the ZyAIR’s new settings.
Hide ESSID
Select this check box to hide the ESSID in the outgoing beacon frame so a station
cannot obtain the ESSID through passive scanning using a site survey tool.
Deny ‘any’
You can set the ZyAIR to block access for wireless LAN clients that have the ESSID set
to “any”.
Station Name
Type a name to identify the ZyAIR in hexadecimal characters 1 ~ 9, A ~ F.
WEP Key
Specify a password (up to 31 alphanumeric characters) as the key to be shared between
the external accounting server and the access points.
The key is not sent over the network. This key must be the same on the external
accounting server and the ZyAIR.
WEP
Select Disable to allow wireless stations to communicate with the access points without
any data encryption (default).
Select 64-bit WEP or 128-bit WEP to enable data encryption. WEP (Wired Equivalent
Privacy) encrypts data frames before transmitting over the wireless network.
Access Point Quick Setup
4-17
ZyAIR B-5000 User’s Guide
Table 4-8 Quick Setup Wireless
LABEL
Default Key
DESCRIPTION
The WEP keys are used to encrypt data. Both the ZyAIR and the wireless stations must
use the same WEP key for data transmission.
If you chose 64-bit WEP, then enter any 5 ASCII characters or 10 hexadecimal
characters ("0-9", "A-F").
If you chose 128-bit WEP, then enter 13 ASCII characters or 26 hexadecimal characters
("0-9", "A-F").
You must configure all four keys, but only one key can be activated at any one time. The
default key is key 1.
KeyGen
If you choose to enable WEP, then WEP keys for 64-bit or 128-bit will be generated
when you click this button.
Back
Click Back to go to the previous screen.
NEXT
Click NEXT to save the changes back to your ZyAIR.
4.5
Quick Setup – Configuration Review
Review the settings of the ZyAIR in this screen. See the rest of this chapter for label descriptions. Click Back
to go to the previous screen. Click SAVE to go to the Restart screen.
4-18
Access Point Quick Setup
ZyAIR B-5000 User’s Guide
Figure 4-9 Quick Setup Configuration Review
Access Point Quick Setup
4-19
ZyAIR B-5000 User’s Guide
4.6
Quick Setup – Restart System
In the final screen, click RESTART to apply your configuration changes to the ZyAIR. The system restarts.
Click CANCEL to return to the previous screen. If the configuration review screen has been saved, these
changes will be retained if you click CANCEL in the Restart System screen.
Figure 4-10 Restart screen
4-20
Access Point Quick Setup
ZyAIR B-5000 User’s Guide
Chapter 5
Bridge Quick Setup
Use this chapter to quick setup your ZyAIR as a wireless bridge.
5.1
Bridge Operation Mode
Use this screen to set the operation mode on the ZyAIR to a Central Wireless Router or Bridge or a Remote
Wireless Router or Bridge, see Figure 3-1 for an overview of the configurator operating modes and see
Figure 2-3 to get to the first operation mode screen.
Figure 5-1 Bridge Operation Mode
Table 5-1 Bridge Operation Mode
LABEL
DESCRIPTION
Central Wireless
Router/Bridge
If you select Bridge in Operating Mode, see Figure 2-3, then you can select
Central Wireless Router/Bridge. See Part IV of this User’s Guide for
configuration examples of bridging.
Remote Wireless
Router/Bridge
If you select Bridge in Operating Mode, see Figure 2-3, then you can select
Remote Wireless Router/Bridge. See Part IV of this User’s Guide for
configuration examples of bridging.
Bridge Quick Setup
5-1
ZyAIR B-5000 User’s Guide
Back
Click Back to go to the previous screen.
NEXT
Click NEXT to continue.
5.1.1 Central Wireless Operation Mode
This screen is displayed when you select Central Wireless Router/Bridge operation mode (see Figure 3-1).
Figure 5-2 Central Wireless Operation Mode
Table 5-2 Central Wireless Operation Mode
LABEL
DESCRIPTION
Central Wireless
Bridge
If you select Central Wireless Router/Bridge in the previous Operation Mode,
see Figure 5-1, then you can select Central Wireless Bridge. See Part IV of this
User’s Guide for configuration examples of bridging.
Central Wireless
Router
If you select Central Wireless Router/Bridge in the previous Operation Mode,
see Figure 5-1, then you can select Central Wireless Router. See Part IV of this
User’s Guide for configuration examples of bridging.
5-2
Bridge Quick Setup
ZyAIR B-5000 User’s Guide
PPP over Ethernet
(PPPoE)
Point-to-Point Protocol over Ethernet (PPPoE) functions as a dial-up connection.
Therefore you’ll also need a username and password and possibly the PPPoE
service name.
Your ISP will give you all needed information.
Dynamic IP Address
(DHCP Client)
Static IP Address
(Fixed IP)
Choose Dynamic IP Address (DHCP Client) if you would like to obtain an IP
address automatically each time you log on.
Static IP Address (Fixed IP). The ZyAIR must have a static IP address in this
case. This information can be obtained from your Internet service provider.
Back
Click Back to go to the tutorial screen.
NEXT
Click NEXT to continue.
5.1.2 Remote Wireless Operation Mode
Use this screen for Remote Router/Bridge Operation Mode (see Figure 3-1 for more information).
Figure 5-3 Remote Wireless Operation
Bridge Quick Setup
5-3
ZyAIR B-5000 User’s Guide
Table 5-3 Remote Wireless Operation Mode
LABEL
Description
Remote Wireless
Bridge
If you selected Remote Wireless Router/Bridge in Bridge Operation Mode, see
Figure 5-1, then you can select Remote Wireless Bridge. See Part IV of this
User’s Guide for configuration examples of bridging.
Remote Wireless
Router
If you selected Remote Wireless Router/Bridge in Bridge Operation Mode, see
Figure 5-1, then you can select Remote Wireless Router. See Part IV of this
User’s Guide for configuration examples of bridging.
PPP over Ethernet
(PPPoE)
Point-to-Point Protocol over Ethernet (PPPoE) also functions as a dial-up
connection. Therefore you’ll also need a username and password and possibly
the PPPoE service name.
This information can be obtained from your Internet service provider.
Dynamic IP Address
(DHCP Client)
Choose Dynamic IP Address (DHCP Client) if you would like to obtain an IP
address automatically each time you log on.
Static IP Address
(Fixed IP)
Static IP Address (Fixed IP). The ZyAIR must have a static IP address in this
case. You’ll also need a login name, associated password, the DSL terminator IP
address and possibly a connection ID.
This information can be obtained from your Internet service provider.
Back
Click Back to go to the tutorial screen.
NEXT
Click NEXT to continue.
5.2
Quick Setup – TCP/IP
Use this screen to set up the TCP/IP configuration. See section 4.2 for information on all related fields.
5-4
Bridge Quick Setup
ZyAIR B-5000 User’s Guide
Figure 5-4 Quick Setup TCP/IP Settings (Central Wireless Bridge Mode)
The following table describes the labels in this screen.
Table 5-4 Quick Setup TCP/IP Settings (Central Wireless Bridge Mode)
LABEL
DESCRIPTION
TCP/IP Settings
Bridge IP Address
Bridge Subnet
Mask
Default Gateway
Bridge Quick Setup
Type the IP address of your ZyAIR in dotted decimal notation, for example,
192.168.1.1 is the factory default.
Type the subnet mask assigned to you by your ISP (if given).
Enter the IP address of the default gateway.
5-5
ZyAIR B-5000 User’s Guide
LABEL
DNS Server
DESCRIPTION
The ISP dynamically assigns DNS server information (and the ZyAIR's WAN IP
address). The field displays the DNS server IP address that the ISP assigns.
General DHCP Server Parameters
DHCP Service
Select Enable or Disable to activate or deactivate DHCP Service, factory default is
Disabled. When configured as a server, the ZyAIR provides the TCP/IP configuration
for the clients. If this is set to Disable, DHCP service will be disabled and you must
have another DHCP server on your LAN, or else the computers must be manually
configured.
Assign Default
Gateway
Enter the IP address of the default gateway.
Assign net Mask
DHCP Start/End IP
Apply Interface
The DHCP server assigns a subnet mask to the PHCP clients.
DHCP Start IP and End IP provide a range of addresses for your network.
Use the drop-down list to select WLAN to make DHCP services available for the
wireless network or select Ethernet, to make DHCP services available for the wired
network.
Back
Click Back to return to the previous screen.
NEXT
Click NEXT to continue to the wireless setup screen.
5-6
Bridge Quick Setup
ZyAIR B-5000 User’s Guide
Figure 5-5 Quick Setup TCP/IP Settings (Central Wireless Router PPPoE Mode)
The following table describes the labels in this screen.
Bridge Quick Setup
5-7
ZyAIR B-5000 User’s Guide
Table 5-5 Quick Setup TCP/IP Settings (Central Wireless Router PPPoE Mode)
LABEL
DESCRIPTION
TCP/IP Settings
Ethernet Interface
IP
Ethernet Subnet
Mask
Wireless Interface
IP
Wireless Subnet
Mask
Type the IP address of your ZyAIR in dotted decimal notation, for example,
192.168.1.1 is the factory default.
Type the subnet mask assigned to you by your ISP (if given).
Type the IP address of your ZyAIR in dotted decimal notation, for example,
192.168.1.1 is the factory default .
Type the subnet mask assigned to you by your ISP (if given).
PPPoE Username
Specify your PPPoE username exactly as the ISP provided it to you.
PPPoE Password
Specify your PPPoE username exactly as the ISP provided it to you.
Confirm Password
Retype the PPPoE password to confirm.
Default Gateway
DNS Server
Enter the IP address of the default gateway.
The ISP dynamically assigns DNS server information (and the ZyAIR's WAN IP
address). The field displays the DNS server IP address that the ISP assigns.
NAT (PAT) Network Address Translation (Port Address Translation) allows the translation of an Internet
protocol address used within one network to a different IP address known within another network.
None
Wireless LAN
Ethernet
PPPoE
Select this to disable NAT on all interfaces.
Select this to activate NAT on the wireless LAN interface.
Select this to activate NAT on the Ethernet interface.
Select this to activate NAT on the PPP over Ethernet interface.
General DHCP Server Parameters
DHCP Service
Select Enable or Disable to activate or deactivate DHCP Service, factory default is
Disabled. When configured as a server, the ZyAIR provides the TCP/IP configuration
for the clients. If this is set to Disable, DHCP service will be disabled and you must
have another DHCP server on your LAN, or else the computers must be manually
configured.
Assign Default
Gateway
Enter the IP address of the default gateway.
Assign net Mask
5-8
The DHCP server assigns a subnet mask to the PHCP clients.
Bridge Quick Setup
ZyAIR B-5000 User’s Guide
LABEL
DHCP Start/End IP
Apply Interface
DESCRIPTION
DHCP Start IP and End IP provide a range of addresses for your network.
Use the drop-down list to select WLAN to make DHCP services available for the
wireless network or select Ethernet, to make DHCP services available for the wired
network.
Back
Click Back to return to the previous screen.
NEXT
Click NEXT to continue to the wireless setup screen.
Figure 5-6 Quick Setup TCP/IP Settings (Central Wireless Router DHCP Mode)
The following table describes the labels in this screen.
Bridge Quick Setup
5-9
ZyAIR B-5000 User’s Guide
Table 5-6 Quick Setup TCP/IP Settings (Central Wireless Router DHCP Mode)
LABEL
DESCRIPTION
TCP/IP Settings
Wireless Interface
IP
Wireless Subnet
Mask
Type the IP address of your ZyAIR in dotted decimal notation, for example,
192.168.1.1 is the factory default .
Type the subnet mask assigned to you by your ISP (if given).
NAT (PAT) Network Address Translation (Port Address Translation) allows the translation of an Internet
protocol address used within one network to a different IP address known within another network.
None
Wireless LAN
Ethernet
Select this to disable NAT on all interfaces.
Select this to activate NAT on the wireless LAN interface.
Select this to activate NAT on the Ethernet interface.
General DHCP Server Parameters
DHCP Service
Select Enable or Disable to activate or deactivate DHCP Service, factory default is
Disabled. When configured as a server, the ZyAIR provides the TCP/IP configuration
for the clients. If this is set to Disable, DHCP service will be disabled and you must
have another DHCP server on your LAN, or else the computers must be manually
configured.
Assign Default
Gateway
Enter the IP address of the default gateway.
Assign net Mask
DHCP Start/End IP
Apply Interface
The DHCP server assigns a subnet mask to the PHCP clients.
DHCP Start IP and End IP provide a range of addresses for your network.
Use the drop-down list to select WLAN to make DHCP services available for the
wireless network or select Ethernet, to make DHCP services available for the wired
network.
Back
Click Back to return to the previous screen.
NEXT
Click NEXT to continue to the wireless setup screen.
5-10
Bridge Quick Setup
ZyAIR B-5000 User’s Guide
Figure 5-7 Quick Setup TCP/IP Settings (Central Wireless Router Static IP Mode)
The following table describes the labels in this screen.
Bridge Quick Setup
5-11
ZyAIR B-5000 User’s Guide
Table 5-7 Quick Setup TCP/IP Settings (Central Wireless Router Static IP Mode)
LABEL
DESCRIPTION
TCP/IP Settings
Ethernet Interface
IP
Ethernet Subnet
Mask
Wireless Interface
IP
Type the IP address of your ZyAIR in dotted decimal notation, for example,
192.168.1.1 is the factory default.
Type the subnet mask assigned to you by your ISP (if given).
Type the IP address of your ZyAIR in dotted decimal notation, for example
192.168.1.1 is the factory default.
Wireless Subnet
Mask
Type the subnet mask assigned to you by your ISP (if given).
Default Gateway
Enter the IP address of the default gateway.
DNS Server
The ISP dynamically assigns DNS server information (and the ZyAIR's WAN IP
address). The field displays the DNS server IP address that the ISP assigns.
NAT (PAT) Network Address Translation (Port Address Translation) allows the translation of an Internet
protocol address used within one network to a different IP address known within another network.
None
Wireless LAN
Ethernet
Select this to disable NAT on all interfaces.
Select this to activate NAT on the wireless LAN interface.
Select this to activate NAT on the Ethernet interface.
General DHCP Server Parameters
DHCP Service
Select Enable or Disable to activate or deactivate DHCP Service, factory default is
Disabled. When configured as a server, the ZyAIR provides the TCP/IP configuration
for the clients. If this is set to Disable, DHCP service will be disabled and you must
have another DHCP server on your LAN, or else the computers must be manually
configured.
Assign Default
Gateway
Enter the IP address of the default gateway.
Assign net Mask
DHCP Start/End IP
Apply Interface
Back
5-12
The DHCP server assigns a subnet mask to the PHCP clients.
DHCP Start IP and End IP provide a range of addresses for your network.
Use the drop-down list to select WLAN to make DHCP services available for the
wireless network or select Ethernet, to make DHCP services available for the wired
network.
Click Back to return to the previous screen.
Bridge Quick Setup
ZyAIR B-5000 User’s Guide
LABEL
DESCRIPTION
Click NEXT to continue to the wireless setup screen.
NEXT
Figure 5-8 Quick Setup TCP/IP Settings (Remote Wireless Bridge Mode)
The following table describes the labels in this screen.
Bridge Quick Setup
5-13
ZyAIR B-5000 User’s Guide
Table 5-8 Quick Setup TCP/IP Settings (Remote Wireless Bridge Mode)
LABEL
DESCRIPTION
TCP/IP Settings
Bridge IP Address
Bridge Subnet
Mask
Default Gateway
DNS Server
Type the IP address of your ZyAIR in dotted decimal notation, for example,
192.168.1.1 is the factory default.
Type the subnet mask assigned to you by your ISP (if given).
Enter the IP address of the default gateway.
The ISP dynamically assigns DNS server information (and the ZyAIR's WAN IP
address). The field displays the DNS server IP address that the ISP assigns.
General DHCP Server Parameters
DHCP Service
Select Enable or Disable to activate or deactivate DHCP Service, factory default is
Disabled. When configured as a server, the ZyAIR provides the TCP/IP configuration
for the clients. If this is set to Disable, DHCP service will be disabled and you must
have another DHCP server on your LAN, or else the computers must be manually
configured.
Assign Default
Gateway
Enter the IP address of the default gateway.
Assign net Mask
DHCP Start/End IP
Apply Interface
The DHCP server assigns a subnet mask to the PHCP clients.
DHCP Start IP and End IP provide a range of addresses for your network.
Use the drop-down list to select WLAN to make DHCP services available for the
wireless network or select Ethernet, to make DHCP services available for the wired
network.
Back
Click Back to return to the previous screen.
NEXT
Click NEXT to continue to the wireless setup screen.
5-14
Bridge Quick Setup
ZyAIR B-5000 User’s Guide
Figure 5-9 Quick Setup TCP/IP Settings (Remote Wireless Router Mode)
The following table describes the labels in this screen.
Bridge Quick Setup
5-15
ZyAIR B-5000 User’s Guide
Table 5-9 Quick Setup TCP/IP Settings (Remote Wireless Router Mode)
LABEL
DESCRIPTION
TCP/IP Settings
Ethernet Interface
IP
Ethernet Subnet
Mask
Wireless Interface
IP
Type the IP address of your ZyAIR in dotted decimal notation, for example,
192.168.1.1 is the factory default. This applies to router modes (for example, Central
Wireless Router except DHCP Client, Remote Wireless Router).
Type the subnet mask assigned to you by your ISP (if given). This applies to router
modes (for example, Central Wireless Router except DHCP Client, Remote
Wireless Router).
Type the IP address of your ZyAIR in dotted decimal notation, for example
192.168.1.1 is the factory default.
Wireless Subnet
Mask
Type the subnet mask assigned to you by your ISP (if given).
Default Gateway
Enter the IP address of the default gateway.
DNS Server
The ISP dynamically assigns DNS server information (and the ZyAIR's WAN IP
address). The field displays the DNS server IP address that the ISP assigns.
NAT (PAT) Network Address Translation (Port Address Translation) allows the translation of an Internet
protocol address used within one network to a different IP address known within another network.
None
Wireless LAN
Ethernet
Select this to disable NAT on all interfaces.
Select this to activate NAT on the wireless LAN interface.
Select this to activate NAT on the Ethernet interface.
General DHCP Server Parameters
DHCP Service
Select Enable or Disable to activate or deactivate DHCP Service, factory default is
Disabled. When configured as a server, the ZyAIR provides the TCP/IP configuration
for the clients. If this is set to Disable, DHCP service will be disabled and you must
have another DHCP server on your LAN, or else the computers must be manually
configured.
Assign Default
Gateway
Enter the IP address of the default gateway.
Assign net Mask
DHCP Start/End IP
Apply Interface
5-16
The DHCP server assigns a subnet mask to the PHCP clients.
DHCP Start IP and End IP provide a range of addresses for your network.
Use the drop-down list to select WLAN to make DHCP services available for the
wireless network or select Ethernet, to make DHCP services available for the wired
network.
Bridge Quick Setup
ZyAIR B-5000 User’s Guide
LABEL
DESCRIPTION
Back
Click Back to return to the previous screen.
NEXT
Click NEXT to continue to the wireless setup screen.
5.3
Quick Setup – Wireless
Use the next Quick Setup screen to set up the wireless LAN and see section 4.4 of this User’s Guide for more
information.
Figure 5-10 Quick Setup Wireless
Bridge Quick Setup
5-17
ZyAIR B-5000 User’s Guide
The wireless stations and ZyAIR must use the same ESSID, channel ID and WEP
encryption key (if WEP is enabled) for wireless communication.
See Table 4-8 for information on the configurator screen of your wireless quick setup.
5.4
Quick Setup – Configuration Review
Review the settings of the ZyAIR in this screen. See the rest of this chapter for label descriptions. Click Back
to go to the previous screen. Click SAVE to go to the Restart screen.
5-18
Bridge Quick Setup
ZyAIR B-5000 User’s Guide
Figure 5-11 Quick Setup Configuration Review
Bridge Quick Setup
5-19
ZyAIR B-5000 User’s Guide
5.5
Quick Setup – Restart System
In the final screen, click RESTART to apply your configuration changes to the ZyAIR. The system restarts.
Click CANCEL to return to the previous screen. If the configuration review screen has been saved, these
changes will be retained if you click CANCEL in the Restart System screen.
Figure 5-12 Restart screen
5-20
Bridge Quick Setup
BASIC CONFIGURATION
Part II:
BASIC CONFIGURATION
This part discusses SYSTEM, INTERFACE, TELNET/CONSOLE, ISP, DHCP, SERVER MAPPING
WIRELESS LAN, CONFIGURATION OVERVIEW, SAVE & RESTART setup screens.
II
ZyAIR B-5000 User’s Guide
Chapter 6
Basic Configuration – System Setup
This chapter provides information on basic system configuration.
6.1
Basic Configuration
Click Basic Configuration to see the Basic Configuration Tutorial screen as shown in Figure 6-1. Please
read it carefully before configuring the screens in Basic Configuration. From here you can enter the System
Setup screen. There is no distinction made between the access point and bridge in the basic configuration
(please see Part I and Part IV of the User’s Guide for network topologies).
System Setup
6-1
ZyAIR B-5000 User’s Guide
Figure 6-1 Basic Configuration Tutorial
6-2
System Setup
ZyAIR B-5000 User’s Guide
6.2
Configuring System Setup
This section provides information on configuring the system setup. Enter the system authentication,
administration, IP address and up to three DNS server addresses.
Figure 6-2 Basic Configuration System Setup
The following table describes the labels in this screen.
System Setup
6-3
ZyAIR B-5000 User’s Guide
Table 6-1 Basic Configuration System Setup
LABEL
DESCRIPTION
System Authentication Information
Supervisor ID
Supervisor
Password
Password
Confirm
Enter the username for this user profile. This will determine the username on login.
This ID name can be up to 16 ASCII characters.
Type a password (up to 16 alphanumeric characters) for this user profile. Note that as
you type a password, the screen displays a (*) for each character you type.
Retype your new system password for confirmation.
Administration Information
Host Name
Domain Name
Type a descriptive name for identification purposes. Some ISPs check this name, so it
is recommended you enter your computer's "Computer name". The default host name
is set to HWLAN.
This name can be up to 16 ASCII characters.
Type the domain name (if you know it) here. If you leave this field blank, the ISP may
assign a domain name via DHCP. The domain name entered by you is given priority
over the ISP assigned domain name.
Default Route
IP Address
Type the IP address of the remote network or gateway. The gateway is an immediate
neighbor of your ZyAIR that will forward the packet to the destination. On the LAN, the
gateway must be a router on the same segment as your ZyAIR; over the WAN, the
gateway must be the IP address of one of the remote nodes.
DNS Parameters
DNS Server
Address 1, 2, 3
Type the DNS server address here. If you do not configure a DNS server, you must
know the IP address of a computer in order to access it (the default is set as shown).
FINISH
Click FINISH to save your changes back to the ZyAIR.
CANCEL
Click CANCEL to close the System Setup screen without saving any changes.
.
6-4
System Setup
ZyAIR B-5000 User’s Guide
Chapter 7
Interface Parameters
This chapter provides information on the Interface Parameters Screen.
7.1
Interface Parameters Overview
This screen allows you to select an interface and modify the status, interface, IP address, NAT and bridging
parameters. Select Interface Parameters in BASIC CONFIG of your web configurator. Select MODIFY to
change the interface parameters.
Figure 7-1 Basic Configuration Interface Parameters
Interface Parameters
7-1
ZyAIR B-5000 User’s Guide
The following table describes the labels in this screen.
Table 7-1 Basic Configuration Interface Parameters
LABEL
DESCRIPTION
Table of Current Interface Parameters
No
Status
Protocol
IP address
Net Mask
NAT (PAT)
Bridging
Select the number of the interface that you want to change and click MODIFY.
This displays an active or inactive interface.
This column displays the type of interface for which traffic goes through the ZyAIR.
They are listed as WLAN, Ethernet or PPPoE.
This is the IP address of your ZyAIR in dotted decimal notation, (default is set as
shown in Figure 7-1).
The net mask specifies the network number portion of an IP address. Your device will
compute the net mask automatically based on the IP address that you entered. You
do not need to change the computer subnet mask unless you are instructed to do so.
Network Address Translation (NAT) allows the translation of an Internet protocol
address used within one network to a different IP address known within another
network. The ZyAIR uses a many to one NAT.
In Many-to-One mode, the ZyAIR maps multiple local IP addresses to one global IP
address.
For more information about NAT refer to the NAT chapter in this User's Guide.
Bridging provides LAN to LAN frame forwarding services between two or more LANs.
Frames from one LAN are forwarded across a bridge to a connected LAN, although
filtering can be employed to selectively forward frames. The bridging displays Join or
Not Join depending on whether the ZyAIR has been configured as a bridge or an
access point.
ISP Index
This is the ISP name given to your current ISP pool in ISP Parameters.
IPCP
IP Control Protocol allows changes to IP parameters such as the IP address in PPPoE
interface only.
Idle Time Out
This displays how many minutes the web configurator can be left idle before the
session times out.
The default is 3 minutes. After it times out you have to log in with your password again.
Very long idle timeouts may have security risks.
A value of "-" means a management session never times out, no matter how long it
has been left idle (not recommended).
MODIFY
Click MODIFY to change the configuration of your desired Interface.
7-2
Interface Parameters
ZyAIR B-5000 User’s Guide
Table 7-1 Basic Configuration Interface Parameters
LABEL
DESCRIPTION
Click CANCEL to reopen the Interface Parameters screen without saving changes.
CANCEL
Figure 7-2 Basic Configuration Interface Parameters
The following table describes the labels in this screen.
Table 7-2 Basic Configuration Interface Parameters
LABEL
DESCRIPTION
Table of Current Interface Parameters
No
Status
Select the number of the interface that you want to modify and click OK
Select Active or Disable to activate or deactivate an interface.
Interface Parameters
7-3
ZyAIR B-5000 User’s Guide
Table 7-2 Basic Configuration Interface Parameters
LABEL
Protocol
IP address
Net Mask
NAT (PAT)
Bridging
DESCRIPTION
This column displays the type of interface for which traffic goes through the ZyAIR.
They are listed as WLAN, Ethernet or PPPoE.
Type the IP address of your ZyAIR in dotted decimal notation.
The net mask specifies the network number portion of an IP address. Your device will
compute the net mask automatically based on the IP address that you entered. You
do not need to change the computer subnet mask unless you are instructed to do so.
Network Address Translation (NAT) allows the translation of an Internet protocol
address used within one network to a different IP address known within another
network. The ZyAIR uses a many to one NAT.
In Many-to-One mode, the ZyAIR maps multiple local IP addresses to one global IP
address.
For more information about NAT refer to the NAT chapter in this User's Guide.
Bridging provides LAN to LAN frame forwarding services between two or more LANs.
Frames from one LAN are forwarded across a bridge to a connected LAN, although
filtering can be employed to selectively forward frames. The bridging displays Join or
Not Join depending on whether the ZyAIR has been configured as a bridge or an
access point.
ISP Index
This is the ISP name given to your current ISP pool in ISP Parameters.
IPCP
IP Control Protocol allows changes to IP parameters such as the IP address in PPPoE
interface only.
Idle Time Out
Type how many minutes the web configurator can be left idle before the session times
out.
The default is 3 minutes. After it times out you have to log in with your password again.
Very long idle timeouts may have security risks.
OK
Click OK to change the configuration of your desired Interface and save the changes
to your ZyAIR.
Back
Click Back to go to the previous screen without saving any changes.
CANCEL
Click CANCEL to reopen the Interface Parameters screen without saving changes.
7-4
Interface Parameters
ZyAIR B-5000 User’s Guide
Chapter 8
Configuration Parameters
This chapter provides information on the Configuration Parameters screen.
8.1
Configuration Parameters Overview
The Basic Configuration - Configuration Parameters screen allows you to adjust the Telnet/Console
parameters, create a user profile and the legal address pool.
Figure 8-1 Basic Configuration Parameters
Configuration Parameters
8-1
ZyAIR B-5000 User’s Guide
The following table describes the labels in this screen.
Table 8-1 Basic Configuration Parameters
LABEL
DESCRIPTION
General Parameters
MAX User
Telnet Port
Console Port
Enter the maximum number of users allowed. The ZyAIR supports a maximum of 5
administrators.
Enter the console listening port, 23 is the factory default.
Enter the console port of your computer (either COM1 or COM2). If you forget your
password (or the ZyAIR IP address), you will need to reset the ZyAIR or upload the
default configuration file via console. See the Telnet and Console chapters in this
User’s Guide for information on resetting.
User Profile
ID
User Name
Privilege Level
Max Screen Line
Show Mode
This shows the username defined by the user in Figure 8-2.
This shows the level of administrator access in the user profile and relates to telnet
commands:
•
1: User Mode – enables you to view system information and ping a computer from
the ZyAIR.
•
2: Root Mode – enables you to change to supervisor mode, see chapter
Supervisor Mode in Part VI of this User’s Guide.
•
3: Configure Mode – enables you to change the configuration in supervisor mode,
see chapter Supervisor Mode in Part VI of this User’s Guide.
•
Unlimited: unlimited privileges – enables all modes.
This shows the maximum number of characters allowable (greater than 13 but less
than or equal to 24).
This is set as Menu or Command Mode and affects the number of menus shown to
the user; see the Console and Telnet chapters in this User’s Guide.
Keyboard Type
Indicates the type of keyboard interface used (VT100, ANSI, Linux or X Window).
Client Address
The IP address of the client interface.
Add
8-2
Select the ID radio button to allow you to add, delete or modify a user profile.
Click Add button to add user profile parameters to the selected ID profile.
Delete
Click Delete button to remove user profile parameters from the selected ID profile.
Modify
Click Modify button to change user profile parameters in an existing selected ID
profile.
Configuration Parameters
ZyAIR B-5000 User’s Guide
Table 8-1 Basic Configuration Parameters
LABEL
DESCRIPTION
Legal Address Pool: If you enter a trusted host, your ZyAIR will only respond to Telnet messages from
these addresses.
ID
IP Address
Add
Select the ID radio button to allow you to Add, Delete or Modify a trusted host within
the Legal Address Pool.
This displays the IP address of the trusted host in dotted decimal notation, (default is
set as shown in Figure 8-1).
Click Add button to add Legal Address Pool parameters to the selected ID profile.
Delete
Click Delete button to remove Legal Address Pool parameters from the selected ID
profile.
Modify
Click Modify button to change Legal Address Pool parameters in an existing
selected ID profile.
FINISH
Click FINISH button to save the changes back to your ZyAIR.
CANCEL
Click CANCEL to begin configuring the screen afresh.
Click Add in the User Profile section of the BASIC CONFIG screen to get to the next Configuration User
Profile screen.
Configuration Parameters
8-3
ZyAIR B-5000 User’s Guide
Figure 8-2 Basic Configuration User Profile
The following table describes the labels in this screen.
Table 8-2 Basic Configuration User profile
LABEL
DESCRIPTION
User Profile of Configuration
User Name
Type a user name to identify the profile in less than 20 ASCII characters. This user
name gives access to SMT main menu through Telnet or Console.
User Password
Type a password in less than 20 ASCII characters. This password gives access to
SMT main menu through Telnet or Console.
Password
Confirm
Retype the new user profile password for confirmation.
8-4
Configuration Parameters
ZyAIR B-5000 User’s Guide
Table 8-2 Basic Configuration User profile
LABEL
Privilege
Level:
DESCRIPTION
Select the privilege level. This shows the level of administrator access in the User
Profile
•
1: User Mode – enables you to view system information and ping a computer from
the ZyAIR.
•
2: Root Mode – enables you to change to supervisor mode, see chapter
Supervisor Mode in Part VI of this User’s Guide.
•
3: Configure Mode – enables you to change the configuration in supervisor mode,
see chapter Supervisor Mode in Part VI of this User’s Guide.
•
Unlimited: unlimited privileges – enables all modes.
Show Mode
Set as Menu or Command Mode. This affects the number of menus shown to the user;
see Console and Telnet chapters in this User’s Guide.
Max Screen Line
Enter the maximum no of characters allowable (greater than 13 but less than or equal
to 24).
Keyboard Type
Select the type of keyboard interface (VT100, ANSI, Linux or X Window).
Client Address
Index
Enter ‘0’ to allow access to the user address pool, enter ‘-1’ for unlimited access (any
user could telnet to this access point and ignore the IP address of the client PC).
FINISH
Click FINISH to save the changes back to your ZyAIR.
Back
Click Back to go to the previous screen..
CANCEL
Click CANCEL to begin configuring the screen afresh.
Configuration Parameters
8-5
ZyAIR B-5000 User’s Guide
Chapter 9
ISP Parameters
This chapter provides information on the ISP screen.
9.1
ISP Parameters Overview
An ISP profile contains the ISP name, ISP telephone number, username and password for Internet access.
The following screen allows you to modify or delete existing ISP profiles.
In BASIC CONFIG click ISP to go to the ISP Parameters screen.
Figure 9-1 Basic Configuration ISP Parameters
The following table describes the labels in this screen.
Table 9-1 Basic Configuration ISP Parameters
LABEL
DESCRIPTION
Table of Current ISP Pool
Index
ISP Name
ISP Parameters
Select the Index radio button to allow you to add, delete or modify your current ISP
pool.
This displays your ISP’s name.
9-1
ZyAIR B-5000 User’s Guide
Table 9-1 Basic Configuration ISP Parameters
LABEL
Phone Number
Username
DESCRIPTION
This field displays the phone number given by your ISP.
This displays the user name given to you by your ISP.
MODIFY
Click MODIFY to change the selected ISP parameters.
DELETE
Click DELETE to remove the selected ISP parameters.
CANCEL
Click CANCEL to begin configuring the ISP Parameters screen afresh.
The following table is used to edit the ISP Parameters in the basic configuration.
Figure 9-2 Basic Configuration ISP Parameters Edit
The following table describes the labels in this screen.
Table 9-2 Basic Configuration ISP Parameters Edit
LABEL
DESCRIPTION
ISP Parameters
ISP Name
Type a name for each new address in the ISP Pool.
ISP Phone
Type the phone number given by your ISP.
Username
Type the username given to you by your ISP.
Password
Type the password associated with the user name above.
9-2
ISP Parameters
ZyAIR B-5000 User’s Guide
Table 9-2 Basic Configuration ISP Parameters Edit
LABEL
DESCRIPTION
Password
Confirm
Retype the password associated with the user name above to confirm.
OK
Click OK to save changes that have been made to the ZyAIR and return to the ISP
Parameters screen.
Back
Click Back to begin configuring this ISP Parameters Edit screen afresh.
CANCEL
Click CANCEL to begin configuring this ISP Parameters Edit screen afresh.
ISP Parameters
9-3
ZyAIR B-5000 User’s Guide
Chapter 10
DHCP Parameters
This chapter provides information on the DHCP screen.
10.1 DHCP Overview
Dynamic Host Configuration Protocol automatically assigns IP addresses to clients when they log on. DHCP
centralizes IP address management on central computers that run the DHCP server program. DHCP leases
addresses, for a period of time, which means that past addresses are “recycled” and made available for future
reassignment to other systems.
10.2 General DHCP Server Parameters
DHCP (Dynamic Host Configuration Protocol, RFC 2131 and RFC 2132) allows individual clients to obtain
TCP/IP configuration at start-up from a server. You can configure the ZyAIR as a DHCP server or disable it.
When configured as a server, the ZyAIR provides the TCP/IP configuration for the clients. If set to Disable,
DHCP service will be disabled and you must have another DHCP server on your LAN, or else the computers
must be manually configured.
10.3 IP Pool Setup
The ZyAIR can allocate fixed IP addresses in the fixed DHCP pool. This configuration leaves nine IP
addresses (excluding the ZyAIR itself) for other server computers, for instance, servers for mail, FTP, TFTP,
web, etc., that you may have. These parameters should work for the majority of installations.
10.4 Fixed Host Entry
The fixed host entry defines a fixed Ethernet-to-IP address mapping to limit the client station with the
Ethernet address from getting the IP address.
10.5 Configuring DHCP Parameters
The following screens allows you to enable or disable DHCP client settings, configure the server parameters
and view a pool of fixed host entries.
DHCP Parameters
10-1
ZyAIR B-5000 User’s Guide
Figure 10-1 Basic Configuration DHCP Parameters
The following table describes the labels in this screen.
Table 10-1 Basic Configuration DHCP Parameters
LABEL
DESCRIPTION
DHCP Client Setting
Interface
The ZyAIR acts as a DHCP client. It receives an IP address, subnet mask and default
gateway IP address from a DHCP server.
Select Disable, Wireless or Ethernet.
If you Disable this, then you must assign the ZyAIR a static IP address. When not
disabled, select the interface (Wireless or Ethernet) on which it can receive IP
address information from a DHCP server.
General DHCP Server Parameters
10-2
DHCP Parameters
ZyAIR B-5000 User’s Guide
Table 10-1 Basic Configuration DHCP Parameters
LABEL
DESCRIPTION
Trigger DHCP
Service
Default Gateway
Select Enable to have your ZyAIR act as a DHCP server and give IP addresses to the
clients. The default is set to Disable.
When DHCP service is enabled, the following items need to be set.
Enter the IP address of the default gateway.
Net Mask
Type the subnet mask that the ZyAIR assigns to its clients computer. Consists of four
sets of digits that help divide a network into sub-networks and simplify routing and data
transmission.
DHCP Start IP
Start defines the range of IP addresses that will be assigned by the ZyAIR to the client
computer. Type the start IP address for your DHCP server. 192.168.1.240 is the
factory default. The IP address range is 192.168.1.1 to 192.168.1.253.
DHCP End IP
Start defines the range of IP addresses that will be assigned by the ZyAIR to the client
computer. Type the end IP address for your DHCP server. 192.168.1.254 is the factory
default. The IP address range is 192.168.1.1 to 192.168.1.253.
Interface
Select WLAN or Ethernet.
Table of Fixed Host Entries (Read Only)
Index
Ethernet
Address
Internet Address
Pool is Empty!
Add
This is a number given to each new host entry to the pool.
This field specifies the Ethernet address or MAC address of the fixed host entry in the
address pool.
This field specifies the Internet address of the fixed host entry in the address pool.
You must click to Add to add entries to the table of fixed host entries; otherwise the
table will be empty.
Click Add for new entries to the pool.
FINISH
Click FINISH to save your changes back to your ZyAIR.
CANCEL
Click CANCEL to begin configuring the DHCP Parameters screen afresh.
DHCP Parameters
10-3
ZyAIR B-5000 User’s Guide
10.6 DHCP Host Entry
You see this screen when you select Add in the previous DHCP Parameters screen. This screen allows you
to enter the Ethernet and Internet address for your fixed host entries.
Figure 10-2 Basic Configuration DHCP Parameters Edit
The following table describes the labels in this screen.
Table 10-2 Basic Configuration DHCP Parameters Edit
LABEL
DESCRIPTION
DHCP Client Setting (Read Only)
Interface
Trigger DHCP
Service
10-4
The ZyAIR acts as a DHCP client. It receives an IP address, subnet mask and default
gateway IP address from a DHCP server.
Select Disable, Wireless or Ethernet.
If you Disable this, then you must assign the ZyAIR a static IP address. When not
disabled, select the interface (Wireless or Ethernet) on which it can receive IP
address information from a DHCP server.
This displays whether or not your ZyAIR acts as a DHCP server and gives IP
addresses to the clients. The default is set to Disable.
DHCP Parameters
ZyAIR B-5000 User’s Guide
Table 10-2 Basic Configuration DHCP Parameters Edit
LABEL
Default Gateway
Net Mask
DESCRIPTION
This displays the IP address of the default gateway.
This displays the net mask assigned to you by the ISP.
DHCP Start IP
This shows the start IP address in a range of addresses for your DHCP server
DHCP End IP
This shows the end IP address in a range of addresses for your DHCP server
Interface
This displays the interface of the current client, WLAN or Ethernet.
Table of Fixed Host Entries
Index
Ethernet
Address
Internet Address
This is a number given to each new host entry to the pool.
Enter an Ethernet address This field specifies the Ethernet address or MAC address of
the fixed host entry in the address pool.
This field specifies the Internet address of the fixed host entry in the address pool.
Ok
Click Ok to save your changes back to your ZyAIR and return to the DHCP
Parameters screen.
Cancel
Click Cancel to begin configuring the DHCP Parameters screen afresh.
DHCP Parameters
10-5
ZyAIR B-5000 User’s Guide
Chapter 11
Server Mapping
This chapter provides information on the Server Mapping screen.
11.1 TCP
Transmission Control Protocol is a connection-oriented transport service that ensures the reliability of
message delivery. It verifies that messages and data were received.
11.2 UDP
User Datagram Protocol (UDP) is a connectionless transport service that dispenses with the reliability
services provided by TCP. UDP gives applications a direct interface with the Internet Protocol (IP) and the
ability to address a particular application process running on a host via a port number without setting up a
connection session.
11.3 Server Mapping
The ZyAIR can forward traffic to a server with a private IP address (Virtual Server) behind the ZyAIR. In
this way it is visible to the outside world.
The Protocol (TCP or UDP) and Port number define the service. For example, TCP port 80 is for web
(HTTP) service.
In addition to the servers for specified services, NAT supports a default server. A service request that does
not have a server explicitly designated for it is forwarded to the default server. If the default server is not
defined, the service request is simply discarded.
Many residential broadband ISP accounts do not allow you to run any server
processes (such as a Web or FTP server) from your location. Your ISP may
periodically check for servers and may suspend your account if it discovers any
active services at your location. If you are unsure, refer to your ISP.
The most often used port numbers are shown in the following table. Please refer to RFC 1700 for further
information about port numbers.
Table 11-1 Services and Port Numbers
SERVICES
ECHO
Server Mapping
PORT NUMBER
7
11-1
ZyAIR B-5000 User’s Guide
Table 11-1 Services and Port Numbers
SERVICES
PORT NUMBER
FTP (File Transfer Protocol)
21
SMTP (Simple Mail Transfer Protocol)
25
DNS (Domain Name System)
53
Finger
79
HTTP (Hyper Text Transfer protocol or WWW, Web)
80
POP3 (Post Office Protocol)
110
NNTP (Network News Transport Protocol)
119
SNMP (Simple Network Management Protocol)
161
SNMP trap
162
PPTP (Point-to-Point Tunneling Protocol)
1723
Figure 11-1 Basic Configuration Server Mapping
The following table describes the labels in this screen.
11-2
Server Mapping
ZyAIR B-5000 User’s Guide
Table 11-2 Basic Configuration Server Mapping
LABEL
DESCRIPTION
Table of Current Virtual Server Entries
Index
Service Name
Protocol
This is the rule index number.
This shows a name that is assigned to the current virtual server.
TCP or UDP will be displayed, see sections 11.1 and 11.2.
Public Access
Interface
Port Number
This field displays the interface you want to map from public access, Ethernet or
Wireless.
See Part VII of this User’s Guide for information on port numbers.
Virtual Server
IP Address
Port Number
This displays the IP address of your virtual server in dotted decimal notation.
This is the number of the port you want to use; see Part VII of this User’s Guide for
information on port numbers.
Pool is Empty!
You must select Add to add entries to the table of virtual servers; otherwise the table
will be empty.
Add
Click Add for new entries to the pool of servers.
FINISH
Click FINISH to save any changes back to your ZyAIR.
CANCEL
Click CANCEL to begin configuring the screen afresh.
The following table is used to update the Server Mapping parameters in the basic configuration.
Server Mapping
11-3
ZyAIR B-5000 User’s Guide
Figure 11-2 Basic Configuration Server Mapping Add
The following table describes the labels in this screen.
Table 11-3 Basic Configuration Server Mapping Add
LABEL
DESCRIPTION
Table of Current Virtual Server Entries
Index
This is the rule index number assigned to each new virtual server entry.
Service Name
Enter a unique name for identification purposes. You may enter up to 16 octets, ASCII
characters.
Protocol
Select TCP or UDP, see sections 11.1 and 11.2.
Public Access
Interface
Port Number
Select the interface you want to map from public access, Ethernet or Wireless.
Enter the number of the port you want to map.
Virtual Server
IP Address
Port Number
Enter the IP address of your virtual server in dotted decimal notation.
Enter the number of the port you want to use.
OK
Click OK to add the virtual server entry to your list of virtual server entries.
Cancel
Click Cancel to begin configuring the Server Mapping edits screen afresh.
FINISH
Click FINISH to save the changes to your ZyAIR.
CANCEL
Click CANCEL to begin configuring the Server Mapping screen afresh.
11-4
Server Mapping
ZyAIR B-5000 User’s Guide
Chapter 12
Wireless
This chapter provides information on the ZyAIR Wireless function.
12.1 Wireless Overview
This section introduces the wireless and some basic terminology.
12.1.1 IBSS
An Independent Basic Service Set (IBSS), also called an Ad-hoc network, is the simplest WLAN
configuration. An IBSS is defined as two or more computers with wireless adapters within range of each
other that from an independent (wireless) network without the need of an access point (AP).
Figure 12-1 IBSS (Ad-hoc) Wireless LAN
12.1.2 BSS
A Basic Service Set (BSS) exists when all communications between wireless stations or between a wireless
station and a wired network client go through one access point.
Intra-BSS traffic is traffic between wireless stations in the BSS. When Intra-BSS is enabled, wireless station
A and B can access the wired network and communicate with each other. When Intra-BSS is disabled,
wireless station A and B can still access the wired network but cannot communicate with each other.
Wireless
12-1
ZyAIR B-5000 User’s Guide
Figure 12-2 Basic Service set
12.1.3 ESS
An Extended Service Set (ESS) consists of a series of overlapping BSS's, each containing an access point,
with each access point connected together by a wired network. This wired connection between access points
is called a Distribution System (DS). An ESSID (ESS Identification) uniquely identifies each ESS. All
access points and their associated wireless stations within the same ESS must have the same ESSID in order
to communicate.
12-2
Wireless
ZyAIR B-5000 User’s Guide
Figure 12-3 Extended Service Set
12.1.4 RTS/CTS
See Part I for information on RTS/CTS.
12.1.5 Fragmentation Threshold
See Part I for information on Fragmentation Threshold.
12.2 Configuring Wireless
If you are configuring the ZyAIR from a computer connected to the wireless LAN
and you change the ZyAIR’s ESSID or WEP settings, you will lose your wireless
connection when you press FINISH. You must then change the wireless settings of
your computer to match the ZyAIR’s new settings
Please refer to Part I for more background information on this chapter.
Wireless
12-3
ZyAIR B-5000 User’s Guide
12.3 WEP Overview
WEP (Wired Equivalent Privacy) as specified in the IEEE 802.11 standard provides methods for both data
encryption and wireless station authentication.
12.3.1 Data Encryption
WEP provides a mechanism for encrypting data using encryption keys. Both the access point and the wireless
stations must use the same WEP key to encrypt and decrypt data. Your ZyAIR allows you to configure up to
four 64-bit or 128-bit WEP keys, but only one key can be enabled at any one time.
The following screen allows you to configure all wireless LAN parameters including Channels, ESS ID and
WEP security. Click BASIC CONFIG and go to Wireless LAN.
12-4
Wireless
ZyAIR B-5000 User’s Guide
Figure 12-4 Basic Configuration Wireless LAN
The following table describes the labels in this screen.
Wireless
12-5
ZyAIR B-5000 User’s Guide
Table 12-1 Basic Configuration Wireless LAN
LABEL
DESCRIPTION
Channel
The range of radio frequencies used by IEEE 802.11b wireless devices is called a
channel.
Domain
Select the user domain based on your geographical location.
RTS
Threshold
Enter a value between 0 and 250.
Fragmentation
Threshold
Enter a value between 256 and 2346. It is the maximum data fragment size that can be
sent. The default is set as shown.
ESSID
(Extended Service Set Identity) The ESSID identifies the Service Set with which a
wireless station is associated. Wireless stations associating to the access point (AP)
must have the same ESSID. Enter a descriptive name in hexadecimal characters 1 ~ 9,
A ~ F.
If you are configuring the ZyAIR from a computer connected to
the wireless LAN and you change the ZyAIR’s ESSID or WEP
settings, you will lose your wireless connection when you click
FINISH. You must then change the wireless settings of your
computer to match the ZyAIR’s new settings.
Hide ESSID
Select this check box to hide the ESSID in the outgoing beacon frame so a station
cannot obtain the ESSID through passive scanning using a site survey tool.
Deny ‘any’
You can set the ZyAIR to block access for wireless LAN clients that have the ESSID set
to “any”.
Station Name
Type a name to identify the ZyAIR in hexadecimal characters 1 ~ 9, A ~ F.
WEP Key
Specify a password (up to 31 alphanumeric characters) as the key to be shared between
the external accounting server and the access points.
The key is not sent over the network. This key must be the same on the external
accounting server and ZyAIR.
WEP
Select Disable to allow wireless stations to communicate with the access points without
any data encryption (Default).
Select 64-bit WEP or 128-bit WEP to enable data encryption. WEP (Wired Equivalent
Privacy) encrypts data frames before transmitting over the wireless network.
12-6
Wireless
ZyAIR B-5000 User’s Guide
Table 12-1 Basic Configuration Wireless LAN
LABEL
DESCRIPTION
Default Key
The WEP keys are used to encrypt data. Both the ZyAIR and the wireless stations must
use the same WEP key for data transmission.
If you chose 64-bit WEP, then enter any 5 ASCII characters or 10 hexadecimal
characters ("0-9", "A-F").
If you chose 128-bit WEP, then enter 13 ASCII characters or 26 hexadecimal characters
("0-9", "A-F").
You must configure all four keys, but only one key can be activated at any one time. The
default key is key 1.
KeyGen
If you choose to enable WEP, then WEP keys for 64-bit or 128-bit will be generated
when you click this button.
FINISH
Click FINISH to save the changes to your ZyAIR.
CANCEL
Click CANCEL to begin configuring the screen afresh.
The wireless stations and ZyAIR must use the same ESSID, channel ID and WEP
encryption key (if WEP is enabled) for wireless communication.
Wireless
12-7
ZyAIR B-5000 User’s Guide
Chapter 13
IEEE 802.1x, RADIUS
This chapter provides information on how to use 802.1x and RADIUS for your ZyAIR.
13.1 IEEE 802.1x Overview
The IEEE 802.1x standard outlines enhanced security methods for both the authentication of wireless
stations and encryption key management. Authentication can be done using the local user database internal to
the ZyAIR or an external RADIUS server for an unlimited number of users.
13.2 Introduction to RADIUS
RADIUS is based on a client-sever model that supports authentication and accounting, where the access
point is the client and the server is the RADIUS server. The RADIUS server handles the following tasks
among others:
•
Authentication
Determines the identity of the users.
•
Accounting
Keeps track of the client’s network activity.
RADIUS user is a simple package exchange in which your ZyAIR acts as a message relay between the
wireless station and the network RADIUS server.
Types of RADIUS Messages
The following types of RADIUS messages are exchanged between the access point and the RADIUS server
for user authentication:
•
Access-Request
Sent by an access point-requesting authentication.
•
Access-Reject
Sent by a RADIUS server rejecting access.
•
Access-Accept
Sent by a RADIUS server allowing access.
IEEE 802.1x, RADIUS
13-1
ZyAIR B-5000 User’s Guide
•
Access-Challenge
Sent by a RADIUS server requesting more information in order to allow access. The access point
sends a proper response from the user and then sends another Access-Request message.
The following types of RADIUS messages are exchanged between the access point and the RADIUS server
for user accounting:
•
Accounting-Request
Sent by the access point requesting accounting.
•
Accounting-Response
Sent by the RADIUS server to indicate that it has started or stopped accounting.
In order to ensure network security, the access point and the RADIUS server use a shared secret key, which
is a password, they both know. The key is not sent over the network. In addition to the shared key, password
information exchanged is also encrypted to protect the wired network from unauthorized access.
13.2.1 EAP Authentication Overview
EAP (Extensible Authentication Protocol) is an authentication protocol that runs on top of the IEEE802.1x
transport mechanism in order to support multiple types of user authentication. By using EAP to interact with
an EAP-compatible RADIUS server, the access point helps a wireless station and a RADIUS server perform
authentication.
The type of authentication you use depends on the RADIUS server or the AP. The ZyAIR supports EAPTLS, and EAP-MD5 with RADIUS. Refer to the Types of EAP Authentication appendix for descriptions on
the four common types.
Your ZyAIR supports EAP-MD5 (Message-Digest Algorithm 5) with the local user database and RADIUS.
The following figure shows an overview of authentication when you specify a RADIUS server on your
access point.
AP
RADIUS Server
Wireless Station
Ethernet
Figure 13-1 EAP Authentication
13-2
IEEE 802.1x, RADIUS
ZyAIR B-5000 User’s Guide
The details below provide a general description of how IEEE 802.1x EAP authentication works. For an
example list of EAP-MD5 authentication steps, see the IEEE 802.1x appendix.
•
The wireless station sends a “start” message to the ZyAIR.
•
The ZyAIR sends a “request identity” message to the wireless station for identity information.
•
The wireless station replies with identity information, including username and password.
•
The RADIUS server checks the user information against its user profile database and determines
whether or not to authenticate the wireless station.
13.3 Dynamic WEP Key Exchange
The ZyAIR maps a unique key that is generated with the RADIUS server. This key expires when the wireless
connection times out, disconnects or reauthentication times out. A new WEP key is generated each time
reauthentication is performed.
If this feature is enabled, it is not necessary to configure a default encryption key in the Wireless screen. You
may still configure and store keys here, but they will not be used while Dynamic WEP is enabled.
To use Dynamic WEP, enable and configure the RADIUS server (see section 13.2) and enable Dynamic
WEP Key Exchange in the 802.1x screen. The wireless station’s EAP type is configured to EAP-TLS
EAP-MD5 cannot be used with Dynamic WEP Key Exchange.
13.4 Configuring IEEE 802.1x
Click BASIC CONFIG and go to Wireless LAN - 802.1x to navigate to the following screen.
IEEE 802.1x, RADIUS
13-3
ZyAIR B-5000 User’s Guide
Figure 13-2 Basic Configuration 802.1x
The following table describes the labels in this screen.
Table 13-1 Basic Configuration 802.1x
LABEL
DESCRIPTION
802.1x Access Control
802.1x services
13-4
Select Enable to allow for authentication services on the ZyAIR if you have two or
more ZyAIR's on the same subnet.
All access points on the same subnet and wireless stations must have the same
ESSID to allow for authentication.
This is set to Disable by default when you do not want authentication services.
IEEE 802.1x, RADIUS
ZyAIR B-5000 User’s Guide
Table 13-1 Basic Configuration 802.1x
LABEL
DESCRIPTION
Accessible
802.1x Users on
Select either Local or Remote Radius, see the section 13.2.1 for more information.
Radius Parameters
Radius Server IP
Share Key
Radius
authentication
port
Radius
accounting Port
Enter the IP address of the external authentication server in dotted decimal notation.
Enter a password (up to 64 ASCII characters) as the key to be shared between the
external authentication server and the ZyAIR.
The key must be the same on the external authentication server and your ZyAIR. The
key is not sent over the network.
Enter the port number of the external authentication server. The default port number is
1812.
You need not change this value unless your network administrator instructs you to do
so with additional information.
Enter the port number of the external accounting server. The default port number is
1813.
You need not change this value unless your network administrator instructs you to do
so with additional information.
Local User Database
No
Username
Add
The local user is given a number in the database. Maximum amount of allowable users
is 20.
Enter the username (up to 24 ASCII characters) for this user profile.
Input new parameters and click Add to add access control parameters.
Delete
Click Delete to remove access control parameters.
Modify
Click Modify to change access control parameters.
FINISH
Click FINISH to save your changes back to the ZyAIR.
CANCEL
Click CANCEL to begin configuring the 802.1x screen afresh.
13.4.1 Local 802.1X User Add
Click Add in the previous screen to go to the next screen. The maximum allowable number of local users is
20.
IEEE 802.1x, RADIUS
13-5
ZyAIR B-5000 User’s Guide
Figure 13-3 Basic Configuration Local 802.1X User Add
The following table describes the labels in this screen.
Table 13-2 Basic Configuration Local 802.1X User Add
LABEL
DESCRIPTION
Add an accessible 802.1X user:
User’s Profile
Username
Enter the user name (up to 24 ASCII characters) for this user profile.
Password
Type a password (up to 8 ASCII characters) for this user profile. Note that as you type
a password, the screen displays a (*) for each character you type.
Confirm
Password
Retype the password for confirmation.
FINISH
Click FINISH to save your changes back to the ZyAIR.
Back
Click Back to change to return to the 802.1X screen.
CANCEL
Click CANCEL to begin configuring the screen afresh.
13-6
IEEE 802.1x, RADIUS
ZyAIR B-5000 User’s Guide
Chapter 14
MAC Filter
This chapter provides information on the MAC Filter of your ZyAIR.
14.1 MAC Filter Overview
The MAC filter screen allows you to configure the ZyAIR to block access to devices or block the devices
from accessing the ZyAIR. Every Ethernet device has a unique MAC (Media Access Control) address. The
MAC address is assigned at the factory and consists of six pairs of hexadecimal characters, for example,
00:A0:C5:00:00:02. You need to know the MAC address of the devices to configure this screen.
To change your ZyAIR’s MAC filter settings, click BASIC CONFIG, Wireless LAN and then MAC Filter.
The screen appears as shown.
Figure 14-1 Basic Configuration MAC Filter
The following table describes the labels in this screen.
MAC Filter
14-1
ZyAIR B-5000 User’s Guide
Table 14-1 Basic Configuration MAC Filter
LABEL
DESCRIPTION
MAC Filter Allowed List
MAC Filter
Service
Select Enable to allow MAC address filtering.
Table of Current
MAC Entries
This is a list of the MAC entries that are currently available.
No
MAC Address
This is the index number of a MAC address entry. The maximum allowable number of
local users is 20.
MAC addresses (in XX:XX:XX:XX:XX:XX format) of the wireless station that are
allowed or denied access to the ZyAIR in these address fields.
Pool is Empty!
You must click Add to add to the table of MAC address entries; otherwise the table will
be empty.
Add
Click Add to add more MAC address parameters.
FINISH
Click FINISH to save your changes back to the ZyAIR.
CANCEL
Click CANCEL to begin configuring the MAC Filter screen afresh.
14.1.1 MAC Address Pool
Click Add to display to the following screen and add a MAC address entry or modify an existing one.
14-2
MAC Filter
ZyAIR B-5000 User’s Guide
Figure 14-2 Basic Configuration MAC Filter Add
The following table describes the labels in this screen.
Table 14-2 Basic Configuration MAC Filter Add
LABEL
DESCRIPTION
MAC Filter Allowed List
MAC Filter
Service
Select Enable to turn on MAC address filtering, which allows the ZyAIR access the
table of MAC address entries.
Select Disable for no filtering.
Table of Current
MAC Entries
This is a list of MAC addresses that are allowed to access the ZyAIR.
No
MAC Address
This is the index number of a MAC address entry.
Enter the MAC addresses (in XX:XX:XX:XX:XX:XX format) of the wireless station that
are allowed access to the ZyAIR in these address fields.
Ok
Click Ok to change the configuration of your MAC filter and save the changes to your
ZyAIR.
Cancel
Click Cancel to begin configuring the screen afresh.
MAC Filter
14-3
ZyAIR B-5000 User’s Guide
Chapter 15
Configuration Overview, Save, Restart
This chapter provides information on the Configuration Overview screen and Save and Restart.
15.1 Configuration Overview
Use this screen to review all the settings in your basic configuration. This page presents the current
configuration settings. These can be modified if desired by selecting the required hyperlink.
Figure 15-1 Basic Configuration Overview
15.2 Basic Configuration Save and Restart
Click Save & Restart in BASIC CONFIG to move to the following screen.
Configuration Overview, Save, Restart
15-1
ZyAIR B-5000 User’s Guide
Figure 15-2 Basic Configuration Save & Restart
The following table describes the labels in this screen.
Table 15-1 Basic Configuration Save & Restart
LABEL
DESCRIPTION
SAVE
Click SAVE to store your device’s current configuration in the non-volatile memory. Do
this to keep your configuration changes even after turning off the device's power. Click
Restart after you save in order to have your configuration changes take effect.
RESTART
Click RESTART to have the device perform a software restart. Any configuration
changes you have made since your last save will be lost. Wait a minute before logging
into the device again.
Default
Click Default to clear all user-entered configuration information and return to the
factory default settings. The device will restart. Wait a minute before logging into the
device again.
15-2
Configuration Overview, Save, Restart
ZyAIR B-5000 User’s Guide
Table 15-1 Basic Configuration Save & Restart
LABEL
CANCEL
DESCRIPTION
Click CANCEL to go to the previous screen.
Configuration Overview, Save, Restart
15-3
ADVANCED CONFIGURATION
Part III:
ADVANCED CONFIGURATION
This part discusses STATIC ROUTE, BRIDGING, SNMP COMMUNITY, SNMP TRAP,
CONFIGURATION, SAVE & RESTART setup screens.
III
ZyAIR B-5000 User’s Guide
Chapter 16
Advanced Configuration
The advanced configuration tutorial screen shows all of the configuration screens in this part.
16.1 Advanced Configuration Overview
The Advanced Configuration allows you to set static route parameters, bridging parameters, SNMP and
review your saved settings.
See the tutorial screen for information regarding the ZyAIR’s advanced configuration features.
Advanced Configuration
16-1
ZyAIR B-5000 User’s Guide
Figure 16-1 Advanced Configuration Tutorial
16-2
Advanced Configuration
ZyAIR B-5000 User’s Guide
Chapter 17
Static Route
This chapter shows you how to configure static routes for your ZyAIR.
17.1 Static Route Overview
Each remote node specifies only the network to which the gateway is directly connected, and the ZyAIR has
no knowledge of the networks beyond. For instance, the ZyAIR knows about network N2 in the following
figure through remote node Router 1. However, the ZyAIR is unable to route a packet to network N3 because
it doesn't know that there is a route through the same remote node Router 1 (via gateway Router 2). The static
routes are for you to tell the ZyAIR about the networks beyond the remote nodes.
Figure 17-1 Example of Static Routing Topology
17.2 Configuring IP Static Route
Click ADVANCED CONFIG and then STATIC ROUTE to edit the static route parameters. You can
modify or delete existing entries and add new entries appending the table.
Static Route
17-1
ZyAIR B-5000 User’s Guide
Figure 17-2 Advanced Configuration Static Route Parameters
The following table describes the labels in this screen.
Table 17-1 Advanced Configuration Static Route Parameters
LABEL
DESCRIPTION
Table of Current Static Route Entries
Index
This field displays an individual static route index number.
Network
Address
This parameter specifies the IP network address of the final destination.
Subnet Mask
This parameter specifies the subnet mask of the final destination.
Gateway
This field displays the IP address of the gateway. The gateway is an immediate
neighbor of your ZyAIR that will forward the packet to the destination. On the LAN, the
gateway must be a router on the same segment as your ZyAIR.
Add
To add a static route to your table, type Network Address, Subnet Mask and
Gateway parameters into the empty spaces of the last index entry without a radio
button. Click add and then click FINISH to save these as a static route entry. A radio
button should appear beside the latest entry.
Delete
To remove a static route on the ZyAIR, select the radio button next to the static route
index number you want to remove, then click Delete.
17-2
Static Route
ZyAIR B-5000 User’s Guide
Table 17-1 Advanced Configuration Static Route Parameters
LABEL
DESCRIPTION
Modify
To change a static route on the ZyAIR, select the radio button next to the static route
index number you want to configure, and then click Modify to go to a Static Route edit
screen.
FINISH
Click FINISH to save the static routes to your ZyAIR.
CANCEL
Click CANCEL to begin configuring the screen afresh.
17.3 Configuring Route Entry
Select a static route index number and click Modify. The screen shown next appears. Fill in the required
information for the selected static route.
Figure 17-3 Static Route Parameters Modify
The following table describes the labels in this screen.
Table 17-2 Static Route Parameters Modify
LABEL
DESCRIPTION
Table of Current Static Route Entries
Index
Static Route
This field displays an individual static route index number.
17-3
ZyAIR B-5000 User’s Guide
Table 17-2 Static Route Parameters Modify
LABEL
DESCRIPTION
Network
Address
This parameter specifies the IP network address of the final destination. Type a new
address into the static route that you would like to modify.
Subnet Mask
This parameter specifies the subnet mask of the final destination. Type a new subnet
mask into the field that you would like to modify.
Gateway
This field displays the IP address of the gateway. The gateway is an immediate
neighbor of your ZyAIR that will forward the packet to the destination. On the LAN, the
gateway must be a router on the same segment as your ZyAIR. Type a new address
into the gateway that you would like to modify.
Ok
Click Ok to update the changes that you have made and return to the first static route
parameters screen.
Cancel
Click Cancel to return to the first static route parameters screen without saving
changes.
FINISH
Click FINISH to save any changes back to your ZyAIR.
CANCEL
Click CANCEL to begin configuring the screen afresh.
17-4
Static Route
ZyAIR B-5000 User’s Guide
Chapter 18
Bridging Parameters
This chapter shows you how to configure Bridging Parameters for your ZyAIR.
19.1 Bridging Overview
Bridging provides forwarding services between two or more networks. Frames from one network are
forwarded across a bridge to another network, although filtering can be employed to selectively forward
frames. See the section on Interface Parameters in Basic Configuration of Part I in this User’s Guide for
more information.
18.2 Configuring Bridging Parameters
Click ADVANCED CONFIG and BRIDGING to go to the general bridge parameters configuration screen.
This screen allows you to disable or enable the bridge function of your ZyAIR and allows you to enter your
IP address and subnet mask.
Figure 18-1 Advanced Configuration Bridging Parameters
The following table describes the labels in this screen.
Bridging Parameters
18-1
ZyAIR B-5000 User’s Guide
Table 18-1 Advanced Configuration Bridging Parameters
LABEL
DESCRIPTION
General Bridge Parameters
Bridge Function
Select the radio button to Disable or Enable the bridge function of your ZyAIR,
depending on whether you want to set it as a router or a bridge. See Part IV for more
information on setting this up.
IP Address
This parameter specifies the IP bridge address of the gateway. 192.168.1.1 is the
factory default, the default IP address of the ZyAIR.
Subnet Mask
This parameter specifies the subnet mask of the final destination. 255.255.255.0 is the
factory default, the subnet mask of the ZyAIR.
FINISH
Click FINISH to save the parameters back to your ZyAIR.
CANCEL
Click CANCEL to begin configuring the Bridging Parameters screen afresh.
18-2
Bridging Parameters
ZyAIR B-5000 User’s Guide
Chapter 19
SNMP
This chapter shows you how to configure SNMP Community Parameters and SNMP Trap for your
ZyAIR.
19.1 SNMP Overview
Simple Network Management Protocol is a popular management protocol defined by the Internet community
for TCP/IP networks. It is a communication protocol for collecting information from devices on the network.
19.2 Configuring SNMP
Simple Network Management Protocol is a protocol used for exchanging management information between
network devices. SNMP is a member of the TCP/IP protocol suite. Your ZyAIR supports SNMP agent
functionality, which allows a manager station to manage and monitor the ZyAIR through the network. The
ZyAIR supports SNMP version one (SNMPv1) and version 2c (SNMPv2c). The next figure illustrates an
SNMP management operation. SNMP is only available if TCP/IP is configured.
Figure 19-1 SNMP Management Model
SNMP
19-1
ZyAIR B-5000 User’s Guide
An SNMP managed network consists of two main types of component: agents and a manager.
An agent is a management software module that resides in a managed device (the ZyAIR). An agent
translates the local management information from the managed device into a form compatible with SNMP.
The manager is the console through which network administrators perform network management functions.
It executes applications that control and monitor managed devices.
The managed devices contain object variables/managed objects that define each piece of information to be
collected about a device. Examples of variables include the number of packets received, node port status etc.
A Management Information Base (MIB) is a collection of managed objects. SNMP allows a manager and
agents to communicate for the purpose of accessing these objects.
SNMP itself is a simple request/response protocol based on the manager/agent model. The manager issues a
request and the agent returns responses using the following protocol operations:
•
Get - Allows the manager to retrieve an object variable from the agent.
•
GetNext - Allows the manager to retrieve the next object variable from a table or list within an agent. In
SNMPv1, when a manager wants to retrieve all elements of a table from an agent, it initiates a Get
operation, followed by a series of GetNext operations.
•
Set - Allows the manager to set values for object variables within an agent.
•
Trap - Used by the agent to inform the manager of some events.
19.3 Supported MIBs
A Management Information Base (MIB) is a collection of managed objects. The managed devices contain
object variables/managed objects that define each piece of information to be collected about a device.
Examples of variables include such as the number of packets received, node port status and so on. The
ZyAIR supports MIB I and MIB II, that are defined in RFC-1213 and RFC-1215. The focus of the MIBs is to
let administrators collect statistical data and monitor status and performance.
19.4 SNMP Community Parameters Configuration
Click ADVANCED CONFIG, SNMP COMMUNITY to go to the SNMP Community Parameters
screen. You can select an Index radio button and modify the SNMP parameters accordingly.
19-2
SNMP
ZyAIR B-5000 User’s Guide
Figure 19-2 Advanced Configuration SNMP Community
The following table describes the labels in this screen.
Table 19-1 Advanced Configuration SNMP Community
LABEL
DESCRIPTION
Table of Current Community Pool
Index
This field displays an individual community index number.
Validity
This can be set to Disable or Enable. Disable does not permit access to the SNMP
Community.
Access Right
This field displays the host access as Deny, Read, Write or Create.
Community
This displays the trap community, which is the password sent with each trap to the
SNMP manager.
Modify
Click Modify to make changes to your current community pool.
FINISH
Click FINISH to save your changes back to the ZyAIR.
CANCEL
Click CANCEL to begin configuring the screen afresh.
SNMP
19-3
ZyAIR B-5000 User’s Guide
19.4
SNMP Community Parameters Modify
Click Modify in the SNMP Community Parameters, Figure 19-3, to modify the SNMP parameters.
Figure 19-3 Advanced Configuration SNMP Community Modify
The following table describes the labels in this screen.
Table 19-2 Advanced Configuration SNMP Community Modify
LABEL
DESCRIPTION
Table of Current Community Pool
Index
This field displays the selected individual community index number.
Validity
This can be set to Disable or Enable. Disable does not permit access to the SNMP
Community.
Access Right
Host access may be set to Deny, Read, Write or Create.
Community
Type the trap community, which is the password sent with each trap to the SNMP
manager.
Ok
Click Ok to update your changes back to the ZyAIR and return to the first SNMP
Community Parameters screen.
Cancel
Click Cancel to return to your SNMP Community Parameters screen without
updating the parameters.
19-4
SNMP
ZyAIR B-5000 User’s Guide
Table 19-2 Advanced Configuration SNMP Community Modify
LABEL
DESCRIPTION
FINISH
Click FINISH to begin modifying SNMP Community Parameters afresh.
CANCEL
Click CANCEL to begin modifying SNMP Community Parameters afresh.
19.5 SNMP Trap Overview
The ZyAIR will send traps to the SNMP manager when any one of the following events occurs:
Table 19-3 SNMP Traps
TRAP #
TRAP NAME
DESCRIPTION
1
coldStart (defined in RFC-1215)
A trap is sent after booting (power on).
2
warmStart (defined in RFC-1215)
A trap is sent after booting (software reboot).
The following table maps the physical port and encapsulation to the interface type.
Table 19-4 Ports and Interface Types
PHYSICAL
PORT/ENCAP
INTERFACE TYPE
LookBack (virtual)
if0
Wireless
if1
enet-encap
Ethernet
if2
enet-encap
PPPoE
if3
pppoe-encap
19.6 SNMP Trap Parameters Configuration
To view your ZyAIR’s SNMP Trap settings, click ADVANCED CONFIG, SNMP TRAP. The screen
appears as shown.
SNMP
19-5
ZyAIR B-5000 User’s Guide
Figure 19-4 Advanced Configuration SNMP Trap
The following table describes the labels in this screen.
Table 19-5 Advanced Configuration SNMP Trap
LABEL
DESCRIPTION
Table of Current Trap Host Pool
Index
This field displays an individual trap index number.
Version
This field displays the trap version.
Disable: ZyAIR does not send out an SNMP trap.
Version 1: This is the SNMP trap Version 1.
Version 2: This is the SNMP trap Version 2.
IP Address
This is the IP address of the station where you will send your SNMP traps.
Community
This is the trap community, which is the password sent with each trap to the SNMP
manager.
Modify
Select an Index beside the community that you would like to modify. Click Modify to
make changes to your current community pool.
Finish
Click FINISH to save your changes back to the ZyAIR.
19-6
SNMP
ZyAIR B-5000 User’s Guide
Table 19-5 Advanced Configuration SNMP Trap
LABEL
Click CANCEL to begin configuring the screen afresh.
Cancel
19.6
DESCRIPTION
SNMP Trap Modify
To change your ZyAIR’s SNMP Trap settings, click ADVANCED CONFIG, SNMP TRAP and Modify.
The screen appears as shown.
Figure 19-5 Advanced Configuration SNMP Trap Modify
The following table describes the labels in this screen.
Table 19-6 Advanced Configuration SNMP Trap Modify
LABEL
DESCRIPTION
Table of Current Trap Host Pool
Index
SNMP
This field displays an individual trap index number.
19-7
ZyAIR B-5000 User’s Guide
Table 19-6 Advanced Configuration SNMP Trap Modify
LABEL
DESCRIPTION
Version
Select the version of SNMP traps that you want to send for this entry. Select Disable
to not send any traps for this index entry.
Version 1: This is the SNMP trap Version 1.
Version 2: This is the SNMP trap Version 2.
IP Address
Type the IP address of the station where you will send your SNMP traps.
Community
Type the trap community, which is the password sent with each trap to the SNMP
manager.
Ok
Click Ok save your changes back to the ZyAIR.
Cancel
Click Cancel begin configuring the screen afresh.
FINISH
Click FINISH to save your changes back to the ZyAIR.
CANCEL
Click CANCEL to begin configuring the screen afresh.
19-8
SNMP
ZyAIR B-5000 User’s Guide
Chapter 20
Configuration, Save & Restart
This chapter gives an overview of the ADVANCED CONFIG. setup, SAVE & RESTART screens.
20.1 Advanced Configuration Setup Overview
The overview of the ZyAIR advanced configuration allows you to modify any of the configuration screens in
ADVANCED CONFIG. – Advanced Configuration – Overview.
Configuration, Save & Restart
20-1
ZyAIR B-5000 User’s Guide
Figure 20-1 Advanced Configuration Overview
20-2
Configuration, Save & Restart
ZyAIR B-5000 User’s Guide
Configurations can be accessed through Figure 20-1, and modified accordingly.
Figure 20-2 Advanced Configuration Save & Restart
The following table describes the labels in this screen.
Table 20-1 Advanced Configuration Save & Restart
LABEL
DESCRIPTION
SAVE
Click SAVE to store your device’s current configuration in the non-volatile memory. Do
this to keep your configuration changes even after turning off the device's power. Click
Restart after you save in order to have your configuration changes take effect.
Restart
Click Restart to have the device perform a software restart. Any configuration changes
you have made since your last save will be lost. Wait a minute before logging into the
device again.
Default
Click Default to clear all user-entered configuration information and return to the
factory default settings. The device will restart. Wait a minute before logging into the
device again.
Configuration, Save & Restart
20-3
ZyAIR B-5000 User’s Guide
Table 20-1 Advanced Configuration Save & Restart
LABEL
CANCEL
20-4
DESCRIPTION
Click CANCEL to go to the previous screen.
Configuration, Save & Restart
CONFIGURATION EXAMPLES
Part IV:
CONFIGURATION EXAMPLES
This part shows how to configure the examples expressed in Part I of this User’s Guide
IV
ZyAIR B-5000 User’s Guide
Chapter 21
Configuration Scenarios
This chapter gives information on the different network topologies that may be implemented using
the ZyAIR.
21.1 Network Topology: Access Point
This section describes several main types of installations commonly implemented using the AP mode of
your ZyAIR. This is by no means intended to be an exhaustive list of all possible configurations, but rather
shows examples of some of the more common implementations in Figure 1 of the Quick Installation Guide
as an access point application.
The ZyAIR can perform in router or bridge modes. In a wireless topology, all communication between
network stations is done through a centralized access point. To show some possibilities of wireless
topologies, the following examples are provided:
Wireless Access Bridge
Wireless Access Router with PPP over Ethernet (PPPoE)
Wireless Access Router with Dynamic IP Address (DHCP Client)
Wireless Access Router with Static IP Address (Fixed IP)
The following network topologies use the Web Configurator. Review Parts I, II, III of this User’s Guide
thoroughly to familiarize yourself with the configurator screens.
The IP addresses displayed in the figures in this chapter are examples only
21.1.1
Configure the ZyAIR as a Wireless Access Bridge
Step 1.
Select ACCESS POINT as the operating mode, click NEXT.
Step 2.
Click ADVANCED CONFIG.
Step 3.
Select Bridging Parameters, and then click Enable for Bridge Function.
Step 4.
In the Bridging Parameters window, enter the IP Address, 192.168.1.1 is the factory default,
and Subnet Mask (default is 255.255.255.0) that are suitable for your network domain.
Step 5.
Click FINISH.
Step 6.
Set Basic Configuration - Wireless LAN parameters on the ZyAIR: Channel and SSID.
Configuration Scenarios
21-1
ZyAIR B-5000 User’s Guide
Step 7.
Set wireless parameters on client stations PC1, PC2 and PC3 as SSID (wireless).
Step 8.
Left side stations are transparent to the right side network.
Step 9.
The DHCP server assigns IP address to PC1, PC2 and PC3.
Figure 21-1 Wireless Access Bridge
21.1.2
Configure the ZyAIR as a Wireless Access Router with PPP over
Ethernet (PPPoE)
Step 1.
Select ACCESS POINT as the operating mode, click NEXT.
Step 2.
Click ADVANCED CONFIG.
Step 3.
Select Bridging Parameters.
Step 4.
Select Disable for Bridge Function.
Step 5.
Click FINISH.
Step 6.
If you are an PPPoE subscriber, you will need to specify your ISP PPPoE username and
password to enable PPPoE broadband access. Click BASIC CONFIG.
Step 7.
Select ISP Parameters.
21-2
Configuration Scenarios
ZyAIR B-5000 User’s Guide
Step 8.
Click MODIFY to setup the correct ISP parameters: ISP Name, ISP Phone, Username and
Password. Click OK.
Your Internet Provider should give you all the information you need.
Step 9.
Click BASIC CONFIG.
Step 10. Select Interface Parameters and select the required interface.
Step 11. Click MODIFY to choose the interface you want to change.
Step 12. In interface 1, ensure that the wireless interface Status is set to Active, enter the IP address and
enter the Net Mask that is suitable for your wireless network. Turn NAT (PAT) ‘off’.
Step 13. In interface 2, ensure that the wireless interface Status is set to Active, and enter the Ethernet
IP address and Net Mask of the Ethernet interface. Turn NAT (PAT) ‘on’.
Step 14. In interface 3, ensure that the PPPoE interface Status is set to Active, and enter the Ethernet IP
address and Net Mask. Choose the ISP index that you have configured in Step 1. After that,
follow the default setting.
Step 15. Click the OK button to return to the Interface Parameters window.
Step 16. Click FINISH.
Ensure that interface 3 within Status is set to Disable. Choose NAT (PAT) in each
interface to enable NAT (PAT) services. For example, ensure PPPoE interface
within NAT (PAT) is set to ‘On’ and the others are set to ‘Off’. This means that
every communication through the PPPoE interface is applied to NAT (PAT).
Step 17. The ZyAIR supports PPPoE auto dial-up; make sure your default route is set to zero. Click
BASIC CONFIG.
Step 18. Select System Setup. In the System Setup page, enter the Default Route as 0.0.0.0,
192.168.2.254 is the factory default.
Step 19. Click the FINISH.
Step 20. Click BASIC CONFIG.
Step 21. Select DHCP Parameters and make sure the DHCP Client Setting is set to Disable.
Step 22. Click FINISH.
Step 23. Set Basic Configuration - Wireless LAN parameters on the ZyAIR: Channel and SSID
(wireless).
Step 24. Turn on the DHCP server on the ZyAIR and assign IP addresses to PC1, PC2 and PC3.
Step 25. Set wireless parameters on client stations PC1, PC2 and PC3: SSID (wireless).
Configuration Scenarios
21-3
ZyAIR B-5000 User’s Guide
Figure 21-2 Wireless Access Router with PPP over Ethernet (PPPoE)
21.1.3
Configure the ZyAIR as a Wireless Access Router with Dynamic IP
Address (DHCP Client)
Step 1.
Select ACCESS POINT as the operating mode, click NEXT.
Step 2.
Click ADVANCED CONFIG.
Step 3.
Select BRIDGING.
Step 4.
Click Disable for Bridge Function.
Step 5.
Click FINISH.
Step 6.
Click BASIC CONFIG.
Step 7.
Select Interface Parameters.
Step 8.
Click a radio button and select MODIFY to choose the interface that you want to change.
Step 9.
In interface 1, ensure that the wireless interface Status is Active and enter the IP address and
wireless interface Net Mask that is suitable for your wireless network. Turn NAT (PAT) ‘off’.
Step 10. In interface 2, Ensure that the ethernet interface Status is set to Active. The other parameters
will be obtained automatically by DHCP from your network environment. Turn NAT (PAT)
‘on’.
Step 11. Click the OK button to return to the Interface Parameters window.
21-4
Configuration Scenarios
ZyAIR B-5000 User’s Guide
Step 12. Click FINISH.
Ensure that interface 3 within Status is set to Disable. In order to enable NAT (PAT)
service; choose the NAT (PAT) in the interface Wireless and Ethernet. For
example, make sure Ethernet interface within NAT (PAT) is set to ‘On’ and
Wireless interface in NAT (PAT) is set to ‘Off’. This means that every
communication through the PPPoE interface is applied to NAT (PAT).
Step 13. Click BASIC CONFIG, select DHCP Parameters and apply the DHCP Client Setting
running as interface 2 (Ethernet Interface). Click FINISH.
Step 14. Set Basic Configuration - Wireless LAN parameters on the ZyAIR: Channel and SSID.
Step 15. Turn on the DHCP server on the ZyAIR and assign IP addresses to PC1, PC2 and PC3.
Step 16. Set wireless parameters on client stations PC1, PC2 and PC3: SSID (wireless).
Figure 21-3 Wireless Access Router with Dynamic IP Address (DHCP Client)
21.1.4
Configure the ZyAIR as a Wireless Access Router with Static IP
Address (Fixed IP)
Step 1.
Select ACCESS POINT as the operating mode, click NEXT.
Step 2.
Click ADVANCED CONFIG.
Step 3.
Select BRIDGING.
Configuration Scenarios
21-5
ZyAIR B-5000 User’s Guide
Step 4.
Click Disable for Bridge Function.
Step 5.
Click FINISH.
Step 6.
Click BASIC CONFIG.
Step 7.
Select DHCP Parameters and ensure that the DHCP Client Setting is set to Disable.
Step 8.
Click FINISH.
Step 9.
Click BASIC CONFIG and select Interface Parameters.
Step 10. Select the radio button and select MODIFY to select the interface that you want to change.
Step 11. In interface 1, ensure that the wireless interface Status is set to Active, enter the wireless
interface IP address and wireless interface Net Mask that are suitable for your wireless
network. Turn NAT (PAT) ‘off’.
Step 12. In interface 2, ensure that the Ethernet interface Status is set to Active; enter the Ethernet IP
address and Ethernet Net Mask of the Ethernet interface. Turn NAT (PAT) ‘on’.
Step 13. Click the OK button to return to the Interface Parameters window.
Step 14. Click FINISH.
Make sure interface 3 within Status is set to Disable. In order to enable NAT (PAT)
service, choose the NAT (PAT) in the interface Wireless and Ethernet. For
example, make sure Ethernet interface within NAT (PAT) is set to ‘On’ and
Wireless interface in NAT (PAT) is set to ‘Off’. This means that every
communication through the PPPoE interface is applied to NAT (PAT).
Step 15. Click BASIC CONFIG, and then select System Setup.
Step 16. In System Setup, enter the Default Route as the IP address of the broadband device connected
to the ZyAIR or the IP address of the Gateway in your LAN environment.
Step 17. Enter at least one IP address for the DNS Parameters (Default DNS server 1 is 192.168.2.254)
provided by your ISP in the DNS server parameter. Click FINISH.
Step 18. Set Basic Configuration - Wireless LAN parameters on the ZyAIR: Channel and SSID.
Step 19. Turn on DHCP server on the ZyAIR and assign IP addresses to PC1, PC2 and PC3.
Step 20. Set wireless parameters on client stations PC1, PC2 and PC3: SSID (wireless).
21-6
Configuration Scenarios
ZyAIR B-5000 User’s Guide
Figure 21-4 Wireless Access Router with Static IP Address (Fixed IP)
Configuration Scenarios
21-7
ZyAIR B-5000 User’s Guide
21.2 Network Topology: Wireless Bridge
This section describes several main types of installations commonly implemented using the ZyAIR. This is
by no means intended to be an exhaustive list of all possible configurations, but rather shows examples of
some of the more common implementations. The Wireless Bridge can be configured into two roles:
Central Wireless Router/Bridge and Remote Wireless Router/Bridge to setup the broadband wireless
point-to-multipoint systems, see Figure 2 of the Quick Installation Guide for bridging application.
Both the Central Wireless Router/Bridge and the Remote Wireless Router/Bridge can function in router
or bridge modes. In a Point-to-Multipoint topology, all communication between network systems is done
through a centralized agent. In the Outdoor Wireless Router/Bridge product, the centralized agent is a
Central Wireless Router or Central Wireless Bridge and the individual network nodes may be Remote
Wireless Router or Remote Wireless Bridge.
To show some possibilities of Point-to-Multipoint topologies, the following examples are provided:
Remote Wireless Bridge-to-Central Wireless Bridge
Remote Wireless Router-to-Central Wireless Bridge
Remote Wireless Bridge-to-Central Wireless Router
Remote Wireless Router-to-Central Wireless Router
21.2.1
Configure the ZyAIR
The ZyAIR can be configured into two operation roles:
Central Wireless Router/Bridge and Remote Wireless Router/Bridge.
Central Wireless Router/Bridge can be configured in four operation modes
Central Wireless Bridge
Central Wireless Router with PPP over Ethernet (PPPoE)
Central Wireless Router with Dynamic IP Address (DHCP Client)
Central Wireless Router with Static IP Address (Fixed IP)
Remote Wireless Router/Bridge can perform in two operation modes:
Remote Wireless Bridge
Remote Wireless Router
The ZyAIR is shipped with default configuration is as a bridge between an Ethernet and wireless network.
Users simply need to attach the ZyAIR to your wired LAN. If users would like to configure the ZyAIR,
please refer to the following procedures.
21-8
Configuration Scenarios
ZyAIR B-5000 User’s Guide
The IP addresses displayed shown in the figures in this chapter are
examples only
21.2.2
Configure the ZyAIR as a Central Wireless Bridge
Step 1.
Select BRIDGE as the operating mode, click NEXT.
Step 2.
Click QUICK CONFIG, select Central Wireless Router/Bridge and click NEXT.
Step 3.
Select Central Wireless Bridge operation mode and click NEXT.
Step 4.
Configure TCP/IP Parameters.
Step 5.
Enter the Bridge IP Address and Bridge Subnet Mask that are suitable for your network
domain. Click NEXT.
Step 6.
Configure IEEE 802.11b WLAN Parameters.
Step 7.
Enter the Channel, rts Threshold, frag Threshold, SSID and Station Name that are suitable
for your wireless network. Click the radio button to disable WEP or enable 64/128 bit WEP
services, if WEP is enabled, you must input a corresponding Default Key index and WEP Key.
Step 8.
Click NEXT.
Step 9.
Review the configured settings of the ZyAIR.
Step 10. Click the SAVE button to store the changes back to your ZyAIR.
Step 11. Click the RESTART button to make the configuration changes.
Configuration Scenarios
21-9
ZyAIR B-5000 User’s Guide
21.2.3
Configure the ZyAIR as a Central Wireless Router with PPP over
Ethernet (PPPoE)
Step 1.
Select BRIDGE as the operating mode, click NEXT.
Step 2.
Click QUICK CONFIG, select Central Wireless Router/Bridge and click NEXT.
Step 3.
Select Central Wireless Router to set this ZyAIR to operate in router mode, you also need to
select the Ethernet connection type in PPP over Ethernet (PPPoE), and then click NEXT.
Step 4.
Configure TCP/IP Parameters.
Step 5.
Enter the Wireless interface IP address, 192.168.1.1 is the factory default and Wireless
interface Net Mask (default is 255.255.255.0) that are suitable for your wireless network.
Step 6.
Specify the Ethernet IP address, 192.168.2.1 is the factory default and Ethernet Net Mask
(default is 255.255.255.0) of the Ethernet interface. If you are a PPPoE subscriber, you may
specify your personal ISP provided PPPoE Username and PPPoE Password to enable
broadband access.
Step 7.
You may have to configure two network settings in the Gateway and DNS tabs of each wireless
client’s computer to surf the Internet, or you can enable DHCP server services for all wireless
clients (default DHCP server setting of the ZyAIR is set to disable in the wireless network). In
General DHCP Server Parameters, enter the Assign Default Gateway, Assign Net Mask,
Assign Name Server, DHCP Start IP, DHCP End IP and choose Apply Interface as
HWLAN to make your DHCP server services available for the wireless network.
Step 8.
Click NEXT.
Step 9.
Configure IEEE 802.11b WLAN parameters.
Step 10. Enter the Channel, rts Threshold, frag Threshold, SSID and Station Name that are suitable
for your wireless network and click the radio button. To disable WEP or enable 64/128 bit WEP
services, if WEP is enabled, you must input a corresponding Default Key index and WEP Key.
Step 11. Click NEXT.
Step 12. Review the configured setting of the ZyAIR.
Step 13. Click the SAVE button to store the changes back to your ZyAIR.
Step 14. Click the RESTART button to take effect the configuration changes.
21.2.4
Configure the ZyAIR as a Central Wireless Router with Dynamic IP
Address (DHCP Client).
Step 1.
Select BRIDGE as the operating mode, click NEXT.
Step 2.
Click QUICK CONFIG, select Central Wireless Router/Bridge and click NEXT.
21-10
Configuration Scenarios
ZyAIR B-5000 User’s Guide
Step 3.
Select Central Wireless Router to set the ZyAIR to operate in router mode. You also need to
select the Ethernet connection type in Dynamic IP address (DHCP Client), and then click
NEXT.
Step 4.
Configure TCP/IP Parameters.
Step 5.
Enter the Wireless interface IP address and Wireless interface Net Mask that are suitable for
your wireless network.
Step 6.
You may have to configure two network settings in the Gateway and DNS tabs of each wireless
client’s computer to surf the Internet, or you can enable DHCP server services for all wireless
clients.
Step 7.
In General DHCP server parameters, enter the Assign Default Gateway, Assign Net Mask,
Assign Name Server, DHCP Start IP, DHCP End IP and choose Apply Interface on HWLAN
to make DHCP server services available for wireless network. Click NEXT.
Step 8.
Configure IEEE 802.11b WLAN parameters.
Step 9.
Enter the Channel, rts Threshold, frag Threshold, SSID and Station Name that are suitable
for your radio network and then click the radio button to disable WEP or enable 64/128 bit WEP
services, if WEP is enabled, you must input a corresponding Default Key index and WEP Key.
Click NEXT.
Step 10. Review the configured settings of the ZyAIR.
Step 11. Click the SAVE button to store the changes back to your ZyAIR.
Step 12. Click the RESTART button to take effect the configuration changes.
21.2.5
Configure the ZyAIR as a Central Wireless Router with Static IP
Address (Fixed IP)
Step 1.
Select BRIDGE as the operating mode, click NEXT.
Step 2.
Click QUICK CONFIG and select Central Wireless Router/Bridge.
Step 3.
Select the Ethernet connection type in Static IP address (Fixed IP) and then click NEXT.
Step 4.
Configure TCP/IP parameters.
Step 5.
Enter the Wireless interface IP and Wireless interface Net Mask that are suitable for your
wireless network, and specify the Ethernet IP address and Ethernet Net Mask of the Ethernet
interface. Enter the Default Gateway as the IP address of the broadband device connected to the
ZyAIR or the IP address of the Gateway in your Ethernet environment and the IP address of the
DNS servers provided by your ISP in the DNS server field.
Configuration Scenarios
21-11
ZyAIR B-5000 User’s Guide
Step 6.
You may have to configure two network settings in the Gateway and DNS tabs of each wireless
client’s computer to surf the Internet, or you can enable DHCP server services for all wireless
clients.
Step 7.
In general DHCP server parameters, input Assign Default Gateway, Assign Net Mask,
Assign Name Server, DHCP Start IP, DHCP End IP and choose Apply Interface on
HWLAN to make DHCP server services available for your wireless network. Click NEXT.
Step 8.
Configure IEEE 802.11b WLAN parameters.
Step 9.
Enter the Channel, rts Threshold, frag Threshold, SSID and Station Name that are suitable
for your radio network and then you can clicked radio button to disable WEP or enable 64/128
bit WEP services (default is disable), if WEP is enabled, you must input a corresponding
Default Key index and WEP Key. Click NEXT.
Step 10. Review the configured settings of the ZyAIR.
Step 11. Click the SAVE button to store the changes back to your ZyAIR.
Step 12. Click the RESTART button to take effect the configuration changes.
21.2.6
Configure the ZyAIR as a Remote Wireless Bridge
Step 1.
Select BRIDGE as the operating mode, click NEXT.
Step 2.
Click QUICK CONFIG, select Remote Wireless Bridge and click NEXT.
Step 3.
Enter the Wireless interface IP and Wireless interface Net Mask that are suitable for your
wireless network, enter the Ethernet IP address and Ethernet Net Mask of the Ethernet
interface. Enter the Default Gateway as the Wireless IP address of the ZyAIR and the IP
address of the DNS servers provided by your ISP in the DNS server parameter.
Step 4.
You may have to configure two network settings in the Gateway and DNS tabs of your wireless
client’s computer to surf the Internet, or you can enable DHCP server services for all wireless
clients.
Step 5.
In General DHCP server parameters, input Assign Default Gateway, Assign Net Mask,
Assign Name Server, DHCP Start IP, DHCP End IP and choose Apply Interface on HWLAN
to made DHCP server services available for your wireless network. Click NEXT.
Step 6.
Configure IEEE 802.11b WLAN parameters.
Step 7.
Ensure the SSID parameter is the same as the configuration of the root ZyAIR.
Step 8.
In this page, enter the Channel, rts Threshold, frag Threshold, SSID and Station Name that
are suitable for your wireless network.
Step 9.
Click the radio button to disable WEP or enable 64/128 bit WEP services, if WEP is enabled,
you must input a corresponding Default Key index and WEP Key. Click NEXT.
21-12
Configuration Scenarios
ZyAIR B-5000 User’s Guide
Step 10. Review the configured setting of the ZyAIR.
Step 11. Click the SAVE button to store the changes back to your ZyAIR.
Step 12. Click the RESTART button to take effect the configuration changes.
You may configure correct network settings as in the following sample
Remote
Extension
Bridge 2
Remote
Extension
Bridge 1
ROOT ZyAIR
WIRELESS LINK
Wireless IP: 192.168.1.3
Wireless IP: 192.168.1.1
Wireless IP: 192.168.1.2
SSID : ZyAIR_Example
SSID : ZyAIR_Example
SSID : ZyAIR_Example
Channel : 1
Channel : 1
Channel : 1
Station Name: ext2
Ethernet IP: 192.168.2.1
Station Name: ext1
Ethernet IP: 192.168.20.1
Default Route: 192.168.2.254
Ethernet IP: 192.168.10.1
Default Route: 192.168.1.1
Static Route:
Default Route: 192.168.1.1
192.168.10.0 / 24 / 192.168.1.2
192.168.20.0 / 24 / 192.168.1.3
Figure 21-5 Configure the ZyAIR as a Remote Wireless Bridge
Configuration Scenarios
21-13
ZyAIR B-5000 User’s Guide
21.2.7
Step 1.
Configure the ZyAIR as a Remote Wireless Router
Select BRIDGE as the operating mode, click NEXT.
Step 2.
Click QUICK CONFIG, select Remote Wireless Router/Bridge and click NEXT.
Step 3.
Configure the operation mode as a Remote Wireless Router.
Step 4.
Configure TCP/IP parameters.
Step 5.
Enter the Wireless interface IP, 192.168.1.1 is the factory default and Wireless interface Net
Mask (default is 255.255.255.0) that are suitable for your wireless network, and enter the
Default Gateway (Default is 192.168.2.254) as the wireless IP address of the Central Wireless
Router/Bridge. Enter the IP address of the DNS servers provided by your ISP in the DNS
server (Default is 192.168.2.254) field.
Design your network infrastructure and assigned the correct IP address for the
Central Wireless Router/Bridge and the Remote Wireless Router/Bridge.
Step 6.
Configure TCP/IP parameters on Ethernet.
Step 7.
Specify the Ethernet IP address, 192.168.2.1 is the factory default and Ethernet Net Mask
(default is 255.255.255.0) of the Ethernet interface that is suitable for your Ethernet network.
Click NEXT.
Step 8.
Configure Wireless parameters. Enter the Channel, rts Threshold, frag Threshold, SSID and
Station Name that are suitable for your wireless network and then you can click the radio button
to disable WEP or enable 64/128 bit WEP services, if WEP is enabled, you must input a
corresponding Default Key index and WEP Key. Click NEXT.
Make sure the SSID parameter is same as the configuration of the Central
Wireless Router/Bridge.
Step 9.
Review the configured setting of the ZyAIR.
Step 10. Click the SAVE button to store the changes back to your ZyAIR.
Step 11. Click the RESTART button to take effect the configuration changes.
Step 12. Click BASIC CONFIG and select Interface Parameters. Click the radio button of the
interface that you want to change and click to MODIFY. In order to enable NAT (PAT)
services choose the NAT (PAT) in the interface Wireless and Ethernet. For example, make sure
that the Ethernet interface within NAT (PAT) is turned ‘off’ and that the Wireless interface
within NAT (PAT) is turned ‘on’.
21-14
Configuration Scenarios
ZyAIR B-5000 User’s Guide
21.2.8
Remote Wireless Bridge-to-Central Wireless Bridge
Figure 21-6 Remote Wireless Bridge-to-Central Wireless Bridge
Step 1.
Set the Central Wireless Router/Bridge as a Central Wireless Bridge see section 21.2.2
(bridge IP address as 192.168.1.1).
Step 2.
Set the Remote Wireless Router/Bridge as a Remote Wireless Bridge see section 21.2.6
(bridge IP address as 192.168.1.2)
Step 3.
Set wireless parameters on Remote Wireless Bridge: Channel and SSID, these parameters
must be the same as the Central Wireless Bridge.
Step 4.
The left side subnet is transparent to the right side.
Step 5.
Have a DHCP server assign IP addresses to PC1 and PC2.
Configuration Scenarios
21-15
ZyAIR B-5000 User’s Guide
21.2.9
Remote Wireless Router-to-Central Wireless Bridge
Figure 21-7 Remote Wireless Router-to-Central Wireless Bridge
Step 1.
Set the Central Wireless Router/Bridge as a Central Wireless Bridge; see section 21.2.2
(bridge IP address is 192.168.1.1).
Step 2.
Set wireless parameters on Central Wireless Bridge: Channel and SSID.
Step 3.
Set the Remote Wireless Router/Bridge as a Remote Wireless Router; see section 21.2.7
(wireless interface IP is 192.168.1.2).
Step 4.
Set wireless parameters on Remote Wireless Router: Channel and SSID, these parameters
must be the same as the Central Wireless Bridge.
Step 5.
Set the DHCP server service on the Remote Wireless Router and apply it on Ethernet Interface.
Step 6.
The remote ZyAIR assigns IP addresses to PC1 and PC2.
21-16
Configuration Scenarios
ZyAIR B-5000 User’s Guide
21.2.10 Remote Wireless Bridge-to-Central Wireless Router
Figure 21-8 Remote Wireless Bridge-to-Central Wireless Router
Step 1.
Set the Central Wireless Router/Bridge as a Central Wireless Router; see section 21.2.3
(Wireless Interface IP is 192.168.1.1, Ethernet Interface IP is 192.168.2.1, Turn ‘off’ NAT
(PAT) on the Wireless Interface and turn ‘on’ NAT (PAT) on the Ethernet interface, default
route is 192.168.2.254).
Step 2.
Set wireless parameters on the Central Wireless Router: Channel and SSID.
Step 3.
Set the DHCP server service on the Central Wireless Router and apply it on Wireless
Interface.
Step 4.
Set the Remote Wireless Router/Bridge as a Remote Wireless Bridge; see section 21.2.6
(Bridge Interface IP is 192.168.1.2).
Step 5.
Set Wireless parameters on Remote Wireless Bridge: Channel (1) and SSID (wireless), these
parameters must be the same as the Central ZyAIR.
Step 6.
The Central Wireless Router assigns IP addresses to PC1 and PC2
Step 7.
You can also turn ‘off’ NAT (PAT) on the Central Wireless Router and the two subnets are
transparent.
Configuration Scenarios
21-17
ZyAIR B-5000 User’s Guide
21.2.11
Remote Wireless Router-to-Central Wireless Router
Figure 21-9 Remote Wireless Router-to-Central Wireless Router
Step 1.
Set the Central Wireless Router/Bridge to run as a Central Wireless Router; see section
21.2.3 (wireless Interface IP is 192.168.1.1, Ethernet Interface IP is 192.168.2.1, 192.168.2.254
is the factory default.
Step 2.
Set wireless parameters on Central Wireless Router: Channel and SSID.
Step 3.
Set the Remote Wireless Router/Bridge as a Remote Wireless Router; see section 21.2.7
(Wireless Interface IP is 192.168.1.2, Ethernet Interface IP is 192.168.10.1, 192.168.1.1 is the
factory default.
Step 4.
Set wireless parameters on Remote Wireless Router: Channel and SSID, these parameters
must be the same as the Central Wireless Router.
Step 5.
Set the DHCP server service on the Remote Wireless Router and apply it to the Ethernet
Interface.
Step 6.
The Remote Wireless Router assigns IP address to PC1 and PC2.
You can turn ‘off’ NAT (PAT) on the Central Wireless Router and turn ‘on’ NAT (PAT) on the Remote
Wireless Router. Any outgoing packets will be translated to address 192.168.1.2.
Central Wireless Router: turn ‘off’ NAT (PAT) on Wireless Interface and turn ‘off’ NAT (PAT) on
Ethernet interface.
Remote Wireless Router: turn ‘on’ NAT (PAT) on Wireless Interface and turn ‘off’ NAT (PAT) on
Ethernet interface.
21-18
Configuration Scenarios
ZyAIR B-5000 User’s Guide
You can also turn ‘on’ NAT (PAT) behavior on Central Wireless Router and turn ‘on’ NAT (PAT)
behavior on Remote Wireless Router.
Central Wireless Router: turn ‘on’ NAT (PAT) on Wireless Interface and turn ‘on’ NAT (PAT) on
Ethernet interface.
Remote Wireless Router: turn ‘on’ NAT (PAT) on Wireless Interface and turn ‘on’ NAT (PAT) on
Ethernet interface.
Configuration Scenarios
21-19
UTILITY
Part V:
UTILITY
This part provides information and configuration instructions for UTILITY SYSTEM INFO,
SOFTWARE UPGRADE and WIRELESS LINK INFORMATION.
V
ZyAIR B-5000 User’s Guide
Chapter 22
Utility
This chapter introduces the Tutorial Screen, General System Information, Software Upgrade and
Wireless Link Info screens.
22.1 Utility Overview
Click UTILITY to show a list of the web configurator screens, that allow you to view general system
information, upgrade software and view the wireless link information when the ZyAIR has been saved as a
Remote Wireless Bridge.
22.2 Utility Tutorial Screen
See the screen for information regarding the ZyAIR’s utility features (see Figure 22-1).
Utility
22-1
ZyAIR B-5000 User’s Guide
Figure 22-1 Utility Tutorial Screen
22.3 General System Information
The following screen shows some general system information. Please refer to the Appendix for a more
comprehensive listing of specifications.
22-2
Utility
ZyAIR B-5000 User’s Guide
Figure 22-2 Utility General System Information
The following table describes the labels in this screen.
Table 22-1 Utility General System Information
LABEL
DESCRIPTION
Product Model
This is your ZyAIR B-5000 Outdoor Access Point & Bridge.
Software Version
This displays the most recent software upgrade number.
CPU
This displays the type and speed of the Central Processing Unit.
RAM
This displays the Random Access Memory of the ZyAIR.
Flash
This displays the nonvolatile storage that can be electrically erased and
reprogrammed so that data can be stored, booted and rewritten as
necessary.
Chipset
This displays the chip model.
Firmware Version
This displays the most recent firmware upgrade number.
Host Name
This is the host name for the Bridge and AP, High speed WLAN in this case.
Domain Name
This is the domain name for the Bridge and AP, domain.com.
Utility
22-3
ZyAIR B-5000 User’s Guide
Table 22-1 Utility General System Information
LABEL
DESCRIPTION
Primary_DNS
This is the IP address of the DNS Servers of your Local ISP.
Default Route
This is the IP address of the remote network or gateway. The gateway is an
immediate neighbor of your ZyAIR that will forward the packet to the
destination. On the LAN, the gateway must be a router on the same segment
as your ZyAIR; over the WAN, the gateway must be the IP address of one of
the remote nodes.
Operation Mode
This field shows the operation mode.
SSID
This is the Wireless LAN service set identifier of the ZyAIR (case sensitive).
Channel
This displays the operating radio frequency channel for the ZyAIR.
WEP
You can Enable or Disable WEP (Wired Equivalent Privacy) key to encrypt
data.
22.4 Uploading Software
Click UTILITY and select SOFTWARE UPGRADE to upgrade the ZyAIR’s firmware.
22.4.1 TFTP
Trivial File Transfer Protocol is an Internet file transfer protocol similar to FTP (File Transfer Protocol), but
it is scaled back in functionality so that it requires fewer resources to run. TFTP uses the UDP (User
Datagram Protocol) rather than TCP (Transmission Control Protocol as used in FTP).
22.4.2 Uploading a software file
Step 1.
Download the default configuration file from the ZyAIR TFTP server, unzip it and save it in a
folder.
Step 2.
Select UTILITY in the ZyAIR Web Configurator and click SOFTWARE UPGRADE. Enter
the IP Address of your computer on which your TFTP is installed.
Step 3.
Check the boxes for each upgrade file (they will all upgrade if you proceed by default).
Step 4.
Click OK, to begin the file upgrade.
22-4
Utility
ZyAIR B-5000 User’s Guide
Step 5.
A Software Upgrade Proceeding screen will appear. The ZyAIR automatically reboots after a
software upgrade.
Figure 22-3 Utility Software Upgrade
The following table describes the labels in this screen.
Table 22-2 Utility Software Upgrade
LABEL
DESCRIPTION
Upgrade Mode & TFTP Parameters
TFTP Server IPAddress
This is the IP address of the TFTP Server. You must therefore setup a TFTP
file with an IP address and at least one new image to upgrade, which has
been previously saved.
Select
Select the check boxes to select the upgrade file type.
Utility
22-5
ZyAIR B-5000 User’s Guide
Table 22-2 Utility Software Upgrade
LABEL
Upgrade Mode
DESCRIPTION
There are three types of images that can be upgraded, Program, Web and
Configuration Images.
Program Image: This is the ZyAIR firmware.
Web Image:
This is the web image file. This file should be uploaded with
the Program Image file.
Config Image:
This is the configuration file on the ZyAIR. Uploading this
file replaces the entire SOHO file system, including your ZyAIR
configurations, system-related data (including the default password), the error
log and the trace log.
Refer to the Firmware and Configuration File Maintenance Chapter.
Upgrade Filename
This displays the upgrade filenames.
soho.bin: This is a binary file of firmware.
pfs.img:
This is a web configurator image file.
soho.cfg: This is the ZyAIR configuration file.
OK
Click OK to start the upgrade.
CANCEL
Click CANCEL to begin configuring the Software Upgrade screen afresh.
22.5 Wireless Link Info
This screen is accessible for Remote Wireless Bridge in Bridge mode only.
The following screen is accessible only when the ZyAIR has been set as a Bridge in operating mode and as
a Remote Wireless Bridge (see Quick Setup chapter). After saving the configuration and restarting the
system, the Wireless Link Info will be available when you select UTILITY.
22-6
Utility
ZyAIR B-5000 User’s Guide
Figure 22-4 Utility Wireless Link Info Screen
The following table describes the labels in this screen.
Table 22-3 Utility Wireless Link Info
LABEL
DESCRIPTION
Current Wireless Link Information
Link Quality
This displays the link quality in decibels.
Signal strength
This displays the signal strength in decibels.
Current Tx Rate
This displays the transmission speed in bytes per second.
REFRESH
Click REFRESH to reload the Wireless Link Info table.
Utility
22-7
CONFIGURATION VIA TELNET, CONSOLE
Part VI:
CONFIGURATION VIA TELNET, CONSOLE
This part provides configuration information using Telnet or Console Port.
VI
ZyAIR B-5000 User’s Guide
Chapter 23
Accessing the ZyAIR via Telnet or
Console Port
This chapter introduces how to access the ZyAIR using Telnet or Console Port.
23.1 Telnet Overview
You can use a Telnet session to manage the ZyAIR.
23.2 Using Telnet Example
Follow these steps to access the ZyAIR using Telnet in the Windows 2000 operating system.
Step 1.
Click Start and Run….
Step 2.
Enter telnet, a space and the default IP address of the ZyAIR.
Step 3.
Click OK
Figure 23-1 Telnet Window
Accessing the ZyAIR via Telnet or Console Port
23-1
ZyAIR B-5000 User’s Guide
Step 4.
In the telnet window, enter the user name and user password as shown (user1 is the factory
default user name and test is the factory default user password) and press [ENTER] to see the
main screen as shown in Figure 23-3. See section 26.3 to change the user name and password.
User Name :
user1
User Password : ****
Figure 23-2 Login via Telnet
ZyAIR-B5000 RS232 Daemon
Version 1.5.8.200
------------------------------------------------------------------------------>> su
Change to superviser(root) mode
sys_info
Show system information
ping
Ping test
exit
Disable privilidge command or disconnect
-------------------------------------------------------- [ Privilege : USER ]
Command : su <password>
Message :
------------------------------------------------------------------------------'UP/DOWN' Move, 'RIGHT/LEFT' Select/Unselect, 'Home/End' Top/Bottom [^Q-Help]
Figure 23-3 Main Screen via Telnet
23-2
Accessing the ZyAIR via Telnet or Console Port
ZyAIR B-5000 User’s Guide
23.3 Console Overview
This section shows you how to access the ZyAIR using the console port and a terminal emulation
programme such as HyperTerminal. The console operation is set up as follows:
23.3.1 Console Port Connections
Step 1.
Connect the power cord to the inline power injector and power outlet.
Step 2.
Connect the "MIL-C-5015 style Ethernet cable" into the special Ethernet port on the bottom of
the ZyAIR.
Step 3.
Connect the "RJ-45 Ethernet connector into the POWER & DATA OUT port on the inline
power injector.
Step 4.
Use the "MIL-C-5015 style RS232 console port cable" to connect computer COM port and the
ZyAIR console port.
Step 5.
You can now access the ZyAIR via a terminal emulator such as HyperTerminal.
23.4 Accessing the ZyAIR via HyperTerminal Example
You can use HyperTerminal to access the configuration of the ZyAIR in the same way as the Telnet
session:
Step 1.
Click Start and then select Programs, Accessories, Communications, HyperTerminal.
Accessing the ZyAIR via Telnet or Console Port
23-3
ZyAIR B-5000 User’s Guide
Figure 23-4 HyperTerminal Access
Step 2.
23-4
After the HyperTerminal window appears, give a new connection a name, for example B-5000.
Accessing the ZyAIR via Telnet or Console Port
ZyAIR B-5000 User’s Guide
Figure 23-5 Connection Description
Step 3.
Select the COM port that is connected to the ZyAIR.
Figure 23-6 COM1 PORT
Accessing the ZyAIR via Telnet or Console Port
23-5
ZyAIR B-5000 User’s Guide
Step 4.
Set baud rate as 115200, data bit as 8, parity as None, stop bits as 1 and flow control as None.
Then click the OK button to bring up the HyperTerminal window (see Figure 23-7).
Figure 23-7 COM1 Properties
23-6
Accessing the ZyAIR via Telnet or Console Port
ZyAIR B-5000 User’s Guide
Step 5.
When you first enter HyperTerminal you will see a blank screen.
Figure 23-8 HyperTerminal
Accessing the ZyAIR via Telnet or Console Port
23-7
ZyAIR B-5000 User’s Guide
Step 6.
Type [ESC] to go to the status screen. This will reboot the ZyAIR. Figure 23-9 allows you to
enter the current network status, reset to defaults or reboot.
RUNTASK period_task...
RUNTASK dhcp_daemon...
RUNTASK telnetd_main...
RUNTASK httpd...
RUNTASK snmp_task...
RUNTASK 802dot1x...
RUNTASK Notify_Trap...
Starting Multitask...
Software Version : HWLAN 1.5.8.200
Current Network Status : Central Wireless Bridge
Bridge IP Address = 192.168.1.1
Ethernet:00090A020069 Wireless:00026F0553D0
Bridge MAC address cloned using wireless interface MAC
Wireless LAN Channel : 1 SSID : wireless
Press 's' or 'S' to show Current Network Status.
Press 'd' or 'D' to reset to default.
Press 'Esc' to reboot.
SNMP: SNMP_TRAP_warmStart OK!
Figure 23-9 Starting Console/Telnet Configuration
23-8
Accessing the ZyAIR via Telnet or Console Port
ZyAIR B-5000 User’s Guide
Step 7.
Enter the status screen by typing S or s.
Current Network Status : PPPoE based Central Wireless Router
Wireless Interface IP = 192.168.2.1
Wireless MAC Address [00-02-6F-05-53-D0]
Wireless LAN Channel : 1 SSID : wireless
Ethernet Interface IP = 192.168.1.1
Ethernet MAC Address [00-09-0A-02-00-69]
PPPoE Interface IP = 192.168.3.1
PPPoE MAC Address [00-09-0A-02-00-69]
Press 's' or 'S' to show Current Network Status.
Press 'd' or 'D' to reset to default.
Press 'Esc' to reboot.
Figure 23-10 System Status
Accessing the ZyAIR via Telnet or Console Port
23-9
ZyAIR B-5000 User’s Guide
Step 8.
To view the HyperTerminal console configuration, type r or R when you see it on the screen. If
you do not do this on time, you can press [ESC] to reboot and try again.
Loading exml.bin ...
Initializing extended memory ...
Loading usstart.bin ...
flash_to_exm(): Src=[00004000], Dest=[00070000], Size=0x000400
Total moved: 1024bytes
Loading soho.cfg ...
flash_to_exm(): Src=[00020000], Dest=[00200000], Size=0x020000
Total moved: 131072bytes
Loading soho.bin ...
flash_to_exm(): Src=[00040000], Dest=[00220000], Size=0x100000
Total moved: 1048576bytes
Loading pfs.img ...
flash_to_exm(): Src=[00180000], Dest=[00360000], Size=0x040000
Total moved: 262144bytes
Ready to run ...
If you want start Rs232 daemon, press 'r' or 'R' now
we will start rs232 daemon
Figure 23-11 Enter HyperTerminal Console Configuration
This will bring you to the SMT main screen, see next chapter for more information.
23-10
Accessing the ZyAIR via Telnet or Console Port
ZyAIR B-5000 User’s Guide
Chapter 24
SMT Main Screen
In this screen you can change the system configuration via supervisor mode, display system
information, ping a computer to test the connection or end the Telnet session.
24.1 SMT Main Screen Overview
You can access the following screen via Telnet or a terminal emulation programme such as HyperTerminal.
ZyAIR-B5000 RS232 Daemon
Version 1.5.8.200
------------------------------------------------------------------------------>> su
Change to supervisor(root) mode
sys_info
Show system information
ping
Ping test
exit
Disable privilidge command or disconnect
-------------------------------------------------------- [ Privilege : USER ]
Command : su <password>
Message :
------------------------------------------------------------------------------'UP/DOWN' Move, 'RIGHT/LEFT' Select/Unselect, 'Home/End' Top/Bottom [^Q-Help]
Figure 24-1 SMT Main Screen via Telnet or HyperTerminal
SMT Main Screen
24-1
ZyAIR B-5000 User’s Guide
Table 24-1 SMT Main Screen via Telnet or HyperTerminal
Control
Description
su
Select su by using the keyboard to go to the supervisor(root) mode. You will need
a supervisor password. The password is “1234” by factory default.
sys_info
Select sys_info by using the keyboard to view information on the current system
status.
ping
Select this by using the keyboard to test the connection between any device and
the ZyAIR.
exit
Select this by using the keyboard to disconnect from the telnet session.
Privilege
The SMT main menu has USER privileges, allowing access to system information.
If you go to the SU mode, you will have ROOT privileges. This allows you to
access the supervisor mode and configure the SU settings. If you select Enable in
SU mode, you will have CONF privileges. You can configure the ZyAIR from here.
Command
This is the command used to change the configuration of the selection.
Message
This help message displays information for the associated command above.
24.2 SMT Navigation Controls
The following table shows the keys required to navigate the SMT main menu.
Table 24-2 SMT Navigation Controls
KEY
DESCRIPTION
Use the following keys to navigate with the terminal window.
Up/Down or I/K key
Right or L or Enter
Left or J key
Use these keys to select an item or enter a sub-menu.
Use these keys to return to the previous menu.
Home or Ctrl A
Move the cursor to the first item of the menu page with these keys.
End or Ctrl A
Move the cursor to the last item of the menu page with these keys.
Ctrl Q or F1
24-2
Use these keys to navigate the cursor up or down and view options.
Use these keys to show the help page.
SMT Main Screen
ZyAIR B-5000 User’s Guide
24.3 SU Mode
See the next chapter for details.
24.4 System Information
You can select sys_info by using Right or L or [Enter] keys to review the general system information. See
Part V, UTILITY chapter for more on General System information.
ZyAIR-B5000 RS232 Daemon
Version 1.5.8.200
-----------------------------------------------------------------------------Status Window...
(1) General system information
Model
:
ZyAIR
Software Version : HWLAN 1.5.8.200
Build
:
CPU
:
RAM
Flash
Chipset
ELANSC400 at 66MHz
:
4MB
:
2MB
:
Intersil PRISM2
Firmware Version :
Server IP Address : 192.168.1.1
Hostname
:
HWLAN
Press Any Key to Return Menu Window...
Figure 24-2 Sys_info Mode
SMT Main Screen
24-3
ZyAIR B-5000 User’s Guide
Table 24-3 Sys_info Mode
LABEL
DESCRIPTION
Model
This is your ZyAIR B-5000 Outdoor Access Point & Bridge.
Software Version
This displays the most recent software upgrade number.
Build
This is the compilation number of this version.
CPU
This displays the type and speed of the Central Processing Unit.
RAM
This displays the Random Access Memory of the ZyAIR.
Flash
This displays the nonvolatile storage that can be electrically erased and
reprogrammed so that data can be stored, booted and rewritten as
necessary.
Chipset
This displays the chip model.
Firmware Version
This displays the most recent firmware upgrade number.
Server IP Address
This field displays the server IP address that the ISP assigns to the ZyAIR.
Host Name
This is the host name for the Bridge and Access Point, high speed WLAN in
this case.
24.5 Ping Test
The following screen shows the information required for a ping test.
Step 1.
Enter the IP address of the ZyAIR
Step 2.
Enter the number of packets that you want to send.
Step 3.
Enter the data size.
Command : ping <ip> [1~65534|-t] [1~1999]
Message : Please input the following information.
IP address <ip> :
Number of ping request packets to send (TAB Select) : None
Data size [1~1999] :
Figure 24-3 Ping Test
24-4
SMT Main Screen
ZyAIR B-5000 User’s Guide
Chapter 25
Supervisor Mode
This chapter introduces the SU mode of your ZyAIR.
25.1 Supervisor Mode Overview
Supervisor mode allows you to access the SMT configuration menu and allows you to make configuration
changes to the ZyAIR through submenus. Select su by using the Right or L or [ENTER] keys and keying
in the supervisor password (1234 is the factory default). Then press [ENTER].
See section Table 24-2 SMT Navigation Controls for a list of the command controls.
Supervisor Mode
25-1
ZyAIR B-5000 User’s Guide
ZyAIR-B5000 RS232 Daemon
Version 1.5.8.200
-----------------------------------------------------------------------------setup
Quick setup system configuration
upgrade
Upgrade system to new version
enable
Enable configuration mode
monitor
Monitor system running status
passwd
Change supervisor password
packet_filter
Packet filter rules manager
WLAN
Wireless LAN configuration
configuration Telnet/RS232 Configuration Setting
show
Showing system configuration
write
Write configuration and restart system
reboot
Restart system and activate new system configuration
su
Change to superviser(root) mode
sys_info
Show system information
ping
>> exit
Ping test
Disable privilidge command or disconnect
-------------------------------------------------------- [ Privilege : ROOT ]
Command : setup [more...]
Message :
-----------------------------------------------------------------------------'UP/DOWN' Move, 'RIGHT/LEFT' Select/Unselect, 'Home/End' Top/Bottom [^QFigure 25-1 Supervisor Mode
25-2
Supervisor Mode
ZyAIR B-5000 User’s Guide
All features relating to system status, resetting and rebooting can be found in the
su mode. Future connections in the same console session will go directly to
screen SMT Main menu. If you cannot remember your system password you will
have to disconnect and reconnect to the ZyAIR and open a new console
HyperTerminal session. You will then have to reset to default and reboot.
The SMT main menu allows USER privileges. The supervisor mode allows ROOT privileges. This means
that you can
View quick setup.
Upgrade the system to new version.
Enable configuration mode (CONF privileges).
Monitor the system running status.
Change the supervisor password.
View the packet filter rules manager.
View the wireless LAN configuration.
Check Telnet/RS232 Configuration Settings.
Show the system configuration.
Write a configuration and restart system.
Reboot the ZyAIR.
25.1.1 Enable configuration mode
The Enable configuration mode allows you to access more configuration submenus and allows you to make
configuration changes as you would in the web configurator. Select Enable by using the Right or L or
[ENTER] keys. See section Table 24-2 for a list of the command controls.
Enable configuration mode allows CONF or configuration privileges. The following figure shows the
menus available in Enable mode.
Supervisor Mode
25-3
ZyAIR B-5000 User’s Guide
ZyAIR-B5000 RS232 Daemon
>> setup
Version 3.5
Quick setup system configuration
upgrade
Upgrade system to new version
enable
Enable configuration mode
monitor
Monitor system running status
passwd
Change supervisor password
system
Generic system parameter configuration
interface
Interface parameter configuration
packet_filter Packet filter rules manager
ppp
PPP parameter configuration
isp
Dial-out ISP parameter configuration
ip_share
NAT parameter configuration
dhcp
DHCP parameter configuration
dhcp_clt
DHCP client configuration
dns_proxy
DNS Server parameter configuration
snmp
SNMP parameter configuration
tftp
Default TFTP parameter configuration
route
Routing parameter configuration
bridge
Transparent bridging parameter configuration
WLAN
Wireless LAN configuration
configuration Telnet/RS232 Configuration Setting
show
Showing system configuration
reset_default
Reset system configuration to default status
write
Write configuration and restart system
reboot
Restart system and activate new system configuration
su
Change to superviser(root) mode
sys_info
Show system information
ping
Ping test
exit
Disable privilidge command or disconnect
-------------------------------------------------------- [ Privilege : CONF ]
Figure 25-2 Enable Configuration Mode
25-4
Supervisor Mode
ZyAIR B-5000 User’s Guide
Chapter 26
Command Examples
This chapter gives information on the commands that are used in the SMT menus.
26.1 Command Syntax
Use of undocumented commands or misconfiguration can damage the unit and
possibly render it unusable.
The command keywords are in courier new font.
Enter the command keywords exactly as shown, do not abbreviate.
You must type in information, in the angle brackets <>.
Predefined selections are enclosed in angle brackets <> separated with the “|” symbol meaning “or”.
For example, System Bridge <Enable | Disable>
This means that you must specify whether to enable or disable the operating mode as a bridge or not.
The following are a list of tables that contain the configuration controls for the ZyAIR. These are accessed
through the supervisor configuration mode.
26.2 Commands Summary
The tables below list the commands necessary in the configuration of your ZyAIR.
Those selections marked by an * are available only when Enable mode has been
activated (see Enable configuration mode in the previous chapter).
Command Examples
26-1
ZyAIR B-5000 User’s Guide
Figure 26-1 Ping Test
Upgrade
IP address
Number of
ping request
packets to
send
Data Size
<ip>
< 1~65534 | -t >
< 1~1999 >
Figure 26-2 SU Setup
Setup
System
Host Name <name>
*Default_route <ip>
Lan
Address <ip> <netmask>
Attrib <Enable | Disable> <Global | Virtual>
Bridge <Enable | Disable>
Wan
Address <ip> <netmask>
Link_type <Disable | Ethernet | PPP | PPPoE>
Attrib <Enable | Disable> <Global | Virtual>
Bridge <Enable | Disable>
Ether_interface <interface>
ISP <ISP Index> <idle disconnect time> <Dial priority>
PPP
Peer_address <ip>
User_profile <name> <pass_set0>
ISP
*ISP_profile <ISP name> <ISP destination>
*account_profile <Access account> <Passwd>
Configuration
Passwd
26-2
<name> <pass_conf> <ip>
<pass_conf>
Command Examples
ZyAIR B-5000 User’s Guide
Figure 26-3 SU Upgrade
Upgrade
Image
<ip> <file>
Web_image
<ip> <file>
Bootstrap2
<ip> <file>
Figure 26-4 SU Enable
Enable
<Enable | Disable>
Figure 26-5 SU Monitor
Monitor
Route
(CR)
WAN
(CR)
Config_access
Filter_rule
[Generic | Profile | Pool]
<Enable | Disable>
Figure 26-6 SU *System
*System
OP_mode
<Router | Bridge | Host>
hostname
<name>
Figure 26-7 SU *Interface
*Interface
LAN 1
Address <ip> <netmask>
Link type <Disable | Ethernet>
Attrib <Disable | Enable> <Global | Virtual>
Bridge <Disable | Enable>
LAN 2
Address <ip> <netmask>
Link type <Disable | Ethernet>
Command Examples
26-3
ZyAIR B-5000 User’s Guide
Figure 26-7 SU *Interface
Attrib <Disable | Enable> <Global | Virtual>
Bridge <Disable | Enable>
WAN 1
Address <ip> <netmask>
Link type <Disable | Ethernet | PPP | PPPoE>
Attrib <Disable | Enable> <Global | Virtual>
Bridge <Disable | Enable>
Ether_interface <interface>
ISP <ISP Index> <dialup timeout> <Dial priority>
WAN 2
Address <ip> <netmask>
Link type <Disable | Ethernet | PPP | PPPoE>
Attrib <Disable | Enable> <Global | Virtual>
Bridge <Disable | Enable>
Ether_interface <interface>
ISP <ISP Index> <Idle disconnect time> <Dial priority>
Figure 26-8 SU Packet Filter
Packet
Filter
Module
Attrib <Disable | Enable>
Add
Protocol
Source
Destination
Delete
Reset_counter
26-4
<IP | TCP | UDP | ICMP >
add source <Any | ip> [Any |
netmask] [port]
add destination <Any | ip>
[Any | netmask] [port]
Delete <0~14>
reset_counter <0~14>
Command Examples
ZyAIR B-5000 User’s Guide
Figure 26-9 SU *PPP
PPP
Users_edit
Modify
(5)
Profile <name> <pass_set0>
Delete
Address_pool
Ip_pool <ip> <1~ 127>
Authenticate
<Userpool | RADIUS> <Userpool | RADIUS>
Assign_address
<Address_Pool | RADIUS> <Address_Pool |
RADIUS>
Figure 26-10 SU *ISP
*ISP
1
Isp_profile (ISP name) (destination string)
Account Profile (name) (pass – set 1)
2
Isp_profile (ISP name) (destination string)
Account Profile (name) (pass – set 1)
3
Isp_profile (ISP name) (destination string)
Account Profile (name) (pass – set 1)
4
Isp_profile (ISP name) (destination string)
Account Profile (name) (pass – set 1)
Figure 26-11 SU *IP_Share
IP_Share
PAT
Add
Protocol <TCPIUDP>
Port <1~65534>
Interface <1~2>
Server <ip> <1~65534>
Name <name>
Delete
Modify (10)
Command Examples
<1~10>
Protocol <TCPIUDP>
26-5
ZyAIR B-5000 User’s Guide
Figure 26-11 SU *IP_Share
Port <1~65534>
Interface <1~2>
Server <ip> <1~65534>
Name <name>
NAT
Local
Range <1~5> <ip> <1~253>
Delete <1~5>
Global
Range <1~5> <ip> <1~253>
Interface <1~5> <1~5>
Delete <1~5>
Fixed
Range <1~128> <ip> <ip>
Interface <1~128> <1~5>
Delete <1~128>
Figure 26-12 SU *DHCP
*DHCP
Generic
Service <Disable | Enable>
Interface <1~2>
Gateway <ip>
Netmask <netmask>
Ip range <ip> <number>
Name server 1 <ip>
Name server 2 <ip>
Name server 3 <ip>
Fixed
Add <mac> <ip>
Delete
Figure 26-13 SU *DHCP clt
*DHCP Clt
26-6
dhcp_clt interface <-1~4>
Command Examples
ZyAIR B-5000 User’s Guide
Figure 26-14 SU *DNS_proxy
*DNS_proxy
dns_proxy <ip> [ip] [ip]
Figure 26-15 SU *SNMP
*SNMP
Community (5)
Edit <Disable | Enable> <string> <Read_Only | Read_Write |
Denied>
Delete
Trap (5)
Edit <Disable | 1 | 2> <ip> <string>
Delete
The following mode allows you to change the setting of the upgrade TFTP address and to change the
upgrade file name (the default is soho.bin in UTILITY).
Figure 26-16 SU *TFTP
*TFTP
tftp <ip> <file>
Figure 26-17 SU *Route
*Route
Static
add <route_entry> <netmask> <ip>
delete <1~20>
Figure 26-18 *Bridge
*Bridge
Generic
Static
<Disable | Enable> <ip> <netmask>
Add
Mac-address <mac>
LAN1_port <Filter | Forward | Dynamic>
LAN2_port <Filter | Forward | Dynamic>
Command Examples
26-7
ZyAIR B-5000 User’s Guide
Figure 26-18 *Bridge
WAN1_port <Filter | Forward | Dynamic>
WAN2_port <Filter | Forward | Dynamic>
Delete (1~20)
Modify (20)
Mac-address <mac>
LAN1_port <Filter | Forward | Dynamic>
LAN2_port <Filter | Forward | Dynamic>
WAN1_port <Filter | Forward | Dynamic>
WAN2_port <Filter | Forward | Dynamic>
Figure 26-19 SU WLAN
WLAN
Channel <1~14>
WEPLevel <Disable | Enable>
Rts threshold <0~3000>
Frag threshold <256^2346>
SSID <string>
stationName
Defaultkeyld <1~4>
Defaultkeys <1~4> <hex>
Figure 26-20 SU Configuration
Configuration
Max_user
<1~5>
telnet_port
<1~65534>
26-8
Command Examples
ZyAIR B-5000 User’s Guide
Figure 26-20 SU Configuration
Console_port
<com 1 | com
2>
User_profile
Add
Attrib <13~30><command |
Menu><VT100 |ANSI | LINUX | X Term>
Source <-1~10>
Profile <name> <pass_conf> <Level 1 |
Level 2 | Level 3 | Unlimited
Delete (1~5)
Attrib <13~30><command |
Menu><VT100 |ANSI | LINUX | X Term>
Source <-1~10>
Profile <name> <pass_conf> <Level 1 |
Level 2 | Level 3 | Unlimited>
Modify
Attrib <13~30><command |
Menu><VT100 |ANSI | LINUX | X Term>
Source <-1~10>>
Profile <name> <pass_conf> <Level 1 |
Level 2 | Level 3 | Unlimited>
Legal - address
Modify
<1~10> <ip>
Delete
<1~10>
Figure 26-21 SU *Show
*Show
Interface
PPP
Ip_share
Dhcp
Dhcp_clt
Snmp
Command Examples
26-9
ZyAIR B-5000 User’s Guide
Figure 26-21 SU *Show
Route
Bridge
Isp
Run
Configuration
26.3 Changing Your Password
We recommend changing your password for security purposes. The web configurator and SMT menu
username and passwords should be changed initially. The SMT su mode password can be changed in su
mode in the SMT.
The following Figure 26-22 shows the Supervisor ID and Supervisor Password found in the web
configurator BASIC CONFIG, Basic Configuration – System Setup.
Figure 26-22 Login Username, Password Change
The following Figure 26-23 shows the User Name and User Password found in the web configurator
BASIC CONFIG, Telnet/Console, Configuration Parameters and Modify.
26-10
Command Examples
ZyAIR B-5000 User’s Guide
Figure 26-23 SMT Username, Password Change
The following table gives information on password defaults and where they can be changed.
Table 26-1 Password Information
DEFAULT USERNAME
DEFAULT PASSWORD
admin
user1
Command Examples
ACCESS
CHANGE LOCATION
1234
Web configurator
Basic Configuration –
System Setup
test
SMT Sys_info and Ping
Web Configurator –
BASIC CONFIG,
Telnet/Console,
Configuration
Parameters, Modify.
1234
SMT Configurator
passwd selection in
Telnet or Console SMT
su mode
26-11
ZyAIR B-5000 User’s Guide
Chapter 27
Firmware and Configuration File
Maintenance
This chapter tells you how to back up and restore your configuration file as well as upload new
firmware and a new configuration file using the SMT.
27.1 Filename Conventions
The configuration file contains the factory default settings in the menus such as password, DHCP Setup,
TCP/IP Setup, etc. It arrives from ZyXEL with a “cfg” filename extension. Once you have customized the
ZyAIR's settings, they can be saved back to your computer under a filename of your choosing.
The system firmware and has a “bin” filename extension.
If your TFTP client does not allow you to have a destination filename different than the source, you will
need to rename them as the ZyAIR only recognizes “soho” and “pfs”. Be sure you keep unaltered copies of
both files for later use.
The following table is a summary. Please note that the internal filename refers to the filename on the
ZyAIR and the external filename refers to the filename not on the ZyAIR, that is, on your computer, local
network or FTP site and so the name (but not the extension) may vary.
Table 27-1 Filename Conventions
FILE TYPE
Configuration
File
INTERNAL NAME
Soho.cfg
Firmware and Configuration File Maintenance
EXTERNAL NAME
This is the configuration filename on the
ZyAIR. Uploading this file replaces the
entire SOHO file system, including your
ZyAIR configurations, system-related data
(including the default password), the error
log and the trace log.
27-1
ZyAIR B-5000 User’s Guide
FILE TYPE
Firmware
INTERNAL NAME
EXTERNAL NAME
Soho.bin
This is the generic name for the firmware
on the ZyAIR.
Pfs.img
This is the name of the web image file.
27.1.1 TFTP and Telnet over WAN Will Not Work When
TFTP, FTP and Telnet over WAN will not work when:
1.
The IP address of the network device connected to the port does not match the client IP. If it does not
match, the ZyAIR will disconnect the Telnet session immediately.
2.
You have an SMT console session running.
27.2 Backup Configuration
When you upload new software, your configuration is lost.
Perform a configuration backup before you upload the software and configuration
restore after you upload the software.
Backup is highly recommended once your ZyAIR is functioning properly. Any serial communications
program should work fine; however, you must use 1K Xmodem protocol to perform the download/upload
and you don’t have to rename the files.
Please note that terms “download” and “upload” are relative to the computer. Download means to transfer
from the ZyAIR to the computer, while upload means from your computer to the ZyAIR.
WARNING!
Do not interrupt the file transfer process as this may PERMANENTLY DAMAGE
YOUR ZyAIR. When the Backup Configuration process is complete, the ZyAIR will
automatically restart.
27-2
Firmware and Configuration File Maintenance
ZyAIR B-5000 User’s Guide
27.2.1 Backup Configuration Example Using HyperTerminal
The ZyAIR supports the up/downloading of configuration files using TFTP (Trivial File Transfer Protocol)
over LAN. Although TFTP should work over WAN as well, it is not recommended.
To use TFTP, your computer must have both telnet and TFTP clients. To backup the configuration file,
follow the procedure shown next.
Use telnet from your computer to connect to the ZyAIR and log in. Because TFTP does not have any
security checks, the ZyAIR records the IP address of the telnet client and accepts TFTP requests only from
this address. Follow these steps to save the ZyAIR’s configuration file on your computer.
Step 1.
Enter HyperTerminal and type [ESC] to go to the status screen. This will reboot the ZyAIR.
Step 2.
When the HyperTerminal screen shows EDORAM Testing, enter X to go to a console mode.
Erase OK!!
now rebooting...
NE2000: shutdown [ifno=2 irno=5]
hwlan_shut
LOOPBACK device 0 SHUTDOWN!
ABCDEFGHIJK1234LM
BIOS DATE 04/22/2002
BIOS Version 1.01
EDORAM Testing 2400KB
Figure 27-1 File Download
Step 3.
A cursor appears. Type GETSC and press [ENTER]. When Ready to send soho.cfg appears
you will need to transfer the file.
Firmware and Configuration File Maintenance
27-3
ZyAIR B-5000 User’s Guide
Type a location for storing the
configuration file or click Browse to
look for one.
Choose the 1K Xmodem protocol.
Then click Receive.
Figure 27-2 Receive File Select Protocol
Step 4.
Click Transfer and Receive File in the Hyperterminal window.
Step 5.
Choose the folder name where you want to save the configuration file using the Browser.
Step 6.
Set the receiving protocol as a 1K Xmodem. Click Receive.
Step 7.
Type a Filename and click OK. This name does not have to be soho.cfg, but must have a .cfg
filename extension.
This displays a location for storing
the configuration file.
Type a filename for storing the file
with a .cfg extension.
Then click OK.
Figure 27-3 Receive Filename
The following message appears. The configuration file has now been saved on your computer.
27-4
Firmware and Configuration File Maintenance
ZyAIR B-5000 User’s Guide
-Getsc
Ready to send soho.cfg ... Complete!!
Figure 27-4 File Backup Complete
27.3 Restore Configuration Example Using HyperTerminal
This section shows you how to restore a previously saved configuration. Note that this function erases the
current configuration before restoring a previous back up configuration; please do not attempt to restore
unless you have a backup configuration file stored on disk.
Please note that you must wait for the system to automatically restart after the file transfer is complete.
Step 1.
Enter HyperTerminal and type [ESC] to go to the status screen. This will reboot the ZyAIR.
Step 2.
When the HyperTerminal screen shows EDORAM Testing, enter X to go to a console mode.
Step 3.
A cursor appears. Type DLSC and press [ENTER].
Step 4.
When CCC…… appears you will need to restore the file.
Step 5.
Click Transfer and Send File in the Hyperterminal window.
Step 6.
Choose the file name that you want to restore using the Browser. The file name has a .cfg
extension.
Step 7.
Set the sending protocol as a 1K Xmodem.
Step 8.
Click Send.
Step 8.
Click OK.
A file upgrade complete message will appear. Your configuration file has been successfully restored.
Firmware and Configuration File Maintenance
27-5
ZyAIR B-5000 User’s Guide
Type the configuration file’s
location, or click Browse to search
for it.
Choose the 1K Xmodem protocol.
Then click Send.
Figure 27-5 File Restore
-dlsc
Download SOHO.CFG ...
Start Address: 20000 ,Size: 20000
Erasing flash sector #01(20000) ... done
Wait 60 seconds to select binary file ...
CCC
XMODEM End of Transfer
SOHO.CFG Upgrade Complete!
Figure 27-6 File Restore Confirmation
WARNING!
Do not interrupt the file transfer process as this MAY PERMANENTLY DAMAGE
YOUR ZyAIR. When the Restore Configuration process is complete, the ZyAIR will
automatically restart.
27-6
Firmware and Configuration File Maintenance
ZyAIR B-5000 User’s Guide
27.4 Uploading Software
This section shows you how to upload software.
WARNING!
Do not interrupt the file transfer process as this may PERMANENTLY DAMAGE
YOUR ZyAIR.
27.5 Example 1K Xmodem Firmware Upload Using
HyperTerminal
The ZyAIR supports the uploading of firmware files using TFTP (Trivial File Transfer Protocol) over LAN.
Although TFTP should work over WAN as well, it is not recommended.
To use TFTP, your computer must have both telnet and TFTP clients. To transfer the firmware and the
configuration file, follow the procedure shown next. This procedure is a HyperTerminal example. The
procedure for other serial communications programs should be similar.
Use telnet from your computer to connect to the ZyAIR and log in. Because TFTP does not have any
security checks, the ZyAIR records the IP address of the telnet client and accepts TFTP requests only from
this address.
Follow these steps to upload a new firmware file from your computer to the ZyAIR.
Step 1.
Enter HyperTerminal and type [ESC] to go to the status screen. This will reboot the ZyAIR.
Step 2.
When the HyperTerminal screen shows EDORAM Testing, enter X to go to a console mode.
Step 3.
Type DLS and press [ENTER].
Firmware and Configuration File Maintenance
27-7
ZyAIR B-5000 User’s Guide
ABCDEFGHIJK1234LM
BIOS DATE 04/22/2002
BIOS Version 1.01
EDORAM Testing 4096KB
Ethernet ID READ SUCCESS
Clock Rate is 66MHz
À
Loading exml.bin ...
Loading Xmodem.bin ...
Identifying Flash ROM ... "MX29F1610A"
-dlx
Download X.BIN ...
Start Address: 0 ,Size: 20000
Wait 60 seconds to select binary file ...
CCCCCCCCCCCCCCCCCCCC
Figure 27-7 File Upload
Step 4.
When “CCC...” appears, select Transfer and Send File in the HyperTerminal window
Step 5.
Set Protocol as 1K Xmodem.
Step 6.
Type the correct filename SOHO.BIN and path.
Step 7.
Click Send to start the firmware upload.
When this is successful proceed to the following image file upload section.
27-8
Firmware and Configuration File Maintenance
ZyAIR B-5000 User’s Guide
Type the configuration file’s
location, or click Browse to search
for it.
Choose the 1K Xmodem protocol.
Then click Send.
Figure 27-8 Example Firmware Upload
27.6 Example 1K Xmodem Image File Upload Using
HyperTerminal
The image file must be uploaded after you upload the software file.
Step 1.
Type DLP and press [ENTER].
Step 2.
When “CCC...” appears, select Transfer and Send File in the Hyperterminal window.
Step 3.
Set Protocol as 1K Xmodem.
Step 4.
Type the correct filename PFS.IMG and path.
Step 5.
Click Send to start configuration image restore.
When this is successful close the HyperTerminal window to exit.
Firmware and Configuration File Maintenance
27-9
ZyAIR B-5000 User’s Guide
Type the configuration file’s
location, or click Browse to search
for it.
Choose the 1K Xmodem protocol.
Then click Send.
Figure 27-9 Example Image File Upload
27.7 Resetting Your ZyAIR
If you forget your system password you may have to reset your ZyAIR to factory defaults. To reset your
ZyAIR to factory defaults, enter a console session and the Terminal emulation console.
Step 1.
Enter HyperTerminal and type [ESC] to go to the status screen. This will reboot the ZyAIR.
Step 2.
Type d or D to reset.
Press 's' or 'S' to show Current Network Status.
Press 'd' or 'D' to reset to default.
Press 'Esc' to reboot.
Figure 27-10 Resetting Your ZyAIR
Step 3.
You will be given a choice to erase configuration to default.
Step 4.
Type y and [ENTER] to reset to the default configuration.
27-10
Firmware and Configuration File Maintenance
ZyAIR B-5000 User’s Guide
Are you sure to clear config to default and reboot (y/n)?
Do not erase config to default...
Figure 27-11 Resetting To Default
Firmware and Configuration File Maintenance
27-11
FIREWALL
Part VII:
FIREWALL
This part introduces firewalls in general and the ZyAIR firewall.
VII
ZyAIR B-5000 User’s Guide
Chapter 28
Firewall
This chapter shows you how to configure your ZyAIR firewall.
28.1 Background Information
Originally, the term firewall referred to a construction technique designed to prevent the spread of fire from
one room to another. The networking term “firewall” is a system or group of systems that enforces an accesscontrol policy between two networks. It may also be defined as a mechanism used to protect a trusted
network from an untrusted network. Of course, firewalls cannot solve every security problem. A firewall is
one of the mechanisms used to establish a network security perimeter in support of a network security policy.
It should never be the only mechanism or method employed. For a firewall to guard effectively, you must
design and deploy it appropriately. This requires integrating the firewall into a broad information-security
policy. In addition, specific policies must be implemented within the firewall itself.
28.2 Firewall Overview
The web configurator has a comprehensive firewall configuration tool. Enter the FIREWALL link to
navigate to the Tutorial screen Figure 28-1. This screen describes the general firewall settings, access control
and denial of service function. Note that the denial of service function can be viewed only when the ZyAIR
has been saved as a wireless router.
Firewall
28-1
ZyAIR B-5000 User’s Guide
Figure 28-1 Firewall Tutorial Screen
28.3 Introduction to ZyXEL’s Firewall
The ZyAIR firewall is designed to protect against Denial of Service attacks. The ZyAIR’s purpose is to allow
a private Local Area Network (LAN) to be securely connected to the Internet. The ZyAIR can be used to
prevent theft, destruction and modification of data, as well as log events, which may be important to the
security of your network. The ZyAIR also has packet-filtering capabilities.
28.4 Denial of Service
Denials of Service (DoS) attacks are aimed at devices and networks with a connection to the Internet. Their
goal is not to steal information, but to disable a device or network so users no longer have access to network
resources. The ZyAIR is pre-configured to automatically detect and thwart all known DoS attacks.
28-2
Firewall
ZyAIR B-5000 User’s Guide
28.4.1 Basics
Computers share information over the Internet using a common language called TCP/IP. TCP/IP, in turn, is a
set of application protocols that perform specific functions. An “extension number”, called the "TCP port" or
"UDP port" identifies these protocols, such as HTTP (Web), FTP (File Transfer Protocol), POP3 (E-mail),
etc. For example, Web traffic by default uses TCP port 80.
When computers communicate on the Internet, they are using the client/server model, where the server
"listens" on a specific TCP/UDP port for information requests from remote client computers on the network.
For example, a Web server typically listens on port 80. Please note that while a computer may be intended
for use over a single port, such as Web on port 80, other ports are also active. If the person configuring or
managing the computer is not careful, a hacker could attack it over an unprotected port.
Some of the most common IP ports are:
Table 28-1 Common IP Ports
21
FTP
53
DNS
23
Telnet
80
HTTP
25
SMTP
110
POP3
28.4.2 Types of DoS Attacks
There are four types of DoS attacks:
1.
Those that exploit bugs in a TCP/IP implementation.
2.
Those that exploit weaknesses in the TCP/IP specification.
3.
Brute-force attacks that flood a network with useless data.
4.
IP Spoofing.
5.
IP Zero Length
1.
"Ping of Death" and "Teardrop" attacks exploit bugs in the TCP/IP implementations of various
computer and host systems.
1-a Ping of Death uses a "ping" utility to create an IP packet that exceeds the maximum 65,536
bytes of data allowed by the IP specification. The oversize packet is then sent to an unsuspecting
system. Systems may crash, hang or reboot.
1-b Teardrop attack exploits weaknesses in the reassembly of IP packet fragments. As data is
transmitted through a network, IP packets are often broken up into smaller chunks. Each fragment
looks like the original IP packet except that it contains an offset field that says, for instance, "This
fragment is carrying bytes 200 through 400 of the original (non fragmented) IP packet." The
Firewall
28-3
ZyAIR B-5000 User’s Guide
Teardrop program creates a series of IP fragments with overlapping offset fields. When these
fragments are reassembled at the destination, some systems will crash, hang, or reboot.
2.
Weaknesses in the TCP/IP specification leave it open to "SYN Flood" and "LAND" attacks. These
attacks are executed during the handshake that initiates a communication session between two
applications.
Figure 28-2 Three-Way Handshake
Under normal circumstances, the application that initiates a session sends a SYN (synchronize) packet to the
receiving server. The receiver sends back an ACK (acknowledgment) packet and its own SYN, and then the
initiator responds with an ACK (acknowledgment). After this handshake, a connection is established.
2-a SYN Attack floods a targeted system with a series of SYN packets. Each packet causes the
targeted system to issue a SYN-ACK response. While the targeted system waits for the ACK that
follows the SYN-ACK, it queues up all outstanding SYN-ACK responses on what is known as a
backlog queue. SYN-ACKs are moved off the queue only when an ACK comes back or when an
internal timer (which is set at relatively long intervals) terminates the three-way handshake. Once
the queue is full, the system will ignore all incoming SYN requests, making the system unavailable
for legitimate users.
28-4
Firewall
ZyAIR B-5000 User’s Guide
Figure 28-3 SYN Flood
2-b In a LAND Attack, hackers flood SYN packets into the network with a spoofed source IP
address of the targeted system. This makes it appear as if the host computer sent the packets to
itself, making the system unavailable while the target system tries to respond to itself.
3.
A brute-force attack, such as a "Smurf" attack, targets a feature in the IP specification known as
directed or subnet broadcasting, to quickly flood the target network with useless data. A Smurf hacker
floods a router with Internet Control Message Protocol (ICMP) echo request packets (pings). Since the
destination IP address of each packet is the broadcast address of the network, the router will broadcast
the ICMP echo request packet to all hosts on the network. If there are numerous hosts, this will create a
large amount of ICMP echo request and response traffic. If a hacker chooses to spoof the source IP
address of the ICMP echo request packet, the resulting ICMP traffic will not only clog up the
"intermediary" network, but will also congest the network of the spoofed source IP address, known as
the "victim" network. This flood of broadcast traffic consumes all available bandwidth, making
communications impossible.
Firewall
28-5
ZyAIR B-5000 User’s Guide
Figure 28-4 Smurf Attack
4.
5.
Often, many DoS attacks also employ a technique known as "IP Spoofing" as part of their attack. IP
Spoofing may be used to break into systems, to hide the hacker's identity, or to magnify the effect of the
DoS attack. IP Spoofing is a technique used to gain unauthorized access to computers by tricking a
router or firewall into thinking that the communications are coming from within the trusted network. To
engage in IP spoofing, a hacker must modify the packet headers so that it appears that the packets
originate from a trusted host and should be allowed through the router or firewall. The ZyAIR blocks all
IP Spoofing attempts.
An IP Zero Length Attack is the use of data sizes zero times a normal packet to flood the
communications that are coming from within a trusted network. These data packets are checked and the
victim network wastes time in attempting to do so.
28.5 Enabling the Firewall
The default rules allow LAN-to-WAN traffic and return traffic from the WAN when the connection initiated
from the LAN. You may allow traffic initiated from the WAN by configuring port-forwarding rules
discussed in section 28.6. Click FIREWALL and GENERAL to open the General Parameters screen.
28-6
Firewall
ZyAIR B-5000 User’s Guide
Figure 28-5 Firewall General Parameters
The following table describes the labels in this screen.
Table 28-2 Firewall General Parameters
LABEL
DESCRIPTION
Web Manager on
PORT
Type the port through which you can access the web configurator to manage your
ZyAIR. 2000 is the factory default.
For example, if your IP address is 192.168.1.1 and web manager port is specified as
2000. Connect to http://192.168.1.1:2000/ to enter the web configurator.
Disable Remote
Manager from
WAN Side
Select this to disallow web configurator access from the WAN. By default, you
connect to web configurator System Setup page from the WAN side or the LAN side
(wireless LAN).
Disable Ping
from WAN Side
Select this to not respond to pings from any host on the WAN side.
FINISH
Click FINISH to save your changes back to the ZyAIR.
CANCEL
Click CANCEL to begin configuring this screen afresh.
28.6 Firewall Access Control
Use the firewall’s access control feature to enable rules for source and destination IP addresses, net masks
and port services.
Firewall
28-7
ZyAIR B-5000 User’s Guide
28.6.1 TCP
Transmission Control Protocol is a connection-oriented transport service that ensures the reliability of
message delivery. It verifies that messages and data were received.
28.6.2 UDP
User Datagram Protocol (UDP) is a connectionless transport service that dispenses with the reliability
services provided by TCP. UDP gives applications a direct interface with the Internet Protocol (IP) and the
ability to address a particular application process running on a host via a port number without setting up a
connection session.
28.6.3 ICMP
Internet Control Message Protocol is a message control and error-reporting protocol between a host server
and a gateway to the Internet ICMP uses Internet Protocol (IP) datagrams, but the messages are processed by
the TCP/IP software and are not directly apparent to the application user.
28.6.4 IP
Internet Protocol (IP) is the underlying protocol for routing packets on the Internet and other TCP/IP-based
networks.
28.6.5 Configuring Firewall Access Control
Click FIREWALL and then ACCESS CONTROL to open the Firewall Config. – Access Control screen
(see Figure 28-6). Use this screen to enable firewall access control.
28-8
Firewall
ZyAIR B-5000 User’s Guide
Figure 28-6 Firewall Config Access Control
The following table describes the labels in this screen.
Table 28-3 Firewall Config Access Control
LABEL
DESCRIPTION
Access Control
Activation
Select the radio button to Enable or Disable firewall access control. If you select
Disable then the ZyAIR will not use firewall services, even if the On is selected in the
source and destination addresses and a protocol and action has been selected.
On
Select the check box for each entry that requires access control. Access control will
be made available only if the Access Control Activation radio button is set to
Enable.
Source
Source of data transmission, LAN or WAN.
Firewall
28-9
ZyAIR B-5000 User’s Guide
Table 28-3 Firewall Config Access Control
LABEL
DESCRIPTION
IP
Netmask
Port
Destination
Netmask
Port
Action
Enter the source subnet mask or range of subnet masks to which this firewall rule
applies. Please note that a blank subnet mask is equivalent to any subnet mask.
Enter the port number range that defines the service. This range is between 1 and
65535. For example, suppose you want to define the Gnutella service. Select TCP
type and enter a port range from 6345-6349.
Destination of data transmission, LAN or WAN.
IP
Protocol
Enter the source IP addresses or range of addresses to which this firewall rule
applies. Please note that a blank source address is equivalent to any address.
Enter the destination IP addresses or range of addresses to which this firewall rule
applies. Please note that a blank destination address is equivalent to any number of
addresses.
Enter the destination subnet mask or range of subnet masks to which this firewall
rule applies. Please note that a blank subnet mask is equivalent to any number of
subnet masks.
Enter the port number range that defines the service. This range is between 1 and
65535. For example, suppose you want to define the Gnutella service. Select TCP
type and enter a port range from 6345-6349.
Select the network language to be used, by choosing from the drop-down list.
Choose from
•
TCP Transmission Control Protocol
•
UDP User Datagram Protocol
•
ICMP Internet Control Message Protocol
•
IP Internet Protocol
Select either
•
Deny The ZyAIR will block packets which match the specific firewall rule
•
Accept The ZyAIR will let packets pass through – port forwarding
•
Count The ZyAIR will let packets pass through and count the number of
packets and bytes.
Count
(Packet/Byte)
The number of packets and the number of bytes moving from source to destination
address. These are logged in the Count column.
FINISH
Click FINISH to save your changes back to the ZyAIR.
28-10
Firewall
ZyAIR B-5000 User’s Guide
Table 28-3 Firewall Config Access Control
LABEL
CANCEL
DESCRIPTION
Click CANCEL to begin configuring this screen afresh.
28.7 Anti – Denial of Service
This screen is accessible for router modes only.
See the section 28.4 for information on the following web configurator screen.
Figure 28-7 Firewall Config Denial of Service
Table 28-4 Firewall Config Denial of Service
LABEL
DESCRIPTION
Please Choose the Following Denial of Services
Reject Land
Attack
Select this to prevent hackers from flooding the network with spoofed source IP
addresses of the targeted system.
Reject IP Zero
Length Attack
Select this to prevent hackers from flooding the network with packets with data sizes
of zero.
Firewall
28-11
ZyAIR B-5000 User’s Guide
Table 28-4 Firewall Config Denial of Service
LABEL
DESCRIPTION
Reject IP Spoofing
Attack
Select this to prevent "IP Spoofing" which may be used to break into systems, to hide
the hacker's identity, or to magnify the effect of the DoS attack.
Reject Smurf
Attack
Select this to prevent a "Smurf" attack that quickly floods the target network with
useless data.
FINISH
Click FINISH to save your changes back to the ZyAIR.
CANCEL
Click CANCEL to begin configuring this screen afresh.
28-12
Firewall
APPENDICES
Part VIII:
APPENDICES
This part provides contains further information on Site Planning and Site Installation, Setting up
Your Computer’s IP Address, Wireless LAN With IEEE 802.1x, Types of EAP Authentication,
Troubleshooting, Technical Specifications, Power Adapter Specifications, Approvals, Packaging
Specifications and Index.
ZyAIR B-5000 User’s Guide
Appendix A
Site Planning
This appendix provides information on site planning requirements for the installation of your
ZyAIR.
Introduction
The installation of a wireless network requires some additional planning over a wired network. This
planning includes RF (Radio Frequency) path planning, site preparation, and installation of outdoor
components such as outdoor units, antennas, lightning protection devices, and cabling suitable for outdoor
conditions. Furthermore, you also need to investigate the zoning laws as well as Federal Communications
Commission (FCC) and European Telecommunications Standards Institute (ETSI).
The technology implemented in this wireless bridge system can make use of multi-path signals, reducing
the effect of obstructions, however, it is important that the characteristics of the path be carefully examined.
With this knowledge, components and network requirements can be correctly planned for your specific
application.
This Appendix provides insight into the planning necessary to prepare your site for your outdoor wireless
bridge.
General Considerations
A basic consideration is the physical location of the sites at each end of the link. Because microwave
signals travel in a straight line, a clear line of sight between antennas is ideal. Frequently, however, the
locations of the desired links are fixed. When a clear line of sight cannot be achieved, you have to plan
accordingly.
Other general site considerations include:
Is there a structure in-situ already on which you can mount the ZyAIR or would you be required to
construct one i.e. a mast for the sole purpose of mounting the ZyAIR?
Would there be permit requirements for this?
Possibility of future obstructions
If trees grow too high will they interfere with the signal?
Are there plans to erect buildings between the sites, which may inadvertently obstruct the
signal path?
Site Planning
A-1
ZyAIR B-5000 User’s Guide
Availability of grounding, good grounding is important in all areas of the world, but in areas prone
to lightning, it is especially critical.
Whether or not strong RF interference exists in the neighborhood, within or adjacent to the
operating frequency.
Specific Considerations
The following information will help you determine site characteristics that are most applicable to your
outdoor wireless bridge and the actions that should be taken.
Weather
It is important to research any unusual weather conditions that are common to the site location. These
conditions include extreme
Rainfall
Fog
Wind
Temperature Ranges.
If extreme conditions exist that may affect the integrity of the radio link, the effects of these conditions
should be considered early in the planning process.
Rainfall
The system discussed in this guide operates at frequencies below 6 GHz, so rain is not a concern.
Except in extreme conditions, attenuation (weakening of the signal) due to rain does not present a serious
problem for frequencies up to the range of 6 to 8 GHz. When microwave frequencies are at 11 GHz and
above, attenuation due to rain becomes more of a concern, especially in areas where rainfall is of high
density and long duration. If this is the case, shorter paths may be required.
Fog
In most cases, the effects of fog are considered to be much the same as rain.
However, fog can adversely affect the radio link when it is accompanied by atmospheric conditions such as
temperature inversion, or very still air accompanied by stratification.
Temperature inversion can negate clearances. Temperature inversions and stratification can cause
ducting, which may increase the potential for interference between systems that do not normally
interfere with each other.
Stratification along with still air can cause severe refractive or reflective conditions with
unpredictable results.
A-2
Site Planning
ZyAIR B-5000 User’s Guide
Where either of these conditions exists, shorter paths and adequate clearances are recommended.
Wind
Any system components mounted outdoors will be subject to the effect of wind. It is important to know the
direction and velocity of the wind common to the site. The mounting structure must be able to withstand
these forces as well as protect against damage to the wireless bridge components.
Antenna designs react differently to wind forces, depending on the location. This is known as wind
loading. Most antenna manufacturers will specify wind loading for each type of antenna manufactured.
Temperature Ranges
Temperature can adversely affect the radio link when phenomena such as temperature inversion or very
still air accompanied by stratification occur
See paragraph on Fog for further detail.
Lightning
The potential for lightning damage to radio equipment should always be considered when planning a
wireless link. There are a variety of lightning protection and grounding devices, whether located inside or
outside the site, which could be potentially damaged by a lightning strike.
Lightning protection requirements are based on the level of site exposure, the cost in the event of a link
downtime, local building codes and electrical codes. If the link is critical and the site is in an active
lightning area, attention to thorough lightning protection and grounding is critical.
Lightning Protection
To provide adequate lightning protection,
Install antennas in locations that are unlikely to receive direct lightning strikes.
Install lightning rods to protect antennas from direct strikes.
Make sure that cables and equipment are properly grounded to provide low-impedance paths for
lightning currents.
Install surge suppressors on telephone lines and power lines.
Interference
An important part of planning your Outdoor Wireless Bridge is the avoidance of interference.
Effects within the system or outside the system can cause interference. Good planning for frequencies and
antennas can overcome most interference challenges.
Site Planning
A-3
ZyAIR B-5000 User’s Guide
Co-Channel and Adjacent Channel Interference
Co-channel interference results when another RF link is using the same channel frequency.
Adjacent-channel interference results when another RF link is using an adjacent channel frequency.
A spectrum analyzer can be used to determine if there is any strong signals present at the site and determine
how close they are to the desired frequency. The further away from your proposed frequency, the less likely
they are to cause a problem.
Antenna placement and polarization, is the most effective method of reducing this type of interference.
Antennas
Antennas play a key role in reducing the potential for interference. They come in a variety of
configurations that have different performance characteristics in the areas of gain and direction. Antennas
that transmit/receive in all directions are known as omni-directional, while those that transmit/receive in
one specific direction are categorized as directional.
Antennas are tuned to operate on a specific group of frequencies. The manufacturer also fixes other specific
attributes such as beam width and gain. Antennas should be selected and placed according to your site and
your application.
In general, the larger the antenna, the higher the gain and the larger the mast required. It is best to use the
smallest antenna that will provide sufficient protection from interference and enough signals at the far end
of the link to provide good reception even with fading.
Antenna Characteristics
Frequency
An antenna in the frequency of 2.4GHz (IEEE 802.11b) or 5GHz(IEEE 802.11a) is needed to
communicate efficiently in a wireless LAN.
Radiation Pattern
A radiation pattern is a diagram that allows you to visualize the shape of the antenna’s coverage
area.
Antenna Gain
Antenna gain, measured in dB (decibel), is the increase in coverage within the RF beam width.
Higher antenna gain improves the range of the signal for better communications.
For an indoor site, each 1 dB increase in antenna gain results in a range increase of approximately
2.5%. For an unobstructed outdoor site, each 1dB increase in gain results in a range increase of
approximately 5%. Actual results may vary depending on the network environment.
A-4
Site Planning
ZyAIR B-5000 User’s Guide
Antenna gain is sometimes specified in dBi, which is how much the antenna increases the signal power
compared to using an isotropic antenna. An isotropic antenna is a theoretical perfect antenna that sends
out radio signals equally well in all directions. dBi represents the true gain that the antenna provides.
Types of Antennas For WLAN
There are two types of antennas used for wireless LAN applications.
Omni-directional antennas send the RF signal out in all directions on a horizontal plane. The
coverage area is torus-shaped (like a donut) which makes these antennas ideal for a room
environment. With a wide coverage area, it is possible to make circular overlapping coverage areas
with multiple access points.
Directional antennas concentrate the RF signal in a beam, like a flashlight. The angle of the beam
width determines the direction of the coverage pattern; typically ranges from 20 degrees (less
directional) to 90 degrees (very directional). The directional antennas are ideal for hallways and
outdoor point-to-point applications.
Antenna Polarization
The orientation of the antenna will change the orientation of the signal. The transmitting and receiving
antennas should be both polarized either horizontally or vertically. Adjacent antennas on different
frequencies can be cross-polarized to help reduce interference between the two, if your operating license
permits this.
Towers
When planning antenna placement, it might be necessary to build a freestanding tower for the antenna.
Regulations and limitations define the height and location of these towers with respect to airports, runways,
and airplane approach paths. The Federal Aviation Administration (FAA) controls these regulations. In
some circumstances, the FAA, the FCC, or both, must approve the tower installations.
To ensure compliance, review the current FCC regulations regarding antenna structures. These regulations
(along with examples) can be viewed on the FCC web site at http://www.fcc.gov/antenna/.
Path Planning
To get the most value from a wireless system, path planning is essential. In addition to the fact that radio
signals dissipate as they travel, many other factors operate on a microwave signal as it moves through
space. All of these must be taken into account, to avoid attenuation of the signal by path obstruction.
Calculating a Link Budget
A link budget is a rough calculation of all known elements of the link, to determine if the signal will have
the proper strength when it reaches the other end of the link.
To make this calculation, consider the following information.
Site Planning
A-5
ZyAIR B-5000 User’s Guide
A signal degrades as it moves through space. The longer the path, the more loss it experiences.
This free-space path loss is a factor in calculating the link viability. Free-space path loss is easily
calculated for miles or kilometers.
Availability represents the quality of a link. It is the ratio of the time that the link is available to
the total time. This serves as a guide to the service that you can expect, on average, over a period
of one year.
Availability
Your application determines what availability is required. A critical application where downtime adversely
affects business and revenue requires a high percentage of availability. Somewhat lower availability might
be acceptable by an application used to gather data, where occasional outages can be tolerated.
Availability is largely a function of fade margins and the amount of signal fading. Paths obstructed by trees
have larger fades than paths with no trees. Longer paths tend to have more fading than shorter paths. Larger
fade margins yield better link availability.
The International Telecommunications Union (ITU) publishes a reference for link planning, which is
available at http://www.itu.ch/.
ITU Recommendation G.826 contains definitions for "availability" and related terms used to describe link
quality. It also contains recommendations for link quality objectives.
ITU Recommendation P.530 contains information on how to plan for high reliability in clear, line-of-sight
links.
Availability is much more difficult to predict for non-line-of-sight links. It is best determined by field
measurements.
Unlicensed Frequencies (U-NII)
The FCC has identified the frequencies from 5.725 to 5.825 GHz as Unlicensed National Information
Infrastructure (U-NII). This band can be used by anyone without having to obtain a license. However, you
must use radio equipment that is "type approved" by the FCC for use within the specific band. If you are
installing a U-NII band link between two buildings, across a parking lot, or across town, you will find that
this type of system is much simpler to implement than licensed systems. By using very directional antennas
in the installation, you are not likely to experience interference.
A-6
Site Planning
ZyAIR B-5000 User’s Guide
Appendix B
Site Installation
This appendix provides information on site requirements for the installation of
your ZyAIR See the Quick Installation guide for more information on site
installation.
Mounting
An antenna couples RF signals onto air. A transmitter within a wireless device sends an RF signal to the
antenna, which propagates the signal through the air. The antenna also operates in reverse by capturing RF
signals from the air.
Choosing the right antennas and positioning them properly increases the range and coverage area of a
wireless LAN.
A wall (side) mount allows for mounting an antenna (mast) on the side of a building or on the side of an
elevated penthouse. This will provide a convenient mounting location when the roof overhang is not
excessive and/or the location is high enough to provide a clear line of sight.
In most situations mounting an antenna directly to the wall will not allow you to properly align the antenna
with the corresponding antenna at the opposite end of your wireless link. As poor alignment will typically
result in poor performance, we advise you to always mount the Outdoor Wireless Bridge to a mast.
Antenna Mast/Antenna Requirements
To accommodate the ZyAIR, the mast must satisfy the following requirements:
The construction of the mast must be of a sturdy, weatherproof and non-corrosive material, for
example, galvanized or stainless steel construction pipe.
Typical diameter of the mast should be between 35 mm (1.4”) and 41 mm (1.625”). Subject to the
type of mast that you intend to install, other diameters are possible.
The height of the antenna mast must be sufficient to allow the antenna to be installed at least 1.5 m
(5’) above the peak of roof. If the roof is metal, then the height of the antenna should be a
minimum of 3m (10’) above the roof.
The mast or wall-bracket must be free from any substance that may prevent a good electrical
connection with the antenna, for example, paint.
Site Installation
B-1
ZyAIR B-5000 User’s Guide
Grounding
A safe grounding system is necessary to protect your outdoor installation from lightning strikes and the
build-up of static electricity.
Direct grounding of the antenna mast, Outdoor Wireless Bridge and Surge Arrester are very important. The
Outdoor Wireless Bridge has a built in Surge Arrester. The Outdoor Wireless Bridge should be connected
to the same grounding system as the antenna mast and the AC wall outlet.
The grounding system must comply with the National Electrical Code and safety standards that apply in
your country. Always check with a qualified electrician if you are in doubt as to whether your outdoor
installation is properly grounded.
What is Lightning Protection?
All outdoor electronic equipment is susceptible to lightning damage. Proper grounding to national and local
codes is instrumental in providing human safety. Lightning Protection is used when a customer wants to
maximize the reliability of the electronic system by diverting the excess energy that can be induced on any
transmission lines (data, power) though a series of surge protection devices. The energy is dissipated
through heat and is also diverted to the ground.
Why is Additional Protection Recommended?
Lightning, even with the built-in protection, can still damage ZyAIR equipment. This can occur for any
number of reasons, such as an improperly grounded installation or if the amount of transient energy from
nearby lightning exceeds what the devices can handle.
If the ZyAIR unit fails due to damage from lightning, the link is out-of-service until the unit is replaced or
repaired. An external, reverting protection device can provide a higher level of protection, and greater
probability of surviving lightning strikes without damage to the ZyAIR equipment.
Antenna Alignment
For optimal performance of your wireless link, make sure that the antennas are properly aligned (facing one
another “eye-to-eye”). To align the antennas:
Use a pair of binoculars and/or a map of the area and compass to point the antennas to one
another.
Optimize antenna alignment if required, by making small modifications in the antenna orientation.
Alternatively, consult a professional Antenna Installation Service to optimize the antenna
alignment.
Omni-directional antennas are characterized by a wide radiation pattern. Therefore alignment of this type of
antennas is less critical than for directional antennas.
B-2
Site Installation
ZyAIR B-5000 User’s Guide
For omni-directional antennas mounted on a table, desk, and so on, point the antenna up. For omnidirectional antennas mounted on a wall or ceiling, point the antenna down. For a single AP application,
place omni-directional antennas as close to the center of the coverage area as possible.
For directional antennas, point the antenna in the direction of the desired coverage area.
Connector Type
The ZyAIR is equipped with a reverse polarity SMA jack, so it will work with any 2.4GHz wireless
antenna with a reverse polarity SMA plug.
Site Installation
B-3
ZyAIR B-5000 User’s Guide
Appendix C
Setting up Your Computer’s IP Address
All computers must have a 10M or 100M Ethernet adapter card and TCP/IP installed.
Windows 95/98/Me/NT/2000/XP, Macintosh OS 7 and later operating systems and all versions of
UNIX/LINUX include the software components you need to install and use TCP/IP on your computer.
Windows 3.1 requires the purchase of a third-party TCP/IP application package.
TCP/IP should already be installed on computers using Windows NT/2000/XP, Macintosh OS 7 and later
operating systems.
After the appropriate TCP/IP components are installed, configure the TCP/IP settings in order to
"communicate" with your network.
If you manually assign IP information instead of using dynamic assignment, make sure that your computers
have IP addresses that place them in the same subnet as the ZyAIR.
Windows 95/98/Me
Click Start, Settings, and Control Panel and double-click the
Network and Dial-up Connections icon to open the Network
window.
The Network window Configuration tab displays a list of installed components. You need a network
adapter, the TCP/IP protocol and Client for Microsoft Networks.
Setting Up Your Computer’s IP Address
C-1
ZyAIR B-5000 User’s Guide
If you need the adapter:
a.
In the Network window, click Add.
b.
Select Adapter and then click Add.
c.
Select the manufacturer and model of your network adapter and then click OK.
If you need TCP/IP:
a.
In the Network window, click Add.
b.
Select Protocol and then click Add.
c.
Select Microsoft from the list of manufacturers.
d.
Select TCP/IP from the list of network protocols and then click OK.
If you need Client for Microsoft Networks:
a.
Click Add.
b.
Select Client and then click Add.
c.
Select Microsoft from the list of manufacturers.
d.
Select Client for Microsoft Networks from the list of network clients and then click OK.
e.
Restart your computer so the changes you made take effect.
In the Network window Configuration tab, select your network adapter's TCP/IP entry and click
Properties.
C-2
Setting Up Your Computer’s IP Address
ZyAIR B-5000 User’s Guide
1.
Click the IP Address tab.
-If your IP address is dynamic, select Obtain an
IP address automatically.
-If you have a static IP address, select Specify
an IP address and type your information into
the IP Address and Subnet Mask fields.
2.
Click the DNS Configuration tab.
-If you do not know your DNS information, select
Disable DNS.
-If you know your DNS information, select
Enable DNS and type the information in the
fields below (you may not need to fill them all
in).
Setting Up Your Computer’s IP Address
C-3
ZyAIR B-5000 User’s Guide
3.
Click the Gateway tab.
-If you do not know your gateway’s IP address,
remove previously installed gateways.
-If you have a gateway IP address, type it in the
New gateway field and click Add.
4.
Click OK to save and close the TCP/IP Properties window.
5.
Click OK to close the Network window. Insert the Windows CD if prompted.
6.
Turn on your ZyAIR and restart your computer when prompted.
Verifying Your Computer’s IP Address
1.
Click Start and then Run.
2.
In the Run window, type "winipcfg" and then click OK to open the IP Configuration window.
3.
Select your network adapter. You should see your computer's IP address, subnet mask and default
gateway.
C-4
Setting Up Your Computer’s IP Address
ZyAIR B-5000 User’s Guide
Windows 2000/NT/XP
1.
For Windows XP, click start, Control Panel. In
Windows 2000/NT, click Start, Settings, Control
Panel.
2.
For Windows XP, click Network
Connections. For Windows 2000/NT, click
Network and Dial-up Connections.
Setting Up Your Computer’s IP Address
3.
Right-click Local Area Connection and
then click Properties.
C-5
ZyAIR B-5000 User’s Guide
4.
Select Internet Protocol (TCP/IP) (under the
General tab in Win XP) and click Properties.
5.
The Internet Protocol TCP/IP Properties
window opens (the General tab in Windows XP).
-If you have a dynamic IP address click Obtain
an IP address automatically.
-If you have a static IP address click Use the
following IP Address and fill in the IP address,
Subnet mask, and Default gateway fields.
Click Advanced.
C-6
Setting Up Your Computer’s IP Address
ZyAIR B-5000 User’s Guide
6.
-If you do not know your gateway's IP address,
remove any previously installed gateways in the
IP Settings tab and click OK.
Do one or more of the following if you want to
configure additional IP addresses:
-In the IP Settings tab, in IP addresses, click
Add.
-In TCP/IP Address, type an IP address in IP
address and a subnet mask in Subnet mask,
and then click Add.
-Repeat the above two steps for each IP address
you want to add.
-Configure additional default gateways in the IP
Settings tab by clicking Add in Default
gateways.
-In TCP/IP Gateway Address, type the IP
address of the default gateway in Gateway. To
manually configure a default metric (the number
of transmission hops), clear the Automatic
metric check box and type a metric in Metric.
-Click Add.
-Repeat the previous three steps for each default gateway you want to add.
-Click OK when finished.
Setting Up Your Computer’s IP Address
C-7
ZyAIR B-5000 User’s Guide
7.
In the Internet Protocol TCP/IP Properties
window (the General tab in Windows XP):
-Click Obtain DNS server address
automatically if you do not know your DNS
server IP address(es).
-If you know your DNS server IP address(es),
click Use the following DNS server addresses,
and type them in the Preferred DNS server and
Alternate DNS server fields.
If you have previously configured DNS servers,
click Advanced and then the DNS tab to order
them.
8.
Click OK to close the Internet Protocol (TCP/IP) Properties window.
9.
Click OK to close the Local Area Connection Properties window.
10. Turn on your ZyAIR and restart your computer (if prompted).
Verifying Your Computer’s IP Address
1.
Click Start, All Programs, Accessories and then Command Prompt.
2.
In the Command Prompt window, type "ipconfig" and then press [ENTER]. You can also open
Network Connections, right-click a network connection, click Status and then click the Support tab.
C-8
Setting Up Your Computer’s IP Address
ZyAIR B-5000 User’s Guide
Macintosh OS 8/9
1.
Click the Apple menu, Control Panel and double-click
TCP/IP to open the TCP/IP Control Panel.
2.
Select Ethernet built-in
from the Connect via list.
Setting Up Your Computer’s IP Address
C-9
ZyAIR B-5000 User’s Guide
3.
For dynamically assigned settings, select Using DHCP Server from the Configure: list.
4.
For statically assigned settings, do the following:
-From the Configure box, select Manually.
-Type your IP address in the IP Address box.
-Type your subnet mask in the Subnet mask box.
-Type the IP address of your ZyAIR in the Router address box.
5.
Close the TCP/IP Control Panel.
6.
Click Save if prompted, to save changes to your configuration.
7.
Turn on your ZyAIR and restart your computer (if prompted).
Check your TCP/IP properties in the TCP/IP Control Panel window.
Macintosh OS X
1.
Click the Apple menu, and click System Preferences
to open the System Preferences window.
C-10
Setting Up Your Computer’s IP Address
ZyAIR B-5000 User’s Guide
2.
Click Network in the icon bar.
- Select Automatic from the Location list.
- Select Built-in Ethernet from the Show list.
- Click the TCP/IP tab.
3.
For dynamically assigned settings, select Using DHCP from the Configure list.
4.
For statically assigned settings, do the following:
-From the Configure box, select Manually.
-Type your IP address in the IP Address box.
-Type your subnet mask in the Subnet mask box.
-Type the IP address of your ZyAIR in the Router address box.
5.
Click Apply Now and close the window.
6.
Turn on your ZyAIR and restart your computer (if prompted).
Checking/Updating Your Computer’s IP Address
1.
In the computer, click Start, (All) Programs, Accessories and then Command Prompt.
2.
In the Command Prompt window, type "ipconfig" and then press ENTER to verify that your
computer’s static IP address is in the correct subnet (in the range between 192.168.1.2 and
192.168.1.254 if using the default ZyAIR LAN IP address). Alternatively, to have the ZyAIR assign
your computer a new IP address (from the IP pool), make sure your ZyAIR is turned on, type
"ipconfig/renew" and then press ENTER.
Setting Up Your Computer’s IP Address
C-11
ZyAIR B-5000 User’s Guide
Testing the Connection to the ZyAIR
The default IP address of the ZyAIR is 192.168.1.1:2000
1.
Click Start, (All) Programs, Accessories and then Command Prompt.
2.
In the Command Prompt window, type "ping” followed by a space and the IP address of the ZyAIR.
3.
Press ENTER and the reply messages displays.
C:\>ping 192.168.1.1
Pinging 192.168.1.1 with 32 bytes of data:
Reply
Reply
Reply
Reply
from
from
from
from
192.168.1.1:
192.168.1.1:
192.168.1.1:
192.168.1.1:
bytes=32
bytes=32
bytes=32
bytes=32
time=10ms
time<10ms
time<10ms
time<10ms
TTL=254
TTL=254
TTL=254
TTL=254
Ping statistics for 192.168.1.1:
Packets: Sent = 4, Received = 4, Lost = 0 (0% loss),
Approximate round trip times in milli-seconds:
Minimum = 0ms, Maximum = 10ms, Average = 2ms
C:\>
Your computer can now communicate with the ZyAIR using the LAN port.
C-12
Setting Up Your Computer’s IP Address
ZyAIR B-5000 User’s Guide
Appendix D
Wireless LAN With IEEE 802.1x
As wireless networks become popular for both portable computing and corporate networks, security is now
a priority.
Security Flaws with IEEE 802.11
Wireless networks based on the original IEEE 802.11 have a poor reputation for safety. The IEEE 802.11b
wireless access standard, first published in 1999, was based on the MAC address. As the MAC address is
sent across the wireless link in clear text, it is easy to spoof and fake. Even the WEP (Wire Equivalent
Privacy) data encryption is unreliable as it can be easily decrypted with current computer speed
Deployment Issues with IEEE 802.11
User account management has become a network administrator’s nightmare in a corporate environment, as
the IEEE 802.11b standard does not provide any central user account management. User access control is
done through manual modification of the MAC address table on the access point. Although WEP data
encryption offers a form of data security, you have to reset the WEP key on the clients each time you
change your WEP key on the access point.
IEEE 802.1x
In June 2001, the IEEE 802.1x standard was designed to extend the features of IEEE 802.11 to support
extended authentication as well as providing additional accounting and control features. It is supported by
Windows XP and a number of network devices.
Advantages of the IEEE 802.1x
•
•
User based identification that allows for roaming.
Support for RADIUS (Remote Authentication Dial In User Service, RFC 2138, 2139) for
centralized user profile and accounting management on a network RADIUS server.
•
Support for EAP (Extensible Authentication Protocol, RFC 2486) that allows additional
authentication methods to be deployed with no changes to the access point or the wireless stations.
Wireless LAN with IEEE 802.1x
D-1
ZyAIR B-5000 User’s Guide
RADIUS Server Authentication Sequence
The following figure depicts a typical wireless network with a remote RADIUS server for user
authentication using EAPOL (EAP Over LAN).
Client computer
access authorized.
Client computer
access not authorized.
Diagram D-1 Sequences for EAP MD5–Challenge Authentication
D-2
Wireless LAN with IEEE 802.1x
ZyAIR B-5000 User’s Guide
Appendix E
Types of EAP Authentication
This appendix discusses two popular EAP authentication types: EAP-MD5 and EAP-TLS. The type of
authentication you use depends on the RADIUS server. Consult your network administrator for more
information.
EAP-MD5 (Message-Digest Algorithm 5)
MD5 authentication is the simplest one-way authentication method. The authentication server sends a
challenge to the wireless station. The wireless station ‘proves’ that it knows the password by encrypting the
password with the challenge and sends back the information. Password is not sent in plain text.
However, MD5 authentication has some weaknesses. Since the authentication server needs to get the
plaintext passwords, the passwords must be stored. Thus someone other than the authentication server may
access the password file. In addition, it is possible to impersonate an authentication server, as MD5
authentication method does not perform mutual authentication. Finally, MD5 authentication method does
not support data encryption with dynamic session key. You must configure WEP encryption keys for data
encryption.
EAP-TLS (Transport Layer Security)
With EAP-TLS, digital certifications are needed by both the server and the wireless stations for mutual
authentication. The server presents a certificate to the client. After validating the identity of the server, the
client sends a different certificate to the server. The exchange of certificates is done in the open before a
secured tunnel is created. This makes user identity vulnerable to passive attacks. A digital certificate is an
electronic ID card that authenticates the sender’s identity. However, to implement EAP-TLS, you need a
Certificate Authority (CA) to handle certificates, which imposes a management overhead.
For added security, certificate-based authentications such as EAP-TLS use dynamic keys for data
encryption. They are often deployed in corporate environments, but for public deployment, simple user
name and password pair is more practical. The following table is a comparison of the features of two
authentication types used in the ZyAIR.
Types of EAP Authentication
E-1
ZyAIR B-5000 User’s Guide
EAP-MD5
EAP-TLS
No
Yes
Certificate – Client
No
Yes
Certificate – Server
No
Yes
No
Yes
Credential Security
None
Strong
Deployment
Difficulty
Easy
Hard
Wireless Security
Poor
Best
No
No
Mutual
Authentication
Dynamic Key
Exchange
Client Identity
Protection
E-2
Types of EAP Authentication
ZyAIR B-5000 User’s Guide
Appendix F
Troubleshooting
This appendix covers potential problems and possible remedies. After each problem description,
some instructions are provided to help you to diagnose and to solve the problem.
Problems Starting Up the ZyAIR
Chart F-1 Troubleshooting Start-Up, Inline Power Injector
PROBLEM
None of the LEDs
turn on when I
connect the power
adaptor.
CORRECTIVE ACTION
Make sure you are using the supplied inline power injector and that it is connected
to an appropriate power source. Check that the power source is turned on.
If the problem persists, you may have a hardware problem. In this case, you should
contact your local vendor.
Problems with Console Port Access
Chart F-2 Troubleshooting Console Port Access
PROBLEM
I cannot access
the ZyAIR via the
console port.
Troubleshooting
CORRECTIVE ACTION
1. Check to see if the ZyAIR is connected to your computer's console port.
2. Check to see if the
communications program is
configured correctly. The
communications software
should be configured as
follows:
VT100 terminal emulation.
115200 bps is the default speed on leaving the
factory. Try other speeds in case the speed has
been changed.
No parity, 8 data bits, 1 stop bit, data flow set to
none.
F-1
ZyAIR B-5000 User’s Guide
Problems with the Password
Chart F-3 Troubleshooting the Password
PROBLEM
I cannot access
the ZyAIR.
CORRECTIVE ACTION
The Password and Username fields are case-sensitive. Make sure that you enter
the correct password and username using the proper casing.
If you forget your password or cannot access the ZyAIR, you will need to reload the
factory-default configuration file. Uploading this configuration file replaces the current
configuration file with the factory-default configuration file. This means that you will
lose all configurations that you had previously and the speed of the console port will
be reset to the default baud rate of 115200bps, with 8 data bit, no parity, one stop bit
and flow control set to none. The password will be reset to ‘1234', also.
Problems with the Ethernet Interface
Chart F-4 Troubleshooting the Ethernet Interface
PROBLEM
I cannot access
the ZyAIR from
the Ethernet
CORRECTIVE ACTION
If all of the LEDs on the inline power injector are on, check the Ethernet cable
connection between your ZyAIR and the computer connected to the DATA IN port
on the inline power injector.
Check for faulty Ethernet cables.
Make sure the computer’s Ethernet adapter is installed and working properly.
Verify that the IP addresses and the subnet masks of the ZyAIR and the computer
are on the same subnet.
I cannot ping any
computer on the
LAN.
If the LEDs on the inline power injector are on, check the Ethernet cable connection
between your ZyAIR and the computer connected to the DATA IN port on the inline
power injector.
Verify that the IP addresses and the subnet masks of the ZyAIR and the computers
are on the same subnet.
Problems with Internet Access
Chart F-5 Troubleshooting Internet Access
PROBLEM
I cannot access the
Internet.
F-2
CORRECTIVE ACTION
Connect your inline power injector to the ZyAIR using the appropriate cables
supplied.
Troubleshooting
ZyAIR B-5000 User’s Guide
Chart F-5 Troubleshooting Internet Access
Refer to the Basic Configuration chapters (web configurator). Make sure you
entered the correct user name and password.
For wireless stations, check that both the ZyAIR and wireless station(s) are using
the same ESSID, channel and WEP keys (if WEP encryption is activated).
Internet connection
disconnects
Check cable connections.
Contact your ISP.
Problems with Telnet
Chart F-6 Troubleshooting Telnet
PROBLEM
I cannot access
the ZyAIR through
Telnet.
CORRECTIVE ACTION
Refer to the Telnet and Console chapters. Make sure you enter the correct user
name and password.
Refer to the Problems with the Ethernet Interface section for instructions on checking
your Ethernet connection.
Problems with the WLAN Interface
Chart F-7 Troubleshooting the WLAN Interface
PROBLEM
I cannot ping any
computer on the
WLAN.
Troubleshooting
CORRECTIVE ACTION
Make sure the wireless adapter on the wireless station is working properly.
Check that both the ZyAIR and wireless station(s) are using the same ESSID,
channel and WEP keys (if WEP encryption is activated).
F-3
ZyAIR B-5000 User’s Guide
Appendix G
Technical Specifications
General
Chart G-1 Environmental Conditions
TEMPERATURE RANGE
DEGREES CELSIUS
OPERATION
+15 ~ +35
NORMAL
~ +35
EXTREME
~ +70
STORAGE
-30 to +80
HUMIDITY (non-condensing)
5% to 95% RH (typical)
Chart G-2 Inspection Channel (CH1, CH7, CH13)
Tx/Rx
1st Lo
2nd Lo
FREQUENCY MHZ
FREQUENCY MHZ
FREQUENCY MHZ
CH1
2412
2038
CH7
2442
2068
CH13
2472
2098
VCO
748
IF
374
Hardware Specification
Chart G-3 Hardware Specifications
Ethernet Interface
One (1) 10Base-T (RJ45)
Access Protocol
CSMA/CA
Technical Specifications
G-1
ZyAIR B-5000 User’s Guide
Chart G-3 Hardware Specifications
Ethernet Interface
One (1) 10Base-T (RJ45)
Roaming
IEEE 802.11b compliant
Security
64-/128-bit data encryption
Radio Data Rate
11, 5.5, 2 and 1 Mbps, Auto Fall-Back
Regulatory & Safety
Certifications
FCC Part 15, Class B
R&TTE Directive 1999/5/EC
EN 300 328-2
EN 301 489-1
EN 301 489-17
EN 60950
IP68
Compatibility
Fully interoperable with IEEE802.11b compliant
products
Power Supply
100 ~ 240VAC 50/60Hz
800mA at -48VDC (PoE)
RADIO SPECIFICATIONS
Chart G-4 Radio Specifications
G-2
FREQUENCY BAND
2.4 ~ 2.4835 (GHz)
RADIO TYPE
Direct Sequence Spread
Spectrum (DSSS)
MODULATION TYPE
(Mbps)
CCK
11, 5.5
DQPSK
2
DBPSK
1
OPERATION CHANNELS
(CH)
North American (FCC)
11
Technical Specifications
ZyAIR B-5000 User’s Guide
Chart G-4 Radio Specifications
FREQUENCY BAND
2.4 ~ 2.4835 (GHz)
RADIO TYPE
Direct Sequence Spread
Spectrum (DSSS)
MODULATION TYPE
(Mbps)
CCK
11, 5.5
DQPSK
2
DBPSK
1
OPERATION CHANNELS
(CH)
European Community (ETSI)
13
RF OUTPUT POWER
(dBm)
FCC (Excluding antenna gain)
19
ETSI (Excluding antenna gain)
14
BAND EDGE
(dBc)
FCC
>30
ETSI
>30
CHART G-5 RX SENSITIVITY (@ FER = 0.08))
11
5.5
2
1
(Mbps)
(Mbps)
(Mbps)
(Mbps)
FCC (dBm)
-85
-86
-89
-92
ETSI (dBm)
-85
-86
-89
-92
Technical Specifications
G-3
ZyAIR B-5000 User’s Guide
SYSTEM TEST
Chart G-6 TRANSMITTING SYSTEM
PARAMETER
TEST CONDITION
SPECIFICATION
TEMP. DEG. C.
Tx Power
Modulation: DQPSK
FCC:
Data Rate: 11Mbps
19dBm ± 1dB
25
19dBm ± 2dB
-20 ~ +70
ETSI:
Spectrum Mask
Frequency Error
14dBm ± 1dB
25
14dBm ± 2dB
-20 ~ +70
±11MHz ~ 22MHz
< -30dBr
-20 ~ +70
±22MHz ~ 33MHz
< -45dBr
Modulation: Carrier Only
± 60KHz
25
± 120KHz
-20 ~ +70
Power Ramp On
Tx power on 90% of Pmax
3us
-20 ~ +70
Power Ramp Off
Tx power off 10% of Pmax
3us
-20 ~ +70
Modulation: Carrier Suppression
20dBr
-20 ~ +70
1GHz ~ 16GHz
-41dBm
25
SPECIFICATION
TEMP. DEG. C.
Pin -85dBm
25
Pin -83dBm
-20 ~ +70
Pin -83dBm
25
Pin -80dBm
-20 ~ +70
16 (CR62)
25
35dB
25
-46dBm
25
Carrier Suppression
Spurious Emission
Chart G-7 RECEIVING SYSTEM
PARAMETER
Rx Sensitivity
(FER)
Rx Sensitivity
(Throughput)
RSSI
TEST CONDITION
FER 8%
THP 3Mbps
Pin -80dBm
Adjacent Channel
Rejection
Carrier -80dBm
Spurious Emission
1GHz ~ 16GHz
G-4
THP 3Mbps
Technical Specifications
ZyAIR B-5000 User’s Guide
Chart G-8 CURRENT CONSUMPTION
PARAMETER
TEST CONDITION
SPECIFICATION
TEMP. DEG. C.
Tx Current
Tx continue
150mA (-48V)
25
Rx Current
Rx continue
80mA (-48V)
25
Standby
50mA (-48V)
25
Standby Current
RELIABILITY TEST
Chart G-9 INSPECTION COSMETIC AND FUNCTION
TEST ITEM
TEST CONDITION
High Temperature
Temp.
+70 Deg. C
Operation
Storage
24 hours
Test
Operation mode in the chamber
Spec.
The same as +25 Deg. C
Low Temperature
Temp.
-20 Deg. C
Operation
Storage
24 hours
Test
Operation mode in the chamber
Spec.
The same as +25 Deg. C
High Temperature
Temp.
+80 Deg. C
Storage
Storage
24 hours
Test
Operation mode in room temperature 4
hours after the storage
Spec.
No Damage In
Cosmetics Or Error In
Function
No Damage In
Cosmetics Or Error In
Function
No Damage In
Cosmetics Or Error In
Function
The same as +25 Deg. C
Low Temperature
Temp.
-40 Deg. C
Storage
Storage
24 hours
Test:
Operation mode in room temperature 4
hours after the storage
Technical Specifications
CRITERIA
No Damage In
Cosmetics Or Error In
Function
G-5
ZyAIR B-5000 User’s Guide
Chart G-9 INSPECTION COSMETIC AND FUNCTION
TEST ITEM
TEST CONDITION
CRITERIA
No Damage In
Cosmetics Or Error In
Function
High Temperature
Temp.
+70 Deg. C
Operation
Storage
24 hours
Test
Operation mode in the chamber
Spec.
The same as +25 Deg. C
Low Temperature
Temp.
-20 Deg. C
Operation
Storage
24 hours
Test
Operation mode in the chamber
Spec.
The same as +25 Deg. C
Spec.
The same as +25 Deg. C
High Temperature
Temp.
+40 Deg. C
High Humidity
Humidity
95%RH (non-condensing)
Storage
72 hours
Test
Operation mode in room temperature 4
hours after the storage
Spec.
Temperature
Recycle
Temp.
Cycle
Test
ESD
Discharge
By Air
Discharge
By
Contact
G-6
No Damage In
Cosmetics Or Error In
Function
No Damage In
Cosmetics Or Error In
Function
The same as +25 Deg. C
+20→0→-20→0→+20→+40→+60→
+40→+20
No Damage On
Electrical Or Error In
Function
Operation in the chamber 1 hour after
arriving at the test temperature
±15KV (Each polarity 10 times)
No Damage On
Electrical
Performance
±8KV (Each polarity 10 times)
Technical Specifications
ZyAIR B-5000 User’s Guide
Appendix H
Power Specifications
Chart H-1 Power Adaptor Specifications
NORTH AMERICAN PLUG STANDARDS
AC Power Cord
USA
Input Power
AC100 ~ 240Volts/50 ~ 60Hz
Output Power
DC48Volts/0.8A
Power Consumption
Tx: <= 7.2 W
Rx: <= 3.84 W
Standby: <= 2.4 W
Safety Standards
UL (UL 1950), CSA (CSA 22.2)
EUROPEAN PLUG STANDARDS
AC Power Cord
Europe
Input Power
AC100 ~ 240Volts/50 ~ 60Hz
Output Power
DC48Volts/0.8A
Power Consumption
Tx: <= 7.2 W
Rx: <= 3.84 W
Standby: <= 2.4 W
Safety Standards
CE mark, EN60950 (2001)
UNITED KINGDOM PLUG STANDARDS
AC Power Cord
UK
Input Power
AC100 ~ 240Volts/50 ~ 60Hz
Output Power
DC48Volts/0.8A
Power Specifications
H-1
ZyAIR B-5000 User’s Guide
Power Consumption
Tx: <= 7.2 W
Rx: <= 3.84 W
Standby: <= 2.4 W
Safety Standards
H-2
TUV, CE (EN 60950, BS7002)
Power Specifications
ZyAIR B-5000 User’s Guide
Appendix I
Approvals
Chart I-1 Approvals
Safety
North America
ANSI/UL-1950 3
rd
CSA C22.2 No. 950 3rd
European Union (CE mark)
EN60950 (1992+A1+A2+A3+A4+A11)
rd
IEC 60950 3
EMI
North America
FCC Part 15 Class B
European Union (CE mark)
EN55022 Class B
EN61000-3-2
EN61000-3-3
EMS
European Union (CE mark)
Electrostatic Discharge
EN61000-4-2
Radio-Frequency
Electromagnetic Field
EN61000-4-3
EFT/Burst
EN61000-4-4
Surge
EN61000-4-5
Conducted Susceptibility
EN61000-4-6
Power Magnetic
EN61000-4-8
Voltage Dips/Interruption
EN61000-4-11
EM Field from Digital
Telephones
ENV50204
LAN compatibility
SmartBit
For Wireless PC Card
FCC Part15C, Sec15.247
ETS300 328
ETS300 826
CE mark
Approvals
I-1
ZyAIR B-5000 User’s Guide
Appendix J
Packaging Specifications
Chart J-1 Packaging Specifications
Accessories
Specification/Description
Q’ty
Inline Power Injector
(PoE)
Input 100 ~ 240VAC 50/60Hz
1
Wall-plug AC Power Cord
(1.8m)
1
RS232 Console Cable
MIL-C-5015 STP (2.0m)
1
Uplink Ethernet Cable
MIL-C-5015 UTP (1.8m)
1
Grounding Cable
UL1015 (3.0m)
1
RJ45 Ethernet Cable
MIL-C-5015 STP (30.0m)
1
Antennas
5dBi omni-direction rubber antenna
2
Mounting Brackets
Wall mount brackets
1
Mast mount brackets
1
Spanner
Installation tool
1
CD-ROM
Quick Installation Guide (English) and
Product user manual (English)
1
Packaging Specifications
Output 800mA at -48VDC
J-1
ZyAIR B-5000 User’s Guide
Index
DoS (Denial of Service) ..................................1-2
A
Address Assignment ............................... 4-2, 4-3
Antenna
Directional..................................................A-5
Omni-directional ........................................A-5
Antenna gain ..................................................A-4
Anti – Denial of Service..............................28-11
auto-negotiation ..............................................1-1
B
Basic Service Set...........................................12-1
Bridge..............................................................3-1
Brute-force Attack,............................ 28-5, 28-12
BSS ....................................See Basic Service Set
C
CA.................................................................. E-1
Certificate Authority ................................See CA
Channel .........................................................4-13
Computer’s IP Address .................................. C-1
Conditions that prevent TFTP and FTP from
working over WAN...................................27-2
Configuration ................................................10-1
Console .........................................................23-3
Copyright ...........................................................ii
Customer Support .............................................. v
D
Data encryption.............................................4-15
Denial of Service...........................................28-2
DHCP...................................... 1-3, 4-3, 4-4, 10-1
Domain Name ....................................... 4-3, 11-2
DoS
Basics ........................................................28-3
Types.........................................................28-3
Index
E
EAP ....................................................... 1-2, 13-2
EAP Authentication ................................. IX, E-1
MD5 ........................................................... E-1
TLS ............................................................ E-1
ECHO............................................................11-1
Encapsulation
PPP over Ethernet .......................................3-1
ESS.............................. See Extended Service Set
ESS ID ..........................................................4-15
Ethernet ............................................ 4-2, 5-4, 5-5
Extended Service Set.....................................12-2
Extended Service Set IDentification ... 4-17, 12-6
F
FCC ...................................................................iii
Filename Conventions...................................27-1
Finger ............................................................11-2
Firewall ...........................................................1-2
Access Methods ........................................28-1
Creating/Editing Rules ..............................28-8
Introduction...............................................28-2
Fixed Host Entry ...........................................10-1
Fragmentation Threshold .................... 4-15, 12-3
FTP...................................................... 10-1, 11-2
FTP Restrictions............................................27-2
G
General Setup..................................................6-3
H
HTTP................................................... 11-2, 28-3
Hyper Terminal .............................................23-3
K-1
ZyAIR B-5000 User’s Guide
I
ICMP echo.................................................... 28-5
IEEE 802.11
Deployment Issues..................................... D-1
Security Flaws ........................................... D-1
IEEE 802.1x...................................D-1, 1-2, 13-1
Advantages ................................................ D-1
Independent Basic Service Set...................... 12-1
Internet Access.........................................1-3, 4-4
Internet Control Message Protocol (ICMP) .. 28-5
Internet Protocol ........................................... 28-8
IP See Internet Protocol
IP Address.... 4-2, 4-3, 4-5, 4-6, 4-7, 4-8, 4-10, 411, 5-6, 5-8, 5-9, 5-10, 5-12, 5-13, 5-14, 5-16,
5-17
IP Addressing ................................................. 3-1
IP Pool Setup ................................................ 10-1
IP Ports ......................................................... 28-3
IP Spoofing ...............................28-3, 28-6, 28-12
IP Zero Length Attack .................................. 28-6
L
LAND ..................................................28-4, 28-5
M
MAC Address Filtering ................................ 14-1
Management Information Base (MIB).......... 19-2
MD5................................................................E-1
Message Digest Algorithm 5 ................ See MD5
N
NAT................................................................ 4-3
Network Management ...........................1-3, 11-2
Network Topology With RADIUS Server
Example ..................................................... D-2
NNTP............................................................ 11-2
P
Ping of Death ................................................ 28-3
K-2
Point-to-Point Tunneling Protocol ................11-2
POP3 ....................................................11-2, 28-3
Port Numbers ................................................11-1
PPPoE .............................................. 4-2, 5-4, 5-5
PPTP .............................................................11-2
Private IP Address ..........................................4-2
Q
Quick Installation Guide ........................... xx, 2-1
R
RADIUS ................................................1-2, 13-1
Related Documentation.................................... xx
Remote Authentication Dial In User Service. See
RADIUS
Restore Configuration...................................27-5
Router .............................................................3-1
RTS Threshold.....................................4-13, 12-3
S
Server Mapping.............................................11-1
Service .............................................................. iv
Service Set ...........................................4-17, 12-6
Services.........................................................11-1
SMTP............................................................11-2
Smurf ....................................... 28-5, 28-6, 28-12
SNMP .......................................... 1-3, 11-2, 19-1
Get.............................................................19-2
Manager ....................................................19-2
MIBs .........................................................19-2
Trap...........................................................19-2
Stateful Inspection ..........................................1-2
Static Route...................................................17-1
Subnet Mask .. 4-3, 4-5, 4-6, 4-7, 4-8, 4-10, 4-11,
5-6, 5-8, 5-9, 5-10, 5-12, 5-13, 5-14, 5-16, 517
Supporting Disk ............................................... xx
SYN Flood ...........................................28-4, 28-5
SYN-ACK.....................................................28-4
System Name ............................ 6-4, 7-2, 7-4, 8-6
Index
ZyAIR B-5000 User’s Guide
T
TCP ...............................................................11-1
TCP/IP ................................................ 28-3, 28-4
Teardrop........................................................28-3
TFTP .............................................................22-4
TFTP and FTP over WAN Will Not Work
When…. ....................................................27-2
TFTP Restrictions .........................................27-2
Three-Way Handshake..................................28-4
TLS ................................................................ E-1
Transmission Control Protocol (TCP)...........28-8
Transport Layer Security ....................... See TLS
Troubleshooting
Accessing ZyAIR....................................... F-3
Ethernet Port .............................................. F-2
Password .................................................... F-1
Start-Up...................................................... F-1
U
UDP .......................See User Datagram Protocol.
Upload Firmware ..........................................27-7
Index
User Datagram Protocol ...................... 11-1, 28-8
User Datagram Protocol (UDP) ....................28-8
W
Warranty............................................................iv
Web Configurator.................................. 2-1, 28-2
WEP .................................................... 4-15, 13-3
WEP Encryption.................................. 4-17, 12-6
Wireless LAN ...............................................4-13
Wizard Setup...................................................3-1
WLAN.................................... See Wireless LAN
X
XMODEM protocol ......................................27-2
Z
ZyNOS ................................................ 22-6, 27-2
ZyXEL Limited Warranty
Note...............................................................iv
ZyXEL’s Firewall
Introduction...............................................28-2
K-3