1
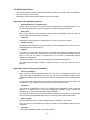
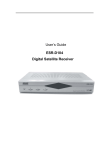
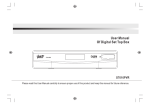
User´s Manual English DX 66 Digital Satellite Receiver for 12/24 V and 230 V operation -2- Table of Contents 1. General Information ..................................................................... 5 1.1 Main Features.............................................................................................5 1.2 Safety instructions.....................................................................................6 1.3 Unpacking...................................................................................................7 1.4 General Operation of the DX 66 ................................................................7 1.5 Remote Control Unit ..................................................................................8 1.6 Front Panel .................................................................................................9 1.7 Rear Panel ..................................................................................................9 2. Installation of DX 66 ................................................................... 10 2.1 Mains Connection .................................................................................... 10 2.2 Connecting to Antenna and TV............................................................... 10 2.3 Connecting to TV/VCR using SCART Support ...................................... 11 2.4 Connecting to Digital Amplifier .............................................................. 11 3. Menu Information ....................................................................... 12 4. Installation................................................................................... 13 4.1 Satellites ................................................................................................... 13 4.2 Antenna Setup.......................................................................................... 13 4.3 Channel Search:....................................................................................... 14 4.3.1 Manual Search/Edit Transponder ........................................................ 15 4.3.2 Single Satellite Search: ........................................................................ 16 4.3.3 Multi Satellite Search: .......................................................................... 16 4.4 Default Value : .......................................................................................... 16 4.5 Parental Control ....................................................................................... 17 4.6 Software- Update via Satellite (OTA – Over The Air) ............................ 17 5. System Setting............................................................................ 18 5.1.Language .................................................................................................. 18 5.2.TV System................................................................................................. 18 5.3 Local Time Setting ................................................................................... 18 5.4 Start Up Channel ...................................................................................... 19 5.5 OSD Setting .............................................................................................. 19 5.6 Remote System ........................................................................................ 19 -3- 6. General Viewing Functions ....................................................... 20 6.1 Select Channel ......................................................................................... 20 6.2 Previous Channel Recall ......................................................................... 20 6.3 TV & Radio Mode ..................................................................................... 20 6.4 TV & VCR Mode........................................................................................ 20 6.5 Channel Information ................................................................................ 20 6.6 Favorite List .................................................................................. 21 6.7 Volume & Audio Control.......................................................................... 21 6.8 Teletext ..................................................................................................... 21 6.9 Pause the frame ....................................................................................... 22 6.10 Multipicture............................................................................................. 22 6.11 Position................................................................................................... 22 6.12 Sat ........................................................................................................... 22 7. Channel Manager........................................................................ 23 Channel Manager ........................................................................................... 23 7.1 Sort Channel............................................................................................. 23 7.2 Favorite Channel ...................................................................................... 23 7.3 Skip Channel ............................................................................................ 24 7.4 Edit Channel ............................................................................................. 24 7.4.1 Move Channel ...................................................................................... 24 7.4.2 Delete Channel .................................................................................... 25 7.4.3 Lock Channel ....................................................................................... 25 7.4.4 Edit/Rename Channel .......................................................................... 25 8. EPG (Electronic Program Guide) .............................................. 26 9. Timer............................................................................................ 27 Time Adjust .................................................................................................... 27 Time Reservation ........................................................................................... 27 10. Software-Update via RS 232 .................................................... 28 11. Trouble Shooting...................................................................... 32 12. SPECIFICATIONS ..................................................................... 34 -4- 1. General Information The DX 66 allows you to view a variety of satellite programs. This user’s guide covers the installation of the DX 66 and the necessary steps to operate various features. It also explains special features available only in this DX 66 in detail, and will allow you to take full advantage of these features. 1.1 Main Features Fully MPEG2, DVB compliant PIG (Picture In Graphic) support DiSEqC1.2 positioner and USUALS control for multisatellites (63 satellites) C/Ku band control for each antenna User Friendly and easy-to-use menu system Various channel editing functions (favorite, moving, locking, renaming, deleting and sorting) User programmable various satellite & transponder information Automatic search for newly added transponder (Network Auto Search) Stores up to 2500 channels Easy and fast software upgrade through RS-232 port Plug-and-play data transfer system (DSR to DSR) Timer function (8 events), automatically turns On/Off by setting function (daily, weekly, monthly, one time), programmable through EPG Electronic Program Guide (EPG) OSD Teletext (DVB ETS 300 706) and Subtitle function support VBI Teletext support Multi picture screen (9) Provides various switch types, LNB types and NTSC/PAL monitor type SCPC/MCPC receivable from C/Ku band satellite Multi LNB controlled by DiSEqC 1.2 and 22KHz 256 color On-Screen-Display Automatic PAL/NTSC conversion Automatic last channel saving Dolby Digital AC 3 (coaxial) Main on/off Switch Operation with 12-24 V DC car adaptor or with 230 V AC power cable -5- 1.2 Safety instructions The following section contains important information relating to operation, place of installation and connecting-up of the receiver. Read these notes carefully before putting the unit into operation. Important notes regarding operation Extended absence / Thunderstorms Always switch the unit off via its mains switch during periods of extended absence or at the onset of thunderstorms. This also applies to any other equipment attached. Mains lead Make certain that the mains lead (power supply lead) is undamaged. Never put the unit into operation if the mains lead is damaged. Cleaning Withdraw the mains plug before cleaning the unit. Use a dry cloth for cleaning. Children-at-play Pay attention that children do not insert objects into the ventilation slots. There is a risk of mortal danger due to electric shock. Repairs On no account remove the housing cover since there are dangerous voltages inside the unit that may be contacted. The und must only be opened by qualified specialists, so allow them to carry out any repairs or adjustments to your receiver. Unauthorised opening entails loss of guarantee. The electrical safety of the unit can be affected by improper tampering with it. The manufacturer's liability excludes accidents occurring to the user when the unit is opened. Important notes for sitting and installation Place of installation Every electronic device generates some heat. The rise in temperature, however, lies within safe limits. Nevertheless, this does not rule out the possibility of slight colour changes to sensitive furniture surfaces and veneers over time due to the constant effect of heat. In conjunction with treated furniture surfaces, the unit's rubber feet can likewise give rise to changes in colour. Where necessary, place the unit on a suitable pad. Ventilation The heat that is generated in this unit is dissipated quite adequately. Never install the receiver in a cabinet, shelf or rack with inadequate ventilation. Never close-off the openings on the unit that are intended for heat dissipation. Do not place objects on top of the unit. Maintain a clearance of at least 10 cm above the unit so that the heat generated within the unit is convected away without obstruction. Mains voltage Run the receiver only from a mains voltage of 23OV / 5O/60Hz or 12-24 V DC. The unit is not to be connected to the mains until after all the installation work has been completed. Humidity Protect the unit against humidity, drips and splashes. -6- Solar radiation/heat Do not place the receiver close to radiators nor expose it to direct sunlight. Grounding The parabolic antenna is to be grounded in accordance with regulations. Here, the relevant German VDE regulations (or equivalent) are to be observed. Connecting up and putting into operation Attention The following section is intended specifically for the specialist dealer. If you are not carrying out the installation yourself, there is no need to pay any attention to this section. A sample configuration is to be found in section: "Connection examples". Do not connect the unit to the mains until after the installation work has been carried out properly. Please note the guidance given in section: “Safety- and Installation instructions”. 1.3 Unpacking Unpack the DX 66 and check to make sure that all of the following items are included in the packaging. 1 x Remote Control Unit (RCU) 1 x User’s Guide 2 x AAA batteries 1 x DX 66 12 V AC car adaptor 230 V AC power cable Disposal Electronic equipment is not household waste. In accordance with directive 2002/96/EC OF THE EUROPEAN PARLIAMENT AND THE COUNCIL of 27th January 2003 on used electrical and electronic equipment, it must be disposed of properly. „At the end of its service life, take this unit for disposal at the designated public collection points." 1.4 General Operation of the DX 66 Throughout this manual you will notice that the everyday operation of your DX 66 is based on a series of user friendly on screen display and menus. These menus will help you get the most from your DX 66, guiding you through installation, channel organizing, viewing and many other functions. All functions can be carried out using the buttons on the RCU, and some of the functions can also be carried out using the buttons on the front panel. Please be aware that new software may change the functionality of the DX 66. Should you experience any difficulties with the operation of your DX 66, please consult the relevant section of this manual, including the Problem Shooting. Hotline in Germany, in case of questions ! Daily between 8.00 – 16.00 h Phone: +49 (0) 7729 / 881-73 e-mail: [email protected] -7- 1.5 Remote Control Unit Key Function Turns power ON/OFF of the DSR. When watching a channel, enables/disables the audio. Enter number of the required menu item or 0~9 Select a channel number to watch . MENU Press this key one time to run menu on screen, and call command box. Returns to the previous menu on the menu screen or escape from the menu. EXIT PR+,PR- When watching a channel, change channels, or moves to the next higher or lower item in the menu. When watching a channel, adjust the volume, or move to the left or right item in menu. Moves up/down a page in the channel list. OK, LIST Executes the selected item in the menu screen, or enters the desired value in any input mode Calls up the EPG (Electronic Program Guide). EPG Shows information of the current channel. Switch between TV and Radio mode. Display the satellite list or searched channel.. Switches back to previous channel. Display the favourite channel list. 1.When watching a channel, switches the audio languages. 2. Selects the different audio modes for speakers: Stereo, Left, right. Makes 4, 6 or 9 pictures to the screen red 1. Switches to teletext or subtitle mode. 2. Menu operations with red button. green 1. Switches between TV or AV mode. 2. Menu operations with green button. grey 1. Displays position bar on the screen to adjust the antenna or for manual search. 2. Menu operations with grey button. blue 1. To still picture in current channel 2. Menu operations with blue button. yellow white -8- 1. Switches one channel up in FAV list. 2. Menu operations with yellow button. 1. Switches one channel down in FAV list 2. Menu operations with yellow button. 1.6 Front Panel DX 66 Figure 2: Front Panel KEY FUNCTION Power Turns on and off the power of the receiver (standby). PR V/Λ When watching, changing to the previous and next channel, or moves to the next higher or lower item in the menu 1.7 Rear Panel Power connector Connect to a PC for software upgrade Power ON/OFF Power Input 12-24 V DC for 12V car power adaptor Connect to digital amplifier Connect to the VCR using scart cable Connect to the TV using scart cable SAT ANT OUT: Connect to another receiver SAT ANT IN: Connect to satellite antenna -9- 2. Installation of DX 66 This section explains the installation of DX 66. Refer to the manuals supplied with the equipment for the installation of outdoor equipment such as the dish antenna. When adding new equipment, be sure to refer to the related parts of the manual for the installation and be sure you have correctly adjusted the antenna to a satellite. 2.1 Mains Connection For mobile operation use the attached 12 V car adaptor to connect to 12-24 V car power. For stationary operation use the attached 230 V power cable and connect one of these to the connector at the rearpanel of the receiver. Caution! Run the receiver only from a mains voltage of 12-24V DC or with attached power cable at AC 23OV / 5O/60Hz, for not destroying the receiver. The unit is not to be connected to the mains until after all the installation work has been completed. 2.2 Connecting to Antenna and TV Satellite antenna antenna Scart cable cable - 10 - 2.3 Connecting to TV/VCR using SCART Support Cable or OFF-Air antenna VCR Satellite Receiver TV 2.4 Connecting to Digital Amplifier Dolby Digital Amplifier Satellite Receiver - 11 - 3. Menu Information Once you have installed and connected the cables of the DX 66, the menu is displayed. This menu consists of 6 main menus as shown below. Channel Manager (chapter 7) Installation (chapter 4) System Setting (chapter 5) Information Timer (chapter 9)Game During the installation the OK key confirms a selection and key shows the Drop Down List Box. You can also use the numeric keys on the RCU to enter a numeric value. Use the PR+, PR- key to move up or down from one line to another line. Use the change parameters in sub menus. To escape the menu system at anytime, press EXIT key on the RCU. - 12 - keys to 4. Installation This menu consists of 6 sub-menus as shown below. 1.Satellite 2.Antenna Setup 3.Channel Search 4.Default Value 5.Parental Lock 6.S/W Upgrade by OTA 4.1 Satellites In this sub-menu, you can select satellite and use color keyon the RCU to Add, Edit, Delete and Mark satellite. 4.2 Antenna Setup In this sub-menu, you can set Satellite, TP Index, LNB Type, DiSEqC, Positioner, 22K, 0/12V,Polarity, Toneburst, LNB Power. 1. Satellite name: Select first satellite you want. 2. Transponder: Select desired transponder.press OK key will Display a down list box which also let's you select desired transponder. 3. LNB Type: Select you LNB type. OK key will Display a down list box. Low Freq.(MHz)/High Freq. (MHz): Enter the proper LNB Frequency referring to your LNB using the numeric keys. Universal LNB is the standard LNB setting. 4. DiSEqC Switch Setting: Select DiSEqC with you want to configure the antenna with a DiSEqC switch. 5. Positioner: You either can select DISEqC1.2 or USALS to configure a motor driven antenna, see below. 6. SWITCHES ( 22K,0/12V, Polarity): you can select the switch with you want to configure the antenna. 7. LNB Power: If your DSR is connected the LNB, Select LNB Powr ON or OFF. - 13 - 4.2.1 Motor Setting/Positioner Select ´Positioner´ DiSEcC1.2 or USALS then press OK key, the screen will shown as beside: 1. Satellite: Select first satellite which you want. 2. Transponder: Select desired transponder. 3. Position: Select number of position of respective satellite. 4. Limit Setup: Select Disable or Enable. If you select East/West Limit option, you can operate as below: Press the OK key on the RCU. The message “Set Positioner limit!” will be displayed for your confirmation. Pressing the Left key on the RCU continuously in next line “Continuous Move” will take you to the eastern most point. 5. Continuous Mode: Use VOL- and VOL+ keys on the RCU to let motor move to west or east to find correct position. 6. Execute command Position”. “Save Present 7. Recalculation: Recalculate All Positions : When all the locations of searched satellites are shifted for any reason, you can realign all of them once you adjusted one satellite location. 8. Go to Reference: When you install the motor of DiSEqC 1.2 antenna, you can select this function to move the center of the antenna to 0°. 4.3 Channel Search: In this menu, you can select Edit TP, Single Satellite Search or Multi Satellite Search. Then press ok to select search mode, then select OK to Search item to search program. - 14 - 4.3.1 Manual Search/Edit Transponder In this menu you can edit, add, delete transponders or scan a transponder for channels. 1. Satellite Name: Select first satellite you want. 2. Transponder: Select desired transponder.press OK key will display a down list box which also let's you select desired transponder. 3. Frequency & Symbol Rate: Edit the frequency and symbol Rate. You can use number keys on the RCU to modify Frequency. 4. Polarization: select polarization mode. HOR or VER 5. Symbol Rate: Edit the symbol Rate. You can use number keys on the RCU to modify symbol rate. 6. Add TP: You can add a new TP into the list, see below 7. Delete TP: selected TP You can delete current 8. Delete All TP: You an delete all TPs of the selected satellite at once. 9. TP Scan: the channel searching process is starting on selected TP. Select search type: you can select only FREE channels, or ALL channels. NIT Search: set NIT Search ON or OFF. Then press OK button, the DSR will search only on this one transponder frequency as shown below: 10. Antenna Setup: You can jump to the Antenna setting menu. Add Transponder In Manual Search menu, press OK at ´Add TP´ line in the menu, the screen will display a submenu, in this sub menu, you can add the frequency and symbol rate, select Hor or Ver polarization mode to add new transponder. - 15 - Delete Transponder Delete TP : If you want to delete a Transponder, please select the Transponder which you want to delete and then press OK on the RCU. A confirm message box will be displayed. Confirm by YES to delete. 4.3.2 Single Satellite Search: Select search mode, then select OK to search programs of the actual satellite. In this menu after pressing OK you can select NIT Search ON or OFF, as well as only FREE channels, or ALL. Select search channel mode. Then press OK, the DSR will automatic search and list channels as shown beside: 4.3.3 Multi Satellite Search: Select search mode, then select OK to search programs of all activated satellites in the satelite list. In this menu after pressing OK you can select NIT Search ON or OFF, as well as only FREE channels, or ALL. Select search channel mode. Then press OK, the DSR will automatic search and list channels as shown beside: 4.4 Default Value : If you want to bring DSR back to the factory default condition, select factory default and press OK button. Then a warning message will displayed. To confirm, select OK. Warning: On selecting factory default you will lose all of data and information, which was previously installed. - 16 - 4.5 Parental Control This function allows you lock the channel with a password in order to prevent children from accessing the channel. You can also protect your installed data and information using the Menu Lock. How to use Menu Lock 1. Enter the current password. 2. Select ON of Menu Lock 3. Enter new password 4. Confirm your new password entering new password again 5. Exit this menu. 6. Select any menu and press OK on the RCU . 7. Then the Enter Password box will be displayed. 8. Unless you enter the correct password, you can not run any menu. Note: Default password is 0000. Warning: Do not forget your password. In case you forgot your personnel password the master code is 8888. How to use Channel Lock 1. To activate channel lock function, go to the TV channel Manager Page. 2. Press “Edit” (Yellow key) and put in the password 3. Press Lock key (White colour key) on the RCU. 4. Select the channel which you want to Lock. 5. Press OK then symbol is displayed. If you then select locked channel you will be asked for the password before you can watch the channel. 4.6 Software- Update via Satellite (OTA – Over The Air) Because of continuous changes in DVB broadcasting it is also necessary to update your recei vers software to be every time on the height of the time. Therefore Zehnder company offers actual upgrade software files on their homepage or by satellite Astra 19,2° for download. But the more easy and convenient way is the „upgrade via satellite“ function offered in the main menu „Installation“ of the receiver. Especially use this function if you have problems with the function of the receiver or the reception of some channels. Simply follow the instructions at the menu screens. - 17 - 5. System Setting This menu consists of below: sub-menus as shown 1. Language 2. TV System 3. Local Time Setting 4. Startup Channel 5. OSD Setting 6. Remote System 5.1.Language You can select menu language, First audio, second audio, subtitle language and teletext Menu 1. Language: Select OSD language out of about 8 languages. 2. First Audio 3. Second Audio 4. Subtitle Language 5. Teletext Language 5.2.TV System 1. Display Mode: You can adjust the TV system type of your TV set Auto, PAL, PAL M +N, NTSC,. 2. Aspect Mode: Select 4:3PS Pan&Scan), 4:3LB (LetterBox) or 16:9 screen ratio depending on your TV screen. 3. Video Output: If your SCART supports RGB control, Select RGB. Otherwise select CVBS. 5.3 Local Time Setting Usually you get the information real time from the satellite Automatically but sometimes they transmit wrong information. In that case, you can adjust the real time using this function. Set Local time (GMT Offset) for central Europe to +1.00h. During Summer Time switch this option to ON Time Display “ON” enables a Clock at the right top of the TV screen. - 18 - 5.4 Start Up Channel 1. Boot On Channel: If you switch to ON, the selected channel starts whenever you turn on the receiver. 2. Mode: Select, if you want to start on a TV or Radio channel. 3. Starting Channel: If you press OK key, then the channel list is displayed. You can select one channel from the list. 5.5 OSD Setting 1. Subtitle Display: Select ON, if you want to display the DVB subtitle as soon as it is broadcasted. 2. OSD Timeout: Set OSD timeout from 1 Sec to 10 Sec for automaticly fade out OSD. 3. Position: Select Bottom or Top like where you want to see the channel information window during channel up/down operation. 4. OSD Transparency: Set OSD transparency from 10% to 40% or OFF. 5. Load OSD Setting Default: Pressing OK resets the factory defaults only of the OSD settings. 5.6 Remote System Remote System: You can set to code B if you have a Dual Remote Control FB22 from Zehnder to use different RCU IR codes by pressing SHIFT button.. - 19 - 6. General Viewing Functions The following describes the basic functions of your DX 66 while watching satellite TV or listening to satellite radio. 6.1 Select Channel If you want to select channel, use CH key on the front panel or PR+, PR- key on the RCU or numeric keys. In addition to the above normal function, DX 66 provides more convenient channel change function. While watching, press OK key on the RCU. A channel list will be displayed on the left side of the screen. If you press EXIT key, the channel list will disappear. To select a channel, go up or down this channel list and place the cursor on a desired channel. Then, press OK key to watch the selected channel. If you press key on the RCU, the channel list will scroll page by page. If you press RED button you get into some Channel Sort window, where you can sort on special options. 6.2 Previous Channel Recall Press key on the RCU to move to the previous channel you watched. 6.3 TV & Radio Mode While viewing a TV channel, press the TV/RADIO key on the RCU to toggle between TV and Radio modes. 6.4 TV & VCR Mode The key on the RCU lets you change the mode from satellite to TV or VCR. Press once to move the TV mode. Press twice to move to VCR mode. Press three tomes to move back to satellite mode. 6.5 Channel Information Every time you change channels, you will receive program information for a few seconds. While watching the channel you can see the current channel information at anytime by pressing the INFO key on the RCU. Note: Channel information will be displayed for 3 seconds by default and will disappear. You can adjust the display time interval from 1 to 10 seconds in the OSD setting menu. - 20 - 6.6 Favorite List To call a favorite group list press on the RCU. key You can access the next of 8 favorite groups when you press the BLUE button. The method to group favorite channels is explained in the Favorite Channel (page 23). 6.7 Volume & Audio Control 1. Volume Control To increase or decrease volume, use key on the RCU. Note: DX 66 has 33 volume levels and this can be controlled from the volume level of your TV. 2. Mute To mute the sound, press Mute button on the RCU. To bring back the normal sound, press this key once again. 3. Audio Control Press the key and then repeatedly to select one of three possible Audio settings (Left, Right and Stereo) The current audio setting will be displayed in the channel information 4. Language Selection key on the RCU and Press the repeatedly / to select audiolanguage. This is dependent on the transmission of audio signal, e.g. AC3 Audio. 6.8 Teletext If a channel is broadcasting either subtitle or teletext information you can see the symbol in the channel information. Easily press the button TEXT to select one of the services. For subtitle mode automatically a specific teletext page is called. The receiver offers you a integrated teletext decoder to have direct access by the receiver remote control. Teletext mode is easy and fast to use because up to 899 pages are stored in memory to have very fast access to each page. Directly choose page number by your remote control. - 21 - 6.9 Pause the frame Press PAUSE button (Blue button) on the RCU to pause the screen. To bring it back to the normal mode, press PAUSE key once again. 6.10 Multipicture Using the MULTIPICTURE button you can divide the TV screen in showing 9 different TV channels simultaneously. Press arrow buttons on RCU to change channels 6.11 Position If you need to adjust the antenna more key on the RCU and accurately, press the position menu will be displayed. Go to “Move” and press key on the RCU to adjust the motor driven antenna. 6.12 Sat If you searched channels from more than one satellite and want to have a channel list for each satellite, press key on the RCU, a satellite list will be displayed. Select one satellite you want, press OK key on the RCU then you will have a channel list of your choice. - 22 - 7. Channel Manager DX 66 provides a powerful channel managing function. This function not only allows you to watch channels but also do a lot of interesting and useful things. Channel Manager Channel manager consists of Edit TV channels and Radio channels, which contain similar menu structures. Note: Since the usage of Radio Channel is same as that of TV channel, in this manual only TV Channel manager is explained. You only have to press TV/Radio button to switch between the lists. On the left side of the TV channel menu, you can see the channel list. On the right side, you can watch the current channel in small Picture in Graphic (PIG) mode (1/9 size of the normal mode). You can also see channel information below the PIG screen. When you move the cursor from one channel to another, the PIG will change accordingly. You can use those color keys on the RCU as below. 1. Sort mode (Red key) 2. Favorite mode(Blue key) 3. Skip mode (White key) 4. Edit mode (Yellow key) 7.1 Sort Channel In the Main Page, press MENU key on the RCU, and press Sort key (red color key) on the RCU and then open sort options by OK button. This Sort menu has a sub command and it allows you to sort the channels, as you like. You can sort the channels by Alphabet, Lock, FTA, Scramble ($) and original sequence (Default). Place the cursor on the desired line, and then press OK key. Check whether the channels are sorted properly on the channel list. Note: Radio Channel Manager has the same operation as TV channel Manager. 7.2 Favorite Channel When you select TV channel manager and then Set Favorites menu (blue colour key) the list will be shown on screen as name “Favorite”. Press up/down key repeatedly to switch between 8 different favorite groups as News, Sports, Kids, Movies, Music, Science, Fashion and confirm by OK key. - 23 - Select your favorite channel and then press OK key. Then respective symbol will be marked next to your selected channel name. If you want to remove the channel name from the favorite channel list, press OK key once again, then the symbol mark will disappear. After the selection of favorite channels press EXIT key twice to save data. 7.3 Skip Channel In the TV channel manager page, press Skip key (White color key) on the RCU. Select a channel by pressing OK key. You can mark more than one channel by the same procedure. All marked channels will be skipt during channel switching operation. 7.4 Edit Channel In the TV channel manager page, press Edit key (Yellow color key) on the RCU. Then key in your personal password (standard password ´0000´) to get into the Edit submenu to use following functions: 7.4.1 Move Channel In the TV channel manager page, press Move key (Red color key) on the RCU. Then press OK Key to mark the channel to be moved. Start moving by cursor key to the location where you want to move the selected channel and press again red colour Move key. Then, you will find that the selected channel has moved to the desired location and channel the number has changed accordingly. The other channels behind will be moved and renumbered automatically. You can mark more than one channel by the same procedure. All marked channels will be moved at once. - 24 - 7.4.2 Delete Channel In the Channel manager, you can enter Delete CH mode, if you press Delete key (Blue color key) on the RCU. This Delete command allows you to delete the channel permanently. First select the mode of deletion: If you press Delete One (Red color key) again, all channels you are manually marking will be deleted. If you press Delete ALL (Yellow color key) again, all channels of the whole channel list will be marked to be deleted. If you press Delete TP (Blue color key) again, all channels of selected transpon der frequency will be marked to be deleted. If you press Delete SAT (White color key) again, all channels of the whole satellite will be marked to be deleted. Then select the channels, which you want to delete; the selected channel number will be marked to “X”. If you cancel the selection, press OK key again, then the marked number will be back. If you decide to delete, press EXIT key and then press OK to delete. Warning: The deleted channel cannot be recovered unless you search again. 7.4.3 Lock Channel In the TV channel manager page, press Lock key (White color key) on the RCU. This Lock command allows you to lock the channel. First select the channel, which you want to lock, and press OK key. Then this will be marked beside the selected channel name. Note: To perform this function, you should set up the Parental Lock in advance. 7.4.4 Edit/Rename Channel In the Channel Edit Page, press Edit key (Yellow color key) on the RCU and then red key to select edit a channel function. A new channel window opens. This Rename command allows you to rename the channel. First select the channel to be renamed and press OK key, then a Keypad dialog box will be displayed. Enter the desired name. Check whether the channel name is changed on the channel list. - 25 - 8. EPG (Electronic Program Guide) DX 66 provides EPG function for you to get access to the TV Guide (or Radio Guide if you are listening to radio channels) that will show the titles and other information of the current and next programs on different channels. The information is only available from the network to which the channel you are watching. To see the EPG data, press EPG key on your RCU when watching a channel. The EPG box will be displayed. You can see the channel in the PIG screen; channel list at the bottom side and Program schedule for selected channel will be displayed on the right side. The time related to the program schedule is also displayed. If you want to check the previous or next hours of the channel, please press +6:00 key (Red color key) or –6:00 key (Blue color key) on the RCU. Note: A ‘No data available” message will be shown if the selected channel does not provide EPG data. Detail Info Select one channel and placing the mark on the time of Program name which detail information you want to see. If there is detail information of the channel, press Detail Info (Yellow color key) key on the RCU, for the detail information box to be displayed. Timer programming through EPG One easy way to program a timer event for automatic switch on/off is using this Program Guide menu. Just select the channel line and mark the event you want to choose and press White button on RCU to open the Timer Event window. There you can choose the status of timer whether it should be one time (Once), Daily or Weekly. Confirm by OK button. This timer event will be added to general Timer menu list (see main menu “Timer”), where you can edit the data. - 26 - 9. Timer In this menu you can program the timer in various ways. This function is one of the strong points of DX 66. One basic condition for the correct operation of this function is the correct time displayed at the top line of the timer menu window. Time Adjust Usually you get the information real time from the satellite automatically but sometimes they transmit wrong information. In that case, you have to check the actual time and you may have to adjust the real time by unplugging the receiver from power for some seconds.. Time Reservation Either you can program a timer event through the EPG data (see EPG) or directly in the Timer Event Table of this menu. Timer can be activated by “Once”, “Daily”, or “Weekly” option in right column. 8 different events can be programmed at maximum number. With left right key you can select between the 8 different timer events showing the channel, start and stop time. 1. Timer number: First select one Timer event and step by step move right with arrow buttons on RCU. 2. Tier Mode: Select the timer mode as Once, Daily, Weekly, Monthly, Yearly or OFF. 3. Timer Service: Select whether you want to drive a TV or Radio channel 4. Wakeup Channel: Select channel opening the channel list wit OK button. by 5. Wakeup Date: Use number keys to fix the data by month and day. 6. Start/Stop: Use number buttons on RCU to key in the wished start and stop time. - 27 - 10. Software-Update via RS 232 For this receiver you can download new software from Zehnder homepage http://www. zehnder-sat.de to up-grade your receiver with new operating system and new channel list by using RS232 interface and programm editor „ChannelEditor1.1x “ . Find at support area ´Download //Software Update´. Then select respective receiver type. With this software you also can prepare your personal channel list at the PC by sorting, moving, deleting, changing, adding channels in a very easy way. 1. Connect receiver to your PC using RS232 cable. 2. Turn off the receiver and check the Front Display is black. 3. Run ChannelEditor1.1x software in your PC, then the editor main window will be displayed. 4. Below the command line, select Com-Port connected to the receiver - 28 - 5. Please check in Menu “Receiver Type” the mark is at Type “Ali DVBS” 6. Call “Software_Upgrade” Menu from Main Menu 7. The followingUpgrade window will open. Select “Upgrade” for Mode Setting and open the File Window by pressing the “Browse” button. 8. You can see file window. Select and open the „rom.abs“ file to be upgraded. - 29 - 9. The “Upgrade Type” automatically will be set to “allcode”. Press button “Next” to start Upgrade procedure. It’s now waiting for Receiver switched ON. 10. Now switch On the Receiver and you can see “Testing serial port status” until “Finished” is displayed. If you cannot find this information. Please check your cable or PCs COM port. After a moment it will show download data. During the download, your receiver will display the update situation by flashing red and green LED at Front panel of the receiver. 11. After completed Download, click ´Next´ to burn data into flash Rom memory. - 30 - 12. Now you can see the burning picture. Be carefully! Do NOT switch off when Burning! 13. Please wait until it displays “End” message in the Front Panel Display. You can upgrade Next Receiver or Finish. 14. Afterwards, the receiver has to be rebooted by power off/on if the procedure is completed. - 31 - 11. Trouble Shooting Problem Possible Causes What To Do The display on the front panel does not light up. Main cable is not connected. Check that the main cable is plugged into the power socket. No sound or picture, but the front panel red light is ON. TheThe SRS-5518-GB Receiver is inis in standby mode. standby mode. No sound or picture. The satellite dish is not pointing at the satellite. No singal or weak signal. Bad picture / blocking error. The satellite dish is not pointing at the satellite. Press the standby button. Adjust the dish, Check the Signal Level in the Antenna Setup menu. Check the cable connection, Lnb and connected between the LNB and the receiver, and/or adjust the dish. Adjust the dish. Signal is too strong. Connect a signal attenuator to the LNB input. Satellite dish too small. Change to a larger dish. LNB noise factor too high. The LNB is faulty. - 32 - Change to an LNB with lower Noise factor. Change the LNB. Problem Possible Causes What To Do The systen is connected by SCART leads and TV is not in AV/EXT mode. If the system is connected by SCART leads, switch the TV to the appropoate AV input. The systen is connected using RF leads. Check the UHF channel fixed in your system and tune the UHF channel properly. There is interference on your digtal satellite channels. The system is connected The systen is connected using RF leads and the using RF leads and the output channel of the output channel of thewith SRsReceiver interferes 5518-GB interferes with an existing terrestrial an existing channelterrestrial or Video channel signal. or Video siganl. Change Receiver Change thethe SRs-5518-GB output channel tomore a output channel to a more suitable channel, suitable channel , or or connect the system connect the system using using SCART leads SCART leads. The RCU is not working. Battery exhausted. Change the batteries. RCU is incorrectty aimed. Aim Aimthe theRCU RCUatatSRSthe Receiver or check 5518-GB, check that that nothing block block the front nothing front panel. panel. No picture appears on the TV scree. Note: If you have tried all of the actions suggested above, and couldn’t solve the problem; please contact your dealer or service provider. - 33 - 12. SPECIFICATIONS CPU & Memory CPU Ali M3329B1 Program memory (Flash) Decoding Memory( RAM) 2 Mbyte 8 Mbyte Tuner & Channel Connector 1 IF Loop through Frequency Range Digital Signal Input Level LNB Supply 22KHz Tone DiSEqC Control Demodulation Input Symbol Rate 2 x F-Type, 3/8-32UNEF-2A Yes 950 to 2150 MHz -25 to -65dBm 13.0V / 18.0V (max.400mA), Short Circular Protection Frequency:22 ± 4KHz Version1.0/ 1.2 Compatible QPSK 2 to 45 MSPS FEC Decoder Convolutional Code Rate 1/2, 2/3, 3/4, 5/6 and 7/8 with Constraint Length K=7 MPEG Transport Stream A/V Decoding Transport Stream MPEG-2 ISO/IEC 13818, Transport stream specification Aspect Ratio Output System Audio Decoding Audio Mode Sampling Rate 4:3; 16:9 PAL/NTSC/AUTO MPEG layer I and II, Musicam Stereo Channel, Dual Mono, Joint Stereo Channel, Mono 32, 44.1 and 48KHz Digital Audio SPDIF with AC-3 loop through A/V Data In/Out TV SCART VIDEO Output (CVBS, RGB) AUDIO Output VCR SCART VIDEO Output (CVBS) VIDEO Input (CVBS, RGB) SPDIF Digital Audio Output RS-232 Data Port 9 pin D-sub Type, Baud rate 115200Kbps Environment Operating Temperature 0°C ~ +40°C Storage Temperature - 40°C ~ +65°C Power Supply Main input voltage 12-24V DC, 2 A 100 ~240V AC @ 50Hz/60Hz with 230V power cable Nominal power consumption Max. 30W, standby 4 W Physical Specification Size (W x H x D) 280mm x 205mm x 42mm Weight (Net) About 1.3Kg · Specification and functions may be changed for improvement without notice in advance. Copy Right© All Rights Reserved - 34 - - 35 - 03.09 Änderungen vorbehalten! HEINRICH ZEHNDER GMBH SATELLITEN-EMPFANGSTECHNIK Weierhalden 37/1 D-78144 Tennenbronn / Germany - 36 - Tel. 07729/881-0 Fax 07729/881-72 http://www.Zehnder-SAT.de e-mail: [email protected]