Download MACROMEDIA DREAMWEAVER MX 2004-USING DREAMWEAVER Specifications

Transcript
Copyright © Rutgers Writing Program
Contact Barclay Barrios ([email protected])
Tutorial – Macromedia Dreamweaver MX 2004
Introduction
In your work at Rutgers, you may want at some point to publish your own web page
or site, either for a class or personal use. One of the most widely-used and versatile
programs for creating web pages today is Macromedia's Dreamweaver MX 2004. This
is a WYSIWYG (What You See Is What You Get) program, so you don't need any
previous knowledge of HTML hand-coding for creating a web page. Dreamweaver MX
2004 allows you to create and edit web pages and sites in a graphical user interface,
so you are able to see changes to your work as you make them. This tutorial will
walk you through many aspects of Dreamweaver MX 2004, from creating a new
document, to publishing it on your RCI space.
Setting Up Your RCI Account
If you have not yet established an account on an ICI (Instructional Computing
Initiative) server at Rutgers University in New Brunswick, called "RCI", you will need
to do so ASAP. All Rutgers employees are eligible for an account.
Just visit the URL below, read the "Acceptable Use Policy" guidelines, then go to the
bottom and click on the "Accept" button. A form will appear on your screen. Fill in
the form, click "Create Account," and in 15 minutes you will have a new "RCI"
account.
Start here to establish your RCI account:
https://www.rci.rutgers.edu/rats/rats.cgi
Setting Up Your public_html Folder
Once you have an RCI account, you will need to establish a folder (or "directory") to
which you can publish your web pages. This is called a "public_html" directory. You
also need to change the permissions (a type of setting) of that directory to make it
available to the public (so that anyone can read but not write to what you post
there). To set up this “public_html” directory, please read the appropriate tutorial; it
will walk you through all of the steps in creating your “public_html” tutorial on any
Rutgers University computer.
Opening Dreamweaver MX 2004
To start working with Dreamweaver MX 2004, you will need to open the program.
Some campus computer labs are equipped with this program on its computers, and it
can also be found on all Computer Classroom computers. You can open it by clicking
on the "Start" button located in the bottom left corner of your screen. Then, navigate
to the "Programs,” and then to the “Macromedia” folder. From there, select
“Macromedia Dreamweaver MX 2004.” Please note that many computers at Rutgers
labs may have multiple, older versions of Dreamweaver installed, and all may be
listed in the “Start” menu. Make sure you open Dreamweaver MX 2004, the most
recent version of the program.
Copyright © Rutgers Writing Program
Contact Barclay Barrios ([email protected])
If you do not see this listed in the “Start” menu, look for an icon for Dreamweaver
MX 2004 on your Desktop.
When you first open the program, Dreamweaver will prompt you with its own
starting window; from here, you can select the type of document you would like to
create. Unfortunately, there is no way to simply close this window; in order to get
rid of it you must select some type of document. Pick “Create New” >> “HTML” to
open a blank web page and close the window (you can also click “Don’t show again”
if you do not want this starting page to show, again).
Copyright © Rutgers Writing Program
Contact Barclay Barrios ([email protected])
Different Views
Dreamweaver MX 2004 is a flexible program that allows you to code in different
“views”: Code View, Code and Design View, and Design View. You can switch
between these views by using a series of three button icons located near the top left
corner of the screen.
In the Code view, Dreamweaver MX 2004 displays a web page in its raw form: HTML
code. If you are familiar with hand-coding HTML, you may wish to edit your web
pages in this view.
The Code and Design View splits the screen in half, displaying the HTML code for the
web page in the top, and the WYSIWYG, or Design View, in the bottom half.
Finally, the Design View displays a web page purely in the WYSIWYG style. Here, you
can physically manipulate your web page elements, rather than coding them in
HTML. This is the ideal view to use for beginners.
Copyright © Rutgers Writing Program
Contact Barclay Barrios ([email protected])
Program Layout
One of the main differences between Dreamweaver MX 2004 and previous versions
of the program is the layout of the interface, which includes several panels and tabs.
When you first open Dreamweaver MX 2004, you will be greeted with a barrage of
panels, mostly located on the right side of the screen, and a list of tabs positioned
horizontally on the top of the screen.
If you are used to an older version of Dreamweaver, you will notice there are quite a
few differences in the layout of the program. While there are mostly only small
adjustments between MX and MX 2004, there are huge jumps from Dreamweaver 4
to this version. Macromedia has included two different types of program layouts for
its users: the default, “Designer” view, and the additional “Coder” view. If you wish
to change to the “Coder” view (note that you can switch back whenever you wish),
click through the “Edit” >> “Preferences” menus.
Copyright © Rutgers Writing Program
Contact Barclay Barrios ([email protected])
Click on the button “Change Workspace,” which is located in the middle of the
default window (the “General” tab).
A new window will appear, giving preview of the two views. This tutorial will be
written with the “Designer” view in mind, which is the default view.
Copyright © Rutgers Writing Program
Contact Barclay Barrios ([email protected])
Panels
For basic web designing tasks, many of these panels may not be needed.
Fortunately, these panels can be closed, making the main Dreamweaver screen less
cluttered. Here is a quick run-down of the panels in Dreamweaver MX 2004:
Design
This panel controls CSS (Cascading Style Sheet) Styles and Layers.
Code
This panel allows you to fine-tune your code with some pre-set examples
(such as navigation and form elements).
Copyright © Rutgers Writing Program
Contact Barclay Barrios ([email protected])
Application
This panel is meant exclusively for managing database functions embedded in
web pages. Since this is a basic tutorial, we will not go into depth about
databases in Dreamweaver MX 2004.
Tag Inspector
The Tag Inspector will allow you to fine-tune and change certain attributes,
specifically in the Code View.
Copyright © Rutgers Writing Program
Contact Barclay Barrios ([email protected])
Files
Of all of the supplementary panels in Dreamweaver MX 2004, you will
probably find the “Files” panel the most important and useful. It is in this
window that you organize files related to your web page or site, and is the
main mechanism for uploading and downloading files to/from the web. Since
this is such a major function of Dreamweaver MX 2004, we will discuss the
Files window in the “Publishing” section.
Managing Panels
There are several ways in which you can manage the panels in Dreamweaver MX
2004. See the diagram below to learn how.
1. The little area with tiny dots means that you can use your mouse to click and
drag away a panel to a different part of the screen. This is helpful for when
you want to un-group the panels.
2. By clicking on the small triangle, you can expand the panel to see all of its
different tabs and menus. Simply click on the triangle again to minimize the
tabs.
3. This long, skinny button with a triangle inside allows you to hide the panels
completely. This saves a lot of space with you wish to view the entire work
Copyright © Rutgers Writing Program
Contact Barclay Barrios ([email protected])
area without the panels cluttering up the main Dreamweaver MX 2004 screen.
Click on this button again to view the panels.
Alternatively, you can right-click on any one of the panels and select “Close Panel
Group” to close the panel completely. To re-open a panel that you have closed, you
can go to the menu bar and select the panels you want from “Window.” Also, you
can select “Hide Panels” from the “Window” menu (shortcut “F4”) if you wish to close
all of the panels quickly.
It is recommended that you set up your Dreamweaver MX 2004 workspace to fit
your preferences as soon as you open up the program.
The Insert Bar
The Insert bar, located across the top of the screen, is different from the abovementioned panels. The Insert bar contains far more tabs than other panels, and has
several options for adding and manipulating objects and functions into a web page.
You may find along the way that you want to familiarize yourself with these options,
as they allow for a quick and easy way to insert objects into a page.
Common
The Common tab features some of the most-used functions in Dreamweaver
MX 2004.
Copyright © Rutgers Writing Program
Contact Barclay Barrios ([email protected])
1. Hyperlink:
Clicking on this brings up a window that lets you create a link to another
web page, file, or location on the same page.
2. E-Mail Link:
Email links allow visitors to a site send someone an email by clicking on a
special link. Using this tool allows to you easily make such a link.
3. Named Anchor:
An anchor is a special kind of link that takes a user to a different part of
the same page. Clicking on the Named Anchor button lets you quickly
make a link for an anchor.
4. Insert Table:
When you click on this tool, a window pops up asking you to input
information to create a table. When you are done, click on “OK” and the
table will appear in your web page.
5. Image:
You can easily place an image in a web page by clicking on this button.
When you do, a new window will pop up. From here, you can browser your
computer to find the image you wish to include in your web page.
Remember, if you plan on putting your page on the Internet, you will need
to put all images used in your web page on the Internet as well. This will
be discussed further in the “Publishing” section.
6. Media:
Allows you to insert special media into a web page, such as a Flash movie
(or other Flash items, such as buttons), or special applets / plug-ins.
7. Date:
Inserts the current date at the cursor point; a new window will appear
asking which format you wish the date to appear in.
8. Comment:
Allows you to enter a comment into the source code. This is useful when
you later come back to designs and need refreshing as to why things have
been laid out in a certain way.
9. Templates:
Allows you to create a new template, or apply a pre-existing one to your
current document. Templates allow you to control and keep consistent
the over-all design of your site.
10. Tag Chooser:
Tag Chooser will bring up a new window allowing you to select code from
a large quantity of pre-written items, divided up into appropriate
categories (such as page composition and formatting).
Layout
The Layout tab provides you with a variety of options to create an efficient
layout for your web pages.
1. Table:
Insert a table based on a wide variety of specifications (including height,
width, number of columns, number of rows, border width, etc).
2. Insert Div Tag:
Div tags are best used in conjunction with Style Sheets.
Copyright © Rutgers Writing Program
Contact Barclay Barrios ([email protected])
3. Draw Layer:
Physically draw a new “layer” onto your web page.
4. Standard
5. Expanded
6. Layout
These three extra views allow you to design and control your layout to an
extreme degree.
7. Layout Table:
While in the extra “Layout” view, you can draw a table to be used as a
layout.
8. Draw Layout Cell:
Similar to the above, while in the “Layout” view, you can draw cells to be
used in designing a layout.
9. Insert Row Above:
Inserts a row to a table above the cursor.
10. Insert Row Below:
Inserts a row to a table below the cursor.
11. Insert Row Left:
Inserts a row to a table to the left of the cursor.
12. Insert Row Right:
Inserts a row to a table to the right of the cursor.
13. Frames:
Insert a variety of types of frames to be used in a web page layout.
14. Import Tabular Data:
Dreamweaver will attempt to import a data file formatted into a table.
Forms
The Forms tab allows for easy insertion and manipulation of forms.
1. Form:
Inserts an empty form at the cursor.
2. Text Field:
Inserts a text field at the cursor.
3. Hidden Field:
Inserts a hidden field at the cursor.
4. Text Area:
Inserts a scrollable text area at the cursor.
5. Check Box:
Inserts a check box at the cursor.
6. Radio Button:
Inserts a radio button at the cursor.
7. Radio Group:
Inserts a radio group of buttons at the cursor; you can specify exactly
which values can be selected in the window that appears.
8. List Menu:
Inserts a menu that can be used to contain a list.
9. Jump Menu:
Inserts a drop-down menu that can be used as navigation.
Copyright © Rutgers Writing Program
Contact Barclay Barrios ([email protected])
10. Image Field:
Inserts an image field at the cursor; will prompt you for an image.
11. File Field:
Inserts a file field at the cursor; typically seen used to attach files to an email.
12. Button:
Inserts a button at the cursor.
13. Label:
Brings you into the Code View and inserts a <label></label> bit of
coding.
14. Fieldset:
Brings you into the Code View and inserts a fieldset bit of coding, based
on the name you specify.
Text
The Text tab provides you with one-click access to formatting the text the
appears on your web pages.
1. Font Tag Editor:
Allows you to edit the fonts that appear, such as in your Style Sheets.
2. Bold:
Places the selected text in bold face.
3. Italics:
Places the selected text in italics.
4. Strong:
Places the selected text in strong/bold face.
5. Emphasis:
Places the selected text in emphasis/italics face.
6. Paragraph:
Turns on the new paragraph indicators in the Design Mode.
7. Block Quote:
Places the selected text in an indented “block quote” format.
8. Preformatted:
Places the selected text in the “Preformatted” format style.
9. Heading 1:
10. Heading 2:
11. Heading 3:
Places the selected text in one of the three varying levels of pre-formatted
“heading” styles.
12. Unordered List:
Places the selected text in a bulleted, unordered list.
13. Ordered List:
Places the selected text in a numbered, ordered list.
14. List Item:
Indicates the selected text as an item in a list.
15. Definition List:
Creates the structure for a definition list.
16. Definition Term:
Indicates the selected text as an item in a definition list.
Copyright © Rutgers Writing Program
Contact Barclay Barrios ([email protected])
17. Definition Description:
Allows the placement of a definition description in a list.
18. Abbreviation:
Allows the indication of an abbreviation with the full title.
19. Acronym:
Allows the indication of an acronym with the full meaning.
20. Characters:
Allows the quick insertion of special characters, such as a line break, the
Pound/Euro/Yen symbols, Em Dash, etc.
HTML
The HTML tab provides you with one-click access to special HTML features,
such as tables, frames, etc.
1. Horizontal Rule:
Inserts a horizontal rule (straight line) at the cursor point.
2. Head:
Inserts special header tags in the coding.
3. Tables:
Allows for easy insertion of tables and their attributes (rows, etc).
4. Frames:
Allows for easy insertion of frames and their attributes (floating, etc).
5. Script:
Allows for control over special script items, such as Server Side Include.
Application
The Application tab allows for access and control to extra record items.
The Application tab features are advanced features that will not be used in
this basic tutorial.
Flash
The Flash tab is used to insert Flash movies.
1. Image Viewer:
Inserts a Flash movie at the cursor point.
Favorites
The Favorites tab can be customized with your own “favorite” options for easy
one-click access to formatting and designing your web pages.
Copyright © Rutgers Writing Program
Contact Barclay Barrios ([email protected])
Creating a New Page
When Dreamweaver MX 2004 has loaded you have the option of opening a blank
page. If you have turned this off, you can get a new blank web page by going to the
menu bar and selecting "File," and then "New" (shortcut “Ctrl+N”).
A window called “New Document” that lists different types of blank documents will
appear. If you are starting a new page, simply select “Basic Page” from the
“Category” column, and “HTML” from the “Basic Page” column. Click on “Create” to
begin a new blank page.
Opening a Page
Websites are coded in what is known as HyperText Markup Language, or HTML. That
said, the file types of web pages on the Internet are ".html." Web browsers take
these HTML files (which we would see as coding), and display it as a graphical user
interface, a web page, for users to navigate. To open a web page (an .htm or .html
document) in Dreamweaver MX 2004, go to the menu bar and select "File," and then
"Open."
Copyright © Rutgers Writing Program
Contact Barclay Barrios ([email protected])
Use the window that pops up to browse through your computer to open the file.
When you find the file you want to open, click on the “OK” button.
NOTE: Dreamweaver MX 2004 is capable of opening any kind of website file,
regardless of whether or not it was originally created in Dreamweaver MX 2004. For
example, if you have an HTML file that you have coded yourself by hand, you can
also open this in Dreamweaver MX 2004 and edit it in WYSIWYG fashion. If you are
familiar with the technology involved, you can also open ".shtml" files, which may
have been coded with SSI.
Saving a Page
In Dreamweaver MX 2004 (and any other computer application), you should always
make sure to save your work on a regular basis. To save a file in Dreamweaver MX
2004, go to the menu bar and select "File," and then "Save As."
Web Pages and Their Relation to Each Other
The first page of a website is referred to as the "index page." It is given its name,
actually, by the filename generally given to it. All main pages are named
"index.html." Why is this? If you were to enter "http://www.yahoo.com" into your
web browser, what you are actually telling it to look for is
"http://www.yahoo.com/index.html". The index file is loaded, immediately, in all
directories on the web. That's why it's important for you to make your main page an
index file (by saving it as "index.html").
Copyright © Rutgers Writing Program
Contact Barclay Barrios ([email protected])
You can name whatever other pages you create however you like. For example, most
pages that contain links to other websites are saved as "links.html" (or, alternatively,
you can create a new folder in the same directory as your "index.html", name that
new folder "links," and save your links page in the new directory as "index.html").
For example, your main page's URL might look like this:
http://www.rci.rutgers.edu/~yourusername/index.html
(…where "yourusername" is the RCI name you signed up for). Again, alternatively,
you could enter in "http://www.rci.rutgers.edu/~yourusername" and it would still
load up the "index.html" file.
Eventually, you'll have enough pages that you'll want to "link" back and forth
between them all. Be sure to name files appropriately, and keep them all organized.
Save all files in the same folder. Don't use special characters when coming up with
file names: stick to the basics (lowercase letters, numbers, and the underscore ( _ )
character); definitely do not use spaces in filenames. This can seriously confuse
some web browsing programs and servers.
Multiple Pages With Similar Style
You might feel like you're getting a little ahead of yourself on this page, but that's
OK! While you haven't yet learned how to format pages, you have learned how to
create and save them, which is really the only essential factor for understanding how
to work with multiple pages that have similar styles to them.
Copyright © Rutgers Writing Program
Contact Barclay Barrios ([email protected])
You will want to have multiple web pages on your site, most likely, and you'll want
them all to have the same layout and navigation, but different content. There are
several reasons why. The major reason is that you want your site to have a
consistent look and feel. If a visitor were to go between different pages of your site
that looked totally different from each other, she or he may think it's a different site
and become confused.
There's a great (and simple) way to save multiple pages of your web site while
retaining the same navigation and layout as your original web page. (Later on in this
tutorial, you will learn how to make "Templates" in Dreamweaver MX 2004. Using
templates is a different way in which you can save multiple pages with the same
layout and edit content within those layouts. Template use is most appropriate for
web sites with many web pages, or for projects that have several people
collaborating on the site.)
Let's pretend that you have one page of your site already complete. Let's also say,
for example, you have sections in your site called "Image Gallery" and "Additional
Online Resources" (the former being a page filled with images, and the latter a page
filled with links to other websites). In your navigation menu bar on your one
completed web page, you have those links linked to documents called "images.html"
and "additional_online_resources.html" (you haven't learned how to make links yet,
but you're still OK!)
However, you haven't made these pages yet. How are you going to make these
pages, and keep the exact same style as your one, already completed page? Will you
have to create the layout, again, completely from scratch? Of course not!
With your one completed web page open in Dreamweaver MX 2004, go to "File", and
select "Save As." Here, you can save this web page as "images.html" (or whatever
web page name you plan to give one of your sections). You can repeat this step to
save "additional_online_resources.html" and any other web pages you want to have
in your site.
Remember, in order for your web site navigation to work, you must save your files
as the file names you specified when making the links for your navigation (if you
created a link to “links.html” make sure you actually save the page as “links.html”).
By opening these web pages in Dreamweaver, you can add and edit the content for
those pages. When you saved the files from the original web page you created, you
simply created copies of that one page, but with different file names. Since you don't
want multiple web pages of the exact same thing, you need to edit the newly saved
web pages, including changing the titles on the pages, images, and text. However,
the over-all design is still the same!
Copyright © Rutgers Writing Program
Contact Barclay Barrios ([email protected])
When you're designing a website, you'll probably want to customize the look of your
site. For starters, you can change the style of the links, the page color, and other
features by working with the Page Properties in Dreamweaver MX 2004.
Opening the Page Properties
You can open up the Page Properties window by going to the menu bar and selecting
"Modify," and then "Page Properties," which is the first option listed. Select “Page
Properties…” and the window will pop up.
Another way to open the Page Properties window in Dreamweaver is by using your
mouse to right-click anywhere on the page. Then, a menu will appear, with Page
Properties as an option. You can select this option here.
The Page Properties Window
The following image is a diagram of the different features Page Properties menu.
Unlike past versions of the Dreamweaver, MX 2004’s is split up into five different
sub-windows/tabs (which actually make it slightly more confusing and unintuitive).
Read the numbered list below and use the corresponding numbers on the image to
see what tools do what tasks:
Appearance:
Copyright © Rutgers Writing Program
Contact Barclay Barrios ([email protected])
1. Page Font:
Allows you to
2. Size:
Allows you to
3. Text Color:
Allows you to
4. Background
Allows you to
5. Background
Allows you to
6. Margins:
Allows you to
pages.
set the default font face for your web pages.
set the default font size for your web pages.
set the default font color for your web pages.
Color:
set the default background color for your web pages.
Image:
set an optional background images for your web pages.
set the left, right, top, and bottom margins on your web
Links:
1. Link font:
Allows you to set
2. Size:
Allows you to set
3. Link color:
Allows you to set
4. Rollover links:
Allows you to set
5. Visited links:
Allows you to set
6. Active links:
Allows you to set
the default font fact that links will appear as/in.
the default font size that links will appear as/in.
the default color that unvisited links appear as/in.
the default color for rollover links.
the default color that visited links appear as/in.
the default color that active links appear as/in.
Copyright © Rutgers Writing Program
Contact Barclay Barrios ([email protected])
7. Underline style:
Allows you to change the style that links appear as/in (underlined, not
underlined, underlined only on rollover, etc.)
Headings:
1. Heading font:
Allows you to set the default font that all headings will appear as/in.
2. Heading 1-6:
Allows you to set the font size that these headings will appear as/in.
Title/Encoding:
Copyright © Rutgers Writing Program
Contact Barclay Barrios ([email protected])
1. Title:
Allows you to set a default title all pages will begin with in the title bar.
2. Encoding:
Allows you to set the type of language encoding that the web pages will all
be using (Western European, Unicode, etc.)
Tracing Image:
Copyright © Rutgers Writing Program
Contact Barclay Barrios ([email protected])
1. Tracing image:
Allows you to browse for and set an image that you will literally “trace” in
the layout design process.
2. Transparency:
Allows you to set the transparency of the tracing image.
Text
As you work with Dreamweaver MX 2004, you'll notice it is similar in many ways to
the programs you may have worked with in the past, such as Microsoft Word. There
are many options and features that indeed work in very similar ways to these other
programs. Some of these most basic features are working with text, and formatting
that text.
To begin adding text to your web page in Dreamweaver MX 2004, use your cursor to
click anywhere on the page and type directly onto the document.
Properties
The Properties panel (not to be confused with the Page Properties window, discussed
in the previous section) can be found going across the bottom of the screen. To
access more options, click on the small triangle next to the word “Properties.” This
will expand the window.
If you do not see the Properties window, go the menu bar, go to “Window” and select
“Properties.”
The Properties Window
Editing text with Macromedia Dreamweaver MX 2004 is not very different from
editing with a word processor. The only difference is that in Dreamweaver MX 2004,
text format and other properties are not controlled in the main menu at the top of
the screen, but in a window (or "palette") called "Properties."
The Properties panel (not to be confused with the Page Properties window, discussed
in the previous section) can be found going across the bottom of the screen. To
access more options, click on the small white triangle next to the word “Properties.”
This will expand the window.
You will use the Properties window to format and edit most of your content on your
web page. Please note that the Properties palette does change appearance
depending on what sort of content you are working with. For example, editing text
makes the Properties palette appear one way, while editing a table makes the palette
appear in a different way. We'll get back to the different states of the Properties
palette when we talk about tables in the next section.
Right now, let's take a look at the different features of the Properties palette. The
numbered list below corresponds with the numbers on the image of the Properties
palette. Use this image to aid you in learning the different features of the palette.
Copyright © Rutgers Writing Program
Contact Barclay Barrios ([email protected])
1. Minimize/Maximize:
Collapses the Properties panel back and forth.
2. Format:
Allows you to pick a pre-set format for the selected text.
3. Style:
Allows you to pick a pre-set selection from a Cascading Style Sheet to format
the selected text.
4. Bold:
Puts the selected text in bold face.
5. Italics:
Puts the selected text in italics.
6. Align Left:
Left-aligns the selected text.
7. Align Center:
Centers the selected text.
8. Right Align:
Right-aligns the selected text.
9. Justify:
Justifies the selected text.
10. Link:
Allows you to link the selected text to another file or web page.
11. Point to File:
Allows you to click-and-drag to another file to indicated a link relationship.
12. Browse for File:
Allows you to browse your local files to link the selected text to.
13. Quick Tag Editor:
Brings up a small “quick tag editor,” in which you can edit the coding by hand
without switching views.
14. Font:
Allows you to select a font face for the selected text to appear as/in.
15. Size:
Allows you to select a font size for the selected text to appear as/in.
16. Pixels/Points:
Allows you to change whether the font size refers to a number of pixels or
points.
17. Text Color:
Brings up an “eyedropper” tool, allowing you to point to any color on the
screen, formatting the selected text in that color.
18. Hex Color:
Allows you to enter in the hex code for a color, rather than using the GUI to
choose it.
19. Unordered List:
Begins an unordered, bulleted list, or formats the selected text into one.
20. Ordered List:
Begins an ordered, numbered list, or formats the selected text into one.
Copyright © Rutgers Writing Program
Contact Barclay Barrios ([email protected])
21. Text Outdent:
”Outdents” the text back to the left.
22. Text Indent:
”Indents” the text over to the right.
23. Target:
Allows you to link to a specific target within the same web page.
24. Page Properties:
Brings up the “Page Properties” series of windows.
25. List Item:
Opens the “List Properties” box.
Please note that the “Text” drop down menu on the menu bar can also accomplish
most of the functions listed above. If you feel more comfortable editing text using
this menu, then please do so. However, the Properties menu is convenient since is
packages all of these features in one, easy-to-use window.
Checking Spelling
Possibly one of the more overlooked features of any program is the ability to check
your spelling. This is essential for a website. Think about it: if CNN or MSNBC were to
make a large amount of spelling errors on their news sites, would they be taken
seriously? Of course not. You want to portray yourself in an intelligent manner on the
Internet. Be sure to use the spell checker. You can access it by using the "Text"
menu, and clicking on "Check Spelling" at the very bottom. The keyboard shortcut is
"Shift+F7."
Copyright © Rutgers Writing Program
Contact Barclay Barrios ([email protected])
Introduction to Style Sheets
As you may have read in the previous section, a "style" is a specific format applied to
either a small or large sample of text, over the range of one or many documents.
You can use (or even create) a "style" that you can apply throughout your document
(or multiple documents!) to any variety of text to keep a common look and feel
throughout your pages. These are called "Cascading Style Sheets." The wonderful
thing about CSS is that the formatting of specific things on a web page can be
controlled through a style sheet. These sheets can be edited, and changes in the
style sheet will automatically appear on the web page elements that have styles
applied to them. This is the perfect solution for those working with large amounts of
pages they would like to keep consistent in style.
To view the available style sheets, go to “Text” on the menu bar and select “CSS
Styles” to view the CSS options.
Copyright © Rutgers Writing Program
Contact Barclay Barrios ([email protected])
From here, you can choose to make a new CSS style (it will automatically ask you to
save it in a new style sheet), edit a previously existing style sheet, or attach a style
sheet to a page.
You are free to apply, as necessary and appropriate, styles to your document.
However, it is in no way necessary if you are creating small pages that are easy to
format on their own. This is more of an advanced feature that may be helpful to
learn for future web projects.
Create a New Style Sheet in the Design Panel
If you never made a style sheet before, don’t worry. You can make one using the
“Design” panel in Dreamweaver MX 2004. Alternatively, you can chose to hand-code
a style sheet, save it, and apply it to a web page (see farther below for more
information on this). For now, let’s discuss how to make a style sheet within
Dreamweaver’s “Design” panel, without having to do any hand-coding.
In the “Design” panel, click on the “New CSS Style” icon.
You will then be taken to the “New CSS Style” window.
Give your style a unique name in the text box. NOTE: Your style MUST begin with a
period (“.”), and cannot have any spaces in between words. A good way to
differentiate between words without using spaces is by capitalizing the first letter in
Copyright © Rutgers Writing Program
Contact Barclay Barrios ([email protected])
each work. However, the first word in the name should be lowercase. An example of
a good name for a style would be “.smallHeading”. For “Type,” select “Class.” Click
the “OK” button.
The “Save Style Sheet As” window will now appear. Give your style sheet a unique
name, and be sure to end it with “.css”. When you click “Save,” a new style sheet file
will be saved, and you can begin to create your own styles. For more information on
how to make a style, skip the next section, and go to “Create a New Style For Your
Style Sheet.”
Create a New Style Sheet From Scratch
Making your own style sheet from scratch may seem a bit intimidating at first, but in
the end, having one to work with can help make formatting your web site a lot
easier.
To start a new style sheet, go to the menu bar and select “File” and then “New.”
From the window that appears, make sure you are in the “General” tab area. Then,
make sure you have selected “Basic Page” from the “Category” column, and select
“CSS” from the “Basic Page” column. There will be a few selections to choose from
that appear on the right side; pick whichever you want (“Basic: Arial” is fine). When
these are selected, click on the “Create” button.
Copyright © Rutgers Writing Program
Contact Barclay Barrios ([email protected])
A new blank page will appear with the words “<< CSS >>” at the top. This is a
comment that indicates that you are working with a style sheet. This will have no
effect on the code you will create.
Hand-Code a New Style
Now it’s time to set up some styles of your own.
Body
The first style you should create is one that controls the look of the page itself. To
create the style for “Body,” we’ll be entering new text inside the “BODY” tags in your
new CSS document. After the first “font-family: Arial, Helvetica, sans-serif;” line,
press the “Enter” key to bring you to a new line. You’ll want a background color for
your web page, and this will be controlled in your “BODY” style. On this line, type:
background-color: #CCCCCC;
This will give all pages that have your style sheet attached to it a gray background.
Now, your text will need a size. Make a new line, and type:
font-size: 10pt;
These will be all of the characteristics that the “BODY” style will manage. It is now
time to close the tag. Do this by putting a close brace “}” right after the last line of
code.
Copyright © Rutgers Writing Program
Contact Barclay Barrios ([email protected])
In Dreamweaver MX 2004, your styles sheet should now look something like this:
Save a Style Sheet
Let’s save this style sheet as it current is, and then apply it to a web page. Go to the
menu bar and select “File” and then “Save As.” Give your style sheet a name, and
add “.css” at the end of the file name. For example, you can name your file
“stylesheet.css”:
Copyright © Rutgers Writing Program
Contact Barclay Barrios ([email protected])
Now that you have saved your style sheet, you can now apply it to as many web
pages in your site as you like.
Apply a Style Sheet to a Page
Open up a page in Dreamweaver MX 2004. Since we will be working with a style
sheet, you will need to have access to the “Design” panel. If it is not yet already
open, go to the menu bar and select “Window” and the “CSS Styles.” This will open
the “Design” panel, if it is not already open.
On the “Design” panel, click on the small icon called “Attach Style Sheet.” It’s the
icon on the left.
A window will appear asking you to browse your computer for a style sheet to attach
to the page. Click on the “Browse” button to find the file. Make sure the “Link” button
is also selected.
Copyright © Rutgers Writing Program
Contact Barclay Barrios ([email protected])
Once you have found the file you want to attach, click the “OK” button.
Go back to the “Design Panel” and click on the radio button next to “Edit Styles.” In
this mode, you can edit previously defined styles, and create some new ones using
Dreamweaver MX 2004’s “CSS Style Definition” menus, which you will soon see. You
will also notice that all of the styles you created in your sheet are listed here.
As you can see, the names of the styles (in this case, the “BODY” style has been
much more defined than the other two) and their properties (located in the right
column) are listed so that you can better keep track of your styles.
Apply a Style to Text
The main point of creating styles is to format text and other web page elements in
very specific ways. Applying a style to text is extremely simple.
First, highlight the text (or other area in your web page) that you want to apply the
style to.
Go down to the Properties panel, and click on the “Style” drop-down menu (which
will probably drop UPWARDS). Choose any style you wish to apply (the image shown
below is using a more extensive style sheet, a great indication of just what you can
really do with the powers of style sheets) and click it.
Copyright © Rutgers Writing Program
Contact Barclay Barrios ([email protected])
The style will immediately be applied to the highlighted text.
Remove a Style From Text
Removing a style from text or any other web page element is just as easy as
applying it. First, put your cursor inside the text with the style you want to remove.
Copyright © Rutgers Writing Program
Contact Barclay Barrios ([email protected])
Go down to the Properties panel, and click the “Style” menu. Select “None” (the topmost option), and the style should be removed from the text.
Create a New Style For Your Style Sheet
CSS is a great tool because you can make an infinite number of styles for nearly
anything on a web page. You can make a style just for headings, links, table borders,
or just about anything you can imagine. Using the “Design” panel in Dreamweaver
MX, you can easily make new styles.
On the “Design” panel, click on the icon “New CSS Style” (it looks like a piece of
paper with a + sign).
The following window will appear:
Give your style a unique name in the text box. REMEMBER: Your style MUST begin
with a period (“.”), and cannot have any spaces in between words. A good way to
differentiate between words without using spaces is by capitalizing the first letter in
Copyright © Rutgers Writing Program
Contact Barclay Barrios ([email protected])
each work. However, the first word in the name should be lowercase. An example of
a good name for a style would be “.smallHeading”
For “Type,” select “Class.” This means that you will be making a style from scratch.
Click the “OK” button. The “CSS Style Definition” window will appear.
At this point, you can use the various menus to make your very own style. This may
take some getting use to, but you will eventually be able to figure out which styles
create what effects. Most of the categories are self-explanatory, so deciding what
style to make should not be too hard. Keep in mind that any style can have as many
attributes as you want, but you shouldn’t make any one style too cluttered. You can
make as many styles as you want to control different formatting and style elements.
Once you create a style, click on the “OK” button. This will automatically save your
new style in the style sheet, and you will see it listed in the “Design” panel at this
point.
Copyright © Rutgers Writing Program
Contact Barclay Barrios ([email protected])
Edit a Style
You can edit any of the styles you have made in a style sheet at any time. Simply
click on the style that you want to edit while you are in the “Edit Styles” mode, and
click on the “Edit Style” icon (the icon on the right near the bottom of the panel,
shaped like a pencil).
The “CSS Style Definition” window will now appear, and you can edit a style as
needed. Click “OK” when you are finished so that the changes can take effect.
Delete a Style
If you need to remove a style from your style sheet, highlight a style in the “Edit
Styles” mode on the “Design” panel, and then click on the “Delete CSS Style” icon
(the button shaped like a trash can, on the bottom right corner of the panel).
Tables
Tables, which are made up of "cells" formed by rows and columns, can come in
handy in many ways when designing a website. By using tables, you can organize
text, hold images, and even make a web page layout. This section of the tutorial will
teach you how to utilize tables in Dreamweaver MX 2004.
Inserting a Table
To insert a table into your web page in Dreamweaver MX 2004, go to the menu bar
and select "Insert," and then "Table.”
Alternatively, you can insert a table by clicking on the “Tables” button from the
“Layout” drop-down.
Copyright © Rutgers Writing Program
Contact Barclay Barrios ([email protected])
When you select “Insert” >> “Table,” a pop up window will appear. It will ask you to
input some information about your table. The information you input in this Table
window will decide what your table will look like. This window has a few text fields
that you will need to know about. Read the numbered list below and use the
corresponding numbers on the image to see how to insert your table:
01. Rows:
Number of rows the table will have.
02. Columns:
Number of columns the table will have.
03. Table Width:
Total width of the table, represented by a number in either…
04. Percent/Pixels:
…a percentage of the total page, or a set number of pixels.
Copyright © Rutgers Writing Program
Contact Barclay Barrios ([email protected])
05. Border Thickness:
The thickness of a border surrounding the table (zero/0 for no border).
06. Cell Padding:
The padding between items inside a cell and the cell’s borders.
07. Cell Spacing:
The padding between cells, themselves.
08. Header:
The header area will automatically be formatted for titles, etc.
09. Caption:
A caption (or title) for the table that will appear immediately above it.
10. Align Caption:
Allows control over the alignment of the table’s caption.
11. Summary:
For the disabled, a summary will explain what type of data the table contains.
Editing Table Properties
When you have a table in your web page, Dreamweaver MX 2004 will allow you to
edit the table in many ways. By using the Properties palette, you can modify
different aspects of your table.
In order to edit your table using the Properties palette, you must select your table.
You can select the table by clicking on its outer border. Additionally, you may rightclick inside the table and select “Select Table” from the menu. This leaves less
chance for error in accidentally resizing your table by clicking on its border. Once it is
selected, you'll notice that the Properties window has changed its appearance to
show that it is now ready to edit your table.
01. Table ID:
Allows you to name a table.
02. Rows:
The number of rows that the table contains.
03. Cols:
The number of columns that the table contains.
04. Width:
The width of the table, represented by a number.
05. Height:
The height of the table, represented by a number.
06. Pixels/Percentage:
The height/width, represented by a number, to be in either pixels or
percentages of the total page size.
07. CellPad:
The space between the items inside a cell and the cell’s borders.
08. CellSpace:
The space between cells, themselves.
Copyright © Rutgers Writing Program
Contact Barclay Barrios ([email protected])
09. Align:
The alignment of the table (left, center, right).
10. Border:
The width of the table’s border (zero/0 for no border).
11. Class:
The CSS style that the table will adhere to.
12. Column Width/Height Quick-Clicks:
Allows for quick formatting / changing of the table’s height and width
attributes.
13. BG Color (Color Chooser):
Choose the table’s background color with the eyedropper tool.
14. BG Color (Hex):
Choose the table’s background color via the hex number.
15. Border Color (Color Chooser):
Choose the table’s border color with the eyedropper tool.
16. Border Color (Hex):
Choose the table’s border color via the hex number.
17. BG Image:
Choose a background image for the table.
All of the fields in the Properties palette for tables are pretty much the same fields
you see when you first insert a table. There are some additions, though. You can
adjust the alignment of the content in the tables, add background or border colors to
the table, add background images, and fine-tune the dimensions of the table. You
can also go back and edit the number of rows and columns in your table, adjust the
width and height in pixels or percent, and modify the cell padding, cell spacing, and
border.
The Table Menu
In addition to using the Properties palette to edit tables, you can also modify a table
by using the table menu. In your table, make sure you have some cells, rows,
columns, or the entire table selected (select whatever part of the table you want,
depending on how you want to edit it). With those cells selected, go to the menu bar
and select "Modify," and then "Table." Under the Table menu, a number of options
will appear. These options in the table menu can allow you to edit your table in even
more ways than before. Here is a list of features in this menu:
Copyright © Rutgers Writing Program
Contact Barclay Barrios ([email protected])
Select Table:
Just as the name implies, this option selects your entire table.
Merge Cells:
This is a helpful option that lets you merge multiple cells into one cell.
Split Cell:
By selecting or putting the insertion point in a cell, you can split that cell into any
number of rows or columns.
Insert Row:
Put the insertion point where you want to insert a new row, and this option inserts
one new row.
Copyright © Rutgers Writing Program
Contact Barclay Barrios ([email protected])
Insert Column:
Similar to the above, this option inserts one new column.
Insert Row of Columns:
This option gives you more flexibility than the above two options. You can choose
how many rows or columns you want to add, and where you want them to be
inserted.
Delete Row:
Select or put the insertion point in the row that you want to delete, and select this
option.
Delete Column:
Same as the above, but deletes columns when selected.
Increase/Decrease Row/Column Span:
By selecting a row or column, you can make its span larger or smaller.
Please note that this menu can also be accessed by right-clicking inside of a table,
and selecting the options as needed.
Images
Images are an important part of the web. If you don't have images, you tend to not
"appeal" to the eye of the average visitor. Then again, if you have too much to look
at, you'll be on the verge of distracting your visitors from the textual content of the
site! While you will learn how to incorporate images into your page, you should stay
realistic and keep the page organized with the text and images (and of course, only
include images that are relevant to your site).
Where to Get Images
You can obtain images for your page from a wide variety of places. Many computer
labs have at least one scanner equipped to a computer. You are encouraged to seek
out your own real, physical images (such as taking photographs) which you can scan
into a digital file for an image. This is preferred because it shows a serious effort has
been put into the site. However, it is also possible to scan images from things such
as magazines and books. If you need help using the scanner, ask a computer lab
assistant, who will be able to assist you.
You can also obtain images from other sources on the Internet, even other websites.
Here are some useful starting points:
•
•
•
•
Free-Clip-Art (http://free-clip-art.com)
Google Image Search (http://www.google.com/imghp?hl=en)
AltaVista Image Search (http://www.altavista.com/image/default)
Microsoft Design Gallery Live
(http://office.microsoft.com/clipart/default.aspx)
There are many, many other places to find images. Other search engines may also
have image searches. Other than search engines, different sites relating to YOUR
site's topic may include images.
Copyright © Rutgers Writing Program
Contact Barclay Barrios ([email protected])
Before using any images from other websites, be sure to take some factors into
consideration. Are the images copyrighted? If so, you may not be able to use them.
Try to use images that you feel are widely used, already, across the Internet. If you
do use images from other sites, it is generally proper "netiquette" to include a small
credit and link back to the site where the image (or images) were obtained.
After you have collected your images, be sure to place them somewhere close to
your web page documents. This is generally in one of two places:
1. The exact same directory (folder) where your web page documents are stored
2. A folder within that directory entitled "images" that you will save ALL images to
for your site
This is necessary to keep your files organized.
Inserting an Image
Place the cursor where you would like to insert an image (it can even be inside a
table's cell). Go to the "Insert" menu at the top of the screen, and click "Image.”
You can also select "Insert Image" in the “Common” tab on the “Insert” panel on the
top of the screen.
The "Select Image Source" box should then appear. Browse to where your images
are saved, and select the file you wish to import into the web page.
On the far right, you will be able to see an Image Preview of the image you selected.
This is useful if you do not quite remember the exact filename you have given to
images. Below the image preview, it will list the dimension (in pixels) of the image,
the file size, and approximately how long it will take to load on a standard dial-up
Internet connection. Click “OK” to insert the image into a page.
Dreamweaver MX 2004 supports three formats of images.
GIF (*.gif") is the format standardized by CompuServe years ago. It's geared
towards images that do not need to be viewed with a large amount of colors. The
standard GIF file will be of 256 colors or less. This is perfect for the Internet, and
more specifically, images that will appear directly on a web page.
JPG or JPEG (*.jpg, *.jpeg) is the format created by the Joint Photographic
Experts Group. It is geared towards images of a "real world" or "natural" sense, such
as photographs. It generally is of thousands of colors or grayscale. JPEG can hold up
to 16 million colors. High quality, larger images stored in a website's "Image Gallery"
may be saved as JPEGs.
Copyright © Rutgers Writing Program
Contact Barclay Barrios ([email protected])
PNG (*.png), or "Portable Network Graphics," is a lossless image compression
(meaning that even when an image is saved as a PNG file, it will look exactly the
same as the original file, unlike GIF and JPG). While it is not in extremely wide use, it
has its advantages over other formats in that it does not lose any quality. This does
mean, however, the filesize will generally be larger.
Once you have selected the image you wish to import, click the "Select" button.
Images Relative to a Location
When you insert an image into your page, the "Select Image Source" window (see
above) will ask you what you want your image “relative” to. What this means is that
when an image is inserted to your web page, the web will try to find the image
located relative to the web page file itself, or in a folder in what is called the "Site
Root."
When your image has been inserted into your page, Dreamweaver MX 2004
automatically creates a reference to that file in the HTML source code. To make sure
that this reference is correct, the image file must be in the current site. If it is not in
the current site, Dreamweaver MX 2004 asks whether you want to copy the file to
the root folder.
Aligning & Wrapping Text
Once you have imported an image, you are free to format and move it in any way.
To move an image, simply click and drag the image to your desired location. When
first imported, the image will most likely push the text away from it and take up a
large amount of room, leaving a lot of white space. You can either keep it this way,
or it is also possible to wrap the text around your image.
If you want to keep the image in between lines of text, per say, you can do this, and
either align the image to the left, the center, or the right. To do this, click and select
the image.
The Properties palette will change so that you can now format your image.
Directly below the "Reset Size" button on the lower right are three buttons. The first
is to align the image to the left, the second to align to the center, and the third to
align right.
Copyright © Rutgers Writing Program
Contact Barclay Barrios ([email protected])
To wrap the text around an image, use the "Align" drop-down menu at the far
bottom right of the Properties palette. The two options you will probably want are
"Left" and "Right." If you select "Left," the image will be aligned to the left-hand side
of your document (or table cell), and the text will wrap around the top, right hand
side, and bottom of the image. If you select "Right," the image will be aligned to the
right, and the text will wrap around the top, left hand side, and bottom of the image.
Alt Tags
On many websites, you may notice that if you put your cursor over an image, a tiny
window of text will appear. These are controlled through "Alt Tags." Specifying Alt
Tags is good design practice. If a visitor stops loading the page before the image is
fully loaded, the Alt Tag text will appear in the image space instead.
More importantly, Alt Tags are used to make your site more accessible to visitors
with disabilities. After selecting in image, in the new Properties palette, you can
enter in this text in the "Alt" box on the far right. Now, once your page is complete
and on the web, if you place the cursor over the image, that text will appear.
Borders
Images sometimes look better if they have a border around them. You can do this by
clicking your image, and entering in a number next to the word "Border" (towards
the right) in the Properties menu. This is also measured in pixels.
Resizing Images
It is also possible to resize the image in the new Properties window. "W" stands for
the width of the image, and "H" for the height of the image. These numbers are
measured in pixels. You can change them to whatever you wish in order to make the
image the size of your liking.
Another way to resize an image is by clicking and dragging the tiny squares on the
corners of the image.
Copyright © Rutgers Writing Program
Contact Barclay Barrios ([email protected])
Resizing an image in Dreamweaver MX 2004 does not physically change the
properties of the image. You are not really resizing the image, but rather, telling
Dreamweaver MX 2004 the size at which to display an image on a web page. If you
are familiar with Adobe Photoshop, or another image editing program, it is
recommended that you edit images there.
Links
The address of a site on the Internet is called an URL, or "Uniform Resource
Locator." Essentially, the World Wide Web is made up of a collection of "hyperlinks."
A link, as it is commonly known, is a special kind of text type that allows a user of a
website to access a document or some kind of multimedia file when that text is
clicked. Links are used for navigating a site, for creating outlets for users to go to
another website, and for opening up files on a website. With all of the various
functions links serve, it's important to learn how to create links in Dreamweaver MX
2004.
Link Properties
The Properties palette has an area designated to making and editing links. It is
slightly different from past versions of Dreamweaver, but still retails the same basic
functionality.
In the “Links” field, you can specify a web site or page that you wish to link to. You
can physically type in the address, use the pull-down menu (if you’ve used the same
link before, it should appear in the menu), or click the folder button in the upperright; this will bring up a window asking you to browse to the file you wish to link to.
The “Target” area is for linking to areas within the same web page.
Additionally, you can edit the properties (or style) of links by going into the web
page's Page Properties window. In this window, you can change the color scheme of
links for sites. You can edit the regular link color, visited link color, and the active
link color. A good idea is to make links contrasting colors from the background color
or image of your site. For example, blue links on a black web page are impossible to
read. Yellow links, or a light, bright color, would work better on a dark background.
Copyright © Rutgers Writing Program
Contact Barclay Barrios ([email protected])
Alternatively, dark links on a light background are also easy to see. Basically, try to
steer clear of using link colors that blend in with your background color.
Creating a Link to Another Site
Making a link to a website or another web page that is not in your site is very simple.
First, select the text that you want to turn into a link. Go to the Properties palette
and in the Link text box, type in the URL of the website that you want to link to. Or,
you can copy the URL from a web browser by going to the menu bar and selecting
"Edit," and then "Copy." Then, go back into Dreamweaver MX 2004, put the cursor in
the Link text box in the Properties palette, and go to "Edit," then "Paste" in the menu
bar (or hit ctrl + v on the keyboard) to paste the URL.
Creating a Link to a Page in Your Site
If the website you are working on that contains multiple pages, you will want to link
to your other pages so that users can navigate your site. After all, since the Internet
is basically a collection of inter-linking web pages, it's essential that you have links
that connect the different parts of your website. When linking to web pages within
your own site, it's best to have all the web pages for your site all saved in one folder,
or in multiple, organized folders. When your website files are organized, it will be
easier to link to your web pages.
With your cursor, highlight the text that you want to turn into a link. Go to the
Properties palette. Next to the Link text box, you will see an icon that looks like a
folder. Click on the icon. By doing this, you can browse your computer to find to the
.html file (or other document) that you want to turn into a link.
Copyright © Rutgers Writing Program
Contact Barclay Barrios ([email protected])
The "Select File" window lets you browse your computer's folders to find the file you
want to link to. When you click on the file name that you want to link to, the name
will appear in the "File name" text box near the bottom of the window. Click on the
"Select" button when you find the file that you want to turn into a link.
After you click "Select," you will see that the file name will appear in the Link text
box in the Properties palette.
Making an Image a Link
In addition to turning text into links, images can also be used as links. Images that
are links can be clicked just like regular links. Making an image into a link is no
different than turning text into a link.
Click on the image that you wish to make into a link (if you do not know how to
insert images into your web page, please read the Images section). Go to the
Properties palette. In the Link text box, type in or paste the URL that you want to
link. Hit the “Enter” key to make the link live, or click elsewhere in Dreamweaver MX
2004. If you click back on the image, you will see the URL you just entered appear in
the Link text box of the Properties palette. This means that you have now turned an
image into a link.
Copyright © Rutgers Writing Program
Contact Barclay Barrios ([email protected])
There are several instances where you might want to make images as links. For
example, if you have your navigation set up for your set that a different image
represented a different section of your site, clicking on an image link would take the
user to that section. Or, if you had a smaller version of a large image on your site
(this is called a "thumbnail"), you might want to make that smaller image a link to
the bigger version of that image (doing this would save on loading time for your web
page in a browser). Making images into links has both practical and aesthetic uses in
web design.
Note: When you make an image a link, the default behavior is to indicate that it's a
link by turning on the image's border. To have no border on an image link, enter “0”
in the “Border” text box. Otherwise, enter in any number you want for the border
size.
Linking to Other Media
HTML files are not the only things you can link to. With images, sound files, movie
files, and other kinds of media floating around the web, it's possible to link to items
other than HTML documents!
There are two ways you can have people view things that you link to. They will either
open up in the web browser, or they can "download" the file to their own computer
to open up in a different program (such as audio files; these are generally not
viewed in a web browser, but rather downloaded and played in a separate program
for audio).
Things such as images or even short audio samples can be directly viewed in the
browser. Most visitors to your website will want to do such, anyway. Large files, such
as movie clips or PDF files, the visitor will want to completely download (save) to
their own computer.
Regardless of how you want someone to download or view something, linking to it is
the same. Whatever file you wish to link to, make sure it is in the same directory as
the page you're linking it from (on the server where your website is located; you'll
learn about publishing and uploading files later). Make sure it has an appropriate
Copyright © Rutgers Writing Program
Contact Barclay Barrios ([email protected])
filename (for example, an image of Murray Hall might be named "murray.jpg" if it's
an image in JPEG format).
Select the text (or image) you want to link to another file. Similar to linking to a
page, you're going to enter the text into the "Link" box in the Properties palette.
Instead of, say, linking to a page named "links.html," you're going to type in
"murray.jpg," (or whatever the name of your file is) since you want to link to the
image.
This is where you run into problems. Every person and every computer has their web
browser configured slightly differently. Maybe you've run across this problem
yourself. Clicking on a link on one computer may bring up a box asking you if you
want to "Open" or "Save" a file, but clicking it on another computer might just go
right ahead and open it without asking for your choice. If you want someone to
download a file, rather than simply clicking on it like a normal web page link, you're
going to have to physically type out a message on your page reminding them to do
so.
To download a file that's been linked to, (in a web browser, not in Dreamweaver MX
2004) place the cursor over the link, and click the right mouse button. You then
select either "Save As" or "Save Target As," depending on what web browser you
may be using.
Copyright © Rutgers Writing Program
Contact Barclay Barrios ([email protected])
A "save" box will then pop up, asking you where you would like to download the file.
Select the destination, and click "Save." The file will begin to download. Depending
upon your computer's speed and your Internet connection speed (and the size of the
file being downloaded), download times can be anything in the world (a small image
will download much faster than a large video, for example).
Making Anchors
Let's say that you have one web page, but it's very long, and you don't want users to
have to scroll through the entire page just to find something they're looking for. A
great way to turn a lengthy web page into something navigable is by creating
"anchors" for your page. Anchors are a type of link that allows you to link to a
certain part within the same page. Creating anchors, however, takes a little more
effort than making regular links.
As an example, pretend you have a section on a web page called "Outside
Resources," but that section is located at the very end of the page. Since you don't
want users to have to scroll all the way to the bottom of the page to find that
section, you'd want to make an anchor.
First highlight the text that you want to turn into an anchor with your cursor. Now,
go to the Properties palette is. You'll put the anchor link inside the Link text box of
the Properties palette. First, type "#" in the text box; all anchored links must have a
"#" sign in front of its name. This coding tells the web browser that the link is an
anchor and is located on the same page you're working in. Then, type in the name of
the anchor you want to make. You can make the anchor name anything you want,
just make sure that it is appropriate to the work you are doing, so that the name
makes sense, and it will be something that you can remember. Be sure not to
include any symbols in the name, but do use underscores (_) when you want to put
spacing between words.
Copyright © Rutgers Writing Program
Contact Barclay Barrios ([email protected])
Now it's time to learn how to do the second step in making anchored links. At this
point, you have made the actual anchor link that will be clicked on by users. But, you
don't have anything to link to on your page! In order to do this, you need to create
what is called the "named anchor." This is the physical anchor itself.
In your web page in Dreamweaver MX 2004, put your cursor where the beginning of
the section where you want to put the anchor. Then, go to the menu bar and click on
"Insert” and then "Named Anchor" (or, you can simply use the keyboard to do the
Named Anchored shortcut, Ctrl + Alt + A).
You can also insert an anchor by going to the “Common” panel and clicking on the
“Named Anchor” icon.
Copyright © Rutgers Writing Program
Contact Barclay Barrios ([email protected])
A dialogue box will pop up asking you to put in the name of the anchor. Put in the
same exact name that you put in for the anchor link. If you don't, then the anchored
link will not work. The link from the previous step must has some place to link to.
Now, you are creating that place, and it must have the same name as the link you
have already created. Please note that for making the actual named anchor,
you do not need to put the "#" at the beginning. You only need to do this for
when you make the link to the anchor.
Click the "OK" button when you have entered the anchor name. When you do, a
physical anchor will be inserted into your web page. See the image below to see how
the anchor looks in Dreamweaver MX 2004. Please note that when the page loads in
a web browser, this icon will not appear. It only appears as an icon in Dreamweaver
MX 2004 so that you can recognize where you inserted an anchor on your page.
You can test to see if your anchors work by previewing your web page in a browser
(press F12 on the keyboard). Click on the anchor link, and it should take you to the
specified part of the page in which you inserted the anchor. If it does not work,
check to make sure if the names of the link and the anchor match in Dreamweaver
MX 2004.
Publishing
When you make web pages or a website in Dreamweaver MX 2004, it doesn't just
automatically appear on the web. You need to publish—or upload—your files to the
Copyright © Rutgers Writing Program
Contact Barclay Barrios ([email protected])
web. While that might sound difficult, fortunately Dreamweaver MX 2004 comes with
a built-in publishing feature that allows you to put your files on to the web with little
effort. However, there are a few steps you need to learn in order to complete the
process of publishing. This part of the tutorial will discuss issues related to putting
your web pages on the web.
Managing Your Workspace
One of the downfalls of Dreamweaver MX 2004 is its confusing and non-intuitive Site
Files window. When you first load Dreamweaver MX 2004, the “Files” panel, which
you will need for uploading your web site files to the Internet, is grouped with the
rest of the panels on the right side of the screen.
You may wish to move the Files panel (this will come in handy later when you want
both a “Remote” and “Local” view). To do so, click the dotted area next to the
“Files” triangle, and drag it out across the screen.
Creating a New Site
When uploading your web page files for the first time in Dreamweaver MX 2004, you
Copyright © Rutgers Writing Program
Contact Barclay Barrios ([email protected])
will be asked to define what is called a "New Site." Defining you Site means telling
the program where you will be publishing your files on the web as well as where your
files are located locally on your computer. You will only be asked to make a New Site
once, but if you ever want to make additional web sites, you'll need to go and define
a whole new site using this feature. To get to New Site, click "Site" on the menu bar,
and select "Manage Sites."
The “Magage Sites” window will appear. To create a new site, click the “New…”
button, and choose “Site” from the menu.
Defining a New Site in Basic Mode
In the “Site Definition” window, make sure you’re in the “Basic” mode. You’ll be able
to tell you’re in the right place by noting the “Basic” tab at the top of the window.
On the first screen, enter a name for your site, such as “My Web Site” or something
that describes the main idea for your site. Then, click on the “Next” button.
Copyright © Rutgers Writing Program
Contact Barclay Barrios ([email protected])
The next screen will ask if you want to use a server technology; Dreamweaver MX
2004 wants to know if any database technology will be included in your site. Since
you will most likely be making a simple site, click “No” and then click on the “Next”
button to continue to the next step.
Copyright © Rutgers Writing Program
Contact Barclay Barrios ([email protected])
Now, you’ll be asked how you want to edit your site files, and how you want to
upload them to the web. Your safest bet is to select the first option, which allows you
to edit your site files that you have saved in a folder in your computer, and upload
them later whenever you are ready. You’ll also choose where your files are located.
If you already have a directory with web site files, choose that one. Otherwise, just
choose a temporary folder (you can create a new one if you need to).
Copyright © Rutgers Writing Program
Contact Barclay Barrios ([email protected])
You’ll have to locate on your computer the folder where all of your site files are
located. Next to “Where on your computer do you want to store your files?,” you’ll
see a small folder icon. Click on this icon to browse your computer to find the desired
folder.
Click on the “Next” button when you are done.
The next section is one of the most important. Here, you will define where you will
be uploading your site files online, and how you will connect to it. Assume you are
going to be uploading your site to your RCI space. Input the following information:
•
•
Make sure that "How do you connect to your remote server" is set to FTP
For “What is the hostname or FTP address of your Web server?,” enter in
"ftp.rci.rutgers.edu". If you are uploading files to different web space, fill in
the information as necessary
Copyright © Rutgers Writing Program
Contact Barclay Barrios ([email protected])
•
•
•
•
For “What folder on the server do you want to store your files in?,” type in
"public_html"
For “What is your FTP Login:,” type in your RCI account user name. Don't
put your actual name—put your username—without "@rci.rutgers.edu"
Leave the Password text box blank if you are working on a public
computer, such as in a computer lab. If you are on your own machine, feel
free to save the password.
Make sure that “Secure FTP” is checked. There are now certain
restrictions on the types of connections that can be made to your web space;
secure connections are now mandatory. Dreamweaver MX 2004 will allow you
to always make these secure connections.
When all of the proper information is entered in this window, click on the “Next”
button.
Copyright © Rutgers Writing Program
Contact Barclay Barrios ([email protected])
The next screen will ask if you want to enable check in / check out. We will discuss
what checking in and checking out means later on in the “Collaborating” section.
Select “No” and click on the “Next” button.
The last screen gives a summary of all of the specifications for the site you just
defined. If everything looks correct, click “Done.”
Copyright © Rutgers Writing Program
Contact Barclay Barrios ([email protected])
There are some disadvantages to using the “Basic” site definition wizard. The “Basic”
view actually makes some of the steps more confusing than they should be. In fact,
you may not even need many of the steps the “Basic” set up takes you through, so
you may fill in information that is not necessary for the site definition. In the
“Advanced” view, all of the sections are clearly defined for you. It is recommended
that you learn to define a site in “Advanced” mode, but you can still use the “Basic”
set up if you wish. To learn how to use the “Advanced” site definition mode, please
continue reading the next section.
Defining a New Site in Advanced Mode
In the “Site Definition” window, click on the “Advanced” tab. You will then see the
following screen:
Copyright © Rutgers Writing Program
Contact Barclay Barrios ([email protected])
On the left side of the window, you will see an area called "Category." You should be
in the "Local Info" category. “Local Info” is the step when you tell Dreamweaver MX
2004 where the site you are working on is located on your computer. Next to "Site
Name," type in a name for your site, which can be anything you want it to be. Make
your "Local Root Folder" the folder in which all of your web site files are saved on
your computer. You can select the folder by clicking on the folder icon next to the
"Local Root Folder" text box. Leave the rest of the information blank, and “Enable
Cache” checked.
Now, click on the "Remote Info" in the Category column. In this area, you enter the
information Dreamweaver MX 2004 needs to locate and log into the web server that
stores your pages on the web. Fill in the information as follows, and see the image
below to see how it should look (this is assuming you are uploading your site to your
RCI account):
•
Make sure that "Access" is set to FTP
Copyright © Rutgers Writing Program
Contact Barclay Barrios ([email protected])
•
•
•
•
•
Next to "FTP Host," type in "ftp.rci.rutgers.edu". If you are uploading files
to different web space, fill in the information as necessary
Next to "Host Directory," type in "public_html"
Next to "Login," type in your RCI account user name. Don't put your actual
name—put your username—without "@rci.rutgers.edu"
Leave the Password text box blank if you are working on a public
computer, such as in a computer lab. If you are on your own machine, feel
free to save the password.
Make sure that “Secure FTP” is checked. There are now certain
restrictions on the types of connections that can be made to your web space;
secure connections are now mandatory. Dreamweaver MX 2004 will allow you
to always make these secure connections.
Leave everything else as it looks in the image above. Notice how there is a check
box called "Enable File Check In and Check Out." For our case, and generally, you
will not need to touch this. However, if you'll be working on collaborative projects,
Copyright © Rutgers Writing Program
Contact Barclay Barrios ([email protected])
this feature is essential, since it helps to prevent people from overwriting each
other’s work.
When you are done putting in all the information, click the “OK” button. After that, a
window called “Edit Sites” will appear. You don’t need to do anything in this window,
since you just created a new site, so click “Done.”
After you’ve clicked “Done,” the Files panel will sort through the files within your
folder, and will default to the “Remote” side (your RCI server space, which is where
the files will eventually go). Make sure that you have pulled out the Files panel from
the side. When you have done so, click the “Expand” button to give yourself views
of both the “Local” and the “Remote” sides.
Now it’s time to connect to your site! Click the “Connect” button.
Copyright © Rutgers Writing Program
Contact Barclay Barrios ([email protected])
If you have not saved your password, a new window will appear asking for it. Enter
your RCI password and click “OK.” You will know you have connected to your web
space when they gray dot on the “Connect” icon turns green.
Uploading Your Files to the Web
Before you begin uploading your files to your web space, you must first learn the
icons listed in the “Site” window that will help manage your files.
1. Connection Status:
Connect or disconnect from your space with this button. When you are
disconnected, it will appear as three disconnected dots.
2. Refresh:
Manually tell Dreamweaver to refresh the contents of a folder by clicking this
button. By clicking on either the “Local” or “Remote” side before clicking the
button, you can refresh either side.
3. View FTP Log:
View a complete log of all FTP transactions.
4. Site Files:
The default setting, this will show the actual “Remote Side” files.
5. Testing Server:
You can specify a “testing” server to upload files to in order to “test” your web
pages, before making them actually “live” on the regular, real server.
6. Site Map:
Another view mode, this will visually arrange the web pages in a hierarchical
manner.
7. Get Files:
This will upload the selected files to the remote server.
8. Put Files:
This will download the selected files from the remote server.
9. Check Out:
Used with the collaborative settings, this will place the selected file in your
name for local editing.
10. Check In:
Used with collaborative settings, this will place the file back on the server with
the updated changes and “cross-off” your name.
11. Expand/Collapse:
Switch back and forth between just a local view, or a view of both the remote
and local sides.
Now you can learn how to put your files online. To publish your website and its
related files to your RCI account, select all of the files you want to upload on the
right side of the screen, and click the "Put" icon. If you are asked "Include
Dependent files?," click "Yes." Dependent files are generally images.
Copyright © Rutgers Writing Program
Contact Barclay Barrios ([email protected])
You know your files have been published to your RCI account when you see the files
appear on the left side of the screen. This means that the files have been transferred
to your web space.
Now, you have a site that you can find on the Web. To view it in a browser, just type
in the following:
http://www.rci.rutgers.edu/~yourusername/your_file_title.html
You type in your own RCI account user name where it says "your_username" and
your file name and extension (that is, the name you saved your file under, such as
"index.html"). If you did not publish your files to your RCI space, just put in the URL
of wherever you uploaded your site index.
Edit Sites
During your time working in Dreamweaver MX 2004, you may want to go back and
edit the web site information you entered when you established your Site. You can
do this by going to the menu bar and selecting “Site” and then “Manage Sites.”
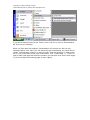
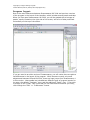
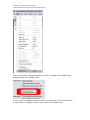
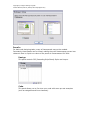
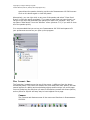
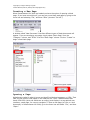
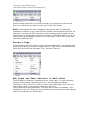
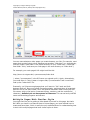
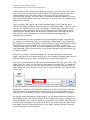
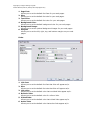
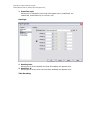
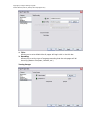
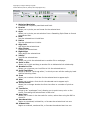
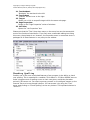
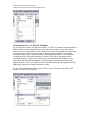
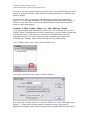
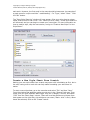
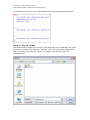
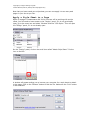
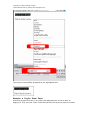
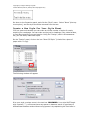
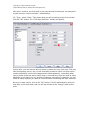
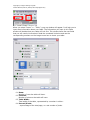
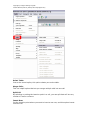
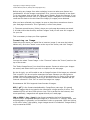
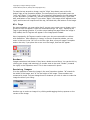
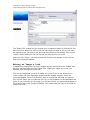
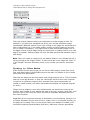
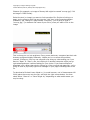
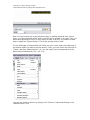
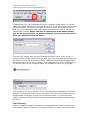
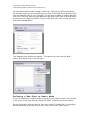
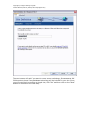
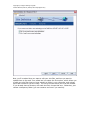
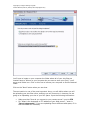
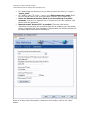
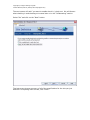
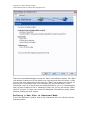
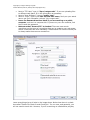
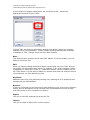
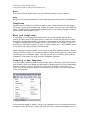
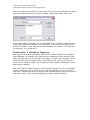
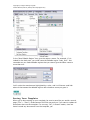
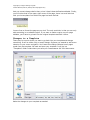
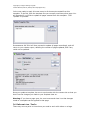
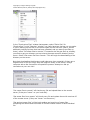
Copyright © Rutgers Writing Program
Contact Barclay Barrios ([email protected])
A new window will appear asking which site you’d like to edit. Choose the
appropriate site and click the “Edit.”
Clicking “Edit” will bring up the familiar window from before, where you originally
entered in all of the information. Simply change anything that warrants changing.
In addition to “Edit,” though, there are a few other options:
New:
This does the same function as the "New Site" feature. From this window, you can
define a whole new site.
Edit:
When you need to change information about a preexisting site, click "Edit" and you
can modify site information from there. For example, if you need to change a folder,
a password, or initiate the “Check In / Check Out” feature, you will need to click on
the “Edit” button. You will then be taken to a window that looks the same as the one
you used when you first defined your site.
Duplicate:
Makes an exact copy of a previously existing site, retaining all of its properties and
settings that you have defined.
Remove:
If there is a site that you do not want to have listed any more, click on the "Remove"
button, and its information will be removed from Dreamweaver MX 2004 (though
local files stored on your computer will remain).
Export:
Lets you to save the exported site as an XML file.
Import:
Lets you to select an XML file for a site to import.
Copyright © Rutgers Writing Program
Contact Barclay Barrios ([email protected])
Done:
Click on the "Done" button when you are finished working with this window.
Help:
Brings up the help documentation if you need assistance editing your site definitions.
Templates
Websites tend to have more than one page to them. While websites are not always
like books (with a specific beginning, middle, and end), they still have many different
parts. As stated earlier in the Getting Started section, you'll want all pages to have a
similar layout and navigation style.
What are Templates?
A "template" is a pre-designed file that allows you to edit certain regions while
leaving all other parts of the page alone, to keep the overall look and feel the same
throughout multiple documents. A template in Dreamweaver MX 2004 has two types
of regions: editable and non-editable. As the name implies, an "editable" region is
one that you can make changes to, type in, insert images, etc. A non-editable region
is one where you cannot do any of these things.
While editing an actual template, you are free to edit both editable and non-editable
regions. However, when you use the template to create a web page, you cannot edit
something in a non-editable region. This can prevent you (or others!) from making
mistakes in vital areas of a page (such as navigation systems).
Creating a New Template
You can create a new template in several ways. Most of the time, you will be doing it
from scratch. Open up a brand new document in Dreamweaver MX 2004, and design
a layout however you wish. Be sure to include your navigation, main body, etc.
When you have your layout exactly as you want it, go to the "File" menu and select
“Save as Template.”
In the box that appears, select a site for your template (this will probably be the site
assigned to your RCI space). There will most likely be no existing templates, as you
Copyright © Rutgers Writing Program
Contact Barclay Barrios ([email protected])
have not created a new one yet. In the "Save As" box, give your template an original
name that makes sense and you will remember. When you're done, click "Save."
A new folder called "Templates" will be generated for you (it will be inside the folder
where your site files are saved on your computer). The template will have the file
extension of DWT (*.dwt), and will be called whatever you named it in the last box
(for example, "my_layout.dwt").
Uneditable & Editable Regions
Now that you've created a template, you'll want to "define" areas of it as editable
and uneditable. For example, you may have your navigation on the left side of the
page, and body text on the right side of the page, in a table. The navigation for the
site will be the same no matter where on the page you go, so you won't want to
make this an "editable" region. It's very easy to make a section uneditable; simply
don't make it editable!
Now, you'll want to make the portion of the site where body text will go an editable
region, so that when you're ready to work from the template, you can insert your
text into it. Highlight the area you want to be an editable region. Go to the menu bar
and select “Insert,” then “Template Objects” and then “Editable Region.”
Copyright © Rutgers Writing Program
Contact Barclay Barrios ([email protected])
In the "New Editable Region" box, give the region a name. For example, if it is
indeed for the body text, you could name the editable region "body_text". Just
remember as you make editable regions that you cannot give the same name to
more than one.
You'll notice the area become highlighted by a color, and it will have a small tab
above it that names the editable regions with whatever name you gave it.
Saving Your Template
When you're done setting up your template, be sure to save like you would a normal
page ("File" > "Save"). Dreamweaver MX 2004 may ask you if you want to update all
documents that use the template. For now say, "No"; it doesn't matter, since we
haven't made any documents from the template, yet.
Copyright © Rutgers Writing Program
Contact Barclay Barrios ([email protected])
Creating a New Page From a Template
The reason why Templates are so powerful is because you can create new blank
pages with a template you designed already attached to them. You do this by
creating a new page from a template.
First, go to the menu bar and select “File” and then “New.”
The “New Document” window will then appear. You should currently be in the
“General” tab, but that’s about to change. Since we want to make a special kind of
new document, not just a blank page, click on the “Templates” tab.
Under the column “Templates For:” on the left side of the screen, choose the site
from which you want to use a template. The templates associated with each site are
listed in the middle column called “Site ‘name’:”. A small preview of the template will
appear in the right column, “Preview.” Decide which template you want to use for
creating a new blank page, and click on the “Create” button.
A new page should appear—one that looks similar to a normal new document.
However, instead of it being completely blank, the layout from your template should
appear on the page. You'll notice the entire page is outlined with a highlight-type
color (probably yellow). Your editable region(s) also appear with an outline on the
outside. This indicates that you can change its contents. However, if you place your
cursor over a region that you have not defined as editable, your cursor should
change into a circle with a line through it. This is Dreamweaver MX 2004 telling you
Copyright © Rutgers Writing Program
Contact Barclay Barrios ([email protected])
that you cannot change what's there, since it hasn't been defined as editable. Finally,
you will notice that in the upper-right corner of the page, there is a small tab that
tells you the template from which the page has been derived.
You are free to format the page as you wish. The only restriction is that you can only
edit something in an editable region. If you want to make a region on your page
editable, you’ll have to go back into the original template and edit it there.
Changes to a Template
There may be a point where you want to go back into your template and change
something. It can be either a big or small change. Suppose you wanted to add a new
selection to your menu navigation. You'd want this change reflected on all pages
made from the template. Go back and open your template. It will be in a
"Templates" folder inside where you save your Dreamweaver MX 2004 documents.
Make the changes to your template as needed.
Copyright © Rutgers Writing Program
Contact Barclay Barrios ([email protected])
You're now ready to apply this new menu to all documents created from this
template. To do this, save the template like you normally would any other page. You
will be asked if you’d like to update all pages created from this template. Click
“Update” to proceed.
Dreamweaver MX 2004 will then proceed to update all pages accordingly, and will
return to you a status report, detailing the number of pages updated, and if any
could not be updated.
Once you update a template, be sure to synchronize with the remote site so that you
don’t lose the changes you made to your template later on.
Warning: If you have a page open, be sure to save and close it so that changes
made to a template can be applied to that page.
Collaboration Tools
There may come a point in time where you need to work with others on a large
Copyright © Rutgers Writing Program
Contact Barclay Barrios ([email protected])
project using Dreamweaver MX 2004. This is referred to as "collaborating." Different
people will work on different parts of the same project at various times, so you'll
need some way to keep track of who has what, what's been done, etc. Luckily,
Dreamweaver MX 2004 makes this whole process a simple task.
Set Check-in / Check-out Option
The essential feature of working in a collaboration project is Dreamweaver MX 2004’s
"Check-in / Check-out" feature. This is an addition to the standard method of "FTPing" files back and forth from the host's server to your computer.
We'll assume you have a place to store your site, and know the appropriate
information. If you do not know how to set up Dreamweaver MX 2004 to access your
site, please refer to the "Publishing" section before continuing.
Go to the menu bar and select “Site” and then “Manage Sites.” Select the site you
want to collaborate on from the window that appears, and click “Edit.” You will then
be brought to the “Site Definition” window.
From the “Category” column, choose “Remote Info.” Now, click the “Enable Check
In/Check Out” box near the bottom of the screen. Next to “Check Out Name,” enter
in a unique name or your initials. Under that, enter in your e-mail address. When
you’re done, your window should look something like this:
Copyright © Rutgers Writing Program
Contact Barclay Barrios ([email protected])
When you are done, click the “OK” button here, and then “Done” on the next window
that appears.
Go ahead and now connect to your site's server space.
Synchronize
Once you're connected, the first thing you must do is "synchronize" with the server.
To do this right-click on a folder (usually the main, top-level folder) in the Site
window, and click “Synchronize.”
Copyright © Rutgers Writing Program
Contact Barclay Barrios ([email protected])
In the “Synchronize Files” window that appears, select “Entire Site” for
“Synchronize.” In the "Direction" window, you really have two choices you can make.
If you're starting up the files on the server space for the first time (that is, there's
absolutely nothing up there that has been uploaded, and you want to put files up
there), select "Put newer files to remote." If someone else has put files up, already,
you want to get your directory set up to have the exact same file directory as the
server. Select "Get newer files from remote." This will begin the downloading of the
directory on the server.
Note that downloading the directory could take some time, especially if there are a
large amount of files (or simply files with large file sizes) on the server. Using a
computer with a fast connection will speed the process. Attempt on dial-up
connection at your own risk!
“Put newer files to remote” will check every file and upload them to the remote
server (if they are “newer” on your local disk).
“Get newer files from remote” will check every file and replace them with versions off
of the remote server (if they are “newer” on the server).
“Get and put newer files” will do both sending and receiving of newer files,
comparing the remote and local hosts to find the newest version of each individual
file.
Copyright © Rutgers Writing Program
Contact Barclay Barrios ([email protected])
The “Delete” checkbox at the bottom is a powerful tool that should be handled with
care. Depending on your situation (putting or getting files), it will delete whatever
files it finds on one side that are not on another. For example, let’s pretend you are
“getting” the newest files off of the remote server. You have an empty “images”
folder on your local side, which is not on the remote side. Dreamweaver will delete
this “images” folder on your local side.
Check-in / Check-out
Once you have connected and synchronized, you will notice that the Site window
may look slightly different. Files will have little "locks" next to them.
To “check out” and edit a file, simply double-click it. A green check-mark will appear
next to it to denote its checked-out status.
When you're done working on a file, you need to "check" it back "in" to the server.
To do this, you'll need to click the "Check In" button in the toolbar.
Collaborating With Templates
The combined knowledge of templates and collaboration in Dreamweaver MX 2004
can create a very powerful web-designing environment. Using the collaborating
features in this program, you can work with other people using the same files, while
at the same time, working within the same templates. This allows for a high level of
consistency and security in your web pages.
Outside References
http://www.webthang.co.uk/tuts/tuts_dmx04/newbie_1/dmx04_1_1.asp
http://www.macromedia.com/devnet/mx/dreamweaver/articles/dw2004_cssp.html
http://www.uwec.edu/help/dwmx.htm
http://valhalla.guhsd.net/mac_lab/dreamweaver/mx_2004/