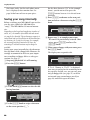
1
o
Song Player/Recorder
MR-200
Owner’s Manual
For EU Countries
This product complies with the requirements of European Directive EMC 89/336/EEC.
Dieses Produkt entspricht der europäischen Richtlinie EMC 89/336/EEC.
The
Ce produit est conforme aux exigences de la directive européenne
EMC 89/336/EEC.
Questo prodotto è conforme alle esigenze della direttiva europea EMC 89/336/EEC.
Este producto cumple con la directrice EMC 89/336/EEC de la CE.
Dit product beantwoordt aan de richtlijn EMC 89/336/EEC van de Europese Unie.
For the USA
FEDERAL COMMUNICATIONS COMMISSION
RADIO FREQUENCY INTERFERENCE STATEMENT
This equipment has been tested and found to comply with the limits for a Class B digital device, pursuant to Part 15 of the
FCC Rules. These limits are designed to provide reasonable protection against harmful interference in a residential
installation. This equipment generates, uses, and can radiate radio frequency energy and, if not installed and used in
accordance with the instructions, may cause harmful interference to radio communications. However, there is no guarantee
that interference will not occur in a particular installation. If this equipment does cause harmful interference to radio or
television reception, which can be determined by turning the equipment off and on, the user is encouraged to try to correct the
interference by one or more of the following measures:
– Reorient or relocate the receiving antenna.
– Increase the separation between the equipment and receiver.
– Connect the equipment into an outlet on a circuit different from that to which the receiver is connected.
– Consult the dealer or an experienced radio/TV technician for help.
This device complies with Part 15 of the FCC Rules. Operation is subject to the following two conditions:
(1) This device may not cause harmful interference, and
(2) This device must accept any interference received, including interference that may cause undesired operation.
Unauthorized changes or modification to this system can void the users authority to operate this equipment.
This equipment requires shielded interface cables in order to meet FCC class B Limit.
For Canada
NOTICE
This Class B digital apparatus meets all requirements of the Canadian Interference-Causing Equipment Regulations.
AVIS
Cet appareil numérique de la classe B respecte toutes les exigences du Règlement sur le matériel brouilleur du Canada.
For the U.K.
IMPORTANT: THE WIRES IN THIS MAINS LEAD ARE COLOURED IN ACCORDANCE WITH THE FOLLOWING CODE.
BLUE:
NEUTRAL
BROWN: LIVE
As the colours of the wires in the mains lead of this apparatus may not correspond with the coloured markings identifying
the terminals in your plug, proceed as follows:
The wire which is coloured BLUE must be connected to the terminal which is marked with the letter N or coloured BLACK.
The wire which is coloured BROWN must be connected to the terminal which is marked with the letter L or coloured RED.
Under no circumstances must either of the above wires be connected to the earth terminal of a three pin plug.
MR-200 – Owner’s Manual
FCC notice
Radio and Television Interference
Rodgers products use and generate small amounts of radio-frequency (RF) energy. The instrument complies with the limits set for Class B computing devices. FCC Rules, Part 15, Subpart J
define the limits for radio and television interference in a residential installation.
Follow the installation and the use instruction in the manual, or the instrument could potentially
cause interference with some radio or television reception. In the unlikely event this occurs, we
encourage the user to try the following corrective measures:
• Turn the instrument OFF to see if it is the actual source of the interference.
• Disconnect the peripheral devices and their input/output cables one at a time. If the interference stops, it is caused by the peripheral device or its I/O cable.
• Try coiling and uncoiling the instrument’s power cord in different ways.
• Connect the instrument’s power cord to a power outlet on a different circuit.
• Move the instrument further away from the radio or television receiver.
• Turn the radio or television receiver until the interference stops.
• Connect the radio or television receiver to a different power circuit.
• Reorient or move the receiver antenna further away from the instrument. Consider installing a
rooftop antenna with coaxial cable lead-in between the antenna and receiver.
• Consult the nearest Rodgers dealer for more information if the above corrective measures don’t
remove the interference.
Notice to users
Information in this document is subject to change without notice. No part of this manual may be
translated into any language, stored in a retrieval system, reproduced or transmitted in any form
or by any means, electronic or mechanical, including photocopying and recording, for any purpose without the express written permission of Rodgers Instruments LLC.
RODGERS INSTRUMENTS LLC
1300 N.E. 25th Avenue
Hillsboro, Oregon 97124
USA
(503) 648-4181
www.rodgersinstruments.com
RODGERS IN CANADA
5480 Parkwood Way
Richmond, B.C. V6V 2M4
(604) 270-6332
© Copyright 2003. Rodgers Instruments LLC, a member of the Roland Group. All rights reserved.
Rodgers®, Rodgers Classic Organs®, and Insignia™ are trademarks or registered trademarks of Rodgers Instruments LLC,
Hillsboro, Oregon.
3
Song Player/Recorder
Used for instructions intended to alert
the user to the risk of death or severe
injury should the unit be used
improperly.
Used for instructions intended to alert
the user to the risk of injury or material
damage should the unit be used
improperly.
* Material damage refers
other adverse effects
respect to the home
furnishings, as well
animals or pets.
to damage or
caused with
and all its
to domestic
The
symbol alerts the user to important instructions
or warnings.The specific meaning of the symbol is
determined by the design contained within the
triangle. In the case of the symbol at left, it is used for
general cautions, warnings, or alerts to danger.
The
symbol alerts the user to items that must never
be carried out (are forbidden). The specific thing that
must not be done is indicated by the design contained
within the circle. In the case of the symbol at left, it
means that the unit must never be disassembled.
The ● symbol alerts the user to things that must be
carried out. The specific thing that must be done is
indicated by the design contained within the circle. In
the case of the symbol at left, it means that the powercord plug must be unplugged from the outlet.
007
001
• Before using this unit, make sure to read
the instructions below, and the Owner’s
Manual.
.............................................................................................................................................
002a
• Do not open or perform any internal
modifications on the unit.
.............................................................................................................................................
003
• Do not attempt to repair the unit, or
replace parts within it (except when this
manual provides specific instructions
directing you to do so). Refer all servicing
to your retailer, the nearest Rodgers Service Center, or an authorized distributor,
as listed on the “Information” page.
• Make sure you always have the unit
placed so it is level and sure to remain
stable. Never place it on stands that could
wobble, or on inclined surfaces.
............................................................................................................................................
• The MR-200 should only be connected to
a power supply of the type described in
the operating instructions, or as marked
on the PSB-1U adapter supplied with the MR-200.
............................................................................................................................................
009
• Do not excessively twist or bend the
power cord, nor place heavy objects on it.
Doing so can damage the cord, producing severed elements and short circuits.
Damaged cords are fire and shock hazards!
............................................................................................................................................
.............................................................................................................................................
004
• Never use or store the unit in places that
are:
• Subject to temperature extremes (e.g.,
direct sunlight in an enclosed vehicle,
near a heating duct, on top of heatgenerating equipment); or are
• Damp (e.g., baths, washrooms, on
wet floors); or are
• Humid; or are
• Exposed to rain; or are
• Dusty; or are
• Subject to high levels of vibration.
.............................................................................................................................................
4
011
• Do not allow any objects (e.g., flammable
material, coins, pins); or liquids of any
kind (water, soft drinks, etc.) to penetrate
the unit.
............................................................................................................................................
013
• In households with small children, an
adult should provide supervision until
the child is capable of following all the
rules essential for the safe operation of
the unit.
............................................................................................................................................
MR-200 – Owner’s Manual
014
• Protect the unit from strong impact.
(Do not drop it!)
.............................................................................................................................................
015
• Do not force the MR-200’s adapter to
share an outlet with an unreasonable
number of other devices. Be especially
careful when using extension cords—the
total power used by all devices you have
connected to the extension cord’s outlet
must never exceed the power rating
(watts/amperes) for the extension cord.
Excessive loads can cause the insulation
on the cord to heat up and eventually
melt through.
.............................................................................................................................................
016
• Before using the unit in a foreign country, consult with your retailer, the nearest
Roland Service Center, or an authorized
Roland distributor, as listed on the
“Information” page.
• If you need to move the instrument, take
note of the precautions listed below. It
should be handled carefully, all the while
keeping it level. Make sure to have a firm
grip, to protect yourself from injury and
the instrument from damage.
2
• Disconnect the adapter cord.
3
• Disconnect all cords coming from
external devices.
.............................................................................................................................................
• Before cleaning the unit, turn off the
power and unplug the adapter from the
outlet.
.............................................................................................................................................
• Whenever you suspect the possibility of
lightning in your area, pull the plug on
the power cord out of the outlet.
.............................................................................................................................................
117
.............................................................................................................................................
• The unit should be located so that its
location or position does not interfere
with its proper ventilation.
• Should you remove screws, be sure to put
them in a safe place out of children’s
reach, so there is no chance of them being
swallowed accidentally.
.............................................................................................................................................
.............................................................................................................................................
101a
102b
• Always grasp only the plug on the adapter
cord when plugging into, or unplugging
from, an outlet or this unit.
.............................................................................................................................................
104
• Try to prevent cords and cables from
becoming entangled. Also, all cords and
cables should be placed so they are out of
the reach of children.
.............................................................................................................................................
106
• Never climb on top of, nor place heavy
objects on the unit.
.............................................................................................................................................
107b
• Never handle the adapter’s power cord or
its plugs with wet hands when plugging
into, or unplugging from, an outlet or
this unit.
.............................................................................................................................................
5
Song Player/Recorder
Important notes
In addition to the items listed under “IMPORTANT SAFETY INSTRUCTIONS” and “USING THE
UNIT SAFELY” on pages 2, 4 and 5, please read and observe the following:
If you connect the MR-200’s PHONES socket to a mixing console, amplifier, etc., to which you also
connect an optional MX-200 module, be sure to use the MX-200’s own adapter (do not power it via
the MR-200’s REMOTE EXTERNAL socket) to avoid unpleasant hum.
Power supply
• Do not use this unit on the same power circuit
with any device that will generate line noise (such
as an electric motor or variable lighting system).
• Before connecting this unit to other devices, turn
off the power to all units. This will help prevent
malfunctions and/or damage to speakers or other
devices.
Placement
• Using the unit near power amplifiers (or other
equipment containing large power transformers)
may induce hum. To alleviate the problem,
change the orientation of this unit; or move it farther away from the source of interference.
• This device may interfere with radio and television
reception. Do not use this device in the vicinity of
such receivers.
• Noise may be produced if wireless communications devices, such as cell phones, are operated in
the vicinity of this unit. Such noise could occur
when receiving or initiating a call, or while conversing. Should you experience such problems,
you should relocate such wireless devices so they
are at a greater distance from the MR-200, or
switch them off.
• Do not expose the unit to direct sunlight, place it
near devices that radiate heat, leave it inside an
enclosed vehicle, or otherwise subject it to temperature extremes. Also, do not allow lighting
devices that normally are used while their light
source is very close to the unit (such as a piano
light), or powerful spotlights to shine upon the
same area of the unit for extended periods of time.
Excessive heat can deform or discolor the unit.
• To avoid possible breakdown, do not use the unit
in a wet area, such as an area exposed to rain or
other moisture.
• Do not put anything that contains water (e.g.,
flower vases) on the cabinet. Also, avoid the use of
insecticides, perfumes, alcohol, nail polish, spray
cans, etc., near the unit. Swiftly wipe away any liquid that spills on the unit using a dry, soft cloth.
6
• Do not paste stickers, decals, or the like to this
instrument. Peeling such matter off the instrument may damage the exterior finish.
Maintenance
• To clean the unit, use a dry, soft cloth; or one that
is slightly dampened. Try to wipe the entire surface using an equal amount of strength. Rubbing
too hard in the same area can damage the finish.
• Never use benzine, thinners, alcohol or solvents of
any kind, to avoid the possibility of discoloration
and/or deformation.
Additional precautions
• Please be aware that the contents of memory is
lost when you switch off the MR-200 or during
improper operation of the unit. To protect yourself against the risk of loosing important data, we
recommend that you save them to floppy disk.
• Use a reasonable amount of care when using the
unit’s buttons, sliders, or other controls; and when
using its jacks and connectors. Rough handling
can lead to malfunctions.
• Never strike or apply strong pressure to the display.
• When connecting / disconnecting all cables, grasp
the connector itself-never pull on the cable. This
way you will avoid causing shorts, or damage to
the cable’s internal elements.
• A small amount of heat will radiate from the unit
during normal operation.
• Use cables from Roland to make the connection. If
using some other make of connection cable, please
note the following precautions.
Some connection cables contain resistors. Do not
use cables that incorporate resistors for connecting to this unit. The use of such cables can cause
the sound level to be extremely low, or impossible
to hear. For information on cable specifications,
contact the manufacturer of the cable.
MR-200 – Owner’s Manual
Before using floppy disks (handling the
floppy disk drive)
• Install the unit on a solid, level surface in an area
free from vibration. If the unit must be installed at
an angle, be sure the installation does not exceed
the permissible range: upward, 2°; downward, 18°.
• Avoid using the MR-200 immediately after it has
been moved to a location with a level of humidity
that is greatly different than its former location.
Rapid changes in the environment can cause condensation to form inside the drive, which will
adversely affect the operation of the drive and/or
damage floppy disks. When the MR-200 has been
moved, allow it to become accustomed to the new
environment (allow a few hours) before operating
it.
• To insert a disk, push it gently but firmly into the
drive—it will click into place. To remove a disk,
press the EJECT button firmly. Do not use excessive force to remove a disk which is lodged in the
drive.
• Never attempt to remove a floppy disk from the
drive while the drive is operating (the indicator is
lit); damage could result to both the disk and the
drive.
• Remove any disk from the drive before switching
the instrument on or off.
• To prevent damage to the disk drive’s heads,
always try to hold the floppy disk in a level position (not tilted in any direction) while inserting it
into the drive. Push it in firmly, but gently. Never
use excessive force.
• To avoid the risk of malfunction and/or damage,
insert only floppy disks into the disk drive. Never
insert any other type of disk. Avoid getting paper
clips, coins, or any other foreign objects inside the
drive.
• Do not subject floppy disks to temperature
extremes (e.g., direct sunlight in an enclosed
vehicle). Recommended temperature range:
10°~50°C (50°~122°F).
• Do not expose floppy disks to strong magnetic
fields, such as those generated by loudspeakers.
• Floppy disks have a “WRITE” tab which can
protect the disk from accidental erasure. It is
recommended that the tab be kept in the PROTECT position, and moved to the WRITE position only when you wish to write new data onto
the disk.
Rear side of the disk
WRITE
(you can save data to the disk)
Protect tab
PROTECT
(you cannot save data)
• Disks containing important performance data
for this instrument should always be locked
(have their write protect tab slid to the PROTECT position) before you insert them into the
drive of another instrument.
• The identification label should be firmly affixed
to the disk. If the label comes loose while the
disk is in the drive, it may be difficult to remove
the disk.
• Put the disk back into its case for storage.
Handling floppy disks
• Floppy disks contain a plastic disk with a thin
magnetic coating. Microscopic precision is
required to enable storage of large amounts of
data on such a small surface area. To preserve
their integrity, please observe the following when
handling floppy disks:
• Never touch the magnetic medium inside the
disk.
• Do not use or store floppy disks in dirty or
dusty areas.
7
Song Player/Recorder
Liability and copyright
• Should data contained and stored on a floppy disk
be lost, it is unfortunately impossible to restore
them. Roland Europe S.p.a. assumes no liability
concerning such loss of data.
• Unauthorized recording, distribution, sale, lending, public performance, broadcasting, or the like
in whole or in part, of a work (musical composition, video, broadcast, public performance, or the
like) whose copyright is held by a third party is
prohibited by law.
• Do not use this unit for purposes that could
infringe on a copyright held by a third party.
Roland assumes no responsibility whatsoever with
regard to any infringements of third-party copyrights arising through your use of this unit.
8
MR-200 – Owner’s Manual
Contents
FCC notice . . . . . . . . . . . . . . . . . . . . . . . . . . . .3
Important notes. . . . . . . . . . . . . . . . . . . . . . . .6
Introduction . . . . . . . . . . . . . . . . . . . . . . . . . .10
Quick tour . . . . . . . . . . . . . . . . . . . . . . . . . . .11
What is the MR-200? . . . . . . . . . . . . . . 11
Front panel . . . . . . . . . . . . . . . . . . . . . . 12
Rear panel . . . . . . . . . . . . . . . . . . . . . . . 14
First steps . . . . . . . . . . . . . . . . . . . . . . . 15
Listening to a song . . . . . . . . . . . . . . . . 17
Recording your first piece . . . . . . . . . . 18
Recording using a Rodgers organ. . . . . . . . 18
Recording using a synthesizer, digital
piano, etc. . . . . . . . . . . . . . . . . . . . . . . . . . . . 20
Saving your song internally. . . . . . . . . 22
More advanced functions . . . . . . . . . . . . . . 23
Metronome functions . . . . . . . . . . . . . 23
Playback functions . . . . . . . . . . . . . . . . 24
Additional recording functions . . . . . 27
MIDI functions. . . . . . . . . . . . . . . . . . . . . . . . 34
Available MIDI parameters. . . . . . . . . 34
File management . . . . . . . . . . . . . . . . . . . . . 37
Disk functions . . . . . . . . . . . . . . . . . . . 37
Erasing internal songs . . . . . . . . . . . . . 39
Copying a song from one floppy disk
to another . . . . . . . . . . . . . . . . . . . . . . . 40
Function flow chart . . . . . . . . . . . . . . . . . . . 42
Specifications . . . . . . . . . . . . . . . . . . . . . . . . 43
MIDI Implementation chart . . . . . . . . . . . . . 44
9
Song Player/Recorder
Introduction
Thank you for choosing a MR-200 Song Player/Recorder. This easy-to-use MIDI recorder allows you
to supplement your Rodgers organ, or any other MIDI-compatible sound source, with a handy external recording device.
The MR-200 is a 16-track recorder and a realtime SMF Player for use with MIDI instruments like
Rodgers organs, the Roland C-180 Portable Organ, an SC-series or JV/XV-series sound module, an
MX-200 Organ Sound Expansion unit, etc.
To get the most out of the MR-200 and to ensure many years of trouble-free service, we urge you to
read through this Owner’s Manual thoroughly. To avoid confusion, let’s agree to use the word “button” for all keys on the front panel, and use “key” only when referring to the keys on an external keyboard.
Before using this unit, carefully read the section “Important notes” on page 6. They provide important information concerning the proper operation of the MR-200. Be sure to keep this manual in a
safe place for future reference.
Realtime SMF Player
The MR-200 can be used to play back Standard MIDI Files. Each track can be assigned
to one of two separate MIDI outputs (A or
B).
16-track Recorder
The MR-200 allows you to record both
complete arrangements (up to 16 different
parts simultaneously) and single tracks, and
to listen to the entire piece or individual
tracks (e.g. to check the accuracy of the
overall musical performance).
Metronome
The MR-200 contains a dedicated metronome function, which is helpful during
recording and for practice. The time signature is selectable (1/4, 2/4, 3/4, 4/4, 5/4, 6/4,
6/8, 9/8) and the metronome sound is generated by the MR-200 itself. (The MR-200
has no internal sound source and thus only
produces a metronome sound.)
Musician-friendly simple operation
The MR-200 can easily load and reproduce
any Standard MIDI File (Format 0 and 1)
from 3.5” floppy disk and also provides an
internal memory area. Moreover, even nonexpert musicians can create songs and save
them in the Standard MIDI File format.
Two independent MIDI outputs
You can connect the MR-200 to two external MIDI devices (i.e. a Rodgers organ and
an MX-200 organ sound module). Assigning the 16 MIDI tracks to the desired MIDI
output (“A” or “B”) is easy.
Remote control functions for the MX-200
The MR-200 allows you to select sounds, set
effects, etc., for the optional MX-200 sound
module and to store that information in
your songs.
Remote DC out
The MR-200 comes with a socket to which
you can connect the adapter socket of an
external sound module (Roland JV-1010,
XV-2020, Rodgers MX-200, etc.). By switching off the MR-200, you also power down
the external module.
Copyright © 2003 ROLAND EUROPE. All rights reserved. No part of this publication may be reproduced in any form without
the written permission of Roland Europe S.p.a.
10
MR-200 – Owner’s Manual
Quick tour
What is the MR-200?
Before explaining how to work with your
MR-200, let us briefly look at what it is and
does. The MR-200 is a “MIDI sequencer”. That
term refers to two things: to the MIDI standard,
and the fact that it allows you to create
sequences.
Concept
Though the MR-200 is as user-friendly as a
tape or MD recorder, it is based on an entirely
different concept. It does not record the audio
information of what you play. In a way, the
MR-200 is an electronic piano roll: it only registers “events” (the digital equivalents of punch
holes), whose position and distance specify
when the notes are to be played. The sequencer
as such (being the “digital paper roll”) cannot
sound what you record – you need an instrument with a tone generator (a “digital pianola”)
for that. The MR-200 must therefore be connected to an electronic sound source, like a
Rodgers organ, etc., before starting playback.
What does it do?
The MR-200 only works with instructions, also
called “data”, “messages”, or “commands” – just
like a computer. Those instructions are generated by your playing on an external keyboard.
Whenever you press a key or pedal, your organ
(or other MIDI instrument) sends a message
that translates what you just did (“start sounding a C4 now”, “stop sounding the C4 now”,
etc.). This is possible thanks to a common language for musical applications, which is called
“Musical Instrument Digital Interface”, or
“MIDI” for short. MIDI has a lot in common
with the internet: you can to link one or many
instruments to one another via a cable (but you
don’t need a telephone line), and you need two
machines that speak and understand the same
language.
In the same way you need to save your letters,
scores, and other files before switching off your
computer, you must save your MR-200 recordings before switching it off.
To play back a song you recorded a while ago,
you must first open it (load the file from floppy
disk). You may very well be able to take the
floppy disk to a friend’s house and to use his/
her computer as playback device – provided
that computer is fitted with a floppy disk drive
and contains a software program that allows
you to play back MIDI files (most computers
do). If that computer contains a sound card,
you will be able to hear your music. Be aware,
however, that the sound card may use slightly
different sounds, and contain a different sound
engine, so that your music does not sound
exactly like when you recorded it. And if you
use a different sound source during playback,
your music sounds different as well. But it is
usually fairly close.
Advantages of a MIDI sequencer like your
MR-200
As stated above, the MR-200 records your playing as a series of isolated instructions (“punch
holes”) rather than sounds. Their chronological order is correct, and so the instructions
(re)produce your music the way you played it
whenever they are sent back to your organ and/
or an external sound module. This approach
offers the following advantages:
• The playback tempo can be changed without affecting the music’s pitch (this allows
you to record at a slower tempo than the
one you will be using during playback);
• You can change (“transpose”) a recorded
piece without affecting its tempo;
• You can repeat the desired passage over and
over using the REPEAT function.
11
Song Player/Recorder
• You can rearrange your own and someone
else’s recordings by selecting different
sounds for the recorded parts and by adding
more parts.
• Your recordings always remain “up-to-date”.
So if you decide to buy another instrument,
you can use its sound generator for playing
back your pieces – without recording them
again, but with the sounds of your new
instrument.
• A MIDI sequence is a lot smaller than any
(MP3) digital audio file. One floppy disk
can hold at least 20 MIDI files (sometimes a
lot more), while it is barely enough for one
MP3 audio file of the same length.
Front panel
A Disk drive
This is where you need to insert the floppy
disk that contains the songs you wish to play
back, or where you wish to save a song you
have recorded. You can use 2DD (720k) and
2HD (1.44MB) disks.
The MR-200 “forgets” the data you record or play
back when you switch it off. Be sure to save your
own songs internally or to a floppy disk beforehand.
B [POWER] button
Press this button to switch the MR-200 on
or off. Switching the MR-200 on or off also
means that the external sound module
whose adapter socket you connect to the
MR-200’s DC OUT socket will be switched
on or off.
12
C BEAT indicator
This LED flashes to indicate the currently
selected tempo: green while the MR-200 is
not running, and red on the first beat/green
on the other beats during playback or
recording. This can be either the tempo you
set, or the tempo of the last Standard MIDI
File you play back.
D [METRONOME] button
Press this button to activate or switch off the
MR-200’s metronome. After pressing this
button, you can also change the metronome’s time signature.
MR-200 – Owner’s Manual
E [TRANSPOSE] button
Press this button to transpose the recorded
parts to another key. This setting only
affects the melodic parts the MR-200 transmits to its MIDI OUT sockets. The data
received via MIDI IN are not affected. See
page 25.
F [DISK] button
Press this button to access the MR-200’s
Disk functions, e.g. to save the current song
to disk or to manage the files on disk. See
page 37.
G Display and assigned buttons
The display keeps you informed about the
MR-200’s current status. The buttons linked
to it by blue dashed lines allow you to select
and set the functions that are currently displayed.
H [VALUE] knob
Use this knob to change the value of the currently selected parameter, e.g. the tempo
value, the transposition interval, etc.
You can also press this knob to confirm your
setting or to change the status (on/off) of
the selected parameter or track.
I [MENU] button
After pressing this button, you can use the
[VALUE] knob to select one of the MR-200’s
functions. The following functions are available (see elsewhere in this manual for an
explanation):
Write iSong
Erase iSong
Master Tune Send
Song Chain
Count In Status
Clock TX
K TRACK [ORGAN] and [OTHER] buttons
Press the [ORGAN] button to select the tracks
that are used for recording your organ playing. Each manual is recorded onto a separate track: GREAT= 12, SWELL= 13, and
PEDAL= 14. Tracks 15 (CHOIR) and 16
(SOLO) are also selected and used by certain
Rodgers models.
Tracks you assign to the MIDI OUT A socket (see
page 36) can be selected using the [ORGAN] button. Tracks assigned to MIDI OUT B can be
selected using the [OTHER] button.
Press the [TRACK] button to select all other
tracks (1~11, Master Track, Tempo Track)
for recording. See also page 27.
L PAGE [√][®] buttons
These buttons allow you to select other display pages with additional parameters you
can set.
M MARKER buttons
Press [A/B] to specify the beginning (“A”) and
end (“B”) of the musical passage you would
like to repeat. Press [REPEAT] to switch the
function of the same name (button lights)
or off (button goes dark). See page 25.
N PLAYER/RECORDER buttons
These buttons allow you to control song
playback and recording. See page 24.
Start/Stop TX
Sync Rx
MIDI Soft Thru
MIDI MACRO Recall
Track 1~16 MIDI Out Assign
J [SOUND SELECT] button
This button is used to register the sound
addresses (as “program change numbers”)
for the various tracks you record. It can also
be used to select sounds on a sound module
or MIDI instrument connected to the MIDI
OUT B socket for playback only.
13
Song Player/Recorder
Rear panel
A
B
A MIDI OUT B, OUT A & IN sockets
Connect the MIDI OUT sockets to the
MIDI IN sockets of two external instruments. The factory settings for these sockets
are: MIDI OUT A should be connected to
the MIDI IN socket of your Rodgers organ.
MIDI OUT B should be connected to an
external sound module (like the MX-200,
for example).
The MIDI IN socket needs to be connected
to the MIDI OUT port of the instrument
your are playing while recording (usually
your organ, digital piano, or synthesizer).
B FOOTSWITCH socket
By connecting an optional Roland DP-2,
DP-6, or BOSS FS-5U footswitch to this
socket, you can start/stop playback or
recording by foot.
C METRONOME [LEVEL] knob and [PHONES]
socket
The PHONES socket allows you to connect
headphones, which might be useful while
recording. You could also connect this
socket to an audio input of an external
14
C
D
E
amplifier or your Rodgers organ using a
standard 1/4” phone audio cable (“guitar
cable”). Before doing so, be sure to read the
note in the gray box on page 6.
There is no absolute need to use this socket as the
metronome beep is also reproduced by the MR-200
itself.
The [LEVEL] knob allows you to set the metronome’s level.
D REMOTE EXTERNAL DC OUT socket
Use the supplied cable to connect this socket
to the DC IN in socket of another Rodgers
or Roland sound module (if it is powered by
an adapter). You can connect any instrument that requires 600mA or less.
Carefully check whether the external module can
indeed be connected to this socket. See its owner’s
manual or ask your dealer for details.
E DC IN 9V 2A socket
This is where you need to connect the supplied PSB-1U adapter.
MR-200 – Owner’s Manual
First steps
MIDI connections
Optional metronome connection
In order to use the MR-200’s full potential, you
need to connect its MIDI sockets as follows:
The MR-200 contains a metronome that indicates the time signature and tempo. Press the
[METRONOME] button to switch it on. If you
have difficulty hearing it, set the [LEVEL] knob
(rear panel) to the desired value. You can also
connect headphones to the PHONES socket,
but then you will only hear the metronome
(not the music).
If the metronome is still difficult to hear, however, you can connect the METRONOME
PHONES socket to the AUX INPUTS L
(MONO) socket of your Rodgers organ. This
requires the use of an optional guitar cable (1/
4” jack→ 1/4” jack).
Before doing so, be sure to read the note in the gray box
on page 6.
You could also connect it to the input of an
external amplifier, but then you would not hear
the metronome if you worked with headphones
connected to your organ.
Rodgers series organ
MR-200
External module*
(*) This could be a Rodgers
MX-200 module, a Roland JV/
XV-series module, or a sound
module by another manufacturer.
MR-200
Rodgers organ, amplifier, etc.
INPUT
A MIDI OUT socket only sends data, while
a MIDI IN socket only receives them. Never
connect a MIDI IN socket to a MIDI IN
port (or a MIDI OUT socket to a MIDI
OUT port), because that does not work.
After switching on the MR-200 (see below), set
the METRONOME [LEVEL] knob to the desired
value. You may also have to change the external
instrument’s or amplifier’s input sensitivity.
15
Song Player/Recorder
Power connections & switching the
MR-200 on and off
F Press the MR-200’s [POWER] button to
switch it on.
After establishing the above connections, you
need to connect the supplied adapter to the
MR-200’s DC IN socket:
Connect the supplied
adapter here.
To an external module.
A Wind the adapter cord round the hook to
its right to prevent accidental disconnection of the adapter cable during operation.
B Insert the small adapter plug into the DC
IN socket on the MR-200’s rear panel.
C Connect the big plug to a suitable wall outlet (see the label on the adapter’s plug).
D If you are also using an external module
with a DC IN socket (a Rodgers MX-200,
for example), connect that socket to the
MR-200’s REMOTE EXTERNAL DC OUT
socket using the supplied cable.
If you also want to connect the PHONES socket to
an external amplifier, mixing console, etc., be sure
to read the note in the gray box on page 6.
E Press the POWER button on the external
module.
This ensures that the module is switched on
when you power on the MR-200. (The
external device doesn’t come on yet.)
16
The module whose DC IN socket you connected to the REMOTE EXTERNAL DC
OUT socket also comes on.
Press the [POWER] button again to switch the
MR-200 (and the connected module) back
off again.
MR-200 – Owner’s Manual
Listening to a song
Listening to a song on disk
To listen to a piece on floppy disk (or a disk
you bought), proceed as follows:
A Connect the Rodgers organ and/or MIDI
sound module to the MR-200’s MIDI sockets (see page 15).
Be sure to follow the suggested connections:
the organ’s MIDI IN→ MIDI OUT A
a module’s MIDI IN→ MIDI OUT B
B Switch on the MR-200 and your instrument.
C Insert the disk with the piece you want to
listen to into the disk drive.
The disk’s metal shutter must point towards
the drive and the disk label must be visible.
The display now looks as follows:
D01:74600_01
I Shot The
In other instances, you can press and hold
the [SONG] button to display both the song’s
internal name and its file name (firs line).
The internal name is usually more explicit
and may therefore help you find the desired
song more quickly.
Not all commercially available Standard MIDI
Files have an internal song name. Furthermore, the
MR-200 does not allow you to program such
names.
D Use the [VALUE] knob to select the song you
wish to listen to.
E Press the [PLAY¥®] button to start playback
(the button lights).
Songs that contain more than 18 tracks cannot be
played back by the MR-200. For such songs, the
display briefly shows the following message:
Can’t load
Too many tracks!
F Press the [STOP¥ª] button to stop playback.
Listening to an internal song
After saving your own music to the
MR-200’s internal memory (see page 22),
you can also select your pieces and play
them back – without using a floppy disk.
A Connect the Rodgers organ or MIDI sound
module to the MR-200’s MIDI sockets (see
page 15).
B Switch on the MR-200 and your instrument.
C Press the [SONG] button.
D Use the [VALUE] knob to select the song you
wish to listen to.
Internal songs are indicated as “I01”, “I02”,
etc.
17
Song Player/Recorder
E Press the [PLAY¥®] button to start playback
(the button lights).
F Press the [STOP¥ª] button to stop playback.
Recording your first piece
As stated earlier, the MR-200 is a MIDI
sequencer that records MIDI messages. MIDI is
a communication standard for digital musical
instruments that can transmit and receive messages on 16 channels simultaneously.
You can also record complete arrangements by
playing all parts in consecutive passes. Rodgers
organs (and keyboard instruments with two or
more “zones”) use several MIDI channels at
once. A Rodgers organ, for example uses separate MIDI channels for each manual and for
registration settings.
This also allows you, for instance, to record the
notes you play on the GREAT manual first, followed by the SWELL notes, and finally the
PEDAL notes. Of course, you can also play the
SWELL and GREAT parts simultaneously, adding just the PEDAL part at a later stage. (And
you can also record all three parts simultaneously.)
It is important to remember that MIDI only
works as expected if the receiving instrument
“watches” the MIDI channel the sender is
transmitting on.
The MR-200 handles MIDI channels almost
automatically, so that you do not really have to
worry about that. What you need to remember
however, is this: if you also wish to use a drum
or percussion part, it should be recorded onto
track 10. We’ll come back to that later. For now,
just remember that the track numbers correspond to the MIDI channel numbers (so track 1=
MIDI channel 1, track 2= MIDI channel 2,
etc.).
Recording using a Rodgers organ
If you are using another type of keyboard
instrument, skip to “Recording using a synthesizer, digital piano, etc.” on page 20.
A Connect the Rodgers organ to the MR-200’s
MIDI sockets (see page 15).
B Switch on the MR-200 and your organ.
C Activate the MIDI mode of your Rodgers
organ. See its owner’s manual for details.
When you switch on the MR-200, its “playback song memory” (computer buffs would
call it “RAM”) is therefore empty. Before
proceeding, ask yourself whether you have
changed the previous song since loading it
and whether you wish to preserve the new
version. If you do, save the song now (see
page 22).
D Press the [REC≈∏] button.
It starts flashing and the display looks as follows:
Rec:NEW SONG 001
All®
4/4
>120
To create a new song, you must select the
“All” setting (if it is not yet selected).
At a later stage (to redo the organ parts),
you can press the TRACK [OTHER] button so
that it stops flashing if you only want to
record to tracks 12~16 (without changing
what’s on tracks 1~11).
There are two things you can do now:
• Perform the following step, then set the time
signature and tempo –OR–
18
MR-200 – Owner’s Manual
• Switch off the metronome.
Here are the pros and cons of these two
approaches:
Recording without the metronome– This
is perfectly possible and has the advantage
that you do no not need to worry about the
correct time signature and tempo. The
drawback, however, is that the measure
indication in the upper right corner (below
“MEASURE”) will be meaningless and that
several more sophisticated functions (like
REPEAT) will not work as expected.
Recording with the metronome– This
approach has the advantage that you can
rely on a rhythmic guide and so play in time.
Since we are dealing with MIDI data, you
could even set a slower tempo for recording
than the one you will be using during playback. The drawback is that you may have the
impression that your performance becomes
too artificial. And tempo changes in the
course of a piece are only possible if you
program them after recording the music.
E If you need the metronome, switch on the
[METRONOME] button.
F If you switched on the [METRONOME] button, set the time signature and tempo:
• Press [BEAT] below the display and use the
[VALUE] knob to set the time signature (1/4,
2/4, 3/4, 4/4, 5/4, 6/4, 6/8, 9/8).
• Press [TEMPO] below the display and use the
[VALUE] knob to set the tempo (20~250).
Watch the BEAT indicator while setting
these two values and listen to the metronome. If necessary, change the setting of the
[LEVEL] knob on the MR-200’s rear panel.
The BEAT value can only be set before you start
recording a new song (and only after selecting “All”
mode). The TEMPO value can be changed while
recording the first part, or by programming the
Tempo Track later (see page 27).
G Press the [PLAY¥®] button.
If the metronome is already ticking, it will
restart when you press the [PLAY¥®] button.
If the metronome is off, you will nevertheless hear a 2-measure count-in, but no metronome while recording (unless you switch
the Count-In function off, see page 23).
H Wait until the count-in is finished and the
[PLAY] button lights, then start playing your
part(s).
Do not play any notes while the count-in is still
running. This is to ensure that the information
about the organ’s registration is also memorized.
That registration information is rather complex
and can only be recorded properly if the MR-200
can “concentrate” on those messages.
If you like (and if you only play with one
hand), you can change the tempo during
recording by first pressing [TEMPO] and then
using the [VALUE] knob.
The MR-200 always starts recording music in measure 2 (measure 1 contains all settings related to the
sounds you are using).
19
Song Player/Recorder
I At the end of your piece, press the [STOP¥ª]
button.
Congratulations! You have just recorded
your first piece with your MR-200. Note
that the “®” next to “All” has changed to
“„”. This means that the organ tracks (12~
16) now contain music data (or silence, if
your organ does not use all five channels).
Listening to your recording
The first thing you probably want to do now is
listen to your recording.
A Press the [RESET¥|√] button.
If you watch the display while doing so, you
will notice that the MEASURE indication in
the upper right corner returns to “001”.
If want to start playback from a different
measure, use the [º¥BWD] or [FWD¥‰] button to rewind or fast-forward.
As explained on page 19, the measure indications
may not coincide with the measures of what you
recorded if you worked without the metronome.
Finding the desired location may therefore be difficult, or even impossible.
B Switch off the [METRONOME] button if you
don’t want to hear the metronome.
C Press the [PLAY¥®] button to start playback.
20
You can change the tempo during playback
by first pressing [TEMPO] and then using the
[VALUE] knob.
D Press the [STOP¥ª] button to stop playback.
If you are satisfied with your rendition save your
piece now (see page 22).
If you are not satisfied and want to record
the piece again, first press [RESET¥|√], then
return to step D on page 18.
Recording using a synthesizer, digital
piano, etc.
The MR-200 can take care of a lot of MIDI settings in the background, so that you do not
have to worry about them. Let us now look at
how to record something using another MIDI
instrument than a Rodgers organ.
A Connect the external instrument to the
MR-200’s MIDI sockets (see page 15).
In the illustration on page 15, replace
“Rodgers series organ” with “your keyboard”.
B Switch on the MR-200 and your external
keyboard.
When you switch on the MR-200, it contains no data at all. Its song memory is
therefore empty. After playing back a song
on floppy disk, however, you need to select
“All” mode to erase the data of the previous song. Before doing so, ask yourself
whether you have changed that song and
whether you wish to preserve the new version. If you do, save the song before proceeding (see page 22).
There are two things you can do:
• Perform the following step, then set the time
signature and tempo –OR–
• Switch off the metronome.
See “Recording without the metronome”
and “Recording with the metronome” on
page 19 for a discussion of these two
options.
MR-200 – Owner’s Manual
C If you need the metronome, switch on the
[METRONOME] button.
The BEAT value can only be set before you start
recording a new song (and only in “All” mode). The
TEMPO value can be changed while recording the
first part or by programming the Tempo Track later
(see page 27).
F Press the [PLAY¥®] button.
D Press the [REC≈∏] button.
It starts flashing and the display looks as follows:
REC:NEW SONG 001
All®
4/4
>120
To create a new song, you must select the
“All” setting (if it is not yet selected).
The “All” message in the lower left corner
means that the MR-200 will record all MIDI
data on all MIDI channels. (Do not select
this option for adding more parts to an
existing song, because even tracks that don’t
receive MIDI data will be empty after your
recording.)
E If you switched on the [METRONOME] button, set the time signature and tempo:
• Press [BEAT] below the display and use the
[VALUE] knob to set the time signature (1/4,
2/4, 3/4, 4/4, 5/4, 6/4, 6/8, 9/8).
• Press [TEMPO] below the display and use the
[VALUE] knob to set the tempo (20~250).
See “Ensuring that your parts sound the same every
time” on page 30 if the MR-200 should also
remember which sound(s) you are using.
Watch the BEAT indicator while setting
these two values and listen to the metronome. If necessary, change the setting of the
[LEVEL] knob on the MR-200’s rear panel.
If the metronome is already ticking, it will
restart when you press the [PLAY¥®] button.
If the metronome is off, you will nevertheless hear a 2-measure count-in (unless you
switch that function off, see page 23) that
stops as soon as the [PLAY¥®] button lights.
G Wait until the count-in is finished, then
start playing your part(s).
Do not play any notes while the count-in is still
running.
If you like (and if you only play with one
hand), you can change the tempo during
recording by first pressing [TEMPO] and then
using the [VALUE] knob.
H At the end of your piece, press the [STOP¥ª]
button.
Congratulations! You have just recorded
your first piece with your MR-200. Note
that the “®” next to “All” (or the track
number) has changed to “„”. This means
21
Song Player/Recorder
that some tracks (or the track whose number is displayed) now contain data. See
page 20 for how to listen to your piece.
Saving your song internally
Before switching your MR-200 off, you need to
save the piece (which the MR-200 calls a
“song”). The MR-200 has 99 internal memories.
Depending on the length and complexity (number of
tracks, etc.), the number of available internal memories may be less than 99. The total memory capacity is
indeed fixed and used for all data in all internal memory locations. So, if your first 32 songs (for example)
are extremely long and contain lots of notes, the
remaining 67 internal locations may no longer be
available.
Saving your songs internally has the advantage
that you don’t need a floppy disk. However, we
strongly recommend to also save your important recordings to floppy disk as a safety precaution. See page 37.
A Stop song playback if it is still running.
B Press the [MENU] button.
For the first character (“N” in the example
above), you do not need to press the
[TEMPO] button, because it is selected automatically.
E Press [TEMPO] to advance to the next position and select a character using the [VALUE]
knob.
Write iSong 1/26
< SEW_SONG
>
F Repeat step E to complete your name.
To correct a previously entered character, press [TRACK] and use the
[VALUE] knob.
G When you are happy with your name, press
the [VALUE] knob.
The display now responds with:
Complete
If “Int Memory Full” is displayed,
your song is too big for the remaining memory capacity. In that case, you can save your
song to floppy disk (see page 37) or delete
an internal song you no longer need (see
page 38) and then repeat the above.
C Use the PAGE [√][®] buttons to select the following function:
Write iSong 1/26
< NEW_SONG
>
D Use the [VALUE] knob to assign a character
to the cursor position (“_”).
22
MR-200 – Owner’s Manual
More advanced functions
Metronome functions
Setting the metronome’s tempo and time
signature
You can also use the metronome for practise
(i.e. without recording or playing back a
song). To do so, switch on the
[METRONOME] button (it must light) and
then proceed as follows:
A Switch off the [DISK], [MENU] or
[SOUND¥SELECT] button (if it lights).
B Press [BEAT] below the display and use the
[VALUE] knob to set the time signature (1/4,
2/4, 3/4, 4/4, 5/4, 6/4, 6/8, 9/8).
C Press [TEMPO] below the display and use the
[VALUE] knob to set the tempo (20~250).
Watch the BEAT indicator while setting
these two values and listen to the metronome. It flashes green when the MR-200 is
not running, and red on the first beat/green
on the other beats during playback or
recording.
If necessary, change the setting of the [LEVEL]
knob on the MR-200’s rear panel.
The BEAT and TEMPO values change when you
play back a song. You may therefore have to repeat
the above steps after playing back a song.
Count-in function
If you prefer to record without the metronome, and therefore do not set the correct
tempo before starting a recording, the 2measure count-in before recording starts
may be distracting. That is why you can
switch it off. In that case, wait until the
[REC≈∏] button lights steadily before starting
to play (do not play anything while the
[REC≈∏] button is still flashing).
The Count-In function is only available for recording – not for playback.
A Press the [MENU] button.
B Use the PAGE [√][®] buttons to select the following function:
Count In
On
5/26
You can also select this function by pressing
and holding [METRONOME].
C Use the [VALUE] knob to select “Off”
(Count-In not available) or “On” (CountIn available).
D Press [MENU] again to leave this function.
The following message appears.
Write Menu ?
Yes
No
E If you wish to keep this setting, press the
[TRACK] button to save your setting. Press
[TEMPO] to leave the menu without saving
your change.
If you press [TEMPO], your setting is only
preserved until you switch the MR-200 off.
23
Song Player/Recorder
Playback functions
Changing the playback tempo
To increase (or decrease) the tempo of the
song you are listening to, proceed as follows:
Tempo changes contained in the song you are playing back will be kept, but shifted accordingly. If you
press [RESET¥|√] to return to the beginning of the
song, however, the song’s tempo is reset to its original value. See “Switching recorded parts on and
off” on page 26 if the song’s tempo values should be
ignored (mute the Tempo track).
A Switch off the [DISK], [MENU] or
[SOUND¥SELECT] button (if it lights).
B Press [TEMPO] below the display and use the
[VALUE] knob to set the tempo (20~250).
If you like the new version better, you can
save it (see page 22 or 37). It is also possible
to program tempo changes by re-recording
the Tempo track. See page 29.
Reset, rewind, fast-forward
You can use the following buttons to jump
to different song locations.
[RESET¥|√]: allows you to return to the beginning of the current song.
[º¥BWD]: allows you to rewind one measure
at a time.
[FWD¥‰]: allows you to fast-forward one
measure at a time.
These buttons are available both during
playback and while playback is stopped.
24
Song Chain function
If you switch on the “Song Chain”
function, the MR-200 plays back all songs in
its internal memory or on floppy disk whenever you press the [PLAY¥®] button. Playback
starts at the first song and runs until the last
song. After playing back that song, the
MR-200 returns to the first song and repeats
the cycle.
A Press the [MENU] button.
B Use the PAGE [√][®] buttons to select the following function:
Song Chain
4/26
Floppy
C Use the [VALUE] knob to select “Floppy”
(playback loop of the files on the inserted
disk), “Internal” (playback loop of the
internal songs) or “Off” to switch the
function off.
D Press [MENU] again (it goes dark) to leave
this function.
The Song Chain setting is not saved.
E If you selected “Floppy”, insert a disk
into the drive.
F Press [PLAY¥®] to start playback of all songs
in the internal memory or on floppy disk.
G Press [STOP¥ª] to stop playback.
H Repeat steps A~D to switch the “Song
Chain” function back off again.
MR-200 – Owner’s Manual
Loop playback (Repeat)
Another clever feature of the MR-200 is that
you can program playback loops. You can
do so during playback or while the MR-200
is stopped.
A Use [º¥BWD] or [FWD¥‰] to jump to the
desired measure and press MARK [A÷B] (the
button flashes).
B Use [FWD¥‰] to fast-forward to the measure
where you want the loop to end and press
MARK [A÷B] again (the button lights
steadily).
You can also program loops on the fly.
Remember, however, that the MR-200
always memorizes the beginning (downbeat) of the next measure (the value that is
indicated in the upper right corner – not
necessarily the next measure of the music).
C If the [REPEAT] button doesn’t already light,
press it to activate the loop you have just
programmed.
This button allows you to switch the
MR-200’s Repeat function on and off.
In certain cases, the MR-200 takes some time to
locate the beginning of the loop. The BEAT indicator flashes rapidly while all required settings are
made.
In certain cases, the Marker function may not be
available. This only happens with very large songs,
however.
Transpose function
The MR-200 contains a transpose function
that allows you to change the key of the
recorded music during playback. It does not
affect the notes you play. This is a temporary
setting that is not stored along with the song
data.
The advantage of this system is that you can
play to a song originally recorded in E major
(for example), while using the fingering of
the C major scale (for example) if that is
more comfortable for you. Let’s look at an
example:
The song was
recorded in E
major.
Transpose set to “–4” for playback
It now sounds in “C”
You can play in C
D To play back the loop, press the [PLAY¥®]
button.
The MR-200 jumps to measure “A” and
starts playing. At the end of measure “B”, the
MR-200 immediately jumps back to the
beginning of measure “A” and continues
playing back the passage.
Please note that the Transpose function is
not available during recording. Use the
external instrument’s Transpose function if
you wish to record new notes in a key that
differs from the one you are using. This was
25
Song Player/Recorder
done for your own good: otherwise, it
would have been possible to record new
parts in “C”, while the song data were still in
“E”.
A Press the [TRANSPOSE] button.
The display now responds with:
Transpose
0
B Use the [VALUE] knob to set the desired
interval (–6~+5 semitones).
Here is how to calculate the correct
value:
• What key does the song use? (This is your
“0” value.) Example→ E major
• What key should be used during playback?
Example→ C major
• How many semitones do you need to go up
or down?
Example→ [D#, D, C#, C]= 4 down, so
“–4”.
C Press the [TRANSPOSE] button (it lights) to
use the transposition interval you just set.
You can also set the transposition interval without
activating the [TRANSPOSE] button by pressing
and holding it while setting the value with the
[VALUE] knob.
D Switch the [TRANSPOSE] button on and off
to alternate between the original key and
the transposition interval.
26
Switching recorded parts on and off
You can temporarily switch off recorded
parts (to “mute” them) if you want to play
them yourself or prefer not to hear them.
These settings are not saved and will be cancelled when you load another song.
A Select the song you want to listen to.
See pages 17 and 38.
B Switch off the [DISK], [MENU] or
[SOUND¥SELECT] button (if it lights).
C Press [TRACK] below the display and use the
[VALUE] knob to scroll through the available
tracks:
All
All tracks listed below.
Tempo
The track that contains the tempo
settings (initial song tempo, possible tempo changes).
Master
The track that contains important
settings for your keyboard/organ
and/or tone generator.
Org
Tracks 12~16. These correspond
to the MIDI channels used by
Rodgers organs. (Not all organ
models use all of these channels,
though.)
Oth
All tracks not included in the
“Org” group (i.e. 1~11).
1~16
The track whose number you
select.
The “Org” and “Oth” options actually
refer to the two MIDI OUT sockets:
“Org”= A, “Oth”= B. (At first, tracks 12~
16 are indeed assigned to MIDI OUT A,
while 1~11 are assigned to MIDI OUT B.
This can be changed (see page 36), however.) The Master and Tempo tracks are
assigned to both MIDI OUT A and B. This
cannot be changed.
D Press the [VALUE] knob (“PUSH”) for each
selected track (or group of tracks) you do
not want to hear.
The “„” symbol means that the selected
track(s) contains data.
Make sure that “∞” is displayed next to a
track you do not want to hear.
MR-200 – Owner’s Manual
You can also work “the other way round”:
suppose you want to mute tracks 1~3 and
5~16, to hear the melody (track 4) in isolation. The quickest way to do so would be as
follows:
• Press TRACK [ORGAN]. → Tracks 12, 13,
14, 15, and 16 are off (Org∞)
• Press TRACK [OTHERS]. → Tracks 1, 2, 3…
11 are off (Oth∞)
• Select “Tr4” and press [VALUE].
Track 4 is on again (4„)
You can mute as many tracks as you like. If
you mute the Tempo track, tempo changes
contained in the song are no longer executed. This also means that the tempo is no
longer reset when you press [RESET¥|√].
Muting the Master track only makes sense if
you do not want certain settings of the
receiving instrument (organ stop settings,
effects, tuning, etc.) to change. This is useful
if you want to try out other organ registrations or synthesizer settings.
E Start playback of the selected song by pressing the [PLAY¥®] button.
Repeat the above to once again activate the
muted tracks.
Using a footswitch
The MR-200 allows you to use an optional
Roland DP-2, DP-6, or BOSS FS-5U footswitch for starting/stopping playback. Such
a footswitch needs to be connected to the
FOOT SWITCH socket on the rear panel.
Press it once to start playback, and again to
stop. If the [REC≈∏] button flashes while the
MR-200 is stopped, pressing the footswitch
once will start recording. Pressing it again
will stop the recording session.
Additional recording functions
Recording to a specific track
There may be times when the recording procedures described on pages 18 and 20 erase
tracks you had already recorded and did not
want to lose.
The “All”, “Org” and “Oth” options
indeed select all assigned tracks for recording (1~16, 12~16, or 1~11 by default) –
even if no data are received on certain channels. And all tracks are “re-recorded”, so that
some tracks may contain “nothing” after an
additional recording pass.
Here is an example: suppose you recorded a
new piece using the “Org” option (short
for “organ”, meaning that the data of the
manuals and the pedalboard are recorded).
After listening to your piece, you decide to
redo the bass part (pedalboard), while the
parts of the two manuals should be kept and
played back during your new recording of
the bass part. The obvious option would be
to once again work with “Org”. But that is
not how the MR-200 works: that option
would replace the manual parts (GREAT
and SWELL) with “nothing”. The proper
procedure for this approach is to only select
track 14 for recording.
This also applies to other tracks (and other
instruments).
The MR-200’s track numbers refer to the MIDI
channels the tracks receive on. If you select an individual track (1 2, 3,… or 16), you must set the
transmission (TX) channel of your external keyboard to match the number of the selected track(s).
A Connect the organ or keyboard instrument
to the MR-200’s MIDI sockets (see
page 15).
B Load the song you want to change or supplement with new parts.
See pages 17 and 38.
27
Song Player/Recorder
C Press the [REC≈∏] button.
It starts flashing and the display looks as follows:
Sng:LoadedSng 001
All®
4/4
>120
D Press [TRACK] below the display. If a “®”
symbol is flashing next to “ALL”, press the
[VALUE] knob to remove that symbol (no
tracks selected for recording).
E Use the [VALUE] knob to select the track you
want to record to:
All
All tracks listed below. (Not to be
selected for existing songs.)
Tempo
The track that contains the tempo
settings (initial song tempo, possible tempo changes). See
page 29.
Master
The track that contains important settings for your keyboard/
organ and/or tone generator. See
page 33.
Org
Tracks 12~16 and Master Track.
Oth
All tracks not included in the
“Org” group (i.e. tracks 1~11).
1~16
The track whose number you
select.
The “Org” and “Oth” options actually
refer to the two MIDI OUT sockets:
“Org”= A, “Oth”= B. (At first, tracks 12~
16 are indeed assigned to MIDI OUT A,
while 1~11 are assigned to MIDI OUT B.
This can be changed (see page 36), however.)
F Press the [VALUE] knob (“PUSH”) when the
track you want to record to is displayed.
The “„” symbol means that the selected
track contains data. They will be replaced if
you change this symbol to “®”.
28
The “All” option is only useful for recording entire sequences from a keyboard workstation or other sequencer that cannot
export its songs as Standard MIDI Files
(SMF).
G If necessary, repeat step E and F to select
additional tracks for recording.
H If you are not working with a Rodgers
organ, you must also set the transmission
channel(s) of the device that sends the data
to match the track numbers you select
(“®”).
If you are working with a Rodgers organ, be
sure to select the track that correspond to
the manual (or coupler) whose data you
wish to record: 12= GREAT, 13= SWELL,
14= PEDAL, 15= CHOIR, 16= SOLO.
I On the external instrument, select the
MIDI transmit channel (probably called
“TX”) whose number corresponds to the
track you selected.
If you want to record an entire arrangement
that can also be played back on a computer
or another sequencer, it would be wise to
stick to the “GM system” that is used or supported by most tone generators these days.
According to that system, the following
selections are mandatory:
Part
Track/
MIDI channel
Melody
4
Bass
2
Drums/Percussion
10
The remaining parts can be recorded onto
any track you like, but the above should
always be used in the suggested way.
J Start recording by pressing [PLAY¥®].
K Press [STOP¥ª] at the end of the part.
Do not forget to save your song. See pages 22 and
37.
MR-200 – Owner’s Manual
Finding out which MIDI channel the
external instrument is using
If you want to find out on which channel(s)
your keyboard is transmitting, proceed as
follows:
A Press and hold the [TRACK] button until the
display looks as follows:
Track Detect 1/7
Tr
Tr
Tr
B Play a few notes on your external instrument.
If it transmits on MIDI channels “1” and
“12” (like a Rodgers organ, for example),
the display now looks as follows:
Tracks detected:
Tr 1 Tr12 Tr
C Select one of the displayed tracks, by pressing [TRACK], [BEAT] or [TEMPO]. That track is
selected for recording.
About track 10 (drums)
Track 10 (MIDI channel 10) is usually used
for the drum/percussion part of an arrangement. That is because the corresponding
“part” (MIDI channel 10) of a multitimbral
tone generator uses a so-called “Drum Set”
(or “Drum Kit”) rather than a melodic
sound. The MX-200 uses that system, for
example.
Drum Sets contain separate drum/percussion sounds for each note. The note C2
allows you to play a bass drum, the D2 a
snare drum, etc. See your module’s or synthesizer’s owner’s manual for details.
This usage is only useful if you work with a
multitimbral tone generator whose Drum
Sets are controlled on MIDI channel 10.
Though track 10 could also be used for
melodic parts, pay attention to the follow-
ing: track 10 is not affected by the Transpose setting (see page 25). This is perfect
for drum/percussion parts, but leads to odd
results if track 10 contains melodic data.
Re-recording the Tempo track
Re-recording the Tempo track can be used
for the following:
• To change the original tempo value after
recording the music.
This is useful if you set a slow tempo for
recording (because of the piece’s technical
challenges).
• To program tempo changes (ritardando,
accelerando, etc.) to make the music sound
more natural after recording with the metronome.
Typically, this step should be performed
after completing the “musical part” of a new
piece.
A Load the song whose tempo you want to
change.
See pages 17 and 38.
B Press [TRACK] below the display.
C Use the [VALUE] knob to select the “Tmp”.
D Press the [REC≈∏] button.
It starts flashing and the display looks as follows:
Sng:LoadedSng 001
Tmp®
4/4
>120
E Press the [TEMPO] button below the display.
F Set the initial tempo value using the [VALUE]
knob.
G Start recording by pressing [PLAY¥®].
H While listening to the music, change the
tempo to your liking with the [VALUE] knob.
I Press [STOP¥ª] at the end of the song.
You can also stop recording well before the
end of the song if the tempo no longer needs
to change.
Do not forget to save your song. See pages 22 and
37.
29
Song Player/Recorder
Ensuring that your parts sound the same
every time
The recording procedures described on
pages 18 and 20 did not mention anything
about how to ensure that your songs also
contain the settings relating to the sounds
you are using while recording sequences.
The MR-200 only records data – or “events”,
as we called them. That term refers to something that takes place at the time of recording. When recording in “Org” mode (and if
you use the MIDI connections described on
page 15, i.e. MIDI OUT→ MIDI IN +
MIDI IN→ MIDI OUT), the MR-200 sees
to it that Rodgers organs transmit those settings automatically. In the case of other
MIDI instruments, however, selecting a
sound before starting to record is not considered an “event” (because there is no
change while the MR-200 is recording).
Consequently, the MR-200 does not
remember which sounds you are using. If
you select another sound on your synthesizer, digital piano or module after recording a part, it will be used instead of the
sound you recorded the part for, however.
In “All” mode, the MR-200 automatically records
the Rodgers organ settings to measure 1, even if you
do not change them while the recording process is
running.
Sound selection operations you can record
via MIDI are handled by so-called “Program
Change” and “Bank Select” messages. When
the MIDI standard was developed, some 20
years ago, 128 memories seemed a lot,
which is why it was decided to use a dedicated message type (Program Change) for
selecting memories on an external device.
The entire MIDI standard evolves around
the magic number “128”. Given that there is
no way of expanding that number, so-called
Bank Select messages were later added to
accommodate the growing number of memories (synthesizers with more than 2,000
sounds are quite common these days).
30
At the time, neither CC00, nor CC32 had
dedicated functions and so these two control change messages were chosen for bank
selection.
Two bank addresses (“MSB” and “LSB”,
a.k.a. CC00 & CC32) with 128 possibilities
each, plus 128 Program Change numbers
provide 128 x 128 x 128 possibilities – a lot
more than you can eat.
On the MR-200, these three messages
(CC00, CC32 and Program Change) are
always sent as a set. Transmitting only Bank
Select messages does nothing at all, while
working only with Program Change messages means that you are stuck with 128
memories in the currently active memory
bank.
That is why you need to transmit:
• A value for control change CC00 (MSB)
• A value for control change CC32 (LSB)
• A Program Change number
See the manual of the receiving MIDI
instrument for the MSB and LSB values it
supports.
Let’s look at the “complete recording picture” now, which also includes settings
related to the sounds you are using.
A Connect the external instrument to the
MR-200’s MIDI sockets (see page 15).
Replace “Rodgers series organ” with “your
keyboard”.
B Switch on the MR-200 and your external
keyboard.
Create a new song (by selecting the “All”
recording mode) or select an existing song
for which you wish to record an additional
part.
C If you need the metronome, switch on the
[METRONOME] button.
D Press [TRACK] below the display.
E Use the [VALUE] knob to select the track you
want to record to.
F Press the [REC≈∏] button.
G Use the [VALUE] knob to select another track
you want to record to.
MR-200 – Owner’s Manual
H Press the [VALUE] knob (“PUSH”) when the
desired additional track is displayed.
The “„” symbol means that the selected
track contains data. They will be replaced if
you change this symbol to “®”. Tracks that
do not contain data have no symbol.
I On the external MIDI instrument, select
the MIDI transmit channel (probably
called “TX”) that corresponds to the
selected track.
J Press the [SOUND¥SELECT] button.
The display now responds with:
Off
<1>2/7
---:No Patch
You can also select this function by pressing
and holding the [TRACK] button. The display
then looks as follows (see also page 29):
Track Detect 1/7
Tr
Tr
Tr
Select the track you wish to assign a sound
to and proceed with step K.
If the “All” recording mode is selected, the
nitial assignment applies to track 01 (see
“<1>” above) . This can be changed, however. You can only select a sound for one
track at a time.
K Press the [TRACK] button and use the
[VALUE] knob to select the track you wish to
assign a sound to (“16” in the following
example).
PresetA
<16>2/7
066:DynaMarimba
If you selected this page via the “Track
Detect” function, this step may be unnecessary.
L Press the [SONG] button and use the [VALUE]
knob to select a category (“PresetA” in the
example above).
M Press the [BEAT] or [TEMPO] button and use
the [VALUE] knob to select a sound (“066” or
“D-50 Heaven”).
If necessary, return to step K and select a
different track.
N Press PAGE [®] to go to the next page:
MSB= 87
<16>3/7
LSB= 81 PC= 66
This page contains the “translated version”
of the sound address you may have selected
in step M. Use this page when you are working with other instruments than an
MX-200.
O Use [SONG] (MSB), [BEAT] (LSB) and
[TEMPO] (PC) to select the parameter you
want to change.
If necessary, press the [TRACK] button and
use the [VALUE] knob to select a different
track.
P Use the [VALUE] knob to set the desired
value.
The settings you make while the [SOUND¥SELECT]
button lights are usually immediately adopted by
the connected sound module, etc.
31
Song Player/Recorder
Q Use PAGE [√][®] to select the other parameters that are available here.
Volume
<16>4/7
110
The other parameters are:
Volume
“Off ”*,
0~127
(CC07) Specifies the volume of
the part that receives on this
MIDI channel.
Pan
“Off ”*,
L64~0~
R63
(CC10) Stereo position of the
track (and corresponding MIDI
channel). “L64” correspond to
hard left, “0” to the center, and
“R63” to hard right.
Reverb
“Off ”*,
0~127
(CC91) Reverb Send value of the
track (and corresponding MIDI
channel). This indicates how
much Reverb should be added to
the part.
Chorus
“Off ”*,
0~127
(CC93) Chorus Send value of the
track (and corresponding MIDI
channel). This indicates how
much Chorus should be added to
the part.
R Press [BEAT] or [TEMPO] to select the parameter and use the [VALUE] knob to set the
desired value.
S Press the [VALUE] knob to select “Off ” (or to
return to the value you set).
If necessary, press the [TRACK] button and
use the [VALUE] knob to select a different
track.
You can also change the [SOUND¥SELECT]
parameters without pressing the [REC≈∏] button first. But that only applies to playback.
The settings you make here are recorded at the
beginning of the track. If you like, you can change
them again (on your external instrument) while
recording to change the volume, pan, etc., as the
song evolves.
Volume, PanPot, Reverb and Chorus are only
transmitted if you also specify a program change
number.
32
[SOUND¥SELECT] is only available while the
MR-200 is stopped.
T If you switched on the [METRONOME] button, set the time signature and tempo:
• Press [BEAT] below the display and use the
[VALUE] knob to set the time signature (1/4,
2/4, 3/4, 4/4, 5/4, 6/4, 6/8, 9/8).
• Press [TEMPO] below the display and use the
[VALUE] knob to set the tempo (20~250).
Watch the BEAT indicator while setting
these two values and listen to the metronome. If necessary, change the setting of the
[LEVEL] knob on the MR-200’s rear panel.
The BEAT value can only be set before you start
recording a new song (and only in “All” mode). The
TEMPO value can be changed while recording the
first part or by programming the Tempo Track later
(see page 27).
U Press the [PLAY¥®] button.
If the metronome is already ticking, it will
restart when you press the [PLAY¥®] button.
If the metronome is off, you will nevertheless hear a 2-measure count-in (unless you
switch that function off, see page 23).
V Wait until the count-in is finished and the
[PLAY] button lights, then start playing your
part(s).
Do not play any notes while the count-in is still
running.
If you like (and if you only play with one
hand), you can change the tempo during
recording by first pressing [TEMPO] and then
using the [VALUE] knob. All changes performed in this way are recorded.
MR-200 – Owner’s Manual
W At the end of your piece, press the [STOP¥ª]
button.
Recording data to the Master track
The Master track of a song typically contains settings that apply to an instrument
(organ, synthesizer, module) as a whole,
such as effects settings (type, level), tuning,
general volume, etc. Such settings are usually only meaningful to one specific model,
and are therefore not standardized (each
manufacturer uses a different system, sometimes even various systems among different
instrument categories). Hence the name
“system exclusive”, or “SysEx” for short.
Again, you don’t need to know how such
messages are structured, or how they work.
We cannot guarantee that your instrument
translates all parameter values into SysEx
messages that are transmitted in realtime
(i.e. while you are changing them), but it
may be worth trying.
The Stop Map data of Rodgers organs are transmitted as SysEx data, which is why they are recorded
onto the Master track. That explains why the Master track is also activated when you record in
“Org” mode – and why recording to the Master
track in isolation may actually erase setting data
you may want to keep. So please be careful.
33
Song Player/Recorder
MIDI functions
The MR-200 also provides a number of functions that allow you to specify how it should
send MIDI data and which MIDI data should
be send to which MIDI OUT socket.
All parameters discussed below can be accessed
using the [MENU] button. The general procedure is as follows:
A Press the [MENU] button.
B Use the PAGE [√][®] buttons to select the
desired parameter.
C Use the [VALUE] knob to select the desired
option.
D Press [MENU] again (it goes dark) to leave
this function.
If you changed a value, the following message appears (otherwise, you are done).
Write Menu ?
Yes
No
E If you wish to keep this setting, press the
[TRACK] button to save your setting. Press
[TEMPO] to leave the menu without saving
your change.
34
Available MIDI parameters
Master Tune Send
Options: 415.3~466.2
Use this parameter to tune your GM2-compatible sound source from the MR-200 (this
is a remote control function). That way, you
do not need to tune your external module
every time you switch it on. This message is
transmitted to MIDI OUT A and B.
This is a GM2 message that may have no effect on
the module you are using (the MX-200, however, is
GM2 compatible).
Clock TX
Options: On, Off
This parameter allows you to specify
whether or not the MR-200 should transmit
synchronization signals (called “MIDI
Clock”) to its MIDI OUT sockets. They are
transmitted to MIDI OUT A and B.
Such messages are needed when you are
using an arranger instrument, a drum
machine, a workstation (a synthesizer with
an internal sequencer), or another
sequencer that should play in time with the
MR-200 (same tempo, same place). If you
want that external instrument to start and
stop whenever you start or stop playback/
recording on your MR-200, you should also
activate the following parameter.
This only works if you set the external instrument
to use the Clock signals received via MIDI rather
than its own internal tempo. See its manual for
details.
MR-200 – Owner’s Manual
Start/Stop TX
Options: On, Off
This parameter allows you to specify
whether or not the MR-200 should transmit
Start/Stop signals to MIDI OUT A and B.
They cause the receiving instrument
(arranger, drum machine, workstation) to
start and stop at the same time as the
MR-200.
If you want that external instrument to use
the exact same tempo as the MR-200
(including tempo changes), you should also
activate the “Clock TX” parameter.
This only works if you set the external instrument
to execute Start/Stop signals received via MIDI. See
its manual for details.
Sync RX
Options: Auto, MIDI, Remote, Off
This parameter is a combination of the previous two – this time for the reception of
Start/Stop and Clock messages by the
MR-200. If your external instrument cannot
be synchronized to another source, you can
instead synchronize the MR-200 to the
external instrument.
Select “Off ” if you do not want to synchronize the MR-200 to an external device. The
other available options are:
Auto– This is a function for remote control
of song playback (using a PK-5A dynamic
MIDI pedal board, for example). If the
MR-200 receives a MIDI Start message (FA),
it waits for Clock messages. If those Clock
messages are not received (a PK-5A, for
instance, doesn’t send them), the MR-200
starts playback using its internal tempo. If,
however, Clock messages (F8) are received
after the Start message, the MR-200 uses the
external tempo. You can nevertheless go on
using the MR-200 without MIDI Start/
Clock messages, which is not possible when
you select “MIDI”.
MIDI– Playback can be started or stopped
with MIDI realtime messages (Start, Stop,
Clock) coming from an external clock
source.
Remote– The MR-200 waits for a Start message to start playback at its own tempo.
When it receives a Stop message, playback
stops.
Soft Thru
Options: Off, OUT A, OUT B, OUT A+B
This parameter transmits the data received
during recording (MIDI IN) to the MIDI
OUT socket you select here. This ensures
that an external module you may have connected to the MR-200 plays the part you are
recording for it (using your Rodgers organ
or a synthesizer, for example). Always select
the OUT socket (“A” or “B”) your module is
connected to. The default value is “OUT B”.
MIDI MACRO Recall
Options: User, All A, All B, Organ +
Expander
This function allows you to assign all tracks
to the desired MIDI OUT socket in one go
(those assignments can also be modified on
a track-by-track basis, see below).
“User” contains your own output assignments. This is related to the “Org” and
“Oth” options displayed in REC mode:
“Org”= MIDI OUT A, “Oth”= MIDI
OUT B. That message is displayed as soon as
you change a setting of the last macro you
selected. “All A” assigns all tracks to the
MIDI OUT A socket, and “All B” does the
same for the MIDI OUT B socket.
Do not forget to connect the receiving instrument to
the MIDI OUT socket you select here.
“Organ + Expander” means that tracks 1~
11 are assigned to MIDI OUT B, while the
Master track and tracks 12~16 are assigned
to MIDI OUT A. This is the obvious choice
when you work with a Rodgers organ and
an MX-200 module, for example. (See
page 15 for how to connect your instruments to the MR-200.)
35
Song Player/Recorder
Track 1~16 MIDI Out Assign
Options: A, B, Off
These parameters (one per track) allow you
to assign the selected track to the desired
MIDI OUT socket (“A” or “B”), or to prevent a track from sending MIDI data
(“Off ”), which has the same effect as muting it (see “Switching recorded parts on and
off ” on page 26). You can use these parameters after selecting a macro (see above) to
modify some assignments, while preserving
the bulk of the macro’s settings. If you do
that, the macro’s name changes to “User”
(see the “MIDI MACRO Recall” parameter).
The setting you make here has no effect on
the Master track, because it is always connected to MIDI OUT A and B.
Tracks you assign to the MIDI OUT A socket can be
selected using the [ORGAN] button. Tracks assigned
to MIDI OUT B can be selected using the [OTHER]
button.
Do not forget to connect the receiving instrument to
the MIDI OUT socket you select here.
Send “GM/GS Mode Exit”
The MR-200 also provides a function that
allows you to cause the receiving sound
module (or synthesizer) to leave the GM
(general MIDI) or GS (Roland’s GS standard) mode. This is only necessary if the
receiving module (or synthesizer) has
another mode that is more powerful than
the GM or GS mode. The Rodgers MX-200,
Roland XV-2020 (or other professional
Roland instruments) is a likely candidate for
the use of this command.
On such instruments, leaving the GM or GS
mode usually means that you have access to
a lot more sounds – but that sequences
recorded for such instruments sound
“strange” on GM- or GS-compatible sound
sources.
A Hold down the [RESET¥|√] button while
pressing [STOP¥ª].
The MR-200 now sends two SysEx messages
to its MIDI OUT A and B ports that cause
the receiving tone generators to leave the
GM or GS mode (if they can).
(The messages transmitted are:
F0, 41, 10, 42,12, 40, 00, 7F, 7F, 42, F7
(GS Exit)
F0, 7E, 7F, 09, 02, F7 (GM Exit).)
While the MR-200 is sending those messages, the display looks as follows:
Exit GM/GS Mode
36
MR-200 – Owner’s Manual
File management
Disk functions
Saving a song to floppy disk
Songs you record with the MR-200 can
either be saved to an internal memory (see
page 22) or to a floppy disk. The internal
memory has the advantage that you don’t
need a floppy disk. But if the memory area is
damaged, you lose all songs it contained. It
would therefore be a good idea to save
important songs both in an internal memory and to a floppy disk as a safety precaution.
Though you can use 2DD floppies, 2HD
disks have twice the capacity of 2DD disks,
so use 2HDs whenever you can.
Whenever the disk drive writes data to or
reads data from disk, the drive’s indicator
flashes. Do not remove the floppy disk
while this indicator is flashing as that may
damage both the disk drive and the disk (so
that it becomes unreadable).
A song saved to disk becomes a Standard
MIDI File.
A Insert a disk into the drive.
The disk’s metal shutter must point towards
the drive and the disk label must be visible.
If your disk is not formatted yet, you must do so
now. See page 39.
Every floppy contains a square tab that
allows you to “close” a little window. With
the tab in that position, you can save data to
the disk. Do not forget to write-enable the
disk by closing this little window prior to
inserting the floppy disk.
B Press the [DISK] button and use PAGE [√][®]
to select the following parameter:
Save FD Song
< SONG_000
2/4
>
C Press the [TEMPO] button and use the
[VALUE] knob to assign a character to the
cursor position (“_”).
Save FD Song
< OONG_000
2/4
>
D Press [TEMPO] again to advance to the next
position and select a character using the
[VALUE] knob.
Save FD Song
< OPNG_000
2/4
>
E Repeat steps C and D to complete your
name.
To correct a previously entered character,
press [TRACK] and use the [VALUE] knob.
F When you are happy with your name, press
the [VALUE] knob.
The display now responds with:
Save FD Song 2/4
<
OPERA_12 >
A confirmation tells you that the data have
been saved to disk:
Complete
G Press [DISK] to leave this mode.
37
Song Player/Recorder
Possible error messages
In certain cases, an error message may be
displayed instead of the confirmation. Here
is what they mean and how to solve the
problem:
Disk Protect You forgot to switch
off the disk’s Write protection. Press the
EJECT button of the disk drive, remove the
floppy and close the tab, insert the disk
again and press [VALUE].
Disk Full The remaining disk capacity does not allow to save your data to this
disk.
Same Name on FD The name you
assigned to the data already exists on the
floppy disk you inserted. If you press
[TRACK] to continue, the file on disk will be
overwritten (and the corresponding data
will be erased). Press [TEMPO] (“Skip”) to
return to the previous page. Either insert
another floppy disk, or enter another name
for the file you want to save. Then, press the
[VALUE] knob again.
Loading songs from a floppy disk
Here is a function that allows you to load a
song from floppy disk into the MR-200’s
RAM area. Doing so allows you to add new
parts to it. Do not forget to save such songs
when you are done.
A Stop playback and insert a disk into the
drive.
The disk’s metal shutter must point towards
the drive and the disk label must be visible.
B Press the [DISK] button and use PAGE [√][®]
to select the following parameter:
Load Song
1/4
1 BACH_M01
C Use the [VALUE] knob to select the song you
wish to load.
D Press the [VALUE] knob to load the song.
E Press [DISK] to leave this mode.
38
Deleting songs on a floppy disk
The Delete function allows you to erase
songs from the inserted floppy disk. This
may be necessary to make room for new files
(e.g. when the “Disk Full” message appears).
Be careful, though, to only delete files you
are absolutely (positively) sure you will
never need again. Once a file has been
deleted, it is gone forever.
As a rule, you should first make a backup
copy of your song by saving it to another
floppy disk (or your computer). After all,
files really only become indispensable once
they are no longer available…
A Insert a disk into the drive.
Every floppy contains a square tab that
allows you to “close” a little window. With
the tab in that position, you can change the
disk’s content. Do not forget to write-enable
the disk by closing this little window prior
to inserting the floppy disk.
B Press the [DISK] button and use PAGE [√][®]
to select the following parameter:
Del FD Song 3/4
1 BACH_M01
C Use the [VALUE] knob to select the song you
want to delete.
Del FD Song
2 CLAIRDE
3/4
D Press the [VALUE] knob.
The display now responds with:
Are you sure?
Yes
No
MR-200 – Owner’s Manual
E Press the [TRACK] button to delete the file,
or [TEMPO] to cancel this function.
If you press [TRACK], a confirmation tells
you that the file has been deleted:
Complete
Erasing internal songs
Songs you no longer need can be de deleted
from the internal memory area to make room
for new data. Before doing so, however, it
would be a good idea to save such songs to
floppy disk (see page 37). To do so, select the
song, then save it to disk.
A Stop song playback if it is still running.
B Press the [MENU] button.
F Press [DISK] to leave this mode.
Formatting floppy disks
This function allows you to format the
inserted floppy disk. It would be a good idea
to also format floppy disks formatted for
MS-DOS®, because that speeds up data
access.
A Defeat the disk’s write protection by closing
the little “window” (see page 7).
B Insert the floppy disk into the drive.
C Press the [DISK] button and use PAGE [√][®]
to select the following parameter:
Formatting
41
D Press the [VALUE] knob.
The percentage value in the display now
indicates that the floppy disk is being formatted:
Formatting
42
When the disk is formatted, the following
message appears:
C Use the PAGE [√][®] buttons to select the following function:
Erase iSong 2/26
5 OPERA_12
D Use the [VALUE] knob to select the internal
memory you wish to delete.
E Press the [VALUE] knob.
The display now responds with:
Are you sure?
Yes
No
F Press the [TRACK] button to delete the file,
or [TEMPO] to cancel this function.
If you press [TRACK], a confirmation tells
you that the file has been deleted:
Complete
Complete
39
Song Player/Recorder
All subsequent internal memories are
renumbered. Example: if you delete song
“5”, song “6” becomes “5”, song “7” becomes
“6”, etc.
G Press [MENU] to leave this mode.
Deleting all internal songs
To delete all internal songs, switch off the
MR-200, hold down the [RESET] button, switch
the MR-200 back on again, and release the
[RESET] button.
There is no “Are you sure?” question, or the like, so be
sure to only use this procedure if you are certain you no
longer need any of the songs stored in the MR-200’s
internal memory.
Copying a song from one
floppy disk to another
There may be times when you wish to you collect songs saved to several floppy disks on a single floppy disk, which then serves as your
“work” disk for your performances. In that
case, proceed as follows:
A Insert the disk with the piece you want to
copy to another disk into the disk drive.
The disk’s metal shutter must point towards
the drive and the disk label must be visible.
The display now looks as follows:
D01:74600_01
74600_01
B Use the [VALUE] knob to select the song you
wish to copy. Then, press the [VALUE] knob
to load the song.
Wait until the song is fully loaded, then…
C Remove the floppy disk from the drive.
D Insert another disk into the drive.
This should be the disk you wish to save the
song to.
If your disk is not formatted yet, you must do so
now. See page 39.
40
Do not forget to write-enable the disk by
closing this little window prior to inserting
the floppy disk.
E Press the [DISK] button and use PAGE [√][®]
to select the following parameter:
Save FD Song
< CLAIRDE
2/4
>
F Press the [VALUE] knob.
The display now responds with:
Save FD Song 2/4
< I SHOT THE >
A confirmation tells you that the data have
been saved to disk:
Complete
G Press [DISK] to leave this mode.
MR-200 – Owner’s Manual
Internal and song names
The MR-200 provides a function that allows
you to display the internal name and the file
name of the last song you selected:
A Press and hold the [SONG] button.
D01:74600_01
The Magic Flute
B Press any other button to leave this page.
The internal name is usually more explicit
(up to 16 characters) than the file name (8
characters). Most commercially available
Standard MIDI Files contain this information.
When you save a song on the MR-200, it
automatically copies the file name (first
line) to the internal name line (second line).
It does not allow you to enter a separate file
name.
41
Song Player/Recorder
Function flow chart
Here is a list of all of the MR-200’s functions, which may help you locate the desired parameter more
quickly:
Menu mode
(press [MENU] and PAGE [√][®])
Write iSong
Track
↓
9 MIDI Out Assign
↓
Track 10 MIDI Out Assign
Erase iSong
Track 11 MIDI Out Assign
↓
↓
↓
Master Tune TX
↓
Track 12 MIDI Out Assign
Song Chain
Track 13 MIDI Out Assign
Count In Status
Track 14 MIDI Out Assign
Clock TX
Track 15 MIDI Out Assign
Start/Stop TX
Track 16 MIDI Out Assign
↓
↓
↓
↓
↓
↓
↓
↓
Sync Rx
MIDI Soft Thru
Disk mode
(press [DISK] and PAGE [√][®])
Load Song
MIDI MACRO Recall
Save FD Song
Track
1 MIDI Out Assign
Delete FD Song
Track
2 MIDI Out Assign
Disk Format
Track
3 MIDI Out Assign
Track
4 MIDI Out Assign
Track
5 MIDI Out Assign
Track
6 MIDI Out Assign
Track
7 MIDI Out Assign
Track
8 MIDI Out Assign
↓
↓
↓
↓
↓
↓
↓
↓
↓
↓
↓
42
↓
↓
↓
MR-200 – Owner’s Manual
Specifications
Display type & controls– 16 x 2 LCD backlight
Panel controls– Alpha knob with push
switch, 21 panel switches (11 with LED),
Beat indicator (2-color LED)
Songs– Realtime SMF player (PLAY, FWD,
BWD, RESET, STOP), Recorder: 1 easy
mode, 16-track Sequencer with selectable
MIDI OUT assign for each track
Recording– Multi-track recording (selectable tracks)
Marker– Yes, 2 (Repeat Mode)
Data Storage– Floppy disk drive, 3.5” 2HD/
2DD, SMF data
Metronome– Output: internal buzzer (?) +
external audio Output (with Level knob),
Time Signature: 1/4, 2/4, 3/4, 4/4, 5/4, 6/4,
3/8, 6/8, Mode: Off, Play Only, REC Only,
Rec&Play, Always, Count-in function
Other functions
Transpose– –6~+5 semitones
Repeat song– 2 markers (A & B)
Single Track Mute– Yes
Single Track Output assign– Yes
Disk functions– Load Song, Save Song,
Erase Song, Disk Format, Song Chain
(internal songs)
System updates– Yes, Flash memory (from
floppy disk)
Internal Flash Memory– Yes, 8MB (internal
song storage)
Connections– MIDI (IN, OUT A, OUT B),
Footswitch (Play, Stop), DC IN, DC OUT
(for Rodgers MX-200, Roland XV-2020)
Dimensions– 278 (W) x 240 (D) x 78 (H)
mm
Weight– 2.1kg
Supplied accessories– Owner’s Manual,
PSB-1U adapter, Remote DC Out cable
Specifications are subject to change without prior
notice.
43
Song Player/Recorder
MIDI Implementation chart
[Song Player/Recorder]
Model: MR-200
Date: November 2003
Version: 1.00
Function...
Transmitted
Recognized
Basic
Channel
Default
Changed
X
X
1~16
1~16
Mode
Default
Message
Altered
X
X
*****
X
X
X
True Voice
X
*****
0~127
0~127
Velocity
Note ON
Note OFF
X
X
O
O
After
Touch
Key’s
Ch’s
X
X
X
X
X
X
*3
Bank Select (MSB/LSB)
Volume
Panpot
Reverb
Chorus
Note
Number
Pitch Bend
0, 32
7
10
91
93
Control
Change
Program
Change
True #
System Exclusive
O
O
O
O
O
*1
*1
*1
*1
*1
X
X
X
X
X
1~128
*****
*1
X
X
O
X
System
Common
Song Position Pointer
Song Sel
Tune
X
X
X
X
X
X
System
Real Time
Clock
Commands
O
O
X
X
Aux
Messages
Local On/Off
All Notes Off
Active Sense
System Request
X
X
O
X
X
X
X
X
Notes
*1 O X are selectable
*2 Recognized as M= 1 even if M≠ 1
Mode 1: OMNI ON, POLY
Mode 3: OMNI OFF, POLY
44
Remarks
*2
In Soft Thru Mode On, the messages received from MIDI
IN are retransmitted to MIDI OUT (A and/or B) merged with
the messages generated by the MR-200 Song Player
without effect on MR-200 parameters.
Mode 2: OMNI ON, MONO
Mode 4: OMNI OFF, MONO
O: Yes
X: No