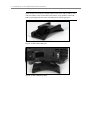
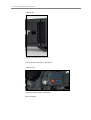
1
User Guide
ARRI ALEXA
Printed on 21 June, 2010
All rights reserved
The system contains proprietary information of ARRI; it is provided
under a license agreement containing restrictions on use and disclosure
and is also protected by copyright law. Reverse engineering of the
system is prohibited.
Due to continued product development this information may change
without notice. The information and intellectual property contained
herein is confidential between ARRI and the client and remains the
exclusive property of ARRI. If you find any problems in the
documentation, please report them to us in writing. ARRI does not
warrant that this document is error-free.
No part of this publication may be reproduced, stored in a retrieval
system, or transmitted in any form or by any means, electronic,
mechanical, photocopying, recording or otherwise without the prior
written permission of ARRI.
Arnold & Richter Cine Technik
Tuerkenstr. 89
D-80799 Munich
Germany
mailto:[email protected]
http://www.arri.com
Contents
1
Disclaimer
4
2
Scope
7
3
What's New In This Version
7
4
ALEXA Images
8
5
Introduction to ALEXA
5.1
6
7
8
10
How to Read This Manual ..................................................... 11
Safety Instructions
12
6.1
Explanation of Warning Signs and Indications ................... 12
6.2
General Safety Instructions ................................................... 12
6.3
Specific Safety Instructions ................................................... 13
General Precautions
15
7.1
Storage and Transport........................................................... 15
7.2
Electromagnetic Interference ................................................ 15
7.3
Condensation.......................................................................... 15
Power Supply
17
8.1
Power Management............................................................... 17
8.2
BAT Connector ....................................................................... 18
8.3
Mains Unit NG 12/26 R........................................................... 18
8.4
Cine-Style Batteries................................................................ 18
8.5
Onboard Batteries .................................................................. 19
8.6
V-Mount Batteries .................................................................. 20
8.7
Gold Mount Batteries............................................................. 21
8.8
Power Outputs........................................................................ 23
8.8.1
12 V Accessories..................................................................... 23
8.8.2
24 V Accessories..................................................................... 23
II
Contents
9
Installation of The Camera
24
9.1
Minimum Equipment Recommended For Operation ......... 24
9.2
Tripod and Remote Heads..................................................... 24
9.3
Electronic Viewfinder EVF-1 .................................................. 25
9.3.1
Viewfinder Cables .................................................................. 26
9.3.2
Viewfinder Mounting Bracket ............................................... 26
9.4
Center Handle CCH-1 ............................................................. 29
9.5
Camera Side Handle CSH-1................................................... 30
9.6
Bridge Plate BP-12.................................................................. 30
9.7
Bridge Plate adapter BPA-1 ................................................... 31
9.8
Leveling Block LB-1 ................................................................ 31
9.9
Shoulder Pad SP-3 ................................................................. 31
10 Connectors
33
10.1
BAT .......................................................................................... 35
10.2
REC OUT 1&2.......................................................................... 35
10.3
RET/SYNC IN........................................................................... 35
10.4
MON OUT ............................................................................... 35
10.5
EXT .......................................................................................... 35
10.6
Ethernet ................................................................................... 36
10.7
EVF........................................................................................... 36
10.8
AUDIO IN................................................................................. 36
10.9
RS............................................................................................. 36
10.10
12 V .......................................................................................... 36
10.11
TC............................................................................................. 37
10.12
3.5mm TRS connector ........................................................... 37
10.13
SD Card ................................................................................... 37
10.14
SxS........................................................................................... 38
11 Optics
39
11.1
Lens Adapter PL Mount LA-PL-1 (no LDS) ........................... 39
11.2
Lens Support .......................................................................... 40
12 User interface
42
12.1
Main UI .................................................................................... 43
12.1.1
Display..................................................................................... 43
12.1.2
Screen Buttons ....................................................................... 43
12.1.3
Function Buttons .................................................................... 44
12.1.3.1 TC (Time Code) ....................................................................... 44
12.1.3.2 INFO......................................................................................... 46
12.1.3.3 USER........................................................................................ 47
12.1.4
Homescreen ............................................................................ 48
12.1.4.1 Lists and User Lists ................................................................ 50
12.1.4.2 FPS........................................................................................... 51
12.1.4.3 SHUTTER ................................................................................ 54
12.1.4.4 EI .............................................................................................. 55
12.1.4.5 WB ........................................................................................... 56
12.1.5
Menu........................................................................................ 59
12.1.5.1 Recording ................................................................................ 59
12.1.5.2 Monitoring .............................................................................. 61
12.1.5.3 Project...................................................................................... 66
12.1.5.4 System..................................................................................... 66
12.1.5.5 User Setups ............................................................................ 69
12.2
Operator UI ............................................................................. 70
12.3
EVF UI ...................................................................................... 70
12.3.1
Viewfinder EVF menu ............................................................ 71
12.3.2
Viewfinder CAM menu........................................................... 72
Appendix
73
12.4
Camera Dimensions............................................................... 73
A.1
Camera Accessory List........................................................... 74
12.5
ARRIRAW ................................................................................ 77
A.2
ALEXA Frame Lines ............................................................... 78
A.3
ALEV III Sensor Specification ................................................ 81
13 Index
83
4 DisclaimerHow to Read This Manual
1
Disclaimer
Before using the products described in this manual be sure to read and
understand all respective instruction.
The ARRI ALEXA is only available to commercial customers. The
customer grants by utilization that the ARRI ALEXA or other
components of the system are deployed for commercial use. Otherwise
the customer has the obligation to contact ARRI preceding the
utilization.
While ARRI endeavors to enhance the quality, reliability and safety of
their products, customers agree and acknowledge that the possibility of
defects thereof cannot be eliminated entirely. To minimize risk of
damage to property or injury (including death) to persons arising from
defects in the products, customers must incorporate sufficient safety
measures in their work with the system and have to heed the stated
canonic use.
ARRI or its subsidiaries do not assume any responsibility for incurred
losses due to improper handling or configuration of the camera or
other system components, due to sensor contamination, occurence of
dead or defective pixels, defective signal connections or
incompatibilities with third party recording devices.
No part of this document may be copied or reproduced in any form or
by any means without prior written consent of ARRI. ARRI assumes no
responsibility for any errors that may appear in this document. The
information is subject to change without notice.
For product specification changes since this manual was published,
refer to the latest publications of ARRI data sheets or data books, etc.,
for the most up-to-date specifications. Not all products and/or types are
available in every country. Please check with an ARRI sales
representative for availability and additional information.
Neither ARRI nor its subsidiaries assume any liability for infringement
of patents, copyrights or other intellectual property rights of third
parties by or arising from the use of ARRI products or any other liability
arising from the use of such products. No license, express, implied or
otherwise, is granted under any patents, copyrights or other intellectual
property right of ARRI or others.
ARRI or its subsidiaries expressly exclude any liability, warranty,
demand or other obligation for any claim, representation, or cause, or
action, or whatsoever, express or implied, whether in contract or tort,
including negligence, or incorporated in terms and conditions, whether
by statue, law or otherwise. In no event shall ARRI or its subsidiaries be
liable for or have a remedy for recovery of any special, direct, indirect,
incidental, or consequential damages, including, but not limited to lost
profits, lost savings, lost revenues or economic loss of any kind or for
any claim by third party, downtime, good-will, damage to or
replacement of equipment or property, any cost or recovering of any
material or goods associated with the assembly or use of our products,
or any other damages or injury of the persons and so on or under any
other legal theory.
Disclaimer
How to Read This Manual 5
In the case one or all of the foregoing clauses are not allowed by
applicable law, the fullest extent permissible clauses by applicable law
are validated.
ARRI is a registered trademark of Arnold & Richter Cine Technik GmbH
& Co Betriebs KG.
Note: This product and the accessories recommended by the manufacturer
fulfill the specifications of the European Directive 2004/108/EC (15th December
2004).
2
Scope
This instruction manual applies to the following ARRI ALEXA hardware,
software and firmware versions:
ARRI ALEXA basic camera with ARRI EVF-1
Camera software packet: 1.0
3
What's New In This Version
As it is the first version - everything!
8 ALEXA ImagesHow to Read This Manual
4
ALEXA Images
Figure 1: Camera right side
Figure 2: Camera left side
Figure 3: Camera top
ALEXA Images
How to Read This Manual 9
10 Introduction to ALEXAHow to Read This Manual
5
Introduction to ALEXA
ALEXA is a 35 format film-style digital camera made by ARRI, the world
leader in professional cinematographic imaging. It combines leading
edge digital technology with film camera features that have been
refined over the more than 90 years of ARRIs history. The result is a
camera that allows classic cinematographers to shoot digitally without
the need for a excessive training when transforming from film.
People who are used to shoot digitally will experience a camera like
they never did before, providing more powerful features than any
camera available today.
Handling
The camera is a true ARRI. It has a high-precision integrated camera
housing with an ergonomic design. It is rugged, reliable and flexible.
Sealed to make it splash-proof. Countless mounting points for
accessories, as ALEXA integrates well with existing ARRI accessories. In
addition, a new range of accessories specifically designed for ALEXA is
available, too.
Operation
ALEXA features a unique user interface, designed to make camera
operation easier than ever, while giving access to more controls than
any camera before.
There are three different control interfaces:
• The Main user interface on the right side gives access to every
camera parameter through a graphical display and a button
panel.
• The Operator user interface on the left side for basic control,
adjustable to the operator's individual needs by supplying
assignable buttons in addition to function buttons.
• The viewfinder user interface for adjusting the most important
image parameters with buttons on the viewfinder and the
interface graphics overlayed to the viewfinder image.
Power management
The camera accepts any input voltage from 11-34 V DC. Different power
sources can be connected to the camera at once. The camera's power
management ensures that the power source with the highest voltage
level is used. Power sources are hot-swappable to minimize the risk of
sudden power loss. Switching power sources without the need to
reboot saves valuable time during a shoot.
Introduction to ALEXA
How to Read This Manual 11
ALEV III sensor
The ALEV III sensor has a horizontal pixel count of 3.5K resulting in true
2K resolution. It covers the full Super-35 format and it provides a
latitude of more than 13.5 stops at a base sensitivity of 800 ASA. The
result is a superior image quality.
The sensor temperature is kept stable by a Peltier element to ensure
optimum image quality under all operating conditions.
AIT - ARRI Imaging Technology
The ARRI imaging technology ensures the most organic, film-like image
quality of any digital camera with natural color rendition and pleasing
skin tones.
Thermal concept
The camera electronics are fully sealed to protect them from dirt and
moisture. Camera heat is transported via heat pipes to a radiator which
is cooled by the fan. The fan itself is very silent, so the camera noise
floor is below 20 dB (A) - this is the same noise level as with ARRI syncsound film cameras. If the fan noise level starts to increase, the fan can
be swapped in a matter of minutes by a trained technician.
EVF-1 electronic viewfinder
ARRI is redefining electronic viewfinders with LED lighting, high
resolution and a viewing experience that comes as close to an optical
viewfinder as possible.
5.1
How to Read This Manual
It is recommended that all user of the ALEXA camera read the manual
front to back prior to the first usage. The manual's structure also
provides quick access for reference to experienced users.
• Images: give a quick overview how the camera looks.
• Safety instructions / general precautions: very important - do not
skip this part.
• Power supply: overview how the camera is supplied with power.
• Installation of the camera: information on camera mechanics.
• Connectors: what goes into tha camera and what comes out.
• Optics: how to get a good image into the camera.
• User interface: how to set up the camera and how to operate it.
12 Safety InstructionsExplanation of Warning Signs and Indications
6
Safety Instructions
Any violation of these safety instructions or non-observance of
personal care could cause serious injuries (including death) to users
and affiliates and damage to the equipment or other objects.
6.1
Explanation of Warning Signs and
Indications
Indicates a possible risk of injury or damage to the equipment
Indicates the risk of electric shock or fire danger that could
result in injury or damage to the equipment.
Note: Indicates further information or information from other instruction
manuals
6.2
General Safety Instructions
• Always follow these instructions to ensure against injury to
yourself or others and damage to the system or other objects.
• This safety information is in addition to the product specific
operating instructions in general and must be strictly observed
for safety reasons.
• Read and understand all safety and operating instructions before
you operate or install the system!
• Retain all safety and operating instructions for future reference.
• Heed all warnings on the system and in the safety and operating
instructions before you operate or install the system. Follow all
installation and operating instructions.
• Do not use accessories or attachments that are not recommended
by ARRI, as they may cause hazards and invalidate the warranty!
• Do not attempt to repair any part of the system! Repairs must
only be carried out by authorized ARRI Service Centers.
Safety Instructions
6.3
Specific Safety Instructions 13
Specific Safety Instructions
• Do not remove any safety measures from the system!
• Do not operate the system in areas with humidity above
operating levels or expose it to water or moisture!
• Do not cover the fan openings at the camera back top and
bottom!
• Do not subject the system to severe shocks!
• Do not place the system on an unstable trolley/hand truck, stand,
tripod, bracket, table or any other unstable support device! The
system may fall, causing serious personal injury and damage to
the system or other objects.
• Operate the system using only the type of power source indicated
in the manual! Unplug the power cable by gripping the power
plug, not the cable!
• Never insert objects of any kind into any part of the system if not
clearly qualified for the task in the manual, as objects may touch
dangerous voltage points or short out parts! This could cause fire
or electrical shock.
• Unplug the system from the power outlet before opening any
part of the system or before making any changes to the system,
especially the attaching or removing of cables!
• Do not use solvents to clean!
• Do not remove any stickers or paint marked screws!
• Always place a lens or a protective cap in the lens mount
receptacle!
• Changing camera lenses should be done in a dry and dust-free
environment. If this is not possible, take extra care that no dust
enters the camera while the lens is off!
• When no lens is attached to the camera, immediately place the
protective on the lens mount to avoid contamination of the
sensor cover glass!
• After changing lenses, always perform a dust check to make sure
no dust has settled on the sensor cover glass!
• Clean optical lens surfaces only with a lens brush or a clean lens
cloth. in cases of solid dirt or grease, moisten a lens cloth with
pure alcohol. Discard contaminated lens cloth after use! Never
attempt to clean a lens brush with your fingers!
• NEVER USE CANS WITH COMPRESSED AIR OR GAS TO BLOW
OFF THE DUST! This can severely damage optical elements.
14 Safety InstructionsSpecific Safety Instructions
• If the sensor cover glass has been contaminated by solid dirt or
grease, special optical cleaning kits should be used for dirt
removal under very high care! If the contamination cannot be
removed, the camera should be taken to an ARRI service center
for cleaning.
• NEVER USE METHANOL OR ACETONE TO CLEAN OPTICAL
SURFACES!
• NEVER TRY TO REMOVE THE SENSOR COVER GLASS!
• DO NOT POINT THE CAMERA INTO DIRECT SUNLIGHT, VERY
BRIGHT LIGHT SOURCES, OR HIGH-ENERGY LIGHT SOURCES
(e.g. laser beams)! This may cause permanent damage to the
camera image sensor.
• DO NOT POINT THE VIEWFINDER INTO DIRECT SUNLIGHT, VERY
BRIGHT LIGHT SOURCES, OR HIGH-ENERGY LIGHT SOURCES
(e.g. laser beams)! This may cause permanent damage to the
viewfinder display and optical elements.
General Precautions
Storage and Transport 15
7
General Precautions
7.1
Storage and Transport
• To prevent damage to the optical filters and the sensor, a
protective cap must be on the lens mount receptacle while no
lens is attached.
• All cables have to be unplugged from the camera when it is
transported or stored inside a camera case.
• Do not store the camera in places where it is subject to extreme
temperatures, direct sunlight, high humidity, severe vibration, or
near strong magnetic fields.
7.2
Electromagnetic Interference
Portable communication devices such as mobile phones or walkietalkies may cause interference with video signals or even lead to
malfunction of the camera. It is recommended to keep these devices
turned off when near the camera.
7.3
Condensation
When moving the camera from a cool to a warm location or when the
camera is used in a damp environment, condensation may form inside
the lens compartment, on the sensor cover glass, between sensor and
its cover glass, and on internal or external electrical connections.
• Operating the camera in these conditions may result in personal
injury or damage to the equipment!
Condensation on the optical components may have a visible effect on
the output images. To reduce the risk of condensation:
• Find a warmer storage location.
• Attach the ARRI air-drying cartridge (silica bottle) to the PL-Mount
of the camera during storage (NOT during transport!)
• If camera needs to be stored in a place that is considerably cooler
than the location where it will be used, consider keeping the
camera powered from a mains unit in addition to using the airdrying cartridge.
16 General PrecautionsCondensation
• In ambient temperatures above 30°C/86°F and/or humidity above
60%, always attach the air-drying cartridge to the PL-Mount of the
camera when not in use. This not only applies to storage, but also
to shooting breaks and situations when the camera remains
without an attached lens for an extended time.
• MAKE SURE THE SILICA BOTTLE IS SECURELY FASTENED.
UNDER NO CIRCUMSTANCES SPILL SILICA INTO THE LENS
COMPARTMENT!
Power Supply
8
Power Management 17
Power Supply
• Only use recommended power supply solutions.
• Manipulation of power supplies can result in severe damage to
the equipment and humans, including death.
ALEXA accepts an input voltage range from 11 to 34 V DC. The camera
can be powered through the BAT connector or can be quipped with
battery adapters accepting V-Mount or Gold mount batteries.
The power supply should deliver an output of more than 90 W to power
the camera sufficiently. The power draw of the camera in basic
configuration is about 85 W.
Note: when powering accessories through the camera, the power draw of the
camera is increased by the amount of power drawn by the accessories.
8.1
Power Management
When using the BAT connector and one or more onboard battery
adapters at once, the camera power management ensures that always
the power source with the highest voltage level is used. When the
voltage level of one power source drops below the level of the other, or
a power source is disconnected from the camera, the power
management automatically switches to the other power source,
avoiding shutdown of the system.
So as an example, one could use a 12 V onboard battery as backup for
the main 24 V battery, or power the camera from the 24 V battery while
on a tripod and use the 12 V battery for fast switching to handheld
mode by just unplugging the power cable.
When using two onboard battery adapters with batteries in parallel,
they are treated as one source by the camera. This allows combining
small batteries with less load per item into one strong power source.
18 Power SupplyBAT Connector
8.2
BAT Connector
The BAT connector of ALEXA is a Fischer 2-pin socket located on the
bottom back of the camera right side.
The socket accepts power cables KC-20S and KC-29S. The cables can
either be connected to the mains unit NG 12/26R or to 24V Cine-style
batteries with three-pin XLR outputs.
Figure 4: BAT connector
8.3
Mains Unit NG 12/26 R
Use of the mains unit is recommended for shooting in the studio and
when using electronic accessories with high power consumption.
• First check that the correct mains voltage is set on the mains unit
(fuse on back of unit).
• Connect the mains unit to AC mains power.
• Ensure that the camera power is turned off.
• Set the voltage switch on the mains unit to 26 V.
Plug the battery cable KC-20S or KC-29S (spiral cable) into the power
supply socket on the camera and into the 26 V socket on the mains unit.
Note: The NG 12/24 R was the original design that provided 12 & 24
volts output – it was superseded by the NG 12/26 R, which outputs 12 &
26 volts. The NG 12/24 R can easily be upgraded to NG 12/26 R
specification at an ARRI service center.
8.4
Cine-Style Batteries
Any Cine-style battery with level of 24 V and a three-pin XLR out can be
used to power the camera through a KC-20S or a KC-29S.
Power Supply
Onboard Batteries 19
Available from ARRI is the battery CINE VCLX/2 battery (280 Wh) with
charger.
To connect the battery to the camera:
• Ensure that the main switch on the camera is off.
• Plug the battery cable KC-20S or KC-29S (spiral cable) into the
power supply socket on the camera and the battery 28 V output
socket.
Note: When the battery voltage drops below the warning level, the BAT1 level
in the camera display will start flashing. A white "i" will appear, signaling more
information is available on the INFO screen.
Note: For more information on setting the low battery warning level, see
Menu>System>Power (on page 66).
Charging the battery
• Connect the charger to AC mains power.
• Plug the charger cable into the charge input socket of the battery.
• Once charged, batteries may be kept on the charger until
required.
Note: For more information on CINE VCLX/2 battery and charger, please check
the corresponding manual.
8.5
Onboard Batteries
The camera can be equipped with adapters for either V-Mount or Gold
mount video-style batteries.
The following adapters are available:
• BAT-V: Top-mount adapter V-Mount batteries
• BAB-V: Back-mount adapter V-Mount batteries
• BAT-G: Top-mount adapter Gold mount batteries
• BAB-G: Back-mount adapter Gold mount batteries
Note: Adapters must be installed by a trained technician!
20 Power SupplyV-Mount Batteries
Anton Bauer Gold Mount batteries and ID-X V-Mount batteries transmit
their remaining capacity to the camera, which is displayed in percent on
the Homescreen of the camera display. For these batteries, the user
does not need to set the battery warning level due to the
communication between the camera and the battery.
8.6
V-Mount Batteries
V-Mount batteries are available from a number of manufacturers. VMount batteries from ID-X transmit information on their remaining
capacity to the camera. ALEXA displays the remaining capacity in
percent on the Homescreen of the camera display. For ID-X batteries,
the user does not need to set the battery warning level due to the
communication of camera and battery.
Attaching the battery to the adapter
• Place the battery with the V-shaped wedge into the adapter so
that the wedge sits right above its counterpart of the mount.
• Move the battery downwards until you hear a snap.
• Make sure it is connected correctly and sits tight.
Releasing the battery
• When facing the battery, press the button located on the mount
on the left side. Some batteries have an additional top-release
mechanism.
Power Supply
Gold Mount Batteries 21
• Move the battery upwards and remove it.
Figure 5: ALEXA with BAB-V and V-Mount battery
Note: Not all V-Mount batteries deliver enough power to supply the camera. We
recommend to not use any batteries with a capacity of less than 90 Wh to
prevent damage to the battery and unpredictable camera behaviour. Any
camera-battery combination should be tested prior to use, especially when
accessories are powered through the camera.
8.7
Gold Mount Batteries
Gold mount is the battery mounting system of Anton Bauer batteries.
The batteries transmit information on their remaining capacity to the
camera. ALEXA displays the remaining capacity in percent on the
Homescreen of the camera display. For Gold Mount batteries, the user
does not need to set the battery warning level due to the
communication of camera and battery.
Attaching the battery to the adapter
• Place the battery with the three pins into the adapter so that the
pins sit in the corresponding holes of the mount.
• Move the battery to the right until you hear a snap.
22 Power SupplyGold Mount Batteries
• Make sure it is connected correctly and sits tight.
Releasing the battery
• When facing the battery, move the lever located on the left side of
the mount down.
• Move the battery left, then pull it towards you and remove it.
Figure 6: Camera with BAB-G and Gold Mount battery
Note: Not all Gold Mount batteries deliver enough power to supply the camera.
We recommend to not use any batteries with a capacity of less than 90 Wh to
prevent damage to the battery and unpredictable camera behaviour. Any
camera-battery combination should be tested prior to use, especially when
accessories are powered through the camera.
Power Supply
8.8
Power Outputs 23
Power Outputs
The camera has three power outputs for accessories, 2x 24 V and 1x 12
V.
Figure 7: 24 V outputs (RS) and 12 V output
8.8.1
12 V Accessories
The 12 V output is located on the right side of the camera. It has a 2-pin
LEMO connector and can supply a device with a current of up to 3 A,
depending on the camera power supply.
8.8.2
24 V Accessories
The two 24 V outputs are located on the right side of the camera. They
are labeled RS and have a 3-pin LEMO connector. They can supply two
devices a combined load of up to 3 A, depending on the camera power
supply.
Besides powering accessories, these sockets can also be used to send a
remote start + stop signal to the camera.
24 Installation of The CameraMinimum Equipment Recommended For Operation
9
Installation of The Camera
9.1
Minimum Equipment
Recommended For Operation
• ARRI ALEXA body including DTE-SxS module and lens adapter
PL mount (LA-PL-1)
• EVF-1 electronic viewfinder
• VMB-1 viewfinder mounting bracket
• KC 150-S viewfinder cable short 0.35m/1.2ft
• CCH-1 center camera handle
• BP-12 bridge plate with base plate, or BPA-1 with BP-5/BP-8
bridge plate and base plate, or WA-1 and quick-release base-plate
• SD card
9.2
Tripod and Remote Heads
Tripod and remote heads used with ALEXA have to provide enough
load capacity to support the camera and attached accessories. The table
to the right shows the camera weight for different components.
Note: Check for the payload of remote heads and cranes.
• In applications where the camera mount is subject to high forces
(e.g. car or helicopter mounts) the camera must be additionally
secured with retaining cords. All fastening screws must be
tightened firmly with an appropriate screwdriver (not with the
commonly used coin!).
Camera weight
lbs
kg
ARRI ALEXA incl. SxS module, EVF-1, VMB-1,
CCH-1
17.62
8.0
ALEXA camera body including SxS module
13.79
6.26
EVF-1
2.42
1.1
VMB-1
0.55
0.25
KC-150S
0.26
0.12
Handle CCH-1
0.6
0.27
Installation of The Camera
9.3
Electronic Viewfinder EVF-1 25
Electronic Viewfinder EVF-1
The EVF-1 employs an LCOS imaging device together with a
temperature stabilized LED light source to provide an accurate and
bright view of the sensor image under all operating conditions. The
viewfinder is calibrated to match the image of the camera's HD outputs.
The image area of the EVF-1 has a size of 1280x720 pixels. 12 additional
pixels each above and below the image provide two status bars for
displaying camera information. The EVF-1 can display the 10%
surround view area of the sensor to help the operator track unwanted
elements before they enter the recorded image area. Focus can be
checked by temporarily zooming into the image center with a
magnification of 2.25x. The low-latency interface of the EVF-1 has a
delay of less than 1 frame.
The viewfinder is connected to the camera with the mounting bracket
VMB-1.
Figure 8: Camera with EVF
26 Installation of The CameraElectronic Viewfinder EVF-1
9.3.1
Viewfinder Cables
The viewfinder cables are unidirectional with a male plug to connect to
the camera and a female plug to connect to the EVF.
Cables are available in the following lengths:
Model
Length
Purpose
(m / ft)
KC-150-S
0.35 / 1.2
For use of EVF-1 on camera left side in
handheld mode
KC-151-S
0.65 / 2.1
For use of EVF-1 on camera right side or
when using Viewfinder Extension Bracket
VEB-1
KC-152-S
2.00 / 6.6
Longest possible length for use with
specialty rigs
Figure 9: Evf cables: KC-150S (center), KC-151S (middle), KC-152S
(outer)
9.3.2
Viewfinder Mounting Bracket
The viewfinder mounting bracket VMB-1 is attached to the camera with
two 3mm hex screws at the very front of the camera top. The
viewfinder is attached to the mounting bracket by sliding the swallow
tail into the receptacle of the mounting bracket and then closing the
lever on the viewfinder.
The position of the viewfinder can be adjusted by loosening the levers
of the mounting bracket, adjusting the position as desired and closing
the levers.
Installation of The Camera
Electronic Viewfinder EVF-1 27
It can be flipped over by first removing the cap at the end of the side
adjusting rod, then removing the rod itself and inserting it into its
mount from the other side.
Note: This is not possible with the standard EVF cable KC-150-S. Instead, cable
KC-151S is needed.
Figure 10: VMB-1 on camera
28 Installation of The CameraElectronic Viewfinder EVF-1
The viewfinder extension bracket VEB-1 extends the mounting point of
the EVF further back. It can be attached to a tripod head for use with
geared heads or greater comfort when using fluid heads. The VEB-1 has
a standard attachment point for the ARRI eyepiece leveler EL-3.
Figure 11: EVF extension bracket
Figure 12: Camera with EVF-1 on extension and cable KC-151S
Installation of The Camera
9.4
Center Handle CCH-1 29
Center Handle CCH-1
The center handle CCH-1 is attached to the camera top with 3 screws,
two at the front and one at the back. Make sure the screws are well
tightened with a 3mm allen key.
The center handle extension mounts to the front end of the CCH-1 and
adds one more focus hook to the camera.
30 Installation of The CameraCamera Side Handle CSH-1
9.5
Camera Side Handle CSH-1
The CSH-1 is used in conjunction with a BAT-V or BAT-G battery top
mounting adapter. It is attached to the camera with 3 screws, two at the
front and one at the back. Make sure the screws are tightened firmly
with a 3 mm allen key.
Figure 13: CSH-1
Figure 14: Camera with CSH-1, side view
9.6
Bridge Plate BP-12
The bridge plate BP-12 has been newly developed for ALEXA. It mounts
directly to the camera housing with two screws.
Installation of The Camera
9.7
Bridge Plate adapter BPA-1 31
Bridge Plate adapter BPA-1
The bridge plate adapter BPA-1 can be used to attach a BP-5/BP-8 to
ALEXA. First attach the BPA-1 to the camera with the two screws. Then
attach the BP-5/BP-8 to the adaptor with its two screws. Make sure the
screws are tightened firmly with a screwdriver.
9.8
Leveling Block LB-1
The leveling block LB-1 attaches to the bottom of the ALEXA back foot.
It prevents the camera from resting on a back mounted battery when
placed on a flat surface.
It is mounted by inserting its top lid into the corresponding channel on
the end of the shoulder arc in the camera base. Twist the knob
clockwise to tighten.
9.9
Shoulder Pad SP-3
The camera base has an integrated arch to fit to the operator's
shoulder. For extended handheld shoots, the newly designed shoulder
pad SP-3 can be attached to the base of the camera with velcro.
32 Installation of The CameraShoulder Pad SP-3
Note: The SP-3 can only be used with a BP-12 and 19 mm rods or with 15 mm
rods and a WA-1+quick-release base plate. When using the BPA-1 with a BP5/BP-8, the bridge plate has to be removed prior to attaching the SP-3.
Figure 15: SP-3 shoulder pad
Figure 16: SP-3 below camera
Connectors
10
Shoulder Pad SP-3 33
Connectors
Camera back
Figure 17: Connectors at back
From top to bottom: MON OUT, RET/SYNC IN, EXT, REC OUT 1&2,
BAT, ETHERNET
Camera right
Figure 18: Connectors on right side
From left to right, top to bottom: 2x RS (24 V) out, AUDIO OUT, TC, 12V
out, AUDIO IN, SD CARD (camera bottom)
34 ConnectorsShoulder Pad SP-3
Camera left
Figure 19: Camera left: SxS slots
Top to bottom: SxS slot 1, SxS slot 2
Camera front
Figure 20: Camera front connector
EVF connector
Connectors
BAT 35
10.1 BAT
The BAT connector can be used to power the camera from an external
power source with cables KC-20S and KC-29S.
It is located on the camera back lower right.
10.2 REC OUT 1&2
The REC OUT consists of two BNC plugs capable of carrying 1920x1080
1.5G HD-SDI signals with frame rates from 23.976 to 60 fps according to
SMPTE standards 274M, 292M and 372M.
It is located on the camera back mid right.
10.3 RET/SYNC IN
This BNC connector is currently not in use.
It is located on the camera back mid right.
10.4 MON OUT
The MON OUT is a single BNC connector capable of carrying a
1920x1080 422 YUV 1.5G HD-SDI signal with frame rates of 23.976, 24,
25, 29.97 or 30 fps according to SMPTE standards 274M and 292M. Its
configuration can be changed with the camera menu.
It is located on the camera back upper right.
10.5 EXT
The EXT connector is a multi-pin accessory connector. It carries signals
for communication with various accessories.
Cables are currently available for:
• Connecting a UMC-3 remote motor controller
• Connecting two ALEXA cameras for synchronized operation
The connector is located on the camera back mid right.
36 ConnectorsEthernet
10.6 Ethernet
Regular Ethernet connectors do not deliver the durability and reliability
required by ARRI, so ALEXA uses a 10-pin LEMO connector. An special
cable, available from ARRI (model KC-153-S), is required to connect the
Ethernet socket to a standard RJ-45 Ethernet socket.
It is located on the camera back lower right.
10.7 EVF
The EVF connector is used to connect to an EVF-1 electronic viewfinder.
The signals on this connector are proprietary and can only be used to
drive an EVF-1. This proprietary signal assures very low latency for the
viewfinder image.
It is located on the camera front lower left.
10.8 AUDIO IN
The 5-pin XLR Audio connector is currently not in use.
It is located on the camera right lower front.
10.9 RS
The two RS connectors either supply external accessories with 24 V
power and combined load of up to 3 A. The sockets also accept an ARRI
remote start/stop trigger button.
They are located on the camera right lower front.
10.10 12 V
The 12 V connector supplies an external accessory with 12 V power and
up to 3 A current.
It is located on the camera right lower front.
Connectors
TC 37
10.11 TC
The TC connector is a 5pin LEMO socket. It accepts and distributes LTC
time code signals.
It can be used to
• Jam sync the camera to a Clockit, TC Slate or another camera
• Transmit the camera's time code to Clockit, TC Slate or another
camera
• Tune the camera crystal oscillator's frequency with an Ambient
ACC Clockit Controller
It is located on the camera right lower front.
10.12 3.5mm TRS connector
The 3.5mm TRS connector is currently not in use.
It is located on the camera right lower front.
10.13 SD Card
The SD card slot is located at the bottom on the camera right side
middle. Any SD or SDHC card with a capacity of up to 4 GB can be
used. The card must be pre-formatted with an FAT32 file system. The
slot is protected from dirt and rain by a slider door. Insert the SD card
according to the drawing on the camera housing.
Note: Always keep the slider door closed during operation to prevent dirt and
moisture from entering the camera.
On the SD card, the following folder structure should be created by the
user prior to first use of the card:
• ARRI
ALEXA
Setups
Firmware
Framelines
38 ConnectorsSxS
10.14 SxS
The SxS slots on the left side of the camera are currently not in use.
Make sure the door is always closed to prevent dirt and moisture from
entering the camera.
Optics Lens Adapter PL Mount LA-PL-1 (no LDS) 39
11
Optics
ALEXA is equipped with an exchangeable lens mount. By using
different adapters, not only PL-mount lenses are supported, but a wide
range of Cine and still photo lenses.
Note: Lenses must cover an image circle of at least 30 mm diameter to
eliminate the risk of vignetting
11.1 Lens Adapter PL Mount LA-PL-1
(no LDS)
The lens adapter LA-PL-1 is the standard lens mount delivered with
ALEXA. It can be used to attach any PL-mount lens to the camera.
Attaching a lens to the camera
• Twist the bayonet ring handle anti-clockwise as far as it will go.
• Remove the protective lens cap.
• Insert the lens into the lens mount receptacle without catching it
at the edges. One of the four slots on the lens mount must fit over
the index pin in the lens mount receptacle.
• Choose a lens position that gives a good readability of lens
markings.
• Press the lens flat onto the lens mount receptacle.
• Twist the bayonet ring handles clockwise until the lens is
attached.
• Make sure the lens is properly mounted.
Note: When no lens is attached to the camera, use the protective cap to avoid
dust entering the lens cavity.
Note: The sophisticated design principle of the camera’s optical module
delivers outstanding images with a cinematic look and feel, but also makes the
imager sensitive to contamination. Dust particles that have settled on the
sensor cover glass during a lens change may become visible as dark spots in
the output image, similar to lint leaving marks on exposed film. The degree of
this effect depends on the aperture of the lens.
40 OpticsLens Support
Figure 21: PL mount LA-PL-1 with index pin
11.2 Lens Support
Heavy lenses may require additional lens support. This guarantees that
the flange focal depth is not influenced by the lens weight and reduces
stress on the lens mount.
To support a lens, use 15mm or 19mm rods and a fitting lens bridge.
15mm rods can be directly inserted into the camera housing. 19mm
rods require a bridge-plate with 19mm rod support (BP-12 or BP-5/BP-8
+ BPA-1).
The lens bridge LS-10 for 15 mm rods is mounted to the rods by
pushing it on the rods from the front, while the lens bridge LS-9 for 19
mm rods is mounted to the rods by pushing it on the rods from the top.
Optics Lens Support 41
When the bridge is in the right position on the rods, it is fixed with the
screw or lever on its side. It is attached to the lens support ring with its
center screw. The lever on the back of the lens bridge fixes the height of
the center screw.
Figure 22: Camera with BP-12, 19mm rods and lens bridge
42 User interfaceLens Support
12
User interface
Structure
The camera user interface consists of three parts:
• Main UI: Located on the camera right side. Consists of a 3" LCDscreen with screen buttons changing their behaviour depending
on the screen content, a jogwheel to navigate through menus and
adjust parameters and a range of function buttons with dedicated
behaviour.
• Operator UI: Located on the camera left side. Consists of three
assignable function buttons plus three function buttons for quickand-easy operator interaction.
• EVF UI: Located on the electronic viewfinder. Allows adjustment
of viewfinder parameters and the most important image related
parameters.
User interface
Main UI 43
12.1 Main UI
The main UI can be used to set all camera parameters.
Figure 23: Main user interface
12.1.1 Display
The LCD display on the right side has a diameter of 3" and a resolution
of 400x240 pixels. The display is back illuminated and transflective
which results in exceptional contrast even in bright sunlight. The
brightness of the display can quickly be adjusted by simply turning the
jogwheel when the Homescreen is displayed.
The removable protective plastic shield protects the display from
scratches and can simply be removed by pulling it off the four pins on
its corners that hold it in place.
12.1.2 Screen Buttons
Six screen buttons are located above and below the display. They
change their behaviour depending on the screen content. Two rows of
black labels at the top and the bottom of the screen show the function
related to each button. Buttons without a label have no function in that
screen.
44 User interfaceMain UI
Operations that cannot be reversed and can result in the loss of data
require the simultaneous pressing of two buttons to prevent them from
accidental use.
12.1.3 Function Buttons
The following function buttons are available on the main UI:
• ON/OFF: Press shortly to switch the camera on. To switch off the
camera, the button must be pressed for several seconds. In the
Homescreen, a countdown is displayed. If the button is released
before the countdown has elapsed, the camera does not shut
down. When a power source is connected to the camera, the
ON/OFF button flashes once per second when the camera is
switched off.
• REC: Currently not in use.
• LOCK: Press long to lock the user interface. When locking the
camera, the UI returns to the Homescreen. Buttons USER, HOME
and ON/OFF are not affected by the lock.
• GRAB: Currently not in use.
• TC: Enters the screen for configuring Time code.
• PLAY: Currently not in use.
• INFO: Enters the Live Info screen, where you get information on
the current state of the system. Also available is version info,
where you get information on camera hard- and firmware.
• USER: Enters the user screen, where you can assign the three
user buttons of the operator UI, as well as the six screen buttons
of the user screen (Note: the top three screen buttons of the user
screen reflect the behaviour of the three user buttons of the
operator UI).
• MENU: Starts the menu, where most camera settings can be
adjusted. Navigate inside the menu with the jogwheel.
• BACK: When navigating, this button brings you back to the
previous page. When editing, this buttons reverts your
adjustment and quits edit mode.
• HOME: Returns to the Homescreen from anywhere in the UI.
12.1.3.1 TC (Time Code)
The TC screen shows the currently set TC. By pressing the OPTIONS
screen button, the time code Options list opens, where TC settings can
be changed.
• Source: Choose the TC source
− Int TC: internal TC counter
− Ext LTC: TC is jam synced from the LTC input. Only possible
with Mode set to Free Run.
− SDI LTC: currently not supported
− SDI VITC: currently not supported
• Mode: Sets how the TC is counted
User interface
Main UI 45
− Rec Run: is currently without use as the camera cannot record
internally.
− Free Run: TC is running free in real time. Only possible if
sensor fps matches Project fps (=TC timebase)
• Counter:
− Regen: Rec Run TC is regenerated from the last valid recorded
TC value.
− Jam sync: Ext LTC can only be jam synced. This means that
the external TC source is connected to the camera, then the
camera read the external TC count and continues counting
on its own. Due to a highly precise crystal oscillator in
ALEXA, the internal counter will count accurately for 8 hours.
After that period, the camera has to be resynced to avoid any
TC offset.
Note: It is recommended to sync after every shooting break to avoid the risk of
having to resync during the shoot.
Note: the camera will keep its TC for about 10 minutes after disconnection from
the power source. If a power source is connected, the camera will remember its
TC for as long as the power source is connected, even if it is switched off.
• Dropframe: for non-integer time base settings 23.967 and 29.97,
TC is currently always counted as drop-frame TC.
• Timebase: the frame count of time code during one second. Can
be adjusted in the Menu: Menu>Project>Project fps.
• Userbit source: select the source of the user bits.
−
−
−
−
Internal: User bits are set manually in the User Bit screen.
LTC in TC: currently not supported.
LTC in UB: currently not supported.
System clock: currently not supported.
Press the SET TC screen button to adjust the TC counter (only with Int
TC as source). Reset it or match it to the system clock with the upper
screen buttons that appear during edit mode.
Press the USER BITS screen button to access the user Bits screen.
Figure 24: Timecode screen
46 User interfaceMain UI
USER BITS
The content of the User binary group in the time code. Can contain 8
letters of Hex values (0-9, A-F).
Press the SET UB screen button to adjust the User Bits values.
Figure 25: User bits screen
12.1.3.2 INFO
System Info
The first info page contains information on the current state of the
camera system. If no info is displayed, everything behaves normally.
Messages can either contain a warning or an error message.
When an SD card is present, a system log can be stored to the SD card
by pressing the lower mid screen button labeled SAVE TO SD. Patience
is required as it can take about a minute until the log is written to the
SD card.
Note: Saving a system log is only necessary if the camera is showing unnormal
behaviour. It can then be sent to the ARRI camera service for analysis. The log
is not human-readable and can only be analyzed by the ARRI camera service.
User interface
Main UI 47
Version Info
• Firmware: version number of the camera firm- and software
packet
• EVF serial number
• EVF firmware: version number of the EVF firmware.
Figure 26: Version info screen
12.1.3.3 USER
By pressing the USER button the User screen is loaded where the
screen buttons can be assigned with user defined functions.
The upper three screen buttons of the User screen mirror the behaviour
of the three assignable buttons on the camera left side (labeled 1, 2, 3).
The two outer lower screen buttons function as additional assignable
buttons with extended functionality.
48 User interfaceMain UI
By pressing the lower mid EDIT screen button, a screen opens where
the functions can be assigned to the buttons.
Figure 27: User screen
Assign functions to the buttons by using the jogwheel.
Figure 28: Edit User Button assignment
12.1.4 Homescreen
Figure 29: Homescreen
The Homescreen is the default screen of the main UI. It shows the most
important camera parameters and gives quick access to changing them
through the screen buttons.
User interface
Main UI 49
Following parameters are displayed:
• Sensor Fps: Currently set frame rate of sensor, adjustable from
0.750-60.000 fps.
• Shutter Angle: Currently set shutter angle of sensor, adjustable
from 5.0-358.0°. Shutter Angle and sensor fps determine
exposure time of the sensor in seconds by the following
equation: 1/(360*Fps/Angle)
• Exposure Index: Currently set exposure index rated in ASA.
ALEXA has a base sensitivity of 800 ASA, the camera rating can
be adjusted from 160-1600 ASA.
Note: ASA rating is identical to ISO rating.
Note: Exposure Index is not applied to Arriraw signals.
• White Balance: Color temperature of the light source the camera
is currently adjusted for. Can be adjusted from 2000-11000 Kelvin.
In addition to the red/blue correction of the white balance, ALEXA
can also compensate for a green/magenta tint.
• Time Code: Displays current time code including source
(INT=internal or EXT=external source). Frames are not displayed,
instead the timebase of the time code is shown in small digits.
• Sync mode: When the camera is set to external sync, an
information is displayed in the Homescreen whether the camera
has been set to Master or Slave mode. The information is shown
below the time code.
• Icons:
− Info: Shows that important information is waiting on the Info
screen. White icon signals warning, red icon signals error.
− Thermometer: informs about a sensor temperature problem.
White icon signals small temperature offset (slightly reduced
image quality), red icon signals high temperature offset
(significantly reduced image quality).
Note: A sensor temperature warning or error after bootup is normal until the
sensor has reached its preset temperature.
− Lock: Signals that the UI is locked. Not all buttons are affected.
buttons that still work: USER, HOME, REC, ON/OFF
− SD card: Signals that an SD card is present. The color changes
to orange while the card is accessed.
All icons of the Homescreen:
50 User interfaceMain UI
12.1.4.1 Lists and User Lists
The Homescreen screen buttons FPS, SHUTTER, WB (White Balance)
and EI (Exposure Index) open lists that contain preconfigured values for
the respective setting.
Except for EI, all lists are user lists where the user can store a selection
of his preferred settings for quick access.
To select a preset, turn the jogwheel until the selection bar is on the
desired value and press the jogwheel.
If the list lacks the required setting, press the ADD screen button. This
opens a screen where the desired value can be set. Either by using the
jogwheel for in- or decrementing the value, or additionally use the
screen buttons for bigger adjustment steps.
When the desired value is set, press the jogwheel to add the value to
the list.
Note: A maximum of 16 entries is supported by the list. After reaching this
number of entries, it is no longer possible to add entries without deleting others
first.
List values no longer required can be deleted by pressing the DELETE
screen button. This opens a screen where the values desired for
deletion can be selected with the jogwheel. To delete the selected
value, press the two lower outer screen buttons simultaneously.
Note: It is not possible to delete a list completely. When the last list entry is
reached, deletion is disabled.
Note: The Exposure Index list is static and cannot be changed by the user. It
contains ASA values from 160-1600 ASA in steps of 1/3 stop.
Figure 30: List example: User list fps
User interface
Main UI 51
12.1.4.2 FPS
Pressing the FPS screen button opens the Fps user list. It contains the
default framerates 23.976, 24.000, 25.000, 29.970, 30.000, 48.000, 50.000,
59.940 and 60.000 fps.
The user can store a selection of his preferred fps settings for quick
access. To select an fps preset, turn the jogwheel until the selection bar
is on the desired value, then press the jogwheel again.
The screen buttons on the screen bottom are shortcuts to the menu
screens of REC OUT and MON OUT, where the output settings can be
adjusted if they do not match the sensor fps.
Figure 31: List example: User list fps
If the list lacks the required setting, press the ADD screen button. This
opens a screen where the desired setting can be set. Either use the
jogwheel to set the desired value, or additionally use the screen buttons
for bigger adjustment steps. When the desired value is set, press the
jogwheel to add the value to the list.
Note: A maximum of 16 entries is supported by the list. After reaching this
number of entries, it is no longer possible to add entries without deleting others
first.
List values no longer required can be deleted by pressing the DELETE
screen button. This opens a screen where the values desired for
deletion can be selected with the jogwheel. To delete the selected
value, press the two lower outer screen buttons simultaneously.
52 User interfaceMain UI
Note: It is not possible to delete a list completely. When the last list entry is
reached, deletion is disabled.
Figure 32: Delete fps list entry
If the sensor fps is linked to the REC OUT frame rate, a message
appears instead of the list. While this setting is active, sensor fps can
only be changed by changing the REC OUT frame rate.
To change this setting, press the REC OUT screen button to access the
REC OUT menu screen and set "Link sensor fps" to "Off".
Figure 33: Fps screen with linked sensor fps
Setting correct frame rates
It is very important to pay good attention when setting frame rates.
Mistakes can result in dropped frames and ruin the shot.
The sensor fps setting determines the amount of frames per second
generated by the sensor. This can be anywhere in the range between
0.750 and 60.000 frames per second. The images are then processed by
the camera electronics for the different output paths.
User interface
Main UI 53
The REC OUT is the recording output path. It is connected to an
external recorder where the images are stored. Its frame rate can only
be set to standard speeds. The REC OUT frame rate must match the
Sensor frame rate! If the REC OUT frame rate is lower than the sensor
frame rate, the images cannot be output as fast as they are created by
the sensor, resulting in dropped frames which are irretrievably lost!
If the REC OUT frame rate is higher than the sensor frame rate,
duplicate frame rates are output on the REC OUT. For example, if the
sensor is running at 10 fps and the REC OUT is set to 30 fps, every
image is output 3 times, resulting in two duplicate frames following
every active frame.
Note: ALEXA does currently not support Variframe recording!
The recorder would record these duplicate frames, which have to be
removed in post.
The MON OUT should match the sensor and the REC OUT frame rate.If
the sensor frame rate exceeds the available MON OUT frame rates, set
the MON OUT to half the sensor frame rate if possible.
How to correctly set frame rates:
• Decide which frame rate you want to set
• In the Homescreen of the camera display, press the FPS screen
button.
• In the Fps screen, press the REC OUT screen button. This opens
the REC OUT menu screen.
• Set the REC OUT frame rate to the desired value. The HD-SDI
format should match the recorder's setting
• If the desired sensor frame rate is a standard speed, set "Link
sensor fps" to "On". This way, the sensor always follows the REC
OUT frame rate, avoiding dropped or duplicate frames.
• When the REC OUT settings are done, press BACK to load the
Sensor Fps screen.
• In the Sensor Fps screen, decide if the MON OUT frame rate is
OK. If not, press the MON OUT screen button. this loads the MON
OUT menu screen.
• Set the MON OUT frame rate to the desired value. If the sensor
frame rate exceeds the available MON OUT frame rates, set the
MON OUT to half the sensor frame rate if possible.
• When the MON OUT settings are done, press the BACK button to
load the Sensor fps screen.
• Choose the desired sensor fps value from the list and press the
jogwheel.
• If the desired value is not available, press the ADD screen button
to set the desired value and add it to the list by pressing the
jogwheel.
54 User interfaceMain UI
• All frame rate settings should be correct now.
12.1.4.3 SHUTTER
Pressing the SHUTTER screen button in the Homecreen opens the
Shutter user list. By default, shutter angles 11.2, 22.5, 45, 90, 172.8, 180,
270 and 358 are contained in the list.
Figure 34: Shutter list
To add a new entry to the list, press the ADD button. This opens the Set
shutter screen.
In this screen, the new list entry can be set with the jogwheel. With the
screen buttons the value can be in- or decreased in bigger steps.
First set the integer value with the jogwheel, clicking it will start edit on
the fractional part.
Note: A maximum of 16 entries is supported by the list. After reaching this
number of entries, it is no longer possible to add entries without deleting others
first.
Figure 35: Add Shutter angle
User interface
Main UI 55
Press the DELETE button to delete list entries. Entries must first be
selected with wheel. Deletion must be confirmed by pressing the two
lower screen buttons simultaneously.
Note: It is not possible to delete a list completely. When the last list entry is
reached, deletion is disabled.
Figure 36: Shutter list delete screen
12.1.4.4 EI
The Exposure Index is the applied sensitivity of the camera.
Note: The Exposure Index list has a fixed content, meaning that it cannot be
changed by the user.
ALEXA has a basic sensitivity of 800 ASA. This means that the dynamic
range is evenly distributed above and below neutral grey with very low
noise in the blacks and a very screen clipping behaviour in the whites.
Due to its high dynamic range, the sensitivity can be set in a range from
160-1600 ASA in steps of 1/3 stops while keeping a high image quality.
Applying the extreme ASA ratings will nonetheless have an influence
on the images. At low ASA ratings like 160 ASA, the dynamic range
below neutral grey gets bigger, which will reduce noise even further. At
the same time, the dynamic range above neutral grey is slightly
reduced. The clipping itself is not influenced by this, but the shoulder of
the gamma curve will get slightly steeper, which will reduce the
smoothness of the clipping.
56 User interfaceMain UI
At high ASA ratings like 1600 ASA, the images behave the opposite
way. Noise is increased, which makes it important to judge the dark
parts of the image, while the clipping behaviour will be even smoother.
Figure 37: Exposure Index screen
12.1.4.5 WB
White Balance adjusts the color balance of the camera according to the
lighting in use.
Typical presets are 3200K for Tungsten, 4300K for Fluorescent and 5600
for Daylight. The white balance can be adjusted in steps of 100K from
2000 to 11000K.
In addition to the white balance, which influences only the red-blue
balance of the image, the CC (color compensating) shift can also adjust
the green-magenta balance.
Any light source that does not have a continuous spectrum, like
fluorescent tubes, will have peaks in its spectrum that can not be
corrected with the traditional white balance.
The CC shift can correct these peaks up to the same amount of a full
green or a full magenta gel.
Figure 38: White balance list
User interface
Main UI 57
If the list lacks the required setting, press the ADD screen button. This
opens a screen where the desired setting can be set. Either use the
jogwheel to set the desired value, or additionally use the screen buttons
for bigger adjustment steps. When the desired value is set, press the
wheel to add the value to the list.
Note: A maximum of 16 entries is supported by the list. After reaching this
number of entries, it is no longer possible to add entries without deleting others
first.
Figure 39: Ad WB screen
To set the CC value of the list entry, press CC SHIFT. This loads the CC
SHIFT screen. Adjust the CC shift value with the jogwheel and press it.
The CC Shift value is stored and the UI returns to the WB screen. Adjust
the WB value if necessary and press the wheel. This adds the new entry
to the list.
Note: CC values are kind of arbitrary. For this reason, a translation of ARRI CC
values into Kodak and Rosco values is displayed in the screen.
Figure 40: Add CC value
58 User interfaceMain UI
White balance and color compensation should be adjusted only with
the help of appropriate equipment. This can either be a color meter or a
vectorscope together with a calibrated grey card.
List values no longer required can be deleted by pressing the DELETE
screen button. this opens a screen where the values desired for deletion
can be selected with the jogwheel. To delete the selected value, press
the two lower outer screen buttons simultaneously.
Note: It is not possible to delete a list completely. When the last list entry is
reached, deletion is disabled.
Figure 41: Delete WB list enrty
User interface
Main UI 59
12.1.5 Menu
The menu contains parameters for the basic camera setup. It has a tree
structure and the current path in the menu is displayed in the top
section of every screen.
To access a new menu level, select the group with the jogwheel and
press the jogwheel. This will open the next level.
To go one level back up, press BACK. A parameter has its value
displayed at the right part of the screen. Select it with the jogwheel and
press the jogwheel to edit it.
Cancel an edit action by pressing BACK, confirm the setting by clicking
the jogwheel.
Figure 42: MENU
12.1.5.1 Recording
Set the parameters of the REC OUT as well as the gamma of the
recorded images.
• Gamma defines the contrast curve that is applied to the images.
The user can choose between REC709 video and CINEON log.
− REC709 video: Gamma according to ITU.R-BT709 standard.
Images are prepared for playback on standard broadcast
monitors
− Log C (no matrix): Gamma according to Cineon specification.
Images are prepared for output to film material or DI-like
treatment. Images will appear flat on a standard broadcast
monitors, the use of external devices to apply a LUT, such as
TCube, is a must to get visually pleasing images on a
monitor.
60 User interfaceMain UI
Figure 43: MENU>RECORDING
REC OUT
The camera has two HD-SDI outputs that carry the camera image to be
recorded with external recording devices.
• HD-SDI format: Select the format that is used to transmit images.
See following table for format details.
Format
Links
Used
Image
Raster
Sampling
Structure
Color
Mode
Possible
Frame Rates
(fps)
422
1
1920x1080
4:2:2
YCbCr
23.976, 24,
25, 29.97, 30
422
1.5G DL
2
1920x1080
4:2:2
YCbCr
48, 50, 59.94,
60
444
2
1920x1080
4:4:4
RGB
23.976, 24,
25, 29.97, 30
2
2880x1620*
*
Bayer**
Bayer*
*
23.976, 24,
25, 29.97, 30
1.5G
1.5G
T-Link
1.5G
**Note: The RAW sensor image is transmitted wrapped as 1920x1080
RGBA. Signal can only be recorded with Arriraw T-Link certified recorders.
Note: 3G formats are currently deactivated.
• Frame rate: See previous table for frame rates of REC OUT.
• Scan format: Defines how images are transmitted.
− P: Progessive. Images are transmitted line by line from left to
right, starting at the top-left pixel.
− Psf : Progressive segmented. Images are first split into fields,
which are then transmitted line by line from left to right.
• Output range: Defines which bit range of the full 10 bit (0-1023) is
used to transmit image data.
User interface
Main UI 61
− Legal: Uses values 64-960.
− Extended: uses values 5-1019. Results in about 10% more
steps.
Note: Check which mode your recorder supports. If you set the camera to
extended, but your recorder only supports legal, you will end up with clipped
images!
• Link sensor fps: If set to "On", the sensor will always follow the
REC OUT frame rate setting. This ensures no frames are dropped
on the output.
Figure 44: MENU>REC OUT
Note: Only use double shielded HD-SDI cables for recording to ensure error free
data transmission!
12.1.5.2 Monitoring
The Monitoring section defines setup of MON OUT and EVF-1 electronic
viewfinder. These are outputs meant for monitoring, not for recording
of images.
The frame lines setup applies to both MON OUT and EVF-1. Frame lines
can of course be switched on or off individually for MON OUT and EVF1.
62 User interfaceMain UI
Figure 45: MENU>MONITORING
Electronic Viewfinder
• Brightness: Select the brightness of the EVF. A level of 5 is
recommended for normal circumstances.
• White point: Sets the color temperature of the EVF. Default is
6500K. Can either be matched to the white point of other
monitoring devices on set, or to match the white point of the
illumination source. NOT TO BE MISTAKEN WITH THE WHITE
BALANCE OF THE CAMERA!
• Rotate image: When mounting the EVF to the right side of the
camera, the image can be flipped so it appears correctly in the
viewfinder. Affects only the EVF image, MON OUT and REC OUT
images are not rotated!
• Surround view: The ALEV III sensor has 10% additional pixels
outside the recorded image for a better monitoring experience.
The user can decide whether he wants to see these 10% in the
viewfinder or not. By switching surround view on, objects that are
not wanted in the image, such as microphone booms, can be
seen by the operator before they enter the image.
• Frame lines: Frame lines are a reference for framing that typically
consist of an image frame, a center cross and an aspect ratio
reference. See the appendix for more information on the ALEXA
frame line format.
• Status info: At the upper and lower edge of the EVF, right outside
the active image area, additional status info can be displayed. The
upper area contains camera image parameters, the lower area
contains camera status infos.
User interface
Main UI 63
Figure 46: MENU>MONITORING>EVF
MON OUT
The MON OUT is a 422 1.5G single link HD-SDI output. The output
range is fixed to legal range.
• Frame rate: The MON OUT frame rate can be set to 23.976, 24, 25,
29.97 or 30 fps. The frame rate should, if possible, match the
sensor frame rate to avoid frame drops or duplicate frames on
the output, which would result in jittering images when image
content is moving.
• Scan format: Defines how images are transmitted.
− P: Progessive. Images are transmitted line by line from left to
right, starting at the top-left pixel.
− Psf: Progressive segmented. Images are first split into fields,
which are then transmitted line by line from left to right.
• Gamma defines the contrast curve that is applied to the images.
The user can choose between REC709 video and CINEON log.
− REC709 video: Gamma according to ITU.R-BT709 standard.
Images are prepared for playback on standard broadcast
monitors
− Log C (no matrix): Gamma according to Cineon specification.
Images are prepared for output to film material or DI-like
treatment. Images will appear flat on a standard broadcast
monitors, the use of external devices to apply a LUT, such as
TCube, is a must to get visually pleasing images on a
monitor.
Note: Log C (no matrix) can only be chosen if the Recording
gamma is set to Log C (no matrix).
• Surround view: The ALEV III sensor has 10% additional pixels
outside the recorded image for a better monitoring experience.
The user can decide whether he wants to see these 10% in the
MON OUT or not. By switching surround view on, objects that are
not wanted in the image, such as microphone booms, can be
seen by the operator before they enter the image.
64 User interfaceMain UI
• Frame lines: Frame lines are a reference for framing that typically
consist of an image frame, a center cross and an aspect ratio
reference. See the appendix for more information on the ALEXA
frame line format.
• Status info: At the upper and lower edge of the MON OUT image,
additional status info can be overlayed to the image. The upper
area contains camera image parameters, the lower area contains
camera status infos.
Figure 47: MENU>MONITORING>MON OUT
Note: Only use double shielded HD-SDI cables for monitoring to ensure error
free data transmission!
Frame Lines
Frame lines are an image overlay that can be applied to either the EVF
image, the MON OUT image, or both.
ALEXA frame lines are stored as XML files containing definitions what
the frame lines look like.
The camera contains default frame lines for 1.33:1, 1.78:1, 1.85:1 and
2.35:1 aspect ratios. Additional frame lines can be loaded from the SD
card.
• Frame lines: Shows a list of all frame lines currently stored in the
camera.
• Color: In the frame lines definition file, lines can either be given a
fixed color, or they can have the color specified as "User". If
"User" is chosen for a line, the setting chosen in this menu
section is applied to the line.
Note: Default frame lines have "User" specified as color for all content.
• Intensity: Sets the intensity of the frame lines. The higher the
number, the brighter the frame lines appear.
User interface
Main UI 65
Figure 48: MENU>MONITORING>FRAMELINES
Manage Frame Lines
• Load frame lines from SD: Loads all frame lines contained on the
SD card to the camera.
• Reset to default frame lines: Deletes all frame lines in the camera
and then loads the ARRI default frame lines.
• Delete camera frame lines: Deletes all frame lines currently stored
in the camera.
66 User interfaceMain UI
12.1.5.3 Project
• Project fps: Currently determines only the timebase of the time
code.
Figure 49: MENU>PROJECT
The timebase of the time code determines how many frames the time
code counts per second.
12.1.5.4 System
Contains groups of system settings.
Figure 50: MENU>SYSTEM
Power
• BAT1 (Plug) warning: The level at which a power warning is
exhibited for the power source connected to the BAT plug. Can be
adjusted to match the used battery type.
• BAT2 (Onboard) warning: The level at which a power warning is
exhibited for the onboard battery. Can be adjusted to match the
used battery type.
User interface
Main UI 67
Note: At a level 10% below the set warning level, a battery error is emitted. this
means that the power source is treated as insufficient to power the camera any
further.
Figure 51: MENU>SYSTEM>POWER
Display
• Display brightness: Set the brightness of the camera right side
LCD display. The brightness can also be adjusted when the
Homescreen is active by turning the jogwheel.
• Button brightness: Set the brightness of the button illumination.
Figure 52: MENU>SYSTEM>DISPLAY
68 User interfaceMain UI
System Clock/Date
Set date and time of the camera to match your current location.
Figure 53: MENU>SYSTEM>CLOCK/DATE
External Sync
Two ALEXA cameras can be synced on their sensor readout so their
images are created at exactly the same time. Choose between "Off" for
single camera mode, "Master" for the master camera and "Slave" for
the slave camera. Cameras must be connected via EXT-CC cable.
Figure 54: MENU>SYSTEM>EXT SYNC
Firmware
• Select update file: If an SD card containing update files is inserted
in the camera, you can select an update file from the list and
perform an update. Start the update procedure by pressing the
two lower outer screen buttons simultaneously. DO NOT
INTERRUPT THE UPDATE ONCE IT HAS STARTED. MAKE SURE
THE CAMERA POWER SUPPLY WILL REMAIN SUFFICIENT FOR
THE DURATION OF THE UPDATE (APP. 5-10 MINUTES).
Note: On rare occasions, the update process can fail. If the update procedure
fails, try it again until you succeed.
User interface
Main UI 69
• Current version: Release code of currently installed firmware.
Figure 55: MENU>SYSTEM>FIRMWARE
12.1.5.5 User Setups
In this section the user can store the current setup to the SD card or
load previously stored setups from the SD card. An SD card must be
present in the camera to perform these operations. Only complete
camera setups can be stored or loaded!
Note: It is recommended to create a default starting setup to load into any new
camera you work with. This way you can ensure all parameters meet your
expectations.
• Save current setup: A setup containing the current camera
settings is stored to the SD card. File is named with time and date
stamp.
• Load setup: Loads a list with all setups located on the SD card.
Select a setup and load it.
Note: Before loading or saving a setup, make sure an SD card is present. When
saving a setup, the write protection of the SD card must be switched off.
• Factory reset: Resets the camera to factory defaults. Confirm
factory reset by pushing the two lower outer screen buttons
simultaneously when the request appears.
Figure 56: MENU>SETUPS
70 User interfaceOperator UI
12.2 Operator UI
The operater UI is located on the camera left side and consists of three
function buttons plus three assignable buttons.
• 1, 2, 3: The assignable buttons (labeled 1, 2, 3) can be assigned
with functions through the USER button on the main UI.
• REC: Currently not in use.
• PLAY: Currently not in use.
• LOCK: long pressing of the button locks the main and the
operator UI. LED indicates if lock is active. Long pressing again
deactivates the locking.
Figure 57: Operator UI
12.3 EVF UI
The EVF UI is located on the electronic viewfinder. It contains a number
of function buttons and a jogwheel.
• CAM: opens the viewfinder CAM menu
• EVF: opens the viewfinder EVF menu.
• ZOOM: zooms into the image with a 2.25x magnification for focus
checking. This results in matching one sensor pixel to one
viewfinder pixel. Zoom remains active as long as button is
pressed. To keep it activated, press the EXP button while the
ZOOM button is pressed. The ZOOM function will remain
activated until the ZOOM button is pressed again.
• EXP: changes the EVF gamma from Rec709 video to Log C (no
matrix) as long as the button is pressed. To keep it activated after
the button press, press the ZOOM button while the EXP button is
pressed. The log gamma will remain active until the EXP button is
pressed again.
User interface
EVF UI 71
Note: This only works when the Recording gamma is set to Log C
(no matrix). If the Recording gamma is set to REC709 video, the EVF
gamma is always set to Video.
12.3.1 Viewfinder EVF menu
Pushing the EVF button opens a menu in the EVF display to set the
viewfinder parameters. Select the setting to be changed with the
jogwheel, press the wheel and set it to the desired value. Press again to
confirm. To quit the menu, press the EVF button.
• Brightness: Select the brightness of the EVF. A level of 5 is
recommended for normal circumstances.
• White point: Sets the color temperature of the EVF. Default is
6500K. Can either be matched to the white point of other
monitoring devices on set, or to match the white point of the
illumination source. NOT TO BE MISTAKEN WITH THE WHITE
BALANCE OF THE CAMERA!
• Rotate image: When mounting the EVF on the camera right side,
the image can be flipped so it appears upright in the viewfinder.
Affects only the EVF image, MON OUT and REC OUT are not
affected!
• Surround view: The ALEV III sensor has 10% additional pixels
outside the recorded image for a better monitoring experience.
The user can decide whether he wants to see these 10% in the
viewfinder or not. By switching surround view on, objects that are
not wanted in the image, such as microphone booms, can be
seen by the operator before they enter the image.
• Frame lines: Frame lines are a reference for framing that typically
consist of an image frame, a center cross and an aspect ratio
reference. See the appendix for more information on the ALEXA
frame line format.
• Status info: At the upper and lower edge of the EVF, right outside
the active image area, additional status info can be displayed. The
upper area contains camera image parameters, the lower area
contains camera status infos.
72 User interfaceEVF UI
• Select frame lines: Choose a frame lines file from those stored in
the camera.
Note: Switching surround view ON and frame lines OFF is a dangerous
combination, as there is no indication in the EVF image that it shows more than
is recorded, which can lead to framing errors.
12.3.2 Viewfinder CAM menu
Pressing the CAM button on the EVF opens the cam menu. The settings
displayed in the upper section of the viewfinder can be adjusted.
These are: Sensor Fps, Shutter Angle, Exposure Index and White
Balance.
The values that can be chosen from mirror the content of the respective
lists in the main UI. Select the setting to be changed with the jogwheel,
press the jogwheel to open the list. Select a list value and press the
jogwheel again. To quit the menu, press the CAM button.
Appendix
In this appendix
Camera Dimensions
73
Camera Accessory List
74
ARRIRAW
77
ALEXA Frame Lines
78
ALEV III Sensor Specification
81
12.4 Camera Dimensions
A.1
Camera Accessory List
The following accessories from ARRI are fully compatible with ALEXA.
Power accessories
• Batteries:
charger
CINE VCLX/2 battery and
• Battery adapters:
BAT-G
BAB-V, BAB-G, BAT-V,
• Power mains supplies:
NG 12/26 R mains unit
• Power cables:
KC-20S, KC-29-S (spiral cable)
Optics accessories
• Follow focus:
FF-5 HD, FF-4, FF-3, LFF-1
• Wireless remote system:
WCU-3
• Lens motors (with UMC-3A):
CLM-3, CLM-2, CLM-1
• Leightweight Matte boxes:
LMB-15
LMB-3, LMB-4a, LMB-5,
• Production Matte boxes:
MB-28, MB-29
MB-14, MB-16, MB-19, MB-20 I/II
• Lens mount:
LA-PV-1 lens adapter Panavision
Support systems
• Bridge plates:
1), BP-12
BP-3, BP-8, (all with adapter BPA-
• Video base plate:
QR-HD1
• Lens supports:
LS-9, LS-10
• Handles:
CCH-1, SCH-1, ACG-2
• others:
leveling block LB-1
ARRIHEAD 2, shoulder pad SP-3,
Viewfinder accessories
• Mounting bracket and extension:
VMB-1,
• Eye cups:
HE-4, HE-5
• Cables:
VEB-1
KC-150S, KC-151S, KC152S
Others
• monitors:
• spare parts:
cable KC-153S
• transport:
HDM-7 HD onboard monitor
SFM-1 spare fan module, SD card 2GB, Ethernet
ALEXA case
For further information on these accessories and availability, please
visit the ARRI website: www.arri.com, contact an ARRI sales agent (find
your nearest through the ARRI website) or contact the camera service:
[email protected]
Overview
12.5 ARRIRAW
ARRIRAW is the name of raw data from ARRI cameras. Raw data is the
sensor image data before it is converted to RGB images. As ALEXA has
a single sensor with a Bayer pattern color filter array, this means that
every pixel only has information of one color channel.
With normal HD images, the missing color channel information is
calculated from the adjacent pixels in the camera.
For raw data, this calculation is delayed until after the recording to save
bandwidth and creative options, as many decisions on how to convert
the images can be made in post.
ALEXA ARRIRAW specs:
• Bayer pattern color coding
• 12 bit log luminance coding
• No white balance applied
• No exposure index applied
• Full sensor resolution (2880x1620)
ARRIRAW is transmitted to the recorder via the ARRIRAW T-Link by
using a standard HD-SDI dual link connection with a proprietary coding.
An ARRIRAW T-Link certified recorder must be used for recording.
These are available from a number of manufacturers like Codex,
Keisuko Giken or S.Two.
For more information, go to www.arri.de/arriraw
A.2
ALEXA Frame Lines
ALEXA frame lines are stored as XML files. A standard set of frame
lines is stored in the camera. Additional frame lines can be loaded from
the SD card to the camera.
Once the idea behind the frame lines system is understood, personal
frame lines can be created with little effort.
Description
The different sections in the file are:
• camera: describes the camera that the frame lines file is made for.
As the ALEXA camera system will consist of several cameras in
the future, this is necessary to differentiate between the camera
types.
• surround: the 10% surround view area outside the recorded
image.
− opacity: opaque masking of the surround area, 0=transparent,
1=black
− border: additional frame around the image if surround view is
switched on in EVF or MON OUT image, with attributes color
and width. Omit the border tag if you do not want the frame
around the image.
• line: all frame lines and the center cross in the active image area
consist of single lines. The line orientation is defined by three
attributes (left and right and bottom or top for horizontal lines,
top and bottom and left or right for vertical lines), where two
attributes define the start and end point, and the third defines the
distance from the parallel image edge.
• Distances for start, end and position are relative to the width or
the height of the image and have a precision of 5.
• To create a centered frame line with a center cross as in the
example, a total of 6 lines is necessary.
• To calculate the position of a horizontal line for a given aspect
ratio, use the following formula: (1-1.78/Aspect)/2=distance from
bottom or top
XML example
The best way to understand the frame lines system is by looking at an
example. The following example describes a frame lines file for a 2.35
centered aspect ratio inside the cameras 1.78 recorded image.
<?xml version="1.0" encoding="UTF-8"?>
<!-- NOTES:
All widths are in pixels.
All colors can be one of: black, white, or user.
If you select user, the color can be changed through
the user interface.
You can add as many lines as you like. Lines are
defined by giving 3 distances from the border.
So if you specify top, left and right it will
be a horizontal line with the given distance
from left, right and from the top.
The values are in the range [0, 1], where:
0 is at the edge
1 is on the opposite edge
So specifing 0.4 from left is the same as 0.6 from right.
-->
<framelines>
<!-- The description of the camera, this will
only be used for selecting the correct files.
So the user can only select glasses for his
camera/current setup. -->
<camera>
<type>Alexa EV</type>
<sensor>3K</sensor>
<aspect>1.78</aspect>
<hres>2880</hres>
<vres>1620</vres>
</camera>
<!-- This describes the surround view (or overscan) area.
You can select the opacity in the range [0, 1]
and the border width and color -->
<surround>
<opacity>0</opacity>
<!-- If you omit the border tag no border is shown -->
<border>
<!-- This is the width in pixels. No
pixel is drawn in active/visible area. -->
<width>4</width>
<!-- The color can be one of: black,
white or user.
If you select user,
the color can be changed through the
user interface. -->
<color>user</color>
</border>
</surround>
<!--user color line at top and bottom of 2.35 aspect-->
<line>
<left>0</left>
<top>0.12174</top>
<right>0</right>
<width>4</width>
<color>user</color>
</line>
<line>
<left>0</left>
<bottom>0.12174</bottom>
<right>0</right>
<width>4</width>
<color>user</color>
</line>
<!-- Center cross horizontal lines, user color -->
<line>
<left>0.46355</left>
<top>0.5</top>
<right>0.50868</right>
<width>4</width>
<color>user</color>
</line>
<line>
<left>0.50868</left>
<top>0.5</top>
<right>0.46335</right>
<width>4</width>
<color>user</color>
</line>
<!-- Center cross vertical lines, user color -->
<line>
<left>0.5</left>
<top>0.43519</top>
<bottom>0.51543</bottom>
<width>4</width>
<color>user</color>
</line>
<line>
<left>0.5</left>
<top>0.51543</top>
<bottom>0.43519</bottom>
<width>4</width>
<color>user</color>
</line>
</framelines>
A.3
ALEV III Sensor Specification
Pixel pitch:
8.25 µm
Active pixels (including surround view):
3112x1782
Image pixels (recorded area only):
2880x1620
Image size after downscale:
1920x1080
Recorded aperture:
23.76x13.365 mm
Image aperture (incl. surround view):
25.674x14.701 mm
13
Index
1
12 V ...................................................................... 36
12 V Accessories .................................................. 23
E
EI .......................................................................... 55
Electromagnetic Interference................................ 15
Electronic Viewfinder ............................................ 62
Electronic Viewfinder EVF-1 ................................. 25
Ethernet ................................................................ 36
EVF....................................................................... 36
EVF UI .................................................................. 70
Explanation of Warning Signs and Indications...... 12
EXT....................................................................... 35
External Sync ....................................................... 68
2
24 V Accessories .................................................. 23
3
F
Firmware............................................................... 68
FPS....................................................................... 51
Frame Lines.......................................................... 64
Function Buttons................................................... 44
3.5mm TRS connector .......................................... 37
G
A
ALEV III Sensor Specification ............................... 82
ALEXA Frame Lines ............................................. 79
ALEXA Images........................................................ 8
Appendix ............................................................... 73
ARRIRAW ............................................................. 78
AUDIO IN .............................................................. 36
General Precautions ............................................. 15
General Safety Instructions .................................. 12
Gold Mount Batteries ............................................ 21
H
Homescreen ......................................................... 48
How to Read This Manual .................................... 11
B
BAT....................................................................... 35
BAT Connector ..................................................... 18
Bridge Plate adapter BPA-1 .................................. 31
Bridge Plate BP-12 ............................................... 30
I
INFO ..................................................................... 46
Installation of The Camera.................................... 24
Introduction to ALEXA .......................................... 10
C
Camera Accessory List ......................................... 74
Camera Dimensions ............................................. 73
Camera Side Handle CSH-1 ................................. 30
Center Handle CCH-1........................................... 29
Cine-Style Batteries .............................................. 18
Condensation........................................................ 15
Connectors............................................................ 33
D
Disclaimer ............................................................... 4
Display ............................................................ 43, 67
L
Lens Adapter PL Mount LA-PL-1 (no LDS)........... 39
Lens Support ........................................................ 40
Leveling Block LB-1.............................................. 31
Lists and User Lists .............................................. 50
M
Main UI ................................................................. 43
Mains Unit NG 12/26 R......................................... 18
Menu..................................................................... 59
Minimum Equipment Recommended For Operation
............................................................................. 24
MON OUT....................................................... 35, 63
Monitoring ............................................................. 61
O
Onboard Batteries................................................. 19
Operator UI ........................................................... 70
Optics.................................................................... 39
V
Viewfinder Cables................................................. 26
Viewfinder CAM menu .......................................... 72
Viewfinder EVF menu ........................................... 71
Viewfinder Mounting Bracket ................................ 26
V-Mount Batteries ................................................. 20
W
P
Power.............................................................. 19, 66
Power Management.............................................. 17
Power Outputs ...................................................... 23
Power Supply........................................................ 17
Project................................................................... 66
R
REC OUT.............................................................. 60
REC OUT 1&2 ...................................................... 35
Recording.............................................................. 59
RET/SYNC IN ....................................................... 35
RS......................................................................... 36
S
Safety Instructions ................................................ 12
Scope...................................................................... 7
Screen Buttons ..................................................... 43
SD Card ................................................................ 37
Shoulder Pad SP-3 ............................................... 31
SHUTTER ............................................................. 54
Specific Safety Instructions ................................... 13
Storage and Transport .......................................... 15
SxS ....................................................................... 38
System .................................................................. 66
System Clock/Date ............................................... 68
T
TC ......................................................................... 37
TC (Time Code) .................................................... 44
Tripod and Remote Heads .................................... 24
U
USER .................................................................... 47
USER BITS ........................................................... 46
User interface........................................................ 42
User Setups .......................................................... 69
WB........................................................................ 56
What's New In This Version.................................... 7