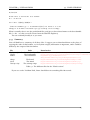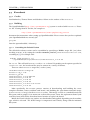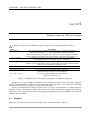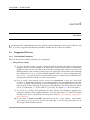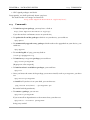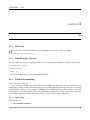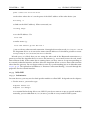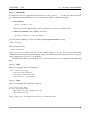
1
˚
¨ Manual
Angstr
om
– Embedded Power –
Merciadri1 Luca, Ko¨en2 Kooi
June 29, 2010
1 [email protected]
2 [email protected]
CONTENTS
CONTENTS
Contents
Thanks
1
License
2
I
3
II
History
5
Installation
1
Warnings
6
2
Installation options
7
3
Loopback Image
3.1 Use . . . . . . . . . . . . . . . . . . . . . . . . . . . . . . . . . . . . . . . . . . . . . . . .
3.2 Interest . . . . . . . . . . . . . . . . . . . . . . . . . . . . . . . . . . . . . . . . . . . . . .
8
8
8
4
LiveRam Disks
4.1 Interest . . . . . . . . . . . . . . . . . . . . . . . .
4.2 The Linux Boot Process . . . . . . . . . . . . . .
4.3 Easy Versions . . . . . . . . . . . . . . . . . . . .
4.4 Hard Versions . . . . . . . . . . . . . . . . . . . .
4.4.1 In Theory . . . . . . . . . . . . . . . . . .
4.4.2 In Practice . . . . . . . . . . . . . . . . . .
4.4.2.1 The Python Script . . . . . . . .
4.4.2.2 The Outfile . . . . . . . . . . . .
4.4.2.3 HaRET . . . . . . . . . . . . . .
4.4.2.4 zImage . . . . . . . . . . . . . .
4.4.2.5 Initrd . . . . . . . . . . . . . . .
4.4.2.6 The Startup Script . . . . . . . .
4.4.2.7 Automatizing The Task . . . . .
4.4.3 Summary . . . . . . . . . . . . . . . . . .
4.5 Kexecboots . . . . . . . . . . . . . . . . . . . . . .
4.5.1 Credits . . . . . . . . . . . . . . . . . . . .
4.5.2 Building . . . . . . . . . . . . . . . . . . .
4.5.2.1 Overriding the Default Version
4.5.2.2 Remarks . . . . . . . . . . . . .
4.5.3 Role . . . . . . . . . . . . . . . . . . . . . .
.
.
.
.
.
.
.
.
.
.
.
.
.
.
.
.
.
.
.
.
.
.
.
.
.
.
.
.
.
.
.
.
.
.
.
.
.
.
.
.
.
.
.
.
.
.
.
.
.
.
.
.
.
.
.
.
.
.
.
.
.
.
.
.
.
.
.
.
.
.
.
.
.
.
.
.
.
.
.
.
.
.
.
.
.
.
.
.
.
.
.
.
.
.
.
.
.
.
.
.
.
.
.
.
.
.
.
.
.
.
.
.
.
.
.
.
.
.
.
.
.
.
.
.
.
.
.
.
.
.
.
.
.
.
.
.
.
.
.
.
.
.
.
.
.
.
.
.
.
.
.
.
.
.
.
.
.
.
.
.
.
.
.
.
.
.
.
.
.
.
.
.
.
.
.
.
.
.
.
.
.
.
.
.
.
.
.
.
.
.
.
.
.
.
.
.
.
.
.
.
.
.
.
.
.
.
.
.
.
.
.
.
.
.
.
.
.
.
.
.
.
.
.
.
.
.
.
.
.
.
.
.
.
.
.
.
.
.
.
.
.
.
.
.
.
.
.
.
.
.
.
.
.
.
.
.
.
.
.
.
.
.
.
.
.
.
.
.
.
.
.
.
.
.
.
.
.
.
.
.
.
.
.
.
.
.
.
.
.
.
.
.
.
.
.
.
.
.
.
.
.
.
.
.
.
.
.
.
.
.
.
.
.
.
.
.
.
.
.
.
.
.
.
.
.
.
.
.
.
.
.
.
.
.
.
.
.
.
.
.
.
.
.
.
.
.
.
.
.
.
.
.
.
.
.
.
.
.
.
.
.
.
.
.
.
.
.
.
.
.
.
.
.
.
.
.
.
.
.
.
.
.
.
.
.
.
.
.
.
.
.
.
.
.
.
.
.
.
.
.
.
.
.
.
.
.
.
.
.
.
.
.
.
.
.
.
.
.
.
.
.
.
.
.
.
.
.
.
.
.
.
.
.
.
.
.
.
.
.
.
10
10
10
11
11
11
12
12
13
13
13
13
13
13
14
15
15
15
15
16
16
i
CONTENTS
CONTENTS
Way of Work . . . . . . . . . . . . . . . . . . . . . . . . . . . . . . . . . . . . . .
Consequences . . . . . . . . . . . . . . . . . . . . . . . . . . . . . . . . . . . . . .
Screenshots . . . . . . . . . . . . . . . . . . . . . . . . . . . . . . . . . . . . . . .
17
17
17
5
Diff. Img. for Diff. Purp.
5.1 Formats . . . . . . . . . . . . . . . . . . . . . . . . . . . . . . . . . . . . . . . . . . . . . .
19
19
6
Hardware
6.1 Supported Devices . . . . . . . . . . . . . . . . . . . . . . . . . . . . . . . . . . . . . . .
6.1.1 Installation Procedure . . . . . . . . . . . . . . . . . . . . . . . . . . . . . . . . .
6.1.2 List . . . . . . . . . . . . . . . . . . . . . . . . . . . . . . . . . . . . . . . . . . . .
21
21
21
22
7
After Installation
7.1 First Steps . . . . . . . . . . . . . . . . . . . .
7.1.1 Security Before Everything . . . . . .
7.1.2 Internationalization and Localization
7.1.2.1 Two Main Definitions . . . .
7.1.2.2 Locale and Packages . . . .
24
24
24
24
24
25
4.5.4
4.5.5
4.5.6
8
.
.
.
.
.
.
.
.
.
.
.
.
.
.
.
.
.
.
.
.
.
.
.
.
.
.
.
.
.
.
.
.
.
.
.
.
.
.
.
.
.
.
.
.
.
.
.
.
.
.
.
.
.
.
.
.
.
.
.
.
.
.
.
.
.
.
.
.
.
.
.
.
.
.
.
.
.
.
.
.
.
.
.
.
.
.
.
.
.
.
.
.
.
.
.
.
.
.
.
.
.
.
.
.
.
.
.
.
.
.
.
.
.
.
.
.
.
.
.
.
26
Bug Tracking System
III
Building
27
IV
˚
¨ System
The Angstr
om
30
9
31
Introduction
10 Packaging System
10.1 Introduction . . . . . . . . . .
10.2 Core Principle . . . . . . . . .
10.3 Commands . . . . . . . . . . .
10.4 Selecting Packages . . . . . .
10.5 Format of Packages . . . . . .
10.6 Sw. fr. Cons. Img. to X Serv. .
.
.
.
.
.
.
11 Use
11.1 The User . . . . . . . . . . . . .
11.2 Checking the Version . . . . . .
11.3 Global Networking . . . . . . .
11.3.1 Basic Info . . . . . . . .
11.3.2 With USB . . . . . . . .
11.3.2.1 On the Server
11.3.2.2 On the Slave .
11.3.3 With Bluetooth . . . . .
11.3.4 With WiFi . . . . . . . .
11.3.4.1 Preliminaries .
11.3.4.2 Commands . .
.
.
.
.
.
.
.
.
.
.
.
.
.
.
.
.
.
.
.
.
.
.
.
.
.
.
.
.
.
.
.
.
.
.
.
.
.
.
.
.
.
.
.
.
.
.
.
.
.
.
.
.
.
.
.
.
.
.
.
.
.
.
.
.
.
.
.
.
.
.
.
.
.
.
.
.
.
.
.
.
.
.
.
.
.
.
.
.
.
.
.
.
.
.
.
.
.
.
.
.
.
.
.
.
.
.
.
.
.
.
.
.
.
.
.
.
.
.
.
.
.
.
.
.
.
.
.
.
.
.
.
.
.
.
.
.
.
.
.
.
.
.
.
.
.
.
.
.
.
.
.
.
.
.
.
.
.
.
.
.
.
.
.
.
.
.
.
.
.
.
.
.
.
.
.
.
.
.
.
.
.
.
.
.
.
.
.
.
.
.
.
.
.
.
.
.
.
.
.
.
.
.
.
.
.
.
.
.
.
.
.
.
.
.
.
.
.
.
.
.
.
.
.
.
.
.
.
.
.
.
.
.
.
.
.
.
.
.
.
.
.
.
.
.
.
.
.
.
.
.
.
.
.
.
.
.
.
.
.
.
.
.
.
.
.
.
.
.
.
.
.
.
.
.
.
.
.
.
.
.
.
.
.
.
.
.
.
.
.
.
.
.
.
.
.
.
.
.
.
.
.
.
.
.
.
.
.
.
.
.
.
.
.
.
.
.
.
.
.
.
.
.
.
.
.
.
.
.
.
.
.
.
.
.
.
.
.
.
.
.
.
.
.
.
.
.
.
.
.
.
.
.
.
.
.
.
.
.
.
.
.
.
.
.
.
.
.
.
.
.
.
.
.
.
.
.
.
.
.
.
.
.
.
.
.
.
.
.
.
.
.
.
.
.
.
.
.
.
.
.
.
.
.
.
.
.
.
.
.
.
.
.
.
.
.
.
.
.
.
.
.
.
.
.
.
.
.
.
.
.
.
.
.
.
.
.
.
.
.
.
.
.
.
.
.
.
.
.
.
.
.
.
.
.
.
.
.
.
.
.
.
.
.
.
.
.
.
.
.
.
.
.
.
.
.
.
.
.
.
.
.
.
.
.
.
.
.
.
.
.
.
.
.
.
.
.
.
.
.
.
.
.
.
.
.
.
.
.
.
.
.
.
.
.
.
.
.
.
.
.
.
.
.
.
.
.
.
.
.
.
.
.
.
32
32
32
33
34
34
34
.
.
.
.
.
.
.
.
.
.
.
35
35
35
35
35
36
36
37
38
39
39
40
ii
CONTENTS
11.3.4.3 WEP . . . . .
11.3.4.4 WPA . . . . .
11.3.4.5 Drivers . . .
11.3.5 Firewall . . . . . . . .
11.4 Errors You Could Encounter .
12 Getting More Help
CONTENTS
.
.
.
.
.
.
.
.
.
.
.
.
.
.
.
.
.
.
.
.
.
.
.
.
.
.
.
.
.
.
.
.
.
.
.
.
.
.
.
.
.
.
.
.
.
.
.
.
.
.
.
.
.
.
.
.
.
.
.
.
.
.
.
.
.
.
.
.
.
.
.
.
.
.
.
.
.
.
.
.
.
.
.
.
.
.
.
.
.
.
.
.
.
.
.
.
.
.
.
.
.
.
.
.
.
.
.
.
.
.
.
.
.
.
.
.
.
.
.
.
.
.
.
.
.
.
.
.
.
.
.
.
.
.
.
.
.
.
.
.
.
.
.
.
.
.
.
.
.
.
.
.
.
.
.
.
.
.
.
.
.
.
.
.
.
40
40
41
41
41
42
iii
CONTENTS
CONTENTS
Thanks
(Luca Merciadri) would sincerely want to thanks Andrea Adami for his information about
kexec-stuff, Yuri Bushmelev for his details on kexec-stuff, Gregory Graeme for his first answer,
˚
Kooi Koen for his idea of setting up a seperate git repo on the Angstr
om
¨ site or gitorious, and
modifying it slightly, Lex Landa for his investment about hx4700, and for his precious help (in
particular: Section 10.2, p. 32, Subsections 4.5.1, 4.5.2, 4.5.2.1, resp. 15, p. 15, p. 15), Kelly Price for
his info about the kexecboot kernels.
I
1
License
he Angstrom
¨ Manual is under Creative Commons (CC) BY-SA license. In this, BY and SA globally
mean ([3, 4]) that others can remix, tweak, and build upon our work, even for commercial
reasons, as long as others credit us and license their creations under the identitcal terms. All new
works based on this will carry the same license, so any derivatives will also allow commercial use.
You are thus free to
T
1. share: copy, distribute and transmit the work,
2. remix: adapt the work
under the following assumptions:
1. You must attribute the work in the manner specified by Luca Merciadri,
2. If you alter, transform, or build upo, this work, you may distribute the resulting work only
under the same, similar or a compatible license.
Any of the above conditions can be waived if you get permission from Luca Merciadri, as Luca
Merciadri holds the copyright.
In no way are any of the following rights affected by the license:
• Your fair dealing or fair use rights,
• The author’s moral rights,
• Rights other persons may have either in the work itself or in how the work is used, such as
publicity or private rights.
For a more detailed description of the license, please read
http://creativecommons.org/licenses/by-sa/3.0/legalcode.
If you need further information about this, please contact me.
c Merciadri Luca 2009. Please see Page 1 for thanks.
Part I
History
3
˚
Angstr
om
was started by a small group of people who worked on the OpenEmbedded,
¨
OpenZaurus and OpenSimpad projects to unify their effort to make a stable and user-friendly
distribution for embedded devices like handhelds, set top boxes and network-attached storage
devices and more.
˚
˚
˚
OpenEmbedded is used by Angstr
om
om
om.
¨ but Angstr
¨ is not OpenEmbedded Angstr
¨
4
Part II
Installation
5
CHAPTER 1. WARNINGS
CHAPTER
1
Warnings
B
˚
efore beginning to speak about Angstr
om,
here are some problems you could encounter when
¨
trying it:
˚
1. Installing Angstr
om
¨ could result in a bricked device, with the consequences of this: your
device could be completely unuseful.
2. Modifying the internal configuration of your device voids warranty.
˚
3. Trying Angstr
om
¨ on older PocketPC, Windows Mobile and Windows CE devices is not without
˚
any danger: it erases the content of the RAM. If you want to exit Angstr
om,
¨ you are obliged to
proceed to a hard-reset. The result of this hard-reset is that you lose all your personal data,
programs, etc. After hard-resetting your device, you will find your system, in the same state as
when you first booted your device after having bought it.
˚
These things being said, enjoy reading this, and try Angstr
om
¨ on your embedded device!
6
CHAPTER 2. INSTALLATION OPTIONS
CHAPTER
2
Installation options
˚
or a given device, there are different possibilites to try Angstr
om
¨ on it:
F1. Using the internal flash memory. This method is potentially dangerous, as it could result in
a bricked device.
˚
2. Using external storage. Running Angstr
om
¨ of an SD or CF card is relatively safe
3. Using a loopback image. Like the external storage option, but using a monolithic file.
4. Using a liveram disk.
These options are highly device dependent, so the instructions are broken down per device
group.
7
CHAPTER 3. LOOPBACK IMAGE
CHAPTER
3
Loopback Image
Contents
3.1
3.2
Use . . . . . . . . . . . . . . . . . . . . . . . . . . . . . . . . . . . . . . . . . . . . . . .
Interest . . . . . . . . . . . . . . . . . . . . . . . . . . . . . . . . . . . . . . . . . . . .
8
8
3.1 Use
˚
ccording to [6] and to my tests, the use of a loopback image for Angstr
om
¨ is done by following
these steps:
A
1. Once you are in http://www.angstrom-distribution.org/releases/2007.12/images/,
2. Download two files:
(a) a .img.bz2 one;
(b) a .exe one,
3. Place them on an extension card, in the same (root) directory,
4. Launch from your OS the .exe file,
˚
5. Choose the .img.bz2 image once Angstr
om
¨ will have asked you which image it should use,
by
(a) Naviguating between images with the “physical” arrows of your device (if so),
(b) Pressing between the four “physical” arrows of your device (to confirm, if so).
3.2 Interest
˚
Once these steps have been performed, Angstr
om
¨ will be executed. If you choose to read the image
˚
from your extension card (and it should be so), all the things you will modify under Angstr
om
¨ (i.e.
new sessions, etc.), will be written on the extension card.
8
CHAPTER 3. LOOPBACK IMAGE
3.2. INTEREST
Consequently, even if you hard-reset the device, doing all the given steps will, if you have already
˚
tried Angstr
om
¨ at least once, using the same extension card as the one you are using now, let you
use the session you defined, all your parameters being written in the memory of your extension
card.
9
CHAPTER 4. LIVERAM DISKS
CHAPTER
4
LiveRam Disks
Contents
4.1
Interest . . . . . . . . . . . . . . . . . . . . . . . . . . . . . . . . . . . . . . . . . . . .
10
4.2
The Linux Boot Process . . . . . . . . . . . . . . . . . . . . . . . . . . . . . . . . . . .
10
4.3
Easy Versions . . . . . . . . . . . . . . . . . . . . . . . . . . . . . . . . . . . . . . . . .
11
4.4
Hard Versions . . . . . . . . . . . . . . . . . . . . . . . . . . . . . . . . . . . . . . . .
11
4.5
Kexecboots . . . . . . . . . . . . . . . . . . . . . . . . . . . . . . . . . . . . . . . . . .
15
4.1 Interest
˚
iveRam Disks is an interesting way to try Angstr
om
¨ without any great danger1 (as you only lose
personal data and programs, i.e. internal configuration). However, all the changes you will do
will not be kept.
A LiveRam Disk is simply a .exe file which can be executed from the File Explorer of your
Windows Mobile Edition.
It should be clear in your mind that these LiveRam Disks are less interesting for the developers;
as a result, they are less “up-to-date.” If you want to use up-to-date LiveRam Disks, you will have
to do some tricky things which will be given in 4.4, p. 11.
We shall give the important info about these two possibilities. To simplify the presentation, we
shall denote by “easy version” a version which is directly available on a website, and which is ready
to execute, on the opposite of “hard versions,” whose file is the result of a compilation of different
files.
We begin by a rough explanation about how Linux boots.
L
4.2 The Linux Boot Process
The Linux boot process is simple [10]:
1 More
info about this at Chapter 1, p. 6, point ??.
10
CHAPTER 4. LIVERAM DISKS
4.3. EASY VERSIONS
1. A boot loader finds the kernel image on the disk, loads it into memory, and starts it,
2. The kernel initializes the devices and its drivers,
3. The kernel mounts the root filesystem,
4. The kernel starts a program called init,
5. init sets the rest of the processes in motion,
6. The last processes that init starts as part of the boot sequence allow you to log in.
4.3 Easy Versions
The easy versions date back to the year 2007. A hx4700 version can be found2 with the name
Angstrom-x11-image-liveramdisk-2007.12-hx4700.exe
You simply use such a file by launching it in the WM File Explorer. That is really straightforward.
4.4 Hard Versions
The hard versions are as up-to-date as you expect them to be, because you constitute them. After
having spoke with Lex Landa because of a WiFi problem, some info emerged from this thread3 ,
becoming increasingly big.
4.4.1
In Theory
To build this exe file, there is a Python script. It is called make-bootbundle.py. Its usage is described
by:
make-bootbundle.py -o <outfile> <path to haret.exe> <zImage> <initrd> <script>
Let’s describe these elements in their order:
1. make-bootbundle.py: the Python script.
2. <outfile>: the name of the file you will launch in the WM File Explorer.
3. <haret.exe>: the name of the HaRET bootloader.
4. <zImage>: the kernel.
5. <initrd>: the initrd.
6. <script>: the startup script.
To understand what they mean, you need some basic knowledge in Linux/UNIX systems which
will not be detailed here. That is a prerequisite.
2 In
the http://www.angstrom-distribution.org/releases/2007.12/images/hx4700/ directory.
http://www.mail-archive.com/[email protected]/msg02710.html.)
3 (See
11
CHAPTER 4. LIVERAM DISKS
4.4.2
4.4. HARD VERSIONS
In Practice
Practically, you may wonder how all these files can be found, as, even with some searches on the
Internet, you may still be wondering where they are.
4.4.2.1 The Python Script
You can use the following Python script (thanks to Lex Landa for this):
#!/usr/bin/env python
import
import
import
import
import
import
sys
os
stat
struct
getopt
re
optlist, args = getopt.gnu_getopt(sys.argv[1:], "o:vh?")
opts = {}
opts.update(optlist)
if len(args) != 4:
print "make-bootbundle - Make a standalone HaRET boot bundle with kernel and initrd"
print "Usage: make-bootbundle.py -o <outfile> <path to haret.exe> <zImage> <initrd> <script>"
sys.exit(0)
outfile = opts["-o"]
os.system("cat %s %s %s %s> %s"
% (args[0], args[1], args[2], args[3], outfile))
exe = open(outfile, "r+b")
kernelSt = os.stat(args[1])
initrdSt = os.stat(args[2])
scriptSt = os.stat(args[3])
exe.seek(0, 2)
exe.write("HARET1\0\0")
exe.write(struct.pack("i",
exe.write(struct.pack("i",
exe.write(struct.pack("i",
exe.write(struct.pack("i",
exe.write(struct.pack("i",
exe.write(struct.pack("i",
exe.close()
kernelSt[stat.ST_SIZE]))
initrdSt[stat.ST_SIZE]))
scriptSt[stat.ST_SIZE]))
0))
0))
0))
if opts.has_key("-v"):
haretSt = os.stat(args[0])
print "HaRET:\t", haretSt[stat.ST_SIZE]
print "Kernel:\t", kernelSt[stat.ST_SIZE]
print "Initrd:\t", initrdSt[stat.ST_SIZE]
print "Script:\t", scriptSt[stat.ST_SIZE]
print "Header:\t", 8 + 4*6
print "-------------"
print "Total:\t", \
haretSt[stat.ST_SIZE] + kernelSt[stat.ST_SIZE] + \
initrdSt[stat.ST_SIZE] + scriptSt[stat.ST_SIZE] + 8 + 4*6
12
CHAPTER 4. LIVERAM DISKS
4.4. HARD VERSIONS
4.4.2.2 The Outfile
There is nothing to say about the outfile, except that giving it a representative name is a nice thing.
For this, you may use the script given at point 4.4.2.7, p. 13.
4.4.2.3 HaRET
The HaRET bootloader is already an old thing: it was also used in Familiar. The latest one4 is
haret-0.5.2.exe.
4.4.2.4 zImage
˚
The easiest thing is to use the Narcissus image generator5 from Angstr
om’s
website. It will generate
¨
6
a file like hx4700-full-x11-image-hx4700.tar.bz2 for the hx4700. You then go to its folder
named boot, and extract the corresponding zImage. For example, it is here zImage-2.6.21-hh20.
Its numbering is the kernel’s numbering, as the zImage is the kernel.
4.4.2.5 Initrd
The initrd file is under the form of a .cpio.gz. For example, its current name is initramfs.cpio.gz.
You can use the following bash script to make the initrd (thanks to Lex Landa for this):
#!/bin/sh
# Execute this from the initrd root dir.
su
find . | cpio -o -H newc | gzip -9 > ../initramfs.cpio.gz
4.4.2.6 The Startup Script
You can use the following startup script:
# initramfs-bootmenu HaRET script
# (c) 2007 Paul Sokolovsky
msgbox "Attention!" "This will boot Linux. All memory will be overwritten and hard reset will be
required to return to Windows Mobile.
You *MUST BACKUP* your data first. Continue booting (Cancel - quit to make backup)?" 0x40031
if result == 2 exit
set cmdline "root=/dev/ram0 rootdelay=3
ip=192.168.2.202:192.168.2.200:192.168.2.200:255.255.255.0:ipaq:usb0
console=tty0 console=ttyS0,115200n8 rdinit=/sbin/init"
ramboot
It is named startup.txt.bootimage in our example.
4.4.2.7 Automatizing The Task
If you want to make the task of producing the bootbundle more automatic, you can use the following
bash script (thanks to Lex Landa for this):
4 Which
can be found in the http://handhelds.org/~koconnor/haret/ directory.
you can find at http://www.angstrom-distribution.org/narcissus/.
6 The name of this file has actually be decided only by me, but it represents the content of it.
5 That
13
CHAPTER 4. LIVERAM DISKS
4.4. HARD VERSIONS
#!/bin/sh
# Run this to build the boot bundle
# L. 01-Nov-09
dt="‘date +%d%m%y-%H%M%S‘"
./make-bootbundle.py -o bootbundle-${dt}.exe haret-0.5.2.exe
zImage-2.6.21-hh20 initramfs.cpio.gz startup.txt.bootimage
What it actually does is use the predefined files, and give a date-related name to the boot bundle
file (i.e. the .exe that you will execute from the WM File Explorer).
You can evidently modify it as you want.
4.4.3
Summary
You will find here a summary of all these files. I suggest you to download them at the place of
copying the code of this booklet, as, for Python scripts, indentation is important, and it could be
broken by the output of this document.
File
Python script
Outfile
HaRET
Role
Produce the bootbundle
The bootbundle
The bootloader
zImage
initrd
Startup script
The kernel
The initrd
The startup script
Download at
http://www.student.montefiore.ulg.ac.be/~merciadri/angstrom/files/make-bootbundle.py
http://www.student.montefiore.ulg.ac.be/~merciadri/angstrom/files/console-zImage-2.6.21-hh20-hx4700.ex
http://handhelds.org/~koconnor/haret/haret-0.5.2.exe
or http://www.student.montefiore.ulg.ac.be/~merciadri/angstrom/files/haret-0.5.2.exe
http://www.student.montefiore.ulg.ac.be/~merciadri/angstrom/files/zImage-2.6.21-hh20
http://www.student.montefiore.ulg.ac.be/~merciadri/angstrom/files/initramfs.cpio.gz
http://www.student.montefiore.ulg.ac.be/~merciadri/angstrom/files/startup.txt.bootimage
Table 4.1: The different files for the “Hard version.”
If you use such a LiveRam Disk, Linux should boot in something like 10 seconds.
14
CHAPTER 4. LIVERAM DISKS
4.5. KEXECBOOTS
4.5 Kexecboots
4.5.1
Credits
Yuri Bushmelev, Thomas Kunze and Matthew Allum are the authors of the kexecboot.
4.5.2
Building
The OpenEmbedded (http://www.openembedded.org) system is used to build kexecboot. Please
see the “Getting Started” for this, for example at
http://wiki.openembedded.net/index.php/Getting_started
document for instructions when setting up OpenEmbedded. Please ensure that you have updated
your OpenEmbedded tree recently (do
git pull
from the openembedded / directory).
4.5.2.1 Overriding the Default Version
The default kexecboot version can be overridden by specifying a BitBake recipe file (.bb) when
invoking bitbake, or by setting the variable PREFERRED_VERSION_linux-kexecboot in local.conf,
according to [1], for example with
bitbake linux-kexecboot -b \
../openembedded/recipes/kexecboot/linux-kexecboot_2.6.32.bb
for 2.6.32. This will build kexecboot with a 2.6.32 kernel. Depending on the options specified in
conf/local.conf, the kexecboot files may be written in a variety of formats.
There are other kexecboot recipe files, such as (2010):
initramfs-kexecboot-image.bb
kexecboot-cfg_0.1.bb
kexecboot_git.bb
linux-kexecboot_2.6.21-hh20.bb
linux-kexecboot_2.6.24.bb
linux-kexecboot_2.6.26.bb
linux-kexecboot_2.6.29.bb
linux-kexecboot_2.6.32+2.6.33-rc3.bb
linux-kexecboot_2.6.32.bb
More specifically, the bitbake process consists of downloading and building the crosscompiler toolchain, native toolchain and kernel, and building the cpio-format initramfs image
(linux-kexecboot-image) for the kexecboot system. This image is used as a ramdisk-based root
filesystem, and its purpose is to mount one or more filesystems, locate the replacement kernel (and
root filesystem) and call the kexecboot kernel routine to replace the kernel.
Before the kernel is built, any patches are downloaded and applied, depending on the machine
type which is selected. The kernel image is compressed and written, along with the initramfs
filesystem.
15
CHAPTER 4. LIVERAM DISKS
4.5. KEXECBOOTS
The kexecboot kernel’s command line arguments are set in the default recipe file, i.e.
recipes/kexecboot/linux-kexecboot.inc. The CMDLINE variable is set conditionally, depending
on the platform (any, poodle, akita, collie, spitz and hx4700). The default kernel configuration
is read from file defconfig and in the do_configure_append() section, some edits are made to
remove various configure options, and add others. CONFIG_BLK_DEV_INITRD and CONFIG_KEXEC are
enabled, and the initramfs source file is set to initramfs.cpio.gz. Kernel modules are disabled
and the kernel is built with the configuration in file .config.
The require line in linux-kexecboot.inc includes ../linux/linux.inc, which builds the
kexecboot kernel. Conditional tests decide whether OABI or EABI support should be included, set
the Linux logo type, Thumb instruction set support, endianness and other options.
The kernel name is set with the following lines:
KERNEL_IMAGE_BASE_NAME = "${KERNEL_IMAGETYPE}-kexecboot-${PV}-${PR}-${MACHINE}"
KERNEL_IMAGE_SYMLINK_NAME = "${KERNEL_IMAGETYPE}-kexecboot-${MACHINE}"
Where is KERNEL IMAG
set?
The do_stage() and do_install() steps are set to empty functions, meaning that they will
have no effect: the kernel and initramfs are built only, and no other actions occur. The generated
images will be written in various locations
Which locations?
For example, build/tmp/deploy/glibc/images/c7x0/ dir contains:
Angstrom-initramfs-kexecboot-image-glibc-ipk-2009.X-test-20100106-c7x0.rootfs.cpio.gz
Angstrom-initramfs-kexecboot-image-glibc-ipk-2009.X-test-20100106-c7x0.rootfs.cpio.lzma
initramfs-kexecboot-image-c7x0.cpio.gz -> Angstrom-initramfs-kexecboot-image-glibc-ipk-2009.X-test-20100106-c7x0.rootfs.cpio.gz
initramfs-kexecboot-image-c7x0.cpio.lzma -> Angstrom-initramfs-kexecboot-image-glibc-ipk-2009.X-test-20100106-c7x0.rootfs.cpio.
modules-2.6.26-r12-c7x0.tgz
zImage-2.6.26-r12-c7x0.bin
zImage-c7x0.bin -> zImage-2.6.26-r12-c7x0.bin
zImage-kexecboot-2.6.26-r15-c7x0.bin
zImage-kexecboot-2.6.32-r15-c7x0.bin
zImage-kexecboot-c7x0.bin -> zImage-kexecboot-2.6.32-r15-c7x0.bin
If USE_MACHINE_KERNEL is defined when building kexecboot, /proc/cpuinfo is scanned for a
Hardware: line and if present, the Hardware result is converted to lower case, spaces are replaced
with underscores and /mnt/boot/zImage- is prepended to it. For example, in the case of the Sharp
SL-5500 (’Collie’), /proc/cpuinfo has the line
Hardware
: Sharp-Collie
The line is checked for a colon and if found, Sharp-Collie would be appended to the zImage- string,
so /mnt/boot/zImage-Sharp-Collie is looked for.
4.5.2.2 Remarks
4.5.3
Role
A kexecboot kernel is, in a more precise way, a kernel that has the kexec feature called; this feature can
˚
load other, normal kernels in and boot into them. This allows the main kernel used in Angstr
om
¨ to
be upgraded without flashing the device whole. The kexecboot kernel needs to be small and slim
enough that it can fit into the NAND, yet be able to handle the managing RAM initdisk used to
find and select the new kernel to boot off of. It should also (in minimal variant) have support all
’bootable’ storages (NAND, CF, SD/MMC, etc).
Similar projects include “Two Kernel Monte” and CoreBoot.
Kexecboot development was started to solve following problems:
16
CHAPTER 4. LIVERAM DISKS
4.5. KEXECBOOTS
1. Zauruses with default bootloader and MTD partitioning have only 1.2 Mb of free space in
NAND to hold kernel. Modern kernels are too big to fit into that constraints without significal
loss in features (even with separate modules),
2. Some devices (such as Zauruses) have no possibility to boot from other media (SD/MMC/CF)
with default bootloader.
˚
Angstr
om
¨ was based on top of OE (OpenEmbedded), OpenZaurus and OpenSimpad. Zaurus’ OS
was the most supported platform, at that times. To address these problems, Thomas Kunze wrote
first versions of kexecboot.
4.5.4
Way of Work
When kexecboot’s kernel is loaded, it runs kexecboot binary as init process. This process does the
following things (for the current development version, i.e. 0.6):
1. scan all known partitons on devices (from /proc/partitions),
2. check that the partition’s filesystem is known (according to fstype.c from klibc and
/proc/filesystems),
3. mount that partition and check for /boot/boot.cfg there:
(a) if boot.cfg is found, then parse it and do some additional things (load custom icon for
example);
(b) if boot.cfg is not found, then check for default kernels (/boot/zImage, /zImage),
4. check for zImage, the replacement Linux kernel (compressed),
5. create and show GUI with collected partitions,
6. wait for selection and then kexec selected kernel.
Kexecboot binary can be started as non-init process too, so you can run it in your own image at any
time too.
Latest kexecboot release was 0.5. The development version is 0.6.
4.5.5
Consequences
As the kexecboot kernel embeds a very limited initramfs, it contains just a couple of static binaries
(kexec and kexecboot). Kexec is the tool (see kexec-tools), kexecboot is the “init,” a custom-purposed
binary launching kexec with appropriate args. The name “kexecboot” was given by the author of
the project.
So, if you want to create a standard “liveramdisk” image, just enable kexec during the config of
the kernel and deploy kexec-tools in your image.
4.5.6
Screenshots
Here are pictures (taken from [2]) of a v0.4 kexecboot.
17
CHAPTER 4. LIVERAM DISKS
4.5. KEXECBOOTS
(a)
(b)
No
Two
bootable
parpartititions
tions
from
found.
SDcard.
Figure 4.5.1: Kexecboots’ screenshots.
18
CHAPTER 5. DIFF. IMG. FOR DIFF. PURP.
CHAPTER
5
Different Images for Different Purposes
ccording to [5], there are different types of images. They are represented at Table 5.1.
A
Name
base-image
console-image
minimal-gpe-image
x11-image
x11-gpe-image
x11-pimlico-image
x11-office-image
Description
Very minimal system without GUI. SSH login over built-in networking
(usbnet, ethernet port, . . . ). This is indended for headless devices
with very small amount of flash (like routers) or for special-purpose installs
(such as standalone portable servers, automation controllers, data loggers, etc.).
Usable system without GUI. Can connect to net via BT/WiFi/USB.
Should handle devices connected via CF or USB Host.
Very minimal system with X11 GUI, on which you may install
software you need. Suitable for devices with minuscule amount of flash and for
DIY fans. NOT suitable for first-time users.
Like console-image but with X11 environment.
x11-image with GPE PIM suite preinstalled.
x11-image with OpenedHand Pimlico PIM suite
preinstalled (VGA screen is recommended).
x11-image with GNOME Office preinstalled
(Abiword, Gnumeric, etc.).
˚
Table 5.1: Different types of images for Angstr
om,
for different purposes.
¨
Images like x11-gpe and big are provided for selected devices which come with large secondary
storage (like Microdrives). If there are no such images for your device, you do not lose anything:
you can easily install any software you need from the feeds.
If you are in doubt which image to choose, use x11-image: it is intended as a starting point for
majority of users, offering basic GUI tools to control the device and devoid of application software
which not every user may need, thus offering good compromise between usability, size required,
and free space available.
5.1 Formats
There are also different formats for each image. They are summarized at Table 5.2.
19
CHAPTER 5. DIFF. IMG. FOR DIFF. PURP.
Extension
.tar.gz, .tar.bz2, .cpio.gz
.ext2, .ext2.bz2, .img,img.bz2
.jffs2
.summary.jffs2
.exe
zImage
5.1. FORMATS
Description
Archived root filesystem (rootfs), suitable
for installing to a secondary storage by
simply unpacking (the secondary storage
must be already formatted appropriately,
usually with ext2 filesystem)
Integral filesystem image, which can be
copied (e.g. using dd)
to a secondary storage partition directly.
Flash image, which can be flashed
to internal flash ROM of the specific device
Same as .jffs2, but with extended “summary”
information allowing to mount flash filesystem quicker.
(Suggested if space allows.)
Executables for WinCE devices.
Bigger files are LiveRam Disks,
Smaller files are bootmanagers (see Chapter 3, p. 8)
Standalone kernel image for ad-hoc boot-loaders
˚
Table 5.2: Different formats of images for Angstr
om,
for different purposes.
¨
20
CHAPTER 6. HARDWARE
CHAPTER
6
Hardware
nfortunately, embedded devices vary greatly in their architecture and system software, and
U as of now, no generic installation procedure suitable for all of them is available.
6.1 Supported Devices
6.1.1
Installation Procedure
Here are the devices which are known to be supported:
1. Sharp Zaurus family
(a) kexecboot: For the Zaurus, a special “kernel+initramfs” has been developed. This specialpurpose kernel is small enough to be flashed on NAND and features a framebuffer
graphical menu for the selection of boot media containing the kernel to be kexec’ed.
Multi-partition cards and lots of filesystems are supported. The kernels to be launched
are searched for in /boot of each available partition. There is a also a configuration file
(/boot/boot.cfg) which allows selection of other kernels, custom kernel command lines,
and specifies the label and the icon for each instance;
(b) How to install: Just unpack zaurus-installer-YOURMACHINE.tar.gz on a free (FAT
or EXT2/3 formatted) partition: the package contains the kexecboot-kernel and the
updater.sh utility. Then proceed as usual for flashing (switch off, pull battery out, insert
battery again, before inserting AC plug, press OK and Power On. In the Japanese Menu
select “4” and finally “3” for SD card or “4” for CF). See Figure 6.1.1 for a screenshot;
(c) For the SL-5500 (collie) and optionally for other Zaurus too, flashing is possible just
using the routines of the original firmware: reset the unit, Press “C” and “D” buttons
during restart. That is specialized. For this, please read http://linuxtogo.org/gowiki/
CollieInstall;
(d) If you want a rootfs in NAND, this must be in the .jffs2 format. Just rename
your-image-rootfs.jffs2 to initrd.bin and copy it on the card with updater.sh.
The image will be flashed on mtd2,
21
CHAPTER 6. HARDWARE
6.1. SUPPORTED DEVICES
2. Sharp Zaurus family (old method, kernel in NAND). Please follow the following links,
according to your device:
(a) Sharp Spitz (c3xxx): http://www.angstrom-distribution.org/angstrom-installation-spitz;
(b) Sharp Akita (c1000): http://www.angstrom-distribution.org/c1000-install-instructions;
(c) Sharp Corgi, Shepherd, Husky, Boxer (c7x0-c8x0): http://www.angstrom-distribution.
org/zaurus-c7x0-c8x0;
(d) Sharp Collie (SL-5500): http://linuxtogo.org/gowiki/CollieInstall;
(e) Sharp Poodle (SL-5600): http://linuxtogo.org/gowiki/PoodleInstall;
(f) Sharp Tosa (SL-6000): http://linuxtogo.org/gowiki/TosaInstall,
3. PocketPC and Windows Mobile family,
4. Generation6 devices such as Archos 5 and Archos 7.
Figure 6.1.1: Sharp Zaurus family’s screen.
6.1.2
List
Roughly speaking, the following devices are supported:
1. Acer n50,
2. Beagle Boards,
3. Dell Axim X50/X51,
4. HP’s
(a) h1940;
(b) h2200, but you may read this: http://www.angstrom-distribution.org/ipaq-h2200-series;
(c) h3900;
(d) h4000;
(e) h63xx;
(f) hx2000;
(g) hx4700 (one of the devices amongst the most supported ones);
(h) rx1950;
(i) rx3000;
(j) rx3115,
5. HTC Alpine, Apache, Athena, Beetles, Blueangel, Magician, Titan, Universal,
6. iMate Jasjar,
7. Nokia 770 internet tablet, and N800 (but see http://linuxtogo.org/gowiki/AngstromAndN800),
22
CHAPTER 6. HARDWARE
6.1. SUPPORTED DEVICES
8. Pandora Handheld (see http://openpandora.org/).
The h2000 create random problems because of WM 2005. See http://www.handhelds.org/
hypermail/hx2000-port/0/0083.html and http://www.handhelds.org/hypermail/hx2000-port/
0/0085.html for this. If your device is listed here: http://linuxtogo.org/gowiki/OeDeviceList
or here: http://linuxtogo.org/gowiki/LinuxDevices, there may be chances that it works, as this
project is closely related to OpenEmbedded.
23
CHAPTER 7. AFTER INSTALLATION
CHAPTER
7
After Installation
7.1 First Steps
7.1.1
Security Before Everything
˚
nce you have installed Angstr
om
¨ and booted into the system, you are highly recommended
to upgrade system from the feed to get the latest security and bug fixes since the release has
been made. To do this, you need to run the following commands in terminal:
O
opkg update
opkg upgrade
However, for this to work, you must be connected to the Internet to be able to download
updates. For more info about the package manager, please have a look at Chapter 10, p. 32.
˚
You may also check the packages of Angstr
om’s
repositories at http://www.angstrom-distribution.
¨
org/repo/.
7.1.2
Internationalization and Localization
7.1.2.1 Two Main Definitions
Here are two definitions from [5]:
1. Internationalization (i18n): Having support in the system for different character sets (both for
input and output), fonts, and using well-known locale-neutral standards for representing data
like time/date, and numbers,
2. Localization (l19n): Having support in the system for particular locality, from time and
monetary data to messages output by applications.
˚
Angstr
om
¨ is targetted at the wide user community throughout the world, and consequently
provides good i18n and l19n support, with basic i18n support available out of the box with standard
˚
˚
X11 GUI images. As a contemporary Linux system, Angstr
om
om’s
¨ uses UTF-8 encoding. Angstr
¨
images come with English UTF-8 locale (en_GB) which is suitable to get good i18n support. Make
sure that you select “English(Great Britain)” when logging into X11 session. You select the locale for
24
CHAPTER 7. AFTER INSTALLATION
7.1. FIRST STEPS
˚
session when logging into X, “Language” dropdown. After Angstr
om
¨ install, it will contain two
choices: “English(C locale)” (just “English” in older builds) and “English(Great Britain).” Make sure
you avoid “English(C locale)” as it does not actually offer any i18n, limiting used charset to ASCII.
To get further regarding l19n support than generic i18n above, one needs to configure proper
˚
locale for libc(C runtime library). As said earlier, Angstr
om’s
images come with en_GB locale
¨
preinstalled (and this was apparently not the best choice, as most people would expect en_US to be
default-available).
To install more libc locales, use packages with names locale-base-LL-VV, where LL is the
language code and VV is the variant code, both converted to lowercase. For example, you may use
opkg install locale-base-en-us
Once the package has been installed, a new choice will be available in X11 login.
Some bugs are known with the Shell and the encodings.
7.1.2.2 Locale and Packages
If you want some given packages to be in your language, you must install locale for the corresponding
language. Then, for each application you are interested in, you should install package
<app>-locale-LL to get translated messages, where LL is the language code, as stated before.
25
CHAPTER 8. BUG TRACKING SYSTEM
CHAPTER
8
Bug Tracking System
For the bug tracking system, please use BugZilla (http://bugs.openembedded.org/). That is the
easiest way to solve problems together.
26
Part III
Building
27
˚
om
ll Angstr
¨ images are built using OpenEmbedded. We here describe the steps (coming
from [8]) which are necessary to setup an environment where you can build images and
packages yourself. You may find more info for the needed packages on your host and possible
tweaks (SElinux, . . . ) at [9].
Here are the steps you need to do:
A
1. Get OE metadata. Use
export OETREE="${HOME}/OE"
mkdir -p ${OETREE} && cd ${OETREE}
git clone git://git.openembedded.org/openembedded.git openembedded
cd openembedded
git checkout origin/stable/2009 -b stable/2009
2. Update OE metadata. Use
cd ${OETREE}/openembedded
git pull
3. Setup the environment.
(a) Download
http://www.angstrom-distribution.org/files/source-me.txt
to ${OETREE};
(b) Setup local.conf for our needs:
mkdir -p ${OETREE}/build/conf
cp ${OETREE}/openembedded/contrib/angstrom/local.conf ${OETREE}/build/conf/
Optionally, you can open ${OETREE}/build/conf/local.conf in your favourite editor
and add:
MACHINE ?= "<your machine>"
where
"<your machine>"
is replaced with the machine you want to build for, such as
i. beagleboard for the OMAP3 beagleboard.org board,
ii. c7x0 for pxa25x zaurus clamshells (SL-C700, SL-C750, SL-C760, SL-C860, SL-7500),
iii. spitz for pxa27x zaurus clamshells with a microdrive (SL-C3000, SL-C3100, SLC3200),
iv. akita for pxa27x zaurus clamshells without a microdrive (SL-C1000),
v. tosa for the SL-C6000,
vi. h2200 for the iPAQ h2200 series,
vii. hx4700 for the iPAQ hx4700,
viii. fic-gta01 for the neo1973 phone;
You may also check
28
http://cgit.openembedded.org/cgit.cgi/openembedded/tree/conf/machine?h=
stable/2009.
(c) Start building. Use
# set environment variables
source source-me.txt
#Go to the OE tree
cd ${OETREE}/openembedded
#Make sure it’s up to date
git pull --rebase
#Start building
# you can specify machine on the cmdline:
MACHINE=yourmachine bitbake base-image ; MACHINE=yourmachine bitbake console-image x11-image
# If you have set it in local.conf you can do:
bitbake base-image ; bitbake console-image x11-image
Building for a different machine or C library is just a matter of changing the MACHINE= or
ANGSTROMLIBC statement in local.conf to a new value. There is ABSOLUTELY no need for
using different directories for that; Angstrom takes care of all the details, it was specifically
designed for this.
29
Part IV
˚
¨ System
The Angstr
om
30
CHAPTER 9. INTRODUCTION
CHAPTER
9
Introduction
˚
he Angstr¨
om system1 is a Linux distribution (distro) for embedded devices (PDAs, Beagleboards,
˚
Mobile Phones, etc.). The Angstr
om
¨ community was started by a group of people who worked
on the OpenEmbedded, OpenZaurus and OpenSimpad projects. They aim to create a stable, user
friendly linux distribution for embedded devices.
Using Linux on an embedded device is an interesting thing. Users of such devices are often
unsatisfied by the bad quality of the built-in OS’es and softwares on their embedded devices. Or
a Linux aficionados is always unhappy to use something else than an UNIX-based system. The
advantage of UNIX-based systems is well-known, and does not enter in the scope of this booklet.
For these reasons, there are now Linux-based distros for embedded devices.
T
1 And
˚
not OpenEmbedded Angstr¨
om!
31
CHAPTER 10. PACKAGING SYSTEM
CHAPTER
10
Packaging System
Some info comes from [5].
10.1 Introduction
˚
s any modern distribution, Angstr
om
¨ is fully package-based. However, as interaction with
˚
A the device during initial setup phase is difficult, Angstr
om
¨ is bootstrapped using an “image,”
which is essentially a set of core packages already merged into archive or filesystem image. This
˚
image is installed using device-specific means, and provides basic Angstr
om
¨ functionality.
˚
Adhering with the Angstrom’s
aim of flexibility and best practices of Linux system management,
¨
the images provide only core packages, allowing users to customize system to their needs by easily
˚
installing any required software from a wealth of Angstr
om’s
feeds. However, as a convenience to
¨
users, different kinds of images are provided, for example, with (core packages of) different GUI
environments pre-installed.
10.2 Core Principle
The packaging system was firstly based on ipkg (Itsy Packaging system), which was developed
a long time ago for the Itsy handheld project, by Compaq. The original ipkg may1 have been
developed by Kernel Concepts (http://www.kernelconcepts.de). For example, its .conf files
are stored in /etc/ipkg/. When that project closed down and http://www.handhelds.org came
to be, ipkg was ported to the ‘Familiar’ system, running on the iPAQ hx4700. opkg appears to
have been developed by OpenedHand Ltd. (http://www.openedhand.com.) The home of opkg is
http://opkg.googlecode.com. The preconfigured feeds are located at /etc/opkg, and, according
to [?], opkg is replacing ipkg, for different reasons; opkg has the following advantages:
• maintained, when ipkg is not,
• two companies behind it,
1 According
to a comment in src/opkg-frontend.c in opkg-0.1.7.
32
CHAPTER 10. PACKAGING SYSTEM
10.3. COMMANDS
• GPG signed packages and feeds.
Consequently, we shall speak only about opkg here.
The feeds for the 2007 image are located at
http://www.angstrom-distribution.org/feeds/2007/.
10.3 Commands
• To look for a given package, you may have a look at
http://www.angstrom-distribution.org/repo/
if you do not have an Internet access on your device,
• To update the list of the packages which is on your device, you could use
opkg update
• To automatically upgrade every package which needs to be upgraded on your device, you
could use
opkg upgrade
• To see the log file of ipkg, you may look in
/var/log/opkgupgrade.log
• To look for a packagename package, you could use
opkg search packagename
(Regexps are also accepted),
• To look for what is available as packages, you could use
opkg list
• Once you know the name of the package you want to install, such as packagename, you then
use
opkg install packagename
to install it. If you have it on your disk, you can then use
opkg install dir1/dir2/.../packagename.ipk
Be careful with dependencies,
• To remove a package, you can use
opkg remove packagename
If you want all its dependencies to be removed too, you then use
opkg remove --recursive packagename
being very careful.
33
CHAPTER 10. PACKAGING SYSTEM
10.4. SELECTING PACKAGES
10.4 Selecting Packages
As with any Linux distro, there are oftentimes different packages available to perform some given
task. However, they often require different levels of resources (e.g. command line mail vs. GUI,
˚
command line mp3 playback vs. XMMS); the key thing with Angstr
om
¨ is whether you have opted
for any GUI support at all (GPE, Opie or Qtopia) or whether you are strictly using command line.
The key therefore is to read the package description and do not use packages with the word ”opie”
in them when you are GPE based and vice-versa!
10.5 Format of Packages
The software packages are stored in files whose name ends by .ipk; this is a compressed format,
containing files to be installed as well as metadata and support scripts. Actually, the .ipk format is
the de facto package format for Embedded Linux, and many other distros use it for their packages too.
˚
However, packages from different systems are not compatible. In particular, Angstr
om
¨ maintainers
cannot guarantee system stability if packages which do not come from the official feeds are used.
10.6 Switch from Console Image to a X Server
If you are using a Console Image, you may install, once you have updated your lists of packages,
xserver-kdrive, or xserver-kdrive-imageon (for Zaurus C7x0 image users). Next, install
task-base-extended, angstrom-x11-base-depends, angstrom-gpe-task-base,
angstrom-gpe-task-settings, libesd0. It will give you a fully working X GUI and a base GPE
environment.
34
CHAPTER 11. USE
CHAPTER
11
Use
11.1 The User
O
˚
nce you have installed Angstr
om,
you can modify your owner’s info by editing
¨
/etc/gpe/gpe-ownerinfo.data
11.2 Checking the Version
˚
You can check the current Angstr
om
¨ version you are running by reading the content of (the file):
/etc/angstrom-version
You can also use
uname -a
just like you would do on every normal UNIX station.
11.3 Global Networking
Some info comes from [5].
˚
One of the first things you want to do after installing an Angstr
om
¨ release is to connect to
˚
Angstrom’s
website and get the latest updates for security and important bug fixes. If you connect
¨
to the Internet “directly” (for example, via GPRS) or via a dedicated router (for example, using WiFi
or Ethernet), you usually do not need to do additional configuration “on the other end,” assuming
your GPRS account is enabled and router already setup to serve other computers.
11.3.1 Basic Info
You may use, to
• List available interfaces:
35
CHAPTER 11. USE
11.3. GLOBAL NETWORKING
ifconfig
• Bring interface interfacename up:
ifconfig interfacename up
or
ifup interfacename
• Bring interface interfacename down:
ifconfig interfacename down
or
ifdown interfacename
11.3.2 With USB
However, many people with conventional PDA devices will connect using USB to the desktop or
˚
laptop computer. In this scenario, your host computer will serve as a router for your Angstr
om
¨
device, and so must be configured accordingly: you must enable IP forwarding and NAT on it.
Please consult your Linux distribution manual on how to make such changes permanent, to be
able to connect the device to the Internet without manual setup in the future. We here assume that
you are using a Linux server. If you are using a Windows one, you need to enable ICS(Internet
Connection Sharing) to achieve the similar functionality. If you are already using ICS for a different
interface than the one you projected to work with, consider the use of a simple proxy such as
AnalogX’s, for giving other cards access to the Internet. It is due to the fact that ICS can only deal
with a couple (of two) devices.
11.3.2.1
On the Server
To activate NAT, you could do
iptables -t nat -A POSTROUTING -o eth0 -j MASQUERADE
assuming eth0 is your external interface.
To activate IP forwarding, you then edit /etc/sysctl.conf, adding
net.ipv4.ip_forward = 1
to it, or replacing
net.ipv4.ip_forward = 0
by
net.ipv4.ip_forward = 1
if
36
CHAPTER 11. USE
11.3. GLOBAL NETWORKING
net.ipv4.ip_forward = 0
is already there. You can then reload the config using
sysctl -p /etc/sysctl.conf
which should show you the line
net.ipv4.ip_forward = 1
(there could be other lines before, evidently).
You then need to load the modules usbnet, cdc_ether and g_ether(the last one being done if
your host is also a device). You also need to add an entry to /etc/network/interfaces like
iface usb0 inet static
address 192.168.129.1
network 192.168.129.0
netmask 255.255.255.0
broadcast 192.168.129.255
if you are running Debian, or
config_usb0=( "192.168.129.1" )
to /etc/conf.d/net if you are using Gentoo, or even create a file
/etc/sysconfig/network/ifcfg-usb0
with
BOOTPROTO=’static’
STARTMODE=’auto’
USERCONTROL=’yes’
NAME=’Sharp Zaurus’
IPADDR=’192.168.129.1’
BROADCAST=’192.168.129.255’
NETMASK=’255.255.255.0’
NETWORK=’192.168.129.0’
PREFIXLEN=’’
if you use SuSE.
11.3.2.2
On the Slave
˚
On the slave (the computer running Angstr
om),
you will then
¨
modprobe g_ether
(if the command
lsmod | grep g_ether
gives nothing as result). Consequently, using then
ifconfig -a
37
CHAPTER 11. USE
11.3. GLOBAL NETWORKING
should display some devices, but at least usb0. If necessary, you may run
ifup usb0
(if usb0 is already there, no need1 for it). You can then modify the IP stuff with either the GUI of
your front-end (X11, GPE, . . . ), or by appending
iface usb0 inet static
pre-up modprobe g_ether
address 192.168.129.201
netmask 255.255.255.0
gateway 192.168.129.1
post-down rmmod g_ether
for example, to your /etc/network/interfaces.
11.3.3 With Bluetooth
˚
Angstr
om
¨ uses the standard 2.6 kernel’s Bluetooth modules (which were derived from http://
www.bluez.org/). Userspace commands used to control/access Bluetooth hardware are hciconfig,
hcitool, rfcomm, l2ping and other ones. (It is also implemented in GUIs.) Before establishing
a Bluetooth connection with another computer, either for rfcomm or pand, it is necessary to pair
the two. Bluetooth uses a PIN, or password, for incoming pairing requests. This one is set in the
/etc/bluetooth/pin file, and for outgoing requests by the utility “passkey-agent.”
There are two ways to make a network using Bluetooth: one is to use point-to-point protocol
(PPP) over the rfcomm(serial-like link); the other is to use PAN. This is a very brief summary to give
you an understanding of the processes involved:
1. PPP over rfcomm was previously popular with PDAs like Palms and some WindowsMobile/PocketPC/WinCE devices. It is not so efficient, but is useful if you are connecting the
˚
device to a Windows computer. On the Angstr
om
¨ device you need to create the appropriate
files in /etc/ppp and then trigger the PPP connection using the command
pppd call XXX
(XXX being the profile); this then results in a ppp0 device appearing.
If the called device is correctly set up, the ppp0 device will end up with the correct IP address
and default route, and the local DNS resolver will probably also be set correctly, otherwise use
ifconfig ppp0
route add default gw x.x.x.x
to tweak settings,
2. PAN/PAND is best for making a Linux-to-Linux connection. Simply run
pand -listen
on one end, and
1 Note
that issuing ifup usb0 would do nothing, in this particular case: it would not duplicate a device!
38
CHAPTER 11. USE
11.3. GLOBAL NETWORKING
pand -connect xx:xx:xx:xx:xx:xx
on the other where the xx’s are the parts of the MAC address of the other device (use
hciconfig -a
to find out the MAC address). When connected, use
ifconfig bnep0
to set the IP address. Use
route add
to make routes (e.g.
route add default gw 192.168.129.1
), just as with any other network connection. You might also need to tweak /etc/resolv.conf on
˚
the Angstr
om
¨ device so it can resolve names into IP addresses. It should be possible to create
a bnep0 entry in /etc/network/interfaces for this.
In both cases, it is likely that you are using the other end of the Bluetooth connection as a
˚
gateway to allow the Angstr
om
¨ device to access the internet (e.g. access mail, browse the web, install
from software feeds). If the remote box is running Linux you may want to set up masquerading on
˚
its external/outbound interface and thus allow the Angstr
om
¨ device to access hosts and networks
other than the gateway. Do not forget neither to turn on ipv4forwarding just as in Subsubsection
11.3.2.1, p. 36. The equivalent in Windows is “Internet Connection Sharing,” accessed through the
properties for the external interface.
11.3.4 With WiFi
11.3.4.1
Preliminaries
On some devices, you may need to load specific modules to allow WiFi. It depends on the chipsets.
• For the hx4700, you need to type
modprobe hx4700-acx
modprobe acx debug=0
in a terminal before being able to use WiFi. If you do not want to modprobe specific modules
manually, you can add them in /etc/modules, just like in every normal UNIX system.
39
CHAPTER 11. USE
11.3.4.2
11.3. GLOBAL NETWORKING
Commands
Commands for WiFi are supposed to be known (iwconfig, iwlist, . . . ), as they are universal. Here
are some basic commands for you, if you are too lazy to have a look at man pages:
• List networks:
iwlist interface scan
where scan can be replaced by scanning and where interface is often wlan0,
• Connect to network with a ESSID essidname:
iwconfig interface essid essidname
As in the other methods, you are also able to bring up the interface issuing
ifup interface
and, to bring it down,
ifdown interface
where interface is often wlan0 (it can be verified using ifconfig). If iwconfig and related
commands are missing (your $PATH being correct, or after having tried with /sbin/iwconfig), be
sure to install the wireless-tools package.
For WEP/WPA/PSK, you need to edit /etc/network/interfaces, as explained in the following
lines.
11.3.4.3
WEP
Here is an example for WEP encryption:
iface wlan0 inet dhcp
wireless_mode managed
wireless_essid youressid
wireless_key
yourwepkey
11.3.4.4
WPA
Here is an example for WPA/PSK encryption:
iface wlan0 inet dhcp
# start wpa_supplicant
wpa-conf /etc/wpa_supplicant.conf
wpa-driver hostap
If wpa_supplicant.conf does not exist in /etc, create one with
40
CHAPTER 11. USE
11.4. ERRORS YOU COULD ENCOUNTER
#/etc/wp_supplicant.conf
ctrl_interface=/var/run/wpa_supplicant
ctrl_interface_group=0
eapol_version=1
ap_scan=1
fast_reauth=1
network={
ssid="(your SSID)"
proto=WPA
pairwise=TKIP
psk= (quoted text or hexadecimal number)
priority=1
}
(You may have a look at http://linux.die.net/man/5/wpa_supplicant.conf.) You also need to
install the package wpa_supplicant.
11.3.4.5
Drivers
There are roughly two different drivers:
1. hostap: supports WEP and WPA,
2. acx: supports WEP.
11.3.5 Firewall
Just like in every normal Linux distro, you may use the following trivial firewall:
iptables -P OUTPUT ACCEPT
iptables -P INPUT DROP
iptables -A INPUT -m state --state ESTABLISHED,RELATED -j ACCEPT
To make this happen on boot-up, you may create a script with these lines, put it into
/etc/init.d/firewall, and make soft links to the script from the rc3.d and rc5.d directories.
11.4 Errors You Could Encounter
It is possible that you encounter different errors, such as, in the console:
xxx: command not found.
In this case, please check that /sbin/ is in the environment variables. If it is not the case, simply
add it, or always use /sbin/ before each app, i.e.
/sbin/modprobe mymodule
or
/sbin/ifconfig myadapter
If you do not want to do this every time you want to use such a command, you may simply add
sbin to $PATH(it is actually only necessary if you are using a liveram disk):
PATH=$PATH:/sbin
export PATH
41
CHAPTER 12. GETTING MORE HELP
CHAPTER
12
Getting More Help
˚
he objective of this booklet was to provide an easy way to find fresh info about Angstr
om.
¨
It is particularly difficult to find recent info on such a subject when the community is not
really big. Fortunately, despite being a small community, users are active. The principal concepts
are evoked here, and feel free to send an e-mail to any contributor (and to me) if there are any
interesting things to say which could be nice to put here. That being said, there are other websites
which you can find any other info on. For example, one can find some interesting information
in [5]. There is also the principal http://www.angstrom-distribution.org/ website, and the
mailinglist (see http://www.angstrom-distribution.org/contact and http://lists.linuxtogo.
org/pipermail/angstrom-distro-users/ for this).
T
42
INDEX
INDEX
Index
.cpio.gz, 20
.exe, 20
.ext2, 20
.ext2.bz2, 20
.img, 20
.img.bz2, 20
.jffs2, 20
.summary.jffs2, 20
.tar.bz2, 20
.tar.gz, 20
x11-office-image, 19
x11-pilico-image, 19
zImage, 13, 14
base-image, 19
bootbundle, 14
bootmanager, 20
BugZilla, 26
console-image, 19
HaRET, 13, 14
i18n, 24
initramfs.cpio.gz, 13, 17
Initrd, see initramfs.cpio.gz
initrd, see initramfs.cpio.gz
kexecboot, 15
l19n, 24
LiveRam Disk, 10, 11, 20
Loopback image, 8
minimal-gpe-image, 19
Startup script, see startup.txt.bootimage
startup.txt.bootimage, 13, 14
x11-gpe-image, 19
x11-image, 19
43
BIBLIOGRAPHY
BIBLIOGRAPHY
Bibliography
[1] BitBake, BitBake (Example 4.7), 2010. http://bitbake.berlios.de/manual/ch04s02.html#
id870480.
[2] Y. Bushmelev, Picasa Albums Web – Jay. http://picasaweb.google.ru/yuri.bushmelev, 2009.
[3] C. Commons, Creative Commons – Attribution-Share Alike 3.0 Unported, 2009.
creativecommons.org/licenses/by-sa/3.0/.
[4]
http://
, Creative Commons Legal Code: BY-SA, 2009. http://creativecommons.org/licenses/
by-sa/3.0/legalcode.
˚
[5] LinuxToGo, Angstr¨
om Manual, 2009. http://www.linuxtogo.org/gowiki/AngstromManual.
[6]
, WinCeQuickInstall, 2009. http://linuxtogo.org/gowiki/WinCeQuickInstall.
[7] L. Merciadri, Using Linux on a Handheld Device: an Obstacle Course? 2009.
˚
˚
om — The Angstr¨
om Distribution, 2006.
[8] OpenEmbedded, Building Angstr¨
angstrom-distribution.org/building-angstrom.
[9]
http://www.
, OEandYourDistro - OpenEmbedded, 2010. http://wiki.openembedded.org/index.php/
OEandYourDistro.
[10] T. S. Press, Chapter 3 – How Linux Boots, 2004.
howlinuxworks_ch3.pdf.
http://nostarch.com/download/
I