1
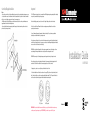
Controller/Display Installation
Notes:
• Be sure to keep controller out of direct sunlight and/or excessive heat for prolonged periods as damage may occur.
• Locate the unit in an area of the vehicle where it will not obstruct the driver’s operation of the vehicle and where it
will not pose a risk to driver or passenger in the event of an emergency stop.
• When Mounting the Controller/Display, ensure that all wires and cables are free of crimps and kinks and are not
trapped between the unit and the mounting surface.
• If your vehicle dashboard has an appropriate, available opening the enclosed mounting cradle can be used to
provide a flush, seamless positioning.
Important!
• This XM Receiver is designed to be use in automobiles with 12V battery and negative grounding. Before installing
in any vehicle, ensure that the battery voltage is proper.
• Before installing this system, be sure to disconnect the “negative” battery cable to avoid short circuits.
• Refer to the vehicle’s Owner’s Manual for details on connecting power amplifiers and other units before
proceeding to make connections.
• Secure all wiring with appropriate clamps and/or adhesive electrical tape. To protect wires, wrap adhesive
electrical tape around them where they contact any surface.
• Route and secure all wiring so it is free and clear of all moving parts such as gear shifts, pedals, hand brake and
seat rails. Keep all wiring free and clear of any areas prone to excessive heat. Damaged wiring (ruptured insulation)
can cause a short circuit if it contacts the vehicle body.
• DO NOT pass the yellow lead through a hole in the engine compartment to connect to the battery as this can
cause damage to the wiring and insulation and create the potential for a dangerous short circuit.
Installation Guide
• DO NOT shorten any leads. Shortening leads may prevent the proper functioning of the protection circuit.
• Never feed power to other units by stripping the insulation of the power supply lead and tapping into it with
another unit’s lead. This will exceed the units current capacity and cause the unit to overheat.
XM-RVR-FM-001
• If replacing a fuse, be sure to use only the fuse specified inside the fuse holder.
• If this unit is installed in a vehicle that does not have an Accessory (ACC) position on the ignition switch, the red
lead of the unit should be connected to a terminal coupled with ignition switch “On/Off” operations. Failure to do
so will cause the unit to drain battery power if left unattended for an extended period.
ACC position
No ACC position
!WARNING: Professional Installation Recommended. Failure to properly follow all installation instructions may
result in personal injury or damage to your XMCOMMANDER, your vehicle or your vehicle A/V system.
Distributed by
Package Contents
Controller
Relay Assembly
Remote Control
Cords/Cables
Antenna
Cradle
Receiver
Mounting Accessories
!CAUTION: Connect only appropriate input devices to the XMCOMMANDER device. Connecting an incorrect input device may damage the
system and/or the external electronic device. It is recommended that you use only the Power Adaptor that came with your
XMCOMMANDER kit.
Note: Wires and leads for this product may be different colors from those supplied with other manufacturer’s systems, even though they
serve the same function. When connecting this product to any other product, refer to the supplied Installation Manuals of both products
and connect only those wires or leads that have similar function.
Antenna Installation
Receiver Installation
Where to locate:
• Best reception is achieved with the antenna mounted on a flat portion of a metal vehicle roof with at least 12” x 12”
of surface area and a minimum of 6” from a window or sunroof.
• If the vehicle has roof racks or skid ribs, it may be necessary to mount the antenna off-center.
• If the vehicle roof does not provide sufficient metal surface area then the antenna can be mounted on the metal
trunk lid. It is recommended that it be mounted at least several inches from the rear window to ensure adequate
clearance.
• CAUTION: DO NOT INSTALL ANTENNA INSIDE VEHICLE PASSENGER COMPARTMENT. Mounting the antenna in the
passenger compartment either on the front dash board or on the rear window deck area of the vehicle will cause
reception issues and must be avoided.
• CAUTION: Mounting the antenna on a non-metallic surface will also result in severe degradation in reception.
• If an appropriate antenna mounting location cannot be identified contact your local retailer installation department
for additional guidance.
Notes:
• Locate the unit in an area of the vehicle where it will not obstruct the driver’s operation of the vehicle and where it
will not pose a risk to driver or passenger in the event of an emergency stop.
• When Mounting the Receiver, ensure that all wires and cables are free of crimps and kinks and are not trapped
between the unit and the mounting surface.
• Do not locate the unit in close proximity to the automobile heater or any heating vents.
• Locate the unit where it will remain shielded from rainwater.
• Before drilling any holes for mounting, be sure to check the surface behind the mounting surface to be sure it is
clear of obstruction and no critical automobile systems will be damaged such as break lines, electrical wiring, etc.
• Ensure that the unit is securely mounted and will not shift during vehicle motion.
• Before final installation of the unit, make all system connections temporarily and test the system for proper
functioning.
Cable routing:
• Once you have mounted the antenna in the correct location, plan how to route the cable from this location to the
receiver, avoiding blocked passages and any obstructions that could kink, crimp, twist or chafe the cable. If the cable
will come into contact with a rough metal opening, use a rubber grommet to prevent damage.
• For antenna mounting locations at the front or middle of the roof, the cable can be routed down along the door jam
and into the car. In some cars, the cable may be brought into the vehicle through the grommet in the door jam which
carries the power window and power lock wires. If the cable does not fit easily through this grommet, do not try to
force it through. Instead, route the cable under the weather seal near the bottom of the door.
• For antenna mounting locations at the rear of the roof, the antenna cable can be routed into the vehicle through the
trunk. Always route the cable under the weather seal near the lowest part of the trunk to reduce possible water leaks.
• Use pre-existing wiring channels created by the vehicle manufacturer whenever possible.
Tools Required:
• The antenna contains a powerful magnet that will secure it to a metal roof under normal driving conditions. No
additional tools should be necessary to mount the antenna.
!WARNING: Use only the parts supplied with this unit for installation. Use of other components may cause system
malfunction and may void the product warranty.