1
Gas Range
rtant
Safety
instructions
.. 1 =4
_ing ..........................
Oven
ng Procedures
5=7
8=9
coting
............................
lg .....................
10
11=12
Oven Cooking
..........................
13=21
Manual Clean Oven controls
Clock
Baking
Timer
Broiling
Manual Clean Oven Knob Control
Baking
Broiling
Self=Clean Oven Controls
Clock
Delay Bake
Timer
Keep Warm
Baking
Broiling
Cook & Hold Oven Racks
;e Controls
Warranty
Guide
& Service
Part No. 8113P560-60
Rev. 1
22
....................
23
de I'utilisateur
Guia del usuario
Form No. C/03/06
.......................
@2006 Maytag
Appliances
............................ 48
Sales Co.
Lithe U.S.A.
any part of your appliance unless it is specifically recommended in this guide. All other servicing should be
referred to a qualified servicer. Have the installer show
you the location of the gas shut off valve and howto
shut it off in an emergency.
Always disconnect power to appliance before servicing.
Importent
Sefety
Instructions
Warning and Important Safety Instructions
appearing in
this guide are not meant to cover all possible conditions
and situations that may occur. Common sense, caution,
and care must be exercised when installing, maintaining,
or operating the appliance.
Always contact the manufacturer about problems or
conditions you do not understand.
Recognize
Safety Symbols, Words, Labels
General
Read and follow all instructions before using this
appliance to prevent the potential risk of fire, electric
shock, personal injury or damage to the appliance as a
result of improper usage of the appliance. Use appliance
only for its intended purpose as described in this guide.
To ensure proper and safe operation: Appliance must
be properly installed and grounded by a qualified technician. Do not attempt to adjust, repair, service, or replace
instructions
Tocheckif deviceis properlyinstalled,lookunderneath
rangewith a flashlightto makesureoneofthe rear
levelinglegsis properlyengagedinthe bracketslot.The
anti-tipdevicesecuresthe rearlevelinglegto the floor
when properlyengaged.Youshouldcheckthis anytime
the rangehasbeenmoved.
Child Safety
To Prevent Fire or Smoke
NEVER leave children alone or unsupervised
appliance when it is in use or is still hot.
Damage
near the
Be sure all packing materials are removed from the
appliance
before operating
NEVER allow children to sit or stand on any part of the
appliance as they could be injured or burned.
it.
Keep area around appliance clear and free from combustible materials, gasoline, and other flammable vapors
and materials.
Children must be taught that the appliance and utensils
in it can be hot. Let hot utensils cool in a safe place, out
of reach of small children. Children should be taught
If appliance is installed near a window, proper precautions should be taken to prevent curtains from blowing
over burners.
that an appliance is not a toy. Children should not be
allowed to play with controls or other parts of the unit.
NEVER leave any items on the cooktop. The hot air from
About Your Appliance
the vent may ignite flammable items and may increase
pressure in closed containers which may cause them to
burst.
Many aerosol-type spray cans are EXPLOSIVE when
exposed to heat and may be highly flammable. Avoid
their use or storage near an appliance.
Many plastics are vulnerable to heat. Keep plastics away
from parts of the appliance that may become warm or
hot. Do not leave plastic items on the cooktop as they
may melt or soften if left too close to the vent or a
lighted surface burner.
To eliminate the hazard of reaching over hot surface
burners, cabinet storage should not be provided directly
above a unit. If storage is provided, it should be limited
to items which are used infrequently and which are
safely stored in an area subjected to heat from an
appliance. Temperatures may be unsafe for some items,
such as volatile liquids, cleaners or aerosol sprays.
In Case of Fire
The oven vent is located at the base of the backguard.
Turn off appliance and ventilating hood to avoid spreading the flame. Extinguish flame then turn on hood to
remove smoke and odor.
Avoid touching oven vent area while oven is on and for
several minutes after oven is turned off. Some parts of
the vent and surrounding area become hot enough to
cause burns. After oven is turned off, do not touch the
oven vent or surrounding areas until they have had
sufficient time to cool.
• Cooktop: Smother fire or flame in a pan with a lid or
cookie sheet.
NEVER pick up or move a flaming pan.
• Oven: Smother fire or flame by closing the oven door.
Do not use water on grease fires. Use baking soda, a dry
chemical or foam-type extinguisher to smother fire or
flame.
2
Other potentially hot surfaces include cooktop, areas
facing the cooktop, oven vent, surface near the vent
opening, oven door, area around the oven door and
oven window.
Always place oven racks in the desired positions while
oven is cool. Slide oven rack out to add or remove food,
using dry, sturdy potholders. Always avoid reaching into
the oven to add or remove food. If a rack must be
moved while hot, use a dry potholder. Always turn the
Do not touch a hot oven light bulb with a damp cloth as
the bulb could break. Should the bulb break, disconnect
power to the appliance before removing bulb to avoid
electrical shock.
oven off at the end of cooking.
Use racks only in the oven in which they were shipped/
purchased.
Do not use the cooktop or ovens as a storage area for
food or cooking utensils.
Use care when opening the oven door. Let hot air or
steam escape before moving or replacing food.
PREPARED FOOD WARNING:
Cooking
Safety
Follow food
manufacturer's
instructions. If a plastic frozen food
container and/or its cover distorts, warps, or is otherwise
damaged during cooking, immediately discard the food
and its container. The food could be contaminated.
Always place a pan on a surface burner before turning it
on. Be sure you know which knob controls which
surface burner. Make sure the correct burner is turned
NEVER use aluminum foil to cover oven racks or oven
on and that the burner has ignited. When cooking is
completed, turn burner off before removing pan to
prevent exposure to burner flame.
bottom. This could result in risk of electric shock, fire, or
damage to the appliance. Use foil only as directed in this
guide.
Always adjust surface burner flame so that it does not
extend beyond the bottom edge of the pan. An
excessive flame is hazardous, wastes energy and may
damage the appliance, pan or cabinets above the
appliance.
Utensil Safety
Use pans with flat bottoms and handles that are easily
grasped and stay cool. Avoid using unstable, warped,
easily tipped or loose-handled pans. Also avoid using
pans, especially small pans, with heavy handles as they
could be unstable and easily tip. Pans that are heavy to
move when filled with food may also be hazardous.
NEVER leave a surface cooking operation unattended
especially when using a high heat setting or when deep
fat frying. Boilovers cause smoking and greasy spillovers
may ignite. Clean up greasy spills as soon as possible.
Do not use high heat for extended cooking operations.
Be sure utensil is large enough to properly contain food
and avoid boilovers. Pan size is particularly important in
deep fat frying. Be sure pan will accommodate the
volume of food that is to be added as well as the bubble
action of fat.
NEVER heat an unopened container on the surface
burner or in the oven. Pressure build-up may cause
container to burst resulting in serious personal injury or
damage to the appliance.
Use dry, sturdy potholders. Damp potholders may cause
burns from steam. Dish towels or other substitutes
To minimize burns, ignition of flammable materials and
spillage due to unintentional contact with the utensil, do
not extend handles over adjacent surface burners.
Always turn pan handles toward the side or back of the
appliance, not out into the room where they are easily
hit or reached by small children.
should never be used as potholders because they can
trail across hot surface burners and ignite or get caught
on appliance parts.
Always let quantities of hot fat used for deep fat frying
cool before attempting to move or handle.
Never let a pan boil dry as this could damage the utensil
and the appliance.
Do not let cooking grease or other flammable materials
accumulate in or near the appliance, hood or vent fan.
Clean hood frequently to prevent grease from
accumulating on hood or filter. When flaming foods
under the hood turn the fan on.
Follow the manufacturer's
cooking bags.
directions when using oven
Only certain types of glass, glass/ceramic, ceramic or
glazed utensils are suitable for cooktop or oven usage
without breaking due to the sudden change in
temperature. Follow manufacturer's instructions when
using glass.
NEVER wear garments made of flammable material or
loose fitting or long-sleeved apparel while cooking.
Clothing may ignite or catch utensil handles.
3
This appliance has been tested for safe performance
using conventional cookware. Do not use any devices or
accessories that are not specifically recommended in
this guide. Do not use eyelid covers for the surface
units, stovetop grills, or add-on oven convection
important
and Warning
The California Safe Drinking Water and Toxic
Enforcement Act of 1986 (Proposition 65] requires the
Governor of California to publish a list of substances
known to the State of California to cause cancer or
systems. The use of devices or accessories that are not
expressly recommended in this manual can create
serious safety hazards, result in performance problems,
and reduce the life of the components of the appliance.
Cleaning
reproductive harm, and requires businesses to warn
customers of potential exposures to such substances.
Users of this appliance are hereby warned that the
burning of gas can result in low-level exposure to some
of the listed substances, including benzene,
Safety
Turn off all controls and wait for appliance parts to cool
before touching or cleaning them. Do not touch the
burner grates or surrounding areas until they have had
sufficient time to cool.
formaldehyde and soot, due primarily to the incomplete
combustion of natural gas or liquid petroleum [LP] fuels.
Properly adjusted burners will minimize incomplete
combustion. Exposure to these substances can also be
minimized by properly venting the burners to the
outdoors.
Clean appliance with caution. Use care to avoid steam
burns if a wet sponge or cloth is used to wipe spills on a
hot surface. Some cleaners can produce noxious fumes
if applied to a hot surface.
Self-Clean
Safety Notice
Users of this appliance are hereby warned that when
the oven is engaged in the self-clean cycle, there may
be some low-level exposure to some of the listed
Oven (select models]
substances, including carbon monoxide. Exposure to
these substances can be minimized by properly venting
the oven to the outdoors by opening the windows and/
or door in the room where the appliance is located
during the self-clean cycle.
IMPORTANT
NOTICE REGARDING
PET BIRDS:
Never keep pet birds in the kitchen or in rooms where
the fumes from the kitchen could reach. Birds have a
Clean only parts listed in this guide. Do not clean door
gasket. The door gasket is essential for a good seal.
Care should be taken not to rub, damage, or move the
gasket. Do not use oven cleaners of any kind in or
around any part of the self-clean oven.
very sensitive respiratory system. Fumes released during
an oven self-cleaning cycle may be harmful or fatal to
birds. Fumes released due to overheated cooking oil, fat,
margarine and overheated non-stick cookware may be
equally harmful.
Before self-cleaning the oven, remove broiler pan, oven
racks and other utensils and wipe up excessive
spillovers to prevent excessive smoke, flare-ups or
flaming.
It is normal for the cooktop of the range to become hot
during a self-clean cycle. Therefore, touching the
cooktop during a clean cycle should be avoided.
Save These instructions
4
for Future Reference
Cleantn l
Self-Clean
6. Wipe up sugary and acidic spillovers such as sweet
potatoes, tomato, or milk-based sauces. Porcelain enamel
is acid-resistant, not acid-proof. The porcelain finish may
discolor if acidic spills are not wiped up before a
self-clean cycle.
Oven (select models)
Note: For manual clean oven, see page 13.
i
To set Self=Clean:
Note: Oven temperature must be below 400° F to program
a clean cycle.
1. Close the oven door.
2. Move door lock lever right to the locked position.
3. Press the CLEAN pad.
The self-clean cycle uses above-normal cooking temperatures
to automatically clean the oven interior. Do not force the oven
door or lock lever open. This may result in exposure to high
temperatures and be a burn hazard.
CLEAN
• CLEAN flashes in the display.
If the door is not closed, beeps will sound and DOOR will
display. If the door is not closed within 45 seconds, the
self-cleaning operation will be canceled and the display
will return to the time of day.
It is normal for flare-ups, smoking, or flaming to occur during
cleaning if the oven is heavily soiled. It is better to clean the
oven regularly rather than to wait until there is a heavy buildup of soil in the oven.
4. Press the A or V pad.
• CL-M (Clean - Medium Soil) is displayed.
During the cleaning process, the kitchen should be well
ventilated to get rid of normal odors associated with cleaning.
5. Press the A or V pad to scroll through the
self-cleaning settings.
V
CL-H (Clean - Heavy Soil, 4 hours)
Before
Self=Cleaning
CL-M (Clean - Medium Soil, 3 hours)
1. Turn off the oven light before cleaning. The light may burn
out during the clean cycle.
CL-L (Clean - Light Soil, 2 hours)
Choosing the soil level of the oven automatically programs
the self-cleaning time.
2. Remove broiler pan, all pans, and oven racks from the
oven. The oven racks will discolor and may not slide easily
after a self-clean cycle if they are not removed.
6. After four seconds, the oven will start cleaning.
3. Clean oven frame, door frame, area outside of gasket, and
around the opening in the door gasket with a nonabrasive
cleaner such as Bon Ami* or detergent and water. The
self-cleaning process does not clean these areas. They
should be cleaned to prevent soil
from baking on during the clean
cycle. 0-he gasket is the seal
around the oven door and window.)
• The cleaning time will start counting down in the display.
• LOCK will appear in the display.
• CLEAN will appear in the display.
To Delay a Self=Clean
Cycle:
DELAY
1. Press the DELAY pad......
• DELAY flashes.
4. To prevent damage, do not clean or
rub the gasket around the oven
door. The gasket is designed to
seal in heat during the clean cycle.
• 00:00 will appear in the display.
2. Press the A or V pad to set the amount of time you want
to delay the cycle. Delay time can be set from ten minutes
(00:101to 11 hours, 59 minutes (11:591.
5. Wipe up excess grease or spillovers from the oven bottom.
This prevents excessive smoking, flare-ups or flaming
during the clean cycle.
3. Press the CLEAN pad.
• CLEAN will flash.
..........
CLEAN
.......
cont.
* Brand names for cleaning products are registered trademarks of the respective manufacturers.
5
After Self=Cleaning
4. Press the A or V pad.
• CL-M (Clean - Medium Soil) is displayed.
A
About one hour after the end of the self-clean cycle, LOCK
will turn off. The door can then be opened. Move door lock
lever to the left to unlock.
V
Some soil may leave a light gray, powdery ash. Remove
it with a damp cloth. If soil remains after wiping, that means
the clean cycle was not long enough. The soil will be
removed during the next clean cycle.
5. Press the A or V pad to scroll through the
self-cleaning settings.
CL-H (Clean - Heavy Soil, 4 hours]
CL-M (Clean - Medium Soil, 3 hours]
CL-L (Clean - Light Soil, 2 hours]
If oven racks were left in the oven and do not slide
smoothly after a clean cycle, wipe racks and rack supports
with a small amount of vegetable oil to make them easier to
move.
Choosing the soil level of the oven automatically programs
the self-cleaning time.
6. After four seconds, CLEAN, DELAY and LOCK will appear
in the display to show that the oven is set for a delayed
clean operation. The delay time is displayed.
Fine lines may appear in the porcelain because it went
through heating and cooling. This is normal and will not
affect performance.
A white discoloration may appear after cleaning if acidic
or sugary foods were not wiped up before the self=clean
cycle. This discoloration is normal and will not affect
performance.
If the oven has already been set for a clean
cycle and you wish to set a delay:
1. Press the DELAY pad.
Notes:
DELAY
• 00:00 will appear in the display.
° If the oven door is left open, DOOR will flash in the
display and a signal will beep until the door is closed
and the CLEAN pad is pressed again.
Press the A or V pad to set the amount of time
you want to delay the cycle.
• The oven door will be damaged if the oven door is
forced to open when LOCK is still displayed.
• DELAY flashes.
..........
After four seconds, CLEAN, DELAY and LOCK will appear
in the display to show that the oven is set for a delayed
clean operation. The delay time is displayed.
When the Self=Clean
Cleaning Procedures
cycle starts:
• DELAY will turn off.
• The clean time will appear in the display.
To cancel
the Self=Clean cycle:
Press the CANCEL pad.
• All words disappear from the display.
° All functions are canceled.
° The time of day appears in the display.
During
the Self=Clean
Broiler Pan and insert
Never cover insert with aluminum foil as this prevents the
fat from draining to the pan below.
• Place soapy cloth over insert and pan; let soak to loosen soil.
• Wash in warm soapy water. Use scouring pad to remove
stubborn soil.
° Broiler pan and insert can be cleaned in dishwasher.
Cycle
When LOCK shows in the display, the door cannot be opened.
To prevent damage to the door, do not force the door open
when LOCK is displayed.
Smoke and Smells
Surface Burners = Conventional = Sealed
• Clean frequently. Allow burner to cool. Clean with soap and
plastic scouring pad. For stubborn soils, use a non-abrasive
cleaner and a cloth. Try to prevent the cleaner from seeping
into the gas ports as this will affect the flame. If the cleaner
does enter the ports, clean with a soft bristle brush or a
straight pin especially the port below the ignitor. Do not
enlarge or distort holes.
° Be careful not to get water into burner ports.
• Use care when cleaning the ignitor.If the ignitor is wet or
damaged the surface burner will not light.
• Conventional Burners: Dry burners in the oven set at 170° F.
You may see some smoke and smell an odor the first few
times the oven is cleaned. This is normal and will lessen in
time.
Smoke may also occur if the oven is heavily soiled or if a
broiler pan was left in the oven.
Sounds
As the oven heats, you may hear sounds of metal parts
expanding and contracting. This is normal and will not
damage the oven.
6
BurnerBox= Conventional Burners Only
The burner box is located under the lift-up cooktop. Clean
frequently to remove spillovers. If soil is allowed to accumulate, it may damage the finish.
• Remove grates and surface burners. Raise lift-up top.
• Clean with soap and water, rinse and dry.
• For stubborn soils, use mildly abrasive cleaning agents such
as baking soda/water paste or Bon Ami*, and a nonabrasive plastic scrubbing pad.
Door Handles - Painted Enamel, Oven Window and
Door = Glass (select models)
• Avoid using excessive amounts of water which may seep
under or behind glass causing staining.
• Wash with soap and water. Rinse with clear water and dry.
Glass cleaner can be used if sprayed on a cloth first.
• Do not use abrasive materials such as scouring pads, steel
wool or powdered cleaners as they will scratch glass.
Oven Interior
Self=Clean:
• Follow instructions on page 15 to set a self-clean cycle.
Nlanual Clean:
• Clean frequently using mild abrasive cleaners and a plastic
pad.
• Do not use metallic scouring pads because they will scratch
the surface.
• When using commercial oven cleaners follow the
manufacturer's instructions.
• Wipe up acidic spills (tomato or milk based foods) as soon
as possible with soap and water. If the spill is not wiped up,
it may discolor the porcelain. To make cleaning easier,
remove the oven door, if desired. (See Maintenance
section on page 8.)
Burner Grates
• Wash grates with warm, soapy water and a nonabrasive,
plastic scrubbing pad. For stubborn soils, clean with a soapfilled, nonabrasive pad or a sponge and Cooktop Cleaning
Creme (Part #20000001).**
• For burned on soils, remove grates, place on newspapers
and carefully spray with commercial oven cleaner. (Do not
spray surrounding surfaces.) Place in plastic bags for several
hours or overnight. Wearing rubber gloves, remove from
bags. Wash, rinse, dry and replace on cooktop.
Clock and Control Pad Area
• To activate "Control Lock" for cleaning, see page 16.
° Wipe with a damp cloth and dry. Do not use abrasive
cleaning agents as they may scratch the finish.
• Glass cleaners may be used if sprayed on a cloth first. DO
NOT spray directly on control pad and display area.
Oven Racks
• Clean with soapy water.
• Remove stubborn soil with cleansing powder or soap-filled
scouring pad. Rinse and dry.
• Racks will permanently discolor and may not slide out
smoothly if left in the oven during a self-clean operation. If
this occurs, wipe the rack and embossed rack supports with
a small amount of vegetable oil to restore ease of
movement, then wipe off excess oil.
Control Knobs
• Remove knobs in the OFF position by pulling forward.
• Wash, rinse and dry. Do not use abrasive cleaning agents as
they may scratch the finish.
• Turn on each burner to be sure the knobs have been
correctly replaced.
Cooktop and Control Panel - Porcelain Enamel
Porcelain enamel is glass fused on metal and may crack or
chip with misuse. It is acid resistant, not acid proof.
All spillovers, especially acidic or sugary spillovers, should
be wiped up immediately with a dry cloth.
• When cool, wash with soapy water, rinse and dry.
• Never wipe off a warm or hot surface with a damp cloth.
This may cause cracking or chipping.
• Never use oven cleaners, abrasive or caustic cleaning
agents on exterior finish of range.
Stainless Steel (select models)
• DO NOT USE ANY CLEANING PRODUCT CONTAINING
CHLORINE BLEACH.
• DO NOT USEABRASIVE OR ORANGE CLEANERS.
• ALWAYS WIPE WITH THE GRAIN WHEN CLEANING.
• Daily Cleaning/Light Soil -- Wipe with one of the
following - soapy water, white vinegar/water solution,
Formula 409 Glass and Surface Cleaner* or a similar glass
cleaner - using a sponge or soft cloth. Rinse and dry. To
polish and help prevent fingerprints, follow with Stainless
Steel Magic Spray* (Part No. 20000008)**.
• Nloderate/Heavy Soil -- Wipe with one of the following Bon Ami, Smart Cleanser, or Soft Scrub* - using a damp
sponge or soft cloth. Rinse and dry. Stubborn soils may be
removed with a damp multi-purpose Scotch-Brite* pad; rub
evenly with the grain. Rinse and dry. To restore luster and
remove streaks, follow with Stainless Steel Magic Spray*.
• Discoloration -- Using a damp sponge or soft cloth, wipe
with Cameo Stainless Steel Cleaner*. Rinse immediately and
dry. To remove streaks and restore luster, follow with
Stainless Steel Magic Spray*.
Side Panels, Storage Drawer, Oven Door (select
models), Lower Broiler Door (select models)
• When cool, wash with warm soapy water, rinse and dry.
Never wipe a warm or hot surface with a damp cloth as this
may damage the surface and may cause a steam burn.
• For stubborn soil, use mildly abrasive cleaning agents such
as baking soda paste or Bon Ami*. Do not use abrasive
cleaners such as steel wool pads or oven cleaners. These
products will scratch or permanently damage the surface.
Note: Use a dry towel or cloth to wipe up spills,
especially acidic or sugary spills. Surface may and
discolor or dull if soil is not immediately removed. This
is especially important for white surfaces.
* Brand names are registered trademarks of the respective
manufacturers.
** To order call 1-877-232-6771 USA and 1-800-688-8408
Canada.
7
Melntenence
Oven Door
Leveling Legs
The range should be leveled when installed. If
the range is not level, turn the plastic leveling
legs, located at each corner of the range, until
range is level.
I_/](_
]1[LI ,I
/J_,_
_:_/
To remove:
\
1. When cool, open the oven door to
the first stop position (opened
about four inches).
LEVELING
LEG
Oven Light (selectmodels)
2. Grasp door at each side. Do not
use the door handle to lift door.
3. Lift up evenly until door clears
hinge arms.
To replace:
1. Grasp door at each side.
2. Align slots in the door with the hinge arms on the range.
3. Slide the door down onto the hinge arms until the door is
completely seated on the hinges. Push down on the top
corners of the door to completely seat door on hinges.
Door should not appear crooked.
To Replace Oven Light Bulb:
1. When oven iscool, hold bulb cover (if equipped) in place, then
slide wire retainer off cover.
when
is closed.
Thison
is anormal
and will
decrease
with use.
Note: itThe
oven door
new range
may
feel "spongy"
Oven
Window
Note: Bulb cover will fall if not held in place while removing
wire retainer.
(select models)
2. Remove bulb cover and light bulb.
BULB
COVER
3. Replace with a 40-watt appliance bulb.
To protect the oven door window:
1. Do not use abrasive cleaning agents such as steel wool
scouring pads or powdered cleansers as they may scratch
the glass.
4. Replace bulb cover and secure with wire retainer.
5. Reconnect power to range.
Reset clock.
2. Do not hit the glass with pots, pans, furniture, toys, or other
objects.
3. Do not close the oven door until the oven racks are in
place.
Scratching, hitting, jarring or stressing the glass may weaken
its structure causing an increased risk of breakage at a later
date.
8
RETAINER
1
Electrical Connection
Storage
Drawer
(select models:)
Appliances which require electrical
power are equipped with a three=
prong grounding plug which must be
plugged directly into a properly grounded
three-hole 120 volt electrical outlet.
Always disconnect power to appliance before servicing.
The three-prong grounding plug offers protection against
shock hazards. DO NOT CUT OR REMOVE THE THIRD
GROUNDING PRONG FROM THE POWER CORD PLUG.
If an ungrounded, two-hole or other type electrical outlet is
encountered, it is the personal responsibility of the
appliance owner to have the outlet replaced with a
properly grounded three-hole electrical outlet.
The storage drawer can be removed to allow you to clean
under the range.
To remove:
1. Empty drawer and pull out to the first stop position.
2. Lift up the front of the drawer.
3. Pull out to the second stop position.
4. Grasp sides and lift drawer up and out.
To replace:
Removal of Gas Appliance
Gas appliance connectors used to connect this appliance to
the gas supply are not designed for continuous movement.
Once installed, DO NOT repeatedly move this gas appliance
for cleaning or to relocate. If this appliance has to be moved
and/or removed for servicing, follow the procedure described
in the installation instructions. For information, contact
Customer Assistance at 1-800-688-1120 USA and Canada.
To prevent range from accidentally tipping, range must be
secured to the floor by sliding rear leveling leg into the antitip bracket.
Conventional
(select
Surface
Burners
models)
Under no circumstances are the surface burner assemblies to
be taken apart for cleaning. The surface burner assembly can
be removed to clean the burner box area.
Freestanding
range only:
The two surface burner assemblies are secured in place
during transportation with screws. Once the range is installed,
these screws may be removed to allow quick and easy
removal of the burner assemblies.
To remove:
Allow the burner assembly to cool. Lift up cooktop. Grasp the
burner assembly and rotate it slightly toward the left to
release the two tabs on the assembly. Then lift the assembly
and pull toward the back of the cooktop until the air shutter
ends on the assembly release from the valves.
To replace:
Insert the air shutter ends on the burner assembly over the
valves and lower the assembly into place. Be sure to secure
the two tabs on the burner assembly into the two slots on the
burner support bracket which is mounted to the burner
bottom. (NOTE: If the tabs are not properly inserted into the
slots, the assembly may rock and the burners may not light
properly.)
1. Fit the ends of the drawer glides into the rails in the range.
2. Lift up the front of the drawer and gently push in to the
first stop position.
3. Lift drawer up again and push until drawer is closed.
Oven Bottom
Protect oven bottom against spillovers, especially acidic or
sugary spills, as they may discolor the porcelain enamel. Use
the correct pan size to avoid spillovers and boilovers.
froubleshootln
For most concerns, try these first.
• Check if oven controls have been properly set.
• Check to be sure plug is securely inserted into receptacle.
• Check or re-set circuit breaker. Check or replace fuse.
• Check power supply.
Oven did not self=clean properly (select models).
• Longer cleaning time may be needed.
• Excessive spillovers, especially sugary and/or acidic foods,
were not removed prior to the self-clean cycle.
Oven door will not unlock after self=clean cycle
(select models).
• Oven interior is still hot. Allow about one hour for the oven
to cool after the completion of a self-clean cycle. The door
can be opened when "LOCK" is not displayed.
• The control and door may be locked. See pages 5 and 16 to
unlock.
Surface burner fails to light.
• Check to be sure unit is properly connected to power supply.
• Check for a blown circuit fuse or a tripped main circuit
breaker.
• Check to be sure ignitor is dry and clicking. Burner will not
light if ignitor is damaged, soiled or wet. If ignitor doesn't
click, turn control knob OFF.
Moisture collects on oven window or steam comes
from oven vent.
• This is normal when cooking foods high in moisture.
• Excessive moisture was used when cleaning the window.
The flame is uneven.
• Burner ports may be clogged.
Surface burner flame lifts off ports.
• Check to be sure a pan is sitting on the grate above.
There is a strong odor or light smoke when oven is
turned on.
• This is normal for a new range and will disappear after a few
uses. Initiating a clean cycle will "burn off" the odors more
quickly.
• Turning on a ventilation fan will help remove the smoke
and/or odor.
• Excessive food soils on the oven bottom. Use a self-clean
cycle.
Baking results are not as expected or differ from
previous oven.
• Check the oven temperature selected. Make sure oven is
preheated when recipe or directions recommend preheat.
• Make sure the oven vent has not been blocked. See page 20
for location.
• Check to make sure range is level.
•Temperatures often vary between a new oven and an old
one. As ovens age, the oven temperature often "drifts" and
may become hotter or cooler. See page 19 for instructions on
adjusting the oven temperature (select models). NOTE: It is
not recommended to adjust the temperature if only one or
two recipes are in question.
• Use correct pan. Dark pans produce dark browning. Shiny
pans produce light browning.
• Check rack positions and pan placement. Stagger pans
when using two racks. Allow 1-2 inches between pans and
oven wall.
• Check the use of foil in the oven. Never use foil to cover an
entire oven rack. Place a small piece of foil on the rack below
the pan to catch spillovers.
Fault Codes (select models)
• BAKE or LOCK may flash rapidly in the display to alert you if
there is an error or a problem. If BAKE or LOCK appear in
the display, press the Cancel pad. If BAKE or LOCK continue
to flash, disconnect power to the appliance. Wait a few
minutes, and then reconnect power. If the flashing still
continues, disconnect power to the appliance and call an
authorized servicer.
• If the oven is heavily soiled, excessive fiareups may result in
a fault code during cleaning. Press the CANCEL pad and
allow the oven to cool completely, wipe out excess soil, then
reset the clean cycle. If the fault code reappears, contact an
authorized servicer.
Food is not broiling properly or smokes excessively.
• Check oven rack positions. Food may be too close to flame.
•Aluminum foil was incorrectly used. Never line the broiler
insert with foil.
•Trim excess fat from meat before broiling.
•A soiled broiler pan was used.
• Preheat oven for 2-3 minutes before placing food in the
oven.
• Broil with the oven door closed.
Noises may be heard.
• The oven makes several low level noises. You may hear the
oven relays as they go on and off. This is normal.
• As the oven heats and cools, you may hear sounds of metal
parts expanding and contracting. This is normal and will not
damage your appliance.
There are no beeps and no display.
• Control may be in Sabbath Mode. See page 18.
"SAb" flashing and then displayed continuously.
• Oven is in Sabbath Mode. To cancel, press and hold the
Clock pad for five seconds.
Oven will not self=clean (select models).
• Check to make sure the cycle is not set for a delayed start.
See pages 15.
• Check if door is closed.
• Check if control is in Sabbath Mode. See page 18.
• Oven may be over 400° F. Oven temperature must be below
400° F to program a clean cycle.
10
Suffece
¢ooktn9
Low: Food maintains a temperature
above 140° F without continuing to
cook. Food is heated on a higher
flame size until it reaches this
temperature and then the flame
size is reduced. Some cooking may
take place on the Low setting if the
pan is covered.
When the range is first installed, the standing pilots may be
difficult to light due to air in the gas line. To bleed off air from
the line, hold a lighted match next to the burner and turn the
knob on. When the burner lights, turn the knob off and
proceed as directed below.
Meal: An intermediate flame size is
used to continue cooking. Food will not
cook any faster when a higher flame
setting is used than needed to maintain a
gentle boil. Water boils at the same
temperature whether boiling gently or
vigorously.
Raise the cooktop and hold a
lighted match near the pilot
ports (See illustration). There
are two pilot ports, one on the
right side and one on the left
side.
Pilot Ignition
(:selectmodels:)
To light pilot:
Conventional
Gas Burner
High: Use to bring liquid to a boil, or reach pressure in a
pressure cooker. Always reduce setting to a lower heat when
liquids begin to boil or foods begin to cook.
Surface Control Knobs
Surface
Controls
Use to turn on the surface burners. An infinite choice of heat
settings is available from Low to High. At the High setting a
detent or notch may be felt. The knobs can be set on or
between any of the settings.
Graphics next to the knob identify which burner the knob
controls. For example, the graphic at left shows the left front
burner location.
CO
•
0
Setting
the controls:
The size and type of cookware will affect the heat
setting.
1. Place a pan on the burner grate.
• The burner flame may lift off or appear separated from
the port if a pan is not placed on the grate.
Pilotless
Ignition
2. Push in and turn the knob counterclockwise to the Lite
setting.
(:selectmodels:)
Pilotless ignition eliminates the need for a constant standing
pilot light. Each sealed burner has a spark ignitor.There are
two ignitors for conventional surface burners. When cleaning
around the surface burner use care. If cleaning cloth should
catch the ignitor, it could be damaged, preventing ignition.
If the surface burner does not
light, check if ignitor is
_-_F_HEAD
broken, soiled or wet. If
A/
clogged, clean the
/ _,
small port beneath
(- _
the ignitor
PORTS
__j
using a
_,
straight
pin.
• A clicking (spark:) sound will be heard and the burner
will light. (All ignitors will spark when any surface
burner knob is turned to the Lite position.)
3. After the burner lights, turn knob to desired flame size.
• The ignitor will continue to spark until the knob is
turned past the Lite position.
_
,_ X
_2_,_ )" -1
"//_
_'_
IGNITOR
PORT BELOW IGNITOR
11
Operating During a
Power Failure
High Performance
(select
models)
Burner
(12,000 BTU_)
There is one high speed burner on your range, located in the
right front position. This burner offers higher speed cooking
that can be used to quickly bring water to a boil and for largequantity cooking.
Simmer
1. Hold a lighted match to the desired surface burner head.
Burner
(select models)
This burner is located in the left rear position. The simmer
burner offers a lower BTU_ flame for delicate sauces or
melting chocolate.
2. Push in and turn the control knob slowly to Lite.
3. Once lit, adjust the flame to the desired level.
* BTU ratings will vary when using LP gas,
Cooktop
Burner Grates
To prevent the cooktop from discoloring
or
The grates must be properly positioned before
cooking. Improper installation of the grates may
result in chipping of the cooktop.
staining:
• Clean cooktop after each use.
Be not operate the burners without a pan on
the grate. The grate's porcelain finish may chip
without a pan to absorb the heat from the
burner flame.
• Wipe acidic or sugary spills as soon as the cooktop has
cooled as these spills may discolor the porcelain.
Sealed Burners
Although the burner grates are durable, they will gradually
lose their shine and/or discolor, due to the high temperatures
of the gas flame.
The sealed burners of your range are secured to the cooktop
and are not designed to be removed. Since the burners are
sealed into the cooktop, boilovers or spills will not seep
underneath the cooktop.
NOteS:
" A properly adjusted burner with clean ports will light
within a few seconds. If using natural gas, the flame
will be blue with a deeper blue inner cone.
after each use. (See page 6 for cleaning
_
directions.)
Unlike a range with standard gas burners,
_ However,
this cooktop
does not
lift-upbenor
is it
the burner
should
cleaned
removable. Do not attempt to lift the
cooktop for any reason.
Conventional
If the burner flame is yellow or is noisy, the air/gas
mixture may be incorrect. Contact a service technician
to adjust. (Adjustments are not covered by the warranty.)
With LP gas, slight yellow tips on the flames are
acceptable. This is normal and adjustment is not
Burners
necessary.
Freestanding ranges with conventional gas burners feature a
lift-up cooktop.
" With some types of gas, you may hear a "popping"
sound when the surface burner is turned off. This is a
normal operating sound of the burner.
To raise the cooktop:
When cool, grasp the front edge
of the cook-top and gently lift up
until the two support rods, if
equipped, at the front of the
cooktop snap into place,
• If the control knob is turned very quickly from High to
Low, the flame may go out, particularly if the burner is
cold. If this occurs, turn the knob to the OFF position,
wait several seconds and relight the burner.
iI
i
I
i
" The flame should be adjusted so it does not extend
beyond the edge of the pan.
To lower:
Hold the front edge of the cooktop and carefully push back
on each support rod, if equipped, to release the notched
support. Then gently lower the top into place. The support
rods will slide into the cooktop frame.
12
• Two short beeps signal the end of the operation. "0:00"
will appear in the display.
Manual Clean Oven Control
(:select models:)
If desired, press the CLOCK pad and the time of day will
briefly reappear in the display during a timing operation.
BAKE
Use for baking and roasting.
BROIL
Use for broiling and top browning.
TIMER
Sets timer.
If desired, press the BAKE or BROIL pads and the
current temperature setting will briefly reappear in the
display during a timing operation.
CLOCK
Use to set time-of-day clock.
To cancel the timer operation:
CANCEL
Cancels all operations except timer
and clock.
Press and hold the TIMER pad for several seconds.
A (More) or
T (Less)
Enters or changes time, oven
temperature. Sets HI or LO broil.
Setting the Controls For Baking
1. Press BAKE pad.
° 000 will light and the Bake indicator light
will flash in the display.
Using the Touchpads
• Press the A or V pad to enter time or temperature.
2. Press the A or V pad until the desired oven temperature is
displayed.
• A beep will sound each time a function pad is pressed. There
is no beep for the A or V pad.
° The oven temperature can be set from 170° to 550° F.
• A double beep will sound if a programming error occurs.
• 350° will appear in the display when either A or V pad
is pressed once.
Note: Four seconds after pressing the A or T pad, the
time or temperature will automatically be entered. If more
than 30 seconds elapse between touching a function pad
and the A or V pad, the function will be canceled and the
display will return to the previous display.
the Clock
Press and tap the A or V pad to change the oven temperature by 5° increments or press and hold the A or V
pad to change the oven temperature by 10° increments.
100° or the actual oven temperature, whichever is higher,
will appear in the display when the oven turns on.
...................................
CLOCK
1. Press the CLOCK pad.
.........
• The clock time cannot be set if the control is programmed for a bake, broil or timing operation.
° The temperature in the display will increase in 5°
increments until preset temperature is reached. A single
beep will sound when the oven is preheated.
° Allow 10 to 15 minutes for the oven to preheat.
2. Set the correct time of day using the A or V pads. If the A
or V pad is not pressed within 30 seconds, the program
will cancel. Press the CLOCK pad and begin again.
Setting
• To recall preset temperature during preheat, press the
BAKE pad. The temperature will be displayed for three
seconds.
° To change oven temperature during cooking, press
the Bake pad, then press the A or V pad until tile
desired temperature is displayed,
the Timer
The timer can be set from one minute (:01) up to 99 hours and
59 minutes (99:59). Time will be displayed in minutes and not
in seconds. THE TIMER DOES NOT CONTROL THE OVEN.
° To change oven temperature during preheat, press
the Bake pad twice, then press the A or V pad until
the desired temperature is displayed.
Press the TIMER pad.
• 0:00 will light and the colon (:) will flash in
the display.
BAKE
" ................
If you press the BAKE pad and do not set an oven temperature within 30 seconds, the program will automatically
cancel and the time of day will reappear in the display.
• Press the desired pad.
Setting
or Roasting:
TIME£
Place food in the oven. Check food for doneness at the
.......................
....
minimum cooking time.
Press the A or V pad until the desired time is displayed.
• The timer will begin as soon as the time is set.
° The flashing colon indicates that a timing operation is in
progress. 0-he colon will not flash if the time of day or
oven temperature is displayed.)
13
4. At the end of cooking, press the CANCEL pad to turn the
oven off and remove the food from the oven.
3. Press the _ pad to select Hi (high) broil or the V pad to
set Lo (low) broil.
The oven features an automatic shut-off. If the oven is
left on for 12 hours it will automatically turn off and 000
will appear in the display, Press the CANCEL pad and
the time of day will reappear in the display,
• Select Hi broil for normal broiling.
• Select Lo broil for low temperature broiling to avoid
excessive browning of longer cooking foods like poultry.
If you do not select Hi or Lo Broil within 30 seconds, the
program will automatically cancel and the time of day
will reappear in the display.
Setting the Controls For Broiling:
(lower compartment - select models)
For best results, use pan designed for broiling.
1,
4. Follow the suggested times in the broil chart below. Meat
should be turned once about halfway through cooking
time.
Place broiler pan on recommended broiling compartment
position shown in the chart below.
2. Press the BROIL pad.
5. After broiling, press CANCEL to turn the oven
off and remove the broiler pan from the oven.
The current time of day will reappear in the
display.
BROIL
• SETwill light and the
Broil indicator light
.......................................................
will flash in the display.
Broiling
Chart
= Lower Compartment
Hamburger Patties, 3/4" thick
Medium
Well Done
Well Done
Middle
Middle
Middle
14 - 20 min.
16 - 24 min.
16 - 24 min.
Pork
Ham, precooked 1/2" slice
Chops, 1" thick
Warm
Well Done
Middle
Middle
8 - 12 min.
18 - 25 min.
Poultry
Chicken Pieces
Well Done
Bottom
[Lo Broil 450° E/
30-45 min.
Seafood
Fish filets
Fish steaks, 1" thick
Flaky
Flaky
Middle
Middle
8 - 12 min.
10 - 15 min.
Beef
Steaks, 1" thick
Upper is the top position; middle is the lower position; bottom is the bottom of the broiler compartment (remove the rack).
** This chart is a suggested guide. The times may vary with the food being cooked.
Manual Clean Oven
Setting the Control for Broiling:
Knob Control
1. For best results, use a broiling pan. Place the broiler pan
on recommended rack position (see chart on page 8).
(select models:]
2. Turn Oven Temp knob to BROIL or, for lower temperature
broiling, to 450° F.
Oven Temp Knob
Lower temperature broiling avoids excessive browning
of longer cooking foods such as poultry.
The Oven Temp knob is used to select
and maintain the oven temperature. Always
turn this knob just to the desired temperature. Do not turn to
a higher temperature and then back.
Setting
the Control for Baking
3. Follow the suggested times in the broil chart on page 8.
Meat should be turned once about halfway through
cooking time.
and Roasting:
4. Check the doneness by cutting a slit in the meat near the
center to check the color.
1. Push in and turn Oven Temp knob to desired temperature.
Allow 10-15 minutes for preheating.
5. After broiling, turn the Oven Temp knob to OFF. Remove
the broiler pan from the oven.
2. Place food in the center of oven. Check food for doneness
at minimum time in recipe. Cook longer if necessary.
3. Remove food from oven and turn Oven Temp knob to OFF.
14
Pilotless Ignition ([selectmodels)
To light pilot:
Your range is equipped with pilotless ignition. With this type
of ignition system, the gas automatically shuts off and the
oven will not operate during a power failure.
When cool, open the broiler door
and remove the broiler rack and
broiler pan.
A lighted match will not light the oven burner. No attempt
should be made to operate the oven during a power failure.
While in the OFF position, push in
and hold the Oven Temp knob
and hold a lighted match to the
pilot located at the back of the
oven burner (see illustration).Once
the pilot lights, let go of the Oven Temp
knob and replace the broiler rack and pan. (NOTE: The oven
burner is shown with the metal flame spreader removed.)
Pilot Ignition (selectmodels)
Light the right rear burner first before lighting the oven pilot
light. This will remove air from the gas system and aid in the
ignition of the pilot light. If this step is not performed, ignition
time may be longer than expected.
Self-Clean Oven Control
(select models)
BROIL
Use for broiling and top browning.
BAKE
Use for baking and roasting.
More (A,) or
Less (V)
Enters or changes time, oven
temperature. Sets HI or LO broil.
Sets timer.
TIMER
Clock
The clock can be set to display time in a 12-hour or 24-hour
format. The clock is set at the factory for the 12-hour format.
To change
the clock to 24=hour
format:
1. Press and hold the CANCEL and DELAY
pads for three seconds.
COOK & HOLD
Bakes for a preset time, then holds food
warm for 1 hour.
2. Press A or Y to select 12 or 24 hour.
CLEAN
Use to set self-clean cycle.
DELAY
Programs the oven to start baking at
a later time.
3. Set the time of day following the
directions below.
CLOCK
Use to set time of day clock.
KEEPWARM
Use to keep cooked food warm in oven.
CANCEL
Cancels all operations except timer
and clock.
............................
"%¸¸%¸¸¸¸¸¸¸¸¸¸¸¢¸¸¸¸;;¸¸;¸¸¸¸¸¸¸¸¸;¸¸¸::/
--
DELAY
To set the Clock:
1. Press the CLOCK pad.
° Time of day and colon flash in the
display.
CLOCK
2. Press A or T to set the time of day.
• Colon continues flashing.
Using the Touchpads
3. Press the CLOCK pad again or waitfour
seconds.
Press the desired pad.
When electrical power is supplied or after a power
interruption, the last clock time before power was
interrupted will flash.
Press the A or V to enter time or temperature.
• A beep will sound when any pad is touched.
V
To recall the time of day when another time function is
showing, press the CLOCK pad.
• A double beep will sound if a programming error occurs.
Clock time cannot be changed when the oven has been
programmed for cook or clean Delay or Cook & Hold.
Note: Four seconds after pressing the A or V pads, the
time or temperature will automatically be entered. If more
than 30 seconds elapse between touching a function pad
and the A or V pads, the function will be canceled and
the display will return to the previous display.
cont.
15
To cancel the Clock display:
To unlock:
If you do not want the time of day to display:
Press and hold the CANCEL and COOK & HOLD pads for
three seconds.
Press and hold the CANCEL and CLOCK pads
for three seconds. The time of day will
disappear from the display
LOCK disappears from the display.
./
When the clock display is canceled, press
-the CLOCK pad to briefly display the time of day.
Fault Codes
CLOCK
BAKE or LOCK may flash rapidly in the display to alert you if
there is an error or a problem. If BAKE or LOCK flash in the
display, press the CANCEL pad. If BAKE or LOCK continue to
flash, disconnect power to the appliance. Wait a few minutes,
and then reconnect power. If the flashing still continues,
disconnect power to the appliance and call an authorized
servicer.
To restore the Clock display:
Press and hold tile CANCEL and CLOCK pads for three
seconds. The time of day will reappear in the display.
Timer
The timer can be set from one minute (00:01) up to 99 hours
and 59 minutes (99:59).
Baking
The timer can be used independently of any other oven
activity. It can also be set while another oven function is
operating.
To set Bake:
1. Press the BAKE pad.
• BAKE will flash.
The Timer does not control the oven. It only controls a
beeper.
........
• The colon will flash.
• 350 ° will light when either pad is first pressed.
Press the A or V pad until the
correct time appears in the display.
° Press the A pad to increase the temperature.
° Press the V pad to decrease the temperature.
• The colon will continue to flash.
3,
A
2. Select the oven temperature. The oven temperature can be set from 170° to 550°. Press or press
and hold the A or V pads.
TIMER
• 0:00 lights in the display.
.................
° 000 will light in the display.
To set the Timer:
1. Press the TIMER pad.
BAKE
3. Press BAKE pad again or wait four seconds.
Press TIMER pad again or wait four seconds.
° BAKE will stop flashing and light in the display.
° The colon continues flashing and the time begins
counting down.
° The last minute of the timer countdown will be displayed
as seconds.
4. At the end of the set time, one long beep will sound.
To cancel
• 100° or the actual oven temperature will display. The
temperature will rise in 5° increments until the preset
temperature is reached.
the Timer:
1. Press and hold the TIMER pad for three seconds.
OR
4. Allow the oven to preheat for 8-15 minutes.
2. Press the TIMER pad and set the time to 00:00.
° When the set oven temperature is reached, one long
beep will sound.
Locking the Controls
• To recall the set temperature during preheat, press the
BAKE pad.
Tile touch pad controls car/be locked for safety, cleaning, or
to prevent unwanted use. They will not function when locked.
5,
If the oven is currently in use, the controls cannot be locked.
6. Check cooking progress at the minimum cooking time.
Cook longer if needed.
The current time of day will remain in the display when the
controls are locked.
7. When cooking is finished, press CANCEL.
To lock:
Press and hold tile CANCEL and COOK &
HOLD pads for three seconds.
LOCK flashes in the display.
Place food in center of oven, allowing a minimum of two
inches between utensil and oven walls.
8. Remove food from the oven.
/
[
__
COOK&
HOLD
16
%¸¸¸¸¸¸¸¸¸¸;;;¸¸¸¸¸¸¸¸¸¸¸¢¸¸.¸¸¸//
After one honr in HOLD WARM:
Baking Notes:
• END will display.
To change oven temperature during cooking, press
the Bake pad, then press the A or V pad until the
desired temperature is displayed.
• The time of day reappears in the display.
To cancel Cook & Hold at any time:
Press the CANCEL pad. Remove food from oven.
To change oven temperature during preheat, press
the Bake pad twice, then press the A or V pad until
the desired temperature is displayed.
Delay Bake
If you forget to turn off the oven, it will automatically turn
off at the end of 12 hours. If you wish to deactivate this
feature, see page 18.
Baking
Differences
Between
Your Old
and New Oven
It is normal to notice some baking time differences between a
new oven and an old one. See "Adjusting the OvenTemperature"
on page 19.
When using Delay, the oven begins to cook later in the day.
Set the amount of time that you want to delay before the oven
turns on and how long you want to cook. The oven begins to
heat at the selected time and cooks for the specified length of
time.
Cook & Hold
Delay time can be set from 10 minutes (00:10] to 11 hours, 59
Cook & Hold allows you to bake for a preset amount of time,
followed by a one-hour Keep Warm cycle.
minutes (11:59).
To set a Delayed
Baking
cycle:
To set Cook & Hold:
1. Press the COOK & HOLD pad.
................................
1. Press the DELAY pad.
COOK&
• DELAY flashes.
HOLD
• BAKE and HOLD flash.
..................................
• 00:00 flashes in the display.
• 000 lights in the display.
...............................
2. Press the A or V pad to set the delay time.
A
2. Select the oven temperature. The oven temperaWhile DELAY is still flashing:
ture can be set from 170° to 550°. Press or press
3. Press the COOK & HOLD pad.
and hold the A or V pads.
V
• Press the A pad to increase the temperature.
• 000 lights in the display.
.........................
• BAKE and HOLD flash.
• Press the V pad to decrease the temperature.
,.---:¸¸¸¸%¸.
COOK&
HOLD
4. Press _, to set the baking temperature.
3. Press COOK & HOLD again OR wait four seconds.
• HOLD flashes.
• 00:00 and HOLD flash.
• 00:00 flashes in the display.
• BAKE stays lit.
Press A to set the baking time.
4. Enter the amount of time you want to bake by pressing the
A or V pads. Bake time can be set from 10 minutes
(00:10} to 11 hours, 59 minutes (11:59}.
• The Delay time, DELAY, BAKE and HOLD light in
the display.
• BAKE and HOLD light in the display.
• The baking time will light in the display.
• The baking time will start counting down.
When the cooking time
DELAY
has elapsed:
• Four beeps will sound.
• BAKE will turn off.
• HOLD and WARM will light.
• 170°will display.
17
When the Delay time has expired:
To cancel Keep Warm:
...............................
• DELAY will turn off.
1. Press the CANCEL pad.
• Baking time is displayed.
2. Remove food from the oven.
..................................
• BAKE and HOLD are displayed.
Keep Warm
To set a Delay when Cook & Hold has already
been programmed:
1. Press the DELAY pad.
° Foroptimal food quality, oven cooked foods should be kept
warm for no longer than 1 to 2 hours.
DELAY
° To keep foods from drying, cover loosely with foil or a lid.
.................................
• To warm dinner rolls:
A
- cover rolls loosely with foil and place in oven.
• DELAY flashes.
• 00:00 appears in the display.
2. Press the A or V pad to set the delay time.
° After four seconds, DELAY will
stay lit to remind you that a delayed
cooking cycle has been set.
When the Delay time has expired
Notes:
'V
.......
..................
and the oven
- press KEEPWARM and A pads to set 170° F.
- warm for 12-15 minutes,
• To warm plates:
- place 2 stacks of up to four plates each in the oven.
starts:
- press KEEPWARM and A pads to set 170° F.
° The baking time will be displayed.
- warm for five minutes, turn off the oven and leave plates
in the oven for 15 minutes more.
° DELAY will turn off.
• BAKE and HOLD will remain lit ........................................
- use only oven-safe plates, check with the manufacturer.
To cancel:
- do not set warm dishes on a cold surface as rapid
temperature changes could cause crazing or breakage.
Press the CANCEL pad.
° All timed and untimed cooking functions will be
canceled.
Automatic
Mode
• The time of day will reappear in the display.
Notes:
Shut-Off/Sabbath
The oven will automatically turn off after 12 hours if you
accidentally leave it on. This safety feature can be turned off.
Do not use delayed baking for items that require a
preheated oven, such as cakes, cookies, and breads.
To cancel
Do not use delayed baking if oven is already hot.
the 12=hour
oven continuously
shut=off
and run the
for 72 hours:
1. Set the oven to bake (see page 12]
2. Press and hold the CLOCK pad for five seconds.
Keep Warm
° SAb will then be displayed continuously until turned off
or until the 72-hour time limit is reached.
To set Keep Warm:
• WARM flashes.
CLOCK
° SAb will be displayed and flash for five seconds.
For safely keeping foods warm or for warming breads and
plates.
1. Press the KEEPWARM pad.
.....
• BAKE will also be displayed if a bake cycle is in use
while the oven is in Sabbath Mode.
KEEP
...........................
All other functions EXCEPTBAKE (Timer, Keep Warm,
Clean, etc.] are locked out during the Sabbath Mode.
• 000 appears in the display.
To cancel Bake when in Sabbath
Select the Keep Warm temperature. The Keep
Warm temperature can be set from 145° to 190°.
Press or press and hold the A or V pads.
• 170° will light when either pad is first pressed.
Mode:
Press CANCEL.
• BAKE will turn off in the display.
V
° No beeps will sound.
• Press the A pad to increase the temperature.
To cancel the Sabbath Mode:
° Press the V pad to decrease the temperature.
1. Press the CLOCK pad for five seconds.
OR
WARM and the temperature will be displayed while Keep
Warm is active.
2. After 72 hours, the Sabbath Mode will end.
• SAb will flash for 5 seconds.
• The time of day will return to the display.
18
CLOCK
Broiling
Sabbath Mode Notes:
To set Broil:
• Sabbath Mode can be turned on at any time with or
without the oven on.
1. Press the BROIL pad.
• BROIL flashes.
, Sabbath Mode cannot be turned on if the touchpads are
locked out or when the door is locked.
° SET is displayed.
• If the oven is baking when Sabbath Mode is set, BAKE
will go out at the end of the baking cycle. There will be
no audible beeps.
Press the A pad to set HI broil or press the V pad to set
LO broil.
• When the Sabbath Mode is started, no preheat beep will
sound.
• Select HI broil (550° F) for normal broiling. Select
LO broil (450° F) for low-temperature broiling of longer
cooking foods such as poultry.
• HI or LO will be displayed.
° All prompts, messages and beeps are deactivated when
Sabbath Mode is active.
After four seconds, the oven will start.
° Pressing CANCEL will cancel a bake cycle, however the
control will stay in the Sabbath Mode.
• BROIL will remain lit.
• If power fails, the oven will power up in Sabbath Mode
with 72 hours remaining and no cycle active.
Adjusting
the Oven Temperature
For optimum browning, preheat for 2-3 minutes before
adding food.
Oven temperatures are carefully tested for accuracy at the
factory. It is normal to notice some baking or browning
differences between a new oven and an old one. As ranges
get older, the oven temperature can shift.
5,
6. Turn meat once about halfway through cooking.
7. When food is cooked, press the CANCEL pad.
Remove food and broiler pan from the oven.
You may adjust the oven temperature if you think the oven is
not baking or browning correctly. To decide how much to
change the temperature, set the temperature 25° higher or
lower than your recipe recommends, then bake. The results
of the "test" should give you an idea of how much to adjust
the temperature.
To adjust
the oven temperature:
1. Press BAKE.
2. Enter 550° by pressing the A pad.
3. Press and hold the BAKE pad for several
seconds or until 0° appears in the display.
Place food in the oven. Close the oven door.
• The time of day will reappear in the display.
Broil
Notes:
• For best results when broiling, use a pan designed for
broiling.
BAKE
° HI is used for most broiling. Use LO broil when broiling
longer cooking foods. The lower temperature allows
food to cook to the well done stage without excessive
browning.
A
• Broil times may be longer when the lower broiling temperature is selected.
If the oven temperature was previously adjusted, the
change will be displayed. For example, if the oven temperature was reduced by 15° the display will show "-15 °".
• Food should be turned halfway through broiling time.
4. Press the A or V pad to adjust the temperature.
Each time a pad is pressed, the temperature changes by
5°. The oven temperature can be increased or decreased
by 5° to 35°.
5. The time of day will automatically reappear in the display.
You do not need to readjust the oven temperature if there
is a power failure or interruption. Broiling and cleaning
temperatures cannot be adjusted.
19
Oven Broiling Chart
Beef
Steak, 1" thick
Hamburgers,
4
4
4
Medium
Well Done
Well Done
15 - 20 minutes
18 - 24 minutes
15 - 18 minutes
4
4
4
Well Done
Well Done
Warm
6 - 10 minutes
22 - 26 minutes
8 - 12 minutes
3 or 4
Well Done
LO Broil
30-45 minutes
4
4
Flaky
Flaky
10 - 15 minutes
8 - 12 minutes
3/4" thick
Pork
Bacon
Chops, 1"
Ham - precooked slice, 1/2" thick
Poultry
Chicken Pieces
Seafood
Fish Steaks, buttered, 1" thick
Fillets, 1/2" thick
* The top rack position is #5.
Note: This chart is a suggested guide. The times may vary with the food being cooked.
Oven Racks
Oven Vent
When the oven is in use the area near the vent may become
hot enough to cause burns. Never block the vent opening.
The oven vent is located below the backguard vent
shield on your range.
OVEN VENT
plastics near the
vent opening as
heat from the
vent
could
distort
Do not
place
or melt the
plastic.
Your oven has two racks. They are designed with a lock-stop
edge.
To remove:
1. Pull rack straight out until it
stops at the lock-stop position.
Oven Light (selectmodels)
2. Lift up on the front of the rack
and pull out.
Press the oven light pad to turn the oven light on
and off.
To replace:
1. Place rack on the rack support in the oven.
oven light
Oven Bottom
2. Tilt the front end up slightly. Slide rack back until it clears
the lock-stop position.
Protect oven bottom against spillovers, especially acidic or
sugary spills, as they may discolor the porcelain enamel. Use
the correct pan size to avoid spillovers and boilovers. Never
place utensils or foil directly on the oven bottom.
3. Lower front and slide back into the oven.
Do not cover an entire rack with aluminum
foil or place
foil on the oven bottom.
Baking results will be affected
and damage may occur to the oven bottom.
2O
MULTIPLE RACK COOKING:
Two rock:
Use rack positions 2 and 4, or 1 and 4.
Note: Never place pans directly on the oven bottom.
Rack Positions
RACK 5 (highest position): Used for toasting bread or
broiling thin, non-fatty foods.
Half Rack Accessory
A half rack, to increase oven capacity, is available as an accessory. It fits
in the left, upper portion of the oven
and provides space for a vegetable
dish when a large roaster is on the
lower rack. Contact your dealer for
the "HALFRACK" Accessory Kit or
call 1-877-232-6771 USA or
1-800-688-8408 Canada.
RACK 4: Used for most two-rack baking.
RACK 3: Used for most baked goods on a cookie sheet or
jelly roll pan, layer cakes, fruit pies, or frozen convenience
foods.
RACK 2: Used for roasting small cuts of meat, casseroles,
baking loaves of bread, bundt cakes, custard pies or two-rack
baking.
RACK 1: Used for roasting large cuts of meat and poultry,
frozen pies, dessert souffles, angel food cake, or two-rack
baking.
ROASTING POSITION:
Used for roasting taller cuts of meat
or turkey. Place both oven racks, one
above the other, on the raised sides
of the oven bottom.
21
/
/
I
I
I
Werrenty
& Service
What
is Not Covered
By These Warranties
1. Conditions and damages resulting from any of the following:
a. Improper installation, delivery, or maintenance.
b. Any repair, modification, alteration, or adjustment not authorized by the
manufacturer or an authorized servicer.
c. Misuse, abuse, accidents, or unreasonable use, or acts of God.
d. Incorrect electric current, voltage, electrical and/or gas supply.
e. Improper setting of any control.
2 Warranties are void if the original serial numbers have been removed, altered,
or cannot be readily determined.
3. Light bulbs, water filters and air filters.
4. Products purchased for commercial or industrial use.
5. The cost of service or service call to:
a. Correct installation errors. For products requiring ventilation, rigid metal
ducting must be used.
b. Instruct the user on the proper use of the product.
c. Transport the appliance to and from the servicer.
6. Any food loss due to refrigerator or freezer product failures.
7. Expenses for travel and transportation for product service in remote locations.
8. Outside of the United States and Canada this warranty does not apply.
Contact your dealer to determine if another warranty applies.
CUSTOMER'SSOLE AND EXCLUSIVE
REMEDY UNDER THIS LIMITED
WARRANTY SHALL BE PRODUCT REPAIR
AS PROVIDED HEREIN. IMPLIED
WARRANTIES, INCLUDING WARRANTIES
OF MERCHANTABILITY OR FITNESSFORA
PARTICULAR PURPOSE,ARE LIMITED TO
ONE YEAR OR THE SHORTESTPERIOD
ALLOWED BY LAW. MAYTAG
CORPORATION SHALL NOT BE LIABLE
FOR INCIDENTAL OR CONSEQUENTIAL
DAMAGES. SOME STATESAND
PROVINCESDO NOT ALLOW THE
EXCLUSION OR LIMITATION OF
INCIDENTAL OR CONSEQUENTIAL
DAMAGES, OR LIMITATIONS ON THE
DURATION OF IMPLIED WARRANTIES OF
MERCHANTABILITY OR FITNESS,SO
THESE EXCLUSIONS OR LIMITATIONS
MAY NOT APPLY TO YOU. THIS
WARRANTY GIVESYOU SPECIFICLEGAL
RIGHTSAND YOU MAY ALSO HAVE
OTHER RIGHTS,WHICH VARY STATE TO
STATE OR PROVINCETO PROVINCE.
9. Consequential or incidental damages sustained by any person as a result of
any breach of these warranties. Some states do not allow the exclusion or
limitation of consequential or incidental damages, so the above exclusion may
not apply.
If You Need
Service
First see the Troubleshooting section in your Use and Care Guide or call the
dealer from whom your appliance was purchased or call Maytag Services, LLC,
Customer Assistance at 1-800-688-9900 USA and 1-800-688-2002 Canada to
locate an authorized servicer.
Be sure to retain proof of purchase to verify warranty status. Refer to
WARRANTY for further information on owner's responsibilities for warranty
service.
• If the dealer or service company cannot resolve the problem, write to Maytag
Services, LLC, Attn: CAIR Center, P.O. Box 2370, Cleveland, TN 37320-2370, or
call 1 =800-688=9900 USA and 1 =800-688-2002 Canada. U.S. customers
using TrY for deaf, hearing impaired or speech impaired, call 1-800-688-2080.
• User's guides, service manuals and parts information are available from Maytag
Services, LLC, Customer Assistance.
Notes=
=When writing or calling about a service problem, please inchde:
a. Your name, address and telephone number;
b. Model number and serial number;
c. Name and address of your dealer or servicer;
d. A clear description of the problem you are having;
e. Proof of purchase (sales receip0.
22
Cuisi.i re
Cuisson dans Je four .................... 37=45
..... 24-28
28-31
31 =33
Commandes du four _ nettoyage manuel
Horloge
Cuisson courante
Minuterie
Gril
Rdgulateur du four _ nettoyage manuel
Cuisson courante
Gril
Commandos du four _ autonettoyage
Horloge
Cuisson courante diff6r6
Minuterie
Maintien au chaud
Cuisson courante
Gril
Cuisson et maintien Grilles du four
33-34
Garantie et service apres=vente ....... 47
................. 35-36
6.ia del Usuario ...................................48
a surface de cuisson
ga=
quepourrait
susciteruneutilisation
incorrecte
derappareil.
Utiliserrappareil
uniquement
pourlosfonctions
prevues,
decrites
dansceguide.
Pour une utilisation adequate et en s_curit_, il faut que
rappareil soit convenablement installe par un technicien
qualifie, et relic _ la terre. Ne pas regler, reparer ni remplacer
un composant, _ moins que cela ne soit specifiquement
recommande darts ce guide. Toute autre reparation doit etre
effectuee par un technicien qualifie. Demander _ rinstallateur
de montrer ou se trouve le robinet d'arret de gaz et comment
le former en cas d'urgence.
Toujours debrancher rappareil avant d'y faire de rentretien.
Instructions
de
impomntes
s
Les instructions de securite importantes et les paragraphes
_{avertissement >>
de ce guide ne sont pas destines _ couvfir
toutes les conditions et situations qui pourraient se presenter.
II faut faire preuve de bon sens, de prudence et de soin lots de
rinstallation, de rentretien ou du fonctionnement de rappareil.
Toujours prendre contact avec le fabricant darts le cas de
problemes ou de conditions qui ne seraient pas comprises.
Reconnaitre los tiquettes,
symboles sur la s6curite
paragraphes et
Lire routes los instructions avant d'utiliser cot appareil;
observer toutes los instructionspour eliminer les risques
d'incendie, choc electrique, dommages materiels et corporels
24
instructions g n6rales
armoire de cuisine directement au-dessus de rappareil. S'il y
a une armoire, on ne devrait y remiser que des articles peu
frequemment utilises et capables de resister _ la chaleur
emise par rappareil. La temperature pourrait ¢tre excessive
pour certains articles, comme liquides volatils, produits de
nettoyage ou flacons d'aerosol.
En cas d'incendie
Interrompre Jefonctionnement de rappareiJ et de Jahotte de
ventilation pour minimiser le risque d'extension des fiammes.
Eteindre les fiammes, puis mettre la hotte en marche pour
evacuer la fumee et rair vicie.
• Table de cuisson : Utiliser un couvercle ou une plaque
biscuits pour etouffer les fiammes d'un feu qui se declare
darts un ustensile de cuisine.
NE JANiAIS saisir ou deplacer un ustensile de cuisine
enfiamme.
Utiliser une lampe torche pour determiner si la bride
antibasculement est convenablement installee sous la
• Four : Fermer la porte du four pour etouffer les fiammes.
Ne pas projeter de reau sur un feu de graisse. Utiliser du
bicarbonate de sodium ou un extincteur _ mousse ou produit
chimique sec pour eteindre les flammes.
cuisiniere. L'un des pieds arriere de reglage de raplomb doit
etre convenablement engage darts la fente de la bride.
Lorsque la cuisiniere est convenablement calee, la bride
antibasculement immobilise le pied arriere contre le sol.
Verifier [a parfaite immobilisation de [a cuisiniere par [a bride
apres ehaque deplacement de [a cuisiniere.
Pour viter
un incendie
S curit
pour les enfants
ou des
dommages par la fum e
S'assurer que tous[es materiaux de conditionnement sont
retires de rappareil avant de le mettre en marche.
Garder les materiaux combustibles, ressence et autres
matieres et vapeurs inflammables bien eioignes de rappareil.
NE JAIVlAIS laisser des enfants seuls ou sans supervision
Iorsque rappareil est en service ou encore chaud.
Si rappareil est installe pres d'une fenetre, des precautions
appropriees doivent etre prises pour eviter que le vent entraine
les rideaux au-dessus des brQleurs.
NE JAIVIAIS [aisser un enfant s'asseoir ou se tenir sur une
partie quelconque de rappareil. II pourrait se blesser ou se
brQler.
NE JANIAIS hisser des articles sur la table de cuisson. L'air
chaud de revent peut les enfiammer et mettre egalement sous
pression des contenants fermes qui pourraient alors exploser.
I1est important d'enseigner aux enfants que la cuisiniere et les
ustensiles places dessus ou dedans peuvent etre chauds.
Laisser refroidir les ustensiles en un lieu sQr, hors d'atteinte
De nombreux flacons d'aerosol peuvent EXPLOSERIorsqu'on
les expose _ la chaleur, et ils peuvent contenir un produit tres
inflammable. Eviter d'utiliser ou remiser un flacon d'aerosol
des enfants. II est important d'enseigner aux enfants qu'un
appareil menager n'est pas un jouet, et qu'ils ne doivent
toucher aucune commande ou autre composant de rappareil.
proximite de rappareil.
De nombreux articles en plastique peuvent etre deteriores par
la chaleur. Conserver les articles en plastique _ distance des
composants de rappareil susceptibles de devenir tiedes ou
chauds. Ne pas laisser des articles en plastique sur la table de
cuisson; un article en plastique trop proche de revent du four
ou d'un brQleur allume pourrait s'amollir ou fondre.
Pour eliminer le besoin d'atteindre queique chose par-dessus
les brQleurs de surface, il est preferable qu'il n'y ait aucune
25
Familiarisation
avec I'appareil
Veiller _ toujours ajuster correctement la taille des flammes
pour qu'elles ne depassent pas sur la peripherie de rustensile.
Des flammes de trop grande taille sur un brOleur sont
dangereuses, elles entrainent un gaspillage d'energie et elles
peuvent faire subir des dommages _ rustensile, _ rappareil ou
rarmoire situee au-dessus.
NE JAMAIS hisser un brOleur de surface allume sans
surveillance, particulierement avec une puissance de
chauffage elevee ou lots d'une operation de friture. Un
debordement pourrait provoquer la formation de fumee et des
produits gras pourraient s'enflammer. Eliminer des que
possible les produits gras renverses. Ne pas utiliser une
puissance de chauffage elevee pendant une periode
prolongee.
NE JAMAIS faire chauffer un recipient non ouvert dans le
four ou sur un brOleur de surface; raccumulation de pression
dans le recipient pourrait provoquer son eclatement et de
graves dommages materiels ou corporels.
Utiliser des maniques robustes et seches. Des maniques
humides peuvent provoquer la formation de vapeur brOlante.
Ne jamais utiliser un torchon b vaisselle ou autre article textile
b la place de maniques; un tel article pourrait trainer sur un
br[ileur et s'enflammer, ou accrocher un ustensile ou un
L'event du four est situe _ la base du tableau de commande.
composant de rappareil.
Eviter de toucher le voisinage de revent du four Iorsque le four
est utilise et pendant plusieurs minutes apres rarret du four.
Certains composants de revent et la zone voisine peuvent
devenir suffisamment chauds pour provoquer des brQlures.
Apres rarret du four, ne pas toucher revent du four ou la zone
voisine avant que ces composants aient pu se refroidir
suffisamment.
Laisser toujours refroidir un recipient d'huile de friture chaude
avant de tenter de le deplacer et le manipuler.
Ne pas hisser la graisse de cuisson ou autre materiau inflammable s'accumuler darts ou pres de rappareil, de la hotte ou
du ventilateur de revent. Nettoyer frequemment la hotte pour
empecher route accumulation sur la hotte elle-meme ou sur le
filtre. Lors du flambage d'aliments sous la hotte, mettre le
ventilateur en marche.
Autres surfaces potentiellement chaudes: table de cuisson,
zones faisant face Q la table de cuisson, event du four, zone
NE JAMAIS porter, lots de rutilisation de rappareil, des
vetements fairs d'un materiau inflammable, ou amples, ou
Iongues manches. De tels vetements peuvent s'enflammer ou
accrocher la poignee d'un ustensile.
voisine de revent, porte du four et zone voisine de la porte et
du hublot.
Ne pas toucher rampoule chaude du four avec un linge
humide; le choc thermique pourrait la briser. En cas de bris de
rampoule, debrancher rappareil de la source d'electricite
avant d'enlever rampoule, pour eviter un choc electrique.
Cuisson et s curit
Placer toujours les grilles b la position appropriee dans le four
Iorsque le four est froid. Faire coulisser la grille vers rexterieur
avant d'ajouter ou enlever un plat; utiliser pour cela une
manique robuste et seche. Eviter d'introduire la main dans le
four pour y placer ou retirer un plat. S'il est necessaire de
deplacer une grille Iorsqu'elle est chaude, utiliser une manique
seche. Veiller b toujours arreter le four b la fin d'une periode
de cuisson.
Placer toujours un ustensile sur un brQleur de surface avant de
rallumer. Veiller _ bien connaftre la correspondance entre les
boutons de commande et les brOleurs. Veiller _ allumer le
N'utiliser les grilles que darts le four darts lequel elles ont ete
achetees/expediees.
Ne pas remiser des aliments ou ustensiles de cuisine sur la
table de cuisson ou dans le four.
Ouvrir toujours la porte du four tres prudemment. Laisser rair
chaud ou la vapeur s'echapper avant de retirer/introduire un
plat.
brOleur correct et verifier que le brOleur s'allume
effectivement. A la fin de la periode de cuisson, eteindre le
brOleur avant de retirer rustensile, pour eviter une exposition
aux flammes du brOleur.
26
AVERTISSEMENT : Mets prepares : Respecter les instructions du fabricant. Si le contenant ou le couvercle en plastique
d'un mets surgele se ddorme ou est endommage durant la
cuisson, jeter immediatement le recipient et son contenu. Les
aliments pourraient etre contamines.
pas expressement recommande dans ce guide peut degrader
la securite de I'appareil ou sa performance, ou reduire la
Iongevite des composants.
NE JAMAIS garnir la sole ou une grille du four avec de la
feuille d'aluminium. Ceci pourrait susciter un risque de choc
Arreter toutes les commandes et attendre le refroidissement
Nettoyage
et s curite
de tousles composants avant de les toucher ou d'entreprendre le nettoyage. Ne pas toucher la grille d'un brQieur ou
la zone voisine avant que ces composants aient pu suffisamment refroidir.
electrique ou d'incendie, ou une autre deterioration de
I'appareil. Utiliser de la feuille d'aluminium uniquement selon
les instructions de ce guide.
Utiliser des ustensiles _ fond plat comportant une poignee
qu'on peut facilement saisir et qui reste fro[de. Eviter d'utiliser
un ustensile instaNe ou ddorm& qui pourrait facilement
basculer, ou dont la poignee est mal fixee. Eviter egalement
Exercer une grande prudence Iors du nettoyage de I'appareil.
Travailler prudemment pour eviter des brQlures par la vapeur
en cas d'utilisation d'un chiffon ou d'une @onge humide Iors
de I'elimination d'un produit renverse sur une surface chaude.
Certains produits de nettoyage peuvent generer des vapeurs
nocives Iorsqu'on los applique sur une surface chaude.
d'utiliser des ustensiles de petite taille comportant une
poignee Iourde; ces ustensiles sont generalement instables et
peuvent facilement basculer. Un ustensile Iourd Iorsqu'il est
rempli peut egalement etre dangereux Iors des manipulations.
Four autonettoyant
(certains modeles)
Ustensiles
et securit6
Veiller 8 utiliser un ustensile de taille suffisante pour que le
contenu ne risque pas de deborder. Ceci est particulierement
important pour un ustensile rempli d'huile de friture. Verifier
que la taille de I'ustensile est suffisante pour qu'il puisse
recevoir les produits alimentaires _ cuire, et absorber
I'augmentation de volume suscitee par I'ebullition de la
graisse.
Nettoyer uniquement les pieces mentionnees dans ce guide.
Ne pas nettoyer le joint de porte; le joint joue un r01eessentiel
Pour minimiser les risques de brQlure, d'infiammation de
matieres et de renversement par contact non intentionnel avec
un ustensile, ne pas orienter la poignee d'un ustensile vers un
brQleur adjacent; orienter toujours la poignee d'un ustensile
vers le cote ou I'arriere de rappareil; ne pus laisser non plus la
poignee d'un ustensile deborder _ ravant de I'appareil, ou un
jeune enfant pourrait facilement la saisir.
quant _ I'etancheite. Ne pas frotter, endommager ou d@lacer
le joint. Ne pus utiliser de produit de nettoyage du four darts
le four autonettoyant ou sur les zones voisines.
Avant d'executer une operation d'autonettoyage, retirer la
lechefrite, les grilles du four et les autres ustensiles, et eliminer
par essuyage tout exces de residus renverses pour eviter la
formation de fumee ou I'inflammation de ces residus.
Veiller _ ne jamais hisser le contenu liquide d'un ustensile
s'evaporer completement; I'ustensile et I'appareil pourraient
subir des dommages.
II est normal que la surface de cuisson devienne chaude
durant une operation d'autonettoyage; par consequent, eviter
de toucher la surface de cuisson durant I'autonettoyage.
Appliquer los instructions du fabricant Iors de I'emploi d'un
sachet pour cuisson au four.
Avertissement
Seuls certains materiaux en verre, vitroceramique, ceramique,
ou certains ustensiles vitrifies/emailles peuvent etre utilises sur
la table de cuisson ou dans le four sans risque de bris sous
I'effet du choc thermique. Observer les instructions du
fabricant Iors de I'utilisation d'un ustensile en verre.
et avis
important pour la securit
La Ioi californienne <<
Safe Drinking Water and Toxic Enforcement Act >>de 1986 (proposition 65) stipule la publication par
le gouverneur de la Californie d'une liste de substances que
I'etat de Californie cons[dOte comme cancerigenes ou
dangereuses pour le systeme reproducteur, et impose aux
entreprises commerciales I'obligation de signaler _ leurs
clients les risques d'exposition _ de telles substances.
La securite de fonctionnement de cet appareil a ete testee
I'aide d'ustensiles de cuisine conventionnels. Ne pas utiliser un
ustensile ou accessoire qui n'est pas specifiquement
recommande darts ce guide. Ne pas utiliser de couvre-brQleur,
gril place sur la table de cuisson ou systeme de convection
additionnei. L'utilisation d'un dispositif ou accessoire qui n'est
Les utilisateurs de cet appareil peuvent etre exposes _ une
faible concentration de certaines substances figurant dans la
liste mentionnee ci-dessus, dont benzene, formaldehyde et
27
suie, du fait de la combustion incomple,te du gaz naturel ou du
gaz de pe,trole liqudie,. Pour minimiser la combustion
incomple,te, veiller _ ce que les brQleurs soient parfaitement
re,gle,s. Pour minimiser I'exposition _ ces substances, veiller
bien e,vacuerles gaz de combustion _ I'exte,rieur.
trouve le four soit convenablement ae,re,edurant une ope,ration
d'autonettoyage par I'ouverture d'une fene,tre ou d'une porte.
AVIS IMPORTANT - OISEAUX FAMILIERS : Les oiseaux ont
Nous informons les utilisateurs de cet appareil que Iors d'une
ope,ration d'autonettoyage, ils peuvent e,treexpose,s_ une
un syste,me respiratoire tre,ssensible. Ne pas garder un oiseau
familier darts la cuisine ou darts une pie,ce ou il pourrait e,tre
expose,aux fume,es. Les fume,es e,misesdurant une ope,ration
d'autonettoyage peuvent e,tre dangereuses ou mortelles pour
faible concentration de certaines substances figurant dans la
liste mentionne,e ci-dessus, dont le monoxyde de carbone.
Pour minimiser I'exposition, veiller _ ce que la pie,ceou se
un oiseau, de me,me que les fume,es e,mises Iors du chauffage
excessif de graisse, huile, margarine, et du chauffage excessif
darts un ustensile _ reve,tement antiadhe,sif.
Conserver
ces instructions
pour consultation
ult6rieure
Nettoyerle cadre du four, le cadre de
la porte, la zonea rext6rieur du joint et
autour de rouverture darts le joint de la
porte, _ I'aide d'un produit de
nettoyagenon abrasif commeBon
Ami* ou d'eau additionnc!ede
d_tergent.Le processus
d'autonettoyagene nettoie pas ces zones.Ellesdoivent 6tre
nettoydespour emp6cherla salet(_de s'incruster pendantle
cycle de nettoyage.(Lejoint assure 1'6tanch6it6autour de la
porte et du hublot du four.)
Four autonettoyant
(certains modeles:)
Remarque : Pour la nettoyagemanualvoir le page 37.
Pouremp(!chertout dommage,ne pas nettoyer ni frotter le joint
qui se trouve autourde la porte du four. Cejoint est congupour
6viter lespertes de chaleurpendant le cycled'autonettoyage.
Eliminerles rc!sidusde graisse ou de produits renversdssur la
sole avant le nettoyage.Ceci emp6chela formation de flammes
ou de fumc!edurant le nettoyage.
Essuyerles r6sidussucrc!set acides,comme lespatatesdouces,
la tomate ou lessaucesa basede lait. La porcelainevitrifi6e
poss_deune certaine r6sistanceaux composdsacides,mais qui
n'est pas limit(!e.Ellepeut se ddcolorersi les r6sidusacides ou
sucresne sont pasenlevdsavant de commencerrautonettoyage.
L'autonettoyageutilise des temp6raturessup_rieures_ celles de la
cuissonnormalepour nettoyerautomatiquementI'int6rieur du four.
Ne forcez pas la porte du four nile levierde verrouillagepour les
ouvrir. Ceci peut provoquerune exposition_ des temp6ratures
61ev6es,
et donc pr6senterun risquede brQlure.
*Les noms de marquedes produits de nettoyagesent des marques
d6pos_esdes diffdrents fabricants.
Si le four est tr_s sale, il est normal qu'on observela formationde
fumde ou de flammesdurant le nettoyage.Nettoyer le four
intervallesr6guliersplutOtque d'attendre une accumulation
importantede rdsidus.
Program[nation de I'autonettoyage :
1. Fermerla porte du four.
Durant le processusd'autonettoyage,il convient de bien ac!rerla
cuisine pour dliminer les odeursnormalement_misesdurant le
nettoyage.
de
205 °C (400
pour programmerun
Remarque
: La°F)
tempdraturedu
four doltcycled'autonettoyage.
6tre situ6e en dessous
suite...
Avant I'autonettoyage
1. Eteindrela lampe du four avant le nettoyage.Elle risqueraitsinon,
de griller.
2. Enleverla 18chefrite,tousles plats et lesgrilles du four. Lesgrilles
risquentde se dc!coloreret de ne plus glisser aussibien apr_sun
cycle d'autonettoyagesi on ne lesenl_vepas.
28
J
2. Placerla manettede verrouillagea la position de verrouillage.
6. Apr_s quatre secondes,les mots CLEAN,DELAYet LOCK
paraissent_ I'afficheur pour indiquer que le four est programmc!
pour une op6rationde nettoyagediffc!r&Le temps d'attente
parait _ I'afficheur.
3. Appuyer sur la touche CLEAN(Nettoyage].
CLEAN
, Le mot CLEAN[NETTOYAGE)
clignote a I'afficheur.............................
Si la porte n'est pus fermSe,des hips retentissentet le mot DOOR
[PORTE)parait_ I'afficheur.Si la porte n'est pusferm_e duns les
Si ie four a dej_ ere programme pour un cycle de
45 secondes,I'op@ationd'autonettoyageest annul6eet
nettoyage et que Yon desire etabiir un deiai :
I'afficheur revienta I'heuredu jour.
.........................
1. Appuyer sur la touche DELAY[D6marragediffc!r_).
DELAY
4. Appuyer sur la touche A ou T.
• Le mot DELAYclignote
, CL-M [Nettoyage- salet8 moyenne]est affich6.
• 00:00parait a I'afficheur.
5. Appuyer sur la touche A ou T pour voir driller
V
2. Appuyer sur la touche A ou T pour programmerla
lesdiff@entsr6glagesde I'autonettoyage.
............................
durc!ed_sir6ede I'attente avant que ne dc!butele
CL-H (Nettoyage- salet6 importante,4 heures)
cycle.
CL-M [Nettoyage- salet6 moyenne,3 heures]
Apr_s quatre secondes,les mots CLEAN,DELAYet
LOCKparaissenta I'afficheur pour indiquer que le four
est programm6pour une op@ationde nettoyagediff6r_.
Le temps d'attenteparait _ I'afficheur.
CL-L [Nettoyage- salet6 16g_re,2 heures)
Le choix du niveaude salet6du four programme
automatiquementla dur6e du cycled'autonettoyage.
Lorsque le cycle d'autonettoyage debate :
6. Apr_s quatre secondes,le four commencele nettoyage.
° Le mot DELAYs'6teint.
• La durSede nettoyagecommencele d6compte a I'afficheur.
• La dur6e de nettoyageparait_ I'afficheur.
, Le mot LOCK(VERROUILLAGE)
parait _ I'afficheur.
Annulation du cycle d'autonettoyage :
• Le mot CLEANparait a I'afficheur.
Appuyersur la touche CANCEL[Annuler).
Demurrage differe d'un cycle d'autonettoyage :
1. Appuyer sur la touche DELAY(Dc!marragediff6r6].
• Le mot DELAY[ATTENTE]clignote.
• Tousles rootsdisparaissentde I'afficheur.
...........................
• Toutesles fonctions sont annul6es.
DELAY
3. Appuyer sur la touche Clean (Nettoyage].
Pendant
A
• CL-M (Nettoyage- salet6 moyenne]est affichc!.
5. Appuyer sur la touche ,i, ou V pour voir driller les
diff@entsrc!glagesde I'autonettoyage.
.......
le cycle
d'autonettoyage
Lorsquele mot LOCKparak a I'afficheur,la porte ne peut 6tre
ouverte.Pour@iter d'endommagerla porte, ne pusla forcer pour
I'ouvrir Iorsque le mot LOCKest affich&
V
Fumee et odeurs
• Le mot CLEAN(NETTOYAGE)
va clignoter...................................
4. Appuyer sur la touche A ou T.
'
• L'heuredu jour parait a I'afficheur.
, 00:00parait _ I'afficheur.
2. Appuyer sur la touche A ou _' pour programmer
la durc!ed'attenteavant que ne commence le cycle.
La dur@ d'attente peut 6tre programm6ede 10
minutes[00:10)_ 11 heureset 59 minutes [11:59).
....... .
CLEAN
La premierelois oL'Jle four est nettoyc!,il peut y avoir production
d'odeur et de fum6e.Ceci est normal et disparaitra_ I'usage.
..................................
Si le four est tr_s saleou si la I_chefritea _!t_!laiss_!eduns le four, il
peut y avoir production de fum_!e.
Bruits
Pendantque le four chauffe, il peut se produire des bruits de m_tal
en dilatation ou en contraction.Ceci est normal et n'indique pasque
le four s'abime.
CL-H (Nettoyage- salet6 importante,4 heures)
CL-M [Nettoyage-salete moyenne,3 heures]
CL-L [Nettoyage- salet6 16g_re,2 heures)
Le choix du niveaude salet6du four programme
automatiquementla durc!edu cycled'autonettoyage.
Apr_s
le cycle
d'autonettoyage
Environune heure apr_s la fin du cycle, le mot LOCKs'_teint. Ace
moment, la porte peut 8tre ouverte.Pousserla manettede la porte
vers la gauchepour d@errouiller.
La salet_ peut aveir laiss_ tin r_sJdugris poudreux.L'enlever
avec un linge humide.S'il reste de la salet_,cela indique que le cycle
de nettoyagen'a pus _t8 assezlong. Cettesalet_ restantesera
enlev_!eau prochain cycled'autonettoyage.
29
Cadre de BrOleur = BrQleursconventionnelsseulement
Le cadrede br01eurest situc!sous soulevent-versle table de cuisson
relevable.Nettoyezfr6quemmentpour enleverdes d_bordements.Si
on permet ale sol de s'accumuler,il pout endommagerla finition.
• Retirezlos grilles et leabrt_leursextc!rieurs.Augmentezle table de
cuissonrelevable.
• Nettoyeravec du savonet I'eau,ringage et s(gchez.
• Pour lessols t6tus, utilisezles produits d'6purationmod_r_ment
abrasifstels que une patede le bicarbonatede soude et eau ou le
nettoyantBon Ami*, et un garniture de frottement en plastique
non-abrasive.
Si les grilles ont _t_ laiss_es _ rint_rieur du four pendant le
cycle d'autonettoyage et qu'ellesglissent real sur leurssupports, lesenduire,ainsi que les supports,d'une fine couche d'huile
vc!g6tale.
De fines lignes peuvent apparaitre darts [a poreeiaine parce
qu'elle a subi chaleur et refroidissement.Ceciest normal et
n'affecterapas la performance.
Une d_coloration blanche pout apparaitre apr_s le nettoyage
si des aliments acides ou sucres n'oat pas _t_ enlev_s avant
que ne commence I'autonettoyage. Lad_colorationest normale
et n'affecterapas la performancedu four.
Grilles des br_leur
• Laverlesgrilles avecde I'eausavonneusetilde et un tampon
r6curerde plastique non abrasif.Pour lossouillures tenaces,
nettoyeravec une 6ponge ou un tampon non abrasif savonneuxet
la CooktopCleaningCreme(produit n° 20000001)**.
Pour los r6sidusalimentairescarbonis_s,enleverlos grilles pour los
placersur du papier-journal,et pulv6riserprudemmentun produit
commercialde nettoyagede four (no pas projeter le produit sur la
surface environnante).Placerles grilles darts un sachetde
plastique pendant plusieursheuresou pendant une nuit. Porter
desgants de caoutchouc et retirer los grillesdu sachet. Laved
rincedfaire s6cheret r6installer losgrilles sur la table de cuisson.
Reilrlarques:
, Si la porte du four n'est pas fermc!e,le mot DOOR[PORTE)
clignote a rafficheur et le four c!metdes hips jusqu'aceque la
porte soit fermc!eet que I'onappuie _ nouveausur Clean.
, La porte du four se trouvera endommag6esi ron force son
ouverturealors que le mot LOCKest encore affich6.
M6thodes
de nettoyage
Zone de la console de commando et horloge
• Pour utiliser la fonction Verrouillagedes commandespour le
nettoyage,voir page 40.
• Laver,rincer et faire s(gcher.Ne pas utiliser un agent de nettoyage
abrasifsusceptible de rayerla finition.
• On pout utiliser un produit de nettoyagedu verre, pulvc!ris6d'abord
sur un chiffon. NE PA$ projeter le produit directement sur los
touchesde commando eu sur I'afficheur.
Boutons de commande
• Placerchaque bouton _ la position d'ARRET,et retirer chaque
bouton en le tirant.
Laver,rincer et faire s(_cher.Ne pas utiliser un agent de nettoyage
abrasifsusceptible de rayerla finition.
• Fairefonctionner bri_vementchaque br01eurpour vdrifier que le
bouton a _t_!correctementrdinstall_.
L_chefrite etsa grille
Ne jamais couvrir la grille de papier d'aluminium; cola
emp_ehe la graisse de couler dans la I_chefrite.
• Recouvrirla I_chefriteet sa grille d'un lingo savonneux;laisser agir
pour d6tacher lesr6sidus.
• Laveravecde I'eausavonneusetilde. Utiliserun tampon _ r6curer
pour 61iminerles souillurestenaces.
• On peut placerlos deux composantsde la 16chefritedarts un lavevaisselle.
Table de cuisson et tableau de commande =_mail vitrifi_
L'_mailvitrifi_ eatdu verre li_!au m_!talpar fusion. II peut se fissurer
ou s'(gcailleren cas de mauvaiseutilisation. II est r(!sistantaux
acides,mais pastotalement inattaquablepar los acides.Tous los
produits renvers(gs,
en particulier acidesou sucres,doivent _tre
essuy_simm(gdiatementavec un linge sec.
• Unefois refroidi, laveravecde I'eausavonneuse,rincer et s_cher.
• Nejamais essuyerune surfacetiede ou chaudeavec un lingo
humide.Ceci pourrait la fissurer ou I'_cailler.
• Nejamais utiliser de nettoyantspour four, d'agentsde nettoyage
caustiquesou abrasifssur le fini extSrieurde la cuisini_re.
Brr_leurs _ surface = Conventionnel=Scell_s
• Nettoyerfr6quemment.Laisserle brt31eur
refroidir. Nettoyer avec
du savonet un tampon _ r6curer de plastique.Pourdes souillures
tenaces,utiliser un produit de nettoyagenon abrasif avecun
chiffon. Eviterde laisser le produit de nettoyages'introduire dans
les orificesde sortie du gaz;ceci pourrait affecter la combustiondu
gaz.Sile produit de nettoyagep_n_tre dartslea orifices, nettoyer
avec un pinceausoupleou une broche droite, particuli_rement
rorifice situ_!au-dessousde I'allumeur.Veiller a ne pasddormer
ou agrandir lostrous.
• Veiller a ne pas laisserde I'eaus'introduire dans los orificesdu
brOleur.
• Proc_!derprudemmentlots du nettoyagede rallumeur. Le br01eur
ne s'allumerapas si rallumeur est mouill_ou endommag_!.
• Brt31eurs
conventionnels:Los br01eurssecsdans le four ont plac_
75° C [170° F].
Panneaux lat_rau×, tiroir de remisage, porte du four (certains
modules),porte du gril inferior (certains modules]et poign_es de
porte = _mail point
• Unelois les pi_ces refroidies,les lavera reau savonneusetilde,
rincer et s_!cher.Nejamais essuyerune surfacetilde ou chaude
avecun linge humide, ceci pouvantendommagerla surfaceet
entrainerune brQlurepar la vapeur.
* Lesnoms de marquesont des marquesd_!pos_esdes diff_rents
fabricants.
** Pour commanderdirectement,composerle 1-877-232-6771E.-U.
ou 1-800-688-8408Canada.
3O
• Pourlostaches
rebelles,
utiliser
desagents
denettoyage
16g_rement
abrasifs
comme
lap_teaubicarbonate
desoude
ou
BenAmi*.Nepasutiliser
denettoyants
abrasifs,
caustiques
ou
_nergiques
comme
lesnettoyants
pourfouroulostampons
en
lained'acier.
Cosproduits
raieraient
ouendommageraient
defa_on
permanente
lasurface.
Remarque : Utiiiser un tinge ou un torchon sec pour essuyer
les produits renvers_s,surtout s'ils sent acides
ou sucr6s. La surface pourrait se d6colorer ou se ternir si la
salet6 n'6tait pas imm6diatement enlev6e. CecJ
est particuli_rement important dans le cas de surfaces
blanches.
Pourfaciiiter le nettoyage,on pout eniever la porte du four.
(Voir la section Entretien,pages31-32.]
Grilles du four
• Nettoyeravec de I'eausavonneuse.
• Eliminerlossouillures tenacesavecune poudre de nettoyageou un
tampon a r_curersavonneux.Rinceret faire s_cher.
• Si los grilles sent laissc!esdarts le four pendantle cycle
d'autonettoyage,ellesse dc!colorentet peuvent ne plustr_s bien
glisser.Si ceci se produit, appliquer par essuyageun peu d'huile
v_g6talesur la grille et sos supportsen relief
pour faciliter le mouvement,et enleverI'excSsd'huile.
Acier inoxydabie (certainsmod_les)
• NE PASUTIL!SERDE PRODUITSDE NETTOYAGECONTENANT
DU JAVELLISANT.
• NE PASUTILISERDE NETTOYANTS_,ORANGE_ OU
ABRASIFS.
• TOUJOURSESSUYERDANS LESENSDE LA TEXTUREDE
L'ACiERLORS DU NETTOYAGE.
• Nettoyage journaiier/salet6 16g_re- Essuyeravec run des
produits suivants:eau savonneuse,vinaigre blanc/eau,produit de
nettoyagepour verreet surfaceFormula409*ou un produit
semblable pour verre - avecun lingo souple et une 6ponge.Rincer
et s(_cher.Pour polk et enleverlos marquesde doigts,faire suivre
par une vaporisationde Magic Spray*pour acier inoxydable[produit
n° 20000008]**.
• Saiet6 mod6r6e/6paisse = Essuyeravec I'un des produits
suivants:Ben Ami*, SmartCleanser*ou Soft Scrub* - _ I'aided'un
lingo souple ou d'une _ponge humide. Rinceret s(!cher.Lostaches
rebellespeuvent6tre enlev_esavec un tampon multi-usages
Scotch-Brite*humidi% Frotteruniform6mentdans le sons du mc!tal.
Rinceret s_cher.Pour redonner du lustre et retirer les rayures,faire
suivre par une vaporisationde Magic Spray*pour acier inoxydable.
• D6coioration - A I'aided'une 6ponge humidifi_e ou d'un lingo
souple, essuyer_ I'aidedu nettoyantCameo*pour acier inoxydable.
Rincer imm6diatementet s6cher.Pour enleverles marqueset
redonnerdu lustre,faire suivre par une vaporisationde Magic
Spray* pour acier inoxydable.
Hublot et porte du four en verre [certains mod_les)
• Eviterd'utiliser trop d'eau,qui risquerait de s'infiltrer sous ou
derriere le verre et de tacher.
• Lavera reau et au savon.Rinceravec de I'eaupropre et s6cher.Un
produit de nettoyagedu verre pout 6tre utilisd en le vaporisant
d'abord sur un lingo.
• Ne pas utiliser de produits abrasifscommetampons a rdcurer,
laine d'acierou produit de nettoyageen poudre qui
risqueraientde rayerle verre.
Int6rieur du four
Four autonettoyant:
• Exdcuterles instructions prdsent6esaux pages39 pour
I'autonettoyagedu four.
Nettoyage manual:
• Nettoyerfr6quemment avecun tampon de plastique et un produit
de nettoyagemoyennementabrasif.
• Ne pas utiliser un tampon a rc!curermc!tallique,qui formeraitdes
rayuressur la surface.
• Lorsde remploi d'un produit commercialde nettoyagede four,
appliquer los instructionsdu fabricant.
• Eliminerd_sque possibleles produits acidesrenvers6s[produits
basede lait ou de tomato] aveceau et savon;ces produits peuvent
faire changerla couleur de I'_mail Iors d'un contact prolong6.
Porte du four
2. Saisir la porte de chaque c6t6. Ne pas
utiliser la poignc!e de porte pour la
soulever.
3. Souleveruniform6ment pour dc!gagerla
porte descharni_res.
Reinstaiiation:
1. Saisirla porte de chaque c6t_!.
2. Aligner les fentesavec lesbras de charni_resur la cuisini_re.
3. Fairedescendrela porte pour la positionner correctementsur los
charniSres.Poussersur losangles sup_!rieursde la porte pour
renfoncer compl_tementsur los charni_res.II faut que la porte
soit parfaitementd'aplomb.
[
Remarque : On pout percevoirune certaine_ _!lasticit(!>>
[ors de
la fermeture de la porte du four d'une cuisini_re neuve;ceci est
normal;cet effet disparait progressivement.
Depose de la porte:
1. Apr6s le refroidissementdu four, ouvrir la porte - position de
cuissonau gril [porte entrouverted'environ10 cm [4 pouces]).
31
Hublot du four (certainsmodeles)
Deplacement
d'un appareil
gaz
Pour prot6ger le hublot de la porte du four :
Lesraccordsdes appareils_ gaz servant_ branchercet appareil
I'alimentationde gaz ne sont pus pr_vuspour 6tre d@lac6s
continuellement.Une lois I'appareilinstall6,NE PAS le d@lacer de
fagon r@6t6e pour le nettoyerou le changerde place.Sicet
appareil dolt 6tre d_m6nag6et/ou enlev_pour 6tre r@ar6,suivre la
mc!thodedc!criteduns les instructionsd'installation.Pourtoute
information, prendrecontact avec le service_ la clientele au
1-800-888-2002E.-U.et Canada.
1. Ne pus utiliser de produits nettoyantsabrasifscommedes
tampons_ r6cureren laine d'acier ou des produits de nettoyage
en poudre qui risqueraientde rayer le verre.
2. Ne pus heurter le hublot en verre avec un ustensile,un article de
mobilier,un jouet, etc.
3. Ne pusfermer la porte du four avant que lesgrilles ne soient en
placeduns le four.
II faut que le pied arri_re de la cuisini_re soit engag6 duns la bride
antibasculementpour que la cuisini_re ne puisse basculer
accidentellement.
Toute d6gradationdu hublot de verre- rayure,choc, tension,etc.peut affaiblir sa structure et augmenterle risque de bris _ une date
ult6rieure.
Pieds de reglage de I'aplomb
Lacuisini_re dolt 6tre d'aplombune fois install6e.Si
elle ne I'est pus,tourner les pieds de r_glagede
I'aplomben plastique,a chacun desangles de la
_1
cuisini_re,jusqu'a ce que celle-ci soit d'aplomb.
_h,,I
Tiroir de remisage
(certains modeles)
Le tiroir de remisagepeut 6tre enlev_pour vous permettrede
nettoyersous la cuisini_re.
D6pose :
1. Vider le tiroir et le tirer jusqu'_ la position de la premierebut6e.
2. SouleverI'avant.
__TIBASI_EMENT
3. Tirerjusqu'_ la position de la secondebutc!e.
PIED DE RL:GLAGE
DE L'APLOMB
4. Saisirle tiroir par lescOt6set soulever/tirer pour I'extraire.
Lampe du four (certainsmodeles)
R_installation
:
1. Ins6rer lesextrc!mit6sdesglissi_resdu tiroir duns les railsde la
cuisini_re.
2. SouleverI'avantdu tiroir et pousserdoucementjusqu'a la
position de la premiere but6e.
3. Souleverde nouveaule tiroir et le pousserpour le fermer.
Br ieurs
conventionnel
(certains modeles)
En aucunecirconstance,il ne faut d_monter les ensemblesde
brQleursde surface pour les nettoyer.Un ensemblede brQleurpeut
_tre enlev_d'un bloc pour nettoyerla zone correspondante.
Pour remplacer I'ampoule du four :
1.Apres le refroidissementdu four,
maintenir le cabochon [si c!quipc!)
tout en enlevant la piece
m6talliquequi la maintient en
place. Remarque : Le
cabochontombera si on ne le
maintientpus en place.
CABOCHON
Les cuisinieres
autonomes
seulement:
Les deuxensemblesde br_leurssont fix_!sen place pendant le
transport a I'aidede vis. Unefois la cuisini_re install_e,il est possible
d'enleverces vis pour permettreune d@ose rapide et facile des
ensemblesde brQleurs.
RESSORTDE RETENUE
(fiTm6tallique)
2. Enleverle cabochon et I'ampoule.
3. Installerune ampoulede 40 watts pour appareil m(!nager.
4. R(_installerle cabochon et le fil m6talliquede retenue.
5. R6tablirI'alimentationde la cuisini_re.R6glerde nouveauI'horloge.
32
D6pose :
Sole du four
Laisserrensemblede br01eurrefroidir. Souleverla table de cuisson.
SaisirI'ensemblede brQleuret le tourner I_g_rementvers la gauche
pour lib_rer losdeux pattes de I'ensemble.Puis,souleverI'ensemble
et le tirer vers I'arri_rede la table de cuissonjusqu'a ceque los
extrc!mitc!sde I'obturateurd'air de rensemble se d6gagentdes
soupapes.
Prot6gerla sole du four centre les renversements_articuli_rement
pour los produits acides ou sucr6s),qui peuventsusciter un
changementde couleur de 1'6mailvitrifi& Utiliser un ustensilede la
taille approprk!epour _viter tout renversementou dc!bordement.
Remise en place :
Raccordement
Introduire lesextr_mit6sde I'obturateurd'air sur I'ensemblede
br01eur,par-dessuslos soupapes,et baisser rensembleen place.
S'assurerde fixer losdeux pattesde I'ensemblede br01eurdunslos
deux fentesdu support de br01eurmont6 au dessousdu br01eur.
[REMARQUE: Si los pattesne sent puscorrectementintroduites
duns les fentes,I'ensemblepeut basculeret les br01eurspeuvent ne
pus s'allumercorrectement.)
Les appareils n_cessitant une aiirnentatJon
_lectrJque comportent une fiche _ trois hroche.,
raisea la terre qui dolt 6tre branch_edirectement
duns une prisede 120volts a trois cavitc!set
correctementraise_ la terre.
lectrique
_-_
..........
_-- _1
_.<_L( =_
Toujoursd4brancherI'appareilavantd'y fairede I'entretien.
La fiche a trois brochesraisea la torte fournit une protectioncentre
les d6chargesc!lectriques.NE PAS COUPERNI ENLEVERLA
BROCNEDETERREDO CORDON D'ALIMENTATION.
Si la prise ne comporteque deux cavit6s,n'est pus raisea la terre ou
n'est pasappropri_e,le propri_taire de I'appareil a la responsa=
biJit_de fake rernpiacer la prise par une prise _ trois cavit_s
correctement raise _ la torte.
Becherche
des
Pour la plupart des prebl_rnes observes,essayerd'abord los
solutions possibles,_ droite.
• V6rifier que les commandesdu four sent correctementr6gk!es.
• V6rifier si la fiche eat bien ins(!r6eclansla prise.
• Inspecter/r_armerle disjoncteur.Inspecter/remplacerlosfusibles.
° ContrOlerla source d'alimentation61ectrique.
chaudou moins chaud.Voir page 43 les instructionsd'ajustement
de la temperaturedu four [certains mod_les).REMARQUE: II
n'est pas utile de modifier le r6glagede temp_!raturesi la variation
n'affecte qu'une ou deux recettes.
° Utiliser les borisustensiles.Lesustensilesfonc_!sdonnent un
brunissementde couleur fone_e,les ustensilesbrillants,un
brunissementplus clair.
° V6rifier la position des grilles et des ustensiles. Lorsde la
r@artition sur deux grilles, ne pus superposerlos plats. Veiller
laisserun espacede 2,5a 5 cm (1 a 2 pc) entre los plats et los
paroisdu four.
° Contr6lerrutilisation de feuille d'aluminium dansle four. Ne
jamais recouvrircompl_tementune grille du four avecde la feuille
d'aluminium.Placerun petit morceau de feuille d'aluminium
sur la grille sous le plat pour rdcup_rerlos mati_resrenvers_es.
Un brr_leurde surface ne s'allume pus.
° V6rifier que I'appareilest correctementraccordc!_ la source
d'c!lectricit6.
° Dc!terminersi ralimentation c!lectriqueest interrompue [fusible
grillddisjoncteur ouvert).
° V6rifier que I'allumeurest sec et qu'il 6met des _tincelles.Le
br01eurne peut s'allumer si I'allumeur est endommag&souill6 ou
mot]ill& Si I'allumeurne gc!n_repusd'6tincelles,ramenerle bouton
de commando_ la position OFF[ARRET].
R_sultats incorrects lots de la cuisson au gril, ou _mission
excessivede [um_e.
• Ddterminerla position desgrilles. Lesalimentspeuvent _tretrop
prosdes flammes.
• Utilisation incorrectede feuille d'aluminium.Nejamais garnir la
grille de I_chefriteavec de la feuille d'aluminium.
• EnleverI'exc_sde graissesur la piScede viandeavant la cuisson
au gril.
• Utilisation d'une I_chefritesouilk!e.
• Pr_chaufferle four pendant2 a 3 minutesavant de placer le plat
dunsle four.
• Portedu four fermSedurant la cuissonat] gril.
Flammes non uniformes.
° Orificesdu br01eurobstruds.
S_paration entre les flammes et le br_leur.
° Veiller a placercorrectementI'ustensilesur la grille du br01eur.
R_sultats de cuisson au four cliff,rents des attentes ou de ceux
produits par le four ant_rieur.
• V_rifier que la temperatures_lectionn_!eest correcte. Veiller
prdchaufferle four si ceci est demand_dunsla recette.
• Ddterminersi I'dventdu four est obstru_.Voir son emplacement
page 47.
• S'assurerque la cuisini_re est d'aplomb.
•Les r_glagesde temperaturevarient souvententre un four neuf et
le four qu'il remplace.On observesouventune ddrivedu rdglage
de tempdratured'un four _ mesurequ'il vieillit; il pout devenirplus
Impossibilit_ d'autonettoyagedu four (certains modules).
• D_!terminerque I'appareiln'a pus _t_ programm_ pour un
autonettoyagediff_!rd.Voir page 39.
33
• Laraiseen marched'un ventilateur aide a rotifer fum(geet odeurs.
• Pr6sencede salet6ssur la sole. Proc6dera un autonettoyage.
•V_rifier que la porte est fermc!e.
•V@ifiersi la commandoest en Mode Sabbat.Voir page 43.
• Le four est pout 6tre _ une temp6raturesup@ieurea 205 °C
(400°F].La temp@aturedu four dolt 6tre infc!rieure_ 205 °C
(400°F] pour pouvoir programmerun cycle d'autonettoyage.
Codes d'anomalie [certains mod_les]
• Losroots BAKEou LOCKpeuventclignoter rapidementa I'afficheur
pour pr6venird'une erreur ou d'un probDme.Sile mot BAKEou
LOCKparait a I'afficheur,appuyersur la touche Cancel.Sile mot
BAKEou LOCKcontinue _ clignoter,d#brancherI'appareil.
Attendre quelquesminutes,puis rebrancherI'appareil.Sile mot
continue _ clignoter,d6brancherI'appareilet prendre contact avec
un r@arateurautoris(g.
•Sile four eat tr_s sale, losflamm_chespeuventproduire un code
d'anomalieau cours du cycle d'autonettoyage.Appuyer sur la
touche Cancelet laisserle four refroidir compDtement,essuyerla
salet6 en exc_spuis reprogrammerI'autonettoyage.Sile code
d'anomalierc!apparait,prendre contact avec un r@arateur autoris6.
Le four ne se autonettoie pas correetement
[certains mod_les].
• Un tempsde nettoyageplus long peut 6tre n6cessaire.
• On n'a pasc!limin6avant I'op@ationd'autonettoyagelos
accumulationsexcessivesde rc!sidus,particuli_rementlos rc!sidus
d'alimentsacides ou sucrc!s.
La porte du four ne se d_verrouille pasapr_s rautonettoyage
[certains mod_les].
• L'int6rieurdu four est encore chaud.Attendre environ une heure
apr_s I'ach_vementde la p@ioded'autonettoyage.II est possible
d'ouvrir la porte apr_s la disparition du messageLOCK
(VERROUILLAGE]
sur I'afficheur.
• Loscommandoset la porte sont peut-6tre verrouillc!es.Voir pages
29 et 40 pour le deverrouillage.
Accumulation d'humidit_sur le hublot ou vapeur sortant
de r_vent.
• Ceciest normal durant la cuissond'alimentscontenant
beaucoupd'eau.
• Utilisationexcessived'humiditc!Iors du nettoyagedu hublot.
Des bruits se font entendre.
• Lefour fait plusieurs bruits faibles. II est possible d'entendrelos
relaisdu four qui se mettent en marche et s'arr6tent.Ceci est
normal.
oAIorsque le four se rc!chauffeet se refroidit,il est possible
d'entendredes bruits correspondanta la dilatation eta la
contraction des pi_ces m6talliques.Ceci eat normalet
n'endommagepas I'appareil.
II n'y a ni hip ni affichage.
• Lefour est peut-6tre en Mode Sabbat.Voir page 43.
Emissiond'une forte odeur ou de fum_e Iors de la mise en
marche du four.
• Ceciest normal pour une cuisini_re neuveet disparait apr_s
quelques utilisations.Un cycle d'autonettoyage_ brCJlera
>>
plus
rapidementlos odeurs.
_ SAb _ ciignote puisreste aiium_.
• Lefour est en modesabbat.Pour annuler,appuyersur la touche
Clock et maintener-laenfonc6e pendantcinq secondes.
34
Culsson
surle surfece
Low (Basse]: Lesalimentsre,stent a une
temp6raturesup6rieurea 60° C (140° F]
sans continuer a cuire. Lesalimentssont
chauffc!ssur des flammesplus grandes
jusqu'a ce qu'ils atteignentcette
temp6rature,puis, la taille desflammes est
r_duite. Lorsquele plat ou I'ustensileest
couvert,un d_but de cuisson peut se
produire avec la puissancede chauffageLow.
Si un brQleurde la table de cuisson ne s'allume pas,d_terminersi
I'allumeurest bris& souilldou mouill6.Le cas 6ch6ant,d6boucher
avec une aiguille ou une broche rectiligne I'orificesitu6 juste
au-dessousde I'allumeur.
Allumage par veilleuse
(certains
modeles)
Lorsde I'installationinitiale de la cuisini_re,il peut 6tre difficile
d'allumer lesveilleusescontinues a causede I'air qui se trouve
dans la conduite de gaz. Pourpurger I'air de la conduite,tenir une
allumette enflammeepros du brQleuret mettre le bouton a la
position ON (MARCHE).Unefois le brCfleurallum& mettre le
bouton a la position OFF[ARRET)et
proc_dercomme il est indiqu6
Bi'eleuragaz
conventionnel
ci-dessous.
Med (Moyen] : Une puissancede chauffage interm6diaireest utilis6e
pour la poursuite de la cuisson.Lesaliments ne cuisent pas plus
rapidementsi on utilise une puissancede chauffageplus 61ev6eque
n6cessairepour le maintien d'une douce _bullition. L'eau bout
toujours a la m6metemp6rature,que I'c!bullitionsoit tranquille ou
vigoureuse.
Allumage de la veilleuse :
Nigh [Elev6e): S'utilisepour porter un liquide a 6bullition ou atteindre
la bonne pressiondans un autocuiseur.R6duireensuite la puissance
de chauffageapr_s le d_but de 1'6bullitionou de la cuissondes
aliments.
Releverla table de cuisson et tenir une
allumette enflammc!epros des orificesde
la veilleuse 07oirillustration),un
droite et I'autre a gauche.
Commandes de la
surface de cuisson
Boutons de commande de la
surface de cuisson
On utilise ces boutons pour commanderI'allumagedes brGleursde
surface.On peut r6gler chaquebouton _ toute position entre les
positionsextr6mesLow (Basse)et Nigh (Elevde).On peut
percevoir une ddtente de calage_ la position High.On peut choisir
toute position de r6glage entre les deux positionsextr6mes.
Un graphique prosde chaque bouton identifie le brQleurde surface
commanddpar ce bouton. Par exemple,le graphique
O O gauche identifie le brQleuravant/gauche.
•
0
R_glage des commandes
:
Lapuissancede chauffage_ employerddpend du type et de la
taille de I'ustensileutilisd.
1. Placerun ustensilesur la grille du brOleur.
Allumage
veille
sans flamme
• Si aucun ustensilen'est placd sur la grille du brQleur,les
fiammespeuvent avoirtendance _ se sdparerdu brQleur.
de
2. Appuyeret tourner le bouton clansle sens anti-horaire,jusqu'_
la position LJte [Allumage).
(certains modeles)
Le syst_med'allumagesans flamme de veille
rend inutile I'alimentationpermanente
d'une flammede veille.ChaquebrCfleur
scelle de la table de cuissonest dote!d'un
allumeur _ c!tincelles.II y a deux allumers pour ...................
lesbrQleursde surface conventionnels.Proc6deravec prudenceIors
du nettoyageau voisinaged'un brQleurde la table de cuisson.Si le
chiffon utilisc!accrochait le dispositif d'allumageil pourrait le
d6t6riorer,ce qui emp6cheraitensuite I'allumagedu brQleur.
° On peut percevoirle cliquetis correspondant_ la production
des _tincelles,et le brQleurs'allume.(Lesquatre allumeurs
produisent desdtincelles Iorsqu'onplace le boutonde I'un
des brt_fleurs
_ la position Lite.]
3. Apr_s I'allumagedu brQleur,r_!glerla taille desflammes selon le
d_sir en tournant le bouton de commande.
, L'allumeurcontinue _ produire des _!tincellesaussi Iongtemps
que le bouton est a la position Lite.
35
Utilisation
Br leur
durant une panne
d' lectricit
de haute
performance
(certains modeles)
(12,000 BTU*)
1. Approcher une allumetteenflamm6edu br01eura utiliser.
2. Enfonceret faire tourner lentementle bouton de commando
jusqu'_ la position [ite.
Cettecuisini_re est dot6e d'un br01eur_ hautevitesse,placc!_ I'avant
droit. Cebr01eurpermet une cuisson rapide qui peut servir a faire
bouillir rapidementde I'eau ou _ cuire une grande quantit6 d'aliments.
3. Quands'allume,ajuster los flammes_ la taille d_sir6e.
Br leur
de mijotage
(certains modeles)
Ce br01eurest situc!a la position arri_re gauche. II offre une plus
faible puissance*pour la cuisson de saucesd_licatesou la fusion du
chocolat.
Lapuissancethermique(BTU) desbrdeurs est diff4renteIors de
I'alimentationau gaz de p4troleliqu4fi4
Surface de caisson
Grilles de br leur
Pour _viter la formation
de taches
changement de couleur
de la surface de caisson
ou un
:
Avant une opc!rationde cuisson,vc!rifierque la grille est
correctementplacc!e.Unegrille de br01eurincorrectement _///
install6e pout 6caillerI'_mail de la table de cuisson.
• Nettoyer la surface de cuissonapr_schaqueutilisation.
• Enleverles rc!sidusrenvers_sde produits acides ou sucr6sd_s que
la surfacede cuissona refroidi; cos produits renvers6speuvent
faire changer la couleur de I'_mail.
Br leurs
Ne pas fake fonctienner un br_leur sans qa'un
astensile seit plac_ sur la grille. L'_rnail de la grille
pout s'_cailler s'il n'y a aucun ustensile capable
d'abserber la chaleur _mise par le br_leur.
scell6s
M6me si les grilles de br01eursent tr6s durables,elles perdront
progressivementleur lustre et changerontde couleur, du fait des
temperatures61ev6esauxquellesles br01eurslos exposent.
Losbr01eursscell6sde la cuisini_resent fixdssur la surface de
cuisson;ils ne sent pas conquspour 6tre enlev6s.Commelos
br01eurssent scell_s,un produit qui d6borde d'un ustensilene
s'infiltrera passous la surfacede cuisson.
Remarques
:
• Un br01eurconvenablementr_gl_ et dent lesorifices sent
propress'allume en quelquessecondes.Lorsde I'alimentation
au gaz naturel losflammes sent bleues,avec un c6ne interne
bleu intense.
On devrait cependant nettoyerlos br01eursapr_s chaqueutilisation.
A la diff6renced'une cuisiniSredot6e de
br01eursa gaz standard,la surfacede cuisson
de cette cuisini6re n'est pas amovibleou
relevable.Ne
pas tenter
de releverlala
Voir
los instructionsde
nettoyagea
page 30.)
surface de caisson, quelle qu'en seit la
Si losflammes d'un br01eursent jaunesou si la combustion
est bruyante,le ratio air/gaz peut _tre incorrect.Demander
un technicien d'effectuer le r_!glage.(La garantie ne couvre
pas ce r_glage.)
EBISOII.
Br leurs
conventionnel
Lorsde I'alimentationau gazde p_trole liqudi& il est acceptable que I'extr_!mit_desflammessoit jaune. Ceciest normal;
aucun r_glage n'est n_cessaire.
Lescuisini_resautonomesa br01eursa gazconventionnelsse
caractc!risentpar une table de cuissonrelevable.
, Avec certainstypes de gaz,on peut percevoir un petit bruit
d'explosionIors de I'extinctiond'un br01eurde surface. Ceci
est normal.
Pour relever la table de caisson :
Lorsqu'elleest froide, la saisir par le herd
avant et la souleverdoucementjusqu'a ce
que lesdeux tiges de support, le cas c!ch6ant,
sur I'avant,s'enclenchent en place.
_
_
///_
.......
, Si on fait passerrapidement le bouton de commandode la
position High (Elev_e)a la position Low (Basse),los flammes
peuvent s'_!teindre,particuli_rementsi le br01eurest froid. Si
ceci se produit, placer le bouton de commando_ la position
OFF (Arr_t) et attendre quelquessecondesavantd'allumer de
nouveaule brOleur.
I
I
I
Pour baisser la table de caisson : Maintenir le bord avant
et pousserdoucementsur chacunedes tiges de support, le cas
c!ch6ant,pour lib6rer I'enclenchement.Puisbaisserdoucementle
dessusen place. Lostiges de support se coulissentdans le cadrede
la table de cuisson.
, Ajuster la puissancede chauffagede telle mani_reque les
fiammes ne d_!bordentpas_ la p_!riph_!rie
de I'ustensile.
36
Caisson
denslefour
Commandes du four
nettoyage
manuel (certainsmodeles)
Cuissoncourante
S'utilisepour la cuissoncourante et le
rOtissage.
Gril
S'utilisepour la cuissonau gril et le
rissolagesur partie supdrieure.
Minuterie
Programmela minuterie.
Horloge
S'utilisepour programmerI'heuredu jour.
ANNULER
Annuletouteslesop6rationssauf minuterie
et horloge.
A (Plus)ou
T (Moins]
S'utilisepour entrerou changerla dur6e,la
tempdraturedu four. Etablit le gril
tempdraturec!lev6eou basse.
Utilisation
2. Appuyer sur A ou T jusqu'_ ceque la dur6e ddsirc!esoit
affich6e.
• La minuterie commence_ ddcompterridsque la dur6e a dtc!
programmc!e.
,Les deuxpoints qui clignotent indiquentqu'un d6compteest
en cours. [Los deuxpoints ne clignotent passi I'heureou la
temp6raturedu four sont affich6es.]
• Deux hipscourts signalent la fin de I'op_ration.0:00parait
I'afficheur.
• Si I'on veut, appuyer sur la touche CLOCK et I'heure du jour
r_apparait bri_vement a I'afficheur pendant une op6ration
minutde.
° Si I'onveut, appuyersur los touches BAKEou BROILet le
rdglage de temp6ratureactuelle r6apparaitbriSvement
I'affichage pendantune opdrationminut6e.
Annulation
des touches
, Appuyer sur A (Plus)ou T [Moins) pour entrer la dur6e ou la
tempdrature.
Programmation des commandes
courante ou un rStissage :
, Un bip retentit Iorsque I'on appuiesur une touche de fonction. II
n'y a pasde bip pour la touche A ou T.
• 000s'allumeet le t_moin lumineuxde cuisson
couranteclignote_ I'afficheur.
-
....
2. Appuyersur la touche A (Plus)ou T (Moins]jusqu'a ceque la
temperatureddsir6edu four soit affich6e.
• La temp6raturepeut 6treprogrammdede 75 a 285 °C (170a 550 °F].
CLOCK
1. Appuyer sur la touche CLOCK(Horloge].............
• L'horlogene pout pas 6tre r%lc!e sile four est d6j_ programm6
pour une op6rationde cuissoncourante,de gril ou une
op6ration minut6e.
2. Mettre a I'heurea I'aidedes touchesA ou T. Si I'onn'appuie
pussur cos touches en moins de 30 secondes,le programmeest
annul& Appuyer sur la touche CLOCKet recommencer.
° 350° paraita I'afficheurIorsqueI'onappuie une fois sur la touche
A ou Y.
, Appuyera plusieursreprisessur la touche A ou T pour
changerla temperaturedu four par inte_valles
de 3 °C (5 °F]ou
appuyersur la toucheA ou Ten maintenantla pression,
pour changerla tempdraturedu four par intervallesde 6 °C
(]o °F).
• 100° ou la tempdraturer_elledu four, selonlaquelleest la plus
dlevde,parait a I'afficheurIorsquele four se met en marche.
de ia minuterie
° La temperature_ I'afficheuraugmentepar intervallesde 3 °C
[5 °F],jusqu'_ ceque la tempdraturepr@rogramm_esoit
atteinte.Unseul hip retentit Iorsquele four est en cours de
pr_chauffage.
La minuterie peut 6tre programmdede une minute [:01]jusqu'a 99
heureset 59 minutes (99:59).La durde seraaffich6een minuteset
non en secondes.L/I MINUTERIENE COMMANBE PA$ LEFOUR.
1. Appuyer sur la touche TIMER[Minuterie].
TIMER
° 0:00s'allume et lesdeux points (:] clignotent
I'afficheur.
BAKE
• Si I'onappuie sur la touche BAKE,sans programmerune tempdraturedu four danslos30 secondessuivantes,le programme
est automatiquementannul6 et I'heuredu jour r6apparait
I'afficheur.
Rernarque : Quatresecondesapr_s avoirappuydsur lestouches
A ou T, la durde ou la tempdratureseront automatiquement
entr_es.Si plus de 30 secondess'6coulententre la pressionsur
une touche de fonction et sur los touchesA ou T, la fonction
seraannulde et I'afficheur reviendraa I'affichagepr6cc!dent.
Programmation
pour une caisson
1. Appuyersur la touche BAKE[Cuissoncourante).
, Un double hip retentit en cas d'erreur de programmation.
de I'horloge
:
Appuyer sur la touche TIMERet la maintenir ainsipendant plusieurs
secondes.
, Appuyer sur la touche d6sir6e.
R glage
de la rninuterie
..............
37
, Laisserle four pr6chaufferpendant 10a 15minutes.
1. Placerla I_chefrite_ la position recommand6e[voir le tableaucidessous)darts le compartimentde cuissonau gril.
, Pour rappelerla temp@aturepr@rogramm6ependantle
pr6chauffage,appuyersur la touche Bake.Latemp6raturesera
affich6ependanttrois secondes.
2. Appuyersur la touche BROIL
(Gril).
BRO&
• SEts'allumeet le t6moin
lumineuxde cuissonau gril
clignote_ I'afficheur.
• Pour changer la temperature du four pendant la cuisson,
appuyersur Bake,puis sur la touche A ou • jusqu'_ ce que la
temp@atured_sir6esoit affich_e.
• Pour changer la temperature du four lots du pr_chauffage,
appuyerdeu× lois sur la touche Bake,puis sur la touche
A ou _r jusqu'_ ceque la temp6ratured6sir6esoit affich6e.
3. Appuyersur la touche A pour choisir un gril a tempc!ratureHi
(Elev6e)ou sur la touche T pour choisirun gril a temp6ratureLo
(Basso).
3. Placerla nourrituredartsle four.Vc!rifierI'avancementde la cuisson
la dur6e minimalede cuisson.
• Choisirle rc!glageHi pour un gril normal.
• Choisirle rc!glageLo pour un gril a temp6raturebasso,afin
d'@iterun rissolageexcessifdes alimentsn6cessitantdes
durc!esde cuissonplus Iongues,commela volaille.
4. Lorsquela cuissonestterminc!e,appuyersur la touche CANCEL
[Annule0 pour 6teindrele four, puisretirer la nourrituredu four.
, Le four se caract6risepar un arr6t automatique.S'il est laiss6
en marchependant12 heures,il s'arr6teraautomatiquernentet
000 paraitraa rafficheur.Appuyersur la touche Cancelet
I'heurerc!apparaitra_ I'afficheur.
, Si I'on ne choisitpas le rc!glageHi ou Loen rnoinsde 30
secondes,le programmeseraautomatiquementannul6 et
I'heurer6apparaitraa I'afficheur.
4. Utiliserlostempsde cuissonsugg6r6sdans le tableauen page 38.
Retournerlospi_cesde viandeversle milieu de la p@iodede
Programmation
des commandes pour la
caisson au gril : (compartiment inferieur certains modeles)
cuisson.
5. Apr_s le gril, appuyersur CANCELpour _teindrele
four, puis retirerla I_chefritedu four. L'heuredu jour
rdapparafta I'afficheur.
Pourde meilleursr6sultats,utiliser I'ustensilepr@upour ce genre de
cuJsson.
Tableau de caisson au gril Compartiment
inf rieur
Boeuf
Steaks, @aisseur 2,5 cm (1 po]
Boeuf hach_ - steakettes,
@aisseur 2 cm( s/4po)
Cuisson moyenne
Bien cuit
Bien cuit
Moyen
Moyen
Moyen
14 - 20 min.
16 - 24 min.
16 - 24 min.
Porc
Jambon, precuit - tranche de 1,3 cm (V2po)
C6telettes, @aisseur 2,5 cm (1 po)
TiSde
Bien euit
Moyen
Moyen
8 - 12 rain.
18 - 25 rain.
VolaiUe
Poulet en morceaux
Bien cult
Fond
Gril mn. (232° C)
(Lo Broil 450° F) 30-45 min.
PoJsson
Filets, @aisseur 1,3 cm (_/2po)
Dames, @aisseur 2,5 cm (1 po)
La chair se d6tache
La chair se d6tache
Moyen
Moyen
8 - 12 min.
10 - 15 min.
Haut= positionsup6rieure;
moyen= positioninterm6diairefond= le fonddu corr _artiment
decuissonaugril (enleverla grille}.
** Tempsde cuissonapproximatifs,
variablesselonlescaract6ristiques
dechaquepiecede viande.
R gulateur
Reglage du four pour une caisson courante ou
un r(itissage :
de four
(certains modeles)
R6glage
du bouton
Le bouton OvenTemp Cremp6raturedu four)
permet de sc!lectionneret maintenir la
temp6raturedu four. On doit toujours faire
tourner ce boutonexactementJUSQU'Ala position de latem 3drature
dc!sir_e.Ne pas faire tourner le bouton au-dela de la position d_!sirde
pour le faire tourner ensuiteversle sons inverse.
38
1. Enfoncer/fairetourner le bouton OvenTemp0-emp@aturedu
four), jusqu'_ la position correspondant_ la temperatured_sir_e.
Laisserle four pr_chaufferpendant 10 a 15 minutes.
2. Placerla nourriture au centre du four. A I'expirationdu temps de
cuisson minimumindiqu_ dans la recette,@aluerle degr_!de
cuisson. Poursuivre la cuissonsi c'estn_!cessaire.
3. Retirerle metsdu four et ramenerle bouton OvenTemp
0-emp@aturefou0 _ la position OFF(ArrSt).
Commande du four
autonettoyant
(certainsmodeles)
R6glage du four pour cuisson au gril
(oertains modules) :
1. Pourobtenir les meilleursr6sultats,utiliser un ustensilecon_u
pour la caissonau gril. Placerla I_chefrite_ la position recommand_eduns le grille du four. (Voir le tableau en page38.)
2. Placerle bouton OvenTemp 0-emp6raturedu fou0 _ la position
BROIL(Gril) ou a la position (232° C) 450° F pour une cuissonat]
gril a bassotempc!rature.
• Utiliserla tempc!ratureplus bassopour la cuissonau gril pour
6viter un brunissageexcessifou pour un mets n6cessitantune
Ionguecuisson(par exemplevolaille).
3. Dtiliserlostempsde cuissonsugg6r6sdunsle tableauen page 38.
Retournerlospi_cesde viandevers le milieude la p6riodede
Gril
S'utilisepourla caissonau gril et le rissolage
sur partiesup_rieure.
Caissoncourante
S'utilisepour la cuissoncouranteet le
rOtissage.
A (Plus)ou
V (Moins)
S'utilisepourentrerou changerla dur6e,la
temp6raturedu four.Etablitle gril
temp6ratureCLEVI_E
ou BASSE.
Minuterie
Programmela minuterie.
Cuissonet maintien
Pourcuirependantune dur6epr66tablie,
avecmaintienau chaudpendantuneheure.
Nettoyage
S'utilisepour programmerle cycle
d'autonettoyage.
Demarragediff6re
Programme
le four pourdebuterune cuisson
plustard.
Horloge
S'otilisepour programmerI'heuredu jour.
Maintienau chaud
S'utilisepour maintenirau chauddansle four
losalimentscults.
Annuler
Annuletouteslesop6rationssaulminuterie
et horloge.
cuissoN.
4. ContrOlerle degr6 de cuisson:inciser la piScede viandepros du
centre pour en observer la couleur.
5. A la fin de la pc!riodede cuisson,ramenerle bouton OvenTemp
0-emp6raturedu fou0 _ la position Off (Arr6t). Retirer la
Dchefrite du four.
Allumage
sans flamme
de veille
(certains modeles)
La cuisini_reest dot6ed'un syst_med'allumagesans flammede
veille. Ce syst_meferme automatiquementI'arriv6ede gazet
emp#che tout fonctionnement du four lots d'une interruption
de I'alimentation#lectrique.
Utilisation
des touches
• Appuyer sur la touche d_sir_!e.
II ne sera pus possibled'allumer le brOleurdu four avecune
allumette. Nepus tenter de Dire fonctionnerle four lots d'une
interruption de I'alimentation_lectrique.
• Appuyersur la touche A (Plus)ou T (Moins] pour entrerla durocou
la temp_!rature.
• Un bip retentit IorsqueI'on appuie sur une touche.
Aliumage
par veilleuse
• Un double bip retentit en cas d'erreur de programmation.
(certains modeles)
Allumez le brt31eur
arri_re en premier,avant la veilleusedu four. Ceci
enDvera I'airdu circuit de gaz et favoriseraI'allumagede la veilleuse.
Sinon,la durc!ede I'allumagepout 6tre plus Iongueque cello qui est
pr6vue.
Ailumage
Remarque : Quatresecondesapr_s avoirappuy(!sur lestouches
A ou _, la dur_e ou la temperatureseraautomatiquemententree.
Si plus de 30 secondess'_coulententre la pressionet sur une
touche de fonction sur les touches• ou T, la fonction sera
annul_e et I'afficheur reviendra_ I'affichagepr_!c_dent.
de la veilleuse du four :
Horloge
Une lois la porte du grilloir refroidie, I'ouvrir et retirer la grille et la
I_chefrite.
L'horlogepeut _tre programm_!epour afficher la dur_e duns un
format de 12 ou 24 heures.L'horlogeest programm_een usine pour
un format de 12 heures.
Tout en c!tant_ la position ARRET,appuyezet maintenez
enfonc6 le bouton de la terap_rature du four et
tenez une allumetteallum6eau-dessusde la
veilleusesitu_e _ I'arri6redu brOleur(voir
I'illustration).Une lois la veilleuse allumc!e,
rel_chezle beaten de temperature du
fear et remettezla I_chefriteet le plateau.
(REMARQUE: Le brOleurdu four est
illustr_ sans le diffuseur de flammeen
mc!tal.)
Change[neat de I'horloge _ un format de 24 heures :
Appuyer sur les touchesCANCEL
(Annulet) et DELAY(D_marragedifferS) et
maintenir la pressionpendanttrois
secondes.
-2. Appuyer sur la touche • ou • pour
programmerun format de 12 ou 24 heures.
DE_Y
3. ProgrammerI'heureen suivantles instructions
donn_!esen dessous.
CLOCK
39
R_glagede I'horloge
4. A la fin de la durc!eprogramm6e,un bip long retentit.
1. Appuyer sur la touche CLOCK(Horloge).
Annulation de la minaterie :
• L'heuredu jour et deux points clignotent
I'afficheur.
1. Appuyer sur la touche TIMERet la maintenir ainsi pendanttrois
secondes.
OU
2. Appuyer sur la touche A ou _' pour
programmerI'heuredu jour.
2. Appuyer sur la touche TIMERet r_gler I'heure_ 00:00.
• Deuxpoints continuent a clignoter.
3. Appuyer a nouveausur la touche CLOCKou attendre quatre
secondes.
Verroaillage des commandos
Lorsquele courant _lectrique arriveou apr_s une interruption de
courant,la demi_re heure avant I'intermption de courant va
clignoter.
Lestouches peuvent6tre verrouill6espour des raisonsde s(!curit&
nettoyageou pour emp6chertoute utilisation non souhaitc!e.Ellesne
pourront 6tre utilis6essi elles sont verrouill6es.
Si le four est en cours d'utilisation,les commandesne peuvent 6tre
verrouill6es.
Pour rappeler I'heuredu jour Iorsqu'uneautre fonction de dur6e
s'affiche,appuyersur la touche CLOCK.
L'heure actuelle du jour restera_ I'afficheur Iorsque lescommandes
seront verrouilk!es.
L'heure de I'horlogene pout 6tre chang6eIorsquele four a €!t6
programm6pour une cuissonou un nettoyagediffc!rc!ou pour la
fonction de cuissonet maintien.
Verroaillage :
Appuyersur lestouches Cancelet Cook& Hold
(Cuissonet maintien) et los maintenir ainsi
pendanttrois secondes.
Annalation de I'affichage de I'heare :
Si I'onne d6sire pasI'affichagede I'heuredu jour :
Appuyer sur lostouches CANCEL(Annule0 et
CLOCK(Horloge)et los maintenir ainsi pendant
trois secondes.L'heuredu jour disparait de
I'afficheur.
° Le mot LOCK[VERROUILLAGE)
clignote a I'afficheur.
--
Appuyersur lestouches CANCELet COOK& HOLDetles maintenir
ainsi pendanttrois secondes.
° Le mot LOCKdisparaftde I'afficheur.
R_affichage de I'heare :
Appuyer sur lestouches CANCELet CLOCKet les maintenir ainsi
pendanttrois secondes.L'heuredu jour r6apparait_ I'afficheur.
Codes d'anomalie
Los mots BAKE(CUISSONCOURANTE)ou LOCK(VERROUILLAGE)
peuventclignoter rapidement_ I'afficheurpour pr6veniren cas
d'erreur ou de probDme.Si tel est lecas, appuyersur la touche
CANCEL.Si losroots BAKEou LOCKcontinuent _ clignoter,
d6brancherI'appareil.Attendre quelquesminutes,puis rebrancher
I'appareil.Si I'un des roots continue _ clignoter,d6brancherI'appareil
et prendre contact avec un rc!parateurautoris&
Nlinaterie
La minuterie peut 6tre programmc!ede une minute (00:01)jusqu'_
99 heureset 59 minutes(99:59),
La minuterie peut 6tre utilis6e ind@endammentde toute autre
activit6 du four, Elle peut 6tre aussi programmc!ealors qu'une autre
fonction du four est en cours d'utilisation.
Caisson
La minuterie ne commandepas le four. Elle ne sert qu'_ c!mettre
des bips.
coarante
Prograramation de la caisson coarante :
Programmation de la minaterie :
1. Appuyer sur la touche BAKE (Cuissoncourante).
TIMER
• Le mot BAKE(CUISSONCOURANTE)clignote.
• 0:00s'allume _ I'afficheur.
° Lesdeux points clignotent.
2. Appuyer sur la touche A ou T jusqu'a ce que I'heure
juste paraissea I'afficheur.
•Les deux points continuent _ clignoter.
COOK&
HOLD
Deverroaillage :
CLOCK
LorsqueI'affichagede I'heureest annul& appuyersur
la touche Clockpour afficher bri_vementI'heuredu jour.
1. Appuyer sur la touche TIMER(Minuterie].
....
..................
• 000 clignote _ I'afficheur.
2. S_lectionnerla temp6raturedu four. La temp6rature
pout 6tre programm_ede 75 a 290 °C (170 a 550 °F).
Appuyer une lois sur la touche A ou _' ou appuyer
sur la touche A ou Yet la maintenirainsi.
A,
_
V
o
• 175° (350) s'allume Iorsque I'onappuie la
premiSrefois sur I'unedes touches.
3. Appuyer a nouveausur la touche Timer ou attendre quatre
secondes.
• Appuyer sur la touche A pour augmenterla temperature.
• Lesdeux points continuent _ clignoter et le dc!comptede la
durc!ecommence.
• Laderni_re minute du d_comptesera affich_!esous forme de
secondes.
• Appuyer sur la touche • pour diminuer la temperature.
40
3. Appuyer a nouveausur la touche BAKEou attendre quatre
secondes.
• Learoots BAKE(CUISSON)et HOLD
(MAINTIEN)clignotent.
• 000 s'allume _ I'afficheur.
• Le mot BAKEs'arr6tede clignoter et s'allumea I'afficheur.
2. %lectionner la temp6raturedu four• La temp6rature
peut 6tre programm6ede 75 a 290 °C (170 a 550 °F).
Appuyer une lois sur la touche A ou _' ou appuyersur
la touche ,A ou _' et la maintenir ainsi.
• Appuyer sur la touche A pour augmenterla
temp6rature.
• 38° (100°) ou la temp6raturerc!elledu four sera affich6e. La
temp6ratureaugmenterapar intervallede 3 °C (5 °F)jusqu'_
ce que la tempc!raturepr@rogramm6esoit atteinte.
• Appuyer sur la touche T pour diminuer la temp6rature.
3. Appuyer _ nouveausur la touche COOK& HOLD OUattendre
quatre secondes.
4. Laisserle four prc!chaufferpendant8 a 15 minutes.
, Lorsquela temp6ratureprogrammc!epour le four est atteinte,
un bip long retentit.
• Le mot HOLDclignote.
• 00:00clignote a I'afficheur.
• Pour rappelerla temp6ratureprogramm_ependant le
pr6chauffage,appuyersur la touche BAKE.
4. Entrerla dur6e pendant laquelle ron d_sireque la cuissonnit lieu
en appuyant sur lestouches A ou T. La durc!ede cuissonpeut
6tre programmc!ede 10 minutes(00:10)_ 11 heures,59 minutes
(11:59].
5. Placerla nourriture au centre du four, en laissantun minimum de
2 pouces(5 cm) entre rustensile et les paroisdu four.
6. V6rifier I'avancementde la cuissona la dur6e minimale de
cuisson.Cuireplus Iongtempsau besoin.
•Les roots BAKEet HOLDs'allument a I'afficheur.
• La dur_e de cuissons'allume_ rafficheur.
7. Lorsquela cuissonest termin6e,appuyer sur
la touche CANCEL(Annule0.
• La dur_e de cuissoncommencele compte_ rebours.
8. Retirerla nourriture du four.
Remarques
au four
Lorsqae la dar6e de caisson s'est bcoal6e :
, Quatrebips retentissent.
sat la caisson courante
• Le mot BAKEs'6teint.
:
• Lesroots HOLDet WARM (CHAUD)s'allument.
• Pour changer la tempbrature du four pendant la euisson,
appuyersur Bake,puis sur la touche A, ou T jusqu'a ce que la
temp6ratured6sirdesoit affich6e.
• 75° (170°) parait _ I'afficheur.
• Pour changer la temperature du four Iors du pr_chauffage,
appuyerdeux lois sur la touche Bake, puissur la touche
A ou T jusqu'_ ce que la tempdraturedc!sir6esoit affich6e.
• Si I'onoublie d'arr6ter le four, il s'arr6teraautomatiquement
apr_s 12 heures.Siron dc!sired_sactivercette fonction, voir
page 43.
Apr_s ane heare de MAINTIEN AU CHAUD :
• Le mot END (Fin] s'affiche.
• L'heuredu jour r_apparait_ rafficheur.
Differences
four
de caisson entre I'ancien
Annulation de la fonction caisson et maintien _ teat
moment :
...........................
et ie nouveau
II eat normalde remarquerquelquesdiffc!rencesdans la dur6e de
cuissonentre un four neuf et un four ancien. Voir Ajustement de la
temp6raturedu four a la page 43.
Appuyersur la touche CANCEL(Annuler).Retirerla
nourriture du four.
Caisson et maintien
Caisson differ6e
Lafonction cuissonet maintien permet de cuire pendantune durc!e
pr6dc!termin6e,suivie par un cyclede maintienau chaud d'une
heure.
Program[nation
de la fonction
caisson
1 Appuyer sur la touche COOK& HOLD (Cuissoll
•
et maintien).
et maintien
:
......................................
COOK&
41
Avec la fonction dilf_r_e, le four se met a cuire plustard dans la
journc!e.Programmerla dur6e d'attentedc!sir_eavant que le four
ne se mottoen marcheet la durde de cuisson dc!sirde.Le four
commencea chauffer_ I'heures61ectionn@et cult pour la durde
spdcifi@.
Lorsque ia dur6e d'attente
le four se met en marche :
s'est
ecouiee
et que
• Ladur_e de cuissonet la tempc!ratureseraaffichc!e.
° Le mot DELAYs'6teint.
° Losmots BAKEet HOLD reste allumc!.
La durde d'attentepout 6tre programmdede 10 minutes(00:10)
11 heures,59 minutes [11:59).
Annuiation
:
Program[nation d'un cycle de caisson courante
diff_r6e :
1. Appuyer sur la touche DELAY(Dc!marragediff6re].
Appuyersur la touche CANCEL(Annuler).
.................................
° Toutesles fonctions de cuissonminut6e et non
DELAY
minut6eseront annul6es.
• Le mot DELAY(ATTENTE]clignote.
.....
° L'heuredu jour r_apparait_ I'afficheur.
, 00:00clignote a I'afficheur.
A
2. Appuyer sur la touche A ou _' pour programmerla
dur6e d'attente.
Alors que le mot DELAYclignote toujours •
3. Appuyer sur la touche COOK& HOLD [Cuisson
et maintien).
, 000s'allume a I'afficheur.
Remarques :
Ne pusutiliser la cuissondiff_!r_epour des articlesqui
n_!cessitentque le four soit pr_chauff_,comme los g_teaux,
lospetits biscuitset los pains.
..............................
Ne pusutiliser le cycle de cuissonet maintien diff_!r_!s
si le
COOl<&
four est d_!jachaud.
HOLD
............................
, Lesroots BAKE[CUISSONCOURANTE)
et HOLD [MAINTIEN)clignotent.
Niaintien au chaud
4. Appuyer sur A pour programmerla tempc!raturede cuisson.
Pour maintenir au chauddans le four des alimentscults et chauds
ou pour r_chaufferpains et assiettes.
• 00:00et le mot HOLDclignotent.
, Le mot BAKEreste allure&
Programmation
5. Appuyer sur A pour programmerla durc!ede cuisson.
du maintien au chaud :
1. Appuyer sur la touche KEEPWARM [Maintien au
chaud).
• La durc!ed'attente, les roots DELAY,BAKEet HOLDs'allument
I'afficheur.
KEEP
WARM
• Le mot WARM [CHAUD]clignote.
° 000 parait a I'afficheur.
Lorsque la duroc d'attente
s'est 6coulee
2. S61ectionnerla tempSraturede maintien au chaud.
Celle-ci peut _tre r_glSede 63 a 90 °C [145
190 °F).Appuyerune fois sur la touche A ou T ou
appuyersur la touche • ou • et la maintenirainsi.
:
, 75° (170°) s'allume IorsqueI'on appuie la
premierefois sur I'unedes touches.
* Lemot DELAYs'_teint.
, La durc!ede cuissonest affich6e.
° Appuyer sur la touche A pour augmenterla temperature.
° Losroots BAKEet HOLDsont affich(!s.
° Appuyer sur la touche • pour diminuer la temperature.
Pour programmer an temps d'attente Iorsque la
fonction caisson et maintien a d_j_ _te
programmee :
1. Appuyer sur la touche DELAY(Dc!marragediff6r6].
Le mot WARM (CHAUD]et la temperatureseront affich_!s
pendant que la fonction maintien au chaud est active.
DELAY
° Le mot DELAY(ATTENTE]clignote.
° 00:00parait _ I'afficheur.
2. Appuyer sur la touche A ou T pour programmer
la dur6e d'attente.
Annulation du maintien au chaud :
1. Appuyer sur la touche CANCEL(Annuler).
° Apr_s quatre secondes,le mot DELAYreste
allure6pour rappeler qu'un cycle de cuisson
diff@c!ea 6t6 programm&
2. Retirerla nourriture du four.
42
Annulation du mode sabbat :
Remarques sur la fonction maintien au
chaud :
1. Appuyer sur la touche CLOCKpendant cinq secondes.
OU
• Pourobtenir des qualit6s alimentaireset nutritives optimales,
losalimentscuits au four ne doivent pas 6tre gard_sau chaud
plus de 1 _ 2 heures.
2. Apr_s 72 heures,le modesabbat seterrnine.
• SAb clignote pendantcinq secondes.
° Pourernp6cherlosalimentsde dess6cher,les recouvrir de
papier alurniniurn,sans sorter,ou d'un couvercle.
• L'heuredu jour revient _ I'afficheur.
• Pour r_chauffer des petits pains :
Remarques sur le mode sabbat :
- recouvrirlea petits pains de papier alurniniurnsansserrer et
los placerau four.
° Le modesabbat peut 6tre rnis en rnarchea tout moment,que
le four soit en marche ou non.
- appuyersur lostouches KEEPWARMet A pour
programmer75 °C [170°F).
• Le modesabbat ne pout pas 6tre rnisen rnarchesiles
cornrnandessont verrouillc!esou la porte verrouillc!e.
- rc!chaufferpendant 12 a 15 minutes.
• Sile four est en mode cuissonIorsque le modesabbat est
prograrnrn6,le mot BAKE(CUISSONCOURANTE]s'6teint a la
fin du cycle de cuisson. II n'y aura aucun signal sonoreaudible.
• Pour r_chauf|er des assiettes :
- placerdeux piles de quatre assiettesmaximumdarts le four.
- appuyersur lostouches KEEPWARMet A pour
programmer75 °C 070 °F).
° Lorsquele modesabbat a dc!rnarrc!,
aucun hip de prc!chauffage
ne retentit.
- rc!chaufferpendant5 minutes,arr6ter le four et laisser los
assiettesau four pendantencore 15 minutes.
• Tousles messageset les bips sont dc!sactivc!s
Iorsquele mode
sabbatest actif.
- n'utiliser que des assiettespouvant aller au four, a v_rifier
avec le fabricant.
• Si I'on appuie sur la touche CANCEL,un cycle de cuisson
courante au four seraannul6. Cependant,le programrnateur
resteraen modesabbat.
- ne pas poserdes assiettestildes sur une surfacefroide, los
changementsrapidesde temp6raturepouvantcasser
I'assietteou la fendiller.
° Apr_s une panne de courant,le four revient en modesabbat
avec72 heuresrestanteset aucuncycle actif.
Arr t
Ajustement
automatique/
de la temperature
Mode sabbat
du four
Lefour s'arr6teautornatiquernentapr_s12 heuress'il a 6tc!
accidentellementlaissc!en rnarche.Cettecaract6ristiquede s6curit6
pout 6tre arr6t6e.
La pr6cisiondes ternp6raturesdu four a 6t6 soigneusernentv(!rifi6e
I'usine.II eat normalde rernarquerquelquesdiff6rencesdans la
cuissonentre un four neuf et un four ancien.Au fur eta mesureque
los cuisini_ressont moins neuves,la ternp6raturedu four pout varier.
Pour annulet
I'arr_t 12 heures et faire fonctionner
le
II est possibled'ajuster la temperaturedu four si I'on penseque le
four ne cuit pasoune rissole pas correctement.Pour dc!ciderde
I'ajustementa apporter,r_gler le four _ une ternp_raturede 15 °C
(25 °F)plus _lev_eou plus bassoque la temperatureindiqu_e darts
la recette,puis faire cuire la preparation.Lear_sultats du {{test _ de
cuissondoivent donner une id(!edu nornbrede degr_!sduquel la
temperaturedoit _tre ajust_e.
four en continu pendant 72 heures :
1. Programmerle four pour une cuissoncourante [voir page 40).
2. Appuyer sur la touche CLOCK(Horloge]et la
maintenir ainsipendant cinq secondes.
CLOCK
° SAb sera affichc!et clignotera pendantcinq des.
° SAb sera ensuite affich6 en continujusqu'a ce qu'on rarr6te ou
jusqu'a ce que la dur_e limite de 72 heuressoit atteinte.
Ajustement de la temperature
du four :
1. Appuyer sur la touche BAKE (Cuissoncourante).
• Le mot BAKE(CUISSONCOURANTE]sera aussi affichc!si un
cyclede cuissoncourante est en cours alors que le four est en
modesabbat.
BAKE
2. Entrer285 °C (550 °F)en appuyant sur la touche A,...................................
Toutes lesautres fonctions [Minuterie, Maintien au chaud, Nettoyage,
etc.)sont verrouill6es,saul BAKE,pendantle mode sabbat.
3. Appuyer sur la touche BAKEet la rnaintenirainsi
pendant phsieurs secondesou jusqu'_ ce que 0°
paraisse_ I'afficheur.
.......................
......
Si la ternp_!raturedu four a _t_ pr_!c_demmentajustSe,le
changementseraaffich_. Par exernple,si la ternp_raturedu four
a _t_ r_!duitede 8 °C (15 °F),rafficheur indiquera -8° (-15°].
Annulation de la cuisson courante alors que le four
est en mode sabbat :
Appuyer sur la touche CANCEL[Annuler].
4. Appuyer sur la touche A ou T pour ajuster la ternp(!rature.
° Lemot BAKEs'_teinta rafficheur.
A chaque lois que ron appuie sur une touche, la temperature
change de 3 °C (5 °F).La temperaturedu four peut _tre
augrnentSeou dirninu_!ede 3 a 20 °C [5 _ 35 °F).
° Aucun bip sonorene retentit.
43
5,
L'heuredu jour rc!apparaitautomatiquementa I'afficheur.
4. Pourun rissolagemaximum,pr6chaufferle four pendant 2 ou 3
minutesavant d'ajouterla nourriture.
II n'est pas n6cessairede r6ajusterla temp@aturedu four en cas
de panne ou d'interruption de courant.Lostemp6raturesde
cuissonau gril et de nettoyagene peuvent6tre ajustc!es.
5. Placerla nourriture dans le four. Formerla porte du four.
6. Retournerla viande une fois a la moiti6 de la durc!ede cuisson.
7. LorsqueI'alimentest cult, appuyersur la touche CANCEL
(Annulet). Retirer la nourritureet la I_chefritedu four
Cuisson au gril
Programmation de la cuisson au gril :
, L'heuredu jour r_apparait_ I'afficheur.
1. Pourcommencer,appuyersur la touche
BROIL(Gril).
Remarques sur la cuisson au gril :
• Le mot BROIL(GRIL)clignote.
° Pour de meilleursrc!sultatsIors du gril, se servir d'un ustensile
pr@upour ce type de cuisson.
• Le mot SET[VALIDER)est affich&
2. Appuyer sur la touche ,& pour programmerun gril a temp@ature
c!lev@ou sur la touche T pour programmerun gril
temp@aturebasse.
, Le gril au r6glage HI (Elev6)est utilisc!pour la majorit_ des
op@ationsde cuissonau gril. Utiliser le gril au r6glage LO
(Bas)pour la cuissonde metsdevant cuire plus Iongtemps,
afin de leur permettred'6tre bien cults sans rissolageexcessif.
• Losroots HI (ELEVEE)ou LO [BASSE)seront affich6s.
• %lectionner HI broil (Gril a temp@aturec!levc!e)[290°C
[550 °F])pour un gril normal.S61ectionnerLO broil [Gril
temp6raturebasso) (230°C [450°F]) pour un gril
temp6ratureinf6rieured'aliments_ cuissonplus Iongue
comme la volaille.
, Losdurc!esde cuisson au gril peuvent6tre plus Ionguesavec
une temp@aturede gril inf6rieure.
, Retournerla nourriture Iorsquela moiti6 de la durc!epr@ue
pour la cuissonau gril s'estc!coulc!e.
3. Apr_s quatre secondes,le four se met en marche.
• Le mot BROILresteallure6.
Tableau de cuisson au gril du four
B_u|
Bifteck, 2,5 cm (1 pc) d'@aisseur
4
4
Cuisson moyenne
Bien cult
15 - 20 minutes
18 - 24 minutes
Hamburgers, 2 cm (3/4 pc) d'@aisseur
4
Bien cult
15 - 18 minutes
4
4
4
Bien cult
Bien cult
Tilde
6 - 10 minutes
22 - 26 minutes
8 - 12 minutes
3 ou 4
Bien cult
Porc
Bacon
COtelettes,2,5cm (1 pc)
Jambon- prc!-cuit tranche de 1,3cm (1/2 pc)
Volaille
Pouleten morceaux
Fruitsde met
Damesde poisson,beurr6es,2,5cm [1 po) d'@aisseur
Filetes,1,3cm (1/2 po) d'@aisseur
LO Broil -
4
4
Lachair se d_tache
La chair se dc!tache
Grille sup6rieure_ la position n° 5.
Remarque : Cetableau n'est qu'un guide de suggestions.Lesdur6espeuventvarier selon I'aliment_ cuire.
44
Gril a temp6rature basse
30 - 45 minutes
10 - 15 minutes
8 - 12 minutes
f
Event du four
Positions des grilles
Lorsquele four fonctionne, lessurfacesvoisinesde l'6vent peuvent
devenirassezchaudespour entrainerdes brQlures.Nejamais bloquer
I'c!vent.
.............
5
4
L'_vent est situ_ sous Jeprotecteur d'_vent du dosseret,sur la
cuisini_re.
_
EVENT
/
\
_-_
I_
I _
I _
_
_'_
___
_/
DU FOUR
_
-_,.
Ne pasrnettre de
plastiquesprosde
r_vent, la chaleur
pouvant los ddormer
.......
3
.......
2
............
1
POSITION 5 (position la plus haute) : Pourcuisson br_ve au gril pain grill6 ou aliments mincescontenant peu de graisse.
POSITION 4 : Pour la plupart des cuissonssur deux grilles.
Eclairage
(certains
POSITION3 : Pour la plupart des cuissonsde p_tisseries
sur une t61ea biscuits - g_teauxa _tages,tartes aux fruits, mets
surgelds.
du four
modeles)
Appuyersur le cornrnutateurd'6clairagedu four situ6
sur le tableau de cornmandepour allurnerou _teindre
la lampe.
POSiTiON2 : Pour rOtissagede pi_cesde viande,mets en sauce,
cuissonde pain,g_teau 16geren couronne [baba)ou entremets,ou
cuissonsur deux grilles.
Oven
Light,
POSITION 1 : Pour le rOtissaged'une grossepiece de viandeou
volaille, tartes surgel_es,soufflds ou g_teauxdes anges,ou cuisson
sur deux grilles.
Fond du four
Protdgerle fond du four, particuli6rementcontre lesproduits acides
ou sucr6squi pourraient6tre renvers6s;ces pro-duits font changer la
couleur de I'_mail.Utiliser un ustensile de faille appropri_e pour
_viter renversement ou d@bordement.
Grilles du four
POSiTiON POUR R6TISSAGE:
Utilisercette position pour la cuisson
d'un gros rOtiou d'une dinde. Placerlos
deuxgrilles du four I'une sur I'autre,en
appui sur lossupports lat6rauxdu fond
du four.
CUISSON SUR PLUSIEURSGRILLES:
Deux grilles: Placerlesgrilles aux positions2 et 4 ou 1 et 4.
Remarque: Nejarnais placerle plat directementsur le fond du four.
Lefour est dotd de deuxgrilles; cos grillescomportent un dispositif
de calage.
Extraction
Dotal=grille
:
Une derni-grille est disponibleen accessoire.Elleaugrnentela
capacit6du four et s'accroche_ gauche,_ la pattie supdrieure.
Elle est utile pour la cuissond'un plat de
f_
16gurnesIorsqu'ungros r6ti se trouve sur
tI,la grille inf6rieure. Prendrecontact avec
le revendeurpour demanderI'accessoire
_._
HALFRACK[demi-grille) ou pour
commander,composerle
1-877-232-8771E.-U.ou
1. Tirer la grille en ligne droitejusqu'a
ce qu'elle s'arr6te_ la position de
calage.
2. Souleverla grille a I'avantpour
pouvoirI'extraire.
R_installation :
1. Placerla grille sur lossupports dans le four.
2. Soulever16g_rementI'avant.Faireglisser la grille vers I'arri_re
au-dela de la position de calage.
1-800-688-8408Canada.
3. Abaisser la grille et la faire glisser dans le four.
Ne pas recouvrirla totaiit_ d'une grille avec de la feuille
d'aluminium,ni garnir le fond du four avec de la feuille
d'aluminium.Ceci modifierait los r_sultats de cuisson au four,
et le fond du four pourrait subir des dommages.
45
,,.,.,,
RemQ_EUeS
46
6erentteet
epres-vente
Ne sent pas couverts par ces garanties
1. Lesprobl_meset dommagesr6sultantdes situations suivantes:
a. Mise en service,livraisonou entretien effectu6s incorrectement.
b.],cute r@aration,modification,alt6ration et tout r_glage non autoris6spar le
fabricant ou par un prestatairede serviceapr_s-venteagr66.
c. Mauvaisemploi,emploi abusif,accidents,usagenon raisonnable,ou catastrophe
naturelle.
d. Courant61ectrique,tension,alimentationc!lectriqueou en gaz incorrects.
e. R_glageincorrect d'une commande.
2. Lesgaranties ne peuvent6tre honor6essi les num6rosde s_rie d'origine ont €!t6
enlev6s,modifi6sou ne sont pas facilement lisibles.
3. Ampoules,filtres a eau et filtres a air.
4. Lesproduits achet6sa des fins commercialesou industrielles.
5. Lesfrais de d@annageou de visite pour :
a. Correctiond'erreursde raiseen service.Pour les produits n_cessitantune
ventilation, un conduit m6tallique rigide dolt 6tre utilis_.
b. Initiation de I'utilisateura I'emploi de I'appareil.
c. Transportde I'appareilchez le r@arateur et retour de I'appareilchez I'utilisateur.
6. ]-out aliment perdu en raisonde pannesdu rdrigc!rateurou du congc!lateur.
7. D@ensesde d@lacement et de transportpour la r@arationdu produit dans des
endroits c!loignc!s.
LE SEULETUNIQUERECOURSDU CLIENTEN
VERTUDECEdE GARAN],IELIMI],EEESTLA
REPARA],IONDU PRODUI],COMMEDECRI],E
PRECEDEMMENT.
LESGARAN],IESIMPLICI],ES,
Y COMPRISLESGARANTIESDEQUALI],E
MARCHANDEOU D'ADAP],ATIONA UN USAGE
PARTICULIER,
SON]-LIMI],EESA UN AN OU A
LA PERIODELA PLUSCOUR],EPERMISEPARLA
LOI.MAYTAGCORPORATION
NESERAPAS
],ENUERESPONSABLE
DESDOMMAGES
DIRECTSOU INDIREC],S.
CERTAINSE],ATSEl,
CERTAINES
PROVINCES
IN],ERDISEN],
L'EXCLUSIONEl, LA LIMITATIONDES
DOMMAGESDIRECTSOU INDIREC],SAINSI
QUELESLIMITATIONSSURLA DUREEDES
GARAN],IESIMPLICI],ESDEQUALI],E
MARCHANDEOU D'ADAP],A],IONA UN USAGE
PAR],ICULIER.
IL ESTDONCPOSSIBLE
QUECES
LIMITATIONSNES'APPLIQUEN],PASA VOUS.
CE],],EGARAN],IEVOUSCONFEREDESDROI],S
JURIDIQUES
SPECIFIQUES
El, IL SEPEU],QUE
VOUSAYIEZ D'AU],RESDROll,S,QUI VARIEN],
D'UN E],A],A L'AU],REOU D'UNEPROVINCE
A
L'AUTRE.
8. Cettegarantie n'est pasvalide a I'ext6rieurdes Etats-Uniset du Canada.Communiquez
avecvotre d6taillant pour savoir si une autre garantie s'applique.
9. Dommagesindirects ou accessoiressubis par toute personne_ la suite d'une
quelconqueviolation des garanties.CertainsEtatsou provincesne permettent pas
I'exclusionou la limitationde responsabilit6en ee qui concerne les dommagesdirects
ou indirects.L'exclusionci-dessuspeut en consc!quencene pass'appliquera votre cas.
Si vous avez besoin d'aide
Consultezd'abord la sectionsur le d@annagedans le manueld'utilisation et d'entretien,
puisappelezle d_taillant de qui vous avezachet6 votre appareil ou le service_ la clientele
de Maytag Services,LLCau 1-800-688-9900aux Etats-Uniset au 1-800-688-2002au
Canadapour savoir oQtrouver un r@arateurautoris&
• Veilleza conserverla facture d'achat pour justifier de la validit_ de la garantie.Pour
d'autres renseignementsconcernantles responsabilit6sdu propric!taire_ I'%ard du
servicesous garantie,voir le texte de la GARANTIE.
• Si le d6taillant ou I'agencede serviceapr_s-ventene peut r6soudrele probl_me,6crivez
Maytag Services,LLCa I'adressesuivante : CAIR<_Center,P.O.Box 2370,Cleveland,TN
37320-2370Etats-Unis,ou appelezau 1=800=688=9900aux Etats=Unisou au
1=800=688=2002au Canada.
• Lesguidesd'utilisation, les manuelsde serviceet lesrenseignementssur les pi_cessont
disponiblesaupr_s du servicea la clientele de Maytag Services,LLC.
P_elll]_rques
: Veillez_ fournir I'informationsuivanteIorsquevous communiquez
avec nousau sujet d'un probl_me :
a. Vos nora,adresseet numdrode t_!ldphone;
b. Num_!rode moduleet num@ode sdriede I'appareil;
c. Nora et adressede votre ddtaillant ou de votre agencede service;
d. Descriptiond_!taill@du probl_meobservd;
e. Preuved'achat [facture de vente).
47
Estufa
a Gas
Materias
)ortantes
............................... 49=53
......................... 53=56
ite
de Limpieza
.................................
56=58
luci6n
.58-59
................... 59=61
Gas Sellados
Cocinando en el Homo ...................61=70
Controles del Homo de Lirnpieza IVlanual
Reloj
Hornear
Temporizador
Asar
Perilla del Homo de Lirnpieza Manual
Hornear
Asar
Controles del Homo Autolirnpiante
Reloj
Parriiias del Horno
Temporizador
Mantener Caiiente
Hornear
Asar
CocciOn y
Mantener Caiiente
Diferido
Garantia y Servicio .................................
71
como resultado de su uso inapropiado. Utilice este
electrodomestico solamente para el prop6sito que ha sido
destinado segQn se describe en esta gufa.
Para asegurar funcionamiento correcto y seguro: El
electrodom_stico debe set instalado debidamente y puesto a
tierra por un tScnico calificado. No intente ajustar, reparar,
prestar servicio o reemplazar ninguna pieza de este electrodomestico a menos que sea espedficamente recomendado en
esta gufa. Todas las reparaciones deben set realizadas por un
t_cnico calificado. Pida al instalador que le indique la
ubicaci6n de la v_lvula de cierre del gas y como cerrafla en
caso de una emergencia.
Siempre desenchufe el electrodomestico antes de efectuar
alguna reparaci6n.
Las advertencias e instrucciones importantes sobre seguridad
que aparecen en esta guia no est_n destinadas a cubrir todas
las posibles circunstancias y situaciones que puedan ocurrir.
Se debe ejercer sentido comQn, precauci6n y cuidado cuando
instale, realice mantenimiento o haga funcionar el artefacto.
Siempre p6ngase en contacto con el fabficante si surgen
problemas o situaciones que usted no comprenda.
Reconozca
los simbolos,
etiquetas
de seguridad
advertencias,
Lea y siga todas las instrucciones antes de usar este
electrodorn_stico para evitar el riesgo potencial de incendio,
choque electfico, lesi6n personal o da_o al electrodomestico
49
Instrucciones Generales
Para eliminar el riesgo de pasar sobre los quemadores
superiores calientes, no se deben guardar articulos en los
armarios que est_n directamente sobre la estufa. Si tales
armarios son usados para almacenamiento, debe limitarse a
colocar artfculos de uso poco frecuente y que pueden
guardarse en forma segura en una _rea que est_ sujeta al
calor proveniente de la estufa. Las temperaturas pueden no
ser apropiadas para algunos artfculos, tal como liquidos
vol_tiles, limpiadores o sprays en aerosol.
En Case de Incendio
Apague el electrodomestico y la campana de ventilaci(Sn para
evitar que las llamas se dispersen. Extinga las llamas luego
encienda la campana para expulsar el humo y el olor.
• En la cubierta: Apague el fuego o la llama en una sarten
con una tapa o una bandeja de hornear.
NUNCA levante o mueva una sarten en llamas.
• En eJ homo: Apague el fuego o la llama cerrando la puerta
del horno.
Para verificar si el dispositivo est_ debidamente instalado, mire
debajo de la estufa con una linterna para asegurarse de que
uno de los tornillos niveladores traseros est6 debidamente
No use agua en los incendios de grasa. Use bicarbonato, un
producto quimico seco o un extinguidor del tipo con espuma
para apagar un incendio o la llama.
enganchado en la ranura del soporte. El dispositivo antivuelco
asegura el tornillo nivelador trasero al piso cuando est_
debidamente enganchado. Esto debe verificarse carla vez
que la estufa sea movida.
Seguridad para los Ni os
Para Evitar un Jncendio o
Da o Causado per el Humo
Aseg_rese de que se hayan retirado todos los materiales de
empaque del electrodomestico antes de su uso.
Mantenga el _rea alrededor del electrodomestico libre y
exenta de materiales combustibles, gasolina u otros vapores y
materiales infiamables.
NUNCA deje a los ni_os solos o sin supervisi6n cuando el
electrodomestico este en uso o este caliente.
Si el electrodomestico es instalado cerca de una ventana, se
debe tenet cuidado para evitar que las cortinas pasen sobre
los quemadores.
NUNCA permita que los ni_os se sienten o se paren en
ninguna parte del electrodomestico pues se pueden lesionar o
quemar.
NUNCA deje articulos sobre la cubierta de la estufa. El aire
caliente del respiradero puede encender los articulos
infiamables y aumentar la presi6n en los envases cerrados
hasta hacerlos reventar.
Se les debe ense_ar a los ni_os que el electrodomestico y los
utensilios que est_n en el o sobre el pueden estar calientes.
Deje enfriar los utensilios calientes en un lugar seguro, fuera
del alcance de los ni_os peque_os. Se les debe ense_ar a los
ni_os que un electrodomestico no es un juguete. No se debe
permitir que los ni_os jueguen con los controles u otras piezas
de la estufa.
Muchos envases de tipo aerosol son EXPLOSIVOScuando son
expuestos al calor y pueden set altamente inflamables. Evite
su uso o su almacenamiento cerca del electrodomestico.
Muchos pl_sticos son vulnerables al calor. Mantenga los
pl_sticos alejados de las piezas de la estufa que puedan estar
tibias o calientes. No deje artfculos de pl_stico sobre la
cubierta de la estufa pues se pueden derretir o ablandar si
est_n demasiado cerca del respiradero o de un quemador
superior encendido.
5O
Generalidades
Siempre ajuste la llama del quemador superior de modo que
no se extienda m_s aN_ del borde inferior del utensiNo. Una
llama excesiva es peligrosa, desperdicia energfa y puede
da_ar la estufa, el utensiNo o los armarios que est_n sobre la
estufa.
NUNCA deje sin supervisi6n la cubierta de la estufa cuando
est6 cocinando, especialmente cuando usa un ajuste de calor
alto o cuando est6 usando una freidora. Los reboses pueden
producir humo y los derrames de grasa pueden inflamarse.
Limpie los derrames grasosos tan pronto como sea posible.
No use calor alto durante periodos de cocci6n prolongados.
NUNOA caliente un envase cerrado en el quemador superior
o en el horno. La acumulaci6n de presi6n puede hacer
explotar el envase causando una lesi6n personal grave o da_o
a la estufa.
Use tomaoNas secos y gruesos. Los tomaollas h_medos
pueden causar quemaduras a causa del vapor. Las toaNas u
otros sustitutos no deben set usados como tomaoNas porque
enos pueden quedar colgando a trav6s de los quemadores
superiores y encenderse o enredarse en las piezas de la
estufa.
Siempre deje enfriar la grasa caliente que se ha usado en la
freidora antes de intentar mover o manipularla.
El respiradero del homo se encuentra en la base del panel de
control.
No permita que se acumule grasa u otros materiales
inflamables en la estufa o cerca de ella, en la campana o en el
ventilador aspirador. Limpie la campana extractora con
frecuencia para evitar que la grasa u otros materiales
inflamables se acumulen en la campana o en el filtro.
Encienda el ventilador cuando cocine alimentos fiameados
Evite tocar el _rea del respiradero del homo cuando el homo
est6 encendido y durante varios minutos despu6s de que el
homo haya sido apagado. AIgunas piezas del respiradero y
del _rea circundante se calientan Io suficiente como para
causar quemaduras. Despu6s de que el homo haya sido
apagado, no toque el respiradero ni las _reas circundantes
hasta que eNashayan tenido tiempo suficiente para enfriarse.
debajo la campana.
NUNOA use vestimentas de materiales inflamables, ropa
suelta o de mangas largas cuando est6 cocinando. La
vestimenta se puede encender o enganchar en los mangos de
los utensiNos.
Otras superficies potencialmente caNentes incluyen la cubierta
de la estufa, las _reas dirigidas hacia la cubierta de la estufa,
el respiradero del homo, la superficie cerca de la abertura del
respiradero, la puerta del homo y la _rea alrededor de la
puerta y la ventana del homo.
Siempre coloque las parriNas del homo en la posici6n deseada
cuando el homo est6 fifo. Deslice la parriNa del homo hacia
afuera para agregar o retirar alimento, usando tomaollas secos
y resistentes. Siempre evite alcanzar dentro del homo para
agregar o retirar alimentos. Si una parrilla debe ser sacada
cuando est_ todavfa caNente, use un tomaollas seco. Siempre
apague el homo despu6s de haber terminado de cocinar.
No toque un foco caliente del homo con un paso h_medo
pues el foco se puede quebrar. Si se quiebra el foco,
desconecte la corriente el6ctrica hacia la estufa antes de sacar
el foco para evitar choque el6ctrico.
No use la cubierta o el homo como una _rea para almacenar
alimentos o utensiNos de cocina.
Use las parriNas solamente en el homo en que fueron
enviadas/compradas.
Seguridad
Tenga cuidado cuando abra la puerta del homo. Deje que
escape el aire o el vapor caliente antes de sacar o volver
colocar el alimento.
Para Cocinar
Siempre coloque un utensiNo en un quemador superior antes
de encenderlo. Aseg_rese de usar la perilla correcta que
controla cada quemador superior. Aseg_rese de encender el
quemador correcto y comprobar de queen efecto el
quemador haya sido encendido. Cuando haya terminado de
cocinar, apague el quemador antes de retirar el utensiNo para
evitar exposici6n a la llama del quemador.
ADVERTENCIA SOBRE LOS ALIMENTO$ PREPARADOS:
Siga las instrucciones del fabricante de los aNmentos. Si un
envase de pl_stico de aNmento congelado y/o su tapa se
deforma, se comba o se da_a de alguna otra manera durante
la cocci6n, descarte inmediatamente el aNmento y su envase.
El alimento puede estar contaminado.
51
NUNCA use papel de ahminio para cubrir una parrilla del
homo o la parte inferior del horno. El uso incorrecto puede
resultar en un riesgo de choque el6ctrico, incendio o daffo al
electrodom6stico. Use papel de aluminio solamente como se
indica en esta gufa.
Limpie la estufa con cuidado. Tenga cuidado para evitar
quemaduras de vapor si se usa una esponja o un paffo mojado
para limpiar los derrames en una superficie caliente. Algunos
limpiadores pueden producir vapores nocivos cuando se
aplican a una superficie caliente.
Utensilios Apropiados
Homo Autolimpiante
(modelos selectos)
Use sartenes con fondos pianos y mangos que sean f_ciles de
tomar y que permanezcan frfos. Evite usar sartenes u ollas
inestables, combadas que se pueden volcar f_cilmente u ollas
cuyos mangos est6n sueltos. Adem_s evite usar utensilios
especialmente pequeffos o sartenes con mangos pesados
pues ellos pueden ser inestables y volcarse f_cilmente. Los
utensilios que son pesados de mover cuando est_n Ilenos con
alimento pueden tambi6n set un peligro.
Limpie solamente las piezas que se indican en esta gufa. No
limpie la junta de la puerta. La junta es esencial para un
sellado herm6tico. No restriegue, daffe, ni mueva la junta de
la puerta. No use limpiadores de homo de ninguna clase en el
homo ni alrededor de cualquier parte del homo autolimpiante.
AsegQrese de que el utensilio sea Io suficientemente grande
como para contener en forma debida los alimentos y evitar
derrames. El tamaffo es particularmente importante cuando se
utilizan freidoras. Asegt_resede que el utensilio tiene
capacidad para el vohmen de alimentos que se va a agregar
al igual que para la formaci6n de burbujas de la grasa.
Antes de la autolimpieza del homo, saque la asadera, las
parrillas del homo y otros utensilios y limpie los derrames
excesivos para evitar que se produzca demasiado humo,
Ilamaradas o llamas.
Para reducir a un mfnimo las quemaduras y que los materiales
inflamables y los derrames se enciendan debidos a contacto
no intencional con el utensilio, los mangos no deben
extenderse sobre el quemador superior adyacente. Siempre
gire los mangos de los utensilios hacia el lado o hacia la parte
trasera de la estufa, no hacia la habitaci6n donde puede ser
f_cilmente golpeados o alcanzados por los niffos peque_os.
Es normal que la cubierta de la estufa se caliente durante el
ciclo de autolimpieza. Por Io tanto, se debe evitar tocar la
cubierta durante un ciclo de autolimpieza.
Aviso y Advertencia
Importante Sobre Seguridad
Nunca deje que un utensilio hierva hasta quedar seco pues
esto puede daffar el utensilio y la estufa.
Siga las instrucciones del fabricante cuando use bolsas para
cocinar en el horno.
La Propuesta 65 de la Ley de 1986 del Estado de California
Sobre Seguridad y Contaminaci6n del Agua Potable (California
Safe Drinking Water and Toxic Enforcement Act of 1986) exige
que el Gobernador de California publique una lista de las
sustancias que segQn el estado de California causan c_ncer o
daffo al sistema reproductivo y exige que las empresas
adviertan a sus clientes sobre la exposici6n potencial a tales
sustancias.
Solamente ciertos tipos de utensilios de vidrio cer_mico, de
cer_mica o glaseados son convenientes para uso en la
cubierta de la estufa o en el homo sin quebrarse debido al
cambio repentino de temperatura. Siga las instrucciones del
fabricante cuando use utensilios de vidrio.
Este electrodom6stico ha sido probado respecto a su
rendimiento seguro usando utensilios de cocina
convencionales. No use ningt_n dispositivo o accesorio que no
haya sido espedficamente recomendado en esta gufa. No use
tapas para cubrir los quemadores superiores, rejillas para la
cubierta de la estufa ni agregue sistemas de convecci6n para
hornos. El uso de dispositivos o accesorios que no son
expresamente recomendados en esta gufa, puede crear serios
peligros de seguridad, resultar en problemas de rendimiento y
reducir la vida Qtil de los componentes de la estufa.
Se advierte a los usuarios de esta estufa que la combusti6n
del gas puede resultar en exposici6n de bajo hive[ a algunas
de las sustancias pubiicadas en la list& incluyendo benceno,
formaldehfdo y hollfn, debido principalmente a la combusti6n
incompleta del gas natural o de los combustibles de petr61eo
licuado. Los quemadores ajustados en forma debida
reducir_n la combusti6n incompleta. La exposici6n a estas
sustancias puede tambi6n ser reducida a un mfnimo
ventilando los quemadores al exterior en forma adecuada.
Se advierte a los usuarios de este electrodom6stico que
cuando el homo est_ funcionando en el ciclo de autolimpieza,
puede haber exposici6n de bajo nivel a algunas de las
sustancias indicadas en la list& incluyendo mon6xido de
carbono. La exposici6n a estas sustancias puede ser reducida
a un mfnimo ventilando el homo al exterior en forma
Seguridad de la Limpieza
Apague todos los controles y espere que se enfffen las piezas
de la estufa antes de tocarlas o limpiarlas. No toque las
rejillas de los quemadores o las _reas circundantes hasta que
elias no hayan tenido tiempo suficiente de enfriarse.
52
adecuada, abriendo las ventanas y/o la puerta en la habitaci0n
en donde est_ ubicado el electrodomestico durante el ciclo de
p_jaros tienen un sistema respiratorio muy sensitivo. Los
humos producidos durante el ciclo de autolimpieza del homo
pueden ser perjudiciales o mortales para los p_jaros. Los
humos que despide el aceite de cocina recalentado, la grasa,
margarina y los utensilios antiadherentes recalentados pueden
autolimpieza.
AVISO IMPORTANTE RESPECTO A LOS PAJAROS
DOMESTICOS:
tambien ser perjudiciales.
Nunca mantenga los p_jaros en la cocina o en las
habitaciones donde puedan Ilegar los humos de la cocina. Los
Conserve
estas
Instrucciones
para Referencia
Futura
CuldadeUmplem
Amr* o con detergentey agua.El
proceso de autolimpiezano limpia estas
areas. Eliasdeben set limpiadas para
evitar que la suciedadse horneedurante
el ciclo de autolimpieza. (La junta es el
sello alrededor de la puerta y ventana
del homo.)
Homo Autolimpiante
(modelos selectos )
Nora: Para la limpiezamanual,ver pagina 61.
\
Paraevitar da_o no limpie ni frote la junta situada alrededorde la
puerta del homo. Lajunta estadise_adapara sellar
herm6ticamenteel calor durante el ciclo de limpieza.
Limpieel excesode grasa o derramesde la parteinferior del
homo. Esto evita humo excesivoo Ilamaradasduranteel ciclo de
limpieza.
Limpielos derramesazucaradoso acidostales como papa dulce
(camote),tomates o salsasa base de leche.La porcelana
esmaltadaes resistenteal acido pero no a prueba de acidos. El
acabadode porcelanapuede descolorarsesi los derramesacidos
o azucaradosno son limpiadosantes de un ciclo de autolimpieza.
Para programar 'Self=Clean' (Autolimpieza):
Elciclo de autolimpiezausatemperaturassuperioresalas
temperaturasnormalesde cocciOnpara limpiar automaticamenteel
interiordel homo. No fuerce la puertadel homo ni la palancade
bloqueopara abrirla. Estopuede causar exposiciOna las
temperaturasaltasy constituir un riesgode quemadura.asnormales
para limpiarautomaticamentetodo el interior del homo.
Nora:
(400
° F)
Lapara
temperaturadel
programarunhomo
ciclodebe
de limpieza.
set inferior a 205° C
1. Cierre la puertadel homo.
Esnormal que ocurran Ilamaradas,humoo llamasdurante la limpieza
si el homo esta demasiadosucio.Esmeier limpiar el homo
regularmenteen vez de esperarhasta que se hayaacumulado
demasiadasuciedad.
2. Mueva la palancade bloqueode la puerta a la derechaa la
posici6n bloqueada.
Duranteel proceso de limpieza,la cocina debe estar bien ventilada
para eliminarlos olores normalesasociadoscon la limpieza.
3. Optima la tecla 'CLEAN'.
CLEAN
Antes de la Autolimpieza
• 'CLEAN'destellaen el indicador visual.
1. Apague la luz del homo antes de la limpieza.La luz del horno
puedefundirse duranteel ciclo de limpieza.
Si la puerta no se cierra, se oira una sepal sonoray la palabra
'DOOR'se desplegaraen el indicadorvisual. Si la puerta no es
cerradadentro de 45 segundos,la operaciOnde autolimpieza
sera canceladay el indicadorvolvera a desplegarla hora del dia.
2. Retire la asadera,todos los utensiliosy las parrillasdel homo. Las
parrillasdel homo se descolorarany no se deslizaranfacilmente
despuc!sde un ciclo de autolimpiezasi no son retiradasdel homo.
3. Limpieel marcodel homo, el marco de la puerta,el area fuera de
la junta de la puertay alrededorde la aberturaen la junta de la
puerta,con un agentede limpieza no abrasivetal como 'Bon
*Los hombresde los productosson marcasregistradasde sus
respectivosfabricantes.
53
4. Optima
lateclaA oY.
, Sedespliega
'CL-M[Limpieza
- SuciedadModerada).
5. Optima
lateclaA oV paradesplazar
los
ajustes
deautolimpieza.
'CL-H'
(Limpieza
-Suciedad
Intensa,/4
horas]
'CL-M'[Limpieza
- Suciedad
Moderada,
3horas)
'CL-L'[Limpieza
- Suciedad
leve,
2 horas]
AIseleccionar
elniveldesuciedad
delhomo
seprograma
autom_iticamente
eltiempo
delimpieza.
6. Despu6s
decuatro
segundos,
elhomo
comenzar_
alimpiar.
, Eltiempo
delimpieza
comenzar_
lacuenta
regresiva
enel
indicador.
, 'LOCK'
sedesplegar_i
enelindicador
visual.
° 'CLEAN'
sedesplegar_i
enelindicador
visual.
Despu6sde cuatro segundos,'CLEAN','DELAY'y 'LOCK'se
desplegar_nen el indicador visual para indicar que el homo est,1
programadopara una ciclo de limpiezadiferido. El tiempo diferido
tambi6n se despliegaen el indicadorvisual.
Cuande eemienza el ciele de autolimpieza:
° 'DELAY'se apagar&
° Eltiempo de limpiezase desplegar_en el indicadorvisual.
Para eancelar el ciele de autolimpieza:
.........
Oprimala tecla 'CANCEL'.
° El indicadorvisual queda en blanco.
° Todas lasfuncionesson canceladas.
. La hera del dfa se despliegaen el indicadorvisual.
Durante
el title
de autolimpieza
Cuandoaparece'LOCK'en el indicador,la puerta no se puede abrir.
Paraevitar da_o a la puerta, no fuerce la puertapara abrirla cuando la
.................................
DELAY
palabra 'LOCK'est_ desplegadaen el indicadorvisual.
Para diferir un ciclo de autolimpieza:
1. Optima la tecla 'DELAY'.
Humo y Olores
° 'DELAY'destella.
Ustedpuede ver humoy sentir olor las primerasvecesque el borne
es limpiado. Estoes normal y disminuir_ con el tiempo.
° '00:00'se desplegar_en el indicadorvisual.
2. Optima la tecla A o V para programarla cantidad de
tiempo que usted deseadiferir el ciclo. El tiempo diferido
puede set programadode 10 minutes[00:10)a
11 horas,59 minutes (11:59).
Tambi6npuede ocurrir humosi el homo est_ demasiadosucio o si se
ha dejado una asaderaen el homo.
Sonidos
V
A medidaque el horno se calienta,usted puede off sonidos de piezas
met_licasque se expandeny contraen. Estoes normaly no daffar_el
homo,
3. Optima la tecla 'CLEAN'.
° 'CLEAN'destellar&
CLEAN
Despu6s del ciclo de autolimpieza
4. Optima la tecla A o V.
° 'CL-M' [Limpieza- SuciedadModerada)se
despliegaen el indicador.
5. Optima la tecla A o V para desplazarlos ajustesde
autolimpieza.
'CL-H' (Limpieza- SuciedadIntensa,4 horas)
'CL-M' [Limpieza- SuciedadModerada,3 horas]
'CL-L' [Limpieza- Suciedadleve,2 horas]
Aproximadamenteuna hera despu6sdel fin del ciclo de limpieza,
....................
'LOCK'desaparecer& La puerta ahora puede set abierta. Mueva la
A
palancade bloqueo de la puerta a la izquierdapara desbloquearla.
Alguna suciedad puede quedar come una love ceniza gris tipo
polvo. Retfrelacon un paBo ht3medo.Si la suciedadpermanece
.............................
despu6sde limpiarla,significa que el ciclo de limpiezano fue Io
suficientementelargo. La suciedadser4eliminada duranteel pr6ximo
ciclo de limpieza.
AI seleccionarel nivel de suciedaddel homo se programa
autom_ticamenteel tiempo de limpieza.
6. Despu6sde cuatro segundos,'CLEAN','DELAY'y 'LOCK'se
desplegar_nen el indicadorvisual para indicarque el homo est,1
programadopara un ciclo de limpiezadiferido. El tiempo diferido
tambi6n se despliegaen el indicadorvisual.
Si las parrillas del homo lueron dejadas en el homo y no se
deslizansuavemente despu6sde un ciclo de limpieza, limpie las
parrillasy los soportesde lasparrillas con una peque_acantidad de
aceite vegetalpara hacerdeslizarlascon m_s facilidad.
Pueden aparecer lineas delgadas en la porcelanaal pasar per
cities de calentamientoy enfriamiento. Estoes normaly no
afectar_el rendimiento.
Una descoloraci6nblanca puede aparecer despu6s del ciclo de
limpieza si los alimentos _cidos o azucarados no lueron
limpiados antes del ciclo de autolimpieza. EstadescoloraciOnes
normaly no afectar_iel rendimiento.
Si el home ya ha side programatic para un title de
limpieza y usted desea programar un tiempe diferide:
1. Oprimala tecla 'DELAY'.
° 'DELAY'destella.
.............................
DE_Y
A
° '00:00'se desplegar_en el indieadorvisual
2. 0prima la teda A o T para programar[a eantidad
de tiempo que usted deseadiferir el eido.
V
Notas:
° si se deja abierta la puertadel homo, la palabra 'DOOR'
destellar_en el indicadorvisual y se escuchar_una sepal
sonora hasta que la puertasea cerraday la tecla 'Clean' sea
oprimidanuevamente.
° La puerta del homo se da_ar_isi se fuerza para abrirla cuando
la palabra'LOCK' continOadesplegadaen el indicador.
54
CuldudoUmplem
Procedimientos
de Limpieza
comercial.(No rode las superficiesvecinas.)Coloqueen bolsasde
pl_sticodurante varias horaso toda la noche. Usando
guantesde goma, retire de las bolsas. Lave,enjuague,sequey
vuelva a colocar en la cubierta de la estufa.
Area del Reloj y de las Teclas de Control
• Paraactivar'Control Lock' (Bloflueode los controles) para la
limpieza,vet p_gina 65.
• Lave,enjuaguey seque. No useagentesde limpiezaabrasivos
puespueden rayarel acabado.
• Se puede usarlimpiavidriossi se rocianen el paso primero. NO
roc[e directamente en el panel
Perillas de Control
* Retire lasperillas cuandoestc!nen la posici0n 'OFF'tir_indolas
haciaadelante.
. Lave,enjuaguey seque. No useagentesde limpiezaabrasives
puespueden rayarel acabado.
. Enciendacadaquemador para asegurarsede que las perillas han
sido correctamentereinstaladas.
Asadera e Inserto
Nunca cubra el inserto con papel de aluminio pues esto evita
que la grasa se escurra a la bandeja inferior.
• Coloqueun paho enjabonadosobreel insertoy la bandeja;deje
remojarpara soltar la suciedad.
• Laveen agua jabonosatibia. Use una esponjade fregar para quitar
la suciedad persistente.
• La bandeja de asary el inserto puedenset lavadosen el
lavavajillas.
Quemadores de la Cubierta - Convencional- SeUados
• Limpiefrecuentemente. Espereque el quemadorse enfrfe. Limpie
con una esponjade fregar de pl_stico conjab6n. Parala suciedad
persistente,use un limpiadorno abrasivoy un pa_o.Trate de evitar
que el limpiadorse escurra hacialos orificios del gas puesesto
afectar_la llama. Si el limpiador penetraen los orificios, limpie con
una escobilla de cerdassuaveso un alfiler derecho,especialmente
el orificio debajodel encendedor. No agrandeo distorsionelos
agujeros.
• Tongacuidado de que no entre agua en losorificios de los
quemadores.
• Tongacuidado cuando limpie el encendedor. Si el encendedor
est_ hOmedoo dahado el quemadorsuperior
no encender_i.
• HornillasConvencionales:Las hornillassecasen el homo fijaron en
75° C [170° F].
Caja de la Homilla
La cajade la hornilla est,1situado bajo la cubierta que puede se
levantada.Limpiecon frequencia para quitar spillovers.Si el sued
se permite acumular,puededahar el final.
• Quite lasrejillas y lashornillassuperficiales.Levantela cubierta
para arriba la tapa.
• Limpiecon el jabOny riegue,aclaraciOny sequese.
• Paralos suelosobstinados,utilice los agentesde limpieza
suavementeabrasivostales come un engrudo de bicarbonato de
sosa y agua o del Bon Ami*,y una pista que friga pl_stica no
abrasiva.
Cubierta y Panel de Control - Esmalte de Porcelana
La porcelanaesmaltadaes vidrio fundido en metal y puede
agrietarseo picarsesi no se usa correctamente.Esresistentea los
_cidos,no a prueba de _cidos.Todoslos derrames,especialmente
los derramesazucaradoso acidicosdeben ser limpiados
inmediatamentecon un paso seco.
• Cuandose enfrie, lavecon agua jabonosa,enjuaguey seque.
• Nunca limpie una superficietibia o caliente con un paso ht_medo.
Estopuede causar agrietamientoo picaduras.
• Nunca use limpiadoresde homo, agentesde limpieza abrasivoso
c_usticosen el acabadoexterior de la estufa.
Paneles Laterales,Gaveta de AImacenamiento, Puerta del
Homo [modelosselectos], Puerta de ia Parrilla inferior y
Manijas de las Puertas [modelosselectos)- Esmalte Pintado
• Cuandoest(_fria, lave con agua tibia jabonosa,enjuaguey seque.
Nunca limpie una superficietibia o caliente con un paffo ht_medo
puesesto puede daffar la superficiey causar una quemaduraa
causadel vapor.
• Paramanchasrebeldes,use agentesde limpieza levemente
abrasivostal como pastade bicarbonatoo 'Bon Ami'*.
No use limpiadoresabrasivos,c_usticoso _sperostal come
esponjasde lana de aceroo limpiadoresde hornos. Estos
productospueden rayaro daffar permanentementela superficie.
Nora: Use una toaiia o un patioseco para limpiar los
derrames, especiaimente los derrames addicos o
azucarados. La superficie se puede descolorar o perder el
brillo si el derrame no se limpia inmediatamente. Esto es
especialmente importante en las superficiesblancas.
Rejillas de los Quemadores
• Lavelas rejillascon agua tibia jabonosay una esponjade fregar de
pl_sticono abrasiva. Parasuciedad persistente,limpie con una
esponjano abrasivae impregnadaconjab6n o con una esponjay
una Cooktop CleaningCreme (pieza#20000001)**.
• Parasuciedadquemada,saquelas parrillas,coloque peri6dicosy
rode cuidadosamentecon un limpiadorde homo
Los hombresde los productosson marcasregistradas
respectivosfabricantes.
** Parahacer pedidos,Ilameal 1-877-232-6771EE.UU.o
al 1-800-688-8408Canada.
55
de sus
Ventana y Puerta dei Home =Vidrio [modelosselectos)
• Eviteusar cantidadesexcesivasde agua pues puede escurrirse
debajo o detr_sdel vidrio causandomanchas.
• Lavecon agua y jabOn. Enjuaguecon agua limpiay seque. El
limpiadorde vidrio puede usarsesi se rocfa en un patio primero.
• No use materialesabrasivestales come esponjasde restregar,
limpiadoresen polvoo esponjasde lana de acero puespueden
rayarel vidrio.
• Lasparrillas se descolorar_inpermanentementey pueden no
deslizarsecon suavidadsi son dejadasen el homo durante un ciclo
de autolimpieza.Si esto sucede,limpie la parrilla y Iosoportesen
relievecon una pequefiacantidad de aceite vegetalpara restaurar
la facilidad de movimiento,luego limpie el excesode aceite.
Acero Inoxidable (modelosselectos)
• NO USENINGUN PRODUCTODE LIMPIEZA QUECONTENGA
BLANQUEADORA BASEDE CLORO.
• NO USELIMP/ADORES "ORANGE" NI L/MPIADORES
ABRASIVES.
• S/EMPRELIMPIE LAS SUPERFICIESDE ACEROA FAVORDEL
GRANO.
• Limpieza Diaria/Suciedad Leve= Limpiecon uno de los
siguientes- agua con jab6n, una soluci6n de vinagre blanco con
agua,limpiador para superficiesy vidrio 'Formula409'*oun
limpiavidriossimilar - usandouna esponjaoun patio suave.
Enjuaguey seque. Parapulir y evitar mamasde los dodos,use el
producto 'StainlessSteel Magic Spray'*[PiezaNo. 20000008)**.
• Suciedad Mederada/Intensa = Limpiecon uric de los siguientes'Ben Ami'*, 'SmartCleanser'*o 'SoftScrub'* - usandouna esponja
h_medaoun patio suave. Enjuaguey seque. Lasmanchasdificiles
puedenset quitadas con una esponjamulti-use 'Scotch-Brite'*
h_meda;frote a favor del grano. Enjuaguey seque. Para restaurar
el lustre y sacar Ins vetas,aplique 'StainlessSteelMagic Spray'*.
• Desceleraci6n - Use una esponjamojadaoun patio suave,limpie
con limpiador de acero 'CameoStainlessSteel
Cleaner'*.Enjuagueinmediatamentey seque. Paraeliminar Ins
estr[asy restaurarel lustre,usedespu_s rociadorpara acero
inoxidable'StainlessSteelMagic Spray'*.
Interior del Homo
Home autelirnpiante:
• Sign las instruccionesen la p_igina64 para programarun ciclo de
autolimpieza.
LimpiezaManual:
• Limpiefrecuentementeusandolimpiadoresabrasivessuavesy una
esponjade pl_stico.
, No useesponjasde fregar met_licasporquepueden rayarla
superficie.
, Cuandoutilice limpiadoresde homo comercialessign Ins
instruccionesdel fabricante.
• Limpielos derrames_cidos(alimentosa basede tomates o de
leche)tan pronto comaseaposiblecon aguayjab6n.
Si el derrameno es limpiadose puededescolorarla porcelana.
Para hacer m_s |_cil la limpieza, saque la puerta del homo, si
le desea. (Vet la secci6nMantenimiento]
Parrillas del Homo
• Limpiarcon agua conjab6n.
• Sacar Ins manchasdificiles con polvo de limpiezaouna esponja
Ilenacon jab6n. Enjuaguey seque.
Puerta del Homo
3. Levanteuniformementehasta que la puertase salga de los brazes
de articulaci6n.
Para velvet a colocar:
1.Sujetela puerta de carla lade.
2.Alinee Ins ranurasde la puerta con los brazesde articulaciOnde la
estufa.
3. Deslicela puerta hacia los brazesde articulaciOnhasta que estc!
completamenteasentadaen Ins bisagras. Empujehaciaabajo Ins
esquinassuperioresde la puertapara asentarlacompletamenteen
Ins bisagras. La puerta no debe quedar torcida.
Beta: La puerta del homo en una estufanuevapuede sentirse
I "esponjosa"cuando se cierra. Estoes normaly disminuir_ con el
| use.
Para sacar:
i
1
Ventana del Homo
1.Cuandoest6 frfa,abra la puerta del homo hasta la posiciOn
primero de asar a la parrilla [abierta
aproximadamente10cm (cuatro
pulgadas)].
(modelos
selectos)
Para proteger la ventana de la puerta del homo:
1. No useagentes de limpiezaabrasivestales come esponjasde
restregarde lana de aceroo limpiadoresen polvo pues olios
pueden rayar el vidrio.
2. Sujetela puerta de cada lade. No use la
manijade la puerta para levantarla.
2. No golpee el vidrio con elias, sartenes,muebles,juguetes u otros
56
objetos.
3. Nocierrelapuerta
delhomo
hasta
quelasparrillas
delhomono
est6n
ensulugar.
AIgolpear,
rayar,
hacer
vibraroesforzar
elvidriopuede
debilitar
su
estructura
causando
unmayor
riesgo
derotura
enunafecha
posterior.
Tornillos Niveladores
Retiro de la Estufa a Gas
Los conectoresde la estufa a gas usadospara conectareste
artefacto al suministro de gas no estan disefiadospara movimiento
continuo. Unavez instalados,NO mueva repetidamenteeste
artefacto a gas para su limpiezao para ubicarlo en otro lugar. Si
este artefactotiene que set movidoy/o retiradopara reparaciOn,siga
el procedimientodescritoen las instruccionesde instalaciOn. Para
informaci6n,p6ngaseen contacto con el Servicioa los Clientes
Ilamandoa[ 1-800-688-9900al EE.UU.y 1-800-688-2002 en
Canada.
Paraevitar que la estufase vuelqueaccidentalmente,se debe
aseguraral piso colocandoel tornillo niveladortrasero dentro del
soporte antivuelco.
Gaveta de Almacenamiento
(modelos selectos)
La
estufa debe
ser niveladacuandose
instala.
Si la
estufano
esta nivelada,gire
los tornillos
niveladores
de plastico ubicadosen cada esquinade la estufa
hastaque quede nivelada.
_,,I
TORNILLO
LUz
del
HOrBO
(modelos
NIVELADOR
La gavetade almacenamientopuedeset retiradapara que usted
pueda limpiar debajo de la estufa.
selectos)
Para sacar :
1. Vac[e la gavetay desl[celahaciaafuera hasta la primera posiciOn
tope.
2. Levantela partedelanterade la gaveta.
3. Tirela hastala segundaposiciOnde tope.
4. Sujete los ladosy levantela gavetapara retirarla.
Para velvet a colocar:
1. Insertelos extremosde lascorrederasde la gavetaen los rieles
de la estufa.
Para reemplazar el foco del homo:
2. Levantela partedelanterade la gavetay suavementeemp0jelaa
la primeraposici6n de tope.
1.Cuandoel homo est6 if[o, sujete la tapa de la bombilla (siesta
equipado] en su lugar, luego deslice el ret6nde alambrefuera de
la cubierta.
3. Levantela gaveta nuevamentey emp0jelahasta que quede
completamentecerrada.
Nota: Lacubierta de la bombillase caerasi no essujeta en su
lugar cuando estasacando el ret6n de alambre.
2.Saque la cubierta del foco y el foco.
3. Coloqueun foco de 40 watts para
electrodom6sticos.
4.Vuelvaa colocar la cubierta de
la bombillay aseg0relacon el
ret6n de alambre.
5.Vuelvaa enchufar la estufa.
Vuelvaa colocar la hora
correota.
Quemadores
Tradicional
CUBIERTA DEL
FOCO
Superiores
(modelos
selectos)
Bajo ninguna circunstanciase deben desarmarlos quemadores
superiorespara su limpieza. El conjunto del quemadorsuperior
puede ser retirado para limpiar el area de la caja del quemador.
En las Estufas
Aislado
Solamente
Losdos conjuntosde quemadoressuperioreshan sido asegurados
durante el transporte con tornillos. Unavez que se hayainstalado la
estufa,estostornillos deben ser retirados para que los quemadores
puedan sersacadosen forma facil y rapida.
RETEN DE ALAMBRE
Para sacar:
Deje que el quemadorse enfr[e.Levantela cubierta de la estufa.
Sujeteel conjunto del quemadory girelo levementehacia la
izquierdapara desengancharlas dos leng0etasdel conjunto. Luego
57
ConexiCn EICctrica
levanteel conjunto y tire de 61hacia la partetrasera de la estufa
hasta que losextremesdel obturador de aire del conjunto se
desenganchende la v_lvula.
Los electredom_sticos que requieren energia
el_ctrica est_n equipados con un enchufe de
ires clavijas con conexiCna tierra, el cual debe
set enchufadodirectamenteen un tomacorriente
elCctricode tres agujeros,para 120voltios
debidamenteconectadoa tierra.
Para velvet a colocar:
Insertelos extremesdel obturadorde aire del conjunto del
quemadoren lasv_lvulasy baje el quemadora su lugar.Asegurelas
dos lengOetasdel quemadoren las ranurasdel soporte del
quemadorque est_ instaladoen la parte inferior del quemador.
(Nora: Si las lengOetasno quedan bien insertadasen las ranuras,el
conjunto del quemadorquedar_iinestabley puedeque los
quemadoresno enciendanen forma debida.)
Siempredesenchufeel electrodom_sticoantesde efectuar
reparacione&
El enchufe de tres clavijascon conexiOna tierra ofrece protecciOn
contra peligros de cheques elCctricos.NO CORTENI EMMINE LA
TERCERACLAVIJADE CONEXIONA TIERRADEL ENCNUFE
DEL CORDONELECTRICO.
Panel inferior del Homo
Protejael panel inferior del homo contra derrames,especialmentede
tipo ac[dico o azucarado,puespueden descolorarla porcelana
esmaltada.Use el utensilio de tamale correctoa fin de evitar
derramesy reboses.
Si solamentese disponede un tomacorrientesin conexiCna tierra,
de dosagujeros u otro tipo de tomacorriente elCctrico,el
propietario del electrodom(_sticoes personalmente
responsablede reemplazar el tomacorriente con un
tomacorriente el_ctrico de tres agujeros debidamente puesto
a tierra.
i0calizact0n$olud6n
de
Para la mayoria de los problemas,verifique primero Io
siguiente.
• Revisesi los controlesdel borne est_indebidamenteajustados.
• Verifique si el enchufe est_ firmemente insertadoen el
tomacorriente.
• Verifique o vuelvaa reponer el disyuntor. Verifique o reemplaceel
fusible.
• Verifique el suministrode energ[ael_ctrica.
• Lastemperaturasa menudovat[anentre un homo nuevoy uno
antiguo. A medidaque pasael tiempo, la temperaturadel homo
cambiay puede hacersem_s caliente o m_s fria. Vet p_g. 68 para
las instruccionescome ajustar la temperaturadel homo (modelos
selectos]. NOTA: No se recomiendaajustar la temperaturasi ha
tenido problemascon solo una o dos recetas.
• Useel utensilio correcto.Los utensiliososcurosproducendorado
oscuro.Losutensilios brillantesproducen dorado clare.
• Verifique las posicionesde las parrillasy la colocaciOnde los
utensilios.Alterne los utensilioscuando use dos parrillas.Deje 2,55 cm [1-2 pulgadas)entre los utensiliosy las paredesdel homo.
• Verifique el use de papel de aluminioen el homo. Nunca use papel
de aluminiopara cubrir una parrilla completadel homo. Coloque
un pedazopequeffode papel de ahminio en la parrilla que est,1
debajo del utensilio para recibir los derrames.
El quemadorsuperior no se enciende.
• Verifique si la estufa est_ debidamenteconectadaa la fuente de
alimentaciOn.
• Verifique si est,1fundido un fusible del circuito o si se dispar6el
disyuntorprincipal.
• Verifique para asegurarsede que el encendedorest6 seco y que
emita chasquidos. El quemadorno se encender_isi el encendedor
est_ da_ado,sucio o mojado. Si el encendedorno produce un
chasquido,gire la perilla de control a la posiciOn'Off'.
La llama es dispareja.
• Losorificios del quemadorpueden estar obstruidos.
La llama del quemadorsuperior se levanta del orificio.
• Verifique para asegurarsede que el utensilio est_ asentadoen la
parrilla sobre el quemador.
Los resultadosdel horneado no son come se esperaban o son
diferentes a los del homo anterior.
• Verifique la temperaturadel horno seleccionada.Aseg0resede que
el homo est6 precalentadocuando la recetao instrucciones
recomiendanprecalentamientodel homo.
• AsegL]resede que el respiraderodel homo no estc!bloqueado. Ver
p_gina 69 para la ubicaciCn.
• Verifique para asegurarsede que la estufaest_ nivelada.
58
Los alimentos no se asan a la parrilla en forma debida o sale
demasiado humo.
• Verifique las posicionesde las parrillasdel homo. El alimento
puede estar muy cerca de la llama.
• El papel de aluminiose us0de maneraincorrecta. Nunca forre el
inserto del asadorcon papel de ahminio.
• Recorteel excesode grasade la came antes de ponerlaa asar a la
parrilla.
• Se us6una asaderasucia.
• Precalienteel homo durantedos a tres minutesantes de colocar el
alimento en el homo.
• Ase a la parrilla con la puerta del homo cerrada.
Elhomo no se autolimpia
(modelos selectos).
• Verifique para asegurarsede que el ciclo no est6 ajustadopara un
comienzodiferido. Ver pdgina 64.
• Verifique si la puerta estd cerrada.
• Verifique si el control est_ en Modo Sab_tico.Ver p_g. 67.
• El homo puede estar a rodsde 205° C (400° F). La temperaturadel
homo debe ser inferiora 205° C (400° F) para programarun ciclo
de limpieza.
• Suciedadexcesivade alimentosen el panel inferior del homo.
Use un ciclo de autolimpieza.
C6digos de Errores(modelos selectos).
° 'BAKE'o 'LOCK'pueden destellar rdpidamenteen el indicador
para avisarleque hay un error o un problem& Si 'BAKE'o 'LOCK'
aparecenen el indicadorvisual,oprima la tecla 'Cancel'. Si 'BAKE'
o 'LOCK'contin_an destellando,desconectela energfaelc!ctricaal
electrodom6stico.Espereunos pocos minutosy vuelva a
reconectarla energ[ael6ctrica. Si contint3andestellando,
desconectela energfaek!ctrica del electrodomc!sticoy Ilameal
t6cnico de servicioautorizado.
• Si el homo est_ demasiadosucio, pueden ocurrir demasiadas
IlamaradasIocual resultarden un c6digo de error durante la
limpieza. Optima la tecla 'Cancel'y deje que el homo se enfr[e
completamente,limpie el excesode suciedady luego vuelvaa
programarel ciclo de limpieza.Si el c6digo de error reaparece,
flame a un t6cnicoautorizado.
El homo no se lirapi6 en forma debida (raodelos selectos).
• Puedeque sea necesarioun tiempo de limpieza m_s largo.
• Losderramesexcesivos,especialmentede alimentosazucaradosy/
o _cidos no fueron limpiadosantes del ciclo de autolimpieza.
La puerta del homo no se desbloquea despu_sdel ciclo de
autolimpieza (modelos selectos).
• El interior del horno todav[aest_ caliente. Dejeque paso
aproximadamenteuna hora para que el homo se enfr[e antes de
que se completeun ciclo de autolimpieza. La puerta puede ser
abiertacuando desaparezcala palabra 'LOCK'del indicadorvisual.
• El control y la puerta puede estar bloqueada. Ver las pdginas53y
65 para se desbloqueo.
Se escuchan ruidos.
• El homo emite variossonidos bajos. Ustedpuede oir los reldsdel
homo cuandose enciendeny se apagan.Estoes normal.
• A medida que el homo se calientay se enfria, usted puede o[r
sonidosde piezasmet_licasque se expandeny contraen. Estoes
normaly no da_ard su electrodom6stico.
Se junta humedad en la ventana del homo o sale vapor pot el
respiraderodel homo.
• Estoes normal cuandose cocinan alimentoscon alto contenido de
humedad.
• Se us6 humedadexcesivacuandolimpi6 la ventana.
No se escuchan so,ales sonoras y el indicadorvisual no se
activa.
• El horno puede estar en Modo Sab_tico. Ver pdg.67.
Hay an olor fuerte o humo love cuando se enciende el homo.
• Estoes normal en una estufa nuevay desaparecerddespu6sde
unos pocosusos.AI iniciar un ciclo de autolimpiezase "quemar_n"
los oloresm_s rdpidamente.
• Si se enciendeel ventiladorayudarda eliminar el humoy/o el olor.
'SAb' desteHay luego se despliega continuamente.
• El horno esta en modosabatico.Paraanular el modosab_tico,
oprimay mantengaoprimida la tecla 'Clock' (Reloj)durante cinco
segundos.
¢oclnaMoenla lstafa
Controles Superiores
'Low' (Bajo):Losalimentosmantienen
una temperaturasobre los 140°F(60°C)
sin que sigancocin_ndose.Los
alimentosse calientancon una llama
mds alta hasta que alcanzan esta
temperatura luego se reduce la llama.
Se puede cocinar en el ajuste 'Low'
siempreque el utensilio estc!tapado.
'Mud' (Median0):Se usa una llamade tama_o
intermedio para continuar cocinando. El alimento no se cocinard
mds rdpido cuando se usa un ajuste de llamam_s alto que el
necesariopara mantener un hervorsuave. El agua hiervea la misma
temperaturasi est_ hirviendosuaveo vigorosamente.
'High' (Alto): Se usapara hacerhervir un I[quido o alcanzarla
presi6nadecuadaen una olla a presi6n. Siemprereduzcael ajuste a
un calor rodsbajo cuando los I[quidoscomiencena hervir o cuando
los alimentoscomiencena cocinarse.
59
Encendido Sin Piloto
(modelos
selectos]
Despu6sque el quemadorse ha encendido,gire la perilla al
tama_o de llamadeseado.
/ ......
-.. c........
. El encendedorcontinuar_iproduciendochispashasta que la
perilla seagirada m_s all_ de la posici6n 'Lite'.
El encendido sin piloto elimina la
necesidad de una luz piloto
constante.Existendos encendedores
para los quemadoressuperiores
tradicionales. Cada uno de los quemadores
selladossuperiores tiene un encendedorde chispa. Tongacuidado
cuando limpie alrededor de los quemadoressuperiores. Si el paso
de limpieza se enredara en el encendedor puede da_arlo e impedir
su ignici6n.
Funcionamiento durante una
Interrupci6n de la Energia
El ctrica
.................
ENCE" I)EBOR
Si un quemadorsuperior no enciende,verifique si el encendedor
est,1roto, sucio o mojado. Si est_ obstruido, limpie el orificio
peque_o debajo del encendedorusando un alfiler derecho.
Encendido per Piloto
(modelos
1. Acerque un f6sforo encendidoa la cabezadel quemador
superior deseado.
selectos]
Cuandola estufase instalapor primeravez,puede que seadiffcil
encenderlos pilotos debido al aire que hay en la tuberfa del gas.
Paradrenar el aire de la tuber[a,coloqueun f6sforo encendidocerca
del quemadory gire la perilla a la posici6n"ON" (Encendido).
Cuandoel quemadorse encienda,gire la perilla a la posici6n "OFF"y
procedacomo se indica a
continuaciOn.
Quemadot
Para encender el piloto:
/
2. Oprimay gire la perilla de control lentamentea la posici6n '[ite'.
3. Cuando la llamaes encendidoajuste al nivel deseado.
Cubierta
Para evitar que la cubierta se descolore o se manche:
de
• Limpiela cubierta de la estufa despu6sde cada uso.
GasTradicional
• Limpielos derrames_icidoso azucaradostan pronto como la
cubierta se hayaenfriadopues estosderramespueden descolorar
la porcelana.
Levantela cubierta y coloque un
f6sforo encendidocerca de los
orificios del piloto [Ver ilustraci6n).
Hay dos orificios de pilotos,uno en
el lado derechoy otro en el
lado izquierdo.
Quemadores
Losquemadoresselladosde su estufaest_inaseguradosa la
cubiertay no hart sido diseffadospara sersacados. Debido a que
los quemadoresest_n selladosen la cubierta,los derrameso
rebosesno se escurrir4n debajo de la cubierta de la estufa.
Perillas de Control de los
Elementos
Superiores
Sin embargo, losquemadorespuedenser limpiados
Se utilizan para encender losquemadoressuperiores. Se disponede
una selecci6ninfinita de ajustesde calor desde'low' a 'High' (Bajoa
Alto). En el ajuste 'High' se puede sentir un tope o una muesca. Las
perillaspueden ser ajustadasexactamenteen los ajustes
correspondienteso entre cualquierade olios.
O
Sellados
-_S..
Lasilustracionescerca de la perilla identifican cual es el
quemadorque controla esaperilla. Por ejemplo,la
O O ilustraci6na izquierdamuestrala ubicaciOndel quemador
delanteroizquierdo.
_
instruccionessobre la limpieza.]
A diferencia de una estufa con quemadoresde
gas est4ndar,esta cubierta no se levantani
tampoco escada
removible.
Noen
intente
levantar
despu6sde
uso. (Ver
la p_gina
55 las
la cubierta per ninff_n motive.
O
Quernadores
Tradicionales
Programaci6n de los Controles:
Lasestufasautoestablescon quemadorestradicionalesest4n
equipadascon una cubierta que puede set levantada.
El tama_o y el tipo de utensilio afectar_nel ajuste de calor.
Para levantar la cubierta:
1. Coloqueun utensiliosobre la rejilla del quemador.
Cuandoest6 fria, sujete el horde delanterode la
cubiertay levdntelocuidadosamentehasta que
lasdos varillas de soporte,si lastiene, situadas
en el frente de la cubierta entren en su lugar con un chasquido.
. La llama del quemadorpuede levantarseo parecerseparada
del orificio si no se coloca un utensilio en la rejilla.
2. Optimay gire la perilla a la izquierdaal ajuste 'Lite' (Encendido).
° Se oir_ un chasquido (chispa]y el quemadorse encender_.
[Los cuatro quemadoresproducir_nchispa cuandose coloca
la perilla de cualquierade los quemadoresen la posici6n 'l.ite'.]
Para bajar"
Sujeteel borde delanterode la cubiertay cuidadosamentelev4ntelo
haciaatr4s en cadavarilla de soporte,si las tiene, para desengancharlas. Luego baje con cuidado la cubierta haciasu lugar. Las
varillasde soportese deslizar_nhaciadentrodel marcode la cubierta.
6O
Quemador de Alto Rendimiento
(modelos
selectos)
Aunque las parrillas de losquemadoresson durables,gradualmente
perder_nsu brillo y/o se descolorar_in,debido alas altas
temperaturasde la llamadel gas.
(12.000 BTU)*
Existeun quemadorde alto rendimiento en su estufa,situado en la
posici6n derechadelantera. Estoquemadorofrece cocci6n m_is
r_pida y puede set usadopara hervir agua con rapidezo para cocinar
grandescantidadesde aliment&
Quemador para Cocinar a
Fuego Lento (modelosselectos)
. Un quemadorajustado de maneracorrecta con orificios
limpios se encender_identro de unos pocos segundos. Si est,1
usandogas natural la llamaser_iazulcon un cono interior azul
profundo.
Si la llamadel quemadoresamarilla o es ruidosa,la mezclade
aire/gas puede ser incorrect& POngaseen contacto con un
t6cnico de serviciopara ajustarla. (Losajustesno est_in
cubiertospor la garantfa.)
Estequemadorse encuentraen la posiciOnizquierdatrasera. El
quemadorpara cocinar a fuego lentoofrece una llamade menor
intensidad (BTU*inferior) para calentarsalsasdelicadaso derretir
chocolate.
Congas licuadoson aceptablesalgunaspuntas amarillasen la
llama. Estoes normal y no es necesariohacer ningOnajuste.
*Elr_gimennominalde BTUvariar_cuandose usagasIicuado.
. Conalgunostipos de gas, usted puede off un "chasquido"
cuandoel quemadorsuperior se apaga. Estees un sonido
normal del funcionamiento del quemador.
==_==7/=
RejUlas de los
Quemadores
Las rejillasdeben estar debidamentecolocadasantes de
comenzara cocinar. La instalaciOnincorrectade las
rejillas puede resultar en picaduras de la cubierta.
Notas:
. Si la perilla de control se gira muy r_pidamentede 'High' a
'Low', la llama puede apagarse,particularmentesi el
quemadorest,1fr[o. Si esto ocurre, gire la perilla a la posiciOn
'OFF' (Apagado},esperealgunossegundosy vuelva encender
el quemador.
_.._u_
///_
° La llamadebe ser ajustada de modoque no se extiendam_s
all_ del borde del utensilio.
No use los quemaderes sin tener an utensilio en la parrilla. El
acabado de porcelana de las parrillas paede picarse si no
existe an atensilio qae absorba el calor de la llama del
quemador.
Ce¢inande
enelItorne
Controles del Homo de
Limpieza Manual
(modelos selectos)
Se escuchar_una serial sonoracadavez que oprima una tecla. No
se escuchar_una serialsonoracuando seopriman las teclas A o
T.
Se escuchar_ndossefiales sonoras Siocurre un error en la
programaciOn.
Se usaparahorneary asar.
Nota: Cuatrosegundosdespuc!sde oprimir la tecla A o V, el
tiempo o la temperaturaque se despliegase programar_
autom_iticamente.Si transcurrenm_s de 30 segundosdespu_sde
haber oprimido una tecla de funciOny la tecla A o V, la funciOn
ser_canceladay el indicadorvisual volver_al despliegueanterior.
Se usaparaasara la parrillay dorar los
alimentos.
'TIMER'(Temporizador)
Programael temporizador.
'CLOCK'[Reloj)
Se usaparaprogramarla horadel d[a.
'CANCEL'(Cancelar)
Cancelatodas lasfuncionesa excepci6n
del temporizadory del reloj.
Programaci6n
Se usanparaseleccionaro cambiarel
tiempoy la temperaturadel homo.
Seleccionalosajustesde asado'HI' (Alto}
o 'LO' _Bajo}.
CLOCK
° La hora del reloj no se puede programarsi el control ha sido
programadopara homearo asar o para usar el temporizador.
Programela hora correctadel dia usandolas teclas A o V. Si la
tecla A o V no se oprime en 30 segundos,la programaciOndel
reloj ser_ cancelada.Oprima la tecla 'CLOCK'para comenzarde
Use de las Teclas
nuevo.
° Oprima la tecla deseada.
° Oprima la tecla A (M_s)o V (Menos)para seleccionarel tiempo o
la temperatura.
del Reioj
1. Oprima la tecla 'CLOCK'.
61
Programaci6n
del Temporizador
• En el indicadorvisualse desplegar_38° (100°] o la temperatura
real del homosi esque essuperiora 38° C 000 ° F] cuandose
enciendeel homo.
El temporizadorpuede set programadode un minute C01]hasta 99
horasy 59 minutes[99:59].El tiempo se desplegar_ien minutesy no
en segundos.EL TEMPORIZADORNO CONTROLtl EL HORNO.
• La temperaturaaumentar_en incrementosde 3° C (5° F] hasta
Ilegara la temperaturaprogramada.Cuandoel homo se haya
...................................
T_MER
precalentado,se escuchar_una sepalsonora.
1. Oprimala tecla 'TIMER'.
• Enel indicadorvisual desplegar_0:00y losdos
puntos (:) destellar_nen el indicadorvisual.
• Esperea que el homo se precalientedurante10-15 minutes.
• Paraverificar la temperaturaprogramadaduranteel precalentamiento del homo, oprimala tecla 'BAKE'.Latemperaturase
desplegar_durantetres segundos.
2. Oprimala tecla A o V hastaque se despliegueel tiempo
deseado.
• Eltemporizadorcomenzar_ia funcionar cuandose programeel
tiempo.
• Para camhiar la temperatara de[ home durante e[ precese
de cecci6n, oprirna la tecla 'Bake',luego oprima A o V hasta
que se desplieguela temperaturadeseada.
• Losdos puntos destellantesindican queun conteo del
temporizadorest,1en progreso.[Los dos puntos no destellan si
el indicadorvisual muestrala hera del dfa o la temperaturadel
homo.)
• Para camhiar la temperatura deJhome durante 'Preheat',
oprima des veces [atecla 'Bake',[uegooprima A o T hasta
que se desplieguela temperaturadeseada.
• AI final del tiempo programado,se escuchar_ndos seffales
sonoras.El indicadorvisual desplegar_"0:00".
3,
. Si as[ Io desea,oprima la tecla 'CLOCK'durante el
funcionamiento del temporizadorpara desplegarbrevemente
la hera del d[a.
4. AI t6rmino de la cocciOn,optima la tecla 'Cancel'para apagarel
homo y retireel alimentodel homo.
• El homo cuentacon unafunciOnde apagadoautom_itico.Si
sedejaencendidodurante 12 horas,el homo seapagar_i
autom_ticamentey el indicadorvisualdesplegar_'000'.Oprimala
tecla 'CANCEL'y la hera del d[a se desplegar_nuevamenteen el
indicadorvisual.
• Si as[ Io desea,oprima la tecla 'BAKE'o 'BROIL'durante el
funcionamiento del temporizadorpara desplegarbrevemente
el ajuste actual de temperatura.
Para cancelar
Coloqueel alimentoel en homo.Verifiqueel progresode la
cocciOncuandohayatranscurridoel tiempo minimorecomendado.
el temporizador:
Oprimay mantengaoprimidala tecla 'TIMER'durantevariessegundos.
Ajuste de los Controles para Asar a la Parrilla:
(compartimiento inferior - modelos selectos]
Ajuste de los Controles
Paraobtenermejoresresultados,use un utensiliodiseffado
especialmenteparaasara la parrilla.
para Horneado
y
Asado:
1. Oprimala tecla 'BAKE'.
• '000'se desplegardy la luz indicadora'BAKE'
destellarden el indicadorvisual.
BAKE
1. Coloquela asaderaen la posiciOndel compartimientorecomendado
................................ para asara la parrilla que se muestraen la tabla siguiente.
2. Oprimala tecla 'BROIL'.
. Si oprimela tecla 'BAKE'y no programala temperaturaen 30
segundos,el programasecancelardautom_ticamentey la
hera del d[a se desplegar_nuevamenteen el indicadorvisual.
• 'SEt'sedesplegar_y la
BROIL
luz indicadora'BROIL'
destellar_en el indicadorvisual.
2. Oprimala tecla ,_. (M_s]o V [Menos)hastaque la temperatura
deseadase despliegueen el indicadorvisual.
3. Oprimala tecla J, paraprogramarel asadoen el
ajuste 'HI' [alto) o Y para el ajuste 'LO' (bajo].
° La temperaturadel homo puede ser programadade 75° a
285° C (170° a 550° F).
• Seleccioneel ajuste'HI' (alto)para asadoa la parrilla normal.
• Seleccioneel ajuste'LO' (bajo) paraasadoa la parrillaa bajas
temperaturaspara evitarel dorado excesivoen alimentosque
requierenmayorestiemposde cocci6ntalescome la came de
ave.
. '175°' (350°]se desplegar_cuandooprima la tecla A o V per
primeravez.
. Oprimala tecla A o V repetidamentepara cambiarla
temperaturaen incrementosde 3° C (5° F],u oprimalay
mantc!ngalaoprimidapara cambiarla temperaturaen
incrementosde 6° C (10° F].
• Si no seleccionaun ajustede Asado ('HI'o 'LO'] en 30 segundos,
el programasecancelar_autom_ticamentey la hera del d[a se
desplegar_nuevamenteen el indicadorvisual.
4. Siga lostiempossugeridosen la tabla paraasar a la parrilla que se
incluye a continuaci6n. La came debe darsevuelta una vezcuando
est_ a mitad del tiempo de cocci6n.
5. Cuandotermine de asara la parrilla,oprima la tecla
'CANCEL'para apagarel homo y retire el utensilio
del homo. La hera del d[a volver_a desplegarseen
el indicadorvisual.
.........
cent.
62
Tabla para Asar a la Parrilla =
Compartimento inferior
Came de Res
Bistecs, 2,5 cm (1") de grossor
Hamburguesas, 2 cm ('3/4"]
de grossor
Cerde
Medio
Bien hecho
Bien hecho
Centre
Centro
Centro
14 - 20 min.
16 - 24 rain.
16 - 24 rain.
Rebanadas de Jamb6n, precocidas,
1,3 em (W') de grossor
Chuletas, 2,5 em (1"] de grossor
Tibio
Centre
8 - 12 rain.
Bien heeho
Centre
18 - 25 rain.
Ave
Polio en Presas
Bien heeho
Inferior
(LO Broil 232°C (450°F)
30-45 rain.
Pescade
Filetes, 1,3 cm (W'] de grossor
Bistecs, 2,5 cm (1") de grossor
Desmenuzado
Desmenuzado
Centro
Centro
8 - 12 rain.
10 - 15 rain.
Superior es la posici6n m4s alta, Centro es la posiei6n m4s baja; Fondo es el fondo del eompartimiento del asador (sacar la parrilla).
** Los tiempos de eoeei6n son aproximados y pueden variar dependiendo de la came.
Perilla del Homo de Limpieza
Ma[Wal
(modelos
4. Verifiqueel t6rmino de cocciOnhaciendoun corte en la came
cerca del centro para verificar el color.
selectos)
5. Despudsde asar a la parrilla,coloque la perilla 'OvenTemp'en la
posici6n "Off". Saquela asaderadel homo.
Periila de ia Temperatura
clel Homo
Encendido Sin Piloto
La perilla 'OvenTemp' (Temperaturadel
Homo) se usa para seleccionary mantenerla
temperaturadel homo. Siempregire esta
perilla justo HASTAla temperaturadeseada.
No gire a una temperaturam_s alta y luego
retroceda.
Ajuste
del Homo para Horneado
(modelos
selectos)
Su estufa est4 equipadacon un encendidosin piloto. Coneste tipo
de sistemade encendido,el gasse apaga autom4ticamentey el
homo no operar# durante una interrupciSn de la corriente
el_ctrica.
y asado:
1. Oprimay gire la perilla 'OvenTemp'a la temperaturadeseada.
Espere10 a 15 minutospara el precalentamiento.
Un f6sforo encendidono encender_el quemadordel homo. No se
debe intentar encenderel homo durante la interrupci6n de la
corriente el_ctrica.
2. Coloqueel alimentoen el centro del homo. Verifiquesi el
alimentose cocin6 en el tiempo m[nimo indicadopara la receta.
Cocinepor m4s tiempo si es necesario.
Encendido
(modelos
3. Saqueel alimento del homo y gire la perilla 'OvenTemp' a la
posici6n "OFF".
per Piloto
selectos)
Enciendael quemadortrasero antesde encenderel piloto del homo.
Esto remover_el aire del sistema de suministro de gasy ayudar4a
encenderla llama piloto. Si no se realizaeste paso,el tiempo de
encendidopuede ser m4s largo de Io esperado.
Ajuste de los Controles para Asado a la
ParriUa 0nodelos selectos]:
1. Paraobtener mejoresresultados,use un utensilio dise_ado
especialmentepara asara la parrilla.Coloquela asaderaen la
posici6nde la parrilla recomendado.[Verla tabla en p4gina 670
Para encender el piloto del homo:
Cuandoel homo est6 fifo, abra la puertadel asadory retire la parrilla
del asadory la asadera.
2. Gire la perilla 'OvenTemp'a 'Broil' para asadoa la parrilla a
temperaturasm_s bajas,a 232° C (450° F).
En la posici6n 'OFF'(APAGADO],oprimay mantenga
oprimida la perilla 'Oven Temp' (Temperaturadel
Homo) y sostengauna cerillaencendidasobre el
piloto que se encuentraen la parte trasera del
quemadordel homo (ver ilustraci6n).Una
vez que se enciendael piloto, suelte la
perilla 'Oven Temp' y vuelvaa colocar la
rejilla del asadory la bandeja. (NOTA:El
quemadordel homo se muestrasin tener
instaladoel difusor de llama met_ilico.)
. El asadoa la parrilla a temperaturasm4s bajasevita el dorado
excesivode los alimentosque se cocinan por m_stiempo,
tales como las carnesde ave.
3. Siga lostiempossugeridosen la tabla en p4gina 67 paraasara la
parrillaque se incluye a continuaciOn.La came debe darsevuelta
unavez cuandoest,1a mitaddel tiempode cocci6n.
63
Controles del Homo
Autolimpiante
(modelos selectos)
'BROIL'(Asara
la Parrilla)
Seusaparaasara la parrillay dorarlos
alimentos.
'BAKE'(Hornear)
Seusaparahorneary asar.
A (Mds]o
V (Menos)
Programao cambiala hera,la
temperaturadel homo.Programa
asara
la parrilla'HI'o 'LO'.
q-IMER'(Temporizador)
'COOK& HOLD'
[Cocci6ny Mantener
Caliente)
Programa
al temporizador.
2. Oprima A o V para programarla hera del dfa.
, Losdos puntos continL_andestellando.
3. Optima la tecla 'CLOCK'nuevamenteo espere
cuatro segundos.
Cuandose conectaenergfael6ctricaal homo o despu_sde una
interrupciOnde la energfaelc!ctrica,la Oltimahera del reloj previaa
la interrupciOndestellar_en el indicador.
Paradesplegarla hera del d[a cuando el indicadorest6 mostrando
otra funci6n de tiempo, oprima la tecla 'CLOCK'.
La hera del reloj no puede ser cambiadacuandoel homo ha side
programatic para 'DELAYCOOK','CLEAN'o 'COOK& HOLD'.
Seusaparahornearduranteun tiempo
seleccionado,
luegomantieneel alimento
calienteduranteunahera.
'CLEAN'(Limpieza)
Seusaparaprogramarun ciclode
autolimpieza.
'DELAY'(Diferido)
Programael homoparacomenzara
hornearo limpiarsea unaheraposterior.
'CLOCK'[Reloj]
Seusaparaprogramarla heradel dfa.
'KEEP
WARM'
(MantenerCaliente]
Seusaparamantenercalienteen el
homoel alimentococinado.
'CANCEL'(Cancela0
Cancelatodaslasfuncionesa excepci6n
deltemporizador
y el reloj.
Para cancelar el despliegue del reloj:
Si no deseaque el indicadorvisual muestre la hera del d[a:
Oprimay mantengaoprimida lasteclas 'CANCEL'
y 'CLOCK'durantetres segundos.La hera del d[a
desaparecer_en el indicador.
Cuandose cancelael desplieguedel reloj,oprima
la tecla 'CLOCK'para desplegarbrevementela
-hera del dia.
.......
CLOCK
Para restaurar el despliegue del relej:
Oprimay mantengaoprimida lasteclas 'CANCEL'y 'CLOCK'durante
tres segundos.La hera del d[a reaparecer_en el indicador.
Use de las Teclas
• Oprima la tecla deseada.
'Timer'
• Optima A o V para programarel tiempo o la temperatura.
El temporizadorpuede ser programadode un minute (00:01)hasta
99 horasy 59 minutes (99:59).
• Se escuchar_una sepal sonoracarla vezque oprima una tecla.
(Temporizador)
El temporizadorpuede ser usado independientementede cualquier
otra actividaddel homo.Adem_ispuede ser programadocuando otra
funci6n del homo est6 en funcionamiento.
• Se escuchar_ndos se_alessonoras si ocurre un error en la
programaciOn.
El temporizadorno controla el homo. Solamentecontrola una seffal
sonora.
Nora: Cuatrosegundosdespu6sde haber oprimido la tecla A o
V, se programar_automdticamenteel tiempo o la temperatura.
Si transcurrenm_s de 30 segundosdespu6sde haber oprimido
una tecla de funciOny antes de oprimir la tecla A o V, la
funciOnserd canceladay el indicador visualvolverd al despliegue
anterior.
Para pregramar el temperizader:
1. Oprirna la tecla 'TIMER'(Temporizado0.
........................
TIMER
, '0:00'destella en el indicadorvisual.
• Losdos puntos destellar_n.
'Clock'
2. Optima la tecla A o V hastaque el tiempo
correcto aparezcaen el indicador visual.
(Reloj)
El reloj puede set ajustadopara desplegarla heraya seaen formate
de 12 horas o 2/4horas. El reloj ha side programadoen la f_ibrica
para el formate de 12 horas.
, Losdos puntos continL_andestellando.
3. Optima nuevamentela tecla 'TIMER'o esperecuatro segundos.
Para cambiar el relej a formate de 24 betas:
, Losdos puntos continL_andestellandoy comienzala cuenta
regresivadel tiempo.
1. Oprimay mantengaoprimidas las teclas
'CANCEL'y'DELAY' durantetres segundos.
2. Oprima_, o V para seleccionarel formate
de 12 horaso 24 horas.
3. Programela hera del dfa siguiendolas
instruccionesindicadasabajo.
, El t31timominute de la cuenta regresivadel temporizadorse
desplegar_ien segundos.
I-
[
4. AI final del tiempo programado,se escuchar_una sepal sonora
larga.
DELAY
Para cancelar el temperizader:
Pregramaci6n del Relej:
1. Oprimala tecla 'CLOCK'.
1. Optima y mantengaoprimida la tecla 'TIMER'durante tres
segundos.
CLOCK
U
, La hera del d[a y dos puntos destellanen el
indicador.
64
2. Optima la tecla 'TIMER'y coloque la hera a 00:00.
BIoqueo de los Controles
4. Esperea que el homo se precalientedurante8-15 minutos.
El teclado puede set bloqueado para seguridad,limpiezao evitar el
uso no autorizado.No funcionar_incuandoest6n bloqueados.
• Cuandoel homo Ilegaa la temperaturaprogramadase
escucharduna sepalsonora larga.
Si el homo est_ en uso, loscontroles pueden bloquearse.
° Paraverificar la temperaturaprogramadadurante el
precalentamientodel homo, oprima la tecla 'BAKE'.
La hora actual del d[a permanecer_en el indicador cuando los
controlesest6n bloqueados.
5. Coloqueel alimento en el centro del homo, dejando un mfnimode
dos pulgadasentre el utensilio y las paredesdel homo.
Para bloquear:
6. Verifique el progresode la cocciOncuando hayatranscurrido el
tiempo m[nimorecomendado.ContinOela cocci6nsi es necesario.
Oprimay mantengaoprimidas lasteclas
'CANCEL'y 'COOK& HOLD'durantetres
segundos.
• 'LOCK'destella en el indicadorvisual.
--
Para desbloquear:
7. AI t6rmino de la cocci6n,oprima la tecla 'Cancel'.
..........................
COOK&
8. Retireel alimento del homo.
HOLD
.................................
Diferencias
del horneado
antiguo y st= homo nuevo
Oprimay mantengaoprimidas lasteclas 'CANCEL'y 'COOK& HOLD'
durantetres segundos.
st= homo
Esnormal observaralgunas diferenciasen el tiempo de horneadode
su homo antiguoy su homo nuevo.Vea "Ajustede la Temperatura
del Homo" en la pdgina 68.
• 'LOCK'desaparecedel indicador visual.
C6digos de Errores
Notas sobre Norneado:
'BAKE'o 'LOCK'pueden destellar r_pidamentepara advertirle que
hay un error o un problem&Si 'BAKE'o 'LOCK'destellanen el
indicadorvisual,oprima la tecla 'CANCEL'.Si 'BAKE'o 'LOCK'
contint3andestellando,desconectela corriente el6ctrica haciael
artefacto.Espereunospocos minutosy vuelva a conectarla
corriente elc!ctrica.Si las palabrasa0n contin0an destellando,
desconectela corriente el6ctrica hacia el artefacto y Ilamea un
t6cnico de servicioautorizado.
'Bake'
entre
Para cambiar la ternperatara del homo darante el proceso
de cocci6n, optima la tecla 'Bake',luego optima A o V hasta
que se desplieguela temperaturadeseada.
Para cambiar la temperatura del homo darante 'Preheat',
oprimados veces la tecla 'Bake',[uegooprima A o V hasta
que se desplieguela temperaturadeseada.
Si olvida apagarel homo, se apagar_iautom_iticamentedespuc!s
de transcurrir 12 horas.Si deseadesactivaresta caracteristica,
yea la p_gina 67.
(Horneado)
Para programar 'Bake':
1. Oprimala tecla 'BAKE'.
BAKE
'Cook & Hold' (CocciOn y
• 'BAKE'destellar&
° '000'destellar_en el indicadorvisual.
2. Seleccionela temperaturadel homo. La temperatura
del homo puede ser programadade 75° a 285° C
(170° a 550° F).Oprimau oprimay mantenga
oprimidala tecla A o V.
Mantener
,
Caliente)
A'
'Cook & Hold' le permite hornear durante una cantidad
determinadade tiempo, seguidode un ciclo 'KeepWarm' de una
hora.
V'
Para programar 'Cook & Hold':
1.Oprimala tecla 'COOK& HOLD'.
• Cuandocualquierade estasdos teclasse oprime
por primeravez,'175°, ('350°') se iluminar&
° 'BAKE'y 'HOLD'destellan.
COOK&
HOLD
• '000' se iluminaen el indicador visual.
• Optima la tecla A para aumentar la temperatura.
2. Seleccionela temperaturadel homo. La temperatura
del homo puede ser programadade 75° a 285° C 070 °
a 550° F). Oprimau oprimay mantengaoprimida la
tecla A o V.
° Optima la tecla V para disminuir la temperatura.
3. Oprimala tecla 'BAKE'nuevamenteo esperecuatro segundos.
• 'BAKE'dejar_ de destellary se iluminar_ien el indicadorvisual.
° '100°,o la temperaturaactual del homose desplegar&La
temperaturase elevar_ien incrementosde 5° hasta que se
alcancela temperaturaprogramada.
° Oprima la tecla A para aumentar la
temperatura.
• Optima la tecla V para disminuir la temperatura.
3. Oprimala tecla 'COOK& HOLD'nuevamenteo esperecuatro
segundos.
° 'HOLD'destella.
° '00:00'destella en el indicadorvisual.
65
4. Programela cantidad de tiempo durante la cual usted desea
hornear oprimiendola tecla A o V. Eltiempo de horneado
puede programarsedesde 10 minutes (00:10] hasta 1] horns,
59 minutes [11:59).
4. Optima A para programarla temperaturade horneado.
• 00:00y 'HOLD'destellan.
• 'BAKE'permaneceiluminado.
5. Optima A para programarel tiempo de horneado.
• 'BAKE'y 'HOLD'se iluminan en el indicadorvisual.
• Enel indicadorvisual se iluminan 'DELAY','BAKE',y
'HOLD'.
° El tiempo de horneadose iluminar_en el indicadorvisual.
• Comenzar_la cuenta regresivadel tiempo de horneado.
Cuande haya expirade el tiempe de cecciBn:
• Se escuchardncuatro sefialessonoras.
• 'BAKE'se apagar&
Cuande el tiempe diferido ha expirade:
° 'HOLD'y 'WARM'se iluminardn.
° 'DELAY'se apagar&
• En el indicadorse desplegard'75°,('170°').
° Se despliegael tiempo y la temperaturade horneado.
• Se despliega'BAKE'y 'HOLD'.
Para pregramar un tiempo diferide cuande ya se ha
programatic 'Cook & Hold':
Despu_s de una hera en 'HOLD WARM' [Mantener
Caliente):
1. Optima la tecla 'DELAY'.
DEL_;f
• 'DELAY'destella
° 'End' sedesplegar&
• '00:00'sedespliegaen el indieadorvisual.
• La hera del d[a volver_a desplegarseen el indicadorvisual.
2. Oprima la tecla A o V para programarel
tiempo diferido.
Para cancelar 'Cook & Hold' en cualquier memento:
Oprimala tecla 'CANCEL'.Retireel alimento del borne.
• DespuBsde cuatro segundos, 'DELAY'
permanecer_iiluminadopara recordarleque se
ha programadoun ciclo de horneadodiferido.
'Delay Bake' (Horneado
Diferido)
Cuande ha expirade el tiempo diferide y el borne
comienza a fnncienar:
• Se desplegar_iel tiempo y la temperaturade homeado.
° 'DELAY'se apagar&
• 'BAKE'y 'HOLD' permanecer_iniluminados.
Para cancelar:
Optima la tecla 'CANCEL'.
Cuandousa 'Delay', el homo comienzaa cocinar mds tarde en el
din. Programela cantidad de tiempo que usted deseadiferir antes
de que se enciendael homo y cuanto tiempo deseacocinar el
alimento.El homo comienzaa calentar en la hera seleccionaday
cocina durante el tiempo especificado.
• Todas Insfuncionesde horneadocontroladaso no per el
temporizadorser_n canceladas.
• La hera del din volver_ia desplegarseen el indicadorvisual.
_OtaS:
El tiempo diferido puede programarsede 10 minutes (00:10)hasta
11 horns,59 minutes(11:59].
, No use horneadodiferido para los articulosque necesitan
precalentamientodel homo,tal come pasteles,galletasy panes.
Para pregramar nn ciclo de herneade diferide:
1. Oprimala tecla 'DELAY'.
° 'DELAY'destella.
• No use horneadodiferido diferido si el homo ya est_ caliente.
..........
DELAY
• '00:00'destellaen el indicadorvisual.
2. Optima la tecla A o V para programarel
tiempo diferido.
Cuando'DELAY'est6 todav[adestellando:
Oprimala tecla 'COOK& HOLD'.
• '000'se ilumina en el indicadorvisual.
• 'BAKE'y 'HOLDdestellan.
....
COOK&
HOLD
66
'Keep Warm'
Cierre Autom tico/Modo
(Mantener
Caliente]
Sab tico
Paramantener calientesen forma seguraalimentoscalienteso para
calentar panesy plates.
Elhornoseapagar_ automdticamentedespu6sde 12 horassi usted Io
deja accidentalmenteencendido. Estacaracteristicade seguridad
puede ser desactivada.
Para pregramar 'Keep Warm':
1. Oprimala tecla 'KEEPWARM'.
, 'WARM'destella.
..............................
KEEP
Para cancelar el cierre autom_tico de 12 betas y
WARM
dejar que el homo funcione centinuamente duraate
72 betas:
° '000'se despliegaen el indicadorvisual.
2. Seleccionela temperaturade 'KeepWarm'.La
temperaturapara 'KeepWarm' puede ser programada
de 63° a 90° C 045 ° a 190° F].Oprima u optima y
mantengaoprimida la tecla A o V.
....
],
Programeel homo para hornear [ver pdgina 65].
2. Optima y mantengaoprimida la tecla 'CLOCK'
durante cinco segundos.
CLOCK
....... ....
° 'SAb'se desplegardy destellar_durante cinco segundos.
........
, Cuandocualquierade estasdos teclasse oprime per primera
vez,'75°, ('WO°'] se iluminar&
° 'SAb'se desplegardcontinuamentehasta que se desactiveo
hastaque transcurra el limite de 72 horas.
° Oprimala tecla A para aumentar la temperatura.
• 'BAKE'tambidn se desplegardsi se est_ usandoun ciclo de
horneadocuandoel homo est_ en modesab_tico.
° Optima la tecla V para disminuir la temperatura.
Todaslas otras funciones EXCEPTO
'BAKE'('Timer','KeepWarm',
'Clean',etc.) estdn bloqueadasdurante el Mode Sab_tico.
'WARM'y la temperaturase desplegar_nen el indicador euando
el eiclo'Keep Warm' est6 active.
Para cancelar 'Bake' cuande el Mode Sab;itice
est_ active:
Oprimala tecla 'CANCEL'.
, 'BAKE'se apagar_en el indicadorvisual.....
° No se oir_ ninguna serialsonora.
Para cancelar 'Keep Warm':
Para cancelar el Mode Sab_tice:
1. Oprimala tecla 'CANCEL'.
1. Oprima la tecla 'CLOCK'durantecinco segundos.
2. Retireel alimento del homo.
CLOCK
O
Notas sobre
'Keep
2. Despudsde 72 horas,el Mode Sab_ticoterminar&
Warm':
° Paracalidad6ptima de los alimentos,los alimentoscocinados
en el homo debenser mantenidoscalientesper no m_s de 1 a
2 horas.
• 'SAb'destellar_durante cinco segundos.
° La hera del dfa reaparecer_en el indicadorvisual.
• Paraevitar que los alimentosse sequen,ct3braloslevemente
con papel de aluminioo una tap&
Notas
Sobre el Mode
Sab_tico:
• El Mode Sab_ticopuedeset activadoen eualquier memento,
estd o no el homo encendido.
° Para calentar paneciiios:
- cubra levementelos panecilloscon papel de aluminio y
col6quelosen el homo.
, El Mode Sab_ticono puede ser activadosi las teclasest_n
bloqueadaso cuando la puertaest_ bloqueada.
- oprima 'KEEPWARM'y la tecla A para programar
75° C (170° F].
° Si el homo estd horneandocuando el Mode Sabdticoes
programado, 'BAKE'se apagardal final del ciclo de horneado.
No se emitir_n sefialessonoras.
- caliente durante 12 a 15 minutes.
• Cuandocomienzael Mode Sab_tico,no se emitird la serial
sonorade precalentamiento.
° Para calentar plates:
- coloque 2 pilas de cuatro plates cada una en el homo.
° Cuandoel Mode Sab_ticoest_ active,todos los avisos,
mensajesy sefialessonorasest_n desactivadas.
-oprima 'KEEPWARM'y la tecla A para programar
75° C (170° F].
° Si oprime la tecla 'CANCEL'se cancelar_un ciclo 'Bake',sin
embargoel control permanecer_en Mode Sab_tico.
- caliente losplates duranteeinco minutes,@ague el homo y
deje los plates en el homo durante 15 minutesrods.
, Si DID la corriente el6ctrica, cuandovuelva la energ[ael homo
se activarden Mode Sabdticocon 72 horasrestantesy ningt_n
ciclo active.
- usesolamenteplates resistentesal homo,verifique con el
fabricante.
- no coloque los plates calientessobreuna superficiefrfa
puesel cambio r_pido de temperaturapuede causarfisuras
superficiales.
67
(Asar a [a Parrilla)
Ajuste de la temperatura
del homo
'Broiling'
La exactitudde las temperaturasdel horno es cuidadosamente
probada en la fdbrica. Es normalnotar alguna diferencia entre la
temperaturade horneado, entre un homo nuevoy un homo antiguo.
Con el correrdel tiempo, la temperaturadel homo puedecambiar.
Para programar 'Broil':
(modelos selectos)
1. Paracomenzar,oprima la tecla 'BROIL'.
• 'BROIL'destella.
• 'SET'se despliegaen el indicador.
Usted puedeajustar la temperaturadel homo, si consideraque su
homo no estd horneandoo dorando en forma correcta. Paradecidir
cuanto debe cambiar la temperatura,programela temperaturadel
homo a 15° C [25° F) mdsalta o m_s baja que la temperatura
indicadaen sus recetas,luego hornee. Los resultadosde la
"prueba" pueden darle una idea de cuanto ajustar la temperatura.
Ajuste de la temperatura
Oprimala tecla A para programarasara la parrilla 'HI' u oprima
la tecla V para programarasarla parrilla 'LO'.
• En el indicadorvisual se desplegar_'HI' o 'LO'.
• Selecciones'HI broil' 285° C (550° F) para asadoa la parrilla
normal. Seleccione'LO broil' 230° C (450° F)para asar a la
parrilla con temperatura baja alimentosque deben set
cocinadospot m_stiempo,tal como la came de ave.
del homo:
1. Oprimala tecla 'BAKE'.
BAKE
2. Programe550° oprimiendo la tecla A.
Despu6sde cuatro segundos,el homo comenzar_a funcionar.
3. Oprimay mantengaoprimida la tecla 'BAKE'durante
varios segundoso hasta que 0° aparezcaen el
indicadorvisual.
• 'BROIL'continuard iluminado.
A
Si la temperaturadel homo ha sido previamenteajustada,el
cambio aparecer_en el indicadorvisual. Porejemplo,si la
temperaturadel homo rue reducidaen 8° C 05 ° F) el indicador
mostrar_'- 8°,('-15°').
4,
4. Oprimala tecla A o V para ajustar la temperatura.
5. Coloqueel alimento en el homo. Cierrela puerta del homo.
Cadavez que se oprimeuna tecla, la temperaturacambia en
3° C [5° F). La temperaturadel homo puedeser aumentadao
disminuidaen 3° a 20° C (5° a 35° F).
6. Dc!vuelta a la came una vez aproximadamentea mitad de la
cocci0n.
5. La hora del dia reapareceraautomaticamenteen el indicador
visual.
7. Cuandoel alimento estd cocinado,oprima la tecla
'CANCEL'. Retireel alimento y la asaderadel homo.
No necesitareajustar la temperaturadel homo si hayuna falla o
interrupciOnde energfaeldctrica. Lastemperaturasde asara la
parrilla y limpiezano puedenser ajustadas.
Tabla de Asar a la Parrilla
Paraun dorado Optimo,precalienteel homo a la parrilla durante
2 a 3 minutos antes de colocarel alimento.
• La hora del din volverda desplegarseen el
indicadorvisual.
dei Homo
Came de Res
Biftec, 2,5cm (1")
Hamburguesas,1,9cm (3/4") de grosor
4
4
4
A medic asar
Bien asado
Bien asado
15 - 20 minutos
18 - 24 minutos
15 - 18 minutos
Came de Cerdo
Tocino
Chuletas,2,5 cm [1")
JamOn- Rebanadasprecocidas,1,3cm [1/2") de grosor
4
4
4
Bien asado
Bien asado
Tibio
6 - 10 minutos
22 - 26 minutos
8 - 12 minutos
3o4
Bien asado
30 - 45 minutos
4
4
Desmenuzado
Desmenuzado
10 - 15 minutos
8 - 12 minutos
Came de Ave
Presasde polio
Mariscos
Bistecsde pescado,con mantequilla,2,5cm [1") de grosor
Filetesde pescado,1,3cm (112")de grosor
'LO Broil'
La posici0n de la parrilla superiores #5.
Nora: Estatabla es s01ouna gufa. Lostiempos puedenvariar con el tipo de alimento que se est_ cocinando.
68
Parrillas del Homo
Notas Sobre Asado a la Parrilla:
• Paramejoresresultadoscuando asea la parrilla, useuna
asaderadisefiadapara asar a la parrilla.
• 'Hi' se usa para la mayor[ade los asadosa la parrilla. Use'LO
broil' cuando asea la parrilla alimentosque necesitancocci6n
prolongada. La temperaturainferior permite que el alimento se
cocine hastaquedar bien asadosin dorarsedemasiado.
• Lostiemposde asadoa la parrilla puedenset m_s largos
cuando se seleccionala temperatura m_s baja de asara la
parrilla.
Su homotiene dos parrillas. Hansido disefiadascon un tope de
engancheen el horde.
Para retirar la parrilla:
, El alimentodebe ser dado vuelta cuandoest_ a mitad del
tiernpo de asar.
1. Tire de la parrilla derechohacia
afuera hasta que se detengaen la
posici6n del tope de enganche.
Respiradero del Homo
2. Levanteel frente de la parrilla y tire
de la parrilla haciaafuera.
Cuandoel horno estden uso,el drea cerca del respiraderopuede
calentarseIosuficiente como para causarquemaduras.Nunca
bloqueela aberturadel respiradero.
Para reinstalar la parrilla:
1. Coloquela parrilla en el soporte de la parrilla en el horno.
El respiraderodel homo se encuentra debajo del respaldo
protector de su estufa.
2. Incline levementehaciaarriba el extremodelantero;deslice la
parrilla haciaatrds hastaque pasosobre los topes de enganche.
RESPIRADERO
3. Baje el frente de la parrilla y deslicela haciaadentro del homo.
No coloquepldsticos
cerca de la abertura
del respiraderopues
el calor que sale
puede deformar o
derretir el pldstico.
'Oven
(modelos
Light'
Posiciones de la Parrilla
PARRILLA5
(posiciOnmds alta):
Se usapara tostar
pan o asar a la
parrilla alimentos
delgadosno
grasosos.
PARRILLA4: Usada
para la mayorfadel
horneadocon dos parrillas.
(Luz del Homo)
selectos)
Oprimael interruptor de la luz del homo en el panel
de control para encendery apagar la luz del homo.
No cubra una parrilla completa con papel de aluminio ni
coloque papel de aluminio en la parte inferior del homo, Se
afectar_n los resultadosdel horneadoy se puede da_ar la
parte inferior del homo.
Oven
Light
Fondo del Homo
Proteinel fondo del homo contra derrames,especialmentederrames
dcidos o azucarados,puespueden descolorarla porcelanaesmaltada.Use el tama_o correcto de utensilio para evitar
derrames y reboses.
i---
...........
--3
....................
2
--1
_
,-.
m
m
a
m_
j
PARRILLA3: Se usapara hornearalimentosen una bandeja
de horneargalletas o un moldepara rollo de mermelada,para
pasteles,pays de frutas o alimentoscongelados.
PARRILLA2: Usadapara asar cortesde came pequefios,cacerolas,
hornear pan,pastel en moldede tubo, flanes u horneadocon dos
parrillas.
PARRILLA1: Usadopara asarcortesde came grandesy
came de ave, pastelescongelados,suflds, pastelesponjosou
horneadocon dosparrillas.
69
5
....................
4
POSICiON PARA HGRNEAR:
Usadopara asar cortes m_isaltos de came
de res o de pavo.Coloqueambas parrillas
del homo, una sobre la otra, en las
salienteslateralesde la parte inferior del
homo.
Accesorio
HORNEADOCON VARIAS PARRILLAS:
de la Media
Parrilla
Se dispone,como accesorio,de una media
parrilla para aumentar la capacidaddel homo.
Se instala en la secci6n superiordel lado
izquierdodel homo y ofrece espaciopara una
plato de verdurascuandose ha colocado una
asaderagrande en la parrilla inferior.
POngaseen contactocon su distribuidor para
obtener el accesorio"HALFRACK"o para
solicitar, Ilameal 1-877-232-6771EE.UU.o 1-800-688-8408Canada.
Dos parrillas: Use lasposiciones2 y 4, o 1 y 4.
Nora: Nunca coloque los utensiliosde cocina directamenteen el
fondo del homo.
70
"
Servldo
Lo que no cubren
estas
garantias
1. Situacionesy dafios resultantesde cualquierade lassiguientessituaciones:
a. InstalaciOn,entregao mantenimientoinapropiados.
b. CualquierreparaciOn,modificaci6n,alteraci6no ajuste no autorizadospot el
fabricante o taller de servicioautorizado.
c. Mal uso, abuso,accidentes,uso no razonableo hechosfortuitos.
d. Corriente,voltaje,suministro elOctricoo suministrode gas incorrectos.
e.Ajuste inadecuadode cualquier control.
2. Lasgarant[asquedan hulassi los n0merosde serieoriginales ban sido retirados,
alteradoso no se pueden determinarf_cilmente.
3. Bombillas,filtros de agua y filtros de aire.
4. Los productoscompradospara usocomercialo industrial.
5. El costodel servicioo Ilamadade serviciopara:
a. Corregirerroresde instalaciOn.Paralos productosque requieranventilaci6n,se
deben usar conductosde metal r[gido.
b. Instruir al usuarioen el uso adecuadodel producto.
c. Transportedel electrodomc!sticoal establecimientode servicioy de regreso.
6. Cualquierpc!rdidade alimentosdebido a fallas del refrigeradoro congelador.
7. Costosde viaje y transportede servicioen _ireasremotas.
8. Estagarant[a no se aplica fuera de los EstadosUnidosy Canad&P0ngaseen contacto
con su distribuidor para determinarsi se aplicacualquier otra garant[a.
LA UNICAY EXCLUSIVA
SOLUCIONPARAEL
CLIENTEBAJOESTAGARANTfALIMITADAES
LA REPARACION
DELPRODUCTOSEGUNSE
INDICAAQUf.LAS GARANTfASIMPLfCITAS,
INCLUYENDOLASGARANTiASDE
COMERClALIZACION
0 DEAPTITUDPARAUN
PROPOSITO
EN PARTICULARESTAN
LIMITADASA UN A_!O0 AL PER[ODODE
TIEMPOMiNIMO PERMITIDOPORLA LEY.
MAYTAGCORPORATION
NOSERA
RESPONSABLE
DEDA_!OSINCIDENTALES
0
CONSECUENTES.
ALGUNOSESTADOSY
PROVlNClASNO PERMITENLA EXCLUSION0
LIMITACIONDEDANOSINCIDENTALES
0
CONSECUENTES
0 LA LIMITACl0N DE LA
DURACIONDELAS GARANTJAS
IMPLIClTASDE
COMERCIALIZACION
0 APTITUD,PORLO QUE
ESTASEXCLUSIONES
0 LIMITACIONES
PUEDENNOAPLICARSEENSU CASO.ESTA
GARANTIALEOTORGADERECHOS
LEGALES
ESPEC[FICOS.
USTEDTAMBIENPUEDETENER
OTROSDERECHOS
QUEVARIANDEUN
ESTADOA OTRO0 DEUNA PROVINCIAA
OTRA.
Form No. C/03/06
Part No. 8113P560
60 Rev. 1
9. Losdafios consecuenteso incidentalessufridospor cualquier personacomo resultado
del incumplimientode esta garantfa.En algunos estadosno se permite la exclusiono
limitaci6nde dafios consecuenteso incidentales,pot Io tanto la limitaci6no exclusion
anteriorpuede no aplicarse en su caso.
Si necesita
servicio
Primerorevisela secci6nde Iocalizaci6ny soluci6n de aver[asen su gu[ade uso y cuidado
o Ilame al distribuidor donde adquiri0 el electrodomc!stico.
Tambk!n puede Ilamara Maytag
Services,LLC,Atenci6n al cliente,al 1-800-688-9900en EE.UU.y al 1-800-688-2002en
Canada1
para ubicar a un agentede serviciocalificado.
, Aseg0resede conservarel comprobantede compra para verificar el estadode la
garantia. Consultela secci6nsobre la GARANTiApara mayorinformaciOnsobre las
responsabilidadesdel propietariopara obtenerservicio bajo la garantia.
, Si el distribuidor o la compafi[ade serviciono pueden resolverel problem& escriba a
Maytag Services,LLC, Attn: CAIR:" Center,P.O.Box 2370,Cleveland,TN 37320-2370o
Ilame al 1-800-688-9900 en EE.UU.y al 1-800-688-2002 en Canad;i.
, Lasgu[asdel propietario, manualesde servicioe informaciOnsobre las piezaspueden
solicitarsea Maytag Services,LLC,AtenciOnal cliente.
_OtaS:
CuandoIlameo escriba acercade un problema de servicio,pot favor
incluya la siguiente informaci6n:
a. Su nombre,direcciOny n0mero de teldono;
b. N0merode modeloy n0merode serie;
c. Nombrey direcci0n de su distribuidor o tc!cnicode servicio;
d. Unadescripci0nclara del problemaque est_ experimentando;
e. Comprobantede compra (recibo de compra).
@2006 Maytag
Appliances
Sales Co.
Litho U.S.A.


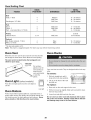


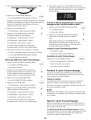


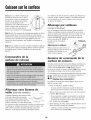
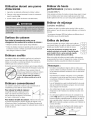

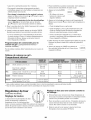

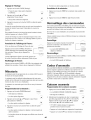
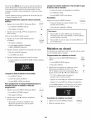


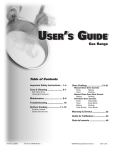


![MA`Y]`AG - Sears Parts Direct](http://vs1.manualzilla.com/store/data/007303854_1-7b2ede6b3b7c67d12ad1099d2b48982d-150x150.png)