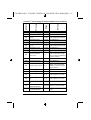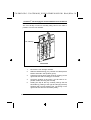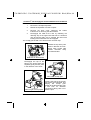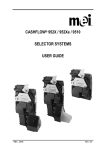
1
530.PROD.GB.3 : 530.PROD.FPAGE.NONE.NONE.GB.1 Black,White,Blue i The ® 530 REFERENCE SERIES 3 TUBE CHANGEGIVER PRODUCT MAINTENANCE HANDBOOK CashFlow®CashFlow®CashFlow®CashFlow®CashFlow®Ca shFlow®CashFlow®CashFlow®CashFlow®CashFlow®Cash Flow®CashFlow®CashFlow®CashFlow®CashFlow®CashFl ow®CashFlow®CashFlow®CashFlow®CashFlow®CashFlow ® CashFlow®CashFlow®CashFlow®CashFlow®CashFlow®C ashFlow®CashFlow®CashFlow®CashFlow®CashFlow®Cas hFlow®CashFlow®CashFlow®CashFlow®CashFlow®CashF low®CashFlow®CashFlow®CashFlow®CashFlow®CashFlo w®CashFlow®CashFlow®CashFlow®CashFlow®CashFlow® CashFlow®CashFlow®CashFlow®CashFlow®CashFlow®Ca shFlow®CashFlow®CashFlow®CashFlow®CashFlow®Cash Flow®CashFlow®CashFlow®CashFlow®CashFlow®CashFl ow®CashFlow®CashFlow®CashFlow®CashFlow®CashFlow ® CashFlow®CashFlow®CashFlow®CashFlow®CashFlow®C ashFlow®CashFlow®CashFlow®CashFlow®CashFlow®Cas hFlow®CashFlow®CashFlow®CashFlow®CashFlow®CashF low®CashFlow®CashFlow®CashFlow®CashFlow®CashFlo w®CashFlow®CashFlow®CashFlow®CashFlow®CashFlow® CashFlow®CashFlow®CashFlow®CashFlow®CashFlow®Ca shFlow®CashFlow®CashFlow®CashFlow®CashFlow®Cash Flow®CashFlow®CashFlow®CashFlow®CashFlow®CashFl ow®CashFlow®CashFlow®CashFlow®CashFlow®CashFlow ® CashFlow®CashFlow®CashFlow®CashFlow®CashFlow®C ashFlow®CashFlow®CashFlow®CashFlow®CashFlow®Cas hFlow®CashFlow®CashFlow®CashFlow®CashFlow®CashF low®CashFlow®CashFlow®CashFlow®CashFlow®CashFlo w®CashFlow®CashFlow®CashFlow®CashFlow®CashFlow® CashFlow®CashFlow®CashFlow®CashFlow®CashFlow®Ca shFlow®CashFlow®CashFlow®CashFlow®CashFlow®Cash Flow®CashFlow®CashFlow®CashFlow®CashFlow®CashFl ow®CashFlow®CashFlow®CashFlow®CashFlow®CashFlow 19162 G3 143538044 530.PROD.GB.3 : 530.PROD.FPAGE.NONE.NONE.GB.1 Black,White,Blue ii CashFlow 530 Changegiver Product Maintenance Handbook Published by : MEI Internet: http://www.meigroup.com For information on translations in your country, please write to the Technical Communications Manager at the above address. CashFlow 530 Changegiver Product Maintenance Handbook ©, MEI UK International Ltd., 1994. All rights reserved. Except as permitted under the relevant local legislation, no part of this publication may be copied, transmitted, transcribed, or distributed in any form or by any means, or stored in a database or retrieval system, or translated into any language (natural or computer), without the prior written permission of MEI. MEI, CashFlow and the MEI device are registered trademarks. ©, MEI., 1994. MEI reserves the right to change the product or the product specifications at any time. While every effort has been made to ensure that the information in this publication is accurate, MEI disclaims any liability for any direct or indirect losses (howsoever caused) arising out of use or reliance on this information. This document does not necessarily imply product availability. Part Number : 143538044 This Edition ( July 1994) ii ©, MEI., 1994. 530.PROD.GB.3 : 530.PROD.GB.3.TOC Black iii CashFlow 530 Changegiver Product Maintenance Handbook TABLE OF CONTENTS SAFETY ....................................................................................... 1 OVERVIEW ................................................................................. 2 INSTALLATION .......................................................................... 4 FIXING THE CHANGER IN POSITION ................................ 5 REJECT LEVER CLEARANCE ........................................... 8 CHUTE ALIGNMENT ........................................................... 8 CONNECTION & OPERATING VOLTAGE .......................... 9 FILLING CHANGE TUBES .................................................. 9 COIN QUALITY.......................................................... 10 COIN FEED RATE ..................................................... 10 INSTALLATION CHECK LIST............................................ 11 CONFIGURATION ................................................................... 12 VIA KEYPAD ...................................................................... 12 USING THE KEYPAD ................................................ 13 Dispensing Coins.............................................. 13 Setting Prices ................................................... 14 Automatic Tube Float........................................ 15 Automatic Tube Inventory................................. 15 Resetting the Tube Counts ............................... 16 Cancelling Credit .............................................. 16 VIA MEI ROUTE ALPHA 250 TERMINAL....................... 17 KEY FUNCTIONS...................................................... 18 USING THE TERMINAL ............................................ 19 ADDRESSES AND VALUES ..................................... 21 DIAGNOSING TERMINAL PROBLEMS ................... 26 TESTING THE TERMINAL........................................ 27 ©, MEI., 1994. iii 530.PROD.GB.3 : 530.PROD.GB.3.TOC Black iv CashFlow 530 Changegiver Product Maintenance Handbook REPLACING MODULES........................................................ 28 REMOVING THE COIN STORAGE CASSETTE................ 28 REFITTING THE COIN STORAGE CASSETTE ................ 29 REMOVING THE COIN FILL FLAP........................... 30 REMOVING COIN TUBES ........................................ 31 Removing the Designators ............................... 33 TUBE POSITIONS.............................................................. 34 COIN SIZES FOR EACH TUBE ......................................... 35 TUBE & DESIGNATOR COMBINATIONS ......................... 36 FRENCH COINSET ................................................... 36 GERMAN COINSET .................................................. 37 UNITED KINGDOM COINSET .................................. 38 DESIGNATOR AND COIN THICKNESS ................... 39 ADDING A NEW COIN ....................................................... 39 SETTING THE TUBE LOW COUNTS ....................... 39 SETTING THE MINIMUM SAFE COUNT.................. 40 SETTING THE TUBE FULL COUNT ......................... 40 REMOVING THE ACCEPTOR ........................................... 41 REFITTING THE ACCEPTOR ............................................ 41 REMOVING THE DISCRIMINATOR BACK COVER . 42 REMOVING THE ACCEPT GATE ............................. 44 REMOVING THE SEPARATOR ......................................... 46 REMOVING THE SEPARATOR SOLENOID BANK .. 47 Removing the Top Level Sensor Assembly...... 48 REMOVING THE DISPENSER........................................... 49 REMOVING THE DISPENSE ARMS......................... 50 REMOVING THE KEYPAD AND TRANSFORMER ........... 51 REPLACING FUSES .......................................................... 52 REMOVING THE CONTROL BOARD ............................... 53 CONNECTORS (ELECTROMECHANICAL) ............. 54 CONNECTORS (EXECUITIVE, MDB & BDV) .......... 55 FAULT-FINDING ...................................................................... 56 iv ©, MEI., 1994. 530.PROD.GB.3 : 530.PROD.GB.3.TOC Black v CashFlow 530 Changegiver Product Maintenance Handbook CLEANING THE ACCEPTOR .............................................. 67 CLEANING (General)......................................................... 68 COMPATIBILITY ...................................................................... 71 MEI BINDER ............................................................................. 73 MEI OFFICES ........................................................................... 74 MEI DISTRIBUTORS .............................................................. 75 INDEX ......................................................................................... 81 ©, MEI., 1994. v 530.PROD.GB.3 : 530.PROD.GB.3.TOC Black vi CashFlow 530 Changegiver Product Maintenance Handbook vi ©, MEI., 1994. 530.PROD.GB.3 : 560.INST.SAF_INST.NONE.NONE.GB.5 Black 1 CashFlow 530 Changegiver Product Maintenance Handbook SAFETY International & Conformance National Standards When installed and operated according to the instructions for the particular unit, CashFlow 530 products are designed to meet the applicable Safety and Electro Mechanical Conformance standards for any country in which they are used. CashFlow 530 products are of class II construction. No safety earth connection is necessary or provided. Dangerous Environments Do not operate in the presence of flammable gases, fumes or water. Disposal of Product Do not dispose of any parts of this product by incineration. Rated Operating Voltage The rated voltage is indicated on a clear see through label above the changegiver keypad. Always operate the changegiver from the type of power source indicated on the label. Warning: before removing or replacing modules SWITCH OFF or ISOLATE the ELECTRICITY SUPPLY to the host machine THIS MANUAL IS PROVIDED FOR USE ONLY BY PERSONNEL TRAINED TO UNDERTAKE ELECTRICAL INSTALLATION ©, MEI., 1994. 1 530.PROD.GB.3 : 530.APPS.OVIEW.NONE.NONE.GB.1 Black,White 2 CashFlow 530 Changegiver Product Maintenance Handbook OVERVIEW The CashFlow 530 changegivers have been designed to address a wide range of market needs that are compatible with the majority of modern vending machines. The flexible approach allows easy matching of modules for all types of applications. They have been designed to work with a wide range of coinsets and can be upgraded in the field to accept new coins. There are three change tubes and field selection of the coins stored in them is possible. On the front of the changegiver is a keypad which is used to dispense coins and reconfigure some simple aspects of the changer. All CashFlow 530 changegivers are made up of the following modules; • Control board • Spine • Transformer • Keypad • Dispenser • Acceptor • Separator • Coin Storage Cassette Back Cover Transformer Keypad Acceptor Separator Control Board Spine Dispenser Coin Storage Cassette Exploded View of the CashFlow Changegiver 2 ©, MEI., 1994. 530.PROD.GB.3 : 530.APPS.OVIEW.NONE.NONE.GB.1 Black,White 3 CashFlow 530 Changegiver Product Maintenance Handbook The basic functionality of all changers is to: • Accept payment • Signal the payment available to the machine (credit output) • Monitor the product request inputs (sense inputs) • Enable the appropriate price line output (if the vend is authorised) • Deduct the vend price from the credit available • Return un-used coins • Monitor the machine inhibited condition (blocker) • Indicate to the host machine the exact change condition With the use of the MEI Route Alpha 250 terminal you can also re-configure certain operational aspects of the changegiver. This includes inhibiting coins, changing from single to multi vend, etc.. ©, MEI., 1994. 3 530.PROD.GB.3 : 530.INST.INST.NONE.NONE.GB.1 Black,White 4 CashFlow 530 Changegiver Product Maintenance Handbook INSTALLATION All changers have a keypad mounted on the front face. To install and set the product up you should understand how the keypad works and how to use it. If in doubt the section on Configuration shows you in more detail how the keypad works. The 5 key points to note when installing any Changegiver are: Machine coin entry should be aligned centrally with the coin entry cup = 2 3 Correct clearance of reject lever 2-3mm Voltage Label 4 Fully Connected! 1 B Min 2-6 coins 5 C D % % % % 80 80 80 80 70 70 70 70 60 60 60 60 50 50 50 50 40 40 40 40 30 30 20 20 20 20 10 10 10 Follow correct process to firmly install changegiver Front View A full installation check list is provided at the end of this section. 4 ©, MEI., 1994. 530.PROD.GB.3 : 530.INST.INST.NONE.NONE.GB.1 Black,White 5 CashFlow 530 Changegiver Product Maintenance Handbook FIXING THE CHANGER IN POSITION 1 There are 3 keyhole fixing points on the rear of each changegiver. It is recommended that only the top right hand fixing point is used with a screw, the two fixing points on the left hand side should be placed on studs. Fix with a screw Place on studs Rear View To ensure that the changegiver operates correctly it must be mounted so that it hangs within +2° of vertical, in both front and side elevations. ©, MEI., 1994. 5 530.PROD.GB.3 : 530.INST.INST.NONE.NONE.GB.1 Black,White 6 CashFlow 530 Changegiver Product Maintenance Handbook To gain access and fit the changer into the machine: Remove the coin storage cassette by squeezing the blue tabs together and unhook the cassette with a careful outwards and upwards pull. Cover Flap Blue Tabs Coin Storage Cassette Press down at the back of the cover flap until it latches in the open position. The top right hand fixing point is now accessible. Cover Flap, in open position, exposing Fixing Screw Keypad Securing Screw 6 ©, MEI., 1994. 530.PROD.GB.3 : 530.INST.INST.NONE.NONE.GB.1 Black,White 7 CashFlow 530 Changegiver Product Maintenance Handbook Unlatch the acceptor by pressing down on the blue acceptor release catch. You may find it easier to use a small screwdriver. Lower the acceptor forwards until it rests on the channel pins. The two left hand keyholes are now accessible Cover Flap Acceptor Release Catch Acceptor Place the changegiver in the machine using all three keyholes. Fully tighten the top right hand screw (under cover flap). Refit the acceptor by carefully pushing back to its upright position. You will hear the acceptor click into place. Close the cover flap by pressing the lower left hand corner of the flap. Refit the coin storage cassette and press each side to ensure the tab ends engage in their slots on the spine. ©, MEI., 1994. 7 530.PROD.GB.3 : 530.INST.INST.NONE.NONE.GB.1 Black,White 8 CashFlow 530 Changegiver Product Maintenance Handbook It is important that before fitting the cassette back into place you make sure the dispense arms are in their parked positions i.e they are as far forward as possible. Switch the machine on, and press the yellow mode key on the keypad twice. This will park the arms automatically for you. (The dispense arms should protrude through the bottom of the cassette after refitting). Press Here Press Here Dispense Arms Should be Seen Here REJECT LEVER CLEARANCE 2 There should be 2 to 3mm clearance between the reject lever on the changegiver and the reject mechanism in the vending machine. A smaller gap than this may cause poor acceptance, as the flight deck lid may remain open. CHUTE ALIGNMENT 3 The centre of the coin entry chute on the machine should be aligned with the centre of the coin entry cup of the changegiver. The alignment can be tested by taking the largest and smallest diameter coins to be accepted and feeding a number through the product. You should ensure that the coin exits, both return and cashbox, are correctly aligned to the machine chuting. In particular, ensure there are no gaps around the coin return chute and the base of the changer which might allow coins to spill into the machine. 8 ©, MEI., 1994. 530.PROD.GB.3 : 530.INST.INST.NONE.NONE.GB.1 Black,White 9 CashFlow 530 Changegiver Product Maintenance Handbook CONNECTION & OPERATING VOLTAGE 4 One of the main causes of poor coin acceptance is insufficient power. Always check the voltage. Poor electrical connections can also lead to poor coin acceptance. To obtain the correct performance from your changegiver, the connector should be fully plugged in and the power to the machine switched on. FILLING CHANGE TUBES 5 To ensure continued acceptance of high value coins there should always be a minimum number of coins left in each tube (safe coin level). To manually fill the tubes it is recommended that you remove the cassette first. Insert a mimimum of 8 coins in each tube. Refit the cassette (after pressing the mode button twice). Press each of the dispense keys A,B,C in turn, holding the keys for at least three seconds. This will latch the dispenser and continue dispensing coins until each tube reaches its safe coin level. Set the changer into automatic float mode and fill the tubes to their preset float levels (see Automatic Float Mode). NOTE: It is easier to remove the cassette before filling the tubes. If the cassette is left in the changer and the tubes are empty, the first coin may pass straight through. B C % % % % 80 80 80 80 70 70 70 70 60 60 60 60 50 50 50 50 40 40 40 40 30 30 20 20 20 20 10 10 10 25% Visually check the tubes to ensure that the first 2 or 3 coins in each tube are lying flat. Occasionally, it may be necessary to gently tap ©, MEI., 1994. 9 530.PROD.GB.3 : 530.INST.INST.NONE.NONE.GB.1 Black,White 10 CashFlow 530 Changegiver Product Maintenance Handbook or remove the coin storage cassette to achieve this. This ensures the changegiver maintains an accurate count of the coins in each tube. COIN QUALITY Do not use bent or damaged coins in this product as they are unlikely to be accepted and may cause a jam, either in the machine entry chute or the product itself. COIN FEED RATE The coins may be fed quickly into the product but best coin acceptance performance will be achieved with intervals of 0.5 seconds or greater. 10 ©, MEI., 1994. 530.PROD.GB.3 : 530.INST.INST.NONE.NONE.GB.1 Black,White 11 CashFlow 530 Changegiver Product Maintenance Handbook INSTALLATION CHECK LIST 1 Check that the operating voltage is correct for the changegiver and the machine. 2 Check that the connector on the changegiver matches that on the machine. 3 Fix the changegiver inside the machine and connect the looms. Make sure that looms are placed tidily so that when the machine door is closed they don’t get trapped. 4 Check the reject lever position and align the coin entry and exit chutes. 5 With the machine switched off, ensure that all coins rejected through the changer are correctly routed to the machine return cup. 6 Switch the machine on. The red LED on the changegiver keypad should be on. If a credit display is fitted then the display digits should light up for approximately 0.5 seconds. 7 Remove the coin storage cassette. Press the mode button twice, this parks the dispense arms in correct position. Re-fit cassette. 8 Set the changer into float mode, by pressing the mode key then key A, and feed through coins until the tubes reach their preset float levels. 9 Press key A to exit the float mode. 10 Set the exact change equation if necessary. 11 Check that one of each of the non tube coins is accepted and routed to the cashbox. Press the mode key followed by the A key twice to cancel the credit. 12 If necessary set the prices, using the keypad. Check that the prices set are correct by making a vend. 13 Close the machine door, the machine is now ready for use. ©, MEI., 1994. 11 530.PROD.GB.3 : 530.INST.CONFIG.KEYPAD.NONE.GB.1 Black 12 CashFlow 530 Changegiver Product Maintenance Handbook CONFIGURATION VIA KEYPAD All products have a keypad mounted on the front face. It can be used to perform the following functions; • Dispense coins • Set price(s). See Note below. • Float the changegiver • Automatic tube inventory • Reset tube counts • Cancel credit NOTES: Setting Prices is available at all times with electromechanical product, unless Route Alpha terminal address 245 has been set to inhibit. With BDV and Executive product it will apply only when Route Alpha 250 terminal address 238 has been activated. Setting Prices is not available for MDB product. The keypad has four letter keys (blue) and a mode key (yellow). There are two LEDs mounted on the left hand side of the keypad (yellow and red) which are used to indicate the status of the changegiver. Above the keypad is a label which has a window showing the voltage. There are also pictures which identify the modes of operation which are available using the keys. Re-set tubes automatically to pre-set level Float up tube Set vend prices Correct voltage for unit No function Dispense coins Tube A dispense Tube B dispense Yellow LED A B Red LED C D Tube C dispense Tube D dispense Mode button (YELLOW) Keypad Label & Keypad 12 ©, MEI., 1994. 530.PROD.GB.3 : 530.INST.CONFIG.KEYPAD.NONE.GB.1 Black 13 CashFlow 530 Changegiver Product Maintenance Handbook The keypad can be in either of two possible modes at any time normal or shifted. The keypad in normal mode allows you to dispense coins while in shifted mode it allows you to change some of the settings of the product. The yellow LED is used to indicate what status the keypad is in. If the LED is off then the keypad is in normal mode. To change any of the functions using the keypad the changegiver must be in an idle state, i.e. not vending or accepting coins, and the keypad must be enabled It is possible that the keypad has been disabled. To enable the keypad, use the MEI Route Alpha 250 terminal to alter address 244 value from a 1 to a 0. When the mode key is pressed, the yellow LED starts to flash. This indicates that the keypad is in shifted mode and you can change the settings of the available functions using the keypad keys. If, after pressing the mode key no other key is pressed within 10 seconds, or if the mode key is pressed a second time, the keypad will return to its normal mode and the yellow LED will go off. The red LED is used to indicate the status of the system. Under normal conditions the LED remains permanently on. If an error is detected on the changegiver then the LED will flash. If a fault is detected on the machine, i.e blocker, then the LED will be permanently off. USING THE KEYPAD Dispensing Coins The tube positions in the coin storage cassette are labelled A,B,C,D on the front of the plastic. When the same letter key on the keypad is pressed a coin will be dispensed from the equivalent coin tube. For instance if letter key A is pressed then a coin is dispensed from the tube held in position A in the coin store. On a single press-and-release of a key the changegiver will pay a single coin from the tube. To get more than 1 coin from the tube hold the key down and the changegiver will start dispensing coins continually. If you release the key within 3 seconds of the initial press, then dispensing will stop after the current coin is dispensed. If the key is held for more than 3 seconds, dispensing will latch, and releasing the key will have no effect. The dispenser will continue to dispense coins until the tube reaches its safe coin level (minimum number of 2 coins left in a tube), or any key is pressed. If 2 or more keys are pressed at the same time, then the changegiver will pay ©, MEI., 1994. 13 530.PROD.GB.3 : 530.INST.CONFIG.KEYPAD.NONE.GB.1 Black 14 CashFlow 530 Changegiver Product Maintenance Handbook coins from the selected tubes in the same way as described above. Latched dispense will continue on each tube until each tube reaches its safe coin level. Setting Prices The main principle of price teach is that selections will have their prices set to the accumulated credit value. To use this mode: 1 Press the mode key on the keypad 2 Press key C. Any stored credit will be cleared and a time-out period of 45 seconds will start. The time-out period restarts after every accepted coin. 3 Enter coins through the acceptor until the value of the price to be set has been reached. The value of any coins entered will be accumulated as credit and will be displayed on the credit display, if fitted. 4 Press the vend button on the machine corresponding to the selection price. The price has now been set. 5 Press key C on the keypad to return to normal operation. Coins to the value of the price set will be returned. If you do not press the C key, then 45 seconds after the last coin was entered, the unit will automatically return to normal operation and credit will be returned. The above stages can be repeated for any selection you wish to change the price of. If a number of selections are required to be set to the same price you only need to accumulate the credit value once. You can then press the appropriate selection buttons on the machine. If more than one price has to be set then accumulate the lowest credit value first, set the price, and then add further coins to the next highest value and set that price etc. Note: Prices of 0 cannot be set. On Executive and BDV variants, the prices are not normally held in the changegiver and are therefore inaccessible to this form of update unless price holding mode is enabled via the MEI Route Alpha 250 Terminal, and the vending machine is able to support price holding operation. 14 ©, MEI., 1994. 530.PROD.GB.3 : 530.INST.CONFIG.KEYPAD.NONE.GB.1 Black 15 CashFlow 530 Changegiver Product Maintenance Handbook Automatic Tube Float To refill the coin tubes (float up) to their pre-programmed float levels follow the instructions below. 1 Press the mode key on the keypad. 2 Press key A. Any stored credit will be cleared and a time-out period of 45 seconds will start. The time-out period restarts after every accepted coin. 3 Enter coins through the acceptor. The changegiver will automatically accept only the amount of coins needed to reach the required float level in that tube. Any subsequent coins will be rejected. Any coins entered will be accumulated as credit and will be displayed on the credit display, if fitted. 4 Press key A on the keypad, it will clear any credit and return to normal operation. NOTE: When the tube is empty, the first coin may pass straight through. If this occurs, remove the coin from the machine return cup and put it back directly into the tube using the manual fill facility as described earlier. You can also reset the float levels using the MEI Route Alpha 250 terminal. Coins can be filled above the pre-set float level in each tube outside of the product. When the cassette is refitted and the dispense keys are pressed, coins will stop dispensing when each tube reaches its safe coin level. The changer can then be floated in the normal way. Automatic Tube Inventory This function allows you to automatically dispense (i.e. float down) all excess coins from each of the tubes. Change coins continue to be routed to the tubes rather than the cashbox when the preset float level has been reached. 1 Press the mode key. 2 Press key A followed by key C. All coins above the preset float level will automatically dispense from the tubes, and will stop when the pre-programmed float level has been reached. ©, MEI., 1994. 15 530.PROD.GB.3 : 530.INST.CONFIG.KEYPAD.NONE.GB.1 Black 16 CashFlow 530 Changegiver Product Maintenance Handbook Resetting the Tube Counts You can force the tube counts to be set to their pre-programmed float levels. This should be done if the coin storage cassette has been manually filled to the preset float levels and then fitted to the changer. To avoid inadvertent resetting of the tube counts this function can only be enabled if the changegiver is in the float mode. 1 Press the mode key. 2 Press key A followed by key B. The tube counts are now reset to their pre-programmed float levels and the changegiver exits the float mode. Under no circumstances should the mode key and the A and B keys be pressed if the low level sensor is uncovered. Note: If the changegiver is not in the float mode before pressing the reset key then the function will be ignored and the keypad will revert to its normal mode. Cancelling Credit If you have been testing or resetting the changer outside of a shifted mode you may accumulate credit in real money terms. To cancel any credit, press the mode key once followed by the A key twice 16 ©, MEI., 1994. 530.PROD.GB.3 : 530.INST.CONFIG.CF_850.NONE.GB.2 Black,White 17 CashFlow 530 Changegiver Product Maintenance Handbook VIA MEI ROUTE ALPHA 250 TERMINAL If you have access to a MEI Route Alpha 250 terminal you can reconfigure any of the functions available for a particular product. The terminal is connected to the acceptor via a six way connector which plugs into the front of the acceptor. C B The terminal is used to check or change certain data which affects the way the changer operates. The data is held in addresses. Each address has a unique number which identifies the feature you wish to read or change e.g. if you want to change from single vend to multi vend then you need to go to address number 226 and put in a 1 (single vend is a 0). The following pages will explain how to access and change the data in certain addresses. At the end of this section there is a list of addresses and the relevant values. ©, MEI., 1994. 17 530.PROD.GB.3 : 530.INST.CONFIG.CF_850.NONE.GB.2 Black,White 18 CashFlow 530 Changegiver Product Maintenance Handbook KEY FUNCTIONS RESET DISPLAY ENTER UP RIGHT LEFT DOWN Reset Key: used to reset all modes and to initialise any settings that you have changed. If the reset key is pressed while an address is being updated then the address may not be updated. The reset key must be pressed to store the changes that you have made. Up Key: used to increase the value displayed on the screen. Down Key: used to decrease the value displayed on the screen. Left Key: used to scroll the display to the left when a large number is being accessed that cannot be fully displayed on the screen. Right Key: used to scroll the display to the right when a large number is being accessed that cannot be fully displayed on the screen. Enter Key: used to change between the address and data displays. Other Facilities of the Terminal The terminal has several features to speed up its use. This includes the ability to scan at a higher speed with the keys auto repeating, to automatically roll over from its highest to lowest address and to inform the operator should a communication error occur. Should you need to know which version numbers of the software is used in the changegiver the UP key is pressed while the terminal is in reset mode. The terminal will firstly display the acceptor HI2 node address, if the UP key is pressed again the acceptor software version number will be displayed.. Pressing the UP key again will display the acceptor eeprom number and if pressed again the acceptor configuration code. To return to normal operation press the RESET key. 18 ©, MEI., 1994. 530.PROD.GB.3 : 530.INST.CONFIG.CF_850.NONE.GB.2 Black,White 19 CashFlow 530 Changegiver Product Maintenance Handbook Auto Repeating Keys If either the UP or DOWN keys are kept pressed they automatically repeat. The repeat speed of the key increases the longer the key is held down. Double Click Hotkeying If a key is doubled clicked (pressed twice in quick succession) then this causes the address number to increment by a larger amount. e.g. if the user starts at address number 1 then double clicks the UP key, the address will jump to 40, double click again the address will jump to address 100 etc. This is useful as the addresses used for the changer start at address 200. You can also double click the DOWN key to decrement by larger amounts. USING THE TERMINAL As soon as the terminal is connected to a changegiver it powers up and interrogates the product. The terminal display will clear and briefly show a message that indicates the version of software in the terminal. A display of [0 1.0] means software with a version number of 1.0 is fitted in the terminal. Software version = 1.0 Power up message After a few seconds the display will show the number [1.] or [1.-]. Not all configuration items are applicable to every product but all the address values are shown on the display. If the value for the address is applicable to the product a dash will be present at the far right position on the display. The value can then be accessed and changed if required. 2 2 No dash displayed Address is not accessible for this product Dash is displayed Address is therefore accessible ©, MEI., 1994. 19 530.PROD.GB.3 : 530.INST.CONFIG.CF_850.NONE.GB.2 Black,White 20 CashFlow 530 Changegiver Product Maintenance Handbook The basic operation to alter the information held in an address is: 1 Connect the terminal to the CashFlow product. 2 Wait for the terminal to power up correctly. 3 Select the address by using the UP and DOWN keys. 4 Examine the data by pressing the ENTER key. 5 Alter the data value by pressing the UP or DOWN keys until the new value has been reached. 6 Press the ENTER key to return to displaying addresses. 7 Press the RESET key to initialise the new value. When the terminal is displaying values stored at addresses, no decimal point will be displayed. If an error occurs with the communication between the terminal and the changegiver the display will show an error message of four half height zeroes. Error message This message will stay on the display. Pressing the RESET key may clear the fault. The display will then revert to showing the current address. If the error occurred while updating an address then the value of that address should be checked as it may not have been updated correctly. If, after pressing the RESET key, the fault remains the error message will stay and you need to return the terminal for repair. As the screen is capable of only displaying four digits at any one time the number displayed on the screen can be scrolled if it is greater than 9999 by using the LEFT and RIGHT keys. The left or rightmost digit will flash indicating an extra digit can be examined by use of the scrolling keys e.g. Value is 12345 press RIGHT key 1 2 345 press LEFT key flashing flashing The table below shows you the address of each item that can be reconfigured and their possible values. 20 ©, MEI., 1994. 530.PROD.GB.3 : 530.INST.CONFIG.CF_850.NONE.GB.2 Black,White 21 CashFlow 530 Changegiver Product Maintenance Handbook Meaning Range Address Parameter ADDRESSES AND VALUES 200 Maximum credit 0-65,535 maximum credit 201 Price 1 0-65,535 value of price 1 202 Price 2 0-65,535 value of price 2 203 Price 3 0-65,535 value of price 3 204 Price 4 0-65,535 value of price 4 226 Single/Multivend 0 -1 0 = single vend 1 = multivend 227 Escrow return inhibit 0 -1 0 = escrow allowed 1 = escrow inhibited 0-4 0 = blocker reset 1 = delayed blocker reset (20ms) 2 = delayed blocker reset (300ms) 3 = blocker hold reset 4 = after escrow signal 0 -15 0 = no coins inhibited 1 = inhibit coin 1 2 = inhibit coin 2 4 = inhibit coin 3 8 = inhibit coin 4 0 -15 0 = no coins inhibited 1 = inhibit coin 5 2 = inhibit coin 6 4 = inhibit coin 7 8 = inhibit coin 8 0 -15 0 = no coins inhibited 1 = inhibit coin 9 2 = inhibit coin 10 4 = inhibit coin 11 8 = inhibit coin 12 0 -15 1 = coin 1 2 = coin 2 4 = coin 3 8 = coin 4 228 Reset mode (Electromech only) 229 Coin inhibit, coins 1-4 for multiple coin inhibit,add together e.g. 1 + 8 = 9 so coins 1 & 4 are inhibited 230 Coin inhibit, coins 5-8 231 Coin Inhibit, coins 9 -12 232 Exact change inhibit group Inhibit coins 1 - 4 ©, MEI., 1994. 21 530.PROD.GB.3 : 530.INST.CONFIG.CF_850.NONE.GB.2 Black,White 22 233 Exact change inhibit group 0 -15 1 = coin 5 2 = coin 6 4 = coin 7 8 = coin 8 0 -15 1 = coin 9 2 = coin 10 4 = coin 11 8 = coin 12 Inhibit coins 5 - 8 234 Exact change inhibit group Inhibit coins 9 - 12 22 Meaning Range Parameter Address CashFlow 530 Changegiver Product Maintenance Handbook 235 Change delay 0 - 255 255 = infinite delay 236 Exact change equation (ECE) part1 0-7 1/2/4 = tubes A/B/C 237 Exact change equation (ECE) part2 0-7 1/2/4 = tubes A/B/C 238 Price hold (Protocol A only) 0-1 0 = do not hold price 1 = hold price 239 Price display 0 -1 0 = do not display price 1 = display price 240 Coin scaling factor 0 - 250 (Protocol A only) 241 Decimal point position 0-3 decimal point position 242 Overpay inhibit 0 -1 0 = overpay allowed 1 = overpay Inhibited 243 Clear overpay inhibit 0 -1 0 = cleardown allowed 1 = cleardown Inhibited 244 Keypad inhibit 0 -1 0 = keypad enabled 1 = keypad inhibited 245 Price teach inhibit 0 -1 0 = price teach allowed 1 = price teach inhibited 246 Fast sense (Electromech only) 0 -1 0 = normal 1 = fast sense 247 Auto Tube Inventory (float down) 0 -1 0 = float down disabled 1 = float down enabled 251 Tube in position A float level 0 - 255 number of coins in a tube to be floated to ©, MEI., 1994. 530.PROD.GB.3 : 530.INST.CONFIG.CF_850.NONE.GB.2 Black,White 23 Meaning Range Parameter Address CashFlow 530 Changegiver Product Maintenance Handbook 252 Tube B float level 0 - 255 as address 251 253 Tube C float level 0 - 255 as address 251 261 Tube in position A full count 0 - 255 number of coins in a tube that activate the full sensor 262 Tube B full count 0 - 255 as address 261 263 Tube C full count 0 - 255 as address 261 271 Tube in position A low count 0 - 255 number of coins in a tube that activate the low sensor 272 Tube B low count 0 - 255 as address 271 273 Tube C low count 0 - 255 as address 271 281 Tube in position A safe count 0-7 minimum number of coins that must be left in a tube (this number is multiplied by 2 in the changer) 282 Tube B safe count 0-7 as address 281 283 Tube C safe count 0-7 as address 281 291 1st coin type in tube A 0 - 12 coin number 0 = no coin (taken from coinset label reading from left to right & top to bottom) 292 1st coin type in tube B 0 - 12 as address 291 293 1st coin type in tube C 0 - 12 as address 291 301 2nd coin type in tube A 0 - 12 coin number, 0 = no coin 302 2nd coin type in tube B 0 - 12 coin number, 0 = no coin 303 2nd coin type in tube C 0 - 12 coin number, 0 = no coin 310 Value of coins in tubes READ ONLY 0-65,535 value of coins in all tubes 311 tube A current coin count READ ONLY 0 - 255 current number of coins in tube ©, MEI., 1994. 23 530.PROD.GB.3 : 530.INST.CONFIG.CF_850.NONE.GB.2 Black,White 24 Meaning Range 312 tube B current coin count READ ONLY 0 - 255 current number of coins in tube 313 tube C current coin count READ ONLY 0 - 255 current number of coins in tube 321-332 value of coins 1 - 12 0-65,535 340 Full sensor errors READ ONLY 0 - 255 value = sum of codes where 1/2/4 = tubes A/B/C 128 = post gate strobe error 341 Tube dis-abled READ ONLY 0 - 31 value = sum of codes where 1/2/4 = tubes A/B/C 0 - 15 1 = errors in page 0 2 = errors in page 1 4 = corrupt audit FEM 8 = audit FEM removed 342 EEPROM errors (i) READ ONLY 343 EEPROM errors (ii) READ ONLY 0 - 15 1 = incorrect configuration version 2 = audit FEM not initialised 4= undefined 8 = internal write error 344 Operational errors (i) READ ONLY 0 - 15 1 = undefined 2 = acceptor error 4 = HII hardware error 8 = HII transmit error Operational errors (ii) READ ONLY 0 - 15 1= coin cassette removed 2=protocol A transmit error 4=protocol A receive error 8 = cashbox full error 349 Reset error flags 0-1 0 = do not reset 1 = reset error flags 360 Audit module - VMC identification code 0-65,535 vending machine ID 361 Audit module printout language 0-4 0 = English 1 = French 2 = German 3 = Dutch 4 = Spanish 345 24 Parameter Address CashFlow 530 Changegiver Product Maintenance Handbook ©, MEI., 1994. 530.PROD.GB.3 : 530.INST.CONFIG.CF_850.NONE.GB.2 Black,White 25 Meaning Range Parameter Address CashFlow 530 Changegiver Product Maintenance Handbook 362 Audit module printout type 0-2 0 = basic 1 = basic + interim vend report 2 = basic + interim vend + free vend report 363 Audit module printout product limit 0 - 25 limit details on printout to first few specified price lines 364 Audit module installation day 1 - 31 day of installation into the machine 365 Audit module installation month 1 - 12 month of installation into the machine 366 Audit module installation year 0 - 99 year of installation into the machine 380 Discount award 0 - 9999 amount added to credit when the vended value exceeds the discount trigger 381 Discount trigger 0 - 9999 if the vended value exceeds this value then the award will be added to the system credit 382 Link Master ID 0 - 9999 ID code of link master node 383 Exact Change Offset 0 - 15 allows a more advanced warning to be given of the exact change 384 Max Coin Credit 0-65,535 maximum coin credit that can be accepted by the changegiver 388 Card Reval Allowed 0-1 0 = revaluation not allowed, 1 = revaluation allowed 389 Audit Unit Fitted 0-1 0 = not fitted, 1 = audit unit fitted 390 VMC Unit Fitted 0-1 0 = not fitted, 1 = VMC fitted 391 CPC Unit Fitted 0-1 0 = not fitted, 1 = CPC fitted ©, MEI., 1994. 25 530.PROD.GB.3 : 530.INST.CONFIG.CF_850.NONE.GB.2 Black,White 26 CashFlow 530 Changegiver Product Maintenance Handbook DIAGNOSING TERMINAL PROBLEMS SYMPTON 26 CAUSE SOLUTION Terminal displays an error message at power up Communications error Terminal displays an error message when changing from address to data mode or vice versa Communications error Repeat last between terminal and operation product or the terminal does not recognise the product it has been connected to Terminal powers up correctly but no addresses are accessible The product is compatible with terminal Terminal does not power up Bad connections Faulty cable Terminal powers up but one of the keys does not work Faulty key Use the self test feature. If the key is faulty send unit for repair Non standard characters printed on display Faulty unit Send unit for repair ©, MEI., 1994. Press RESET not Requires a the different terminal/ software or Check the connections at either end of lead. Replace lead 530.PROD.GB.3 : 530.INST.CONFIG.CF_850.NONE.GB.2 Black,White 27 CashFlow 530 Changegiver Product Maintenance Handbook TESTING THE TERMINAL It is possible to test all the features of the terminal itself by putting the unit into a special test mode. To enter the test mode hold the ENTER key pressed when powering the unit up. The display will initially show three digits indicating the result of an automatic on board test. The display format is: [<BUSY state> <DATA state> <AUTO TEST result>] where <BUSY state> = current state of BUSY line, 0 = low, 1 = high <DATA state> = current state of DATA line, 0 =low, 1=high <AUTO TEST result> = result of automatic test 0 = Pass 1 = BUSY line error 2 = DATA line error 3 = BUSY and DATA line errors Pressing the ENTER key activates the next stage of test. The LCD is tested by displaying a pattern of four identical digits on the display. The digits alter every 1/2 second and the display should be examined to check all the digits are formed correctly. Display will show: [0000], [1111], [2222], [3333], [4444], [5555], [6666], [7777], [8888], [9999], [----], [oooo], [ ], [....]. Pressing the ENTER key activates the next stage of test. The terminal keys are checked next. A single number is shown on the display indicating what key was pressed last. Display shows: [ 0] No key pressed [ 1] UP key pressed [ 2] RIGHT pressed [ 3] DOWN key pressed [ 4] LEFT key pressed [ 5] ENTER key pressed This is the last test and the RESET key must be pressed to restart the terminal in normal operational mode. ©, MEI., 1994. 27 530.PROD.GB.3 : 530.GEN.MOD_XCHNG.STORE.NONE.GB.1 Black,White 28 CashFlow 530 Changegiver Product Maintenance Handbook REPLACING MODULES Before removing any module from the changegiver make sure the machine is switched off. Take care when dis-assembling the product as there are some parts containing static sensitive devices. REMOVING THE COIN STORAGE CASSETTE 1 Squeeze together the blue tabs between the thumb and forefinger. 2 Swing the coin storage cassette forwards and unhook it with a careful upwards and outwards pull. Take care not to damage the dispense arms at the bottom when removing. Blue tabs Float Indicators (can be moved manually) Coin Storage Cassette 28 ©, MEI., 1994. 530.PROD.GB.3 : 530.GEN.MOD_XCHNG.STORE.NONE.GB.1 Black,White 29 CashFlow 530 Changegiver Product Maintenance Handbook REFITTING THE COIN STORAGE CASSETTE Before refitting the cassette it is recommended that the machine is switched on and the mode button on the keypad pressed twice. This will ‘park’ the dispense arms to their correct positions automatically for you. If the machine is switched off, position the dispense arms manually by carefully pulling them forwards. Dispense Arms Dispenser Arms should be seen here after refitting After refitting the cassette you should be able to see the ends of the dispense arms for tubes B and C through the bottom of the cassette. The dispense arm for tube A does not come as far forward and therefore cannot be seen with the cassette fitted. ©, MEI., 1994. 29 530.PROD.GB.3 : 530.GEN.MOD_XCHNG.STORE.NONE.GB.1 Black,White 30 CashFlow 530 Changegiver Product Maintenance Handbook REMOVING THE COIN FILL FLAP The coin fill flap is used for manually filling coins to the tube in position A on the coin cassette. Coin Fill Flap Front View 30 1 Remove the coin storage cassette. 2 With the cassette facing you, push the coin fill flap at the bottom and hold in that position (open). 3 The flap is held in place at the centre by a spring on the right hand side and a locating pin on the left. 4 Check the position of the spring, you will need to reposition it after removing the coin flap. 5 Holding the flap at the top, carefully unhinge the left hand side by pushing to the right and bringing the flap forwards and out of its retaining slot. The spring on the right hand side will now come away easily. ©, MEI., 1994. 530.PROD.GB.3 : 530.GEN.MOD_XCHNG.STORE.NONE.GB.1 Black,White 31 CashFlow 530 Changegiver Product Maintenance Handbook REMOVING COIN TUBES You can replace any of the coin tubes. NOTE: If you are changing the tube type or the tube positions then you must check and change if necessary the data in addresses 251253, 261-263, 271-273, 281-283, 291-293. This can be done using the MEI Route Alpha 250 terminal. 1 Remove the coin storage cassette. 2 Unscrew the three screws on the front of the cassette The coin tubes are held in place by the prism housing. Screws Cassette Front View of Cassette 3 With the back of the cassette facing you, prise the prism housing out of its retaining slots. Gently ease the retaining slot away from the clip on the prism housing. This may take a small amount of force. Prism Housing Retaining Slot Rear View of Cassette ©, MEI., 1994. 31 530.PROD.GB.3 : 530.GEN.MOD_XCHNG.STORE.NONE.GB.1 Black,White 32 CashFlow 530 Changegiver Product Maintenance Handbook The coin tubes are now accessible and can be removed. There are eight different size of tube available. A list of the coin sizes that will fit into each tube is shown at the end of this section. The tubes can be identified by a number on each one in the range 0 - 7. The larger the tube the lower the number i.e. 0 is the largest, 7 is the smallest. If you are removing or replacing more than one coin tube make a note of the positions they are in. This ensures the correct tube number is refitted in the correct position when re-assembling. 1 Lift the coin tube upwards, it will slide out. Take care not to touch the low level sensor mirrors that you can now see on the cassette, fingerprints will impair performance. Cassette Tube Locating Points Low Level Sensor Mirror To replace the tube, simply slide back into position. There are locating points on the cassette for each tube. NOTE: Although the cassette holds three tubes there are some limitations on the possible combinations. At the end of this section there is a table showing the possible options. 32 ©, MEI., 1994. 530.PROD.GB.3 : 530.GEN.MOD_XCHNG.STORE.NONE.GB.1 Black,White 33 CashFlow 530 Changegiver Product Maintenance Handbook Removing the Designators There are eight different size of designator. One designator is fitted at the bottom of each tube in the cassette. They are colour coded and identified by a letter on each one in the range A - H. The size of designator fitted is determined by the thickness of the coin which is to be routed to that tube. A list of the designators and coin thicknesses are shown at the end of this section as well as a table showing the possible designator and tube options. All designators can be fitted in any position. The designators are held in place by two clips which locate under the base of the cassette. 1 Remove the tubes as described in the previous pages. 2 Lift the back of the designator and pull forwards out of the cassette. You may find it easier to use a small screwdriver to lift the designator clips. Designators ©, MEI., 1994. 33 530.PROD.GB.3 : 530.GEN.MOD_XCHNG.STORE.NONE.GB.1 Black,White 34 CashFlow 530 Changegiver Product Maintenance Handbook TUBE POSITIONS Possible tube combinations in the cassette. Tube 34 Position A Position B Position C 0 ✘ ✔ ✘ 1 ✘ ✔ ✘ 2 ✘ ✔ ✔ 2.5 ✘ ✔ ✔ 3 ✔ ✔ ✔ 3.5 ✔ ✔ ✔ 4 ✔ ✔ ✔ 4.5 ✔ ✔ ✔ 5 ✔ ✔ ✔ 5.5 ✔ ✔ ✔ 6 ✔ ✘ ✔ 6.5 ✔ ✘ ✔ 7 ✔ ✘ ✔ ©, MEI., 1994. 530.PROD.GB.3 : 530.GEN.MOD_XCHNG.STORE.NONE.GB.1 Black,White 35 CashFlow 530 Changegiver Product Maintenance Handbook COIN SIZES FOR EACH TUBE Tube No Part No Min Coin Diameter Max Coin Diameter 0 101812001 31.01 32.50 1 140164001 29.21 31.00 2 101825001 26.91 29.20 2.5 169494001 26.10 26.90 3 101838001 24.51 26.00 3.5 169509001 23.21 24.50 4 101841001 21.61 23.20 4.5 169512001 20.76 21.60 5 101854001 19.51 20.75 5.5 169525001 18.61 19.50 6 101867001 16.70 18.60 6.5 169538001 16.70 18.00 7 101870001 15.00 16.69 ©, MEI., 1994. 35 530.PROD.GB.3 : 530.GEN.MOD_XCHNG.STORE.NONE.GB.1 Black,White 36 CashFlow 530 Changegiver Product Maintenance Handbook TUBE & DESIGNATOR COMBINATIONS FRENCH COINSET Coin 10c 20c 36 Tube No 5 4 Designator F F 50c 5.5 D IFR 3.5 E Positions Low Count Min Safe Count Full Count A 14 2 98 B 13 2 98 C 14 2 98 A 14 2 95 B 13 2 95 C 14 2 95 A 10 2 73 C 10 2 73 A 11 2 80 B 11 2 80 C 11 2 80 B 11 2 72 C 11 4 79 2FR 2.5 E 5FR 2 C B 9 2 62 10FR 4 C B 9 2 63 20FR 2.5 C B - - - C - - - ©, MEI., 1994. 530.PROD.GB.3 : 530.GEN.MOD_XCHNG.STORE.NONE.GB.1 Black,White 37 CashFlow 530 Changegiver Product Maintenance Handbook GERMAN COINSET Coin Tube No Designator 5PF 6 E 10PF 50PF IDM 4.5 5 4 E E E 2DM 2.5 D 5DM 2 D Positions Low Count Min Safe Count Full Count A 12 2 86 C 12 2 86 A 12 2 85 B 11 2 85 C 12 2 85 A 13 2 92 B 12 2 92 C 13 2 92 A 11 2 79 B 11 2 79 C 11 2 79 B 10 2 77 B 9 2 50 C 10 2 50 Note: 5DM - Maximum float level should be limited to 50 coins. ©, MEI., 1994. 37 530.PROD.GB.3 : 530.GEN.MOD_XCHNG.STORE.NONE.GB.1 Black,White 38 CashFlow 530 Changegiver Product Maintenance Handbook UNITED KINGDOM COINSET Coin 1p Tube No 5 Designator 3 D 5p 6.5 E 3.5 Low Count Min Safe Count Full Count A 14 2 95 B 13 2 95 C 14 2 95 B 11 2 75 C 11 2 75 A 12 2 84 C 12 2 84 A 11 2 76 B 10 2 76 C 11 2 76 A 12 2 81 F 2p 10p new Positions D 20p 4.5 E B 11 2 81 C 12 2 81 50p 1 D B 7 6 54 A 7 2 38 B 6 2 38 C 7 2 38 100p 4 B Note: 1p - preferred route is position ‘A’ 5p - preferred route is position ‘A’ 38 ©, MEI., 1994. 530.PROD.GB.3 : 530.GEN.MOD_XCHNG.STORE.NONE.GB.1 Black,White 39 CashFlow 530 Changegiver Product Maintenance Handbook DESIGNATOR AND COIN THICKNESS Designator A (RED) Nominal Designator Thickness Minimum Coin Thickness Maximum Coin Thickness 1.0 3.16 3.60 B (ORANGE) 1.55 2.66 3.15 C (YELLOW) 2.05 2.18 2.65 D (GREEN) 2.48 1.81 2.17 E (BLUE) 2.80 1.56 1.80 F (VIOLET) 3.05 1.36 1.55 G (BLACK) 3.25 1.21 1.35 H (WHITE) 3.40 1.10 1.20 ADDING A NEW COIN If you have added a new coin to the coinset you must establish and reset the following addresses using the MEI Route Alpha 250 terminal; Tube Low Counts - addresses 271-273 Minimum Safe Counts - addresses 281-283 Tube Full Counts - addresses 261 -263 SETTING THE TUBE LOW COUNTS 1 Set the tube low count number to 3 (address 271 - 273 depending on the tube). 2 Set the minimum safe count number to 1 (address 281 283 depending on the tube). 3 Fill the tube with coins up to at least 25% of the total tube capacity. 4 Press the mode key then A key followed by the B key on the keypad. (This will set the coin count to its preset coin level). 5 Press the appropriate dispense button and hold for approx 3 seconds to ‘latch’ the dispenser. 6 After the dispenser has stopped returning coins count the coins that are left in the tube. ©, MEI., 1994. 39 530.PROD.GB.3 : 530.GEN.MOD_XCHNG.STORE.NONE.GB.1 Black,White 40 CashFlow 530 Changegiver Product Maintenance Handbook 7 Set the tube low count to 1 coin greater than the coins that remained in the tube in 6 above. To ensure the correct tube low count is reached steps 3 - 6 should be repeated several times. Note: Check that the float level set (address 251 - 253) is at least 5 coins greater than the number of coins actually in the tube. SETTING THE MINIMUM SAFE COUNT 1 Set the minimum safe count number (address 281 - 283) to 3 (6 coins). 2 Set the tube low count number to the same number that you used in 7 above. 3 Repeat steps 3 to 6 of the ‘setting tube low counts’. You should have six coins ± 1 left in the tube each time you repeat steps 3 to 6. Note: Check that coins dispense correctly. If problems occur increase the minimum safe count to 4 (8 coins). The ‘minimum safe count’ MUST be a lower number of coins than the ‘low count’). SETTING THE TUBE FULL COUNT 1 Measure the diameter and thickness of the coin (in mm). 2 The tube full count = 160 - Coin Diameter Coin Thickness From the result of 2 above round the number down to the next whole number. 3 40 4 Set the tube full count using the rounded down number (address 261 - 263) 5 Float coins to the tube via the acceptor until coins overflow to the cashbox. 6 Remove the coin storage cassette or dispense the coins manually. Check that the total coins held in the tube agree with the tube full number ± 2 coins. ©, MEI., 1994. 530.PROD.GB.3 : 530.GEN.MOD_XCHNG.ACC.NONE.GB.1 Black,White 41 CashFlow 530 Changegiver Product Maintenance Handbook REMOVING THE ACCEPTOR 1 Remove the coin storage cassette as shown in the previous pages. 2 Unlatch the acceptor by pressing down on the blue acceptor release catch with a small screwdriver. 3 Disconnect the acceptor loom which is plugged in to the rear of the acceptor. 4 Ease the acceptor/separator module forwards and down until it is free of the catch and rests on the locating pins. 5 Lift the separator out of the retaining slots on the spine. Acceptor Loom Acceptor Release Catch Acceptor REFITTING THE ACCEPTOR 1 Place the acceptor/separator in the retaining slots. 2 Plug in the acceptor loom. 3 Push the acceptor back to its upright position making sure the acceptor loom is looped upwards. You will hear the acceptor click into place against the release catch. ©, MEI., 1994. 41 530.PROD.GB.3 : 530.GEN.MOD_XCHNG.ACC.NONE.GB.1 Black,White 42 CashFlow 530 Changegiver Product Maintenance Handbook REMOVING THE DISCRIMINATOR BACK COVER NOTE: After removing the back cover the discriminator PCB is exposed and normal anti static precautions should be taken to avoid damaging the PCB or any parts associated with it. Also, the lid of the discriminator is now free to open, and disengage the hinge spring. 1 Remove the coin storage cassette and the acceptor / separator as shown in the previous pages. 2 Disconnect the separator looms from the rear of the acceptor. Separator Looms Rear View Acceptor / Separator 42 ©, MEI., 1994. 530.PROD.GB.3 : 530.GEN.MOD_XCHNG.ACC.NONE.GB.1 Black,White 43 CashFlow 530 Changegiver Product Maintenance Handbook 3 Using a small screwdriver release each of the clips in the order shown below. Right Hand Clips Clip 1 Clip 2 Clip 4 Clip 3 Left Hand Clips The discriminator is held in the back cover by four clips. Because there are no screws to be undone the discriminator is held quite firmly in place by the four clips. It does take some practise to enable you to remove the back cover easily and quickly. ©, MEI., 1994. 43 530.PROD.GB.3 : 530.GEN.MOD_XCHNG.ACC.NONE.GB.1 Black,White 44 CashFlow 530 Changegiver Product Maintenance Handbook REMOVING THE ACCEPT GATE 1 Remove the acceptor/separator. 2 Detach the separator from the acceptor. 3 Remove the back cover, observing the earlier instructions on removing the discriminator. 4 Dis-engage the PCB at the rear by releasing the retaining clip on the upper left hand side of it. Extreme care should be taken not to damage the flexi-circuit leading to the PCB while it is dis-engaged. The accept gate is held in the discriminator via three clips. Release the clip at the point shown in direction of arrow. Gently ease accept gate module outwards away from discriminator. Rear view of discriminator Dis-engage the clip at the base of the accept gate and separate gently the two parts in the direction of the arrow. View under accept gate View to right of accept gate 44 Pressing the side of the accept gate at the point indicated, and keeping the accept gate parallel to the discriminator, pull it free from its electrical connections, taking care not to bend the pins. ©, MEI., 1994. 530.PROD.GB.3 : 530.GEN.MOD_XCHNG.ACC.NONE.GB.1 Black,White 45 CashFlow 530 Changegiver Product Maintenance Handbook To replace the accept gate the discriminator lid must be opened. Great care must be taken because the spring will become disengaged if the lid, (which is normally restrained by the back cover), is taken further back than 100˚. When replacing the accept gate make sure that all three clips are correctly aligned before pushing back into place. At all times the flexi-circuit must be treated with care to ensure no damage results from rough handling. Should the spring require re-fitting the guides and pivot points forming the physical link between the deck and lid must be first be correctly located, and the spring connected at both ends. The two parts should be pulled apart and pivoted into the correct position. At no time should undue force be used as this will cause irreparable damage to the mouldings and make the discriminator unusable. Lid Deck Spring PCB retaining clip ©, MEI., 1994. 45 530.PROD.GB.3 : 560.GEN.MOD_XCHNG.SEP.NONE.GB.2 Black 46 CashFlow 530 Changegiver Product Maintenance Handbook REMOVING THE SEPARATOR 1 Remove the coin storage cassette and the acceptor / separator as shown in the previous pages. 2 Carefully disconnect the two looms which are attached to the back of the acceptor. (When removing the looms be careful not to pull any wires out of their housings.) 3 Gently release the bottom left hand clip and then the top left hand clip. The third clip on the right hand side will now release itself. You may find it easier to release the clips from the reverse side but still in the same order as above. Front View showing Left Hand Clips Clip Clip Clip Rear View showing Right Hand Clips 46 ©, MEI., 1994. 530.PROD.GB.3 : 560.GEN.MOD_XCHNG.SEP.NONE.GB.2 Black 47 CashFlow 530 Changegiver Product Maintenance Handbook When refitting the separator, position the right hand clip first, then the left hand clips. Make sure that all three clips are seated correctly as it is possible to snap the separator into place without the clips being fitted correctly. If this happens you may get coin jams. REMOVING THE SEPARATOR SOLENOID BANK 1 Remove the separator from the acceptor. 2 The solenoid bank is held in position with a retaining spring. 3 Squeeze together both sides of the spring, unhook and bring forwards. 4 The spring is held in place at the bottom by two small clips. Lift the spring up and over these clips. 5 Lift the solenoid bank from its resting position. Make a note of the way the cable from the solenoids is routed. Once removed, you will need to re-route this cable after refitting a new solenoid bank. Spring Clip Solenoid Bank ©, MEI., 1994. 47 530.PROD.GB.3 : 560.GEN.MOD_XCHNG.SEP.NONE.GB.2 Black 48 CashFlow 530 Changegiver Product Maintenance Handbook Removing the Top Level Sensor Assembly 1 Remove the separator from the acceptor. 2 The sensor assembly is held in position by two push in clips. To release these clips push the assembly out from the underside as shown in the diagram below. You will need a fine screw driver or similar tool to fit the access holes. Top Level Sensor Assembly Access Points 48 ©, MEI., 1994. 530.PROD.GB.3 : 530.GEN.MOD_XCHNG.DISP.NONE.GB.1 Black,White 49 CashFlow 530 Changegiver Product Maintenance Handbook REMOVING THE DISPENSER 1 Remove the coin storage cassette as shown in the previous pages. 2 Remove the Function Expansion Module (FEM) cover by releasing the retaining clip (located in the lower right hand corner of the cover) and lifting off. 3 Unplug the dispenser loom which you can now access. 4 Release the clips holding the dispenser to either side of the spine. 5 Slide the dispenser out. You may find it easier to remove the dispenser by laying the changegiver flat after removing the coin storage cassette. FEM Cover Dispenser Clips ©, MEI., 1994. 49 530.PROD.GB.3 : 530.GEN.MOD_XCHNG.DISP.NONE.GB.1 Black,White 50 CashFlow 530 Changegiver Product Maintenance Handbook REMOVING THE DISPENSE ARMS 1 Remove the dispenser from the spine. 2 Remove the dispenser base plate by releasing the two retaining clips. Push the clips towards the back of the dispenser and the base plate will drop down. Dispense Arms Baseplate Release Clips The dispense arms are marked A to C and correspond to the three tube positions A to C. When the base plate has been removed the dispense arms are accessible. 50 ©, MEI., 1994. 530.PROD.GB.3 : 560.GEN.MOD_XCHNG.KEYPAD.NONE.GB.3 Black 51 CashFlow 530 Changegiver Product Maintenance Handbook REMOVING THE KEYPAD AND TRANSFORMER Remember to switch off the machine. The keypad and its housing also provides protection for the transformer assembly. 1 Remove the coin storage cassette and the acceptor as shown in the previous pages. 2 Push the back of the cover flap downwards until it latches in the open position. 3 Remove the fixing screw which you can now see under the front edge of the cover flap. 4 Ease the keypad and cover towards you. Push the cover flap here Fixing Screw When you have removed the cover you can access the transformer assembly. The transformer is connected to the control board via two looms. To remove it, disconnect the two looms and lift the transformer out of its housing. ©, MEI., 1994. 51 530.PROD.GB.3 : 560.GEN.MOD_XCHNG.KEYPAD.NONE.GB.3 Black 52 CashFlow 530 Changegiver Product Maintenance Handbook REPLACING FUSES The fuses are located on the control board, to access and replace follow these instructions: Make sure that all power has been switched off. 1 Remove the coin storage cassette and the acceptor as shown earlier. 2 The fuse cover is on the left hand side. Push the cover down and it will rest in an open position. 3 The fuses are now accessible Fuses Fuse Cover 52 ©, MEI., 1994. 530.PROD.GB.3 : 530.GEN.MOD_XCHNG.CONTROL_B.NONE.GB.1 Black 53 CashFlow 530 Changegiver Product Maintenance Handbook REMOVING THE CONTROL BOARD In order to remove the control board all other modules need to be removed first. When removing those modules connected to the control board via looms or cables, make a note of the positions of the connectors that each module is attached to. This will help when re-assembling. When all modules have been removed you can access the control board itself. Turn the spine so that the rear is facing you. For safety reasons there is a screw located to the right of the lower keyhole. Once unscrewed, the back cover can be removed by releasing the three clips as indicated by arrows on the back cover. The control board can then be lifted off. Back Cover Release Clips Screw ©, MEI., 1994. 53 530.PROD.GB.3 : 530.GEN.MOD_XCHNG.CONTROL_B.NONE.GB.1 Black 54 CashFlow 530 Changegiver Product Maintenance Handbook CONNECTORS (ELECTROMECHANICAL) CON 15 CON 13 CON 16 CON 2 CON 12 CON 3 CON 8 CON 7 CON 1 CON 4 CON 5 CON 6 CON 11 Con 1, 2 = Machine Interface / Power Con 3 = Transformer (primary) Con 4 = Transformer (secondary) Con 5 = FEM (Function Expansion Module) Con 6 = Acceptor Con 7 = Protocol A / Serial Comms Con 8 = Keypad Con 11 = Dispenser Con 12 = Display Con 13 = Credit Relay Con 15 = Audit Con 16 = Robust HII 54 ©, MEI., 1994. 530.PROD.GB.3 : 530.GEN.MOD_XCHNG.CONTROL_B.NONE.GB.1 Black 55 CashFlow 530 Changegiver Product Maintenance Handbook CONNECTORS (EXECUITIVE, MDB & BDV) CON 15 CON 16 CON 8 CON 3 CON 7 CON 1 CON 4 CON 5 CON 6 Con 1 = Machine Interface/ Power Con 3 = Transformer (primary). Applies to Executive only Con 4 = Transformer (secondary). Replaced by a capacitor in BDV and MDB applications Con 5 = FEM (Function Expansion Module) Con 6 = Acceptor. When connecting the loom to this connector the blue edge to the cable must be on the left, and running to the top of the PCB. Con 7 = Protocol A / Serial Comms. Not applicable to MDB Con 8 = Keypad Con 11=Dispenser Con 16 = Robust HII ©, MEI., 1994. 55 530.PROD.GB.3 : 530.INST.FFIND.NONE.NONE.GB.1 Black 56 CashFlow 530 Changegiver Product Maintenance Handbook FAULT-FINDING The red LED on the keypad can be used as a helpful aid in diagnosing reported faults on a changegiver. When the changegiver is switched on the red LED should be permanently on. If the Red LED is off (Machine fault or no power) Check the power • Press the mode key, check the yellow LED flashes • Check the fuses and looms Machine Checks • Out of stock (blocker off, electro-mechanical only) • VMC fault (Executive or BDV changegiver) • Check MDB host VMC If the Red LED is flashing There are eight different addresses which contain error codes. Read all error codes using the MEI® Route Alpha 250 Terminal before any further action is taken. The numbers are additive e.g. if the display reads an error code of 5 then tubes A and C are faulty. If a 0 is displayed there is no fault in that address. Address 340 Full sensor errors on tubes A,B,C, or D. Range = 0 - 255 1 = Page 0 EEPROM error. Fatal error. Contact your MEI distributor. 2 = Page 1 EEPROM error. Fatal error. Contact your MEI distributor. 4 = Audit FEM corrupt. Fatal error. Contact your MEI distributor. 8 = Audit FEM removed. Switch off power to the machine. Check that audit FEM is inserted firmly in the board. Contact your MEI distributor if the error persists. If an error is indicated check for blockages etc. at the top of the tubes. Check the prisms at the top of the cassette, they should be clean and undamaged. 56 ©, MEI., 1994. 530.PROD.GB.3 : 530.INST.FFIND.NONE.NONE.GB.1 Black 57 CashFlow 530 Changegiver Product Maintenance Handbook Address 341 Disabled tube at position A, B, C or D Range = 0 - 31 Range value = the sum of the codes, where: 1 / 2 / 4 / 8 = tube A / B / C / D If necessary, use the Route Alpha 250 terminal to enable the tube. Address 342 EEPROM Errors (i) READ ONLY Range = 0 - 15 .Range value = the sum of the codes, where: 1 = Page 0 EEPROM error. Fatal error. Contact your MEI distributor. 2 = Page 1 EEPROM error. Fatal error. Contact your MEI distributor. 4 = Audit FEM corrupt. Fatal error. Contact your MEI distributor. 8 = Audit FEM removed. Switch off power to the machine. Check that audit FEM is inserted firmly in the board. Contact your MEI distributor if the error persists. CAUTION. Switch off the power to the changegiver for at least 2 minutes before inserting or removing the audit FEM. Failure to do this can cause corruption of the FEM and loss of audit data. Address 343 EEPROM Errors (ii) READ ONLY Range = 0 - 15 Range value = the sum of the codes, where: 1 = Incorrect configuration version. Contact your MEI distributor. 2 = Audit FEM not initialised. Initialise FEM, if fitted. Refer to the Product Maintenance Handbook before attempting to initialise the FEM. Contact your MEI distributor if the error persists. 4 = Not used. 8 = Internal EEPROM write error. Contact your MEI distributor. ©, MEI., 1994. 57 530.PROD.GB.3 : 530.INST.FFIND.NONE.NONE.GB.1 Black 58 CashFlow 530 Changegiver Product Maintenance Handbook Address 344.......Operational Errors (i) READ ONLY. Range = 0 - 15 1 = Not used. 2 = Acceptor initialisation error. Switch off power to the machine.Open the lid of the acceptor then close it again firmly. Wait for 15 seconds, then power up the unit. Contact your MEI distributor if the error persists 4 = HI2 hardware error. Set Route Alpha address 349 to 1. Contact your MEI distributor if the error persists. 8 = HI2 transmission error. Set Route Alpha address 349 to 1. Contact your MEI distributor if the error persists. Check for dispenser jams and clear if necessary. Each time a coin is dispensed the dispense arm should return to its parked position. Should the arm fail to park correctly this will also result in an error. Address 345.......Operational Errors (ii) READ ONLY. Range = 0 -15 Range value = the sum of the codes,where: 1 = Cassette removed, or top level sensors covered. Switch off power to the machine. Remove coin cassette, check for coins covering the top level sensors. Check acceptor coin path, check for jams in separator. Close lid of acceptor firmly. Power up. Press Mode+Mode to park the dispenser arms. Replace the cassette, ensuring the retaining clips snap shut. 2 = Protocol A (interface controller) transmission error. Check the serial interface loom. 4 = Protocol A (interface controller) transmission error. Check the serial interface loom. 8 = Cashbox full. Try to clear these errors by checking the looms and connectors and then resetting the data in address 349 to 1 and re-initialising. If clearing the errors and resetting the data have no effect make a note of the error code and return the changegiver for repair. 58 ©, MEI., 1994. 530.PROD.GB.3 : 530.INST.FFIND.NONE.NONE.GB.1 Black 59 CashFlow 530 Changegiver Product Maintenance Handbook Address 346.......BDV Errors (i) (BDV only) Range = 0 -15 1 = Audit timed out 2 = VMC timed out 4 = CPC timed out Address 347.......BDV Errors (ii) (BDV only) Range = 0 - 15 1 = Audit incompatible 2 = VMC incompatible 4 = CPCincompatible Address 349.......Reset error flags 0 = Do not reset 1 = Reset error flags If the red LED is on and not flashing Occasionally, there may be a fault which is undetected and the red LED remains permanently on. Should this occur check for coin jams and then use the following fault-finding table. ©, MEI., 1994. 59 60 ©, MEI., 1994. Coins are accepted but no credit is given Power loom is not inserted correctly. Coin jam in the separator module (post gate strobes are covered). Accept gate strobes mechanism blocked or dirty. Refer to the Product Maintenance Handbook before attempting to clean the strobes or the opto’s. Switch off power to the machine, and check the separator for jams. Switch off power to the machine, and check the loom. Build-up of dirt in the Switch off power to machine, check and clean acceptor. acceptor. Check that the coin entry and exit chutes of the machine are aligned with the coin entry cup on the unit and the cashbox on the machine. Adjust the modules until they are aligned accurately. Check and re-level the unit if necessary. Changegiver unit is not level. Modules are not mounted and aligned correctly. Actions Poor coin acceptance Causes Blocked accept gate Switch off power to machine, check if the opto’s are blocked, and clean the unit. opto’s, or build up of dirt in Refer to the Product Maintenance Handbook before cleaning the opto’s. the unit. Power loom not inserted Switch off power to the machine, and check the loom. correctly. No coins accepted Problem Troubleshooting the CashFlow 530 Unit 530.PROD.GB.3 : 530.INST.FFIND.NONE.NONE.GB.1 Black 60 CashFlow 530 Changegiver Product Maintenance Handbook Coins are not routing correctly Actions Check the coin/token is in the coin set, and has been enabled. Use the Route Alpha 250 terminal to enable the coin. ©, MEI., 1994. A tube is disabled. Wrong acceptor separator is fitted. Use the Route Alpha 250 terminal to enable the tube. or Check that the acceptor and separator are the correct versions. Refer to your authorised MEI distributor. The top-level sensor Switch off the power, remove the cassette and release the acceptor. Check that loom or the separator the top-level sensor and separator looms are fitted correctly. Replace the acceptor loom is not connected and cassette. Switch on power to the unit, insert coins and check routing. correctly. The level of coins in a Check tube counts. If they are above the pre-set float levels and automatic tube tube is covering a top- inventory is set, press Mode+A+C to float-down the coins in the tubes. level sensor. A tube has reached pre- Press A to leave float mode and to clear any credit. set float level, further Check the tube levels, then make a vend to check that the correct change is coins are rejected dispensed. because the unit is in float mode. Coin or token is damaged Discard the worn or damaged coin/token. or w o r n . Causes Coin or token is inhibited. Problem Unit rejects one type of coin or token 530.PROD.GB.3 : 530.INST.FFIND.NONE.NONE.GB.1 Black 61 CashFlow 530 Changegiver Product Maintenance Handbook 61 62 ©, MEI., 1994. Insufficient change coins are available. Incorrect coin values are set. Incorrect prices are set for selections. Levels of coins in the tubes are below the safe count. Dispenser loom not connected, or loose. Incorrect change is dispensed No coins are dispensed Red LED is Normal operation. ON, except when a vend is made Faulty dispenser module. Re-float the coin tubes through the acceptor until the low-level sensor mirrors are covered. Too few coins in the change tubes, leaving the low-level sensors uncovered. Unit is in No Overpay mode. High-value coins are rejected and exact change light is ON No action. Check that the dispenser module is operating correctly. Refer to the Product Maintenance Handbook before you attempt to service or to replace the dispenser. Switch off power to the machine and check that the dispenser loom is fitted correctly. Refer to the Product Maintenance Handbook. Check that change coins are available in the tubes. If necessary, float up the tubes with the correct change coins. Check coin values and prices, reset if necessary using the Route Alpha 250 terminal. Press A, B, C and D to check if change coins are dispensed. Check that coins are being routed to the tubes correctly. If required, float up through acceptor with correct change coins. Check Route Alpha 250 address 242. Actions Causes Problem 530.PROD.GB.3 : 530.INST.FFIND.NONE.NONE.GB.1 Black 62 CashFlow 530 Changegiver Product Maintenance Handbook ©, MEI., 1994. Red LED is OFF, but change coins are routed to the cashbox and not to the tubes Red LED stays OFF Red LED is ON but coins are not accepted Problem Press and hold down A, B, C and D for at least three seconds each to dispense coins down to the tube safe counts. Press Mode + A + B, and insert change coins through the acceptor until tubes reach their pre-set levels.1 Mismatch between the true coin count in a tube and the count being registered by the changegiver If an audit FEM is fitted, Mode+A+B is not available to reset tubes automatically to pre-set levels. In this case, float tubes to required levels and make a trial vend. If the yellow LED flashes, the power is ON. If yellow LED stays off, switch off power to the machine, and check all power looms and fuses. Replace any blown fuses. Restart the machine and check that the red LED is on. No power to the unit, loose loom or blown fuse. Check clearance is between 2 - 3mm, and adjust if necessary. Not enough reject lever clearance. Check that the power supply to the changegiver is at the voltage shown in the window on the keypad label. Test the power supply by pressing the Mode button. Switch off the power to the machine. Open and close the lid of the acceptor, wait at least 15 seconds, then switch on again. Lid of the acceptor is open. No power to the unit, or voltage not correct. Check for jams in the acceptor and in the tubes. Clear the jams. Press Mode + Mode to park the dispenser arms before replacing the cassette, then dispense a coin from each tube to check operation. Actions Coin jam in the changer mechanism. Causes 530.PROD.GB.3 : 530.INST.FFIND.NONE.NONE.GB.1 Black 63 CashFlow 530 Changegiver Product Maintenance Handbook 63 64 Problem Red LED stays OFF and all coins are rejected Red LED is FLASHING Switch off the power to the machine, remove the cassette and check the dispenser for jams. Clear any blockages and check for damaged coins. Check the Route Alpha 250 audit addresses. Return the unit to your MEI distributor for repair if necessary. Press coin cassette into place firmly, ensure clips snap shut. Restock machine if necessary. If an Executive version machine, check the communications cable. Refer to the Product Maintenance Handbook. Check for a full waste bucket. Check if machine is paused halfway through a vend cycle. Complete the cycle if necessary. Check the keypad module. If faulty, refer to your MEI distributor. Check the transformer. If faulty, refer to your MEI distributor. A coin is jammed in the dispenser module. Coin cassette is unclipped. No stock available for vending. Check for fault on vending machine. No blocker signal from the machine. LED or keypad fault. Faulty transformer. Fault with the audit module. Remove the coin cassette and check the tops of the coin tubes. A coin has covered the top-level sensor mirrors. Actions Press A, B, C and D to check if coins are dispensed. If the red LED is still flashing, switch off the power to the machine, wait at least 15 seconds and switch on again.Check that coins are dispensed. Causes Fault with the changegiver unit. 530.PROD.GB.3 : 530.INST.FFIND.NONE.NONE.GB.1 Black 64 CashFlow 530 Changegiver Product Maintenance Handbook ©, MEI., 1994. Faulty LED or keypad module. Causes ©, MEI., 1994. Normal operation Normal operation Yellow LED is OFF Yellow LED flashes when coins are accepted The acceptor loom is not connected. The coin path in the acceptor is dirty. Red LED is Check Route Alpha 250 flashing and addresses 340 to 349 for no coins are a description of the error. accepted The lid of the acceptor is not closed firmly. Red LED permanently OFF. No other problems. Problem No action No action Switch off power to the machine and clean the acceptor. Check the acceptor loom and reconnect it if necessary. Switch off power to the machine and open and close the lid of the unit. Make sure the lid snaps shut firmly. Wait at least 15 seconds and switch the power on again. Use the table of Route Alpha 250 error addresses in this manual. Check the keypad module. If it is faulty, refer to your authorised MEI distributor. Actions 530.PROD.GB.3 : 530.INST.FFIND.NONE.NONE.GB.1 Black 65 CashFlow 530 Changegiver Product Maintenance Handbook 65 66 Faulty LED or faulty keypad module Faulty unit, or faulty modules Yellow LED is OFF permanently. No other problems. Problems in handling coins persist after all solutions have been tried The changegiver is in shifted mode because the Mode button has been pressed Yellow LED is flashing Causes No power supply to the vending machine Problem Yellow LED remains OFF when Mode button is pressed Actions ©, MEI., 1994. Contact your MEI distributor. To help diagnosis, note the symptoms, and the model and serial number of the unit for reference. These numbers are on a label on the side of the unit. If faulty, refer to your MEI distributor. Check the keypad module. (To exit from shifted mode, press Mode or wait for 45 seconds ) The keypad is available to change the functions of the unit. Replace blown fuses, following the instructions in this manual. Switch off power to the machine, check all looms and check all fuses. 530.PROD.GB.3 : 530.INST.FFIND.NONE.NONE.GB.1 Black 66 CashFlow 530 Changegiver Product Maintenance Handbook 530.PROD.GB.3 : 560.GEN.CLEAN.ACC.NONE.GB.1 Black 67 CashFlow 530 Changegiver Product Maintenance Handbook CLEANING THE ACCEPTOR In order to ensure maximum efficiency from this product it is essential to pay regular attention to the cleaning of the coin pathway. Before attempting to clean or remove the Acceptor the machine must be switched off. The shaded areas shown in the diagram below should always be kept free from dirt, grease, etc. Any cleaning should be carried out by using a soft damp cloth.The surface should always be left clean and dry after any such cleaning. Should any drops of water enter this product leave the machine switched off until the water has dried out. Never use solvents to clean this product as this will damage the surfaces. Note: Failure to switch the machine off before cleaning could result in a possible delay in accepting coins. The acceptor re-calibrates itself at power up and every 4 minutes thereafter. If you switch on with the lid open it will re-calibrate itself incorrectly and you will have to wait for 4 minutes after the lid has been closed before it will start accepting coins. ©, MEI., 1994. 67 530.PROD.GB.3 : 530.GEN.CLEAN.NONE.NONE.GB.1 Black,White 68 CashFlow 530 Changegiver Product Maintenance Handbook CLEANING (General) In order to ensure the changer continues performing at its best it is important that other parts as well as the acceptor itself are kept clean. Details showing how to dis-assemble modules are shown in earlier sections of the book. If you are cleaning the optos or prisms in a module you should use a cotton bud or a soft cloth. Never use solvents or abrasives as this will damage the optical surfaces. Below is a list of modules and their parts which should receive particular attention. Gate Coin Reject Path Optos Accept Gate Module Coin Exit Plate located here Prisms Discriminator Module 68 ©, MEI., 1994. 530.PROD.GB.3 : 530.GEN.CLEAN.NONE.NONE.GB.1 Black,White 69 CashFlow 530 Changegiver Product Maintenance Handbook Separator The separator is a sealed unit. If it looks particularly dirty then remove the prism housing and solenoid bank. You can then immerse the remaining plastic part in hot soapy water. Rinse, and leave to dry thoroughly before refitting. Prism Housing Solenoid Bank ©, MEI., 1994. 69 530.PROD.GB.3 : 530.GEN.CLEAN.NONE.NONE.GB.1 Black,White 70 CashFlow 530 Changegiver Product Maintenance Handbook Dispense Arms Dispenser Prisms Designators Coin Tubes Coin Tubes & Designators 70 ©, MEI., 1994. 530.PROD.GB.3 : 530.INST.COMP.NONE.NONE.GB.2 Black 71 CashFlow 530 Changegiver Product Maintenance Handbook COMPATIBILITY The CashFlow 530 product range is compatible with the majority of modern vending machines requiring a changegiver. The options currently available are; • CashFlow 530 - 4 price - A four price electromechanical changegiver Interfaces are provided for a credit display if required on the above. MACHINE INTERCONNECTION LOOMS The looms fitted to the CashFlow 530 products have a range of connectors and pinouts to be fully compatible with existing machine wiring. The table below shows the new CashFlow® looms and the old interface looms which they replace. CashFlow® Machine Loom No. Replaces T3 Electro mechanical No. of Price Lines B32,FI, F16 ✓ 1 T4 FF,B12,F15, F26 ✓ 4 T5 FB,B03,B62 F03,F10,F3 5 ✓ 4 T6 FJ,B02,F02, F27 ✓ 3 T7 FA, No credit relay T8 FD,B74,F01 ✓ 4 T9 FC,B60,F08 ,F33 ✓ 4 Serial (PA) BDV (Gen. purpose loom) ©, MEI., 1994. 71 530.PROD.GB.3 : 530.INST.COMP.NONE.NONE.GB.2 Black 72 CashFlow 530 Changegiver Product Maintenance Handbook CashFlow® Machine Loom No. Replaces T11 Electro mechanical No. of Price Lines FE,F12 ✓ 4 T12 FG,F44 ✓ 4 Machine Loom ❋ 165972002 FF, F26 Adaptor ✓ 4 Machine Loom ❋ 165974001 FM, F75 Adaptor ✓ 6 Serial (PA) BDV ❋ Requires T7 Adaptor Loom to effect interface. 72 ©, MEI., 1994. 530.PROD.GB.3 : GEN.PROD.PACK_KIT.NONE.NONE.GB.5 Black 73 CashFlow 530 Changegiver Product Maintenance Handbook MEI BINDER You can protect your documentation with an MEI binder. This binder has been specifically designed to hold your A5 documentation. It has six rings and is manufactured from top quality materials. It is finished in a stylish black hessian weave with dark grey suede lining and protective metal corners. Your MEI binder will hold several CashFlow books if required. It comes supplied with a set of ten colour coded section dividers. The binder also includes; • magnetic clasp • pen loop • business card pocket • large pocket suitable for ‘starter guides’ • 3 smaller pockets To order your CashFlow Binder contact your MEI Distributor or MEI Regional Office. ©, MEI., 1994. 73 530.PROD.GB.3 : GEN.GEN.OFF.NONE.NONE.GB.11 Black 74 CashFlow 530 Changegiver Product Maintenance Handbook MEI OFFICES WWW.MEIGROUP.COM 74 ©, MEI., 1994. 530.PROD.GB.3 : GEN.GEN.OFF_DIST.NONE.NONE.GB.11 Black 75 CashFlow 530 Changegiver Product Maintenance Handbook MEI DISTRIBUTORS The Following Distributors Offer A Comprehensive Sales And Replacement Service For New Product And Spare Parts. WWW.MEIGROUP.COM ©, MEI., 1994. 75 530.PROD.GB.3 : GEN.GEN.OFF_DIST.NONE.NONE.GB.11 Black 76 CashFlow 530 Changegiver Product Maintenance Handbook 76 ©, MEI., 1994. 530.PROD.GB.3 : GEN.GEN.OFF_DIST.NONE.NONE.GB.11 Black 77 CashFlow 530 Changegiver Product Maintenance Handbook ©, MEI., 1994. 77 530.PROD.GB.3 : GEN.GEN.OFF_DIST.NONE.NONE.GB.11 Black 78 CashFlow 530 Changegiver Product Maintenance Handbook 78 ©, MEI., 1994. 530.PROD.GB.3 : GEN.GEN.OFF_DIST.NONE.NONE.GB.11 Black 79 CashFlow 530 Changegiver Product Maintenance Handbook ©, MEI., 1994. 79 530.PROD.GB.3 : GEN.GEN.OFF_DIST.NONE.NONE.GB.11 Black 80 CashFlow 530 Changegiver Product Maintenance Handbook 80 ©, MEI., 1994. 530.PROD.GB.3 : 530.PROD.GB.3.IX Black 81 CashFlow 530 Changegiver Product Maintenance Handbook INDEX A Accept Gate Module Acceptor Loom Acceptor Module Acceptor Release Catch Adding New Coin Anti-Static Precautions Auto Repeating Keys Automatic Tube Dispense Automatic Tube Inventory 44 41, 46 2, 14, 15, 41, 46, 47, 51, 52, 68 41 39 42 19 15 15 B BDV Version Price Setting Blocker Blocker Signal 14 13 3 C Cancelling Credit 16 Cashbox 8, 11 Change Tubes 2 Coin Entry Chute 8, 11 Coin Entry Cup 8 Coin Exits 8, 11 Coin Feed Rate 10 Coin Fill Flap 30 Coin Routing 11 Coin Storage Cassette 2, 6, 7, 8, 9, 16, 28, 29, 30, 31, 32, 33, 41, 42, 46, 49, 51, 52 Coin Tube and Designator Combinations 36, 37, 38 Coin Tube Combinations 34 Coin Tube Designators 33 Coin Tube Refill 15 Coin Tubes 31, 32 Compatibility 71 Configuration 2, 4, 12, 19, 20 Control PCB 2, 51, 52, 53 Credit Display 11 D Dangerous Environments Designator and Coin Thickness Discriminator Back Cover ©, MEI., 1994. 1 39 42, 43, 44 81 530.PROD.GB.3 : 530.PROD.GB.3.IX Black 82 CashFlow 530 Changegiver Product Maintenance Handbook Discriminator PCB Dispense Arms Dispense Keys Dispenser Base Plate Dispenser Loom Dispenser Module Dispensing Coins Disposal Of Product Double Click Hotkeying Down Key 42 8, 11, 28, 29, 50 9 50 49 2, 13, 49, 50, 70 13 1 19 18 E Electrical Connection Enter Key Error Message Exact Change Signal Executive Version Price Setting 9, 11 18, 20 20 3 14 F Fault Finding Float Down Float Levels Float Mode Float Up Function Expansion Module Fuse Cover Fuses 56 15 15, 16 9, 11, 16 15 49 52 52 I Idle State Installation Interface Loom 13 4, 5, 6, 7, 8, 9, 10, 11 11 K Keypad Keypad Operation 2, 4, 8, 11, 12, 29, 51, 56 12, 13, 14, 15, 16 L Left Key Low Level Sensor 18 16 M Machine Interface Looms MEI OFFICES MEI® Route Alpha 250 Terminal MEI DISTRIBUTORS MEI Literature Binder 82 ©, MEI., 1994. 71 74 3, 13, 14, 15, 17, 19, 20, 39 75 73 530.PROD.GB.3 : 530.PROD.GB.3.IX Black 83 CashFlow 530 Changegiver Product Maintenance Handbook Mode Button 11 Mode Key 14, 15, 16 Module Replacement 28, 29, 30, 31, 32, 33, 41, 42, 43, 44, 46, 47, 48, 49, 50, 51, 52, 53, 54 Mounting Points 5 Multiple Coin Dispensing 13 O Operating Voltage Optos 1, 9, 11 68 P PCB Connectors Power Down Power Up Price Line Outputs Price Teach Prisms Product Overview 54 11 11 3 14 68 2 R Reject Lever Reset Key Resetting Tube Counts Right Key 8, 11 18, 20 16 18 S Safe Coin Level Safety Sense Inputs Separator Loom Separator Module Separator Solenoids Setting Prices Single/Multi Vend Solenoid Loom Spine Stored Credit 9 1 3 42 2, 41, 44, 46, 47, 48, 69 47 11, 14 3 47 2, 53 15 T Terminal Addresses Terminal Connector Terminal Display Terminal Fault Finding Terminal Key Functions Terminal Test Mode 17, 18, 21, 39, 40, 56, 57, 59 17 19, 20, 27 26 18 27 ©, MEI., 1994. 83 530.PROD.GB.3 : 530.PROD.GB.3.IX Black 84 CashFlow 530 Changegiver Product Maintenance Handbook Time-Out Top Level Sensor Assembly Transformer Assembly Transformer Cover Flap Transformer Looms Tube Full Count Tube Low Count 14, 15 48 2, 51 6 51 40 39, 40 U Up Key 18, 20 V Vend Price 84 3 ©, MEI., 1994. 530.PROD.GB.3 : GEN.PROD.BPAGE.NONE.NONE.GB.1 Black,White 85 REPRESENTATIVE: ™