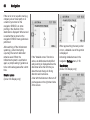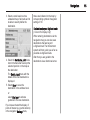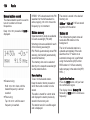
1
OPEL ASTRA
Infotainment System
Contents
CD 70 / DVD 90 NAVI .................... 3
CDC 40 OPERA .......................... 73
CD 30 / CD 30 MP3 ................... 111
Mobile phone portal ................... 137
CD 70 / DVD 90 NAVI
Introduction .................................... 4
Radio ........................................... 22
CD Player .................................... 30
AUX input ..................................... 34
Navigation .................................... 36
Index ............................................ 70
4
Introduction
Introduction
General information ....................... 4
Theft-deterrent feature ................... 5
Overview ........................................ 6
Operation ..................................... 11
Tone settings ............................... 19
Volume settings ........................... 20
General information
The Infotainment system provides
you with state-of-the-art in-car
infotainment.
Enjoy uninterrupted radio reception
thanks to the powerful twin tuner.
The radio has ten automatic station
memories for each available
waveband and the same number of
manual station memories.
The integrated CD player will
entertain you with audio CDs and
MP3 CDs.
Furthermore, you can connect
external sources, e. g. a portable
player to the Infotainment system.
The digital sound processor provides
you with several preset equalizer
modes for sound optimisation.
The navigation system with dynamic
route planning will reliably guide you
to your destination, and, if desired,
will automatically avoid traffic jams or
other traffic problems.
Optionally, the Infotainment system
can be operated using controls on the
steering wheel.
In addition the Infotainment system
can be equipped with a Mobile phone
portal.
The well-thought-out design of the
control elements and the clear
displays enable you to control the
system easily and intuitively.
Important information on
operation and traffic safety
9 Warning
The Infotainment system has to be
used so that the vehicle can be
driven safely at all times. If in doubt
stop your vehicle and operate the
Infotainment system while the
vehicle is stationary.
Introduction
9 Warning
9 Warning
The usage of the navigation
system does not release the driver
from the responsibility for
a correct, vigilant attitude in road
traffic. The related traffic
regulations must always be
followed.
Only make entries (e. g.
addresses) with the vehicle
stationary.
If a navigation instruction
contradicts traffic regulations, the
traffic regulations always apply.
In some areas one-way streets
and other roads and entrances
(e. g. pedestrian zones) that you
are not allowed to turn into are not
marked on the map. In such areas
the Infotainment system will issue
a warning that must be accepted.
Here you must pay particular
attention to one-way streets, roads
and entrances that you are not
allowed to drive into.
Radio reception
Radio reception may be disrupted by
static, noise, distortion or loss of
reception due to
■ changes in distance from the
transmitter,
■ multi-path reception due to
reflection,
■ shadowing.
5
Theft-deterrent feature
The Infotainment system is equipped
with an electronic security system for
the purpose of theft deterrent.
The Infotainment system therefore
functions only in your vehicle and is
worthless for a thief.
6
Introduction
Overview
Instrument panel: CD 70 NAVI
Introduction
1
2
3
4
5
6
7
8
9
e knob ................................. 11
Briefly press: switch on/off
Infotainment system .............. 11
Press and hold: activate/
deactivate mute ..................... 11
Turn: adjust volume .............. 11
a button ................................ 31
Eject audio/MP3 CD .............. 31
Audio/MP3 CD slot ................ 38
NAVI ...................................... 38
Navigation menu ................... 38
MAIN ..................................... 11
Recall main display .............. 11
Multifunction knob ................. 11
Turn: select menu items
and commands ..................... 11
Press: confirm a selection
(OK) ...................................... 11
INFO ..................................... 11
Additional, situationdependent information .......... 11
SOUND ................................. 19
Sound settings ...................... 19
0...9 station buttons .............. 22
Long press: save station ....... 22
Short press: select station .... 22
10 u button ............................... 57
Repeat last navigation
message ............................... 57
11 G button ................................ 44
Recall home address ............ 44
12 BC ........................................... 6
Trip computer (if available) ..... 6
13 SETTINGS ............................ 11
Settings menu, depending
on the selected function ........ 11
14 Rocker switch ........................ 24
Radio: search backwards/
forwards ................................ 24
CD/MP3: skip track
backwards/forwards .............. 31
Navigation: scroll through
map displays and select
options .................................. 63
15 TP ......................................... 26
Activate or deactivate
radio traffic service ................ 26
16 AUDIO ................................... 22
Switch between radio and
CD menu ............................... 22
17 Navigation CD slot ................ 31
7
18 b button ............................... 38
Eject navigation CD .............. 38
8
Introduction
Instrument panel: DVD 90 NAVI
Introduction
1
2
3
4
5
6
7
8
9
e knob ................................. 11
Briefly press: switch on/off
Infotainment system .............. 11
Press and hold: activate/
deactivate mute ..................... 11
Turn: adjust volume .............. 11
b button ............................... 38
Eject navigation CD/DVD ..... 38
Navigation CD/DVD slot ........ 31
NAVI ...................................... 38
Navigation menu ................... 38
MAIN ..................................... 11
Recall main display .............. 11
Multifunction knob ................. 11
Turn: select menu items
and commands ..................... 11
Press: confirm a selection
(OK) ...................................... 11
INFO ..................................... 11
Additional, situationdependent information .......... 11
SOUND ................................. 19
Sound settings ...................... 19
0...9 station buttons .............. 22
Long press: save station ....... 22
Short press: select station .... 22
10 u button ............................... 57
Repeat last navigation
message ............................... 57
11 G button ................................ 44
Recall home address ............ 44
12 BC ........................................... 6
Trip computer (if available) ..... 6
13 SETTINGS ............................ 11
Settings menu, depending
on the selected function ........ 11
14 Rocker switch ........................ 24
Radio: search backwards/
forwards ................................ 24
CD/MP3: skip track
backwards/forwards .............. 31
Navigation: scroll through
map displays and select
options .................................. 63
15 TP ......................................... 26
Activate or deactivate
radio traffic service ................ 26
16 AUDIO ................................... 22
Switch between radio and
CD menu ............................... 22
17 Audio/MP3 CD slot ................ 38
9
18 a button ................................ 31
Eject audio/MP3 CD .............. 31
10
Introduction
Steering wheel audio controls
4
5
6
1
2
3
Thumbwheel ......................... 11
Turn: select menu items
and commands ..................... 11
Press: confirm a selection
(OK) ...................................... 11
q button ............................... 22
Radio: select station button . . 22
CD: CD restart ...................... 31
MP3: next album ................... 31
p button .............................. 31
Switch between radio and
CD/MP3 mode ...................... 31
d button ................................. 24
Radio: search backwards,
scroll down in station
memory ................................. 24
CD/MP3: skip track
backwards, fast rewind ......... 31
c button ................................. 24
Radio: search forwards,
scroll up in station memory ... 24
CD/MP3: skip track
forwards, fast forward ........... 31
Thumbwheel ......................... 20
Turn: adjust volume .............. 20
The steering wheel remote control
has other functions in conjunction
with the Mobile phone portal, see
chapter for Mobile phone portal.
Symbols in the main display
Audio function
AM
= AM waveband is selected.
FM
= FM waveband is selected.
AS
= FM or AM Autostore level is
selected.
[]
= Traffic programme is
active, however no TP
station is being received.
TP
= The station selected
transmits traffic
announcements.
[TP] = Traffic programme is
active, traffic
announcements will be
relayed.
TMC = RDS TMC traffic
information is being
received.
REG = Regionalisation is active.
Introduction
CD in = An audio/MP3 CD is
inserted in the audio CD
slot.
MP3 = The loaded CD contains
MP3 files.
Navigation function
y
= Route option Fastest route is
selected.
x = Route option Shortest route
is selected.
z
= Route option Motorway is
selected.
A = Route option Secondary
roads is selected.
C
= Route option Toll-free is
selected.
B = Route option Dyn. Guidance
is active.
w = No or insufficient GPS
reception (e.g. under
bridges, in forests or between
high buildings).
v
= The volume of the acoustic
directions is switched off.
Operation
Control elements
The Infotainment system is operated
via function buttons, multifunctional
knobs and menus that are shown on
the display.
Inputs are made optionally via:
■ the central control unit in the
instrument panel 3 6
■ controls on the steering wheel 3 6.
Switching the Infotainment
system on or off
Press the e knob briefly. After
switching on the last selected
Infotainment source is active.
Switching on and off with the ignition
key (ignition logic)
If ignition logic is activated, the
Infotainment system is automatically
switched off/on by removing or
inserting and turning the ignition key.
See below: "Settings".
11
Automatic switch-off
If the Infotainment system was
switched on using the e knob, it
switches off automatically one hour
after the ignition key is removed.
Setting the volume
Turn the e knob.
When the Infotainment system is
switched on, the last selected volume
is set, if that volume is lower than the
maximum start up volume.
The following can be set separately:
■ the maximum start up volume
3 20.
■ the volume of the traffic
announcements 3 20.
■ the volume of the navigation
messages 3 20.
Speed dependent volume control
(SDVC)
When SDVC is activated 3 20, the
volume is adapted automatically to
make up for the road and wind noise
when driving.
12
Introduction
Mute
Press and hold the e knob to mute
the audio sources.
■ When TP is switched on, traffic
announcements continue to be
heard.
■ When navigation is active you will
continue to hear the voice
announcements.
To cancel mute again: turn the e
knob or press and hold the e knob
again.
AUX input
An external audio source, e.g.
a portable CD player, can be
connected via the AUX input of your
vehicle 3 34.
Multifunction knob
The multifunction knob is the central
control element for the menus.
Turn:
Select commands, menu options or
letters.
Press:
Confirm the displayed selection.
Info Menu
Navigation parameters
Pressing the INFO button displays
a summary of the most important
information on the selected audio
source, navigation and the current
traffic situation via RDS TMC.
The following information is available
in the info menu:
Audio parameters
The top two lines show information
about the audio function.
Symbols for the audio source settings
(e.g. FM/AM for the selected
waveband, [TP], REG, etc.).
Set radio station or current CD/MP3
track.
Display symbols 3 6.
The lower area of the info menu
displays information on the
navigation.
■ Current altitude above sea level
(provided adequate GPS reception
is available).
■ Selected route option, e.g. y.
■ Avoidance of toll roads C.
■ Dynamic guidance active B.
■ Distance remaining to destination.
■ Arrival or remaining travel time,
depending on navigation settings.
Display symbols 3 6.
Introduction
If navigation is inactive:
Current geographical position with
latitude and longitude (provided
adequate GPS reception is
available).
TMC
You can receive up-to-date
messages on the traffic situation via
the TMC interface 3 38.
Main display
The main display is the display shown
after switching on the Infotainment
system. It can be recalled at any time
from a different menu display using
the MAIN button.
13
The various functions are displayed
depending on the equipment of the
vehicle.
■ t Audio
■ K Navigation
■ J Trip computer (if available)
■ I Mobile phone portal (if
available)
Turn the multifunction knob to call up
the display of the required function.
Depending on the selected function,
the following information is displayed
on the main page:
Information about the currently
selected audio source (e.g.
waveband, station name or frequency
or CD track and track number, etc.).
Audio
Guidance information (if guidance is
activated) and navigation
parameters.
Navigation
Trip computer
(if available)
The following information is displayed
in all functions of the main page:
■ Outside temperature
■ Time of day
■ Information on the climate control
system (if available)
14
Introduction
When the Infotainment system is off
and the ignition is on, the outside
temperature, time of day and date (if
available) are displayed.
Selection pages
Feature pages are menu pages
where you stay, e.g. when you are
listening to the radio or a CD.
Feature pages also have menu items
that can be executed and that will lead
you to further feature or settings
pages.
The FM menu is an example of
a feature page.
Selection pages have a selection
menu with a preview of each menu
item on the left margin of the screen.
Selection pages lead you to feature or
settings pages.
The Audio menu is an example of
a selection page.
Settings pages
Mobile phone portal
(if available)
Mobile phone portal information.
Menu concept
The menu structure of the
Infotainment system consists of
different types of menu pages:
■ Selection pages
■ Feature pages
■ Settings pages
The different pages have different
functionalities:
Feature pages
Settings pages are menu pages
where you can make settings, e.g.
sound, system settings, etc.
The CD Extras menu is an example
of a settings page.
Introduction
Menu levels
The menus of the Infotainment
system are divided into levels. The
current menu level is shown by
vertical lines at the left-hand side of
the screen (e.g. main display = no
line, FM feature page = 1 line, etc.).
This function can also be executed at
any time by pressing the MAIN
button.
Selecting from a menu
Menu operation
By turning the multifunction knob the
menu items available in a menu can
be selected. Each selected menu
item has an inverse field designated
as the cursor.
Many of the available functions are
executed directly by pressing the
multifunction knob. Some open
a submenu with further functions.
Each menu has the hidden Return
menu item. This menu item only
becomes visible if you get to the top
end of a menu (turn the multifunction
knob anti-clockwise).
15
Select Return to go to the next highest
menu.
Each menu also has the hidden
Main menu item. This menu item only
becomes visible if you get to the
bottom end of a menu (turn the
multifunction knob clockwise).
Select Main to recall the main display.
The cursor shows which menu item is
to be selected.
Move the cursor to the desired menu
item by turning the multifunction
knob.
Press the multifunction knob to
confirm your selection.
The corresponding function is
executed or the corresponding
submenu displayed.
For some menu items settings are
made after selecting them by turning
the multifunction knob.
16
Introduction
Selecting from a list
In some lists the last selected list
entries are marked with a l before
the list entry.
Pop-up menus
For some menu items lists are called
up. You can navigate these lists using
the cursor.
Press the multifunction knob to
confirm your selection.
Move cursor up or down by turning
the multifunction knob.
Further list entries are displayed
when the cursor is moved to the top
or bottom area of the display. A scroll
bar at the right-hand display area
shows the current cursor position
within the entire list.
The number of list entries appears in
the top display line.
In certain cases the display shows
additional notes and information of
the Infotainment system or other
vehicle components as a pop-up.
For this purpose, the currently
displayed menu is overlaid with the
pop-up.
You have to confirm some of the popups (e.g. the safety warnings of the
navigation), others will automatically
disappear after a short period.
In CD mode, for example, the traffic
station is displayed during a traffic
announcement when TP is active.
Recalling main functions
The main functions are recalled using
the NAVI, AUDIO, SOUND and BC
buttons:
■ To recall the navigation menu,
press the NAVI button.
■ Press the AUDIO button to access
the radio, CD/MP3 CD sources.
■ Press the SOUND button to open
the sound settings menu.
■ Press the BC button to display the
functions of the trip computer (if
available).
Audio sources
The available audio sources are radio
(AM/FM) and CD (audio/MP3).
In addition, you can connect an
external audio source.
Radio:
You can choose between the FM and
AM wavebands.
CD/MP3:
The CD player integrated into the
Infotainment system supports both
audio CDs and CDs in MP3 format.
Introduction
Aux:
You can switch to an externallyconnected audio source via the Aux
option.
The Aux audio source can only be
selected via the Audio menu.
Selecting an audio source
If the radio or CD menu is displayed:
Press the AUDIO button to switch
between the radio and CD/MP3 CD
audio sources.
If one of the other menus (e.g.
navigation, settings, etc.) is active:
Press the AUDIO button once.
The radio or CD/MP3 menu appears
in the display.
Press the AUDIO button again to
change audio source.
If no CD (audio or MP3) is inserted
into the audio CD slot of the
Infotainment system, the
Infotainment system prompts you to
insert a CD.
Selecting audio source using the
Audio menu
1. Press the MAIN button.
2. Select the t audio function in the
main display.
3. Press the multifunction knob.
4. Select the Return menu item.
The Audio menu is displayed.
5. Select the FM, AM, CD or AUX
menu item to switch to the desired
audio source.
The selected audio source is played.
The Infotainment system
automatically switches to the display
page of the selected audio source
(not with AUX).
Settings
17
The Infotainment system provides
you with various options to customise
the behaviour and functions of the
system according to your personal
preferences.
Use the SETTINGS button to access
the relevant Settings menu,
depending on the selected function
(main page, radio, navigation, Mobile
phone portal).
The following settings menus are
available:
■ System settings (see below)
■ Audio settings 3 26
■ Navigation settings 3 38
■ Mobile phone portal (see chapter
for Mobile phone portal)
18
Introduction
System settings
Setting the language
From the main page, you can make
all the settings that influence the
displays and functions of the entire
Infotainment system.
To recall the main page, press the
MAIN button.
Press the SETTINGS button.
The Settings menu for the system
settings is displayed.
The following settings are described
in the vehicle owner's manual:
■ Time, Date
■ Units
■ Day / Night
You can change the language of
menu texts and navigation prompts.
You need the languages CD in order
to change the prompt language.
In the Settings menu for the system
settings:
1. Select the Language menu item.
The list of available languages is
displayed.
2. Select the desired language from
the list.
You are prompted as to whether
you want to change the prompt
language in addition to the
language of menu texts.
3. Answer No:
The language of menu texts is
changed.
The prompt language remains
unchanged.
4. Answer Yes:
You will be prompted to insert the
languages CD in the navigation
DVD/ CD slot for the Infotainment
system.
5. Remove the navigation DVD/CD
by pressing the b button.
6. Insert the languages CD and
select the Continue menu item.
The selected prompt language is
loaded from the languages CD.
Loading can take several minutes.
Introduction
Caution
Do not switch off the Infotainment
system or the ignition under any
circumstances while loading is in
progress.
Do not start the engine under any
circumstances while loading is in
progress.
Do not press any button on the unit
while loading is in progress.
After successful loading, you will be
prompted to remove the languages
CD and to re-insert the navigation
DVD/CD.
Ignition lock logic
The Infotainment system is normally
switched on and off with the e knob.
When the system is switched on, it
can be switched off and back on again
by retracting and/or inserting and
turning the ignition key.
This ignition lock logic is activated as
a factory setting, but can be
bypassed.
Switching ignition lock logic on/off
Switch the ignition lock logic on or off
by confirming the Ign. logic menu
item.
■ With the ignition lock logic switched
off, the Infotainment system can
only be switched on and off with the
e knob.
■ After the system has been
disconnected from the operating
voltage (e.g. removal of the battery)
and reconnected, the ignition lock
logic is always on.
■ The automatic switch-off is
independent of the ignition lock
logic and therefore always remains
active.
Tone settings
The settings for Bass, Treble and
Sound can be set separately for radio
and CD/MP3).
The settings for Fader and Balance
apply to all sources and cannot be set
separately.
19
Select the desired source (FM/AM or
CD/MP3) for which you want to adjust
the sound.
Press the SOUND button to recall the
Sound menu.
The display automatically shows the
menu items for sound settings.
Setting bass and treble
20
Introduction
Select Bass or Treble.
Set the desired value for the option
selected and confirm by pressing the
multifunction knob.
Setting the sound
Setting the volume distribution
between front - rear and left right
Select Fader or Balance.
Set the desired value for the option
selected and confirm by pressing the
multifunction knob.
If you prefer a preset sound style
there are five options to select from.
Select the Sound menu item.
The list of available sound styles is
displayed.
Activate the desired sound style.
Under the User sound style you can
store your own personal settings for
treble and bass.
When you adjust treble and bass the
User sound style is automatically
selected.
Volume settings
Press the AUDIO button to recall the
Audio menu.
Press the SETTINGS button.
The audio Settings menu appears.
The submenu Volumes allows you to
customise the following volumes to
your requirements:
TA Volume:
The system increases the volume in
a standard manner for every traffic
announcement if the TP function is
activated. Using this function, you can
change the minimum volume for
traffic announcements.
SDVC (Speed Dependent Volume
Control):
The purpose of the SDVC function is
to compensate for outside and road
noises. To this effect, the volume of
the unit is increased at higher speeds.
Navi announc.:
Volume of the navigation
announcements 3 38.
Start-up volume:
With this setting, the maximum
volume when switching on the unit
can be set.
External In:
Introduction
An external source (e.g. hands-free
kit) can be connected to the
Infotainment system.
With External In the volume of an
external source can be set in addition
to the volume of the audio sources.
The external source is relayed
automatically by means of a control
signal from the connected unit.
AUX In:
With this setting, the sensitivity of the
Aux input can be adjusted to the
volume of the external unit.
21
22
Radio
Radio
Usage
Activating the radio mode
Usage .......................................... 22
Station search .............................. 24
Autostore lists .............................. 26
Radio data system (RDS) ............ 26
For CD mode and when displaying
the CD menu:
Press the AUDIO button.
The display shows the radio menu
and the last station selected will be
played.
If the station is stored under one of the
memory locations, the memory
location number is displayed before
the station name or the reception
frequency.
If you are in one of the other menus
(e.g. navigation, settings, etc.):
Press the AUDIO button once.
The display shows the radio menu
and the currently selected audio
source (in this case, CD) will be
played.
Press the AUDIO button again.
The audio source is changed.
Selecting a waveband
The Infotainment system provides
two wavebands: FM and AM. In
addition, each of the wavebands has
an autostore memory location (AS)
where stations can be automatically
stored 3 26.
To change the waveband, proceed as
follows:
In the radio menu:
Select the Return menu item.
The Audio menu is displayed.
Radio
Select the desired waveband, FM or
AM.
The radio menu is displayed.
The following functions are available
in the radio menu:
■ |k and l|: automatic search
upwards or downwards.
■ Station: selecting a station from the
station list.
■ Store: storing the currently selected
station under one of the memory
locations 0 ... 9.
■ Manual: enabling manual search.
■ Extras: see below.
Extras
The autostore levels are accessed
using the Extras menu item 3 26.
The following options are available in
the Extras submenu:
AS level
23
This option is used to change to the
autostore level of the current
waveband.
Detailed information about the
autostore function 3 26.
Traffic stations
This function is used to select one of
the traffic stations currently
receivable.
PTY selection (FM only)
Many RDS stations 3 26 transmit
a PTY code that indicates the type of
programme being broadcast (e.g.
news). The PTY code enables
selection of the station according to
programme type.
After selecting the PTY selection
menu item the list of selectable
programme types appears.
24
Radio
Select the desired programme type
from the list.
A list of the receivable stations of the
selected programme type is
displayed.
Select the desired station from the
list.
If no corresponding station is found,
No station available is displayed and
the previously selected station will be
played.
PTY station (FM only)
After selecting the PTY station menu
item a list of all stations with a valid
programme type is displayed.
Select the desired station from the
list.
Some stations will also change the
PTY code depending on the
broadcast content.
Station search
Automatic search
Using the radio menu:
Select the |k or the l| menu item in
the radio menu.
Using the rocker switch: briefly press
search button m or n.
The Infotainment system will tune to
the next receivable station.
If RDS or traffic programmes (TP) are
switched on, the search searches
only for stations transmitting RDS or
traffic programme signals. RDS
3 26; Traffic programme (TP)
3 26.
If no station is found, the Infotainment
system automatically switches to
a more sensitive search level.
Press search button d or c once, or
repeatedly to set the frequency stepby-step.
Station list
To recall a station stored under one of
the memory locations 0 to 9 (station
buttons):
Select the Station menu item in the
radio menu.
The station list of the current
waveband AM or FM is displayed.
Select the desired station from the
station list.
In the FM waveband only:
Radio
The Infotainment system will
additionally create a list of all
receivable stations of the current
reception area.
The stations stored under the
memory locations 0 ... 9 are displayed
at the start of the station list. Below
these you will find all currently
receivable stations.
Select the Update stations menu item
to update the station list.
The stations stored under the
memory locations 0 ... 9 are not
overwritten during this update. The
Infotainment system’s station list is
kept up to date constantly.
Station memory
In each waveband, 10 stations (radio
programmes) can be stored under
memory locations 0 to 9.
The memory locations can be
selected using the number buttons
0 to 9 or using the Station menu item
in the radio menu.
Storing stations using the radio menu
Tune to the desired waveband and
station.
Select the Store menu item in the
radio menu.
Select the position in the station list
where the set station is to be stored.
Storing stations manually
Tune to the desired waveband and
station.
Press and hold the number key where
the selected station is to be stored (0
to 9).
The radio mutes briefly and displays
the station previously stored at this
location.
As soon as the set station becomes
audible again, the station is stored
under this memory location.
The selected memory location
appears in the display.
Recalling stored stations
Recall the desired memory location
0 to 9 using the number keys 0 ... 9,
or:
25
select the desired station from the
station list using the Station menu
item.
Manual tuning
Stations for which the frequencies are
known can be set in this way.
Using the radio menu:
1. Select the Manual menu item.
Depending on the selected
waveband FM Manual or AM
manual is displayed in the top
display line.
The frequency range of the set
waveband is displayed and the
pointer shows the currently set
reception frequency.
2. Turn the multifunction knob
clockwise to gradually increase
the reception frequency.
3. Turn the multifunction knob anticlockwise to gradually reduce the
reception frequency.
4. Press the multifunction knob to
confirm the set reception
frequency and exit manual
frequency tuning.
26
Radio
Using the rocker switch:
Rough tuning
Press and hold search button d or c
until the frequency of the required
station is almost reached.
Fine tuning
Press search button d or c repeatedly
until the exact station frequency
appears in the display.
Autostore lists
Autostore (automatic storing)
The station with the strongest signal
in your current reception area is found
in this way.
Select the AS level menu item in the
AM Extras or the FM Extras menu.
The Infotainment system
automatically switches to the
autostore level of the selected
waveband (AM-AS or FM-AS).
This is indicated by the AS symbol in
the main display.
Select the Autostore menu item in the
AM AS or the FM AS radio menu.
The automatic search is started, the
frequencies of the 10 strongest
stations from the current reception
area are stored in the AS memory
locations.
Previous stations stored in the AS
memory locations are overwritten.
RDS is activated during automatic
storage in the FM waveband and then
remains active.
If TP is switched on before automatic
storage, the Infotainment system
calls up a memory location containing
a traffic information station when the
station search ends.
If TP is switched on during automatic
storage, the search remains active
until at least one automatically stored
TP station has been found
The memory locations of the
autostore level may also be stored
manually 3 24.
Select the FM level or AM level menu
item to return to the FM or AM
memory level.
Returning to FM or AM level
Select the Extras menu item in the AM
AS or the FM AS radio menu.
Audio settings
Radio data system (RDS)
RDS is a European service provided
by broadcasting companies, which
makes finding the required FM
programme much easier and aids
good reception.
When the RDS function is switched
on, RDS stations are recognised by
the fact that the programme name is
displayed instead of the station
frequency.
RDS stations transmit information
which is automatically evaluated by
the RDS radio, or when the RDS
function is active.
RDS and the REG and TP functions
associated with RDS can be set in the
audio Settings menu:
Press the AUDIO button to recall the
Audio menu.
Press the SETTINGS button.
Radio
The audio Settings menu appears.
The following settings can be made:
RDS
The RDS submenu allows you to
influence the behaviour of the radio in
the FM waveband.
There are now two options for
influencing the RDS behaviour of the
Infotainment system:
Automatic RDS
Activate Automatic.
■ This function ensures that the radio
treats RDS stations as if RDS had
been activated even when RDS is
switched off (functions like PS, AF,
PTY, etc. are active).
■ The automatic search does not
respond to non-RDS stations.
RDS always activated
Select On to activate RDS.
Activating RDS provides the following
advantages:
■ The Infotainment system will only
tune to RDS stations when
searching automatically.
■ The display shows the programme
name of the set station instead of
the frequency.
■ The Infotainment system always
tunes to the frequency with the best
reception for the selected radio
programme using AF (alternative
frequency).
Switching off RDS
Deselect On and Automatic.
The frequency now appears in the
display instead of the programme
name.
The radio no longer automatically
selects the frequency with the best
reception for a programme.
27
REG (Regional programmes)
Some RDS stations transmit different
regional programmes over different
frequencies at certain times.
(RDS must be activated)
In the audio Settings menu: Select the
REG menu item.
The regionalisation menu appears.
There are three options for
influencing the behaviour of the
Infotainment system with regard to
regional programmes:
Automatic REG
When searching for the frequency
with the strongest reception (AF) of
a radio programme, the Infotainment
system remains tuned to the selected
regional programme until good
reception is no longer possible.
If the reception quality of the selected
regional programme no longer
provides good reception, the
Infotainment system will switch to
another regional programme.
28
Radio
REG On
When searching for the frequency
with the strongest reception (AF) of
a radio programme, the Infotainment
system always remains tuned to the
selected regional programme.
REG Off
When searching for the frequency
with the strongest reception of a radio
programme, the Infotainment system
also considers regional programmes.
If Automatic REG or REG On is
activated, the REG symbol is shown
in the display.
TP (Traffic programme)
Activate this menu option to listen to
traffic announcements.
Traffic stations can be recognised by
the TP symbol in the display.
Switching on TP
Using the audio Settings menu:
Activate the TP option in the audio
Settings menu.
Using the function key:
Press the TP button.
The [ ] symbol appears in the display.
If the current station is a traffic station,
[TP] is shown in the display.
Only TP stations are received.
If the current station is not a traffic
station, the unit will automatically
search for the next traffic station.
When the TP function is switched on,
CD/MP3 CD playback is interrupted
for a traffic announcement.
Traffic announcements are heard at
the preset TA volume 3 20.
During a traffic announcement the
message Traffic announcem. will
appear in the display.
Switching off TP
Press the TP button,
or:
switch off TP using the TP menu item
in the audio Settings menu.
[ ] disappears from the display.
During a traffic announcement:
Press the TP button twice to switch off
TP.
Hearing traffic announcements only
Switch on TP.
Reduce the volume to zero.
Or:
Press and hold the e knob to mute
the Infotainment System.
Traffic announcements are heard at
the preset TA volume 3 20.
Deactivating traffic announcements
To deactivate an unwanted traffic
announcement, e.g. during CD/MP3
playback:
Press the TP button once during the
traffic announcement,
or:
Press the AUDIO button once.
The traffic announcement is
interrupted.
TP remains switched on.
Setting the volume of traffic
announcements
The volume of traffic announcements
(TA volume) can be set in the audio
Settings menu 3 20.
Radio
Traffic station list
In the AM Extras and FM Extras radio
menus, you can use the Traffic
stations menu item to call up one of
the currently receivable traffic
stations directly without having to do
a lengthy search.
EON (Enhanced Other Networks)
With EON, you can also hear traffic
announcements if the station set is
not transmitting its own traffic
programme. If you have set a station
of this type, the TP symbol is
displayed as for traffic stations.
29
30
CD Player
CD Player
General information ..................... 30
Usage .......................................... 31
General information
The Infotainment system is equipped
with a CD player that can play audio
CDs as well as MP3 CDs. The CD
player will automatically recognise
the CD type.
Caution
Under no circumstances place
DVDs, single-CDs with a diameter
of 8 cm or shaped CDs in the audio
player.
You must not put any stickers on
CDs. These discs can get jammed
in the CD drive and ruin the drive.
An expensive replacement of the
device will then be necessary.
■ The format of the CD must be
ISO 9660 Level 1, Level 2 or
JOLIET. All other formats cannot be
played back reliably.
■ Audio CDs with copy protection,
which are not in compliance with
the audio CD standard, may not
play correctly or not at all.
■ Self-recorded CD-Rs and CD-RWs
are more vulnerable to mishandling
than prerecorded CDs. Correct
handling, especially in the case of
self-recorded CD-Rs and CD-RWs,
must be ensured. See below.
■ Self-recorded CD-Rs and CD-RWs
may not play correctly or not at all.
In such cases it is not the
equipment that is at fault.
■ With mixed mode CDs
(combination of audio and data,
e.g. MP3) only the audio tracks are
recognised and played back.
■ Avoid leaving fingerprints when you
change CDs.
■ Put CDs back in their sleeves
immediately after removing them
from the CD player in order to
protect them from damage and dirt.
■ Dirt and liquids on CDs can smear
the lens of the CD player inside the
device and cause faults.
■ Protect CDs from heat and direct
sunlight.
■ The following restrictions apply for
data stored on an MP3 CD:
CD Player
When naming albums and tracks,
umlauts or special characters
should not be included.
Applicable playlist extensions:
"m3u" or "pls".
When generating (coding) the MP3
files from audio data, a bitrate of up
to max. 256 kbit/s should be used.
To use MP3 files in the Infotainment
system, the MP3 files must have
the file extension ".mp3".
Usage
CD/MP3 playback
Inserting a CD
Insert a CD with the printed side up
into the CD slot until it is pulled in.
CD playback begins.
CD in is displayed.
If an MP3 CD is inserted, MP3 is also
displayed.
Depending on the complexity of the
file structure and the number of MP3
files on the CD, reading may take
some time.
If a CD is already inserted in the audio
CD slot:
Press the AUDIO button once.
The CD menu appears in the display.
CD playback begins.
If a menu other than the Audio menu
is displayed (e.g. Navigation,
Settings or the Main display):
Press the AUDIO button once to
display the Audio menu.
Press the AUDIO button again to
switch to CD playback mode.
■ The number of the current track and
the elapsed track time is displayed.
31
■ If the inserted audio CD has CD
text, the album title, name of the
current track and artist are
displayed. For this purpose, CD text
display must be activated, see
below "Show title".
■ For MP3 CDs, the track name (ID3
tag) of the current piece of music is
displayed. For this purpose, track
display must be activated, see
below "Show title".
If there is no track name, only the
file name is displayed.
Direct track selection
In the CD menu:
Select the Track menu item.
The list of the tracks available on the
CD is displayed.
Select the desired track from the list.
Skipping to the next track or
previous track
Briefly press the rocker switch m or
n,
or:
32
CD Player
Select the ⃒_ or 6⃒ menu item in the
CD menu.
Fast forward or rewind
Hold down the rocker switch m or
n for more than 1 second,
or:
select the __ or 66 menu item in the
CD menu.
Fast forward/rewind takes place.
During fast forward/rewind the track is
played at a higher speed and reduced
volume.
To stop the fast search using the
menu, select the __ or 66 menu item
again.
CD Extras
Various further functions for CD/MP3
playback can be set using the CD
Extras menu.
Select the Extras menu item in the
CD menu.
The following functions can be
selected:
Normal
CD/MP3 tracks are played in their
normal sequence.
All tracks on an MP3 CD are sorted
and played in alphabetical and
numerical order in this mode.
Random CD
The tracks are played in random
sequence.
The g symbol appears in the
display.
To exit the random function, select
Normal from the CD Extras menu.
Random Album
The MP3 tracks in the current album
(directory) are played in random
order.
This function is available only with an
MP3 CD.
The tracks on the album selected are
played back in random order.
The g symbol appears in the
display.
To exit the random function, select
Normal from the CD Extras menu.
Repeat track
The current CD/MP3 track is repeated
until you select a different mode.
The i symbol appears in the
display.
To exit the repeat function, activate
Normal in the CD Extras menu,
or:
Press and hold the rocker switch c.
You can also switch the repeat
function on and off by pressing and
holding the rocker switch c.
Scan CD
All tracks on the CD are played briefly.
The 6⃒ symbol appears in the
display.
CD Player
To listen to the complete currently
selected track and exit the scan
function, activate Normal in the CD
Extras menu,
or:
press and hold the d button.
You can also switch the scan function
on and off by pressing and holding the
d button.
Show title
Activate this function if the
Infotainment system is to display the
name of a track instead of the elapsed
track time.
Selecting MP3 albums or
playlists
If your MP3 CD is made up of
a number of albums (directories), you
can select these as follows:
Tap the rocker switch c or d
repeatedly until the album appears in
the display.
or using the CD menu:
Select the Album menu item.
The list of albums available on the CD
is displayed.
The first track on the album will be
played.
Select the album.
To avoid long access times
a maximum of 20 albums should be
used.
The name of the currently selected
directory is displayed as the album
title.
Directories without MP3 files are
automatically skipped.
Removing a CD
Press the a button.
33
The CD is pushed out of the CD slot.
If the CD is not removed after
ejection, it will be pulled back in again
automatically after a few seconds.
34
AUX input
AUX input
Usage .......................................... 34
Usage
To play back an audio source
connected to the AUX input of the
vehicle, e.g. a portable CD player, via
the Infotainment system
loudspeakers, the audio source has
to be enabled:
The connector is located in the area
of the centre console.
Always ensure that the AUX input
remains clean and dry.
1. Connect the audio source to the
AUX input of your vehicle.
2. Press the MAIN button.
3. Select the Audio function in the
main display.
4. Press the multifunction knob.
5. Select the Return menu item.
6. Select the AUX menu item.
The external audio source is
switched through to the
Infotainment system.
7. Switch on the external audio
source and set it to the maximum
volume.
■ The audio source signal is then
played back via the loudspeakers
of the Infotainment system.
■ If distortion occurs during playback
of the external source, reduce the
volume level of the external unit
until distortion is no longer present.
AUX input
Caution
When switching between the
various audio sources, take
account of the different volumes in
radio, CD and AUX mode. Reduce
the volume before switching.
35
36
Navigation
Navigation
General information ..................... 36
Usage .......................................... 38
Destination input .......................... 44
Guidance ..................................... 57
Dynamic guidance ....................... 61
Maps ............................................ 63
Symbols overview ........................ 66
General information
The navigation system will reliably
guide you to your destination without
the need to read maps, even if you
have no local knowledge whatsoever.
The current traffic situation is taken
into account in the route calculation if
dynamic route guidance is used. For
this purpose the Infotainment system
receives traffic announcements in the
current reception area via RDS TMC.
The navigation system cannot,
however, take into account traffic
incidents, traffic regulations changed
at short notice and hazards or
problems that arise suddenly (e. g.
road works).
Caution
The usage of the navigation
system does not release the driver
from the responsibility for
a correct, vigilant attitude in road
traffic. The relevant traffic
regulations must always be
followed. If a navigation instruction
contradicts traffic regulations, the
traffic regulations always apply.
Functioning of the navigation
system
The position and movement of the
vehicle are detected by the navigation
system using sensors. The travelled
distance is determined by the
vehicle's speedometer signal, turning
movements on bends by a gyro
sensor. The position is determined by
GPS satellites (Global Positioning
System).
By comparing the sensor signals with
the digital maps on the navigation
DVD/CD, it is possible to determine
the position with an accuracy of
approx. 10 m.
Navigation
The system will also work with poor
GPS reception, however, the
accuracy of the determination of the
position will be reduced, resulting in
incorrect position messages.
Poor GPS reception is indicated by
the w symbol in the main display.
After the entry of the destination
address or point of interest (nearest
petrol station, hotel, etc.) the route is
calculated from the current location to
the destination selected.
The route guidance is provided by
voice output and an arrow, as well as
with the aid of a multi-colour map
display or a combination of both.
Important information on map
DVDs/CDs
Caution
Under no circumstances place
DVDs, single-CDs with a diameter
of 8 cm or shaped CDs in the audio
player.
You must not put any stickers on
CDs. These discs can get jammed
in the CD drive and ruin the drive.
An expensive replacement of the
device will then be necessary.
■ Only use map DVDs/CDs approved
by the vehicle manufacturer. The
Infotainment system will not read
map DVDs/CDs from other
manufacturers.
■ Never insert navigation DVDs into
the audio CD slot. DVDs may
become jammed in the CD player.
The unit will then have to be
exchanged at your expense.
■ It is recommended to always use
the latest map DVD/CD approved
by the vehicle manufacturer for the
Infotainment system.
■ CD 70 NAVI only: The European
trunk road network and the major
European cities are stored on all
navigation CDs.
DVD 90 NAVI only: The detailed
road network of all countries
displayed in the destination input is
stored on the navigation DVD. It is
■
■
■
■
■
37
not necessary to change DVD
when crossing borders.
For more information on navigation
DVDs/CDs, we recommend you
contact an authorised Opel Partner.
Avoid leaving fingerprints when you
change map DVDs/CDs.
Put map DVDs/CDs back in their
sleeves immediately after removing
them from the Infotainment system
in order to protect them from
damage and dirt.
Dirt and liquids on map DVDs/CDs
can smear the lens of the DVD/CD
player inside the device and cause
faults.
Protect map DVDs/CDs from heat
and direct sunlight.
38
Navigation
Usage
Activating the navigation system
navigation map or the split screen
with directional arrow and navigation
map.
Navigation settings
Inserting navigation DVD/CD
Push the navigation DVD/CD, label
side up, into the DVD/CD slot until it
is pulled in automatically.
Removing a map DVD/CD
Press the NAVI button.
or:
Select the K function in the main
display and confirm the selection.
If navigation is inactive:
The Navigation main menu is
displayed. The last destination
address entered is displayed.
If navigation is active:
Depending on the previously selected
display type, the guidance screen
shows the directional arrow, the
Press the b button. The DVD/CD is
pushed out of the DVD/CD slot.
If the DVD/CD is not removed after
ejection, it will be pulled back in again
automatically after a few seconds.
Setting the language
You can change the language of
navigation prompts 3 11.
If you are not yet in the navigation
function:
Press the NAVI button to switch to the
navigation function.
Press the SETTINGS button.
The Settings menu for the navigation
is displayed.
The following settings can be made:
Route class
This submenu allows you to influence
the behaviour of the navigation
system when a route is being
calculated.
The following options are available:
Navigation
Fastest y
When calculating the route the fastest
route is given preference.
Shortest x
When calculating the route the
shortest route is given preference.
Motorway z
When calculating the route,
motorways and expressways are
given preference.
Secondary roads A
When calculating the route,
secondary roads are given
preference.
Route options
In addition to the route type, you can
activate the following options for route
planning:
Toll-free C
When calculating the route, toll roads
are avoided.
No tunnels O
When calculating the route, tunnels
are avoided.
No Ferries N
When calculating the route, ferry
connections are avoided.
If no connections exist for the route
being calculated without the
exclusion criteria selected above, the
navigation system will, if necessary,
use toll roads, ferries or tunnels as
well.
In this case, you will be given
a corresponding message by the
Infotainment system.
Dyn. Guidance B
When calculating the route, the
navigation system takes into account
the current traffic situation reported
via RDS TMC. 3 61
The corresponding symbols for route
class, avoidance of toll roads and
dynamic guidance are shown in the
main display.
Map options
This submenu allows you to influence
the display of the navigation map.
The following options are available:
39
Head up
The map is displayed in the direction
of travel. This display type can only be
activated if the scale is 100 m to
10 km.
Centered
The map is displayed in such a way
that the vehicle position is always in
the centre of the display.
With this type of display the map is
always North up.
North up
The map is displayed with North at the
top.
With this type of display the display of
the map is static. Only when the
vehicle position reaches the edge of
the map is the map moved and
redrawn.
Show POIs
Select which category of POIs are to
be displayed as symbols in the map
display (e.g. hotels, petrol stations,
tourist attractions, etc.). Symbols
overview 3 66.
40
Navigation
Delete lists
This submenu allows you to delete
the entries in the following lists.
■ Addressbook
■ Last destinat.
■ Home
■ Tour memory
Highlight the desired lists and then
select the Delete menu item.
Navi announcement
Using this setting you can change the
volume of navigation
announcements.
Select the Announc. menu item and
adjust the minimum volume of voice
information.
Select the Music menu item to set the
volume of the music during voice
information.
Select the Test navi announcement
menu item to test the selected setting.
If the value for Announc. is set to
0 there is no voice output and the
main display shows the v symbol.
To show the remaining driving time or
arrival time, press the INFO button
while navigation is active.
Extras
This submenu allows you to make the
following settings for guidance:
Pop-up info
Select whether the popup info is
active or inactive. If the pop- up info is
active, the navigation screen is
displayed automatically just before
a navigation message.
Information on navigation
Driving time / Arrival time
Choose between the display of the
remaining driving time or the arrival
time.
The Infotainment system bases the
driving time and arrival time on an
average speed. These times may
therefore vary depending on driving
style and traffic volume.
Detailed arrows
Choose from a simplified display of
guidance information or a display with
early warning, distance bar and
detailed junction display.
Press the INFO button to display the
Info menu.
Select the NAVI menu item in the
Info menu.
Navigation
The Infoo menu for the navigation is
displayed.
The following detailed information on
navigation is available:
TMC map
Traffic messages which the
Infotainment system is currently
receiving via RDS TMC can be
displayed on the TMC map as
symbols. In addition, detailed
information on each of the traffic
problems displayed on the map can
be recalled.
Select the TMC map menu item.
The position map with the traffic
problems signalled via RDS TMC is
displayed.
■ For RDS TMC traffic information to
be displayed, a navigation DVD/CD
must be inserted in the
Infotainment system.
■ RDS TMC reception is guaranteed
only if the TMC symbol appears in
the display.
41
Depiction of TMC symbols
The TMC symbols are displayed
differently depending on the scale of
the map:
■ Map scale larger than 10 km: The
traffic hold-ups are displayed as
triangles with a directional arrow.
The arrow indicates the travel
direction of the road obstruction.
■ Map scale of 10 km and smaller:
The symbol indicates the type of
traffic hold-up (e. g. accident,
roadblock). The road section
affected is marked with arrows.
Symbols overview 3 66.
Colours of the TMC symbols
Additional information is provided by
the colour of the TMC symbols:
■ Yellow: Traffic problems on the
planned route that would cause
a negligible delay.
■ Red: Traffic problems on the
planned route that would cause
a severe delay.
42
Navigation
■ Green: Traffic problems that are
bypassed by a global detour using
dynamic guidance.
■ Grey: Traffic problems that are not
on the planned route or that are
bypassed by a local detour.
The basis for the possible delay due
to a traffic hold-up and calculated by
the Infotainment System is data that
the system receives via the currently
selected RDS-TMC station. The
actual delay may deviate from the
calculation.Red: Traffic problems on
the planned route.
Changing map scale
Select the Scale w menu item or the
symbol in the menu bar. Change the
scale by turning the multifunction
knob, then confirm the value set.
View TMC messages in detail
Move the cursor (bracket) to the
desired TMC symbol in the map using
the rocker switch.
In the menu bar, select the Symbol
menu item or the [9 ] symbol.
Detailed information on the selected
traffic information and the calculated
delay are displayed.
TMC info
Select the TMC menu item in the
Info menu.
The traffic information broadcast by
the currently received RDS TMC
station is displayed in short form in
a list.
■ Only messages which are activated
as Info type in the TMC Settings
menu and correspond to the
filtering set are displayed see
below: "TMC settings".
■ For RDS TMC traffic information to
be displayed, a navigation DVD/CD
must be inserted in the
Infotainment system.
■ The TMC symbol in the display
shows RDS TMC reception.
View TMC messages in detail
Select the desired list entry.
Detailed information on the selected
traffic information is displayed.
The list of traffic messages can also
be accessed using the TMC info
menu item in the Info menu for the
navigation.
TMC settings
This submenu allows you to set the
parameters for TMC messages.
The following options are available:
Info type
Select which type of traffic message
is to be displayed.
The first list entry Info types enables
you to switch all message types on or
off simultaneously.
Navigation
Info types that are not active are not
announced and are not shown in the
message list or the map display.
Urgent hazard warnings cannot be
deactivated.
Filtering
Select which type of TMC traffic
message is to be displayed:
■ All: All traffic messages received
via RDS TMC are displayed.
■ Route: All traffic messages on the
current route are displayed.
■ Current position: All traffic
messages for the area around the
current vehicle position are
displayed.
■ Vicinity destination: All traffic
messages within 50 km of the
current destination input are
displayed
To view TMC messages, press the
INFO button and then select the
TMC menu item.
Sorting criterion
Select the criterion for sorting the list
of TMC traffic messages:
■ Distance: Traffic messages are
displayed sorted based on distance
from the current location or from the
destination (depending on the
setting in the “Filtering” category).
■ Street name: Traffic messages are
displayed sorted based on road
names.
TMC station
This submenu allows you to select the
station to be used for TMC traffic
information.
If Automatic is active, the
Infotainment system automatically
selects the RDS TMC station with the
strongest signal.
If the manually selected RDS TMC
station can no longer be received
(e.g. because you have driven out of
the station’s reception range), the
Infotainment switches automatically
to Automatic and searches for an
RDS TMC station to ensure that traffic
messages are available.
43
Position
Shows your current vehicle position
with city, road and geographical
coordinates. With adequate GPS
reception the altitude above sea level
is also shown.
The accuracy of the altitude display
depends very much on the quality of
GPS reception.
Select the Save menu item to save
your current vehicle position in the
address book.
Destin. info
Shows the position of the current
destination with city, road,
geographical coordinates and
remaining distance and time to travel
or arrival time.
Route list
Shows the route with all the roads to
be used and their distances to the
current destination.
44
Navigation
Destination input
The following options for destination
input are available:
■ Destin. Input: To input a new
destination address with country,
city, road, number or corner.
■ POIs: Selection of special
destinations (restaurants, hotels,
etc.)
■ Destination mem.: To select
a destination from the address
book, the list of destinations last
used or to load the home address.
■ Entering destinations via the map:
To input a destination using
a cursor on the navigation map,
3 63.
CD 70 NAVI only:
Entering an address using the
speller function
When you enter a town or road name,
for example, an input menu will
appear. In the following, it will simply
be called “typewriter”.
Move the cursor to the desired
character by turning the multifunction
knob.
The currently selected character is
highlighted.
Confirm the selection by pressing the
multifunction knob.
The selected character will be
transferred to the input field.
Characters for navigation are entered
by selecting letters from a list of
letters, digits and special characters.
Intelligent “typewriter”
When you enter destinations, the
system compares the character string
already entered with all database
entries on the navigation DVD/CD.
Once you select a character, you will
notice that only certain letters remain
displayed.
Only those characters can be
selected on the “typewriter” that can
be used to further determine the
name.
In the event that the destination is in
a different country, it might not be
stored on the current navigation CD.
In this case, you should first input
a larger city near the destination
which is stored on the CD. After you
have reached this city, insert the
navigation CD of the destination
country and input the destination
town.
Navigation
The Infotainment system
automatically completes entries with
the possible further characters.
Deleting characters
When you have entered the wrong
character:
Select the kC menu item in the
“typewriter”.
The last character selected is
deleted.
If the Infotainment system has
automatically completed characters,
these characters are also deleted
again.
Cancelling character entry
Turn the multifunction knob anticlockwise until the hidden menu item
Cancel is displayed.
Select Cancel to finish entering
characters.
The Destin. Input menu is displayed.
List
The List menu item in the "typewriter"
can be selected when inputting
destinations. Depending on the
previously input character sequence,
the maximum number of remaining
list entries is displayed behind the
menu item.
When entering a character or
a character combination the number
of inputs in the list is reduced.
If there are fewer than 7 entries in the
list, the selection list is automatically
displayed.
Cancelling list selection
Turn the multifunction knob anticlockwise until the hidden menu item
Return is displayed.
Select Return to cancel the list
selection.
The “typewriter” is displayed.
45
"Typewriter" for name input
In addition to upper case letters,
numbers and special characters,
lower case letters are also available
for entering names (addresses in
address book, tours, etc.).
In addition, you also have the option
of editing a name during the input
using a movable cursor.
Select the abc or ABC menu item to
enter lower case or upper case
letters, respectively.
Select Abc if the first letter of entries
is to be automatically written in upper
case.
Select #&[ to enable special
characters to be entered.
46
Navigation
Press k or l to move the cursor
back and forth within the text already
entered.
Select OK to finish entering text.
Destin. Input
If navigation is inactive:
In the Navigation menu, select the
Destin. Input menu item.
The Destin. Input menu is displayed.
With Colour Info Display and active
navigation:
Select the Menu menu item in the
guidance screen.
Select the Destin. Input menu item.
You can now enter the destination
address with the following
information:
Country
Select the Country menu item in the
Destin. Input menu.
The list of the countries stored on the
navigation DVD/CD is displayed.
Select the required country from the
list.
If a destination address has already
been entered, the country ID of the
destination country is displayed
instead of the Country menu item,
e.g. D for Germany.
CD 70 NAVI only:
If you select a country that does not
correspond to the inserted country
CD you can only enter the major
European cities and the most
important trunk roads as
a destination.
To be able to enter an exact
destination, insert the country CD of
the destination country as soon as
you have crossed the border.
Town
Select the Town menu item in the
Destin. Input menu.
If a destination address has already
been input, the town name of the last
destination entered is displayed
instead of the Town menu item.
Navigation
The “typewriter” for entering
characters is displayed.
Enter a new city name by selecting
the letters on the “typewriter”.
When the number of possible entries
in the town list is small enough, the
selection list with town names will be
automatically displayed.
Select the desired town from the list.
The “typewriter” for entering
characters is displayed.
Enter a new road name by selecting
the letters on the “typewriter”.
When the number of possible entries
in the road list is small enough, the
selection list with road names will be
automatically displayed.
Select the desired road from the list.
Street
House number
If house numbers for the entered road
are stored on the inserted navigation
DVD/CD you can enter a house
number for the destination.
Select the No. menu item in the
Destin. Input menu.
If a destination address has already
been input, the house number of the
last destination entered is displayed
instead of the No. menu item.
The “typewriter” for entering
characters is displayed.
Enter the house number by selecting
one of the preset digits on the
“typewriter”.
Select the Street menu item in the
Destin. Input menu.
If a destination address has already
been input, the road name of the last
destination entered is displayed
instead of the Street menu item.
47
■ Within the database, certain ranges
of house numbers are combined,
the entered house number being in
such a range. In such a case, the
navigation system will lead you to
the entered house number range.
■ In some cases, the navigation
system will also correct your entry.
If for example you have entered
house number 83 but only numbers
up to 51 are stored on the
navigation DVD/CD, the system will
automatically correct this to 51.
Corner
As an alternative to the house number
you can also enter an intersecting
road (corner) for the destination.
Select the Corner menu item in the
Destin. Input menu.
If a destination address has already
been input, the road name of the last
destination entered is displayed
instead of the Corner menu item.
Enter the road name of the
intersecting road as previously
described.
48
Navigation
Entering parts of a destination
address
If you want to enter a new road, house
number or a new intersecting road,
just select the corresponding menu
item from the Destin. Input menu.
Select the Start navi menu item to
start guidance.
The Destin. Input menu is displayed
and the route will be calculated (this
may take several seconds).
Guidance 3 57.
Entering locations via the postcode
If postcodes are stored on the
inserted navigation DVD/CD you can
enter the postcode instead of the
town name when entering locations.
When the number of possible entries
in the town list is small enough, the
selection list with town names will be
automatically displayed.
Activating guidance
In the main menu:
In the Destin. Input menu:
Select the Start navi menu item to
start guidance.
You can save the destination entered
in the address book using the Save
menu item.
Entering a point of interest (POI)
Interesting or useful special
destinations along the route or for the
destination location can be selected.
For this, the Infotainment system
offers various categories in which
important addresses are stored:
Select the POIs menu item in the
Destin. Input menu.
The Select POIs menu is displayed.
If a POI has already been entered as
a destination address, the name of
the last destination input is displayed.
Navigation
You can now select POIs according
to the following criteria:
■ Vicinity current position: Shows you
POIs depending on your current
position.
■ Vicinity destination: Shows you the
POIs at the selected destination.
■ In other towns: Shows you POIs in
the town of your choice.
■ Nationwide: Shows you POIs of
nationwide importance (e.g.
airports, ferries, etc.).
Select one of the two selection
criteria.
The list of possible categories is
displayed (e.g. car rental, hotel, town
centre, etc.).
Select the desired category.
A list of POIs of the selected category
is displayed.
■ If more than six POIs are available
for the selected category, the
“typewriter” will be displayed.
■ When selecting Vicinity current
position a list of at most 45 points of
interest in the selected category is
always displayed, sorted based on
distance from current location.
With open typewriter:
■ Limit the number of destinations by
entering one or several initial
characters or select the List menu
item.
■ Select the required destination from
the list.
When list is displayed:
Select the required destination
directly from the list.
After a destination has been selected,
the Destin. Input menu will be
displayed again. The top lines show
the destination selected and the
destination town.
49
Special case for In other towns
Enter the desired location for which
the available POIs are to be listed
using the “typewriter”.
Destination mem.
The destination memory of the
Infotainment system allows you to
store destinations that you would like
to use more frequently for guidance.
In addition, the destinations last used
for guidance are stored in the
destination memory.
If navigation is inactive:
From the Navigation menu, select the
Destination mem. menu item.
The destination memory list appears.
50
Navigation
With Colour Info Display and active
navigation:
Select the Menu menu item in the
guidance screen.
Select the Destination mem. menu
item.
The destination memory list appears.
The destination memory list has the
following entries available:
■ Last destinat.: The list of
destinations last used for guidance
is displayed.
■ Home: Recalls the stored home
address.
■ Addressbook: All addresses that
are already stored in the address
book (in alphabetical order).
Selecting one of the last destinations
Select the Last destinat. menu item in
the Destination mem. menu.
The list containing a maximum of 30
last destinations for which a route was
calculated is displayed.
Select the required destination from
the list.
Select Start navi to start guidance,
or:
select Delete to delete the selected
destination from the last destinations
list.
Selecting home address as
destination
1. Select the Home menu item in the
Destination mem. menu.
2. Select Start navi to start guidance,
or:
select Edit to change the home
address.
3. Regardless of which menu you
are in:
Press the G button to recall the
home address.
4. Select Start navi to start guidance.
or:
press the G button briefly twice to
immediately start guidance to the
home address.
If a home address has not been
stored, pressing the G button
automatically displays the Home
menu.
Select Edit to change the home
address, see below.
Changing home address or storing
a new home address
After selecting the Edit menu item you
can change the home address.
If no home address has been stored
yet, enter the desired address.
Enter the details of the home address.
Select Save to save the new/changed
home address in the destination
memory.
Navigation
Deleting home address
The details of the home address can
be deleted using the Delete lists
menu item in the navigation Settings
menu 3 38.
Saving destinations in the address
book
Selecting destinations from the
address book
In the destination memory:
Select the required destination from
the destination memory list.
The address book entry with the
details of the address is displayed.
Select Start navi to start guidance.
You can save up to 100 destinations
(99 addresses and the home
address) in the address book. The
saved destinations can be individually
named.
In the Destin. Input menu:
1. Enter the desired destination
address.
2. Select the Save menu item.
The “typewriter” appears.
3. Accept the specified name using
OK,
or:
51
add characters to the specified
name by selecting from the
character list,
or:
delete the entire specified name
using kC and enter a new name.
4. Select OK to save the address
under the name entered in the
address book.
Changing destinations in the address
book
Select the required destination from
the destination memory list.
Select Edit to change the selected
destination address.
Change the required details (e.g.
town, road, no. or the name).
Select Save to transfer the changed
address to the address book.
52
Navigation
Deleting destinations from the
address book
Tours
With Graphic Info Display
Select the Tours menu item in the
Navigation menu.
The Tours menu is displayed.
Entering a new tour
Select the required destination from
the destination memory list.
Select the Delete menu item to delete
the displayed destination from the
address book.
Confirm the deletion.
The destination is deleted from the
address book.
If you want to delete all saved
destinations from the address book in
one go, select the Delete lists menu
item from the navi Settings menu,
3 38.
The Tours menu provides you with
the option of driving to a series of
various destinations one after the
other without having to input each
destination individually.
You only need to enter the individual
stations of the tour once via the
destination input or the destination
memory and store this tour under
a freely selectable name.
The tour memory can store a total of
7 tours each with a maximum of 10
stages.
With Colour Info Display
Select the Journey menu item in the
Navigation menu.
Select Tours.
1. Select the Add tour menu item in
the Tours menu.
The “typewriter” appears.
2. Enter a name for the new tour.
3. Select OK to save the name
entered.
This will take you automatically to
the menu for editing a tour (see
below).
You can now enter tour stages
(intermediate destinations).
Navigation
53
Starting a tour
Displaying a tour
Editing a tour
Select a tour in the Tours menu.
To start guidance: Select Start tour.
All predefined tour stages
(intermediate destinations) are taken
into account for route guidance.
Skip predefined stages
If you want to skip predefined stages
on the tour and start direct guidance
to a certain stage:
Select Start from.
The list of tour stages is displayed.
Select the desired tour stage. A route
is calculated that leads directly to the
selected tour stage.
With this function it is possible to view
the list of tour stages (intermediate
destinations) for the selected tour.
Select Show.
The list of tour stages for the selected
tour is displayed.
If you select one of the tour stages
from the list, the details of the address
are displayed.
You have the following options in the
Edit menu:
■ Destin. Input: Add new destinations
to the tour.
■ Destination mem.: Add
destinations from the destination
memory to the tour.
■ Move: Move stages within the
selected tour.
■ Delete: Delete individual stages of
the selected tour or the entire tour.
54
Navigation
Add tour stages
Select (Insert at end) if the new
stage is to be placed at the end of
the list.
Move tour stages
1. Select the Destin. Input or
Destination mem. menu item in
the Edit menu.
2. Enter a new destination or select
a destination from the destination
memory.
3. Select Add to add the selected
destination to the tour.
The list of stages already stored
for the tour is displayed.
4. Move the cursor by turning the
multifunction knob to the position
in the list where the new stage is
to be inserted.
5. Press the multifunction knob to
place the new stage in front of the
highlighted entry.
1. From the Edit menu, select the
Move menu item.
The list of tour stages in the
selected tour is displayed.
2. Highlight the stage to be moved
using the cursor.
3. Press the multifunction knob.
4. Move the cursor by turning the
multifunction knob to the position
in the list where the new stage is
to be inserted.
5. Press the multifunction knob to
place the new stage at the
selected position.
Select (Insert at end) if the stage
is to be moved to the end of the
list.
Delete tour stages
1. From the Edit menu, select the
Delete menu item.
The list of tour stages in the
selected tour is displayed.
2. Highlight the stage to be deleted
using the cursor.
3. Press the multifunction knob.
The desired stage is deleted from
the tour.
Delete entire tour
From the Edit menu, select the
Delete menu item.
The list of tour stages in the selected
tour is displayed.
Select the Delete whole tour menu
item.
Travel guide information
(DVD 90 NAVI only)
Navigation
The Add. Info function in the Travel
menu provides access to travel guide
information from various suppliers.
Depending on the navigations-DVD
inserted, different information from
third-party suppliers can be retrieved.
This may be hotel and restaurant
guides and tourist information, for
example.
A browser similar to an internet
browser is used to display the
additional information.
The additional information may
contain text, addresses and
telephone numbers.
You can transfer the address of the
desired hotel to the navigation system
directly from the travel guide, for
example.
Search in additional information
If navigation is inactive:
In the main menu, select Journey.
If navigation is active:
1. Select the Menu menu item in the
guidance screen.
2. Select the Journey menu item.
3. In the Journey menu, select Add.
Info.
The overview of additional
information stored on the
navigation DVD is displayed.
4. Select the desired provider from
the list.
If additional information from
a supplier is available, the
selection is displayed directly via
the search options.
5. Select the desired search option
from the list.
55
The following can be selected:
■ Homepage: Displays the startpage
for the selected supplier (if
available).
■ Vicinity current position: Displays
the search screen for facilities in the
vicinity of the current location.
■ Vicinity destination: Displays the
search screen for facilities in the
vicinity of the destination.
■ In other towns: Displays the search
screen for facilities in the vicinity of
the location of your choice.
To narrow down the search, this may
be followed by a multistage query,
presented in the form of lists, from
which the respective subcategories
can be selected (e.g. All hotels,
Categories, Extras, Search by name).
56
Navigation
Using the browser
1. Use the rocker switch m or n
to jump from one option to
another.
The selected option is then
highlighted (in different ways
depending on layout of search
pages and supplier).
2. Press the search button d or c to
scroll up or down page by page.
3. Press the multifunction knob to
confirm the selected option or the
activated link..
Display of the results
After you have started a search, the
Infotainment displays the results of
the search in the form of a list.
The browser also has a dynamic
menu. As soon as the multifunction
knob is turned, the following menu
items are available:
■ Select H: Confirms the selected
option.
■ Homepage: Goes to the overview
page for the selected supplier (if
available)
■ History: Displays the list of
previously viewed pages.
■ Previous page: Retrieves the
previous page in the history.
■ Next page: Retrieves the next page
in the history.
The results include the address of the
facilities, the hit percentage and the
distance from the current location.
To display detailed information on the
facilities use the O symbol.
To open the next/previous page of
results use the arrow symbols.
Transfer to navigation system
In the detail view, you can transfer the
selected facility to the navigation
system as a new destination via the
↱ symbol.
Navigation
Guidance
Petrol stop
As soon as the range calculated by
the trip computer has dropped below
a certain distance, the Infotainment
system informs you with a message
and offers you the option of planning
a route to a petrol station nearby.
Select Petrol stations.
A list of up to 10 petrol stations in the
vicinity is displayed, sorted based on
distance from the current location.
The arrow indicates the direction of
the selected petrol station.
Only petrol stations included on the
navigation DVD/CD as points of
interest are displayed.
57
Select the desired petrol station from
the list.
Select Start navi.
The Infotainment system calculates
a route to the selected petrol station.
Or:
Confirm the range message with OK
if you do not require route planning to
a petrol station.
After the route has been calculated,
guidance takes place by means of
voice output and directional arrows.
The directional arrows are displayed
in the guidance screen or in the main
display in simplified form.
Voice output and the directional arrow
in the display recommend the next
change in travel direction.
■ Adjusting the announcement
volume in the navigation Settings
menu 3 38.
■ Setting the route options in the
navigation Settings menu 3 38.
58
Navigation
Guidance screen
Dynamic menu
■
■
■
■
The guidance screen with the
guidance arrows appears as soon as
you have started the navigation.
For vehicles with Colour Info Display
the navigation map or a combination
of map and arrow display may be
shown depending on the selected
type of display.
The top display line shows the
distance remaining to the destination.
On the left-hand side of the guidance
screen a small menu bar with
symbols is displayed. The menu with
the complete menu texts expands
when you turn the multifunction knob.
If the menu bar is collapsed, the menu
item shown as a symbol in the menu
bar and highlighted by the cursor can
be executed directly.
The following menu items are
available in the guidance screen:
With Colour Info Display:
■ Stop navi: Stops guidance.
■ Menu: Opens the submenu with the
Info, Destin. Input, Destination
mem., Journey and View menu
items.
■
■
Submenu View 3 63
Destination mem.: Opens the
destination memory.
Journey: Opens the Journey menu.
Map F, Map/Arrow E, Arrow D:
Toggles between the three possible
display types.
Scale w: Changes the scale for
map display.
Detour: Opens the menu for
planning an alternative route.
Repeat M: Repeats the current
navigation prompt.
With Graphic Info Display:
■ Stop navi: Stops guidance.
■ Destin. Input: Opens the Destin.
Input menu.
■ Destination mem. Opens the
destination memory.
■ Tours: Opens the Tours menu.
■ Repeat M: Repeats the current
navigation announcement.
Navigation
Notes on Detour:
■ A detour can be planned at any time
while guidance is active.
■ Planning detours 3 61.
■ When dynamic guidance is active,
information to this effect will appear
automatically as soon as you
approach a traffic hold-up on your
route.
■ Dynamic guidance 3 61.
Notes on Repeat
■ If the Infotainment system receives
corresponding traffic information
via RDS TMC an obstruction on
your road will be announced as
well.
■ The current announcement can be
repeated at any time using the M
button.
Pop-up info
With active route guidance, you can
access any menu (e. g. Audio,
Settings, etc.) conveniently without
missing the next turn-off prompt.
If pop-up info is active, the
Infotainment system briefly switches
to the navigation screen before each
turn-off prompt.
With the Colour Info Display the
system switches to the combined
map/arrow display. 100 m is always
used as the map scale, irrespective of
other settings.
After the turn-off prompt, the system
switches back again to the original
menu.
The pop-up info can be deactivated in
the navigation Settings menu, 3 38.
Set display type
(Colour Info Display only)
Depending on the display type
previously set:
In the guidance screen, move the
cursor to the Map, Map/Arrow,
Arrow menu item.
When the menu is collapsed, the F,
E or D symbols are displayed instead
of the menu texts.
Press the multifunction knob
repeatedly until the required display is
shown in the guidance screen.
59
Guidance with arrow display
The Infotainment system displays the
following information in the guidance
screen:
■ Road turn-off: Next road to be
taken.
■ Navigation parameters: Route
option, dynamic guidance, prompt
off, etc.
■ Turn-off or directional arrow.
■ Current distance to the next turn-off
point.
The closer you come to the turn-off
point, the more segments of the
directional arrow are filled.
60
Navigation
If the car is not on a public road (e.g.
company site or forest path) or on
a road not yet stored on the
navigation DVD/CD, an arrow
pointing in the direction of the
destination is displayed. When a road
is reached that is stored on the
navigation DVD/CD route guidance is
performed.
After switching off the Infotainment
system (e.g. when interrupting
a journey) the current destination
remains saved. When the
Infotainment system is switched on
again, a prompt asking if guidance is
to be continued appears after a short
time.
Detailed arrows
(Colour Info Display only)
If the "detailed arrows" function is
active, an additional and simplified
early warning is displayed above the
directional arrow that informs you
about the next change in driving
direction well in advance.
A bar with the distance to the turn-off
point appears on the right-hand side
of the screen.
When approaching the next junction
or turn, a detailed view of the junction
is displayed.
Activating detailed arrows in the
navigation Settings menu, 3 38.
Map display
(Colour Info Display only)
Navigation
Next to the arrow displayed for
guidance a map display with the route
drawn in can be selected.
Select the Map menu item or the F
symbol in the guidance screen.
A map with the current position is
displayed. The calculated route is
emphasised in colour on this map.
The current position of the vehicle is
shown by an arrow.
Change map scale
(Colour Info Display only)
Change the scale by turning the
multifunction knob, then confirm the
value set.
The map will be redrawn to the
selected display scale.
The map scale can be set between
50 m and 1000 km.
Change map orientation
(Colour Info Display only)
You can change the orientation of the
map display in the navigation
Settings menu 3 38.
Display POIs
(Colour Info Display only)
Select the Scale w menu item or the
symbol in the guidance screen.
The currently set display scale is
shown.
You have the option of displaying
points of interest (e.g. petrol stations,
hotels, etc.) on the map.
61
■ Points of interest are displayed for
scales of 1 km and smaller.
■ Activating the display of POIs 3 38.
POIs symbol overview 3 66.
Combined map/arrow display
(Colour Info Display only)
The “split screen”, as it is known,
shows a combination of map and
arrow display in the guidance screen.
Select the Map/Arrow menu item or
the E symbol in the guidance screen.
Dynamic guidance
62
Navigation
With dynamic guidance, the whole of
the current traffic situation that is
received by the Infotainment system
via RDS TMC is incorporated into the
calculation of the route.
If there is a traffic hold-up (e.g. traffic
jam, road closure) on the planned
route, you will be informed of this by
the Infotainment system and you can
decide whether the system should
avoid the problem by changing the
route in order to avoid the segment
concerned or whether it would be
more sensible just to drive through
the problematic road section.
This enables the system to check
continuously during guidance on the
basis of the traffic information
whether there is a better route for
route guidance and a new route is
sometimes calculated, for example, if
a traffic jam has disappeared.
■ Dynamic guidance can be
activated/deactivated in the
navigation Settings menu 3 38.
■ The basis for the possible delay
due to a traffic hold-up and
calculated by the Infotainment
system is data that the system
receives via the currently selected
RDS TMC station. From
experience, the actual delay may
deviate from the calculation.
■ The dynamic guidance only works
if the Infotainment system receives
traffic information via RDS TMC.
TMC reception is indicated by the
TMC symbol in the main display of
the Audio function.
Depending on the traffic situation,
there are two different types of detour:
1. Extensive detour
As soon as the Infotainment system
has received information about one or
more traffic hold-ups via RDS TMC
that would mean a relatively long
delay for navigation to your
destination, the system offers you
well in advance of the hold-up the
option of taking a detour around the
traffic hold-ups.
If a relatively long delay on your route
is expected due to traffic hold-ups,
a message informing you of the
calculated delay is given.
■ Select Recalculate if you want to
make an extensive detour around
the traffic hold-ups.
■ Select Cancel if you do not want to
make a detour.
Even after cancelling, it is possible to
have the route recalculated via the
Detour menu item.
Traffic hold-ups that are expected to
result in just a short delay are
detoured locally if desired via the
Detour function (see below).
In the immediate vicinity of a traffic
hold-up, a warning is issued again
and a detour of the immediate traffic
holdup (local detour) is offered via the
Detour menu item.
2. Local Detour
Navigation
With a local detour, all traffic hold-ups
can be bypassed, even if they are not
viewed as critical by the evaluation of
the Infotainment system.
When you approach the last exit
before a traffic hold-up, the
Infotainment system will inform you to
this effect.
In addition to the Detour menu text the
M symbol appears on the route
guidance screen.
You can now decide whether to
calculate a detour or not.
Planning a detour manually
current vehicle position), in addition to
the dynamic route guidance
functions.
1. Select the Detour menu item in
the guidance screen.
The Detour menu is displayed.
2. Set the distance for the detour to
a value between 1 and 50 km.
3. Select Calculate.
An alternative route is calculated
for the specified distance (starting
at the current vehicle position).
4. Select Return to quit the Detour
menu.
Maps
Displaying the map
(Colour Info Display only)
The Infotainment system offers the
option of bypassing a specific part of
the calculated route (starting at the
63
The Infotainment system provides the
option of displaying a map at any
time, even if navigation is inactive.
A navigation DVD/CD must be
loaded.
If navigation is inactive:
Select the Map menu item in the
navigation main menu.
The position map showing the current
vehicle position is displayed.
If navigation is active:
Select the Menu menu item in the
guidance screen.
Select the View menu item.
The position map showing the current
vehicle position and a cursor are
displayed.
64
Navigation
Moving the map section
(Colour Info Display only)
3. Select the Map scroll OFF menu
item in the menu bar to restore the
original map section (current
position or destination) and hide
the cursor.
Entering destinations via the map
(Colour Info Display only)
In addition to the Position map menu
item, the following functions are
available in the menu bar.
■ Destination map: If a destination
has been entered, the map with the
area surrounding the current
destination is displayed.
■ Map scroll/Map scroll OFF: Turns
the cursor on and off and allows the
cursor to be moved using the rocker
switch. See below “Movng the map
section”.
■ Scale: Changes the scale for the
map display.
Changing map scale 3 57.
■ Set destin. point: Sets the cross of
the cursor as the new destination.
If the position map or the destination
map is displayed, the cursor shown
can be moved using the rocker
switch.
If no cursor is displayed (e.g. when
navigation is inactive):
1. Select the Map scroll menu item in
the menu bar to show the cursor.
2. Move the cursor lines to the
desired position on the map using
the rocker switch
The map section is automatically
shifted when you reach the screen
edge with one of the cursor lines.
While the position or destination map
is displayed:
1. Activate the cursor with the Map
scroll menu item if it is not already
shown.
2. Move the cursor to the desired
point on the map.
Initially use a large map scale
(e.g. 20, 50, 100 km) to roughly
set the map section.
Navigation
3. Select a small scale to show
a detailed map of all roads and to
be able to exactly define the
destination.
4. Select the Set destin. point menu
item in the menu bar to accept the
selected position on the map as
the destination.
The Destin. Input menu with the
details of the new destination is
displayed.
5. Select Save to save the
destination in the address book.
or:
select Start navi to activate
guidance to the new destination.
If you have activated the display of
points of interest (e.g. petrol stations)
in the navigation Settings menu,
these are indicated on the map by
corresponding symbols. Navigation
settings 3 38
Destinations beyond digitised roads
( Colour Info Display only)
When entering destinations via the
navigation map you can also save
destinations that are beyond
a digitised road. The Infotainment
system will then guide you as far as
possible via digitised roads.
After that you are guided to the
destinations via a directional arrow.
65
66
Navigation
Symbols overview
Navigation
No.
Explanation
No.
Explanation
No.
Explanation
1
Airport
18
Destination
35
Park + Ride
2
Amusement park
19
Education
36
Petrol station
3
ATM
20
Embassy
37
Place of worship
4
Automobile club
21
Entertainment
38
Police
5
Bank
22
Exhibition centre
39
Post office
6
Bus station
23
Ferry
40
Railway station
7
Car park
24
Fire station
41
Restaurant
8
Car rental company
25
Golf course
42
Services
9
Car repair
26
Hospital
43
Shopping centre
10
Chemist
27
Hotel
44
Sports centre
11
Cinema
28
Industrial estate
45
Theatre
12
City centre
29
Library
46
Tourist attraction
13
Clinic
30
Marina
47
Tourist information
14
Community centre
31
Military base
15
Council office
32
Monument
16
Court house
33
Museum
17
Cultural centre
34
Park
67
68
Navigation
TMC symbols overview
Navigation
For scales greater than 10 km:
No. Explanation
No. Explanation
14 No parking possibility
1
Road obstruction
15 Vehicle on worng carriageway
2
Road obstruction in both
directions of travel
16 Closed roads
For scales of 10 km and less:
No. Explanation
3
Roadworks
4
Danger
5
Slippery road
6
Poor weather conditions
7
Bad roadway
8
Accidents
9
Slow or queuing traffic
10 Stationary traffic
11 Delays, waiting times
12 Exeptional vehicles
13 Narrow road sections
17 Bad visibility
18 Heavy wind
19 Smog alert
20 Overhead clearance restrictions
21 Observe information in the radio
69
70
Index
A
Activating CD player..................... 31
Activating guidance...................... 44
Activating the navigation system. . 38
Address book................................ 44
Add tour.................................. 44, 57
AM................................................ 22
Arrow display................................ 57
AS................................................. 26
AS level........................................ 22
Automatic search.......................... 24
Automatic switch off...................... 11
Autostore...................................... 26
Autostore lists............................... 26
Aux input....................................... 11
AUX input..................................... 34
B
Balance......................................... 19
Bass.............................................. 19
C
CD changer.................................. 31
CD, eject....................................... 31
CD Extras..................................... 31
CD, insert...................................... 31
CD text.......................................... 31
Change map orientation............... 57
Change map scale........................ 57
D
Delete lists.................................... 38
Deleting characters....................... 44
Destination input .......................... 44
Destination mem........................... 44
Destin. input.................................. 44
Detour........................................... 61
Displaying the map....................... 63
Display POIs................................. 57
Driving time / Arrival time.............. 38
Dynamic guidance........................ 61
Dynamic menu.............................. 57
E
Ejecting navigation DVD/CD......... 38
Entering destinations.................... 44
Entering destinations via the map 63
Entering letters............................. 44
F
Fader............................................ 19
FM................................................ 22
G
General information............ 4, 30, 36
Guidance ..................................... 57
Guidance screen.......................... 57
H
Home address.............................. 44
71
I
P
Ignition logic.................................. 11
Info menu...................................... 11
Infotainment system
control elements.......................... 6
instrument panel.......................... 6
Multifunction unit......................... 6
steering wheel audio controls..... 6
Inserting navigation DVD/CD........ 38
Petrol stop.............................. 44, 57
Planning detours.......................... 61
Points of interest........................... 44
POIs.............................................. 44
Position......................................... 57
Position map................................. 63
PTY selection............................... 22
M
Radio data system (RDS) ............ 26
Radio Extras................................. 22
Random........................................ 31
Random album............................. 31
Recalculate................................... 61
Repeat track................................. 31
Route guidance...................... 44, 57
Route list....................................... 57
Route option................................. 38
Main display.................................. 11
Manual tuning............................... 24
Map display.................................. 57
Map options.................................. 38
Maps ............................................ 63
Map scroll..................................... 63
Menu operation............................. 11
Multifunction knob......................... 11
Mute.............................................. 11
N
Navi announcement..................... 38
Navigation, general information.... 36
Navigation settings....................... 38
O
Operation ..................................... 11
Overview ........................................ 6
R
S
Scale............................................. 57
Scan CD....................................... 31
SDVC............................................ 20
Setting the language.................... 38
Setting the navigation volume...... 38
Setting the volume........................ 11
Show title...................................... 31
Sound settings.............................. 19
Speed dependent volume
control (SDVC).......................... 20
Starting CD replay........................ 31
Start navi...................................... 44
Start-up volume............................ 20
Station list..................................... 24
Station memory............................ 24
Station search............................... 24
Store............................................. 24
Switching the Infotainment
system on or off......................... 11
Symbols overview ........................ 66
T
TA volume.................................... 20
Theft-deterrent feature ................... 5
TMC info....................................... 57
Tone settings................................ 19
Tours...................................... 44, 57
Travel guide information......... 44, 57
Treble........................................... 19
U
Update stations............................. 24
Usage......................... 22, 31, 34, 38
User.............................................. 19
Using the CD player..................... 31
Using the Infotainment system..... 11
Using the navigation system........ 38
72
V
View.............................................. 63
Volume......................................... 11
Volume settings............................ 20
CDC 40 OPERA
Introduction .................................. 74
Radio ........................................... 88
CD Player .................................. 100
Index .......................................... 108
74
Introduction
Introduction
General information ..................... 74
Theft-deterrent feature ................. 75
Overview ...................................... 76
Operation ..................................... 78
Tone settings ............................... 84
Volume settings ........................... 86
General information
The Infotainment system provides
you with state-of-the-art in-car
infotainment.
The radio has nine automatic station
memories for each available
waveband (FM, AM, DAB).
The integrated changer unit can take
up to six CDs and will entertain you
with audio CDs and MP3 CDs.
The digital sound processor provides
you with several preset equalizer
modes for sound optimisation.
A DAB receiver for digital radio
reception can be connected as an
option.
Furthermore, you can connect an
external source, such as a mobile
phone to the Infotainment system.
In addition the Infotainment system
can be equipped with a Mobile phone
portal.
Optionally, the Infotainment system
can be operated using controls on the
steering wheel.
The well-thought-out design of the
control elements and the clear
displays enable you to control the
system easily and intuitively.
Important information on
operation and traffic safety
9 Warning
The Infotainment system has to be
used so that the vehicle can be
driven safely at all times. If in doubt
stop your vehicle and operate the
Infotainment system while the
vehicle is stationary.
Radio reception
Radio reception may be disrupted by
static, noise, distortion or loss of
reception due to
■ changes in distance from the
transmitter,
■ multi-path reception due to
reflection,
■ shadowing.
Introduction
Theft-deterrent feature
The Infotainment system is equipped
with an electronic security system for
the purpose of theft deterrent.
The Infotainment system therefore
functions only in your vehicle and is
worthless for a thief.
75
76
Introduction
Overview
Control elements on instrument panel
Introduction
1
2
3
4
5
6
7
8
e knob ................................. 78
Briefly press: switch on/off
Infotainment system .............. 78
Turn: adjust volume .............. 78
TUNER .................................. 88
Switch between FM and AM . 88
If DAB receiver is
connected: Switch
between analogue and
digital reception ..................... 88
CDC .................................... 101
CD changer programme
selection .............................. 101
MAIN ..................................... 78
Main menu ............................ 78
Multifunction knob ................. 78
Turn: select function .............. 78
Press: confirm function ......... 78
INFO ..................................... 78
Information page ................... 78
SOUND ................................. 84
Sound function
programme selection ............ 84
BC ......................................... 76
On-board computer ............... 76
9
10
11
12
13
14
1...9 ....................................... 88
Radio: number buttons,
station buttons ...................... 88
CD changer: direct
selection of the CDs
inserted using the buttons
1-6 ....................................... 101
Audio/MP3 CD slot .............. 101
SETTINGS ............................ 78
Context-depending
settings .................................. 78
Rocker switch ...................... 101
Radio: mn automatic
station search, dc manual
station search ........................ 88
CD: mn track selection/
fast forward/fast rewind,
dc Album/CD selection, c
Repeat track, d Scan CD .... 101
TP ......................................... 93
Traffic programme ................. 93
j CD-Changer menu .......... 101
77
Steering wheel audio controls
1
2
Thumbwheel ......................... 78
Turn: Move cursor ................. 78
Press: confirm a selection ..... 78
q button ............................... 88
Radio: next stored station ..... 88
CD: next CD ........................ 101
78
3
4
5
6
Introduction
p button ............................ 101
Switch between radio and
CD mode ............................. 101
Radio: Discontinue TA and
PTY31 messages .................. 88
If a DAB receiver is
connected: changing
between analogue and
digital reception and CD
mode ..................................... 88
c button ................................. 88
Radio: search down, scroll
back through station
memory ................................. 88
Discontinue TA and
PTY31 messages ................. 88
CD: Skip one track
backwards, fast reverse
station memory ................... 101
d button ................................. 88
Radio: search Radio:
search up, scroll forwards
through station memory ........ 88
Discontinue TA and
PTY31 messages ................. 88
CD: Skip one track
forwards, fast forward ......... 101
Turn: adjust volume .............. 76
Operation
Control elements
The Infotainment system is operated
via function buttons, multifunctional
knobs and menus that are shown on
the display.
Inputs are made optionally via:
■ the central control unit in the
instrument panel 3 76
■ controls on the steering wheel
3 76.
Switching the Infotainment
system on or off
Press the e knob.
The audio source last set is played.
Switching on and off with the ignition
key (automatic switch-on)
If the automatic switch-on is enabled,
the Infotainment system can also be
switched off and on again via the
ignition.
This link between the radio and
ignition is preset in the factory, but this
can be disabled.
■ If the automatic switch-on is
disabled, the Infotainment system
can only be switched on with the
e switch and with the j button for
the CD changer and off with the e
button.
■ If the Infotainment system is
switched off when the ignition is
switched off, regardless of the
current setting of the automatic
switch-on it, can only be switched
on via the e button and with the
j button for the CD changer.
■ The automatic start is always
enabled after the Infotainment
system has been disconnected
from the operating voltage and reconnected.
Enable/Disable Ignition Logic
In the main menu press SETTINGS
button.
The system Settings menu is
displayed.
Enable/disable Ignition logic tick box.
Introduction
Enabled: on the right side of the
display the message appears "The
radio will be switched on/off
automatically with the ignition".
Disabled: on the right side of the
display the message appears "Radio
can only be switched on via ON/OFF
button".
Automatic switch-off
The Infotainment system switches
itself off automatically after one hour
if you switch it on with the ignition off.
Setting the volume
Turn the e knob.
■ The Infotainment system plays at
the volume last set, provided the
volume was below the maximum
switch-on volume 3 86.
■ Traffic announcements and
external audio sources are inserted
at a preset minimum volume
3 86.
■ If the respective source is enabled,
the volume of the traffic
announcements, the external audio
sources and the radio and CD can
be adjusted separately.
Speed dependent volume control
(SDVC)
When SDVC is activated 3 86, the
volume is adapted automatically to
make up for the road and wind noise
when driving.
79
Menu concept
The menu structure of the
Infotainment system consists of
different types of menu pages:
■ Selection pages
■ Feature pages
■ Settings pages
The different pages have different
functionalities:
Selection pages
External source
An external source, e.g. a mobile
phone or a navigation system, can be
connected to the Infotainment
system.
In this case External In appears in the
display.
We recommend having appliances
installed by an Opel Partner.
Selection pages have a selection
menu with a preview of each menu
item on the left margin of the screen.
Selection pages lead you to feature or
settings pages.
80
Introduction
The Audio menu is an example of
a selection page.
Settings pages
Selecting from a menu
Settings pages are menu pages
where settings can be made , e.g.
sound settings, etc.
The CD Extras menu is an example
of a settings page.
The items within a menu are selected
by using a cursor moved by turning
the multifunction knob. The cursor
has the shape of a frame (bar). The
cursor indicates which menu item is
being selected.
Turn the multifunction knob until the
desired menu item is marked.
Press the multifunction knob.
The associated function is performed
or another menu is displayed.
■ In the following chapters of the
operating instructions, the requests
for action described above are
summarised into the following
request for action:
Feature pages
Feature pages are menu pages
where you stay, e.g. when listening to
the radio or a CD.
Feature pages also have menu items
that can be executed and that will lead
to further feature or settings pages.
The radio menu is an example of
a feature page.
Menu levels
The menus of the Infotainment
system are divided into levels. The
current menu level is shown by
vertical lines at the edge of the screen
(e.g. main display = no line, feature
page radio = 1 line, etc.).
Introduction
Select the menu item.
■ In some menus, settings are made
by turning the multifunction knob.
■ Active functions are identified by
a ticked box or a selected option
field in front of the menu item.
■ Functions, which are switched off,
are identified by an unticked box or
an empty option field in front of the
menu item.
Selecting from a list
Press the multifunction knob to
confirm your selection.
In the following chapters of the
operating instructions, the requests
for action described above are
summarised into the following
request for action:
Select the desired list item.
■ If you move the cursor to the top or
bottom area of the display, other list
items appear. A scroll-bar on the
right edge of the display indicates
the current cursor position in the
list.
■ The last list item selected is marked
with an arrow in some lists.
■ The name of the list and the number
of items in it are displayed above
the list.
81
For this purpose, the currently
displayed menu is overlaid with the
pop-up.
You have to confirm some of the popups (e.g. traffic announcements
during a telephone conversation),
others will automatically disappear
after a short period.
In CD mode, for example, the traffic
station is displayed during a traffic
announcement when TP is active.
Selecting the main menu
Pop-up menus
Some menus are displayed in the
form of lists.
Move cursor up or down by turning
the multifunction knob.
In certain cases the display shows
additional notes and information of
the Infotainment system or other
vehicle components as a pop-up.
To access the main menu, proceed
as follows:
Turn the multifunction knob to the
right until menu item Main appears in
the footer.
82
Introduction
Press the multifunction knob.
The main menu is displayed.
Or:
Repeat the following steps until the
main menu is displayed:
Turn the multifunction knob to the left
until menu item Return is displayed
on the title bar.
Press the multifunction knob.
Or:
Press MAIN button.
The main menu is displayed.
The station last tuned in to is
displayed.
You will hear the last station tuned in.
Selecting the CD menu
To select the Audio menu, proceed as
follows:
In the radio, CD or Sound menu:
Turn the multifunction knob to the left
until menu item Return is displayed
on the title bar.
Press the multifunction knob.
The Audio menu is displayed.
If no CD is inserted, the CDChanger menu appears 3 101.
The last CD track played is displayed.
You will hear the last CD track played.
Selecting the Sound menu
Press CDC button.
The CD menu is displayed.
Selecting the radio menu
Press TUNER button.
The radio menu is displayed.
Selecting the Audio menu
In the Audio menu, change between
the wavebands FM, AM, DAB (if
available) and the CD changer to
access the Sound menu.
Press SOUND button.
The Sound menu is displayed.
Or:
You are in the Audio menu.
Select the menu item Sound.
The Sound menu is displayed.
Introduction
Leaving a menu
There are two ways to leave a menu:
Leaving a menu with the multifunction
knob
Turn the multifunction knob to the left
until menu item Return is displayed
on the title bar.
Press the multifunction knob.
The next higher-ranking menu is
displayed.
This option is not available in the main
menu.
Or:
Turn the multifunction knob to the
right until menu item Main is
displayed on the bottom bar.
Press the multifunction knob.
The main menu is displayed.
This option is not available in lists,
input menus and the main menu.
Using the function buttons to exit from
menu
You can use the CDC, TUNER,
SETTINGS, SOUND or MAIN
function buttons to exit from a menu.
■ Press CDC button.
The CD menu is displayed.
■ Press TUNER button.
The radio menu is displayed.
■ Press SETTINGS button.
The next higher-ranking menu is
displayed.
Menus opened via the SETTINGS
button can also be left via that
button.
■ Press SOUND button.
The Sound menu is displayed.
■ Press MAIN button.
The main menu is displayed.
83
Main menu
The main menu is the display which
only provides information. Three
different main menu views can be
selected: audio, Mobile phone portal
and on-board computer.
To enter the main menu, proceed as
described above.
The following information can be
displayed:
On-board computer information
Display of on-board computer
information, which was selected with
the BC button. See your car owner’s
manual.
84
Introduction
Mobile phone portal information
Display of the information provided if
a Mobile phone portal is fitted. See
operating instructions for Mobile
phone portal.
Audio Information
Display of the following audio
information:
■ Current station memory slot or CD.
■ Current station name or station
frequency or CD no., CD track no,
CD title, artist’s name or album
name plus track time and track
name.
■ If the analogue radio is enabled,
FM, AM or FMDAB is displayed
3 88.
■ If the digital radio is enabled,
DABFM or DAB plus the name of
the ensemble and the service are
displayed 3 96.
■ If the Regional function is enabled,
REG is displayed 3 93.
■ If the AS-memory is enabled, AS
will be displayed 3 91.
■ The programme name is indicated
if the RDS function is active
3 93.
■ If traffic announcements are
enabled, [TP] or [ ] will be displayed
3 93.
■ If one or more CDs are inserted, CD
in will be displayed. If a CD with
MP3 music files is being played,
MP3 is also displayed 3 101.
■ If Random CD is enabled g is
displayed 3 101.
■ If Random Magazine is enabled
h is displayed 3 101.
■ If Repeat Track is enabled i is
displayed 3 101.
■ If Scan CD is enabled l︳is
displayed 3 101.
Outside Temperature
Indication of the current outside
temperature. See your car owner’s
manual.
Time
Display of the current time. See your
car owner’s manual.
Information on the climate control
system
See car owner’s manual.
Tone settings
In the Sound menu, which is called up
via the SOUND button or via the
Audio menu, the following menu
items are listed:
■ Treble and Bass
■ Balance and Fader
■ Subwoofer (if available)
■ Position
■ Sound
■ Equalizer
Introduction
Setting Bass and Treble
The settings apply to the currently
selected audio source and are stored
separately for FM, AM, DAB (if
available) and CD changer.
1. Select the menu item Treble Bass.
2. Select Bass or Treble.
3. Turn the multifunction knob until
the desired value is set.
4. Press the multifunction knob.
Bass tones are automatically
adjusted to the driving speed to
compensate for rolling and ambient
noise. The setting cannot be
changed.
Setting the volume distribution
between right - left
1. Select the menu item Balance Fader.
2. Select menu item Balance.
3. Turn the multifunction knob until
the desired value is set.
4. Press the multifunction knob.
Setting the volume distribution
between front - rear
1. Select the menu item Balance Fader.
2. Select menu item Fader.
3. Turn the multifunction knob until
the desired value is set.
4. Press the multifunction knob.
Subwoofer
(if available)
Use this function to adjust the volume
for the separate bass speaker, if
applicable.
1. Select menu item Subwoofer.
2. Turn the multifunction knob until
the desired value is set.
3. Press the multifunction knob.
The Sound menu is displayed.
Position
Use this function to optimise the
surround sound (running times,
frequency response and volume)
using preset values.
Select menu item Position.
85
The following options are available:
■ Driver: Optimisation of surround
mapping for the driver.
■ Front: Optimisation of surround
mapping for the front seats.
■ All positions: Optimisation of
surround mapping for all seats.
Select the desired option.
Sound
If you prefer a preset sound style
there are five options to select from.
Select menu item Sound.
The following options are available:
User (user-defined sound colour, see
Equalizer, Jazz, Speech, Pop,
Classic, Rock.
Activate the desired sound style.
Equalizer
With this function, you can alter
7 sound frequencies (7 band
equalizer).
Please note that any sound
optimisations you have made are
cancelled.
86
Introduction
1. Select menu item Equalizer.
A slider is provided for each of the
sound frequencies.
2. Select the desired sound
frequency.
3. Turn the multifunction knob until
the desired setting is reached.
4. Press the multifunction knob.
If you have made settings with the
equalizer, then the User option field in
the Sound menu is automatically
enabled.
Volume settings
The Volumes menu can be called up
from the radio or CD menu.
Press SETTINGS button.
Select menu item Volumes.
The Volumes menu is displayed.
Turn the multifunction knob until the
desired value is set.
Press the multifunction knob.
SDVC
The following menu items are
available in the Volumes menu:
■ TA Volume: Volume of traffic
announcements
■ SDVC: Speed Dependent Volume
Control
■ Start-up volume: Maximum volume
when the Infotainment system is
switched on
■ External In: Volume of an external
source (for example when
connecting a mobile telephone)
TA Volume
Use this function to adjust the volume
of traffic announcements.
Select menu item TA Volume.
To compensate for ambient and
rolling noise, the Infotainment
system’s volume is adjusted to the
speed of the vehicle. You can use the
SDVC function to adjust the speeddependent volume.
Select menu item SDVC.
Turn the multifunction knob until the
desired value is set.
Press the multifunction knob.
Start-up volume
Select menu item Start-up volume.
Turn the multifunction knob until the
desired value is set.
Press the multifunction knob.
■ When switched on, the
Infotainment system starts with the
volume last selected if that volume
is below the maximum volume for
switch-on.
Introduction
■ When switched on, the
Infotainment system starts with the
maximum volume for switch-on if
that volume is below the volume
last selected.
External In
Use this function to adjust the volume
of external audio sources such as
a mobile phone.
Select menu item External In.
Turn the multifunction knob until the
desired value is set.
Press the multifunction knob.
87
88
Radio
Radio
Usage
Radio mode
Usage .......................................... 88
Station search .............................. 88
Autostore lists .............................. 91
Radio data system (RDS) ............ 93
Digital audio broadcasting ........... 96
Switch from CD mode to radio mode
as shown below:
Press TUNER button.
Press the multifunction knob.
The Audio menu is displayed.
Select waveband FM, AM or DAB (if
available).
The station last selected on the
waveband is heard and displayed.
It is possible to choose between FM
(analogue radio) and DAB (digital
radio, if available) by pressing the
TUNER button.
Station search
Station menu
You are listening to the station last
tuned in.
Selecting a waveband for radio
mode
You are listening to the station last
tuned in.
In the radio menu turn the
multifunction knob to the left until
menu item Return is displayed on the
title bar.
Starting in the radio menu proceed as
follows to access the Station menu:
Select menu item Station.
Radio
The Station menu contains the
following areas:
In the upper area, stored stations can
be called up.
In the lower area, all other receivable
stations can be called up.
In the centre area the list of receivable
stations using menu item Update
stations can be updated.
Calling up stored stations using the
Station menu
Move the cursor in the list of memory
slots (upper area).
The station currently tuned in is
marked with an arrow.
Select the station desired.
The new station tuned in is marked
with an arrow.
You will hear the newly tuned-in
station.
Calling up receivable stations using
the Station menu
Move the cursor in the list of
receivable stations (lower area).
The station currently tuned in is
marked with an arrow.
Select the station desired.
The new station tuned in is marked
with an arrow.
You will hear the newly tuned-in
station.
Update list of stations
The list of receivable stations is
updated automatically. The
performance of the station list update
varies depending on the waveband
set.
Select menu item Update stations
(centre area).
For analogue radio reception (FM or
AM):
Memory... is displayed.
The radio is muted during searching.
If the search has ended, the first
station on the updated station list will
be played.
For digital radio reception (DAB):
The entire waveband is displayed.
89
The list of stations reappears after the
search. The first station on the
updated list is played and is marked
with an arrow.
For digital radio (DAB), in addition to
the list of stations, there is also a list
of ensembles 3 96.
Automatic search
Keep the rocker switch m or n
pressed until Seek is displayed.
Or:
Select the menu item |k or the l| in
the radio menu.
Seek is displayed (only with RDS off).
The radio is muted until a station is
found.
90
Radio
■ If you know the frequency of the
desired station, then keep the
rocker switch m or n pressed
until the frequency is almost
reached.
■ After releasing the rocker switch,
the next receivable station is
automatically tuned in.
■ If the radio cannot find a station, it
switches automatically to a more
sensitive search level. If it still
cannot find a station, the last
frequency active will be set.
With digital radio (DAB), you can also
search for ensembles 3 96.
Manual station search
■ Coarse tuning:
Keep the rocker switch c or d
pressed until the desired frequency
is almost reached.
■ Fine tuning:
Fine tuning is not possible in the
DAB waveband.
Tap on the rocker switch c or d
repeatedly until the exact frequency
is reached.
Station search with the multifunction
knob
The station search with the
multifunction knob is started from the
radio menu.
The manual station search is used to
tune in to stations of known
frequencies.
Station search with the rocker switch
Keep the rocker switch c or d pressed
until the desired frequency is
reached.
Select menu item Manual.
In the DAB waveband, proceed as
follows:
Select menu item Extras and then
select menu item Manual.
The following applies to all
wavebands:
A slider with the entire waveband is
displayed.
The frequency last tuned into is
displayed.
Turn the multifunction knob until the
exact frequency is reached.
You will hear the newly tuned-in
station.
Press the multifunction knob.
The radio menu is displayed.
The newly tuned-in station is
displayed.
With digital radio (DAB), you can also
search for ensembles 3 96.
Station memory
In the FM or AM waveband, proceed
as follows:
Separate memory slots are available
for each wavelength (FM, AM, DAB):
Radio
9 memory slots are available for each
of the following wavelenght:
FM, FM-AS (automatically stored FM
stations), AM, AM-AS (automatically
stored AM stations), DAB (digital
radio) and DAB-AS (automatically
stored digital stations).
The memory slots can be selected
directly in the respective wavelength
via the station buttons or via the list of
stations.
The station tuned-in is audible again
and is displayed.
The station is stored in the desired
memory slot.
Or:
In the radio menu set the station
required.
Select menu item Store.
A list of all stored stations is
displayed.
Manual Storing
To store stations manually, the radio
needs to be in normal mode 3 91.
RDS on or RDS off are stored
together with the station.
Two options are available for manual
station storing:
Tune in to the desired station.
Keep the station button pressed on
which the tuned-in station is to be
stored.
The radio is muted for a short while
and displays the station previously
stored in the memory slot.
Select the memory slot required.
The radio menu is displayed.
The new memory slot is displayed.
The station is stored in the desired
memory slot.
91
Autostore lists
Autostore (AS)
Automatic storing (AS) of any
receivable station is possible in all
wavebands. These stations are
stored in a separate AS memory.
To automatically store stations, the
radio needs to be in AS mode.
In the radio menu enable/disable on
standby for traffic announcements if
desired 3 93.
Select menu item Autostore.
The entire waveband is displayed.
The automatic station storing is
started.
92
Radio
The 9 best receivable stations in the
selected waveband are stored to
memory slots 1 to 9.
After the stations have been stored,
the desired station can be selected by
pressing the appropriate station
button or in the station menu 3 88.
RDS is switched on automatically
when automatic storing is enabled.
First, all receivable RDS stations are
stored.
If on standby for traffic announcement
is switched on prior to or during
automatic storing, the radio will select
a memory slot with a traffic
announcement station on completion
of the automatic station search.
If on standby for traffic announcement
is switched on during automatic
storing, then the automatic station
search will remain active until at least
one traffic programme is found.
Switching between AS and
normal mode
Switching to AS mode
If the Autostore menu item is not
available in the radio menu, proceed
as follows:
Select menu item Extras.
The corresponding waveband
specific Extras menu is displayed.
Select menu item AS level.
The radio switches to the AS mode of
the selected waveband.
The radio menu appears on the
display, the menu item Autostore is
listed there.
Switching to normal mode
If the Autostore menu item is listed in
the radio menu, proceed as follows:
Select menu item Extras.
The corresponding waveband
specific Extras menu is displayed.
Select menu item FM level, AM level
or DAB Level (if available).
The radio switches to the normal
mode for the selected waveband.
The radio menu appears on the
display, the menu item Store is listed
there.
Storing new stations with AS
If you drive out of the reception area
of a stored station, new stations need
to be stored.
Radio
93
Calling up a station
If the RDS function is not switched on,
the frequency of an RDS station is
displayed.
Calling up a station via station button
You are listening to the station last
tuned in.
Select the desired station with
a station button.
Automatic RDS
Use this function to ensure that the
RDS function is enabled even when
RDS is disabled. However, the
automatic station search will also
respond to non-RDS stations.
This function is only applied if RDS is
switched off.
Select menu item RDS.
Enable/disable the Automatic tick
box.
The desired waveband and the
desired mode need to be active 3 88.
Calling up stations with the menu
To call up stations via a menu 3 88.
Radio data system (RDS)
RDS is a service provided by the radio
stations which makes it significantly
easier to find the FM channels
required and enables them to be
received without interference.
RDS is only possible on the FM band.
This function is set in the radio menu.
Press SETTINGS button.
The audio settings menu is displayed.
Select menu item RDS.
Switching RDS on/off
If you switch RDS on, the RDS
functions are enabled and only RDS
stations are sought during the
automatic station search.
If you switch RDS off, the RDS
functions will be disabled and the
automatic station search will not only
look for RDS stations.
Select menu item RDS.
Select the option field On/Off.
If the RDS function is switched on, the
programme name of an RDS station
is displayed.
RDS station selection
RDS must be switched on
Press the rocker switch m or n or
select the menu item |k or l| in the
radio menu.
The radio scrolls on to the next RDS
station stored in the list of stations.
RDS station search
To search RDS stations, proceed as
follows:
RDS must be switched on.
94
Radio
You are listening to the station last
tuned in.
Keep the rocker switch m or n
pressed until Seek is displayed.
The radio is muted until a station is
found.
If you switch the traffic programme
(TP) on before searching for stations,
the system will only search for traffic
programme stations.
Select menu item PTY selection.
Several programme types such as e.
g. News or Sport are available.
The PTY station list with the
receivable stations and your selected
programme types is displayed.
Select the desired programme type.
The radio menu appears on the
display and PTY Search is displayed.
The station last found is displayed.
You will hear the station found.
If no PTY station can be received, No
station available is displayed. Select
this message to access the radio
menu.
Select the station desired.
The new station tuned in is marked
with an arrow.
You will hear the station found.
Programme type (PTY)
Many RDS stations transmit a PTY
code describing the type of
programme broadcast (e. g. news).
The PTY code allows selection of
stations by programme type.
■ Programme type and station
selection is only possible in the FM
and DAB wavebands.
■ This function is set in the radio
menu.
Programme type selection
You are listening to the station last
tuned in.
Select menu item Extras.
Programme type station list
You can make your choice from a list
of all the receivable stations with their
programme type.
You are listening to the station last
tuned in.
Select menu item Extras.
Select menu item PTY stations.
Regional programmes
Some RDS stations transmit different
regional programmes over different
frequencies at certain times.
Radio
■ Regionalisation is only possible in
the FM waveband.
■ The RDS function must be switched
on.
■ This function is set in the radio
menu.
Press SETTINGS button.
Select menu item REG.
Three option fields are available for
regionalisation.
On
The radio remains tuned to the
regional programme while seeking
the best receivable station frequency.
Off
The radio allows switching to another
regional programme.
Automatic
The radio remains tuned to the
regional programme while seeking
the transmission frequency with the
strongest reception (AF) for a radio
programme until the programme can
no longer be received without
interference.
If the reception quality of the regional
programme is no longer sufficient for
interference-free reception, the radio
switches to another regional
programme.
Switching regionalisation on, off,
automatic
Select menu item REG.
Select option field Automatic / On /
Off.
Traffic programme (TP)
Traffic programme stations are FM
RDS stations which broadcast traffic
news.
95
Traffic stations can be recognised by
the TP symbol in the display.
Switching traffic programme on/off
■ If on standby for traffic
announcement is enabled, [TP] or
[ ] is displayed in the upper display
line.
■ If the current station is a traffic
programme station, [TP] appears in
the upper line of the display.
■ This function is set with the TP
button.
Press TP button to enable/disable
on standby for traffic
announcement.
If on standby for traffic
announcement is enabled, [ ] is
displayed. If on standby for traffic
announcement is disabled, [ ] is not
displayed.
Or:
Press SETTINGS button.
The audio settings menu is displayed.
96
Radio
Keep the rocker switch m or n
pressed until Seek is displayed.
The radio only searches for traffic
programme stations.
Enable/disable the TP tick box.
If on standby for traffic announcement
is enabled, [ ] is displayed.
If on standby for traffic announcement
is disabled, [ ] is not displayed.
■ If on standby for traffic
announcement is switched on, then
CD playback or DAB reception are
interrupted during a traffic
announcement.
■ Traffic announcements are played
at the preset traffic announcement
volume 3 86.
Traffic programme station search
This function is only possible within
the FM waveband.
Hearing traffic announcements only
Being on standby for traffic
announcements must be enabled.
Turn the knob e to the left to reduce
the volume to zero.
Deactivating traffic announcements
To switch off a traffic announcement,
e. g. during CD playback, proceed as
follows:
Press TP button.
The traffic announcement is stopped.
On standby for traffic announcement
remains switched on.
Traffic announcement while an
external source is active
The external source (e. g. mobile
phone) has priority over traffic
announcements. However, if
necessary you can hear a traffic
announcement. To do this, on
standby for traffic announcements
must be enabled.
During the phone call the radio or CD
changer are muted.
External In and [TP] appear on the
display.
Information on traffic announcements
in DAB mode 3 96.
During a traffic announcement the
message A traffic message is just
received is displayed.
The phone call is not interrupted.
Select menu item Reject to reject the
traffic announcement.
Select menu item Accept to listen to
the traffic announcement.
Digital audio broadcasting
DAB (Digital Audio Broadcast) allows
you to enjoy digital sound quality
radio.
Radio
Ensemble
Several programmes are always
combined into a so-called ensemble
on a frequency.
Scrolling through ensembles
You can scroll through ensembles
which you have already received
once (the ensembles need to be
receivable).
Press the rocker switch c or d.
The previous or next occupied
memory level appears briefly on the
display.
After that the ensemble stored on the
memory level and its first available
programme are displayed.
The first available programme of the
ensemble is played.
Selecting an ensemble
You can select ensembles directly
which you have already received
once (the ensemble needs to be
receivable).
This function is set in the radio menu.
Select the arrow next to the ensemble
name.
Select the desired ensemble.
The radio menu is displayed.
The desired ensemble and its first
available programme are displayed.
The first available programme of the
ensemble is played.
Automatic ensemble search
Keep rocker switch m or n pressed
until the ensemble search starts.
The radio is muted until an ensemble
is found.
The first available programme of the
ensemble is played.
Or:
This function is set in the radio menu.
Select the arrow next to the ensemble
name.
Select menu item Search available
ensembles.
The DAB Ensemble menu is
displayed.
The entire waveband is displayed.
97
The automatic ensemble search
starts.
After going through the wavelength,
the system changes back to the
ensemble list.
You will hear the program available
from the first ensemble. This is
marked with an arrow.
Ensemble: Manual search
Keep the rocker switch c or d pressed
until the next memory level is
displayed.
Use rocker switch c or d for manual
tuning.
Or:
Press rocker switch c or d during the
automatic ensemble search.
Use rocker switch c or d for manual
tuning.
DAB menu
DAM menu functions are set in the
radio menu.
Press SETTINGS button.
The audio settings menu is displayed.
98
Radio
■ same program type: if reception is
poor, the system will change to an
FM station with the same type of
programme, if available.
■ other programs: If reception is poor,
the system will change to any other
FM station.
■ No switch to FM: the system will not
change to any other station.
The following menu items are
available in the DAB menu:
DABFM
You can define that the same station
as on DAB is received, if possible,
when switching to FM.
Select menu item DAB.
Select menu item DABFM.
Change to: same program, same
program type, other programs or No
switch to FM
■ same program: if reception is poor,
the system will change to the
relevant FM station, if available.
DAB AF
You can define that when you drive
into another ensemble area the same
station is received as in the previous
ensemble area.
This function can only be performed if
the station is included in the new
ensemble.
Select menu item DAB.
Enable/disable the DAB AF tick box
to change the setting.
DAB Compr.
You can define that very quiet sounds
(e. g. some passages of classical
pieces) are played more loudly
(volume bandwidth compression).
This makes them more audible when
rolling or ambient noise is high.
Select menu item DAB.
Enable/disable the DAB Compr. tick
box to change the setting.
Announcement types
You can define for which
announcements radio or CD playback
will be interrupted. You can select
more than one announcement type at
the same time.
Availability of the announcements
depends on the broadcasting
stations.
Select menu item DAB.
Select menu item Announc. types.
The Announc. types list is displayed.
Enable/disable the tick box required.
Radio
■ The messages of all
announcement types are issued via
a pop-up window using an increase
in volume.
■ Alarm and Traffic announcements
have a higher priority and may
interrupt other announcement
types.
■ An announcement can be
terminated with the TP button.
DAB: Radio text
Some DAB stations additionally
broadcast information (e. g. news) as
text on the display.
■ Radio text is only available in the
DAB waveband.
■ Not all stations broadcast radio text
continuously.
Radio text
99
The first 20 to 25 characters of the
radio text can also be shown in the
info menu.
9 Warning
Since the display of radio texts
may distract you from the road,
you should use the DAB radio text
function only when the vehicle is
stationary.
Select menu item Extras.
Select menu item Radio text.
The radio text received from the
tuned-in DAB station is displayed.
Turn the multifunction knob to
navigate up and down in the menu.
Showing and hiding Radio text in
menu information
Radio text can be shown or hidden in
the info menu (INFO button). The
factory setting shows radio text.
Only the first 20 to 25 characters can
be displayed in the info menu. For
information on how to display all of the
radio text see “Radio text”.
This function is set in the radio menu.
Press SETTINGS button.
Select menu item DAB.
Enable/disable the Radio text tick
box.
Traffic Announcement in DAB Mode
If the current DAB station provides
traffic programmes and this type of
announcement is enabled, the
announcements of the DAB station
will be switched on.
100
CD Player
CD Player
General information ................... 100
Usage ........................................ 101
General information
The CD player is equipped with
a changer unit for six CDs.
You can play standard commercial
CDs with a diameter of 12 cm with this
unit. CDs with a diameter of 8 cm can
only be played with an adapter.
Caution
Under no circumstances place
DVDs, single-CDs with a diameter
of 8 cm or shaped CDs in the audio
player.
You must not put any stickers on
CDs. These discs can get jammed
in the CD drive and ruin the drive.
An expensive replacement of the
device will then be necessary.
■ The format of the CD must be
ISO 9660 Level 1, Level 2 or
JOLIET. All other formats cannot be
played back reliably.
■ Audio CDs with copy protection,
which are not in compliance with
the audio CD standard, may not
play correctly or not at all.
■ You can also use the Infotainment
system to play CDs containing MP3
music data and Mixed Mode CDs.
■ Self-recorded CD-Rs and CD-RWs
are more vulnerable to mishandling
than prerecorded CDs. Correct
handling, especially in the case of
self-recorded CD-Rs and CD-RWs,
must be ensured. See below.
■ Self-recorded CD-Rs and CD-RWs
may not play correctly or not at all.
In such cases it is not the
equipment that is at fault.
■ Avoid leaving fingerprints when you
change CDs.
■ Put CDs back in their sleeves
immediately after removing them
from the CD player in order to
protect them from damage and dirt.
■ Dirt and liquids on CDs can smear
the lens of the CD player inside the
device and cause faults.
■ Protect CDs from heat and direct
sunlight.
■ The following restrictions apply for
data stored on an MP3 CD:
CD Player
When naming albums and tracks,
umlauts or special characters
should not be included.
Applicable playlist extensions:
"m3u" or "pls".
When generating (coding) the MP3
files from audio data, a bitrate of up
to max. 256 kbit/s should be used.
To use MP3 files in the Infotainment
system, the MP3 files must have
the file extension ".mp3".
■ A total of 65535 playable tracks can
be stored on one CD. It will not be
possible to play any additional
tracks.
■ A maximum of 253 albums can be
saved on an MP3 CD for use with
the Infotainment System. The
albums can be selected individually
with the Infotainment system.
Usage
Inserting a CD
Press j button.
The CD-Changer menu is displayed.
101
In the upper area of the display CD
in appears for audio CDs, with an
additional MP3 for MP3 CDs and the
CD name for text CDs.
You do not leave the CD changer
menu until you press the CDC button.
This allows you to insert more CDs.
CD playback
In the CD-Changer menu, radio mode
is always on to bridge CD changes.
Select an empty CD compartment.
Please insert CD now is displayed on
the bottom bar of the display.
Insert the CD into the CD slot.
The CD is automatically drawn in.
■ Do not prevent or assist the CD
being drawn in.
■ reading... CD X appears on the
display (X = respective number of
the CD slot).
The tick box of the CD slot marked is
enabled.
Switch from radio mode to CD mode
as follows:
One or several CDs are in the CD
changer.
Press CDC button.
The CD menu is displayed.
You’re listening to the CD in the CD
compartment selected.
102
CD Player
Depending on the type of CD,
different CD information is displayed
in the CD menu. Text information only
appears if Show title is switched on in
the Extras menu, see below
"Activating/deactivating CD text".
If no CDs are inserted, the CDChanger menu is displayed.
Track selection
For audio CDs, the track is selected
within the CD, for MP3 and Mixed
mode CDs within the album selected.
You’re listening to a track.
Tap on the rocker switch m or n
repeatedly until the desired track is
displayed.
The track required is played.
Or:
In the CD menu turn the multifunction
knob until menu item |k or l| is
marked.
Press the multifunction knob
repeatedly until the desired track is
displayed.
The track required is played.
Or:
In the CD menu select menu item
Track.
A list of all tracks is displayed.
The track currently being played is
marked with an arrow.
Select the track required.
The CD menu is displayed.
The newly selected track is displayed
and played.
In the CD menu select the menu item
__ or 66.
The CD changer plays the CD at
increased speed and reduced
volume.
The fast search is not audible with
MP3 tracks.
Again select menu item __ or 66
when the desired passage is
reached.
Fast search forwards/
backwards
You’re listening to a track.
Press the appropriate number key.
The CD changer is muted.
If a CD has not yet been read
reading... appears on the display.
The CD compartment is selected and
the track is displayed.
You’re listening to the CD in the CD
compartment selected.
If no other CDs are inserted, playback
of the current CD is continued.
Or:
To find a certain point on a CD,
proceed as follows:
You’re listening to a track.
Keep rocker switch m or n pressed
until you reach the point you want.
The CD changer plays the CD at
increased speed and reduced
volume.
The fast search is not audible with
MP3 tracks.
Or:
Selecting a CD
CD Player
Tap on the rocker switch d or c
repeatedly until the desired CD
compartment is marked.
The CD changer is muted.
If a CD has not yet been read
reading... appears on the display.
The CD compartment selected and
the track are displayed.
You’re listening to the CD in the CD
compartment selected.
If no other CDs are inserted, playback
of the current CD is continued.
Or:
Starting from the CD menu, select the
desired CD as shown below:
Select menu item CD.
A CD album list appears on the
display.
The CD selected is indicated by being
underlined.
Select the desired CD.
The CD menu is displayed.
The newly selected CD is displayed
and played.
■ If it is an MP3 or Mixed Mode CD
with several albums, these are also
shown on the list
■ If it is a Mixed Mode CD, the tracks
from the audio part are played first.
Album or CD selection for MP3
or Mixed CDs
You are listening to a track from an
album.
Press the rocker switch c or d until the
album or CD you want appears on the
display.
You will hear the first track from the
album or CD selected.
Or:
You are in the CD menu.
Select menu item Album.
A CD album list appears on the
display.
The current CD is underlined and the
album which has just been played is
marked with an arrow.
Select the album or CD you require.
The CD menu is displayed.
103
The first track from the newly selected
album or CD is shown on the display.
The newly selected track is played.
CDC Extras
In the CD menu select the Extras
menu item.
The CD Extras menu is displayed.
The following option fields are
available in the Extras menu:
Normal
With this option, the subsequent
functions Random CD/Random
Magazine, Repeat Track and Scan
CD will be deactivated
104
CD Player
Random CD (Random)
Audio CD:
When random play is selected for an
audio CD, the tracks on a CD will be
played in random order.
MP3 CD:
If there are 5 or fewer albums on an
MP3 CD, 4 tracks per album are
played in random order. If there are
more than 5 albums on the MP3 CD,
1 track respectively is played per
album.
Mixed Mode CD:
On a Mixed Mode CD, the tracks from
the audio part are played first in
random order. Then the tracks from
the MP3 part are played as described
above.
Switching on Random CD
Select the Random CD option field.
The g symbol appears in the
display.
Random Magazine (Random)
With Random Magazine, the tracks
on all CDs inserted will be played in
random order.
Audio CD:
4 tracks per CD are played before
changing to the next CD.
MP3 CD:
If there are 5 or fewer albums on an
MP3 CD, 4 tracks per album are
played before changing to the next
CD.
If there are more than 5 albums, one
track per album is played before
changing to the next CD.
Mixed Mode CD:
On a Mixed Mode CD, first of all
4 tracks from the audio part are
played in random order and then the
system changes to the next CD. The
next time the system changes to the
Mixed Mode CD, the tracks from the
MP3 part are played as described
above.
These rules protect the mechanical
system and relatively long
interruptions in play caused by
changing CDs are avoided.
Switching on Random Magazine
Select the Random Magazine option
field.
The h symbol appears in the
display.
Switching off Random CD or
Random Magazine
Select the Normal option field.
The g or h symbol is no longer
displayed.
Repeat Track
The CD/MP3 changer repeats the
current track using the Repeat
function.
Switching on Repeat Track
A track will be played.
Hold down the rocker switch c until
the i symbol appears in the display.
Repeat On appears in the display for
a few seconds.
This track will be repeated constantly.
Or:
Select the Repeat Track option field.
The i symbol appears in the
display.
This track will be repeated constantly.
CD Player
Switching off Repeat Track
Hold down the rocker switch c until
the i symbol is no longer displayed.
Repeat Off appears in the display for
a few seconds.
Or:
Select a new track.
Or:
Select the Normal option field.
The i symbol is no longer displayed.
Switching off Scan CD
Hold down the rocker switch d until
the 6⃒ symbol is no longer displayed.
Or:
Select a new track.
Or:
Select the Normal option field.
The CD menu appears in the display.
The 6⃒ symbol is no longer
displayed.
Scan CD
With the Scan CD function, the CD/
MP3 changer plays each track for 10
seconds.
Switching on Scan CD
A track will be played.
Hold down the rocker switch d until
the 6⃒ symbol appears in the display.
Or:
Select the Scan CD option field.
The 6⃒ symbol appears in the
display.
Activating/deactivating CD text
Different information can be
displayed depending on whether CD
text is activated or deactivated.
Activated
= CD name
Track name
Artist name
Album name
Deactivated = Track number
CD-number
Album name
Playing time
105
Not all CDs contain CD text. In these
cases, the track numbers and playing
times are always displayed.
Activate/deactivate the Show title
check box.
Traffic announcement in CD mode
Traffic announcements can be
received while a CD is playing. Traffic
programme (TP) 3 93.
A traffic announcement can be
terminated with the TP button and the
current CD will continue to play.
Removing a CD
Press the j button.
The CD-Changer menu appears in
the display.
106
CD Player
The last station set or the last CD
played will be played.
1. Select the desired CD tray.
The CD changer ejects the CD.
If a CD is ejected or inserted, the
last radio station used will
automatically be played.
2. Remove the CD.
If the CD is not removed, it will
return to the player automatically
after a short time.
It is possible to remove all the CDs
from the CD changer at once.
3. Hold down the j button until
a pop-up menu appears in the
display, asking Eject all CDs?
4. Confirm OK by pressing the
multifunction knob.
The CDs will be ejected one after
the other.
■ If a CD is not removed, it will return
to the player automatically and the
ejection process will be stopped.
■ If the CD magazine is empty, the
text “Magazine empty” appears on
the display for about 5 seconds.
CD Player
107
108
Index
A
Activating CD player................... 101
AM................................................ 88
AS................................................. 91
Automatic search.......................... 88
Automatic switch off...................... 78
Autostore lists............................... 91
B
F
Fader............................................ 84
FM................................................ 88
G
General information.............. 74, 100
I
Ignition logic.................................. 78
Balance......................................... 84
Bass.............................................. 84
L
C
M
Calling up stations........................ 88
CD changer........................ 100, 101
CD, eject..................................... 101
CD Extras................................... 101
CD, insert.................................... 101
CD text........................................ 101
D
DAB........................................ 88, 96
DAB menu.................................... 96
DAB radio text.............................. 96
Digital audio broadcasting............ 96
E
Ensemble...................................... 96
External In.................................... 86
Leaving a menu............................ 78
Main display.................................. 78
Manual station search.................. 88
Menu operation............................. 78
Multifunction knob......................... 78
O
Operation ..................................... 78
Overview ...................................... 76
P
Pop-up menu................................ 78
Position......................................... 84
Programme type........................... 93
PTY............................................... 93
109
R
Radio data system (RDS) ............ 93
Radio text..................................... 96
Random...................................... 101
Random album........................... 101
Regional programmes.................. 93
Repeat track............................... 101
S
Scan CD..................................... 101
SDVC............................................ 86
Setting the volume........................ 78
Show title.................................... 101
Sound settings.............................. 84
Speed dependent volume
control (SDVC).......................... 86
Starting CD replay...................... 101
Start-up volume............................ 86
Station list..................................... 88
Station memory............................ 88
Station menu................................ 88
Station search............................... 88
Store............................................. 88
Subwoofer.................................... 84
Switching the Infotainment
system on or off......................... 78
T
TA volume.................................... 86
Theft-deterrent feature ................. 75
Tone settings................................ 84
TP................................................. 93
Traffic announcements................. 93
Traffic programme........................ 93
Treble........................................... 84
U
Update stations............................. 88
Usage................................... 88, 101
User.............................................. 84
Using the CD player................... 101
Using the Infotainment system..... 78
V
Volume......................................... 78
Volume settings............................ 86
110
CD 30 / CD 30 MP3
Introduction ................................ 112
Radio ......................................... 123
CD Player .................................. 129
AUX input ................................... 133
Index .......................................... 134
112
Introduction
Introduction
General information ................... 112
Theft-deterrent feature ............... 113
Overview .................................... 114
Operation ................................... 117
Tone settings ............................. 120
Volume settings ......................... 121
General information
The Infotainment system provides
you with state-of-the-art in-car
infotainment.
The radio has nine automatic station
memories for each available
waveband (FM, AM).
The digital sound processor provides
you with several preset equalizer
modes for sound optimisation.
The integrated CD player will
entertain you with audio CDs and
MP3 CDs.
The on-board computer can be
accessed from the Infotainment
System. For details please consult
the Owner’s Manual for your car.
Furthermore, you can connect an
external source, such as a mobile
phone to the Infotainment system.
An audio source connected to the
AUX input of your vehicle, e.g.
a portable CD player or an MP3
player can be played back via the
loudspeakers in the Infotainment
system.
In addition the Infotainment system
can be equipped with a Mobile phone
portal.
Optionally, the Infotainment system
can be operated using controls on the
steering wheel.
The well-thought-out design of the
control elements and the clear
displays enable you to control the
system easily and intuitively.
Important information on
operation and traffic safety
9 Warning
The Infotainment system has to be
used so that the vehicle can be
driven safely at all times. If in doubt
stop your vehicle and operate the
Infotainment system while the
vehicle is stationary.
Introduction
Radio reception
Radio reception may be disrupted by
static, noise, distortion or loss of
reception due to
■ changes in distance from the
transmitter,
■ multi-path reception due to
reflection,
■ shadowing.
Theft-deterrent feature
The Infotainment system is equipped
with an electronic security system for
the purpose of theft deterrent.
The Infotainment system therefore
functions only in your vehicle and is
worthless for a thief.
113
114
Introduction
Overview
Control elements on instrument panel
Introduction
1
2
3
4
5
6
RDS .................................... 125
Display programme name
or transmission frequency
of the station ....................... 125
Update station list ............... 123
AS ....................................... 125
Activate/deactivate AS
level ..................................... 125
Automatic station store ....... 125
TP ....................................... 125
Traffic programme ............... 125
REG .................................... 125
Regional programme on/off 125
FM/AM ................................ 123
Radio mode/switch
between FM and AM ........... 123
AUX input: Switch audio
source to the external input 123
BC ....................................... 114
Trip computer ...................... 114
7
m ....................................... 120
Radio: Page back in
station memory, manual
and automatic station
search ................................. 123
CD/MP3: Previous track,
fast track backward ............. 130
Change menu values .......... 117
8 oe knob ....................... 117
Press: Switch on/off
Infotainment system ............ 117
Turn: Adjust volume ............ 117
9 CD/MP3 .............................. 130
CD/MP3 mode .................... 130
Changing the display type . . 130
Activate/deactivate
random playback ................ 130
MP3: Display most
recently played album ......... 130
10 OK ....................................... 117
Confirm selection or page
forward in settings menu ..... 117
115
11 n ....................................... 123
Radio: Page forward in
station memory, manual
and automatic station
search ................................. 123
CD/MP3: Next track, track
fast forward ......................... 130
Change menu values .......... 117
12 1...9 ..................................... 123
Station buttons .................... 123
13 SETTINGS .......................... 121
Volume settings .................. 121
System settings ................... 117
14 Audio/MP3 CD slot .............. 130
15 SOUND ............................... 120
Enter sound settings ........... 120
16 j ......................................... 130
Eject CD .............................. 130
116
Introduction
Steering wheel audio controls
1
2
3
Thumbwheel ....................... 117
Turn: TID (Triple-InfoDisplay): Manual station
search ................................. 117
Turn: GID (Graphic-InfoDisplay): Previous/next
trip computer entry,
manual station search
(when combined with a trip
computer, turning the
thumbwheel has no radio
finction) ............................... 117
Press: TID: no function ....... 117
Press: GID: call up/reset
trip computer, select a trip
computer entry .................... 117
q button ............................. 123
Radio: Next stored station . . 123
CD: Start CD playback ........ 130
MP3: Next album ................ 130
p button ............................ 130
Switch between radio/CD/
MP3 and AUX mode mode . 130
4
5
6
d button ............................... 123
Radio: search up, scroll
forwards through station
memory ............................... 123
CD: Short press: Skip one
track forwards ..................... 130
CD: Long press: fast
forward ................................ 130
c button ............................... 123
Radio: search down, scroll
back through station
memory ............................... 123
CD: Short press: Skip one
track backwards .................. 130
CD: Long press: fast
backwards ........................... 130
o ................................... 117
Turn: adjust volume ............ 117
Hold: adjust volume
continously .......................... 117
Introduction
The steering wheel remote control
has other functions in conjunction
with the Mobile phone portal, see
chapter for Mobile phone portal.
Operation
Control elements
The Infotainment system is operated
optionally via:
■ the central control unit in the
instrument panel 3 114
■ controls on the steering wheel
3 114.
The operation of the Infotainment
system can vary with the information
display type. There are two different
information displays available: TripleInfo-Display (TID) and Graphic-InfoDisplay (GID). See "Information
displays" in the Owner's manual for
further information.
Switching the Infotainment
system on or off
Press the e knob.
The audio source last set is played.
Switching on and off with the ignition
key (automatic switch-on)
If the automatic switch-on is enabled,
the Infotainment system can also be
switched off and on again via the
ignition.
This link between the radio and
ignition is preset in the factory, but this
can be disabled.
■ If the automatic switch-on is
disabled, the Infotainment system
can only be switched on with the
e button or by inserting a CD and
off with the e button.
■ If the Infotainment system is
switched off when the ignition is
switched off, regardless of the
current setting of the automatic
switch-on it, can only be switched
on via the e button and by inserting
a CD.
■ The automatic start is always
enabled after the Infotainment
system has been disconnected
from the operating voltage and reconnected.
117
Enable/Disable Ignition Logic
TID only:
1. Press SETTINGS button to
display Audio.
2. Press m button to display
System.
3. Press OK until Ign.Logic ON or
Ign.Logic OFF (depending on the
current setting) is displayed.
4. Select the desired status with the
m n buttons.
After a few seconds Audio is
displayed, followed by the relevant
audio source.
After changing the settings, press the
SETTINGS button again and move
back one level in the Settings menu.
Once you have changed settings,
press one of the function buttons FM/
AM, CD/MP3 or BC to display the
relevant function.
GID only:
1. Press SETTINGS button to
display Audio and System.
2. Press m button to display
System.
118
Introduction
3. Press OK to select System.
4. Press m until a selected or
unselected box for "Ign.Logic"
(depending on the current setting)
is displayed.
5. Press OK to change the current
setting.
After changing the settings, press the
SETTINGS button again and move
back one level in the Settings menu.
Once you have changed settings,
press one of the function buttons FM/
AM, CD/MP3 or BC to display the
relevant function.
Press m until Main is displayed, then
confirm with OK to leave the
Settings menu.
Press n until Return appears, then
confirm by pressing OK to move back
one level in the Settings menu.
Setting the volume
Automatic switch-off
The Infotainment system switches
itself off automatically after one hour
if you switch it on with the ignition off.
Speed dependent volume control
(SDVC)
When SDVC is activated 3 121, the
volume is adapted automatically to
make up for the road and wind noise
when driving.
Turn the o knob.
■ The Infotainment system plays at
the volume last set, provided the
volume was below the maximum
switch-on volume 3 121.
■ Traffic announcements and
external audio sources are inserted
at a preset minimum volume
3 121.
■ The volume of an audio source
connected via the AUX input can be
adjusted to suit the volumes of the
other audio sources (e.g. radio)
3 121.
■ If the respective source is enabled,
the volume of the traffic
announcements, the external audio
sources and the radio and CD can
be adjusted separately.
External source
An external source, e.g. a mobile
phone or a navigation system, can be
connected to the Infotainment
system.
The external source is automatically
transferred through via a control
signal from the device connected,
even when the Infotainment system is
off. In this case External In is
displayed.
We recommend having appliances
installed by an Opel Partner.
AUX input
An external audio source, e.g.
a portable CD player, can be
connected via the AUX input of your
vehicle. Stereo sound from this
source is played back via the
loudspeakers of the Infotainment
system.
The connector is located in the area
of the centre console.
Always ensure that the AUX input
remains clean and dry.
Introduction
For the best possible audio quality,
the external audio source should be
set to maximum volume. On units with
line-out, the output signal is available
at a fixed audio level and cannot be
changed.
To avoid overriding the AUX input, the
effective output voltage of the
external audio source must be lower
than 1.5 V.
Main display
The main menu is the display that
appears after the Infotainment
system is switched on.
The display varies depending on the
equipment level of the vehicle.
The following information can be
displayed:
Trip computer information
Display of on-board computer
information, which was selected with
the BC button. See your car owner’s
manual.
Mobile phone portal information
Display of the information provided if
a Mobile phone portal is fitted. See
operating instructions for Mobile
phone portal.
Audio Information
Display of the following audio
information:
■ Current waveband or AUX/CD.
■ Current station name or station
frequency or CD track number or
CD track name.
■ If the Regional function is enabled,
REG is displayed 3 125.
■ If the AS level is enabled, AS will be
displayed 3 125.
■ If the RDS function is enabled,
RDS is displayed 3 125.
■ If traffic announcements are
enabled, [TP] or [ ] will be displayed
3 125.
■ If a CD is inserted, either CD or CD
in will be displayed. If a CD with
MP3 music files is being played,
MP3 is also displayed 3 130.
119
■ If Random CD is enabled either
RDM or g is displayed 3 130.
Outside Temperature
Indication of the current outside
temperature. See your car owner’s
manual.
Time
Display of the current time. See your
car owner’s manual.
Information on the climate control
system
See car owner’s manual.
120
Introduction
Tone settings
Press the SOUND button to make the
following settings:
■ Fader
■ Balance
■ Bass
■ Treble
■ Sound
Setting the volume distribution
between front - rear
1. Press the SOUND button.
Fader appears on the display.
2. Adjust the value with m or n.
After a few seconds the most
recent display reappears.
3. Once you have changed settings,
press one of the function buttons
FM/AM, CD/MP3 or BC to display
the relevant function.
4. Press the SOUND button until the
last active display appears again.
Setting the volume distribution
between right - left
1. Press the SOUND button until
Balance appears on the display.
2. Adjust the value with m or n.
After a few seconds the most
recent display reappears.
3. Once you have changed settings,
press one of the function buttons
FM/AM, CD/MP3 or BC to display
the relevant function.
4. Press the SOUND button until the
last active display appears again.
Setting Bass and Treble
Make sure that any sound
opitmisations (see below "Sound")
are disabled.
The Bass and Treble settings apply to
the current audio source and are
stored separately for FM, AM and CD.
1. Press the SOUND button until
Bass or Treble appear on the
display.
2. Adjust the value with m or n.
After a few seconds the most
recent display reappears.
3. Once you have changed settings,
press one of the function buttons
FM/AM, CD/MP3 or BC to display
the relevant function.
4. Press the SOUND button until the
last active display appears again.
Sound
1. Press the SOUND button until
Sound and the set tone colour
appear on the display.
2. Select a tone colour with m or
n.
The available tone colour settings
are: Rock, Disco, Classic, Jazz,
Vocal and Off.
After a few seconds the most
recent display reappears.
3. Once you have changed settings,
press one of the function buttons
FM/AM, CD/MP3 or BC to display
the relevant function.
4. Press the SOUND button until the
last active display appears again.
Introduction
Sound settings in the Settings
menu
Alternatively, the settings for Fader,
Balance and Sound can be changed
in the Settings menu:
1. Press the SETTINGS button.
2. Press OK until the relevant
function is displayed.
3. Adjust the value or select a tone
colour (see above) with m or n.
After a few seconds the most
recent display reappears.
4. Press the SETTINGS button
again and move back one level in
the Settings menu.
5. Once you have changed settings,
press one of the function buttons
FM/AM, CD/MP3 or BC to display
the relevant function.
Volume settings
Press SETTINGS button.
The following menu items are
available:
■ AUX Vol. AUX input volume, e.g.
a portable CD player
■ TA Volume: Volume of traffic
announcements
■ SDVC: Speed Dependent Volume
Control
■ On Volume: Maximum volume
when the Infotainment system is
switched on
■ Ext. In Vol.: Volume of an external
source (for example when
connecting a mobile telephone)
AUX Vol.
Use this function to adjust the AUX
input level in relation to other audio
sources (e.g. radio). This function is
only available when the AUX audio
source is enabled.
1. Set the external audio source to
maximum volume.
2. Press the SETTINGS button.
3. Press OK to select the relevant
function.
121
4. Adjust the value with m or n.
After a few seconds the most
recent display reappears.
5. Press the SETTINGS button
again and move back one level in
the Settings menu.
6. Once you have changed settings,
press one of the function buttons
FM/AM, CD/MP3 or BC to display
the relevant function.
TA Volume
If the TP function is switched on, the
system increases the volume for
traffic announcements by default.
This function allows setting
a minimum volume for traffic
announcements.
1. Press the SETTINGS button.
2. Press OK to select the relevant
function.
3. Adjust the value with m or n.
After a few seconds the most
recent display reappears.
4. Press the SETTINGS button
again and move back one level in
the Settings menu.
122
Introduction
5. Once you have changed settings,
press one of the function buttons
FM/AM, CD/MP3 or BC to display
the relevant function.
The volume is only set to a minimum
for announcements if the current
volume setting is lower than the
minimum announcement volume
selected.
SDVC
To compensate for ambient and
rolling noise, the Infotainment
system’s volume is adjusted to the
speed of the vehicle. You can use the
SDVC function to adjust the speeddependent volume.
1. Press the SETTINGS button.
2. Press OK to select the relevant
function.
3. Adjust the value with m or n.
After a few seconds the most
recent display reappears.
4. Press the SETTINGS button
again and move back one level in
the Settings menu.
5. Once you have changed settings,
press one of the function buttons
FM/AM, CD/MP3 or BC to display
the relevant function.
On Volume
1. Press the SETTINGS button.
2. Press OK to select the relevant
function.
3. Adjust the value with m or n.
After a few seconds the most
recent display reappears.
4. Press the SETTINGS button
again and move back one level in
the Settings menu.
5. Once you have changed settings,
press one of the function buttons
FM/AM, CD/MP3 or BC to display
the relevant function.
The maximum switch on volume
selected is used only if the volume
prior to switching off was higher than
the maximum switch on volume and
the Infotainment system has been off
for at least five minutes with the
ignition off.
Ext. In Vol.
Use this function to set a minimum
volume of external audio sources
such as a mobile phone.
1. Press the SETTINGS button.
2. Press OK to select the relevant
function.
3. Adjust the value with m or n.
After a few seconds the most
recent display reappears.
4. Press the SETTINGS button
again and move back one level in
the Settings menu.
5. Once you have changed settings,
press one of the function buttons
FM/AM, CD/MP3 or BC to display
the relevant function.
Radio
Radio
Usage ........................................ 123
Station search ............................ 123
Autostore lists ............................ 125
Radio data system (RDS) .......... 125
Usage
Station search
Radio mode
Automatic search
Switch from CD or AUX mode to radio
mode as shown below:
Press FM/AM button.
You are listening to the station last
tuned in.
123
Keep m or n pressed until Seek is
displayed.
Selecting a waveband
The Infotainment system provides
two wavebands: FM and AM. In
addition, each of the wavebands has
an autostore memory location (AS)
where stations can be automatically
stored 3 125.
The radio is on.
Press FM/AM button briefly.
The radio switches between FM, FMAS, AM and AM-AS.
The station last selected on the
waveband is heard and displayed.
The radio is muted until a station is
found.
If the radio cannot find a station, it
switches automatically to a more
sensitive search level. If it still cannot
find a station, the last frequency
active will be set.
124
Radio
Manual station search
The manual station search is used to
tune in to stations of known
frequencies.
Keep m or n pressed until MAN is
displayed.
■ Coarse tuning:
Hold m or n down until the
desired frequency is almost
reached.
■ Fine tuning:
Tap m or n until the exact
frequency is reached.
If RDS 3 125 is deactivated in the FM
waveband or the AM waveband is
active, tapping m or n moves the
frequency by on increment.
The station is stored in the desired
memory slot.
RDS on or RDS off 3 125 are stored
together with the station.
Station memory
Station list
Separate memory slots are available
for each wavelength (FM, AM):
9 memory slots are available for each
of the following wavelenght:
FM, FM-AS (automatically stored FM
stations), AM, AM-AS (automatically
stored AM stations).
The memory slots can be selected
directly in the respective wavelength
via the station buttons.
Manual storing
Tune in to the desired station.
Keep the station button pressed on
which the tuned-in station is to be
stored.
The radio is muted for a short while
and displays the station previously
stored in the memory slot.
The station tuned-in is audible again
and is displayed.
The Infotainment system stores all
receivable FM stations in the
background.
The list of receivable stations is
updated automatically if the radio
searches for a TP station or an
automatic storage run is performed
using the Autostore (AS) function.
RDS stations 3 125 are sorted by
radio company in the station list (HR1,
HR2...)
Update list of stations
Press the RDS button until you hear
the confirmation signal.
The display shows: Memory FM
followed by MEM and the continuous
frequency.
Radio
Autostore lists
Activate/deactivate AS level
Tap the AS button.
When the AS level is active, the
display shows AS.
The AS level can also be activated
and deactivated using the FM/AM
button 3 123.
Autostore (AS)
Automatic storing (AS) of any
receivable station is possible in all
wavebands. These stations are
stored in a separate AS memory.
To automatically store stations,
proceed as follows:
1. Select the required waveband.
2. Enable/disable on standby for
traffic announcements if desired
3 125.
3. Hold down the AS button until you
hear the confirmation signal.
The radio changes over to the AS
level of the selected waveband (FMAS or AM-AS).
The automatic station storing is
started.
The 9 best receivable stations in the
selected waveband are stored to
memory slots 1 to 9.
After the stations have been stored,
the desired station can be selected by
pressing the appropriate station
button.
RDS is switched on automatically
when automatic storing is enabled.
First, all receivable RDS stations are
stored.
If on standby for traffic announcement
is switched on prior to or during
automatic storing, the radio will select
a memory slot with a traffic
announcement station on completion
of the automatic station search.
If on standby for traffic announcement
is switched on during automatic
storing, then the automatic station
search will remain active until at least
one traffic programme is found.
125
Storing new stations with AS
If you drive out of the reception area
of a stored station, new stations need
to be stored.
Calling up a station
The desired waveband and the
desired mode need to be active
3 123.
Hold down the AS button to go to the
AS level.
Select the storage location with the
storage buttons.
Radio data system (RDS)
RDS is a service provided by the radio
stations which makes it significantly
easier to find the FM channels
required and enables them to be
received without interference.
RDS is only possible on the FM band.
Switching RDS on/off
If RDS is switched on, the RDS
functions are enabled and only RDS
stations are sought during the
automatic station search.
126
Radio
If you switch RDS off, the RDS
functions will be disabled and the
automatic station search will not only
look for RDS stations.
Press the RDS button to activate
RDS.
If the RDS function is switched on,
RDS and the programme name of an
RDS station is displayed.
If the RDS function is not switched on,
the frequency of an RDS station is
displayed, RDS is not displayed.
Keep m or n pressed until Seek is
displayed.
The radio is muted until a station is
found.
If you switch the traffic programme
(TP) on before searching for stations,
the system will only search for traffic
programme stations.
Programme type (PTY)
Many RDS stations transmit a PTY
code describing the type of
programme broadcast (e.g. news).
The PTY code allows selection of
stations by programme type.
If the station currently selected is not
an RDS station, the radio searches
automatically for the next receivable
RDS station.
To deactivate RDS, press the RDS
button again.
RDS station selection
RDS must be switched on.
Press m or n.
The radio scrolls on to the next RDS
station stored in the list of stations
3 123.
RDS station search
To search RDS stations, proceed as
follows:
RDS must be switched on.
Radio
Programme type selection
1. Press the SETTINGS button.
2. Press OK until PTY is displayed.
3. Select one of the 29 programme
types e.g. News or
Entertainment with m or n.
4. Hold down the OK button until the
station search begins.
After station search starts the radio
display appears.
If the radio does not find an
appropriate station, it plays the
station to which the radio was most
recently tuned.
Regional programmes
Some RDS stations transmit different
regional programmes over different
frequencies at certain times.
Switching on regionalisation
The RDS function must be switched
on.
Press the REG button briefly.
REG is shown on the display.
Automatic regionalisation
Press the REG button for a few
seconds.
REG Auto On appears on the display
and then the display shows REG.
During the search for the frequency
with the best reception, the radio
stays with the regional programme it
is tuned to until the reception signal
becomes too weak. Then it switches
to a different regional programme.
Press the REG button again for a few
seconds.
REG Auto Off appears on the display
and then the display shows REG.
During the search for the frequency
with the best reception, the radio
stays with the regional programme it
is tuned to.
Switching off regionalisation
Press the REG button briefly again.
REG is no longer shown on the
display.
The radio allows switching to another
regional programme.
127
Traffic programme (TP)
Traffic programme stations are FM
RDS stations which broadcast traffic
news.
Traffic stations can be recognised by
the TP symbol in the display.
Switching traffic programme on/off
■ If radio traffic announcement is
enabled, [TP] or [ ] is displayed.
■ If the current station is a traffic
programme station, [TP] appears in
the display.
■ If the current station is a not traffic
programme station, the radio will
automatically search for the traffic
station with the best reception.
[ ] does not appear on the display.
Press the TP button to switch on
TP.
[ ] is displayed.
■ The automatic station search
feature searches only for traffic
announcements.
■ During automatic search or if
reception of a traffic programme is
not possible, [ ] is displayed.
128
Radio
■ If on standby for traffic
announcement is switched on, then
CD playback is interrupted during
a traffic announcement.
■ Traffic announcements are played
at the preset traffic announcement
volume 3 121.
Press the TP button again to switch
TP off.
[ ] is no longer displayed.
Traffic programme station search
This function is only possible within
the FM waveband.
Keep the m or n pressed for
approximately 1 second.
The radio only searches for traffic
programme stations.
Hearing traffic announcements only
Being on standby for traffic
announcements must be enabled.
Turn the knob o to the left to
reduce the volume to zero.
Traffic announcements are played at
the preset volume for traffic
announcement 3 121.
Deactivating traffic announcements
To switch off a traffic announcement,
e.g. during CD playback, proceed as
follows:
Press TP button.
The traffic announcement is stopped.
The most recent CD/MP3 track plays.
On standby for traffic announcement
remains switched on.
Traffic announcement whilst an
external source is active
The external source (e.g. mobile
phone) has priority over traffic
announcements.
During the phone call no traffic
announcement will be heard or
displayed.
CD Player
CD Player
General information ................... 129
Usage ........................................ 130
General information
With the CD player you can play
standard commercial CDs with
a diameter of 12 cm.
Caution
Under no circumstances place
DVDs, single-CDs with a diameter
of 8 cm or shaped CDs in the audio
player.
You must not put any stickers on
CDs. These discs can get jammed
in the CD drive and ruin the drive.
An expensive replacement of the
device will then be necessary.
■ The format of the CD must be
ISO 9660 Level 1, Level 2 or
JOLIET. All other formats cannot be
played back reliably.
■ Audio CDs with copy protection,
which are not in compliance with
the audio CD standard, may not
play correctly or not at all.
■ You can also use the Infotainment
system to play CDs containing MP3
music data and Mixed Mode CDs.
129
■ Self-recorded CD-Rs and CD-RWs
are more vulnerable to mishandling
than prerecorded CDs. Correct
handling, especially in the case of
self-recorded CD-Rs and CD-RWs,
must be ensured. See below.
■ Self-recorded CD-Rs and CD-RWs
may not play correctly or not at all.
In such cases it is not the
equipment that is at fault.
■ Avoid leaving fingerprints when you
change CDs.
■ Put CDs back in their sleeves
immediately after removing them
from the CD player in order to
protect them from damage and dirt.
■ Dirt and liquids on CDs can smear
the lens of the CD player inside the
device and cause faults.
■ Protect CDs from heat and direct
sunlight.
■ The following restrictions apply for
data stored on an MP3 CD:
When naming albums and tracks,
umlauts or special characters
should not be included.
130
CD Player
Applicable playlist extensions:
"m3u" or "pls".
When generating (coding) the MP3
files from audio data, a bitrate of up
to max. 256 kbit/s should be used.
To use MP3 files in the Infotainment
system, the MP3 files must have
the file extension ".mp3".
■ A total of 367 playable tracks can
be stored on one CD. It will not be
possible to play any additional
tracks.
■ A maximum of 99 albums can be
saved on an MP3 CD for use with
the Infotainment System. The
albums can be selected individually
with the Infotainment system.
Usage
Inserting a CD
Insert the CD with the printed side up
into the CD slot.
The CD is automatically drawn in.
Do not prevent or assist the CD being
drawn in.
Read CD and the CD symbol appear
on the display, then the number of CD
tracks is displayed.
CD playback
Switch from radio mode to CD mode
as follows:
Press the CD/MP3 button.
The CD track last played is displayed
and starts to play.
Track selection
To select a track while a CD is
playing, tap on m or n repeatedly
until the desired track is displayed.
The track is played.
As soon as the first track starts to
play, the display shows Track 1 and
the playing time or information about
the track (title, artist).
With MP3 CD, the MP3 symbol lights
up on the display and the first album
name is displayed.
Information about the track (title,
artist) are displayed as soon as the
first track starts to play.
Fast search forwards/
backwards
To find a certain point on a CD,
proceed as follows:
You’re listening to a track.
Keep m or n pressed until you
reach the point you want.
The CD plays at increased speed and
reduced volume.
MP3 with fast search backward, the
search stops at the beginning of the
current track.
CD Player
Album selection for MP3 CDs
You are listening to a track from an
album.
Press the CD/MP3 button.
The CD track last played is displayed.
Tap on m or n repeatedly until the
desired album is displayed.
The first track on the album is
displayed and played.
All albums which do not contain MP3
files are automatically skipped.
Random mode
Random CD (Random)
When random play is selected, the
tracks on a CD will be played in
random order.
Press the CD/MP3 button three
times.
The current random setting is
displayed.
Tap on m or n to select a setting.
Audio CD:
■ Random on: activates random
mode
■ Random off: deactivates random
mode
MP3 CD:
■ Random album: Random playback
of the tracks of an album
■ Random CD: Random playback of
the tracks on a CD
■ Random off: deactivates random
mode
If the random function is enabled
RDM or g appears on the display.
Changing the display type
Different information can be
displayed.
Press the CD/MP3 button twice.
CD info appears on the display.
Tap on m or n to select a display
type.
Depending on the CD type (audio CD
with or without CD text, MP3 CD with
or without track name (ID3 tags)), the
following may be displayed.
131
Audio CD without CD text:
Track number and playing time
Audio CD with CD text:
■ Track name
■ Artist name
■ CD name
■ Track number and playing time
MP3 CD without ID3 tags
■ File name
■ Track number and playing time
■ Album name
MP3 CD with ID3 tags
■ Track name
■ Artist name
■ Album name
■ Track number and playing time
Traffic announcement in CD mode
Traffic announcements can be
received while a CD is playing. Traffic
programme (TP) 3 125.
A traffic announcement can be
terminated with the TP button and the
current CD will continue to play.
132
CD Player
Removing a CD
Press the j button.
Eject CD appears on the display.
If a CD is ejected, the last radio station
used will automatically be played.
A CD can be ejected even if the
appliance is turned off. The appliance
switches off after the CD has been
removed.
If the CD is not removed, it will return
to the player automatically after
a short time.
AUX input
AUX input
Usage ........................................ 133
Usage
The connector is located in the area
of the centre console.
To play back an audio source
connected to the AUX input of the
vehicle, e.g. a portable CD player, via
the Infotainment system
loudspeakers, the audio source has
to be enabled:
When the radio is on.
Connect the audio source to the AUX
input of the vehicle.
Press the FM/AM button until AUX
appears on the display.
133
The external audio source is
transferred through on the
Infotainment system.
Enable the external audio source and
set it to maximum volume.
The audio source signal is played
back via the Infotainment system
loudspeakers.
134
Index
A
Activating CD player................... 130
AM.............................................. 123
AS............................................... 125
Automatic search........................ 123
Automatic switch off.................... 117
Autostore level............................ 125
Autostore lists............................. 125
AUX input........................... 117, 133
AUX volume................................ 121
B
Balance....................................... 120
Bass............................................ 120
C
CD, eject..................................... 130
CD, insert.................................... 130
CD text........................................ 130
E
External In Volume..................... 121
F
Fader.......................................... 120
FM.............................................. 123
G
General information............ 112, 129
I
Ignition logic................................ 117
M
Main display................................ 117
Manual tuning............................. 123
Multifunction knob....................... 117
O
On Volume.................................. 121
Operation ................................... 117
Overview .................................... 114
P
Programme type......................... 125
PTY............................................. 125
R
Radio data system (RDS) .......... 125
Random mode............................ 130
Regional programmes................ 125
S
SDVC.......................................... 121
Setting the volume...................... 117
Sound settings............................ 120
Speed dependent volume
control (SDVC)........................ 121
Starting CD replay...................... 130
Station list................................... 123
Station memory.......................... 123
135
Station search............................. 123
Store........................................... 123
Switching the Infotainment
system on or off....................... 117
T
TA volume.................................. 121
Theft-deterrent feature .............. 113
Tone settings.............................. 120
TP............................................... 125
Traffic announcements............... 125
Traffic programme...................... 125
Treble......................................... 120
U
Update stations........................... 123
Usage......................... 123, 130, 133
Using the CD player................... 130
Using the Infotainment system... 117
V
Volume....................................... 117
Volume settings.......................... 121
136
Mobile phone portal
Introduction ................................ 138
Voice recognition ....................... 151
Index .......................................... 158
138
Introduction
Introduction
General information ................... 138
Connection ................................. 141
Bluetooth connection ................. 142
Emergency call .......................... 144
Operation ................................... 145
Mobile phones and CB radio
equipment .................................. 149
General information
The Mobile phone portal offers the
opportunity to hold telephone
conversations using the mobile
phone via a vehicle microphone and
vehicle loud speaker system and to
operate the most important mobile
telephone functions via the
Infotainment system in the vehicle.
The Mobile phone portal is operated
via the steering wheel remote control
system, a speech recognition system
and a multifunction button on the
radio. The menu-driven operations
and status are shown via the info
display.
The fact that the most important
content on the telephone display is
shown on the info display enables you
to operate the whole portal
comfortably.
The mobile phone should be
operated via an exterior aerial by
clicking it into a telephone-specific
adapter.
When a telephone connection is
active, the radio sound is switched off.
When the telephone connection has
ended, the radio sound is switched on
again.
General advice on these
operating instructions
You can find detailed functional
descriptions for your Infotainment
system in the operating instructions
included with your Infotainment
system.
Information on telephone-specific
adapters for the mobile telephone is
available from your Opel Partner.
Not all Mobile phone portal functions
are supported by every phone. The
telephone functions possible depend
on the mobile telephone used and the
network operator. Further information
is given in the operating instructions
for the mobile telephone and in the
instructions for the telephone-specific
adapter, and can be obtained from
the network operator.
Introduction
9 Warning
The Infotainment system has to be
used so that the vehicle can be
driven safely at all times. If in doubt
stop your vehicle and operate the
Infotainment system while the
vehicle is stationary.
Operating the mobile telephone
Mobile telephones affect your
environment. This is the reason why
safety rules and regulations were
drawn up. You should find out about
the relevant regulations before you
use the telephone function.
9 Warning
Use of the hands-free facility while
driving can be dangerous because
your concentration is reduced
when telephoning. Park your
vehicle before you use the handsfree facility. Follow the stipulations
of the country in which you find
yourself at present.
Do not forget to follow the special
regulations that apply in specific
areas and always switch off the
mobile phone if the use of mobile
phones is prohibited, if
interference is caused by the
mobile phone or if dangerous
situations can occur.
Bluetooth™
The Mobile telephone portal supports
Bluetooth™ Handsfree Profile V. 1.5
and is specified to Bluetooth™
Special Interest Group (SIG).
Further information on the
specification can be found on the
interned under
http://qualweb.bluetooth.org. The
Bluetooth™ qualification code of the
Mobile phone portal is B02237.
When devices are being paired,
a random PIN code of at least four
digits should be selected for reasons
of safety.
139
Declaration of conformity
We hereby declare that the Mobile
phone portal is compliant with the
basic requirements and other
relevant stipulations of the guideline
1999/5/EC.
Operating the speech
recognition system
Do not use the speech recognition
system in emergencies because your
voice can change so much in stressful
situations that you can no longer be
sufficiently recognised in order for the
desired connection to be created
quickly enough.
Base plate for the telephone
support
Keep the base plate contacts free
from dust and dirt.
140
Introduction
Charging the telephone
batteries
As soon as the Mobile phone portal
has been switched on and the
telephone has been slotted into the
telephone-specific adapter, the
telephone’s batteries are charging.
Control elements
The Mobile phone portal can be
operated via a steering wheel remote
control system, speech recognition
system and a multifunction knob on
the radio.
As soon as the Mobile phone portal
has been switched on and the mobile
telephone is logged in, the start page
appears on the display.
Selection of the functional ranges in
the headline and additional
operations are described below:
Steering wheel remote control
system
1 Thumbwheel
Turn: select menu items and
commands
Press: confirm a selection (OK)
2 q button
Press: Selecting/switching off
speech recognition system
3 151
3 p button
Press: Accept or end a telephone
call or access the call list directly
4 o Turn: adjust volume
Operating the Infotainment system
with the multifunction knob
See "Control elements on instrument
panel" in the relevant Infotainment
system manual.
The Mobile phone portal can be
operated optionally via the speech
recognition system 3 151.
Introduction
Connection
A connection can be created between
a mobile telephone and the
Infotainment system via:
■ a telephone-specific adapter
■ a Bluetooth™ connection as long
as the mobile telephone and the
Mobile telephone portal support
this function
In order for a connection to be
created, the Mobile telephone portal
must be switched on and the mobile
telephone logged in. The Mobile
telephone portal switches itself on
and off via the battery. If the battery is
switched off, you can switch the
mobile telephone on and off via the
Infotainment system. When the
battery is switched off, the operating
time is limited to one hour.
On many mobile telephones, the
adapter is only used as a charging
station. In this case, the connection
must be created via Bluetooth™
3 142.
You can obtain information on
available telephone-specific adapters
for your mobile telephone from your
Opel Partner.
For information on the Bluetooth™
function for your mobile telephone,
see the operating instructions for the
mobile telephone.
Slotting the telephone-specific
adapter into the base plate
141
adapter, please read about the
specific assembly process in the
instructions.
Fasten the adapter to the base plate
Ensure that the contacts are
connected properly. You must hear
a click sound when the adapter is
being slotted in
In order to remove the adapter, press
the release button on the base plate.
Inserting the mobile telephone
into the telephone-specific
adapter
Specific assembly instructions for
each adapter are enclosed with the
product. Before you assemble the
142
Introduction
Insert the mobile telephone into the
adapter
Ensure that the contacts are
connected properly. You must hear
a click sound when the mobile
telephone is being inserted
In order to remove the mobile
telephone, press the release button
on the adapter.
Bluetooth connection
The Bluetooth™ function on the
mobile telephone must be activated,
see operating instructions for the
mobile phone.
Bluetooth™ is a radio standard for
wireless connection of e.g. a mobile
telephone to other equipment.
Information such as the phone book,
call list, network operator and field
intensity can be transmitted.
Depending on type of equipment, the
functions may be restricted.
Creating a connection
In the main menu select the
telephone symbol from the headline.
If Bluetooth™ has been deactivated,
proceed as follows:
1. Select the Bluetooth menu item.
If Bluetooth™ has been activated,
the remaining menu items will
appear on the display.
When the mobile telephone is slotted
in the adapter, the telephone menu or
Bluetooth™ menu appear on the
display.
If the mobile telephone is not slotted
into the adapter, the Bluetooth™
menu appears on the display.
Select the Bluetooth menu item.
2. Select the Bluetooth PIN menu
item.
3. Enter a random Bluetooth™ PIN
and confirm it with OK.
For safety reasons, a randomly
selected PIN code of at least four
digits should be used.
4. Ensure that the Bluetooth™
function of the mobile telephone
has been activated and set to
"visible".
Introduction
5. Select the Start searching menu
item.
During the search process for
Bluetooth™ devices, the word
Searching... is displayed.
When the search process has
ended, the Bluetooth™ devices
are listed in the Found devices
menu.
6. Select the required mobile
telephone.
While the connection is being
created, the message The
connection will be established...
appears on the display.
"Please enter the Bluetooth PIN"
or a similar request appears on
the display of the mobile
telephone.
7. Using the keypad on the mobile
telephone, enter the same
Bluetooth™ PIN as for the
Infotainment system and confirm
it with OK.
The message "Add device to
known devices?", or a similar
message, appears on the display
of the mobile telephone.
8. Confirm this on the keypad of the
mobile phone by pressing OK.
Once a connection has been created
successfully, the message is added
to paired devices appears on the
display.
The connection between the mobile
telephone and the Infotainment
system has now been created.
Up to five devices can be added to the
list.
Closing the connection
1. In the Bluetooth™ menu, select
Paired devices.
143
The Paired devices menu
appears on the display.
2. Select the required mobile
telephone.
The Bluetooth™ menu appears
on the display.
144
Introduction
3. Deactivate Connect.
The message Disconnected!
appears followed once again by
the Bluetooth™ menu.
4. Select Remove.
The message Removed! appears
followed once again by the
Bluetooth™ menu.
UHP visible
Activating this function enables the
mobile telephone portal to be
detected by other Bluetooth™
devices. In this way e.g.
a Bluetooth™ connection can be
established from the mobile
telephone to the Mobile telephone
portal.
1. In the Bluetooth™ menu select
UHP visible.
The Mobile phone portal can be
seen by the other devices for the
next 3 minutes.
2. Start the mobile telephone’s
search function for Bluetooth™
devices (see the operating
instructions for the mobile
telephone).
The message "Device found:
UHP" appears on the display of
the mobile telephone.
3. Start the mobile telephone’s
connection function (see the
operating instructions for the
mobile telephone).
4. Enter the Bluetooth PIN in the
Infotainment system).
5. Enter the "Bluetooth PIN" on the
mobile telephone.
The Bluetooth™ connection has been
created between the mobile
telephone and the Infotainment
system.
Freespeech
A telephone connection is active.
Move the thumbwheel.
A context menu is opened. Activate
Freespeech. The sound is sent to the
car’s loudspeakers.
Emergency call
9 Warning
Connection setup cannot be
guaranteed in all situations. For
this reason you should not rely
exclusively on a mobile phone
when a vitally important
communication (e. g. a medical
emergency) is concerned.
In some networks it may be
necessary for a valid SIM card to
be properly inserted in the mobile
phone.
Introduction
9 Warning
Bear in mind that you can make
and receive calls with the mobile
phone, if it is in a service area with
a sufficiently strong signal. Under
certain circumstances emergency
calls cannot be made on all mobile
phone networks; it is possible that
they cannot be made when certain
network services and/or telephone
functions are active. You can
enquire about this with the local
network operators.
The emergency call number can
differ depending on the region and
country. Please enquire
beforehand about the correct
emergency call number for the
relevant region.
Making emergency calls
Dial the emergency number (e.g.
112).
The connection to the emergency call
centre is created.
Answer if the service staff ask you
about the emergency.
Ending emergency calls
Select the Hang-up menu item.
Or:
Press the p key.
9 Warning
Do not end the call until you are
requested to do so by the
emergency call centre.
Operation
Introduction
As soon as a connection is created
between the mobile telephone and
the Infotainment system via the
telephone-specific adapter or via
Bluetooth™, you can also operate
many of the mobile telephone’s
functions via the Infotainment system.
145
For example, via the infortainment
system you can create a connection
with the telephone numbers saved in
the mobile telephone or change the
telephone numbers.
As a rule, you can also continue
operating the system using the
mobile telephone, e.g. by accepting
a call or setting the sound level.
After a connection has been created
between the mobile telephone and
the Infotainment system, data is
transferred from the mobile telephone
to the Infotainment system. This may
take some time, depending on the
brand of telephone. During this period
of time, the mobile telephone can only
be operated to a limited extent via the
Infotainment system.
Some telephones do not support all of
the Mobile phone portal’s functions.
As a result of this, these specific
telephones may work differently from
the functional content described in
the manual. For further information,
see the instructions on the telephonespecific adapter.
146
Introduction
Calls which arrive or are being made
when the mobile telephone is being
slotted into the telephone-specific
adapter, are kept and are transmitted
as soon as the mobile telephone has
been slotted into the adapter.
In addition to operating using the
steering wheel remote control
system, some functions can also be
operated using a speech recognition
system 3 151.
If a connection has been created via
the telephone-specific adapter, the
functionality of the mobile telephone
can be limited (in this respect, see
instructions enclosed with the
adapter).
When a Bluetooth™ connection
exists, the functional scope of the
mobile telephone can also be limited.
Entering PIN codes
When the mobile telephone is
switched on after being slotted into
the telephone-specific adapter, the
PIN code must still be entered.
The Infotainment system is switched
on.
No PIN appears on the display. Select
the telephone symbol from the
headline.
Please enter your PIN Code! appears
on the display.
Enter the PIN code using the
thumbwheel and confirm this by
pressing OK.
The PIN code can also be spoken in
using the speech recognition system
3 151.
PIN verification, please wait...
appears on the display.
If the PIN code is entered incorrectly
three times, the SIM card is blocked.
SIM locked appears on the display.
■ A blocked SIM card can only be
released by entering the PUK via
the mobile telephone, see
operating instructions for the
mobile telephone.
■ When the correct PIN code has
been entered and confirmed, the
previously selected menu appears
on the display.
■ Some network operators allow you
to switch off the request for the PIN
code. Additional information on this
subject can be found in the
operating instructions for the
mobile telephone and can be
requested from the local network
operator.
Introduction
Making telephone calls
Three different options where dialling
a telephone number is concerned are
available:
■ dial the telephone number
manually
■ select the telephone number from
the phone book
■ select the telephone number from
the list of calls (calls made, calls
received and missed calls)
Dial
Dialling the telephone number
manually
In the telephone menu:
Select the Dial menu item.
147
Enter No... appears on the display.
Select the digits for the telephone
calls from the foot of the display in
order and start the dialling process
using Dial.
Phone book
After creation of the connection, the
phone book is compared with the
temporary phone book if the same
SIM card or telephone is used. In this
time, new entries are not displayed. If
the SIM card or telephone are
different, the phone book is loaded
afresh. This process may take a few
minutes, depending on telephone
model. The new entries are only
saved after the ignition is turned off
and the ignition key removed
Selecting the telephone numbers
from the phone book
In the telephone menu select the
Phone book menu item.
A list of all the entries in the phone
book appears on the display.
Select the desired entry and start the
dialling process.
Entries with several numbers
Depending on telephone type,
several numbers may be stored
under one phone book entry.
Under Phone book, select the desired
entry.
A list of all numbers stored under this
entry appears on the display.
148
Introduction
Select menu item Filtering.
The selected check box indicates
active filtering. The phone book
entries are grouped by initial letter
(abc, def, …).
Select the entry you want and start
the dialling process.
Select the number you want and start
the dialling process.
Filtering
To help you find phone book entries,
a filter can be activated:
Select the Phone book menu item.
A list of all the entries in the phone
book appears on the display.
Call list
Selecting telephone numbers from
the list of calls
Select the Call list menu item.
A list of the most recently called
telephone numbers is displayed. The
status of the telephone number
(dialled, received or missed) is
displayed in the footer.
Select the desired entry and start the
dialling process.
Incoming calls
When a call is incoming, a selection
menu appears for accepting or
refusing a call.
Accepting calls
Select the Accept menu item.
or:
Press the p key .
Refusing calls
Select the Reject menu item.
Ending calls
Do the following in order to end the
telephone call:
Press the p.
or:
Move the thumbwheel.
A context menu is opened.
Select Hang-up.
Functions during a call
Some functions are only available
during a call.
A telephone connection is active.
Move the thumbwheel.
A context menu is opened.
Introduction
149
Mobile phones and CB
radio equipment
Installation instructions and
operating guidelines
The following functions are available:
Hang-up
This function ends the telephone
connection.
Micro off
This function turns off the telephone
microphone.
DTMF (tone)
Various phone services (e.g. VoiceMail or telephone banking) require
the input of control tones.
When a telephone connection is
active:
Select the menu item DTMF.
The DTMF menu is displayed.
You can now enter numbers using the
thumbwheel.
In the display footer, select the figures
required.
The signal tones are now sent.
Freespeech
With a mobile telephone connected
via Bluetooth™, with this function you
can turn off the hands-free function
3 142.
This menu point is invisible when the
mobile telephone is connected to the
Infotainment system via an adapter.
The vehicle specific installation
instructions and the operating
guidelines of the mobile phone and
handsfree manufacturer must be
observed when installing and
operating a mobile telephone. Failure
to do so could invalidate the vehicle
type approval (EU directive 95/54/
EC).
Recommendations for fault-free
operation:
■ Professionally installed exterior
antenna to obtain the maximum
range possible,
■ Maximum transmission power 10
watts,
■ Installation of the phone in
a suitable spot, consider relevant
Note in the Owner's manual,
chapter Airbag system.
150
Introduction
Seek advice on predetermined
installation points for the external
antenna or equipment holder and
ways of using devices with
a transmission power exceeding 10
watts.
Use of a handsfree attachment
without external antenna with mobile
telephone standards GSM
900/1800/1900 and UMTS is only
permitted if the maximum
transmission power of the mobile
telephone is 2 watts for GSM 900 or
1 watt for the other types.
For reasons of safety, do not use the
phone while driving. Even use of
a handsfree set can be a distraction
while driving.
9 Warning
Operation of radio equipment and
mobile telephones which fail to
meet above mentioned mobile
telephone standards is only
permitted using an antenna
located outside of the vehicle.
Caution
Mobile telephones and radio
equipment may lead to
malfunctions in the vehicle
electronics when operated inside
the vehicle with no exterior
antenna, unless the above
mentioned regulations are
observed.
Voice recognition
Voice recognition
Voice recognition ....................... 151
Voice recognition
The speech recognition system
enables you to operate some of the
mobile telephone’s functions by voice
input. It recognises commands and
sequences of numbers independently
of the person speaking. The
commands and sequences of
numbers can be spoken without
a break between the individual words.
You can also save telephone
numbers using a name randomly
chosen (voice tag). The telephone
connection can be created using this
name.
If the speech recognition system fails
to operate properly or fails to
recognise your voice, it provides you
with acoustic messages and asks you
to input the command you want again.
The speech recognition system also
provides an answer to important
commands and, if required, makes
enquiries.
Stop the voice dialogue at any time by
re-pressing q.
151
Before you dial a telephone number,
the following preconditions must
exist:
■ The mobile telephone must be
ready for operation and slotted into
the telephone-specific adapter, or
a Bluetooth™ connection must
exist.
■ The mobile telephone must be
logged in.
To prevent conversations being held
in the interior of the vehicle from
causing inadvertent control of the
mobile telephone or audio system,
the speech recognition system only
starts once it has been activated.
Activating the speech
recognition system
By pressing q, the speech
recognition system is activated and
the symbol q appears on the display.
The radio is switched to "silent" for the
duration of the dialogue. Any traffic
news coming in will be interrupted.
The functions can only then be
operated if the mobile telephone is
logged into a network.
152
Voice recognition
Ending the dialogue
There are various ways to deactivate
the speech recognition system and
end the dialogue:
■ By pressing q
■ Time-outs: if nothing has been
input for a certain period of time
The speech recognition system is
also interrupted by an incoming call.
Operation
With the aid of the speech recognition
system, the mobile telephone can be
operated very comfortably using the
voice input function. Simply activate
the speech recognition system and
say the desired command. Once the
command has been input, you will be
led through the dialogue with the
corresponding questions and
messages in order to reach the
required action.
Say the commands and digits in
a normal voice, without any artificial
pauses between the numbers.
Recognition is most successful when
you pause for at least half a second
after every three to five numbers.
The Infotainment system
simultaneously reacts to commands
with voice messages and displays.
SIM card
If no SIM card has been inserted, the
following message appears: Please
insert a SIM card!
Once you have inserted a SIM card,
you will be asked to enter the PIN
code. For more on this, see the next
section.
PIN code
If the PIN code has not been entered,
the following message appears:
Please enter the PIN code!.
Now say the PIN code in a normal
voice, without any artificial pauses
between the numbers.
The following commands are
available:
■ "Accept": The PIN code is
confirmed.
■ "Change": The number last entered
is deleted.
■ "Delete": The PIN code is deleted.
■ "Additional digits": Additional
numbers can be entered.
Example of a dialogue whereby a PIN
code is entered:
Voice output: "Please enter the PIN
code!"
User: "One Two Three Four – Accept"
Voice output: "The PIN code is
incorrect!"
User: "Four Three Two One – Accept"
Voice output: "The PIN code has
been accepted"
Main commands
After the speech recognition system
has been activated, you will hear
a short sound, which is a signal to
Voice recognition
inform you that the speech
recognition system is waiting for an
input.
The following commands are
available:
■ "Call"
■ "Redial"
■ "Save"
■ "Delete"
■ "Phonebook"
■ "Help"
■ "Cancel"
Detailed description of these
commands see below.
"Call"
Using this command, you can input
a telephone number which has been
saved in the phone book under
a name (voice tag) or which is to be
used to create a connection. After this
command, the following commands
are available:
■ "Number": The connection is
created using the number entered.
■ "Name": The connection is created
using the voice tag.
"Number"
After this command has been given,
you will be asked to enter the number.
The Infotainment system repeats the
recognised numbers. You can then
input additional numbers or the
following commands:
■ "Call" or "Accept": The inputs are
accepted.
■ "Change": The last block of
numbers has been deleted.
■ "Delete": The complete input has
been deleted.
■ "Help": The dialogue is ended and
all commands available in this
context are listed.
■ "Plus": A plus is placed before the
number for foreign calls.
■ "Additional digits": Additional digits
are being added.
■ "Cancel:" Ending the dialling
process. After the request for
a correction, all blocks of numbers
153
previously entered are repeated
with the exception of the last block.
If all inputs have been deleted, you
are once again asked to input
a telephone number.
If there is a voice pause of more than
one second between the individual
numbers, the Infotainment system
assumes that the process of inputting
the block of numbers has ended and
repeats the block of numbers.
In order to make a foreign call, you
can say the word "Plus" (+) in front of
the number. The plus allows you to
make a call from that country without
knowing the foreign dialling code for
the country in question. Then say the
country code.
The country code corresponds to the
conventional format, i. e. 49 for
Germany, 44 for Great Britain, etc.
The "0" must be left out of the local
network code (dialling code) except in
Italy.
Example of a dialogue between the
user and voice output to dial
a telephone number:
User: "Call"
154
Voice recognition
Voice output: "Name or Number?"
User: "Number"
Voice output: "The number, please!"
User: "Plus Four Nine"
Voice output repeats: "Plus Four
Nine"
User: "Seven Three One"
Voice output repeats: "Seven Three
One"
User: "One One Nine Nine"
Voice output repeats: "One One Nine
Nine"
User: "Change"
Voice output repeats the blocks of
numbers previously input: "Plus Four
Nine – Seven Three One"
User: "One One Nine One"
Voice output repeats: "One One Nine
One"
User: "Call"
Voice output: "The number is being
dialled"
"Name"
Using this command, you can select
a telephone number under a name
(voice tag).
If the system recognises a name entry
already available, it is shown on the
display. The symbol q representing
a voice tag appears to the right of the
name. The connection is created
using the voice tag.
"Redial"
Using the "Redial" command, the
number most recently dialled can be
redialled.
"Save"
Using this command, you can save
a telephone number under a voice
tag.
Additionally the previously input voice
tag in the phone book can be
included.
Voice tags can only be included in the
phone book if they are saved in the
Infotainment system.
A maximum of 25 voice tags can be
stored in the phone book. If 25 voice
tags are already stored, the message
is given "The speech memory is full!".
Voice tags are dependent on the
speaker, which means that only the
person who has spoken in the voice
tag can select it.
After three invalid attempts, the
speech recognition system is turned
off automatically.
It can happen that the two names
input are too different for the speech
recognition system, which then
rejects them. You can then decide if
you want to input the names again or
end the process:
■ "Yes": Input the names again.
■ "No"/"Cancel": The dialogue is
ended without anything being
saved.
In order to prevent a cut-off at the
beginning of the recording when
names are being saved, a short
pause should be left after the request
for an input.
Voice recognition
In order to be able to use the voice tag
independently of the location, i.e. in
other countries, all telephone
numbers should be entered with
a "Plus" and the country code.
Example of a name being saved as
a voice tag:
User: "Call"
Voice output: "Name or Number?"
User: "Name"
Voice output: "The name, please!"
User: <Miriam>
Voice output: "The number, please!".
User: "Plus Four Nine"
Voice output: "Plus Four Nine"
User: Seven Three One.
Voice output: "Seven Three One"
User: "One One Nine One"
Voice output: "One One Nine One"
User: "Save"
Instead of "Save" you can also use
the command "Accept".
"Delete"
Using the "Delete" command, you can
delete a previously saved voice tag.
"Phonebook"
Using the command "Phonebook",
you can dial a previously saved voice
tag which you have included in the
phonebook. You can also delete
a voice tag. After inputting
the "Phonebook" command, you will
be asked to input a name.
After the recognised name has been
output, you can input the following
commands:
■ "Call": The connection to the saved
number is created.
■ "Delete": The voice tag is deleted.
■ "Cancel": The dialogue is ended.
■ "Help": The dialogue is ended and
all commands available in this
context are listed.
Example of how to dial a telephone
number saved in the directory:
User: "Phonebook".
Voice output: <Karl-Heinz>
Voice output: <Markus>
155
Voice output: <Miriam>
User: "Call"
Instead of "Call" you can also use the
command "Accept".
Voice output: "The number is being
dialled"
"Help"
Using the "Help" command, all of the
commands available in this particular
context are listed.
"Cancel"
Using the "Cancel" command, the
speech recognition system can be
switched off.
Changing language
Change the language shown
The Infotainment system supports 12
pre-set languages to be shown on the
display. Contact your Opel Partner to
activate a different language from that
preset.
156
Voice recognition
Change the language spoken
The speech recognition system
supports the following 6 languages:
■ German
■ (British) English
■ French (EU)
■ Italian
■ Spanish (EU)
■ Dutch
Contact your Opel Partner to activate
a different language from that preset.
Voice recognition
157
158
Index
A
Accepting calls............................ 145
Activating speech recognition..... 151
B
Bluetooth connection.................. 142
C
Call lists...................................... 145
Changing the language.............. 151
Connection................................. 141
Cradle......................................... 141
D
Dialling........................................ 145
DTMF.......................................... 145
E
Emergency call........................... 144
Ending calls................................ 145
Entering PIN codes..................... 145
Entries with several numbers..... 145
F
Filtering....................................... 145
Freespeech................................. 142
Functions during a call............... 145
G
General information.................... 138
H
Hang-up...................................... 145
L
Lists............................................ 145
M
Making telephone calls............... 145
Micro off...................................... 145
Mobile phones and CB radio
equipment .............................. 149
N
Name.......................................... 151
Number....................................... 151
O
Operation.................................... 145
P
Phone book................................ 145
R
Redialling.................................... 145
Refusing calls............................. 145
S
Selecting telephone numbers..... 145
Speech recognition..................... 151
Steering wheel remote control.... 138
159
T
Telephone numbers................... 145
Telephone-specific adapter........ 141
V
Voice recognition ....................... 151
160