1
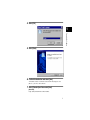
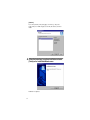
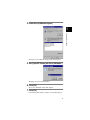
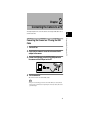
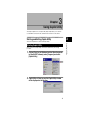
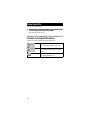
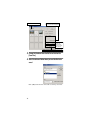
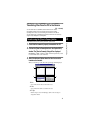
Caplio Utility
for Windows
Operation Manual
English
To ensure correct use of the product, read this manual
carefully before use. Keep the manual handy for future
use.
Introduction
Thank you for purchasing a Ricoh product.
This manual explains the correct handling procedures and precautions for the product. To ensure
the best performance from the product, please read the manual carefully before using the
product. Keep the manual handy for future reference.
Ricoh Co., Ltd.
Important
• Be sure to make a backup copy of important data. Data may be lost in the event of misoperation by the
user or malfunction of the product.
• Ricoh Co., Ltd. assumes no liability for data created by the user using this product.
• Ricoh Co., Ltd. assumes no liability for damages caused by failure of the product, damages incurred due
to loss of text or data, or any other damages arising from use of the product.
Copyright
Reproduction or alteration of copyrighted documents, magazines, music and other materials, other than for
personal, home or similarly limited purposes, without the consent of the copyright holder is prohibited.
• This publication may not be reproduced in whole or part without the express written permission of Ricoh.
© 2001 Ricoh Co., Ltd.
• Ricoh reserves the right to change the contents of this publication without notice.
• Considerable care was taken in preparing this manual. If, however, you have any questions about any part
of the manual, or note any mistakes or inaccuracies, please contact us at the address listed on the back
cover.
Microsoft, MS and Windows are registered trademarks of Microsoft Corporation in the United States and
other countries.
QuickTime is a trademark of Apple Computer, Inc. registered in the United States and other countries.
All other company and product names are registered trademarks and/or trademarks of their respective
owners.
What You Can Do Using This Software
Download images, Sound file and motion pictures and transfer files to the
camera
By connecting the camera to a PC, you can download recorded images, Sound file and motion
pictures onto the PC, and you can also transfer images, Sound file (WAV files) and motion
picture files (AVI files) stored in the PC to the camera.
1
Contents
What You Can Do Using This Software........................................................1
Chapter 1
Preparing the Software .................................................... 3
Explanation of Software ................................................................................3
System Environment .....................................................................................5
Installing the Software...................................................................................6
Uninstalling the Software ............................................................................10
Chapter 2
Connecting the Camera to a PC.................................... 13
Connecting the Camera to a PC using the USB Cable ..............................13
Disconnecting the USB Cable....................................................................14
Chapter 3
Using Caplio Utility ........................................................ 15
Starting and Exiting Caplio Utility ...............................................................15
Starting Caplio Utility............................................................................................... 15
Exiting Caplio Utility ................................................................................................ 16
Functions of the Caplio Utility buttons ........................................................16
Saving Files in the Camera on the PC ........................................................17
Saving from the camera using the [Save from Camera] button ............................. 17
Transferring Files From the PC to the Camera ...........................................19
Transfer using the [Save to Camera] button ........................................................... 19
Other Functions (Camera Property)............................................................21
Name of the photographer (Camera Property) ....................................................... 21
Entry Memo ............................................................................................................. 22
Chapter 4
Troubleshooting ............................................................. 23
When the Camera Does Not Work Correctly ..............................................23
COM Port Settings for Windows 98/Me ......................................................24
Reinstalling Caplio RR1 Software (USB Driver)..........................................25
Restoring the device when recognized as an unknown device ............................. 25
2
Chapter
1
Preparing the Software
1
Explanation of Software
The following initial screen is displayed when the CD-ROM is loaded.
■ Caplio RR1 Software
To install the software listed below, click on [ Caplio RR1 Software] on the initial
screen.
Software
Description
Caplio Utility
This software enables you to save files recorded with the camera in
the PC, or transfer files stored in the PC to the camera.
USB Driver
This software is required for using Caplio Utility and TWAIN Driver
when the camera is connected to the PC by the USB interface.
TWAIN Driver
This software is for downloading still images recorded with the
camera directly from the TWAIN application.
3
Preparing the Software
This chapter explains the preparations required to use the supplied software, such as the
necessary system environment, installation of Caplio Utility, etc.
■ Browse CD-ROM
Click on [ Browse CD-ROM] on the initial screen to display the folders contained in the
CD-ROM. To install the software, click on the installer in the appropriate folder.
Software
Description
QuickTime Folder
QuickTime 4 (Be
sure to install this
software)
This software is required to view motion pictures recorded with the
camera.
MGI Folder
MGI PhotoSuite
This software is a well-rounded photo editing package that delivers
extensive multimedia file playback and online imaging service
support.
Note
• For further details, refer to the Readme or PDF file for the software.
4
System Environment
1
The following system environment is required to use Caplio Utility.
Operating system
CPU
Memory
Available HD space for
installation
Display resolution
PC on which the above operating system is pre-installed and
which is equipped with a USB port whose operation is
guaranteed by the PC manufacturer
Pentium or later
Windows 98/98SE: 32 MB or more (96 MB recommended)
Windows Me: 64 MB or more (96 MB recommended)
Windows 2000: 128 MB or more (256 MB recommended)
Windows 98/98SE: 10 MB or more
Windows Me: 10 MB or more
Windows 2000: 10 MB or more
640 × 480 dots or more (800 × 600 dots or more recommended)
Display colors
256 or more (65000 or more recommended)
CD-ROM drive
CD-ROM drive compatible with the above PC
USB port
Sound
Preparing the Software
PC
Windows 98/98SE
Windows Me
Windows 2000
USB port compatible with the above PC
Sound blaster compatible with the above operating system, or
interchangeable sound card and speakers
Note
• You can display images with 256 colors, but reproduction is greatly improved with 65,000
colors. You are therefore recommended to use 65,000 colors or more if possible.
5
Installing the Software
This section explains how to install the necessary software, such as Caplio Utility, USB
Driver for connecting the camera to a PC, and QuickTime.
Exit all other applications before following the procedures below to install the software.
Note
• If you start up Windows and connect the camera to the PC before installing the software, the
[Add New Hardware Wizard] screen will be displayed. If this happens, click on [Cancel] and
proceed to install the software after Windows is up and running.
• This section explains the installation procedure by the standard installation method. Users who
are familiar with PCs and digital cameras may choose to specify the software they wish to install.
• For Windows 2000, users with administrator rights should login first before installing the
software.
1
Turn the PC on and start up Windows.
2
Insert the CD-ROM supplied with the camera in the CDROM drive. The initial CD-ROM screen will be displayed.
3
Select [Caplio RR1 Software].
The installer will start up and the language selection screen will be displayed
after a short time.
6
4
Select [OK] .
1
Preparing the Software
5
Select [Next].
6
Confirm the destination and select [Next].
To install the software in a different folder other than that displayed, select
[Browse...] and choose the destination.
7
Select [Standard] and then select [Next].
[Standard]
Caplio Utility and USB Driver will be installed.
7
[Custom]
If you select [Custom] on the [Setup Type] screen in Step 7, the [Select
Components] screen will be displayed. Select only the software you want to
install.
8
Follow the instructions to continue installation and select
[Finish] on the InstallShield Wizard screen.
Installation is completed.
8
■ To Install QuickTime
QuickTime is required for viewing motion pictures recorded with the camera.
Turn the PC on and start up Windows.
2
Insert the CD-ROM supplied with the camera in the CDROM drive.
1
Preparing the Software
1
The initial CD-ROM screen will be displayed.
3
Select [Browse CD-ROM].
The contents of the CD-ROM will be displayed.
4
Double click on the [QuickTime] folder.
5
Double click on [QuickTime Installer].
Installation of the QuickTime software will start.
6
Proceed in accordance with the instructions displayed on
the screen.
Note
• If QuickTime 4.1.2 is already installed in your PC, this operation is not required.
9
Uninstalling the Software
You can delete all the software that has been installed. To reinstall the software, follow the
uninstallation procedure first before installing the software again.
Important
• Exit all active applications and save important data before uninstalling the software.
• Disconnect any other USB equipment or Plug and Play devices connected to the PC.
Note
• If you connect or disconnect the camera to or from a PC using the USB cable before installing
the USB Driver, the PC may not recognize the camera. In this case, delete the USB Driver from
the system and then reinstall it.
■ To Delete the Caplio RR1 Software
You can delete all the software that has been installed from Caplio RR1 Software,
such as Caplio Utility and USB Driver.
1
Turn the PC on and start up Windows.
2
Click on [Start] on the Windows task bar.
3
Move the pointer to [Settings] and select [Control Panel].
The control panel will be displayed.
10
4
Double click on [Add/Remove Programs].
1
Preparing the Software
The Property screen for adding and removing programs will be displayed.
5
Select [Caplio RR1 Software] and click on [Add/Remove...].
The language selection screen will be displayed.
6
Click on [OK].
The screen for confirming file deletion will be displayed.
7
Click on [OK].
Deletion will start. When deletion is completed, a message will be displayed.
11
8
Click on [Finish].
Important
• During Step 6, a confirmation dialog for deletion of shared files may appear. This dialog appears
when the displayed shared file is not being used by any other program on the system. Although
deleting the file will not corrupt the system, select [No to All] if you are unsure.
• To delete all shared files not being used by the system, select [Yes to All].
• If the “Uninstall completed. Some items could not be deleted.” message is displayed in the
Remove Program from Computer dialog, select [Details] to check the items that could not be
deleted and manually delete the items related to the Caplio RR1 Software application. When
reinstalling, the software may not install properly if items related to the application are left in the
PC.
• If the “Locked File Detected” message is displayed during the uninstall procedure, select
[Restart] and proceed the uninstallation.
12
Chapter
2
Connecting the Camera to a PC
This chapter explains how to connect the camera to a PC using the USB cable in order to
send and receive files.
Connecting the Camera to a PC
Connecting the Camera to a PC using the USB
Cable
1
Turn the PC on.
2
Check that the camera is turned off and connect the AC
adapter to the camera.
3
Connect the USB cable to the DIGITAL(USB)terminal on
the camera and the USB port on the PC.
4
Turn the camera on.
2
The camera is now in connection standby status.
Note
• If the power cuts out during operation, the camera and the PC may be adversely affected.
You are therefore recommended to avoid powering the camera by the battery and to use the
optional AC adapter.
13
Disconnecting the USB Cable
To disconnect the USB cable, press the sides of the USB cable connector to release the
lock and pull the connector out.
1
Turn the camera off.
2
Press the sides of the USB cable connector to release the
lock and detach the connector.
Note
• Pulling the connector out without pressing the buttons on either side or only pulling the
cable may not disconnect the connector from the camera.
14
Chapter
3
Using Caplio Utility
This chapter explains how to use Caplio Utility. Caplio Utility enables you to save files
recorded with the camera in the PC, and transfer files from the PC to the camera.
3
Starting and Exiting Caplio Utility
This section explains how to start and exit Caplio Utility.
When you want to use Caplio Utility, start it from the Start menu by the following
procedure.
1
Click on [Start] on the Windows task bar. Move the pointer
to [Caplio RR1 Software] under [Programs] and select
[Caplio Utility].
2
Caplio Utility will start up, and the Caplio Utility window
will be displayed on the desktop.
15
Using Caplio Utility
Starting Caplio Utility
Exiting Caplio Utility
To exit, perform the operation below.
1
Click on [Exit] on the Caplio Utility window.
The Caplio Utility window will close.
Functions of the Caplio Utility buttons
The buttons on the Caplio Utility windows have the following functions.
Saves files in the camera to a PC.
m See “Saving Files in the Camera on the PC” (p.17).
Transfers camera files saved in the PC to a camera media.
m See “Transferring Files From the PC to the Camera”
(p.19).
Exits Caplio Utility.
m See “Exiting Caplio Utility” (p.16).
16
Saving Files in the Camera on the PC
(Camera ➝ PC)
You can save image, sound and motion picture files recorded with the camera to a
specified folder on the PC.
Check that the camera is properly connected to the PC before proceeding.
Note
Saving from the camera using the [Save from
Camera] button
You can save files in the camera on the PC by using the Caplio Utility “Save from Camera”
button.
1
Check that the camera is properly connected to the PC.
m See “Connecting the Camera to a PC using the USB Cable” (p.13).
2
Click on the [Save from Camera] in the Caplio Utility
window. The [Select files] dialog will be displayed.
17
3
Using Caplio Utility
• To avoid the names of saved files being overwritten, consecutive file names are assigned and the
files are saved in the specified folder.
• Whenever possible, use the AC adapter and avoid powering the camera by the battery. If the
power cuts out during operation, the operation will have to be performed again.
• Do not connect or disconnect the AC adapter or USB cable when the camera is turned on or data
is being transferred. The camera or PC may be adversely affected.
• Files are recorded by the camera in the following formats. Still image files: Exif2.1 (*.JPG); noncompressed files: TIFF-YUV(TIF); text files: TIFF-MMR (*.TIF); motion picture files:
AVI(*.AVI); sound files: WAV (*.WAV).
“CARD”/ “MEMORY” : Selects memory.
Memo : User comments as specified in
EXIF can be entered in the displayed file.
Select all : Selects all
the files in the
selected memory.
Release all : Cancels
all file selections.
Save Files : Saves the selected files to the computer disk drive.
3
Choose the thumbnail from the file list and click on the
[Save Files].
4
Select the drive and folder where you want the files to be
saved.
Click on [OK] and the files in the camera will be saved in the specified folder.
18
Transferring Files From the PC to the Camera
(PC ➝ Camera)
You can transfer files recorded with the camera from the PC to the camera.
Check that the camera is properly connected to the PC before proceeding.
Uploading refers to the process of transferring a file from the PC to the camera.
You can transfer image, sound and motion picture files from the PC to the camera by
using the Caplio Utility [Save to Camera] button.
3
Transfer using the [Save to Camera] button
To transfer files in the PC to the camera, perform the operation below.
Check that the camera is properly connected to the PC.
2
Click on the [Save to Camera] button in the Caplio Utility
window. The [Save to Camera] dialog will be displayed.
Only EXIF files (*.JPG), sound files (*.WAV), and motion picture files (*.AVI)
recorded with the camera can be transferred.
3
Select the drive and folder where the files that are to be
transferred are located.
When you select the type of file, files of the specified type will be displayed.
4
2
3
1
1. Drive
Selects the drive where the file to be transferred is located.
2. Folder
Selects the folder where the file to be transferred is located.
3. File Type
When the file type is selected from [File Type], only files of the selected type are
displayed in the window.
19
Using Caplio Utility
1
4. File List
A list of filenames available for transfer within the specified folder is displayed. Specify
the file you want to transfer.
4
Select the files to be transferred and click on the [Save].
The specified files will be transferred from the PC to the camera.
20
Other Functions (Camera Property)
Name of the photographer (Camera Property)
When the camera is connected to the PC, you can enter the name of the photographer in
the camera.
1
Click on
in the Caplio Utility window.
3
The Caplio Utility menu will be displayed.
Using Caplio Utility
2
Select the [Camera Property...].
The [Camera Property] dialog will be displayed.
Note
• You can enter the name of the photographer using up to 17 ASCII characters.
3
Check that the name of the photographer is correct and
select [OK].
The name of the photographer is now set.
21
Entry Memo
Memos can be entered in image files.
1
Click on the [Copy from Camera] button in the Caplio
Utility window.
The Select File dialog will be displayed.
2
With a single file specified, click the [Memo Entry in
screen...] button.
The [Memo entry] dialog will be displayed.
3
Enter the memo
A memo of up to 20 ASCII characters can be entered in the specified file.
4
Select [OK].
The memo is entered in the image file.
22
Chapter
4
Troubleshooting
When the Camera Does Not Work Correctly
4
If the camera is not functioning normally, follow the procedure below.
Follow the steps below in order and check whether the necessary preparations have
been performed correctly.
• Is the camera on?
• Is the AC adapter correctly connected to the camera or inserted into the electrical
outlet?
2. USB cable
• Is the USB cable properly connected to the camera and PC?
• It is recommended that the USB cable be connected directly to the USB port of the
PC without the use of a HUB, etc.
3. Installation of USB driver
Has installation of the USB driver been completed successfully?
m See “Installing the Software” (p.6).
If the camera still does not function normally after checking that all of the above are
working properly, try the following.
1. Check the COM port setting. (Windows 98/98SE, Windows Me)
2. Delete the Caplio RR1 Software (USB driver) and reinstall.
m See “Reinstalling Caplio RR1 Software (USB Driver)” (p.25).
23
Troubleshooting
1. Power supply
COM Port Settings for Windows 98/Me
The USB Driver for Windows treats the camera as (virtually connected to) the COM port.
For Windows 98/Me, if the COM port conflicts with other equipment, the camera may fail
to be detected even when the driver has been correctly installed.
In this case, change the COM port by the following procedure.
1
Connect the camera to the PC using the USB cable and
turn the camera on.
2
Start the device manager.
Select [Settings] → [Control Panel] from the [Start] button. Double click on the
[ System] icon in the window that opens. Select the [Device Manager] tab from
the [System Properties] dialog box, and open [Ports (COM&LPT)] from the
list.
Set [RICOH Camera Port] from [Ports (COM&LPT)] and click on [Properties].
3
Change to another COM number (COM 5 -9) on the [Port
Select] screen.
An asterisk [*] will be attached to the port that is used by the camera.
24
Reinstalling Caplio RR1 Software (USB Driver)
Restoring the device when recognized as an
unknown device
If the device is recognized as an unknown device and not as the proper device, such as
when inserting/removing the USB cable before installing the driver or when canceling
installation before it is completed, delete the driver using the procedure below and
reinstall.
■ Before uninstalling
1
Connect the camera and PC using the USB cable and turn
the camera on.
2
Display the Device Manager.
● Windows 98 (98SE)/Windows Me
From the [Start] button, select [Settings] → [Control Panel] → [System] →
[Device Manager].
● Windows 2000
From the [Start] button, select [Settings] → [Control Panel] → [System] →
[Hardware] → [Device Manager].
3
Check whether there is a “!” mark (unknown device) on the
left of [RICOH USB Virtual Com] under [Universal Serial
Bus Controller] or [RICOH Camera Port] under [Ports
(COM&LPT)].
4
Select the device with the “!” mark and click on [Remove].
25
Troubleshooting
• Exit all active applications and save important data.
• Disconnect any other USB or Plug and Play devices.
4
When the confirmation dialog appears, click on [OK].
Note
• Even when deleting the successfully installed driver, delete both [RICOH Camera Port]
under [Ports (COM&LPT)] and [RICOH USB Virtual Com] under [Universal Serial Bus
Controller].
• For Windows 2000, only [RICOH Camera Port] is displayed under [Ports (COM&LPT)] on
the Device Manager.
5
From [Control Panel], double click on the [Add/Remove
Programs] icon.
The Property screen for adding and removing programs will be displayed.
Important
• Perform “Add/Remove Programs” only after deletion from the Device Manager, has been
performed.
26
6
Select [Caplio RR1 Software] and click on [Add/Remove...].
4
Troubleshooting
A confirmation message for deletion will be displayed.
7
Select [Yes].
8
Turn the camera and PC off.
9
Turn the PC on, insert the CD-ROM in the CD-ROM drive
and reinstall the software.
m See “Installing the Software” (p.6).
10
After checking the USB cable connection, turn the
camera on.
When the camera is detected by the PC, the “New Hardware” window will
open and construction of the driver database will start.
Wait until the construction of the database is completed.
The USB Driver setup is completed when the message disappears.
27
Note
• The display for constructing the database appears only when connecting for the first time.
The display will not appear for later connections.
28