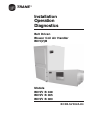
1
TRANE
R
Installation
Operation
Diagnostics
Belt Driven
Blower Coil Air Handler
BDH(V)B
Models
BDH/V B 048
BDH/V B 065
BDH/V B 080
BCXB-SVX02A-E4
TRANE
®
Contents
Performance Data
1
Model Nomenclature
2
General Specification
3
Unit Installation
Unit Configuration
4-6
7
Dimension Data
8-11
Wiring Diagram
12
Operation / Start Up
13
Maintenance
14-16
Trouble Analysis
17-19
i
TRANE
®
Performance Data
Foreword
Installation
General Information
These instructions do not attempt to
cover all variations in systems, nor to
provide for every possible contingency
to be met in connection with
installation. Should further information
be desired or should particular
problems arise which are not
sufficiently covered for the purchaser's
purpose, the matter should be referred
to the manufacturer.
Warranty
Warranty is based on the general terms
and conditions of The Trane Company.
The warranty is void if the equipment
is repaired or modified without the
written approval of the manufacturer, if
the operating limits are exceeded or if
the control system or the electrical
wiring is modified. Damage due to
misuse, lack of maintenance or failure
to comply with the manufacturer's
instructions or recommendations are
not covered by the warranty obligation.
This manual covers the installation,
operation and maintenance of the
Trane Chilled Water Blower coil Air
Handlers. BDHB and BDVB completely
designed to incorporate a single slab
coil assembly, improved application
flexibility, servicing and maintenance
accessibility and an improved
accessory line.
BDH/VB are factory convertible type
(vertical or horizontal) they are shipped
in vertical position.
Note:
"Warnings" and "Cautions" appear at
appropriate places in this manual.
Your personal safety and the proper
operation of this machine require that
you follow them carefully. The
manufacturer assumes no liability for
installations or servicing performed by
unqualified personnel.
Reception
Handling
On arrival, inspect the unit before
signing the delivery note. Specify any
damage on the delivery note, and send
a registered letter of protest to the last
carrier of the goods within 72 hours of
delivery. Notify the local Trane Sales
Office at the same time.
The unit will be supplied with a
shipping based and protective
packaging over the unit casing. The
packaging should be kept on the unit
during handling or storage on site.
The unit should be totally inspected
within 15 days of delivery. If any
concealed damage is discovered,
stop unpacking the shipment.
Notify the carrier immediately by phone
and registered mail. Notify the local
Trane Sales Office. Concealed
damage must be reported within 15
days of delivery. Check the unit
nameplate to confirm that the proper
unit was shipped. Available power
supply must be compatible with
electrical characteristics specified on
component nameplates.
1
If it is necessary to remove the
packaging for inspection prior to
completion of on site handling, retain
packaging parts and reapply them by
tapping in position to prevent damage
to the casing. The unit as supplied
has a shipping base which is suitable
for handling by a fork lift truck.
TRANE
BDH(V)B
Model Nomenclature
Digit 1,2
B D
BLOWER COIL UNIT, BELT-DRIVEN, Cooling Only
Digit 3
H
Airflow Configuration
H = Horizontal Discharge
V = Vertical Discharge
Digit 4
B
Development Sequence,
B = Second
Digit 5,6,7
0 4 8
Nominal Capacity, Airflow [CFM]
048 = 4800
065 = 6500
Digit 8
G
Installed Motor kW
G = 2.2
H = 3.0
J = 4.0
K = 5.5
MODEL
BDH/V B 048
BDH/V B 065
BDH/V B 080
080 = 8000
MOTOR SIZE
OVERSIZE
STANDARD
J = 4.0kW
G = 2.2kW
K = 5.5kW
H = 3.0kW
K = 5.5kW
J = 4.0kW
FAN
SIZE
KAT 15s
KAT 18s
KAT 18s
Digit 9
0
Electrical rating / Utilization Range : Volt / Phase / Hz.
D = 380-415V / 3Ph / 50Hz
K = 380V / 3Ph / 60Hz
3 = 230V / 3Ph / 60Hz
4 = 460V / 3Ph / 60Hz
S = SPECIAL
Digit 10
1
Chilled Water Coil
1 = 3 Row / RH Connection
2 = 3 Row / LH Connection
3 = 4 Row / RH Connection
4 = 4 Row / LH Connection
Digit 11
0
Future Use
Digit 12
A
Factory Installed Option
A = 1” Filter (Standard)
B = 2” Washable Filter
C = Discharge Plenum c/w Louver (Applicable on BDV - Series Only)
D = 2” Washable Filter & Discharge Plenum c/w Louver
Digit 13
0
Future Use
Digit 14
A
Minor Design Sequnce
A = First
Digit 15
A
Service Indicator
2
®
TRANE
®
General Specifications
BDHB / BDVB
Model
Nom. Airflow
CFM
CMH
Cooling Coil
Coil Face Area
3 Row
Total Capacity
WFR
WPD
4 Row
Total Capacity
WFR
WPD
Sq. ft (m2)
Row/FPI
MBH(kW)
GPM (L/S)
ft. wg (kPa)
Row/FPI
MBH(kW)
GPM (L/S)
ft. wg (kPa)
Fins Material
Header Material
Tube Size (OD) in (mm)
Header Diameter (OD)
in (mm)
Drain Connection Size
in (mm)
Fan
Drive Type
Fan Type
Fan Size
No. of Fans
Motor kW / FanSpeed@**ESP 187 Pa kW / rpm
(0.75”wg **ESP incl. 1” filter & 3 row
Motor Type
Power Supply
Motor Size Standard / Hi Static Motor
kW
FLA(2) Std / Hi Static
Amp (A)
LRA(2) Std / Hi Static
Amp (A)
Filter Type
Quantity - Size in
Approx Operating Weight
Unit Dimensions : H x W x L
kg
mm
BDH(V)B 048
4800
8156
BDH(V)B 065
6500
11045
BDH(V)B 080
8000
13594
15.0 (1.39)
15.0 (1.39)
3 /12
231 (67.68)
161.3 (47.26)
261.9 (76.74)
46.03 (2.90)
32.14 (2.03)
52.18 (3.29)
22.36 (66.81)
16.21 (48.44)
27.84 (83.19)
4 / 12
279.0 (81.75)
197.2 (57.78)
320.5 (93.91)
55.59 (3.51)
39.30 (2.48)
63.87 (4.03)
43.61 (130.31)
30.75 (91.88)
55.46 (165.71)
Aluminium
Copper With Threaded Steel Connector (External)
3/8” (9.525)
1 1/4” (31.75) BSPT Threaded Connection
1 1/2” (38.10) BSPT Steel
10.22 (0.95)
Belt Drive - Constant Speed
Centrifugal Forward Curved Fan
KAT 18-18
KAT 15-15
KAT 18-18
1
1
1
3.0 / 823
2.2 / 901
4.0 / 833
4 Poles - TEFC, IP55, Class F insulation
380-415V / 3ph / 50Hz 60Hz Motor - Special Option
3.0 / 5.5
2.2 / 4.0
4.0 / 5.5
6.78 / 11.7
5.16 / 8.80
8.80 / 11.7
48.14 / 81.9
35.09 / 56.32
56.32 / 81.9
1” Washable Filters
2-20” x 20”
2-20” x 25”
2-20” x 20”
1-20” x 25”
1-20” x 25”
320
270
320
1423 x 1438 x 702
1546 x 1755 x 772
1546 x 1755 x 772
Note:
1. Cooling Coil performances are rated at 26.7°C (80°F) EDB,19.4°C (67°F) EWB and nominal airflow listed
(6.67°C EWT / 12.22°C LWT).
2. Motor current rated as per 380V / 3Ph / 50Hz.
3. Basic unit includes belt-drive fan motor, cooling coil and 1” washable filters.
4. Please refer to the product catalog for more details on unit dimension.
3
TRANE
®
Unit Installation
!
WARNING: OPEN AND
LOCK UNIT DISCONNECT
TO PREVENT INJURY OR
DEATH FROM ELECTRIC
SHOCK OR CONTACT
WITH MOVING PARTS
BEFORE ATTEMPTING ANY
INSTALLATION
OR
MAINTENANCE
The general location of the air handler
is normally selected by the architect,
contractor, and/or buyer. for proper
installation, the following items must
be considered.
1. Available power supply must agree
with electrical data on component
nameplate.
2. If external accessories are installed
on the unit, additional clearances
must be provided.
3. All ductwork should be properly
insulated to prevent condensation
and heat loss.
Note: It is recommended that the
outline drawings should be studied
!
and dimensions properly noted and
checked against selected installation
site.
Important:
If adding external
accessories to the unit, additional
clearances must be considered for the
overall space needed.
This will prevent the straps from
crushing the unit cabinet or damaging
the unit finish.
All units must be mounted level to
assure proper drainage and operation.
Unit Suspension - Typical
Lifting
Recommendations
Before Preparing the unit for lifting, the
center of gravity should be determined
for lifting safety. Because of the
placement of internal components, the
unit weight may be unevenly
distributed. The unit can be moved
using a forklift of suitable capacity. For
lifting the unit into an elevated
mounting position, run lifting straps or
slings under the unit and attached
securely to the lifting device. Use
spreader bars to protect the unit casing
from damage. Test lifts the unit to
determine proper balance and stability.
Caution: Use spreader bars to prevent
straps from damaging the unit. Install
the bars between lifting straps, both
underneath the unit and above the unit.
WARNING: ON SITE LIFTING
EQUIPMENT MUST BE
CAPABLE OF LIFTING THE
WEIGHT OF THE UNIT WITH
AN ADEQUATE SAFETY
FACTOR. THE USE OF
UNDER-CAPACITY LIFTING
DEVICES MAY RESULT IN
PERSONAL INJURY OR
DEATH
AND
CAUSE
DAMAGE TO THE UNIT.
Figure 1
4
If the unit will be suspended, use a
suspension mouting kit to isolate the
unit from structure. This is usually
accomplished through the use of
spring or rubber isolators, which are
to be furnished by the installer.
To install the suspension rods, check
each of the following before mounting
the unit.
(a) Space Requirement And
Clearances
To allow adequate space for the unit
and free air or service clearances. See
figure 3.
BDHB is applicable for horizontal
application only.
Typical Installation For BDHB
Method 1
TRANE
®
Unit Installation
Suspend the unit using the factory
provided mounting base or holes. This
is usually accomplished through the
use of spring or rubber isolators,
which are to be furnished by the
installer.
Suitable hanging type vibration
isolators (see figure 2 on page 9) may
be used in conjunction with flexible
duct connrctors to further limit vibration
transmission on critical applications.
Vertical Floor (BDVB only)
For servicing and routine maintenance,
provide access to the unit through
removable panels in the ceiling.
(b) Location, Mounting And
Positioning
Before installing any unit make sure
proper preparation has been made at
each unit location for piping and
electrical connections.
Check that the supporting structure
is strong enough to support unit
weights.
Suspend the unit using the factoryprovided threaded mounting holes on
top of the unit for BDHV or lifting lugs
for BDH/V. See Dimensional Data
Section for mounting holes or lifting
lugs location.
Caution: For BDVB, before hanging the
unit on suspension rods, reinforce the
cabinet around the knockouts, using
a large washer inside the cabinet.
Washers should be between the skin
of the air handler and the nut on the
suspension rod.
Align the mounting holes of BDH/V with
structure support and secure
suspension rods to the structure, then
to the air handler cabinet. If the
mounting holes locations do not
permit proper alignment with existing
structure, it may be necessary to field
fabricate cross members on existing
structural beams.
It is generally recommended that the
unit be mounted on the sub - base so
that adequate height can be provided
for condensate drain trap. However, if
adequate drainage can be provided,
the unit may be mounted directly on
the floor. It is recommended that either
a polyurethane or thin rubber gasket
be applied to the unit base to prevent
paint damage and subsequent
corrosion. Before installing any unit
make sure proper preparation has
been made at each unit location for
piping and electrical connections.
Allow adequate space for the unit and
free air or service clearances. Refer to
Dimension Data Section (for general
unit dimension).
All BDVB can be installed back to the
wall. Service clearance required is 1m
at both left and right hand sides of
BDVB. 1m in front of the coil is
minimum recommended airflow
clearance.
Vertical Sub - base (BDVB
only)
An accessory sub - base is available
for vertical floor mount configuration,
wihich will increase the height of the
unit by 152 mm. It also allows for
condensate drain trapping.
5
Water Pipe Connections
The Water coils for the BDH/V series
units have been designed with 3/8”
(34.93 mm)OD copper tubes and
W3BS aluminium fins. The copper
headers are fitted with 43mm (1-1/4”)
BSPT steel adapter for ease of
connection.
TRANE
®
Unit Installation
Warning:
Care must be taken when
connecting pipework to the coil
headers.
The header will not
withstand the torque necessary for a
watertight joint. Always support the coil
connection with a suitable wrench
when connecting pipework to the unit.
Condensate protection for
chilled water headers,
valves and piping must be
provided by installer.
Condensate
Connections
Drain
These air handlers come with
standard drain pan. 38mm diameter
drain connections are provided on the
unit sides as required. U-Trap must
be applied to avoid water being sucked
back. See Figure 4
Auxiliary Drain Pan
Filters
Electrical connection
Air handlers are shippen with 1"
washable filters installed in the unit,
2"or 4" high efficiency secondary filter
(BDVB) as an option. For filter
dimensions, refer to General
specification.
Filters shall be
accessible from the side coil access
panel.
All electrical lines, sizing, protection
and grounding must be in accordance
with the National Electric code and local
codes.
1. If conduit is used, isolate whenever
vibration transmission may cause
a noise problem within the building
structure.
2. Ensure all connections are tight and
no wires exposed.
3. All accessories must be installed
and wired according to the
instructions packaged with that
accessory.
Duct Connections
The supply and return ducts should be
connected to the unit with flame
retardant duct connectors and the use
of flexible connectors field supplied is
recommended for all duct connections
in order to reduce vibration
transmission. See figure 5.
The retum duct should be sized to the
same dimensions as the return inlet
of the unit.
A field fabricated auxiliary drain pan
may be installed under the unit, and
when condensate overflow may cause
damage. This drain pan will eliminate
any excess condensation that may be
due to extreme humidity or an
obstructed drain in the primary drain
pan. Drain lines from this pan must
be installed, but should not be
connected to the primary drain line
from the unit.
Isolate the auxiliary drain pan from
both the air handler and the structure.
6
!
WARNING: WHEN INSTALLING OR SERVICING THIS
EQUIPMENT, ALWAYS EXERCISE BASIC POSSIBILITY OF
ELECTRIC SHOCK THAT
COULD RESULT IN SEVERE
PERSONAL INJURY OR
DEATH.
TRANE
®
Unit Configuration
7
TRANE
Dimension Data
8
®
BDHB 48 - HDT
TRANE
®
Dimension Data
9
BDVB 48 - VDT
TRANE
Dimension Data
10
®
BDHB 65/80 - HDT
TRANE
®
Dimension Data
11
BDVB 65/80 - VDT
TRANE
BD - Series Wiring Diagram
12
®
TRANE
®
Operation / Start-Up
Pre-Start-Up Inspection
Start-Up procedures
Perform the following checks and
inspections before operating the unit.
After completing all items under "PreStart-Up", the unit may be started and
the following checks and adjustments
performed:
Inspection Checklist
a)Unit is mounted securely to the
ceiling support rods (mounting
units).
b)Ductwork connections are
complete, valve and piping have
thoroughly insulates.
c)Coil connections are complete
and tight.
d)Condensate
drain
pan
connections are complete and
tight.
e)Electrical
connections
completed. Wiring is correct and
in accordance with the wiring
diagram. Ground connection
completed.
f)Check and retighten, if necessary
all the motor, fan pulley, fan
bearings and wheel.
g)Rotate fan by hand, to ensure that
is runs freely and that there is no
interference.
h)Check and retighten, if
necessary, drive and bearing
bolts, motor clamp plate bolts
and isolator bolt.
i)Check to ensure that pulley is
correctly aligned and that shaft
is parallel.
j)Check belt tension as per
instruction given in the
maintenance section.
13
a)Measure the motor voltage and
amps on all phases to insure
proper operation.
Compare these reading with the
motor nameplate.
b)Disconnect load and start motor
to check the direction of rotation.
If the rotation need to be
changed, stop the motor
completely and change the
direction of rotation by changing
the line connection.
c)After connecting the load, the
motor should start quickly and
run smoothly. If it does not, the
power supply should be
switched off at once and all
connections, as well as the
power supply, should be rechecked before re-starting.
d)In the event of excessive vibration
or unusual noises, the motor
should be disconnected from the
load and checked for poor
alignment, loose mounting bolts,
etc.
e)When the motor has been
operated under load for a short
period of time, check that the
operating current with the
nameplate current.
TRANE
®
Maintenance
!
WARNING:
WHEN
INSTALLING OR SERVICING
THIS EQUIPMENT, ALWAYS
EXERCISE BASIC SAFETY
PRECAUTIONS TO AVOID
THE POSSIBILITY OF
ELECTRIC SHOCK THAT
COULD
RESULT
IN
SEVERE
PERSONAL
INJURY OR DEATH.
Monthly Inspection
1Check condition of air filters and
replace them if necessary.
2.Check the drain pan to be sure that it
is clean and free to carry the flow of
condensate through the drain line.
3.Check the coil surface for
cleanliness. Clean if necessary.
Yearly Inspection
1.Replace filters.
2.Check coil surface, clean by
vacuuming or flushing with cold
water. Do not use steam or hot water.
3.Carry out check (g) through (j) as
detailed in inspection chelist in the
Operation Section.
4.Inspect the condition of the fan belt
and replace if necessary.
The belts fitted to units cannot achive
design performance without the
correct tensioning.See figure 6.
5.Check condition of vibration isolators,
replace if there is any sign of wear,
loosening or material deterioration.
6.Check fan bearings for noisy
operation and excessive lubricant
leakage. Replace if necessary.
7.Inspect the condensate drain pan
and condensate piping to make sure
they are clear and will carry away all
water.
8.Inspect the control panel wiring to
make sure connections are tight and
insulation is intact.
9.Check system for water leaks.
14
Change / Clean Filters
Change or clean air filters at least twice
a year. Filters will require more
frequent care under high load
conditions or dirty air. A clogged air
filters reduces airflow, cooling capacity
and increases energy usage.
To clean washable filters, remove the
filter media and wash it in water to
remove dust, dirt and lint; allow to dry
thoroughly before re-installing in the
units. Do not rub or wring.
Washable filters can also be cleaned
by blowing with compressed air in
opposite direction of filter airflow.
High efficiency secondary filter can't be
washed and must be replaced when it
is dirty.
TRANE
®
Maintenance
It is important that belts are maintained
at the correct tension to avoid
premature bearing failure and
unnecessary belt wear. There are two
methods of checking belt tension.
a)The increase in belt length when it
is stretched can be measured. The
increase under tension should be
from 0.6% for a small unit with
continuous running, to 1.0% for large
units with irregular motor torque.
b)Using a proprietary instrument such
as the browning belt tension
checker.
Belt Maintenance
Clean fan belts and pulleys with a dry
cloth. Oil and grease must be kept off
belts. The use of a belt dressing is not
recommended. Where replacing
belts, use a matched set. Do not force
belts onto pulleys, but adjust motor
position to allow mounting and then
re-tighten.
Sheave Alignment
When the sheaves are aligned, the
straightedge will touch both sheaves
at points A throught D. A string, drawin
tight may be used in the same manner.
For uneven width sheaves, place a
string in the center groove of both
sheaves and pull tight. Adjust sheaves
and tighten the sheave set screws to
the proper torques, given in Table 2.
To prevent interference of the fan frame
with the belt, make sure that the belt
edge closest to the motor has the
proper clearance from the fan frame,
as shown in Figure 7.
Align the fan and motor sheaves by
using a straightedge as shown in
Figure 8. The straightedge must be
long enough to span the distance
between the outside edges of the
sheaves.
Table 2
Recommended Torques for Tightening Sheaves and Bearing Thrust Collar
Torque for Tightening
Sheave Setcrews
Torque for Tightening
Bearing Thrust Collar
Torque for Tightening
Fan Wheel Setscrews
Inch
Lbs.
Foot
Lbs.
N-m
Inch
Lbs.
Foot
Lbs.
N-m
Inch
Lbs.
Foot
Lbs.
N-m
144
12
16.3
66
5.5
7.5
144
12
16.3
Pulley Alignment
This is checked by means of a straight
edge, which should touch both edges
of both pulleys at the same time.
15
TRANE
®
Maintenance
Maintenance
Training
Contract
It is strongly recommended that you
sign a maintenance contract with your
local Service Agency. This contract
provides regular maintenance of your
installation by a specialist in our
equipment.
Regular maintenance ensures that any
malfunction is detected and corrected
in good time and minimizes the
possibility that serious damage will
occur. Finally, regular maintenance
ensures the maximum operating life
of your equipment. We would remind
you that failure to respect these
installation
and
maintenance
instructions might result in immediate
cancellation of the warranty.
16
The equipment described in this
manual is the result of many years of
research
and
continuous
development.
To assist you in obtaining the best use
of it, and maintaining it in perfect
operating condition over a long period
of time, the constructor have at your
sisposal a refrigeration and air
conditioning service school. The
principal aim of this is to give operators
and maintenance technicians a better
knowledge of the equipment they are
using, or that is under their charge.
Emphasis is particularly given to the
importance of periodic checks on the
unit operating parameters as well as
on preventative maintenance, which
reduces the cost of owning the unit by
avoiding
serious
and
costly
breakdown.
TRANE
®
Trouble Analysis
Use the tables in this section to assist
in identifying the cause of causes of a
malfunction in BD Series operation.
The column header RECOMMENDED
ACTION
will
suggest
repair
procedures.
Note: These Tables are intended as a
diagnostic aid only. For detailed repair
procedures, contact your local Trane
Service Company.
Warning: Disconnect electrical
power source and allow all rotating
equipment to stop completely before
17
inspecting or servicing the unit.
Failure to do so may result in personal
injury or death from electrical shock
or moving parts.
Warning: Disconnect electrical
power prior to access into a fan
ductwork. Even when locked out
electrically, fans may cause injury or
damage if the impeller is subject to
"windmilling". The impeller should be
secured to physically restrict
rotational movement. Failure To
secure impeller can cause severe
personal injury or death.
TRANE
®
BD Series
Trouble Analysis
Symptom
Probable cause
Recommended Action
Bearing is excessively hot
First Start After relubrication. (grease
Allow mechine to cool down and restart.
distribution) Over-lubrication,
Clean Surface of grease and purge.
Over tensioned belts.
Tension belts.
No lubricant.
Apply lubricant. Check bearings for
damage.
Motor falls to start
Misaligned bearing.
Correct alignment. Check shaft level.
Blown fuse or open circuit breaker.
Replace fuse or reset circuit breaker.
Overload trip.
Check and reset overload.
Inproper wiring or connections.
Check wiring with diagram supplied on
unit.
Improper current supply.
Compare actual supply power with
motor nameplate recommendations.
Contact power company for adjustments.
Mechanical failure.
Check that motor and driave rotate
freely. Check bearing lubricant.
Motor stalls
Open phase.
Check line for an open phase.
Overloaded motor.
Reduce load or replace with larger
motor.
Low line voltage.
Check across AC line. Correct voltage
if possible
Excessive vibration
Poor alignment.
Align bearing set screws.
Loosen and retighten bearing set
screws.
Shipping spacers not removed.
Remove shipping spacers and/ or
bolts.
Motor runs and then dies down
Over tensioned belts
Adjust belts tension.
Misaligned drive
Align drive.
Partial loss of line voltage.
Check for loose connections.
Determine adequacy of main power
supply.
Motor does not come up to speed.
Stator shorts when motor warms up.
Replace stator.
Low voltage at motor terminals.
Check across AC line and correct voltage loss if possible.
Motor overheats
Line wiring to motor too small.
Replace with larger sized wiring.
Overloaded motor.
Reduce load or replace with a larger
motor.
Motor fan is clogged with dirt
Remove fan cover, clean fan and re-
preventing proper ventilation.
place cover.
18
TRANE
®
BD Series
Trouble Analysis
Symptom
Probable cause
Recommended Action
Excessive motor noise.
Motor mounting bolts loose.
Tighten motor mouting bolts.
Rigid coupling connections.
Replace with flexible connections.
Worn motor bearings.
Replace bearing and seals.
Fan rubbing on fan cover.
Remove interference in motor fan
housing.
Rapid motor bearing wear
Excessive overhung load due to
Check belt tension and overhung load.
overtensioned drive.
Excessive overhung load due to a
Replace sheave with larger one.
small diameter motor sheave.
Loose fan belt
Motor is poorly positioned.
Adjust belt tension.
Worn or damaged belt.
Replace belt or belt set. Check sheave
alignment.
Short belt Life
Worn sheaves.
Replace sheaves.
Worn sheaves.
Replace sheaves.
Misaligned belt.
Realign drive with MVP sheave set at
mean pitch diameter.
Grease or oil on belts.
Check for leaky bearings. Clean belts
and sheaves.
Belt slipping.
Adjust tension.
Belts rubbing.
Remove obstruction or realign drive for
clearance.
Bearing Noise
Poor alignment.
Loosen bearing set screws and realign.
Inadequate lubrication.
Grease bearing(s).
Low coil capacity
Air is bypassing coil.
Prevent bypass with blockoffs.
(Chilled Water)
Coil tubes are blocked.
Clean and unblock tubes.
Incorrect airflow.
Check fan-operating conditions.
Incorrect gpm.
Check water pumps, valves and lines
for obstructions.
Under CFM or low air flow
Incorrect water temperature.
Provide proper water temperature.
Belt loose
Adjust belt tension or clean belt if it is
greasy.
Duct leakages
Check duct joining or turning.
Duct obstruction or too small
Increase fan rpm to overcome high
causing high static
static but fan and motor working limitations must be considered.
Over cfm or high air flow
Water leaking
Dirty filter or coil
Change filter and clean coil.
Low static due to oversize duct or duct
Replace pulley to reduce fan rpm to
work too short
meet requirement.
Drain pipe choked
Clear drain pipe.
Improper or no U-trap
Ensure U-trap installed properly.
Water carry over due to high velocity
Replace pulley to reduce fan rpm.
19
TRANE
®
Literature Order Number BCXB-SVX02A-E4 (April 2007)
File Number
Trane
A business of American Standard Companies
www.trane.com
For more information, contact your local district
office
Supersedes
BCXB-SVX02A (October 2006)
Stocking Location
Malaysia
Trane has a policy of continuous product and product data improvement and reserves the right to charge
design and specifications without notice. Only qualified technicians should perform the installation and
servicing of equipment referred to in this publication.