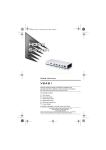
1
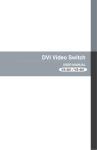
VS481.fm Page 1 Monday, July 17, 2006 1:15 PM User Manual VS-481 Read this guide thoroughly and follow the installation and operation procedures carefully in order to prevent any damage to the units and/or any devices that connect to them. This package contains: 1 User Manual 1 Quick Start Guide 1 VS-481 HDMI Switch 1 HDMI Cable (1.8m) 1 IR Remote Control Unit 1 Power Adapter If anything is damaged or missing, contact your dealer. Copyright © 2006 ATEN® International Co., Ltd. Manual Part No. PAPE -xxx - xxx Printing Date: 07/2006 ATEN and the ATEN logo are trademarks of ATEN International Co., Ltd. All rights reserved. All other trademarks are the property of their respective owners. VS481.fm Page 2 Monday, July 17, 2006 1:15 PM Note: This equipment has been tested and found to comply with the limits for a Class B digital device, pursuant to Part 15 of the FCC Rules. These limits are designed to provide reasonable protection against harmful interference in a residential installation. This equipment generates, uses and can radiate radio frequency energy, and if not installed and used in accordance with the instruction manual, may cause interference to radio communications. However, there is no guarantee that interference will not occur in a particular installation. If this equipment does cause harmful interference to radio or television reception, which can be determined by turning the equipment off and on, the user is encouraged to try to correct the interference by one or more of the following measures: Reorient or relocate the receiving antenna; Increase the separation between the equipment and receiver; Connect the equipment into an outlet on a circuit different from that which the receiver is connected; Consult the dealer or an experienced radio/television technician for help. This product is RoHS compliant. VS481.fm Page 3 Monday, July 17, 2006 1:15 PM OVERVIEW The VS-481 4 Port HDMI Switch allows you to quickly and easily share your HDMI display device with 3 HDMI and 1 DVI-D input sources. The VS-481 allows convenient switching between digital devices such as DVD players, satellite receivers, video cameras, and computers (Mac and PC). The VS-481 allows you to select the desired input source via a remote control unit and pushbuttons located on the switch. Features Low cost solution for home theater integration. Easy switching between four digital video signals (e.g., DVD and satellite receiver) by remote control or front panel switches. LED indication of video source channels. Supports high resolution: Supports HDTV resolution of 480p, 720p, 1080i and 1080p & Supports VGA, SVGA, SXGA (1280x1024) and UXGA(1600x1200). Plug-and-play. No software installation required. Installs in minutes. HDMI HDCP Compliant Backward compatible with all DVI devices (requires a DVI/ HDMI adapter when not using the DVI port on the switch) Remote control or front panel pushbutton source selection -3- VS481.fm Page 4 Monday, July 17, 2006 1:15 PM System Requirements Source Device(s) HDMI Type A output connector(s) or DVI-D connector Note: A DVI/HDMI adapter is required when connecting more than one DVI source device. Load Device A display device or receiver with an HDMI Type A input connector Cables 3 HDMI cables 1 DVI-D cable Note: Not all cables are included in this package. We strongly recommend that you purchase high quality cables of appropriate length since this will affect the quality of the audio and video display. Contact your dealer to purchase the correct cable sets. Software The following operating systems are supported: Microsoft Windows 98SE, Windows ME, Windows 2000, Windows XP, and later Red Hat Linux 7.1, 7.2, 7.3, 8.0, and later Mandrake Linux 9.0 and later SUSE Linux 8.2 and later Mac OS 8.6, 9.0, 9.1, X, 10.1, 10.2, 10.3, 10.4, and later -4- VS481.fm Page 5 Monday, July 17, 2006 1:15 PM Hardware Overview VS-481 Front View 2 1 3 # Description 1 Port Selection Buttons 2 IR Receiver 3 Port LEDs Function Pressing a port selection button routes the source from the corresponding input port to the output port for display. The IR receiver receives signals from the IR remote control. The are two Port LEDs next to each port selection button. The ON LINE LED (top) and the SELECTED LED (bottom). The ON LINE LED (orange) lights to indicate that the device attached to the corresponding port is powered on. The SELECTED LED (green) lights to indicate that the port is selected. -5- VS481.fm Page 6 Monday, July 17, 2006 1:15 PM VS-481 Rear View 1 2 3 4 # Description 1 Power Jack Function 2 HDMI Out (Type A) 3 DVI-D IN The cable from the DVI source device plugs in here. 4 HDMI IN (Type A) The cables from the HDMI source devices can plug into any of the three available ports. The power adapter cable plugs in here. The cable from the HDMI display device plugs in here. -6- VS481.fm Page 7 Monday, July 17, 2006 1:15 PM IR REMOTE CONTROL 1 2 # Description Function 1 Port Up / Port Down Buttons Press the Port Up button to cycle forward through ports (1 to 2; 2 to 3; 3 to 4; 4 to 1). Press the Port Down button to cycle backward through the ports (4 to 3; 3 to 2; 2 to 1; 1 to 4). 2 Port Selection Buttons Press a button to bring the focus directly to its associated port. -7- VS481.fm Page 8 Monday, July 17, 2006 1:15 PM Hardware Installation Before you Begin 1. Ensure that all equipment to be connected is powered off. 2. Make sure that all devices you will be connecting up are properly grounded. 3. Unplug the power cords of all the computers that have the Keyboard Power On function. Installation of this HDMI switch is simply a matter of plugging in the appropriate cables. To install the switch, refer to the installation diagram on the next page as you perform the following three steps: 1. Use HDMI cables to connect the HDMI input connector on the video display device to the HDMI output connector on the rear of the switch. 2. Use HDMI cables to connect the HDMI output connectors on the source device(s) to the HDMI input connectors on the switch. 3. If you have a DVI source device, use a DVI-D cable to connect the DVI output connector on the source device to the DVI input connector on the switch. 4. Plug the provided power adapter into an appropriate AC power source; plug the power adapter cable into the Power Jack on the HDMI Switch. This completes the installation. You may now turn on the display and source devices. -8- VS481.fm Page 9 Monday, July 17, 2006 1:15 PM Installation Diagram HDTV (HDMI) 1 4 3 2 PC (DVI-D) DVD Player (HDMI) -9- VS481.fm Page 10 Monday, July 17, 2006 1:15 PM Source Device Selection The VS-481 HDMI switch offers easy and flexible source device selection either with the front panel pushbuttons, or with the remote control. Note: Whenever the VS-481 HDMI switch is powered on, it automatically selects port 1. You may choose one of the two methods listed below to select a different port. Manual Selection To select a source device, press the pushbutton that corresponds to the port it is connected to. Note: The SELECTED LED (green) light indicates which port is currently selected. - 10 - VS481.fm Page 11 Monday, July 17, 2006 1:15 PM Remote Control Selection To select a source device with a remote control, press the number button that corresponds to the port it is connected to. Alternatively, you may also cycle through the available source devices by pushing the Port Up and Port Down buttons on the remote control unit. Use the Port Up button to select the next available port in an ascending order (from left to right on the front view panel). Use the Port Down button to select the next available port in a descending order (from right to left on the front view panel). Note: 1. The maximum range of the remote control unit is 10 meters (32 feet). 2. Aim the remote control unit at the IR receiver located on the front panel of the HDMI Switch. For optimum performance, make sure there is a clear line-of-sight between the remote control unit and the IR receiver. - 11 - VS481.fm Page 12 Monday, July 17, 2006 1:15 PM Powering Off and Restarting If you power off the VS-481, follow these steps before powering it on again: 1. Power off the attached devices. 2. Unplug the power adapter cable from the HDMI switch. 3. Wait 10 seconds, and then plug the power adapter cable back in. 4. After the HDMI switch is powered on, power on the attached devices. Note: Whenever the VS-481 HDMI switch is powered on, it automatically selects port 1. - 12 - VS481.fm Page 13 Monday, July 17, 2006 1:15 PM Specifications Function Specification Display Connections Connectors 1 Display HDMI Out 1 x HDMI Type A female (Black) Device HDMI In 3 x HDMI Type A female (Black) DVI Video In 1 x DVI-D female (White) Power LEDs Buttons 1 On Line 4 (Orange) Selected 4 (Green) Port Selection 4 x Pushbuttons, Remote Control IR Sensor 1 I/P Rating DC 5.3 V, 2.4 A Power Consumption Video Environment 120V, 12W; 230V, 12W 1600 x 1200 @ 60Hz; ; 480p, 720p, 1080i, 1080p Operating temp 0 - 50° C Storage temp Physical Properties -20 - 60° C Humidity 0 - 80% RH, Non-condensing Housing Metal Weight ? LxWxH ? - 13 - VS481.fm Page 14 Monday, July 17, 2006 1:15 PM Getting Help If you need to contact ATEN technical support with a problem, visit our website at www.aten.com. Limited Warranty IN NO EVENT SHALL THE DIRECT VENDOR'S LIABILITY EXCEED THE PRICE PAID FOR THE PRODUCT FROM DIRECT, INDIRECT, SPECIAL, INCIDENTAL, OR CONSEQUENTIAL DAMAGES RESULTING FROM THE USE OF THE PRODUCT, DISK, OR ITS DOCUMENTATION. The direct vendor makes no warranty or representation, expressed, implied, or statutory with respect to the contents or use of this documentation, and especially disclaims its quality, performance, merchantability, or fitness for any particular purpose. The direct vendor also reserves the right to revise or update the device or documentation without obligation to notify any individual or entity of such revisions, or update. For further inquiries, please contact your direct vendor. - 14 -