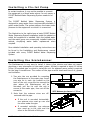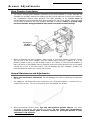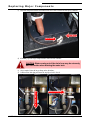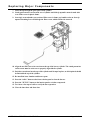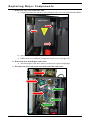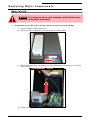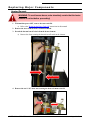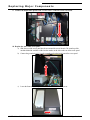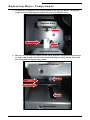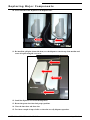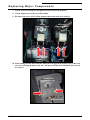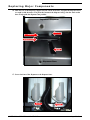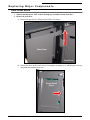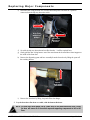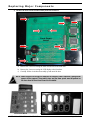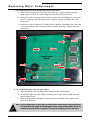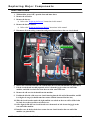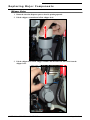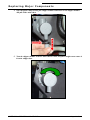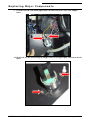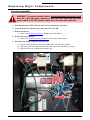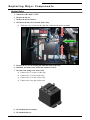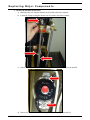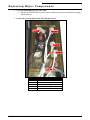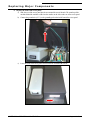
1
February 2012 Operation & Service Manual VKI Publication #N016487 CAFFÈ MIO – OPERATION AND SERVICE Page 2 of 110 T A BLE OF C ONT ENTS SECTION 1 - INTRODUCTION ............................................................................................... 3 Equipment Overview .......................................................................................................... 4 Equipment Specifications................................................................................................... 6 Using Coffee Packets.......................................................................................................... 7 General Information........................................................................................................... 7 SECTION 2 - INSTALLATION................................................................................................. 7 Unpacking ........................................................................................................................... 8 Plumbing the Unit............................................................................................................... 9 Water Filter ......................................................................................................................... 9 Installing a Flo-Jet Pump................................................................................................. 10 Installing the Scalehammer ............................................................................................ 10 Cup Holder Installation .................................................................................................... 12 Condiment Stand Installation.......................................................................................... 12 Adding Products ............................................................................................................... 13 Testing Equipment Operation .......................................................................................... 14 Publicity Graphics Installation ........................................................................................ 15 Software Menus ................................................................................................................ 16 SECTION 3 - MAINTENANCE ............................................................................................... 18 Daily Customer Maintenance ........................................................................................... 19 Preventative Maintenance ............................................................................................... 20 Brewer Adjustments......................................................................................................... 25 Brew Chamber Tension Adjustment................................................................................ 25 Brew Chamber Installation ............................................................................................. 26 General Maintenance and Adjustments........................................................................... 26 Zuma Brewer – Brew Chamber Tension Adjustment ....................................................... 27 Downloading Software Updates ...................................................................................... 29 SECTION 4 - TROUBLESHOOTING ...................................................................................... 31 Indicator Messages .......................................................................................................... 32 Troubleshooting................................................................................................................ 35 Coffee............................................................................................................................ 35 Coffee Water ................................................................................................................. 36 Chocolate ...................................................................................................................... 36 Fuses............................................................................................................................. 37 Overflows ...................................................................................................................... 37 Water Tank.................................................................................................................... 38 Zuma Brewer................................................................................................................. 39 SECTION 5 – REPLACING COMPONENTS ........................................................................... 39 Replacing Major Components .......................................................................................... 40 Outlet Valve(s) .............................................................................................................. 40 Brewer Screen ............................................................................................................... 45 Brewer .......................................................................................................................... 47 Brewer Bracket / Brewer Motor ...................................................................................... 50 Water Tank.................................................................................................................... 54 Water Tank Lid .............................................................................................................. 62 Heater Element.............................................................................................................. 66 Temperature Probe ........................................................................................................ 68 Ingredient Dispenser...................................................................................................... 71 Ingredient Dispenser Motor............................................................................................ 74 Front Circuit Board......................................................................................................... 80 Rear Circuit Board.......................................................................................................... 87 Whipper Motor............................................................................................................... 89 Inlet Valve ..................................................................................................................... 97 Fuse Box Assembly ........................................................................................................ 99 Overflow Cup Assembly ............................................................................................... 102 Heater Relay................................................................................................................ 103 Thermal Cut-Off Switch................................................................................................ 104 CAFFÈ MIO – OPERATION AND SERVICE Page 3 of 110 S E CT I ON 1 - I NT RODUC TI ON E q u i pm en t O ve r v i ew Hot Water Tank Powder Dispenser Water Tank Overflow Cup Coffee Dispenser Coffee Packet Chute Dispenser Spouts Zuma Brewer Brewer Spout Grounds Container CAFFÈ MIO – OPERATION AND SERVICE Powder Whipper Assembly Cup Stand Sensor and Overflow Sensor Page 4 of 110 S E CT I ON 1 - I NT RODUC TI ON E q u i pm en t O ve r v i ew Place your cup Choose a beverage HIDDEN BUTTONS SCROLL ‘UP’ AND ‘INCREASE’ BUTTON SCROLL ‘DOWN’ AND ‘DECREASE’ BUTTON Choose a cup size to start The diagram above illustrates the selection panel layout on the front door of the Caffè Mio. Use this diagram as reference when installing the decals onto the selection buttons. Also, note that there is only one button on the interior control panel. This button allows access to the counters and to the “SET-UP” mode. NOTE: An optional side-mounted coin changer unit (A510122) can also be installed on this unit. Consult VKI Publication # N016524 for more detailed information. CAFFÈ MIO – OPERATION AND SERVICE Page 5 of 110 S E CT I ON 1 - I NT RODUC TI ON E q u i pm en t S p e ci fi c at i on s WARNING: This equipment is designed for INDOOR USE ONLY. Placing the unit outdoors is extremely dangerous. VKI Technologies is not responsible for any damage or injury resulting from outdoor placements of these coffee makers. E LE CT RI CA L S P E CS Power Consumption (Heater): Maximum Current Draw: Power Source: 1100 wa tts 12.5 amps 115 Volts AC @ 60Hz O V ER A L L D I M EN S I O N S Height: Width: Depth: 26.5 in 13.5 in 19.5 in (67 cm) (34 cm) (49 cm) I NS T ALL AT IO N D IM E NS IO NS Height: Width: Depth: 35.5 in 22.5 in 24 in (90 cm) (57 cm) (61 cm) 85 lbs 102 lbs (39 kg) (46 kg) W EI G H T Shipping: Operational: C AP A CIT Y Coffee Hopper: 1.5 lbs Powder Hopper: 2 lbs Hot Water Tank: 1.9 gallons (680 g) (908 g) (7.3 liters) B R EW ER 12-oz Zuma Paperless Brewing Temperature: approximately 199°F (93°C) F U S ES 5 amp 15 amp Protects valves, motors and electronics Protects heater circuit only CAFFÈ MIO – OPERATION AND SERVICE Page 6 of 110 S E CT I ON 1 - I NT RODUC TI ON Us i n g C o f fee P a ck et s To brew a cup of coffee using a packet, follow these simple instructions. 1. Press the “PACKET ” button on the front selection panel. 2. Open the packet door on the top front of the machine. 3. Open the coffee packet and pour the contents into the packet opening on the top of the machine. 4. Close the packet door. 5. Press the pre-selected cup size button for the packet to start the brew cycle. The LED for this cup size will be flashing. NOTE: To cancel the packet option if the packet button has been pressed accidentally, press the “COFFEE ” button. If the cycle is not started in 30 seconds, the packet cycle will automatically be canceled. G e n e r al In f o r m ati o n The hot water feature is “PRESS AND HOLD” only. Hot water will only be dispensed as long as the “HOT WATER” button is pressed. It will not be dispensed “by the cup”. There is only one button on the inner board panel. This button is used to access the set-up mode, and to return to the main menu after a setting has been changed. The access code to enter the SET-UP is: “SET-UP” ACCESS CODE COFFEE + PACKET + CHOCOLATE + COFFEE To exit a sub-menu and get back to the main menu, press the SET - UP button. To display the VEND TOTAL, press the "COFFEE " and "STRONG" buttons simultaneously. To display the FREE VEND TOTAL, press the "CHOCOLATE " and "STRONG" buttons simultaneously. To display the WATER TEMPERATURE , press the "CAFÉ MOCHA " and "STRONG" buttons simultaneously. To reset the counters, scroll to the “ CLEAR COUNTERS” menu in the set-up and enter the follow ing access code: “CLEAR COUNTERS” ACCESS CODE COFFEE + PACKET + CHOCOLATE + COFFEE + SMALL CUP The COFFEE and SMALL CUP buttons cannot be disabled. All other buttons can be disabled in the ENABLE SWITCHES menu. This unit works in free vend only, unless an optional, side- mounted coin changer unit is installed (p/n – A510122). CAFFÈ MIO – OPERATION AND SERVICE Page 7 of 110 S E CT I ON 2 - I NSTA L LA TI ON Un pa ckin g NOTE: Prior to signing for the delivery, check the shipping carton for damage. Indicate any damage on the delivery slip and have the driver sign acknowledging it. Damages during shipping must be claimed with the carrier, and not with VKI Technologies. 1. Remove the coffee maker from its shipping carton. 2. Lift and place the coffee maker onto your workbench. WARNING: DO NOT lift the coffee maker by placing your hand underneath the front door. It is not designed to support the weight of the machine, and serious personal injury and/or damage to the unit may occur. 3. Open the outer door (the key is in a small envelope attached to the service cord) and open the top cover. 4. Remove all the shipping tape. a) Shipping tape is found in the following areas: service cord, brewer spout, cup tray. 5. Remove the cup tray shipped inside the coffee maker and install it onto the front door. CAFFÈ MIO – OPERATION AND SERVICE Page 8 of 110 S E CT I ON 2 - I NSTA L LA TI ON P l u m b i n g t h e Un i t NOT E: The shut-off valve must be easily accessible by the customer, who must be informed of its location during the installation. MATERIAL REQUIREMENTS: EQUIPMENT FITTING: Male 3/8 inch NPTF TUBING (WATER SUPPLY TO FILTER ): Reinforced PVC Beverage grade TUBING (WATER FILTER TO EQUIPMENT): Stainless steel braided hose Wate r Fil te r We recommend the use of a high quality water filter (such as Everpure Filters) which will eliminate most odors present in water, and reduce the amount of particles entering the water tank. The following are basic instructions for installing a cartridge type filter using a head bracket (Everpure type filter). 1. Assemble the retaining bracket to the filter head. 2. Insert the cartridge into the filter head and turn the cartridge clockwise. 3. Apply Teflon tape to the threaded portion of two 3/8" x 1/4" fittings and screw each into the filter head. 4. Mount the water filter at an easily accessible place for servicing, such as: (a) Under the sink against the back or side wall, (b) On the back of a utility cabinet, (c) On the back of the coffee maker, (d) Any location generally within 20 feet of the machine. NOTE: When the filter is installed or replaced, make sure to write the installation date in the provided area on the filter cartridge. Follow the manufacturer’s recommendations for filter replacement intervals. CAFFÈ MIO – OPERATION AND SERVICE Page 9 of 110 S E CT I ON 2 - I NSTA L LA TI ON In st all in g a Fl o -Je t Pu m p In certain locations, it may not be possible to connect the equipment to a direct water source. In such cases, a FLOJET Bottled Water Dispensing System needs to be used. The FLOJET Bottled Water Dispensing System is designed to pump water from a commercially available 5 gallon water bottle. The system delivers the water under pressure to the equipment on which it is connected. The illustration to the right shows a basic FLOJET Bottled Water Dispensing System installation inside the cabinet on which the equipment is installed. Both the bottled water and the water pump are conveniently installed inside the cabinet, simplifying water bottle replacement when required. More detailed installation and operating instructions can be found in the Installation and Maintenance manual included with every FLOJET Bottled Water Dispensing System. In st all in g th e S c al eha m me r The Scalehammer is very easy to install, it takes a few minutes and does not require plumbing or any interruption to the water system. All that is required is about 18 inches (45cm) of exposed pipe on which to install the unit. An adjacent power outlet is required for the plug-in transformer. The surface of the pipe must be clean and free of oil, grease and insulation. 1. Two wire ties are provided for mounting the Scalehammer to the water pipe. Insert one wire tie in each clip located on the back of the unit; wrap the ties around the pipe where the Scalehammer will be mounted, pull the tie until the unit is secure to the water pipe, then cut off the excess tie. NOTE: Maximum pipe diameter is 1” (2.5 cm) 2. Note that the antenna wires are offcentered with the pipe. If the unit is mounted horizontally: one antenna wire must go over and the other under the pipe. If mounted vertically: one antenna wire must go to the right and the other to the left side of the pipe. CAFFÈ MIO – OPERATION AND SERVICE Page 10 of 110 S E CT I ON 2 - I NSTA L LA TI ON In st all in g th e S c al eha m me r 3. Wrap the antenna wire around the pipe in a very tight coil. A minimum of 18 full coils is required for best results. Apply the supplied tape to assure that the coils are securely maintained on the pipe. Overlap the coils at least ¾ of an inch (2cm), applying two coats of tape. For best results, each antenna coil must be wound in very tight turns snuggly fitted against each other using up the entire antenna and held secure. NOTE: One antenna must be wrapped in a clockwise direction and the other in a counter-clockwise direction. 4. Insert the power supply plug into the power supply jack on the side of the Scalehammer then plug the power supply into a standard electrical outlet. When on, the green power indicator will light up and when the water will be energized, the red indictor will start flashing. If the indicator lights are not responding, unplug the power supply, wait one minute, and then plug in the power supply again. WARNING: If you suspect a malfunction of the Scalehammer, do not open or modify the unit - this will nullify the warranty and damage the unit. CAFFÈ MIO – OPERATION AND SERVICE Page 11 of 110 S E CT I ON 2 - I NSTA L LA TI ON C u p H ol d e r I n st al la ti on 1. Install two screws into the threaded clinch nuts on the top right wall of the coffee maker. 2. Place the cup holder onto the two screws making certain the screws enter the key-hole shaped slots of the cup holder. 3. Slide the cup holder downwards onto the two screws. 4. Tighten the two screws to secure the cup holder in position. C o n di me nt St an d I n s tal la ti on 1. Install two screws into the threaded clinch nuts on the top left wall of the coffee maker. 2. Place the condiment stand onto the two screws making certain the screws enter the key-hole shaped slots of the condiment stand. 3. Slide the condiment stand downwards onto the two screws. 4. Tighten the two screws to secure the condiment stand in position. WARNING: DO NOT lift the coffee maker by placing your hand underneath the cup holder or condiment stand. Remove both of these accessories prior to lifting the equipment. CAFFÈ MIO – OPERATION AND SERVICE Page 12 of 110 S E CT I ON 2 - I NSTA L LA TI ON A d d in g P ro d u ct s 1. Open the front door. 2. Raise the machine lid open. 3. Lift and remove the coffee and chocolate dispenser lids. 4. Pour fresh ground coffee into the coffee dispenser (left side). 5. Pour chocolate powder into the chocolate dispenser (right side). 6. Re-install the coffee and chocolate dispenser lids. 7. Close the machine lid. 8. Close the front door. Machine Lid Wate r Ta nk Access Pane l Ingredie nt Dispe nsers CAFFÈ MIO – OPERATION AND SERVICE Page 13 of 110 S E CT I ON 2 - I NSTA L LA TI ON T e s tin g E qui p m ent O pe r at i on 1. With the front door open, place a cup directly below the brewer spout. 2. Press the “COFFEE” button on the selection panel. 3. Press “START” to begin the brew cycle. 4. Visually verify the operation of the brewer, coffee dispenser and coffee water valve. 5. Verify the quantity of liquid dispensed into the cup. If the level is too high or too low, make the necessary water and/or product adjustments. 6. Test the temperature of the finished beverage. 7. Adjust the temperature, if required. 8. Taste the coffee and make any necessary adjustments. 9. Repeat the same procedure for the “STRONG” beverage. 10. With the front door open, place a cup on the cup stand (on the door), as chocolate is dispensed through the door spout. 11. Press the “HOT CHOCOLATE” button on the selection panel. 12. Press “START” to begin the cycle. 13. Visually verify the operation of the chocolate dispenser, whipper system (including the tubing) and chocolate water valve. 14. Verify the quantity of liquid dispensed into the cup. If the level is too high or too low, make the necessary water and/or product adjustments. 15. Taste the hot chocolate and make any necessary adjustments. 16. With the front door open, place a cup on the cup stand (on the door), as hot water is dispensed through the door spout. 17. Press and hold the “HOT button is pressed. WATER” button. Water should be dispensed as long as the 18. Visually verify the operation of the hot water valve and the tubing. CAFFÈ MIO – OPERATION AND SERVICE Page 14 of 110 S E CT I ON 2 - I NSTA L LA TI ON P u bl i ci t y G r a p hi c s I n st al la ti on The front door of the Caffè Mio is designed to easily accept (and replace) publicity graphics that can be viewed by the public. From time to time, new graphics may become available and you may want to replace the existing graphics in the equipment. The procedure for replacing the publicity graphics on the Caffè Mio door is outlined below. 1. Open the front door of the Caffè Mio. 2. Lift the publicity graphics spring plate and remove the existing graphics sheet. 3. Slide the new graphics sheet under the spring plate and align it so that it can be viewed through the front window. 4. Gently release the graphics spring plate, which will then hold the graphics sheet securely in place. 5. Close the front door of the Caffè Mio. CAFFÈ MIO – OPERATION AND SERVICE Page 15 of 110 S E CT I ON 2 - I NSTA L LA TI ON S o ft wa re Me nu s PRESS SET-UP BUTTON INSIDE FRONT DOOR There is only one button on the inner board panel. It is used to access the SET- UP mode, and to return to the main menu after a setting has been changed. MAIN MENU LCD MESSAGE DESCRIPTION OF ITS FUNCTION TO OPEN BREWER PRESS PRODUCT Press the COFFEE button to open the brew chamber. Press the COFFEE button once more to close the brew chamber. CAS H BOX PRESS PRODUCT This counter displays the total amount of money that has accumulated in the cash box, located inside the optional Coin Changer Assembly. To reset the counter to zero, press the COFFEE and MOCHA buttons on the front selection panel simultaneously. RINS E CYCLE PRESS PRODUCT Activates the different types of rinse cycles available on this equipment. Press COFFEE for the brewer rinse cycle. Press CHOCOLATE for the whipper rinse cycle. Press COFFEE to cancel the brewer rins e cycle after it has been initiated. SET-UP PRESS PRODUCT Press the COFFEE button to access the SET- UP mode. The menus displayed in the SET- UP mode are listed in the table on the next page (titled SET-UP MENU). EMPTY WATER TANK PRESS PRODUCT This feat ure opens the wat er valve and allows the water tank to drain to the valve level. The inlet valve will be disabled during this cycle. This will simplify valve replacement. Press the COFFEE button to access this menu. To drain the water tank, press the COFFEE and HOT WATER buttons simultaneously and keep them pressed – release the buttons to stop the cycle. CAUTION – The water will come out of the coffee valve and may be extremely hot. Also make certain the coffee hose i s placed inside a leak-proof container. TOGGLE FREE/COI N PRESS PRODUCT Allows you to toggle the equipment from “ FREE” mode to “COIN” mode and vice-versa. TOTAL/S ELECTION PRESS PRODUCT This counter will display the number of cups brewed for the selection that corresponds to the LED’s that are illuminated on the selection panel. To get a counter reading, press the buttons that would correspond to the counter you need to access. At this point, the LE D’s for your selection(s) will be illuminated. CAFFÈ MIO – OPERATION AND SERVICE Page 16 of 110 S E CT I ON 2 - I NSTA L LA TI ON MAIN MENU LCD MESSAGE PROCEDURE ENTER CODE CODE: An access code must be entered to get into SET-UP mode. The access code is: 'SET-UP' SET PROD. COFFEE 1. 2. 3. COFFEE + PACKET + CHOCOLATE + COFFEE Press the COFFEE button to enter this menu. Select COFFEE or COFFEE STRONG and a CUP size. Increase or decrease the product timing using the hidden scroll buttons. To test the coffee quantity to be dispensed, press the HOT W ATER button. To return to the main menu, press the SET-UP mode button. 'SET-UP' SET WATER COFFEE 1. 2. 3. Press the COFFEE button to enter this menu. Select a CUP size. Increase or decrease water timing using the hidden scroll buttons. To test the water quantity to be dispensed, press the HOT WATER button. To return to the main menu, press 'SET-UP' ENABLE SWITCH 1. 2. SET-UP mode button. Press the COFFEE button to enter this menu. Enable or disable product or cup size by pressing the corresponding button on the front selection panel. If LED is on, the corresponding button is enabled and if LED is off, the corresponding button is disabled. To return to the main menu, press 'SET-UP' SET TOP PAUS E 1. 2. 3. 1. 2. 3. 1. 2. 1. 2. mode button. SET-UP mode button. Press the COFFEE button to enter this menu. Increase or decrease delay pause timing by using the hidden scroll buttons. To return to the main menu, press 'SET-UP' SET TEMP ERATURE SET-UP Press the COFFEE button to enter this menu. Select product and cup size. Increase or decrease bottom pause timing by using the hidden scroll buttons. To return to the main menu, press 'SET-UP' DELAY PAUS E mode button. Press the COFFEE button to enter this menu. Select a cup size. Increase or decrease top pause timing by using the hidden scroll buttons. To return to the main menu, press 'SET-UP' SET BOTTOM P AUS E SET-UP SET-UP mode button. Press the COFFEE button to enter this menu. Increase or decrease the temperature by using the hidden scroll buttons. To toggle from C° to F°, press the “COFFEE” button while in this menu. To return to the main menu, press CAFFÈ MIO – OPERATION AND SERVICE SET-UP mode button. Page 17 of 110 S E CT I ON 2 - I NSTA L LA TI ON MAIN MENU LCD MESSAGE PROCEDURE 'SET-UP' CLEAR COUNTERS 1. 2. Press the COFFEE button to enter this menu. An access code must be entered to reset counters. The access code is: COFFEE + PACKET + CHOCOLATE + COFFEE + SMALL CUP To return to the main menu, press 'SET-UP' SET PRI CE 1. 2. 1. 2. 3. 4. mode button. Press the COFFEE button to enter this menu. Increase or decrease the price of the selections by using the hidden scroll buttons. To return to the main menu, press 'SET-UP' SET WATER POWDER SET-UP SET-UP mode button. Press the COFFEE button to enter this menu. Select POWDER or POWDER /COFFEE MIX. Select a CUP size. Increase or decrease the product timing using the hidden scroll buttons. To test the water quantity to be dispensed, press the HOT WATER button. To return to the main menu, press 'SET-UP' SET PROD. POWDER 1. 2. 3. 4. SET-UP mode button. Press the COFFEE button to enter this menu. Select POWDER or POWDER /COFFEE MIX. Select a CUP size. Increase or decrease the powder timing using the hidden scroll buttons. To test the powder quantity to be dispensed, press the HOT WATER button. To return to the main menu, press 'SET-UP' SET LANGUAGE 1. 2. 1. 2. mode button. Press the COFFEE button to enter this menu. Change the language from English to French by using the hidden scroll buttons. To return to the main menu, press 'SET-UP' PACKET CUP SIZE SET-UP SET-UP mode button. Press the COFFEE button to enter this menu. Press “SMALL ” cup or “L ARGE” cup to configure the packet cup size. To return to the main menu, press CAFFÈ MIO – OPERATION AND SERVICE SET-UP mode button. Page 18 of 110 S E CT I ON 3 - M A I NT E N A NC E D ai l y Cu st om e r M ain ten an ce Print or make copies of this section to use as a checklist for daily customer maintenance. You can leave a copy of this page with the customer as a reminder of the daily maintenance that needs to be performed. Empty the Waste Bin 1. 2. Open the front door. Open the inner door. 3. 4. 5. Pull out the waste bin. Discard the contents of the bin. Rinse the waste bin with warm running water and dry it thoroughly. 6. Re-install the waste bin. Adding Coffee / Chocolate 1. 2. Raise the machine lid open. Lift and remove the coffee and choc olate dispenser lids. 3. 4. 5. Pour fres h ground coffee into the coffee dis penser (left side). Pour chocolate powder into the chocolate dispenser (right side). Re-install the coffee and chocolate dispenser lids. 6. Close the machine lid. Clean Drip Tray 1. 2. Pull the drip tray straight out. Empty the contents of the tray into a sink. 3. 4. 5. Separate the grill from the tray. Rinse the grill under warm running water. Rinse the drip tray under warm running water. 6. 7. Place the grill back onto the drip tray. Slide the drip tray back into the position on the front door. Clean Interior & Exterior of Equipment 1. 2. Clean the interior of the machine by using a damp cloth (wat er only) to wipe the machine base, walls, inner and main door, etc. To clean the exterior of the machine, use a mild cleaner and a clean cloth and wipe the exterior of the machine, the counter top, etc. CAFFÈ MIO – OPERATION AND SERVICE Page 19 of 110 S E CT I ON 3 - M A I NT E N A NC E P re ven ta ti ve Ma int en an ce Print or make copies of this section to use as a checklist during a preventative maintenance visit. If any problems are identified with the equipment, they must be corrected before you leave the account. Empty the Waste Bin 1. 2. 3. Open the front door. Open the inner door. Pull out the waste bin. 4. 5. 6. Discard the contents of the bin. Rinse the waste bin with warm running water and dry it thoroughly. Re-install the waste bin. Adding Coffee / Chocolate 1. 2. 3. Raise the machine lid open. Lift and remove the coffee and choc olate dispenser lids. Pour fres h ground coffee into the coffee dis penser (left side). 4. 5. 6. Pour chocolate powder into the chocolate dispenser (right side). Re-install the coffee and chocolate dispenser lids. Close the machine lid. Brewer Rinse Cycle When performing a brewer rinse, use only VKI approved powder cleaner. Any other chemicals or detergents may damage the brewer. Do not, under any circumsta nces, soak the bre we r’s plastic parts in brewe r c leane r for prolonged periods of time (maximum is 30 minutes) as they may become brittle. 1. Open the front door and place a heat-resistant and leak-proof container below the brewer spout. This container must remain under the brewer spout for the duration of the brewer rinse cycle. 2. 3. 4. Pour a packet of VKI/Filterfresh approved brewer cleaner into the brew chamber. Press the “SET-UP” button on the interior panel. Using the hidden scroll buttons, scroll to the “RINSE CYCLE” menu. 5. To start the automated brewer rinse cycle, press the “COFFEE” button on the front selection panel. The piston will now move to the top of the brewer cylinder and water will be dispensed into the brewer, mixing with the brewer cleaner powder. The brewer will pause in this position for approximately five minutes, allowing the cleaning solution break down oils and stains that have accumulated inside the brewer and on the screen. 6. 7. a) If you need to cancel the “RINSE CYCLE” after it has been initiated, press the “COFFEE” button. After the five minutes have elapsed, the brewer will cycle, dumping the cleaning solution into the container that was placed below the brewer spout. The brewer will then automatically cycle water seven consecutive times to rinse the cleaner from the brewer. 9. After thes e cycles are finished, the brewer will stop and the machine will exit the rinse mode. 10. Brew several cups of coffee – the coffee oils are needed to re-lubricate the brewer. 8. 11. Remove the brewer chamber and rinse it under warm water to remove any residual cleaner that may have been left behind after the rinse cycle. Please note that the screen is only good for 2-3 cleanings. If the screen appears to be damaged in any way, it needs to be replaced. Refer to the "Replacing the Brewer Screen" section of this guide for instructions. CAFFÈ MIO – OPERATION AND SERVICE Page 20 of 110 S E CT I ON 3 - M A I NT E N A NC E P re ven ta ti ve Ma int en an ce Clean Brew Chamber 1. 2. 3. Rotate the coffee dispenser spout (left dispens er) so that it is in a horizontal position. Press the “SET-UP” button on the interior panel. Press the “COFFEE” button on the front selection panel to open the brewer. 4. 5. 6. Lift the releas e latch on the front of the brew chamber and pull the chamber out. Rinse the brew chamber (and wiper) with warm running water to clean it. Re-align the brew chamber wit h the brewer, making certain the wiper is centered, and slide the chamber back into the brewer as far as it will go. It will lock itself in place. Press the “COFFEE” button on the front selection panel to close the brewer. Rotate the coffee dispenser spout back to its original position. 7. 8. 9. Press the button on the interior control panel. 10. Place a large cup on the cup stand. 11. Press the “COFFEE” button on the front selection panel, and press the “START” button to brew a cup of coffee. 12. Verify that the brewer and the wiper are working properly. Clean Brewer Spout 1. Remove the brewer spout. 2. 3. Rinse the brewer spout under warm running water. Re-install the brewer spout. Chocolate Rinse Cycle 1. 2. 3. 4. 5. 6. 7. Open the front door and place a heat-resistant and leak-proof container below the door spouts. This container must remain under the door spouts for the duration of the chocolate rinse cycle. Press the “SET-UP” button on the interior panel. Using the hidden scroll buttons, scroll to the “RINSE CYCLE” menu. To start the automated choc olate rinse cycle, press the “HOT CHOCOLATE” button on the front selection panel. The chocolate valve will now open, dispensing wat er from the tank for about five seconds, and the whipper motor will activate. The hot water will flow through the whipper system and through the tubing, rinsing all of these components in the process. For a more thorough rinsing, repeat this process as often as necessary. CAFFÈ MIO – OPERATION AND SERVICE Page 21 of 110 S E CT I ON 3 - M A I NT E N A NC E P re ven ta ti ve Ma int en an ce Clean Chocolate Whipper 1. 2. 3. Rotate the chocolate dis penser spout so that it is pointing upwards. Lift the whipper vacuum funnel off the whipper bowl. Lift the whipper bowl off the whipper chamber and disconnect the water hose from the whipper bowl. 4. 5. Remove the plastic clamp securing the whipper chamber outlet elbow to the whipper chamber. th Turn the whipper chamber clockwise about 1/8 of a turn, and pull it straight out to remove it from the whipper base. 6. 7. 8. Pull the whipper blade straight out to remove if from the whipper motor shaft. Remove the two screws securing the whipper base to the metal support and remove the base. Thoroughly clean all of the parts that were removed under warm running water. 9. Re-install the whipper base ont o the metal support and secure it in place wit h the two screws. 10. Re-install the whipper blade. a) The whipper blade and whipper mot or shaft have a “D” type fit. The line at the rear or the blade must line up with the flat spot on the mot or shaft. Flat Spot Alignment Line These two areas must be aligned to install the whipper blade 11. Re-install the whipper chamber by placing it onto the bas e a turning it counter-clockwise to lock it in position. 12. Re-c onnect the outlet elbow to the whipper chamber and secure it in place with a plastic clamp. 13. Re-install the whipper bowl on to the chamber and re-connect the chocolate hose to the whipper bowl. 14. Re-install the whipper vacuum funnel onto the whipper bowl, making sure to place the notched side over the vacuum hose coupling. 15. Rotate the chocolate dis penser spout so that it is pointing downwards onto the whipper bowl. Inspect Outlet Valves 1. 2. 3. Loosen the two screws securing the water tank access panel to the right wall of the machine. Slide the right side of the water tank access panel outwards until it clears the two loosened screws. Remove the water tank access panel. 4. 5. 6. Inspect the outlet valves for any leaks around their support seals on the water tank. Check both outlet valves for any slow drips. In a valve is leaking, check the “Replacing Major Components” section of this manual for valve replacement instructions. WARNING: Do not attempt to remove and replace any valve without following the correct replacement instructions. Serious burns from hot water may occur if the hot water tank is not properly drained first. 7. Inspect the wiring to the outlet valves for any damage or loose terminals. 8. 9. Re-install the water tank access panel. Tighten the two screws securing the water tank access panel to the right wall of the machine. CAFFÈ MIO – OPERATION AND SERVICE Page 22 of 110 S E CT I ON 3 - M A I NT E N A NC E P re ven ta ti ve Ma int en an ce Clean Drip Tray 1. 2. 3. Pull the drip tray straight out. Empty the contents of the tray into a sink. Separate the grill from the tray. 4. 5. 6. Rinse the grill under warm running water. Rinse the drip tray under warm running water. Place the grill back onto the drip tray. 7. Slide the drip tray back into the position on the front door. Empty Overflow Cup 1. 2. Lift the overflow cup up and pull it towards you to free it from its support bracket. Discard the water inside the overflow cup. 3. Replace the overflow cup onto its support bracket. Check “Service” Decal 1. Make certain the “For Service Call…” decal is present on the equipment and is in good condition. 2. Install or replace the decal, if required. Check Water Filter and Expiration Date 1. 2. Check the expiration date that was written onto the water filter cartridge when it was installed. Replace the water filter cartridge, if required. Follow the manufacturer’s instructions for replacing the cartridge. Inspect the water filter for any leaks around the filter head. 3. Inspect the tubing and fittings for leaks on the inlet and outlet of the filter head. Inspect Fascia and Selection Buttons 1. 2. Inspect the fascia on the selection panel for damage and adhesion issues. If the fascia is damages or if it is not sticking well, replace the fascia. 3. 4. Inspect the decals on the buttons for wear. Replace decal(s), if necessary. Not including the “ START” button, press each selection button on the selection panel several times to verify proper operation (this includes the hidden buttons). 5. 6. Place a cup on the cup stand. Press the “START” button to verify its operation. This will start a brew cycle and the beverage will be dispensed int o the cup on the cup stand. Brew Test Cups of Each Product 1. 2. 3. With the front door closed, place a cup on the cup stand. Press the “COFFEE” button. Press “START” to begin the brew cycle. 4. 5. Taste the coffee and make any necessary adjustments. Repeat the same procedure for all the rest of the beverages on the selection panel. CAFFÈ MIO – OPERATION AND SERVICE Page 23 of 110 S E CT I ON 3 - M A I NT E N A NC E P re ven ta ti ve Ma int en an ce Temperature Adjustments (if required) 1. 2. 3. Press the “SET-UP” button on the interior control panel. Using the hidden scroll buttons, scroll “UP” until the “ ENTER CODE” menu appears on the display. Enter the access code button sequence: 1 – COFFEE, 2 – PACKET, 3 – CHOCOLATE, 4 – COFFEE 4. 5. Scroll until “SET TEMPERATURE” appears on the display. Press the “COFFEE” button to ent er this menu. 6. 7. 8. Using the hidden buttons, increase or decreas e the temperat ure setting. Press the “SET-UP” button on the interior control panel to return to the main menu. Press the “SET-UP” button on the interior control panel once more to exit the “SET-UP” mode. Reading Counters 1. 2. Press the button on the interior control panel. Using the hidden scroll buttons, scroll UP until the display reads “TOTAL/SELECTION – PRESS PRODUCT”. 3. This counter displays the number of cups brewed for the selection that corresponds to the LED’s that are illuminated on the selection panel. To get a counter reading, press the buttons that would correspond to the counter you need to access. At this point, the LED’s for your selection(s) will be illuminated. Pressing the selection button on the selection panel will switch the corresponding LED on or off. Clean Interior & Exterior of Equipment 1. 2. Clean the interior of the machine by using a damp cloth (wat er only) to wipe the machine base, walls, inner and main door, etc. To clean the exterior of the machine, use a mild cleaner and a clean cloth and wipe the exterior of the machine, the counter top, etc. CAFFÈ MIO – OPERATION AND SERVICE Page 24 of 110 S E CT I ON 3 - M A I NT E N A NC E Br e w e r A dj u st me nt s Brew Chamber Tension Adjustment • When adjusting the tension on the brewer, add full shims (K011950) or ha lf shims (K011191) between the T-bar and the H-frame, as illustrated below. These shims must be added one at a time. Do not add several shims at once as the tension may be inc reased too much. In most cases, this simple procedure is enough to stop the leaking. However, if the brewer still leaks at this point, repeat the procedure and add one more shim (start with one ha lf shim – if that’s not enough, remove the half shim and add one full shim). • Turning the T-bar should be avoided and should only be done as a last resort. If the brewer tension is still too loose after installing two full shims, remove the two shims and only once they are removed should you turn the T-bar one rotation clockwise. • If the wiper is hitting the coffee paddy as it moves towards the left, this indicates that the brew chamber is not rising high enough. Either something is interfering with the upward motion of the chamber, or the chamber tension is too tight. • If the tension is adjusted properly and the brewer is f looding, do not tighten the bre w chamber even more. Increase the bottom pause, lower the water temperature or replace the filter screen. If the problem persists, check the brewer to make certain there is no loss of vacuum, usually caused by a cracked brew chamber or cylinder, a worn or scored cylinder, or a worn Teflon seal. CAFFÈ MIO – OPERATION AND SERVICE Page 25 of 110 S E CT I ON 3 - M A I NT E N A NC E Br e w e r A dj u st me nt s Brew Chamber Installation • The correct removal and installation procedure for the brew chamber is crucial. Although the assembly can be easily removed for cleaning (by lifting up the latch bar in front of the chamber), the re-installation requires some precision. The wiper assembly on the chamber must be inserted between the two stainless steel arms located at the rear of the brewer. These two arms can be easily located once the brew chamber assembly is removed. Failure to properly align the brew chamber during installation may result in excessive brewer damage. Lift Latch and Pull Brew Chamber • When re-installing the brew chamber, make certain it is properly locked in position. Gently grip the top of the brew chamber (not the release latch) and pull it slightly. If it is not properly locked in place, you will be able to pull it out. Failure to lock the brew chamber in place will result in the chamber moving forwards, and then coming down on top of the plastic cylinder lip in front of the filter screen. This can damage the brew chamber, cylinder, the arms and bearings and/or the vertical rod housing. General Maintenance and Adjustments • Never turn the bre we r backwa rds. This will damage the arms and bearings and possibly the cam. • Use only the VKI designed screen extraction tool (illustrated below) to remove the reuseable filter screen. The use of any other tools will damage the brewer. • When performing a brewer rinse, use only VKI approved powder clea ner. Any other chemicals or detergents may damage the brewer. Do not, unde r any c irc umstances, soak the bre wer’s plastic parts in bre wer clea ner for prolonged pe riods of time (maximum is 30 minutes). CAFFÈ MIO – OPERATION AND SERVICE Page 26 of 110 S E CT I ON 3 - M A I NT E N A NC E Br e w e r A dj u st me nt s Zuma Brewer – Brew Chamber Tension Adjustment Figure 1 Figure 2 Too Loose – Side View Too Loose – Front View The wiper is not touching the surface of the cylinder and filter screen. No bend on the wiper because it is not touching the surface of the cylinder and filter screen. Figure 3 Figure 4 Perfect Tension – Side View Perfect Tension – Front View The wiper is gently touching the surface of the cylinder & filter screen. A slight deformation is seen on the wiper. Slight bend on the wiper. All coffee grounds will be removed from the surface of the filter screen. Figure 5* Figure 6* Too Tight – Side View Too Tight – Front View The wiper is stretched and extremely deformed. The brewer is under extreme pressure. Very pronounced bend on the wiper. The wiper arm and vertical rod housing are under extreme pressure. CAFFÈ MIO – OPERATION AND SERVICE Page 27 of 110 S E CT I ON 3 - M A I NT E N A NC E Br e w e r A dj u st me nt s Zuma Brewer – Brew Chamber Tension Adjustment BREWER TENSION IS TOO LOOSE Figure 1 As the wiper moves across the top of the cylinder, it does not make contact with the filter screen. This will leave a layer of coffee grounds on the screen. A brewer adjusted this way may also leak when the brew chamber is closed. If the leak is severe enough, it can result in a loss of vacuum and possible brewer flooding on larger cup sizes. Figure 2 Because the wiper is not making proper contact with the top of t he cylinder and filter screen, there is very little or no bend on it. In some cases, this may result in a lay er of coffee grounds remaining on the surface of the screen. BREWER TENSION IS PROPERLY ADJUSTED Figure 3 When a Zuma brewer is properly adjusted, the wiper will gently slide across the top of the cylinder, cleaning t he surface of the filter screen. A slight deformation of the wiper can be seen as it moves across the top of the cylinder and filter screen. Figure 4 As the wiper moves to the right side, the used coffee grounds will be transported t o the waste container. The c offee grounds will gently drop off the right-most edge of the brewer, directly into the waste container. The filter screen will be clean of coffee grounds. BREWER TENSION IS TOO TIGHT * Figure 5* When the brew chamber is too tight, the wiper begins to stretch and becomes noticeably deformed. If you look carefully at the photo, you will notice the rippling effect this has at the bottom of the wiper. The brewer is under extreme pressure at this point and the sound of the brewer motor may change to indicate that there is a larger load on it. Permanent damage to the wiper may also result. Figure 6* As the wiper moves across the top of the cylinder and filter screen, there will be a very pronounced bend on it. When it passes over the right-most edge of the brewer cylinder, and the pressure gets released from the wiper, coffee grounds will be flung towards the right wall of the machine. After only a few cycles, heavy grounds accumulation can be seen around the waste container and on the right wall of the unit. Throughout the complete cycle, the bearing on the wiper arm in under extreme pressure, causing the complete arm assembly to twist. The vertical rod is also under extreme pressure when the brew chamber closes. At this point, there is a very high risk of damage to both of these components. The bearing on the wipe arm will eventually break or snap off, and the pressure being exerted on the vertical rod will stress the plastic vertical rod housing causing it to initially crack, and break. *Please note the Zuma brewer used in Figure 5 and Figure 6 was only slightly overtightened. If the tension is higher than that used in the example, damage to the brewer components will occur much quicker and will be more severe. The following signs are an indication that the tension on the Zuma Brewer may be too tight: • The wiper has a pronounced bend as it passes over the top of the brewer cylinder and filter screen. • The wiper carriage looks like it is getting crushed between the brew chamber and the top of the brewer cylinder. • The motor sounds like it is straining due to a heavy load. • The wiper is hitting the top of the coffee paddy as it passes over it (while mov ing towards the left side). Heavy coffee grounds accumulation around the waste container and on the right wall of the machine. CAFFÈ MIO – OPERATION AND SERVICE Page 28 of 110 S E CT I ON 3 - M A I NT E N A NC E D o wnl o a din g S o ft wa r e U p d at e s For updating the software in the Caffè Mio, it is necessary to purchase a VKI Data Link downloader. A DB9 cable, a phone jack harness, and an auxiliary downloading harness are required to interface the Data Link to the coffee maker. Updates to the software will be provided on an EPROM (from VKI Technologies) which needs to be inserted into the Data Link Downloader. Please note that only one EPROM is needed in the Data Link to program as many Caffè Mio coffee makers as needed. The following procedures are required to download software updates from the Data Link device to the Caffè Mio. Equipment require d: • VKI Data Link Dow nloader (p/n – A210214, sold separately) • Auxiliary Downloading Harness (p/n - M310262, sold separately) • EPROM w ith Software Upgrade 1. Insert the EPROM containing the updated software into the VKI Data Link Downloader. a) Slide the small EPROM door open on the Data Link Dow nloader. b) With the notch on the EPROM pointing upwards (same as the notch on the socket), line up the two rows of pins on the EPROM with the two rows on the socket. Slowly insert the EPROM into the socket making absolutely certain not to bend any of the pins between the EPROM and the socket. Notch Notch CAFFÈ MIO – OPERATION AND SERVICE Page 29 of 110 S E CT I ON 3 - M A I NT E N A NC E D o wnl o a din g S o ft wa r e U p d at e s 2. Switch off the power to the machine. 3. Remove the front board access panel on the inside of the front door. a) Loosen the access panel screw. b) Lift and pull out the access panel. Front Board Access Pane l Loosen c) Connect one end of the auxiliary harness to the rear board (Data Link connector), and the other end to the Data Link downloader. d) Disconnect the phone jack cable from front board. Front Circ uit Boa rd Disconnect CAFFÈ MIO – OPERATION AND SERVICE Page 30 of 110 S E CT I ON 3 - M A I NT E N A NC E D o wnl o a din g S o ft wa r e U p d at e s e) Connect the phone jack cable to the Data Link. f) Switch on the power to the unit. g) Press the “ START ” button on the Data Link to begin the downloading operation. Please note that the new factory settings must be downloaded as well. WARNING: Do not interrupt this procedure once it is in progress as data being transferred may become corrupted, creating problems with the operation of the equipment. h) Once the download is complete, re-install the front board access panel on the inside of the front door. CAFFÈ MIO – OPERATION AND SERVICE Page 31 of 110 S E CT I ON 4 - T RO U B LE S H O OT I N G I n d i ca t o r M e s sa g e s MESSAGE BEVERAGE BEING PREPARED BREW ER HOME ERR PRESS PRODUCT POSSIBLE CAUS E CORRECTIVE ACTION Brewing cycle is in progress. The message reverts to the standby message once the current brew cycle is complete. The brewer is not in the home or starting position. Press product button to cycle the brewer. The home switch may be defective or needs to be re-adjusted or cleaned. An electrical connection to the brewer home switch is faulty. The brewer brake may not be working properly. Adjust the brake or replace the brewer motor. Connect the wiring harness to the corresponding connector on the rear board. The wiring harness is not connected to the rear board. The “CLEAR COUNTERS” menu has been accessed. Press “COFFEE” to enter this menu or press “SET-UP” to exit. The system is set to "COIN " mode, but a coin changer is not installed. Install a coin changer. Switch to "FREE" mode. DEFECTIVE COIN CHANGER SENSOR A sensor in the coin changer is defective. Replace the coin changer. EMPTY OR INSTALL CUP TRAY The cup tray may not be installed, or it may be full of liquid. Install the cup tray. If the cup stand is full of liquid, empty and clean it. The hot water valve may be leaking. Repair or replace hot water valve. If the message cannot be cleared, the rear board may be wet. Replace the board and let the wet one dry overnight. Empty and clean the water tank overflow cup. Verify the water level probe adjustment. They may be positioned too high allowing too much water into the tank. Water level probes may need to be cleaned. Inlet valve may be leaking, constantly allowing water to enter the tank. Replace the inlet valve. Water in the tank may be boiling. Turn temperature down to 185195°F. If message cannot be cleared, rear board may be wet. Replace the board and let the wet one dry overnight. CHECK WATER TEMP. HARNESS CLEAR COUNTERS PRESS PRODUCT COIN CHANGER NOT INSTALLED EMPTY WATER TANK OVERFLOW CUP The water tank overflow cup may be full of water. CAFFÈ MIO – OPERATION AND SERVICE Page 32 of 110 S E CT I ON 4 - T RO U B LE S H O OT I N G I n d i ca t o r M e s sa g e s MESSAGE EMPTY WATER TANK PRESS PRODUCT ERROR – CALL FOR SERVICE ERROR - CHECK STUCK BUTTON POSSIBLE CAUS E CORRECTIVE ACTION The “EMP TY W ATER TANK ” function has been accessed. To empty the water tank, press and hold the “COFFEE” and “HOT W ATER ” buttons simultaneously. An error is present with the machine. If this message appears, the caretaker needs to call a technician for service. A button on the front board is stuck pressed down. Fascia may be binding against the side of a button. Re-align fascia or trim fascia around the button(s). A front board button may have collapsed. Replace front board. Machine may not be getting any water - check and fix the water supply. Switch machine OFF for ten seconds and ON AG AIN . Using the Data Link Downloader, re-install the software into the rear board. ERROR DETECTED RELOAD SOFTWARE EXACT CHANGE POUR PACKET CONTENTS PLEASE CHECK BREW ER The software in the rear board has been corrupted. Equipment requires exact change to operate. Insert exact change or add some coins to the coin changer tubes. The packet system has been activated. Pour packet contents into the packet system and activate brew cycle. A problem exists with the brewer motor that prevents it from finding the home position. Check the brewer motor home switch. Check the wiring to the brewer motor. Brewer motor may be seized. Replace the motor. Brewer may be jammed. Repair or replace the brewer motor. Connect the wiring harness to the corresponding connector on the rear board. PLEASE CHECK BREW ER HARNESS PLEASE CHECK OVERFLOW HARNESS PLEASE CHECK TANK HARNESS The wiring harness is not connected to the rear board. The wiring harness is not connected to the rear board. Connect the wiring harness to the corresponding connector on the rear board. The wiring harness is not connected to the rear board. Connect the wiring harness to the corresponding connector on the rear board. CAFFÈ MIO – OPERATION AND SERVICE Page 33 of 110 S E CT I ON 4 - T RO U B LE S H O OT I N G I n d i ca t o r M e s sa g e s MESSAGE PLEASE CHECK WATER SOURCE POSSIBLE CAUS E Indicates a problem with the main water supply not getting to the water tank. CORRECTIVE ACTION At this point, the water tank is not full and this message has to be reset. To reset it, switch the power off and on. If the problem persists, check all components on the water line (water filter, tubing, fittings, etc.). Check inlet valve to make certain it is functioning properly. In the case of a temporary disruption with the water supply, the coffee maker will reset itself after every hour. The packet system door is open. Close the packet door. A correctable fault may exist with the equipment. Press the flashing button to clear this fault. Please note that the brewer may cycle after the button is pressed. PROBES CALL FOR SERVICE The water tank may be overfilling due to mineral build-up on water level probes. Clean any mineral build-up that has accumulated on the water tank level probes. REPLACE FAULTY TEMP. PROBE The electronic temperature probe is not working properly. Replace the electronic temperature probe in the water tank. The “RINSE CYCLE” has been activated. Press “CHOCOLATE” to acti vate whipper rinse or press “COFFEE” to activate brewer rinse. PLEASE CLOSE PACKET DOOR PRESS FLASHING BUTTON RINSE CYCLE CHOCO. OR COFFEE Product selected may be disabled. Press “SET-UP” to exit the rinse cycle. Check the "ENABLE SWITCHES" menu to see if product has been canceled. Coffee maker is in "standby" mode. None required. Indicates that the water tank has not yet been filled with water. TO OPEN BREWER PRESS PRODUCT The “OPEN BREWER ” menu has been accessed. Please wait a few minutes for the tank to fill. If it takes too long, a "PLE AS E CHECK WATER SOURCE" message will appear. Press “COFFEE” to open the brewer. TO CLOSE BREWER PRESS START The brewer has been opened using the “OPEN BREWER ” feature. Press “COFFEE” to close the brewer. SELECT – THEN INSERT COIN The unit is in “COIN ” mode. This only applies if the optional coin changer unit is installed. Select a product and insert the amount of money required for that product. PRICE: $ X.XX CREDIT: $X.XX The unit is in “COIN ” mode. This only applies if the optional coin changer unit is installed. The top line displays the price and the bottom line displays how much money has been inserted. SELECTION NOT AVAILABLE SELECT - THEN PRESS <CUP SIZE> TANK IS FILLING PLEASE WAIT CAFFÈ MIO – OPERATION AND SERVICE Page 34 of 110 S E CT I ON 4 - T RO U B LE S H O OT I N G T ro u b le sh o o tin g Coffee Bitter ► ► ► ► ► ► ► / Too Strong Coffee setting may be too high – decrease the coffee setting. “TOP PAUSE ” setting may be too high – decrease the “TOP PAUSE ” setting. Brewer may require a thorough cleaning – clean the brewer. Coffee may be stale or not within specifications – replace coffee. Coffee blend may be too strong – replace the blend. Water filter may need to be replaced. Water tank may need to be delimed. Too Wea k ► Ingredient dispenser may be empty – refill the dispenser with coffee. ► Coffee setting may be too low – increase the coffee setting. ► Water temperature setting may be too low – increase the temperature. ► Coffee may be stale or not within specifications – replace coffee. ► Coffee blend may be too mild – replace the blend. ► Increase “TOP PAUSE ” to increase the strength of the coffee. ► Ingredient dispenser may not be coupled properly with the motor – remove dispenser and re-install it, making certain it is coupled with the motor. Short C up Dispe nsed ► Water setting may be too low – increase the water setting. ► Water tank may not be filling quickly enough – verify main water pressure, hoses and inlet valve. ► Water filter may be clogged – replace water filter. ► If a self-piercing saddle valve was used to tap into the water supply, the valve may have an obstruction – close and open the valve. ► Brewer may be leaking or flooding – verify the brewer operation and repair, if necessary. ► Outlet valve may be defective – repair or replace outlet valve (P/N - M029082). No Product Dispensed ► Ingredient dispenser may be empty – refill the dispenser with coffee. ► Coffee setting may be set too low – increase the coffee setting. ► Wiring may not be connected to the dispenser motor – verify the wiring. ► Dispenser motor may be defective – replace dispenser motor (P/N - C110043). ► Ingredient dispenser may no be coupled properly with the motor – remove dispenser and re-install it, making certain it is coupled with the motor. ► Rear board may be defective – replace the rear board (P/N - G410232MIO). CAFFÈ MIO – OPERATION AND SERVICE Page 35 of 110 S E CT I ON 4 - T RO U B LE S H O OT I N G T ro u b le sh o o tin g Coffee Water Short C up Dispe nsed ► Water setting may be too low – increase the water setting. ► Water tank may not be filling quickly enough – verify main water pressure, hoses and inlet valve. ► Water filter may be clogged – replace water filter. ► If a self-piercing saddle valve was used to tap into the water supply, the valve may have an obstruction – close and open the valve. ► Brewer may be leaking or flooding – verify the brewer operation and repair, if necessary. ► Outlet valve may be defective – repair or replace outlet valve (P/N - M029082). No Wate r Dispensed ► Verify that the brewer hose is properly positioned on the diffuser. ► Coffee valve may not be working – repair or replace the valve (P/N - M029082). ► Check the water pressure on the main water supply. ► Verify that the water tank is filling properly and quickly. ► Inlet valve may not be working properly – replace valve (P/N – E310309S). ► Water filter may be clogged – replace water filter. Chocolate Too Wea k ► Ingredient dispenser may be empty – refill the dispenser with chocolate. ► Chocolate setting may be too low – increase the chocolate setting. ► Water temperature setting may be too low – increase the temperature. ► Ingredient dispenser may not be coupled properly with the motor – remove dispenser and re-install it, making certain it is coupled with the motor. Short C up Dispe nsed ► Water setting may be too low – increase the water setting. ► Whipper system may be clogged. Check the whipper bowl, elbow and door tube for any obstructions or powder accumulation. ► Water tank may not be filling quickly enough – verify main water pressure, hoses and inlet valve. ► Water filter may be clogged – replace water filter. ► If a self-piercing saddle valve was used to tap into the water supply, the valve may have an obstruction – close and open the valve. ► Outlet valve may be defective – repair or replace outlet valve (P/N - M029082). CAFFÈ MIO – OPERATION AND SERVICE Page 36 of 110 S E CT I ON 4 - T RO U B LE S H O OT I N G T ro u b le sh o o tin g Fuses 5 Amp F use Blowing ► If fuse blows when machine is powered-up, check the following; o Exhaust fan o Front board o Rear board o Wiring ► If fuse blows when a “COFFEE ” is brewed, check the following; o Coffee valve o Coffee dispenser motor o Brewer motor o Inlet valve o Wiring ► If fuse blows when a “CHOCOLATE ” is brewed, check the follow ing; o Whipper motor and/or transformer o Chocolate dispenser motor o Chocolate valve o Inlet valve o Wiring 15 Amp Fuse Blowing ► Verify the wiring to the high-power components of the water tank. ► Make certain all wiring terminals are pushed completely onto the tabs of the highpower components. ► Replace any damaged or burnt wiring terminals on high-power components. ► Heater element may be damaged – replace heater element (P/N - E310016). ► Heater relay may be defective – replace heater relay (P/N - M018R08). ► Check the wiring inside the fuse box and on the 15 amp fuse holder (P/N - E110114) – repair or replace any damaged components. Overflows Cup Tray Overflow ► The cup tray may be full of liquid – clean and dry the catch. ► The “HOT WATER” valve may be leaking – repair or replace the valve (P/N - M029082). ► The “CHOCOLATE ” valve may be leaking – repair or replace the valve (P/N - M029082). ► Check the brewer home position – if the piston stops below the pour spout creating constant dripping after each cup, correct the home position by adjusting the brewer “HOME ” switch (P/N - M019399). ► If no overflow is present, the rear board may be wet – thoroughly dry or replace the rear board (P/N - G410232MIO). Wate r Ta nk Ove rflow ► The overflow cup may be full of liquid – clean and dry the cup. ► Equipment may have been moved, causing water to spill out of the water tank. ► Water tank may be boiling over – reduce the water temperature. ► Water level probes may require cleaning. ► Water level probes may not be pushed completely into the grommets – adjust the probes. ► Inlet valve may be leaking – replace the inlet valve (P/N - E310309). CAFFÈ MIO – OPERATION AND SERVICE Page 37 of 110 S E CT I ON 4 - T RO U B LE S H O OT I N G T ro u b le sh o o tin g Bre wer Overflow ► Water setting may be too high – reduce the water setting. ► Bottom pause setting may need to be increased. ► Coffee setting may be too high – reduce the coffee setting. ► Coffee may be stale or not within specifications – replace coffee. ► Water temperature may be too high – reduce the temperature. ► Screen assembly may be dirty and clogged – clean or replace the brewer screen assembly (P/N - K310306). ► Screen assembly may be damaged – replace screen assembly (P/N - K310306). ► Brew chamber may be cracked creating a vacuum loss – replace chamber (P/N M044065). ► Cylinder may be scored or cracked creating a vacuum loss – replace cylinder (P/N M044071). ► Teflon seal on piston may be worn – replace Teflon seal (P/N - K110174). Water Tank Boiling /Overfilling ► Clean and dry the overflow cup. ► The equipment may have been moved or bumped. ► If water tank is overfilling, check the following; o Water level probes may require cleaning. o Water level probe harness may be defective – replace the probe harness. o Inlet valve may be leaking – replace inlet valve (P/N - E310018). ► If water tank is boiling over, check the following; o Water temperature setting may be too high – reduce temperature setting. o Temperature probe may be defective – replace the probe (P/N - M210220). o Components inside water tank may be covered with scale – delime water tank. o Verify the wiring and connections to the water tank. Not Heating ► The overflow cup may be full of liquid – clean and dry the overflow cup. ► 15 amp fuse may be blown – replace the fuse (P/N - M018046). ► Thermal cut-off switch may be tripped – press the small button in the center of the thermal cutoff switch to reset. ► If thermal cutoff switch trips with a full water tank, replace the thermal cutoff switch (P/N - A210087). ► Verify the wiring and connections to the water tank. ► Check for power to the heater element. If power is present, replace the heater element (P/N - E310016). ► The heater relay may be defective – replace the heater relay (P/N - M018R08). ► Temperature probe may be defective – replace the temperature probe (P/N M210220). CAFFÈ MIO – OPERATION AND SERVICE Page 38 of 110 S E CT I ON 4 - T RO U B LE S H O OT I N G T ro u b le sh o o tin g Zuma Brewer Grounds Not Being Wipe d ► Brew chamber may not be installed properly. Open the brewer and re-install the brew chamber – the wiper must be positioned between the two brewer arms. ► Brew chamber assembly may be damaged – repair or replace the brew chamber assembly (P/N - M044065). ► Wipe arm may be damaged – replace the wipe arm (P/N - E210285). ► Triple cam may be damaged – replace the triple cam (P/N - K033001). Bre wer Flooding / Overflowing ► Water setting may be too high – reduce the water setting. ► Bottom pause setting may need to be increased. ► Coffee setting may be too high – reduce the coffee setting. ► Coffee may be stale or not within specifications – replace coffee. ► Water temperature may be too high – reduce the temperature. ► Screen assembly may be dirty and clogged – clean or replace the brewer screen assembly (P/N - K310306). ► Screen assembly may be damaged – replace screen assembly (P/N - K310306). ► Brew chamber may be cracked creating a vacuum loss – replace chamber (P/N M044065). ► Cylinder may be scored or cracked creating a vacuum loss – replace cylinder (P/N - M044071). ► Teflon seal on piston may be worn – replace Teflon seal (P/N - K110174). Leaking ► Verify that the brewer hose is properly positioned on the diffuser. ► Brew chamber may not be closing properly – adjust the brew chamber tension. ► Brew chamber may be cracked – replace brew chamber (P/N - M044065). ► Brewer cylinder may be cracked – replace cylinder (P/N - M044071). Noisy Operation ► If the brewer was just cleaned with brewer cleaner, make several cups of coffee to re-lubricate the brewer. ► Brew chamber may not be installed properly. Open the brewer and re-install the brew chamber – the wiper must be positioned between the two brewer arms. ► Brew chamber may be too tight – loosen the T-bar or remove a shim. ► If the brewer motor is equipped with a cooling fan, make certain the fan is not rubbing on anything while brewer motor is operation. ► Verify that the waste bin bag is not caught in any part of the brewer and motor. ► The brewer motor may have an internal problem w ith the gears – replace the brewer motor (P/N - A210289). ► A brewer component may be worn – replace brewer (P/N - A510033S). Home Position ► Verify the operation of the brewer "HOME " switch (P/N - M019399) – adjust or replace, if necessary. ► The brake on the brewer motor may not be working – clean/adjust the brake, or replace the brewer motor (P/N - A210289). ► Verify the wiring and connections. ► Sensor on the rear board may be defective – replace the rear board (P/N G410232MIO). CAFFÈ MIO – OPERATION AND SERVICE Page 39 of 110 S E CT I ON 5 – REP LA C I NG C O M P O N E NT S R e pl a ci n g Ma j o r C om p o nen t s Outlet Valve(s) 1. Turn off the water supply to the machine. 2. Switch off the power to the machine. 3. Remove the waste bin. 4. Drain the water tank to a level below the valves. a) Remove the clip from top of the drain plug. Remove locking clip b) Gently push the drain plug upwards to open it. Push plug upwards CAFFÈ MIO – OPERATION AND SERVICE Page 40 of 110 S E CT I ON 5 – REP LA C I NG C O M P O N E NT S R e pl a ci n g Ma j o r C om p o nen t s c) Place the clamped end of the brown drain hose into a heat-resistant and leak-proof container. Drain Hose Hose Clamp d) Carefully open the large clamp and drain water into the container. CAUTION: Water coming out of the drain hose may be extremely hot. Use caution when draining the water tank. e) Once emptied, close the large clamp on the drain hose. f) Pull down the drain plug and insert the top clip to lock it closed. Pull fitting downwards CAFFÈ MIO – OPERATION AND SERVICE Insert locking clip Page 41 of 110 S E CT I ON 5 – REP LA C I NG C O M P O N E NT S R e pl a ci n g Ma j o r C om p o nen t s 5. Remove the valve cover. a) Loosen (but do not remove) the two screws securing the valve cover to the right wall of the machine. Valve Cover Loosen Remove Loosen b) Remove the screw securing the left side of the cover. c) Pull the valve cover straight out, clearing the loosened screws on the right wall. 6. Disconnect the wires from the valve that needs to be removed. Hot Water Valve Chocolate Valve Coffee Valve CAFFÈ MIO – OPERATION AND SERVICE Page 42 of 110 S E CT I ON 5 – REP LA C I NG C O M P O N E NT S R e pl a ci n g Ma j o r C om p o nen t s 7. Pull the old valve(s) out towards you making certain to leave the silicone valve support in place. CAUTION: A small quantity of water will drip out when a valve is removed and this water may be extremely hot. Use caution when removing the outlet valves. Silicone Support 8. Insert the new valve(s) into the appropriate outlet of the hot water tank. a) The top outlet is for chocolate, the center for hot water and the lower for coffee water. 9. Re-connect the valve wires. a) Coffee valve wires are numbered #3 and #1-8. Hot water valve wires are numbered #2 and #1-7. Chocolate valve wires are numbered #4 and #1-6. The green ground wires also need to be reconnected. #1-7 #2 #13-5 #1-8 #3 #13-6 Hot Water Valv e Chocolate Valv e #1-6 #4 #13-4 Cof f ee Valve CAFFÈ MIO – OPERATION AND SERVICE Page 43 of 110 S E CT I ON 5 – REP LA C I NG C O M P O N E NT S R e pl a ci n g Ma j o r C om p o nen t s 10. Attach the hoses. a) The brown hose goes onto the coffee valve, the hose to the whipper goes onto the chocolate valve, and the hose going to the door goes onto the hot water valve. 11. Reconnect the coffee hose (brown) to the brewer. Coffee Hose Bre wer 12. Turn on the water supply to the machine. 13. Switch ON the power to the machine. 14. Allow the water tank to fill and check for leaks. 15. Verify the operation of each valve. a) Test brew a cup of coffee and a cup of hot chocolate. b) Dispenser a cup of hot water. 16. Switch the machine power OFF. 17. Replace the valve cover. a) Slide the right side over the two loosened screws. b) Secure the left side with another screw. c) Tighten the two screws on the right side. Valve Cover Tighten Install Tighten CAFFÈ MIO – OPERATION AND SERVICE Page 44 of 110 S E CT I ON 5 – REP LA C I NG C O M P O N E NT S R e pl a ci n g Ma j o r C om p o nen t s Brewer Screen 1. Open the front door and inner door. 2. Press the "S ET-UP" button on the interior panel. a) The display now reads “TO OPEN BREWER – PRESS PRODUCT”. Set-Up Button Interior Pane l 3. Press the “COFFEE” button on the front selection panel. a) The brewer motor will now cycle and stop with the brew chamber in the open position. 4. Remove the brewer spout. 5. Remove the brew chamber. 6. Using a Zuma filter screen extractor tool, hold & turn handle section so tip section faces upward. CAFFÈ MIO – OPERATION AND SERVICE Page 45 of 110 S E CT I ON 5 – REP LA C I NG C O M P O N E NT S R e pl a ci n g Ma j o r C om p o nen t s 7. Insert the tip through the pour spout on the cylinder. 8. Gently push extractor tool towards rear of cylinder and slide tip up until contact is made with rear of filter screen's plastic frame. 9. Once tip is centered under rear section of filter screen's frame, pry handle section to force tip upward. Resulting force will dislodge the filter screen, which can then be removed. 10. Align the new filter screen in recession on the top of the brewer cylinder. The round protrusion on the screen must be at the rear to properly align with the cylinder. 11. Push the screen down into the top of the cylinder until it snaps in place, at which point it should be flush with the top of the cylinder. 12. Re-install the brew chamber and brewer spout. 13. Press the “coffee” button on the front selection panel to close the brewer. 14. Press the "SET-UP" button on the interior panel to exit the set-up mode. 15. Test brew a few cups of coffee to verify the brew operation. 16. Close the inner door and front door. CAFFÈ MIO – OPERATION AND SERVICE Page 46 of 110 S E CT I ON 5 – REP LA C I NG C O M P O N E NT S R e pl a ci n g Ma j o r C om p o nen t s Brewer 1. Press the "S ET-UP" button on the interior panel. a) The display now reads “TO OPEN BREWER – PRESS PRODUCT”. Set-Up Button Interior Pane l 2. Press the “COFFEE” button on the front selection panel. a) The brewer motor will now cycle and stop with the brew chamber in the open position. 3. Release the brewer lock pin. a) Lower the lock pin by pulling it down all the way. b) Turn the pin to the left until it is directly below the flange, and release. Locke d Position Unloc ked Position 4. Remove the old brewer from the brewer bracket. a) Disconnect the coffee hose from the top of the brewer. b) Gently grasp the brewer with one hand on the top, and the other hand on the bottom. c) Move the brewer to the right until it clears the front of the bracket, and pull it towards you until it is free from the bracket. CAFFÈ MIO – OPERATION AND SERVICE Page 47 of 110 S E CT I ON 5 – REP LA C I NG C O M P O N E NT S R e pl a ci n g Ma j o r C om p o nen t s 5. Place the new brewer onto the brewer bracket. a) Make sure that the brew chamber is open. b) Make sure that the brewer drive pin aligns with the coupling on the brewer motor. Location Fla nge Rear Support Motor Coupli ng Brewe r Drive Pi n c) Gently grasp the brewer, with one hand on the top, and the other hand on the bottom. d) Align the rear support of the brewer with the flange at the rear of the brewer bracket. e) Push the brewer into place to engage the brewer drive pin with the slot in the motor coupling. If it does not align, move the brewer crank arm slightly until you feel the brewer engaging with the motor coupling. f) Once engaged, move the brewer slightly to the left until it is behind the left support. 6. Engage the lock pin. a) Release the lock pin from under the front flange and engage it with the hole located on the front left side of the brewer. The brewer should now be firmly in place. Unloc ked Position CAFFÈ MIO – OPERATION AND SERVICE Locke d Position Page 48 of 110 S E CT I ON 5 – REP LA C I NG C O M P O N E NT S R e pl a ci n g Ma j o r C om p o nen t s 7. Connect the coffee hose to the top of the brewer. Coffee Hose Bre wer 8. Press the “COFFEE” button on the front selection panel. b) The brewer motor will now cycle and stop in the home (starting) position. 9. Press the "S ET-UP" button on the interior panel to exit the set-up mode. Interior Pane l Set-Up Button CAFFÈ MIO – OPERATION AND SERVICE Page 49 of 110 S E CT I ON 5 – REP LA C I NG C O M P O N E NT S R e pl a ci n g Ma j o r C om p o nen t s Brewer Bracket / Brewer Motor 1. With the machine power OFF, remove the brewer. a) See “Replacing the Brewer” section for more details. 2. Remove the brewer bracket. a) Loosen, but do not remove, the three screws from the left side of the brewer bracket. Loosen Loosen Bre wer Bracket Loosen b) Lift the bracket clear of the screws and pull it away from the wall. c) Disconnect the two brewer harnesses and the ground wire from the rear board. Rea r C irc uit Board Brewe r Ha rness Brewer Harness Ground Wire CAFFÈ MIO – OPERATION AND SERVICE Page 50 of 110 S E CT I ON 5 – REP LA C I NG C O M P O N E NT S R e pl a ci n g Ma j o r C om p o nen t s 3. Loosen the two upper screws securing the motor to the bracket. 4. Remove the two lower screws securing the motor to the bracket. Bre wer Bracket Loosen Loosen Bre wer Motor Remove Remove 5. Remove the brewer motor assembly from the brewer bracket. 6. Disconnect the power wires (#8 and #9) from the brewer motor. 7. Remove the switch plate assembly from the old brewer motor. a) Remove the three screws that secure the switch plate to the motor. Remove Screw Remove Screw Bre wer Motor Remove Screw Power Wires CAFFÈ MIO – OPERATION AND SERVICE Switc h Plate Page 51 of 110 S E CT I ON 5 – REP LA C I NG C O M P O N E NT S R e pl a ci n g Ma j o r C om p o nen t s 8. Install the brewer motor onto the brewer bracket. a) Install the brewer motor to the brewer bracket using four screws – the stack of the brewer motor should be towards the right side. b) Tighten all four screws. Bre wer Bracket Inst all Inst all Bre wer Motor Stack Inst all Inst all 9. Re-connect the power wires to the brewer motor. a) Wires #8 and #9. 10. Install the switch plate assembly onto the new brewer motor. a) Secure the switch plate to the motor with three screws. Wire #9 Inst all Inst all Bre wer Motor Inst all Wire #8 CAFFÈ MIO – OPERATION AND SERVICE Switc h Plate Page 52 of 110 S E CT I ON 5 – REP LA C I NG C O M P O N E NT S R e pl a ci n g Ma j o r C om p o nen t s 11. Re-connect the two brewer harnesses and the ground wire to the rear board. Rea r C irc uit Board Brewe r Ha rness Brewer Harness Ground Wire 12. Re-install the brewer bracket assembly onto the left wall of the machine. a) Make sure the bracket goes over the three loosened screws. b) Tighten the screws to secure the bracket to the wall. Tighten Tighten Bre wer Bracket Tighten 13. Replace the brewer. a) See “Replacing the Brewer” section for more details. CAFFÈ MIO – OPERATION AND SERVICE Page 53 of 110 S E CT I ON 5 – REP LA C I NG C O M P O N E NT S R e pl a ci n g Ma j o r C om p o nen t s Water Tank 1. Switch the coffee maker "OFF". 2. Open the front door and open the machine lid. 3. Remove the water tank access panel on top of the machine. a) Remove the screw securing the access panel to the top of the machine. Machine Lid Ingredie nt Dispense rs Wate r Ta nk Access Pane l Remove b) Slowly lift the front of the water tank access panel and disconnect the ground wire connected inside the panel. Disconnect Wire c) Lift the access panel open and pull it forward to release it at the rear. CAFFÈ MIO – OPERATION AND SERVICE Page 54 of 110 S E CT I ON 5 – REP LA C I NG C O M P O N E NT S R e pl a ci n g Ma j o r C om p o nen t s 4. Drain the water tank. a) Have a heat-resistant and leak-proof container ready for draining the water tank. b) Remove the top clip on the drain fitting and push the drain plug upwards. Push Plug Upwards Remove Lock Clip CAUTION: Water coming out of the water tank may be extremely hot. Use caution when draining the water tank or when removing the outlet valves. 5. Remove the brewer. a) See “Replacing the Brewer” section for more details. 6. Disconnect the inlet hose. a) Remove the hose clamp securing the inlet hose to the inlet fitting. b) Pull the inlet hose off the inlet fitting. Remove Clamp Inlet Hose CAFFÈ MIO – OPERATION AND SERVICE Page 55 of 110 S E CT I ON 5 – REP LA C I NG C O M P O N E NT S R e pl a ci n g Ma j o r C om p o nen t s 7. Remove the valve cover on the water tank. a) Loosen (but do not remove) the two screws securing the valve cover to the right wall of the machine. Valve Cover Loosen Remove Loosen b) Remove the screw securing the left side of the cover. c) Pull the valve cover straight out, clearing the loosened screws on the right wall. 8. Remove the hoses from all three outlet valves. a) After removing the coffee hose, connect it to the brewer to prevent misplacing it. 9. Disconnect the power and ground wires from each of the outlet valves. Disconnect Wire s Disconnect Wire s Hot Wat er Hose Disconnect Wire s Chocolate Hose Cof f ee Hose CAFFÈ MIO – OPERATION AND SERVICE Page 56 of 110 S E CT I ON 5 – REP LA C I NG C O M P O N E NT S R e pl a ci n g Ma j o r C om p o nen t s 10. Disconnect the temperature probe harness from the rear board. Temp. Probe Har ness 11. Disconnect the wires from the tank lid. #1-2 #4-3 #5-2 #11-2 #14 12. Carefully pull the old water tank up and out the top of the machine. 13. With the valves pointing towards the front of the machine, lower the new water tank assembly down through the top of the machine until it sits on the support CAFFÈ MIO – OPERATION AND SERVICE Page 57 of 110 S E CT I ON 5 – REP LA C I NG C O M P O N E NT S R e pl a ci n g Ma j o r C om p o nen t s 14. Connect the temperature probe harness to the rear circuit board. a) Route the harness down the front of the water tank and connect it to the rear circuit board. Temp. Probe Har ness 15. Connect the wires identified in the table and photo below. #1-2 #4-3 #5-2 #11-2 #14 WIRE # #11-2 #14 #1-2 #4-3 #5-2 CONNECT ED TO: Heater element Thermal cut-off switch Level probe - long Level probe - long Level probe - short CAFFÈ MIO – OPERATION AND SERVICE Page 58 of 110 S E CT I ON 5 – REP LA C I NG C O M P O N E NT S R e pl a ci n g Ma j o r C om p o nen t s 16. Connect the inlet valve hose to the inlet fitting (rear fitting) at the bottom of the water tank, and use a hose clamp to secure it in place. Make sure the drain plug is also down and locked. Drain Plug Down Install Clamp Inlet Hose 17. Connect the respective hoses to all three outlet valves. a) Remove the coffee hose from the brewer and connect it to the coffee valve. 18. Connect the power and ground wires to each of the outlet valves. #1-7 #2 #13-5 #1-8 #3 #13-6 #1-6 #4 #13-4 Hot Wat er Hose Chocolate Hose Cof f ee Hose WIRES #2 and #1-7 #3 and #1-8 #4 and #1-6 (#13-5 is ground) (#13-6 is ground) (#13-4 is ground) CAFFÈ MIO – OPERATION AND SERVICE CONNECTED TO: Hot Water Valve Chocolate Valve Coffee Valve Page 59 of 110 S E CT I ON 5 – REP LA C I NG C O M P O N E NT S R e pl a ci n g Ma j o r C om p o nen t s 19. Install the brewer. a) Refer to the "Replacing the Brewer" instructions in this manual 20. Connect the coffee hose to the brewer. Coffee Hose Bre wer 21. Replace the valve cover. a) Slide the right side over the two loosened screws. b) Secure the left side with another screw. c) Tighten the two screws on the right side. Valve Cover Tighten Install Tighten CAFFÈ MIO – OPERATION AND SERVICE Page 60 of 110 S E CT I ON 5 – REP LA C I NG C O M P O N E NT S R e pl a ci n g Ma j o r C om p o nen t s 22. Replace the water tank access panel. a) Slide the rear of the access panel into the area around the rear of the tank. The metal top of the machine behind the tank has to slide into the notches on the sides at the rear of the access panel. b) Connect the ground wire (#13-3) to the grounding tab on the inside front of the access panel. Connect Ground c) Lower the front of the access panel closed and secure it closed with a screw. Screw CAFFÈ MIO – OPERATION AND SERVICE Page 61 of 110 S E CT I ON 5 – REP LA C I NG C O M P O N E NT S R e pl a ci n g Ma j o r C om p o nen t s Water Tank Lid WARNING: To avoid severe burns, make absolutely certain that the heater element is not hot before proceeding! 1. With machine power OFF, remove the water tank access panel on top of the machine. a) Open the front door and the machine lid. b) Remove the screw securing the access panel to the top of the machine. Remove c) Slowly lift the front of the water tank access panel and disconnect the ground wire connected inside the panel. Disconnect Wire d) Lift the access panel open and pull it forward to release it at the rear. CAFFÈ MIO – OPERATION AND SERVICE Page 62 of 110 S E CT I ON 5 – REP LA C I NG C O M P O N E NT S R e pl a ci n g Ma j o r C om p o nen t s 2. Disconnect the wires from the tank lid. #1-2 #4-3 #5-2 #11-2 #14 3. Remove the old lid assembly. a) Press the lock latch on the lid to free it. Lock Latch b) Lift the assembly up and out of the water tank. 4. Lower the new lid assembly into the water tank. a) Slide the back of the lid into the tank first, and push the front down until the latch engages. CAFFÈ MIO – OPERATION AND SERVICE Page 63 of 110 S E CT I ON 5 – REP LA C I NG C O M P O N E NT S R e pl a ci n g Ma j o r C om p o nen t s 5. Connect the wires identified in the table and photo below. #1-2 #4-3 #5-2 #11-2 #14 WIRE # #11-2 #14 #1-2 #4-3 #5-2 CONNECT ED TO: Heater element Thermal cut-off switch Level probe - long Level probe - long Level probe - short 6. Replace the water tank access panel. a) Slide the rear of the access panel into the area around the rear of the tank. The metal top of the machine behind the tank has to slide into the notches on the sides at the rear of the access panel. b) Connect the ground wire (#13-3) to the grounding tab on the inside front of the access panel. Connect Ground CAFFÈ MIO – OPERATION AND SERVICE Page 64 of 110 S E CT I ON 5 – REP LA C I NG C O M P O N E NT S R e pl a ci n g Ma j o r C om p o nen t s c) Lower the front of the access panel closed and secure it closed with a screw. Screw CAFFÈ MIO – OPERATION AND SERVICE Page 65 of 110 S E CT I ON 5 – REP LA C I NG C O M P O N E NT S R e pl a ci n g Ma j o r C om p o nen t s Heater Element WARNING: To avoid severe burns, make absolutely certain that the heater element is not hot before proceeding! 1. With machine power OFF, remove the water tank lid. a) Refer to the "Replacing the Water Tank Lid" instructions in this manual. 2. Remove the wires from the heater element terminals. 3. Detach the thermal cut-off switch from the heater element. a) Remove the clamp securing the thermal cut-off switch to the element. Remove Clamp Thermal Cut-Off 4. Remove the two 11/16" brass nuts securing the heater element to the lid. Remove CAFFÈ MIO – OPERATION AND SERVICE Remove Page 66 of 110 S E CT I ON 5 – REP LA C I NG C O M P O N E NT S R e pl a ci n g Ma j o r C om p o nen t s 5. Remove the old heater element from the lid. 6. Position the new heater element into the tank lid. a) The "curve" at the bottom of the heater element should point towards the rear of the tank. 7. Secure the heater element to the tank lid with the two 11/16" brass nuts. Install Install 8. Replace thermal cut-off switch onto the element and secure it with the clamp. a) The bulb of the thermal cut-off switch must be installed about one third of the way down onto the heater element. b) The winding of the thermal cut-off switch must be below the water line when the tank is full. Winding Install Clamp Bulb 9. Replace the lid assembly. a) Refer to the "Replacing the Water Tank Lid" instructions in this manual. 10. Connect the power wires to the heater element. a) Wire #11-2 connects to the right terminal. b) Wire from thermal cut-ff switch connects to the left terminal. 11. Re-install the water tank access panel. CAFFÈ MIO – OPERATION AND SERVICE Page 67 of 110 S E CT I ON 5 – REP LA C I NG C O M P O N E NT S R e pl a ci n g Ma j o r C om p o nen t s Temperature Probe 1. Switch the machine power OFF, and open the front and inner doors. 2. Disconnect the temperature probe from the “ WATER TEMP” connector on the rear board. Temp. Probe Har ness 3. Lift the machine lid open. 4. Remove the water tank access panel. a) Remove the screw securing the front of the cover to the top of the machine. b) Lift the front of the cover and disconnect the ground wire from the cover. 5. Pull the temperature probe out of the grommet on the tank top. Temperature Probe Pull out of Grommet Grommet CAFFÈ MIO – OPERATION AND SERVICE Page 68 of 110 S E CT I ON 5 – REP LA C I NG C O M P O N E NT S R e pl a ci n g Ma j o r C om p o nen t s 6. Carefully pull the temperature probe’s wiring out the top of the machine. a) Any tie-wraps securing the temperature probe wiring to the main water tank wiring harness will need to be cut. 7. Install the new probe into the grommet on the water tank top. Temperature Probe Push into Grommet Grommet 8. Drop the temperature probe connector (harness) down the front of the water tank (valve area) and route it to the rear board. Temp. Probe Wiring CAFFÈ MIO – OPERATION AND SERVICE Page 69 of 110 S E CT I ON 5 – REP LA C I NG C O M P O N E NT S R e pl a ci n g Ma j o r C om p o nen t s 9. Connect the temperature probe to the “ WATER TEMP” connector of the rear board. Temp. Probe Har ness 10. Replace the water tank access panel. a) Slide the rear of the access panel into the area around the rear of the tank. The metal top of the machine behind the tank has to slide into the notches on the sides at the rear of the access panel. b) Connect the ground wire (#13-3) to the grounding tab on the inside front of the access panel. Connect Ground c) Lower the front of the access panel closed and secure it closed with a screw. Screw CAFFÈ MIO – OPERATION AND SERVICE Page 70 of 110 S E CT I ON 5 – REP LA C I NG C O M P O N E NT S R e pl a ci n g Ma j o r C om p o nen t s Ingredient Dispenser 1. Open the front door and the inner door. 2. Lift the machine lid open. 3. Remove the spill plate that surrounds the two dispensers. a) Remove the screws at the front and rear of the spill plate securing it to the top of the machine. b) Remove the lids on both of the dispensers. c) Slide the spill plate up and over the dispensers to remove it. Remove Screw Remove Lid Remove Lid Spill Plate Remove Screw Spill Plate and Dispense r Lids Removed 4. Rotate both ingredient dispenser spouts upwards. 5. Remove the screw securing the front of each dispenser to the dispenser base. Remove Remove 6. Lift the front of the dispenser and pull it forward to unlock the dispenser. 7. Lift the dispenser out of the top of the machine. CAFFÈ MIO – OPERATION AND SERVICE Page 71 of 110 S E CT I ON 5 – REP LA C I NG C O M P O N E NT S R e pl a ci n g Ma j o r C om p o nen t s 8. To install the new dispenser, lower in into position from the top of the machine and align the coupler at the rear of the dispenser with the drive pin on the dispenser motor. Dispenser Motor Drive Pin Support Cutout Coupler Ingredient Dispenser 9. Slide the rear of the dispenser support into the cutout on the base, and push the dispenser back to couple it with the motor. The pin at the bottom of the dispenser will go into the notch on the base to help guide the dispenser into position. Ingredient Dispenser Support Guide Pin Support Cutout Notch Dispenser Base CAFFÈ MIO – OPERATION AND SERVICE Page 72 of 110 S E CT I ON 5 – REP LA C I NG C O M P O N E NT S R e pl a ci n g Ma j o r C om p o nen t s 10. Screw the front of the dispenser to the dispenser base. Install Install 11. Re-install the spill plate (foam side down) over the dispensers onto the top of the machine and secure it in place using the two screws. Install Screw Replace Lid Replace Lid Spill Plate Install Screw 12. Install the dispenser covers onto the dispensers. 13. Rotate the spouts down into their proper positions. 14. Close the inner door and front door. 15. Test brew a couple of cups of coffee or chocolate to verify dispenser operation. CAFFÈ MIO – OPERATION AND SERVICE Page 73 of 110 S E CT I ON 5 – REP LA C I NG C O M P O N E NT S R e pl a ci n g Ma j o r C om p o nen t s Ingredient Dispenser Motor 1. With machine power OFF, open the front door and open the machine lid. 2. Remove the brewer. a) Refer to the "Replacing the Brewer" instructions in this manual. 3. Remove the brewer bracket. a) Refer to the "Replacing the Brewer Bracket" instructions in this manual. 4. Remove the spill plate that surrounds the two dispensers. a) Remove the screws at the front and rear of the spill plate securing it to the top of the machine. b) Remove the lids on both of the dispensers. c) Slide the spill plate up and over the dispensers to remove it. Remove Screw Remove Lid Remove Lid Spill Plate Remove Screw Spill Plate and Dispense r Lids Removed 5. Rotate both ingredient dispenser spouts upwards. 6. Remove the screw securing the front of each dispenser to the dispenser base. Remove CAFFÈ MIO – OPERATION AND SERVICE Remove Page 74 of 110 S E CT I ON 5 – REP LA C I NG C O M P O N E NT S R e pl a ci n g Ma j o r C om p o nen t s 7. Lift the front of each dispenser and pull it forward to unlock the dispenser. 8. Lift the dispensers out of the top of the machine. 9. Disconnect the power wires from the dispenser motor that needs to be replaced. Coffee Dispense r Motor Chocolate Dispense r Motor Disconnect Disconnect Disconnect Disconnect 10. While holding onto the motor from the underside of the ingredient dispenser base, remove the two screws securing the motor to the base. The motor will then be freed from the base and can be removed. Dispense r Motor Remove Remove Dispense r Base CAFFÈ MIO – OPERATION AND SERVICE Page 75 of 110 S E CT I ON 5 – REP LA C I NG C O M P O N E NT S R e pl a ci n g Ma j o r C om p o nen t s 11. Remove the support plate from the dispenser motor by removing the two screws that secure it. Remove Remove Support Plate Dispense r Motor 12. Install the support plate onto the new dispenser motor with two screws. 13. While holding onto the motor from the underside of the ingredient dispenser base, install the two screws that secure the motor to the base. Dispense r Motor Install Install Dispense r Base CAFFÈ MIO – OPERATION AND SERVICE Page 76 of 110 S E CT I ON 5 – REP LA C I NG C O M P O N E NT S R e pl a ci n g Ma j o r C om p o nen t s 14. Reconnect the power wires to the ingredient motor(s). Coffee Dispense r Motor Chocolate Dispense r Motor Wire #6 Wire #1-3 Wire #3 Wire #12-2 15. To install the dispenser, lower in into position from the top of the machine and align the coupler at the rear of the dispenser with the drive pin on the dispenser motor. Dispenser Motor Drive Pin Support Cutout Coupler Ingredient Dispenser CAFFÈ MIO – OPERATION AND SERVICE Page 77 of 110 S E CT I ON 5 – REP LA C I NG C O M P O N E NT S R e pl a ci n g Ma j o r C om p o nen t s 16. Slide the rear of the dispenser support into the cutout on the base, and push the dispenser back to couple it with the motor. The pin at the bottom of the dispenser will go into the notch on the base to help guide the dispenser into position. Ingredient Dispenser Guide Pin Support Support Cutout Notch Dispenser Base 17. Screw the front of the dispenser to the dispenser base. Install CAFFÈ MIO – OPERATION AND SERVICE Install Page 78 of 110 S E CT I ON 5 – REP LA C I NG C O M P O N E NT S R e pl a ci n g Ma j o r C om p o nen t s 18. Re-install the spill plate (foam side down) over the dispensers onto the top of the machine and secure it in place using the two screws. Install Screw Replace Lid Replace Lid Spill Plate Install Screw 19. Install the dispenser covers onto the dispensers. 20. Rotate the spouts down into their proper positions. 21. Close the inner door and front door. 22. Test brew a couple of cups of coffee or chocolate to verify dispenser operation. CAFFÈ MIO – OPERATION AND SERVICE Page 79 of 110 S E CT I ON 5 – REP LA C I NG C O M P O N E NT S R e pl a ci n g Ma j o r C om p o nen t s Front Circuit Board 1. With the machine power OFF, remove the drip tray assembly from the front door. 2. Remove the front door. a) Remove the inner door by lifting it up and off the door hinges. Lift off the Hinges Inner Door Front Door b) Remove the front circuit board cover by loosening the mounting screw and lifting the cover up and pulling the bottom towards you. Front Board Cover Loosen CAFFÈ MIO – OPERATION AND SERVICE Page 80 of 110 S E CT I ON 5 – REP LA C I NG C O M P O N E NT S R e pl a ci n g Ma j o r C om p o nen t s c) Disconnect the phone type cable from the bottom of the front board, and disconnect the ground wire from the inside wall of the door. Disconnect Front Circuit Board Disconnect d) Loosen the screws and remove the drip tray and overflow detection bracket at the inside bottom of the front door. Loosen Loosen Drip Tray Detection Switc h CAFFÈ MIO – OPERATION AND SERVICE Overflow Detection Probes Page 81 of 110 S E CT I ON 5 – REP LA C I NG C O M P O N E NT S R e pl a ci n g Ma j o r C om p o nen t s e) Disconnect the wiring from the two overflow detection probes and from the 3-position connector from the drip tray detection switch. Disconnect Drip Tray Detection Switc h Disconnect Overflow Detection Probes f) Set aside the drip tray detection and overflow bracket – it will be required later. g) Gently pull the door wiring harness out of the round cutout in the metal door frame/support on the inside of the front door. h) Remove the dispensing spout and hose assembly from the front door by lifting the spout off the retaining bracket. Lift Spout Spout Reta ining Brac ket i) Remove the front door by lifting it up and off the door hinges. 3. Lay the front door flat down on a table, with the button side down. NOTE: The front door must remain flat on a table until all the modifications are done. Lifting the door will cause all of the switch caps and supporting components to fall to the floor. CAFFÈ MIO – OPERATION AND SERVICE Page 82 of 110 S E CT I ON 5 – REP LA C I NG C O M P O N E NT S R e pl a ci n g Ma j o r C om p o nen t s 4. Remove the front circuit board assembly from the front door. Remove Remove Remove Remove Remove Remove LCD Display Front Circuit Board Remove Remove Remove Remove Remove Remove a) Remove the 8 screws securing the front circuit board to the front door. b) Remove the 4 screws securing the LCD display to the front door. c) Carefully lift the circuit board assembly up and out of the door. NOTE: When the front circuit board is removed, the selection switch caps and a sponge foam spacer will be exposed. These switch caps and the foam spacer must be present on the door when the front circuit board is re-installed. Front Circuit Board CAFFÈ MIO – OPERATION AND SERVICE View (inside door) with front circuit board removed Page 83 of 110 S E CT I ON 5 – REP LA C I NG C O M P O N E NT S R e pl a ci n g Ma j o r C om p o nen t s 5. Re-install the front circuit board assembly onto the front door. a) Align the front circuit board into position on the front door – make certain that the foam sponge spacer and all the screw holes align with the stand-offs on the front door. b) Install the 8 screws securing the front circuit board to the door. Hand-tighten the screws only – do not over-tighten as this will strip the plastic standoffs, requiring a complete door shell replacement. c) Install the 4 screws securing the LCD display board to the door. Hand-tighten the screws only – do not over-tighten as this will strip the plastic standoffs, requiring a complete door shell replacement. Install Install Install Install Install Install LCD Display Front Circuit Board Install Install Install Install Install Install 6. Re-install the front door onto the coffee maker. a) Align and slide the front door hinges down onto the machine cabinet hinges. b) Re-install the dispensing spout and hose assembly onto the front door by sliding it onto the spout retaining bracket. c) Route the wiring harness through the round cutout in the metal door frame/support on the inside of the front door. NOTE: From this point forward, all the wiring connections must be made with the wiring routed behind the round cutout in the metal door frame/support. No door wiring should be visible after all the connections are made (with the exception of the wiring harness going into the round cutout). CAFFÈ MIO – OPERATION AND SERVICE Page 84 of 110 S E CT I ON 5 – REP LA C I NG C O M P O N E NT S R e pl a ci n g Ma j o r C om p o nen t s d) Connect the phone-type cable to the connector on the bottom of the front circuit board and connect the green ground wire to the ground tab on the inside wall of the door. Connect Front Circuit Board Connect e) Pick up the drip tray detection and overflow bracket that was set aside earlier. f) Connect the two small blue wires to the two overflow detection probes and connect the 3position connector to the drip tray detection switch. Connect Drip Tray Detection Switc h CAFFÈ MIO – OPERATION AND SERVICE Connect Overflow Detection Probes Page 85 of 110 S E CT I ON 5 – REP LA C I NG C O M P O N E NT S R e pl a ci n g Ma j o r C om p o nen t s g) Install the drip tray detection and overflow bracket onto the slots at the inside bottom of the front door, and tighten the screws to secure the bracket in place. Make certain the probes and switch arm are placed in their proper position. Tighten Tighten Position of Switc h Arm Position of Overflow Probes h) Once certain that all the wiring connections have been made, re-install the front board cover, making sure it the mounting screw passes through the key-hole slot on the cover. Tighten the screw to secure the cover in place. Front Board Cover Tighten 7. Re-install the inner door by aligning and sliding the inner door hinges onto the machine cabinet hinges (note that these are the same hinges used for the front door). 8. Re-install the drip tray assembly onto the front door. CAFFÈ MIO – OPERATION AND SERVICE Page 86 of 110 S E CT I ON 5 – REP LA C I NG C O M P O N E NT S R e pl a ci n g Ma j o r C om p o nen t s Rear Circuit Board 1. With machine power OFF, open the front and inner doors. 2. Remove the waste bin. 3. Remove the brewer. a) Refer to the "Replacing the Brewer" instructions in this manual. 4. Remove the brewer bracket. a) Refer to the "Replacing the Brewer Bracket" instructions in this manual. 5. Disconnect all of the wiring connections and ground connections to the rear circuit board. Disconnect Disconnect Disconnect Fuse Box Remove Sc re w Wate r Ta nk Area Rear Circuit Board Disconnect Disconnect Disconnect Disconnect Disconnect Disconnect 6. Remove the screw that secures the rear circuit board to the rear wall of the machine (see photo above). 7. Lift the circuit board assembly upwards to free it from the joggle on the rear wall of the machine, and slide it to the left to clear the rear of the water tank area. 8. Remove the old rear circuit board from the machine. 9. Position the left side of the new rear circuit board against the left wall of the machine, and lift it as high as it can go (it should come into contact with the bottom of the fuse box). 10. Slide the circuit board towards the right until the screw hole on the rear wall is visible in the key-hole slot on the top of the rear board cover. 11. Once aligned, slide the rear circuit board cover downwards to lock it onto the joggle at the rear wall of the machine. 12. Install a screw in the key-hole slot to secure the rear circuit board to the rear wall of the machine (see photo below) CAFFÈ MIO – OPERATION AND SERVICE Page 87 of 110 S E CT I ON 5 – REP LA C I NG C O M P O N E NT S R e pl a ci n g Ma j o r C om p o nen t s 13. Connect all of the wiring connections and ground connections (green wires) to the rear circuit board. Connect Fuse Box Install Scre w Connect Connect Wate r Ta nk Area Rear Circuit Board Connect Connect Cconne ct Connect Connect Connect 14. Install the brewer bracket. a) Refer to the "Replacing the Brewer Bracket" instructions in this manual. 15. Install the brewer. a) Refer to the "Replacing the Brewer" instructions in this manual. 16. Replace the waste bin. 17. Switch the machine power ON and allow the unit to fill and heat. 18. Test the equipment to make certain everything is working properly. a) Refer to the “Testing Equipment Operation” section of this manual. NOTE: It may be necessary to re-adjust product, water and/or bottom pause settings after replacing the rear circuit board. Also note that counter readings are stored in the rear circuit board and may be lost if the board is completely inoperative and is replaced. CAFFÈ MIO – OPERATION AND SERVICE Page 88 of 110 S E CT I ON 5 – REP LA C I NG C O M P O N E NT S R e pl a ci n g Ma j o r C om p o nen t s Whipper Motor 1. Rotate the chocolate dispenser spout so that it is pointing upwards. 2. Lift the whipper vacuum funnel off the whipper bowl. Lift Off 3. Lift the whipper bowl off the whipper chamber and disconnect the water hose from the whipper bowl. Lift Off CAFFÈ MIO – OPERATION AND SERVICE Page 89 of 110 S E CT I ON 5 – REP LA C I NG C O M P O N E NT S R e pl a ci n g Ma j o r C om p o nen t s 4. Open the plastic clamp securing the whipper chamber outlet elbow to the whipper chamber and pull off the outlet elbow. Pull Down Open Clamp 5. Turn the whipper chamber clockwise about 1/8th of a turn, and pull it straight out to remove it from the whipper base. CAFFÈ MIO – OPERATION AND SERVICE Page 90 of 110 S E CT I ON 5 – REP LA C I NG C O M P O N E NT S R e pl a ci n g Ma j o r C om p o nen t s 6. Remove the whipper base support bracket. a) Loosen the four screws securing the bracket. b) Lift the bracket up until it clear the screws and pull it out. Loosen Loosen Loosen Loosen 7. Pull the whipper blade straight out to remove if from the whipper motor shaft. Pull Straight Out 8. Remove the two screws securing the whipper base to the metal support and remove the base. Remove Remove CAFFÈ MIO – OPERATION AND SERVICE Page 91 of 110 S E CT I ON 5 – REP LA C I NG C O M P O N E NT S R e pl a ci n g Ma j o r C om p o nen t s 9. From the rear side of the metal support plate, disconnect the power wires to the whipper motor. Disconnect Disconnect 10. Remove the two hex nuts securing the whipper motor to the support plate, and remove the old motor. Remove Remove CAFFÈ MIO – OPERATION AND SERVICE Page 92 of 110 S E CT I ON 5 – REP LA C I NG C O M P O N E NT S R e pl a ci n g Ma j o r C om p o nen t s 11. Install the new motor onto the support plate and secure it in place with two hex nuts. Install Install 12. Connect the two power wires coming from the transformer (yellow and blue wires) to the whipper motor. Connect CAFFÈ MIO – OPERATION AND SERVICE Connect Page 93 of 110 S E CT I ON 5 – REP LA C I NG C O M P O N E NT S R e pl a ci n g Ma j o r C om p o nen t s 13. Install the whipper base support bracket. c) Lower the bracket onto the four loose screws. d) Tighten the screws to secure the bracket in place. Tighten Tighten Tighten Tighten 14. Clean all of the parts that were removed earlier under warm running water prior to replacing them. 15. Install the whipper base onto the metal support and secure it in place with the two screws. Install Install 16. Re-install the whipper blade. a) The whipper blade and whipper motor shaft have a “D” type fit. The line at the rear or the blade must line up with the flat spot on the motor shaft. Flat Spot Alignment Line These two areas must be aligned to install the whipper blade CAFFÈ MIO – OPERATION AND SERVICE Page 94 of 110 S E CT I ON 5 – REP LA C I NG C O M P O N E NT S R e pl a ci n g Ma j o r C om p o nen t s 17. Re-install the whipper chamber by placing it onto the base a turning it counter-clockwise to lock it in position. 18. Re-connect the outlet elbow to the whipper chamber and secure it in place with a plastic clamp. CAFFÈ MIO – OPERATION AND SERVICE Push Up Clamp Page 95 of 110 S E CT I ON 5 – REP LA C I NG C O M P O N E NT S R e pl a ci n g Ma j o r C om p o nen t s 19. Re-install the whipper bowl on to of the chamber and re-connect the chocolate hose to the whipper bowl. Push Down 20. Re-install the whipper vacuum funnel onto the whipper bowl, making sure to slide the notched side over the vacuum coupling. Slide Down Vacuum Coupling 21. Rotate the chocolate dispenser spout so that it is pointing downwards onto the whipper bowl. 22. Close the inner door and front door. 23. Power ON the machine and test the system by making several cups of hot chocolate. CAFFÈ MIO – OPERATION AND SERVICE Page 96 of 110 S E CT I ON 5 – REP LA C I NG C O M P O N E NT S R e pl a ci n g Ma j o r C om p o nen t s Inlet Valve 1. Switch the coffee maker "OFF". 2. Shut off the water supply. 3. Drain the water tank completely. 4. Remove the fitting from the inlet valve at the back of the machine. 5. Disconnect the two wires that go to the inlet valve. Wate r Ta nk Disconnect Wires Inlet Valve 6. Disconnect the inlet hose from the hot water tank. a) Remove the clamp securing the hose to the inlet fitting at the bottom of the water tank. b) Pull firmly on the hose to remove it. Wate r Ta nk Remove Hose Remove Clamp 7. Remove the screws that secure the old inlet valve to the back of the machine. a) These screws are located on the outside of the rear wall of the machine. CAFFÈ MIO – OPERATION AND SERVICE Page 97 of 110 S E CT I ON 5 – REP LA C I NG C O M P O N E NT S R e pl a ci n g Ma j o r C om p o nen t s 8. Place the new inlet valve into position and secure it with the two screws. a) These screws are located on the outside of the rear wall of the machine. 9. Connect wires #6 and #1-2 onto the inlet valve. Wate r Ta nk Connect Wires Inlet Valve 10. Secure the inlet valve hose (using a hose clamp) to the inlet at the bottom of the water tank. Drain Plug Down Install Clamp Inlet Hose 11. Make sure that the drain plug on the bottom of the tank a closed (pulled down) and locked with the locking clip. Also make certain the large clamp at the end of the drain hose is closed. 12. Connect a fitting to the inlet valve at the back of the machine, and connect a water source to the fitting. 13. Turn on the water supply and switch the coffee maker "ON", and check for leaks. CAFFÈ MIO – OPERATION AND SERVICE Page 98 of 110 S E CT I ON 5 – REP LA C I NG C O M P O N E NT S R e pl a ci n g Ma j o r C om p o nen t s Fuse Box Assembly WARNING: To prevent electrical shock, always disconnect the service cord from the wall outlet when working on the fuse box. Even with the main power switch in the OFF position, parts of the fuse box will remain live. 1. With machine power OFF, disconnect the service cord from the wall outlet. 2. Open the front door, the inner door, and remove the waste bin. 3. Remove the brewer. a) Refer to the "Replacing the Brewer" instructions in this manual. 4. Remove the brewer bracket. a) Refer to the "Replacing the Brewer Bracket" instructions in this manual 5. Disconnect the wiring coming out of the fuse box. a) Disconnect the ground wire from the terminal on the left wall of the machine. b) Disconnect the wires connected to the door harness and water tank harness (3 total). c) Disconnect the wire connected to the heater relay. Disconnect Disconnect Disconnect Disconnect Disconnect CAFFÈ MIO – OPERATION AND SERVICE Page 99 of 110 S E CT I ON 5 – REP LA C I NG C O M P O N E NT S R e pl a ci n g Ma j o r C om p o nen t s 6. Remove the two screws securing the fuse box assembly to the rear wall of the machine. Remove Remove Fuse Box 7. Remove the old fuse box assembly. a) Tilt the front of the fuse box assembly down, and lift it at the rear to free it. b) Pull the fuse box assembly (including the service cord) out of the machine. 8. Install the new fuse box assembly. a) Pass the service cord through the cut-out at the rear of the machine (from the inside to the outside). b) Insert the bottom of the fuse box assembly into the cut-out at the rear of the machine, and tilt the front of the fuse box up. c) Secure the fuse box assembly to the rear wall of the machine with two screws. Install Install Fuse Box CAFFÈ MIO – OPERATION AND SERVICE Page 100 of 110 S E CT I ON 5 – REP LA C I NG C O M P O N E NT S R e pl a ci n g Ma j o r C om p o nen t s 9. Connect the wiring coming out of the fuse box. a) Connect the green ground wire #5 to the ground terminal on the left wall of the machine. b) Connect the heavy duty white wire #11 to the terminal on the heater relay. c) Connect the white wire #2 to white wire #10-2 of the door harness. d) Connect the blue wire #3-3 to blue wire #12-3 of the door harness. e) Connect the blue wire #3-2 to blue wire #11 of the water tank harness. Wire #5 Wire #3-2 Wire #2 Wire #3-3 Wire #11 10. Install the brewer bracket. a) Refer to the "Replacing the Brewer Bracket" instructions in this manual 11. Install the brewer. a) Refer to the "Replacing the Brewer" instructions in this manual. 12. Install the waste bin, and close the inner and outer doors. 13. Connect the service cord to the wall outlet and switch the machine power ON. 14. Test the operation of the machine. CAFFÈ MIO – OPERATION AND SERVICE Page 101 of 110 S E CT I ON 5 – REP LA C I NG C O M P O N E NT S R e pl a ci n g Ma j o r C om p o nen t s Overflow Cup Assembly 1. With machine power OFF, open the front door and inner door. 2. Disconnect the two inline wiring connections to the overflow cup. Overflow Cup Wiring Connections 3. Lift and remove the old overflow cup from its support. 4. Connect the two inline wiring connections to the new overflow cup. 5. Re-seat the overflow cup onto the overflow cup support. 6. Switch the machine power ON. 7. Pour a small quantity of water into the overflow cup (about half full) and make certain the “Tank Overflow” error is displayed on the LCD. 8. Once verified, empty the overflow cup and place it back on its support. 9. Close the inner and out doors. CAFFÈ MIO – OPERATION AND SERVICE Page 102 of 110 S E CT I ON 5 – REP LA C I NG C O M P O N E NT S R e pl a ci n g Ma j o r C om p o nen t s Heater Relay 1. Switch the coffee maker "OFF". 2. Remove the brewer. 3. Remove the brewer bracket. 4. Disconnect the four wires from the heater relay. a) The heater relay is located on the right side wall behind the brewer assembly. Remove Screw Heater Relay Remove Screw 5. Remove the two screws securing the old heater relay to the wall. 6. Install the new heater relay and secure it with two screws. 7. Reconnect the wiring to the heater relay. a) Connect wire #1-4 to pin 1 of the relay. b) Connect wire #7 to pin 2 of the relay. c) Connect wire #11 to pin 3 of the relay. d) Connect wire #14 to pin 4 of the relay. 8. Re-install the brewer bracket. 9. Re-install the brewer. CAFFÈ MIO – OPERATION AND SERVICE Page 103 of 110 S E CT I ON 5 – REP LA C I NG C O M P O N E NT S R e pl a ci n g Ma j o r C om p o nen t s Thermal Cut-Off Switch WARNING: To avoid severe burns, make absolutely certain that the heater element is not hot before proceeding! 1. With machine power OFF, remove the water tank access panel on top of the machine. a) Open the front door and the machine lid. b) Remove the screw securing the access panel to the top of the machine. Remove c) Slowly lift the front of the water tank access panel and disconnect the ground wire connected inside the panel. Disconnect Wire d) Lift the access panel open and pull it forward to release it at the rear. CAFFÈ MIO – OPERATION AND SERVICE Page 104 of 110 S E CT I ON 5 – REP LA C I NG C O M P O N E NT S R e pl a ci n g Ma j o r C om p o nen t s 2. Disconnect the wires from the tank lid. #1-2 #4-3 #5-2 #11-2 #14 3. Remove the old lid assembly. a) Press the lock latch on the lid to free it. Lock Latch b) Lift the assembly up and out of the water tank. CAFFÈ MIO – OPERATION AND SERVICE Page 105 of 110 S E CT I ON 5 – REP LA C I NG C O M P O N E NT S R e pl a ci n g Ma j o r C om p o nen t s 4. Remove the thermal cut-off switch. a) Disconnect the wire from the thermal cut-off switch to the heater element. b) Loosen the clamp securing the thermal cut-off switch to the heater element. Disconnect Loosen Clamp The rmal Cut-Off c) Remove the two screws and hex nuts securing the thermal cut-off switch to the tank lid. Remove Remove d) Remove the old thermal cut-off switch by pulling it out the top of the tank lid. CAFFÈ MIO – OPERATION AND SERVICE Page 106 of 110 S E CT I ON 5 – REP LA C I NG C O M P O N E NT S R e pl a ci n g Ma j o r C om p o nen t s 5. Install the new thermal cut-off switch. a) Pass the bulb and winding of the new thermal cut-off switch through the opening on the tank lid. b) Secure the top of the thermal cut-off switch to the tank lid using two sets of screws and hex nuts. The screws pass through the bottom of the lid, to the top. Secure the screws with the hex nuts. Install Install c) Secure the bulb of the thermal cut-off switch to the heater element using a metal clamp. i. The bulb of the thermal cut-off switch must be installed about one third of the way down onto the heater element and the winding of the thermal cut-off switch must be below the water line when the tank is full. Winding Install Clamp Bulb d) Connect the thermal cut-off switch wire with the white terminal cover to the heater element. CAFFÈ MIO – OPERATION AND SERVICE Page 107 of 110 S E CT I ON 5 – REP LA C I NG C O M P O N E NT S R e pl a ci n g Ma j o r C om p o nen t s 6. Lower the lid assembly into the water tank. a) Slide the back of the lid into the tank top first, and push the front down until the latch engages with the tank top. 7. Connect the wires identified in the table and photo below. #1-2 #4-3 #5-2 #11-2 #14 WIRE # #11-2 #14 #1-2 #4-3 #5-2 CONNECTED TO: Heater element Thermal cut-off switch Level probe - long Level probe - long Level probe - short CAFFÈ MIO – OPERATION AND SERVICE Page 108 of 110 S E CT I ON 5 – REP LA C I NG C O M P O N E NT S R e pl a ci n g Ma j o r C om p o nen t s 8. Replace the water tank access panel. a) Slide the rear of the access panel into the area around the rear of the tank. The metal top of the machine behind the tank has to slide into the notches on the sides at the rear of the access panel. b) Connect the ground wire (#13-3) to the grounding tab on the inside front of the access panel. Connect Ground c) Lower the front of the access panel closed and secure it closed with a screw. Screw CAFFÈ MIO – OPERATION AND SERVICE Page 109 of 110 S E CT I ON 5 CAFFÈ MIO – OPERATION AND SERVICE – REP LA C I NG C O M P O N E NT S Page 110 of 110