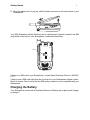
1
Nextel
iDEN
Digital Multi-service Data-capable Phone
i920/i930 Phone User’s Guide
Smartphone Information Provided by Microsoft
© 2005 Nextel Communications, Inc. Copying, distribution, or use without permission is strictly prohibited.
NEXTEL®, the NEXTEL logo®, NEXTEL. Done.TM, and NEXTEL WORLDWIDE® are service marks,
trademarks, and/or registered trademarks owned by Nextel Communications, Inc.
MOTOROLA, the Stylized M Logo and all other trademarks indicated as such herein are trademarks of
Motorola, Inc. ® Reg. U.S. Pat. & Tm. Off. © 2005 Motorola, Inc. All rights reserved.
Microsoft and Microsoft Internet Explorer are registered trademarks of Microsoft Corporation.
T9 is a trademark owned by Tegic Communications.
T9® Text Input Patent and Trademark Information
This product is covered by U.S. Pat. 5,818,437, U.S. Pat. 5,953,541, U.S. Pat. 6,011,554 and other
patents pending.
Java and all other Java-based marks are trademarks or registered trademarks of Sun Microsystems, Inc.
in the U.S. and other countries.
All other product names or services mentioned in this manual are the property of their respective
trademark owners.
Information in this document, including URL and other Internet Web site references, is subject to change
without notice. Unless otherwise noted, the example companies, organizations, products, domain names,
email addresses, logos, people, places and events depicted herein are fictitious, and no association with
any real company, organization, product, domain name, email address, logo, person, place or event is
intended or should be inferred. Complying with all applicable copyright laws is the responsibility of the
user. Without limiting the rights under copyright, no part of this document may be reproduced, stored in or
introduced into a retrieval system, or transmitted in any form or by any means (electronic, mechanical,
photocopying, recording, or otherwise), or for any purpose, without the express written permission of
Microsoft Corporation.
Microsoft may have patents, patent applications, trademarks, copyrights, or other intellectual property
rights covering subject matter in this document. Except as expressly provided in any written license
agreement from Microsoft, the furnishing of this document does not give you any license to these patents,
trademarks, copyrights, or other intellectual property.
© 2003 Microsoft Corporation. All rights reserved. Microsoft products are licensed to OEMs by Microsoft
Licensing Inc., a wholly owned subsidiary of Microsoft Corporation.
Microsoft, ActiveSync, MSN, Outlook, Windows, the Windows logo, and Windows Media are either
registered trademarks or trademarks of Microsoft Corporation in the United States and/or other countries.
The names of actual companies and products mentioned herein may be the trademarks of their respective
owners.
Software Copyright Notice
The Motorola products described in this manual may include copyrighted Motorola and third party software
stored in semiconductor memories or other media. Laws in the United States and other countries preserve
for Motorola and third party software providers certain exclusive rights for copyrighted software, such as
the exclusive rights to distribute or reproduce the copyrighted software. Accordingly, any copyrighted
software contained in the Motorola products may not be modified, reverse-engineered, distributed, or
reproduced in any manner to the extent allowed by law. Furthermore, the purchase of the Motorola
products shall not be deemed to grant either directly or by implication, estoppel, or otherwise, any license
under the copyrights, patents, or patent applications of Motorola or any third party software provider,
except for the normal, non-exclusive, royalty-free license to use that arises by operation of law in the sale
of a product.
Contents
Getting Started ............................................................................................................... 1
About This Guide .......................................................................................................... 1
Getting to Know Your Smartphone ............................................................................... 1
Setting Up Your Smartphone ........................................................................................ 6
Turning Your Smartphone On ..................................................................................... 11
Wirelessly Synchronize E-mail.................................................................................... 12
More Set-up Options ................................................................................................... 12
Install ActiveSync Desktop Client................................................................................ 13
The Sync Cradle ......................................................................................................... 14
Accessories................................................................................................................. 17
Wireless Local Number Portability:
Bringing Your Phone Number From Another Carrier ............................................... 18
Sprint® Customer Care................................................................................................ 18
Understanding Status Messages ................................................................................ 19
Finding More Information ............................................................................................ 19
The Basics .................................................................................................................... 20
Navigation Methods .................................................................................................... 20
Understanding Status Indicators ................................................................................. 25
Backlight Dimming ...................................................................................................... 26
Finding Your Phone Number and Other Basic Information ......................................... 26
Entering Text and Numbers ........................................................................................ 27
Securing Your Smartphone ......................................................................................... 31
Using a Headset.......................................................................................................... 36
Navigating and Managing Stored Files ....................................................................... 37
Managing Memory ...................................................................................................... 37
Phone Calls .................................................................................................................. 38
Making a Phone Call ................................................................................................... 38
Receiving a Phone Call............................................................................................... 42
Managing Phone Calls ................................................................................................ 43
Call Forwarding ........................................................................................................... 44
Using the Flip to Answer or End Calls......................................................................... 45
Retrieving Voice Mail Messages ................................................................................. 45
Speed Dials and Voice Shortcuts................................................................................ 45
Advanced Calling Options........................................................................................... 48
Special Dialing Codes ................................................................................................. 49
Nextel® Phone Services .............................................................................................. 50
Setting Up Wireless E-mail ......................................................................................... 52
Making Sure You Have the Correct Data Access Plan ............................................... 52
Setting up Corporate E-mail, Calendar, and Contacts ................................................ 52
Setting up Personal E-mail.......................................................................................... 55
Using Wireless Messaging Features.......................................................................... 57
Understanding Messaging Features ........................................................................... 57
Working with Accounts................................................................................................ 59
Creating Messages ..................................................................................................... 60
Sending and Receiving Messages.............................................................................. 65
Importing Text Messages............................................................................................ 66
Viewing and Responding to Messages ....................................................................... 66
Working with Message Folders ................................................................................... 70
Configuring Message Notifications.............................................................................. 72
Sending and Receiving Instant Messages .................................................................. 72
Nextel Worldwide® Services........................................................................................ 75
Nextel Worldwide Customer Care ............................................................................... 75
Features Available in the United States and Abroad .................................................. 75
Placing Worldwide Calls.............................................................................................. 76
Setting the Way Your Phone Searches for Networks ................................................. 76
Searching for a Network.............................................................................................. 77
Using Wireless Data Services Internationally ............................................................. 78
Text Messaging (SMS)................................................................................................ 80
Nextel® Voice Mail ........................................................................................................ 81
Setting Up Your Voice Mail Box .................................................................................. 81
Accessing Your Voice Mail Box .................................................................................. 81
Playing Messages ....................................................................................................... 81
Changing Your Password ........................................................................................... 82
Recording Your Name................................................................................................. 82
Recording Your Active Greeting.................................................................................. 83
Advanced Voice Mail Features ................................................................................... 83
Change Your Voice Mail Language to Spanish .......................................................... 85
Nextel Walkie-Talkie Calls, Call Alerts, and Talkgroup Calls................................... 86
Nextel Walkie-Talkie Service ...................................................................................... 86
Dialing Walkie-Talkie Numbers ................................................................................... 86
Making a Walkie-Talkie Call........................................................................................ 86
Receiving a Walkie-Talkie Call.................................................................................... 89
Managing Walkie-Talkie Calls..................................................................................... 90
Voice Shortcuts ........................................................................................................... 90
One Touch Walkie-Talkie............................................................................................ 92
Call Alerts.................................................................................................................... 92
Talkgroup Calls ........................................................................................................... 94
Recent Calls ................................................................................................................. 97
Viewing the Recent Calls List...................................................................................... 97
Saving to Contacts ...................................................................................................... 98
Making Calls From the Recent Calls List .................................................................... 98
Deleting Items From the Recent Calls List ................................................................ 100
Returning to the Home Screen After a Call............................................................... 100
Contacts, Calendar, and Tasks................................................................................. 101
Using Contacts.......................................................................................................... 101
Using Calendar ......................................................................................................... 106
Using Tasks .............................................................................................................. 108
SIM Manager............................................................................................................... 110
Using SIM Manager .................................................................................................. 110
Changes When Contacts Are Copied to Your SIM Card .......................................... 113
Voice Notes ................................................................................................................ 114
Settings....................................................................................................................... 115
Viewing and Changing Settings ................................................................................ 115
Display Properties ..................................................................................................... 115
Phone Calls............................................................................................................... 117
PTT — Nextel Walkie-Talkie Settings ....................................................................... 121
Vibrate All.................................................................................................................. 122
Notifications............................................................................................................... 122
Voice Volume ............................................................................................................ 125
Power Management .................................................................................................. 125
Accessibility............................................................................................................... 126
Regional Settings ...................................................................................................... 126
Date and Time........................................................................................................... 127
Phone Networks........................................................................................................ 127
Data Connections...................................................................................................... 128
Beam......................................................................................................................... 133
Certificates ................................................................................................................ 133
Flight Mode ............................................................................................................... 134
Profiles ...................................................................................................................... 134
Security ..................................................................................................................... 135
Owner Information..................................................................................................... 137
Phone Information..................................................................................................... 137
Remove Programs .................................................................................................... 138
ActiveSync Desktop Client ....................................................................................... 139
Understanding ActiveSync Desktop Client................................................................ 139
Setting up ActiveSync Desktop Client....................................................................... 139
Camera and Camcorder ............................................................................................ 143
Pictures ..................................................................................................................... 143
Video Clips ................................................................................................................ 145
Sending Captured Pictures and Video Clips ............................................................. 148
Closing the Camera and Camcorder......................................................................... 149
Media Theater............................................................................................................. 150
Pictures ..................................................................................................................... 150
Video Clips ................................................................................................................ 154
Sending Pictures and Video Clips............................................................................. 156
Opening Camera and Camcorder ............................................................................. 157
GPS Enabled .............................................................................................................. 158
IMPORTANT: Things to Keep in Mind ...................................................................... 158
Making an Emergency Call ....................................................................................... 159
Viewing Your Approximate Location ......................................................................... 160
Enhancing GPS Performance ................................................................................... 161
Updating Satellite Almanac Data .............................................................................. 162
Setting Privacy Options............................................................................................. 162
Using GPS with Map Software.................................................................................. 163
ClearvueTM Suite ......................................................................................................... 166
Java Applications ...................................................................................................... 167
Deleting Java Applications ........................................................................................ 168
Java Applications and GPS Enabled ........................................................................ 168
Beaming Information ................................................................................................. 170
Using Your Smartphone as a Modem ...................................................................... 172
Internet........................................................................................................................ 173
Browsing the Web ..................................................................................................... 173
Wireless Data Services.............................................................................................. 177
Wireless Data Services ............................................................................................. 177
Accessing Wireless Data Services From Your Phone .............................................. 177
Navigation Keys ........................................................................................................ 177
Guides and Demos ................................................................................................... 178
Windows Media Player .............................................................................................. 179
Games ......................................................................................................................... 190
Solitaire ..................................................................................................................... 190
Calculator ................................................................................................................... 191
Getting Started
1
Getting Started
Congratulations on the purchase of your new i920/i930 phone, a Smartphone with
Windows Mobile™ software! This chapter will help you familiarize yourself with your
i920/i930 phone and get it ready to use. You will also find information about installing
Microsoft® ActiveSync® desktop client how to purchase accessories, and where to find
additional help for using your i920/i930 phone.
About This Guide
This User’s Guide is for users of the i920 Smartphone and the i930 Smartphone. The
i930 Smartphone includes a built-in camera and camcorder. The i920 Smartphone does
not. All references to a camera, camcorder, camera lens, camera short-range flash light,
or related functionality refer only to the i930 Smartphone.
Getting to Know Your Smartphone
Before you set up your i920/i930 phone and start using it, take a moment to get familiar
with your Smartphone.
Flip Closed — External Features
retractable
antenna
infrared port
camera
lens
volume
controls
WalkieTalkie
button
SD card slot*
status light
flip open
button
camera
short-range
flash light
external
display
speaker key
smart key
stereo
audio port
speaker
(in back)
accessory connector
* To purchase an SD card go to sprint.com or call 1-800-NEXTEL6.
Note: The camera lens and the camera short-range flash light appears only in the
i930 Smartphone.
Retractable Antenna
The retractable antenna on your Smartphone is designed to be extended during calls
and is essential to attain the hearing aid compatibility rating on applicable models.
Getting Started
2
To extend the antenna, pull gently on the rounded tip until the antenna is fully extended
and clicks into position.
When finished with a call, retract the antenna by pushing gently on the rounded tip until
the antenna clicks into place.
To optimize your Smartphone’s performance, extend the antenna when you make or
receive a call, and avoid touching the antenna with any body part.
Important: Failure to fully extend or retract the antenna until the antenna clicks
into place causes severely degraded performance, which may result
in missed calls, dropped calls, or garbled audio.
Flip Open Button
Press this to open your Smartphone’s flip easily.
Status Light
The status light appears as a ring around the flip open button.
Status Light
Meaning when phone is on
Meaning when phone is off
Flashing green
In service.
N/A
Solid red
No service.
Connected to the charger and charging.
Solid green
Making a call or in a call.
Connected to the charger, and fully
charged.
The status light also flashes when you recieve a call, a call alert, or message notification,
or play a .midi audio recording on your phone.
You can set the status light not to light up. See “Turn the status light on or off” on page
125.
Camera Lens
Lets you take pictures with your Smartphone.
Note: The camera lens appears only in the i930 Smartphone.
Camera Short-Range Flash Light
Helps light the pictures you take with your Smartphone.
Note: The camera short-range flash light appears only in the i930 Smartphone.
Volume Controls
Sets the volume of the sound coming out of the earpiece and speaker. When your
Smartphone is in a call, the volume controls set the volume of calls. When your
Smartphone is not engaged in any activity, the volume controls set the volume of the
ringer and of multimedia audio.
The volume controls can also by used to scroll through lists that appear on the external
display.
Walkie-Talkie Button
Lets you make Walkie-Talkie calls and Talkgroup calls.
Getting Started
3
External Display
Shows a portion of the information on the internal display. To see more information, open
the flip.
Speaker
Sound comes out of your Smartphone here when you have the speaker turned on.
Stereo Audio Port
Insert headset connector here.
Note: The stereo audio port is compatible with non-stereo headsets.
Accessory Connector
Insert the connectors of accessories such as a charger or data cable here.
Infrared Port
The infrared port on your Smartphone enables you to send and receive (beam) contact
cards, calendar appointments, messages, pictures, and video clips using infrared
technology.
SD Card Slot
Insert your SD card here.
You can purchase a secure disk flash memory card (SD card) to use with your
Smartphone at sprint.com. Under Personal, click on Wireless. Then, under Shop the
Nextel Store Online, click on Accessories. Or, call 1-800-NEXTEL6.
Note: Your Smartphone can be used with multimedia cards (MMC cards) as well as
SD cards.
Speaker Key
The speaker key (t):
• Acts like the s when your Smartphone’s flip is closed.
• Turns Walkie-Talkie / Talkgroup speaker on and off.
• Used with voice shortcuts.
• Resumes suspended Java applications when the flip is closed.
Smart Key
The smart key (.):
• Acts like e when your Smartphone’s flip is closed.
• Accesses recent calls when the flip is closed.
• Suspends Java applications when the flip is closed.
Getting Started
4
Flip Open — Keypad, Navigation Area, and More
earpiece
internal
display
soft keys
home key
back key
navigation
area
send key
end key
navigation pad
OK key
keypad
power key
light sensor
microphone
Earpiece
Sound comes out of the earpiece when the speaker is off.
Power Key
When the Smartphone is turned off:
• Press and hold the Power key (p) for 2 to 3 seconds to turn on the Smartphone.
When the Smartphone is on:
• Press p to display the Quick List, a fast way to change your profile settings or lock
the Smartphone.
• Press and hold p to turn off the Smartphone. Or, press p and then press 1.
Internal Display
The internal display shows the following information:
• At the top of the screen are status indicators about the current mode, the name of the
current activity, or the name of the active program, if one has been selected.
• In the center of the screen is the active menu or program.
• At the bottom of the screen are menus or commands related to the active program.
Getting Started
5
Navigation Area
This area contains the keys and controls used to:
• Navigate through your phone’s menus, lists, and screens.
• Perform commands.
• Begin phone calls, end phone calls, and put phone calls on hold.
Navigation pad
Use the navigation pad to move the selection focus up, down, left, or right. This is called
“scrolling.” In a text field, use the navigation pad to move the cursor right or left, character
by character.
OK Key
Press the OK key (O) to open a highlighted item, or to select or clear a check box. The
OK key works much like the ENTER key on a keyboard, and is sometimes referred to as
the Action key or the “Do It” key.
Soft Keys
Press a soft key (A or B) to open the menu or perform the command shown on the
screen immediately above the key.
Send Key
Press the send key (s) to:
• Dial a phone number that you entered or selected.
• Answer an incoming call.
• Place a call on hold to answer a second incoming call (call waiting).
• Change between an active call and a call that is on hold.
End Key
Press the end key (e) to:
• End a call when 1 party is on the line, and end the active call when multiple parties are
connected.
• Return to the Home screen.
Press and hold e to lock the keypad.
Home Key
Press the home key (h) to view the Home screen. The Home screen is described later, in
“Using the Home Screen” on page 21.
Back Key
Press the back key (m) to go to the previous screen or to end a Walkie-Talkie call.
In a text field:
• Press m to backspace over 1 or more characters.
• Press and hold m to delete the entire contents of the field.
Getting Started
6
Keypad
Press keys on the keypad to enter numbers and characters.
* Key
• Press * to change between uppercase and lowercase in text input modes.
• Press and hold * to change between text and numeric input modes.
# Key
• Press and hold # to view a list of symbols that you can enter as text.
• On the Home screen, press and hold # to switch between phone lines. This feature
is available if your phone supports 2 phone lines.
Note: If you are not provisioned for a second line and you set your line to line 2, you
will not be able to make or receive calls.
Setting Up Your Smartphone
Locating Your SIM Card
Remove the battery door
1
Slide the release button back until it releases the battery door.
release
button
Getting Started
2
7
Allow the battery door to pop up, slide it forward, and remove it from the back of your
Smartphone.
Your SIM (Subscriber Identity Module) card is a small piece of plastic located in the SIM
card holder in the back of your Smartphone, underneath the battery.
SIM card
If there is no SIM card in your Smartphone, contact Sprint Customer Care at 1-800-6396111.
If want to use a SIM card other than the one that is in your Smartphone, please contact
Sprint Customer Care to verify that the SIM card you want to use is compatible with your
Smartphone.
Charging the Battery
Your Smartphone comes with a Standard Lithium Ion Battery and a rapid travel charger
to charge it.
Getting Started
8
Insert the battery before charging it
1
Slide the release button back until it releases the battery door.
release
button
2
Allow the battery door to pop up, slide it forward, and remove it from the back of your
Smartphone.
3
Insert the top of the battery into the battery area. Press the bottom of the battery to
secure it.
Getting Started
4
9
Replace the battery door and press it gently until you hear a click.
Charge the battery
1
2
Plug the charger into an electrical outlet.
Open the connector cover.
connector
cover
3
Plug the other end of the charger into the accessory connector.
Tip: To remove the charger from the accessory connector: Press the buttons on the
sides of the plug. Pull the plug straight out.
4 If you have purchased optional batteries or chargers, see “Charging Times” on page
10.
Getting Started
10
Charging Times
Check your battery and charger type against the grid below to determine appropriate
charging times.
Battery
Charger
Rapid
Standard
Standard Lithium Ion
2 hours
4 hours
Extended Capacity Lithium Ion
2.5 hours
5.5 hours
For best results, charge the batteries within the temperature range of 50°F to 104°F
(10°C to 40°C).
Prolonged charging is not recommended.
Battery Use and Maintenance
• The Motorola iDEN Approved Lithium Ion chargers provide optimum performance.
Other chargers may not fully charge the iDEN Lithium Ion battery or may yield a
reduced number of lifetime charge cycles.
• Extreme temperatures degrade battery performance. Do not store the battery where
temperatures exceed 140°F (60°C) or fall below 4°F (-20°C).
• Lithium Ion batteries have a self discharge rate and without use, lose about 1% of
their charge per day.
• The battery capacity is degraded if the battery is stored for long periods while fully
charged. If long term storage is required, store at half capacity.
Removing the Battery
Normally, it is not necessary to remove your Smartphone’s battery, but you may want to
if you have purchased an optional charger or want to remove your SIM card.
Remove the battery
1
2
Power off your Smartphone.
Slide the release button back until it releases the battery door.
release
button
Getting Started
11
3
Allow the battery door to pop up, slide it forward, and remove it from the back of your
Smartphone.
4
Remove the battery by pushing it toward the antenna and lifting it out.
Turning Your Smartphone On
Turn On
Press and hold the power button for 2 or 3 seconds.
power
button
While your Smartphone powers on for the first time, you will receive an alert to select OK
to restart the device. Select OK when prompted.
Note: This step is only necessary the first time you power on your Smartphone.
Turn Off
Press and hold the power button for 2 or 3 seconds.
Or, press the power button and then press 1.
Getting Started
12
Wirelessly Synchronize E-mail
There are two primary ways to set up your Smartphone to wirelessly synchronize your email, so you can send and receive e-mail messages from your Smartphone:
• Corporate E-mail — Synchronize the Outlook E-mail, Calendar, and Contacts on
your Smartphone with Microsoft® Outlook® E-mail, Calendar, and Contacts on your
Microsoft® Exchange server 2003.
Note: If your company does not use Microsoft Exchange server 2003, there are other
solutions available that may enable you to wirelessly synchronize with your
corporate e-mail, depending on the other type of e-mail server you have. Go to
sprint.com for more details.
• Personal E-mail — Connect to a POP3 or IMAP4 e-mail server to send and receive
Internet e-mail messages.
For more information about wirelessly synchronizing your Smartphone to your e-mail
accounts, see “Setting Up Wireless E-mail” on page 52.
Note: You do not need to install the ActiveSync desktop client in order to synchronize
wirelessly.
More Set-up Options
You may want to set up personal or corporate e-mail accounts, copy contacts to your
Smartphone from an older SIM card, set up your voice mail box, choose Nextel
Worldwide Service for international calls to select cities, and use the Settings feature to
customize your Smartphone’s features.
For information on setting up your personal and corporate e-mail accounts, see “Setting
Up Wireless E-mail” on page 52.
Copy Contacts From an Older SIM to Your Smartphone
1
2
3
On the Home screen, select Start.
Select SIM Manager, and then select Menu.
Select Copy To Contacts.
• To copy only Contacts you select, select the Contacts you want to copy to your
Smartphone.
• To copy all your Contacts to your Smartphone, select Menu, Select, and then All.
Note: If you select a Contact that is already on your Smartphone, that contact will not
be copied.
4 Select Copy.
For more information on SIM Manager, see “SIM Manager” on page 110.
Nextel® Voice Mail
You must set up your voice mail box before you can retrieve messages. See “Setting Up
Your Voice Mail Box” on page 81.
Getting Started
13
Nextel Worldwide® Service
Your Smartphone allows you to make and receive calls in the United States on the
Nextel iDEN digital network. With Nextel Worldwide Service, your Smartphone operates
in the United States as well as in over 100 countries around the world. When traveling
internationally, your Smartphone dual-mode phone registers with a local GSM or iDEN
network to provide you with voice as well as data services, depending on the country.
Visit sprint.com for up-to-date information regarding coverage, rates, and services
available in the country you will be visiting. For more information, see “Nextel
Worldwide® Services” on page 75.
Customizing Features
You can control many features of your Smartphone, including changing the appearance
of the Home screen, setting network connectivity, and enabling the Smartphone to
receive infrared beams from other devices. See “Settings” on page 115.
Install ActiveSync Desktop Client
With the Sync Cradle and mini USB cable, you can use ActiveSync desktop client to
synchronize Microsoft Outlook E-mail, Contacts, Calendar, and Tasks on your desktop
computer with your Smartphone, easily configure your ActiveSync options for
synchronization, or share files between your computer and your Smartphone.
Do not connect your Smartphone to your computer until you have installed ActiveSync
desktop client on your computer.
Install ActiveSync desktop client on your desktop computer
1
2
3
4
5
6
Insert the CD that came with your Smartphone into your computer. The installation
screen opens.
Click Getting Started with Windows Mobile.
Click Start Here.
Click Install ActiveSync.
Click Install.
Follow the instructions.
Note: You do not need to install ActiveSync desktop client to wirelessly synchronize
between your Smartphone and Outlook or other e-mail accounts. For more
information on setting up your personal and corporate e-mail accounts to sync
wirelessly with your Smartphone, see “Setting Up Wireless E-mail” on page 52.
Getting Started
14
The Sync Cradle
Your Smartphone comes with a Sync Cradle and mini USB cable that you use to connect
your Smartphone to your desktop computer when using ActiveSync desktop client. Do
not connect your Smartphone to your desktop computer until you have installed
ActiveSync desktop client on your computer.
Place the Smartphone in the cradle with the Smartphone powered off unless you have
already installed ActiveSync desktop client on your desktop computer. Do not power on
the Smartphone while it is in the cradle until you have installed ActiveSync desktop client
on your desktop computer.
Tip: You can also use the Sync Cradle to charge the battery in your Smartphone.
Assemble the Sync Cradle
1
Place the tabs of the phone support into the slots in the base of the cradle.
• If you are using a Standard Lithium Ion battery, place the tabs in the slots closest to
the front of the base.
• If you are using an Extended Capacity Lithium Ion battery, place the tabs in the
slots just behind the slots closest to the front.
tabs
slots
2
Press the phone support downward on to the base of the cradle, until it cannot easily
be removed.
Getting Started
15
Connect the mini USB cable
Note: Do not connect your desktop computer and Smartphone with the mini USB
cable until after you have installed the ActiveSync desktop client.
1 Insert the cable’s smaller connector into the cradle’s USB port.
USB port
2
Insert the cable’s large connector into the desktop computer’s USB port.
Place the Smartphone into the cradle
1
Open the Smartphone’s connector cover.
connector
cover
2
Place the Smartphone into the cradle, inserting the connector in the base of the
cradle into the Smartphone’s accessory connector.
Getting Started
16
Using the Sync Cradle to Charge Your Smartphone
You can use the Sync Cradle to charge your Smartphone any time, whether or not you
are using ActiveSync or have the mini USB cable attached.
Charge the battery
1
2
Plug the charger into an electrical outlet.
Plug the other end of the charger into the cradle’s charger port.
charger port
3
Open the Smartphone’s connector cover.
connector
cover
4
If you have not yet installed ActiveSync desktop client on your desktop computer,
make sure your Smartphone is powered off.
Getting Started
5
17
Place the Smartphone into the cradle, inserting the connector in the base of the
cradle into the Smartphone’s accessory connector.
Setting Up a Partnership
After you install ActiveSync desktop client, assemble the Sync Cradle and use the mini
USB cable to connect your Smartphone to your desktop computer. You are now ready to
set up a partnership between your Smartphone and your desktop computer.
Tip: Before you copy your Outlook Contacts to your Smartphone Contact list, it is a
good idea to clean up your Outlook Contacts list to avoid duplication of Contacts
that may already be on your Smartphone, and to assure that your Contacts are
alphabetized consistently with the Contacts on your Smartphone. Your Outlook
Contacts are combined in the same list as your Smartphone Contacts.
Run the ActiveSync New Partnership Wizard
If you have not done so already, press and hold p for 2 to 3 seconds to power on
the Smartphone.
2 When your desktop computer detects the USB connection, it will start the ActiveSync
New Partnership Wizard. Follow the instructions on the screen.
After you finish using the wizard, your data will begin to synchronize between your
desktop computer and your Smartphone. After synchronizing for the first time, take a
look at E-mail, Contacts, Calendar, and Tasks on the Smartphone. You will notice that
your information has been copied to the Smartphone. Disconnect the Smartphone from
the desktop computer and you are ready to go!
For more information about installing and using ActiveSync desktop client, see
“ActiveSync Desktop Client” on page 139.
1
Accessories
Your Smartphone comes with a Standard Lithium Ion Battery, rapid travel charger, the
Sync Cradle and its mini USB cable, and holster.
Various accessories are available for use with your i920/i930 phone, including stereo
headsets, mini-keyboard, cases, vehicle power charger, data cables, Hands-Free
accessories and more.
Getting Started
18
To order additional accessories, go to sprint.com or call 1-800-Nextel6. You can also
contact your Nextel Authorized Sales Representative or stop by any Nextel-owned Retail
Store. For information on Nextel retail store locations, go to sprint.com.
Wireless Local Number Portability:
Bringing Your Phone Number From
Another Carrier
If you are bringing your phone number from another carrier, your new phone will be
active as soon as you receive it. Nextel will provide you with a temporary phone number
so that you can begin using your Smartphone immediately. Once the number you have
brought to Nextel is activated, your temporary phone number will be deactivated and
service with your previous carrier will be cancelled automatically. You will receive a text
message on your Smartphone letting you know that activation is complete. Simply turn
your Smartphone off and back on again to complete activation.
Here is additional information you need to be aware of until the number you have brought
to Nextel is active on the Nextel network:
Nextel® Voice Mail
We suggest you set up your voice mail box after the number you brought to Nextel is
active on your Smartphone and your temporary phone number is deactivated. If you set
up your voice mail box prior to this, all messages and all settings (including your greeting
and password) will be lost when the number you have brought to Nextel becomes active.
Text Messaging
During the activation process, it is possible that text messages may not be properly
routed to your Smartphone.
911 Calls
Nextel continues to make efforts to ensure that all 911 calls are minimally impacted by
this process. If you make a call to 911 from your temporary phone number and the call
fails, the 911 emergency response center will not be able to call you back on your
Smartphone if in the meantime your Smartphone has been programmed with your
permanent phone number. As with any wireless 911 call, if your call is disconnected
before location and details have been provided, be sure to call 911 again and advise that
you were disconnected.
Go to sprint.com/bringyournumber for more details.
Sprint® Customer Care
Sprint Customer Care: 1-800-639-6111 or dial 611 from your i920/i930 phone.
Nextel Worldwide Customer Care: +1-360-662-5202 (toll-free from your i920/i930
phone).
Getting Started
19
Understanding Status Messages
Your Smartphone may display status messages under certain conditions. Before
contacting Sprint Customer Care, note the message, numeric code, and the conditions
under which it appeared. You can go to sprint.com for additional information about status
messages.
Finding More Information
The following table is a guide to finding more information about using your Smartphone.
Information about
Source
Making a phone call
This user guide: “Phone Calls” on page 38
SIM card
This user guide: “Securing Your Smartphone” on page
31 and “SIM Manager” on page 110.
Entering text
This user guide: “Entering Text and Numbers” on page
27.
Customizing your Smartphone’s features
This user guide: “Settings” on page 115.
Setting up a voice mail box
This user guide: “Setting Up Your Voice Mail Box” on
page 81.
Programs on the Smartphone
This user guide: “Using the Start Menu” on page 23.
Additional programs that you can install on the
Smartphone
Companion CD
Connecting to and synchronizing with a desktop This user guide: “Setting Up Wireless E-mail” on page
computer or a Microsoft Exchange Server
52 and “ActiveSync Desktop Client” on page 139.
Using your Smartphone, service and rate plans, http://www.sprint.com
purchasing a Smartphone, and customer
support.
Motorola warranty service or other information.
http://www.motorola.com/iden/support
Last-minute updates and detailed technical
information
Readme files, located in the Microsoft ActiveSync folder
on the desktop computer
Up-to-date information on using ActiveSync with http://www.microsoft.com/mobile
your Smartphone
The Basics
20
The Basics
This chapter provides basic information about using your Smartphone, such as moving
through the screens, understanding what is on your screen, entering text and numbers,
and securing the Smartphone.
Navigation Methods
The following topics describe how to move through the Smartphone screens and perform
tasks quickly and easily.
Using the Navigation Pad
You can use the navigation pad to perform the following actions:
• Scrolling horizontally and vertically, moving the selection focus on the screen.
• Selecting an item that has the focus (is highlighted).
Scroll by pressing the part of the navigation pad that corresponds to the direction in
which you want to scroll. Once you have scrolled to an item, you can then select it by
pressing O at the center of the navigation pad.
In many cases, scrolling to an item and pressing O (in other words, “selecting” the item)
takes you to a program or setting. When you scroll to a check box, pressing O selects or
clears the check box.
In most procedures in this document, “select” means scrolling to an item and pressing O.
In some programs, such as Messaging, you can move to the next or previous item by
scrolling left or right. For example, when you are viewing a message in Messaging, you
can move to subsequent messages in the message list by scrolling right.
Some screens, such as the ones in Settings, let you select an option by scrolling left and
right within a field. Usually, you apply the option by pressing the soft key below Done.
spinner
Using Soft Keys
There are 2 soft keys on the Smartphone, located directly below the display screen.
Pressing a soft key performs the command displayed immediately above it on the
screen. Soft key commands may change from one screen to the next.
The Basics
21
Using Menus
On many screens, the right soft key is the Menu soft key. Pressing this soft key displays
a list of commands for the current screen. Depending on the menu, selecting a command
has one of the following results:
• Performs the command.
• Takes you to another screen where you can perform the command.
• Displays another menu.
• Opens a program.
Use a menu command
1
2
Select Menu by pressing B beneath Menu on any screen where Menu is displayed.
Select a command by scrolling to it and pressing O.
Navigate a menu
• You can choose menu commands quickly by pressing the number on the keypad that
corresponds to the number shown next to the command you want.
• When the top menu command is selected, scrolling up moves the selection focus to
the menu item on the bottom of the screen.
• To see more of a menu that takes up more than one screen, select More from the
menu or press 9.
Using the Home Key
Pressing h takes you to the Home screen.
Using the Home Screen
The Home screen is your starting place for most tasks. You can gain access to all of the
Smartphone features and programs from the Home screen.
The Home screen displays automatically when you turn on the Smartphone or leave the
Smartphone idle when it is on, but you can go to it at any time by pressing h.
You can control what displays on your Home screen by choosing from 7 Home screen
layout settings: Nextel, Motorola Basic, Motorola Default, Windows Simple, Windows
Default, Windows Basic, and Large Font.
When you recieve your Smartphone the Home screen layout setting is Nextel.
The Basics
22
Nextel Layout
icons for recently
used programs
and name of
selected icon
status icons
service
provider
time
date
last call
appointments
voice mail
e-mail, text,
and media
messages
start menu
right soft key
option
The Home screen displays:
• Status icons
• Icons for the programs that you have most recently used.
• The name of the program associated with the icon selected in the row above
• Your service provider’s name (Nextel)
• The time
• The date
• The phone number of the last call
• Any upcoming Calendar appointments
• The number of voice mail messages you have. Select this area to go to your voice
mail messages.
• The number of e-mail messages, text messages (SMS), and media messages (MMS)
you have. Select this area to go to your Inbox.
• The Start menu, on the left. Pressing the soft key for this menu takes you to the list of
installed programs.
• A variable option, on the right. Pressing this soft key opens the associated program.
Change the Home screen layout
1
2
3
4
On the Home screen, select Start.
Select Settings and then Display Properties.
In Home screen layout, select the option you want.
Select Done.
Note: To change other display property settings, see “Display Properties” on page
115.
The Basics
23
Open programs from the Home screen
For all Home screen layouts:
• To open a program from the list of programs on the Start menu, select the start menu
by pressing A beneath Start, and then select a program by scrolling to it and
pressing O.
• To open the program that appears as the right variable option, such as Contacts,
press B beneath it.
For some Home screen layouts:
• To open any the programs that you have most recently used, select the icon
associated with the program by scrolling to it (you can scroll left and right by pressing
the left and right parts of your navigation pad) and pressing O.
• To go to your list of voice mail messages, select voice mail by scrolling to the voice
mail area of the screen and pressing O.
• To go to your Inbox for your e-mail messages, text messages (SMS), and media
messages (MMS), select the Inbox by scrolling to the message area of the screen and
pressing O.
• To go to the recent calls list, select it by scrolling to the area showing information
about the recent calls list and pressing O.
• To go to the Calendar, select it by scrolling to the area showing information about
upcoming appointments and pressing O.
Using the Start Menu
You can access most of your Smartphone’s features directly from the Start menu.
Pre-installed programs appear on the Start menu, such as Java applications.
Open a program
1
2
On the Home screen, select Start by pressing A beneath Start.
Select a program by scrolling to it and pressing O.
Assigning a Speed Dial Number to a Program
To make a program on the Start menu easier to access, you can assign that program a
speed dial number. When you press and hold the number you have assigned, the
program will open.
Assign a speed dial number to a program
1
2
3
4
5
6
On the Home screen, select Start by pressing A beneath Start.
Highlight the program you want to assign a speed dial number to.
Select Menu.
Select Add Speed Dial.
In the screen that appears, you can assign a speed dial number and the name that
will appear for the speed dial number in your list of speed dial numbers, or accept the
default values that are shown.
Select Done.
The Basics
24
Using the Quick List
The Quick List provides a list of commands that you can use to quickly perform common
actions.
Use the Quick List
1
2
Press p.
Select the Quick List command you want by scrolling to it and pressing O.
Commands are described in the following table.
To
Select this Quick List
Command
Turn off the Smartphone.
Power off
Turn off wireless capability. You can turn off wireless capability to
Flight mode
conserve battery life when you do not want to make or receive calls,
or in environments where cell phones must be turned off. When the
wireless capability is turned off you can still use the other Smartphone
features.
Lock the keypad so that you cannot make accidental keypresses. To Key lock
unlock the keypad, select Unlock, and then press #.
Lock the Smartphone.
Device lock
Turn on all wireless capability, so that you can make and receive calls. Flight mode off
Make one of these profiles the active profile.
Normal
Silent
Meeting
Outdoor
Automatic
Headset
Car
Speakerphone
Using the Back Key
Pressing m takes you to the previous screen, in a similar manner to m on a browser.
In a text field, pressing m moves the cursor back to delete 1 or more characters. This is
similar to pressing the BACKSPACE key on a keyboard.
Backspace and remove 1 character
• Press m.
Backspace and remove a line of text
• Press and hold m.
The Basics
25
Understanding Status Indicators
Status indicators appear at the top of the Smartphone screen. The following table lists
common status indicators and their meanings.
Indicator
Meaning
New e-mail
New voice mail. The icon or icons you see may depend on your network.
New instant message
Voice call in progress
Data call in progress
Incoming voice calls are being forwarded to another number
Call on hold
Missed call
Outgoing line 1
Outgoing line 2
Battery level
Low battery
Battery charging
No battery
Signal strength
No signal
General Packet Radio Services (GPRS) available
General Packet Radio Services (GPRS) in use
General Packet Radio Services (GPRS) in use for IDEN mode
Packet data exchanging for IDEN mode
Roaming
Sync error
Radio off
Ringer off
Vibrate instead of ringing
Speakerphone on — Phone call sounds come through the speaker
The Basics
Indicator
26
Meaning
Speaker on — Walkie-Talkie and Talkgroup sounds come through the
speaker
Speaker off — Walkie-Talkie and Talkgroup sounds come through the
earpiece
Backlight Dimming
A backlight lights the display and keypad when you make or receive a call, open or close
the flip, or press keys or buttons.
If you do not do any of these things for 10 seconds, the backlight of the internal display
dims. If you do not do any of these things for 30 seconds or more, the backlight turns off.
While on an active call with the flip open or closed, the internal display or external display
will remain dimly lit for the duration of the call.
When the backlight is off, pressing a key on the keypad turns the backlight on but does
not perform the action associated with the key.
Set time it takes for the backlight to turn off
1
2
3
4
On the Home screen, select Start.
Select Settings and then Power Management.
In Backlight timeout, select the amount of time for the Smartphone before the
backlight turns off, if you do not make or receive a call, open or close the flip, or press
keys or buttons.
Select Done.
Finding Your Phone Number and Other
Basic Information
The Owner Information screen displays the following information about your
Smartphone:
This Field
Displays
Name
If you want to fill in this field, enter your name.
Line 1
Your phone number. This number appears when your receive your first
phone call.
Line 2
Your Smartphone’s second line, if you have one.
PTT
Your Walkie-Talkie number, the number others use to contact you on
Walkie-Talkie calls.
E-mail address
If you want to fill in this field, enter your e-mail address here.
PTT Group ID
The number of the Talkgroup you have joined.
Carrier IP
The IP address assigned to Nextel. This field is filled in when you register
for packet data services.
IP Address - 1
The IP address you use to access the Internet with your Smartphone.
This number appears when you register for packet data service.
The Basics
27
This Field
Displays
IP Address - 2
The IP address you use to access the Internet with your Smartphone.
This number appears when you register for packet data service.
Notes:
If you want to fill in this field, enter the note you want to appear here.
Access the Owner Information screen
1
2
On the Home screen, select Start.
Select Settings and then select Owner Information.
Entering Text and Numbers
You can enter text and numbers by using the keypad*. Your Smartphone supports 4
input modes for entering text and numbers: Multipress, T9, Numeric, and Symbols.
Multipress and T9 modes are used for entering text, Numeric mode is used for entering
numbers, and Symbols is used for entering symbols.
* An external QWERTY mini-keyboard for easy text entry can be purchased at sprint.com or by calling call
1-800-NEXTEL6.
When you select a field that requires text or numbers, your Smartphone automatically
selects the appropriate input mode.
The status indicator on the top right side of the display screen shows the input mode and
capitalization that you are currently using.
Indicator Input mode
Multipress text input mode, lowercase
Multipress text input mode, uppercase 1 letter
Multipress text input mode, caps lock
T9 text input mode, lowercase
T9 text input mode, uppercase 1 letter
T9 text input mode, caps lock
Numeric input mode
If you are using Symbols mode, a page of symbols for you to choose from appears on
the screen, but no status indicator appears.
Change input modes and capitalization
To choose Multipress, T9, Numeric, or Symbols mode:
1 Press and hold * until a menu appears showing all input modes.
2 Select the mode you want.
To choose Multipress, T9, or Numeric mode, and choose the capitalization you want:
• Press * repeatedly until the status indicator for the input mode you want is shown on
the top of the display screen.
The Basics
28
To select Symbols mode:
• Press and hold #.
Delete characters
• Press m to delete character to the left of the cursor.
• Press and hold m to delete all the characters in a line.
Insert a space
• Press #.
Entering Text in Multipress Mode
To enter a letter in Multipress mode, press the number key on which the letter appears.
To enter the first letter on the number key, press the key once. To enter the second
letter, press the key twice, and so on.
For example:
• To enter the letter “s,” press 7777.
• To enter the word “hat,” press 44, 2, 8.
The letter entered most recently is underlined until you have completed the keypresses
for the letter and moved on to the next letter. When you enter letters that are on the same
number key, you must pause after entering the first letter and wait until the underline
disappears before entering the next letter so that the first letter can be processed. For
example:
• To enter the word “cat,” press 222, pause, press 2, pause, and press 8.
The pause between keypresses is called the Multipress time out, and you can adjust the
length of the pause.
Change the Multipress time out
1
2
3
4
5
On the Home screen, select Start.
Select Settings and then Accessibility.
Select Multipress Timeout.
In Multipress time out, select the length of the pause between keypresses.
Select Done.
Enter Punctuation in Multipress Mode
• Press 1 repeatedly until you see the punctuation mark that you want.
Tip: To see all of the available symbols, press and hold #.
Entering Text in T9 Mode
To form a word in T9 mode, press the number keys that contain the letters you want. As
you enter letters, T9 analyzes your keypresses and attempts to complete the word. For
example, to enter the word “shoe,” press 7, 4, 6, 3.
The Basics
29
Enter text in T9 mode
1
2
Select T9 as your input mode.
Enter letters by pressing the keys on which the letters appear. Press a key only once
for each letter.
Tip: If your word is 3 letters long or longer, it is best to press the keys for at least the
first 3 letters.
3 If the word you want appears:
• Scroll right to accept the word and move the cursor to the end of the word.
• Scroll left to accept the word and move the cursor to the beginning of the word.
• Press # or O to accept the word and enter a space after it.
4 If you want to view a list of available words, use the navigation pad to scroll up or
down. When the word you want is highlighted:
• Scroll right to accept the word and move the cursor to the end of the word.
• Scroll left to accept the word and move the cursor to the beginning of the word.
• Press # or O to accept the word and enter a space after it.
If you do not see the correct word, backspace to delete the word you entered, press and
hold * to change to Multipress mode, and then manually enter the word.
Enter compound words in T9 mode
You can string short words together to create longer, compound words like “mailman” or
“cannot”.
1 Enter the word that is the first part of the compound word, like “mail” or “can”.
2 Scroll right to accept the word and move the cursor to the end of the word.
3 Enter the word that is the next part of the compound word, like “man” or “not”.
Enter punctuation in T9 mode
• Press 1, then use the navigation pad to scroll through a list of common punctuation
and select the one you want.
Enter “emoticons” in T9 mode
1
2
Press 1 twice or 3 times, depending on the number of characters in the “emoticon”
you want.
Use the navigation pad to scroll through a list of “emoticons” and select the one you
want.
Having Trouble Entering a Word in T9 Mode?
T9 cannot always find the word you want in the list of possible words; in these cases, add
the word to the T9 dictionary. Next time, you will be able to enter the word in T9 mode.
Add a word to the T9 dictionary
1
2
3
Scroll to the end of the list of words and select Add Word?.
Enter the word in Multipress mode.
Select Done.
The Basics
30
Entering Numbers
You can enter numbers by using Numeric mode. If you need to enter a number within a
line of text, you can change to Numeric mode to enter the number, and then change back
to Multipress or T9 mode to finish entering the text.
Enter a number
1
2
3
If necessary, change to Numeric mode by pressing and holding *.
On the keypad, press the number you want.
Change back to Multipress or T9 input mode by pressing and holding *, and then
finish entering your text.
Note: If a field permits a numeric entry only, such as the Work phone field in
Contacts, the input mode automatically defaults to Numeric mode.
Entering Symbols
In Multipress and T9 modes, you can access some symbols by pressing 1.
In any mode you can access all symbols by pressing and holding # until a page of
symbols appears. When you select the symbol you want, you are returned to the
previous mode.
Enter a symbol
• In Multipress or T9 mode, press 1 repeatedly until the symbol you want appears.
• In any mode, press and hold # and select the symbol you want.
Performing Common Input Tasks
Enter a space
• In Multipress or T9 mode, press #.
Start a new line
• In any input mode, press O.
Delete characters
• Press m to delete the character to the left of the cursor.
• Press and hold m to delete all the characters in a line.
Change between uppercase and lowercase
• In Multipress or T9 mode, press *.
Tip: In Multipress or T9 mode, the first letter of a sentence is automatically
capitalized.
Lock caps
• In Multipress or T9 mode, press * twice. Press * again to return to lowercase.
Enter a symbol
• In any input mode, press and hold # and select a symbol.
The Basics
31
Enter the plus (+) sign for international calls
• Press and hold 0.
Securing Your Smartphone
You can secure your Smartphone by:
• Using your SIM card PIN feature
• Removing the SIM card from your Smartphone
• Locking the Smartphone’s keypad*
* An external QWERTY mini-keyboard for easy text entry can be purchased at sprint.com or by calling call
1-800-NEXTEL6.
For more security settings, see “Security” on page 135.
Using the SIM Card PIN
To prevent unauthorized use of your Smartphone, your SIM card can be protected by a
PIN that you enter each time the Smartphone is powered on. You can change the PIN,
and you can select whether you want the requirement that it be entered on or off. The
default selection is off.
When the SIM PIN requirement is off, your Smartphone can be used without entering a
PIN.
Important: When the SIM PIN requirement is off, the personal data on your SIM
card is not protected. Anyone can use your Smartphone and access
your personal data.
When the SIM PIN requirement is on, you are prompted to enter your PIN each time you
power on your Smartphone.
Note: If a SIM PIN is required, your Smartphone will not function until the SIM PIN is
entered, except for making emergency calls.
Turn the PIN requirement on or off
1
2
3
4
On the Home screen, select Start.
Select Settings then Security.
Select Enable SIM PIN or Disable SIM PIN.
Enter your PIN and select Done.
Note: The default SIM PIN is 0000. Change your PIN to prevent fraudulent use of the
SIM card (see “Change the PIN” on page 32).
Enter the PIN
1
When the Enter PIN screen appears after you power on your Smartphone, enter
your SIM PIN.
2 Select Done.
Note: If you enter your PIN incorrectly 3 times, your SIM card is blocked. To unblock
your SIM card, you must contact Sprint Customer Care. See “Unblock the PIN”
on page 32.
The Basics
32
Change the PIN
1
2
3
4
5
6
Note: The SIM PIN requirement must be turned on in order to access this feature.
On the Home screen, select Start.
Select Settings and then Security.
Select Change PIN.
In Old PIN, enter the current PIN number.
In New PIN, enter the new PIN number.
In Confirm new PIN, enter the new PIN number again, and select Done.
Important: Be sure to make a note of your PIN. When the SIM lock is enabled,
you must provide this PIN when you turn on your Smartphone to
make calls.
Unblocking the PIN
If you enter your PIN incorrectly 3 times, your SIM card is blocked. To unblock your SIM
card, you must contact Sprint Customer Care to get a PIN Unblock Code (PUK).
Important: If you unsuccessfully enter the PUK code 10 times, your SIM card is
permanently blocked and must be replaced. If this happens, all data
is lost. You will get a message to contact Sprint Customer Care.
Except for making emergency calls, your Smartphone will not
function with a blocked SIM card.
Unblock the PIN
1
2
Contact Sprint Customer Care.
At your Sprint Customer Care representative’s request, provide the information
needed to give you a PUK code.
3 Select Unblock PIN.
4 Enter the PUK code.
5 Enter a new 4- to 8-digit SIM PIN.
6 Re-enter your SIM PIN.
Note: These steps must be performed in quick succession.
If you entered the codes properly, SIM Unlocked appears on the display.
Removing the SIM Card
Normally, it is not necessary to remove your SIM card, but you may wish to do so for an
extra measure of security.
Important: Do not touch the gold-colored areas of your SIM card. Protect your
SIM card as you would any delicate object. Store it carefully.
The Basics
33
Removing the SIM card
1
2
Power off your Smartphone.
Slide the release button back until it releases the battery door.
release
button
3
Allow the battery door to pop up, slide it forward, and remove it from the back of your
Smartphone.
4
Remove the battery by pushing it toward the antenna and lifting it out.
The Basics
5
34
Slide your SIM card out of the SIM card holder.
SIM card
holder
Return the SIM card to your Smartphone
1
2
3
4
Make sure the Smartphone is powered off
If necessary, remove the battery door and battery.
Hold your SIM card and Smartphone in the orientation shown in step 4.
Carefully slide your SIM card into your Smartphone until it lines up with the marks
above and below the SIM card holder.
SIM card
holder
The Basics
35
Using a Different SIM Card in Your Smartphone or Using Your SIM
Card in a Different Phone — Information May Be Lost
If you want to use a SIM card other than the one that is in your Smartphone, please
contact Sprint Customer Care to verify that the SIM card you want to use is compatible
with your Smartphone.
The SIM card that comes with your Smartphone is designed for optimal Contacts storage
and feature use.
If you remove your SIM card and use it with another phone, or use another SIM card with
your Smartphone, the following information is erased from your Smartphone:
• The recent calls list
• The call alert queue
• Call forwarding settings
• Call waiting settings
• Owner information
Note: In some cases, Contacts may not be accessible if you move your SIM card to
another phone. Contacts entries created with your Smartphone may not
readable be by an older iDEN SIM-based phone or may appear differently than
on your Smartphone.
Locking the Keypad
• Locking the keypad turns off keypad functionality. This is a helpful feature if, for
example, the Smartphone is turned on and in your pocket, and you want to prevent
accidental keypresses.
Lock the keypad
• On the Home screen, press and hold e. When the Smartphone is locked, the left soft
key command displays Unlock.
Unlock the keypad
• On the Home screen, select Unlock and press #.
Note: You can still receive calls and make emergency calls when the keypad is
locked.
The Basics
36
Using a Headset
If you use a headset or similar device with your Smartphone, you can set your phone to
send incoming sound to the headset only, or to the headset and the speaker at the same
time.
Note: If you are using your Smartphone with a headset, and you have the Flip to End
option set to On, closing your flip sends incoming sound to the headset and
does not end the call.
Send incoming sound to headset only
1
2
3
4
On the Home screen, select Start.
Select Settings and then Phone Calls.
Select Headset/Speaker.
Select Headset only.
• Select Headset & Speaker to send incoming sound to the headset and ring tones
to the speaker.
5 Select Done.
Send incoming sound to headset and speaker
1
2
3
4
5
On the Home screen, select Start.
Select Settings and then Phone Calls.
Select Headset/Speaker.
Select Headset & Speaker.
Select Done.
Using a Remote Walkie-Talkie Button
If you are using a headset or other accessory with a remote Walkie-Talkie button, you
can use the remote Walkie-Talkie button for phone calls, Walkie-Talkie calls, and
Talkgroup calls.
For phone calls, use the remote Walkie-Talkie button to answer calls, switch between
calls, and end calls. Hold the remote Walkie-Talkie button for less than 2 seconds to
answer calls and switch between calls. Hold the remote Walkie-Talkie button for more
than 2 seconds to end calls.
For Walkie-Talkie calls and Talkgroup calls, use the remote Walkie-Talkie button as you
would the Walkie-Talkie button on your phone.
When you are not in a call or receiving a call, pressing the remote Walkie-Talkie button
for more than 2 seconds enables you to enter a phone number by using a voice shortcut.
Note: When using a headset, the Walkie-Talkie button on your phone works the
same way as when you are not using a headset. Walkie-Talkie and Talkgroup
sounds will be heard through the headset.
The Basics
37
Navigating and Managing Stored Files
File Explorer enables you to navigate and manage the files stored on your Smartphone,
and, if you have purchased an SD card* and inserted it into your Smartphone, the files on
your SD card.
* To purchase an SD card go to sprint.com or call 1-800-NEXTEL6.
File Explorer on your Smartphone works similarly to Windows Explorer on your PC. You
can view, run, copy, rename, and delete files with it.
Access File Explorer from the Start menu.
When using File Explorer:
• Scroll to highlight folders and files.
• Press O to expand or close highlighted folders.
• Use the option on the left soft key and the menu on the right soft key to open, run,
move, copy, paste, rename, and delete.
Managing Memory
The following types of items share memory space in your Smartphone:
• Ring tones and other sounds
• Pictures and wallpapers
• Video clips
• All types of messages, except voice mail messages
• Applications you have downloaded
• Contacts entries
• Calendar entries
Deleting any of these items frees more memory for all of these types of items.
Phone Calls
38
Phone Calls
This chapter explains how to make, receive, and manage digital cellular phone calls, and
create aids that help you make calls more efficiently, such as speed dials and voice
shortcuts.
Making a Phone Call
There are several ways to make a phone call. This section describes how to make a call
from the following locations:
• The Home screen
• Contacts
• The list of recently dialed phone numbers
• The recent calls list
• An e-mail message
This section also covers how to make emergency calls.
Making a Phone Call from the Home Screen
On the Home screen, you can call someone by entering a phone number or a contact
name using the keypad.
As you begin pressing keys, your Smartphone displays the names from your Contacts
and recent call list whose name or phone number match your entry. You can then select
the name or number to call without having to enter the entire name or number.
Contacts appear on the Home screen with this icon
and a contact list abbreviation.
You can view all the contact list abbreviations for all the numbers stored in this contact by
scrolling to the name and then scrolling left and right. The phone call is made to the
phone number associated with the contact list abbreviation that is showing when you
press s.
Note: For more information about contact list abbreviations, see “Contacts, Calendar,
and Tasks” on page 101.
Make a call by entering a phone number
1
2
On the Home screen, begin entering the phone number.
Do one of the following:
• If you see the number or contact name to call, scroll to it. If the contact list
abbreviation for the number you want to call is not showing, scroll left or right to
display it. Then press s.
• If you do not see the number or contact name, finish entering the number and press
s.
Phone Calls
39
Make a call by entering a contact name
1
On the Home screen, begin pressing the numbers on the keypad the correspond to
the letters in the contact name.
2 When you see the contact name, scroll to it. If the contact list abbreviation for the
number you want to call is not showing, scroll left or right to display it.
3 Press s.
Note: The number you make the call to becomes the contact’s default number.
Making a Phone Call from Contacts
You can make a phone call from your contact list or from an open contact.
When you make a call from your contact list, the Smartphone dials the contact’s default
number. The contact list abbreviation associated with the default number appears with
the contact when you view the contact list. You can change a contact’s default number at
any time.
You can view all the contact list abbreviations for all the numbers stored in a contact by
scrolling to the name and then scrolling left or right. The phone call is made to the phone
number associated with the contact list abbreviation that is showing when you press s.
When you make a call from an open contact, you can select the number to dial from the
contact card.
Make a call from the contact list
1
2
3
On the Home screen, select Start.
Select Contacts.
Scroll to the contact. If the contact list abbreviation for the number you want to call is
not showing, scroll left or right to display it.
4 Press s.
Tip: If you have a long list of contacts, and you don’t see the contact you want, enter
the first few letters of the contact’s name. When you do this, the Smartphone
searches through the contact list and displays the name.
Change the default number for a contact
1
2
3
4
On the Home screen, select Start.
Select Contacts.
Select the contact whose default number you want to change.
Scroll to the phone number that you want to set as the new default number. Make
sure you choose a phone number as the default number.
5 Select Menu, and then select Set as Default.
Note: When you make a call from the Home screen using a contact, the number you
make the call to becomes the contact’s default number.
Make a call from an open contact
1
2
3
4
5
On the Home screen, select Start.
Select Contacts.
Select the contact to call.
Select the phone number to call.
Press s.
Phone Calls
40
Making a Phone Call Using a Recently Dialed Number
You can select a name or number from the list of recently dialed phone numbers to call
that person again. You can also quickly redial the last number called.
Make a call using a recently dialed phone number
1
2
3
On the Home screen, press s to display a list of recently dialed phone numbers.
Scroll to the name or phone number to call.
Press s.
Dial the last number called
• On the Home screen, press s twice.
Making a Phone Call from the Recent Calls List
When you make a phone call from the recent calls list, the call is made to the phone
number you choose.
If a name on the recent calls list is stored in Contacts with more than one phone number,
you can choose to make the call to a different phone number in that contact by scrolling
left or right through the contact list abbreviations stored with the contact. The phone call
is made to the phone number associated with the contact list abbreviation that is showing
when you press s.
Make a phone call from the recent call list
With the Flip Open
1 From the Home screen, select Start.
2 Select Recent Calls.
3 Choose a number to call:
• Scroll to or select the name or number you want to call.
• Scroll to a name that is stored in your Contacts. If the contact list abbreviation for
the number you want to call is not showing, scroll left or right to display it.
4 Press s.
With the Flip Closed
1 Press ..
2 Press the volume controls to scroll to the name or number you want to make a phone
call to.
3 To make a phone call, press t.
4 To end the phone call, press ..
Phone Calls
41
Making a Phone Call from a Hyperlink Phone Number
You can quickly dial a phone number from an e-mail that contains a hyperlink phone
number. A hyperlink phone number is underlined, in the same manner as a Web site
address.
Make a call from a hyperlink phone number
1
From a message containing a hyperlink phone number, scroll to and then select the
phone number.
You will be prompted to verify the phone number and if necessary, to include the
country code or area code.
2 Select Call.
For more information about opening messages, see “Viewing and Responding to
Messages” on page 66.
Making Emergency Phone Calls
Your Smartphone supports emergency calling. Emergency phone calls can be made
even when your SIM card is blocked or not in your Smartphone.
Dial 911 to be connected to an emergency response center.
When you make an emergency call, your Smartphone’s GPS Enabled feature can help
emergency service personnel find you, if you are in a location where your Smartphone's
GPS antenna has established a clear view of the open sky and your local emergency
response center has the equipment to process location information. See “GPS Enabled”
on page 158, and particularly “IMPORTANT: Things to Keep in Mind” on page 158 and
“Making an Emergency Call” on page 159, for more information on the limitations of this
feature. Because of the limitations of this feature, always provide your best knowledge of
your location to the emergency response center when you make an emergency call.
Important: If you have not registered on the network, emergency calls cannot
be placed while your SIM card is in your Smartphone.
Important: If you are bringing your phone number to Nextel from your previous
carrier, you may receive a temporary telephone number while your
Smartphone is being programmed with your permanent phone
number. If you make a call to 911 and the call fails, the 911
emergency response center will not be able to call you back on your
Smartphone if in the meantime, your Smartphone has been
programmed with your permanent telephone number. If the call is
disconnected before location and details have been provided, call
911 again and advise that you were disconnected.
Make an emergency call
• Enter 911 and press s.
Having Problems Making a Call?
Check to make sure that the Smartphone contains a valid SIM card and that the
Smartphone is turned on and unlocked, and your Smartphone is receiving an adequate
signal.
Phone Calls
42
Receiving a Phone Call
When you receive a call on your Smartphone, the Smartphone rings, and the name and
number of the caller are displayed on the screen. If the name of the caller is not in your
contact list, only the caller’s phone number is displayed.
The Smartphone provides different options for handling a call, depending on whether or
not you already have a call on the line. The following screen capture shows the Incoming
screen that appears when you are not already on a call.
Answer or reject a first call
• To answer the call, press s or select Accept.
• To reject the call, press e or select Reject.
Note: Selecting Reject will connect the caller to your voice mail if you subscribe to
this service.
If your service includes Call Waiting, you can receive a second call when you are already
on a call. In this case, the Smartphone notifies you with a beep and displays a screen
such as the following:
Answer or reject a second call
• To end the first call and answer the second call, press e and then select Accept.
• To put the first call on hold and answer the second call, press s or select Accept. To
switch between calls, press s.
• To send the call to voice mail, select Reject.
Tip: To immediately silence the ring of an incoming call, press the volume controls.
You can then proceed to answer the call, if you want.
Phone Calls
43
Managing Phone Calls
While a call is in progress, you can use menu commands for common tasks. Some of
these commands are available only when multiple calls are in progress or during a
conference call.
Use menu commands during a call
• Select Menu and then one of the commands described in the following table.
To
Select this menu command
End the active call
End
Put the active call on hold
Hold
Activate the call on hold
Unhold
Switch between 2 calls
Swap*
Create a contact card for the caller
Save to Contacts
Join together all existing calls, if you have
subscribed to this service
Conference
Break one call out of a conference and make it Private
active while the rest of the conference is on hold
Turn the microphone off for the active call so the Select Mute.
other party cannot hear you, but you can still
hear the other party
Turn the microphone back on for the active call Select Unmute.
so the other party can hear you
* If you have two active calls and you end one call, and then you attempt to Swap to another call, you will
disconnect the active call.
Use call management commands that are not on the menu
The following table describes other tasks that you can perform while on a call.
To
Do this
Put the current call on hold and answer an
incoming call
Select Accept.
Send the incoming call to voice mail
Select Reject.
End the active call
Press e.
Turn the microphone off for the active call so the Select Mute.
other party cannot hear you, but you can still hear
the other party
Turn the microphone back on for the active call
so the other party can hear you
Select Unmute.
Switch between phone lines
• On the Home screen, press and hold # to switch between phone lines. This feature
is available if your phone supports 2 phone lines.
Note: If you are not provisioned for a second line and you set your line to line 2, you
will not be able to make or receive calls.
Phone Calls
44
Go to the Home screen during a call
• Press h.
You can then access other features from the Home screen.
To return to the call screen:
• Press m as many times as needed.
Speakerphone
Turning on speakerphone makes incoming sound come out of the Smartphone’s
speaker instead of the earpiece. Speakerphone is available whenever you are on an
active phone call.
You can turn the speakerphone on or off any time you are on a phone call or dialing a
phone number.
Turn speakerphone on or off
With the Flip Open
• Press and hold s.
• Press t on top of your phone.
With the Flip Closed
• When you make a call with the flip closed, speakerphone is always on.
• Opening the flip turns speakerphone off.
Call Forwarding
Call forwarding sends calls to the phone numbers you specify. You can forward all calls
to one number or forward missed calls to different numbers depending on the reason you
missed the call.
Set call forwarding
1
2
3
4
On the Home screen, select Start.
Select Settings and then Phone Calls.
Select Call Forwarding.
Select the condition under which to forward calls:
• Unconditional to forward all calls
• No Reply to forward calls when you do not answer
• Busy to forward calls when your line is busy
• Unavailable to forward calls when your Smartphone is off or out of service range
5 Select Enable call forwarding.
6 Enter the phone number to which calls are to be forwarded.
7 Select Done.
Note: This sets call forwarding for the current outgoing line. To set call forwarding for
the other line, make that line the current outgoing line (see “Change the line for
outgoing calls” on page 117) and then set call forwarding for that line. The
setting for each line remains even if that line is no longer the outgoing line.
Phone Calls
45
Using the Flip to Answer or End Calls
You can set your Smartphone to answer phone calls by opening the flip, end phone calls
by closing the flip, or both.
Set flip options
1
2
3
4
On the Home screen, select Start.
Select Settings and then Phone Calls.
Select Flip Activation.
To set your phone to answer calls by opening the flip, select Open flip to answer
call.
5 To set your phone to end calls by closing the flip, select Close flip to end call.
6 Select Done.
Note: If you are using your Smartphone with a headset, and you have the Flip to End
option set to On, closing your flip sends incoming sound to the headset and
does not end the call.
Retrieving Voice Mail Messages
If you are on the Nextel iDEN digital network, you can call your voice mail box by using
speed dial 1, which is reserved for your voice mail number, by selecting Voice Mail from
the Start menu, or by selecting the voice mail area on the Home screen.
Follow the instructions to retrieve your messages.
If you are roaming internationally, you will need to enter +1 before your voice mail
number in order to retrieve messages. For example, if your voice mail number is 703555-6245, you would need to save +1-703-555-6245 in your phone to be able to access
voice mail while roaming. For more information about using voice mail while roaming,
please see “Nextel Worldwide® Services” on page 75.
Speed Dials and Voice Shortcuts
Speed dials and voice shortcuts are aids that you can create for dialing frequently called
phone numbers quickly, automatically browsing to Web pages, or addressing e-mail
messages quickly.
Speed Dials
You can create 1- or 2-digit speed dials. When you press a speed dial, Smartphone
automatically dials the associated phone number, opens an e-mail message using the
associated address, or goes to the associated Web page.
You can create speed dials from 2 to 99. Speed dial 1 is reserved for your voice mail
number, and is automatically configured in your speed dial settings.
Phone Calls
46
Create a speed dial
1
2
3
4
On the Home screen, select Start.
Select Contacts.
Select the contact for whom to create a speed dial.
Scroll to the phone number, e-mail address, or Web page address for which to create
a speed dial.
5 Select Menu and then Add Speed Dial.
6 In Keypad assignment, select the speed dial number to use.
7 Select Done.
Note: You can create a speed dial only for a phone number, e-mail address, or Web
page address that is stored in Contacts.
Use a speed dial
• On the Home screen, press and hold the number on the keypad that you have
assigned as a speed dial for the phone number, e-mail address, or Web page. If the
speed dial is 2 digits, press the first digit, and press and hold the second digit. The
Smartphone dials the phone number, opens a new e-mail message, or goes to the
Web page.
View and edit a speed dial
1
2
3
4
On the Home screen, select Start.
Select Speed Dial.
Select the speed dial and then Edit.
Make any changes and select Done.
Delete a speed dial
1
2
3
4
5
On the Home screen, select Start.
Select Speed Dial.
Select the speed dial to delete.
Select Menu and then Delete.
Select Yes.
Voice Shortcuts
You can record a voice shortcut for a phone number. Then, when you speak the voice
shortcut, Smartphone automatically dials the associated phone number. You can use a
voice shortcut to make a phone call with the flip open or closed.
You can create one voice shortcut for each phone number in a contact. To change the
voice shortcut associated with a number, simply record a new voice shortcut in place of
the old one.
You can create up to 25 voice shortcuts in all.
Create a voice short cut
1
2
3
On the Home screen, select Start.
Select Contacts.
Select the contact containing the phone number you want to create a voice shortcut
for.
Phone Calls
4
5
6
7
47
Scroll to the phone number you want to create a voice shortcut for.
Select Menu and then Set Voice Shortcut.
After the audio and visual cue, begin recording the voice shortcut.
When prompted, repeat the voice shortcut. The Smartphone plays back the voice
shortcut.
Use a voice shortcut to make a phone call
While your phone is idle, press and hold t. You can do this with the flip open or
closed.
2 Say the word or words that you recorded as a voice shortcut.
The Smartphone plays back the voice shortcut and then places the call to the phone
number associated with the shortcut.
3 To end the phone call:
• If the flip is closed, press ..
• If the flip is open, press e.
Tip: To cancel the call before it is placed, do the same as you would to end the call.
1
Change a voice shortcut
1
2
3
4
5
6
7
8
On the Home screen, select Start.
Select Contacts.
Select the contact containing the phone number you want to change the voice
shortcut for.
Scroll to the phone number that is associated with the voice shortcut you want to
change.
Select Menu and then Set Voice Shortcut.
Select Record New.
After the audio and visual cue, begin recording the voice shortcut.
When prompted, repeat the voice shortcut. The Smartphone plays back the voice
shortcut.
Play a voice shortcut
1
2
3
4
5
6
On the Home screen, select Start.
Select Contacts.
Select the contact containing the phone number you want to play the voice shortcut
for.
Scroll to the phone number that is associated with the voice shortcut you want to
play.
Select Menu and then Set Voice Shortcut.
To play the shortcut again, select Menu and then Playback.
Delete a voice shortcut
1
2
3
On the Home screen, select Start.
Select Contacts.
Select the contact containing the phone number you want to delete the voice shortcut
for.
Phone Calls
4
5
6
7
48
Scroll to the phone number that is associated with the voice shortcut you want to
delete.
Select Menu and then Set Voice Shortcut.
Select Menu and then Remove.
Select Yes.
Advanced Calling Options
This section covers advanced dialing options that may be required for making certain
types of calls, such as international calls.
Adding a Pause to a Dialing Sequence
Smartphone allows you to insert an automatic 3-second pause in a dialing sequence.
If you want to insert a pause longer than 3 seconds in the dialing sequence, Smartphone
allows you to insert a manual pause, also known as a “wait”. When Smartphone reaches
a manual pause while dialing a number, it pauses until you press s to continue the
dialing sequence.
Insert a 3-second pause in a dialing sequence
1
2
3
4
5
6
7
On the Home screen, select Start.
Select Contacts.
Select the contact in whose phone number you want to insert a pause.
Scroll to the phone number and select Edit.
Scroll through the number and place the cursor where you want to insert the pause.
Select Menu and then Insert Pause. The letter “p” appears where the 3-second
pause will occur in the dialing sequence.
Select Done.
Insert a manual pause in a dialing sequence
1
2
3
4
5
6
On the Home screen, select Start.
Select Contacts.
Select the contact in whose phone number you want to insert a manual pause.
Scroll to the phone number and select Edit.
Scroll through the number and place the cursor where you want to insert the pause.
Select Menu and then Insert Wait. The letter “w” appears where the manual pause
will occur in the dialing sequence.
7 Select Done.
Note: To resume dialing after reaching a manual pause, press s.
International Calls From the United States
Your service default is “International Calls Restricted.” Contact Sprint Customer Care to
obtain international dialing access.
Calls placed between the United States and Canada do not require an international
access code.
Phone Calls
49
To make an international call, you must include an international access code at the
beginning of the dialing sequence for the phone number. Then enter the country code,
city code or area code, and phone number.
Insert an international access code
• Press and hold 0 until a plus (+) sign appears. The network translates the (+) into
the appropriate international access code needed to place the call.
Note: You can insert a plus (+) sign into a contact’s phone number or dial it directly
from the keypad.
Note: To learn more about using your Smartphone internationally, see “Nextel
Worldwide® Services” on page 75.
TTY Calls
You can use your Smartphone to make phone calls using a teletypewriter (TTY) device.
TTY device features such as Turbo-Code, High-Speed, and Interruption are not
supported by your Smartphone. These features must be turned off or disabled to use
your TTY device with your Smartphone.
Connect your Smartphone to your TTY device and make calls
1
2
3
4
Connect one end of a 2.5mm cable into the stereo audio port on your Smartphone.
Connect the other end of the cable to your TTY device.
Make sure that your Smartphone’s TTY feature is on and select the TTY mode you
want to use. See “Enable TTY” on page 126.
Use your Smartphone to enter phone numbers you want to call.
Press s to make the call.
Special Dialing Codes
Non-Emergency Numbers
Nextel supports many “non-emergency” numbers (such as #77, 311,...) provided by local
and state governments. These numbers are used to report non-emergency incidents. If
the situation includes imminent danger or loss of life, you should dial 911.
Telecommunications Relay Service
Nextel supports services for communicating with speech and/or hearing impaired
individuals. You can dial 711 to reach a local Telecommunications Relay Center. You will
then be connected to your destination number. Relay service works through a
Communications Assistant who reads messages typed into a TDD/TTY device by a
speech or hearing impaired individual to you. The Communications Assistant then types
your spoken messages to the hearing or speech impaired individual.
Telecommunications Relay Service is available 24 hours a day, 7 days a week, and
every call is strictly confidential.
Note: Using 711 to reach Telecommunications Relay Service may not be available in
all areas.
Phone Calls
50
Nextel® Phone Services
Contact Sprint Customer Care to obtain these services or for additional information:
Note: Some services are not available outside of the continental United States.
Caller ID
Your Smartphone can automatically display the phone number or name (if the 10-digit
phone number is stored in your Contacts) of the person calling (unless blocked by the
caller), enabling you to decide whether to take the call or forward it to voice mail.
Caller ID information is not available on all calls.
Per-Call Blocking
You can block delivery of your phone number to other Caller ID units for a single phone
call:
• Press * 6 7 before dialing the call.
Your Nextel phone number cannot be blocked from calls made to 911, 800, 855, 866,
877, 888, or other toll-free phone numbers.
Per-Line Blocking
You can permanently block delivery of your phone number on every call you make.
To show your number on a per-call basis:
• Press * 8 2 before dialing the call.
Second Line Service
You can have two different phone numbers on the same phone. With Second Line
Service, you can:
• Get separate bills for each phone line.
• Bring in an existing wireless or home phone number to Nextel to activate on the
second line.
• Have two different area codes (must be in same market) to convey a local image to
callers.
• Use different ringer styles so that you can tell which line is receiving a call.
• Forward incoming calls to either your primary or alternate line phone number.
• Choose a Second Line Service plan that fits your needs.
In order to activate Second Line Service, contact your Nextel Sales Representative or
call Sprint Customer Care.
Set the active line
1
2
3
4
5
On the Home screen, select Start.
Select Settings and then Phone Calls.
Select Line For Outgoing Calls.
Select the line you want to be the active line.
Select Done.
Phone Calls
51
Note: If you are not provisioned for a second line and you set your line to line 2, you
will not be able to make or receive calls.
Call Restrictions
You can prevent your Smartphone from making or receiving long distance, incoming,
and outgoing (except 911) calls.
Directory Assistance Plus
Dial 411 to reach an operator who will assist you with movie listings and showtimes,
making dinner reservations, turn-by-turn directions and white and yellow page listings.
Spanish speaking operators are also available. You can also get phone numbers of
restaurants, movie theaters or phone listings you have requested sent to your phone via
text message. Airtime and other charges apply.
Setting Up Wireless E-mail
52
Setting Up Wireless E-mail
There are two primary ways to set up your Smartphone to wirelessly synchronize your email, so you can send and receive e-mail messages from your Smartphone:
• Corporate E-mail — Synchronize the Outlook E-mail, Calendar, and Contacts on
your Smartphone with Microsoft® Outlook® E-mail, Calendar, and Contacts on your
Microsoft® Exchange server 2003.
Note: If your company does not use Microsoft Exchange server 2003, there are other
solutions available that may enable you to wirelessly synchronize with your
corporate e-mail, depending on the other type of e-mail server you have. Go to
sprint.com for more details.
• Personal E-mail — Connect to a POP3 or IMAP4 e-mail server to send and receive
Internet e-mail messages.
Making Sure You Have the Correct Data
Access Plan
Before setting up e-mail on your new Smartphone, make sure you have updated your
data plan to one with unlimited access. Users who rely on e-mail or other data services to
keep them connected “on-the-go”, typically require frequent data use and need a plan
that includes a data access bundle. This will ensure that you don’t incur extra charges
every time you synchronize e-mail or go to a Web site – unlimited data access plans
allow you to access everything you need to – as many times as you need to – without
any extra charges. To be sure you have the right plan, talk to your sales representative
or call Sprint Customer Care at 800-639-6111.
Setting up Corporate E-mail, Calendar, and
Contacts
Your Smartphone includes Outlook E-mail, Calendar, and Contacts applications. You
can synchronize these applications with your corporate E-mail, Calendar, and Contacts if
your company is using Microsoft Exchange 2003 with ActiveSync. When you set up your
Smartphone to wirelessly synchronize, the E-mail, Calendar, and Contacts on your
phone synchronize with your Outlook on the corporate Exchange server. Only those
applications that are marked for synchronization on your Smartphone are copied in this
manner.
Note: If your company does not use Microsoft® Exchange server 2003, there are
other solutions available that may enable you to wirelessly synchronize with
your corporate e-mail. Go to sprint.com for more details.
To set up your corporate e-mail account, locate the following information before you
begin:
• Make sure your e-mail is running on Microsoft Exchange 2003.
• Get your corporate network server domain name and server name (these may be the
same as your company’s Web mail log-in information, or you can get the information
from your system administrator).
• You must also know your Exchange user name and password to synchronize with the
server.
Setting Up Wireless E-mail
53
Once you create a connection, you can edit the connection later to stop synchronizing a
particular application (E-mail, Calendar, or Contacts) or change how much information is
synchronized.
Configuring a Connection with Your Exchange Server
1
2
3
4
5
6
7
8
9
10
If the Smartphone is connected to your desktop computer, disconnect it.
On the Home screen, select Start.
Select ActiveSync.
Select Menu and then Options.
Select Server Settings.
Select Connection.
In User name, enter your Microsoft Exchange user name.
In Password, enter your Microsoft Exchange password.
In Domain, enter the name of the domain of your Exchange server.
If you want the Smartphone to save your password so that you need not enter it when
connecting, select Save password.
11 If configuring a Server Name, enter the name of your Exchange server.
12 Select Done.
Setting the Smartphone to Wirelessly Synchronize
With Outlook
You can set up the Smartphone to wirelessly synchronize with your corporate E-mail,
Calendar, and Contacts, if your company is using Microsoft® Exchange server 2003, and
you have configured a connection with your Exchange server
1
2
3
4
5
6
On the Home screen, select Start.
Select ActiveSync.
Select Menu and then Options.
Select Server Settings.
Select the synchronization settings to edit: Calendar, Contacts, or Inbox.
Do one of the following:
• To start synchronizing Calendar, Contacts, or Inbox information, select Sync
[Information Type] with a server on the appropriate synchronization settings
page by highlighting the field and pressing O.
• To stop synchronizing Calendar, Contacts, or Inbox information, clear the Sync
[Information Type] with a server check box on the appropriate synchronization
settings page by highlighting the field and pressing O.
• Change the amount of information to be synchronized.
7 Select Done.
Setting Up Wireless E-mail
54
Creating a Synchronization Schedule
After you set up your Smartphone to access your corporate E-mail, Calendar, and
Contacts, you can create an automated schedule for wirelessly synchronizing the
information. You can schedule synchronization of your Smartphone on 2 separate time
schedules. Use the peak times schedule to synchronize during working hours or other
times you experience higher mail volumes. Use the off-peak schedule to synchronize
during times when you experience lower mail volumes. When you are roaming, you can
synchronize manually to reduce roaming charges, or you can synchronize using the
mobile schedules.
Note: To edit schedule settings, your Smartphone must be disconnected from your
desktop computer.
1 On the Home screen, select Start.
2 Select ActiveSync.
3 Select Menu and then Options.
4 Select Mobile Schedule.
5 Select how often to synchronize in the Peak time sync (during the work day) list. The
recommended setting is Every 30 Minutes, or less frequently.
6 Select how often to synchronize in the Off-peak time sync (evening and weekends)
list. The recommended setting is Manually.
7 Select whether or not to synchronize on a schedule in the Roaming sync list. The
recommended setting is Manually, because your sync costs will be on a different
plan with International Wireless Data Services (GPRS) roaming.
8 Select Sync outgoing items as they are sent to synchronize every time you send
e-mail.
9 Select Done.
The recommended setting for Peak time sync is Every 30 Minutes, or less frequently,
for the following reasons:
• When your Smartphone is synchronizing (in a data session), you cannot receive
cellular service (an incoming call, for example). A less frequent synchronization
schedule will reduce the chances that you may miss a call.
• Every time you synchronize there is a reduction in battery life. A less frequent
synchronization schedule will keep your battery life stronger, for a longer period of
time.
• You can always initiate a manual sync in case you need to make sure you have the
latest information.
Synchronizing Automatically
Note: If you set up more than three e-mail accounts on the Smartphone to
synchronize automatically, the settings will automatically revert to manual.
With ActiveSync you can schedule automatic synchronization between your Smartphone
and a server every time an item arrives or is changed at the server. Your Smartphone is
informed of that event and synchronizes automatically to retrieve those items, making
your Smartphone always up-to-date. You must synchronize your Smartphone at least
once (such as after creating a partnership) before you can see and change the settings
for synchronization as items arrive.
Setting Up Wireless E-mail
55
Note: You can synchronize as items arrive only if your company is running Microsoft
Exchange Server with Exchange ActiveSync.
Set up a schedule to synchronize automatically
1
2
3
4
5
6
On the Home screen, select Start.
Select ActiveSync.
Select Menu and then Options.
Select Mobile Schedule.
Set Peak time sync and/or Off-peak time sync to When new items arrive.
Select Done.
Synchronizing and Viewing Your E-mail
Once you have set up your Smartphone to synchronize wirelessly with your corporate
E-mail, Calendar, and Contacts using ActiveSync, you are ready to begin.
Synchronize your e-mail
1
2
3
On the Home screen, select Start.
Select ActiveSync.
Select Sync to wirelessly synchronize all your corporate E-mail, Calendar, and
Contacts.
View your e-mail
1 On the Home screen, select Start.
2 Select Messaging.
3 Select the account you want to view.
The Inbox message list displays your received messages.
For more information on using e-mail, see “Using Wireless Messaging Features” on page
57.
Setting up Personal E-mail
Another way to send and receive e-mail messages is by using your personal Internet email account. To set up an Internet e-mail account on your Smartphone, you need to
know which type of e-mail server hosts your mail box: IMAP4 or POP3. You also need
your e-mail user name and password, and your domain name. If you are not sure,
contact your Internet Mail Provider’s Help Desk.
Some popular IMAP4 or POP3 Internet E-mail accounts include: aol.com, comcast.net,
yahoo.com, bellsouth.net, earthlink.net, mindspring.com, and pacbell.net. Check with
your provider to find out if they require you to upgrade to a premium account in order to
gain access with your Smartphone.
Setting Up Wireless E-mail
56
Configuring Your Personal Internet E-mail Account
(POP3 or IMAP)
1
2
3
4
5
6
7
8
9
10
11
12
13
14
15
16
17
18
On the Home screen, select Start, Messaging, and then select an account.
Select Menu and then Options.
Select Account Setup, Menu, and then New.
In Your name, enter your display name for e-mail messages.
In E-mail address, enter the e-mail address for this account.
Select Attempt to obtain e-mail settings from the Internet if you want to set up
your account automatically. If your account could not be set up automatically or you
want to set it up manually, continue with step 7.
In User name, enter your user name. This is usually the first part of your e-mail
address, which appears before the “at” sign (@).
In Password, enter your password.
In Domain, enter the domain name, if required.
To save your password, so that you do not need to enter it each time you connect to
your e-mail server, select Save password.
Select Next.
In Server type, select the type of e-mail server that hosts your mail box — POP3 or
IMAP4 — and select Next.
In Account name, enter a name for this account. You must use a different name for
each account that you set up.
In Network, select the type of network that your e-mail server runs on and select
Next.
Enter information about your e-mail servers. If you are not sure what to enter, ask
your network administrator.
Select the security options if necessary and select Next.
Select message download options and select Next.
Select a connection option, select Next, and then select Finish.
Checking and Viewing Your E-mail
Once you have set up your Smartphone to wirelessly send and receive personal Internet
e-mail, you are ready to begin.
Check your e-mail
1
2
3
On the Home screen, select Start and then Messaging.
Select the Internet e-mail account for which you want to send and receive messages.
Select Menu and then Send/Receive. The Smartphone connects to your Internet email server and sends and receives your messages.
Tip: To stop this process, select Menu and then Stop Send/Receive.
View your e-mail
1 On the Home screen, select Start.
2 Select Messaging.
3 Select the account you want to view.
The Inbox message list displays your received messages.
Using Wireless Messaging Features
57
Using Wireless Messaging
Features
You can use your Smartphone to send and receive e-mail, text messages, media
messages (MMS), and instant messages.
Your Smartphone is already set up for voice mail messaging, if your phone service
includes this feature.
Note: To receive voice mail messages, you must first set up your voice mail box. See
“Nextel® Voice Mail”.
This chapter describes how to work with messages on your Smartphone. It discusses the
following topics:
• Working with messaging accounts
• Creating, sending, and receiving messages
• Importing text messages
• Viewing and responding to messages
• Working with large messages and attachments
• Working with message folders
• Customizing message notifications
• Using MSN® Messenger for instant messaging
For information on setting up personal and corporate e-mail accounts, see “Setting Up
Wireless E-mail” on page 52.
Understanding Messaging Features
You can compose and view e-mail messages and media messages directly on your
Smartphone. You can also use instant messaging with MSN Messenger.
While on the Nextel iDEN digital network, you can receive text messages (SMS). While
roaming on a GSM network, you can send or recieve text messages.
E-mail Messaging
There are 4 ways to send and receive e-mail messages with the Smartphone:
• By wirelessly synchronizing your Outlook E-mail Inbox folder with Microsoft® Outlook®
on your Microsoft® Exchange server.
• By wirelessly connecting to a POP3 or IMAP4 e-mail server to send and receive
Internet e-mail messages.
• By synchronizing your Outlook E-mail Inbox folder with Microsoft Outlook on your
desktop computer using ActiveSync desktop client and the Sync Cradle and mini USB
cable.
• Use Pocket Internet Explorer to view Web-based e-mail.
For information on setting up personal and corporate e-mail accounts, see “Setting Up
Wireless E-mail” on page 52.
Using Wireless Messaging Features
58
Text Messaging (SMS)
You can send and recieve text messages only in GSM mode. While using the Nextel
iDEN digital network, you can only recieve text messages.
In GSM mode, you can send and receive text messages up to 160 characters in size.
While using the iDEN network, you can recieve messages up to 500 characters long.
The advantages of text messaging include the following:
• Text messages are sent instantly.
• Text messages can be sent or received at any time, except during a data call, WalkieTalkie call, or Talkgroup call.
• Most mobile phones support text messages, so most recipients can read text
messages that you send.
Note: You cannot synchronize text messages with your desktop computer, and you
cannot use text messages to send or receive attachments or voice notes.
Media Messaging (MMS)
Media messages are composed of 1 or more pages, and each page can contain up to 1
picture, text region, and sound. Thus, when the recipient opens your media message,
the experience is similar to watching a simple slideshow. The recipient must download
the message before viewing it.
You can create media messages of up to 100 KB in size, including pictures and sound
files.
The advantages of media messages include the following:
• After the message has been downloaded, media messages essentially “play” the
picture or sound you attach to the message, so the recipient does not have to
download each attached file.
• Media messages can be sent or received any time your Smartphone is turned on and
not in a voice or data call.
Instant Messaging
You can use MSN® Messenger on the Smartphone to send and receive instant
messages. MSN Messenger on the Smartphone provides the same chat environment as
MSN Messenger on your desktop computer. For example, you can chat with a single
MSN Messenger contact, or with several contacts at once. You can switch between
active chats, block contacts, and configure display settings, such as your name and
current status (Away, Online, and so on).
An external QWERTY mini-keyboard for easy text entry can be purchased at sprint.com
or by calling call 1-800-NEXTEL6.
For information on setting up the Smartphone for instant messaging, see “Sending and
Receiving Instant Messages” on page 72.
Using Wireless Messaging Features
59
Working with Accounts
You can use up to 8 different messaging accounts with the Smartphone. This section
describes how to do the following:
• View the list of accounts
• Move between accounts so that you can send and receive messages, or change
options for a particular account
• Change options for an account after it has been set up
• Delete an account that you no longer want to use
View the list of accounts
• On the Home screen, select Start and then Messaging.
The list of accounts displays with the number of unread messages in the Inbox of each
account shown in parentheses.
Tip: You can open an account by selecting it in the list.
Move quickly between accounts
• If you have an account open, you can quickly switch to another account by scrolling
right or left.
• Select Menu and then Switch Accounts.
Change e-mail account options
1
2
3
4
On the Home screen, select Start, Messaging, and then select an account.
Select Menu and then Options.
Select the type of options to change.
Change the options and select Done.
Delete an account
1
2
3
4
5
On the Home screen, select Start, Messaging, and then select an account.
Select Menu and then Options.
Select Account Setup.
Scroll to the account to delete.
Select Menu and then Delete.
Note: You cannot delete your Media Messages account.
Using Wireless Messaging Features
60
Creating Messages
You can start creating a new message from Messaging. You can also create a new
message from Contacts. After you create a message, you can send it. See “Sending and
Receiving Messages” on page 65.
You can create messages by switching to the account to use, opening a new message,
addressing it, and then composing the message. For information about entering text on
the Smartphone, see “The Basics” on page 20.
Tip: You can quickly enter e-mail addresses from your contact cards. In To, press O
and select a recipient from the list. Then, select the recipient’s e-mail address.
To insert punctuation such as the “at” sign (@), a period (.), or a semicolon (;),
repeatedly press 1 in Multipress mode until the punctuation appears or press
and hold # to view a list of symbols that you can enter as text.
To cancel a message, select Menu and then Cancel Compose.
If you have included an e-mail address in a contact card, you can create a new message
from a contact card.
Create an e-mail message in Messaging
1
2
3
4
5
On the Home screen, select Start and then Messaging.
Select one of your e-mail accounts.
Select New.
Fill in the fields of the message as you would when creating an e-mail message from
this account on your desktop computer or PDA.
Select Send. E-mail messages are stored in Outbox and sent to recipients the next
time you synchronize or connect to your e-mail server and send and receive mail.
Create a text message in Messaging
1
2
3
4
5
6
Note: You can send and receive text messages only in GSM mode. While using the
Nextel iDEN digital network, you can only receive text messages.
On the Home screen, select Start and then Messaging.
Select Text Messages.
Select New.
In To, enter recipient text message numbers. Insert a semicolon (;) between multiple
addresses or numbers.
Enter the text of the message.
Select Send.
Create a media message in Messaging
1
2
3
4
On the Home screen, select Start and then Messaging.
Select your media account, Media Messaging.
Select New.
In To, enter recipient e-mail addresses, text message numbers, or media message
addresses. Insert a semicolon (;) between multiple addresses or numbers.
Using Wireless Messaging Features
61
5
In Cc and/or Bcc, enter the e-mail or media message addresses of persons to
receive a copy. This field does not appear to recipients who receive the message as
a text message instead of a media message.
6 In Subj, enter a subject. This field does not appear to recipients who receive the
message as a text message instead of a media message.
7 To insert a picture, sound, or text into a media message, select Menu, Insert, and
then select Picture, Sound, or Text.
8 To change the background color of all the pages in your message, select Menu,
Background Color and select the color you want.
9 To add a page to the media message, select Menu, Pages, and then Add Page.
10 To preview the message, select Menu and then Preview.
11 Select Send. For information about how media messages are sent, see “Sending
and Receiving Messages” on page 65.
Create a message from a contact card
1
2
3
4
5
6
7
8
On the Home screen, select Start.
Select Contacts.
Select the contact.
Select the e-mail address or text message number to use.
Note: You cannot send a media message directly from a contacts card.
Select the account to use.
In Subj, enter a subject. This field does not appear to recipients who receive the
message as a text message instead of a media message.
Enter a message.
Select Send. E-mail messages are stored in Outbox and sent to recipients the next
time you synchronize or connect to your e-mail server and send and receive mail.
Text messages are sent immediately.
Tip: To insert punctuation such as the “at” sign (@), a period (.), or a semicolon (;),
repeatedly press 1 in Multipress mode until the punctuation appears or press
and hold # to view a list of symbols that you can enter as text.
To cancel a message, select Menu and then Cancel Compose.
Inserting Predefined Text into Messages
To save time entering text, you can insert predefined text into messages. You can edit
the predefined text included with the Smartphone to create words or phrases that you
frequently use in messages.
Insert predefined text into a message
1
2
3
On the Home screen, select Start and then Messaging.
Select an account and then New.
In Subj or the message area, select Menu and then Insert Text for e-mail and text
messages, or Menu, Insert, and then Text for media messages.
4 Scroll to the text and select Insert.
Tip: You can quickly insert text by entering its associated number.
Using Wireless Messaging Features
62
Edit predefined text
1
2
3
4
5
On the Home screen, select Start, Messaging, and then select an account.
Select Menu and then Options.
Select Edit My Text.
Scroll to the text to edit.
Edit the text and select Done.
Inserting Voice Recordings into Messages
You can easily insert a voice recording into an e-mail message. Inserting a voice
recording is useful when you want to verbally explain information that is contained in the
message.
Insert a voice recording into a message
1
2
3
4
In the message area of an e-mail message, select Menu and then Insert Recording.
Select Record and start speaking into the Smartphone microphone.
When finished speaking, select Stop.
Select Done.
Note: You can send only 1 voice recording in an e-mail message. If you create a
second voice recording in an e-mail message, it replaces the first recording.
Inserting Pictures into Messages
You can easily insert a picture into a media message.
Insert a picture into a message
• Scroll to the picture area of the message and press O. Select the picture you want to
insert.
• In the body of the message, select Menu, Insert, and then Picture.
Tip: To remove a picture, select the picture, select Menu, and then Remove Object.
Inserting Sounds into Messages
You can easily insert a sound into a media message.
Insert a sound into a message
1
2
In the message area, select Menu, Insert, and then Sound.
Select the sound you want to insert and press O. The sound appears as an
attachment in the message.
Tip: To remove a sound, select the sound attachment, select Menu, and then
Remove Object.
Using Wireless Messaging Features
63
Inserting Signatures into Messages
For each e-mail account and your text messaging account, you can specify a signature
to be automatically inserted into messages that you send.
Specify a signature to insert for e-mail and text messages
1
2
3
4
5
6
7
8
On the Home screen, select Start, and then Messaging.
Select and e-mail account or select Text Messages.
Select Menu and then Options.
Select Signatures.
Scroll right to switch to the account for which you want to specify a signature.
Select Use signature with this account.
To insert a signature in every message you send, select Include when replying and
forwarding. Otherwise, a signature is inserted only in new messages.
Replace the text in the Signature box with a signature to insert, and select Done.
The signature is inserted into messages that you send from this account.
Specify a signature to insert for media messages
1
2
3
4
5
6
7
8
9
On the Home screen, select Start, and then Messaging.
Select Media Messages.
Select Menu and then Options.
Select Account Setup.
Select Menu and then Edit.
Select Menu and then Signatures.
Select Use signature with this account.
To insert a signature in every message you send, select Include when replying and
forwarding. Otherwise, a signature is inserted only in new messages.
Replace the text in the Signature box with a signature to insert, and select Done.
The signature is inserted into messages that you send from this account.
Turn off signature
1
2
3
4
5
On the Home screen, select Start, Messaging, and then select an account.
Select Menu and then Options.
Select Signatures.
If necessary, scroll right or left to switch to the account for which you want to stop
inserting a signature.
Clear the Use signature with this account check box and select Done. A signature
is no longer inserted in messages that you send from this account.
Using Wireless Messaging Features
64
Saving a Draft of a Message
You can save a draft of a message that you are composing to finish and send later.
Save a draft of a message
1
2
3
4
5
On the Home screen, select Start and then Messaging.
Select an account.
Select New.
Enter information in the message.
Select Menu and then Postpone Message. A draft of the message is stored in the
Drafts folder of the account.
Reopen and send a message draft
1
2
3
4
5
On the Home screen, select Start and then Messaging.
Select an account.
Select Menu and then Folders.
Select Drafts and then the draft to open.
Edit the message and select Send. E-mail messages are stored in Outbox and sent
to recipients the next time you synchronize or connect to your e-mail server and send
and receive mail. Text messages are sent immediately. For information about how
media messages are sent, see “Sending and Receiving Messages” on page 65.
Requesting a Delivery Receipt
You can request a delivery receipt for a text message or media message. When you do
this, you receive a confirmation that your message was delivered to the recipient.
Request a delivery receipt for a text message
1
2
3
Before sending a text message, select Menu, and then Message Options.
Select Request message delivery notification.
Select Done. When your message is delivered, you receive a receipt on the
Smartphone.
Request a delivery receipt for a media message
1
2
3
Before sending a media message, select Menu, and then Message Options.
Select Delivery report.
Select Done. When your message is delivered, you will receive a receipt on the
Smartphone.
Using Wireless Messaging Features
65
Sending and Receiving Messages
• The Smartphone immediately sends text messages when you select Send on the
New Message screen. When you receive a message, the new message icon appears
at the top of the screen. The Smartphone automatically receives text messages
whenever it is turned on. If you recieve a text message during a call or data session,
your phone notifies you after the call or data session has ended. If your phone is
powered off when you receive a text message, your phone notifies you the next time
you power it on. If you are out of your coverage area, your phone alerts you when you
return to your coverage area.
• For media messages, there are 2 modes of sending and receiving messages:
automatically and manually.
• In automatic mode, messages are sent automatically when you select Send on the
New Message screen. In manual mode, messages are moved to Outbox and will
be sent the next time you select Send/Receive.
• In automatic mode, messages are received automatically. An exception to this is
when an application that uses a wireless data connection is in use. For example, if
Pocket Internet Explorer is downloading a Web page, it will prevent a media
message from being downloaded automatically. In manual mode, you will receive a
notification with instructions on how to download the media message.
Note: Media messages cannot be sent or received during a phone call if you are in
manual mode.
Change settings for sending and receiving media messages
1
2
3
4
5
On the Home screen, select Start and then Messaging.
Select Media Messages.
Select Menu and then Options.
Select Account Setup, and then Media Messages.
Under Send/receive, select Automatically or Manually.
Sending and Receiving E-mail Messages
You can send and receive e-mail messages:
• By connecting to your desktop computer using ActiveSync desktop client (see
“ActiveSync Desktop Client” on page 139) or synchronizing wirelessly with your
Exchange Server (see “Setting Up Wireless E-mail” on page 52).
• By using the Send/Receive menu command from an Internet e-mail account, as
described next.
Send and receive Internet e-mail messages
1
2
3
On the Home screen, select Start and then Messaging.
Select the Internet e-mail account for which you want to send and receive messages.
Select Menu and then Send/Receive. The Smartphone connects to your Internet email server and sends and receives your messages.
Tip: To stop this process, select Menu and then Stop Send/Receive.
Using Wireless Messaging Features
66
Note: Before you can send and receive e-mail messages, the Smartphone must be
properly configured, as described earlier in “Setting Up Wireless E-mail” on
page 52.
You must take additional steps to receive large messages and attachments.
See “Working with Large Messages and Attachments” on page 69.
Importing Text Messages
In addition to receiving text messages wirelessly, you can import them from your
Subscriber Identity Module (SIM) card.
Import text messages from the SIM card
1
2
3
4
5
On the Home screen, select Start and then Messaging.
Select Text Messages.
Select Menu and then Options.
Select Import SIM Messages.
Select Done. The text messages are copied from the SIM card to the Inbox of the
Text Messages account.
Note: You cannot export text messages from your Smartphone to a SIM card.
Note: Text messages are not removed from the SIM card after they are imported to
the Inbox of the Text Messages account.
Viewing and Responding to Messages
When you receive an e-mail message, the Smartphone plays a sound and displays an
envelope icon at the top of the screen. By default, the Home screen also displays the
number of unopened e-mail messages, text messages, and media messages. To quickly
view new messages, select the message notification area on the Home screen.
Working with the Message List
Received messages are stored in the Inbox folder of the appropriate account. They are
displayed in the Inbox message list.
View the Inbox message list
1 On the Home screen, select Start and then Messaging.
2 Select an account. The Inbox message list displays your received messages.
By default, messages are displayed in the order received. You can change the order in
which messages are displayed and show the date and time that messages were sent.
Change message list display options
1
2
3
4
5
On the Home screen, select Start and then Messaging.
Select an account.
Select Menu and then Options.
Select Display.
Change the display options and select Done.
Using Wireless Messaging Features
67
As shown in the following example, messages that you have read are displayed in
normal type with an open envelope icon. Messages that you have not read are displayed
in bold type with a closed-envelope icon. You can change the status of a message by
marking it as Read or Unread.
Mark a message as Read or Unread
1
2
3
4
5
On the Home screen, select Start and then Messaging.
Select an account.
Scroll to the message to mark.
Select Menu.
Select Mark as Read or Mark as Unread. The message display is changed to reflect
its new status: normal text for read messages and bold text for unread messages.
When you synchronize or send and receive e-mail, the message is displayed as
Read or Unread in all locations.
Working with Messages
You can open messages by selecting them in the message list. Using Messaging menu
commands, you can quickly reply to, forward, and delete messages.
Open a message
1
2
3
4
On the Home screen, select Start and then Messaging.
Select an account.
Select the message to open.
To return to the message list, press m.
Tip: To open the next message in the list from within an open message, scroll right; to
open the previous message in the list, scroll left.
To create a contact card for the sender, select Menu and then Save to
Contacts.
Save media from a media message
• To save a single picture or sound, from an open message, select the item and then
select Save.
• To save all media in the message, select Menu and then Save All.
Note: Media are saved in \Storage\My Documents on the device.
Specify the language for reading a message
1
2
3
From an open message, select Menu and then Options.
In E-mail message language, scroll to the language.
Select Done. The message is displayed using the appropriate characters for the
selected language.
Note: This option is not available for media messages.
Using Wireless Messaging Features
68
Reply to a message
1
2
3
4
From an open message, select Menu and then Reply.
Select Reply or Reply All.
Enter a message in the message area.
Select Send. The message is stored in Outbox and sent to recipients the next time
you synchronize or connect to your e-mail server. Text messages are sent
immediately. For information about how media messages are sent, see “Sending and
Receiving Messages” on page 65.
Forward a message
1
2
3
4
From an open message, select Menu, and then Forward.
In To, enter recipient e-mail addresses, phone numbers to send a text message, or
media message addresses. Insert a semicolon (;) between multiple addresses or
numbers.
Optionally, you can enter an introductory message by scrolling to the message area,
pressing O to insert a blank line, and entering your text.
Select Send. E-mail messages are stored in Outbox and sent to recipients the next
time you synchronize or connect to your e-mail server and send and receive mail.
Text messages are sent immediately. For information about how media messages
are sent, see “Sending and Receiving Messages” on page 65.
Delete a message
1
2
3
4
On the Home screen, select Start and then Messaging.
Select an account.
Scroll to the message to delete.
Select Menu and then Delete. For the Outlook E-mail account, the message is also
deleted from Outlook on your desktop computer or Exchange Server the next time
you synchronize.
Delete all text or media messages
1
2
3
4
5
On the Home screen, select Start, Messaging, and then the appropriate account.
Select Menu and then Folders.
Select Menu and then Show All Folders.
Scroll to the folder with the text or media messages you want to delete.
Select Menu and then Clear Text Messages or Clear Media Messages.
Note: If the folder you select has a subfolder, messages within the subfolder will not
be deleted. Repeat these steps for each subfolder.
Using Wireless Messaging Features
69
Working with Large Messages and Attachments
When you receive large e-mail messages and attachments, the Smartphone downloads
only a portion of them. You can view the partial message or attachment and decide if you
want to download the rest of it.
When you synchronize your Outlook E-mail account with your desktop computer or
Exchange Server, the Smartphone downloads the first 0.5 KB of each new e-mail
message by default. When you connect to an Internet e-mail server, it downloads the
amount (in KB) of each new message that you specified when you set up the account.
The message size includes its attachments. The original messages and attachments
remain on the server or your desktop computer.
Note: For information about changing Outlook e-mail synchronization settings, see
“ActiveSync Desktop Client” on page 139. For information about changing
Internet e-mail settings, see “Setting Up Wireless E-mail” on page 52.
In the message list, messages with an attachment display an envelope icon with a
paperclip. Within a message, attachments are displayed as a list of hyperlinks at the
bottom of the message, and are preceded by an attachment icon. The hyperlink includes
the file name and size of the attachment.
Note: On messages received from a POP3 e-mail server, the attachment size is
omitted.
The attachment icon has the following 3 states:
• Not downloaded
• Marked for download
• Downloaded
Download a complete e-mail message
1
2
3
4
On the Home screen, select Start and then Messaging.
Select an account.
Scroll to the message to download.
Select Menu and then Mark for Download. The complete message is retrieved the
next time you synchronize or connect to your e-mail server and send and receive email.
Download an attachment
• In an open message with an attachment to download, select the attachment. The
attachment is downloaded the next time you synchronize or connect to your e-mail
server and send and receive e-mail.
Note: If there are multiple attachments in the message, all attachments are
downloaded.
View an attachment
• In an open message containing a downloaded attachment, select the attachment.
Note: You can view attachments only for file types that are supported by the
Smartphone.
Using Wireless Messaging Features
70
Delete an attachment
1
2
In an open message containing a downloaded attachment, scroll to the attachment.
Select Menu and then Delete. This deletes attachments on the Smartphone only.
Important: This deletes all of the attachments to this message, not only the
selected attachment.
Accepting Meeting Requests
You can receive and respond to Outlook meeting requests on your Smartphone in a
similar manner as you do in Outlook on your desktop computer.
Respond to a meeting request
1 On the Home screen, select Start and then Messaging.
2 Select an account.
3 Select the meeting request and then respond to it as follows:
• To accept the meeting request and insert the meeting into your calendar, select Menu
and then Accept.
• To decline the meeting request, select Menu and then Decline.
• To tentatively accept the meeting request and insert a tentative meeting into your
calendar, select Menu and then Tentative.
Your response is sent back to the meeting organizer the next time that you
synchronize.
Note: For more information about synchronizing, see “ActiveSync Desktop Client” on
page 139.
Working with Message Folders
Each messaging account has a set of folders in which the Smartphone stores messages
for that account. The default folders are:
• Deleted Items. Contains messages that you delete until you empty this folder.
• Drafts. Contains messages that you save before sending.
• Inbox. Contains messages that you receive.
• Outbox. For the Outlook E-mail account, contains sent e-mail messages until you
synchronize. For other e-mail accounts, contains sent e-mail messages until you
connect to your e-mail server.
• Outbox. For the Outlook E-mail account, contains sent e-mail messages until you
synchronize. For other e-mail accounts, contains sent e-mail messages until you
connect to your e-mail server. Text messages are sent immediately over the network
and appear in your Text Messages Outbox folder only for a few seconds. Media
messages are sent immediately while in automatic mode. For more information about
sending media messages, see “Sending and Receiving Messages” on page 65.
• Sent Items. Contains copies of messages that you send.
If you want, you can move a message to a different folder within the same account.
Using Wireless Messaging Features
71
When you synchronize or send and receive e-mail, the Smartphone synchronizes any
additional e-mail folders that you have created in Outlook on your desktop computer or
on your e-mail server. It also synchronizes the messages contained in those folders, if
the folders are marked for synchronization.
View message folder contents
1
2
3
4
5
On the Home screen, select Start and then Messaging.
Select an account.
Select Menu and then Folders.
Select the folder to view. To view all Outlook E-mail folders, even those not marked to
synchronize, select Menu and then Show All Folders.
To return to the message list view of the Inbox folder, select Menu, Folders, and then
Inbox.
Mark a folder for synchronization
1
2
3
4
5
6
Synchronize your Outlook E-mail account with your desktop computer. This creates
the same Inbox folders on your Smartphone as in Outlook on your desktop computer.
On the Home screen, select Start and then Messaging.
Select Outlook E-Mail, Menu, and then select Folders.
Select Menu and then Manager Folders.
Scroll to a folder to synchronize.
Select Show and then Done. The next time you synchronize, the folder(s) that you
marked on your Smartphone are synchronized with the corresponding folders in
Outlook on your desktop computer.
Move a message to a different folder
1
2
3
4
5
On the Home screen, select Start and then Messaging.
Select an account.
Scroll to the message to move.
Select Menu and then Move.
Select the folder into which to move the message.
Tip: You can move an open message in the same manner, by selecting Menu and
then Move.
Empty the Deleted Items folder
1
2
3
4
On the Home screen, select Start and then Messaging.
Select an account.
Select Menu, Folders and then Deleted Items.
Select Menu and then Empty Folder.
Using Wireless Messaging Features
72
Configuring Message Notifications
Your Smartphone makes a sound to alert you when new messages arrive. You can
change the sound that is played when you receive a message. For more information, see
“Setting ring tones” on page 124.
Tip: When you receive a new voice mail message, the new voice mail icon appears
at the top of the display. You can call your voice mail service number and listen
to new voice mail messages by selecting the voice mail message area on the
Home screen.
Modify a sound alert for notifications
1
2
3
4
5
On the Home screen, select Start.
Select Settings and then Notifications.
Scroll to the notification to modify.
Scroll left or right to select a new sound.
Select Done.
Sending and Receiving Instant Messages
You can use MSN Messenger on your Smartphone to send and receive instant
messages. MSN Messenger on your Smartphone provides the same chat environment
as MSN Messenger on your desktop computer. Features of this environment include:
• Sending and receiving instant messages.
• Seeing the status of others in your MSN Messenger contacts list, or changing your
own status (for example, available, busy, or out to lunch).
• Inviting other people to a chat.
• Blocking contacts from seeing your status or sending you messages.
Setting up MSN Messenger
Before you can use MSN Messenger, you must take steps to set it up. First, you need
either a Microsoft .NET Passport account or a Hotmail account. To set up a Microsoft
.NET Passport account, go to: http://www.passport.com. Once you have this account,
you need to do the following:
Create a connection on your Smartphone, such as a modem or wireless connection that
allows you to connect to the Internet. For more information about creating connections,
see “Phone Networks” on page 127.
Using MSN Messenger
You can sign in to MSN Messenger using your Hotmail credentials or your .NET
Passport. Once you sign in, you can create contacts and exchange instant messages
with them. This is called “chatting.” Contacts must have a Hotmail or .NET Passport
account and must have MSN Messenger installed.
Using Wireless Messaging Features
73
Sign in to MSN Messenger
1
2
3
4
On the Home screen, select Start.
Select MSN Messenger.
Select Sign In.
In Sign-in Name, enter the sign-in name that you use for Hotmail or your .NET
Passport (Example: [email protected]).
5 In Password, enter your Hotmail or .NET Passport password.
6 Select Remember my password if you don’t want to enter your password again in
the future.
7 Select Sign In.
Note: When you sign in, MSN Messenger retains your sign-in name, and your
password if you opted to save it, so that you do not need to enter this
information again the next time.
Sign out of MSN Messenger
• Select Menu and then Sign out.
Important: Signing out closes your data connection. Be sure to sign out when
you are finished using MSN Messenger or your connection will
remain open. This might result in additional charges.
Add an MSN Messenger contact
1
2
In the MSN Messenger contacts list, select Menu and then Add Contact.
Add the Hotmail or .NET Passport sign-in name of a person with whom you want to
chat. Their sign-in name is added to the contact list.
Delete an MSN Messenger contact
1
2
In the MSN Messenger contact list, select the contact.
Select Menu and then Delete Contact.
Send an instant message
1
2
3
4
Sign in to MSN Messenger.
Scroll to the contact with whom you want to chat.
Select Menu and then Send Message.
Enter your message and select Send. This starts a chat with the contact.
Tip: To quickly add common messages, select Menu, select My Text, and then
select the text to use. To edit this text, select Menu, select Options, and then
select Edit My Text. Select the text, make any edits, and then select Done.
For information about text input, see “The Basics” on page 20.
Using Wireless Messaging Features
74
Reply to an instant message
1
2
Select Menu and then Chats.
Select the name of the person sending the instant message. The message displays,
along with a box for your reply.
3 Enter your reply and select Send.
Tip: By default, your Smartphone plays a sound when you receive an instant
message. For instructions on changing the sound, see “Setting ring tones” on
page 124.
If you want to be able to receive instant messages at any time your Smartphone
is connected to a network, select Menu and then Options. Select Passport
Account, select Run this program when connection is available, and then
select Done.
Invite a contact to an ongoing chat
• From a chat, select Menu, select Invite, and then select a contact. The contact
receives an instant message and can join the chat.
Change between chats
1
2
Select Menu and then Chats.
In the list of ongoing chats, select the name of a contact with whom to chat.
Return to the contacts list
• From a chat, select Menu and then My Contacts.
End a chat
• Select Menu and then End Chat.
See who is already chatting
• Select Menu and then Chats.
Block or unblock an MSN Messenger contact
1
2
3
In the MSN Messenger contact list, select the contact's name.
Select Menu and then Block. The contact will no longer be able to see your status or
send you messages.
To unblock the contact, select Menu and then Unblock.
Change your status
1
2
In the MSN Messenger contact list, select your name.
Select a status description, such as Away. This status is displayed next to your name
in your contact list.
Change your display name
1
2
3
In the MSN Messenger contact list, select Menu.
Select Options and then Passport Account.
In My display name, enter your name as you want it to display in your contact list.
Nextel Worldwide® Services
75
Nextel Worldwide® Services
Your Smartphone allows you to make and receive calls in the United States on the
Nextel iDEN digital network. With Nextel Worldwide Service, your Smartphone operates
in the United States as well as in over 100 countries around the world. When traveling
internationally, your Smartphone dual-mode phone registers with a local GSM or iDEN
network to provide you with voice as well as data services, depending on the country.
For up-to-date information regarding coverage, rates, and services available in the
country you will be visiting, go to sprint.com, and under Personal, click on Wireless.
Under Shop the Nextel Store Online, click on Services & Features, and then
International Services. To activate Nextel Worldwide voice or data services, contact
Sprint Customer Care at 800-639-6111.
Nextel Worldwide Customer Care
Exclusively for Nextel Worldwide customers, Nextel offers Nextel Worldwide Customer
Care support. When traveling outside of the United States and Canada, call +1 (360)
662-5202 for your Customer Care service needs. This worldwide Customer Care number
is toll free from your Smartphone.
Features Available in the United States and
Abroad
Feature
Available in the United States
Available Abroad
Walkie-Talkie
Yes.
Available in select countries.
Wireless Data
Services
Yes.
Available in select countries.
Media messaging
(MMS)
Yes.
Yes. Available in select countries.
Text messaging
(SMS)
Yes, receive messages only.
Available in select countries.
Voice mail
Yes.
Yes.
Dial-up service
Yes.
Yes.
Second Line
Service
Yes.
No.
Caller ID
Yes.
Available in select countries.
Call forwarding
Yes.
Yes, but calls cannot be forwarded to
non-U.S. numbers.
GPS services
Yes.
No.
Emergency Calling Yes.
See sprint.com for service availability.
Available in select countries.
Nextel Worldwide® Services
76
Placing Worldwide Calls
Placing international calls has never been easier. The phone and Nextel Worldwide
Service include access to multiple networks so you can get connected and stay
connected. Use “+ Dialing” when making calls from one country to another, or within a
foreign country. To place an international call using the “+ Dialing” feature, see “+
Dialing” on page 76.
+ Dialing
+ Dialing lets you quickly place an international call without entering the local
international access code. + Dialing can be used for country-to-country calls as well as
local or long distance calls in a foreign country.
1 Press and hold 0 for two seconds. A “0” appears, then changes to a “+.”
Note: The network translates the “+” into the appropriate international access code
needed to place the call.
2 Enter the country code, city code or area code, and phone number.
3 Press s.
Direct Dial
1
Manually enter the international access code (varies per country) plus the country
code, city or area code, and phone number.
2 Press s.
Note: If an international call cannot be completed using + Dialing, use Direct Dial.
Please be aware that many in-country phone numbers will require a “0” before
the local number.
Setting the Way Your Phone Searches for
Networks
When you are traveling internationally, you may want to configure the phone to search
for a specific network or enable it to select the best network. You do this using the iDEN/
GSM Selection setting.
There are six options available:
Note: Your phone comes programmed with Last active as the default setting. This is
the recommended setting, which reduces network registration time.
• Last active — This option enables the phone to switch between iDEN and GSM
systems that do not overlap. For example, you send or receive calls on an iDEN
network while in New York. Then you travel to Paris. Your phone will first search for an
iDEN network. If it cannot locate one, it will automatically search for a GSM network.
Your Smartphone will always register on the last active mode.
• iDEN preferred — This option is useful if your home system is iDEN and you travel to
a country or region where GSM coverage is also available. Your Smartphone always
searches first for iDEN networks. If an iDEN network is not found, your phone will then
search for a GSM network.
Nextel Worldwide® Services
77
• GSM preferred —This option is useful if your home system is GSM and you travel to
a country or region where iDEN is also available. Your phone will always search for
GSM networks first. If a GSM network is not found, your phone will then search for an
iDEN network.
• iDEN only — This option is useful when you are in an area that is covered by iDEN
and GSM networks, but you want to use iDEN. Your Smartphone attempts to register
only on iDEN networks. This is the optimal setting you should set your Smartphone to
when in a Nextel iDEN service region.
• GSM only — This option is useful when you are in an area that is covered by iDEN
and GSM, but you want to use GSM. Your Smartphone attempts to register only on
GSM networks. This is the optimal setting you should set your Smartphone to when in
a region with only GSM carriers.
• Roam — This option is useful when you are in an overlapping system-coverage area
and have no preference for either the iDEN or the GSM network. Your Smartphone will
switch between iDEN and GSM until it finds an acceptable network.
Note: Be aware that some features that are supported by the Nextel iDEN network
are not supported when you connect to a GSM network.
Select iDEN/GSM options
1
2
3
4
5
On the Home screen, select Start.
Select Settings and then Phone Networks.
Select iDEN/GSM Selection.
In iDEN/GSM selection, select to the option you want.
Select Done.
Searching for a Network
While you are on a GSM network, you can perform an automatic or manual search for
available networks. A manual search allows you to view the available networks and
make a selection rather than use the network automatically selected by the Nextel
Worldwide Service.
Note: Your phone will automatically attempt to register with networks that have
agreements with Nextel. By manually selecting a network, you may choose a
network that does not have an agreement with Nextel or does not offer optimal
coverage in that area.
View current network
1
2
3
4
On the Home screen, select Start.
Select Settings and then Phone Networks.
Select Current Network.
Select Done.
View current GSM band
1
2
3
4
On the Home screen, select Start.
Select Settings and then Phone Networks.
Select GSM Band.
Select Done.
Nextel Worldwide® Services
78
Select a GSM network
1
2
3
4
5
6
7
On the Home screen, select Start.
Select Settings and then Phone Networks.
Select GSM Network Selection.
In Network selection, select the option you want: Manual or Automatic.
If you selected Manual, select Menu and then Select a Network. Select the network
and select Done. The Smartphone will use the selected network.
If you selected Automatic, select Menu and then Preferred Networks. Select the
networks to use and select Done. The Smartphone will automatically use the
preferred networks.
Select Done.
Limit calls to specific area codes or phone numbers
1
2
3
4
5
6
7
Note: You will see this option only if you are on a GSM network.
On the Home screen, select Start.
Select Settings and then Phone Calls.
Select Fixed Dialing and then Enable fixed dialing.
Select Menu and then Edit Numbers.
Select Menu and then Add.
Enter the phone number or area code to which to restrict calling and select Done.
Repeat steps 4, 5, and 6 to add more numbers as necessary. You will be able to
make and receive calls only to and from the numbers or area codes specified.
Using Wireless Data Services
Internationally
Many of your Wireless Data Services can be used internationally just as you use them in
the U.S. on the Nextel National Network. To activate your Wireless Data Services for use
abroad, contact your Nextel sales representative. See sprint.com for a list of wireless
data services you can use internationally and in which countries you can use them.
Data Connections for GSM
Setting Up Your Smartphone for Wireless Data Service Access
If you activate your Wireless Data Services for use in GSM countries (GPRS) you can
set up a GPRS connection to gain access to your corporate network or the Internet on
your Smartphone.
Before accessing your data services internationally for the first time, see “Create a
GPRS connection” and “Connect to the Internet with a GPRS connection” on page 79.
Create a GPRS connection
Note: You are not required to enter a user name, password, primary DNS, secondary
DNS, or IP address to create GPRS connection.
1 On the Home screen, select Start.
2 Select Settings and then Data Connections.
Nextel Worldwide® Services
79
3
4
5
6
7
Select Internet Connection.
Select Menu and then Edit Connections.
Select GPRS Connections.
Select Menu and then Add.
Enter the requested information as follows and select Done:
• In Description, enter a name for the connection (for example, Nextel, GSM,
GPRS).
• In Connects to, select the type of network to which you will connect (for example,
Internet).
• In Access point, enter the information provided by Nextel.
When you open a program that connects to the Internet, the Smartphone uses this
connection.
Note: If you are not sure about the information to enter, ask your Sprint Customer
Care Representative.
Edit a GPRS connection
1
2
3
4
5
6
7
8
On the Home screen, select Start.
Select Settings and then Data Connections.
Select Internet Connection.
Select Menu and then Edit Connections.
Select GPRS Connections.
Scroll to the connection to edit.
Select Menu and then Add.
Change any information and select Done.
Delete a GPRS connection
1
2
3
4
5
6
7
8
On the Home screen, select Start.
Select Settings and then Data Connections.
Select Internet Connection.
Select Menu and then Edit Connections.
Select GPRS Connections.
Scroll to the connection to delete.
Select Menu and then Add.
Select Yes.
Connect to the Internet with a GPRS connection
1
2
3
On the Home screen, select Start.
Select Settings and then Data Connections.
In Internet Connection, select the GPRS you want to use and select Done.
Tip: After you use the GPRS connection once, you may want to change your
Internet Connection back to Automatic. Your phone will then automatically
select the correct connection based on the network.
Nextel Worldwide® Services
80
Text Messaging (SMS)
You can send and recieve text messages only in GSM mode. While using the Nextel
iDEN digital network, you can only recieve text messages. In GSM mode, you can send
and receive text messages up to 160 characters in size. While using the iDEN network,
you can recieve messages up to 500 characters long.
The advantages of text messages include the following:
• Text messages are sent instantly.
• Text messages can be sent or received at any time, except during a data call, WalkieTalkie call, or Talkgroup call.
• Most mobile phones support text messages, so most recipients can read text
messages that you send.
Note: You cannot synchronize text messages with your desktop computer, and you
cannot use text messages to send or receive attachments or voice notes.
Nextel® Voice Mail
81
Nextel® Voice Mail
Note: To receive voice mail messages, you must first set up your voice mail box.
Note: If you are bringing your phone number from another carrier, we suggest you set
up your voice mail box after the number you brought to Nextel is active on your
Smartphone and your temporary phone number is deactivated. If you set up
your voice mail box prior to this, all messages and all settings (including your
greeting and password) will be lost when the number you have brought to
Nextel becomes active.
Setting Up Your Voice Mail Box
Using your i920/i930 phone, dial your 10-digit Nextel Personal Telephone Number
(PTN). For example: 7035557777. Follow the system instructions to create a new 4- to 7digit password, record your name, and record a greeting. When the system says, “Thank
you for using Nextel Voice Mail,” your mail box is set up.
If you are calling from a phone other than your i920/i930 phone, dial your 10-digit Nextel
PTN. When you hear the greeting, press * to access your voice mail box. The system
will prompt you to enter your password. Enter the last 7 digits of your Nextel PTN. For
example: 5557777. This is your temporary password.
You are in the main voice mail menu when you hear the options listed below.
• To play your messages, press 1. (This option plays only if you have new or saved
messages.)
• To record a message, press 2.
• To change your greeting, press 3.
• To access your personal options, press 4.
If you press * while you are in a sub-menu, you will go to the previous menu. If you
press **, you will go to the main voice mail menu. From the main voice mail menu,
press # to exit voice mail. At any time, you may end the call by pressing e.
Accessing Your Voice Mail Box
There are several ways to access your voice mail box:
• Use speed dial 1.
• Select Voice Mail from the Start menu.
• Select the voice mail area from the Home screen.
• Manually dial your 10-digit PTN.
Playing Messages
When you receive a new voice mail message, you can listen to it immediately by
selecting the voice mail message area on the Home screen.
These are options available while you are listening to your messages:
• Backup — press 1.
• Rewind to beginning of message — press 11.
Nextel® Voice Mail
82
• Pause or continue the current message — press 2.
• Fast forward — press 3.
• Fast forward to end of message — press 33.
• Play the date and time stamp — press 55.
These options are available while a message is playing or after it has played:
• Forward the message to another subscriber — press 6.
• Delete the message — press 7.
• Reply to a message — press 8.
• Save the message — press 9.
• Skip to the next message — press #.
Messages that are not saved or deleted remain in your mail box as new messages. All
messages are automatically deleted after 30 days.
To retrieve deleted messages, press * 3. This option only applies to the current
voice mail session. If you end the call, the messages will be permanently deleted.
Important: After exiting the voice mail session, you cannot recover deleted
messages.
Changing Your Password
From the main voice mail menu, press 4 to access personal options.
Press 4 to access personal preferences.
Press 1 to modify password.
Enter your new password. It must be 4 to 7 digits long.
Note: It is important that you choose a number that is easy for you to remember, but
hard for someone else to guess. Passwords using all the same digits, for
example 4,4,4,4 or a sequential series of digits, 1,2,3,4, will not be accepted.
5 Press ** to return to the main menu.
Note: If you forget your password, contact Sprint Customer Care.
1
2
3
4
Recording Your Name
When you send, reply to, or copy a message, your name response precedes the
message. To record or re-record your name at any time:
1 From the main voice mail menu, press 4 to access personal options.
2 Press 4 to access personal preferences.
3 Press 3 to access the record your name option.
4 Press 2 to record your name.
5 Press ** to return to the main menu.
Nextel® Voice Mail
83
Recording Your Active Greeting
You may want to include one or all of the following options in your greeting so that callers
will know they are available.
• Press 1 to send a numeric message.
• Press 2 to send an operator-assisted message. (This option is available only if you
are a subscriber of Operator Assisted Messaging. Contact Sprint Customer Care for
more information.)
• Press # to skip the greeting and record a message immediately.
To record or alter your greeting at any time:
1 From the main voice mail menu, press 3 to change your greeting.
2 Press 1 to play, press 2 to record or re-record, or press 7 to delete your active
greeting.
3 Record your greeting and press # when you have finished.
4 Press ** to return to the main menu.
Advanced Voice Mail Features
Multiple Greetings
You can create up to 5 different greetings and designate which greeting will be your
active greeting at any given time. The greeting that was recorded during your initial voice
mail box setup is greeting 1. This is your default active greeting.
To access additional greetings, from the main voice mail menu, press 3 and follow the
prompts.
Greetings Schedule
You can choose to have your greetings automatically activated based on a predetermined time schedule. By activating the Greeting Schedule, Greetings 1, 2, and 3
will automatically play according to the time schedule listed below.
Greeting 1
Evenings and Weekends
Greeting 2
Greeting 3
Weekday Mornings
Weekday Afternoons
5:00 pm – 7:59 am, Monday – Friday
24-hours, Saturday and Sunday
8:00 am – 11:59 am Monday – Friday
Noon – 4:59 pm Monday – Friday
To activate the greeting schedule, from the main voice mail menu, press 3, then press
9 to activate your greeting schedule.
Note: The greeting schedule, when on, will override any other greeting that you may
set as active. If a greeting is not recorded, a system standard greeting will be
played.
Nextel® Voice Mail
84
Automatic Playback and Playback Order
By default, the playback mode of your voice mail service is set to normal. This feature
automatically plays and saves new messages when you log in. To activate automatic
playback:
1 From the main voice mail menu, press 4 to access personal options.
2 Press 4 to access personal preferences.
3 Press 2 to access playback preferences.
4 Follow the prompts for automatic or normal playback.
Recording, Forwarding, and Replying to Messages
These functions allow you to record and send, reply to, or forward a message to an
assigned destination address or group list number. If you record a complete or partial
message, but do not send it, Nextel Voice Mail service will refer to this message as an “in
preparation” message.
To access additional greetings, from the main voice mail menu, press 2 and follow the
prompts.
Note: You can only send messages using this method to Nextel customers in your
home market.
Delivery Options
After you have created a message, you can assign the message to a category before
you send it. Below is a list of the options that can be applied to a message:
• Urgent — Recipient will hear this message before other messages.
• Private — Recipient cannot copy the message to another mail box or phone number.
• Notification of Non-Delivery — You will be notified if the recipient has not listened to
your message by a certain date and time.
• Future Delivery — You can specify a time and date (up to 3 months in advance) for
the message to be delivered.
Note: All dates must have digits in the MM/DD format (2 digits for the month and 2
digits for the date). For example, January 2nd would be 0102.
Important: Once a message has been sent for future delivery, it cannot be
retrieved or deleted.
To set a special delivery option after recording your message, but before sending it,
press 5 and follow the prompts.
Working with Group Lists
This feature enables you to create a list and assign it a unique name. Then, you can add
mail box numbers, group lists, or individuals. Once you create a list you can send a voice
message to everyone on the list by entering the group list number. You can have up to
40 group lists. Each list can hold up to 50 addresses.
To set up a group list:
1 From the main voice mail menu, press 4 to access personal options.
2 Press 2 to access your Group Lists and follow the prompts.
Nextel® Voice Mail
85
Message Forwarding
Note: You can only forward messages to Nextel customers in your home market.
This feature allows you to program your phone to automatically forward incoming
messages to another mail box. There are 2 types of forwarding: notified and silent.
Notified forwarding prompts the caller that the message will be forwarded. Silent
forwarding does not prompt the caller that the message will be forwarded.
To modify forwarding options:
1 From the main voice mail menu, press 4 to access personal options.
2 Press 5 to modify forwarding options, then follow the prompts.
Change Your Voice Mail Language to
Spanish
Nextel voice mail settings can be heard in English or Spanish.
Use this feature to change the language you and your callers will hear while in voice
mail.
1 From the main voice mail menu, press 4 to access your personal options
2 Press 4 again to access the language menu.
3 Follow the prompts to change your language setting to English or Spanish.
Nextel Walkie-Talkie Calls, Call Alerts, and Talkgroup Calls
86
Nextel Walkie-Talkie Calls, Call
Alerts, and Talkgroup Calls
This chapter explains how to make, receive, and manage Walkie-Talkie calls, call alerts,
and Talkgroup calls.
Walkie-Talkie calls let you use your Smartphone as a long-range, digital Walkie-Talkie.
Call alerts let the recipient know you would like to talk to him or her on a Walkie-Talkie
call. Talkgroup calls are Walkie-Talkie calls to more than one Walkie-Talkie number at
the same time.
Nextel Walkie-Talkie Service
Nextel offers the following Walkie-Talkie services on the i920/i930 Smartphone:
• Local Walkie-Talkie — allows Walkie-Talkie calling within your local coverage area.
• Nationwide Walkie-Talkie — allows coast-to-coast Walkie-Talkie calling to Nextel
users from anywhere on the Nextel National Network (U. S.) to anywhere on the
National Network.
• International Walkie-Talkie — allows Walkie-Talkie calling to and from select countries.
• Talkgroup — allows Walkie-Talkie calling to up to 100 Nextel customers
simultaneously (see “Talkgroup Calls” on page 94).
For more details on these Walkie-Talkie services, go to sprint.com. Under Personal,
click on Wireless, and then click Nextel® Walkie-Talkie. Pricing for each of these
services is based on your service contract.
Dialing Walkie-Talkie Numbers
Every Walkie-Talkie number has 3 parts — an area ID, a network ID, and a member ID
— with an asterisk between each of these parts. For example: 999*999*9999.
When you place a Walkie-Talkie call, you must enter the whole Walkie-Talkie number
including the asterisks.
Tip: When you store a Walkie-Talkie number in Contacts, it is good practice to
include the whole Walkie-Talkie number including the asterisks.
Making a Walkie-Talkie Call
There are several ways to make a Walkie-Talkie call. This section describes how to
make a call from the following locations:
• From the Home screen
• From Contacts
• From the recent calls list
Nextel Walkie-Talkie Calls, Call Alerts, and Talkgroup Calls
87
Making a Walkie-Talkie Call from the Home Screen
On the Home screen, you can call someone by entering a phone number or a contact
name using the keypad.
As you begin pressing keys, your Smartphone displays the names from your Contacts
and recent call list whose name or phone number match your entry. You can then select
the name or number to call without having to enter the entire name or number.
Contacts appear on the Home screen with this icon
and a contact list abbreviation. If
a contact contains a Walkie-Talkie number, you can make a Walkie-Talkie call to that
number even if the contact list abbreviation for the Walkie-Talkie number (PTT) is not
showing.
Note: For more information about contact list abbreviations, see “Contacts, Calendar,
and Tasks” on page 101.
Make a Walkie-Talkie call by entering a Walkie-Talkie number
1
On the Home screen, enter the Walkie-Talkie number:
• If you see the number or contact name to call, scroll to it.
• If you do not see the number or contact name, finish entering the number.
2 Press and hold the Walkie-Talkie button on the side of your Smartphone.
3 Begin talking after your Smartphone emits a chirping sound.
4 Release the Walkie-Talkie button to listen.
5 To end the call:
• Wait a few seconds for the call to end automatically.
• Press e or press m.
A Walkie-Talkie call ends automatically if there is no activity on the call for a few
seconds.
Make a call by entering a contact name
1
2
On the Home screen, begin entering the contact name.
When you see the contact name, scroll to it and then press and hold the WalkieTalkie button.
3 Begin talking after your Smartphone emits a chirping sound.
4 Release the Walkie-Talkie button to listen.
5 To end the call:
• Wait a few seconds for the call to end automatically.
• Press e or press m.
Nextel Walkie-Talkie Calls, Call Alerts, and Talkgroup Calls
88
Making a Walkie-Talkie Call from Contacts
You can make a Walkie-Talkie call from your contact list or from an open contact. If a
contact contains a Walkie-Talkie number, you can make a Walkie-Talkie call to that
number even if the contact list abbreviation for the Walkie-Talkie number (PTT) is not
showing.
Make a call from the contact list
1
2
3
4
5
6
7
On the Home screen, select Start.
Select Contacts.
Scroll to the contact to call.
Press and hold the Walkie-Talkie button.
Begin talking after your Smartphone emits a chirping sound.
Release the Walkie-Talkie button to listen.
To end the call:
• Wait a few seconds for the call to end automatically.
• Press e or press m.
Tip: If you have a long list of contacts, and you don’t see the contact you want, enter
the first few letters of the contact’s name. When you do this, the Smartphone
searches through the contact list and displays the name.
Make a call from an open contact
1
2
3
4
5
6
7
On the Home screen, select Start.
Select Contacts.
Select the contact to call.
Press and hold the Walkie-Talkie button.
Begin talking after your Smartphone emits a chirping sound.
Release the Walkie-Talkie button to listen.
To end the call:
• Wait a few seconds for the call to end automatically.
• Press e or press m.
Making a Walkie-Talkie Call from the Recent Calls List
The recent calls list displays calls you made, received, and missed, as well as call alerts
you received.
If a name on the recent calls list is stored in Contacts with a Walkie-Talkie number, you
can make a Walkie-Talkie call to that number even if the PTT contact list abbreviation is
not showing.
Make a Walkie-Talkie call from the recent call list
With the Flip Open
1 From the Home screen, select Start.
2 Select Recent Calls.
3 Scroll to or select the name or number you want to call.
4 Press and hold the Walkie-Talkie button.
Nextel Walkie-Talkie Calls, Call Alerts, and Talkgroup Calls
89
5
6
7
Begin talking after your Smartphone emits a chirping sound.
Release the Walkie-Talkie button to listen.
To end the call:
• Wait a few seconds for the call to end automatically.
• Press e or press m.
With the Flip Closed
1 Press ..
2 Press the volume controls to scroll to the name or number you want to make a
Walkie-Talkie call to.
3 Press and hold the Walkie-Talkie button.
4 Begin talking after your Smartphone emits a chirping sound.
5 Release the Walkie-Talkie button to listen.
6 To end the call:
• Wait a few seconds for the call to end automatically.
• Press ..
• Open the flip and press e or press m.
Having Problems Making a Call?
Check to make sure that the Smartphone contains a valid SIM card and that the
Smartphone is turned on and unlocked, and your Smartphone is receiving an adequate
signal.
Receiving a Walkie-Talkie Call
When you receive a Walkie-Talkie call, your Smartphone emits a chirping sound or
vibrates. The name of the caller is displayed on the screen. If the name of the caller is not
in your contact list, only the caller’s Walkie-Talkie number is displayed.
You can recieve a Walkie-Talkie call with the Smartphone’s flip open or closed.
Answer a Walkie-Talkie call
1
2
3
Wait for the caller to finish speaking.
Press and hold the Walkie-Talkie button on the side of your Smartphone. Begin
talking after your Smartphone emits a chirping sound.
Release the Walkie-Talkie button to listen.
End a Walkie-Talkie call
• Press e.
• If the flip is closed, press ..
A Walkie-Talkie call ends automatically if there is no activity on the call for a few
seconds.
Nextel Walkie-Talkie Calls, Call Alerts, and Talkgroup Calls
90
Managing Walkie-Talkie Calls
While a Walkie-Talkie call is in progress, you can use menu commands for common
tasks. You can also go to the Home screen and access other features without ending the
Walkie-Talkie call.
Use menu commands during a call
• Select Menu and then one of the commands described in the following table.
To
Select this menu command
Go to Contacts
Go to the recent calls list
Go to Owner Information
Go to the messaging Inbox
Go to the messaging Calendar
Contacts
Recent Calls
Owner Information
Inbox
Calendar
Go to the Home screen during a call
• Press h.
You can then access other features from the Home screen.
To return to the call screen:
• Press m as many times as needed.
Voice Shortcuts
You can record a voice shortcut for a Walkie-Talkie number. Then, when you speak the
voice shortcut, Smartphone automatically enters the Walkie-Talkie number associated
with that voice shortcut. You can use a voice shortcut to make a Walkie-Talkie call with
the flip open or closed.
You can create only one voice shortcut for each Walkie-Talkie number. To change the
voice short cut associated with a number, simply record a new voice shortcut in place of
the old one.
You can create up to 25 voice shortcuts in all.
Create a voice shortcut
1
2
3
4
5
6
7
On the Home screen, select Start.
Select Contacts.
Select the contact containing the Walkie-Talkie number you want to create a voice
shortcut for.
Scroll to the Walkie-Talkie number you want to create a voice shortcut for.
Select Menu and then Set Voice Shortcut.
After the audio and visual cue, begin recording the voice shortcut.
When prompted, repeat the voice shortcut. The Smartphone plays back the voice
shortcut.
Nextel Walkie-Talkie Calls, Call Alerts, and Talkgroup Calls
91
Use a voice shortcut to make a Walkie-Talkie call
1
2
3
4
5
6
While your Smartphone is idle, press and hold t. You can do this with the flip open
or closed.
Say the word or words that you recorded as a voice shortcut.
When the Walkie-Talkie number or name associated with the voice shortcut appears
on the screen, press and hold the Walkie-Talkie button.
Begin talking after your Smartphone emits a chirping sound.
Release the Walkie-Talkie button to listen.
To end the call:
• Press e or press m.
• Press ..
• Wait a few seconds for the call to end automatically.
Change a voice shortcut
1
2
3
4
5
6
7
8
On the Home screen, select Start.
Select Contacts.
Select the contact containing the Walkie-Talkie number that is associated with the
voice shortcut you want to change.
Scroll to the Walkie-Talkie number.
Select Menu and then Set Voice Shortcut.
Select Record New.
After the audio and visual cue, begin recording the voice shortcut.
When prompted, repeat the voice shortcut. The Smartphone plays back the voice
shortcut.
Play a voice shortcut
1
2
3
4
5
6
On the Home screen, select Start.
Select Contacts.
Select the contact containing the Walkie-Talkie number that is associated with the
voice shortcut you want to play.
Scroll to the Walkie-Talkie number.
Select Menu and then Set Voice Shortcut.
To play the shortcut again, select Menu and then Playback.
Nextel Walkie-Talkie Calls, Call Alerts, and Talkgroup Calls
92
One Touch Walkie-Talkie
One Touch Walkie-Talkie sets your Smartphone to call the most recent Walkie-Talkie
number on the recent calls list, or a Walkie-Talkie number you choose, every time you
press the Walkie-Talkie button.
Set the most recent call as your One Touch Walkie-Talkie number
1
2
3
4
5
6
On the Home screen, select Start.
Select Settings and then PTT.
Select One Touch PTT.
Select Use One Touch PTT.
In Place call to, select Last Call.
Select Done.
Set another number as your One Touch Walkie-Talkie number
1
2
3
4
5
6
On the Home screen, select Start.
Select Settings and then PTT.
Select One Touch PTT.
Select Use One Touch PTT.
In Place call to, select Assigned Number.
Enter the number you want in the Number field:
• Type the number you want into the field.
• Browse to the number. Select Menu and then Browse Contacts or Browse
Recent Calls, as required. Select the number you want.
7 Select Done.
Turn off One Touch Walkie-Talkie
1
2
3
4
On the Home screen, select Start.
Select Settings and then PTT.
Select One Touch PTT.
Select Use One Touch PTT. This clears the checkbox and turns off One Touch
Walkie-Talkie.
Call Alerts
Sending a call alert lets the recipient know you want to talk to him or her on a WalkieTalkie call.
Sending Call Alerts
When you send a call alert, the recipient’s phone emits a series of beeps, or vibrates,
and displays your name or Walkie-Talkie number.
The recipient can:
• Answer — begin a Walkie-Talkie call with the sender
• Queue — store the call alert to the call alert queue, which is a list of call alerts
• Clear — dismiss and delete the call alert
Nextel Walkie-Talkie Calls, Call Alerts, and Talkgroup Calls
93
Send a call alert
1
Enter the Walkie-Talkie number you want to send to, as you would when making a
Walkie-Talkie call. Just as with making a Walkie-Talkie call, you can enter the number
from the Home screen or choose it from Contacts or the recent call list.
2 Depending on how you enter the number, do one of the following:
• Select Alert.
• If Alert is not one of the soft key options, select Menu and then select Alert or
Alert/Join.
Ready to Alert appears on the display.
3 Press the Walkie-Talkie button until Alert Successful appears on the display.
Note: If the alert is not successful, this may mean the person you are trying to reach
is on a call or has their phone turned off.
Receiving Call Alerts
When you receive a call alert, you must answer, queue, or clear it. You cannot receive
phone calls or Walkie-Talkie calls until you do.
Answer a call alert
• Press the Walkie-Talkie button to make a Walkie-Talkie call to the sender.
Queue a call alert
• Select Queue.
Clear a call alert
• Select Clear.
• If the flip is closed, press ..
Note: The recent calls list also stores call alerts you have received. They appear as
Walkie-Talkie calls. Call alerts remain in your recent calls list until you delete
them or until they reach the end of the list.
Using the Call Alert Queue
When you queue a call alert, it remains in the call alert queue until you make a WalkieTalkie call to the sender, or delete the call alert from the queue.
View call alerts
1
2
3
On the Home screen, select Start.
Select Call Alert Queue.
Scroll through the list.
View the date and time a call alert was received
1
2
3
On the Home screen, select Start.
Select Call Alert Queue.
Select the call alert you want information on.
Nextel Walkie-Talkie Calls, Call Alerts, and Talkgroup Calls
94
Make a Walkie-Talkie call to the sender
1 On the Home screen, select Start.
2 Select Call Alert Queue.
3 Scroll to the call alert you want to respond to.
4 Press the Walkie-Talkie button to begin the call.
This removes the call alert from the queue.
Send a call alert to the sender
1
2
3
4
5
On the Home screen, select Start.
Select Call Alert Queue.
Scroll to the call alert you want to respond to.
Select Alert. Ready to Alert appears on the display.
Press the Walkie-Talkie button until Alert Successful appears on the display.
Delete a call alert from the queue
1
2
3
4
5
On the Home screen, select Start.
Select Call Alert Queue.
Scroll to the call alert you want to delete.
Select Menu and then select Delete.
Select Yes to confirm.
Delete all call alerts from the queue
1
2
3
4
On the Home screen, select Start.
Select Call Alert Queue.
Select Menu and then select Delete All.
Select Yes to confirm.
Sort call alerts by the order they were received
1
2
3
4
5
On the Home screen, select Start.
Select Call Alert Queue.
Select Menu and then select Sort By.
Scroll left or right to select the First On Top or Last On Top.
Select Done.
Talkgroup Calls
A Talkgroup call is a Walkie-Talkie call to a predetermined group that has been
provisioned by Nextel or an account administrator. Group members must be on the same
Walkie-Talkie network (fleet) and from and within the same home market. Groups can
accommodate up to 100 members in the same local market and network.
Before you can make or receive Talkgroup calls, a Talkgroup group must be established.
After the group is established you must join it.
Nextel Walkie-Talkie Calls, Call Alerts, and Talkgroup Calls
95
Setting Up and Joining Talkgroups
When you enable security, you receive a list of Talkgroups that have been set up for you
if you subscribe to this service. The Talkgroup list is saved to Contacts.
To receive calls made to any of these Talkgroups, you must join the Talkgroup.
Join a Talkgroup
1
2
3
4
On the Home screen, select Start.
Select Contacts.
Scroll to the Talkgroup you want to join.
Select Menu and then select Alert/Join.
Note: You will now be able to receive communications from this Talkgroup only. You
can only monitor one Talkgroup at a time.
Setting Up More Talkgroup Groups
You can set up more Talkgroup groups in 3 ways:
• Using Talkgroup Management* on MyNextel at sprint.com
* You must be an account administrator to use Talkgroup Management.
• Contacting your Nextel Sales Representative at the time of activation
• Using Wireless Manager to create, manage, and delete Talkgroups
When you create your Talkgroup groups, you can select your own group numbers.
You can join a new Talkgroup by pressing # and entering the number using the
keypad. Then select Menu and select Alert/Join.
Making and Receiving Talkgroup Calls
Make a Talkgroup call
1
Enter the Talkgroup number:
• Press #. Then enter the Talkgroup number using the keypad.
• Choose the Talkgroup name from Contacts or the recent call list.
2 Proceed as if making a Walkie-Talkie call.
Answer a Talkgroup call
• Proceed as if answering a Walkie-Talkie call. Only one person at a time may speak on
a Talkgroup call.
The Walkie-Talkie number or name of the person who is speaking will appear on the
display below the Talkgroup number.
Nextel Walkie-Talkie Calls, Call Alerts, and Talkgroup Calls
Turning Off Talkgroup Calls
If you don’t want hear any calls to your Talkgroup, you can set your Smartphone to
silence all Talkgroup calls.
Silence all Talkgroup calls
1 On the Home screen, select Start.
2 Select Settings and then PTT.
3 Select PTT Group Silent.
4 In PTT Group Silent, select On.
5 Select Done.
When you want to hear Talkgroup calls again, select Off in step 4.
96
Recent Calls
97
Recent Calls
The recent calls list contains the numbers of up to 20 of the most recent calls you have
made, received, and missed.
Viewing the Recent Calls List
The recent call list displays the following for each call on the list:
• An icon indicating the type of call:
•
— missed phone call
•
— incoming phone call
•
— outgoing phone call
•
— Walkie-Talkie call or call alert
•
—Talkgroup call
• The name or number associated with the call. The name appears instead of the
number if the number is stored in Contacts with a name.
• How long ago the call ended.
• For phone calls, the number of missed calls from that phone number, if there have
been more than one. For example, “5x” means missed 5 calls from that number.
• If a number on the recent calls list is stored in Contacts, the contact list abbreviation
appears with the number. All Walkie-Talkie calls, call alerts, and Talkgroup calls
appear with the contact list abbreviation PTT. Phone calls stored in Contacts appear
with the contact list abbreviation the number is stored as.
• You can view all the contact list abbreviations for all the numbers stored in Contacts
with a name on the recent calls list by scrolling to the name as then scrolling left and
right.
When you select a call to view its details, you see the following additional information
about the call:
• Both the name and number associated with the call, if the number is stored in
Contacts with a name.
• The date and time of the call.
• The duration of the call.
• An icon indicating the type of call, like when viewing the list.
View the recent calls list
With the Flip Open
1 From the Home screen, select Start.
2 Select Recent Calls.
3 Scroll through the list.
4 If a number on the recent calls list is stored in Contacts, you can scroll to the number
and then scroll left or right to view all the contact list abbreviations for all the numbers
stored with that name.
Recent Calls
98
With the Flip Closed
1 Press ..
2 If you want to view the rest of the recent calls list, press the volume controls.
3 Press . twice to dismiss the recent calls list.
View the details of a call on the recent calls list
1
2
3
From the Home screen, select Start.
Select Recent Calls.
Select the item you want information on.
Saving to Contacts
Numbers on the recent calls list can be saved as new contacts or in contacts entries.
Save a number from the recent calls list to Contacts
1
2
3
4
5
6
7
8
9
From the Home screen, select Start.
Select Recent Calls.
Select the item you want to save.
Select Menu and then select Save.
Choose to save the number as a new contact or in an existing contact:
• To save the number as a new contact, select <New Item>.
• To save the number in an existing contact, select the contact you want to save the
number to.
Scroll to the place in the Contacts entry screen where you want to store the number
from the recent calls list.
Select Insert.
Add any additional information that you want to save in the contact such as a name.
Select Done.
Making Calls From the Recent Calls List
Phone Calls
When you make a phone call from the recent calls list, the call is made to the phone
number you choose.
If a name on the recent calls list is stored in Contacts with more than one phone number,
you can choose to make the call to a different phone number in that contact by scrolling
through the contact list abbreviations stored with the contact. The phone call is made to
the phone number associated with the contacts list abbreviation that is showing when
you press s.
Recent Calls
99
Make a phone call from the recent call list
With the Flip Open
1 From the Home screen, select Start.
2 Select Recent Calls.
3 Choose a number to call:
• Scroll to or select the name or number you want to call.
• Scroll to a name that is stored in your Contacts. If the contact list abbreviation for
the number you want to call is not showing, scroll left or right to display it.
4 Press s.
With the Flip Closed
1 Press ..
2 Press the volume controls to the scroll to the name or number you want to call.
3 To make a phone call, press t.
4 To end the phone call, press ..
Walkie-Talkie Calls
The recent calls list displays calls you made, received, and missed, as well as call alerts
you received.
If a name on the recent calls list is stored in Contacts with a Walkie-Talkie number, you
can make a Walkie-Talkie call to that number even if the PTT contact list abbreviation is
not showing.
Make a Walkie-Talkie call from the recent call list
With the Flip Open
1 From the Home screen, select Start.
2 Select Recent Calls.
3 Scroll to or select the name or number you want to call.
4 Press and hold the Walkie-Talkie button.
5 Begin talking after your Smartphone emits a chirping sound.
6 Release the Walkie-Talkie button to listen.
7 To end the call, press e.
With the Flip Closed
1 Press ..
2 Press the volume controls to the scroll to the name or number you want to call.
3 Press and hold the Walkie-Talkie button.
4 Begin talking after your Smartphone emits a chirping sound.
5 Release the Walkie-Talkie button to listen.
6 To end the call:
• Wait of few seconds for the call to end automatically.
• Open the flip and press e.
Recent Calls
100
Deleting Items From the Recent Calls List
Delete an item from the recent calls list
1
2
3
4
5
From the Home screen, select Start.
Select Recent Calls.
Select the item you want to delete.
Select Menu and then select Delete.
Select Yes to confirm.
Delete all items on the recent calls list
1
2
3
4
From the Home screen, select Start.
Select Recent Calls.
Select Menu and then select Delete All.
Select Yes to confirm.
Returning to the Home Screen After a Call
When you end a call, the recent calls list appears. You can set how long the recent calls
list is displayed before the Smartphone automatically displays the Home screen. The
values you can choose are: immediately, 30 seconds, 1 minute, 5 minutes, and 10
minutes.
Set the return to Home screen time
1
2
3
4
5
6
From the Home screen, select Start.
Select Recent Calls.
Select Menu and the select Setup.
To set the amount of time the Smartphone displays the recent call list after a phone
call:
In Return after phone call, select a time.
To set the amount of time the phone displays the recent call list after a Walkie-Talkie
or Talkgroup call:
In Return after DC/GC, select a time.
Select Done.
Contacts, Calendar, and Tasks
101
Contacts, Calendar, and Tasks
This chapter introduces features on your Smartphone that help you manage and keep
track of contacts, appointments, and schedule, and maintain a things-to-do list. This
chapter also explains how to send and receive contact and appointment information
between your Smartphone and another mobile device or a desktop computer (beaming
data) by using infrared technology.
For information about synchronizing Contacts with your desktop computer, see
“ActiveSync Desktop Client” on page 139.
Using Contacts
You can think of Contacts as an address book, where you store information about people
and businesses with whom you communicate. For example, you can store multiple
phone numbers, e-mail and street addresses, Web pages, as well as other information
that relates to the contact, such as a birthday or anniversary date.
You can specify a special ring tone for the Smartphone to use when a contact calls. You
can also assign a contact to a category, such as business or personal, so you can filter
the contact list to view contacts in a category. You can use Contacts to dial phone
numbers and compose e-mail and text messages directly from a contact card. The
contacts you create are saved in your Smartphone, but you can copy them to your SIM
card and copy contacts on your SIM card to your phone. You can synchronize contact
cards with your desktop computer or beam contact cards to another device.
Note: Your Smartphone may display the menu option New SIM Contact. This option
has no function. Please do not select it.
The Contact List
The contact list displays the names of your contacts alphabetically. From this list, you
can create new contact cards with address, phone, and e-mail information. You can also
easily call a contact directly from the list, open a contact card to view and edit its
information, or delete a contact card. When you synchronize with your desktop
computer, your contact information is updated to reflect any changes on both your
Smartphone and your desktop computer.
Beside each name in the contact list is an abbreviation for the default communication
method. If the default method is a phone number, such as a work (w) or home phone
number (h), when you scroll to the contact and press s, the Smartphone automatically
dials that number. If the default method is e-mail, when you scroll to the contact and
press O twice, the Smartphone opens an e-mail message addressed to the contact. This
makes it easy to reach a contact by using the method you prefer.
Contacts, Calendar, and Tasks
102
View the contact list
• On the Home screen, select Contacts.
The following table describes abbreviations that might be displayed to the right of a
contact name in the contact list.
Contact list
abbreviation
Meaning
w
w2
h
h2
m
pgr
car
PTT
txt
e
e2
e3
web
wfx
hfx
ast
Work phone
Second work phone
Home phone
Second home phone
Mobile phone
Pager
Car phone
Walkie-Talkie number or Talkgroup number
Text message number
E-mail address
Second e-mail address
Third e-mail address
Web page
Work fax (appears only when contact is open)
Home fax (appears only when contact is open)
Assistant’s phone (appears only when contact is open)
Note: Although Walkie-Talkie numbers and Talkgroup numbers both use the PTT
abbreviation, the # sign always appears before a Talkgroup to distinguish the 2
types of numbers.
Find a contact
1
2
3
On the Home screen, select Start.
Select Contacts.
Begin entering the name of the contact to find until the name is displayed. For
example, to find “Sandra,” enter 7, 2, 6, 3, 7, 2 because these numbers
correspond to the letters for that name.
Filter the contact list
1 On the Home screen, select Start.
2 Select Contacts.
3 Select Menu and then Filter.
4 Select a category to filter, such as Business, Miscellaneous, or Personal.
The contacts assigned to the category you selected are displayed in the list.
Contacts, Calendar, and Tasks
103
Create a new contact
1 On the Home screen, select Start.
2 Select Contacts and then New.
3 Enter information for the new contact.
4 Select Done.
To cancel and return to the contact list without creating a contact card, select Menu and
then Cancel.
You can insert pauses in the dialing sequence of a phone number, such as for an
international call. For more information, see “Adding a Pause to a Dialing Sequence” on
page 48.
You can synchronize contact cards with your desktop computer using ActiveSync
desktop client or you can synchronize wirelessly using a Microsoft® Exchange server.
For more information on synchronizing with your desktop computer, see “ActiveSync
Desktop Client” on page 139. For more information on synchronizing wirelessly, see
“Setting Up Wireless E-mail” on page 52.
Save numbers from the recent calls list to Contacts
1
2
3
4
5
6
7
8
9
From the Home screen, select Start.
Select Recent Calls.
Select the item you want to save.
Select Save.
Choose to save the number as a new contact or in an existing contact:
• To save the number as a new contact, select <New Item>.
• To save the number in as existing contact, select the contact you want to save the
number to.
Scroll to the place in the Contacts entry screen where you want to store the number
from the recent calls list.
Select Insert.
Add any additional information that you want to save in the contact such as a name.
Select Done.
Delete a contact
1
2
3
4
5
On the Home screen, select Start.
Select Contacts.
Scroll to the contact to delete.
Select Menu and then Delete.
Select Yes.
Note: The next time you synchronize, the contact is deleted from Outlook on your
desktop computer as well. If you have not previously synchronized, however,
the contact is not deleted.
Contacts, Calendar, and Tasks
104
Making Calls from Contacts
You can make phone calls and Walkie-Talkie calls from your contact list or from an open
contact.
When you make a call from your contact list, the Smartphone dials the contact’s default
number. The contact list abbreviation associated with the default number appears with
the contact when you view the contact list. You can change a contact’s default number at
any time.
You can view all the contact list abbreviations for all the numbers stored in this contact by
scrolling to the name and then scrolling left and right.
A phone call is made to the phone number associated with the contact list abbreviation
that is showing when you press s. When you make a call from an open contact, you can
select the number to dial from the contact card.
If a contact contains a Walkie-Talkie number, you can make a Walkie-Talkie call to that
number even if the contact list abbreviation for the Walkie-Talkie number (PTT) is not
showing.
Make a phone call from the contact list
1
2
3
4
On the Home screen, select Start.
Select Contacts.
Scroll to the contact. If the contact list abbreviation for the number you want to call is
not showing, scroll left or right to display it.
Press s.
Make a phone call from an open contact
1
2
3
4
5
On the Home screen, select Start.
Select Contacts.
Select the contact to call.
Scroll to phone number to call.
Press s or O.
Make a Walkie-Talkie call from the contact list
1
2
3
4
5
6
7
On the Home screen, select Start.
Select Contacts.
Scroll to the contact to call.
Press and hold the Walkie-Talkie button.
Begin talking after your Smartphone emits a chirping sound.
Release the Walkie-Talkie button to listen.
To end the call, press e.
Make a Walkie-Talkie call from an open contact
1
2
3
4
5
On the Home screen, select Start.
Select Contacts.
Select the contact to call.
Press and hold the Walkie-Talkie button.
Begin talking after your Smartphone emits a chirping sound.
Contacts, Calendar, and Tasks
6
7
105
Release the Walkie-Talkie button to listen.
To end the call, press e.
Change the default number for a contact
1
2
3
4
On the Home screen, select Start.
Select Contacts.
Select the contact whose default number you want to change.
Scroll to the phone number that you want to set as the new default number. Make
sure you choose a phone number as the default number.
5 Select Menu, and then select Set as Default.
Note: When you make a call from the Home screen using a contact, the number you
made the call to becomes the contacts default number.
Contact Cards
A contact card displays all of the information that you have entered for the contact, such
as the name of the person or business, phone numbers, e-mail addresses, and more.
You can select a phone number on a contact card and press s to dial it. You can also
select an e-mail address or text message number and press O to open a new message
addressed to the contact.
View and edit a contact card
1
2
3
4
5
On the Home screen, select Start.
Select Contacts.
Select the contact whose card you want to view.
To edit the card, select Edit.
When finished making changes, select Done.
Call a contact from a contact card
1
2
3
4
5
On the Home screen, select Start.
Select Contacts.
Select the contact to call.
Scroll to the phone number to dial.
Press s.
Send a message from a contact card
1
2
3
4
5
6
On the Home screen, select Start.
Select Contacts.
Select the contact.
Select the e-mail address or text message number to use.
Select the account to use.
Enter a subject, compose your message, and then select Send.
Note: For information about composing e-mail messages, see “Creating Messages”
on page 60.
Using the contact card menu commands, you can quickly create a speed dial or voice
shortcut for the contact. You can also beam the contact card to another mobile device or
a desktop computer by using infrared, if your device has this capability.
Contacts, Calendar, and Tasks
106
Note: For information about creating speed dials and voice shortcuts, see “Phone
Calls” on page 38. For instructions on beaming a contact card, see “Beaming
Information” on page 170.
Using Calendar
Calendar is the scheduling program on your Smartphone, where you can create and
view appointments and view your calendar by day, week, or month. When you create
and edit appointments in Calendar, your changes are reflected in Outlook on your
desktop computer when you synchronize.
Tip: The default reminder time is 15 minutes prior to an appointment. You can
change this by selecting Menu and then Options from within Calendar.
Note: When you create a new appointment on your Smartphone, you can
synchronize Calendar with your desktop computer or Exchange Server to keep
your schedule information up-to-date in all locations.
Open Calendar
• On the Home screen, select Start and then Calendar.
Create a new appointment
1
2
3
4
5
6
On the Home screen, select Start.
Select Calendar.
Select Menu and then New.
Enter information about the appointment.
In Reminder, scroll to the amount of time before the appointment that you want to be
reminded. If you don’t want to be reminded, select None.
Select Done.
View an appointment
1
2
3
On the Home screen, select Start.
Select Calendar.
Select the appointment to view.
Edit an appointment
1
2
3
4
5
On the Home screen, select Start.
Select Calendar.
Select the appointment and then Edit.
If the appointment is recurring, select Yes to edit only the current occurrence, or
select No to edit the series.
Make your changes and select Done.
Delete an appointment
1
2
3
4
On the Home screen, select Start.
Select Calendar.
Scroll to the appointment to delete.
Select Menu and then Delete.
Contacts, Calendar, and Tasks
5
107
If the appointment is recurring, select Yes to delete only the current occurrence, or
select No to delete the series.
Tip: To cancel a deletion, press m.
Note: When you delete an appointment in Calendar on your Smartphone, it is also
deleted on your desktop computer the next time you synchronize. If you have
not previously synchronized, however, the appointment is not deleted.
Viewing Your Schedule
You can view your schedule in 3 different views: Agenda, Week, and Month.
Agenda View
Agenda view is the default view for calendar information. This view displays meetings
and appointments scheduled for the current day. Appointments are shown in
chronological order according to start time. All-day appointments are shown as a single
line at the top of the Agenda view. Up to 3 all-day events are displayed. If more than 3
all-day events are scheduled, you can scroll to see the additional events.
View today’s agenda
Do one of the following:
• On the Home screen, select your upcoming appointments.
• From Week or Month view in Calendar, select Menu and then Go to Today.
Tip: To view previous or approaching dates, scroll left or right.
View your agenda for a specific date
1
2
3
4
5
On the Home screen, select Start.
Select Calendar.
Select Menu and then Go to Date.
Enter the date to view.
Select Done.
Week View
Week view shows your schedule a week at a time. Week view gives you a quick
indication of your free and busy time, and allows you to create an appointment at a
selected time easily.
By default, Week view displays the hours from 9:00 A.M. to 5:00 P.M. in 1-hour
increments on the left side of the screen. You can scroll up or down to show the hours
before or after those displayed.
Note: If you scroll up or down and then leave Week view, the hours last shown are
displayed when you return to Week view.
View appointments for the week
1
2
3
On the Home screen, select Start.
Select Calendar.
Select Menu and then Week View.
Contacts, Calendar, and Tasks
108
Month View
Month view provides an overview of your schedule 1 month at a time. Arrows pointing
upward represent morning appointments, and arrows pointing downward represent
afternoon appointments. If you have both morning and afternoon appointments on the
same day, the arrows form a colored box. All-day events are indicated by an empty box.
If you have morning and afternoon appointments and an all-day event on the same day,
an empty box surrounds a colored box.
View your schedule for the month
1
2
3
On the Home screen, select Start.
Select Calendar.
Select Menu and then Month View.
Customizing the Calendar View
You can change viewing options for Calendar, such as specifying the first day of the
week and the number of days per week to display, as well as showing and hiding week
numbers.
Customize the calendar view
1
2
3
4
5
On the Home screen, select Start.
Select Calendar.
Select Menu and then Options.
Scroll to select the options you want, and make your changes.
Select Done.
Importing Calendar Information
You can import calendar information from another calendar program that uses the iCal or
vCal format. You can import calendar information from attachments in e-mail messages,
text messages, and links in Microsoft® Pocket Internet Explorer, or by beaming. When
you import information and then synchronize, the information is added to Outlook on your
desktop computer.
Using Tasks
A task is a personal or work-related project, assignment, or errand to track through
completion. A task can occur once, or it can recur. A recurring task can repeat at regular
intervals or repeat based on the date you mark the task complete. For example, you
might want to pay a bill on the last Friday of every month, or get a haircut when 1 month
has passed since your last haircut.
The Task List
The task list is your “things to do” list. On the Smartphone you can create and delete
tasks and mark them as complete. Completed tasks are displayed with the
corresponding check box selected.
Contacts, Calendar, and Tasks
109
When you create or edit tasks with Outlook on your desktop computer and then
synchronize with your Smartphone, additional task information may display. A task that
has been marked as high priority is preceded by an exclamation mark, and one marked
as low priority by a down arrow. On color devices, overdue tasks are displayed bold and
red.
Note: If you synchronize tasks with your desktop computer, completed tasks are
removed from your Smartphone during synchronization. They are then
displayed in gray with a strikethrough on your desktop computer.
Create a new task
1
2
3
On the Home screen, select Start.
Select Tasks.
Enter the task and press O.
Note: When you create a new task on your Smartphone, you can synchronize tasks
with your desktop computer to keep your task list up-to-date in both locations.
You cannot synchronize your Outlook tasks wirelessly.
If you create a new task with a reminder on your desktop computer and
synchronize tasks with your Smartphone, you hear the reminder on your
Smartphone.
Mark a task as complete
1
2
3
On the Home screen, select Start.
Select Tasks.
Scroll to the task and select Complete.
Change a completed task to incomplete
1
2
3
On the Home screen, select Start.
Select Tasks.
Scroll to the task and select Activate.
Delete a task from the task list
1
2
3
On the Home screen, select Start.
Select Tasks.
Select the task and then Delete.
SIM Manager
110
SIM Manager
When you enter a new contact into Contacts, that contact is stored on your Smartphone,
not your SIM card. The contact is not saved on your SIM card until you copy it to your
SIM card using SIM Manager.
Note: This section describes using the SIM Manager with the SIM card provided with
your Smartphone. Using SIM Manager with the SIM card provided with an older
iDEN SIM-based phone may produce different results.
Using SIM Manager
The SIM Manager lets you manage your contacts so that your SIM card stays current.
You can do the following with the SIM Manager:
• Copy a contact from your Smartphone (Contacts) to your SIM card
• Copy an contact from your SIM card to your Smartphone (Contacts)
• Manage your current set of SIM card contacts
You can select either a contact or only certain contact types for the given contact. When
you choose to select only certain contact types, the checkbox next to the contact in the
Contacts list will be both checked and grayed out.
The following table outlines the task set for each component of the SIM Manager.
Copy to SIM
Copy to Contacts
Manage SIM
Sort the contacts list
Sort the contacts list
Sort the contacts list
Search for contacts
Search for contacts
Search for contacts
View all contact types for a
selected contact
View all contact types for a
selected contact
View all contact types for a
selected contact
Select only certain contact types
for a selected contact
Select only certain contact types
for a given contact
Select only certain contact types
for a given contact
Select all contacts
Select all contacts
Select all contacts
Select only new contacts
Select only new contacts
Select only new contacts
Copy contacts from Smartphone to Copy contacts from SIM to
SIM
Smartphone
Copy contacts from SIM to
Smartphone
Copy contacts from Smartphone
to SIM
Edit a selected contact
Delete selected contacts
Delete all contacts
The SIM Manager can store up to 3000 contacts.
Copy contacts from your Smartphone to your SIM
1
2
3
On the Home screen, select Start.
Select SIM Manager, and then Copy to SIM.
Select each contact you want to copy.
Note: If you select a contact that is already on your SIM, that contact will not be
copied.
SIM Manager
4
111
Select Copy.
Copy contacts from your SIM to your Smartphone
1
2
3
On the Home screen, select Start.
Select SIM Manager, and then Copy to SIM.
Select each contact you want to copy.
Note: If you select a contact that is already on your Smartphone, that contact will not
be copied.
4 Select Copy.
Select all contacts in the list
1
2
3
On the Home screen, select Start.
Select SIM Manager.
Access the contacts in your Smartphone or on your SIM card:
• To access contacts on your Smartphone, select Copy to SIM.
• To access contacts on your SIM card, select Copy to Contacts or Manage SIM.
4 Select Menu and then Select.
5 Select All.
Select only new contacts
1
2
3
On the Home screen, select Start.
Select SIM Manager.
Access the contacts in your Smartphone or on your SIM card:
• To access contacts on your Smartphone, select Copy to SIM.
• To access contacts on your SIM card, select Copy to Contacts or Manage SIM.
4 Select Menu and then Select.
5 Select New.
Select only certain contact types in a contact
1
2
3
4
5
6
7
On the Home screen, select Start.
Select SIM Manager.
Access the contacts in your Smartphone or on your SIM card:
• To access contacts on your Smartphone, select Copy to SIM.
• To access contacts on your SIM card, select Copy to Contacts or Manage SIM.
Scroll to the contact you want.
Scroll right to view all the contact types saved in that contact.
Select the contact types that you want.
Select Done.
View all contact types for a contact without the opportunity to select
1
2
3
On the Home screen, select Start.
Select SIM Manager.
Access the contacts in your Smartphone or on your SIM card:
• To access contacts on your Smartphone, select Copy to SIM.
• To access contacts on your SIM card, select Copy to Contacts or Manage SIM.
SIM Manager
112
4
5
Scroll to the contact you want to view details for.
Select Menu and then Details.
Note: You can not select contact types from this screen.
6 Select Done.
Search for contacts
1
2
3
4
Note: The search feature is only available when the list displays alphabetically.
On the Home screen, select Start.
Select SIM Manager.
Access the contacts in your Smartphone or on your SIM card:
• To access contacts on your Smartphone, select Copy To SIM.
• To access contacts on your SIM card, select Copy To Contacts or Manage SIM.
Enter the first letter of the name of the contact you want.
Sort the contacts list
1
2
3
On the Home screen, select Start.
Select SIM Manager.
Access the contacts in your Smartphone or on your SIM card:
• To access contacts on your Smartphone, select Copy to SIM.
• To access contacts on your SIM card, select Copy to Contacts or Manage SIM.
4 To sort the list of contacts alphabetically, select Menu, then Sort, then Alphabetical.
To sort the list of contacts so that new contacts appear at the top of the list, select
Menu, then Sort, then New entries first.
Edit a SIM contact
1
2
3
4
5
6
On the Home screen, select Start.
Select SIM Manager and then Manage SIM.
Scroll to or select the contact you want to edit.
To view all contact types for the selected contact before editing, select Detail or
select Menu and then View Details. To edit the selected contact after viewing its
contact types, select Edit.
To edit the contact without viewing contact details, select Menu and then Edit.
Enter the changes you want.
Select Done.
Delete selected SIM contacts
1
2
3
4
On the Home screen, select Start.
Select SIM Manager and then Manage SIM.
Scroll to or select the contacts you want to delete.
Select Menu and then Delete.
Note: You can only delete entire contacts. If you select Delete when you have certain
contact types selected for a given contact, you will delete the entire contact.
5 Select Yes.
SIM Manager
113
Delete all SIM contacts
1
2
3
4
On the Home screen, select Start.
Select SIM Manager and then Manage SIM.
Select Menu and then Delete All.
Select Yes.
Changes When Contacts Are Copied to
Your SIM Card
When you copy a contact from your Smartphone to your SIM card, the contact may
display differently on the SIM than on your Smartphone.
The first and last name of a contact may be displayed in reverse order in SIM version of
the contact. Some long names may be truncated when in the SIM version of the contact.
These contact types are omitted from the SIM version of the contact:
• Categories
• Web page
• Custom ring tone
• Job title
• Department
• Company
• Office address
• Home address
• Other address
• Notes
• Birthday
• Anniversary
• Spouse
• Children
• Assistant
• File As
If a contact contains only these contact types, the contact may not be copied to your SIM
card at all.
Voice Notes
114
Voice Notes
You can use Voice Notes to work with short voice recordings. Voice notes are included in
the All Notes list and are named consecutively (Recording 1, Recording 2, and so on).
Create a voice note
1
2
3
4
5
On the Home screen, select Start.
Select Voice Notes.
Hold the Smartphone microphone near your mouth.
Press the Record key and speak your voice note.
Select Stop to stop recording a voice note. The voice note is recorded and appears
in the All Notes list of Voice Notes.
Playing a voice note
1
2
3
4
On the Home screen, select Start.
Select Voice Notes.
Scroll to the voice note to play.
Select Menu and then Play.
Tip: To stop playing a voice note before it is finished playing, select Stop.
Rename a voice note
1
2
3
4
5
6
On the Home screen, select Start.
Select Voice Notes.
Scroll to the voice note to rename.
Select Menu and then Rename.
In Name, hold down m to delete the current name and then enter a new name.
Select Done.
Delete a voice note
1
2
3
4
5
On the Home screen, select Start.
Select Voice Notes.
Scroll to the voice note to delete.
Select Menu and then Delete.
Select Yes.
Note: If you delete a voice note that has a default name, such as Recording 1, this
name becomes available for a new voice note that you create. For example, if
you have 3 voice notes, named Recording 1, Recording 2, and Recording 3,
and you delete Recording 1, the next voice note you create will be named
Recording 1.
Set a voice note as your ring tone
1
2
3
4
5
On the Home screen, select Start.
Select Voice Notes.
Scroll to the voice note you want to set as your ring tone.
Select Menu and then Set as Ringtone.
Select OK.
Settings
115
Settings
This chapter describes how to customize the settings on your Smartphone and how to
restore your Smartphone to its original settings.
Viewing and Changing Settings
The Settings screen displays a list of settings that you can change to personalize the
Smartphone for the way you work. For example, you can change the sounds your
Smartphone makes and even use your own sounds for ring tones, notifications, and
reminders. You can also change the image for the Home screen background, set up data
connections for remotely accessing a data network, and more.
View the list of settings
• On the Home screen, select Start and then Settings.
Tip: To view the remaining settings, select More.
Exiting Setting Screen
After you modify a Settings option, you may have to select Done one or more times to
exit the Setting screens. However, you only need to select Done once, as described in
each of the instructions in this chapter, to apply the setting you have chosen.
To exit the Setting screens without applying the setting you have chosen, press e.
Display Properties
You can use Display Properties to change the Home screen layout, the color scheme,
the internal and external wallpapers, and the time delay before the Home screen
appears when the Smartphone is idle.
Change the Home screen layout
1
2
3
4
On the Home screen, select Start.
Select Settings and then Display Properties.
In Home screen layout, select the option you want.
Select Done.
Note: The default home screen layout is Nextel.
Choose a Home screen wallpaper for the internal display
1
2
3
4
On the Home screen, select Start.
Select Settings and then Display Properties.
In Wallpaper internal display, select the option you want.
Select Done.
Note: The default home screen wallpaper for the internal display is Nextel.
Choose a Home screen wallpaper for the external display
1
2
3
On the Home screen, select Start.
Select Settings and then Display Properties.
In Wallpaper external display, select the option you want.
Settings
4
116
Select Done.
Add your own wallpaper image
1
2
Connect the Smartphone to your desktop computer.
On your desktop computer, copy the image file you want. The file format must be .gif,
.jpg, or .bmp.
3 In ActiveSync on your desktop computer, click Explore and then double-click My
Smartphone.
4 Double-click Storage, double-click Application data, double-click Home.
5 Paste the image file into the Home folder.
Note: Before you open ActiveSync to paste the image file, make sure that the
Smartphone is connected to your desktop computer by a USB connection. For
best results, use images with a 176 x 200 screen resolution to fit on the screen.
You can use this image for your Home screen.
Change the color scheme for screens throughout your Smartphone
1
2
3
4
On the Home screen, select Start.
Select Settings and then Display Properties.
In Color scheme, select the option you want.
Select Done.
Note: The default color scheme is Nextel.
Change the font size for screens throughout your Smartphone
1
2
3
4
On the Home screen, select Start.
Select Settings and then Display Properties.
In System font size, select the option you want.
Select Done.
Change the contrast on the internal display
1
2
3
4
On the Home screen, select Start.
Select Settings and then Display Properties.
In Contrast internal display, scroll left or right to set the desired contrast.
Select Done.
Change the contrast on the external display
1
2
3
4
On the Home screen, select Start.
Select Settings and then Display Properties.
In Contrast external display, scroll left or right to set the desired contrast.
Select Done.
Change the text color on the external display
1
2
3
4
On the Home screen, select Start.
Select Settings and then Display Properties.
In Text color external display, select the option you want.
Select Done.
Settings
117
Specify the idle time before returning to the Home screen
1
2
3
4
On the Home screen, select Start.
Select Settings and then Display Properties.
In Return to Home screen, select the option you want. This is the amount of time it
takes your Smartphone to return to the Home screen after you make or receive a call,
open or close the flip, or press keys or buttons.
Select Done.
Phone Calls
You use Phone Calls to set options such as call forwarding, call waiting, and caller ID.
Change the line for outgoing calls
1
2
3
4
5
On the Home screen, select Start.
Select Settings and then Phone Calls.
Select Line For Outgoing Calls.
In Current outgoing line, select the option you want: line 1 or line 2.
Select Done.
Block incoming or outgoing calls
1
2
3
4
On the Home screen, select Start.
Select Settings and then Phone Calls.
Select Call Barring.
In Block incoming calls or Block outgoing calls, select the option you want: Off,
When Roaming, or All Calls.
5 Select Done. You will now be able to receive or make calls according to the options
that you selected.
Note: In GSM mode, the SIM card needs to be provisioned for Call Barring to
function.
Forward calls
1
2
3
4
On the Home screen, select Start.
Select Settings and then Phone Calls.
Select Call Forwarding.
Select the condition under which to forward calls as follows:
• Unconditional to forward all calls
• No Reply to forward calls when you do not answer
• Busy to forward calls when your line is busy
• Unavailable to forward calls when your Smartphone is off or out of service range
5 Select Enable call forwarding.
6 Enter the phone number to which calls are to be forwarded.
7 Select Done.
Note: This sets call forwarding for the current outgoing line. To set call forwarding for
the other line, make that line the current outgoing line and then set call
forwarding for that line. The setting for each line remains even if that line is no
longer the outgoing line.
Settings
118
Answer a call by pressing any key
1
2
3
4
5
On the Home screen, select Start.
Select Settings and then Phone Calls.
Select Call Options.
Select Any key answer. This lets you answer incoming calls by pressing any key.
Select Done.
Enter the phone numbers you call for voice mail messages
1
2
3
4
5
6
Note: In most cases, your voice mail access number is sent to your phone
automatically. Use this setting feature only if your phone did not receive this
number. If you use this feature to enter a number other than your voice mail
access number, the number you enter will be overwritten by the actual voice
mail access number the next time you receive a voice mail.
On the Home screen, select Start.
Select Settings and then Phone Calls.
Select Call Options.
In Voice mail number (L1), enter your voice mail number for line 1. The Smartphone
dials this number when you press Speed Dial 1.
In Voice mail number (L2), enter your voice mail number for line 2. The Smartphone
dials this number when you press Speed Dial 2.
Note: Do not use this option when on the iDEN network. The iDEN network does not
provide a voice mail access number for line 2.
Select Done.
Change your text message service number
1
2
3
4
5
On the Home screen, select Start.
Select Settings and then Phone Calls.
Select Call Options.
In SMS service center, enter the phone number.
Select Done.
Specify your country code and area code
1
2
3
4
5
6
On the Home screen, select Start.
Select Settings and then Phone Calls.
Select Call Options.
In Country code, enter your country code.
In Area code, enter your area code.
Select Done.
Turn call waiting notifications on and off
1
2
3
4
On the Home screen, select Start.
Select Settings and then Phone Calls.
Select Call Waiting.
Select or clear Provide call waiting notifications.
Settings
5
119
Select Done. If you selected Provide call waiting notifications, you will now be
notified when you receive a call while you are already on a call.
Configure caller ID
1
2
3
4
5
On the Home screen, select Start.
Select Settings and then Phone Calls.
Select Caller ID.
In Provide my caller ID to, select the option you want: Everyone, No one, or Only
my contacts.
Select Done. The selected callers will be able to see your name and phone number
information when you call them.
Configure channels
1
2
3
4
5
On the Home screen, select Start.
Select Settings and then Phone Calls.
Select Channels.
Select the options you want.
Select Done.
Limit calls to specific area codes or phone numbers
1
2
3
4
5
6
7
Note: You will see this option only if you are on a GSM network.
On the Home screen, select Start.
Select Settings and then Phone Calls.
Select Fixed Dialing and then Enable fixed dialing.
Select Menu and then Edit Numbers.
Select Menu and then Add.
Enter the phone number or area code to which to restrict calling and select Done.
Repeat steps 4, 5, and 6 to add more numbers as necessary. You will be able to
make and receive calls only to and from the numbers or area codes specified.
Answer calls automatically
1
2
3
4
5
Note: The Auto Answer setting affects the Car and Headset profiles. If you change
the setting for Auto Answer under Settings, the same change will be made
automatically under Profiles.
On the Home screen, select Start.
Select Settings and then Phone Calls.
Select Auto Answer.
In Auto-answer in, select the amount of time you want to elapse before your
Smartphone automatically answers the call.
Select Done. All calls will be answered automatically once the selected interval has
elapsed.
Allow last number redial
1
2
3
On the Home screen, select Start.
Select Settings and then Phone Calls.
Select Auto redial.
Settings
4
5
120
In Auto Redial, select On.
Select Done. Your Smartphone will automatically redial calls you make when the
system is busy.
Activate flip options
1
2
3
4
On the Home screen, select Start.
Select Settings and then Phone Calls.
Select Flip Activation.
To set your Smartphone to answer calls by opening the flip, select Open flip to
answer call.
5 To set your Smartphone to end calls by closing the flip, select Close flip to end call.
6 Select Done.
Note: If you are using your Smartphone with a headset, and you have the Flip to End
option set to On, closing your flip sends incoming sound to the headset and
does not end the call.
Set headset options
1
2
3
4
On the Home screen, select Start.
Select Settings and then Phone Calls.
Select Headset/Speaker.
Choose a headset setting:
• Select Headset only to send incoming sound to the headset only.
• Select Headset & Speaker to send incoming sound to the headset and ring tones
to the speaker.
Note: If you are using your Smartphone with a headset, and you have the Flip to End
option set to On, closing your flip sends incoming sound to the headset and
does not end the call.
5 Select Done.
Block Walkie-Talkie calls, Talkgroup calls, and data transfers
1
2
3
4
5
On the Home screen, select Start.
Select Settings and then Phone Calls.
Select Phone Only.
In Phone only, select On.
Select Done. Your Smartphone cannot make or receive Walkie-Talkie calls or
Talkgroup calls, or transfer data.
Settings
121
PTT — Nextel Walkie-Talkie Settings
You can set PTT settings to control how your Smartphone handles Walkie-Talkie calls
and Talkgroup calls.
Mute Walkie-Talkie calls and Talkgroup calls
1
2
3
4
5
On the Home screen, select Start.
Select Settings and then PTT.
Select PTT Group Silent.
In PTT Group Silent, select On.
Select Done. Your Smartphone will not alert you to Walkie-Talkie calls or Talkgroup
calls.
Define your Talkgroup calling area
1
2
3
4
5
On the Home screen, select Start.
Select Settings and then PTT.
Select PTT Group Area.
In PTT Group Area, select the option you want.
Select Done.
Add a new Talkgroup calling area
1
2
3
4
5
6
7
On the Home screen, select Start.
Select Settings and then PTT.
Select PTT Group Area.
Select Menu and then New Area.
Enter a name for the area.
Enter a number for the area.
Select Done.
Edit a Talkgroup calling area
1
2
3
4
5
6
7
On the Home screen, select Start.
Select Settings and then PTT.
Select PTT Group Area.
Select the area you want.
Select Menu and then Edit.
Make the necessary edits.
Select Done.
Delete a Talkgroup calling area
1
2
3
4
5
6
On the Home screen, select Start.
Select Settings and then PTT.
Select PTT Group Area.
Select the area you want.
Select Menu and then Delete.
Select OK.
Settings
122
Set the most recent call as your One Touch Walkie-Talkie number
1
2
3
4
5
6
On the Home screen, select Start.
Select Settings and then PTT.
Select One Touch PTT.
Select Use One Touch PTT.
In Place call to, select Last Call.
Select Done.
Set another number as your One Touch Walkie-Talkie number
1
2
3
4
5
6
On the Home screen, select Start.
Select Settings and then PTT.
Select One Touch PTT.
Select Use One Touch PTT.
In Place call to, select Assigned Number.
Enter the number you want in the Number field:
• Type the number you want into the field.
• Browse to the number. Select Menu and then Browse Contacts or Browse
Recent Calls, as required. Select the number you want.
7 Select Done.
Turn off One Touch Walkie-Talkie
1
2
3
4
On the Home screen, select Start.
Select Settings and then PTT.
Select One Touch PTT.
Select Use One Touch PTT. This clears the checkbox and turns off One Touch
Walkie-Talkie.
Vibrate All
You can set your Smartphone to vibrate for all phone calls, Walkie-Talkie calls,
Talkgroup calls, message notifications, and call alerts, even if you want your Smartphone
to ring for other features, with the Vibrate All setting.
1 On the Home screen, select Start.
2 Select Settings and then Vibrate All.
3 Select Use Vibrate All.
4 Select Done.
Notifications
You can use Notifications settings to control how your Smartphone notifies you of calls,
call alerts, messages, Calendar reminders, and other events, such as pressing keys on
the keypad.
You can customize the sounds your Smartphone makes for many of these events.
Note: With the exception of ring tones, only .midi and .wav files can be set for
notifications.
Settings
123
Change how your phone notifies you of all calls
1
2
3
On the Home screen, select Start.
Select Settings and then Notifications.
In Phone ring type, select the option you want:
• Ring — your Smartphone makes a sound until you respond to the call.
• Ring once — your Smartphone makes a sound only once when you get a call.
• Increasing ring — your Smartphone rings more loudly with each ring when you get
a call.
• Vibrate — your Smartphone vibrates and does not make a sound when you get a
call.
• Vibrate then ring — your Smartphone vibrates and then makes a sound when you
get a call.
• Vibrate and ring — your Smartphone vibrates and makes a sound at the same
time when you get a call.
• Silent — your Smartphone does not vibrate or make a sound when you get a call.
4 Select Done.
Change how your Smartphone notifies you of Walkie-Talkie calls and
Talkgroup calls
1
2
3
4
On the Home screen, select Start.
Select Settings and then Notifications.
In PTT, scroll right or left to select Ring, Vibrate, or Off.
Select Done.
Change how long your Smartphone notifies you of call alerts
1
2
3
4
On the Home screen, select Start.
Select Settings and then Notifications.
In Call alert timeout, select the option you want. This is the amount of time your
Smartphone continues to notify you after you have received a call alert and have not
responded to it.
Select Done.
Change the sound you hear when you press keys on the keypad
1
2
3
4
On the Home screen, select Start.
Select Settings and then Notifications.
In Keypad control, select the option you want: Tone, Click, or None.
Select Done.
Note: Your Smartphone sends tones across the network, and they are audible to
devices or people on the other end of the line, even if you choose Click or
None.
Settings
124
Setting ring tones
1
2
3
On the Home screen, select Start.
Select Settings and then Notifications.
Scroll to the item that you want to specify a ring tone for:
• To specify the sound made when you receive calls on line 1 or line 2, select Ring
tone line 1 or Ring tone line 2.
• To specify the sound made when you receive call alerts, select Call alert.
• To specify the sound made when you receive reminders from the Calendar, select
Reminders.
• To specify the sound made when you receive each type of message, select New email, New text message, New voice message, New instant message, or New
channel message.
• To specify the sound made by the alarm, select Alarm clock.
• To specify the sound made when your Smartphone displays certain types of
information, select SIM toolkit messages, Exclamation, Question, or Warnings.
4 Scroll right or left to select a sound. Select None if you do not want to hear a sound.
5 Select Done.
Tip: When you select a sound, the sound plays. To hear the sound again, select
Menu and then Play.
Add your own sound
1
2
Connect the Smartphone to your desktop computer using a USB connection.
On your desktop computer, copy the sound file you want. The file format must be
.wav, .mid, or .wma.
3 In ActiveSync on your desktop computer, click Explore and then double-click My
Smartphone.
4 Do one of the following:
• To save the sound on your phone, double-click Storage, double-click Application
data, double-click Sounds, and then paste the sound file into the Sounds folder.
• To save the sound on your SD card*, double-click Storage Card, double-click My
Documents, and then paste the sound file into the My Documents folder.
* To purchase an SD card go to sprint.com or call 1-800-NEXTEL6.
Tip: You can now specify this sound for a ring tone, notification, or reminder on your
Smartphone, as described in “Setting ring tones” on page 124. For ring tones,
you can use sounds in either .wav, .mid, or .wma file format. You can use sounds
in the .wma file format as ring tones only; you cannot use .wma files for
notifications or reminders.
Delete a sound
1
2
3
4
5
On the Home screen, select Start.
Select Settings and then Notifications.
Select Menu and then Delete Sounds.
Select the sound you want to delete.
Select Yes.
Note: You can only delete sounds that you added. You cannot delete sounds included
with the Smartphone.
Settings
125
Turn the status light on or off
1
2
3
4
On the Home screen, select Start.
Select Settings and then Notifications.
In Status LED, select the option you want.
Select Done.
Voice Volume
The Voice Volume screen sets the volume coming out of your Smartphone’s earpiece
and speaker when you are in a call and at most other times.
These settings do not control the volume of the sounds your Smartphone makes to notify
you of phone calls, data calls, or messages. The volume of those sounds is set in
Profiles.
Set the volume of sound from the earpiece and the speaker
1
2
3
4
5
On the Home screen, select Start.
Select Settings and then Voice Volume.
In Earpiece, scroll to the volume you want for sound coming out your Smartphone’s
earpiece.
In Speaker, scroll to the volume you want for sound coming out your Smartphone’s
speaker.
Select Done.
Power Management
You can use Power Management to control how long your Smartphone’s backlight stays
on. You can also check the battery level.
Set time it takes for the backlight to turn off
1
2
3
4
On the Home screen, select Start.
Select Settings and then Power Management.
In Backlight timeout, select the amount of time for the Smartphone before the
backlight turns off, if you do not make or receive a call, open or close the flip, or press
keys or buttons.
Select Done.
View battery power level
1
2
3
On the Home screen, select Start.
Select Settings and then Power Management.
Main battery displays the amount of battery life remaining.
Select Done.
Settings
126
Accessibility
You can use Accessibility settings to configure large digit dialing, multipress time out,
confirmation time out, and TTY.
Change accessibility settings
1
2
3
On the Home screen, select Start.
Select Settings and then Accessibility.
Select the options you want to change, as follows:
• Large Digit Dialing to set your Smartphone to briefly display very large digits when
you enter numbers at the Home screen.
• Multipress Timeout to set the length of time between keypresses when entering
text in Multipress mode.
• Confirmation Timeout to set the delay before an unconfirmed action times out.
• TTY to set TTY options. Please refer to “Enable TTY” for more information.
4 When you are finished making the changes you want, select Done.
Enable TTY
1
2
3
4
5
On the Home screen, select Start.
Select Settings and then Accessibility.
Select TTY.
Select Use TTY.
Select the option you want for Type:
• TTY — You type and read text on your TTY device.
• VCO (Voice-Carry-Over) — You speak into your Smartphone and read text replies
on your TTY device.
• HCO (Hearing-Carry-Over) — You type text on your TTY device and listen to voice
replies on your Smartphone speaker.
6 Select the option you want for Baud.
• To make TTY calls within the U.S., set the baud rate to 45.45.
• To make calls outside the U.S., set the TTY baud rate to 50.0.
7 Select Done.
Regional Settings
You can use Regional Settings to change the language, date, and time style, as well as
number and currency formatting options.
Configure regional settings
1
2
3
4
On the Home screen, select Start.
Select Settings and then Regional Settings.
In Language, select the language to use when entering information.
In Locale, select your locale. This changes the remaining settings appropriately for
your locale.
Settings
127
5
Configure other settings in the same manner:
• Short date style and Long date style show how dates appear on your
Smartphone.
• Time Format shows how times of day appear on your Smartphone.
• Positive number, Negative number, Positive currency, and Negative currency
show how numbers and currency appear on your Smartphone.
6 Select Done.
Note: After changing the language, you must turn your device off and on for the
change to take effect.
Date and Time
You can use Date and Time settings to change the local time zone, the current date and
time, and to set the alarm.
Set the date and time
1
2
3
4
5
6
On the Home screen, select Start
Select Settings and then Date and Time.
In Time Zone, select your time zone.
In Date, select the month, day, or year and edit the information.
In Time, select a number and edit it.
Select Done.
Set the alarm
1
2
3
4
5
On the Home screen, select Start.
Select Settings and then Date and Time.
In Alarm, select Off or On to turn the alarm off or on.
In Alarm time, specify the time for the alarm to go off.
Select Done.
Phone Networks
You can use settings in Phone Networks to view and configure networks and networkrelated values.
View current network
1
2
3
4
On the Home screen, select Start.
Select Settings and then Phone Networks.
Select Current Network.
Select Done.
Select iDEN/GSM options
1
2
3
4
5
On the Home screen, select Start.
Select Settings and then Phone Networks.
Select iDEN/GSM Selection.
In iDEN/GSM selection, select to the option you want.
Select Done.
Settings
128
View current GSM band
1
2
3
4
On the Home screen, select Start.
Select Settings and then Phone Networks.
Select GSM Band.
Select Done.
Select a GSM network
1
2
3
4
5
6
7
On the Home screen, select Start.
Select Settings and then Phone Networks.
Select GSM Network Selection.
In Network selection, select the option you want: Manual or Automatic.
If you selected Manual, select Menu and then Select a Network. Select the network
and select Done. The Smartphone will use the selected network.
If you selected Automatic, select Menu and then Preferred Networks. Select the
networks to use and select Done. The Smartphone will automatically use the
preferred networks.
Select Done.
Set network ID
1
2
3
4
5
6
On the Home screen, select Start.
Select Settings and then Phone Networks.
Select Network ID.
Select the Network ID you want.
Select the value you want. If you select Enter Value, then enter the value into the
entry field.
Select Done.
Data Connections
Baud Rate
When you use your Smartphone as a modem, you can set its baud rate.
Set baud rate
1
2
3
4
On the Home screen, select Start
Select Settings and then Data Connections.
In Baud Rate, select the baud rate you want.
Select Done.
Adding a URL Exception
Some URLs for Web pages on your company intranet may use periods, for example:
intranet.companyname.com. To view these pages in Pocket Internet Explorer, you must
create a URL exception. Otherwise, the pages will not display.
Note: You do not need to create URL exceptions for Internet URLs.
Settings
129
Add a URL exception
1
2
3
4
5
6
On the Home screen, select Start.
Select Settings and then Data Connections.
Select Internet Connection.
Select Menu and then Work URL Exceptions.
Select Menu and then Add.
In URL Pattern, enter the URL and select Done. Separate multiple URLs with a
semicolon (;).
Edit a URL exception
1
2
3
4
5
6
7
On the Home screen, select Start.
Select Settings and then Data Connections.
Select Internet Connection.
Select Menu and then Work URL Exceptions.
Select the URL to edit.
Select Menu and then Edit.
Edit the URL and select Done.
Delete a URL exception
1
2
3
4
5
6
7
On the Home screen, select Start.
Select Settings and then Data Connections.
Select Internet Connection.
Select Menu and then Work URL Exceptions.
Scroll to the URL to delete.
Select Menu and then Delete.
Select Yes.
Working with Dial-up Connections
You can create a dial-up connection to connect remotely to the Internet, a Wireless
Application Protocol (WAP) network, or your corporate network. Then, when you open a
program that is configured to use this connection, the Smartphone uses it to
automatically connect to the network. For example, you can create an Internet
connection and then configure Pocket Internet Explorer to use it. Then, when you start
Internet Explorer and browse to a Web page on the Internet, the Smartphone
automatically connects to the Internet by using your Internet connection.
Create a dial-up connection
1
2
3
4
5
6
7
On the Home screen, select Start.
Select Settings and then Data Connections.
Select Work Connection.
Select Menu and then Edit Connections.
Select Dial-up Connections.
Select Menu and then Add.
Enter the requested information as follows and then select Done:
• In Description, enter a name for the connection.
Settings
130
• In Connects to, select the network.
• In Phone number, enter the phone number you use to dial the network.
• In User name, enter your network user name.
• In Password, enter your password.
• In Domain, enter the domain name, if required.
Note: If you are not sure about the information to enter, ask your network
administrator.
Tip: If you subscribe to General Packet Radio Services (GPRS), you can set up a
GPRS connection to access your corporate network or the Internet, which is
faster than a dial-up connection. See “Setting Up Your Smartphone for Wireless
Data Service Access” on page 131.
Edit a dial-up connection
1
2
3
4
5
6
7
8
On the Home screen, select Start.
Select Settings and then Data Connections.
Select Work Connection.
Select Menu and then Edit Connections.
Select Dial-up Connections.
Scroll to the connection to edit.
Select Menu and then Edit.
Change any information and select Done.
Delete a dial-up connection
1
2
3
4
5
6
7
8
On the Home screen, select Start.
Select Settings and then Data Connections.
Select Work Connection.
Select Menu and then Edit Connections.
Select Dial-up Connections.
Scroll to the connection to delete.
Select Menu and then Delete.
Select Yes.
Working with VPN Connections
You can create a VPN connection to gain access to your corporate network over an
Internet connection. For information on creating and using a VPN connection, contact
your corporate network administrator.
Working with Proxy Connections
You can use a proxy connection to gain access to the Internet over an existing
connection to your corporate network.
Create a proxy connection
1
2
3
On the Home screen, select Start.
Select Settings and then Data Connections.
Select Work Connection.
Settings
4
5
6
7
131
Select Menu and then Edit Connections.
Select Proxy Connections.
Select Menu and then Add.
Enter the requested information as follows and then select Done:
• In Description, enter a name for the connection.
• In Connects from, select the type of network from which you will connect.
• In Connects to, select the type of network to which you will connect.
• In Proxy (name:port) enter the proxy server name and port number in the form:
server name:port number.
• In Type, select the type of proxy connection to create.
• In User name, enter your user name for the network to which you will connect.
• In Password, enter your password.
Note: If you are not sure about the information to enter, ask your network
administrator.
Edit a proxy connection
1
2
3
4
5
6
7
8
On the Home screen, select Start.
Select Settings and then Data Connections.
Select Work Connection.
Select Menu and then Edit Connections.
Select Proxy Connections.
Scroll to the connection to edit.
Select Menu and then Edit.
Change any information and select Done.
Delete a proxy connection
1
2
3
4
5
6
7
8
On the Home screen, select Start.
Select Settings and then Data Connections.
Select Work Connection.
Select Menu and then Edit Connections.
Select Proxy Connections.
Scroll to the connection to delete.
Select Menu and then Delete.
Select Yes.
Data Connections for GSM
Setting Up Your Smartphone for Wireless Data Service Access
If you activate your Wireless Data Services for use in GSM countries (GPRS) you can
set up a GPRS connection to gain access to your corporate network or the Internet on
your Smartphone.
Before accessing your data services internationally for the first time, see “Create a
GPRS connection” and “Connect to the Internet with a GPRS connection” on page 132.
Settings
132
Create a GPRS connection
Note: You are not required to enter a user name, password, primary DNS, secondary
DNS, or IP address to create GPRS connection.
1 On the Home screen, select Start.
2 Select Settings and then Data Connections.
3 Select Internet Connection.
4 Select Menu and then Edit Connections.
5 Select GPRS Connections.
6 Select Menu and then Add.
7 Enter the requested information as follows and select Done:
• In Description, enter a name for the connection (for example, Nextel, GSM,
GPRS).
• In Connects to, select the type of network to which you will connect (for example,
Internet).
• In Access point, enter the information provided by Nextel.
When you open a program that connects to the Internet, the Smartphone uses this
connection.
Note: If you are not sure about the information to enter, ask your Sprint Customer
Care Representative.
Edit a GPRS connection
1
2
3
4
5
6
7
8
On the Home screen, select Start.
Select Settings and then Data Connections.
Select Internet Connection.
Select Menu and then Edit Connections.
Select GPRS Connections.
Scroll to the connection to edit.
Select Menu and then Add.
Change any information and select Done.
Delete a GPRS connection
1
2
3
4
5
6
7
8
On the Home screen, select Start.
Select Settings and then Data Connections.
Select Internet Connection.
Select Menu and then Edit Connections.
Select GPRS Connections.
Scroll to the connection to delete.
Select Menu and then Add.
Select Yes.
Connect to the Internet with a GPRS connection
1
2
3
On the Home screen, select Start.
Select Settings and then Data Connections.
In Internet Connection, select the GPRS you want to use and select Done.
Settings
133
Tip: After you use the GPRS connection once, you may want to change your
Internet Connection back to Automatic. Your phone will then automatically
select the correct connection based on the network.
Beam
If you want to receive infrared beams from other devices, you must turn on the option to
receive incoming beams.
Receive incoming beams
1
2
3
4
On the Home screen, select Start.
Select Settings and then Beam.
Select Receive incoming beams. The Smartphone receives all incoming beams
from other devices until you clear this option.
Select Done.
Certificates
On your Smartphone you can add and delete public key certificates. These certificates
help establish your identity when you log on to a secure network, such as a corporate
network. Certificates also help establish the identity of other computers, such as servers,
with which you connect. This helps prevent unauthorized users from accessing your
Smartphone and its information.
You can store 2 types of certificates on your phone: personal certificates that establish
your identity, and root certificates that establish the identity of servers with which you
connect. Your Smartphone may include a set of preinstalled certificates.
View certificates
1
2
3
4
5
On the Home screen, select Start.
Select Settings and then Certificates.
To view the list of personal certificates, select Personal.
To view the list of root certificates, select Root.
To view details about a certificate, select it in the list.
Delete certificates
1
2
3
4
5
On the Home screen, select Start.
Select Settings and then Certificates.
To view the list of personal certificates, select Personal. To view the list of root
certificates, select Root.
Scroll to the certificate you want to delete in the list, select Menu, and then select
Delete.
Select Yes.
Settings
134
Flight Mode
Sometimes you may want to have your Smartphone on, but turn off its ability to make
and receive calls, such as when you are on an airplane. You can set your Smartphone so
that it cannot make or receive phone calls, Walkie-Talkie calls, or Talkgroup calls; or
transfer data.
Turn on or off calls and data transfers
1
2
3
4
On the Home screen, select Start.
Select Settings and then Flight Mode.
To turn off calls and data transfers, select Flight mode. To exit Flight mode, clear
Flight mode.
Select Done.
Profiles
You can use Profiles settings to change how the Smartphone notifies you of events such
as incoming calls, approaching appointments, or arriving messages.
The Smartphone includes 8 profiles. You can use the profiles as-is, or you can edit and
rename them to suit your needs. For each profile, you can choose the ring type and
volume, the alarm type and volume, the notification type and volume, and the system
sound volume.
Note: The Ring Volume setting in profiles controls the volume level for the ring sound
of line 1, line 2, messages, and data. For information about setting the volume
level for the earpiece or speaker when you are in a call, see “Voice Volume” on
page 125.
You can quickly select the profile suited to your current situation. For example, when you
are attending a meeting, you can choose the Meeting profile, which silences the ring of
your Smartphone and provides visual notifications only. When you are waiting for an
important call, you can choose the Speakerphone profile, which makes your Smartphone
ring loudly.
The following table describes the profiles that are included with the Smartphone. The
default profile is the Normal profile.
Profile
Name
Ring Type
Ring
Volume
Alarm Type
Alarm
Volume
Notification
Type
Notification
Volume
System
Sound
Volume
Normal
Ring
3
Increasing
3
Play sound
3
3
Silent
Vibrate
Off
Vibrate
Off
Vibrate
Off
Off
Meeting
Vibrate
1
Play sound
1
Play sound
1
Off
Outdoor
Ring
Loud
Increasing
Loud
Play sound
Loud
Loud
Automatic
Toggles between Normal and Meeting, based on your calendar.
Headset
Ring
3
Increasing
3
Play sound
3
3
Car
Ring
4
Increasing
4
Play sound
4
4
Speakerphone
Ring
Loud
Increasing
Loud
Play sound
Loud
Loud
Settings
135
View the list of profiles
1
2
On the Home screen, select Start.
Select Settings and then Profiles.
Change the current profile
1
On the Profiles screen, scroll to a new profile and select Done.
Tip: You can also change your profile by using the Quick List. Press p and then
select the profile.
Edit a profile
1
2
3
On the Home screen, scroll to the profile to edit.
Select Menu and then Edit.
Save changes or cancel:
• Modify the settings and select Done.
• To cancel without saving changes, select Cancel.
To revert to the default profile settings, select Menu and then Reset to Default.
Security
Your subscriber identity module (SIM) card is locked by default, and you must enter a
PIN to unlock it. Locking the SIM card prevents you and others from making phone calls
until the correct PIN is entered. You can, however, still make emergency calls when the
SIM card is locked. If you want, you can change the PIN number required to unlock the
SIM card.
Lock the SIM card
1
2
3
4
On the Home screen, select Start.
Select Settings and then Security.
Select Enable SIM PIN.
Enter your PIN and select Done.
Note: To cancel without locking the SIM card, press h.
Unlock the SIM card
1
2
3
4
On the Home screen, select Start.
Select Settings and then Security.
Select Disable SIM PIN.
Enter your PIN and select Done.
Settings
136
Change the SIM PIN number
1
2
3
4
5
6
On the Home screen, select Start.
Select Settings and then Security.
Select Change PIN.
In Old PIN, enter the current PIN number.
In New PIN, enter the new PIN number.
In Confirm new PIN, enter the new PIN number again, and select Done.
Important: Be sure to make a note of your PIN. When the SIM lock is enabled,
you must provide this PIN when you turn on your Smartphone to
make calls.
View keypad lock instructions
1
2
3
4
On the Home screen, select Start.
Select Settings and then Security.
Select Enable Keypad Lock.
Select Done.
Enable GPS Lock
1
2
3
4
5
6
7
On the Home screen, select Start.
Select Settings and then Security.
Select Enable GPS Lock.
In Old PIN, enter your current GPS PIN.
In New PIN, enter a new GPS PIN.
In Confirm new PIN, re-enter your new GPS PIN.
Select Done.
Remove all personal information
1
2
3
On the Home screen, select Start.
Select Settings and then Security.
Select Remove all personal info. This removes all information from Contacts,
Calendar, Tasks, and Owner Information and deletes all e-mail messages, media
messages, and text messages.
4 In Enter SIM PIN, enter your SIM PIN.
5 Select Done.
Important: Depending on your ActiveSync settings, using this option may
result in all information in Contacts, Calendar, Tasks, and all Outlook
e-mail being deleted from your desktop computer and the server on
which you are running Microsoft Exchange Server.
Reset Phone, Master Reset, and Change PIN2
The Reset Phone, Master Reset, and Change PIN2 options should be used only under
the direction of a Sprint Customer Care representative.
Settings
137
Owner Information
You can use Owner Information settings to record personal information, such as your
name, phone number, and e-mail address.
View owner information
1
2
3
On the Home screen, select Start.
Select Settings and then select Owner Information.
Select Done.
Fill in owner information
1
2
3
4
On the Home screen, select Start.
Select Settings and then select Owner Information.
Enter the information you want in Name, E-mail address, and Notes. The other
fields are filled in automatically.
Select Done.
Phone Information
You can view information about your Smartphone, such as its operating system, service
status, phone model, software version, and call timers. This information may be
requested by your Sprint Customer Care representative.
View operating system information
1
2
3
4
On the Home screen, select Start.
Select Settings and then select Phone Information.
Select About.
Select Done.
View call timers
1
2
3
4
On the Home screen, select Start.
Select Settings and then select Phone Information.
Select Call Timers.
Select Done.
Reset call timers
1
2
3
4
5
6
7
Note: Only certain call timers can be reset. These include: Total line 1 time, Total line
2 time, Total PTT time, Circuit data time, iDEN Kbytes Tx/Rx, and GPRS
Kbytes Tx/Rx.
On the Home screen, select Start.
Select Settings and then select Phone Information.
Select Call Timers.
Scroll to the timer you want to reset.
Select Reset.
Select Yes.
Select Done.
Settings
138
View service status information
1
2
3
4
On the Home screen, select Start.
Select Settings and then select Phone Information.
Select Service Status.
Select Done.
View unit information
1
2
3
4
On the Home screen, select Start.
Select Settings and then select Phone Information.
Select Unit Info.
Select Done.
View IMEI/SIM ID information
1
2
3
4
On the Home screen, select Start.
Select Settings and then select Phone Information.
Select IMEI/SIM ID.
Select Done.
View registration log information
1
2
3
4
On the Home screen, select Start.
Select Settings and then select Phone Information.
Select Registration Log.
Select Done.
Remove Programs
You can use Remove Programs to remove programs installed on the Smartphone, with
the exception of core programs that came with the Smartphone, for example, Contacts,
Calendar, and Internet Explorer.
Remove a program
1
2
3
4
5
On the Home screen, select Start.
Select Settings and then select Remove Programs.
Scroll to the program to remove.
Select Menu and then Remove.
Select Done.
ActiveSync Desktop Client
139
ActiveSync Desktop Client
This chapter introduces the basic features of Microsoft® ActiveSync® desktop client
technology. It describes how to use ActiveSync for synchronizing information on your
Smartphone with your desktop computer.
For detailed information about using ActiveSync desktop client, see ActiveSync Help
once you have installed the client on your desktop computer by clicking the Help tab and
selecting ActiveSync Help.
Note: You do not need to install ActiveSync desktop client in order to synchronize
wirelessly. For information on wirelessly synchronizing e-mail, see“Setting Up
Wireless E-mail” on page 52.
Understanding ActiveSync Desktop Client
ActiveSync desktop client synchronizes information stored on your Smartphone with
Microsoft® Outlook® information on your desktop computer. It also allows you to share
files between your Smartphone and your desktop computer.
When you synchronize, ActiveSync desktop client compares the information on your
Smartphone with the information on your desktop computer and updates all locations
with the most recent information.
With ActiveSync desktop client, you can:
• Synchronize Outlook e-mail, Contacts, Calendar, and Tasks information on your
Smartphone with your desktop computer.
• Copy (rather than synchronize) files between your Smartphone and your desktop
computer.
• Synchronize on a schedule to control when synchronization occurs.
• Select which types of information are synchronized and specify how much information
is synchronized. For example, you can choose how many weeks of past appointments
to synchronize.
Setting up ActiveSync Desktop Client
Using Microsoft ActiveSync desktop client, you can synchronize information on the
Smartphone with your desktop computer. This section explains how to:
• Install ActiveSync desktop client on your desktop computer.
• Create a partnership between your desktop computer and the Smartphone.
• Set up a synchronization schedule.
Installing ActiveSync Desktop Client and Creating a
Partnership
Before you can synchronize information with a desktop computer, you must first install
ActiveSync desktop client on your desktop computer, use the Sync Cradle and mini USB
cable to connect your Smartphone to your desktop computer, and then create a
partnership between your Smartphone and your desktop computer.
ActiveSync Desktop Client
140
You can install ActiveSync desktop client on the desktop computer from the i920/i930
companion CD.
As soon as ActiveSync desktop client installation completes, the New Partnership
Wizard automatically starts. This wizard helps you set up a partnership between your
Smartphone and your desktop computer.
When you create a partnership, you specify your synchronization settings; for example,
the type of information to synchronize, such as E-mail, Contacts, Calendar, or Tasks.
Once a partnership is set up, ActiveSync desktop client on your desktop computer
recognizes your Smartphone when you connect it, and automatically applies the
synchronization settings you specified.
When you finish using the wizard, the first synchronization begins automatically. When
synchronization completes, you will notice that the information from your desktop
computer that you selected now appears on your Smartphone.
Install ActiveSync desktop client
1
2
3
4
5
6
Insert the CD that came with your Smartphone into your computer. The installation
screen opens.
Click Getting Started with Windows Mobile.
Click Start Here.
Click Install ActiveSync.
Click Install.
Follow the instructions.
Note: Do not connect your Smartphone to your computer until you have installed
ActiveSync desktop client on your computer.
Assemble the Sync Cradle and connect the mini USB cable
See “The Sync Cradle” on page 14.
Create a partnership
Tip: Before you copy your Outlook Contacts to your Smartphone Contact list, it is a
good idea to clean up your Outlook Contacts list to avoid duplication of Contacts
that may already be on your Smartphone, and to assure that your Contacts are
alphabetized consistently with the Contacts on your Smartphone. Your Outlook
Contacts are combined in the same list as your Smartphone Contacts.
After you assemble the Sync Cradle and use the mini USB cable to connect your
Smartphone to your desktop computer, you are ready to set up a partnership between
your Smartphone and your desktop computer.
1 If you have not already done so, press p for 2 to 3 seconds to power up your
Smartphone.
2 When your desktop computer detects the USB connection, it will start the ActiveSync
New Partnership Wizard. Follow the instructions on the screen.
After you finish using the wizard, your data will begin to synchronize between your
desktop computer and your Smartphone.
ActiveSync Desktop Client
141
Change ActiveSync Desktop Client Settings Later
If you want to change ActiveSync desktop client settings for synchronizing with a desktop
computer, use ActiveSync desktop client on the desktop computer. For more
information, see “Modifying the Amount of Information Synchronized” in ActiveSync Help
on your desktop computer.
If you want to change ActiveSync settings for synchronizing wirelessly with your
Exchange server, use ActiveSync on your Smartphone, as described in “Setting Up
Wireless E-mail” on page 52.
Creating a Synchronization Schedule
You can create a schedule for automatically synchronizing information on your
Smartphone with your desktop computer. To set up a synchronization schedule with your
desktop computer, you must use ActiveSync desktop client on your desktop computer.
For instructions, see “Scheduling Synchronizing / Change desktop synchronization
schedule” in ActiveSync Help on your desktop computer.
Synchronizing by Using an Infrared Connection
You can connect your Smartphone to another mobile device or your desktop computer
by using an infrared connection. This method is ideal for changing quickly between
multiple devices because there are no cables or adapters to connect.
For more information about synchronizing by using an infrared connection or other
connection types, see ActiveSync Help on your desktop computer.
Deciding Which Information to Synchronize
By default, ActiveSync desktop client does not automatically synchronize all types of
Outlook information. You can use ActiveSync desktop client options to turn
synchronization for specific information types on and off. This section provides an
overview of the types of Outlook information you can synchronize.
Synchronizing Outlook E-mail
When you select Inbox for synchronization in ActiveSync desktop client, e-mail
messages are synchronized as part of the general synchronization process. During
synchronization, the following events occur:
• Messages are copied from the Outlook Inbox folder on your desktop computer to the
Inbox folder of the Outlook E-mail account on your Smartphone.
• By default, when synchronizing your Outlook E-mail account with your desktop
computer, you receive only messages from the last 3 days and the first 500 bytes of
each new message.
• The messages on your Smartphone and on your desktop computer are linked. When
you delete a message on your Smartphone, it is deleted from your desktop computer
the next time you synchronize, and vice versa.
• Messages in subfolders of other Outlook e-mail folders are synchronized only if the
folders have been selected for synchronization in your Outlook E-mail account on your
Smartphone.
Note: Text messages are not received in Messaging through synchronization.
ActiveSync Desktop Client
142
Synchronizing Calendar
Calendar items stored on your Smartphone can be synchronized with calendar items
stored on your desktop computer. By default, Calendar items from the last 2 weeks are
synchronized.
Calendar items created on your Smartphone are copied to your desktop computer, and
vice versa. Similarly, Calendar items that are deleted from your Smartphone are deleted
from your desktop computer during synchronization, and vice versa.
Synchronizing Contacts
Contacts stored on your Smartphone can be synchronized with contacts stored on your
desktop computer. By default, all of your contacts are synchronized.
Contacts created on your Smartphone are copied to your desktop computer, and vice
versa. Similarly, contacts that are deleted from your Smartphone are deleted from your
desktop computer during synchronization, and vice versa.
Synchronizing Tasks
Tasks stored on your Smartphone can be synchronized with tasks stored on your
desktop computer. Task synchronization is automatically selected in ActiveSync desktop
client. By default, all of your incomplete tasks are synchronized.
Tasks created on your Smartphone are copied to your desktop computer during
synchronization, and vice versa. Similarly, tasks that are deleted from your Smartphone
are deleted from your desktop computer during synchronization, and vice versa.
Note: Tasks can be synchronized only with your desktop computer; they cannot be
synchronized with a server running Microsoft Exchange.
ActiveSync Error Messages
If your information cannot be successfully synchronized, you will see an error message
on your Smartphone. To help troubleshoot the problem, you can view more information
about the error.
View information about an ActiveSync error
• When an error message is displayed, scroll to it and press O.
Camera and Camcorder
143
Camera and Camcorder
Note: The camera and camcorder appear only in the i930 Smartphone.
The camera and camcorder in your Smartphone take pictures and record video clips.
You can save these pictures and video clips in your Smartphone and view them through
Media Theater. For more information about playing media, see “Media Theater” on page
150. You can also send pictures and clips you take via e-mail messages, media
messages (MMS), and with infrared.
If you receive a call while you are recording a video clip, the recording will stop.
Open camera and camcorder
1
2
On the Home screen, select Start.
Select Camera&Camcorder.
The camera and camcorder opens in preview mode. It may be ready to record video
clips or take pictures, depending on how you last used it.
Choosing pictures or video clips
1
2
3
4
On the Home screen, select Start.
Select Camera&Camcorder.
Select Menu.
Choose to view or capture video clips or pictures:
• To view stored pictures, select View Media and then View Pictures.
• To capture a picture, select Capture and then Capture Picture.
• To view stored video clips, select View Media and then View Videos.
• To capture a video clip, select Capture and then Capture Video.
Pictures
Your Smartphone takes .jpeg pictures. The pictures are automatically saved as they are
taken. To take pictures, you must place the camera and camcorder in capture picture
mode, if it is not already in capture picture mode.
Take a picture
1
2
3
4
5
6
On the Home screen, select Start.
Select Camera&Camcorder.
Select Menu.
Select Capture and then Capture Picture.
Using the Smartphone’s internal display as a viewfinder, aim the camera lens at what
you want to take a picture of.
Select Take Picture.
Take another picture
1
2
3
Select New Picture.
Using the Smartphone’s internal display as a viewfinder, aim the camera lens at what
you want to take a picture of.
Select Take Picture.
Camera and Camcorder
144
After Taking a Picture
After you take a picture, while New Picture is displayed as the left soft Key option, you
can select Menu and then select any of the following options:
To
Select this menu command
Delete the last picture taken.
Delete
View the last picture taken.
View picture
Go back to the camera to take a new picture.
New picture
Access the Send option to send last picture
Send
taken to a recipient. For more information about
sending clips, see “Sending Captured Pictures
and Video Clips” on page 148.
Rename the last picture taken.
Rename picture
View the camera and camcorder software
version and copyright information.
About
Managing Stored Pictures
You can manage your snapshots with the image viewer, which is in Media Theater. For
more information about the viewing images in the image viewer, see “Sending Pictures
and Video Clips” on page 156.
To open the image viewer from the camera and camcorder:
1 On the Home screen, select Start.
2 Select Camera&Camcorder.
3 Select Menu and then View Media.
4 Select View Pictures.
Changing Picture Settings
You can control many of the settings for the pictures you record.
Accessing the pictures settings menu
1
2
3
4
5
6
On the Home screen, select Start.
Select Camera&Camcorder.
If the camera and camcorder did not open in capture picture mode, place it in capture
picture mode now.
Select Menu and the select Settings.
Scroll to access the settings you want. The options are described in “Picture Settings
Options”.
When you are finish setting the options, select Done.
Camera and Camcorder
145
Picture Settings Options
To
Select this menu command
Set the location to which pictures are stored. If Save location
you have purchased an SD card* and have it
inserted in your Smartphone, you can choose to
store pictures there. Otherwise, pictures are
stored to your Smartphone’s memory.
Set the image quality of the pictures by choosing JPEG quality
the type of JPEG files it is saved as. From lowest
quality to highest, the options are: Basis,
Normal, Fine, and Best. Higher quality JPEG
files require more memory space.
Set the image size, in pixels.
JPEG size
Select the default file name base for pictures.
Name base
Adjust the contrast level of the image. A higher
number means higher contrast.
Contrast
Adjust the brightness level of the lighting. A
higher number means more light.
Brightness
Select the sound that is heard when a picture is Shutter noise
taken starts.
Turn on or off the camera flash.
Flash light
* To purchase an SD card go to sprint.com or call 1-800-NEXTEL6.
Video Clips
Your Smartphone records video clips in .3gp. While recording video clips is not restricted
by a time limit, you are limited to the maximum file size of 95KB. The recording progress
bar will turn red during the final 2 seconds before your file reaches 95KB. Video clips are
automatically saved as they are recorded.
To record video clips, you must place the camera and camcorder in video mode by
choosing to capture video clips.
Record video
1
2
3
4
5
6
On the Home screen, select Start.
Select Camera&Camcorder.
Select Menu.
Select Capture and then Capture Video.
Using the Smartphone’s internal display as a viewfinder, aim the camera lens at what
you want to record.
Select Record.
Pause or resume recording
• To pause recording, select Pause or press O.
• To resume recording, select Resume or press O.
Camera and Camcorder
146
Stop recording
• To stop recording and exit the camera and camcorder in one step, select m.
• To stop recording, select Stop.
Note: You must record at least 1 second of video before you stop recording.
Record another video clip right after completing one
• Select Menu and then New Clip.
After Recording a Video Clip
After you record a video clip, you may select Menu and then select any of the following
options:
To
Select this menu command
Record another clip.
New clip
Play the last recorded clip.
Play clip
Delete the last recorded clip.
Delete
Access the Send option to send the clip to a
Send
recipient. For more information about sending
clips, see “Sending Captured Pictures and Video
Clips” on page 148.
Rename the last recorded clip.
Rename clip
Access Settings. For more information about
changing camcorder settings, see “Changing
Video Clip Settings” on page 147.
Settings
View the camera and camcorder software
version and copyright information.
About
Controls the rate at which the video display
Flicker Control
refreshes. Change this setting if the video
display flickers under certain lighting conditions.
Managing Stored Video Clips
Rename a video clip
1
2
3
4
5
6
7
8
On the Home screen, select Start.
Select Camera&Camcorder.
Select View Media and then View Videos.
Scroll to the clip you want.
Select Menu.
Select File and then Rename.
In File Name, enter the name you want.
Select Rename.
Delete a video clip
1
2
3
On the Home screen, select Start.
Select Camera&Camcorder.
Select View Media and then View Videos.
Camera and Camcorder
4
5
6
7
147
Scroll to the clip you want.
Select Menu.
Select File and then Delete.
Select Yes.
View clip details
1
2
3
4
5
6
7
On the Home screen, select Start.
Select Camera&Camcorder.
Select View Media and then View Videos.
Scroll to the clip you want.
Select Menu.
Select File and then Properties.
Select Done.
Changing Video Clip Settings
You can control many of the settings for the video clips you record.
Accessing the video clip settings menu
1
2
3
4
5
6
On the Home screen, select Start.
Select Camera&Camcorder.
If the camera and camcorder did not open in capture video mode, place it in capture
video mode now.
Select Menu and the select Settings.
Scroll to access the settings you want. The options are described in “Video Clip
Settings Options”.
When you are finish setting the options, select Done.
Camera and Camcorder
148
Video Clip Settings Options
To
Select this menu command
Set the location to which clips are stored. If you Save location
have purchased an SD card* and have it
inserted in your Smartphone, you can choose to
store clips there. Otherwise, clips are stored to
your Smartphone’s memory.
Set the video quality. From lowest quality to
highest, the options are Normal, Good, and
High. Higher quality video files require more
memory space.
Video quality
Turn audio recording on or off.
Record sound
Set the maximum clip size.
Clip size
Select the default file name for video clips.
Name base
Specify the title of the clip.
Title
Specify who created the clip.
Author
Specify the copyright information for the clip.
Copyright
Specify the description of the clip.
Description
Specify the rating of the clip.
Rating
Adjust the contrast level of the image. A higher
number means higher contrast.
Contrast
Adjust the brightness level of the lighting. A
higher number means more light.
Brightness
Select the sound that is heard when recording
starts.
Shutter noise
Turn on or off the camera flash.
Flash light
* To purchase an SD card go to sprint.com or call 1-800-NEXTEL6.
Sending Captured Pictures and Video Clips
You can send pictures and video clips you captured in e-mail messages, media
messages (MMS), and with infrared. You can access the Send menu either in preview
mode or after recording.
Access the Send menu
1
2
3
4
5
6
On the Home screen, select Start.
Select Camera&Camcorder.
Select Menu and then View Media.
Select View Pictures or View Videos, as required.
Scroll to the item you want.
Select Menu and then Send.
Access the Send menu after recording
Select Menu and then Send.
Camera and Camcorder
149
Send in an e-mail message
1
2
3
4
From the Send menu, select Send via E-mail. If Send via E-mail is not one of your
options, select Via E-mail.
Select Outlook E-mail.
The e-mail message opens with the item attached.
Compose your e-mail message. For information about creating e-mail messages,
see “Creating Messages” on page 60.
Select Send.
Send via infrared
1
2
3
From the Send menu, select Send via Infrared. If Send via Infrared is not one of
your options, select Via Infrared.
Select the device you want to send the item to.
Select Beam.
Closing the Camera and Camcorder
After 5 minutes of being idle, the camera and camcorder will automatically close.
To exit the camera and camcorder, press m.
Media Theater
150
Media Theater
Your Smartphone features Media Theater, which lets you view pictures and playback
video clips, as well as send pictures and video clips in e-mail messages, media
messages (MMS), and with infrared. If you receive a call while you are viewing a picture
or video clip, Media Theater will pause. You can resume viewing during the call. Viewing
will pause again when the call disconnects.
Media Theater can display files in the following formats: .jpeg, .gif, .png, .mp4, and .3gp.
Open Media Theater
1 On the Home screen, select Start.
2 Select Media Theater.
When the Media Theater opens, it may be ready to show pictures or play video clips,
depending on how you last used the Media Theater or camera and camcorder.
Note: The camera and camcorder appear only in the i930 Smartphone.
Choosing pictures or video clips
1
2
3
4
On the Home screen, select Start.
Select Media Theater.
Select Menu and then select View Media.
Choose to view pictures or video clips:
• To view pictures, select View Pictures.
• To view video clips, select View Videos.
Pictures
View a picture
1
2
3
4
5
On the Home screen, select Start.
Select Media Theater.
If you do not see the list of pictures, select Menu, select View Media, and then select
View Pictures.
Scroll to the picture you want.
Select Select.
Working with Views
You can view pictures in either portrait or full screen mode. The default is portrait.
Change view to full screen mode
To select full screen mode while viewing a picture:
• Press any number key.
• Select Menu and then View. Select Full Screen.
Return a picture to portrait mode
• Press any number key.
Media Theater
151
Return to thumbnail view
• Select Menu and then Thumbnails.
• Select Back.
Manipulating Pictures (Portrait Mode Only)
In portrait mode, you can:
• Flip a picture
• Rotate a picture
• Zoom in or out of a picture
• Pan left or right across a picture
Note: You cannot do any of these things in full screen mode.
Picture Controls
The following table outlines how you can manipulate pictures using your Smartphone’s
keypad.
To
Do This in Portrait Mode
Do This in Full Screen Mode
Toggle zoom and pan
Press O.
Unavailable.
Toggle full screen/portrait
display
Press any number key.
Press any number key.
Zoom in/pan in
Scroll up.
Unavailable.
Zoom out/pan out
Scroll down.
Unavailable.
Pan left
Scroll right.
Unavailable.
Pan Right
Scroll left.
Unavailable.
End
Press m.
Press m.
Rotate a picture
Note: You can only rotate pictures in portrait mode. Pictures rotate in intervals of 90
degrees.
1 Select Menu.
2 Select View.
3 To rotate the picture left, select Rotate Left. To rotate the picture right, select Rotate
Right.
Flip a picture
Note: You can only flip pictures in portrait mode.
1 Select Menu.
2 Select View.
3 To flip the picture vertically, select Flip Vertically. To flip the picture horizontally,
select Flip Horizontally.
Media Theater
152
About Zoom and Pan
Zoom and Pan are only available in portrait mode. Pan is available once you have
zoomed in to the degree that the picture becomes larger than its actual size. While Pan is
available, Zoom is unavailable. In Pan mode, a navigation box displays in the bottom
right corner of the screen. This box represents how you are panning over the picture.
Set the zoom
1
2
3
4
On the Home screen, select Start.
Select Media Theater.
Select the picture you want.
To zoom in, scroll up. To zoom out, scroll down.
Set the pan
1
2
3
4
5
6
On the Home screen, select Start.
Select Media Theater.
Select the picture you want.
To zoom in until the picture is larger than actual size, scroll up.
Press O.
To pan in or out, scroll up or scroll down. To pan left or right, scroll left or scroll right.
Toggle between zoom mode and pan mode
• Press O.
• Select Menu and then Zoom/Pan.
Undo changes
To return the picture to its original state,
1 Select Menu and then View.
2 Select Reset.
Save changes
To save the changes you have made to a picture:
1 Select Menu and then Save.
2 If you want to rename the file, enter the name in the File Name field. To delete
characters, press m.
3 If you want to save the file to a different location, select the location in the Location
field.
4 Select Save.
Media Theater
Manage Pictures
Sort list by date/time
1
2
3
4
5
On the Home screen, select Start.
Select Media Theater.
Select Menu.
Select Sort.
Select Sort by date.
Sort list by title
1
2
3
4
5
On the Home screen, select Start.
Select Media Theater.
Select Menu.
Select Sort.
Select Sort by name.
Rename a picture
1
2
3
4
5
6
7
On the Home screen, select Start.
Select Media Theater.
Scroll to the picture you want.
Select Menu and then File.
Select Rename.
In File Name, enter the name you want. To delete characters, press m.
Select Rename.
Delete a picture
1
2
3
4
5
6
On the Home screen, select Start.
Select Media Theater.
Scroll to the picture you want.
Select Menu and then File.
Select Delete.
Select Yes.
Move a picture
1
2
3
4
5
On the Home screen, select Start.
Select Media Theater.
Scroll to the picture you want.
Select Menu and then File.
Select Move to storage card or Move to phone memory, as required.
* To purchase an SD card go to sprint.com or call 1-800-NEXTEL6.
153
Media Theater
154
Set a picture as wallpaper
1
2
3
4
5
On the Home screen, select Start.
Select Media Theater.
Scroll to the picture you want.
Select Menu and then Set Wallpaper.
To set the picture as wallpaper for the internal display, select Internal Display. To set
the picture as wallpaper for the external display, select External Display.
Slideshows
You can create a slideshow with the pictures you have in the picture viewer. Pictures
display in 3-second intervals. You can present the slideshow in either portrait or full
screen mode. Pause and Resume are available to you during the slideshow
presentation.
To create or view a slideshow
1
2
3
4
On the Home screen, select Start.
Select Media Theater.
Select Menu, View Media and then View Pictures.
Select Menu and then Slideshow.
Video Clips
Playback Video Clips
You can playback a video clip that is stored on your Smartphone. You can also stream
video that is external to your Smartphone, and download video for playback.
Play a stored video clip
1
2
3
On the Home screen, select Start.
Select Media Theater.
If you do not see the list of video clips, select Menu, select View Media, and then
select View Videos.
4 Scroll to the clip you want.
5 Select Play.
Note: During playback, you can change the view between full screen mode and
portrait mode by pressing any number key.
Media Theater
155
Playback Control (Portrait Mode Only)
During playback, you can do the following with the specified keys/options.
To
Do This in Portrait Mode
Do This in Full Screen Mode
Play
Press O.
Unavailable.
Pause
Press O.
Unavailable.
Fast forward
Scroll right.
Unavailable.
Rewind
Scroll left.
Unavailable.
Toggle full screen/portrait
display
Press any number key.
Press any number key.
Turn volume up
Scroll up.
Unavailable.
Turn volume down
Scroll down.
Unavailable.
End
Press m.
Press m.
About Fast Forward and Rewind
When either fast forwarding or rewinding, the interval that the clip moves forward or
backward is determined by how long you press the given key. The longer you press the
key the faster the clip fast forwards or rewinds.
About Full Screen Display
During playback, you can toggle the screen display to full screen view by pressing any
number key. The clip will rotate 270 degrees and expand to fill the screen.
The clip will return to portrait view if you receive an incoming call, experience a low
battery, or press any number key.
Rename a video clip
1
2
3
4
5
6
On the Home screen, select Start.
Select Media Theater.
Select the clip you want and then Menu.
Select File and then Rename.
In File Name, enter the name you want. To delete characters, press m.
Select Rename.
Move a video clip
1
2
3
4
On the Home screen, select Start.
Select Media Theater.
Scroll to the clip you want and then select Menu.
Select File and then Move to storage card or Move to phone memory, as required.
* To purchase an SD card go to sprint.com or call 1-800-NEXTEL6.
Delete a video clip
1
2
3
4
On the Home screen, select Start.
Select Media Theater.
Scroll to the clip you want and then select Menu.
Select File and then Delete.
Media Theater
5
156
Select Yes.
View clip details
1
2
3
4
5
On the Home screen, select Start.
Select Media Theater.
Scroll to the clip you want and then select Menu.
Select File and then select Properties.
Select Done.
Sending Pictures and Video Clips
You can send pictures and video clips in e-mail messages or media messages (MMS), or
with infrared.
Send in an e-mail message
1
2
3
4
5
6
7
8
On the Home screen, select Start.
Select Media Theater.
Scroll to the picture or video you want.
Select Menu and then Send.
Select Send via E-mail.
Select Outlook E-mail.
The e-mail message opens with the item attached.
Compose your e-mail message. For information about creating e-mail messages,
see “Creating Messages” on page 60.
Select Send.
Send in a media message (MMS)
1
2
3
4
5
6
On the Home screen, select Start.
Select Media Theater.
Select the picture you want.
Select Menu and then Send.
Select Send via MMS.
Compose your message. For information about media messages, see “Creating
Messages” on page 60.
7 To insert the item, select Menu and then Insert.
8 Select Picture.
9 To browse to the item, select Menu and then Browse. Select My Device.
10 Select the item you want.
11 Select Send.
Send via infrared
1
2
3
4
On the Home screen, select Start.
Select Media Theater.
Scroll to the picture or video you want.
Select Menu and then Send.
Media Theater
5
6
7
Select Send via Infrared.
Select the device you want to send the item to.
Select Beam.
Opening Camera and Camcorder
1
2
3
4
5
Note: The camera and camcorder appear only in the i930 Smartphone.
On the Home screen, select Start.
Select Media Theater.
Select Menu.
Select Capture.
Take a picture or record a video clip:
• To take a picture, select Capture Picture.
• To take a video clip, select Capture Video.
157
GPS Enabled
158
GPS Enabled
Your Smartphone’s GPS Enabled feature uses information from Global Positioning
System (GPS) satellites orbiting the Earth to determine the approximate geographical
location of your Smartphone, expressed as latitude and longitude. The availability and
accuracy of this location information (and the amount of time that it takes to calculate it)
will vary depending on the environment in which you are using the GPS feature. For
example, GPS location fixes are often difficult to obtain indoors, in covered locations,
between high buildings, or in other situations where you have not established a clear
broad view of the sky. Also, nearby radio and electronic equipment may block or interfere
with reception from these distant satellites. SEE: “IMPORTANT: Things to Keep in
Mind”.
When you make a 911 emergency call, the GPS feature of your Smartphone can help
emergency personnel locate you if your Smartphone has adequate access to GPS
satellite signals and your emergency response center is equipped to process such
information.
You can also use the GPS feature to view your approximate location. Location
information appears on the Smartphone’s display.
Java applications loaded on your Smartphone can also request your location. If your
Smartphone is connected to a laptop computer or similar device, software running on
that device can request your location. To protect your privacy, you can control whether
these requests are granted.
IMPORTANT: Things to Keep in Mind
If you are using the GPS feature of your Smartphone while driving, please give full
attention to driving and to the road.
Where adequate signals from multiple satellites are not available (usually because
your GPS antenna cannot establish a view of a wide area of open sky), the GPS feature
of your Smartphone WILL NOT WORK. Such situations include but are not limited
to:
• In underground locations
• Inside of buildings, trains, or other covered vehicles
• Under any other metal or concrete roof or structure
• Between tall buildings or under dense tree-cover
• Near a powerful radio or television tower
• When your GPS antenna is covered (for example, by your hand or other object)
or facing the ground
• Some radios, entertainment equipment and other electronic devices may
generate signals that can block or interfere with the GPS receiver ability to
receive the distant satellite signals, particularly when such devices are
operating in close proximity to the GPS receiver. Therefore, in a 911 call, or
when otherwise using the GPS location function, always move your phone away
from any such devices.
• In temperature extremes outside the operating limits of your Smartphone
Walking or driving very slowly may also substantially reduce GPS performance.
GPS Enabled
159
Even where location information can be calculated in such situations, it may take
much longer to do so, and your location estimate may not be as accurate.
Therefore, in any 911 call, always report the location to the emergency response
center if you can and if you cannot, remain on your Smartphone for as long as the
emergency response center instructs you.
Even where adequate signals from multiple satellites are available, your GPS
feature will only provide an approximate location, often within 150 feet (45 meters)
but sometimes much further from your actual location. Advice on how to improve
GPS performance is provided in “Enhancing GPS Performance” on page 161.
While the GPS feature of your Smartphone can be a valuable navigational aid, it does
not replace the need for careful navigating and good judgment. Never rely solely on
one device for navigation. Remember that the accuracy of the location information and
the time needed to obtain it will vary depending on circumstances, particularly the ability
to receive signals from adequate numbers of satellites.
On emergency calls, your Smartphone uses assistance information from the
Smartphone network to improve the speed and accuracy of your Smartphone’s location
calculation: if such assistance information becomes unavailable, it may reduce the speed
and accuracy of the location calculation.
The satellites used by the GPS feature of your Smartphone are controlled by the U.S.
government and are subject to changes implemented in accordance with the Department
of Defense GPS user policy and the Federal Radionavigation Plan. These changes may
affect the performance of the GPS feature of your Smartphone.
Making an Emergency Call
Dial 911 to be connected to an emergency response center.
When you make an emergency 911 call, the GPS feature of your Smartphone begins to
seek information to calculate your approximate location. It will take the GPS feature of
your Smartphone some time to determine your approximate location. Even where
your Smartphone has good access to sufficient GPS satellite signals and network assist
data, it may take 30 seconds or more to determine the approximate location. This time
will increase where there is reduced access to satellite signals. When your approximate
location is determined, it is made available to the appropriate emergency response
center.
In some cases, your local 911 emergency response center may not be equipped to
receive GPS location information. For this reason, and because the GPS location
information reported is only approximate or may not be available in your location (see
“IMPORTANT: Things to Keep in Mind” on page 158), always report your location to
the 911 operator you speak to when making an emergency call, if able, just as you
would when using a phone without GPS capabilities.
Note: If you are concerned about whether your local 911 emergency response center
is equipped to receive GPS location information, contact your local authorities.
In general, if your Smartphone has access to signals from more GPS satellites, your
location will be determined faster and more accurately than if your Smartphone has
access to signals from fewer GPS satellites.
If your Smartphone does not have adequate access to GPS satellites signals, the
location of the nearest cell tower in contact with your Smartphone is automatically made
available to the emergency response center, if the center has the capability to receive
such information.
GPS Enabled
160
See “Enhancing GPS Performance” on page 161 for information on how to help your
Smartphone determine your location.
Viewing Your Approximate Location
You can calculate your approximate location, which is automatically saved in your phone
for you to view again later. The next time you calculate your approximate location, the
new location replaces the old one.
Calculate your approximate location
1 From the Home screen, select Start.
2 Select Accessories and then GPS Location.
3 Select Refresh.
It may take your Smartphone several minutes to complete the process of determining
your location. During this time, a message usually appears on your Smartphone’s display
saying your Smartphone is scanning for satellites. For tips on getting the best location
calculation, see “Enhancing GPS Performance”.
After your approximate location is calculated, the Smartphone displays the following
information:
• The approximate location, expressed as latitude and longitude
• The estimated accuracy of the calculated location. This estimate of accuracy is only a
very rough estimate and may vary substantially from the actual accuracy of the
approximate location information reported.
• The number of satellites used to calculate the location. In general, more satellites
make for better accuracy.
• The time (as Greenwich Mean Time) and date that the location was last calculated
Each time approximate location of your Smartphone is calculated, the latest location
information is stored in your Smartphone and remains there even when your
Smartphone is powered off. You will see this information the next time you go to the GPS
Location screen.
If you received a phone call or alert while attempting to determine your location, the GPS
Location screen will disappear, but your Smartphone will continue attempting to
determine its location. If it is successful, the new location information will be displayed
the next time you view the GPS Location screen.
Cancel a location calculation before it is completed
• Select Stop to return to the position screen.
• Press e to return to the Home screen.
View your location later
1
2
From the Home screen, select Start.
Select Accessories and then GPS Location.
GPS Enabled
161
Enhancing GPS Performance
Sometimes the GPS feature of your Smartphone may be unable to complete a location
calculation successfully. If this happens when you are making an emergency call, the
location of the nearest cell tower in contact with your Smartphone is made available to
the appropriate emergency response center if the center has the capability to receive
such information. If this happens when you are trying to view your location on the
Smartphone’s display, you will see a message indicating that your Smartphone cannot
access satellites.
To improve accuracy and increase your chances of a successful calculation, do the
following while your Smartphone is determining your approximate location:
• Stay in the open. The GPS feature works best where there is nothing between your
Smartphone and a large amount of open sky. If possible, go outside, away from tall
buildings and foliage. While performance in a building is improved by moving closer to
windows, glass with certain sun shielding films may block satellite signals.
• Extend your Smartphone antenna.
• Hold your Smartphone to enhance reception. Signals from GPS satellites are
transmitted to your GPS antenna, which is in your Smartphone antenna. Hold your
Smartphone away from your body, giving the antenna clear access to satellite signals.
Do not cover the antenna area with your fingers or anything else.
GPS antenna
• Move away from electronic devices. Radios, entertainment devices, and other
electronic devices may generate interfering signals that may prevent GPS receiver
operation if they are in close proximity to the phone. Move your phone away from such
devices when using the GPS-Enabled feature.
• Stand still. If possible, stand still until your Smartphone is finished determining your
location. Moving your Smartphone at a walking pace while your Smartphone is
calculating your approximate location may substantially decrease GPS performance.
• In a car. When using the GPS Enabled feature in a car, position your Smartphone so
that the GPS antenna has good access to GPS signals through the car’s windows.
Typically, the GPS antenna has best access to GPS signals in a car when placed near
a window.
Note: Although moving your Smartphone at a walking pace decreases GPS
performance, moving it at the speed of a moving car does not.
GPS Enabled
162
• Stay in network coverage. Depending on who your service provider is, the network will
provide your Smartphone with information that helps determine your location more
quickly and accurately.
Updating Satellite Almanac Data
Another way to keep the GPS feature of your Smartphone working well is to keep your
satellite almanac data up to date.
The United States government maintains an almanac of data about where GPS satellites
are as they orbit the Earth. This information is available to your Smartphone. Keeping
your satellite almanac up to date helps your Smartphone determine your location more
quickly.
The almanac contains information about the location of satellites, their operational
status, and other satellite information. Keeping this information updated enhances the
performance of your GPS feature. In most cases, your Smartphone will be able to get a
fix in strong satellite signal conditions with outdated almanac data, but it may take longer.
Note: When you make an emergency call, your Smartphone does not rely upon the
almanac to determine your location.
If your satellite almanac data is out of date, your Smartphone may prompt you to update
it. Follow the instructions that appear on the Smartphone’s display. You may be asked to
go to a web site or call a customer care number.
Setting Privacy Options
Your Smartphone’s GPS privacy options control whether Java applications on your
Smartphone or other software applications may view the location of your
Smartphone.You may set your Smartphone to one of these GPS privacy options.
Note: Privacy options do not apply to the transmission of location information during
emergency 911 calls.
Set your GPS privacy options
1
2
3
4
From the Home screen, select Start.
Select Accessories and then GPS Location.
Select Menu and then Setup.
If your GPS PIN security feature is enabled, enter your GPS PIN. (See “Setting the
GPS PIN Security Feature” on page 163 for more information.)
5 In Share my position, select the privacy option you want:
• Don’t Share — No Java or similar software applications may view the location of
your Smartphone. However, location information may still be available to the
Smartphone’s owner, fleet manager, or account administrator.
• Available to all — All applications may view the location of your Smartphone,
without notifying you.
• Ask me — When an application attempts to view the location of your Smartphone,
you will be prompted to give permission. However, location information may still be
available to the Smartphone’s owner, fleet manager, or account administrator.
6 Select Done.
GPS Enabled
163
Setting the GPS PIN Security Feature
To prevent your GPS privacy settings from being altered without your knowledge, your
GPS privacy option can be protected by a PIN.
When you receive your Smartphone, the GPS security feature is turned off, so you do
not have to enter a GPS PIN to access your GPS privacy options. If you turn this feature
on, you will be required to enter a GPS PIN to access your GPS privacy options.
Enable GPS Lock
1
2
3
4
On the Home screen, select Start.
Select Settings and then select Security.
Select Enable GPS Lock.
In Enter GPS Pin, enter your current GPS PIN.
Note: There is no default GPS PIN.
Disable GPS Lock
1
2
3
4
On the Home screen, select Start.
Select Settings and then select Security.
Select Disable GPS Lock.
In Enter GPS Pin, enter your current GPS PIN.
Change your GPS PIN
1
2
3
4
5
6
7
On the Home screen, select Start.
Select Settings and then select Security.
Select Enable GPS Lock.
In Old PIN, enter your current GPS PIN.
In New PIN, enter a new GPS PIN.
In Confirm new PIN, re-enter your new GPS PIN.
Select Done.
Note: Your GPS PIN must be enabled in order to access this feature.
Using GPS with Map Software
You can use the GPS feature of your Smartphone to provide approximate location data
to a laptop computer or similar device that is running interactive map software such as
that made by DeLorme or Microsoft. This way, if your Smartphone has good access to
GPS signals, your approximate position on a map can be made available as you travel in
a vehicle.
To do this, connect your Smartphone to your laptop (or other device) with a serial data
cable and set your Smartphone to transmit data (see “Getting Started with Map
Software” on page 164). Your Smartphone then provides your approximate location to
the device running the map software, which displays your location on a map. Your
Smartphone provides an updated location every second and the map software displays
your changing location on its map.
See “Enhancing GPS Performance” on page 161 for more details on obtaining good
location information.
GPS Enabled
164
Note: Because your Smartphone is continuously determining your location, using the
GPS feature of your Smartphone with map software uses the Smartphone’s
battery power quickly.
Software Compatibility
Your Smartphone sends location information to your laptop or other device using the
standard National Marine Electronics Association (NMEA) format. Your Smartphone
supports output messages in NMEA-0183 format and supports the following NMEA-0183
sentences: GGA, GLL, GSA, GSV, RMC, and VTG.
The map software running on your laptop or other device must support NMEA 3.0.
Getting Started with Map Software
Connect your Smartphone to your laptop or other device
1
Open the connector cover.
connector
cover
2
With the Smartphone’s display facing up, insert the serial data cable’s connector into
the accessory connector, until you hear a click.
3
Insert the data plug into the COM port of your laptop or other device.
GPS Enabled
165
Check COM port settings
1
Make sure no other application is using the COM port selected of your laptop or other
device.
2 Make sure the COM port settings of your laptop or other device are set to the
following:
• Bits per second: 4800
• Data bits: 8
• Parity: None
• Stop bits: 1
• Flow control: Hardware
Set your Smartphone to send location information to your laptop or
other device
1 From the Home screen, select Start.
2 Select Accessories and then GPS Location.
3 Select Menu and then Setup.
4 In Device Connection, select NMEA out.
5 Select Done.
Your Smartphone is now sending location data to your laptop or other device.
Stop your Smartphone from sending location data to your laptop or
other device
• Select No Connection as Device Connection option.
Each time you power your Smartphone on, the Device Connection option is
automatically set to No Connection.
ClearvueTM Suite
166
ClearvueTM Suite
Your Smartphone comes pre-installed with Clearvue. Clearvue lets you open and view
Microsoft® Office files created in Microsoft Office 1997 and later, Adobe® Acrobat® PDFs,
and digital images. Clearvue includes Image Viewer, PDF Viewer, PowerPoint Viewer,
Word Viewer, and Worksheet Viewer.
Clearvue lets you open and view PowerPoint® presentations, Excel graphs, worksheets
and charts, Word documents, PDFs and .bmp, .jpg and .png digital images directly on
your Smartphone. Clearvue will open and view files, but does not support editing. There
is no additional software required to operate Clearvue.
Access Clearvue from your Smartphone
1
2
On the Home screen, select Start.
Select Applications and then select Clearvue.
View files using Clearvue
1
2
3
4
From the Start menu, select Messaging.
Select Outlook E-mail.
Select the message containing the file you want to view.
Click on the file that you want to download. A red arrow will appear showing that the
file has been marked for download.
While the file is being downloaded, the display will show that the Smartphone is
synchronizing. Once the synchronization has stopped, scroll to the end of the message
where the file is located and click on it once. The appropriate Clearvue viewer will
launch, and allow you to view the file.
Java Applications
167
Java Applications
Some Java applications can run with the flip open or the flip closed. Others can be run
only with the flip open.
When you are running an application, you can suspend the application. This sends the
application to the background so that you can run another application in the foreground.
You can resume the suspended application at any time. This brings it to the foreground.
Note: Using Java applications may cause your Smartphone to use up more battery
power than other uses of your Smartphone.
Using Java Applications With the Flip Open
Run a Java application
1
2
From the Home screen, select Start.
Select the Java application you want to run.
Suspend a Java application
• Press m.
• Press e.
• Close the flip. If the Java application cannot run with the flip closed, it is suspended.
View suspended Java application
1
2
3
From the Home screen, select Start.
Select Java Control Panel.
Select Menu and then select Suspended Apps.
Resume a Java application
1
2
From the Home screen, select Start.
Select the Java application you want to resume.
Ending a Java suspended application
1
2
From the list of all Java applications or the screen showing the suspended
application, select the application you want to end.
Select Menu and then select End Application.
Ending all Java applications
1
2
3
From the list of all Java applications on the screen showing the suspended
application, select Menu and then select End All.
Select Yes to confirm.
If you want to end all applications without letting them exit, select End Now.
Exit the Java Control Panel
• Press h.
• Press e.
• Select Exit.
Java Applications
168
Using Java Applications With the Flip Closed
You must start running all Java applications with the flip open, but some Java
applications can continue running after you close the flip. You can then suspend, view,
and resume without opening the flip.
Suspend a Java application with the flip closed
• If a Java application is running on the external display, press . to suspend it.
View suspended Java applications with the flip closed
To view a list of suspended Java applications that can run on the external display:
• From the idle screen, press . twice.
• From the recent calls list, press ..
Resume a Java application with the flip closed
To resume a Java application that can run with the flip closed:
1 While viewing the list of suspended applications, use the volume keys to scroll to the
Java application you want to resume.
2 Press t.
Deleting Java Applications
1
2
3
From the Java Control Panel screen, select the Java application you want to delete.
Select Menu and then select Deinstall Suite.
Select Yes to confirm.
Java Applications and GPS Enabled
Some Java applications make use of your Smartphone’s GPS feature to determine the
approximate geographical location of your Smartphone. (See “GPS Enabled” on page
158 for more information on the GPS feature.)
However, for privacy and other reasons, you may not always want Java applications to
access the location of your Smartphone. Your Smartphone protects you by giving you
the option to block all or some Java applications from accessing the location of your
Smartphone. You do this by setting permissions.
Permission
Option
Sets This Permission
Ask
When applications request permission to access the location of your Smartphone, you
are prompted to grant or deny permission.
Always
When applications request permission to access the location of your Smartphone, the
request is granted without notifying you.
Never
When applications request permission to access the location of your Smartphone, the
request is denied without notifying you.
Note: Even when you set this option to Ask or Never, location information may still be
available to the Smartphone’s owner, fleet manager, or account administrator.
Java Applications
169
Set permission options
1
2
3
4
5
6
From the Home screen, select Start.
Select Java Control Panel.
Select Menu and select Permissions.
Select the Java application you want to set permission options for.
In Location, select the permission option you want (Ask, Always, or Never).
When you are finished, select Done.
Granting or Denying Permission for Each Application
If you set the permission to Ask, you must grant or deny permission to perform this
function when the application requests permission to access the location of your
Smartphone for the first time. You may be required to grant or deny subsequent
requests, depending on the option you choose.
These are the options you must choose from when prompted:
Option
Does This...
Allow only once
Grants the application permission to access the location of your Smartphone. If this
application or another application requests permission to access the location of your
Smartphone again, you are prompted to grant or deny permission.
Allow for this
session
Grants the application permission to access the location of your Smartphone. If this
application or another application requests permission to access the location of your
Smartphone again before you end the application, the request is granted without
notifying you.
Allow always
Grants the application permission to perform its function. If this application or another
application requests permission to access the location of your Smartphone again, the
request is granted without notifying you.
Deny only once
Denies the application permission to perform its function. If this application or another
application requests permission to access the location of your Smartphone again,
you are prompted to grant or deny permission.
Deny for this
session
Denies the application permission to perform its function. If this application or another
application requests permission to access the location of your Smartphone again
before you end the application, the request is denied without notifying you.
Deny always
Denies the application permission to perform its function. If this application or another
application requests permission to access the location of your Smartphone again, the
request is denied without notifying you.
Grant or deny permission
1
2
When prompted, scroll left or right to choose the grant or deny option you want.
Select Done.
Beaming Information
170
Beaming Information
You can use the infrared port on your Smartphone to send and receive (beam) contact
cards and calendar appointments between your Smartphone and another mobile device
or a desktop computer that has an infrared port and supports vCards and vCal. You can
also use infrared beams to send messages, pictures, video clips. For information on
sending pictures and video clips using infrared, see “Sending Captured Pictures and
Video Clips” on page 148.
The device you are beaming to must be powered on and set to receive incoming beams.
Note: You cannot beam SIM contacts.
Beam a contact
1
2
3
4
5
6
7
On the Home screen, select Start.
Select Contacts.
Select the contact to beam.
Select Menu and then Beam Contact.
Make sure that the infrared ports are unobstructed and within close range of each
other.
Select the device to which you want to beam.
Status information displays, indicating the name of the device to which the
Smartphone is beaming, and whether the beaming process is pending, finished, or
has failed.
If the beaming process fails and you want to try again, select Beam.
Beam an appointment
1
2
3
4
5
6
7
8
On the Home screen, select Start.
Select Calendar.
Select the appointment to beam.
Select Menu and then Beam Appointment.
Scroll to the device you want to beam to.
Make sure that the infrared ports are unobstructed and within close range of each
other.
Select the device to which you want to beam.
Status information displays, indicating the name of the device to which the
Smartphone is beaming, and whether the beaming process is pending, finished, or
has failed.
If the beaming process fails and you want to try again, select Beam.
Receive beamed information
1
2
3
4
5
On the Home screen, select Start.
Select Settings and then Beam.
Select Receive incoming beams.
Make sure that the infrared ports are unobstructed and within close range of each
other.
Select Done to receive the information.
Beaming Information
171
Note: Once you select Receive incoming beams, your device automatically
receives beams until you clear this check box.
Your Smartphone can receive beamed files of any type, but you may need to
copy some files to your desktop computer for viewing.
Using Your Smartphone as a Modem
172
Using Your Smartphone as a
Modem
You can use your Smartphone as an external modem for data transfer to and from your
computer by using the Sync Cradle and mini USB cable or by using an infrared
connection.
Note: To use your Smartphone as a GPRS modem, see “Setting Up Your
Smartphone for Wireless Data Service Access” on page 131.
You can use your Smartphone to transfer data only when it is not in a call. If your
Smartphone is in a Walkie-Talkie call when you set up a data transfer, the Walkie-Talkie
call is ended. You will not receive any type of call or message notifications while
transferring data.
For more information on using your Smartphone as a modem, see the Modem User
Guide on sprint.com.
Internet
173
Internet
This chapter explains how to browse the Web using Microsoft® Pocket Internet Explorer.
Browsing the Web
To help you get started, we have added Nextel’s Wireless Web to provide you access to
news, weather, traffic, sports and entertainment information. With content providers such
as Google, CNN, ESPN and more, you can stay in touch, informed and in control, all
from your Nextel phone.
With Pocket Internet Explorer, the Favorites list is displayed as the main screen instead
of a home page, so you can easily go to your favorite Web sites. In addition to Nextel
Wireless Web links, you can add your own favorites to this list for Web sites you
frequently visit. You can view your Favorites list from any Web page by selecting
Favorites.
Using Pocket Internet Explorer, you can also browse the World Wide Web on your
Smartphone. While you are surfing the World Wide Web, realize some sites may not
display properly with Pocket Internet Explorer. Nextel Wireless Web sites have been
selected to provide you with an optimal surfing experience.
Pocket Internet Explorer on your Smartphone supports HTML (Hypertext Markup
Language), cHTML (compact Hypertext Markup Language), xHTML (Extensible HTML)
and WAP (Wireless Application Protocol). It also supports Jscript, ActiveX controls, and
CSS (cascading style sheets). The browser supports images and sounds, but it does not
support frames on a Web page.
Open Internet Explorer
• On the Home screen, select Start and then Internet Explorer.
Disconnect from the Internet
• Press e.
View a favorite
1
2
3
4
On the Home screen, select Start.
Select Internet Explorer.
If the Favorites list does not appear, select Favorites.
Scroll to a favorite and select Go.
Tip: To view your favorites list from a Web page, select Favorites.
Go to a link
• Select the link.
Note: Scroll to see all available links.
Go to a Web page
1
2
3
4
On the Home screen, select Start.
Select Internet Explorer.
Select Menu and then Address Bar.
Enter the Web address and select Go.
Internet
174
Return to a Web page you visited in the same session
• On a Web page, press m repeatedly until the page appears.
View a list of recently-visited Web pages
1
2
3
4
On the Home screen, select Start.
Select Internet Explorer.
Select Menu and then Address Bar.
Select View History.
Go to a Web page on the History list
1
2
3
4
5
On the Home screen, select Start.
Select Internet Explorer.
Select Menu and then Address Bar.
Select View History.
Scroll to the Web page address and select Go.
Tip: While you are connected to the Internet, you can change between Pocket
Internet Explorer and other programs on your Smartphone by pressing h and
navigating to the program you want. This does not close your Internet
connection. To return to the Web page you were viewing, press m as many times
as necessary until the Web page displays.
Using the Favorites List
If you see a Web page you want to visit another time, mark it as a favorite. The next time
you want to visit that Web page, you can select it from your Favorites list.
Add a Web page to the Favorites list
1
2
3
4
5
6
7
On the Home screen, select Start.
Select Internet Explorer.
Select Menu and then Add Favorite.
In Name, enter a name for the Web page.
In Address, enter the Web page address.
In Folder, select a folder for this favorite.
Select Add.
Edit a favorite
1
2
3
4
5
On the Home screen, select Start.
Select Internet Explorer and then Favorites.
Scroll to the favorite to edit.
Select Menu and then Edit.
Make your changes and select Done.
Delete a favorite
1
2
3
On the Home screen, select Start.
Select Internet Explorer and then Favorites.
Scroll to the favorite to delete.
Internet
4
5
175
Select Menu and then Delete.
Select Yes.
Create a new folder in Favorites
1
2
3
4
5
On the Home screen, select Start.
Select Internet Explorer and then Favorites.
Select Menu and then Add Folder.
In Name, enter a name for the folder.
Select Add.
Refreshing Web Pages
The Smartphone caches the Web pages that you view and stores them until the cache is
full. It then replaces the oldest pages with new pages. If you go to a page that is cached
on your Smartphone, you see the stored version unless you refresh the page to see the
latest version.
Refresh a Web page
1
2
3
4
5
On the Home screen, select Start.
Select Internet Explorer.
If you want to refresh a page other than the one displayed, in your Favorites or
History list, scroll to the Web page and select Go.
Wait for the Web page to load.
Select Menu and then Refresh.
Customizing Pocket Internet Explorer
You can customize Web browsing options, change the network to connect to, and make
more memory available on your Smartphone by clearing stored cookies and Web pages.
Change Web page display options
1
2
3
4
5
On the Home screen, select Start.
Select Internet Explorer.
Select Menu and then Options.
Select General.
Select the options you want, as described in the following table, and select Done.
To
Select
Display graphics on Web pages
Show pictures
Play sounds on Web pages
Play sounds
Warn when moving from a secure
to a non-secure Web page
Warn when changing to an unsecure page
Allow Web sites to download
cookies to your Smartphone
Allow cookies
Select the alphabet to use
Language
Change connection options
1
On the Home screen, select Start.
Internet
176
2
3
4
5
6
Select Internet Explorer.
Select Menu and then Options.
Select Connections.
To automatically detect network settings, select Automatically detect settings.
If you did not select Automatically detect settings, in Select network, select the
network to which Internet Explorer should connect.
7 Select Done.
Note: You can configure settings for your selected network from Connections. For
more information, see “Phone Networks” on page 127.
Clear memory
1
2
3
4
5
On the Home screen, select Start.
Select Internet Explorer.
Select Menu and then Options.
Select Memory.
Select the type of memory to clear, as described in the following table, and select
Clear, then Yes, and then Done.
To
Select
Clear Web pages from the cache. (When you do
this, you will no longer be able to view these
cached Web pages offline. You will need to
connect to the Internet and go to the page. This
downloads a new file to the cache, so you can
again view the page offline.)
Temporary files
Clear stored cookies. This deletes personal
information about you that is stored for use by
various Web sites.
Cookies
Clear History files.
History
Wireless Data Services
177
Wireless Data Services
You can use your phone to access a suite of wireless data products known as Wireless
Data Services. Services include Wireless Web, Messaging, Instant Messaging, and
more.
Most services require the activation of a rate plan with access to pay-per-use Wireless
Data Services, or the separate purchase of a Wireless Data Services plan. To order, call
1-800-NEXTEL6 or contact your service provider sales representative.
Wireless Data Services
Messaging — send and receive e-mail messages from your Smartphone. For additional
information, see “Using Wireless Messaging Features” on page 57.
Wireless Web — use Microsoft® Pocket Internet Explorer to access the wireless Internet
from your Smartphone for information and services from many top wireless Web sites.
Other services and features available include access to any wireless Internet address.
Conduct topic and key word searches, and bookmark sites and applications.
Instant Messaging — send and receive instant messages via MSN Messenger®.
Accessing Wireless Data Services From
Your Phone
To access Messaging Services:
1 Select Start to access the Start menu.
2 Select Messaging.
To access other Wireless Data Services:
1 Select Start to access the Start menu.
2 Choose the service you want to access.
To access the Wireless Web:
1 Press A under Start to access the Start menu.
2 Select Internet Explorer and then select your desired category to access the
information you need. See “Internet” on page 173 for more information.
To access MSN Messenger:
1 Press A under Start to access the Start menu.
2 Select MSN Messenger.
Many screens will require you to enter text. For information on entering text, see
“Entering Text and Numbers” on page 27.
Navigation Keys
Tip: Press h or m to return to your Home screen.
Tip: Press m to return to a previous screen.
Wireless Data Services
178
Tip: While navigating through Wireless Data Services screens, a number may
appear to the left of the application or topic you want to access. Press the
corresponding number on the keypad for quicker access to that application or
topic.
Guides and Demos
For more information on Wireless Data Services and access to Quick Start Guides,
demos, and other resources, go to sprint.com. Under Personal, click on Wireless, then
Services & Features, and then click the Support tab. Then, under Nextel Subscribers,
click on Guides&Tutorials.
Windows Media Player
179
Windows Media Player
Microsoft® Windows Media® Player 10 Mobile for Smartphone let you play digital audio
and video files that are stored on your Smartphone or on the Web.
By default, Windows Media Player can play the following types of files:
• Windows Media Audio
• Windows Media Video
• MP3
This includes files with the extensions .asf, .wma, .wmv, and .mp3. If the manufacturer of
your Smartphone has installed additional components, your version of Windows Media
Player might be capable of playing additional file types.
In addition to Windows Mobile™-based Smartphones, Windows Media Player is
available on other operating environments, including desktop computers running the
Windows or Macintosh operating systems and Windows Mobile-based Pocket PCs.
In this documentation, the version of Windows Media Player for Windows-based desktop
computers is called the “desktop Player” and the version for Smartphone is called the
“Smartphone Player.”
About the Screens and Menus
Windows Media Player 10 Mobile for Smartphone has 3 primary screens:
Playback screen. The default screen that displays the playback controls (such as Play,
Pause, Next, Previous, and Volume), the album art window, and the video window. You
can change the appearance of this screen by choosing a different skin if additional skins
are installed on your Smartphone.
Now Playing screen. The screen that displays the Now Playing playlist. This special
playlist indicates the currently playing file and any files that are “queued up” to play next.
Library screen. The screen that lets you quickly find your audio files, video files, and
playlists. It contains categories such as My Music, My Video, My TV, and My Playlists.
At the bottom of each screen is a menu called Menu. The commands on this menu
change depending upon which screen you are viewing.
Playback Screen Menu
When you are viewing the Playback screen, these commands appear on Menu.
This command
Does this
Play/Pause
Starts or pauses playback.
Stop
Stops playback and rewinds to the beginning of the current file.
Shuffle
Plays the items in the Now Playing playlist in a random order.
Repeat
Plays the items in the Now Playing playlist repeatedly.
Full Screen
When a video is playing, displays it by using the entire screen.
Library
Displays the Library screen so you can choose a file to play.
Open URL
Lets you play a file on a network, such as the Internet.
Options
Lets you adjust various Windows Media Player options, including network, skin,
and hardware button options.
Windows Media Player
180
This command
Does this
Properties
Displays information about the currently playing file.
About
Displays information about Windows Media Player, such as the version number.
Now Playing Screen Menu
When you are viewing the Now Playing screen, these commands appear on Menu.
This command
Does this
Library
Displays the Library screen so you can choose a file to play.
Move Up
Moves the selected item up in the playlist order.
Move Down
Moves the selected item down in the playlist order.
Delete from Playlist
Removes the selected item from the playlist.
Shuffle
Sets playlist to play in random order.
Repeat
Sets playlist to start playing again after the last song.
Clear Now Playing
Removes all items from the Now Playing playlist.
Error Details
Displays error information about the selected item (an exclamation mark
appears before the item name if error details are available).
Properties
Displays information about the selected file.
Library Screen Menu
When you are viewing the Library screen, these commands appear on Menu.
This command
Does this
Queue Up
Adds the selected item to the end of the current (Now Playing) playlist.
Delete from Library
Removes the selected item from the library.
Library
Lets you select the library that you want to view (for example, the library of items
stored on your Smartphone, or the library of items stored on a removable storage
card*).
Update Library
Adds new items to the library by searching your Smartphone or storage card*.
Open File
Lets you find and play files that are stored on your Smartphone or storage card*,
but that are not in the library.
Properties
Displays information about the selected file.
Done
Closes the library screen and displays the Playback screen.
* To purchase an SD card go to sprint.com or call 1-800-NEXTEL6.
About Libraries
The library contains links to your audio files, video files, and playlists. As in the desktop
Player, it lets you sort your content by criteria such as artist name, album title, or genre.
Unlike the desktop Player, the Smartphone Player can have multiple libraries. Each
library represents an available storage location. For example, if you store some content
in the internal storage location on the Smartphone (known as random access memory or
RAM), the My Device library contains links to those files.
If you also store content on removable storage cards, such as an SD card, you will have
additional libraries for each of those cards.
* To purchase an SD card go to sprint.com or call 1-800-NEXTEL6.
Windows Media Player
181
On the Library screen, you can switch between the My Device library and any other
libraries that are available to your Smartphone.
When you turn on your Smartphone and open Windows Media Player, the program
automatically searches the internal storage location of your Smartphone for compatible
digital media files. If it finds any, they are added to the My Device library.
Similarly, when you insert a removable storage card* into your Smartphone, Windows
Media Player asks you if you want to search it for content. If you agree, Windows Media
Player adds any content it finds to a Mounted Volume library.
If you copy new files to your Smartphone or storage card* and they do not appear in the
library, you can manually update the library by using the Update Library command.
About Synchronization
Use the Sync feature in the latest version of the desktop Player (Windows Media Player
10 or later) to automatically copy your favorite audio files, video files, and playlists from
your desktop Player library to your Smartphone Player library every time you connect
your Smartphone to your computer.
For more information about synchronization, see the desktop Player Help.
About Playlists
A playlist is a list of digital media files that play in a specified order. By using playlists,
you can group audio and video files together for convenient playback.
For example, in the desktop Player, you can create a playlist of upbeat songs to listen to
when you exercise or a playlist of soothing songs to enjoy during a long flight. When you
synchronize with the latest desktop Player (Windows Media Player 10 or later), your
favorite playlists are automatically copied to your Smartphone.
You can also create a temporary playlist, called Now Playing, directly on your
Smartphone. It is available from the Now Playing menu. It lists the currently playing file,
as well as any files that have been “queued up” to play next. The contents of the Now
Playing list are not saved on your Smartphone when you power it off.
About Licenses and Protected Files
Some digital media files (such as songs downloaded from online stores, including
Napster and MusicNow) are encrypted to prevent the files from being unlawfully
distributed or shared.
Content providers, such as online stores, use a technology called digital rights
management (DRM) to encrypt the files. During the encryption process, the content
provider creates a license which specifies how and when the file can be used.
For example, a content provider could create a license that allows you to play a certain
file on your computer, but not on your Smartphone. Or a content provider could create a
license that allows you to play a certain file on your Smartphone, but only for a month.
Files that have licenses associated with them are called protected files.
Windows Media Player
182
If you want to copy a protected file from your desktop computer to your Smartphone, use
the desktop Player to synchronize the file to your Smartphone (instead of dragging the
file from a folder on your desktop computer to a folder on your Smartphone or to storage
card* in a storage card reader, for example). This will ensure that the license is copied
along with the protected file.
* To purchase an SD card go to sprint.com or call 1-800-NEXTEL6.
For more information about synchronizing files to your Smartphone and other devices,
see the desktop Player Help.
Note: You can view the protection status of a file by checking its file properties (select
Menu, and then select Properties).
Supported Audio and Video Codecs
High-quality digital media files can require a large amount of storage space. To minimize
file size, digital media files are often compressed by using software called a codec (short
for compressor/decompressor). To play the file, it must be decompressed by using the
same codec that compressed the file.
Windows Media Player 10 Mobile for Smartphone can play files that have been
compressed by using any of the following audio and video codecs. You can determine
which codecs a file uses by checking its file properties (select Menu, and then select
Properties).
Audio Codecs
• Microsoft Windows Media Audio codec versions 1.0, 2.0, 7, 8, and 9.
Although Windows Media Player for Smartphone supports all the variants of the
Windows Media Audio 9 codec (including the Windows Media Audio 9, Windows Media
Audio 9 Professional, Windows Media Audio 9 Voice, and Windows Media Audio 9
Lossless codecs), the following variants are only partially supported:
• Windows Media Audio 9 Professional codec. Multiple channels are combined into a
stereo mix during playback. Depending upon the audio playback capabilities of your
Smartphone, content with an audio sampling rate higher than 48 kilohertz (KHz) might
be played as 48 KHz.
• Windows Media Audio 9 Lossless codec. Depending upon the audio playback
capabilities of your Smartphone, content with an audio sampling rate higher than 48
KHz might be played as 48 KHz.
Video Codecs
•
•
•
•
Microsoft Windows Media Video codec versions 7, 8, and 9.
Microsoft Windows Media Video 9 Image codec versions 1.0 and 2.0.
Microsoft MPEG-4 codec version 2.0 and 3.0.
ISO MPEG-4 video codec version 1.0.
Note: Windows Media Player 10 Mobile for Smartphone does not support any version
of the Windows Media Video Screen codec.
Windows Media Player
183
Playing Audio and Video Files
• Use the following procedures to select and play audio and video files.
Open Windows Media Player
1
2
On the Home screen, select Start.
Select Windows Media.
Select and play items on your Smartphone
Use the library to find and play songs, videos, and playlists that are stored on your
Smartphone or removable storage card*.
* To purchase an SD card go to sprint.com or call 1-800-NEXTEL6.
1
2
If you are not on the Library screen, select Menu, and then select Library.
If necessary, on the Library screen, select Library, and then select the library that
you want to use (for example, My Device or Mounted Volume).
3 Scroll to a category (for example, My Music or My Playlists), and then press O.
4 Select the item that you want to play (such as a song, album, or artist name), and
then select Play (or select Menu and then select Queue Up).
Note: To play a file that is stored on your device, but that is not in a library, do the
following: On the Library screen, select Menu, and then select Open File.
Select the item that you want to play, and then select Play (or select Menu and
then select Queue Up).
Note: On the Playback screen, you can toggle between pause and play by pressing
O.
Select and play an item on a network
Use the Open URL command to play a song or video that is stored on the Internet or on
a network computer.
1 If you are not on the Playback screen, press m until you are.
2 Select Menu, and then select Open URL.
3 In the URL box, enter a network address.
Or, in the History box, scroll to a URL that you have previously used, and then press
O.
Note: To play an item on a network, you must be connected to a network. For more
information about creating a remote connection between your Smartphone and
a network, see the Data Connections section.
Note: On the Playback screen, you can toggle between pause and play by pressing
O.
To skip to the next item in a playlist
1
2
If you are not on the Playback screen, press m until you are.
On the Playback screen, press right on the navigation pad.
To skip to the beginning of the playing item
1
2
If you are not on the Playback screen, press m until you are.
On the Playback screen, press left on the navigation pad.
Windows Media Player
184
To skip to the previous item in a playlist
1
2
If you are not on the Playback screen, press m until you are.
On the Playback screen, press left on the navigation pad twice quickly.
Play items repeatedly
Use the Repeat command to play all items in the Now Playing playlist repeatedly. A
check mark appears next to the command name when repeat play is turned on.
1 If you are not on the Playback screen, press m until you are.
2 On the Playback screen, to turn repeat play on or off, select Menu, select Shuffle/
Repeat, and then select Repeat.
Play items in a random order
Use the Shuffle command to play all items in the Now Playing playlist in a random order.
A check mark appears next to the command name when shuffle play is turned on.
1 If you are not on the Playback screen, press m until you are.
2 On the Playback screen, to turn shuffle play on or off, select Menu, select Shuffle/
Repeat, and then select Shuffle.
Adjust the volume of a playing file
1
2
If you are not on the Playback screen, press m until you are.
On the Playback screen, press up or down on the navigation pad to increase or
decrease the volume of a playing file.
Note: When you are on the Playback screen, you can turn the sound on or off quickly
(that is, turn mute on or off) by pressing #.
Note: On any screen, you can use the volume control to increase or decrease the
volume of a playing file. However, this control affects all sounds on your
Smartphone, not just the sounds of Windows Media Player.
View file properties
You can view detailed information about files (such as artist and album name, length,
codecs used, protection status, and storage location) by using the Properties command.
1 If you are not on the Library screen, select Menu, and then select Library.
2 On the Library screen, select Library, and then select the library that you want to use
(for example, My Device or Mounted Volume).
3 Scroll to a category (for example, My Music), and then press O.
4 Select the file that you want to view information about, select Menu, and then select
Properties.
Note: When you view the file properties of a song, you can use the Buy CD
command to find out whether the corresponding CD is available for purchase.
To buy a CD, on the Properties screen, select Menu, and then select Buy CD.
After selecting Buy CD, you must synchronize with the latest version of the
desktop Player (Windows Media Player 10 or later) to view the Buy CD Web
page and complete the transaction. The Buy CD command is not available for
all files.
Windows Media Player
185
Managing Audio and Video Files
Use the following procedures to manage audio and video files on your Smartphone.
Copy files to your Smartphone
Use the latest version of the desktop Player (Windows Media Player 10 or later) to
synchronize digital media files to your Smartphone (instead of dragging a file from a
folder on your desktop computer to a folder on your Smartphone, for example). Using the
desktop Player ensures that licenses are copied with protected files.
For more information about synchronizing files to devices such as Smartphones, see the
desktop Player Help.
Note: Audio files copy faster if the desktop Player is configured to automatically set
the quality level for audio files copied to your Smartphone. For more
information, see the desktop Player Help.
Update a library
You can manually update a library to ensure that it has links to any new files that you
might have recently copied to your Smartphone or a removable storage card*.
1 If you are not already on the Library screen, select Menu, and then select Library.
2 On the Library screen, select Library, and then select the library that you want to
update (for example, My Device or Mounted Volume).
3 Select Menu, and then select Update Library.
4 Select Search, wait for the files to be added, and then select Done.
Remove an item from a library
1
2
If you are not already on the Library screen, select Menu, and then select Library.
On the Library screen, select Library, and then select the library that you want to use
(for example, My Device or Mounted Volume).
3 Select the item that you want to remove (such as a song, video, or playlist), and then
select Delete from Library.
Note: The item is removed from the library, but not deleted from your Smartphone or
removable storage card*. If you also want to delete the file from your
Smartphone or storage card, select Yes when you are prompted.
* To purchase an SD card go to sprint.com or call 1-800-NEXTEL6.
Using the Now Playing Playlist
The Now Playing playlist lists the currently playing file and any files that are “queued up”
to play next.
Add items to the Now Playing playlist
1
2
3
4
If you are not on the Library screen, select Menu, and then select Library.
On the Library screen, select Library, and then select the library that you want to use
(for example, My Device or Mounted Volume).
Scroll to a category (for example, My Music or My Playlists), and then press O.
Select the item that you want to add to Now Playing (such as a single file or an album
name), select Menu, and then select Queue Up.
Windows Media Player
186
Edit the Now Playing playlist
If you are not on the Now Playing screen, press m until you are on the Playback
screen.
On the Playback screen, select Now Playing.
On the Now Playing screen, select Menu, and do any of the following.
1
2
3
To
Select
Move the selected item up in the playlist.
Move Up
Move the selected item down in the playlist.
Move Down
Remove the selected item from the playlist.
Delete from Playlist
Note: If you select Delete from Playlist, the item is removed from the playlist, but not
removed from the library or deleted from your Smartphone or removable
storage card*.
Clear the Now Playing playlist
The Now Playing playlist displays the currently playing file and any files that are “queued
up” to play next. You can quickly remove all items from the playlist by clearing it.
1 If you are not on the Now Playing screen, press m until you are on the Playback
screen.
2 On the Playback screen, select Now Playing.
3 On the Now Playing screen, select Menu, and then select Clear Now Playing.
Note: Clearing the Now Playing playlist removes all items from the Now Playing
playlist, but it does not remove the items from the library or delete them from
your Smartphone or removable storage card*.
* To purchase an SD card go to sprint.com or call 1-800-NEXTEL6.
Customizing Settings
The following procedures let you customize the appearance and functionality of
Windows Media Player.
Change Player appearance
You can change the appearance of the Playback screen by choosing a new skin if you
have additional skins installed on your Smartphone.
1 If you are not on the Playback screen, press m until you are.
2 Select Menu, select Options, and then select Skins.
3 Press left or right on the direction pad to select a skin.
Note: To download new skins, see the WMPlugins.com Web site (http://
www.wmplugins.com).
Note: To ensure that skins appear on the Skins options screen, do not store skin files
in the Windows folder on your Smartphone.
Windows Media Player
187
Shrink oversized video
If you play a video that is larger than the video window, a portion of the image will not be
visible. When selected, the Shrink to fit window option scales the video down to fit the
video window.
1 If you are not on the Playback screen, press m until you are.
2 Select Menu, select Options, and then select Audio/Video.
3 Select the Shrink to fit window check box.
Note: Oversized video files are larger than the video area of a skin (typically, 160 ×
120 pixels).
Play video in full screen
You can choose whether you want videos to play inside the video window or to play in
full screen. When a video plays in full screen, the playback controls are hidden.
If you are not on the Playback screen, press m until you are.
1 Select Menu, select Options, and then select Audio/Video.
2 In Play video in full screen, do one of the following.
To
Select
Never play video in full screen.
Never
Play only oversized video in full screen.
Only when oversized
Play all video in full screen.
Always
Note: Oversized video files are larger than the video area of a skin (typically, 160 ×
120 pixels).
Note: To override the Never and Only when oversized options when playing a
video, on the Playback screen, press *.
Change background playback
You can choose whether you want files to continue to play in the background when you
use other programs.
1 If you are not on the Playback screen, press m until you are.
2 Select Menu, select Options, and then select Playback.
3 Do one of the following.
To
Do This
Pause playback while using another
program.
Select the Pause playback while using another program
check box.
Continue playback while using another
program.
Clear the Pause playback while using another program
check box.
Windows Media Player
188
Change how time is displayed
When you play a file, the Playback screen shows either how much time has elapsed
since you started playing the file or how much time is remaining until the file ends.
1 If you are not on the Playback screen, press m until you are.
2 Select Menu, select Options, and then select Playback.
3 In the Show time as box, do one of the following.
To
Select
Show elapsed time on the Playback screen.
Elapsed
Show remaining time on the Playback screen.
Remaining
Change playback after a phone call
When you place or receive a phone call, any file that you are playing is automatically
paused. You can choose whether you want playback to automatically resume after you
complete your call.
1 If you are not on the Playback screen, press m until you are.
2 Select Menu, select Options, and then select Playback.
3 Do one of the following.
To
Do This
Resume playback after you complete a
phone call.
Select the Resume playback after a phone call check box.
Prevent playback from resuming after you Clear the Resume playback after a phone call check box.
complete a phone call.
Change network connection speed
1
2
3
If you are not on the Playback screen, press m until you are.
Select Menu, select Options, and then select Network.
In the Internet Connection box, select the speed of your network connection.
Change network protocol options
1
2
3
If you are not on the Playback screen, press m until you are.
Select Menu, select Options, and then select Network.
In Protocol, select the check box for each protocol that you want to enable.
Note: Enter the port number for User Datagram Protocol (UDP), if necessary.
Note: You must select at least one protocol.
Note: We recommend that you select all protocols. However, if your network
implements a firewall that prevents you from receiving streams that use the
UDP or TCP protocols, you might want to clear the UDP or TCP check boxes.
Windows Media Player
189
Change the startup screen
You can choose whether the Playback screen or the Library screen is displayed when
you open Windows Media Player.
1 If you are not on the Playback screen, press m until you are.
2 Select Menu, select Options, and then select Library.
3 Do one of the following.
To
Do This
Show the Library screen when you open
Windows Media Player.
Select the Start Player on Library screen check box.
Show the Playback screen when you open Clear the Start Player on Library screen check box.
Windows Media Player.
Note: This option does not take effect until you turn off your Smartphone and then
turn it on again.
Use hardware buttons
To give you quick access to some Windows Media Player controls without using the
menus, you can assign their functions to the hardware buttons on your Smartphone.
1 If you are not on the Playback screen, press m until you are.
2 Select Menu, select Options, and then select Buttons.
3 In the list of controls, scroll to the item that you want to change (such as the button
assigned to the Play/Pause control), select Menu, select Assign, and then press the
hardware button (such as O) that you want to assign to that control.
Note: To reset a control to its default hardware button, scroll to the item that you want
to change, select Menu, and then select Reset.
Note: To assign no hardware button to a control, scroll to the item that you want to
change, select Menu, and then select None.
Troubleshooting
If you encounter a problem while using Windows Media Player 10 Mobile for
Smartphone, see the Troubleshooting Windows Media Player Mobile page at the
Microsoft Web site (http://go.microsoft.com/fwlink/?LinkId=29195).
Games
190
Games
Your Smartphone comes with pre-loaded games, including Solitaire.
Solitaire
The object of Solitaire is to use all the cards in the deck to build up the 4 suit stacks in
ascending order, beginning with the aces. You win the game when all cards are on the
suit stacks.
Start a game of Solitaire
1
2
On the Home screen, select Start.
Select Games and then select Solitaire.
Start a new game
• When you have finished playing a game, start a new one by selecting Menu and then
New Game.
Move cards
• A number or character is displayed above each card stack. On the keypad, press the
number or character of the card to move, and then press the number or character of
the stack to which you want to move the card.
Tip: Scrolling moves a card to one of the 4 stacks in the upper right corner of the
screen if it belongs there. For example, if an ace appears in one of the lower
stacks, press the number above it, and scroll up.
Play Solitaire
1
Move any aces on the 7 stacks to the 4 card spaces at the top of the screen, and
then make any other available plays.
2 When you have made all available plays, select Draw to turn over cards.
Note: The card that is face up on the deck is always available for play.
Calculator
191
Calculator
You can use Calculator to perform any of the standard operations for which you would
normally use a handheld calculator. Calculator performs basic arithmetic, such as
addition, subtraction, multiplication, and division.
Perform a calculation
1
2
3
4
On the Home screen, select Start.
Select Accessories.
Select Calculator.
Enter the first number of the formula by using the keypad.
Tip: To display the available mathematical symbols, use the navigation keys. Press
up for the plus sign (+), down for the minus sign (–), left for the division sign (/),
and right for the multiplication sign (X).
5 Select Options and then the type of calculation to perform: Add, Subtract, Multiply,
Divide, or Decimal Point.
6 Enter the second number of the formula.
7 Select Options and then Equals.
Tip: To scroll through the available mathematical symbols, press #.
To enter a decimal point, press *.
Clear a displayed number or calculation
• Select Clear.
Clear the last digit entered
• Press m.