1
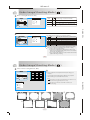
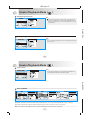
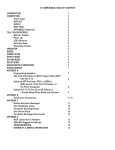
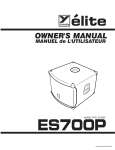
165 mm+-2
Under Image Shooting Mode (
).
TELE / WIDE Button
The zoom bar, appearing on the top side of the TFT LCD monitor shows the
current zoom status.
122 mm+-2
Set the Mode Button at (
)
12
Under Image Shooting Mode (
)
Macro Mode
OK
MENU
When you take a shot of a very close-up of object within the distance of 5 cm ,
press the Macro/Up Button and the Macro icon (
). Will appear on the LCD
screen for notice.
OK
MENU
Flash Mode
By pressing down the Flash/Right Button you may select different flash
options as follows:
14
6M
OK
MENU
Auto Flash
OK
MENU
The flash fires automatically as required under shooting mode.
Auto Flash with To avoid the subject's eyes appear red in the picture, use this
mode can effectively minimize the likelihood of the red-eye
Red-eye
effect.
Reduction
The flash will fire and the camera will set the shutter speed at
Slow Sync
a proper speed.
Fill-in Flash
This m ode will enable the flash to fire in any
c ircumstances.
Flash Off
The mode will disable the flash to fire in any circumstances.
13
122 mm+-2
14
6M
165 mm+-2
Under Image Shooting Mode (
)
Self-timer Mode
OK
MENU
With the 10 sec. Self-timer ( ):
The image will be taken after an interval of 10 seconds
once the Shutter Button is released.
9
With the 2 sec. Self-timer ( ) :
The image will be taken after an interval of 2 seconds once
the Shutter Button is released.
2S
With the Double self-timer ( ) :
The image will be taken twice once the Shutter Button is
released.
OK
MENU
The first image will be taken after an interval of 10 seconds.
The second one will be taken after an interval of 2 seconds
continuously right after the first shooting .
Voice Memo Mode
7
5M
122 mm+-2
7
5M
You can have two ways to put the voice memo onto the images.
OK
MENU
OK
MENU
At Image Shooting Mode:
1. When the Voice Memo Button is pressed down, the Voice Memo icon( ) will
show up on the LCD.
2. Press down the Shutter Button to take a picture.
3. Then you can record a voice memo up to 10 seconds after the image is taken.
The recording can be stopped at any time by pressing the Shutter Button.
At Playback Mode:
1.Press down the Voice Memo/Down Button and a recording bar will show.
2. Press down the Shutter Button half way down to record a voice memo.
3. Then you can record a voice memo up to 10 seconds after the image is taken.
The recording can be stopped at any time by pressing the Shutter Button.
After the voice memo is recorded, the ( ) will show on the TFT LCD Monitor.
14
Under Image Shooting Mode (
)
Exposure / Delete Button
14
6M
14
6M
Operation Steps
Operation Steps
100-0015
1.
Operation Steps
1.
DELETE
DELETE: OK
CANCEL:
F5.8
AUTO
OK
MENU
OK
MENU
OK
MENU
Shooting Mode
OK
MENU
Night Mode
OK
MENU
OK
MENU
Playback Mode
At Image Shooting Mode:
By pressing down the Delete / +/- Button, you can adjust the value of the exposure compensation, which is ranged from
-2.0EV to +2.0EV (at 0.5EV increment), and you can see the exposure compensation icon (
) showing on the right, bottom
on the TFT LCD. By press the Up & Down Button you can choose the ISO values and press OK Button to confirm.
At Night Scene Mode under Shooting Mode:
You can adjust the value of the long-time shutter, including 8, 6, 4, 3, 2, 1, 1/2, 1/4, 1/8sec, Auto by pressing Flash/Right &
Self-timer/Left Button. By pressing the Up & Down Button you can choose the aperture and press OK Button to confirm.
At Playback Mode:
Deleting the single image can be done by pressing down this button and OK Button.
If you would like to delete all images, please refer to page 24.
15
122 mm+-2
0.0EV
165 mm+-2
Under Image Shooting Mode (
)
Press Menu/OK Button to enter the settings.
Image Size Setting (Default: 2864X2160)
The Image size options are provided as follows:
Operation Steps
3264 x 2448
2816 x 2112
2560 X 1920
2304 X 1728
2048 X 1536
BACK :
(
(
(
(
(
(
8M
6M
5M
4M
3M
SET :OK
)3264x2448
)2816x2112
)2560x1920
)2304x1728
)2048x1536
)1600x1200
122 mm+-2
SIZE
Image Quality Setting (Default: Fine)
The image quality options are provided as follows:
Operation Steps
QUALITY
(
(
(
S. FINE
FINE
NORMAL
BACK :
) Super Fine
) Fine
) Normal
SET :OK
16
Under Image Shooting Mode (
)
Metering Setting (Default: MULTI )
With Metering Setting, you can get more superior exposure
condition and take a picture with brightness.
1. MENU
2. Or
3.
4.
or
5.OK
MULTI
SPOT
BACK :
Operation Steps
Multi Metering:
Exposure will be evaluated according to the average of the
available light sources in the image area. This is suitable
for general use.
SET: OK
Spot Metering:
If the subject is against the light source or has little
contrast, you can use this function to have the subject be
brighter.
Sharpness Setting (Default: NORMAL)
SHARPNESS
SOFT
1. MENU
2. or
3.
4.
or
5.OK
SOFT
NORMAL
VIVID
BACK :
This effect can make the edge of the captured
image look smoother, which is suitable for image
editing on PC.
This effect can make the edge of the captured
NORMAL image look sharp, which is suitable for printing out.
Operation Steps
SET: OK
VIVID
17
This effect can make the edge of the captured
image look much sharper yet may cause more
noises.
122 mm+-2
METERING
165 mm+-2
U n d e r Im a g e S h o o tin g Mo d e (
)
E ffe c t S e ttin g ( D e fa u lt: N o r m a l)
B&W
NORMAL
SEPIA
RGB
BACK :
B &W
O pe r a tio n S te ps
1. ME N U
2.
or
3.
4.
or
5. O K
NOR
RG
B
Normal
T urn the ima ge into bla c k a nd white .
NOR
S e pia
RGB
SET: OK
N o e ffe c t is a dde d to the pic ture .
T urn the ima ge into ye llowis h brown.
RG
B
T his s e tting a llows you to a djus t the va lue
of R G B by yours e lf.
W h ite B a la n c e S e ttin g ( D e fa u lt: A U T O )
W. BALANCE
AUTO
DAYLIGHT
CLOUDY
FLUORESCENT
TUNGSTEN
BACK :
T he W hite B a la nc e options a re provide d a s follows :
O pe r a tio n S te ps
A uto
D a ylight
C loudy
F luore s c e nt
T ungs te n
S uns e t
C us tom
1. ME N U
2.
or
3.
4.
or
5. O K
AWB
SET: OK
A djus ting the white ba la nc e a utoma tic a lly
U nde r the s trong light e nvironme nt
U nde r the c loudy light e nvironme nt
U nde r the fluore s c e nt light e nvironme nt
U nde r the tungs te n light e nvironme nt
U nde r the s uns e t light e nvironme nt
U nde r unc e rta in light e nvironme nt
122 mm+-2
EFFECT
Y ou c a n s e le c t the mos t a ppropria te white ba la nc e s e tting
for a give n s hooting e nvironme nt by "C us tom" s e tting.
1. C hoos e the C U S T O M s e tting.
2. P ut a s he e t of white pa pe r in front of the c a me ra , a nd
the n pre s s the s hutte r button. ( N ote : ma ke s ure tha t the
T F T s hows only white a re a . )
3. T he C us tom va lue will be re c orde d a nd this va lue will be
a pplie d for ima ge s hooting.
18
U n d e r Im a g e S h o o tin g Mo d e (
)
P h o to F r a m e S e ttin g ( D e fa u lt: O F F )
FRAME
OFF
ON
Frame 2
Frame 3
Frame 4
Frame 5
Frame 6
Frame 7
Frame 8
Frame 9
Y ou c a n put the s e le c te d photo fra me to the ima ge you
c a pture .
C a nc e l the P hoto F ra me func tion a fte r us e if you pre fe r
the ne xt ima ge not to be with P hoto F ra me .
SET
SET::OK
OK
NOT E
T his func tion c a n only be us e d whe n the re s olution is s e t
a t le s s tha n 6 me ga pixe ls ( 2816 x 2112) .
O pe r a tio n S te ps
T his func tion c a nnot be us e d with C ontinuous &
A E B s hooting.
1. ME N U
2.
or
3.
4.
or
5. OK
6.
7. OK
1.
2.
6.
3.
4.
7.
8.
19
5.
9.
122 mm+-2
BACK
BACK: :
Frame 1
165 mm+-2
U n d e r Im a g e S h o o tin g Mo d e (
)
N ig h t S c e n e S e ttin g ( D e fa u l t: O F F )
OFF
ON
BACK
MOVE: :
SET :OK
CHANGE:
F2.8
O pe r a tio n S te ps
1. ME N U
2.
or
3.
4.
or
5. O K
Y ou ma y a djus t the s hutte r s pe e d with
the L E F T / R IG H T B utton a fte r pre s s ing
down the E xpos ure / D e le te B utton.
Y ou ma y a djus t the a pe rture with the
U P / D O W N B utton a fte r pre s s ing down
the E xpos ure / D e le te B utton.
AUTO
C a nc e l the N ight S c e ne s e tting a fte r us e
if you pre fe r the ne xt ima ge not to be
with N ight S c e ne func tion.
H is to g r a m ( D e fa u lt: O F F )
HISTOGRAM
H is togra m s hows the dis tribution of tone s in the ima ge . T he
horiz onta l a xis c orre s ponds to pixe l brightne s s , with da rk
tone s to the le ft a nd bright tone s to the right. T he ve rtic a l a xis
s hows the numbe r of pixe ls of e a c h brightne s s in the ima ge .
OFF
ON
BACK
MOVE: :
122 mm+-2
7
5M
NIGHT
SET :OK
CHANGE:
20
U n d e r Im a g e S h o o tin g Mo d e (
)
SHOOTING
T his function allows you to take pictures continuous ly once
the s hutter button is releas ed.
T here are three options in the feature which are:
S ingle
T his option is for you to cancel the C ontinuous & AE B s hooting
function.
C ontinuous
T he continuous s hooting function will s tart after the S hutter
B utton is pres s ed. T he s hutter will keep releas ing if the
S hutter B utton is being pres s ed. T he s hutter will s top releas ing
when you s top pres s ing the S hutter B utton or the memory
of the flas h memory or when the memory card is full. At leas t
two images will be taken even with jus t one pres s of the
S hutter B utton.
AE B (Auto E xpos ure B racket)
When this function is chos en, when the S hutter B utton is
pres s ed, three images will be taken continuous ly. T he three
images are with (a) the current E V s etting (b) +0.5E V of the
current E V s etting and (c) -0.5E V of the current E V s etting.
1. ME N U
2.
or
3.
4.
or
5. O K
SINGLE
CONTINUOUS
AEB
MOVE :
O pe r a tio n S te ps
CHANGE:
NOT E
C ontinuous & A E B will be dis a ble d whe n photo
fra me is us e d.
S E T UP
P le a s e re fe r to pa ge 30.
21
122 mm+-2
C o n tin u o u s S h o o tin g S e ttin g
165 mm+-2
Under Image Stabilizing Helper Mode (
)
The operation procedure is the same as described in
"Under Image Shooting Mode ( )" (please refer to
page 12 to page 21) except for the flash mode
and ISO value setting.
When using this mode, the flash mode will automatically
set at Flash Off and the ISO will be set at Auto. These
two settings cannot be adjusted with this feature.
14
6M
It is suggested to use this feature under the
circumstances below or the effect won't be obvious.
Under low light environment and the object is
beyond 3.0 m from the camera.
This feature is just a helper to "reduce" the chance
of blurred image due to unsteady holding of hands to
the camera.
Image noise may occur with this feature.
This feature can only be used with still image but not
video.
When you prefer the next image to be without ISH
feature, please press the Mode Button to enter Image
Shooting Mode (
).
122 mm+-2
ISH
ISH
22
Under Playback Mode (
)
Playback of a Still Image
100-0021
Please press Playback Button to view the images taken.
OK
MENU
Press the Right or Left Button to go to or back to the next or
last image.
Operation Steps
Note
The icon (
) shows up when viewing still image comes
with a voice memo.
122 mm+-2
1. Mode Button
2. or
OK
MENU
Playback of a Movie Clip
100-0021
Press UP Button to play the movie clips.
OK
MENU
Press UP Button to play or pause or continue the playing.
Note
The icon (
) on the left of the TFT LCD represents a
movie clip, not a still image.
Operation Steps
1. Mode Button
2. or
OK
MENU
23
165 mm+-2
U n d e r P l a y ba c k Mo d e (
)
T h u m bn a il D is pl a y ( S m a l l Im a g e s )
100-0021
100-0002
E x plo r in g a n Im a g e
100-0021
100-0021
100-0021
OK
MENU
X 1.6
122 mm+-2
2
1
X 1.6
1. T humbna il D is pla y is a c onve nie nt tool for you to find the ima ge you took from the lis t. Y ou c a n pre s s W ID E B utton to
ha ve T humbna il D is pla y .
2. P re s s down the T E L E B utton a nd you c a n s e e the e nla rge me nt of the ima ge .
3. Y ou c a n s e e a s qua re ic on like (
) s howing the time s of the e nla rge me nt a nd the c urre nt loc a tion of the ima ge .
4. U s e the T E L E /W ID E B utton to z oom in or to z oom out.
5. U s e the U P /D O W N /L E F T /R IG H T B utton to loc a te the pos ition you would like to re vie w.
N o te : In this s te p, you c a n a ls o trim the s iz e of the pic ture by pre s s ing down the O K /Me nu B utton.
6. P re s s down the W ID E B utton to re turn to the origina l P la yba c k Mode .
24
U n d e r P l a y ba c k Mo d e (
)
D is pla y in g Im a g e In fo r m a tio n
100-0021
B y pre s s ing the S hutte r B utton "ha lfwa y down" ( if it is
pre s s e d too ha rd, it'll s witc h to Ima ge S hooting Mode ) , the
brie f a nd de ta ile d informa tion of the ima ge will s how on the
T F T L C D Monitor. P re s s the S hutte r B utton ha lfwa y down
a ga in to re turn to the P la yba c k Mode or pre s s the S hutte r
B utton down to the e nd to re turn to the Ima ge S hooting Mode .
S IZE : 1600X1200
F NO: F 2.8
E XP . T IME : 1/30
F L A S H: F IR E D
DA T E : 2005/07/01
122 mm+-2
T his de ta ile d informa tion will only s how with s till ima ge s .
S ta r ting a S lide S ho w (Defa ult: O F F )
SLIDE
SHOW
INTERVAL
EFFECT
BACK :
O pe r a tio n S te ps
P res s Menu/O K B utton to enter the menu a nd choos e S L IDE .
PLAY
1 SEC
OFF
T here a re three options in this fea ture which a re:
S HO W
T his option is to s ta rt the s lides how a fter you s et up the
s ettings of INT E R V AL a nd E F F E C T . In this option you ca n
a ls o choos e to pla y the s lides how jus t once or repea tedly.
INT E R V AL
T his option is to choos e the interva l time between ea ch s till
ima ge.
E FFE CT
T his option is to choos e the effect of the s lides how.
Note
After you complete the s etting of INT E R V AL a nd E F F E C T ,
plea s e go to S HO W
P L AY / R E P E AT to s ta rt the s lides how.
CHANGE :
25
165 mm+-2
Under Playback Mode (
)
Setting Image Protection
PROTECT
Operation Steps
This function allows you to prevent your specific images
from being deleted if the "LOCK" under "PROTECT" list is
selected. Conversely, you can select "UNLOCK" to cancel
the protection.
ONE PIC
ALL PICS
SET: OK
122 mm+-2
BACK :
Deleting Images
DELETE ALL
Operation Steps
You can delete all images or the current image (single) with
this function.
ONE PIC
ALL PIC
BACK :
SET: OK
26
Under Playback Mode (
)
Copy To Card
COPY TO CARD
Operation Steps
This function allows you to copy the images stored in the
internal flash memory into the memory card.
NO
YES
SET: OK
122 mm+-2
BACK :
DPOF -STANDARD
DPOF
STANDARD
INDEX
SIZE
CANCEL
MOVE :
DPOF
0 PIC
NO
DEFAULT
NO
CHANGE:
Operation Steps
100-0021
Operation Steps
STANDARD
STANDARD
INDEX
ONE PIC
SIZE
CANCEL
MOVE :
00 PRINTS
Operation Steps
EXIT: SH1
SET: OK
MOVE :
CHANGE:
This option allows you to put the print quantity (MAX. 30 pcs) on your memory card.
[ONE PIC] - specifies the number of copies for a selected image and you can press LEFT/RIGHT Button to go to next image.
[ALL PICS] - specifies the number of copies for all pictures apart from movie clips and voice recording files.
Note: You cannot see the "PRINT" function on the TFT LCD Monitor if a memory card is not inserted.
27
165 mm+-2
U n d e r P l a y ba c k Mo d e (
)
D P O F - IN D E X
T his option a llows you to put the numbe r of c opie s for inde x prints a nd print out a ll ima ge s a s thumbna il dis pla y.
D P O F - S IZ E
T his option a llows you to s e t up the printout pa pe r s iz e inc luding 3X 5, 4X 6, 5X 7, 8X 10 a nd D E FA U L T ba s e d on the s e tting of
your printe r.
122 mm+-2
[Y E S ] - you c a n print out the inde x prints for a ll ima ge s .
DP OF - C A NC E L
T his option a llows you to c a nc e l a ll s e ttings a bove inc luding S T A N D A R D , IN D E X , S IZ E .
28
U n d e r P l a y ba c k Mo d e (
)
R o ta tin g A n Im a g e
100-0004
O pe r a tio n S te ps
W ith this s e tting, you c a n rota te the ima ge with diffe re nt
de gre e s whic h a re V e rtic a l, H oriz onta l, 180, L e ft 90, &
R ight 90.
DEFAULT
NOT E
T his func tion c a n only be us e d whe n the re s olution is s e t
a t le s s tha n 6 me ga pixe ls ( 2816 x 2112) .
S H 1 s ta nds for "S hutte r 1" whic h me a ns to pre s s the
S hutte r B utton ha lfwa y. If the S hutte r B utton is be ing
pre s s e d ha rd, it'll s witc h to Ima ge S hooting Mode
a utoma tic a lly.
SET: OK
S elec ting a S TA R T-U P Ima ge
S. IMAGE
O pe r a tio n S te ps
T his func tion a llows you to s e le c t the ima ge a s your
de fa ult s ta rt-up ima ge if Y E S ( ple a s e re fe r to page 36 ) .
NO
YES
BACK :
SET: OK
S E T UP
P lea s e r efer to pa ge 32.
29
122 mm+-2
EXIT : SH1
MOVE PIC. :
165 mm+-2
Under Movie Clip Mode (
)
Video Size Setting (Default: 320 X240)
640x480
320x240
640x480
320x240
640
320
SET :OK
122 mm+-2
BACK :
The video size options are provided as follows:
Operation Steps
SIZE
Video Quality Setting (Default: 24FPS )
24 FPS
15 FPS
24
24 FPS
15 FPS
BACK :
The image quality options are provided as follows:
Operation Steps
FRAME RATE
FPS
15
FPS
SET :OK
30
Under Movie Clip Mode (
)
Video Effect Setting (Default: Normal)
B&W
Operation Steps
EFFECT
Normal
NOR
RGB
RG
B
No effect is added to the video.
NOR
Sepia
Turn the video into yellowish brown.
RG
B
This setting allows you to adjust the value
of RGB by yourself.
SET :OK
Video White Balance Setting (Default: AUTO)
The White Balance options are provided as follows:
Operation Steps
W. BALANCE
AUTO
DAYLIGHT
CLOUDY
FLUORESCENT
BACK :
Auto
Daylight
Cloudy
Fluorescent
Tungsten
Sunset
Custom
AWB
SET :OK
Adjusting the white balance automatically
Under the strong light environment
Under the cloudy light environment
Under the fluorescent light environment
Under the tungsten light environment
Under the sunset light environment
Under uncertain light environment
You can select the most appropriate white balance setting for a
given shooting environment by "Custom" setting.
1. Choose the CUSTOM setting.
2. Put a sheet of white paper in front of the camera, and then
press the shutter button.(Note:make sure that the TFT
shows on ly white area)
3. The Custom value will be recorded and this value will be
applied for image shooting.
31
122 mm+-2
B&W
NORMAL
SEPIA
RGB
BACK :
Turn the video into black and white.
165 mm+-2
SETUP Setting (
Operation Steps
OK
MENU
Note:
1. FILE
2. PWR SAVE
3. LANGUAGE
4. FORMAT
5.
6.
7.
8.
RESET
2 MIN
ENGLISH
NO
YY/MM/DD
SET : OK
DATE TYPE
TIME
IMPRINT
SOUND
9. LCD
10. VIDEO
11. Q. VIEW
12. RESET
You can find the SETUP icon in any
working mode by pressing down
the MENU Button and Up / Down
Button.
1.MENU
2. or
3.
4. or
5.
6. or
7. OK
13. S. SOUND
14. S. IMAGE
15. SH. SHOUND
16. GAME
17. USB
18. INFO.
122 mm+-2
SETUP
FILE
PWR SAVE
LANGUAGE
FORMAT
DATE TYPE
BACK :
)
Setting FILE
SETUP
FILE
PWR SAVE
LANGUAGE
FORMAT
DATE TYPE
BACK :
This setting allows you to name the files.
RESET
SERIES
If RESET is selected, the next file name will be set from
0001 even after formatting, deleting all, or inserting a new
memory card.
If SERIES is selected, the file name will directly follow the
latest stored file name instead.
SET : OK
32
)
Setting PWR SAVE (Default: 2 minutes)
Operation Steps
SETUP
FILE
PWR SAVE
LANGUAGE
FORMAT
DATE TYPE
BACK :
Setting LANGUAGE
OFF
SET: OK
FILE
PWR SAVE
LANGUAGE
FORMAT
DATE TYP
BACK :
Setting DATE TYPE(Default: YY/MM/DD)
Operation Steps
SETUP
1.MENU
2. or
3.
4. or
5. OK
NO
YES
SET : OK
4. German
8. Russian
9. Thai 10. Portuguese 11. SimplifiedChinese
12. Traditional Chinese 13. Dutch
Setting FORMAT(Default: NO)
SETUP
ENGLISH
1.MENU
2. or
3.
4. or
5.
6. or
7. OK
1. English 2. Japanese 3. French
5. Spanish 6. Italian
7. Turkish
The camera will be automatically off once having
been operated for the time interval you set. This
setting helps avoid some unnecessary power
consumption when the camera is not in use.
FILE
PWR SAVE
LANGUAGE
FORMAT
DATE TYPE
BACK :
Operation Steps
SETUP
1.MENU
2. or
3.
4. or
5.
6. or
7. OK
FILE
PWR SAVE
LANGUAGE
FORMAT
DATE TYPE
BACK :
SET : OK
1. YY/MM/DD
2. MM/DD/YY
3.DD/MM/YY
This function allows you to
format the memory card
or the built-in flash memory .
33
YY/MM/DD
MM/DD/YY
DD/MM/YY
SET : OK
Operation Steps
1.MENU
2. or
3.
4. or
5.
6. or
7. OK
122 mm+-2
SETUP Setting (
165 mm+-2
SETUP Setting (
)
Setting IMPRINT(Default: Off)
SETUP
DATE TYPE
TIME
IMPRINT
SOUND
LCD
BACK :
SETUP
Operation Steps
2006/01/20
12 : 58
SET : OK
This option allows you to set
the date and the time
1. MENU
2.
or
3.
4.
or
5.
6.
or
7.
8.
or
9.
10. or
11. OK
DATE TYPE
TIME
IMPRINT
SOUND
LCD
BACK :
HIGH
LOW
SET : OK
SET : OK
1.MENU
2. or
3.
4. or
5.
6. or
7. OK
Setting LCD (Default: Bright)
Operation Steps
SETUP
OFF
DATE
D&TIME
This option allows you to
print out the images with date
& team.
Setting SOUND
DATE TYPE
TIME
IMPRINT
SOUND
LCD
BACK :
Operation Steps
SETUP
1.MENU
2. or
3.
4. or
5.
6. or
7. OK
DATE TYPE
TIME
IMPRINT
SOUND
LCD
BACK :
122 mm+-2
Setting TIME
Operation Steps
DARK
NORMAL
BRIGHT
SET : OK
1.MENU
2. or
3.
4. or
5.
6. or
7. OK
This option is to adjust the
brightness of the TFT LCD
Monitor
This option is to choose
the volume of the
operation sound.
34
SETUP Setting (
)
Setting VIDEO
Operation Steps
NTSC
PAL
SET : OK
VIDEO
Q. VIEW
RESET
S. SOUND
S. IMAGE
BACK :
NTSC: U.S.A, Canada, Japan, South Korea, Taiwan, Mexico.
[1 ~ 3 sec] : The captured image is briefly displayed during the selected time.
Setting START-UP SOUND (Default: Sound 1)
Operation Steps
NO
YES
SET : OK
SET : OK
[OFF]: You cannot view the picture you just take in the LCD monitor.
Setting RESET(Default: No)
SETUP
OFF
1.MENU
2. or
3.
4. or
5.
6. or
7. OK
If Q. View is on, you can view the image you just captured on the LCD monitor.
PAL : Australia, Austria, Belgium, China, Denmark, Finland, Germany,
U.K., Holland, Italy, Kuwait, Malaysia, New Zealand, Singapore,
Spain, Sweden, Switzerland, Thailand, Norway.
VIDEO
Q. VIEW
RESET
S. SOUND
S. IMAGE
BACK :
Operation Steps
SETUP
1.MENU
2. or
3.
4. or
5.
6
or .
7.OK
SETUP
1.MENU
2. or
3.
4. or
5.
6. or
7.OK
VIDEO
Q. VIEW
RESET
S. SOUND
S. IMAGE
BACK :
OFF
SOUND1
SOUND2
SOUND3
SET : OK
Operation Steps
1.MENU
2. or
3.
4. or
5.
6. or
7.OK
There are three start-up sounds tochoose. Or you can choose"OFF" to
disable the start-up sound.
This option provides the function ofrecalling all default values
except the Date, Time, Language, andVideo Out.
35
122 mm+-2
SETUP
VIDEO
Q.VIEW
RESET
S. SOUND
S. IMAGE
BACK :
Setting QUICK VIEW(Default: 1 Second)
165 mm+-2
SETUP Setting (
)
Setting START-UP IMAGE( Factory Default Setting)
Operation Steps
SET : OK
There are three factory default start-up images and a space reserved for
one "user start-up image".
1.MENU
2. or
3.
4. or
5.
6. or
7. OK
To set up the start-up image, please follow the steps below.
1.Press Menu/OK Button and enter "SETUP".
2.Choose "S. IMAGE"
3.Select the image you prefer and press Menu/OK Button to confirm the
setting.
To set an image as the user start-up image, the steps are as below.
1.Enter Playback Mode.
2.Choose the image you would like to set as a start-up image.
3.Press Menu/OK Button and choose "S. IMAGE''.
4.Press OK to confirm.
122 mm+-2
SETUP
VIDEO
Q. VIEW
RESET
S. SOUND
S. IMAGE
BACK :
Setting Shooting Sound (Default: SH. SOUND 1)
SETUP
S. IMAGE
SH. SOUND
GAME
USB
INFO.
BACK :
SH. SOUND1
COMPUTER
PRINTER
SET : OK
Operation Steps
There are three shooting sounds available. Or you can choose
OFF to disable the shooting sound.
1.MENU
2. or
3.
4. or
5.
6. or
7. OK
36
SETUP Setting (
)
Setting USB
COMPUTER
PRINTER
SET : OK
Operation Steps
With the connection of the printer for PictBridge function,
you have to select the option of printer for correct
driver support.
1.MENU
2. or
3.
4. or
5.
6. or
7. OK
122 mm+-2
SETUP
S. IMAGE
SH. SOUND
GAME
USB
INFO.
BACK :
37
165 mm+-2
SETUP Setting (
)
How to Play Games
Operation Steps
1. PUZZLE
UP, DOWN, RIGHT, LEFT Buttons -- to manipulate
Delete Button -- to show the original picture
Shutter Button -- to escape from the game
1.MENU
2. or
3.
4. or
5.
6. or
7. OK
PUZZLE
TETRIS
SOKO
SNAKE
SET : OK
2.TETRIS
RIGHT/ LEFT - to manipulate the direction of the falling brick
UP Button - to rotating the brick
DOWN Button -- to speeding up brick to fall
Shutter Button -- to escape from the game
1. PUZZLE
2. TETRIS
3. SOKO
4. SNAKE
3.SOKO
TELE/WIDE - to select the game level
UP, DOWN, RIGHT, LEFT Buttons - to manipulate
DELETE Button -- to undo the last movement
Shutter Button -- to escape from the game
GAME 2
GAME 1
4.SNAKE
UP, DOWN, RIGHT, LEFT Buttons - to manipulate
Shutter Button -- to escape from the game
GAME 3
122 mm+-2
SETUP
S. IMAGE
SH. SOUND
GAME
USB
INFO.
BACK :
GAME 4
6
01
38
SETUP Setting (
)
Setting INFO.
SETUP
Operation Steps
BASIC
DETAIL
SET : OK
Choose "DETAIL" to show all the information of the image
on screen under Image Shooting Mode.
1.MENU
2. or
3.
4. or
5.
6. or
7. OK
Choose "BASIC" to show only the basic information of the image
on screen under Image Shooting Mode.
122 mm+-2
S. IMAGE
SH. SOUND
GAME
USB
INFO.
BACK :
39
165 mm+-2
Under Voice Recording Mode (
)
1. Press the Mode Button and choose Voice Recording Mode (
2. Press the Shutter Button to start the voice recording.
Press the Shutter Button again to stop the voice recording.
3. Press the Up Button to pause the voice recording.
Press the Up Button again to continue the voice recording.
4. You can connect camera with other audio player or PC by
USB cable to play and check the voice recording file.
).
122 mm+-2
00:06:44
START:SH1
00:00:00
40
Under Digital Music Player Mode (
)
MUSIC
2
1
PAUSE :
/
DCIM
00:09
How To Download The Digital Music To The Camera
1. Connect the Camera with the computer with the USB/Video cable.
2. Copy the digital music files to the "Removal Disk" (when the camera is connected to the computer the computer will create a
new disk called "Removal Disk").
How To Play The Digital Music
1. Press the Digital Music Player Button (
).
2. Choose the folder where you posted the digital music files on.
3. Choose the music file you would like to play and press the Menu /OK Button.
4. The music will come out from the built-in speaker if no earphone is used. If you prefer to play the music through an earphone,
please have the earphone connected to the Earphone Jack (
).
How To Delete The Digital Music From The Camera
There are two ways that you can delete the music files which are;
1. By pressing the Delete Button.
2. Connect the camera with the computer and delete the digital music files from the
Removal Disk.
41
122 mm+-2
R
165 mm+-2
Under Digital Music Player Mode (
)
How To Adjust The Volume
Press TELE/WIDE Button can adjust the volume.
How To Set The Playing Mode Of The Digital Music
By pressing the Down Button can choose the playing mode of the digital music which the mode options are as below.
1
Play single song just one time.
1
ALL
ALL
R
R
Play all songs just one time.
Play all songs repeatedly.
Play one song randomly.
Play all songs randomly.
Power Saving
By pressing the Shutter Button"half way" can switch off the TFT LCD Monitor to save power.
122 mm+-2
Play single song repeatedly.
42
Printer Connection (PictBridge Mode)
122 mm+-2
Connecting the Camera to a PictBridge-supported Printer
If the printer you have supports the interface of PictBridge, then you can have your camera connected
with the printer by the supplied USB cable to have the stored images print out directly.
1. Have both of the camera and the printer power on.
2. Press the MENU Button to go to SETUP Mode.
3. Go to USB and select PRINTER for printer connection.
4. Use the supplied USB cable to connect the camera to the PictBridge-supported printer as shown above.
43