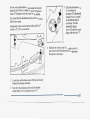
1
uwe1
The 1998 Buick LeSabre Owner’s Manual
1-1
Seats and Restraint Systems
This section tells you how to use your seats and safety belts properly. It also explains the “SRS” system.
2-1
Features and Controls
This section explains how to start and operate your vehicle.
3- 1
Comfort Controls and Audio Systems
This section tells you how to adjust the ventilation and comfort controls and how to operate your audio system.
4-1
Your Driving and the Road
Here you’ll find helpful information and tips about the road and how to drive under different conditions.
5-1
Problems on the Road
This section tells what to do if you have a problem while driving, such as a flat tire or overheated engine, etc.
6- 1
Service and Appearance
Care
Here the manual tells you how to keep your vehicle running properly and loolung good.
7-1
Maintenance Schedule
This section tells you when to perform vehicle maintenance and what fluids and lubricants to use.
8- 1
Customer Assistance Information
This section tells you how to contact Buick for assistance and how to get service and owner publications.
It also gives you information on “Reporting Safety Defects” on page 8-8.
9- 1
Index
Here’s an alphabetical listing of almost every subject in this manual. You can use it to quickly find
something you want to read.
r
a m -
We support voluntary
technician certification.
p?J
CERTIFIED
GENERAL MOTORS, GM, the GM Emblem,BUICK,
the BUICK Emblemand the name LESABRE are
registered trademarks of General Motors Corporation.
This manual includes the latest information at the time it
was printed. We reserve theright to make changes in the
product after that time without further notice. For
vehicles first sold in Canada, substitutethe name
“General Motors of Canada Limited” for Buick Motor
Division whenever it appears inthis manual.
Please keep thismanual in your vehicle, so it will be
there if you ever need it when you’re on the road. If you
sell the vehicle, please leave this manual in it so the new
owner can use it.
WE SUPPORT
VOLUNTARY TECHNICIAN
CERTIFICATION THROUGH
National Institute for
AUTOMOTIVE
SERVICE
EXCELLENCE
For Canadian OwnersWho Prefer a
French Language Manual:
Aux propribtaires canadiens:Vous pouvez vous
procurer un exemplaire de ceguide en franGais chez
votre concessionaire ou au:
DGN Marketing Services Ltd.
1577 Meyerside Dr.
Mississauga, Ontario L5T 1B9
Litho inU.S.A.
Part No. 25655109 C First Edition
ii
0Copyright General Motors Corporation 1998
All Rights Reserved
How to Use this Manual
Many peopleread their owner’s manual from beginning
to end whenthey first receivetheir new vehicle. If
you do this, it will help you learn about the features
and controls for yourvehicle. In this manual, you’ll
find thatpictures and words work together to explain
things quickly.
Index
A good placeto look for what you need is the Index in
back of the manual. It’s an alphabetical list of what’s in
the manual, and the page number where you’ll find it.
Safety Warnings and Symbols
You will find a number of safety cautions inthis book.
We use a box and the word CAUTION to tell you
about thingsthat could hurtyou if you were to ignore
the warning.
I
A
h!~CAUTION:
These mean thereis something that could hurt
you or other people.
In the caution area,we tell you what the hazard is. Then
we tell you what to do tohelp avoid or reduce the
hazard. Pleaseread these cautions.If you don’t, you or
others couldbe hurt.
You will also find a circle
with a slash through it in
this book. This safety
symbol means “Don’t,”
“Don’t do this” or “Don’t
let this happen.’’
iii
Vehicle Damage Warnings
Also, in this book you will find these notices:
NOTICE:
These mean there is something that could
damage your vehicle.
In the notice area, we tell you about something that can
damage your vehicle. Many times, this damage would
not be covered by your warranty, and it could be
costly. But the notice will tell you what to do to help
avoid the damage.
When you read other manuals, you might see
CAUTION and NOTICE warnings in different
colors or in different words.
You’ll also see warning labels on your vehicle. They use
the same words, CAUTION or NOTICE.
iv
Vehicle Symbols
These aresome of the symbols you may find on your vehicle.
For example,
these symbols
are used on an
original battery:
CAUTION
POSSIBLE
INJURY
A
CAUSTIC
BATTERY
ACID COULD
CAUSE
BURNS
These symbols
are used on
warning and
indicator lights:
WINDSHIELD
WIPER
TURN
SIGNALS
DOOR LOCK
UNLOCK
PROTECT
EYES BY
SHIELDING
These symbols
are on some of
your controls:
These symbols
have to do with
your lamps:
These symbols
are important
for you and
your passengers
whenever your
vehicle is
driven:
COOLANT
TEMP
e
BAllERY
CHARGING
SYSTEM
WINDSHIELD
DEFROSTER
FASTEN
SEAT
BELTS
BRAKE
-I-1
Here are some
other symbols
you may see:
FUSE
LIGHTER
t
u
(0)
c
z
e,
h
SPEAKER
POWER
WINDOW
SPARK OR
FLAME
COULD
EXPLODE
BATTERY
,111,
m
DAYTIME *
RUNNING * '
LAMPS ' * *
FOG LAMPS
0
$0
WINDOW
DEFOGGER
ENGINE OIL
PRESSURE
VENTILATING
FAN
ANTI-LOCK
BRAKES
FUEL
B
(@)
V
fi
vi
NOTES
Section 1 Seats and Restraint Systems
Here you’ll find information about the seats in your Buick and how to use your safety belts properly. You can also
learn about somethings you should not do with air bags and safety belts.
1-2
1-5
1-9
1-10
1- 10
1-17
1-18
1-18
1-25
Seats and Seat Controls
Safety Belts: They’re for Everyone
Here Are Questions Many People Ask About
Safety Belts and the Answers
How to Wear Safety BeltsProperly
Driver Position
Safety BeltUse During Pregnancy
Right FrontPassenger Position
Supplemental Restraint System(SRS)
Center PassengerPosition
1-26
1-29
1-32
1-35
1-47
1-50
1-50
1-50
Rear Seat Passengers
Rear Safety Belt ComfortGuides for Children
and Small Adults
Children
Child Restraints
Larger Children
Safety Belt Extender
Checking Your Restraint Systems
Replacing Restraint System Parts
After a Crash
1-1
Seats and SeatControls
This section tellsyou about the seats -- how to
adjust them -- and also about recliningseatbacks and
head restraints.
Manual FrontSeat
You can lose control of the vehicleyou
if try to
adjust a manual driver’s seat while the vehicle is
moving. The sudden movement could startle and
confuse you, or make you push a pedal when you
Pull up on the control bar under the frontof the seat to
don’t want to. Adjust the driver’s seat only when unlock it. Slide the seat to where you want it, then
the vehicle is not moving.
release the bar and try to move the seat with your body
to make surethe seat is locked into place.
1-2
Power Seat(If Equipped)
Rear Control:Raise the rearof the seat by pushing the
switch on the left. Lower the of
rear
the seat by pushing
the switchon the right.
RecliningFrontSeatbacks
.
The power seat controls are on the armrest.
Front Control:Raise the frontof the seat by pushing
the left sideof the switch. Push the right side
of the
switch to lower the front
of the seat.
To adjust the seatback, lift the lever on the outerofside
Center Control:Move the seat forward or backward by the seat and move the seatback to where you want it.
Release the lever to lock the seatback. Pull up on the
or back. Raise the seat
pushing the control on the front
by pushing the control on the left. Lower the seat by lever and the seat will go to an upright position.
pushing the control on
the,right.
1-3
But don’t havea seatback reclined if your vehicle
is moving.
Sitting in a recmea position when your vehicle is
in motion can be dangerous. Even if you buckle
up, your safety belts can’t do their job
when
you’re reclined like this.
The shoulder belt can’t do itsjob because it
won’t be against your body. Instead, it will be in
front of you. In a crash you could go into it,
receiving neckor other injuries.
The lap belt can’t doits job either. In a crash the
belt could go up over your abdomen. The belt
forces would be there, not at your pelvic bones.
This could cause serious internal injuries.
For proper protection when the vehicle is in
motion, have the seatback upright. Then sit well
back in the seat and wear your safety belt properly.
Head Restraints
Slide the head restraint up or down so that the top of the
restraint is closest to the top of your ears. Thisposition
reduces the chance of a neck injury in a crash.
1-4
Safety Belts: They’re for Everyone
This part of the manual tells youhow to use safety belts
properly. It also tells you some things you should notdo
with safety belts.
And it explains the Supplemental Restraint System
(SRS), or air bag system.
Don’t let anyone ride where he or she can’twear
a safety belt properly. If you are ina crash and
you’re not wearing a safety belt, your injuries
can be much worse. You can hit thingsinside the
vehicle or be ejected from it. You can be seriously
injured orkilled. In the same crash,
you might
not beif you are buckled up. Always fasten your
safety belt, and check that your passengers’ belts
are fastened properlytoo.
I It is extremelydangerous to ride in a cargo area,
inside or outside of a vehicle. In a collision,
people riding in these areas aremore likely to be
seriously injured orkilled. Do not allow peopleto
ride in anyarea of your vehicle that is not
equipped with seats and safety belts. Be sure
everyone in your vehicle isin a seat andusing a
safety belt properly.
1-5
Az!
-
FASTEN
BELTS
Your vehicle has a light
that comes on as a reminder
to buckle up. (See “Safety
Belt Reminder Light” in
the Index.)
Why Safety Belts Work
When you ride in or on anything, you go as fast as
it goes.
In most states and Canadian provinces, the law says to
wear safety belts. Here’s why: They work.
You never know if you’ll be in acrash. If you do have a
crash, you don’t know if it will be a bad one.
A few crashes are mild, and some crashes can be so
serious that even buckled up a person wouldn’t survive.
But most crashes are in between. In many of them,
people who buckle up can survive and sometimes walk
away. Without belts they could have been badly hurt
or killed.
After more than 30 years of safety belts in vehicles,
the facts are clear. In most crashes buckling up does
matter ... a lot!
1-6
I
.. . .
Take the simplest vehicle. Suppose it’s just a seat
on wheels.
Put someone on it.
Get it up to speed.Then stop the vehicle. The rider
doesn’t stop.
1-7
T b person keeps going until stopped by something.
In a real vehicle, it could bethe windshield ...
or the instrument panel...
a
Here Are Questions Many People Ask
About Safety Belts
-- and the Answers
‘.e:
.
.
Won’t I be trappedin the vehicle after an
accident if I’m wearing a safety belt?
I
You could be -- whether you’re’wearing a safety
belt or not. But you can unbuckle a safety belt,
even if you’re upside down. And your chance of
being conscious during and after an accident,
so
you can unbuckle and get out,
is much greater if
you are belted.
A:
\
Q:
A:
’
If my .vehicle has air bags,
why should I have to
wear safety belts?
Air bags are’inmany vehicles today and will in
be
most of them in the fidxue. But they are
supplemental systems only;so they workwith
Withsafetybelts, you slowdownas the vehicledoes.safetybelts
-- notinstead ofthem.Every
bag
You get more time to stop. You stop over more distance, system ever offered for sale has required the use
of
and your strongest bones take the forces. That’s why
air
safety belts. Evenif you’re in a vehicle that has
safety belts make such good sense.
bags, youstill have to buckle up to. get the most
protection. That’s true not0nly.hfrontal collisions,
but especiallyin side and other collisions.
or the safety belts!
‘
a
i
r
1-9
&= If I’m a good driver, andI never drive far from
home, why should I wear safety belts?
A:
First, you’ll want to know which restraint systems your
vehicle has.
You may be an excellent driver, but if you’re in an
accident -- even one that isn’t your fault -- you and
your passengers can be hurt. Being a good driver
doesn’t protect you from things beyond your
control, such as bad drivers.
We’ll start with the driver position.
Most accidents occur within 25 miles (40 km)of
home. And the greatest numberof serious injuries
and deaths occur at speeds of less than 40 mph
(65 km/h).
The driver has a lap-shoulder belt. Here’s how to wear
it properly.
Safety belts are for everyone.
How to Wear Safety Belts Properly
Adults
This partis only for people of adult size.
Be aware that thereare special things to know about safety
belts and children. And there are different rules
for smaller
children and babies.If a child will be riding in your
vehicle, see the part of this manual called “Children.”
Follow those rules for everyone’s protection.
1-10
Driver Position
This part describes the driver’s restraint system.
Lap-Shoulder Belt
1. Close and lock the door.
2. Adjust the seat (to see how, see “Seats” in the Index)
so you can sit up straight.
3. Pick up the latch plate and pull the belt across you. The lap partof the belt shouldbe worn low and snug.
on
Don’t letit get twisted.
the hips, just touching
the thighs. In a crhh, this applies
force to the strong, pelvic bones. And you’d be less likely
4. Push the latch plate into the buckle until
it clicks.
If you slid under it, the belt
to slide under the lap belt.
Pull up on the latch plate to make sure
it is secure.If
This could cause
would apply force at your dbdomen.
the belt isn’t long enough, see “Safety Belt
go
serious or even fatal injuries. The shoulder belt should
Extender” at the end
of this section.
over the shoulder and across the chest. ‘These parts of the
body are best able to take belt restraining forces.
.Make sure the release button on the buckle
is
positioned so you would be able to unbuckle the
The safety belt locksif there’s’a sudden stop
or crash.
safety belt quickly if you ever had to.
1-11
Shoulder Belt Height
Adjuster
Before you beginto drive, move the shoulder belt
adjuster to the height that is right for you.
To move.it down, squeeze the release handle and move
You can move
the height adjuster to the desired position.
of the
the adjuster' up just by pushing up on the bottom
release handle. After you move the adjuster to where
you wantit, try to moveit down without squeezing the
release handle to make sure
it has locked into position.
of
Adjust the heightso that the shoulder portion
the beltis centered on your shoulder. The belt.should
off
be away from your face and neck, but not falling
your shoulder.
I
1-12
@
What’s wrong with this?
:ON:
You can be seriously hurt if your shoulder belt is
too loose. In a crash, you would move forward
too much, which could increase injury. The
shoulder belt should fit against your
body.
L
A:
The shoulder beltis too loose. It won’t give nearly
as much protection thisway.
1-13
@
What's wrong with this?
1JTI IN:
You can be seriously injured rif! !y
belt is
buckled in thewrong place like this. In a crash,
the belt would go up over your abdomen. The
belt forces would be there, not at the pelvic
bones. This could cause serious internal injuries.
Always buckle your belt into thebuckle
nearest you.
A:
The belt is buckled in the wrong place.
1-14
What’s wrong with this?
You can be seriously injured if you wear the
shoulder belt under your arm. Ina crash, your
body would movetoo far forward,which would
increase thechance of head and neck injury.
Also, the belt would apply too much force to the
ribs, which aren’t as strong as shoulder bones.
You could also severely injure internal organs
like your liver or spleen.
A:
The shoulder beltis worn under the arm. It should
be worn over the shoulder at all times.
1-15
@
What's wrong with this?
A CAUTION:
a crash, you wouldn't have the full width of the
twisted,
belt to spread impact forces. If a is
belt
make it straightso it can work properly, or ask
your dealer tofix it.
A:
The belt is twisted across the body.
1-16
Safety Belt Use During Pregnancy
Safety belts work for everyone, including pregnant
women. Likeall occupants, they are more likely to be
seriously injuredif they don’t wear safety belts.
To unlatchthe belt,just push the button on the buckle.
The belt shouldgo back outof the way.
Before you close the door, be sure the belt is out of the
way. If you slam the door on you
it, can damage both the
belt .and your vehicle.
A pregnant woman should wear a lap-shoulder belt, and
the lap portion should be worn as low as possible, below
..
the rounding, throughout the pregnancy.
1-17
The best way to protect the fetus isto protect the
mother. When a safety belt is worn properly, it’s more
likely that the fetus won’t be hurt in a crash. For
pregnant women, as foranyone, the key to making
safety belts effective is wearing them properly.
Reduced-force frontal air bags are designed to help
reduce the risk of injury from the force of an inflating
air bag. But even these air bags must inflate very
quickly if they are to do their job and comply with
federal regulations.
Right Front Passenger Position
Here are the most important things to know about the air
bag system:
To learn how to wear the right front passenger’s safety belt
properly, see “Driver Position” earlier inthis section.
The right front passenger’s safety belt works the same way as
the driver’s safety belt
-- except for one thing. If youever pull
the lap portion
of the belt out all way,
the you will engage the You can be severelyinjured or killed in a crash if
child restraint locking feature.
If this happens,just let the belt
you aren’t wearing your safety belt even if you
go back all the way and start again.
have air bags. Wearing your safety belt during a
If your vehicle has a center passenger position, be sure
crash helps reduce your chance of hitting things
to use thecorrect buckle when buckling your
inside the vehicle or being ejected from it. Air
lap-shoulder belt. If you find that the latch plate will not
bags are 6‘supplementalrestraints” to thesafety
go fully into the buckle, seeif you are using the buckle
belts. All air bags even reduced-force air
for the centerpassenger position.
bags are designed to work with safety belts,
Supplemental Restraint System (SRS) but don’t replace them. Air bags are designed to
work only in moderate to severe crashes where
This part explains the Supplemental Restraint System
the frontof your vehicle hits something. They
(SRS) or air bag system.
CAUTION: (Continued)
Your vehicle has “Next Generation” reduced-force
frontal air bags -- one air bag for the driver and another
air bag forthe right front passenger.
--
~
1-18
--
--
CAUTION: (Con1ued)
aren’t designedsto inflate at all in rollover, rear,
side or low-speed frontal crashes. And, for
unrestrajned occupants, reduced-force bags
air
may provide less pro$ection in frontalcrashes
than moreforceful air bags have provided in the
past. Everyone in yourvehicle should wear a
safety belt properly whether or not there’s an
air bag forthat person.
--
Air bags inflate withgreat force, faster than the
blink of an eye. If you’re too closeto an inflating
air bag, it could seriouslyinjure you. This is true
even with reduced-force fmntal air bags. Safety
belts help keep youin position before and during a
crash. Always wear your safety belt, evenwith air
bags. The driver should sitas far back as possible
while still maintaining control’of the vehicle.
A CAUTION:
,
.
1
~
1
Childreri who are upagainst, or very close to,an
air bag when it inflates can be seriously injured
or killed. This is true even though your vehicle
bas reduced-force frontal airbags. Air bags plus
lap-shoulder belts offer the best protection for
adults, but not for young children and infants.
Neither thevehicle’s safety belt system nor itsair
bag system is designedfor them. Young children
and infantmeedthe protectionthat achild
restraint system can provide. Always secure
children properly inyour vehicle. To read how,
see the partof this manualcalled “Children” and
see the caution labels
on the sunvisorsand the
right frontpassenger’s safety belt.
.
1-19
BAG
There is an air bag
readiness light on the
instrument panel, which
shows AIR BAG.
How the Air Bag System Works
The system checks the airbag electrical system for
malfunctions. The lighttells you if there is an electrical
problem. See “Air Bag Readiness Light” in the Index
for more information.
Where are the air bags?
The driver’s air bag is in the middle of the
steering wheel.
1-20
.. .
I /11 CAUTION:
I
If something is betweenan occupant and an air
bag, the bagmight not inflate properly or it
might force the object into
that person. The.path
of an inflating air bag must be keptclear. Don't
put anythingbetween an occupant and anair
bag, and don't eattach or put anythingon the
steering.whee1hub oron or near any other air
bag covering.
The right front passenger's
air bag is in the instrument
side.
panel on the passenger's
i
1-21
When should an airbag inflate?
What makes anair bag inflate?
An air bag is designed to inflate ina moderate to severe
frontal or near-frontal crash. The air bag will inflate
only if the impact speed is above the system’s designed
“threshold level.” If your vehicle goesstraight into a
wall that doesn’t move or deform, the threshold level is
about 9 to 15 mph (14 to 24 km/h). The threshold level
can vary, however, with specific vehicle design, so that
it can be somewhat above orbelow this range. If your
vehicle strikes something that will move or deform, such
as a parked car, the threshold level will be higher. The
air bag is not designed to inflate in rollovers, side
impacts or rear impacts, because inflation would not
help the occupant.
In an impact of sufficient severity, the air bag sensing
system detects that the vehicle is in a crash. The sensing
system triggers a release of gas fromthe inflator, which
inflates the air bag. The inflator, air bag and related
hardware are all part of the air bag modules inside the
steering wheel and in the instrument panel in frontof the
right front passenger.
In any particular crash, no one can say whether an air
bag should have inflated simply because of the damage
to a vehicle or because of what the repair costs were.
Inflation is determined by the angleof the impact and
how quickly the vehicle slows down in frontal or
near-frontal impacts.
1-22
How does an air bag restrain?
In moderate to severe frontalor near-frontal collisions,
even belted occupants can contact the steering wheelor the
instrument panel.Air bags supplement the protection
provided by safety belts. Air bags distribute the forceof
the impact more evenly over the occupant’s upper body,
stopping the occupant more gradually. But air bags would
not help you in many types of collisions, including
rollovers, rear impacts andside impacts, primarily because
an occupant’s motion is not toward thoseair bags. Air
bags should never be regarded as anything more than a
supplement to safety belts, and then only in moderate to
severe frontal or near-fiontal collisions.
What will yousee after an air bag inflates?
After an air bag inflates,it quickly deflates, so quickly
that some people may not even realize theair bag
inflated. Some componentsof the air bag module-- the
steering wheel hub for the driver’s air bag, or the
instrument panel for the right front passenger’s
The parts of the bag
bag -- will be hot for a short time.
that come into contactwith you may be warm, but not
too hot to touch. There will be some smoke
and dust
coming from vents in the deflated air bags.
Air bag
inflation doesn’t prevent the driver from seeing or from
being able to steer the vehicle,
nor does it stop people
from leaving the vehicle.
I
Air bags are designed to inflate only once. Afterthey
inflate, you’llneed some new parts for your air bag
system. If you don’t get them, the air bag system
won’t be there to help protect you in another crash.
A new system will include air bag modules and
possibly other parts.The service manual for your
vehicle covers theneed to replace other parts.
Your vehicle is equipped with a crash sensing and
diagnostic module, which records information about
the air bag system. The module records information
about the readiness of the system, when the sensors are
activated and driver’s safety belt usage at deployment.
Let only qualified technicians work on your
air bag system. Improper service
can mean that your
air bag system won’twork properly. Seeyour dealer
for service.
When an air bag inflates, there is dust in the air.
This dust could cause breathing problems
for
people with a history of asthma or other
breathing trouble.To avoid this, everyone in the
vehicle should get outas soon as it is safe to do
so.
If you have breathing problems but can’t get out
of the vehicle after an air bag inflates, then get
fresh airby opening a window or door.
1-23
NOTICE:
If you damage the covering for the driver’s or the
right frontpassenger’s air bag, the bag may not
work properly. You may have to replace the air
bag module in the steeringwheel or both the air
bag module and the instrumentpanel for the
right frontpassenger’s air bag. Do not open or
break theair bag coverings.
If your vehicle ever gets into a lotof water -- such as
water up to the carpeting or higher -- or if water enters
your vehicle and soaks the carpet, the air bag controller
can be soaked and ruined. If this ever happens, and then
you start your vehicle, the damage could make the air
bags inflate, even if there’s no crash. You would have to
replace the air bagsas well as the sensors and related
parts. If your vehicle is ever in a flood,or if it’s exposed
to water that soaks the carpet,you can avoid needless
repair costs by turning off the vehicleimmediately.
Don’t let anyonestart the vehicle, even to tow it, unless
the battery cables are first disconnected.
Servicing Your Air Bag-Equipped Vehicle
Air bags affect how your vehicle should be serviced.
There areparts of the air bag system in severalplaces
around your vehicle. You don’t want the system to
inflate while someone isworking on your vehicle. Your
dealer and the LeSabre Service Manual have
information about servicing your vehicle and the air bag
system. To purchase a servicemanual, see “Service and
Owner Publications” in the Ir :x.
*
For up to10 minutes after theignition key is
turned off and the batteryis disconnected, an air
bag can still inflate during improperservice. You
can be injured if you are close to an airbag when
it inflates. Avoid yellow connectors. They are
probably part of the air bag system. Be sure to
follow proper service procedures, and make sure
the person performing work for you is qualified
to doso.
The air bag system does not need regular maintenance.
1-24
Center Passenger Position
m
U
Lap Belt
If your vehicle has front
and rear bench seats, someone
can sitin the centerpositions.
'
When you sit in a center seating position,
you have a lap
safety belt, which hasno retractor. To make the belt
longer, tilt the' latch plate
and pull it along the belt.
1-25
. .
.-
Rear Seat Passengers
It’s very important for rearseat passengers to buckleup!
Accident statisticsshow that unbelted peoplein the rear
seat are hurt more often in crashes than those who are
wearing safety belts.
Rear passengers who aren’t safety belted can be thrown
out of the vehicle in a crash.And they can strikeothers
in the vehicle who are wearing safety belts.
.
Rear Seat Outside Passenger Positions
To make thebelt shorter, pull its free endas shown until,
the belt issnug.
Buckle,, position and release it thesame way as the lap .
part of a lap-shoulder belt. Ifthe belt.isn’t long enough,
see “Safety Belt Extender” at the end
of this section.
Make sure the release
button on the buckle positioned
is
so you would be able to unbuckle the
safety belt quickly
if you ever hadto.
.
‘I
Lap-Shoulder Belt
The positions next to the
w.indowshave lap-shoulder
belts. Here’s how to wear oneproperly.
If the belt stops before
it reaches the buckle, tilt the
latch plate and keep pulling until you can buckle
it.
Pull up on the latch plate
to make sure itis secure.
1. Pick up the latch plate and pull the belt
across you.
Don’t letit get twisted.
2. Push the latch plate into the buckle until it clicks.
h
If the belt is not long enough, “Safety
see
Belt
Extender” at the end
of this section. Make sure the
release button on the buckle positioned
is
so you
would be able to unbuckle the
safety belt quickly if
you ever hadto.
1-27
I
I
3. To make the lap part tight, pull down on the buckle
end of the belt as you pull up on the shoulder part.
I
I
1
I
I
I
I
I
I
I
I
I
The lap part of the belt should be worn low and snug on the
hips, just touching the thighs. In a crash, this applies force
to the strong pelvic bones. And you’d be less likely to slide
under the lap belt.If you slid under it, the belt would apply
force at your abdomen.This could cause serious or even
fatal injuries. The shoulder belt shouldgo over the shoulder
and across the chest. These parts of the body are best able
to take belt restraining forces.
The safety belt locks if there’s a sudden stop or a crash.
1-28
1
You can be seriously hurtif your shoulder belt is
too loose.In a crash, you would move forward
too much, which could increase injury. The
shoulder belt should fit against your body.
Rear Safety Belt Comfort Guides for
ChildrenandSmallAdults
Rear shoulder belt comfort guides
will provide added
safety belt comfort for children who have outgrown
on a
child restraints and for small adults. When installed
shoulder belt, the comfort guide pulls the belt away
from the neck and head.
There is one guide for each outside passenger position in
the rear seat.To provide added safety belt comfort for
children who have outgrown child restraints
and for
smaller adults, the comfort guides
may be installed on
the shoulder belts. Here'show to install a comfort guide
and use the safety belt:
To unlatch the belt, justpush the button on the buckle.
1-29
1. Pull the elastic cord out
fkom between the 'edgeof
the seatback and the interior body
to remove the
,.
guide from itsstorageclip.
2. Slide the guide under and past the belt. The elastic
cord must be under the belt. Then, place the guide
of the belt into
over the belt,and insert the two edges
the slotsof the guide.
..
.
'
t
. .
,
Y
.; .
.
.
.
,:
.
.,, " i,
2
.
".:,
.
e,,,,
r.
'I
3. Be sure that the belt is not twisted and it lies flat.
The elastic cord must be under
the belt and the guide
on top.
4. Buckle, position and releasd the safety belt as
described in “Rear Seat Outside Passenger
Positions”
earlier inthis section.,Make sure that the
shoulder
belt crosses theshoulder.
To remove and store the comfort guides, squeeze the belt
edges togetherso that you c a take
~ them outfrom the
guides. f i l l the guide upward to expose
its storage clip,
and then slide the guide onto
the clip. Rotate the guide and
clip inward andin between the seatbackand the interior
body, leaving only the loopof elastic cord exposed.
1-31
.Children
'
. .
I
.
.
Everyone in a vehicle needs protection! That includes
infants and. all.children smaller than,adult size. Neither
CAUTION:
the distance traveled nor the age
ind size of the traveler
changes the need, for everyone, to use safety restrsiints.
Children who are upagainst, or very close to, any
In,fact, the lawin every statein the United States and,in
every Chadian province says children up to some age
air bag when it inflates can be seriouslyinjured'
must be restrained while in a vehicle.
or killed. This is true even though your vehicle
has reduced-force frontal airbags. Air bags plus
lap-shoulder belts offer the best protection for
. .
adults, butnot for young children andinfants.
Neither the vehicle's safety belt system nor its air
bag system is designed
for them. Young.chiidren
; '
and infantsneed the protection that child
a
restraint system can provide. Alwayssecure
children properly in
your vehicle.
,A
'
,
i.
,
5
i
1
.
c
-
Smaller children andbabies should always be
restrained in a child or infant restraint. The
instructions for the restraintwill say whether it is
the right type and size for your child. A very
young child’s hip bones are so small that a
regular belt might not stay low on the hips, as it
should. Instead, thebelt will likely be overthe
child’s abdomen. In a crash, thebelt would apply
force right on the child’s abdomen, which could
cause serious or fatal injuries.So, be sure that
any child small enough for one is alwaysproperly
restrained in a child or infant restraint.
Infants need complete support, including support for
the
head and neck. This is necessary because an infant’s
neck is weak and its head weighs so much compared
with the rest of its body. In a crash,an infant in a
rear-facing restraint settles into the restraint, so the crash
forces canbe distributed across the strongestpart of the
infant’s body, the back and shoulders. A baby should be
secured in an appropriate infantrestraint. This is so
important that many hospitals today won’t release a
newborn infant to its parentsunless there is an
infant restraint available for the baby’s first tripin a
motor vehicle.
1-33
. .
t
,
I
at.only 25 mph (40 km/h), a 12h..(5.5 kg) baby
will suddenly become a 240-1b. (UO kg) force on
your arms. The baby would be almost impossible
to hold.
Secure the baby in aninfant restraint.
L
!.. .
-.
Never holda baby in your-arms
while riding ina
vehicle. A baby doesn’t weighmuch until a
crash. During a crash a baby ;will become so
heavy you can’t hold it. For example, in a crash
CAUTION:,(Continued)
--
1-34
Child Restraints
Every t h e infants andyoung children ridein
vehicles, they should have protection provided
by
appropriate restraints.
@
What are the different typesof add-on
child restraints?
A:
Add-on child restraints are availablein four basic
types. When selecting a child restraint, take into
consideration not only the
child’s weight and size,
but also whether or not the restraint will be
compatible with the motor vehicle in which it will
be used.
An infant car bed (A) is a special bed made
for use
in a motorvehicle. It’s an infant restraint system
designed to restrain or positionchild-on
a
a
continuous flatsurface. With an infant car bed,
make sure that the infant’s head rests towafd the
center of the. vehicle.
1-35
/
.
.
e
i
A rear-facing infant restraint(B) positions an infant
to face the rearof the vehicle. Rear-facing infant
restraints are designed for infants
of up to about
20 lbs. (9 kg) and about one year of age. This type
of restraint faces the rear
so that the infant's head,
neck and body can have the support they need
in a
crash. Some infant seats come
in two parts -- the
base stays secured in the vehicle and the seat part
is removable.
c
'
I
I-
i
..
A forward-facing child restraint(C-E) positions a
child upright to face forward
in the vehicle. These
forward-facing restraints are designed help
to
protect childrenwho are from 20 to 40 lbs.
(9 to 18 kg) and about26 to 40 inches
(66 to 102 cm) in height, or up to around four
years
of age. One type,a convertible restraint,is
designed to be used either
as a rear-facing infant
seat or a forward-facing child seat.
I
"..
I
A booster seat (F, G) is designed for children who
are about 40 to 60 lbs. (18 to 27 kg) and about four
to eight yearsof age. It’s designed to improvethe
fit of the vehicle’s safety belt system. Booster seats
with shields use lap-only belts; however, booster
seats without shields uselap-shoulder belts.
Booster seats can also help a child to see out
the window.
1-38
When choosing achild restraint, be sure the child
restraint is designed to beused in a vehicle. If it is, it
will have a label saying that meets
it
Federal Motor
Vehicle Safety Standards.
Then follow the instructions for the restraint. You may
find these instructions on the restraint itself or in a
booklet, or both. These restraints use the belt system in
your vehicle, but thechild also has to besecured within
the restraint to help reduce the chanceof personal injury.
The
instructions that come with the infant or child
restraint will show you how to do that. Both the owner’s
manual and the child restraint instructions are important,
so if either one of these is not available. obtain a
replacement copy from the manufacturer.
Where to Put the Restraint
Accident statistics show that children are safer if they
are restrained in the rear rather than the front seat.We at
General Motors thereforerecommend that you put your
child restraint in the rear seat..Neverput a rear-facing
child restraintin the front passenger seat. Here’s why:
I
A child in a rear-facing child restraint can be
seriously injured if therightfront passenger’s air
bag inflates, even though your vehicle has
reduced-force frontal air bags. This is because
the back of the rear-facingchild restraint would
be very closeto the inflatingair bag. Always
secure a rear-facing child restraint ina rear seat.
You may secure a forward-facing child restraint
in the right front seat, but before you do, always
move the frontpassenger seat asfar back as it
will go. It’s better to secure the child restraint in
a rear seat.
1-39
A CAUTION:
Top Strap
-
A child in a child restraint in the center front seat
can be badly injured or killed by the right front
passenger air bag if it inflates, even though your
vehicle has reduced-force frontal air bags. Never
secure a chiId restraint in the center front
seat.
It’s always better to secure
a child restraint in the
rear seat. You may secure a forward-facing child
restraint in the right frontpassenger seat, but
before you do, always movethe frontpassenger
seat as far back as itwill go. It’s better to secure
the child restraint ina rear seat.
Wherever you install it,be sureto secure the child
restraint properly.
Keep in mind thatan unsecured child restraint can move
around in a collision or sudden stop and injure people
in
the vehicle. Besure to properly secureany child
restraint in your vehicle -- even when no child is in it.
If your child restraint has a top strap,
it should be
anchored. If you need to have an anchor installed,you
can ask your Buick dealer to put
it in foryou. If you
want to install an anchor yourself,your dealer can tell
you how to do it.
Canadian law requires that child restraints have a top
strap, and that the strapbe anchored.
1-40
and shoulder
If your child restraint has a top strap, your dealer can 2. Pick up the latch plate, and run the lap
obtain a kit with anchor hardware
and installation
this vehicle. The
instructions specifically designed for
dealer can then install the anchor you.
for In Canada,
this work willbe done foryou free of charge. Or, you
may install the anchor’yourself using the instructions
provided in the kit.
portions of the vehicle’s safety belt through or
around the restraint.The child restraint instructions
will show you how.
Securing a Child Restraint, in a Rear
Outside SeatltBosition
, [
You’ll be using the lap-shoulder belt. See the earlier part
about the top strap
if the child restraint has one. Be sure
to follow the instructions that came with the child
restraint. Secure the child
in the child restraint
when and
3. Tilt the latch plate to adjust thebelt if needed.
as the instructionssay.
If the shoulder belt goes
in front of the child’s face or
1. Put the restraint on the seat.’
neck, put it behind the child restraint.
1-41
I
,
4. Buckle the belt. Makesure the releasebutton is
positioned so you would be able to unbuckle the
safety belt quickly if you ever had to.
.
5. To tighten the belt, pull up on the shoulder belt while
you push down on the child restraint. If you're using
a forward-facingchild restraint, you may find it
helpful to use your knee to pushdown on the child
restraint as you tighten the belt.
,
6. Push and pull the child restraint in different
directions to be sure it issecure.
To remove the child restraint,
just unbuckle thevehicle’s
safety belt and letit go back all theway. The safety belt
will move freely again and be ready work
to for an adult
or larger child passenger.
Securing a Child Restraint in the Center
Rear Seat Position
U
You’ll be using the lap belt.Be sure to follow the
instructions that camewith the child restraint. Secure
the child in the child restraint when and as the
instructions say.
A CAUTION:
hgm
:+*
1
. L
fgp
zjqg;
43
.2..I*
A child in a child restraint in the cenzer front seat
can be badly injured orkilled by the rightfront
passenger air bag if it inflates, even though your
vehicle has reduced-force frontal airbags. Never
secure a child restraint in the center frontseat.
It’s alwaysbetter to secure child
a restraint in the
rear seat. You may secure a forward-facingchild
restraint in the right frontpassenger seat, but
before you do, always movethe frontpassenger
seat as far back as itwill go. It’s better to secure
the child restraint ina rear seat.
See the earlier part about the top strap
if the child
:estraint has one.
1-43
1. Make the belt as long as possible
by tilting the latch
plate and pulling it along the belt. ’
2. Put the restraint on the seat.
3. Run the vehicle’s safety belt throughor around the
restraint. The child restraint instructions will
show
YOU how.
1-44
4. Buckle the belt. Make sure the release button is
positioned so you would be able to unbuckle the
safety belt quickly
if you ever had to.
5. To tighten the belt, pull its free end while
you push
down on the child restraint.If you’re using a
forward-facing child restraint,you may find it
helpful touse your knee topush down on the child
restraint as you tighten the belt.
6. Push and pull the child restraint in different
directions to besure it is secure.
To remove the child restraint, just unbuckle the vehicle’s
safety belt. It will be ready to work for an adult or larger
child passenger.
Securing a Child Restraint in the Right
Front Seat Position
Your vehicle has a right front passenger airbag. Never
put a rear-facing child restraint in this seat. Here’s why:
A CAUTION:
I
A child in a rear-facingchild restraint canbe
seriously injured orkilled if the rightfront
passenger’s air bag inflates, even though your
vehicle has reduced-force frontalair bags. This is
because the back of a rear-facing child restraint
would be very closeto the inflatingair bag.
Always secure a rear-facing child restraint in the
rear seat.
You’ll be using the lap-shoulder belt. See the earlierpart
about the top strap if the child restraint has one. Be sure
to follow the instructions that came
with the child
restraint. Secure the child in the
child restraint when and
as the instructions say.
1. Because your vehicle has a right front passenger air
bag, always move the seat as far backas it will go
before securing a forward-facing child restraint. (See
“Seats” in the Index.)
2. Put the restraint onthe seat.
1-45
3., Pick up the latch plate, and run lap
theand shoulder
portions of the vehicle's safety belt through or
around therestraint.,The child restraintinstruct'ions
will-showyou how.
If the shoulder belt goes in front of the child's face or
neck, put it behind the child
restraint.
5. Pull the restof the lap belt all the way-outof the
retractor to set the
lock.
L
4. Buckle the belt. Make sure the release button is
positioned so you would be able to unbuckle
the
safety belt quickly if you ever hadto.
1-46
.
\
Larger Children
6 . To tighten the belt, feed the lap belt back into the
retractor whileyou push down,on the child restraint.
You may find it helpful to use your knee
to push
Children who have outgrown child restraints should
down on the child restraint
as you tighten thebelt.
wear thevehicle’s .safetybelts.
7. Push and pull the child restraint in different
If you htive the choice, a child should sit next to a
directions to be sure it is secure.
window so the child can wear lan-shoulder
a
belt and
To remove the child restraint,Just unbuckle thevehicle’s
get the additional restraint asho&&r belt c b provide.
safety.belt and let
it go back all the
way. The safety belt
will move freely again and be readywork
to for an adult
or larger child passenger.
1-47
Accident statistics show that children are safer if they
are restrained in the rear seat. But they need to use the
safety belts properly.
Children who aren’t buckled up can be thrown out in
a crash.
Children who aren’t buckled up can strike other
people who are.
Never do this.
Here two children are wearing the same belt. The
belt can’t properly spread the impactforces. In a
crash, the two children can be crushed together
and seriously injured. A belt must be used by
only one person at a time.
Q.’ What if a child iswearing a lap-shoulder belt,
but thechild isso small that the shoulder belt is
very close to the child’s face or neck?
A:
1-48
Move the child toward the center of the vehicle, but
be sure that the shoulder belt still is on the child’s
shoulder, so that in a crash the child’s upper body
would have the restraint that belts provide. If the
child is sitting in a rear seatoutside position, see
“Rear Safety Belt Comfort Guides’’ in the Index.
If the child is so small that the shoulder belt is still
very close to the child’s face orneck, you might
want to place the child in the center seat position,
the one that has only a lap belt.
...
.
Never do this.
Here a child issitting in a seatthat has a
lap-shoulder belt, but the shoulderpart is behind
the child. If the child wears the belt in this way, in
a crash thechild might slide under thebelt. The
belt’s force would then be applied righton the
child’s abdomen. That could cause serious or
fatal injuries.
Wherever the child sits, the lap portion
of the belt
should beworn low and snug on the hips, just touching
the child’s thighs. This applies belt forcethe
to child’s
pelvic bones in a crash.
1-49
Safety Belt Extender
If the vehicle’s safety belt will fasten around you, you
should use it.
But if a safety belt isn’t long enough to fasten, your
dealer will order you an extender. It’s free. When you go
in toorder it, take the heaviest coat you will wear, so the
extender will be long enough for you. The extender will
be justfor you, and just for the seat in your vehicle that
you choose. Don’t let someone elseuse it, and use it
only for the seat it is made to fit.To wear it, just attach it
to the regular safety belt.
Checking Your Restraint Systems
Now and then, make sure thesafety belt reminder light
and all your belts, buckles, latch plates, retractors and
anchorages are working properly. Look forany other
loose ordamaged safety belt system parts. If you see
anything that might keep a safety belt system from
doing its job, have it repaired.
Torn or frayed safety belts may not protect you in a
crash. They can rip apart under impact forces. If a belt is
torn or frayed, geta new one right away.
Also look forany opened or broken air bag covers, and
have them repaired or replaced. (The air bag system
does not need regular maintenance.)
Replacing Restraint System Parts
After a Crash
If you’ve had a crash, do you need new belts?
After a very minor collision, nothing may be necessary.
But if the belts were stretched, as they would be if worn
during a more severe crash, then you need new belts.
If belts are cut ordamaged, replace them. Collision
damage also may mean youwill need to have safety belt
or seatparts repaired or replaced. New parts and repairs
may be necessary even if the belt wasn’t being used at
the time of the collision.
If your seat adjuster won’t work after a crash, the special
part of the safety belt that goes through the seat to the
adjuster may need to be replaced.
If an air bag inflates, you’ll need to replace air bag
system parts. See the part on the air bag system earlier
in this section.
fi
NOTES
1-51
b% NOTES
1-52
Section 2 FeaturesandControls
Here you can learn about the many standard
and optional featureson your vehicle, and information on starting,
you if everything
shifting and braking. Also explained are the instrument panel
and the warning systems that tell
is working properly-- and what to do if you have a problem.
2-2
2-4
2-8
2-13
2-15
2- 16
2-17
2-19
2-19
2-2 1
2-22
2-24
2-27
2-28
2-3 1
2-3 1
Keys
Door Locks
Remote Keyless Entry System(If Equipped)
Trunk
Theft
Universal Theft-Deterrent (If Equipped)
PASS-Key@I1
New Vehicle “Break-In’’
Ignition Positions
Starting Your Engine
Engine Coolant Heater(If Equipped)
Automatic Transaxle Operation
Parking Brake
Shifting IntoPARK (P)
Shifting Outof PARK (P)
Parking Over Things That Burn
2-32
2-32
2-33
2-34
2-34
2-35
2-40
2-42
2-46
2-5 1
2-53
2-53
2-54
2-56
2-59
Engine Exhaust
Running Your Engine WhileYou’re Parked
Windows
Horn
Tilt Wheel
Turn SignaVMultifunction Lever
Exterior Lamps
Interior Lamps
Mirrors
Storage Compartments
Ashtrays and Cigarette Lighter
Sun Visors
Instrument Panel
Instrument Panel Clusters
Warning Lights, Gages and Indicators
Keys
Leaving young children in a vehicle with the
ignition key is dangerous for many reasons.
A child or others could be badly injured or
even killed.
They could operate power windows or other
controls or even make the vehicle move. Don’t
leave the keys ina vehicle with young children.
2-2
The ignition keys are for
the
ignition only.
When a new vehicle is delivered,the dealer removes
the plugs from thekeys, and gives them to the first
owner. However, the ignition key may not have a plug.
If the ignition key doesn’t have a plug,
it will have a
bar-coded key tag.
Each plug or tag has a code on it that tells your dealer or
a qualifiedlocksmith how to make extra keys.Keep the
plugs or the tags in a safe place.
If you lose your keys,
you’ll be able to havenew ones made easily using these
plugs or the tag. If your ignition keys don’t have plugs
or the tag, goto your dealer forthe correct key code if
you need a new ignition key.
The door keys are ror the
doors and all other locks.
1
I
I NOTICE:
Your vehicle has a numberof features that can
of
help prevent theft. But you can have a lot
trouble getting into your vehicle if you ever
lock your keys inside. You may even have to
damage your vehicleto get in.So be sure you
have extra keys.
2-3
Door Locks
rUnlocked doors canbe dangerous.
Passengers -- especially children -- can easily
open the doors andfall out. When a door is
locked, the inside handle won’t open it.
Outsiders can easily enter throughan unlocked
door when you slow downor stop yourvehicle.
This may not beso obvious: You increase the
chance of being thrown outof the vehicle in a
crash if the doors aren’tlocked. Wear safety belts
properly, lock your doors, and you will befar
better off whenever you drive yourvehicle.
There areseveral ways to lockand unlock your vehicle.
2-4
From the outside, use your door key or remote keyless
entry transmitter (if equipped). With your door key,
turning the key toward the rearof the vehiclewill lock
the door. Turning the key toward the front of the vehicle
will unlock it.
If your vehicle has a theft-deterrent system and it
is activated, unlock the doors only with the key or
remote keyless entry system. This will avoid setting
off the alarm.
To lock the door from the
inside, slidethe manual
door lock control on the
door down.To unlock the
door, slide the manual door
lock control up.
Power
1 With power door locks,
you can lock or unlock
all the doors of your
vehicle using the driver’s
or front passenger’s door
lock switch.
closed again,it will not lock automatically. Just use the
manual or power lock to lock the door again.
If you need to lock the doors before shifting out of
PARK (P), just use the manual or powerlock button
to lock the doors.
Personal Choice Programming
If your vehicle is equipped with remote keyless entry,
you can program thememory door locks featureto
change to the following modes:
Mode
Operation
0
The switch on each rear doorworks only that door’s
lock. It won’t lock (or unlock) all of the doors -- that’s a
safety feature.
All doors automatically lock when shifted
out of PARK (P). No automatic doorunlock.
2
All doors automatically lock when shifted
out of PARK (P). Only the driver’s door
automatically unlocks when shifted into
PARK (P).
3
All doors automatically lock when shifted
out of PARK (P). All doors automatically
unlock when shifted intoPARK (PI.
Memory Door Locks
Close the doors and turn on the ignition. Every timeyou
move the shift lever out of PARK (P), all of the doors
will lock. And, every timeyou stop and move the shift
lever into PARK (P), the doorswill unlock. If someone
needs to get out while you’re not in PARK (P), have that
person use the manual or power lock. When the dooris
No automatic door lock orunlock.
Vehicles are delivered programmed in Mode 3.
Use the following procedure to changemodes:
Delayed Locking(If Equipped)
1. Close all the doors and turn the ignition on. Keep all
doors closed throughout this procedure.
This feature lets the driver delay the actual loclung
of the vehicle. When the power door lock switch is
pressed with the key removed from the ignition, and
the driver’s door open, a chime will sound three times
to signal that delayed locking is active. When all doors
have been closed, the doors will lock automatically
after five seconds. If any door is opened before this, the
five-second timer will reset itself once all the doors have
been closed again.
2. Press and hold LOCK on the driver’s power door
lock switch through Step 4.
3. Press theLOCK button on the remote keyless entry
transmitter. The automaticdoor locks will remain in
the current mode.
4. Press the LOCK button on the transmitter again.
Each time the transmitter’s LOCK button is pressed,
the mode will advance by one, going from 3 to 0 to
1, etc.
Note: The door lockswill cycle according to the
mode entered while customizing the memory door
locks. (Mode “0” has no feedback.)
5 . Release the power door lockswitch. The
automatic door lockswill remain in the most
recent mode selected.
Pressing the door lock switch twice within two seconds
will override this feature.
Personal Choice Programming
The delayed locking feature canbe turned on or off
for each remote keyless entry transmitter. Vehicles are
delivered with each transmitter defaulted with delayed
locking off.
To turn the feature on:
1. Press and hold LOCK on the driver’s power door
lock switch throughout this procedure. All the
doors will lock.
2-6
2. Press the UNLOCK button on the transmitter.
The lock delay is still off and all doors will
remain locked.
Rear Door SecurityLock
Your vehicle is equipped
with rear door security
locks that help prevent
passengers from opening
the rear doors of your
vehicle from the inside.
3. Press the UNLOCK button on the transmitter again.
Lock delay is now active and all doors will unlock.
4. Release the power door lock switch.
To turn this feature off, repeat the previous procedure.
If your vehicle is not equipped with remote keyless
entry, the delayed locking feature canbe turned on or
off by using the following procedure:
1. With the ignition on, press and hold LOCK on the
driver’s power door lock switch. All doors will lock.
2. Cycle the headlamp switch four times. On the third
cycle, the doors will lock if the feature is now off, or
will unlock if the feature has beenturned on.
To use one of these locks:
3. To change modes, cycle the headlamp switch once
more. A lockingaction will confirm the new mode.
2. Move the lever located on the door edge, all the
way up to the ENGAGED position.
4. Release the power door lock switch.
3. Close the door.
To turn the feature off, repeat the previous procedure.
4. Do the same thing to the other rear door lock.
1. Open one of the rear doors.
This procedure changesthe mode for only the
transmitter used to change thissetting. The procedure
will need to be repeated for the second transmitter.
2-7
The rear doors of your vehicle cannot beopened from
the inside when this feature is in use. If youwant to
open a rear door when the security lock is on:
1. Unlock the door.
2. Then open the door fromthe outside.
If you don’t cancel the security lock feature, adults or
older children who ride in the rear seat won’t be able to
open the rear door from the inside. You should let adults
and older children know how these security locks work,
and how to cancel the locks.
To cancel the rear door lock:
1. Unlock the door and open the door from the outside.
2. Move the lever all the way down.
3. Do the same for the other rear door.
The reardoor locks will now work normally.
Lockout Protection
The power door locks will not work if the key is left
in the ignition with the driver’s door open. You can
override this feature by holding the power door lock
switch for morethan three seconds, unless the engine
is running.
2-8
Leaving Your Vehicle
If you are leaving the vehicle, take your keys, open
your door and set the locks from the inside. Then get out
and close the door. Or, youmay also use the LOCK
button on the remote keyless entry transmitter after
shutting the doors.
If your vehicle has a theft-deterrent system, see
“Universal Theft-Deterrent” in the Index.
Remote Keyless Entry System
(If Equipped)
If your vehicle has this
option, you can lock and
unlock your doors or
unlock your trunk from
about 3 feet (1 m) up to
30 feet (9 m) away using
the remote keyless entry
transmitter supplied with
your vehicle.
Check the distance. You may be too far fromyour
vehicle. You may need to stand closer duringrainy
or snowy weather.
Your remote keyless entry system operateson a radio
frequency subject to Federal Communications
Commission (FCC) Rulesand with Industry Canada.
Check the location. Other vehicles or objects may
be blocking the signal.Take a few steps to the left
or right, hold the transmitter higher, and try again.
This device complieswith Part 15 of the FCC Rules.
Operation is subject to the following two conditions:
(1) this devicemay not cause harmful interference,
and (2) this device must acceptany interference
received, including interferencethat may cause
undesired operation.
0
This device complieswith RSS-210 of Industry Canada.
Operation is subject tothe following two conditions:
(1) this device may not cause interference,and (2) this
device must accept any interferencereceived, including
interference that may cause undesired operation of
the device.
Operation
Changes or modifications to this system by other than an
authorized service facility couldvoid authorization to
use this equipment.
This system has a range of about 3 feet (1 m) up to 30 feet
(9 m). At times you may notice a decrease in range. This
is normal for any remote keyless entry system.If the
transmitter does not work orif you have to stand closer
to your vehicle for the transmitter to work, trythis:
Check to determine if battery replacement is
necessary. See the instructions thatfollow.
If you’re still having trouble, see your dealer or a
qualified technician for service.
The driver’s doorwill unlock when UNLOCK
is pressed.
If UNLOCK is pressed again within five seconds,all
doors will unlock. Pressingthe UNLOCK button will
also illuminatethe interior lamps. See “Illuminated
Entry” in the Index.
All doors will lock when LOCK is pressed.
The trunk will unlock when the trunk symbol is pressed
when the ignition is inOFF. The trunk symbol will
also work when the ignition is on, but only while in
PARK (P).
Instant Alarm
Personal Choice Features
When the button with the horn symbol on the remote
keyless entry transmitter is pressed, the horn will sound
and the headlamps and taillamps will flash for up to one
minute. This can be turned off by pressing the instant
alarm button again or by turning the ignition on. If your
vehicle is equipped with the Universal Theft-Deterrent
feature, you may also turn off the instant alarm by
unlocking the vehicle with a key.
The following list of features that are available on your
vehicle can be programmed to each driver’s preference
for each of the key transmitters.
0
Memory DoorLocks: This featureprograms your
door locks to automatically lock orunlock when
shifting in and out of PARK (P).
0
Security Feedback:This featureprovides feedback
to the driver when the vehicle receives a command
from the remote keyless entry transmitter.
0
Delayed Locking:This featurelets the driver delay
the actual locking of the vehicle. When all doors
have been closed, the doors will lock automatically
after five seconds.
Perimeter Lighting:When the UNLOCK button
on the key transmitter is pressed, the headlamps,
parking lamps, back-up lamps and cornering lamps
will turn on.
Resynchronization
If only the instant alarm works, the transmitter needs to
be resynchronized to the receiver. Do this by pressing
and holding both the LOCK and UNLOCK buttons at
the same time for about eight seconds. You must be
within range of the vehicle.
Once the transmitter has been resynchronized, the horn
will chirp and the exterior lamps will flash once. The
system should now operate properly.
0
For more detailed information and programming
instructions, refer to the Index for each individual
feature listed above.
2-10
Security Feedback
This featureprovides feedback to the driverwhen the
vehicle receives a command from the remote
keyless
entry transmitter. One of the following modesmay be
selected for each transmitter:
ModeSecurityFeedback
ModeSecurityFeedback
5
Headlamps, parking lamps and cornering
lamps (if equipped) flashand horn chirps
when locking; headlamps, parking lamps and
cornering lamps(if equipped) flash when
unlocking vehicle.
0
No feedback when locking or
unlocking vehicle.
Feedback will be provided according to the modethat
has been selected.
1
No feedback when locking; headlamps,
parking lamps and cornering lamps (if
equipped) flashwhen unlocking vehicle.
Vehicles are delivered programmed in Mode 5 . To
change to another mode:
2
Headlamps, parking lamps and cornering
lamps (if equipped) flashwhen locking;
no feedback when unlocking vehicle.
2. Press and hold LOCK on the driver’spower door
lock switch.
3
Headlamps, parking lampsand cornering
lamps (if equipped) flash when locking
and unlocking vehicle.
4
Headlamps, parking lampsana cornering
lamps (if equipped) flashand horn
chirps when locking; no feedbackwhen
unlocking vehicle.
1. Turn the ignition key to OFF.
3. Press the trunk button on the transmitter. The
transmitter will remain in its current mode.
4. Press the trunk button again. Each time the trunk
button is pressed, the transmitter will advance to
the next mode.
5. Release the power door lock switch.
This procedure changes the mode for only the
transmitter used to change this setting. The procedure
will need to be repeated for the second transmitter.
2-11
Matching Transmitter(s) To Your Vehicle
Each remote keyless entry transmitter is coded to
prevent another transmitter from unlocking your vehicle.
If a transmitter is lost or stolen, a replacement can be
purchased through your dealer. Remember to bring any
remaining transmitters with you when you go to your
dealer. When the dealer matches thereplacement
transmitter to your vehicle, any remaining transmitters
must also be matched. Once your dealer has coded the
new transmitter, the lost transmitter will not unlock your
vehicle. Each vehicle can haveonly four transmitters
matched to it.
See your dealer to match transmitters to another vehicle.
Battery Replacement
Under normal use, the battery in your remote keyless
entry transmitter should last about twoyears.
You can tell the battery is weak if the transmitter won’t
work at the normal range inany location. If you have to
get close toyour vehicle before the transmitter works,
it’s probably time to change the battery.
2-12
For battery replacement, use one Duracell@
battery, type
DL-2032, or a similar type.
I NOTICE:
When replacing the battery, use
care not to touch
any of the circuitry. Static from your body
transferred to these surfaces maydamage the
transmitter.
I
To replace thebattery:
Trunk
I. Insert a coin intothe notch near the key ring. Turn
the coin to the left (counterclockwise) to separate
the
two halves of the transmitter.
Trunk Lock Release
2. Once the transmitteris separated, use apencil eraser
to remove the old battery. Do not use a metal object.
3. Remove and replace the battery. Replace it as the
instructions inside the cover indicate.
tightly to be sure
4. Snap the transmitter back together
no moisture can enter.
5. Resynchronize the transmitter by pressingand
holding the LOCKand UNLOCK buttons for
about eight seconds.You must be within range
of the vehicle. When the transmitterhas been
resynchronized, the horn will chirp and the
headlamps, parking lampsand cornering lamps (if
equipped) will flash once.
To unlock the trunk from the outside,insert the door key
and turn it to the right.
Remote Trunk Release
The TRUNK releasebutton
is on the instrument panel
to the left of the steering
column. Thetransaxle
must be inPARK (P) or
NEUTRAL (N).
If the remote trunk release button does not open the
trunk, make surethe remote trunk release lockoutswitch
in the glove box is in the on position.
2-13
Trunk Lid
The trunk release lockout
switch in the glove
box
must be on forthe TRUNK
button to work. This feature
allows you to secure items
in the trunkwhen you must
leave the ignition key with
an attendant.
To secure the trunk, turn off the TRUNK RELEASE,
lock the glovebox, then take the door key
with you.
Now the trunk button to the left,
of the steering column
will not open the trunk.
Trunk Security Override
The remotekeyless entry transmitter (if equipped), will
open thetrunk even if the trunk release lockoutswitch
is in OFF.
2-14
It can bedangerous to drivewith the trunk lid
open because.carbon monoxide (CO) gas can
come into yourvehicle. You can’t see or smell
CO. It can cause unconsciousness and even death.
If you must drivewith the trunklid open or if
electrical wiring or othercable connections must
pass through theseal between the body and the
trunk lid:
Make sureall windows are shut.
0 Tbrn the fanon your heatingor cooling
system to its highest speed withthe setting
on VENT.That will force outside air into
your vehicle. See.“Comfort Controls” in
the Index.
If you have air outlets on or under the
instrument panel, open them all theway..
See “Engine Exhaust” in the Index.
~
b
Theft
Parking Lots
Vehicle theft is big business, especially in some cities.
Although your vehiclehas a number of theft-deterrent
features, we know that nothing we put on it can make
it impossible to steal. However, there areways you
can help.
If you park in a lot where someone will be watching
your vehicle, it’s best to lock it up and take your keys.
But what if you have to leave your ignition key?
Key in the Ignition
If you leave your vehicle with the keys inside,it’s an
easy target for joyriders or professional thieves -- so
don’t do it.
With the ignition off and the driver’s door open,you’ll
hear a chime remindingyou to remove your key from
the ignition and take it with you. Always dothis. Your
steering wheel will be locked, and so will your ignition
and transaxle. And rememberto lock the doors.
Parking at Night
e If possible, park in a busy, well lit area.
e Put your valuables in a storage area, like your
trunk or glove box. Be sure to close and lock the
storage area.
e Close all windows.
0
Turn off the TRUNK RELEASE lockout in the
glove box.
e Lock the glove box.
e Lock all the doors exceptthe driver’s.
0
Then take the door key and remote keyless entry
transmitter (if equipped) with you.
Park in a lighted spot, close all windows and lock your
vehicle. Remember to keepyour valuables out of sight.
Put them in a storage area, or take
them with you.
2-15
Universal Theft-Deterrent
(If Equipped)
SECURITY
If your vehicle has
this option, it has a
theft-deterrent alarm
system. With this system,
the SECURITY light will
flash as you open the door
(if your ignition is off).
This light reminds you to activate the theft-deterrent
system when leaving your vehicle.
Activating the system:
1. Open the door.
2. Lock the door with the power door lock switch while
the door is open, or with the remote keyless entry
transmitter. The SECURITY light should turn on and
stay on.
3. Close all doors. The SECURITYlight should go off
after about 30 seconds. The alarm is not armed until
the SECURITY light goes off.
2-16
If the SECURITY light comes on for oneminute and
then shuts off while the ignition is on, the security
system has detected a problem with itself. See your
dealer for service.
If a door or the trunk is opened without the key or
remote keyless entry transmitter, the alarm will go off.
It will also go off if the trunk lock is damaged. Your
vehicle’s lamps will flash and the horn will sound for
one minute, and then will go off in order to save
battery power.
Remember, the theft-deterrent system won’t activate if
you lock the doors with a key or manual door lock. It
activates only if you use a power door lock switch with
a door open, or the remote keyless entry transmitter. You
should also remember that you can start your vehicle
with the correct ignition key if the alarm has been set
off. You must still shut off the alarm by inserting the key
in the door lock, or by pressing the UNLOCK button on
the remote keyless entry transmitter.
Here’s how to avoid setting off the alarm by accident:
0
If you don’t want to activatethe theft-deterrent
system, lockthe door by using the door key orthe
manual door lock switch.
0
Always unlock a door with key,
a or use the remote
keyless entry system transmitter. Unlocking a door
any other way will set off the alarm.
If you set off the alarm by accident, unlock any door
with your key.
You can also turn off the alarm by using the remote
keyless entry transmitter, if you have it. The alarm won’t
stop if you try to unlock a doorany other way.
Testing the Alarm
1. From inside thevehicle, roll down the window.
2. Activate the system by locking the doors with the
power door lock switch whilethe door is open, or
with the remote keyless entrytransmitter.
If the alarm does not sound when it should,but the
vehicle’s lamps flash,check to see if the horn works.
The horn fuse may be blown. To replace the fuse, see
“Fuses and Circuit Breakers” in the Index.
If the alarm doesnot sound or the vehicle’s lamps do not
flash, the vehicle should be serviced by an authorized
service center.
PASS-Key@I1
Your vehicle is equipped
with the PASS-Key I1
(Personalized Automotive
Security System)
theft-deterrent system.
PASS-Key I1 is a passive
theft-deterrent system.
It works when you insert
or removethe key from
the ignition.
3. Get out of the car, close the doorand wait for the
SECURITY light togo out.
4. Then reach in through the window, unlock the door
with the manual door lockand open the door. This
should set off the alarm.
PASS-Key I1 uses a resistor pellet in the ignition key
that matches a decoderin your vehicle.
2-17
When thePASS-Key I1 system senses that someone is
using the wrong key, it shuts down the vehicle’s starter
and fuel systems.For about three minutes, the starter
won’t work and fuel won’t go tothe engine. If someone
tries to start your vehicle again or uses another key
during thistime, the vehicle will not start. This
discourages someone fromrandomly trying different
keys with different resistor pellets in an attempt to
make a match.
The ignitionkey must be clean and dry before it’s
inserted inthe ignition or the enginemay not start.If the
engine doesnot start and.the SECURITY lightturns on,
the key may be dirty or wet. Turn the ignition off.
Clean and dry the key. Wait about three minutes and try
again. If the starter still won’t work, and the key appears
to be clean and dry, wait about three minutes and try
another ignition key. At this time, you may also want to
check the fuse (see “Fuses and Circuit Breakers” in the
Index). If the starter won’t work with the other key, your
vehicle needs service. If your vehicledoes start, the first
ignition key may be faulty. See your dealer or a
locksmith who can service the PASS-Key 11.
2-18
If you accidentally use a key that has a damaged or
missing resistor pellet, the starter won’t work. The
SECURITY light will flash. Butyou don’t have to wait
three minutes before trying another ignition key.
See your dealer or a locksmith who can service the
PASS-Key I1 to have a new key made.
If you’re ever driving and the SECURITY light turns
on and stays on,you will be able torestart your engine
if you turn it off. Your PASS-Key I1 system, however,
is not working properly and must be serviced by
your dealer. Your vehicle is notprotected by the
PASS-Key I1 system.
If you lose ordamage a PASS-Key I1 ignition key, see
your dealer or a locksmith who can service PASS-Key I1
to have a new key made. In an emergency, call the
Buick Premium Roadside Assistance Center at
1-800-252- 1112. In Canada, call 1-800-268-6800.
Ignition Positions
New Vehicle “Break-In”
With the ignition key in the ignition switch, you can turn
the switch to five different positions.
NOTICE:
Your vehicle doesn’t needan elaborate
“break-in.” But it will perform better in the long
run if you follow these guidelines:
0 Don’t drive at any one speed
fast or
slow for the first500 miles (805 km).
Don’t make full-throttlestarts.
0 Avoid making hard stops for the first
200 miles (322km) or so. During thistime
your new brake linings aren’t yet broken
in. Hard stops with new linings can mean
premature wear and earlierreplacement.
Follow this breaking-inguideline every
time you get new brake linings.
0 Don’t tow a trailer duringbreak-in.
See “Towing a Trailer’’ in theIndex for
more information.
--
C
--
A
t
E
ACCESSORY (A): This position lets you use things
like the radioand the windshield wipers when the
engine isoff. To use, push in thekey and turn it toward
you. Your steering wheel will remain locked, just as it
was before you inserted the key.
2-19
\
.
.
,
.
.
-
LOCK (B): This is theonly position in which you
can remove thekey. This position locks your ,
NOTICE:
ignition, steering wheel and transaxle. It’s a
theft-deterrent feature.
OFF (C): This position lets you turn off the engine but
still turn the steering wheel. It doesn’t lock thesteering
wheel likeLOCK &d it doesn’t send any electrical
power to theaccessories. Use OFF if you must have
your vehicle in motion whilethe engine isnot running.
’
RUN 0):
The switch returns to thisposition after you
start your engine and release the
key. This is the position
for normaldriving. Even when the engine isnot
running, you can use RUN to operate your electrical
power accessories and todisplay some instrument panel
warning lights. ,
START (E): This position starts your engine. Whenthe
engine starts,release the key and the
switch will move
to RUN.
I
If your key seemsstuck inLOCK and you can’t
turn it, be sure you are using the correctkey; if
so, is it all the way in? If it is, then turn the
steering wheel left and &ht while you turn the
key hard. But turn thekey only withyour hand,
Using a tool to forceit could break thekey or the
ignition switch.If none of this works, then .your
vehicle needs service.
Key Reminder Warning
If you leave yourkey in the ignition, inOFF, you will
hear awarning chime when you open the driver’s door.
Always leave ‘yourkey in LOCK. If you leave itin any
other position, you will drain your battery power.
Starting Your Engine
Starting Your 3800 Series I1 Engine
Move your shift leverto PARK (P) or NEUTRAL(N).
Your engine won’t start in any other position -- that’s a
safety feature. To restart when you’re already moving,
use NEUTRAL (N)only.
1. Without pushing the accelerator pedal,turn your
ignition key to START. When the engine starts, let
go of the key. The idle speed will go down as your
engine gets warm.
NOTICE:
NOTICE:
Don’t try to shift toPARK (P) if your Buick is
moving. If you do, you could damage the
transaxle. Shiftto PARK (P) only when your
vehicle isstopped.
Holding your key in START for longer than
15 seconds at a time will cause your battery to
be drained much sooner. And the excessive heat
can damage your starter motor.
2. If it doesn’t startright away, hold your key in
START for aboutthree to fiveseconds at a time until
your engine starts. Wait about 15 seconds between
each try to help avoid draining your battery or
damaging your starter.
2-21
3. If your engine still won’t start (or starts but then
stops), it could beflooded with too much gasoline.
Try pushing your accelerator pedal all the way to the
floor and holding it there as you hold the key in
START for about three seconds. If the vehicle starts
briefly but then stops again, do the same thing, but
this timekeep the pedal down for five orsix seconds.
This clears the extra gasoline fromthe engine.
After waiting about 15 seconds, repeat the normal
starting procedure.
Engine Coolant Heater (If Equipped)
/
NOTICE:
Your engine is designed to work with the
electronics in your vehicle. If you add electrical
parts or accessories, youcould change the way
the engine operates. Before adding electrical
equipment, check with your dealer. If youdon’t,
your engine might not perform properly.
If you ever have to have your vehicle towed, see
the part of this manual that tells how to do it
without damaging your vehicle. See “Towing
Your Vehicle” in the Index.
2-22
In very cold weather, 0”F (- 18 O C ) or colder, the engine
coolant heater can help. You’ll get easier starting and
better fuel economy during engine warm-up. Usually,
the coolant heater should be plugged in a minimum of
four hours prior to starting your vehicle.
To Use the Engine Coolant Heater
1. Turn off the engine.
2. Open the hood and unwrap the electrical cord.
3. Plug it intoa normal, grounded 110-volt AC outlet.
1
~
Plugging the cord into an ungrounded outlet
could cause an electrical shock. Also, the wrong
kind of extension cord could overheat and cause
a fire. You could be seriously injured. Plug the
cord intoa properly grounded three-prong
110-volt AC outlet. If the cordwon’t reach, use a
heavy-duty three-prong extension cord rated for
at least 15 amps.
4. Before starting the engine, be sure tounplug and
store the cord as it was before to keep it away from
moving engine parts.If you don’t, it couldbe
damaged.
How long should you keep the coolant heaterplugged
in? The answer depends on the outside temperature, the
kind of oil you have, and some other things. Instead of
trying to list everything here,we ask that you contact
your dealer in thearea where you’ll be parking your
vehicle. The dealer can giveyou the best advice forthat
particular area.
2-23
Automatic Transaxle Operation
Your automatic transaxle has a shiftlever located on the
steering column.
PARK (P): This position locks your front wheels. It’s
the best position to use when you start your engine
because your vehicle can’t move easily.
L
LA UTION:
It is dangerous to get out of your vehicle if the
shift lever is not fully in PARK (P) with the
parking brake firmly set. Your vehiclecan roll.
CAUTION: (Continued)
2-24
Don’t leave your vehicle whenthe engine is
running unless you have to. If you have left the
engine running, the vehicle can move suddenly.
You or others could be injured. To be sure your
vehicle won’t move, even when you’re
on fairly
level ground, always set your parking brake and
move the shift lever to PARK (P).
See “ShiftingInto PARK (P)” in theIndex. If
you’re pulling a trailer, see “Towinga Trailer”
in the Index.
Ensure theshift lever is fully in PARK (P) range before
starting the engine. Your vehicle has a Brake-Transaxle
Shift Interlock (BTSI). You have to fully apply your
regular brakes before you can shift from PARK (P)
when the ignition key is in RUN. If you cannot shift
out of PARK (P), ease pressure on the shift lever and
push the shift lever all the way into PARK (P) as you
maintain brake application. Then move the shiftlever
into the gear you wish. See “Shifting Out of PARK (P)”
in this part.
REVERSE (R): Use this gear to back up.
~
~~
~
~
~
-
.-=
~~~~
~
~~
~
NOTICE:
Shifting to REVERSE (R) whileyour vehicle is
moving forward could damage your transaxle.
Shift toREVERSE (R)only after your vehicle
is stopped.
To rock your vehicle back and forth to get out of snow,
ice or sandwithout damaging your transaxle, see “Stuck
in Sand, Mud, Ice or Snow” the
in Index.
NEUTRAL (N): In this position, your engine doesn’t
connect withthe wheels. To restart when you’re
already moving, use NEUTRAL(N) only. Also, use
NEUTRAL (N) when your vehicle is being towed.
Shifting out of PARK (P) or NEUT-,kL (N)
while your engine is “racing” (running at high
speed) is dangerous. Unless your foot is firmly on
the brakepedal, your vehicle could movevery
rapidly. You could losecontrol and hitpeople or
objects. Don’t shift outof PARK (P) or
NEUTRAL (N) while your engine is racing.
I NOTICE:
Damage to your transaxle caused by shifting out
of PARK (P) or NEUTRAL (N) with the engine
racing isn’t covered by your warranty.
2-25
(a):
AUTOMATIC OVERDRIVE
This position is
for normal driving. If you need more power for passing,
and you’re:
Going less than about 35 mph (55 km/h), push your
accelerator pedal about halfway down.
Going about 35 mph (55 km/h) or more, push the
accelerator all the way down.
SECOND (2): This position gives you more power but
lower fuel economy than THIRD (3). You can use
SECOND ( 2 ) on hills. It can help control your speed as
you go down steep mountain roads, but then you would
also want to use your brakes off and on.
I
I
You’ll shift down to the next gear and have more power.
~
THIRD (3): This position is also used for normal
driving, however, it offers more power and lower fuel
economy than AUTOMATIC OVERDRIVE (@).
Here are some times you might choose THIRD (3)
instead of AUTOMATICOVERDRIVE (0):
When driving on hilly, winding roads
When towing a trailer, so there is less shifting
between gears
i
NOTICE:
Don’t drive in SECOND(2) for more than
5 miles (8 km), or at speeds over55 mph
(90 km/h), or you can damage your transaxle.
Use AUTOMATIC OVERDRIVE(03)or
THIRD (3) as much as possible.
Don’t shift into SECOND
(2) unless you are
going slower than65 mph (105 k d ) , or you
can damage your engine.
When going down a steep hill
2-26
.
FIRST (1): This position gives you evenmore power
(but lower fuel economy)
than SECOND (2). You
can use it on very steep hills,or in deep snow or mud.
If the selector leveris put in FIRST (l),the transaxle
won’t shift into first gearuntil the vehicle is going
slowly enough.
I NOTICE:
If your front wheels can’t rotate, don’t try to
drive. This might happen if you were stuck in
very deep sand or mud or were up against a
solid object. You could damage your transaxle.
Also, if you stop when goinguphill, don’t hold
your vehicle there with only the accelerator
pedal. This could overheat and damage the
transaxle. Use your brakes or
shift intoPARK (P)
to hold your vehicle in position on a hill.
Parking Brake
This vehicle has a PUSH
TO RELEASE parking
brake pedal. To set the
parking brake, hold the
regular brake pedal down
with your right foot. Push
down the parking brake
pedal with your left foot.
If the ignition is on, the brake system warning light
will turn on and a single chimewill be heard. The
parking brake uses the brakes on the rear wheels.
To release theparking brake, hold the regular brake
pedal down and push the parking brake pedal with
your left foot. This willunlock the pedal. When you
lift your left foot,the park brake pedal will follow it to
the released position.
If you try to drive approximately 40 feet (12.2 m) with
the parking brake on, the brake light stays on and a
chime sounds until you release the parking brake.
I NOTICE:
1
Driving with the parking brakeon can cause
your rear brakes tooverheat. You may have to
replace them, and you couldalso damage other
parts of your vehicle.
If you are towing a trailer and are parking on any hill,
see “Towing a Trailer” in the Index. That section shows
what to do first to keepthe trailer from moving.
Shifting Into PARK (P)
It can be dangerous to get out of your vehicle if
the shiftlever is not fully in PARK (P) with the
parking brakefirmly set. Your vehiclecan roll. If
you have left the engine running, the vehicle can
move suddenly. You or others could beinjured.
To be sure your vehicle won’t move, even when
you’re on fairly level ground, use the steps that
follow. If you’re pulling a trailer, see “Towing a
Trailer’’ in theIndex.
1. Hold the brake pedal down with your right foot and
set the parking brake.
2-28
2. Move the shift lever intoPARK (P) like this:
0
0
Pull the lever toward you.
Move the lever up as far as it will go.
3. Turn the ignition key to LOCK.
4. Remove the key and take it with you. If you can
leave your vehicle with the ignitionkey in your
hand, your vehicle is in
PARK (P).
Leaving Your Vehicle With the
Engine Running
It can be dangerousto leave your vehicle with the
engine running.Your vehicle could move
suddenly if the shift lever is not fully in PARK
(P)
with the parking brake firmly set. And, if you
leave the vehicle with the engine running, it could
overheat and even catch fire.You or others could
be injured. Don’t leave your vehicle with the
engine running unless you have
to.
If you have to leaveyour vehicle with the engine
running, be sure your vehicle is in PARK (P) and your
parking brake is firmly set before you leave it. After
you’ve moved the shift lever into PARK (P), hold the
regular brake pedal down. Then, seeif you can move the
shift lever away from PARK (P) without first pulling it
toward you. If you can, it means that the shift lever
wasn’t fully locked into PARK (P).
2-30
Torque Lock
If you are parking on a hill and you don’t shift your
transaxle into PARK (P) properly, the weight of the
vehicle may put too much force onthe parking pawl in
the transaxle. You may find it difficult to pull the shift
lever out of PARK (P). This is called“torque lock.” To
prevent torque lock, set the parking brake and then shift
into PARK (P) properly before you leave the driver’s
seat. To find out how, see “Shifting Into PARK (P)” in
the Index.
When you are ready to drive, move the shift lever out
of PARK (P) before you release the parking brake.
If torque lock does occur, you may need to have another
vehicle push yours a little uphill to take some of the
pressure from the parking pawl in the transaxle, so you
can pull the shift lever out of PARK (P).
Shifting Outof PARK (P)
Parking Over Things That Burn
Your vehicle has a Brake-Transaxle Shift Interlock
(BTSI). You have to fully apply your regular brake
before you can shift from PARK (P) when the ignition is
in RUN. See “AutomaticTransaxle” in the Index.
If you cannot shift outof PARK (P), ease pressureon
the shift lever -- push the shift lever all theway into
PARK (P) as you maintain brake application. Then
move the shift lever intothe gear you want. If you ever
hold the brake pedal down but still can’t shift outof
PARK (P), try this:
1. Turn the key to OFF.
2. Apply and hold the brake until the end of Step 4.
3. Shift to NEUTRAL (N).
4. Start the vehicle and then shift to the drive
gear
you want.
5. Take your vehicle to an authorized service center as
soon as you can.
I
1
Things that can burn could touch hot exhaust
parts under your vehicle and ignite. Don’t park
over papers, leaves, dry grass or other things that
can burn.
2-31
Engine Exhaust
Running Your Engine While
You’re Parked
It’s better not to park with the engine running. But if you
ever have to, here are somethings to know.
Engine exhaust can kill. It contains the gas
carbon monoxide (CO), which you can’t see or
smell. It can cause unconsciousness and death.
You might have exhaust coming in if:
Your exhaust system sounds strange
or different.
Your vehicle gets rusty underneath.
0 Your vehicle was damaged in a collision.
Your vehicle wasdamaged when driving over
high points on the roador over road debris.
Repairs weren’t done correctly.
Your vehicle or exhaust system had been
modified improperly.
If you ever suspect exhaust is coming into
your vehicle:
Drive it only with all the wmows down to
blow out any CO; and
Have your vehicle fixed immediately.
2-32
Idling theengine with the climate control
system off could allowdangerous exhaust into
your vehicle (seethe earlierCaution under
“Engine Exhaust”).
Also, idling in a closed-in place can let deadly
carbon monoxide (CO) into yourvehicle even
if the fanswitch is at the highest setting. One
place this can happen is a garage. Exhaust with
CO can come in easily. NEVERpark in a
garage with the engine running.
Another closed-in place can be a blizzard. (See
“Blizzard” in the Index.)
--
--
It can bedangerous to get out of your vehicle if
the shiftlever is not fully in PARK (P) with the
parking brakefirmly set. Your vehiclecan roll.
Don’t leave your vehicle when the engine is
running unless you have to. If you’ve left the
engine running, the vehicle can move suddenly.
You or others could be injured. To be sure your
vehicle won’t move, evenwhen you’re on fairly
level ground, always set your parking brake and
move the shiftlever to PARK (P).
Follow the proper stepsto be sure yourvehicle won’t
move. See “Shifting IntoPARK (P)” in the Index.
If you are parking ona hill and if you’re pulling a
trailer, also see “Towing a Trailer” in the Index.
Switches on thedriver’s armrest control eachof the
windows while the ignition is on. In addition, each
passenger door hasa switch for its own window.
Express-Down Window
Tilt Wheel
The switchfor the driver’s window has an express-down
feature. Pullthe switch back all the way, release it
and the window will lower automatically. To stop the
window from lowering, pull the switch again. To
partially open the window, pull the switch back and
quickly release it. To raise the window, hold the
switch forward.
Window Lock
Press the LOCK switch on the driver’s armrest to
disable all passenger window switches. The driver’s
window controls will still be operable. This is a
useful feature when you have children as passengers
Press the UNLOCK switch to allow passengers to
use their window switches again.
Horn
Nearly the entire surfaceof the center pad of the
steering wheel is an active horn switch. Press
anywhere on the pad to sound the horn.
2-34
A tilt steering wheel allows you to adjust the steering
wheel before you drive.
You can also raise it to the highest level to give your
legs more room when you exit and enter the vehicle.
To tilt the wheel, hold the steering wheel and pull the
lever toward you. Move the steering wheel to a
comfortable level, then release the lever to lock the
wheel in place.
Turn SignaVMultifunction Lever
Turn and Lane Change Indicator
I
The turn signal has two upward (for right) and two
downward (for left) positions. Thesepositions allow you
to signal a turn or a lane change.
To signal a turn, move the lever all theway up or down.
When theturn is finished, the lever will return automatically.
An arrow on the instrument
panel will flash in the
direction of the turn or
lane change.
The lever on the left side of the steering column
includes your:
0
Turn Signal and Lane Change Indicator
0
Headlamp High/Low Beam Changer and
Passing Signal
0
Windshield Wipers and Washer
CruiseControl
To signal a lane change,just raise or lower the lever
until the arrow starts to flash. Hold it there until you
complete your lane change. The leverwill return by
itself when you release it.
If the arrows just stay on and don’t flash as you signal
a turn or a lane change, a signal bulb
may be burned
out and other drivers won’t see yourturn signal.
If a bulb is burned out, replace it to help avoid an
accident. If the arrows don’t goon at all when you
signal a turn, check the fuse (see “Fuses and Circuit
Breakers” in the Index) and for burned-out bulbs.
lbrn Signal On Chime
Windshield Wipers
If your turn signal isleft on formore than 314 of a mile
(1.2 km), a chime will sound at each flash of the turn
signal. To turn off the chime, move the turn signal lever
to the off position.
Headlamp High/Low Beam Changer
To change the headlamps from low beam to high beam
or highbeam to low beam,pull the turn signal lever
toward you and release it.
When the high beams are
on, this light on the
instrument panel will
also be on.
The windshield wipers are controlled by turning the
band marked WIPER.
For a single wiping cycle, turn the band to MIST. Hold
it there until the wipers start, then let go. The wipers will
stop after one cycle.If you want more cycles, hold the
band on MIST longer.
2-36
For steady wiping at low speed, turn the band away
from you to the LO position. For high-speed wiping,
turn the band further, to HI. To stop the wipers, move
the band to OFF.
The wiper speedmay be set for a long or short delay
between wipes. This can bevery useful in light rain or
snow. Turn the band to choose the delay time. The
closer to LO, the shorter thedelay.
Heavy snow or ice can overload
your wiper motor.
A circuit breaker will stop the motoruntil it cools.
Clear away snow or ice to preventan overload.
Keep in mind that damaged wiperblades may prevent
you from seeing well enough to drivesafely. To avoid
damage, be sureto clear ice and snow from the wiper
blades before using them. If your blades do become
damaged, getnew blades or blade inserts.
In freezing weather, don’t use your washer until
the windshield is warmed. Otherwise the washer
fluid can form ice on the windshield, blocking
your vision.
Cruise Control
With cruise control,you can
maintain a speed of about
25 mph (40 km/h) or more
without keeping your foot
on the accelerator. This can
really help on long trips.
Windshield Washer
At the top of the turn signal/multifunction lever, there’s
a paddle with the word PUSH on it. To spray washer
fluid on the windshield, push the paddle for lessthan a
second. The wipers will clear the window and either
stop or return to your preset speed. For more
washer
cycles, push and hold the paddle.
Cruise control does not work at speeds below about
25 mph (40 km/h).
When you apply your brakes, the cruise control
shuts off.
Setting Cruise Control
I
,
Cruise control can be dangerous where you
can’t drive safely at a steady speed. So,
don’t use your cruise control on winding
roads or in heavy traffic.
Cruise control can be dangerous on
slippery roads. On such roads, fastchanges
in tire traction cancause needless wheel
spinning, and you could losecontrol. Don’t
use cruise controlon slippery roads.
If youleave your cruise control switch on when
you’re not using cruise, you might hit a button
and go into cruisewhen you don’twant to. You
could bestartled and even losecontrol. Keep the
cruise control switch off until you want to use it.
1. Move the cruise control switch to ON.
2. Get up to the speed you want.
If your vehicle is in cruisecontrol when the optional
traction control system begins to limitwheel spin,
the cruise control will automatically disengage. (See
“Traction Control System” in the Index.) When road
conditions allow you to safely use it again, you may
turn the cruise control back on.
3. Push in the SET button at the end of the lever and
release it.
4. Take your foot off the accelerator pedal.
then release the switch. (To increase your speed in
very small amounts, move the switchR/A
to briefly
and then release it. Each time
you,do this, your
vehicle will go about1 mph (1.6 kmh) faster.)
Resuming a Set Speed
Suppose you set your cruise control
at a desired speed
and thenyou apply thebrake. This, of course, shutsoff
the cruise ‘control.
But you don’t need to reset it.
Once you’re going about
25 mph (40 km/h) or more,
you can move the cruise control switch
from ON to
WA (resume/accelerate) briefly.
You’ll go right backup to your chosen speed and
stay there. Remember thatif you hold the switch at
R/A longer, the vehicle will keep going faster until
you
release the switchor apply thebrake. So unless you
want to go faster,
don’t hold the switch atWA.
Increasing Speed While Using Cruise Control
There are two ways to go to a higher
speed:
0
0
Use the accelerator pedal to get
to the higherspeed.
Push the SET button atthe end of the lever, then
release the buttonand the acceleratorpedal. You’ll
now cruise at the higher speed.
Move the cruise switch from
ON to R/A. Hold it
there until you get up to the speed you want, and
. .
1.
The accelerate featurewill only work after you have
set the cruise control speed
by pushing theSET button.
Reducing Speed While Using Cruise Control
There are two ways to reduce your speed while using
cruise control:
0
Push in the SET
button at the endof the lever until
you reach the lower speed
you want, then release it.
0
To slow downin very small amounts, push the
SET buttonbriefly. Each timeyou do this, you’ll
go 1 mph (1.6 km/h) slower.
Passing Another Vehicle While Using Cruise Control
Use the accelerator pedal
to increase yourspeed. When
you take your footoff the pedal, your vehicle will slow
down to the cruise control speed
you set earlier.
.I
2-39
Using Cruise Controlon Hills
How well your cruise controlwill work on hillsdepends
upon your speed, load and the steepness of the hills.
When going up steep hills, you may have to step on the
accelerator pedal to maintain your speed. When going
downhill, you may have to brake orshift to a lower gear
to keep your speed down. Applying the brake or shifting
into a lower gear will take you out of cruise control. If
you need to apply the brake or shift to a lowergear due
to the grade of the downhill slope, you may not want to
attempt to use your cruise control feature.
Exterior Lamps
Headlamps
These switches control
these systems:
Headlamps
Taillamps
Parking Lamps
License Lamps
Ending Cruise Control
SidemarkerLamps
There are two ways to turn off the cruisecontrol:
Instrument Panel Lights
Step lightly on the brake pedal; or
Move the cruise switch to OFF.
Erasing Speed Memory
When you turn off the cruisecontrol or the ignition,
your cruise cqn&~lset speed memory is erased.
Press the LIGHTS switch to turn on the headlamps.
Press it again to turn them off. Whenthe headlamps are
turned on, the instrument panel lights will also turn on.
The brightness of the instrument panel lights can be
adjusted with the PANEL LIGHTS switch to the left of
the steering column. Some lights will not dim during
daylight hours.
Press the PARK switch to turn on the parking lamps.
Press it again to turn them off. (If the parking lamps
were turned on with the PARK switch, they must be
turned off with that switch).
2-40
Lamps On Reminder
If you leave themanual headlamp or parking lamp
switch on, remove thekey from the ignitionand open
the driver’s door, you will hear a continuous warning
chime. The chimewill turn off when the lamps are
turned off.
Daytime Running Lamps
Daytime Running Lamps(DRL) can make it easier for
others to see the frontof your vehicle duringthe day.
DRL can be helpful in many different driving
conditions, but they can be especially helpful in the
short periods after dawn and before sunset.
A light sensoron top of the instrumentpanel monitors
the exterior light level for the operation
of DRL and
twilight sentinel, so be sure itisn’t covered.
The DRLsystem will make your high-beam headlamps
turn on at reduced brightnessin daylight when:
The ignition is on,
0
The headlamp switch is off and
0
The transaxle is not in PARK (P).
When the DRL are on, only your high-beam headlamps
will be on. Theparking lamps, taillamps, sidemarker
and other lamps won’t be on.Your instrument panel
lights won’t be on either.
When it is dark enough outside, your low-beam
headlamps will come on. The other lampsthat turn
on with your headlamps will also turn on. When it is
bright enough outside,the regular lamps will go off,
and your high-beam headlamps change tothe reduced
brightness of DRL.
To turn off all exterior lighting at night when you are
parked, turn off the headlamps and move the twilight
sentinel control all the way toward MIN. The exterior
lamps will turn back on automatically when you move
the transaxle outof PARK (P).
As with any vehicle, you should turn on the regular
headlamp system when you need it.
Cornering Lamps(If Equipped)
The cornering lamps are designed to turn on when you
signal aturn. This will provide more lighting when
cornering at night.
2-41
Twilight Sentinel
Light Sensor
Your twilight sentinel and
DRL work with the light
sensor ontop of the
instrument panel. Don’t
cover it up. If you do, the
sensor will read “dark” and
the headlamps will turn on.
Twilight sentinel turns your
lamps onand off by sensing
how dark it is outside.
To operate it, leave the lamp switch off.
If you move the control all the way to MAX, your
headlamps will remain on for threeminutes after you
turn off your engine. As you move thecontrol toward
MIN, the headlamps will turn off more quickly when
you turn off your engine. You can change this delay time
from only a few seconds to three minutes.
The exterior lamps can be completely shut off while
the vehicle is in PARK (P) by sliding the twilight
sentinel control all the way toward MIN, and release.
To turn the exterior lamps back on, slide the control
all the way toward MIN again, and release; or, shift
out of PARK (P).
2-42
Interior Lamps
Instrument Panel IntensityBrightness Control
The instrument panel
intensity can be adjusted by
moving this lever between
LO and HI. The instrument
panel lights will be on
only when the headlamps
are on. Theinterior courtesy
lamps can be turned on by
sliding the lever all the
way to the right.
Courtesy Lamps
Illuminated Entry(If Equipped)
When any door is opened, several lamps go on. They
make it easy for you to enter and leave thevehicle.
You can alsoturn these lamps onby sliding the
PANEL LIGHTS switch to INT(Interior).
Press the UNLOCK button on the remote keylessentry
transmitter (if equipped) and the interior courtesy lamps
will turn on and stay on forup to a minute. The lamps
will turn off immediately by pressing the LOCK button
on the remote keyless entry transmitter, starting the
engine or activatingthe power door locks.
Delayed Entry Lighting
When you open the door, the interior lamps will turn
on. When you close the doorwith the ignition off,the
interior lamps. will stay on for 25 seconds or until the
ignition is turned to an on position. Note that locking the
doors will override the delayed entry lighting feature
and the lamps willturn off right away.
Perimeter Lighting(If Equipped)
When the UNLOCK button on the remote keyless entry
transmitter is pressed, the headlamps, parking lamps,
back-up lamps and cornering lampswill turn on if it is
dark enough outsideaccording to the twilight sentinel.
If your vehicle is not equipped with twilight sentinel and
perimeter lightingis active, the lights will
turn on whenever
This feature allows for a three to five-second fadeofout the UNLOCK buttonon the transmitter is pressed.
the courtesy lamps insteadofimmediate turn off.
Personal Choice Programming
Delayed Exit Lighting
This feature canbe programmed in the on or off mode
With this feature, the interior lamps
will turn on and stay
for each transmitter.
on forup to 25 seconds afteryou remove the key from
To turn the feature off:
the ignition. Thiswill give you time to findthe door pull
handle or lock switches.
1. Turn the ignition key to OFF.
Theater Dimming
2. Press and hold LOCK on the power door lock switch
throughout this procedure.All the doors will lock.
2-43
3. Press the instant alarm on the remote keyless entry
transmitter. Perimeter lighting remains on at this
time and the hornwill chirp two times.
5. Release the door lock switch. The perimeter lighting
feature isnow on.
only the
This procedure changes the mode for
4. Press the instant alarm on the remote keyless entry transmitter used to change this setting. The procedure
will need to be repeated for the second transmitter.
transmitter again. Perimeter lightingis disabled and
the horn will clmp one time.
Front Reading Lamps(If Equipped)
5. Release the door lock switch. The perimeter lighting
Front seat reading lamps are turned
on or off by pressing
feature is nowoff.
the LAMP switch.
To turn the feature on:
1. Turn the3gnition key toOFF.
2. Press and holdLOCK on the power door lock switch
throughout this procedure. All the doors will lock.
3. Press the instantalarm on the transmitter again.
Perimeter lightingis now enabled and the horn
will chirp one time.
4. Press the instant alaim on the transmitter again.
Perimeter lightingis now enabled and the horn
will
chxp two times.
2-44
Rear Reading Lamps(If Equipped)
Battery Rundown Protection
The lamp, switchand a coat hanger are aboveeach rear
door. Slide the switch toturn the lamp on or off.
This feature automatically turns off the interior lamps,
if any are left on for more than 10 minutes when the
ignition is off or a dooris left open. This will keep your
battery from running down.
This feature also shuts off the exterior lamps if they are
left on for more than 10 minutes when the ignition is
OFF. You may override this feature for the exterior
lamps by turning the lamps off and then back on after
the ignition is turned to OFF. If you do this, the exterior
lamps will stay on until you manually turn them off.
If the feature is enabled for the interior and exterior
lamps, all lamps should turn off at approximately
the same time.
2-45
Mirrors
Daymight Manual Rearview Mirror
With Integral Reading Lamps
The integral reading lamps are turned on or off by
pressing the toggle switch at the bottom of the mirror.
These lamps are also part of the courtesy lamps
described earlier in this section.
Electrochromic Daymight Rearview
Mirror (If Equipped)
When you are sitting in a comfortable driving position,
adjust themirror so you can see clearly behind your
vehicle. The day-night adjustment allows you to
adjust the mirror to avoid glare fromthe headlamps
behind you.
Your vehicle may have an automatic electrochromic
dayhight rearview mirror.
When this feature is turned on, the mirror automatically
changes to reduce glare fromheadlamps behind you. A
photocell on the mirror senses when it is becoming dark
outside. Another photocell built into the mirror face,
senses when headlamps are behind you.
I
2-46
At night, when the glare is too high,the mirror will
gradually darken to reduce glare (this change may take
a few seconds). Themirror will return to its clear
daytime state when the glare is reduced.
I
.I.
Mirror Operation
To turn on the automatic dimming feature,press
AUTO. To turn off automatic dimming,press OFF.
The green indicator lightwill be illuminated when this
feature is active.
Time Delay
The automatic mirrorhas a time delay feature which
prevents unnecessary switching fromthe night back to
the day position. This delay prevents rapid changingof
the mirror as you drive under lightsand through traffic.
When set in the MIRROR position, this mirror
automatically changes to reduce glare from headlamps
behind you. A time delay featureprevents rapid
changing from the day to night positions while
driving under lights andthrough traffic.
Cleaning the Photocells
Use a cotton swaband glass cleaner to clean the
photocells when necessary.
The mirror also includes an eight-point compass
display in the upper right cornerof the mirror face.
When on, the compass automatically calibrates as
the vehicle is driven.
Electrochromic Daymight Rearview Mirror
with Compass (If Equipped)
When cleaning the mirror, use a paper towelor similar
material dampened with glass cleaner. Do not spray
glass cleanerdirectly on the mirror as that may cause
the liquid cleaner to enter the mirror housing. Use a
cotton swab and glass cleaner to clean the photocells
when necessary.
Your vehicle may have an electrochromic inside
rearview mirror with a compass.
2-47
Mirror Operation
Compass Operation
Press the COMPASS button once.to turn the compass
on or off.
When the ignition and the compass feature are on,
the compass will show two character boxes for
approximately two seconds. After two seconds, the
mirror will display the compassheading.
The right sideof the switch located at the bottom
of the
mirror turns the electrochromic mirror on and off. To
turn on the automaticdi&ng feature, press MIRROR.
To turi off automatic dimming,press MIRROR again.
The greenindicator light will beilluminated when this
feature is active.
2-48
If, after two seconds, the display does not show a
compass heading( “ N ’ for North, for example),there
may be a strong magnetic field interfering with the
compass. Such interferencemay be caused by a
magnetic antennamount, magnetic note pad holder
or a similar magneticitem.
Compass Variance
The mirror is set in zone eight upon leaving the factory.
It will be necessary to adjust the compass to compensate
for compass variance if you live outside zone eight.
Under certain circumstances, as during a long distance
cross-country trip, it will be necessary to adjust for
compass variance. Compass varianceis the difference
between earth’s magneticnorth and true geographic
north. If not adjusted to account for compass
variance,
your compass could give false readings.
To adjust for compassvariance:
1. Use the COMPASS button located at the bottom of
the mirror.
2. Press and hold the COMPASS button until a zone
number appears in thedisplay.
3. Find your current location and variance zone number
on the following zone map.
4. Press the COMPASS button on the bottom of the
mirror until the new zone number appears in the
display. After you stop pressing the button, the
display will show a compass direction within a few
seconds. (This is the automatic calibration mode.
Drive in a circle to calibrate the mirror. See
“Compass Calibration” following.)
2-49
Compass Calibration
If the letter “C” should ever appearin the compass
window, the mirror may need calibration.
The mirror can be calibrated in oneof two ways:
0
Drive the vehicle in circles at five mph (8 km/h) or
less until the display reads a direction, or
Drive the vehicle on your everyday routine.
Manual Remote Control Mirror
To adjust the driver’s
side outsidemirror, rotate
the knob located on the
driver’s door. The right
outside mirror must be
adjusted manually.
The outside rearview mirror should be adjusted so you
can just seethe side of your vehicle when you are sitting
in a comfortabledriving position.
To adjust your passenger’s side mirror, sit in the driver’s
seat and have a passenger adjust themirror for you.
Power Remote Control Mirrors
(If Equipped)
If your vehicle has the
outside power remote
mirrors, the control is
located on the driver’s door.
Move the switch in the middle of the control to choose
the right or left mirror. Push the arrow controls in the
direction you want to move themirror.
Adjust each mirror so you can see the side of your
vehicle and the area behind your vehicle.
2-50
Automatic DimminglHeated Outside
Rearview Mirror(IfEquipped)
If you have this feature, the outside mirrors will adjust
for the glareof headlamps behind you. This feature
is controlled by the on and off settings on the automatic
electrochromic dayhight rearview mirror. See
“Electrochromic Daymight Rearview Mirror” earlier
in this section.
When you operate the rearwindow defogger, a defogger
also warms the heated driver’s and passenger’s outside
rearview mirrors to help clear themof ice and snow.
Convex Outside Mirror
Your passenger’s side mirror is convex. A convex
mirror’s surface is curved so you can see more from
the driver’s seat.
I A CAUTION:
1
’
A convex mirror can make things (like other
vehicles) look farther away than they really are.
If you cut too sharply into the right lane, you
could hit a vehicle on your right. Check your
inside mirror or glance over your shoulder
before changing lanes.
Storage Compartments
Glove Box
Use the door key to lock and unlock the glove box. To
open, liftthe latch release onthe left side of the glove
box door.
2-51
Center Console Cupholder/Coinholder
Inside, a cupholder flips forwardand unfolds to hold
two cups. The cupholderis designed to break away
should it receive excessive pressure. If it breaks away,
snap the edges back into place.
There is also a removable coinholder, cassette tape and
compact disc storage area.
Convenience Net(If Equipped)
Your vehicle may have a conveniencenet. You’ll see it
just inside the back wall of the trunk.
Put small loads, likegrocery bags, behind the net. It can
help keep them from falling over duringsharp turns or
quick starts and stops. For heavier loads, store them in
the trunk as far forwardas you can.
The armrest between the front seats opens into a storage
area. To open it, press the leverupward at the front edge
of the armrest.
2-52
You can unhook the net so that it will lie flatwhen
you’re not using it.
Ashtrays and Cigarette Lighter
Sun Visors
The front centerand rear ashtrays may be removed for
cleaning. Hold the sidesof the ashtray and then pull the
ashtray up and out.
Dual Sun Visors
NOTICE:
Don’t put papersor other flammableobjects
into your ashtrays. Hot cigarettes
or other
smoking materials could ignite them,causing a
damaging fire.
To use a lighter, push the center all the way in and let it
go. When itis ready, the center will pop back by itself.
Pull out the entire unit to use it.
Each sun visor has two parts, so that both the windshield
and door glass can be shaded at the same time. To use
the dual sun visors, flip the firstvisor down and turn
toward the window. Then, flipthe second visor down
toward the windshield.
Illuminated Visor Vanity Mirrors
(If Equipped)
When you open the cover to either thepassenger s or
driver’s visor vanity mirror, the lamps will turn on. The
brightness of the lamp can be adjusted by sliding the
switch up or down.
NOTICE:
Don’t hold a cigarette lighterin with your hand
while it is heating. If you do, it won’t be able to
back away from the heatingelement when it’s
ready. That can makeit overheat, damaging the
lighter and the heatingelement.
2-53
Instrument
Panel
I
2-54
1. Air Outlet
9. Glove BOX
2. Instrument Panel Intensity Control
10. Climate Control Syste'En
3. Twilight Sentinel
11. Ashtray and Cigarette Lighter
4. Turn SignaVMultifunction Lever
12. Ignition Switch
5. Tilt Steering Wheel Lever
13. Traction Control Button
6. Instrument ClustedGages
14. Trunk Release Button
7. Hazard Warning Flasher Switch
15. Hood Release
8. AudioSystem
2-55
Instrument Panel Clusters
Your instrument panel cluster is designed to let you know at a glance how your vehicle is running. You’ll know how
fast you’re going, how much fuel you’re using, and many other things you’ll need to drive safely and economically.
Your vehicle is equipped with one of these instrument panel clusters, which includes indicator warning lights and
gages that are explained on the following pages.
UNLEADED F U E L ONLY
Standard Cluster
2-56
1
Ibllollolollololol
8
u,
0
2 1
0
0
uno 0 n o
0
UNLEADED FUEL ONLY
Gage Cluster
2-57
Speedometer and Odometer
Your speedometer lets you see your speed in both miles
per hour (mph) and kilometers per hour (km/h). Your
odometer shows how far your vehiclehas been driven,
in either miles (used in the United States) orkilometers
(used in Canada).
Your vehicle has a tamper resistant odometer. If you see
bright silver lines between the numbers, you’ll know
that someonehas probably tried to turn it back. The
numbers may not be true.
You may wonder what happens if your vehicle needs a
new odometer installed. If the new one can be set tothe
mileage total of the old odometer, then it must be. But if
it can’t, then it’s set at zero and a label must be put on
the driver’s door to show the old mileagereading when
the new odometer was installed.
Trip Odometer
A trip odometercan tell you how far you have driven
since you last set it to zero.
To reset it, push the button.
2-58
Tachometer (If Equipped)
2 \‘
4
3\ \ I / / 5
.
The tachometer tells
you how fast the engine
is going. It displays
engine speed in
thousands of revolutions
per minute (rpm).
lz=====o
RPM X 1000
NOTICE:
Do not operate the engine with the tachometer in
may occur.
the red area or engine damage
Warning Lights, Gages
and Indicators
This part describes the warning lights and gages that
may be on your vehicle. The pictures will help
you
locate them.
Warning lights and gages can signal that something is
wrong before it becomes serious enough to cause an
expensive repair or replacement. Paying attention to
your warning lights and gages could also save
you or
others from injury.
Warning lights come on when there
may be or is a
problem with one of your vehicle’s functions.As you
will see in the details on the next few pages, some
warning lights come on briefly when
you start the
engine just tolet you know they’re working.
If you are
familiar with this section, you should not be alarmed
when this happens.
When one of the warning lights comeson and stays on
when you are driving, or when one
of the gages shows
there may be a problem, check the section that tells
you
what to do about it. Please follow this
manual’s advice.
-- and even
Waiting to do repairs can be costly
dangerous. So please get to know your warning lights
and gages. They’re a big help.
Safety Belt Reminder Light
When the key is turned toRUN or START, a chime
will come on for about eight seconds to remind people
to fasten their safety belts.
m
The safety
belt light will
also come on and stay on
for about70 seconds. If the
driver’s belt is already
buckled, neither the chime
nor the light will come on.
Gages can indicate when there
may be or is a problem
with one of your vehicle’s functions. Often gages and
warning lights work together to let
you know when
there’s a problem with your vehicle.
2-59
Air Bag Readiness Light
There is an air bagreadiness light on the instrument
the
panel, which shows AIR BAG. The system checks
air bag’s electrical system for malfunctions. The light
tells you if there is an electrical problem. The system
check includes the air bag sensors, the air bag modules,
the wiring and the crash sensing and diagnostic module.
For more information on the air bag system, see “Air
Bag” in the Index.
AIR
BAG
This lightwill come on
when you start your engine,
and it will flash for a few
seconds. Then the light
should go out. This means
the system is ready.
If the air bagreadiness light stayson after you start the
engine or comes on when you are driving, your air bag
system may not work properly. Have your vehicle
serviced right away.
The air bag readiness light should flash fora few
seconds when you turn the ignition key to RUN. If the
light doesn’t come onthen, have it fixed so it will be
ready to warn you if there is a problem.
2-60
Battery System Warning Light
il
t
Standard Cluster
Gage Cluster
When you turn the key to RUN, one of these lights will
turn on briefly, to show that your generator and battery
charging systems are working.
If the light stays on, you need service and you should
take your vehicle to the dealer at once. To save your
battery until you get there, turn off all accessories and
set your climate control system to OFF.
Voltage Gage (If Equipped)
I I
If your vehicle is equipped
with the
gage
cluster,
this
gage shows voltage in the
electricalsystem.
"
a
,
0
'
'
8
\
I
/
18
The normal range is 11 to 15 volts. If the gage reading
stays in either red range, or the battery warning light
turns on, have your dealer check the electrical system.
Brake System Warning Light
Your vehicle's hydraulic brake systemis divided into
two parts.If one part isn't working, the other part can
still work and stop you. For good braking, though,
you
need both parts working well.
If the warning light comes on, there is a brake problem.
Have your brake system inspected rightaway.
BRAKE
(a) (a!
BRAKE
I
I
I
Cluster
Gage
Standard
Cluster
One of these lights shouldcome on when you turn the
key to START. If it doesn't come on then, have it fixed
so it will be ready to warnyou if there's a problem.
2-61
If the lightand chime come onwhile you are driving,
pull off the road and stop carefully. You may notice that
the pedal is harder to push. Or, the pedal may go closer
to the floor. It may take longer to stop. If the light isstill
on, have thevehicle towed for service. (See “Towing
Your Vehicle”in the Index.)
IA
With the anti-lock brake
system, the light(s) will
come on when you start
your engineand may stay
on for several seconds.
That’s normal.
CAUTION:
Your brake system may not be working properly
if the brake system warning light is on. Driving
with the brake system warning light on can lead
to an accident.If the lightis still on after you’ve
pulled off the road and stopped carefully, have
the vehicle towed for service.
When the ignition is on, the brake system warning light
will also come onwhen you set your parking brake.
The lightwill stay on if your parking brake doesn’t
release fully. If you try to drive off with the parking
brake set,a chime will also come onuntil you release
the parking brake. If the light and chime stayon after
your parking brake is fully released, it means you have
a brake problem.
2-62
Anti-Lock Brake System Warning Light
If the lightstays on, turn the ignition to OFF. Or, if the
light comes on when you’re driving, stop assoon as
possible and turn the ignition off. Then start the engine
again to reset the system. If the light still stays on, or
comes on again while you’re driving, your vehicle needs
service. If the regular brake system warning light isn’t
on, you still have brakes, but you don’t have anti-lock
brakes. If the regular brake system warning light is also
on, you don’t have anti-lock brakes and there’s a
problem with your regular brakes. See “Brake System
Warning Light” earlier in this section.
The anti-lock brake system warning light should come
on briefly when you turn the ignition key toRUN. If the
light doesn’t come on then,have it fixed so it will be
ready to warn you if there is a problem.
will turn off and the warning light will come on.If
your brakes begin to overheat, the traction control
system will turn off and the warning light will come
on until your brakes cool down.
Traction Control System Warning
Light (Option)
TRACTION
OFF
This warning lightshould
come on briefly as you start
the engine. If the warning
light doesn’t come on then,
have it fixed so it will be
ready to warn you if there’s
a problem.
If it stays on, or comeson when you’re driving, there
may be a problem with your traction control system and
your vehicle may need service. When thiswarning light
is on, the system will not limit wheel spin. Adjust your
driving accordingly.
The traction control system warning lightmay come on
for the following reasons:
If you turn the system off by pressing the button
located to the left of the steering column,the
warning light will come on and stay on. To turn the
system back on, press the button again. The warning
light should go off. (See “Traction Control System”
in the Index for more information.)
0
If there’s a brake system problem that is specifically
related to traction control, the traction control system
0
If the traction control system is affected by an
engine-related problem, the system will turn off and
the warning light will come on.
If the traction control system warning light comeson
and stays on for an extended period of time when the
system is turned on, your vehicle needs service.
Engine Coolant Temperature Warning Light
TEMP
This lightwill tell you
that your engine coolant
has overheated or your
radiator cooling are
fans
I not working*
If you have been operating your vehicleunder normal
driving conditions,you should pull off the road, stop
your vehicle and turn the engine off as soon as possible.
In the section “Problemson the Road,” this manual
explains what to do. See “Engine Overheating”
in
the Index.
2-63
Engine Coolant TemperatureGage
(If Equipped)
If your vehicle is equipped
with the gage cluster, you
have a gage that shows the
engine coolant temperature.
If the gage pointer moves
into thered area, your
engine is too hot!
That readingmeans the samething as thewarning light.
It means that your engine coolanthas overheated. If you
have been operating yourvehicle under normal driving
conditions, you should pull off the road, stop your
vehicle and turn off the engine as soonas possible.
The enginecoolant temperature gage indicates the
coolant temperature in degreesFahrenheit. The
Canadian instrument panels indicate
the coolant
temperature in degrees Celsius.
In the section“Problems on theRoad,” this manual
explains what to do. See“Engine Overheating” in
the Index.
2-64
Malfunction IndicatorLamp
(Check Engine Light)
CHECK
Your vehicle is equipped
with a computer which
monitors operation of the
fuel, ignition and emission
control systems.
This system iscalled OBD I1 (On-Board
Diagnostics-Second Generation) and is intended to
assure that emissions are atacceptable levels for the
life of the vehicle, helping to producea cleaner
environment. The CHECK ENGINElight comes on to
indicate that there isa problem and service is required.
Malfunctions often will be indicated by the system
before any problem is apparent. This may prevent more
serious damage to your vehicle. This system is also
designed to assist your service technician in correctly
diagnosing anymalfunction.
I NOTICE:
If you keep driving your vehicle with this light
on, after a while, your emission controls may not
work as well, your fuel economy may not be as
good and your engine may not run as smoothly.
This could lead to costly repairs that may not be
covered by your warranty.
This light should come on, as a checkto show you it is
working, when the ignition is on and the engine isnot
running. If the light doesn’t come on, have
it repaired.
This light will also come on during a malfunction in one
of two ways:
0
0
Light Flashing -- A misfire condition has been
detected. A misfire increases vehicle emissions
and
may damage the emission control system on your
vehicle. Dealer or qualified service center diagnosis
and service may be required.
Light On Steady -- An emission control system
malfunction has been detected on your vehicle.
Dealer or qualified service center diagnosis
and
service may be required.
If the Light Is Flashing
The following may prevent more serious damage to
your vehicle:
Reducing vehicle speed.
Avoiding hard accelerations.
Avoiding steep uphill grades.
0
If you are towing a trailer, reduce the amount of
cargo being hauled as soon as it is possible.
If the light stops flashing and remains
on steady, see “If
the Light Is On Steady” following.
If the light continues to flash,when it is safe to do so,
stop the vehicle.Find a safe place to park
your vehicle.
Turn the key off, wait at least 10 seconds andrestart the
engine. If the light remainson steady, see “If the Light
Is On Steady” following.If the light is still flashing,
follow the previous steps, and drive the vehicle to your
dealer or qualified service center forservice.
If the LightIs On Steady
You may be able toi?iifli%tthe emission system
malfunction by considering the following:
If you experience one or more
of these conditions,
change the fuelbrand you use. It will require at least one
full tankof the proper fuel to
turn the lightoff.
If none of the above steps have made the light
turn off,
have your dealer or qualified service center check
the
If so, reinstall the fuel cap, making sure to fully install vehicle. Your dealer has the proper test equipment
and
if the fuel
the cap. The diagnostic system can determine
diagnostic tools to fix
any mechanical or electrical
cap hasbeen left off or improperly installed.A loose or
problems that may have developed.
missing fuel cap will allow fuel to evaporate into the
Oil Pressure LightIGage
atmosphere. A few driving tripswith the cap properly
installed shouldturn the light off.
If your vehicle has the
Did you just drive through a deep puddle
of water?
standard instrument
panel cluster, this light
If so, your electrical systemmay be wet. The condition
will come on if there is
will usually be corrected when the electrical system
a problemwith your
dries out.A few driving trips shouldturn the light off.
OIL
engine oil pressure.
Have you recently changed brandsof fuel?
Did you recently put fuel into your vehicle?
7 3
If so, be sure to fuel your vehicle
with quality fuel (see
“Fuel” in the Index). Poor fuel quality
will cause your
engine not torun as efficiently as designed.
You may
notice this as stalling after start-up, stallingwhen you
put the vehicle intogear, misfiring, hesitationon
”acceleration or stumbling on acceleration. (These
conditions may go away once the engine is warmed up.)
This will be detected
by the systemand cause the light
to turn on.
Standard Cluster
If your vehiclehas the
optional gagecluster,
you can read your oil
pressure directly from
the gage on your
instrument panel.A
small lightto the left of
the gage will come on if
there is a problem with
the engine oil pressure.
Gage Cluster
The oil light could come on briefly when you turn your
key to RUN. It goes off once you turn it to START.
That’s just a checkto be sure the light works.If it
doesn’t, be sureto have it fixedso it will be there to
warn you if something goes wrong.
But, when this light comes on and stays on, it means oil
isn’t going through your engineproperly. You could be
low on oil, or you might have some otheroil problem.
See your dealer for service.
I
A CAUTION:
Don’t keep driving if the oil pressure is low. If
you do, your engine can become so hot that it
catches fire. You or others could be burned.
Check your oil as soon as possible and have
your vehicle serviced.
I NOTICE:
Damage to your engine from neglected oil
problems can be costlyand is not covered by
your warranty.
2-67
Check Oil Level Light(If Equipped)
CHECK
OIL LEVEL
The CHECK OIL LEVEL
light turns on for three
seconds as a bulb check
each time the ignition key is
turned to RUN. If the light
doesn’t turn on, have your
vehicle serviced.
If the engine oil is more than one quart (0.95 L) low and
the engine has been shut off for at least eight minutes,
the CHECK OIL LEVELlight will turn on forabout
one minute and will then remain off until the next time
you start the vehicle.
If the CHECK OIL LEVEL lightturns on, the engine oil
should be checked at the dipstickthen brought up to the
proper level if necessary. See “Engine Oil” in the Index.
Change Oil Soon Light(If Equipped)
CHANGE
OIL SOON
This light is activated by the
Engine Oil Life Monitor
System. The EngineOil
Life Monitor determines the
condition of the engine oil
and lets you know when the
oil should be changed. See
“Engine Oil”in the Index.
The Engine Oil Life Monitor receives information about
engine speed, coolant temperature and vehicle speed to
determine how much the oil has degraded.
When to change your oil depends on your driving habits
and conditions. The CHANGE OIL SOONlight may
turn on as early as 2,000 miles (3 2 1 8 km)or less for
harsh circumstances.
The CHANGEOIL SOON light is lit for three seconds
as a bulb check each time the ignition key is turned to
RUN. It will stay on for 60 seconds once 90 percent of
the oil life has been used and each time the engine is
started after that. If the CHANGE OIL SOON light is on
continuously, there is a problem with the Oil Life
Monitor System and service is required.
2-68
After changing the engine oil, the system should be
reset. This will cause the CHANGEOIL SOON light to
be lit for a bulb check
period of three seconds. Referto
“Engine Oil” inthe Index to determine what type of
oil to use.
Fuel Gage
Q
\
\
‘
\
E
Standard Cluster
The reset button is in the glovebox. With the ignition
key in RUN, push the reset button,hold it in for at least
five seconds but not more than 60 seconds. After five
seconds, the CHANGE OIL SOON lightwill flash four
times and then go off. This indicates that the Oil Life
Monitor System has been reset.
Gage Cluster
Your fuel gage shows abouthow much fuel is in your
tank. It works only when the engine is on. When the
indicator nears EMPTY (E), you still have a little fuel
left. You need to get more fuel right away.
2-69
Here are somethings that some owners askabout. None
of these show a problem with your fuel gage:
0
At the servicestation, the gas pump shutsoff before
the gagereads FULL (F).
0
It takes a little more or less fuel tofill up than the
gage indicated. For example,the gage may have
indicated the tank was half full, but itactually took a
little more or lessthan half the tank’s capacity to fill
the tank.
0
The gagemoves a little when you turn a corner,
speed up, or make a hard stop.
0
The gagedoesn’t go back to EMPTY (E) when you
turn off the ignition.
2-70
Low Fuel Light(If Equipped)
If your vehicle has the
gage cluster, a light near the
fuel gagewill turn on when
you are low on fuel. You
should get more fuel as
soon as you can.
@I
NOTES
fi
2-72
NOTES
Section 3 Comfort Controls and Audio Systems
In this section, you’ll find out how to operate the comfort control and audio systems offered
with your vehicle.Be
sure toread about the particular systems supplied
with your vehicle.
3-2
3-6
3-7
3-8
3-9
3-10
3-11
3- 11
3-11
3- 12
3- 12
3- 14
Comfort Controls
Air Conditioning
Heating
Ventilation System
Defogging and Defrosting
Rear Window Defogger
Passenger Control (If Equipped)
Steering Wheel Controls for Climate Control
(If Equipped)
Audio Systems
Setting the Clock
AM-FM Stereo
AM-FM Stereo with Cassette
Tape Player
(If Equipped)
3- 17
3-21
3 -25
3-30
3-32
3-33
3-34
3-35
3-35
3-36
AM-FM Stereo with Cassette Tape Player and
Automatic Tone Control (If Equipped)
AM-FM Stereo with Compact Disc Player and
Automatic Tone Control (If Equipped)
AM-FM Stereo with Cassette Tape and
Compact Disc Player with Automatic
Tone
Control (If Equipped)
Theft-Deterrent Feature
Audio Steering Wheel Controls(If Equipped)
Understanding Radio Reception
Care of Your Cassette Tape Player
Care of Your Compact Discs
Care of Your Compact Disc Player
Heated Backlite Antenna
3-1
Comfort Controls
Fan Button
This section describes how to operateyour climate
control system. Your climate control system uses
ozone-friendly R- 134arefrigerant.
The FAN control is used to select the speed of the
blower fan and the force of air you want. There are four
speeds to choose from. Moving the lever between LOW
and HIGH will decrease or increasethe fan speed. The
fan will be off when the system is off.
With these systems, you can control the heating, cooling
and ventilation in your vehicle. Your vehicle also has a
flow-through ventilation system described later in
this section.
Electronic Touch Climate Control
Temperature Lever
This lever adjusts the temperature of the air coming
through the system. Movethe TEMPERATURE lever to
change the temperature of the air coming through your
outlets. Move the lever between COOL and WARM to
lower or raise the temperature.
Mode Controls
The buttons on your system allow you to choose
settings to deliver air through the lower, middle or
windshield outlets.
:f your vehicle has this climate control system, the
'allowing information tells you how it works.
RECIRC: Press this button to limit the amount of
outside air entering your vehicle. This is helpful when
you are trying to cool the interior of the vehicle quickly,
or limit the amount of outside air entering your vehicle.
To turn off RECIRC, press the button again. If you
select FRONT defrost or BLENDwhile RECIRC is
selected, the system will automatically turn off RECIRC
to prevent fogging.
VENT: This setting directs outside airthrough the
middle instrument panel outlets. The air conditioning
compressor is notworking when VENT is selected.
NORM: This setting cools the outside air entering
your
vehicle and directs itthrough the middle instrument
panel outlets. The air conditioner is on
in this mode.
HTR: This button directs air outof the heater outlets.
Most of the air will come from the floor outlets while
some air will flow through the windshield and side
window outlets.The airconditioning compressor isnot
working when HTR is selected.
BI-LEV: This setting directswarm air to the floor and
cooler air to themiddle instrument panel outlets. The air
conditioner is on in this
mode.
BLEND: When BLEND is selected,the aifflow will be
split between thewindshield and the floor outlets.The
air conditioning compressorwill be operating.
FRONT This setting directs most of the airflow toward
the windshield.
OFF: The ventilation system always allows fresh air
to flow through your vehicle when itis moving. The
system will try to keep the air at a previously chosen
temperature. When the systemis off, the blower fan is
also off.
MAX: This setting directsairflow through the middle
instrument panel outlets. The amount of outside air
entering your vehicle is limited with
this setting. The air
conditioning compressor is on in this mode.
Dual Automatic Comfortemp
Climate Control(If Equipped)
If your vehicle hasthe Dual Automatic Comfortemp
Climate Control option, the following
information tells
you how it works.
You will hear a beep each timea button is pushed and a
light on the button will indicate which function is active.
The lights are on all buttons except TEMP, FAN and
AIR FLOW. The display will show fan speed, comfort
level setting and airflow direction fora few seconds
whenever AUTO is selected, and then it will display the
outside temperature. The outsidetemperature reading is
most accurate when the vehicle ismoving. During stops,
the display shows the previoustemperature for best
accuracy and system control.
Temperature Button
To adjust the comfort levelyou want maintained inside
the vehicle, push the TEMP button. If you want a
warmer comfort level, push the red arrow. If you wanta
cooler comfortlevel, push the bluearrow. Your comfort
setting is shown in the display.
Fan Button
The speed of the blower fan is controlled automaticallyif
you have the system set forAUTO. Pressing the FAN
button will display and hold the current blower fan setting.
If the display is flashingafter the climate control system
is started, there is a problem with the system and you
should see your dealer forservice.
Sun and temperature sensors automatically adjust the air
temperature, the airflow direction and the fan speed to
maintain your comfort setting. Thesystem may supply
cooler air to the side
of the vehicle toward the sun. Be
careful not toput anything overthe sensors on top of
the dash.
3-4
If you want the blower fan torun at a lower speed, push
the bottom of the FAN button. The fanspeed will
decrease with every push of the button until the lowest
speed is reached. If you want to increasethe fan speed,
push the top of the FAN button. Notice the fan
indicators in the display.
Mode Controls
Press the AIR FLOW button to deliverair through the
floor, middle or windshield outlets. The system will stay
in the selected mode until the AUTO button is pushed.
Press the up arrow on the AIR FLOW button to cycle
through the available modes.
Automatic Operation
Manual Operation
Press the AUTO button when you want the system to
automatically adjust to changesin the temperature inside
the vehicle, the outside temperature and the sun load on
the vehicle. When the system is set for automatic
operation, air will come fromthe floor, middle or
windshield outlets depending on the temperature inside
the vehicle, the outside temperatureand sun load. Fan
speed will vary as the system gets to and maintains the
comfort setting you have selected through the use of the
TEMP button.
You may also manually adjust the air delivery or fan speed.
To find your comfort setting, start
with the system in
AUTO mode and the TEMP button adjusted to 75°F
(24"C), give the vehicle about 20 minutes to stabilize,
and adjust your comfort setting if necessary, by using
the TEMP button. The display will show the comfort
setting for a few seconds and then it will display the
outside temperature.If you want to see your current
automatic fan speed, airflow direction and comfort
setting, press the AUTO button.
In cold weather, the system will delay turning on the
fan, to avoid blowing cold air. The length of the delay
depends on the engine coolant temperatureand the
outside temperature. Pushingthe FAN, AIR FLOW or
FRONT buttons will override this delay, turn off the
AUTO setting and change the fan speed.
AIR FLOW: This button is used to change the direction
of the airflow. The airflow choices available are
FLOOR, FLOOR-MID, MIDand
WINDSHIELD-FLOOR. If the system is set for AUTO,
pressing the AIR FLOW button will display the current
airflow direction and the comfort setting. Press the AIR
FLOW up or down button again to change the direction
of the airflow.
If the AIR FLOW up button is selected while in the
FRONT defrost mode, the system will direct the air
toward the windshield and the floor. If the AIR FLOW
down button is selected while in the FRONT defrost
mode, the system will direct the air toward the floor, and
the FRONT defrost mode will cancel. Notice the arrows
in the display.
OFF: If the passenger comfort control is turned on, it
can be turned off by pressing the OFF button once.
Pressing the OFF button a second time will turn off the
main system. Turning off the main system causes the fan
to turn off and the airflow to be directed toward the
floor. The system will still try to keep the interior of the
vehicle at the previous chosen comfort setting. The
outside temperature will show on the display when the
system is OFF.
The ventilation system always allows fresh air to flow
through your vehicle when the vehicle is moving even
with the system in the OFF mode.
VENT The VENTbutton allows outside air to flow
through your vehicle without the air conditioning
compressor working. Selecting VENT and the AUTO
button at the same time allowsthe system to control
automatically without the use of the airconditioning
compressor orthe use of the RECIRC mode. To turn off
the VENT selection, push the VENT button again.
RECIRC: When RECJRC is selected, the system will
limit the amount of outside air entering your vehicle.This
is helpful when you are trying to cool the interiorof the
vehicle quickly or limit the amountof outside air entering
your vehicle. RECIRC and AUTO may be selected at the
same time. The system will remain in RECIRC until the
ignition is turned off, then the system will return back to
the previously selected mode. Deselecting the RECIRC
button will also turn off the RECIRC function. RECIRC
can be selected in all manual airflow modes except
FRONT defrost and VENT.
FRONT This selection is used to defrost the windshield
by directing the airflow toward the windshield.
3-6
If FRONT is selected while in the AUTO mode,
the fan speed and the air temperature from the front
defroster will vary. If a manual fan speed setting is
selected, the fan speed will remain at that selection until
another fan speed selection is made orthe AUTO mode
is selected. To turn off FRONT, press the AUTO or
AIR FLOW button.
FRONT defrost will work better if any ice or snow is
cleared from the hood and the air inlet area between the
base of the windshield and the hood.
Air Conditioning
On hot days, open the windows long enough to let hot
inside air escape. This reduces the time it takes for your
vehicle to cool down. Then keep your windows closed
for the air conditioner to work its best.
If you have the electronic touch system, for quick
cool-down on very hot days, use MAX with the
temperature and fan speed adjusted to COOL and
HIGH. If this setting is used for long periods of time, the
air in your vehicle may become too cold and dry.
For normal cooling on hot days, use NORM and adjust
the temperature and fan speed for your comfort. If
RECIRC is selected while in the NORM air
conditioning mode, the system works like MAX and
recirculates the air.
On sunny days, when the air is moderately warm or
cool, use BI-LEV to deliver warm air to the floor and
cooler air to the middle instrument panel outlets.
On
days like these, the sunmay adequately warm your
upper body, but your lower bodymay not be warm
enough. To warm or cool the air delivered, adjust the
TEMPERATURE lever.
The amount of fresh air entering the vehicle is limited
when RECIRC is selected. This is helpful
when you are
trying to cool the air in your vehicle or limit the air
entering the vehicle.
Heating
If your vehicle has the electronic touch system, on
cold days, useHTR with the TEMPERATURE lever
toward WARM.
If your vehicle has the Dual Automatic Comfortemp
if the AUTO mode is selected,
system, and on cold days,
the system will automatically direct the airtoward the
floor and the temperature door willbe positioned at the
full hot position.You can choose the extreme comfort
setting of 90°F (32°C) but the systemwill not warm up
any faster by selecting the extreme comfort setting.
If
the outside temperature is cold, the fan will
be delayed
to avoid blowing coldair. Pushing the FAN, AIR FLOW
or FRONT buttonswill override thisdelay, turn off the
AUTO mode and changethe fan speed.
If your vehicle has the Dual Automatic Comfortemp
system and it is set for AUTO,
on very hot days, the
system will automatically enter the RECIRC mode
and
the temperature doorwill be positioned at the full cold
position for maximum cooling.If the system is notin
the AUTO mode, RECIRC should be selected to provide With each system, outsideair will be brought in and sent
works best if you
maximum cooling.You can choose the extreme comfort through the floor outlets. The heater
keep your windows closed while usingit.
setting of 60°F (16"C), but the system will not cool any
faster by choosing the extreme comfort setting.
When the air conditioneris on, you may sometimes
notice slight changesin your vehicle's engine speed
and power. This is normal because the system
is
designed to cycle the compressoron and off to keep the
desired temperature.
3-7
Ventilation System
For mild outside temperatures when little heating or
cooling is needed, use VENT (on the electronic touch
system or manual operation on the Dual Automatic
Comfortemp system) to direct outside air through your
vehicle. Air will flow through the middle instrument
panel outlets.
Your vehicle’s flow-through ventilation system supplies
outside air into the vehicle when it’s moving. When the
vehicle is not moving, you can get outside airto flow
through by selecting any air choice (except the rear
window defogger) and any fan speed.
Adjust the direction of
airflow by moving the
louvered vents.
3-8
If you have the rear passenger comfortemp option,
you can adjust the direction of the airflow to the rear
seating area.
Ventilation Tips
0
Keep the hood and front air inlet free
of ice, snow or
any other obstruction such as leaves. The heater and
defroster will work better, reducing the chance of
fogging your windows.
0
Keep the air path under the front seats clearof
objects. This helps air to circulate
throughout
your vehicle.
0
When the engine idles for a long
time, the exterior
temperature sensor may causethe system toblow air
that is too cool. Oncethe vehicle is moving again,
the system will try to maintain the set temperature
inside your vehicle.
0
When you start your vehicle and the EXT display
flashes (Dual Automatic Comfortemp system only)
for some time, the system may need repair. See
your dealer.
Defogging and Defrosting
If you have the electronic touch system, adjust the
TEMPERATURE lever toward WARM and the FAN
lever toward HIGH.
If you have the Dual Automatic Comfortemp system,
use the FRONT button to defog or defrost the
windshield. By choosing thisbutton, the airflow will be
directed at the windshield. Adjust your comfort level by
pressing the TEMP up or down arrow. The fanspeed
will be controlled by the system. You can change the fan
speed by pressing the topof the FAN button to increase
speed, and the bottom of the button to decrease speed.
To reduce the chance of fogging your windows in cold
weather, using the electronictouch system, selectHTR
to supply air through the floor outlets.The.n move the
FAN lever to HIGH for a fewmoments before driving
away. This will blow moist air from the intake outlets
toward the floor, not the windshield. If you have the
Dual Automatic Comfortemp system, the AUTO setting
will do this for you.Manual operation of the automatic
comfortemp system in the FLOOR mode will also
supply air through the floor outlets.
3-9
Rear Window Defogger
The lines you see on the
rear window warm the
glass. Pressthis button to
start warming your window.
Do not attach a temporary vehicle license, tape or decals
across the defogger grid on the rear window.
NOTICE:
Do not try to clear frost or other material from
the inside of the rear window with a razor blade
or anything else that is sharp. This
may damage
the rear defogger grid. The repairs wouldn’t be
covered by your warranty.
After 10 minutes it will turn off by itself, or pressing the
button during the heating cyclewill turn it off. If you
need additional warming time, push the button again.
The systemwill then operate for fiveminutes before
going off by itself.
3-10
Passenger Control(If Equipped)
If you have the Dual
Automatic Comfortemp
system, the front seat
passenger can control the
air temperaturein their
seating area.
The temperature canbe set up to 5 O F (- 15O C) cooleror
warmer than the primary setting. To activate the
passenger control, simplypress the COOL or WARM
buttons located on the passenger’sdoor.
The indicator lights above the control will show the
difference from the main temperature setting.
If the passenger controlhas been turned on, it canbe
turned off by pressing the OFF button once. Pressingthe
OFF button a second timewill turn off the main system.
Steering Wheel Controls for Climate
Control (If Equipped)
If your vehicle has this
feature, you can control the
temperature function by
using the button on your
steering wheel. Press the
TEMP uparrow to increase
the temperature and the
TEMP down arrow to
decrease the temperature.
Audio Systems
Your Delco Electronics audio systemhas been designed
to operate easily and give years of listening pleasure.
You will get the most enjoyment out of it if you acquaint
yourself with it first.Find out what your Delco
Electronics system can do and how to operate all its
controls, to be sure you’re getting the most out of the
advanced engineering that went into it.
3-11
Setting theClock
Playing theRadio
Press and hold HRS until the correct hour appears. Press
and hold MIN until the correct minute appears.
VOLUME: This knob turns the system on and off and
controls the volume. To increase volume and turn the
radio on, turn the knob to the right. Turn it tothe left to
decrease volume.
You may set the clock with the ignition off if you
press RECALL first and follow the same procedure
described above.
AM-FM Stereo
RECALL: Press the upper knob briefly to recall the
station being played or to display the clock. To change
what is normally shown on the display (station or time),
press the knob until you see the display you want, then
hold the knob until the display flashes. If you press the
knob when the ignition is off, the clock will show for a
few seconds.
Finding a Station
AM-FM: Press the AM-FM button to switch between
AM, FM1 and FM2. The display shows your selection.
TUNE: Turn the lower knob to choose radio stations.
SEEK: Press the right or left arrow to go to the next
higher or lower station and stay there. The sound will
mute while seeking.
3-12
SCAN: Press one of the SEEK arrows fortwo seconds,
and SCAN will appear on the display. Use SCAN to
listen to stations for a few seconds. The radio
will go to
a station, stop for a few seconds,
then go on to the next
station. Press oneof the SEEK arrows again to stop
scanning. The sound will mute while scanning.
PUSHBUTTONS: The six numbered pushbuttons let
you return to your favorite stations. You can set up to
18 stations (six AM, six FM1 and six FM2). Just:
1. Turn the radio on.
2. Press the AM-FM button to select the band.
3. Tune in the desired station.
4. Press and hold one of the six numbered buttons. The
sound will mute. When it returns, release the button.
Whenever you press that numbered button, the
station you set will return.
Setting theTone
BASS: Press this knob lightly so it extends. Turn the
knob to increase or decrease bass.
TREB: Press this knob lightly so it extends. Turn the
knob to increase or decrease treble. If a station is weak
or noisy, you may want to decrease the treble.
Push these knobs back into their stored positions when
you’re not using them.
Adjusting the Speakers
BAL: Turn the control behind the upper knob to move
the sound to the left or right speakers. Themiddle
position balances the sound between the speakers.
FADE: Turn the control behind the lower knob to move
the sound to the front or rear speakers. Themiddle
position balances the sound between the speakers.
5. Repeat the steps for each pushbutton.
P SCAN:Press this button to listen to each of your
preset stations for a few seconds.
The radio will go to
the first preset station, stop for a few seconds,
then go
on to the next preset station. Press P SCAN again to stop
scanning. The radiowill not stop at a preset station if the
station is weak.
3-13
AM-FM Stereo with CassetteTape Player
(If Equipped)
RECALL: Press the upper knob briefly to recall the
station being played or to display the clock. To change
what is normally shown on the display (station or time),
press the knob until you see the display you want, then
hold the knob until the display flashes. If you press the
knob when the ignition is off, the clock will show for a
few seconds.
Finding a Station
AM-FM: Press the lower knob to switch between AM,
FMl and FM2. The display shows your selection.
TUNE: Turn the lower knob to chooseradio stations.
SEEK: Press the right or left arrow to go to the next
higher or lowerstation and stay there. The sound will
mute while seeking.
Playing the Radio
VOLUME: This knobturns the system on and off and
controls the volume. To increase volume and turn the
radio on, turn the knob to the right. Turn it to the left to
decrease volume.
3-14
SCAN: Press one of the SEEK arrows fortwo seconds,
and SCAN will appear on the display. Use SCAN to
listen to stations for a few seconds. The radiowill go to
a station, stop for a fewseconds, then go on to the next
station. Press one of the SEEK arrows again to stop
scanning. The sound will mute while scanning.
PUSHBUTTONS: The six numbered pushbuttons let
you return to your favorite stations.You can set up to
18 stations (six AM, six FMl and six FM2).Just:
Setting theTone
BASS: Press this knob lightly so it extends. Turn the
knob to increaseor decrease bass.
1. Turn the radio on.
TREB: Press this knob lightly so it extends. Turn the
knob to increase or decrease treble.If a station is weak
or noisy, you may want to decreasethe treble.
2. Press AM-FM to select the band.
3. Tune in the desired station.
4. Press and hold one of the six numbered buttons. The
sound will mute. When it returns, release thebutton.
Whenever you press that numbered button, the
station you set will return.
5. Repeat the steps for each pushbutton.
P SCAN: Press this button to listen to eachof your
preset stations fora few seconds. The radiowill go to
the first preset station, stop for
a few seconds, then go
on to the next preset station. Press P SCAN again to stop
scanning. The radiowill not stop at a preset if the station
is weak.
Push these knobs back into their stored positions when
you’re notusing them.
Adjusting the Speakers
BAL: Turn the control behind the upper knob to move
the sound to the left or right speakers. The middle
position balances the soundbetween the speakers.
FADE: Turn the control behind the lower knob to move
the sound tothe front orrear speakers. The middle
position balances the sound between the speakers.
Ell: The tape is broken. Try a new tape.
Playing a Cassette Tape
0
The longer side with the tape visible should face to the
right. If the ignition and the radio are on, the tape can be
inserted and will begin playing. If you hear nothing or
hear a garbled sound, the tape may not be in squarely.
Press EJECT to remove the tape and start over.
If any error occurs repeatedly or if an error can’t be
corrected, please contact your dealer. If your radio
displays an error number, write it down and provide it to
your dealer when reporting the problem.
While the tape is playing, use the VOLUME, FADE,
BAL, BASS and TREB controls just asyou do for the
radio. Other controls may have different functions when
a tape is inserted. Thedisplay will show an arrow to
show which side of the tape is playing.
If you want to insert a tape when the ignition or radio is
off, first press EJECT or RECALL. Note that the
cassette tape adapter kits for portable compact disc
players will work in your cassette tape player.
Your tape bias is set automatically.
If E and a number appear on the radio display, the tape
won’t play because of an error.
E10: The tape is tight and the player can’t turn the
tape hubs. Remove the tape. Hold the tape with the
open end down andtry to turn the right hub to the left
with a pencil. Turn the tape over and repeat. If the
hubs do not turn easily, your tape may be damaged and
should not be used in the player. Try a new tape to
make sure your playeris working properly.
3-16
PREV (1): Press this button to search for the previous
selection on the tape. Your tape must have at least three
seconds of silence between each selection for PREV to
work. The sound will mute while seeking.
NEXT (2): Press this button to search for the next
selection on the tape. Your tape must have at least three
seconds of silence between each selection for NEXT to
work. The sound will mute while seeking.
The SEEK left and right arrows will also find the
previous and next selections on the tape.
44 (3): Press this button to reverse the tape rapidly.
Press it again to return to playing speed. The radio will
play while the tape reverses.
..
(4): Press this button to advance quickly to another
part of the tape. Press the button again to return to
playing speed. The radio will play while the tape
advances.
SIDE (5): Press this button to change the side
of the
tape that is playing.
AM-FM Stereo with Cassette Tape Player
and Automatic Tone Control(If Equipped)
00 (6): Press
this button to reduce background noise.
The display will show either OFF or ON for a few
seconds whenyou press the button.
Dolby Noise Reductionis manufactured under a license
from Dolby Laboratories Licensing Corporation. Dolby
and the double-D symbol are trademarksof Dolby
Laboratories Licensing Corporation.
EJECT Press this button to remove the tape.
The radio
will play.
CLN: If this message appears on the display, the
cassette tape player needsto be cleaned. It will still play
tapes, but you should clean it as soon as possible to
prevent damage to the tapes and
player. See “Careof
Your Cassette Tape Player” in the Index. Afteryou clean
the player, press and hold EJECT for five seconds to
reset the CLN indicator. The radio will display--- to
show the indicatorwas reset.
Playing the Radio
VOLUME: Press this knob toturn the system on and
off. To increase volume,turn the knob to the right.
Turn
it to the left to decrease the volume.
3-17
RECALL: Press this button briefly to recall the station
being played or todisplay the clock.To change what is
normally shown on the display (station or time), press
this button until you see the display you want, then hold
the button until the display flashes. If you press the
button when the ignition is off, the clock will show for a
few seconds.
PUSHBUTTONS: The six numbered pushbuttons let
you return to your favorite stations. You can set up to
18 stations (six AM, six FM 1 and six FM2). Just:
Findin&a Station
AM-FM: Press this button to switch between AM, FMl
and FM2. The display shows your selection.
4. Press TONE to select the setting you prefer.
TUNE: Press the up or down arrow to choose
radio stations.
SEEK: Press the up or down arrow to go to the next
higher or lowerstation and stay there. The sound will
mute while seeking.
SCAN: Press one of the SEEK arrows for twoseconds
and SCAN will appear on the display. Use SCAN to
listen to stations for a few seconds.The radio will go to
a station, stop for a few seconds,
then go on to the next
station. Press one of the SEEK buttons again to stop
scanning. The soundwill mute while scanning.
3-18
1. Turn the radio on.
2. Press AM-FM to select the band.
3. Tune in the desired station.
5. Press and hold one of the six numbered buttons. The
sound will mute. When it returns, release the button.
Whenever you press that numbered button, the
station you set will return and the tone you selected
will be automatically selected for that button.
6. Repeat the steps for each pushbutton.
P SCAN: Press this button to listen to each of your
preset stations for a few seconds. Theradio will go to
the first preset station, stop for afew seconds, then go
on to the next preset station. Press P SCAN again to stop
scanning. If a preset station has weak reception, the
radio will not stop at the preset station.
AUTO SET Press this button and the system
will seek
and set the12 strongest FM or the 6 strongest AM
stations on your preset buttons (depending on which
band (AM or FM)you are listening to). AUTOSET will
flash while seeking andwill remain on until this
function is complete.To return to the stations you
manually set, press AUTO SET again.
Setting the Tone
BASS: Press this knob lightlyso it extends. Turn the
knob to increase or decrease bass.
TREB: Press this knob lightlyso it extends. Turn the
If a station isweak
knob to increase or decrease treble.
or noisy, you may want to decrease the treble.
Push these knobs back into their stored positions
when
you’re notusing them.
TONE: This feature allowsyou to choose preset bass
and treble equalization settings designed for classical,
pop, rock, jazz, talk and country/western stations.
CLASS will appear on the display when
you first press
TONE. Each timeyou press it, another setting will
appear on the display. Press
it again after C& W
appears and MANUALwill appear. Tone control will
return to theBASS and TREB knobs. Also,if you use
the BASS and TREB knobs, control will return
to them
and MANUAL will appear.
Adjusting the Speakers
BAL: Press h s knob lightly so it extends. Turnthe knob
to move the soundto the left or right speakers.The middle
position balances the sound between the speakers.
FADE: Press this knob lightly so it extends. Turn the
knob to move the sound to the frontor rear speakers.The
middle position balances the sound between the speakers.
Push these knobs back into their stored positions when
you’re not using them.
Playing a CassetteTape
The longer sidewith the tape visible should face to the
right. If the ignition and the radio are on, the tape can be
inserted andwill begin playing.If you hear nothing or
hear a garbled sound, the tape
may not be in squarely.
Press EJECT to remove the tape and start over.
While the tapeis playing, use the VOLUME,FADE,
BAL, BASS and TREB controls just
as you do for the
radio. Other controlsmay have different functionswhen
a tape is inserted.The display will showan arrow to
show which sideof the tape is playing.
If you want to insert a tape
when the ignition or radio is
off, first press EJECT or RECALL. Note that the
cassette tape adapter kits for portable compact disc
players will work in your cassette tapeplayer.
3-19
Your tape bias is set automatically.
If E and a number appear on the radio display, the tape
won’t play because of an error.
ElO: The tape is tight and the player can’t turn the
tape hubs. Remove the tape. Hold the tape with the
open end down and try to turn the right hub to the
left with a pencil. Turn the tape over and repeat. If
the hubs do not turn easily, your tape may be
damaged and should not be used in the player. Try a
new tape to make sureyour player is working
properly.
Ell: The tape is broken. Try a new tape.
If any error occurs repeatedly or if an error can’t be
corrected, please contact your dealer. If your radio
displays an error number, write it down and provide it to
your dealerwhen reporting the problem.
PREV (1): Press this button to search for the previous
selection on thetape. Your tape must have at least three
seconds of silence between each selection for PREVto
work. The soundwill mute while seeking.
3-20
NEXT (2): Press this button to search for the next
selection on the tape. Your tape must have at least three
seconds of silence between each selection for NEXT to
work. The sound will mute while seeking.
The SEEK up and down arrows will also find the
previous and next selections on the tape.
44 (3): Press this button to reverse the tape rapidly.
Press it again to return to playing speed. The radiowill
play while the tape reverses.
,,
(4): Press this button to advance quickly to another
part of the tape. Press the button again to return to
playing speed. The radio will play while the tape
advances.
SIDE (5): Press this button to change the side of the
tape that is playing.
00 (6): Press this button to reduce background noise.
The double-D symbol will appear on the display.
Dolby Noise Reduction is manufactured under a license
from Dolby Laboratories Licensing Corporation. Dolby
and the double-D symbol are trademarks of Dolby
Laboratories Licensing Corporation.
AM-FM: Press this button to play the radio when a tape
is in the player.
AM-FM Stereo with Compact Disc Player
and Automatic Tone Control(If Equipped)
SOURCE: Press this button to change tothe tape
function when the radio is on.TAPE PLAY with an
arrow will appear on the display when the tape isactive.
EJECT Press this button to remove the tape. The radio
will play.
CLN: If this message appearson the display, the
cassette tape player needs to be cleaned. It will still play
tapes, but you should clean itas soon aspossible to
prevent damage to the tapesand player. See “Care of
Your Cassette Tape Player’’ in the Index.After you clean
the player, press and hold EJECT for five seconds to
reset the CLN indicator. The radio will display --- to
show the indicator was reset.
Playing the Radio
VOLUME: Press this knob toturn the system on and
off. To increase volume, turn the knob to the right. Turn
it to the left to decrease the volume.
3-21
RECALL: Press this button briefly to recall the station
being played or todisplay the clock. To change what is
normally shown on the display (station or time), press
the button until you see the display you want, then hold
the button until the display flashes. If you press the
button when the ignition is off, the clock will show for a
few seconds.
Finding a Station
2. Press AM-FM to select the band.
3. Tune in the desired station.
4. Press TONE to select the setting you prefer.
5. Press and hold one of the six numbered buttons. The
sound will mute. When it returns, release the button.
Whenever you press that numbered button, the
station you set will return and the tone you selected
will be automatically selected for that button.
AM-FM: Press this button to switch between AM, FMl
and FM2. The display showsyour selection.
6. Repeat the steps for each pushbutton.
TUNE: Press the up
or down arrowto choose radio stations.
P SCAN: Press this button to listen to eachof your
SEEK: Press the up or down arrow to go to the next
higher or lower station and stay there. The sound will
mute while seeking.
SCAN: Press oneof the SEEK m o w s for twoseconds
and SCAN will appear on the display. Use SCAN to
listen to stations for a few seconds. The radiowill go to
a station, stop fora few seconds,then go on to the next
station. Press one of the SEEK arrows again to stop
scanning. The soundwill mute while scanning.
PUSHBUTTONS: The six numbered pushbuttons let
you return to your favorite stations. You can set up to
18 stations (six AM, six FM1 and six FM2). Just:
1. Turn the radio on.
3-22
preset stations for a few seconds. Theradio will go to
the first preset station, stop fora few seconds, then go
on to the next preset station. Press P SCAN again to stop
scanning. If a preset station has weak reception, the
radio will not stop at the preset station.
AUTO SET Press this button and the system will seek
and set the 12 strongest FM or the 6 strongest AM
stations on your preset buttons (depending on which
band (AM or FM) you are listening to). AUTO SET will
flash while seeking and will remain on until this
function is complete. To return to the stations you
manually set, press AUTO SET again.
BASS: Press this knob lightlyso it extends. Turn the
knob to increase or decrease bass.
FADE: Press this knob lightly so it extends. Turn
this knob to move the sound
to the front orrear
speakers. The middleposition balances the sound
between the speakers.
TREB: Press this knob lightly so it extends. Turn the
knob to increase or decreasetreble. If a station is weak
or noisy, you may want to decreasethe treble.
Push these knobsback into their stored positions when
you’re not using them.
Setting the Tone
Push these knobs back into their stored positions when
you’re not using them.
TONE: This feature allows you to choose
preset bass
and treble equalization settings designed for classical,
pop, rock, jazz, talkand country/western stations.
CLASS will appear on the display when you first press
TONE. Each time you press it, another settingwill
appear on the display. Press it again after C & W
appears and MANUAL will appear. Tone control will
return to the BASSand TREB knobs. Also,if you use
the BASS and TREB knobs, control will return to them
and MANUAL will appear.
Playing a Compact Disc
Insert a disc partway into the slot, label side
up. The
player will pull it in. The disc
should begin playing.
If you want to insert a CD while the ignition or the radio
is off, first press EJECT or RECALL.
If you’re driving on a very rough road or if it’s very hot,
the disc may not play and an error codemay appear on
the display. When things get back to normal,the disc
should play. If the disc comes out,it could be that:
0
Adjusting the Speakers
BAL: Press this knob lightlyso it extends. Turn this knob
to move the sound to the leftor right speakers. The middle
position balances the sound between the speakers.
E20: The disc is upside down.
E20: It is dirty, scratched or wet.
E20: There’s too much moisture in the air. (Wait
about an hour and try again.)
If any error occursrepeatedly or if an error can’t be
corrected, please contactyour dealer. If your radio
displays an error number, write it down and provide it to
your dealer when reporting the problem.
0
3-23
PREV (1): Press this button to go to the start of the
current track if more than eight seconds have played. If
you hold the button or press it morethan once, the
player will continue moving back through the disc. The
sound will mute while seeking.
NEXT (2): Press this button to go to the next track. If
you hold the button or press it more than once, the
player will continue moving forwardthrough the disc.
The soundwill mute while seelung.
The SEEK down and up arrows will also find the
previous and next selections on the disc.
44 (3): Press and hold this button to quickly reverse
within a track. You will hear sound.
(4): Press and hold this button to quickly advance
within a track. You will hear sound.
RAND (6): Press this button to hear the tracks in
random, rather than sequential, order. Press RAND
again to turn off random play.
3-24
RECALL: Press this button to see which track is
playing. Press it again within five seconds to see how
long it has been playing. To change what is normally
shown on the display (track or elapsed time), press the
button until you see the display you want, then hold the
button until the display flashes.
AM-FM: Press this button to play the radio when a disc
is in the player.
SOURCE: Press this button to changeto the disc
function when the radio is on. When a discis inserted,
the disc will play until you press AM-FM. Then the disc
will stop playing and the radio will play. Press SOURCE
again to play a disc again. CD PLAY will show on
the display.
EJECT Press this button to remove the disc. The radio
will play.
If you turn off the ignition or .radio with a disc in the
player, it will stay in the player. When you turn on the
ignition or system, the disc will start playing where it
stopped, if it was the last-selected audio source.
RECALL: Press this button briefly to recall the station
AM-FM Stereo with Cassette
Tape and
Compact Disc Player with Automatic Tone being played or to display the clock.To change what is
normally shown on the display (station or time),press
Control (If Equipped)
the RECALL button until you see thedisplay you want,
then hold the RECALL button until the display flashes.
If you press the button when the ignition is off, the clack
will show for a few seconds.
Finding a Station
AM-FM: Press this button to switch between AM, FMl
and FM2. The display shows your selection.
TUNE: Press the upor down arrowto choose radio stations.
SEEK: Press the up or down arrow to go to the next
higher or lower station and stay there. The sound will
mute while seeking.
Playing the Radio
VOLUME: Press this knob to turn the system on and
off. To increase volume, turn the knob to the right. Turn
it to the leftto decrease volume.
SCAN: Press one of the SEEKarrows for two seconds
and SCAN will appear on the display. Use SCAN to
listen to stations fora few seconds. The radiowill go to
a station, stop fora few seconds, then go on to the next
station. Press oneof the SEEKarrows again to stop
scanning. The soundwill mute while scanning.
\
1
PUSHBUTTONS: The six numbered pushbuttons let
you return to your favorite stations.
You can set up to
. 18 stations (sixAM, six FM1 and, sixEM2). Just:
1. Turn the radio on.
2. Press AM-FM to select the band.
AUTO SET: Press this buttonand the system will seek
and set the 12 strongest FM or the6 strongest AM
SET will flash
stations on your preset buttons. AUTO
this function is
while seeking and will remain on until
complete. To return to the stations you manually
set,
press AUTO SET again.
3. Tune in the desired station.
Setting the Tone
4. Press TONE to select the settingyou prefer.
BASS: Press this knob lightlyso it extends. Turn the
knob to increase or decrease bass.
5. Press and hold one of the six numbered buttons. The
sound will mute. Whenit returns, release the button. TREB: Press thisknob lightly so it extends'. Turnthe'
Whenever you press that numbered button, the
knob to increase or decrease treble.If a stationis weak
station you set will return and the tone you selected or noisy, you may want to decrease the .treble.
will be automatically selected for that button.
Push these knobs back
into their stored positions when
6. Repeat the steps for each pushbutton.
you're not using them.
P SCAN: Press this button to listento.eachof your
TONE: This feature allows you to choose preset bass
will go to
preset stations for a few seconds. The radio
and treble equalization settings designed for classical,
the first preset station, stop for a few seconds, then gopop, rock,jazz, talk and country/western stations.
P SCAN again to stop CLASS will appear on the display when you first press
on to the next preset statioh. Press
scanning. If a preset station has weak reception, the
TONE. Each time you press
it, another setting-will
radio will not stop at the preset station.
appear on the display. Press
it again afterC & W
appears and MANUAL will appear. Tone control will
return tothe BASS and TREB knobs. Also, if youuse
the BASS and TREB knobs, control will return to them
and MANUAL will appear.
%
3-26
Adjusting the Speakers
Your tape bias is set automatically.
BAL: Press this knob lightly so it extends. Turn the
If E and a number appear on the radio display, the tape
won’t play because of an error.
knob to move the soundto the left orright speakers. The
middle position balances the sound between the
speakers.
FADE: Press this knob lightly so it extends. Turn the
knob to move the sound tothe front orrear speakers.
The middle position balances the sound between
the speakers.
Push these knobs back intotheir stored positions when
you’re not using them.
Playing a Cassette Tape
The longer sidewith the tape visible should face to the
right. If the ignition and the radio areon, the tape can be
inserted and will begin playing. If you hear nothing or
hear a garbled sound, the tape may not be in squarely.
Press EJECT to remove the tapeand start over.
While the tape is playing, use the VOLUME,
FADE,
BAL, BASS and TREB controlsjust asyou do for the
radio. Other controls may have different functionswhen
a tape is inserted. The display will show an arrow to
show which side of the tape is playing.
If you want to insert a tape when the ignition or radio is
off, first press EJECT or RECALL.
0
E10: The tape is tight and the player can’t turn the
tape hubs. Remove the tape. Hold the tape with the
left
open end down and try to turn the right hub to the
with a pencil. Turn the tape over and repeat.If the
hubs do not turn easily, your tape may be damaged and
should not be used in the player. Try a new tape to
make sure your playeris working properly.
Ell: The tape is broken. Try a new tape.
If any error occursrepeatedly or if an error can’t be
corrected, pleasecontact your dealer. If your radio
displays an error number, write it down and provide it to
your dealer when reporting the problem.
PREV (1): Press this button to search for the previous
selection on the tape. Your tape must have at least three
seconds of silence between each selection for PREVto
work. The sound will mute while seeking.
NEXT (2): Press this button to search for the next
selection on the tape. Your tape must have at least three
seconds of silence between each selection for NEXT to
work. The sound will mute while seeking.
The SEEK down and up arrows will also find the
previous and next selections on the tape.
EJECR The systemhas two EJECTbuttons. Press the
button near the CD slot to remove a disc. Press the
44 (3): Press this button to reverse the tape rapidly.
button near the tape slot to removea tape and the radio
will play.
..
Press it again to return to playing speed. The radiowill
play while the tape reverses.
CLN: If this message appears on the display, the
cassette tape player needs to be cleaned. It will still play
(4): Press this button to advance quicklyto another
tapes, but you should clean it as soon as possible to
part of the tape. Press the button again to return to playing
prevent damage tothe tapes and player. See “Care of
speed. The radio will play while the tape advances.
Your Cassette Tape Player” in the Index. After you clean
SIDE (5): Press this button to change the side of the
the player, press and hold EJECT for fiveseconds to
tape that is playing.
reset the CLN indicator. The radio will display --- to
show the indicator was reset.
RAND (6): Press this button to reduce background
noise. The double-D symbol will appear in the display.
Your cassette tape player automatically reduces
background noise from tapes encoded with Dolby NR.
Dolby Noise Reduction is manufactured under a license
You may turn Dolby off by pressing the number
from Dolby Laboratories Licensing Corporation. Dolby
six preset.
and the double-D symbolare trademarks of Dolby
Laboratories Licensing Corporation.
Playing a Compact Disc
SOURCE: Press this button to change to the tape or
Insert a disc partway into the slot, label side up. The
disc function when the radio is on. If both a tape and a
player will pull it in. The disc should begin playing.
disc areinstalled, the system will first go to tape play;
If you want to insert a CD while the ignition or the radio
TAPE SIDE and an arrow will appear onthe display. If
is off, first press EJECT or RECALL.
SOURCE is pressed again, the system will go to disc
play; CD PLAY will appear on the display.
3-28
If you’re driving on avery rough road or if it’s very hot,
the disc may not play and an error code may appear on
the display. When things get back to normal, the disc
be that:
should play. If the disc comes out, it could
0
0
0
E20: The disc is upside down.
E20: It is dirty, scratched or wet.
E20: There’s too much moisture in the air. (Wait
about an hourand try again.)
If any error occursrepeatedly or if an error can’t be
corrected, pleasecontact your dealer. If your radio
displays an error number, write it down and provide it to
your dealer when reporting the problem.
PREV (1): Press this button to go to the start
of the
current track,if more than eight seconds have played.If
you hold the button or press it morethan once, the
player will continue movingback through the disc. The
sound will mute while seeking.
NEXT (2):Press this button to go to thenext track. If
you hold the button orpress it more than once,the
player will continue moving forwardthrough the disc.
The sound will mute while seeking.
The SEEK down and up arrows will also find the
previous and next selections on the disc.
44 (3): Press and hold this button to quickly reverse
within a track. You will hear sound.
,,
(4): Press and hold this button to quickly advance
within a track. You will hear sound.
RAND (6): Press this button to hear the tracks in
random, rather than sequential, order. Press RAND
again to turn off random play.
RECALL: Press this button to see which track is
playing. Press it again within five seconds to see how
long it has been playing. To change what is normally
shown on the display (track or elapsed time), press the
RECALL button until you see the display you want,
then hold the RECALL button until the display flashes.
AM-FM: Press this button to play the radio when a disc
is in the player.
SOURCE: Press this button to change to the disc
function when the radio is on. When a disc is inserted,
the disc will play until you press AM-FM. Then the disc
will stop playing and the radio will play. Press SOURCE
again to play a disc again. CD PLAY will show on the
display.
EJECT Press this button to remove the disc. The radio
will play.
3-29
If you turn off the ignition or radiowith a disc in the
player, it will stay in the player. When you turn on the
ignition or system, the disc will start playing where it
stopped, if it was the last-selected audio source.
Also, as a protection feature, if a CD is ejected and left
in the player, it will be pulled back in the player with the
ignition on or off.
Activating the Theft-Deterrent Feature
The instructions which follow explain how to enter your
secret code to activate the THEFTLOCK system. It is
recommended that you read through all nine steps
before starting the procedure.
Theft-Deterrent Feature
NOTE: If you allow more than 15 seconds to elapse
between any steps, the radio automatically reverts to
time and you must start the procedure over at Step 4.
THEFTLOCK@is designed to discourage theft of your
radio. It works by using a secret code todisable all radio
functions whenever battery power is removed.
1. Write down any three or four-digit number from
000 to 1999 and keep it in a safe place separate from
the vehicle.
If THEFTLOCK is active, the THEFTLOCK indicator
will flash when the ignition is off.
2. Turn the ignition to ACCESSORY or RUN.
3. Turn the radio off.
The THEFTLOCK feature forthe radio may be used or
ignored. If ignored, the system plays normally and the
radio is not protected by the feature.If THEFTLOCK is
activated, your radio will not operate if stolen.
4. Press the 1 and 4 buttons together. Hold them down
until --- shows on the display. Next you will use the
secret code number which you have written down.
When THEFTLOCK is activated, the radio will display
LOC to indicatea locked condition anytime battery
power is removed. If your battery loses power forany
reason, you must unlock the radiowith the secret code
before it will operate.
5. Press MIN and 000 will appear on the display.
6. Press MIN again to make the last two digits agree
with your code.
7 . Press HRS to make the first one or two digits agree
with your code.
8. Press AM-FM after you have confirmed that the
code matches the secret code you have written down.
The display will show REP to letyou know that you
need to repeat Steps 5 through 7 to confirm your
secret code.
9. Press AM-FM and this time the display will show
SEC to let you know that your radio is secure.
4. Press HRS to make the first one or two digitsagree
with your code.
5 . Press AM-FM after you have confirmed that the
code matches the secret codeyou have written down.
The display will show SEC, indicating the radio is
now operable and secure.
Enter your secret codeas follows; pause no morethan
15 seconds between steps:
If you enter the wrong code eighttimes, INOP will
appear on the display. You will have to wait an hour
with the ignition on before you can try again. When
you try again, you will only have three more chances
(eight tries per chance) to enter the correct code before
INOP appears.
1. LOC appears when the ignition is on.
If you lose or forgetyour code, contact your dealer.
Unlocking the Theft-Deterrent Feature After
a
Power Loss
2. Press MIN and 000 will appear on the display.
3. Press MIN again to make the last two digits agree
with your code.
3-31
Disabling the Theft-Deterrent Feature
Enter your secret code as follows; pause
no more than
15 seconds between steps:
1. Turn the ignition to ACCESSORY or RUN.
2. Turn the radio off.
3. Press the 1 and 4 buttons together. Hold them down
until SEC shows onthe display.
4. Press MIN and 000 will appear on the display.
5 . Press MIN again to make the last two digits agree
with your code.
6. Press HRS to makethe first one or two digits agree
with your code.
7 . Press AM-FM after you have confirmed that the
code matches the secret codeyou have written down.
The display will show ---,indicating that the radio is
no longer secured.
If the code entered is incorrect, SECwill appear onthe
display. The radio will remain secured until the correct
code isentered.
When battery power is removed and later applied to a
secured radio, the radio won’t turn on and LOC will
appear on the display.
To unlock a secured radio see “Unlocking the Theft-Deterrent
Feature After a Power Loss” earlier in this section.
3-32
Audio Steering Wheel Controls
(If Equipped)
If your vehicle has this feature, you can control certain
radio functions using the buttons on your steering wheel.
Some steeringwheel controls may operate climate
controls. See “Steering Wheel Controls for Climate
Control” earlier in this section.
SEEK: Press this button to
go to the next higher or
lower radio station,Press
and hold this button again
for two seconds and SCAN
will appear. Press it again to
stop scanning.
SCAN: Press this button to scan the stations preset on
your radio pushbuttons. This featureworks like your
radio’s P SCAN button and allows you to listen to each
of your preset stations for a few seconds. The radio will
go to the first preset station, stop fora few seconds, then
go on to the next preset station. Press SCAN again to
stop scanning.If a preset station has weak reception, the
radio will not stop at the preset station.
AM-FM: Press this button to chooseAM,FM1 or FM2.
VOL: Press the up or down
arrow to increase or
decrease volume.
Understanding Radio Reception
AM
The range for most
AM stations is greater than for
FM,
especially at night. The longer range, however, can
cause stations to interferewith each other.AM can pick
up noise from things like storms and power lines.
Try
reducing the treble to reduce this noise
if you ever getit.
FM Stereo
FM stereo will give you the best sound,but FM signals
will reach only about10 to 40 miles (16 to 65 km). Tall
buildings or hills can interfere
with FM signals, causing
the sound to come and go.
Tips AboutYour Audio System
SRCE: If you have radio-only controls,you will have
this control. PressSRCE to play a cassette tapeor
compact disc when the radio is playing.
If both a tape
and disc are installed, the system will first go to tape
play. Press SRCE again to go to discplay.
MUTE: If you have radio-only controls,you will have
Hearing damage from loud noise is almost undetectable
until it istoo late.Your hearing can adapt to higher
volumes of sound. Sound that seems normal can
be loud
and harmfulto your hearing.Take precautions by
adjusting the volume control on
your radio to a safe
sound level beforeyour hearing adapts toit.
this control. Press MUTEto silence the system. Press it
again toturn on the sound.
3-33
To help avoid hearing loss or damage:
I
.
Care of Your Cassette Tape Player
Adjust the volume control to the lowest setting.
A tape player thatis not cleaned regularly can cause
Increase volume slowly until you hear cornfortably
and clearly.
reduced sound quality, ruined cassettes or a damaged
mechanism. Cassette tapes should be stored in their
cases away from contaminants, direct sunlight and
extreme heat.If they aren’t, they may not operate
properly or may cause failureof the tape player.
NOTICE:
Before you add anysound equipment to your
vehicle like a tapeplayer, CB radio, mobile
telephone or two-way radio be sure you can
‘addwhat you want. If you can, it’s very
important to do it propefly. Added sound
equipment ‘mayinterfere with the operationof
your vehicle’s engine, DelcoElectronics -radioor
other systems, and even damage them. Your
vehicle’s systems mayinterfere with the
operation of sound equipment that has been
added improperly.
So, before adding sound equipment, check with
your dealer andbe sure to check Federal rules
covering mobileradio andtelephone units.
--
--
Your tape player should be cleaned regularly after every
50 hours of use. Your radio may display
CLN to indicate
that you have used your tape player50
forhours without
If this message appears on
resetting the tape clean timer.
the display, your cassette tape player needs to be
it as
cleaned. It will still play tapes, but you should clean
soon as possible to prevent damage to your tapes and
in sound quality,try a
player. If you notice a reduction
if it is the tape or the tape
known good cassette to see
player at fault.If this other cassette has no improvement
in souild quality, clean the tape player.
The recommended cleaning method for your cassette
.of a scrubbing action,
tape player is the use
non-abrasive cleaning cassette with pads which-scrub
the tape head as the hubs of the cleaner cassette turn.
The recommended cleaning cassette is available through
your dealership (GM Part No. 12344789).
When using a scrubbing action, non-abrasive cleaning
cassette, it is normal for
the cassette to eject because
your unit is equippedwith a cut tape detection feature
and a cleaning cassette may appear as a broken tape. If
the cleaning cassette ejects, insert the cassette
at least
three times to ensurethorough cleaning.
You may also choose a non-scrubbingaction, wet-type
cleaner which uses a cassettewith a fabric belt toclean
the tape head. This type of cleaning cassette will not
eject on its own. A non-scrubbing action cleaner
may
not clean as thoroughly as the scrubbingtype cleaner.
The use of a non-scrubbing action, dry-type cleaning
cassette is not recommended.
After you clean the player, press and hold EJECT for
five seconds toreset the CLN indicator. The radio will
display --- to show the indicator was reset.
Care of Your Compact Discs
Handle discs carefully. Store themin their original cases
or otherprotective cases and away from direct sunlight
and dust. If the surface of a disc is soiled, dampen a
clean, soft cloth in a mild, neutral detergent solution and
clean it, wiping from the centerto the edge.
Be sure never to touch the signal surfacewhen handling
discs. Pick up discs by grasping the outer edges or the
edge of the hole and the outer edge.
Care of Your Compact Disc Player
The use of CD lens cleaner discs is not advised, due to
the risk of contaminating the lens of the CD optics with
lubricants internal to the CD mechanism.
Cassettes are subject to wear and the sound quality may
degrade over time.Always make sure the cassette tape is
in good condition before you have your tape
player serviced.
3-35
Heated Backlite Antenna
Your AM-FM antenna is integrated with your rear
window defogger, located in the rear window. Be sure
that the inside surface of the rearwindow is not
scratched and that the lines onthe glass are not
damaged. If the inside surface isdamaged, it could
interfere with radio reception.Do not apply
aftemarket glass tinting. The metallic film in some
tinting materials will interfere with or distort the
incoming radioreception.
NOTICE:
Do not try to clear frostor other material from
the inside of the rear window with
a razor blade
or anything else that is sharp. This may damage
the rear defogger grid and affect your radio’s
ability to pick up stations clearly. The repairs
wouldn’t be covered by your warranty.
3-36
If, when you turn on your rear window defogger, you
hear static on your radio station, it could mean that a
defogger grid line has been damaged. If this is true, the
grid linemust be repaired.
If you choose toadd a cellular telephone to your
vehicle, and the antenna needs to be attached to the
glass, be sure that you do not damage the grid lines for
the AM-FM antenna.
b
NOTES
3-37
fi
3-38
NOTES
Section 4 Your Driving and the Road
Here you’ll find information about driving on different kinds
of roads and in varying weather conditions.We’ve also
included many other useful tips on driving.
4- 2
4- 3
4- 6
4- 6
4- 10
4- 12
4- 13
4- 14
4- 15
Defensive Driving
Drunken Driving
Control of a Vehicle
Braking
Steering
Off-Road Recovery
Passing
Loss of Control
Driving at Night
4- 17
4- 20
4- 21
4- 22
4- 23
4- 23
4- 25
4- 29
4- 31
Driving in Rain and on Wet Roads
City Driving
Freeway Driving
Before Leaving on a Long Trip
Highway Hypnosis
Hill and Mountain Roads
Winter Driving
Loading Your Vehicle
Towing a Trailer
4-1
Defensive driving really means “be ready for anything.’’
On city streets, rural roads or freeways, it means
“always expect the unexpected.”
Assume that pedestrians or other drivers are going to be
careless and make mistakes. Anticipate what they might
do. Be ready for their mistakes.
Rear-end collisions are about the mostpreventable of
accidents. Yet they are common.Allow enough
following distance. It’s the best defensive driving
maneuver, in both city and rural driving. You never
know when the vehicle in front of you is going to brake
or turn suddenly.
Defensive Driving
The best advice anyone can give about
driving is:
Drive defensively.
Please start with a very important safety device in your
Buick: Buckle up. (See“Safety Belts” in the Index.)
Defensive driving requires that a driver concentrate on
the drivingtask. Anything that distracts from the
driving task -- such as concentrating on a cellular
telephone call, reading, or reaching forsomething on the
floor -- makes proper defensive driving more difficult
and can even cause a collision, with resulting injury.
Ask a passenger to help do things like this, or pull
off the road in a safe place to dothem yourself.
These simple defensive driving
techniques could save
your life.
Death and injury associated with drinking and driving
is
a nationaltragedy. It’s the number one contributor to
the highway death toll, claiming thousands
of victims
every year.
The obvious way to solve this highway safety problem
is for people never to drink alcohol and then drive. But
what if people do? Howmuch is “toomuch” if the
driver plans to drive?It’s a lot lessthan many might
think. Although it dependson each person and situation,
here is some general information on the problem.
Alcohol affects four things that anyone needs to drive
a vehicle:
The Blood Alcohol Concentration (BAC)
of someone
who is drinking dependsupon four things:
Drunken Driving
Judgment
The amount of alcohol consumed
MuscularCoordination
The drinker’s body weight
Vision
The amount of food that is consumed before and
during drinking
Attentiveness.
Police records showthat almost half of all motor
vehicle-related deaths involve alcohol. In most cases,
these deaths are the result
of someone who was drinking
17,000 annual motor
and driving. In recent years, over
vehicle-related deaths havebeen associated with the use
of alcohol, with more than300,000 people injured.
Many adults -- by some estimates, nearlyhalf the
adult population-- choose never to drink alcohol,
so
they never drive after drinking. For persons under
2 1,
it’s against the lawin every U.S. state to drink alcohol.
There are good medical, psychological and
developmental reasons for these laws.
The length of time it has taken the drinker to
consume the alcohol.
According to the American Medical Association, a
180-lb. (82 kg) person who drinks three 12-ounce
(355 ml) bottles of beer in an hour will endup with a
BAC of about 0.06 percent. The person would reach the
same BACby drinking three 4-ounce (120ml) glasses
of wine or threemixed drinks if each had 1- 1/2 ounces
(45 ml) of a liquor likewhiskey, gin or vodka.
c .
1
i
.
. .
Since alcoholis carried in.body water,this means that a
a
womin generally will reach a higher BAC level than
man of her same body weight when each the
hassame
number ofdrinks.
,Thelaw in many U.S. states sets the legal limit at
BAC
a
of 0.10 percent. In a growing number ofU.S. states, and
.throughout Canada, the limit
is 0.08 percent. In some
all for
other countries, it’s even lower. The BAC limit
commercial driversin the United States is0.04 percent.
The BAC will be over
0.10 percent after threeto six
drinks (in one hour).
Of course, as we’ve seen,it
depends ion how much alcoholis in-thedrinks, and how
quickly the persondrinks them.
But the ability to drive
is affected well below a BAC
of
0.10 percent. Research shows that the driving skills
of
many people are impaired at a BAC approaching
0.05 percent, and that the effects are worse at night.
All
It’s the amount of alcohol that counts. For example,
if
drivers’ are impaired at BAC levels above
0.05 percent.
the same persondrank three double’ martinis
(3 ounces
of being in a,collision
or 90 ml of liquor each) within an hour, the person’s Statistics show that the chance
of
BAC would be close to 0.12 percent. A person who increases sharply for drivers who have a BAC
0.05
percent-or
above.
A
driver
with
BAC
a
level
of
will have a
consumes foodjust before or during drillking
0.06 percent has doubled his or her chance
of having a
somewhat lower BAC level.
of 0.10 percent, the chance
of
collision. At a BAC level
There is a gender difference, too. Women generally have this driver having a collision
is 12 .times greater; at a
a lower relative percentage
of body water than men.
level of 0.15 percent, the chanceis 25 times greater!
’’
.,
The body takes aboutan hour torid itself of the alcohol
in one drink. No amount of coffee or numberof cold
showers will speed thatup. “I’ll be careful” isn’t the
right answer. Whatif there’s an emergency, a need to
take sudden action, as when a child darts into the street?
A person with even a moderate
BAC might not be able
to react quickly enough to avoid the collision.
There’s something else about drinking and driving that
many people don’tknow. Medical research shows that
alcohol in aperson’s system can make crash injuries
worse, especially injuries to the brain, spinal cord or
heart. This means that when anyone who has been
drinking -- driver or passenger-- is in a crash, that
person’s chance of being killed or permanently disabled
is higher thanif the person had notbeen drinking.
Drinking and then drivingis verydangerous.
Your reflexes, perceptions, attentiveness and
judgment canbe affected by even a small amount
of alcohol. You can have a serious or even
fatal collision if you drive after drinking.
Please don’t drink anddrive or ridewith a driver
who has been drinking. Ride home in a cab; orif
you’re with a group, designate a driver who will
not drink.
--
--
4-5
Control of a Vehicle
Braking
You have three systems that make your vehicle
go where
you want it to go.They are the brakes, the steeringand
the accelerator. All three systems have to do their
work
at the placeswhere the tiresmeet the road.
Braking action involves
perception time and
reaction time.
First, you have to decide to push on the brake pedal.
That’s perception time. Then you have tobring up your
foot and do it. That’s reaction time.
Average reaction time is about 3/4of a second. But
that’s only an average. It might be less
with one driver
and as long as two or three seconds or more
with
another. Age, physical condition, alertness, coordination
and eyesight allplay a part. So do alcohol,drugs and
frustration. But evenin 314 of a second, a vehicle
moving at60 mph (100 km/h) travels 66 feet (20 m).
That couldbe a lot of distance in anemergency, so
keeping enough space between
your vehicle and others
is important.
And, of course, actual stopping distances
vary greatly
with the surfaceof the road (whether it’s pavement or
gravel); the conditionof the road (wet,dry, icy); tire
tread; the conditionof your brakes; the weightof the
vehicle and the amount
of brake force applied.
Sometimes, aswhen you’re drivingon snow or ice,it’s
easy to ask more
of those control systems than the tires
and roadcan provide. That meansyou can lose control
of your vehicle.
4-6
Avoid needless heavy braking. Some people drive in
spurts -- heavy acceleration followedby heavy
braking -- rather than keeping pace with traffic. This is a
mistake. Your brakes may not have time to cool between
hard stops.Your brakes will wear out much faster if you
do a lotof heavy braking. If you keep pace with the
traffic and allow realistic following distances,you will
eliminate a lotof unnecessary braking. That means
better braking and longer brakelife.
If your engine ever stops while you’re driving, brake
normally but don’t pump your brakes.If you do, the
pedal may get harderto push down.If your engine
stops, you will still have some power brake assist. But
you will use it when you brake. Once the power assist is
used up, it may take longerto stopand the brakepedal
will be harderto push.
Anti-Lock Brakes
Your vehicle has anti-lock brakes (ABS). ABS is an
advanced electronic braking system that will help
prevent abraking skid.
When you start your engine, or when you begin to drive
away, your anti-lock brake system will check itself.You
may hear a momentary motor or clickingnoise while
this test is going on, andyou may even noticethat your
brake pedal moves or pulses a little. This is normal.
If there’s a problem with the
anti-lock brake system,this
warning light will stay on.
See “Anti-Lock Brake
System Warning Light” in
the Index.
4-7
The anti-lock systemcan change the brake pressure faster
than any driver could.The computer is programmed to
make the mostof available tire and road conditions.
. ...
Here’s how anti-lock works. Let’s.say the road is wet.
You’re driving safely. Suddenly an animal jumps out in
front of you.
You slam on the brakes. Here’s what happens with ABS,
You can steeraround the obstacle while braking hard.
A computer senses that wheels are slowing down. If one
of the wheels is about to stop rolling, the computerwill
separately work the brakes at each frontwheel and at
both rear wheels.
As you brake, your computer keepsreceiving updates on
wheel speed and controls braking pressure accordingly.
4-8
Remember: Anti-lock doesn’t change the timeyou need
to get your footup to the brake pedal or always decrease
stopping distance.If you get too close to the vehicle in
front of you, you won’t have timeto apply your brakes
if that vehicle suddenly slows or stops. Always leave
enough room upahead to stop, eventhough you have
anti-lock brakes.
If your vehicle is in cruise control when the
traction
control system beginsto limit wheel spin, the cruise
control will automatically disengage. Whenroad
conditions allow you to safely use it again, you may
reengage the cruise control. (See “Cruise
Control’’
in the Index.)
Using Anti-Lock
Don’t pump the brakes. Just hold the brake pedal down
firmly and let anti-lock work for you. You may feel a
slight brake pedal pulsation or notice some noise, but
this is normal.
TRACTION
OFF
This light should come on
briefly when you start the
engine. If it stays onor
comes on while you are
driving, there’s a problem
with your traction
control system.
Traction Control System(If Equipped)
Your vehicle may have a traction control system that
limits wheel spin. Thisis especially useful in slippery
road conditions. The system operates only if it senses
that one or both of the front wheels are spinningor
beginning to lose traction. Whenthis happens, the
system works the front brakesand reduces engine power
to limit wheel spin.
You may feel or hear the system working, but this
is normal.
See “Traction Control SystemWarning Light’’ in the
Index. Whenthis warning light is on, the system will not
limit wheel spin. Adjust your drivingaccordingly.
The traction control systemautomatically comes on
whenever you start your vehicle. To limit wheel spin,
especially in slipperyroad conditions, you should
always leave the system on. But
you can turn the
traction control systemoff if you ever needto. (You
should turn the systemoff if your vehicle ever gets stuck
in sand, mud, ice or snow. See “Rocking Your Vehicle”
in the Index.)
4-9
To turn the system off, press
the TRACTION
CONTROL button on the
instrument panel to the left
of the steering wheel.
Steering
Power Steering
If you lose power steering assist because the engine
stops or the system isnot functioning, you can steer but
it will take much more effort.
Magnasteer
.
::
.
,
!
.
.
. . .. .. ’ . . . . .. ,8.r:,>
. .. ... .
i“”’
”’
The traction control systemwarning light will come on
and stay on. If the system islimiting wheel spin when
you press the button, the warninglight will come
on -- but the system won’t turn off right away.
It will wait until there’s no longer a current need to limit
wheel spin.
You can turn the system back on at any time by pressing
the button again. Thetraction control system warning
light should go off.
Braking in Emergencies
With anti-lock, you can steerand brake at the same
time. In many emergencies, steering canhelp you more
than even thevery best braking.
4-10
(If Equipped)
Your vehicle may be equipped with GM Magnasteer” ,
a steering system that continuously adjusts the effort you
feel when steering at all vehicle speeds. It provides ease
when parking, yet a firm, solid feel at highway speeds.
Your steering can be adjusted for an easier or more firm
setting. See your dealer forinformation.
Steering Tips
Driving on Curves
It’s important to takecurves at a reasonable speed.
A lot of the “driver lost control”accidents mentioned on
the news happen on curves.Here’s why:
Experienced driver or beginner, each
of us is subject to
the same lawsof physics when driving on curves. The
traction of the tires against the road surface makes
it
possible for the vehicle to change its path when
you turn
the front wheels.If there’s no traction, inertia will keep
the vehicle going in the same direction.
If you’ve ever
tried to steera vehicle on wet ice, you’ll understand this.
The traction you can get in a curve depends on the
condition of your tires andthe road surface, the angle at
which the curve is banked, and your speed. While you’re
in a curve, speed is theone factor you can control.
Suppose you’re steering througha sharp curve. Then you
suddenly accelerate.Both control systems -- steering and
acceleration -- have to do their work where the tires meet
the road. Adding the sudden accelerationcan demand too
much of those places. You can lose control.Refer to
“Traction Control” in the Index.
What should you do if this ever happens? Easeup on the
accelerator pedal, steer the vehicle the
way you want it
to go, and slow down.
Speed limit signs near curves
warn that you should
adjust your speed.Of course, the posted speeds are
based on good weather and road conditions. Under less
favorable conditions you’llwant to go slower.
If you need to reduceyour speed as you approach a
curve, do it before you enter the curve, whileyour front
wheels are straight ahead.
Try to adjust your speed so you can “drive” through the
curve. Maintaina reasonable, steady speed.Wait to
accelerate untilyou are outof the curve, and then
accelerate gently into the straightaway.
Steering in Emergencies
There are times when steering can be more effective than
braking. For example,you come over a hill and find a
truck stopped in your lane, or
a car suddenly pulls out
from nowhere, or a child darts out from between parked
cars and stops right in front
of you. You can avoid these
problems by braking -- if you can stop in time. But
sometimes you can’t; there isn’t room. That’s the time
for
evasive action -- steering around the problem.
Your vehicle can performvery well in emergencies like
these. First apply your brakes. (See “Brakingin
Emergencies” earlier in this section.)
It isbetter to
remove as much speed as you can from a possible
collision. Then steer around the problem, to the left or
right depending on the space available.
4-11
Off-Road Recovery
You may find that your right wheels have dropped
off the
edge of a road onto the shoulder whileyou're driving.
An emergency like this requires close attention and a
quick decision. If you are holding the steeringwheel at
the recommended 9 and 3 o'clock positions, you can
turn it a full 180 degrees very quickly without removing
either hand. But you have to act fast, steerquickly, and
just asquickly straighten the wheel once you have
avoided the object.
The factthat such emergency situations are always
possible is a good reason to practice defensive drivingat
all times and wear safety belts properly.
4-12
If the level of the shoulder is only slightly below the
pavement, recovery should be fairlyeasy. Ease off the
accelerator and then, if there is nothing in the way, steer so
that your vehicle straddles the edgeof the pavement.You
can turn the steering wheel up to one-quarterturn until the
right front tire contacts the pavement edge. Then
turn your
steering wheelto go straight down the roadway.
Passing
0
Do not get too close to the vehicleyou want to
pass while you’re awaitingan opportunity. For one
thing, following too closely reduces your area
of
vision, especiallyif you’re followinga larger
vehicle. Also,you won’t have adequate space
if the
vehicle ahead suddenly slows or stops. Keep back
a
reasonable distance.
0
When it looks like a chance to pass is coming up,
start to acceleratebut stay in the right lane and don’t
get too close. Time your move
so you will be
increasing speed as the time comes
to move into the
other lane.If the way is clear to pass, you will have a
“running start”that more than makes up for the
distance you would lose by dropping back.
And if
something happens to causeyou to cancel your pass,
you need only slow down and drop back again
and
wait for another opportunity.
The driver of a vehicle about to pass another on
a
two-lane highway waits for
just the right moment,
accelerates, moves around the vehicle ahead, then goes
back into the right lane again.
A simple maneuver?
Not necessarily! Passing another vehicle on
a two-lane
highway is a potentially dangerous move, since the
passing vehicle occupies the same lane as oncoming
traffic for several seconds.A miscalculation, an error in
judgment, ora brief surrender to frustration or anger can
suddenly put the passing driver
face to face with the
worst of all traffic accidents-- the head-on collision.
So here are some tips for passing:
“Drive ahead.” Look down the road, to the sides and to
crossroads for situations that might affect your passing
patterns. If you have any doubt whatsoever about
making a successful pass, waitfor a better time.
Watch for traffic signs, pavement markings and lines.
If you can see a sign up ahead that might indicatea
turn or an intersection, delay your pass.A broken
center line usually indicates it’s all right to pass
(providing the road ahead is clear). Never cross
a solid
line on your side of the lane or a double solid line,
even if the road seems emptyof approaching traffic.
If other cars are lined up to passa slow vehicle, wait
your turn. But take care that someone
isn’t trying to
pass you as you pull out to pass the slow vehicle.
Remember to glance over your shoulder
and check
the blind spot.
4-13
0
Check your mirrors, glance overyour shoulder, and
start your left lane change signal
before moving out
of the right lane topass. When you are farenough
ahead of the passed vehicle tosee its front inyour
inside mirror, activate your right lane change signal
and move back into theright lane. (Remember that
your right outside mirroris convex. The vehicle you
just passed may seem to be farther
away from you
than it really is.)
0
Try not to pass more than one vehicleat a time
on two-lane roads. Reconsider before passing the
next vehicle.
0
Don’t overtake a slowly moving vehicle too rapidly.
Even though the brake lamps arenot flashing, it may
be slowing down or starting to turn.
0
If you’re being passed, make iteasy for the
following driver to get ahead of you. Perhaps you
can ease a little to the right.
Loss of Control
Let’s review what driving experts sayabout what
happens when the three control systems (brakes, steering
and acceleration) don’t have enough frictionwhere the
tires meet the road to do what the driver has asked.
4-14
In any emergency, don’t give up. Keep trying to steer and
constantly seek an escape routeor area of less danger.
Skidding
In a skid, a driver can lose controlof the vehicle.
Defensive drivers avoid most skids
by taking reasonable
care suited to existing conditions, and
by not “overdriving”
those conditions. But skidsare always possible.
The three types of skids correspond to your vehicle’s
three control systems. In the braking skid, your wheels
aren’t rolling. In the steering or cornering skid, too
much speed or steering in a curve causes tires to slip and
lose cornering force. And in the acceleration skid, too
much throttle causes the drivingwheels to spin.
A cornering skid is best handled by easing your foot off
the accelerator pedal.
If you have the traction control system, remember: It
helps avoid only the acceleration skid.
If you do not have traction control, orif the system is
off, then an acceleration skid isalso best handled by
easing your foot off the accelerator pedal.
If your vehicle starts to slide, ease
your foot off the
accelerator pedal and quickly steer the
way you want the
vehicle to go.If you start steering quickly enough, your
vehicle may straighten out. Alwaysbe ready for a
second skidif it occurs.
Of course, traction is reduced when
water, snow, ice,
gravel or other materialis on the road. For safety, you’ll
want to slow down and adjust your driving to these
conditions. It is important to slow down
on slippery
surfaces because stopping distance will
be longer and
vehicle control more limited.
Driving at Night
7
While driving on a surface with reduced traction,
try
your best to avoid sudden steering, acceleration or
braking (including engine brakingby shifting to a lower
gear). Any sudden changes could cause the tires to slide.
You may not realize the surface is slippery until
your
vehicle is skidding. Learn to recognize warning
clues -- such as enough water, ice or packed snow
on the road to make a “mirrored surface”
-- and slow
Night driving is more dangerous than day driving. One
down when you have any doubt.
reason is that some driversare likely to be impaired -- by
Remember: Any anti-lock brake system (ABS) helps
alcohol or drugs, with night vision problems,or by fatigue.
avoid only the braking skid.
4-15
Rere are some tips on night driving.
0
Drive defensively.
0
Don’t drink and drive.
0
Adjust your inside rearview mirror to reduce the
glare from headlamps behind you.
0
Since you can’t see as well,you may need to slow
down and keep more space betweenyou and other
vehicles.
0
Slow down, especially on higher speed roads.
Your
headlamps can lightup only so much road ahead.
0
In remote areas, watch for animals.
0
If you’re tired, pulloff the road in a safe place
and rest.
down on glare from headlamps,
but they also make a lot
of things invisible.
You can be temporarily blindedby approaching
headlamps. It can take a second or two,
or even several
seconds, foryour eyes to readjustto the dark. Whenyou
are faced with severe glare (as from a driver who
doesn’t lowerthe high beams, or a vehiclewith
misaimed headlamps), slow down a little.
Avoid staring
directly into the approaching headlamps.
Keep your windshield and all the glass your
on vehicle
is much
clean -- inside and out. Glare at night made
worse by dirt on the glass. Even the inside
of the glass
can build up a film causedby dust. Dirty glass makes
lights dazzle and flash more than clean glass would,
making the pupilsof your eyes contractrepeatedly.
Remember thatyour headlamps lightup far lessof a
roadway when you are in a turn or curve.
Keep your
No one can see as well at night as in the daytime. But as eyes moving;that way, it’s easier to pickout dimly
lighted objects. Just as your headlamps should be
we get olderthese differences increase. A 50-year-old
so should your eyes
driver may require at least twiceas much light to see the checked regularly for proper aim,
be examinedregularly. Some drivers suffer from night
same thing at nightas a 20-year-old.
blindness -- the inability to seein dim light-- and
What you do in the daytimecan also affect your night
aren’t even awareof it.
vision. For example,if you spend theday in bright
sunshine you are wise to wear sunglasses.Your eyes will
have less trouble adjusting to night. But
if you’re
driving, don’t wear sunglasses at night.
They may cut
Night Vision
4-16
Driving in Rain andon Wet Roads
Rain and wet roads can mean driving trouble.On a wet
road, you can’t stop, accelerate or turn as well because
your tire-to-road traction isn’t as good as on dry roads.
And, if your tires don’t have muchtread left, you’ll get
even less traction. It’s always wise to go slower
and be
cautious if rain starts to fallwhile you are driving. The
surface may get wet suddenly when your reflexes are
tuned for driving on dry pavement.
The heavier the rain, the harder it is to see. Even if your
windshield wiper blades are ingood shape, aheavy rain
can make itharder to see road signs and traffic signals,
pavement markings, the edgeof the road and even
people walking.
r
It’s wise to keep your windshield wiping equipment in
good shape and keep your windshield washer tank filled
with washer fluid. Replace yourwindshield wiper
inserts when they show signs of streaking or missing
areas on the windshield, or when strips of rubber start to
separate from the inserts.
4-17
............... $ti
Driving too fast through large
water puddles or even
going through some car washes can causeproblems, too.
The water may affect your brakes. Try to avoid puddles.
But if you can’t, try to slow down before you hit them.
4-18
Wet brakes can cause accidents. They won’t work
as well in a quick stop and may cause pulling to
one side.You could lose controlof the vehicle.
After driving through a large puddle
of water or
a car wash, apply your brake pedal lightly until
your brakes work normally.
Hydroplaning
Hydroplaning is dangerous.So much water canbuild up
under your tires that they can actually ride on the
water.
This can happenif the roadis wet enough and you’re
is hydroplaning,
going fast enough. When your vehicle
it has little or no contact with the road.
Hydroplaning doesn’t happen often. But can
it if your
tires do nothave much tread or if the pressurein one or
more is low. It can happenif a lot of water is standing on
the road. If you can see reflections from trees, telephone
poles or other vehicles, and raindrops “dimple” the
water’s surface, there could be hydroplaning.
Hydroplaning usually happens at higher speeds. There
just isn’t a hard and fast rule about hydroplaning.The
best advice is to slow downwhen it is raining.
Driving Through Deep Standing Water
NOTICE:
If you drive too quickly through deep puddles or
standing water, water can come in through your
engine’s air intake and badly damage your
engine. Never drive through water that is slightly
of your vehicle.If you
lower than the underbody
can’t avoid deep puddles or standing water, drive
through them very slowly.
Some Other Rainy Weather Tips
Besides slowing down, allow some extra following
distance. And be especially carefulwhen you pass
another vehicle. Allow yourself more clear room
ahead, and be prepared to have your view restricted
by road spray.
Have good tires with proper tread depth. (See
“Tires” in the Index.)
4-19
Here areways to increase yoursafety in city driving:
Know the best way to get to where you are
going. Get a city map and plan your trip into an
unknown part of the city just asyou would for a
cross-country trip.
Try to use the freeways that rim and crisscross most
large cities. You’ll save time and energy. (See the
next part, “Freeway Driving.”)
Treat a green light as a warning signal. A traffic
light is therebecause the corner is busy enough to
need it. Whena light turns green, and just before you
start to move, check both ways for vehicles that have
not cleared the intersection or may be running the
red light.
One of the biggest problems with city streets is the
amount of traffic on them. You’ll want to watch out for
what the other drivers are doing
and pay attention to
traffic signals.
4-20
Freeway Driving
At the entrance, there isusually a ramp that leads to the
freeway. If you have a clear view of the freeway asyou
drive along the entrance ramp,
you should begin to
check traffic.Try to determine whereyou expect to
blend with the flow.Try to merge into the gap at close to
the prevailing speed. Switch on your turn signal, check
your mirrors and glance over your shoulder as often as
necessary. Try to blend smoothlywith the traffic flow.
Once you are on the freeway, adjust your speed to the
posted limit orto the prevailing rateif it’s slower. Stay
in the right lane unless
you want to pass.
Before changing lanes, checkyour mirrors. Then use
your turn signal.
Just before you leave the lane, glance quickly over
your
shoulder to make sure there isn’t another vehicle in your
“blind” spot.
Once you are moving on the freeway, make certain
you
to move
allow a reasonable following distance. Expect
Mile for mile, freeways (also called thruways, parkways, slightly slower at night.
expressways, turnpikesor superhighways) are the safest
When you want to leavethe freeway, moveto the proper
of all roads. But they have their own special rules.
lane well in advance. If you miss your exit, do not,
The most important adviceon freeway driving is: Keep
under any circumstances, stop and back up. Drive on to
up with traffic and keep to the right. Drive at the same the next exit.
speed mostof the other drivers are driving. Too-fast or
too-slow driving breaks a smooth traffic flow. Treat the The exit ramp canbe curved, sometimes quite sharply.
left lane on a freeway
as a passing lane.
4-21
The exit speed is usually posted.
Here are some thingsyou can check before atrip:
Reduce your speed according to your speedometer, not
to your sense of motion. After driving for any distance
at higher speeds,you may tend to thinkyou are going
slower thanyou actually are.
0
Windshield Washer Fluid: Is the reservoir full? Are
all windows clean insideand outside?
0
Wiper Blades: Are they in good shape?
0
Fuel, Engine Oil, Other Fluids: Have you checked
all levels?
Before Leaving on a Long Trip
0
Make sure you’reready. Try to be well rested.If you
must start when you’re not fresh-- such as after aday’s
0
work -- don’t plan to make too many miles that first part
of the journey.Wear comfortable clothing and shoes
you
can easily drive in.
If you keep it
Is your vehicle ready for a long trip?
serviced and maintained,it’s ready to go.If it needs
service, haveit done before starting out.Of course,
you’ll find experienced and able service experts in
Buick dealerships all across North America. They’ll
be
ready andwmng to help if you need it.
4-22
Lamps: Are they all working? Are the lenses clean?
Tires: They are vitally important to a safe,
trouble-free trip.Is the tread good enough for
long-distance driving? Are the tires all inflated
to the
recommended pressure?
0
Weather Forecasts: What’s the weather outlook
along your route? Shouldyou delay your trip a short
time to avoid a major storm system?
0
Maps: Do you have up-to-date maps?
Highway Hypnosis
Hill and Mountain Roads
Is there actually such a condition as “highway hypnosis”?
Or is it just plain falling asleep at the wheel? Callit
highway hypnosis, lackof awareness, or whatever.
There is something about an easy stretchof road with the
same scenery, along withthe hum of the tires on the road,
the drone of the engine, andthe rush of the wind against
the vehicle that can make you sleepy. Don’t
let it happen
to you! If it does, your vehicle can leave the road less
in
than a second, and you could crash and be injured.
What can you do about highway hypnosis? First, be
aware thatit canhappen.
Then here are some tips:
0
Make sure your vehicleis well ventilated,with a
comfortably cool interior.
0
Keep your eyes moving. Scan the road ahead and to
the sides. Check your rearview mirrors and your
Driving on steep hills or mountains is different from
instruments frequently.
driving in flat or rolling terrain.
If you get sleepy, pulloff the road intoa rest, service
or parking area and takea nap, get some exercise, or
both. For safety, treat drowsiness on the highway as
an emergency.
0
4-23
If you drive regularly in steep country, or if you’re
planning to visit there, here are sometips that can make
your trips safer and more enjoyable.
0
Keep your vehicle in good shape. Checkall fluid
levels and also the brakes, tires, cooling system
and transaxle. These parts can work hard on
mountain roads.
0
Know how to go down hills. The most important
thing to know is this: let your enginedo some of the
slowing down. Shift toa lower gear when you go
down a steep or longhill.
Coasting downhill in NEUTRAL(N) or with the
ignition off is dangerous. Your brakes will have to
do all the work of slowing down. They could getso
hot that they wouldn’t work well. You would then
have poor braking or even none going down a hill.
You could crash. Always haveyour engine running
and your vehicle in gear when you go downhill.
-
A CAUTION:
If you don’t shift down, your brakescould
get so hot that they wouldn’t work well. You
would then have poor braking oreven none going
down a hill. You could crash. Shiftdown to let
your engine assist your brakeson a steep
downhill slope.
>
4-24
0
Know how to go uphill. Drive in the highest
gear possible.
0
Stay in your own lane when driving ontwo-lane
roads in hills or mountains. Don’t swing wide or cut
across the center of the road. Drive at speeds that let
you stay in your own lane.
0
As you go over the topof a hill, be alert. There could be
something in your lane, likea stalled car or an accident.
0
You may see highway signs on mountains that warn of
special problems. Examples are long grades, passing or
no-passing zones, a falling rocks area or winding
roads. Be alert to these and take appropriate action.
Winter Driving
Here are some tips for winter driving:
Have your vehicle in good shape for winter.
0
You may want to put winter emergency supplies in
your trunk.
Include an ice scraper, a small brush or broom, a supply
of windshield washer fluid, a rag, somewinter outer
clothing, a small shovel, a flashlight, a red cloth and a
couple of reflective warning triangles. And, if you will
be driving under severe conditions, include a small bag
of sand, a piece of old carpet or a couple of burlap bags
to help provide traction. Be sure you properly secure
these items in your vehicle.
4-25
What’s the worst timefor this? “Wet ice..” Very cold
be slick and hard to drive on. But wet
snow or ice can
Most of the time, those places where your
tires meet the
it may offerthe
ice can be even more ‘trouble because
road^ probablyhavegoodtraction,
.
least tractionof all. You can get wet ice whenit’s about
freezing (32°F; OOC) apd freezing rain begins to fall.
However, if there is snow orice between your tires and
ice until salt and sand crews
the road,. you can have
a. very ‘slippery situation. You’ll Try to avoid driving on wet
have a lot less traction or “grip” and will need to be can get there.
very careful.
Whatever the condition-- smooth ice, packed, blowing
or loose snow-- drive with caution.
Driving on Snow or Ice
’
’
I
If you have traction control, keep the system on.
It will
improve your ability to accelerate when driving on a
slippery road. Even though your vehicle has a traction,
control system, you’ll want to .slow down and adjust
your driving to the road conditions. See “Traction
Control System” inthe Index.
If you don’t have the traction control system, accelerate
If you
gently. Try not to break the fragile traction.
accelerate too fast, the drive wheels will spinpolish
and
the surface under the
tires even more.
.
-.
f
4-26
.
’ .
Your anti-lock brakes improve your vehicle’s stability
when you make a hard stop on a slippery road. Even
though you have the anti-lock braking system, you’ll
want to begin stopping sooner than
you would on dry
pavement. See “Anti-Lock” in the Index.
0
Allow greater following distance on any
slippery road.
0
Watch for slippery spots. The road mightbe fine
until you hit a spotthat’s covered with ice. On an
otherwise clear road, ice patches
may appear in
shaded areas where the sun can’t reach: around
clumps of trees, behind buildings or under bridges.
Sometimes the surfaceof a curve oran overpass may
If
remain icy when the surrounding roads are clear.
you see a patchof ice ahead of you, brake beforeyou
are onit. Try not to brake while you’re actually on
the ice, and avoid sudden steering maneuvers.
If You’re Caught in a Blizzard
If you are stoppedby heavy snow, you could be in a
serious situation.You should probably staywith your
vehicle unlessyou know for sure that you are
near help
and you can hike through thesnow. Here are some
things todo to summon help and keep
yourself and your
passengers safe:
Turn on your hazard flashers.
4-27
.lie a red cloth to your vehicle to alert police that
you’ve been stopped by the snow.
0
Put on extra clothingor wrap a blanket around you.
If you have no blankets or extra clothing, make body
insulators from newspapers, burlap bags, rags, floor
mats -- anything you can wrap around yourself or
tuck under your clothing to keep warm.
You can runthe engine to keep warm,but be careful.
4-28
Snow can trap exhaust gases under your vehicle.
This can cause deadly CO (carbon monoxide) gas
to get inside. CO could overcome you and kill
you. You can’t see it or smell it, so you might not
know it is in your vehicle. Clear away snow from
around thebase of your vehicle, especiallyany
that is blocking your exhaust pipe. And check
around again from time to time to be sure snow
doesn’t collect there.
Open a window just a little on the side of the
vehicle that’s away from thewind. This will help
keep CO out.
Run your engine only as long as you must. This saves
fuel. When you run the engine, make it go a little faster
than just idle. That is, push the
accelerator slightly. This
uses less fuel for the heat
that you get and it keeps the
battery charged. You will need a well-charged battery to
restart the vehicle, and possibly for signaling later on
with your headlamps. Let the heater
run for awhile.
Then, shutthe engine off and close the window almost
all theway to preserve the heat. Start
the engine again
and repeat this only when you feel really uncomfortable
from the cold. But do asit little as possible. Preserve the
fuel as long as you can. To help keep warm, you can get
out of the vehicle and do some fairly vigorous exercises
every half hour or so until help comes.
Loading Your Vehicle
Fm
\
TIRE-LOADING INFORMATION
OCCUPANTS
VEHICLE CAP. WT.
RR.
TOTAL LBS.
KG
CTR.
FRT.
MAX. LOADING & GVWR SAME AS VEHICLE
CAPACITY
WEIGHT
XXX
COLD TIRE
TIRE SIZE
PRESSURE
SPEED
PSI/KPa
RTG
FRT.
RR.
SPA.
IF TIRES ARE HOT, ADD 4PS1;28KPa
SEE OWNER’S MANUAL FOR ADDITIONAL
INFORMATION
L
/
Two labels on your vehicle showhow much weight it
may properly carry. The Tire-Loading Information label
found on the rear edge of the driver’s door tells you the
proper size, speed rating and recommended inflation
pressures for thetires on your vehicle. It also gives you
important information about the number of people that
can be in your vehicle and the total weight that you c m
carry. This weight is called the vehicle capacity weight
and includes the weight of all occupants, cargoand all
nonfactory-installed options.
4-29
MFD BY GENERAL MOTORS CORP
DATE GVWR GAWR FRT GAWR RR
THIS VEHICLE CONFORMS TO ALL APPLICABLE U.S. FEDERAL MOTOR VEHICLE
SAFETY, BUMPER, AND THEFT PREVENTION
STANDARDS IN EFFECT ON THE DATE OF
MANUFACTURE SHOWN ABOVE.
The otherlabel is the Certification label,found on the
rear edgeof the driver’s door. It tells you the gross
weight capacity of your vehicle, called the Gross
Vehicle Weight Rating (GVWR). The GVWR includes
the weight of the vehicle, all occupants, fueland cargo.
Never exceed the GVWR for your vehicle, or the Gross
Axle Weight Rating (GAWR) for either the front or
rear axle.
And, if you do have a heavy load, you should spread it
out. Don’t carry more than 176 lbs. (80 kilograms) in
your trunk.
4-30
Do not load your vehicle any heavier than the
GVWR, or either themaximum front or rear
GAWR. If youdo, parts on your vehicle can
break, or itcan change the way your vehicle
handles. These could cause you to lose control.
Also, overloading can shorten thelife of
your vehicle.
t
I NOTICE:
~~
~
~~
Your warranty does not cover parts or
components that fail because of overloading.
If you put things inside your vehicle -- like suitcases,
tools, packages, or anything else -- they will go asfast
as the vehicle goes. If you have to stop orturn quickly,
or if there is a crash, they’ll keep going.
I
\ CAUTION:
Things you put inside your vehicle can strike
and injurepeople in a sudden stop
or turn, orin
a crash.
0 Put things in the trunk of your vehicle. In a
trunk, putthem asfar forward as
you can.
Try to spread theweight evenly.
0 Never stack heavier things, like suitcases,
inside the vehicle so that some of them are
above the tops of the seats.
0 Don’t leave an unsecured child restraint in
your vehicle.
0 When you carry something inside the
vehicle, secure it whenever you can.
Towing a Trailer
A CAUTION:
If you don’t use the correct equipment and drive
properly, you can lose control when you pull a
trailer. For example, if the trailer is too heavy,the
brakes may not work well or even at all. You
and yourpassengers could be seriouslyinjured.
You may also damage your vehicle; the resulting
repairs would not be coveredby your warranty.
Pull a traileronly if YOU have followed all the
steps in this section. Ask your dealer foradvice
and information abouttowing a trailer with
your vehicle.
--
Electronic Level Control(If Equipped)
This feature keeps the rear
of your vehicle levelas the
load changes. It is automatic
-- you do not need to
adjust anything.
4-31
Your vehicle can tow a trailer if it is equipped with the
proper trailer towing equipment. To identify what the
vehicle trailering capacity is for your vehicle, you
should read the information in “Weight of the Trailer”
that appears later in this section. But trailering is
different than just driving your vehicle by itself.
Trailering means changes in handling, durability and
fuel economy. Successful, safetrailering takes correct
equipment, and it has to be used properly.
That’s the reason for this part. In it are many
time-tested, important trailering tips and safety rules.
Many of these are important for
your safety and that of
your passengers. So please read this section carefully
before you pull a trailer.
Load-pulling components such as the engine, transaxle,
wheel assemblies and tires are forced to work harder
against the drag of the added weight. The engineis
required to operate at relatively higher speeds and under
greater loads, generating extra heat. What’s more, the
trailer adds considerably to wind resistance, increasing
the pulling requirements.
4-32
If You Do Decide To Pull A Trailer
If you do, here are someimportant points:
0
There are many different laws, including speed limit
restrictions, having to do with trailering. Make sure
your rig will be legal, not only where you live but
also where you’ll be driving. A good source forthis
information can be state or provincial police.
0
Consider using a sway control. You can ask a hitch
dealer about sway controls.
0
Don’t tow a trailer at all during the first 1,000miles
(1 600 km) your new vehicle is driven. Your engine,
axle or other parts could be damaged.
0
Then, during the first 500 miles (800 km)that you
tow a trailer, don’t drive over 50 mph (80 km/h) and
don’t make starts at full throttle. This helps your
engine and other parts of your vehicle wear in at the
heavier loads.
0
Obey speed limit restrictions when towing a trailer.
Don’t drive faster than the maximum posted speed
for trailers (or no more than 55 mph (90 kmh)) to
save wear on your vehicle’s parts.
Three important considerations have to
do with weight:
the weight of the trailer,
0
the weight of the trailer tongue
and the total weight on your vehicle’s tires.
In Canada, write to:
General Motors of Canada Limited
Customer Communication Centre
1908 Colonel Sam Drive
Oshawa, Ontario L l H 8P7
Weight of the Trailer
Weight of the Trailer Tongue
How heavy can a trailer safely be?
The tongue load (A) of any trailer is an important
weight to measure because it affects the total or gross
weight of your vehicle. The Gross Vehicle Weight
(GVW) includes the curb weight of the vehicle, any
cargo you may carry in it, and the people who will be
riding in the vehicle. And if you tow a trailer, you must
add the tongue load to the GVW because your vehicle
will be carrying that weight, too. See “Loading Your
Vehicle” in the Index for more information about your
vehicle’s maximum load capacity.
It should never weigh more than 1,000 lbs. (450 kg). But
even that can be too heavy.
It depends on how you plan to use your rig. For
example, speed, altitude, road grades, outside
temperature and how much your vehicle is used to pull a
trailer are all important. And, it can also depend on
any
special equipmentthat you have on your vehicle.
You can ask your dealer for our
trailering information or
advice, or you can write us at:
Buick Motor Division,
Customer Relations Center
902 E. Hamilton Avenue
Flint, MI 48550
4-33
Total Weight on Your Vehicle’s Tires
Be sure your vehicle’s tires are inflated to the upper
limit for cold tires. You’ll find these numbers on the Tire
Loading Information label located at the rear edgeof the
driver’s door or see “Loading Your Vehicle’’ in the
Index. Then be sureyou don’t go over the GVW limit
for your vehicle, including the weight of the
trailer tongue.
A
B
Hitches
It’s important to have the correct hitch equipment.
Crosswinds, large trucks going by and rough roads are a
few reasons why you’ll need the righthitch. Here are
some rules to follow:
If you’re using a weight-carrying hitch, the trailer
tongue (A) should weigh 10 percent of the total loaded
trailer weight (B). If you have a weight-distributing
hitch, the trailer tongue (A) should weigh 12 percent of
the total loaded trailer weight (B).
After you’ve loaded your trailer, weigh the trailer and
then the tongue, separately, to see if the weights are
proper. If they aren’t, you may be able to get them right
simply by moving some itemsaround in the trailer.
4-34
0
The rear bumper on your vehicle is not intended for
hitches. Do not attach rental hitches or other
bumper-type hitches to it.Use only a frame-mounted
hitch that does not attach to thebumper.
0
Will you have to make any holes in the body of your
vehicle when you install a trailer hitch? If you do,
then be sure to seal the holes later when you remove
the hitch. If you don’t seal them, deadly carbon
monoxide (CO) from your exhaust can get into your
vehicle (see “Carbon Monoxide” in the Index). Dirt
and water can, too.
Safety Chains
You should always attach chains between your vehicle
and your trailer. Cross thesafety chains under the tongue
of the trailer so that the tongue will not drop to the road
if it becomes separated from the hitch. Instructions
about safety chains may be provided by the hitch
manufacturer or by the trailer manufacturer. Follow the
manufacturer’s recommendation for attachingsafety
chains and do not attach them to the bumper. Always
leave just enough slack so you can turn with your rig.
And, never allow safety chains to dragon the ground.
Trailer Brakes
Does your trailer have its own brakes?Be sure to read and
follow the instructionsfor the trailer brakes so you’ll be
able to install, adjust and maintain them properly.
Because you have anti-lock brakes, do not try to tap into
your vehicle’s brake system. If you do, both brake
systems won’t workwell, or at all.
Driving with a Trailer
Towing a trailer requires a certain amountof experience.
Before setting out forthe open road, you’ll want to get
to know your rig. Acquaintyourself with the feel of
handling and braking with the added weight of the
trailer. And always keep in mind that the vehicle you are
driving is now a good deal longer and not nearly as
responsive as your vehicle is by itself.
Before you start, check the trailer hitch
and platform
(and attachments), safety chains, electricalconnector,
lamps, tires and mirror adjustment. If the trailer has
electric brakes, start your vehicle
and trailer moving and
then apply the trailer brake controllerby hand to be sure
the brakes are working. This letsyou check your
electrical connection at the same time.
During your trip, check occasionally to be sure that the
load is secure, and that the lamps and any trailer brakes
are still working.
Following Distance
Stay at least twice as farbehind the vehicleahead as you
would when driving your vehicle without a trailer. This
can help you avoid situationsthat require heavy braking
and sudden turns.
Passing
You’ll need more passing distance upahead when
you’re towing a trailer. And, because you’re a good deal
longer, you’ll need to go much farther beyond the
passed vehicle beforeyou can return to your lane.
Backing Up
Turn Signals When Towing a Trailer
Hold the bottom of the steering wheel with one hand.
Then, to movethe trailer to the left, just move that hand
to the left. To move the trailer to the right, move your
hand to the right. Always back up slowly and, if
possible, have someone guideyou.
When you tow a trailer, your vehicle may need a
different turn signal. flasher and/or extra wiring. Check
with your Buick dealer. The green arrows on your
instrument panel will flash whenever you signal a turn
or lane change. Properly hooked up, the trailer lamps
will also flash, telling other drivers you’re about toturn,
change lanes or stop.
Making Turns
NOTICE:
Making very sharp turns while trailering could
cause the trailer to come in contact with the
vehicle. Your vehicle could be damaged. Avoid
making very sharp turns while trailering.
When you’re turning with a trailer, make wider turns
than normal. Do this so your trailer won’t strike soft
shoulders, curbs, road signs, trees or other objects.
Avoid jerky or sudden maneuvers. Signal well
in advance.
4-36
When towing a trailer, the green arrows on your
instrument panel will flash for turnseven if the bulbs on
the trailer are burned out. Thus,you may think drivers
behind you are seeing your signal when they are not. It’s
important to check occasionally to be sure the trailer
bulbs are still working.
Your vehicle has bulb warning lights. When you plug a
trailer lighting system into yourvehicle’s lighting
system, its bulb warning lights may not let you know if
one of your lamps goes out.So, when you have a trailer
lighting system plugged in, be sure to check your
vehicle and trailer lamps from time to time to be sure
they’re all working. Once you disconnect the trailer
lamps, the bulb warning lights again can tell you if one
of your vehicle lamps is out.
Driving On Grades
Reduce speed and shift atolower gear before you start
down a long or steep downgrade.If you don’t shift
down, you might haveto use your brakesso much that
they would get hot andno longer work well.
Parking on Hills
When You Are Ready to Leave After
Parking ona Hill
1. Apply your regular brakes and hold the pedal down
while you:
0
Start your engine;
0
Shift into a gear; and
0
Release the parking brake.
You really should not park your vehicle, with a trailer
attached, on a hill. If something goes wrong, your rig
could start to move. People can be injured,
and both
your vehicle andthe trailer canbe damaged.
2. Let up on the brake pedal.
But if you ever have to park your
rig on a hill, here’s
how to doit:
4. Stop and have someone pick up and store the chocks.
3. Drive slowly until the trailer is clear of the chocks.
1. Apply your regularbrakes, but don’t shift into
PARK (P) yet.
trailer wheels.
2. Have someone place chocks under the
3. When thewheel chocks are in place, release the
regular brakes until the chocks absorb the load.
4. Reapply the regular brakes. Then apply your parking
brake, and then shift toPARK (P).
5. Release the regular brakes.
4-37
Maintenance When Trailer Towing
Engine Cooling When Trailer Towing
Your vehicle will need service more often when you’re
pulling a trailer. See the Maintenance Schedulefor more
on this.Things that are especially important in trailer
operation are automatic transaxle fluid (don’t overfill),
engine oil, belts, cooling system and brake adjustment.
Each of these is covered in this manual, and the Index
will help you find them quickly. If you’re trailering, it’s
a good idea to review these sections before you start
your trip.
Your cooling system may temporanly overheat during
severe operating conditions. See “Engine Overheating”
in the Index.
Check periodically to seethat all hitch nuts and bolts
are tight.
4-38
Section 5 Problems on the Road
Here you’ll find what to do about some problems that can occur
on the road.
5-2
5-3
5-3
5-8
5- 13
.5- 15
Hazard Warning Flashers
Other Warning Devices
Jump Starting
Towing Your Vehicle
Engine Overheating
Cooling System
5-23
5-23
5-36
5-37
If a TireGoesFlat
Changing a FlatTire
Compact
Spare
Tire
If You’re Stuck: In Sand,Mud,
Ice or Snow
5-1
,'.
Hazard Warning Flashers
.
I
Press the buttonto make
turn
your front and rear
signal lamps flash on
and off.
Your hazard warning
flashers work no matter
what position your key in,
is
and even if the key isn't
in.
To turn off the flashers, pull
out the collar.
Your hazard warning flashers let you warn others. They
also let police know you have a problem.
Your front and
rear turn' signal
lamps will flash on andoff.
When the hazard warning flashers are on, your
turn
signals won't work.
Other Warning Devices
If you carry reflective triangles,you can set oneup at
the side of the road about300 feet (100 m) behind
your vehicle.
Jump Starting
If your battery has run down, you
may want to use
another vehicle and some jumper cables to start your
vehicle. But please use the following steps to do
it safely.
NOTICE:
Remember that ignoring these steps could result
in costly damage to your vehicle that wouldn’t be
covered by your warranty.
Trying to start your vehicle by pushing or pulling
it won’t work, and itcould damage your vehicle.
1. Check the other vehicle.It must have a 12-volt
battery with a negative ground system.
I
NOTICE:
Batteries canhurt you. They can be
dangerous because:
0 They contain acid that can burn you.
0 They contain gas that can explode or ignite.
0 They contain enough electricity to
burn you.
If you don’t follow these steps exactly, someor all
of these things canhurt you.
If the othersystem isn’t a 12-volt system witha
negative ground, bothvehicles can be damaged.
5-3
2. Get the vehicles close enough so the jumper cables
can reach, but be sure the vehicles aren’t touching
each other. If they are, itcould cause a ground
connection you don’t want. You wouldn’t be able to
start your vehicle, and the bad grounding could
damage the electrical systems.
To avoid the possibility of the vehicles rolling, set
the parking brake firmly on both vehicles involved in
the jump start procedure. Put your automatic
transaxle in PARK (P) before setting the
parking brake.
3. Turn off the ignition on both vehicles. Unplug
unnecessary accessories plugged into the cigarette
lighter. Turn off all lamps that aren’t needed as well
as radios. This will avoid sparks and help save both
batteries. In addition, it could save your radio!
5-4
I NOTICE:
If you leave your radio on,it could be badly
damaged. The repairs wouldn’t be covered
by
your warranty.
4. Open the hoods and locate the batteries.
An electric fan can start up even when the engine
is not running and can injure you. Keep hands,
clothing and tools away from any underhood
electric fan.
~~
’
’
,
Using a match neara battery cancause battery
gas to explode. People have been hurt doing this,
and some have been blinded. Use a flashlight if
you need more light.
Be sure the battery has
enough water. You don’t
need to addwater to theACDelco Freedom@
battery installed in every new GM vehicle. But if
a battery has fiiler
caps, besure the right amount
of fluid is there. If it is low, add waterto take care
of that first. If you don’t, explosive gas could
be present.
Battery fluid contains acid that can burn
you.
Don’t get it on you. If you accidentally get it in
your eyes or on your skin, flush the place with:
water andget medical help immediately.
5. Find the positive(+) and negative (-) terminals on
each battery.
6. Check that the jumper cables don’t have loose
or
missing insulation. If they do, you could get a shock.
The vehicles could be damaged, too.
Before you connect the cables, here
are some basic
things you shouldknow. Positive (+) will go to
positive (+) and negative(-) will go to negative (-)
or a metal engine
part. Don’t connect positive(+) to
negative (-) or you’ll get a short that would damage
parts, too.
the battery and maybe other
m
A CAUTION:
Fans or other moving engineparts can injure
you
badly. Keep your hands
away from moving parts
once the engine is running.
-~ .
5-5
8. Don’t let the other end
of the cable touch metal.
Connect it to the
positive (+) terminal of
the good battery. Use a
remote positive (+)
terminal if the vehicle
has one.
7 . Connect the red positive (+) cable to the positive (+)
terminal of the vehicle with the dead battery. Use a
remote positive (+) terminal if the vehicle has one.
9. Now connect the black
negative (-) cable to
the good battery’s
negative (-) terminal.
Don’t let the other end
touch anything until the
next step. The other end
of the negative (-) cable
doesn’t go to the dead
battery. It goes to a heavy
unpainted metal part on
the engineof the vehicle
with the dead battery.
5-6
13. Remove the cablesin reverse order. Take care that
they don’t touch each other or any other metal.
10. Attach the cable at least
18 inches (45 cm) away
parts that
from the dead battery, but not near engine
move. The electrical connection just
is as good
of sparks getting back to the
there, but the chance
battery is much less.
A. Heavy Metal EnginePart
B . Good Battery
11. Now start the vehicle with the good battery and run
C. Dead Battery
the engine for a while.
12. Try to start the vehicle with the dead battery.
If it won’t start after a few tries,
it probably
needs service.
5-7
Towing Your Vehicle
Try to have a dealer or professional
a
towing service tow
your vehicle. See “Roadside Assistance” in the Index.
If your vehicle has been changed or modified since it
was factory-new by adding aftermarket items like fog
lamps, aero skirting, or special tires and wheels, these
instructions and illustrations may not be correct.
Before you do anything,turn on the hazard
warning flashers.
When you call, tell the towing service:
0
That your vehicle can only be towed with certain
equipment, as described later in this section.
That your vehicle has front-wheel drive.
The make, model and year of your vehicle.
Whether you can still move the shift lever.
If there was an accident, what was damaged.
5-8
When the towing service arrives, let the tow operator
know that this manual contains detailed towing
instructions and illustrations. The operatormay want to
see them.
-
-
To help avoid injury toyou or others:
0 Never let passengers ride in a vehicle that is
being towed.
0 Never tow faster than safe or posted speeds.
0 Never tow with damaged parts not
fully secured.
0 Never get under your vehicle after it has
been lifted by the tow truck.
0 Always secure the vehicle on each side with
separate safety chains when towing it.
0 Never use J-hooks. Use T-hooksinstead.
A vehicle can fall from a car carrierif it isn’t
adequately secured. This can cause a collision,
serious personal injury andvehicle damage. The
vehicle should be tightly secured with chains or
steel cables before it is transported.
Don’t use substitutes (ropes, leather straps,
canvas webbing, etc.) that can be cut by sharp
edges underneath the towed vehicle. Alwaysuse
T-hooks inserted in theT-hook slots. Never use
J-hooks. They will damage drivetrain and
suspension components.
5-9
Front Towing
Attach T-hook chains on
both sides in the slotted
holes inthe bottom of
the cradle, behind the
front wheels.
Position a 4” x 4” wood beam across sling chains
contacting the bottom of the radiator support. Position
the lower slingcrossbar directly under the front bumper.
5-10
Rear Towing
Tow Limits -- 55 mph (90 km/h), 500 miles (800 km)
F
Attach T-hook chains to
slots in the bottomof the
floor pan directly ahead
of the rear wheels on
both sides.
A 4 ” x 4 ” wood beam is not needed.
Attach a separate safety chain around the outboard end
of each control arm.
5-11
i~
Position the lower sling crossbar directly behind &d at
the lower edgeof the rear bumper coyer.
5-12
,
Attach a separate.safety chain &oundthe outboard,end
of each lower controlarm.
.
# I.
Engine Overheating
You will find a coolant light or a warning light about a
If you
hot engine on your vehicle’s instrument panel.
also have a
have the optional gage cluster, you may
coolant temperature warning gage. See “Engine Coolant
Temperature Warning Light’’ or “Engine Coolant
Temperature Gage”in the Index.
If Steam Is Coming From Your Engine
I
Steam from an overheated engine can burn you
badly, evenif you just open the hood. Stay away
from theengine if you seeor hearsteam coming
from it. Just turn itoff and get everyoneaway
from thevehicle until it cools down. Wait until
there is no sign of steam or coolant before you
open the hood.
If you keep driving when your engine is
overheated, the liquids itin can catch
fire. You or
others could be badly burned. Stopyour engine if
it overheats, and get out of the vehicle until the
engine iscool.
NOTICE:
If your engine catches fire because you keep
driving with nocoolant, your vehicle can be
badly damaged. The costly repairs would not be
covered by your warranty.
5-13
If No Steam Is Coming From Your Engine
If you get the overheat warning but see or hear no
steam, the problem may not be too serious. Sometimes
the engine canget a little too hot when you:
Climb a long hill on a hot day.
Stop after high-speed driving.
Idle for long periods in traffic.
Tow a trailer.
If you get the overheat warning with no sign of steam,
try this fora minute or so:
1. Turn off your air conditioner.
2. Turn on your heater to full hot at the highest fan
speed and open the window as necessary.
3. If you’re in a traffic jam, shift to NEUTRAL(N);
otherwise, shift to thehighest gear while
driving -- AUTOMATIC OVERDRIVE (@)or
THIRD (3).
5-14
If you no longer have the overheat warning,
you can drive.Just to be safe, drive slower for
about 10 minutes. If the warning doesn’t come back
on, you can drive normally.
If the warning continues, pull over, stop, and park your
vehicle right away.
If there’s still no sign of steam, you can idle the engine
for twoor three minutes while you’re parked, to see if
the warning stops. But then, if you still have the
warning, turn ofSthe engine and get everyone out of the
vehicle until it cools down.
You may decide not to lift the hood but to get service
help right away.
Cooling System
When you decide it’s safe to lift thehood, here’s what
you’ll see:
An electric engine cooling fan under the hood can
start up even when the engine is not running and
can injure you. Keep hands, clothing and tools
away from any underhood electric fan.
If the coolant insidethe coolant recovery tank is boiling,
don’t do anything else until it cools down.
A. Coolant Recovery Tank
B. Radiator Pressure Cap
C. Electric Engine Fans
5-15
Heater and radiatorhoses, and otherengine
parts, can be very hot. Don’ttouch them. If you
do, you can beburned.
Don’t run the engine if there is a leak. If you run
the engine, it could lose all coolant.That could
cause an engine fire, andyou could be burned.
Get any leak fixedbefore you drive thevehicle.
The coolant levelshould be at or abovethe FULL
COLD mark.
If it isn’t, you may have a leak inthe radiator hoses,
heater hoses, radiator, water pump or somewhere elsein
the coolingsystem.
I NOTICE:
Engine damage from running your
engine
without coolant isn’t covered byyour warranty.
~
~~~~~
If there seemsto be no leak, with the engine on, check to
see if the electric engine coolingfans are running. If the
engine is overheating, both fans should be running. If
they aren’t, your vehicle needs service.
5-16
How to Add Coolant to the Coolant
Recovery Tank
If you haven’t found a problemyet, but the coolant level
isn’t at the FULL COLD mark, add a 50/50 mixture of
clean water (preferably distilled) and DEX-COOL@
engine coolant at the coolant recovery tank. (See
“Eng 3 Coolant” in the Index for more information.)
*
I NOTICE:
In cold weather, water can freeze and crack the
engine, radiator, heater core and other parts.
Use the recommended coolant and the proper
coolant mixture.
Adding only plain water toyour cooling system
can be dangerous. Plain water, or some other
liquid like alcohol, can boil before the proper
coolant mixture will. Your vehicle’scoolant
warning system is set for the propercoolant
mixture. With plain wateror the wrong mixture,
your engine could get too hot but you wouldn’t
get the overheat warning. Your engine could
catch fire andyou or others could be burned.
Use a 50/50 mixture of clean water and
DEX-COOL@coolant.
5-17
-
’nCAUTION:
-
-
=
I
I
You can be burnedif you spill coolant on hot
engine parts. Coolant contains ethylene glycol
hot
and itwill burn if the engine parts are
enough. Don’t spill coolant on a hot engine.
When the coolant in the coolant recovery tank at
is the
FULL COLD mark, start yourvehicle.
If the overheat warning continues, there’s one more
coolant
thing you can try.You can add the proper
mixture directly to the radiator, but be sure the cooling
system is cool before you do it.
5-18
-I
Steam and scalding liquids froma hot cooling
system can blow out and burnyou badly. They
are underpressure, andif you turn the radiator
pressure cap even a little they can come out
at high speed. Neverturn thecap when the
cooling system,including the radiatorpressure
cap, is hot. Wait for thecooling systemand
radiator pressure cap tocool if you ever have to
turn the pressurecap.
--
--
5-19
How to Add Coolant tothe Radiator
2. Then keep turning the pressure cap, but now push
down as you turn it. Removethe pressure cap.
1. You can remove the radiator pressure cap when the
cooling system, including the radiator pressure cap
and upper radiator hose, is no longer hot. Turn the
pressure cap slowly counterclockwise until it first
stops. (Don't press down while turning the
pressure cap.)
If you hear a hiss, wait for that to stop. A hiss means
there is still some pressure left.
5-20
~
i
3. Fill the radiator with the proper
DEX-COOL@
coolant mixture, up to the base
of the filler neck.
(See “Engine Coolant” in the Index for more
information about the proper coolant mixture.)
4. Then fill the coolant recoverytank to’the FULL
COLD mark.
5 . \Put the cap back
on the coolant recoverytank,but
off.
leave the radiator pressure cap
?
I
5-21
6. Start the engine and let it run until you can feel the
upper radiator hose getting hot.Watch out forthe
engine cooling fans.
7. By this time, the coolant level inside the radiator
filler neck may be lower. If the level is lower, add
more of the proper DEX-COOL@ coolant mixture
through the filler neck until the level reaches the
base of the filler neck.
5-22
8. Then replace the pressure cap. At any time during
this procedure if coolant begins to flow out of the
filler neck, reinstall the pressure cap. Be surethe
arrows on the pressure cap lineup like this.
If a Tire Goes Flat
Changing a Flat Tire
If a tire goes flat,avoid further tire and wheel damage
It’s unusual for a tire to“blow out” while you’re driving,
by driving slowly to a level place. Turn on your hazard
especially if you maintain yourtires properly. If air goes
warning flashers.
out of a tire, it’s much more likely to leak out slowly.
But if you should ever have a “blowout,” here are a few
I
tips about what to expect and what to do:
If a front tire fails, the flat will
tire create a dragthat
pulls the vehicle toward that side. Take your foot off the
accelerator pedal and grip the steeringwheel firrnly.
Steer tomaintain lane position, and then gently brake to
a stop well out of the traffic lane.
A rear blowout, particularly on a curve, acts
much like a
skid and may require the same correction you’d use
in a
skid. In any rear blowout, remove your foot from
the
accelerator pedal. Get thevehicle under controlby
steering the way you want the vehicle to go. Itmay be
very bumpy and noisy, but you can still steer. Gently
brake to a stop -- well off the road if possible.
If a tire goes flat,the next part shows how to use your
jacking equipment to change a flat tire
safely.
I
’
~
Changing a tire cancause an injury. The vehicle
can slip off the jack androll over you or other
people. You and they could be badly injured.
Find a level place to change your tire. To help
prevent the vehicle from moving:
1. Set theparkingbrake firmly.
2. Put the shift lever in PARK (P).
3. Thrn off the engine.
To be even more certain thevehicle won’t move,
you can put blocks at the front andrear of the
tire farthestaway from the one being changed.
That would be the tireon the otherside of the
vehicle, at the opposite end.
5-23
Removing the Spare Tire andTools
The followingsteps will tell you how to use the jackand
change atire.
5-24
The equipment you’ll need is in the trunk. Pull the
carpeting fromthe floor of the trunk.
r
Turn the center retainerbolt
on the spare tire cover to the
left (counterclockwise) to
remove it.
Lift and remove the cover. See “Compact Spare Tire”
later in this section for more information about the
compact spare.
The box that stores the jack
and wrench is on the
passenger side trunk wall.
Open the box and then
remove the wing bolt by
turning it to the left
(counterclockwise).
Remove the jack and wheel wrench.
Remove the spare tire fromthe trunk.
5-25
Removing Wheel Covers and Wheel
Nut Caps
r"
1
-
L. -
The tools you'll be using include thejack (A) and wheel
wrench (B).
If your vehicle has an aluminum wheel with a center
cover that hides the wheel nuts, remove the center cover
by using the flat end of the wrench to pry it off.
5-26
If your vehicle hasa
wheel cover, remove it by
of the
using the flat end
wheel wrench.
Pry along the edgeof the wheel coveruntil it comes off.
Be careful, the rim edgesmay be sharp. Don’ttry to
remove it with your bare hands.
If your vehicle has this
aluminum wheel, you may
have plastic wheel nut caps.
Use the wheel nut wrench
to remove the wheel nut
caps and to loosenthe
wheel nuts.
When reinstalling the decorativenut caps, tighten the
caps snugly with the wheel wrench, then continue
one-quarter rotation to secure plastic caps.
Note: When replacing any wheel cover, carefully line up
the tire valve stem and the notch in the wheel cover.
5-27
If your vehicle has wire
wheel covers, remove them
as follows:
1. Use the wire wheel key
wrench to remove the
wheel cover.
2. Using the flat endof the
key wrench handle,
between the wire wheel
cover and the center cap,
pry off the center cap.
3. Remove the
theft-deterrent nut, by
placing the key end of
the wire wheel key
wrench over the nut and
turning it to the left.
Pull off the wire wheel
cover. Store it in the
trunk until the flat tire is
repaired or replaced.
Note: When replacing the wheel cover, carefully line up
the tire valve stem and the notch in the wheel cover.
5-28
Removing the Flat Tire and Installing the
Spare Tire
2. Turn the wheel wrench to the right (clockwise) by
hand to raise the jack head until it fits under
the vehicle.
1. Use the wheel wrench to loosen the wheel nuts, but
don’t remove them.
5-29
/1\ CAUTION:
-1
Getting under avehicle whenit is jacked up is
dangerous. If the vehicle slips off the jack,you
could be badlyinjured orkilled. Neverget under
a vehicle whenit is supported only by a jack.
IO” (25 cm)
8”(20cm)
3. Put thejack into a notch in the frame which is
located near each wheelwell. The front notch is
10 inches (25 cm) back from the front
wheel well.
The rear notchis 8 inches (25 cm) forward from the
rear wheel well.
4. Position thejack and raise thejack head until it fits
firmly on the ridgein the vehicle’s frame nearest the
flat tire.Do not raise the vehicle yet. Put the compact
spare tire nearyou.
5-30
~
Raising your vehicle withthe jack improperly
positioned can damage the vehicle and even
make the vehicle fall. To help avoid personal
injury andvehicle damage, be sure to fit thejack
lift head into the properlocation before raising
the vehicle.
7. Remove any rust or dirt
from the wheel bolts,
mounting surfaces and
spare wheel.
I
5. Raise the vehicle by rotating the wheel wrench to the
right (clockwise)in the jack. Raise the vehicle far
enough so there’s enough room for the spare tire
to fit.
6. Remove all the wheel nuts and take off the flat tire.
I
Rust or dirt on the wheel, or on the parts to
which it is fastened, can make the wheel nuts
become looseafter a time. The wheel could come
off and cause an accident. When you change a
wheel, remove any rust or dirt from
the places
where the wheel attaches to thevehicle. In an
emergency, you can use a cloth or a paper towel
to dothis; but be sure to use a scraper orwire
brush later, if you needto, to get all the rust or
dirt off.
-1
10. Make sure each wheel stud is centered in each
wheel hole while tightening the nuts. Tighten each
nut by hand until the wheel is held against the hub.
Never use oil or grease on studs
or nuts. If you
do, the nuts might come loose. Your wheel could
falloff,causingaseriousaccident.
8. Place the compact spare tire
on the wheel-mounting
surface.
9. Replace the wheel
nuts with the rounded
end of the nuts toward
the wheel.
11. Lower the vehicle by rotating the wheel wrench to
the left (counterclockwise) on the jack. Lower the
jack completely.
5-32
-
12. Tighten the wheel
nuts firmly in a
crlsscross sequence.
NOTICE:
Improperly tightened wheel nuts can lead to
brake pulsation and rotordamage. To avoid
expensive brake repairs, evenly tighten the wheel
nuts in the propersequence and to the proper
torque specification.
I NOTICE:
Incorrect wheel nuts or improperly tightened
wheel nuts can cause the wheel to become loose
and even comeoff. This could lead to an accident.
Be sure to use the correctwheel nuts. If you have
to replace them, be sure to get new GM original
equipment wheel nuts.
Stop somewhere as soon as you can and have
the nutstightened with a torque wrench to
100 lb-ft (140 Nom).
Wheel covers won’t fit on your compact spare. If
you try to put a wheel cover on your compact
spare, you could damage the cover or the spare.
5-33
oper the
Storing the Flat Tire and Tools
Store the flat tire as far forward inthe trunk as possible.
Store thejack and wheel wrench in their box in the trunk
on the passenger’s side.
1
Storing ajack, a tire or other equipment in the
passenger compartmentof the vehicle could
cause injury. In a sudden stop or collision, loose
equipment could strike someone. Store all these
in
After you’ve put the compact sparetire on your vehicle,
you’ll need to store the flat tire in your
trunk. Use the
following procedure to securethe flat tirein the trunk.
5-34
Storing the Spare Tire
and Tools
5
3
1
Storing a jack, a tire or other equipment in the
passenger compartmentof the vehicle could
cause injury. Ina sudden stopor collision, loose
equipment could strike someone. Store all these
in the proper place.
7
2
The compact spareis for temporary use only. Replace
the compact spare tire with a full-size tire
as soon as you
can. See “Compact Spare Tire” later in this section.See
the storing instructions labelto replace your compact
spare intoyour trunk properly.
1. Jack
2. Wheel Wrench
3. Wing Bolt
4. Tire
5. Cover
6. Bolt
5-35
Compact Spare Tire
Don’t use your compact spare on other vehicles.
Although the compact spare tire was fully inflated when
your vehicle was new, it can lose air after a time.
Check the inflation pressure regularly. It should be
60 psi (420 kPa).
And don’t mix your compact sparetire or wheel with
other wheels or tires. They won’t fit. Keep your spare
tire and its wheel together.
After installing the compact spare on your vehicle, you
should stop as soon as possible and make sure your
spare tire is correctly inflated. Thecompact spare is
made to perform well at speeds up to 65 mph
(1 05 kmh)for distances up to 3,000 miles ( 5 000 km),
so you can finish your trip and have your full-size tire
repaired or replaced where you want. Of course, it’s best
to replace your spare with a full-size tire as soon as you
can. Your spare will last longer and be in good shape in
case you need it again.
NOTICE:
When the compact spare is installed, don’t take
your vehicle through an automatic car wash with
guide rails. The compact spare can get caught on
the rails. That can damage the tire andwheel,
and maybe other parts of your vehicle.
5-36
NOTICE:
Tire chains won’t fit your compact spare. Using
them can damage your vehicle and can damage
the chains too. Don’t usetire chains on your
compact spare.
If You’re Stuck: In Sand, Mud,
Ice or Snow
NOTICE:
What you don’t want to do when your vehicle is stuck is
to spin your wheels too fast. The method known
as
“rocking” can help you get out when you’re stuck, but
you must use caution.
Spinning your wheels can destroy parts of your
vehicle as well as thetires. If you spin the wheels
too fast while shifting your transaxle back and
forth, you can destroy your transaxle.
0
If you let your tires spinat high speed, they can
explode, and you or otherscould be injured. And,
the transaxleor other parts of the vehicle can
overheat. That could cause an engine
compartment fireor otherdamage. When you’re
stuck, spin thewheels as littleas possible. Don’t
spin thewheels above 35 mph (55 kmh) as shown
on the speedometer.
I
For information about using tire chains onyour vehicle,
see “Tire Chains” in the Index.
Rocking Your Vehicle To Get It Out
First, turn your steering wheel left and right. That will
clear thearea around your front wheels. If your vehicle
has traction control, you should turn the system off. (See
“Traction Control System” in the Index.) Then shift
back and forthbetween REVERSE (R) and a forward
gear, spinning the wheels as little as possible. Release
the accelerator pedal while you shift, and press lightly
on the accelerator pedal when the transaxle is in gear. If
that doesn’t get you out aftera few tries,you may need
to be towed out. If you do need to be towed out, see
“Towing Your Vehicle” in the Index.
5-37
fi
5-38
NOTES
Section 6 Service and Appearance Care
Here you will find information about the care
of your vehicle. This section begins with service and fuel information,
is also technical information about your
and then it shows how to check important fluid and lubricant levels. There
vehicle, and a part devoted to its appearance care.
6-2
6-3
6-5
6-5
6-8
6-8
6-1 1
6-15
6-18
6-20
6-23
6-24
6-24
6-26
6-29
6-30
6-38
6-38
Service
Fuel
Fuels in Foreign Countries
Filling Your Tank
Filling a Portable Fuel Container
Checking Things Under the Hood
Engine Oil
Air Cleaner
Automatic Transaxle Fluid
Engine Coolant
Radiator Pressure Cap
Power Steering Fluid
Windshield Washer Fluid
Brakes
Battery
Bulb Replacement
Windshield Wiper Blade Replacement
Tires
6-46
6-47
6-49
6-49
6-50
6-52
6-52
6-52
6-53
6-54
6-54
6-54
6-59
6-60
6-60
6-60
6-6 1
6-6 1
Appearance Care
Cleaning the Insideof Your Vehicle
Care of Safety Belts
Cleaning Glass Surfaces
Cleaning the Outsideof Your Vehicle
Cleaning Tires
Sheet Metal Damage
Finish Damage
Appearance Care Materials Chart
Vehicle Identification Number (VIN)
Service Parts Identification Label
Electrical System
Replacement Bulbs
Capacities and Specifications
Air Conditioning Refrigerants
Engine Specifications
Normal Maintenance Replacement Parts
Vehicle Dimensions
6-1
--ngYour Own Service Work
Service
Your dealer knows your vehicle best and wants you to
be happy with it. We hope you’ll go to your dealer for
all your service needs. You’ll get genuine GMparts and
GM-trained and supported service people.
We hope you’ll want to keep your GM vehicle all GM.
Genuine GMparts have one of these marks:
A
CTPwine
6-2
want to do someof your own service work, you’ll
want to use the proper Buick Service Manual. It tells
you much more about how to service your vehicle than
this manual can. To order the proper service manual, see
“Service and Owner Publications” in the Index.
11 you
Your vehicle has an air bag system. Before attempting to
do your own service work, see “Servicing Your Air
Bag-Equipped Vehicle” in the Index.
You should keep a record with all parts receipts and list
the mileage and the date of any servicework you
perform. See “Maintenance Record” in the Index.
1 A CAUTION:
You can. be injured and your
vehicle could be
damaged if you try to doservice work on a
vehicle without knowing enough about it.
Be sure you have sufficient knowledge,
experience, the properreplacement parts
and tools before you attempt ariy vehicle
maintenance task.
Be sure to use the propernuts, bolts and
other fasteners.c6English’’and “metric”
fasteners canbe easily confused.If you use
the wrong fasteners, parts can later break
or fall off. You could behurt.
Adding Equipment to the Outsideof
Your Vehicle
Things you might add to the outside
of your vehicle-can
affect the airflow around it. This may cause wind noise
and affect windshield washer performance. Cheqk with
your dealer before adding equipment to the outside
of
your vehicle.
Fuel
Use regular unleaded gasoline rated at
87 octane or
higher. At a minimum, it should meet specifications
CGSB 3.5-M93
ASTM D4814 in the United States and
in Canada. Improved gasoline specifications have been
developed by the American Automobile Manufacturers
Association ( M A ) for better vehicle performance
AAMA
and engine protection. Gasolines meeting the
specification could provide improved driveability
to
and emission control system protection compared
other gasolines.
Be sure the posted octane
is at ‘least87. If the octaneis
less than 87, you may get a heavy knocking noise when
engbe.
you drive.If it’s bad enough,it can. damage your
If you’re using fuel rated 87
at octane or higher and
you
.hear heavy knocking, your engine needs service. But
don’t worry if you hear a little pinging noise when
you’re accelerating or driving uphill.
a That’s normal,
and you don’t have to buy a higher octane
fuel to get -rid
of pinging. It’s the heavy, constant knock that means
you have a problem.
6-3
If your vehicle is certified to meet California Emission
Standards (indicated on the underhood emission control
label), it is designed to operate on fuelsthat meet
California specifications. If such fuels arenot available
in states adopting California emissionsstandards, your
vehicle will operate satisfactorily on fuelsmeeting
federal specifications, but emission control system
performance may be affected. The malfunction indicator
lamp onyour instrument panel may turn on and/or your
vehicle may fail a smog-check test. If this occurs, return
to your authorized Buick dealer fordiagnosis to
determine the cause of failure. In theevent it is
determined that the cause of the condition is the type of
fuels used, repairs may not be covered by your warranty.
Some gasolines that are not reformulated for low
emissions containan octane-enhancing additive called
methylcyclopentadienyl manganese tricarbonyl (MMT);
ask your service station operator whether or not his fuel
contains MMT. General Motors doesnot recommend the
use of such gasolines. If fuels containing MMT areused,
spark plug life may be reduced and your emission
control system performance may be affected. The
malfunction indicator lamp on yourinstrument panel
may turn on. If this occurs, return to your authorized
Buick dealer forservice.
6-4
To provide cleaner air, all gasolines in the United States
are now required to contain additives that will help
prevent deposits from formingin your engine and fuel
system, allowing your emission control system to
function properly. Therefore, you should not have to add
anything to the fuel. In addition, gasolines containing
oxygenates, such as ethers and ethanol, and
reformulated gasolines may be available in your area to
help clean the air. General Motorsrecommends that you
use these gasolines if they comply with the
specifications described earlier.
I NOTICE:
Your vehicle was not designed for fuel that
contains methanol. Don’t use it. It can corrode
metal parts in your fuel system and also damage
plastic and rubber parts. That damage wouldn’t
be covered under your warranty.
Fuels in Foreign Countries
Filling Your Tank
If you plan on driving in another country outside the
United States or Canada,the proper fuel may be hard to
find. Never use leaded gasoline or any other fuel not
recommended in the previous text on fuel. Costly repairs
caused by use of improper fuel wouldn’t be covered
by
your warranty.
To check on fuel availability, ask an auto club, or
contact a major oil company
that does business in the
country where you’ll be driving.
You can also write us at the following address for
advice. Just tell us where you’re goingand give your
Vehicle Identification Number (VIN).
General Motors Overseas DistributionCorporation
1908 Colonel Sam Drive
Oshawa, OntarioL 1H 8P7
The cap isbehind a hinged door on the driver’s side of
your vehicle.
6-5
IA
CAUTION:
I
Gasoline vaporis highly flammable. It burns
violently, and that can cause very bad injuries.
Don’t smokeif you’re near gasoline or refueling
your vehicle. Keep sparks, flames and smoking
materials away from gasoline.
To remove the cap, turn it slowly to the left
(counterclockwise). The cap has a spring in it; if you let
go of the cap too soon, it will spring back to the right.
While refueling, hang the tethered cap from the hookon
the fuel door.
6-6
If you get gasolineon yourself and then
something ignites it, you could bebadly burned.
Gasoline can spray outon you if you open the
fuel filler captoo quickly.This spray can happen
if your tank is nearly full, and is more likely in
hot weather. Open the fuel filler capslowly and
wait for any “hiss” noiseto stop. Then unscrew
the capall the way.
Be careful not to spill gasoline. Clean gasoline from
painted surfaces as soon as possible. See “Cleaning the
Outside of Your Vehicle” in the Index.
When you put the cap back on,turn it to the right
(clockwise) until you hear a clicking sound. Make
sure you fully install the cap. The diagnostic system
can determineif the fuel caphas been left off or
improperly installed. Thiswould allow fuel to
evaporate into the atmosphere.See “Malfunction
Indicator Lamp”in the Index.
NOTICE:
If you need a new cap, be sure to get the right
type. Your dealer can get one for you. If you get
the wrong type, it may not fitproperly. This may
cause your malfunction indicator lampto light
and yourfuel tank andemissions system may be
damaged. See “Malfunction Indicator Lamp” in
the Index.
6-7
Filling a Portable Fuel Container
Checking Things Under theHood
A
,A
CAUTION:
~
Never filla portable fuel contamer while it is in
your vehicle. Static electricity discharge from the
container can ignite the gasoline vapor.You can
be badly burned and yourvehicle damaged if this
occurs. To help avoid injury toyou and others:
Dispense gasoline onlyinto approved
containers.
Do not fill a container while it is inside a
vehicle, in a vehicle’s trunk, pickup bed or
on any surface other than the
ground.
Bring thefill nozzle in contact with the
inside of the fill opening before operating
the nozzle. Contact should be maintained
until thefilling is complete.
0 Don’t smoke while pumping gasoline.
6-8
r
An electric fan under the
hood can start up and
injure you even whenthe engine is notrunning.
Keep hands, clothing and tools awayfrom any
underhood electric fan.
Things that burncan get onhot engine parts and
start a fire. Theseinclude liquids like gasoline,
oil, coolant, brake fluid, windshield washer and
other fluids, and plastic or rubber. You or others
could beburned. Be careful not to drop orspill
things that will burn onto a hot engine.
I
Hood Release
To open the hood, first pull
the hood release handle
inside the vehicle. It is next
to the parking brake pedal
near the floor.
Then go to the frontof the vehicle and pullup on the
secondary hood release. The hood latch is under the
hood, near the center, and at the front edge
of the grille.
Lift up on the lever as you lift up on the hood.
are
Before closing the hood,be sure all the filler caps
on properly. Then just pullthe hood down and close
it firmly.
6-9
-
3800 Series 11 Engine (L36 Code K)
When you open the hood, you’ll see:
A. Engine Coolant
Recovery Tank
B. Battery
C. Radiator Pressure Cap
6-10
D. Engine Oil Dipstick
E. Engine Oil Fill Cap
E Automatic Transaxle
Fluid Dipstick
G. Brake Master Cylinder
H. Air Cleaner
I. Windshield Washer
Fluid Reservoir
Engine Oil
CHECK
O1 LEVEL
If the CHECK OIL LEVEL
light on the instrument
panel comes on, it means
you need to check your
engine oil level right away.
For more information, see“Check Oil Level Light” in
the Index. You should check your engine oillevel
regularly; this is an added reminder.
The engine oil dipstick is
right behind the engine
fans and in front of the
engine oil fill cap. Thetop
of the dipstick is a round,
yellow loop.
Turn off the engine and
give the oil a few minutes
to drain back into the oil
pan. If you don’t, the oil
dipstick might not show
the actual level.
It’s a good idea to check your engine oilevery time you
get fuel. In order to get an accurate reading, the oil must
be warm and the vehicle must be on level ground.
6-11
Pull out the dipstick and clean
it with a paper towel or
cloth, then pushit back in all the,way.’Removeit again,
keeping the tip down, and check the
level..
I
to add at least one quart
of oil. But you must use the
fight kind. This part explains what kind
of oil to use. For
crankcase capacity, see “Capacities and Specifications”
in the Index.
NOTICE:
Don’t add too much oii.
If your engine hasso
much oil that the oil level gets above the
cross-hatched area that shows the proper
operating range, your engine could be damage4
a.
The engine oil fill cap
is behind the engine oil dipstick
and engine fans.
Be sure tofill it enough to put the level somewhere in
the proper operating range.h s h the dipstickall the way
back in when you’re through.
What Kind of Engine Oil to Use
RECOMMENDED SAE VISCOSITY GRADE ENGINE OILS
Oils recommended for yourvehicle can be identified by
looking for the “Starburst” symbol. This symbol
indicates that the oil has been certified by the American
Petroleum Institute (API).Do not use any oil which
does not carry this Starburst symbol.
’
I
I
If you change your own
oil, be sureyou use oil
that has the Starburst
symbol on the frontof the
oil container. If you have
your oil changed for you,
be sure the oil put into
your engine isAmerican
Petroleum Institutecertified
for easoline engines.
U
FOR BESTFUELECONOMYANDCOLDSTARTING,SELECTTHELOWEST
SAE VISCOSITY GRADE OL
I FOR THE EXPECTED TEMPERATURE RANGE.
__
“c‘
+ 38
+ 27
U
You should also use the proper viscosity oil for your
vehicle, as shown in the following chart:
LOOK
FOR MIS
SYMBOL
HOT
WEATHER
t
? II
<d
i
SAE SW-30
COLD
WEATHER
DO NOT USE SAE 2OW-50 OR ANY
OTHER GRADE OIL NOT RECOMMENDED
6-13
As shown in the chart, SAE 1OW-30 is best for your
vehicle. However, you can use SAE 5W-30 if it’s
going to be colderthan 60°F (16°C) before your next
oil change. When it’s very cold, you should use
SAE 5W-30. These numbers on an oil container show
its viscosity, or thickness. Do not use other viscosity
oils, such as SAE 20W-50.
Engine Oil Additives
Don’t add anything to your oil. Your dealer is ready to
advise if you think something should be added.
When to Change EngineOil
If any one of these is true for you, use the short trip/city
maintenance schedule:
0
Most trips are less than 5 to 10 miles (8 to 16 km).
This is particularly important when outside
temperatures are below freezing.
0
Most trips include extensive idling (such as frequent
driving in stop-and-go traffic).
0
Most trips are through dusty areas.
0
You frequently tow a trailer or use a carrier on top of
your vehicle.
GM Goodwrench@oil meets all the requirements for
your vehicle.
0
The vehicle is used for delivery service, police, taxi
or other commercial application.
If you are in an area where the temperature falls
below -20°F (-29”C), consider using either an
SAE 5W-30 synthetic oil or an SAE OW-30 oil. Both
will provide easier cold starting and better protection
for your engine at extremely low temperatures.
Driving under these conditions causes engineoil to
break down sooner. If any one of these is true for your
vehicle, then you need to change your oil and filter
every 3,000 miles (5 000 km) or 3 months -- whichever
occurs first. (See “Change Oil Soon Light” in
the Index.)
NOTICE:
Use only engine oil with the American Petroleum
Institute Certified For Gasoline Engines
“Starburst” symbol. Failure to use the
recommended oil can resultin engine damage not
covered by your warranty.
6-14
If none of them is true, use the long trip/highway
maintenance schedule. Change the oil and filter every
7,500 miles (12 500 km) or 12 months -- whichever
occurs first. Driving a vehicle with a fully warmed
engine under highway conditions causes engine oil
to break down slower.
Air Cleaner
The air cleaner and filter are on
the driver’s sideof the
engine compartment.
(See “Change Oil Soon Light”
in the Index.)
What to Do with Used Oil
Did you know that used engine oil contains certain
elements that may be unhealthy for your skin and could
even cause cancer? Don’t let
used oil stay on your skin
for very long. Clean your skin and nails
with soap and
water, or a good hand cleaner.
Wash or properly throw
away clothing or rags containing
used engine oil. (See
the manufacturer’s warnings about the use and disposal
of oil products.)
Used oil canbe a real threat to the environment.
If you
change your own oil,be sure to drainall free-flowing
oil from the filter before disposal. Don’t ever dispose
of
oil by putting it in the trash, pouringit on the ground,
into sewers, or into streams or bodies
of water. Instead,
recycle it by takingit to a place that collects
used oil. If
you have a problem properly disposing
of your used oil,
ask your dealer, a service station or a local recycling
center for help.
1. Remove the screws on the air cleaner housing cover
6-15
r
3. Disconnect the electrical
connector from the
air intakehose. This
will allow you to lift
the rearportion of the
air cleaner.
4. After detaching the hose from the throttle body, pull
back the entire rear portion of the aircleaner by
pulling upward and rearward.
2. Remove the air intake hosethat is snapped over the
throttle body by pulling thehose upward and away
from thethrottle body which is located near the top
of the engine.
6-16
/!\ CAUr
Operating theengine with the air cleaneroff can
cause you or othersto be burned. Theair cleaner
not only cleansthe air, it stopsflame if the engine
backfires. If it isn’t there, and theengine
backfires, you could beburned. Don’t drive with
it off, and be carefulworking on the engine with
the air cleaner off.
5.
6.
7.
8.
Replace the air filter.
Reinstall the rear section of the air cleaner.
Reconnect the electricalconnector.
Reattach the air intake hoseby snapping it back onto
the throttle body.
I NOTICE:
_ _ _ ~ ~
If the air cleaner is off, a backfire cancause a
damaging engine fire. And, dirt can easily get
into your engine, which willdamage it. Always
have the air cleaner in place when you’re driving.
Refer to the Maintenance Scheduleto determine when to
replace the air filter.
See “Scheduled Maintenance Services”
in the Index.
6-17
~~~
~
~~
~
~
~~~~
~~~~
Automatic Transaxle Fluid
NOTICE:
When to Check and Change
Too much or too little fluid can damage your
transaxle. Too much can mean that some of the
fluid could come out and fall on hot engine parts
or exhaust system parts, starting a fire. Be sure to
get an accurate reading if you check your
transaxle fluid.
A good time to check your automatic transaxle fluid
level is when the engine oil is changed.
50,000 miles
Change both the fluid and filter every
(83 000 km)if the vehicle is mainlydriven under one
or moreof these conditions:
In heavy city traffic where the outside temperature
regularly reaches90°F (32"C) or higher.
Wait at least30 minutes before checkingthe transaxle
fluid levelif you have been driving:
In hilly or mountainous terrain.
When doing frequent trailer towing.
0
Uses such as found in taxi, police or delivery service.
If you donot use your vehicle under
any of these
conditions, the fluid and filter
do not require changing.
See "Scheduled Maintenance Services" in the Index.
How to Check
Because this operation can be a little difficult,
you may
choose to have this done at your Buick dealership
Service Department.
I
If you do it yourself, be sure to follow all the instructions
here, or you could geta false reading on the dipstick.
6-18
When outside temperatures are above90°F (32"C).
At high speed for quite a while.
0
In heavy traffic -- especially in hotweather.
While pulling a trailer.
To get the right reading, the fluid should
be at normal
operating temperature,which is 180°F to 200°F
(82°C to 93°C).
Get the vehiclewarmed up by driving about15 miles
(24 km)when outside temperaturesare above
50°F (10°C).If it's colder than50°F ( lO"C), you
may have to drivelonger.
-
Checking theFluid Level
0
Park your vehicle on a level place. Keep the
engine running.
0
With the parking brake applied, place the
shift lever
in PARK (P).
0
With
lever
three
shift
0
Let, the engine
k n at idle for three to five minutes.
1. Pull out the dipstick and wipe
it with a clean rag
or paper towel.
2. Push it back in all the way, waitlthree seconds
and
then pull it back out again.
your footon the brake pedal, moveathe shift
through each gear range, pausing for ,about
seconds in each range. Then, position the
leverin PARK (P).
Then, without shuttingoff the engine, follow these steps:
I.
The transaxle fluid
dipstick top is a round
'.loop andis next to the
brake master cylinder
behind the engine' block.
.. .
.. . . .
3. Check both sidesof the dipstick, and read th,e
the
lower level. The fluid level mustinbe
cross-hatched area.
4. If the fluid level is in the acce!ptable range, push
the dipstick backin all theway.
6-19
How to Add Fluid
Refer to the Maintenance Scheduleto determine what
kind of transaxle fluid touse. See “Recommended
Fluids and Lubricants” in the Index.
If the fluid level is low, add only enough of the proper
e
area on
fluid to bring the levelin@ . ~ cross-hatched
the dipstick.
1. Pull out the dipstick.
2. Using a long-neck funnel,add enough fluid at the
dipstick hole to bring it to the proper level.
It doesn’t take much fluid, generally less than
one pint (0.5 L). Don’t overji22.
NOTICE:
We recommend you use only fluid labeled
DEXRON@-111, because fluid with that label is
made especially for your automatic transaxle.
Damage caused by fluid other than DEXRON-I11
is not covered by your new vehicle warranty.
3. After adding fluid, recheck the fluid level as
described under “How to Check.”
4. When the correct m i d level is obtained, push the
dipstick back in all the way.
Engine Coolant
The cooling s stem in your vehicle isfilled with
DEX-COOL J engine coolant. This coolantis designed
to remain in your vehicle for 5 years or 150,000 miles
(240 000 km)whichever occurs first, if you add only
DEX-COOL’ extended life coolant.
The following explains your cooling system and
how to add coolant when it is low. If you have a
problem with engine overheating, see “Engine
Overheating” in the Index.
A 50/50 mixture of water and DEX-COOL@
coolant will:
Give freezing protection down to -34°F (-37°C).
Give boiling protection up to 265 “F(129 “ C ) .
Protect against rust and corrosion.
0
Help keep the proper engine temperature.
Let the warning lights and gages work as
they should.
6-20
What to Use
NOTICE:
When adding coolant, it is important thatyou
use onlyDEX-COOL@(silicate-free) coolant.
If coolant other thanDEX-COOL is added to
the system, premature engine, heater core or
radiator corrosion may result. In addition, the
engine coolant will require change sooner at
30,000 miles (50 000 km) or 24 months,
whichever occurs first.Damage caused by the
use of coolant other than DEX-COOL@is not
covered by your new vehiclewarranty.
Use a mixtureof one-half clean water (preferably
distilled) and one-halfDEX-COOL’ coolant which
won’t damage aluminumparts. you use this mixture,
you don’t need to add anything else.
. I f
--
I
’ Adding only plain water to yourcooling system
,
can be dangerous. Plain water, or some other
liquid like alcohol, can boil before the proper
coolant mixture will. Your vehicle’s coolant
warning system isset for the propercoolant
mixture. With plain wateror thewrong mixture,
your engine could get too
hot butyou wouldn’t
get the overheatwarning. Your engine could
catch fireand you or otherscould be burned.
Use a 50/50 mixture of clean water and
DEX-COOL@coolant.
6-21
Checking Coolant
NOTICE:
If you use an improper coolant mixture, your
engine couldoverheat andbe badly damaged.
The repaircost wouldn't be covered by your
warranty. Too much waterin the mixturecan
freeze and crack theengine, radiator, heatercore
and other parts.
If you have to add coolant more than four times a year,
have yourdealer check your cooling system.
.,
NOTICE:
If you use the propercoolant, you don't have to
add extra inhibitorsor additives which claim to
improve the system. These can be harmful.
6-22
When your engineis cold, thecoolant level shouldbe
at FULL COLD or a littlehigher. When your engine
is warm, the level shouldbe up to FULL HOT or a
little higher.
. .
,
.
i.
Radiator Pressure Cap
Adding Coolant
If you need more coolant,add the proper DEX-COOL'
coolant mixtureat the coolant recovery tank, but be
careful not to spill it.
Turning theradiator pressure capwhen the
engine and radiator arehot canallow steam and
scalding liquids to blow out andburn you badly.
With the coolant recovery tank, you will almost
never have to addcoolant at the radiator.
Never turn the radiator pressure cap even a
little when the engine and radiator arehot.
--
--
NOTICE:
Your radiator capis a 15 psi (105 kPa)
pressure-type cap and must
be tightly installed to
prevent coolant loss and possible enginedamage
from overheating. Be sure the arrows
on the cap
line up with the overflow tube on the radiator
filler neck.
When you replace your radiator pressure cap, aGM cap
is recommended.
Thermostat
Engine coolant temperature is controlled by a thermostat
in the engine coolant system.The thermostat stops the
flow of coolant through the radiator until the coolant
reaches apreset temperature.
You can be burnedif you spill coolant on hot
engine parts. Coolant contains ethylene glycol,
and it will burn if the engine parts arehot
enough. Don't spill coolant on a hot engine.
6-23
. .
I
'
Power Steering Fluid
How To Check Power SteeringFluid
When the engine compartment is cool, wipe the and
cap
the topof the reservoir clean, then unscrew the cap and
When to Check Power SteeringFluid
It is not necessary to regularly check power steering
in the systemor
fluid-unlessyou suspect there is a leak
you hear an unusual noise.A fluid loss in this system
could indicatea problem. Have the system inspected
and repaired.,.
6-24
-
Adding Washer Fluid
,--:
’
.. .
- .
NOTICE:
0
0
Open the cap labeledWASHER FLUID ONLY. Add
washer fluid until the tank is full.
0
When using concentrated washer fluid,
follow the manufacturer’s instructions for
adding water.
Don’t mix water with ready-to-use washer
fluid. Water can cause the solution to freeze
and damage your washer fluid tank and
other parts of the washer system. Also,
water doesn’t clean as well as washer fluid.
Fill your washer fluid tank only
three-quarters fullwhen it’s very cold. This
allows for expansion if freezing occurs,
which coulddamage the tankif it is
completely full.
Don’t use engine coolant (antifreeze) in
your windshield washer. It can damage
your washer system and paint.
6-25
Brakes
Brake Fluid
of the brake system.If it is, you should have yourbrake
system fixed, since a leak means that sooner or later your
brakes won’t work well, or won’t work at all.
So, it isn’t a good idea to “top off’ your brake fluid.
Adding brake fluid won’t correct a leak. If you add fluid
when your linings areworn, then you’ll have too much
fluid when you get new brake linings.You should add
(or remove) brake fluid, asnecessary, only when work is
done on the brake hydraulic system.
-
A C XJTION:
Your brake master cylinder reservoir is here. It is filled
with DOT-3 brake fluid.
There are only two reasons why the brake fluid levelin the
reservoir mightgo down. The first is that the brake fluid
goes down to an acceptable level during normal brake
lining wear. When new liningsare put in, the fluid level
goes back up. The other reasonis that fluidis leaking out
6-26
If you have too much brake fluid, it can spill on
the engine. The fluid will burn if the engine is
hot enough.You or others could be burned,
and your vehicle could be damaged. Add brake
fluid only when work is done on the brake
hydraulic system.
When yourbrake fluid fallsto a low level, your brake
warning light will come on.A chime will sound if you
try to drive with this warning light on. See“Brake
System Warning Light’’ in the Index.
What toAdd
When you do need brake fluid, use only DOT-3
brake fluid -- such as Delco Supreme 11 (GM Part
No. 12377967). Use new brake fluid from a sealed
container only.
NOTICE:
@
Always clean the brake fluid reservoir capand the area
around the cap before removing it. This will help keep
dirt from entering the reservoir.
I A CAU
IN:
With the wrong kind of fluid in your brake
system, your brakes may not work well, or they
may not even work at all. This could cause a
crash. Always use the proper brakefluid.
0
Using the wrong fluid can badly damage
brake system parts. For example, just a few
drops of mineral-based oil, such asengine
oil, in your brake system can damage brake
system parts so badly that they’ll have to be
replaced. Don’t let someone put in the
wrong kind of fluid.
If you spill brake fluid on your vehicle’s
painted surfaces, the paintfinish can be
damaged. Be careful not to spill brake fluid
on your vehicle. If you do, wash
it off
immediately. See “Appearance Care” in
the Index.
6-27
Brake Wear
Your vehicle has front discbrakes and rear drum brakes.
Disc brake pads have built-in wear indicators that
make a high-pitched warning sound when the brake
pads are worn and new pads areneeded. The sound
may come and go orbe heard all the time your vehicle
is moving (except when you are pushing on the brake
pedal firmly).
The brake wear warning sound means that
soon
your brakes won’t workwell. That could leadto
an accident. Whenyou hear the brake wear
warning sound, have your vehicle serviced.
I NOTICE:
Continuing to drive with worn-out brake pads
could result in costly brake repair.
6-28
Some driving conditions or climates may cause a brake
squeal when the brakes are firstapplied or lightly
applied. This doesnot mean something is wrong with
your brakes.
See “Caliper/Knuckle Maintenance Inspection” in
Section 7 of this manual under Part C “Periodic
Maintenance Inspections.”
Properly torqued wheel nuts arenecessary to help
prevent brake pulsation. When tires are rotated, inspect
brake pads forwear and evenly torque wheel nuts in
the proper sequence to GM specifications.
Your rear drum brakes don’t have wear indicators, but
if you ever hear a rear brake rubbing noise, have the
rear brake linings inspected immediately. Also, the rear
brake drums should be removed and inspected each time
the tires are removed for rotation or changing. When
you have the front brake pads replaced, have the rear
brakes inspected, too.
Brake linings should always be replaced as complete
axle sets.
See “Brake SystemInspection” in Section 7 of
this manual under Part C “Periodic Maintenance
Inspections.”
Brake Pedal Travel
Battery
See yourdeder if the brake pedal does not return to
normal height, orif there is a rapid increase in pedal
travel. This could be a sign
of brake trouble.
Brake Adjustment
Every new Buick has an ACDelco Freedom@ battery.
You never have to add water to of
one
these. When it’s
time for a new battery, we recommend an ACDelco
Freedom battery. Get one that has the replacement
number shown onthe original battery’s label.
Every time you apply the brakes, with or without the
vehicle moving,your brakes adjust for wear.
Vehicle Storage
If you’re not going to drive
your vehicle for25 days or more,
remove the black, negative(-) cable fromthe battery. This
The.braking system on a modern vehicle is complex. will help keepyour battery fkom running down.
m
Its many parts have to be of top quality and work well
together if the vehicleis to have really good braking.
Your vehicle was designed, and tested with top-quality
GM brake parts. When you replace parts
of your braking
liningswear
system -- for example, when your brake
Batteries have acid that can burn you gas
and
to have new ones put
in -- be sure
down and you have
that can explode.You can be badly hurt
if you
GM replacement parts. If you
you get new approved
aren’t careful. See“Jump Starting’’ in the Index
don’t, your brakes may no longer work properly. For
for tips on working around a battery without
example, if someone puts
in brake linings that ,are wrong getting hurt.
for your vehicle, the balance between your front and
-- for the worse. The braking
rear brakes can change
Contact your dealer to learn how to prepare your
performance you’ve come to expect can change
in
vehicle for longer storage periods.
many other waysif someone puts in the wrong
replacement brake parts.
Also; for your audio system, see “Theft-Deterrent
Feature” in the Index.
Replacing Brake System Parts
Bulb Replacement
Headlamps
For any bulb changingprocedure not listed in this
section, contact your dealer’s service department.
This procedure is for both the driver’s and passenger’s
side headlamps.
For thebulb types to be used in the following
procedures, see “Replacement Bulbs” in the Index.
Halogen Bulbs
Halogen bulbs have pressurized gas inside and
You or
can burst ifyou drop or scratch the bulb.
others couldbe injured. Be sure to read and
follow the instructions on the bulb package.
1. Use a 10 mm hex socket to remove two bolts
retaining the headlamp assembly.
6-30
2. Slide the headlamp outboard until the pins are loose. 4. Rotate the bulb retainer to the left
(counterclockwise) to remove the bulb
assembly.
3. Remove the headlamp assembly to access the bulbs.
6-31
5. Pull the tabs away from the bulb base to remove the
bulb fromthe retainer.
6. Push the new bulb straight onto the retainer.
7. Reverse these steps to replace the bulb assembly.
Front Tbrn Signal
The frontturn signal bulbs can be accessed from under
the front of the vehicle. Reach up from under the vehicle
and, while pushing in the tab on the bulb assembly, turn
assembly to the left (counterclockwise) and remove.
Remove the old bulb by pulling it straight out of the
retainer. Replace the bulb and turn the bulb assembly
back into place.
6-32
Cornering Lamps
Follow the same procedure asused for replacing
the headlamps. However, to remove the cornering
lamp bulb, turnthe bulb assembly to the left
(counterclockwise) and pull the bulb straight out.
Trunk MountedBack-up and Taillamps
2. Pull out the assembly.
1. Loosen and remove the eight fasteners (four per
side) that hold the assembly in place. The assembly
for both sides is onepiece. The entire piece must be
removed to replace any bulbs.
6-33
3. Push in the tab and turn the bulb assembly to the left
(counterclockwise) to remove it.
6-34
4. Remove the old bulb by pulling it straight out.
Rear Turn Signals
1. Open the trunk. Turn the screw to the left
of the
(counterclockwise) located just inside
trunk and remove.
2. Pull the carpet away from the rear area to access
the turn signal bulb assembly.
3. Turn the bulb socket one-quarterturn to the left
(counterclockwise), while pressingit firmly.
4. Pull the bulb socket straight outof the assembly.
5. Remove the old bulb by pulling it straight out.
6. Replace with a new bulb by pushing the bulb straight
into the socket until the bulb clicks into place.
5 . Replace the bulb and reverse the steps to install the
new bulb assembly.
7. Turn the bulb socket one-quarterturn into the
assembly to lock it back into place.
8. Reverse Steps 1 through 3 to reinstall the
bulb assembly.
6-35
Headlamp Aiming
0
Your vehicle has the composite headlampsystem. These
headlamps have horizontal and vertical aim indicators.
The aimhas been pre-set at the factory and should need
no further adjustment .
NOTICE:
To make sure your headlamps are aimed
properly, read all the instructions before
beginning. Failure to follow these instructions
could cause damage to headlamp parts.
If your vehicle is damaged in anaccident and the
headlamp aim seems to be affected, see your dealer.
Headlamps on damaged vehicles may require
recalibration of the horizontal aimby your dealer.
To check the aim, the vehicle should be properly
prepared as follows:
Place the vehicle on a level pad or surface.
0
The vehicle should not have any snow, ice or mud
attached to it.
The vehicle should be fully assembled and all other
work stopped while headlamp aiming is being done.
0
There should not be any cargo or loading of the
vehicle, except it shouldhave a full tank of fuel and
one person or 160 lbs. (75 kg) on the driver’s seat.
Tires should be properly inflated.
6-36
Rock the vehicle to stabilize the suspension.
Open the hood and locate the vertical aim level (A) that
you can see through the top of the headlamp.
u
l It is recommended that
the upper limit not exceed
plus 0.4 degrees from
the center of the bubble.
Other drivers may flash
their high beams at you if
your adjustment is much
above plus 0.4 degrees.
For the vertical adjustment, state inspection stations
generally will allow a reading
of plus 0.76 degreesor
minus 0.76 degrees from the center of the bubble.
If you find that the headlamp aiming needs adjustment,
follow these steps:
Adjustment screws can be turned with E8
an Tome’
socket orT15 Tom screwdriver.
fi‘
3. Check the horizontal aim
(C) and adjust as
necessary. The horizontal
aiming device is located
on the inboard sideof
each lamp.Turn the
horizontal aiming
screw (D) until the screw
aligns with the zero“0”.
4. Recheck the vertical aim(A) to make sureit is
still correct after the horizontal
aim adjustment.
Re-adjust as necessary.
1. Locate the vertical aiming screw
(B) that is directly
behind the headlamp assembly.
2. Turn the vertical aiming screw until the bubble
“0”.
inside the level (A) is centered at zero
i
6-37
Windshield Wiper Blade Replacement
3. Push the new wiper blade securely on the wiper arm.
For the proper windshield wiper blade replacement
length and type, see “Normal Maintenance Replacement
Parts” in the Index.
Tires
Your new vehicle comes with high-quality tires made by
a leading tire manufacturer. If you ever have questions
about your tire warranty and where to obtain service, see
your Buick Warranty booklet for details.
Replacement blades come in different types and are
removed in different ways. Here’s how to remove the
type with a releasehole:
I. Pull the windshield wiper arm away from the
windshield.
2. Insert a small screwdriverinto the hole (A) and pull
the blade assembly off the wiper arm (B).
6-38
~
Poorly maintained and improperly used tires
are dangerous.
Overloading your tires can cause
overheating as a result of too much friction.
You could have an air-out and a serious
accident. See “LoadingYour Vehicle” in
the Index.
CAUTION: (Continued)
-
NOTICE:
CAUTION: (Continued)
0
0
Underinflated tirespose the samedangeras
overloaded tires. The resulting accident
could cause serious injury.Check all tires
frequently to maintain the,recommended
pressure. Tire pressureshould be checked
when your tiresare cold.
Overinflated tiresare more likely to’ be
cut, punctured or broken
by a sudden
impact such as when youhit a pothole..
Keep tires at the recommended pressure.
Worn, old tires cancause accidents. If your
tread is badly worn, ,orif your tireshave
been damaged, replace them.
--
0
Inflation
J
-- Tire Pressure
The Tire-Loading Information label, which
is on the
rear edgeof the driver’s door, shows the correct
inflation pressuresfor your tires when’they’re cold.
has been sittingfor at least
“Cold” means your vehicle
1 mile (1.6 km).
three hours or driven no more than
Don’t let anyone tell youthat underinflation or
overinflation is all right. It’s not.If your tires
don’t have enough air (underinflation), you can
get the following:
Too much flexing
0 Too much heat
Tire overloading
0 Bad wear
Bad handling
0 Bad fuel economy.
If your tires have toomuch air (overinflation),
you can get the following:
0 Unusual wear
Bad handling
0 Rough ride
0 Needless damage from road hazards.
1
6-39
When to Check
Check your tires once amonth or more.
Don’t forget your compact spare tire. It should be at
60 psi (420 Wa).
The purpose of regular rotation is to achievemore
uniform wear for all tires on the vehicle. The first
rotation is the most important. See “Scheduled
Maintenance Services” in the Index for scheduled
rotation intervals.
How to Check
Use a good quality pocket-type gage to check tire
pressure. You can’t tell if your tires are properly inflated
simply by looking at them. Radial tires may look
properly inflated even when they’re underinflated.
1
Be sure toput the valve caps back onthe valve
stems. They help prevent leaks by keeping out dirt
and moisture.
Tire Inspection and Rotation
Tires should be rotated every 6,000 to 8,000 miles
(10 000 to 13 000 km). Any time you notice unusual
wear, rotate your tires as soon as possible and check
wheel alignment. Also check fordamaged tires or
wheels. See “When It’s Time forNew Tires” and
“Wheel Replacement” later in this section for
more information.
6-40
When rotating your tires, always use the correct
rotation pattern shown here.
Don’t include the compact spare tire in your
tire rotation.
After the tires have been rotated, adjust the front
and rear inflationpressures as shown on the
Tire-Loading Information label. Makecertain that all
wheel nuts are properly tightened. See “Wheel Nut
Torque” in the hdex.
Rust or dirton a wheel, or on the parts towhich
it is fastened, can make wheel nuts become loose
after a time. The wheel could come off and cause
an accident. When you change a wheel, remove
any rust or dirt
from places where the wheel
attaches to thevehicle. In anemergency, you can
use a cloth or a paper towel to dothis; but be
sure touse a scraper orwire brush later, if you
need to, to get all therust or dirtoff. (See
“Changing a Flat Tire” in theIndex.)
When It’s Time for New Tires
One way to tell when it’s
time for new tires is to
check the treadwear
indicators, which will
appear when your tires have
only 1/16 inch (1.6 mm) or
less of tread remaining.
You need a new tire if any of the following statements
are true:
0
You can see the indicators at three or more places
around the tire.
You can see cord or fabric showing through the
tire’s rubber.
The tread or sidewall is cracked, cut or snagged deep
enough to show cord or fabric.
The tire has a bump, bulge or split.
The tire has a puncture, cut or other damage that
can’t be repaired well because of the size orlocation
of the damage.
6-41
Buying New Tires
A CAUTION:
To find outwhat kind and size of tires you need, look at
the Tire-Loading Information label.
The tires installed on your vehicle when it was new had
a Tire Performance Criteria Specification (TPC Spec)
number on each tire’s sidewall. Whenyou get new tires,
get ones with that same TPC Specnumber. That way
your vehicle will continue to have tires that are designed
to giveproper endurance, handling, speed rating,
traction, ride and other things during normal service on
your vehicle. If your tireshave an all-season tread
design, the TPC number will be followed by an “MS”
(for mud and snow).
’
Mixing tires could cause you to lose control while
driving. If you mix tires of different sizes or types
(radial andbias-belted tires), the vehicle maynot
handle properly, and you could have a crash.
Using tires of different sizes may also cause
damage to your vehicle. Be sure touse the same
size and type tires on all wheels.
It’s all right to drivewith your compact spare,
though. It was developedfor use on your vehicle.
If you ever replace your tires with those not having a
TPC Spec number, make sure they are the same size,
load range, speed rating and construction type (bias,
bias-belted or radial) as youroriginal tires.
If you use bias-ply tires on your vehicle, the
wheel rim flanges could developcracks after
many.miles of driving. A tire and/or wheel could
fail suddenly, causing a crash. Use only radial-ply
tires with the wheels on your vehicle.
6-42
Uniform Tire Quality Grading
Treadwear
The following information relates to the system
developed by the United States National Highway
Traffic Safety Administration,which grades tires by
treadwear, traction and temperature performance. (This
applies only to vehicles sold in the United States.) The
grades aremolded on the sidewalls of most passenger
car tires. The Uniform TireQuality Grading system does
not apply to deep tread,winter-type snow tires,
space-saver or temporary use spare tires,tires with
nominal rim diameters of 10 to 12 inches (25 to 30 cm),
or to some limited-productiontires.
The treadwear grade is a comparativerating based
on the wear rate of the tire when tested under controlled
conditions on aspecified government test course.
For example, a tiregraded 150 would wear one and a
half (1 1/2) times as well on the government course
as a tire graded 100. The relative performance of tires
depends upon the actual conditions of their use,
however, and may depart significantly from the norm
due to variations in driving habits, service practices
and differences in road characteristics and climate.
While thetires available on General Motorspassenger
cars and light trucks may vary with respect to these
grades, they must also conform to Federalsafety
requirements and additional General Motors Tire
Performance Criteria (TPC) standards.
Traction
-- A, B, C
The traction grades, fromhighest to lowest, areA, B,
and C, and they represent the tire’s ability to stop on
wet pavement as measured under controlled conditions
on specified government test surfaces of asphalt
and concrete. A tire marked C may have poor
traction performance.
Warning: The traction grade assigned to this tire is
based on braking (straight ahead) traction tests and
does not include cornering (turning) traction.
6-43
Temperature
-- A, B, C
The temperature grades areA (the highest), B, and C,
representing the tire’s resistance tothe generation of
heat and its ability to dissipateheat when tested under
controlled conditions on a specified indoor laboratory
test wheel. Sustained high temperature can cause the
material of the tire to degenerate and reduce tire life,
and excessive temperature can lead to sudden tire
failure. Thegrade C corresponds to a level of
performance which all passenger car tires must meet
under the Federal Motor Vehicle Safety Standard
No. 109. Grades B and A represent higher levels of
performance on the laboratory test wheel than the
rninimum required by law.
Warning: The temperature grade forthis tire is
established for a tire that is properly inflated and not
overloaded. Excessivespeed, underinflation, or
excessive loading, either separately or in combination,
can cause heat buildup and possible tire failure.
Wheel Alignment and Tire Balance
The wheels on your vehicle were aligned and balanced
carefully at the factory to give you the longest tire life
and best overall performance.
6-44
Scheduled wheel alignment and wheel balancing are
not needed. However, if you notice unusual tire wear
or your vehicle pulling one way or the other, the
alignment may need to bereset. If you notice your
vehicle vibrating when driving ona smooth road, your
wheels may need to be rebalanced.
Wheel Replacement
Replace any wheel that is bent, cracked,or badly rusted
or corroded.If wheel nuts keep comingloose, the wheel,
wheel bolts and wheel nuts should be replaced. If the
wheel leaks air, replace it (except some aluminum
wheels, which can sometimes be repaired). See your
dealer if any of these conditions exist.
Your dealer will know the kind of wheel you need.
Each new wheel should have the sameload-carrying
capacity, diameter, width, offset and be mounted the
same way as the one itreplaces.
If you need to replace any of your wheels, wheel bolts
or wheel nuts, replace them only with new GM original
equipment parts. This way, you will be sure to have
the right wheel, wheel bolts and wheel nuts for your
Buick model.
Used Replacement Wheels
Using the wrong replacement wheels, wheel
bolts or wheel nuts on your vehicle can be
dangerous. It could affect the braking and
handling of your vehicle, make your tireslose
air andmake you lose control. You could have a
collision in which you or otherscould be injured.
Always use the correctwheel, wheel bolts and
wheel nuts forreplacement.
I NOTICE:
The wrong wheel can also cause problems with
bearing life, brake cooling, speedometer or
odometer calibration, headlamp aim, bumper
height, vehicle ground clearance and tire
or tire
chain clearance to the
body and chassis.
See “Changing a Flat Tire” in the Index for
more information.
A CAUTION:
~
--..
:,;,,-.-’,’,.
. 1
:::,
ib.:
’
.
c:
.’F
:
Putting a used wheel on your vehicle is
dangerous. You can’t know how it’s been usedor
how far it’s been driven. It could fail suddenly
and cause an accident. If you have to replace a
wheel, use a new GM original equipmentwheel.
Tire Chains
Never use these to clean your vehicle:
Gasoline
NOTICE:
0
Benzene
Naphtha
Use tire chains only where legal and only when
you must. Use only SAE Class “S” type chains
that arethe propersize for your tires. Install
them on the front tires and
tighten them as
tightly as possible with the ends securely
fastened. Drive slowly and follow the chain
manufacturer’s instructions. If you can hear the
chains contacting your vehicle, stop andretighten
them. If the contact continues, slow downuntil it
stops. Driving too fast or spinning the wheels
with chains on will damage your vehicle.
Appearance Care
Remember, cleaning products can be hazardous. Some
are toxic. Others can burst into flameif you strike a
match or getthem on ahot part of the vehicle. Some are
dangerous if you breathe their fumes in a closed space.
When you use anything from acontainer to clean your
vehicle, be sure tofollow the manufacturer’s warnings
and instructions. And always open your doors or
windows when you’re cleaning the inside.
6-46
0
Carbon Tetrachloride
0
Acetone
0
Paint Thinner
Turpentine
0
Lacquer Thinner
0
Nail Polish Remover
They can all be hazardous -- some more than
others -- and they can all damage your vehicle, too.
Don’t use any of these unless this manual says you can.
In many uses, these will damage yourvehicle:
Alcohol
0
Laundry Soap
Bleach
0
Reducing Agents
Cleaning the Inside ofYour Vehicle
Use a vacuum cleaner often to get of
riddust and loose
dirt. Wipe vinyl,leather, plastic and painted surfaces
with a clean, damp cloth.
Your dealer has two cleaners, Multi-Purpose Interior
Cleaner and Capture Non-Solvent Dry Spot and Soil
Remover for cleaning fabricand carpet. Theywill clean
normal spots and stains very well. You can get
GM-approved cleaning products from your dealer. (See
“Appearance Careand Materials” in the Index.)
Here are some cleaningtips:
0
Always read the instructions on the cleaner label.
Clean up stains as soon as you can -- before they set.
0
Carefully scrape off any excess stain.
Using Multi-Purpose Interior Cleaner
on Fabric
1. Vacuum and brush the area to remove any loose dirt.
2. Always clean a wholetrim panel or section. Mask
surrounding trim along stitch or welt lines.
3. Mix powdered cleaner following the directions on
the container label to formthick suds.
4. Use suds only and apply with a clean sponge.
Don’t saturate the material and don’t rub it roughly.
5 . As soon as you’ve cleaned the section, use a sponge
to removethe suds.
6. Wipe cleaned area with a clean, damptowel or cloth.
7. Wipe with a clean cloth and let dry.
Use a clean cloth or sponge,and change to a clean
area often. A soft brush may be used if stains are
stubborn.
0
If a ring forms after spot cleaning, cleanthe entire
area immediately or it will set.
6-47
Special Fabric Cleaning Problems
Cleaning Vinyl
Stains causedby such thingsas catsup, coffee (black),
egg, fruit, fruit juice, milk, soft drinks, vomit, urine
and
blood canbe removed as follows:
Use warm water and a clean cloth.
Rub with a clean, damp clothto remove dirt. You
may have todo it more than once.
1. Carefully scrapeoff excess stain, then sponge the
soiled areawith cool water.
Things like tar, asphalt and shoe polish will stain
if you don’t get themoff quickly. Use a clean
cloth and a vinyl/leathercleaner. See your dealer
for this product.
2. If a stain remains, follow the multi-purpose interior
cleaner instructions describedearlier.
3. If an odor lingers after cleaningvomit or urine,
treat the areawith a waterbaking soda solution:
1 teaspoon (5 ml) of baking soda to1 cup (250 ml)
of lukewarm water.
4. Let dry.
Stains causedby candy, ice cream, mayonnaise, chili
sauce andunknown stains canbe removed as follows:
1. Carefully scrape off excess stain.
2. First, clean with cool water and allow todry
completely.
3. If a stain remains, follow instructions for
Multi-Purpose Interior Cleaner.
6-48
Cleaning Leather
Use a soft clothwith lukewarm water and mild
a
soap or
saddle soapand wipe dry with a soft cloth. Then, let the
leather dry naturally. Do not use heat todry.
0
For stubborn stains, use a leather cleaner,
See your
dealer forthis product.
Never use oils, varnishes, solvent-based or abrasive
cleaners, furniturepolish or shoe polishon leather.
Soiled or stained leather should becleaned
immediately. If dirt is allowed to work into the
finish, it can harm the leather.
Cleaning theTop of the Instrument Panel
Cleaning Glass Surfaces
Use only mild soap and water to clean the top surfaces
of the instrumentpanel. Sprays containing silicones or
waxes may cause annoying reflections in thewindshield
and even make it difficult to see through the windshield
under certain conditions.
Glass should be cleaned often. GM Glass Cleaner (GM
Part No. 1050427) or a liquid household glass cleaner
will remove normal tobacco smokeand dust films on
interior glass.
Cleaning Interior Plastic Components
Use only a mild soap and water solution ona soft
cloth or sponge. Commercial cleaners
may affect the
surface finish.
Care of Safety Belts
Don't use abrasive cleanerson glass, because they
may cause scratches.Avoid placing decals on the inside
rear window, since they may have to be scraped off later.
If abrasive cleaners areused on the insideof the rear
window, an electric defogger elementmay be damaged.
Any temporary license should not be attached across
the defogger grid.
Keep belts cleanand dry,
A CAUTION:
Do not bleach or dye safety belts. If you do, it
may severely weaken them.In a crash, they
might not be able to provide adequate protection.
Clean safety belts only with mild soap and
lukewarm water.
6-49
Cleaning the Outsideof the
Windshield and Wiper Blades
If the windshield is not clear after using the
windshield washer, or if the wiper blade chatters
when running, wax, sap or othermaterial may be on
the blade or windshield.
Clean the outside of the windshield with GM
Windshield Cleaner, Bon Ami@Powder (non-scratching
glass cleaning powder), GM Part No. 1050011. The
windshield is clean if beads do not form when you
rinse it with water.
Grime fromthe windshield will stick to the wiper
blades and affect their performance. Clean the blade
by wiping vigorously with a cloth soaked in
full-strength windshield washer solvent. Then
rinse the blade with water.
Check the wiper blades and clean themas necessary;
replace blades that look worn.
Weatherstrips
Silicone greaseon weatherstrips will make them last
longer, seal better, and not stick or squeak. Apply
silicone grease with a clean cloth atleast every
six months. During very cold, damp weather
6-50
more frequent application may be required. (See
“Recommended Fluids and Lubricants’’in the Index.)
Cleaning the Outside ofYour Vehicle
The paint finish on your vehicle provides beauty, depth
of color, gloss retention and durability.
Washing Your Vehicle
The best way to preserve your vehicle’s finish is to
keep it clean by washing it often with lukewarm or
cold water.
Don’t wash your vehicle in the direct rays of the sun.
Don’t use strong soaps or chemical detergents. Use
liquid hand, dish or car washing (mild detergent) soaps.
You can get GM-approved cleaning products from your
dealer. (See “Appearance Care and Materials’’ inthe
Index.) Don’t use cleaning agents that are petroleum
based, or that contain acid or abrasives. All cleaning
agents should be flushed promptly and not allowed to
dry on the surface, or they could stain. Dry the finish
with a soft, clean chamois or an all-cotton towel to
avoid surface scratches and water spotting.
High pressure car washes may cause water to enter
your vehicle.
Cleaning ExteriorLampskenses
Use lukewarmor cold water, a soft clothand a liquid
hand, dish or car washing(mild detergent) soap to clean
exterior lamps and lenses. Follow instructions under
“Washing Your Vehicle.”
Finish Care
Occasional. waxing ormild polishing of your vehicle by
the paint
hand may be necessary to remove residue from
finish. You can get GM-approved cleaning products
from your dealer. (See “Appearance Care and Materials”
in the Index.)
Your vehicle has a “basecoatklearcoat” paintfinish.
The clearcoat gives more depth and gloss to the colored
basecoat. Always use waxes and polishes that are
non-abrasive and made for a basecoat/clearcoat paint finish.
NOTICE:
Machine compounding or aggressive polishing on
a basecoatklearcoat paint finish may dull
the
finish or leave swirl marks.
Foreign materials such as calcium chlorideand other
salts, icemelting agents, road oil and tar, tree sap, bird
droppings, chemicals fromindustrial chimneys, etc., can
damage your vehicle’s finish if they remain on painted
surfaces. Wash the vehicle as soon as possible. If
necessary, use non-abrasive cleaners that are
marked
safe forpainted surfaces to remove foreignmatter.
Exterior painted surfaces are subject to aging,
weather
and chemical falloutthat can take their toll over a period
of years. You can help to keep thepaint finish looking
new by keeping your vehicle garaged or covered
whenever possible.
Cleaning Aluminum Wheels
(If Equipped)
Keep your wheels clean using a soft clean cloth with
mild soap and water. Rinse with clean water. After
rinsing thoroughly, dry with a soft clean towel. A
wax may then be applied.
The surfaceof these wheelsis similar to the painted
surface of your car. Don’t use strong soaps, chemicals,
abrasive polishes, abrasive cleaners or abrasivecleaning
brushes on them because you could damage the surface.
Don’t take your vehiclethrough an automatic
car wash that has silicon carbide tirecleaning brushes.
These brushes canalso damage the surface
of these wheels.
Cleaning Tires
Underbody Maintenance
To clean yourtires, use a stiff brush with a tirecleaner.
Chemicals used for iceand snow removal and dust
control can collect on the underbody. If these arenot
removed, accelerated corrosion (rust) can occur on
the underbody parts such as fuel lines, frame, floor
pan and exhaust system even though they have
corrosion protection.
NOTICE:
When applying a tire dressing always take care
to wipe off any overspray or splash from all
painted surfaces on the body or wheels of the
vehicle. Petroleum-based products may damage
the paint finish.
Sheet Metal Damage
If your vehicle is damaged and requires sheet metal
repair or replacement, make sure the body repair shop
applies anti-corrosion material to the parts repaired or
replaced to restore corrosion protection.
Finish Damage
Any stone chips, fractures or deep scratches in the finish
should be repaired right away. Bare metal will corrode
quickly and may develop into amajor repair expense.
Minor chipsand scratches can berepaired with touch-up
materials available from your dealer or other service
outlets. Larger areas of finish damagecan be corrected
in your dealer’s body and paint shop.
6-52
At least every spring, flush thesematerials from the
underbody with plain water. Clean any areas where mud
and other debris can collect. Dirt packed in closed areas
of the frameshould be loosened before being flushed.
Your dealer or an underbody car washing system can do
this for you.
Chemical Paint Spotting
Some weather and atmospheric conditions can create
a chemical fallout. Airborne pollutants can fall upon
and attack painted surfaces on yourvehicle. This
damage cantake two forms: blotchy, ringlet-shaped
discolorations, and small irregular dark spots etched
into the paint surface.
Although no defect in the paint job causes this, Buick
will repair, at no charge to the owner, the surfaces of
new vehicles damaged by this falloutcondition within
12 months or 12,000 miles (20 000 km)of purchase,
whichever occurs first.
Appearance Care Materials Chart
I 16
(0.473 L)
1
Surface
Cleaner
See your General Motors Parts Department for these products.
See “Fluids and Lubricants” in the Index.
12377984
02.
I
Removes contaminants, blemishes and swirl marks
** Not recommended for use on instrument panel vinyl.
6-53
the model designation,
Vehicle Identification Number (VIN)
paint information and
0
a list of all production options and
special equipment.
Be surethat this label is not removed from thevehicle
Electrical System
Add-on Electrical Equipment
This is the legal identifier foryour vehicle. It appears on
a plate in the front comer of the instrument panel, on the
driver’s side. You can seeit if you look through the
windshield from outsideyour vehicle. The VIN also
appears on the Vehicle Certification and Service Parts
labels and the certificates of title and registration.
Engine Identification
The 8th character in your VIN is the engine code. This
code will help you identify your engine, specifications
and replacement parts.
Service Parts Identification Label
You’ll find this label onyour spare tire cover. It’s very
helpful if you ever need to order parts. On this label is:
your VIN,
6-54
I NOTICE:
Don’t add anything electrical to your vehicle
unless you check with your dealer first. Some
electrical equipment can damage your vehicle
and the damage wouldn’t be covered by your
warranty. Some add-on electrical equipment
can keep other components from working as
they should.
Your vehicle has an air bag system. Before attempting
add anything electrical to your vehicle, see “Servicing
Your Air Bag-Equipped Vehicle” in the Index.
Headlamp Wiring
The headlamp wiring is protected by an internal
circuit breaker. An electrical overloadwill cause the
lamps to go on and off, or in some casesto remain off.
If this happens, have your headlamp system checked
right away.
Windshield Wipers
The windshield wiper motor is protected by an internal
circuit breakerand a fuse. If the motor overheatsdue to
heavy snow, etc., the wiperwill stop until the motor
cools. If the overload is caused by some electrical
problem, be sure to have it fixed.
Power Windows and Other
Power Accessories
Circuit breakersin the fusepanel protect the power
windows and other power accessories. When the current
load is tooheavy, the circuit breaker opensand closes,
protecting the circuit until the problem isfixed or goes
away.
Maxifuse@/Relay Center
To check the fusesin this underhood fuse center,
turn the two knobs one-quarterturn to the left
(counterclockwise) and loosenthe metal wing nut on
the passenger sideof the cover. Then remove thecover.
The insideof the cover has a chart that explains the
features and controls governed by each fuse and relay.
Fuses and Circuit Breakers
The wiring circuits in your vehicle areprotected from
short circuitsby a combination of fuses, circuitbreakers
and fusible thermal links. This greatly reduces the
chance of damage causedby electrical problems.
Look at the silver-colored band insidethe fuse. If the
band is broken or melted, replace the fuse. Be sure you
replace abad fuse with a new one of the identical size
and rating.
If you ever have aproblem on theroad and don’t have a
spare fuse,you can “borrow”onethat has the same
amperage. Justpick some featureof your vehicle that
you can get along without -- like the radio or cigarette
lighter -- and use its fuse,if it is the correct amperage.
Replace it assoon as you can.
There are two fuse
blocks in your vehicle: the driver’s
side and passenger’s side fuseblocks.
Driver’s Side Fuse Block
1
The driver’s side fuseblock is tothe left of the steering
wheel, under the instrumentpanel.
Snap off the cover to reveal the fuses. You’ll find a fuse
puller clipped to the inside of the cover. Place the wide
end of the fuse puller over the plastic end of the fuse.
Squeeze the ends over the fuse and pull it out.
Spare fusesare located in the slots labeled “Spare” on
the following chart.
When finished, replace the cover by snapping it back up
into place.
6-56
2
3
4
5
6
Fuse
1
2
3
4
5
1A
2A
3A
4A
5A
6A
7A
8A
9A
1B
2B
3B
4B
5B
Usage
Not Used
Not Used
Power Seats Circuit Breaker
Not Used
Not Used
PASS-Key
Spare
Not Used
Not Used
Up-Level HVAC, ALM, Cruise
Control, Cluster
Courtesy Lamps, Power Mirrors
Not Used
Perimeter Lighting
Ashtray, Cigarette Lighter
Turn Signal, Back-up Lamps, LCM, BTSI
Spare
Not Used
Not Used
Anti-Lock Brake System, Computer
Command Control
Fuse
6B
7B
8B
9B
IC
2c
3c
4c
5c
6C
7c
8C
9c
ID
2D
3D
4D
5D
6D
7D
Usage
Brake and Hazard Lamps
Not Used
Interior Lighting
Cigarette Lighter
Air Bag System
Spare
Not Used
Not Used
Cooling Fans, Transaxle
Parking Lamps, Interior Lamps
Not Used
Parking Lamps
Radio, Cluster
Telltale, Chime, Cluster, RAC
Spare
Heated Mirrors
Not Used
Base N C
Not Used
TCC
6-57
Fuse
8D
9D
1E
2E
3E
4E
5E
6E
7E
8E
9E
Usage
Radio
Not Used
Not Used
Air Bag System, PASS-Key
Not Used
Not Used
Rear Defog
Not Used
Miscellaneous Engine-Non OBD I1
Wipers, Washer
Not Used
o n o n
n 00. 000
POSITIONS
n o
n o
000 uno
r----------
Passenger's Side FuseBlock
Additional fuses are located in the relay center, on
the passenger's side, below the instrument panel.
You must remove the sound insulator on the right
side of the passenger footwell to replace these fuses.
Since thereplacement of these fusescan be difficult,
we recommend that you see your dealer for
fuse replacement.
6-58
I
I
I
FUSE
POSITIONS
I
I
I
I
I
I
I
I
I
I
I
I
I
Fuse Usage
Door Locks
Trunk Release, RAC
Horns
Not Used
5
Miscellaneous Engine Controls
6
Fuel Pump
7
Injectors
8
Powertrain Control Module
9
Not Used
10
Not Used
11
A/C Programmer
12
Not Used
Replacement Bulbs
Front Outside Lamps
Cornering Lamps . . . . . . . . . . . . . . . . . . . . . . . .
Halogen Headlamps
Low-Beam . . . . . . . . . . . . . . . . . . . . . . . . . . .
High-Beam . . . . . . . . . . . . . . . . . . . . . . . . . . .
Parking/Turn Signal Lamps . . . . . . . . . . . . . . . .
Rear Outside Lamps
Back-up Lamps . . . . . . . . . . . . . . . . . . . . . . . . .
Tail . . . . . . . . . . . . . . . . . . . . . . . . . . . . . . . . . . .
Tail/Stop/Turn Signal lamps . . . . . . . . . . . . . . .
Bulb
3 156
9006
9005
3057
3156
194
3357
6-59
Capacities and Specifications
Air Conditioning Refrigerants
The following approximate capacities are given in
English and metric conversions. Please refer to
“Recommended Fluids and Lubricants” in the Index
for more information.
Not all air conditioning refrigerants are the same.
If the air conditioning system in your vehicle needs
refrigerant, be surethe proper refrigerant is used. If
you’re not sure, ask your dealer.
3800 SeriesI1 Engine (L36) CodeK 3.8L V6
Automatic Transaxle (Overdrive)
Pan Removal and Replacement . . . 6.5 quarts (6.1 L)
After Complete Overhaul . . . . . . . . . 10 quarts (9.5 L)
When draining or replacing torque convertor, more
fluid may be needed,
Cooling System . . . . . . . . . . . . . . . 13 quarts (1 2.3 L)
EngineCrankcase . . . . . . . . . . . . 4.5 quarts (4.3 L)
Oil change withfilter change
Fuel Tank .................... 18 gallons (68 L)
Tire Pressures . . . . . . See Tire-Loading Information
label on driver 5. dooK
Wheel Nut Torque . . . . . . . . . . 100 lb-ft (140 N-m)
R-134a Air Conditioning . . . See refrigerant charge
label under the hood.
Engine Specifications
All capacities are approximate. When adding,be sure
to fillto the appropriate level, asrecommended in
this manual.
6-60
3800 Series I1 Engine (L36) CodeK
VIN Engine Code . . . . . . . . . . . . . . . . . . . . . . . . . . .
K
Type . . . . . . . . . . . . . . . . . . . . . . . . . . . . . . . . . . . .
V6
Displacement . . . . . . . . . . . . . . . . . . . . . . . . . . . .
3.8L
Horsepower . . . . . . . . . . . . . . . . . . . . . . . . . ..205-hp
Firing Order . . . . . . . . . . . . . . . . . . . . . .
1-6-5-4-3-2
Thermostat Temperature . . . . . . . . . . . 195°F (91°C)
Normal Maintenance
Replacement Parts
Air Cleaner Filter . . . . . . . . . . . . . AC Type A-1096C
Engine Oil Filter . . . . . . . . . . . . . . . . AC Type PF-47
Transaxle Filter . . . . . . . . . . . . GM Part No. 8651909
Spark Plugs . . . . . . . . . . . . . . . . . . . AC Type 41-921
Gap: 0.060 inch(1.52 mm)
Windshield Wiper Blades
Type . . . . . . . . . . . . . . . . . . . . . . . . . . . . . . . . . . .
Pin
Length .....................
22 inches (56 cm)
L36 Engine Accessory Belt
I
C
Vehicle Dimensions
Length . . . . . . . . . . . . . . . . . . . . 200 inches (508 cm)
Width . . . . . . . . . . . . . . . . . . . 73.6 inches (1 86.9 cm)
Height . . . . . . . . . . . . . . . . . . . 55.7 inches (141.5 cm)
Wheelbase . . . . . . . . . . . . . . 110.8 inches (281.4 cm)
Tread Width
Front . . . . . . . . . . . . . . . . . . 60.4 inches (153.4 cm)
Rear . . . . . . . . . . . . . . . . . . . 60.2 inches (152.9 cm)
The L36 engine uses
an engine accessory belt. This
diagram shows the features connected
and the routing.
See “Maintenance Schedule”in the Indexfor when to
check the belt.
A. Power Steering
B . Generator
C. Air Conditioning
D. Crank
E. Coolant Pump
F. Tensioner
6-61
fi
6-62
NOTES
Section 7 MaintenanceSchedule
This section covers the maintenance required
for your Buick. Your vehicle needs these services to retain its
safety,
dependability and emission control performance.
7-2
7-4
7-29
Introduction
Part A: Scheduled Maintenance Services
Part B: Owner Checksand Services
7-33
Part C: PeriodicMaintenanceInspections
D: RecommendedFluidsandLubricants
7-35Part
7-37
Part E: Maintenance Record
7-1
IMPORTANT.
I
KEEP ENGINE OIL
AT THE PROPER
LEVEL AND CHANGE AS
RECOMMENDED .
8
Introduction
Your Vehicle and the Environment
Proper vehicle maintenance not only helps to keep your
vehicle in good working condition, but also helps the
environment. All recommended maintenance procedures
are important. Improper vehicle maintenance can even
affect the quality of the air we breathe. Improper fluid
levels orthe wrong tire inflation can increase the level
of emissions from yourvehicle. To help protect our
environment, and to keep your vehiclein good
condition, please maintain your vehicle properly.
How This Section is Organized
The remainder of this section is divided into five parts:
Have you purchased the GM Protection Plan? The Plan
supplements your new vehicle warranties. See your
Warranty and Owner Assistance booklet, or your Buick
dealer for details.
7-2
“Part A: Scheduled Maintenance Services”shows
what to have doneand how often. Someof these
services can be complex, so unless you are technically
qualified and have the necessary equipment, you should
let your dealer’s service department or anotherqualified
service center do thesejobs.
A CAUTION:
Performing maintenancework on a vehicle can
be dangerous. In trying todo some jobs, you can
be seriously injured. Do your own maintenance
work only if you have the requiredknow-how
and the propertools and equipment for the job.
If you have any doubt,have a qualified
technician do thework.
If you are skilled enough to do some work your
on
vehicle, you will probably want to get the service
information. See “Service and Owner Publications”
in
the Index.
“Part B: Owner Checks and Services” tells you what
should be checked and when. It also explains what you
can easily do to help keep your vehicle in good condition.
“Part C: Periodic MaintenanceInspections” explains
important inspections that your dealer’s service
department or another qualified service center
should perform.
“Part D: Recommended Fluids and Lubricants”lists
some recommended products to help keep your vehicle
properly maintained. These products, or their
equivalents, shouldbe used whetheryou do thework
yourself or haveit done.
“Part E: Maintenance Record” provides a place for
you to record the maintenance performed on
your
vehicle. Wheneverany maintenance is performed, be
sure to writeit down in this part. This
will help you
determine when your next maintenance should be done.
your maintenance
In addition, itis a good idea to keep
receipts. Theymay be needed to qualifyyour vehicle for
warranty repairs.
7-3
Part A: Scheduled Maintenance
Services
Using Your Maintenance Schedule
We at General Motors want to help
you keep your
vehicle ingood working condition. But we
don’t know
exactly how you’ll drive it.You may drive very short
distances only a few times a week. Oryou may drive
long distances all the time very
in hot, dustyweather.
You may use your vehicle in making deliveries. Or
you may driveit to work, todo errands or in many
other ways.
The proper fluids and lubricants touse are listedin
Part D. Make sure whoever services your vehicleuses
these. All parts should be replaced andall necessary
repairs done beforeyou or anyone else drives the vehicle.
These schedules are for vehicles
that:
carry passengers and cargo within recommended
limits. You will find these limits onyour vehicle’s
Tire-Loading Information label. See “Loading
Your
Vehicle” in the Index.
are driven on reasonableroad surfaces within legal
driving limits.
use the recommended fuel. See “Fuel” in the Index.
Because of all the differentways people use their
vehicles, maintenance needsvary. You may even need
Selecting the Right Schedule
more frequent checks and replacements than you’ll find
First you’ll need to decide whichof the two schedulesis
So please read this
in theschedules in this section.
right for yourvehicle. Here’s how to decidewhich
section and notehow you dnve. If you have any
schedule to follow:
questions on how to keep your vehiclein good
condition, seeyour Buick dealer.
This part tellsyou the maintenance servicesyou should
have done andwhen you should schedule them.If you
go toyour dealer foryour service needs,you’ll know
that GM-trained and supported service peoplewill
perform thework using genuineGM parts.
7-4
Maintenance Schedule
~
Short Trip/City Definition
Follow the Short Trip/City Maintenance Scheduleif any
your vehicle:
one of these conditions is true for
0
Most trips are less than 5 to 10 miles (8 to 16 km).
This isparticularly important when outside
temperatures are below freezing.
0
Most trips include extensive idling (suchas frequent
driving in stop-and-go traffic).
0
Most trips are through dusty areas.
You frequently tow a trailer or use a carrieron top of
your vehicle.
0
If the vehicle is used for delivery service, police, taxi
or other commercial application.
One of the reasons you should follow this scheduleif
you operate your vehicle under any of these conditions
is that these conditions cause engine oil to break
down soonel:
Short Trip/City Intervals
Every 3,000 Miles (5000 km): Engine Oil and Filter
Change (or 3 months, whichever occurs first).
Every 6,000 Miles (10000 km): Chassis Lubrication
(or 6 months, whichever occurs first).Tire Rotation.
Every 15,000 Miles(25 000km): Air Cleaner Filter
Inspection, if driving in dusty conditions.
Every 30,000 Miles (50 000 km): Air Cleaner Filter
Replacement. FuelTank, Cap and Lines Inspection.
Every 50,000 Miles (83 000 km): Automatic Transaxle
Service (severe conditions only).
Every 60,000 Miles (100 000 km): Engine Accessory
Drive Belt Inspection.
Every 100,000 Miles(166 000 km): Spark Plug Wire
Inspection. Spark Plug Replacement.
Every 150,000 Miles(240 000 km): Cooling System
Service (orevery 60 months, whichever occurs first).
These intervals only summarize maintenance services.
Be sure to follow the complete maintenance schedule on
the following pages.
7-5
Maintenance Schedule
.
Long Tripmighway Definition
I
I Tripmighway
Long Intervals
Follow this maintenance scheduleonly if none of the
conditions fromthe Short Trip/City Maintenance
Schedule is true. Do not use this schedule if the vehicle
is used for trailer towing, driven ina dusty area orused
off paved roads. Use the ShortTripKity schedule for
these conditions.
Every 7,500 Miles (12 500 km): Engine Oil and Filter
Change (or every 12 months, whichever occurs first).
Chassis Lubrication (or every 12 months, whichever
occurs first).Tire Rotation.
~~
Driving a vehicle with a fully warmed engine under
highway conditions causes engine oil to break
down slower:
Every 30,000 Miles(50 000 km): Air Cleaner Filter
Replacement. Fuel Tank, Cap and Lines Inspection.
Every 50,000 Miles (83 000 km): Automatic Transaxle
Service (severe conditions only).
Every 60,000 Miles (100 000 km): Engine Accessory
Drive BeltInspection.
Every 100,000 Miles (166000 km): Spark PlugWire
Inspection. Spark PlugReplacement.
Every 150,000 Miles (240 000 km): Cooling System
Service (orevery 60 months, whichever occurs first).
These intervals only summarize maintenance services.
Be sure to followthe complete maintenance schedule on
the following pages.
7-6
I
I
Short TripKity Maintenance Schedule
The services shown in this schedule up to 100,000 miles
(166 000 km) should be performedafter 100,000 miles
(166 000 km)at the same intervals.The services shown
at 150,000 miles (240 000 km) should be performedat
the sameinterval after 150,000 miles (240 000 km).
See “Owner Checks and Services’’ and “Periodic
Maintenance Inspections” following.
Footnotes
The U.S. Environmental Protection Agencyor the
California Air Resources Boardhas determined that the
failure toperform this maintenance itemwill not nullify
the emission warranty or limit recallliability prior to the
completion of the vehicle’s useful life. We, however,
urge that all recommended maintenance services be
performed at the indicated intervalsand the maintenance
be recorded.
# Lubricate the suspension and steering linkage,
transaxle shift linkage,parking brake cable guidesand
underbody contact points.
I
* If your
vehicle has an
Engine Oil Life Monitor, the monitor
will show you when to change the oil -- usually between
3,000 miles (5 000 km)and 7,500 miles (12 500 km)since
your last oil change. Under severe conditions, the indicator
may come on before 3,000 miles (5 000 km). Never drive
your vehicle more than 7,500 miles (12 500 km)or
12 months, (whichever occurs first), withoutan oil change.
The system won’t detect dust in the oil. So if you drive in
a dusty area be sure to change your oil every 3,000 miles
(5 000 km)or sooner if the CHANGE OIL SOON light
comes on. Remember to reset the Oil Life Monitor when
the oil has been changed. For more information, see
“CHANGE OIL SOONLight” in the Index.
+ A good time to checkyour brakes is during tire
rotation. See “Brake System Inspection” under “Periodic
Maintenance Inspections”in Part C of this schedule.
++ If you drive in a highly corrosive environment, your
brake calipers may require additional inspection and
service, at every other tire rotation.See “Caliperffiuckle
Maintenance Inspection” under “Periodic Maintenance
Inspections” in Part C of this schedule.
7-7
I
Short Trip/City Maintenance Schedule
I
3,000 Miles (5 000 km)
I DATE
0 Change engineoil and filter (or every 3 months, whichever occurs first).
MILEAGE
An Emission Control Service. (See footnote *.)
6,000 Miles (10 000 km)
DATE
0 Change engineoil and filter (orevery 3 months, whichever occurs first).
9,000 Miles (15 000 km)
I DATE
Cl Change
I
7-8
I
MILEAGE
An Emission Control Service. (See footnote*.)
0 Lubricate chassis components (orevery 6 months, whichever occurs first).
(See footnote#.)
0 Rotate tires. See “Tire Inspection and Rotation” in the Index for proper
rotation pattern and additional information. (See footnote+.)
engine oiland filter (or every3 monms, whichever occurs first).
An Emission Control Service. (See footnote*.)
I
ACTUAL
MILEAGE
I
I SERVICEDBY: I
I
Short TripKity Maintenance Schedule
I
12,000 Miles (20 000 km)
1
DATE
0 Change engine oiland filter (or every3 months, whichever occurs first).
An Emission Control Service. (See footnote *.)
0 Lubricate chassis components (or every6 months, whichever occurs first).
(See footnote#.)
Rotate tires. See “Tire Inspection and Rotation” in the Index for proper
rotation pattern and additional information. (See footnote
+.)
(Also see footnote++.)
15,000 Miles (25 000 km)
0 Change engine oiland filter (or every3 months, whichever occurs first).
An Emission Control Service. (See footnote *.)
0 Inspect air cleaner filterif you are driving industy conditions. Replace
filter if necessary.
An Emission Control Service. (See footnote?.)
18,000 Miles (30 000 km)
0 Change engine oil and filter (or every 3 months, whichever occurs first).
An Emission Control Service. (See footnote*.)
Cl Lubricate chassis components (or every6 months, whichever occurs first).
(See footnote#.)
0 Rotate tires. See “Tire Inspection and Rotation” in the Index for proper
rotation pattern and additional infomation. (See footnote +.)
+
I DATE
ACTUAL
MILEAGE
DATE
I
SERVICED BY:
I
MILEAGE
7-9
I
Short Trip/City Maintenance Schedule
I
21,000 Miles (35 000 km)
Change engineoil and filter (or every 3 months, whichever occurs first).
An Emission Control Service. (See footnote*.)
24,000 Miles (40 000 km)
0 Change engine oiland filter (or every 3 months, whichever occurs first).
An Emission Control Service. (See footnote *.)
0 Lubricate chassis components (or every 6 months, whichever occurs first).
(See footnote #.)
0 Rotate tires. See “Tire Inspection and Rotation” in the Index for proper
rotation pattern and additional information. (See footnote+.) (Also see
footnote ++.)
27,000 Miles (45 000 km)
0 Change
engine oil and filter (or every 3 months, whichever occurs first).
An Emission Control Service. (See footnote *.)
7-10
DATE
I
MILEAGE
DATE
MILEAGE
I
Short TripKity Maintenance Schedule
I
30,000 Miles (50000 kmj
'
DATE
I'
-?'
I
Change engine oil and filter (or every3 months, whichever occurs first).
MILEAGE
An Emission Control Service. (See footnote* .)
0 Lubricate chassis components (or every
6 months, whichever occurs first).
(See footnote#.)
0 Replace air cleaner filter.An Emission Control Service.
0 Inspect fuel tank, cap and lines for damage or leaks. Inspect fuel cap gasket
for any damage. Replace parts as needed.
An Emission Control Service. (See footnote"f)
0 Rotate tires. See "Tire Inspection and Rotation" in the Index for proper
rotation pattern and additional information. (See footnote
+.)
33,000 Miles (55000 km)
I
I
'
0 Change engine oil and filter (or every3 months, whichever occurs first).
An Emission Control Service. (See footnote*.)
MILEAGE
36,000 Miles (60,OObkm)
0 Change engine oil and filter (or every
3 months, whichever occurs first).
An Emission Control Service. (See footnote*.)
c
(Conti1- __ aa)
7-11
!
I
I
Short Trip/City Maintenance Schedule
I
36,000 Miles (60 000 km) (Continued)
Lubricate chassis components (or every 6 months, whichever occurs first).
(See footnote#.)
0 Rotate tires. See “Tire Inspection and Rotation” in the Index for proper
rotation pattern and additional information. (See footnote+.)
(Also see footnote ++.)
39,000 Miles (65 000 km)
I DATE
I
I DATE
I
Change engine oiland filter (or every 3 months, whichever occurs first).
An Emission Control Service. (See footnote*.)
42,000 Miles (70 000 km)
0 Change engineoil and filter (or every 3 months, whichever occurs first).
An Emission Control Service. (See footnote*.)
Lubricate chassis components (orevery 6 months, whichever occurs first).
(See footnote #.)
0 Rotate tires. See “Tire Inspection and Rotation’’ in the Index for proper
rotation pattern and additional information. (See footnote +.)
7-12
I
Short TripKity Maintenance Schedule
I
45,000 Miles (75 000 km)
0 Change engine oiland filter (or every 3 months, whichever occurs first).
MILEAGE
An Emission Control Sewice. (See footnote *.)
0 Inspect air cleaner filterif you are driving in dusty conditions. Replace filter if
necessary. An Emission Control Sewice. (See footnote?.)
48,000 Miles (80 000 km)
DATE
0 Change engine oil and filter (or every3 months, whichever occurs first).
An Emission Control Service. (See footnote*.)
0 Lubricate chassis components(or every 6 months, whichever occurs first).
(See footnote#.)
0 Rotate tires. See “Tire Inspection and Rotation”in the Index for proper rotation
pattern and additional information. (See footnote+.) (Also see footnote ++.)
50,000 Miles (83 000 km)
I DATE
0 Change automatic transaxle fluidand filter if the vehicle ismainly driven
I
under one or moreof these conditions:
- In heavy city traffic where the outside temperature regularly reaches 90°F
(32 C) orhigher.
- In hilly or mountainous terrain.
ACTUAL
MILEAGE
I
I
SERVICEDBY
I
I
O
(Continued)
7-13
I
Short TripKity Maintenance Schedule
I
50,000 Miles (83 000 km) (Continued)
- When doing frequent trailer towing.
= Uses such as found in taxi, police or delivery service.
If you do not use your vehicle under any of these conditions, the fluid and
filter donot require changing.
51,000 Miles (85 000 km)
0 Change engine oiland filter (or every 3 months, whichever occurs first).
An Emission Control Service. (See footnote *.)
54,000 Miles (90 000 km)
DATE
I
ACTUAL
MILEAGE
I DATE
0 Change engine oiland filter (orevery 3 months, whichever occurs first).
An Emission Control Service. (See footnote*.)
0 Lubricate chassis components (or every 6 months, whichever occurs first).
(See footnote #.)
0 Rotate tires. See “Tire Inspection and Rotation” in the Index for proper
rotation pattern and additional information. (See footnote +.)
57,000 Miles (95 000 km)
Change engineoil and filter (or every 3 months, whichever occurs first).
An Emission Control Service. (See footnote *.)
7-14
MILEAGE
I SERVICEDBY: I
I
I
Short Trip/City Maintenance Schedule
I
60,000 Miles (100 000 km)
DATE
0 Change engine oil and filter (or every 3 months, whichever occurs first).
An Emission Control Service. (See footnote *.)
0 Lubricate chassis components (orevery 6 months, whichever occurs first).
(See footnote#.)
0 Inspect engineaccessory drive belt. An Emission Control Service.
Replace air cleaner filter. An Emission Control Service.
0 Inspect fuel tank, cap and lines for damage orleaks. Inspect fuel cap gasket
for any damage. Replace partsas needed.
An Emission Control Service. (See footnote?.)
0 Rotate tires. See “Tire Inspection and Rotation” in the Index for proper rotation
pattern and additional information. (See footnote +.) (Also see footnote ++.)
63,000 Miles (105 080 km)
DATE
I
DATE
I
0 Change engine oil and filter (or every 3 months, whichever occurs first).
An Emission Control Service. (See footnote *.)
66,000 Miles (110 000 km)
0 Change engine oil and filter (or every 3 months, whichever occurs first).
An Emission Control Service. (See footnote *.)
(Continued)
7-15
~
~
_ _ _ _ _ _ _ ~ ~ ~
~
~~
~~~
~~
~~
~~
~~~~
~
~~
Short TripKity Maintenance Schedule
66,000 Miles (110 000 km) (Continued)
0 Lubricate chassis components (or every 6 months, whicheveroccurs first).
(See footnote #.)
0 Rotate tires. See“Tire Inspection and Rotation’’ in the Index forproper
rotation pattern and additional information. (See footnote+.)
69,000 Miles (115 000 km)
I
DATE
0 Change engine oil and filter (or every 3 months, whicheveroccurs first).
An Emission Control Service. (See footnote *.)
I
72,000 Miles (120 000 km)
0 Change engineoil and filter(or every 3 months, whicheveroccurs first).
An Emission Control Service. (See footnote*.)
0’
Lubricate chassis components (or every
6 months, whichever occurs first).
(See footnote#.)
0 Rotate tires. See“Tire Inspection and Rotation” in the Index for proper
rotation pattern and additional information. (See footnote+.)
(Also see footnote ++.)
,
I
I
I
DATE
MILEAGE
,..-
. .,.
i
I
Short Trip/City Maintenance Schedule
I
75,000 Miles (125 000 km)
I DATE
I
78,000 Miles (130 000 km)
I
1
0 Change engine oil and filter (or every
3 months, whichever occurs first).
I
0 Change engine oil and filter (or every
3 months, whichever occurs first).
An Emission Control Service. (See footnote*.)
0 Inspect air cleaner filterif you are driving in dusty conditions. Replace
filter if necessary.
An Emission Control Service. (See footnote?.)
An Emission Control Service. (See footnote*.)
0 Lubricate chassis components (or every6 months, whichever occurs first).
(See footnote#.)
0 Rotate tires. See “Tire Inspection and Rotation” in the Index for proper
rotation pattern and additional information. (See footnote
+.)
81,000 Miles (135 000 km)
0 Change engine oil and filter (or every3 months, whichever occurs first).
An Emission Control Service. (See footnote* .)
DATE
ACTUAL
MILEAGE
DATE
I SERVICEDBY: I
I
I
Short TripKity Maintenance Schedule
I
84,000 Miles (140 000 km)
I DATE
0 Change engineoil and filter (or every 3 months, whichever occurs first).
I
An Emission Control Service. (See footnote *.)
0 Lubricate chassis components(or every 6 months, whichever occurs first).
(See footnote #.)
0 Rotate tires. See “Tire Inspection and Rotation” in the Index for proper
rotation pattern and additional information. (See footnote +.)
(Also see footnote ++.)
87,000 Miles (145 000 km)
0 Change engine oiland filter (or every 3 months, whichever occurs first).
An Emission Control Service. (See footnote*.)
90,000 Miles (150 000 km)
0 Change engine oiland filter (or every 3 months, whichever occurs first).
An Emission Control Service. (See footnote *.)
0 Lubricate chassis components (or every 6 months, whichever occurs first).
(See footnote #.)
0 Replace air cleaner filter.
An Emission Control Service.
0 Inspect fueltank, cap and lines for damageor leaks. Inspect fuel cap gasket
for any damage. Replace parts asneeded.
An Emission Control Service. (See footnote?.)
7-18
ACTUAL
MILEAGE
DATE
MILEAGE
DATE
I
I SERVICEDBY: I
I
Short Trip/City Maintenance Schedule
I
0 Rotate tires. See “Tire Inspection and Rotation” in the Index for proper
rotation pattern and additional information. (See footnote+.)
93,000 Miles (155 000 km)
I DATE
I
I DATE
I
0 Change engine oiland filter (or every3 months, whichever occurs first).
An Emission Control Service. (See footnote *.)
96,000 Miles (160 000 km)
0 Change engine oiland filter (or every3 months, whichever occurs first).
An Emission Control Service. (See footnote *.)
0 Lubricate chassis components (orevery 6 months, whichever occurs first).
(See footnote#.)
0 Rotate tires. See “Tire Inspection and Rotation” in the Index for proper
rotation pattern and additional information. (See footnote+.)
(Also see footnote++.)
99,000 Miles (165 000 km)
MILEAGE
DATE
0 Change engine oiland filter (or every3 months, whichever occurs first).
An Emission Control Service. (See footnote *.)
7-19
I
Short Rip/City Maintenance Schedule
I
100,000 Miles (166 000 km)
0 Inspect spark plug wires.
An Emission Control Service.
Replace spark plugs.
An Emission Control Service.
0 Change automatic transaxle fluidand filter if the vehicle is mainly driven
under one or more
of these conditions:
- In heavy city traffic wherethe outside temperature regularly reaches90°F
(32°C) orhigher.
- In hilly or mountainous terrain.
- When doing frequent trailer towing.
- Uses such as found in taxi, police or delivery service.
Ij’you do notuse your vehicle under any of these conditions, the fluid and
filter donot require changing.
DATE
I
ACTUAL
MILEAGE
150,000 Miles (240 000 km)
0 Drain, flush and refill cooling system (or every60 months since last service,
whichever occurs first).See “Engine Coolant”in the Index forwhat to use.
Inspect hoses. Clean radiator, condenser, pressure cap neck.
and Pressure test
cooling system and pressure cap.
An Emission Control Service.
7-20
MILEAGE
I SERVICEDBE I
Lbng Tripmighway Maintenance Scheduh
The services shown in this schedule
up to 100,000 miles
( 166 000 km)should be performed after 100,000 miles
(166 000 km)at the same intervals. The servicesshown
at 150,000 miles (240 000 km)should be performed at
the same interval after 150,000 miles (240 000 km).
See “Owner Checks and Services” and “Periodic
Maintenance Inspections” following.
Footnotes
‘r The U.S. Environmental ProtectionAgency or the
California Air ResourcesBoard has determined thatthe
failure to perform this maintenance item will not nullify
the emission warranty or limit recall liability prior to the
completion of the vehicle’s useful life. We, however,
urge that all recommended maintenance servicesbe
performed at the indicated intervals and the maintenance
be recorded.
# Lubricate the suspension and steering linkage,
transaxle shift linkage, parking brake cable guides
and
underbody contact points.
* If your vehicle has an EngineOil Life Monitor, the
monitor will show you when to change the engine oil
and filter -- usually between 3,000 miles ( 5 000 km)
and 7,500 miles (12 500 km)since your last oil change.
Under severe conditions,the indicator may come on
before 3,000 miles ( 5 000 km). Never drive your vehicle
more than 7,500 miles (12 500 km)or 12 months
without an oil and filter change.
The system won’t detect dust in the oil. So if you drive
in a dusty area, be sure to change your oil and filter
every 3,000 miles ( 5 000 km) or soonerif the CHANGE
OIL SOON light comes on. Remember to
reset the Oil
Life Monitor when the oil has been changed. For more
information, see “CHANGE OIL SOON Light” in
the Index.
+ A good time to check your brakes is during tire
rotation. See “Brake System Inspection”under
“Periodic Maintenance Inspections” in Part
C of
this schedule.
++ If you drive in a highly corrosive environment, your
brake calipers may require additional inspection and
service, at every other tire rotation.
See “Caliper/Knuckle
Maintenance Inspection” under “Periodic Maintenance
Inspections” in PartC of this schedule.
7-21
I Long Tripmighway Maintenance Schedule
7,500 Miles (12 500 km)
0 Change engine oil and filter (or every 12 months, whichever occurs first).
MILEAGE
An Emission Control Sewice. (See footnote *.)
0 Lubricate chassis components (or every 12 months, whichever occurs first).
(See footnote#.)
0 Rotate tires. See “Tire Inspection and Rotation” in the Index for proper
rotation pattern and additional information. (See footnote+.)
15,000 Miles (25 000 km)
DATE
0 Change engine oil and filter (or every 12 months, whichever occurs first).
An Emission Control Sewice. (See footnote *.)
Lubricate chassis components (orevery 12 months, whichever occurs first).
(See footnote#.)
0 Rotate tires. See “Tire Inspection and Rotation” in the Index for proper
rotation pattern and additional information. (See footnote +.)
(Also see footnote++.)
22,500 Miles (37 500 km)
I DATE
0 Change engine oil and filter (or every 12 months, whichever occurs first).
I
An Emission Control Sewice. (See footnote *.)
[7 Lubricate chassis components (or every 12 months, whichever occurs first).
(See footnote#.)
7-22
ACTUAL
MILEAGE
I
I SERVICEDBY I
Long Tripmighway Maintenance Schedule
Rotate tires. See “Tire Inspection and Rotation” in theIndex for proper
rotation pattern and additional information. (See footnote+.)
30,000 Miles (50 000 km)
DATE
I
DATE
I
I7 Change engine oiland filter (or every 12 months, whichever occurs first).
An Emission Control Service. (See footnote*.)
0 Lubricate chassis components (or every12 months, whichever occurs first).
(See footnote#.)
17 Rotate tires. See “Tire Inspection and Rotation” in the Index for proper
rotation pattern and additional infomation. (See footnote +.)
(Also see footnote++.)
0 Replace air cleaner filter.
An Emission Control Service.
0 Inspect fuel tank, cap and lines for damage or leaks. Inspect fuel cap gasket
for any damage. Replace partsas needed.
An Emission Control Service. (See footnote?.)
37,500 Miles (62 500 km)
0 Change engine oil and filter (orevery 12 months,whichever occurs first).
An Emission Control Service. (See footnote*.)
0 Lubricate chassis components (or every12 months, whichever occurs first).
(See footnote#.)
(Continued)
MILEAGE
7-23
Long Trip/Highway Maintenance Schedule
37,500Miles (62 500 km) (Continued)
0 Rotate tires. See “Tire Inspection and Rotation’’ in theIndex for proper
rotation pattern and additional information. (See footnote +.)
45,000 Miles (75 000 km)
DATE
0 Change engine oil and filter (or every 12 months, whichever occurs first).
An Emission Control Sewice. (See footnote *.)
Lubricate chassis components (or every 12 months, whichever occurs first).
(See footnote #.)
0 Rotate tires. See “Tire Inspection and Rotation” in the Index for proper
rotation pattern and additional information. (See footnote +.)
(Also see footnote ++.)
50,000 Miles (83 000 km)
0 Change automatic transaxle fluid and filter if the vehicle is mainly driven
under one or more of these conditions:
- In heavy city traffic where the outside temperature regularly reaches 90°F
(32 O C) orhigher.
- In hilly or mountainous terrain.
- When doing frequent trailer towing.
- Uses such as found in taxi, police or delivery service.
If you do not use your vehicle under any ($these conditions, the fluid and
filter do not require changing.
7-24
MILEAGE
Long Tripmighway Maintenance Schedule
52,500 Miles (87 500 km)
0 Change engine oil and filter (or every12 months, whichever occurs first).
An Emission Control Service. (See footnote *.)
0 Lubricate chassis components (or every12 months, whichever occurs first).
(See footnote#.)
0 Rotate tires. See“Tire Inspection and Rotation’’ in the Index for proper
rotation pattern and additional information. (See footnote +.)
DATE
I
60,000 Miles (100 000 km)
I
Change engine oil and filter (or every 12 months, whichever occurs first).
An Emission Control Service. (See footnote *.)
Lubricate chassis components(or every 12 months, whicheveroccurs first).
(See footnote#.)
0 Rotate tires. See“Tire Inspection and Rotation” in the Index for proper
rotation pattern and additional information. (See footnote+.)
(Also see footnote++.)
0 Inspect engine accessory drive belt.
An Emission Control Service.
0 Replace air cleaner filter.
An Emission Control Service.
0 Inspect fueltank, cap and lines for aamageor leaks. Inspect fuel capgasket
for any damage. Replace partsas needed.
An Emission Control Service. (See footnote?.)
I
ACTUAL
MILEAGE
I SERVICEDBY: I
1
DATE
ACTUAL
MILEAGE
I
I SERVICEDBY I
7-25
r
Long Trip/Highl
~~
ly MaintenanceSchedule
’
67,500 Miles (112 500 km)
DATE
0 Change engineoil and filter (or every 12 months, whichever occurs first).
An Emission Control Service. (See footnote *.)
0 Lubricate chassis components (or every 12 months, whichever occurs first).
(See footnote#.)
0 Rotate tires. See “Tire Inspection and Rotation” in the Index for proper
rotation pattern and additional information. (See footnote+.)
75,000 Miles (125 000 km)
Cl Change
engine oiland filter (or every 12 months, whichever occurs first).
An Emission Control Service. (See footnote *.)
0 Lubricate chassis components (or every 12 months, whichever occurs first).
(See footnote #.)
0 Rotate tires. See “Tire Inspection and Rotation” in the Index for proper
rotation pattern and additional information. (See footnote +.)
(Also see footnote ++.)
82,500 Miles (137 500 km)
0 Change engineoil and filter (or every 12 months, whichever occurs first).
An Emission Control Service. (See footnote *.)
0 Lubricate chassis components (or every 12 months, whichever occurs first).
(See footnote#.)
7-26
DATE
ACTUAL
MILEAGE
DATE
I SERVICEDBY: I
1
Long Trip/Highway Maintenance Schedule
0 Rotate tires. See “Tire Inspection and Rotation” in the Index for proper
rotation pattern and additional information. (See footnote+.)
90,000 Miles (150 000 km)
0 Change engine oil and filter (or every 12 months, whichever occurs first).
An Emission Control Service. (See footnote *.)
Lubricate chassis components(or every 12 months, whichever occurs first).
(See footnote#.)
0 Replace air cleanerfilter. An Emission Control Service.
0 Inspect fuel tank, cap and lines for damageor leaks. Inspect fuel cap gasket
for any damage. Replace parts as needed.
An Emission Control Service. (See footnote?.)
0 Rotate tires. See “Tire Inspection and Rotation” in the Index for proper
rotation pattern and additional information. (See footnote +.)
(Also see footnote ++.)
97,500 Miles (162 500 km)
DATE
I
ACTUAL
MILEAGE
I SERVICEDBY
I
I
DATE
0 Change engine oil and filter(or every 12 months, whichever occurs first).
An Emission Control Service. (See footnote *.)
0 Lubricate chassis components (or every12 months, whichever occurs first).
(See footnote#.)
0 Rotate tires. See “Tire Inspection and Rotation” in the Index for proper
rotation pattern and additional information. (See footnote+.)
7-27
-
,.
.
._
I LongTrip/HighwayMaintenanceSchedule I
100,000 Miles (166 000 km)
Inspect spark plug wires.
An Emission Control Service.
Replace spark plugs.
An Emission Control Service.
Change automatic transaxle fluid and filter
if the vehicle ismainly driven
under one or more
of these conditions:
- In heavy city traffic where the outside temperature regularly reaches
90°F
(32°C) or higher.
- In hilly or mountainous terrain.
- When doing frequent trailer towing.
- Uses such as found in taxi, police or delivery service.
I f you do not use your vehicle under any of these conditions, the fluid and
filter do not require changing.
DATE
ACTUAL
MILEAGE
150,000 Miles (240 000 km)
0 Drain, flush and refill cooling system(or every 60 months since last service,
whichever occurs first). See “Engine Coolant” in the Index for to
what
use.
Inspect hoses. Clean radiator, condenser, pressure cap and neck. Pressure
test
the cooling systemand pressure cap.
An Emission Control Service.
7-28
MILEAGE
I
SERVICED BY:
Part B: Owner Checks and Services
Windshield Washer Fluid Level Check
Listed below are owner checks and services which
should be performed at the intervals specified to help
ensure the safety, dependability and emission control
performance of your vehicle.
Check the windshield washer fluid levelin the
windshield washer tank and add the proper fluid if
necessary. See “Windshield Washer Fluid” in the
Index for further details.
Be sure any necessary repairs are completedat once.
Whenever any fluids or lubricants are added to your
vehicle, make sure they are the proper ones, as shown
in Part D.
At Least Once a Month
At Each FuelFill
It is important for you or a service station attendant to
per$orm these underhood checks at each fuel fill.
Engine Oil Level Check
Tire Inflation Check
Make sure tires are inflated to the correct pressures.
See “Tires” in the Index for further details.
Cassette Deck Service
Clean cassette deck. Cleaningshould be done every
50 hours of tape play. See “Audio Systems”in the
Index for further details.
Check the engine oil level and add the proper
oil
if necessary. See “Engine Oil”in the Index for
further details.
Engine Coolant Level Check
Check the engine coolant leveland add DEX-COOL@
coolant mixtureif necessary. See “Engine Coolant”in
the Index for further details.
7-29
At Least Twicea Year
At Least Oncea Year
Restraint System Check
Key Lock Cylinders Service
Lubricate the key lock cylinders with the lubricant
specified in Part D.
Make surethe safety belt reminder light and all your
belts, buckles, latch plates, retractors and anchorages are
working properly. Look for any other loose or damaged
safety belt system parts. If you see anything that might
keep a safety belt system from doingits job, have it
repaired. Have any torn or frayed safety belts replaced.
Also look for any opened or broken air bag coverings,
and have them repaired or replaced. (The air bag system
does not need regular maintenance.)
Wiper Blade Check
Inspect wiper blades for wear or cracking. Replace blade
inserts that appear worn or damaged orthat streak or
m i s s areas of the windshield. Also see “Wiper Blades,
Cleaning” in the Index.
Automatic Transaxle Check
Check the transaxle fluid level; add
if needed. See
“Automatic Transaxle” in the Index.A fluid loss may
indicate a problem. Check the system and repair if needed.
7-30
Body Lubrication Service
Lubricate all body door hinges. Also lubricate all hinges
and latches, including those for the hood, glove box
door and console door. Part D tells you what to use.
More frequentlubrication may be required when
exposed to a corrosive environment.
Starter Switch Check
CAUTION:
When you are doing this check, the vehicle could
move suddenly. If it does, you or others could be
injured. Follow the steps below.
1. Before you start, be sure you have enough room
around the vehicle.
2. Firmly apply both the parking brake (see “Parking
Brake’’ in the Index if necessary) and the
regular brake.
NOTE: Do not use the accelerator pedal, andbe
ready to turn off the engine immediatelyif it starts.
3. Try to start the engine in each gear. The starter
should work only in PARK (P) or NEUTRAL (N). If
the starter worksin any other position, your vehicle
needs service.
Brake-Transaxle Shift Interlock (BTSI) Check
A CAUTION:
&%?
When you are doing this check, the vehicle could
move suddenly. If it does, you or others could be
injured. Follow the steps below.
1. Before you start, be sureyou have enough room
around the vehicle. It should be parked on a
level surface.
2. Firmly apply the parking brake (see “Parking Brake”
in the Index if necessary).
NOTE: Be ready to apply the regular brake
immediately if the vehicle begins to move.
3. With the engine off, turn the key to the RUN
position, but don’t start the engine. Without applying
the regular brake, try to move the shift lever out
of
PARK (P) with normal effort. If the shift lever
moves out of PARK (P), your vehicle’s BTSI
needs service.
7-31
Ignition Transaxle Lock Check
While parked, and with the parking brake set, try to turn
the ignition key to LOCKin each shift lever position.
The key should turn to LOCK only when the shift
lever is in PARK (P).
0
The key should come out only in LOCK.
Parking Brakeand Automatic Transaxle PARK (P)
Mechanism Check
A CAUTION:
When you are aomg tms check, your vehicle
could beginto move. You or others could be
injured and property couldbe damaged. Make
sure thereis roomin front of your vehicle in case
it begins to roll. Be ready to apply the regular
brake at once should the vehicle begin to move.
7-32
Park on a fairly steep hill, with the vehicle facing
downhill. Keeping your foot on the regular brake, set the
parking brake.
0
To check the parking brake's holding ability: With
the engine running and transaxle in NEUTRAL (N),
slowly remove foot pressure from the regular brake
pedal. Do this until the vehicle is held by the parking
brake only.
To check the PARK (P) mechanism's holding ability:
With the engine running, shift to PARK (P). Then
release all brakes.
Underbody Flushing Service
At least every spring, use plain water to flush any
corrosive materials from theunderbody. Take care to
clean thoroughly any areas where mud and other debris
cancollect.
Part C: Periodic Maintenance
Inspections
Listed below are inspections and services which shouldbe
performed at least twice a year (for instance, each spring
and fall). You should let your dealer’s service department
or other qualified service centerdo these jobs. Make sure
any necessary repairs are completed at once.
Proper proceduresto perform these servicesmay be
found in a service manual. See “Service and Owner
Publications” in the Index.
Steering, Suspension and Front Drive Axle
Boot and Seal Inspection
Inspect the front and rear suspensionand steering
system for damaged, looseor missing parts, signs of
wear or lack of lubrication. Inspectthe power steering
lines and hoses for proper hook-up,binding, leaks,
cracks, chafing, etc. Clean and then inspect the drive
axle boot seals for damage, tears or leakage. Replace
seals if necessary.
Exhaust System Inspection
Inspect the complete exhaust system. Inspect the body near
the exhaust system.Look for broken, damaged, missingor
out-of-position parts as well as open seams, holes, loose
connections or other conditions which could cause a heat
build-up in the floor panor could let exhaustfumes into
the vehicle. See “Engine Exhaust”in the Index.
Engine Cooling System Inspection
Inspect the hoses and have them replaced
if they are
cracked, swollen or deteriorated. Inspect all pipes, fittings
and clamps; replaceas needed. Clean the outsideof the
radiator and air conditioning condenser. To help ensure
proper operation, a pressure test of the cooling system and
pressure cap is recommended at leastonce a year.
Throttle System Inspection
Inspect the throttle system for interference or binding,
and for damagedor missing parts. Replace parts as
needed. Replaceany components that have high effort
or excessivewear. Do not lubricate accelerator and
cruise control cables.
7-33
Brake System Inspection
Inspect the complete system. Inspect brake lines and
hoses for proper hook-up, binding, leaks, cracks,
chafing, etc. Inspect disc brake pads for wear and rotors
for surface condition. Also inspect drum brake linings
for wear and cracks. Inspect other brake parts, including
drums, wheel cylinders, calipers, parking brake, etc.
Check parking brake adjustment. You may need to have
your brakes inspected more often if your driving habits
or conditions result in frequent braking.
CaliperKnuckle Maintenance Inspection
If you operate your vehicle in a highly corrosive
environment, as indicated by the shaded areas on the
map following this text, your vehicle may require
additional brake service. Refer to the appropriate GM
Service Bulletin for the proper caliper
inspection
procedure. As necessary, caliper pins and knucklebrake
pad abutments should be lubricated at every other tire
rotation. Also, see your GM dealer’s service department
or qualified service center foradditional information.
7-34
Part D: Recommended Fluids
and Lubricants
NOTE: Fluids and lubricants identified below
by name,
part number or specificationmay be obtained from
your dealer.
I USAGE
USAGE
FLUID/LUBRICANT
Parking Brake
Cable Guides
Chassis Lubricant(GM Part
No. 12377985 or equivalent) or
lubricant meeting requirementsof
NLGI # 2, Category LB or
GC-LB.
Power Steering
System
GM Power Steering Fluid (GM
Part No. 1052884 - 1 pint,
1050017 - 1 quart, or equivalent).
Automatic
Transaxle
DEXRON@-I11Automatic
Transmission Fluid.
Key Lock
Cylinders
Multi-PuoseLubricant,
Superlube% (GM Part
No. 12346241 or equivalent).
Chassis
Lubrication
Chassis Lubricant (GM Part
No. 12377985 or equivalent) or
lubricant meeting requirementsof
NLGI # 2, Category LB or
GC-LB.
FLUID/LUBRICANT
Engine Oil with the American
Petroleum Institute Certified For
Gasoline Engines “Starburst”
symbol of the proper viscosity.To
determine the preferred viscosity
for your vehicle’s engine, see
“Engine Oil” in the Index.
50/50 mixture of clean water
(preferably distilled) and use only
GM Goodwrench@ DEX-COOL@
or Havoline@ DEX-COOL@
Coolant. See “Engine Coolant” in
the Index.
Hydraulic Brake Delco Supreme11 Brake Fluid
System
(GM Part No. 12377967 or
equivalent DOT-3 Brake Fluid).
@
7-35
FLUIDLUBRICANT
USAGE
FLUIDLUBRICANT
USAGE
Windshield
Washer Solvent
GM Optikleen' Washer Solvent
(GM PartNo. 1051515)or
equivalent.
Hood Latch
Assembly,
Secondary Latch,
Pivots, Spring
Anchor and
Release Pawl
Lubriplate' Lubricant Aerosol
(GM Part No. 12346293 or
equivalent) or lubricant meeting
requirements of NLGI # 2,
Category LB or GC-LB.
Fuel Door Hinge Multi-PuoseLubricant,
% (GMPart
Superlube
and Rear
No. 12346241 or equivalent).
Compartment
Lid Hinges
Weatherstrip
Conditioning
Dielectric Silicone Grease(GM
Part No. 12345579 or equivalent).
~~
Hood and Door
Hinges
7-36
Multi-PuoseLubricant,
% (GM Part
Superlube
No. 12346241 or equivalent).
E
Part E: Maintenance Record
After the scheduled services are performed,record the
date, odometer reading and who performed
the service
in the boxes provided after the maintenance interval.
Any additional informationfrom “Owner Checksand
Services” or “Periodic Maintenance” can be added on
the following record pages. Also, you should retain all
maintenance receipts.Your owner information portfolio
is a convenient placeto store them.
Maintenance Record
DATE
ODOMETER
READING
SERVICED BY
MAINTENANCE PERFORMED
7-37
Maintenance Record
ODOMETER
DATE MAINTENANCE
SERVICED BY
READING PERFORMED
~~
7-38
(i@
Section 8 CustomerAssistanceInformation
Here you will find outhow to contact Buickif you need assistance. This section alsotells you how to obtain service
publications and how to report any safety defects.
8-2
8-4
8-5
8-5
8-6
8-7
Customer Satisfaction Procedure
Customer Assistancefor Text
Telephone (TTY) Users
Roadside Assistance
Canadian Roadside Assistance
Courtesy Transportation
GM Participation in an Alternative Dispute
Resolution Program
8-8
8-8
8-9
8-9
8-9
Warranty Information
Reporting Safety Defects to the
United
States Government
Reporting Safety Defects to the
Canadian Government
Reporting Safety Defects to General Motors
Ordering Serviceand Owner Publications
in Canada
Customer Satisfaction Procedure
Buick dealers have the facilities, trained technicians and
up-to-date information to promptly address any
concerns you may have. However, if a concern has not
been resolved to your complete satisfaction, take the
following steps:
STEP ONE -- Discuss your concern with a member
of dealership management. Normally, concerns can
be quickly resolved at that level. If the matter has
already been reviewed with the sales, service or parts
manager, contact the owner of the dealership orthe
general manager.
8-2
STEP TWO -- If after contacting a member of
0
dealership management, it appears your concern cannot
be resolved by the dealership without further help,
contact the Buick Customer Relations Center by calling
1-800-521-7300. In Canada, contact GM of Canada
Customer Communication Centre in Oshawa by calling
1-800-263-3777 (English) or 1-800-263-7854 (French).
For help outside of the United Statesand Canada, call
the following numbersas appropriate:
In Mexico: (525) 625-3256
In Puerto Rico: 1-800-496-9992 (English) or
1-800-496-9993 (Spanish)
In the U.S. Virgin Islands: 1-800-496-9994
In the Dominican Republic: 1-800-751-4135
(English) or 1-800-75 1-4 136 (Spanish)
In the Bahamas: 1-800-389-0009
In Bermuda, Barbados, Antiguaand the British
Virgin Islands: 1-800-534-0122
0
In all other Caribbean countries: (809) 763-1315
In other overseas locations, call GM Overseas
Distribution Corporation in Canada at:
(905) 644-4112.
8-3
For promptassistance, please havethe following
information available to givethe Customer
Assism,cRepresentative:
.
.
Your name, address, home and business
telephone numbers
0
0
Vehicle Identification Number (This is available
from the vehicle registration or title, or the plate at
the top left of the instrumentpanel and visible
through the windshield.)
Dealership name and location
Vehicle delivery date and present mileage
Nature of concern
We encourage you to call usso we can giveyour inquiry
prompt attention. However, if you wish to write
Buick, address your inquiry to:
Buick Motor Division
Customer Relations Center
902 E. Hamilton Avenue
Flint, MI 48550
In Canada,write to:
General Motors of Canada Limited
Customer Communication Centre, 163-005
1908 Colonel Sam Drive
Oshawa, Ontario L l H 8P7
Refer to your Warranty and Owner Assistance
Information booklet for addresses of GM
Overseas offices.
When contacting Buick, please remember that your
concern will likely be resolved in the dealership, using
the dealer’s facilities, equipment and personnel. That
is why we suggest you follow Step Onefirst if you
have a concern.
Customer Assistance for Text
Telephone (TTY) Users
To assist customers who are deaf,hard of hearing, or
speech-impaired and who useText Telephones (TTYs),
Buick has TTY equipment available at its Customer
Assistance Center. Any TTY user can communicate with
Buick by dialing: 1-800-83-BUICK. (TTY users in
Canada can dial 1-800-263-3830.)
Our commitment to Buick owners has always included
2,800 Buick
superior service through our network of over
an
dealers. Buick Premium Roadside Assistance provides
extra'measure of convenience and security.
Roadside Assistance
BUCK PREMIUM ROADSIDE ASSISTANCE:
Provides owners with access to minor repairs or
towing for disabled vehicles. Although Roadside
Assistance is not a repair facility,
it is a meansof
assisting customers in an emergency situation.
A
L
'
1
1
4
4
Takes the anxiety out of uncertain situations by
providing easy access to service professionals trained
24 hours a day, 365 days
to 'work with Buick owners,
a year, including weekend.s and holidays.
For details on Buick Premium Roadside Assistance,
please consultyour.Buick Premium Roadside Assistance
owner booklet included with your owner's manual. For
needed assistance, call the Buick Premium Roadside
1112.
Assistance toll-free hotline: 1-800-252-
Buick Motor Division is proud to offer Buick Premium
Roadside Assistance to customers for vehicles covered Canadian Roadside Assistance
000 km)new car
under the 3 year/36,000 mile (60
Vehicles purchased in Canada have an extensive
warranty (whichever occurs first).
Roadside Assistance program accessible from anywhere
in Canada or the United States. Please refer to the
separate brochure provided by the dealer or call
1-800-268-6800 for emergency services.
8-5
Courtesy Transportation
To Buick Motor Division,Quality Means Service-- and
service means “keeping you on the road.”
Included with your Buick new car warranty
(3 years/36,000 miles (60 000 km), whichever occurs
first), is Courtesy Transportation, a program which
will provide Buick retail and lease
customers with:
Reimbursement toward a loaner vehicle, courtesy
of Buick Motor Division, up to $30 a day (five
days maximum) for vehicles requiring overnight
warranty repairs. Also, reimbursement up to $30 a
day (five days maximum)may be available for the
cost of a rental car, bus or even a cab.
A free one-way shuttle ride orvehicle pick-up from a
location up to 10 miles (16 km) from the dealership
is available for those whose vehicleonly requires
same daywarranty repairs.
NOTE: All Courtesy Transportation arrangements
will be administered by your Buickdealer
service management.
Courtesy Transportation is Buick’s way of extending the
Premium Serviceyou’ve come to expect from Buick
and its over 2,800 dealers. Please review the Courtesy
Transportation glove box card contained in your vehicle
or consult your Buick dealer for details.
Because of uncertain availability, it is frequently not
possible to providecustomers with the same model
loaner vehicle (including optional equipment) as the
vehicle the customer owns or leases and has brought in
for warranty repair. If a loaner vehicle is required, please
consult your dealership for completeprogram details
and loaner caravailability in yourarea.
Some stateinsurance regulations make it impractical
to rentvehicles to people under 21 years of age. If you
are under 21 and have difficulty renting a vehicle, Buick
will reimburse you up to $30/day, for any documented
transportation you receive. Please consultyour dealer
for details.
For warranty repairs during the Complete Vehicle
Coverage period in the New Vehicle Limited Warranty,
interim transportation may be available under the
Courtesy Transportation program. Please consult your
dealer for details. The Courtesy Transportation program
is available onlyin the United States and Canada.
In Canada,please consult your GM dealer for
information on Courtesy Transportation.
Buick reserves the right to make any changes or
discontinue the Courtesy Transportation program at
any time without notification.
GM Participation in an Alternative
Dispute Resolution Program
This program is availablein all 50 states and the District
of Columbia. Canadian owners referto your Warranty
and Owner Assistance Information booklet for
information on the Canadian Motor
Vehicle Arbitration
Plan (CAMVAP). General Motors reserves the right to
change eligibility limitationsand/or to discontinue its
participation in this program.
Both Buick and your Buick dealer are committed
to making sure you are completely satisfiedwith
your new vehicle. Our experiencehas shown that,
if a situation arises where you feel your concern
has not been adequately addressed, the Customer
Satisfaction Procedure described earlier in this
section is very successful.
There may be instances wherean impartial third party
can assist in arriving at a solution to a disagreement
regarding vehicle repairsor interpretation of the New
Vehicle Limited Warranty. To assist in resolving these
disagreements, Buickvoluntarily participates in BBB
AUTO LINE.
BBB AUTO LINE is an out-of-court program
administered by the Better Business Bureau system to
settle automotive disputes. Thisprogram is available
free of charge to customers who currently own or lease a
GM vehicle.
If you are not satisfied after following the Customer
Satisfaction Procedure,you may contact the BBB using
the toll-free telephone number, or write them at the
following address:
BBB AUTO LINE
Council of Better Business Bureaus,Inc.
4200 Wilson Boulevard
Suite 800
Arlington, VA 22203- 1804
Telephone: 1-800-955-5 100
To file a claim,you will be asked to provide your name
and address, your Vehicle Identification Number (VIN)
and a statementof the nature of your complaint.
Eligibility is limited by vehicle age and mileage, and
other factors.
8-7
J
We prefer you utilize the Customer Satisfaction
Procedure beforeyou resort to AUTO LINE, but you
may contact the BBB at any time. The BBB will attempt
to resolve the complaint serving as an intermediary. If
this mediation is unsuccessful, an informal hearing will
be scheduled where eligible customers may present their
case toan impartial third-party arbitrator.
The arbitrator will make a decision which you may
accept orreject. If you accept the decision, GM will be
bound by that decision. The entire disputeresolution
procedure should ordinarily take about40 days fromthe
time you file a claim until a decision is made.
Some statelaws may require you to use this program
before filinga claim with a state-run arbitration program
or in the courts. For further information, contact the
BBB at 1-800-955-5100 or the Buick Customer
Assistance Center at 1-800-521-7300.
Warranty Information
Your vehicle comes witha separate warranty booklet
that containsdetailed warranty information.
REPORTING SAFETY DEFECTS
TO THE UNITED STATES
GOVERNMENT
If you believe that your vehicle has a defect which could
cause a crash or could cause injury or death, you should
immediately inform the National Highway Traffic
Safety Administration (NHTSA), in addition to
notifying General Motors.
If NHTSA receives similar complaints, it may open an
investigation, and if it finds thata safety defect exists in
a group of vehicles, it may order a recall and remedy
campaign. However, NHTSA cannot become involved
in individual problems between you, your dealer or
General Motors.
To contact NHTSA, you may either call the Auto Safety
Hotline toll-free at 1-800-424-9393 (or 366-0123 in the
Washington, D.C. area) or write to:
NHTSA, U.S. Department of Transportation
Washington, D.C. 20590
You can also obtain other information about motor
vehicle safety from the Hotline.
8-8
REPORTING SAFETY DEFECTS
TO THE CANADIAN
GOVERNMENT
If you live in Canada, and you believe that your vehicle
has a safety defect, you should immediately notify
Transport Canada, in addition to notifying General
Motors of Canada Limited.You may write to:
Transport Canada
Box 8880
Ottawa, Ontario K1G352
REPORTING SAFETY DEFECTS
TO GENERAL MOTORS
In additionto notifying NHTSA (or Transport Canada)
in a situation like this,we certainly hope you’ll notify
us. Please call us at 1-800-521-7300, orwrite:
Buick Motor Division
Customer Relations Center
902 E. Hamilton Avenue
Flint, MI 48550
In Canada, pleasecall us at 1-800-263-3777 (English)
or 1-800-263-7854 (French).Or, write:
General Motorsof Canada Limited
Customer Communication Centre, 163-005
1908 Colonel Sam Drive
Oshawa, Ontario L1H 8P7
Ordering Service and Owner
Publications in Canada
Service manuals, owner’s manuals
and other service
literature are available for purchase for
all current and
past model General Motorsvehicles.
The toll-free telephone number for ordering information
in Canada is 1-800-668-5539.
1998 BUICK SERVICE PUBLICATIONSORDERING INFORMATION
The following publications covering the operation and servicing of your vehicle can be purchased by filling out
the Service Publication Order Form in this bookand mailing it in withyour check, money order,
or credit card information to Helm, Incorporated (address below.)
CURRENT PUBLICATIONS FOR 1998 BUCK
SERVICE MANUALS
Service Manuals have the diagnosis and repair information
on engines, transmission, axle, suspension, brakes,
electrical, steering, body, etc.
RETAIL SELL PRICE: $90.00
OWNER’S INFORMATION
Owner publications are written directly for Owners and
intended to provide basic operational information about the
vehicle. The owner’s manual will include the Maintenance
Schedule for all models.
TRANSMISSION, TRANSAXLE, TRANSFER CASE
UNIT REPAIR MANUAL
This manual provides information on unit repair service
procedures, adjustments and specifications for the
1998 GM transmissions, transaxles and transfer cases.
RETAIL SELL PRICE: $40.00
In-Portfolio: Includes a Portfolio, Owner’s Manual and
Warranty Booklet.
RETAIL SELL PRICE: $15.00
SERVICE BULLETINS
Service Bulletins give technical service information needed
to knowledgeably service General Motors cars and trucks.
Each bulletin contains instructions to assist in the
diagnosis and service of your vehicle.
PLEASE COMPLETE THE ORDER FORM SHOWN ON
THE FOLLOWING PAGE AND MAIL TO:
Helm, Incorporated P.O. Box 07130 Detroit, MI 48207
Without Portfolio: Owner’s Manual only.
RETAIL SELL PRICE: $10.00
CURRENT & PAST MODEL ORDER FORMS
Service Publications areavailable for current and past
model GM vehicles. To request an order form, please
specify year and model name of the vehicle.
OR ORDER TOLL FREE:1-800-782-4356
Monday-Friday8:OO AM - 6:OO PM Eastern Time
For Credit Card Orders Only(VISA-MasterCard-Discover)
ORDER TOLL FREE
(NOTE: For Credit Card Holders
Only)
1-800-782-4356
-
(Monday-Friday8:OO AM 6:OO PM EST)
FAX Orders Only 1-31 3-865-5927
s
H
I'
p
T
a
Orders will be mailed within 10 days of receipt. Please allow ade uate time for postal
service. If further information is needed, write to the address s own below or call
1-800-782-4356.Material cannot be returned for credit without packing slip with return
information within 30 days of delivery. On returns, a re-stocking fee may be applied
against the original order.
NOTE: Dealers and Companies please provide dealer or company name, and also the
name of the person to whose attention the shipment should be sent.
Mail completed order form to:
HELM, INCORPORATED P.O. Box 07130 Detroit, MI 48207
For purchases outside U.S.A. please write to the above address for quotation.
(CUSTOMER'S NAME)
(ATTENTION)
(STREET ADDRESS-NO P.O. BOX NUMBERS)
(STATE)
DAYTIME TELEPHONE NO.
(ZIP CODE)
0
AREA CODE
A-BUI-ORD98
*(Prices are subject to change without notice and without incurring
obligation. Allow ample time for delivery.)
Note to Canadian Customers: All listed prices are quoted in U.S. funds. Canadian residents
are to make checks payable in US. funds. To cover Canadian postage, add $115 0 plus the
U.S. order processing.
&
8-12
NOTES
Section 9 Index
A i r Bag . . . . . . . . . . . . . . . . . . . . . . . . . . . . . . . . . . . . . .
1-18
1-22
How Does it Restrain . . . . . . . . . . . . . . . . . . . . . . . . . .
How it Works . . . . . . . . . . . . . . . . . . . . . . . . . . . . . . . . 1-20
1-20
Location . . . . . . . . . . . . . . . . . . . . . . . . . . . . . . . . . . . .
1.20, 2.60
Readiness Light . . . . . . . . . . . . . . . . . . . . . . . . .
Servicing . . . . . . . . . . . . . . . . . . . . . . . . . . . . . . . . . . .
1-24
What Makes it Inflate . . . . . . . . . . . . . . . . . . . . . . . . . .
1-22
What Will You See After it Inflates . . . . . . . . . . . . . . . 1-23
When Should it Inflate . . . . . . . . . . . . . . . . . . . . . . . . . 1-22
Aircleaner . . . . . . . . . . . . . . . . . . . . . . . . . . . . . . . . . . . . 6-15
3 -6
Air Conditioning . . . . . . . . . . . . . . . . . . . . . . . . . . . . . . . .
6-60
Air Conditioning Refrigerants . . . . . . . . . . . . . . . . . . . . .
Air Control. Climate Control System . . . . . . . . . . . . . 3-2. 3-4
2-10
Alarm. Instant. Keyless Entry . . . . . . . . . . . . . . . . . . . . .
Alarm. Universal Theft-Deterrent . . . . . . . . . . . . . . . . . . 2- 16
6-44
Alignment and Balance. Tire . . . . . . . . . . . . . . . . . . . . . .
6-5 1
Aluminum Wheels. Cleaning . . . . . . . . . . . . . . . . . . . . . .
Antenna. Heated Backlite . . . . . . . . . . . . . . . . . . . . . . . .
3-36
Antifreeze . . . . . . . . . . . . . . . . . . . . . . . . . . . . . . . . . . . . . 6-20
Anti-Lock
Brake System Warning Light . . . . . . . . . . . . . . . . 2-62. 4-7
Brakes . . . . . . . . . . . . . . . . . . . . . . . . . . . . . . . . . . . . . . 4-7
Anti-Theft. Radio . . . . . . . . . . . . . . . . . . . . . . . . . . . . . .
3-30
AppearanceCare . . . . . . . . . . . . . . . . . . . . . . . . . . . . . . .
6-46
Appearance Care Materials . . . . . . . . . . . . . . . . . . . . . . .
6-53
Arbitration Program . . . . . . . . . . . . . . . . . . . . . . . . . . . . . . 8-7
Armrest. Storage . . . . . . . . . . . . . . . . . . . . . . . . . . . . . . . 2-52
Ashtrays . . . . . . . . . . . . . . . . . . . . . . . . . . . . . . . . . . . . . . 2-53
Audio Equipment. Adding . . . . . . . . . . . . . . . . . . . . . . . . 3-34
Audio. Steering Wheel Touch Controls . . . . . . . . . . . . . . 3-32
Audio Systems . . . . . . . . . . . . . . . . . . . . . . . . . . . . . . . . . 3-11
Automatic Dimming/Heated Outside Mirror . . . . . . . . . . 2-51
AutomaticTransaxle . . . . . . . . . . . . . . . . . . . . . . . . . . . .
2-24
Check . . . . . . . . . . . . . . . . . . . . . . . . . . . . . . . . . . . . . .
7-30
6-18
Fluid . . . . . . . . . . . . . . . . . . . . . . . . . . . . . . . . . . . . . . .
2-24
Operation . . . . . . . . . . . . . . . . . . . . . . . . . . . . . . . . . . .
Overdrive . . . . . . . . . . . . . . . . . . . . . . . . . . . . . . . . . . . 2-26
Park Mechanism Check . . . . . . . . . . . . . . . . . . . . . . . . 7-32
2-24
Shifting . . . . . . . . . . . . . . . . . . . . . . . . . . . . . . . . . . . . .
Battery . . . . . . . . . . . . . . . . . . . . . . . . . . . . . . . . . . . . . . 6-29
Jump Starting . . . . . . . . . . . . . . . . . . . . . . . . . . . . . . . . .5-3
Replacement. Remote Keyless Entry . . . . . . . . . . . . . . 2-12
Rundown Protection . . . . . . . . . . . . . . . . . . . . . . . . . . . 2-45
Warning Light . . . . . . . . . . . . . . . . . . . . . . . . . . . . . . .
2-60
Warnings . . . . . . . . . . . . . . . . . . . . . . . . . . . . . . . . . . . .
5-3
BBB Auto Line . . . . . . . . . . . . . . . . . . . . . . . . . . . . . . . . . 8-7
Belt. Engine Accessory . . . . . . . . . . . . . . . . . . . . . . . . . .
6-61
Better Business Bureau Mediation . . . . . . . . . . . . . . . . . . . 8-7
Blizzard. Driving In . . . . . . . . . . . . . . . . . . . . . . . . . . . . .
4-27
9-1
Brake
Adjustment . . . . . . . . . . . . . . . . . . . . . . . . . . . . . . . . . .
6-29
Anti-lock System Warning Light . . . . . . . . . . . . . 2.62.4.7
Fluid . . . . . . . . . . . . . . . . . . . . . . . . . . . . . . . . . . . . . . . 6-26
Master Cylinder . . . . . . . . . . . . . . . . . . . . . . . . . . . . . . 6-26
2-27
Parking . . . . . . . . . . . . . . . . . . . . . . . . . . . . . . . . . . . . .
6-29
PedalTravel . . . . . . . . . . . . . . . . . . . . . . . . . . . . . . . . .
Replacing System Parts . . . . . . . . . . . . . . . . . . . . . . . .
6-29
2-61
System Warning Light . . . . . . . . . . . . . . . . . . . . . . . . .
Trailer . . . . . . . . . . . . . . . . . . . . . . . . . . . . . . . . . . . . . . 4-35
Transaxle Shift Interlock Check . . . . . . . . . . . . . 2.24.7.3 1
Wear . . . . . . . . . . . . . . . . . . . . . . . . . . . . . . . . . . . . . . . 6-28
Brakes. Anti-Lock . . . . . . . . . . . . . . . . . . . . . . . . . . . . . . .4-7
Braking . . . . . . . . . . . . . . . . . . . . . . . . . . . . . . . . . . . . . . . . 4-6
Braking in Emergencies . . . . . . . . . . . . . . . . . . . . . . . . . .
4- 10
Break-In. New Vehicle . . . . . . . . . . . . . . . . . . . . . . . . . .
2- 19
Brightness Control . . . . . . . . . . . . . . . . . . . . . . . . . . . . . . 2-42
BTSI Check . . . . . . . . . . . . . . . . . . . . . . . . . . . . . . 2.24. 7-31
Bulb Replacement . . . . . . . . . . . . . . . . . . . . . . . . . . . . . . 6-30
8-5
Canadian Roadside Assistance . . . . . . . . . . . . . . . . . . . .
Capacities and Specifications . . . . . . . . . . . . . . . . . . . . . . 6-60
Carbon Monoxide . . . . . . . . . . . . . . . . . . . . . . . . . . 2-32, 4-28
Cassette Deck Service . . . . . . . . . . . . . . . . . . . . . . . . . . .7-29
Cassette Tape Player . . . . . . . . . . . . . . . . . . 3.16,3.19. 3.27
Care . . . . . . . . . . . . . . . . . . . . . . . . . . . . . . . . . . . . . . . 3-34
Errors . . . . . . . . . . . . . . . . . . . . . . . . . . . . 3.16.3.20. 3.27
Center Passenger Position . . . . . . . . . . . . . . . . . . . . . . . . 1-25
Certification Label . . . . . . . . . . . . . . . . . . . . . . . . . . . . . . 4-30
Certificatioflire Label . . . . . . . . . . . . . . . . . . . . . . . . . .
4-30
Chains. Safety . . . . . . . . . . . . . . . . . . . . . . . . . . . . . . . . .
4-35
9-2
Chains. Tire . . . . . . . . . . . . . . . . . . . . . . . . . . . . . . . . . . . 6-46
2-68
Change Oil Soon Light . . . . . . . . . . . . . . . . . . . . . . . . . .
Changing a Flat Tire . . . . . . . . . . . . . . . . . . . . . . . . . . . . .5-23
Check Engine Light . . . . . . . . . . . . . . . . . . . . . . . . . . . . .2-64
2-68
Check Oil Level Light . . . . . . . . . . . . . . . . . . . . . . . . . . .
Checlung Your Restraint Systems . . . . . . . . . . . . . . . . . . 1-50
6-52
Chemical Paint Spotting . . . . . . . . . . . . . . . . . . . . . . . . . .
Child Restraints . . . . . . . . . . . . . . . . . . . . . . . . . . . . . . . . 1-35
Securing in a Rear Outside Seat Position . . . . . . . . . . . 1-41
Securing in the Center Rear Seat Position . . . . . . . . . . 1-43
Securing in the Right Front Seat Position . . . . . . . . . . 1-45
1-40
TopStrap . . . . . . . . . . . . . . . . . . . . . . . . . . . . . . . . . . .
1-39
WheretoPut . . . . . . . . . . . . . . . . . . . . . . . . . . . . . . . .
CigaretteLighter . . . . . . . . . . . . . . . . . . . . . . . . . . . . . . .
2-53
Circuit Breakers and Fuses . . . . . . . . . . . . . . . . . . . . . . . 6-55
Cleaner, Air . . . . . . . . . . . . . . . . . . . . . . . . . . . . . . . . . . . 6-15
Cleaning
6-51
Aluminum Wheels . . . . . . . . . . . . . . . . . . . . . . . . . . . .
ExteriorLampsLenses . . . . . . . . . . . . . . . . . . . . . . . . 6-51
Fabric . . . . . . . . . . . . . . . . . . . . . . . . . . . . . . . . . . . . . . 6-47
Glass Surfaces . . . . . . . . . . . . . . . . . . . . . . . . . . . . . . . 6-49
6-47
Inside of Your Vehicle . . . . . . . . . . . . . . . . . . . . . . . . .
6-49
Instrument Panel . . . . . . . . . . . . . . . . . . . . . . . . . . . . .
Interior Plastic Components . . . . . . . . . . . . . . . . . . . . . 6-49
Leather . . . . . . . . . . . . . . . . . . . . . . . . . . . . . . . . . . . . . 6-48
Outside of Your Vehicle . . . . . . . . . . . . . . . . . . . . . . . . 6-50
Special Problems . . . . . . . . . . . . . . . . . . . . . . . . . . . . . 6-48
Stains . . . . . . . . . . . . . . . . . . . . . . . . . . . . . . . . . . . . . .6-48
Tires . . . . . . . . . . . . . . . . . . . . . . . . . . . . . . . . . . . . . . .
6-52
6-48
Vinyl . . . . . . . . . . . . . . . . . . . . . . . . . . . . . . . . . . . . . . .
Windshield and Wiper Blades . . . . . . . . . . . . . . . . . . . 6-50
Climate Control, SteeringWheel Touch Control . . . . . . . 3-11
Climate Control System . . . . . . . . . . . . . . . . . . . . . . . . . . . 3-2
Clock. Setting the . . . . . . . . . . . . . . . . . . . . . . . . . . . . . . . 3- 12
Coinholder . . . . . . . . . . . . . . . . . . . . . . . . . . . . . . . . . . . .
2-52
3- 1
Comfort Controls . . . . . . . . . . . . . . . . . . . . . . . . . . . . . . . .
Compact Disc Care . . . . . . . . . . . . . . . . . . . . . . . . . . . . .
3-35
Compact Disc Player . . . . . . . . . . . . . . . . . . . . . . . 3-23. 3.28
Care . . . . . . . . . . . . . . . . . . . . . . . . . . . . . . . . . . . . . . .3-35
Errors . . . . . . . . . . . . . . . . . . . . . . . . . . . . . . . . . 3.23.3.29
5-36
Compact Spare Tire . . . . . . . . . . . . . . . . . . . . . . . . . . . . .
ConsoleStorage . . . . . . . . . . . . . . . . . . . . . . . . . . . . . . . . 2-52
4-6
Control of a Vehicle . . . . . . . . . . . . . . . . . . . . . . . . . . . . . .
ConvenienceNet . . . . . . . . . . . . . . . . . . . . . . . . . . . . . . .
2-52
2-5 1
Convex Outside Mirror . . . . . . . . . . . . . . . . . . . . . . . . . .
Coolant . . . . . . . . . . . . . . . . . . . . . . . . . . . . . . . . . . . . . . .
6-20
Heater. Engine . . . . . . . . . . . . . . . . . . . . . . . . . . . . . . .2-22
RecoveryTank . . . . . . . . . . . . . . . . . . . . . . . . . . . . . . .
5-17
5- 15
Cooling System . . . . . . . . . . . . . . . . . . . . . . . . . . . . . . . .
Cornering Lamps . . . . . . . . . . . . . . . . . . . . . . . . . . . . . . . 2-41
Courtesy Lamps . . . . . . . . . . . . . . . . . . . . . . . . . . . . . . . . 2-43
Courtesy Transportation . . . . . . . . . . . . . . . . . . . . . . . . . . . 8-6
CruiseControl . . . . . . . . . . . . . . . . . . . . . . . . . . . . . . . . . 2-37
Cupholders . . . . . . . . . . . . . . . . . . . . . . . . . . . . . . . . . . . . 2-52
Customer Assistance forText Telephone Users . . . . . . . . . 8-4
Customer Assistance Information . . . . . . . . . . . . . . . . . . . 8- 1
Customer Satisfaction Procedure . . . . . . . . . . . . . . . . . . . . 8-2
Damage. Finish . . . . . . . . . . . . . . . . . . . . . . . . . . . . . . .
Damage. Sheet Metal . . . . . . . . . . . . . . . . . . . . . . . . . . . .
Daytime Running Lamps . . . . . . . . . . . . . . . . . . . . . . . . .
Dead Battery . . . . . . . . . . . . . . . . . . . . . . . . . . . . . . . . . . .
Defects. Reporting Safety . . . . . . . . . . . . . . . . . . . . . . . . .
6-52
6-52
2-41
5-3
8-8
Defensive Driving . . . . . . . . . . . . . . . . . . . . . . . . . . . . . . .
4-2
Defogger. Rear Window . . . . . . . . . . . . . . . . . . . . . . . . . 3-10
Defogging . . . . . . . . . . . . . . . . . . . . . . . . . . . . . . . . . . . . . 3-9
Defrosting . . . . . . . . . . . . . . . . . . . . . . . . . . . . . . . . . . . . .3-9
Delayed Entry Lighting . . . . . . . . . . . . . . . . . . . . . . . . . . 2-43
Delayed Exit Lighting . . . . . . . . . . . . . . . . . . . . . . . . . . .
2-43
2-6
DelayedLoclung . . . . . . . . . . . . . . . . . . . . . . . . . . . . . . . .
Personal Choice Programming . . . . . . . . . . . . . . . . . . . . 2-6
Dimensions. Vehicle . . . . . . . . . . . . . . . . . . . . . . . . . . . . 6-61
Dolby B Noise Reduction . . . . . . . . . . . . . . 3.17.3.20.3.28
DoorLocks . . . . . . . . . . . . . . . . . . . . . . . . . . . . . . . . . . . . . 2-4
DriverPosition . . . . . . . . . . . . . . . . . . . . . . . . . . . . . . . . .1-10
Driving
City . . . . . . . . . . . . . . . . . . . . . . . . . . . . . . . . . . . . . . . . 4-20
4-2
Defensive . . . . . . . . . . . . . . . . . . . . . . . . . . . . . . . . . . . .
4-3
Drunken . . . . . . . . . . . . . . . . . . . . . . . . . . . . . . . . . . . . .
Freeway . . . . . . . . . . . . . . . . . . . . . . . . . . . . . . . . . . . . 4-21
InaBlizzard . . . . . . . . . . . . . . . . . . . . . . . . . . . . . . . . . 4-27
In Foreign Countries . . . . . . . . . . . . . . . . . . . . . . . . . . . 6-5
IntheRain . . . . . . . . . . . . . . . . . . . . . . . . . . . . . . . . . .4-17
4-15
Night . . . . . . . . . . . . . . . . . . . . . . . . . . . . . . . . . . . . . .
OnCurves . . . . . . . . . . . . . . . . . . . . . . . . . . . . . . . . . . 4-10
On Grades While Towing a Trailer . . . . . . . . . . . . . . . 4-37
4-23
On Hill and Mountain Roads ....................
OnSnowandIce . . . . . . . . . . . . . . . . . . . . . . . . . . . . . 4-26
Throughwater . . . . . . . . . . . . . . . . . . . . . . . . . . . . . . . 4-19
WetRoads . . . . . . . . . . . . . . . . . . . . . . . . . . . . . . . . . . 4-17
Winter . . . . . . . . . . . . . . . . . . . . . . . . . . . . . . . . . . . . . . 4-25
With a Trailer . . . . . . . . . . . . . . . . . . . . . . . . . . . . . . . . 4-35
Drunken Driving . . . . . . . . . . . . . . . . . . . . . . . . . . . . . . . . 4-3
Dual Automatic ComforTemp Climate Control . . . . . . . . . 3-3
9-3
Electrical Equipment. Adding . . . . . . . . . . . . . . . 3.34. 6-54
6-54
Electrical System . . . . . . . . . . . . . . . . . . . . . . . . . . . . . . .
Electrochromic Daymight Rearview Mirror . . . . . . . . . . 2-46
With Compass . . . . . . . . . . . . . . . . . . . . . . . . . . . . . . . 2-47
4-3 I
Electronic Level Control . . . . . . . . . . . . . . . . . . . . . . . . .
Electronic Touch Climate Control . . . . . . . . . . . . . . . . . . . 3-2
Engine . . . . . . . . . . . . . . . . . . . . . . . . . . . . . . . . . . . . . . . 6-10
6-61
Accessory Belt . . . . . . . . . . . . . . . . . . . . . . . . . . . . . . .
Coolant . . . . . . . . . . . . . . . . . . . . . . . . . . . . . . . . . . . . . 6-20
Coolant Heater . . . . . . . . . . . . . . . . . . . . . . . . . . . . . . . 2-22
7-29
Coolant Level Check . . . . . . . . . . . . . . . . . . . . . . . . . .
2-64
Coolant Temperature Gage . . . . . . . . . . . . . . . . . . . . .
Coolant Temperature Warning Light . . . . . . . . . . . . . . 2-63
2-32
Exhaust . . . . . . . . . . . . . . . . . . . . . . . . . . . . . . . . . . . . .
Fuse Block (Driver’s Side) . . . . . . . . . . . . . . . . . . . . . .
6-56
Fuse Block (Passenger’s Side) . . . . . . . . . . . . . . . . . . . 6-58
6-54
Identification . . . . . . . . . . . . . . . . . . . . . . . . . . . . . . . .
7-29
OilLevelCheck . . . . . . . . . . . . . . . . . . . . . . . . . . . . . .
Overheating . . . . . . . . . . . . . . . . . . . . . . . . . . . . . . . . .
5-13
2-32
Running While Parked . . . . . . . . . . . . . . . . . . . . . . . . .
Specifications . . . . . . . . . . . . . . . . . . . . . . . . . . . . . . . . 6-60
2-21
StartingYour . . . . . . . . . . . . . . . . . . . . . . . . . . . . . . . .
Engine Cooling When Trailer Towing . . . . . . . . . . . . . . . 4-38
6-11
Engineoil . . . . . . . . . . . . . . . . . . . . . . . . . . . . . . . . . . . .
Adding . . . . . . . . . . . . . . . . . . . . . . . . . . . . . . . . . . . . .
6-12
6-14
Additives . . . . . . . . . . . . . . . . . . . . . . . . . . . . . . . . . . .
6-12
Checking . . . . . . . . . . . . . . . . . . . . . . . . . . . . . . . . . . .
Life Monitor . . . . . . . . . . . . . . . . . . . . . . . . . . . . . . . . . 2-68
2-66
Pressure Gage . . . . . . . . . . . . . . . . . . . . . . . . . . . . . . . .
Pressure Light . . . . . . . . . . . . . . . . . . . . . . . . . . . . . . .
2-66
6-15
Used . . . . . . . . . . . . . . . . . . . . . . . . . . . . . . . . . . . . . . .
What Kind to Use . . . . . . . . . . . . . . . . . . . . . . . . . . . . . 6-13
9-4
Whentochange . . . . . . . . . . . . . . . . . . . . . . . . . . . . . .
Entry Lighting. Delayed . . . . . . . . . . . . . . . . . . . . . . . . . .
Ethanol . . . . . . . . . . . . . . . . . . . . . . . . . . . . . . . . . . . . . . . .
Exhaust. Engine . . . . . . . . . . . . . . . . . . . . . . . . . . . . . . . .
Exit Lighting. Delayed . . . . . . . . . . . . . . . . . . . . . . . . . . .
Express-Down Window . . . . . . . . . . . . . . . . . . . . . . . . . .
Exterior Lamps . . . . . . . . . . . . . . . . . . . . . . . . . . . . . . . . .
6-14
2-43
6-4
2-32
2-43
2-34
2-40
6-47
Fabric Cleaning . . . . . . . . . . . . . . . . . . . . . . . . . . . . . . .
Fan Control. Climate Control System . . . . . . . . . . . . 3-2. 3-4
Filling a Portable Fuel Container . . . . . . . . . . . . . . . . . . . . 6-8
Filling Your Tank . . . . . . . . . . . . . . . . . . . . . . . . . . . . . . . .
6-5
Filter. Air . . . . . . . . . . . . . . . . . . . . . . . . . . . . . . . . . . . . .
6-15
Filter. Engine Oil . . . . . . . . . . . . . . . . . . . . . . . . . . . . . . .
6-14
6-51
Finishcare . . . . . . . . . . . . . . . . . . . . . . . . . . . . . . . . . . . .
Finish Damage . . . . . . . . . . . . . . . . . . . . . . . . . . . . . . . . . 6-52
First Gear. Automatic Transaxle . . . . . . . . . . . . . . . . . . .2-27
Flashers. HazardWarning . . . . . . . . . . . . . . . . . . . . . . . . .
5-2
Flat Tire. Changing . . . . . . . . . . . . . . . . . . . . . . . . . . . . .
5-23
7-35
Fluids and Lubricants . . . . . . . . . . . . . . . . . . . . . . . . . . . .
Foreign Countries. Fuel . . . . . . . . . . . . . . . . . . . . . . . . . . . 6-5..
FrenchLanguageManual . . . . . . . . . . . . . . . . . . . . . . . . . . .
11
FrontTowing . . . . . . . . . . . . . . . . . . . . . . . . . . . . . . . . . . 5-10
Front Turn Signal Bulb Replacement . . . . . . . . . . . . . . . . 6-32
Fuel . . . . . . . . . . . . . . . . . . . . . . . . . . . . . . . . . . . . . . . . . . 6-3
Canada . . . . . . . . . . . . . . . . . . . . . . . . . . . . . . . . . . . . . . 6-3
Filling a Portable Container . . . . . . . . . . . . . . . . . . . . . .
6-8
FillingYourTank . . . . . . . . . . . . . . . . . . . . . . . . . . . . . . 6-5
Gage . . . . . . . . . . . . . . . . . . . . . . . . . . . . . . . . . . . . . . .
2-69
6-5
In Foreign Countries . . . . . . . . . . . . . . . . . . . . . . . . . . .
Fuses and Circuit Breakers . . . . . . . . . . . . . . . . . . . . . . .
6-55
Franqais
Gages
Engine Coolant Temperature . . . . . . . . . . . . . . . . . . . .
2-64
2-66
Engine Oil Pressure . . . . . . . . . . . . . . . . . . . . . . . . . . .
2-69
Fuel . . . . . . . . . . . . . . . . . . . . . . . . . . . . . . . . . . . . . . .
GAWR . . . . . . . . . . . . . . . . . . . . . . . . . . . . . . . . . . . . . . . 4-30
Gear Positions. Automatic Transaxle . . . . . . . . . . . . . . . . 2-24
2-51
GloveBox . . . . . . . . . . . . . . . . . . . . . . . . . . . . . . . . . . . .
4-30
Gross Axle Weight Rating . . . . . . . . . . . . . . . . . . . . . . . .
Gross Vehicle Weight Rating . . . . . . . . . . . . . . . . . . . . . . 4-30..
. . . . . . . . . . . . . . . . . . . . . . . . . . . . . . . . . 11
Guide en
GVWR . . . . . . . . . . . . . . . . . . . . . . . . . . . . . . . . . . . . . . .
4-30
6-30
Halogen Bulbs . . . . . . . . . . . . . . . . . . . . . . . . . . . . . . . .
5-2
Hazard Warning Flashers . . . . . . . . . . . . . . . . . . . . . . . . . .
Head Restraints . . . . . . . . . . . . . . . . . . . . . . . . . . . . . . . . . 1-4
Headlamps . . . . . . . . . . . . . . . . . . . . . . . . . . . . . . . . . . . . 2-40
Aiming . . . . . . . . . . . . . . . . . . . . . . . . . . . . . . . . . . . . . 6-36
Bulb Replacement . . . . . . . . . . . . . . . . . . . . . . . . . . . .
6-30
HighLow Beam Changer . . . . . . . . . . . . . . . . . . . . . .
2-36
2-41
On Reminder . . . . . . . . . . . . . . . . . . . . . . . . . . . . . . . .
Wiring . . . . . . . . . . . . . . . . . . . . . . . . . . . . . . . . . . . . .
6-55
Hearing Impaired, Customer Assistance . . . . . . . . . . . . . . 8-4
3-7
Heating . . . . . . . . . . . . . . . . . . . . . . . . . . . . . . . . . . . . . . . .
High-Beam Headlamps . . . . . . . . . . . . . . . . . . . . . . . . . .
2-36
4-23
Highway Hypnosis . . . . . . . . . . . . . . . . . . . . . . . . . . . . . .
Hill and Mountain Roads . . . . . . . . . . . . . . . . . . . . . . . . . 4-23
Hitches, Trailer . . . . . . . . . . . . . . . . . . . . . . . . . . . . . . . . .
4-34
Hood
Checking Things Under . . . . . . . . . . . . . . . . . . . . . . . . . 6-8
Release . . . . . . . . . . . . . . . . . . . . . . . . . . . . . . . . . . . . . . 6-9
Horn . . . . . . . . . . . . . . . . . . . . . . . . . . . . . . . . . . . . . . . . . 2-34
Hydroplaning . . . . . . . . . . . . . . . . . . . . . . . . . . . . . . . . . .
4-19
Ignition Positions . . . . . . . . . . . . . . . . . . . . . . . . . . . . . .
2-19
Ignition Transaxle Lock Check . . . . . . . . . . . . . . . . . . . . 7-32
2-43
Illuminated Entry . . . . . . . . . . . . . . . . . . . . . . . . . . . . . . .
Inflation. Tire . . . . . . . . . . . . . . . . . . . . . . . . . . . . . . . . . .
6-39
Inside Daymight Rearview Mirror . . . . . . . . . . . . . . . . . 2-46
Inspections . . . . . . . . . . . . . . . . . . . . . . . . . . . . . . . . . . . . 7-33
Brakesystem . . . . . . . . . . . . . . . . . . . . . . . . . . . . . . . .
7-34
Caliper/Knuckle . . . . . . . . . . . . . . . . . . . . . . . . . . . . . . 7-34
Engine Cooling System . . . . . . . . . . . . . . . . . . . . . . . .
7-33
7-33
Exhaust System . . . . . . . . . . . . . . . . . . . . . . . . . . . . . .
Front Drive Axle Boot . . . . . . . . . . . . . . . . . . . . . . . . . 7-33
7-33
Front Drive Axle Seal . . . . . . . . . . . . . . . . . . . . . . . . .
7-33
Steering . . . . . . . . . . . . . . . . . . . . . . . . . . . . . . . . . . . .
Suspension . . . . . . . . . . . . . . . . . . . . . . . . . . . . . . . . . . 7-33
7-33
Throttle System . . . . . . . . . . . . . . . . . . . . . . . . . . . . . .
Instrumentpanel . . . . . . . . . . . . . . . . . . . . . . . . . . . . . . .
2-54
Brightness Control . . . . . . . . . . . . . . . . . . . . . . . . . . . .
2-42
6-49
Cleaning . . . . . . . . . . . . . . . . . . . . . . . . . . . . . . . . . . . .
Cluster . . . . . . . . . . . . . . . . . . . . . . . . . . . . . . . . 2-56.2-57
2-42
Interior Lamps . . . . . . . . . . . . . . . . . . . . . . . . . . . . . . . . .
.
Jack Tire . . . . . . . . . . . . . . . . . . . . . . . . . . . . . . . . . . . .
Jump Starting . . . . . . . . . . . . . . . . . . . . . . . . . . . . . . . . . . .
5-26
5-3
K e y Lock Cylinders Service . . . . . . . . . . . . . . . . . . . . .
7-30
2- 15.2-20
Key Reminder Warning . . . . . . . . . . . . . . . . . . . . .
2-8
Keyless Entry System . . . . . . . . . . . . . . . . . . . . . . . . . . . .
2-10
Personal Choice Features . . . . . . . . . . . . . . . . . . . . . . .
Keys . . . . . . . . . . . . . . . . . . . . . . . . . . . . . . . . . . . . . . . . . .
2-2
9-5
Labels
4-30
Certification . . . . . . . . . . . . . . . . . . . . . . . . . . . . . . . . .
4-30
Certificatioflire . . . . . . . . . . . . . . . . . . . . . . . . . . . . .
Service Parts Identification . . . . . . . . . . . . . . . . . . . . .
6-54
4-29
Tire-Loading Information . . . . . . . . . . . . . . . . . . . . . .
Vehicle Identification Number . . . . . . . . . . . . . . . . . . . 6-54
Lamps . . . . . . . . . . . . . . . . . . . . . . . . . . . . . . . . . . . . . . . . 2-40
2-43
Courtesy . . . . . . . . . . . . . . . . . . . . . . . . . . . . . . . . . . . .
Entry Lighting, Delayed . . . . . . . . . . . . . . . . . . . . . . . . 2-43
2-43
Exit Lighting. Delayed . . . . . . . . . . . . . . . . . . . . . . . . .
2-40
Exterior . . . . . . . . . . . . . . . . . . . . . . . . . . . . . . . . . . . .
2-43
Illuminated Entry . . . . . . . . . . . . . . . . . . . . . . . . . . . . .
2-42
Interior . . . . . . . . . . . . . . . . . . . . . . . . . . . . . . . . . . . . .
.
.
.
.
.
.
.
.
.
.
.
.
.
.
.
.
.
.
.
.
.
.
.
.
.
.
.
.
.
.
.
.
2-41
OnReminder
2-43
Perimeter Lighting . . . . . . . . . . . . . . . . . . . . . . . . . . . .
Theater Dimming . . . . . . . . . . . . . . . . . . . . . . . . . . . . . 2-43
2-8
Leaving Your Vehicle . . . . . . . . . . . . . . . . . . . . . . . . . . . . .
Leaving Your Vehicle with the Engine Running . . . . . . . 2-30
Light Sensor. Twilight Sentinel . . . . . . . . . . . . . . . . . . . .
2-42
2-53
Lighter . . . . . . . . . . . . . . . . . . . . . . . . . . . . . . . . . . . . . . .
Lights
1-20. 2-60
Air Bag Readiness . . . . . . . . . . . . . . . . . . . . . . .
Anti-Lock Brake System Warning . . . . . . . . . . . . 2-62. 4-7
2-60
Battery Warning . . . . . . . . . . . . . . . . . . . . . . . . . . . . . .
Brake System Warning . . . . . . . . . . . . . . . . . . . . . . . . .
2-61
2-68
ChangeOilSoon . . . . . . . . . . . . . . . . . . . . . . . . . . . . .
CheckEngine . . . . . . . . . . . . . . . . . . . . . . . . . . . . . . . .
2-64
CheckOilLevel . . . . . . . . . . . . . . . . . . . . . . . . . . . . . . 2-68
Engine Coolant Temperature Warning . . . . . . . . . . . . . 2-63
Engine Oil Pressure Light . . . . . . . . . . . . . . . . . . . . . .
2-66
LowFuel . . . . . . . . . . . . . . . . . . . . . . . . . . . . . . . . . . . 2-70
Oil Pressure . . . . . . . . . . . . . . . . . . . . . . . . . . . . . . . . . 2-66
Safety Belt Reminder . . . . . . . . . . . . . . . . . . . . . . . . . . 2-59
9-6
Traction Control System Warning . . . . . . . . . . . . 2.63.4.9
4-9
Traction Off Warning . . . . . . . . . . . . . . . . . . . . . . . . . . .
Loading YourVehicle . . . . . . . . . . . . . . . . . . . . . . . . . . .
4-29
2-8
Lockout Protection . . . . . . . . . . . . . . . . . . . . . . . . . . . . . . .
2-4
Locks . . . . . . . . . . . . . . . . . . . . . . . . . . . . . . . . . . . . . . . . .
Cylinders . . . . . . . . . . . . . . . . . . . . . . . . . . . . . . . . . . . 7-30
DelayedLocking . . . . . . . . . . . . . . . . . . . . . . . . . . . . . . 2-6
Door . . . . . . . . . . . . . . . . . . . . . . . . . . . . . . . . . . . . . . . . 2-4
Ignition Transaxle Lock Check . . . . . . . . . . . . . . . . . . 7-32
7-30
Key Lock Cylinder Service . . . . . . . . . . . . . . . . . . . . .
2-8
Lockout Protection . . . . . . . . . . . . . . . . . . . . . . . . . . . . .
2-5
Memory Door . . . . . . . . . . . . . . . . . . . . . . . . . . . . . . . . .
2-5
PowerDoor . . . . . . . . . . . . . . . . . . . . . . . . . . . . . . . . . .
.
.
.
.
.
.
.
.
.
.
.
.
.
.
.
.
.
.
.
.
.
.
.
.
.
.
.
.
.
2-7
Rear Door Security
2-13
Trunk . . . . . . . . . . . . . . . . . . . . . . . . . . . . . . . . . . . . . .
2-34
Window . . . . . . . . . . . . . . . . . . . . . . . . . . . . . . . . . . . .
LowFuelLight . . . . . . . . . . . . . . . . . . . . . . . . . . . . . . . . 2-70
Lubricants and Fluids . . . . . . . . . . . . . . . . . . . . . . . . . . . . 7-35
Lubrication Service. Body . . . . . . . . . . . . . . . . . . . . . . . . 7-30
Magnasteer
. . . . . . . . . . . . . . . . . . . . . . . . . . . . . . . . 4. 10
Maintenance. Normal Replacement Parts . . . . . . . . . . . . 6-61
Maintenance Record . . . . . . . . . . . . . . . . . . . . . . . . . . . . 7-37
Maintenance Schedule . . . . . . . . . . . . . . . . . . . . . . . . . . . . 7-1
Long Tripmighway Definition . . . . . . . . . . . . . . . . . . .7-6
7-6
Long Trip/Highway Intervals . . . . . . . . . . . . . . . . . . . . .
Owner Checks and Services . . . . . . . . . . . . . . . . . . . . .
7-29
Periodic Maintenance Inspections . . . . . . . . . . . . . . . . 7-33
Recommended Fluids and Lubricants . . . . . . . . . . . . . 7-35
Scheduled Maintenance Services . . . . . . . . . . . . . . . . . . 7-4
Short Trip/City Definition . . . . . . . . . . . . . . . . . . . . . . .
7-5
7-5
Short Trip/CityIntervals . . . . . . . . . . . . . . . . . . . . . . . .
Maintenance. Underbody . . . . . . . . . . . . . . . . . . . . . . . . . 6-52
Maintenance When Trailer Towing . . . . . . . . . . . . . . . . . 4-38
Malfunction Indicator Lamp . . . . . . . . . . . . . . . . . . . . . . 2-64
1-2
ManualFrontSeat . . . . . . . . . . . . . . . . . . . . . . . . . . . . . . .
2-50
Manual Remote Control Mirror . . . . . . . . . . . . . . . . . . . .
6-55
Maxifuse@/Relay Center . . . . . . . . . . . . . . . . . . . . . . . . .
2-5
Memory Door Locks . . . . . . . . . . . . . . . . . . . . . . . . . . . . .
2-5
Personal Choice Programming . . . . . . . . . . . . . . . . . . . .
Methanol . . . . . . . . . . . . . . . . . . . . . . . . . . . . . . . . . . . . . . 6-4
2-46
Mirrors . . . . . . . . . . . . . . . . . . . . . . . . . . . . . . . . . . . . . . .
Automatic Dimmingmeated Outside. . . . . . . . . . . . . . 2-5 1
Convex Outside . . . . . . . . . . . . . . . . . . . . . . . . . . . . . . 2-51
Daymight Rearview with Reading Lamps . . . . . . . . . 2-46
Electrochromic Daymight Rearview . . . . . . . . . . . . . . 2-46
Electrochromic Daymight Rearview With Compass . 2-47
2-50
Manual Remote Control . . . . . . . . . . . . . . . . . . . . . . . .
2-50
Power Remote Control . . . . . . . . . . . . . . . . . . . . . . . . .
.
.
.
.
.
.
.
.
.
.
.
.
.
.
.
.
.
.
.
.
.
.
.
.
.
.
.
.
.
.
.
.
.
2-53
Visor Vanity
MMT . . . . . . . . . . . . . . . . . . . . . . . . . . . . . . . . . . . . . . . . .
6-4
2-35
Multifunction Lever . . . . . . . . . . . . . . . . . . . . . . . . . . . . .
2-52
N e t . Convenience . . . . . . . . . . . . . . . . . . . . . . . . . . . . . .
Neutral. Automatic Transaxle . . . . . . . . . . . . . . . . . . . . .
2-25
2-19
New Vehicle Break-In . . . . . . . . . . . . . . . . . . . . . . . . . . .
Nightvision . . . . . . . . . . . . . . . . . . . . . . . . . . . . . . . . . . .
4-16
Normal Maintenance Replacement Parts . . . . . . . . . . . . . 6-6 1
Odometer . . . . . . . . . . . . . . . . . . . . . . . . . . . . . . . . . . . .
Odometer. Trip . . . . . . . . . . . . . . . . . . . . . . . . . . . . . . . . .
Off-Road Recovery . . . . . . . . . . . . . . . . . . . . . . . . . . . . .
2-58
2-58
4- 12
Oil. Engine . . . . . . . . . . . . . . . . . . . . . . . . . . . . . . . . . . . . 6-11
Oil Level Warning Light . . . . . . . . . . . . . . . . . . . . . . . . . 2-68
Oil Pressure Light . . . . . . . . . . . . . . . . . . . . . . . . . . . . . .
2-66
Overdrive. Automatic Transaxle . . . . . . . . . . . . . . . . . . . 2-26
5-13
Overheating Engine . . . . . . . . . . . . . . . . . . . . . . . . . . . . .
Owner Checks and Services . . . . . . . . . . . . . . . . . . . . . . .
7-29
8-10
Owner Publications. Ordering . . . . . . . . . . . . . . . . . . . . .
P a i n t Spotting. Chemical . . . . . . . . . . . . . . . . . . . . . . . .
6-52
Park
2-24
AutomaticTransaxle . . . . . . . . . . . . . . . . . . . . . . . . . .
Shifting Into . . . . . . . . . . . . . . . . . . . . . . . . . . . . . . . . . 2-28
2-31
Shifting Out of . . . . . . . . . . . . . . . . . . . . . . . . . . . . . . .
Parking
AtNight . . . . . . . . . . . . . . . . . . . . . . . . . . . . . . . . . . . .
2-15
Brake . . . . . . . . . . . . . . . . . . . . . . . . . . . . . . . . . . . . . . 2-27
7-32
Brake Mechanism Check . . . . . . . . . . . . . . . . . . . . . . .
Lots . . . . . . . . . . . . . . . . . . . . . . . . . . . . . . . . . . . . . . . 2-15
2-31
Over Things That Bum . . . . . . . . . . . . . . . . . . . . . . . .
3-11
Passenger Temperature Control . . . . . . . . . . . . . . . . . . . .
Passing . . & . . . . . . . . . . . . . . . . . . . . . . . . . . . . . . . . . . . . 4-13
PASS-Key I1 . . . . . . . . . . . . . . . . . . . . . . . . . . . . . . . . . 2-17
2-43
Perimeter Lighting . . . . . . . . . . . . . . . . . . . . . . . . . . . . . .
Personal Choice Programming . . . . . . . . . . . . . . . . . . . 2-43
Periodic Maintenance Inspections . . . . . . . . . . . . . . . . . . 7-33
Personal Choice Programming
2-6
Delayed Locking . . . . . . . . . . . . . . . . . . . . . . . . . . . . . .
Memory Door Locks . . . . . . . . . . . . . . . . . . . . . . . . . . .
2-5
Perimeter Lighting . . . . . . . . . . . . . . . . . . . . . . . . . . . .
2-43
SecurityFeedback . . . . . . . . . . . . . . . . . . . . . . . . . . . . 2-11
9-7
Power
DoorLocks . . . . . . . . . . . . . . . . . . . . . . . . . . . . . . . . . . .
OptionFuses . . . . . . . . . . . . . . . . . . . . . . . . . . . . . . . .
Remote Control Mirror . . . . . . . . . . . . . . . . . . . . . . . .
Seat . . . . . . . . . . . . . . . . . . . . . . . . . . . . . . . . . . . . . . . . .
Steering . . . . . . . . . . . . . . . . . . . . . . . . . . . . . . . . . . . .
Steering Fluid . . . . . . . . . . . . . . . . . . . . . . . . . . . . . . . .
Windows . . . . . . . . . . . . . . . . . . . . . . . . . . . . . . . . . . .
Pregnancy. Use of Safety Belts . . . . . . . . . . . . . . . . . . . .
Problems on the Road . . . . . . . . . . . . . . . . . . . . . . . . . . . .
Publications. Service and Owner . . . . . . . . . . . . . . . . . . . .
2-5
6-55
2-50
1-3
4-10
6-24
2-33
1- 17
5- 1
8-9
Radiator . . . . . . . . . . . . . . . . . . . . . . . . . . . . . . . . . . . . . 5-20
6-23
Radiator Pressure Cap . . . . . . . . . . . . . . . . . . . . . . . . . . .
3-33
Radio Reception . . . . . . . . . . . . . . . . . . . . . . . . . . . . . . . .
Radios . . . . . . . . . . . . . . . . . . . 3.12.3.14.3.17.3.21.3.25
4- 17
Rain. Driving In . . . . . . . . . . . . . . . . . . . . . . . . . . . . . . . .
2.44.2.45
Reading Lamps . . . . . . . . . . . . . . . . . . . . . . . . . . .
Rear
2-7
DoorSecurityLocks . . . . . . . . . . . . . . . . . . . . . . . . . . .
1-26
Outside Seat Position . . . . . . . . . . . . . . . . . . . . . . . . . .
Safety Belt Comfort Guides . . . . . . . . . . . . . . . . . . . . .
1-29
1-26
Seatpassengers . . . . . . . . . . . . . . . . . . . . . . . . . . . . . .
5-11
Towing . . . . . . . . . . . . . . . . . . . . . . . . . . . . . . . . . . . . .
Turn Signal Bulb Replacement . . . . . . . . . . . . . . . . . . 6-35
Window Defogger . . . . . . . . . . . . . . . . . . . . . . . . . . . .
3.10
Rearview Mirror . . . . . . . . . . . . . . . . . . . . . . . . . . . . . . . . 2-46
Electrochromic Daymight . . . . . . . . . . . . . . . . . . . . . . 2-46
Inside Daymight with Reading Lamps . . . . . . . . . . . . 2-46
With Compass . . . . . . . . . . . . . . . . . . . . . . . . . . . . . . . 2-47
9-8
Reclining Front Seatbacks . . . . . . . . . . . . . . . . . . . . . . . . . 1-3
Recommended Fluids and Lubricants . . . . . . . . . . . . . . . 7-35
5-17
Recovery Tank. Coolant . . . . . . . . . . . . . . . . . . . . . . . . . .
. . . . . . . . . . . . . . . . . . . . 6-60
Refrigerants.AirConditioning
Remote
Trunk Release . . . . . . . . . . . . . . . . . . . . . . . . . . . . . . . . 2-13
TrunkRelease Lockout . . . . . . . . . . . . . . . . . . . . . . . . 2-14
2-8
Remote Keyless Entry . . . . . . . . . . . . . . . . . . . . . . . . . . . .
2-10
InstantAlarm . . . . . . . . . . . . . . . . . . . . . . . . . . . . . . . .
2-10
PersonalChoice . . . . . . . . . . . . . . . . . . . . . . . . . . . . . .
Resynchronization . . . . . . . . . . . . . . . . . . . . . . . . . . . . 2-10
2-11
SecurityFeedback . . . . . . . . . . . . . . . . . . . . . . . . . . . .
Replacement
6-59
Bulbs . . . . . . . . . . . . . . . . . . . . . . . . . . . . . . . . . . . . . .
Parts . . . . . . . . . . . . . . . . . . . . . . . . . . . . . . . . . . . . . . . 6-61
Wheel . . . . . . . . . . . . . . . . . . . . . . . . . . . . . . . . . . . . . . 6-44
Replacing Safety Belts . . . . . . . . . . . . . . . . . . . . . . . . . . . 1-50
Reporting Safety Defects . . . . . . . . . . . . . . . . . . . . . . . . . . 8-8
Restraints
Checking . . . . . . . . . . . . . . . . . . . . . . . . . . . . . . . . . . .
1-50
1-35
Child . . . . . . . . . . . . . . . . . . . . . . . . . . . . . . . . . . . . . . .
Head . . . . . . . . . . . . . . . . . . . . . . . . . . . . . . . . . . . . . . . .
1-4
Replacing Parts After a Crash . . . . . . . . . . . . . . . . . . . 1-50
7-30
Systemcheck . . . . . . . . . . . . . . . . . . . . . . . . . . . . . . . .
Reverse. Automatic Transaxle . . . . . . . . . . . . . . . . . . . . .
2-25
Right Front Passenger Position . . . . . . . . . . . . . . . . . . . .
1-18
8-5
Roadside Assistance . . . . . . . . . . . . . . . . . . . . . . . . . . . . . .
Roadside Assistance. Canadian . . . . . . . . . . . . . . . . . . . . .
8-5
Rocking YourVehicle . . . . . . . . . . . . . . . . . . . . . . . . . . . 5-37
Rotation.Tires . . . . . . . . . . . . . . . . . . . . . . . . . . . . . . . . . 6-40
Safety Belt Extender . . . . . . . . . . . . . . . . . . . . . . . . . . . .
1-50
1-5
Safety Belts . . . . . . . . . . . . . . . . . . . . . . . . . . . . . . . . . . . .
Adults . . . . . . . . . . . . . . . . . . . . . . . . . . . . . . . . . . . . . .
1-10
Care . . . . . . . . . . . . . . . . . . . . . . . . . . . . . . . . . . . . . . .
6-49
1-25
Center Passenger Position . . . . . . . . . . . . . . . . . . . . . .
1-32
Children . . . . . . . . . . . . . . . . . . . . . . . . . . . . . . . . . . . .
1.10
Driver Position . . . . . . . . . . . . . . . . . . . . . . . . . . . . . . .
Extender . . . . . . . . . . . . . . . . . . . . . . . . . . . . . . . . . . . .
1-50
1.10
How to Wear Properly . . . . . . . . . . . . . . . . . . . . . . . . .
Incorrect Usage . . . . . . . . . . . . . . . . . . . .
1.13,1.48.
1-49
LapBelt . . . . . . . . . . . . . . . . . . . . . . . . . . . . . . . . . . . .
1-25
Lap-Shoulder . . . . . . . . . . . . . . . . . . . . . . . . . . .
1.10. 1-27
1-47
Larger Children . . . . . . . . . . . . . . . . . . . . . . . . . . . . . .
1-9
Questions and Answers . . . . . . . . . . . . . . . . . . . . . . . . .
Rear Comfort Guides . . . . . . . . . . . . . . . . . . . . . . . . . .
1-29
Rear Seat Outside Passenger Positions . . . . . . . . . . . . 1-26
Rear Seat Passengers . . . . . . . . . . . . . . . . . . . . . . . . . . 1-26
2-59
Reminder Light . . . . . . . . . . . . . . . . . . . . . . . . . . . . . .
1-50
Replacing After a Crash . . . . . . . . . . . . . . . . . . . . . . . .
Right Front Passenger Position . . . . . . . . . . . . . . . . . . 1 .18
Shoulder Belt Height Adjuster . . . . . . . . . . . . . . . . . . . 1.12
Smaller Children and Babies . . . . . . . . . . . . . . . . . . . .
1-32
1.17
Use During Pregnancy . . . . . . . . . . . . . . . . . . . . . . . . .
1-6
WhyTheyWork . . . . . . . . . . . . . . . . . . . . . . . . . . . . . . .
4-35
SafetyChains . . . . . . . . . . . . . . . . . . . . . . . . . . . . . . . . . .
8-8
Safety Defects. Reporting . . . . . . . . . . . . . . . . . . . . . . . . .
...
Safety Warnings and Symbols . . . . . . . . . . . . . . . . . . . . . . .
111
Scheduled Maintenance Services . . . . . . . . . . . . . . . . . . . .
7-4
Seats
ManualFront . . . . . . . . . . . . . . . . . . . . . . . . . . . . . . . . .
1-2
1-3
Power . . . . . . . . . . . . . . . . . . . . . . . . . . . . . . . . . . . . . . .
1.1
Restraint Systems . . . . . . . . . . . . . . . . . . . . . . . . . . . . . .
Reclining Front . . . . . . . . . . . . . . . . . . . . . . . . . . . . . . .
1-3
Seatcontrols . . . . . . . . . . . . . . . . . . . . . . . . . . . . . . . . .
1-2
Securing a Child Restraint . . . . . . . . . . . . 1.41.1.43.
1-45
Second Gear. Automatic Transaxle . . . . . . . . . . . . . . . . . 2-26
2-11
Security Feedback . . . . . . . . . . . . . . . . . . . . . . . . . . . . . .
Personal Choice Programming . . . . . . . . . . . . . . . . . . . 2-11
2-17
Security System . . . . . . . . . . . . . . . . . . . . . . . . . . . . . . . .
Service . . . . . . . . . . . . . . . . . . . . . . . . . . . . . . . . . . . . . . . .
6-2
8-10
Bulletins. Ordering . . . . . . . . . . . . . . . . . . . . . . . . . . . .
8-10
Manuals. Ordering . . . . . . . . . . . . . . . . . . . . . . . . . . . .
6-54
Parts Identification Label . . . . . . . . . . . . . . . . . . . . . . .
8-10
Publications. Ordering . . . . . . . . . . . . . . . . . . . . . . . . .
Work. Doing Your Own . . . . . . . . . . . . . . . . . . . . . . . . . 6-2
Service and Appearance Care . . . . . . . . . . . . . . . . . . . . . .
6-1
8-9
Service and Owner Publications . . . . . . . . . . . . . . . . . . . .
8-9
Service Publications . . . . . . . . . . . . . . . . . . . . . . . . . . . . . .
Servicing Your Air Bag-Equipped Vehicle . . . . . . . . . . . 1-24
Sheet Metal Damage . . . . . . . . . . . . . . . . . . . . . . . . . . . . 6-52
Shifting
2-24
Automatic Transaxle . . . . . . . . . . . . . . . . . . . . . . . . . .
2-28
Into PARK(P) . . . . . . . . . . . . . . . . . . . . . . . . . . . . . . .
OutofPARK(P) . . . . . . . . . . . . . . . . . . . . . . . . . . . . .
2-31
1-12
Shoulder Belt Height Adjuster . . . . . . . . . . . . . . . . . . . . .
Signaling Turns . . . . . . . . . . . . . . . . . . . . . . . . . . . . . . . .
2-35
Skidding . . . . . . . . . . . . . . . . . . . . . . . . . . . . . . . . . . . . . . 4-14
Sound Equipment. Adding . . . . . . . . . . . . . . . . . . . . . . . . 3-34
Spare Tire. Compact . . . . . . . . . . . . . . . . . . . . . . . . . . . . .
5-36
6-60
Specifications and Capacities . . . . . . . . . . . . . . . . . . . . . .
Specifications. Engine . . . . . . . . . . . . . . . . . . . . . . . . . . . 6-60
Speech Impaired. Customer Assistance . . . . . . . . . . . . . . . 8-4
Speedometer . . . . . . . . . . . . . . . . . . . . . . . . . . . . . . . . . . . 2-58
SRS . . . . . . . . . . . . . . . . . . . . . . . . . . . . . . . . . . . . . . . . .
1-18
9-9
Stains. Cleaning . . . . . . . . . . . . . . . . . . . . . . . . . . . . . . . .6-48
Starter Switch Check . . . . . . . . . . . . . . . . . . . . . . . . . . . . 7-3 1
2-21
Starting Your Engine . . . . . . . . . . . . . . . . . . . . . . . . . . . .
5-13
Steam . . . . . . . . . . . . . . . . . . . . . . . . . . . . . . . . . . . . . . . .
Steering . . . . . . . . . . . . . . . . . . . . . . . . . . . . . . . . . . . . . . 4-10
In Emergencies . . . . . . . . . . . . . . . . . . . . . . . . . . . . . . . 4- 11
Magnasteer” . . . . . . . . . . . . . . . . . . . . . . . . . . . . . . . . 4-10
4-10
Power . . . . . . . . . . . . . . . . . . . . . . . . . . . . . . . . . . . . . .
4-10
Tips . . . . . . . . . . . . . . . . . . . . . . . . . . . . . . . . . . . . . . . .
Wheel. Tilt . . . . . . . . . . . . . . . . . . . . . . . . . . . . . . . . . . 2-34
Wheel Touch Controls . . . . . . . . . . . . . . . . . . . . 3-1 1. 3-32
Storage Compartments . . . . . . . . . . . . . . . . . . . . . . . . . . . 2-5 1
Storage. Vehicle . . . . . . . . . . . . . . . . . . . . . . . . . . . . . . . . 6-29
Stuck: In Sand. Mud. Ice or Snow . . . . . . . . . . . . . . . . . . 5-37
2-53
Sun Visors . . . . . . . . . . . . . . . . . . . . . . . . . . . . . . . . . . . .
1- 18
Supplemental Restraint System . . . . . . . . . . . . . . . . . . . .
Symbols. Vehicle . . . . . . . . . . . . . . . . . . . . . . . . . . . . . . . . . . v
Tachometer . . . . . . . . . . . . . . . . . . . . . . . . . . . . . . . . . .
2-58
Taillamp Bulb Replacement . . . . . . . . . . . . . . . . . . . . . . . 6-33
TapePlayerCare . . . . . . . . . . . . . . . . . . . . . . . . . . . . . . . 3-34
Temperature Control. Climate Control System . . . . . 3-2. 3-4
Temperature Control. Passenger . . . . . . . . . . . . . . . . . . . 3- 11
TheaterDimming . . . . . . . . . . . . . . . . . . . . . . . . . . . . . . . 2-43
Theft . . . . . . . . . . . . . . . . . . . . . . . . . . . . . . . . . . . . . . . . .2-15
Theft-Deterrent Alarm System ....................
2- 16
Theft-Deterrent Feature . . . . . . . . . . . . . . . . . . . . . . . . . . 3-30
THEFTLOCK” . . . . . . . . . . . . . . . . . . . . . . . . . . . . . . . .
3-30
Thermostat . . . . . . . . . . . . . . . . . . . . . . . . . . . . . . . . . . . . 6-23
Third Gear. Automatic Transaxle . . . . . . . . . . . . . . . . . . . 2-26
Tilt Steering Wheel . . . . . . . . . . . . . . . . . . . . . . . . . . . . .2-34
9-10
Time. Setting the . . . . . . . . . . . . . . . . . . . . . . . . . . . . . . .
3-12
Tire Chains . . . . . . . . . . . . . . . . . . . . . . . . . . . . . . . . . . . . 6-46
4-29
Tire Loading . . . . . . . . . . . . . . . . . . . . . . . . . . . . . . . . . . .
Tire-Loading Information Label . . . . . . . . . . . . . . . . . . . 4-29
Tires . . . . . . . . . . . . . . . . . . . . . . . . . . . . . . . . . . . . . . . . . 6-38
Alignment and Balance . . . . . . . . . . . . . . . . . . . . . . . . 6-44
BuyingNew . . . . . . . . . . . . . . . . . . . . . . . . . . . . . . . . .
6-42
6-46
Chains . . . . . . . . . . . . . . . . . . . . . . . . . . . . . . . . . . . . .
Changing a Flat . . . . . . . . . . . . . . . . . . . . . . . . . . . . . . 5-23
Cleaning . . . . . . . . . . . . . . . . . . . . . . . . . . . . . . . . . . . . 6-52
Compact Spare . . . . . . . . . . . . . . . . . . . . . . . . . . . . . . . 5-36
Inflation . . . . . . . . . . . . . . . . . . . . . . . . . . . . . . . . . . . .6-39
Inflation Check . . . . . . . . . . . . . . . . . . . . . . . . . . . . . . . 7-29
Inspection and Rotation . . . . . . . . . . . . . . . . . . . . . . . . 6-40
Loading . . . . . . . . . . . . . . . . . . . . . . . . . . . . . . . . . . . . 4-29
6-39
Pressure . . . . . . . . . . . . . . . . . . . . . . . . . . . . . . . . . . . .
6-44
Temperature . . . . . . . . . . . . . . . . . . . . . . . . . . . . . . . . .
Traction . . . . . . . . . . . . . . . . . . . . . . . . . . . . . . . . . . . .
6-43
Treadwear . . . . . . . . . . . . . . . . . . . . . . . . . . . . . . . . . . .
6-43
Uniform Quality Grading .......................
6-43
Wear Indicators . . . . . . . . . . . . . . . . . . . . . . . . . . . . . . 6-41
Wheel Replacement . . . . . . . . . . . . . . . . . . . . . . . . . . .
6-44
6-41
When It’s Time for New . . . . . . . . . . . . . . . . . . . . . . .
TopStrap . . . . . . . . . . . . . . . . . . . . . . . . . . . . . . . . . . . . . 1-40
TorqueLock . . . . . . . . . . . . . . . . . . . . . . . . . . . . . . . . . . . 2-30
Torque, Wheel Nut . . . . . . . . . . . . . . . . . . . . . . . . .
5-33, 6-60
Towing a Trailer . . . . . . . . . . . . . . . . . . . . . . . . . . . . . . . . 4-31
Towing Your Vehicle . . . . . . . . . . . . . . . . . . . . . . . . . . . . .
5-8
Traction
Control System . . . . . . . . . . . . . . . . . . . . . . . . . . . . . . . . 4-9
Control System Warning Light . . . . . . . . . . . . . . 2-63, 4-9
4-9
Off Warning Light . . . . . . . . . . . . . . . . . . . . . . . . . . . . .
Trailer
Brakes . . . . . . . . . . . . . . . . . . . . . . . . . . . . . . . . . . . . . 4-35
Driving on Grades . . . . . . . . . . . . . . . . . . . . . . . . . . . .
4-37
Driving with . . . . . . . . . . . . . . . . . . . . . . . . . . . . . . . . . 4-35
Engine Cooling When Towing . . . . . . . . . . . . . . . . . . . 4-38
I-Zltches . . . . . . . . . . . . . . . . . . . . . . . . . . . . . . . . . . . . . 4-34
4-38
Maintenance When Towing . . . . . . . . . . . . . . . . . . . . .
4-37
ParkingonHills . . . . . . . . . . . . . . . . . . . . . . . . . . . . . .
Safety Chains . . . . . . . . . . . . . . . . . . . . . . . . . . . . . . . . 4-35
Tongueweight . . . . . . . . . . . . . . . . . . . . . . . . . . . . . . . 4-33
Total Weight on Tires . . . . . . . . . . . . . . . . . . . . . . . . . . 4-34
Towing . . . . . . . . . . . . . . . . . . . . . . . . . . . . . . . . . . . . . 4-31
4-36
Turnsignals . . . . . . . . . . . . . . . . . . . . . . . . . . . . . . . . .
Weight . . . . . . . . . . . . . . . . . . . . . . . . . . . . . . . . . . . . . 4-33
6- 18
Transaxle Fluid. Automatic . . . . . . . . . . . . . . . . . . . . . . .
Transmitters. Matching to Your Vehicle . . . . . . . . . . . . . 2-12
Transmitters. Remote Keyless Entry . . . . . . . . . . . . . . . . . 2-8
8-6
Transportation. Courtesy . . . . . . . . . . . . . . . . . . . . . . . . . .
Trip Odometer . . . . . . . . . . . . . . . . . . . . . . . . . . . . . . . . .
2-58
TrLlnk
Lock . . . . . . . . . . . . . . . . . . . . . . . . . . . . . . . . . . . . . . . 2-13
Release Lockout. Remote . . . . . . . . . . . . . . . . . . . . . .
2- 14
Release. Remote . . . . . . . . . . . . . . . . . . . . . . . . . . . . . .
2- 13
SecurityOverride . . . . . . . . . . . . . . . . . . . . . . . . . . . . .
2-14
TTYUsers . . . . . . . . . . . . . . . . . . . . . . . . . . . . . . . . . . . . .
8-4
Turn Signal and Lane Change Indicator . . . . . . . . . . . . . 2-35
Turn Signal. Front. Bulb Replacement . . . . . . . . . . . . . . . 6-32
2-36
Turn Signal On Chime . . . . . . . . . . . . . . . . . . . . . . . . . . . .
Turn Signal. Rear. Bulb Replacement . . . . . . . . . . . . . . . 6-35
Turn SignaVMultifunction Lever . . . . . . . . . . . . . . . . . . . 2-35
Turn Signals When Towing a Trailer . . . . . . . . . . . . . . . . 4-36
2-42
Twilight Sentinel . . . . . . . . . . . . . . . . . . . . . . . . . . . . . . .
Underbody Flushing Service . . . . . . . . . . . . . . . . . . . . .
Underbody Maintenance . . . . . . . . . . . . . . . . . . . . . . . . .
Universal Theft-Deterrent . . . . . . . . . . . . . . . . . . . . . . . .
7-32
6-52
2-16
Vehicle
Control . . . . . . . . . . . . . . . . . . . . . . . . . . . . . . . . . . . . . .
Damage Warnings . . . . . . . . . . . . . . . . . . . . . . . . . . . . . .
Dimensions . . . . . . . . . . . . . . . . . . . . . . . . . . . . . . . . .
Identification Number . . . . . . . . . . . . . . . . . . . . . . . . .
Loading . . . . . . . . . . . . . . . . . . . . . . . . . . . . . . . . . . . .
Storage . . . . . . . . . . . . . . . . . . . . . . . . . . . . . . . . . . . . .
Ventilation System . . . . . . . . . . . . . . . . . . . . . . . . . . . . . . .
VisorVanity Mirrors . . . . . . . . . . . . . . . . . . . . . . . . . . . .
Visors. Sun . . . . . . . . . . . . . . . . . . . . . . . . . . . . . . . . . . . .
VoltageGage . . . . . . . . . . . . . . . . . . . . . . . . . . . . . . . . . .
4-6
iv
6-61
6-54
4-29
6-29
3-8
2-53
2-53
2-61
w a r n i n g Devices . . . . . . . . . . . . . . . . . . . . . . . . . . . . . . . 5-3
Warning Lights. Gages and Indicators . . . . . . . . . . . . . . . 2-59
8-8
Warranty Information . . . . . . . . . . . . . . . . . . . . . . . . . . . . .
Washer Fluid. Windshield . . . . . . . . . . . . . . . . . . . . . . . . 6-24
6-50
Washing Your Vehicle . . . . . . . . . . . . . . . . . . . . . . . . . . .
6-50
Weatherstrips . . . . . . . . . . . . . . . . . . . . . . . . . . . . . . . . . .
Wheel
Alignment . . . . . . . . . . . . . . . . . . . . . . . . . . . . . . . . . .
6-44
5.33.6.60
Nut Torque . . . . . . . . . . . . . . . . . . . . . . . . . . . . .
6-44
Replacement . . . . . . . . . . . . . . . . . . . . . . . . . . . . . . . . .
Wheel Cover Removal . . . . . . . . . . . . . . . . . . . . . . . . . 5-26
Wheel Nut Cap Removal . . . . . . . . . . . . . . . . . . . . . . . 5-26
Wire Wheel Cover Removal . . . . . . . . . . . . . . . . . . . .
5-28
5-26
Wrench . . . . . . . . . . . . . . . . . . . . . . . . . . . . . . . . . . . . .
9-11
WindowLock . . . . . . . . . . . . . . . . . . . . . . . . . . . . . . . . . .
2-34
Windows . . . . . . . . . . . . . . . . . . . . . . . . . . . . . . . . . . . . .2-33
Express-Down . . . . . . . . . . . . . . . . . . . . . . . . . . . . . . . 2-34
Power . . . . . . . . . . . . . . . . . . . . . . . . . . . . . . . . . . . . . .2-33
WindshieldWasher . . . . . . . . . . . . . . . . . . . . . . . . . . . . . 2-37
6-24
Fluid . . . . . . . . . . . . . . . . . . . . . . . . . . . . . . . . . . . . . . .
7-29
Fluid Level Check . . . . . . . . . . . . . . . . . . . . . . . . . . . .
Windshield Wiper . . . . . . . . . . . . . . . . . . . . . . . . . . . . . . 2-36
6-50
Bladecleaning . . . . . . . . . . . . . . . . . . . . . . . . . . . . . . .
9-12
Blade Replacement . . . . . . . . . . . . . . . . . . . . . . . . . . .
6-38
6-55
Fuses . . . . . . . . . . . . . . . . . . . . . . . . . . . . . . . . . . . . . .
Winter Driving . . . . . . . . . . . . . . . . . . . . . . . . . . . . . . . . . 4-25
WiperBladeCheck . . . . . . . . . . . . . . . . . . . . . . . . . . . . . 7-30
6-50
Wiper Blades. Cleaning . . . . . . . . . . . . . . . . . . . . . . . . . .
Wiring. Headlamp . . . . . . . . . . . . . . . . . . . . . . . . . . . . . . 6-55
5-8
WreckerTowing . . . . . . . . . . . . . . . . . . . . . . . . . . . . . . . . .
Wrench. Wheel . . . . . . . . . . . . . . . . . . . . . . . . . . . . . . . . . 5-26
Firing Orde
rhermos"-' at s
to Opr?
ower
A
.
Rear iread
retailed look at
t's Under the Hc
I
Fuel
Use unleaded gas only.