1
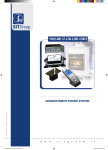
9.957.074 00
PROFLAME SYSTEM
TROUBLESHOOTING GUIDE
This document is intended to be to be used by the appliance manufacturer only
and is not to be distributed to field service personnel or the end user.
Scope
This document is intended to be used in combination with the instruction manuals for each of the
Proflame system components to aide in trouble-shooting and solving problems that may arise with
the Proflame system.
The appliance manufacturer’s instructions shall always supersede the information contained within
this document.
This document is intended to be used as a guide only, and must not be used to establish
conformity of system components with OEM specifications, local codes, or certification standards.
1 Brief description of the system
The Proflame System can be comprised of these elements specifically designed to be used in
conjunction with
•
A stand-alone Proflame system
o
Proflame DFC: the flame ignition and control board
o
Proflame DFC main wirings harness
o
Proflame pilot assembly
o
Proflame 885/886 gas valve
o
Proflame power supplies
•
Remotely controlled Proflame system
o
Proflame DFC: the flame ignition and control board
o
Proflame DFC main wirings harness
o
Proflame pilot assembly
o
Proflame 88# gas valve
o
Proflame GT* Transmitter
o
Proflame GT* Receiver
o
Proflame GT* main wirings harness
o
Proflame GT Fan Control Module, or power supplies
o
540 split flow valve
in which the “#” character will be:
- “0” if a non modulating valve is used,
- “5” if an electronically modulation valve is used,
- "6" if a manually adjustable modulating valve is used,
and the “*” string will be the composition of the following characters:
- “blank” if a non-modulating, or manually adjustable valve is used,
- “M” if an electronically modulating valve is used,
- “F” if the Fan Control Module peripheral is used, this will also supply power to the
whole system,
- “S” if the Split Flow Valve is used.
2 Brief description of the components
2
The Proflame control is available in three different configurations. The 880 Proflame provides
basic ON/OFF operation of gas flow to the pilot and main burners of the heating appliance. The 885
Proflame provides the same basic functions as the 880 Proflame while also allowing for electronic
modulation of the gas pressure to the appliance burner.
The 886 Proflame offers the same functions as the 885 control except that it is fitted with a manual
HI/LO knob to allow for manual modulation of the gas outlet pressure to the appliance burner.
The Proflame controls are designed to be used with either LPG or Natural Gas and can be converted
by use of an OEM supplied conversion kit. The 880 valves can also be upgraded to 885 or 886
configurations by installing OEM supplied conversion/ kits.
The Proflame 584 Digital Fireplace Control (DFC) is an automatic gas ignition system based
on a single microcontroller core. This family of controls is suited to manage all functions related to
ignition, flame sensing and supervision for atmospheric applications.
The Proflame DFC can be set to provide continuous or intermittent ignition control sequences and
flame monitoring with safety shutdown in case of failure.
The Proflame DFC can be set up as a stand alone AC powered system with battery back up.
When used with the Proflame 584 Remote Control System the Proflame DFC can be supplied with AC
power from either an AC wall adaptor or the Fan Control Module via the remote receiver.
The Proflame receiver supplies battery back up power for both configurations. The Proflame
GT Series is a modular remote control system that directs the functions of a hearth appliance. The
Proflame GT is configured to control the ON/OFF and flame level of the main burner and provides on/
off and Smart thermostatic control of the hearth appliance. The system controls a remotely actuated
120V/60Hz power outlet, Fan speed through six (6) levels and has a constantly powered 120V/60Hz
power outlet.
The Proflame Receiver (fig. 1) connects directly to the gas valve, stepper motor and Fan Control
Module with a wiring harness. The receiver is powered by (4) AA type batteries. The receiver
accepts commands via radio frequency from the Transmitter to operate the appliance in accordance
with the particular Proflame system configuration. The three-position slider switch on the receiver
can be set to any of the three positions: ON (Manual override), Remote (Remote control) or Off.
The Proflame Remote Control System consists of a transmitter and receiver that, when
used in conjunction with a combination gas control valve, controls the functions of the gas hearth
appliance. It is capable of providing ON/OFF and thermostatic control of the appliance when used
in it’s most basic form, or may be configured to work with an electronically modulating control to
provide variable flame height and Smart thermostat operation. The system can be further upgraded
to include a Fan Control Module that is capable of controlling power to a remotely controlled ON/OFF
120V/60Hz outlet, a constantly powered 120V60Hz power outlet, and a variable outlet that provides
six (6) different fan speeds. The Proflame Transmitter uses a streamline design with a simple button
layout and informative LCD display. A Mode Key is provided to index between the features and a
Thermostat Key is used to turn on/off or index to through the Thermostat functions.
The Proflame GT Series is a modular remote control system that directs the functions of a
hearth appliance. The Proflame GT is configured to control the ON/OFF and flame level of the main
burner and provides on/off and Smart thermostatic control of the hearth appliance.
The Proflame Fan Control Module (FCM) offers the added ability to control the fan speed from off
through six (6) speeds, a remotely actuated 120V outlet in addition to providing a constantly powered
120V outlet. The FCM provides DC power to the receiver & DFC board allowing the batteries to be
used only when line power is interrupted or lost.
- The Split Flow burner controller has one inlet and two outlets. The inlet is connected to
the outlet of the appliance main safety valve, while the outlets are connected to the primary and
secondary burners respectively. The primary outlet is always open, simply allowing the gas flow
from the safety valve to the primary burner. The secondary outlet is controlled by the Split Flow and
can be open or closed at the user request. A 6VDC pulse is applied to the solenoid which opens a
valve allowing gas to flow to the burner. The valve will remain open until a pulse of opposite polarity
is applied to the coil. The Split Flow is NOT a safety device, and is only used for controlling burner
sections in a gas appliance. The appliance manufacturer must verify that the burners light correctly
when the appliance is put into operation with either one or two burners being lit at a time. The Split
Flow is fully compatible for use with the Proflame remote control system.
3
3 Basic configuration schematics
Standalone Proflame system (Fig.1)
ON / OFF
CPI / IPI MODE
Orange
ON/OFF
Green
IPI/CPI
Battery
Holder
Red
Black
880/886 Proflame
VALVE
BATTERY
120 Vac INPUT
7 Vdc STABILIZED
SUPPLY OUTPUT
Chassis
connection
GROUND
DFC
DC SUPPLY
Fig. 1: electrical connections of standalone Proflame system
4
GTMFS Proflame system (Fig.2)
REMOTE
120V OUT
REMOTE
MOTOR
FCM-COM
Orange
Pilot
Green
Pink
Receiver 14
Pin Connector
Blue
Split Flow
RECEIVER
885 PROFLAME
SPLIT FLOW
GROUND
TPTH
TH
ON / OFF
Chassis
connection
Remote control
DC SUPPLY
DC SUPPLY
IPI/CPI
Fig. 2
CPI / IPI MODE
GTMS Proflame system (Fig.3)
120 Vac INPUT
7 Vdc STABILIZED
SUPPLY OUTPUT
REMOTE
REMOTE
MOTOR
DC SUPPLY
Orange
Green
Pilot
Pink
Receiver 14
Pin Connector
Blue
Split Flow
RECEIVER
885 PROFLAME
SPLIT FLOW
GROUND
TPTH
TH
Remote control
ON / OFF
Chassis
connection
DC SUPPLY
DFC SUPPLY
Fig. 3
IPI/CPI
CPI / IPI MODE
5
4 Tools
Multimeter
Flat-head
Screwdriver
Manometer
Phillips-head
Screwdriver
Test Wire
5 Troubleshooting
Before proceeding with the procedures in the following troubleshooting table, verify that the power
supply (AC/DC adapter or Fan Control Module) is present and that the batteries inside the receiver
and/or optional battery pack are fresh and installed with correct polarity.
Make sure all the connections between the wire harnesses and system components are proper
and positive.
Make sure the communication link between transmitter and receiver is established (see Operating
Procedure of 9957035 GTMF Installation manual).
Verify that the static inlet pressure meets the manufacturer’s recommended inlet pressure. If necessary adjust the line pressure regulator.
If the recommended actions for the following troubleshooting flow chart do not help to address the
problem consider replacing wiring harnesses.
See Troubleshooting flow chart.
In case of doubt contact us before to proceed.
WARNING
6
Any actions performed on the gas valve must be performed in accordance with the gas
valve instruction manual. Likewise, any actions performed on the DFC or other system
components must be done in accordance with the with the individual component instruction
manuals.
Replacement of components must be performed in accordance with the manufacturer’s
instruction manual.
Troubleshooting flow chart
1
If the DFC giving signal lock out.
The board should be unlocked to
reinitiate a pilot flame ignition (for
the correct unlock sequence refer
to the DFC Use and Installation
Instructions)
Pilot flame is ON
NO
Is the DFC board in
lock out
NO
1. Verify the electrical connections integrity and
make sure they are in accordance with the
relevant system wiring diagram. If necessary
replace the wire harness.
2. Replace the DFC board.
YES
1. Check the spark electrode positioning - adjust
as necessary (for the correct distance refer t o
the Pilot burner user installation manual)
Was observed spark
at the Pilot Hood before the
DFC board locked out
2. Replace the spark cable, or the cableelectrode assembly, or the pilot assembly
NO
3. Verify the electrical connections integrity and
make sure they are in accordance with the
relevant system wiring diagram. If necessary
replace the wire harness.
4. Replace the DFC board.
1. Verify the electrical connections integrity and
make sure they are in accordance with the
relevant system wiring diagram. If necessary
replace the wire harness.
YES
YES
2. If pilot flow adjuster screw is not sealed;
check if pilot flow adjust screw is set correctly in
accordance with the appliance manufacturer
instructions. If necessary correct it.
3.Replace pilot tube or complete pilot assembly.
4.Replace the pilot orifice with a new orifice of
correct size, and type, or replace the pilot
assembly. Under all circumstances follow the
appliance manufacturer's service instructions.
5. Remove the provided wiring harnesses from
EV1 of gas valve (red base), and verify voltage
at ignition between the EV1 terminal and the
ground connection on the valve body. If the
voltage is greater then 0 then Replace Valve.
Otherwise Replace DFC
Spark
continues while the
pilot is ON
NO
2
YES
1. Replace the sense cable, or the cablesense electrode assembly, or the pilot assembly
2. Replace the DFC board
7
2
Main burner
lights when the
pilot only should
light
1. Replace DFC board
YES
2. Replace the gas valve
1. Verify the pilot flame fully engulfs the tip of the sense electrode. If not replace the pilot
assembly.
NO
2. Replace the sense electrode.
3. Carefully clean the electrical connections of the sense cable, and the DFC board sense
cable connection.
Pilot holds
the flame?
NO
4. Replace the sense cable, or the cable- sense electrode assembly, or the pilot assembly
5. Verify the pilot is properly grounded, and there is no damage to the ground cable.
If necessary replace the pilot ground cable .
6. Replace the pilot orifice with a new orifice of correct size, and type, or replace the pilot
assembly. Under all circumstances follow the appliance manufacturer's service instructions.
7. If pilot flow adjuster screw is not sealed; check it in acordance to appliance manufacturer
instruction. If necessary correct it
YES
1. Verify the electrical connections integrity and make sure they are in accordance with the
relevant system wiring diagram. If necessary replace the wire harness.
2. Check if the remote transmitter is in thermostat mode and verify there is a call for heat.
Adjust the setting for heat.
3. Verify that the pilot hood is properly fitted and a pilot flame is directed to properly ignite
the main appliance burner.
Main burner
ignites?
NO
4. Replace the main burner orifice with a new orifice of correct size, and type, or replace the
pilot assembly. Under all circumstances follow the appliance manufacturer's service
instructions.
5. Remove the provided wiring harnesses from EV2 of gas valve (red base), and verify
voltage at ignition between the EV1 terminal and the ground connection on the valve body.
5.1 If the voltage is greater then 0 then Replace Valve.
5.2 Or Replace DFC
6. Check the pressure at the outlet pressure test point out according to the manufacturer
instruction. If not in accordance replace the gas valve.
YES
1. Verify the electrical connections integrity and make sure they are in accordance with the
relevant system wiring diagram. If necessary replace the wire harness.
2. Check the pressure at the outlet pressure test point out according to the manufacturer
instruction. If not in accordance replace the gas valve.
Main burner
remains ON
YES
8
3
NO
3. With the system in the OFF position, connect the voltmeter between the EV2 terminal
(green base) on the valve, and the ground on the valve body.
Turn the system ON, let the pilot light, and observe the following voltage sequence: once
the pilot flame is proved, the voltage on EV2 should spike to approx. 5 VdC for approx. 2
sec and then drop to approx. 0.6 Vdc continuously.
3.1 If the sequence is respected, replace the gas valve.
3.2 If the sequence is not respected, replace the DFC board.
1. Replace the main burner orifice with a new orifice of correct size (partial blckage
possible). Verify that the main burner flame modulates.If it does not modulate replace the
gas valve.
3
2. Verify that the gas valve outlet pressure limits are in accordance with the manufacturer
specifications. If not replace the gas valve.
Main
burner modulates
properly?
NO
FOR MANUAL HI/LO VERSION
3. Verify the flame changes while rotating the HI/LO knob on the front of the gas valve.
If there is no change replace the gas valve.
FOR STEPPER MOTOR VERSION
4. Check for the proper electric connections, and inspect the stepper motor wiring for
damage. If the stepper motor wiring is damaged, replace the gas valve.
5. Replace the transmitter.
6. Replace the receiver
YES
7. Replace the gas valve
4
9
4
Turn Fan ON via
transmitter
Fan turns on?
NO
Are you using
remote transmitter
GTMF or GTMFS?
YES
NO
1.Replace transmitter with GTMF or GTMFS version
1. Verify the FCM is connected to the AC Power and switch it ON.
2. Verify the electrical connections integrity and make sure they are in accordance
with the relevant system wiring diagram. If necessary replace the wire harness.
YES
3. Unplug the fan from the Fan outlet of FCM, and plug it into the appliance 120V
supply.
3.1 If the fan works replace the FCM.
3.2 If the fan doesn't work, replace the fan and connect to fan outlet.
1. Verify the FCM is connected to AC Power and is ON and that the Fan is plugged
into the FCM receptable marked FAN. If not do it.
Fan RPM changes in
accordance with trasmitter
commands
NO
2. Verify that the pilot ground wire connection is properly connected to the
appliance chassis, as per the DFC installation manual..
3. Replace FCM.
YES
1. Verify the FCM is connected to AC Power and the Aux devices are plugged in.
2. Verify that the DFC board is properly grounded to the appliance chassis as per
DFC board Use and Installation Instruction. If not make proper ground connection.
Aux devices work as
commanded by transmitter
NO
2. Unplug the Aux device from the Aux outlet of FCM, and plug it into the appliance
120V supply.
2.1 If the Aux device works replace the FCM.
2.2 If the Aux device doesn't work, replace the aux device and connect it to Aux
outlet.
YES
1. Verify the Transmitter has Split flow features.
Split flow works as
commanded by the
transmitter
NO
1. Verify the electrical connections integrity and make sure they are in accordance
with the relevant system wiring diagram. If necessary replace the wire harness.
2. Replace Split Flow.
YES
10
END
Receiver - transmitter troubleshooting flow chart
Rx-TX
comm
Replace receiver battery with new ones
Is receiver beeping?
NO
1. Replace the receiver
YES
Replace transmitter battery with new ones
1. move closer transmitter to receiver
Pushing ON/OFF button of
transmitter is receiver beeping?
NO
2. resynchronize the receiver and the
transmitter
3. replace the transmitter with a correct
type version
YES
END
11
OFF command troubleshooting flow chart
OFF
command
1. Verifiy transmitter-receiver communication
Main burner
turns OFF?
NO
2. Remove the electrical wire connector from the EV1 (green base)
and EV2 (red base) on the gas valve. If the main burner still
remains lit continuously, turn off the gas supply to the appliance,
and replace the gas valve.
YES
1. Verify the status of the IPI/CPI switch. If the IPI/CPI switch is in
CPI position the system behaves as expected.Otherwise, check
with manufacturer's instruction manual.
Pilot turns
OFF?
YES
END
12
NO
2. Remove the electrical wire connector from the EV1 (green base)
on the gas valve. If the pilot still remains lit continuously, turn off
the gas supply to the appliance, and replace the gas valve.
6 Additional troubleshooting information
6.1 DFC power supply verification
Battery supply test
Switch off the FCM if present. Measure voltage between CN1.1 (+) and CN1.3 (-) at the DFC
board (see wiring diagram in the DFC installation manual).
The measured voltage should be between 4.4Vdc and 6.4Vdc. Less than 4.4Vdc could indicate
drained batteries. To be also sure, each single battery level should be measured greater than
1.1Vdc.
6.2 AC/DC supply test
Turn FCM ON or plug in the AC/DC adapter. Measure voltage between CN1.2 (+) and CN1.3 (-)
at the DFC board (see wiring diagram in the DFC installation manual).
The measured voltage should be between 6.7Vdc and 7.3 Vdc for the AC/DC adapter.
The measured voltage should be between 6Vdc and 6.4 Vdc for the FCM.
7 Available documentation
CODE
9957018
9957039
9957063
9957061
9957015
9957016
9957017
9957028
9957029
9957030
9957031
9957032
9957035
9957036
9957037
9957038
9957014
9957100
7252627
7252628
7252638
7252639
DESCRIPTION
880 PROFLAME Use and Installation Instructions
885 PROFLAME Use and Installation Instructions
886 PROFLAME Use and Installation Instructions
PROFLAME DFC Use and Installation Instructions
GT System Use and Installation Instructions
GTM System Use and Installation Instructions
GTMF System Use and Installation Instructions
Prolame GTMF System Use and Instructions
Proflame System with the SPLIT FLOW feature
584 Proflame GTMF Transmitter
584 Proflame GTMF Receiver
584 Proflame GTMF Fan Control Module
584 Proflame GTMF System
584 Proflame GTM System
584 Proflame GT System
584 Proflame Receiver (S)
Split flow Use and Installation Instructions
Pilot Burner Use and Installation Instructions
PROFLAME HI/LO conversion kit
PROFLAME Stepper motor conversion kit
Assembly instructions (LPG)
Assembly instructions (NG)
LANGUAGE
GB
GB
GB
GB
FR
FR
FR
FR GB
GB
GB
GB
GB
GB
GB
GB
GB
GB
GB
GB
GB
GB
GB
13
This page is intentionally left blank
14
This page is intentionally left blank
15