1
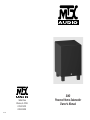
1 Mitek Plaza
Winslow, IL 61089
815-367-3000
800-225-5689
21A7059
SW2
Powered Home Subwoofer
Owner’s Manual
TECHNICAL ASSISTANCE
For additional technical assistance you can visit our web site at
www.mtx.com. Otherwise, our technical service representatives can be
reached by phone: 1-800-CALL-MTX or by E-mail: [email protected].
TWO YEAR LIMITED WARRANTY
MTX Powered Subwoofers purchased in the United States from an
authorized MTX dealer are guaranteed against defective material and
workmanship for a period of TWO YEARS from the date purchased by the
end user, and limited to the original retail purchaser of the product. Product
found to be defective during that period will be repaired or replaced by MTX
at no charge. This warranty is void if it is determined that unauthorized
parties have attempted repairs or alterations of any nature. Warranty does
not extend to cosmetic or finish. Before presuming a defect is present in
the product, be certain that all related equipment and wiring is functioning
properly. MTX disclaims any liability for other incurred damages resulting
from product defects. Any expenses incurred in the removal and reinstallation of products are not covered by this warranty. MTX’s total liability will
not exceed the purchase price of the product. If a defect is present, your
authorized MTX dealer may be able to effect repairs.
Proof of purchase is required when requesting service, so please retain
your sales receipt and take a moment to register your warranty on line at
www.mtx.com.
SAFETY SYMBOLS AND STATEMENTS
SPECIFICATION
Amplifier Type:
Class A/B
Frequency response:
35 Hz - 160 Hz
Lo-pass xover
60 Hz - 160 Hz at 18 dB per octave
Inputs:
Line level and speaker level full range
Outputs:
Line level
Hi-pass subsonic filter:
18 dB per octave below 30 Hz
Polarity switch:
Normal (0 degrees)/reverse (180 degrees)
Amplifier
Power: (continuous)
100 watts
Driver
Size:
12”
Voice coil diameter:
1-1/2”
Dimensions
Height:
17-1/2”
Width:
15”
Depth:
17” (17 7/8” Including Amplifier)
Weight
System:
Shipping:
35.5 lbs
39 lbs
Specifications subject to change without notice.
14
IMPORTANT SAFETY INSTRUCTIONS
IN CASE OF TROUBLE
1. Read Instructions – All the safety and operating
instructions should be read before the product is
opened.
2. Retain Instructions – The safety and
operating instructions should be retained for future
reference.
3. Heed Warnings – All warnings on the product
and in the operating instructions should be adhered
to.
4. Follow Instructions – All operating and use
instructions should be followed.
5. Cleaning – Unplug this product from the wall
outlet before cleaning. Do not use liquid cleaners or
aerosol cleaners. Use a damp cloth for cleaning.
Exception: A product that is meant for uninterrupted
service and that for some specific reason, such as
the possibility of the loss of an authorization code for
a CATV Converter, is not intended to be unplugged
by the user for cleaning or any other purpose, may
exclude the reference to unplugging the product in
the product in the cleaning description otherwise
required in above 5).
6. Attachments – Do not use attachments not
recommended by the product manufacturer as they
may cause hazards.
7. Water and Moisture – Do not use this product
near water – for example, near a bath tub, wash
bowl, kitchen sink, or laundry tub; in a wet
basement; or near a swimming pool; and the like.
8. Accessories – Do
not place this product on
an unstable cart, stand,
tripod, bracket, or table.
The product may fall,
causing serious injury to a
child or adult, and serious
damage to the product.
Use only with a cart,
stand, tripod, bracket,
or table recommended
by the manufacturer, or
sold with the product. Any mounting of the product
should follow the manufacturer’s instructions, and
should use a mounting accessory recommended by
the manufacturer.
9. A product and cart combination should be
moved with care. Quick stop, excessive force, and
uneven surfaces may cause the product and cart
combination to overturn.
10. Ventilation – Slots and openings in the cabinet
are provided for ventilation and to ensure reliable
operation of the product and to protect it from
overheating, and these openings must not be
blocked or covered. The openings should never be
blocked by placing the product on a bed, sofa, rug
or other similar surface. This product should not be
placed in a built-in installation such as a bookcase
or rack unless proper ventilation is provided or the
manufacturer’s instructions have been adhered to.
11. Power Sources – This product should be
operated only from the type of power source
indicated on the marking label. If you are not sure
of the type of power supply to your home, consult
your product dealer or local power company. For
products intended to operate from battery power, or
other sources, refer to the operating instructions.
12. Grounding or Polarization – This product may
be equipped with a polarized alternating-current
line plug (a plug having one blade wider than the
other). This plug will fit into the power outlet only
one way. This is a safety feature. If you are unable
to insert the plug fully into the outlet, try reversing
the plug. If the plug should still fail to fit, contact
your electrician to replace your obsolete outlet.
Your new subwoofer, once set-up and adjusted, should give you years of
listening enjoyment with your favorite movies and music. However, if you
should experience a problem with your unit, the following chart should help
you locate the trouble:
Do not defeat the safety purpose of the polarized
plug.
13. Power-Cord Protection – Power-supply cords
should be routed so that they are not likely to be
walked on or pinched by items placed upon or
against them, paying particular attention to cords
at plugs, convenience receptacles, and the point
where they exit from the product.
15. Outdoor Antenna Grounding – If cable
system is connected to the product, be sure the
cable system is grounded so as to provide some
protection against voltage surges and built-up static
charges.
16. Lightning – For added protection for this
product during a lightning storm, or when it is left
unattended and unused for long periods of time,
unplug it from the wall outlet and disconnect the
antenna or cable system. This will prevent damage
to the product due to lightning and power-line
surges.
17. Overloading – Do not overload wall outlets,
extension cords, or integral convenience
receptacles as this can result in a risk of fire or
electric shock.
18. Object and Liquid Entry – Never push objects
of any kind into this product through openings as
they may touch dangerous voltage points or shortout parts that could result in a fire or electric shock.
Never spill liquid of any kind on the product.
19. Servicing – Do not attempt to service this
product yourself as opening or removing covers
may expose you to dangerous voltage or other
hazards. Refer all servicing to qualified service
personnel.
20.a) When the power-supply cord or plug is
damaged.
b) If liquid has been spilled, or objects have
fallen into the product.
c) If the product has been exposed to rain or
water.
d) If the product does not operate normally by
following the operating instructions. Adjust
only those controls that are covered by
the operating instructions as an improper
adjustment of other controls may result in
damage and will often require extensive
work by a qualified technician to restore the
product to its normal operation.
e) If the product has been dropped or damaged
in any way.
21. Replacement Parts – When replacement
parts are required, be sure the service technician
has used replacement parts specified by the
manufacturer or have the same characteristics as
the original part. Unauthorized substitutions may
result in fire, electric shock, or other hazards.
22. Safety Check – Upon completion of any service
or repairs to this product, ask the service technician
to perform safety checks to determine that the
product is in proper operating condition.
23. Wall or Ceiling Mounting – The product
should be mounted to a wall or ceiling only as
recommended by the manufacturer.
24. Heat – The product should be situated away
from heat sources such as radiators, heat registers,
stoves, or other products (including amplifiers) that
produce heat.
Problem
1) Subwoofer makes loud noise at turn-on.
2) Subwoofer has no output.
a) Status LED off
b) Red light on
c) Green light on
3) Subwoofer has little output.
4) Subwoofer output is distorted at high
volume.
Diagnosis
A) Muting circuit is defective.
Return unit for repair.
A) Line cord is not plugged in.
B) Line fuse is blown. Unplug line cord
from wall outlet,then check fuse.
C) Internal fuse is blown. Return unit for
repair.
A) No signal is reaching the unit.
Check connections from receiver or
preamplifier.
B) Power switch is turned off. Place switch
to “stand by” or “on” mode.
A) Signal is present, but input level control
is set at minimum.
A) Input level control is set too low.
B) If using high level inputs, right and left
channels are connected out of phase.
Check wiring.
A) Volume of subwoofer is too high,
causing amplifier to be over driven.
Reduce setting of input level control.
B) Signal from receiver, amplifier, or
preamplifier is distorted from being over
driven. Reduce main system volume or
bass tone control.
C) Subwoofer electronics are defective.
Return unit for repair.
5) Subwoofer output is distorted at low
volume.
A) Signal from receiver, amplifier, or
preamplifier is distorted from defective
electronics.
B) Signal connecting wires to subwoofer
are shorted. Check wiring.
C) Subwoofer electronics are defective.
Return unit for repair.
6) Subwoofer makes hum or buzzing
noises.
A) Grounding problem or ground loop
condition. Check wiring.
B) Isolate problem by removing all
connecting cables and turning up
subwoofer input level control. If
noise is still present, subwoofer
electronics are defective. Return
unit for repair.
13
OPERATION
After you have connected your subwoofer, adjusted it for proper operation
with the rest of your system, and experimented to find the best location
for it, it’s time to sit back and enjoy it. As you do, here are some hints for
getting the most out of your subwoofer.
A) The subwoofer’s level control is designed to adjust the balance between
your subwoofer and main stereo speakers and should not be used as a
substitute for the bass or loudness controls on your amplifier or receiver. If
more bass is desired, advance the bass or loudness controls on your main
amplifier or receiver.
B) Your subwoofer’s auto turn-on-turn-off feature allows “set it and forget
it” operation by keeping the electronics in a standby mode until a signal is
detected, which turns the amplifier on instantly. When there is no signal
present after a few minutes, the electronics will again shut down to the
standby mode. We do suggest that you turn the subwoofer off by its power
switch if it is to be unused for an extended period of time. For additional
protection against damage from lightning, we recommend unplugging the
line cord.
C) The tone controls on your preamplifier, receiver, or amplifier should be
used with caution and care. Excessive boost in certain frequency ranges
can cause heavy demands on amplifier and loudspeaker components
resulting in overheating, distortion, mechanical overload, and premature
failure.
POWERED HOME SUBWOOFER
OWNER’S MANUAL
Table of Contents
Introduction .............................................................. 2
Unpacking/pre-installation instructions .................... 3
Glossary ................................................................... 3
Explanation of features and controls ....................... 4
Placement or positioning ......................................... 6
Wiring and connections ........................................... 7
Set-up and adjustment........................................... 11
CARE AND CLEANING
Your subwoofer is finished in a durable vinyl and may be wiped clean with
a damp cloth as needed when the power switch is turned off.
Operation ............................................................... 12
Care and cleaning.................................................. 12
In case of trouble ................................................... 13
Specifications......................................................... 14
12
CONGRATULATIONS...
SET-UP AND ADJUSTMENT
... on your purchase of a MTX powered home subwoofer system. Your
new subwoofer is one of the most exciting home entertainment electronic
products available, adding impact and realism to recorded music and the
wide variety of movies to be found on videotape, laser disc, DVD and offthe-air broadcasts.
After you have selected an initial location for your subwoofer and have
connected it into your system, have a seat in your normal listening position
and have someone help you with the following adjustments:
Once set-up and properly adjusted, it should give you many years of
entertainment pleasure.
Your subwoofer is a high value product built using the latest materials,
technology, and equipment by MTX, a vertically integrated company.
Thank you for selecting MTX in making your audio equipment purchase.
INTRODUCTION
Your new subwoofer has many features which help to deliver its great bass
performance and make it a remarkable value in home theater products.
* High efficiency amplifier:
Your home subwoofer utilizes a modern class A/B amplifier circuit to
produce high power with a minimum of heat.
* Versatile hook-up and operation:
Your new subwoofer has a variety of input and output connections that
make it easy to set-up and use in almost any stereo or home theatre
system.
* Low distortion woofer:
Each woofer uses an overhung voice coil and large excursion suspension
to produce higher sound pressure levels with lower distortion.
* Optimal enclosure:
Each enclosure is designed to match the parameters of its woofer
to maximize performance. Special low noise vents are used for less
distortion at the bottom of the frequency range.
2
A) If you are using the line level inputs and your main speakers are
receiving a full range signal, set the subwoofer crossover frequency control
to its full counterclockwise position of 60 Hz.
B) Set the polarity switch to the “normal” position and the level control to
the full counterclockwise position at “minimum”.
C) Turn off the loudness control and set the bass tone control on your main
amplifier to the flat position.
D) Use familiar program material that has substantial bass content and play
your main system at a moderate volume level.
E) Slowly rotate the subwoofer level control clockwise until a good balance
is achieved between the low frequency output of your subwoofer and the
mid bass and upper frequencies from your main speakers.
F) Change the polarity switch from “normal” to “reverse” to determine which
position results in the most overall bass output. Leave the switch in the
position that gives the highest output level.
G)Slowly rotate the subwoofer crossover frequency control clockwise to
attain the best blend between the level of the subwoofer and the main
speakers in the midbass crossover region. Advancing the control too far will
cause a “boominess” in the overall sound and will add an unnatural “chesty”
quality to male voices.
11
B) For use with A/V preamps and receivers that have 5.1 channel line
level outputs.
If your preamplifier or receiver has a single “subwoofer” output or “LFE”
output, connect a shielded cable from the preamplifier output to either one
of the subwoofer line level inputs. Refer to Figure E.
UNPACKING/PRE-INSTALLATION INSTRUCTION
Unpack your new subwoofer carefully, keeping the carton and packing
material for future use. Check the condition of your unit, reporting any
damage which may have occurred in transit to your dealer or shipping
company.
GLOSSARY
The following list of terms with their definitions is offered as a help in
understanding the set-up and operation of your subwoofer.
Preamplifier
Crossover (xover) - an electrical filter with lo-pass or hi-pass
characteristics that divides the frequency range into bands of low, middle,
or high frequencies to match the capabilities of specialized loudspeakers
like subwoofers that are only effective at reproducing limited frequency
ranges. The crossover frequency is the frequency where the filter begins
to attenuate or reduce the level of the signal.
OUTPUTS
Full range - refers to signals which cover the entire audio frequency span
from 20 Hz to 20 kHz.
SUB
Hi-pass - a type of filter circuit that allows high frequencies to pass, while
reducing the level of low frequencies with the transition from high to low
occurring at the crossover frequency. The rate of reduction of the signal
is called the attenuation rate or slope and is measured in decibels (dB)
over a change in frequency of one octave, which is a doubling or halving
of frequency.
Impedance - the resistance to the flow of current in an alternating
current circuit (such as with music). Line level circuits are typically a high
impedance of several thousand ohms, while speaker level circuits are
usually a low impedance of a few ohms.
Line level - the type of signal produced at the outputs of preamplifiers,
tape decks, CD players, etc., with a typical value of a volt or less in a high
impedance circuit. Sometimes called low level signals, they are routed
using shielded cables which are usually terminated with RCA phono
connectors.
FIGURE E
Lo-pass - a type of filter circuit that allows low frequencies to pass, while
reducing the level of high frequencies with the transition from low to high
occurring at the crossover frequency. The rate of reduction is called the
attenuation rate or slope and is measured in decibels (dB) over a change in
frequency of one octave, which is a doubling or halving of frequency.
Speaker level - the type of signal produced at the outputs of power
amplifiers that may be many volts in a low impedance circuit. Sometimes
called high level signals, they are routed using two conductor unshielded
wire of 18 gauge or larger. Connections are usually made with stripped
ends of wire gripped in spring loaded terminals.
10
3
EXPLANATION OF FEATURES AND CONTROLS
Installation using line level inputs
Refer to Figure A.
A) Using a preamp or receiver with line level outputs.
If a preamplifier output is available on your receiver, or you have a
preamplifier, connect it to the stereo line level RCA type input jacks on your
subwoofer. Use quality shielded cables and connectors. Connect one
set of shielded cables from the preamplifier output to the subwoofer input.
Connect a second set of cables from the subwoofer outputs to the input of
the power amplifier for your main stereo speakers. Refer to Figure D.
1) Polarity switch: This two position switch allows the best match of
acoustic output between the subwoofer and the main stereo speakers
in the region of the crossover frequency between them. The “normal”
position maintains phase from input to output, the “reverse” position
changes polarity or phase by 180 degrees.
2) Power switch: This three position switch controls the power status of
the subwoofer.
Off: Turns the unit off.
Auto: Places the unit in the standby mode, in this mode the subwoofer will
automatically turn on when an audio signal is applied to either the high or
low level inputs.
Note: Do not use the tape monitor output from your receiver or preamplifier
because its signal level will not vary with the setting of the preamp volume
control.
On: Turns the unit on regardless of whether a signal is present or not.
3) Subwoofer crossover : This rotary control adjusts a variable low pass
filter to set the upper frequency at which the output of the subwoofer
begins to roll-off. Continuously variable from 60 Hz to 160 Hz, it matches
the upper frequency characteristics of the subwoofer to the low frequency
response of the main stereo speakers.
Preamplifier
OUTPUT
L
R
4) Line level output: These RCA phono jacks provide a line level, stereo
output that tracks the level of the full range signal at the line level or
speaker level input. This output is provided for those wishing to “bi-amplify”
their main stereo speakers.
5) Line level input: These RCA phono jacks accept a line level full range
signal from the preamplifier output of a receiver or preamplifier. This full
range signal is processed and amplified to power the subwoofer.
Power Amplifier
INPUT
L
+
R
-
-
6) Speaker level input: These spring loaded terminals for speaker wire
accept a stereo, speaker level, full range signal from a receiver or
power amplifier. This signal is processed and amplified to power the
subwoofer.
+
+
-
7) Fuse: For continued protection replace fuse with same type and size
listed.
8) Level control: This rotary control adjusts the level of the subwoofer and
is used to balance its volume with that of the main stereo speakers.
-
4
+
9) Status LED: This two color light emitting diode shows the status of
the subwoofer electronics. “Red” indicates that the amplifier is plugged
in and the power switch is either off or in standby mode with no input
signal present. “Green” indicates that the amplifier is operating with signal
present at the input from the preamplifier, receiver, or power amplifier.
Right
Left
Speaker Speaker
FIGURE D
9
B) For amplifiers with two sets of speaker connections.
An alternate method of connecting your subwoofer and main speakers is
possible if you have a receiver or amplifier that can accommodate two sets
of speakers that can be switched on at the same time and be connected in
parallel. (Note that some receivers and amplifiers connect “A” and “B” sets
of speakers in series, not parallel. A series wiring will not allow this alternate
connection method for your subwoofer. Consult the owner’s manual for
your receiver or amplifier to find out which type of connection is used for
“A” and “B” sets of speakers.)
9
8
2
3
Make one set of connections from the “A” speaker outputs of your receiver
or amplifier to the speaker level inputs of your subwoofer and another set
of connections from the “B” speaker outputs of your receiver or amplifier to
your main stereo speakers. Switch both “A” and “B” speakers to the “on”
position. Refer to Figure C.
1
Right
Speaker
-
+
Left
Speaker
-
+
5
-
R
+ +
L
--
R
+
+
L
-
4
Receiver
or
Power Amplifier
6
7
FIGURE A
FIGURE C
8
5
PLACEMENT OR POSITIONING
Your new subwoofer will work well in a variety of locations. However,
placement in your listening room will affect its performance. Since the
wavelengths of sound reproduced by your subwoofer are large compared
to its size, those sounds are omni-directional in nature. This means that
locating your subwoofer in relation to your left and right main speakers will
not affect the directional cues which they provide.
Because the sounds you hear are a combination of direct sound from
the speaker and reflected sound from the walls, ceiling, and floor of your
listening room, placement of the subwoofer in relation to room boundaries
changes the balance of what you hear at low frequencies. In that low
frequency range, the dimensions of most rooms are comparable to the
wavelengths of those sounds. As sound propagates and reflects in the
room, “standing waves” are created at frequencies where the wavelength
of sound or multiples of the wavelength are equal to one of the dimensions
of the room. At your listening position, these standing wave patterns of
reflected sound add together in and out of phase causing large variations
in the response that you hear.
As a general rule, locating your subwoofer near the corner of the room will
increase its overall output, but will excite more standing waves in the room
and may result in a more uneven response. Locating your subwoofer along
a wall will usually mean less acoustic output but a somewhat smoother
response. A middle of the room location would suggest the smoothest
response with the least output capability. Of course, any location will be a
compromise between acoustic performance and the aesthetic blend of the
subwoofer enclosure with the decor and furnishings of your room. Don’t
be afraid to experiment with the location of your subwoofer in your room for
the best results at your listening position. As with any other listening test,
use program material that you are familiar with that has substantial bass
content.
WIRING AND CONNECTIONS
Turn off all power to your subwoofer and other equipment before
making any connections.
Installation using speaker level inputs
A) For amplifiers with one set of speaker connections.
If a preamplifier output connection is not available on your amplifier
or receiver, your subwoofer can be connected using your equipment’s
speaker outputs. These connections are made using commonly available
18 or 16 gauge lamp cord or speaker hook-up wire. Observe correct
polarity by connecting red(+) to red(+) and black(-) to black(-) for both left
and right channels. Connect your amplifiers speaker output terminals to the
subwoofer’s speaker level input terminals as well as to your main stereo
speakers according to Figure B.
Right
Speaker
-
-
Left
Speaker
+
R
+
-
+
+
L
-
Receiver
or
Power Amplifier
FIGURE B
6
7