Download Manual - MCM Electronics
Transcript
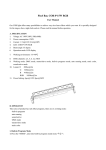
High Power LED RGB
Colour Wash Bar
Model: LEDBAR 24.1
www.pulse-light.co.uk
1
Safety Information
The lightning bolt within a
triangle is intended to alert
the user to the presence of
dangerous voltage levels
within the product’s
enclosure.
To reduce the risk of electric
shock, do not remove cover of
this device. There are no user
serviceable parts inside. Refer
servicing only to qualified
service personnel.
The exclamation point within a
triangle is intended to alert the
user to important operating and
maintenance (servicing)
instructions in the literature
accompanying the appliance.
This voltage may be of
sufficient magnitude to
constitute an electric shock
risk.
Safety Precautions
•
•
•
•
•
•
•
•
•
•
•
Read and retain these instructions
Follow all instructions and heed warnings
Do not use this device near water or in damp environments
If the surface becomes dirty, clean only with dry cloth, do not use solvents or thinners
Install in accordance with the manufacturer’s instructions
Do not install near heat sources such as radiators, heat registers, stoves, or other devices that
produce heat
Only use accessories specified by the manufacturer
Refer all servicing to qualified personnel
If mounting on a stand please ensure the stand has a sufficient load capacity to hold the unit. The
stand must be operated in accordance with the stand manufacturer’s instructions.
Rigging of lighting products should only be carried out by a competent person in accordance with
current guidelines. All fixings used should be correctly rated taking care to observe 10:1 safety
factors and utilise “Secondary” fixings as backup to the primary fixing methods.
This device must not be exposed to water in any way. No object filled with liquids should be placed
on apparatus
2
Pulse LEDBAR 24.1 – Colour LED Wash Bar
The Pulse LEDBAR 24.1 features 24 super bright, 1W LED’s offering greater output than the standard 252
LED products. Ideal for use indoors adding effects to stages, washing walls in colour or general up lighting.
The LED’s are split along the length of the bar in diagonal stripes to ensure a smooth wash across the wall
without any hotspots from any of the colours.
Features
•
•
•
•
•
•
•
•
•
•
•
•
24x 1W super bright LED’s (8 red, 8 green, 8 blue)
7 selectable DMX modes: 2, 3, 4, 6, 7, 14 and 26 channels
Selectable operating modes including Auto, DMX, Master/Slave, Sound Active and Static Colour
Black aluminium housing supplied complete with feet/hanging brackets
40 degree beam angle
LED display with four button menu system for ease of setup
IEC power in/out
3-pin XLR DMX connections
Integral microphone for Sound Active mode
Low power consumption: 36W
Dimensions (WxHxD): 1025x65x65mm (not including brackets)
Universal input voltage: AC120-240V/50-60Hz
Operation:
3
1) Mains Power Inlet
The LEDBAR24.1 operates from a standard mains voltage outlet (AC120-240V/50-60Hz). DO NOT
connect this to a dimmer pack as this can damage the unit and/or the dimmer pack. Dimming or
control of this product is done utilising the onboard DMX functions.
2) Mains Fuse
1A 250V rated 20mm mains fuse. Should the fuse require replacement the unit must be isolated
from the mains power supply before removing the fuse cover. The replacement fuse must be of the
same type and rating.
3) Mode
After the unit has powered up Press the “MODE” button to access the menu system and select the
required operating mode.
4) Setup
Press the “SETUP” button to access the parameters relevant to the selected mode.
5) Up
Press the “UP” button to increase the value of the selected parameter.
6) Down
Press the “DOWN” button to decrease the value of the selected parameter.
7) DMX Input
Standard 3-pin XLR male chassis socket for DMX input. Pin configuration for this product is Pin1=
Ground, Pin2= Negative (-ve) and Pin3= Positive (+ve).
8) DMX Output
Standard 3-pin XLR female chassis socket for DMX input. Pin configuration for this product is Pin1=
Ground, Pin2= Negative (-ve) and Pin3= Positive (+ve).
9) Mains Power Output
The LEDBAR 320 features a mains power pass through for daisy chaining the power on multiple
LEDBAR 320 units.
After power on, Press “MODE” button to activate the main menu: Built-in programs mode, Auto
running mode, DMX mode, Slave mode, sound-activated mode.
“SETUP” is to set the relative specification for current mode.
“UP” is to add the value of current specification.
“DOWN” is to decrease the value of current specification.
Built-in Programs: 17 built-in programs allow the user to generate a light show without the need for
a controller. Each program can be adjusted for speed or fade time.
Auto Run: This adds variety to the light show by running the built-in programs one after another in
continuous loop.
DMX mode: Controlled by DMX controller
Slave Mode: Used in conjunction with the Program, Auto, Sound Active or Static Colour modes
Sound Active Mode: In Sound Active mode the fixture will react to the mid/low tones, with each
beat the fixture will move the program forward one step.
Static Colour mode: Static Colours can be preset with each colour featuring 255 levels from 0-255
4
1. Built-in Programs Mode
Press mode until it shows Prxx, you can select 17 different built-in Programs. Press “SETUP” and
“UP” “DOWN” buttons to select the programs (from Pr01 to Pr17) and select the desired program
values.
When it shows Pr01, press “SETUP” to choose from seven static colours.
When it is Pr02 to Pr17, press “SETUP” and “UP” “DOWN” buttons, you can set the values for
flash(FS00-FS99), fading time(Fd00-Fd99), running speed(SP00-SPFL).
2. Auto Run Mode
You can press “MODE” button to select auto run mode, it shows
, then it will run the built-in
programs automatically.
Press “SETUP”, it shows n. 001, then you can adjust the running loops number by “UP” “DOWN”
If continuing pressing “SETUP”, it will show SPxx, Fdxx, FSxx, then you can set the value for speed,
fading and flash by “UP” “DOWN”
3.
DMX Mode
You can control the devices individually via your DMX-controller. Press “MODE” button until it shows
, this means DMX address is 001, you can set the DMX address by “UP” and “DOWN” buttons. If
press “SETUP” button, it will show d-p1 , it means the device is in which DMX mode 1. You can switch
these DMX modes by “UP” and “DOWN” buttons. There are 6 DMX modes.
DMX Profiles:
DMX mode 1: d.-P1
CH1
R dimming
0-255
CH2
G dimming
0-255
DMX mode 2: d.-P2
CH1
CH2
R dimming
G dimming
0-255
0-255
CH3
B dimming
0-255
CH3
B dimming
0-255
CH4
RGB dimming
0-255
DMX mode 3: d.-P3
C
H
1
R
1
+
R
2
02
5
5
CH
2
CH3
G1+
G2
B1+B2
R3+R4
G3+G4
0255
0-255
0-255
0-255
CH4
CH5
CH6
B3+B4
0-255
CH7
R5+R6
0-255
CH8
G5+G6
0-255
CH9
B5+B6
0-255
CH10
R7+R8
0-255
CH11
G7+G8
0-255
CH12
B7+B8
0-255
CH13
CH14
flash
dimming
0-255
0-255
5
CH1
R
DMX mode 4: d.-P4
CH2 CH3
CH4
G
B
R
0-255
0-255
CH1
4
G
CH1
5
B
0-255
0-255
0-255
CH16
R
0-255
CH5
G
0-255
CH1
7
G
0-255
0-255
CH6
B
CH7
R
CH8
G
CH9
B
CH10
R
CH11
G
CH12
B
CH13
R
0-255
0-255
0-255
0-255
0-255
0-255
0-255
0-255
CH18
CH19
CH20
CH21
CH22
CH23
B
R
G
B
R
G
0-255
0-255
0-255
0-255
0-255
0-255
DMX mode 5: d.-P5
CH1
NO DMXval
Effect programs
.
ue
1 0--9
OFF
2 10--19
R
3 20--29
RG
4 30--39
G
5 40--49
GB
6 50--59
B
7 60--69
RB
8 70--79
RGB
9 80--89
PROGRAM01
10 90--99
PROGRAM02
11 100--109 PROGRAM03
12 110--119 PROGRAM04
13 120--129 PROGRAM05
14 130--139 PROGRAM06
15 140--149 PROGRAM07
16 150--159 PROGRAM08
17 160--169 PROGRAM09
18 170--179 PROGRAM10
19 180--189 PROGRAM11
20 190--199 PROGRAM12
21 200--209 PROGRAM13
22 210--219 PROGRAM14
23 220--229 PROGRAM15
24 230--239 PROGRAM16
25 240--255 Sound active
CH2
4
B
CH25
CH26
flash
dimmin
g
0-255
0-255
0-255
CH2
SPEED 0--255
sensitivity
6
DMX mode 6: d.-P6
CH1 CH2 CH3
CH4
CH5
R
G
B
NO.
DMX
Effect programs
flash
value
0001
0--9
OFF
255
255
255
2
10--19
R
3
20--29
RG
4
30--39
G
5
40--49
GB
6
50--59
B
7
60--69
RB
8
70--79
RGB
9
80--89
PROGRAM01
10 90--99
PROGRAM02
11 100-PROGRAM03
109
12 110-PROGRAM04
119
13 120-PROGRAM05
129
14 130-PROGRAM06
139
15 140-PROGRAM07
0--255
149
16 150-PROGRAM08
159
17 160-PROGRAM09
169
18 170-PROGRAM10
179
19 180-PROGRAM11
189
20 190-PROGRAM12
199
21 200-PROGRAM13
209
22 210-PROGRAM14
219
23 220-PROGRAM15
229
24 230-PROGRAM16
239
25 240-Sound active
255
Remark: when CH4 is off, DMX values 32-255 for CH6 is available.
CH6
<=31
DMX
value
32--63
Effect programs
PRO01
64—95
PRO02
96—127
PRO03
128—
159
160--191
PRO04
PRO05
192--223
PRO06
223--255
Sound active
7
C
H
1
R
025
5
DMX mode 7: d.-P7
CH2 CH3
G
B
NO.
0255
0255
CH4
1
DMX
value
0--9
Effect programs
OFF
2
3
4
5
6
7
8
9
10
11
12
13
14
15
16
17
18
19
20
21
22
23
24
25
10--19
20--29
30--39
40--49
50--59
60--69
70--79
80--89
90--99
100--109
110--119
120--129
130--139
140--149
150--159
160--169
170--179
180--189
190--199
200--209
210--219
220--229
230--239
240--255
R
RG
G
GB
B
RB
RGB
PROGRAM01
PROGRAM02
PROGRAM03
PROGRAM04
PROGRAM05
PROGRAM06
PROGRAM07
PROGRAM08
PROGRAM09
PROGRAM10
PROGRAM11
PROGRAM12
PROGRAM13
PROGRAM14
PROGRAM15
PROGRAM16
Sound active
CH5
CH6
CH7
speed
flash
dimming
0-255
0-255
0-255
sensitivity
4. Slave mode
Press “MODE” button to select SLAu to run the slave mode. The LEDBAR will then replicate the effect
from the first unit in the signal chain. The first unit in the chain must be running in one of the
standalone modes such as Program, Sound Active, Static Colour or Auto.
5. Sound active mode
Press “MODE” button to select SU31 to be run, once activated the LEDBAR will advance one step at a
time triggered by the bass beat, adjust the sensitivity by using the “UP” and “DOWN” buttons.
Sensitivity Scale: SO01 - SO31, 01 = low, 31 = high
6. Static Colour Mode
Press “MODE” button to select Colr to be run, press “SETUP”, it will show r/G/b255, then you can
adjust the colors by “UP” and “DOWN” buttons.
8
Connection:
Pulse DMX fixtures should be connected using high quality, digital signal specific cables to help prevent
connection issues or data errors. It is also best practice to terminate all DMX lines using a DMX Terminator
are available from Pulse retailers & distributors (Code: DMXTERM-3P or DMXTERM-5P). The terminator
should be inserted into the last fixture in each DMX chain.
DMX Pin Configuration
Pin1= Ground
Pin2= Negative (-ve)
Pin3= Positive (+ve).
Care should be taken whan manufacturing DMX cables to ensure above pinout is observed. Do not connect
the cable’s shield conductor to the ground lug or allow the shield conductor to come in contact with the
XLR’s outer casing. Grounding the shield could cause a short circuit and erratic behaviour.
Trouble Shooting:
Unit does not power up: Check mains supply. If mains supply is correct check the fuses in all power cords and on
the fixture. Disconnect all cabling and fixtures from the mains supply before changing mains fuses.
Unit does not respond to DMX: Check DMX cabling to ensure reliable data connection including DMX polarity (see
diagram above). Check DMX address settings in line with the DMX controller or console.
Unit does not respond to SOUND: The internal microphone features a filter to cancel out high pitched tones
including treble. The fixture will respond to the lower mid and bass tones. The microphone requires a reasonable
sound level before it will activate and trigger the next step.
Compliance
When this product reaches the end of its life, do not dispose with household waste. See www.recycle-more.co.uk for
details of how to dispose of PULSE products in an environmentally sound fashion, or contact PULSE directly via
www.pulse-audio.co.uk
Warranty
Pulse products are warranted, by Pulse, against manufacturer defects for a period of one year from the original date
of purchase. This warranty is limited to manufacturer defects, in either materials or workmanship. PULSE, or any
other worldwide divisions of Premier Farnell PLC, is not responsible for any consequential or inconsequential damage
to any other component, structure or the cost of installation or removal of said items. Defective items should be
returned to the retailer/distributor from whom they were originally purchased. Batteries are classed as a consumable
item, as a result any battery will only carry a 90 day warranty from date of purchase.
This warranty will not cover damage due to improper use such as (and not limited to) damaged cones, mounting
frames, voice coils or items damaged by weather including exposure to moisture.
For questions or specific information regarding warranty replacement or repair, contact:
PULSE
www.pulse-light.co.uk
9


