1
LBI-38862A
Operator’s Manual
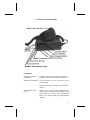
MONOGRAM SERIES
MOBILE RADIO
ERICSSONZ
TABLE OF CONTENTS
SAFETY INFORMATION . . . . . . . . . . . . . .
SAFE DRIVING RECOMMENDATIONS FOR
USERS OF MOBILE RADIOS* . . . . . . . .
OPERATING PROCEDURES . . . . . . . . . . . .
INTRODUCTION . . . . . . . . . . . . . . . . . . .
OPTIONS AND ACCESSORIES . . . . . . . . . . .
CONTROLS AND INDICATORS . . . . . . . . . .
CONTROLS . . . . . . . . . . . . . . . . . . .
INDICATORS . . . . . . . . . . . . . . . . . .
ALERT TONES . . . . . . . . . . . . . . . . .
OPERATION . . . . . . . . . . . . . . . . . . . . . .
POWER UP/DOWN . . . . . . . . . . . . . . .
RECEIVING A CALL . . . . . . . . . . . . . .
TO TRANSMIT A MESSAGE . . . . . . . . .
CHANNEL SCAN OPERATION . . . . . . . . . . .
NON PRIORITY SCAN . . . . . . . . . . . . .
PRIORITY SCAN . . . . . . . . . . . . . . . . . . .
LIMITED PRIORITY SCAN . . . . . . . . . .
VACANT CHANNEL SCAN . . . . . . . . . .
TRANSMIT TIME OUT TIMER . . . . . . . .
BUSY CHANNEL LOCKOUT . . . . . . . . .
FRONT PANEL PROGRAMMING . . . . . . . . . .
PRIORITY CHANNEL PROGRAMMING . . . . . .
ERROR MESSAGES . . . . . . . . . . . . . . . . .
. . . . .
3
.
.
.
.
.
.
.
.
.
.
.
.
.
.
.
.
.
.
.
.
.
.
4
4
6
6
7
7
8
9
10
10
10
11
12
12
13
14
14
15
15
15
16
18
.
.
.
.
.
.
.
.
.
.
.
.
.
.
.
.
.
.
.
.
.
.
.
.
.
.
.
.
.
.
.
.
.
.
.
.
.
.
.
.
.
.
.
.
.
.
.
.
.
.
.
.
.
.
.
.
.
.
.
.
.
.
.
.
.
.
.
.
.
.
.
.
.
.
.
.
.
.
.
.
.
.
.
.
.
.
.
.
NOTICE
This manual covers Ericsson and General Electric products manufactured and
sold by Ericsson Inc.
NOTICE
Repairs to this equipment should be made only by an authorized service
technician or facility designated by the supplier. Any repairs, alterations
or substitution of recommended parts made by the user to this equipment
not approved by the manufacturer could void the user’s authority to
operate the equipment in addition to the manufacturer’s warranty.
This manual is published by Ericsson Inc., without any warranty. Improvements and changes
to this manual necessitated by typographical errors, inaccuracies of current information, or
improvements to programs and/or equipment, may be made by Ericsson Inc., at any time and
without notice. Such changes will be incorporated into new editions of this manual. No part of
this manual may be reproduced or transmitted in any form or by any means, electronic or
mechanical, including photocopying and recording, for any purpose, without the express written
permission of Ericsson Inc.
Copyright © November 1992, Ericsson GE Mobile Communications Inc.
2
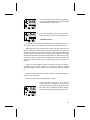
SAFETY INFORMATION
The operator of any mobile radio should be aware of certain hazards
common to the operation of vehicular radio transmissions.
A list of possible hazards are:
1.
Explosive Atmospheres
Just as it is dangerous to fuel a vehicle with the motor running, be
sure to turn the radio off while fueling the vehicles. Do not carry
containers of fuel in the trunk of the vehicle.
2.
Interference To Vehicular Electronics Systems
Electronic fuel injection systems, electronic antiskid braking systems, etc., are typical of the type of electronic devices that may
malfunction due to the lack of protection from radio frequency energy
present when transmitting. If the vehicle contains such equipment,
consult the dealer for the make of the vehicle and enlist his aid in
determining if such electronic circuits perform normally when the
radio is transmitting.
3.
Dynamite Blasting Caps
Dynamite blasting caps may be caused to explode by operating a radio
within 500 feet of the blasting caps. Always obey the "Turn Off Two
Way Radios" signs posted where dynamite is being used.
When transporting blasting caps in your vehicle:
4.
a.
Carry the blasting caps in a closed metal box with a soft lining.
b.
Leave the radio OFF whenever the blasting caps are being put
into or removed from the vehicle.
Radio Frequency Energy
To prevent burns or related physical injury from radio frequency
energy, do not operate the transmitter when anyone outside of the
vehicle is within two feet of the antenna.
3
5.
Liquefied (LP) Gas Powered Vehicles
Mobile radio installations in vehicles powered by liquefied petroleum
gas with the LP gas container in the trunk or other sealed-off space
within the interior of the vehicle must conform to the National Fire
Protection Association standard (NFPA) 58 which requires that:
a.
Space containing the radio equipment shall be isolated by a seal
from the space containing the LP gas container and its fittings.
b.
Outside filling connections shall be used for the LP gas container.
c.
The LP gas container shall be vented to the outside of the vehicle.
SAFE DRIVING RECOMMENDATIONS FOR USERS OF MOBILE
RADIOS*
Read the literature on the safe operation of your unit.
Keep both hands on the steering wheel and the microphone on the
hookswitch.
Place calls only when the vehicle is stopped.
When talking from a moving vehicle is unavoidable, drive in the slower
lane. Keep conversation brief.
If conversation requires taking notes or complex thought, stop the
vehicle in a safe place and continue your call.
Whenever you use a mobile radio you should exercise caution.
* As recommended by the AAA.
OPERATING PROCEDURES
Two-way FM radio systems must be operated in accordance with the rules
and regulations of the Federal Communications Commission (FCC). As an
operator of two-way radio equipment, you must be thoroughly familiar with
the rules that apply to your particular type of radio operation. Following these
rules will help to eliminate confusion, assure the most efficient use of existing
radio channels, and result in a smoothly functioning radio network.
4
When using your two-way radio remember these rules:
1.
It is a violation of FCC rules to interrupt any distress or emergency
message. And, as your radio operates in much the same way as a
telephone "party line", always listen to make sure that the line is clear
and that no one else is on the air before sending messages. If someone
is sending an emergency message, such as reporting a fire, or asking
for help in an accident - KEEP OFF THE AIR! Emergency calls
have priority over all other messages.
2.
Use of profane or obscene language is prohibited by Federal law.
3.
It is against the law to send false call letters, or a false distress or
emergency message.
4.
The FCC requires that you keep conversations brief and confine them
to business. To save time, use coded messages whenever possible.
5.
Using your radio to send personal messages (except in an emergency)
is a violation of the FCC rules. You may send only those messages
that are essential to the operation of your business.
6.
It is against the Federal law to repeat or otherwise make known
anything you overhear on your radio. Conversations between others
sharing your channel must be regarded as confidential.
7.
The FCC also requires that you identify yourself at certain times by
means of your call letters. Refer to the rules that apply to your
particular type of operation for the proper procedure.
8.
No changes or adjustments shall be made to the equipment except by
an authorized or certified electronics technician.
5
INTRODUCTION
The Monogram Series Mobile Radio utilizes advanced design techniques
using state-of-the-art technology. Microcomputer technology and a Phase
Locked-Loop (PLL) synthesizer provide the added flexibility and capability
inherent in quality radios.
16 channel capability, CTCSS (Channel Guard) and DCS signaling systems compatibility, as well as a quick scan function, (including dual-level
priority scan) are all controlled by the microprocessor.
Priority channels on both levels are front panel programmable - and you
the operator are in control. You can program your own list of priority channels.
An automatic self-check feature is built into the radio. Each time the radio
is turned on, the microprocessor executes a self-check of the microprocessor
and indicates proper operation by displaying 4000 in the display window and
sounding an alert tone.
For programming, service and repair needs, see your local Service Representative. He will be happy to service your radio for you.
IMPORTANT
Under U.S. Law, operation of an unlicensed radio transmitter within
the jurisdiction of the United States may be punishable by a fine up to
$10,000, imprisonment up to two years, or both!
OPTIONS AND ACCESSORIES
MGAN1A
MGMC5J
MGMC5H
MGLS1F
MGCE3F
MGZM7C
MGPD1A
MGSU1C
MGPS5V
6
Antenna, 148-470 MHz
Mobile Microphone
Desk Microphone
External Speaker
Speaker Adapter Cable
External Speaker with Adapter Cable (includes
MGLS1F & MGCE3F)
Noise Filter
Relay Kit
Station Power supply, 120 Vac With Adapter Cable
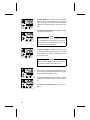
CONTROLS AND INDICATORS
CONTROLS
ON/OFF/VOLUME
CONTROL
Turns the radio ON or OFF and allows the user to
adjust the volume to the desired listening level.
SQUELCH CONTROL
Quiets the radio receiver when there are no
incoming calls.
Maximum squelch is obtained at full clockwise
rotation.
CHANNEL SELECT
(CH)
Enables you to select any of the preprogram- med
channels by pressing either of the channel selector
push-buttons (up or down). These push-buttons
allow you to scroll through the preprogrammed
channels.
7
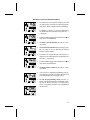
SCAN PUSH-BUTTON Turns the SCAN function ON or OFF (ON
indicated by a RED backlit display).
Provides the "ENTER" function during scan
programming.
PRIORITY SCAN
PUSH-BUTTON
Turns priority scan on/off (ON indicated by a green
backlit display).
Provides access to programming mode at radio
turn-on.
AUXILIARY SPEAKER Functionally, it replaces the internal speaker with
PUSH-BUTTON
the auxiliary speaker. This function must be
(Optional)
re-initialized after power is cycled (OFF/ON).
In the programming mode, it deletes channels from
the scan list.
MONITOR
PUSH-BUTTON
Disables tone or digital Channel Guard in the
receive mode.
Returns operation to the normal mode from the
programming sequence.
Controls display intensity.
INDICATORS
TRANSMIT LED (TX)
Indicates the microphone Push-To-Talk (PTT)
switch is pushed.
FLASHING
Indi cat es t he frequency s ynt he sizer is
malfunctioning. Contact your local service center.
BUSY LED
Indicates activity on the receive channel (indicated
by a YELLOW backlit display).
CALL LED
Indicates activity on a channel programmed for
Channel Guard (indicated by a GREEN backlit
display).
8
ALERT TONES
Self Check
ALERT TONE - Sounded for one second each
time the radio is turned on and the microprocessor
completes its self-check. It also indicates proper
operation by momentarily displaying 4000 in the
display window.
POWER UP - A power up alert tone is sounded to
indicate proper operation of the microprocessor.
SCAN LIST EMPTY - If your scan list is empty,
the "S" button will not light, an alert tone will
sound, and scanning will not start.
TIME OUT TIMER - If the transmitter has been
keyed (PTT bar pressed continuously) for a period
of time exceeding the preprogrammed time, an
alert tone is sounded until the PTT bar is released
and the TX LED goes out.
CHANNEL BUSY LOCKOUT - If a
transmission is attempted on a channel that is being
used, a WARNING tone sounded and all transmit
functions will be disabled. Transmissions are
allowed only on channels that are idle (BUSY LED
off).
PROGRAMMING PROMPT - A tone is
sounded to indicate access to the programming
mode.
ANTENNA IMPROPERLY CONNECTED - a
3 beep alert tone is sounded, the TX LED blinks,
and the transmitter is disabled.
CHANNEL DISPLAY
BLUE-GREEN - Indicates channel number,
priority scan channels, programming mode, and
error messages.
9
OPERATION
POWER UP/DOWN
1.
Turn the radio on by rotating the volume control
1/2 turn clockwise. "4000" appears in the display
window for approximately 1 second. A power up
alert tone is then sounded for approximately 1
second to indicate proper operation of the microprocessor. The MONITOR push-button will light
to indicate operation in the receive mode.
NOTE
All receiver tone options are off (disabled) until
you press the MONITOR button and the
GREEN backlight goes out.
The display changes to indicate the priority 1 channel
(if programmed) or channel No. 1 (Ch:01).
2.
Turn the radio off by turning the VOLUME control
full counterclockwise.
RECEIVING A CALL
10
1.
Turn the radio on and select the desire frequency
by pressing the appropriate channel select pushbutton until the desired channel is displayed.
2.
With the Monitor button lit, adjust the volume
control to a comfortable listening level.
3.
Rotate the SQUELCH control clockwise until the
squelch noise (rushing sound) is no longer heard
from the speaker and the BUSY LED goes out.
4.
Push the Monitor button. The green blacklight will
go out to indicate normal operation.
NOTES
DO NOT adjust the SQUELCH control while
other parties are using the channel.
If your radio is equipped with Channel Guard,
tone or digital, push the Monitor button (if lit)
to enable the option. The CALL LED will now
be off.
TO TRANSMIT A MESSAGE
1.
Turn the radio on and select the desired channel by
pushing the appropriate CHannel up ▲ or CHannel down ▼ selector button to display the desired
channel.
2.
Pick up the microphone (or Push the Monitor button while the mic is on-hook) and listen to be sure
no one else is using the channel. The Monitor
button should be lit and the BUSY LED should be
out.
3.
Remove the microphone from the hook-switch and
push the PTT bar on the side of the microphone.
Speak into the microphone in a normal tone of
voice. The TX LED will light while the PTT bar is
pressed (NOTE: PTT will not operate while the
microphone is "on-hook").
4.
Terminate the call as soon as you are through by
releasing the PTT bar.
11
CHANNEL SCAN OPERATION
Scan permits you to monitor any or all programmed channels; the receiver
continuously scrolls through each channel selected from the scan list. The
channels to be scanned are user programmable and may or may not be assigned
a priority level, its up to you the user to make this determination.
NOTE
If the power is cycled or the channel selector is changed during scan
operation, scan must be re-initiated.
NON PRIORITY SCAN
Non-priority operation is initiated by pressing the "S" button. If the "2"
button (Monitor) is lit, scan will be faster because the transceiver is looking
only for carrier activity not channels programmed for Channel Guard. When
not in the Monitor mode (i.e., "2" button not lit), scanning speed will be slower
due to combined search of carrier and channels programmed for Channel
Guard.
If your scan list is empty, the "S" button will not light, an alert tone will
sound, and scanning will not start.
The scanner will stop on the first channel with activity, and when that
activity ceases, the dealer programmed SCAN WAIT TIME will go into effect
(for reception of any additional transmissions on that channel). At the end of
the scan wait time, the transceiver will resume scanning, starting with the next
channel on the list.
Picking up the microphone (going off-hook) while locked onto an active
channel will stop scan and cause the radio to remain locked on that channel for
the duration of transmission plus the scan wait time.
Picking up the microphone while not locked onto a channel, will stop scan
as above, however, the transceiver will stop on the channel being scanned at
the time the microphone was taken off-hook, if no priority channel had been
programmed. If a priority channel is programmed, the transceiver will revert
to Priority Channel #1, even in the Non-Priority scan mode.
Returning the microphone to the holder (going on-hook) will cause the scan
sequence to resume the pre-programmed scan wait time.
12
1.
To enter the non-priority scan mode, press the "S"
button; it will light and the radio will start scanning
all valid channels on the scan list.
2.
To exit the non-priority scan mode, press the "S"
button, the radio will return to normal operation.
PRIORITY SCAN
Any of the radio’s programmed channels may be assigned a priority level.
Two levels of priority our available - priority level #1 and priority level #2.
When operating in the scan mode, the scanner will stop on the first scan
channel with activity. If that channel is not a priority channel, the scanner will
continue to monitor both priority channels at each pre-programmed time
interval. When the radio detects activity on Priority Channel #2, it selects that
channel while continuing to monitor Priority Channel #1. When activity occurs
on Priority Channel #1, the scanner will immediately select that channel and
remain there until the transmission is completed and the scan wait time has
expired.
Picking up the microphone (taking it off-hook) will cause the radio to
immediately select Priority Channel #1 for operation. Unless a different
operating channel is selected, all transmissions will occur on Priority Channel
#1.
Returning the microphone to its holder (on-hook) will return the radio to
the scan mode of operation.
Refer to Priority Channel Programming for details.
1.
To enter the priority mode, press the "S" and "P"
buttons while the microphone is on-hook. Each
will light to indicate operation in the priority mode.
The radio will now monitor the priority channels
at time intervals pre-programmed by your dealer.
13
2.
To exit the priority scan mode, press the "S" and
"P" buttons. The radio will return to Priority Channel #1 for normal operation.
LIMITED PRIORITY SCAN
In Limited Priority Scan, the radio operates in the same manner as in
Priority Scan, the radio will monitor Priority Channels 1 and 2 (at the intervals
programmed by your dealer) as well as the non-priority channel to which you
assigned limited priority scan.
1.
To enter the Limited Priority Scan mode, press the
"P" button while the microphone is on-hook. The
"P" button will light and the radio will begin scanning Priority Channels 1 and 2 and the channel you
assigned limited priority scan.
2.
To exit the limited priority scan mode, press the "P"
button. The light will go out and the radio will
resume non-priority channel operation.
VACANT CHANNEL SCAN
Operation in the Vacant Channel Scan mode allows you to search for an
idle channel. When this mode is selected, the radio will lock onto the first valid
channel with no activity. If that channel goes active during the scan wait time,
the radio will resume the search for another inactive channel. The SCAN WAIT
TIME (time radio remains on the channel after carrier drops) will remain in
effect, however the SCAN DELAY TIME (time required for radio to detect
proper frequency and Channel Guard tone) is turned off.
1.
14
To enter the Vacant Channel Scan Mode, press the
"S" button. The "S" light will blink, indicating
vacant channel scan is in progress. When a channel
is identified, the "S" light will go out and the idle
channel number displayed.
2.
To exit the Vacant Channel Scan Mode, press the
PTT bar. The TX LED will light.
TRANSMIT TIME OUT TIMER
The Transmit Time Out Timer is a dealer programmable option that
disables the radio transmitter if a single transmission (PTT pressed continuously) exceeds a preprogrammed time. When this occurs, the radio reverts to
the receive mode, even if the PTT bar is still pressed. Following the time out
period, an alert tone is sounded until the PTT bar is released and the TX LED
goes out. In this way, the Transmit Time Out Timer minimizes channel abuse.
A transmission can be initiated immediately after releasing the PTT bar by
simply pressing the PTT bar again. If the PTT bar is released prior to exceeding
the time out period, the radio operates normally (reverts to the receive mode
with no alert tone.
The time out period can be set for any period from 10 seconds to 16.5
minutes in 10 second increments.
BUSY CHANNEL LOCKOUT
The Busy Channel Lockout option prevents inadvertent transmissions on
a channel that is already being used. If this option is enabled, pressing the PTT
bar while the selected channel is in use will cause all transmit functions,
including the TX LED, to be disabled and a WARNING tone sounded.
Transmissions will be allowed only on channels that are idle (BUSY LED off).
FRONT PANEL PROGRAMMING
In the Programming Mode, the user can program the scan list and two
Priority Channels, if desired. Entry into the Programming Mode is allowed
only during the first four seconds when the radio is turned on.
1.
To enter the Programming Mode, turn the radio
on and press and hold the "P" Priority button for
up to 4 seconds. The radio will sound the prompt
tone and display "Prog". The radio can now be
programmed with your scan list, with or without
priorities.
15
2.
To add a channel to the scan list, select the channel
and press the "S" button while the channel is flashing in the display. The number will be displayed
continuously to indicate that it is stored on the scan
list.
3.
To select the next channel to be programmed and
repeat the procedure above.
NOTE
When st opped on a channel i n the
Programming Mode, the display will blink if
the channel is not in the scan list, and be on
continuous if already included.
4.
To delete a channel from the scan list, press the
"1" auxiliary button LED. The display will change
from continuous to flashing, indicating the deletion was successful.
NOTE
After selecting a channel to be deleted, use the
"1" button to delete it from the scan list.
16
5.
After you have completed programming your scan
list, press the "P" button again, the radio will sound
the prompt tone and display "Prog".
6.
To save the scan list, press the "P" button again to
enter the scan list into the micro-processor memory.
7.
To exit the programming mode, press the "2"
button.
PRIORITY CHANNEL PROGRAMMING
1.
To display the current priority channel, press the
"P" button. Note: you must be in the user programming mode. Refer to Front Panel Pro-gramming.
If Channel 1 is Priority 1, "P1:01"is displayed; if
no channel has been assigned priority, then "P1:--"
is displayed.
2.
Use the CHannel up ▲ or the CHannel down ▼ to
ramp to the desired channel.
3.
To delete a priority channel, press the "1" auxiliary button.
4.
To save Priority Channel 1 after selecting it, press
the "S" button to save it and bring up Priority
Channel 2 in the display.
5.
If channel 2 is assigned Priority 2, then P2:02" is
displayed. If no channel has been assigned priority,
then "P2:--" is displayed.
6.
Use the CHannel up ▲ or the CHannel down ▼ to
ramp to the desired channel.
7.
To delete priority channel 2, press the "1" auxiliary button.
8.
After you have completed programming your priority channels, press the "P" button, the radio will
sound the prompt tone and display "Prog".
9.
To exit the programming mode, press the "2"
button. The radio will return to the normal operating state on Priority Channel 1, if assigned, or to
Ch:01 if no priority channels were programmed
into the radio.
17
ERROR MESSAGES
During normal operation, from turn-on to turn-off, the microprocessor is
working. From initial self-check to channel scan operation it is designed to
keep you informed of its operating status.
If your radio displays:
ER:01 - there is a problem with the EEPROM (For example, EEPROM
not installed or installed incorrectly).
ER:02 - there is a programming problem with channel data. The radio will
work, but only on correctly programmed channels.
ER:03 - indicates the synthesizer is out of lock or a channel is out of
acceptable band; it is necessary to re-program or re-align the radio.
ER:04 - indicates improper antenna connection; the microprocessor will
disable the transmitter, sound a 3 beep alert tone and blink the TX LED as
warnings.
18
MONOGRAM SERIES WARRANTY
A.
Ericsson Inc. (hereinafter "Seller") warrants to the original purchaser for use (hereinafter "Buyer")
that Equipment manufactured by Seller shall be free from defects in material, workmanship and
title, and shall conform to its published specifications. With respect to any Equipment not
manufactured by Seller (except for integral parts of Seller’s Equipment to which the warranties
set forth above shall apply). Seller gives no warranty, and only the warranty, if any, given by the
manufacturer shall apply. Batteries are excluded from this warranty but are warranted under a
separate Nickel-Cadmium Battery Warranty.
B.
Seller’s obligations set forth in Paragraph C below shall apply only to failures to meet the above
warranties (except as to title) occurring within the following periods of time from date of sale to
the Buyer and are conditioned on Buyer’s giving written notice to Seller within thirty (30) days of
such occurrence:
1. for fuses, incandescent lamps, vacuum tubes and non-rechargeable batteries, operable on
arrival only.
2. for parts and accessories (except as noted in B.1) sold by Seller’s Service Parts Operation,
ninety (90) days.
3. for all other Equipment of Seller’s manufacture, two (2) years.
C.
If any Equipment fails to meet the foregoing warranties, Seller shall correct the failure at its option
(i) by repairing any defective or damaged part or parts thereof, or (ii) by making available at Seller’s
factory any necessary repaired or replacement parts. Any repaired or replacement part furnished
hereunder shall be warranted for the remainder of the warranty period of the Equipment in which
it is installed. Where such failure cannot be corrected by Seller’s reasonable efforts, the parties
will negotiate an equitable adjustment in price. Labor to perform warranty service will be provided
at no charge only for the Equipment covered under Paragraph B.3, and only during the first
twenty-four (24) months following the date of sale to the Buyer. Thereafter, labor will be charged
at prevailing rates. To be eligible for no-charge labor, service must be performed by an Authorized
Service Center or other Servicer approved for these purposes either at its place of business during
normal business hours, for mobile or personal equipment, or at the Buyer’s location, for fixed
location equipment. Service on fixed location equipment more than thirty (30) miles from the
Service Center or other approved Servicer’s place of business will include a charge for transportation. Equipment located off-shore is not eligible for no-charge labor.
D.
Seller’s obligations under Paragraph C shall not apply to any Equipment, or part thereof, which
(i) has been modified or otherwise altered other than pursuant to Seller’s written instructions or
written approval or, (ii) is normally consumed in operation or, (iii) has a normal life inherently
shorter than the warranty periods specified in Paragraph B, or (iv) is not properly stored, installed,
used, maintained or repaired, or, (v) has been subjected to any other kind of misuse or detrimental
exposure, or has been involved in an accident.
E.
The preceding paragraphs set forth the exclusive remedies for claims (except as to title) based
upon defects in or nonconformity of the Equipment, whether the claim is in contract, warranty, tort
(including negligence), strict liability or otherwise, and however instituted. Upon the expiration of
the warranty period, all such liability shall terminate. The foregoing warranties are exclusive and
in lieu of all other warranties, whether oral, written, expressed, implied or statutory. NO IMPLIED
OR STATUTORY WARRANTIES OF MERCHANTABILITY OR FITNESS FOR PARTICULAR
PURPOSE SHALL APPLY. IN NO EVENT SHALL THE SELLER BE LIABLE FOR ANY INCIDENTAL, CONSEQUENTIAL, SPECIAL, INDIRECT OR EXEMPLARY DAMAGES.
This warranty applies only within the United States.
1-800-528-7711 (Outside USA, 804-528-7711)
ECX-915C
19
Ericsson Inc.
Private Radio Systems
Mountain View Road
Lynchburg, Virginia 24502
1-800-528-7711 (Outside USA, 804-528-7711)
Printed in U.S.A.
QUICK REFERENCE CARD
RADIO ON/OFF, POWER UP
1. Turn the radio on by rotating the on/off control 1/2
turn clockwise after "4000" appears in the display and
the power up alert tone is generated, the display will
change to indicate the #1 priority channel. If no priority
channel is programmed, the display will change to channel 1.
2. Turn the radio off by rotating the on/off control fully
counterclockwise.
FRONT PANEL CONTROLS,
SWITCHES AND INDICATORS
- On/Off/Volume Control: turns radio on/off and adjusts audio output level
- Squelch Control: silences the radio’s receiver when
no signal is being received
- Channel Change Buttons: scroll you through the programmed channels in your radio, allow you to select the
one you want
- Scan Push Button: turns Priority Scan on/off (ON
with GREEN backlight)
- Auxiliary speaker Button: silences internal speaker
and connects the auxiliary speaker
- Monitor Button: disables tone or digital coded
squelch options in receive mode; controls display intensity
- Transmit LED: indicates transmission when illuminated
- Busy LED: indicates activity on receive channel when
illuminated
- Call LED: indicates activity with the correct tone or
code when illuminated
RECEIVING A CALL
1. Turn the radio on and select the desired channel. With
the Monitor Button/LED 2 ("2") lit, adjust the volume
control to a comfortable listening level.
2. Rotate the squelch control clockwise (to the right) until the squelch noise (the rushing sound) is no longer
heard.
3. Depress the "2" to extinguish the GREEN backlight.
NOTE: If your radio is equipped with coded squelch options, depress the "2" to enable the option, the CALL
LED will no longer be illuminated.
TRANSMITTING
1. Turn the radio on and select the desired channel.
2. Pick up the microphone and listen briefly to make
sure that no one else is using the channel. Or, with the
microphone on-hook, depress the "2" to monitor the
channel for activity; the "2" light should be illuminated
and the BUSY LED should be off.
3. Press the PTT on the microphone and from a distance
of 1/2 to 2 inches speak directly into the microphone in
a normal tone of voice.
4. The TX LED will light RED while pressing the PTT.
5. Release the PTT as soon as you have completed the
transmission.
NOTE: FCC Rules and Regulations require that you
monitor a frequency for activity before transmitting.
CHANNEL SCAN OPERATION
Non-Priority Scan
1. With microphone on-hook, press the S button ("S"), it
will light and your radio will start to scan the valid channels in the scan list.
2. If the "2" is illuminated, scan will be faster because
the transceiver is only looking for carrier, no coded
squelch, activity.
3. The scanner will stop on the first scan channel with
activity. When that activity falls off, the dealer programmed scan wait time will go into effect. At the end
of the scan wait time, scan resumes, beginning with the
next channel in the list.
4. Going off-hook (picking up the microphone) while
locked onto an active channel will stop scan, and cause
the radio to remain locked on that channel for duration
of activity plus the scan wait time.
5. Going off-hook, while not locked onto any particular
channel, scan will stop as above; however, the transceiver will revert to the #1 Priority channel, even in nonpriority scan.
6. Going back on-hook (returning the microphone to
holder) will cause the scan sequence to resume after the
preprogrammed scan wait time.
7. Exit the scan mode by pressing "S". Your radio will return to normal operation.
NOTE: If your scan list is empty/unprogrammed, the
"S" will not illuminate, scan will not start and an alert
tone will sound.
Priority Scan
1. With microphone on-hook, press the "S" and "P".
Each will illuminate and the radio will be in the priority
scan mode.
2. The scanner stops on the first scan channel with activity. If that channel is not a priority channel, the scanner
will continue to monitor both priority channels every
Look Back Time.
3. When the transceiver finds the #2 Priority Channel
with activity, it decodes that channel activity while continuing to monitor Priority Channel #1. However, if activity is found on Priority Channel 1, the scanner will
remain there until carrier drops and the Scan Wait Time
is over.
4. Going off-hook at any time during Priority Scan will
result in the radio and the display reverting to the #1 priority Channel. Transmitting will then occur on Priority
#1.
5. Returning microphone to its holder will cause the Priority Scan sequence to restart.
6. Exit the Priority Scan mode by pressing both the "S"
and "P" (to extinguish). Radio and display will return to
priority #1 channel for normal operation.
2. As in priority Scan, the transceiver will monitor the
priority channels every Look Back Time as programmed
by the dealer.
3. Operating remains the same as in Priority Scan
4. Exit the Limited Priority Scan by pressing the "P". Radio and display will remain on the non-priority channel
for normal operation.
Vacant Channel Scan
1. With the microphone off-hook, press the "S" and the
radio will start scanning for a vacant channel on which
to transmit.
2. The "S" will blink to indicate that vacant channel scan
is in process.
3. The radio will lock onto the first channel with no activity. If that channel becomes active during the scan
wait time, the vacant channel scan will then resume.
4. If you press the PTT to transmit, the "S" will go out,
the TX LED will go on, and you will have exited the vacant channel scan mode. Otherwise, simply return the
microphone to its holder.
FRONT PANEL PROGRAMMING
To enter the user programming mode, press and hold the
"P" during the initial 4 seconds at radio turn-on. The radio will sound the prompt tone and display the message
"Prog".
Scan List Programming
Limited Priority Scan
1. With microphone on-hook, press the "P". It will light
and your transceiver will start to scan for activity on the
#1 and #2 Priority Channels as will as the channel you
assigned Limited Priority Scan.
1. After entering the programming mode, press the "S",
the radio will display channel "01". The number will
blink if channel one is not in the list.
2. Then insert this or any channel onto the scan list,
press the "S" while the channel number is flashing in the
display. The channel number will be displayed continuously to indicate that it is stored in the scan list.
3. You can now use the channel up and down buttons to
change the displayed channel number accordingly.
4. To delete a channel from the scan list, press the 1 button/LED. The display will change from continuous to
flashing, indicating that the deletion was successful.
5. After you have completed programming your scan
list, press the "P". The radio will sound the prompt tone
and display the message "Prog".
6. Press the "P" again to save the scan list in the microprocessor’s memory.
7. Press the "2" to exit the user programming mode.
NOTE: Use the "1" to delete displayed channel from the
scan list; use the "S" to store displayed channel in the
scan list.
Priority Channel Programming
1. After you have entered the user programming mode,
press the "P" to change the display to indicate the current #1 priority channel.
2. Use the Channel up and down buttons to change it.
3. After you have selected the First Priority Channel,
press the "S" to save it and to bring up Priority Channel
2 in the display.
4. Use the Channel up and down buttons to get to the desired priority #2 channel.
5. After you have selected Second Priority Channel,
press the "P" to save the priority channel programmed,
to sound the prompt tone and to display the message
"Prog".
6. To exit from priority channel programming mode,
press the "2".