1
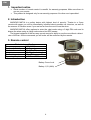
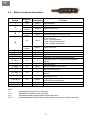
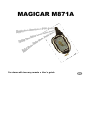
MAGICAR M871A Car alarm with two-way remote ● User’s guide EN EN MAGICAR M871A Car alarm with two-way remote User’s guide TABLE OF CONTENTS Table of contents ...................................................................................................................... 2 1. Important notice................................................................................................................. 4 2. Introduction........................................................................................................................ 4 3. Remote control .................................................................................................................. 4 3.1. Display of remote control ......................................................................................... 5 3.2. Display icon description ........................................................................................... 5 3.3. Button functions description..................................................................................... 6 4. Control...............................................................................................................................7 4.1. Arming/disarming..................................................................................................... 7 4.2. Vibrating mode On/Off ............................................................................................. 8 4.3. AUX Mode Entry On/Off........................................................................................... 8 4.3.1. Turning AUX1 On .................................................................................................... 9 4.3.2. Turning AUX2 On .................................................................................................... 9 4.4. 4.5. 4.6. 4.7. 4.8. 4.9. Trunk release .............................................................................................. 9 Remote backlight ..................................................................................................... 9 Car check function ................................................................................................... 9 Parking timer.......................................................................................................... 10 Button hold function ............................................................................................... 10 PANIC mode.......................................................................................................... 11 4.10. Mute siren when armed/disarmed 4.11. Valet mode 4.12. 4.13. Turning additional sensors off .......................................................................... 12 Drive lock ....................................................................................................... 12 4.14. 4.15. Passive arming ............................................................................................... 12 AUTO mode........................................................................................................... 13 4.16. RPS (Remote Paging System) ................................................................... 11 ..................................................................................................... 11 ...................................................................... 13 2 5. Alarm activation ............................................................................................................... 14 5.1. 5.2. Shock sensor trigger Additional sensor trigger ................................................................................... 14 .......................................................................... 14 5.3. Theft function (door, hood or trunk trigger) ...................................................... 14 5.4. Engine start blocking ............................................................................................. 14 5.5. Lights on indication ................................................................................................ 14 5.6. In range display ..................................................................................................... 14 5.7. Battery saving function........................................................................................... 15 5.8. Door open indicating function (optional) ................................................................ 15 5.9. Open trunk indicating function (optional) ............................................................... 15 5.10. Time information backup........................................................................................ 15 6. Valet mode (without remote) ........................................................................................... 15 6.1. Entering valet mode without PIN code. .................................................................. 15 6.2. Entering valet mode with PIN code........................................................................ 15 6.3. Valet mode deactivation......................................................................................... 16 7. Programming ................................................................................................................... 16 7.1. Remote control programming. ............................................................................... 16 7.2. Setup of PIN code.................................................................................................. 16 7.3. Setup of security code ........................................................................................... 17 7.4. Disarming (using security code):............................................................................ 17 7.5. Remote options set-up........................................................................................... 18 8. Setting the shock sensor sensitivity and siren. ................................................................ 19 8.1. Setting the shock sensor sensitivity. ...................................................................... 19 8.2. Setting the siren sound. ......................................................................................... 19 3 EN 1. Important notice Serial number of remote control is needful for warranty purposes. Make sure there is one on your remote. This product is designed only for car security purposes. No other use is permitted. 2. Introduction MAGICAR M871A is a safety device with highest level of security. Thanks to a 2-way remote with pager you will be immediately informed about possible car intrusion, as well as the manner of intrusion even if you are too far from the car to hear the siren. MAGICAR M871A offers options to enter the valet mode using a 2-digit PIN code and to disarm the alarm using a 4-digit code entered via RPS sensor. The biggest advance of the two-way remote control is ability to use the car without a direct view of the car. All the commands you will order will be confirmed by the remote. 3. Remote control Technical specification Frequency 433,92 MHz Frequency Stability +/- 2ppm/year Dimension 86 x 39 x 20 mm Weight 33,50 g (no battery) Transmitting output 10 mW Operating temperature -15°C to +50°C Battery Cover Lock Battery 1,5V (AAA) 4 EN 3.1. Display of remote control The two-way remote control is equipped with a color LCD display, which non-stop informs the owner of the car’s status. Using various icons the remote always provides exact information about what is actually happening to the car. 3.2. Display icon description Icon Description Alarm on/off Auto arming mode on/off AUTO – mode 1 (icon light on) AUTO – mode 3 (icon flashes fast) AUTO – mode 2 (icon flashes slowly) AUTO – mode off (icon is not displayed) Passive Arming on/off On – siren will beep when arming or disarming Off – siren will not beep when arming or disarming. The siren will still be activated if the alarm is triggered or PANIC mode is activated. On – remote will only vibrate, when the alarm will by triggered it will beep too. Off – remote will only give audible confirmation, when the alarm will by triggered it will vibrate too. Shock sensor and additional sensors on/off Alarm clock on/off Ignition central door lock AUX mode on/off This icon displays the signal strength while transmitting or receiving Intrusion to the vehicle is detected Valet mode Parking lights are flashing Displays current time, temperature inside the vehicle (F/C), remote start runtime, remaining turbo mode time, battery voltage in the car/remote Indicates the door open Indicates the trunk open Indicates the hood open Indicates remaining remote control battery life RPS on/off Indicates someone using the RPS to page you from your vehicle Interior temperature Voltage display 5 EN 3.3. Button functions description Pressing Description time Button I Function 0,5 s Page 7 Arming/disarming 0,5 s 2x short presses 0,5 s 2x short presses Page 9 AUX 1 on/off Page 8 Remote vibrating on/off Page 9 AUX 2 on/off Page 9 Backlight of remote is turned on for 10 Sec. Page 9 Check car function 1st tap – vehicle temperature 2nd tap – voltage of vehicle battery 3rd tap – voltage of remote battery Page 10 Parking timer on/off Page 9 Page 10 Page 1 Trunk open Buttons lock Panic mode 0,5 s Page 1 Siren beeps on/off when locking/unlocking the car 2s X 0,5 s Page 11 Valet mode on/off 2s Page 12 Shock and additional sensor on/off 0,5 s Page 12 Lock/unlock the drive lock 2s X 0,5 s Page 12 Passive arming on/off ( II + III ) –– 2s Page 18 Programming remote menu. The time, timer time, alarm clock, RPS and vibrating mode settings. ( II + IV ) –– ( III + IV )–– 2s 2s Page 13 Page 8 Automatic alarm on/off (AUTO mode) AUX 1,2 on/off II III 0,5 s IV III –– IV –– IV ––––– ( I + II ) ( I + II ) –– ( I + III ) ( I + III ) –– ( I + IV ) ( I + IV ) –– ( II + III ) Note: –– ––––– (+) ( + ) –– 2x short presses 2s 2s 4s Programming menu 1. Only for professional installation service!!! Programming menu 2. Only for professional installation service!!! represents long press for 2 seconds. represents long press for 4 seconds. represents pressing two buttons at the same time represents pressing two buttons at the same time for more than 2 seconds. 6 EN 4. Control Every command from the remote control accepted by alarm is confirmed by the remote. If not, you are out of range. In the following text • Short press = 0,5 seconds. • Long press = 2 sec ( or 4 sec) By pressing any button, on the remote control display there will appear an antenna symbol , which means signal has been transmitted. If the signal has been accepted and processed, there will appear a sign , which means confirming the performance of a command. In a bottom left corner of display there is an indicator of remote battery life level. As the battery life is running down, the range of remote control is shrinking at the same time. 4.1. Button I Arming/disarming Arming/disarming, locking/unlocking, turning blocking of the engine on/off, RPS, turning the siren off. Arming (alarm is off, the car is unlocked) • Press button I shortly. • Remote will beep 1x and an icon will appear on display. • Siren beeps 1x and lights will flash 1x . • Alarm will be armed and the car will be locked. • LED on RPS sensor will begin to flash. • Shock sensor will be activated after 15 sec. While armed, the engine blocking system against starting attempt is activated. At the same time, if this is on, RPS will be activated as well. Attention ! If your hazard lights are on and you will arm the car, it may cause false alarm. Note: If, when activating alarm, there are some doors opened, siren will beep 3x, lights will flash 3x, remote beeps 3x and the door symbol on display will be flashing. Alarm will not turn on! If, when turning alarm on, some doors are opened, alarm will not turn on, but if you have activated function of door line delay, alarm will go on no matter if the doors are open or closed. If the car is equipped with original electronic windows, which require only extension of a locking impulse to be closed ( VW group), you can require activation of 15s locking impulse in service centre. If you put a command for turning alarm off during the 15 s locking impulse, the 15 s locking impulse will be cut of and alarm will go off. When leaving your parking lights on after stepping out of the car, you will be made aware of it by beeping of the remote. Disarming (alarm is on, the car is locked) • Press button I shortly. • Siren will beep 2x and the lights will flash 2x. • Remote will beep 2x and an icon will appear on display. • Alarm will be on and the car will be unlocked. Start blocking will be off as well as RPS. You can turn acoustic signal off when arming/disarming, if you wish to (page 1) Alarm memory: 7 EN If in the arming mode the alarm has gone off because of: nd • Opened doors, hood, trunk, additional sensor, 2 - shock sensor zone Then when turning the alarm off, the lights will flash 4x and siren with the remote will beep 4x. RPS memory: If in the arming mode RPS sensor has been triggered, the „CALL“ symbol appears on display at first and then a number of times the sensor was triggered. Shock sensor memory: If in the arming mode shock sensor has been activated, first the „Shock“ symbol appears on display and after that a number of times it was triggered. Auto rearming: If you don’t open the door or turn the ignition on within 30 sec. after disarming, the alarm will arm automatically. Turning the siren off when alarm has been triggered: If the alarm has been triggered and siren is hooting, press button I. The siren will stop, but the alarm will still be armed. One more press of button I will disarm the alarm. The system will not respond for the first few seconds after the alarm was triggered, this is because it is still trying to send signal out to the remote during that time. 4.2. Button II - 2x Vibrating mode On/Off By two short presses of button II the vibrating mode will be activated. This will be indicated by an icon. Acoustic signal will not be active, only vibrations, when buttons pressed on remote. By pressing the button II 2 times again, vibrating mode will be deactivated and the icon will disappear. Acoustic signal will be activated again. 4.3. Buttons (III + IV) -– AUX Mode Entry On/Off By outputs AUX 1 and AUX 2 (when AUX2 is set as an additional output - see Programming menu 2-10) you can operate any additional equipment in your car such as: opening/closing 8 EN the windows, turning the light on/off, and other features. Ask for more info at your service centre. Turning AUX outputs on/off It is necessary to enable this function before using AUX outputs. Keep buttons III + IV pressed • Icon will appear on display • If within 60 sec. no outputs of AUX 1 or AUX 2 will be used, AUX outputs will be automatically turned off and the icon will disappear. 4.3.1. Button II Turning AUX1 On After entering AUX mode, AUX 1 output will be triggered, if button II is pressed for 0.5 sec. While operating AUX 1, the remote control will indicate that as A-01 is operating. 4.3.2. Button III Turning AUX2 On After entering AUX mode, AUX 2 output will be triggered, if button IlI is pressed for 0.5 sec. While operating AUX 2, the remote control will indicate that as A-02 is operating. 4.4. Button III –- Trunk release Trunk release (if the car is equipped with an electric lock). • Keep button III pressed. • Remote will beep 2x and an icon will appear on display. • Trunk will be released and alarm will be disarmed (if armed). If the vehicle has not a trunk actuator, it may be convenient to put the system into Valet mode. If you are going to be using the opened trunk for an extended period of time. It is possible to set the impulse length for trunk release (Programming menu 2-01). If the reservation mode is set and there is a trunk actuator installed, when the trunk is opened the reservation mode is cancelled. 4.5. Button III - 2x Remote backlight By pressing button III shortly 2x in row, you will activate the remote backlight for about 10 sec. 4.6. Button IV Car check function By pressing button lV, you can check the car status. If you are within a range of the remote, display will show the status of your vehicle (opened/closed door, locked/unlocked...) and remote will beep to indicate one of the following situations: Armed Disarmed Remote Beep, Beep, Beep Beep, Beep Siren Chirp Chirp, Chirp If the door or the trunk is open, appropriate icon will be displayed. If Mute function is enabled, then siren will not chirp. 9 EN Car’s indoor temperature indication: If you have connected the temperature sensor with your alarm, the remote will display the actual temperature inside the vehicle (°C/°F). However, if you haven’t connected it, the remote will display “FAIL”. The temperature sensor can be placed at any place of car interior. Car battery voltage check: If you press button lV one more time, the remote will display car battery voltage (for example “12,6 V”) The remote battery check: If you press button lV once again, the remote will display remote battery voltage (for example “1,4 V”) AUX 1, 2 output display: In case that you have activated the AUX 1,2 outputs, after pressing button lV the remote will display only status of AUX 1 followed by AUX 2 (example: „1-on“ „2-of“ ) Changes of the menu: The menu will change from “indoor temperature check” > ”battery voltage check” > ”the remainder of a remote control battery check” in this order, if a IV button is pressed within 2 seconds in a row. 4.7. Button IV - 2x Parking timer You can use the parking timer to check the time of parking or driving your car. Press button lV shortly twice in a row. Remote will beep once. Timer is on. You will turn it off by pressing button lV twice again. Parking timer on the remote: After starting the parking timer, the display will alternate between the present time and the parking time every second. The parking time will also show the tenths of a minute “0-9 ( one tenth of 60 sec)” For example: if the time on display will show 00:02 5 – that means 2 minutes and 30 seconds have passed The maximum display time of the parking timer is 99 hours 59 minutes. 4.8. Button IV –– Button hold function This function prevents accidental button presses while carrying your remote. • Keep button IV pressed for 2 seconds. • Remote will beep once and will display „Hold“. • You will turn this function off by pressing button IV again for 2 seconds. You will also unlock the buttons by activating PANIC mode– keep button lV pressed for 4 sec. When the buttons are blocked, the remote displays letter „H“ in the bottom right corner. 10 EN 4.9. Button IV ––- PANIC mode Panic mode activation: Keep button IV pressed for 4 seconds. The door will lock, lights will flash and the siren will be hooting for 1 minute 30sec. „PANIC“ symbol will be flashing on display for 30 seconds. By a short press of button I you will turn PANIC mode off. 4.10. Buttons (I + II) Mute siren when armed/disarmed Siren on/off when armed/disarmed. • Press buttons I and II shortly. • Siren will be off when arming/disarming. • You will turn siren back on by pressing buttons I and II shortly. on display of the remote control, acoustic signal If there is no icon when arming/disarming is off. In this mode siren will not produce any sound when arming/disarming. 4.11. Buttons (I + III) Valet mode In this mode most of the alarm functions are disabled. • Press buttons I and III shortly. • Remote beeps 1x and an icon of the function will appear on display. • Remote will display an icon of the valet mode. • You will turn valet mode off by pressing of buttons I and III shortly. You can turn the valet mode on by turning ignition on/off 3 times within 3 sec., or by using 2 – digit PIN code. (see page 15). Attention! When the system is in the Valet mode, the alarm is not active, even when the doors are locked. Any starter or ignition kill systems, that have been installed, will be disabled as well. Valet mode display: Button I (0,5s) – lock/unlock Buttons I+III (0,5s) – valet mode Button IV (0,5s) – car status control (only armed/disarmed) Button III (2x short press) – backup light for 10 seconds Buttons II + III (2sec) – Programming remote menu If any other functions are attempted, the remote will beep three times and “SLEEP” symbol will scroll across the screen to indicate that the system is in Valet mode. If you lend your vehicle to someone who is not familiar with this system, you may want to use Valet mode to avoid any problems caused by accidental activation of various alarm features. 11 EN 4.12. Buttons (I + III) –- Turning additional sensors off You can use this function if you do not wish the alarm to react to shock sensor and other additional sensors during armed mode Keep buttons I and III pressed. Shock sensor will be off. • Remote will display turning the sensors off by an icon . • You will turn additional sensor back on by pressing buttons I and III again. Turning the sensors off is useful when leaving a dog or a child in the car. Sensors are off but alarm is still protecting the car (door, hood and trunk inputs are not switched off). • • 4.13. Buttons (I + IV) Drive lock This option enables you to lock the doors after a start up of the vehicle and pressing the foot brake. The doors will automatically unlock when the engine is turned off. • Press buttons I and IV shortly. • Remote will beep 1x and an icon of the function will appear on display. • You will turn the function off by pressing buttons I and IV shortly again. The doors will not lock when some of the doors, a trunk or a hood is opened. 4.14. Buttons (II + III) Passive arming The system will be automatically turned on 30 sec. after the ignition is off and all the doors are closed. After 10 sec. and 20 sec. siren will beep 1x and the lights will flash 1x, 30 sec. after that the car will be locked and armed. • Press buttons II and III shortly. • Remote will beep 1x and an icon of the function will appear on display. • You will turn the mode off by pressing the buttons II and III again. Conditions for setting the passive arming: • Alarm disarmed. • Door closed. • Ignition must be off. Note • If both Passive mode and Auto mode are active at the same time, Auto mode has priority over Passive mode. • If you get out of the car with the running engine (you set up the reservation mode), the car will be lock after the last door are closed Attention! When PASSIVE mode is on, the doors will lock automatically (if you have central locking installed). Therefore do not forget to always take your keys and remote control with you. If you will be staying in the vehicle for an extended period of time without the engine running, you should turn Passive Arming off. In case of accidental locking the remote inside the vehicle, use RPS to deactivate the alarm and open the car. 12 EN 4.15. Buttons (II + IV) –– AUTO mode Keep buttons ll and lV pressed for 2 sec., this will turn on Auto mode. Using Auto mode, the vehicle will unlock/disarm when the remote is getting closer, and lock/arm when the remote is far away (with doors closed). Keeping buttons II + IV pressed for 2 sec. you can set AUTO mode as followed: AUTO Mode 1 Short distance (10m) Icon is on AUTO Mode 2 Longer distance (15m) Icon flashes at 1.5 second intervals. AUTO Mode 3* Long distance (15m) Icon flashes at 0.5 second intervals. OFF Icon is off *Auto mode 3 suspends AUTO mode when the remote senses consecutively arming/disarming signals. The suspension above is cancelled by pressing button I once. Auto arming: Remote will play : dodoreremimifafamimireredodo Auto disarming: Remote will play : beep-beeep beep-beeep beep-beeep beep-beeep Attention! Due to varying vehicles and environments, there may be a small area of distance within which the system thinks the remote is far enough away to lock, and, close enough to unlock. If your remote is within this area, the system will repeatedly arm and disarm. To avoid this situation, try placing your remote farther away from the vehicle. Auto mode will drain your remote battery much faster. The weather and temperature differences will affect the operational distance of Auto mode. 4.16. RPS (Remote Paging System) Using MAGICAR M871A it is possible to call the owner of the car to the vehicle, if the car is armed and the RPS mode is on. If you knock quickly two times in row on the window, where the RPS is fixed, hard enough for LED light to remain lit red for a few seconds, the owner’s remote will start beeping and vibrating (if within the range) and will display icon as shown. The owner will be thus made known that someone is there next to his car and is calling him. By knocking on RPS the alarm will not go off. Remote will be beeping at 6 seconds intervals, until you press any button. You can adjust sensitivity of RPS at 3 levels on the reverse-side of RPS. 13 EN 5. Alarm activation 5.1. Shock sensor trigger If the alarm is armed and the shock sensor is triggered by a strong impact, the alarm will go off, the siren will be hooting for 20 sec., remote starts beeping and will display the icon for about 9 sec., but it will continue flashing until you press any button. Press the button I to turn the siren and lights off. With a weak impact there will be activated only first level of alarm. Siren will beep 4x and the remote will warn you by acoustic sound and by displaying the icon. 5.2. Additional sensor trigger In case of additional sensor disturbance, an appropriate icon will flash (30 sec.). When the alarm is over, the remote will beep at 2 second intervals with indication of „U“ letter next to the time. 5.3. Theft function (door, hood or trunk trigger) If there are opened door, hood or trunk in a car, 30 seconds alarm will go off and the remote will be beeping and displaying the flashing icon of the door (trunk, hood). Remote control will be beeping for 30 sec. and after that at 2 second intervals, until you press any button. 5.4. Engine start blocking When armed, the engine start is blocked. If there is an impact to the car, it will not be possible to start the engine without disarming. 5.5. Lights on indication If you leave the lights on after getting out of the car, after arming you will be warned of this by a 6-second beep and by a flashing icon of lights and battery on your remote. 5.6. In range display If the remote and vehicle are within the operational range of each other, the signal strength will be displayed beside the antenna icon on the display. 14 EN 5.7. Battery saving function When the battery is almost empty and ready to be replaced, the battery icon will flash and Battery Save Mode will be in operation. Battery saving mode operation: The remote will only receive the confirmation signals for button I operations. The other buttons will still be in function, but they will not receive confirmation signals back from the vehicle. 5.8. Door open indicating function (optional) When disarmed, the hazard lights will flash to indicate that the door is opened. (See programming menu 1-06). 5.9. Open trunk indicating function (optional) When disarmed, the hazard lights will flash to indicate that the trunk is open. (See programming menu 1-08). 5.10. Time information backup This saves time information (start-up reservation time and alarm time) in case the power has not been supplied to remote (at a time of replacing batteries). If the power is supplied again, users do not have to re-adjust the time information. 6. Valet mode (without remote) You can set the alarm system into valet mode even without the remote control (in case of a lost or damaged remote). You can enter valet mode without using a PIN code or with PIN code (see programming menu 1-10). By using PIN you will decrease the risk of unauthorized valet mode access. 6.1. 6.2. Entering valet mode without PIN code. Open the door with a key. Alarm will be triggered. Wait for 30 seconds until siren is mute. Within 3 seconds repeat 3 of the following steps: 1. Turn the key to the “Ignition On” position. When the ignition is on, the lights on the dashboard will be turned on. In most vehicles this position is two “clicks” forward from the “Off” position. 2. Turn the ignition off. The lights on the dashboard should be turned off. 3. Steps 1 and 2 must be repeated for a total of three times within three seconds. Once this has been done, the alarm will turn off and valet mode will be active. Entering valet mode with PIN code. Steps for setting up a PIN code are described on page 16. Default factory code is 11. 1. Alarm is armed. 2. By opening the door alarm will be triggered. Siren will go off. 3. Within 3 sec turn the ignition on/off three times. 4. Lights will flash once. 5. Push the button on RPS as many times, as your first number is. Intervals in-between the pushes must not be longer than 1.5 sec. 6. Lights will flash once. 7. Push the button on RPS as many times, as your second number is. 8. Lights will flash twice and siren will be turned off. Valet alet mode is activated. 15 EN 6.3. Valet mode deactivation. You can deactivate valet mode only by using the remote control: Push buttons I and III shortly at the same time. Siren will beep once and lights will flash twice. 7. Programming 7.1. Remote control programming. System memory is designed for 3 remote controls. We recommend programming the remote controls at professional installation service stations. 1. Alarm is disarmed. 2. Within 3 sec turn the ignition on/off three times. The lights will flash once. Now you are in valet/programming mode. 3. Within 6 seconds press button l on your remote control shortly. Lights will flash once to confirm programming. 4. The same way as in step 2, set the remaining remote controls. Lights will flash once to confirm each remote. System will automatically exit the programming mode after the third remote is set up or after 6 sec. time, which will be signaled by two flashes of the lights. Note !!! When programming new remote controls, old ones will be automatically erased. If you have only one remote, it is not necessary to program it 3 times. In case of losing or damaging your remote control... If the alarm is armed and you have lost or damaged your remote, you can still open and disarm the car by entering a four-digit code via RPS. 7.2. Setup of PIN code PIN code is set as a factory default code (11). PIN code must be inserted to enter Valet mode after turning key on/off 3 times, if you already selected “PIN code” from optional table. Procedures of changing PIN code from the factory default code 11 to owner’s own code 1. System is disarmed. 2. Maintain the conditions of trunk opened and door opened. 3. Turn the ignition key on/off 3 times. Lights will flash once. Siren will make a long beep. 4. Push the button on RPS as many times, as your first number (1-9) is. Intervals inbetween the pushes must not be longer than 1.5 sec. 5. Siren beeps once. Lights will flash once. 6. Push the button on RPS as many times, as your second number (1-9) is. 7. Siren beeps twice. Lights will flash twice. 8. Press button IV on remote for authentication. Siren beeps 3 times and lights will flash three times. Set-up completed. 16 EN 7.3. Setup of security code Conditions for primary setup of security code! Function in Programming menu 1-04 must be set. Disarmed ignition on / Doors opened engine off Programming of security code (1111-9999): 1. Ignition on. 2. Open the door. 3. Push the button on RPS sensor 10 times. At every single push, LED will flash red. Intervals in-between the pushes must not be longer than 1.5 sec. 4. LED will start flashing fast blue. If this is not happening, go back to step 1. 5. Push the button on RPS as many times as your first number between 1-9 is. After each push, red LED will flash. 6. After entering the digit, wait until led will confirm the digit by a corresponding number of blue LED flashes. 7. Blue LED will begin flashing fast. Push the button on RPS as many times as your second number between 1-9 is. After each push, red LED will flash once. 8. After entering the digit, wait until led will confirm the digit by a corresponding number of blue LED flashes. 9. Repeat steps 7, 8 for entering the third and fourth number of your code. 10. After entering the fourth number, lights will flash to confirm acceptation of the programmed code. 7.4. Disarming (using security code): 1. Knock on RPS 10 times. 2. At each knock LED will flash red once. Intervals between each knocks must not be longer than 1.5 sec. 3. LED will start flashing blue fast. 4. Enter your 4-digit code by knocking correspondent number between 1-9. After each knock LED will flash red once. Intervals between each knocks must not be longer than 1,5 sec. After entering each digit, wait until LED confirms the number by a corresponding number of blue LED flashes. If LED confirms the correct knock number and starts flashing quickly again, continue by entering remaining three digits. If there is a wrong number entered, the remote control will start beeping and vibrating (4x). Then go back to step 1. 5. After entering the correct code the doors will unlock, the car alarm will disarm which will be displayed on remote, too. Note If you enter the wrong password more than 5 times within 30 min, this function will not be available for 24 hours or until the car is unlocked by the remote control. Attention! 17 EN There is no code programmed in the alarm by a manufacturer. We recommend you set your own code immediately after taking your car from the garage! 7.5. Buttons (II + III) –- Remote options set-up Using the remote control you can set-up basic user’s functions. Keep buttons II and III pressed at the same time. Button control procedures: Function Button II. I. Alarm clock on/off RPS Set-up/cancellation Change Basic set-up :cancellation Vibrating mode set-up /cancellation Change Basic set-up :cancellation Change of the temperature unit Change –Basic set-up : °F • • Minutes Minutes To the next menu Hours Hours Change Basic set-up :cancellation IV. Back to the previous menu Present time set-up Alarm clock set-up III. Change °F or °C You will finish programming by pressing buttons ll and lll for more than 2 seconds. Programming will end automatically if you do not carry out any changes in 15 seconds. Remote programming menu:: Function Present time set-up Alarm clock set-up Button Description Hours – button I Minutes – button II Hours – button I Minutes – button II Alarm clock on/off On/off button I RPS on/off On/off button I The icon flashes. At this moment the button l will control the hour, and the button ll will control the minute. The , icon and flashes. At this moment the button l will control the hour, and the button ll will control the minute. The icon flashes. Alarm On/off by pressing button I. - alarm is on Display - alarm is off. Display The icon flashes. RPS On/off by pressing button I. Display - RPS is on Display - RPS is off. RPS: will be activated only if armed and you knock twice on the sensor. The icon flashes. Vibration mode on/off by pressing button l. - vibration mode is on, remote will only vibrate, Display there will be no acoustic sound when button is pressed. - vibration mode is off, remote will beep when Display buttons is pressed. Vibration mode on/off On/off – button I Temperature set-up Change – button I 18 The icon flashes. Change the units by pressing button l. EN 8. Setting the shock sensor sensitivity and siren. 8.1. Setting the shock sensor sensitivity. The shock sensor consists of two zones which can be adjusted according to your needs. Shock Sensor sensitivity can vary from vehicle to vehicle for many reasons, including where and how it is mounted, and the size of the vehicle. Some after-installation adjustments may be necessary to fine tune the sensor. Let professional installation service do this for you. 2nd zone 8.2. 1st zone Setting the siren sound. In order to increase the volume of the siren, cut the loop of black wire at the base of the siren. Let professional installation service do this for you. 19 20