1
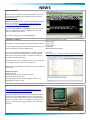
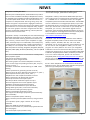
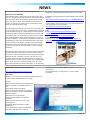
Issue 60 2012 Free Commodore Computer Magazine In TEXT, PDF, SEQ, D64 and HTML And Ebook formats www.commodorefree.com www.commodorefree.com CONTENTS EDITORIAL PAGE 2 “You cant get more Stone cold cooler than that”! NEWS - DMS 64 Released - C64 Studio 2.1 Released - Old-School Hacker Movie PAGE 5 NEWS - MorphOS: OpenOffice Viewer 0.0.5 - Timberwolf for AMIGA OS - Universal C64 Cartridge PAGE 7 NEWS - Hollywood 5: Infinity Out Now! PAGE 8 NEWS - Audio Evolution 4 Now Freeware - CodeAudio for AmigaOS - Retro Wallpapers PAGE 11 NEWS - NewsTek Episode #12 - jAMOS PAGE 12 NEWS - DIAG264 PAGE 12 Commodore FREE Review: Wyvern PAGE 14 Finding Program Start and Endpoint By Commodoreman PAGE 16 Rediscovering CP/M - Part 2 By Commoodreman PAGE 17 Assembler Programming By Shaun Bebbington PAGE 24 Page 2 www.commodorefree.com EDITORIAL ELCOME Hi and welcome to another late edition of Commodore Free magazine, thrown together in much hast and with very little skill involved Especially welcome this issue are the new readers who recently contacted me, (they wished to be anonymous) hopefully the magazine is catering to your needs and you said you enjoyed reading the articles and are busily back tracking through the old issues in true retro style. Or is that a retro style-e Other series of note for me are Pawn stars, as in pawning an item to get funds, and American restorations where they take old items and make them look like new, (although I am not to sure about making every old item look new, to me some items are better rusty and old looking) but the skill involved is well worth watching. Nothing to do with Commodore but on Pawn stars they did get an old Apple II computer to pawn in and they Pawned it for $100 the girl really wanted $300. Anyways let’s look what’s in this issue HELP me if you can ........ I haven’t received much in the way of a response to the “cry for help” I issued, where I said I needed reviewers and information on the Commodore 264 series of machines (these are the Commodore 16 and plus 4 and C116 machines). If you are a user of these machines and feel passionate enough to write something for others to read please get in touch as I would like to put together a “264 Special issue”. PICK ME UP BEFORE YOU GO GO I have recently become fascinated with the TV programme “American Pickers”, if you haven’t seen it yet I would suggest you look out for it. These guys hunt through “collectors some may call them obsessive hoarders but I suspect all commodore users are guilty of this, I know I am, heck I cant even open the door on my “computer room” because as my wife says its full of JUNK)” homes trying to find old items to sell on and therefore try to make a profit. Although picking isn’t something new, the fact we can now follow 2 guys around (albeit by watching a TV show) and see some of these eccentric collections I find fascinating. If you are wondering what I think all the fuss is about then head over to the History channel and click on videos http://www.history.com/ I know it works in the Uk and America but am not sure if you can view these videos in other parts of the world though, maybe using a Uk proxy server may assist you. The items uncovered are things like 100 year old bikes, farming implements, motoring items. I also like “storage wars” were people bid on old storage units (the owners can’t be found) very exciting. Errm ok then what’s in the issue................ In this issue then We have more news, and a review of WYVERN THE GAME, we continue our CP/M and Assembler tutorials I haven’t had any feedback on these, so I presume everyone is following along and digesting the information. Finally Commodore man tells us how to Finding the Start and Endpoint of a Program Thanks for reading and comments as well as submissions are always welcome Regards Nigel (acting Editor Commodore Free) www.commodorefree.com Page 3 www.commodorefree.com NEWS DMS 64, RELEASED DMS 64, creates images of Commodore 64 disks and can split the image into multiple files. Copyright Donncha O Caoimh, http://ocaoimh.ie/ Version 1.0 originally written in 1994 but was fixed and spread online in Feb 2012: http://ocaoimh.ie/2012/02/22/thecommodore-64-disk-masher-c64-dms/ To create a disk image with DMSREADER. You'll need 2 blank disks or 2 D64 files to write to. Multiple files with the extension .DMS will be created. Recreate the original disk by using DMSWRITER. C64 Studio 2.1 released -Variable watch (memory or value) -Memory view C64 Studio is a .NET based IDE written by Georg Rottensteiner -Register view -Charset editor This app supports project based C64 assembly or Basic V2. The -Sprite editor internal assembler is using the ACME syntax. -Media Manager (.t64/.d64) In connection with Vice the IDE allows you to debug through your code and watch variables/memory locations, registers and memory. Any other emulator can be set up as well if it's start able via runtime arguments. Get it here: http://www.georg-rottensteiner.de/files/C64StudioRelease.zip C64 Studio allows you to compile to raw binary, .prg, .t64, .d64 or cartridge format (.bin and .crt for 8k and 16k) Additionally to this C64 Studio comes with a charset, sprite and media editor. It features for now: -ACME like syntax -solution (project) explorer (collection of files) -Compile to plain,.prg,.t64,.d64 -Cartridge support for 8k and 16k cartridges (to bin or crt) -Debugging through your code Old-School Hacker Movie Set In Melbourne Needs Your Help http://www.gizmodo.com.au/2012/02/old-school-hackermovie-set-in-melbourne-needs-your-help/ It’s not every day someone asks you for your old Commodore 64 to help recreate 1980s Melbourne for a period piece on hackers. Yet, that’s exactly what the makers of Underground, a direct-to-TV movie currently in the works for Channel Ten, are doing. So, have you got any aging hardware you’re willing to part with? Page 5 www.commodorefree.com Page 6 www.commodorefree.com NEWS MorphOS: Document Viewer Version 0.0.5 OpenOffice OpenOffice Viewer displays text and graphics in OpenDocument format, which is used for instance by OpenOffice. Changes in version 0.0.5: - Pictures inside of OpenDocument text will now be detected and displayed. - Horizontal tabs are now interpreted correctly. - Soft Page Breaks and Hard Page Breaks in OpenDocument text will now be interpreted. - The print routine for native data transfer (PostScript) is ready and running. - The temporary routine for TurboPrint support works. - The GUI has been changed slightly (it looks better now). - A guide has been written. ‐ The localization of the GUI in four languages (German, English, Turkish and French) was performed. - A bug in the routine images (OpenDocument Text) has been fixed. - A new icon has now been given to the program. Download: OpenOfficeViewer_0.0.5.lha (10.2 MB) http://world-ofamiga.eu/download/OpenOfficeViewer_0.0.5.lha New Timberwolf release for AMIGA OS The Timberwolf team is proud to announce the immediate availability of the first beta version of Timberwolf 4.0.1. Timberwolf is an AmigaOS web browser based on Firefox/Mozilla technology. This technology is more than just a browser, it is an enabling technology, bringing powerful tools such as html5, WebM, JavaScript, XUL, and more to AmigaOS 4.x. These are the building blocks for other applications as well, such as the email client "Thunderbird" or the media centre "Songbird". Minimum Requirements: AmigaOS 4.1 (Update 4) is required to run this version of Timberwolf. http://www.os4depot.net/?function=showfile&file=network/b rowser/timberwolf.lha http://www.friedenhq.org/index.php?option=com_content&vi ew=article&id=56:new-timberwolf-release&catid=35:amigaos This first beta release includes almost the full functionality of the browser, allowing style-sheet enabled web browsing, secure connections, use of Firefox® add-on and more. Of course, being a beta, there are some limitations, such as missing support for printing, sound, WebGL, and drag & drop. Most importantly, no support for hardware accelerated rendering is implemented yet. We are working on getting all those features implemented over time. Current focus is on stability and completeness. UNIVERSAL C64 CARTRIDGE A C64 cartridge with USB connection for uploading CRT files from a PC and for fast turnaround time when developing assembler programs for the C64 on a PC. The board contains a MC9S08 microcontroller, a 128 Kbyte SRAM and a CPLD, which can be programmed to emulate many cartridge types. With a different firmware it can be used in standalone mode, without a C64, for other applications as well, like a logic analyzer or a motor controller. Homepage: http://www.ohwr.org/projects/c64cartridge/wiki/Wiki http://www.ohwr.org/projects/c64cartridge Page 7 www.commodorefree.com NEWS Hollywood 5: Infinity Out Now! - Standard library set encompasses over 600 functions now! - Lots of other changes, optimizations and bug fixes After two years of development, Airsoft Software is proud to announce the immediate availability of Hollywood 5: Infinity for AmigaOS and compatibles and Microsoft Windows. This is a massive update which boasts over 120 new functions in comparison to Hollywood 4.8 and brings along many new features and general improvements. Highlights include the ability to play video streams, full Internet and network support (you could even run a server with Hollywood now!), support for real vector graphics and vector image formats like SVG, hardware accelerated double-buffering, inbuilt synthesizer functions and much much more. Hollywood 5: Infinity is the ultimate Multimedia experience and a must-have for all creative people. Hollywood is available on a CD-ROM and as a download version for AmigaOS compatible systems and for Microsoft Windows. The CD-ROM version is delivered in a nice Digipak (see photo). If you order the download version, you will have to download an ISO image which you need to burn on CD-R then. If you already own Hollywood, you can buy a discounted upgrade version. Customers, who have bought Hollywood 4.8 after January 1st, 2012, can apply for a free upgrade. Screenshots of Hollywood 5 are available on the Airsoft Software homepage. Hollywood 5: Infinity is undoubtedly the most advanced Amiga http://www.airsoftsoftwair.com/ multimedia application and on Windows, it is a fresh Indie alternative to bloated authoring systems that need tons of Hollywood is the ultimate bridge between all the different DLLs, memory, and hard-drive space. Hollywood is highly AmigaOS compatible platforms and the other three modern stable, extremely easy to use and flexible, and used by many desktop systems, Windows, Mac OS, and Linux! With creative people around the globe. A totally unique feature is Hollywood, you can save programs for all those platforms. You the ability to cross-compile native executables for many do not have to own AmigaOS4 or AROS, you can save different platforms including: AmigaOS3, AmigaOS4, WarpOS, programs for these platforms also from your AmigaOS3 MorphOS, AROS (x86), Windows (x86 & PPC), and Linux (x86 & installation! You do not need to have Mac OS X, you can still PPC). compile your programs for it using your AmigaOS or MorphOS installation. Only Hollywood makes it possible. If you want to Here is a non-exhaustive list of new features in Hollywood 5: learn more about Hollywood, please visit the official -Video playback support Hollywood portal at http://www.hollywood-mal.com/ which - Full Internet and network support also has a forum for all questions concerning Hollywood or the - Support for vector images like SVG Airsoft Software homepage http://www.airsoftsoftwair.com/ - Real vector graphics can now be used (Bézier curves etc.) - Tons of new image manipulating functions (blur, sharpen, All this makes Hollywood The Cross-Platform Multimedia gamma, oil paint...) Application Layer. Join the Multimedia revolution and get your - Hardware accelerated double-buffering for 500% faster personal copy of Hollywood 5: Infinity now! drawing - Inbuilt synthesizer for generating sounds on-the-fly - Many functions for brush distortion (perspective, arc, polar...) - New requester functions (font, colour, lister...) - Hollywood can now compile for PowerPC Linux too! - Many new functions for dealing with samples - Great improvements to the layers system - Real drop shadow and border support for layers - Over 20 image filters that can be applied to layers - Hardware accelerated image transformations - Real time calculated effects for layers with filters - New gradient types (radial, conical and multicolour) - IPC functions for talking to other programs - Platform independent localization support - FPU support for 68k Amigas (improves speed dramatically also on WinUAE!) - Platform independent pattern matching - Many new utility functions (MD5 checksum, string functions etc.) - Cross-platform public plugin interface for 3rd party extensions - More than 500kb of new documentation - Manual is also available as a professionally typeset PDF now (over 700 pages!) - 14 new example scripts (over 80 in total) Page 8 www.commodorefree.com NEWS Audio Evolution 4 Now Freeware News from DaveAE The full version of the audio hard disk recording software Audio Evolution 4 for OS4 has been uploaded to OS4depot! The source code and AROS/MorphOS versions will follow later. I hereby wish to thank all customers who have purchased AE4 (for any of the above platforms) in the past. All the best, Davy For successors of Audio Evolution on other platforms (Android, Windows, OSX), please visit the link below. http://www.audio-evolution.com New CodeAudio release by OnyxSoft for classic AmigaOS OnyxSoft releases an update of CodeAudio! - The wizard can now create recursive target directories. - Made the subtask communication more robust which fixes some auto download/update bugs. - And more... http://www.onyxsoft.se/codeaudio.html CodeAudio v3.10 - (68k) Full-featured GUI for audio encoders (MP3/OGG/FLAC/AAC/A8) with a wizard and CD, CDDB/FreeDB support. - The Wizard can now skip already encoded files from for example a half-encoded CD. - Added a new converter and player for the Amiga optimized A8 format. - Reorganized the encoders/decoders/players into groups to make it easier to overview. - Changed the wizard Extra High mode to use stereo mode instead of j-stereo. RETRO WALLPAPERS http://retrovgm.wordpress.com/custom/wallpapers/ Wallpapers, Lock Screens & Backgrounds news from Retro VGM These are all fun ways in which we like to add our own personal stamp on our mobile communications device of choice from Windows Phone & Android to Blackberry & iPhone we all have a preferred device of choice. While it is nice to be able to snap a picture and then, without any messing around, use that picture as our own wallpaper it’s also fun to be able to use other pictures in order to really add that personal touch. So RETRO VGM have created a series of Retro Themed Smartphone wallpapers in three different styles. feedback is appreciated regarding the styles that I have chosen and not the actual choice of images, however if you would like to see a particular game from the ZX Spectrum or Commodore 64 added then I will do my best to add them. All the wallpapers are sized for WVGA screen resolution of 480×800 pixels. If your device supports a higher or lower resolution you’ll still be able to use them but they might resize oddly. Enjoy browsing, I will be adding more as time passes so check back every now and again or even follow the blog. Style 1 – A simple enlargement with smoothing, Style 2 – A classic style comic book ink shading applied, Style 3 – Glowing Neon Edges. Page 11 www.commodorefree.com NEWS NewsTek Roars Back to Life in 2012 with Episode #12 The Amiga is mentioned about 30:30 minutes into the show. Information from NEWSTEK NewsTek Roars back in 2012 with a brand new episode. Rich and I are changing it up for this episode. I lined up an interview with Allen Wolf, writer and producer of the hit film “In My Sleep”. We do an in depth interview with Allen and learn his process in writing and producing this psychological sleep thriller in an Alfred Hitchcock style. The Internet Movie Database lays out the story line of Marcus, “..as he struggles with Parasomnia, a sleepwalking disorder that causes him to do things in his sleep that he cannot remember the next day. When he wakes up with blood on his hands and a knife at his side, he is startled to hear that a close friend has been found stabbed to death. Marcus frantically tries to put the pieces together – could he have murdered his friend while sleepwalking to hide a dark secret between them? The police close in as Marcus investigates his own nocturnal activities, desperate to figure out what happens after he goes to sleep. His journey to uncover the truth leads him to a shocking revelation.” DiscreetFX is giving away three of Special Edition Blu-ray/DVD Combos. http://www.amazon.com/Sleep-Special-.../dp/B005UKFGWW If you would like to be entered to win one of these send an email requesting it to the link below. http://www.discreetfx.com/contact.html Links Amazon: http://www.amazon.com/Sleep-Special.../dp/B005UKFGWW IMDB: http://www.imdb.com/title/tt0326965/ In My Sleep Website: http://inmysleep.com/ NewsTek: http://www.amigaz.org/2012/02/12/new...ngsome-sleep/ We talked with Allen about some of the experiences during the filming of the movie. Also about some of his research about “Parasomnia” and this sleep disorder. We also got some insight about the process of making a movie in general. All in all a really good interview about a thrilling movie. It’s the Sleeper hit that you have not seen yet but need to. We are giving away three “In My Sleep” Blu-ray /DVD Combo packs. Be sure to listen to the episode to find out how to get in on the giveaway. JAMOS AMOS CROSSPLATFORM LANGUAGE http://sourceforge.net/projects/javaamos/ -From MequaScript: Multiple jAMOS programs can be run concurrently -From MequaScript: The beginnings of simple object orientation Description jAMOS is a cross platform, Java-based reimplementation of François Lionet's AMOS BASIC on the Amiga. Features -BASIC-like interpreter based on MequaScript -AMAL interpreter from jAMAL written in Java -Script editor utilising Java Swing -AMAL-to-Java code translator and compiler -Source is buildable in Eclipse and NetBeans IDE out of the box -Runnable from a single JAR file -Reimplemented AMAL Environment Generator -Rudimentary Amiga-style screen and scrolling engine -Integrated AMOS sprite bank viewer (AbkViewer) -From MequaScript: Supports both BASICstyle and C-style syntax (in progress) Page 12 www.commodorefree.com NEWS DIAG264 DIAG264 is a system to search for defects in a Commodore C16, C116 or Plus/4 computer. The system consist of a special cartridge and several loop back connectors. With this system you can test the following parts: RAM, ROM, I/O of the CPU and TED registers. On the DIAG264 web page you can find a very comprehensive manual how to test your computer DESCRIPTION FROM THE WEBSITE The design and operation of Diag264 is modelled closely on the operation of the cartridges available for the 64/128 and VIC-20. One of the aspects that I was most keen to copy was the functionality of the Dead Test Cartridge of the 64. The primary use of this cartridge was to find RAM issues in a machine that otherwise appeared dead. beginning with 318004 (PAL) or 318005 (NTSC.) The cartridge option involves sacrificing a standard commercial Commodore C16/Plus cartridge (I used Strange Odyssey) unless you are lucky enough to have a supply of cartridge blanks. You will need to remove the ‘low’ ROM and install a 28-pin DIL socket in its place, as seen in my cartridge in Figure 1. The TED chip itself supports both NTSC and PAL standards, controlled by bit 6 of register 7. NTSC and PAL machines therefore have slightly different kernals to correctly set the state of this bit, and also some other small modifications to take into account timing differences. When running from a cartridge, DIAG264 could query the installed kernal to determine whether it should be running in NTSC or PAL mode. This could be done by checking the value of $F33F which contains the default for TED register 7. As of version 0.2B, this is not implemented, and it is not possible at all when running from a kernal replacement. For this reason I have made both NTSC and PAL versions of DIAG264 available. The majority of Commodores 8-bit offerings used DRAM chips in either a 64k x 1 or 16k x 4 configuration. This usually meant that any dead RAM chip would make the machine completely inoperable, as the zero page ($0002-$00FF) and stack ($0100- http://inchocks.co.uk/commodore/Diag264/HTMLManual/Dia $01FF) are rendered practically unusable. The kernal start-up g264.htm routines in both the 64 and 264's make extensive use of the ZP and implicitly rely on the stack upon the first execution of an RTS instruction! This presents a problem for any normal cartridge based diagnostic tool because we are dependent on the kernal to hand over control to the cartridge ROM. The Dead Test cartridge avoids this problem by making use of the 64's rarely used Ultimax mode, which enables an external cartridge ROM to replace the Kernal of the host machine and therefore bypass the normal start-up routines, making it a superior tool for identifying RAM problems on an otherwise ‘dead’ system. The 264 architecture does not include any way of auto-booting into an external ROM without trying to pull some dirty tricks with the address lines. So it becomes a trade-off between the conveniences of a cartridge versus the extra benefits of Figure 1 - Cartridge Mod booting straight into the diagnostic. Not being a fan of compromise, the Diag264 ROM can be compiled for either cartridge or kernal. The kernal option is a simple drop in replacement of the kernal ROM, which is the 28-pin ROM chip with the identifier Page 13 www.commodorefree.com Wyvern COMMODORE FREE GAME REVIEW http://tnd64.unikat.sk/friends/Wyvern.zip loading the D64 gives a TND style into Released by : ColorClashSoftware, The New Dimension Credits : Code .... Chris Yates Jon Wells Music .... Richard of Blazon, Psytronik Software, Scene World Magazine, The New Dimension Graphics .... ColorClashSoftware Design .... ColorClashSoftware Text .... Richard of Blazon, Psytronik Software, Scene World Magazine, The New Dimension Concept .... ColorClashSoftware Loader .... Martin Piper WYVERN . THE STORY across the land of Prodigia lived a holy dragon (you) called, WYVERN; you rest in a small cave sleeping. Far from this land lies a castle, in which an EVIL DRAGON LORD lives as ruler. He sends an army of his minions to capture wyvern and took him to the dungeons. With some suitably tuneful music and thumping along style baseline, of course pressing space starts the game loading With some very squelchy square wave music – and a bouncy melody line, you can see this is a SEUCK from the information WYVERN suddenly wakes up and finds he takes a deep breath and MELTS the SHACKLES in which at the time was restraining him from his escape. Then he breaks out of the huge dungeon to make his ESCAPE. Wyvern sets his sights for freedom, but an army of colourful dragons have spotted him. WYVERN THE GAME You are WYVERN you have been ABDUCTED by the EVIL DRAGON LORD who wants to control the world of PRODIGIA. You break out of the shackles, by breathing fire at them and ESCAPE the DUNGEON inside the castle. Unfortunately you are menu or title screen. spotted by an evil dragon, and now an army of them have Pressing the joystick fire button (connected to port 2) starts been set free to STOP ‘you. the game Your quest is to ESCAPE from the castle of the evil lord. Escaping the castle will be quite a CHALLENGE as there are ENEMY dragons and minions Out there to stop you. BREATHING FIREBALLS at the enemies should hopefully do the trick. During your escape, you need to pick up bottles of POTION, to BOOST up your score, avoid CRASHING into DEADLY background and escape before the dragon lord CAPTURES you and BANISHES you in the dungeon FOREVER! COMMODORE FREE The game downloads as a Zip file and has a D64 and Tap version Page 14 www.commodorefree.com I am unsure how the music fits in with the game; but the music sounds are good and the tune holds itself up well, I quite liked the bass drum kick and the snare in the main game very realistic. The games backgrounds are very colourful and there is a lot going on screen (background wise at any rate) with the design of the columns etc it’s easy enough to see where you are and what you are supposed to kill or avoid. The main character sprite is dragon like creature in green and the attacking sprites (also dragons) move in the usual predetermined SEUCK patter completing this level is just a matter of moving to the right place on screen and pressing fire, until you get to the end. The enemy movements should have been a little more random but again this is more a SEUCK limitation than a game design, however some of the enemies could have moved differently. The next level is mealy moving through a winding corridor with nothing to shoot and is over quite quickly, the bricks look like bricks and erm... The game has some odd bugs for example if you die while crashing into the wall /maze area in level 2 the screen still scrolls and you re-emerge inside the bricks moving will kill you ! However just leaving the creature there and he will eventually die anyway? Very annoying. It isn’t every time and I have noticed the same problem later in the game, also on level 3 I can see a bonus to collect I collect this and the game seems to jump back and I am playing the same part of the level over and over again. Here is what Richard Baylis had to say about this particular problem I noticed what Christian did for level 3. I think he was trying to implement a trick that was to make the game repeat a section twice/three times the game would restart that level before moving on to the next stage. Sometimes this is a clever trick in SEUCK (Due to memory restrictions of the editor). Then after this has happened, the game moves on to the final level. :) Well I am struggling a little here it’s a corridor or tunnel whatever you want to call it. After that it’s more of the same with the creature’s following a new path wave and increasing in difficulty by some considerable amount; and it’s here I come stuck, in my skills as a dragon killing other items on screen. The level of difficulty seems to jump from very easy to very hard. The games looks are great, not sure about the main sprites but the backgrounds are great detailed and very colourful, and although its nothing that could be in any way called original, it’s another welcome sideways SEUCK blaster with decent music although I wondered how the music . SCORES Graphics 7/10 Music Playability Lastability Overall 7/10 5/10 5/10 6/10 INFORMATION At the start of the game as soon as the colour lettering disappears start to move right quickly as there is a bonus right at the screen edge shown in this pictures with a GREEN circle to highlight it Page 15 www.commodorefree.com Finding the Start and Endpoint of a Program (On a Commodore computer using a Monitor program) by Commodoreman (c) Have you ever wondered where a computer program is stored after you “load” it in the computer? Have you ever been given the place in RAM where a program starts–but wonder where it ends? How much RAM is actually being used? program, the start address (or beginning point) is also used. For me, I wanted to know where this program ended so I could cram in more programs into this free area (49152-53247 is not used by BASIC). If you have ever asked yourself this question, but never had To find out where Editor starts and ends, there is a neat little the experience or knowledge with the Commodore computer, trick that can be used to make it a lot easier. Sometimes there this article will provide a way to figure that one out. It will be is lots of meaningless stuff “stored” in RAM. We will fill the easier for you 128 and Plus/4 owners, since the 128 and Plus/4 RAM area between $C000 (49152) and $CFFF (53247) with a has a built-in monitor readily available. If you have a VIC-20 or bunch of zeros. This will make it easy to identify where the a 64, you’ll need access to a monitor program. (You club program ends. members have access to a few in the Library). Type in and run the following little program in BASIC: I will be giving the example using a Commodore 128 in 64 mode. I will be using the Commodore Assembler Development 10 FOR I=49152 TO 53247 System software which has two monitor programs available. 20 POKE I,0:REM THIS IS A ‘ZERO’ 30 NEXT I If you are using 128 mode, similar results can be obtained RUN using the built-in monitor (just turn on the 128 in 128 mode READY. and type M-O-N-I-T-O-R followed by the Return key). Just be sure to account for the differences in how the 128 handles This little loop is all we need to fill the area we want with zeros. RAM. It can also be modified to fill any area in RAM. I’ll be giving memory locations in hex with the decimal Next, we will load the Editor program: equivalent in brackets–that should make it easier for those who are still learning what all this hex stuff means. LOAD”EDITOR64",8,1 Let’s say you’re a beginning assembly or machine language SEARCHING FOR EDITOR64 programmer. You’ve just created a small utility program and LOADING would like to place it in the RAM area between $C000 and READY. $CFFF (49152 to 53247). If you are using the Commodore Assembler Development software, you probably know that the SYS 49152 Editor loads into RAM starting at location $C000 (49152). This COMMODORE 64 EDITOR V072982 is known because whenever a SYS command is used to start a (C) 1982 BY COMMODORE BUSINESS MACHINES READY. Next we need to select one of the monitor programs. Note: Because we are using RAM areas $C000- (49152 -), we cannot use MONITOR$C000 (that would erase Editor64). So we will use MONITOR$8000. (If you get an ?OUT OF MEMORY ERROR, just type NEW and key in the following:) LOAD”MONITOR$8000",8,1 The Following will be displayed: SEARCHING FOR MONITOR$8000 LOADING READY. SYS 32768 Page 16 www.commodorefree.com B* PC SR .;803E . AC 32 00 XR 83 YR 00 SP F6 Now we will use the .D (disassemble) command to view the RAM starting at $C000 (49152). .D C000 ., C000 A9 00 The last line I get is for RAM location $C647 (50759) and takes up three bytes to $C649 (50761). I know this because the next line displayed is C64A. WHAM-O!! There it is! It is safe to assume that the EDITOR64 program ends at $C64A (50762). Since we placed a bunch of zeroes in this area of RAM, loading the EDITOR64 program changes the values in a certain segment. By checking to see what has changed, we find out how much RAM has been “disturbed”. So we can place our next program into the RAM location starting at $C64B (50763). LDA #$00 Remember, always make sure that you count a BRK at the end. This tells the computer that this is where the program ends (so Notice that RAM location $C000 (49152) to $C001 holds the values ‘A9' and ‘00'? LDA #$00 means to Load the Accumulator don’t overwrite it!). The BRK statement in Assembly/Machine language is equivalent to the END statement in BASIC. with the value 0 (zero), and it took two bytes of RAM to do it. Use the cursor down to scroll to the next memory address. There ya go! Happy programming! The next RAM address is C002. Notice that there is something stored here too. This will continue to be the case for a while. Hold down the cursor down key until you get a bunch of lines with 00 and BRK in them. Rediscovering Commodore CP/M by: Commodoreman © PART 2 Welcome to Part 2 – Rediscovering Commodore CP/M. In this article I am dividing this into two sections: SETUP and FIRING UP COMMODORE CP/M MODE. Since I cannot guess what anyone else reading this article has access to, I will try to use more than one type of system configuration. However, I will start with what I have listed below, and later use different combinations and hopefully most readers will be able to follow along. I’ve also decided to do more of a journal type entry and writing things down as I go. Things could get a little messy without an “organized” approach, but hopefully somebody out there can glean something useful. Section 1: SETUP I have assembled the following: System configuration: 128D 1701 Monitor (40 column mode) Drive 8: Built-in 1571 Drive 9: 1541 Drive 10: 1581 Other available and resources: 1902 Monitor (80 column mode) 1750 REU Commodore CP/M 3.0 System Boot Disk Program disk: the genealogy program mentioned Misc. CP/M formatted disks I had stored and other blank disks. Commodore 128D System Guide Commodore 128 Programmer’s Reference Guide Digital Research book (The one I bought from a former club member) The Internet I will start with the initial setup and then use any of the other items listed as the need arises. I have noticed that there are some internet sites that have programs, but I have not as of yet tried any of them. That might be a good start too. I have a feeling that the internet will play an important role here as well. Also, somewhere in my collection I have some miscellaneous Z80 programming books – might be useful after I run through the basics. Firing up CP/M Mode CP/M 3 is the version available to the Commodore 128. The Commodore 64 did have a cartridge with version 2.2, but from what I understand, it was not as functional. I'll stick with version 3 on the 128 (yeah, somewhere I do have a cartridge for the 64 – wonder where it is...). I will have to be sure any programs I have now or in the future will be for version 3. I inserted the System Disk into the drive and I fired up the 'ol 128. Here's what I got... Another 1571 drive Page 17 www.commodorefree.com AMIGA FOREVER AND COMMODORE 64 FOREVER Amiga Forever http://www.amigaforever.com http://www.facebook.com/AmigaForever C64 Forever http://www.c64forever.com http://www.facebook.com/C64Forever RetroPlatform Project http://www.retroplatform.com Page 18 www.commodorefree.com http://www.cmdweb.de/ Here you find information about the SuperCPU, FD disk drive, HD series, JiffyDOS and RAMLink. To order, pick your closest distributor. Furthermore, you can visit our About CMD section or the Download area. www.commodorecomputerclub.co.uk/ Welcome to the home of the Commodore Computer Club UK. We have set up to support all popular Commodore 8-bit computers, from the Commodore (CBM) PET range, through to the C128, so if you have a C64, VIC-20, C16, Plus/4 or even a C64DTV, and would like to know more about the club, please read the club FAQs or visit our forums if you have any further questions. Page 19 www.commodorefree.com Page 20 www.commodorefree.com On the Way to Fun: An Emotion-Based Approach to Successful Game Design Roberto Dillon (Author) Product details Paperback: 200 pages Publisher: A K Peters/CRC Press (8 Mar 2010) Language English ISBN-10: 1568815824 ISBN-13: 978-1568815824 Golden Age of Video Games: The Birth of a Multi billion Dollar Industry [Paperback] Roberto Dillon (Author) Product details Paperback: 209 pages Publisher: A K Peters/CRC Press; 1 edition (28 April 2011) Language English ISBN-10: 1439873232 ISBN-13: 978-1439873236 Page 21 www.commodorefree.com CP/M 3.0 On the Commodore 128 40 column display 1 Aug 85 I think I will make a checklist of things I want to do later, so I don’t forget…I’ll put this at the end of the article for easier reference. A> (blinking cursor) R A01 10 O.k., back to the manuals. The next titbit mentioned in the 128D User’s Guide mentions that a RAM Expansion module is accessed as drive ‘M’. This is set up as a RAM Disk. The manual mentions to reference the User’s Guide for the RAM expansion Well, I remember A> had something to do with the current default drive, so I entered the following: B: <RETURN> and this is what was displayed... CP/M Error On B: Disk I/O BDOS Function = 14 I know this is an error code – Time to hit the manuals! While I'm looking for the error code, I will look up what the R A01 10 displayed at the bottom of the screen means (I know, all you CP/M veterans are probably laughing by now...). Oh, also, I noticed that at the bottom of the screen, it has changed from R A01 10 to R B03 00 (Could this be a hint as something to do with disk access?). Accessing the Manuals… According to the Commodore 128D User’s Guide, the above display is deciphered as follows: unit being used. Since I have a 1750, I checked out the manual to see what it says. I found another checklist item. Apparently This is how CP/M looks on the 128 in 40 column mode. The there is a disk that is supposed to have been included with the screen is divided in two parts with the left half showing. I need REU for CP/M. I will have to research this since I don’t to use the Control Key and one of the Right Arrow keys (these remember seeing one with mine (the problems of buying a are the keys at the top of the keyboard!) to view the other part used peripheral). of the screen. (Hmm, if this becomes too cumbersome, I’ll be connecting the 80 column monitor). I just found a book in my collection about CP/M – it is book #8 from the Commodore 128 series published by ABACUS. Here is The User’s Guide also states that I have access to 58k of what I was able to find out about those numbers at the bottom available RAM (in CP/M terms – TPA, or Transient Program of the screen… Area). “You've probably noticed that there are always some numbers The opening screen shows the default user and drive letter (0 in the lower right corner during loading. Even when the initial is the default and is not shown, drive A is the default disk message disappears, these numbers don't go away. The last drive). Also, according to the manual, I can connect 4 physical line of the screen is the status line, which can't be written on. disk drives (lettered A, B, C, and D), and one “logical or virtual The numbers in the corner show which block is being read drive”. I’ll investigate that later. I did check out what was from or written to. An R stands for reading from, and a w for meant by the “default user” and according to the Digital writing to a block. Further down is an A or B message, Research User’s Guide (see pg. 2-4), CP/M files can be divided indicating the disk drive that's being used. The status line can into “user” groups. There are 16 users possible numbered from be turned on and off with the key combination (p. 25)”. 0 to 15. Here’s what the User’s Guide states, Now for that error message. I found in the Digital Research “CP/M 3 further identifies all files by assigning each one a user Programmer’s Guide more information on BDOS errors, number which ranges from 0 to 15. CP/M assigns the user number to a file when the file is created. User numbers allow “Physical and extended errors are displayed on the console in you to separate your files into sixteen file groups. User the following format: numbers are particularly useful for organizing files on a hard disk”. CP/M Error on d: error message BDOS function = nn = filename.typ I interpret this as a means of helping to organize when there are likely to be multiple users (such as in a business environment of some sort) that use the same machine. I’m gonna have to investigate the hard drive issue later. Page 22 www.commodorefree.com where d identifies the drive selected when the error condition is detected; error message identifies the error; nn is the BDOS function number, and filemane.typ identifies the file specified by the BDOS function. If the BDOS function did not involve an FCB, the file information is omitted. Note that the second line above the error message is displayed only in the banked version of CP/M 3 if expanded error message reporting is requested by GENCPM (p. 2-29)”. How do I use other peripheral devices (modem, printer, joystick, etc.)? What other high-level languages exist (BASIC, FORTRAN, COBOL, etc.)? LIST OF RESOURCES Hardware: Commodore 128D/1571 1541 O.k., so from this I know the error message means that BDOS (I 1581 1750 REU found out this acronym stands for Basic Disk Operating 1702 Monitor System) is telling me that there is some type of disk error on drive B. The BDOS function number (14 in this case) is defined 1902 Monitor as “Select Disk”. I guess I should have had a disk in the drive and the latch closed! It seems to me that CP/M will check the Software: drive for a disk when an attempt is made to switch from the CP/M System Boot Disk default drive (or any other drive) which had been placed into Genealogy Program the primary position (as indicated by the prompt). I’ll put BDOS other CP/M formatted disks (copies of system disk) down on my list of things to get more information on. Printed Material: So if I summarize what I have researched so far, here is one Commodore 128D User’s Guide way of how I do it... Commodore 128 Programmer’s Reference Manual Digital Research User’s Guide (3 books in one) Commodore 128 CP/M User’s Guide - ABACUS CP/M (Control Program for Microprocessors) is a system of ISBN#0916439453 organizing information via hardware and software. When booting the system on a 40 column screen the computer Other: displays information on the CP/M version number followed by Internet printing “On Commodore 128", the date, current user number (0 being the default and is not shown) followed by the current default drive letter and the status of the disk drive. The user number and the default drive letter are followed by the right bracket “>” and is known as the system prompt. This is where the user enters information called a command. This could be a system command or a call to a program. CP/M handles interfacing with disk drives via BDOS (Basic Disk Operating System). CP/M on the Commodore 128 includes the following : There is 59 kilobytes of Transient Program Area (user RAM) A maximum of 4 disk drives can be connected (512 Megabytes maximum capacity) CP/M will recognize a RAM expansion unit (set to drive M) Recognizes a virtual drive (E) Can use a 40 or 80 column display. Other peripheral devices can be connected. End of Part 2 Commodoreman CHECKLIST Hard drive (note: logical drive capacity cannot exceed 512 MB – CP/M Programmer’s Guide, sec. 1.5, p. 1.11). Find out more about this feature (can I still get one?) REU CP/M disk BDOS What is the date displayed on startup? Is it the date of the OS or is it there to represent the current date? If so how do I change it? Page 23 www.commodorefree.com ASSEMBLER PROGRAMMING MICRO MART BY SHAUN BEBBINGTON (C) Author's notes: This is the third lot of tutorials (parts 9 through to 12 inclusive) that were published in Micro Mart magazine between February and July 2011 in the 'Specialist' section, which also includes Amiga, Apple, Linux and gaming news and views – see www.micromart.co.uk for more information about this publication. Bitmapping – Part 9 Without delving too far into the secrets of the Commodore 64's many graphics modes, such as Flexible Line Interpretation (known as FLI) or the interlaced version [IFLI], the VIC-II chip sees the screen as 8x8 character blocks by default, but can also 'bit-map' the screen, allowing 64,000 pixels to be manipulated by the user. Each eight pixels is grouped together in a byte, so the bit-mapped screen excluding colour RAM is 8,000 bytes of memory, or just under 8K. By comparison, a screen full of characters is 8 times smaller, excluding colour nybbles (and any memory used for user-defined graphics). Whether you're using plain old characters (or UDGs) or you're bit-mapping the screen, or using both, you can toggle multicoloured mode, which means that the vertical resolution is Disclaimer: The tutorials assume some prior knowledge of essentially halved and the number of colours in an 8x8 pixel machine code, so you may need to read the last two issues of Commodore FREE which has parts one through to four and five area is doubled from two to four, giving a 'chunky' 160 x 200 through to eight . None of this will not be very useful if you are pixel matrix. More about this later. For now, we'll just worry about high-resolution bit-mapping (sometimes referred to as not a complete beginner and I'm only providing a foundation mono-colour mode). on which to build. I'm sure all of the example code could be improved greatly. Remember: the more you experimentation The first thing that you will need to do when switching on you do with your code, and the more you read up about the bitmap mode is to know where your bitmap will reside in Commodore 64's hardware, the more you will learn. Even memory. For a full bitmap, there are certain places in RAM better if you enjoy programming, because this will aid your that are used and these cannot be altered at will. You should progression as much [or more] than anything else. also note that when in this mode, each character block on the text screen is used to define the colour of the pixel area on the I retain the copyright for these articles, which are used in Commodore FREE with permission. If you would like to contact bitmap that it matches (assuming mono-colour, also referred to as high-resolution). The easiest way to think of this is that me about them, then you may do so through the Micro Mart forums and a link is provided. Without any further ado, here is the each character on the normal screen is below each 8x8 the next installment, which covers some of the very basics. The pixel area of the bitmap, and affects the foreground and background colour in each block (pixels that are on or off original images that I provided with the articles are included respectively). As the C64 has just 16 colours, ranging from 0 to for illustration purposes only. 15 inclusive, the colours are represented by four-bits each, as this fits exactly into our 8-bit hexadecimal system, so if you Page 24 www.commodorefree.com store f3 hex at screen location 1024 (0400 in hex), the two colours are affected in the corresponding bit of the bitmap area (top-left 8x8 pixel block in this case, assuming your bitmap resides at memory location 8192 onwards). How the colours are worked out is to split the byte into four bits, so f hex is equal to 15 decimal, which is light grey, and 3 hex is exactly the same as it would be in decimal, which is cyan. Therefore the pixels switched off in the block will be cyan and those switched on will be light grey. Let's have a look at a quick example of a high-resolution bitmap then in assembly: *=$c000 ; Where our program resides in memory lda #$60 sta $fc lda #$00 sta $fb ; This will indirectly index the bitmap RAM lda $d011 ; The following sets up hi-resolution bitmap ora #%00100000 sta $d011 lda $dd00 and #%11111100 ora #%00000010 sta $dd00 lda #$5c sta $0288 lda #$79 sta $d018 lda #$f3 ; This is our default colour setting ldy #$00 DEFCOL ; Sets up default colour to new screen area sta $5c00,y sta $5d00,y sta $5e00,y sta $5f00,y iny bne DEFCOL lda #%10000001 ; This will be our default pattern ldy #$00 sty $d020 ; Sets the border colour according to Y index ldx #$20 ; How many pages of RAM we'll be using LOOP ; This will set our default pattern as above sta ($fb),y ; if A was set to zero, it would clear all bits iny bne LOOP inc $fc dex ; We've set one page, X is decreased bne LOOP ; This will check if X is zero. HOLD ; Marker for unconditional infinite loop jmp HOLD ; Infinite loop Recapping on last week, I briefly described bit-mapping the screen on the Commodore 64, and gave a quick example of displaying a not-very-exciting high-resolution image that could be said to resemble some rather horrid looking stripy wall paper. Hopefully, you had the chance to play around with the example and change the colours and the bit pattern displayed. You may have noticed that bit-mapping, like re-defining the character set, requires you to change the VIC-II memory pointers so it 'sees' the relevant 16K bank of RAM, so in other words, if you were going to use last week’s example for a basis to display a title or splash screen, and you had user defined graphics (UDGs) in your project too, you'd have to ensure your UDGs where in the same bank as the bit-map when reverting to text display whilst remembering that all characters should be written to 5C00 in hexadecimal, unless of course you were to change the pointer in the VIC-II afterwards to a different bank. It's therefore easy to guess that memory management is an issue when creating your C64 project, although there's nothing that is insurmountable without a bit of forward thinking, which is where a pencil and paper proves useful. Here is some example code of changing the bank: BANKSWITCH lda $dd00 ; This memory location is used for bank switching on the VIC-II chip and #%11111100 ; We only need bits 0 and 1, so we'll leave bits 2 - 7 unaltered ora #%00000010 ; and then 'or' the value with the bank that we want to see sta $dd00 ; and now we should write the new value back to location DD00 hexadecimal rts So, if you want the default bank on start-up (VIC bank zero, memory location 0 to 3FFF hex), you'd change the third line of the above code to: ora #%00000011 For VIC bank one (located from 4000 to 7FFF hexadecimal), the value would be as in the code example above, bank two (starting at 8000 through to BFFF hex), the value would be #%00000001 and finally bank three (C000 to FFFF hex) would be #%00000000. Of course, each change will alter where the character screen and bit-map screen is in RAM - more about this on the forums at tinyurl.com/C64-Coding, where you may pose any questions to me. As it's not possible to go too far indepth through these pages, it's worth reading up about memory management by searching the vast Internet for information, but a good site covering such subject matters is at codebase64.org. Run it by using SYS 49152 and you should see something that looks a little like rather sickening stripy wall paper. To find out more about mono-colour bitmaps, please email me or check out tinyurl.com/C64-Coding. Looking Spritely Another feature of the host graphics chip is hardware sprites. Note that 'sprites' are sometimes referred to as Movable Object Blocks (MOBs) in some literature. Banks and sprites – Part 10 Without worrying about advanced programming techniques such as multi-plexing or anything fancy like that, the C64 can Page 25 www.commodorefree.com ldx #$40 ; X is used as a counter SETUP dex sta $0340,x bne SETUP ; Builds the sprite lda #%00000000 sta $d010 ; This clears the MSB setting for all sprites As with bit-mapping or the default screen mode, everything ldx #$64 has its' place, so each sprite must start at specific locations in ldy #$70 the memory bank that the VIC-II is pointing to. stx $d000 ; X position set sty $d001 ; Y position set Each sprite is made up of 24 pixels by 21 pixels in mono-colour SCAN (high-resolution) mode, with multi-colour mode halving the jsr $ff9f ; Scans keyboards vertical resolution, meaning 12 by 21 pixels. There is quite verjsr $ffe4 ; Put relevant value into A satile handling too, as each [sprite] may be expanded horizontally, vertically or both, and is automatically layered based on a START cmp #$57 ; W is up pre-set of zero through to seven. And regardless of how beq MOVEUP ; If true, move sprite up... chunky you have set your MOBs, you are still able to move cmp #$53 ; S is down them horizontally or vertically one single pixel at a time based beq MOVEDOWN ; etc... on the default visible area of 320 by 200 pixels, which is quite cmp #$41 ; A is left good as it always ensures smooth movements even if the beq MOVELEFT graphics have that 'blocky' look about them. You may also set cmp #$44 ; D is right the priority of each sprite to say whether or not it is in front of beq MOVERIGHT or behind the characters on the screen or the bit-mapped, but cmp #$0d ; Checks is the RETURN key is pressed you are not able to change the way one sprite may over or unbeq EXIT ; If so, we'll exit der lap another as this is set by the hardware. I have a brief jmp SCAN ; Back to loop marker sprite demonstration next time as unfortunately we've ran out MOVEUP of space for a coding example. ldy $d001 ; Gets previous Y position dey ; Decreases by one sty $d001 ; Stores new value jmp SCAN MOVEDOWN ldy $d001 iny sty $d001 jmp SCAN MOVELEFT ldx $d000 dex stx $d000 cpx #$ff ; Checks for horizontal position moving left bne SCAN lda #%00000000 sta $d010 ; Clears MSB for horizontal position A C64 sprite editor jmp SCAN MOVERIGHT ldx $d000 More on sprites – Part 11 inx Last week, I briefly introduced hardware sprites on the stx $d000 Commodore 64, so as there wasn't much time or space for a cpx #$00 ; Checks for horizontal position moving right piece of example code, I thought that I'll throw one straight at bne SCAN you, with some explanations on the forums at lda #%00000001 tinyurl.com/C64-Coding. Here's this week’s routine: sta $d010 ; Sets MSB for horizontal position jmp SCAN *=$1000 EXIT lda #$0d ; Using block 13 for sprite zero jsr $e544 sta $07f8 lda #$00 lda #%00000001 ; Enable sprite zero sta $d015 ; Switches off sprites sta $d015 rts ; Back to BASIC lda #$05 ; We'll colour it green sta $d027 lda #%11100111 ; Our bit pattern for the sprite (repeated) display eight sprites on a single screen regardless of which screen mode you've set. To be more precise, the VIC-II is able to handle eight sprites per scan-line (sometimes referred to as a raster-line or raster-beam), but we needn't concern ourselves with this at the moment. Page 26 www.commodorefree.com Once it's assembled, the program assumes that the VIC-II is looking at the default 16K bank as explained last week. For completeness, however, you may add the code to force the graphics chip to see bank zero, but try changing the banks anyway to see what happens. Run the routine by SYS 4096, and use the keyboard to move the simple sprite around the screed, W is up, S is down, D moves right and A moves left and RETURN exits the example program. Fortunately, I'll be covering reading the joystick port next week, and as space is at a premium, I'll leave it there. As mentioned, send over your question that you have and I'll answer them as best I can. The joys of movement - Part 12 We've reached the final instalment of these tutorials, so I hope that you've enjoyed your first steps into the mystical world of machine code programming. But it needn't end here; there is the accompanying thread over on the Micro Mart forums at tinyurl.com/C64-Coding, and even though this beginners guide ends here, I'll still endeavour to answer any questions that you have. Remember that the more you experiment, the more you will learn! You may have noticed that I haven't covered the Commodore 64's diverse sound capabilities. This is simply because covering such a subject would take at least 12 instalments by itself. But as you are now getting to grips with assembly language, take a look at tinyurl.com/6ehvk54. which direction is set, we can use an 'And' gate, for instance: READJOY lda $dc00 ; We're testing port two here and #%00000001 ; Check for up beq MOVEUP lda $dc00 and #%00000010 ; Check for down beq MOVEDOWN lda $dc00 and #%00000100 ; Check for left beq MOVELEFT lda $dc00 and #%00001000 ; Check for right beq MOVERIGHT lda $dc00 and #%00010000 ; Check for fire beq FIRE This technique is fine, but there's a more efficient way of doing things. What we can do is to 'roll' the accumulator so that each bit shifts to the right, so any bits that essentially 'fall off the end' will be put onto the processor stack and the carry flag will be set. So, if you logically shift the following bit pattern to the right: %00000010, the new value will be %00000001. Do it again, and you will get %00000000 + carry flag set. Here's an example: READJOY clc ; It's good practice to clear the carry flag testing it lda $dc01 ; Okay, we'll try port one this time lsr a ; Logical shift RIGHT bcs MOVEUP ; Branch on Carry Set lsr a bcs MOVEDOWN lsr a bcs MOVELEFT lsr a bcs MOVERIGHT lsr a bcs FIRE Last week’s example demonstrated moving a sprite around the This is more efficient that the first example, plus has other benefits too, which is discussed on the forum thread screen using the keyboard. Now we all know that the C64 has mentioned above. The important thing to remember is that it's two joystick ports, so it makes sense to use them. up to you as to how you write your code, as the first thing to worry about is to get it working. The two joystick ports are read into memory locations dc00 and dc01 hexadecimal, which represents ports two and one respectively. You'll note that most games use the second port, See if you can use either example this week with the code last week and replace the keyboard controls with either joystick but if you want to use the other then there's really nothing stopping you, as the difference is only in the memory location port. You may need to slow things down a little as machine code is many times quicker than BASIC. There was a way to do that you're reading and not in how it works. this much earlier in the The C64, like most 8-bits, used 8-way, digital controllers with a series, but you know what to do if you get stuck. single fire button, a standard set by the Atari with its 2600 console. This makes sense as most classic games don't require Whatever happens, keep on coding as it can be the more than 8 directional controls, and some don't use more most rewarding thing that than two. Each direction is read as one or two bits in memory you can do with your old and fire as required. Reading a binary octet from right to left, Commodore. Bye for now! the zero-bit is up, bit one is down, bit two is left and bit three is right. The forth bit is set when fire is depressed. To test Page 27 Issue 60 2012 Editor Nigel Parker Spell Checking Peter Badrick Text & HTML Conversion Paul Davis D64 Disk Image Al Jackson PDF Design Nigel Parker Website www.commodorefree.com Email Address [email protected] Submissions Articles are always wanted for the magazine. Contact us for details .We can’t pay you for your efforts but you are safe in the knowledge that you have passed on details that will interest other Commodore enthusiasts. Notices All materials in this magazine are the property of Commodore Free unless otherwise stated. All copyrights, trademarks, trade names, internet domain names or other similar rights are acknowledged. No part of this magazine may be reproduced without permission. The appearance of an advert in the magazine does not necessarily mean that the goods/services advertised are associated with or endorsed by Commodore Free Magazine. Copyright Copyright © 2011 Commodore Free Magazine