1
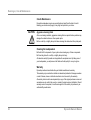
Contents Contents Introduction .................................................................................................................... 1 Dear Music Lover,...................................................................................................... 1 About this guide............................................................................................................. 2 General safety instructions........................................................................................... 3 Unpacking....................................................................................................................... 4 Installation recommendations ...................................................................................... 6 Positioning ................................................................................................................. 7 Foam piece for sound damping and optimization ...................................................... 8 Re-painting ..................................................................................................................... 9 Installation .................................................................................................................... 10 Checking the installation point ................................................................................. 10 Installing IW 17, IP 17 and IP 24 ............................................................................. 10 Installing IC 17 ......................................................................................................... 18 Running-in, Care & Maintenance................................................................................ 21 Running-in the loudspeakers ................................................................................... 21 Power rating............................................................................................................. 21 Care & Maintenance ................................................................................................ 22 Cleaning the loudspeakers ...................................................................................... 22 Warranty .................................................................................................................. 22 Technical specifications.............................................................................................. 23 Installation Products Introduction Introduction Dear Music Lover, Thank you for your decision to acquire a Dynaudio installation product. The loudspeakers of the Installation Product series feature the advanced Dynaudio technology, resulting in music reproduction at a very high level, making many familiar recordings a new listening experience altogether. This advanced technology results from many years of intense research and development, the highest quality standards in production, and Dynaudio’s enduring passion for musical truth. Dynaudio is one of very few companies who can realize such loudspeaker concepts through it's own in-house development and production facilities. These facilities are so advanced and the quality control is so strict that Dynaudio is TS16949 certified. To realize the highest installation and sound quality, some areas should be addressed, as will be explored on the following pages. By considering the tips and suggestions, you will achieve the maximum performance and enjoyment of the loudspeaker and its advanced musical capabilities for a long time to come. We wish you many years of enjoyment experiencing music, Dynaudio Installation Products 1 About this guide About this guide Used expressions and symbols In this operating manual following expressions and symbols are used: The exclamation point within an equilateral triangle is intended to alert the user to the presence of important operating and maintenance (servicing) instructions in the literature accompanying the product. CAUTION Note 2 Indicates (in combination with a safety sign) a potentially hazardous situation which could result in minor or moderate injury or damage to equipment. Additional information is provided, which is important to fully understand the loudspeaker and how to operate it. ✓ This sign indicates a step which must be taken before the following actions. The arrow will identify steps to be performed. Please follow the instructions carefully. 1. 2. 3. Multiple steps that should be performed consecutively are numbered. Please follow these instructions carefully. Dynaudio Owners Manual General safety instructions General safety instructions CAUTION High sound levels Listening to high sound pressure levels over a longer period of time may harm your hearing. To avoid auditory effect do not listen to high sound levels over a longer period of time. CAUTION Damage of structural fire protection The cut out for an in-ceiling or in-wall speaker installation could damage the fire protection elements of a building. This may impact the fire protection properties and violate fire protection regulations. Observe and follow the local regulations for structural fire protection. Contact an architect, the constructor or an official authority for structural fire protection. Installation Products 3 Unpacking Unpacking 1. Fold the top carton flaps back and carefully remove the contents. We suggest that you keep the entire packaging and all contents until the installation is complete. 2. Check the contents; see next page. 3. Remove the speaker from the plastic bag. IP series only: 4. Carefully remove the grille by lifting both ends of the red foil at the same time. 5. Un-tighten the screws: – IP 17: 6 screws, Torx 20 bit – IP 24: 10 screws, Torx 20 bit Place the screws into the accessory pack for later use. 6. Remove the baffle from the frame and, to avoid damage, keep them in the supplied plastic bag (and preferably in the carton) away from the work area until they are ready to be mounted. Also reference the chapter “Installation” on page 10. 4 Dynaudio Owners Manual Unpacking 1 2 3 + 0 - 6a 4 5 7 8a 6b 8b 9 10 11 12 POSITIONING AND MOUNTING TEMPLATE FOR MODEL IC 17 Installation Products 5 Installation recommendations Installation recommendations The Dynaudio IW/IP/IC models are designed to operate satisfactorily in a wide range of cavity volumes. Ideally these cavity volumes are: Model Cavity volume IW 17 > 15 liter (0.53 ft3) IP 17 > 15 liter (0.53 ft3) IP 24 > 30 liter (1.1 ft3) IC 17 > 15 liter (0.53 ft3) Avoid installing the speakers in the same cavity as any ducts, as this may result in excessive rattle. The sound quality of any loudspeaker is influenced by the furniture, wall materials and other objects in the listening room. For example, large rooms without much furniture and many clean, hard wall surfaces can give a bright and diffuse sound with diverse echoing frequencies. A room with thick carpet, curtains and soft furniture surfaces will yield a slightly warmer, darker and less lively sound. 6 Dynaudio Owners Manual Installation recommendations Positioning Following explanations help you to find the right installation location: • The distance between each loudspeaker and your listening position should be the same. • The closer the listening position is in relation to the loudspeakers, the closer the speakers can be positioned to each other. • If the speakers are positioned too close to each other, the stereo image will not seem realistic; if that distance is too wide, the image may leave an acoustic hole in the middle. • If possible, keep the speakers at a distance greater than 20" (0.5 m) away from any wall edges.Placement near the intersection of a wall/ceiling, wall/floor or in a corner is not recommended, as it may detract from the optimum sound quality. • Due to the residual magnetic field from the drivers, it is advisable to position the speakers at a minimum distance of 6" (0.15 m) from CRT televisions to avoid any adverse effect on the picture. Installation Products 7 Installation recommendations Foam piece for sound damping and optimization The sound quality of any installation loudspeaker system without a cabinet enclosure is strongly influenced by the rigidity of the wall or ceiling and the damping of the internal wall cavity. Note the following tips to improve the sound quality of your speaker installation: • A foam piece is supplied to damp the area behind the drive units. We recommend the whole section of the wall cavity to be filled with wadding, such as mineral wool used for insulation. CAUTION Prohibited damping material Using damping material that does not meet safety regulations may cause fire and may be dangerous to your health. Check that the materials you use meet the local fire and building regulations. • To obtain a satisfactory bass response, keep the area of approx. 1.5 ft (0.5 m) around the speaker clear of wadding. If more bass is required, remove more wadding around the speaker. • To further optimize the sound quality of the speaker, improve the stiffness of the wall by adding bracing (inside the wall) around the speaker. • To adapt the loudspeaker to various environments the tweeter level can be adjusted: – IP series: With the 3-position switch placed on the right hand side of the tweeter by ±1.5 dB. – IW/IC series: With the 3-position switch accessible via a hole in the front plate by ±2 dB. 8 Dynaudio Owners Manual Re-painting Re-painting The frames and the grilles of the IW, IP and IC loudspeakers are painted in a white semimatte (RAL 9003) finish. Frames and grilles may also be re-painted, and are ready to be refinished to match your own interior décor scheme. CAUTION Improper painting Do not paint the baffle (of the IP series loudspeakers) and the drive units. Paint on these parts may worsen the sound quality or even destroy the product. Protected the baffle and drive units e.g. with a thin plastic foil when re-painting the frame or the surrounding wall area. Avoid touching the drive units. To paint the grille: Remove the grille and paint it in the desired color. To paint the frame: 1. Remove the grille. 2. Protected drive units e.g. with a thin plastic foil. 3. Paint the aluminium frame in the desired color. Installation Products 9 Installation Installation Checking the installation point WARNING Pipe work, air conditioning, power cabling Damaging existing in-wall installations may cause severe injury or death. Before producing the wall or ceiling cut-out, be sure that no conflict with other in-wall installations will occur (pipe work, air conditioning, power cabling, etc.). In existing (retrofit) construction applications, use a stud-finding tool to map the wall construction accurately, a pipe detector to scan the proposed installation position and an electrical field detector to help avoid any risk of electrical damage or shock. Dynaudio strictly recommends asking a professional for help. Installing IW 17, IP 17 and IP 24 A pre-construction bracket is available to better facilitate new construction installations of the Dynaudio IP loudspeakers, by working both as a template as well as a structural support for the installation. The bracket serves as a guide to the dry wall/sheet rock installer in order to help them ensure that the loudspeaker cut-out openings are in the desired location upon completion of the dry wall installation. The stamped steel bracket is designed to fit between standard width studs in order to accommodate the proper cutout for the loudspeaker opening. For availability please check with your local Dynaudio dealer. 10 Dynaudio Owners Manual Installation Installation steps (IP 17 and IP 24 only) (For descriptions of the steps see next page.) 1. 2. 3. 4. Figures show IP 24 Installation Products 11 Installation Produce the cut-out (for wall cut-out dimensions see page 16 and page 17). WARNING: Notice and follow the safety warnings about existing in-wall installations on page 10! Installing IP 17 and IP 24 In case you have already unpacked your loudspeakers, continue with step 4, otherwise start with step 1: 1. Carefully remove front grille by lifting up strips. 2. Un-tighten the screws (Torx 20 bit): IP 17: 6, IP 24: 10 Place the screws into the accessory pack for later use. 3. Carefully remove baffle by lifting up strips. Protect the baffle in the original packing. 4. Make sure the gasket on the rear side is in correct position. 5. To put the frame inside the wall or ceiling cut-out: a. Un-tighten the screws to bring the dogleg clamps from “locked” position to “loose” position. b. Make sure all doglegs are in “loose” position before frame is positioned in the wall. c. Depending on the wall or ceiling thickness, two different options to turn the doglegs are available: – Wall or ceiling thickness 0 – 40 mm (0 – 1.6"): see 5c. (I) – Wall or ceiling thickness 36 – 65 mm (1.4 – 2.6"): see 5c. (II) 6. Turn the doglegs so they press against the wall by carefully tightening the screws. Place your hand inside the cavity to control and assure the doglegs movement. 12 Dynaudio Owners Manual Installation 5a. 6. 5b. IP 17 / IP 24 min. (I) max. min. 0 mm (0") max. 40 mm (1.6") 5c. min. IW 17 min. 36 mm (1.4") max. 65 mm (2.6") (II) max. Installation Products 13 Installation 7. Make sure that the amplifier power is switched off. Connect the speaker terminal to the amplifier. 8. Put the foam on the rear side of the woofer in its correct position. 9. Position the baffle with top first. Make sure not to jam or damage the speaker wire. 10. To lock the speaker unit into position tighten the screws, which you have unscrewed at the beginning (see step 2). 11.Insert the grille by pressing it carefully into the gap between the frame and baffle. Do not press in the middle of the grille. Congratulations. Installation is complete. Installing IW 17 To install the IW 17, perform the previously described steps in following order: Step 7 Step 8 Step 5 Step 6 Step 11 Congratulations. Installation is complete. 14 Dynaudio Owners Manual Installation 7. 8. Crossover 9. Amplifier IP 17 / IP 10. 11. IW 17 Figures show IP 24 Installation Products 15 Installation Dimensions IW 17 / IP 17 Housing (IW 17) / Mounting frame (IP 17) a b Height: Width: 289/325 mm 195/225 mm (11.38/12.80") (7.68/8.86") Cut out (IW 17/IP 17) c d Height: Width 269,5/295 mm 175,5/194 mm (10.61/11.61") (6.91/7.64") Grille (IW 17/IP 17) e f Height: Width: 260/285 mm 163,5/185 mm (10.24/11.22") (6.44/7.28") Minimum depth required (IW 17/IP 17) g Depth: 92/92 mm (3.62/3.62") + 0 - f d b 16 e a c a g Figure shows IP 17 Dynaudio Owners Manual Installation Dimensions IP 24 Aluminium mounting frame a b Height: Width: 385 mm 286 mm (15.15") (11.25") Cut out c d Height: Width: 351 mm 252 mm (13.82") (9.92") Grille e f Height: Width: 343 mm 244 mm (13.50") (9.60") Minimum depth required g Depth: 92 mm (3.62") e a f d b Installation Products c a g 17 Installation Installing IC 17 Installing the IC 17 ceiling loudspeaker is very easy. No additional installation aids are needed. Installation steps For wall cut out dimensions see page 20. 1. Remove the grille from the loudspeaker (the grille is simply clipped into place). 2. Connect the loudspeaker cables coming from the amplifier to the terminals of the frequency crossover at the loudspeaker: a. Connect the positive lead to the red marked positive terminal (+). The positive lead usually has an additional identification label. b. Connect the negative lead to the black marked negative terminal (–). 3. Mount the loudspeaker into the ceiling cut out. 4. Tighten the four screws crosswise until the loudspeakers is properly secured. Setting up the loudspeaker The tweeter sound level can be adjusted in three steps by means of a level switch accessible from the speaker front. This allows you to adapt the IC 17 ceiling loudspeaker to various acoustic environments. ✓ The grille is un-mounted. 5. Set the level switch at the desired level. 6. Clip the grille onto the speaker frame. 18 Dynaudio Owners Manual Installation 1. 2. 3. Crossover _ 4. Amplifier + 5. 0 6. 4x Installation Products 19 Installation Dimensions IC 17 Dimensions (Ø) a 236 mm (9.3") Cut out (Ø) b 218 mm (8.6") Minimum depth required c 109 mm (4.3") b a a 20 c Dynaudio Owners Manual Running-in, Care & Maintenance Running-in, Care & Maintenance Running-in the loudspeakers The moving parts of a newly manufactured loudspeaker have been acoustically checked after production, but nevertheless are not as flexible as they need to be for optimum results to be realized. The higher the quality of any driver system, the more demanding the loudspeaker will be regarding time for running-in the system. A newly unpacked Dynaudio loudspeaker therefore requires several weeks running/ playing to reach its optimum performance capability. After that period, a couple of minutes before every listening session will be helpful to “warm up” the loudspeakers. Power rating Due to the construction and the driver technology the loudspeakers can be driven with very high power levels. With a high quality amplifier, delivering undistorted signals, the speaker can achieve high volumes without any compromises in sound quality. Attention must be given to amplifiers with very low power and adjustable tone controls or switches. These types may soon overreach their own performance limits and may send distorted output signals to the speakers, compromising even high quality technology. Any damage caused under such circumstances is not covered by the Dynaudio warranty and is easily avoided in the first place by consulting your Dynaudio dealer for advice regarding the choice of amplifier. CAUTION Installation Products Distorted output signals Distorted output signals from too weak, defective or overloaded amplifiers may damage the loudspeakers. Use high quality amplifiers only and run loudspeakers and amplifiers within specified power ratings. 21 Running-in, Care & Maintenance Care & Maintenance Dynaudio loudspeakers require no special treatment apart from the kind of careful handling you would normally apply to any high tech product in your home. CAUTION Aggressive cleaning fluids All-in-one cleaning materials, aggressive cleaning fluids or special furniture polishes may damage the cabinet surface or other speaker parts. Use a soft dry or slightly damp cloth when cleaning the cabinet and other plain parts. Cleaning the loudspeakers Switch off all components of your system when cleaning any of these components. Clean the grille with a soft dry or slightly damp cloth only. All materials used by Dynaudio are integrated with exceptional care. By taking care of your loudspeakers, you will preserve the finish and build quality for a very long time. Warranty Dynaudio provides a transferable five-year limited manufacturer’s warranty. This warranty only covers faults or defects in material and production. Damage caused as a result of abuse, misuse or defective electronics is not covered by the warranty. All warranty claims must be accompanied by a copy of the original purchase invoice and warranties are only valid in the country or market of original origin or distribution. Should warranty service be required, it must be arranged for in the country of purchase by an authorized Dynaudio dealer. 22 Dynaudio Owners Manual Technical specifications Technical specifications IW 17 IP 17 IP 24 IC 17 2 way 2 way 2 way 2 way axial Mid/woofer 165 mm (6.5"), cone 165 mm (6.5"), cone 240 mm (10"), cone 165 mm (6.5"), cone Tweeter 21 mm (3/4"), dome 28 mm (1.1"), dome 28 mm (1.1"), dome 21 mm (3/4"), dome Sound level adjust (Tweeter) ±2 dB ±1.5 dB ±1.5 dB ±2 dB Sensitivity (2.83 V/1 m) 88 dB 88 dB 90 dB 88 dB Principle IEC Long Term Power Handling 100 W 150 W 150 W 100 W 4 – 6 Ohm, linearized 8 Ohm, linearized 4 Ohm, linearized 4 – 6 Ohm, linearized Frequency Response (3 dB) 45 Hz – 25 kHz 45 Hz – 23 kHz 40 Hz – 23 kHz 45 Hz – 25 kHz Dimensions (W x H) 195 x 289 mm (7.68 x 11.38") 225 x 325 mm (8.86 x 12.80") 286 x 385 mm (11.25 x 15.15") Ø 236 mm (Ø 9.3") 1.7 kg (3.74 lbs) 3.0 kg (6.61 lbs) 3.5 kg (7.71 lbs) 1.5 kg (3.31 lbs) Impedance (nominal) Weight Installation Products 23