1
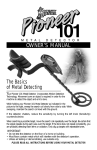
Cat. No. 63-3011
OWNER’S MANUAL
Please read before using this equipment.
Three-Mode Discriminator
Metal Detector
with Analog
Signal-Strength Meter
FEATURES
With your RadioShack Three-Mode
Discriminator Metal Detector with Analog Signal-Strength Meter, you can
hunt for coins, jewelry, gold, and silver,
just about anywhere. The detector is
designed to be versatile and easy to
use.
Loaded with features but simple to operate, the detector lets you locate and
identify all types of metals with pinpoint accuracy. It can distinguish between different types of metals and
“tune out” the ones you don’t want to
search for.
Discrimination and Tone Control —
lets you adjust the detector’s discrimination and adjust the tone it sounds.
This lets you set the detector so you
can quickly tell when it has found the
type of metal you are searching for,
and automatically ignore junk metal
while you search.
Two-Tone Audio Discrimination —
sounds distinctive tones for different
types of metals, to make target identification easier.
The detector’s features include:
Low Battery Indicator — lets you
know when it is time to replace the batteries.
Easy-to-Read Viewmeter — lets you
quickly see the strength of an indication when the detector finds metal.
S-Rod Handle with Arm Cup — lets
you comfortably hold and use the detector for long periods.
Target Mode Control — lets you easily select the detector’s operation
modes.
Automatic Tuning and Ground Balancing — let you quickly use the detector without time-consuming adjustments.
Waterproof 7-Inch Searchcoil — lets
you use the searchcoil under water,
and use the detector in just about any
type of weather.
Built-In Speaker — lets you use the
detector without headphones.
Headphone Jack — lets you connect
headphones with a 1/4 inch plug (not
supplied) to the detector.
Sensitivity Control — turns on the
detector and lets you adjust its sensitivity.
Note: Your metal detector requires two
9-volt alkaline batteries (not included)
for operation.
© 1998 Tandy Corporation.
All Rights Reserved.
RadioShack is a registered trademark used by Tandy Corporation.
2
OPTIONAL ACCESSORY
The 7-inch searchcoil supplied with
your detector efficiently finds deeplyburied objects, and is ideal for general
use.
However, if you are looking for tiny objects (coin-sized and smaller) that are
not buried too deeply, a 4-inch searchcoil (such as RadioShack Unlimited
No. 10484954, not supplied) might
work better for you.
This searchcoil is highly sensitive and
offers superior performance when
hunting for small objects such as gold
nuggets or small pieces of jewelry, or
when hunting in mineralized or highly
trashy areas. Because of its smaller
size, it has a narrower detection field
and is less susceptible to interference
from junk metal. This makes it better
able to isolate precious metals in these
areas.
3
CONTENTS
Preparation ........................................................................................................
Assembling the Detector ...............................................................................
Installing Batteries ........................................................................................
Using Headphones .......................................................................................
Traffic Safety ...........................................................................................
5
5
6
7
7
Understanding the Detector ............................................................................. 8
Operation ...................................................................................................... 8
Viewmeter ............................................................................................... 8
SENSITIVITY ......................................................................................... 8
DISC/ALL METAL/TONE ........................................................................ 8
DISC/TONE ............................................................................................ 8
Testing the Detector ...................................................................................... 9
Holding the Detector .................................................................................... 10
Using the Detector ....................................................................................... 10
Fine-Tuning the Detector ............................................................................. 11
Adjusting SENSITIVITY ........................................................................ 11
Adjusting DISC/TONE .......................................................................... 12
Pinpointing a Target ..................................................................................... 12
False Signals ............................................................................................... 13
Troubleshooting .............................................................................................. 14
Care and Maintenance .................................................................................... 15
Treasure Hunter’s Code of Ethics .................................................................. 16
4
PREPARATION
ASSEMBLING THE
DETECTOR
Assembling your detector is easy and
requires no special tools. Just follow
these steps.
1. Loosely attach the searchcoil to
the lower stem using the supplied
bolt and knurled knob. Do not
tighten the bolt and knob yet.
2. While holding down the button on
the top of the lower stem, slide the
lower stem tube into the upper
stem tube.
3. Adjust the stem to a length that
lets you comfortably stand upright.
The stem should be long enough
to let you comfortably hold the
detector so the searchcoil is level
to the ground and about 1/2 to 2
inches above the ground with your
arm relaxed at your side.
4. Adjust the searchcoil to the
desired position, then tighten it by
turning the bolt and knob in opposite directions until they stop.
Caution: Do not overtighten the
searchcoil or use tools such as pliers to tighten it.
5. Wind the searchcoil’s cable
around the stem. Leave enough
slack in the cable to let you adjust
the searchcoil when you are hunting on uneven ground.
6. Insert the searchcoil’s plug into the
matching connector on the detector’s control housing. Make sure
the pins on the plug align with the
holes in the connector.
5
Cautions:
• The searchcoil’s plug fits into
the connector only one way. Do
not force it.
3. Snap a 9-volt battery onto each
battery terminal, then slide the
batteries inside the compartment.
• To disconnect the searchcoil’s
cable from the detector, grasp
the plug and pull it out of the
connector. Never pull on the
cable.
INSTALLING BATTERIES
You must use two 9-volt alkaline batteries (such as Cat. No. 23-553) to
power your detector.
Cautions:
• Use only fresh batteries of the
required size and type.
4. Carefully insert the tabs on the
battery compartment door into the
slots on the detector, then press in
on the door until it clicks to close it.
LOW BAT on the front of the detector
flashes once when you turn off the detector.
• Do not mix old and new batteries
or different types of batteries
(standard or alkaline).
1. If the detector is on, turn it off by
turning SENSITIVITY on the front
panel fully counterclockwise toward OFF/POWER until it clicks.
2. While holding down the release
clip on the right side of the battery
compartment door, lift off the door.
If LOW BAT lights during normal use or
the detector sounds a long continuous
tone or does not function properly, replace both batteries.
Cautions:
• If you do not plan to use the detector for a week or more, remove the
batteries. Batteries can leak chemicals that can destroy electronic
parts.
6
• Dispose of old batteries promptly
and properly. Do not burn or bury
them.
USING HEADPHONES
Traffic Safety
You can connect a pair of stereo headphones (not supplied) to the detector
so you can listen to it privately. Using
headphones also saves battery power
and makes it easier to identify subtle
changes in the sounds you hear, for
better detection results. Your local
RadioShack store has a wide selection
of headphones.
Do not wear headphones while operating your detector near high traffic areas.
Even though some headphones let
you hear some outside sounds when
listening at normal volume levels, they
still can present a traffic hazard.
To connect headphones to the detector, insert the headphones’ 1/4-inch
(6.35 mm) plug into HEADPHONE on
the front panel.
The detector’s internal speaker disconnects when you connect headphones.
Notes:
• Mono headphones do not work
with the detector unless you connect a mono-to-stereo adapter
such as Cat. No. 274-1520 (not
supplied) between the headphone
jack and the detector.
• You cannot use the detector to
adjust the headphone’s volume.
7
UNDERSTANDING THE DETECTOR
OPERATION
Your RadioShack Three-Mode Discriminator Metal Detector with Analog
Signal-Strength Meter is a “motion” detector. This means that you must move
the searchcoil slightly to detect the
presence of metal (see “Pinpointing a
Target” on Page 12). The motion required is slight, and pinpointing targets
is very easy as long as the metal is under the searchcoil and the searchcoil
is moving.
Viewmeter
The detector’s viewmeter is on the
front of the control housing. The
meter’s needle swings to the right
when an object is detected.
DISC/ALL METAL/TONE
This control lets you select any of the
detector’s three operating modes.
DISC — at this setting, the detector au-
tomatically rejects iron and can be adjusted to reject most trash items. The
detector sounds a unique tone when it
detects metal.
ALL METAL — at this setting, the detector sounds a single tone when it detects any type of metal.
TONE — at this setting, the detector
automatically rejects iron and sounds
2 unique tones when it detects metal
and DISC/TONE has been properly adjusted (see “Adjusting DISC/TONE” on
Page 12).
DISC/TONE
SENSITIVITY
Use this control to turn the detector on
or off and increase or decrease the detector’s sensitivity at any operational
setting.
8
This control is for adjusting the discrimination when DISC/ALL METAL/
TONE is set to DISC or TONE (see “Adjusting DISC/TONE” on Page 12).
TESTING THE
DETECTOR
To learn how the detector reacts to different metals, you should test it before
you use it the first time.
1. Turn on the detector by turning
SENSITIVITY clockwise until it
clicks. The detector beeps and the
viewmeter’s needle swings to the
right, then returns to the left.
2. Adjust SENSITIVITY until it is about
halfway between OFF and HIGH.
3. Set DISC/ALL METAL/TONE to the
desired setting (see “DISC/ALL
METAL/TONE” on Page 8).
4. Lay the detector on a wooden or
plastic table, then remove any
watches, rings, or metal jewelry
you are wearing.
Note: Never test the detector on a
floor inside a building. Most buildings have metal of some kind in
the floor, which will interfere with
the objects you are testing or
mask the signal completely.
6. Make sure the detector is set to
detect the type of metal you are
using to test it (see “Adjusting
DISC/TONE” on Page 12).
7. Slowly move a sample of the
material you want the detector to
find (such as a gold ring or a coin)
side-to-side 1–2 inches above the
face of the searchcoil.
Note: If you are using a coin, the
detector will detect it more easily if
you hold it so a flat side (not the
edge) is parallel with the flat side
of the searchcoil.
If the detector detects the material,
it sounds a tone and the viewmeter’s needle swings to the right.
If the detector does not detect the
material, make sure DISC/ALL
METAL/TONE is correctly set for
the type of metal you are searching for, then repeat this step.
5. Adjust the searchcoil so the flat
part points toward the ceiling.
9
HOLDING THE
DETECTOR
Stand with your
arm
extended
only slightly in
front
of
your
body. Do not
bend or stoop,
but stand in an
upright position
that is comfortable.
5. Place a sample of the material you
want the detector to find (such as
a gold ring or a coin) on the
ground. (If you are using valuable
metal such as gold to test the
detector, mark the area where you
placed the item, to help you find it
later. Do not place it in tall grass or
weeds).
6. While holding the searchcoil level
to the ground, about 1–2 inches
above the surface, slowly move it
over the area where you placed
the sample, sweeping in a side-toside motion.
Hold the detector so the searchcoil is
about 1–2 inches above the ground.
Then adjust the searchcoil so it is parallel to the ground.
USING THE DETECTOR
1. Turn on the detector by turning
SENSITIVITY clockwise until it
clicks. The detector beeps and the
viewmeter’s needle swings to the
right, then returns to the left.
2. Adjust SENSITIVITY until it is about
halfway between OFF and HIGH.
3. Set DISC/ALL METAL/TONE to the
desired setting (see “DISC/ALL
METAL/TONE” on Page 8).
4. Find an area of ground where
there is no metal.
10
Never sweep the searchcoil as if it
were a pendulum. Raising the
searchcoil while sweeping or at
the end of a sweep will cause false
readings. And sweep slowly —
hurrying will cause you to miss targets.
If DISC/ALL METAL/TONE is set to
TONE and DISC/TONE has been
properly adjusted (see “Adjusting
DISC/TONE” on Page 12), the
detector sounds a unique audio
tone for each of three categories
of metal. This makes it easier to
identify the type of metal being
detected.
As shown here, the detector
sounds a low tone when it detects
small gold and nickels, a broken
tone when it detects most pull tabs
and some gold and zinc, and a
high tone when it detects copper,
silver, and brass.
searchcoil over the target a few
times, the target is probably junk
metal.
• False signals can be caused by
trashy ground, electrical interference, or large oddly-shaped
pieces of junk metal.
7. Try finding other metal in the area.
When you find a metal item, wait a
few seconds after the tone stops
before continuing, to allow the
detector time to reset.
If DISC/ALL METAL/TONE is set to
TONE and DISC/TONE has been
properly adjusted, the detector
sounds a unique audio tone for
items such as bottle caps, zinc
pennies, and pull tabs.
Note: Since these indications are
approximations, the detector might
not have actually found the item it
indicates. The indicators are only
references to help you decide if an
item is worth investigating.
If the detector does not detect the
item you placed on the ground,
make sure DISC/ALL METAL/TONE
is correctly set for the type of metal
you are searching for (see “DISC/
ALL METAL/TONE” on Page 8),
then repeat this step. Also, make
sure you are moving the searchcoil correctly.
Notes:
• The detector responds with a
strong signal when it detects
most valuable metal objects. If a
signal is broken or does not
repeat after you sweep the
FINE-TUNING THE
DETECTOR
After you become familiar with how
your detector works, you can fine-tune
it to make it less sensitive to interference and more selective in what it
finds. For example, you can set it so it
ignores most junk metal such as pull
tabs or bottle caps, but still registers
silver and copper coins.
Adjusting SENSITIVITY
For maximum detection depth, always
adjust SENSITIVITY set as high as possible while using the detector. But
broadcast antennas and power lines
can cause the detector to indicate
false signals and operate erratically.
Adjust SENSITIVITY lower to help reduce or eliminate these false signals.
Turn SENSITIVITY clockwise to increase it, or counterclockwise to reduce it.
11
Notes:
• SENSITIVITY also turns the detector on and off.
• If you set the detector’s sensitivity
too high, the detector might sound
false tones.
Adjusting DISC/TONE
PINPOINTING A TARGET
Accurately pinpointing a target while
detecting makes digging it up easier.
Accurately pinpointing small metal objects takes practice. We suggest that
you practice finding and digging up
small metal objects on your own property before you search other locations.
Discrimination is the detector’s ability
to differentiate between types of metal
and either find or ignore them. DISC/
TONE adjusts the detector’s discrimination.
Follow these steps to pinpoint a target.
When DISC/ALL METAL/TONE is set to
DISC, adjust DISC/TONE so the tab is
pointing straight up and slightly clockwise (toward HIGH) to set the detector
to ignore items such as bottle caps,
zinc pennies, nickels, small gold items,
and pull tabs, while still detecting items
such as silver and copper coins. Or,
when DISC/ALL METAL/TONE is set to
TONE, adjust DISC/TONE counterclockwise (toward LOW) to find all such
items.
2. Make a visual note of the exact
spot on the ground where the
detector beeps.
Notes:
5. If necessary, “X” the target at different angles to zero in on the
exact spot on the ground where
the detector beeps.
• Adjusting DISC/TONE has no effect
while DISC/ALL METAL/TONE is set
to ALL METAL.
• If you set DISC/ALL METAL/TONE
to TONE then set the detector’s
discrimination too high, the detector will not detect gold items and
nickels.
12
1. When the detector detects a buried target, continue sweeping the
searchcoil over the target in a narrowing side-to-side motion.
3. Stop the searchcoil directly over
this spot on the ground. Then
move the searchcoil straight
forward away from you and
straight back toward you a couple
of times.
4. Make a visual note of the exact
spot on the ground where the
detector beeps.
Note: The detector beeps just as the
center of the searchcoil passes directly
over the buried target.
If you have difficulty pinpointing very
strong signals, try lifting the searchcoil
higher off the ground until a weaker
but more concise signal is heard. For
very weak signals, move the coil in
short quick sweeps close to the
ground.
FALSE SIGNALS
Your detector is extremely sensitive,
and will detect even deeply-buried
metal. Because of this, trash-induced
signals and other sources of interference might cause signals that seem
confusing. The key to handling these
types of signals is to dig for only those
targets that emit a strong, repeatable
signal. As you sweep the searchcoil
back and forth over the ground, learn
to recognize the difference between
signals that occur at random and signals that are stable and repeatable.
To reduce false signals when searching very trashy ground, scan only a
small area at a time using slow, short
overlapping sweeps. To help prevent
erratic signals and pinpoint targets in
trashy areas, try a smaller searchcoil
(see “Optional Accessory” on Page 3).
13
TROUBLESHOOTING
If you have problems, here are some suggestions that might help. If none of these
suggestions help, take your detector to your local RadioShack store for assistance.
PROBLEM
The detector displays or
sounds false signals.
SUGGESTION
The sensitivity might be set too high. Adjust
SENSITIVITY counterclockwise.
You might be sweeping the detector’s searchcoil too fast or at the wrong angle. Sweep the
searchcoil more slowly and hold the detector
correctly. See “Using the Detector” on
Page 10 and “Pinpointing a Target” on
Page 12.
The detector might sound a false signal if it
detects some types of heavily oxidized metals. Try pinpointing the target from several different angles (see “Pinpointing a Target” on
Page 12). If the detector does not display and
sound the same signal each time, the target is
probably heavily oxidized metal.
The detector sounds only one
kind of tone, and discrimination does not work.
DISC/ALL METAL/TONE is set to ALL METAL or
DISC. This is not a malfunction.
Set DISC/ALL METAL/TONE to TONE (see
“DISC/ALL METAL/TONE” on Page 8).
The detector sounds a constant loud tone or constant
repeating tones.
The batteries might be weak. Replace the batteries.
You are operating the detector near another
detector or near power lines. Power lines can
interfere with the frequency that the detector
operates on.
The detector does not turn
on, has weak volume, will not
tune properly, operates erratically, or drifts.
14
The batteries might be weak. Replace the batteries.
CARE AND MAINTENANCE
Your RadioShack Three-Mode Discriminator Metal Detector with Analog SignalStrength Meter is an example of superior design and craftsmanship. The following
suggestions will help you care for your detector so you can enjoy it for years.
Keep the detector’s chassis dry and do not let water enter it. If the
chassis gets wet, wipe it dry immediately. Liquids might contain minerals that can corrode the electronic circuits.
The searchcoil supplied with the detector is waterproof however,
and may be submerged in either fresh or salt water. After using the
searchcoil in salt water, rinse it with fresh water to prevent corrosion
of the metal parts.
Use and store the detector only in normal temperature environments. Temperature extremes can shorten the life of electronic devices, damage batteries, and distort or melt plastic parts.
Handle the detector gently and carefully. Dropping it can damage
circuit boards and cases and can cause the detector to work improperly.
Use only fresh batteries of the required size and type. Batteries can
leak chemicals that damage your detector’s electronic parts.
Wipe the detector with a damp cloth occasionally to keep it looking
new. Do not use harsh chemicals, cleaning solvents, or strong detergents to clean the detector.
Modifying or tampering with the detector’s internal components can cause a malfunction and might invalidate your detector’s warranty. If your detector is not performing as it should, take it to your local RadioShack store for assistance.
15
TREASURE HUNTER’S CODE OF ETHICS
All treasure hunters might be judged by the example you set. Here are a few basic
rules you should follow while using your detector.
• Always obtain permission before searching any site.
• Respect the rights and property of others.
• Observe all national, state, and local laws while treasure hunting.
• Never destroy historical or archaeological treasures. If you are not sure about
an object you have found, contact a museum or historical society in your area.
• Leave the land and vegetation as it was. Fill in any holes you dig.
• Use your detector only in safe areas.
• Dispose of any junk you find, only in approved areas. Do not leave it for the
next treasure hunter to find.
Limited Ninety-Day Warranty
This product is warranted by RadioShack against manufacturing defects in material and workmanship under normal use for ninety (90) days from the date of purchase from RadioShack company-owned stores and
authorized RadioShack franchisees and dealers. EXCEPT AS PROVIDED HEREIN, RadioShack MAKES
NO EXPRESS WARRANTIES AND ANY IMPLIED WARRANTIES, INCLUDING THOSE OF MERCHANTABILITY AND FITNESS FOR A PARTICULAR PURPOSE, ARE LIMITED IN DURATION TO THE DURATION OF THE WRITTEN LIMITED WARRANTIES CONTAINED HEREIN. EXCEPT AS PROVIDED
HEREIN, RadioShack SHALL HAVE NO LIABILITY OR RESPONSIBILITY TO CUSTOMER OR ANY
OTHER PERSON OR ENTITY WITH RESPECT TO ANY LIABILITY, LOSS OR DAMAGE CAUSED DIRECTLY OR INDIRECTLY BY USE OR PERFORMANCE OF THE PRODUCT OR ARISING OUT OF ANY
BREACH OF THIS WARRANTY, INCLUDING, BUT NOT LIMITED TO, ANY DAMAGES RESULTING
FROM INCONVENIENCE, LOSS OF TIME, DATA, PROPERTY, REVENUE, OR PROFIT OR ANY INDIRECT, SPECIAL, INCIDENTAL, OR CONSEQUENTIAL DAMAGES, EVEN IF RadioShack HAS BEEN ADVISED OF THE POSSIBILITY OF SUCH DAMAGES.
Some states do not allow the limitations on how long an implied warranty lasts or the exclusion of incidental
or consequential damages, so the above limitations or exclusions may not apply to you.
In the event of a product defect during the warranty period, take the product and the RadioShack sales receipt as proof of purchase date to any RadioShack store. RadioShack will, at its option, unless otherwise
provided by law: (a) correct the defect by product repair without charge for parts and labor; (b) replace the
product with one of the same or similar design; or (c) refund the purchase price. All replaced parts and
products, and products on which a refund is made, become the property of RadioShack. New or reconditioned parts and products may be used in the performance of warranty service. Repaired or replaced parts
and products are warranted for the remainder of the original warranty period. You will be charged for repair
or replacement of the product made after the expiration of the warranty period.
This warranty does not cover: (a) damage or failure caused by or attributable to acts of God, abuse, accident, misuse, improper or abnormal usage, failure to follow instructions, improper installation or maintenance, alteration, lightning or other incidence of excess voltage or current; (b) any repairs other than those
provided by a RadioShack Authorized Service Facility; (c) consumables such as fuses or batteries; (d) cosmetic damage; (e) transportation, shipping or insurance costs; or (f) costs of product removal, installation,
set-up service adjustment or reinstallation.
This warranty gives you specific legal rights, and you may also have other rights which vary from state to
state.
RadioShack Customer Relations, Dept. W, 100 Throckmorton St., Suite 600, Fort Worth, TX 76102
We Service What We Sell
3/97
RadioShack
A Division of Tandy Corporation
Fort Worth, Texas 76102
3/98
Printed in the USA