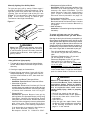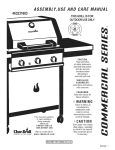
1
America's Barbecue Grill Superstores
Owner's M anual
G5STR/G5STRN, G6STR/G6STRN
Grill Information Center: If you have questions about assembly or grill operation, or if there are damaged or
missing parts when you unpack this unit from the shipping boxes, call us 8am - 4:30 pm PST,
Monday through Friday at: 1-800-474-5587
! WARNING:
Read this Owner's Manual carefully and be sure your
gas grill is properly assembled, installed and
maintained. Follow all leak check procedures carefully in this manual prior to grill operation. Do this
even if the grill was store assembled.
Failure to
follow these instructions could result in serious bodily
injury and/or property damage. This grill is intended for
outdoor use only and is not intended to be installed in
or on recreational vehicles or boats.
Note to Installer:
Leave this Owner's Manual
with the consumer after delivery and/or installation.
Note to Consumer: Leave this Owner's Manual in
a convenient place for future reference.
Important Note:
This grill is manufactured to
exact specifications. Model Turbo Select LP is
certified for use with LP gas and Model Turbo Select
NG is certified for use with Natural Gas. You cannot
convert this grill from one fuel type to the other.
For your safety, conversion kits are available but
can only be installed by a BBQ Galore technician.
Any attempt to convert your grill will void your
warranty.
Manufacturer:
Barbeques Galore Inc.
10 Orchard Road, Suite 200
Lake Forest, CA. 92630
P 80151082A - Date : 09/25/03
•
1. The LP gas tank has a Shut Off Valve,
terminating in an LP gas supply tank valve
outlet, that is compatible with a Type 1 tank
connection device. The LP gas tank must also
have a safety relief device that has a direct
communication with the vapor space of the
tank.
2. The tank supply system must be arranged for
vapor withdrawal.
3. The LP gas tank used must have a collar
to protect the tank valve.
•
Proper Placement and Clearance of Grill
Never use your gas grill in a garage, porch, shed,
breezeway or any other enclosed area. Your gas grill is
to be used outdoors only, at least 16 inches from the
back and 14 inches from side of any combustible
surface. Your gas grill should not be placed under
any surface that will burn. Do not obstruct the flow
of ventilation air around the gas grill housing.
•
•
! WARNING
This outdoor gas grill is not intended to be installed in
or on recreational vehicles and/or boats.
A strong gas smell, or the hissing sound of
gas indicates a serious problem with your gas
grill or the LP gas tank. Failure to immediately
follow the steps listed below could result
in a fire or explosion that could cause serious
bodily injury, death, or property damage.
! WARNING
Failure to comply with these instructions
could result in a fire or explosion that
could cause serious bodily injury, death, or
property damage.
•
•
•
•
•
•
•
•
•
•
•
Never connect an unregulated LP gas tank to
your gas grill. The gas Regulator assembly
supplied with your gas grill is adjusted to have
an outlet pressure of 11" water column (W.C.)
for connection to an LP gas tank.
Only use the Regulator and Hose Assembly
supplied with your gas grill. Replacement
Regulators and Hose Assemblies must be
those specified by manufacturer.
Have your LP gas tank filled by a reputable
propane gas dealer and visually inspected
and re-qualified at each filling.
Never fill the gas tank beyond 80% full.
Have your propane gas dealer check the
release valve after every filling to ensure that
it remains free of defects.
Always keep LP gas tanks in upright position.
Do not store (or use) gasoline or other flammable
vapors and liquids in the vicinity of this gas grill.
An LP gas tank that is not connected for use must
NOT be stored on bottom shelf inside cabinet or in
the vicinity of this or any other gas grill.
Do not subject the LP gas tank to excessive heat.
Never store an LP gas tank indoors. If you
store your gas grill in the garage or other
indoor location, always disconnect the LP
gas tank first, store it safely outside.
LP gas tanks must be stored outdoors in a
well-ventilated area and out of the reach of
children. Disconnected LP gas tanks must not
be stored in a building, garage or any other
enclosed area.
When your gas grill is not in use the gas
must be turned off at the LP gas tank.
The Regulator and Hose assembly must be
inspected before each use of the grill. If there
is excessive abrasion or wear or if the hose
is cut, it must be replaced prior to the grill
being used again.
Keep the gas Regulator Hose away from hot
grill surfaces and dripping grease. Avoid
unnecessary twisting of hose. Visually inspect
hose prior to each use for cuts, cracks,
excessive wear or other damage. If the Hose
appears damaged do not use the gas grill,
call our Grill Information Center for a
replacement, at 1-800-474-5587.
Never light your gas grill with the Lid closed
or before checking to insure the Burner Tubes
are fully seated over the Gas Valve Orifices.
Never allow children to operate your grill. Do
not allow children to play near your grill.
• Shut off gas supply to the gas grill.
• Turn the Control Knobs to OFF position.
• Put out any flame with a Class B fire
•
•
•
•
extinguisher.
Open Grill Lid.
Get away from the LP gas tank.
Do not try to fix the problem yourself.
If odor continues or you have a fire you cannot
extinguish, call your fire department. Do not call
near the LP gas tank because your telephone is
an electrical device and could create a spark
resulting in fire and/or explosion.
NOTE: The normal flow of gas through the
Regulator and Hose Assembly can create a
humming sound. A low volume of sound is
perfectly normal and will not interfere with operation of the grill. If humming sound is loud and
excessive you may need to purge air from the
gas line or reset the Regulator excess gas flow
device. This purging procedure should be done
every time a new LP gas tank is connected to
your grill. For help call the Grill Information
Center.
Grill Information Center, 8:00am-4:30pm
PST, Monday through Friday at:
1-800-474-5587
3
Natural Gas Safety Instructions
•
•
F igure 1
(F or Natural G as Model O nly )
Y our Natural G as G rill is des igned to operate on
N a tura l G a s only, a t a pre s s ure of 7" wa te r
column (W.C .) (1/4 ps ig or 1.75 kpa), regulated at
the res idential meter. C heck with your gas utility
company for local gas pressure and with your local
municipa lity for building code requirements . If
your res idential gas line pres s ure has not been
regula ted to 7" W . C . , conta ct your loca l ga s
utility company for profes s ional as s is tance.
INS
OU
TSI
DE
TO NATURAL GAS
REGULATOR
ID
E
WA
L
L
WA
LL
LOCKING GAS
SHUT OFF VALVE
T he gas pres s ure R egulator s upplied with this
appliance mus t be us ed. T his R egulator is s et
for an outlet pres s ure of 4" W. C .
MALE
FITTING
•
It is recommended tha t a S hut O ff V a lve be
ins ta lle d a t the ga s s upply s ourc e outdoors .
Ins ta ll a t a point a fte r the ga s pipe e xits the
outs ide wa ll a nd before the Q uick Dis connect
Hos e, or ins tall it at the point before the gas line
piping enters the ground. S ee
F igure 1.
NATURAL GAS SUPPLY
QUICK
DIS C ONNE C T
Additional
Hardware Not
Included
G as L ine P iping
•
P ipe sealing compound or pipe thread tape resistant
to the action of Natural G as must be used on all male
pipe threads when making the connection.
If the length of line required does not exceed 50 feet,
us e a 5/8" O.D. tube. One s ize larger s hould be us ed
for lengths greater than 50 feet.
•
Dis connect your gas grill from fuel s ource when
the gas s upply is being tes ted at high pres s ures .
T his gas grill and its individual S hut Off V alve must
be dis connected from the gas s upply pipe s ys tem
during a ny pres s ure tes ting of tha t s ys tem a t
pr e s s ur e in e x c e s s o f 1 /2 ps i ( 3 . 5 k pa ) .
G a s piping ma y be c oppe r tubing, type K or L ;
polye thyle ne pla s tic tube , with a minimum wa ll
thicknes s of .062 inch; or s tandard weight (s chedule
40) s teel or wrought iron pipe.
•
T urn off your ga s grill when the ga s s upply is
tes ted at low pres s ures . T he grill mus t be is olated
from the ga s s upply pipe s ys tem by clos ing its
individua l Ma nua l S hut O ff V a lve during a ny
pres s ure tes ting of the gas s upply pipe s ys tem at
pres s ures equal to or les s than 1/2 ps i (3.5kpa).
•
T he Quick Dis connect connects to a 3/8 inch NP T
thread from gas s ource. T he Q uick Dis connect
fitting is a hand operated device that automatically s huts off the the flow of gas from the s ource
when it is dis connected.
•
T he Q uick D is conne ct fitting ca n be ins ta lled
horiz onta lly, or pointing downwa rd. D O N O T
ins ta ll the fitting with the ope ning pointing
upwa rd beca us e the fitting could collect wa ter
and debris .
•
C opper tubing mus t be tin-lined if the gas contains
more tha n 0. 3 gra ms of hydrogen s ulfide per 100
cubic feet of gas .
P la s tic tubing is s uita ble only for outdoor, underground us e.
G as piping in contact with earth, or any other material which may corrode the piping, mus t be protected
a ga ins t c o r r o s io n in a n a ppr o v e d ma nne r .
U nderground piping mus t ha ve a minimum of 18"
cover.
NOTE : Check with local gas company before
installing any gas line.
Test Connections
All connections and joints mus t be thoroughly tes ted
for leaks in accordance with local codes and all lis ted
procedures in the la tes t edition of AN S I Z223. 1
! DANGER
T he Dus t C overs (plas tic plugs ) provided with the
Q uic k D is c onne c t he lp ke e p the ope n e nds
clean while dis connected.
•
T he outdoor connector mus t be firmly attached to
a ridged permanent cons truction.
•
T he Quick Dis connect MUS T B E ins talled above
ground.
•
W A R N IN G : D o not route the 1 2 foot Q uic k
Dis connect Hos e under a deck. T he hos e mus t be
vis ible a nd ins pe cte d prior to e a ch grill us e .
Do not us e a n open fla me to c hec k for ga s
lea k s . B e s ure there a re no s pa rk s or open
fla mes in the a rea while y ou c hec k for ga s
lea k s . T his will res ult in a fire or ex plos ion
whic h c a n c a u s e s er io u s bo dily injur y o r
de a th , a n d da m a ge to pr o pe r ty .
4
Pre-Assembly Instructions
CAUTION: BEWARE OF FLASH-BACK
CAUTION: Spiders and small insects occasionally spin webs or make nests in the grill burner
tubes during transit and warehousing. These
webs can lead to a gas flow obstruction which
could result in a fire in and around the Burner
Tubes. This type of fire is known as a "FLASHBACK" and can cause serious damage to your
grill and create an unsafe operating condition
for the user.
To reduce the chance of "FLASH-BACK" (see
CAUTION at left) clean the Burner Tubes and
Burners before fully assembling your grill. Remove
the Cotter Pin from the rear underside of each
Burner using a pair of long nose pliers. Carefully
lift each Burner up and away from the Gas Valve
Orifice, then refer to Figure 1 and perform one
of these three cleaning methods:
Although an obstructed Burner Tube is not the
only cause of "FLASH-BACK", it is the most
common cause.
works well) into a small hook as shown below.
Run the hook through the Burner Tube and
inside the Burner several times to remove any
debris.
1. Bend a stiff wire, (a lightweight coat hanger
To reduce the chance of "FLASH-BACK", you
must clean the Burner Tubes before assembling
your grill, and at least once a month in late
summer or early fall when spiders are most
active. Also perform this Burner Tube cleaning
procedure if your grill has not been used for
an extended period of time.
2. Use a Burner Cleaning Brush, or a bottle brush
with a flexible handle. Run the brush through
the Burner Tube and inside the Burner several
times, removing any debris.
3. Use an air hose to force air through each Burner
Tube. The forced air should pass debris or
obstructions through the Burner and out the
ports.
! WARNING
Tools Required for Assembly
The location of the Burner Tube with respect
to the Orifice is vital for safe operation. Check
to ensure the Orifice is inside of the Burner Tube
before using your gas grill. See Figure 2. If the
Burner Tube does not fit over the Valve Orifice,
lighting the Burner may cause explosion
and/or fire.
• Phillips Head screw driver
• Adjustable wrench
• Long nose pliers - used to remove the
Cotter Pin when cleaning the Burners
• Open-end wrench (included with Hardware
•
•
Pack) used to tighten the Casters.
Protective work gloves
Eye protection
SPARK ELECTRODE
Figure 2
GAS COLLECTOR BOX
ORIFICE
Figure 1
TO CLEAN BURNER TUBE,
INSERT HOOK HERE
ORIFICE
BURNER
GAS COLLECTOR BOX
SPARK ELECTRODE
BURNER TUBE
5
BURNER
BURNER PORT
for Hardware
Pack
C ontents Contents
for Hardware
P ac
k (P art #P 4182A )
T he following table illustrates a breakdown of the Hardware P ack. It highlights what components
are us ed in the various s tages of as s embly.
Qty. to us e
R ef. C omponent
P urpos e of C omponent
A.
1/4" x 1" P hillips Head S crew
4
F ix the G rill B owl on the C art
B.
1/4" x 3/4" P hillips Head S crew
8
Attach the S ide S helf on the B owl S ide P anel
C.
"AA" B atteries
1
P ower the E lectronic Ignition
D.
"AAA" B atteries
2
P ower the T ank G auge
E.
3/16" x 3/8" P hillips Head S crew
2
Attach the bas ket on the Door P late
A c tual S ize and Q uantity of E ac h Hardware P iec e:
A.
B.
1/4" x 3/4"
P hillips Hea d S crew x 8
1/4" x 1" P hillips H ea d S crew - Q T Y 4
C.
E.
"AA" B a tteries - Q T Y . 1
D.
"AAA" B a tteries - Q T Y . 2
3/16" x 3/8" P hillips H ea d S crew - Q T Y 2
Barbeques Galore Information: If you have questions about assembly or grill operation, or if there are damaged
or missing parts when you unpack this unit from the shipping boxes, call us 8am - 4:30 pm PS T,
Monday through F riday at: 1-800-474-5587
6
6B Parts Diagram
Remove all components from both cartons and place within easy reach. Turn the largest carton
upside down and it will provide a comfortable height work surface for grill assembly.
4
2
17
37
6
38
16
63
39
67
29
23
11
18
19
27
15
14
25
26
66
24
41
35
33
42
68
43
44
34
51
45
31
49
36
71
53
37
22
28
30
32
55
5
3
20
65
69
67
8
10
64
50
7
12
21
40
13 9
1
70
46
62
52
76
73
54
59
78
75
60
79
74
56
57
72
77
58
61
7
6B Parts List
REF#
1.
2.
3.
4.
5.
6.
7.
8.
9.
10.
11.
12.
13.
14.
15.
16.
17.
18.
19.
20.
21.
22.
23.
24.
25.
26.
27.
28.
29.
30.
31.
32.
33.
34.
35.
36.
37.
38.
39.
40.
41.
42.
43.
44.
45.
46.
47.
48.
49.
50.
51.
52.
53.
54.
DESCRIPTION
PART#
Lid Plate
Heat Indicator
Name Plate
Lid Side Panel, Left
Lid Side Panel, Right
Lid Handle
Grip(I)
Grip(II)
Frame for Back Burner
Spark Electrode
Back Burner
Bowl Rear Panel
Orifice(LP Back Burner)
Orifice(NG Back Burner)
Gas Tube Assembly
Wind Shield
Up Warming Rack
Cooking Grid
Burner Bracket
Ceramic Flame Tamer
Rack for Flame Tamer
Hinge Seat,Left
Hinge Seat,Right
Bowl Side Panel,Left
Bowl Side Panel,Right
Burner
Gas Collector Box W. Electrode
Bowl Front Panel
Orifice(LP Main Burner)
Orifice(NG Main Burner)
Control Panel
Control Knob(Back Burner)
Control Knob(Main Burner)
Control Knob Seat
Electric Ignitor(4 Port)
AA Battery
Grease Tray
Heat Shield
Side shelf Lid
Storage Box
Left Side Shelf
Decoration Plate
Right Side Shelf
Electrode for Side Burner
Side Burner
Side Burner Body
Pot Support
Decoration Plate(Side Burner)
Control Knob(Side Burner)
Control Knob Seat(Side Burner)
Gas Valve for Side Burner
Regulator W. Hose
Tank Gauge Set
Rear Panel
Door Bracket
Bottom Shelf
P00118026A
P00607211C
P00417001C
P00127017J
P00128017J
P00206001B
P00202001A
P00202002A
P03305001H
P02610005B
P02007027D
P00725024A
P06520001A
P06520002A
P03717001B
P0071601AB
P01517001B
P01606003B
P02206011B
P01804004A
P01720001B
P05511001O
P05511002O
P00720044A
P00721044A
P02001002E
P02609002B
P00738014A
P06519001A
P06519002A
P02910023S
P03426023K
P03426013K
P03415014A
P02502134C
P05301001A
P02708012B
P06903002B
P00115016A
P05205001D
P01123001A
P07503003D
P01124001A
P02614007C
P02002047D
P02302003D
P00815001D
P07513001D
P03401031F
P03408051J
P03208007D
P03601004A
P04009003C
P07702003E
P03301002J
P01004001K
QTY.
REF#
55.
56.
57.
58.
59.
60.
61.
62.
63.
64.
65.
66.
67.
68.
69.
70.
1
1
1
1
1
1
1
1
1
1
1
1
1
1
1
1
1
3
1
12
1
1
1
1
1
6
3
1
6
6
1
1
6
7
1
2
1
1
1
1
1
1
1
1
1
1
1
1
1
1
1
1
1
1
1
1
71.
72.
73.
74.
75.
76.
77.
78.
79.
DESCRIPTION
PART#
Side Panel, Left
Side Panel, Right
Door Plate,Left
Door Plate,Right
Castor
Towel Rack
Basket
Connection Tube
Hook Rack
Tool Hook
Smoke Box
Lighting Tube
NG Connection Tube
NG Regulator
NG Air Shutter
Orifice (LP Side Burner)
Orifice (BG Side Burner)
"AAA" Battery
Motor
Motor Bracket
Spilt
Fork
Bushing
Trim Plate (Right)
Trim Plate (Left)
Trim Plate (Rear)
P01102003G
P01103003G
P04302001A
P04303001A
P05115020A
P05209003A
P05203003A
P03705001E
P05514001A
P05514002A
P06702001A
P05530001A
P03719001A
Y0080006
P05524055A
P06521001A
P06521002A
P05301002A
P07101002B
P05508018F
P05508015F
P05508090F
P05508017F
P07504005A
P07505005A
P07515005A
QTY.
1
1
1
1
4
1
1
1
1
4
1
1
1
1
7
1
2
1
1
1
2
2
1
1
1
For the repair or replacement parts you need:
Call our Grill Information Center, 8am - 4:30pm PST,
Monday through Friday at 1-800-474-5587
To make sure you obtain the correct replacement part
(s) for your gas grill please refer to the parts list on
this page. The following information is required to
insure you receive the correct parts:
1. Model and Serial Number (see CSA label on grill)
2. Part Number
3. Description
4. Quantity of parts needed
Please allow sufficient time to process and ship.
IMPORTANT: Keep this Owner's Manual for
convenient referral and for part replacement.
IMPORTANT: Use only factory authorized parts. The
use of any part that is not factory authorized can
be dangerous. This will also void your warranty.
8
5B Parts Diagram
Remove all components from both cartons and place within easy reach. Turn the largest carton
upside down and it will provide a comfortable height work surface for grill assembly.
4
2
17-1
17
37
6
16
38
39
63
29
23
27
65
69 26
15
14
25
66
37
22
24
35
33
68
42
45
31
49
70
36
71
52
62
76
54
73
59
56
57
72
78
75
79
74
60
41
43
44
34
51
53
11
18
19
28
30
32
55
5
3
20
67
67
8
10
64
50
7
12
21
40
13 9
1
58
77
61
9
46
5B Parts List
REF#
1.
2.
3.
4.
5.
6.
7.
8.
9.
10.
11.
12.
13.
14.
15.
16.
17.
17-1.
18.
19.
20.
21.
22.
23.
24.
25.
26.
27.
28.
29.
30.
31.
32.
33.
34.
35.
36.
37.
38.
39.
40.
41.
42.
43.
44.
45.
46.
47.
48.
49.
50.
51.
52.
53.
54.
DESCRIPTION
PART#
QTY.
Lid Plate
Heat Indicator
Name Plate
Lid Side Panel, Left
Lid Side Panel, Right
Lid Handle
Grip(I)
Grip(II)
Frame for Back Burner
Spark Electrode
Back Burner
Bowl Rear Panel
Orifice(LP Back Burner)
Orifice(NG Back Burner)
Gas Tube Assembly
Wind Shield
Up Warming Rack
Cooking Grid(I)
Cooking Grid(II)
Burner Bracket
Ceramic Flame Tamer
Rack for Flame Tamer
Hinge Seat,Left
Hinge Seat,Right
Bowl Side Panel,Left
Bowl Side Panel,Right
Burner
Gas Collector Box W. Eletrode
Bowl Front Panel
Orifice(LP Main Burner)
Orifice(NG Main Burner)
Control Panel
Control Knob(Back Burner)
Control Knob(Main Burner)
Control Knob Seat
Electric Ignitor
AA Battery
Grease Tray
Heat Shield
Side shelf Lid
Storage Box
Left Side Shelf
Decoration Plate
Right Side Shelf
Electrode for Side Burner
Side Burner
Side Burner Body
Pot Support
Decoration Plat(SideBurner)
Control Knob(Side Burner)
Control Knob Seat(Side Burner)
Gas Valve for Side Burner
Regulator W. Hose
Tank Gauge Set
Rear Panel
Door Bracket
Bottom Shelf
P00118056A 1
P00607211C 1
P00417001C 1
P00127017J 1
P00128017J 1
P00206002B 1
P00202001A 1
P00202002A 1
P03305002H 1
P02610005B 1
P02007027D 1
P00725034A 1
P06520001A 1
P06520002A
P03717002B 1
P0071602AB 1
P01515001B 1
P01606003B 2
P01606004B 1
P02205011B 1
P01804004A 10
P01720002B 1
P05511001O 1
P05511002O 1
P00720044A 1
P00721044A 1
P02001002E 5
P02609002B 3
P00738024A 1
P06519001A 5
P06519002A
P02909033S 1
P03426023K 1
P03426013K 1
P03415014A 6
P02502134C 2
P05301001A 2
P02707012B 1
P06903003B 1
P00115016A 2
P05512084A 1
P01123001A 1
P07503003D 1
P01124001A 1
P02614007C 1
P02002047D 1
P02302003D 1
P00815001D 1
P07513001D 1
P03401031F 1
P03408051J 1
P03208007D 1
P03601004A 1
P04009003C 1
P07702006E 1
P03301003J 1
P01003001K 1
REF#
55.
56.
57.
58.
59.
60.
61.
62.
63.
64.
65.
66.
67.
68.
69.
70.
71.
72.
73.
74.
75.
76.
77.
78.
79.
DESCRIPTION
PART#
Side Panel,Left
Side Panel,Right
Door Plate,Left
Door Plate,Right
Castor
Towel Rack
Basket
Connection Tube
Hook Rack
Tool Hook
Smoke Box
Lighting Tube
NG Connection Tube
NG Regulator
NG Air Shutter
Orifice (LP Side Burner)
Orifice (NG Side Burner)
"AAA" Battery
Motor
Motor Bracket
Spilt
Fork
Bushing
Trim Plate (Right)
Trim Plate (Left)
Trim Plate (Rear)
P01102003G
P01103003G
P04302002A
P04303002A
P05115020A
P05209003A
P05203003A
P03705001E
P05514001A
P05514002A
P06702001A
P05530001A
P03719001A
Y0080006
P05524055A
P06521001A
P06521002A
P05301002A
P07101002B
P05508018F
P05508016F
P05508090F
P05508017F
P07504005A
P07505005A
P07515006A
QTY.
1
1
1
1
4
1
1
1
1
4
1
1
1
1
6
1
2
1
1
1
2
2
1
1
1
For the repair or replacement parts you need:
Call our Grill Information Center, 8am - 4:30pm PST,
Monday through Friday at 1-800-474-5587
To make sure you obtain the correct replacement part
(s) for your gas grill please refer to the parts list on
this page. The following information is required to
insure you receive the correct parts:
1. Model and Serial Number (see CSA label on grill)
2. Part Number
3. Description
4. Quantity of parts needed
Please allow sufficient time to process and ship.
IMPORTANT: Keep this Owner's Manual for
convenient referral and for part replacement.
IMPORTANT: Use only factory authorized parts. The
use of any part that is not factory authorized can
be dangerous. This will also void your warranty.
10
Figure 1
Cart Assembly Instructions
Remove all cart parts, hardware, and Grill Head from
shipping boxes. Raise the Grill Lid and remove all
packed components. Use the parts list to check that
all necessary parts have been included.
GRILL BOWL
Assemble the gas grill on a protective work surface
to avoid scratching grill surfaces. Inspect your grill for
damage as you proceed. Do not assemble or operate
your grill if it appears damaged.
When assembling this grill, we recommend asking for
the assistance of another person when maneuvering
some of the larger, heavier pieces. You will need both
an Adjustable Wrench and Phillips Screw Driver
(not provided) for securing the nuts and screws.
Assembling The Grill
1. Remove cart assembly from shipping box and place
on a flat and level surface such as a garage floor.
Peel back approximately two inches of the protective
PVC film from the Cart Door.
2. Put the Grill Bowl on the Cart.Slide the Grill Bowl
to align the hole on the Fixing bar.See Figure 1.
Use 4 of the 1/4"x 1" Phillips Head screw.
A.
CART
Figure 2A
1/4" x 1" Phillips Head Screw
3. Attach the Left Side Shelf (with Ice Box) on the
Left Bowl Panel. Use 4 of the 1/4"x 3/4" Phillips
Head screw. See Figure 2A.
Figure 2B
B.
1/4" x 3/4" Phillips Head Screw
4. Attach the Right Side Shelf (with Side Burner) on
the Right Bowl Panel. Use 4 of the 1/4" x 1" Phillips
Head screw. See Figure 2B.
11
5. Locate the Male F itting of connection from S ide
B urner. F eed the Male F itting through the hole on
the right S ide P anel. C onnect the Male F itting to the
Quick Disconnect F itting (under the rear side of the
grill bowl) as s hown in F igure 3 & 3A .
The Quick Disconnect F itting is hand operated device
that automatically s huts off the flow of gas when it
is disconnected.
C aution: All connections and joints must be throughly
tes ted for leaks . Do Not us e flame to tes t for gas
leaks.
Figure 4
DOOR P L A T E
SIDE BURNER
Figure 3
CONNECTION
TUBE
QUICK DISCONNECT FITTING
B AS K E T
MALE FITTING
7. P lace the R ack for C eramic F lame T amers on the
lower ledge above B urners . S ee F igure 5. P lace
all 12 C eramic F lame T amers on the R ack.
P lace C ooking G rid on the ledge above C eramic
F lame T amers . S ee F igure 5.
Figure 3A
F igure 5
CERAMIC FLAME
TAMER
6. Attach the B as ket on the Door P late. Us ing 2 of
3/16" x 3/8" P hillips S crews . S ee F igure 4.
E.
C OOK ING
GR ID
3/16" x 3/8" P hillips Head S crew
RACK
FOR
CERAMIC FLAME
TAMERS
12
UPPER WARMING
RACK
Ignitor Battery Installation - See Figure 6
1. Unscrew the Ignitor Cap located on the Grill Control
Panel and remove the Contact and Spring from the
Ignitor Slot.
5. If no "clicking" sound is heard check the
following common causes. If you need
assistance call Barbeques Galore Info
Center at 1-800-474-5587.
2. Place the manufacturer supplied AA battery into the
Ignitor Slot. Be sure to place the positive pole facing
toward you.
• Ignitor AA battery not installed properly.
• Ignitor wires may be loose. Remove the AA
battery, inspect the Ignitor Junction Box
found behind the Control Panel, and connect
any loose wires.
3. Place the Spring over the AA battery, then place
the Contact on top of the Spring. Screw the Ignitor
Cap back onto the grill Control Panel.
Figure 6
Electrode Check
Requires and assistant:
Before placing the cooking components into your
grill, insure that the Spark Electrode Tip is properly
positioned within each Gas Collector Box (stainless
steel mechanism found at the front between each
set of Burners.) The easiest way to insure this is
to perform this Electrode Check:
IGNITOR CAP
IGNITOR SOLT
CONTRACT
SPRING
1. Be sure all Control Knobs are set to "OFF"
and open the Grill Lid.
POSITIVE POLE
AA BATTERY
2. Have an assistant stand behind to the right of
the grill and look down at each Gas Collector
Box. NEVER put your face inside Grill Head.
3. Push the ignition Cap. You should hear a
clicking sound and your assistant should see
a small blue spark within each Gas Collector Box.
If a spark is present the Electrode Tips are
properly positioned.
Figure 7 - Side View Gas Collector Box
4. If no spark is seen the Spark Gap shown in
Figure 7 needs to be adjusted as follows:
SPARK GAP
• Using an adjustable wrench, loosen the inside
Nut just until the Gas Collector Box can be
maneuvered and turned upward.
• The gap between the Spark Electrode Tip and
Spark receiver should be approximately 3/16".
• If the gap is wider than 3/16" use a pair of long
SPARK
ELECTRODE TIP
nose pliers and gently squeeze the Gas
Collector Box until the gap is correct.
INSIDE
NUT
• Return the Gas Collector Box to its original
horizontal position, secure the inside Nut and try
the Electrode Check again.
Barbeques Galore Information: If you have questions about assembly or grill operation, or if there are damaged
or missing parts when you unpack this unit from the shipping boxes, call us 8am - 4:30 pm PST, Monday
through Friday at: 1-800-474-5587 (1-800-GRILL-UP)
13
O u td o o r B B Q B u i l t - i n I n s ta l l a t i o n Sp e c i f i c a t i o n s
NOTE: When choosing a location for your Gas grill, keep in
mind that it should not be located under any overhead combustible construction. The side and bottom of the grill should
not be any closer than 14 inches to combustible construction,
and the back of the grill should not be any closer than 16 inches to combustible construction.
NOTE: When installing a barbecue equipped for liquid
propane in an island, the propane tank must be in a separate enclosure that is completely isolated from the barbecue.
It must be cross-ventilated in accordance with the current
standard. The propane tank MUST NEVER be installed
directly under the barbecue.
WARNING: When using Propane, EXTREME CAUTION
should be used to provide ample ventilation of vapor from the
enclosure. LP Gas vapor is heavier than air and SERIOUS
INJURY from a DANGEROUS EXPLOSION could occur if LP
Gas is allowed to accumulate in an enclosure and then ignited. Both the Barbecue enclosure and LP cylinder enclosure
require venting that must be provided at the floor level of the
enclosure to allow any leaking LP Gas vapor to escape. Upper
& lower ground-level vents (20 sq. in. minimum each) MUST
BE PROVIDED on both sides of built-in construction. Please
ask a Barbeques Galore associate for full details.
NOTE: Upper & lower ground-level vents (20 sq. in. minimum each) MUST BE PROVIDED for combustion air on
both sides of built-in construction. Please ask a Barbeques
Galore associate for full details.
Barbecues must be installed in accordance with CSA
specifications and all local building codes.
Built-in Instructions
1. Attach Left and Right Side Trim Kit on either side of the barbecue. Use 3 of 1/4"x 3/4" Phillips head screws for each side.
2. Loosen the 2 1/4" x 3/4" Phillips Head screws on the top section of the Wind Shield. Attach the Rear Trim Kit with the Wind
Shield. Use 3 of 1/4" x 3/4" Phillips head screrws (2 from Wind Shield).
3. Carefully slide the barbecue into the island cutout.
Non-combustible
Construction
Figure 8
dt
Wi
h
ep
D
He
th
igh
10” minimum clearance
from cutout (for Hood)
BUILT-IN CUTOUT DIMENSIONS
MODEL
Width
Depth
Height
G55TR(N)
32-1/4"
20-1/4"
9-1/2"
G65TR(N)
39"
20-1/4"
9-1/2"
14
t
LP Gas Installation
Figure 9
Natural Gas
Installation
Figure 10
Rear
Trim
Left Trim
Clamp down
flexline
Right
Trim
Air Vents
Stainless
Flexline
Access must
be provided to
Shut-off Valve
Figure 11 Natural Gas models only
CSA Approved
Rubber Gas Hose
Non-combustible
Construction
3/8 FF - 1/2 MP
HOSE CONNECTOR
Vented Access Door
CSA Approved Propane Regulator
QCC-1/OPD
Tank
Vented on BOTH SIDES of Island
OUT
nWARNING
Vapors from products containing Chlorine and other caustic
chemicals can cause Stainless Steel flexible connectors to
corrode. THESE PRODUCTS SHOULD NOT BE STORED IN
AN ISLAND OR NEAR THE connector.
Cleaning solutions, Household Chemicals and Solder fluxes
can also cause pinholes if they come in contact with these
connectors and MUST be washed off immediately with water.
Yellow Teflon Pipe Thread
Sealant is recommended for
use on all pipe thread connections EXCEPT flared threads.
IN
CSA Approved
Natural Gas
Regulator
Stainless
Flexline
Close Nipple
Natural
Gas Supply
Shut-off Valve
1/2-1/2” NPT
IMPORTANT: Regulator must be on the Barbecue or your warranty is void.
15
Fuel Gauge Display Installation. (LP Only)
IMPORTANT: Before installing batteries be sure the gas
tank is not mounted in the tank pull-out tray.
1. Attach the Tank Gauge Bracket on the Bottom
Shelf. Using 4 of 1/2" x 3/4" Phillips Head
Screws to fixing the Tank Gauge.
2. Rotate the Battery Cover on the Bottom of the tank
Pull-out Tray.
3. Insert two "AAA" Batteries into Battery Box.
4. Return the Battery Box and wire to Tank Pull-out
Tray. Rotate the Battery Cover Back.
BOTTOM SHELF
Fuel Gauge Display Operating - See Figure 5
Press the "CHECK" button to operate Fuel Gauge
Display.
NOTE: Tank must be positioned in tray Fuel
Gauge Display check.
T A N K GA U GE
BRACKET
1. Fuel Display: Indicates gas tank fill level
2. Fuel Warning Display: When the gas tank fill level
is on the last row a warning signal will sound for
approximately 3 seconds to warn you that the tank
volume is near empty.
P UL L OUT T R AY
T A NK G A UG E
DIS P L A Y
3. Battery Warning Display: A low battery warning
light will illuminate when the battery voltage drops
to a low level. Replace the batteries.
B A T T E R Y B OX
B A T T E R Y C OV E R
A A B A T T E R IE S
FUEL DISPLAY
FUEL WARNING
DISPLAY
CHE CK
BATTERY WARNING
DISPLAY
16
CHECK BUTTON
Rotisserie Instruction
1.Attach the motor bracket on the outside of the right
grill bowl panel. Align the two holes on the grill bowl
panel. Tighten securely using two #10-24 UNC x 3/4"
screws, flat washers and nuts provided.
MOTOR BRACKET
2. Slide a Holding Fork onto each end of Skewer
and tighten the thumbscrew to keep the Holding
Forks in place. Slide the bushing onto the end
of the Skewer.
3.Install the AC rotisserie motor onto the motor
bracket as shown.
4.Insert the end of bushing to the hole on the left
and right grill bowl panel. Slide the Skewer into
AC motor.
5.Tighten the thumbscrew on the Bushing.
IMPORTANT: Before rotisserie cooking you will
need to remove the cooking grids (and possibly
the flame tamers and warming rack) on
your grill to rotisserie cook- depending on the
size of meat you will place on the rotisserie.
BUSHING
THUMBSCREW
SKEWER
FORK
AC MOTOR
MOTOR BRACKET
17
Disconnecting A Liquid Propane Gas (LP gas)
Tank From Your Grill
1. Turn the Burner Valves and LP Gas Tank Valve
to the full OFF position (turn clockwise to
close).
Connecting A Liquid Propane Gas (LP gas)
Tank To Your Grill
1. Check the Tank Valve to insure it has proper
external mating threads to fit the Hose and
Regulator Assembly provided. (Type 1 connection per ANSI Z21.58a-1998)
2. Detach the Hose and Regulator Assembly from
the LP gas Tank Valve by turning the Quick
Coupling Nut counterclockwise.
2. Inspect the Valve Connection Port and
Regulator assembly. Look for damage or debris.
Remove any debris. Inspect Hose for damage.
Never use damaged or plugged equipment.
Figure 7.
3. Hang your filled gas tank on the Tank Seat.
The ring foot of the gas tank will rest on the
Tank Display. See Figure 7. Make sure the
LP gas tank valve is in the full OFF position
(turn clockwise to close). To reset the Tank
Gauge, depress the gas tank all
the way down using your hand, each time
you replace the tank.
4. Make sure all Burner Valves are in the OFF
position.
5. When connecting the Hose and Regulator
Assembly to the Tank Valve, hand tighten nut
clockwise to a full stop. Do Not use a wrench
to tighten because it could damage the Quick
Coupling Nut and result in a hazardous
condition.
T ANK G AUG E
6. Slowly open the tank valve 1/4 to 1/2 open
(counterclockwise). Use a soapy water solution
to check all connections for leaks before
attempting to light your grill. See "Checking for
Gas Leaks" on page 17. If a leak is found,
turn the Tank Valve off and do not use your
grill until the leak is repaired. Do this leak test
even if the grill was store assembled.
R E GULATOR
C OUP LING NUT
TY P E 1
CONNE CTION
P E R ANS I Z21.
58A-1998
To connect A Natural Gas (NG) Grill Refer
to Instructions on page 4.
CAUTION: When the appliance is not in use, the
gas must be turned off at the supply tank.
Congratulations
Your Turbo Select gas grill is now ready for
use. Before the first use and at the beginning
of each season (and whenever a LP gas tank
has been changed):
1. Read all safety, lighting and operating instructions.
2. C h e c k G a s V a l v e O r i f i c e s , B u r n e r
Tubes and Burner Ports for any obstructions.
3. Perform gas leak check according to instructions found on page 17 of this Owner's
Manual.
18
Grill Lighting Instructions
! WARNING
A strong gas smell, or the hissing sound of
gas indicates a serious problem with your
gas grill or the LP gas tank. Failure to
immediately follow the steps listed below
could result in a fire or explosion that could
cause serious bodily injury, death, or property damage.
• Shut off gas supply to the gas grill.
• Turn the control knobs to OFF position.
• Put out any flame with a fire extinguisher.
• Open grill lid.
• Get away from the LP gas tank.
• Do not try to fix the problem yourself.
• If odor continues or you have a fire you
cannot extinguish, call your fire department.
Basic Lighting Procedures
1. Familiarize yourself with the safety guidelines at
the front of this manual. Do not smoke while
lighting grill or checking gas supply connections.
2. Be sure the LP gas tank is filled.
3. Check that the end of each burner tube is properly
located over each valve orifice.
4. Make sure all gas connections are securely
tightened.
5. Open the Grill Lid.
! WARNING
Do not call near the LP gas tank because
your telephone is an electrical device and
could create a spark resulting in fire and/or
explosion.
Failure to open Grill Lid during the
lighting procedures could result in a fire
or explosion that could cause serious
bodily injury, death, or property
damage.
NOTE: The normal flow of gas through the
regulator and hose assembly can create a
humming noise. A low volume of noise is
perfectly normal and will not interfere with
operation of the grill. If humming noise is loud
and excessive you may need to purge air from
the gas line or reset the regulator excess gas
flow device. This purging procedure should be
done every time a new LP gas tank is
connected to your grill. For help call the
Barbeques Galore Infoline for assistance.
6. Set control knobs to OFF and open the LP gas
tank valve slowly until 1/4 to 1/2 open.
Open LP
gas tank
OFF
Customer Service Helpline, 8:00am - 4:30pm PST
Monday through Friday at 1-800-474-5587.
7. Push and turn the LEFT control knob to HIGH.
OFF
Checking For LP Gas Leaks
Never test for leaks with a flame. Prior to first use,
at the beginning of each season, or every time your
LP gas tank is changed, you must check for gas
leaks. Follow these four steps:
HIGH
8. Immediately press the electric ignitor for 3-4
seconds to light the burner.
1. Make a soap solution by mixing one part liquid
detergent and one part water.
PRESS
2. Turn the grill control knobs to the full OFF
position, then turn the gas ON at source.
3. Apply the soap solution to all gas connections. If bubbles appear in the soap solution
the connections are not properly sealed.
Check each fitting and tighten or repair as
necessary.
9. If the burner does not light, turn the control knob to
OFF, wait 5 minutes for gas to clear, then retry.
10. Once the left grill burner is ignited, the adjacent
burner can be lit by simply turning its control knob
to HIGH.
4. If you have a gas leak that you cannot repair,
turn off the gas at the source, disconnect fuel
line from your grill and call
1-800-474-5587 or your gas supplier for repair
assistance.
11. Adjust control knobs to your desired cooking
temperature.
19
Manually Lighting Your Grill by Match
• Misalignment of Ignitor on Burner
To light your gas grill by match, Follow steps 1
through 6 of the Basic Lighting Procedures. Then,
light the match and place near the top end of
Lighting Tube on the right side of the grill. See
Figure 7. Turn the nearest Main Burner Control
Knob to the HIGH setting to release gas.
The Burner should light immediately.
• Disconnected Ignition Wires
Correction: Check for proper position of the
Electrode Tip as shown on page 15. The gap
between the Spark Electrode Tip and
Spark Receiver should be approximately
3/16". Adjust if necessary following the
Electrode Check procedure on page 15.
Figure. 7
MATCH
•
LIGHTING
TUBE
Correction: Inspect the Ignitor Junction
Box found behind the Control Panel. Connect
loose Ignitor wires to Junction Box and try
to light grill.
Weak AA battery
Correction: Unscrew the Ignitor Cap and replace
the battery.
To purge air from your gas line and/or
reset the Regulator excess gas flow device:
Opening the tank valve all the way or too quickly is
what triggers the Regulators safety device to shut
down gas flow which prevents excessive gas flow to
your grill. Lighting the Burner farthest from the fuel
source every time will help eliminate air pockets in
the Manifold. This procedure should be done every
time a new LP gas tank is connected to your grill:
! WARNING
Never lean over the grill cooking area while
lighting your gas grill. Keep your face and body
a safe distance (at least 18 inches) from the
Lighting Hole or Burners, when lighting your
grill by match.
Turn all Control Knobs to the OFF position.
Turn off the LP gas tank valve at the tank
valve.
Disconnect Regulator from LP gas tank.
Let unit stand for 5 minutes.
Reconnect Regulator to the LP gas tank.
Open Grill Lid or Side Burner Lid.
Turn the LP gas tank valve on slowly until
1/4 to 1/2 open.
Light the Burner farthest from fuel source by
turning its Control Knob to IGN then pushing
in the Control Knob. To light the Side Burner
push its Control Knob in and turn to HIGH.
If the grill fails to light properly:
1. Turn gas off at source and turn the Control Knobs
to OFF. Wait at least five minutes for gas to clear,
then retry.
2. Check gas supply and connections.
3. Repeat lighting procedure. If your grill still fails
to operate properly, turn the gas off at source,
turn the Control Knobs to OFF, then check the
following:
! WARNING
• Misalignment of Burner Tubes over Orifices
Should a "FLASH-BACK" fire occur in/
or around the Burner Tubes, follow the
instructions below. Failure to comply
with these instructions could result in a
fire or explosion that could cause
serious bodily injury, death, or property
damage.
Correction: Reposition Burner Tubes over Orifices.
• Obstruction in gas line
Correction: Remove fuel line from grill. Do not
smoke! Open gas supply for one second to clear
any obstruction from fuel line. Close off gas supply
at source and reconnect fuel line to grill.
• Plugged Orifice
• Shut off gas supply to the gas grill.
• Turn the Control Knobs to OFF position.
• Put out any flame with a Class B fire
extinguisher.
• Open Grill Lid.
• Once the grill has cooled down, clean
the Burner Tubes and Burners according
to the cleaning instructions found on
page 21 in this manual.
Correction: Remove Burners from grill by
pulling Cotter Pin (beneath Burner) using Long
nose pliers. Carefully lift each Burner up and
away from Gas Valve Orifice. Remove the Orifice
from Gas Valve and gently clear any obstruction
with a fine wire. Then reinstall all Orifices,
Burners, Cotter Pins and cooking components.
If an obstruction is suspected in Gas Valves or
Gas Valve Bracket, please call
Barbeques Galore at 1-800-474-5587.
20
B ac k B urner L ighting Ins truc tions
Us ing y our Infrared
B ac k B urner and R otis s erie
Note: T he location of the B ack B urner makes it more
susceptible to winds that will decrease the performance of
your R otis s erie cooking. F or this reas on you s hould not
operate the B ack B urner during windy weather conditions.
Your new grill includes an Infrared Back Burner and a
Rotisserie designed to slowly cook foods that are moist
and flavorful, because the turning food self bastes using
infrared heat. The location of the Back Burner allows the
placement of a basting pan beneath the food to collect
juices and drippings for basting and gravy. To flavor the
contents of the basting pan you may add herbs, onions,
or other spices of your choice. The Rotisserie Burner is
Infrared, which provides intense radiant heat. This intense
heat is magnificent for searing in the natural juices and
nutrients found in quality cuts of meat.
F or bes t res ults , always R otis s erie cook with the grill Lid
down and the B ack B urner C ontrol K nob s et to High. Do
not use the main grill B urners when the B ack B urner is in
operation.
1. Open the G rill Lid.
2. S et all C ontrol K nobs to O F F and open the L P gas
Tank Valve s lowly until 1/4 to 1/2 open. F or Natural
G as ope n S hutt O ff Va lve a t s ourc e c omple tly.
3. P us h and turn the B ack B urner C ontrol K nob to IG N
pos ition. P us h the C ontrol K nob in to ignite the
burner.
4. If the B urner does not light, turn the C ontrol K nob to
O F F, wa it 5 minutes for gas to c lea r, the n re try.
5. O nc e lit, the B a c k B urne r will re a c h c ook ing
temperature quickly. T he orange/red glow will even
out in about 5 minutes .
6. F or bes t res ults , a lwa ys R otis s erie cook with the
grill Lid down and the B ack B urner C ontrol K nob s et
on H IG H . D o n o t u s e th e m a in B u r n e r s wh e n
the B ac k B urner is in operation.
Rotisserie cooking is a slow cooking process and the
maximum temperature you can expect to reach with
the Lid closed is about 325° to 350° F.
R ead A ll Ins truc tions :
1. Always attach the R otis s erie to the grill firs t, and
then plug cord into a grounded outlet. To disconnect,
turn R otis s erie "OF F " then remove plug from outlet.
2. Mos t grill s urfaces and acces s ories are hot during
and after cooking, s o us e reas onable care around
grill, wear protective mitts and us e the R otis s erie
Handle.
3. T he use of accessory attachments on the R otisserie
is not recommended by the manufacture and may
caus e injuries .Do not us e this appliance for other
than intended use.
4. Never line the bottom of your G rill B owl with aluminum
foil, s and or any greas e abs orbent s ubs tance.
5. S hould a grease fire occur, turn the B urners and gas
off and leave the Lid C LOS E D until fire is out.
! WAR NING
F a ilur e to open G r ill L id during the lightin g pr o c e du r e s c o u ld r e s u lt in a fir e o r
ex plos ion tha t c ould c a us e s erious bodily
i n ju r y , d e a th , o r p r o p e r ty d a m a g e .
! WAR NING
L oading T he R otis s erie
T he R otisserie Motor must be electrically grounded
in accordance with local codes or, in the absence of
local codes , with the National E lectric C ode, ANS I/
NF PA 70-1990. K eep the R otis s erie Motor electric
cord away from the heated s urface of the grill. Do
not operate the R otis s erie with a damaged cord or
plug, or if the R otis s erie malfunctions or has been
damaged in any manner. C all the G rill Information
C enter for replacement. T he power supply cord has
a 3-prong grounded plug. F or your pers onal s afety
do not remove the grounding prong. It mus t be
plugged into a ma ting 3-prong grounding type
receptacle, grounded in accordance with the National
E lectrical C odes and local codes and ordinances. If
an extens ion cord is us ed it mus t be properly
grounde d and s uita ble for us e with O utdoor
Appliances. K eep the extension cord connection dry,
off of the ground and out of the reach of children.
When the R otisserie Motor is not in use remove and
s tore in a dry indoor area.
To load the S kewer begin with the Handle in place, and
s lide one of the Meat Holders (P rongs facing away from
the Handle) onto the S kewer. P us h the S kewer through
the center of the food, and then s lide the s econd Meat
Holder, (prongs toward the food) onto the S kewer. It is
very important to center and balance the food to be cooked
on the S kewer then push the Meat Holders firmly together.
T ighte n the W ing N uts with plie rs . It ma y a ls o be
necessary to wrap the food with butcher string (never use
plastic or nylon string) to secure any loose portions. Once
the food is s ecure ins ert the S kewer into the motor. If
needed, remove the grill C ooking G rids. P lace a basting
pan below the food to collect the juices and drippings as
the food cooks . It is normal for the S kewer to flex when
larger cuts of meats are being cooked. S tart motor and
cook food with the Lid clos ed.
21
Cleaning and Maintenance
5. Cover each gas Valve Orifice with aluminum foil.
6. Brush the inside and bottom of the grill with a brass
wire brush or fiber cleaning pad, and wash with a
mild soap and warm water solution. Rinse
thoroughly and let dry.
Keeping outdoor cooking gas appliance area clear and
free from comustible materials, gasoline and other
flammable vapors and liquids.
7. Remove aluminum foil from Orifices and check
each Orifice for obstruction.
As with all appliances, proper care and maintenance
will keep your grill in top operating condition and
prolong its life. By following these cleaning procedures
on a timely basis, your grill will stay clean and work
properly with minimum effort.
8. Check eachSpark Electrode, adjusting as
needed. The space between the Spark
Electrode Tip and Spark Receiver should
be approximately 3/16".
CAUTION:
Be sure your grill is OFF and cool before cleaning.
9. R e p l a c e t h e B u r n e r s a n d a d j u s t t h e g a s
collector box. The edge of the collector box
should be overlapping the Burner Port.
Cleaning The Cooking Grids
Before initial use and as needed, wash your Grids
with a mild detergent and rinse with hot water. For
stubborn food residue use a degreaser and fiber or
brass cleaning brush.
10. Replace Flame Tamers and the Cooking Grids.
11. Reconnect the gas source and observe the
Burner flame for correct operation.
Exterior Stainless Steel Surfaces:
Cleaning The Grease Tray and Receptacle
Weathering and high heat can cause a stainless steel
grill Lid to turn tan in color. This is not to be
confused with rust and is not a product defect.
Machine oils used in the manufacturing process of
stainless steel as well as cooking oils and a dirty
grill Lid can also encourage discoloration if the Lid
is not cleaned prior to grill use.
To reduce the chance of fire, the Grease Draining
Tray, Grease Receptacle and Heat Shield should
be inspected before each grill use. Remove
grease (a plastic spatula works well) and wash
Grease Tray and Receptacle with a mild soap
and warm water solution.
Cleaning the Flame Tamers
1. Shut off gas supply at source and disconnect fuel
line from Gas Valve Manifold. Protect fuel line
fitting.
To reduce the chance of flare-ups, Flame Tamers
should be cleaned whenever food or grease
drippings accumulate. Brush off Flame Tamers
with a fiber type brush and turn over to allow
the burner heat to burn off any stuborn food residue.
The Ceramic Flame Tamers work equally well
on either side.
2. Use a Stainless Steel Cleaner and soft cloth to
remove residual adhesive and oils from the inside
and outside of your grill Lid. Never use abrasive
cleaners or scrubbers. In addition to the initial
cleaning, routine cleaning to remove dirt, grease
and oils will help discourage Lid discoloration.
Annual Cleaning of The Grill Interior
Use a fiber or brass cleaning brush to clean the interior Grill Bowl, Cooking Grids, Flame Tamers and
grease containers. On porcelain finished parts never
use a wire brush or metal scraper which can scratch
or chip the porcelain finish and promote rusting.
1. Turn all Control Knobs to the full OFF position.
2. Turn the LP gas Tank Valve to the full OFF position.
3. Detach the LP gas Regulator assembly from your gas
grill or disconnect the Quick Disconnect Hose from the
gas source.
4. Remove and clean the Flame Tamers, Cooking
Grids, and Grill Burners.
Grill Information Center: If you have questions about assembly or grill operation, or if there are damaged
or missing parts when you unpack this unit from the shipping boxes, call us 8am - 4:30 pm PST, Monday
through Friday at: 1-800-474-5587
22
Regardless of which Burner cleaning procedure you
use, we recommend you also complete the following
steps to help prolong Burner life.
Cleaning The Burner Tubes and Burner Ports
To reduce the chance of "FLASH-BACK" you must
clean the Burner Tubes at least once a month in late
summer or early fall when spiders are most active
or when your grill has not been used for an
extended period of time.
1. Use a wire brush to clean the entire outer surface of
each Burner until free of food residue and dirt.
2. Clean any clogged ports with a stiff wire, such as
an open paper clip.
1. Turn all Control Knobs to the full OFF position.
3. Inspect each Burner for damage (cracks or holes)
and if such damage is found, order and install a
new Burner. After installation, check to insure
that the Gas Valve Orifices are correctly placed
inside the ends of the Burner Tubes. Also check
the position of your Spark Electrode.
2. Turn the LP gas Tank Valve to the full OFF position.
3. Detach the LP gas Hose and Regulator Assembly
from your gas grill or disconnect the Quick Disconnect Hose from the Natural Gas source.
4. Remove the Cooking Grids, Flame Tamers, and
Grease Trays from your grill.
5. Remove the Cotter Pin from the rear underside of
each Burner using a pair of long nose pliers.
! WARNING
The location of the Burner Tube with respect
to the Orifice is vital for safe operation. Check
to ensure the Orifice is inside of the Burner
Tube before using your gas grill. See Figure
2. If the Burner Tube does not fit over the
Valve Orifice, lighting the Burner may cause
explosion and/or fire.
6. Carefully lift each Burner up and away from the gas
Valve Orifice.
7. Refer to Figure 1 and perform one of these three
cleaning methods:
•
•
•
Bend a stiff wire, (a lightweight coat hanger
works well) into a small hook as shown below.
Run the hook through the Burner Tube and
inside the Burner several times to remove any
debris.
SPARK ELECTRODE
Figure 2
GAS COLLECTOR BOX
Use a Burner Cleaning Brush or a bottle brush
with a flexible handle. Run the brush through
the Burner Tube and inside the Burner several
times, removing any debris.
ORIFICE
BURNER
Use an air hose to force air through each
Burner Tube. The forced air should pass debris
or obstructions through the Burner and out the
ports.
Figure 1
TO CLEAN BURNER TUBE,
INSERT HOOK HERE
ORIFICE
GAS COLLECTOR BOX
SPARK ELECTRODE
BURNER TUBE
23
BURNER
BURNER PORT
Question: My grill has a low flame and sometimes
will not light. Why?
Answer: You need to purge air from the gas line or
reset the Regulator excess gas flow device. Opening
the tank valve all the way or too quickly triggers the
Regulators safety device to shut down gas flow which
prevents excessive gas flow to your grill. Lighting the
Burner farthest from the fuel source every time will help
eliminate air pockets in the Manifold. Perform this procedure every time a new LP tank is connected to grill:
Turn all Control Knobs to the OFF position.
Turn off the LP gas tank valve.
Disconnect Regulator from LP gas tank.
Let unit stand for 5 minutes.
Reconnect Regulator to the LP gas tank.
Open Grill Lid or Side Burner Lid. Turn the tank
valve on slowly until 1/4 to 1/2 open.
Light the Burner farthest from fuel source by
turning its Control Knob to IGN then pushing
in the Control Knob. To light the Side Burner push
its Control Knob in and turn to HIGH.
Frequently Asked Questions
Question: Can I convert my grill from LPG to NG?
Answer: No, your gas grill is manufactured to exact
specifications and is certified for Liquid Propane (LPG)
or Natural Gas (NG) use only. For your safety,
conversion kits are not available. Any attempt
t o c o n v e r t y o u r g r i l l w i l l v o i d y o u r w a r r an t y.
Question: The Hose and Regulator supplied with my
grill does not fit the older LPG tank I've used for years.
Answer: U.S. Government regulates gas appliances
and LP gas tanks. When regulations are changed the
LP gas tank fittings are altered to insure compliance.
If your LP gas tank does not fit the Hose and
Regulator supplied with your new grill, the tank is
outdated and must be replaced. Note: Effective April 1,
2002 all LP gas tanks sold must include an "OPD"
OverflowProtection Device. This internal device
prevents the LP gas tank from being overfilled.
Tanks without an OPD valve can not be refilled.
Question: Sometimes I hear a humming sound
coming from my Regulator. What causes this?
Answer: The humming sound is gas flowing through
the Regulator. A low volume of sound is normal and will
not interfere with the operation of your grill. If the humming sound is loud and excessive you need to purge air
from the gas line or reset the Regulator excess gas flow
device as described above.
Question: Are the serial and model numbers of my grill
listed somewhere for future reference?
Answer: The model and serial numbers are listed on a
Silver Label placed on the Control Panel bottom righthand side. If your grill features a Side Burner, it will have
its own silver label and a model number ending in SB.
This is not the primary grill model number or
s e r ia l n u m b e r n e e d e d fo r P r o d u c t Wa r r an t y
Registration or for Customer Support purposes.
Question: How and when do I clean the interior
cooking components of my grill?
Question: What causes grill parts to rust and what
affect does it have on the grill materials.
Answer: Rusting is a natural oxidation process and may
appear on cast-iron and steel parts. Rust will not affect short
term performance of your grill. Stainless steel grill parts
will not rust. However, weathering and extreme heat can
cause a stainless steel Lid to turn tan color. This is
discoloration and is not considered a manufacturing
defect.
Question: My grill does not light properly. Why?
Answer: Always light the Burner farthest from the fuel source
first. This draws gas across the Manifold helping prevent air
pockets which obstruct gas flow. Also check these causes:
Check LP gas supply. An empty LP gas tank weights
about 20 pounds. A full tank weighs about 40 pounds.
Check to insure all gas connections are secure.
The Ignition AA battery may need replacing.
Ignition wires may be loose. Remove the battery,
inspect the Ignitor Junction Box found behind the
Control Panel and connect any loose wires.
Spark Electrode Tips may need repositioning. Refer to
the electrode "Check" procedures found on page 15.
Check that the end of each Burner Tube is properly
located over each Gas Valve Orifice.
There may be an obstruction in the gas line. To correct
this, remove LP gas Hose and Regulator or Natural Gas
fuel line from your grill. Do not smoke! Open gas supply
for one second to clear any obstruction from fuel line.
Close off gas supply at source and reconnect fuel line
to your grill.If an obstruction is suspected in the
Orifice or Gas Valves, call Barbeques Galore
at 1-800-474-5587.
Stainless Steel Cooking Grids: Before initial use and
as needed, wash Grids with a mild detergent and rinse
with hot water. For stubborn food residue use a degreaser
and fiber or brass cleaning brush.
Flame Tamers: To reduce the chance of flare-ups,
Flame Tamers should be cleaned whenever food or
grease drippings accumulate. Brush off Flame Tamers
with a fiber type brush and turn over to allow the burner
heat to burn off any stuborn food residue. The Ceramic
Flame Tamers work equally well on either side.
Grease Tray, Receptacle and Heat Shield:
To reduce the chance of fire, the Grease Draining Tray,
Grease Receptacle and Heat Shield should be inspected
before each grill use. Remove grease (a plastic spatula
works well) and wash Grease Tray and Receptacle
with a mild soap and warm water solution.
Question: What causes a stainless steel to discolor?
Answer: Weathering and high heat can cause a
stainless steel grill Lid to turn tan in color. This is not
to be confused with rust and is not a product defect.
Machine oils used in the manufacturing process of
stainless steel, cooking oils and a dirty grill Lid can
also encourage discoloration if the Lid is not cleaned
prior to grill use. After your grill is assembled,
remove the protective PVC film from the grill Lid and
use a Stainless Steel Cleaner and soft cloth to
remove residual adhesive and oils from the inside and
outside of your grill Lid. Never use abrasive cleaners
or scrubbers. Routine cleaning to remove dirt, grease
and oils will help discourage Lid discoloration.
24
Indirect Cooking
Cooking Instructions
The indirect cooking method can also be used with
the supplied cooking grids. To cook indirectly, the
food should be placed on the left or right side of your
grill with the burner lit on the opposite side. Indirect
cooking must be done with the lid down.
! WARNING
Your grill will get very hot. Never lean over
the cooking area while using your grill. Do
not touch cooking surfaces, grill housing,
Grill Lid or any other grill parts while the grill
is in operation, or until the grill has cooled
down after use.
Flare-Ups
The fats and juices dripping from grilled food can
cause flare-ups. Since flare-ups impart a favorably,
distinctive taste and color to food cooked over an
open flame, they should be accepted up to a point.
Nevertheless, uncontrolled flaring can result in a
ruined meal.
Failure to comply with these instructions
may result in serious bodily injury.
Burn-off
! WARNING
Before cooking on your gas grill for the first time, you will
want to "burn off" the grill to eliminate any odor or foreign
matter. Just ignite the Burners, lower the Lid, and operate
grill on the HIGH setting for three to five minutes.
Do not line the bottom of the grill housing
with aluminum foil, sand or any substance
that will restrict the flow of grease into the
grease draining tray and receptacle.
CAUTION:
Operating your grill on the HIGH setting for longer than
five minutes may damage certain parts of your grill. Do
not leave your grill unattended.
Failure to comply with these instructions
could result in a fire or explosion which could
cause serious bodily injury, death, or property
damage.
Preheating
To preheat, light your grill on HIGH, lower the lid and
follow this timetable:
• For high temperature cooking, preheat grill
3 to 5 minutes.
• For low temperature cooking, preheat grill
3 minutes.
• To slow cook, preheating is not necessary.
Cooking Temperatures
High setting: Only use this setting for fast warm-up,
searing steaks or chops and for burning food residue
off the grill after cooking is complete. Never use the
HIGH setting for extended cooking.
Medium to Low settings: Most recipes specify
medium to low settings, including all smoking,roasting,
baking and for cooking lean cuts such as fish.
NOTE: Temperature settings will vary with the amount
of wind and temperature outside your home.
Direct Cooking
The direct cooking method can be used with the
supplied Cooking Grids and food placed directly over
the lit grill Burners. Direct cooking requires the grill
lid to be up. This method is ideal for searing and
whenever you want meat, poultry or fish to have an
open-flame barbecued taste. Deep frying and smoking
are also best cooked in this manner because they
require direct heat.
25
Guide to Grilling Meat and Poultry with the Direct Cooking Method
Grilling Steak and Ribs
Cut of Meat
Approximate Cooking Times
Turn the grill Burners on high, close the Lid
and preheat your grill 3 to 5 minutes. Open Lid
and place the meat on the Cooking Grid
directly above the lit Burners. Cook the meat
on both sides until seared. Reduce the heat
to medium and cook meat until done. Grilling
times will vary according to meat thickness.
T-bone steak
Sirloin steak
Beef spare ribs
Porter house steak
New York strip steak
Rare: 4-8 minutes
Medium: 10-14 minutes
Well done: 15-20 minutes
Hamburgers
Sausages
Rare: 4-6 minutes
Medium: 8-10 minutes
Well done: 10-15 minutes
Chicken breast
(cook with bone down)
Chicken wings
Drumsticks
Direct method:
approximately 15 minutes
Whole bird
(cook with breast up)
Indirect method:
approximately 1 hour
Pork spare ribs
Chops
Loins
Cutlets
Rare: 4-8 minutes
Medium: 10-14 minutes
Well done: 15-20 minutes
Grilling Hamburgers and Sausages
Turn the grill Burners on high, close Lid and
preheat your grill 3 to 5 minutes. Open Lid
and place the meat on the Cooking Grid
directly above the lit Burners. Cook the meat
on both sides until seared. Reduce the heat
to medium and cook the meat until done.
Grilling times will vary according to meat
thickness.
Grilling Poultry
Turn the grill Burners on high, close Lid and
preheat your grill 2 to 3 minutes. Then raise
the Lid, reduce heat to medium and cook
poultry directly over lit Burners until done.
Poultry skin is fatty so you should expect
some flare-ups when using this direct method.
To minimize flare-ups, try grilling poultry
using the indirect method. Place the poultry
on one side of the grill with the opposing
Burners on medium heat, and lower the grill
Lid. Grilling times will vary based on the size
of your poultry.
Indirect method:
up to 30 minutes
Grilling Pork
Turn Burners on high and preheat your grill 3 to
5 minutes with the Lid down. Raise Lid, place
pork on Cooking Grid and cook until seared.
Reduce heat to medium and cook until done.
Grilling times will vary according to meat
thickness.
26
Guide to Grilling Fish and Seafood with the Direct Cooking Method
Whole Fish and Whole Fillets
Cut of Meat
Approximate Cooking Times
Preheat your grill on HIGH for 2-3 minutes
with the Lid down. Raise Lid and turn
Burners to medium heat. Place fish (skin
down) on grill and cook over direct heat until
done. Use cooking time as a guide or until
fish is opaque but still moist.
Whole fish
Whole fish fillets
10 - 12 minutes per pound or
until fish is opaque
Fish fillets
Boneless cubes
4 - 5 minutes each side
or until fish is opaque
Smaller Fish Fillets and Cubes
Follow the directions from above, using
approximate cooking times shown at right.
Place a small piece of aluminum foil on the
Cooking Grids if the fish pieces are small
enough to drop between the cooking grids.
Guide to Grilling Vegetables and Fruit
Prepare your fruit or vegetables and brush with
butter or basting sauce if desired. To cook indirectly,
the food should be placed on the left or right side of
your grill with the Burner lit on the opposite
side and the grill Lid down.
oven. However, there are many factors such as outside
temperature, wind conditions and location of grill
that affect your grill performance so we suggest you
watch the Temperature Gauge and adjust the heat
accordingly.
In some instances, you may want to grill vegetables
and fruit directly over the heat, using the supplied
Cooking Grids. Foods that work best with direct
heat are relatively soft and require a short cooking
time; mushrooms, zucchini, tomatoes and skewered
fruit such as apricots, peaches, pineapple,
strawberries and kiwis. Remember the grill Lid
must remain up when cooking directly.
Cooking times for foods prepared with the direct method
will be much shorter mainly because of the direct heat
sourse and softness of the food. Timing will be
comparable to normal pan frying or grilling.
For very firm vegetables—particularly potatoes and
yams, we recommend that you partially boil until
almost cooked, before placing them on the grill.
Cooking times using the indirect method with the
hood down will be similar to those for your kitchen
27
Guide to Slow Roasting and Baking Techniques
An Important Note About Heat Settings
Food Preparation
The suggested heat settings shown are approximate.
There are many factors such as outside temperature,
wind conditions and grill location that affect your grill
performance. We offer these cooking times as a
convenience, but suggest you watch the grill
Temperature Gauge and adjust the heat accordingly.
Trim meat of excess fat. Truss meat and poultry with
cooking string to retain shape if desired. Bacon strips can
be used to cover the outside surface of lean meat and
poultry to help prevent it from drying out. Another method
for keeping food moist during roasting is to put water
in a cooking pan, then cover with foil. The foil should
be removed for the first or the last part of the cooking
time to ensure proper browning.
Preparing to Roast
Roasting uses the indirect cooking method. Therefore,
the food should be placed on the left or right side of your
grill with the Burner lit on the opposite side. You can also
use the supplied Cooking Grid with an
aluminum drip pan underneath allowing you to collect
juices for making gravies. Remember, indirect cooking
requires the Lid of your grill to be down.
Tips for Roasting
Except when roasting with water in a roasting pan, the
juices that collect in the pan can be used as the base for
a tasty sauce or gravy. Place a cooking pan directly over
the heat, add extra butter if needed, then add several
spoonfuls of flour to thicken sauce. Finally, add sufficient
chicken or beef stock to obtain the desired consistency.
Preheating your grill is not required for slow cooking
methods such as roasting. If you do choose to preheat
your grill before roasting, turn the Burners on high
and close Lid for approximately 2-3 minutes.
Once the meat is cooked, remove it from your grill and
cover with a piece of foil. Allow it to stand for 10-15
minutes which allows the juices to settle. This will make
carving easier and ensure a tender, juicy roast.
Type of Food
How Cooked
Approximate Cooking Times
Beef
Rare
Medium
Well done
18 minutes per pound
23 minutes per pound
27 minutes per pound
Lamb
Medium
Well done
18 minutes per pound
23 minutes per pound
27 minutes per pound
30-33 minutes per pound
20-25 minutes per pound
25 minutes per pound
10 minutes per pound
20-25 per pound + 30 minutes
18-23 per pound + 15 minutes
Veal
Pork
Chicken
Duck
Fish
Turkey, under 16 pounds
Turkey, over 16 pounds
indirect cooking method. Therefore, your cooking pan
should be placed on the left or right side of your grill with
the Burner lit on the opposite side.
BAKING TECHNIQUES
From casseroles and cornbread to delicious deserts
like fondue fruit skewers or crumb cake, baking on the
grill is as easy as baking in the kitchen.
Tips for Baking
Prepare your favorite recipe as you would in the kitchen.
Foods cooked in the grill for long periods of time should
always be covered in aluminum foil to retain moisture.
You will need to stir the food several times as it bakes,
and add additional liquid if required.
Preparing to Bake
To bake in your new grill you'll need a baking dish or
cast-iron cooking pan, and a pair of insulated cooking
mitts. If the cooking pan is cast-iron be sure to
season the pan before use.
Watch the temperature, and adjust to cook according
to your recipe directions.
Preheat your grill 3-5 minutes, then lower heat to
achieve the baking temperature desired.
Oven Temperature
Slow
300° - 340° F
Moderate
355° - 390° F
High
Recommended Grill Setting
Both outside Burners on low
One outside Burner on high and the other outside
Burner on low
Both outside Burners on high
410° - 480° F
28
Guide to Rotisserie Cooking
Rotisserie Cooking
Note: it is our experience that many smoking chip and
pellet products do not actually produce a smoke but
instead infuses the food with flavor. Please read product
labels carefully and if in doubt, ask your retailer
for details.
Rotisserie cooking produces foods that are moist,
flavorful and attractive. The Rotisserie system is most
commonly used for cooking meat or poultry and is
designed to cook food slowly. You can place a cooking
pan beneath the food to collect juices for basting and
gravy. To flavor the contents of the cooking pan you may
add herbs, onions, or other spices of your choice.
Using A Smoker Box
There are many optional smoker boxes available for
purchase. Follow these guidelines and always refer to
the label of your smoking chips or pellets for specific
directions.
Rotisserie cooking is a slow cooking process and
the maximum temperature you can expect to reach
with the Lid closed is about 325 to 350 ƒ F.
.
Raise your Grill Lid and light the grill. Lower the Grill
Lid allowing your grill to reach the desired cooking
temperature for the food you are grilling. Fill your smoker
box with your prepared smoking chips or pellets. Dried
herbs and spices may also be added to produce different
flavors. Wear an insulated cooking glove and place your
smoker box on a Cooking Grid or Flame Tamer directly
above a lit grill Burner. The heated smoking chips or
pellets will flavor your foods.
Balancing the Food
In Rotisserie cooking, balancing the food is of utmost
importance. The Rotisserie must turn evenly or the
stopping and starting action will cause the food to cook
unevenly and possibly burn the heavier side.
The easiest foods to balance are those of uniform shape
and texture. To test if the food is balanced correctly when
secured, place the ends of the Rotisserie Skewer loosely
in the palms of your hands. If there is no tendency to roll,
give the Skewer a quarter turn. If it is still stable, give it a
final quarter turn. It should rest without turning in each of
these positions. It can then be attached to your grill.
Tips for Smoking
You can reduce the strength of the smoke flavor by
only smoking for half or three quarters of the cooking
time. The heat required for smoking is normally low to
medium.
Foods naturally high in oils lend themselves well to
smoking, while drier foods benefit from a marinade.
You can also rub the food with herbs, spices or
flavored oils. Many foods can be smoked to produce
stunning results with very little effort. Here are a few
suggestions:
Loading the Rotisserie
To load the Skewer begin with the Handle in place,
and slide one of the Meat Holders (Prongs facing away
from the Handle) onto the Skewer. Push the Skewer
through the center of the food, and then slide the
second Meat Holder, (prongs toward the food) onto
the Skewer. It is very important to center and balance
the food to be cooked on the Skewer then push the
Meat Holders firmly together. Tighten the Wing Nuts
with pliers. It may also be necessary to wrap the food
with butcher string (never use plastic or nylon string)
to secure any loose portions. Once the food is secure
insert the Skewer into the motor. If needed, remove
the grill Cooking Grids. Place a basting pan below the
food to collect the juices and drippings as the food
cooks. It is normal for the Skewer to flex when larger
cuts of meats are being cooked. Start motor and cook
food with the Lid closed.
• Tuna steaks, marinated in Asian flavors of sesame
oil, soy sauce and sherry.
• Pork fillets, rubbed with ginger, orange rind and
brushed with maple syrup.
• Mussels, brushed with lemon rind and chili oil.
• Lamb cutlets, marinated in virgin olive oil, lemon,
•
•
•
•
•
Guide to Smoking
Preparing to Smoke
Smoking gives food a distinctive, delicious flavor. You
will find a variety of wood chips or pellets available
for use in smoking grilled foods. Pre-soaking of
wood chips may be required so read and follow the
manufacturers instructions for preparation of smoking
chips prior to use.
29
oregano and black pepper. The same marinade can
be used for a whole leg or rack of lamb.
Chicken, boneless chicken pieces—especially sliced
breasts.
Fish, sliced fillets of firm fish, assorted seafood
such as prawns, scallops and calamari.
Pork, sliced fillets, diced or minced pork, sliced
leg steak and sliced chops.
Beef, sliced fillet, rib-eye, round, rump and sirloin.
Lamb, sliced fillet, round and loin.
Guide to Stir-Frying and Deep-Frying
STIR-FRYING TECHNIQUES
DEEP-FRYING TECHNIQUES
This method of cooking is popular around the world and
can be easily accomplished outdoors on your grill. It's
a quick and healthful way of preparing a complete meal
using meat, poultry or seafood in infinite combinations
with other interesting ingredients like vegetables, rice
or noodles.
A wide variety of foods can be deep-fried outdoors
on your grill, from potatoes, to seafood and chicken.
Deep-frying uses a large portion of oil, preferably
saturated. The outdoor location is ideal for deep-frying
as smoke, grease and smells reach for the sky,
not the ceiling of your kitchen.
Preparing to Stir-fry
Preparing to Deep-fry
Although it is possible to stir fry in other dishes, a wok is
your best tool. Its high sides enable the cook to stir food
without spillage. Its construction allows you to cook
quickly at high temperatures, with instant control of heat
which is essential for successful stir frying.
Deep-fry on your grill using a cooking pan or wok, over
direct heat with the grill lid raised.
Fill a cooking pan no more than half full of vegetable or
corn oil. Start with low heat, then raise the heat
gradually. Check the temperature of the oil carefully
with a frying thermometer or test with a cube of bread.
The cube of bread should brown in about 30 seconds
for most cooking needs. A temperature between
350 and 400 degrees is optimal for preparing
the majority of deep-fried foods.
Food preparation
Slice meat and poultry into long thin strips and cube
fish fillets. Remove all fat from meat and poultry and
cut large vegetables into even slices or cubes.
Marinate foods for extra flavor and tenderness.
Marinating times will vary for red meat, fish and
or various cuts. Less tender cuts of meat should
be marinated longer. Remember to always chill
marinating food in the refrigerator prior to cooking.
Food Preparation
Foods being deep-fried taste better when coated
with either batter or breadcrumbs to add flavor and
prevent moisture from escaping.
Stir-fry meats, poultry or fish first. Next, add hard
vegetables like carrots. Then continue with softer
vegetables like snowpeas and peppers. To ensure
even cooking, continually stir and toss the food in
the wok using a wooden spoon or spatula.
Tips for Deep-frying
Wear an insulated cooking glove and slowly
lower foods into the hot oil using a wire scoop
or stainless steel tongs. Add only a small quantity
of food to the oil, allow it to cook, then repeat
with another small quantity. This ensures the
oil doesn't drop in temperature. Once the food
is cooked, remove it carefully and drain onto a paper
towel. Turn the heat off as soon as you have finished
deep-frying and allow your pan to cool. When the
oil is cool, remove all remnants of fried foods
by straining it through a fine metal sieve. Once
the oil is quite cool, store it in a clean bottle for
future use.
Tips for Stir-frying
Place a wok directly over a high heat on your grill or Side
Burner. Add only a small amount of food at a time to
ensure fast cooking and also to allow the wok to reheat
between ingredients.
Guide to Using the Optional Secondary Cooking Rack
Vegetables are generally easy to cook on the grill. The
optional cooking rack makes it convenient because
you can still use the main cooking area while the
vegetables are suspended above the Cooking Grids.
The optional cooking rack can be used for purposes
other than just the obvious. Consider using it for
warming French bread, garlic bread, croissants or
even bagels.
Pre-cook hard vegetables by briefly boiling or
microwaving them before cooking on the grill. Wrap
vegetables in a double thickness of foil to protect them
while cooking on the grill. Then, remove the foil if
desired, 10-15 minutes before the end of cooking,
brush vegetables with butter or oil and finish cooking.
A small whole fish wrapped in foil also cooks well on
the optional cooking rack. Parcels of seafood such as
scallops, prawns and sliced fish fillets prepared in a
sauce and portioned into small foil wraps cook well
this way, too.
30
1/4
1 1/2
2
1/3
1/4
Recipes
ONION BURGERS
A honey and mustard sauce glazes the onion slices as
they cook alongside these delicious burgers. For optimal
sweetness, select Vidalia or Walla Walla onions.
Makes 4 open face burgers.
Preparing the Salsa
Combine tomato, green pepper, onion, jalapeno
peppers, garlic, cilantro and salt in a bowl. Set
aside 2 tablespoons of salsa. Cover and chill
remaining salsa until serving time.
Ingredients
2
2
2
2
1
1/4
1/8
4
4
4
teaspoon salt
pounds lean ground beef
cups shredded lettuce
cup finely shredded cheddar cheese
cup dairy sour cream and /or guacamole
large sweet onions, sliced (12 to 16 ounces)
tablespoons margarine or melted butter
teaspoons dry mustard
teaspoons honey
pound lean ground beef
teaspoon salt
teaspoon pepper
slices Texas toast
lettuce leaves
tomato slices
Preparing Burgers
In another bowl, combine ground beef with 2
tablespoons of reserved salsa, mix well. Shape
mixture into six 1/2 inch thick burgers and place
on the grill directly over medium heat with lid up.
Grill for 13 to 15 minutes or until no pink remains.
Turn burgers once, halfway through grilling time.
Arrange the shredded lettuce on individual plates.
Top lettuce with a burger, cheddar cheese and
salsa. Serve with sour cream and/or guacamole.
Preparing Onions
Place onions in a cooking pan or on a small piece of
aluminum foil. Combine melted margarine, mustard and
honey, then drizzle over onions. Cover pan with lid or
fold up edges of foil and seal with double fold to
completely enclose onions—leaving space for steam
to build. Place pan or foil packet on grill directly
over medium heat for 15 minutes with the grill lid up.
CHICAGO STYLE HOT DOGS
Serve these hot dogs "Chicago-style" with pickled peppers!
Makes 4 servings.
Ingredients
1/3
1/4
2
2
1/4
4
4
Preparing Burgers
While onions are cooking, combine ground beef, salt and
pepper in a medium bowl and mix well. Shape mixture into
four 3/4 inch burger patties and add to grill, directly over
heat. Grill burgers along with onions for about 5 minutes,
then turn burgers. Grill for 8 to 10 minutes more or until no
pink remains in meat, and onions are tender. To serve,
toast both sides of Texas toast on grill. Then top each
slice of Texas toast with a burger, lettuce, tomato
and onion. Sprinkle with pepper if desired.
cup ketchup
cup chopped pickled peppers
tablespoons pickle relish
tablespoons chopped onion
teaspoon poppy seed
fully cooked 4-ounce jumbo hot dogs
hot dog buns
Preparing the Relish
Combine ketchup, chopped pickled peppers, relish, onion and poppy seed in a small bowl, then set aside.
DOUBLE SALSA BURGERS
Preparing Hot Dogs
A fresh tomato salsa flavors the beef mixture for a zesty
tasting burger. The salsa also serves as a colorful
topping. Makes 6 burger patties.
Place hot dogs on grill directly over medium heat 5
to 8 minutes with the lid up. Turn hot dogs and
brush with some of the relish mixture. Grill hot dogs
6 to 8 minutes more or until thoroughly cooked.
Ingredients
To Serve
1
1/2
1/4
2
1
1
Toast inner sides of hot dog buns on grill. Serve hot dogs
inside buns and top with remaining relish mixture.
large tomato, seeded and finely chopped
cup finely chopped green pepper
cup finely chopped red onion
finely chopped, seeded jalapeno peppers
garlic clove, minced
tablespoon snipped cilantro
31
RIB EYE STEAKS WITH GRILLED GARLIC
Preparation
As they cook, the garlic cloves mellow in flavor, making
a delicious sauce for any grilled meat. And for an
appetizer, spread the softened cloves over toasted slices
of french bread!
Makes 4 servings.
Combine ketchup, pepper, rosemary, basil and
garlic powder. Coat both sides of steak with mixture.
Grill steak with lid up, directly over medium heat
for 6 minutes. Turn steak and grill for 8 to 12
minutes more or until cooked as desired. Cut
into serving size pieces.
Ingredients
1
2
1
1
2
whole head of garlic
tablespoons olive oil or cooking oil
tablespoon snipped fresh basil, or 1/2
teaspoon dried basil, crushed
tablespoon snipped fresh rosemary or 1/2
teaspoon dried rosemary, crushed
twelve-oz. boneless rib eye steaks
BARBECUED RIBS
Serve this tangy barbecue classic with corn-on-the-cob,
green salad, potato salad or coleslaw!
Makes 4 servings.
Ingredients
Preparing the Garlic
2
1/2
1/2
2
Use a cooking pan or tear off a 24x18-inch piece of
aluminum foil and fold long length in half, then trim to
make a 12-inch square. Remove the outer layer of
garlic head, then cut off and discard the top 1/2-inch
of garlic head to expose the garlic cloves. Place
garlic head in center of a cooking pan or in center of
foil with all sides of the foil folded up around the
garlic to form a cup. Drizzle garlic with oil and sprinkle
with basil and rosemary. Cover pan or twist the
ends of the foilto completely enclose the garlic.
pounds American style pork spareribs
cup barbecue sauce
cup tomato sauce
cloves garlic, crushed
juice of 1 lemon
few drops of tobasco sauce
Preparation
Place ribs into a large glass or ceramic dish.
Combine remaining ingredients and pour over
the ribs. Refrigerate for several hours.
Preparing Steaks
Place steaks and the garlic pack on grill directly over
medium heat and cook about 7 minutes with the lid up.
Turn steaks and grill for 5 to 8 minutes more, or until
cooked to taste. Then remove steaks and place on
platter. Remove garlic and drizzle its juices over your
steak. Remove the softened garlic cloves and spread
over your steak. Season with salt and pepper as
desired and cut into serving-size pieces.
Preheat your grill 3 minutes and place the ribs
on cooking grid. Cook indirectly, over a low
to medium heat until cooked. During the last few
minutes of cooking you can cook the ribs over
a direct fire for added barbecue flavor and texture.
HERB-PEPPER SIRLOIN STEAK
The hearty beef flavor is complemented with a
delicious herb coating! Makes 6 servings.
Ingredients
2
tablespoons ketchup
1/2 teaspoon coarsely ground pepper
1 1/2 teaspoons snipped fresh rosemary or 1/2
teaspoon dried rosemary, crushed
1 1/2 teaspoons snipped fresh basil or 1/2 teaspoon
dried basil, crushed
1/8 teaspoon garlic powder
1
1 1/2-pound boneless beef sirloin steak,
cut 1-inch thick
32
MARINATED TUNA STEAK
Preparation
Experiment with unique dishes, like this tuna steak
recipe boasting a delicious wine marinade!
Makes 4 servings.
Combine thawed fish, margarine or butter, lemon
juice, mustard and basil into a cooking pan or
aluminum foil rectangle, and cook directly over low
flame until melted. Brush mixture over both sides of
halibut fish steaks. Pour balance of mixture into
small bowl.
Ingredients
4
1/3
1
1
1
2
1
1/4
6-ounce fresh or frozen tuna steaks cut 1 inch
thick. Thaw fish if frozen
cup dry white wine
tablespoon lemon juice
tablespoon olive oil or cooking oil
clove garlic, minced
teaspoons snipped fresh rosemary, crushed,
or 1/2 teaspoon dried rosemary, crushed
teaspoon snipped fresh oregano, crushed, or
1/4 teaspoon dried oregano, crushed
teaspoon salt
Place clean cooking pan or foil on center of grill with
both outer burners on medium. Place fish on grill
and close lid. Cook indirectly for 8 to 12 minutes or
just until fish begins to flake easily, turning once
and brushing as needed with remaining mixture.
ALMOND COATED TROUT
This delicious recipe is unique and easy to prepare on
your gas grill. Makes 4 servings.
Preparation
Ingredients
Combine wine, oil, garlic, rosemary, oregano and
salt. Place tuna steak in plastic bag and into
shallow dish, add marinade then seal bag. Rotate
bag to coat fish well then chill for up to 2 hours,
turning fish once.
2
1/2
1
1
1/3
Remove fish from bag and discard marinade. Place
a cooking pan with baking rack or roasting rack
into center of grill with outer burners on medium
heat. Cook tuna steak on top of rack with lid
down for 8 to 12 minutes or until fish begins to
flake easily. Turn fish once during cooking.
When cooked, remove fish from grill and serve.
olive or peanut oil for frying
Preparation
Remove the head and tail from trout and fillet all
bones. Cut each fish in half to form 4 long fillets.
Coat fish in flour, dip in egg and roll in almonds.
Refrigerate for 1 hour.
Fill a cooking pan with 1 to 2 inches of oil, and place
over high heat. Cook trout until golden brown.
Drain oil, sprinkle trout with parmesan cheese
and serve right from the grill.
MUSTARD-GLAZED HALIBUT STEAKS
A simple sauce of melted margarine, lemon juice,
Dijon-style mustard and basil adds a scintillating note
to these sizzling fish steaks! Makes 4 servings.
Ingredients
4
2
2
1
2
trout
cup all purpose flour
egg, lightly beaten
cup sliced almonds
cup parmesan cheese, grated
6-ounce fresh or frozen halibut steaks, cut 1
inch thick
tablespoons margarine or butter
tablespoons lemon juice
tablespoon Dijon-style mustard
teaspoons snipped fresh basil or 1/2
teaspoons dried basil, crushed
33
SOUTHWEST CHICKEN BREASTS
BARBECUED CHICKEN
This popular recipe can also be a grilled chicken salad!
Slice chicken into small strips and place them on top
of shredded lettuce with avocado dressing and top with
cheese! Makes 6 servings.
Another backyard favorite, this recipe includes an easy
to make, sweet and spicy sauce.
Makes 4 servings.
Ingredients
Ingredients
1/4
2
2
1/4
6
2
1
1
2
2
1
1
1
1/2 cup ketchup
1/4 cup orange marmalade
1
tablespoon vinegar
1/2 teaspoon celery seed
1/2 teaspoon chili powder
1/4 to 1/2 teaspoon bottled hot pepper sauce
1
2 1/2 to 3 pound broiler-fryer chicken, pre-cut
cup dry white wine
tablespoons olive oil or cooking oil
teaspoons snipped fresh tarragon or 1/4
teaspoon dried tarragon, crushed
teaspoon salt
skinless, boneless chicken breast halves
avocados, pitted, peeled and chopped
tomato, chopped
clove garlic, minced
tablespoons finely chopped seeded
green chili peppers of your choice
green onions, finely chopped
tablespoon snipped fresh cilantro
tablespoon honey
tablespoon lemon juice
Preparing the Sauce
Combine ketchup, marmalade, vinegar, celery seed,
chili powder and hot pepper sauce in a cooking pan,
and cook directly over a low to medium heat.
Leave the cooked sauce in the pan and remove
from heat until chicken is prepared.
Preparing the Chicken
Wash chicken and dry with paper towels. Turn
outside burners on medium and place pre-cut chicken
pieces (bone side down) in center of grill. Close lid
and cook indirectly for 1 hour or until chicken is no
longer pink. Brush occasionally with sauce.
Remove chicken from grill once cooked, then place
cooking pan with sauce into center of grill and
reheat. Pour warmed sauce over chicken and
serve.
Preparing the Chicken
Combine wine, oil, tarragon and salt. Rinse chicken
and dry with paper towels. Place chicken in plastic
bag and into shallow dish—then add marinade and
seal bag. Rotate chicken to coat well and chill up
to 24 hours, turning bag occasionally.
Preparing the Avocado Dressing
Combine avocados, tomato, garlic, chili peppers, onions,
cilantro, honey and lemon juice. Toss well then cover
and chill up to 2 hours.
Grilling the Chicken
Remove the chicken from plastic bag and reserve
the marinade. Grill chicken directly over medium
heat with lid up for 5 minutes. Turn chicken and
brush with marinade, then grill for 5-10 minutes more
or until chicken is no longer pink. Serve with side
of avocado dressing.
34
TRADITIONAL HOLIDAY TURKEY
PIZZA ON THE GRILL
Imagine everyone's surprise when you serve your next
holiday turkey—complete with dressing—delicious and
tender straight from the grill! Serves 8 - 10
You may never want to call out for pizza again! Follow
this pizza dough recipe, or purchase ready-made pizza
dough found in your grocers refrigerated section—next to
the biscuits. Slice and serve directly from the grill.
Serves 6 - 8
Ingredients for Turkey
8 - 10 pound whole turkey
4
ounces butter, softened
2
tablespoons chopped thyme
2
tablespoons lemon juice
2
teaspoons grated lemon rind
Ingredients
1 1/2
1
1/2
3
3
1/4
6
1
3/4
8
Ingredients for Dressing
2
2
8
2
1/4
2
4
ounces butter
onions, finely chopped
ounces bacon, chopped
tablespoons port wine
cup red wine
chicken stock cubes
ounces chopped cashews, hazelnuts or
pecans
1/2 cup chopped celery
1/2 cup chopped carrot
1 - 1 1/2 cups fresh white breadcrumbs
1
egg, lightly beaten
--
teaspoons dried yeast
cup lukewarm water
teaspoon sugar
tablespoons olive oil
cups all purpose flour
cup tomato paste or Italian tomato sauce
ounces sliced pepperoni
red pepper, roasted and sliced
cup pitted black olives
ounces grated mozzarella cheese
It's easy to customize this recipe with toppings to
suit your family's taste. For spicier crust, lightly rub
the dough with olive oil then spice with pepper and
garlic salt before spreading your tomato sauce.
Preparing the Pizza Dough
salt and pepper to taste
Combine yeast, water and sugar together and let
stand in a warm place until mixture starts to foam.
Add this yeast mixture to flour and oil and combine
to form your pizza dough. Knead on a lightly floured
surface until smooth and elastic. Cover and stand in
a warm place until doubled in size. Knock back
dough and roll out to a rectangle the size of your
cooking pan or baking dish. Place dough into a
lightly oiled pan.
Preparing the Dressing
Prepare dressing in a cooking pan directly over medium
heat. Melt butter, add onions and bacon then saute
3 minutes. Add port, red wine and stock cubes and
bring to a boil. Cook 2 minutes. Wear protective gloves
and remove pan to allow ingredients to cool.
Add remaining ingredients and mix.
Preparing the Turkey
If you purchased a ready-made pizza dough, simply
open can and roll dough into a lightly oiled cooking
pan.
Although not required, you may want to preheat your
grill 3 minutes.
Preparing the Pizza
Wash inside of turkey and dry with paper towels. Pack
breadcrumb seasoning into the turkey cavity.
Combine the butter, thyme, lemon juice and
rind together in a bowl. Using turkey baster, insert
butter mixture under skin covering the turkey breast.
Spread tomato paste or Italian tomato sauce on top of
your pizza dough. Top with pepperoni, red peppers,
olives, and lastly, mozzarella cheese. Or if you prefer,
you may place cheese first with toppings on last.
Truss the turkey with string and place it on a baking
pan or roasting rack that rests into a cooking pan.
Remove the cooking grids from your grill if necessary,
then place the cooking pan and turkey in the center of
your grill. Turn one outside burner to low, the other to
medium, and close lid. Cook indirectly for 3 1/2 to
4 hours or until cooked. Halfway through cooking
time you may alternate burner temperatures so that
the turkey browns evenly. Once cooked, remove
dressing from cooked turkey, slice and serve.
Place a cooking pan in center of grill and cook
indirectly, with one outside burner on high and the
other on low, for approximately 20 minutes or until
bottom of crust is light brown. Lastly, raise the lid and
finish cooking pizza by turning burner under the
cooking pan on high for about 2 minutes. This will
insure the center of pizza gets brown. Then turn off
heat, slice and serve directly from pan.
35
FRESH VEGETABLE STIR-FRY
GRILLED POTATO SKINS
Take a trip to the Orient with this easy, and healthy
vegetable recipe. Makes 4 - 6 servings.
Serve these crispy potatoes as a snack or side dish.
We've included microwave instructions for a timesaving
short cut. Makes 12 servings.
Ingredients
2
1
1
2
1
2
1
1/2
Ingredients
tablespoons oil
onion, cut into wedges
carrot, thinly sliced
cups broccoli, cut into small flowerets
red pepper, sliced
sticks celery, thinly sliced
cup snow peas
cup chicken broth
6
3
1/2
1
3
Preparation
Heat oil in a wok or saute pan, directly over a high
heat. Add onion and cook 1 minute. Add carrot
and broccoli and stir-fry 2 minutes, then add
red pepper, celery and snow peas and continue
cooking 1 minute more. Add chicken broth and
toss vegetables until cooked to desired doneness.
1/2
cup sour cream (optional)
Preparation
Puncture clean potatoes with a fork, wrap in
aluminum foil and place directly over low to medium
heat. Close lid and cook directly for 1 hour or until
center is tender. OR - Microwave clean, punctured
potatoes on high for 15 to 20 minutes, or until center
tender. Allow cooked potatoes to cool then
unwrap and discard foil.
Cut potatoes in half - lengthwise. Scoop out potato
pulp (serve separately or discard.) Be sure to leave
1/4-inch thick potato shell remaining. Brush the
inside of each potato shell with melted margarine.
Spoon 2 teaspoons picante sauce into each potato
shell, sprinkle with cheese and top with bacon.
ONION BLOSSOMS
Great served as a snack, or to dress up barbecued
meats, poultry or fish. Makes 4 servings.
Ingredients
4
1
1
1/8
1
1
1
1
baking potatoes (about 8 ounces each)
tablespoons margarine or butter, melted
cup picante sauce
cup shredded cheddar cheese (4 ounces)
slices bacon, crisp-cooked and crumbled
or use prepackaged bacon bits
chopped tomato (optional)
diced green onion (optional)
Place prepared potato skins on grill, directly
over medium heat. Close lid and cook for 8 to 10
minutes or until potato skins are crisp. Sprinkle
each potato skin with tomato and green onion
and then top with sour cream, if desired.
medium sweet onions (4-5 ounces each)
tablespoons margarine or butter, melted
teaspoon Dijon-style mustard
teaspoon hot pepper sauce
tablespoon brown sugar
pepper (optional)
Preparation
Peel onions, then cut almost completely through each
onion, forming 8 wedges. Onion will be loose, but still be
intact. Prepare four 12-inch squares of aluminum foil.
Place one onion in the center of each foil square.
Stir margarine (or butter) with hot pepper sauce and
drizzle over onions. Sprinkle with brown sugar. Then
bring up two sides of foil square and double fold.
Bring remaining corners up and completely
enclose leaving enough space for steam to build.
Place wrapped onion blossoms on grill, directly
over medium heat. Close lid and cook 15 to 25
minutes or until onions are nearly tender. Make a 2-inch
opening at the top of each onion wrapping, then close
lid and cook 5 to 10 minutes more, or until onions
are lightly browned. Sprinkle with pepper if desired
and serve warm.
36