1
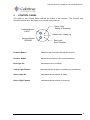
Colortrac Scanner Installation and Operating Manual.
Kings Hall
St Ives Business Park
St Ives
Huntingdon
Cambridgeshire
United Kingdom
PE27 4WY
17301 West Colfax Avenue,
Suite 165 Golden,
CO 80401 USA
Room 4-B1B, Building #7
Section 3, Century City
HaiDian District
Beijing 100089
China
T: +44 (0)1480 464618
F: +44 (0)1480 464620
T: +1 800 533 0165
F: +1 303 973 7092
T:+86(0)1051 988928
F:+86(0)1051 988927
www.colortrac.com
[email protected]
Note: The entire risk of the use or the result of the use of this hardware, software or
documentation remains with the user. No part of this documentation may be reproduced or
transmitted in any means, electronic or mechanical, for any purpose, except with the
express prior written permission Colortrac Ltd.
Colortrac Ltd makes no warranty claims with respect to this documentation and disclaims
any implied warranties of merchantability or fitness for a particular purpose. The information
contained in this document is subject to change without notice. Colortrac Ltd assumes no
responsibility for errors or omissions that may appear in this documentation
REVISION 2.0
© Colortrac 2004
This document should not be copied without prior permission from:
Colortrac Ltd.
Kings Hall
St. Ives Business Park
St. Ives
Huntingdon
Cambridgeshire
PE27 4WY
United Kingdom
Tel: +44 (0) 1480 464618
Fax: +44 (0) 1480 464620
Colortrac Ltd makes no warranty with respect to this documentation and disclaims any
implied warranties of merchantability or fitness for a particular purpose. Information in this
document is subject to change without notice. Colortrac Ltd assumes no responsibility for
errors that may appear in this document.
PAS106
1
Colortrac Scanner Installation and Operating Manual.
TABLE OF CONTENTS
1
INTRODUCTION..................................................................................... 3
2
SAFETY.................................................................................................. 4
3
INSTALLATION ...................................................................................... 5
3.1
3.2
UNPACKING AND INSTALLATION...............................................5
SCANNER CABLING AND SET-UP ................................................5
3.2.1
3.2.2
4
4.1
4.2
4.3
Installation using IEEE 1394/Firewire...........................................................6
Installation using ultra wide SCSI .................................................................6
OPERATION OF SCANNER ................................................................... 7
INITIAL START-UP..........................................................................7
AUTO DOCUMENT FEED ...............................................................7
START SCANNING ..........................................................................7
5
CONTROL PANEL.................................................................................. 8
6
RAISING LID OPERATING INSTRUCTIONS........................................... 9
6.1
6.2
6.3
6.4
7
7.1
7.2
7.3
INTRODUCTION ..............................................................................9
MEDIA TYPES ..................................................................................9
REMOVING THE PAPER GUIDE ASSEMBLY .............................10
FITTING SCANNER APERTURE TAPE ........................................11
MAINTENANCE .................................................................................... 12
LEFT/RIGHT AND FRONT BACK STITCH...................................12
COLOUR CALIBRATION...............................................................12
SERVICE REQUIREMENTS ON TUBES AND LUBRICATION....12
8
TROUBLE SHOOTING.......................................................................... 13
9
SPECIFICATION................................................................................... 15
9.1
9.2
MODEL VARIATION .....................................................................15
COMMON SPECIFICATION ..........................................................21
10
DECLARATION OF CONFORMITY....................................................... 22
PAS106
2
Colortrac Scanner Installation and Operating Manual.
1
INTRODUCTION
Thank you for choosing Colortrac Ltd for your wide-format colour and monochrome
scanning needs.
This manual covers the installation, operation and maintenance of the Colortrac 5480e,
4860e, 4280e, 4260e, 3680e and 3640e range of large format scanners.
Each scanner model requires a host computer running a software package such as the
ScanWorks or CopyWorks PC software. The installation and operation of this software will
be described in a separate User Manual (in PDF format on the Colortrac Software CD).
We recommend that a Colortrac approved technician install the scanner. If you decide to
undertake this yourself the Installation section will provide some guidance on how to do
this. If you have any problems in carrying out the installation please contact your supplier.
In order to achieve the best results from your scanner we recommend that you spend a few
minutes reading the Operation and Maintenance sections of this manual.
Finally we hope that you will have years of productive trouble-free scanning with your new
Colortrac large format scanner.
PAS106
3
Colortrac Scanner Installation and Operating Manual.
2
SAFETY
Electrical Safety
Do not remove any of the cover panels without first disconnecting the power
and waiting for the recommended time written inside the scanner.
General Safety Warnings
FINGER TRAP
There is a danger of trapping fingers between the lid and the ends of the
scanner. Ensure that all hands are clear of the ends of the scanner when
the lid is closed.
ROTATING ROLLERS
The scanner operates two sets of rollers to move the image across the
scanner. These rollers will grip ties and any other similar items of
clothing. Long hair is also a potential hazard if allowed near the
rollers or the scanner mouth during operation of the scanner.
Weight Warning
The scanners can weigh up to 90 Kg and require two people to lift them. No attempt should
be made by a single person to lift the scanner. Suitable clothing and footwear should be
used when lifting the equipment.
Tilt Warning
If weight is applied to the paper feed tray the scanner may tilt if the locking pin is not
inserted. Do not stand or climb on the scanner
Environmental Warning
This equipment is not intended for operation while exposed to extremes of temperature,
excessive dust, moisture, or vibration or to flammable gases, corrosive or explosive
atmospheres or any ingress of water.
EMC Class A
This is a class A product. In a domestic environment this product may cause radio
interference. In such cases the user may be required to take adequate measures. The
“domestic environment” is an environment where the use of broadcast radio and television
receivers may be expected within a distance of 10 metres of the apparatus.
PAS106
4
Colortrac Scanner Installation and Operating Manual.
3
3.1
INSTALLATION
Unpacking and Installation
Please refer to the sheet included in the packaging of your scanner headed:
HOW TO INSTALL YOUR SCANNER
3.2
Scanner Cabling and Set-up
Rear of scanner
Power connector
and switch
SCSI connector and
Firewire connector
Before connecting the scanner to the power supply, please ensure that the local supply is
within the voltage and frequency range specified on the voltage rating plate on the back of
the scanner. The scanner automatically senses the local power supply and requires no
operator setting.
The scanner may be connected to the host computer via the Ultra-Wide SCSI connector or
the IEEE1394 FireWire connector. Colortrac Ltd recommends the use of the FireWire
connector if you are running Windows 2000/XP on the host computer.
PAS106
5
Colortrac Scanner Installation and Operating Manual.
3.2.1
Installation using IEEE 1394/Firewire
IMPORTANT CABLING INFORMATION
WARNING:
Please observe correct polarity of the FireWire IEEE1394
connectors at all times. This will mean taking care when making
the connection between the cable and the scanner and again
when attaching the cable to the FireWire interface on the
computer.
Although the scanner can be ‘hot-plugged’ to the computer when
the scanner and computer are switched on it is not recommended
to remove the FireWire connection during scanning as this may
require the computer to be restarted to re-establish the software
connection.
SERVICE & WARRANTY
If a fault on the scanner can be traced to a failure on the part of the operator to observe the
instructions above then any remedial action involving the replacement of electronics by the
manufacturer or its agent WILL NOT BE COVERED under the terms of the scanner
warranty.
To connect your scanner using FireWire just plug in the supplied Firewire connector to your
host computer. If you are running Windows 2000/XP the computer will automatically detect
the scanner and ask for a driver. This is supplied on the accompanying software CD.
Note: If a FireWire cable is plugged into the scanner the SCSI connector will be disabled.
Do not try and run the scanner from both ports at the same time.
3.2.2
Installation using ultra wide SCSI
The host computer and the scanner should be powered off and an appropriate SCSI cable
used to connect the scanner to the computer. By default the scanner is set to SCSI ID 5. If
your PC is not compatible with this setting please contact your distributor who will be able
to provide assistance.
PAS106
6
Colortrac Scanner Installation and Operating Manual.
4
4.1
OPERATION OF SCANNER
Initial start-up
On power up the amber light will flash for approximately 15 seconds. After this the green
light and also the internal scanner lights will turn on. The scanner is now ready for use. On
initial installation Colortrac Ltd recommends that the scanner has its cameras stitch aligned
(except 3640e) and it is colour calibrated / white normalised. For details on how to do this
see section 6 in this document.
4.2
Auto Document Feed
With the green light on, the automatic document feed system allows documents to be
loaded with the leading edge of the document automatically positioned for the start of a
scan. The document should be placed on the paper tray face down either centre justified or
justified along the guide on the right hand side. Push the document towards the scanner lid
making sure it is square to the scanner. The document will then be detected by the
scanner and automatically loaded.
WARNING:
Care should be taken when using the Auto Document Feed to load original documents as
fragile, damaged or tightly-rolled documents may be damaged during loading or
subsequent scanning. If problems are experienced the feed mechanism can be instantly
halted by depressing either the forward or reverse button on the control panel.
COLORTRAC LTD CAN ACCEPT NO LIABILITY FOR DAMAGE TO ANY DOCUMENT
DURING THE LOADING OR SCANNING PROCESS.
4.3
Start Scanning
The host software initiates the scan. Please refer to the software manual for further
information.
WARNING: DOCUMENTS THAT ARE SENSITIVE TO LIGHT SHOULD NOT BE LEFT IN
THE SCANNER. COLORTRAC LTD ACCEPTS NO LIABILITY FOR DAMAGE TO ANY
DOCUMENT DAMAGED BY LIGHT.
PAS106
7
Colortrac Scanner Installation and Operating Manual.
5
CONTROL PANEL
The lights on the Control Panel indicate the status of the scanner. The Forward and
Reverse buttons allow the paper to be moved in the scanner.
Forward Button
EJECT
Green Light Ready or Scanning
Yellow Light - Warm Up
Reverse Button
REWIND
Red Light Error Condition
Forward Button
Advances the document through the scanner
Reverse Button
Moves the document in the reverse direction
Red Light On
Indicates an error condition
Yellow Light Flashes
Indicates that the scanner is warming up normalising
Green Light On
Indicates that the scanner is ready
Green Light Flashes
Indicates that the scanner is scanning
PAS106
8
Colortrac Scanner Installation and Operating Manual.
6
6.1
RAISING LID OPERATING INSTRUCTIONS
Introduction
These scanners can accept documents up to 12 mm (0.47”) thick. The front levers are
graduated and are adjusted by pushing or pulling the levers to set the required height.
Setting 12 is the highest setting (12mm) and the lowest is 0 suitable for thin paper.
6.2
Media Types
These models as well as scanning paper are designed to scan thick documents like display
panels or documents mounted on rigid foamboard up to a maximum thickness of 12 mm
thick. They can also accept display panels or documents mounted on certain other media
such as 1mm, 3mm and 5mm flexible plastic sheets. Lamination should not present a
problem provided that the overall thickness does not exceed 12 mm.
Beyond these media types caution and common sense should be exercised. For example
do not try to scan a 12 mm thick sheet of steel. Be aware of originals that have sharp
edges as these may cause damage to the scanner. Take care not to scratch the underside
of the lid and the surface of the white paper hold-down assembly. Damaged originals that
are distorted or bent may cause loading and scanning problems .
When scanning very thin media the use of Aperture Scanning Tape is recommended. See
section 6.4
WARNING:
If in any doubt check carefully the scanning process with a less valuable sample of similar
or identical media to ensure that the scanner will not damage the original during the
scanning process.
COLORTRAC LTD ACCEPTS NO LIABILITY FOR DAMAGE TO ANY DOCUMENT
DURING THE LOADING OR SCANNING PROCESS OR DAMAGE TO THE SCANNER
DUE TO SCANNING UNSUITABLE MEDIA.
PAS106
9
Colortrac Scanner Installation and Operating Manual.
6.3
Removing the Paper Guide Assembly
Pull the adjustment levers to the central position - a setting of 5 is fine. Open the lid, pull
and twist the locking pin on each side and carefully raise the assembly upwards from the
fixings. The paper guide assembly can now be lifted out in a rearwards direction.
LOCATING FIXINGS
LOCKING PIN
ADJUSTMENT LEVER
Right-hand side adjustment lever shown. The left-hand side adjustment lever is a mirror
image.
Refitting of the Paper Guide Assembly (also known as the Paper Hold Down or PHD) is the
reversal of the removal procedure.
Note: The adjustment levers should be set back to 5mm again before trying to re-engage
the locking pin.
Always ensure that the locking pins are properly engaged before closing the lid as uneven
pressure applied by this part of the scanner will lead to paper skew and the possibility of
document damage.
PAS106
10
Colortrac Scanner Installation and Operating Manual.
6.4
Fitting Scanner Aperture Tape
This self-adhesive tape is used when scanning thin media which may otherwise catch on
the scan aperture. It is a consumable product and must be removed if scratched. Tape
supplies are available from your distributor or from the Colortrac Technical Support Group.
Peel off backing strips to affix. When removing clean off any glue residue before scanning.
The application of Aperture Tape to the Series 4 Colortrac scanner
PAS106
11
Colortrac Scanner Installation and Operating Manual.
7
7.1
MAINTENANCE
Left/Right and Front Back Stitch
If the scanner has been transported, the alignment of the cameras may need adjusting.
This can be carried out automatically by inserting the auto stitch target centrally (except
4280e models where the target is offset - see markings on target) into the scanner and
selecting the option on the host software to carry out the auto stitch operation. The 3640e
scanners have no auto-stitch function because they are single camera devices.
7.2
Colour Calibration
The scanner may require to be colour calibrated. This ensures that the scanner produces
the correct colours across the scan. This can be carried out automatically by inserting the
Calibration Target into the scanner and selecting the option on the host software to carry
out white balance. The Calibration Target fits over the scan slot and depending on your
firmware revision may be driven during calibration.
Depending on type of target issued the target may be found inside the lid of the scanner.
In order to achieve the best colour response from the scanner it should be left on
continuously.
7.3
Service Requirements on Tubes and Lubrication
The scanner will require a yearly service to ensure that it gives the best performance. The
details of this service can be obtained from your distributor.
PAS106
12
Colortrac Scanner Installation and Operating Manual.
8
TROUBLE SHOOTING
Lights on scanner control panel fail to come on
1.
2.
3.
Check that the power supply is connected to the scanner.
Check that the scanner is switched on.
Check that the SCSI bus is correctly terminated.
Red error light on the display panel indicates a failure during start up
1.
2.
3.
4.
Ensure that the normalisation target is fitted during calibration.
Ensure that the lid is closed.
Recalibrate the scanner.
If the fault persists then a service engineer is required.
Streaks appear on the image
Change the aperture tape if fitted.
If the lines are vertical and continuous re-calibrate the scanner first making sure that the
calibration target is as clean as possible.
Document twists visibly in the scanning plane as it is loaded or during scan
Check lid height setting. Check that neither edge of the document is fouling on the side of
a pinch roller. Move the document left or right prior to loading if necessary.
Document slips when scanning
Reduce scanning speed. If the problem persists, the document may be too heavy or
slippery to be accepted. If the document is light then try mounting it on a less slippery
backing before scanning.
Drive motor stalls when loading
Check for correct height adjustment. If the problem persists, the document may be too
heavy or slippery to be accepted.
Drive motor stalls when scanning
Reduce scanning speed. Check for correct height setting. Check scanner throat is clear
and all surfaces are clean. If the problem persists, then document may be too heavy or
slippery to be accepted.
PAS106
13
Colortrac Scanner Installation and Operating Manual.
contd. . .
There is a vertical discontinuity in the image half way across the whole scanner
width (4260e or 3680e) or 1/3 or 2/3 of the way across the scanner (5480e or 4280e).
Carry out the auto stitch procedure. If this does not solve the problem re-stitch using auto
stitch function with the auto stitch target attached to a piece of media of similar physical
qualities to the document which is being scanned.
There are visible colour artefacts in the image - very noticeable in the horizontal
direction and the scanner stops and starts while scanning.
Use the fractional speed function on the Scanworks software to slow down the document
speed and avoid the motion from stopping and re-starting. With fractional speed set to 4 or
more, stopping and re-starting will not produce any visible artefact.
Horizontal artefacts in the image at approximately 70mm from start or end of
document
Attach 75mm wide strips of similar media to the leading or trailing edges of the document.
See the FAQ (Frequently Asked Questions) area of the Colortrac website at
www.colortrac.com for more help with common software and installation queries.
PAS106
14
Colortrac Scanner Installation and Operating Manual.
9
SPECIFICATION
9.1
Model Variation
Colortrac 5480e
Features
24-bit RGB mode
Selectable white / black point & tone reproduction
8-bit indexed colour palette
8-bit greyscale
4-bit indexed colour palette
1-bit binary (b/w)
Resolution
50 to 400 in 1dpi increments
600 & 2400 dpi
400 dpi optical resolution
Imaging Technology
3 tri-linear CCD cameras
3 x 7500 pixels each
Scan Area
137cm (54”) x unlimited (by scanner).
Scanning Rates at 200 dpi
Mono:
Greyscale:
Colour:
4.5in/sec 1143 mm/sec
4.5in/sec 1143 mm/sec
1.5in/sec 381 mm/sec
These scan rates refer to the capability of the scanner hardware. The actual scan rates to
disk will depend upon host system performance - particularly with high resolution 24-bit
colour scanning.
PAS106
15
Colortrac Scanner Installation and Operating Manual.
Colortrac 4860e
Features
24-bit RGB mode:
Selectable white / black point & tone reproduction
8-bit indexed colour palette
8-bit greyscale
4-bit indexed colour palette
1-bit binary (b/w)
Resolution
50 to 300 in 1dpi increments
450 & 1800 dpi
300 dpi optical resolution
Imaging Technology
2 tri-linear CCD cameras
3 x 7500 pixels each
Scan Area
122 cm (48”) x unlimited (by scanner).
Scanning rates at 300 dpi
Mono:
Greyscale:
Colour:
4.in/sec 1016mm/sec
4.in/sec 1016mm/sec
1.33 in/sec 339mm/sec
These scan rates refer to the capability of the scanner hardware. The actual scan rates to
disk will depend upon host system performance - particularly with high resolution 24-bit
colour scanning.
PAS106
16
Colortrac Scanner Installation and Operating Manual.
Colortrac 4260e
Features
24-bit RGB mode
Selectable white / black point & tone reproduction
8-bit indexed colour palette
8-bit greyscale
4-bit indexed colour palette
1-bit binary (b/w)
Resolution
50 to 300 in 1dpi increments
450 & 1800 dpi
300dpi optical resolution
Imaging Technology
2 tri-linear CCD cameras
7500 pixels each
Scan Area
106 cm (42”) x unlimited ( by scanner )
Scanning rates at 300 dpi
Mono:
Greyscale:
Colour:
4.0in/sec 1016 mm/sec
4.0in/sec 1016 mm/sec
1.33in/sec 339 mm/sec
These scan rates refer to the capability of the scanner hardware. The actual scan rates to
disk will depend upon host system performance - particularly with high resolution 24-bit
colour scanning.
PAS106
17
Colortrac Scanner Installation and Operating Manual.
Colortrac 4280e
Features
24-bit RGB mode
Selectable white / black point & tone reproduction
8-bit indexed colour palette
8-bit greyscale
4-bit indexed colour palette
1-bit binary (b/w)
Resolution
50 to 400 in 1dpi increments
600 & 2400 dpi
400dpi optical resolution
Imaging Technology
3 tri-linear CCD cameras
7500 pixels each
Scan Area
106 cm (42”) x unlimited (by scanner)
Scanning Rates at 300 dpi
Mono:
Greyscale:
Colour:
4.0in/sec 1016 mm/sec
4.0in/sec 1016 mm/sec
1.33in/sec 339 mm/sec
These scan rates refer to the capability of the scanner hardware. The actual scan rates to
disk will depend upon host system performance - particularly with high resolution 24-bit
colour scanning
PAS106
18
Colortrac Scanner Installation and Operating Manual.
Colortrac 3680e
Features
24-bit RGB mode:
Selectable white / black point & tone reproduction
8-bit indexed colour palette
8-bit greyscale
4-bit indexed colour palette
1-bit binary (b/w)
Resolution
50 to 400 in 1dpi increments
600 & 2400 dpi
400 dpi optical resolution
Imaging Technology
2 tri-linear CCD cameras
7500 pixels each
Scan Area
91cm (36”) x unlimited (by scanner)
Scanning rates at 300 dpi
Mono:
Greyscale:
Colour:
3.0in/sec 762mm/sec
3.0in/sec 762mm/sec
1.0in/sec 254mm/sec
These scan rates refer to the capability of the scanner hardware. The actual scan rates to
disk will depend upon host system performance - particularly with high resolution 24-bit
colour scanning.
PAS106
19
Colortrac Scanner Installation and Operating Manual.
Colortrac 3640e
Features
24-bit RGB mode:
Selectable white / black point & tone reproduction
8-bit indexed colour palette
8-bit greyscale
4-bit indexed colour palette
1-bit binary (b/w)
Resolution
50 to 200 in 1dpi increments
300 & 1200 dpi
200 dpi optical resolution
Imaging Technology
1 tri-linear CCD cameras
7500 pixels
Scan Area
91cm (36”) x unlimited (by scanner)
Scanning Rates at 300 dpi
Mono:
Greyscale:
Colour:
1.33in/sec 339mm/sec
1.33in/sec 339mm/sec
4.0in/sec 1016mm/sec
These scan rates refer to the capability of the scanner hardware. The actual scan rates to
disk will depend upon host system performance - particularly with high resolution 24-bit
colour scanning.
PAS106
20
Colortrac Scanner Installation and Operating Manual.
9.2
Common Specification
Document Thickness
12mm maximum
Document Type
Opaque or translucent
Scan System
Primary point digital data capture
Illumination and Optics
Colour balanced twin daylight
blue tubes, apochromatic lenses
Output Modes
8-bit indexed colour palette
4-bit indexed colour palette
24-bit RGB
8-bit greyscale
1-bit error diffused monochrome
1-bit monochrome
Thresholding
2D intelligent adaptive thresholding
Line mode (global thresholding)
Interface
Ultra-Wide SCSI up to 40MB/sec
IEEE 1394 FireWire output (6-pin connector)
Operating Environment
15-30 degrees Centigrade
15-85% relative humidity, non condensing
PAS106
21
Colortrac Scanner Installation and Operating Manual.
10
DECLARATION OF CONFORMITY
Manufacturer:
Colortrac Ltd
Kings Hall
St Ives Business Park
St Ives
Cambridgeshire, PE27 4WY
United Kingdom
Details Of Electrical Equipment
Model Number:
3640e, 3680e, 4260e, 4280e, 4860e, 5480e
Description: Large Format Colour Document Scanner
Directives this equipment complies with:
LVD 73/23/EEC
EMC 89/336/EEC
CE Marking 92/31/EEC
Harmonised standards applied in order to verify compliance with Directive:
BS EN60950:1992
EN55024-1:1998
EN61000-3-2:1995
EN55022 Class A:
This is a class A product. In a domestic environment this product may cause radio
interference in which case the user may be required to take adequate measures
(note 1).
Other Standards Applied:
CFR47:2001 Class A
Test Report Issue by : dB Technology
Year in which CE mark was affixed: 2002
Issued:
15th August 2002
Signed
Graham Tinn
Managing Director
..........................................
Note 1:- The “domestic environment” is an environment where the use of broadcast radio and television receivers may be
expected within a distance of 10 meters of the apparatus concerned.
PAS106
22
Colortrac Scanner Installation and Operating Manual.
PAS106
23
Colortrac Scanner Installation and Operating Manual.
PAS106
24