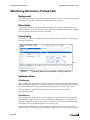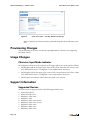
1
R E L E A S E
N O T E S
ShoreTel 9.1
ShoreWare Server
Release Notes
Document and Software Copyrights
Copyright © 1998–2009 by ShoreTel, Inc., Sunnyvale, California, U.S.A. All rights reserved. Printed in
the United States of America. Contents of this publication may not be reproduced or transmitted in any
form or by any means, electronic or mechanical, for any purpose, without prior written authorization of
ShoreTel, Inc.
ShoreTel, Inc. reserves the right to make changes without notice to the specifications and materials
contained herein and shall not be responsible for any damage (including consequential) caused by
reliance on the materials presented, including, but not limited to, typographical, arithmetic, or listing
errors.
Trademarks
Copyright © 2009 ShoreTel. All rights reserved. The ShoreTel logo, ShoreTel, ShoreCare, ShoreGear,
ShoreWare, ShorePhone and ControlPoint are registered trademarks of ShoreTel, Inc. in the United
States and/or other countries. Specifications are subject to change without notice.
Microsoft, Windows, Windows NT, and ActiveX are either registered trademarks or trademarks of
Microsoft Corporation in the United States and/or other countries. VxWorks is a trademark of Wind
River Systems. All other copyrights and trademarks herein are the property of their respective owners.
Patents
This product is covered by one or more of the following patents: United States patent 6,996,059, United
States patent 7,003,091, United States patent 7,167,486, United States patent 7,379,540, and United
States patent 7,386,114. ShoreTel, Inc. All rights reserved. ShoreTel, Inc. All rights reserved.
Version Information
ShoreWare Server Release Notes
Release Version 9.1
Revision GA - RN_91a_20090513 -1
Part Number: 800-1306-01
Date: May 20, 2009
Company Information
ShoreTel, Inc.
960 Stewart Drive
Sunnyvale, California 94085 USA
+1.408.331.3300
+1.408.331.3333 (fax)
www.shoretel.com
Table of Contents
System Specifications. . . . . . . . . . . . . . . . . . . . . . . . . . . . . . . . . . . . . . . . . . . 11
System Specifications . . . . . . . . . . . . . . . . . . . . . . . . . . . . . . . . . . . . . . . . . . . . . . . . . . 13
Hardware and Software Requirements . . . . . . . . . . . . . . . . . . . . . . . . . . . . . . . . . . . . . . . . . . . . . . . . 13
Server Device Requirements. . . . . . . . . . . . . . . . . . . . . . . . . . . . . . . . . . . . . . . . . . . . . . . . . . . . . . . . 13
Client Device Requirements . . . . . . . . . . . . . . . . . . . . . . . . . . . . . . . . . . . . . . . . . . . . . . . . . . . . . . . . 14
Director and ShoreWare Web Access Requirements . . . . . . . . . . . . . . . . . . . . . . . . . . . . . . . . . . . . . 15
Supported Devices . . . . . . . . . . . . . . . . . . . . . . . . . . . . . . . . . . . . . . . . . . . . . . . . . . . . . . . . . . . . . . . 15
ShoreGear Switches . . . . . . . . . . . . . . . . . . . . . . . . . . . . . . . . . . . . . . . . . . . . . . . . . . . . . . . . . . . . . . 15
ShorePhone Telephones . . . . . . . . . . . . . . . . . . . . . . . . . . . . . . . . . . . . . . . . . . . . . . . . . . . . . . . . . . . 16
Upgrade Paths and Application Support. . . . . . . . . . . . . . . . . . . . . . . . . . . . . . . . . . . . . . . . . . . . . . . 16
Upgrade Path . . . . . . . . . . . . . . . . . . . . . . . . . . . . . . . . . . . . . . . . . . . . . . . . . . . . . . . . . . . . . . . . . . . 16
Email Integration . . . . . . . . . . . . . . . . . . . . . . . . . . . . . . . . . . . . . . . . . . . . . . . . . . . . . . . . . . . . . . . . 16
Converged Conferencing . . . . . . . . . . . . . . . . . . . . . . . . . . . . . . . . . . . . . . . . . . . . . . . . . . . . . . . . . . 16
Contact Center . . . . . . . . . . . . . . . . . . . . . . . . . . . . . . . . . . . . . . . . . . . . . . . . . . . . . . . . . . . . . . . . . . 17
SIP-BRI 8 . . . . . . . . . . . . . . . . . . . . . . . . . . . . . . . . . . . . . . . . . . . . . . . . . . . . . . . . . . . . . . . . . . . . . . 17
SIP Devices . . . . . . . . . . . . . . . . . . . . . . . . . . . . . . . . . . . . . . . . . . . . . . . . . . . . . . . . . . . . . . . . . . . . . 17
Character Sets . . . . . . . . . . . . . . . . . . . . . . . . . . . . . . . . . . . . . . . . . . . . . . . . . . . . . . . . . . . . . . . . . . 17
Codecs . . . . . . . . . . . . . . . . . . . . . . . . . . . . . . . . . . . . . . . . . . . . . . . . . . . . . . . . . . . . . . . . . . . . . . . . 17
System Capacity . . . . . . . . . . . . . . . . . . . . . . . . . . . . . . . . . . . . . . . . . . . . . . . . . . . . . . . . . . . . . . . . . 17
ShoreTel 9.1 Feature Set . . . . . . . . . . . . . . . . . . . . . . . . . . . . . . . . . . . . . . . . 19
Windows Server 2008 Support . . . . . . . . . . . . . . . . . . . . . . . . . . . . . . . . . . . . . . . . . . . 21
Introduction . . . . . . . . . . . . . . . . . . . . . . . . . . . . . . . . . . . . . . . . . . . . . . . . . . . . . . . . . . . . . . . . . . . . 21
Background . . . . . . . . . . . . . . . . . . . . . . . . . . . . . . . . . . . . . . . . . . . . . . . . . . . . . . . . . . . . . . . . . . . . 21
Terms . . . . . . . . . . . . . . . . . . . . . . . . . . . . . . . . . . . . . . . . . . . . . . . . . . . . . . . . . . . . . . . . . . . . . . . . . 21
Implementation. . . . . . . . . . . . . . . . . . . . . . . . . . . . . . . . . . . . . . . . . . . . . . . . . . . . . . . . . . . . . . . . . . 21
Installation Requirements . . . . . . . . . . . . . . . . . . . . . . . . . . . . . . . . . . . . . . . . . . . . . . . . . . . . . . . . . 21
Upgrading ShoreWare Servers from Windows 2003 to Windows 2008 . . . . . . . . . . . . . . . . . . . . . . 27
Upgrading ShoreWare Distributed Voicemail Server from Windows 2003 to Windows 2008 . . . . . 31
Call Manager on 64-Bit Vista . . . . . . . . . . . . . . . . . . . . . . . . . . . . . . . . . . . . . . . . . . . . 35
Introduction . . . . . . . . . . . . . . . . . . . . . . . . . . . . . . . . . . . . . . . . . . . . . . . . . . . . . . . . . . . . . . . . . . . . 35
Background . . . . . . . . . . . . . . . . . . . . . . . . . . . . . . . . . . . . . . . . . . . . . . . . . . . . . . . . . . . . . . . . . . . . 35
Description . . . . . . . . . . . . . . . . . . . . . . . . . . . . . . . . . . . . . . . . . . . . . . . . . . . . . . . . . . . . . . . . . . . . . 35
Implementation. . . . . . . . . . . . . . . . . . . . . . . . . . . . . . . . . . . . . . . . . . . . . . . . . . . . . . . . . . . . . . . . . . 35
Single Sign On – Instant Messaging . . . . . . . . . . . . . . . . . . . . . . . . . . . . . . . . . . . . . . . 37
Introduction . . . . . . . . . . . . . . . . . . . . . . . . . . . . . . . . . . . . . . . . . . . . . . . . . . . . . . . . . . . . . . . . . . . . 37
Background . . . . . . . . . . . . . . . . . . . . . . . . . . . . . . . . . . . . . . . . . . . . . . . . . . . . . . . . . . . . . . . . . . . . 37
Terms . . . . . . . . . . . . . . . . . . . . . . . . . . . . . . . . . . . . . . . . . . . . . . . . . . . . . . . . . . . . . . . . . . . . . . . . . 37
Implementation. . . . . . . . . . . . . . . . . . . . . . . . . . . . . . . . . . . . . . . . . . . . . . . . . . . . . . . . . . . . . . . . . . 37
SIP Header Enhancement – Integration with 911 Enable . . . . . . . . . . . . . . . . . . . . . . . 39
Introduction . . . . . . . . . . . . . . . . . . . . . . . . . . . . . . . . . . . . . . . . . . . . . . . . . . . . . . . . . . . . . . . . . . . . 39
Background . . . . . . . . . . . . . . . . . . . . . . . . . . . . . . . . . . . . . . . . . . . . . . . . . . . . . . . . . . . . . . . . . . . . 39
ShoreTel 9.1
Page 3
Table of Contents
ShoreWare Server Release Notes
Terms . . . . . . . . . . . . . . . . . . . . . . . . . . . . . . . . . . . . . . . . . . . . . . . . . . . . . . . . . . . . . . . . . . . . . . . . . 39
Description . . . . . . . . . . . . . . . . . . . . . . . . . . . . . . . . . . . . . . . . . . . . . . . . . . . . . . . . . . . . . . . . . . . . . 40
Shared Call Appearance . . . . . . . . . . . . . . . . . . . . . . . . . . . . . . . . . . . . . . . . . . . . . . . . 41
Introduction . . . . . . . . . . . . . . . . . . . . . . . . . . . . . . . . . . . . . . . . . . . . . . . . . . . . . . . . . . . . . . . . . . . . 41
Definition . . . . . . . . . . . . . . . . . . . . . . . . . . . . . . . . . . . . . . . . . . . . . . . . . . . . . . . . . . . . . . . . . . . . . . 41
Background . . . . . . . . . . . . . . . . . . . . . . . . . . . . . . . . . . . . . . . . . . . . . . . . . . . . . . . . . . . . . . . . . . . . 41
Terms . . . . . . . . . . . . . . . . . . . . . . . . . . . . . . . . . . . . . . . . . . . . . . . . . . . . . . . . . . . . . . . . . . . . . . . . . 41
Description . . . . . . . . . . . . . . . . . . . . . . . . . . . . . . . . . . . . . . . . . . . . . . . . . . . . . . . . . . . . . . . . . . . . . 42
Synopsis . . . . . . . . . . . . . . . . . . . . . . . . . . . . . . . . . . . . . . . . . . . . . . . . . . . . . . . . . . . . . . . . . . . . . . . 42
Feature Components . . . . . . . . . . . . . . . . . . . . . . . . . . . . . . . . . . . . . . . . . . . . . . . . . . . . . . . . . . . . . 42
Feature Limitations . . . . . . . . . . . . . . . . . . . . . . . . . . . . . . . . . . . . . . . . . . . . . . . . . . . . . . . . . . . . . . 45
Implementation. . . . . . . . . . . . . . . . . . . . . . . . . . . . . . . . . . . . . . . . . . . . . . . . . . . . . . . . . . . . . . . . . . 45
Configuring . . . . . . . . . . . . . . . . . . . . . . . . . . . . . . . . . . . . . . . . . . . . . . . . . . . . . . . . . . . . . . . . . . . . 46
Using Shared Call Appearance . . . . . . . . . . . . . . . . . . . . . . . . . . . . . . . . . . . . . . . . . . . . . . . . . . . . . 46
Silent Coach . . . . . . . . . . . . . . . . . . . . . . . . . . . . . . . . . . . . . . . . . . . . . . . . . . . . . . . . . 49
Introduction . . . . . . . . . . . . . . . . . . . . . . . . . . . . . . . . . . . . . . . . . . . . . . . . . . . . . . . . . . . . . . . . . . . . 49
Definition . . . . . . . . . . . . . . . . . . . . . . . . . . . . . . . . . . . . . . . . . . . . . . . . . . . . . . . . . . . . . . . . . . . . . . 49
Background . . . . . . . . . . . . . . . . . . . . . . . . . . . . . . . . . . . . . . . . . . . . . . . . . . . . . . . . . . . . . . . . . . . . 49
Terms . . . . . . . . . . . . . . . . . . . . . . . . . . . . . . . . . . . . . . . . . . . . . . . . . . . . . . . . . . . . . . . . . . . . . . . . . 49
Description . . . . . . . . . . . . . . . . . . . . . . . . . . . . . . . . . . . . . . . . . . . . . . . . . . . . . . . . . . . . . . . . . . . . . 50
Synopsis . . . . . . . . . . . . . . . . . . . . . . . . . . . . . . . . . . . . . . . . . . . . . . . . . . . . . . . . . . . . . . . . . . . . . . . 50
Implementation. . . . . . . . . . . . . . . . . . . . . . . . . . . . . . . . . . . . . . . . . . . . . . . . . . . . . . . . . . . . . . . . . . 51
Configuring Silent Coach Permissions . . . . . . . . . . . . . . . . . . . . . . . . . . . . . . . . . . . . . . . . . . . . . . . . 51
Enabling the Silent Coach Warning Tone . . . . . . . . . . . . . . . . . . . . . . . . . . . . . . . . . . . . . . . . . . . . . 52
Configuring Silent Coach buttons . . . . . . . . . . . . . . . . . . . . . . . . . . . . . . . . . . . . . . . . . . . . . . . . . . . 52
Performing a Silent Coach Operation . . . . . . . . . . . . . . . . . . . . . . . . . . . . . . . . . . . . . . . . . . . . . . . . . 53
Call Manager . . . . . . . . . . . . . . . . . . . . . . . . . . . . . . . . . . . . . . . . . . . . . . . . . . . . . . . . . . . . . . . . . . . 53
IP Phone . . . . . . . . . . . . . . . . . . . . . . . . . . . . . . . . . . . . . . . . . . . . . . . . . . . . . . . . . . . . . . . . . . . . . . . 55
Hotline. . . . . . . . . . . . . . . . . . . . . . . . . . . . . . . . . . . . . . . . . . . . . . . . . . . . . . . . . . . . . . 57
Introduction . . . . . . . . . . . . . . . . . . . . . . . . . . . . . . . . . . . . . . . . . . . . . . . . . . . . . . . . . . . . . . . . . . . . 57
Definition . . . . . . . . . . . . . . . . . . . . . . . . . . . . . . . . . . . . . . . . . . . . . . . . . . . . . . . . . . . . . . . . . . . . . . 57
Background . . . . . . . . . . . . . . . . . . . . . . . . . . . . . . . . . . . . . . . . . . . . . . . . . . . . . . . . . . . . . . . . . . . . 57
Terms . . . . . . . . . . . . . . . . . . . . . . . . . . . . . . . . . . . . . . . . . . . . . . . . . . . . . . . . . . . . . . . . . . . . . . . . . 57
Implementation. . . . . . . . . . . . . . . . . . . . . . . . . . . . . . . . . . . . . . . . . . . . . . . . . . . . . . . . . . . . . . . . . . 57
Configuration . . . . . . . . . . . . . . . . . . . . . . . . . . . . . . . . . . . . . . . . . . . . . . . . . . . . . . . . . . . . . . . . . . . 57
Usage . . . . . . . . . . . . . . . . . . . . . . . . . . . . . . . . . . . . . . . . . . . . . . . . . . . . . . . . . . . . . . . . . . . . . . . . . 58
Feature Limitations . . . . . . . . . . . . . . . . . . . . . . . . . . . . . . . . . . . . . . . . . . . . . . . . . . . . . . . . . . . . . . 58
Mobile Call Manager – Device Support Enhancements. . . . . . . . . . . . . . . . . . . . . . . . . 59
Introduction . . . . . . . . . . . . . . . . . . . . . . . . . . . . . . . . . . . . . . . . . . . . . . . . . . . . . . . . . . . . . . . . . . . . 59
Definition . . . . . . . . . . . . . . . . . . . . . . . . . . . . . . . . . . . . . . . . . . . . . . . . . . . . . . . . . . . . . . . . . . . . . . 59
Feature Support . . . . . . . . . . . . . . . . . . . . . . . . . . . . . . . . . . . . . . . . . . . . . . . . . . . . . . . . . . . . . . . . . 59
Location Based Services . . . . . . . . . . . . . . . . . . . . . . . . . . . . . . . . . . . . . . . . . . . . . . . . . . . . . . . . . . . 59
Voicemail Preview . . . . . . . . . . . . . . . . . . . . . . . . . . . . . . . . . . . . . . . . . . . . . . . . . . . . . . . . . . . . . . . 59
PIM Integration . . . . . . . . . . . . . . . . . . . . . . . . . . . . . . . . . . . . . . . . . . . . . . . . . . . . . . . . . . . . . . . . . 59
Default Network Speed Setting . . . . . . . . . . . . . . . . . . . . . . . . . . . . . . . . . . . . . . . . . . . . . . . . . . . . . 59
Fonts. . . . . . . . . . . . . . . . . . . . . . . . . . . . . . . . . . . . . . . . . . . . . . . . . . . . . . . . . . . . . . . . . . . . . . . . . . 59
Page 4
ShoreWare Server Release Notes
Table of Contents
ShoreTel 9 – System Features . . . . . . . . . . . . . . . . . . . . . . . . . . . . . . . . . . . . 61
Active Directory . . . . . . . . . . . . . . . . . . . . . . . . . . . . . . . . . . . . . . . . . . . . . . . . . . . . . . 63
Introduction . . . . . . . . . . . . . . . . . . . . . . . . . . . . . . . . . . . . . . . . . . . . . . . . . . . . . . . . . . . . . . . . . . . . 63
Description . . . . . . . . . . . . . . . . . . . . . . . . . . . . . . . . . . . . . . . . . . . . . . . . . . . . . . . . . . . . . . . . . . . . . 63
Active Directory Implementation . . . . . . . . . . . . . . . . . . . . . . . . . . . . . . . . . . . . . . . . . . . . . . . . . . . . 63
Enabling AD Integration on a ShoreTel System. . . . . . . . . . . . . . . . . . . . . . . . . . . . . . . . . . . . . . . . . 64
Configuring AD on a New System . . . . . . . . . . . . . . . . . . . . . . . . . . . . . . . . . . . . . . . . . . . . . . . . . . . 64
Mapping Active Directory Attributes to ShoreTel Fields . . . . . . . . . . . . . . . . . . . . . . . . . . . . . . . . . . 65
Authenticating AD Users . . . . . . . . . . . . . . . . . . . . . . . . . . . . . . . . . . . . . . . . . . . . . . . . . . . . . . . . . . 66
Director . . . . . . . . . . . . . . . . . . . . . . . . . . . . . . . . . . . . . . . . . . . . . . . . . . . . . . . . . . . . . . . . . . . . . . . 66
Call Manager . . . . . . . . . . . . . . . . . . . . . . . . . . . . . . . . . . . . . . . . . . . . . . . . . . . . . . . . . . . . . . . . . . . 67
Web Client . . . . . . . . . . . . . . . . . . . . . . . . . . . . . . . . . . . . . . . . . . . . . . . . . . . . . . . . . . . . . . . . . . . . . 68
Synchronizing AD and Director User Records . . . . . . . . . . . . . . . . . . . . . . . . . . . . . . . . . . . . . . . . . . 69
Enabling AD for a ShoreTel User. . . . . . . . . . . . . . . . . . . . . . . . . . . . . . . . . . . . . . . . . . . . . . . . . . . . 69
Updating AD Fields . . . . . . . . . . . . . . . . . . . . . . . . . . . . . . . . . . . . . . . . . . . . . . . . . . . . . . . . . . . . . . 69
Removing AD Users . . . . . . . . . . . . . . . . . . . . . . . . . . . . . . . . . . . . . . . . . . . . . . . . . . . . . . . . . . . . . . 69
Bulk Provisioning of User Accounts . . . . . . . . . . . . . . . . . . . . . . . . . . . . . . . . . . . . . . . . . . . . . . . . . . 70
Exporting AD Records . . . . . . . . . . . . . . . . . . . . . . . . . . . . . . . . . . . . . . . . . . . . . . . . . . . . . . . . . . . . 70
Importing the CSV File. . . . . . . . . . . . . . . . . . . . . . . . . . . . . . . . . . . . . . . . . . . . . . . . . . . . . . . . . . . . 71
LLDP / 802.1x . . . . . . . . . . . . . . . . . . . . . . . . . . . . . . . . . . . . . . . . . . . . . . . . . . . . . . . . 73
Introduction . . . . . . . . . . . . . . . . . . . . . . . . . . . . . . . . . . . . . . . . . . . . . . . . . . . . . . . . . . . . . . . . . . . . 73
LLDP-MED . . . . . . . . . . . . . . . . . . . . . . . . . . . . . . . . . . . . . . . . . . . . . . . . . . . . . . . . . . . . . . . . . . . . . 73
Feature Description . . . . . . . . . . . . . . . . . . . . . . . . . . . . . . . . . . . . . . . . . . . . . . . . . . . . . . . . . . . . . . 73
Implementation. . . . . . . . . . . . . . . . . . . . . . . . . . . . . . . . . . . . . . . . . . . . . . . . . . . . . . . . . . . . . . . . . . 73
802.1x . . . . . . . . . . . . . . . . . . . . . . . . . . . . . . . . . . . . . . . . . . . . . . . . . . . . . . . . . . . . . . . . . . . . . . . . . 74
Feature Description . . . . . . . . . . . . . . . . . . . . . . . . . . . . . . . . . . . . . . . . . . . . . . . . . . . . . . . . . . . . . . 74
Implementation. . . . . . . . . . . . . . . . . . . . . . . . . . . . . . . . . . . . . . . . . . . . . . . . . . . . . . . . . . . . . . . . . . 74
Unicode Character Set Support. . . . . . . . . . . . . . . . . . . . . . . . . . . . . . . . . . . . . . . . . . . 75
Introduction . . . . . . . . . . . . . . . . . . . . . . . . . . . . . . . . . . . . . . . . . . . . . . . . . . . . . . . . . . . . . . . . . . . . 75
Feature Description . . . . . . . . . . . . . . . . . . . . . . . . . . . . . . . . . . . . . . . . . . . . . . . . . . . . . . . . . . . . . . 75
Implementation. . . . . . . . . . . . . . . . . . . . . . . . . . . . . . . . . . . . . . . . . . . . . . . . . . . . . . . . . . . . . . . . . . 75
Usage Information. . . . . . . . . . . . . . . . . . . . . . . . . . . . . . . . . . . . . . . . . . . . . . . . . . . . . . . . . . . . . . . . 75
SRTP-AES . . . . . . . . . . . . . . . . . . . . . . . . . . . . . . . . . . . . . . . . . . . . . . . . . . . . . . . . . . . 77
Introduction . . . . . . . . . . . . . . . . . . . . . . . . . . . . . . . . . . . . . . . . . . . . . . . . . . . . . . . . . . . . . . . . . . . . 77
Definition . . . . . . . . . . . . . . . . . . . . . . . . . . . . . . . . . . . . . . . . . . . . . . . . . . . . . . . . . . . . . . . . . . . . . . 77
History . . . . . . . . . . . . . . . . . . . . . . . . . . . . . . . . . . . . . . . . . . . . . . . . . . . . . . . . . . . . . . . . . . . . . . . . 77
Background . . . . . . . . . . . . . . . . . . . . . . . . . . . . . . . . . . . . . . . . . . . . . . . . . . . . . . . . . . . . . . . . . . . . 77
SRTP-AES Description . . . . . . . . . . . . . . . . . . . . . . . . . . . . . . . . . . . . . . . . . . . . . . . . . . . . . . . . . . . . 78
System Support. . . . . . . . . . . . . . . . . . . . . . . . . . . . . . . . . . . . . . . . . . . . . . . . . . . . . . . . . . . . . . . . . . 78
Devices . . . . . . . . . . . . . . . . . . . . . . . . . . . . . . . . . . . . . . . . . . . . . . . . . . . . . . . . . . . . . . . . . . . . . . . . 78
Installation and Upgrades . . . . . . . . . . . . . . . . . . . . . . . . . . . . . . . . . . . . . . . . . . . . . . . . . . . . . . . . . . 79
Provisioning . . . . . . . . . . . . . . . . . . . . . . . . . . . . . . . . . . . . . . . . . . . . . . . . . . . . . . . . . . . . . . . . . . . . 79
Disaster Recovery Enhancements . . . . . . . . . . . . . . . . . . . . . . . . . . . . . . . . . . . . . . . . . 81
Introduction . . . . . . . . . . . . . . . . . . . . . . . . . . . . . . . . . . . . . . . . . . . . . . . . . . . . . . . . . . . . . . . . . . . . 81
Description . . . . . . . . . . . . . . . . . . . . . . . . . . . . . . . . . . . . . . . . . . . . . . . . . . . . . . . . . . . . . . . . . . . . . 81
Conditions during the Failover and Failback Operations . . . . . . . . . . . . . . . . . . . . . . . . . . . . . . . . . 81
System Failover Conditions . . . . . . . . . . . . . . . . . . . . . . . . . . . . . . . . . . . . . . . . . . . . . . . . . . . . . . . . 82
System Failback Conditions . . . . . . . . . . . . . . . . . . . . . . . . . . . . . . . . . . . . . . . . . . . . . . . . . . . . . . . . 82
Implementation. . . . . . . . . . . . . . . . . . . . . . . . . . . . . . . . . . . . . . . . . . . . . . . . . . . . . . . . . . . . . . . . . . 82
ShoreTel 9.1
Page 5
Table of Contents
ShoreWare Server Release Notes
Server Address Configuration . . . . . . . . . . . . . . . . . . . . . . . . . . . . . . . . . . . . . . . . . . . . . . . . . . . . . . 82
System Failover Requirements . . . . . . . . . . . . . . . . . . . . . . . . . . . . . . . . . . . . . . . . . . . . . . . . . . . . . . 83
System Failback Requirements. . . . . . . . . . . . . . . . . . . . . . . . . . . . . . . . . . . . . . . . . . . . . . . . . . . . . . 83
CDR Reports – Codecs . . . . . . . . . . . . . . . . . . . . . . . . . . . . . . . . . . . . . . . . . . . . . . . . . 85
Introduction . . . . . . . . . . . . . . . . . . . . . . . . . . . . . . . . . . . . . . . . . . . . . . . . . . . . . . . . . . . . . . . . . . . . 85
Definition . . . . . . . . . . . . . . . . . . . . . . . . . . . . . . . . . . . . . . . . . . . . . . . . . . . . . . . . . . . . . . . . . . . . . . 85
Background . . . . . . . . . . . . . . . . . . . . . . . . . . . . . . . . . . . . . . . . . . . . . . . . . . . . . . . . . . . . . . . . . . . . 85
Implementation. . . . . . . . . . . . . . . . . . . . . . . . . . . . . . . . . . . . . . . . . . . . . . . . . . . . . . . . . . . . . . . . . . 85
Failover . . . . . . . . . . . . . . . . . . . . . . . . . . . . . . . . . . . . . . . . . . . . . . . . . . . . . . . . . . . . . 87
Introduction . . . . . . . . . . . . . . . . . . . . . . . . . . . . . . . . . . . . . . . . . . . . . . . . . . . . . . . . . . . . . . . . . . . . 87
Definition . . . . . . . . . . . . . . . . . . . . . . . . . . . . . . . . . . . . . . . . . . . . . . . . . . . . . . . . . . . . . . . . . . . . . . 87
IP Phone Operation . . . . . . . . . . . . . . . . . . . . . . . . . . . . . . . . . . . . . . . . . . . . . . . . . . . . . . . . . . . . . . 87
IP Phone Calls Continue Through Failover . . . . . . . . . . . . . . . . . . . . . . . . . . . . . . . . . . . . . . . . . . . . 88
Feature Description . . . . . . . . . . . . . . . . . . . . . . . . . . . . . . . . . . . . . . . . . . . . . . . . . . . . . . . . . . . . . . 88
IP Phone Behavior during Failover . . . . . . . . . . . . . . . . . . . . . . . . . . . . . . . . . . . . . . . . . . . . . . . . . . 89
Restrictions. . . . . . . . . . . . . . . . . . . . . . . . . . . . . . . . . . . . . . . . . . . . . . . . . . . . . . . . . . . . . . . . . . . . . 89
Spare Switch Failover . . . . . . . . . . . . . . . . . . . . . . . . . . . . . . . . . . . . . . . . . . . . . . . . . . . . . . . . . . . . . 89
Background . . . . . . . . . . . . . . . . . . . . . . . . . . . . . . . . . . . . . . . . . . . . . . . . . . . . . . . . . . . . . . . . . . . . 89
Feature Description . . . . . . . . . . . . . . . . . . . . . . . . . . . . . . . . . . . . . . . . . . . . . . . . . . . . . . . . . . . . . . 89
Implementation. . . . . . . . . . . . . . . . . . . . . . . . . . . . . . . . . . . . . . . . . . . . . . . . . . . . . . . . . . . . . . . . . . 90
Provisioning – Director . . . . . . . . . . . . . . . . . . . . . . . . . . . . . . . . . . . . . . . . . . . . . . . . . . . . . . . . . . . 91
Call Manager on 64-bit Windows Terminal Server . . . . . . . . . . . . . . . . . . . . . . . . . . . . 93
Introduction . . . . . . . . . . . . . . . . . . . . . . . . . . . . . . . . . . . . . . . . . . . . . . . . . . . . . . . . . . . . . . . . . . . . 93
Description . . . . . . . . . . . . . . . . . . . . . . . . . . . . . . . . . . . . . . . . . . . . . . . . . . . . . . . . . . . . . . . . . . . . . 93
Implementation. . . . . . . . . . . . . . . . . . . . . . . . . . . . . . . . . . . . . . . . . . . . . . . . . . . . . . . . . . . . . . . . . . 93
Initial Call Manager Installation . . . . . . . . . . . . . . . . . . . . . . . . . . . . . . . . . . . . . . . . . . . . . . . . . . . . 93
Upgrading Call Manager on WTS 64-bit . . . . . . . . . . . . . . . . . . . . . . . . . . . . . . . . . . . . . . . . . . . . . . 93
ShoreTel 9 – Director Enhancements. . . . . . . . . . . . . . . . . . . . . . . . . . . . . . . 95
DiffServ / ToS Support . . . . . . . . . . . . . . . . . . . . . . . . . . . . . . . . . . . . . . . . . . . . . . . . . 97
Introduction . . . . . . . . . . . . . . . . . . . . . . . . . . . . . . . . . . . . . . . . . . . . . . . . . . . . . . . . . . . . . . . . . . . . 97
Definition . . . . . . . . . . . . . . . . . . . . . . . . . . . . . . . . . . . . . . . . . . . . . . . . . . . . . . . . . . . . . . . . . . . . . . 97
Description . . . . . . . . . . . . . . . . . . . . . . . . . . . . . . . . . . . . . . . . . . . . . . . . . . . . . . . . . . . . . . . . . . . . . 97
Implementation. . . . . . . . . . . . . . . . . . . . . . . . . . . . . . . . . . . . . . . . . . . . . . . . . . . . . . . . . . . . . . . . . . 97
Voice Packet Marking. . . . . . . . . . . . . . . . . . . . . . . . . . . . . . . . . . . . . . . . . . . . . . . . . . . . . . . . . . . . . 97
Video Packet Marking . . . . . . . . . . . . . . . . . . . . . . . . . . . . . . . . . . . . . . . . . . . . . . . . . . . . . . . . . . . . 97
Support of 256 Workgroups . . . . . . . . . . . . . . . . . . . . . . . . . . . . . . . . . . . . . . . . . . . . . 99
Introduction . . . . . . . . . . . . . . . . . . . . . . . . . . . . . . . . . . . . . . . . . . . . . . . . . . . . . . . . . . . . . . . . . . . . 99
Definition . . . . . . . . . . . . . . . . . . . . . . . . . . . . . . . . . . . . . . . . . . . . . . . . . . . . . . . . . . . . . . . . . . . . . . 99
Background . . . . . . . . . . . . . . . . . . . . . . . . . . . . . . . . . . . . . . . . . . . . . . . . . . . . . . . . . . . . . . . . . . . . 99
Implementation. . . . . . . . . . . . . . . . . . . . . . . . . . . . . . . . . . . . . . . . . . . . . . . . . . . . . . . . . . . . . . . . . . 99
SIP Trunk Profiles . . . . . . . . . . . . . . . . . . . . . . . . . . . . . . . . . . . . . . . . . . . . . . . . . . . . 101
Introduction . . . . . . . . . . . . . . . . . . . . . . . . . . . . . . . . . . . . . . . . . . . . . . . . . . . . . . . . . . . . . . . . . . . 101
Definition . . . . . . . . . . . . . . . . . . . . . . . . . . . . . . . . . . . . . . . . . . . . . . . . . . . . . . . . . . . . . . . . . . . . . 101
Panel Description . . . . . . . . . . . . . . . . . . . . . . . . . . . . . . . . . . . . . . . . . . . . . . . . . . . . . . . . . . . . . . . 101
Implementation. . . . . . . . . . . . . . . . . . . . . . . . . . . . . . . . . . . . . . . . . . . . . . . . . . . . . . . . . . . . . . . . . 102
Page 6
ShoreWare Server Release Notes
Table of Contents
DID Enhancements . . . . . . . . . . . . . . . . . . . . . . . . . . . . . . . . . . . . . . . . . . . . . . . . . . . 105
Introduction . . . . . . . . . . . . . . . . . . . . . . . . . . . . . . . . . . . . . . . . . . . . . . . . . . . . . . . . . . . . . . . . . . . 105
Definition . . . . . . . . . . . . . . . . . . . . . . . . . . . . . . . . . . . . . . . . . . . . . . . . . . . . . . . . . . . . . . . . . . . . . 105
Usage Information. . . . . . . . . . . . . . . . . . . . . . . . . . . . . . . . . . . . . . . . . . . . . . . . . . . . . . . . . . . . . . . 105
ShoreTel 9 – Client Features . . . . . . . . . . . . . . . . . . . . . . . . . . . . . . . . . . . . 107
Announced Find Me . . . . . . . . . . . . . . . . . . . . . . . . . . . . . . . . . . . . . . . . . . . . . . . . . . 109
Introduction . . . . . . . . . . . . . . . . . . . . . . . . . . . . . . . . . . . . . . . . . . . . . . . . . . . . . . . . . . . . . . . . . . . 109
Definition . . . . . . . . . . . . . . . . . . . . . . . . . . . . . . . . . . . . . . . . . . . . . . . . . . . . . . . . . . . . . . . . . . . . . 109
Background . . . . . . . . . . . . . . . . . . . . . . . . . . . . . . . . . . . . . . . . . . . . . . . . . . . . . . . . . . . . . . . . . . . 109
Description . . . . . . . . . . . . . . . . . . . . . . . . . . . . . . . . . . . . . . . . . . . . . . . . . . . . . . . . . . . . . . . . . . . . 109
Provisioning . . . . . . . . . . . . . . . . . . . . . . . . . . . . . . . . . . . . . . . . . . . . . . . . . . . . . . . . . . . . . . . . . . . 109
Enabling Announced Find Me from Director . . . . . . . . . . . . . . . . . . . . . . . . . . . . . . . . . . . . . . . . . . 110
Enabling Announced Find Me from Call Manager . . . . . . . . . . . . . . . . . . . . . . . . . . . . . . . . . . . . . . 110
Enabling Announced Find Me from Web Access . . . . . . . . . . . . . . . . . . . . . . . . . . . . . . . . . . . . . . . 111
Usage Information. . . . . . . . . . . . . . . . . . . . . . . . . . . . . . . . . . . . . . . . . . . . . . . . . . . . . . . . . . . . . . . 112
Caller Functions . . . . . . . . . . . . . . . . . . . . . . . . . . . . . . . . . . . . . . . . . . . . . . . . . . . . . . . . . . . . . . . . 112
Call Recipient Functions. . . . . . . . . . . . . . . . . . . . . . . . . . . . . . . . . . . . . . . . . . . . . . . . . . . . . . . . . . 112
Personalized Call Handling . . . . . . . . . . . . . . . . . . . . . . . . . . . . . . . . . . . . . . . . . . . . . 113
Introduction . . . . . . . . . . . . . . . . . . . . . . . . . . . . . . . . . . . . . . . . . . . . . . . . . . . . . . . . . . . . . . . . . . . 113
Definition . . . . . . . . . . . . . . . . . . . . . . . . . . . . . . . . . . . . . . . . . . . . . . . . . . . . . . . . . . . . . . . . . . . . . 113
Background . . . . . . . . . . . . . . . . . . . . . . . . . . . . . . . . . . . . . . . . . . . . . . . . . . . . . . . . . . . . . . . . . . . 113
Description . . . . . . . . . . . . . . . . . . . . . . . . . . . . . . . . . . . . . . . . . . . . . . . . . . . . . . . . . . . . . . . . . . . . 114
Introduction . . . . . . . . . . . . . . . . . . . . . . . . . . . . . . . . . . . . . . . . . . . . . . . . . . . . . . . . . . . . . . . . . . . 114
Call Handling Rules . . . . . . . . . . . . . . . . . . . . . . . . . . . . . . . . . . . . . . . . . . . . . . . . . . . . . . . . . . . . . 114
Call Routing Plan . . . . . . . . . . . . . . . . . . . . . . . . . . . . . . . . . . . . . . . . . . . . . . . . . . . . . . . . . . . . . . . 115
Licensing . . . . . . . . . . . . . . . . . . . . . . . . . . . . . . . . . . . . . . . . . . . . . . . . . . . . . . . . . . . . . . . . . . . . . . 116
Configuring Personalized Call Handling . . . . . . . . . . . . . . . . . . . . . . . . . . . . . . . . . . . . . . . . . . . . . 116
Call Manager User Interface Panels . . . . . . . . . . . . . . . . . . . . . . . . . . . . . . . . . . . . . . . . . . . . . . . . 116
Director User Interface Panels . . . . . . . . . . . . . . . . . . . . . . . . . . . . . . . . . . . . . . . . . . . . . . . . . . . . . 120
Implementing Personalized Call Handling . . . . . . . . . . . . . . . . . . . . . . . . . . . . . . . . . . . . . . . . . . . . 121
Administrative Permission . . . . . . . . . . . . . . . . . . . . . . . . . . . . . . . . . . . . . . . . . . . . . . . . . . . . . . . . 121
Creating and Editing Call Handling Rules . . . . . . . . . . . . . . . . . . . . . . . . . . . . . . . . . . . . . . . . . . . . 122
Managing the Call Routing Plan . . . . . . . . . . . . . . . . . . . . . . . . . . . . . . . . . . . . . . . . . . . . . . . . . . . 125
Administrative Oversight . . . . . . . . . . . . . . . . . . . . . . . . . . . . . . . . . . . . . . . . . . . . . . . . . . . . . . . . . 125
Parked Call Enhancements . . . . . . . . . . . . . . . . . . . . . . . . . . . . . . . . . . . . . . . . . . . . . 127
Introduction . . . . . . . . . . . . . . . . . . . . . . . . . . . . . . . . . . . . . . . . . . . . . . . . . . . . . . . . . . . . . . . . . . . 127
Definition . . . . . . . . . . . . . . . . . . . . . . . . . . . . . . . . . . . . . . . . . . . . . . . . . . . . . . . . . . . . . . . . . . . . . 127
Unparking Selected Calls . . . . . . . . . . . . . . . . . . . . . . . . . . . . . . . . . . . . . . . . . . . . . . . . . . . . . . . . . 127
Background . . . . . . . . . . . . . . . . . . . . . . . . . . . . . . . . . . . . . . . . . . . . . . . . . . . . . . . . . . . . . . . . . . . 127
Feature Description . . . . . . . . . . . . . . . . . . . . . . . . . . . . . . . . . . . . . . . . . . . . . . . . . . . . . . . . . . . . . 127
Provisioning . . . . . . . . . . . . . . . . . . . . . . . . . . . . . . . . . . . . . . . . . . . . . . . . . . . . . . . . . . . . . . . . . . . 127
Implementation. . . . . . . . . . . . . . . . . . . . . . . . . . . . . . . . . . . . . . . . . . . . . . . . . . . . . . . . . . . . . . . . . 128
Distinguish Bounced Calls from New Calls . . . . . . . . . . . . . . . . . . . . . . . . . . . . . . . . . . . . . . . . . . . 129
Background . . . . . . . . . . . . . . . . . . . . . . . . . . . . . . . . . . . . . . . . . . . . . . . . . . . . . . . . . . . . . . . . . . . 129
Feature Description . . . . . . . . . . . . . . . . . . . . . . . . . . . . . . . . . . . . . . . . . . . . . . . . . . . . . . . . . . . . . 129
Monitoring Extensions: Parked Calls . . . . . . . . . . . . . . . . . . . . . . . . . . . . . . . . . . . . . . . . . . . . . . . . 130
Background . . . . . . . . . . . . . . . . . . . . . . . . . . . . . . . . . . . . . . . . . . . . . . . . . . . . . . . . . . . . . . . . . . . 130
Description . . . . . . . . . . . . . . . . . . . . . . . . . . . . . . . . . . . . . . . . . . . . . . . . . . . . . . . . . . . . . . . . . . . . 130
Provisioning . . . . . . . . . . . . . . . . . . . . . . . . . . . . . . . . . . . . . . . . . . . . . . . . . . . . . . . . . . . . . . . . . . . 130
ShoreTel 9.1
Page 7
Table of Contents
ShoreWare Server Release Notes
Implementation. . . . . . . . . . . . . . . . . . . . . . . . . . . . . . . . . . . . . . . . . . . . . . . . . . . . . . . . . . . . . . . . . 130
Call Handling Mode Delegation . . . . . . . . . . . . . . . . . . . . . . . . . . . . . . . . . . . . . . . . . 133
Introduction . . . . . . . . . . . . . . . . . . . . . . . . . . . . . . . . . . . . . . . . . . . . . . . . . . . . . . . . . . . . . . . . . . . 133
Definition . . . . . . . . . . . . . . . . . . . . . . . . . . . . . . . . . . . . . . . . . . . . . . . . . . . . . . . . . . . . . . . . . . . . . 133
Implementation. . . . . . . . . . . . . . . . . . . . . . . . . . . . . . . . . . . . . . . . . . . . . . . . . . . . . . . . . . . . . . . . . 133
Voicemail Enhancements . . . . . . . . . . . . . . . . . . . . . . . . . . . . . . . . . . . . . . . . . . . . . . 135
Introduction . . . . . . . . . . . . . . . . . . . . . . . . . . . . . . . . . . . . . . . . . . . . . . . . . . . . . . . . . . . . . . . . . . . 135
Definition . . . . . . . . . . . . . . . . . . . . . . . . . . . . . . . . . . . . . . . . . . . . . . . . . . . . . . . . . . . . . . . . . . . . . 135
Voicemail Timestamps . . . . . . . . . . . . . . . . . . . . . . . . . . . . . . . . . . . . . . . . . . . . . . . . . . . . . . . . . . . 135
Background . . . . . . . . . . . . . . . . . . . . . . . . . . . . . . . . . . . . . . . . . . . . . . . . . . . . . . . . . . . . . . . . . . . 135
Feature Description . . . . . . . . . . . . . . . . . . . . . . . . . . . . . . . . . . . . . . . . . . . . . . . . . . . . . . . . . . . . . 135
Implementation. . . . . . . . . . . . . . . . . . . . . . . . . . . . . . . . . . . . . . . . . . . . . . . . . . . . . . . . . . . . . . . . . 135
Voicemail Deletion Notification Control . . . . . . . . . . . . . . . . . . . . . . . . . . . . . . . . . . . . . . . . . . . . . 135
Background . . . . . . . . . . . . . . . . . . . . . . . . . . . . . . . . . . . . . . . . . . . . . . . . . . . . . . . . . . . . . . . . . . . 135
Description . . . . . . . . . . . . . . . . . . . . . . . . . . . . . . . . . . . . . . . . . . . . . . . . . . . . . . . . . . . . . . . . . . . . 136
Implementation. . . . . . . . . . . . . . . . . . . . . . . . . . . . . . . . . . . . . . . . . . . . . . . . . . . . . . . . . . . . . . . . . 136
ShoreTel 9 – Client Device and Application Enhancements . . . . . . . . . . . . 137
IP 110 – On-Hook Dialing . . . . . . . . . . . . . . . . . . . . . . . . . . . . . . . . . . . . . . . . . . . . . . 139
Introduction . . . . . . . . . . . . . . . . . . . . . . . . . . . . . . . . . . . . . . . . . . . . . . . . . . . . . . . . . . . . . . . . . . . 139
Description . . . . . . . . . . . . . . . . . . . . . . . . . . . . . . . . . . . . . . . . . . . . . . . . . . . . . . . . . . . . . . . . . . . . 139
Implementation. . . . . . . . . . . . . . . . . . . . . . . . . . . . . . . . . . . . . . . . . . . . . . . . . . . . . . . . . . . . . . . . . 139
Call Manager – IM Privacy . . . . . . . . . . . . . . . . . . . . . . . . . . . . . . . . . . . . . . . . . . . . . 141
Introduction . . . . . . . . . . . . . . . . . . . . . . . . . . . . . . . . . . . . . . . . . . . . . . . . . . . . . . . . . . . . . . . . . . . 141
Definition . . . . . . . . . . . . . . . . . . . . . . . . . . . . . . . . . . . . . . . . . . . . . . . . . . . . . . . . . . . . . . . . . . . . . 141
History . . . . . . . . . . . . . . . . . . . . . . . . . . . . . . . . . . . . . . . . . . . . . . . . . . . . . . . . . . . . . . . . . . . . . . . 141
Description . . . . . . . . . . . . . . . . . . . . . . . . . . . . . . . . . . . . . . . . . . . . . . . . . . . . . . . . . . . . . . . . . . . . 141
Privacy States . . . . . . . . . . . . . . . . . . . . . . . . . . . . . . . . . . . . . . . . . . . . . . . . . . . . . . . . . . . . . . . . . . 141
Requesting Presence Access . . . . . . . . . . . . . . . . . . . . . . . . . . . . . . . . . . . . . . . . . . . . . . . . . . . . . . . 141
Implementation. . . . . . . . . . . . . . . . . . . . . . . . . . . . . . . . . . . . . . . . . . . . . . . . . . . . . . . . . . . . . . . . . 142
System Privacy Invitation Settings . . . . . . . . . . . . . . . . . . . . . . . . . . . . . . . . . . . . . . . . . . . . . . . . . . 142
User Privacy settings . . . . . . . . . . . . . . . . . . . . . . . . . . . . . . . . . . . . . . . . . . . . . . . . . . . . . . . . . . . . 143
Presence Change Alerts . . . . . . . . . . . . . . . . . . . . . . . . . . . . . . . . . . . . . . . . . . . . . . . . . . . . . . . . . . 144
Installation . . . . . . . . . . . . . . . . . . . . . . . . . . . . . . . . . . . . . . . . . . . . . . . . . . . . . . . . . . . . . . . . . . . . 145
New Installations . . . . . . . . . . . . . . . . . . . . . . . . . . . . . . . . . . . . . . . . . . . . . . . . . . . . . . . . . . . . . . . 145
Upgrade . . . . . . . . . . . . . . . . . . . . . . . . . . . . . . . . . . . . . . . . . . . . . . . . . . . . . . . . . . . . . . . . . . . . . . 145
Presence Server Support . . . . . . . . . . . . . . . . . . . . . . . . . . . . . . . . . . . . . . . . . . . . . . . . . . . . . . . . . . 145
Call Manager – Contact Import. . . . . . . . . . . . . . . . . . . . . . . . . . . . . . . . . . . . . . . . . . 147
Introduction . . . . . . . . . . . . . . . . . . . . . . . . . . . . . . . . . . . . . . . . . . . . . . . . . . . . . . . . . . . . . . . . . . . 147
Description . . . . . . . . . . . . . . . . . . . . . . . . . . . . . . . . . . . . . . . . . . . . . . . . . . . . . . . . . . . . . . . . . . . . 147
Implementation. . . . . . . . . . . . . . . . . . . . . . . . . . . . . . . . . . . . . . . . . . . . . . . . . . . . . . . . . . . . . . . . . 147
Editing the Registry . . . . . . . . . . . . . . . . . . . . . . . . . . . . . . . . . . . . . . . . . . . . . . . . . . . . . . . . . . . . . 147
Placing the File. . . . . . . . . . . . . . . . . . . . . . . . . . . . . . . . . . . . . . . . . . . . . . . . . . . . . . . . . . . . . . . . . 147
Viewing the Contacts . . . . . . . . . . . . . . . . . . . . . . . . . . . . . . . . . . . . . . . . . . . . . . . . . . . . . . . . . . . . 148
File Properties. . . . . . . . . . . . . . . . . . . . . . . . . . . . . . . . . . . . . . . . . . . . . . . . . . . . . . . . . . . . . . . . . . 149
Data Fields . . . . . . . . . . . . . . . . . . . . . . . . . . . . . . . . . . . . . . . . . . . . . . . . . . . . . . . . . . . . . . . . . . . . 149
CSV Files . . . . . . . . . . . . . . . . . . . . . . . . . . . . . . . . . . . . . . . . . . . . . . . . . . . . . . . . . . . . . . . . . . . . . 150
XML Files . . . . . . . . . . . . . . . . . . . . . . . . . . . . . . . . . . . . . . . . . . . . . . . . . . . . . . . . . . . . . . . . . . . . . 153
Page 8
ShoreWare Server Release Notes
Table of Contents
Mobile Call Manager – Location Based Service. . . . . . . . . . . . . . . . . . . . . . . . . . . . . . 157
Introduction . . . . . . . . . . . . . . . . . . . . . . . . . . . . . . . . . . . . . . . . . . . . . . . . . . . . . . . . . . . . . . . . . . . 157
Definition . . . . . . . . . . . . . . . . . . . . . . . . . . . . . . . . . . . . . . . . . . . . . . . . . . . . . . . . . . . . . . . . . . . . . 157
History . . . . . . . . . . . . . . . . . . . . . . . . . . . . . . . . . . . . . . . . . . . . . . . . . . . . . . . . . . . . . . . . . . . . . . . 157
Description . . . . . . . . . . . . . . . . . . . . . . . . . . . . . . . . . . . . . . . . . . . . . . . . . . . . . . . . . . . . . . . . . . . . 157
Definition . . . . . . . . . . . . . . . . . . . . . . . . . . . . . . . . . . . . . . . . . . . . . . . . . . . . . . . . . . . . . . . . . . . . . 157
Process Description . . . . . . . . . . . . . . . . . . . . . . . . . . . . . . . . . . . . . . . . . . . . . . . . . . . . . . . . . . . . . 158
Availability . . . . . . . . . . . . . . . . . . . . . . . . . . . . . . . . . . . . . . . . . . . . . . . . . . . . . . . . . . . . . . . . . . . . 159
Configuring LBS . . . . . . . . . . . . . . . . . . . . . . . . . . . . . . . . . . . . . . . . . . . . . . . . . . . . . . . . . . . . . . . . 159
Managing Location Based Services Activity . . . . . . . . . . . . . . . . . . . . . . . . . . . . . . . . . . . . . . . . . . . 159
Polling Rate Selection . . . . . . . . . . . . . . . . . . . . . . . . . . . . . . . . . . . . . . . . . . . . . . . . . . . . . . . . . . . . 160
Managing Waypoints . . . . . . . . . . . . . . . . . . . . . . . . . . . . . . . . . . . . . . . . . . . . . . . . . . . . . . . . . . . . 161
Waypoints Settings. . . . . . . . . . . . . . . . . . . . . . . . . . . . . . . . . . . . . . . . . . . . . . . . . . . . . . . . . . . . . . 161
LBS Indicators. . . . . . . . . . . . . . . . . . . . . . . . . . . . . . . . . . . . . . . . . . . . . . . . . . . . . . . . . . . . . . . . . . 162
LBS Activity status . . . . . . . . . . . . . . . . . . . . . . . . . . . . . . . . . . . . . . . . . . . . . . . . . . . . . . . . . . . . . . 162
GPS Reception Status . . . . . . . . . . . . . . . . . . . . . . . . . . . . . . . . . . . . . . . . . . . . . . . . . . . . . . . . . . . . 162
LBS Implementation Status . . . . . . . . . . . . . . . . . . . . . . . . . . . . . . . . . . . . . . . . . . . . . . . . . . . . . . . 162
Mobile Call Manager – Enhancements . . . . . . . . . . . . . . . . . . . . . . . . . . . . . . . . . . . . 165
Introduction . . . . . . . . . . . . . . . . . . . . . . . . . . . . . . . . . . . . . . . . . . . . . . . . . . . . . . . . . . . . . . . . . . . 165
Definition . . . . . . . . . . . . . . . . . . . . . . . . . . . . . . . . . . . . . . . . . . . . . . . . . . . . . . . . . . . . . . . . . . . . . 165
History . . . . . . . . . . . . . . . . . . . . . . . . . . . . . . . . . . . . . . . . . . . . . . . . . . . . . . . . . . . . . . . . . . . . . . . 165
Feature Enhancements . . . . . . . . . . . . . . . . . . . . . . . . . . . . . . . . . . . . . . . . . . . . . . . . . . . . . . . . . . . 165
Office Anywhere . . . . . . . . . . . . . . . . . . . . . . . . . . . . . . . . . . . . . . . . . . . . . . . . . . . . . . . . . . . . . . . . 165
Voicemail . . . . . . . . . . . . . . . . . . . . . . . . . . . . . . . . . . . . . . . . . . . . . . . . . . . . . . . . . . . . . . . . . . . . . 167
Call History . . . . . . . . . . . . . . . . . . . . . . . . . . . . . . . . . . . . . . . . . . . . . . . . . . . . . . . . . . . . . . . . . . . 168
QuickDialer . . . . . . . . . . . . . . . . . . . . . . . . . . . . . . . . . . . . . . . . . . . . . . . . . . . . . . . . . . . . . . . . . . . 168
Installation Changes . . . . . . . . . . . . . . . . . . . . . . . . . . . . . . . . . . . . . . . . . . . . . . . . . . . . . . . . . . . . . 168
Version Control . . . . . . . . . . . . . . . . . . . . . . . . . . . . . . . . . . . . . . . . . . . . . . . . . . . . . . . . . . . . . . . . 168
Permanent Configuration Storage . . . . . . . . . . . . . . . . . . . . . . . . . . . . . . . . . . . . . . . . . . . . . . . . . . 169
Screen Size Notifications: Multi-Screen and Slider Devices. . . . . . . . . . . . . . . . . . . . . . . . . . . . . . . 169
Client Notification of Upgrade . . . . . . . . . . . . . . . . . . . . . . . . . . . . . . . . . . . . . . . . . . . . . . . . . . . . . 169
Provisioning Changes . . . . . . . . . . . . . . . . . . . . . . . . . . . . . . . . . . . . . . . . . . . . . . . . . . . . . . . . . . . . 170
Usage Changes . . . . . . . . . . . . . . . . . . . . . . . . . . . . . . . . . . . . . . . . . . . . . . . . . . . . . . . . . . . . . . . . . 170
Character Input Mode indicator. . . . . . . . . . . . . . . . . . . . . . . . . . . . . . . . . . . . . . . . . . . . . . . . . . . . 170
Support Information . . . . . . . . . . . . . . . . . . . . . . . . . . . . . . . . . . . . . . . . . . . . . . . . . . . . . . . . . . . . . 170
Supported Devices . . . . . . . . . . . . . . . . . . . . . . . . . . . . . . . . . . . . . . . . . . . . . . . . . . . . . . . . . . . . . . 170
Feature Support . . . . . . . . . . . . . . . . . . . . . . . . . . . . . . . . . . . . . . . . . . . . . . . . . . . . . . . . . . . . . . . . 171
Glossary . . . . . . . . . . . . . . . . . . . . . . . . . . . . . . . . . . . . . . . . . . . . . . . . . . . . . . . . . . . 173
ShoreTel 9.1
Page 9
Table of Contents
Page 10
ShoreWare Server Release Notes
System Specifications
System Specifications
Hardware and Software Requirements
Server Device Requirements
Operating Systems
ShoreWare 9.1 server software is supported on the following operating systems:
•
Windows Server 2003 SP2 (Standard or Enterprise)
ShoreWare Version 9.1 is not supported on Windows 2003 SP1
•
•
Windows Server 2003 R2 Enterprise Edition, 32-bit (Standard or Enterprise)
Windows Server 2008 (Standard or Enterprise)
ShoreWare is supported only on 32-bit operating systems. There is no 64-bit support.
Server Hardware Requirements
Table 1 displays the minimum recommended configuration for servers running ShoreWare Main Server
software. Sound card, speakers, and microphone are recommended for all configurations.
Users
Calls/Hour
Pentium Processor
RAM
Network
100
1,000
E2160 / Single DualCore 1.8 GHz
1 GB
100 Base-T
500
5,000
Xeon 3050 / Single DualCore 2.13 GHz
2 GB
100 Base-T
1,000
10,000
Xeon 3070, 5150 / Single DualCore 2.66 GHz 3 GB
100 Base-T or Gigabit Ethernet
2,500
25,000
Xeon 3220 / Single QuadCore 2.4 GHz
4 GB
100 Base-T or Gigabit Ethernet
5,000
50,000
Xeon 3230 / Single QuadCore 2.66 GHz
4 GB
100 Base-T or Gigabit Ethernet
10,000
50,000
Xeon 5365 / Single QuadCore 3.0 GHz
4 GB
100 Base-T or Gigabit Ethernet
Table 1
Main Server Hardware Requirements
Table 2 displays the minimum recommended configuration for servers running ShoreWare Distributed
Server software.
Users
Calls/Hour
Pentium Processor
RAM
Network
100
1,000
E2160 / Single Dual-Core 1.8 GHz
1 GB
100 Base-T
500
5,000
Xeon 3050 / Single Dual-Core 2.13 GHz
2 GB
100 Base-T
1,000
10,000
Xeon 3070, 5150 / Single Dual-Core 2.66 GHz
3 GB
100 Base-T or Gigabit Ethernet
Contact Center and Enterprise Contact Center Support Requirements – Refer to Contact Center Documentation
Table 2
ShoreTel 9.1
Distributed Server Hardware Requirements
Page 13
System Specifications
ShoreWare Server Release Notes
To maintain high server performance and reliability, ShoreTel recommends Gigabit Ethernet Interface for
all configurations regardless of the number of users or network load. Although the 100 Base-T interface
can provide acceptable performance and reliability for the specified configurations, administrator
intervention is frequently required to properly configure the IP network and prioritize real-time
information during peak network traffic conditions.
SBE Hardware Requirements
Table 3 displays the recommended configuration for servers running SBE software.
Users
Calls/Hour
Processor
RAM
Network
50
500
Celeron 430 – 1.8 GHz
2 GB
100 Base-T
Table 3
SBE Hardware Requirements
Client Device Requirements
Operating Systems
The ShoreWare 9.1 client software is supported on the following operating systems:
•
Windows Client Operating System
— Windows XP Professional SP3 – 32-bit
— Windows Vista, Business and Enterprise editions, SP1 – 32-bit
— Windows Vista Business 64-bit , with Desktop Optimization
•
Windows Terminal Server
— Windows 2003 SP2 Terminal Server – 32- or 64-bit
— Windows 2003 R2 Terminal Server – 32- or 64-bit
•
Citrix
For current information about support for specific Citrix versions and Call Manager features on
the Citrix platform, refer to the Citrix product bulletin available at
https://login.shoretel.com/?src=s&ReturnUrl=%2falerts%2fdownloads%2f2008-06-04.pdf
Client Hardware Requirements
Computer hardware requirements for running Call Manager depend on the Call Manager version and
video call resolution. Table 4 displays the minimum recommended configuration for computers running
ShoreWare Call Manager.
RAMa
Diskb
Call Manager Version
Processor
Personal
Pentium 3 – 800 MHz
100 MB
100 MB
1 GB
1 GB
Professional
Pentium 4 – 2.0 GHz
150 MB
150 MB
1 GB
1 GB
Agent, Supervisor, Operator
(<40 extension presences)
Pentium 4 – 2.0 GHz
150 MB
150 MB
1 GB
1 GB
Table 4
Page 14
Client Device Hardware Requirements
XP
Vista
XP
Vista
ShoreWare Server Release Notes
System Specifications
Agent, Supervisor, Operator
(<500 extension presences)
Pentium 4 – 3.0 GHz
150 MB
150 MB
1 GB
1 GB
All Versions, VGA Video
Dual-Core 1.6 GHz
150 MB
150 MB
1 GB
1 GB
All Versions, XGA Video
Core 2 Quad 2.4 GHz
150 MB
150 MB
1 GB
1 GB
Table 4
Client Device Hardware Requirements
a. Call Manager memory requirements during normal operation. When running other office applications on the PC in addition
to Call Manager, memory recommendations are 512 MB (XP) or 1 GB (Vista).
b. Disk space requirement is for installation on a system without .NET Framework installed previously. Once installed, Call
Manager requires less than 100MB of disk space.
Video Bandwidth Requirements
Video calls require the following minimum bandwidth:
•
•
VGA: 600 kbps
XGA: 1.2 Mbps
Video Hardware Requirements
Computers configured for video calls require the following:
•
•
VGA Video: Graphic Card with 64 MB of VRAM, DirectX 9.0c-compatible
XGA Video: Graphic Card with 256 MB of VRAM, DirectX 9.0c-compatible
NOTE: XGA video does not support Call Manager features running on a 64-bit Vista client.
Director and ShoreWare Web Access Requirements
Director and ShoreWare Web Access require one of the following internet browsers:
•
•
MS Internet Explorer 6.0, SP2
MS Internet Explorer 7.0
Supported Devices
ShoreGear Switches
Version 9.1 supports the following ShoreGear Voice Switches:
•
•
•
•
•
•
•
•
•
•
•
•
•
ShoreGear 50
ShoreGear 50V
ShoreGear 90
ShoreGear 90V
ShoreGear 90BRI
ShoreGear 90BRIV
ShoreGear 220T1
ShoreGear 220E1
ShoreGear 220T1A
ShoreGear 30
ShoreGear 30BRI
ShoreGear 24A
ShoreGear T1k
ShoreTel 9.1
Page 15
System Specifications
•
•
•
•
•
•
ShoreWare Server Release Notes
ShoreGear E1k
ShoreGear 120
ShoreGear 60
ShoreGear 40
ShoreGear T1
ShoreGear E1
ShorePhone Telephones
Version 9.1 supports the following ShorePhone Telephones
•
•
•
•
•
•
•
•
•
•
•
•
•
•
IP565
IP560g
IP560
IP530
IP265
IP230g
IP230
IP212k
IP210
IP115
IP110
IP8000
AP110
AP100
Upgrade Paths and Application Support
Upgrade Path
ShoreTel supports single step upgrades to ShoreWare 9.1 from Version 9, Version 8.1, and Version 7.5.
ShoreTel supports upgrade paths from other versions through an intermediate upgrade to a version
through which single step upgrade is supported.
Email Integration
ShoreWare 9.1 Call Manager supports email integration with the following products:
•
•
Outlook 2003, SP2
Outlook 2007
When running on a Citrix platform, Call Manager does not import Outlook contacts if Outlook is in
seamless mode. To import contacts, users must close the Outlook window and either start Call Manager
or click the Import Contact button.
ShoreWare 9.1 does not provide support for integrating email with Outlook 2002.
Converged Conferencing
Version 9.1 supports interoperability for Converged Conferencing 7.1 and above.
Page 16
ShoreWare Server Release Notes
System Specifications
Contact Center
Version 9.1 supports interoperability for Contact Center 4.66.05 and above.
SIP-BRI 8
Version 9.1 supports interoperability for SIP-BRI 8 Build R3.T_2006-10-04 and above.
SIP Devices
Version 9.1 supports the following SIP devices as SIP extensions:
•
IP8000
Character Sets
This version of ShoreWare supports only ISO 8859-1, also known as Latin -1 or Microsoft Windows
CP1252 character set (see http://www.microsoft.com/globaldev/reference/sbcs/1252.mspx/ for
supported character set). This set consists of characters from the Latin script. This character encoding
is used throughout the Americas, Western Europe, Oceania, and much of Africa.
It is also commonly used in most standard Romanizations of East-Asian languages. Certain characters
in Central\Eastern Europe, Baltic languages, Cyrillic, Arabic, and Greek are displayed as "?" if the
character encoding is not found. Double-byte characters, such as those found in Chinese, Japanese, and
Korean languages, are also not supported and displayed as"?". System directory entries, imported
Outlook contacts or other user-generated entries (i.e., IM contacts) should use Latin-1 encoding to
ensure all characters are displayed properly.
Codecs
Version 9.1 supports the following codecs:
•
•
•
•
•
•
•
•
•
•
L16/16000
L16/8000
AAC_LC/32000
PCMU/8000
PCMA/8000 (G.711)
G722/8000
DVI4/8000
BV32/16000
BV16/8000
G729/8000
System Capacity
Version 9.1 supports the following:
•
Users
— 10,000 users if DRS is enabled.
— 1,000 users if DRS is not enabled.
ShoreTel 9.1
Page 17
System Specifications
•
ShoreWare Server Release Notes
ShoreGear Switches
— 60 switches per site if DRS is not enabled.
— 500 switches per site if DRS is enabled.
•
ShoreGear Voicemail Model Switches
— 50 Voicemail Model switches per site
— 100 Voicemail Model switches per system.
•
Servers
— One main server.
— 20 distributed servers.
•
IP Phones
— 5 ShorePhones per ShoreGear port.
— 100 SIP Proxies per ShoreGear port.
•
Desktop Clients
—
—
—
—
—
—
•
10,000 Call Manager instances per system.
1,000 Call Manager instances per server.
100 Call Manager instances per WTS (64-bit) server1
200 operator clients per system.
500 monitored extensions per client.
5000 monitored extensions per system.
Make-me Conferencing
— One conferenced party per ShoreGear port.
•
Voice Mail
— 10,000 mailboxes per system.
— 3,000 mailboxes per server.
— 254 simultaneous calls per server.
•
Workgroups
—
—
—
—
—
•
256 workgroups.
300 agents per workgroup.
16 agents per workgroup when simultaneous hunt is enabled.
500 agents per system.
128 supervisors per system.
Call Volume
— 5,000 BHCA.
•
CDR Size
— Not restricted by ShoreWare.
1. Assumes WTS server running on Core 2 Quad 2.4 GHz with 16 GB RAM.
Page 18
ShoreTel 9.1 Feature Set
Windows Server 2008 Support
Introduction
ShoreWare 9.1 supports the Windows 2008 operating systems as a platform for the
following ShoreWare components:
•
ShoreWare Main Server – Windows Server 2008, Standard and Enterprise (32-bit)
editions.
•
ShoreWare Distributed Server – Windows Server 2008, Standard and Enterprise (32bit) editions.
ShoreWare 9.1 continues to support all operating system platforms that are supported by
ShoreWare 9.
All ShoreWare servers within a system must use the same operating system version. All
servers must either run on Windows 2008 or on Windows 2003.
Background
Previous ShoreTel releases only supported Windows 2003 Server as the platform for
running ShoreWare server software.
Terms
Configuration Databases consists of MySQL and ShoreWare databases.
Windows Server 2008 is the most recent release of Microsoft Windows server line of
operating systems. It is the successor to Windows Server 2003.
Internet Information Services (IIS) is a set of Internet-based services for servers created by
Microsoft for use with Microsoft Windows.
COM+ Component Object Model (COM) is a Microsoft software development platform for
windows. COM+ is an extension of COM that supports distributed transactions,
resource pooling, disconnected applications, and event management, while improving
memory and processor thread management.
Simple Mail Transfer Protocol (SMTP) is an Internet standard for email transmission
across IP networks. SMTP was first defined in RFC 821 (STD 10) and most recently
updated in RFC 5321 (2008).
Implementation
Installation Requirements
ShoreWare servers require IIS, COM+, SMTP, and FTP. Other required tasks include
changing the SMTP and FTP startup type to automatic.
The following sections describe the selections required at pivotal steps in the installation
process. These steps must be completed as a prerequisite to installing or upgrading the
ShoreWare components discussed in this section.
NOTE: Windows Server 2008 must be activated through Microsoft before installing
ShoreWare Server and Remote Server.
ShoreTel 9.1
Page 21
Windows Server 2008 Support
ShoreWare Server Release Notes
Application Server Role
Figure 2 displays the required roles for the Application Server for ShoreTel. Selecting IIS
and COM+ ensures the installation of these services.
Step 1 Click the Server Manager icon on the Task bar or, select Start -> Programs ->
Administrative Tools -> Server Manager.
Step 2 In Server Manager right-click Roles and select Add Roles from the pop-up menu.
Note: You can also click the Add Roles icon on the right pane
Figure 1
Installation Windows Role Services
Step 3 In Add Roles Wizard, click Server Roles on the left pane.
Step 4 In the Roles pane, click Application Server and Web Server (IIS).
Page 22
ShoreWare Server Release Notes
Figure 2
Windows Server 2008 Support
Required Server Roles
Web Server (IIS) Role Servers
Figure 2 displays the Web Server required roles. The following Web Server (IIS) role
services should be installed.
Figure 3
Required Web Server Roles
Step 1 Access the Web Server Role by selecting Server Manager
Step 2 Right click on Server->Add Roles
Step 3 Select Web Server (IIS)-> Role Services
ShoreTel 9.1
Page 23
Windows Server 2008 Support
ShoreWare Server Release Notes
Web Server Roles
•
Select all Common HTTP Features
•
Select all Application Development Features
•
Select the following Health and Diagnostics Features
—
—
—
—
HTTP Logging
Logging Tools
Request Monitor
Tracing
•
Select all Security options
•
Select all Performance options
NOTE: You may need to scroll down the Web Role Server window to see all the
available options.
Management Tools – select all Management Tools options
FTP Publishing Service – select all FTP Publishing Service options
Microsoft Server Features
Figure 4 displays the Select Features Installation panel. ShoreWare requires the installation
of the SMTP Server
.
Figure 4
Selecting SMTP Server
Microsoft Server Feature Properties
After SMTP and FTP are installed, the startup type must be changed from manual to
automatic. The following procedure changes the startup type for SMTP and FTP.
NOTE: Verify that the FTProot folder in the Inetpubs directory has at least read access.
Page 24
ShoreWare Server Release Notes
Windows Server 2008 Support
Step 1 Access the Services table by selecting Server Manager -> Configuration -> Services.
Step 2 Open the Simple Mail Transfer Protocol (SMTP) Properties panel by right clicking
Simple Mail Transfer Protocol and selecting Properties on the context menu.
Figure 5
Selecting SMTP Properties
.
ShoreTel 9.1
Page 25
Windows Server 2008 Support
Figure 6
ShoreWare Server Release Notes
SMTP Properties panel
Step 3 Select Automatic on the Startup Type drop down menu, then click the OK button.
Step 4 Return to the Services table.
Step 5 Open the FTP Publishing Service properties panel by right clicking FTP Publishing
and selecting Properties on the context menu.
Step 6 Select Automatic on the Startup Type drop down menu, then click the OK button.
Step 7
Page 26
ShoreWare Server Release Notes
Windows Server 2008 Support
Upgrading ShoreWare Servers from Windows 2003 to
Windows 2008
Upgrading Servers Running ShoreWare 9.1
The following procedure is required when upgrading to Windows Server 2008 on a server
that is running ShoreWare 9.1 server software.
Warning: Active Directory settings must be disabled before proceeding with the upgrade
process.If active directory is not disabled, you will not be able to start ShoreWare
Director after upgrading.
Figure 7
Upgrade Process for Servers Running ShoreWare Version 9.1
Step 1 Stop all ShoreWare services and backup the Configuration and CDR databases.
Refer to the ShoreTel Administrator Guide for instructions on backing up
ShoreWare databases.
NOTE: ShoreTel recommends that you back up these databases to a storage
device separate from the server you intend to upgrade.
Step 2 Backup the contents of the Shoreline Data folder, except the Call Records2 folder,
to an external device.
NOTE: If there are any customizations that you wish to save or need to refer to
after upgrading the ShoreWare software, be sure to backup the Inetpub folder
along with the current and local machine folders in the regedit directory. Refer to
Microsoft documentation.
Step 3 Uninstall the ShoreWare Server software and delete the following folders:
•
ShoreTel 9.1
Shoreline Data
Page 27
Windows Server 2008 Support
•
Shoreline Communication
•
FTPRoot
ShoreWare Server Release Notes
Refer to the Planning and Installation Guide for instructions on uninstalling
ShoreWare Server software.
NOTE: Make sure Windows PowerShell is not present. Refer to Microsoft
support for information on uninstalling Windows PowerShell.
Step 4 Upgrade the server operating system to Windows Server 2008. After the operating
system is upgraded, you must activate the operating system prior to installing
ShoreWare Server software.
Refer to Microsoft documentation and the Installation Requirements section,
starting on page 21.
NOTE: Do not use Autorun from the Windows Server 2008 CD. Autorun will
only allow a new installation of Windows 2008.
Step 5 Ensure that the Application Server Roles and Web Server Roles are configured.
Step 6 Install the ShoreWare Server software.
Refer to the Planning and Installation Guide for instructions on installing
ShoreWare Server software.
Step 7 Restore the Configuration and CDR databases.
Refer to the ShoreTel Administrator Guide for instructions on restoring a backup
copy of a ShoreWare database.
Step 8 Enable Active Directory login if you previously disabled this option.
Warning: If you did not disable Active Directory prior to upgrading to Windows
2008 and Active Directory is enabled after upgrading to Windows 2008, you will
not be able to access ShoreWare director.
Page 28
ShoreWare Server Release Notes
Windows Server 2008 Support
Upgrading Servers Running ShoreWare Versions
ShoreWare 9.1 is the only ShoreWare version that supports Windows Server 2008. Servers
running earlier versions of ShoreWare must upgrade to Version 9.1 to ensure database
compatibility before upgrading to Windows Server 2008. ShoreWare versions that can be
directly upgraded to Version 9.1 include Versions 7.5, 8.1, and 9.
Figure 8
Upgrading Servers Running ShoreWare Software
Perform the following steps to upgrade the operating system to Windows Server 2008 on a
server that is running any ShoreWare version except 9.1.
Step 1 Upgrade the ShoreWare Server software to Version 9.1.
Refer to the Planning and Installation Guide for instructions on upgrading
ShoreWare Server software.
Step 2 Disable Active Directory if you have this option enabled.
Step 3 Stop all ShorewWare services and backup the Configuration and CDR databases.
Refer to the ShoreTel Administrator Guide for instructions on backing up
ShoreWare databases.
NOTE: ShoreTel recommends that you back up these databases to a storage
device separate from the server you intend to upgrade.
Step 4 Backup the contents of the Shoreline Data folder, except the Call Records2 folder,
to an external device.
NOTE: If there are any customizations that you wish to save or need to refer to
after upgrading the ShoreWare software, be sure to backup the Inetpub folder
along with the current and local machine folders in the regedit directory. Refer to
Microsoft documentation.
NOTE: ShoreTel recommends that you back up these databases to a storage
device separate from the server you intend to upgrade.
ShoreTel 9.1
Page 29
Windows Server 2008 Support
ShoreWare Server Release Notes
Step 5 Uninstall the ShoreWare Server software 9.1 and delete the following folders.
•
Shoreline Data
•
Shoreline Communications
•
FTPRoot
Refer to the Planning and Installation Guide for instructions on uninstalling
ShoreWare Server software.
NOTE: Make sure Windows PowerShell is not present. Refer to Microsoft
support for information on uninstalling Windows PowerShell.
Step 6 Perform the Windows Server 2008 upgrade procedure described in the Upgrading
Servers Running ShoreWare 9.1 section, starting on page 27.
Step 7 Re-install the ShoreWare Server 9.1 software.
Refer to the Planning and Installation Guide for instructions on installing
ShoreWare Server software.
Step 8 Restore the Configuration and CDR databases.
Refer to the ShoreTel Administrator Guide for instructions on restoring a backup
copy of a ShoreWare database.
Step 9 Enable Active Directory login if you previously disabled this option.
Installing ShoreWare 9.1 on New Servers Running Windows Server 2008
The following procedure is required when installing ShoreWare 9.1 server software on a
new server running Windows Server 2008.
NOTE: Be sure to disable Windows Firewall before installing ShoreWare 9.1 software.
Figure 9
Installing ShoreWare 9.1 on New Servers Running Windows Server 2008
Step 1 Install ShoreWare Server 9.1 software.
Refer to the Planning and Installation Guide for instructions on installing
ShoreWare Server software.
Step 2 Restore any previously backed up databases.
Refer to the ShoreTel Administrator Guide for instructions on restoring a backup
copy of a ShoreWare database.
Page 30
ShoreWare Server Release Notes
Windows Server 2008 Support
Upgrading ShoreWare Distributed Voicemail Server from
Windows 2003 to Windows 2008
Upgrading Distributed Voicemail Server Running ShoreWare 9.1
The following procedure is required when upgrading to Windows Server 2008 on a
ShoreWare Distributed Voicemail Server that is running ShoreWare 9.1 server software.
NOTE: Before proceeding with the upgrade process make sure you complete the steps
described in the Installation Requirements section starting on page 21.
Figure 10
Upgrading Distributed Voicemail Servers Running ShoreWare 9.1
Step 1 Stop all ShoreWare services.
Step 2 Backup the contents of the Shoreline Data folder to an external device.
NOTE: If there are any customizations that you wish to save or need to refer to
after upgrading the ShoreWare software, be sure to backup the Inetpub folder
along with the current and local machine folders in the regedit directory. Refer to
Microsoft documentation.
Step 3 Uninstall the ShoreWare Distributed Voicemail Server software and delete the
following folders:
•
Shoreline Data
•
Shoreline Communication
•
FTPRoot
Refer to the Planning and Installation Guide for instructions on uninstalling
ShoreWare Distributed Voicemail Server software.
NOTE: Make sure Windows PowerShell is not present. Refer to Microsoft
support for information on uninstalling Windows PowerShell.
ShoreTel 9.1
Page 31
Windows Server 2008 Support
ShoreWare Server Release Notes
Step 4 Upgrade the server operating system to Windows Server 2008. After the operating
system is upgraded, you must activate the operating system prior to installing
ShoreWare Distributed Voicemail Server software.
Refer to Microsoft documentation and the Installation Requirements section,
starting on page 21.
NOTE: Do not use Autorun from the Windows Server 2008 CD. Autorun will
only allow a new installation of Windows 2008.
Step 5 Ensure that the Application Server Roles and Web Server Roles are configured.
Step 6 Install the ShoreWare Distributed Voicemail Server software.
Refer to the Planning and Installation Guide for instructions on installing
ShoreWare Distributed Voicemail Server software.
Upgrading Distributed Voicemail Servers Running ShoreWare Versions
Perform the following steps to upgrade the operating system to Windows Server 2008 on a
server that is running any ShoreWare version earlier than 9.1.
NOTE: Before proceeding with the upgrade process make sure you complete the steps
described in the Installation Requirements section starting on page 21.
Figure 11
Upgrading Distributed Voicemail Servers Running ShoreWare Versions
Step 1 Stop all ShoreWare services.
Step 2 Backup the contents of the Shoreline Data folder to an external device.
NOTE: If there are any customizations that you wish to save or need to refer to
after upgrading the ShoreWare software, be sure to backup the Inetpub folder
along with the current and local machine folders in the regedit directory. Refer to
Microsoft documentation
Page 32
ShoreWare Server Release Notes
Windows Server 2008 Support
NOTE: ShoreTel recommends that you back up these databases to a storage
device separate from the server you intend to upgrade.
Step 3 Uninstall the ShoreWare Distributed Voicemail Server software 9.1 and delete the
following folders.
•
Shoreline Data
•
Shoreline Communications
•
FTPRoot
Refer to the Planning and Installation Guide for instructions on uninstalling
Distributed Voicemail Servers software.
NOTE: Make sure Windows PowerShell is not present. Refer to Microsoft
support for information on uninstalling Windows PowerShell.
Step 4 Perform the Windows Server 2008 upgrade procedure described in the Upgrading
Servers Running ShoreWare 9.1 section, starting on page 27.
Step 5 Re-install the ShoreWare Distributed Voicemail Server 9.1 software.
Refer to the Planning and Installation Guide for instructions on installing
ShoreWare Distributed Voicemail Server software.
Installing ShoreWare 9.1 on New ShoreWare Distributed Voicemail
Servers Running Windows Server 2008
The following procedure is required when installing ShoreWare Distributed Voicemail
Server 9.1 software on a new server running Windows Server 2008.
NOTE: Be sure to disable Windows Firewall before installing ShoreWare 9.1 software.
Figure 12
Installing ShoreWare 9.1 on New Servers Running Windows Server 2008
Step 1 Install ShoreWare Distributed Voicemail Server 9.1 software.
Refer to the Planning and Installation Guide for instructions on installing
ShoreWare Distributed Voicemail Server software.
Step 2 Restore any previously backed up (voicemail, log, prompts, etc.) files.
Refer to the ShoreTel Administrator Guide for instructions on restoring a backup
copy of a ShoreWare database.
ShoreTel 9.1
Page 33
Windows Server 2008 Support
Page 34
ShoreWare Server Release Notes
Call Manager on 64-Bit Vista
Introduction
ShoreTel 9.1 extends support for running Call Manager on 64-bit platforms to include
Microsoft Windows Vista – Business edition.
Background
ShoreTel 9 supports Call Manager on the following platforms:
•
32-bit systems: Windows 2003 (including Citrix and Windows Terminal Server),
Windows XP, or Windows Vista operating systems
•
64-bit systems: only on Windows 2003 running Windows Terminal Server
Call Manager disables SoftPhone, Video, and Outlook integration while running in
Terminal server mode. These functions remain unavailable when running Call Manager
on 64-bit WTS platforms.
Description
ShoreTel 9.1 extends 64-bit Call Manager support to the following operating systems:
•
Windows Vista Business 64-bit, with or without Desktop Optimization
Call Manager operates as a 32-bit application on the 64-bit platforms.
All Call Manager features available on the 32-bit Vista platform remain available when
running the application on the 64-bit operating system with the following exceptions:
•
XGA Video.
Implementation
The Call Manager installation process on Vista 64-bit platforms is identical to the
installation process on Vista 32-bit platforms.
The default location of 64-bit TAPI related files is <Windows folder>\System32.
ShoreTel 9.1
Page 35
Call Manager on 64-Bit Vista
Page 36
ShoreWare Server Release Notes
Single Sign On – Instant Messaging
Introduction
ShoreTel 9.1 supports Single Sign On (SSO) for logging into the OCS 2007 server.
Background
ShoreTel 9 integrated Active Directory with the ShoreTel directory. Single sign on to Call
Manager and Director were among the Active Directory features introduced in ShoreTel 9.
Terms
Active Directory Active Directory (AD) is a Mircosoft technology that provides various
network services, including LDAP-style directory services and authentication, for
Windows environments. Administrators can assign policies, deploy software, and apply
critical updates to an organization from a single Active Directory database.
Converged Conferencing ShoreTel Converged Conferencing is a real time communications
server that supports audio conferencing, web conferencing, an integrated contact list
with presence, and instant messaging (text chat).
Microsoft Office Communications Server 2007(OCS 2007) is an enterprise real-time
communications server that provides the infrastructure for enterprise instant
messaging, presence, file transfer, and other multi-media functions. OCS2007 is one of
two platforms Call Manager supports for instant messaging and presence.
Single Sign On (SSO) Single Sign On is an LDAP process where applications automatically
authenticate LDAP users that are logged into the network domain through their
network credentials. Such users that are logged into the network are not prompted to
re-enter their credentials when accessing applications requiring authentication.
Implementation
ShoreTel supports Active Directory authentication for users logging into the OCS 2007 IM
server without requiring username or password entry into the Call Manager Preferences
panel that configures Instant Messaging access.
The Converged Conferencing Bridge Server does not offer Single Sign On for Instant
Messaging access.
User Interface consequences of this feature include:
•
Users with Active Directory credentials are not required to set up their Instant
Messaging Account during the initial Call Manager configuration
•
The Instant Message account username and password options are not active in the
Instant Messaging panel of the Call Manager Options and Preferences window, as
shown in Figure 13.
These fields are auto-filled with the user’s network credentials.
ShoreTel 9.1
Page 37
Single Sign On – Instant Messaging
Figure 13
Page 38
ShoreWare Server Release Notes
SSO – Inactive Instant Messaging Logon Options
SIP Header Enhancement –
Integration with 911 Enable
Introduction
ShoreTel 9.1 modifies the SIP Header structure in packets handled by the ShoreTel system.
The MAC address is added to the From Header.
This change accommodates a third party solution for providing emergency services to
devices in an IP network without requiring PSTN access.
Background
The emergence of centralized IP-PBX deployments and greater employee mobility requires
a reliable 911 option. The e911 feature available in this release now offers improved
customer support. Device deployment options, including desktop office phones and remote
teleworker phones, along with mobile feature options, including Anyphone and Find Me,
increase the difficulty of physically locating an IP Phone that originates an emergency call.
Terms
New Terms
911 Enable 911 Enable is a third party vendor that markets a reliable method of routing
calls from IP network devices to emergency service providers.
Emergency Gateway (EGW) An Emergency Gateway is a hardware device manufactured by
911 Enable that tracks IP device movement and handles emergency calls between a
corporate IP network and the 911 Enable Emergency Routing Service through SIP
trunks.
Emergency Routing Service (ERS) Emergency Routing Service is a service provided by 911
Enable that routes location information received by an EGW to the appropriate Public
Safety Answering Point.
Established Concepts
Call Manager (switch) Call Manager is a ShoreGear module that handles MGCP
information from the IP phones to which the switch is assigned. This hardware module
is not directly related to the Call Manager client application.
Media Access Control (MAC) Address The MAC Address is a 48-bit number assigned to a
hardware device. The MAC address is written into the device hardware code when
manufactured and accessed by programs when configuring or locating the device. The
MAC address assigned to a device is unique from all other assigned MAC addresses.
PSAP A Public Safety Answering Point is a call center responsible for answering calls to an
emergency telephone number for police, firefighting, and ambulance services.
SIP Session Initiation Protocol is a signalling protocol that is typically used for setting up
and tearing down multimedia communication sessions, including voice and video calls.
SIP also supports video conferencing, streaming multimedia distribution, instant
messaging, and presence information.
ShoreTel 9.1
Page 39
SIP Header Enhancement – Integration with 911 Enable
ShoreWare Server Release Notes
Description
911 Enable is a third party vendor that markets a reliable method of routing calls from IP
network devices to emergency service providers. The 911 solution consists of two
components:
•
An Emergency Gateway (EGW) is a hardware device manufactured by 911 Enable that
tracks IP device movement and handles emergency calls between a corporate IP
network and the 911 Enable Emergency Routing Service through SIP trunks.
•
Emergency Routing Service (ERS) is a service provided by 911 Enable that routes
location information received by an EGW and to the appropriate Public Safety
Answering Point.
The Emergency Gateway receives 911 calls from the ShoreTel network, then communicates
with the ERS to determine the appropriate PSAP for the emergency call. ERS maintains a
database that associates IP device MAC addresses with the physical location of the device.
E911 Enable Integration
SIP Trunk
Switch
Emergency
Gateway
(EGW)
SIP Trunk:
911 Enable
Service
SIParator
SIP Trunk:
ITSP
Call Manager
Switch
T1 Trunk:
PSTN
T1 Switch
Figure 14
Integration 911 Enable Emergency Call Routing
To support the 911 Enable solution, the structure of ShoreTel SIP packet is modified to
include the MAC Address of the originating device in the From Header. The following is an
example of a From header containing the MAC address of a device:
From: "2181"<sip:[email protected]>; tag=c7aaad0801d6-00e0bb18b520
A new SIP trunk profile parameter – SendMACIn911Call Setup – is added to the default
SIP trunk profile. The default value of this parameter is enabled.
Page 40
Shared Call Appearance
Introduction
Definition
Shared Call Appearance is a ShoreTel client feature that establishes common Bridged Call
Appearance between a user (executive) and at least one other user (assistant). A Shared
Call Appearance is typically established to allow one or more assistants to manage inbound
calls and initiate outbound calls for an executive.
Background
Shared Call Appearance implementation relies on the technology defined by two existing
ShoreTel features – Bridged Call Appearances and Ringdown circuits.
Terms
New Terms
Associated Bridged Call Appearance (aBCA) Associated Bridged Call Appearance are
BCAs that are automatically assigned to an Executive Extension. All calls to the
Executive Extension are routed to the corresponding aBCA.
Executive Extension A Executive Extension is a ShoreTel extension whose Call
Appearances are configured as associated Bridged Call Appearances.
Hotline A Hotline is a bi-directional ringdown circuit that connects two ShoreTel users.
Hotline calls are initiated by pressing the corresponding IP Phone or Call Manager
button.
Established Concepts
Bridged Call Appearance (BCA) A Bridged Call Appearance is an extension that is shared
among multiple users. A BCA is characterized by its extension number and call stack
depth. The extension number specifies the method of contacting BCA users. The call
stack depth specifies the number of calls that can simultaneously reside on the BCA.
Bridged Call Appearance Monitor A Bridged Call Appearance Monitor is a Call Manager
window that displays all Bridged Call Appearances accessible to the user’s extension
through all devices assigned to the user. The Bridged Call Appearance Monitor is only
available through Operator Call Manager.
Call Stack The ShoreTel extension component that manages an entity’s call appearances.
The size defines the maximum number of calls – including active and held calls – that
an extension can handle simultaneously.
Extension Monitor Extension Monitor is a ShoreTel function that allows a user to access
another user's extension. In addition to viewing extension activity, the monitoring user
can answer and place calls on the calls extension. Extension monitoring is facilitated
through Call Manager and IP Phone Programmable buttons.
Programmable Call Manager Toolbar Buttons Programmable Toolbar buttons is a Call
Manager feature that provides access to ShoreTel call management functions. Each
ShoreTel 9.1
Page 41
Shared Call Appearance
ShoreWare Server Release Notes
button is programmed by the administrator to perform a specific function when clicked
and can contain text that relays function status.
Programmable IP Phone Buttons Programmable IP Phone buttons is a ShorePhone feature
that provides access to ShoreTel call management functions. Each button is
programmed by the user or administrator to perform a specific function when pushed
contains an LED indicator which may display function status.
Ringdown circuit a circuit that consists of predefined devices at the endpoints and is
configured to ring a recipient device immediately after an initiating device goes off
hook. Ringdown calls are completed without dialing or any other signaling other than
taking the initiating device off hook.
Description
Synopsis
Shared Call Appearance converts the call appearances on an extension’s call stack to
associated bridged call appearances (aBCAs). aBCAs are typically accessed by one or more
assistants to manage and initiate calls for the user assigned to the extension.
Feature Components
Executive Extension
The executive extension is a ShoreTel extension that is configured for Shared Call
Appearance. All call appearances of the executive extension are converted into associated
Bridged Call Appearances (aBCA); calls to the executive extension are routed to the
extension of the corresponding aBCA.
To convert an extension to a executive extension
Step 1 Open the Edit User panel of the desired user by selecting Administration -> Users > Individual Users from the Director Main Menu, then click the name of the desired
user.
Step 2 Select Shared Call Appearances, as shown in Figure 15.
Director autofills the Associated BCA field. This field specifies the extension of the
aBCA associated with the executive extension.
Step 3 Enter the desired number for the aBCA in the Associated BCA field.
This step can be skipped if the autofill entry is acceptable. This field cannot be
edited after the initial configuration.
Step 4 Press the Save button at the top of the Edit User panel.
Clearing the Shared Call Appearances checkbox reverts the executive extension to a
normal extension and deletes the aBCAs associated with the extension.
Associated Bridge Call Appearance
An Associated Bridged Call Appearance (aBCA) is a bridged call appearance that is
associated to a Executive Extension. Associated Bridged Call Appearances differ from other
BCAs as follows:
Page 42
ShoreWare Server Release Notes
Figure 15
Shared Call Appearance
Configuring the Executive Extension
•
aBCAs are not editable from the Bridged Call Appearance Director panel. aBCA settings
and parameters are configured from the user’s Edit User panel.
•
aBCAs are created when a ShoreTel extension is converted to a executive extension.
To create a executive extension, open the Edit User panel for the desired user and select
the Share Call Appearances option. The number listed in the Associated BCA field
specifies the extension of the aBCA.
•
aBCAs are deleted if the associated executive extension is reverted to a normal
extension.
To revert a executive extension to a normal extension, clear the Shared Call
Appearance option on the Edit User panel.
NOTE: If there are any secretaries that are monitoring Executive' aBCA the
dependencies shall be removed before you can clear Share CallAppearances check
box.
Associated BCA settings are viewed from a Bridged Call Appearance edit panel, as shown in
Figure 16. This panel is read only for aBCA. Parameters can be modified from the edit panel
of the associated user. The No Answer Number of Rings and Call Forward Destination
parameters reflect the initial state of these values and, depending on the activity of the user,
may not indicate the current state of these parameters.
The following procedure opens the aBCA edit panel:
Step 1 In Director, open the Bridged Call Appearance List panel of the desired user
Step a Select Administration -> Call Control -> Bridged Call Appearances from the
Director Main Menu.
Step b Click the aBCA associated with the desired user.
ShoreTel 9.1
Page 43
Shared Call Appearance
ShoreWare Server Release Notes
Figure 16
Edit Panel – Executive Bridged Call Appearances
aBCA names have the form <first name>_<last name>_<extension>, where
— first name is the first name of the user
— last name is the last name of the user
— extension is the user’s extension number
Step 2 Open the edit panel for the aBCA, as shown in Figure 16, by clicking the name of
the desired aBCA on the Bridged Call Appearance List panel.
When the Edit panel of an aBCA opens, Director displays a warning that the BCA is
a Shared Bridged Call Appearance and cannot be modified.
Assistant Users
Assistant users require no additional configuration, other than the assignment of Call
Manager or IP Phone programmable buttons to monitor the Executive Extension aBCAs.
Hotline
A hotline is a bi-directional ringdown circuit accessed through IP Phone or Call Manager
buttons. A hotline call is initiated by pressing the assigned button. Hotline calls can be
configured as speed dial or intercom calls.
A Hotline circuit can be implemented between an executive and assistant to communicate
call status on the executive’s aBCA.
Refer to the Hotline Release Note for configuration information.
Programmable Buttons
Executives and Assistant users access aBCAs and the hotline circuit from Call Manager or
ShorePhones through programmable buttons configured for Bridged Call Appearances.
Buttons for Executive Extensions are not configurable as Call Appearances.
Page 44
ShoreWare Server Release Notes
Shared Call Appearance
Refer to the ShoreTel Administrator Guide for information about programmable buttons.
Bridged Call Appearance Monitor
The Bridged Call Appearance Monitor is a Call Manager window that displays all Bridged
Call Appearances accessible to the user’s extension through all devices assigned to the user.
The BCA Monitor consolidates all of a user’s aBCA activity into a single panel.
The Bridged Call Appearance Monitor is only available through Operator Call Manager.
Feature Limitations
Shared Call Appearances are subject to the following limitations:
•
Shared Call Appearances are supported on all ShoreGear switches and all ShorePhones
that have programmable buttons.
•
When a executive extension is routed to a phone that does not have programmable
buttons, the executive extension is handled as a normal extension.
The extension behavior reverts back to that of an Executive Extension when extension
calls are routed to a phone with programmable buttons.
•
Placing a executive extension call on hold parks the call on the aBCA. Held calls on a
executive extension can be viewed from the PCM Bridged Call Appearance Monitor or
from IP Phone display.
•
Hotline calls and Extension Monitor calls to an Executive extension that are picked up
are not bridged.
•
An executive extension’s redial list shows only outbound calls.
•
Hotline intercom calls will use a user's intercom permissions. Hence same rules that
apply to regular intercom calls apply to hotline-intercom calls.
•
When a new call is placed from executive's PCM the existing active calls will be locally
held and not parked back on aBCA. However if the new call is placed from the phone,
then the existing active call will be parked back on aBCA.
•
aBCA is only hidden in the phone directory list so that users don't accidently call aBCA
instead of executive. But like any normal BCA, administrators can configure aBCA as
the destination of a trunk group or target extension of a programmable button
function. Its up to administrator’s discretion how to use aBCA.
•
Internal users calling executive will see aBCA's number called party ID while the call is
ringing and actual executive number after the call is connected.
•
Executive call timer gets reset if Executive puts call on hold.
•
To land a call on hotline button as intercom or speed dial, its required that both the
parties have a hotline program button. If not the call will be offered as normal call.
•
6-way conference is currently possible from the Executive phone, but only 3-way
conferencing is possible from the Assistant’s phone.
Implementation
A typical Shared Call Appearance application includes a Hotline circuit between an
executive and an assistant. The hotline circuit is used by the assistant to relay the status of
calls requiring the executive’s attention.
ShoreTel 9.1
Page 45
Shared Call Appearance
ShoreWare Server Release Notes
The following sections describe the set up and performance of Shared Call Appearance and
Hotline circuits for this typical scenario.
Configuring
Setting up a Shared Call Appearance – Hotline connection between a executive extension
(executive) and an assistant user requires the following steps:
Step 1 Convert the executive’s extension to a Executive Extension, as described in
Executive Extension on page 42.
This step configures the executive’s Call Appearances as aBCAs.
Step 2 Configure the executive’s ShorePhone or Call Manager to access the hotline circuit.
Refer to the Hotline Release Note for configuration details.
Step 3 Configure the Assistant user to access the aBCA associated with the executive
extension
Step 4 Configure the Assistant user’s ShorePhone or Call Manager to access the hotline
circuit.
Refer to the Hotline Release Note for configuration details.
Using Shared Call Appearance
Inbound Calls
The following scenario describes a typical process of receiving calls for an executive by an
assistant through Shared Call Appearances.
Step 1 The inbound call flashes an aBCA indicator on the assistant’s and executive’s calling
devices – ShorePhone or Call Manager.
The executive can answer the call at this time and eliminate the assistant’s role.
Step 2 The assistant user answers the call that is flashing on the aBCA button and
determines the caller’s name and purpose.
Step 3 The assistant user places the call on hold.
Step 4 The assistant user presses the hotline button to call the executive.
Step 5 The assistant user advises the executive of the call in progress and provides
instructions on picking up the call.
Step 6 The executive picks up the held call by pressing the aBCA button, as instructed by
the assistant.
Outbound Calls
The following scenario describes a typical process of setting up a call for an executive by an
assistant through Shared Call Appearance.
Step 1 The assistant user accesses an aBCA associated with the executive extension by
pressing an appropriate IP Phone or Call Manager button.
Page 46
ShoreWare Server Release Notes
Shared Call Appearance
NOTE: The called party will see the executive's bBCA or the assistant’s aBCA's
caller ID based on the BCA Caller ID registry setting.
Step 2 The assistant user calls the recipient and prepares the recipient for the executive’s
call.
Step 3 The assistant user places the call on hold.
Step 4 The assistant user presses the hotline button to call the executive.
Step 5 The assistant user advises the executive of the call in progress and provides
instructions on picking up the call.
Step 6 The executive picks up the held call by pressing the aBCA button, as instructed by
the assistant.
Using Blind Conference Option with Shared Call Appearance
Scenario 1
In this scenario the executive is currently on a call with party one. The assistant receives a
call from a second party. The assistant determines that the executive is on a call and wants
to have the second party join the Executive's call. Using the assistant blind transfer, the
Assistant calls Executive on hotline to tell the Executive that the second party is on the line
and ready to join the call. The hotline call ends and the Executive is connected back to
Party and the Assistant is connected back to Party two. The Assistant then initiates a
conference and selects executive's call into which Party two needs to join. Once the
conference connection iscompleted, Parties one and two will be in the same call.
Scenario 2
In this scenario executive hotlines the assistant and asks him or her to bring party two into
the call and then the executive gets back on the line with party1. Then the assistant calls
party two, hotlines the executive to tell him that party two is ready to join and then joins
party two by initiating a blind conference and then selecting the executive’s line.
NOTE: The assistant joins the second party into the executive call by initiating a blind
conference then specify the number or extension and then select options for for blind or
consultative conference. The executive’s line LED will be RED as designed.
Blind Conference Limitation
Blind Conference is subject to the following limitation.
•
ShoreTel 9.1
Assistant cannot join a party into a executive’s line if the executive is already on a 3party call on that line.
Page 47
Shared Call Appearance
Page 48
ShoreWare Server Release Notes
Silent Coach
Introduction
Definition
Silent Coach is a ShoreTel client feature that allows a user to intervene in another user’s
active call and communicate with that user. The initiator can speak to the specified user
and listen to all other call participants. The specified user is the only call participant that
can hear the initiator. A Telephony Class of Service assigns Silent Coach rights. Silent
Coach can be initiated through various ShorePhone models or through Call Manager.
This feature also provides the capability for the initiator to switch between Silent Monitor,
Barge In, and Silent Coach functions for the same call.
Background
Previous ShoreTel versions provided Silent Monitor, Barge In, and Whisper Page functions.
Silent Coach differs from these features as follows:
•
Silent Monitor: The initiator cannot speak to or be heard by any call party.
•
Barge In: The initiator can be heard by and speak to all call participants.
•
Whisper Page: The initiator can only listen to, speak to, or be heard by the user whose
call was interrupted.
Terms
New Terms
Silent Coach Silent Coach is a ShoreTel client feature that allows a user to intervene in a
specified user’s active call and communicate with that user. The initiator can speak to
the specified user and listen to all other call participants. The specified user is the only
call participant that can hear the initiator. A Telephony Class of Service sets Silent
Coach rights.
Established Concepts
Barge In Barge In is a ShoreTel function that allows a user to enter another user’s active call.
The initiator can listen and speak to all other call participants. A Telephony Class of
Service sets Barge In rights.
Class of Service (CoS) A class of service grants permission to a specified set of features and
privileges. Users assigned to a class of service can access the specified features and
privileges. ShoreTel defines three types of service classes: telephony features, call
permissions, and voicemail permissions.
Silent Monitor Silent Monitor is a ShoreTel function that allows a user to listen to another
user’s call without being heard by any of the call participants. When a call is monitored,
external callers may hear a monitor tone; system users are not signaled. A Telephony
Class of Service sets Silent Monitoring rights.
Whisper Page Whisper Page is a ShoreTel client feature that allows a user to interrupt an
active call and speak with an internal user. The other call party and the initiator are not
ShoreTel 9.1
Page 49
Silent Coach
ShoreWare Server Release Notes
connected – they cannot hear or speak with each other. A Telephony Class of Service
sets Whisper Page rights.
Description
Synopsis
Silent Coach is a ShoreTel client feature that allows a user to intervene in a specified user’s
active call and communicate with that user. The initiator can speak to the specified user
and listen to all other call participants. The specified user is the only call participant that
can hear the initiator. A Telephony Class of Service sets Silent Coach rights. Silent Coach
can be initiated through various ShorePhone models or through Call Manager.
The right to perform Silent Coach is set by the system administrator. The system
administrator also designates users whose calls can be monitored.
Initiating a Silent Coach Session
Silent Coach sessions can be initiated through ShorePhone or Call Manager programmable
buttons, Call Manager menu options, and star code calls from other calling devices.
Session Transitions
Users initiating a Silent Coach session can change the session to a Silent Monitor or Barge
In session. Silent Monitor sessions can be changed into a Silent Coach sessions.
Coach Consult and Resumption
The user that receives a Silent Coach session can place the original call on hold to engage in
a two-way conversation with the Silent Coach initiator. At the end of this conversation, the
user can resume or terminate the original call.
Limitations
The following devices do not support session transitions, coach consulting, and coach
resumption:
•
•
•
all analog phones
IP110
IP210
Call Manager can be used with these devices to perform session transitions, coach
consulting, and coach resumption.
Silent Coach cannot be initiated with users that are on conference calls.
Calls upon which Silent Coach is active and cannot be transferred or converted to a
conference call.
Silent Coach is not available on SIP extensions or over SIP phones trunks.
The recipient cannot record calls while Silent Coach is active.
Page 50
ShoreWare Server Release Notes
Silent Coach
Implementation
Configuring Silent Coach Permissions
Silent Coach access is controlled through Telephony CoS settings. Permissions for
monitoring calls and for having calls monitored are configured through the Silent Monitor
/ Silent Coach option on the Telephony Class of Service Edit panel, as shown in Figure 17.
Figure 17
Class of Service Setting – Silent Coach
To configure Silent Coach for a Telephony Class of Service:
Step 1 Open a Telephony Class of Service panel for the desired service class:
Step a Select Administrator -> Users -> Class of Service on the Main Menu.
Step b Click the name of the desired Telephony Features Permissions CoS.
Step 2 Select the following Silent Monitor options for users assigned to the Class of
Service:
•
Enable users assigned to the CoS to monitor calls by marking the Allow
Initiation checkbox in the Silent Monitor / Silent Coach Other’s Calls row.
•
Determine the users that can monitor users assigned to the CoS by selecting a
radio button right of the Accept: text.
Valid options include None, All, and From Only. Selecting From Only activates
the data entry field that specifies the user that can silently monitor calls of
users assigned to the CoS.
Step 3 Click the Save button to save your changes.
ShoreTel 9.1
Page 51
Silent Coach
ShoreWare Server Release Notes
Enabling the Silent Coach Warning Tone
ShoreWare provides an option for playing a Silent Coach Warning Tone to all call
participants when a Silent Coach session is initiated and if the Silent Coach Warning Tone
option is enabled. The Warning Tone setting applies to all Silent Coach sessions on the
system.When a user transitions between Silent Coach and Silent monitor, the warning
tones start/stop are based on the silent coach or silent monitor warning tone setting.
To enable the Silent Coach Warning Tone option:
Step 1 Open the Call Control Options Edit panel, as shown in Figure 18, by selecting
Administration -> Call Control -> Options on the Director Main Menu.
Step 2 Mark the Enable Silent Coach Warning Tone option.
Figure 18
Enabling the Silent Coach Warning Tone
Configuring Silent Coach buttons
ShorePhone and Call Manager programmable buttons can be configured to initiate a Silent
Coach session with a specific user or to query the caller for a Silent Coach destination. The
configuration processes for ShorePhone and Call Manager programmable buttons are
almost identical.
To configure an IP Phone button to initiate Silent Coach:
Step 1 Open a user’s IP Programmable Button panel for the desired user:
Step a
Step b
Step c
Step d
Select Administrator -> Users -> Individual Users on the Main Menu.
Open the Edit User panel by clicking the name of the desired user.
Select Personal Options at the top of the panel.
Click IP Phone Buttons.
Figure 19 displays the IP Phone Buttons configuration panel.
Step 2 Select Silent Coach from the Function drop-down menu of a selected button.
Step 3 Enter the button label in the Label field.
Step 4 To program the button to monitor the calls of a specific user, enter the user’s
extension in the Extension field.
Page 52
ShoreWare Server Release Notes
Figure 19
Silent Coach
Programming IP Phone Button – Silent Coach
If this field is left blank, pressing the IP Phone button queries the initiator to enter
a number in the Telephone User Interface before the session begins.
Step 5 Click Save to store panel changes.
Performing a Silent Coach Operation
Silent Coach is initiated from the following:
•
•
•
•
Call Manager programmable button
Call Manager menu option
ShorePhone programmable button
Any phone by pressing the code *22, then entering the target extension.
Call Manager
Call Manager supports two methods of initiating Silent Coach operations – from menu
options and by pressing a toolbar button.
To perform a Silent Coach from a Call Manager Menu:
Step 1 Perform one of the following:
•
•
•
Click the Application Button, then select Dial -> Silent Coach.
Select Dial -> Silent Coach from the main menu.
Right click the System Tray ShoreTel icon select Dial -> Silent Coach.
Call Manager displays the Silent Coach dialog box, as shown in Figure 20.
Step 2 Enter an extension or select an item from the drop-down list.
Step 3 Click the Silent Coach button at the bottom of the panel.
ShoreTel 9.1
Page 53
Silent Coach
ShoreWare Server Release Notes
Figure 20
Silent Coach Dialog box
To perform a Silent Coach from a Call Manager toolbar button:
Step 1 Press the programmable Silent Coach button, as shown in Figure 21.
If the button specifies a Silent Coach recipient, the system immediately initiates a
Silent Coach session with that user. Skip the remaining steps.
If the button does not specify a Silent Coach recipient, Call Manager displays the
Silent Coach dialog box. In this case, continue to the next step.
Figure 21
Call Manager – Silent Coach session
Step 2 Enter an extension or select from the drop-down list.
Page 54
ShoreWare Server Release Notes
Silent Coach
Step 3 Click the Silent Coach button.
To transition a Silent Coach session into a Silent Monitor or Barge In session, perform
one of the following:
•
Right click the call cell and select the desired session type on the context menu.
Figure 21 displays the context menu during a Silent Monitor Session.
•
If available, press the Monitor or Barge In programmable button.
Figure 21 displays Silent Monitor, Silent Coach, and Barge In programmable
buttons.
The same process transitions a Silent Monitor session into a Silent Coach session.
IP Phone
To perform a Silent Coach from a ShorePhone programmable button, press the Silent
Coach button.
•
If the button specifies a Silent Coach recipient, the system immediately initiates a
Silent Coach session with that user. Disregard the remaining steps.
•
If the button does not specify a Silent Coach recipient, enter the recipient’s name or
number in the Telephone User Interface.
Call Manager displays the Silent Coach dialog box. In this case, continue to the next
step.
To perform a Silent Coach from any system phone,
•
Enter the *22 code, followed by the number of the target extension.
ShoreTel phones display softphone options while a Silent Monitor option is active. Figure
22 displays the ShorePhone 560 Telephone User Interface for a user that initiated a Silent
Coach session.
Figure 22
IP Phone User Interface – Silent Coach initiator
Softkey options available to the Silent Coach initiator:
ShoreTel 9.1
•
SilMon: Transitions the session into a Silent Monitor session
•
Barge: Transitions the session into a Barge In call.
•
Show: Displays all call participants in the Telephone User Interface
•
Hangup: Terminates the Silent Monitor session.
Page 55
Silent Coach
ShoreWare Server Release Notes
Softkey options available to the Silent Coach recipient:
•
Consul: Places the active call on hold and establishes a two-way voice path
between with the Silent Coach initiator.
While the recipient consults with the initiator, soft key options include:
— Resume: Restarts the recipient’s original call.
— Show: Displays all call participants.
— HangUp: Terminates the call.
Page 56
•
Show: Displays all call participants in the Telephone User Interface.
•
Hangup: Terminates the Silent Monitor session.
Hotline
Introduction
Definition
A Hotline is a bi-directional ringdown circuit accessed through IP Phone or Call Manager
buttons. A hotline call is initiated by pressing the assigned button. Hotline calls can be
configured as speed dial or intercom calls.
The Hotline feature is implemented without Bridged Call Appearances.
Background
Previous ShoreTel versions provided Hotline functionality through Ringdown call
appearances. The Hotline feature defines a specific type of ringdown circuit that does not
require Bridged Call Appearances to implement.
Terms
New Terms
Hotline A bi-directional ringdown circuit accessed through IP Phone or Call Manager
buttons.
Established Concepts
Programmable Call Manager Toolbar Buttons Programmable Toolbar buttons is a Call
Manager feature that provides access to ShoreTel call management functions. Each User
Interface button is programmed by the administrator to perform a specific function
when clicked and contains text that provides status of the function.
Programmable IP Phone Buttons Programmable IP Phone buttons is a ShorePhone
feature that provides access to ShoreTel call management functions. Each button is
programmed by the user or administrator to perform a specific function when pushed
and contains an LED indicator that displays status of the function.
Ringdown circuit a circuit that consists of predefined devices at the endpoints and is
configured to ring a recipient device immediately after an initiating device goes off
hook. Ringdown calls are completed without dialing or any other signaling other than
the initiating device going off hook.
Implementation
Configuration
A hotline is configured on an IP Phone or Call Manager button by accessing the
Programmable Button panel through the Edit User panel. Figure 23 displays the Edit panel
for a user’s programmable IP Phone buttons, where button 2 is configured as a hotline.
Through this assignment, the user has a hotline set up with a user at extension 159.
ShoreTel 9.1
Page 57
Hotline
ShoreWare Server Release Notes
Figure 23
Programming a Hotline button
Usage
Users access the hotline circuit from Call Manager or ShorePhones through programmable
buttons.
Hotlines calls are presented as normal voice calls to users that have not assigned a button
for that hotline.
Refer to the ShoreTel Administrator Guide for information about programmable buttons.
Feature Limitations
Hotline is subject to the following limitations:
Page 58
•
Hotline program button cannot be configured on button box.
•
If the hotline call recipient does not have accept intercom permissions, then the hotline
call will be offered as normal call.
Mobile Call Manager – Device
Support Enhancements
Introduction
Definition
ShoreTel 9.1 provides support for the following mobile devices:
•
•
HTC TyTN II
Nokia E71
Feature Support
Although basic MCM functions are available on all supported devices, the implementation
of some functions varies between devices because of the inherent devices differences. The
following sections list MCM features that are available on models introduced in ShoreTel
9.1
Location Based Services
MCM supports LBS on the Nokia E71
Devices supporting LBS must either have internal GPS hardware or the capability of
connecting to an external device that provides GPS functionality, such as dongles. The
carrier must allow GPS on the device and allow third party applications, such as MCM, to
use GPS functionality. External GPS devices may be used to enable LBS features on these
devices, depending on carrier limitations
Voicemail Preview
MCM supports Voicemail Preview over the speaker phone on the Nokia E71
PIM Integration
The Nokia E71 supports PIM entry import. The MCM settings panel provides an option to
disable PIM loading.
The TY TN II does not support PIM.
Default Network Speed Setting
The default setting on the Nokia E71 is High Speed/Wi-Fi.
The only network speed setting available on TY TN II devices is Slow 2/2.5G/CDMA.
Fonts
MCM displays text through native OEM fonts on the Nokia E71 and the HTC TyTN II
ShoreTel 9.1
Page 59
Mobile Call Manager – Device Support Enhancements
Page 60
ShoreWare Server Release Notes
ShoreTel 9 – System Features
Active Directory
Introduction
ShoreTel 9 integrates Active Directory with the ShoreTel directory to provide the following
functions:
•
•
•
Bulk Import of user accounts
Synchronize ShoreTel user accounts with Active Directory user records
Authentication of Active Directory users
Active Directory compliant directories centrally stores information for all users, computers,
and other entities. This feature adds the capacity to provision and authenticate user
accounts that are generated and maintained by other applications.
Refer to the Glossary for a definition of the following terms used in this release note:
•
•
•
•
•
•
Active Directory (AD)
DBImport
Explicit Authentication
Lightweight Directory Access Protocol (LDAP)
LDAPExport
Single Sign On (SSO)
Description
Directory services store organization information and settings in a central, organized,
accessible database. LDAP is the protocol used for exchanging information between client
applications and the serving directory. An LDAP directory allows administrators to assign
enterprise-wide policies, deploy programs to many computers, and apply critical updates to
an entire organization.
Active Directory (AD) is the Microsoft application that implements LDAP on Windows
based systems. AD is widely deployed among large enterprises.
The ShoreTel AD implementation supports the synchronization of user records between the
ShoreTel database and other applications using AD on Windows based networks.
ShoreTel AD includes the following features:
•
Authentication of AD Users, as described in Authenticating AD Users on page 66.
•
Synchronizing AD Directory and ShoreTel Director user records, as described in
Synchronizing AD and Director User Records on page 69.
•
Bulk Provisioning of User Accounts, as described in Bulk Provisioning of User
Accounts on page 70.
Active Directory Implementation
Active Directory Integration is an optional ShoreTel feature that is disabled by default.
Systems that disable AD Integration do not recognize links to the Active Directory for AD
properties attached to system users and do not provide AD authentication,
synchronization, or provisioning services.
ShoreTel 9.1
Page 63
Active Directory
ShoreWare Server Release Notes
When AD Integration is enabled, only users that have Administrative Permissions can log
into Director. This requires the explicit definition of at least one administrator role and the
assignment of users requiring Director access to an administrative role.
Enabling AD Integration on a ShoreTel System
AD is enabled from the Edit Other System Parameters panel, as shown in Figure 24, is
accessed through ShoreWare Director by selecting Administration -> System Parameters ->
Other.
To enable AD, select Enable AD Integration located at the bottom of the panel, then enter
the Active Directory path in the data entry field.
Figure 24
Enabling Active Directory
IMPORTANT Since AD prevents anonymous users from logging in through the default
administrator account, the default Director access method (admin/changeme) is not
available when AD is enabled. At least one user must be assigned Administrative
rights before enabling AD.
Configuring AD on a New System provides a procedure that includes required user
and administrative assignment steps for enabling Active Directory on a newly
installed ShoreTel system.
Configuring AD on a New System
The following procedure enables AD Integration on a new system including the initial user
configuration and assignment of administrative permissions:
Step 1 Login to an Active Directory account through which ShoreWare Director will be
accessed.
Step 2 Access ShoreWare Director by entering the following parameters:
username – admin
password – changeme
Step 3 Add a user to the ShoreTel system with a Client User ID name that matches the
Active Directory login name.
Page 64
ShoreWare Server Release Notes
Active Directory
To add a system user, select Administration -> Users -> Individual Users from the
Main Menu. Refer to the ShoreTel Administration Guide for more information.
Step 4 Assign Administrative Rights to the new user account.
To assign rights, press the New button in the Administrators List panel that is
accessed by selecting Administration -> System Parameters -> Administrative
Permissions -> Administrators panel. Refer to the ShoreTel Administration Guide
for more information.
Step 5 Open the System Parameters: Edit Other Parameters panel by selecting
Administration -> System Parameters -> Other from the Director Main Menu Login,
as shown in Figure 24.
Step 6 Select Enable AD Integration located at the bottom of the panel, then enter a valid
AD path in the AD Path data entry field.
Step 7 When prompted to save your changes and close the window, press the OK button
and Yes option.
This step logs you out of Director
Step 8 Log into Director again, using the username created in Step 3.
The default password is changeme.
Step 9 Open the Edit User panel for the new user and enable Active Directory for that
user, including the domain and user ID for the user.
Step 10Log out of ShoreWare Director and close the window.
Subsequent ShoreWare Director launches when logged on to the domain through this
username will automatically log into Director.
Mapping Active Directory Attributes to ShoreTel Fields
ShoreTel user records contain eleven data fields that map directly to Active Directory
records. The following is a list of these data fields, categorized by the Director panel that
sets their ShoreTel value.
Edit User panel
•
•
•
•
•
•
First Name: Active Directory field capacity is 64 characters; ShoreTel capacity is 50.
Last Name: Active Directory field capacity is 64 characters; ShoreTel capacity is 50.
Number: ShoreTel extracts the number of digits specified by the extension length,
starting from the right side of the AD phone number.
DID
Email Address
Client User ID: Active Directory length is limited to 20 characters.
System Directory
•
•
•
•
Home Phone
Pager
Cell Phone
Fax Phone
ShoreTel Database (does not appear in Director)
ShoreTel 9.1
Page 65
Active Directory
•
ShoreWare Server Release Notes
LDAP-GUID: Used internally by the ShoreTel system when performing subsequent user
updates from the AD database.
Authenticating AD Users
ShoreTel supports AD authentication for users logging into Call Manager, Web Client, and
Director, permitting access to these programs without providing the ShoreWare username
or password.
•
AD Users logging into Director and Call Manager are authenticated through Single Sign
On (SSO) with their current network credentials. Users are not required to re-enter
their credentials to access these applications.
•
AD users logging into Web Client are authenticated through Explicit Authentication,
which requires re-entry of their credentials each time they access the application.
Director
When AD Integration is enabled, user access to ShoreWare Director is restricted as follows:
•
•
•
•
only users with a domain account can log into Director
only users with administrative permissions can log into Director
users do not need to be logged into their domain account to access Director
users do not need their ShoreTel account configured for Active Directory (AD Users) to
access Director
The following sections describe Director access scenarios.
AD User Logged into the Domain
Users configured for AD within ShoreWare that are logged into the domain network are
directed to the Director Quick Look panel when they attempt to access Director without
entering their network credentials.
Upon logging off from Director, the browser displays a ShoreWare entry panel that allows
Director access by pressing a button, as shown in Figure 25.
Figure 25
Page 66
Director Login panel – AD user
ShoreWare Server Release Notes
Active Directory
Non-AD User Logged into the domain
Users that are not configured for AD within ShoreWare that are logged into the domain
network are directed to a Director Login panel, as shown in Figure 26. Users access
Director from this panel by entering their ShoreTel username and password in the
respective data fields.
Figure 26
Director Logon panel – Non-AD user
Users not logged into the domain
Users attempting to access Director without first logging into the domain network are
initially routed to a domain login panel, as shown in Figure 27. After entering their
network credentials, users are routed to the appropriate panel – AD users are routed to the
Quick Look panel and Non-AD users are directed to a login panel.
Figure 27
Domain Login Panel
Call Manager
When AD Integration is enabled, access to Call Manager is available to all system users,
including users without domain accounts or not configured as ShoreTel AD users.
Initial Configuration
When installing Call Manager, users authenticated through AD are not queried for their
credentials; they are immediately prompted for the server name after which wizard panels
guide them through the setup process.
ShoreTel 9.1
Page 67
Active Directory
ShoreWare Server Release Notes
Users that are not authenticated through AD are required to enter their name, password
and server name. After verifying the user’s credentials, Call Manager guides the user
through the setup process.
Logging into Call Manager
Attempts to log into Call Manager after the initial setup are handled on the basis of the
user’s AD configuration. Active Directory users are authenticated by SSO through the
verification of their AD credentials. Users not configured for Active Directory are
authenticated through the verification of their ShoreTel username and password, as
previously loaded through their Call Manager account. In either case, users are typically
not required to re-enter their username or password each time they open Call Manager
from their computer.
Call Manager behavior when authentication fails is not changed by this feature.
User Name – Telephony Options panel
The User Name data field at the top of the Options and Preferences: Telephony panel
displays the user name of the Call Manager account. This field is read only for users
authenticated through AD credentials, as shown in Figure 28.
Figure 28
Options and Preferences: Telephony panel
Web Client
When AD Integration is enabled, access to the Web Client is available to all users,
including users without domain accounts or not configured as ShoreTel AD users.
Attempts to log into Web Client always require the user to enter credential information.
Domain members configured as ShoreTel Active Directory members enter their Active
Directory user name and password and are authorized through Explicit Authentication. All
other users enter their ShoreTel username and password.
Page 68
ShoreWare Server Release Notes
Active Directory
Synchronizing AD and Director User Records
Director provides an interface for adding, updating, and deleting AD users from the
ShoreTel database. Synchronization is performed on individual users and does not affect
the AD directory.1
Enabling AD for a ShoreTel User
When AD Integration is enabled, the first parameter on the Edit User: General panel
enables Active Directory for the user, as shown in Figure 29.
To enable Active Directory for a user, enable the Active Directory User option at the top of
the panel, then enter the domain\user name for the user, as shown in Figure 29.
Figure 29
Enabling Active Directory for a User
Updating AD Fields
Active Directory users can synchronize user account records with contents from the Active
Directory database by pressing the Sync from AD button located left of the user’s Active
Directory user ID. Pressing the Show From AD button displays parameter settings for the
user’s Active Directory account.
The Show From AD and Sync From AD buttons are inactive for users accessing this panel
that are not configured as AD users.
Removing AD Users
When an administrator attempts to delete a user with an AD account, ShoreWare displays a
warning message and requires confirmation before removing the record from the ShoreTel
database.
1. The authentication process is defined between the computer running the HQ server and the computer
hosting Active Directory. Authenticating AD records from a different computer involves Delegation, which
is defined by Microsoft as a process where a trusted account impersonates the account that has AD access
permission – in this case, from the computer hosting the HQ server.
Authentication Delegation is available in most ShoreTel configurations, allowing AD queries through the
Edit User panel from any computer running Director. If a problem arises when attempting to access AD
information through the Edit User panel from a remote device, access Director through an intranet URL
from the computer hosting the Headquarters Server software.
For more information about Authentication Delegation, refer to Microsoft technical software.
ShoreTel 9.1
Page 69
Active Directory
ShoreWare Server Release Notes
Bulk Provisioning of User Accounts
ShoreTel supports the bulk provisioning of user accounts from AD records through a two
step process:
Step 1 Export AD records to a CSV file.
Exporting AD Records describes this step.
Step 2 Import CSV records to the ShoreTel user database.
Importing the CSV File on page 71 describes this step.
Exporting AD Records
ShoreTel provides a VBScript file to export data records from an Active Directory database
to a CSV file. The VBScript file can be used as a template for specific ShoreTel system
requirements.
The parameter section of the file is shown in Figure 30. This section consist of two
subsections:
Figure 30
Page 70
Sample ldaptocsv.vbs file – parameter sections
•
The top section receives values from the AD database for each imported file. As
indicated in the comments section, one value can be assigned to individual fields for all
users by entering the value in place of the quotes.
•
The bottom section is a data template containing non-AD fields that are saved to the
CSV file. The values entered in these fields are assigned to all records retrieved from the
AD database.
ShoreWare Server Release Notes
Active Directory
The following command line executes the AD to CSV file import:
cscript ldaptocsv.vbs outputCSVfile LDAPpath [modifiedInLastN#OfDays]
where
outputCSVfile specifies the name of the output file
LDAPpath specifies the path to the AD database
[modifiedInLastN#OfDays]
The resulting CSV file can be modified though a spreadsheet program to customize user
settings for import to the ShoreTel database.
Importing the CSV File
DBImport.exe is a executable file that imports CSV contents to the ShoreTel database that
was introduced in a previous ShoreWare release and described in the ShoreTel
Administrator Guide.
To support AD record imports, the following fields are supported by DBImport.exe:
•
LDAP-User flag: indicates that the user settings were imported from an AD database.
•
LDAP-GUID: a data field that creates an association between an LDAP record and the
corresponding ShoreTel record.
•
LDAP-DomainName: specifies the name of the user’s domain network.
The following command line imports CSV file records to the ShoreTel database.
Dbimport -log DbLog.log -err DbErr.err <inputCSVfile>
ShoreTel 9.1
Page 71
Active Directory
Page 72
ShoreWare Server Release Notes
LLDP / 802.1x
Introduction
Version 9 enhances ShorePhones to support LLDP-MED and 802.1x.
The Link Layer Discovery Protocol-Media Endpoint Discovery (LLDP-MED) is an
enhancement to the Link Layer Discovery Protocol (LLDP) that addresses the following:
•
•
•
•
Device location discovery to support location databases and VoIP E911 services.
Auto-discovery of LAN policies to support “plug and play” networking.
Extended and automated power management of PoE endpoints.
Inventory management.
A component of IEEE 802.1 group of networking protocols, 802.1x addresses port-based
Network Access Control. It provides an authentication mechanism for devices attaching to
a LAN port to either establish a point-to-point connection or prevent the device from
accessing the port if authentication fails. 802.1x is based on the Extensible Authentication
Protocol (EAP).
Refer to the Glossary for a definition of the following terms used in this release note:
•
•
802.1x
LLDP-MED
LLDP-MED
LLDP-MED, an enhancement to the basic LLDP protocol, addresses the discovery of
endpoints by networks supporting LLDP.
Implementing LLDP-MED requires LLDP-MED capable network switches. ShorePhones
IP110 and IP210 do not support LLDP-MED.
Feature Description
ShorePhones that are updated to ShoreTel 9 comply with all mandatory TIA-1057 LLDPMed functionality for Class III Communications Device Endpoints and selected optional
capabilities or limitations.
Implementation
ShoreTel changes that support LLDP-MED implementation include the following:
•
Definition of a new telephone parameter – LldpEnable
LldpEnable is a one character ASCII parameter. Valid settings for LldpEnable are 0 and
1:
— LldpEnable = 1 (LLDP is enabled)
— LldpEnable = 0 (LLDP is disabled)
Default value is 1 (enabled)
•
Modify Setup Source Preferences
When setting up ShorePhones, parameter settings are obtained from the following
sources, listed in order of highest to lowest precedence:
ShoreTel 9.1
Page 73
LLDP / 802.1x
ShoreWare Server Release Notes
—
—
—
—
—
Config File
DHCP (if active)
LLDP (if active)
Setup Command
Default values
802.1x
A component of IEEE 802.1 group of networking protocols, 802.1x addresses port-based
Network Access Control. It provides an authentication mechanism for devices attaching to
a LAN port to either establish a point-to-point connection or prevent the device from
accessing the port if authentication fails. 802.1x is based on the Extensible Authentication
Protocol (EAP).
ShorePhones IP110 and IP210 do not support 802.1x.
Feature Description
ShorePhones that are updated to ShoreTel 9 comply with all mandatory 802.1x
functionality for Class III Communications Device Endpoints and selected optional
capabilities or limitations.
If 802.1x is enabled on the ShorePhone and disabled on the Network switch, the
ShorePhone never comes up.
Implementation
ShoreTel changes that support IEEE 802.1x implementation include:
•
Definition of a new telephone parameter – 802.1xEnable
802.1xEnable is a one character ASCII parameter. Valid settings for 802.1xEnable are 0
and 1:
— 802.1xEnable = 1 (802.1 authentication is enabled)
— 802.1xEnable = 0 (802.1 authentication is disabled)
Default value is 0 (disabled)
Page 74
Unicode Character Set Support
Introduction
Feature Description
ShoreTel 9 supports Unicode Character sets by incorporating the v5.1 MySQL ODBC
connector, resulting in databases that support Unicode Character sets. ShoreTel 9 does not
localize any ShoreTel application, including Director, not localized in a previous version.
Support of Unicode Character sets extends to the ShoreTel system and CDR databases.
Refer to the Glossary for a definition of the following terms used in this release note:
•
•
•
•
•
•
Call Detail Record (CDR)
CDR Database
MySQL
ODBC
ODBC Connectors
System Database
Implementation
ShoreTel 9 implements this feature through the following:
•
Changing MySQL ODBC connector version to v5.1.
V5.1 supports Unicode for Windows Server and Linux Server.
•
Changing CDR reports to use ArialUnicode For ST font.
Font changes require the appropriate authorization on the computer where they are
installed or removed.
Usage Information
Ascender Corporation provides four font files (Arial Unicode for ShoreTel, Arial Unicode
for ShoreTel Bold, Arial Unicode for ShoreTel Italics, and Arial Unicode for ShoreTel Bold
Italics) for three languages: Japanese, Simplified Chinese, and Traditional Chinese. Only
one set of files – supporting one language – can be installed on a computer at any time.
To install a font on a machine where web reports are required, perform the following:
Step 1 Open the Edit Reporting Options panel by selecting Reporting -> Options from the
Directory Main Menu.
Figure 31 displays the Edit Reporting Options panel.
Step 2 Select the desired language from the Select Language Variant drop-down menu.
Step 3 Press the Install Fonts button.
ShoreTel installs the requested font set on the computer.
ShoreTel 9.1
Page 75
Unicode Character Set Support
Figure 31
ShoreWare Server Release Notes
Reporting Options panel
Chinese Traditional font is installed on the Headquarters server by default. Access reports
from a client machine or using a different Asian font requires a font installation through the
Reporting Options panel.
Page 76
SRTP-AES
Introduction
Definition
ShoreTel 9 supports SRTP for encrypting, authenticating, and replaying media streams for
ShoreGear switches and ShorePhones that support encryption. Implementation details
include the following:
•
Media streams support of the AES algorithm
•
ShorePhone and ShoreGear support of government certified AES
•
All SRTP mandatory features:
—
—
—
—
Support AES in Counter Mode at 128-bit
Support key derivation rate (KDR) at 0
Do not support AES in F8 Mode
Do not support Master Key Identification (MKI)
Refer to the Glossary for a definition of the following terms used in this release note:
•
•
•
•
•
Advanced Encryption Standard (AES)
Real-time Transport Control Protocol (RTCP)
Real-time Transport Protocol (RTP)
Secure Real-Time Transport Protocol (SRTP)
Session Description Protocol (SDP)
History
ShoreWare 6 introduced a proprietary 64-bit encryption algorithm for protecting media
streams between ShoreTel devices, including ShoreGear switches and ShorePhones.
ShoreWare encrypts RTP (payload) packets within the ShoreWare network. Call control
packets are not encrypted.
ShoreWare 8 introduced a 128-bit proprietary algorithm that replaced the 64-bit version.
Background
AES is a United States Encryption standard defined in Federal Information Processing
Standard (FIPS) 192, published in Nov. 2001. AES is a symmetric block cipher which can
process 128-bit blocks, using key sizes of 128, 192, or 256-bit.
In June 2003, the US Government announced that any key length of AES is sufficient to
protect classified information up to secret level. Top secret information requires key length
of 192 or 256-bit.
SRTP, a profile of the Realtime Transport Protocol (RTP), provides confidentiality, message
authentication, and replay protection to the RTP traffic and to the control traffic (RTCP).
AES is the default and only standardized cipher for SRTP.
ShoreTel 9 support AES and SRTP through adopting RFC 4568.
ShoreTel 9.1
Page 77
SRTP-AES
ShoreWare Server Release Notes
SRTP-AES Description
System Support
ShoreTel 9 supports SRTP for encrypting, authenticating, and replaying media streams for
ShoreGear switches and ShorePhones that support encryption. ShoreWare encrypts RTP
(payload) packets sent within the ShoreTel network. Call control packets are not
encrypted. ShoreTel 9 retains the proprietary 128-bit encryption algorithm that is available
in previous version as an alternative to SRTP encryption.
Encryption is enabled or disabled on a system basis, encompassing all sites, and cannot be
specified for individual devices or selected calls. Encryption is transparent to end users and
cannot be selected for individual devices or calls. Calls in progress when the encryption
setting is changed remain the same encryption method through the duration of the call.
System administrators enable and select an encryption algorithm through ShoreWare
Director. The following encryption options are available:
•
•
•
None
128 bit ShoreTel Proprietary
SRTP - 128 bit AES
SRTP with AES and authentication has a significant impact on the system load when a large
number of media channels are encrypted.
SRTP-AES encryption is provided on all ShoreTel 9 systems and does not require an
additional license.
Devices
Switches and Codecs
SRTP encryption is supported by the following ShoreGear Voice Switches:
•
•
•
All Voicemail Model switches
All 1-U Half Width switches
All 1-U Full Width switches
Switches do not support SRTP with linear (LRNB/8000) or wide-band (LRWB/16000)
codecs. When SRTP is enabled, codec negotiation excludes these codecs.
ShoreGear switches support a maximum of 36 encrypted media streams. This limitation
potentially impacts switches that provide T1 or E1 channels with high 3-way conference
call traffic.
Each channel in a 3-way conference requires two media stream encryption resources,
limiting switches to 18 encrypted channels for 3-way conferences. In this scenario, all
remaining trunks provided by the switch are blocked while 18 channels are engaged in 3way conference calls. Switches can service any combination of two-way (one encrypted
media stream) and three-way (two encrypted media streams) calls that do not exceed 36
media streams. Analog ports on the SG-220T1A are included in this limitation.
Phones and Applications
All ShorePhones that run the ShoreTel 9 firmware support SRTP-AES. SoftPhone, which is
available through Call Manager, also supports SRTP-AES.
Page 78
ShoreWare Server Release Notes
SRTP-AES
Call Manager and ShorePhones display a padlock icon for each call utilizing SRTP
encryption. The Call History list also uses the padlock icon to denote encrypted calls.
ShorePhones IP210, IP110, and IP115 do not display the encrypted call padlock icon. The
padlock icon indicates that the call media is secure on the ShoreTel network. ShoreTel
cannot guarantee call security outside of the network, such as calls that terminate across an
analog or digital trunk. The padlock icon is not displayed when Proprietary Encryption is
active.
The ShoreTel Conference Bridge, the IP 8000 Conference Phone, voicemail, and auto
attendant do not support SRTP-AES encryption.
Phones that do not support SRTP cannot perform barge in, whisper, or silent monitor
functions on existing calls that are SRTP encrypted. When added to a call using SRTP, new
parties using devices that do not support SRTP exchange unencrypted media streams. SRTP
does not address user registration, call setup, or signaling related security.
Installation and Upgrades
SRTP-AES support requires the upgrade of switch software and phone firmware to ShoreTel
9. Upgrades of AES/SRTP in switches and IP phones may be decoupled. Phone calls are
encrypted with the proprietary method on phones that do not support AES/SRTP.
Media Encryption is disabled on new installations. Media Encryption settings remain in
place after a system is upgraded to ShoreTel 9.
Provisioning
Encryption is configured in the Call Control: Options panel, shown in Figure 32. The
Media Encryption parameter determines the encryption setting for the entire system.
Figure 32
ShoreTel 9.1
Configuring Media Encryption
Page 79
SRTP-AES
ShoreWare Server Release Notes
To configure encryption:
Step 1 Open the Call Control: Options panel by selecting Administration -> Call Control > Options from the main menu.
Step 2 Select the desired option from the Media Encryption drop down menu, as shown in
Figure 32.
Step 3 Press the Save button at the top of the panel.
Page 80
Disaster Recovery Enhancements
Introduction
ShoreTel 9 introduces Disaster Recovery Enhancements to improve system compatibility
with supported failover solutions. Disaster Recovery Enhancements implements primary
and secondary IP addresses to distinguish the Headquarters server from its backup server.
Refer to the Glossary for a definition of the following terms used in this release note:
•
•
•
Distributed Routing Service (DRS)
Failback
Failover
Description
ShoreTel 9 Disaster Recovery Enhancements consist of the following:
•
The Headquarters server specifies a primary and a secondary IP address.
— The server located at the primary IP address performs as the Headquarters server
during normal operation.
— The server located at the secondary IP address performs as the Headquarters server
during a failover.
Implementing the secondary server requires an additional Headquarters server license.
•
ShoreTel system components access the server at the primary IP address during normal
conditions and the secondary server under failover conditions when requesting
services from the Headquarters server.
•
The primary and secondary Headquarters server cannot be running and connected to
the network at the same time.
•
Single Headquarters Server mode is supported when a secondary IP address is not
specified.
To convert a system to single Headquarters Server mode, remove the address from the
secondary IP address field, then reboot the Headquarters server.
•
When the secondary IP address is specified, Citrix Servers and Window Terminal
Server must reference the Headquarters server by the DNS name.
Conditions during the Failover and Failback Operations
ShoreWare performs a failover operation when the primary server fails to transfer
Headquarters server functions to the secondary server. After the failover operation is
complete, the secondary server performs all Headquarters server functions.
The system administrator manually initiates the failback operation to restore Headquarters
server function to the primary server. After the failback is complete, the system structure
that existed before the failback operation is restored. Refer to the documentation
accompanying the failover solutions for instructions on initiating a failback operation.
ShoreTel 9.1
Page 81
Disaster Recovery Enhancements
ShoreWare Server Release Notes
Failover and failback operations typically require between five to 20 minutes, depending on
the system configuration. During these periods, no Headquarter server services are
available. Failover and failback operation effects are resolved after the operations are
complete and the secondary (for failover) or primary (failback) server is functioning as the
Headquarters server.
Failover and failback operation effects on Call Manager include:
•
Users configured on the Headquarters server lose most connectivity capabilities,
including telephony and video. IM connectivity is not affected.
•
Users configured on distributed servers maintain all connectivity capabilities.
•
Configuration changes are unavailable.
•
Users logging into Call Manager while the secondary server controls the system must
specify the IP Address of the secondary server.
Refer to the Call Manager User’s Manual for instructions on specifying the server IP
address.
Failover and failback operation effects on voicemail include:
• Sites that receive voicemail through the Headquarters server lose voicemail access.
• Mailboxes lose access to any voicemail that is routed through the Headquarters server.
• Sites that receive voicemail from distributed servers retain voicemail access.
Failover and failback operation effects on other system components include:
•
Account Code and Workgroup services are not available.
•
Director, Web Client, and Call Manager configuration changes are not available.
•
If DRS is enabled, intersite calls are unavailable to users residing on sites whose only
access to a DRS server is through the Headquarters server.
System Failover Conditions
After the failover operation is complete, the secondary server performs all distributed
server and application connectivity activities managed by the Headquarters server.
System Failback Conditions
After the failback operation is complete, the primary server resumes all distributed server
and application connectivity activities managed by the Headquarters server.
Implementation
Server Address Configuration
The primary and secondary IP addresses are configured on the Edit Server panel for the
Headquarters server, as shown in Figure 33. To access the Edit Server panel, open the
Application Servers List by selecting Administration -> Application Servers from the Main
Menu, then select the Headquarters Server on the list. On the Edit Server panel, the Host IP
Address parameter configures the Primary IP address.
Page 82
ShoreWare Server Release Notes
Figure 33
Disaster Recovery Enhancements
Designating Primary and Secondary IP Addresses
When the primary and secondary servers are in different subnets, their IP addresses must
be static.
The DNS server accessed by a ShoreTel system must associate the same server name to the
primary and secondary servers if
•
The primary and secondary servers are configured with static IP addresses.
and
•
The HQ server supports MCM clients or clients on Citrix or Windows Terminal
Servers.
The primary and secondary servers cannot be running and connected to the network at the
same time.
System Failover Requirements
The following sections describe required administrator tasks after the failover operation.
License Compliance
After a failover operation transfers Headquarters server control to the secondary server,
license status on the secondary server is non compliant. To restore the system to
compliance, reinstall all licenses that were originally purchased for the secondary server.
MCM Failover Requirements
To assure proper MCM client operation and performance after a Failover or a Failback, the
browser cache must be cleared. The system administrator should send messages to all
MCM clients after a failover operation advising them to clear the browser cache on their
devices.
System Failback Requirements
The following sections describe required administrator tasks after the failback operation.
ShoreTel 9.1
Page 83
Disaster Recovery Enhancements
ShoreWare Server Release Notes
License Compliance
After a failback operation transfers Headquarters server control to the secondary server,
license status on the secondary server is non compliant. To restore the system to
compliance, reinstall all licenses that were originally purchased for the secondary server.
MCM Failback Requirements
To assure proper MCM client operation and performance after a Failback, the browser
cache must be cleared. The system administrator should send messages to all MCM clients
after failback procedures advising them to clear the browser cache on their devices.
Page 84
CDR Reports – Codecs
Introduction
Definition
ShoreTel 9 enhances the CDR database and CDR reports to support the following:
•
•
codecs added in ShoreTel 8
references to codec strings added by the administrator
Refer to the Glossary for a definition of the following terms used in this release note:
•
•
•
Call Detail Record (CDR)
CDR Database
Codec
Background
ShoreTel 8 supports the following codecs:
•
•
•
•
•
•
•
•
•
•
•
G711μ
G711a
L16/16000
DVI4/8000
G729A/8000
G729B/8000
L16/16000
G722/8000
BV32/16000
BV16/8000
AAC_LC/32000
ShoreTel 8 also permits administrators to add other codecs.
Implementation
The TMS-CDR Media Stream Statistics Report and the Media Stream Detail Report
indicates the encoding method that the call employed. The list of valid parameter settings
is expanded to include all codecs supported by ShoreTel.
The following is a list of ShoreTel field values used by the CDR database and the codec that
they represent:
•
•
•
•
•
•
•
•
ShoreTel 9.1
1 ALAW
2 MULAW
3 LINEAR
4 ADPCM
5 G729A
6 G729B
7 LINEARWIDEBAND
8 G722
PCMA/8000 (or G711A)
PCMU/8000 (or G711μ)
L16/16000
DVI4/8000
G729A/8000
G729B/8000
L16/16000
G722/8000
Page 85
CDR Reports – Codecs
•
•
•
•
Page 86
9 BV32
10 BV16
11 AAC_LC32000
12 Custom
ShoreWare Server Release Notes
BV32/16000
BV16/8000
AAC_LC/32000
Codec added by administrator
Failover
Introduction
Definition
ShoreTel 9 implements the following Failover enhancements:
•
IP Phone Calls Continue Through Failover feature enhances IP Phone Failover to
continue a voice call, even after the managing switch becomes unavailable, until the
normal completion of the call
•
Spare Switch Failover introduces spare switches for handling IP Phones that failover.
Refer to the Glossary for a definition of the following terms used in this release note:
•
•
•
•
•
•
Call Manager (switch)
Failback
Failover
IP Phone Configuration Switch
IP Phone Failover
IP Phone Keep Alive
This release note uses the following endpoint and switch designations to describe the
component functions during the failover process.
•
•
•
•
•
Local endpoint: The endpoint controlled by the failed switch during a failover.
Remote endpoint: The endpoint controlled by the functioning switch during a failover.
Failed switch: The switch that triggered the failover when it became unavailable.
New switch: The switch that replaces an unavailable switch in response to a failover.
Surviving Switch: The switch that remains available when a failover is triggered.
IP Phone Operation
IP phones in a ShoreTel system interact with two ShoreGear switches: the configuration
switch and the call manager switch. The configuration switches help the IP phones obtain
their configuration from the ShoreWare server, which functions as a FTP server for the IP
phones. Each system has one configuration switch and can designate a second switch as a
backup.
During the configuration process, each IP phone is assigned a ShoreGear switch that acts as
its call manager for setting up and tearing down calls. IP phones communicate with
ShoreGear switches via MGCP, a device control protocol. The relationship between the
switch (call manager) and the phone (gateway) follows a master–slave model.
Media travels through the ShoreTel system using Real-Time Protocol (RTP). After call
setup, media flows directly between IP phones via RTP. The ShoreGear switch is involved
only when setting up or tearing down a call.
ShoreTel 9.1
Page 87
Failover
ShoreWare Server Release Notes
IP Phone Calls Continue Through Failover
Feature Description
The IP Phone Calls Continue Through Failover feature maintains active calls through the
normal completion of the call even when the call manager switch handling the call
becomes unavailable.
Background
When a phone’s call manager switch becomes unavailable during a call while IP Phone
Failover is enabled, the phone goes through two failover stages:
•
Pending Failover is the period between when the phone does not receive the expected
acknowledgement signal from its call manager switch until the time that an alternate
switch is assigned to perform call manager tasks for the phone. This period typically
lasts between two to four minutes after the switch becomes unavailable.
•
Failover is the period after the alternate switch is assigned to perform call manager
tasks for the phone.
IP Phone Failover is enabled from the IP Phones Options edit panel, as shown in Figure 34.
Figure 34
Enabling IP Phone Failover
Legacy Behavior
When a phone enters the Pending Failover stage, calls in progress remain active. Call
control options, including softkey operation, are unavailable during this time. Users cannot
initiate new calls and the phone display remains frozen during Pending Failover.
In previous ShoreTel versions, all active calls are dropped when the phone enters the
Failover stage. The phone then resumes normal operation, allowing the user to initiate or
receive calls and perform call control actions on new calls.
Feature Definition
IP Phone Calls Continue Through Failover feature maintains active calls through the
beginning of the Failover stage until the normal completion of the call. All Pending Failover
restrictions remain in place after the phone enters the Failover stage until calls maintained
through Failover initiation are completed.
This feature is applicable to ShorePhones, SIP extensions, and Conference Bridges.
SoftPhone does not support continuation of calls through failover.
Page 88
ShoreWare Server Release Notes
Failover
IP Phone Behavior during Failover
ShorePhone – Local Endpoint
During the Pending Failover stage, the telephone user interface (TUI) displays a No
Service message until the phone is assigned to a new switch. Call control operations are not
available on surviving calls. All inbound calls to the local endpoint are routed to the
destination specified by the current Call Handling Mode.
During the Failover stage, the TUI displays Failover Mode while surviving calls remain
active. Pressing phone keys generates a No Service message on the TUI. Call control
operations on surviving calls remain unavailable. All inbound calls to the local endpoint
are routed to the destination specified by the current Call Handling Mode. After all
surviving calls are concluded, the ShorePhone returns to normal operation.
ShorePhone – Remote Endpoint
ShorePhones on remote endpoints during failover calls can hang up the call, place the call
on hold, or retrieve the call from hold. All other softkey operations are unavailable for the
duration of the call. The ShorePhone continues displaying call information until the end of
the call. Call control operations on other calls remain available.
SIP Phones
This feature causes no changes to messages displayed by SIP devices. Failover procedures
and restrictions are applicable to SIP phones. Call control operations initiated from SIP
phones on failover calls are not available.
Trunk Behavior
ShoreTel only releases the trunk after the remote side goes on-hook. System cleanup
procedures, executed every two hours, release trunks that were left hanging.
Restrictions
Bandwidth cannot be reallocated on the failover switch.
Spare Switch Failover
Background
Prior to version 9, ShoreTel does not reserve switches exclusively for servicing phones
losing access to their call manager switch. Phones fail over to switches with available
resources that are assigned to the same site as the phone.
Effective use of IP Phone Failover requires sufficient excess switch capacity at each site for
reassigning call manager resources to phones having lost switch access.
Feature Description
Spare Switch Failover introduces spare switches for handling IP Phones that failover. Spare
switches are reserved for servicing IP Phones unable to access their call manager switch. A
spare switch is available at the site where it is configured and all descendants of that site.
A spare switch remains dormant until activated by a site. IP Phone failover processes within
a site are unaltered by this feature until a site has no remaining call manager resources for
assignment to failover devices. When an IP Phone initiates a failover when no switch
ShoreTel 9.1
Page 89
Failover
ShoreWare Server Release Notes
resources are available, ShoreWare searches the site and its ascendant sites until a dormant
spare switch is identified. The spare switch is assigned to the site requiring the resource,
after which a call manager resource is assigned to the IP Phone performing the failover.
Active spare switches only service IP Phones that failover from losing call manager
resources. Other switch resources are unavailable including analog extensions, trunks,
media proxy, make-me conference ports, and music on hold. Office Anywhere extensions
may be created on the switch.
Implementation
Spare Switches
Spare switches provide replacement IP phone capacity for failed switches in the site and
descendant sites. When activated, the spare switch is moved to the site of the failed switch.
Users configure switches as a spare through Director. Spare switch resources are not
allocated during configuration. Each spare is assigned to a home site and can be used from
any descendants of the home site. The entire capacity of the switch is available for MGCP
and SIP extension at the site to which it is assigned through a Failover operation.
ShoreGear switches that can be configured as spares include:
•
•
•
•
•
•
•
•
•
•
•
ShoreGear 120/24
ShoreGear 40/8
ShoreGear 60/12
ShoreGear 50
ShoreGear 90
ShoreGear 220T1
ShoreGear 220E1
ShoreGear 90BRI
ShoreGear 220T1A
ShoreGear 30
ShoreGear 30BRI
Voicemail Model switches cannot be configured as spare switches.
Spare switches cannot change languages when they are activated. Language
incompatibilities are denoted with an Firmware upgrade available message when a switch
is configured into a site with a different language.
Established calls survive the failover process when a spare switch is required.
Spare Switch Failover
Switches are returned to spare status through Director when the user has sufficient IP
phone capacity to support the devices that the spare switch is servicing. IP phones
managed by the switch are moved to other switches at the site when the spare switch fails
back.
If the site does not have sufficient capacity to cover IP phones after a failback operation, the
spare switch performs another failover.
Failback
Failback is the operation that restores the spare switch to reserved status. Spare switch
failback is manually performed through Director; automatic failback of spare switches is
not supported.
Page 90
ShoreWare Server Release Notes
Failover
IP phones managed by the switch are moved to other switches after failback operation. If
the site does not have sufficient capacity to cover IP phones when a failback is initiated, the
spare switch performs another failover.
Failback is performed from the Maintenance – Switch Summary panel in Director.
Provisioning – Director
The following Director panels are added or modified to support Spare Switch Failover
Spare Switch List
The Spare Switch List panel, shown in Figure 35, is a new Director panel that adds a switch
to the specified site. You can access the configuration panel for a spare switch by clicking
that switch’s name.
To access the Spare Switch List, select Administration -> Switches -> Spare from the
Director Main Menu.
Figure 35
Spare Switch List panel
Edit Spare Switch panel
The Edit Spare Switch, shown in Figure 36, configures parameter settings for the specified
ShoreGear Switch. The Spare Switch panel differs from Primary Switch configuration
panels in that port resources are not allocated to system devices.
Figure 36
ShoreTel 9.1
Edit Spare Switch panel
Page 91
Failover
ShoreWare Server Release Notes
To access the Edit Spare Switch List, select Administration -> Switches -> Spare from the
Director Main Menu, then click the Go text at the top of the panel to add a switch or click
the desired switch name to edit that switch.
Enabling IP Phone Failover
IP Phone Failover must be enabled from the Edit IP Phone Options panel.
Quick Look panel
The Quick Look panel is modified to display a Temporary Disable IP Phone Failover
Across Sites selection box at the bottom of the panel. When this option is selected, spare
switches do not failover throughout the entire system. Figure 37 displays a Quick Look
panel with the Temporary Disable IP Phone Failover Across Sites selection box.
Figure 37
Temporary Disable IP Phone Failover Across Sites selection box
Maintenance – Switches Summary
The Maintenance – Switches Summary panel, shown in Figure 38, is modified to add a
section listing the Spare Switches located on the specified site. This section indicates the
activity level of the switch and, when active, the site upon which the switch is deployed.
Manual failbacks are performed from this panel by accessing the drop down menu for the
desired switch and selecting Fail Back.
Figure 38
Page 92
Maintenance – Switches Summary panel
Call Manager on 64-bit Windows
Terminal Server
Introduction
ShoreTel 9 supports running Call Manager on Windows Terminal Server 64-bit operating
system.
Description
ShoreTel 9 supports Call Manager on the following platforms:
•
32-bit systems: Windows 2003 (including Citrix and Windows Terminal Server),
Windows XP, or Windows Vista operating systems
•
64-bit systems: only on Windows 2003 running Windows Terminal Server
Implementation
Initial Call Manager Installation
Installing Call Manager on 64-bit Windows running Windows Terminal Server requires the
following steps:
Step 1 Install DotNet Framework for 64-bit Windows machines – Version 2.0 or higher.
DotNet Framework is not supplied with the ShoreTel installation software. This
software is available from Internet sources or from your software vendor.
Step 2 Install Call Manager.
Step 3 Access Control Panel -> Phone and Modem -> Advanced (tab) and remove ShoreTel
Remote TAPI Service P.rovider.
Step 4 Run TSPInstall.exe
TSPInstall.exe is provided with the ShoreTel installation software.
Installing 32-bit ShoreWare Clients on a 64-bit platform places files in the following
folders:
•
•
The default location is C:\Program Files (x86)
The location of 32-bit client dll files is C:\Windows\SysWow64
Upgrading Call Manager on WTS 64-bit
To upgrade Call Manager on 64-bit WTS platform, perform the following procedure:
Step 1 Access Control Panel -> Phone and Modem -> Advanced (tab) and remove
ShoreTel Remote TAPI Service Provider.
Step 2 Perform the procedure in the Initial Call Manager Installation section, starting
with Step 1.
ShoreTel 9.1
Page 93
Call Manager on 64-bit Windows Terminal Server
Page 94
ShoreWare Server Release Notes
ShoreTel 9 – Director Enhancements
DiffServ / ToS Support
Introduction
Definition
ShoreTel 9 extends DiffServ/ToS packet marking as follows:
•
The existing DiffServ/ToS marking for voice IP packets is extended to voice, voicemail,
workgroup, account code collection, and contact center calls.
•
DiffServ/ToS marking for video IP packets is introduced.
Refer to the Glossary for a definition of the following terms used in this release note:
•
•
•
•
•
Differentiated Services
DSCP
QoS
Per-Hop Behavior
ToS
Description
ShoreTel 9 extends the DiffServ/ToS setting to all voicemail, workgroup, account code
collection (ACC), or contact center calls. One setting applies to all ShoreTel servers in a
ShoreTel system.
ShoreTel 9 also introduces DiffServ/ToS marking for video IP packets. The default value for
the Video DiffServ/ToS Byte is 0, indicating that priority is not defined for Video packets.
Changing the Video QoS setting does not affect video sessions in progress. The updated
value is applied to new video sessions. Call Manager recognizes the change without being
restarted.
Implementation
Voice Packet Marking
The Director Call Control panel provides an option to configure DiffSrv/ToS setting for
Voice calls, as shown in Figure 39. All ShoreTel servers need to be rebooted to enable the
new setting. This parameter configures DiffServ/ToS for voicemail, workgroup, account
code collection (ACC), and contact center calls.
This panel is not altered by the Voice Packet Marking capability change.
Video Packet Marking
The Director Call Control panel is modified to provide a video packet DiffSrv/ToS
configuration options, as shown in Figure 39. Changing this setting does not affect active
video sessions. New video sessions will use the updated value. Call Manager recognizes the
new value without being restarted.
The default value for the Video DiffServ/ToS Byte is 0, which defines no priority for Video.
ShoreTel 9.1
Page 97
DiffServ / ToS Support
Figure 39
Page 98
ShoreWare Server Release Notes
DiffSrv / ToS Parameter
Support of 256 Workgroups
Introduction
Definition
ShoreTel 9 increases the number of Workgroups supported by ShoreWare to 256.
Background
ShoreTel 8.1 supports up to 128 workgroups, with up to 300 members per workgroup. A
workgroup enables a group of users to appear as a single unit to calling parties. Calls can be
routed in top-down, longest-idle, round-robin, and simultaneous-ring fashion.
Workgroups are typically used by support and sales groups to automate call handling.
Refer to the Glossary for a definition of the following terms used in this release note:
•
•
Automatic Call Distributor (ACD)
Workgroup
Implementation
Director allows the creation of a maximum of 256 workgroups in the system.
To view the list of Workgroups, select Administration -> Workgroups from the Director
Main Menu. Figure 40 displays the Workgroups List panel.
Figure 40
ShoreTel 9.1
Workgroups List panel
Page 99
Support of 256 Workgroups
Page 100
ShoreWare Server Release Notes
SIP Trunk Profiles
Introduction
Definition
SIP Trunk Profiles is a Director enhancement that supports custom SIP Trunk parameter
settings to specify third party service provider configurations.
In addition to a generic profile, ShoreWare provides a profile that supports ATT BVOIP.
Refer to the Glossary for a definition of the following terms used in this release note:
•
•
•
•
Internet Telephony Service Provider (ITSP)
Session Initiation Protocol (SIP)
SIP Trunk
SIP Extensions
Panel Description
The Edit SIP Trunk Profiles panel, shown in Figure 41, is the Director panel that specifies
settings for packets sent from trunks to which the profile is assigned. The Edit SIP Profile
panel is accessed from the SIP Profile List by adding a new profile or editing an existing
profile. All parameter fields can be edited for User Defined profiles. Enable is the only
parameter that can be modified on predefined panels.
Figure 41
SIP Trunk Profile panel
To open the SIP Trunk Profile panel, select Administration -> Trunks -> SIP Profiles from
the Director Main Menu.
Parameters listed on the panel include:
•
ShoreTel 9.1
Name: This parameter is the label by which Director refers to the profile.
Page 101
SIP Trunk Profiles
ShoreWare Server Release Notes
•
User Agent: This parameter is the expression ShoreWare uses to identify devices
covered by the profile. ShoreWare compares this expression to the User Agent field in
the header of SIP packets handled by the system.
•
Priority: This parameter determines the order by which the profiles are evaluated
against the SIP packet header. Profiles with larger priority values are evaluated before
profiles with smaller priority values.
The each profile in the User Agent field is compared to the User-Agent field of the SIP
packet header until a match is found. The profile containing the matching User-Agent
field is then used to specify device configuration settings.
•
Enable: This parameter lists the status of the profile. ShoreWare uses only profiles that
are enabled when evaluating the characteristic set of a device.
•
System Parameters: This field lists the device characteristics and default settings.
•
Custom Parameters: This field lists additional device settings or overwrite default
settings listed in the System Parameters field. Supported parameters include:
— DontFwdREFER: When enabled, packets are inhibited from sending REFER
messages.
Implementation
To view the available SIP Trunk Profiles, access the SIP Trunk Profile List, as shown in
Figure 42, select Administration -> Trunks -> SIP Profiles from the Director Main Menu.
Figure 42
SIP Trunk Profile List
To view a SIP Trunk profile, open the Edit SIP Trunk Profile panel, as shown in Figure 43,
click the name of the desired profile in the SIP Trunk Profile List.
To create a new SIP Trunk profile, open the Edit SIP Trunk Profile panel, as shown in
Figure 43, press the New button in the upper left corner of the SIP Trunk Profiles list.
To implement a SIP Trunk profile into the definition of a SIP Trunk Group, perform the
following:
Step 1 Open the Trunk Groups List by selecting Administration -> Trunks -> SIP Profiles
from the Director Main Menu.
Step 2 Open the desired trunk group by clicking the name of the group.
Step 3 Select a profile from the Profile drop down list, as shown in Figure 44.
Page 102
ShoreWare Server Release Notes
ShoreTel 9.1
SIP Trunk Profiles
Figure 43
Edit SIP Trunk Profile panel
Figure 44
Implementing a SIP Trunk
Page 103
SIP Trunk Profiles
Page 104
ShoreWare Server Release Notes
DID Enhancements
Introduction
Definition
ShoreTel 9 modifies DID assignment fields and labels on User, Workgroup, Route Point,
Menu, Hunt Group, and Bridge Call Appearance panels.
Refer to the Glossary for a definition of the following terms used in this release note:
•
•
•
Available DID numbers
DID Range
Direct Inward Dialing
Usage Information
DID assignment sections on Director panels consist of two parameters: DID Range and DID
Number. Figure 45 displays these parameters on the Edit User panel. Other affected panels
are constructed similarly.
Figure 45
•
DID Parameters on Edit User panel
The DID Range parameter displays the complete base phone number and trunk group
name.
— To authorize the user to use a DID number, select the checkbox located left of the
DID Range text.
— Access the drop-down menu to specify the DID Range from which the entity’s DID
number will be selected. Each DID Range corresponds to a trunk group and lists
the number of available numbers, as shown in Figure 46.
•
A link to the System Directory panel is located right of the DID Range data entry field.
Administrators can assign a DID number by viewing the System Directory panel to find
an available DID number, then selecting the number from the drop-down list.
ShoreTel 9.1
Page 105
DID Enhancements
Figure 46
ShoreWare Server Release Notes
DID Range parameter – drop-down menu
Unassigned numbers within a DID range may not be available if the number is assigned
as a DNIS in the same trunk group.
•
Page 106
The DID Number parameter assigns the specified DID number to the entity. The prefix
located left of the data entry field and the range located right of the data entry field are
based on the selected DID range.
ShoreTel 9 – Client Features
Announced Find Me
Introduction
Definition
Announced Find Me is an enhancement of Find Me that provides for the recording of the
caller’s name for calls routed to Find Me destinations. This feature provides the capacity for
all inbound callers to be identified when their call is routed to a Find Me destination.
Refer to the Glossary for a definition of the following terms used in this release note:
•
•
Announced Find Me
Find Me
Background
Find Me is a call handling method that allows a user to route inbound calls to a specified
extension or phone number as an alternative to sending callers to voicemail.
Find Me call handling provides inbound callers with a method of connecting to their
intended call recipient while listening to the recipient’s voicemail greeting. Callers are
routed to an extension or phone number by pressing “1” while listening to the recipient’s
voicemail greeting.
System users configured for Find Me can specify two numbers for receiving calls through
Find Me. The standard voice mail greeting does not prompt the caller on the availability of
Find Me call handling.
Find Me call handling is enabled through call handling mode settings. Find Me
destinations are independent of the call handling modes that activate Find Me.
After the caller presses “1”, the system informs the caller that Find Me destinations are
being called. Calls not answered at either Find Me destination are sent to voice mail.
When a call is forwarded to a Find Me destination, the phone at the Find Me destination
displays recipient’s voice mail caller ID to the call originator. When answering a call, the
recipient hears a prompt announcing the call and, if available, the caller’s ID information.
The recipient can then accept the call or route the caller to voicemail.
Description
Announced Find Me enhances the base Find Me feature such that:
•
The caller’s name is announced to the recipient of a Find Me call.
•
Callers from external numbers or from internal extensions without a recorded name are
prompted to record their name before the call is routed to the recipient.
Provisioning
Announced Find Me is available for users assigned to a class of service for which Find Me
is authorized. ShoreWare provides three methods of enabling Announced Find Me for a
user: from Director, from Call Manager, and from Web Access.
ShoreTel 9.1
Page 109
Announced Find Me
ShoreWare Server Release Notes
Users can receive Announced Call Me introductions for all callers or restrict the
introductions to calls for which Caller ID is not available.
Enabling Announced Find Me from Director
Administrators enable Announced Find Me for system users from the Find Me and
External Assignment panel.
To enable Announced Find Me for a user, perform the following:
Step 1 Access the user’s Edit User panel by selecting Administration -> Users -> Individual
Users from the Director Main Menu, then clicking the desired user’s name in the
Individual Users list panel.
Step 2 Access the user’s Find Me and External Assignment panel, as shown in Figure 47,
by selecting Personal Options in the selection bar at the top of the Edit User panel,
then clicking Find Me at the bottom of the Personal Options panel.
Figure 47
Enabling Announced Find Me from Director
Step 3 Select the Enable Record Caller’s Name for Find Me (When Caller ID is unavailable)
checkbox.
To enable Announced Find Me when Caller ID is available, select the Record Name
Even If Caller ID Is Present checkbox.
Enabling Announced Find Me from Call Manager
Users enable Announced Find Me from the Options and Preferences: Find Me panel in Call
Manager.
Page 110
ShoreWare Server Release Notes
Announced Find Me
To enable Announced Find Me from Call Manager, perform the following:
Step 1 Open the Options and Preferences panel by executing one of the following actions:
•
•
•
•
Select Tools -> Options from the Main menu.
Click the Application Button and select Options.
Right click the ShoreTel icon in the System Tray and select Options.
Press Ctrl+O.
Step 2 Open the Find Me panel, shown in Figure 48, by selecting Find Me from the Menu
on the left side of the panel.
Figure 48
Enabling Announced Find Me from Call Manager
Step 3 Select the Enable Record Caller’s Name for Find Me (When Caller ID is unavailable)
checkbox.
To enable Announced Find Me when Caller ID is available, select the Record Name
Even If Caller ID Is Present checkbox.
Enabling Announced Find Me from Web Access
Users enable Announced Find Me from the Find Me panel in Web Access.
To enable Announced Find Me from Web Access, perform the following:
Step 1 Open the Find Me panel, shown in Figure 49, by clicking the Find Me tab at the
top of the page.
Step 2 Select the Enable Record Caller’s Name for Find Me (When Caller ID is unavailable)
checkbox.
To enable Announced Find Me when Caller ID is available, select the Record Name
Even If Caller ID Is Present checkbox.
ShoreTel 9.1
Page 111
Announced Find Me
Figure 49
ShoreWare Server Release Notes
Enabling Announced Find Me from Web Access
Usage Information
Caller Functions
When the Announced Find Me parameter is enabled, callers that are routed to a Find Me
extension are prompted to record their name under each of the following conditions:
•
The call is from a source external to the ShoreTel system and the number is not
available through Caller ID.
•
The call is from a source external to the ShoreTel system and Record Name Even if
Caller ID is Present option is selected.
•
The call source is within the ShoreTel system, the caller’s name recording is not
available, and the Record Name Even if Caller ID is Present option is selected.
The prompt advises the caller to press the # button when finished with the name recording.
Callers can press the # button without recording a message. Pressing the * button restarts
the name recording process.
Call Recipient Functions
The base Find Me feature introduces the caller identity whenever available to recipients
that have enabled the feature. This information is always available when receiving calls
from ShoreTel extensions or from PSTN numbers identifiable through Caller ID.
Announced Find Me extends this function to identify all callers regardless of the
originating phone number by recording the name of callers whose identity is unavailable.
Callers that do not record their name when prompted are not identified when the system
introduces the call to the Find Me recipient.
Page 112
Personalized Call Handling
Introduction
Definition
Personalized Call Handling defines flexible handling methods for inbound calls from
different callers received at various times and dates. Possible applications for Personalized
Call Handling includes:
•
Requiring unidentified callers to announce their name by routing them to Announced
Find Me.
•
Assigning different ringtones for selected callers, such as family, personal contacts,
external contacts.
•
Routing calls from non urgent sources directly to voicemail or to other extensions.
Personalized Call Handling filters and manages inbound calls on the basis of multiple
criteria including time or date calls are received, end user status, and caller identity.
Personalized Call Handling is implemented through Call Routing Plans and Call Routing
Rules:
•
The call routing plan specifies a user’s call handling method. The plan prioritizes a list
of enabled Call Handling Rules.
•
A call handling rule is the base unit of a Call Routing Plan that consists of a condition
and action. When a call handling rule is active and the condition is satisfied, the action
specifies the method by which the ShoreTel system handles the user’s call.
Refer to the Glossary for a definition of the following terms used in this release note:
•
•
•
•
•
•
•
•
•
Active Call Handling Mode
Announced Find Me
Auto Find Me
Call Handling Mode
Call Handling Rule
Call Routing Plan
Find Me
Off System Extensions
Personalized Call Handling
Background
Call Handling Modes automate call routing on the basis of a user’s schedule or activity.
Personalized Call Handling defines call handling methods by considering, in addition to
Call Handling Modes, conditions outside the scope of Call Handling Modes.
ShoreTel 9.1
Page 113
Personalized Call Handling
ShoreWare Server Release Notes
Description
Introduction
A Call Routing Plan manages a user's inbound voice calls. The plan consists of call
handling rules, each of which specifies a method of handling a call when a condition set is
valid. The plan enables and prioritizes selected rules. The user's inbound calls are evaluated
against the call handling rules. The highest priority rule with conditions that are satisfied
define the handling method for the call.
This section describes the structure and call handling rules, followed by a discussion of
creating a call routing plan from these rules.
Call Handling Rules
Call handling rules define evaluation conditions and handling action. When the rule is
active and the condition is satisfied, the action determines how the call is handled.
Three components comprise a call handling rule: name, condition, and action. The
following sections describe call handling rule components.
Name
The name is the label by which Call Manager and Director refer to a call handling rule.
Users specify the name when they create the rule.
Condition
The condition is the filtering criteria that determines if a corresponding call handling
action is performed. When a condition statement consists of multiple criteria, each
criterion must be satisfied or the action is not performed.
Call Handling Rules defines the following six types of criteria
•
Phone number match: The phone number match is satisfied when the caller ID of the
inbound call is a subset of the specified match type. Users can specify a maximum of
ten phone number match entries.
Users can select one of the following match types:
— specific number – user specifies the number that must match the caller ID; numbers
can be internal extension or phone number external to the system.
— off system extension – user specifies the off system extension that must match the
caller ID.
— any internal extension starting with – user specifies the digits that must match the
first digits of numbers originating from internal callers.
— any external extension starting with – user specifies the digits that must match the
first digits of numbers originating from phone numbers external to the system.
— private – matches all calls that are identified by caller ID as private.
— out of area / unknown – matches all calls that caller ID identifies as out of area or
unknown.
— Every internal number – matches all calls originating from a device within the
ShoreTel network.
— Every external number – matches all calls originating from a device not located
within the ShoreTel network.
Page 114
ShoreWare Server Release Notes
Personalized Call Handling
•
I am on the phone: This criterion is satisfied when the user’s phone is busy.
•
Call Handling Mode: This criterion is satisfied when the user’s active Call Handling
Mode matches the specified mode.
•
Time of day: This criterion is satisfied when the call is received during the specified
time ranges. Time of day entries are based on the timezone setting of the site to which
the user is assigned.
•
Day of week: This criterion is satisfied when the call is received on one of the specified
days. Day of week entries are based on the timezone setting of the site to which the
user is assigned.
•
DNIS Match: This criterion is satisfied when the DNIS of the inbound call matches the
specified number.
Workgroup and Hunt Group DNIS numbers are not propagated to members that
answer group calls. This prevents the filtering calls on the basis of DNIS numbers not
directly associated to the entity ultimately receiving the call.
Action
The action specifies the resolution for calls that match the specified condition. Call
Handling Rules define the following five action types:
•
Forward Call to Specific Number: This action routes the call to the specified number.
Users can select one of the following number types:
— Specific Number
— Off System Extension
•
Forward Call to Voice Mail: This action routes the call to the recipient’s voice mail.
•
Forward Call to Auto Find Me: This action routes the call to voicemail, which then
forwards the call to the recipient’s Find Me number.
•
Forward Call to Announced Find Me: This action routes the call to voicemail, which
then forwards the call to the recipient’s Find Me number. The system attempts to
announce the caller’s name to the recipient, which may require the caller to record their
name before the call is presented to the recipient.
•
Play Ringtone: This action programs the ShorePhone to play the designated ring tone
that announces the presence of the inbound call to the recipient.
Call Routing Plan
Definition
The Call Routing Plan is the data structure that determines the routing method of a user’s
inbound calls. The following sections describe the composition and operation of a call
routing plan.
Components
A call routing plan consists of a maximum of ten call handling rules. The plan specifies the
rules that are active and lists the rules in the order by which they are used to evaluate
characteristics of the inbound call.
ShoreTel 9.1
Page 115
Personalized Call Handling
ShoreWare Server Release Notes
Execution
When a user receives an inbound call, the system evaluates the characteristics against the
highest priority call handling rule that is enabled. If all of the criteria comprising the
condition of that rule matches the call characteristics, the call is routed as specified by the
rule’s action and the plan execution is complete. If any of the criteria do not match the call
characteristics, the system continues the plan execution by evaluating the call against the
next highest priority call handling rule that is enabled.
This process is repeated for all enabled call handling rules. If the call characteristics do not
match the conditions of any enabled call handling rule, the call is routed as specified by the
active Call Handling Mode.
Licensing
Personalized Call Handling is available to all system users that are authorized for the
following Call Manager types:
•
•
•
•
Professional
Operator
Workgroup Agent
Workgroup Supervisor
Personalized Call Handling does not require administrator authorization for users assigned
to these Call Manager types.
Configuring Personalized Call Handling
The following sections describe the User Interface panels that configure Personalized Call
Handling.
Call Manager User Interface Panels
The following Personalized Call Handling panels are available through Call Manager.
Option and Preferences Panels: Personalized Call Handling
The Personalized Call Handling panel, shown in Figure 50, configures the user’s call
routing plan.
To access the Personalized Call Handling panel, open the Options and Preferences
window, then select Personalized Call Handling in the menu on the left side of the window.
Personal Call Handling panel parameters include:
•
Rule Table: The rule table, located in the top half of the panel, lists the rules defined by
the user. Rules are listed in the order that the system uses them to evaluate inbound
calls. Table columns and components include:
— Rule Buttons: Rule buttons are located at the top of the panel and control the
creation, modification, and removal of Call Handling Rules from the Rule Table.
Page 116
❋
Pressing the New Rule button opens the Condition Setup panel. A new rule is
added to the Rule Table upon successful completion of the setup panels.
❋
Pressing the Modify Rule button opens the Condition Setup panel and fills the
parameters with the settings of the rule highlighted in the Rule Table.
ShoreWare Server Release Notes
Figure 50
❋
Personalized Call Handling
Options and Preferences: Personalized Call Handling panel
Press the Delete Rule button to remove the highlighted rule from the Rule
Table.
— Rule List: The Rule list displays the list of call handling rules defined by the user.
Rules are listed in order of their usage priority; higher priority rules are listed first.
List columns include:
❋
Rule: This column displays the name of the rule.
❋
Action: This column displays the call handling action triggered by the rule
when the corresponding condition is satisfied.
❋
Enabled: This column indicates the status of the rule.
To enable a rule, mark the Enabled box.
To disable a rule, clear the Enabled box.
— Priority button: The buttons located right of the rule list changes the priority of the
highlighted rule by moving it up or down in the rule list.
•
Rule Description: The Rule Description field, located in the bottom half of the panel,
displays the conditions and call handling actions of the highlighted rule in the Rule
List. Clicking on hypertext accesses a dialog box that modifies the condition or action
specified by the hypertext.
Condition Setup panel
The condition setup panel, as shown in Figure 51, specifies the filtering criteria that the
call characteristic must match before the corresponding action is performed. To access the
Condition Setup panel, press the New Rule or Modify Rule buttons in the Personalized Call
Handling panel.
Condition Setup panel components include:
•
ShoreTel 9.1
Condition selection field: The Condition selection field is located in the top half of the
panel and contains six checkboxes for the six call condition types. Conditions selected
in this field are displayed in the Condition description field. At least one checkbox
must be selected; there are no other restrictions on the number of selected conditions.
Page 117
Personalized Call Handling
Figure 51
ShoreWare Server Release Notes
Condition Setup panel
•
Condition Description field: The Condition Description field displays the selected
conditions and the parameter setting that the call characteristic must match. Hypertext
links denote a condition that requires a parameter setting. Clicking the link opens a
dialog panel that assigns a value to the parameter.
•
Button bar: The button bar is located at the bottom of the panel.
— Pressing the Cancel button returns to the previously opened window without
saving condition changes.
— Pressing the Next button opens the Action Setup panel if all conditions listed in the
Condition Description field are assigned parameter values.
Condition Selection dialog boxes
Call Manager displays a condition selection dialog box when the corresponding condition
is selected in the Condition Description field of the Condition Setup panel. Figure 52
displays the available Condition Selection boxes.
Figure 52
Page 118
Condition Selection dialog boxes
ShoreWare Server Release Notes
Personalized Call Handling
Action Setup panel
The action setup panel, as shown in Figure 53, specifies the call handling action performed
on the call when the rule conditions match the call characteristics. To access the Action
Setup panel, press the Next button in the Condition Setup panel.
Figure 53
Action Setup panel
Action Setup panel components include:
•
Action selection field: The Action selection field is located in the top half of the panel
and contains five action lines. The action conditions selected in this field are displayed
in the Action description field. One line is selected.
•
Action description field: The Action description field displays the selected action and
the parameter setting that describes the routing destination for the call. Hypertext links
denote an action that requires a parameter setting. Clicking the link opens a dialog
panel that assigns a value to the parameter.
•
Button bar: The button bar is located at the bottom of the panel.
— Cancel: returns to the Options and Preferences: Personalized Call Handling panel
without saving panel changes to the Action Setup panel.
— Previous: returns to the Condition Setup panel without saving changes to the
Action Setup panel.
— Next: opens the Name Setup panel if all actions listed in the Action Description
field are assigned parameter values.
Action Selection dialog boxes
Call Manager displays an action selection dialog box when the corresponding action is
selected in the Action Description field of the Action Setup panel. Figure 54 displays the
available Action Selection boxes.
Figure 54
ShoreTel 9.1
Condition Selection dialog boxes
Page 119
Personalized Call Handling
ShoreWare Server Release Notes
Name Setup panel
The Name Setup panel, as shown in Figure 55, specifies the label by which the call
handling rule is referred by the Personalized Call Handling panel. To access the Action
Setup panel, press the Next button in the Action Setup panel.
Figure 55
Action Setup panel
Director User Interface Panels
The Personalized Call Handling Rules panel, as shown in Figure 56, displays the Call
Handling Rules created by the specified user. The table displays the name, condition, action
and enabled status of each rule. The rules are listed in the order that they were created; the
table does not display the usage priority of the rules.
Figure 56
Personalized Call Handling Rules panel (Director)
To access the Personalized Call Handling panel:
Step 1 Open the Individual User list by selecting Administration -> Users -> Individual
Users from the Director Main Menu.
Page 120
ShoreWare Server Release Notes
Personalized Call Handling
Step 2 Open the Personal Options panel for the desired user by clicking the name of the
desired user in the Individual User List, then selecting Personal Options on the
menu bar toward the top of the Edit User panel.
Step 3 Click Personalized Call Handling Rules, located in the middle of the Personal
Options panel, as shown in Figure 57.
Figure 57
Edit User Panel – Selecting Personalized Call Handling Rules
Implementing Personalized Call Handling
The following steps are required to implement Personalized Call Handling for a system
user:
•
Receive Administrator Access to Personalized Call Permission
•
Create and Edit Call Handling Rules
•
Manage the Call Routing Plan
•
Administrative Oversight of defined plans
The following sections describes the required steps.
Administrative Permission
All users that have access to Professional, Workgroup Agent, Workgroup Supervisor, or
Operator Call Manager are authorized to use Personalized Call Handling.
Your system administrator can provide authorization for a Call Manager version that
supports Personalized Call Handling.
ShoreTel 9.1
Page 121
Personalized Call Handling
ShoreWare Server Release Notes
Creating and Editing Call Handling Rules
Personalized Call Handling Rules are created or edited from the Options and Preferences:
Personalized Call Handling panel, as shown in Figure 58.
Figure 58
Personalized Call Handling panel
To create a Call Handling Rule:
Step 1 Press the New Rule button, located at the top of the panel.
Call Manager displays the Personalized Call Handling Setup panel, as shown in
Figure 59.
Figure 59
Page 122
Personalized Call Handling Setup panel – choosing condition
ShoreWare Server Release Notes
Personalized Call Handling
Step 2 Select all conditions in the Choose Condition to handle inbound calls section
located in the top half of the panel.
The Condition Description section, located in the bottom half of the panel, displays
the set of conditions that an inbound call must meet to be filtered by the rule. Blue
hypertext regions link to dialog boxes that define specific criteria for filtering calls.
Step 3 Click each hypertext region to enter filtering criteria in the dialog boxes.
Figure 60 displays the Phone Number match dialog box that Call Manager displays
when the Phone Number Match hypertext is clicked. Pressing the OK button closes
the dialog boxes and displays the selected parameters on the Condition Selection
section.
Figure 60
Phone Number Match dialog box
Step 4 Press the Next button located in the bottom right corner of the Personalized Call
Handling Setup panel.
The top section displays Choose Action for rule options; and bottom section
displays Action Description, as shown in Figure 61.
Step 5 Select the desired call handling action for calls from the Choose Action for rule list.
The Action Description section, located in the bottom half of the panel, displays
the selected action.
Step 6 If the selected action in the Action Description section includes hypertext, click the
link to display an action dialog box. Select the desired option in the dialog box and
press the OK button.
Step 7 Press the Next button located in the bottom right corner of the Personalized Call
Handling Setup panel.
Step 8 Enter a name for the new rule in the Enter Rule Name data entry field.
Step 9 Press the Finish button located in the bottom right corner of the Personalized Call
Handling Setup panel.
ShoreTel 9.1
Page 123
Personalized Call Handling
Figure 61
ShoreWare Server Release Notes
Personalized Call Handling Setup panel – choosing action
The new rule appears in the Rule list of the Options and Preferences: Personalized
Call Handling panel, as shown in Figure 62.
Figure 62
Page 124
Personalized Call Handling Rule
ShoreWare Server Release Notes
Personalized Call Handling
To edit an existing Personalized Call Handling Rule:
Step 1 Highlight the desired rule in the rule list in the top half of the Personalized Call
Handling panel.
Step 2 Press the Modify Rule button at the top of the panel.
Step 3 Modify rule parameters, using the same steps that create a Call Handling Rule.
Managing the Call Routing Plan
The Call Routing Plan determines the rules that are actively filtering calls and specifies the
order that the rules are applied to calls. If the filtering criteria of more than one rule
matches a call’s characteristic, the first rule in the list that filters a call determines the
handling action for that call.
To enable a Call Handling Rule, select the Enabled box located in the right column of the
rule. In Figure 63, all of the call handling rules are selected.
To change the filtering order of a call handling rule, highlight the rule and press the Up or
Down arrows located to the right of the call handling rule list.
Figure 63
Call Handling Plan with multiple rules
Administrative Oversight
System administrators can view each user’s call handling plan and enable or disable
individual rules. Contact your system administrator for more information.
ShoreTel 9.1
Page 125
Personalized Call Handling
Page 126
ShoreWare Server Release Notes
Parked Call Enhancements
Introduction
Definition
Parked call enhancements support the following changes to the parked call feature:
•
Provide caller ID information to users attempting to pick up calls parked or held on
any extension.
•
Provide caller ID and return notification for bounced parked calls that are returned to
the extension that parked the call.
•
Extend the capability of Monitor Extension Programmable Buttons to access parked
and held calls on the monitored extension’s call stack.
Refer to the Glossary for a definition of the following terms used in this release note:
•
•
•
•
•
•
•
•
•
Bounced Call
Call Appearance
Call Stack
DN
Monitor Extension
Parking a Call
Programmable Call Manager Toolbar Buttons
Programmable IP Phone Buttons
Unparking a Call
Unparking Selected Calls
Background
When an extension’s call stack contains more than one held call, users from other
extensions can retrieve calls from that stack through programmable button functions. The
Monitor Extension function allows the user to view the caller ID of the call and select a call
to unpark. The Unpark function only allows retrieval of the first suspended call that was
placed on the stack.
Feature Description
ShoreTel 9 expands the Unpark programmable button capability, allowing users to view the
caller ID of all calls on the specified extension’s stack and select a call for retrieval.
This feature enhancement does not alter unpark star code and park star code behaviors. It
also does not alter the Monitor Extension programmable button function.
Provisioning
Users must be authorized for the following:
•
•
ShoreTel 9.1
to view caller ID information for other extensions.
to view individual calls through a Class of Service setting.
Page 127
Parked Call Enhancements
ShoreWare Server Release Notes
These options are enabled by selecting the Show Caller ID Name and Number for Other
Extensions and Enumerate Individual Held Calls for Unpark options on the Edit Telephony
Features Permissions Class of Service panel, as shown in Figure 64.
Figure 64
Enumerate Individual Held Calls for Unpark option
Implementation
Call Manager
Users unpark calls from a monitored user’s call stack by pressing a Monitored Extension
button. To perform the unparked call function, the Extension Monitor button must be
appropriately configured by the system administrator and Call Manager cannot be servicing
a connected call.
When the call stack of the monitored extension contains more than one call, the user can
view a drop-down menu by pressing the arrow on the right side of the button. The dropdown menu displays contact information for each parked call on the stack. The desired call
is unparked by selecting the corresponding entry in the menu.
The Call Manager window in Figure 65, contains a Monitored Extension button with an
accessed drop-down menu.
Pressing the button unparks the call that was parked first.
ShorePhones
Pressing a programmable button configured for the Monitored Extension – Unparked
function displays the list of parked calls on the telephone user interface. Press the cursor
control to select the desired call, then press the appropriate soft button to unpark the call.
Page 128
ShoreWare Server Release Notes
Figure 65
Parked Call Enhancements
Unparked Call Button Drop-Down Menu
Distinguish Bounced Calls from New Calls
Background
Bounced calls are unanswered parked calls that are returned to the extension from where
they were parked after a specified period. Bounced calls are returned as new calls; the
extension is not notified that the call was previously parked.
Feature Description
This feature modifies the call bouncing process to distinguish new calls from calls bounced
from another extension’s stack.
Call Manager
Figure 66 displays a call cell of a bounced call.
Figure 66
Call Manager – Bounced Call icon
ShorePhones
ShorePhone call appearance buttons indicate a call that was returned from another
extension’s call stack with the following LED pattern:
Green 200ms – Off 200ms – Green 200ms – Off 800ms
ShoreTel 9.1
Page 129
Parked Call Enhancements
ShoreWare Server Release Notes
Monitoring Extensions: Parked Calls
Background
Extension monitoring is a ShoreTel feature that permits a user to view the extension status
of another user and answer inbound or held calls to that extension.
Description
This feature extends the Extension Monitoring function to monitor parked calls on the
subject extension. Users can unpark a call by pressing the programmable button. Multiple
users can monitor the same extension’s call stack.
Provisioning
This feature is enabled by configuring a Programmable Button (IP Phone or Call Manager)
as shown in Figure 67.
Figure 67
Configuring Monitor Extension Button to monitor parked calls
Implementation
Call Manager
When a suspended call is placed on the monitored extension’s stack, the programmable
button displays an orange icon, as shown in Figure 68. The button displays this icon while
the stack contains at least one suspended call and no other call on the stack is active.
The user retrieves a parked call from the monitored extension by pressing the
programmable button.
ShorePhones
When a suspended call is placed on the monitored extension’s stack, the programmable
button blinks orange. The button continues blinking orange while the stack contains at
least one suspended call and no other call on the stack is active.The button blinks orange
until all the calls are unparked and there are no active calls.
The button quits blinking if the call is resumed or another call becomes active on the
subject extension. The button resumes blinking orange if the active call is placed on hold.
Page 130
ShoreWare Server Release Notes
Figure 68
Parked Call Enhancements
Extension Monitor – Park button
The user retrieves a parked call from the monitored extension by pressing the blinking
button.
ShoreTel 9.1
Page 131
Parked Call Enhancements
Page 132
ShoreWare Server Release Notes
Call Handling Mode Delegation
Introduction
Definition
ShoreTel 9 expands Call Handling Rule Delegation by permitting users to designate other
users that can change their current call handling mode. As originally implemented, CHM
delegation permissions were managed by an administrator through Director.
Users modify the current call handling mode of other users through the following tools:
•
•
Operator Call Manager, by right clicking a user in the Contact Viewer.
Web Access Client, by selecting Other -> CHM Delegation.
Refer to the Glossary for a definition of the following terms used in this release note:
•
•
Active Call Handling Mode (or Current Call Handling Mode)
Call Handling Mode
Implementation
The table at the bottom of the Options and Preferences: Call Handling Mode panel, shown
in Figure 69, lists the users that can change the subject’s current call handling mode. The
table includes users added to the table by the subject and users that received access to the
subject’s current call handling mode through Director.
Figure 69
Call Handling Mode panel
The following procedure adds a user to the list of users allowed to change the current Call
Handling Mode.
Step 1 Select the Call Handling Mode in the panel directory on the left side of the window.
ShoreTel 9.1
Page 133
Call Handling Mode Delegation
ShoreWare Server Release Notes
Step 2 Type a name or number in the edit box, as shown in Figure 70.
A drop down menu displays a list of system users, filtered by the edit box contents.
Figure 70
Entering the Names of Users allowed to Change the Mode
Step 3 Select the Add button to add a user to the list:
Parameters added to the Call Handling Mode panel include:
•
Allow these users to change current call handling mode: The edit box is a Quick Dial
type window. Entering a name or number in the data entry field results in a drop down
menu that lists all matching user names or numbers. The drop down only displays user
extensions. Workgroups and system extensions are not displayed.
The table below the edit box contains the list of users allowed to change the current call
handling mode of the subject.
— Add button: Click this button to add the user listed in the edit box to the table.
— Remove button: Select this button to remove the highlighted user/users from the
list of users.
Page 134
Voicemail Enhancements
Introduction
Definition
ShoreTel 9 Voicemail enhancements include:
•
•
Voicemail Timestamps standardization
Voicemail Deletion Notification Control
Refer to the Glossary for a definition of the following terms used in this release note:
•
Site
Voicemail Timestamps
Background
The time stamp of voice messages is based on the time of the server where the message is
received. For example:
•
The timestamp on messages viewed in Call Manager or Outlook is adjusted to match
the time zone setting on the user’s computer.
•
The timestamp on messages accessed though voicemail is based on the time of the
server handling the voicemail call.
Feature Description
When a user accesses voice mail from a telephone, message timestamps are based on the
time zone setting of the site to which the phone is associated. If a phone is not assigned to
a ShoreTel site, such as an external phone, the message timestamps are based on the site to
which the user is assigned.
Message timestamps displayed by Call Manager are based on the computer’s time zone
setting.
Implementation
The timestamp setting is not configured or controlled from Director.
Voicemail Deletion Notification Control
Background
The Auto-delete by Number of Days feature allows a system administrator to set a
maximum time limit for retaining messages. When the feature is enabled and a user has
messages approaching the retention limit, the user receives a message warning of the
imminent message deletion. The range of valid retention periods is between 30 and 2000.
days.
ShoreTel 9.1
Page 135
Voicemail Enhancements
ShoreWare Server Release Notes
The first warning is sent two weeks before the expiration deadline. A second message is
sent one week prior to the deadline. After the time limit passes, the user receives a message
stating that the messages were deleted.
Description
ShoreTel 9 provides administrator control over Voicemail deletion notification messages.
Voicemail deletion message notification control is a Class of Service setting.
Implementation
Voicemail Deletion Notification is controlled from the Class of Service: Voice Mail
Permissions panel, shown in Figure 71. To access the Class of Service: Voice Mail panel,
select Administrator -> Users -> Class of Service from the Director Main Menu, then click
the desired service class in the Voice Mail Permissions section at the bottom of the list.
To enable the sending of voice mail deletion notification messages, select Enable AutoDelete Notification at the bottom of the panel. This option is available only if Delete Saved
/ Unheard Messages after (30 - 2000) days or Delete Heard Messages after (30 - 2000)
days.
When at least one message options is selected, the Enable Auto-Delete Notification default
setting is enabled.
Figure 71
Page 136
Enable Auto-Delete Notification
ShoreTel 9 – Client Device and Application Enhancements
IP 110 – On-Hook Dialing
Introduction
ShoreTel 9 adds On-hook Dialing to the IP110 ShorePhone.
Description
On-hook dialing supports number dialing by pressing keyboard digits without picking up
the handset. When dialing a number without picking up the handset, ringback and the
connected call media stream is played through the IP110 speaker.
Because the IP110 does not have a microphone, users must pick up the handset to speak to
the other party. The mute button remains lit while the IP110 is on-hook; pressing the mute
button at this time has no affect.
On-hook dialing on the IP110 is typically used when checking voicemail through the
speakerphone or to avoid picking up the headset until a call is answered.
The Redial button can initiate calls while the IP110 is on-hook. The Mute key is red when
the audio path is through the speaker.
The IP110 cannot initiate Intercom calls on-hook.
Implementation
IP110 Phone firmware version 2.4.0 supports on-hook dialing. Any firmware older than
2.4.0 does not support this feature.
ShoreTel 9.1
Page 139
IP 110 – On-Hook Dialing
Page 140
ShoreWare Server Release Notes
Call Manager – IM Privacy
Introduction
Definition
IM Presence Privacy is a ShoreTel 9 feature that provides users the capacity to manage the
visibility of their IM presence status. Restricting access to IM Presence information also
prevents blocked users from sending instant messages to users restricting their access.
Refer to the Glossary for a definition of the following terms used in this release note:
•
•
•
Instant Messaging
Presence
QuickDial Field
History
ShoreTel 8 introduced Instant Messaging as a Call Manager feature available on
Professional, Workgroup Agent, Workgroup Supervisor, and Operator Call Manager.
Description
Privacy States
Presence privacy states define the IM interaction status between two system users. Users
restrict access to their IM presence state by assigning a privacy state to other users.
ShoreWare defines two presence privacy states:
•
Allowed: This state indicates that the requested party has received access to the user’s
IM presence status.
•
Blocked: This state indicates that the requested party was denied access to the user’s IM
presence status.
A user’s IM presence state appears as Offline to all users whose state is Blocked.
•
Pending: This state indicates that the user has not responded to the party’s request for
IM presence status.
Until the requested user responds to a presence request, the presence state of that user
depends on the type of presence server that the user accesses:
— OCS 2007: Contact’s presence is displayed until access is blocked
— Conference Bridge 7.1: Presence state is offline until access is allowed
The default setting is Blocked.
Requesting Presence Access
Call Manager provides the following methods of requesting access to a user’s presence state:
•
•
•
ShoreTel 9.1
adding the user to the Contact list
calling the user
sending the user an Instant Message
Page 141
Call Manager – IM Privacy
ShoreWare Server Release Notes
Administrators can configure Class of Service options to require users to approve privacy
requests or to automatically accept all requests. Users that are required to approve privacy
requests are only able to view other users privacy from the Contact list.
Contacts that are denied access to a user’s presence information appear as Offline in the
user’s Contact list and QuickDialer fields. Contacts can send instant messages to only users
that grant them access to presence privacy information.
A popup window notifies the recipient concerning a presence access request. The recipient
responds to the request by marking the checkboxes of contacts, then pressing the OK
button. Contacts that are not checked when the OK button is pressed are denied access to
the user’s presence information. Figure 72 displays a privacy request notification popup.
Figure 72
Notification popup
Users do not receive instant messages from other users for whom the privacy state is
Blocked. Presence access requests are also blocked from these users.
Implementation
Although presence privacy settings are configured by each user, ShoreWare provides tools
for administering IM presence access requests on a system or user basis. Presence access
requests for the entire ShoreTel system are administered through Class of Service settings.
Presence access requests for users are configured through Call Manager.
System Privacy Invitation Settings
System IM presence privacy is a Telephony Class of Service parameter. Class of Service
settings have priority over settings configured by individual users.
To set the Presence Invitation Handling parameter for a telephony class of service:
Step 1 Open the Class of Service panel by selecting Administration -> Users -> Class of
Service from the Director main menu.
Step 2 Select the desired Telephony Features Permission Class.
Director opens the Edit Class of Service panel, as shown in Figure 73.
Step 3 Select the desired option from the IM Presence Invitation Handling drop-down.
Valid setting options for IM Presence Invitation Handling include:
•
Page 142
User defined: Each user’s method for handling presence requests is specified by
the Call Manager Options and Preferences setting.
ShoreWare Server Release Notes
Figure 73
Call Manager – IM Privacy
Presence Invitation Handling parameter
•
Auto accepts Invitation: All user invitations are accepted. Notification popups
are displayed when a user receives a request to indicate a requestor was granted
access to the recipient’s presence settings.
•
Prompt to Accept Invitation: Users receive a popup when another user
requests access to their presence. The recipient processes the request by
clicking an option on the popup.
The Class of Service setting does not affect the user’s Call Manager configuration. The Call
Manager Invitation Handling setting persists even when overridden by the Class of Service.
The Call Manager setting becomes active if the CoS service is set to User Defined.
User Privacy settings
Users control their IM presence access settings from the Options and Preferences: Instant
Messaging-Privacy panel, as shown in Figure 74.
Figure 74
ShoreTel 9.1
Options and Preferences: Instant Messaging – Privacy panel
Page 143
Call Manager – IM Privacy
ShoreWare Server Release Notes
Privacy Invitation settings
The Privacy Invitation settings section, located at the top of the Instant Message-Privacy
panel, determines the user’s Presence access request method when the CoS for the user is
set to User Defined.
The invitation handling section provides the following options:
•
auto accept invitation: All requests are accepted. When a user receives a request, a
notification popup indicates a requestor was granted access to the user’s presence.
•
prompt to accept invitation: The user receives a popup when a another user requests
presence access. The request is processed by clicking a popup option.
When the Class of Service is not set to User Defined, this option is read only.
Presence Permissions table
The Presence Permissions table, located at the bottom of the Instant Message-Privacy
panel, configures the presence access setting for listed users. Users in the table are assigned
one of the following permissions:
•
Allowed: Presence information is available to users that are set to this value.
•
Blocked: Presence information is not available to users that are set to this value. Instant
Messages and presence access requests from the user are blocked.
•
Pending: This state indicates that the user has not responded to the party’s request for
IM presence status.
To add a user to the list, press the Add button located below the table.
To edit a user’s permission setting, select the user in the list and press the Edit button.
To remove a user from the list, select the user in the list and press the Delete button.
To sort by name or permission, click on the column heading of the desired key.
To search for a name, click the Name column heading, then start typing the desired name.
Presence Change Alerts
Users can mark a contact to determine when that contact has terminated a phone call or an
instant message session. Call Manager then informs the user when the contact has changed
their presence. Users that can access a contact’s IM presence information and receive
notification of IM or telephony presence changes. Users that are denied access to a contact’s
presence information can only receive notification of that contact’s telephony presence
change.
To mark a contact for a presence change alert, right click the desired contact in the
Contact List and select Alert When Available on the context menu. If that contact is on the
phone or in an Instant Message session, Call Manager displays the popup shown in Figure
75 when that contact completes the call or session. If that contact is not on the phone or a
session, the popup is displayed after the contact subsequently begins a call or session, then
terminates it.
Page 144
ShoreWare Server Release Notes
Call Manager – IM Privacy
Pressing the snooze button closes the popup for the period listed on the button. If the
contact is still available after the period elapses, the popup is displayed again. If the contact
is not available, the popup is displayed immediately after the contact becomes available.
Figure 75
Presence Change Alert popup
Installation
New Installations
In newly installed systems:
— Invitation handling for all users is set to Prompt.
— IM Presence Invitation Handling for all Service Classes is set to Prompt.
Upgrade
Upgrading a ShoreTel system performs the following actions:
•
Server upgrade from Version 8.1
— Invitation handling for all users is set to Prompt.
— IM Presence Invitation Handling for all Service Classes is set to Auto Accept.
•
Server upgrade from Version 7.5
— Invitation handling for all users is set to Prompt.
— IM Presence Invitation Handling for all Service Classes is set to Prompt.
•
Call Manager upgrade
— Call Manager sends requests to everyone in the user’s Contact list.
When an upgrade changes the CoS or individual user mode setting to prompt after server
upgrade, users may initially receive popups listing multiple presence access requests.
Presence Server Support
Presence servers differ in maintaining privacy list and generating requests. This section lists
the privacy differences between servers that support IM presence.
List types
Table 5
ShoreTel 9.1
OCS 2007
eDial
Three lists are maintained:
1.New subscription list
2.Permissions
3.Contact list
One list is maintained.
Presence Access Settings for Supported Presence Servers
Page 145
Call Manager – IM Privacy
Presence state of
new contacts
ShoreWare Server Release Notes
OCS 2007
eDial
Contact’s presence is displayed until access
is blocked.
Presence state is offline until access is
allowed.
Request Generation Each time new subscribers enter.
Only first time new subscribers enter.
Privacy and Contact Privacy and Contact lists are separate.
lists
Subscriber and permission lists are separate.
Deleting user permission list does not
generate new notification.
Permission and Contact lists are same entity.
Permission list displays only users on
contact list.
Users removed from Contact list are
State of users deleted from permission list is removed from Permission list; presence state
does not change.
Show Status.
Delete operation does not remove entry from
Permission list. Delete operation sets
presence state to Don’t Show Status.
Table 5
Page 146
Presence Access Settings for Supported Presence Servers
Call Manager – Contact Import
Introduction
ShoreTel 9 Call Manager supports the import of data records from CSV or XML files for
display in the Directory Viewer. The CSV and XML files contain lists of personal contacts
and are formatted specifically for integration with Call Manager.
The CSV and XML files are not modified by the import process, nor are the contacts
permanently added to the user’s Call Manager database.
Description
Call Manager caches CSV or XML file contents at start-up and after each file change. The
data is available in the Directory Viewer, Contacts Viewer, and QuickDialer. Call Manager
reports errors during the cache process to the user and in log files. Call Manager receives
records from all properly formatted CSV and XML files in the target directory.
Implementation
The following sections describes the steps required for Call Manager to import records
from a data file. File Properties on page 149 describes the properties of CSV and XML
import files.
Editing the Registry
Call Manager reads data files located in a directory specified by the following registry key:
Location: HKEY_CURRENT_USER\Software\Shoreline Teleworks\ShoreWare Client
Key: ContactImportLocation.
The value in this registry is a string. The default value of this key is a string that points to
the Contacts directory in the user profile directory:
C:\Documents and Settings\username\Application Data\ ShoreWare Client\Contacts
The registry entry can point to a PC location or a server path.
WARNING Windows registry changes are effective immediately, and backups are not
created automatically. Only experienced personnel should attempt registry changes.
Figure 76 displays the registry editor after insertion of the ContactImportLocation key. This
registry is set up such that Call Manager will import records from CSV and XML files
located in Bonnie Hopkin’s CM_Import folder
Placing the File
Properly configured CSV and XML files placed in the folder specified by the
ContactImportLocation key are immediately cached to Call Manager. Changes to these files
are visible when the edited file is saved.
When a file is removed from the folder, the contacts listed in that file remain in the
Directory Viewer until Call Manager is exited. Contacts removed from a file also remain in
the Directory Viewer. When Call Manager is started again, all records removed by contact
deletion or file removal do not appear in the Directory Viewer.
ShoreTel 9.1
Page 147
Call Manager – Contact Import
Figure 76
ShoreWare Server Release Notes
ContactImportLocation key viewed in the Registry Editor
Viewing the Contacts
Directory View
Contacts imported from CSV or XML files appear in the Directory Viewer, as shown in
Figure 78. When contacts are grouped by data source, they appear under a heading that
lists the Data Source. When the contacts are grouped by company or not grouped, the Data
Source column indicates either the name of the originating file or the contents of the Name
field in the originating file.
Figure 77
Page 148
Directory Viewer containing Imported Records
ShoreWare Server Release Notes
Call Manager – Contact Import
Directory Item Details
Details of contacts imported from the CSV or XML files are visible from the Directory Item
Details panel, access by right clicking a contact and selecting View Directory Item Detail.
The Directory Item Details panel, as shown in Figure 78, indicates the source of the file in
the first data field and states that the record contents are not editable.
Figure 78
Directory Item Details
Quick Dialer
The imported CSV/XML file contacts will be available in all QuickDialer controls. They will
appear in the list just like any other contact.
File Properties
Data Fields
File Heading Fields
File heading fields provide a description of the record source within the Directory Viewer.
The Source and Version fields are typically listed in the same CSV or XML line. Only one
instance of each field should be provided in a contact file.
The following are the subdirectory heading fields:
•
Source: This field is associated with all file records in Call Manager and corresponds to
the Data Source column in the Directory Viewer. Typically, this value is set to the
original source of the file contents.
When this field is not included, Call Manager uses the CSV or XML file name as the
Data Source contacts imported into the Directory Viewer.
•
ShoreTel 9.1
Version: This field displays the version of the contact information. When included, this
field must be set to 1.0.
Page 149
Call Manager – Contact Import
ShoreWare Server Release Notes
Column Heading Fields
Unless otherwise specified, a contact record should contain only one instance of each field.
The only mandatory data entry field is Contact ID. At least one name field and one other
column heading field must contain information for each contact.
The column heading fields include the following:
•
Contact ID: This field uniquely identifies the contact record within the file. The
Contact ID is a string with a maximum of 126 characters. Call Manager does not
display this field. All contact records require a Contact ID. If multiple contact records
contain identical Contact IDs, the last such contact in the list is imported into Call
Manager and all other contacts with the same ID are ignored.
•
First name: This field contains the contact’s first name.
•
Middle name: This field contains the contact’s middle name.
•
Last name: This field contains the contact’s last name.
•
Company: This field contains the contact’s company name.
•
Department: This field contains the contact’s department name.
•
Phone numbers: This field contains the contact’s phone numbers. A contact record
may contain more than one phone number as follows:
—
—
—
—
—
Business: two fields (Business, Business 2)
Home: two fields (Home, Home 2)
Mobile: one field (Mobile)
Pager: one field (Pager)
Fax: one field (Fax)
•
Email addresses: This field contains the contact’s addresses. A contact record may
contain three email addresses (Email Address, Email Address 2, Email Address 3).
•
IM: This field contains the contact’s instant messaging address.
•
Categories: This field provides a method of grouping contacts.
CSV Files
CSV files contains records, each of which consists of data fields. The following sections
describe the composition of CSV file fields and records.
Field Composition
Each field denotes one property for the file or for one contact. The field entries must
conform to the following syntax rules:
•
Data is of type strings and supports UTF-16 encoding.
•
Fields that contain a double quote must be surrounded by double quotes. Double
quotes are indicated by two double quotes.
Example 1: A “tiny” space -> “A ““tiny”” space””
Example 2: “Joe” -> “““Joe”””
Example 3: “Red” Wagon -> “““Red”” Wagon”
•
Fields that contain commas must be surrounded by double quotes.
Example 1: “ShoreTel, Inc.”
Page 150
ShoreWare Server Release Notes
Call Manager – Contact Import
•
Fields that do not contain double quotes or commas with double quotes may be
surrounded with double quotes.
•
Data fields with no information translate into blank entries in Call Manager.
Record Types
Each line in a CSV files corresponds to one data record. The end of a record is denoted by a
Carriage Return and Line Feed.
Call Manager CSV integration files define three types of records
•
File Information Record: The File Information Record denotes the Source of the data
and the Version of the file. Inclusion of this record in the CSV file is optional. When it
is included, the File Information Record must be the first record in the file.
— Source: This field is associated with all file records in Call Manager and
corresponds to the Data Source column in the Directory Viewer. Typically, this
value is set to the original source of the file contents.
When this field is not included, Call Manager uses the CSV or XML file name as the
Data Source contacts imported into the Directory Viewer.
— Version: This field displays the version of the contact information. When included,
this field must be set to 1.0.
Source and Version variable declarations must conform to the following:
— Syntax for the Source variable is Source=sourcetext.
— Syntax for the Version variable is Version=versionname.
— The Source and Version variables are optional.
Example 1: “Source=Lotus”,”Version=1.0”
Example 2: Source=Lotus, Version=1.0
•
Contact Header Record: The Contact Header Record is mandatory and lists the names
of the fields that the file lists for the contacts. The Contact Header Record is located
immediately after the File Information Record. If the file does not contain a File
Information Record, the Contact Header Record is the first record in the file.
Although field names correspond to Directory Viewer heading names, the field name
and heading name are not identical.
The following is a list of valid field names for CSV import files:
— Contact ID: This field uniquely identifies the contact record within the file. The
Contact ID is a string with a maximum of 126 characters. Call Manager does not
display this field. All contact records require a Contact ID. If multiple contact
records contain identical Contact IDs, the last such contact in the list is imported
into Call Manager and all other contacts with the same ID are ignored.
Call Manager does not display the contents of this field.
— First name: Directory Viewer displays contents under the First Name column.
— Middle name: Directory Viewer displays contents under the Middle Name column.
— Last name: Directory Viewer displays contents under the Last Name column.
— Company: Directory Viewer displays contents under the Company column.
— Department: Directory Viewer displays contents under the Department column.
— Business Phone: Directory Viewer displays contents under the Business column.
ShoreTel 9.1
Page 151
Call Manager – Contact Import
ShoreWare Server Release Notes
— Business Phone 2: Directory Viewer displays contents under the Business 2
column.
— Home Phone: Directory Viewer displays contents under the Home column.
— Home Phone 2: Directory Viewer displays contents under the Home 2 column.
— Mobile Phone: Directory Viewer displays contents under the Mobile column.
— Pager: Directory Viewer displays contents under the Pager column.
— Business Fax: Directory Viewer displays contents under the Fax column.
— Email Address: Directory Viewer displays contents under the Email column.
— Email2 Address: Directory Viewer displays contents under the Email2 column.
— Email3 Address: Directory Viewer displays contents under the Email3 column.
— IM Address: Directory Viewer displays contents under the IM column.
— Categories: Directory Viewer displays contents under the Categories column.
Example 1: “Contact ID”,”First Name”,”Last Name”, “Business Phone”
•
Contact Record: The file contains one record for each contact that is integrated into the
Directory viewer. The order of data fields in each contact record must be identical to
the fields in the Contact Header Record.
Example 1: “ID_100”,”Johnny”,”Fracas”, “398-212-0012”
Example 1: ID_100,Johnny,Fracas, 398-212-0012
CSV Examples
The following is an example of a CSV file where all fields are surrounded by double
quotes:
“Source=Lotus”,”Version=1.0”
“Contact ID”, “First Name”, ”Middle Name”, “Last Name”, “Company”, “Department”,
“Business Fax”, “Business Phone”, “Home Phone”, “Mobile Phone”, “Pager”, “Categories”,
“Email Address”
“1234”,”Maude”,”June”,”Bigsby”,”Anycorp, Inc.”,””,,”(398) 777-8888”
“1235”,”David”,”””Doc”””,”Daniels”,”Anycorp, Inc.”,”Software Engineering”,”(398) 3319999”,”(408) 331-3662”,”(650) 999-1212”,”(398) 218-9898”,”(398) 222-3434”,”New
Customer”,”[email protected]”
The following is an example of a CSV file where only fields with commas and double
quotes are surrounded by double quotes:
Source=Lotus,Version=1.0
Contact ID,First Name,Middle Name,Last Name,Company,Department,Business
Fax,Business Phone,Home Phone,Mobile Phone,Pager,Categories,Email Address,IM Address
1234,Maude,June,Bigsby,”Anycorp, Inc.”,,,(398) 777-8888,,,,,,
1235,David,”””Doc”””,Daniels,”Anycorp, Inc.”,Software Engineering,(398) 3319999,(398) 331-3652,(398) 929-1212,(398) 888-9898,(398) 222-3434, New Customer,
[email protected], [email protected]
Page 152
ShoreWare Server Release Notes
Call Manager – Contact Import
XML Files
XML files contain a structure set of elements. The following sections describe required file
components and XML elements recognized by Call Manager.
XML File Name
Elements
The following elements are recognized by Call Manager Contact XML files.
Level 1 Elements
Each file contains one Contacts element.
•
Contacts: The Contacts element specifies the source name and version number and
contains one Contacts element for each contact in the file.
— valid attributes: source, version
Example: <contacts source = “File 1” version = “1.0”> </contacts>
Level 2 Elements
The Contacts element contains one Contacts element for each user defined by the XML file.
Each Contacts element contains Level 3 elements that define the field contents for the user.
Each Contacts element must contain one ContactID element and one other Level 3
element.
Refer to the Example on page 155 for an example of the Contacts element.
Level 3 Elements
Level 3 elements are contained with the Contacts element and specify field contents for
contacts imported to Call Manager. The following is a list of Level 3 elements.
•
contactID: This field uniquely identifies the contact record within the file. The Contact
ID is a string with a maximum of 126 characters. Call Manager does not display this
field. All contact records require a Contact ID. If multiple contact records contain
identical Contact IDs, the last such contact in the list is imported into Call Manager
and all other contacts with the same ID are ignored.
Example: <contactID>1234</contactID>
•
name: This element specifies the contact’s name. Each contact element may contain
only one name element.
— valid attributes: first, middle, last
Example: <name first=”Sarah” middle=”Jane” last=”Clauser”/>
•
company: Each contact element may contain only one company element.
— valid attributes: value
Example: <company name=”Anycorp, Inc.”/>
•
department: Each contact element may contain only one department element.
— valid attributes: value
Example: <department value=”Sales”/>
•
ShoreTel 9.1
categories: Each contact element may contain only one categories element.
Page 153
Call Manager – Contact Import
ShoreWare Server Release Notes
— valid attributes: value
Example: <categories value=”Austin”/>
•
phone: This element specifies the contact’s phone numbers. A contact element may
contain multiple phone elements, subject to the following:
— valid attributes: type, name, value
Type: The type attribute must be equal to one of the following: Business, Home,
Mobile, Pager, and Fax.
❋
❋
❋
❋
❋
An element may contain 2 phone elements with name is equal to Business
An element may contain 2 phone elements with name is equal to Home
An element may contain 1 phone elements with name is equal to Mobile
An element may contain 1 phone elements with name is equal to Pager
An element may contain 1 phone elements with name is equal to Fax
Name: The name attribute specifies the label of the Call Manager Directory Viewer
column heading. If a name value does correspond to a standard column heading
label, Call Manager creates a new heading.
Value: The value attribute specifies the phone number that appears in the Directory
Viewer data field label of the Call Manager Directory Viewer column heading. If a
name value does correspond to a standard column heading label, Call Manager
creates a new heading.
Example 1: <phone type =”Business” name=”Business 2” value= “+1 (398) 244-2489”/>
Example 2: <phone type =”Pager” name=”Pager” value= “+1 (398) 298-231”/>
If multiple Phone Type elements have the same name attribute, Call Manager uses the
first string and ignores all duplicate entries.
•
email: This element specifies the contact’s email addresses. A contact element may
contain a maximum of three email elements, subject to the following:
— valid attributes: name, value
Name: The name attribute specifies the label of the Call Manager Directory Viewer
column heading. If a name value does correspond to a standard column heading
label, Call Manager creates a new heading.
Value: The value attribute specifies the email address that appears in the Directory
Viewer data field.label of the Call Manager Directory Viewer column heading. If a
name value does correspond to a standard column heading label, Call Manager
creates a new heading.
Example 1: <email name=”email 2” value= “[email protected]”/>
Example 2: <email name=”email” value= “[email protected]”/>
•
IM: This element specifies the contact’s instant messaging address. An contact element
may contain only one IM element.
— valid attributes: name, value
Name: The name attribute specifies the label of the Call Manager Directory Viewer
column heading. If a name value does correspond to a standard column heading
label, Call Manager creates a new heading.
Value: The value attribute specifies the IM address that appears in the Directory
Viewer data field label of the Call Manager Directory Viewer column heading. If a
name value does correspond to a standard column heading label, Call Manager
creates a new heading.
Page 154
ShoreWare Server Release Notes
Call Manager – Contact Import
Example
The following is an example of a Call Manager Contact Integration XML file:
<?xml version="1.0" encoding="utf-8"?>
<contacts source="Lotus" version="1.0">
<contact>
<name first="Sarah" middle="" last="Clauser"/>
<company value="Anycorp, Inc."/>
<department value="Finance"/>
<contactID>1234</contactID>
<phone type="Business" name="Business" value="+1 (398) 122-2558"/>
<phone type="Business" name="Business 2" value="+1 (398) 122-2558"/>
<email name="Email" value="[email protected]"/>
<email name="Email Address 2" value="[email protected]"/>
<IM name="IM" value="[email protected]"/>
</contact>
<contact>
<name first="Tammy" middle="" last="Masoon"/>
<company value="Anycorp, Inc."/>
<department value="Sales"/>
<contactID>2234</contactID>
<phone type="Home" name="Home" value="+1 (398) 962-2552"/>
<phone type="Pager" name="Pager" value="+1 (398) 529-8670"/>
</contact>
<contact>
<name first="Greg" middle="" last="Thilmonda"/>
<company value="ShoreTel, Inc."/>
<department value="Sales"/>
<contactID>3234</contactID>
<email name="Email" value="[email protected]"/>
</contact>
<contact>
<name first="Patrick" last="Farrington"/>
<contactID>4234</contactID>
<phone type="Business" name="Business" value="+1 (398) 331-3642"/>
<phone type="Mobile" name="Mobile" value="+1 (398) 666-5113"/>
<phone type="Fax" name="Fax" value="+1 (398) 331-3642"/>
<email name="Email" value="[email protected]"/>
<IM name="IM" value="[email protected]"/>
</contact>
</contacts>
ShoreTel 9.1
Page 155
Call Manager – Contact Import
Page 156
ShoreWare Server Release Notes
Mobile Call Manager – Location
Based Service
Introduction
Definition
ShoreTel 9 adds Location Based Service functions to Mobile Call Manager (MCM).
Refer to the Glossary for a definition of the following terms used in this release note:
•
•
•
•
•
•
•
•
Active Call Handling Mode
Call Handling Modes
Coordinate
Global Positioning System
Location based service
Office Anywhere
Office Anywhere Extension
Waypoint
History
MCM, introduced in ShoreTel 7.5 provides mobile device access to selected Call Manager
features. The MCM implementation includes the client application that runs on cell phones
and the server component – Mobile Call Manager Server (MCMS) – that runs on any
ShoreWare application server.
ShoreTel 8.1, extended Mobile Call Manager access to new audiences through carrier
independence and support of additional European and American languages.
Description
Definition
MCM Location Based Services (LBS) uses GPS to identify device location. MCM users can
customize call management on the basis of the device location.
Users define waypoints based on known locations and associate a Call Handling Mode
(CHM) or Office Anywhere (OA) destination with each waypoint. When the device moves
into a region covered by a waypoint, MCM changes the active CHM or OA destination as
specified by the waypoint.
WARNING Calls placed through ShoreTel to Office Anywhere numbers are dropped if
the OA setting changes during the calls. Scenarios that may result in dropped OA calls
include:
•
ShoreTel 9.1
Moving through different waypoints when MCM is running – even if only in
the background – and LBS is enabled while both phone and network are
capable of simultaneous data and voice communications.
Page 157
Mobile Call Manager – Location Based Service
•
ShoreWare Server Release Notes
OA is set for a home or office phone and MCM is turned on in a location
identified by a waypoint as valid for a different calling device.
Process Description
Preparation
Before a mobile device can run MCM LBS, the user must configure the polling method and
waypoint set.
•
Polling Method: The polling method specifies the conditions under which the device
searches for a GPS signal. Before LBS can be enabled, the polling method and frequency
must be configured.
MCM LBS defines two polling conditions:
— After an On-Use interrupt.
An On-Use interrupt is an event that enables MCM as the foreground application.
MCM becomes the foreground application when the user accesses any MCM
function or moves MCM to the foreground. In this case, MCM polls for LBS
coordinates after each event that enables MCM as the foreground application.
This method is the default setting and is recommended because it has the smallest
device battery life impact.
— After periodic intervals
Users can configure MCM to poll once each hour or once each fifteen minutes.
Periodic polling can significantly affect the device battery life.
•
Waypoint Set: A waypoint is an MCM data point that associates an action with a
specified location. When the device receives a GPS signal in the location specified by a
waypoint while MCM is the foreground application, MCM performs the action defined
by the waypoint.
Each waypoint defines a region in terms of a point (longitude and latitude) and range
(radius). MCM actions associated with waypoints include changing the active Call
Handling Mode or the active Office Anywhere extension.
MCM allows the configuration of multiple waypoints.
Algorithm
The following describes the MCM LBS algorithm:
1. MCM polls for LBS as configured.
2. When MCM receives GPS coordinates that fall within a region specified by a waypoint,
MCM changes the active CHM or OA destination settings to those associated with the
waypoint. The ShoreTel system routes calls to the destination specified by the new
setting.
When LBS coordinates do not fall within the range of any waypoint, MCM sets the
active CHM and OA destination as follows:
Page 158
•
If the user has specified an OA Default Destination, MCM sets the OA destination
to that value.
•
If the user has not specified an OA Default Destination, MCM sets the OA
destination to value specified by Call Manager or Web Access.
ShoreWare Server Release Notes
•
Mobile Call Manager – Location Based Service
The CHM setting remains unchanged.
Manual CHM or OA setting changes have higher priority than GPS generated settings.
Manual settings remain in effect until the next GPS poll that meets the following criteria:
•
LBS and waypoint are re-initiated.
•
The new LBS coordinate either maps to a new waypoint or does not map to a waypoint.
If the coordinate does not match a known waypoint, the default Office Anywhere
extension is used.
Availability
MCM supports LBS features on the following devices (depending on carrier support):
•
•
•
•
•
•
BB 9000 series
BB 8300 series (requires a GPS dongle)
BB 8800 series
Nokia N95
Nokia E90
Nokia E61i
Devices supporting LBS must either have internal GPS hardware or the capability of
connecting to an external device that provides GPS functionality such as dongles. The
carrier must allow GPS on the device and allow third party applications, such as MCM, to
use GPS functionality. External GPS devices may be used to enable LBS features on these
devices, depending on carrier limitations.
Configuring LBS
LBS parameters are configured on the Location-based Services panel, as shown in Figure
79. To open the Location-based Services panel, select Settings -> Location-based Services
from the Main Menu.
Figure 79
Location-based Services
Managing Location Based Services Activity
The Enable Location-based Services parameter, located at the top of the panel, controls
activation of Location-Based Services. The checkbox located left of the text indicates the
status; when the box is filled, Location-Based Services is enabled.
The parameter is a toggle setting – the LBS is enabled and disabled through the same
procedure.
To change the Location Based Services activity:
Step 1 Select Enable Location-based Services with the cursor.
ShoreTel 9.1
Page 159
Mobile Call Manager – Location Based Service
ShoreWare Server Release Notes
Step 2 Press the Menu button to display the context menu, as shown in Figure 80.
Figure 80
Toggling Location-based Services Activity
Step 3 Select Toggle button.
Step 4 Press the Trackball.
Polling Rate Selection
The Polling Rate parameter, located below the Enable Location-based Service parameter,
specifies the condition and rate that MCM searches for a GPS signal. Valid parameter
settings include
•
On Use: Select this option to poll when any event that enables MCM as the foreground
application – when the user accepts a call, accesses voicemail, or manually moves
MCM to the foreground.
•
Every Hour: Select this option to poll on 60 minute intervals.
•
Every 15 Minutes: Select this option to poll on 15 minute intervals.
The Polling Rate selection significantly impacts the device battery life.
To change the Polling Rate:
Step 1 Select Polling Rate with the cursor.
Step 2 Select the Polling Rate drop-down menu, as shown in Figure 81.
Figure 81
Setting the Polling Rate
Step 3 Scroll to, and select, the desired option.
Page 160
ShoreWare Server Release Notes
Mobile Call Manager – Location Based Service
Managing Waypoints
Waypoints are accessed from the Location-based Services panel, as shown in Figure 82. All
configured Waypoints are listed below the Waypoint text. Office Anywhere numbers
referenced by waypoints should be defined before configuring the waypoint.
Figure 82
•
Selecting a Waypoint
To add a new waypoint, press the Menu button and select Add Waypoint.
The Waypoints Settings panel opens for the new waypoint.
•
To modify a waypoint’s name or settings, select the desired Waypoint, press the Menu
button, and select Edit Waypoint.
The Waypoints Settings panel opens for the specified waypoint.
•
To remove a waypoint, select the desired Waypoint, press the Menu button, and select
Delete Waypoint.
Adding or editing a waypoint opens the Waypoint Settings panel.
Waypoints Settings
The Waypoint Settings panel specifies the name, location, range, and action of the specified
waypoint, as shown in Figure 83.
Figure 83
Waypoint Settings panel
•
The Name is the label by which other panels refer to the waypoint.
•
The Lat and Long denote the center of the waypoint. MCM waypoints do not reference
altitude.
— To set these parameters to the current location of the device, press the Set using
GPS button.
— To set these parameters to the location of a street address, press the Set Using
Address button. MCM responds by displaying a form for specifying the desired
location.
ShoreTel 9.1
Page 161
Mobile Call Manager – Location Based Service
•
ShoreWare Server Release Notes
The Range specifies the radius of the waypoint. Valid parameter settings depend on the
language setting:
— For English US or English UK, valid settings are 100 feet and 1000 feet.
— For all other languages, valid settings are 100 meters and 1000 meters.
•
The Attach to parameter specifies the parameter setting selected by MCM when it
receives a GPS signal that is located within the region defined by the waypoint.
Valid settings include all Call Handling Modes and all Office Anywhere numbers. The
setting is activated when the device receives a GPS signal at the location specified by
the waypoint.
LBS Indicators
MCM panels displays LBS icons that indicate activity and GPS reception. The Main Menu
also displays LBS rule implementation status.
LBS Activity status
MCM panels displays a satellite dish icon in the top right corner when LBS is enabled, as
shown in Figure 84.
Figure 84
Indication Icons
GPS Reception Status
The GPS Reception Status icon appears as an appendage of the LBS Activity icon. The
following icons denote reception results of the last polling attempt:
•
green circle: indicates that coordinates from the most recently received GPS signal
matched a waypoint.
The icon in Figure 84 contains the green circle.
•
empty circle: indicates that coordinates from the most recently received GPS signal did
not match a waypoint.
•
dish (rotating): indicates MCM is searching for a GPS signal.
•
no icon: indicates the device is not configured for LBS.
•
E (three red bars): indicates a GPS or LBS error condition.
LBS Implementation Status
When the current Office Anywhere or Call Handling Mode is set because a waypoint
matched a GPS signal, a satellite icon appears next to the setting. In Figure 84, the satellite
icon appears next to the In a Meeting indicator at the bottom of the panel.
Page 162
ShoreWare Server Release Notes
Mobile Call Manager – Location Based Service
When manually selecting a current Call Handling Mode or Office Anywhere destination,
the LBS initials indicate an option that is attached to at least one waypoint. Figure 85
displays three Call Handling Modes – Standard, Extended Absence, and Custom – that are
attached to at least one waypoint.
Figure 85
ShoreTel 9.1
LBS Rule Indicators
Page 163
Mobile Call Manager – Location Based Service
Page 164
ShoreWare Server Release Notes
Mobile Call Manager –
Enhancements
Introduction
Definition
ShoreTel 9 enhances the following Mobile Call Manager (MCM) features:
•
•
•
•
•
•
Office Anywhere
Voicemail
Call History
QuickDialer
Installation enhancements
Navigating through messages using the existing TUI when using visual voicemail.
Refer to the Glossary for a definition of the following terms used in this release note:
•
•
•
•
•
•
Active Call Handling Mode
Call Handling Modes
Office Anywhere
Office Anywhere Extension
Active Office Anywhere Extension
Default Office Anywhere Extension
History
MCM, introduced in ShoreTel 7.5, provides mobile device access to selected Call Manager
features. The MCM implementation includes the client application that runs on cell phone
and the server component – Mobile Call Manager Server (MCMS) – that runs on any
ShoreWare application server.
ShoreTel 8.1 extended Mobile Call Manager access to new audiences through carrier
independence and support of additional European and American languages.
Feature Enhancements
Office Anywhere
ShoreTel 9 expands MCM to support the following Office Anywhere (OA) enhancements:
•
Definition of multiple destinations for selection as the active Office Anywhere
destination.
•
Designation of a Default Office Anywhere number.
•
Automatic enabling of Office Anywhere when MCM is activated.
Multiple Office Anywhere Numbers
MCM defines multiple OA extensions for each user. OA extensions are categorized as
Permanent and User Defined.
ShoreTel 9.1
Page 165
Mobile Call Manager – Enhancements
•
ShoreWare Server Release Notes
Permanent Extensions: Two permanent OA extensions are available for each user.
Permanent extensions cannot be deleted or renamed. MCM permanent extensions
include:
— Home Extension: The Home Extension refers to the device connected to the user’s
home port, as configured through Director. You cannot modify, rename, or delete
the Home Extension.
— External Extension: The External Extension is specified from Call Manager or Web
Access. A user cannot modify the External Extension from the MCM.
Call Manager and Web Client specifies an active OA extension. The External
Extension is set to this number if it is not assigned to one of the User Defined
Extensions. Otherwise, the External Extension is set to the null value.
•
User Defined Extensions: User defined extensions are created by the user. They differ
from Permanent Extension if the destination is specified by the user and that the user
can modify or delete them.
Upon initial use, MCM provides an User defined OA extension named Mobile
Extension. The Mobile Extension is specified during initial setup and provisioning by
the user to the mobile device’s phone number. The user can modify and delete the
Mobile Extension setting.
To access the Office Anywhere Extensions panel, select Settings -> Office Anywhere from
the Main Menu. The Office Anywhere Extensions, as shown in Figure 86, displays the
names of all available OA extensions.
Figure 86
Office Anywhere Extensions panel
To add an Office Anywhere extension, press the Menu button in the Office Anywhere
Extensions panel, then select Add Extension in the context menu.
To modify an existing Office Anywhere Extension, scroll to the desired extension in the
Office Anywhere Extensions panel, press the Menu button, then select Edit Extension in
the context menu.
MCM displays an edit panel for creating new extensions or modifying existing extensions,
as shown in Figure 87. The user assigns a label and specifies the phone number in this
panel. You can specify the default extension from this panel.
Some fields are not editable for various Permanent Extensions. These fields display a grey
background.
Automatic Office Anywhere
This feature facilitates the receipt of calls on an MCM device without requiring execution
of the OA configuration process every time a user turns on the device. When a user places
a call or accesses voicemail through MCM, the Active Call OA extension is set to the Default
Office Anywhere Extension number unless one of the following conditions is present:
Page 166
ShoreWare Server Release Notes
Figure 87
•
•
Mobile Call Manager – Enhancements
Edit panel – User Defined Extensions
A default OA extension is not selected.
LBS is active and the Active OA Extension was specified by entry into the current
waypoint.
Users can change the Active Office Anywhere extension by pressing the Menu button and
selecting Set Office Anywhere. Manual changes to the Active OA extension have priority
over changes generated by LBS but are lost when the user places a call or plays a voice
message.
A maximum of one OA extension can be designated as the default extension. Initially, the
Mobile Extension is set as the default; users can change the Default OA Extension through
the Extension Edit Panel, as shown in Figure 87.
MCM denotes that a Default AO destination is defined by placing a star icon in the banner
line at the top of all MCM panels. MCM denotes that the Active AO Extension is set to the
Default extension with a star icon next to the Active Office Anywhere extension name in
the status line of the Main Menu. Figure 88 displays the banner and status lines on the
Main Menu.
Figure 88
Denoting Default OA Extension Status in Banner and Status Lines
Voicemail
ShoreTel 9 supports the following MCM voicemail access enhancements:
ShoreTel 9.1
•
After playing voicemail messages, users can access other voicemail menus and
messages without reconnecting to voicemail.
•
Voicemail preview messages are available through either the internal or external
speakers.
•
Voicemail message items in the mailbox are boldface when the message is marked
unheard.
•
When using the Advanced Voicemail or DTMF VM feature, the user can access all
voicemail menu operations.
Page 167
Mobile Call Manager – Enhancements
ShoreWare Server Release Notes
Call History
ShoreTel 9 supports the following MCM Call History access enhancements:
•
Call History supports Delete and Delete All commands.
•
Call History maintains 50 entries after changing OA settings or restarting the MCM
server.
•
The Missed Call counter is reset when the user views Call History.
•
Call History displays the most recent missed call in bold.
QuickDialer
ShoreTel 9 supports the following MCM QuickDialer enhancements:
QuickDialer: Wild Card Search “e#b#”
MCM QuickDialer recognizes wild card characters for narrowing searches. Wild card usage
is consistent with that of the “Directory” button on ShorePhones.
QuickDialer wildcard usage is subject to the following:
•
•
•
Applies to both Directory and PIM
Case and Diacritical insensitive
Wild card characters used are “#”, “*” and the space character “ “
Wildcard character scope:
•
•
# and space character replaces all remaining characters in the string
The * character replaces only one character within the string
Example: The following strings filter the name “Mark Halsteam”:
M#H , Ma#H, M H, Ma H, M**k H, .
Settings – Disable PIM Entries
Users can enable or disable the loading of PIM entries into the Quickdialer list.
Installation Changes
Version Control
When MCM client is initiated by a user, it compares its software version to that of the
MCM server. Software upgrades are initiated on the basis of that comparison.
•
The Client and Server versions are identical.
The client launches or resumes normally. No upgrade is required
•
The Client and Server versions are different but compatible.
MCM client displays a panel with an upgrade button and an out of date warning. The
user can press the button to upgrade immediately or continue using the application.
The panel is displayed each time the application starts until the user upgrades MCM.
•
Page 168
The Client and Server versions are different and incompatible.
ShoreWare Server Release Notes
Mobile Call Manager – Enhancements
MCM client displays an incompatibility warning message indicating that an upgrade is
required. The panel includes an Upgrade button that sends the user to the URL that
provides download access to updated application.
The MCM Client will not run until the new version has been installed and launched.
When a user initiates an upgrade, the device launches an Internet browser while exiting or
moving MCM to the background. If the device is unable to launch a browser, it displays a
URL link and instructs the user to open the link manually.
The following device types support automatic browser launching:
•
•
•
Motorola
Nokia
Window Mobile
Permanent Configuration Storage
MCM stores configuration settings for a user’s client device in the ShoreTel database. When
a user changes mobile devices, these settings can be downloaded to the new device. While
the user must still provision MCM on the new device, re-entering user information is
obviated.
These settings are available to users who replace a device upon which MCM was installed
or resets MCM to change the provisioning. The stored configuration does not replace the
provisioned settings of an existing MCM device unless explicitly instructed by the user.
When a user provisions a replacement MCM device, settings for the new device are stored
in the ShoreTel database after the provisioning is complete. MCM settings not required by
the second device, such as LBS settings for a non-LBS device, are not retained.
ShoreWare Director does not indicate the existence or status of these settings.
Screen Size Notifications: Multi-Screen and Slider Devices
Although MCM support is provided for multi-screen and slider device, MCM is available in
only one screen size or slider mode. On these devices MCM displays a message on the
unsupported screen instructing the user to Open the Phone (multi-screen device) or Move
the Slider to the top (slider device).
Client Notification of Upgrade
ShoreTel 9 MCM supports the automated disbursement of email messages to inform end
users of an upgrade. The process is similar to that for Call Manager upgrades: the process is
manually initiated through Director, after which the system sends an email message to all
specified MCM end users.
To initiate an upgrade notification:
Step 1 Access the Notify Users panel in Director, as shown in Figure 89, by selecting
Administration -> Call Manager -> Notify Users from the Main Menu.
Step 2 Select either Mobile Call Manager or Both from the Send Emails for drop-down
menu.
Step 3 Specify the desired recipients by selecting a Notify radio button and completing the
associated data entry fields.
Step 4 Press the Send Email button.
ShoreTel 9.1
Page 169
Mobile Call Manager – Enhancements
Figure 89
ShoreWare Server Release Notes
Notify Users panel – Selecting Mobile Call Manager
Director displays an Internet Explorer panel indicating that the notifications were
sent.
Provisioning Changes
The provisioning server entry text field accepts alphanumeric characters for supporting
DNS name entries.
Usage Changes
Character Input Mode indicator
MCM displays a character mode indicator in the upper right corner of the panel as follows:
•
MCM displays abc in the upper right corner of the screen when the user selects a data
entry field and the device is configured to enter alphanumeric characters.
•
MCM displays 123 in the upper right corner of the screen when the user selects a data
entry field and the device is configured to enter only numeric characters.
•
MCM displays no indicator when a data entry field is not selected.
Support Information
Supported Devices
ShoreTel Version 9 supports MCM on the following mobile devices:
•
•
•
•
•
•
•
•
•
Page 170
Motorola RAZR V3
Motorola RAZR V3xx
Blackberry 7200 Series
Blackberry 7290
Blackberry 8100 Series (Pearl)
Blackberry 8300 Series (Curve)
Blackberry 8700 Series
Blackberry 8800 Series
Blackberry 9000 Series
ShoreWare Server Release Notes
•
•
•
•
•
Mobile Call Manager – Enhancements
Nokia E61i Series
Nokia E65 Series
Nokia E90 Series
Nokia N95 Series
HTC Mogul Series (Sprint PPC – 6800 version only)
Feature Support
Although basic MCM functions are available on all supported devices, the implementation
of some functions may vary between devices because of the inherent differences of the
devices. The following sections list features that are available on selected models and the
significant implementation differences between devices.
Location Based Services
MCM supports LBS features on the following devices (depending on carrier support):
•
•
•
•
•
BB 9000 series
BB 8800 series
Nokia N95
Nokia E90
Nokia E61i
Devices supporting LBS must either have internal GPS hardware or the capability of
connecting to an external device that provides GPS functionality such as dongles. The
carrier must allow GPS on the device and allow third party applications, such as MCM, to
use GPS functionality. External GPS devices may be used to enable LBS features on these
devices, depending on carrier limitations.
Voicemail Preview
The following devices support Voicemail Preview over the speaker phone:
•
•
•
•
•
•
•
•
•
•
•
Blackberry 8100 Series (Pearl)
Blackberry 8300 Series (Curve)
Blackberry 8700 Series
Blackberry 8800 Series
Blackberry 9000 Series
Nokia E61i Series
Nokia E65 Series
Nokia E90 Series
Nokia N95 Series
Motorola RAZR V3
Motorola RAZR V3xx
The following devices support Private Preview of Voicemail on the phone:
•
•
•
•
Blackberry 8100 Series (Pearl)
Blackberry 8300 Series (Curve)
Blackberry 8800 Series
Blackberry 9000 Series
PIM Integration
All listed Blackberry and Nokia devices support PIM entry import. The MCM settings panel
provides an option to disable PIM loading for these devices.
ShoreTel 9.1
Page 171
Mobile Call Manager – Enhancements
ShoreWare Server Release Notes
RAZR V3 and Mogul devices do not support PIM.
Network Speed Setting
The default network speed setting on the Blackberry 7290 and Motorola RAZR devices is
Slow 2/2.5G/CDMA. The default setting on all other devices is High Speed/Wi-Fi.
DTMF Handling
Some devices do not support DTMF signaling during a call when MCM is the foreground
application.
In the Nokia N95, users can send DTMF signaling during a call as follows:
After pressing the Call button to answer a the call, press the Menu key twice; the first
time places MCM in the background while the second time displays the dialer for
sending DTMF signals.
Fonts
MCM displays text through custom font (bitmaps) or native OEM fonts.
Page 172
•
The Motorola RAZR V3 uses a custom font and includes a setting that specifies the font
size.
•
Native OEM fonts are used by all other devices that support MCM.
Glossary
802.1x A component of IEEE 802.1 group of networking protocols that addresses port-
based Network Access Control. It provides an authentication mechanism for devices
attaching to a LAN port to either establish a point-to-point connection or prevent the
device from accessing the port if authentication fails. 802.1x is based on the Extensible
Authentication Protocol (EAP).
ACD see Automatic Call Distributor
Active Call Handling Mode The active call handling mode is the CHM that is designated
to specify the current method of handling a user’s inbound calls. One mode is always
active for each user. The active CHM is selected manually by the user or changes
automatically based on the user’s schedule.
Active Directory (AD) Active Directory is a Mircosoft technology that provides various
network services, including LDAP-style directory services and authentication, for
Windows environments. Administrators assign policies, deploy software, and apply
critical updates to an organization from a single Active Directory database.
Active Office Anywhere Extension An OA Extension is the phone number where a
user’s callers are routed when the user has enabled Office Anywhere. See Office
Anywhere Extension and Default Office Anywhere Extension.
AD see Active Directory
Advanced Encryption Standard (AES) Advanced Encryption Standard is a United States
Encryption standard defined in Federal Information Processing Standard (FIPS) 192,
published in Nov. 2001. AES is a symmetric block cipher which can process fixed 128bit data blocks, using 128, 192 or 256-bit keys.
AES see Advanced Encryption Standard
Announced Find Me Announced Find Me is an option where the identity of an inbound
caller is provided to the Find Me call recipient. Inbound callers may be required to
record their spoken name before the call is connected.
Automatic Call Distributor (ACD) An Automatic Call Distributor is a system that
distributes inbound calls to members, or agents, of the system.
Auto Find Me Auto Find Me is a Find Me option where a call recipient can program the
system to immediately forward inbound call without requiring the caller to press “1”.
Available DID numbers DID numbers within a range that are not assigned to a user or
entity within the context of that range.
DID number availability within a range does not consider DNIS assignments. Numbers
assigned as a DNIS number are still enumerated as available within a DID range;
attempts to assign these DID numbers will be unsuccessful.
Bounced Call A bounced call is a parked call that is returned to the extension that parked
the call because is was not picked up within a specified period.
Call Appearance A VoIP data structure that supports one voice call session.
Call Detail Record (CDR) A Call Detail Record is a data record containing statistics of a
call that passed through a PBX or telephone exchange.
ShoreTel 9.1
Page 173
Glossary
ShoreWare Server Release Notes
Information provided by a CDR includes the number of the originating party, the
number of the recipient, the time that the call started, and the duration of the call.
ShortTel CDRs contain additional information.
Call Handling Mode A call handling mode is a ShoreTel variable that defines a method of
handling specified inbound calls. Each user is assigned five call handling modes, one of
which is active and determines the user’s current call handling method. See Active Call
Handling Mode.
The five call handling modes assigned to each user are Standard, In a Meeting,
Extended Absence, Out of Office, and Custom.
Call Handling Rule A call handling rule is the base unit of a Call Routing Plan that
consists of a condition and action. When a call handling rule is active and the
condition is satisfied, the action specifies the method by which the ShoreTel system
handles the user’s call.
Call Manager (client application) Call Manager is the ShoreWare client application that
manages a user’s calls, voicemail, and personal system settings through a graphical user
interface.
Call Manager (switch) Call Manager is a ShoreGear module that handles MGCP
information from the IP phones to which the switch is assigned.
This hardware module is not directly related to the Call Manager client application.
Call Routing Plan The Call Routing Plan is the Personal Call Handling component that
contains rules that specifies a user’s call handling method. The plan prioritizes a list of
enabled Call Handling Rules.
Call Stack A data structure that manages an extension’s call appearances. The Call Stack
Size defines the maximum number of calls – including active and held calls – that an
extension can handle simultaneously.
CDR see Call Detail Record
CDR Database A CDR database contains all CDRs generated by a ShoreTel system over a
specified period of time. The CDR database is maintained on the Main server.
CHM see Call Handling Mode
Codec A codec is a device or program that encodes and decodes a digital data stream or
signal. Codecs encode a data stream or signal for transmission, storage, or encryption
and decode it for viewing or editing. Codecs are typically used in videoconferencing
and streaming media applications.
Coordinate Location Based Services data point that identifies a specific location in terms
of longitude, latitude, and elevation. See Location Based Services.
Current Call Handling Mode see Active Call Handling Mode.
DBImport DBImport is a ShoreTel utility that uses the contents of a CSV file to update the
ShoreWare user database. DBImport.exe adds, deletes, and modifies user account
records based on the CSV file contents.
Default Office Anywhere Extension The Default Office Anywhere Extension is the
MCM component that can specify the Active Office Anywhere Extension when a user
places a call or plays a voice message through MCM. See Active Office Anywhere
Extension and Office Anywhere Extension.
Dial Number (DN) Dial Number – the number dialed by a user.
DID see Direct Inward Dialing
Page 174
ShoreWare Server Release Notes
Glossary
DID Range A DID range is a list of consecutive DID numbers assigned to a Trunk Group.
Ranges assigned to a trunk group cannot overlap. A DID number can be assigned to
multiple trunk groups.
Differentiated Services Differentiated Services is a computer networking architecture
that specifies a method for managing network traffic and providing Quality of Service
(QoS) guarantees on IP networks.
Differentiated Services can provide low-latency, guaranteed service for critical network
traffic (voice or video) while providing simple best-effort traffic guarantees to less
critical services (web traffic or file transfers).
Direct Inward Dialing (DID) Direct Inward Dialing is a feature offered by telephone
companies where they allocate a range of numbers to a customer's PBX. As calls are
presented to the PBX, the number that the caller dialed is also given, which the PBX
uses to route the call to the correct recipient.
Distributed Routing Service (DRS) a ShoreTel system feature that increases system
switch capacity by moving inter-site switching routing decisions from the individual
switches to the ShoreWare servers. ShoreTel systems normally have a capacity of 60
switches – enabling DRS increases the system capacity to 500 switches.
DN see dial number.
DRS See Distributed Routing Service.
DSCP Differentiated Services Code Point is a 6-bit value, contained in the 8-bit DiffServ/
ToS field of the IP packet header, that indicates the data traffic Per-Hop Behavior
(PHB).
Explicit Authentication Explicit Authentication is an LDAP process where an
application prompts users for credentials when they log into a network, then verifies
those credentials through a call to the LDAP server.
Failback Failback is the process of restoring a server, system, component, or network to
the original, pre-failover state. See failover.
Failover Failover is the action of automatically transferring operations to a redundant or
standby server, system, component, or network to continue normal operation after the
base device fails. The failover process initiates without human intervention and
typically without warning.
Find Me Find Me is a call handling feature that allows callers who are routed to a user's
voice mailbox to contact the user at alternate devices by pressing “1” while listening to
the voicemail greeting. See Auto Find Me and Announced Find Me.
Global Positioning System The Global Positioning System (GPS) uses a constellation of
24 and 32 satellites that transmit microwave signals to GPS receivers, which they use to
determine their current location, the time, and their velocity. GPS usually requires line
of sight access between the transmitter and the device.
GPS see Global Positioning System
IM see Instant Messaging
Instant Messaging (IM) Instant Messaging is the real-time transmission of text between
at least two parties.
Internet Telephony Service Provider (ITSP) An Internet Telephony Service Provider is a
vendor that offers Internet data services for making telephone calls.
IP Phone Configuration Switch In each ShoreTel installation, one switch is responsible
for assigning, to each IP phone, a switch that performs call manager activities.
ShoreTel 9.1
Page 175
Glossary
ShoreWare Server Release Notes
IP Phone Failover IP Phone Failover is a ShoreTel feature that continues a voice call after
the ShorePhone loses communication with the its call manager switch.
When IP Phone Failover is implemented, ShorePhones are configured to send a signal
to their ShoreGear Call Manager switch every four minutes and to expect an
acknowledgment from the switch. When a phone does not receive the return signal, it
connects to another switch located at the same site.
IP Phone Keep Alive A signal that voice switches send to the IP phones for which they
provide Call Manager services. The system considers phones that acknowledge the
signal as functioning. The signal is also referred to as a heartbeat.
ITSP see Internet Telephony Service Provider
LBS see Location based service.
LDAP see Lightweight Directory Access Protocol.
LDAPExport LDAPExport is a ShoreTel utility that exports AD directory information to a
CSV file, whose contents can be imported to a ShoreWare user database. LDAPExport
was introduced in ShoreTel to support AD Integration.
Lightweight Directory Access Protocol (LDAP) Lightweight Directory Access Protocol
is an application protocol for querying and modifying directory services running over
TCP/IP.
LLDP-MED An enhancement to the basic LLDP protocol that addresses the discovery of
endpoints by networks supporting LLDP.
Location based service Location based service (LBS) is a component feature that
receives data identifying the position of the device in terms of latitude, longitude, and
altitude. Data reception methods include GPS access and through Mobile Cell device
service transmitters.
MCM location based services does not use altitude to specify the location of the device.
Monitor Extension Extension monitoring is a ShoreTel feature that permits a user to
view another user’s extension status and answer inbound or held calls to that
extension.
MySQL MySQL is a relational database management system that runs as a server
providing multi-user access to a number of databases. MySQL is owned and sponsored
by a single for-profit firm, the Swedish company MySQL AB, which is a subsidiary of
Sun Microsystems. The project's source code is available under terms of the GNU
General Public License, as well as under a variety of proprietary agreements.
MySQL is officially pronounced My S Q L, not My sequel. This adheres to the official
ANSI pronunciation.
OA see Office Anywhere.
ODBC The Open Database Connectivity specification provides a standard software API
method for using database management systems (DBMS). The designers of ODBC
aimed to make it independent of programming languages, database systems, and
operating systems.
ODBC Connectors Drivers that provide connectivity to the MySQL server for client
programs. There are currently five MySQL Connectors – Connector/ODBC, Connector/
NET, Connector/J, Connector/MXJ, Connector/PHP.
Off System Extensions Off System Extensions are ShoreTel extensions that, when dialed,
route calls from the trunk group to which they are associated. A ShoreTel system
typically uses Off System Extensions to connect with a legacy PBX system.
Page 176
ShoreWare Server Release Notes
Glossary
Office Anywhere (OA) Office Anywhere is a ShoreWare user feature that forwards calls
to a designated device – either a system IP phone device or a remote telephone
connected to the PSTN. Office Anywhere requires administrative authorization.
Office Anywhere Extension An OA Extension is a phone number to which a user’s
callers can be routed when the user has enabled Office Anywhere. An OA number can
be any system extension or PSTN number that is accessible from the ShoreTel system.
Users can define multiple OA extensions, of which only one can be active at any time.
See Active Office Anywhere Extension and Default Office Anywhere Extension.
Parking a Call Parking a call places a call on hold on another extension’s call stack.
Per-Hop Behavior Per-Hop behaviors define packet forwarding properties associated with
a class of traffic. Different PHBs may be defined to offer low-loss, low-latency
forwarding properties or best-effort forwarding properties.
Personalized Call Handling Personalized Call Handling is a ShoreTel feature that
defines flexible handling methods for inbound calls. Calls are filtered and managed on
the basis of caller identity, time or date or receipt, end user status, and caller identity.
Presence Presence is a feature that identifies and distributes the availability of system
users and other personal contacts. ShoreWare defines two types of Presence: IM
presence and telephony presence.
Programmable Call Manager Toolbar Buttons Programmable Toolbar buttons is a Call
Manager feature that provides access to ShoreTel call management functions. Each User
Interface button is programmed by the administrator to perform a specific function
when clicked and contains text that provides function status.
Programmable IP Phone Buttons Programmable IP Phone buttons is a ShorePhone
feature that provides access to ShoreTel call management functions. Each button is
programmed by the user or administrator to perform a specific function when pushed
and contains an LED indicator that displays function status.
QoS A traffic engineering term that refers to resource reservation control by providing
different priorities to different applications, users, or data flows to guarantee a
performance level for a data flow.
QuickDial Field A QuickDial field is a data entry field requesting contact information for
a system user, extension, or external contact. Upon the entry of alphanumeric
characters, the field expands vertically to display all possible valid entries, filtered by
the input. Users fill the field by selecting one of the options with the cursor.
Real-time Transport Control Protocol (RTCP) Real-time Transport Control Protocol,
defined in RFC 3550, is a sister protocol of the Real-time Transport Protocol (RTP) that
provides out-of-band control information for an RTP flow. It accompanies RTP in the
delivery and packaging of multimedia data, but does not transport any data itself. It is
used periodically to transmit control packets to participants in a streaming multimedia
session, primarily to provide feedback on the quality of service being provided by RTP
media stream.
Real-time Transport Protocol (RTP) Real-time Transport Protocol defines a standardized
packet format for delivering audio and video over the Internet. RTP is described by
IETF RFC 3550.
RTCP see Real-time Transport Control Protocol.
RTP see Real-time Transport Protocol.
SDP see Session Description Protocol.
ShoreTel 9.1
Page 177
Glossary
ShoreWare Server Release Notes
Secure Real-Time Transport Protocol (SRTP) Secure Real-Time Transport Protocol
defines a profile for providing encryption, message authentication and integrity, and
replay protection to RTP data streams.
Session Description Protocol (SDP) Session Description Protocol is a format for
describing streaming media initialization parameters. The IETF published a revised
specification as an IETF Proposed Standard as RFC 4566 in July 2006. SDP is intended
for describing multimedia communication sessions for the purposes of session
announcement, session invitation, and other forms of multimedia session initiation.
SDP does not provide the content of the media form itself but simply provides a
negotiation between two end points to allow them to agree on a media type and format.
Session Initiated Protocol (SIP) Session Initiation Protocol is a signalling protocol that is
typically used for setting up and tearing down multimedia communication sessions
including voice and video calls. SIP also supports video conferencing, streaming
multimedia distribution, instant messaging, and presence information.
Single Sign On (SSO) Single Sign On (SSO) is an LDAP process where applications
automatically authenticate LDAP users that are logged into the network domain
through their current network credentials. Such users logged into the network are not
prompted to re-enter their credentials.
SIP see Session Initiated Protocol.
SIP Extensions SIP Extensions are ShoreTel extensions that provide calling services
through SIP devices. By default, ShoreTel extensions support MGCP devices.
SIP Trunk A SIP trunk is an ITSP service that supports business VoIP sessions to
endpoints outside of an enterprise network through the connection that accesses the
Internet.
Site A site is a ShoreWare data structure that is identified by a geographic location and
characterized by transmission capabilities, device extensions, and other parameters
required by ShoreTel devices. Switches, servers, users, and other ShoreWare entities are
associated with a site.
SRTP see Secure Real-Time Transport Protocol.
SSO see Single Sign On.
System Database The ShoreTel system database is the data structure that retains system
operational information concerning user accounts, system architecture, switches,
servers, sites, and status. Changes made through ShoreWare Director are stored in the
system database.
ToS An eight-bit field in the IP Packet Header, previously referred to as Type of Service,
that is used to accommodate applications that require real-time data streaming, as
specified by RFC 3168. The ToS fields contains a six-bit Differentiated Services Code
Point and a two-bit Explicit Congestion Notification field.
Unparking a Call Unparking a call is the retrieval of a parked call to the extension that
parked the call.
Waypoint A known location specified by coordinates, associated with a coverage area
(radius), and identified by a descriptive label.
Workgroup Workgroups is a ShoreWare entity that performs ACD functions for inbound
calls. Calls are routed to a workgroup through an extension which, in turn, routes them
to workgroup agents. Each workgroup is assigned an extension, mailbox, and other
parameter settings.
Page 178