1
Hacking the Verizon Galaxy Nexus
Much like my Droid X Hacking (../droidx-hacking/) page, this page describes how to do cool
things with your Galaxy Nexus. My Nexus is the Verizon LTE flavor, however some things may
work on other Nexuses (Nexi?). None of these things are particularly difficult and do not need
their own document, however a collection of little hacks can be useful to both me and,
hopefully, others.
1. Hardware Recommendations
A lot of people complain that a new phone costs $300 on contract but think nothing of dropping another
$200 on phone-specific accessories that they’ll just throw away when they upgrade. I try to keep things
as generic as possible while maximizing utility.
First, some things not to buy. I don’t bother with cases at all, I’m careful with my phones and I’ve spent
more on cases than it would cost me to replace most phones. If you want some level of protection,
consider a neoprene pouch which can be swapped between phones.
Docks are even worse. It’s often easier to just plug in the USB cable on a generic or even makeshift dock
than to seat a phone into a proprietary dock. Car docks are just as bad, especially in the VZW Galaxy
Nexus’ case since the car dock doesn’t make use of the three-pin contact charger. This means you need to
fumble to get the phone in the dock and you still need to hook up the charger and/or audio cable - it’s no
better than a generic dock. However, I do admit that a dock able to make use of the three-pin charger
would be something I’d consider because I do find myself passing my phone to my wife in the back seat
with my daughter.
Instead, consider a generic car dock like this one
(http://www.amazon.com/Arkon-SM410-Universal-Windshield-Smartphones/dp/B003ELOOZO/). It fits
the Galaxy Nexus well enough, and also my wife’s new Droid X or her work Blackberry. It has either a
suction-cup mount or a vent mount and it’s easy to make mods to either to support other mounting styles,
you can pick from a range here (http://www.arkon.com/smartphone-car-mount.html). Just as a warning,
the Mega Grip style I linked works with the Galaxy Nexus, but it does restrict access to the headphone
jack in some positions and the volume buttons can get in the way.
Consider an MHL HDMI adapter
(http://www.amazon.com/Menotek-Adapter-Samsung-Galaxy-Sensation/dp/B005F9W6DU/). This will
give you a full-sized female HDMI port when you plug it into the MicroUSB and plug a power adapter
into the MHL adapter. Kind of annoying that it needs power, but it does provide full screen mirroring at
720p on the Galaxy Nexus. I also wish it was a little smaller and used the micro-HDMI cable I have with
1
Hacking the Verizon Galaxy Nexus
my X, but at least the MHL standard is used by other Samsung phones as well as HTC. And since it’s a
cross-vendor standard there’s a good chance others will follow suit.
I’m also a big fan of external batteries. Not only are batteries phone-specific, but there is an increasing
trend towards slimmer phones using polymer batteries that are able to fit in unusual shapes but are not
user-replaceable (easily). There is a special issue with swapping batteries on the Galaxy Nexus in that the
NFC functionality is in the battery. This means that a new battery means updating all of your
NFC-enabled software to use the new tag. I’ve got a pair of these APC UPB10s
(http://www.amazon.com/APC-UPB10-Universal-Battery-10WH/dp/B000GBN42E/). They work with
all four phones my wife and I carry, as well as my Bluetooth headset, a host of other devices, and I’ve got
an adapter that lets me use it on my infant daughter’s bouncer and swing. I can also carry it in my pocket
without a cover (or fear my keys will short it out, leaving me with a dead battery or even causing a fire
risk for those cheap batteries), I charge it via a mini-USB port (micro would be better, but I don’t need a
battery charger), and it has a 10,000mAH capacity compared to a spare battery running on the order of
2000mAH. The only downside is that if I’m out of juice I become tethered to it until I can recharge, but a
little pre-planning lets me charge in my pocket and it still beats needing to power off my phone just to
swap a battery.
You’ll also probably want to check out your old car charger. If you’ve got a micro USB connector it will
work with your Galaxy Nexus, but try running it for a while under normal usage. For me this is
streaming Pandora via Bluetooth to the car radio with the GPS on. Many car chargers won’t be able to
keep up with this and you’ll notice some creep. If you do, try out a 2.1A charger like this one
(http://www.amazon.com/Griffin-Technology-PowerJolt-Charger-iPhone/dp/B003LGT4WU/). Be
careful of chargers with multiple ports, often the current rating is shared across both, but some like this
one (http://www.amazon.com/gp/product/B006321NJ6/) actually have a high power and a low power
port.
2. Unlocking the Bootloader
Unlocking the bootloader lets you more easily update ROMs and install custom kernels. The usefulness
of this has often been overstated, as a Droid X user with a locked bootloader I had no issue with loading
new ROMs and most kernel enhancements are useless to me (minor power and CPU clockspeed
optimizations). However, the Galaxy Nexus is a developer phone so it’s fun to be able to have the
freedom to do what we want.
As a developer phone it comes with a locked bootloader. Luckily, it’s pretty trivial to unlock. First, install
Linux. It’s just easier that way, but if you must you can do this in Windows
(http://forums.androidcentral.com/verizon-galaxy-nexus-rooting-roms-hacks/141563-guide-how-unlockbootloader-root-verizon-galaxy-nexus.html).
Consider carefully what you’re doing here. You’re voiding your warranty but, more importantly, you’re
about to wipe your device. I did this before I even activated my phone, you may end up with some
reconfigurations once you’re done here.
2
Hacking the Verizon Galaxy Nexus
Now that you’ve got Linux installed, download SuperBoot (/android/r3-galaxynexus-superboot.zip) (or
download it from MoDaCo here
(http://android.modaco.com/topic/348161-30-nov-r3-superboot-rooting-the-gsm-lte-galaxy-nexus/)) and
extract it someplace you know. Open up a terminal window and go to that directory.
Now power off your phone. Hold down Vol Up+Vol Down+Power until you see a little robot exposing
himself and a bit Start arrow. Connect your phone to your PC.
Go back to the terminal window and type chmod +x fastboot-linux; ./fastboot-linux unlock which will
make a script executable and then run said script to unlock your bootloader. You should now have a
rather stern warning on your phone, use the volume keys to select the appropriate entry and the power
button to confirm. The text at the bottom of the screen should read that your phone is now unlocked.
Most of you will want to proceed directly to Section 3 to root your phone.
3. Rooting your Phone
Rooting your phone buys you some neat stuff. Linux permission schemes call for a standard level user
(this is pretty much everyone) as well as a superuser. This superuser can do things that are dangerous to
the system so these actions are restricted from mere mortals. Some examples of Android features that
need root include using applications like Titanium Backup
(https://market.android.com/details?id=com.keramidas.TitaniumBackup), run a VNC server
(http://forum.xda-developers.com/showpost.php?p=16990415&postcount=249) (not currently fully
functional on ICS), modify system files, do things like install Linux, and tons of other neat stuff.
I’m assuming you’ve just unlocked your bootloader so you’ve got the SuperBoot file unzipped in your
current directory. You’ve also got the exhibitionist robot splayed in front of you (if not, power off your
phone, hold Vol Up+Vol Down+Power until he appears, then plug your phone into your computer). To
root your phone, just run chmod +x install-superboot-linux.sh; ./install-superboot-linux.sh and you
should be good to go. Unlike unlocking the bootloader, this is non-destructive.
4. Installing Backtrack Linux
Android is Linux. Except it’s not really Linux at all. It runs the Linux kernel (with some modifications)
and has some basic Linux functionality (especially with busybox installed) but it’s not really Linux.
Luckily, you can use what’s known as a chroot environment (http://en.wikipedia.org/wiki/Chroot) to run
a full-blown Linux distribution.
Kind of. You can’t just take an off-the-shelf Ubuntu installation and get it working because it’s compiled
for an Intel processor (known as i386 [32-bit] or amd64 [64-bit]). Luckily, several distributions are built
for ARM processors like the OMAP 4460 that powers the Galaxy Nexus. This doesn’t mean that
3
Hacking the Verizon Galaxy Nexus
everything you love about Linux on your desktop will work just fine. Some things like Google Chrome
don’t have ARM builds (at least not supported and stable ones). Other things you may need to compile
yourself.
I could walk you through installing a pretty-looking Ubuntu image
(https://wiki.ubuntu.com/ARM/OMAP) but this is a Galaxy Nexus we’re talking about here people, not
some consumer-friendly iPhone wanna-be. Let’s do this with a little style and get a hacker’s Linux image
onto our hacker’s phone. Let’s do this with BackTrack Linux (http://www.backtrack-linux.org/). Before I
get started, I’d like to thank msullivan for this post
(http://forum.xda-developers.com/showthread.php?t=1079898). However, I ended up downloading the
BT5 (not 5R1) GNOME-based arm image from BackTrack directly
(http://www.backtrack-linux.org/downloads/) just to see what I could do myself.
As it turns out, I could do quite a bit. The first thing I did was to modify the bootbt script. Quite a bit,
actually. I added a variable to set your VNC server resolution and defaulted it to the Galaxy Nexus’
resolution. I also changed the default screen to be :10 since I run a VNC server on my phone as well.
This meant I needed to modify the startvnc script. I created a "quit" script which will prevent most
"Resource is busy" error messages. I added msullivan’s addition to .bashrc. I created a variable you can
set to change your ssh server port number, this allows you to use port 22 for your phone itself and port
2200 (or anything else) for your BackTrack port. And I included the IPv6 versions of Google’s
nameservers. And I modified /etc/apt/sources.lst to include a bunch of Lucid repos. You can run
the diff on my version vs. the one included with the BackTrack image to see a list of all the changes.
To install BackTrack, simply download the image and unzip it using 7za x BT5-GNOME-ARM.7z Note
that you may need to run sudo apt-get install p7zip-full to install the proper archive handler. Now copy
my bootbt and put it into this directory. Now move the entire BT5 directory over to your Galaxy Nexus’
/sdcard/ directory. Open up a terminal window on your phone or SSH into it and run the following:
cd /sdcard/BT5
gunzip bt5.img.gz
If you need to install busybox, you can run sh installbusybox.sh. To boot up BackTrack just run cd
/sdcard/BT5; sh bootbt and you should get a command prompt. If you’ve started up a VNC session you
can use something like android-vnc-viewer
(https://market.android.com/details?id=android.androidVNC) or countless other apps to log into
localhost on port 5910 with a password of toortoor. Alternately, you can connect to your Nexus via WiFi
using the IP address shown in the startup process from any PC.
4
Hacking the Verizon Galaxy Nexus
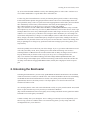
Figure 1. BackTrack Linux GUI on Galaxy Nexus
Note, if you get a grey screen with an error message relating to gconf you can usually fix this by starting
up Backtrack using an SSH session instead of a terminal program. Don’t ask my why this happens
sometimes or why it doesn’t happen all the time but I’ve found that starting the session through
ConnectBot seems to be a fairly reliable way of getting the GUI running.
If you need to install other packages, you may also want to edit /etc/apt/sources.lst and remove
the comments on many of the repositories listed. I uncommented some of the lucid repositories for you
(BackTrack 5 is based off Lucid) to install vim and curl. Note that the repositories aren’t quite clean, not
only do you need to be careful about removing packages but doing an apt-get upgrade seems to break
FireFox. Personally I’d only update things that need it and make a backup often in case of corruption.
Beyond that you’ve now got a top-notch penetration testing distribution in the palm of your hand. Plus
it’s not a horrible all-around Linux distro, either.
Note that frequent writes seem to lock up the phone. I’ve noticed this mostly with apt-get. If this
happens the phone will become mostly unresponsive and you’ll need to do a battery pull. Unfortunately
this corrupts the filesystem and you may become stuck since Android doesn’t natively have fsck.ext2
and you can’t fix a mounted volume. Barring having a second installation on your SD card, you can exit
out of the chroot, get bt5.img to your desktop (I use gzip to shorten the transfer time), and then run this
series of commands on your desktop.
gunzip bt5.img.gz
export img_dev=/dev/loop7
sudo losetup $img_dev bt5.img
sudo fsck.ext2 -p $img_dev
if [ ! $? = 0 ]; then sudo fsck.ext2 $img_dev; fi
5
Hacking the Verizon Galaxy Nexus
sudo losetup -d $img_dev
gzip bt5.img
5. Night Mode
First of all, this requires the use of Francisco Franco’s
(https://plus.google.com/u/0/106873500108976028532/posts) franco.Kernel
(http://forum.xda-developers.com/showthread.php?t=1422956) or another kernel with color modification
support. It also assumes you have an SSH server installed that has support for key-based authentication (I
use QuickSSHd (https://play.google.com/store/apps/details?id=com.teslacoilsw.quicksshd)).
Have you ever wondered why a lot of nighttime displays use red? Most digital alarm clocks and many car
dashboards will use red lighting at night because our eyes are least sensitive to red. This means that red
lighting will not impair our night vision and it won’t seem as harsh - even though if I were to put a red
screenshot up for you to view in your well-lit room with a white background it would appear to be very
jarring. I’ve found that when I wake up in the morning (or the middle of the night, for that matter) having
a red-tinted phone lets me browse the web in peace without waking my wife or blinding me when I look
away. Luckily, Franco’s kernel lets you do just this, but unfortunately without any automated controls.
I should research how to write a quick widget I can use to control this, but I’m lazy and I have the power
of a Linux box at my fingertips. So I just use the ssh server I already have installed on my phone, and a
cron job on my Linux box. Now from 9pm until 6am I move my phone into night mode using these
simple commands after running crontab -e on my Ubuntu box:
00 6 * * * SSH_AUTH_SOCK="$(find /tmp/keyring*/ -perm 0775 -type s -user $LOGNAME -group $LO
00 21 * * * SSH_AUTH_SOCK="$(find /tmp/keyring*/ -perm 0775 -type s -user $LOGNAME -group $L
First, the cron syntax. It says at 6:00 every day of the month, every month, every day of the week run the
command. The SSH_AUTH_SOCK section is saying that if I’m logged in, steal the existing SSH
keyring. This is important if you have your SSH key locked (as you should, of course) but the syntax
may need to change based on your distro (for example, you may need to specify another group or there
may be a slightly different location for this). I’m running an ssh command to an entry in my
~/.ssh/config file titled "galaxy_nexus" which is just a shortcut that includes my phone’s IP address,
a username, a key location, etc. I’m then running the echo command to put the values listed into the color
control multiplier file. If you don’t like these values, feel free to play with them either manually or in
Franco’s app (https://play.google.com/store/apps/details?id=com.franco.kernel), view the contents of this
file, and then edit your cron accordingly.
Alternatively, you can also create a script to do this as I have. In my /system/xbin directory I put a
colormode script (don’t forget the chmod 755 /system/xbin/colormode when you’re done). Now I just
need to run colormode day or colormode night to get things back the way they should be.
6
Hacking the Verizon Galaxy Nexus
Example 1. colormode script
#!/system/bin/sh
if [ ! $# = 1 ]; then
echo Usage: $(basename $0)’ [day|night]’
exit 1
fi
if [ $1 = day ]; then
echo 2004318071 2004318071 2004318071 > /sys/class/misc/colorcontrol/multiplier
exit 0
fi
if [ $1 = night ]; then
echo 494318071 4318071 4318071 > /sys/class/misc/colorcontrol/multiplier
exit 0
fi
echo Unknown mode \"$1\", try day or night
Don’t have access to a Linux box or want the script to run even when you’re away from home? Enter
Cron4Phone (https://play.google.com/store/apps/details?id=com.aes.cron4phonefree). This app has the
same syntax as the cron job I created above, but since it runs on your phone you don’t need to worry
about whether your PC can connect for it to work. Just select the "Tasks" tab, add a task, I called it Night
Mode, set it for 0 21 * * * (9pm), and used /system/xbin/colormode night as the script. I
created a similar one for Day Mode starting at 0 6 * * *.
6. IPv6 WiFi Support
If you’re reading this, please star Android Issue 3389
(http://code.google.com/p/android/issues/detail?id=3389) (and if that made you think of RDP, my
condolences). Android is based on Linux which has a rich history of IPv6 support. Android itself
supports IPv6, but not well. Sadly, Verizon FiOS is also a bit slow to deploy IPv6 so I need a tunnel from
SixXS (http://www.sixxs.net/) to get v6 connectivity, the Ubuntu Wiki (https://wiki.ubuntu.com/IPv6)
has a nice description on how to create a Linux-based IPv6 router that connects to a SixXS tunnel. I’ve
since upgraded to a DrayTek 2130N (http://www.draytek.com/user/PdInfoDetail.php?Id=111) router
with built-in support for SixXS’ AICCU tunnel manager (http://en.wikipedia.org/wiki/AICCU). I won’t
get into the details of my configuration here, but if you can get to ipv6.google.com
(http://ipv6.google.com/), www.v6.facebook.com (http://www.v6.facebook.com) or see the infamous
dancing turtle at www.kame.net (http://www.kame.net) you’re golden.
Google’s focus for IPv6 and Android has been focused on the 3G/4G side. This is in a lot of cases much
easier because you know which equipment and features you need to provide. If you’re on LTE on
Verizon you have an IPv6 address and should be able to visit those sites above. WiFi support has been a
bit more lacking, at least as far as grabbing an IP address. The latest and greatest method for distributing
IPv6 addresses is DHCPv6, which my DrayTek router supports out of the box but my Galaxy Nexus does
7
Hacking the Verizon Galaxy Nexus
not. To fix this horrible injustice, I rely on the Cron4Phone
(https://play.google.com/store/apps/details?id=com.aes.cron4phonefree) app I mentioned above and a
short little script. Note that Tasker
(https://play.google.com/store/apps/details?id=net.dinglisch.android.taskerm) may provide more options
like running this only when WiFi is connected but I haven’t had the time or energy to play around with
Tasker and $6.50 is a bit steep if you only have one or two uses for it. On the other hand, a cron job will
probably wake your phone from deep sleep and it’s a trade-off between how long you go without IPv6
service and how much battery life you’re willing to waste.
The script itself is pretty simple. Replace the IPv4 and IPv6 addresses (and device, if necessary) defined
at the top of the script with your own information and run it by hand first to see if it works. It will grab
your current config and then only if you’ve got your home IP address and no IPv6 address will it try to
set your IPv6 address and default route. I’m assuming your phone will get the same IPv4 address from
your router all the time, I fix the IP address of all my DHCP-enabled devices so I can more easily manage
them. When setting up the cron, I currently run it every 15 minutes which looks like */15 * * * *.
Note that it may make sense to change your default WiFi subnet to something less well-used to reduce
the chances that a random WiFi hotspot will give you a home address and cause you to misconfigure the
IPv6 address. I don’t like to connect to open WiFi plus I use a 172.16.0.0 address internally so it’s a
non-issue for me, but it’s easy enough to change the success criteria to something more unique to your
network (for example, I can try to grab an object from the local IP of my webserver to confirm I’m
actually at home). You can also try grabbing a known IPv6 entity to see if the IPv6 connection was
successful and remove it if not (for example, if $? after wget -O /dev/null http://ipv6.google.com is not
equal to 0 you weren’t able to get to Google’s IPv6 page).
#!/system/xbin/bash
ipv4_addr=1.2.3.4/24
ipv6_addr=2001:dead:beef::cafe/64
ipv6_gw=2001:dead:beef::1
device=wlan0
ip_config=$(ip addr show $device)
curr_ipv4=$(echo "$ip_config" | grep -w inet | grep ’scope global’ | awk ’{print $2}’)
curr_ipv6=$(echo "$ip_config" | grep -w inet6 | grep ’scope global’ | awk ’{print $2}’)
if [ "$curr_ipv4" = "$ipv4_addr" ] && [ "$curr_ipv6" = "" ]; then
ip -f inet6 addr add $ipv6_addr dev $device
ip -f inet6 route add default via $ipv6_gw
fi
7. Adding an Incoming Firewall
For some reason Android Firewall apps seem to be fixated on blocking Internet access to individual apps.
This to me is kind of silly, if I don’t trust an app to talk to the Internet I don’t trust it to me on my phone,
8
Hacking the Verizon Galaxy Nexus
and if it’s just an ad-block mechanism then I’d rather petition the developer for a paid version or just not
use the app. What I want and need is an incoming firewall.
By default Android has no ports open which is a nice, safe way to run. One of the first apps I install is
QuickSSHd (https://play.google.com/store/apps/details?id=com.teslacoilsw.quicksshd) which opens up
an SSH port. SSH is a good port to have open, it’s a protocol who has "secure" as it’s first name. But then
I install a VNC Server (http://forum.xda-developers.com/showthread.php?t=1476648), which is one of
the least secure protocols known to man. Go ahead, protect it with a password. That we’ll pass in
plaintext. On a device that makes it generally useful only on WiFi networks. Which are usually
unsecured. And by the way, this app gives you complete control over the phone. D’oh!
On your home network this isn’t much of a problem, I’m assuming you’re not dumb enough to have an
unsecured WiFi network which will let you be responsible for defending yourself every time someone
downloads MPAA-monitored content from your IP, uses your network to launch a DDoS attack, etc. On
3G/4G with IPv4 this isn’t a huge issue since you’re "protected" by a NAT device on IPv4 and Verizon
blocks incoming IPv6 traffic on LTE (T-mobile may not at this point so there may be a risk). However, if
you connect to any shared WiFi network odds are you’ll run into one where some user is actively
scanning for vulnerable ports/protocols.
How do you fix this? First, you learn how to use SSH Port Forwarding
(http://www.lmgt4u.com/?q=SSH%20Port%20Forwarding). Second, you block the heck out of any port
other than SSH (and even SSH you need to secure with strong passwords or, even better,
passphrase-protected secure keys and you may want to move to another port). Luckily this is easy,
unfortunately it needs to be done whenever you change networks so I have a cron set up (see above,
*/15 * * * * to run every 15 minutes) to run every time I check to see if I need to configure IPv6.
Again, Tasker may be a better choice here from a battery life and security perspective since I may go for
15 minutes open to attack in the current config.
The firewall rules are all just iptables commands and they’re pretty simple. I’ve documented them here,
assuming you want port 22 (ssh) open, everything else closed, and egress traffic is allowed. Note that
using another firewall like DroidWall
(https://play.google.com/store/apps/details?id=com.googlecode.droidwall.free) may overwrite these rules
which will, in turn, overwrite the DroidWall rules when the cron runs.
#!/system/bin/sh
# Accept
iptables
iptables
iptables
incoming
-A INPUT
-A INPUT
-A INPUT
connections from localhost, established, or port 22
-i lo -j ACCEPT
-m state --state ESTABLISHED,RELATED -j ACCEPT
-p tcp --dport 22 -j ACCEPT
# Drop all other connections including forwarding but accept outbound
iptables -P INPUT DROP
iptables -P FORWARD DROP
iptables -P OUTPUT ACCEPT
9
Hacking the Verizon Galaxy Nexus
A. About Me
My name is Jeff Bower, I’m a technology professional (http://www.linkedin.com/in/jdbower) with more
years of experience in the telecommunications industry than I’d care to admit. I tend to post with the
username jdbower on various forums, including Komodo Kamado (http://komodokamado.com/forum/),
Android Central (http://forum.androidcentral.com/), VirtualBox (http://forums.virtualbox.org/), and
MakeMKV (http://www.makemkv.com/forum2/). Writing these documents is a hobby of mine, I hope
you find them useful and feel free to browse more at https://www.ebower.com/docs.
I also enjoy cooking, especially outdoors with my Komodo Kamado (http://www.komodokamado.com)
and using my Stoker (https://www.rocksbarbque.com). Take a look at my recipes stored at
https://www.ebower.com/recipes.
If you’ve got any questions or feedback please feel free to email me at [email protected]
(mailto:[email protected]) or follow me on Google+
(https://profiles.google.com/100268310848930740059) or Twitter (http://twitter.com/jdbower).
10