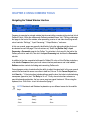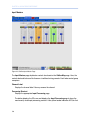
1
COMPASS USER GUIDE
Galileo™ 616
Keep these important operating instructions.
Check www.meyersound.com for updates.
Copyright © 2009 Meyer Sound Laboratories
05.141.002.10 A
Compass User Guide
Based on Compass 2.1.1 1353/4528/455 Code Date: November 5, 2008
Published 2009-Feb-09
The contents of this manual are furnished for informational purposes only, are subject to change without notice, and
should not be construed as a commitment by Meyer Sound Laboratories Inc. Meyer Sound assumes no responsibility
or liability for any errors or inaccuracies that may appear in this manual. Except as permitted by applicable copyright
law, no part of this publication may be reproduced, stored in a retrieval system, or transmitted, in any form or by any
means, electronic, mechanical, recording, or otherwise, without prior written permission from Meyer Sound.
LIMITED WARRANTY
If your Compass Software is provided with your purchase of a Galileo System, the warranty on your Galileo System
applies. For Compass Updates and for users of a Galileo System who are not owners of their system, Meyer Sound
warrants that, for a period of ninety (90) days from the date of you download or install the Compass Software, the
Compass Software, when properly installed, will perform substantially in accordance with Meyer Sound’s current published
documentation for such Compass Software. Meyer Sound does not warrant that the functions contained in the Compass
Software will meet your requirements or that the operation of the Compass Software or any replacement copy will be
uninterrupted or error free. Meyer Sound’s sole obligation under this warranty is to attempt to remedy any defect in your
copy of the Compass Software in a manner consistent with Meyer Sound’s customary business practices.
WARRANTY LIMITATIONS; LIMITATIONS OF REMEDIES. THE ABOVE LIMITED WARRANTY AND THE WARRANTY
ON YOUR GALILEO SYSTEM ARE THE ONLY WARRANTIES MADE BY MEYER SOUND IN CONNECTION WITH YOUR
GALILEO SYSTEM AND THE COMPASS SOFTWARE. THERE ARE NO OTHER WARRANTIES, EXPRESS OR IMPLIED.
ALL WARRANTIES THAT MAY BE IMPLIED BY LAW, INCLUDING BUT NOT LIMITED TO WARRANTIES OF
MERCHANTABILITY AND FITNESS FOR A PARTICULAR PURPOSE, ARE EXPRESSLY DISCLAIMED. MEYER SOUND’S
ENTIRE LIABILITY AND YOUR EXCLUSIVE REMEDY ARISING OUT OF OR IN ANY WAY CONNECTED WITH THIS
AGREEMENT AND/OR YOUR USE OF THE COMPASS SOFTWARE, REGARDLESS OF THE CAUSE OR FORM OF
ACTION, SHALL NOT EXCEED THE AMOUNTS PAID OR PAYABLE BY YOU FOR THE PURCHASE OF A GALILEO
SYSTEM FOR WHICH THE COMPASS SOFTWARE IS USED, OR, IF YOU HAVE NOT PURCHASED A GALILEO SYSTEM,
THE AMOUNTS PAID OR PAYABLE BY YOU, IF ANY, FOR THE PURCHASE OF THE COMPASS SOFTWARE. IN NO
EVENT SHALL MEYER SOUND BE LIABLE TO YOU OR TO ANY THIRD PARTY FOR ANY CONSEQUENTIAL, INCIDENTAL,
OR SPECIAL DAMAGES (INCLUDING LOST PROFITS) ARISING OUT OF OR IN ANY WAY CONNECTED WITH THIS
AGREEMENT AND/OR YOUR USE OF THE COMPASS SOFTWARE, REGARDLESS OF THE LEGAL THEORY, AND
EVEN IF MEYER SOUND HAS BEEN ADVISED OF THE POSSIBILITY OF SUCH DAMAGES.
TRADEMARKS
MEYER SOUND and the Meyer Sound wave logo are trademarks of Meyer Sound Laboratories Inc. and are registered
in the United States Patent and Trademark Office, as well as in other countries.
The following is a partial list of additional Meyer Sound trademarks and service marks: AlignALink, BroadbandQ, Compass,
Composite EQ, Constellation®, CueConsole, CueStation, Ensemble, Galileo®, GuideALink, Intelligent AC, LCS, M Series,
M1D, M2D, M3D®, MAPP Online Pro, Matrix3, M'elodie, Meyer Sound MAPP Online®, MICA, MILO®, MultiSense,
QuickFly®, QuietCool, REM, RMS, SIM®, SpaceMap®, SpeakerSense, Stella, TruPower®, TruShaping®, UltraSeries,
VariO, VocalFocal, VoiceLift, VRAS, Wild Tracks
All third-party trademarks are property of their respective owners.
Printed in the U.S.A.
ii
TABLE OF CONTENTS
Documentation Overview
About this Document
About Meyer Sound
Technical Support
Chapter 1: Start Here
System Requirements
Installing Compass and Virtual Galileo
Running Compass with Virtual Galileo
Running Compass with Galileo
Chapter 2: Compass Overview
Compass Capabilities
Compass Controls
General Workflow
Chapter 3: Using Compass Tools
Navigating the Tabbed Window Interface
Using Shortcuts
Setting Compass and Channel Preferences
Configuring Audio Inputs and Outputs
Using the Summing Matrix
Linking Channels
Linking Galileos
Atmospheric Correction and M Series Array Correction
Connecting and Configuring for use with SIM3
Using Signal Processing
Copy, Paste, Load, Save, and Reset Control Values
Saving and Loading Projects and Snapshots
Restricting Access to Compass Settings
Chapter 4: User Interface Reference
Compass Tab
Galileos Tab
Named Galileo Tabs
Additional User Interface Details
ix
ix
xvi
xvii
1
1
2
3
6
9
9
10
16
23
23
24
26
28
30
42
46
47
51
53
59
61
68
71
71
86
93
139
iii
Appendix A: Compass Software File Locations
Project Backups
Factory Presets
Appendix B: Network Information
145
145
146
147
Appendix C: User-Defined Equalization Curves with
M Series Array and Atmospheric Correction
149
High-Frequency Equalization Strategies
Low-Frequency Equalization Strategies
Example Curves
Index
iv
149
150
151
157
List of Figures
Illustrated User Interface Element Names
Low Pass
2nd Order High Pass
Elliptical High Pass
Compass Preferences Page
Channel Linking Preferences Page
Galileos Page
Galileo Project Page
Galileo Network Settings Page
Galileo I/O Settings Page
Galileo SIM3 Settings Page
Galileo Environment Settings Page
Galileo Access Settings Page
Galileo Array Correction Settings Page
Galileo Link Groups Settings Page
Galileo Galileo Map Page
Galileo Input Processing Page
Galileo Output Processing Page
Galileo Summing Matrix Page
Galileo Input Masters Page
Galileo Output Masters Page
Typical Clipboard Options and Saved Settings window
Single MILO at 4 meters
Eight MILO Array at 60M
Corrected Eight MILO Array at 60M
Corrected Eight MILO Array at Various Distances
Corrected MILO Arrays of Differing Sizes
Corrected Eight MILO Array at Various Distances
10
58
58
58
71
76
86
96
102
103
105
107
108
110
112
114
120
129
135
136
138
139
152
152
153
154
155
156
v
List of Tables
Modifier Key Name Conventions
User Interface Element Name Conventions
Mouse Action Conventions
Keyboard Action Conventions
Typographic Conventions
Symbol Conventions
Delay Unit Ranges
Screen Resolutions and Recommended User Interface
Scales
Keyboard Modifiers
Tab Color Definitions
Background Color Definitions
Channel Color Definitions
OS X Compass Software Installation Locations
Microsoft Windows Compass Software Installation
Locations
xi
xi
xiii
xiv
xiv
xv
59
73
141
142
142
143
145
145
vii
PREFACE : DOCUMENTATION OVERVIEW
About this Document
Compass™ provides an intuitive interface to the Galileo™ 616 loudspeaker management system.
Galileo is a fully digital matrix processor providing 96 kHz/32 bit resolution signal processing
for six inputs and sixteen outputs.
Galileo may be directly connected to the SIM® 3 audio analyzer, providing complete
measurement as well as control for complex audio systems. The Galileo loudspeaker
management system with the Compass control software fulfills all of the necessary signal routing
and processing between the console and the amplifier/loudspeaker.
Compass provides “snapshot” capturing of Galileo control values, allowing you to design
numerous sound processing configurations, each specific to a particular use of a venue and
subsequently available for recall at any time. Numerous snapshots may be saved as a “project”
to a workstation or laptop computer, providing backup and restoration capability, and another
level of organization.
Audience
Galileo and Compass are professional audio hardware and software. Users of the system are
sound design professionals with an understanding of sound design theory, signal equalization
design, atmospheric correction, signal delay design, and matrix mixing. This manual does not
teach sound design theory and practice.
The Galileo hardware is presumed to have been correctly installed and configured. In particular,
the Galileo must be configured with an IP address before running Compass. This process is
detailed in the Galileo Hardware Reference Manual.
Users of Compass software are assumed to be experienced computer users. Inexperienced
computer users may wish to read the Document Conventions (p. x) section, below, to become
familiar with the terminology used in describing the user interface. Inexperienced computer
users are also advised to read the operating system user manual that came with their system.
ix
DOCUMENTATION OVERVIEW
Organization
This manual comprises the following chapters:
■
Start Here (p. 1) provides details regarding installation of Compass, and how to connect
to and simulate connection to a Galileo 616 system.
■
Compass Overview (p. 9) discusses Galileo’s capabilities, explains how various
components of the Compass user interface are used, and provides an example of a typical
Compass/Galileo project work flow.
■
The Using Compass Tools (p. 23) provides usage examples for all common tasks and all
major Compass components.
■
The User Interface Reference (p. 71) provides a detailed summary of all Compass graphic
interface components, capabilities, and side-effects.
Appendices and a comprehensive index round out the manual.
Related Documentation
For setup, maintenance, and technical information regarding the Galileo 616 please consult the
Galileo Hardware Reference Manual.
Documentation Updates
Meyer Sound welcomes customer input regarding its end-user manuals. Please see Technical
Support (p. xvii) for contact details and information on accessing the latest edition of the manual.
Document Conventions
Compass offers “night” and “day” color modes. When the color of a user interface element
changes dependent on mode, the night color is listed first and the day color follows in
parentheses, i.e. “the row will have a dark green (light green) background.”
x
COMPASS USER GUIDE
Please note that Macintosh and Windows keyboards may use different names for the modifier
keys:
Table 1. Modifier Key Name Conventions
In the Manual
Macintosh Keyboard
Windows Keyboard
‹ Alt ›
‹ Option ›
‹ Alt ›
‹ Cmd ›
‹ Cmd ›
‹ Ctrl ›
‹ Enter ›
‹ Return ›
‹ Enter ›
The following conventions are used when referring to the user interface:
Table 2. User Interface Element Name Conventions
Element
Description
Window
The main rectangular area in which application controls are displayed.
Title bar
An element of a window, at the top edge, that can be dragged to move
the window. The title bar typically displays the name of the window or
information about the contents of the window.
Menu bar
An element of a window that contains headings which, when clicked,
reveal a list of appropriate commands.
The menu bar may be at the top of the main display (OS X, some Linux
configurations) or at the top of the window (MS Windows, some Linux
configurations).
Command
An element of the menu bar, revealed when a menu bar heading name
is clicked.
If a command is “dim,” it is not currently available for use.
Some commands control the status of a setting: if a checkmark or
bullet indicator is shown beside the command, the setting is enabled
and re-selecting the command will disable the setting.
If a command ends with an ellipsis (…) it will present a pop-up window;
the command will typically be issued when that window’s OK button
is clicked.
Many commands will also list a keyboard shortcut.
Tool bar
An element of a window that contains icons for commands. The tool
bar is typically near the top of the window, oriented horizontally.
xi
DOCUMENTATION OVERVIEW
Element
Description
Status bar
An element of the window that provides information regarding the
application status. The status bar is typically at the bottom of the
window, oriented horizontally.
Scroll bar
A control within a window, typically along the right or bottom edge,
with a slider. The slider can be dragged to scroll the contents of the
window, or the arrows at either end can be clicked to advance the
slider.
Resize corner
A control within a window, typically at the bottom right corner, that can
be dragged to change the size of the window.
Button
A control within a window which, when clicked, gives a command to
the application, toggles a setting, displays a pop-up window, or displays
a menu.
Text box / Value box
A control which, when clicked, takes ownership of the keyboard cursor
and thus allows typed data entry.
Some text boxes will accept text, while others accept only numeric
values. Some numeric text boxes have arrows which can also be used
to increment or decrement the value.
Check box
A control within a window which, when clicked, toggles an indicator.
The indicator is typically a checkmark, and indicates whether a feature
is enabled or disabled.
Slider / Fader
A control within a window which can be dragged to change the value
of the control. The horizontal or vertical position of the control
corresponds to its value.
Dial / Encoder
A control within a window which can be dragged to change the value
of the control. The location of the control does not change; rather, its
orientation is changed.
Icon
A graphic representation of an application, file, or control.
xii
COMPASS USER GUIDE
The following conventions are used when referring to actions performed using the mouse:
Table 3. Mouse Action Conventions
Verb [item on which to act]
Action
Click [item]
Point the mouse cursor at the item and then click and release the left
(primary) mouse button.
Right-click [item]
Click using the right (context) mouse button.
Double-click [item]
Click the item twice in rapid succession without moving the mouse.
Select / De-select [list-type item]
When referring to an item in a list, turn on the highlight (select) or turn
off highlighting (de-select) by clicking the item.
For some items you may multi-select by pressing a modifier key (Shift
or Cmd) while clicking.
Select / Clear [toggle-type item]
When referring to an item that has a checkbox or bullet indicating status,
turn on the checkmark or bullet (select) or turn it off (clear) by clicking
the item.
Drag [item]
Click on the item without releasing the mouse button, then move the
item to a new position or place.
Right-drag [item]
Use the right mouse button for a right-drag.
Key name+drag [item]
(e.g. Ctrl+drag item)
Open [item]
If a key name is provided, hold that key down, then drag the item.
Double-click the folder, device, or application icon. This will “open” a
window showing files on the device or “run” the application.
Choose [menu > sub-menu > command] Open a menu and select a command from the list of commands or
sub-menus.
Choose [tab > sub-tab > control]
Select a tab to open a page, then select a tab on the page to open a
sub-page, and then select a control on the page.
xiii
DOCUMENTATION OVERVIEW
The following conventions are used when referring to actions performed using the keyboard:
Table 4. Keyboard Action Conventions
Verb [item on which to act]
Action
Press [key]
Tap [key]
Press and release the specified key.
Hold [key]
Hold down the specified key during the command or action.
Type [text]
Type the specified text
Multi-select
To select more than one item using the mouse by holding the Shift or
Cmd (OS X, some Linuxes) or Ctrl (MS Windows, some Linuxes) while
clicking the items.
Key name+key name
(e.g. Shift+X, Cmd+H)
Hold the specified modifier key(s) (Shift, Cmd, Ctrl, Alt, Fn, etceteras)
and tap the ordinary key (alphabetic, numeric, or function key).
Key name+drag [item]
(e.g. Ctrl+drag item)
Hold the specified modifier key(s), then drag the item.
Key name, key name
(e.g. Alt+F, G)
Tap the keys in sequence. For example, Alt+F, G indicates that one
should hold the Alt key and tap F, then release both keys and tap G.
The following typographical conventions are used to help differentiate different word meanings:
Table 5. Typographic Conventions
Typographic Style
Meaning
Normal text
No special meaning.
Emphasis
Important text.
Strong emphasis
Very important text.
Data to be typed
Data to be typed on the keyboard.
‹ Key name+key name ›
Command or shortcut to be typed on the keyboard.
Control Label
The name of a control on the screen.
Menu > Sub-menu > Command
The “path” to select the specified command or control.
Filename
The name of a file.
Document reference
The name of a document or part of a document. Often a reference to
a section
xiv
COMPASS USER GUIDE
The following symbols are used to identify important information:
Table 6. Symbol Conventions
Symbol
Meaning
Note
Caution/Important
Tip
Warning
xv
DOCUMENTATION OVERVIEW
About Meyer Sound
Since its founding, Meyer Sound has been devoted to meeting the needs of sound reinforcement
professionals with the finest products available, the industry’s most extensive and knowledgeable
customer support, and high-level technical education.
The 1970s saw sound equipment for live performance increase in power capability, but not in
reliability or fidelity. In 1979, John and Helen Meyer established Meyer Sound to create and
support high-quality products for sound reinforcement and recording, designed to meet the
real challenges faced by audio practitioners. Today, the company’s history shows a track record
of almost 30 years of innovation, quality, performance and support.
Meyer Sound has more than 250 employees at its Berkeley, California, headquarters and satellite
offices, including one of the largest engineering staffs (in proportion to company size) in the
audio industry. International sales and support are supplied by more than half a dozen offices
around the globe. The company works closely with professionals in all areas of sound
reinforcement, gathering information on customers’ needs and providing the tools, training,
technical support and information to enable the best experience possible for sound system
users and audiences alike. Meyer Sound products are manufactured entirely at its Berkeley
factory, where high technology is combined with hand craftwork. By performing core processes
in house, the company is able to exercise the control to insure its quality standards are met
and that each unit is exactly the same as the last.
John and Helen Meyer have been personally involved with the performing arts for years, which
has given them a feeling for the role of technology in the arts. Meyer Sound is often involved
directly with the performing arts at both corporate and individual levels, locally in Berkeley and
worldwide. This is one more way that the company stays in touch with the real reason for its
existence.
COMPASS
With all the features and power offered by Galileo® 616, giving the user a comprehensive,
intuitive way to control them is paramount. Meyer Sound’s Compass software fulfills this
requirement. Running under either the Macintosh or Windows operating system, Compass
provides a graphical user interface that is the result of years of experience optimizing complex
systems.
Compass’ Galileo Map lets users see signal flow at a glance. The unique filter display shows
and allows direct editing of the composite response created by the CP-10 and TruShaping®
filters. Filter parameters can be edited graphically or by direct text or numeric entry. Seeing the
xvi
COMPASS USER GUIDE
frequency shaping curve is not the full story, however, so Compass’ filter display also shows
the composite phase response.
A large library of presets is included for systems ranging from two small Meyer Sound
loudspeakers all the way up to complex, multi-zone systems built around M Series line array
products. No more building processing chains one block at a time; Galileo users can get right
to the starting line and make modifications as needed from there.
More information is available at http://www.meyersound.com.
You may also contact us directly:
+1 510 486.1166
+1 510 486.8356
[email protected]
Technical Support
Web Site Support
The latest documentation, additional support files, and email support links are available on our
website, http://www.meyersound.com/616/support.htm.
Telephone Voice/Fax Support
Twenty-four hour telephone support is available by calling +1 510 486.0657.
For our North American customers, daytime telephone support is available during standard
business hours by calling +1 510 486.1166.
Our Berkeley offices are open Monday to Friday, 08:00 — 16:00 PST/PDT (GMT +8/+7).
xvii
DOCUMENTATION OVERVIEW
Before Using Technical Support
When contacting telephone support, please have the following information available. The quality
of the information you provide significantly affects our ability to provide you with timely and
comprehensive support answers. Having these details available will help us help you more
quickly and effectively.
■
A precise description of the problem.
■
The components used in your Galileo system.
■
The version of Compass used at your workstations.
■
The operating system version you are using at your workstations.
xviii
CHAPTER 1: START HERE
System Requirements
Compass is available for 32-bit versions of Mac OS X and Microsoft Windows operating systems.
Requirements vary dependent on the type of workstation used:
Mac OS X
Apple Macintosh computers are highly standardized. All default hardware configurations are
supported, provided they meet the following specification:
■
OS X v10.4 “Tiger” with software updates, OS X v10.5 "Leopard", or subsequent OS X
releases.
■
50 MB free drive space.
■
DVD drive or Internet connection.
Microsoft Windows
Computers which use the Microsoft Windows operating system are highly variable in their
hardware configuration and subsequent capabilities. However, most brand name computers
should be compatible with Compass, provided they meet the following specifications:
■
Microsoft Windows XP SP2 or later, or Windows Vista SP1 or later.
■
Intel 2 GHz or faster processor.
■
1 GB RAM.
■
50 MB free drive space.
■
32 MB DirectX 9.0 capable video card.
■
10BASE-T or better Ethernet connection.
■
CD drive or Internet connection.
1
CHAPTER 1: START HERE
Installing Compass and Virtual Galileo
Compass is easily installed on your computer workstation.
Mac OS X
1.
Insert the installation CD into the workstation DVD drive. When the CD icon appears on
the Desktop, open it.
OR
Download the Compass.zip and Virtual Galileo.zip files from the Meyer Sound web
site (http://www.meyersound.com/forms/compass/, or navigate to the Compass product
page and click Get Compass). Registration is required.
2.
Copy or move the zip files to the Desktop. Open the zip files.
New folders named Compass and Virtual Galileo will appear on the Desktop.
3.
Drag the folders to the Applications folder.
If the Applications folder is not displayed, double-click the hard drive icon, normally in
the top right corner of the screen. The Finder will open a window. The Applications folder
is listed in the shortcuts bar, on the left (if the shortcut bar is not shown, select View >
Toolbar to restore it.)
4.
Select the Compass.zip and Virtual Galileo.zip files and drag them to the Trash icon
on the Dock.
To uninstall Compass and Virtual Galileo, simply delete the folder.
TIP: To avoid accidental loss of project files, save your projects to a different folder than
the one in which the software is installed.
Microsoft Windows
1.
2
Insert the installation CD into the workstation CD or DVD drive. When the CD icon appears
on the Desktop, open it.
OR
COMPASS USER GUIDE
Download the Windows installers Compass.msi and Virtual Galileo.msi from the Meyer
Sound web site (http://www.meyersound.com/forms/compass/, or navigate to the Compass
product page and click Get Compass). Registration is required.
2.
For each .msi file in turn:
a.
Open the .msi file. The Windows Installer will be started automatically.
b.
Follow the on-screen instructions to install Compass or Virtual Galileo.
When installation is complete the application will be shown on the Desktop and will
also be available in the C:\Program Files\Meyer Sound\Compass folder. This folder
also contains documentation and sample files.
3.
Select the Compass.msi and Virtual Galileo.msi files and drag them to the Recycle
Bin.
To uninstall the applications, run the installer a second time. You will be presented the option
to repair or remove the installation.
TIP: To avoid accidental loss of project files, save your projects to a different folder than
the one in which the software is installed.
Running Compass with Virtual Galileo
Virtual Galileo provides a software simulation of the Galileo 616 hardware. It allows you to be
productive when Galileo hardware is not available for your use; it also allows you to create new
projects without risking changes to a Galileo unit that is currently in use.
Virtual Galileo is available as both a built-in component of Compass and as a stand-alone
application. The former requires no special configuration. The latter allows you to also run the
Front Panel Emulator, which provides a visual simulation of the front of a Galileo 616 with
operative buttons, status lights, and LCD panel.
The Front Panel Emulator is a good way to become familiar with the physical Galileo unit without
the risk of changing the configuration of an installed unit and to see how changes made through
Compass are reflected in the status lights and LCD panel of the Galileo 616.
3
CHAPTER 1: START HERE
The built-in Virtual Galileo can be used to simulate an arbitrary number of Galileo 616 units.
The stand-alone version provides only a single unit.
Using the Built-In Virtual Galileo for Stand-alone Development
Select this method when you wish to work on a Galileo without having a working physical
connection to a real Galileo 616.
1.
Start Compass.
2.
Select the Galileos tab.
3.
Click Add Galileo. A settings window will be displayed.
Provide a nickname and/or tab name for the Virtual Galileo. The IP address will not be used
and can be left at its default value.
Click OK. A new Galileo will now listed in the main window.
4.
If you would like to see demonstration meters, click Meters.
5.
Click Use Virtual. The Status entry will change to Connected and the VIRTUAL button
will flash blue. A new Galileo tab will be added to the top of the window. The text “virtual”
will be shown above the Galileo tab name.
You may now use the Virtual Galileo device as if it were a real Galileo 616 unit, though without
audio signal.
IMPORTANT: When you disconnect the Virtual Galileo all settings will be lost. If you
want to save your configuration and channel settings, capture a snapshot and save the
project before disconnecting!
Using the Built-In Virtual Galileo to Substitute for an Existing Galileo 616
Select this method when you are connected to a real Galileo 616, but wish to modify a
configuration without changing the settings of the real unit while you do your work. You will not
be able to audition sound, but can quickly switch to the real hardware when you wish to do so.
1.
4
Start Compass.
COMPASS USER GUIDE
2.
Select the Galileos tab.
3.
If the Galileo 616 is connected, click Disconnect.
4.
Click Use Virtual. The Status entry will change to Connected and the VIRTUAL button
will flash blue. A new Galileo tab will be added to the top of the window. The text “virtual”
will be shown above the Galileo tab name.
The Virtual Galileo will now perform in place of the Galileo 616 unit.
IMPORTANT: When you disconnect the Virtual Galileo all settings will be lost. If you
want to save your configuration and channel settings, capture a snapshot and save the
project before disconnecting!
Using the Stand-Alone Virtual Galileo
Select this method when you want to use the Front Panel Emulator to fully simulate a working
Galileo environment. This is particularly useful when learning to use Compass.
1.
Start Virtual Galileo.
If you wish to see simulated meter traffic:
a.
Click the picture of the Galileo to expand the window, displaying a set of window tabs.
b.
Select the Galileo Engine tab.
c.
Enable Generate simulated meter traffic (demo mode). A warning will be displayed;
click Yes.
2.
Start the Front Panel Emulator.
3.
Start Compass.
4.
Select the Galileos tab.
5.
Click Find Galileos. Within a few seconds, a list of connected Galileos will be displayed.
6.
Identify the IP address that corresponds to your workstation and click Connect. The Status
entry will change to Connected. A new Galileo tab will be added to the top of the window.
5
CHAPTER 1: START HERE
Running Compass with Galileo
Although you may be able to design an entire project without making use of physical Galileo
616 hardware, at some point you’ll want to audition the sound, upload snapshots to the Galileo,
and monitor the system. Provided your network is functional, connecting your workstation to
Galileo units is simple.
Network Connections
In brief, you can connect your workstation directly to a single Galileo 616 unit, or connect your
workstation and multiple Galileo 616 units to a network switch or router.
Many modern computers support a network standard named Auto-MDIX which allows you to
connect the workstation computer directly to the Galileo without an intervening network switch
or router. With these computers, you need only plug a standard Cat-5e Ethernet cable into the
workstation and Galileo Ethernet connector. Computers that do not support Auto-MDIX may
still be directly connected to a Galileo through the use of an Ethernet crossover cable.
Adding Galileo 616 Units to Compass
Running Compass with Galileo 616 units is as easy as using the Virtual Galileo simulator:
Auto-discovery Connection of Galileo 616 Units
Select this method when the workstation computer connects to the Galileo 616 unit(s) through
its primary Ethernet port.
1.
Start Compass.
2.
Select the Galileos tab.
3.
Click Find Galileos. Within a few seconds a list of Galileos available through the network
will be displayed.
If no Galileos are discovered you may need to choose a manual configuration as described
below.
Discovery and connection can be configured to take place when Compass starts up. See
Startup Galileo Discovery and Connection Options (p. 75).
6
COMPASS USER GUIDE
Manual Connection of Galileo 616 Units
Select this method if auto-discovery fails to detect your Galileo 616 units or if the workstation
computer is using a secondary Ethernet port to connect to the Galileo network.
Prerequisite: using the front panel controls of the Galileo 616 units, record the IP address of
each unit. See the Galileo Hardware Reference Manual for details.
1.
Start Compass.
2.
Select the Galileos tab.
3.
For each Galileo in the network:
a.
Click Add Galileo. A settings window will be displayed.
b.
Provide the IP Address for the Galileo unit. If you also provide a Galileo Nickname
and/or Tab Name, the Galileo will be renamed; if you leave these fields blank, Compass
will retrieve the name from the Galileo 616 unit.
c.
Click OK. The Galileo 616 unit will now listed in the main window.
d.
If necessary, click Refresh to detect the Galileo connection.
You may now click Connect to establish a links to the Galileos.
Troubleshooting Galileo 616 Connections
Compass communicates with Galileo 616 units using TCP/IP ports 15001 and 15002. If you
have enabled a firewall or other access-restriction software on your workstation, or are connected
to the network using a router or switch, you may need to configure their security settings to
permit use of these ports. In addition, permitting access to port 8000 on the Galileo 616 units
will allow web access to the Galileo log files.
Compass auto-detection of connected Galileo 616 units is restricted to the primary Ethernet
port. If connections are made through alternate ports, connections must be configured manually.
The workstation operating system may also need to be manually configured to enable the
alternate Ethernet port.
If connecting directly to a Galileo 616 unit, your workstation may require the use of a crossover
Ethernet cable.
7
CHAPTER 1: START HERE
A full discussion of networking issues is beyond the scope of this manual. If you encounter
problems with connecting your workstation computer to a Galileo system, please refer to the
Galileo Hardware Reference Manual for details, consult your local hardware installation technician,
or contact Meyer Sound technical support.
8
CHAPTER 2: COMPASS OVERVIEW
In this chapter you will learn how more about the types of tools Compass provides you, as well
as gain some insight into the relationship between Compass and Galileo.
Compass Capabilities
Compass provides comprehensive control of the Galileo 616 through a graphical user interface
running on a remote computer.
Compass is the primary method of operating the Galileo loudspeaker management system.
The software enables easy access to all Galileo features and even provides control of multiple
units. Compass includes a context help system, full copy and paste of all settings and groups
of settings, and multiple levels of undo. The tabbed interface can be scaled to any display
resolution and the colors can be configured for either day or night. Windows and Mac OS X
versions have the same user interface so that switching between platforms is completely
transparent.
A sophisticated channel linking system allows multiple input and outputs, even on multiple
Galileo 616s, to be linked so that parameter changes can be applied to all linked channels.
Relative gain mode allows gain changes to linked channels while retaining gain differences
between linked channels.
The EQ Plotter window includes an overlay display of the applied CP-10 and TruShaping
equalization, for both amplitude and phase, in a single editable window. Equalization parameters
can be edited directly by simply dragging EQ points in the display, or by entering values
numerically for greater precision.
9
CHAPTER 2: COMPASS OVERVIEW
Compass Controls
Figure 2.1. Illustrated User Interface Element Names
On each Compass page are controls for setting values; selecting, isolating, and link grouping
channels; enabling or bypassing parts of the signal path; selecting a page or sub-page of
controls; adjusting the display of components; saving snapshots and projects; and so on.
Some pages appear to be very complex, but as with physical consoles there is a large duplication
of controls, each specific to a channel or band. Color is used to indicate the status or setting
of controls, and many controls are likely to be familiar to you already, either as parts of a
traditional console or as a variation of a common graphic interface control.
The following sections discuss the major controls in more detail:
Using Tabs
Compass organizes its controls on “pages,” which are selected by
choosing a “tab.” Visually, these tabs look similar to the tabs used
in binders and books: an extra bit of the page that sticks out beyond the normal page edge,
with a label. Selecting the tab displays the page.
When a tab is clicked the page is changed immediately after the mouse button is released. If
you move the mouse off the toggle button, the action is canceled.
10
COMPASS USER GUIDE
Some pages have tabs within the page itself, providing access to a series of sub-pages that
further organize controls. On the Input Processing and Output Processing pages these tabs
can be hidden or the sub-pages collapsed, freeing up additional space for the plot curve display.
The color of the tab indicates the network status of the Galileo unit. Working Galileos have a
blue tab; disconnected Galileos have a red tab. If there are network communication errors, the
tab will turn yellow and, if the network is in a stall condition, magenta.
Throughout this guide the selection of tabs is indicated as a sequence: Compass > Compass
Preferences indicates that the Compass tab should be selected, followed by the Compass
Preferences tab. This convention is sometimes extended to include the name of a specific
control or group of controls within the page.
When directing you to a page that is specific to a particular Galileo unit the name of the unit is
not included: for instance, the [Galileo Unit] > Input Processing > Parametric EQ page is a
sub-page of a specific Galileo, but this manual cannot know in advance what name you have
given the Galileo: you will need to click the name of that Galileo before clicking the Input
Processing tab.
Using Value Boxes
Value boxes provide a place to type a name or number to set a value.
Visually, the value box is presented as a raised box containing the name or
value of the setting. Clicking in the box places the text input cursor — a
blinking vertical bar — in the box.
With the default setting of Compass > Compass Preferences > User
Interface Display and Control Options > Select All Text When Entering
Text Field, the value is automatically selected: typing will immediately replace the value. If this
setting is cleared, typing will be inserted at the cursor.
Pressing ‹ Enter › or ‹ Return › sets the new value. If ‹ Esc › is pressed instead, the original value
is restored. You can also use ‹ Cmd+Z › to undo changes.
11
CHAPTER 2: COMPASS OVERVIEW
Using Buttons
Buttons perform an action when pressed, perhaps selecting a
channel, toggling a function, or displaying a new page. Visually,
the buttons look like traditional on-screen buttons.
Buttons almost always have a label (unassigned Link buttons
are the notable exception); this label may change to indicate the status of the underlying function:
clicking a “Bypassed” button will change it to “Enabled,” for instance. Also of note, the Galileo
Map page has processing buttons that display a miniaturized version of the EQ plot: clicking
the button takes you to the appropriate processing page.
When a button is clicked the action is performed immediately after the mouse button is released.
If you move the mouse off the button, the action is canceled: the click and release must occur
on the button for the action to take place.
Using Toggles
Toggles are a type of button, choosing an “on” or “off” setting for
a preference. Visually, toggles look like back-lit mechanical
switches, glowing when the toggle is “on.”
When a toggle is clicked the setting is changed immediately after
the mouse button is released. If you move the mouse off the toggle
button, the action is canceled.
Using Selectors
Two types of selectors are used in Compass. The first is a “option
selector” which acts like the buttons on a automobile radio: only one
station can be active at a time. The second is a “drop down” selector
which acts like a menu: clicking the button displays a list of choices,
one of which can be selected.
Visually, the option selector looks like a round button which glows
when selected. The drop-down selector looks like a button, labeled
with the active setting, and has an arrow at the right end indicating other choices are available
for selection.
12
COMPASS USER GUIDE
When an option selector is clicked the setting is changed immediately after the mouse button
is released. If you move the mouse off the button, the action is canceled.
When a drop-down selector is clicked a vertical list of choices is immediately displayed. The
mouse button must then be released so that you can click your selected choice. When the
mouse button is released the second time, the list disappears and the selected choice is
displayed as the selector button label. In the example above, the “Layout” drop-down selector
is showing its normal state, while the “Order” selector has been clicked and is presenting a list
of choices.
Using Encoders
Gain, delay, and frequency value boxes are accompanied by a rotary encoder
control. This gives you the choice of using a mouse to set the value instead
of typing the value directly. Visually, the encoder looks like a round knob
inside a square casing. When the knobs are colored the colors correspond
to the colors of the Galileo 616 front panel encoders.
Unlike the controls described so far, the encoder is used by dragging: click and hold the mouse
button, then drag the cursor around to change the value in the value box. The location of the
click determines the rate of change: clicking the center of the knob displays a x10 label beside
the cursor, indicating that mouse movements will result in larger value changes, while clicks
further from the center will result in smaller value changes.
In addition to fine and coarse movement, encoders can respond to circular movements or linear
movements dependent on the Compass > Compass Preferences > User Interface Display
and Control Options > Value Controller Type preference. In Encoder mode, the cursor must
travel around the encoder, as if turning it with one’s fingers. In Joystick mode, the cursor is
dragged horizontally or vertically to adjust the value, as if the encoder were a slider.
Another behavior variation is selected by the Compass > Compass Preferences > User
Interface Display and Control Options > Input Device Type preference, which modifies the
behavior of the cursor when the mouse button is released. In Mouse mode, the cursor remains
in place when the button is released. In Tablet mode, the cursor returns back to the encoder.
13
CHAPTER 2: COMPASS OVERVIEW
Using Faders
Faders are shown on the input and output master pages. Visually, they look like
traditional physical console faders: a slider that can be dragged up or down to
adjust the gain value, with value demarcations beside it. The gain value is
displayed in both the associated value box and on the slider knob.
A subtle feature of fader sliders is found in the ability to click a number label to
jump the slider to that exact value: clicking the -3 label will set the gain to -3 dB;
clicking the −∞ label will set the gain to full attenuation. As well, clicking above
or below the slider knob will adjust the gain value up or down by one decibel.
Using Meters
Meters are shown on several pages; some meters are displayed vertically,
others horizontal. Visually, they look like traditional VU meters. The signal
level may be shown on the meter, as per the Compass > Compass
Preferences > User Interface Display and Control Options > Show Meter
Values preference.
When clipping occurs the meter is highlighted in a red box. By default this
clipping indicator is active only when clipping is occurring. This behavior may be changed using
the Compass > Compass Preferences > Clip Indicator Clear Mode preference. When clipping
indication is set to be held, clicking the meter will clear the indicator.
Clipping occurs at -0.5 dB on the meters: this corresponds to the signal voltage level selected
by the [Galileo Unit] > Settings > Input and Output voltage range preferences (+26 dBu by
default, configurable to +20 dBu for studio mode use).
NOTE: The clipping indicator is set at a true -0.5 dB. The clipping indicator is not a
pre-warning that clipping may occur: it indicates that clipping is actually happening.
Using Parametric EQ Handles
The Parametric EQ plot displays “handles” for the available EQ
bands. Visually, these appear as numbered squares, with the
numbers corresponding to the bands displayed on the
14
COMPASS USER GUIDE
Parametric sub-page. When the mouse is hovered over a handle, an expanded handle is
displayed: three vertical bars intersecting a horizontal bar.
The horizontal bar, amber in color, corresponds to the gain level. The center vertical bar, red,
corresponds to the frequency centerpoint. And the two outside vertical bars, blue, correspond
to the bandwidth.
Dragging a bar will adjust only the corresponding value: for example, if you wish to adjust
frequency without adjusting gain or bandwidth, drag the red bar.
Dragging a crosspoint will adjust two values simultaneously: for example, if you wish to adjust
both frequency and gain, drag the crosspoint of the red and amber bars.
Pressing ‹ Alt › before clicking will remove the red bar, replacing it with a single blue bandwidth
bar; you can then adjust bandwidth and gain simultaneously, or select either bar to adjust
bandwidth or gain in isolation.
Using TruShaping EQ Bars
The TruShaping EQ plot displays “bars” for the available EQ bands. Visually,
these appear as horizontal and vertical bars, with large handles where the bars
connect.
Each horizontal bar may be dragged to adjust one of four gain settings; each
vertical bar dragged to adjust one of three frequency settings. The large handles
may also be dragged, adjusting a gain and frequency setting simultaneously.
Using the File Selector
The file selector is used to save and load snapshots
and projects. It provides file selection functionality:
a Look In drop-down selector used to select parent
directories; a quick-selection box with computer and
storage device names; a file list box showing the
contents of a directory; and a File name value box
in which to name the file that is to be loaded or
saved.
15
CHAPTER 2: COMPASS OVERVIEW
In the upper right, navigation arrows allow you to easily go up the directory tree or back to a
previous directory; an icon of a folder will create a new folder within the current directory; and
the rightmost icons choose how the file list is displayed.
At the bottom, the Files of Type box shows the type of file Compass wants to load or, if saving,
the extension that will be appended to the File name.
Compass remembers the last directory you used; often, you will do little more than type a new
file name (when saving) or select an existing file name (when loading, or to overwrite a file when
saving). If you save your files alongside the stock Compass example files, you’ll use the “up
directory” arrow to navigate a shallow directory tree, moving up from a storage directory to a
parent directory, then double-clicking a directory name to move down into the directory in
which the file you want is stored, or to save your file.
If saving files to a USB memory stick, select the USB memory stick device in the quick-select
box on the left, provide a File name, and click Save. If loading a file, select a name in the list
of files and click Open.
NOTE: File selection windows are not affected by your choice of dark or light color
scheme: they are always bright. Please be aware of this when planning project file
changes during a performance.
General Workflow
The following steps outline a typical Compass workflow.
1. Configure Galileo
The natural first step when working with Compass is to configure the software to match the
connected hardware. The Galileo 616 supports six channels of input and sixteen channels
output. Inputs may be single-channel analog signal or two-channel AES digital signal; outputs
are analog signal capable of driving Meyer Sound self-powered loudspeakers directly. Voltage
for analog inputs and outputs can be set to +26 dBu (standard) or +20 dBu (studio mode).
The Galileo 616 also has a standard Ethernet connection for communication with Compass. In
facilities with more than one Galileo, the Ethernet connections will be made to a network hub
or router, allowing Compass to communicate with all Galileos simultaneously. Where there is
only one Galileo, the Compass workstation may be connected directly to the Galileo.
16
COMPASS USER GUIDE
Audio input/output configuration is managed through the [Galileo Unit] > Settings > Input
and Output page. Detailed instructions are provided in Configuring Audio Inputs and
Outputs (p. 28).
Network configuration is managed through the Galileos page. Find Galileos will, in most
situations, auto-discover network-connected Galileo 616 units. Detailed instructions are provided
in Running Compass with Galileo (p. 6).
2. Label Galileos, Inputs, and Outputs
Although most Galileo installations are relatively simple, it is still important to provide useful
names for the Galileos and their input and output channels. Naming helps reduce errors and
speeds the design process.
Galileo naming can be done through the Galileos page: simply select the Galileo Nickname
and type a new name. The tab name will be automatically updated to match the nickname;
when the tab name is too long, you may wish to select it and type a new, shorter tab name.
Please keep in mind that the front panel display on Galileo units can display about a dozen
letters in a channel name, and only alphanumeric characters A-Z, a-z, 0-9. If users will be
managing the Galileo using its front panel, make sure the most important information is at the
start of the name.
Channel naming can be done through the [Galileo Unit] > Galileo Map page. Select the Label
and type a new name for the channel. The new name will be used on all other pages
automatically.
In addition to providing names for the Compass interface it is also useful and wise to label the
signal cables themselves. Should it be necessary to replace a Galileo unit, or if someone
disconnects the cables, correct reconnection is simple when the Galileo ID and channel ID are
attached to the cable end.
3. Routing
After labeling you will probably want to route inputs to outputs so that you can begin setting
gains and processing values while auditing the signal aurally and/or through a SIM3 analyzer.
Routing is done through the [Galileo Unit] > Summing Matrix page.
17
CHAPTER 2: COMPASS OVERVIEW
A number of preset matrices ship with Compass and may be useful as a launching point for
developing a new project. Alternatively, you may wish to enable Router Mode on the Summing
Matrix page, to quickly map out the paths, and then clear the mode for fine-tuning the signal
levels. For any moderately complex system you will send an input to multiple outputs: for
instance, several input channels will likely be routed not only to their corresponding left or right
loudspeaker arrays, but also to a combined subwoofer output on which you’ll configure a high
pass filter.
See Using the Summing Matrix (p. 30) for detailed instructions on using the Summing Matrix.
4. Initial Gains
With inputs routed to outputs, you can now start to adjust signal gains. If you work best with
access to the full suite of controls, the [Galileo Unit] > Galileo Map page is where you’ll do
this task. If you’re more comfortable with traditional consoles and faders, you’ll probably prefer
the [Galileo Unit] > Input Masters and [Galileo Unit] > Output Masters pages.
In either case, you’ll probably make use of Select, Isolate, and Mute as you start configuring
for a baseline system setup. To make your work progress more quickly, learn to use the Using
Shortcuts (p. 24).
Although the Galileo 616 has a very low noise floor and wide dynamic range it is best to work
the mixing console at its optimum levels. The Galileo will accept the maximum output of most
mixing consoles, allowing you to restrict gain control in the Galileo to the adjustment and
balancing of signals. This will provide you maximum flexibility and the best audio quality.
5. Link Groups
Once the loudspeaker gains are balanced, it is useful to create sets of link groups that can be
used to duplicate changes across multiple channels simultaneously. Judicious use of link groups
will both speed the development of system configurations and reduce errors by ensuring all
associated channels are updated without further effort.
Link groups can operate in one of two modes. In the default mode, link groups simplify the
selection of multiple channels before adjusting a control; in its optional mode, link groups
provide an “always on” form of channel selection. See Linking Channels (p. 42) for details. See
Channel Linking Preferences (p. 76) for options that influence the behavior of selects, link
groups, and linked Galileos.
18
COMPASS USER GUIDE
You may configure link groups through the [Galileo Unit] > Settings > Link Groups page. First
determine which channels will share identical settings: these are the channels you’ll wish to
assign to a common link group. When this is done you will be able to adjust the same control
on multiple channels simultaneously, either by selecting a channel in the group and then adjusting
the control (default mode); or by adjusting the control in a channel that belongs to the link group
(alternative mode).
Note that control value changes can be replicated as absolute or relative changes. See Choosing
Absolute or Relative Linked Channel Gain Control Changes (p. 45) for usage details.
6. Atmospheric Correction and Array Correction
Before fine-tuning loudspeaker outputs, atmospheric correction and array correction should
be configured. Atmospheric correction takes into account environment conditions and
loudspeaker distances to correct for high-frequency attenuation. Array correction mitigates
low- and mid-frequency build-up due to coupling effects in loudspeaker arrays.
Atmospheric correction is calculated using temperature, humidity, altitude, and loudspeaker
distance. The first three variables are assigned on a per-Galileo basis, on the [Galileo Unit] >
Settings > Environment page; the latter on a channel-by-channel basis, on the [Galileo Unit]
> Output Processing > Channel Settings pages.
Array correction is available for Meyer Sound M Series arrays. Highly-tuned EQ curves have
been developed for each particular M Series product. Array correction configuration is managed
on the [Galileo Unit] > Settings > Array Correction page.
These settings can create very large changes in gain level across parts of the signal frequency
range. Before using atmospheric and array correction, be sure you understand when and how
to use them. See the Using Signal Processing (p. 53) section for more usage details.
7. Connect SIM3
The Meyer Sound SIM-3022 Audio Analyzer is used to quickly and accurately measure the
frequency, phase response, and signal-to-noise ratio of components in the acoustic signal path
for all combinations of inputs and outputs. It is a superlative tool for determining optimal
loudspeaker placement and appropriate acoustic environment correction. When connected to
a Galileo 616, the Galileo is used as a line switcher, eliminating the need for any additional
patching.
19
CHAPTER 2: COMPASS OVERVIEW
See Connecting and Configuring for use with SIM3 (p. 51) for a quick overview. Consult the
SIM3 User Manual for full details.
8. Configure Processing
Compass provides first-order EQ (TruShaping) and second-order EQ (parametric) equalization
on input and output channels, as well as a 31-band graphic equalizer on inputs and high/low
pass filtering on outputs. TruShaping allows you to shape frequency response with a minimum
of phase shift; parametric helps in reducing interaction artifacts; and the low/high pass filters
are often used in creating subwoofer feeds.
See the Using Signal Processing (p. 53) section for more usage details.
9. Create Project and Snapshots
As you finalize the settings for a given source type you will want to capture a “snapshot” of the
input, output, and summing matrix control values. Once captured, a snapshot can be recalled
at will: when it is recalled, all the controls are set to the values they had when the snapshot was
captured, recreating the aural environment you designed.
An additional level of organization is provided by “projects,” which allow you to save and load
a set of snapshots for subsequent recall. Projects can be particularly useful as a means of
collating a base set of snapshots from which to develop site-specific snapshots; or to organize
snapshots by act, venue, or other arbitrary measure. Projects also save Galileo settings and
Compass preferences, restoring your user interface and network preferences when loaded.
Snapshot, project creation, and update buttons are available at the bottom of most pages;
there is also a full suite of controls located on the [Galileo Unit] > Project page. See Saving
and Loading Projects and Snapshots (p. 61) for further details.
10. Restrict Access
In those situations when you are creating snapshots for a facility installation, where snapshots
will be recalled by multiple users, you may want to lock down access to the Galileo front panel
controls and Compass control pages: in all likelihood, you will want to provide access to only
snapshot recall and environment settings. Access control gives you this ability.
20
COMPASS USER GUIDE
In other situations you may be responsible for designing the signal processing components of
a show, but the show itself will be run by a someone else; in such a case, you may want to
allow access to gain control and the summing matrix while locking-out access to signal
processing.
Compass provides access restrictions for twenty-eight types of controls and functions. Access
control is documented in Restricting Access to Compass Settings (p. 68).
21
CHAPTER 3: USING COMPASS TOOLS
Navigating the Tabbed Window Interface
Compass is presented as a single-window interface controlling a number of physical and virtual
Galileo 616 units. Within the window each Galileo is provided its own “tab.” Clicking a tab brings
that page to the front of the window, often presenting a series of sub-tabs classifying various
sets of controls: “Settings,” “Input Processing,” “Output Masters,” and so on.
In this user manual, pages are generally identified by listing the tabs and sub-tabs that must
be selected to reach the page. If the instructions say “Select the [Galileo Unit] > Input
Processing > Parametric page for the Galileo,” the intention is that you click the tab for the
Galileo you wish to work with, then click the Input Processing tab, and then the Parametric
sub-tab.
In addition to the tabs associated with specific Galileo 616 units or Virtual Galileo simulations,
a tab labelled Compass allows you to set various interface preferences and a tab labelled
Galileos contains controls for finding and connecting Galileo units.
On each page a variety of controls offer the ability to adjust the signal path. In this user manual
control titles and control names are written in bold text, like so: “In the Current Project box,
click Save As…”. If the instructions include setting a specific value, that value is indicated using
monospace (typewriter) text: “Set Delay to 20 ms.” Finally, where instructions reference a
special keyboard combination, the key names are given special treatment: “When using the
keyboard, use ‹ Shift+Enter › to set the value after typing it.”
NOTE: Macintosh and Windows keyboards may use different names for the modifier
keys.
In the Manual
Macintosh Keyboard
Windows Keyboard
‹ Alt ›
‹ Option ›
‹ Alt ›
‹ Cmd ›
‹ Cmd () ›
‹ Ctrl ›
‹ Enter ›
‹ Return ›
‹ Enter ›
23
CHAPTER 3: USING COMPASS TOOLS
Using Shortcuts
To facilitate rapid Compass configuration a number of shortcuts are available:
Linking Settings Between Stereo Pairs
Assuming that neither channel of a stereo pair is isolated, a stereo pair of control values can
be adjusted simultaneously:
■
When using the mouse, hold the ‹ Shift › key when dragging or clicking a control.
■
When using the keyboard, use ‹ Shift+Enter › to set the value after typing it.
Linking Settings for All Channels on a Galileo Unit
A control value can be set for all non-isolated channels simultaneously:
■
When using the mouse, hold ‹ Shift+Cmd › when dragging or clicking a control.
■
When using the keyboard, use ‹ Shift+Cmd+Enter › to set the value after typing it.
The set of all input or all output channels on the Galileo that are not isolated will now share the
same control value.
Isolating a Single Channel
When multiple Selects are enabled, changing the value of a control for one selected channel
normally changes it for all selected channels. To momentarily override this behavior:
■
When using the mouse, hold ‹ Cmd › when dragging or clicking a control.
■
When using the keyboard, use ‹ Cmd+Enter › to set the value after typing it.
Switching Between Absolute and Relative Gain Control Adjustment
The default behavior of linked channel gain adjustment — absolute or relative value
change — can be overridden using the keyboard:
■
24
When using the mouse, hold ‹ Alt › when dragging or clicking a control.
COMPASS USER GUIDE
■
When using the keyboard, use ‹ Alt+Enter › to set the value after typing it.
The selected control value will be adjusted using the alternative behaviour. See Channel Linking
Preferences (p. 76) for more detail.
Automatic Negative Gain Values
When typing a value in a gain value input box the default behavior for Compass is to assume
the value is negative unless preceded by a plus: for example, typing 2 in a gain value box will
set the gain to −2 dB. Type +2 to set the gain to +2 dB. This behavior can be changed; see
User Interface Display and Control Options (p. 72) for details.
Setting Full Attenuation Gain Values
When using the keyboard, type -i, -inf, or a value less than -60 to set gain to full attenuation.
Arithmetic in Gain Value Controls
Gain value boxes support addition and subtraction through the keyboard:
■
To increase a value by an amount, precede the value with double-plus: for example, typing
++2 in a gain value box will increase the value by two decibels.
■
To decrease a value by an amount, precede the value with double-minus: for example,
typing --6 in a delay value box will decrease the value by six decibels.
The normal behavior of a gain value box is to accept the value as an absolute: typing +2 in a
gain value box sets the value to 2 dB; typing -6 in a gain value box sets the value to −6 dB.
Rapid Fader Values Changes with the Mouse
■
Click a numeric value to the right of the fader slider to directly set common integer values.
■
Click above or below the fader slider to increment or decrement the value.
Fine and Coarse Rotary Encoder Value Changes with the Mouse
■
Click the center of an encoder before dragging to boost value change speed by a factor
of ten. The pointer will display 10x to indicate values will change rapidly.
25
CHAPTER 3: USING COMPASS TOOLS
■
Click outside the center of an encoder before dragging to change values less rapidly.
Setting Frequency Values
When typing a frequency value, the values 1500, 1.5k, and 1k5 are equivalent.
Tabbing Between Input Boxes
The ‹ Tab › key will jump the input cursor from input box to input box. This can make it remarkably
quick and easy to configure controls; on the Input Masters page, for example, one can tap
‹ Tab, Tab › to jump from channel name box to channel name box (skipping the value box),
renaming them en masse without one’s hands leaving the keyboard.
Tabbing Between All Controls
The ‹ Tab › key can be configured to allow keyboard control of buttons as well as input boxes.
By default, tab jumps only to value input boxes; to change this behavior to include buttons:
■
Select the Compass > Compass Preferences page and clear Disable Keyboard Control
of Buttons.
Reset to Default
To reset a value box to its default, type ✱ (asterisk).
Undo/Redo
A thousand levels of Undo are available.
■
To undo a change, press ‹ Cmd+Z ›.
■
To redo a change after undoing it, press ‹ Shift+Cmd+Z ›.
Setting Compass and Channel Preferences
The visual appearance of Compass and many of its default behaviors can be configured to suit
your preferences. See Compass Tab (p. 71) for complete details.
Unless stated otherwise, the following preference settings are found on the Compass >
Compass Preferences and Compass > Channel Linking Preferences pages.
26
COMPASS USER GUIDE
Viewing Full-Screen Compass
Toggle full-screen Compass by clicking the small Full Screen button in the upper left of any
Compass window.
Using Small Screen Scaling
If your computer has a low-resolution screen, Compass control pages may not fit on the screen
at its default size. To remedy this:
■
From User Interface Display and Control Options, select a User Interface Scale that
allows the Compass window to fit your screen.
When you reduce the user interface scale, the control handles on equalizers may become too
small to be useful. To counter this:
■
From User Interface Display and Control Options, select a Plotter Control Handle Scale
that will negate the reduction.
Show Meter Values on Meters
From User Interface Display and Control Options, enable Show Meter Values.
Retain Meter Clipping Indicator
By default the clipping indicator is on only for the duration of an over-signal event. To change
this:
■
From Clip Indicator Clear Mode, select a time-out option or select manual clear.
Connect Compass to Galileos On Start-up
To have Compass search the network for Galileos and connect to those Galileos and Virtual
Galileos which were active when Compass was last used, as well as listing all discovered
Galileos, set the following Startup Galileo Discovery and Connection Options:
■
Enable Find Available Galileos on startup.
■
Enable Relaunch and reconnect to previously connected Virtual Galileos on startup.
■
Enable Reconnect to previously connected Galileos on startup.
27
CHAPTER 3: USING COMPASS TOOLS
Clear Selected Channels on Galileo Switching
Compass normally retains channel selects for each Galileo page, so that when you return to a
page the previously-selected channels are still selected. If you prefer to have channel selects
automatically cleared when leaving a Galileo page:
■
From Channel Linking and Select Options, enable De-select all channels when the
active Galileo tab changes.
Change Linked Gain Controls by Relative Amounts
When you set a new value in a gain control on a selected channel, the default behavior is to
change the value of all linked channels to that same value (“absolute” mode: changing a -10 dB
control to -8 dB sets the linked gain controls to -8 dB). If you would rather have the other
channels changed by the same amount (“relative” mode: increasing a -10 dB control to -8 dB
increases linked gain controls by +2 dB):
■
From Gain Control Linking Mode, enable Linked Channel Gain changes are relative
by default, use ALT for absolute.
Include Isolated Channels in Channel Linking
Value changes propagated through channel linking skip isolated channels by default. If you’d
rather the (selected) isolated channels were included:
■
From Isolate Linking Behavior, enable Isolated channels will be included when linking
from another channel.
Configuring Audio Inputs and Outputs
Each Galileo 616 unit can receive six channels of audio input signal and send sixteen channels
of output signal. The Galileo 616 can accept the line level output of most mixing consoles and
can directly drive Meyer Sound self-powered loudspeakers to full output.
28
COMPASS USER GUIDE
Configuring the Galileo 616 for Analog Audio Input
Determine the maximum signal level before configuring the Galileo. Selecting an input voltage
range that is too low can result in increased noise levels depending on your power and grounding
infrastructure. +20 dB is mainly for Studio applications, +26 dB is for all other types of
applications.
1.
Select the [Galileo Unit] > Settings > Input and Output page.
2.
Clear Enable Linking Across Selected Galileos to avoid configuring other Galileos.
3.
Set Input Channel Types to Analog for the appropriate input channel pairs.
4.
Select the appropriate Input Voltage Range for the input source.
Configuring the Galileo 616 for Digital Audio Input
Note that AES connections are made to ports A, C, and E. The companion ports (B, D, and F)
must be left unconnected.
1.
Select the [Galileo Unit] > Settings > Input and Output page.
2.
Clear Enable Linking Across Selected Galileos to avoid configuring other Galileos.
3.
Set Input Channel Types to AES for the appropriate input channel pairs.
AES input does not require selecting an input voltage range.
Configuring the Galileo 616 Audio Outputs
The adjustable output range provides two level output settings to drive Meyer Sound
self-powered products. The +20 dBu output range setting lowers the overall noise floor by
nearly 6 dB. However, this setting makes the Galileo output signal more vulnerable to defects
in the overall grounding system. The actual improvement attained depends on the quality of
the grounding between components. For this reason the default setting is +26 dBu.
In either setting, the digital gain will compensate for either analog output gain setting, so that
the overall system output level set in the Galileo will remain the same.
1.
Select the [Galileo Unit] > Settings > Input and Output page.
29
CHAPTER 3: USING COMPASS TOOLS
2.
Clear Enable Linking Across Selected Galileos to avoid configuring other Galileos.
3.
Select the appropriate Output Voltage Range for the connected devices.
Configuring Many Galileos Simultaneously
When you have several Galileo 616 units with identical I/O requirements, you can configure
them simultaneously.
1.
On the Galileos page:
a.
In the Link column, select the Galileos that will be configured identically.
b.
In the ID column, assign the selected Galileos the same link ID.
2.
Select a [Linked Galileo Unit] > Settings > Input and Output page.
3.
Select Enable Linking Across Selected Galileos. The page background color will change
to dark purple (magenta).
4.
Configure the Galileos as described in the previous procedures.
All globally linked Galileos will now have the same I/O configuration.
Using the Summing Matrix
The Summing Matrix is analogous to the matrix component of a standard physical mixing
console, where input channel rows are directed to output channel columns. Each crosspoint
can be fine-tuned from full attenuation to +20 dB gain.
Using the Summing Matrix as a Signal Router
Signal routers do not adjust signal level as the signal is routed from inputs to outputs. Each
crossover point is a simple switch, selecting full attenuation (off) or unity gain (on).
1.
Select the [Galileo Unit] > Summing Matrix page.
2.
Select Router Mode, located at the top left of the page.
30
COMPASS USER GUIDE
3.
For each input that is to be routed to an output, click the crossover point to select unity
gain. Input signal will be routed to the output channel at unity gain.
Crossover points may still be assigned an arbitrary crossover attenuation value. Click inside
the crosspoint value box and type a new value, then press ‹ Enter › to set the value.
Creating a Custom Summing Matrix
The greatest power of the matrix is its ability to route an input channel to several output channels
simultaneously at varying signal levels, combining sources and helping diminish sound
localization.
1.
Select the [Galileo Unit] > Summing Matrix page.
2.
Clear Router Mode, located at the top left of the page.
3.
For each input that is to be routed to an output, assign an attenuation value to the
crosspoint. You may adjust the level of the combined signal using the Output Masters
controls, while adjusting the relative level of each input source using the Summing Matrix
controls in the output channel column.
Resetting Matrix Values
1.
Right-click on a crossover point: either the crossover point you wish to reset, a crossover
point on a row you wish to reset, or on any crossover point if you want to reset the entire
matrix. The Clipboard Options and Saved Settings window will be displayed.
2.
Select the appropriate Reset. The button row labeled Matrix Gain corresponds to the
specific crossover point, Matrix Input Row to the row, and Summing Matrix to the entire
matrix.
NOTE: Channel selects and global Galileo linking can result in other matrix controls
also being reset. The Clipboard Options and Saved Settings window provides a
list of linked Galileos and channels.
31
CHAPTER 3: USING COMPASS TOOLS
Copying or Saving Matrix Values
1.
Right-click on a crossover point: either the crossover point you wish to copy or save, a
crossover point on a row you wish to copy or save, or on any crossover point if you want
to copy or save the entire matrix. The Clipboard Options and Saved Settings window
will be displayed.
2.
Select the appropriate Copy for the set of controls that is to be copied, or the appropriate
Save if you wish to save values to a file. The button row labeled Matrix Gain corresponds
to the specific crossover point, Matrix Input Row to the row, and Summing Matrix to the
entire matrix. If you are saving matrix values a file selection window will allow you to select
the directory and file name.
Pasting or Loading Matrix Values
1.
Right-click on a crossover point: any crossover point to affect the entire matrix, a crossover
point on a row you wish to change, or a specific crossover point. The Clipboard Options
and Saved Settings window will be displayed.
2.
Select Paste if your previous copy was of the appropriate type, or click the appropriate
Load if you wish to load values from a file. The button row labeled Matrix Gain corresponds
to the specific crossover point, Matrix Input Row to the row, and Summing Matrix to the
entire matrix. If you are loading matrix values a file selection window will allow you to select
the directory and file name.
3.
The value(s) of the crossover point, crossover row, or entire matrix will be overwritten with
the pasted or loaded values.
NOTE: Channel Selects and global Galileo linking can result in other matrix controls
also being overwritten. The Clipboard Options and Saved Settings window
provides a list of linked Galileos and channels.
Using a Factory Preset Matrix
A number of pre-defined matrices are included with Compass. These can be used as a starting
point for designing a matrix tuned to your venue.
1.
32
Select the [Galileo Unit] > Summing Matrix page.
COMPASS USER GUIDE
2.
Right-click a crossover point. The Clipboard Options and Saved Settings window will
be shown.
3.
On the Copy Summing Matrix row, click Load. A file selection window will be displayed,
allowing you to choose an existing summing matrix. Summing matrix files use
[file name].galileoSummingMatrix names. The following pages detail the matrix
configuration in each file.
The tables below demonstrate the channel routing for each preset; you will likely wish to “tune”
the signal levels for your particular loudspeaker configuration.
33
CHAPTER 3: USING COMPASS TOOLS
2x4 + 2x2 + 2x2.galileoSummingMatrix:
A
1
2
3
4
✱
✱
✱
✱
5
6
7
8
B
C
✱
F
34
10
11
12
✱
✱
✱
✱
13
14
✱
✱
15
16
✱
✱
✱
D
E
9
✱
✱
COMPASS USER GUIDE
2x4 + 2x4.galileoSummingMatrix:
A
1
2
3
4
✱
✱
✱
✱
5
6
7
8
B
C
D
✱
✱
✱
9
10
11
12
✱
✱
✱
✱
13
14
15
16
✱
✱
✱
✱
✱
E
F
35
CHAPTER 3: USING COMPASS TOOLS
2x6 + 2x2.galileoSummingMatrix:
A
1
2
3
4
5
6
✱
✱
✱
✱
✱
✱
7
8
B
C
D
E
F
36
✱
9
10
11
12
13
14
✱
✱
✱
✱
✱
✱
15
16
✱
✱
✱
COMPASS USER GUIDE
2x6 + 4.galileoSummingMatrix:
A
B
1
2
3
4
5
6
7
8
✱
✱
✱
✱
✱
✱
✱
✱
✱
✱
9
10
11
12
13
14
✱
✱
✱
✱
✱
✱
15
16
✱
✱
✱
✱
C
D
E
F
37
CHAPTER 3: USING COMPASS TOOLS
2x8.galileoSummingMatrix:
A
B
C
D
E
F
38
1
2
3
4
5
6
7
8
✱
✱
✱
✱
✱
✱
✱
✱
9
10
11
12
13
14
15
16
✱
✱
✱
✱
✱
✱
✱
✱
COMPASS USER GUIDE
5.1.galileoSummingMatrix:
1
A
B
C
D
E
F
2
3
4
5
6
✱
7
8
9
10
11
12
13
14
15
16
✱
✱
✱
✱
✱
✱
✱
✱
✱
✱
✱
39
CHAPTER 3: USING COMPASS TOOLS
Diagonal.galileoSummingMatrix:
1
A
B
C
D
E
F
40
2
3
4
5
6
✱
✱
✱
✱
✱
✱
7
8
9
10
11
12
13
14
15
16
COMPASS USER GUIDE
All Off.galileoSummingMatrix:
1
2
3
4
5
6
7
8
9
10
11
12
13
14
15
16
A
B
C
D
E
F
41
CHAPTER 3: USING COMPASS TOOLS
Linking Channels
You may want several channels to share the same settings. For instance, stereo pairs almost
always have identical processing, and loudspeakers are almost always in the same environment
and should share the atmospheric correction settings.
There are two link modes: one that uses the ‹ Shift › key to set the value of a stereo pair; and
one that uses the Select buttons to set the value of an arbitrary selection of channels.
Linking Settings Between Stereo Pairs
Assuming that neither channel of a stereo pair is isolated, a stereo pair of control values can
be adjusted simultaneously. On the input side, A+B, C+D, and E+F provide three stereo pairs;
on the output side, 1+2, 3+4, … 15+16 provide eight stereo pairs.
■
When using the mouse, hold the ‹ Shift › key when dragging or clicking a control.
■
When using the keyboard, use ‹ Shift+Enter › to set the value after typing it.
Linking Settings for All Channels on a Galileo Unit
A control value can be set for all non-isolated channels simultaneously:
■
When using the mouse, hold ‹ Shift+Cmd › when dragging or clicking a control.
■
When using the keyboard, use ‹ Shift+Cmd+Enter › to set the value after typing it.
The set of all input or all output channels on the Galileo that are not isolated will now share the
same control value.
Linking Arbitrary Channels via Select
Channels with enabled Selects are linked: changes to a control on one of the selected channels
will change all selected channels simultaneously.
1.
Enable Select for the channels that are to share the setting; clear Select or enable Isolate
for those channels that are not to be linked.
Selected channels have a dark green (light green) background.
42
COMPASS USER GUIDE
2.
Make your control setting changes. All selected, non-isolated channels are linked and will
share the control setting value.
Select linking can be momentarily disabled by holding the ‹ Cmd › key when mousing or using
‹ Cmd+Enter › when entering a control value.
See Separating Select and Link Group Behaviors (p. 44) for details regarding the interaction of
Select and link groups.
Selecting Many Channels Simultaneously (Link Groups)
Mass selection of channels is possible through the use of link groups. When using link groups,
enabling and clearing Select for a channel will simultaneously enable or clear Select for all
channels in the link group. Up to three groups of input channels and eight groups of output
channels may be configured. Isolated channels can be excluded or included in link group
selections, depending on a preference setting.
1.
Select the Compass > Channel Linking Preferences page.
2.
Set Link Groups and Selects Mode to Selected channels are always selected in groups
in part of an enabled Link Group.
3.
Set Isolate Linking Behavior:
■
Select Isolated channels will not be included when linking from another channel
if you want isolated channels to be excluded from link group selection unless the
isolated channel is specifically selected.
■
Select Isolated channels will be included when linking from another channel if
you want isolated channels to be included in link group selection, so that clicking any
channel in the group results in the isolated channel also being selected.
4.
Select the [Galileo Unit] > Settings > Link Groups page.
5.
Assign the appropriate channels to a single link group. Enable that link group.
Linked channels have a dark blue (light blue) background.
Linking behavior can be momentarily disabled by holding the ‹ Cmd › key when mousing or
using ‹ Cmd+Enter › when entering a control value.
43
CHAPTER 3: USING COMPASS TOOLS
Separating Select and Link Group Behaviors
By default link groups are used to enable selection of many channels simultaneously, as
described above.
An alternative behavior is available in which the channels in a link group are linked regardless
of their select status. This allows you to create two levels of channel linking: one of channels
linked by their Select status, and one of channels linked by their Link group.
1.
Select the Compass > Channel Linking Preferences page.
2.
Set Link Groups and Selects Mode to Enabled Link Group channels are linked
independently and in addition to selected channels.
3.
Set Isolate Linking Behavior:
■
Select Isolated channels will not be included when linking from another channel
if you want isolated channels to be entirely excluded from link group control linking.
■
Select Isolated channels will be included when linking from another channel if
you want isolated channels to be included in link groups control linking. Changes made
to controls in the isolated channel will not effect changes in other channels, but changes
in other channels in the link group will effect changes in the isolated channel.
4.
Select the [Galileo Unit] > Settings > Link Groups page.
5.
Assign the appropriate channels to a single link group. Enable that link group.
Linked channels have a dark blue (light blue) background.
Linking behavior can be momentarily disabled by holding the ‹ Cmd › key when mousing or
using ‹ Cmd+Enter › when entering a control value.
Quickly See Which Channels Are Linked
Channels belonging to a link group have a dark blue (light blue) background; channels which
are actively selected have a dark green (light green) background. While these colors provide
visual feedback that a change to a control is going to effect changes in other channels, you
may want to know precisely which channels are going to change. The following procedure will
assist:
44
COMPASS USER GUIDE
■
Right-click the control before adjusting it. The Clipboard Options and Saved Settings
window will be displayed. Below the name of the channel and the control is a graph of
Galileo units: those channels that are shown as buttons are linked and will be affected by
the control setting change. Those channels that are dimmed will not be affected.
In the example to the right, three Galileos are linked.
A change to the output polarity on Foyer channel
five will result in the same change being applied to
six other channels (Main Unit channels 4–6, Fill
channels 3–5).
Choosing Absolute or Relative Linked Channel Gain Control Changes
When a gain control is adjusted, linked channels are affected by the change. There are two
ways the change can be propagated to the other controls: as an absolute value, so that all
affected channels are set to the same value; or as a relative change, so that all affected channels
are adjusted by the same amount.
In absolute mode, if you had linked gains at -4, -12, and -18 dB, and set one gain to 0 dB, all
three gains would be set to 0 dB.
In relative mode, if you had linked gains at -4, -12, and -18 dB, and adjusted one gain up by
2 dB, the gains would then be set to -2, -10, and -16 dB.
To configure the gain control change mode:
1.
Select the Compass > Channel Linking Preferences page.
2.
Set Gain Control Linking Mode:
■
Select Linked Channel Gain changes are absolute by default, use ALT for relative
if you want linked channel controls to be set to the same value.
■
Select Linked Channel Gain changes are relative by default, use ALT for absolute
if you want linked channel controls to be changed by the same amount.
As indicated by the mode title, you can hold ‹ Alt › while dragging or clicking a control to use
the alternative mode, or use ‹ Alt+Enter › when using the keyboard to set the linked channels
using the alternative mode.
45
CHAPTER 3: USING COMPASS TOOLS
Linking Galileos
Galileos can, through Compass, share settings. When Galileos are linked, selected channels
(or all channels: see Choosing Selected-Channel Link Mode (p. 46), below) on the Galileos will
share any changes made to their controls.
Linking Galileo Units
1.
Select the Galileos page.
2.
In the Link column, enable Select for the Galileos that are to share settings.
3.
In the ID column, select the same link ID for each Galileo in the group.
The Galileos are now linked, and changes made to channel controls may be propagated from
one Galileo to the others.
Choosing Selected-Channel Link Mode
By default, all selected channels on all linked Galileos will share control settings. Alternatively,
you can choose to link all channels regardless of their Select status; or link only those selected
channels on the active Galileo, ignoring the Select status of channels on other Galileos. Details
of these preferences are provided below:
1.
Select the Compass > Channel Linking Preferences page.
2.
Set Global Galileo Select-Linking Mode:
46
■
Select All selected channels on selected Galileos are globally linked if you want
all selected channels on all linked Galileos to be treated as a single control. In this
mode, the linked Galileos will display a bright green bar across the top of their page
tabs. On the Galileos page, enabled Select buttons will be bright green.
■
Select Selected channels on the active Galileo tab are linked to the same channels,
by letter or number, on other selected Galileos if you want selected controls on a
linked Galileo to affect the same control on all other linked Galileos (regardless of the
selection status of that control on the other Galileos). In this mode, the linked Galileos
will display a bright blue bar across the top of their page tabs. On the Galileos page,
enabled Select buttons will be bright blue.
COMPASS USER GUIDE
■
Select All channels on the active Galileo tab are always linked to the same
channels, by letter or number, on other selected Galileos if you want all controls
on a linked Galileo to affect the same control on all other linked Galileos (regardless
of the selection status of that control on the other Galileos). In this mode, the linked
Galileos will display a magenta bar across the top of their page tabs. On the Galileos
page, enabled Select buttons will be magenta.
See the many examples in Global Galileo Select-Linking Mode (p. 78).
Choosing Isolated Channel Link Mode Behavior
When Global Galileo Select-Linking Mode is set to All selected channels on selected
Galileos are globally linked (see Choosing Selected-Channel Link Mode (p. 46), above), the
behavior of isolated channels is configurable. By default isolated channels do not participate
in the links, but you may choose to link isolated channels:
1.
Select the Compass > Channel Linking Preferences page.
2.
Set Global Galileo Select-Linking Mode to All selected channels on selected Galileos
are globally linked.
3.
Set Isolate Mode:
■
Select Enable global linking of isolated channels if you want isolated channels to
be linked between all linked Galileos.
■
Select Disable global linking of isolated channels if you want isolated channels to
be excluded from global Galileo linking.
Atmospheric Correction and M Series Array Correction
Atmospheric Correction
Atmospheric correction applies equalization to the higher frequencies, based on environmental
conditions and the distance between the loudspeakers and the listening area, to compensate
for the attenuation of these frequencies by the air. This attenuation effect varies with temperature,
humidity, and altitude.
47
CHAPTER 3: USING COMPASS TOOLS
Setting Environment Conditions for a Single Galileo Unit
1.
Select the Galileo Map page for the Galileo.
2.
If the background color of Environment for Atmospheric Correction is dark purple
(magenta):
3.
a.
Select the [Galileo Unit] > Settings > Environment page.
b.
Clear Enable Linking Across Selected Galileos. The window will now have a black
(white) background color.
Using the Natural Environment for Atmospheric Correction controls, set the temperature,
humidity, and altitude for the facility.
You should now set the distance between the loudspeakers and listening area.
Setting Loudspeaker Distance for a Single Channel
The distance setting can be used to correct high frequency attenuation. For popular music
reinforcement or any application for which the system will be running near its limit, start with
half the actual distance between the loudspeaker or array, and the audience. If the result is too
flat or sounds unnatural, reduce the distance parameter to achieve the desired response.
1.
Select the [Galileo Unit] > Output Processing > Channel Settings page.
2.
If the background color of the page is dark green (light green), indicating it is part of a
selection set, de-select or isolate the channel.
3.
Using the Atmospheric Correction Distance control, set the distance between the
loudspeakers and the audience.
Avoid settings of more than 40 m (130 ft) to save headroom in the very high frequencies.
Setting Environment Conditions for Multiple Galileo Units
1.
Configure globally linked Galileos as described in Linking Galileos (p. 46).
2.
Select a [Linked Galileo Unit] > Settings > Environment page.
48
COMPASS USER GUIDE
3.
Select Enable Linking Across Selected Galileos. The window will now have a dark purple
(magenta) background color.
4.
Using the Natural Environment for Atmospheric Correction controls, set the temperature,
humidity, and altitude for the facility.
All globally linked Galileos will now be set to the same environment conditions. You should now
set the distances between the loudspeakers and listening area.
Setting Loudspeaker Distance for Multiple Channels on Multiple Galileos
The distance setting can be used to correct high frequency attenuation. For popular music
reinforcement or any application for which the system will be running near its limit, start with
half the actual distance between the loudspeaker or array, and the audience. If the result is too
flat or sounds unnatural, reduce the distance parameter to achieve the desired response.
1.
Configure globally linked Galileos as described in Linking Galileos (p. 46).
2.
For each of the globally linked Galileos:
a.
Enable Select and disable Isolate for each output channel that is to be set.
b.
Select the Settings > Environment page and enable Atmospheric Correction
Distance Linked.
3.
For one of the globally linked Galileos, select Enable Linking Across Selected Galileos.
The windows of the globally linked Galileos will now have a dark purple (magenta)
background color.
4.
Select the Output Processing > Channel Settings page.
5.
Using the Atmospheric Correction Distance control, set the distance between the
loudspeakers and the listening area.
All selected/non-isolated channels on the globally linked Galileos will now be set to the same
loudspeaker distance. Avoid settings of more than 40 m (130 ft) to save headroom in the very
high frequencies.
49
CHAPTER 3: USING COMPASS TOOLS
M Series Line Array Correction
Array correction applies an EQ curve that is dependent on both the loudspeaker model and the
number of loudspeakers in the line array. As line arrays become longer they also become more
directional in the lower frequencies. Array correction controls this low- and mid-low frequency
emphasis. Up to eight unique configurations (type and size) of Meyer Sound M Series arrays
can be controlled by a single Galileo 616.
NOTE: Bypassed buttons in the Output Processing pages do not affect array correction.
Configuring M Series Array Correction
This setting assumes the output channel(s) on the Galileo 616 unit are connected to a Meyer
Sound M Series curvilinear or line array. Array Correction allows you to assign pre-configured
EQ correction to the channels to compensate for low-frequency build-up related to the length
of the array.
1.
Select the [Galileo Unit] > Settings > Array Correction page.
2.
Provide an identifying name for the array and change its status to Enabled.
3.
From the Type selector, select one of the Meyer Sound M Series line array systems: M1D,
M2D, MILO®, M3D®, Mica, or M'elodie.
4.
In the Size box, or using the rotary encoder beside it, set the number of cabinets in the
line array. An array may have up to twenty-four cabinets.
By selecting Type and Size, the appropriate equalization curve is ready for use with output
channels.
NOTE: While only a single row needs to be defined for each unique (type and size) array
configuration, it is often conceptually easier to create an entry for each line array
separately. The end result is the same, but the naming and visual separation of channels
can help illustrate important information as you continue to develop snapshots.
If all your line arrays are identical in type and size, you can define a single instance of
that array and assign all appropriate output channels to it.
50
COMPASS USER GUIDE
Assigning M Series Array Correction to an Output Channel
To apply an M-Series array correction output:
1.
2.
Select:
■
[Galileo Unit] > Galileo Map. In the Array Corr. column, click the button that
corresponds to the channel that will be sent to the line array. The Settings > Array
Correction page will be displayed.
■
[Galileo Unit] > Settings > Array Correction.
For each output channel that is being sent to a line array, select its entry on the line
corresponding to the type of Array EQ it requires. Each output channel may be assigned
one array correction EQ.
Configuring MSL-4 Loudspeaker Array Correction
The Meyer Sound MSL-4 is a horn-loaded long-throw speaker that can be configured for use
in horizontal array clusters. When so configured, a low-mid frequency rise occurs. Compass
provides a TruShaping equalization setting to correct this low-frequency emphasis.
1.
Select the [Galileo Unit] > Output Processing > TruShaping page.
2.
Right-click TruShaping tab. Click the TruShaping EQ Load button. A file selector window
will be displayed.
3.
Navigate to the Compass/Saved Settings/Examples directory and load
Set TruShaping to LD-2 Array.galileoTruShapingEq.
The TruShaping equalization curve will now be set to provide low-mid frequency correction to
the rise that is created by using the MSL-4 in a horizontal array.
Connecting and Configuring for use with SIM3
The Galileo 616 can be configured to act as a line switcher for the Meyer Sound SIM-3022
Audio Analyzer, allowing the SIM3 to measure across all combinations of inputs and outputs
without need for further patching, further increasing your efficiency and design capabilities.
51
CHAPTER 3: USING COMPASS TOOLS
SIM3 performs source independent measurement of the frequency, phase response, and
signal-to-noise ratio of components in the electronic or acoustic signal path in near-real-time,
providing you the ability to understand the acoustic environment, determine optimal loudspeaker
placement, and configure Galileo snapshots.
Configuring Galileo for SIM3
1.
Connect the SIM3 Line Switcher port to a Galileo 616 unit SIM3 bus connector.
2.
Select [Galileo Unit] > Settings > SIM3.
3.
Set the SIM3 Bus Address. This value will be used in configuring branches in the SIM3
software.
4.
Select a SIM3 Trim mode:
5.
■
Enabled: The SIM3 Trim control on [Galileo Unit] > Output Processing > Channel
Settings pages will be used to adjust gain to the analyzer, allowing you to directly see
the extent of gain changes. In the SIM3 software Room response will show acoustic
relative gain, Processor will show electronic relative gain, and Result will show the
combination of both.
■
Disabled: The SIM3 Trim control on [Galileo Unit] > Output Processing > Channel
Settings pages will be disabled.
Select the SIM3 Output Probe Point:
■
Output Post Delay: Includes TruShaping EQ, Parametric EQ, SIM3 Trim, Polarity, and
Delay controls. select this when tuning frequency-based crossover.
■
Output Post Gain: Includes Output Post Delay controls plus Atmospheric Correction,
Array Correction, High/Low Pass, and Gain controls. select this when tuning relative
levels between systems.
The Galileo network is now connected to SIM3. Please refer to the SIM3 User Guide for further
details regarding the use of SIM3.
52
COMPASS USER GUIDE
Using Signal Processing
Compass provides composite equalization: you can “layer” various types of equalization, view
the summation result in a graphic plot, and adjust various EQ parameters to achieve the ideal
signal equalization curve.
There are a number of configurable settings specific to the user interface. See Input
Processing (p. 120) and Output Processing (p. 129) for descriptions of these settings.
Selecting Channels
When working with a single or dual plot display:
■
A drop-down channel selector and channel selection buttons are located above the plot.
Use either of these to select the working channel.
When working with multiple EQ plots:
■
Use the Layout, Order, and First controls to select the channel series. See Displaying
Multiple EQ Plots (p. 54), below.
Customizing the Display
Many aspects of the plotter display can be changed, including value ranges, curves, control
handles, number of plots simultaneously displayed, metering, and more. See the Input and
Output Processing sections of the User Interface Reference (p. 71) for details regarding each
setting.
1.
Enable the Settings control, located in the top right corner.
2.
Use the settings available in the Plotter, Handles, and Response pages to control various
aspects of the plot display.
Maximizing the EQ Plot Area
Small-screen users will benefit by maximizing the space available to the EQ plot and controls.
1.
If multiple plots are displayed, enable Settings, select the Plotter page, and beside the
EQ Plots label select Single display.
53
CHAPTER 3: USING COMPASS TOOLS
2.
Clear the Settings control, located in the top right corner. The various display setting
controls will now be hidden, allowing the plot more horizontal space.
3.
Clear the Dual View setting.
4.
Click Collapse, located to the right of the sub-page selection tabs. The control setting
controls will now be hidden, providing significantly more vertical space for the plot.
Screen-splitting the Processing Window
Large-screen users may benefit by using Dual View mode when developing EQ plots. In this
mode the entire processing control suite is duplicated in left and right halves of the Compass
window. You can use this to see two views of one channel (with access to two sets of EQ
controls simultaneously); to view a stereo pair; or to select two arbitrary channels for comparison.
1.
Enable the Dual View control, located in the top right corner.
2.
Use the Input Channel or Output Channel selectors to choose channels to be displayed
in either half of the Compass window.
Displaying Multiple EQ Plots
At the cost of reduced plot size, multiple plots may be displayed simultaneously:
1.
Enable Settings, select the Plotter page, and beside the EQ Plots label select Multiple
display.
2.
In Layout, select the size of the plot grid (w × h).
3.
In Order, choose between horizontal or vertical channel numbering layout.
4.
In First, select the first (top left) channel for the layout.
The channel plots will be laid out sequentially, starting at the top left and proceeding horizontally
or vertically, as selected. When necessary, the channel numbers will “wrap around” to channel
one,
54
COMPASS USER GUIDE
Displaying EQ Plot Control Handles
Selecting an EQ control page will normally display only the control handles for that plot type.
If you wish to see other EQ handles as well:
■
Enable Settings, select the Handles page, and select the types of EQ control handle you
want displayed.
The Automatic Handles setting controls whether selecting an EQ page will display the control
handles for that plot type automatically. If this setting is cleared the plot may be viewed without
handles.
Viewing EQ Plots With/Without Composite Addition
An EQ plot may be viewed on its own, without the influence of other EQ types, or as a composite
of all EQ types.
■
Enable Settings, select the Response page, and enable/clear the EQ response components
you wish to view or hide.
Parametric EQ
Compass provides a digital version of the Meyer Sound CP-10 filter set through its five-band
(inputs) and ten-band (outputs) complementary phase parametric equalizers. As a second-order
filter, it is ideal for treating interaction artifacts.
Setting Parametric EQ Values
There are several methods available to set the value of a parametric EQ band:
■
Drag an EQ handle. Dragging a parametric EQ handle usually moves it in the gain/frequency
plane. This behavior can be changed:
■
Hold ‹ Alt › while dragging to adjust the bandwidth/gain plane.
■
Drag the plot handles to adjust specific parameters:
■
Drag the red handle to adjust frequency.
■
Drag the amber handle to adjust gain.
55
CHAPTER 3: USING COMPASS TOOLS
■
■
Drag a blue handle to adjust bandwidth.
■
Drag handle crosspoints to adjust two values simultaneously.
Type values in the Freq, B/W, and Gain boxes.
“Stacking” EQ Handles for Composite EQ
You can place two or more EQ handles at the same frequency. This will result in an additive
effect, allowing you to create notch filters and other effects.
Viewing Exact Plot Values
Click and drag anywhere on the plot to view the gain response and phase response at the
frequency corresponding to the cursor location.
TruShaping EQ
The TruShaping equalizer provides four first-order filters that control shelving EQ and bandpass
EQ. With TruShaping, phase shift is kept to a minimum, making it ideal for shaping low frequency
signal and the associated subjective qualities perceived by the listening audience. When VX-1
Mode is enabled, the EQ curve will duplicate the functionality of the Meyer Sound VX-1.
Setting TruShaping EQ Values
There are several methods available to set the value for a TruShaping EQ control:
■
Drag a horizontal handle to adjust gain.
■
Drag a vertical handle to adjust frequency.
■
Drag a handle crosspoint to adjust gain and frequency simultaneously.
■
Type values in the Gain and Freq boxes.
Viewing Exact Plot Values
Click and drag anywhere on the plot to view the gain response and phase response at the
frequency corresponding to the cursor location.
56
COMPASS USER GUIDE
Using VX-1 Mode
In VX-1 mode the upper two gain handles are locked together, such that the upper frequency
handle has no effect on the EQ curve. This creates a smooth, broad high-frequency boost or
cut.
When VX-1 Mode is first enabled the TruShaping EQ plot does not change: this preserves your
TruShaping design until you deliberately adjust one of the upper handle components.
Graphic EQ
Thirty-one bands of Graphic EQ are available on input channels. The frequency range spans
20 Hz — 20 kHz, incrementing on a logarithmic scale.
Setting Graphic EQ Values
There are two ways to set the value for a graphic EQ band:
■
Drag a slider handle to adjust frequency gain for the selected band.
■
Type a value in the Gain box.
When the Graphic EQ is active (one or more bands of EQ have a non-zero value), the Galileo
Map page displays a “G” beside the channel EQ button.
57
CHAPTER 3: USING COMPASS TOOLS
Subwoofer Filtering
Each output channel may be assigned a low or high pass filter. There are three filter choices
available:
Figure 3.1. Low Pass
nd
Figure 3.2. 2
Order High Pass
Figure 3.3. Elliptical High Pass
Using Low Pass Filtering
Low pass filtering is easily applied to a channel:
1.
Select the [Galileo Unit] > Output Processing > Channel Settings page.
2.
In the selection box beside the Freq control, select Low Pass.
3.
Using the Freq control or the High/Low Pass Response handle, set the knee frequency.
Using High Pass Filtering
1.
Select the [Galileo Unit] > Output Processing > Channel Settings page.
2.
In the selection box beside the Freq control, select:
3.
■
2nd Order High Pass: provides a linear drop-off.
■
Elliptical High Pass: provides an exponential drop-off.
Using the Freq control or the High/Low Pass Response handle, set the knee frequency.
Delay
Up to two seconds of delay may be applied to inputs and outputs.
58
COMPASS USER GUIDE
Delay Units and Ranges
Delay values are correlated, allowing automatic conversion from one measurement unit to
another when changing the unit measure. Delay units and value ranges are as follows:
Table 3.1. Delay Unit Ranges
Unit
Range
Milliseconds (ms)
0.00−2000.00 ms
Meters (m)
0.00−686.4 m
Feet (ft)
0.00−2 251.97 ft
Frames (24 fps)
0.00−02:00.00
Frames (25 fps)
0.00−02:00.00
Frames (30 fps)
0.00−02:00.00
Samples (96 kHz)
0.00−192 000
Setting Input Channel Delay
1.
Select the [Galileo Unit] > Input Processing > Channel Settings page.
2.
Select the desired units measure (milliseconds, feet, meters, frames, or samples).
3.
Set the Delay value.
Setting Output Channel Delay
1.
Select the [Galileo Unit] > Output Processing > Channel Settings page.
2.
Select the desired units measure (milliseconds, feet, meters, frames, or samples).
3.
Set the Delay value.
Copy, Paste, Load, Save, and Reset Control Values
Many controls in Compass support the use of right-click to copy, paste, save, load, and reset
control values or the values of a set of controls.
The Paste, Copy, Save, Load, and Reset actions are described as “Copy/Reset” in the following
task descriptions (pasting and loading implies the value was copied in the first place.)
59
CHAPTER 3: USING COMPASS TOOLS
In the window that is displayed subsequent to the right-click, click the button that corresponds
to the action you wish to take. Paste is available only after a value is copied, and only when
the selected control is able to accept the pasted value. When saving or loading values, a file
selection window is displayed, through which you may choose a directory and file name.
Copy/Reset an Individual Channel Control Value
■
Right-click the channel Select button.
Save and Load file names have the form [file name].galileo[control type].
Copy/Reset Summing Matrix Control Values
■
Right-click on a crossover point: either the crossover point you wish to copy or save, a
crossover point on a row you wish to copy or save, or on any crossover point if you want
to copy or save the entire matrix.
Save and Load file names have the form [file name].galileoMatrixGain,
[file name].galileoMatrixInputChannel, [file name].galileoMatrixOutputChannel,
or [file name].galileoSummingMatrix, dependent on the choice you make.
Copy/Reset Processing Control Values
■
On the Galileo Map page, right-click a Processing control, Array Corr. control,
Atmospheric correction control, or Environment control.
Save and Load file names have the form [file name].galileoInputEqualization,
[file name].galileoInputParametricEq, [file name].galileoInputTruShapingEq,
[file name].galileoGraphicEq, [file name].galileoOutputEqualization,
[file name].galileoOutputParametricEq, [file name].galileoOutputTruShapingEq,
[file name].galileoOutputHighLowPass, [file name].galileoArrayGroupIndex,
[file name].galileoAtmosphericCorrection, or [file name].galileoEnvironment,
dependent on the choice you make.
60
COMPASS USER GUIDE
Copy/Reset All Control Values of an Input or Output Channel
■
Right-click the channel Select button.
Save and Load file names have the form [file name].galileoInputChannel and
[file name].galileoOutputChannel.
Copy/Reset All Control Values of All Input or Output Channels
■
Right-click the Input Masters or Output Master page tab.
Save and Load file names have the form [file name].galileoInputSection and
[file name].galileoOutputSection.
Copy/Reset All Control Values of a Galileo I/O Configuration
■
Right-click the [Galileo Unit] > Settings > Input and Output page tab.
Save and Load file names have the form [file name].galileoInputOutputSettings.
Copy/Reset All Control Values of Galileo System Settings
■
Right-click the [Galileo Unit] > Settings page tab.
Save and Load file names have the form [file name].galileoSystemSettings.
Copy/Reset All Control Values of an Galileo Unit
■
Right-click the page tab of the Galileo.
Save and Load file names have the form [file name].galileoDevice.
Saving and Loading Projects and Snapshots
In Compass a snapshot is a saved Galileo configuration that contains all the input, output,
summing matrix, and signal processing values for the unit. A project captures the snapshot
library and device settings. One project at a time may be loaded into a Galileo; that project may
61
CHAPTER 3: USING COMPASS TOOLS
contain many snapshots. Snapshots capture the state of all controls, not just those that are on
a particular Galileo unit sub-page. Recalling a snapshot instantly sets the controls and system
settings to the saved values.
At the bottom of Galileo unit sub-pages is a set of snapshot and project control buttons. These
replicate important functionality found on the Project sub-page. Except where noted, the
following instructions assume use of this set of controls.
Snapshots
Creating a Snapshot
Using the controls at the bottom of any Galileo sub-page:
1.
Click Create. The Create New Snapshot window will be displayed.
2.
Provide a name for the snapshot and, if
desired, a descriptive comment.
The new snapshot will be listed on the [Galileo
Unit] > Project page, in the Snapshot Library.
Recalling a Snapshot
1.
Select the [Galileo Unit] > Project page.
2.
From the Snapshot Library, select the desired snapshot.
3.
In the Snapshot Library control set, click Recall (there are two recall buttons; the other
is in the Boot Snapshot control set.)
All control values for the Galileo unit will be changed to match those that were captured in the
snapshot.
62
COMPASS USER GUIDE
Updating a Snapshot
Assuming a snapshot has been previously created or recalled, it may be updated to match
current control settings. Using the controls at the bottom of any Galileo sub-page:
■
Click Update.
Recalling a Boot Snapshot at Galileo Power-on
The Galileo 616 can be configured to automatically recall a specific snapshot when first
powered-on. This is very useful for defining a “safe” or default configuration.
1.
Select the [Galileo Unit] > Project page.
2.
From the Snapshot Library, select the desired snapshot.
3.
In the Snapshot Library box, enable Is Boot.
The Boot Snapshot control will be updated with the snapshot name. The next time the Galileo
unit is powered-on, that snapshot will be automatically recalled.
Galileos that have been assigned a boot snapshot are indicated by the presence of a blue Boot
Snapshot Enabled box at the bottom center of their control pages.
Locking a Snapshot
When you have perfected a snapshot, you may want to ensure it is not accidentally modified.
1.
Select the [Galileo Unit] > Project page.
2.
From the Snapshot Library, select the desired snapshot.
3.
In the button row below the library list, click Lock.
If the need arises, click Unlock to allow updates to the snapshot. If a snapshot with the same
name already exists, a count number will be appended to the name of the loaded snapshot’s
name.
63
CHAPTER 3: USING COMPASS TOOLS
Saving a Snapshot
Snapshots are usually saved as part of a Galileo project. It is also possible to save them
individually. This is especially useful as a means of copying snapshots between projects.
1.
Select the [Galileo Unit] > Project page.
2.
From the Snapshot Library, select the desired snapshot.
3.
In the button row below the library list, click Save….
A file selection window will be displayed, through which you can select a directory and file
name for the snapshot file.
Loading a Snapshot
Individual snapshots may be loaded into the snapshot library.
1.
Select the [Galileo Unit] > Project page.
2.
In the button row below the library list, click Load….
A file selection window will be displayed, through which you can select a snapshot to be
loaded into the current library. Snapshot file names have the form
[file name].galileoSnapshots.
The loaded snapshots are added to the library list.
Using Snapshots in Static Facilities
A common usage scenario is found in facilities which host a variety of program material:
speeches and lectures, singing, instrumental music, and perhaps even audio-visual media
events. Each of these performance types may require a different configuration of fixed and
movable microphones, but will generally use a fixed set of loudspeakers. Churches, small
theaters, and lecture halls are representative of this application.
In this scenario you might create a project file named for the facility, and then capture snapshots
named and tuned for each application. Using Access Control (p. 68), you would lock down the
system with the exception of Recall Snapshots and perhaps Environment. With minimal
64
COMPASS USER GUIDE
training the facility operator will be able to select and recall the appropriate snapshot for the
current activity.
Using Snapshots for Tour Setup
In a traveling show, snapshots can be used to provide a base foundation from which to quickly
develop site-specific tuning. For this purpose, you might create a separate project file for each
act, and capture snapshots of various base configurations suitable for the venues you expect
to encounter. As you tune the configuration for a specific venue, you might save new snapshots,
some of which may be useful at future sites. If you are not mixing the show, you might use
Access Control (p. 68) to lock down parts of the system.
Projects
Creating a New Project
1.
Select the [Galileo Unit] > Project page.
2.
In the Current Project box, click Save As….
A file selection window will be displayed, through which you can select a directory and file
name for the project file.
Saving a Project
■
Click Save Project.
If a project has not been previously created or loaded, a file selection window will be
displayed, through which you can choose a directory and file name for the project file.
65
CHAPTER 3: USING COMPASS TOOLS
Loading a Project
1.
Select the [Galileo Unit] > Project page.
2.
Choose:
3.
■
Enable Load Galileo Settings if you want the control values that were saved with the
project to be loaded.
■
Clear Load Galileo Settings if you want to retain the control values currently in use.
In the Current Project box, click Open….
A file selection window will be displayed, through which you can select a project file. Project
file names have the form [file name].galileoProject.
The snapshot library saved with the project will replace the library that was previously loaded.
If this is not the desired behaviour, see Merging Projects (p. 66), below.
Merging Projects
Snapshot libraries may be combined by merging their projects.
1.
Select the [Galileo Unit] > Project page.
2.
In the Current Project box, click More⋙.
An extra set of controls will now be shown.
3.
Select Merge Project…. A file selection window will be displayed, through which you can
choose the project file that is to be merged with the current project.
The snapshots in the merging project will be appended to the end of the library list. Other
aspects of the merging project (Galileo settings, user interface settings) will not be merged.
Creating Project Backups
1.
Select the [Galileo Unit] > Project page.
2.
In the Current Project box, click More⋙.
66
COMPASS USER GUIDE
An extra set of controls will now be shown.
3.
Select Backup Project. Project backup file names are automatically saved in the
Compass_Settings/Compass_Backups directory, and have the form
Backup_[date + time code].galileoProject. See Compass Software File Locations for
further details.
Creating a Project Report
The values of controls in each snapshot can be saved to a human-readable text file. This is
especially useful as system documentation.
1.
Select the [Galileo Unit] > Project page.
2.
In the Current Project box, click More⋙.
An extra set of controls will now be shown.
3.
Select Generate Report…. A file selection window will be displayed, through which you
can choose a directory and file name for the report file.
You can open the report file in any text editor or send it to a printer. The file has a simple format,
listing the controls and values for each snapshot in the library.
67
CHAPTER 3: USING COMPASS TOOLS
Restricting Access to Compass Settings
In some venues it is advantageous to permit “public” access to some Galileo functionality while
restricting access to other controls. For instance, you may create several snapshots with control
settings that vary to accommodate speaking voice amplification, singing voice amplification,
and music amplification. It would be appropriate to allow the facility operator to select one of
the snapshots, while denying changes to the channel controls. Access lock-out settings affect
both Compass software and the Galileo front panel controls.
Locking Galileo Controls
1.
Select [Galileo Unit] > Settings > Access.
2.
Enable or clear the various control types. Users will have access to enabled controls only;
cleared controls will be locked against value changes by the user.
Clear All may be used to lock all controls; Set All may be used to unlock all controls.
3.
In the Access Code boxes, type three one- or two-digit numbers in the range 1 — 99. The
value “zero” is reserved for removing the access code.
4.
Click Change Access Code to lock-down the Galileo unit.
Unlocking Galileo Controls
1.
Select [Galileo Unit] > Settings > Access.
2.
In the Access Code boxes, type the previously-assigned access code.
3.
Until such time as Change Access Code is clicked again, the unit is unlocked and all
controls may be used
Changing Galileo Access Control
1.
Select [Galileo Unit] > Settings > Access.
2.
In the Access Code boxes, type the previously-assigned access code.
68
COMPASS USER GUIDE
3.
Enable or clear the various control types. Those items that are cleared will not be available
to user control when the unit is locked.
4.
Click Change Access Code to lock-down the Galileo unit again.
Removing Galileo Access Control
1.
Select [Galileo Unit] > Settings > Access.
2.
In the Access Code boxes, type the previously-assigned access code.
3.
Click Clear Access Control.
Recovering a Lost Access Password
Password recovery requires access to the physical Galileo unit.
1.
On the Galileo front panel, press Menu and select the System Settings > Access >
Recover Lost Access Code command. A recovery code consisting of three 3-digit numbers
will be generated.
2.
Call Meyer Sound Technical Support at +1 510 486.0657 and provide the recovery code.
A single-use unlock code will be given to you.
3.
Unlock the Galileo Controls using Compass, as described above. The old access code will
be revealed; it may be changed, reused, or cleared as desired.
69
CHAPTER 4: USER INTERFACE REFERENCE
Compass Tab
The Compass pages provides access to configuration options that adjust various behaviors
and functionality of the Compass user interface. These options are split across two sub-pages:
one that deals mainly with user interface and startup options, and another that controls the
behavior of channel and Galileo control value linking.
Compass Preferences
Figure 4.1. Compass Preferences Page
The Compass Preferences page contains a number of controls that affect visual appearance,
mouse and keyboard operation, and startup options. It comprises:
71
CHAPTER 4: USER INTERFACE REFERENCE
General Options:
Full Screen
Toggles the Compass display between a floating window which can be repositioned and
resized, and full-screen mode, which maximizes the size of the window.
This control is also duplicated in the top left corner of all windows, appearing above the
Compass tab.
About Compass
Displays copyright and trademark information regarding Compass, Galileo 616, and other
system components.
Compass EULA
Displays the end-user licensing agreement, which enumerates your rights and limitations
regarding the use of Compass software.
Exit Compass
Quits Compass.
Help
Displays contextual help for this page.
User Interface Display and Control Options:
User Interface Scale
Selects a scaling factor to reduce or enlarge the size of the Compass window and window
contents. Scaling is particularly useful when running Compass on computers attached to
a low-resolution display. Display sizes and the suitable scaling factor for that resolution are
as follows:
72
COMPASS USER GUIDE
Table 4.1. Screen Resolutions and Recommended User Interface Scales
Screen Resolution (H × V pixels)
Recommended Scale
640 × 480
50%
768 × 576
60%
896 × 672
70%
1024 × 768
80%
1152 × 864
90%
1280 × 960
100%
1408 × 1056
110%
1536 × 1152
120%
Scaling factors greater than 100% can be useful for displays with a very fine pixel pitch,
where the 100% scale results in text that is too small to easily read.
Plotter Control Handle Scale
Selects a second scaling factor to be applied specifically to the signal processing plot
“handles,” which can otherwise become too small to be easily used at the smaller user
interface scale factors.
Value Controller Type
These options affect encoder controls:
Encoder
A “rotational” cursor movement will be used to adjust encoder values. This is a natural
movement with touch screens and is easy with a mouse; it is rather more difficult when
using a laptop touch pad.
Joystick
Moving the cursor horizontally or vertically, as if the encoder were a slider control, will
adjust encoder values. This is a natural movement with mice and touch pads; it is
somewhat unintuitive when using a touch screen.
Input Device Type
Only applicable when Value Controller Type is Joystick. These options affect the behavior
of the cursor after an encoder value is adjusted:
Mouse
When the encoder control is released, the cursor remains at the point of release. This
is normal mouse behavior.
73
CHAPTER 4: USER INTERFACE REFERENCE
Tablet
When the encoder control is released, the cursor returns to the encoder.
Color Mode
Selects a dark or bright user interface color set. Where colors are specified in this document,
the dark color is mentioned first (followed by the bright color).
NOTE: The file selection window is always bright. Please plan accordingly when
loading or saving files during a performance.
Typed in Decibel (dB) Values Default to Negative
When selected, gain values are assumed to be negative unless explicitly made positive by
a leading + (plus) sign.
When cleared, negative gain values must be indicated with a leading - (minus) sign.
Disable Keyboard Control of Buttons
Select to disable keyboard selection of buttons. In this mode, pressing ‹ Tab › will move the
input cursor from value box to value box, but will skip over buttons. This prevents accidental
triggering of Mute or other settings.
Clear to enable keyboard selection of buttons. In this mode, pressing ‹ Tab › will move the
input cursor to the next control, regardless of whether that control is a value box or a button.
The ‹ Spacebar › or ‹ Return › key can be used to “click” buttons.
ESC Key Removes Cursor Focus in Text Fields
When selected, pressing ‹ ESC › after entering a value for a control disables keyboard control
of the user interface. This prevents accidental changes to control values. Keyboard control
will be restored by clicking in a value box.
Select All Text When Entering Text Field
When selected, choosing a value box automatically selects the entire value. Pressing ‹ Tab ›
or ‹ Enter › sets the value; pressing ‹ ESC › will restore the original value.
When cleared, the backspace key must be used to remove the previous value.
Re-select All Text After Editing a Text Field
When selected, pressing ‹ Enter › after typing a value sets the value and then selects the
entire value, such that a new value can be typed to replace the previous value. This makes
it easy to audit a series of values in succession.
74
COMPASS USER GUIDE
When cleared, pressing ‹ Enter › after typing a value sets the value and then places the
cursor at the end of the value.
Show Meter Values
Select to display numeric value read-out to meters. Clear to have analog meters only.
Individual meters can be toggled to show or hide the meter value by using Alt+click on the
meter display.
Startup Galileo Discovery and Connection Options:
These options control the behavior of Compass when it is started:
Find available Galileos on startup
Select to search the primary network for Galileo 616 units when Compass is started,
displaying them on the Galileos tab.
When cleared, Galileos are discovered only when Find Galileos is clicked.
Relaunch and reconnect to previously connected Virtual Galileos on startup
Remembers which Galileo units were being used in Virtual Galileo mode, restarting them
in the same mode the next time Compass is started.
Reconnect to previously connected Galileos on startup
Remembers which Galileo units were connected, restarting them in the same mode the
next time Compass is started.
Default Delay Units
Sets the measurement unit for delay values.
Galileos that are already connected will continue to use the old measurement unit unless
Set All Galileos To Default Units is clicked. Existing delay values will be converted from
the previous measurement unit to the new unit.
Equalization Bypass on System Map is read-only
Disables EQ Enabled/EQ Bypassed buttons on connected Galileo Galileo Map pages.
Enabling and disabling EQ is always available using the Equalization Enabled/Equalization
Bypassed button on the appropriate Processing page.
75
CHAPTER 4: USER INTERFACE REFERENCE
Clip Indicator Clear Mode
Selects the meter clipping mode. Meter clipping is indicated by the presence of a red border
around the meter and can always be cleared by clicking the meter. When the clip indicator
is held, it can be cleared by clicking the meter.
Channel Linking Preferences
Figure 4.2. Channel Linking Preferences Page
The Channel Linking Preferences page determines how various controls are linked across
channels. It comprises:
Help
Displays contextual help for this page.
76
COMPASS USER GUIDE
Allow Select and Isolate settings to be recalled from a snapshot
When selected, recalling a snapshot will apply the channel Select and channel Isolate values
that were captured in the snapshot.
When cleared, snapshots will recall everything except the channel Select and channel
Isolate values.
De-select all channels when the active Galileo tab changes
When selected, channel Selects are dropped when switching Galileo pages. You will need
to select channels explicitly whenever you change pages.
When cleared, channels remain selected until you explicitly de-select them.
Gain Control Linking Mode:
This setting determines how gain value differences are calculated when adjusting gains on
linked channels:
Linked Channel Gain changes are absolute by default, use ALT for relative
When a gain control is set to a new value, all linked gain controls will be set to that
value as well. If you had linked gains at -4, -12, and -18 dB, and set one gain to 0 dB,
all three gains would be set to 0 dB.
Use ‹ Alt+drag › or ‹ Alt+Enter › to adjust the linked controls by relative amounts.
Linked Channel Gain changes are relative by default, use ALT for absolute
When a gain control is changed by Δ dB, all linked gain controls will be adjusted by
Δ dB as well. If you had linked gains at -4, -12, and -18 dB, and adjusted one gain up
by 2 dB, the gains would then be set to -2, -10, and -16 dB.
Use ‹ Alt+drag › or ‹ Alt+Enter › to adjust the linked controls by absolute amounts.
Link Groups and Selects Mode:
This setting modifies the action of channel Select. See also Global Galileo Select-Linking
Mode (p. 78), below, for details regarding the interaction between this setting and Galileo
linking modes.
Selected channels are always selected in groups if part of an enabled Link Group
Enabling a channel Select for any channel in a link group enables channel Select for
all the channels in the link group.
Use ‹ Cmd+click › to override this behavior.
77
CHAPTER 4: USER INTERFACE REFERENCE
Enabled Link Group channels are linked independently and in addition to selected
channels
Enabling a channel Select for a channel in a link group has no effect on the channel
Select for other channels in the link group.
A dark blue (light blue) background on link group channels indicates they are individually
selectable.
Isolate Linking Behavior:
This setting determines whether isolated channels are affected by changes made to channels
to which they are linked:
Isolated channels will not be included when linking from another channel
Control changes that would normally replicate among linked channels will not affect
any isolated channels in the link group.
Isolated channels will be included when linking from another channel
Control changes made to a linked channel will affect isolated channels in the link group.
Global Galileo Select-Linking Mode:
This setting determines how control changes are propagated across a set of selected,
linked Galileo units.
Connected Galileo units listed on the Galileos page can be linked to one another by
activating their Select buttons and assigning them the same ID group. Control value
changes on one Galileo channel will then be copied to the same controls of other units.
All selected channels on selected Galileos are globally linked
Changes made to a selected channel on the active Galileo will be replicated in all
selected, non-isolated channels on the linked Galileos. If the selected channel on the
active Galileo is isolated, its changes are not propagated. Channel links on the active
Galileo do not propagate their changes.
A light green bar across the top of the Galileo tab indicates the Galileos are linked in
“all selected channels” mode. On the Galileos page, enabled Select buttons will be
bright green in color.
78
COMPASS USER GUIDE
Example 4.1. Globally Linked Galileos (“all selected channels” mode) - several Selects on Linked Galileos
Ch.
Galileo
A
1
Δ
Galileo
B
Galileo
C
Δ
2
3
Δ
Δ
4
Δ
5
Δ
6
Δ
Δ
Changes to any of the selected channels (green) on any linked Galileo (green bars) will
be propagated to selected channels on all linked Galileos.
Selected channels on the active Galileo tab are linked to the same channels, by letter
or number on other selected Galileos
Changes made to a selected channel on the active Galileo will be replicated on the
same channels (if not isolated) on the linked Galileos. If the selected channel on the
active Galileo is isolated, its changes are not propagated. Channel links on the active
Galileo do not propagate their changes.
A aqua bar across the top of the Galileo tab indicates the Galileos are linked in “same
selected channels” mode. On the Galileos page, enabled Select buttons will be aqua
in color.
Two examples follow:
79
CHAPTER 4: USER INTERFACE REFERENCE
Example 4.2. Globally Linked Galileos (“same selected channels” mode) - one Select on Active Galileo
Ch.
Galileo
A
Galileo
B
Galileo
C
1
Δ
Δ
Δ
2
3
4
5
6
Changes to a selected channel (aqua) on active Galileo A (aqua) will be propagated to
the same channel on the linked Galileos (aqua bars).
The selection status of channels on the inactive Galileos (aqua bars) is irrelevant.
Isolated channels do not change.
Example 4.3. Globally Linked Galileos (“same selected channels” mode) - several Selects on Active
Galileo
Ch.
Galileo
A
Galileo
B
Galileo
C
1
Δ
Δ
Δ
Δ
Δ
Δ
2
3
4
5
6
Δ
Δ
Changes to a selected channel (aqua) on active Galileo A (aqua) will change the other
selected channels on Galileo A.
These changes are then propagated to the same channels on the linked Galileos.
Isolated channels (amber) do not change.
The selection status of channels on the inactive Galileos (aqua bars) is irrelevant.
80
COMPASS USER GUIDE
All channels on the active Galileo tab are always linked to the same channels, by letter
or number, on other selected Galileos
Changes made to a channel on the active Galileo will be replicated on the same
channels on the linked Galileos. The changed channel does not need to be one that
is selected. Isolated channels on the active Galileo may propagate changes (see Isolate
Mode, below). Channels that are linked on the active Galileo will be replicated. Channel
links on the active Galileo do propagate their changes.
A magenta bar across the top of the Galileo tab indicates the Galileos are linked in “all
channels” mode. On the Galileos page, enabled Select buttons will also be magenta
in color.
Three examples follow, demonstrating increasingly complex interactions between
various settings:
Example 4.4. Globally Linked Galileos (“all channels” mode) - no Selects on Active Galileo
Ch.
Galileo
A
Galileo
B
Galileo
C
1
Δ1
Δ1
Δ1
2
Δ2
Δ2
Δ2
3
Δ3
Δ3
Δ3
4
Δ4
Δ4
Δ4
5
Δ5
Δ5
Δ5
6
Δ6
Δ6
Δ6
Changes to any channel on active Galileo A (magenta) will be propagated to the same
channels on the linked Galileos (magenta bars). All selected channels on all linked
Galileos are linked.
The selection status of channels on the inactive Galileos (magenta bars) is irrelevant.
Isolated channels have two possible behaviours, described below.
81
CHAPTER 4: USER INTERFACE REFERENCE
Example 4.5. Globally Linked Galileos (“all channels” mode) - several Selects on Active Galileo
Ch.
Galileo
A
Galileo
B
Galileo
C
1
Δ1
Δ1
Δ1
2
Δ2
Δ2
Δ2
3
Δ1
Δ1
Δ1
4
Δ4
Δ4
Δ4
5
Δ5
Δ5
Δ5
6
Δ1
Δ1
Δ1
Changes (Δ1) to a selected channel (magenta) on active Galileo A (magenta) will change
the other selected channels on that Galileo. These changes are then propagated to
the same channels on the linked Galileos.
Changes to other channels on active Galileo A will be propagated to the same channels
on the linked Galileos.
The selection status of channels on the inactive Galileos (magenta bars) is irrelevant.
Isolated channels have two possible behaviors, as described below.
82
COMPASS USER GUIDE
Example 4.6. Globally Linked Galileos (“all channels” mode) combined with “linked independently”
mode
In this example, a further level of complexity is introduced: link channel groups have
an additional effect, as described above in Link Groups and Selects Mode (p. 77).
Ch.
Link
Group
1
Galileo
A
Galileo
B
Galileo
C
Δ1
Δ1
Δ1
2
◉
Δ1
Δ1
Δ1
3
◉
Δ1
Δ1
Δ1
4
◉
Δ1
Δ1
Δ1
5
Δ5
Δ5
Δ5
6
Δ1
Δ1
Δ1
Changes to a channel in a link group that is also selected (channel 3 in the example)
on active Galileo A (magenta) will change the other linked group channels and other
selected channels on that Galileo. These changes are then propagated to the same
channels on the linked Galileos.
Isolated channels have two possible behaviors:
Isolate Mode
This option applies only to the All channels on the active Galileo… choice, above.
Enable global linking of isolated channels
Changes made to an isolated channel on the active Galileo will change the
same channel on linked Galileos if and only if the channel on the linked Galileo
is not also isolated.
83
CHAPTER 4: USER INTERFACE REFERENCE
Example 4.7. Globally Linked Galileos (“all channels” mode, “isolated channels included”
mode) - several Selects and Isolates on Active Galileo.
Ch.
Galileo
A
Galileo
B
Galileo
C
1
Δ1
Δ1
Δ1
2
Δ2
Δ2
Δ2
3
Δ1
Δ1
Δ1
4
Δ4
Δ4
Δ4
5
Δ5
Δ5
Δ5
6
Δ1
Δ1
Δ1
Changes to isolated channels (amber) propagate to channels on linked Galileos.
Isolates on the inactive Galileos (magenta bars) are irrelevent.
Disable global linking of isolated channels
Changes made to an isolated channel on the active Galileo do not change the
same channel on linked Galileos.
Example 4.8. Globally Linked Galileos (“all channels” mode, “isolated channels not included”
mode) - several Selects and Isolates on Active Galileo.
Ch.
Galileo
A
Galileo
B
Galileo
C
1
Δ1
Δ1
Δ1
2
Δ2
3
Δ1
Δ1
Δ1
4
Δ4
Δ4
Δ4
5
Δ5
6
Δ1
Δ1
Changes to isolated channels (amber) do not propagate. Isolates on the inactive
Galileos (magenta bars) remain isolated.
System Settings - Enable Linking Across Selected Galileos:
In addition to control value changes, configuration setting changes can be propagated to
other Galileo units. A dark purple (magenta) background indicates that a system setting
page is linked to other Galileos.
84
COMPASS USER GUIDE
Input and Output Settings
Changes made to the Settings > Input and Output page will be propagated to linked
Galileos.
SIM3 Settings
Changes made to the Settings > SIM3 page will be propagated to linked Galileos.
Environment
Changes made to the Settings > Environment page will be propagated to linked
Galileos.
M Series Array Correction
Changes made to the Settings > Array Correction page will be propagated to linked
Galileos.
Link Groups
Changes made to the Settings > Link Groups page will be propagated to linked
Galileos.
85
CHAPTER 4: USER INTERFACE REFERENCE
Galileos Tab
Figure 4.3. Galileos Page
The Galileos page provides settings for auto-detecting and adding Galileo 616 units to Compass,
and for managing global project and snapshot files. The page comprises four main groups of
controls:
Galileo 616 List Control:
Find Galileos
Auto-discovers Galileo 616s on the primary network and adds them to the list of Galileos.
At the same time, the status of listed Galileos is updated.
Refresh Status
Updates the status of the listed Galileos.
86
COMPASS USER GUIDE
Add Galileo
Allows you to manually add a Galileo entry to the list. This is
particularly useful when adding a Galileo 616 that is networked on
a non-primary port and when adding Virtual Galileo units for
stand-alone development.
IP Address
Sets the IP network address of the Galileo 616 unit.
When adding a Virtual Galileo this value is not used and may be left at the default value.
NOTE: Your operating system may require special configuration to access its
non-primary Ethernet ports (i.e. wired versus wireless). Consult your local
system administration or contact Meyer Sound technical support if you need
assistance with this task.
Galileo Nickname
Sets the name of the Galileo 616, which will be displayed on the Galileo front panel.
The nickname can provide a useful reminder as to the unit’s intended use, loudspeaker
connections, or other pertinent information.
Tab Name
Sets the name of the tab for the Galileo 616 or Virtual Galileo. A meaningful name will
help you quickly navigate between the Galileo units.
Help
Displays contextual help for the page.
Global Project:
When configuring multiple Galileos, it can be convenient to save the settings for all Galileos to
a single Project file.
Global Project
The file name of the global project.
87
CHAPTER 4: USER INTERFACE REFERENCE
Open...
Displays a file selection window in which you can select an existing global project. Global
projects have .galileoGlobalProject appended to the file name.
After the file is selected, the Open Global Project window allows you to select individual
Galileos for project uploads. This allows you to recall the settings for one or more Galileos
without recalling the settings for all of the connected Galileos.
IP Address, Galileo Nickname, Tab Name, Status
Information about those Galileos currently known to Compass.
Project
Toggles between Load and a blank button face. When Load is selected, project file
information will be uploaded to the Galileo. Project information include the values of
the project title, description, notes, and snapshot library.
All and None buttons at the bottom of the column will mass-select the Project buttons.
Settings
Toggles between a blank button face and Load. When Load is selected, settings saved
with the project will be uploaded to the Galileo. Settings information includes the project
information plus the values of controls at the time the project was saved.
All and None buttons at the bottom of the column will mass-select the Settings buttons.
Use Virtual
Displayed only for those Galileos known to Compass but not connected. When selected,
Project and Settings buttons are available for the (now simulated) Galileo.
Use Tab Names From File
When selected, allows tabs to be renamed to match the tab names saved with the
project.
88
COMPASS USER GUIDE
Upload Projects
Sends project information to Galileos according to the settings selected in this window.
Any problems sending the projects will be reported to the right of the Galileo list.
Save
Displays the Save Global Project window:
NOTE: Disconnected Galileos do not participate in global saves.
IP Address, Galileo Nickname, Tab Name
Shows information about connected Galileo units.
Include in Global Project
Selects Galileos for inclusion in the global project file.
Save Individual Project Files
Selects the creation of individual project files, in addition to the creation of a global
project file.
The individual project files use a name based on the global project file name, in the
form [global project name]_[Galileo nickname]_[IP address].galileoProject.
Retrieve Projects
Requests project file information from each Galileo. Any problems retrieving the projects
will be reported to the right of the Galileo list.
After retrieving the projects from the selected Galileos, the global project file can be
saved.
Save As...
First, displays a file selection window in which you will select a project directory and file
name. The Save Global Project window is then displayed, as described in Save, above.
89
CHAPTER 4: USER INTERFACE REFERENCE
Close
Clears the file name of the global project, preventing accidental overwriting of the file.
Help
Displays contextual help for the Global Project control.
Global Snapshot:
Snapshots affecting all connected Galileos may be captured or recalled in a single action.
Global Snapshot
Displays the name of the global snapshot. Those Galileo units using this name for their
snapshot name will be included in a recall of the global snapshot.
Global Snapshot Options...
Displays the Global Snapshot Options window:
IP Address/Galileo Nickname/Tab Name
Shows information about connected Galileo units.
Include
Selects a Galileo unit for inclusion in global snapshot creation or recall.
Active Snapshot
Provides the name of the snapshot currently recalled for the Galileo unit.
Active Global Snapshot
Displays the name of the current global snapshot.
90
COMPASS USER GUIDE
Update
Recaptures the global snapshot. Only those Galileos selected for inclusion will
participate in the capture.
Create New...
Creates a new global snapshot with
the specified name. A comment
may also be provided.
NOTE: The active snapshot
name for all included
Galileos will be changed to that of the new global snapshot.
Available Global Snapshots
Provides a list of global snapshots available for recall.
Refresh
Refreshes the list of global snapshots.
Recall
Recalls the selected global snapshot, making it the active global snapshot.
Delete
Removes the selected global snapshot.
Duplicate
Creates a duplicate of the selected global snapshot, appending a count number
to the end of the name.
Lock
Locks the selected global snapshot against deletion.
NOTE: The global snapshot can be updated while locked.
Unlock
Unlocks the selected global snapshot so that it may be deleted.
Help
Displays contextual help for the Global Snapshot Options control.
91
CHAPTER 4: USER INTERFACE REFERENCE
Known Galileos List:
The main body of the Galileos page is dedicated to a list of known Galileo units.
Remove
Removes a disconnected Galileo from the list.
Order
Moves the associated Galileo up or down the list.
Link
Selects a Galileo for inclusion in global Galileo linking. Linked units are also indicated by
a colored bar above their tab.
See Global Galileo Select-Linking Mode (p. 78) for configuration details regarding the
behavior of globally linked Galileos.
ID
Selects the global link group for the Galileo. Up to eight global groups may be defined.
IP Address/Galileo Nickname/Tab Name/Ver./Status
Shows information about the Galileo unit.
Connection
Select Refresh to determine whether Compass can connect to the Galileo unit.
Select Connect to connect to the Galileo.
Select Disconnect to disconnect the Galileo from Compass.
Virtual
Select Use Virtual to simulate connection to the Galileo using Virtual Galileo. Select this
when you wish to work on a project without having a working physical connection to a real
Galileo 616. Settings on a connected Virtual Galileo can always be transferred to a physical
Galileo using the Snapshot/Project window.
Meters
Select Demo prior to connecting a Galileo to show a meter simulation on various UI meters.
Tab
Select Hide to hide a disconnected Galileo from the tabs list at the top of the window.
92
COMPASS USER GUIDE
Select Show to restore the Galileo tab at the top of the window.
Global Atmospheric Correction Control:
Configures atmospheric correction for all Galileos.
IMPORTANT: Adjusting the global atmospheric settings resets the individual Galileo
atmospheric correction values. You must disconnect those Galileos that are not to be
changed.
Temperature
Sets the facility temperature.
Humidity
Sets the facility humidity.
Altitude
Sets the facility altitude.
Named Galileo Tabs
Each Galileo is listed on its own page, selected using its tab at the top of the Compass window.
A set of tabbed sub-pages classifies various sets of controls, as listed below; some of these
pages have sub-pages of their own, due to the many controls available for your use.
Status Bar
At the bottom of all named Galileo pages is a status bar with snapshot and project controls,
and channel select, isolate, and link group controls, as well as some status indicators.
NOTE: These controls affect only the active Galileo. These controls do not affect global
snapshots, projects, or link group assignments.
93
CHAPTER 4: USER INTERFACE REFERENCE
Save Project
Displays a file selection window, in which you can select a directory and a file name for the
project. Projects use a name in the form [project name].galileoProject.
[Project Name]
The current project name (if the project has been saved or loaded).
Update
Updates the snapshot, if a snapshot has been previously created or recalled, saving all
controls with their current values.
Create
Creates a new snapshot capturing the
current Galileo control values.
[Snapshot Name]
The current snapshot name, if a snapshot
has been created or loaded.
Boot Snapshot Disabled/Boot Snapshot Enabled
Indicates whether a boot snapshot has been assigned to the selected Galileo.
?
Displays contextual help for the status bar.
Select
Indicates which channels are selected. Channels A−F are input channels; channels 1−16
are output channels.
Click a channel Select button to toggle it.
Use the < / > button to toggle all Select buttons off and on.
Isolate
Indicates which channels are isolated.
Click a channel Isolate button to toggle it.
Use the < / > button to toggle all Isolate buttons off and on.
94
COMPASS USER GUIDE
Link Group
Indicates the link group with which a channel is associated. See
Compass Overview, General Workflow for further details.
When a channel’s link button is clicked, a link group selection window
will be displayed. In this window you may choose the link group to
which the channel will belong, enable or bypass link groups, or click
Go to Link Groups to open the Link Groups settings page.
Status Lights
In the lower right corner a pair blinking lights indicates network
communication activity between Compass and the selected Galileo.
If the lights cease to blink, communications is down. Compass will
disable editing of the Galileo unit: you will then need to return to the
Galileos page to refresh the connection for the affected Galileo, or
use Virtual Galileo in lieu of a network connection.
95
CHAPTER 4: USER INTERFACE REFERENCE
Project
Figure 4.4. Galileo Project Page
The Project page provides detailed information about the project and snapshots known to the
selected Galileo.
Active Snapshot:
ID, Name, Comment
Shows information about the currently active snapshot.
Not Modified / Modified
Shows the status of the active snapshot: when the Galileo’s control values have been
adjusted subsequent to loading or saving the snapshot, the Modified indicator is lit bright
red.
96
COMPASS USER GUIDE
User / Factory
Indicates whether the active snapshot is a user-created snapshot or a factory-default
snapshot.
Create New...
Creates a new active snapshot capturing
the current Galileo control values. The new
snapshot will be appended to the Snapshot
Library list.
Update
Updates the active snapshot, if a snapshot has been previously created or recalled, saving
all controls with their current values.
Select
Selects the active snapshot in the Snapshot Library list (described below). This is a
convenience shortcut, so that you do not have to scroll through the list looking for the
snapshot.
The active snapshot is also indicated in the snapshot list by the presence of the word
“Current” beside the snapshot ID.
Close
Clears the name of the global project, preventing accidental overwriting of the file.
Current Project:
Name, Description
Shows information about the current project.
Modified
Shows the status of the current project: when Galileo control values have been adjusted
subsequent to loading or saving the project, the Modified indicator is lit bright red.
97
CHAPTER 4: USER INTERFACE REFERENCE
More>>> / <<<Less
Displays or hides additional project controls:
Notes
A space for free-form text
note entry.
Update Notes
Makes the note a part of the
project, so that it is saved with the project.
Merge Project...
Displays a file selection window, through which you can select a project file to be
merged with the current project. When the merging project contains snapshot names
that conflict with existing snapshot names, a count number is appended to the name
of the incoming snapshot. See Merging Projects for further details.
Backup Project
Saves a duplicate of the project file to Compass_Settings/Compass_Backup. See
Compass Software File Locations for further details.
Generate Report...
Displays a file selection window, through which you can select a directory and file
name for the report data. The report contains detailed information recording the control
settings of each snapshot in the project library, project notes, and other information.
The report file can be opened with any text editor.
Open
Displays a file selection window, through which you can select a project.
Load Galileo Settings
Select to update the Galileo’s configuration settings to match the settings saved in the
project file.
CAUTION: When connected to live amplified loudspeakers, loading Galileo
configuration settings with the project may result in damage to connected devices.
Please use this option with caution!
In particular, if the input type is set to AES and Galileo settings are loaded with
input types set to analog, damaging signal levels may result.
98
COMPASS USER GUIDE
Save
Saves the current project, using the existing project name.
Save As...
Displays a file selection window, through which you can select a directory and file name
for the project.
Close
Closes the current project. This will prevent changes from being accidentally written to the
project.
Boot Snapshot:
Name
Shows the name of the boot snapshot, which will be recalled when the Galileo is first
powered-on. This can be used to provide a “default mode” of safe system settings and
control values appropriate for recovery from a site power failure, or to provide appropriate
control values for the first few minutes of beginning preparations for a show.
Recall
Recalls the boot snapshot, setting the Galileo’s controls as if power-on had just occurred.
Select
Selects the boot snapshot in the Snapshot Library list (described below). This is a
convenience shortcut, so that you do not have to scroll through the list looking for the
snapshot.
To make a snapshot the boot snapshot, use the Is Boot selector in the Snapshot Library.
Clear ‘Is Boot’
Removes the boot snapshot indicator from the snapshot. As a result, the configuration
settings and control values the Galileo had when powered-off will be restored when power
is restored (instead of using the settings and control values captured in a boot snapshot.)
Snapshot Library:
ID, Name, Comment
Shows information about the selected snapshot.
99
CHAPTER 4: USER INTERFACE REFERENCE
Recall
Recalls the selected snapshot, making it the active snapshot. This is also indicated in the
snapshot list by the presence of the word “Current” beside the snapshot ID.
Locked / Unlocked
Indicates when the snapshot is locked against changes. Locked snapshots are also indicated
in the snapshot list by the presence of the letter “L” beside the snapshot ID.
User
Indicates whetehr the active snapshot is a user-created snapshot or a factory-default
snapshot.
Update Selected
Updates the selected snapshot, capturing the Galileo’s current control values.
Is Boot
Assigns the selected snapshot to the Galileo Boot Snapshot controls. Boot snapshots are
also indicated in the snapshot list by the presence of the letter “B” beside the snapshot
ID.
Snapshot List
Lists the snapshots in the project file. The ID column also indicates whether the snapshot
is active (“Current”), a boot snapshot (“B”), and/or locked (“L”).
Lock / Unlock
Locks the snapshot against changes, or unlocks it so that it may be deleted or saved with
new control values.
Duplicate
Creates a copy of the snapshot, appending it to the end of the library list. A count number
will be appended to the snapshot name.
Delete
Removes the selected, unlocked snapshot from the library.
Cut
Removes the selected, unlocked snapshot from the library, retaining a copy of the snapshot
so that it can be pasted into another library.
Copy
Makes a copy of the selected snapshot, to be pasted into another library.
100
COMPASS USER GUIDE
Paste
If a copy of a snapshot has been made by Cut or Copy, appends that copy to the current
library. If a snapshot with the same name already exists in the library, a count number will
be appended to the name of the pasted snapshot.
Load...
Displays a file selection window, through which you can select a snapshot to be loaded
into the current library. Snapshot file names have the form [file name].galileoSnapshots.
Save...
Displays a file selection window, through which you can select a directory and file name
for the snapshot file.
Settings
The Settings page contains seven sub-pages detailing various aspects of the Galileo’s
configuration.
101
CHAPTER 4: USER INTERFACE REFERENCE
Network
Figure 4.5. Galileo Network Settings Page
This page provides information about the Galileo network settings, and allows you to update
the Galileo’s firmware.
Galileo Device Type, Galileo Device Nickname, IP Address
Shows information about the Galileo. The nickname can be changed. The other settings
can not be changed: go to the Galileos page instead.
Upload Firmware...
Displays a file selection window, through which you can select a firmware update file.
Firmware file names have the form [filename].galileoFirmware.
102
COMPASS USER GUIDE
The selected firmware file will immediately start uploading to the Galileo. This can take
several minutes.
WARNING: Power to the Galileo must not be interrupted while a firmware update
is underway. If power is lost during the update, the Galileo will no longer be functional
and will require servicing.
Input and Output
Figure 4.6. Galileo I/O Settings Page
Each Galileo 616 unit must be correctly configured for its input types and signal voltage ranges.
Incorrect configuration may lead to signal distortion and may result in damage to connected
components.
103
CHAPTER 4: USER INTERFACE REFERENCE
Enable Linking Across Selected Galileos
Replicates these settings across all selected Galileos when Global Galileo Select-Linking
Mode (p. 78) is enabled.
Input Channel Types:
A Galileo can accept up to six analog inputs or three digital (AES/EBU) inputs. These inputs
are named in stereo pairs (A/B; C/D; E/F).
Analog / AES
Configures the input for analog input or AES digital input.
The image displaying the three XLR input pairs on the back of the Galileo indicates which
connectors are enabled. When using AES/EBU input, the bottom connector is not available
for use.
Input Voltage Range:
Enabled for analog inputs only.
+26 dBu / +20 dBu
+26 dBu is standard signal level for analog input.
+20 dBu may be useful as a studio mode. This setting may cause clipping or increase noise
levels. Use with caution!
Set all to +26 dBu / Set all to +20 dBu
Provides a shortcut to set all input voltages to the same range.
Output Voltage Range:
+26 dBu / +20 dBu
+26 dBu is standard signal level for analog output.
+20 dBu may be useful as a studio mode. This setting may cause clipping or increase noise
levels. Use with caution!
Set all to +26 dBu / Set all to +20 dBu
Provides a shortcut to set all output voltages to the same range.
104
COMPASS USER GUIDE
SIM3
Figure 4.7. Galileo SIM3 Settings Page
The Galileo 616 system is compatible with the Meyer Sound SIM3 Audio Analyzer, an advanced
sound design tool for determining crossover points, delay times, EQ curves, levels, and speaker
positioning that minimizes distortion.
Enable Linking Across Selected Galileos
Replicates these settings across all selected Galileos when Global Galileo Select-Linking
Mode (p. 78) is enabled.
SIM3 Bus Address
Sets the bus address of the attached SIM3. When the SIM3 is connected, the adjacent
indicator will display SIM3 Active.
105
CHAPTER 4: USER INTERFACE REFERENCE
SIM3 Trim Disabled / SIM3 Trim Enabled
Enables trim gain control for channels on the Output Processing page.
SIM3 Output Probe Point
Selects which output signal probe point will be used in SIM3 calculations.
Output Post Delay
The probe point includes TruShaping EQ, Parametric EQ, SIM3 Trim, Polarity, and
Delay.
Output Post Gain
The probe point includes Output Post Delay as well as Atmospheric Correction, M
Series Array Correction, High/Low Pass, and Gain.
106
COMPASS USER GUIDE
Environment
Figure 4.8. Galileo Environment Settings Page
Atmospheric conditions can greatly affect the quality of venue sound. Environment settings aid
in correction of atmospheric distortion.
Enable Linking Across Selected Galileos
Replicates the environment settings across all selected Galileos when Global Galileo
Select-Linking Mode (p. 78) is enabled.
Temperature (°C or °F)
Sets the temperature of the venue environment. The Celsius and Fahrenheit controls are
linked; adjusting one adjusts the other.
Humidity
Sets the humidity for the venue.
107
CHAPTER 4: USER INTERFACE REFERENCE
Altitude
Sets the altitude range for the venue.
Atmospheric Correction Distance Linked
Enables linking of all output loudspeaker distances, so that adjusting the value of one output
channel will effect a change in all non-isolated channels on this Galileo and any linked
Galileos.
Access
Figure 4.9. Galileo Access Settings Page
Access control is used to limit the ability of a Compass user to modify Compass and Galileo
settings and control values.
108
COMPASS USER GUIDE
Access Code Entry:
Access Code
Unlocks the access control page when the correct, previously-assigned access code is
provided.
The access code is comprised of three (3) one- or two-digit numbers in the range 1–99.
“Zero” is reserved for disabling access control.
Change Access Code
Locks this page using the access code provided in Access Code.
Clear Access Code
Clears the access code, so that it is no longer required to change settings on this page.
Locked / Unlocked
Displays the status of this page.
Access Restrictions:
[various control types]
Enables and disables access to the control type. Users who do not provide the Access
Code will be unable to make changes to those controls that are disabled. Access restrictions
apply to both Compass and the Galileo 616 unit.
Clear All / Set All
Provides a shortcut for setting and clearing all access rights.
109
CHAPTER 4: USER INTERFACE REFERENCE
Array Correction
Figure 4.10. Galileo Array Correction Settings Page
Array correction applies an EQ curve that is dependent on both the loudspeaker model and the
number of loudspeakers in the line array. As line arrays become longer they also become more
directional in the lower frequencies. Array correction controls this low- and mid-low frequency
emphasis. Up to eight Meyer Sound M Series arrays can be controlled by a single Galileo 616.
Enable Linking Across Selected Galileos
Replicates these settings across all selected Galileos when Global Galileo Select-Linking
Mode (p. 78) is enabled.
Array Name
Displays the name of this type of array. You may type a new name.
110
COMPASS USER GUIDE
Status
Enables or disables loudspeaker array correction.
Type
Selects the type of Meyer Sound M Series loudspeaker array.
Size
Selects the number of loudspeaker units in the array.
Array Correction Output Assignments
Lists the output channels assigned to the array. Click a channel button to assign or remove
the channel to/from the array.
Array correction does not mix channels: it only specifies that an EQ is to be applied to the
channel. Channel mixing is performed by the Summing Matrix exclusively.
111
CHAPTER 4: USER INTERFACE REFERENCE
Link Groups
Figure 4.11. Galileo Link Groups Settings Page
Link group settings are configured on this page. It provides a detailed view of the information
that is summarized in on each page’s status bar.
Enable Linking Across Selected Galileos
Replicates these settings across all selected Galileos when Global Galileo Select-Linking
Mode (p. 78) is enabled.
Link Group Input Assignments:
Group Name
Displays the name of the link group. You may type a new name.
112
COMPASS USER GUIDE
Status
Enables and disables the link group.
[channels A−F]
Assigns or removes the channel to/from the link group.
Link Group Output Assignments:
Group Name
Displays the name of the link group. You may type a new name.
Status
Enables and disables the link group.
[channels 1−16]
Assigns or removes the channel to/from the link group.
113
CHAPTER 4: USER INTERFACE REFERENCE
Galileo Map
Figure 4.12. Galileo Galileo Map Page
The Galileo Map provides a summary of the entire Galileo configuration. Some channels control
values may be adjusted directly on this page; others, when clicked, display the appropriate
page for more complex operations.
Inputs Rows:
Select
Selects the channel. Selected channels show a bright green Select button and a dark green
(bright green) background color on all pages.
114
COMPASS USER GUIDE
Channels not selected have a dark green Select button and typically a black (white)
background color.
Isolate
Isolates the channel from channel linking behaviors (dependent on Channel Linking
Preferences (p. 76) settings). Isolated channels show a bright orange Isolate button and a
amber (orange) background color on all pages.
Channels not isolated have an amber Isolate button and typically a black (white) background
color.
Link
Assigns the channel to a link group. Linked channels show a link
number on the button. Channels not linked show a blank button.
Enabled links show a bright blue link button. Bypassed links have a
yellow link button.
In the Select Input Link Group window (displayed when you click
a link button), bypassed groups show a yellow button, while enabled
groups are dark yellow. If you wish to enable a link group and assign the selected channel
simultaneously, do so in that order; when the group assignment selector is clicked, the
window closes.
Label
Displays the channel label. You may type a new label.
Meter
Displays the input signal level. Click to clear peak hold; Alt+click to toggle the digital display.
Mute
Mutes the channel. On the Input Processing page, muted channels show a dark red input
channel view button (bright red when the channel is viewed).
Gain
Sets the channel gain. Both a value entry box and an encoder are provided.
Delay
Sets the channel delay. Both a value entry box and an encoder are provided.
Processing Shortcuts
Displays the appropriate Input Processing page.
115
CHAPTER 4: USER INTERFACE REFERENCE
The button on the left displays the EQ curve and opens the Input Processing page to
show the most recently-used input processing controls. A dim yellow border indicates EQ
is disabled; a dim white border indicates the channel is currently viewed on the Input
Processing page.
The button on the right displays the Graphic EQ processing controls, and contains a “G”
when the graphic equalizer is enabled and has non-unity settings.
Summing Matrix
Displays the Summing Matrix page (see Summing Matrix (p. 135).)
Outputs Rows:
Processing Shortcuts
Displays the appropriate Output Processing page.
The button displays the EQ curve and opens the Output Processing page to show the
most recently-used output processing controls. A dim yellow border indicates EQ is disabled;
a dim white border indicates the channel is currently viewed on the Output Processing
page.
Equalization
Enables channel EQ.
Array Corr.
Displays the Array Correction page (see Array Correction (p. 110).) When a channel belongs
to an array correction group, the button label displays the model name of the loudspeaker
and size of the array. If no correction has been assigned, the button label reads “Edit.”
Atmospheric
Displays the appropriate Output Processing page. When a channel has atmospheric
correction applied, the button label displays the correction distance, otherwise it reads
“Edit.” See Environment for additional iformation.
Polarity
Selects the signal polarity.
116
COMPASS USER GUIDE
Delay
Sets the channel delay. Both a value entry box and an encoder are provided.
Gain
Sets the channel gain. Both a value entry box and an encoder are provided.
Meter
Displays the output signal level. Click to clear peak hold; Alt+click to toggle the digital
display.
Mute
Mutes the channel. On the Output Processing page, muted channels show a dark red
input channel view button (bright red when the channel is viewed).
Select
Selects the channel. Selected channels show a bright green Select button and a dark green
(bright green) background color on all pages.
Channels not selected have a dark green Select button and typically a black (white)
background color.
Isolate
Isolates the channel from channel linking behaviors (dependent on Channel Linking
Preferences (p. 76) settings). Isolated channels show a bright orange Isolate button and a
amber (orange) background color on all pages.
Channels not isolated have an amber Isolate button and typically a black (white) background
color.
Link
Assigns the channel to a link group. Linked channels show a link
number on the button. Channels not linked show a blank button.
Enabled links show a bright blue link button. Bypassed links have a
yellow link button.
In the Select Output Link Group window (displayed when you click
a link button), bypassed groups show a yellow button, while enabled
groups are dark yellow. If you wish to enable a link group and assign
the selected channel simultaneously, do so in that order; when the
group assignment selector is clicked, the window closes.
117
CHAPTER 4: USER INTERFACE REFERENCE
Galileo Map Control:
Control...
Displays a secondary window, which can remain open while using the Galileo Map page.
This button is positioned under the outputs section, on the left. The Galileo Map Control
page comprises:
Enable Linking Across Selected Galileos
Replicates changes made in this window to all selected Galileos
when Global Galileo Select-Linking Mode (p. 78) is enabled.
Toggle All Polarity Settings
Reverses the polarity setting for all output channels.
Mute / Unmute / Toggle All Inputs
Mutes, un-mutes, or reverses the mute setting for all input
channels.
Mute / Unmute / Toggle All Outputs
Mutes, un-mutes, or reverses the mute setting for all output
channels.
Bypass / Enable All Input Equalization
Bypasses or enables EQ for all input channels. Does not affect
the Graphic EQ on input channels.
Bypass / Enable All Output Equalization
Bypasses or enables EQ for all output channels.
Bypass / Enable All M Series Array Correction
Bypasses or enables array correction for all output channels.
Close
Closes the Galileo Map Control window.
Help
Displays context help for this window.
118
COMPASS USER GUIDE
Atmospheric Correction:
See also Named Galileo Unit > Settings > Environment (p. 107) and Galileos > Global
Atmospheric Correction Control (p. 93).
Temperature (°C or °F)
Sets the temperature of the venue environment. The Celsius and Fahrenheit controls are
linked; adjusting one adjusts the other.
Humidity
Sets the humidity for the venue.
Altitude
Sets the altitude for the venue.
119
CHAPTER 4: USER INTERFACE REFERENCE
Input Processing
Figure 4.13. Galileo Input Processing Page
The Input Processing page provides a complete and comprehensive suite of signal processing
controls. A set of sub-page tabs selects the different types of equalization that may be applied
to channels.
Channel Selection:
Located along the top of the window, below the tab bar.
120
COMPASS USER GUIDE
Input Channel
Selects the input channel by channel label. Muted channels are shown with a dark red
button (bright red when selected). Selected, isolated, and linked channels are indicated by
the colour of the window background color.
Channel Buttons
Selects the input channel using buttons A−F.
Plot Curve:
The plot curve(s) typically dominate the page, providing a graphic representation of the frequency
gain curve generated by the EQ parameters.
Meters
When displayed, shows input signal level for the selected channel or all displayed channels,
dependent on the Processing Interface Settings (p. 122). Click to reset peak hold; Alt+click
to toggle the digital display.
Mute
Mutes the associated channel. When displayed (see Processing Interface Settings (p. 122)),
this button is located in the upper left corner.
Sel / Iso / [Link]
Selects, isolates, or links the associated channel. When displayed (see Processing Interface
Settings (p. 122)), these buttons are located in the upper left corner.
121
CHAPTER 4: USER INTERFACE REFERENCE
Plot
Shows the frequency/gain curve, control handles, phase response, and other EQ details.
Equalization plot display options are controlled through Processing Interface Settings (p. 122).
The displayed plot is often selected by choosing one of the sub-page tabs.
Processing Interface Settings
The processing pages have a complete suite of interface settings, allowing you to customize
plot displays:
Dual View
When enabled, displays a pair of channel Processing pages with subtabs.
All channel controls are duplicated.
When cleared, a single channel Processing control set is displayed.
Settings
When enabled, displays Processing user interface settings. There are a
number of user interface settings, as follows.
When cleared, Processing user interface settings are hidden, allowing more
room for the EQ plot.
Plotter
EQ Plots
Shows a single EQ plot, or up to six input or sixteen output channel EQ plots as
configured by the following settings:
Layout
Selects the grid dimensions, from 1×2 to 3×2 channels.
Order
Selects the channel display order, left-to-right or top-to-bottom.
First
Selects the first (top-left) channel on the layout grid.
Plotter Gain Range
Selects the gain (vertical) axis range of EQ plots.
122
COMPASS USER GUIDE
Plotter Frequency Range
Selects the frequency (horizontal) axis range of EQ plots.
Meters
Selects the display of meters to the left of the channel EQ plots.
When multiple channels are displayed, Current Only displays a single large meter for
the current channel while All Plots displays a separate, smaller meter for each channel.
Show Mutes
Displays a Mute button at the upper left of each channel EQ graph.
Show Selects / Isolates / Link Groups
Displays a select, isolate, and/or link group button at the upper right of each channel
EQ graph.
Show Area Under Curve
Shows a faint background tint between the EQ gain curve and unity gain.
Show Grid
Displays a grid behind the channel EQ curves.
?
Displays context help for these settings.
Handles
Automatic Handles
Displays only those control handles appropriate for the selected EQ controls page.
Parametric Handles
Displays the parametric equalizer control handles.
TruShaping Handles
Displays the TruShaping equalizer control handles.
Graphic EQ Handles
Displays the graphic equalizer control handles.
Available only on input processing pages.
123
CHAPTER 4: USER INTERFACE REFERENCE
?
Displays context help for these settings.
Response
Parametric Response
Includes parametric equalization when calculating the plot curve. Regardless of this
setting, the EQ remains enabled: this controls only whether it is shown on the plot.
TruShaping Response
Includes TruShaping equalization when calculating the plot curve. Regardless of this
setting, the EQ remains enabled: this controls only whether it is shown on the plot.
Gain Response
Displays the gain response curve (orange).
Phase Response
Displays the phase response curve (grey).
Highlight Gain Response
Overlays a graph of the gain response curve for a single band of equalization, when
hovering over a control or handle for that band, as if all other bands were bypassed.
Highlight Phase Response
Overlays a faint graph of the phase response curve for a single band of equalization,
when hovering over a control or handle for that band, as if all other bands were
bypassed.
?
Shows contextual help for this window.
124
COMPASS USER GUIDE
Channel Settings
Label
Displays the channel label. You may rename the channel.
Gain
Sets the channel gain value.
Delay
Sets the channel delay value and selects the delay unit measure. Selecting a new unit
measure converts the value.
Mute
Mutes the channel.
Sel / Iso / [Link]
Selects, isolates, or links the channel. These controls may also be shown at the top right
of the plot display area.
Parametric Enabled / Parametric Bypassed
Enables or bypasses parametric EQ.
TruShaping Enabled / TruShaping Bypassed
Enables or bypasses TruShaping EQ.
Graphic EQ Enabled / Graphic EQ Bypassed
Enables or bypasses graphic EQ.
Equalization Enabled / Equalization Bypassed
Enables or bypasses all EQ.
125
CHAPTER 4: USER INTERFACE REFERENCE
Parametric
<<< / >>>
Enables or bypasses all bands.
[1−5] Enabled / [1−5] Bypassed
Enables or disables a specific band.
Parametric Enabled / Parametric Bypassed
Enables or bypasses parametric EQ.
Equalization Enabled / Equalization Bypassed
Enables or bypasses all EQ.
Freq
Sets the frequency value for an EQ band.
B/W
Sets the bandwidth value for an EQ band.
Gain
Sets the gain value for an EQ band.
126
COMPASS USER GUIDE
TruShaping
TruShaping Enabled / TruShaping Disabled
Enables or bypasses TruShaping EQ.
VX-1 Mode
Enables VX-1 Mode, locking the two upper handles together, emulating the functionality
of the Meyer Sound VX-1.
Equalization Enabled / Equalization Bypassed
Enables or bypasses all EQ.
Gain
Sets the gain value for a TruShaping EQ band.
Freq
Sets the frequency value for a TruShaping EQ band.
127
CHAPTER 4: USER INTERFACE REFERENCE
Graphic EQ
Graphic EQ Enabled / Graphic EQ Bypassed
Enables or bypasses graphic EQ.
Equalization Enabled / Equalization Bypassed
Enables or bypasses all EQ.
Freq
Sets the frequency value for a graphic EQ band.
Gain
Sets the gain value for a graphic EQ band.
u
Sets a graphic EQ band to unity value.
128
COMPASS USER GUIDE
Output Processing
Figure 4.14. Galileo Output Processing Page
The Output Processing page provides a complete and comprehensive suite of signal processing
controls. A set of sub-page tabs selects the different types of equalization that may be applied
to channels.
Channel Selection:
Located along the top of the window, below the tab bar.
Output Channel
Selects the output channel by channel label.
129
CHAPTER 4: USER INTERFACE REFERENCE
Channel Buttons
Selects the output channel using buttons 1−16. Muted channels are shown with a dark red
button (bright red when selected).
Plot Curve:
The plot curve(s) typically dominate this page, providing a graphic representation of the frequency
gain curve generated by the EQ parameters.
Meters
When displayed, shows output signal level for the selected channel or all displayed channels,
dependent on the Processing Interface Settings (p. 122). Click to reset peak hold; Alt+click
to toggle the digital display.
Mute
Mutes the associated channel. When displayed (see Processing Interface Settings (p. 122)),
this button is located in the upper left corner.
Sel / Iso / [Link]
Selects, isolates, or links the associated channel. When displayed (see Processing Interface
Settings (p. 122)), these buttons are located in the upper left corner.
Plot
Shows the frequency/gain curve, control handles, phase response, and other EQ details.
Equalization plot display options are controlled through Processing Interface Settings (p. 122).
The displayed plot is often selected by choosing one of the sub-page tabs.
130
COMPASS USER GUIDE
Output Processing Interface Settings
See Processing Interface Settings (p. 122).
Channel Settings
Label
Displays the channel label. You may rename the channel.
Gain
Sets the channel gain value.
Delay
Sets the channel delay value and selects the delay unit measure. Selecting a new unit
measure converts the value.
Mute
Mutes the channel.
131
CHAPTER 4: USER INTERFACE REFERENCE
Sel / Iso / [Link]
Selects, isolates, or links the channel.
Parametric Enabled / Parametric Bypassed
Enables or bypasses parametric EQ.
TruShaping Enabled / TruShaping Bypassed
Enables or bypasses TruShaping EQ.
Equalization Enabled / Equalization Bypassed
Enables or bypasses all EQ.
SIM3 Trim
If a SIM3 is detected and SIM3 Trim Enabled is selected (see SIM3 (p. 105) settings), sets
the SIM3 trim value.
Polarity
Toggles the channel polarity.
High/Low Pass Filtering
Selects low pass, 2nd order high pass, or elliptical high pass filtering and sets the knee
frequency. Use Enabled / Bypassed to enable or disable pass filtering.
The frequency pass filter is shown on the plot as a yellow (low pass), green (2nd order high
pass) or cyan (elliptical high pass) vertical bar. The bar may be dragged to set the knee
frequency.
Atmospheric Correction Distance
Sets the correction distance. Both meter and feet values are available; conversion between
the two units is automatic.
Use Enabled / Bypassed to enable or disable atmospheric correction.
M Series Array Correction
Displays the Array Correction settings page.
132
COMPASS USER GUIDE
Parametric
<<< / >>>
Enables or bypasses all bands.
[1−10] Enabled / [1−10] Bypassed
Enables or disables a specific band.
Parametric Enabled / Parametric Bypassed
Enables or bypasses parametric EQ.
Equalization Enabled / Equalization Bypassed
Enables or bypasses all EQ.
Freq
Sets the frequency value for an EQ band.
B/W
Sets the bandwidth value for an EQ band.
Gain
Sets the gain value for an EQ band.
TruShaping
TruShaping Enabled / TruShaping Disabled
Enables or bypasses TruShaping EQ.
133
CHAPTER 4: USER INTERFACE REFERENCE
VX-1 Mode
Enables VX-1 Mode, locking the two upper handles together, emulating the functionality
of the Meyer Sound VX-1.
Equalization Enabled / Equalization Bypassed
Enables or bypasses all EQ.
Gain
Sets the gain value for a TruShaping EQ band.
Freq
Sets the frequency value for a TruShaping EQ band.
134
COMPASS USER GUIDE
Summing Matrix
Figure 4.15. Galileo Summing Matrix Page
Router Mode
Toggles the matrix crosspoints between switches and knobs.
In router mode, clicking a crosspoint routes audio input to output at unity gain. In mixer
mode, adjusting a crosspoint knob routes audio at a specified gain value.
When typing values directly, you may use -inf or −90 to represent full off. Press ‹ Enter ›
after typing a value to set the value.
Matrix:
The summing matrix is displayed as a 6×16 grid of input to output channel attenuation
values.
135
CHAPTER 4: USER INTERFACE REFERENCE
Input Masters
Figure 4.16. Galileo Input Masters Page
The Input Masters page duplicates controls also found on the Galileo Map page. Here, the
controls look and feel more like those on a traditional mixing console. Each fader control group
comprises:
Channel Label
Displays the channel label. You may rename the channel.
Processing Shortcut
Displays the appropriate Input Processing page.
The button displays the EQ curve and displays the Input Processing page to show the
most recently-used input processing controls. A dim yellow border indicates all EQ for that
136
COMPASS USER GUIDE
channel is disabled; a dim white border indicates the channel is currently viewed on the
Input Processing page.
Sel / Iso / [Link]
Selects, isolates, or links the associated channel. The display of these buttons is controlled
through Processing Interface Settings (p. 122).
Meter
Displays the input signal level. Click to clear peak hold; Alt+click to toggle the digital display.
Fader
Adjusts the input signal level.
Mute
Mutes the channel.
137
CHAPTER 4: USER INTERFACE REFERENCE
Output Masters
Figure 4.17. Galileo Output Masters Page
The Output Masters page duplicates controls also found on the Galileo Map page. Here, the
controls look and feel more like those on a traditional mixing console. Each fader control group
comprises:
Channel Label
Displays the channel label. You may rename the channel.
Processing Shortcut
Displays the appropriate Output Processing page.
The button displays the EQ curve and displays the Output Processing page to show the
most recently-used input processing controls. A dim yellow border indicates EQ for that
138
COMPASS USER GUIDE
channel is disabled; a dim white border indicates the channel is currently viewed on the
Output Processing page.
Sel / Iso / [Link]
Selects, isolates, or links the associated channel. The display of these buttons is controlled
through Processing Interface Settings (p. 122).
Meter
Displays the input signal level. Click to clear peak hold; Alt+click to toggle the digital display.
Fader
Adjusts the input signal level.
Mute
Mutes the channel.
Additional User Interface Details
Right-click Copy
Most Compass controls support
right-click access to powerful control
value copy/save/load actions. When
a control is right-clicked, a window
with the following structure will be
displayed, allowing you to select the
scope of the action to be performed:
[control group]
Displays the name of the control Figure 4.18. Typical Clipboard Options and Saved Settings window
group in which you right-clicked.
Setting
Displays the name and address of the control on which you right-clicked.
[list of Galileos and Channel Selects]
Identifies which channels are linked to the control through channel selection.
139
CHAPTER 4: USER INTERFACE REFERENCE
Paste [control] / Paste [control set] / Paste [control page]
Displayed when a control value has been copied to the clipboard by one of the Copy actions
below. Only one value can be copied at a time.
Pastes the copied value to the control(s), overwriting their previous value(s).
Copy [control] / Copy [channel] / Copy [control set]
Copies the value of a specific control (the one which you right-clicked); or the value of a
collection of controls (i.e. a channel, a matrix row, etceteras) to the clipboard.
The values are then available to be pasted to another set of the same type of control using
a Paste command, above. The clipboard can hold only one copy value set at a time.
Save
Saves the value of the control, channel, or control set. A file selector window will be provided,
in which you can select a directory and file name.
Load
Loads a previously-saved control, channel, or control set value file. A file selector window
will be provided, through which you can select the directory and file name.
Reset
Resets the value of the control, usually to an “off” value appropriate to the control.
Help
Displays contextual help.
Cancel
Closes the window.
140
COMPASS USER GUIDE
Keyboard Modifiers and Shortcuts
Table 4.2. Keyboard Modifiers
Modifier Key or Shortcut
Action
‹ Shift+Enter ›
Set control value as a stereo pair.
‹ Shift+drag ›
‹ Cmd+Enter ›
Ignore channel linking: apply change to this channel only.
‹ Cmd+drag ›
‹ Alt+Enter ›
‹ Alt+drag ›
Use alternate gain control linking mode (relative instead of
absolute; or absolute instead of relative).
On parametric EQ, adjust bandwidth instead of frequency.
‹ Shift+Cmd+Enter ›
Set same control value on all channels.
‹ Shift+Cmd+drag ›
‹ Shift+Alt+Enter ›
‹ Shift+Alt+drag ›
‹ Shift+Cmd+Alt+Enter ›
When clicking a toggle button, invert the values of the stereo
pair.
‹ Shift+Cmd+Alt+drag ›
When clicking a toggle button, invert the values of all
channels.
‹ Esc ›
Revert value.
✻ (asterisk)
Set default value.
-i, -inf
Set gain to full attenuation.
++[value] / --[value]
Add or subtract value to/from an existing gain value.
Colors
Color is used throughout the Compass interface to indicate the status of Galileo 616 units and
of channels.
Colors in the following tables show the default “night” color followed by the optional “day” color
in parenthesis.
141
CHAPTER 4: USER INTERFACE REFERENCE
Tab Colors
The color of named Galileo tabs indicates the network status of the Galileo.
Table 4.3. Tab Color Definitions
Color
Meaning
Blue
Galileo is connected and communicating.
Yellow
A momentary network stall, expected to resolve immediately.
Will turn magenta if the stall is not resolved.
Magenta
A full network stall. Will turn red if the stall is not resolved.
Red
Galileo is not connected.
Green Overline
Linked Galileo (Compass > Channel Linking Preferences
> Global Galileo Select-Linking Mode > All selected
channels on selected Galileos are globally linked)
Aqua Overline
Linked Galileo (Compass > Channel Linking Preferences
> Global Galileo Select-Linking Mode > Selected channels
on the active Galileo tab are linked to the same
channels…)
Magenta Overline
Linked Galileo (Compass > Channel Linking Preferences
> Global Galileo Select-Linking Mode > All channels on
the active Galileo tab are always linked…)
Background Colors
The color of the channel strip or the channel window (for processing pages) indicates the global
linking status:
Table 4.4. Background Color Definitions
Color
Meaning
Black (white)
Normal
Dark Purple (magenta)
Linking across Galileos
142
COMPASS USER GUIDE
Channel Colors
The color of a channel strip or the channel window (for processing pages) indicates its status.
Table 4.5. Channel Color Definitions
Color
Meaning
Black (white)
Normal
Dark Green (light green)
Channel Select
Amber (orange)
Channel Isolate
Dark Purple (magenta)
Globally Linked Channel (Compass > Channel Linking
Preferences > Global Galileo Select-Linking Mode > All
channels on the active Galileo tab are always linked…)
Dark Blue (light blue)
Linked Channel using link groups (Compass > Channel
Linking Preferences > Link Groups and Selects Mode >
Enabled Link Group channels are linked independently…)
143
APPENDIX A: COMPASS SOFTWARE FILE LOCATIONS
Table A.1. OS X Compass Software Installation Locations
File Type
File Location
Compass application
/Applications/Compass
Documentation
/Applications/Compass
Galileo firmware
/Applications/Compass
Sample projects
/Applications/Compass/Projects
Galileo settings
/Applications/Compass/Saved Settings
Project Backups
~/Compass_Settings/Compass_Backups
Table A.2. Microsoft Windows Compass Software Installation Locations
File Type
File Location
Compass application
\Program Files\Meyer Sound\Compass
Documentation
\Program Files\Meyer Sound\Compass
Galileo firmware
\Program Files\Meyer Sound\Compass
Sample projects
\Program Files\Meyer Sound\Compass\Projects
Galileo settings
\Program Files\Meyer Sound\Compass\Saved Settings
Project Backups
\Documents and Settings\User Name\Compass_Settings\Compass_Backups
Project Backups
To create a back up of your current project, select [Galileo Unit] > Project > Current Project
> More > Backup Project. The backup file will be saved to the location listed in the above
tables.
Backup file names take the form Backup_[date and time code].galileoProject. This is an
ordinary project file, and may be loaded normally.
145
APPENDIX A
COMPASS SOFTWARE FILE LOCATIONS
Factory Presets
A number of factory presets are available for use with the Output Processing and Summing
Matrix controls. The presets files are located in the Compass/Saved Settings sub-directories.
Compass/Saved Settings/Examples
This directory contains three sample EQ configuration files.
The 600-HP/700-HP .galileoOutputChannel files are loaded by right-clicking [Galileo Unit]
> Output Processing > Channel Settings. These configure equalization on the selected output
channel.
The Set TruShaping to LD-2 Array.galileoTruShapingEq file is loaded by right-clicking
[Galileo Unit] > Output Processing > TruShaping. It configures equalization to emulate the
Meyer Sound LD-2 Line Driver.
Compass/Saved Settings/Factory Presets
This directory contains over fifty snapshots that will configure the Galileo for a particular
configuration of loudspeakers, subwoofers, low- and high-pass filtering, and subwoofer polarity;
or combinations of loudspeaker arrays and associated fill speakers. The file names indicate the
file contents.
Of particular note is All Factory Presets.galileoSnapshots, which contains all the individual
snapshots; and Factory Defaults.galileoSnapshots, which will reset all controls to their
defaults.
These files are loaded by clicking the Load… button on the [Galileo Unit] > Project page.
Compass/Saved Settings/Summing Matrix Presets
This directory contains Summing Matrix configurations. Load them by right-clicking [Galileo
Unit] > Output Processing.
Details for these presets can be found in Using the Summing Matrix (p. 30).
146
APPENDIX B: NETWORK INFORMATION
Compass is client-side software that connects to a Galileo 616 server and acts as a control
interface to the functions provided by the Galileo. The same functions are also available through
the front panel controls of the Galileo.
Communication between the Compass client and Galileo server takes place over standard
Ethernet network. As with other network applications, Compass requires appropriate access
to TCP/IP addresses and ports; if you have enabled a firewall or other access-restriction software
on your workstation, you may need to configure it to allow Compass to communicate with
Galileos. If you use firewall software on your workstation or network router, you will need to
open TCP/IP ports 15001 and 15002.
Compass auto-detection of connected Galileo 616 units is currently restricted to the primary
Ethernet port. If connections are made through alternate ports, connections must be configured
manually.
Virtual Galileo
Virtual Galileo substitutes a local (“running on the workstation”) Galileo 616 server in place of
a physical Galileo 616 server. This local server performs all the internal functions provided by
a real Galileo 616 (with the exception of passing audio signal).
Communication between the Compass client and Virtual Galileo server takes place over the
same standard network system as used when communicating with real Galileos. However, a
different set of TCP/IP addresses and ports are used. Your firewall should not interfere with
these communications, as they are local to the workstation.
Virtual Galileo is useful as a stand-in for real hardware during those times you need to develop
configurations without having access to Galileo hardware.
147
APPENDIX C: USER-DEFINED EQUALIZATION CURVES WITH
M SERIES ARRAY AND ATMOSPHERIC CORRECTION
In a typical system design, small vertical splay angles in the upper part of the array boost
long-distance coverage, while larger angles in the lower elements increase vertical coverage
for shorter distances. Those angles, along with the number of cabinets and the distance from
the array to the listening area, determine the overall response of the array. Galileo M Series
Array Correction and Atmospheric Correction create custom EQs that compensate for the
overall response of the array to help achieve a flat frequency response based on the type and
size of the array and the natural environment conditions.
NOTE: MAPP Online Pro is the tool of choice for accurate and comprehensive predictions
for optimal coverage(s) during the design phase. Visit
http://www.meyersound.com/mapponline for further information.
You can use the Galileo to drive an array with multiple vertical zones — usually two or three
zones, depending on the design and number of elements. For designs where a flat response
is not desired (for example, user-defined equalization curves) use M Series Array Correction
and Atmospheric Correction parameters to effectively create the desired equalization curve.
The key is to apply different strategies for low and high frequencies in both the long and short
throw.
High-Frequency Equalization Strategies
For the far field, air absorption plays a critical role: the longer the distance, the greater the
attenuation of high frequencies. In this zone, high frequencies generally need correction to
compensate for energy lost over distance, and the gain needed is usually proportional to the
distance and high-frequency air absorption.
NOTE: In the near to mid-field, air absorption is not nearly as critical. Therefore, high
frequencies need less correction in this zone.
149
APPENDIX C
USER-DEFINED EQUALIZATION CURVES WITH M SERIES ARRAY AND
ATMOSPHERIC CORRECTION
For high frequencies, the Atmospheric Correction Distance parameter can be used to obtain
the desired correction. Start with an accurate distance value for the distance to which the
correction is needed; if the result is too flat and/or sounds unnatural, reduce the distance
parameter to achieve the desired response.
NOTE: For designs where user-defined curves or other types of response curves are
desired, always use the Atmospheric Correction Distance parameter for each channel,
NOT the Temperature, Humidity or Altitude controls.
Low-Frequency Equalization Strategies
The number of elements in an array plays a critical role for the low to mid-low frequencies. The
more elements, the more coupling and therefore the more build-up in this end of the spectrum.
Although the array can (and usually should) be zoned for implementing different equalization
curves at high frequencies, identical equalization should be maintained in all the low-frequency
filters. Different low-frequency equalization settings in the same array will degrade the coupling
effect.
For this same reason, gain tapering is not recommended for line arrays, since adjusting various
zones with an overall amplitude control for each zone results in the following:
■
Directionality decreases.
■
Low-frequency headroom decreases.
■
The length of the line array column is effectively shortened.
For low to mid-low frequencies, the Array Correction Size parameter can be used to obtain the
desired correction. Start with an accurate size value for the number of elements in the array
and then reduce it to achieve the desired response.
NOTE: Keep in mind that the M Series Array Correction section has no effect on the
Atmospheric Correction section: the two functions are independent of each other.
Changing the Array Type or Size will not change the correction produced by the Galileo’s
atmospheric functions.
150
APPENDIX C
USER-DEFINED EQUALIZATION CURVES WITH M SERIES ARRAY AND
ATMOSPHERIC CORRECTION
Example Curves
The following curves show how changing the settings on the Galileo allows you to tailor the
response to create different contour curves. These examples use eight MILO™ high-power
curvilinear array loudspeakers in a single zone array at a distance of 60 meters, temperature of
20° C, and 50% relative humidity at sea level.
NOTE: The examples in this section are not meant to be used as a template for your
own system designs. Acoustical characteristics, physical constraints, audio content,
audience and many other factors should always be uniquely weighed into your own
applications.
Simple Flat Response Curve
As shown in Figure C.1: “Single MILO at 4 meters” (p. 152), MILO was designed to have a very
flat frequency response on its own. In a typical design, however, the response of a MILO array
is affected by two primary factors:
■
Depending on atmospheric conditions and distance, high frequencies may attenuate due
to air absorption.
151
APPENDIX C
USER-DEFINED EQUALIZATION CURVES WITH M SERIES ARRAY AND
ATMOSPHERIC CORRECTION
■
Depending on the number of elements in the array, low and low-mid frequency build-up
may occur due to coupling at those frequencies.
Figure C.1. Single MILO at 4 meters
With eight elements at 60 meters, Figure C.2: “Eight MILO Array at 60M” (p. 152) shows the
response of the example MILO array and the effect of air absorption as well as low and low-mid
coupling.
Figure C.2. Eight MILO Array at 60M
The Galileo corrects for the air absorption and coupling, and yields a very flat response as
152
APPENDIX C
USER-DEFINED EQUALIZATION CURVES WITH M SERIES ARRAY AND
ATMOSPHERIC CORRECTION
shown in Figure C.3: “Corrected Eight MILO Array at 60M” (p. 153), by performing these functions:
■
High-frequency attenuation is corrected by setting the Natural Environment for
Atmospheric Correction to actual conditions: Temperature of 20° C, Humidity at 50%,
Altitude below 800m, and (on the channel Output Processing pages) Atmospheric
Correction Distance at 60 meters.
■
Low and low-mid frequency build-up is corrected by setting the M Series Array Correction
to reflect the actual type and number of loudspeakers: Array Type MILO and Array Size
8.
Figure C.3. Corrected Eight MILO Array at 60M
The response in this example could be the ideal response or the perfect starting point for
achieving other equalization curves.
High-Frequency Response Curves
Reducing the Atmospheric Correction Distance parameter changes the amount of atmospheric
correction, making it possible to produce different responses in the high frequency range.
Figure C.4: “Corrected Eight MILO Array at Various Distances” (p. 154) shows the response of
the example MILO array (already compensated in the low frequencies) with distance settings
at 60, 40, and 20 meters.
153
APPENDIX C
USER-DEFINED EQUALIZATION CURVES WITH M SERIES ARRAY AND
ATMOSPHERIC CORRECTION
At a distance setting of 60 meters — the actual distance of the array — the Galileo produces
the flattest result; any setting below 60 can be used to achieve a different response in the high
frequencies.
NOTE: For designs where user-defined curves or other types of response curves are
desired, always use the Atmospheric Correction Distance parameter for each channel,
NOT the Temperature,
Humidity
, or Altitude controls.
Figure C.4. Corrected Eight MILO Array at Various Distances
Low-Frequency Response Curves
In the low to low-mid frequency range, reducing the Array Size parameter changes the amount
of array correction to produce different responses. Figure C.5: “Corrected MILO Arrays of
Differing Sizes” (p. 155) shows the response of the example MILO array (compensated in the
high frequencies) with Array Size settings at 8, 6 and 4.
154
APPENDIX C
USER-DEFINED EQUALIZATION CURVES WITH M SERIES ARRAY AND
ATMOSPHERIC CORRECTION
An Array Size of 8 — which matches the number of elements in the array — achieves the flattest
result. However, any setting below eight can be used to achieve a different desired response
in the low to low-mid frequencies.
NOTE:
For designs where user-defined curves or other types of response curves are desired,
always use the Array Size parameter for each channel, NOT the Array Type selector.
Figure C.5. Corrected MILO Arrays of Differing Sizes
Combined Response Curves
Figure C.6: “Corrected Eight MILO Array at Various Distances” (p. 156) shows all the curves that
can be obtained based on only four settings of Array Size and Distance. Keep in mind that the
M Series Array Correction section has no effect on the Atmospheric Correction section and
vice-versa; the two functions are totally independent of each other. Galileo’s key parameters
155
APPENDIX C
USER-DEFINED EQUALIZATION CURVES WITH M SERIES ARRAY AND
ATMOSPHERIC CORRECTION
— Distance and Array Size — make it extremely versatile; it can produce a wide range of
equalization curves to satisfy almost any application or personal taste.
Figure C.6. Corrected Eight MILO Array at Various Distances
156
INDEX
A
Access Control, 68
changing access control, 68
locking controls, 68
removing access control, 69
unlocking controls, 68
Air Absorption Compensation, 47
setting loudspeaker distance, 48, 49
setting values for a single Galileo, 48
setting values for multiple Galileos, 48
C
Channel Linking, 42
absolute versus relative gain control of
linked channels, 19, 45
all channels, 24, 42
identifying channels linked to a control, 44
separate Select and Link Group, 43, 44
stereo pairs, 24, 42
using Link Groups, 43
using Selects, 42
Channel Selection
retaining or clearing when switching
Galileos, 28
Copy
all control values of a Galileo, 61
all control values of an individual channel,
61
control values of all input or output
channels, 61
Galileo I/O Configuration, 61
Galileo Settings, 61
processing control values, 60
summing matrix control values, 60
value of an individual control, 60
D
Delay, 58
on input channels, 59
on output channels, 59
units and ranges, 59
Document Conventions
graphic interface element names, xi
keyboard actions, xiv
mouse actions, xiii
symbols, xv
typographical, xiv
F
Frequency Control
entering unit multipliers, 26
Full Screen mode, 27
G
Gain Control
absolute versus relative gain control of
linked channels, 19, 45
entering - values, 25
entering negative values, 25
fader shortcuts, 25
overriding absolute or relative gain mode,
24
support for arithmetic, 25
Galileo
analog input configuration, 29
analog output configuration, 29
auto-discovery of Galileo units, 6
configuring multiple units, 30
digital input configuration, 29
manual configuration of Galileo units, 7
troubleshooting Galileo connections, 7
Galileo Linking, 46
behavior of isolated channels, 47
behavior of link modes, 46, 47
Galileos
157
INDEX
startup options, 27
Graphic EQ, 57
setting values, 57
I
Installation
Mac OS X
installing, 2
system requirements, 1
uninstalling, 2
Microsoft Windows
installing, 2
system requirements, 1
uninstalling, 3
Isolate
overriding multiple selects, 24
L
Line Array Compensation, 50
assigning to an output channel, 51
configuring M Series correction, 50
configuring MSL-4 correction, 51
Linked Channels
behavior of isolated channels, 28
gain control movement, 28
Load
all control values of a Galileo, 61
all control values of an individual channel,
61
control values of all input or output
channels, 61
Galileo I/O Configuration, 61
Galileo Settings, 61
processing control values, 60
summing matrix control values, 60
value of an individual control, 60
M
Meters
meter clipping modes, 27
158
showing meter values, 27
Meyer Sound
about, xvi
technical support, xvii
website, xvii
N
Network
auto-discovery of Galileo units, 6
connection of Compass workstation and
Galileo units, 6
manual configuration of Galileo units, 7
troubleshooting Galileo connections, 7
P
Parametric EQ, 55
setting values, 55
stacking control handles, 56
viewing plot values, 56
Paste
all control values of a Galileo, 61
all control values of an individual channel,
61
control values of all input or output
channels, 61
Galileo I/O Configuration, 61
Galileo Settings, 61
processing control values, 60
summing matrix control values, 60
value of an individual control, 60
Preferences
overview of common settings, 26
Projects, 65
backups, 66
creating, 65
loading, 66
merging, 66
project reports, 67
saving, 65
INDEX
R
Redo, 26
Reset
all control values of a Galileo, 61
all control values of an individual channel,
61
control values of all input or output
channels, 61
Galileo I/O Configuration, 61
Galileo Settings, 61
processing control values, 60
summing matrix control values, 60
value of an individual control, 60
Rotary Encoders
slow and fast modes, 25
S
Save
all control values of a Galileo, 61
all control values of an individual channel,
61
control values of all input or output
channels, 61
Galileo I/O Configuration, 61
Galileo Settings, 61
processing control values, 60
summing matrix control values, 60
value of an individual control, 60
Screen Scaling
using interface and control handle scaling,
27
Selects
isolating one channel momentarily, 24
Shortcuts, 24
Signal Processing, 53
Air Absorption Compensation, 47
assigning array correction to outputs, 51
channel selection, 53
configuring M Series array correction, 50
configuring MSL-4 array correction, 51
delay units and ranges, 59
Delays, 58
display options, 53
displaying control handles, 55
dual view mode, 54
Graphic EQ, 57
high pass filters, 58
Line Array Compensation, 50
linking air absorption compensation, 48
low pass filters, 58
maximizing plot area, 53
multiple plots mode, 54
Parametric EQ, 55
setting environment conditions, 48
setting graphic EQ values, 57
setting input channel delay, 59
setting loudspeaker distance, 48, 49
setting output channel delay, 59
setting parametric EQ values, 55
setting TruShaping EQ values, 56
stacking parametric EQ handles, 56
Subwoofer Filtering, 58
TruShaping EQ, 56
Trushaping VX-1 mode, 57
viewing composite EQ plots, 55
viewing plot values, 56
SIM3, 51
configuring, 52
Snapshots, 62
assigning a boot snapshot, 63
creating, 62
loading, 64
locking against changes, 63
recalling, 62
saving, 64
updating, 63
usage scenario, 64, 65
Stereo Pairs
159
INDEX
linking control value adjustments, 24, 42
Subwoofer Filtering, 58
high pass filter, 58
low pass filter, 58
Summing Matrix, 30
copying values, 32
factory presets, 32
loading, 32
pasting values, 32
resetting values, 31
saving, 32
use as a signal router, 30
use as a standard mixer, 31
Support
latest documentation, xvii
online product documentation, xvii
technical support requirements, xviii
telephone support hours, xvii
T
Tab key
preferences, 26
use in navigating the user interface, 26
TruShaping EQ, 56
setting values, 56
viewing plot values, 56
VX-1 mode, 57
U
Undo, 26
User Interface
description of controls, 10
V
Value Entry
reset values to defaults, 26
Virtual Galileo
front panel emulation, 5
substituting for a Galileo 616 unit, 4
used in stand-alone development, 4
160
W
Workflow, 16, 95
2832 San Pablo Avenue
Berkeley, CA, 94702
+1 510 486.1166
+1 510 486.8356
www.meyersound.com
©2009
Meyer Sound Laboratories
05.141.002.10 A