1
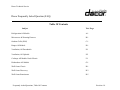
Product line
Frequently Asked Questions
(FAQ)
Dacor Technical Service
Dacor Frequently Asked Question (FAQ)
Table Of Contents
Subject
Tab / Page
Refrigeration All Models
A-1
Microwaves & Warming Drawers
B-1
Outdoor Grills (EOG)
C-1
Ranges All Models
D-1
Ventilation, All Downdrafts
E-1
Ventilation, All Updrafts
E-2
Cooktops All Models Gas & Electric
F-1
Dishwashers All Models
G-1
Wall Ovens Classic
H-1
Wall Ovens Discovery
H-3
Wall Ovens Renaissance
H-5
Frequently Asked Questions, Table Of Contents
Revision 1.0
Dacor Technical Service
Problem
CLICKING
FAQ Refrigeration Sounds All Models
Possible Cause
• Motorized device sounds like an electric clock and
snaps in and out
• From within the freezer section could be a failure of
the defrost system. Frost and ice entering the area
of the fan will cause a clicking sound.
Suggestions
• Normal operation of the switches and relays.
• Failure of the defrost system will require a
service.
AIR RUSHING OR WHIRRING
• Freezer, fresh food, and condenser fans make this
noise while operating
• Normal operation. May vary in volume
depending on the operating speed of the motor
GURGLING OR BOILING
SOUND
• Evaporator and heat exchanger refrigerant makes
this noise when flowing
• Normal operation
THUMPING
• Ice cubes from ice maker drop into ice bucket
• Normal operation
VIBRATING NOISE
• Compressor makes a pulsating sound while
running. Normal operation
• Refrigerator is not level.
• Ice maker water valve hookup buzzes when ice
maker fills with water.
• See Installation Instructions for
details on how to level your refrigerator
BUZZING
HUMMING
HUMMING IT THE COMPRESSOR
AREA
HISSING OR POPPING
• Ice maker is in the ‘ON’ position without water
connection. Stop sound by raising the ice maker arm
to ‘OFF’ position
• Can make a high-pitched hum and vary in volume
while operating.
• Defrost heater hisses, sizzles or pops when
operational.
Frequently Asked Questions, Refrigeration
A- 1
• Normal operation
• Normal operation
• Normal operation
Revision 1.0
Dacor Technical Service
Problem
DISPENSER WILL NOT DISPENSE
WATER OR ICE
FAQ General Refrigeration All Models
Possible Cause
• A water filter, or the filter bypass plug must be in
place.
• Door is open.
• Water supply turned off.
• Water pressure too low.
• Lock switch on.
• Ice jam in the dispenser.
• Ice maker not operating.
• Water line within unit frozen.
• Defective water valve.
• Defective ice maker.
• Defective Switch within dispenser
WILL NOT RUN.
• Power cord not plugged in.
• No power at the electrical outlet.
• Circuit breaker tripped or house fuse blown.
• Reset control.
• Check Sabbath mode setting.
• Main power switch turned off (EF42 & 48)
Touch the on / off pad (EF 42 &48)
RUNS TOO LONG/TOO
FREQUENTLY
• Today’s energy efficient refrigerators are larger and
require more running time to maintain stable
temperatures.
• Prolonged door openings.
• Too many door openings.
• Condenser needs cleaning.
• The door not sealing (due to a package or a
container holding door open).
• Warm room temperature.
NOISY OPERATION.
• Cabinet not level.
• Weak floor.
• See Normal Operating Sounds
Frequently Asked Questions, Refrigeration
A- 2
Suggestions
• Defrost water line and water tank, bring freezer
temp above 5 deg. F. May need W10130482
water tank kit (EF36 Only)
Revision 1.0
Dacor Technical Service
ODOR IN CABINET.
• Odor producing foods should be covered or
wrapped.
• Interior needs cleaning.
WARM AIR FROM COMPRESSOR
AREA
CABINET VIBRATES.
• Normal air flow for condenser circulation
MOISTURE ON INSIDE CABINET
WALLS.
• Can occur during hot, humid weather with frequent
or prolonged
door openings.
• Door not closed properly.
FOOD SAVER DRAWERS NOT
WITHIN TARGET RANGE
• After drawer openings, the addition of a new load
or changing settings, the readout may vary. The
temp will recover in a short period of time.
• The normal cold setting has been chosen
NO TEMP READOUT IN FOOD
SAVER DRAWERS (EF42 & 48)
EXCESSIVE MOISTURE IN OR
AROUND DELI DRAWER.
• Cabinet not level.
• Weak floor.
• Improper installation.
• Food not wrapped properly.
• Hot, humid weather.
REFRIGERATOR COMPARTMENT
TOO COLD.
• Refrigerator temperature set too cold.
• Defective dampener
• Defective Sensor
• Defective HV control board (EF36)
REFRIGERATOR OR FREEZER
COMPARTMENT TOO WARM.
• Refrigerator or freezer temperature set too warm.
• Prolonged door openings.
• Defective door switch
• Defective dampener
• Defective sensor
• Defective freezer evaporator fan
• Defective fresh food fan
• Defective HV control board (EF36)
Frequently Asked Questions, Refrigeration
A- 3
Revision 1.0
Dacor Technical Service
• Defective Compressor
• Sealed system leak
• Defrost system failure
ICE & FROST DEVELOPING ON
THE WALLS OF THE FREEZER
FREEZER NOT FREEZING
PROPERLY.
• Failure of the defrost system.
ICE CUBES HOLLOW
• Water pressure is low and not filling icemaker
completely.
• Replace Water filter.
• Check home supply valve is open fully.
ICE CUBES EVAPORATE.
• Cold air moving over the ice cubes. causes
shrinkage, especially.
with limited usage. This is normal.
AUTOMATIC ICE MAKER NOT
OPERATING.
• Wire lever arm in up (OFF) position.
• Water supply turned off.
• Water pressure too low.
• Freezer too warm.
• Supply water line crushed or kinked.
• Ice cube jammed in icemaker.
• Install filter or filter bypass.
• Defective Icemaker.
FRONT CABINET SURFACE
WARM TO THE TOUCH.
• Special design to limit condensation during periods
of high humidity.
DOORS ARE NOT LEVEL (EF42 &
48)
• Unit needs to be level. Raising and lowering each
side of the unit will cause the doors to raise and
• Service required
• Products with high sugar content may not harden
completely when frozen (ice cream, concentrated
juice, etc.) Do not store in door.
• Adjust freezer temperature to a colder setting.
• Defrost system failure.
• Defective freezer evap fan motor
Frequently Asked Questions, Refrigeration
A- 4
• Removal of RO system may be necessary.
• Bypassing of internal water filter system may be
necessary.
• Inspect water line behind unit for kinks or
damage.
• Before removing jammed ice from maker
disconnect power from unit.
• The EF42 & 48 are flexible and will take the form
of an un level floor causing the doors to become
Revision 1.0
Dacor Technical Service
DOORS WILL NOT STAY CLOSED
OR WILL OPEN BY IT SELF
INSIDE LIGHTS DO NOT WORK
F1, F5, FE IN DISPLAY (EF24
ONLY)
lower.
• Food on interior shelves may be in contact with
doors not allowing them to close fully.
• Check refrigerator level.
• In Sabbath mode.
• Bad light Switch.
• Lights are turned off (EF24).
• Light bulb(s) burned out.
• F1 – Bad air sensor upper
• F5 – Bad air sensor lower
• FE – Bad PCB EPROM
Frequently Asked Questions, Refrigeration
A- 5
un level.
• Pitch Refrigerator back to let gravity assist in the
closing.
Disconnect power cord and call for service.
Revision 1.0
Dacor Technical Service
Problem
FAQ CONVECTION MICROWAVES DCM,PCOR
Cause
Suggestions
HOME FUSE BLOWS WHEN
POWER CORD PLUGGED IN
• Short in power cord.
• Replace power cord
UNIT DEAD OR NO DISPLAY
• Check power source.
• Reset by unplugging unit for 30 sec.
• Defective key pad.
• Defective power board.
• Blown fuse.
• Defective door switch
• Door out of alignment.
• Broken latch.
• Replace defective part.
• Misalignment of the primary interlock system.
• Defective Control unit.
• Defective Key unit.
• Loose wiring.
• Primary interlock system.
• Defective control unit.
• Defective key unit.
• Loose wiring.
• Defective control unit.
• Key unit.
• Door switch.
• Bad motor or coupling
• Replace defective part.
DOOR NOT LATCHING
DISPLAY DOES NOT OPERATE
PROPERLY WHEN STOP CLEAR
PAD IS DEPRESSED
LIGHT DOES NOT COME ON
WHEN DOOR OPENS
KEY PAD NOT RESPONDING
TURN TABLE MOTOR NOT
TURNING
OVEN DOES NOT GO INTO A
COOK CYCLE WHEN START PAD
IS TOUCHED
• Secondary interlock switch.
• Primary interlock system.
•Touch control panel.
• Key unit.
• Loose wiring.
Frequently Asked Questions, Micro & Warming Drawers
• replace door latch and or door hook
• replace door switch or relay
• Replace defective part.
• Replaced motor and or coupling.
• Replace defective part.
B -1
Revision 1.0
Dacor Technical Service
NOT HEATING
• If in popcorn mode only ensure popcorn bag is
elevated in tray by an inverted microwave safe plate.
• Shorted wiring Capacitor, Diode or magnetron.
• High voltage transformer or interlock switch
• Replace defective part.
ARCHING
• Check turntable placement. Is metal rack in unit?
• May have a bad Magnetron
UNIT RUNS FOR 59 SECONDS
AND CANCELS
• Defective damper motor.
• Defective damper motor switch.
• Broken wire.
• Bad bulbs, key unit of control unit
• Replace defective part.
Lights not working on hood
No difference in fan speed
Problem
• Normally there is very little difference in fan speed
and sound.
• Blower motor is not installed correctly for installation.
• Venting exit point is blocked or restricted.
FAQ Microwave DMO DMT PMOR
Cause
Suggestions
HOME FUSE BLOWS WHEN
POWER CORD PLUGGED IN
• Short in power cord
• Replace Cord
NO POWER UNIT DEAD
• Bad power board, Control unit or shorted wiring
• Check power source, replaced power cord,
interlock switch, fuse or power board.
• Hood thermal cut-out, Hood fan motor,RY-4,Hood
OVEN LIGHT DOES NOT LIGHT
WHEN DOOR OPENED. HOOD FAN motor capacitor, open or shorted wiring
MOTOR OPERATES WHEN
POWER CORD IS FIRST PLUGGED
IN
NOT HEATING
• Shorted wiring.
• Defective capacitor, diode or magnetron.
• Defective H.V. transformer or interlock switch.
Frequently Asked Questions, Micro & Warming Drawers
B -2
Revision 1.0
Dacor Technical Service
FIRE OR ARCHING
• Dirty wave guide cover.
• Defective magnetron.
• Non microwaveable product in unit.
• Replaced wave guide cover.
• Replace magnetron.
PARTIAL DISPLAY OR NO
DISPLAY
• Control unit
• unplug unit for 30 sec.
• Replaced Control unit
UNIT WONT START WHEN START • Defective control unit.
• Defective key unit of interlock switch.
BUTTON DEPRESSED
TURN TABLE MOTOR NOT
TURNING
• Defective motor of coupling.
• Replace control unit or key unit, interlock switch.
• Replace motor and or coupling.
• Normally there is very little difference in fan speed
• Send servicer may need motor replaced.
and sound.
• Blower motor is not installed correctly for installation.
• Venting exit point is blocked or restricted.
• Replace light bulbs.
HOOD LIGHTS DO NOT TURN ON • Open or shorted wiring, RY-4.
• Defective control unit.
• Replace defective parts.
WHEN OPTION PAD PRESSED
NO DIFFERENCE IN FAN SPEED
FAQ Warming Ovens All Models
Problem
Cause
Suggestions
TIMER NOT RUNNING
• Check if unit is in manual
• Replace timer.
NOT GETTING WARM
• Check power to unit.
• Check hi limit (Service company only)
• Reset Hi Limit ** NOTE** high limit tripped can be
caused by a defective thermostat, cooling fan, or
temperature switch.
DRAWER OUT OF ALIGNMENT OR • Rail out of alignment
DRAWER NOT CLOSING
Frequently Asked Questions, Micro & Warming Drawers
• Adjust rails
B -3
Revision 1.0
Dacor Technical Service
Problem
NO IGNITION
SLOW BURNER IGNITION
FLAMES COMING OUT FROM
UNDER CONTROL PANEL
52” OUTSIDE BURNERS
BLOWING OUT
CANOPY WARPED
CONTINUES TO SPARK AFTER
BURNER IS LIT
BROILER WILL NOT STAY LIT
FAQ Outdoor Grill EOG
Cause
• Check for 120VAC at outlet.
• Check ground to unit.
• Check if GFI (outdoor outlet) has trip.
• 120VAC present if interior lights work.
• Check for dirt, grease, etc blocking holes in burner
tubes.
• Check electrode position to burner tubes.
• Check installation. Front of control panel extends
pass cabinet for air ducts. Rear of unit clear all way
to bottom of unit (counter top NOT touching back of
unit) with 1” clearance.
• Normal if in direct wind pattern. If no wind, check to
see burner rings and caps installed correctly.
• Check gas pressure, should be 10” LP or 5” Nat.
• Check main burner flames for correct size (almost
all blue flame). Installation clearances front and rear.
Is customer keeping unit clean and free from
excessive grease buildup causing too high flames in
unit? Only if all check ok, then replace canopy.
Suggestions
• Internal wiring for melted / broken wire.
• Clean burners and electrodes.
• Call for service to inspect for possible internal
heat damage.
• Is unit grounded? Check for clean burner tubes.
Check igniter location to flame.
• Check for correct gas pressure. Does gas come
thru when holding control in while trying to light? If
not then replace control valve for broiler. Does
igniter spark as you hold broiler knob in and turn? If
not check igniter switch. If unit sparks and gas
comes thru while holding knob and for 10 seconds
and still won’t stay lit, replace thermocouple.
Frequently Asked Questions, Out Door Grills
C-1
Revision 1.0
Dacor Technical Service
Problem
IGNITERS DO NOT SPARK.
FAQ Ranges All Models
Cause
• Check circuit panel for blown fuses or tripped
breakers.
• Wet or dirty igniter.
NO FLAME.
• Gas is turned off.
• Burner ring or burner cap is dirty or clogged.
• Burner ring or burner cap not properly positioned.
FLAME IS DISTORTED,
YELLOW, OR VERY LARGE.
• Range set up to use a different type of gas (Natural
or LP) or setup for different altitude.
• Gas regulator is not installed or faulty.
• Flame distorted by air draft.
IGNITER CONTINUES TO SPARK
(CLICK) AFTER FLAME IGNITES.
• Wet or dirty igniter.
• Burner ring or burner cap is dirty.
• Burner ring or burner cap not properly positioned.
• Air intake holes obstructed.
• Low gas pressure.
• Happens when cleaning glass top.
ELECTRIC SURFACE BURNER
WILL NOT TURN ON.
ELECTRIC SURFACE BURNER
WILL NOT TURN OFF.
ELECTRIC SURFACE BURNER
TURNS ON AND OFF WITHOUT
CUSTOMER ACTIVATING
CONTROLS.
BURNER KNOB WILL NOT
TURN.
BURNER KNOB LIGHT NOT
Suggestions
• Turn power on at junction box. Check for tripped
circuit breaker or blown fuse.
• Clean
• Reset Controls.
• Make sure the gas supply valve is in the on
position.
• Contact gas company.
• Clean burner head.
• Make sure burner is assembled properly.
• Have qualified service technician check to make
sure that the range is set up for the type of gas
and the correct altitude.
• Have qualified service technician check the gas
regulator.
• Burners may continue to spark for up to 60
seconds when cold and set to low.
• Minimize any air drafts around the range. Close
nearby windows.
• Clean burner head and igniters.
• Make sure burner is assembled correctly.
• Check to make sure air holes above knobs are
not blocked.
• Contact gas company
• Use Secure Lock-out when cleaning Cooktop
surface.
• Turn Power off for 5 minutes then back on.
• Improper operation.
• Light Failure.
• Push Knob in then Turn. See U&C.
• Call For Service
• Range not connected to electrical
power. Contact power company.
• Power to range is off.
• Have electrician connect range to properly wired
electrical connection.
• Turn power on at junction box. Check for tripped
Frequently Asked Questions, Ranges
D-1
Revision 1.0
Dacor Technical Service
WORKING
NOTHING WORKS.
OVEN WILL NOT HEAT.
OVEN SHUTS OFF BY ITSELF
AFTER IT HAS BEEN ON FOR 12
HOURS.
TIME ON DISPLAY NOT
CORRECT.
TIME FLASHES ON DISPLAY.
OVEN DOES NOT SELF-CLEAN.
• Reset Controls
• Control panel locked.
• Oven setting not correct.
• Oven set for delay timed cooking.
• Attempting to broil with meat probe connected.
• Reset Controls
circuit breaker or blown fuse.
• Turn Power off for 5 minutes then back on.
• Press CANCEL/SECURE key for 4 seconds to
reactivate control panel.
• Oven will turn on automatically at preset time.
Press CANCEL/SECURE to return to normal
operation
• Broil and convection broil settings will not work
when meat
probe is connected. Disconnect meat probe.
• Turn Power off for 5 minutes then back on.
• 12 hour timer is on. Unit is set
to turn off automatically after 12
hours of continuous use.
• Reset Controls
• Time of day not set.
• Power failure or power was turned off.
• Reset Controls
• Turn off 12 hour timer. See U&C.
• Turn Power off for 5 minutes then back on.
• Power failure or power was turned off.
• Reset Controls
• Door not shut tightly.
• Oven set for delay timed cleaning.
• Oven not set properly.
• Meat probe connected.
• Reset time. See U&C.
• Turn Power off for 5 minutes then back on.
• Check for obstructions. Close door tightly.
• Oven will start to self-clean at preset time. Press
CANCEL/SECURE to return to normal operation.
• Oven will not start self-clean cycle when meat
probe is connected. Disconnect and remove meat
Frequently Asked Questions, Ranges
D-2
• Set time. See U&C.
• Reset time. See U&C.
• Turn Power off for 5 minutes then back on.
Revision 1.0
Dacor Technical Service
probe
• Model ER48D only: Other oven is on or selfcleaning.
OVEN LIGHTS WILL NOT WORK.
• Light bulbs burned out.
• Oven in self-clean mode.
FOODS OVER OR UNDER COOK.
• Incorrect cooking time or
temperature.
• Incorrect cooking time or
temperature.
• Normal operation.
FOODS OVER OR OVER COOK.
COOLING FAN CONTINUES TO
RUN AFTER OVEN IS TURNED
OFF.
OVEN DOOR WILL NOT OPEN.
F0
F1
F2
F3
F4
F6
F7
• Adjust Time. Use Pure Convection
• The cooling fan may run for a while after the
oven is turned
• Oven is set to self-clean.
• Touch pad is stuck in a depressed position (shorted
touch pad key) on membrane.
• Relay drive circuitry failure. Also cooking and selfclean modes shorted touch pad keys only.
• Oven temperature exceeded the clean runaway
temperature (Self-Clean mode only) or cooking
runaway temperature
(cooking modes only).
• Short circuit in the oven temperature sensor and/or
its wiring.
• Open circuit in the oven temperature sensor and/or
its wiring.
• Failure in the EEPROM checksum comparison.
Control failure (microprocessor failure). (Only time of
day and timer will
operate.)
• Failure of the Self-Clean automatic door latch
circuitry.
Frequently Asked Questions, Ranges
• Due to power consumption on model ER48D,
one oven cannot self-clean while the other is in
use or self-cleaning. Turn off other oven.
• Replace light bulbs. See U&C.
• Lights do not work when oven is in self-clean
mode.
• Adjust Time. Use Pure Convection
D-3
• Check display. If “LOCK” appears on display
oven door cannot be opened. Wait for oven to
complete self-clean or press CANCEL/SECURE.
Door will unlock once oven has
• Reset Controls. Turn Power off for 5 minutes
then back on. If failure returns, call for service.
• Reset Controls. Turn Power off for 5 minutes
then back on. If failure returns, call for service.
• Reset Controls. Turn Power off for 5 minutes
then back on. If failure returns, call for service.
• Reset Controls. Turn Power off for 5 minutes
then back on. If failure returns, call for service.
• Reset Controls. Turn Power off for 5 minutes
then back on. If failure returns, call for service.
• Reset Controls. Turn Power off for 5 minutes
then back on. If failure returns, call for service.
• Check for latch obstruction.
Reset Controls. Turn Power off for 5 minutes then
Revision 1.0
Dacor Technical Service
F10
• Failure of the door latch motor. Occurs when the
motor runs for two minutes without the door locking
in Self-Clean mode.
• Temp Runaway
F11
• Membrane Switch
F13
• EPROM Failure
F14
• Watchdog Protect Circuit
F15
• Fuse Error
F20
• Communication Error
F30
• Sensor Short
F31
• Sensor Open
F32
• Membrane Connection
F90
• Door unlock timeout
F95
• Door lock
F8
Frequently Asked Questions, Ranges
D-4
back on. If failure returns, call for service.
• Close oven door.
Reset Controls. Turn Power off for 5 minutes then
back on. If failure returns, call for service.
• Reset Controls. Turn Power off for 5 minutes
then back on. If failure returns, call for service.
• Reset Controls. Turn Power off for 5 minutes
then back on. If failure returns, call for service.
• Reset Controls. Turn Power off for 5 minutes
then back on. If failure returns, call for service.
• Reset Controls. Turn Power off for 5 minutes
then back on. If failure returns, call for service.
• Reset Controls. Turn Power off for 5 minutes
then back on. If failure returns, call for service.
• Reset Controls. Turn Power off for 5 minutes
then back on. If failure returns, call for service.
• Reset Controls. Turn Power off for 5 minutes
then back on. If failure returns, call for service.
• Reset Controls. Turn Power off for 5 minutes
then back on. If failure returns, call for service.
• Reset Controls. Turn Power off for 5 minutes
then back on. If failure returns, call for service.
• Check for latch obstruction.
Reset Controls. Turn Power off for 5 minutes then
back on. If failure returns, call for service.
• Close oven door.
Reset Controls. Turn Power off for 5 minutes then
back on. If failure returns, call for service.
Revision 1.0
Dacor Technical Service
Problem
NOTHING WORKS.
FAQ Raised Vents RV, RVR, RVC
Cause
• Raised vent not connected to electrical power.
• Power to vent’s electrical outlet is off.
• Power outage.
• Keypad is deactivated.
VENT INTAKE RAISES OR
LOWERS PARTIALLY THEN
STOPS.
• An obstruction is interfering with the vent intake
movement.
GAS FLAME IS BEING PULLED
BY DRAW OF VENT.
CLEAN FILTER SYMBOL IS LIT.
• Short duct run or high input of system make
ventilating force very strong.
• Blower has operated for over 40 hours.
Problem
NOTHING WORKS
FAQ Raised Vent ERV, PRV
Cause
• Raised vent not connected to electrical power.
• Power to vent’s electrical outlet is off.
• Power outage.
VENT INTAKE RAISES OR
LOWERS PARTIALLY THEN
STOPS.
• An obstruction is interfering with the vent intake
movement.
GAS FLAME IS BEING PULLED
BY DRAW OF VENT.
• Short duct run or high output of system make
ventilating force very strong.
Frequently Asked Questions, Ventilation
E -1
Suggestions
• Make sure power plug is connected to electrical
outlet.
• Turn on power at circuit breaker or fuse box.
Check for tripped breaker or blown fuse.
• Contact power company.
• Reactivate control panel: press high and low key
at the same time. Hold down for one second.
• Immediately Up/Down key, then disconnect the
power plug. Remove the obstruction. Reconnect
the vent power plug and press Up/Down key to
raise or lower intake.
• Reduce blower speed to a lower setting.
• Inspect, clean filters, and reset timer.
Suggestions
• Make sure power plug is connected to electrical
outlet.
• Turn on power at circuit breaker or fuse box.
Check for tripped breaker or blown fuse.
• Contact power company.
• Immediately press Up/Down switch, and then
disconnect the power plug. Remove the
obstruction. Reconnect the power plug and press
Up/Down switch to raise or lower intake.
• Reduce blower speed to a lower setting.
Revision 1.0
Dacor Technical Service
Problem
NOTHING WORKS. CONTROL
PANEL IS NOT LIT. FAN DOES
NOT WORK.
FAQ Updraft EH 12 & 18
Cause
• Power to hood is off.
• Power outage.
• Hood not connected to electric power.
LIGHTS DO NOT WORK.
CONTROL PANEL IS NOT LIT.
LIGHT DOES NOT WORK.
CONTROL PANEL IS LIT.
• See Nothing Works above.
FAN DOES NOT DRAW HEAT
AND SMOKE PROPERLY.
• Fan set to lower setting.
• Filter(s) clogged or dirty.
• Damper jammed shut or duct work clogged.
• Time feature used.
FAN SHUTS OFF BY ITSELF.
FAN DOES NOT WORK.
CONTROL PANEL NOT LIT.
FAN DOES NOT WORK.
CONTROL PANEL NOT LIT.
FAN COMES ON BY ITSELF.
Problem
NOTHING WORKS. CONTROL
PANEL IS LIT. BLOWER SYSTEM
• Loose light bulb.
• Light bulb burned out.
Suggestions
• Turn on power at junction or fuse box. Check for
tripped breaker or blown fuse.
• Call electric company.
• Have qualified electrician connect hood to
electric power.
• Check to make sure that the light bulb is
screwed in completely.
• Replace light bulb.
• Check filters. Make sure they are completely
clean and not blocked by foreign objects.
• Consult with a qualified installation professional.
• If the timer is set, the fan will turn off after ten
minutes.
• See Nothing Works above.
• Fan malfunction.
• Call for service.
• Hood AUTO-ON feature.
• The fan comes on automatically when the
temperature rises above 140˚F. The AUTO-ON
feature protects the control panel from damage
due to overheating. The fan will automatically turn
off when it the temperature goes below 140˚F, if
the fan control is set to “off”. This safety feature
cannot be turned off.
FAQ Updraft DHI, DHW, PHW, PHG
Cause
• Power to hood is off.
• Hood main power switch is off.
Frequently Asked Questions, Ventilation
E -2
Suggestion
• Turn on power at junction or fuse box. Check for
tripped breaker or blown fuse.
Revision 1.0
Dacor Technical Service
DOES NOT.
• Power outage.
• Hood not connected to electric power.
LIGHTS DO NOT WORK.
CONTROL PANEL IS NOT LIT.
LIGHT DOES NOT WORK.
CONTROL PANEL IS LIT.
• See Nothing Works above.
BLOWER SYSTEM DOES NOT
DRAW HEAT AND SMOKE
PROPERLY.
BLOWER SHUTS OFF BY ITSELF
AFTER BEING LEFT ON FOR A
LONG TIME.
BLOWER SYSTEM DOES NOT
WORK. CONTROL PANEL NOT
LIT.
BLOWER SYSTEM DOES NOT
WORK. CONTROL PANEL LIT.
• Blower set to low setting.
• Filter(s) clogged or dirty.
• Damper jammed shut or duct work clogged.
• Normal Operation.
Problem
NOTHING WORKS.
• Loose light bulb.
• Light bulb burned out.
• Make sure hood main power switch is on.
• Call electric company.
• Have qualified electrician connect hood to
electric power.
• Check to make sure that both prongs on the light
bulb are inserted into the holes on the light socket.
• Replace the light bulb.
• Check filters. Make sure they are completely
clean and not blocked by foreign objects.
• Consult with a qualified installation professional.
• To conserve energy, the blower automatically
turns itself off if it is left on for four hours
continuously.
• See Nothing Works above.
• Blower system malfunction.
• Call for service.
FAQ Updraft EHD & MHD
Cause
• Vent power supply interrupted or not energized.
LIGHTS DO NOT TURN ON.
BLOWERS TOO NOISY.
• A loose or burned out light.
• Restricted vent Pipes, to many turns
In duct work, short run of duct work
LIGHT COMES ON ONLY WHEN
FAN SWITCH IS ON
• Fan and Light switch are wired
incorrectly
Frequently Asked Questions, Ventilation
E -3
Suggestions
• Have an electrician check power supply,
including the house circuit breaker, wiring and
fuses.
• Check the light.
• Check for blocked end cap or blower damper.
Have an HVAC tech check
duct calculations
• Call a service technician.
Revision 1.0
Dacor Technical Service
FAQ Gas Cooktops All Models
Problem
Cause
Suggestions
NOTHING WORKING
• Cooktop is not connected to electrical power.
• Check that cooktop is plugged in.
IGNITERS DO NOT SPARK
• Electrical panel has blown fuses or tripped breakers. • Check electrical panel for blown fuses or tripped
• Power cord may be unplugged in.
breaker.
• Check that cooktop is plugged in.
SPARKING, BUT NO FLAME
IGNITION
• Check that gas supply is not in the off position.
BURNERS IGNITE, BUT FLAME IS • Burner rings are not seated to burner base or ports
EXTREMELY LARGE, DISTORTED are plugged.
• Cooktop is set up for natural gas fuel and is hooked
OR YELLOW
up to L/P gas supply.
• Regulator is not installed.
BURNER FLAMES GOES OUT ON • Turn know toward to off position.
• Turn knob to correct low setting.
LOW SETTING
• Burner obstruction in valve or orifice.
IGNITERS SPARK
CONTINUOUSLY AFTER FLAME
IGNITES
• Power supply not grounded - new install.
• Power supply has reverse polarity- new install.
• Igniter wet or dirty. Clean or replace igniter
• Igniter ceramic post fracture or cracked.
ONE OR MORE BURNERS WILL
NOT STOP SPARKING UNLESS A
CERTAIN SEQUENCE OF
BURNERS ARE TURNED ON AT
THE SAME TIME
• There is a mismatch of igniter wires going to the
wrong burners. Follow the spark switch wiring back to
the valves and put the correct igniter to the correct
burner. Match this at the spark module.
• EXAMPLE valve 1 with burner head 1.
• Defective spark wire, cut, pinched, or grounded.
STAINLESS STEEL IS STAINED & • Remove all burners parts and knobs. Take Easy-Off
cleaner and apply it to a cotton cloth, be sure to use
DISCOLORED
gloves. Dab the cotton towel onto the stain and let sit
for 20 minutes. Wipe with damp TOWEL, REPEAT AS
Frequently Asked Questions, Cooktops Gas & Electric
F -1
Revision 1.0
Dacor Technical Service
many times till stain goes away.
FAQ Electric Cooktops All Models
Problem
D.O.A.
DEAD ON ARRIVAL
Cause
Suggestions
• Is there a light on around the DACOR name on the
cooktop glass?
• Cooktop in child lock out. Touch and hold light for 6
seconds, you will here 3 beeps and light will be off.
Cooktop should be operational.
D.O.A.
DEAD ON ARRIVAL
• Check for 240VAC at incoming power source
Fuse is blown or circuit breaker tripped
HEATING ELEMENTS DO NOT
HEAT PROPERLY
• Cooktop is not connected to 240 volt circuit.
• Check circuit beaker.
• Improper cookware being used or pot on wrong
burner being used. Elements shut down on it thermo
limiters
HEATING ELEMENT CYCLING ON • Heating Element temperature limiters are
temporarily shutting off the elements due to exceeding
– OFF – ON – OFF
the maximum allowable temperatures.
• This is a normal operating condition.
GLASS COOKTOP CARE
• Clean your Ceran cooktop surface regularly,
preferably each time you use it. First clean area with a
metal razor scraper, (Provided with your cooktop).
Hold the scraper at approximately at a 30 degree
angle to the cooktop surface. With the cooktop off and
Frequently Asked Questions, Cooktops Gas & Electric
F -2
Revision 1.0
Dacor Technical Service
not hot apply a few dabs of ALCO cleaner,(Provided
with your cooktop) on the area needing cleaning.
Use with a damp paper towel and wipe it like your
cleaning a window.
As a final step, clean with clear water and wipe the
cooktop surface with a clean, dry, towel.
GLASS IS STAINED OR
SCRATCHED
• Scratches resulting from daily use are quite
harmless and only impair the visual effect. There is no
need to worry if something spills or boils over. Even
burned-on foods can be easily removed using the
metal scraper. Please make sure that all deposits are
removed before the cooking surface will be used
again.
D.O.A.
DEAD ON ARRIVAL
• Is there a light on around the DACOR name on the
cooktop glass?
• Cooktop in child lock out. Touch and hold dacor or
light for 6 seconds, you will here 3 beeps and light will
turn off.
Cooktop should be operational.
D.O.A.
DEAD ON ARRIVAL
• Check for 240VAC at incoming power source
Fuse is blown or circuit breaker tripped
Frequently Asked Questions, Cooktops Gas & Electric
F -3
Revision 1.0
Dacor Technical Service
FAQ Dishwasher ED
Problem
Cause
Suggestions
DEAD/NO DISPLAY
• Verify 110 volts present a plug socket
• Unplug the dishwasher for 30 seconds and plug
back in.
• If dishwasher is still dead refer to a local servicer for
service
NOT CLEANING THE DISHES
• Verify incoming water temperature is at least 120
• Lower wash arm
degrees
• Wash motor
• Verify using newer powder dishwashing detergent.
Old detergent tends to clump together and not
dissolve as well
• Verify 3 piece filtration system is clean of debris
• If the first three check out OK refer to a local servicer
for service
NOT DRAINING
• Check for a clog in the air gap on the sink.
• If no obstruction is found refer to a local servicer for
service
NOT DRYING THE DISHES
• Verify customer is using rinse aid
• Heater
• Tupperware and other plastics will not dry in any
• Detergent dispenser
dishwasher
• Verify incoming water temperature is at least 120
degrees
• If the first three check out OK refer to a local servicer
for service
STOPS IN MID CYCLE/ MOTOR
NOT RUNNING
• Refer to service
Frequently Asked Questions, Dishwashers
• Control Board
• Display board
• Drain Pump
• Latch Assemble
• And/or adjustment
• Possible control board in MDW series
G -1
Revision 1.0
Dacor Technical Service
STOPS IN MID CYCLE/ MOTOR
CONTINUES TO RUN
• Verify what number on the display it gets stuck on
• Refer to service
Frequently Asked Questions, Dishwashers
G -2
• Control Board
Revision 1.0
Dacor Technical Service
Problem
MY OVEN DOESN’T HEAT UP.
THERE IS A FAN RUNNING
AFTER I TURN THE OVEN OFF.
FAQ Classic Wall Oven EC, MC, PC
Cause
Suggestions
• When you set the mode and the temperature what
• Replace high temperature limit.
does the clock show? Is it staying at 135 degrees?
If it stays at 135 degrees and is not heating the high
temperature limit may be tripped.
• This is the cooling fan, it is a normal sound and it
will go off after the oven components are cooled
down.
THE MEAT PROBE DOES NOT
WORK ALL THE TIME.
• Make sure you are following the instructions for
using the temperature probe in the “Use and Care”.
Hint: Be sure the meat is above 55 degrees when
you put it in the oven with the probe inserted.
MY OVEN RACKS ARE BINDING
AND WON’T MOVE.
NOTHING WORKS
• Are you talking about the glide rack? It may have
been left in during the clean cycle.
• Oven is not connected to electrical power.
• Power supply is not energized
• Replace glide rack.
OVEN WILL NOT HEAT.
• Oven settings are not correct
• Oven is set for Delay Timed Cooking
CLOCK DISPLAYS INCORRECT
TIME OF DAY.
• Time of day is not set.
• Power supply has been interrupted.
FOODS OVER-COOK.
• Incorrect cooking time, temperature or rack position
being used.
• Oven temperature calibration differs from your •
previous oven.
• Follow mode selection and clock settings as
specified in OVEN OPERATION section of U&C.
• Oven will turn on automatically at preset time.
If desired, press “CANCEL • SECURE” touch
pad to cancel out of Delay Timed Cooking.
• Press “CLOCK” touch pad, then press
“TIME • TEMP” pad to set correct time of day.
• Reset time of day.
• Adjust time or temperature.
• Change rack position
• Adjust oven temperature as per ADJUSTING THE
OVEN TEMPERATURE section.
FOODS UNDER-COOK.
• Incorrect cooking time, temperature, or rack
• Adjust time or temperature.
Frequently Asked Questions, Wall Ovens
H-1
• Have oven connected to a properly sized
electrical power supply by a qualified electrician.
• Have an electrician check power supply,
including the house circuit breaker, wiring
and fuses
Revision 1.0
Dacor Technical Service
position being used.
• Oven temperature calibration differs from your
previous oven.
• Adjusting the Oven Temperature
IMPORTANT :
The user may find the temperature in their new oven
to be different
from that of their previously-owned appliance.
Familiarity with the
old appliance sometimes makes it difficult to get
used to a new oven.
If you feel that the oven temperature is consistently
high or low, the
temperature of the new oven can be adjusted. The
adjustment needs
to be done only once.
The oven temperature may be adjusted (calibrated)
by
following these steps:
1. Press “BAKE” selector pad.
2. Press the “TIME • TEMP” “+” pad to set a
temperature of 500˚F or
higher.
3. Press and hold the “BAKE” selector pad. After
approximately 5
seconds the temperature display is replaced by “00”.
The “BAKE”
pad can now be released. The calibration mode has
been accessed.
4. Press the “TIME • TEMP” “+“ or “–” pad to set the
amount of
temperature adjustment. The temperature can be
changed a
maximum of 35˚F higher or lower. Set the
adjustment to positive (+)
numbers to increase the oven temperature; set the
adjustment to
Frequently Asked Questions, Wall Ovens
H-2
• Change rack position
• Adjust temperature as per Adjusting the oven
Temperature section of Use And Care
Revision 1.0
Dacor Technical Service
negative (–) numbers to reduce the oven
temperature. Temperatures
can be adjusted in increments of 5˚F.
5. After setting the desired temperature adjustment,
press the
“CANCEL • SECURE” pad to exit the calibration
mode and to reset the temperature.
OVEN DOES NOT SELF-CLEAN.
• Door is not shut tight, so automatic door latch will
not lock.
• Oven settings are not correct.
• Oven is set for Delay Timed Cleaning.
OVEN LIGHT WILL NOT WORK.
• Light bulb is burned out
DOOR WILL NOT OPEN.
• Door will not open after clean cycle.
OVEN WILL NOT HEAT AFTER
SELF CLEANING.
• Time of day is not set due to power failure.
• If oven is hot, door latch will release automatically
when oven temperature falls below 390˚F at end of
cycle.
• Press “CLOCK” touch pad, then press “TIMETEMP” pad to set correct time of day.
• Oven settings are not correct.
Problem
I KEEP GETTING A MESSAGE
TO CLEAN CONVECTION
FILTER.
• Close door tightly.
• Follow mode selection and clock settings as
specified in the SELF-CLEANING section.
• Oven will turn on automatically at preset time. If
desired, press “CANCEL • SECURE” touch pad to
cancel out Delay Timed Cleaning.
• Follow REPLACING THE OVEN LIGHT
Section in your use and care manual.
• Follow mode selection and clock settings as
specified
In the OVEN OPERATION section
of use and care.
FAQ Discovery Wall Oven EO, MO, PO
Cause
Suggestions
• Clearing the “Clean Convection Fan Filter”
• Use and Care will tell you that this is normal after
Message:
15 hours of convection fan running
NOTE: The “Clean Convection Fan Filter” is a
reminder
Frequently Asked Questions, Wall Ovens
H-3
Revision 1.0
Dacor Technical Service
that you should clean the convection filter(s).
Following the steps below, you may either choose to
ignore the message and continue baking, or reset
the
reminder function. You will have approximately 15
hours of use in this mode before you receive this
message
again.
When the “Clean Convection Fan Filter” message
appears on the screen, the variable function keys will
be labeled OK, RESET UPR, and/ or RESET LWR.
Press OK to clear the screen and continue using
oven.
Doing so does not clear the warning. Next time the
home screen is displayed, the message will
reappear.
Pressing OK allows you to leave the message as a
reminder if you are not ready to clean the filter, but
still want to cook.
If you clean the filter(s) and/or you want to reset
the message and counter, press the variable function
key with the appropriate RESET label. RESET UPR
will reset the upper or a single oven, RESET LWR
will reset the lower oven on units equipped with two
ovens.
NOTHING WORKS
• Oven not connected to electrical power.
• Lock-out feature is on (LOCKED appears in
display)
• Oven’s sleep feature is on,
• Oven’s Sabbath feature turned on.
OVEN WILL NOT HEAT
• Oven settings not correct
Frequently Asked Questions, Wall Ovens
H-4
• Have an electrician connect the oven to a
properly wired connection.
• Press and hold CANCEL/SECURE key for 5
seconds
• Press any control panel key or open the oven
door to cause the display to light up.
• Press CANCEL/SECURE
• Press CANCEL/SECURE, then follow the
Operating Your Oven – The Basics section in the
use and care
Revision 1.0
Dacor Technical Service
• Oven will turn on automatically at preset time.
Press “CANCEL/SECURE” to return to normal
operation.
PROBLEM
NOTHING WORKS
FAQ Renaissance Wall Ovens EOR, MOR
Cause
Suggestions
• Oven not connected to electrical power
• Have a licensed electrician connect oven to
• Power to oven is off
properly wired electrical connection.
• Control panel locked
• Turn on power at circuit breaker or fuse box. check
for tripped breaker or blown fuse.
• Press CANCEL-SECURE key for 4 seconds to
reactivate control panel.
OVEN WILL NOT HEAT
• Oven setting not correct.
• Oven set for delay timed cooking
• Attempting to broil with the meat probe connected.
OVEN SHUTS OFF BY ITSELF
AFTER IT HAS BEEN ON FOR
12 HOURS.
TIME ON DISPLAY NOT
CORRECT.
TIME FLASHES ON DISPLAY
• 12 hour timer is on. Unit is set to turn off
automatically after 12 hours of continuous use.
• Press CANCEL-SECURE, the follow instructions in
Operating the Oven section of the use and care.
• Oven will turn on automatically at the preset time.
press CANCEL-SECURE to return to normal
operation.
• Broil and Convection Broil settings will not work
when meat probe is connected to oven.
Disconnect the meat probe.
• Turn off 12 hour timer. See page 11 in use and
care
• Time of day not set
• Power failure or power was turned off.
• Time flashes on display
• Set time of day in Use and Care pg 8.
• Reset time, See Use and Care pg 8.
• Reset time, See Use and Care pg. 8
OVEN DOES NOT SELF
CLEAN
• Oven door not shut tightly.
• Oven set for delay timed cleaning
• Oven not set properly.
• Meat probe connected.
OVEN LIGHTS WILL NOT
• Light bulbs burned out.
• Check for obstructions. Shut door tightly.
• Oven well start to clean at preset time. Press
CANCEL-SECURE to return to normal operation.
• Follow instructions in Care and Cleaning section.
• Oven will not start self-clean cycle when meat
probe is connected. Disconnect and remove meat
probe.
• Replace light bulbs.
Frequently Asked Questions, Wall Ovens
H-5
Revision 1.0
Dacor Technical Service
WORK.
• Oven in self-clean mode.
• Oven in Sabbath mode
FOODS OVER OR UNDER
COOK.
COOLING FAN CONTINUES
TO RUN AFTER OVEN HAS
BEEN TURNED OFF.
CANNOT SET CLOCK.
• Incorrect cooking time or temperature
ERROR CODE APPEARS AND
STAYS ON DISPLAY, FOR
EXAMPLE “U55”
SABBATH MODE DOES NOT
WORK.
• Lights do not work when oven is in self-clean
mode, see page 23 in Use and Care.
• Lights do not work when oven is in Sabbath mode.
See page 20 in the Use and Care.
• Follow instructions in Operating Your Oven section.
• Normal operation
• The cooling fan may run for a while after the oven
is turned off, until the internal parts have cooled.
• Oven in use. Clock cannot be set while the oven is
in use.
• An error code having a letter with a number
following it that appears and stays on the display
indicated a problem that cannot be resolved by the
customer.
• Meat probe connected
• Turn oven off to set clock.
• Call for service.
• Oven will not start Sabbath mode when meat probe
is connected. Disconnect and remove the meat
probe.
• Press light key to turn lights off.
OVEN LIGHTS WILL NOT
TURN OFF.
OVEN DOOR WILL NOT OPEN.
• Light key is set to on.
• Oven door will not open.
• Check display, if lock symbol appears
On display, oven door cannot be opened.
Wait for oven to complete cycle or press
CANCEL-SECURE. Door will unlock once oven has
cooled.
CLOCK DISPLAYS THE
INCORRECT OF DAY
• Time of day is not set.
• Oven’s sleep feature is on.
• Clock disabled
OVEN DOES NOT SELF
CLEAN.
• Door not shut tight
• Oven set for delay timed cleaning
• Double ovens only; Other oven is on
BOTH OVEN LIGHTS WILL
NOT WORK. (NOTE: IF ONLY
ONE LIGHT IS NOT WORKING,
• Oven light disabled.
• Oven is in the self clean cycle
• Light bulbs burned out
• See clock section of the Use and Care.
• Press and control pad key or open the oven door to
cause the display to light up.
• See Enable/Disable the Clock in Use and Care
• Check for obstructions. Close door tightly
• Oven will start to self-clean at preset time. Press
CANCEL/SECURE to return to normal operation.
• Turn other oven off
• See Oven Lights in Use and Care
• Press CANCEL/SECURE
• See Replacing the Light Bulbs in the Use and Care
Frequently Asked Questions, Wall Ovens
H-6
Revision 1.0
Dacor Technical Service
THE BULB IS PROBABLY
BURNED OUT)
Frequently Asked Questions, Wall Ovens
H-7
Revision 1.0