1
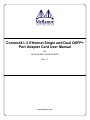
ConnectX®-3 Ethernet Single and Dual QSFP+
Port Adapter Card User Manual
P/N:
MCX313A-BCBT, MCX314A-BCBT
Rev 1.7
www.mellanox.com
Rev 1.7
ConnectX®-3 Ethernet Single and Dual QSFP+ Port Adapter Card User Manual
NOTE:
THIS HARDWARE, SOFTWARE OR TEST SUITE PRODUCT (“PRODUCT(S)”) AND ITS RELATED DOCUMENTATION ARE
PROVIDED BY MELLANOX TECHNOLOGIES “AS-IS” WITH ALL FAULTS OF ANY KIND AND SOLELY FOR THE PURPOSE
OF AIDING THE CUSTOMER IN TESTING APPLICATIONS THAT USE THE PRODUCTS IN DESIGNATED SOLUTIONS. THE
CUSTOMER'S MANUFACTURING TEST ENVIRONMENT HAS NOT MET THE STANDARDS SET BY MELLANOX
TECHNOLOGIES TO FULLY QUALIFY THE PRODUCT(S) AND/OR THE SYSTEM USING IT. THEREFORE, MELLANOX
TECHNOLOGIES CANNOT AND DOES NOT GUARANTEE OR WARRANT THAT THE PRODUCTS WILL OPERATE WITH THE
HIGHEST QUALITY. ANY EXPRESS OR IMPLIED WARRANTIES, INCLUDING, BUT NOT LIMITED TO, THE IMPLIED
WARRANTIES OF MERCHANTABILITY, FITNESS FOR A PARTICULAR PURPOSE AND NONINFRINGEMENT ARE
DISCLAIMED. IN NO EVENT SHALL MELLANOX BE LIABLE TO CUSTOMER OR ANY THIRD PARTIES FOR ANY DIRECT,
INDIRECT, SPECIAL, EXEMPLARY, OR CONSEQUENTIAL DAMAGES OF ANY KIND (INCLUDING, BUT NOT LIMITED TO,
PAYMENT FOR PROCUREMENT OF SUBSTITUTE GOODS OR SERVICES; LOSS OF USE, DATA, OR PROFITS; OR BUSINESS
INTERRUPTION) HOWEVER CAUSED AND ON ANY THEORY OF LIABILITY, WHETHER IN CONTRACT, STRICT LIABILITY,
OR TORT (INCLUDING NEGLIGENCE OR OTHERWISE) ARISING IN ANY WAY FROM THE USE OF THE PRODUCT(S) AND
RELATED DOCUMENTATION EVEN IF ADVISED OF THE POSSIBILITY OF SUCH DAMAGE.
Mellanox Technologies
Mellanox Technologies, Ltd.
350 Oakmead Parkway Suite 100
Beit Mellanox
Sunnyvale, CA 94085
PO Box 586 Yokneam 20692
U.S.A.
Israel
www.mellanox.com
www.mellanox.com
Tel: (408) 970-3400
Tel: +972 (0)74 723 7200
© Copyright 2012. Mellanox Technologies. All rights reserved.
Mellanox®, Mellanox logo®, BridgeX®, ConnectX®, CORE-Direct®, InfiniBridge®, InfiniHost®, InfiniScale®, PhyX®,
SwitchX®, Virtual Protocol Interconnect® and Voltaire® are registered trademarks of Mellanox Technologies, Ltd. ConnectIB™, FabricIT™, MLNX-OS™, ScalableHPC™, TestX™, Unbreakable-Link™, UFM™ and Unified Fabric Manager™ are
trademarks of Mellanox Technologies, Ltd.
All other trademarks are property of their respective owners.
2
Mellanox Technologies
Document Number: 3688
ConnectX®-3 Ethernet Single and Dual QSFP+ Port Adapter Card User Manual
Rev 1.7
Table of Contents
Table of Contents . . . . . . . . . . . . . . . . . . . . . . . . . . . . . . . . . . . . . . . . . . . . . . . . . . . . . . . . . . . . . . . . . 3
List of Tables . . . . . . . . . . . . . . . . . . . . . . . . . . . . . . . . . . . . . . . . . . . . . . . . . . . . . . . . . . . . . . . . . . . . . 5
List of Figures . . . . . . . . . . . . . . . . . . . . . . . . . . . . . . . . . . . . . . . . . . . . . . . . . . . . . . . . . . . . . . . . . . . . 6
Revision History . . . . . . . . . . . . . . . . . . . . . . . . . . . . . . . . . . . . . . . . . . . . . . . . . . . . . . . . . . . . . . . . . . 7
About this Manual . . . . . . . . . . . . . . . . . . . . . . . . . . . . . . . . . . . . . . . . . . . . . . . . . . . . . . . . . . . . . . . . 8
Intended Audience . . . . . . . . . . . . . . . . . . . . . . . . . . . . . . . . . . . . . . . . . . . . . . . . . . . . . . . . . . . . . . . . . .
Related Documentation . . . . . . . . . . . . . . . . . . . . . . . . . . . . . . . . . . . . . . . . . . . . . . . . . . . . . . . . . . . . . .
Document Conventions . . . . . . . . . . . . . . . . . . . . . . . . . . . . . . . . . . . . . . . . . . . . . . . . . . . . . . . . . . . . . .
Technical Support . . . . . . . . . . . . . . . . . . . . . . . . . . . . . . . . . . . . . . . . . . . . . . . . . . . . . . . . . . . . . . . . . .
Firmware and Software Updates . . . . . . . . . . . . . . . . . . . . . . . . . . . . . . . . . . . . . . . . . . . . . . . . . . . . . . .
Chapter 1
Overview . . . . . . . . . . . . . . . . . . . . . . . . . . . . . . . . . . . . . . . . . . . . . . . . . . . . . . . . . . . . 10
1.1
Supported Network Protocol Standards . . . . . . . . . . . . . . . . . . . . . . . . . . . . . . . . . . . . . . . . . . . . . . . .
1.1.1 10 and 40 Gigabit Ethernet . . . . . . . . . . . . . . . . . . . . . . . . . . . . . . . . . . . . . . . . . . . . . . . . . . . .
1.2 Adapter Cards Covered in this Manual . . . . . . . . . . . . . . . . . . . . . . . . . . . . . . . . . . . . . . . . . . . . . . . . .
1.3 Finding the MAC and Serial Number on the Adapter Card . . . . . . . . . . . . . . . . . . . . . . . . . . . . . . . . .
1.4 Safety Warnings . . . . . . . . . . . . . . . . . . . . . . . . . . . . . . . . . . . . . . . . . . . . . . . . . . . . . . . . . . . . . . . . . .
Chapter 2
I/O Interfaces . . . . . . . . . . . . . . . . . . . . . . . . . . . . . . . . . . . . . . . . . . . . . . . . . . . . . . . . . . . . . . . . . . . . .
2.1.1 Ethernet Interface . . . . . . . . . . . . . . . . . . . . . . . . . . . . . . . . . . . . . . . . . . . . . . . . . . . . . . . . . . .
2.1.2 PCI Express Interface . . . . . . . . . . . . . . . . . . . . . . . . . . . . . . . . . . . . . . . . . . . . . . . . . . . . . . . .
2.1.3 LED Assignment . . . . . . . . . . . . . . . . . . . . . . . . . . . . . . . . . . . . . . . . . . . . . . . . . . . . . . . . . . .
2.1.4 I2C-compatible Interface . . . . . . . . . . . . . . . . . . . . . . . . . . . . . . . . . . . . . . . . . . . . . . . . . . . . .
2.2 Power . . . . . . . . . . . . . . . . . . . . . . . . . . . . . . . . . . . . . . . . . . . . . . . . . . . . . . . . . . . . . . . . . . . . . . . . . . .
2.3 Power Level . . . . . . . . . . . . . . . . . . . . . . . . . . . . . . . . . . . . . . . . . . . . . . . . . . . . . . . . . . . . . . . . . . . . .
2.4 Memory . . . . . . . . . . . . . . . . . . . . . . . . . . . . . . . . . . . . . . . . . . . . . . . . . . . . . . . . . . . . . . . . . . . . . . . . .
2.4.1 System Memory . . . . . . . . . . . . . . . . . . . . . . . . . . . . . . . . . . . . . . . . . . . . . . . . . . . . . . . . . . . .
2.4.2 SPI . . . . . . . . . . . . . . . . . . . . . . . . . . . . . . . . . . . . . . . . . . . . . . . . . . . . . . . . . . . . . . . . . . . . . .
2.4.3 EEPROM . . . . . . . . . . . . . . . . . . . . . . . . . . . . . . . . . . . . . . . . . . . . . . . . . . . . . . . . . . . . . . . . .
14
16
16
16
16
17
17
17
17
17
18
Ethernet Adapter Card Installation. . . . . . . . . . . . . . . . . . . . . . . . . . . . . . . . . . . . . . 21
3.1
3.2
3.3
Hardware Requirements . . . . . . . . . . . . . . . . . . . . . . . . . . . . . . . . . . . . . . . . . . . . . . . . . . . . . . . . . . . .
Installation Instructions . . . . . . . . . . . . . . . . . . . . . . . . . . . . . . . . . . . . . . . . . . . . . . . . . . . . . . . . . . . . .
Identify the Card in Your System . . . . . . . . . . . . . . . . . . . . . . . . . . . . . . . . . . . . . . . . . . . . . . . . . . . . .
3.3.1 On Windows . . . . . . . . . . . . . . . . . . . . . . . . . . . . . . . . . . . . . . . . . . . . . . . . . . . . . . . . . . . . . . .
3.3.2 On Linux . . . . . . . . . . . . . . . . . . . . . . . . . . . . . . . . . . . . . . . . . . . . . . . . . . . . . . . . . . . . . . . . . .
3.4 Cables and Modules . . . . . . . . . . . . . . . . . . . . . . . . . . . . . . . . . . . . . . . . . . . . . . . . . . . . . . . . . . . . . . . .
3.4.1 Cable Installation . . . . . . . . . . . . . . . . . . . . . . . . . . . . . . . . . . . . . . . . . . . . . . . . . . . . . . . . . . .
Chapter 4
10
10
11
11
11
Adapter Card Interfaces . . . . . . . . . . . . . . . . . . . . . . . . . . . . . . . . . . . . . . . . . . . . . . . 14
2.1
Chapter 3
8
8
8
8
9
21
21
21
21
22
23
23
Driver Software and Firmware . . . . . . . . . . . . . . . . . . . . . . . . . . . . . . . . . . . . . . . . . 24
4.1
Driver Software . . . . . . . . . . . . . . . . . . . . . . . . . . . . . . . . . . . . . . . . . . . . . . . . . . . . . . . . . . . . . . . . . . .
4.1.1 Linux . . . . . . . . . . . . . . . . . . . . . . . . . . . . . . . . . . . . . . . . . . . . . . . . . . . . . . . . . . . . . . . . . . . . .
4.1.2 Windows . . . . . . . . . . . . . . . . . . . . . . . . . . . . . . . . . . . . . . . . . . . . . . . . . . . . . . . . . . . . . . . . . .
4.2 FlexBoot . . . . . . . . . . . . . . . . . . . . . . . . . . . . . . . . . . . . . . . . . . . . . . . . . . . . . . . . . . . . . . . . . . . . . . . .
4.3 RDMA over Converged Ethernet . . . . . . . . . . . . . . . . . . . . . . . . . . . . . . . . . . . . . . . . . . . . . . . . . . . . .
4.3.1 Hardware and Software Requirements . . . . . . . . . . . . . . . . . . . . . . . . . . . . . . . . . . . . . . . . . . .
4.4 Updating Adapter Card Firmware . . . . . . . . . . . . . . . . . . . . . . . . . . . . . . . . . . . . . . . . . . . . . . . . . . . . .
24
24
24
26
26
27
27
Appendix A Specifications. . . . . . . . . . . . . . . . . . . . . . . . . . . . . . . . . . . . . . . . . . . . . . . . . . . . . . . . 30
A.1 MCX313A-BCBT Specifications . . . . . . . . . . . . . . . . . . . . . . . . . . . . . . . . . . . . . . . . . . . . . . . . . . . . . 30
A.2 MCX314A-BCBT Specifications . . . . . . . . . . . . . . . . . . . . . . . . . . . . . . . . . . . . . . . . . . . . . . . . . . . . . 31
Mellanox Technologies
3
Rev 1.7
A.3 Board Mechanical Drawing and Dimensions . . . . . . . . . . . . . . . . . . . . . . . . . . . . . . . . . . . . . . . . . . . . 32
A.4 Regulatory Statements. . . . . . . . . . . . . . . . . . . . . . . . . . . . . . . . . . . . . . . . . . . . . . . . . . . . . . . . . . . . . . 33
Appendix B Interface Connectors Pinout . . . . . . . . . . . . . . . . . . . . . . . . . . . . . . . . . . . . . . . . . . . 34
B.1 I2C-compatible Connector Pinout . . . . . . . . . . . . . . . . . . . . . . . . . . . . . . . . . . . . . . . . . . . . . . . . . . . . . 34
B.2 PCI Express x8 Connector Pinout . . . . . . . . . . . . . . . . . . . . . . . . . . . . . . . . . . . . . . . . . . . . . . . . . . . . . 34
B.3 QSFP+ Connector Pinout . . . . . . . . . . . . . . . . . . . . . . . . . . . . . . . . . . . . . . . . . . . . . . . . . . . . . . . . . . . 36
Appendix C Replacing a Tall Bracket With a Short Bracket . . . . . . . . . . . . . . . . . . . . . . . . . . . 38
C.1 Replacing a Bracket. . . . . . . . . . . . . . . . . . . . . . . . . . . . . . . . . . . . . . . . . . . . . . . . . . . . . . . . . . . . . . . . 38
C.2 Removing the Existing Bracket from the Adapter Card . . . . . . . . . . . . . . . . . . . . . . . . . . . . . . . . . . . . 38
C.3 Installing the New Bracket . . . . . . . . . . . . . . . . . . . . . . . . . . . . . . . . . . . . . . . . . . . . . . . . . . . . . . . . . . 39
Appendix D Avertissements de sécurité d’installation (Warnings in French) . . . . . . . . . . . . . . 41
Appendix E Sicherheitshinweise (Warnings in German). . . . . . . . . . . . . . . . . . . . . . . . . . . . . . . 43
Appendix F Advertencias de seguridad para la instalación (Warnings in Spanish) . . . . . . . . . 45
4
Mellanox Technologies
ConnectX®-3 Ethernet Single and Dual QSFP+ Port Adapter Card User Manual
Rev 1.7
List of Tables
Table 1:
Revision History Table . . . . . . . . . . . . . . . . . . . . . . . . . . . . . . . . . . . . . . . . . . . . . . . . . . . 7
Table 2:
Documents List . . . . . . . . . . . . . . . . . . . . . . . . . . . . . . . . . . . . . . . . . . . . . . . . . . . . . . . . . 8
Table 3:
Single and Dual-port 40 Gigabit Ethernet Adapter Cards. . . . . . . . . . . . . . . . . . . . . . . . 11
Table 4:
Physical and Logical Link Indication . . . . . . . . . . . . . . . . . . . . . . . . . . . . . . . . . . . . . . . 16
Table 5:
Jumper Configuration . . . . . . . . . . . . . . . . . . . . . . . . . . . . . . . . . . . . . . . . . . . . . . . . . . . 17
Table 6:
MCX31[34]-BCBT VPD Layout . . . . . . . . . . . . . . . . . . . . . . . . . . . . . . . . . . . . . . . . . . 18
Table 7:
MCX313A-BCBT Specifications Table . . . . . . . . . . . . . . . . . . . . . . . . . . . . . . . . . . . . . 30
Table 8:
MCX314A-BCBT Specifications Table . . . . . . . . . . . . . . . . . . . . . . . . . . . . . . . . . . . . . 31
Table 9:
I2C-compatible Connector Pinout . . . . . . . . . . . . . . . . . . . . . . . . . . . . . . . . . . . . . . . . . . 34
Table 10:
Connector Pin Number and Name to Signal Name Map. . . . . . . . . . . . . . . . . . . . . . . . . 37
Mellanox Technologies
5
Rev 1.7
List of Figures
Figure 1:
Card Product Label (Example) . . . . . . . . . . . . . . . . . . . . . . . . . . . . . . . . . . . . . . . . . . . . 11
Figure 2:
MCX314A-BCBT Card. . . . . . . . . . . . . . . . . . . . . . . . . . . . . . . . . . . . . . . . . . . . . . . . . . 14
Figure 3:
Dual-port Bracket . . . . . . . . . . . . . . . . . . . . . . . . . . . . . . . . . . . . . . . . . . . . . . . . . . . . . . 15
Figure 4:
Single-port Bracket . . . . . . . . . . . . . . . . . . . . . . . . . . . . . . . . . . . . . . . . . . . . . . . . . . . . . 15
Figure 5:
I2C-compatible Connector . . . . . . . . . . . . . . . . . . . . . . . . . . . . . . . . . . . . . . . . . . . . . . . 16
Figure 6:
PCI Device. . . . . . . . . . . . . . . . . . . . . . . . . . . . . . . . . . . . . . . . . . . . . . . . . . . . . . . . . . . . 22
Figure 7:
Device Manager. . . . . . . . . . . . . . . . . . . . . . . . . . . . . . . . . . . . . . . . . . . . . . . . . . . . . . . . 25
Figure 8:
Support Download Assistant . . . . . . . . . . . . . . . . . . . . . . . . . . . . . . . . . . . . . . . . . . . . . . 28
Figure 9:
Mechanical Drawing of the Single-port MCX313A-BCBT Adapter Card. . . . . . . . . . . 32
Figure 10: Mechanical Drawing of the Dual-port MCX314A-BCBT Adapter Card . . . . . . . . . . . 33
Figure 11: Compatible Connector Plug and Pinout . . . . . . . . . . . . . . . . . . . . . . . . . . . . . . . . . . . . . 34
Figure 12: PCIe Connector Pinout . . . . . . . . . . . . . . . . . . . . . . . . . . . . . . . . . . . . . . . . . . . . . . . . . . 35
Figure 13: Connector and Cage Views . . . . . . . . . . . . . . . . . . . . . . . . . . . . . . . . . . . . . . . . . . . . . . . 36
Figure 14: Bracket Screws . . . . . . . . . . . . . . . . . . . . . . . . . . . . . . . . . . . . . . . . . . . . . . . . . . . . . . . . 38
Figure 15: Gasket Location on Adapter Card . . . . . . . . . . . . . . . . . . . . . . . . . . . . . . . . . . . . . . . . . . 39
Figure 16: Gasket Installation . . . . . . . . . . . . . . . . . . . . . . . . . . . . . . . . . . . . . . . . . . . . . . . . . . . . . . 39
Figure 17: Placing the Bracket on the Card . . . . . . . . . . . . . . . . . . . . . . . . . . . . . . . . . . . . . . . . . . . 40
6
Mellanox Technologies
ConnectX®-3 Ethernet Single and Dual QSFP+ Port Adapter Card User Manual
Rev 1.7
Revision History
This document was printed on November 14, 2012.
Table 1 - Revision History Table
Date
Rev
Comments/Changes
November 2012
1.7
•
Updated Web links in the following locations:
- Section 4.3.1, “Hardware and Software Requirements,” on
page 27
- Table 7, “MCX313A-BCBT Specifications Table,” on page 30
- Table 8, “MCX314A-BCBT Specifications Table,” on page 31
October 2012
1.66
•
•
Fixed Table 5, “Jumper Configuration,” on page 17
Updated figures in Section 4.1.2, “Windows,” on page 24 by providing ConnectX-3 examples
August 2012
1.5
•
Added operational and non-operational temperature and humidity level to the following tables:
- Table 7, “MCX313A-BCBT Specifications Table,” on page 30
- Table 8, “MCX314A-BCBT Specifications Table,” on page 31
May 2012
1.4
•
Removed “Blinking indicates a problem with the physical link”
from Table 4, “Physical and Logical Link Indication,” on
page 16
April 2012
1.3
•
Updated power numbers in Table 7, “MCX313A-BCBT Specifications Table,” on page 30 and Table 8, “MCX314A-BCBT
Specifications Table,” on page 31
January 2012
1.2
•
•
Minor edits
Updated LED functions in Section 2.1.3, “LED Assignment,” on
page 16
Formatted specification tables in Appendix A, “Specifications,”
on page 30
•
October 2011
1.1
Added new OPNs based on ConnectX-3 Step A1 devices
July 2011
1.0
Minor edits
July 2011
0.10
First Release
Mellanox Technologies
7
Rev 1.7
About this Manual
This User Manual describes Mellanox Technologies ConnectX®-3 40 Gigabit Ethernet Single and
Dual QSFP+ port PCI Express x8 adapter cards. It provides details as to the interfaces of the
board, specifications, required software and firmware for operating the board, and relevant documentation.
Intended Audience
This manual is intended for the installer and user of these cards.
The manual assumes basic familiarity with Ethernet networks and architecture specifications.
Related Documentation
Table 2 - Documents List
Mellanox Firmware Tools (MFT) User Manual
Document no. 2204UG
User Manual describing the set of MFT firmware management tools for a
single node.
See http://www.mellanox.com => Support => Download Firmware Tools
IEEE Std 802.3 Specification
This is the IEEE Ethernet specification
http://standards.ieee.org/getieee802
PCI Express 3.0 Specifications
Industry Standard PCI Express 3.0 Base and Card Electromechanical
Specifications
Document Conventions
When discussing memory sizes, MB and MBytes are used in this document to mean size in mega
bytes. The use of Mb or Mbits (small b) indicates size in mega bits. In this document PCIe is used
to mean PCI Express.
Technical Support
Customers who purchased Mellanox products directly from Mellanox are invited to contact us
through the following methods.
• URL: http://www.mellanox.com => Support
• E-mail: [email protected]
• Tel: +1.408.916.0055
Customers who purchased Mellanox M-1 Global Support Services, please see your contract for
details regarding Technical Support.
8
Mellanox Technologies
ConnectX®-3 Ethernet Single and Dual QSFP+ Port Adapter Card User Manual
Rev 1.7
Customers who purchased Mellanox products through a Mellanox approved reseller should first
seek assistance through their reseller.
Firmware and Software Updates
The Mellanox support downloader contains software, firmware and knowledge database information for Mellanox products. Access the data base from the Mellanox Support web page,
http://www.mellanox.com => Support
or use the following link to go directly to the Mellanox Support Download Assistant page,
http://www.mellanox.com/supportdownloader/.
Mellanox Technologies
9
Rev 1.7
1
Overview
Overview
This document is a User Manual for Mellanox Technologies Ethernet cards based on the ConnectX®-3 EN integrated circuit device. The cards described in this manual have the following
main features:
• IEEE Std. 802.3 compliant
• PCI Express 3.0 (1.1 and 2.0 compatible) through an x8 edge connector up to 8GT/s
• Single and Dual-port options available
- ESD protection on the network connector
• Compliant with QSFP+ MSA spec Rev. 1.0
• Compatible with copper cables and optical cables with the use of QSFP connectors. Support for
SFP+ cables is available through QSA (Quad to Serial)
• RDMA over Converged Ethernet (RoCE)
• End-to-end QoS and congestion control
• Hardware-based I/O virtualization
• TCP/UDP/IP stateless off-load
• RoHS-R6 compliant
• Two bracket heights: short and tall
1.1
Supported Network Protocol Standards
1.1.1 10 and 40 Gigabit Ethernet
10 and 40 Gigabit Ethernet are Ethernet network protocol standards for LANs specifying data
transfer rates of 10 and 40Gb/s, respectively. Mellanox adapters comply with the following IEEE
802.3* standards:
• IEEE Std 802.3-2008 Ethernet
• IEEE Std 802.3ae 10 Gigabit Ethernet
• IEEE Std 802.3ba 40 Gigabit Ethernet
• IEEE Std 802.3ad Link Aggregation and Failover
10
Mellanox Technologies
ConnectX®-3 Ethernet Single and Dual QSFP+ Port Adapter Card User Manual
1.2
Rev 1.7
Adapter Cards Covered in this Manual
Table 3 lists the single and dual-port 40 Gigabit Ethernet adapter cards.
Table 3 - Single and Dual-port 40 Gigabit Ethernet Adapter Cards
Ordering Part Number
(OPN)
PCI Express
SERDES Speed
Data Transmission Rate/
# of ports
MCX313A-BCBT
PCIe 3.0 x8
8GT/s
40GigE singleport QSFP
MCX314A-BCAT
(Legacy product)
MCX314A-BCBT
1.3
PCIe 3.0 x8
8GT/s
PCIe 3.0 x8
8GT/s
40GigE dual-port
QSFP
40GigE dual-port
QSFP
RoHS
IC
Part Number
R6
MT27518A1-FCCR-BE
R6
R6
MT27518A0-FCCR-BE
MT27518A1-FCCR-BE
Device ID (decimal)
•
4099 for Physical
Function
•
4100 for Virtual
Function
•
4099 for Physical
Function
•
4100 for Virtual
Function
•
4099 for Physical
Function
•
4100 for Virtual
Function
Finding the MAC and Serial Number on the Adapter Card
Each Mellanox adapter card has a label on the print side that shows the card serial number and the
card MAC for the Ethernet protocol.
Figure 1: Card Product Label (Example)
1.4
Safety Warnings
Below is a list of safety warnings in English. For safety warnings in other languages, please refer
to the appendices in this user manual.
Mellanox Technologies
11
Rev 1.7
Overview
1. Installation Instructions
Read all installation instructions before connecting the equipment to the power source.
2. Over-temperature
This equipment should not be operated in an area with an ambient temperature exceeding the maximum recommended: 55°C (131°F).
To guarantee proper air flow, allow at least 8cm (3 inches) of clearance around the ventilation openings.
3. During Lightning - Electrical Hazard
During periods of lightning activity, do not work on the equipment or connect or disconnect cables.
4. Copper Cable Connecting/Disconnecting
Some copper cables are heavy and not flexible, as such they should be carefully
attached to or detached from the connectors. Refer to the cable manufacturer for special warnings and instructions.
5. Equipment Installation
This equipment should be installed, replaced, or serviced only by trained and qualified
personnel.
6. Equipment Disposal
Disposal of this equipment should be in accordance to all national laws and regulations.
7. Local and National Electrical Codes
This equipment should be installed in compliance with local and national electrical
codes.
12
Mellanox Technologies
ConnectX®-3 Ethernet Single and Dual QSFP+ Port Adapter Card User Manual
Rev 1.7
8. Hazardous Radiation Exposure
Caution – Use of controls or adjustment or performance of procedures other than
those specified herein may result in hazardous radiation exposure.
CLASS 1 LASER PRODUCT and reference to the most recent laser standards:
IEC 60 825-1:1993 + A1:1997 + A2:2001 and EN 60825-1:1994+A1:1996+
A2:2001
Mellanox Technologies
13
Rev 1.7
Adapter Card Interfaces
2
Adapter Card Interfaces
2.1
I/O Interfaces
Each adapter card includes the following interfaces:
• QSFP+ port(s)
• PCI Express (PCIe) x8 edge connector
• I/O panel LEDs
• I2C-compatible connector (for debug)
Figure 2: MCX314A-BCBT Card
The adapter cards include special circuits to protect from ESD shocks to the card/server when
plugging copper cables.
For dual-port cards, Port 1 connects to connector 1 of the device, while Port 2 connects to connector 2 of the device. See Figure 3 for the mechanical drawing of a dual-port bracket and Figure 4 for
the mechanical drawing of a single-port bracket.
14
Mellanox Technologies
ConnectX®-3 Ethernet Single and Dual QSFP+ Port Adapter Card User Manual
Rev 1.7
Figure 3: Dual-port Bracket
Figure 4: Single-port Bracket
Mellanox Technologies
15
Rev 1.7
Adapter Card Interfaces
2.1.1 Ethernet Interface
The network ports of the ConnectX®-3 adapter cards are compliant with the IEEE 802.3 Ethernet
standards listed in Section 1.1.1, “10 and 40 Gigabit Ethernet,” on page 10. Ethernet traffic is
transmitted through the cards' QSFP+ connectors.
2.1.2 PCI Express Interface
The ConnectX®-3 adapter cards support PCI Express 3.0 (1.1 and 2.0 compatible) throughanx8
edge connector. The device can be either a master initiating the PCI Express bus operations or a
slave responding to PCI bus operations.
2.1.3 LED Assignment
There are two I/O LEDs per port in dual-port designs. See Table 4 for different LED functions.
Table 4 - Physical and Logical Link Indication
LED
Function
Green - physical link
•
•
Constant on indicates a good physical link
If neither LED is lit, then the physical link has not been established
Yellow logical (data activity
link)
•
•
A blinking yellow indicates activity (data transfer)
Stays off when there is no activity
The short bracket has the same port and LED footprints as the tall bracket.
2.1.4 I2C-compatible Interface
A three-pin header on the adapter cards is provided as the I2C-compatible interface. See Figure 10,
“Mechanical Drawing of the Dual-port MCX314A-BCBT Adapter Card,” on page 33 for the location on the board.
Figure 5: I2C-compatible Connector
16
Mellanox Technologies
ConnectX®-3 Ethernet Single and Dual QSFP+ Port Adapter Card User Manual
2.2
Rev 1.7
Power
All adapter cards receive 12V and 3.3V power from the PCI Express edge connector. All other
required power voltages are generated by on-board switch mode regulators. See “Specifications”
on page 30.
2.3
Power Level
The adapter cards support power levels according to SFF Committee SFF-8436 Specification for
(Small Form-factor Pluggable) Transceiver.
2.4
Memory
The adapter cards support multiple memory devices through the PCIe, SPI (Flash) and I2C interfaces.
2.4.1 System Memory
The adapter cards utilize the PCI Express interface to store and access Ethernet fabric connection
information and packet data on the system memory.
2.4.2 SPI
Each of the adapter cards includes one 16MB SPI Flash device (M25PX16-VMN6P device by ST
Microelectronics) accessible via the SPI interface of the ConnectX®-3 device.
When a jumper is inserted into the drill holes in the adapter it indicates to the device that the onboard Flash device should not be used for boot instructions. Contact your Mellanox support representative should you need to use this jumper. Table 5 provides information on this jumper. The
jumper location on the board is illustrated in Appendix A.3, “Board Mechanical Drawing and
Dimensions,” on page 32.
Table 5 - Jumper Configuration
Description
Flash present/
not present
Option
connection open – Flash present
Card Default
Configuration
connection open –
Flash present
connection shorted – Flash not present
Mellanox Technologies
17
Rev 1.7
Adapter Card Interfaces
2.4.3 EEPROM
Each board incorporates an EEPROM that is accessible through the I2C-compatible interface. The
EEPROM capacity is 4Kb. The EEPROM is used for storing the Vital Product Data (VPD).
The PCI VPD (Vital Product Data) layout for each of the adapter cards complies with the format
defined in the PCI 3.0 Specification, Appendix I.
Table 6 - MCX31[34]-BCBT VPD Layout
Offset
(Decimal)
18
Item
Value
Format
Description
0
Large Resource Type ID
String Tag (0x02)
0x82
1
Length [7:0] LSB
0x18
2
Length [15:8] MSB
0x0
3
Data
CX314A - ConnectX-3 QSFP
27
Large Resource Type VPD-R
Tag (0x10)
0x90
28
Length [7:0] LSB
0x4F
29
Length [15:8] MSB
0x00
30
VPD Keyword
PN
32
Length
0x15
33
Part Number
PN
%STR_SPC
54
VPD Keyword
EC
STR
Engineering Change Level of
the card (rev)
56
Length
0x2
57
Revision
RV
%STR
PCB revision
59
VPD Keyword
SN
STR
Serial Number
61
Length
0x18
62
SerialNumber
SN
%STR_SPC
“00..00XXXX..XX”
86
VPD Keyword
V0
STR
Misc Information
88
Length
0x10
89
Data
PCIe Gen3 x8
STR_SPC
105
VPD Keyword
RV
STR
107
Length
0x1
108
Data
0,107
109
Large Resource Type VPD-W
Tag (0x11)
0x91
110
Length [7:0] LSB
0x8F
STR
STR
Add in Card Part Number
%CS0
111
Length [15:8] MSB
0xF
112
VPD Keyword
V1
114
Length
0x6
115
Data
N/A
STR_SPC
121
VPD Keyword
YA
STR
Asset Tag
123
Length
0x18
124
Data
N/A
STR_SPC
“N/A”
Mellanox Technologies
STR
EFI Driver version
ConnectX®-3 Ethernet Single and Dual QSFP+ Port Adapter Card User Manual
Offset
(Decimal)
Item
148
150
Rev 1.7
Value
Format
Description
VPD Keyword
RW
STR
Remaining read/write area
Length
0x69
151
Data
256
VPD Keyword
RW
258
Length
0xfd
259
Data
512
VPD Keyword
RW
514
Length
0xfd
515
Data
768
VPD Keyword
RW
770
Length
0xfd
771
Data
1024
VPD Keyword
RW
1026
Length
0xfd
1027
Data
1280
VPD Keyword
RW
1282
Length
0xfd
1283
Data
1536
VPD Keyword
RW
1538
Length
0xfd
1539
Data
1792
VPD Keyword
RW
1794
Length
0xfd
1795
Data
2048
VPD Keyword
RW
2050
Length
0xfd
2051
Data
2304
VPD Keyword
RW
2306
Length
0xfd
2307
Data
2560
VPD Keyword
RW
2562
Length
0xfd
2563
Data
2816
VPD Keyword
RW
2818
Length
0xfd
2819
Data
3072
VPD Keyword
RW
3074
Length
0xfd
3075
Data
3328
VPD Keyword
RW
3330
Length
0xfd
3331
Data
3584
VPD Keyword
RW
3586
Length
0xfd
STR_ZERO
Reserved (0x00)
STR
Remaining read/write area
STR_ZERO
Reserved (0x00)
STR
Remaining read/write area
STR_ZERO
Reserved (0x00)
STR
Remaining read/write area
STR_ZERO
Reserved (0x00)
STR
Remaining read/write area
STR_ZERO
Reserved (0x00)
STR
Remaining read/write area
STR_ZERO
Reserved (0x00)
STR
Remaining read/write area
STR_ZERO
Reserved (0x00)
STR
Remaining read/write area
STR_ZERO
Reserved (0x00)
STR
Remaining read/write area
STR_ZERO
Reserved (0x00)
STR
Remaining read/write area
STR_ZERO
Reserved (0x00)
STR
Remaining read/write area
STR_ZERO
Reserved (0x00)
STR
Remaining read/write area
STR_ZERO
Reserved (0x00)
STR
Remaining read/write area
STR_ZERO
Reserved (0x00)
STR
Remaining read/write area
STR_ZERO
Reserved (0x00)
STR
Remaining read/write area
Mellanox Technologies
19
Rev 1.7
Adapter Card Interfaces
Offset
(Decimal)
20
Item
Value
3587
Data
3840
VPD Keyword
RW
3842
Length
0xfc
3843
Data
4095
Small Resource Type END
Tag (0x11)
Mellanox Technologies
0x78
Format
Description
STR_ZERO
Reserved (0x00)
STR
Remaining read/write area
STR_ZERO
Reserved (0x00)
ConnectX®-3 Ethernet Single and Dual QSFP+ Port Adapter Card User Manual
3
Ethernet Adapter Card Installation
3.1
Hardware Requirements
Rev 1.7
A system with a PCI Express x8 slot is required for installing the card.
3.2
Installation Instructions
Read all installation instructions before connecting the equipment to the power source.
To change a tall bracket to a short bracket see Replacing a Tall Bracket With a Short
Bracket on page 38.
The adapter cards listed above are standard PCI Express cards, each with a standard x8 edge connector. The cards require a PCI Express x8. Please consult the host machine documentation for
instructions on how to install a PCI Express card.
If the card is installed in a PCI slot with less lanes than the card requires then the adapter
card will not provide the optimum data transfer.
3.3
Identify the Card in Your System
3.3.1 On Windows
1.
2.
3.
4.
Open Device Manager on the server. Click start => Run, and then enter “devmgmt.msc”.
Expand System Devices and locate your Mellanox ConnectX-3 adapter card.
Select Properties to display the adapter card properties window.
Click the Details tab and select Device Instance Id (Windows 2003) or
Hardware Ids (Windows 2008/R2) from the Property pull-down menu.
Mellanox Technologies
21
Rev 1.7
Ethernet Adapter Card Installation
Figure 6: PCI Device
5.
In the Value display box, check the fields VEN and DEV (fields are separated by ‘&’). In the
display example above, notice the sub-string “PCI\VEN_15B3&DEV_1003”: VEN is equal
to 0x15B3 – this is the Vendor ID of Mellanox Technologies; and DEV is equal to 1003 –
this is a valid Mellanox Technologies PCI Device ID.
If the PCI device does not have a Mellanox adapter ID, return to Step 4 to check another
device.
The list of Mellanox Technologies PCI Device IDs can be found in the PCI ID repository at http://pci-ids.ucw.cz/read/PC/15b3.
3.3.2 On Linux
Get the device location on the PCI bus by running lspci and locating lines with the string “Mellanox Technologies”:
> lspci |grep -i Mellanox
27:00.0 Network controller: Mellanox Technologies MT27500 Family [ConnectX-3]
22
Mellanox Technologies
ConnectX®-3 Ethernet Single and Dual QSFP+ Port Adapter Card User Manual
3.4
Rev 1.7
Cables and Modules
Please refer to “Mellanox Products Approved Cable Lists” at www.mellanox.com/related-docs/
user_manuals/Mellanox_approved_cables.pdf.
3.4.1 Cable Installation
1.
2.
3.
All cables can be inserted or removed with the unit powered on. To insert a cable, press the
connector into the port receptacle until the connector is firmly seated.
After inserting a cable into a port, the GREEN LED indicator will light when the physical
connection is established (that is, when the unit is powered on and a cable is plugged into the
port with the other end of the connector plugged into a functioning port).
After plugging in a cable, lock the connector using the latching mechanism particular to the
cable vendor. When a logical connection is made the YELLOW LED will come on. When
data is being transferred the yellow led will blink.
When installing cables make sure that the latches engage.
Always install and remove cables by pushing or pulling the cable and connector in a
straight line with the card.
4.
5.
Care should be taken as not to impede the air exhaust flow through the ventilation holes.
Cable lengths which allow for routing horizontally around to the side of the chassis before
bending upward or downward in the rack should be used
To remove a cable, disengage the locks and slowly pull the connector away from the port
receptacle. Both LED indicators will turn off when the cable is unseated.
Cables, especially long copper cables, can weigh a substantial amount. Make sure that
the weight of the cable is supported on its own and is not hanging from the adapter
card.
Mellanox Technologies
23
Rev 1.7
Driver Software and Firmware
4
Driver Software and Firmware
4.1
Driver Software
4.1.1 Linux
For Linux, download and install the latest MLNX_EN driver software package available via the
Mellanox web site at: http://www.mellanox.com => Products => Software/Drivers => Ethernet
SW/Drivers => ConnectX®-3 EN 10/40GigE Linux Driver => Download. Follow the installation
instructions included in the download package (also available from the download page). To ensure
that communication has been established follow the instructions below.
Check the link status
First check the network interface name by running the “ifconfig –a” command
To assign an IP address to the interface run:
> ifconfig eth<x> <ip>
where 'x' is the OS assigned interface number.
To check driver and device information run:
> ethtool -i eth<x>
Example:
> ethtool -i eth2
driver:mlx4_en (MT_1020110019_CX-3)
version: 1.5.6.33 (Oct 2011)
firmware-version:2.10.0000
bus-info: 0000:07:00.0
4.1.2 Windows
For Windows, download and install the latest Mellanox WinOF VPI for Windows software package available via the Mellanox web site at: http://www.mellanox.com => Products => Software/
Drivers =>Ethernet Software/Drivers=> Mellanox WinOF => Download. Follow the installation
instructions included in the download package (also available from the download page). http://
24
Mellanox Technologies
ConnectX®-3 Ethernet Single and Dual QSFP+ Port Adapter Card User Manual
Rev 1.7
www.mellanox.comTo ensure that communication has been established follow the instructions
below.
To display a summary of network adapter software-, firmware- and hardware-related information
such as driver version, firmware version, bus interface, adapter identity, and network port link
information, perform the following steps:
Step 1: Display the Device Manager
Figure 7: Device Manager
Step 2: Right-click a Mellanox ConnectX Ethernet adapter (under “Network adapters list) and leftclick Properties.
Mellanox Technologies
25
Rev 1.7
Driver Software and Firmware
Step 3: Select the Information tab from the Properties sheet (example).
To save this information for debug purposes, click Save To File and provide the output
file name.
4.2
FlexBoot
FlexBoot enables remote boot over Ethernet, Boot over Ethernet (BoE) or Boot over iSCSI (BoiSCSI). This technology is based on the Preboot Execution Environment (PXE) standard specification, and FlexBoot software is based on the open source iPXE project (see www.ipxe.org). For
more information go to http://www.mellanox.com => Products => Software/Drivers => Ethernet
Software/Drivers => FlexBoot => Download.
4.3
RDMA over Converged Ethernet
ConnectX®-3 connected to an Ethernet fabric provides all of the basic NIC functionality plus
RDMA over Converged Ethernet (RoCE). RoCE utilizes advances in Data Center Bridging (DCB)
to enable efficient and low cost implementations of RDMA over Ethernet, supporting the entire
breadth of RDMA and low latency features. This includes reliable connected service, datagram
service, RDMA and send/receive semantics, atomic operations, user level multicast, user level I/O
access, kernel bypass, and zero copy. This capability is enabled when using the Mellanox OFED or
WinOF VPI drivers.
26
Mellanox Technologies
ConnectX®-3 Ethernet Single and Dual QSFP+ Port Adapter Card User Manual
Rev 1.7
ConnectX®-3 EN with RoCE based network management is the same as that for any Ethernet and
DCB-based network management, eliminating the need for IT managers to learn new technologies.
4.3.1 Hardware and Software Requirements
Software:
• Mellanox OFED 1.5.1 or WinOF 2.1.2 or later. To download these packages go to http://
www.mellanox.com => Products => Software/Drivers => Ethernet SW/Driver.
Hardware:
• ConnectX®-3 EN adapter card
4.4
Updating Adapter Card Firmware
Each card is shipped with the latest version of qualified firmware at the time of manufacturing.
Firmware is updated occasionally, and the most recent firmware can be obtained from:
http://www.mellanox.com => Support => Download Firmware. Check that the firmware on your
card is the latest found on the Mellanox site, if not update to the latest version found on the Mellanox web site.
Firmware can be updated on the stand alone single card using the flint tool of the Mellanox Firmware Tools (MFT) package. This package is available for download, along with its user manual,
from the Mellanox Firmware Tools page. See http://www.mellanox.com => Support => Download
Firmware Tools.
A firmware binaries table lists a binary file per adapter card. The file name of each such binary is
composed by combining the firmware name, the firmware release version, and the card part number. Please contact Mellanox System Support if you cannot find the firmware binary for your
adapter card.
The following steps describe how to retrieve the PSID (firmware identification) and programmed
firmware version of your adapter card. They also describe how to update the card with the latest
firmware version available.
1.
Retrieve the PSID and firmware version:
a. Install the MFT package. The package is available at http://www.mellanox.com => Products
=> Software/Drivers => Ethernet Software/Drivers => Firmware Tools. Make sure to download the package corresponding to your computer’s operating system.
b. Enter: mst start.
c. Get the Mellanox mst device name using the command "mst status". The mst device name will be of
the form: /dev/mst/mt4099_pci_cr0.
d. Get the PSID (firmware identification) and programmed firmware version using the command.
Mellanox Technologies
27
Rev 1.7
Driver Software and Firmware
> flint -d /dev/mst/mt4099_pci_cr0 q
Image type:
ConnectX
FW Version:
2.9.4000
Device ID:
4099
Chip Revision: 0
Description:
Node
Port1
Port2
Sys image
GUIDs:
000002c900000200 000002c900000201
000002c900000202 000002c900000203
MACs:
000002c90200
000002c90201
Board ID:
(MT_1020110019)
VSD:
PSID:
MT_1020110019
2.
Compare the programmed firmware version with the latest available.
a. Go to Mellanox’s web site: http://www.mellanox.com/supportdownloader. See Figure 8.
b. Enter your card PSID to display the latest firmware.
Figure 8: Support Download Assistant
3.
If a newer firmware version exists for your adapter card, update the firmware as follows:
a. Download the firmware image zip file from the Download Center (see Step 2a above).
b. Unzip the firmware image.
c. Burn the firmware image. Enter:
28
Mellanox Technologies
ConnectX®-3 Ethernet Single and Dual QSFP+ Port Adapter Card User Manual
Rev 1.7
> flint -d /dev/mst/mt4099_pci_cr0 -i <binary image> burn
d. Reboot the computer.
e. Enter: mst start.
f. Verify that the card firmware was updated successfully.
> flint -d /dev/mst/mt4099_pci_cr0
Image type:
ConnectX
FW Version:
2.9.4100
Device ID:
4099
...
q
Mellanox Technologies
29
Rev 1.7
Appendix A: Specifications
A.1
MCX313A-BCBT Specifications
Table 7 - MCX313A-BCBT Specifications Table
Size: 2.12in. x5.6 in. (53.59mm x 142.25 mm)
Physical
Connector: QSFP
Ethernet: 40GBASE-CR4 /-SR4/-LR4; also supports the following when used with a
QSA: 10GBASE-CR/-SR/LR; 1000BASE-T/-SR/-LR
Protocol Support
Data Rate: 1/10/40Gb/s – Ethernet
PCI Express Gen3: SERDES @ 8.0GT/s, 8 lanes (2.0 and 1.1 compatible)
Voltage: 12V, 3.3V
Typ Power: Passive Cables 6.54W
Max Power: Passive Cables 8.19W
Power and
Environmental
Temperature: Operational 0°C to 55°C
Non-operational 0°C to 70°C
Humidity: 90% relative humiditya
Air Flow: 200LFMb
EMC: Refer to the following link:
www.mellanox.com/related-docs/user_manuals/Regulatory_and_Compliance_Guide.pdf
Regulatory
Safety: IEC/EN 60950-1:2006
ETSI EN 300 019-2-2
IEC 60068-2- 64, 29, 32
RoHS: RoHS-R6
Cable Support
PPlease refer to "Mellanox Products Approved Cable Lists" at:
www.mellanox.com/related-docs/user_manuals/Mellanox_approved_cables.pdf
a. For both operational and non-operational states
b. Air flow is measured ~1” from the heat sink between the heat sink and the cooling air inlet.
30
Mellanox Technologies
ConnectX®-3 Ethernet Single and Dual QSFP+ Port Adapter Card User Manual
A.2
Rev 1.7
MCX314A-BCBT Specifications
Table 8 - MCX314A-BCBT Specifications Table
Size: 2.71n. x5.6 in. (68.90mm x 142.25 mm)
Physical
Connector: QSFP
Ethernet: 40GBASE-CR4 /-SR4/-LR4; also supports the following when used with a
QSA: 10GBASE-CR/-SR/LR; 1000BASE-T/-SR/-LR
Protocol Support
Data Rate: 1/10/40Gb/s – Ethernet
PCI Express Gen3: SERDES @ 8.0GT/s, 8 lanes (2.0 and 1.1 compatible)
Voltage: 12V, 3.3V
Typ Power: Passive Cables 7.69W
Max Power: Passive Cables 9.35W
Power and
Environmental
Temperature: Operational 0°C to 55°C
Non-operational 0°C to 70°C
Humidity: 90% relative humiditya
Air Flow: 200LFMb
EMC: Refer to the following link:
www.mellanox.com/related-docs/user_manuals/Regulatory_and_Compliance_Guide.pdf
Regulatory
Safety: IEC/EN 60950-1:2006
ETSI EN 300 019-2-2
IEC 60068-2- 64, 29, 32
RoHS: RoHS-R6
Cable Support
Please refer to "Mellanox Products Approved Cable Lists" at:
www.mellanox.com/related-docs/user_manuals/Mellanox_approved_cables.pdf
a. For both operational and non-operational states
b. Air flow is measured ~1” from the heat sink between the heat sink and the cooling air inlet.
Mellanox Technologies
31
Rev 1.7
A.3
Board Mechanical Drawing and Dimensions
All dimensions are in millimeters.
All the mechanical tolerances are +/- 0.1mm
Figure 9: Mechanical Drawing of the Single-port MCX313A-BCBT Adapter Card
J1 - I2C Connector
Flash Jumper
142.24
40.5
49.09
22.61
53.59
45.95
32
Mellanox Technologies
12.75
ConnectX®-3 Ethernet Single and Dual QSFP+ Port Adapter Card User Manual
Rev 1.7
Figure 10: Mechanical Drawing of the Dual-port MCX314A-BCBT Adapter Card
J1 - I2C Connector
Flash Jumper
142.25
64.4
56.15
50.00
68.90
45.96
A.4
12.75
Regulatory Statements
For regulatory statements for all ConnectX®-3 cards please refer to:
http://www.mellanox.com/related-docs/user_manuals/Regulatory_and_Compliance_Guide.pdf
Mellanox Technologies
33
Rev 1.7
Appendix B: Interface Connectors Pinout
B.1
I2C-compatible Connector Pinout
Figure 11: Compatible Connector Plug and Pinout
Table 9 - I2C-compatible Connector Pinout
B.2
Connector Pin Number
Signal Name
1
SPSDA
2
SPSCL
3
GND
4
NC
5
NC
PCI Express x8 Connector Pinout
The adapter cards use a standard PCI Express x8 edge connector and the PCI Express x8 standard
pinout according to the PCI Express 3.0 specification.
34
Mellanox Technologies
ConnectX®-3 Ethernet Single and Dual QSFP+ Port Adapter Card User Manual
Rev 1.7
Figure 12: PCIe Connector Pinout
Mellanox Technologies
35
Rev 1.7
B.3
QSFP+ Connector Pinout
Figure 13: Connector and Cage Views
36
Mellanox Technologies
ConnectX®-3 Ethernet Single and Dual QSFP+ Port Adapter Card User Manual
Rev 1.7
Table 10 - Connector Pin Number and Name to Signal Name Map
Connector Pin Number
Connector Pin Name
Port A Signal Name
1
GND
GND
2
TXN_2
Tx2n
3
TXP_2
Tx2p
4
GND
GND
5
TXN_4
Tx4n
6
TXP_4
Tx4p
7
GND
GND
8
ModSelL_Port0
ModSelL
9
ResetL_Port0
ResetL
10
VccRx
11
SCL
SCL
12
SDA
SDA
13
GND
GND
14
RXP_3
Rx3p
15
RXN_3
Rx3n
16
GND
GND
17
RXP_1
Rx1p
18
RXN_1
Rx1n
19
GND
GND
20
GND
GND
21
RXN_2
Rx2n
22
RXP_2
Rx2p
23
GND
GND
24
RXN_4
Rx4n
25
RXP_4
Rx4p
26
GND
GND
27
ModPrsl_Port0
Mod PrsL
28
IntL
IntL
29
VccTx
30
Vcc1
31
LPMode_Port0
LPMode
32
GND
GND
33
TXP_3
Tx3p
34
TXN_3
Tx3n
35
GND
GND
36
TXP_1
Tx1p
37
TXN_1
Tx1n
38
GND
GND
Mellanox Technologies
37
Rev 1.7
Appendix C: Replacing a Tall Bracket With a Short Bracket
This section provides instructions on how to remove the tall bracket of a standard Mellanox Technologies adapter card and replace it with a short one.
C.1
Replacing a Bracket
To replace the bracket you will need the following parts:
• the new bracket of the proper height
• one new square gasket for each of the ports
• the 2 screws saved from the removal of the bracket
• the 2 fiber washers saved from the removal of the bracket
C.2
Removing the Existing Bracket from the Adapter Card
Figure 14: Bracket Screws
Screws
1.
2.
Remove the two screws holding the bracket in place.
The bracket comes loose from the card.
Be careful not to put stress on the LEDs.
3.
38
Save the two screws and the two fiber washers.
Mellanox Technologies
ConnectX®-3 Ethernet Single and Dual QSFP+ Port Adapter Card User Manual
C.3
Rev 1.7
Installing the New Bracket
1.
2.
3.
Remove the paper to expose the adhesive on the gasket.
Place the gasket for each port onto the new bracket. Make sure to correctly align the gasket
with the hole in the bracket.
If the old gaskets are still on the card, remove them before installing the new bracket. Make
sure that only one gasket per port is used.
Figure 15: Gasket Location on Adapter Card
Gasket
Figure 16: Gasket Installation
1.
Place the bracket onto the card until the screw holes line up.
Do not force the bracket onto the card. You may have to gently push the LEDs using a
small screwdriver to align the LEDs with the holes in the bracket.
2.
Screw on the bracket using the screws and washers saved from the procedure above step 1.
Mellanox Technologies
39
Rev 1.7
Figure 17: Placing the Bracket on the Card
3.
4.
40
Make sure that the LEDs are aligned onto the bracket holes.
Use a torque driver to apply up to 2 lbs-in torque on the screws.
Mellanox Technologies
ConnectX®-3 Ethernet Single and Dual QSFP+ Port Adapter Card User Manual
Rev 1.7
Appendix D: Avertissements de sécurité d’installation
(Warnings in French)
1. Instructions d’installation
Lisez toutes les instructions d’installation avant de brancher le matériel à la source
d’alimentation électrique.
2. Température excessive
Ce matériel ne doit pas fonctionner dans une zone avec une température ambiante
dépassant le maximum recommandé de 55°C (131°F). Un flux d’air de 200LFM à
cette température ambiante maximale est nécessaire. En outre, pour garantir un bon
écoulement de l’air, laissez au moins 8 cm (3 pouces) d’espace libre autour des ouvertures de ventilation.
3. Orages – dangers électriques
Pendant un orage, il ne faut pas utiliser le matériel et il ne faut pas brancher ou
débrancher les câbles.
4. Branchement/débranchement des câbles en cuivre
Les câbles en cuivre sont lourds et ne sont pas flexibles, il faut donc faire très attention
en les branchant et en les débranchant des connecteurs. Consultez le fabricant des
câbles pour connaître les mises en garde et les instructions spéciales.
5. Installation du matériel
Ce matériel ne doit être installé, remplacé ou entretenu que par du personnel formé et
qualifié.
6. Elimination du matériel
L’élimination de ce matériel doit s’effectuer dans le respect de toutes les législations et
réglementations nationales en vigueur.
Mellanox Technologies
41
Rev 1.7
7. Codes électriques locaux et nationaux
Ce matériel doit être installé dans le respect des codes électriques locaux et nationaux.
8.
Exposition au rayonnement grave
Mise en garde – l'utilisation de commandes ou de réglages ou l'exécution de
procédures autres que ce qui est spécifié dans les présentes peut engendrer une
exposition au rayonnement grave.
PRODUIT LASER DE CLASSE 1 » et références aux normes laser les plus
récentes CEI 60 825-1:1993 + A1:1997 + A2:2001 et NE 608251:1994+A1:1996+ A2:2001
42
Mellanox Technologies
ConnectX®-3 Ethernet Single and Dual QSFP+ Port Adapter Card User Manual
Rev 1.7
Appendix E: Sicherheitshinweise (Warnings in German)
1. Installationsanleitungen
Lesen Sie alle Installationsanleitungen, bevor Sie das Gerät an die Stromversorgung
anschließen.
2. Übertemperatur
Dieses Gerät sollte nicht in einem Bereich mit einer Umgebungstemperatur über der
maximal empfohlenen Temperatur von 55°C (131°F) betrieben werden. Es ist ein Luftstrom von 200 LFM bei maximaler Umgebungstemperatur erforderlich. Außerdem
sollten mindestens 8 cm (3 in.) Freiraum um die Belüftungsöffnungen sein, um einen
einwandfreien Luftstrom zu gewährleisten.
3. Bei Gewitter - Elektrische Gefahr
Arbeiten Sie während eines Gewitters und Blitzschlag nicht am Gerät, schließen Sie
keine Kabel an oder ab.
4. Anschließen/Trennen von -Kupferkabel
Kupferkabel sind schwer und nicht flexible. Deshalb müssen sie vorsichtig an die
Anschlüsse angebracht bzw. davon getrennt werden. Lesen Sie die speziellen Warnungen und Anleitungen des Kabelherstellers.
5.
Geräteinstallation
Diese Gerät sollte nur von geschultem und qualifiziertem Personal installiert, ausgetauscht oder gewartet werden.
6. Geräteentsorgung
Die Entsorgung dieses Geräts sollte unter Beachtung aller nationalen Gesetze Bestimmungen erfolgen.
7. Regionale und nationale elektrische Bestimmungen t
Dieses Gerät sollte unter Beachtung der regionalen und nationalen elektrischen
Bestimmungen installiert werden.
Mellanox Technologies
43
Rev 1.7
This equipment should be installed in compliance with local and national electrical codes.
8. Strahlenkontak
Achtung – Nutzung von Steuerungen oder Einstellungen oder Ausführung von
Prozeduren, die hier nicht spezifiziert sind, kann zu gefährlichem Strahlenkontakt führen..
Klasse 1 Laserprodukt und Referenzen zu den aktuellsten Lasterstandards :
ICE 60 825-1:1993 + A1:1997 + A2:2001 und EN 60825-1:1994+A1:1996+
A2:2001
44
Mellanox Technologies
ConnectX®-3 Ethernet Single and Dual QSFP+ Port Adapter Card User Manual
Rev 1.7
Appendix F: Advertencias de seguridad para la instalación
(Warnings in Spanish)
1. Instrucciones de instalación
Antes de conectar el equipo a la fuente de alimentación, leer todas las instrucciones de
instalación.
2. Sobrecalentamiento
No se debe utilizar el equipo en un área con una temperatura ambiente superior a la
máxima recomendada: 55°C(131°F). Además, para garantizar una circulación de aire
adecuada, se debe dejar como mínimo un espacio de 8 cm (3 pulgadas) alrededor de las
aberturas de ventilación.
3. Cuando hay rayos: peligro de descarga eléctrica
No utilizar el equipo ni conectar o desconectar cables durante períodos de actividad de
rayos.
4. Conexión y desconexión del cable Copper
Dado que los cables de cobre son pesados y no son flexibles, su conexión a los conectores y su desconexión se deben efectuar con mucho cuidado. Para ver advertencias o
instrucciones especiales, consultar al fabricante del cable.
5. Instalación de equipos
La instalación, el reemplazo y el mantenimiento de este equipo estarán a cargo únicamente de personal capacitado y competente.
6. Eliminación de equipos
La eliminación definitiva de este equipo se debe efectuar conforme a todas las leyes y
reglamentaciones nacionales.
Mellanox Technologies
45
Rev 1.7
7. Códigos eléctricos locales y nacionales
Este equipo se debe instalar conforme a los códigos eléctricos locales y nacionales.
8. Exposición a niveles de radiación peligrosos
Precaución: el uso de controles o ajustes o la realización de procedimientos distintos de
los que aquí se especifican podrían causar exposición a niveles de radiación peligrosos.
PRODUCTO LÁSER DE CLASE 1 y referencia a las normas de láser más recientes:
IEC 60825-1:2007/03 y EN 60825-1:2007
46
Mellanox Technologies