1
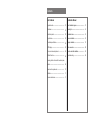
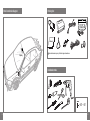
Front & rear
Parking assist system
Top front windshield display
BRM061
Manual
PTS800V7
Contents
User's Manual
Installation Manual
Important notice ---------------------------------------- 01
Brief installation diagram ----------------------------
Disclaimer -----------------------------------------------
01
Packing list ---------------------------------------------- 14
About the product -------------------------------------
02
Installation tools ---------------------------------------- 14
Key features --------------------------------------------
02
Sensor installation ------------------------------------- 15
13
21
Technical specifications ------------------------------ 02
Display installation ------------------------------------
LCD display ---------------------------------------------
03
Wire connection ---------------------------------------- 22
Voice and volume adjustment ----------------------
04
Function test after installation ---------------------- 23
Self-test function ---------------------------------------
05
Troubleshooting ---------------------------------------- 24
Learning function for cars with tow-bar or spare
wheel -----------------------------------------------------
06
How does the system work -------------------------
07
Attention -------------------------------------------------
11
Sensor maintenance ---------------------------------- 11
Important notice
About the product
Key features
Parking assist systems help to provide assistance
when reversing and parking. Driving skills, such as
slowing down, use of mirrors etc. is always essential.
Parking assist system is an ultrasonic distance
monitoring system. It electronically detects the area
in front of and/or at rear of your vehicle while
parking, and alerts you with audio and visual
warnings. It assists the driver when parking and
in manoeuvring situation.
l Complete front & rear protection
l 0.08s response time
l Display installed on top of front windshield
l Anti-false alert technology
l Blue wide screen display
l Self-test function
l Voice / beep alert selectable
l Intelligent detection, supper for cars with
tow-bar, spare tire or other protrusion
1. This unit is for vehicles with 12V DC only.
2. Unit should be installed by a professional auto
technician.
3. Route wiring harness away from heat sources
and electrical components.
4. It is strongly recommended to check the position
of the sensors before the actual drilling of the
holes.
User's Manual
5. Perform a test after installation.
Disclaimer
The parking assist system is designed as a driver
assistance device, and should not be used as a
substitute for safe parking practices. The area into
which the vehicle is to be reversed must be
constantly visually monitored while parking.
The manufacturer and its distributors do not
guarantee or assume liability for collisions or
damages while reversing your vehicle.
01
PTS800V7 is a front and rear parking assist system
with blue wide LCD display. All the detachable
sensors are water-resistance and can be easily
changed. Combined with the anti-interference and
anti-false alert technology, the system can detect
obstacles in any weather conditions and response
quickly. The system has intelligent detection, which
is ideal for cars with tow-bar or spare tire.
Every piece of our products has passed the most
stringent test before releasing to the market. It is
reliable at a wide temperature range (-40°C ~
+85°C/-40°F~+185°F) and becomes very useful
when you are parking at a raining day, snowing
day or at night etc. With the help of parking assist
system, you can enjoy a comfortable, relaxed and
safer parking experience.
Technical specifications
l
l
l
l
Input voltage: 9 ~ 16VDC
Working current: < 300mA
Static current: < 80mA
Operation temperature: -40°C ~ +80°C/
-40°F ~ +176°F
l Beep volume: 50~70dB
l Detection range:
Front: 0.10~0.99m/0.33~3.25ft
0.10~0.69m/0.33~2.26ft (reversing)
Rear: 0.10~2.59m/0.33~8.50ft
l Display range:
Front: 0.3~0.99m/0.98~3.25ft
0.3~0.69m/0.98~2.26ft (reversing)
Rear: 0.3~2.59m/0.98~8.50ft
02
Display
Voice and volume adjustment
Turning ON/OFF voice alert
1
Matrix indication (front)
Meters
Volume
Distance
2
ACC ON
OFF
Press "SET" once
START
Voice alert turned off
Damaged sensor indication
Matrix indication (rear)
Ignition on
Press "SET" button
3 seconds.
(Front view)
Press "SET" once
Voice alert turned on
Volume adjusting
" " Volume +
SET
" " Volume -
Low volume
ACC ON
OFF
START
Medium volume
(Rear view)
Ignition on
High volume
Press the " " / " " button to increase or decrease the volume.
03
04
Self-test function
Learning function for cars with tow-bar or spare wheel
1. Once the ignition is turned on, the system will test the 4 front sensors E,F,G and H automatically.
1) All sensors are working.
Be
Be
2) Damaged sensors are detected.
Be...Be...Be...
Damaged sensor
locations
Number of damaged
sensors
Beep once
Beep three times
The number and locations of
the damaged sensors are shown
on the display
Other sensors keep working
normally
3) Once the self-test procedure is completed, the system will detect the obstacle in front of the car
for 5 seconds.
2. When the reverse gear is selected, the system will test the 4 rear sensors A, B, C, D and 2 front
sensors E and H automatically.
1) All sensors are working.
+
X10
1"
Ignition on, shift the gear from "N" to "R" and shift back in 1
second and repeat for 10 times. At the 10th time stay at "R"
position for 6 seconds to achieve the learning function.
Ignition on, shift the gear from "N" to "R" and shift back in 1
second and repeat for 12 times. At the 12th time stay at "R"
position for 8 seconds to clean the learning function.
Flash
The display will flash 3 times then
beep once, this indicates that the
learning function is successful and
the system will not warn for tow-bar
or spare wheel.
Note: If you forget the shift-times, please stay at "R" position
for 2 seconds to clean the memory and next time will be the
first time.
2) Damaged sensors are detected.
l Beep three times
l The number and locations of
Be
Be...Be...Be...
Damaged sensor
locations
Beep once
Number of damaged
sensors
the damaged sensors are shown
on the display
l Other sensors keep working
normally
0.5 m/
1.64ft
When the learning function is activated,
the system will ignore the tow-bar or
spare wheel and only detect other
objects behind the vehicle.
Note: If the vehicle does not have tow-bar or spare wheel, you do not need to use this function.
05
06
How does the system work
Driving forward (6 sensor)
+12V
Driving forward (8 sensor)
+12V
0.81m/2.6ft
No beep
07
+12V
0.35m/1.1ft
Be
Be
Stop(<0.30m/1.0ft)
Be
+12V
+12V
0.81m/2.6ft
No beep
+12V
0.40m/1.3ft
Be
Be
Stop(<0.30m/1.0ft)
Be
08
Reversing
1.21m/4.0ft
Be---
09
Zigzag reversing
0.60m/2.0ft
Be---Be---
Stop(<0.30m/1.0ft)
Be
0.30m/1.0ft
Be-Be-Be-Be-
Stop! (<0.30m/1.0ft)
Be
10
Attention
Sensor maintenance
False detection may occur in the following situations:
Do not wash the sensor with squirt gun or
swab them forcibly.
Please wash car with low-pressure water.
Installation Manual
Please melt the ice with warm water when the
sensors are covered by ice.
After installation, please fully test the system
before use.
Dirty or damaged sensors can cause incorrect
detection.
Ensure that the self-test procedure is completed
and all sensors are functioning before use.
11
Please clean the sensors with cloth or lowpressure water when the sensors are covered
by mud or snow.
12
Brief installation diagram
Packing list
Manual
Display
ECU
The actual sensor may vary from the image shown above
Installation tools
60' ~ 80'
13
14
Sensor installation
Pls adjust the sensor angle according to sensor height and bumper angle, avoid detecting to ground.
1
H > 45cm/1.5ft
H < 65cm/2.1ft
H > 40cm/1.3ft
H < 60cm/2.0ft
< 45cm/1.5ft
L1
15
L2
35cm/1.1ft <L1< 45cm/1.5ft
50cm/1.6ft <L2< 76cm/2.5ft
40cm/1.3ft <H< 60cm/2.0ft
L1
H < 45cm/1.5ft
H > 65cm/2.1ft
1.5m
/0.5ft
45cm/1.5ft <H< 65cm/2.1ft
H
0.6m
/2.0ft
< 45cm/1.5ft
2.5m
/0.8ft
0.9m
/3.0ft
H < 40cm/1.3ft
H > 60cm/2.0ft
< 45cm/1.5ft
c
b
a
a
b
c
a = 1/8L
b = 2/8L
c = 1/8L
16
3
2
4
E
F
G
H
C
D
B
A
5
2
Check the size of the hole saw packed in
the product to be matching the diameter
of the sensors before drilling any holes.
17
18
6
7
Power
Reversing light +
H
G
F
E
2
D
C
B
A
Check the size of the hole saw packed in the product to be matching
the diameter of the sensors before drilling any holes.
19
20
Display installation
Wire connection
ECU
Display
E F G H A B C D
Pink
ACC
Red
Reversing light
White
Footbrake light
Black wire
Ground
D
Sensor D
C
Sensor C
B
Sensor B
A
Sensor A
H
G
F
E
21
Sensor H
Sensor G
Sensor F
Sensor E
22
Function test after installation
Troubleshooting
After installation, the display doesn’t work
6m/23.6ft.
b) Is the ignition turned on?
a) Are sensors mounted too low or detecting the
c) Is the reverse gear selected or is the footbrake
ground?
pressed?
b) Check whether the sensor is installed up-side-
Damaged sensor detected
ft
0.9m/3.0
Function test is possible by
holding a wooden board (0.3x
1m/1.0x3.2ft) standing at the
front/ rear of the car, and drive
the car forward and backward
to test each function
respectively as shown in this
manual.
The display always shows 0.4/15.7ft~0.
a) Are all wires connected properly?
down.
a) Are all sensors plugged into the ECU correctly
c) Unplug 1 sensor at a time to check for root
and tightly?
cause.
b) Is the sensor wire broken?
If the problem persists, please follow these
c) Is the sensor covered by mud or snow?
steps
d) Is the sensor damaged?
a) For consumers: contact your dealer or nearby
The object position does not correspond to
the correct indicator on the blue digital display.
service centre.
a) Are the sensor cables connected to the control
unit (ECU) in the correct position?
to "Checking flow chart" from.
b) For installer or dealer : check system according
False warning
a) Are all sensors plugged into the ECU in the
correct position tightly?
b) Does any sensor detect the ground?
Warning sound is too low or too high
a) Press the "Volume" buttons to adjust the volume
to a suitable level.
No voice warning
2.5m/8.2
23
ft
a) Check whether the voice warning is switched
on.
24