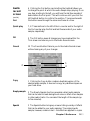
1
Casablanca
Nonlinear digital video editor
System Software Version 3
Owner’s Manual
Casablanca Owner’s Manual
For System Software Version 3
Copyright © 1999 DraCo Systems, Inc., Boulder, Colorado USA
and MS MacroSystem Computer GmbH, Witten, Germany
All Rights Reserved
Our thanks go out to the many people connected with the creation and
production of this owner’s manual series for the Casablanca nonlinear
digital video editor, starting with Casablanca creators Jörg Sprave,
president of MacroSystem, GmbH, and Eric Kloor, president of DraCo
Systems, Inc. The original manual was written by Jörg Sprave and Eric
Kloor, and was initially revised for the Version 2 System Software by
Mr. Sprave before it was translated to English by Rafael Dyll of
MacroSystem.
Further revisions and redesign for the Version 2 manual were provided
by Scott Curl and Rick Barron of DraCo Systems, with design work by
Mary Barron of M Barron Studios and technical help from Cory
Hodnefield and Matt Olson of DraCo Systems Technical Support.
The revisions for the Version 3 manual were written by Scott Curl and
Cory Hodnefield and edited by Rick Barron, with technical help from
Jörg Sprave and Matt Olson.
Our additional thanks go out to the many Casablanca users who have
provided us with suggestions for enhancing the Casablanca learning
experience.
Boulder, Colorado 1999
DraCo Systems, Inc.
3380 Mitchell Lane
Suite 102
Boulder, CO 80301
USA
303.440.5311
fax 303.440.5322
email [email protected]
www.draco.com
Table of Contents
Getting Started ............................................................ i
Unpacking the box ................................................................................ i
Setting up the Casablanca ..............................................................
iii
Introduction and General Concepts ......................... 1.1
General information ..........................................................................
New features of Version 3 .................................................................
Philosophy and tools ........................................................................
External controls ...............................................................................
Interface controls ..............................................................................
1.1
1.3
1.6
1.7
1.7
Tutorials ................................................................... 2.1
A short video project tutorial ............................................................. 2.1
An insert-editing tutorial .................................................................. 2.17
An audio-mixing tutorial .................................................................. 2.18
A titling tutorial ................................................................................ 2.21
A multilayering tutorial ..................................................................... 2.24
Reference ................................................................. 3.1
System settings ................................................................................ 3.1
Project settings ................................................................................. 3.2
Video settings ................................................................................... 3.4
Record ............................................................................................. 3.5
Edit ................................................................................................... 3.7
Finish screen .................................................................................. 3.17
Transitions screen ........................................................................... 3.18
Image processing screen ................................................................ 3.24
Title screen ..................................................................................... 3.29
Audio record screen ....................................................................... 3.34
Audio mix screen ............................................................................ 3.42
Appendix A Expansion .............................................. A.1
Hardware upgrades .......................................................................... A.1
Software upgrades ........................................................................... A.2
Appendix B Troubleshooting .................................... B.1
Index .......................................................................... I.1
Getting Started
Unpacking the box
When you first open up your Casablanca box, you should find:
■ Your
Casablanca unit.
■A
hard drive located inside the Casablanca behind a removeable
black face plate.
■A
user’s manual.
■A
set of hard drive keys that will lock your drive in place.
■A
demonstration video tape that will introduce you to the
Casablanca and its features.
■A
trackball (shown below) and trackball extension cable.
■A
pair of composite (RCA) plugs (shown below).
■ An
SVHS cable.
■ An
SVHS to composite conversion cable (shown below).
■A
power cable for the Casablanca.
■A
Casablanca System Software Version 3 floppy disk.
■A
EuroScart/composite adapter (shown below).
■ A “new owner’s package” that includes your registration card,
product information and warranty options.
If you are missing one or more of these items, please contact your
Casablanca dealer.
Setting up the Casablanca
To operate properly, the Casablanca needs to be:
■ Plugged
in to a power source through the power cable.
■ Connected to a video player (a camcorder, VCR or deck). Audio
and video will come OUT of your player and IN to the
Casablanca through either the FireWire, SVHS or composite
(RCA) cables in order to capture video.
■ Connected to a video recorder (a camcorder, VCR or deck).
Audio and video will come OUT of the Casablanca and IN to the
recorder through either the FireWire, SVHS or composite (RCA)
cables in order to save or record your completed video to tape.
■ Connected
to a trackball through the serial port
■ Connected to a monitor. Audio and video come OUT of the
Casablanca and IN to your monitor through the SVHS or
composite (RCA) cables.
NOTE: If you are using the same device as both your video player
and your video recorder, you need to make sure you reconnect
your cables after each separate operation (e.g., when you are
recording to tape, disconnect the cables that bring video in to the
Casablanca). If you have audio and video coming out of and into
the device at the same time, you will create a “loop” that will cause
distortion in your video images.
ii
Getting Started
All of the ports, cables and jacks that you need to connect the
Casablanca to a player, recorder and monitor are shown below
(there are additional front audio and video input jacks as well).
1
2
S/N 000000
M/J
Mini-DV
EuroScart Out
Video/RGB/Audio
5
Audio out
S-video out
Audio in
FireWire
Trackball
S-video in
SCSI port
Serial port
Audio Out SVHS
Out
L
R
4
Audio In
L
R
SVHS
In
00/00
8
Euroscart
3
9
6
7
1 The Euroscart adapter converts the component Euroscart signal
into composite audio and video out.
2 RCA plugs connect to the Audio Out jacks.
3 An S-video (or Y/C) cable connects to the SVHS Out port and
carries the S-video signal out of the Casablanca (this can’t be
adapted to an RCA composite signal with the RCA adapter).
4 The RCA plugs connect to the Audio In jacks to bring sound
into the Casablanca from a camera, deck or a CD player. Mono
sound should connect to the left jack only.
5 The IEEE1394 FireWire cable connects to the Mini DV port and
allows you to bring a digital video signal into and back out of the
Casablanca.
6 The Trackball operates the Casablanca’s interface and connects to
the small serial port.
7 An S-video cable connects to the SVHS In port to carry the Svideo signal into the Casablanca.
8 Female 50-pin SCSI port for connection to external hard drives.
9 Male 25-pin serial-cable connection for PC Link.
Getting Started
iii
There are three basic configurations that can be used when setting
up your Casablanca, depending upon the type of equipment that
you are using with your Casablanca.
(Optional)
Mini
DV
Direct connection 1
Digital
Video
S/N 000000
M/J
Mini-DV
EuroScart Out
Video/RGB/Audio
Audio Out SVHS
Out
L
R
SVHS
In
Audio In
L
R
00/00
back
front
(Optional)
(Optional)
Mini
Direct connection 2
DV
Digital
Video
S/N 000000
M/J
Mini-DV
EuroScart Out
Video/RGB/Audio
Audio Out SVHS
Out
L
R
Audio In
L
R
SVHS
In
00/00
back
front
(Optional)
(Optional)
Mini
Indirect
connection
DV
Digital
Video
S/N 000000
M/J
Mini-DV
EuroScart Out
Video/RGB/Audio
Audio Out SVHS
Out
L
R
Audio In
L
R
SVHS
In
00/00
back
front
(Optional)
iv
Getting Started
Direct connection 1
Direct Connection 1 reflects how most Casablanca users set up
their systems. A television monitor is connected to the Euroscart
adapter via RCA cables, a videotape player is connected to the
Casablanca’s Audio and Video Out jacks and another videotape
player is connected to the Casablanca’s Audio and Video In jacks.
A digital camera could also be connected to the Casablanca’s
FireWire port and a standard camcorder could be connected to
the Audio and Video In jacks on the front of the machine.
Direct connection 2
Direct Connection 2 can be used if one of your videotape players
is unable to accommodate an SVHS cable but your tevelevison
monitor can. The television monitor is connected to the Audio
and Video Out jacks, a videotape player is connected to the
Casablanca’s Euroscart port and another videotape player is
connected to the Casablanca’s Audio and Video In jacks. A digital
camera could also be connected to the Casablanca’s FireWire port
and a standard camcorder could be connected to the Audio and
Video In jacks on the front of the machine.
Indirect
connection
The Indirect Connection option allows you to set up your system
even if your televion monitor is unable to accommodate anything
other than a coaxial cable. The television monitor is connected to
a videotape player through a coaxial cable, and that tape player is
then connected to the Casablanca through either the Euroscart
port or the Audio and Video Out jacks; another videotape player
is connected to the Casablanca’s Audio and Video In jacks. A
digital camera could also be connected to the Casablanca’s
FireWire port and a standard camcorder could be connected to
the Audio and Video In jacks on the front of the machine.
System software With your Casablanca turned off, insert the software disk in the
disk drive and turn the Casablanca on. Once the Casablanca logo
disappears, a series of on-screen instructions will guide you
through the rest of the installation process.
WARNING: Installing new system software may erase the
contents of your hard drive. It’s vital that you save to tape any
projects and scenes that you want to keep.
The system software disk can only be used on your registered
Casablanca. Once installed, the disk will not be accepted by any
other Casablanca unit.
Getting Started
v
Chapter 1
Introduction and General Concepts
General information
Congratulations on your purchase of the DraCo Casablanca
nonlinear digital video editor! We thank you for the trust you
have placed in our company and our product and we hope you’ll
soon discover that the Casablanca meets and exceeds all of your
expectations.
The Casablanca will revolutionize your work, in part because it
follows a unique philosophy—your ability to create great video
productions should never be hindered by the process of operating the
video editor. We have worked hard to simplify every step of the
editing process without sacrificing editing features or the quality
of the output. By integrating all of the components you need for
high quality video editing into a single box, we’ve eliminated the
perils of changing configuration settings and the pitfalls of
incompatible cards and programs. And the logical design of our
editing software protects you from the confusion and technical
minutia that can bog down projects.
This manual will help you set up your Casablanca and learn to use
your powerful new editing tool. Following this introduction are
two main sections:
1. A tutorial section that starts by guiding you through a simple
project step by step. Succeeding chapters take you through
every menu item available, so you’ll have a complete understanding of the entire system.
2. A reference section that covers each and every button and
menu item, so you’ll have fast access to instant information on
any aspect of the Casablanca’s operation.
Following the two main sections, an appendix presents technical
and background information as well as some tips and tricks for
using the Casablanca. Finally, a comprehensive index will help you
find the answer to any question.
We also strongly urge you to watch the demonstration and
training video cassette that came with your unit; you’ll be able to
watch a complete demonstration of all of Casabalnca’s features and
pick up numerous editing tips.
The Casablanca is a complete system for editing videos in a
digital, nonlinear form. Data rates and picture quality surpass DV
system specifications. All you need to operate the editing software
is the trackball included with your Casablanca. When you receive
new software, simply insert the disk and restart the Casablanca–
installation is automatic.
Here is the basic process of editing a video on the Casablanca:
1. You capture your recorded video and audio by transferring it
from a VCR or camcorder directly to the Casablanca. This
digitizes the footage onto the Casablanca’s hard drive.
2. You “cut” the digitized footage into scenes. You can trim these
scenes frame-specific to the length you need and then place
them onto the storyboard in the order you want them to
appear in the final production.
3. You apply various effects to the scenes and transitions between
the scenes, insert additional clips into the scenes and add
titling.
4. You add audio to any or all of the three stereo tracks which
support audio mixing and dubbing, allowing for the original
audio, background sounds and commentaries.
5. You output the completed project to a videotape.
Not only can the Casablanca accommodate your analog signals,
but its data rate of 3.1 MB/second and DV FireWire option make
the Casablanca ideal for digital video editing. Our IEEE 1394
FireWire for DV camcorders and recorders lets you capture, edit
and store digitally without any quality loss. The DV option also
allows for machine control of digital cameras and recorders.
Note that you must use both a DV camcorder and a DV recorder
(or a DV camcorder capable of recording from another source) to
avoid analog loss. You can also go digital from the camcorder for
the input and record Casablanca’s output via YC to your VHS,
SVHS or HI8 machine.
There’s another significant benefit that comes with the Casablanca: You’ll never need to be involved with plug-in videocapture boards, audio cards or other mix-and-match components.
The Casablanca is a completely integrated system built by one
manufacturer; hardware, software and video technology were all
developed by DraCo Systems in the U.S. and MacroSystem of
Germany.
1.2
Chapter 1 Introduction and General Concepts
Have fun discovering the capabilities of this amazing editing tool.
We hope you will be as happy with it as the many thousands of
users before you have been. And remember: We’d love to hear
from you about your Casablanca, be it ideas for further development, notes on how you’re using it, or even criticisms of any
aspect of the Casablanca or our company (although we’ll never
turn away compliments, either).
New features of Version 3
This section describes new features in the Casablanca software
since Version 2.75. If you have just purchased the Casablanca, you
can skip this part and start with the Philosophy and Tools section.
Enhanced audio features are the centerpiece of this Version 3
software upgrade. We have received countless ideas and suggestions from users like yourself since our initial release and we have
taken great care in determining how to implement the new
functions into our tried and tested user interface. Some of the
main advances are:
Changes in audio
Anchored audio In Version 3, the commentary and background audio tracks are
“anchored” to a particular scene within your storyboard, not to
the storyboard itself. Therefore, if you have placed an audio
segment in your commentary track, for example, and you decide
to later add a three-second empty scene at the beginning of the
storyboard, your audio will no longer be thrown off–it will now
shift with the scene(s) it was originally placed under.
Audio during
split and trim
You can now hear a scene’s audio track whenever you split or trim
it. This new feature allows you to split scenes “on the fly” (cut
your scenes according to their original audio tracks); once you’ve
selected a scene to split, left click on the split screen’s play button
and listen to the audio as your scene plays through, then left click
on “use” to split your scene at every point you choose.
Waveform
An optional waveform panel can be displayed whenever you use
the split and trim functions by clicking on the small speaker icon
in the box in the upper left corner of the control panel. The
waveform provides you with a visual display of a scene’s audio and
a white vertical bar indicates your current position within the
scene’s audio.
Chapter 1 Introduction and General Concepts
1.3
Sample ->Scene The new Sample ->Scene function within the Audio Record
screen creates a black empty scene that featuring an audio sample
of your choosing as the scene’s source audio. This scene can then
be used to add video to the underlying audio track.
To create an audio-sample scene, go into the audio record screen
and select an audio sample from the list on the right by clicking
the left trackball button and scrolling through the audio samples
until your selection is highlighted in blue. Click the left trackball
button to confirm your choice and then select the “Sample ->
Scene” button to the left of the audio sample list. When you exit
the audio record screen and enter the edit screen, you will find the
newly created scene at the end of your scene bin.
You can now use this audio-sample scene to help you edit video to
audio. To do this, you use the split function to cut the scene into
different segments by first clicking Play to hear the audio, then
you click the “use” button to make a video cut to the audio. When
finished, your original audio-sample scene will be divided into
numerous scenes. You can then place these new scenes in your
storyboard sequentially and use the insert button to place video
scenes of your choosing over the empty black video in each of the
empty scenes.
Audio split and In addition to the Sample ->Scene option, the new audio Split
trim
and Special buttons, as well as the newly enhanced Trim feature
within the Audio Record screen, help make your audio editing
experience faster, easier and more fun as they enable you to edit
your sound samples in much the same way as you edit your video
scenes.
By clicking on Split, for example, you can scroll through and cut
segments out of your music or narration clip, or break long
samples up into several smaller pieces.
The audio Trim lets you trim the in and out points of your audio
samples (just as it did in previous versions of the software) but
now it displays your audio piece in a waveform to provide you
with a visual display of what it is that you are editing.
Special
1.4
The new Special option allows you to add a variety of effects to
your audio clips, such as “karaoke” (drops the volume of the vocal
track and raises the backing music) and lets you raise or lower the
volume of the entire piece or just the left or right channels.
Chapter 1 Introduction and General Concepts
Several cosmetic changes have been made to the displays within
Audio mix
display changes the Audio Mix screen. The rendered/unrendered audio indicator
is now displayed just below the storyboard scenes above the tracks
themselves. This allows the bar to display the exact amount of
audio that has been rendered (green) or unrendered (red), rather
than having the entire audio segment appear in green or red.
The names of the different audio tracks have been replaced by
icons. The Original Audio track was called “Org.” in earlier
versions of the software, but is now represented by an icon of a
video camera on a tripod. The Commentary track, which was
called “Com.,” now displays a microphone icon, and the Background Music track, formerly “Bkg.,” is now an icon that depicts
three musical notes.
Audio mix
screen icon
You can now move directly from the Edit Screen to the Audio
Mix screen by clicking on the Audio Mix icon (two musical notes
above a wrench) in the bottom left of your screen.
Other changes
Several other important improvements have been made to the
Casablanca’s system software that will enhance your editing
experience without complicating the system’s elegant interface.
Preview cuts
You can now preview the hard cuts between scenes in your
storyboard when you play your storyboard in the Transitions
Screen.
Full-screen
previews
Now, in addition to using the familiar real-time preview window,
you have the option to preview titles, effects and transitions in a
single-frame, full-screen mode. Within the full-screen preview,
you can view a display showing which title or effect is being
applied, the frame that’s being displayed. With a click of a button
you can see: The original scene without the added effect; the scene
with the effect added to it; the effect and the original scene
displayed simultaneously.
Field, frame
and interpolation
Most of the motion effects within the Special screen (slow motion,
still and strobe) can now be applied in one of several new ways.
You can add the motion effect to either a single field within a
frame (the way motion effects were applied in previous versions of
the software) or on both fields within a frame. In addition, you
Chapter 1 Introduction and General Concepts
1.5
Field, frame
and interpolation (cont’d)
can employ an interpolated field (the Casablanca generates an
extra field that improves the appearance of the effect by adding
image stability and reducing flicker) or an interpolated frame.
Partial storyWith Version 3, you can now set a range that lets you work on
board play back multiple projects at the same time by recording a selected portion
of your storyboard to tape, rather than the entire storyboard.
When you enter the Finish Screen, you will notice a Range button
in the left center section of the screen. Once you click on this
Range button, the first frame of your storyboard will appear
behind a Trim toolbar. Once you set your new In and Out points,
click on the videocassette icon in the lower right corner of the
toolbar to return to the Finish screen.
Insert-edit
enhancement
The newly enhanced Insert edit function enables you to view
either the end of the foreground scene or the beginning of the
scene being inserted while you set the range and confirm the
insert.
Hide play panel In the lower right corner of the System Settings screen is an
Options function that allows you to select whether the play panel
is visible or hidden when you play your storyboard.
Philosophy behind the Casablanca
“Simplify. Simplify.” Henry David Thoreau wrote those words
150 years ago, yet they perfectly describe today’s DraCo Casablanca. We wanted to create a high-quality video editor that
would be understandable and easy to operate, so we followed
Thoreau’s lead and simplified the entire editing process.
The concept
behind the
Casablanca
For example, the Casablanca records onto a hard drive as opposed
to video tape. Recordings made on tape are linear and specific
scenes can only be reached after time-intensive spooling. The
Casablanca’s hard drive, however, allows you to edit in a nonlinear
fashion–any recorded scene can be accessed at any time without
cumbersome fast-forwarding or rewinding.
The Casablanca also features a very straightforward interface. If
you want to record, for example, you press the “record” button. If
you want to edit, you press Edit. This minimalist approach can
help you without limiting the Casablanca’s power; we basically
simplified the process so you don’t have to simplify your ideas.
In fact, whether you’re editing a wedding video or creating a
documentary, you are likely to follow these basic steps.
1.6
Chapter 1 Introduction and General Concepts
With the Casablanca, the video novice follows the same path as
the experienced editor. Before embarking along on that path,
however, let’s stop and take note some of the basic tools that are
used to operate the Casablanca.
External controls
Selecting screens and buttons is done with the trackball. (Note:
Your Casablanca may be equipped with a different style of
trackball than the one illustrated.) Every trackball has at least three
key components:
Trackball
1. The ball, which moves the on-screen pointer and the sliders.
2. The left (Select) button. Use this to select an option once you
have positioned the pointer over a button on the screen.
3. The right (Cancel) button. This button can either cancel an
operation or return you to the previous screen.
Although a Microsoft-compatible mouse can also be used, the
trackball is easier to use with the Casablanca, particularly for
trimming scenes.
Interface controls
The Casablanca features several types of on-screen interface
controls that can be selected by the trackball. They are as follows:
Buttons
A button is a symbol that you press in order to start a particular
operation. Because we try to keep things as simple as possible, the
selection of the “Delete” button, for example, will result in the
deletion of a selected scene.
Chapter 1 Introduction and General Concepts
1.7
Buttons with
selectable
functions
Clicking on these buttons reveals a list of several additional options
and/or functions. The current option is always hilighted in blue.
Simply click on a particular option to select it or press the right
trackball button to cancel and return to the previous screen.
Icons
Many of Casablanca’s screens feature a row of icons that represent
the recording, editing, and video-setting screens. Clicking on these
icons will let you quickly “jump” directly from one operation to
another without having to return to the main Casablanca screen.
Sliders
Sliders are bars that allow you to move quickly through a selection
for a particular field. Just click on the slider and the pointer will
disappear. Roll the trackball and you’ll scroll through the material
on the screen. Click the left trackball button to accept the changed
position, or the right button to cancel.
On-screen
keyboard
You can easily place text (such as scene names and titles) into your
video project with the Casablanca’s on-screen keyboard–just move
the trackball pointer over the key you want to type and click the left
trackball button. If you prefer, you can attach a standard DOS
keyboard to input your text.
In and out
points
These points define the portion of a scene that you want to work
with. You can use them to separate the video material that you want
to keep in a scene, mark the entry and exit points of a special effect
or indicate where an audio segment will begin and end.
1.8
Chapter 1 Introduction and General Concepts
Quick Play
Buttons
Quick play buttons help you trim off material from the beginning
or end of a scene without having to play through the entire piece.
They allow you to play the first five seconds at the beginning of a
scene and the three seconds of video prior to the end of a scene.
Single frame
Press the “<” and “>”buttons to move the in/out points forward or
backward one frame at a time within your video project.
Selection fields
These small squares can be activated by merely clicking onto them.
A check mark within the square means that the selection is active.
Video-control
buttons
These buttons on this control panel play, record, pause and stop
your audio and video. The icons we use match those found on
most commercial video recorders.
Color box
The color box allows you to create and archive your color selections. You can use these colors for titles, the background in empty
scenes and with Chromakey special effects. The bar at the top of
the panel represents the main color spectrum. Use the slider at the
top of the box to scroll through the spectrum until you find the
general color range that you want to use. You can then use the
vertical slider on the left to adjust saturation and the horizontal
slider at the bottom to adjust the color intensity (brightness).
Chapter 1 Introduction and General Concepts
1.9
Chapter 2
Tutorials
A short video project tutorial
This chapter serves as a tutorial that will guide you through an
initial editing session on the Casablanca and introduce several
advanced editing techniques. Every step of the editing process will
be covered, however, so if you already have experience with the
Casablanca, feel free to skip over the sections you are familiar with
and refer back to them as needed.
Select
your video
Select a tape containing at least three minutes of prerecorded
video. It can be your favorite movie, an event, vacation videos–
anything at all that will make the tutorial fun for you to work on.
Put this tape into your video player (which can be a VCR, tape
deck or camcorder) and cue up the portion of tape that you want
to work with.
The main
screen
Turn on the Casablanca by pressing the button on the upper left
corner of the Casablanca’s front panel and wait until the Main
screen appears (shortly after the Casablanca logo). You’ll notice
four main areas appear within the Main screen:
The Settings area (top right)
Here you can set the Casablanca’s clock, select a language, and
choose the video-quality level.
■
Record / Edit area (left center)
This is where you record the source video onto the Casablanca’s
hard drive. Once the video is recorded, you can then split it up
into separate scenes that will be ordered in your digital Storyboard.
■
Effects/Titling area (right center)
Here you add transitions, special effects and titles to your project.
■
Audio area (bottom left)
This is where you can add music, a voice-over commentary or
sound effects to your project’s original soundtrack.
■
The settings
Before starting a video project, you need to check your
Casablanca’s settings. Use the trackball to move the on-screen
pointer to the “System Settings” button and select it by clicking
the left trackball button. The system settings screen is shown
above.
You will now be prompted to set the Casablanca’s front LCD
clock display. (You’ll wish your VCR’s clock were as easy to set.)
Confirm the message prompt with the left trackball button and
the message window will disappear from your screen.
TIP: If the LCD clock display does not appear on the
front of your Casablanca, remove the power cable
from the back of the unit, wait several seconds and
reconnect the cable. This will reset your clock
mechanism and the LCD will begin flashing.
Next, click the “Hrs” (Hours) strip in the time field. The strip will
change color when selected. Scroll the trackball to select the
correct hour and confirm it by clicking the left trackball button.
Do the same with “Min” (minutes). The correct time should now
appear on the both the screen and the front LCD display.
You can return to the main screen either by pressing the right
trackball button or by selecting the “Main screen” button in the
lower-left corner of the screen.
2.2
Chapter 2 Tutorials
Now adjust the project settings (shown below) by clicking the
“Project Settings” button.
For the purposes of this project, choose “HiFi (Stereo)” for the
audio-quality and “Large” for the screen size. You can now return
to the main menu either by pressing the right trackball button or
by selecting the main screen button in the bottom-right corner.
Press the “Video Settings” button to enter the video settings
screen (shown below).
Start your source video tape by pressing “Play” on your tape
player. Choose the input setting that describes where the video-in
cables enter your Casablanca (either the front or the rear). You can
modify the front and rear input settings by selecting whether the
automatic gain control (AGC) is on or off. AGC is an optional
setting that may improve the quality of some video signals, so
experiment with it to see which benefits your video feed. If the
video signal on your monitor appears in black and white after you
have made your adjustments, check all of the cables to ensure they
are connected properly. You can use the sliders to adjust the
brightness, contrast and color settings, then return to the main
screen.
TIP: If you are not using a professional video system, try
to avoid a high color saturation level; it could lead to
picture disturbances when you record your project to
video tape.
Chapter 2 Tutorials
2.3
Recording
When you click the “Record” screen button, a toolbar appears at
the bottom of your screen. Behind this control panel is the source
video that you cued up while adjusting your video settings. When
you see a segment of video that you want to use, press the
“Record” button (the red circlular symbol in the lower left corner)
on the control panel, and the Casablanca will digitize the source
video to its hard drive. This will continue until you click the black
“stop” button. Repeat this step until you have recorded four or
five separate takes from the source video. To play the segment,
press the triangular “play” button.
TIP: The forward and rewind buttons at the top of the
record control panel can only be used if you are
working with a DV-equipped Casablanca and source
deck. Because the buttons operate the digital video
recorder itself, this process is commonly referred to as
“machine control.”
When you are finished recording and viewing your separate takes,
stop your source deck and return to the Main screen by pressing
the right trackball button. The Casablanca will now automatically
save your project, so there may be a slight pause before the screen
actually changes.
TIP: Always stop recording on your Casablanca before
you press Stop on your source player (VCR, deck, etc.);
otherwise, your recorded scene will lose its audio sync.
You may also want to power down your source player
once you have finished recording material onto the
Casablanca’s hard drive in order to eliminate screen
“jitter.”
2.4
Chapter 2 Tutorials
Editing
Storyboard
Play
storyboard
Scene bin
Play scene
Click the “Edit” button to enter the edit screen. The top portion
of this screen contains the “storyboard” and the bottom half
features the “scene bin.” You will see a series of small, framed
pictures in the scene bin; these small icons are representations of
your recorded scenes. Every scene you record on the Casablanca
will appear in this area, although you can only see up to 12 scenes
at any given time. You can view the other scenes by using the
scroll bar to move through the scene bin.
Play
If you want to play your first scene to review its contents, select it
and press the arrow-shaped Play button (Play scene) that appears
at the bottom of the screen (shown above).
You can pause the playback (shown above) at any time by
pressing the “Pause” button or stop it entirely by pressing “Stop.”
Splitting
We will now separate the scene into several segments. It is
important to note that the Casablanca’s editing process is nondestructive. The original scene will not actually be split into pieces;
rather, the “splits” will refer to sections of the original.
Chapter 2 Tutorials
2.5
The original scene will remain in the scene bin in its entirety,
along with the scenes we will create from it.
Click the “Split” button in the mid-left portion of the edit screen
and the first frame of your scene will appear along with the split
position toolbar (shown below).
Click on the “Split Position” button on the control panel and
scroll through the scene with the trackball. You can also click the
“<” and “>” buttons to move through the scene frame-by-frame.
Clicking the waveform icon in the upper left corner of the panel
will bring up a waveform display in the upper left corner of your
screen. The waveform is a visual representation of the scene’s
original audio track as you hear it. Click the left trackball button
to mark the exact point that you want to split out of your scene.
Press the play button to view and hear the material that you have
selected. If you want to keep this material as a separate scene, click
the “Use” button. If you want to get rid of the split material
entirely, select “Drop” and the segment will be disregarded.
Continue until you have created a number of usable segments
from the original scene.
Return to the edit screen by clicking the right trackball button.
The scene bin will now contain your newly created scenes in
addition to the originals.
TIP: The scenes that you split out from the original
recorded footage don’t take up additional
hard drive space.
You can play any of the new scenes by selecting it (the active scene
will be marked with a blue frame) and pressing the Play button.
The play button appears, along with the name and length of the
selected scene, at the bottom left of the screen.
2.6
Chapter 2 Tutorials
Renaming
scenes
If you want a scene’s title to be more descriptive than the generic
“S1,” you can easily rename it. Select the scene that you want to
rename and a blue frame will border the icon. Then click on the
scene’s name in the lower-left section of the scene bin and a digital
keyboard will appear. Type the new title on the keyboard and
press “OK.” Repeat this for all scenes that you want to rename.
Trimming
scenes
Trimming creates crisp, clearly defined start and end points by
denoting what actually appears in the scene. Select a scene that
you want to trim (for our tutorial, it will be best to pick a scene
that is at least three seconds long) and press “Trim.”
You’re now in the Trim screen. If you click on the waveform icon
in the upper-left corner of the toolbar, you’ll see a visual representation of the scene’s audio while you listen to it. You will define
the scene’s beginning (or “In point”) first, so click the “In” button
on the control panel. The slider at the bottom of the panel
changes from grey to blue. As you move the trackball, you scroll
through the scene (as indicated by the receding blue slider). Stop
scrolling once you reach the frame you want for the start of your
new scene. The time box to the right of the in button indicates
the amount of material that has been removed from the scene.
The counter in the upper-right corner displays a scene’s running
time in minutes (the first digits), seconds (the second set of digits)
and frames (the last set of digits). The Casablanca records at thirty
frames per second, so the final two digits in the code will start
with 00 and go up to 29 (00:02:01, for example, would indicate
that the scene has been shortened by two seconds and one frame).
Finally, confirm your new In point by pressing the left trackball
button. To select a new Out point, click on the out button and
perform the steps that you followed to adjust the In point.
Chapter 2 Tutorials
2.7
When you finish trimming your scene, return to the edit screen
and trim the other scenes until you feel comfortable with the
process. When you are finished, return to the edit screen.
TIP: If you‘re using a keyboard to trim or split scenes,
you might find these shortcuts to be helpful:
- Once you press either the In or Out buttons on the
Casablanca, the Up and Right arrow keys on the
keyboard will advance your scene one frame at a time
- Holding the arrow key down will play through your
scene with frame by frame with audio playback.
- If you press the Left and/or Down arrow keys while
holding the control key, your scene will move one
second at a time.
- If you hold the Control and Shift keys at the same time
your scene will move in 10-second increments.
-The Home key will jump to the beginning of the clip; the
End key will advance to to the end of the clip.
- Pressing either the Page Up or Page Down keys stops
the playback and starts the loop again.
Arranging
scenes in the
storyboard
Now that you’ve modified your original scenes, you need to
arrange them in a logical order within the storyboard.
One way to conceptualize this stage of editing with the Casablanca is to imagine an artist creating a painting. The source video
that we first used can be thought of as “paint.” When that source
video was recorded onto the hard drive, placed within the scene
bin and trimmed, it was like an artist placing paint on a palette
and mixing it to form a variety of new colors. Now, just as the
artist would take the colors from the palette and arrange them on
a canvas to create a painting, we will take our scenes from the
scene bin and move them up to our “canvas,” the storyboard, to
create our video project.
Since the Casablanca is a nonlinear editing machine, you are free
to place your scenes in any sequence. Choose whichever scene you
would like to use first, place the pointer over it, and click the left
trackball button. Now select the “Add” button on the control
panel in the top half of the screen and the scene will be placed in
the storyboard, framed by a large grey border called the “workbox.”
2.8
Chapter 2 Tutorials
When you add a second scene to the storyboard, and only in this
instance, you will need to indicate whether you want to place it
“In Front” (to the left of the first scene), or “Behind” (to the
right). For our tutorial, select Behind and your storyboard will
consist of two scenes. The Casablanca will place all additional
scenes behind the workbox. Copy the rest of your scenes to the
storyboard.
TIP: Scenes in the scene bin that you have already used
in the storyboard are marked with a small black dot in
the upper right corner of its frame. This helps you scan
for scenes that have been used in your storyboard.
Take a moment to view the storyboard and see what your project
looks like by selecting the first scene in the storyboard. You can do
this in a variety of ways:
a) Move the slider underneath the storyboard until the scene you
want is framed in the grey workbox
b) Press the “<” and “>” buttons on the storyboard control panel
to move scene-by-scene through your composition
c) Click on the large yellow arrow in the upper-left corner of the
storyboard
d) Select the scene by clicking on it with the trackball’s pointer.
Once you’ve selected the first scene, press the Play button on the
storyboard’s control panel.
Rearranging
scenes in the
storyboard
If you’d like to change the storyboard’s sequence, you can easily
rearrange scenes (one of the true joys of nonlinear editing). If you
want to remove a scene from the storyboard, place the pointer
over the scene, click the left trackball button and then press the
“remove” button.
If you want to replace a storyboard scene with a scene from the
scene bin, click on the scene that is to be added (it will be framed
by a blue border), then select the storyboard scene that you want
to remove (it should appear within the grey workbox). Press the
“Replace” button on the storyboard’s control panel and the
storyboard scene will be replaced with the scene you selected.
Chapter 2 Tutorials
2.9
Transitions and You now have most of your video project in place; all you need to
effects
do now is smooth out the rough spots. If you press the play
button on your storyboard, you will notice that many of the cuts
between individual scenes are jerky. This is due to a lack of
transitions–the “glue” that binds individual scenes together. We’ll
use the basic “Crossfade” transition for our tutorial.
In order to add the crossfade transition, you need to return to the
main screen and select the yellow “Transitions” button, which will
take you directly to the Transitions screen (shown below).
The storyboard will appear near the top of the screen again, but
this time two scenes will be framed within the workbox (since
transitions take place between two scenes). On the left of your
screen is a list of available transitions and their icons. Click
anywhere in the table to make it active and use the trackball to
scroll down through the list of transitions until you see Crossfade
highlighted in blue. Click the left trackball button to select it. The
Crossfade symbol will then appear in red between the two
workbox scenes.
You can get an idea of what the transition will look like by
selecting the Preview button. A small window will appear in the
center of your screen displaying a real-time preview of your
transition (shown below).
2.10 Chapter 2 Tutorials
You can also see the transition as it affects a single-frame within
your scene in a full-screen preview (shown below) by clicking on
the Full Size button.
In the upper-left corner of the toolbar are the effect’s name and
icon. Below the name is a frame indicator and a slider bar that
enables you to select any frame within the scene. Below the frame
indicator is a display modifier. This option allows you to preview
any frame of your original scene (Original), any frame of the
effect (Effect), or a special split-screen mode (Orig. + Effect) that
displays the original scene on the left half of the screen and the
applied effect on the right.
On the right side of the Full Size preview’s toolbar are the contol
options that allow you to modify the image-processing effects
and transitions. Therefore, you can make adjustments to the
effect or transition immediately after previewing it in full-screen
mode.
Click the right trackball button to return to the Transitions
screen, select “Render” and your transition will be finalized and
saved. A blue time bar will indicate rendering progress (the
receding gray area indicates what remains unrendered). The
transition’s icon will change from red to green once the rendering
is complete–you can then view your transition by pressing the
play button.
Move through your storyboard and choose a place to insert
another transition. Click on the transitions list and select the
“Bars” effect. A window containing specific settings for the bars
transition will appear on the left side of your screen. Here you
can choose whether the bars are to be “pushed” or “wiped” across
the screen, the direction in which they will move and the number
of bars that will appear.
Chapter 2 Tutorials
2.11
You can also change the transition’s length by selecting the “1/2,”
“1s” and “2s” buttons, meaning transition durations of one-half
second, one second and two seconds. The “X” button will allow
you to define a specific, frame-accurate length (such as two
seconds, 13 frames). When you are finished setting all of the
parameters, press the Render button.
Now try adding some image-processing effects. Click the Image
Processing button (second button from the left at the bottom of
the screen) to leave Transitions and enter the “Image-Processing”
screen (shown below).
Select a different storyboard scene that is at least five seconds long
and has no transitions attached to it, then click on the effects
table. Select the “Film” effect with the left trackball button and
the Film icon will appear in red over the storyboard scene. You
can press either the full-size preview button or the real-time
preview button to see what the effect looks like. Select the Render
button to complete the effect and leave the screen once the
rendering has finished.
2.12 Chapter 2 Tutorials
Audio editing
You can enhance your project by adding background music track
or narration to the video. You’ll need a CD player or tape deck
this example.
First, you can connect your music player to the Casablanca by
attaching a standard RCA cable from the player’s Audio-Out jacks
to the Casablanca’s Audio-In jacks on either the front or the back
of the machine (you can refer to the Casablanca diagram on page
iii of the “Getting Started” chapter for more information on the
location of the Casablanca’s Audio-In jacks). For this example,
we’ll use a CD player connected to the front Audio-In jacks.
Recording
audio
Cue up the song that you want to use on the CD player and then
click on the “Audio Record” button on the main screen and the
Audio Record screen will appear (shown below).
In the upper-right corner of the screen is the “Input” selection,
which is where you indicate whether you have the audio input
coming into the Casablanca through connections that are in the
Front, the Rear, Like Video (which mirrors the settings that you
indicated in the Video Settings screen) or through Mini DV
(loads audio from a DV source in FireWire-equipped units).
To the left of the Input selector is the decibel-level display and
control bar. Before you actually record your audio onto the
Casablanca’s hard drive, you play through the audio to check the
decibel display. Make sure that the meter only strays into the red
levels during the loudest portions of your incoming audio. If the
meters are constantly within the red levels, you will need to lower
the incoming volume with the decibel control slider to prevent
overmodulation.
Chapter 2 Tutorials
2.13
Reset your player to the beginning of the song that you want to
use, press the “Play” button on the CD player and then press the
red Record button at the bottom of the Audio Record screen’s
control panel. When the song ends, press the square “Stop”
button next to the red Record button on the control panel, and
the music sample will now be listed above in the yellow box as
“A1” (you can rename the samples just as you rename scenes in
the Edit screen). Press Play to hear what you recorded. You can
trim off portions of the audio sample’s beginning and end with
the in and out buttons in the same way that you trimmed your
video scene earlier in the tutorial. When you are satisfied with
your music sample, you can leave the Audio Record screen and
enter the Audio Mix screen by pressing the Audio-mix icon at the
bottom of your screen.
Audio mixing
The top of the Audio Mix screen shown above features a storyboard that mirrors the one in your edit screen. The center part of
this screen is made up of three long strips; each strip represents
one of the three Casablanca stereo audio tracks. The top track is
the Original source audio track from your project (this track will
be full when you enter this screen). The middle track is the
Commentary track which can be used for voice-overs and
narration. The bottom track is for Background music (typically
referred to as a “soundtrack”). The names for the last two tracks
are merely references; you can place a narration on the Background track and music on the Commentary track if you wish.
On the lower-left side of your screen is a list of all the audio
recordings. Select the song sample that you just recorded, then
select a scene from the storyboard.
2.14 Chapter 2 Tutorials
Now click the “Insert” button and a message prompt will appear
in the middle of the screen asking you to indicate which audio
track you want to lay the sample onto. For this tutorial, choose
the background track and the audio sample that you have selected
should appear on that track within a blue highlight (the track
highlighted in blue will always be the currently active track).
A red bar will then appear above your original audio track
indicating the length of the combined, unrendered audio tracks.
When you press “Render,” the original source audio will be mixed
with the sample and the indicator bar will turn green when the
audio has been rendered. You must render your audio to be able
to hear the combination of all three tracks; otherwise, you will
only hear the particular audio sample that is highlighted in blue.
If you want to change the audio level for a particular scene, select
the track that you want to alter and move the dB meter to adjust
your sound. (The dB meter registers each audio track’s decibel
change, so all tracks are initially set at 0 dB–no decibel change.)
Let’s suppose that your original source audio is drowning out the
sample you placed on the Background track. You correct the
problem by first selecting the original source audio track and then
moving the dB level to -05. When you render the audio, the
original Background track will be slightly lower in sound and you
should be able to hear your music more clearly. Once the background audio sample has finished playing, the original source
audio will rise in volume to its original level.
TIP: The Casablanca adds the volumes of all three audio
tracks together, which could lead to an overmodulation
error. You can solve this problem by lowering the volumes
of each audio track before you render your audio.
You can also adjust the beginning and ending of each audio
sample on a particular track by moving the Fade In and Fade Out
sliders (represented by the two rectangular black icons just below
the background audio slider the lower right side of the screen).
First, select an audio sample within an audio track and it will be
highlighted in blue. Click on the Fade In slider and scroll to the
right. The counter to the right of the slider indicates the length of
the fade. You can fade the sample out in the same manner. You
can leave the Audio Mix screen once you have completed your
audio modifications and enter the Main screen.
Chapter 2 Tutorials
2.15
Finishing
Your video is nearly complete, so select “Finish” from the main
screen and you will enter the Finish screen (shown below).
If you rendered all of the audio and effects on the project as you
added them to your storyboard, press the “Record to VCR”
button (or “Record to DV” if your unit is FireWire-equipped). If
you have any unrendered effects remaining on your storyboard,
however, the Casablanca will render all of them for you now
before you record to tape when you press “Render Storyboard.” A
message prompt will indicate the estimated rendering time, while
a blue time bar indicates just how much rendering has taken place
and the receding gray bar indicates the amount of material that
still needs to be rendered. This is also called a “Batch Render.”
Once you have rendered everything and pressed Record to VCR,
the first frame of your project will appear behind a “Start Recording” button. Please take a moment to make sure that all of your
video-out cables are properly connected. (If you are using only
one VCR to play and record your video, make sure that all videoin cables are disconnected.) Start recording on your VCR and
press “OK” on the screen.
Stop recording on the VCR once the Casablanca has played the
project through to the end.
Congratulations! You have now successfully completed your first
video project. It may not be ready for the film-festival circuit just
yet, but with a little practice, you could be well on your way.
Once you have gotten the feel of the editing process, you will
want to try the advanced tutorials for insert editing, audio mixing,
refined titling and multilayer editing.
2.16 Chapter 2 Tutorials
Insert-editing tutorial
Insert editing can be a great addition to any project. The idea
behind the procedure is simple: You want to insert a scene into
another, longer scene, yet you want the longer scene’s audio to
remain intact. This is a great way to utilize footage from two
cameras that have shot the same event. Let’s say, for example, that
you used two video cameras to film a speech. One camera
recorded the speaker, while the other recorded the audience. With
insert editing, you can place a scene of the speaker at the podium
on your storyboard and insert a scene of the audience reacting to
the speech while the original audio remains undisturbed.
First, enter the Edit screen and choose a scene from your scene bin
that you want to insert into the highlighted–or center–scene in
your storyboard (the background scene should be longer).
Click the Insert button, which takes you to the range screen.
Here’s where you can set the starting frame of your video insert by
using the “Start” button for general selection and the Single Frame
(< and >) keys for fine tuning. The In and Out buttons in the
lower portion of the range screen are for trimming your original
video scene.
If you want the insert to start with the first frame of the master
scene, just click on the right trackball button after you’ve clicked
on Insert. This brings you back to the Edit screen. The scene that’s
been inserted into the master scene now has the insert icon over it.
As another example, let’s say that you want to insert a two-second
scene and you want it to start with a frame that’s five seconds into
a 15-second master scene.
In the Range screen, you’ll see the time counter on the top line.
For this example, we’ll say that the counter indicates that you’re at
frame 24.16:03. Adding five seconds to that time results in a time
of 24.21:03.
Scroll the starting point to 24.21:03 using the start button. Click
the right trackball button or click on the Edit button to return to
the Edit Screen.
Now you’ll notice the master scene on the storyboard has been
broken up into three parts. Part one is the first five seconds of the
master scene, which are unaffected. The second part is the two-
Chapter 2 Tutorials
2.17
second insert and the last part is the final eight seconds of the 15second master scene.
You can make multiple inserts and add transitions between an
insert and a master scene (but not between two inserts). If you
wish to have transitions between multiple inserts within one
master scene, you’ll need to create a scene of the inserts along with
the transitions between them and then place that scene on the
storyboard as one insert. (For more information on this
procedure, see the Multilayering tutorial.)
Audio-mixing tutorial
Once you feel comfortable using the Casablanca, you’ll want to go
beyond the basic audio edits in the general tutorial and do some
advanced audio mixing. We’ll concentrate on perfecting your
project’s soundtrack, including the correction of the original
sound, adding a full commentary and incorporating background
music.
Preparations
First, you’ll need a completed video project with all transitions
and effects rendered. For this example, make sure that the project
is roughly two to four minutes in length. Finally, select a piece of
music from a CD or tape that will serve as your background
music.
Recording
Enter the Audio Record screen and record a segment of spoken
dialogue with a microphone fed through a mixer or your
camcorder into the Casablanca. If you don’t have a microphone,
you can record a segment of spoken dialogue from a CD or tape
into the Casablanca–the idea is to get a segment of speech onto
the Casablanca’s hard drive. When you have finished, record a
segment of music (make sure that your recording is not longer
than your project). You can then name the audio samples just as
you did in the general tutorial.
You can also trim audio segments down in the same way you trim
individual scenes. Select the audio sample that you want to trim,
click on either the In or Out point and move the trackball to
scroll through the sample. You can also view a visual representation of the audio track in the waveform display just above the In
button. If you press the left Quick Play (I>) button you will hear
the first three seconds of the sample and if you select the right
Quick Play button you will hear the last three seconds of your
2.18 Chapter 2 Tutorials
sample. After you have recorded, named and trimmed your audio,
exit the Audio Record screen and enter the Audio Mix area.
Placing and
mixing
Now you can arrange and mix your audio segments. First, select
the music sample from the audio-segment list in the lower-left
corner of the screen. Then click on the first scene in the storyboard and press “Insert.” When you are prompted to choose one
of the two available tracks, select “Background.” The music
sample will then be placed on the Background track.
Scroll through the storyboard until you reach the end. If the audio
sample is longer than the actual storyboard, you need to shorten
the sample. Select your audio sample, click the “Range” button
and move the out point back to the left until you reach the last
video frame.
If you have a segment of music that is too short to accompany the
entire storyboard, select an additional music sample from the list
(it can be the same piece of music or a different sample) and click
onto the scene in which the audio sample ends. Select “Insert”
and the sound is fitted directly behind the previous sound. Go
ahead and repeat this procedure until you have filled the entire
storyboard with music.
You add the spoken dialogue in the same way: Select the Commentary track (it’s the middle track represented by the microphone icon) and scroll to the scene where you want the commentary to begin. Choose the commentary sample from the audio list
and press “Insert.”
If you would like a more precise placement of an audio sample,
just click the “Range” button. You will then see the first frame of
the scene and a control panel appear on your screen. You can press
the Waveform button to see a representation of the audio and the
Play button to both watch the scene and hear your audio track as
you originally placed it. To move the audio, press the “Start”
button and scroll through the scene with the trackball until you
reach precise frame where you would like the audio to begin. Press
the play button once again to check your new audio placement.
Once you have finished, return to the Audio Mix screen.
Now you can render the audio. Click on the sample that you
placed in the Commentary track and select “Render.” All three
tracks will be rendered together. You can now play through the
Chapter 2 Tutorials
2.19
storyboard to check your work. Listen carefully to the volumes of
all three tracks to ensure that they are proportionally correct
(occasionally the commentary may be sound either too soft or too
loud). If this is the case, you can easily adjust the volume by
selecting the track you want to correct and then moving the dB
meter. You can also use the “Fade in” and “Fade out” controls to
alter the abruptness of an audio change. A one-frame fade out
results in a fast, sudden volume change while one-second fade out
(30 frames) creates a much more gradual change.
You can also affect the volume levels of material on the other two
tracks for the duration of your highlighted sample. This can be
quite useful if you need to either adjust or remove a specific
segment of your audio. Let’s say, for example, that you have a oneminute scene of an audience applauding in your storyboard. The
sound of the applause occupies the original source audio track and
you want to insert a 30-second segment of music into the
Background audio track 15 seconds into the scene. You also want
the sound of applause to drop slightly while the music is playing
(so the music can be heard more clearly) and then rise to its
original level when the music sample has stopped. All you would
need to do to accomplish this is to highlight the sample on the
background track, then use the original source volume slider to
reduce the source audio by 10dB. The original track will only be
affected for the duration of the highlighted background track.
You can use this technique to remove unwanted noise as well. Let’s
say that there is the distinct sound of several audience members
“booing” for two seconds in the middle of your original source
audio and you prefer that they keep their commentary to themselves. You can adjust the sound level through the commentary
track (even though you already modified it once to allow the
music sample to be heard).
Go into the audio record screen and click the “Create Sample”
button, which will allow you to create a sound segment of
“silence.” Next, select the duration for the silence sample (since
the booing lasted for two seconds, you should set the duration for
two seconds). Return to the audio mix screen and insert this
segment of silence into the commentary track at the appropriate
point by using the range button to advance to the two-seconds of
booing within the scene and click OK. Highlight the two-second
sample, select the Original slider and reduce the volume by 10dB.
Since this segment of the source audio was
2.20 Chapter 2 Tutorials
already reduced by 10 dB in the previous example, your total
reduction of the two seconds of booing would be by 20db.
Once you are finished adjusting the audio, press Render and
check the changes that you’ve made.
Titling Tutorial
You can use Casablanca’s titler to create introductions, credits and
subtitles for your project. For this tutorial, you will need a
completed video project; a simple set of three of four scenes that
are each 10 seconds in length will work fine. The more you work
with the titler, the more you’ll find that the process is very similar
to applying effects to your scenes.
Choose “Titling” from the main screen and you will enter the
titling screen (shown below).
Select the scene in the storyboard to which you would like to add
titles. For this example, take the first scene and add an introduction that will display the name of the video and the date of the
recording. Click on the list of title options and select Text Table.
Click on the “Enter/Change Text” button and you will enter a
screen with a keyboard display: This is where you type your text.
Press “Choose Font.” The word “Casablanca” appears and will
change according to the font you select. You can click on any font
and point size that you like. For this tutorial, use a point-size of
150. Return to the main titling screen by pressing “OK.”
TIP: The “Horizontal Roll” and the “Multicolor Roll” tiake
slightly longer to render than other titles due to the
constantly changing text.
Chapter 2 Tutorials
2.21
You can now manipulate your text even further by choosing (from
left to right) “Italics,” “Bold,” “Border” or “Shadow” (shown
below).
Select both Border and Shadow, which will make our text clearer
on the video.
TIP: Titles that use dark-bordered fonts are the easiest
to read.
Now choose a color by clicking “Color” and a color box will
appear (for more information on the color box, see p. 1.9). For
this tutorial, choose a light shade of red or yellow. Your font, its
color, and any other attributes will appear in the upper-right
portion of the screen.
You can also position your text by choosing from “Left aligned,”
“Right aligned,” “Centered” and “Justified,” and the table modes
“Left-> <-Right” and “<- Middle ->.” For our tutorial, select
“Centered” and begin typing your text on the keyboard.
If you find that the text is too thin, too wide, or the wrong point
size, you can select the “Choose Font” button and make any
necessary corrections (shown below).
Please note that only the currently active line of text will appear in
color; the other lines appear in gray on the screen, but your
finished video will display all of the lines in the proper color.
Saving text
Your text for the introduction should now be on your screen. You
can save this text for future projects by first clicking “Archive” and
then “Save.”
2.22 Chapter 2 Tutorials
A list with the word “Demotext” (a small preloaded demonstration text) will appear. Click on the horizontal yellow box just
above the “OK” and “Cancel” buttons and enter a name for the
text you are saving. Confirm the name by pressing “OK” on the
keyboard. Leave the Archive screen by pressing the OK button
again and the name will appear in the list box (along with
Demotext). Finally, click on the OK button in the lower-right
corner and you’ll return to the titling screen. You can now select
“Fade In/Out” if you want a gentle fade effect for your text. You
can also select the “–-” setting to prevent your text from fading
altogether. You can check to see how your title looks by selecting
either the real-time “Preview” button or the single-frame “Full
Size” button.
Now let’s set the range of the text within the scene. This works
just like defining the range for image processing effects. At the
moment, the whole scene is affected by the text. Pressing “Range”
will allow you to change the length of time that the text appears
on the scene. For our tutorial, trim the title to a length of about
three seconds by moving the In and Out points.
Now check the text once again by selecting the preview button.
Once you are happy with your title’s appearance, you can
render it.
Credits
Now you can add a second title in a different scene that will be
called “Credits.” Choose a scene from the storyboard that does
not contain text and select the “Vertical Roll” button. This option
will “pull” your text up from the bottom of the screen like the
credit sequences seen in most motion pictures. Click on “Enter /
Change Text” to return to the text input window. You can enter
any text that you want, but for the sake of this tutorial let’s
reactivate a previously-saved text. Click on Archive and then
Load. Now choose the text we just created for the last scene and
press OK. The text should now appear in the text window. Click
OK again and you’ll return to the Titling screen. You can check
your credits by pressing the real-time Preview button or the Full
Size preview button. If you’re not satisfied with the roll, you can
adjust it by clicking the Range button and adjusting your running
time (a good running time for this tutorial would be five seconds).
Now you can render your credits and play the final scene.
Chapter 2 Tutorials
2.23
Multilayering tutorial
As you have probably already discovered, defining and adding
individual effects is very easy. But what if you wanted several
effects to overlap one another? What about a picture-in-picture
effect with more that one picture? What if you wanted to place a
title onto a negative scene?. The answer is multilayering, a
technique that involves making a scene out of your entire
storyboard before additional effects are added.
Preparations
For this tutorial you’ll need a scene that’s at least three seconds
long and an empty storyboard. Select the “Film” effect, which will
make it appear as if the scene was filmed many years ago by
adding “jumps,” “scratches” and sepiatones to your video material.
Creating the
first layer
First, you need to place your scene into the storyboard, enter the
Image Processing screen and select the “Film” effect from the list
on the left. Go into the Full Size full-screen preview (shown
below) and select “Orig. + Effect” to see what your effect will look
like as you modify it with the controls on the right.
When you’re satisfied with the effect’s appearance, click “OK” and
exit the Full Size preview. Go ahead click the “Render” button to
render the effect.
Creating the
second layer
Now click the “Scene” button: You now can make a scene of just
the effect (“Effect”), the entire storyboard (“Effect + Scene”) or a
particular range within the storyboard (“Range”) as shown on the
top of the next page.
2.24 Chapter 2 Tutorials
Choose Effect + Scene and return to the edit screen. A new scene
should now appear in your scene bin that contains both of your
old scene and the effect.
Remove the original scene from your storyboard by clicking the
Remove button. Select the new scene that you just created and
add it to your now-empty storyboard.
Go back into Image Processing and select any effect you like and
add it to your scene. You can click on either the real-time Preview
button or the Full Size preview button to see the layering as both
effects appear within the scene. Once you are satisfied, you can
render the effect.
You can add additional layers by repeating the procedure as often
as you like.
Chapter 2 Tutorials
2.25
Chapter 3
Reference
System settings
1
2
3
4
5
6
7
Language
1 Select your language of choice. The names of many of the
functions will change immediately, but you’ll need to restart the
Casablanca for all of the language changes to take place.
Clock
2 Click and scroll on “Hrs” or “Min” (hours and minutes using
military time) to set the clock on the front LCD display.
Trackball speed 3 Choose one of three speed settings to alter your trackball speed.
Code
4 This unlocks the sample “demo” effects that have been
preinstalled on your Casablanca. If you want to purchase a
particular set of effects, call DraCo at (303) 440-5311 and you
will receive a code to unlock them.
Hardware/
software info
5 The information field displays your unit’s serial number and the
version of system software that you’re running.
Main screen
icon
6 Clicking the Main screen icon leads you back to the Main
screen.
Options
7 Options has additional features, such as the ability to hide your
Play panel and to loop a scene for continuous playback.
Project Settings
2
1
You may adjust the settings for a specific project, such as the
screen size and the overall quality of your picture and sound. You
can also see how much material has been recorded, check the
available space on your hard drive and initiate a project clean up to
free up memory on your hard drive.
Picture quality
1 Select a setting to adjust the quality of your video. If you’ve
already started a project, you will only be able to choose from the
three quality settings within your current range, not 12. Generally
speaking, the higher the quality setting, the more hard-drive space
is required.
Audio quality
2 Audio quality can be set to one of three levels. You cannot
change the audio quality once a project has been started. The
frequencies of the three modes are as follows:
VCR
Mono
20Hz - 9kHz
HiFi-Stereo
Stereo
20Hz - 14kHz
CD-Quality
Stereo
20 Hz - 20kHz
Although the highest setting does produce CD-quality sound,
most camcorders and VCRs can’t record at that level. Therefore,
you can normally use one of the lower settings without an
appreciable loss of sound quality. As was the case with the video
settings, higher audio quality means less hard drive space. Sound
can require up to 150 Kbytes/second; using all three audio tracks
can multiply this to about 600 Kbytes/second. If you record with
the lowest video quality setting of 500 Kbytes/second, the sound
can take up more space on the hard drive than the video. Therefore, we reccommend using the “Hi Fi (Stereo)” setting.
3.2
Chapter 3 Reference
Project
settings
1
(cont’d)
2
3
Picture size
1 This determines the size of the recorded video picture. The
Casablanca can record all pixels from any source–the typical
limitations of VHS recorders can be ignored.
Many video sources, however, don’t use the entire signal; this is
especially true for camcorders. The Casablanca can’t tell whether
the entire incoming signal is at full resolution or only parts of the
signal are at full resolution. As a result, you may see black borders
around your picture during transitions. Select a smaller image size
and the borders should vanish.
System capacity 2 These bars indicate just how much of your Casablanca’s hard
drive is occupied by audio and video (red) and how much drive
space is still free (green). The figures next to the bars tell you how
many minutes or seconds you still have in the selected quality.
Clean up
3 Clean up is a way to physically manage your hard drive space
by removing deleted audio and video files. (It does not remove
material deleted with the trim function because the trimmed parts
can be reactivated at any time.) You should run the clean up
function regularly, particularly if you have a large number of
deleted scenes. Otherwise, you may run into audio/video partition
full errors that can seriously damage your project. The overall
clean up time will depend on the structure of your project–it
could take up to 30 minutes or just a few seconds. The estimated
time will always appear on-screen. Never pull the power plug
while reorganizing your drive; it could lead to a loss of all video
and audio data. Instead, switch it off using the front on/off
button, which will save your information before it shuts down.
Chapter 3 Reference
3.3
Project
settings
A message prompt will appear over your cleanup progress bar
stating that your Casablanca will be “Switching off after cleanup.”
(cont’d)
1
2
New project
1 Clicking this button erases all of the recorded audio and video
data on your hard drive and starts a new project. It does not
remove effects, fonts, archived texts and colors or selected settings.
Main screen
button
2 This button brings you back to the Main screen. Pressing the
right trackball button has the same effect.
Video settings
1
2
Brightness,
contrast and
color
1 These settings let you directly influence the video signal as it’s
recorded onto the Casablanca’s hard drive. You can make additional corrections to the video once the recording has been done
but if you want to achieve the best results, it’s better to have a
good signal from the start. Making corrections afterwards has its
limitations–despite corrections, a picture that’s initially too dark
will never be as crisp and bright as it would if it had been digitized
within the right parameters.
Audio/video
input
2 Here you can change the location of the active audio/video
input. The Casablanca has two input areas, one at the front
(behind the panel) and one at the back of the machine. In most
cases, you’ll use the front input for your camera and the back
input for your video recorder. Many video cameras have difficulty
shifting from one scene to the next, particularly if you switch off
the camcorder off between takes. The Casablanca compensates for
3.4
Chapter 3 Reference
Video
settings
(cont’d)
this by using an internal synchronization with the front input.
The rear input uses the sync coming from the source (genlock
technique). If you experience picture “shivers” when recording to
your hard drive, select the front input. When working in a studio,
however, you should use the rear input to synchronize the video.
The inputs can also be configured with or without AGC.
2, 3
1
Up/down
1 If the on-screen control panel obscures a portion of incoming
video, you can move the entire menu from the bottom of the
screen to the top. Pressing this button a second time returns the
control panel to the previous position.
Record icon
2 The Record icon takes you to the Record screen.
Main screen
icon
3 The Main screen icon returns you to the Main screen.
Record
Here’s where you record your source video material onto your
hard drive. The screen itself is placed on top of the video signal
(just like the video settings control panel). You can see the
incoming signal at all times and choose what to record. The DV
Controls are only available on DV Option-equipped units.
1
Scene name and 1 Clicking on the scene’s name allows you to change the name
length
itself. A keyboard will appear next to the scene name, along with
the length of the recorded scene. Type the name and press OK.
Chapter 3 Reference
3.5
12
11
Record
(cont’d)
1
2 3 4
5
6
7 8 9 10
Up/down
1 This button moves the panel to the top or bottom of the screen.
Record
2 Press the Record button to start capturing footage.
Stop
3 Pressing either the Stop button or the right trackball button will
stop the recording and create a new scene from the material.
Note: Always press “Stop” on the Casablanca before you
press the stop button on your source deck.
Play
4 Click the Play button to see the last recorded scene.
Delete
5 “Delete” removes the last recorded scene.
Trim
6 “Trim” brings you directly to the Trim screen without going
through the Main screen.
Edit screen
7 The Edit screen icon takes you to the Edit screen.
Audio record
8 The Audio Record icon leads you to the Audio Record screen.
Video settings
9 The Video Settings icon leads to the Video Settings screen.
Main screen
10 Clicking on the Main Screen icon gets you back to the Main
Screen.
Rest
11 The “Rest” ( or “remaining”) counter shows how much
material can still be recorded onto your hard drive. This counter
works while recording but you should be aware that it calculates
the remaining capacity based on the recording details of the first
digitized scene–therefore, the remaining time is only an estimate.
DV Controls
12 The DV Controls enable you to operate your DV camera or
deck (pause, rewind, fast forward, play and stop) from the
Casablanca’s interface.
3.6
Chapter 3 Reference
Edit
1
3
4
2
5
The Edit screen is where you’re likely to spend most of your time
when editing a project. It’s where you split the footage into
separate scenes, trim them, add special effects, name the new
scenes and place them into the storyboard.
Storyboard
1 The storyboard is where you put the scenes in the order they
will be viewed. The storyboard itself is found at the top of the
screen. The current scene is always located in the center of the
storyboard within a gray frame (the “workbox”). The scene’s name
and running time are displayed at the top of the workbox (see
“The storyboard” on p. 3.13 for more detailed information).
Scene bin
2 Recorded scenes automatically appear in the “Scene bin.” Up to
twelve scenes can be viewed in the scene bin at any one time. If
you have more than twelve scenes, use the slider (3) or the up and
down arrows (4) to scroll through the bin.
Renaming
scenes
5 To rename a scene, select the scene with the left trackball
button (the frame of selected scenes change to blue) and then
click within the box in the lower-left corner of the screen displaying its name. An on-screen keyboard will appear. If you have an
external PC keyboard, you may use it to type your text. Otherwise, click on the keyboard buttons with the left trackball button
to enter the new scene name. To delete the old scene name, use
the backspace arrow that points to the left (located in the upperright corner of the keyboard). If you want to type in capital letters
or use special characters, press the up-arrow button (the shift key)
in the lower-left corner of the keyboard. Clicking on “OK”
confirms your changes and closes the keyboard window.
Chapter 3 Reference
3.7
Edit
(cont’d)
2
3
1
Play
1 To play a scene from the scene bin, click on the scene (which
changes its frame to blue) and press the play button in the lowerleft corner of the screen. The scene will play in its entirety. The
actual running time of selected scenes appears between the play
button and the scene’s name.
Split
2 Selecting the Split button takes you into the Split screen
(shown below). The concept behind splitting scenes on the
Casablanca is somewhat like that of splicing film reels.
Clicking on the Waveform button on the upper-left corner of the
tool bar allows you to hear your scene’s audio while splitting as
well as bringing up a simple waveform display in the top-left
corner of your screen.This waveform provides a visual representation of the scene’s audio and can be a useful editing tool.
Click on Split Position and scroll through the scene with the
trackball (you can also use the Single Frame buttons to move
through the scene frame-by-frame). Click the left trackball button
to mark the exact point that you want to split out of your scene.
Press the play button to view what you have selected. The scene
bin will now contain the new scenes. If you want to keep this
3.8
Chapter 3 Reference
Edit
(cont’d)
material as a separate scene, click the “use” button. If you do not
want to use the split material, select “Drop.”
When you press the Autolog button ( >I), the Casablanca
automatically searches through your scene and determines
potential split positions based on the rate of image changes. You
then decide if you want the splits to go where the machine has
assigned them (the Casablanca’s automatic search is roughly 85%
accurate).
When you return to the Edit screen, you’ll see the split scenes after
the original source scene. The new scenes can be edited in the
same fashion.
Trim
3 Click on the Trim button to get to the Trim screen (shown
below). You can trim each scene precisely by defining the in-point
(first frame, start of the scene) and the Out-point (last frame, end
of the scene).
Clicking “In” allows you to scroll through the scene and select a
new in-point. The blue bar indicates how much of the scene is
selected. The gray portion of the bar shows the amount of
material that will be removed from the scene. Press the left
trackball button to make your selection. You choose the out-point
in exactly the same way, clicking “Out.” Click the arrow buttons
below the out button to move the scene forward and backward
one frame at a time.
Clicking on the Waveform button in the upper-left corner
displays a simple waveform display in the top-left corner of your
screen.This waveform provides a visual representation of the
scene’s audio and can be a useful editing tool.
Chapter 3 Reference
3.9
Edit
(cont’d)
1&2
5
3&4
1 A scene may be copied as often as you like without using up
additional hard drive space. One benefit of copying is that you can
alter the copy as much as you like without affecting the original.
To make a copy, select a scene by clicking on it (its frame changes
to blue) and press “Copy.”
Copy
The Casablanca also makes automatic copies when you split scenes
up, place scenes into the storyboard or render effects into a scene,
none of which occupy any additional space on your hard drive.
Empty scene
2 Empty scenes are great for introductions, ending-credit
backgrounds and lead-ins for various projects. Click on the Empty
Scene button and a screen with various options appears (shown
below).
Create an empty scene by clicking onto the list and then scrolling
through it. The “Color Bars” option creates a striped test picture
according to the CCIR standard. Most professionals use about 10
seconds of color bars before the actual video begins.
3.10
Chapter 3 Reference
Edit
(cont’d)
“Color” allows you to create a scene composed of a solid color
from the color box. The spectrum at the top of the box is for
selecting the color itself. The sliders on the left and bottom of the
box are for adjusting the brightness and the color strength,
respectively. You can use the “Archive” option to save your color
and use it again at a later stage.
“Noise” creates either a colored or monochromatic noise pattern
on the screen. The frequency of the noise can also be adjusted.
Note: The preview function can be extremely helpful in creating
the noise pattern that you want.
“Black” creates a black video scene.
“Random color” generates a scene that continually changes its
color modulation. “Base color” sets the color for the first frame,
while “Mode” selects the amount of random color that will appear
within the scene. “Solid” produces a single colored block, “4
Point” defines four different colors in each corner of the picture
and “5 point” defines the four corners plus a fifth point in the
middle of the picture. “Deviation” determines the amount of
color variance (a high deviation setting means more colors), while
“Activity” sets the speed of the color change (a high speed setting
means a faster change of colors). Once these settings have been
made, you need only to enter the length of the new scene. Just
click on duration and scroll through the choices.
Delete/undelete 3, 4 You can delete a scene at any time. The current scene
(framed in blue) is removed by pressing the “delete” button. Please
note that additional hard-drive space is not automatically gained
by deleting a scene; you must delete a scene and then initiate a
project clean up (in the project settings screen) in order to
physically remove the unwanted material and gain room on your
hard drive. Clicking the Undelete button to the right restores the
deleted scenes (up to 10 levels).
Special
5 Special lets you apply special effects (Slow Motion, Fast Motion,
Reverse, Still, Strobe, Scene - -> Audio Sample) to copies of your
selected scene.
Some of the motion effects within the Special screen (slow
motion, still and strobe) can also be applied in one of several ways.
You can add the motion effect to either a single field within a
Chapter 3 Reference
3.11
Edit
(cont’d)
frame (the way motion effects were applied in previous versions of
the software) or on both fields within a frame. In addition, you
can employ an interpolated field (the Casablanca generates an
extra field that improves the appearance of the effect by adding
image stability and reducing flicker, etc.) or an interpolated frame.
The right side of the Special screen (shown above) also contains
the access buttons to add-on software, such as PC Link and Akaba
motion-paint software (for more information on operating PC
Link and Akaba, please refer to their respective manuals).
Slow motion
Slow motion creates a scene copy that is identical to the original
except that it runs slower. The “slowness rate” can be set with the
slider: A high rate (10) leads to an extremely slow version 10-times
the length of the original, while the lowest rate (2) creates a scene
that’s only twice as slow as the original. The scene’s original sound
is also played in slow motion, but you can mute it in the audio
mix screen. Slow motion can be applied both fields within a
frame, interpolated fields or interpolated frames. The new slow
motion scene will appear in your scene bin with the suffix “_SM,”
indicating that it is a slow motion scene.
Fast Motion
Fast motion works just like the slow-motion effect, except that
scenes are played faster. Choose an acceleration factor (two times
as fast, three times as fast and so on) and click OK. We suggest
that you use an even factor as it will allow for complete resolution.
Once the scene has rendered, the new scene will appear in your
scene bin bearing the suffix “_QM,” indicating that it is a quickmotion scene.
3.12
Chapter 3 Reference
Edit
(cont’d)
Reverse
Any scene can be made to run backwards. The Casablanca will
automatically begin building your new scene once you select
“reverse.” After the scene has been rendered, the new scene
appears with the suffix “_BW,” meaning this scene is a backwards
scene. Just like the slow-motion effect, the sound is affected when
the reverse effect is applied to the scene. You can switch the
original source audio off in the Audio Mix screen.
Still
The Casablanca can create perfectly stable stills without any
interference stripes. Select a scene and the first frame will become
a still once you click on the “still” button. If you want a still of a
frame that’s located further into the scene, you can make a copy of
the original scene, then trim it down so that the frame that you
want is the starting point. Stills can be be applied to fields within
a scene or interpolated frames. A still frame does not have sound.
Strobe
To create a strobe effect, you need to select a scene, click on the
special button and choose “Strobe.” You then adjust the slider to
choose just how long the Casablanca should hold each frame. A
setting of 4 means that one frame will stay on the screen for a
duration of four frames. A setting of 3 means that the first frame
is held for the length of three frames, then frame number four
would appear for a length of three frames, followed by frame
number seven and so on.
Scene -> Audio
Scene -> Audio Sample creates a new audio sample from a selected
scene, making it possible for you to edit video and sound separately. Once you select a scene and click this button, the scene’s
sound will appear in the list of audio samples in the audio/record
and audio/mix screens. From there, you can work with the sample
as you would with any other audio segment.
Cancel
Cancel exits the special menu without changing anything.
Clicking the right trackball button has the same effect.
Storyboard
The concept behind the storyboard is as old as the film industry
itself. Filmmakers have always used a storyboard to help organize
the layout of their project. A good storyboard allows a director to
Chapter 3 Reference
3.13
quickly review every stage of a project by displaying every scene
(usually represented by the scene’s first frame) in order, providing
an album of snapshots of the final film. Traditionally, the storyboard would actually be a large board composed of hand-drawn
pictures that represent every scene. As a result, the storyboard
would often look like a large comic-strip version of the film.
Edit
(cont’d)
The Casablanca modernizes this time-honored concept with its
own digital storyboard. Within this storyboard, scenes are
represented by their names and the first frame of the scene; the
playing order is from left to the right.
2
1
Storyboard
placement
3
You can place a scene into the storyboard by selecting the scene
that you want to add (it becomes framed in blue) and pressing the
“add” button. The scene will then appear within a gray frame
called the workbox. When you add a scene next to the very first
scene in the storyboard, you will need to indicate whether you
want the new scene to be placed before (to the left) or after (to the
right) the scene in the workbox. All other scenes will be automatically added after the current workbox scene.
Please note that the scenes in the storyboard are merely representations or “snapshots” of the actual scenes in the scene bin. If you
trim or even delete a scene that’s in your scene bin, it will have no
effect on your storyboard. To incorporate any scene changes, you
need to replace the storyboard scene with the altered scene, since
you can’t edit a scene that’s in the storyboard.
Remove
1 This button removes the storyboard scene in the gray workbox.
An insert-edit scene can also be removed this way, thus making the
background scene visible again.
Search and
replace
2, 3 These two functions are closely related. Press “Replace” to
remove the current storyboard scene and place the selected (blueframed) scene from the scene bin in its spot. “Search” will locate
the original version of the scene in the workbox. Let’s say that you
3.14
Chapter 3 Reference
Edit
(cont’d)
would like to trim a scene that’s in the storyboard. First, place the
storyboard scene within the workbox and press “Search.” The
Casablanca will then locate the scene within the scene bin that has
the same name (if you haven’t already deleted this scene or
renamed it). Once it’s found, you may trim that scene down,
return to the edit screen and press “Replace.”
3
1, 2
Insert and range 1, 2 The Insert and Range buttons control insert editing. To
insert video material into an existing scene, you need to select a
scene in the storyboard that will serve as your background scene
(this scene will also provide the audio for the insert) and move it
into the gray workbox. Select a scene from your scene bin with the
left trackball button (its frame will turn blue)–this is the material
that will be inserted into your storyboard scene.
Click the Insert button and the Range screen will appear. Here
you can set the starting frame of your video insert by clicking
either the start button (for a gross selection) or the < and > keys
(for fine tuning). The in and out buttons in the lower portion of
the range screen are for trimming your original scene.
If you want the insert to start with the first frame of the master
scene, just click the right trackball button after you’ve clicked on
Insert. This brings you back to the edit screen. You’ll notice that
the master scene on the storyboard has been broken into several
parts: The initial portion of the master scene, the inserted scene
and the remainder of the master scene. The scene that has been
inserted into the master scene will have an Insert icon superimposed on it indicating that the insert has taken place.
You can make multiple inserts within the same scene and add
transitions between an insert and the master scene, but not
between two inserts. If you wish to have transitions between
multiple inserts within one master scene, you need to make a
single scene of the inserts and transitions, then insert that scene.
Play
3 The Play button will play through your storyboard, starting
from the scene within the gray workbox (which may anywhere in
the storyboard) and ending with the final scene. To start from the
Chapter 3 Reference
3.15
very beginning, scroll through the storyboard until the first scene
lies within the workbox. You can stop playing by pressing either
the Stop button or the right trackball button.
Edit
(cont’d)
4
2, 3
1
Moving
through the
storyboard
1 The center scene of the storyboard is framed in the gray
workbox. This is the active scene. The storyboard can hold an
unlimited number of scenes, but only five scenes will be visible on
the storyboard. You can scroll through the storyboard to view your
other scenes by clicking on a particular scene. You can also:
2 Move the slider beneath the storyboard (the fastest way of
moving within the storyboard);
3 Press the Single Scene (< >) buttons to move the storyboard
scene-by-scene); or
4 Press the yellow triangle to the left or right of the storyboard to
jump to the first or last scene of the storyboard.
3.16
Chapter 3 Reference
Finish screen
1
2
3
The finish screen is where you go to render all of your audio and
video at once and then record your final rendered project to tape.
Rendering
1 You may choose to run a “batch render” to render all audio and
video changes at once instead of rendering each effect as you go
along. Once you click on Render Storyboard, the Casablanca will
indicate which effect is currently being rendered and how many
remain unfinished. The front LCD panel will also display the
percentage of completed rendering. Keep in mind that this
percentage is an estimate and there may be a deviation between
the calculation and the actual speed that it’s rendering at.
Range
2 Range lets you record a selected portion of your storyboard to
tape, rather than the entire storyboard. Once you click on the
Range button, the first frame of your storyboard will appear
behind a Trim toolbar (see the section on Trim within this chapter
for more information). Once you set your new In and Out points,
click on the videocassette icon in the lower right corner of the
toolbar to return to the Finish screen.
Record to VCR/ 3 These buttons allow you to record your finished video project
to tape. It’s always a good idea to record your finished project to
DV
tape, but you might even want to make video tape copies of your
unfinished storyboard–particularly with longer projects.
Before you begin to actually record your project to tape, you need
to turn on your video recorder and make sure that all of the
cabling is correct, then press either the record to VCR or the
Chapter 3 Reference
3.17
Finish
screen
(cont’d)
record to DV button. Once this is done, the first frame of your
video project will appear along with the message “Please switch
VCR to record.” Press the Record button on your video recorder
and then press the on-screen Start button.
It’s a good idea to start your video project off with a few seconds of
black video (an empty scene) in order to give you enough time to
start recording on your VCR. You could even end the video with a
fade-out to a blank scene–this allows you to avoid recording the
Casablanca screen that appears once you have played through your
entire project.
Transitions screen
1, 2
3
Once your storyboard is organized, you can add transitions
between scenes if you think your project needs them (you could,
of course, use simple cuts between scenes and avoid transitions
altogether, depending on your individual editing style). Transitions
in the traditional sense are known as A/B rolls, but with the
Casablanca you can also use gentle crossfades, wipes, page-turns,
chroma key superimposition and other effects.
Transitions must be rendered in order to take effect. You should
always check out the transition’s appearance in the preview
window before rendering. You could also leave the rendering for
later and do a batch render in the finish screen. Once you’ve
placed a transition, its icon will appear between the two scenes it
affects on the storyboard. As long as the effect is unrendered, the
icon’s frame will be red. Once rendered, the icon changes to green.
3.18
Chapter 3 Reference
Transitions 1 This button inserts the active transition effect into the storyboard. You can also insert the transition into the storyboard by
screen
(cont’d)
Insert
Delete
selecting the transition from the transition list and clicking the left
trackball button.
2 This button deletes the transition from the workbox scene.
1/2s, 1s, 2s, xs 3 Whenever you select a transition or effect, the running time is
automatically set at one second. You can change this by selecting
one of these buttons, which will set the length at either one-half of
a second, one second, two seconds or the number of seconds you
specify (this number, however, cannot exceed the length of the
shortest scene that the effect is being applied to).
TIP: A transition can only be as long as the shorter of the two
scenes it’s applied to.
A transition effect that is placed between two “normal” scenes that
are not the result of an insert-edit will shorten the total length of the
storyboard by the length of that transition. A transition that is
placed between a normal scene (background) and an “insert”
scene (foreground) has no effect on the length of the storyboard.
Transitions shouldn’t overlap. In the case of a five-second scene,
for example, the total length of the transitions attached to it cannot
exceed five seconds. Transitions placed within insert-edit scenes
are limited by the length of the insert.
A scene’s original source audio is automatically crossfaded
whenever a transition is present. This means that the sound from
the first scene becomes quieter while the sound from the second
scene becomes louder. You should remember to change the
volume of a loud scene BEFORE placing the effect. Should an
insert scene be involved, the sound doesn’t change at all, since the
audio comes from the background scene.
Chapter 3 Reference
3.19
Transitions
screen
5
1
3, 4 2
(cont’d)
6
Preview
1 Clicking the Preview button produces a window in the middle
of your screen (shown below).
This window displays a real-time preview of what the finished
transition will look like once it’s rendered, as well as the two
seconds of video before and after the transition. The preview itself
will not take up any space on your hard drive.
Full size
2 Clicking the Full Size button displays a full-size preview of a
single frame from the selected scene or scenes (as shown below).
In the uppre-left corner of the toolbar are the effect’s name and
icon. Below the name is a frame indicator and a slider bar that
enables you to select any frame within the scene. Below the frame
3.20
Chapter 3 Reference
Transitions indicator is a display modifier. This option allows you to preview
any frame of your original scene (Original), any frame of the effect
screen
(cont’d)
(Effect), or a special split-screen mode (Orig. + Effect) that
displays the original scene on the left half of the screen and the
applied effect on the other.
On the right side of the Full Size preview’s toolbar are the contol
options that allow you to modify the image-processing effect or
transition. Therefore, you can make adjustments to the effect or
transition immediately after previewing it in full-screen mode.
Rendering
3 When you render a transition, the Casablanca reads both frames
from the source scenes and applies the transition to each of them.
When you’re recording footage onto the Casablanca’s hard drive,
make sure to leave some free space for the rendered transition
effects (anywhere from two to ten percent of the drive’s total
capacity).
Scene
4 Clicking this button creates an entire scene from a rendered
effect, the effect and its surrounding scenes or any number of
scenes that you specify; you can even make a scene that’s composed of your entire storyboard. This procedure makes it possible
to use more than one transition effect on a particular scene–the socalled multi-layer-effect (or A/B/C/D-Roll). Multilayering can be
a powerful tool for experienced Casablanca users; it’s like using
several analog video mixers at the one time, but without any
quality loss. See Chapter Two for a tutorial and a more-detailed
explanation of effective multilayering techniques.
Play
5 This button plays the rendered transition effect. The Casablanca
also plays an additional two seconds before and after the effect
itself so you can see the effect within the context of the project.
Types of
transitions
6 The following effects are available on every Casablanca. The
running times are only recommendations, so don’t hesitate to
experiment with the times to find a setting that’s right for you.
3-D Rotation The scene is rendered onto a plate which rotates in
several directions and disappears to reveal the new scene. Recommended running time: Three seconds.
Chapter 3 Reference
3.21
Transitions Bars The new scene shoves the old one away in one of six different
directions (two of which are combined) with the help of up to
screen
(cont’d)
200 bars. Recommended time: Up to two seconds.
Picture-in-picture This effect is not really a transition, but since it
works with two scenes the Casablanca treats it like a transition.
The first scene (to the left) is the background scene and the
second scene (to the right) will be the small inset picture. The
position of the smaller picture can be set with the “Position”
button. Use the “size” button to select one of three available sizes.
You may also add an optional border and border color. Try to
avoid using very bright colors, as they tend to “bleed.” The sound
from both scenes will be crossfaded, although in most cases you’ll
need to edit the sound yourself. (Such a crossfade is seldom
wanted in conjunction with the Picture-in-Picture effect.) Remove
the audio sample from the scene (Scene --> Audio Sample) and
place it into one of the audio tracks (Audio mix). At the same
time, lower the volume of the other scene accordingly. Recommended time: Five seconds.
Colorfade This transition fades a scene into a chosen color and
then fades the color into the following scene. Use the color panel
to choose your color (the typical colors used with this transition
are usually a basic black or white). Recommended time: Up to
two seconds.
Circlewipe This effect fades the scene within a shrinking or
expanding circle. The direction can be chosen with the “direction”
button. You could use this effect in shrink mode together with a
black, empty scene to achieve a cartoonish ending. Recommended
time: Up to two seconds.
Page turn A scene is turned into another in 3-D. It’s like turning a
page in a book. Recommended time: One second.
Crossfade Aside from the hard cut, the classic, gentle fade is
probably the most often-used method directors use to end a scene.
It gently fades one scene into another, with the second becoming
more and more visible while the first slowly disappears. As is the
case with all of the Casablanca transitions, both scenes remain in
motion throughout. Recommended time: Up to three seconds.
Collapse The old scene is pulled apart at the sides, ultimately
resembling a star with five points as it rotates off of your screen.
Recommended time: Up to three seconds.
3.22
Chapter 3 Reference
Transitions Cone The old scene is wrapped around a cone and rotates out of
the picture in 3-D. Recommended time: Two to three seconds.
screen
(cont’d)
Disc A scene is rendered onto a round disc and whirls its way off
of the screen. Recommended time: Three seconds.
Explosion A scene “explodes” into small pieces. You can choose
both the direction and the amount of flying fragments. Recommended time: One second.
Funnel A scene turns into a tornado and whirls off of the screen.
Recommended time: Three seconds.
Halfsphere A scene turns into an open halfsphere and is catapulted off of the screen. Recommended time: Three to four
seconds.
Roll A scene is rolled up or down like a window shade (similar to a
page turn). Recommended time: One second.
Sphere A scene turns into a sphere and either rolls off of the screen
or shoots away as if it were a bursting balloon. Recommended
time: Three seconds.
Triangles A scene is split into three triangles which spin out of the
screen according to your mode selection. Recommended time:
One second.
Twirl A scene twirls into itself and spins off of the screen. Recommended time: One to three seconds.
1
Screen icons
1 You can use these icons to reach the Edit, Image Processing,
Titling and Main screens.
Chapter 3 Reference
3.23
Image processing screen
3&4
5
1&2
The Casablanca offers a wide range of image processing effects.
The scene within the gray workbox in center of the storyboard
will always be the active scene for the effect (that is, the scene you
are working with), although you can work on a single frame or the
entire storyboard if you wish.
Tips: You may find the following tips to be useful when
applying image-processing effects
First choose a scene to host the effect.
Then select an effect by clicking on the effects list and
clicking on the desired effect with the left trackball button.
The operator icon now appears within the chosen scene.
Next, choose the appropriate options for your effect.
If you want the effect to be longer than the host scene,
press the range button and choose the first frame (inpoint) and last frame (out-point) for your effect.
Click the preview button and check the results. You can
then make any necessary corrections.
Render the effect and play it.
Insert
1 This button places the effect onto the selected storyboard scene.
Double-clicking on the effect within the list accomplishes the
same thing. The effect’s icon now appears in red over the workbox
scene. After you render the effect, it will change to green.
Delete
2 This deletes the effect from the workbox scene, regardless of
whether or not it’s been rendered. Deleted image-processing
3.24
Chapter 3 Reference
effects are not removed from your hard drive unless you run a
Image
processing clean up.
screen
(cont’d)
Range
Preview
3 An image-processing effect will always alter the entire workbox
scene unless you adjust the effect’s range. To do this, press the
range button and you will be able to set the effect’s new in- and
out-points. Remember: You can only place one effect on a scene at
one time. You may not overlap image processing effects, transitions and titles. However, you can use multilayer editing to add
multiple effects to one scene (see the detailed multilayering
tutorial for more instructions).
4 Clicking the Preview button produces a window in the middle
of your screen (shown below).
This window displays a real-time preview of what the finished
effect will look like once it’s rendered, as well as the two seconds of
video before and after the effect. The preview itself will not take
up any space on your hard drive.
Full size
5 Clicking the Full Size button displays a full-size preview of a
single frame from the selected scene (as shown below).
I
Chapter 3 Reference
3.25
Image
processing
screen
(cont’d)
In the upper-left corner of the toolbar are the effect’s name and
icon. Below the name is a frame indicator and a slider bar that
enables you to select any frame within the scene. Below the frame
ndicator is a display modifier. This option allows you to preview
any frame of your original scene (Original), any frame of the effect
(Effect), or a special split-screen mode (Orig. + Effect) that
displays the original scene on the left half of the screen and the
applied effect on the other.
On the right side of the full-screen preview’s toolbar are the contol
options that allow you to modify the image-processing effect or
transition. Therefore, you can make adjustments to the effect or
transition immediately after previewing it in full-screen mode.
3
1&2
4
Render
1 The Casablanca renders an effect by reading the source frames
from the hard drive, applying the selected effect on these frames
and saving the result back to the hard drive. This process takes
time and requires free space on your hard drive. It’s a good idea to
keep up to 10% of your hard drive capacity free for effect
rendering and other operations.
Scene
2 This button creates an entire scene from a rendered effect, the
effect and the scenes it alters or any number of scenes that you
want-you can even reduce your entire storyboard to as single
scene. The scene function is what makes so-called multilayer
editing (also known as A/B/C/D-Roll) possible. Please see the
multilayering tutorial for more information.
Play
3 This button plays a rendered effect. In fact, the Casablanca will
also play an additional two seconds of video both before and after
the effect so you can see in within the context of your project. You
3.26
Chapter 3 Reference
can cancel the play function any time by pressing either the right
Image
processing trackball button or the stop button.
effects
(cont’d)
4 The following effects are available on every Casablanca:
Types of image Fade in/out You can use this effect to fade from black into the
scene or fade from the scene into black. Such an effect is used at
processing
the start or end of a film or whenever two scenes vary in context.
effects
The mode button gives you the option of either fading in or
fading out. You can get a similar result from the crossfade transition (when used in conjunction with a black empty scene) or even
the colorfade transition, but the rendering times would be a bit
longer.
Freeze The first frame of a scene is frozen on-screen.
Telescope This effect creates the illusion that your scene is being
viewed through a telescope or binoculars (it’s frequently used in
television and films). The Casablanca’s version of the effect gives
you three options: A view through two overlapping circles (field
glasses), a single circle (telescope) or a telescopic gun sight.
Strobe Holds each field for the length indicated on the slider. A
settings of 0:02, for example, holds every second frame for two
frames. At the maximum setting of 1:00 it holds every frame for
one second.
Mirror A scene is mirrored either horizontally, vertically or both.
Sharpen You can use this effect to improve your overall picture
sharpness if, for example, your archived material needs to be
restored. The sharpness grade can be regulated in 8 steps.
Control Image The brightness, contrast, gamma and color aspects
of your image can be changed.
Flashbulb This effect creates the illusion of lightning flashes or
numerous flashbulbs going off at once. You can set the frequency
and brightness of the flash. To simulate a single flash, use the
contol-image effect (raise the scene’s brightness and gamma
settings) with a range of just one frame.
Stabilize This effect stabilizes your shaky scenes. There are three
different settings to provide you with a perfect transition to the
rest of your video.
Chapter 3 Reference
3.27
Image
processing
effects
(cont’d)
CVBS Filter This effect can be used to reduce a flickering that can
occasionally occur when you are using CVBS connections (as
opposed to SVHS connections). The reason for this is that the
CVBS signal combines brightness and color, which can lead to a
loss of video bandwidth (especially with color).
Solarize This effect alters the scene’s colorization, as black and
gray shades change to orange, yellow, green, cyan and blue. This
process is often used in science to demonstrate different levels of
brightness; the human eye can only recognize about 100 different
levels of brightness, but it can discern over 100,000 color variations. Hard cuts can lead to flickering edges if you use CVBS, but
the “CVBS filter” and “soften” effects can correct this problem.
Control Color This is for Red/Green/Blue correction.
Color Depth This effect reduces the amount of color in the
picture. Once again, any flickering that might occur can be
corrected with the CVBS filter and soften effects.
Line Art This effect turns the scene into a kind of moving line-art
drawing (all edges will seem to have been drawn with a pencil).
The contrast slider sets the darkness of the lines according to the
contrast of the original scene.
Negative Similar to an actual photographic negative. Although it
is often used to merely alter the scene, you could also apply it in
other areas. You could use the macro function of a video camera
to record video of a slide or a negative. The Casablanca’s negative
effect could then be used to turn the negative back into a positive
image to be used in a video project.
Relief The scene is turned into a three dimensional relief,
ultimately resembling an image chiseled in stone. The “light”
slider changes the direction of the light source.
Color to gray The original color scene is turned into a monochromatic black and white one. If you intend on having the entire
video in black and white, use the video settings to lower the
saturation to zero before recording the material and avoid the long
rendering times associated with applying color to gray to your
entire project.
Soften This effect reduces the picture’s sharpness.
3.28
Chapter 3 Reference
Wave A scene is made into a “wave” with a height and frequency
of your choosing.
Crosswave The same as above but with waves extending in both
directions.
Rectangle A rectangle is rendered into the scene. You determine
the rectangle’s size, dimension, color and transparency.
Dynamic range This effect reduces the brightness and the range of
contrast for a scene. Try experimenting with different settings and
check the preview window before rendering. The “scale” mode
retains all of the picture’s information.
NOP This effect has no impact on your editing whatsoever; it’s a
tool used by DraCo Systems to test software.
Title screen
The titler works very much like the transition and image-processing screens. Instead of adding a crossfade or a filter effect to one of
your scenes, the Casablanca uses the same process to digitally mix
text into your scene.
The titler is sharp, scrolls gently, features a wide range of fonts and
can display text in any color. The current version offers several
scrolling options, including “Text Table” (fades stationary text in
and out of your scene), “Vertical Roll,” “Horizontal Roll,” a
“Color Roll” and “Subtitle.” The titler also features the identical
Range, Preview, Render, and Play functions that are used within
the Transitions and Image-Processing effects screens.
Chapter 3 Reference
3.29
Title
screen
There are, however, several key differences between titling and
other effect-generating operations.
(cont’d)
Titling consists of two parts: Selecting the title and then inputting
your text.
3
2
1
Range
4
5&6
7, 8 & 9
1 A title normally runs for the length of the selected scene, but
you can adjust the title’s default running time to let it run for a
shorter or longer period. The range of a text is very important. A
longer range results in a slower scrolling speed.
The Range screen is similar to the trim screen. Instead of marking
the active part of a scene, you merely set the effective time for the
text. The text starts at whatever frame you set (In-point) and ends
at the last frame (Out-point). Some parts of the storyboard may
appear in red. These scenes can’t be selected for titling since they
are already marked by other effects (the overlapping of imageprocessing effects, transitions and titles is impossible without
multilayer editing. You’ll find information on using this technique
within Chapter Four). Return to the titling menu once you have
made your selections and your scene should now bear the titling
icon (if your titles spill over into other scenes, they’ll be marked
with the icon as well).
Insert
2 This button places your title onto the selected storyboard scene.
Title icon
3 This icon represents a placed title. It will appear red if the title
is unrendered, and green if the title has been rendered.
Delete
4 This button deletes the title from the scene within the workbox,
regardless of whether it has been rendered or not. Deleted titles,
transitions and effects may disappear from your screen, but
remain on your hard drive until you run a clean up.
3.30
Chapter 3 Reference
Preview
5 The Preview button plays the title in a real-time preview. The
running time will be about as long as that of the final version. The
preview requires no additional space on your hard drive.
Full-size
preview
6 The Full-Size button plays a full-screen preview of the title
being applied to a single frame of your scene. In the upper-left
corner of the toolbar are the title’s name and icon. Below the name
is a frame indicator and a slider bar that enables you to select any
frame within the scene for viewing. Below the frame ndicator is a
display modifier. This option allows you to preview any frame of
your original scene (Original), any frame of the title (Effect), or a
special split-screen mode (Orig. + Effect) that displays the original
scene on the left half of the screen and the applied title effect on
the other.
On the right side of the full-screen preview’s toolbar are the contol
options that allow you to modify the title by entering or changing
the text, color, etc. Therefore, you can make adjustments to the
title immediately after previewing it in full-screen mode.
Play
7 This button plays the rendered title and an additional two
seconds before and after the title itself. You can stop playing at any
time just by pressing either the stop button or the right trackball
button.
Render
8 When rendering a title, the Casablanca reads the source frames
from the hard drive, applies the selected title to these frames and
saves the result back to the hard drive. This process takes time to
complete and does require some free space on your hard drive.
Remember to always keep up to 10% of your hard drive capacity
free for rendering transitions, effects and titles.
Scene
9 This button can create a scene from a rendered title, the title
and the scene(s) it appears on or any number of scenes in the
storyboard (you can even make a scene out of the entire storyboard). This makes it possible to use the multilayer-editing
technique (also known as A/B/C/D-Roll) to place more than one
title on a scene.
Chapter 3 Reference
3.31
Title
screen
3
(cont’d)
1
2
Title interface
Once you click on “Enter/Change Text,” you enter a screen
where you can define the actual text, colors and fonts.
Keyboard
Using the on-screen keyboard to type in text may take some
getting used to, but it works much like a traditional wordprocessing program. The Casablanca uses line-orientated text,
however. This means that you can use any number of fonts, sizes
and colors on different lines, but not within a single line.
Return key
1 To create a new line, press the return key. A new line is inserted
that automatically takes on the last line’s settings. If you want your
text to have a consistent size, color and font, type the first line,
make your selections and each following line will follow these
settings. The delete key (arrow to the left) deletes the text to the
left.
Arrow keys
2 The arrow keys move the cursor in the text. The system doesn’t
automatically wrap text so you have to press the return key for
that. If you want to halve the line, move the cursor to the point
before the word you want to place in the line below and press
return. If you go to the start of a line and press delete, the line will
jump to the end of the previous line.
Choose fonts
3 Seven fonts are available with your standard system package and
many additional fonts are available on separate font disks (see
Appendix A for more information). You can scroll through the list
of fonts using the trackball. A sample of the current font is
displayed below the list.
3.32
Chapter 3 Reference
Title
screen
(cont’d)
1
2
3
You can choose any font size that you want. The sample text
(“Casablanca”) will reflect your changes. In the case of some
extremely large fonts, you might only see parts of the text but the
actual version will display in its entirety.
Font attributes
1 Four combinable attributes (represented by variations on the
letter “I”) can be selected for each font: “Italic,” “Bold,” “Outlined” and “Shadow.” To activate an attribute, press its corresponding button (the button will turn blue, indicating that it’s
active). You can combine any attributes, so you’ll have no problem
creating that italic, bold, outlined text with a shadow.
The attributes are shown in the text field and in the text preview
window, but will appear at a lower resolution than the final video.
There are some fonts that are not legible in bold.
Color
2 You can also select the font’s color with the Casablanca’s Color
Box. Although you can choose any color you want, you should
avoid using high saturation levels if you don’t have a professional
video recorder since the colors may bleed together.
Text position
3 There are a number of different positions available for your text,
most of which can be found in typical word-processing programs:
“Left aligned,” “right aligned,” “centered,” “justified,”
“left -> <- right” and “<-middle->.”
Chapter 3 Reference
3.33
Title
screen
(cont’d)
1
2
Del and DeL
1 The “Del” key just above the return key deletes a single letter to
the right, while the “DeL” key to the right deletes the entire line.
Archive
2 Archive allows you to save text and load it back again at a later
time. All settings (the font, size, color and attributes) are saved
along with the text, but project-specific settings like range and
direction of the roll must be redefined. As the video data changes
with each new project, the text must also be rendered.
To archive text, press the Save button. To overwrite archived text,
click onto the archived text name and press OK. To load a text
archive, press “Load” and choose the desired text. You can also
delete a previously saved archive, but once it has been deleted it
can’t be recovered.
Audio record screen
Audio editing adheres to the same basic principle as video editing:
Record the raw audio data.
Trim this data.
Place the audio samples into the storyboard.
Choose the volume of the original sound, commentary and
background tracks and set any fade in/out points.
Render all of the project’s sound (the three stereo tracks will
combine into one stereo track).
The Audio Record screen is where you record and manipulate
your audio. The Split, Trim, Copy and Delete functions are very
similar to their video counterparts in the Edit screen.
3.34
Chapter 3 Reference
Audio
record
screen
1
2
(cont’d)
3
Within the Audio Record screen’s interface (shown above), you
can record, trim, split, copy, name and add effects to your audio
material. The sound files resulting from a recording, whether they
be music, voiceovers, or sound effects, are called samples and are
placed in the list to the right.
Volume meter
1 The volume meter helps you monitor your incoming audio
signal’s decibel levels. When you record audio to the Casablanca’s
hard drive, you should ensure that the decibel meters only register
in red (high) during the loudest portions of the audio sample. If
the meters are consistantly within the red area, you should lower
the volume of your incoming audio.
If you intend to work with several tracks at once, don’t use high
volume settings for all of the tracks. The volumes of all three
tracks are summed up and this could lead to an over-modulation
of the final sound. Each bar on the display represents about 5 dB.
This meter disengages once you actually begin recording.
Decibel control 2 The Decibel Control slider allows you to lower and raise the
volume of the incoming audio. The actual change in decibels is
displayed to the right of the slider.
Audio input
3 The Audio Input selector is where you indicate the type of
audio input you are using: Front, Rear, Like Video (the Casablanca uses the same settings that you selected in the Video
Settings screen) or Mini DV (which only allows you to load audio
from a DV source, but without machine control).
Chapter 3 Reference
3.35
Audio
record
screen
1
3
(cont’d)
2
Free capacity
1 This time display indicates the amount of time remaining in
your audio partition.
Sample list
2 This box displays the names and running times (minutes:
seconds: frames) of your audio samples. If you want to select a
sample, click anywhere within the box and scroll up and down
with the trackball until the sample you want isd highlighted in
blue, then click on the left trackball button to confirm it.
Split
3 The Split function allows you to split up your audio samples
just as you would split up your video samples in the Edit screen.
1
4
5&6
11 & 12
2&3
13
10
9
7&8
The Audio Split controls (shown above) are similar to those found
in the video Split window.
Waveform
3.36
1 The Waveform display provides a visual representation of your
audio sample.
Chapter 3 Reference
Quick play
2, 3 The Quick Play button s play the five seconds of audio before
and after your split. This can be useful when you are trying to
ensure that you’ve selected all of the audio you want before making
the actual split.
Name display
4 This box displays the name of the clip you are editing.
Play
5 The Play button plays the audio sample that you’ve selected up
to the split point.
Stop
6 The Stop button stops the sample from playing.
Time display
7 The top Time display indicates the length of the sample prior to
the selected split point, counted from the beginning of the sample.
Remaining
display
8 The Remaining display indicates the length of the audio sample
after the split point.
Split Position
9 The Split Position button allows you to set the split points in
your audio sample. Once you press the button, scroll right with
your trackball. You’ll notice that the sound from your audio
sample plays as you scroll in. Once you stop scrolling, the last few
seconds of audio prior to the split point will play in a continuous
loop until you click the left trackball button.
Single frame
10 The Single Frame ( < and > ) buttons move your selected split
points backward and foreward one frame at a time.
Use
11 The Use button retains the scrolled through audio segment.
Drop
12 The Drop button discards the segment of audio that you
scrolled through.
OK
13 OK returns you to the Audio Record screen after saving.
Chapter 3 Reference
3.37
Audio
record
screen
1
(cont’d)
Trim
1 This button takes you into the Trim screen, where you can alter
the In and Out points of your audio samples. The audio Trim
controls function much like the video Trim controls (the audio
Trim screen is shown below).
1
2, 3 & 4
6
10
5
9
7&8
Waveform
1 This waveform is a visual representation of your audio sample
that is activated when you select the In and Out points.
Play
2 The Play button plays your audio sample. from the beginning
Stop
3 The Stop button stops the sample from playing.
Time display
4 This displays the length of your trimmed audio sample from the
in point; the length changes as you adjust the In and Out points.
In
5 Clicking the In button and scrolling the trackball allows you to
change the point at which you sample begins playing. The arrows
beneath the button move through the scene one frame at a time.
3.38
Chapter 3 Reference
Audio
record
screen
6 Clicking the Out button and scrolling the trackball allows you
to change the point at which the audio sample stops playing. Once
you stop scrolling to the left, you will hear the last few seconds of
audio before the Out point. This will continue until you click the
left trackball button to confirm the position. The arrows beneath
the button move through the scene one frame at a time.
(cont’d)
Out
Quick play
7, 8 These buttons to the left of the In counter and to the right of
the Out counter play the first and last five seconds of your audio
sample, respectively.
OK
9 The OK button saves all changes you have made within the
Trim screen and returns you to the Audio Record screen.
Cancel
10 The Cancel button Returns you to the Audio Record screen
without saving any of your changes.
2
1
3
Copy
1 Clicking the Copy button creates a duplicate version of the
selected audio sample; it does not occupy any additional space on
your hard drive.
Empty sample
2 The Empty Sample function generates a silent audio sample
that can be used to mask background noise or affect other samples
in other audio tracks. You can select the length of the sample (up
to five minutes).
Special
3 The Special button brings up a menu listing a variety of effects
that can be added to your audio samples. The original audio
sample, however, remains intact - the effects are applied to copies
Chapter 3 Reference
3.39
Audio
record
screen
(cont’d)
of your audio sample and are then placed in the sample list. The
special effects are modular and will expanded in the future. Note:
Most effects involve stero sound and cannont be applied if the
audio quality has been set to “Mono.” The current effects are:
Base width
Base width allows you to simulate an increase or decrease in the
distance between your speakers (a setting of zero is “mono”).
Copy
Copy allows you to replace either the right or left channel with a
duplicate of the other channel. Left -->Right results in the audio
data from the left channel appearing in both left and right channels; Right -->Left results in the audio data from the right channel
appearing in both the right and left channels.
Karaoke
Karaoke removes the vocals from any audio sample. Although this
effect works best with music, it can remove unwanted voices from
a spoken sample.
Mono
Mono blends the audio data from the left and right channels and
plays the combination over both channels.
Mute
Mute allows you to mute the audio data on either the left or the
right channel.
Swap
Swap reverses the data from the left and right channels, so that it
plays on the opposite channel (right and left).
Volume
Volume raises or lowers the volume of the entire audio sample.
Volume L R
Volume L R allows you to raise or lower the volumes of the left and
right channels independently.
3.40
Chapter 3 Reference
Audio
record
screen
(cont’d)
1
2
3
5, 6 & 7
8
4
Sample
1 Sample --> Scene generates a new scene that consists of empty
black video accompanied by a selected audio sample in the original
audio track. This new scene will be located within the Edit screen’s
scene bin and can be used to help you “edit to the beat.” If you
place the empty scene in your storyboard, you can insert-edit video
clips into the scene while retaining the audio track (for more
information on insert editing, see the tutorial on p. 2.17)
Delete
2 Delete removes an audio sample from your interface. To remove
the sample from your hard drive, you must run a clean up.
Undo
3 The Undo button allows you to restore the last ten audio
samples that have been deleted.
Name display
4 This box displays the name of the highlighted audio sample.
Record
5 Record begins recording your incoming audio signal.
Stop
6 Pressing the Stop button halts the recording.
Play
7 Play will play the highlighted sample from the beginning.
Hot-key icons 8 These are hot-key icons that can take you directly to the Record,
Audio Mix and Main screens.
Chapter 3 Reference
3.41
Audio mix screen
1
2
3
4
This screen allows you to arrange the recorded samples and
regulate their volumes. The Audio Mix screen is quite similar to
the video Edit screen. To the left you’ll find the recorded samples
and at the top is the storyboard. Unlike the video storyboard,
however, this one features three horizontal bars representing the
three audio tracks: Original source audio, Commentary and
Background tracks.
Available audio 1 Your Original audio track (the top track represented by a
tracks
camera on a tripod) is always occupied with your source audio and
cannot be added to. The Commentary (microphone) and Background music (music notes) tracks are available for you to place
audio samples on. These names are merely designations, however;
you could place the background music in the comment track if
you wish.
Audio mixing
rules of thumb
These steps are essential for working within the Audio Mix screen:
Select either the Commentary or Background track by choosing
the box to the right of the track itself and choose a sample.
Move the storyboard to where you want the sound to begin and
click Insert. The sample appears in the chosen track at the start of
the selected scene.
To choose the exact length of the sample, press Range. You’ll then
be able to move the whole sample (via the start button) or shorten
it at the beginning or end (In/Out points). You can also see the
appropriate scene and can play your video along with the sample.
After making the adjustments, return to the Audio Mix screen and
press Render.
3.42
Chapter 3 Reference
Audio mix
screen
Press the play button to the right of the storyboard and the video
will be played along with the audio material you just rendered.
(cont’d)
If any sound is too soft or too loud, click on it. The sample turns
blue and you can set the volume again (press the camera, microphone or notes icons). ONLY the selected sample is affected by
this; segments before and after this sample are left as they were.
If you need fades for a certain sample, click on it and set the
length of the fade in or fade out. Add additional samples in the
same manner.
Render all material so that no red (unrendered) samples are left.
Starting with Casablanca Sysytem Software Version 3, changes in
your video (inserting scenes, deleting effects, etc.) will NOT
throw off your other audio tracks. You will NOT have to manually rearrange parts of the audio all over again.
Insert
2 This button inserts the active sample into the storyboard. If you
have not already chosen a track, you will be prompted to do so
now. Initially, audio samples are placed at the start of the scene.
You can move the sample using the range function or trim it using
the in and out buttons.
If a sample is already present, the Casablanca will automatically
insert your new audio at the end of the old sample. Audio samples
can’t overlap, so this will only work if you have enough space in
the storyboard after the first sample.
Remove
3 The Remove button removes the active sample from the
commentary and background tracks. You can’t remove your
original source audio. Remember that if you remove audio
samples you’ll need to re-render the storyboard.
Range
4 This sets the In and Out points of a sound sample. The range
button can only be selected once you’ve chosen an audio sample
from the storyboard (selected samples are shown in blue).
Chapter 3 Reference
3.43
Audio mix
screen
(cont’d)
2&3
4&5
10
1
6
7&8
9
11
Whenever you place an audio sample into an available track, it is
inserted at the very beginning of the scene located within the gray
workbox. There may be time, however, when that type of general
placement is inadequate. The functions within the Audio Range
screen (shown above) solve that problem by enabling you to make
frame-precise audio sample placements.
Waveform
1 Clicking the Waveform button allows you to turn the audio
scrub function on (a waveform appears) or off (the waveform
display disappears). With the scrub audio turned on, you can hear
the audio sample as you’re attempting to place it - a key feature in
professional audio placement.
Start
2 The Start button enables you to set the point at which the
highlighted audio sample will begin.
Single frame
3 Clicking these Single Frame arrows moves the Start point
forwards and backwards one frame at a time.
Play
4 The Play button plays the storyboard for the the duration of the
audio sample.
Stop
5 Pressing the Stop button stops the sample from playing.
Up/Down
6 This button moves the toolbar to either the top or bottom of
your screen.
3.44
Chapter 3 Reference
In
7 The In button sets the In point for your inserted sample, just as
it does in the Audio Record screen.
Single frame
8 Clicking these Single Frame arrows moves the In point
forwards and backwards one frame at a time.
Out
9 The Out button sets the point within the storyboard scene at
which your audio sample will stop playing.
Single frame
10 These Single Frame arrows move the Out point backwards
and forwards one frame at a time.
Audio Mix
screen hot key
11 This hot-key button returns you to the Audio Mix screen.
2
1
When you return to the audio-mix screen, you’ll notice that the
sample has moved to the new position.
Render
1 Casablanca can play all three tracks together only if they have
been rendered (unrendered samples appear in red within a bar
above the original track; rendered samples appear in green).
Render a sample by clicking on it and pressing the render button.
The Casablanca will then render the segment covered by the
active sample. The time needed for rendering depends on the
length of the sample, but note that rendering audio is much faster
than rendering video.
Play
2 The Play button in the upper-right section of the storyboard
plays the selected audio sample and the corresponding video
Chapter 3 Reference
3.45
Audio mix segment. Other samples are only played if they’ve been rendered.
Video is also played. The Play button in the middle only plays the
screen
current audio sample (not video). The name of the sample is shown
above the Play button.
(cont’d)
1, 2 & 3
4&5
6
Camera icon
(original
audio)
1 Here is where you can change the volume of a scene’s Original
audio track. You can make it quieter (negative dB values) or louder
(positive dB values). Remember that all audio changes must be
rendered before they take effect.
Microphone
2 Allows you to change the volume of the Commentary track.
icon (commen- Volume changes must be rendered.
tary audio)
Music notes
3 Allows you to change the volume of the Background track.
icon (background audio)
4 This slider sets the length of an audio fade in. The set time
Fade in
represents the time needed for the sound to reach the previously
selected volume. If you want a comment to be gently faded in, you
could select 1 second. The fade-in and fade-out times affect the
other tracks. A Commentary track fade in results in the Background music being gently turned down at the same time.
Fade out
Direct screen
icons
3.46
5 This slider sets the length of an audio fade out. The set time
represents the time needed for the sound to be muted. If you want
the commentary track to fade out gently, you could select 1 second.
The fade-in and fade-out times affect the other tracks.
6 Use the icons to reach the Audio Record and Main screens.
Chapter 3 Reference
Chapter 3 Reference
3.47
Appendix A
Expansion
We want the Casablanca to grow along with your needs as you
take on new editing challenges and opportunities, so we’ve
designed it to be as upgradeable as possible. There are several ways
that you can expand your machine’s hardware and software.
Hardware
Currently, there are several hardware upgrades available for your
Casablanca. Some can be installed by your dealer, while others
need to be installed by DraCo. Please contact your Casablanca
dealer for more details.
DV option
(FireWire)
The FireWire DV Option is a digital module for activating the Ilink connector at the back of Casablanca. This option makes
possible a fully digital editing process. The result is a pristine
digital copy of your video project, one that suffers no generational
loss from the original source material. DraCo worked in conjunction with Sony to incorporate an IEEE 1394 board into the
Casablanca. The result is a DV option that allows you to mix
different types of source video within single projects and provides
machine control over all of your DV-compatible camcorders and
VCRs. If you have FireWire installed, you must select from either
DV signal only (for inputting only digital video) or a combination
of signals (if you’re bringing in digital and analog video) within
your project settings before beginning a project. Machine contol
capability is enabled through additional buttons on your control
panels for recording video to your hard drive and recording your
project out to tape.
Hard drives
Currently, additional four-, six-, nine, and 18-gigabyte hard drives
are available for purchase from DraCo Systems or your dealer.
New drives, such as the 36-gigabyte model, will become available
throughout 1999.
Processor
upgrade
The processor chip upgrade modifies your 040 model Casablanca
into a render-accelerated 060 version with faster rendering times.
Keyboard
Most DOS keyboards should work with the Casablanca but there
have been some instances of DOS keyboard incompatibility. Once
you register your Casablanca with DraCo Systems, you’ll receive a
free keyboard that’s guaranteed to be compatible.
Breakout Box
The Breakout Box connects to the back of your Casablanca (via
the Euroscart port) and provides component/XLR, Beta and other
cabling ports not normally featured on the standard unit.
Software
We are proud to offer regular system software upgrades and
additional transitions, image processing effects, title effects, empty
scenes and fonts that will improve your video projects.
Some transitions and image-processing effects have been included
on your system software disk. We also sell additional sets of fonts
and effects disks. You can receive a set of free effects and transitions just by sending us your registration card. Sending us this
card is very important because it allows us to provide you with
technical support and the latest information and software for your
Casablanca.
Installation
Installing new software on the Casablanca is both quick and easy.
Turn off your Casablanca, then place the software disk in the disk
drive and turn the Casablanca on. Once the Casablanca logo
disappears, on-screen instructions will guide you through the rest
of the installation process. Installing new system software may
erase the contents of your hard drive. It’s vital that you save any
projects and scenes that you want to keep over to tape.
System software You can purchase additional system software upgrades for the
Casablanca beginning with version 3.0. The system software disk
can only be used on your personal Casablanca. Once installed, the
disk will not be accepted by any other Casablanca unit since the
serial number of the original unit is saved onto the disk.
Additional
software
A.2
In addition to routine system software upgrades, DraCo offers
Casablanca owners additional effects and fonts software packages.
There are also several additional software upgrades manufactured
by third parties.
Appendix A Expansion
The following effects-related software add-ons are currently
available from DraCo Systems or your Casablanca dealer:
Effects Disk 1
Effects Disk 1 contains the following effects and transitions:
Bouncer - The second scene “bounces” in over the first scene.
Film - Gives your video the appearance of an antique film, with
adjustable quality, flicker and movement levels .
Fly - The second scene flies across the first scene diagonally.
Pcube - The first and second scenes rotate as if they were on
opposite sides of a cube.
Polar - The second scene appears as a “splatter” in the middle of
the first scene and spreads to completely replace it.
Raster - The second scene appears as a series of dots that multiply
and eventually cover the first scene.
Swap 1 - The second scene replaces the first through a series of
staggered lines.
Swap 2 - The second scene replaces the first through a series of
uniform lines.
Swirl 1 - The first scene is replaced by a swirling second scene that
emerges from several points simultaneously.
Swirl 2 - The first scene is replaced by a series of swirling lines
that eventually become the second scene.
Effects Disk 2
Effects Disk 2 contains the following effects and transitions:
Flupp - The first scene is stretched until it “snaps” across and
pulls in the second scene..
Karo - The first scene is overtaken by a diamond-shaped second
scene.
Liquid 1 - The second scene flows across the first scene.
Liquid 2 - The second scene flows across the first from one side to
the other.
Melt - The second scene appears to liquefy and melt down over
the first scene from the top of the screen.
Radar - The second scene wipes over the first in four sections in
either a clockwise or counter clockwise path.
Sphere 1 - A circle wipe grows from the center of the screen and
brings up the second scene in a bar pattern while the
first scene is wiped by a shrinking circle.
Sphere 2 - A circle wipe grows from the center of the screen and
brings up the second scene in a checkerboard pattern
while the first scene is wiped by a shrinking circle.
Appendix A Expansion
A.3
Stretch - The first scene compresses while the second scene stretches
in behind it.
Turnover - The first scene slides around the second scene.
Effects Disk 3 Effects Disk 3 contains the following effects and transitions:
Strange - Builds a scene line-by-line from either the top, bottom,
left or right.
Crosszoom - The first scene zooms in to the center while the other
zooms out.
Dreamland - The second scene replaces the first through “clouds”
that form inside out.
Fly On - The second scene flies in from a corner, centers and grows
to cover the first scene.
Megazoom - The first scene zooms out and multiplies to form a
“wallpaper” pattern, then zooms into become the next
scene.
Net - The first scene is replaced by a the second scene through a
checkerboard pattern.
Puzzle - The first scene is replaced by a puzzle-like second scene.
Waves - The first scene becomes wavy and dissolves into the second
scene when the waves subside.
XTC - The first scene dissolves into a negative, then dissolves into a
negative of the second scene and finally dissolves into the
second scene itself.
Zebra - The second scene replaces the first through a “zebra stripe”
pattern.
Effects Disk 4 Effects Disk 4 contains the following effects and transitions:
Earthquake - Makes your scene appear as if it’s shaking. You can
determine the parameters of the‘quake.
Power Off - Simulates an old television turning off. The scene
shrinks down to a small dot and then disappears from
the screen.
Across - The first scene shrinks toward one corner while the second
expands from the other.
Fall Down - The scene falls and “dangles” from a corner before
dropping off the screen completely.
Paint - The first scene is covered by a paint made up of the second
scene.
Pixels - The first scene is replaced by a series of pixels that reveal
the second scene.
Rain - The first scene is washed away by raindrops that contain
portions of the next scene.
A.4
Appendix A Expansion
Smoke - The second scene emerges from a “smoke” that covers
the first scene.
Strip In - The second scene appears in a series of small strips that
eventually replace the first scene.
Whirl - The first scene splits into four sections that rotate out and
reveal the second scene. The effect can also be reversed so
that sections of the second scene come together and cover
the first.
Effects Disk 5
Effects Disk 5 contains the following effects and transitions:
Split Screen - Two scenes can be placed next or on top of each
other. You can determine the duration of the effect
and the sizes of both scenes.
Diag - One scene is pushed diagonally over another.
Blinds - This transition creates the illusion of blinds hanging in
front of the scene. The second scene is revealed when the
blinds “close.”
Fog - The scene is covered by a foggy edge. You determine the
fog’s shape and density.
Bump - Light and shadow effects make it appear as if one scene
bumps the other off of the screen.
Streaks - One scene appears over another through a number of
streaks.
Shockzoom - Two scenes begin to overlap in the middle of the
screen. One scene either gains size and disappears
into the background.
Sunbeams - Rays coming from the center of the screen fade into
the next scene.
Ripples - The transition takes the form of half-circular segments,
spreading across the picture like waves of water.
Chroma Key
The Chroma Key effect appears in your transitions list as “Blue
Box” and allows you to superimpose video images over a colored
background. You can use this effect to create interesting titles and
design your own special effects.
Adorage Magic Adorage Magic I and II are effects software packages designed by
I and II
proDAD. Each disk features striking 3-D transitions and effects,
including explosions, waves and rotations.
Appendix A Expansion
A.5
Video
Spicerack
Video Spicerack is a third-party effects software package designed
by Pixelan Software for the Casablanca. Spicerack features more
than 200 different effect options for your video projects and comes
complete with its own detailed users manual. The effects have been
sorted according to type and are available on a total of three disks.
To prevent the list of effects from being unnecessarily long, we have
chosen to bring effects with a particular theme together within one
operator - a very logical and easy-to-manage system.. You won’t have
to worry about your video being overloaded with garish effects,
however, because we’ve carefully selected classic effect options that
will spice up your projects without distracting viewers.
Font and
charactergenerating
software
The following character and text-related software add-ons are
currently available from DraCo Systems or your Casablanca dealer:
The Fonts Disk series features a number of stylish fonts for your
titles that are not among the seven standard fonts that are
preinstalled on your Casablanca.
Fonts Disk 1
Included on this disk are: (clockwise, beginning in the upper-right
corner): Baskerville, Charles, Bochum, Bodoni, Balloon, Avignon,
Bangkok, ArnoldBoecklin, ArchiText, Bodacious, Blocks, BeeBopp
and Blippo.
A.6
Appendix A Expansion
Fonts Disk 2
Font Disk Two includes 14 different fonts, all of which are shown
above. They are as follows (clockwise, beginning in the upper-right
corner): Fiorentini, Gonzo, Cunei, FatAmerican, Flintstone,
Genoa, Eras, High-School, Fragola, Daniela, Cooper, Circola,
Crillee and Cottonwoood.
Fonts Disk 3
Font Disk Three includes 14 different fonts, all of which are
shown above. They are as follows (clockwise, beginning in the
upper-right corner): Ironwood, Isabelle, Jupiter, NewBrunswick,
Lombardoc, Braha, PostAntiqua, Lithos, Lyon, Phaedrus, Lintsec,
Juniper, Parisian and Mistral.
Appendix A Expansion
A.7
Fonts Disk 4
Font Disk Four includes 12 different fonts, all of which are shown
above. They are as follows (clockwise, beginning in the upper-right
corner): Revue, Quantum, Rickshaw, Wistata, Saigon, Reklama,
Tribeca, TaranisT1, Saxon, Stuart, SanDiego and Unical.
Monument
Monument Titler is a third-party character generator designed by
proDAD. Monument enhances the Casablanca’s own powerful
titler by enabling users to create professional, anti-alias 3-D titles.
This software add-on also provides high-speed rendering, freely
positionable titles and animated character-motion options, such as
spins, zooms, 3-D rotations and distortion effects.
Other software Other software products that can revolutionize how you edit video
include:
PC Link
PC Link enables users to transfer image files and animations from
a PC to the Casablanca andexport images from the Casablanca
into a PC. The software/serial cable package is compatible with
Windows ‘95 and Windows NT Systems.
Akaba
Akaba is a paint program for the Casablanca that allows you to edit
both still video images and complete scenes. You can actually draw
on your video, make color changes, touch up faces...the possibilities
are endless. Although the software revolutionizes editing on the
Casablanca, the program’s user interface uses the same philosophy
and tools found throughout the Casablanca product line, making it
simple and easy to use.
A.8
Appendix A Expansion
Free registration disk
The free registration disk contains the following effects and
transitions:
Aquarium - This effect adds tiny bubbles to your scene.
Cinemascope - a black border is added to the top and bottom of
scene, making it appear as if your footage is in a
widescreen “letterbox” format.
ColorWipe 1 - A background color shifts over a scene from any
direction. The color disappears in the direction it
came from and reveals a second scene.
ColorWipe 2 - A background color shifts over a scene from any
direction. The scene disappears in the same
direction and reveals a new scene.
ColorWipe 3 - A background color shifts over a scene from any
direction or from the middle of the picture. The
screen disappears in the direction from which it
came and reveals a new scene.
Split Screen - The screen is split vertically or horizontally. Each half
is filled with one of the scenes. You can define the
splitting line's width and color.
Shift 1 - One scene is “pulled” over another scene. You can also pull
the first to any side and reveal the second scene (you can
add a split line of any color or width).
Stars - Creates a scene that displays animated stars, simulating
spaceflight.
Wipe 1 - This effect is a classic wipe. Choose the direction and have
the first scene wiped away by the second. You can add a
split line of any color or width.
Wipe 2 - The second scene is wiped over the first from one corner
of the screen to another (direction can be defined). You
can add a splitting line with any color and width.
Appendix A Expansion
A.9
Appendix B
Troubleshooting
This collection of troubleshooting solutions will grow over time.
We’d love to hear your ideas on improving and expanding this
part of the manual.
No video image Problem I can’t get a video image on my monitor when I’m
trying to record.
Solution Check to see if: you have selected the right video input
in the video settings screen, the source player is connected
correctly and the plugs fit properly and that the source player is
actually sending a signal
“Alien disk”
errors
Problem I can’t install the program. The message “Alien disk”
appears.
Solution That means that the disk you are using belongs to
another Casablanca unit. When Casablanca-related software is
loaded into the Casablanca’s floppy disk drive, the machine writes
its own serial number to the diskette, thus linking the two
together. If that diskette is loaded into another Casablanca after
that, it will not load. It will give you a red message in the lower
left corner of the screen saying “Alien disk.” Sometimes a
damaged disk will result in this message. If you have a damaged
disk, call your Casablanca dealer for a replacement. If you happen
to get this message, you should contact your dealer immediately.
Installation
Problem The installation process begins again every time I start
the Casablanca.
Solution Your installation disk is probably still in the floppy
drive. Remove the disk and the system will start directly from the
hard drive.
Incoming video Problem My incoming video signal is either too bright or too
quality
weak. Adjusting the video settings doesn’t seem to help.
Solution Casablanca’s Automatic Gain Control (AGC) may have
problems reading some video sources. Try deactivating the AGC
by going into the video settings menu and selecting an input
without AGC.
“Jumping”
video
Problem The incoming video appears to “jump” when I’m
recording.
Solution Try changing your video-input jacks. Each input has a
different function; the front input is better for video signals with a
faulty synchronization (as is the case with some camcorders),
while the back video input synchronizes to the video source and
makes the Casablanca suitable for studio-quality machines.
Unable to view Problem The video picture is impossible to view. I can only get a
incoming video clear picture by switching the video recorder off.
Solution You’ve probably constructed a video-signal loop. Make
sure that the video recorder is not used as play source and recorder
at the same time. The “loop” occurs when the video recorder is
waiting for a signal from the Casablanca, while the Casablanca is
waiting for a signal from the recorder. The result is a messy
picture. You can avoid this by using a camcorder as your play
source and a VCR as the recorder, or you can simply disconnect
whichever cables (In/Out) you are not using at the time.
Front display
malfunction
Problem The front LCD display doesn’t work. The machine itself
works fine but the display is off.
Solution Switch the Casablanca off, pull the power cord from the
wall socket and wait a few seconds. Put the cord back in, switch
the machine back on and the display should work again.
Record screen
problems
Problem The Casablanca’s record screen seems to “fall” downwards to the bottom of my monitor whenever I press pause on my
VCR.
Solution The Casablanca requires a full video picture in order to
synchronize the menu and some video sources send half-pictures
while pausing. The only way to avoid this is to refrain from
pausing your VCR; just press Stop.
B.2
Appendix B Troubleshooting
Transitions
Problem I’m unable to define a transition.
Solution Transitions cannot overlap, so if the scene is already fully
involved in another transition (which can happen with very short
scenes), you can’t add another transition to it. You work around
this by using the “scene” function.
Titles appear in Problem In the titling menu, only one line appears in color, while
gray
the rest remains gray.
Solution That’s a function of the system’s display. Regardless of the
gray on your titling screen, all rendered titles will appear in the
proper color. Simply move the cursor to the other lines when you
are titling and check the color for each line.
Color bleeding
in titles
Problem The titles I create look fine on the monitor but they seem
to “bleed” once I record to tape.
Solution Some of the Casablanca’s colors can only be read
accurately by professional recorders. If you’re using a “standard”
VCR and you experience a “bleed,” try reducing the saturation and
brightness. You’ll get the same color but it ‘ll be easier to record.
Rendering
times
Problem Some title and effects don’t seem to be rendering. Even
after long periods, the blue bar doesn’t seem to move.
Solution Some 3-D titles and effects can take a while to render,
especially thoses that allow you to increase their duration or size.
Microphone
input
Problem Where can I connect my microphone?
Solution The Casablanca doesn’t have a microphone socket but it
does have two AV inputs. You could plug your microphone into
your camera, VCR or mixer and then connect i to the Casablanca.
“Partition full” Problem I get an “Audio/video partition full” error message when I
errors
attempt to render an effect.
Solution You need to run a project clean up from the finish
window. Running periodic clean ups will remove deleted scenes
and audio remnants from your hard drive and prevent your
partitions from becoming full.
Appendix B Troubleshooting
B.3
Trouble freeing Problem Running a project clean up doesn’t seem to clear up
enough space on my hard drive.
up hard drive
space
Solution The clean up function only helps to gain space from
deleted scenes. Scenes in your storyboard or scene bin that are
merely trimmed or split will not take up drive space, so make sure
that you have deleted scenes from the Edit screen’s scene bin that
you will no longer need and then run a clean up.
Video buffer
empty errors
Problem The message “Video Buffer is Empty” has appeared.
What does this mean?
Solution This means that the Casablanca hasn’t been able to
transport data to the hard drive fast enough. This could be due to
a defective video frame or scene that resulted from a badly
synchronized source-video signal. You should be able to delete the
defective scene and continue working. The corrupt data on the
hard drive is simply skipped and the video can be played.
Video playing
on its own
Problem Why does my video seem to play on its own in the Split
and Trim functions?
Solution If the trackball hasn’t been scrolled and no buttons have
been pushed, the Casablanca will loop playback from the current
designated start point.
Color bars too Problem I think that the Color Bars may be too “Hot.”
hot
Solution There are two sets of color bars that can be generated by
the Casablanca. The 100/100 color bars are set up for PAL systems,
and will appear overdriven on NTSC systems. The 75/100 color
bars are made for NTSC specifications.
Beeps in audio Problem I think I hear “beeps” in my audio.
Solution On DV-equipped Casablancas, dropouts from the source
tape appear as “beeps” after they’re digitized through the DV cable.
If your source tape has several dropouts, you’ll have better success
using the “DV+Rear Audio” option in Video Settings screen. This
setting requires separate audio cabling, which should eliminate
your problem.
B.4
Appendix B Troubleshooting
Transition on
wrong video
scene
Problem My transition seems to be applied to the wrong video.
Solution When video inserts are used in your storyboard, it’s
important to remember that there is still a scene “under” the insert.
Therefore, if transitions are used on a video insert at the end of the
original scene that the insert appears to be “covering,” you will still
be able to see a portion of that original scene during the transition.
To avoid this problem, make a scene of the insert, replace it, and
then apply the transition.
Problem I get an error message that says: “Hard drive missing or
Hard drive
defective,” yet my hard drive is still inside the Casablanca.
missing/
defective error Solution Occasionally, when the Casablanca is moved or gets
jostled, the hard-drive sled becomes slightly disconnected from the
docking bay inside the machine. To remedy this problem, turn off
the Casablanca and push the drive sled a bit deeper into the
Casablanca so that you hear a small “click” and the front of the sled
is flush with the sides of the drive bay.
Inputs default
to front
Problem My video input s keep defaulting to the front.
Solution When using a DV-equipped Casablanca, you must select
“DV” as your input in the Video Settings screen. “DV” will
remain your selected input until you re-enter the Video Settings
screen. Each time you enter the Video Settings screen, the input
will revert back to the “Front” setting, but not until then.
Problem I can’t hear the audio that I’ve added in the Audio Mix
Can’t hear
sound in Audio screen.
Mix
Solution The audio must be rendered after any changes have been
made.
Can’t hear
audio sample
Problem My audio sample seems to be muted, yet all of it’s db
meters are set to 0 - not “Mute.”
Solution The audio sample in question is being affected by a
sample in another audio track. Select each of the other tracks and
check the db meter for your sample’s track.
Appendix B Troubleshooting
B.5
Storyboard
records to tape
in black and
white
Problem When I record my finished project to tape, it comes
out in black and white. Even the menu is monochromatic.
Starting a new
project
Problem I have finished my project and want to start a new one.
How do I do that?
Solution Check to see if you are using an S-video/RCA adapter
cable to send your images out of the Casablanca. If so, you need
to switch to either an S-video cable or the Euroscart adapter for
your video out.
Solution Select the “new project” option from the project
settings screen. This will delete all data from the drive (after a
safety check) and allow you to start a completely new video.
Problem I can’t find a “Save” button.
Save
Solution To force a project save you can either enter the Record
Screen or the Audio Record screen and then click the right
trackball button to back out or enter. The Casablanca will then
automatically save your project.
Shut down
Problem It takes a while for the Casablanca to turn off once I’ve
pressed the “off ” button.
Solution That’s OK. It’s normal for the machine to do this. The
Casablanca automatically saves your project before shutting
down.
Please check our website at www.draco.com for the latest FAQs.
B.6
Appendix B Troubleshooting
Error codes
Green and red
error codes
Many of the numerically coded “error” messages that appear on
screen are not relevant to the user; rather, they are codes for the
software developers. These messages will appear in green and can
be removed from the screen by clicking “OK.” Messages that
appear in red, however, do refer to specific problems. When
asking your dealer or DraCo technical support about a particular
error message, be sure to describe the context in which the error
appeared. The context is usually more significant than the string
of numbers and letters within the error code itself.
Error 25, error These three errors all mean that there is a defective scene in your
27 and error 30 storyboard. It may be something as simple as a frame that has
“dropped” out of the scene or other minor problems that may
have occurred when the scene was digitized. You may be able to
remove the problematic area with the split function, or you can
always re-digitize the scene onto your hard drive. If the error
arises during a project clean up, just press “Continue.”
Failed to read
video data
quick enough
This error indicates that your Casablanca is not receiving data at
the required speed. This is usually a one-time error. If you play
the scene a second time, you should get a perfect playback.
Scene video list
defective
This message occurs during cleanup if you’ve used a particular
scene more than once within your project storyboard. Click
“continue” to clear the error and finish your cleanup.
Alien disk
The disk you are using belongs to another Casablanca unit. When
Casablanca-related software is loaded into the Casablanca’s floppy
disk drive, the machine writes its own serial number to the
diskette, thus linking the two together. If that diskette is then put
into another Casablanca, it will not load. It will give you a red
message in the lower left corner of the screen saying “Alien disk”.
Sometimes a damaged disk will result in this message. If you have
a damaged disk, call your Casablanca dealer for a replacement. If
you happen to get this message, you should contact your dealer
immediately.
Appendix B Troubleshooting
B.7
Index
B
A
Background audio track
Adorage Magic I & II A.5
adjusting volume of 3.46
Akaba A.8
audio mix tutorial 2.19
Alien disk error B.1, B.7
location of 3.42
Anchored audio 1.3
short project tuorial 2.14, 2.15
Archive 3.34
Base width 3.40
Audio/video input
Bars 3.22
explained 3.4, 3.35
Batch render
location of iii
explained 3.17
short project tutorial 2.3
short project tutorial 2.16
Audio mix
Breakout box A.2
changes 1.5
Brightness 3.4
explained 3.42-3.46
Buttons 1.7
short project tutorial 2.14-2.16
Buttons with selectable functions 1.8
tutorial 2.18-2.21
C
Audio quality 3.2
Cancel button 3.13
Audio record
Chroma key A.5
audio mix tutorial 2.18
Circlewipe 3.22
explained 3.34-3.43
Clean up
short project tutorial 2.13, 2.14
Audio split & trim
audio mix tuorial 2.18
explained 3.3
troubleshooting B.3
Clock
changes 1.4
setting 3.1
explained 3.36
short project tutorial 2.2
short project tuorial 2.14
troubleshooting B.2
Automatic gain control (AGC)
Codes for additional software 3.1
defined 2.3
Collapse 3.22
explained within settings 3.5,
Color bars
troubleshooting B.1
Automatic Split 3.9
explained 3.10
Crosswave 3.29
troubleshooting B.4
CVBS filter 3.28
Color box
defined 1.9
D
Decibel/volume control
titling tutorial 2.22
audio mix tutorial 2.20
use of within “special” screen 3.11
explained 3.35
Color depth 3.28
short video project tutorial 2.15
Color to gray 3.28
Del and DeL Keys 3.34
Colorfade 3.22
Delete button
Commentary audio track
audio record screen 3.41
adjusting volume of 3.46
explained 3.11
audio mix tutorial 2.19
image processing screen 3.24
location of 3.42
title screen 3.30
short video project tuorial 2.14
transitions screen 3.19
Composite (RCA) cables
Demonstration video tape i
connected to Casablanca ii-iv
Disc 3.23
illustration of i
Drop button
short project tutorial 2.13
audio split 3.37
Cone 3.23
explained 3.9
Connecting the cables iii, iv
short video project tutorial 2.6
Contrast 3.4
DV editing (also see FireWire)
Control color 3.28
audio 2.13
Control image 3.27
advantages of 1.2
Copy Button
connections for iii, iv
audio effect 3.40
recording incoming signal 2.4, 3.5,
explained 3.10,
3.6
within audio record screen 3.39
recording out to DV 2.16 3.17,
Crossfade
defined 3.22
short project tutorial 2.10, 2.11
I.2
Index
3.18
troubleshooting B.5
Dynamic range 3.27
title effect 2.23
E
visual effect 3.27
Edit screen
short video project tutorial 2.5-2.9
explained 3.7-3.16
Effects
Failed to read video data quick enough
B.7
Fast motion 3.12
Field/frame
additional A.3-A.5
explained 3.11, 3.12
free registration A.9
preinstalled 3.27-3.29
introduced 1.5, 1.6
Finish screen
Empty sample 3.39
explained 3.17
Empty scene 3.10, 3.11
Enter/change text
short video project tutorial 2.16
FireWire (also see DV editing)
titling tutorial 2.23
connections iii, iv
explained 3.32
Error codes
alien disk B.1, B.7
explained 1.2, A.1
Flashbulb effect 3.27
Fonts
failed to read video data quick
additional disks A.6-A.8
enough B.7
titling tutorial 2.21, 2.22
error 25, 27 and 30 B.7
green and red error messages B.7
hard drive defective/missing B.5
partition full B.3
preinstalled 3.32, 3.33
Free Registration Effects Disk A.9
Freeze Effect 3.27
Full size preview (“full screen preview”)
video buffer empty B.4
explained 3.20
EuroScart adapter ii, iii
introduced 1.5
Explosion 3.22
multilayering tutorial 2.25
External controls 1.7
short project tutorial 2.11
F
Funnel effect 3.23
Face plate i
G
Fade in/out
audio effect 2.15, 2.20, 3.39
General information 1.1-1.3
Getting started i-v
Index
I.3
Interpolation
H
Halfsphere 3.23
explained 3.12
Hard drive
introduced 1.6
capacity of 3.3
K
location of i
Karaoke 3.40
sizes available A.1
Keyboard
troubleshooting B.4, B.5
compatability A.2
Hard drive keys i
explained 1.8, 3.32
Hardware upgrades A.1
renaming scenes 3.7
Hide play panel 1.6, 3.1
shortcuts 2.8
I
titling tutorial 2.21, 2.22
L
Icons
changes 1.5
Language 3.1
explained 1.8
LCD display
explained 3.1
Image processing screen
explained 3.24-3.29
setting 2.2
multilayering tutorial 2.24
troubleshooting 2.2, B.2
short project tutorial 2.10-2.12
In and out points
Loops
audio editing 3.45
audio ii
defined 1.8
video 3.1
explained 3.9
range 3.20
short project tutorial 2.7
Insert editing
changes 1.6
explained 3.15
short project tutorial 2.17, 2.18
Interface controls 1.7-1.9
I.4
Lineart 3.28
Index
M
Main screen
explained 2.1, 2.2
Mirror 3.27
Monitor ii, iv
Mono 3.40
Monument titler A.8
Multilayering 2.24, 2.25
Mute 3.40
short video project tutorial 2.3
N
Q
Name display 3.41
Quick play buttons 1.9, 3.37, 3.39
Negative 3.28
R
New features of Version 3 1.3-1.7
New project 3.4, B.6
NOP 3.29
Range
audio mix 3.43, 3.44
audio mix tutorial 2.19
O
image processing 3.25
Original audio track
insert editing 3.15
audio mix tutorial 2.20
insert editing tutorial 2.17
changing the volume 3.46
recording to tape 3.17
explained 3.42
titling 3.30
short video project tutorial 2.14
titling tutorial 2.23, 2.24
Real time preview
P
Page turn 3.22
Partition full
clean up 3.3
error B.3
PC Link A.8
Philosophy behind the Casablanca 1.6,
1.7
Picture Quality 3.2
explained 3.20
short video project tutorial 2.10,
titling 3.31
Record to DV
explained 3.17
short video project tutorial 2.16
troubleshooting B.6
Record to VCR
Picture Size 3.3
changes 1.6
Picture-in-picture 3.22
explained 3.17
Play screen 2.5, 3.8
short video project tutorial 2.16
Previewing cuts 1.5
troubleshooting B.6
Processor chips A.1
Project settings
explained 3.2-3.4
Recording audio
audio mix tutorial 2.18, 2.20
explained 3.2
Index
I.5
short video project tutorial 2.13,
2.14
SCSI port iii
Recording video
Selection fields 1.9
Search and replace 3.14, 3.15
explained 3.5, 3.6
Serial port iii
short video project tutorial 2.4
Sharpen 3.27
troubleshooting B.2
Shutting down the machine B.6
Rectangle 3.27
Single frame advance button 1.9
Remove
Sliders 1.8
Renaming scenes
Slow motion 3.11, 3.12
explained 3.7
Soften 3.27
short video project tutorial 2.7
Solarize 3.28
Render
Special motion effects
audio mix tutorial 2.19
changes 1.4
batch 3.17
explained 3.11, 3.12
explained 3.17, 3.21, 3.31
Sphere 3.23
multilayering tutorial 2.24, 2.25
Split (video)
short video project tutorial 2.12,
explained 3.8, 3.9
troubleshooting B.3
short video project tutorial 2.5, 2.6
S
Stabilize 3.27
Sample-->scene
Still 3.13
explained 3.41
introduced 1.4
Storyboard
change in recording to tape 1.6
Saving your project B.6
explained 3.7, 3.13-3.17
Scene bin
insert editing tutorial 2.17
explained 3.7
short video project tutorial 2.5, 2.9
Scene function
explained 3.21, 3.26
multilayering tutorial 2.24
Scene video list defective B.7
Scene-->audio sample 3.11, 3.13
I.6 Index
short video project tutorial 2.5, 2.8,
2.9
Strobe effect 3.27
SVHS 1.2,
SVHS cables i-iii
Swap 3.40
System capacity 3.3
System settings
Transitions
explained 3.1
additional disks A.3-A.5
short video project tutorial 2.2
explained 3.18-3.21
System software
preinstalled 3.21-3.23
features of version 3 1.3-1.6
short video project tutorial 2.10, 2.11
troubleshooting B.3, B.5
installation v
packed with the Casablanca i
troubleshooting B.1
Triangle 3.23
Trimming scenes
changes 1.4
T
explained 3.9
Table of contents I
Telescope 3.27
Tips
color saturation 2.3
keyboard shortcuts 2.8
LCD display 2.2
short video project tutorial 2.7, 2.8
Troubleshooting B.1-B.7
Twirl 3.23
U
Unpacking the Casablanca box i, ii
machine control 2.4
V
overmodulated audio 2.15
Video buffer empty B.4
recording video 2.4
Video control buttons 1.9
rendering titles 2.21
Video project tutorial 2.1-2.15
splits 2.6
Video settings
titling styles 2.22
explained 3.4, 3.5
used scenes 2.9
short video project tutorial 2.3
Titling
explained 3.29-3.34
short video project tutorial 2.21-2.23
troubleshooting B.3
Trackball
connecting ii, iii
explained 1.7
packed with the Casablanca i iii
Video-control button 1.9
W
Wave effect 3.27
Waveform
audio mix tutorial 2.18, 2.19
explained 3.8, 3.9, 3.36, 3.38
introduced 1.3
short video project tutorial 2.6
Index
I.7