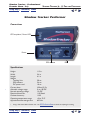
Download ATTI Shadow Tracker Premier Specifications

Transcript
Shadow Tracker ™ Professional
Premier Base - Help
GETTING STARTED
Using Help | Contents | Index
2
Quick Start Setup
The Quick Start Setup is designed to provide an overview of all the steps necessary to get your
Shadow Tracker Professional System up and running. It is important that the steps be completed in
the order that is outlined below and that no steps are skipped. If you are unsure how to complete
a particular task, click the link provided to view the Help File instructions for that task.
Step 1 - Install the Shadow Tracker Professional Software on your Computer
IMPORTANT: DO NOT install a Tracking Unit into a vehicle before adding it to the software.
Step 2 - Configure the Software and Tracking Units
1
2
3
4
5
6
7
8
9
10
Set the Week Ending Date (Time and Inventory modules only).
Create Company/Branch Records. Company and Branch Information
Create Employee Records. Employee Records
Create Vehicle Records. Vehicle Records
Create Vehicle Issue Records. Vehicle Issue Records
Set the Com Port on the computer. Setting the COM Port
Connect the Tracking Unit to the computer. Connecting a Tracking Unit to a Computer
Add the Tracking Unit to the database. Adding a Tracking Unit
Assign each Tracking Unit to a Vehicle Record. Assigning a Tracking Unit to a Vehicle Record
Disconnect the Tracking Unit from the computer.
Step 3 - Setup and Connect the Premier Base Radio
1 Connect the Premier Base Radio to the computer. Connecting the Premier Base Radio
2 Set the Premier Base COM Port. Set Premier Base COM Port
3 Set the Base Unit Configuration Settings. Set Base Unit Configuration Settings
Step 4 - Install the Tracking Unit into aVehicle
1 Install the Tracking Unit into vehicle. Connecting a Tracking Unit in a Vehicle
Once the Tracking Unit’s have been installed into the vehicles, you will be ready to begin collecting
and processing GPS data. Whenever a Shadow Tracker Premier Tracking Unit comes within range
of the Premier Base Radio, the Tracking Unit’s GPS data will be automatically downloaded and
stored on the Premier Base. Then, after the GPS data has been downloaded from the Premier
Base and processed into the database, you will be able to view the GPS data as Historical Tracks
and create Reports.
Using Help | Contents | Index
2
Shadow Tracker ™ Professional
Premier Base - Help
Using Help | Contents | Index
OVERVIEW
3
What is Shadow Tracker Professional?
The Advanced Tracking Technologies, Inc. (ATTI) family of products includes Shadow Tracker
Professional, a software product designed exclusively for the consumer market. Shadow Tracker
Professional is designed specifically to work with the GPS data collected using the Shadow Tracker
Premier, Jr., j2, Pro and Performer Tracking Unit’s.
Together, the Shadow Tracker Professional software and Tracking Unit’s form the Shadow
Tracker Professional – Vehicle Tracking System, which provides vehicle tracking services and travel
documentation for any vehicle. The Shadow Tracker Professional System uses state of the art
GPS (Global Positioning System) technology created and maintained by the U.S. Department of
Defense.
How does the Shadow Tracker Professional System work?
Once a Tracking Unit has been properly validated using the Shadow Tracker Professional software,
it is installed into a vehicle to begin gathering and recording GPS satellite signals. When travel is
complete the Shadow Tracker Premier Tracking Unit is automatically downloaded by the Premier
Base Radio and processed into the Shadow Tracker Professional database. Or, in the case of the
Shadow Tracker Jr., j2, Pro and Performer, the Tracking Unit is removed from the vehicle and
connected to the computer where the Unit’s GPS data is downloaded and processed into the
database.
Shadow Tracker Professional is then used to display the complete route or Historical Track traveled
by the vehicle. The Historical Track displays a bread crumb trail that shows you precisely where
the vehicle has traveled on the map, detailing the exact streets that were driven, any stops made
along the way, and the speed that was traveled throughout each segment of the Track.
By using the Reporting feature even more detailed information about the Track can be revealed,
including the arrival and departure time of each transit and stop and the maximum speed and
distance traveled during each transit.
Benefits
•
•
•
•
•
•
•
•
•
Displays and prints the complete travel route of any private vehicle
Documents personal mileage and time for tax purposes
Indicates speed of the vehicle at any place along the route
Shows number of stops and time spent at each location
Shows the miles driven at any time
Helps parents keep track of teenagers
Effectively tracks activities of employees and others
Current maps of your town and region, complete with street names
Easily installs into any vehicle
Using Help | Contents | Index
3
Shadow Tracker ™ Professional
Premier Base - Help
Using Help | Contents | Index
DATABASE RECORDS
4
Shadow Tracker
Building your Database
The database is where all of the information relevant to managing your employees and vehicles is
stored. Creating and maintaining accurate database records is critical to the smooth operation of
your Shadow Tracker Professional software and is the key to staying organized. Database records
fall into several different categories and include:
•
•
•
•
•
Company and Branch Information
Customer Records
Employee Records
Vehicle Records
Vehicle Issue Records
Once these records are created, they will be combined with the GPS data collected by the Tracking
Units to provide you with an accurate and detailed overview of your employee’s travel activity.
!
TIP: Shadow Tracker Professional comes with a data Import utility. If you already have Customer,
Employee and/or Vehicle Records in another software program, and if that program is able to
create a comma-delimited export file, the Import utility can be used to import and create these
database records for you. See Creating an Import File
Database Record Security
When logged in to Shadow Tracker as Administrator, you have complete access to create, modify
and delete any and all of these records as necessary. To assist in controlling access to this important
area of Shadow Tracker, the Administrator is able to create individual User accounts, which can be
used to restrict an individuals’ access to this and other sensitive areas of the program. See User
Accounts
Using the Data Entry Forms
Database records are created using a series of data entry forms (or windows). Each category
uses a specific form to create, modify and delete the records for that category. Each of the data
entry forms contains buttons that are viewable according to the security permissions of the User
who is accessing the form. If the user does not have permission to perform a specific task, then
the associated button will be disabled or invisible. The functionality associated with each of these
buttons is listed as follows:
Using Help | Contents | Index
4
Shadow Tracker ™ Professional
Premier Base - Help
Using Help | Contents | Index
DATABASE RECORDS
5
Shadow Tracker
Add: To create a new record in the database.
Edit: To make changes to an existing record.
Delete: To erase a record from the database, and in some cases delete associated records as well.
Save: To save a new record to the database.
Save Changes: To save the changes made to an existing record.
Cancel: To cancel any changes made to the record.
Record Navigation Arrows: Located at the bottom of most data entry forms, these arrows
allow you to navigate through records by moving through the records listing, in First, Next,
Previous and Last record order.
Close: Returns you to the Shadow Tracker program window.
Assigning Record ID’s
When a database record is created for a Customer, Employee or Vehicle, you are required to
designate an ID number for that record. This number can be any number you choose, but can be
no longer that nine characters in length.
In addition, Customer and Employee Records allow you to designate an Accounting ID number
that can be associated with each record. The Accounting ID is not a required field, but can be
useful if you plan to export any of these records to other software programs.
Creating, Editing, and Deleting Database records
Company and Branch Information
The Company Information Record is for information regarding your specific company. You can
include as little or as much information as you like.
If your company has one or more Branch locations, a Branch Information Record can also be
created for each Branch that you wish to include in your database. Structuring your records in this
way will help to keep your database organized.
Using Help | Contents | Index
5
Shadow Tracker ™ Professional
Premier Base - Help
DATABASE RECORDS
Using Help | Contents | Index
6
Shadow Tracker
To add company information:
1 From the menu, click File > Open > Company Information.
2 Click Add and enter your company information.
If your company has Branch locations, select Yes next to Does your company have branch
locations?
3 Click Save to save the record.
The required fields for creating a Company Record are:
• Name
• Phone
NOTE: If you have purchased the Time and Inventory modules, you will be prompted to set the
Weekending data.
To add branch information:
1 From the Company Information window, click the Branch Information button.
2 Click Add and enter the branch information.
3 Click Save to save the record.
The required field for creating a Branch Record is:
• Branch Name
To edit branch information:
1 From the Branch Information window, use the record navigation arrows to scroll to the
record to be edited.
2 Click Edit.
3 Edit the record and click Save.
Using Help | Contents | Index
6
Shadow Tracker ™ Professional
Premier Base - Help
DATABASE RECORDS
Using Help | Contents | Index
7
Shadow Tracker
To delete branch information:
1 From the Branch Information window, use the record navigation arrows to scroll to the
record to be deleted.
2 Click Delete. You will receive a confirmation message; click Yes to delete the record.
Customer Records
Customer Records can be created for any business or service that you wish. Creating these
records will assist you in creating Map Locations that can be included in the display of Historical
Tracks and/or in creating Reports.
To create a customer record:
1 From the menu, click File > Open > Customer Records.
2 In the Customer Records window, click Add and enter the customer information.
3 Click Save Changes to save the record.
The required fields for creating a Customer Record are:
• Customer Number
• Company Name
• First/Last Name
To edit a customer record:
1 From the Customer Records window, use the record navigation arrows to scroll to the
record to be edited.
2 Click Edit.
3 Edit the record and click Save Changes.
Using Help | Contents | Index
7
Shadow Tracker ™ Professional
Premier Base - Help
DATABASE RECORDS
Using Help | Contents | Index
8
Shadow Tracker
To delete a customer record:
1 From the Customer Records window, use the record navigation arrows to scroll to the
record to be deleted.
2 Click Delete.
3 You will receive a confirmation message; click Yes to delete the record.
To search for a customer record:
Once you have more that 10 Customer Records in the database, a Search button will be displayed
in the Customer Records window.
1 From the Customer Records window, click Search.
2 Enter a Company Name, Last Name or First Name.
3 Click Locate Customer Information to display the record.
Employee Records
Employee Records can be created for any employee or person who will be driving a tracked
vehicle. These records can also be used in creating Map Locations that can be included in the
display of Historical Tracks and/or in creating Reports.
To create an employee record:
1 From the menu, click File > Open > Employee Records.
2 From the Employee Records window click File > New Employee.
3 Enter the employee information.
4 Click Save to save the record.
The required fields for creating an Employee Record are:
• ID Number
• First/Last Name
Using Help | Contents | Index
8
Shadow Tracker ™ Professional
Premier Base - Help
Using Help | Contents | Index
DATABASE RECORDS
9
Shadow Tracker
To edit an employee record:
1 From the Employee Records window, click the Employee Record you wish to edit.
2 Edit the record and click Save.
To delete an employee record:
1 From the menu, click Tools > Data Manager.
2 Click the Database Maintenance tab.
3 Select the Purge employee and data radio button and select the Employee Record from the
drop-down list.
4 Click Purge. You will receive a confirmation message; click Yes to delete the record.
Vehicle Records
Vehicle Records are used to maintain information on each of the vehicles that will be used to
gather GPS data.
Groups
Before a Vehicle Record can be created, a Group must be defined to associate the Vehicle Record
with. Creating groups provides you with an easy way to organize the Vehicle Records in your
database. A Group can be used to distinguish between different types of vehicles, different shifts,
or even different departments within your company; it’s up to you. You can create as many
groups as you like, but even if you do not plan to group your vehicles in any particular fashion,
you will need to create at least one group to associate your Vehicle Records with.
To create a group:
1 From the menu, click File > Open > Vehicle Records.
2 From the Vehicle Records window, click File > New Group.
3 In the Add a Group window, enter a group name and description (optional) and select a
colored car icon to be associated with the Group.
4 Click Save.
Using Help | Contents | Index
9
Shadow Tracker ™ Professional
Premier Base - Help
DATABASE RECORDS
Using Help | Contents | Index
10
Shadow Tracker
To edit a group:
1 From the Vehicle Records window, click the name of the Group you wish to edit.
2 In the Edit a Group window, edit the record and click Save.
To create a vehicle record:
1 From the menu, click File > Open > Vehicle Records.
2 From the Vehicle Records window, click File > New Vehicle\Equipment.
3 In the New Vehicle window enter the vehicle information and click Save.
The required fields for creating a Vehicle Record are:
• Vehicle
• License
To assign a tracking unit to a vehicle record:
1 From the menu, click File > Open > Vehicle Records.
2 From the Vehicle Records window, click the Vehicle Record you wish to assign a Tracking
Unit to.
3 Select a Tracking Unit from the Tracker # drop-down list.
4 Click Save and click Close to close the Edit a Vehicle window.
To edit a vehicle record:
1 From the Vehicle Records window, click the Vehicle Record you wish to edit.
2 Edit the record and click Save > Close.
Using Help | Contents | Index
10
Shadow Tracker ™ Professional
Premier Base - Help
Using Help | Contents | Index
DATABASE RECORDS
11
Shadow Tracker
To delete a vehicle record:
1 From the menu, click Tools > Data Manager.
2 Click the Database Maintenance tab.
3 Select the Purge vehicle and data radio button and choose the Vehicle Record from the
drop-down list.
4 Click Purge. You will receive a confirmation message; click Yes to delete the record.
Vehicle Issue
Vehicle Issue Records are not required for the manually downloaded Shadow Tracker Jr., j2, Pro,
or Performer Tracking Units, but can be very useful in keeping your GPS data records organized.
A Vehicle Issue Record is required for each Shadow Tracker Premier Tracking Unit. A Vehicle
Issue Record is comprised of an Employee Record and a Vehicle Record combined together,
which is then assigned a specific date and time range. This allows all downloaded GPS data to be
automatically associated with the correct Vehicle and Employee Record whenever it is processed
into the database.
NOTE: Whenever a Vehicle Issue Record is created or edited, before the record is saved it is compared
to all other Vehicle Issue Records to make sure no conflicts exist. If there is a conflict you will be
notified and will need to modify the record accordingly. This occurs whenever a Vehicle Issue Record
“overlaps” or conflicts with an existing records’ parameters in some way.
To create a vehicle issue record:
1 From the menu, click File > Open > Vehicle Records.
2 In the Vehicle Records window, click File > Vehicle Issue.
3 Click the Add button.
4 Choose a Vehicle Record from the License drop-down list.
5 Choose an Employee Record from the Employee drop-down list.
6 Select a Date range for the Vehicle Issue Record.
Example: From: 01/01/2004 Thru: 12/31/2010
7 Select a Time range using the 24-hour military format.
Example: From: 00:00 Thru: 23:59
Using Help | Contents | Index
11
Shadow Tracker ™ Professional
Premier Base - Help
DATABASE RECORDS
Using Help | Contents | Index
12
Shadow Tracker
!
TIP: Reporting only - if you have a vehicle which is driven by more than one employee in a given
day, you can create a separate Vehicle Issue Record for each employee and use the Time
Range setting to keep the GPS data correctly separated when creating Reports.
Example:
Vehicle
XY7 R36
XY7 R36
Employee
D Gilmour
R Waters
Date
Time
From
To
From
To
01/01/2004
01/01/2004
12/31/2010
12/31/2010
00:00
12:00
11:59
23:59
Whenever GPS data, from the vehicle’s Tracking Unit, is downloaded and processed into the
database, the data will be automatically associated with the correct Employee.
8 Click Save to save the record.
To edit a vehicle issue record:
1 From the menu, click File > Open > Vehicle Records.
2 In the Vehicle Records window, click File > Vehicle Issue.
3 Select the Vehicle Issue Record by clicking it in the listing. Click the Edit button.
4 Make the changes to the record and click Save.
Fixed Location Records
A Fixed Location Record is a database record from which a Map Location can be created. Map
Locations that do not fall into either the Branch, Customer or Employee catagories are created
using the Fixed Location Record.
To create a fixed location record:
1 From the menu, click File > Open > Fixed Location Records.
2 In the Fixed Location Records window, click File > New Location.
3 In the Map Locations window, enter the map location information and click Save.
Using Help | Contents | Index
12
Shadow Tracker ™ Professional
Premier Base - Help
MAP FUNCTIONALITY
Using Help | Contents | Index
13
Shadow Tracker
MAP FUNCTIONALITY
Learning how to manipulate and control the map display is important to getting the most out of
your Shadow Tracker Professional System. Whether you need to view the entire United States or
Canada, a specific state or province, or even a neighborhood street, the mapping controls allow
you to display as much or as little detail as necessary.
Map Display Settings
The information that is displayed on the map at any given time is directly related to the map scale
at which you are currently viewing the map. As you decrease the map scale or zoom in, the type
and amount of information that is displayed will change/vary. The same is true when you increase
the map scale or zoom out.
Map Properties
Map properties are divided into four main categories: Roads, Water, Population and Features. You
have complete control over the amount and type of information you want displayed on the map.
To change map properties:
1 From the menu, select View > Map Properties
2 In the Map Properties window:
• check the properties you wish displayed
• uncheck the properties you wish not displayed.
3 When you’re finished, click OK.
Your selections will be immediately applied to the map and will remain until you make future
changes.
Map Legend
Map Legend controls the display of a moveable map legend to be placed on the map.
To display the map legend:
From the menu, click View > Map Legend
Using Help | Contents | Index
13
Shadow Tracker ™ Professional
Premier Base - Help
Using Help | Contents | Index
MAP FUNCTIONALITY
14
Shadow Tracker
Startup Map Display
The map displayed when Shadow Tracker Professional is first opened is called the Startup Map
Display. You can customize this setting so that each time the program is opened, the map view
automatically opens to a pre-set display.
To change the Startup Map Display:
1 Adjust the map to display the map area and scale you wish to set as the new Startup Map
Display.
2 From the file menu, select Map Operations > Map > Set Startup Map Presentation
A message will appear indicating that the Startup Map settings have been successfully changed.
3 Click OK.
The next time the program is opened, this map view will be displayed.
To go to the Startup Map
Do one of the following
• From the menu, select Map Operations > Map > Go to Startup Map Presentation
• Click the Go to Startup Map shortcut button on the toolbar.
Using Help | Contents | Index
14
Shadow Tracker ™ Professional
Premier Base - Help
MAP FUNCTIONALITY
Using Help | Contents | Index
15
Shadow Tracker
Adjusting the Map Display
Basic Controls
Zoom In: Moves in for a closer and more detailed view of the currently displayed map.
To zoom in:
Do one of the following
• Drag out a zoom box over the area you wish to zoom in on.
• From the menu, click Map Operations > Zoom In
• Keyboard shortcut “Ctrl” + “I”
Zoom Out: Moves out for a less detailed view of the currently displayed map.
To zoom out:
Do one of the following
• Drag out a zoom box over the area you wish to zoom in on.
• From the menu, click Map Operations > Zoom In
• Keyboard shortcut “Ctrl” + “O”
Zoom Box: Allows you to zoom in on a specified area of the map.
To draw a zoom box:
• Place your mouse cursor on the map, while holding down the left mouse button, drag out
a selection box around the area you wish to zoom in on. Release the mouse button. The
map will zoom in on the area you captured in the selection box.
Pan: Allows map to be repositioned in any direction you choose.
To use the pan feature:
• Place the mouse cursor on the map, while holding down the right mouse button, move the
cursor in any direction to reposition the map.
Center Map: Centers the map on a specified point.
To use center map:
• Place the mouse cursor on the point you want centered. Left-click the mouse. The map
will be redrawn and centered on the specified point.
Using Help | Contents | Index
15
Shadow Tracker ™ Professional
Premier Base - Help
MAP FUNCTIONALITY
Using Help | Contents | Index
16
Shadow Tracker
Finding a Location on the Map
The Find utility allows you to search for a specific location based on GPS coordinates, street name,
city or zip code. The location must fall within a 50-mile radius of the current map view’s center
point. By supplying a street name, city or zip code, a list of possible matches will be returned for
you to review and select. For a more accurate search, the street number, cross-streets, state
and/or zip code can also be specified.
To find a location based on GPS coordinates:
1 From the menu, click Map Operations > Find > Coordinate
2 In the Find Coordinate window, enter the Longitude and Latitude coordinates.
3 Click Find, and the map will be center on the specified coordinates.
To find a street location:
1 From the menu, select Map Operations > Find > Location
2 In the Find a Location window, select the Street tab.
3 Under Search Criteria, enter the street name.
If you know the city, county,state or zip code of the street you are searching for, enter them
in the appropriate box(s).
4 Click Find.
A list of possible matches will be displayed. Review the list and select the listing that most
accurately matches the location you are searching for.
5 Click the Go To button and the map will re-center to that location.
To find a city location:
1 From the menu, select Map Operations > Find > Location
2 In the Find a Location window, select the City tab.
3 Under Search Criteria, enter the name of the city or town.
Using Help | Contents | Index
16
Shadow Tracker ™ Professional
Premier Base - Help
Using Help | Contents | Index
MAP FUNCTIONALITY
17
Shadow Tracker
4 Click Find.
A list of possible matches will be displayed. Review the list and select the listing that most accurately matches the location you are searching for.
5 Click the Go To button and the map will re-center to that location.
To find a zip code location:
1 From the menu, select Map Operations > Find > Location
2 In the Find a Location window, select the Zip Code tab.
3 Under Search Criteria, enter the zip code.
4 Click Find.
A list of possible matches will be displayed. Review the list and select the listing that most
accurately matches the location you are searching for.
5 Click the Go To button and the map will re-center to that location.
Routing
To create a route:
1 From the menu, select Map Operations > Find > Route
2 Select a start point, by moving your mouse cursor to a map location and left-clicking.
3 In the Routing window, select the green Set Location button to set the coordinates.
4 Select a end point, by moving your mouse cursor to the map location and left-clicking.
5 In the Routing window, select the red Set Location button to set the coordinates.
6 Under Priority, select either Highways or Local Roads.
7 Click Find.
The driving instructions will be calculated and displayed.
Using Help | Contents | Index
17
Shadow Tracker ™ Professional
Premier Base - Help
Using Help | Contents | Index
MAP FUNCTIONALITY
18
Shadow Tracker
To clear a route:
From the menu, select Map Operations > Find > Clear a Route
Print Current Map
Sends a copy of the currently displayed map to the designated printer.
To print the current map:
1 From the menu, click File > Print Map
2 In the Printer window, select a printer and click the Print button.
Using Help | Contents | Index
18
Shadow Tracker ™ Professional
Premier Base - Help
Using Help | Contents | Index
MAP LOCATIONS
19
Shadow Tracker
MAP LOCATIONS
A Map Location is a location on the map that you define and assign to specific GPS coordinates.
Once a Map Location has been created it can be displayed on the map whenever necessary. When
viewing Historical Tracks, this enables you to quickly determine if any of these locations have been
traveled to.
Map Locations are organized into four catagories:
• Branch: Branch Record locations.
• Customer: Customer Record locations.
• Employee: Employee Record locations.
• Fixed: all other locations.
Each Map Location catagory is displayed using a unique icon to denote the location type, making
locations or landmarks that are commonly traveled to, easy to identify. Shadow Tracker Professional
allows you to create and save up to 500 Map Locations.
Creating a Map Location
Creating a Map Location is a simple two-step process, which consists of creating a database
record, and then assigning the record to specific GPS coordinates. If you have Branch, Customer
and Employee database records already created, they can be used to create a Map Location.
Assigning a Map Location sets specific GPS coordinates to a Map Location record. To assign GPS
coordinates to a record, the map scale must be below 500 ft.
Map Locations always need to be plotted as accurately as possible. The most accurate way to set
a Map Location is to first display a Historical Track which includes a stop at the location you intend
to set as a Map Location. Although this is not required, instructions for creating a Map Location
include loading a Historical Track before assigning the Map Location.
!
TIP: Shadow Tracker Professional comes with a data Import utility. If you already have Map
Location records in another software program, and if that program is able to create a commadelimited export file, the Import utility can be used to import and create these database records
for you. See Creating an Import File.
Using Help | Contents | Index
19
Shadow Tracker ™ Professional
Premier Base - Help
MAP LOCATIONS
Using Help | Contents | Index
20
Shadow Tracker
Mapping Target Area
The Mapping Target Area is an invisible, circular area that surrounds and extends outward from a
Map Locations’ fixed GPS coordinates. Increasing or decreasing the Mapping Target Area allows
a larger or smaller area to be included in a Map Location’s GPS coordinates. This feature is
important for accurately displaying stop locations that are in close proximity to each other. By
adjusting the Mapping Target Area as needed, you can ensure more accurate mapping results.
EXAMPLE: A vehicle is consistently parked at a company, which has a large parking area. A Map
Location is created for the company’s location. If the Mapping Target Area for the Map Location is
set to 200 ft, then any time a vehicle is stopped within a 200 ft. radius of the Map Location’s GPS
coordinates, the Historical Track will indicate a stop was made at that company’s location.
The Mapping Target Area is an adjustable setting that is specific to each Map Location.
Whenever a Historical Track is viewed on the map, if a stop occurs within the Mapping Target Area
of a Map Location, the Map Location’s name will be displayed whenever the mouse cursor is moved
over the stop. The Mapping Target Area setting is distinct from the Reporting Target Area setting.
To create a map location:
- Create a Database Record 1 From the menu, click File > Open.
2 Select a database record type by selecting one of the following:
• Company Information (for Branch locations)
• Customer Records
• Employee Records
• Fixed Location Records
The entry form for the record type you selected will be displayed. Enter appropriate information.
3 Click the down-arrow below Mapping Target Area: and select a setting from the dropdown list.
4 Click the Save button to save the record.
- Assign GPS Coordinates to the Database Record 5 Load a Historical Track that includes a stop at the location you wish to set as a Map Location.
After the Track loads, zoom-in on the stop to be used to assign the Map Location.
Using Help | Contents | Index
20
Shadow Tracker ™ Professional
Premier Base - Help
MAP LOCATIONS
Using Help | Contents | Index
21
Shadow Tracker
6 Do one of the following:
• From the menu, select Map Operations > Mark A Map Location.
• Click the Mark a Location shortcut button on the toolbar.
The mouse cursor will change to display a Pushpin icon.
7 Place the Pushpin icon on the location you wish to assign the Map Location to, and left-click
the mouse. The Locations window will automatically open.
8 Select a location type by selecting either the Fixed, Customer, Employee or Branch buttons.
9 Use the arrow buttons, at the bottom of the window, to navigate to the record you wish
to assign to these GPS coordinates.
10 In the Locations window, click the Assign button.
The record is now assigned to these GPS coordinates.
Displaying Map Locations
To display a map location:
1 From the menu, click View > Map Locations > View Map Locations.
2 In the Map Locations window, click a location type in the left column.
All of the Map Locations for that category will display in the right column.
3 Check each Map Location you wish to display, or
• To display all Map Locations for a Location Type, click Select All.
• To display all Map Locations place a check in the All Locations Type checkbox and click
Select All.
4 Click Close to close the Map Locations window.
The selected Map Locations will be displayed on the map.
To clear a map location:
From the menu, click View > Map Locations > Clear Map Locations.
Using Help | Contents | Index
21
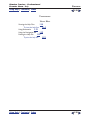
Shadow Tracker ™ Professional
Premier Base - Help
MAP LOCATIONS
Using Help | Contents | Index
22
Shadow Tracker
Locating a Map Location
In order to locate a Map Location on the map it must first be displayed.
To locate a map location:
Select the Map Location from the drop-down list located on the shortcut toolbar.
The map view will automatically be repositioned to display the Map Location centered on the screen.
Using Help | Contents | Index
22
Shadow Tracker ™ Professional
Premier Base - Help
Using Help | Contents | Index
HISTORICAL TRACKS
23
Shadow Tracker
Historical Tracks
Historical Tracks provide a detailed, visual representation of the GPS data collected by your
Tracking Unit(s). This functionality lies at the heart of the Shadow Tracker Professional System.
When a Track is created, the GPS data is drawn and displayed as a colored-line overlaid on the
map. Each Track displays the Begin and End locations, any stops made, and the option to display
the rate of speed traveled throughout each portion of the Track.
Please note that before GPS data can be viewed as an Historical Track, it must be downloaded
from the Tracking Unit and processed into the database. Historical Tracks are organized and
displayed according to the Vehicle Record that is associated with the Tracking Unit’s GPS data at
the time of download.
Understanding and Adjusting Track Display
When you create and display Historical Tracks, there are several settings that impact the way a
Track is drawn and displayed. Understanding the Stop Interval and Speed Display settings, and
how they affect the way Historical Tracks are rendered, will help you display Tracks that detail the
information you are most interested in.
Stop Interval
The Stop Interval: setting allows you to determine what time-interval will actually constitute a stop
when the Track is created and displayed. This setting can have a huge impact on the way Historical
Tracks are rendered. By adjusting this setting you can remove any unnecessary stop data created
by heavy traffic or traffic lights. The Stop Interval is adjusted by clicking the up/down arrows in
the Stop Interval: text box and can be decreased to as low as 1minute or increased to as high as
120 minutes.
When the Track is displayed, each stop is displayed and marked using a sequentially numbered
stop icon. By positioning your mouse cursor over a stop icon, the stop number, stop time and stop
duration for that stop will be displayed in the status bar at the bottom of the map. You can also
click a stop icon to display a pop-up box, which will contain the same stop information.
The Shadow Tracker program attempts to associate each stop with a known Map Location.
Anytime a stop occurs within the Mapping Target Area of a Map Location’s GPS coordinates, that
stop will be considered a stop at the Map Location’s location.
Using Help | Contents | Index
23
Shadow Tracker ™ Professional
Premier Base - Help
HISTORICAL TRACKS
Using Help | Contents | Index
24
Shadow Tracker
Speed Display
When a Track is created you have the option to include speed information in the Track’s display.
The map legend provides you with three choices: No Speed, 5 mph or 10 mph increments. If No
Speed is selected the Track will be displayed as a single colored line. If 5 or 10 mph increments are
selected, the Track will be displayed as a multi-colored line. Each speed increment is represented
by a different color that corresponds to the Speed Bar legend. When the Track is displayed you
will notice that the color of the Track will change according to the rate of speed the vehicle was
traveling at that time. The default setting is No Speed.
NOTE: Km/h is substituted for MPH for countries using the metric system.
Viewing Historical Tracks
Only one Track can be viewed on the map at any given time. However, when displaying Tracks
you can choose to load a single or multiple Tracks.
Single Track
A single Track displays the GPS data for a single date and time interval.
To load and view a single track:
1 From the menu, select View > Historical Tracking > Select Track
2 In the View Historical Track window, select the Track radio button.
3 Click to select a vehicle from the vehicle license listing.
4 Click the arrow below Start Date, and using the calendar, navigate to and select a date.
5 Click the arrow below Stop Date, and using the calendar, navigate to and select a date.
6 Using the 24-hour military time format, select a Start Time and Stop Time.
7 Select a Stop Interval.
Optional: To include speed information in the Track, check Enable Speed Bar and select 5
or 10 mph.
8 Click Build. The View Historical Track window will close.
9 In the Shadow Tracker window, select the vehicle license from the Tracking Subject
drop-down list and the Track will be displayed.
Using Help | Contents | Index
24
Shadow Tracker ™ Professional
Premier Base - Help
HISTORICAL TRACKS
Using Help | Contents | Index
25
Shadow Tracker
Multiple Tracks
Selecting multiple Tracks, allows you to load all of the Tracks that fall within the selected date
range. Even though only one date can be viewed at a time, the other dates are readily available
for viewing by selecting them from the Tracking Date drop-down list.
To load and view multiple tracks:
1 From the menu, select File > View > Historical Tracking > Select Track
2 In the View Historical Track window, select the Track radio button.
3 Click to select a vehicle from the vehicle license listing.
4 Click the arrow below Start Date, and using the calendar, navigate to and select a date.
5 Click the arrow below Stop Date, and using the calendar, navigate to and select a date.
6 Using the 24-hour military time format, select a Start Time and Stop Time.
7 Select a Stop Interval.
Optional: To include speed information in the Track, check Enable Speed Bar and select 5
or 10 mph.
8 Click Build. The View Historical Track window will close.
9 In the Shadow Tracker window, select the vehicle license from the Tracking Subject dropdown list and the first Track will be displayed.
To view any of the other loaded Tracks, select a date from the Tracking Date drop-down list.
Clearing Historical Tracks
To clear the currently displayed Historical Track from the map, follow the instructions below.
To clear a track:
From the menu, select View > Historical Tracking > Clear Track
Using Help | Contents | Index
25
Shadow Tracker ™ Professional
Premier Base - Help
Using Help | Contents | Index
HISTORICAL TRACKS
26
Shadow Tracker
Printing Historical Tracks
From time to time, you may want to print a hardcopy of an Historical Track you are viewing. This
is easily done, simply adjust the map to display the Track and mapping information you wish to
print and follow the instructions below.
To print a track:
1 From the menu, select File > Print Map.
2 In the Print window, select a printer and click the Print button.
Track Details
The Track Detail window provides a convenient way to display detailed stop and transit information
for any Track displayed in the viewport. Once opened, the Track Detail window is fixed across the
bottom of the viewport in the form of a scrollable table.
Each stop and transit associated with the Track is listed along with its Begin, End, and Duration
times, Location, Max Speed, and Mileage information.
Track Details Window
To display or hide track details:
From the menu, select View > Track Details
!
TIP: Clicking a stop number in the Goto column of the Track Detail window will cause the map
to recenter on that stop.
Using Help | Contents | Index
26
Shadow Tracker ™ Professional
Premier Base - Help
HISTORICAL TRACKS
Using Help | Contents | Index
27
Shadow Tracker
Track Playback
The Track Playback feature allows you to observe a Track as it is drawn segment by segment,
versus being displayed all at one time. A Track segment is a line drawn between two consecutive
GPS positions of a Track. Typically Tracks are displayed in their entirety for a given day. Track
Playback however works like a VCR or DVD recorder by allowing you to play, pause, fast-forward,
rewind or stop a Track’s display.
To use this feature, a Historical Track must first be loaded and displayed in the map viewport.
Track Playback Controls
A B C D
E
F
G
H
A. Play B. Skip Next C. Pause D. Stop E. Stop list F. Speed bar legend G. Playback Speed
H. Close
• Play - Starts playback at the Begin position of the selected Track.
• Skip Next - Skips or fast forwards to the next stop in the Track.
• Pause - Temporarily pauses or resumes Track Playback.
• Stop - Causes the Track to be drawn out completely and centered on the End position of
the Track.
• Stop List - The drop-down menu displays stops and stop times associated with the Track
being displayed. Selecting a stop from the Stop list will cause the Track to fast-forward or
rewind to that stop. Playback will then resume from that stop.
• Playback Speed - The slider is used to adjust the speed at which Track segments are
drawn. Moving the slider to the right, or +, increases the drawing speed, while moving
the slider to the left, or _, decreases the speed. The Playback Speed can be adjusted at
anytime during playback.
Using Help | Contents | Index
27
Shadow Tracker ™ Professional
Premier Base - Help
Using Help | Contents | Index
HISTORICAL TRACKS
28
Shadow Tracker
To view a track using playback:
1 Load and display the Historical Track you wish to view.
2 Select View > Track Playback.
3 Click the Play button.
The map will clear and center on the Begin location of the Track. As the Track is being drawn, the
playback will briefly pause at each stop and display a pop-up message detailing the stop number,
stop time, and location for that stop. Playback will then resume and the Track will advance segment
by segment to the next stop.
NOTE: To view a different Track you must first close the Track Playback window, load the Track you
wish to view and then re-open the Track Playback window.
To close playback:
Select the X in the top right corner of the Track Playback window.
NOTE: The Viewport’s map magnitude is not adjustable while Track Playback is in Play mode. To
adjust map magnitude during playback first select Pause, adjust the magnitude and then re-select
Pause to resume playback.
Using Help | Contents | Index
28
Shadow Tracker ™ Professional
Premier Base - Help
REPORTS
Using Help | Contents | Index
29
Shadow Tracker
REPORTS
Whether your system is used to track a single vehicle or manage an entire fleet, Shadow Tracker
Professional Reports provide an indispensable tool for monitoring the status of your employees
and vehicles. Shadow Tracker Professional provides 47 different reports that can be customized
to meet your specific needs. Each report accesses database records according to the reporting
parameters you select. The data is then organized and displayed in an easy to understand format.
Reports fall into several categories or types, which are listed and summarized below.
Tracking Reports – Provide detailed daily GPS tracking information for employees and vehicles.
Vehicle Reports – Provide detailed summaries of Vehicles and Vehicle Groups
Map Locations – Provide detailed Map Location information.
Other Reports – Provide detailed summaries of Branch, Customer and Employee Records
The following reports require a seperate module for operation. See the documentation which
relates to these modules.
InventoryReports
Marked Locations
Job/Time Activity
Understanding Reporting Parameters
Before creating a report, it is important to understand reporting parameters and how they will
impact the reports you create. Simply stated, reporting parameters are the adjustable settings
that you control when you create a report. These parameters determine the specific information
that will be included in the report and, depending on the values that are used, can produce
strikingly different results. You can think of setting reporting parameters as a method of targeting
and shaping your GPS data. As you gain experience and become more familiar with how these
settings impact your reports, you will be able to quickly create reports that zero-in on the detailed
information you need to manage your vehicles more efficiently.
Beginning / Ending Time
The Beginning / Ending Time setting is directly related to the Start and End Date that is selected.
Both settings are based on the 24-hour Military Time format where 00:00 represents 12:00 AM
or midnight, and 23:59 represents 11:59 PM or one minute before midnight. This setting controls
the time frame that will be included in the report for the Date that is selected. Only the GPS data
that falls within this time frame will be used in the report.
Using Help | Contents | Index
29
Shadow Tracker ™ Professional
Premier Base - Help
Using Help | Contents | Index
REPORTS
30
Shadow Tracker
Stops Exceeding Duration
This is the stop interval setting which allows you to determine what time-interval will actually constitute
a stop, whenever the report is created. This parameter can have a profound impact on your reporting
results and is adjusted by clicking the up/down arrows in the Exceeding Duration: text box. The stop
interval can be decreased to as low as 1 minute or increased as to high as 120 minutes.
Max Speed
The Max Speed setting relates to the GPS Daily Travel Report summary only. Based on this setting,
the report calculates the amount of time the vehicle spent traveling above this speed benchmark.
The result is displayed in the Speed column of the report summary.
Target Area Deviation for Reports
This is an invisible, circular area that surrounds and extends outward from a Map Location’s fixed
GPS coordinates. Increasing or decreasing the Target Area Deviation, allows a smaller or larger
area to be included in a Map Location’s GPS coordinates. This feature is important for accurately
displaying stop locations that are in close proximity to each other. By adjusting the Target Area
Deviation as needed, you can ensure more accurate reporting results.
EXAMPLE: A vehicle is consistently parked at a company, which has a large parking area. A Map
Location is created for the company’s location. If the Reporting Target Area for the Map Location is
set to 200 ft, then any time a vehicle is stopped within a 200 ft. radius of the Map Location’s GPS
coordinates, the report will indicate a stop was made at that company’s location.
This setting is applied to all Map Locations uniformly. When the report is created, if a stop
occurs within the Target Area Deviation of a Map Location, the Map Location’s name will be
displayed in the Location Name column of the report. This Target Area Deviation setting is
distinct from the Mapping Target Area setting.
Understanding Reporting Results
Map Locations
If a stop falls within the Target Area Deviation of a Map Location, the Map Location’s name will be
displayed in the Location Name column of the report. Depending upon Map Location placement
and the Target Area Deviation setting, it is possible for more than one Map Location to fall within
the Target Area of the same stop. In these cases, each of the Map Location names will be listed in
the report.
Using Help | Contents | Index
30
Shadow Tracker ™ Professional
Premier Base - Help
Using Help | Contents | Index
REPORTS
31
Shadow Tracker
Stops
Stops not associated with a Map Location, are displayed using a street address range. Example:
“1200-1298 FANNIN, Houston, TX 77001”. Stops that occur within an area not associated with
a street address range are listed as “Unknown”. In these cases, if this is a commonly traveled to
location, a Map Location can be created to display any relevant information you choose. By doing
this, all future reports will display this Map Location’s name instead of “Unknown”.
Power and Ignition Events
If you are using a Tracking Unit with ignition sensing capabilities, each time the Unit is connected
and disconnected, or the vehicle’s ignition is turned on or off, the time these events occur will be
recorded. This information will be reflected in certain reports. These events will be displayed in
the Action Type and Location Name columns of the report.
Report Types
Tracking Reports
Tracking Reports allow you to review the daily travel activity of your Employees and Vehicles,
giving you the ability to monitor and analyze the driving habits and daily work routines of your
Employees. These reports can be extremely valuable in increasing both Employee and Vehicle
efficiency. The reports are created based on either an Employee or Vehicle Record, and provide an
accurate and detailed description of travel activity. Data can also be displayed in a more graphical
format by using the Time and Ignition Comparison graphs.
Reports vary in the type and amount of information they contain. When a Tracking Report is
created, the specified GPS data is organized and displayed in chronological order. Each Event
type is listed separately along with its’ associated data. The GPS data is arranged and displayed
according to the following columnar headings:
• Begin / End: Displays the start and end time of each stop, transit or event type.
• Duration: Displays the duration of each stop, transit or event type.
• Event Type: Displays various event types such as, stops and transits, power on/off, ignition
on/off, track begin/end.
• Location Name: Displays information related to each stop, transit or event type.
• Max Speed: Displays the maximum speed traveled during a transit.
• Mileage: Displays the total mileage traveled during a transit.
• Days Accrual Statistics: A summary of all stops, transits, mileage and speed data detailed
in the report.
Using Help | Contents | Index
31
Shadow Tracker ™ Professional
Premier Base - Help
Using Help | Contents | Index
REPORTS
32
Shadow Tracker
The available Tracking Reports are listed below along with a brief summary of the information each
report contains.
GPS Tracking Activity
• GPS Daily Travel – details the Begin/End, Duration, Location Name, Max Speed, Mileage
and Summary for the selected date or date range.
• GPS Daily Stop – details the Begin/End, Duration, Stop # and Location Name for the
selected date or date range.
• GPS Complete Tracking – details the Begin/End, Duration, Event Type, Location Name,
Max Speed, Mileage and Summary for the selected date or date range. Includes data for
Ignition and Power events.
• GPS Power Activity – details the power events, which occurred during the selected date
or date range.
• Vehicle Ignition Events – details the Begin/End, Duration, Event Type and Employee for
each Ignition event in the selected date or date range.
• GPS Vehicle Movement – details the Begin/End, Duration, Max Speed and Mileage for
each Transit event in the selected date or date range.
• GPS Vehicle Idle time – details the Begin/End, Duration and Location Name for stops
where the Vehicle is stopped with the ignition ON. Available with Units that provide
ignition sensing.
• Mileage by State – details the Daily and Cumulative Mileage of each day, grouped by State
name.
• GPS Odometer – details the Odometer readings entered using the Time Traveler keypad.
Time Graphs
• Displays the Stop and Transit data of the selected Vehicle, Employee or Group for the
selected date or date range in graph format.
Ignition Comparison
• Displays the Ignition events of the selected Vehicle, Employee or Group for the selected
date or date range in graph format.
Using Help | Contents | Index
32
Shadow Tracker ™ Professional
Premier Base - Help
Using Help | Contents | Index
REPORTS
33
Shadow Tracker
To create a GPS tracking report or graph:
1 From the menu, click Reports.
2 Select GPS Tracking Activity, Time Graphs, or Ignition Comparison from the list in
the Reports window.
3 Select the specific report you wish to create.
4 Select the Vehicle(s), Employee(s), Branch(s), and Vehicle Group(s) from the Filter Lists
to define your report.
5 Select a date or date range for the report by highlighting the date(s) in the Start and End
Date calendars.
NOTE: To create a report for one day only, highlight the same date in both the Start and End
Date calendars.
6 Adjust the Beginning/Ending Time, Max Speed, Stops Exceeding Duration, and Target Area
Deviation for Reports settings as needed.
7 Click the Print button to create and view the report.
Other Reports
Other Reports are used to display information contained in your Branch, Customer and Employee
database records. The available reports are listed below along with a brief summary of the
information each report contains.
• Listing of Branch Information – creates a list, which contains an abbreviated version of
the information contained in the selected branch(s) database record.
• Listing of Customer Information – creates a list, which contains an abbreviated version
of the information contained in the selected customer(s) database record.
• Customer Data Sheet – creates a one-page sheet, which details all of the information
contained in the selected customer(s) database record.
• Listing of Employee Information – creates a list, which contains an abbreviated version
of the information contained in the selected employee(s) database record.
• Employee Data Sheet – creates a one-page sheet, which details all of the information
contained in the selected employee(s) database record.
Using Help | Contents | Index
33
Shadow Tracker ™ Professional
Premier Base - Help
Using Help | Contents | Index
REPORTS
34
Shadow Tracker
To create a report:
1 From the menu, click Reports.
2 Select Other Reports from the list in the Reports window.
3 Select the specific report you wish to create.
4 Select the Branch(s), Customer(s), or Employee(s) from the Filter Lists to define your
report.
5 Click the Print button to create and view the report.
Vehicle Reports
Vehicle reports allow you to create reports that detail the information contained in your Vehicle,
Vehicle assignment and Group database records. The available Vehicle reports are listed below
along with a brief summary of the information each report contains.
• Listing of Vehicle Information – creates a list, which details all of the information contained
in the selected vehicle(s) database record.
• Assignment by Vehicle – creates a list, which details the employee record that is associated
with the selected vehicles’ database record.
• Assignment by Employee – creates a list, which details the vehicle record that is associated
with the selected employees’ database record.
• Listing of Vehicle Groups – creates a list, which contains an abbreviated version of the
information contained in the selected branch(s) database record.
To create a vehicle report:
1 From the menu, click Reports.
2 Select Vehicle Reports from the list in the Reports window.
3 Select the specific report name you wish to create.
4 Select the Vehicle(s), Employee(s), or Group(s) from the Filter Lists to define your
report.
5 Click the Print button to create and view the report.
Using Help | Contents | Index
34
Shadow Tracker ™ Professional
Premier Base - Help
Using Help | Contents | Index
REPORTS
35
Shadow Tracker
Map Locations
Map Location reports allow you to create reports that detail the information contained in your
Map Location database records. The available Map Location reports are listed below along with
a brief summary of the information each report contains.
• Branch – creates a list, which details the information contained in the database record(s)
of each map location classified as a branch map location.
• Customer – creates a list, which details the information contained in the database record(s)
of each map location classified as a customer map location.
• Employee – creates a list, which details the information contained in the database record(s)
of each map location classified as an employee map location.
• Fixed – creates a list, which details the information contained in the database record(s) of
each map location classified as a fixed map location.
To create a map location report:
1 From the menu, click Reports.
2 Select Map Locations from the list in the Reports window.
3 Select the specific report name you wish to create.
4 Select the parameters from the Filter Lists to define your report.
5 Click the Print button to create and view the report.
Using Help | Contents | Index
35
Shadow Tracker ™ Professional
Premier Base - Help
Using Help | Contents | Index
REPORTS
36
Shadow Tracker
Printing Reports
After a report has been created, it is displayed in the Report Display window for you to review.
From here, a hardcopy of the report can be printed.
To print a report:
1 In the Report Display window, click File > Print.
NOTE: Shadow Tracker Professional utilizes Microsoft Internet Explorer to print reports. If, when
printing reports, all of the displayed information is not printed or is “cut-off”, it may be necessary
to adjust the page setup margin settings in Microsoft Internet Explorer.
To adjust the page setup margin settings:
1 Open Microsoft Internet Explorer.
2 Select File > Page Setup…
3 Adjust the Left, Right, Top and Bottom margin settings to 0.25”.
4 Click OK.
Using Help | Contents | Index
36
Shadow Tracker ™ Professional
Premier Base - Help
TRACKING UNIT MAINTENANCE
Using Help | Contents | Index
37
Shadow Tracker
TRACKING UNIT MAINTENANCE
The Tracker Maintenance window it is where all functionality related to managing your Tracking
Units is centralized. This includes adding and removing Tracking Units from the database, as well
as erasing and obtaining Tracking Unit information.
Tracking Unit Maintenance functionality is also available in and accessible from the Administrator
program. By including Tracking Unit Maintenance in both the Shadow Tracker and Administrator
programs, the System Administrator has the option of creating Users who can access this
functionality without having to be given Administrator user status.
NOTE: Access to the Base Unit Configuration utility is available only in the Administrator Tracking
Unit Maintenance.
Establishing Communications
An important step in configuring your Shadow Tracker Professional System is to synchronize
communications between your computer, the Tracking Units and your software. This is done by
verifying, and if necessary adjusting, the COM Port setting in your Shadow Tracker Professional
software and by learning how to correctly connect your Tracking Units to the computer.
Setting the COM Port
IMPORTANT: The COM Port instructions below are for the Shadow Tracker Jr., Shadow Tracker
Pro, Shadow Tracker Performer and Shadow Tracker 2000 Tracking Units, which use a serial
COM Port to connect to the computer.
The Shadow Tracker j2 Tracking Unit uses a USB Port connection which is configured
automatically.
The COM Port is the communications port on your computer that Shadow Tracker Professional
will use to connect to and interact with your Tracking Units.
To set the COM Port:
If you know the COM Port # the Tracking Unit will be connected to;
1 From the menu, click Shadow Tracker > Connect to Tracking Unit.
2 In the Com Port Settings window, click the Edit button and select the correct COM
Port # from the drop-down list.
Using Help | Contents | Index
37
Shadow Tracker ™ Professional
Premier Base - Help
TRACKING UNIT MAINTENANCE
Using Help | Contents | Index
38
Shadow Tracker
3 Click Save, and then click Close.
If you do not know the COM Port # the Tracking Unit will be connected to, use the Detect
feature to determine the COM Port.
To detect the COM Port:
1 Connect a Tracking Unit to the computer. Click a Tracking Unit below for instructions.
• Shadow Tracker Jr., j2, Pro, or Performer
• Shadow Tracker Premier
2 From the menu, click Shadow Tracker > Connect to Tracking Unit.
3 In the Com Port Settings window, click the Detect button.
Shadow Tracker Professional will attempt to connect to the Tracking Unit. When the COM
Port has been detected, the message: Communication Port has been set! will be displayed and
the setting will automatically be saved.
If the connection is not achieved, you will receive a message explaining the reason and further
information on how to fix the problem.
The Set COM Port at low speed check box is left unchecked by default. This should be
changed only if there is a communication problem. Change this value only under instructions
of an ATTI Tech Support representative.
4 Click the Close button.
Adding a Tracking Unit to the Database
NOTE: The Shadow Tracker j2 model # ST-760 Tracking Unit is supported in the following
operating systems only: Windows 2000, Windows XP and Windows Server 2003.
Before you can begin downloading and processing GPS data collected with your Tracking Units,
each Unit must be validated to the Shadow Tracker Professional software. Validating a Tracking
Unit adds that Unit to your database. This enables the Shadow Tracker Professional software to
recognize your Unit and correctly classify the GPS data when downloaded.
Each Tracking Unit is equipped with an unchangeable serial number. When a Unit is added, or
validated, the Tracking Unit’s serial number is retrieved and added to your database. In a separate
process, the Tracking Unit must then be assigned to a Vehicle Record.
Using Help | Contents | Index
38
Shadow Tracker ™ Professional
Premier Base - Help
TRACKING UNIT MAINTENANCE
Using Help | Contents | Index
39
Shadow Tracker
IMPORTANT: Whenever a new Shadow Tracker Premier Tracking Unit is added to your System, the
Number of Units value in the Base Unit Configuration must be incremented to reflect the total
number of Premier units being monitored by the Premier Base. See Base Radio Configuration
To add a tracking unit:
1 Connect a Tracking Unit to the computer. Click a Tracking Unit listed below for instructions.
• Shadow Tracker Jr., j2, Pro, or Performer
• Shadow Tracker Premier
2 From the menu, select Shadow Tracker > Maintenance.
3 In the Tracker Maintenance window, click the Add Shadow Tracker button.
If your Tracking Unit is EVM enabled place a check in the True checkbox.
4 Click the Add button.
When the operation has successfully completed you will receive a confirmation message: This
Unit has been authorized for operation.
5 Click OK.
!
TIP: Although not required for the Shadow Tracker Jr., j2, Pro or Performer Tracking Units, once
these manually downloaded Units has been added to the database, you have the option of assigning
the Tracking Unit to an existing Vehicle Record. After this has been done the Vehicle Record
can then be used to create a Vehicle Issue Record. A Vehicle Issue Record joins an Employee
Record to a Vehicle Record. Then each time the Tracking Unit is downloaded the GPS data will be
automatically associated with the Vehicle and Employee Records used to create the Vehicle Issue
Record. See Vehicle Issue Record. If you choose not to create a Vehicle Issue Record, you will be
prompted to select the Vehicle and Employee Record to assign the downloaded GPS data to each
time the Unit is downloaded.
Manual Downloading and Processing
If you have Shadow Tracker Jr., j2, Pro or Performer Tracking Units included in your System, the
GPS data collected by these Units must be downloaded manually. Shadow Tracker Premier
tracking units can only be downloaded using the Premier Base radio.
To manually download and process GPS data:
1 Connect the Tracking Unit to the computer.
Using Help | Contents | Index
39
Shadow Tracker ™ Professional
Premier Base - Help
TRACKING UNIT MAINTENANCE
Using Help | Contents | Index
40
Shadow Tracker
2 From the menu, select Shadow Tracker > Download.
3 In the Download Service window, click the Download button.
4 Select an Employee and Vehicle using the drop-down lists and click Download Shadow Tracker.
The GPS data will be downloaded from the Tracking Unit. When the download is complete
you will receive a notification: Unit has been cleared and reset. You may disconnect it now.
NOTE: If the Tracking Unit has not been properly connected to the computer, the download
routine will timeout within 30 seconds. You will receive a message indicating that the Unit is
not communicating correctly. You will then be asked to disconnect and then re-connect the
Unit and try again. Also verify that the Unit is connected to the correct COM Port by verifying
your COM Port settings.
IMPORTANT: GPS data files that are manually downloaded from Shadow Tracker Jr., j2, Pro and
Performer Tracking Units, are placed into the InboundManual folder located in the STRT program
folder. Each time the Wireless Grabber program checks the Premier Base Radio for GPS data,
it also checks this InboundManual folder for any manually downloaded GPS data files. If a file is
found, the Wireless Grabber will pickup the file and perform several validation checks for data
integrity. If the file passes the validation checks it is replicated and placed into the Processing
folder where it can be processed into the database using the Data Processor program. If an error
is found the file will be placed into the Unprocessed folder. See Unprocessed Downloads.
Determining Tracking Unit Memory
If at anytime you need to know the amount of a Tracking Unit’s memory currently being utilized,
this can be determined by using the Memory utility.
To determine amount of tracking unit memory used:
1 Connect the Tracking Unit to the computer.
2 From the menu, select Shadow Tracker > Maintenance.
3 In the Tracker Maintenance window, click Add Shadow Tracker.
4 Click the Memory button.
When the operation has successfully completed you will receive a confirmation message
displaying the amount of memory currently being used.
5 Click OK.
Using Help | Contents | Index
40
Shadow Tracker ™ Professional
Premier Base - Help
TRACKING UNIT MAINTENANCE
Using Help | Contents | Index
41
Shadow Tracker
Retrieving Tracking Unit Settings
This utility allows you to retrieve important information from your Tracking Unit, such as the Serial
Number and the current GPS Collection Rate.
To retrieve tracking unit settings:
1 Connect the Tracking Unit to the computer.
2 From the menu, select Shadow Tracker > Maintenance.
3 In the Tracker Maintenance window, click Get Shadow Tracker Information.
The Unit’s settings will be retrieved and displayed in the Tracker Maintenance window.
Removing a Tracking Unit from the Database
Tracking Units do not need to be connected to your computer to be removed from your database
but, please note, once a Tracking Unit is removed, all GPS data related to that Unit will be deleted
from the database. Once deleted, these records cannot be recovered.
To remove a tracking unit:
1 From the menu, select Shadow Tracker > Maintenance.
2 In the Tracker Maintenance window, click the Remove Shadow Tracker button.
3 Select the Tracking Unit by double-clicking it in the Active Shadow Trackers list.
4 Click the Remove Tracker button.
5 You will receive a confirmation message; click Yes to remove the Unit.
Erasing a Tracking Unit
After a Tracking Unit is downloaded, the Unit’s GPS data is automatically erased. There may be
times when you have collected GPS data that you do not wish to download and process into the
database. In order to clear the GPS data from the Unit, you will need to use the erase utility.
Using Help | Contents | Index
41
Shadow Tracker ™ Professional
Premier Base - Help
TRACKING UNIT MAINTENANCE
Using Help | Contents | Index
42
Shadow Tracker
To erase data from a unit:
1 Connect the Tracking Unit to the computer.
2 From the menu, select Shadow Tracker > Maintenance.
3 In the Tracker Maintenance window, click the Erase Shadow Tracker button.
4 You will receive a confirmation message; click Yes to erase the Unit.
When complete, you will be prompted with a message indicating whether or not the erase
utility was successful. If the Unit was erased, you can disconnect the Unit from your computer
and begin collecting GPS data. Otherwise, use the erase utility again.
Adjusting the GPS Collection Rate
The Shadow Tracker Premier does not have an adjustable GPS collection rate. But, if you have
Shadow Tracker Jr., j2, Pro or Performer Tracking Units validated to your System, the GPS collection
rate on these Units can be adjusted. The collection rate setting determines how often the Tracking
Unit will collect and record GPS coordinates. In other words, the time interval between recorded
GPS coordinates. The default collection rate setting is 10 seconds, but you can change this at any
time to one of the following settings:
•
•
•
•
•
3 seconds
7 seconds
10 seconds
15 seconds
20 seconds
•
•
•
•
•
30 seconds
45 seconds
60 seconds
90 seconds
120 seconds
To change the GPS collection rate:
1 Connect the Tracking Unit to the computer.
2 From the menu, select Shadow Tracker > Maintenance.
3 Click the Get Shadow Tracker Information button.
4 Select a new collection rate from the drop-down list, and click the Set button.
5 Click the Close button.
Using Help | Contents | Index
42
Shadow Tracker ™ Professional
Premier Base - Help
IMPORT
Using Help | Contents | Index
43
Shadow Tracker
IMPORT
Shadow Tracker Professional allows certain types of data to be imported directly into your database.
This can be useful if you have a significant amount of pre-existing information that can be used to
create Customer, Employee, Vehicle and/or Map Location Records. Adding the necessary information
from scratch could be a time consuming process, but if you have this information already available
in a different program, there’s a good chance that the program will have an export feature. If this is
the case, then the information can be imported into your Shadow Tracker Professional database, as
a comma-delimited text file. Please refer to the documentation of the program you are exporting
from, for instructions on how to create the comma-delimited text file.
Creating an Import File
IMPORTANT: Before you create an import file, open the Import Utility and familiarize yourself with
how the file should be formatted.
The steps used to determine the formatting requirements needed to create an import file are the
same for each database record type. The illustration below outlines how to format an import file
containing Map Location data.
To create an import file:
1 From the menu, click Tools > Import/Export.
2 In the Import/Export window, click the Import button.
3 In the Import window, select the Map Locations Data button.
Notice that the LocationName, BranchNumber, and Address1 Data Fields have a check in
the Check Field column, and that the field names are displayed in the lower portion of the
Import window. This indicates that these Data Fields are required in order to create this type
of database record.
!
TIP: The Data Fields that are required, vary according to the type of record being created. When
preparing to import information to create Customer, Employee or Vehicle Records, always review
which fields are required, beforehand. Each required Data Field will have a check in the Check
Field column when the Import window opens.
3 In the Map Locations Data Fields list, place a check in the Check Field column of each
data field you plan to include in the import file.
Using Help | Contents | Index
43
Shadow Tracker ™ Professional
Premier Base - Help
IMPORT
Using Help | Contents | Index
44
Shadow Tracker
After making your selections, the field names will be displayed in field order from left to right,
enclosed in double-quotation marks in the lower portion of the Import window. Use this
same field order as your guideline when building the comma-delimited text file that you
will use for import.
4 The final step is to actually create the file using the program that contains the data you wish
to import.
IMPORTANT: The file you create must conform exactly to the specifications listed in the Import File
Checklist below. If it does not, none of the information will be imported. Instead you will receive
a notification to double-check and correct the formatting of your import file before attempting to
import it again.
Import File Checklist
• The first line of your import file must contain a Header Line that consists of each field name
enclosed in double-quotation marks and separated by commas.
• The Data Type, Max Size and Format values for each field name must conform exactly to
the guidelines described in the Import window.
• The spelling of the field names in your Header Line must match exactly to the field names listed.
• The field order of the field names in your Header Line must match exactly to the field
order listed.
• There should be no spaces between the field names and the commas. If any are included
it will cause an error when the file is imported.
Example of a correctly formatted, comma-delimited text file:
HEADER LINE 1
LINE 2
LINE 3
“Map Location Name”,”Address1”,”Address2”,”City”,”State”,”ZipCode”,”Longitude”,”Latitude”
“ABC Supply”,”201 Main”,”Suite 600”,”Spring”,”TX”,”77373”,””,””
”Acme Store”,”21043 North Frwy”,””,”Houston”,”TX”,”77055”,”-95.3905”,”30.0789”
Using Help | Contents | Index
44
Shadow Tracker ™ Professional
Premier Base - Help
IMPORT
Using Help | Contents | Index
45
Shadow Tracker
Importing Data to the Database
Once a correctly formatted import file has been created, it can be imported and added to your
Shadow Tracker Professional database.
To import a comma-delimited text file:
1 From the menu, click Tools > Import/Export.
2 Click the Import button and select a Data type from the list.
3 In the Import window, select the Data Fields to be imported by placing a check in the
Check Field column.
4 Click the Browse Files for Import button and navigate to and select the import file.
5 Click OK and the file will be scanned and loaded for you to review.
If an error occurs when the data is matched against the selected Data Fields, you will receive
a message describing the problem. Make any necessary adjustments to the Import window
or the import file.
6 Click the Import to Database button.
A confirmation message will be displayed in the message bar stating: Importing File [file name]
Completed Successfully.
7 Click Close to exit the Import Utility.
Using Help | Contents | Index
45
Shadow Tracker ™ Professional
Premier Base - Help
Using Help | Contents | Index
46
Administrator
ADMINISTRATOR
The Administrator program is where Shadow Tracker Professional’s most critical and sensitive
program functionality is centralized. It is accessible only by the person who has been designated
as Administrator, and any Users to whom the Administrator has given Administrator status.
Besides being used to control User Administration and Security, the Administrator program is
used to perform important Database and Tracking Unit Maintenance functions and to adjust Base
Radio and RealTime configuration settings. The Administrator window also details important
information regarding the current status of your Shadow Tracker Professional System.
To open the Administrator:
1. From the Start menu, select Programs > Shadow Tracker Professional > Administrator.
2. At the login window, enter the following Username and Password.
• AdminUserID: Administrator
• Password: root
3. Click the ATTI button and the Administrator program will open.
The Administrator Window
The Administrator window is divided into four main areas.
Toolbar - provides access to User Administration and Security, Database and Tracking Unit
Maintenance Utilities, Base Radio configuration and other useful features.
Current Active Users - displays all Users that are currently connected to the Shadow Tracker
Professional System. Depending on the number of User licenses you have purchased, you can have up
to that number of individual Users accessing the program simultaneously. Below the Current Active
Users list, the number of User licenses available as well as the licenses currently in use are displayed.
Message Board - displays the current size of your database and is also used to prompt you with
other important information regarding your System.
Unprocessed Downloads - displays the contents of the Unprocessed folder and provides functionality to reprocess any GPS data files that did not process during the initial processing attempt.
Using Help | Contents | Index
46
Shadow Tracker ™ Professional
Premier Base - Help
Using Help | Contents | Index
47
Administrator
Unprocessed Downloads
The Unprocessed Downloads portion of the Administrator is used to display and re-process any
GPS files not processed during the initial processing attempt. From the Administrator you may
review these files, and determine how they should be handled. Once the issue has been corrected, the file can be resubmitted for processing. The System’s Administrator should monitor
Unprocessed Downloads on a regular basis to ensure that all downloaded GPS files are processing into the database.
Double-clicking a file’s name in Unprocessed Downloads, will cause a message to be displayed
indicating the reason the file was not processed, if this can be determined. The most common
reasons a file is not processed successfully are:
• The file contains no GPS data to process.
• The Tracking Unit has not been validated or added to the database.
• The Tracking Unit is not associated with a Vehicle Issue Record.
These types of unprocessed files can be resubmitted for processing once the issue has been corrected. For any other unprocessed file messages, contact ATTI Technical Support for assistance.
To resubmit a file for processing:
1 In the Administrator window, select the file by clicking the file’s name.
2 Click the Re-Submit File button, or if you have more than one file, click Re-Submit All.
To delete a file from unprocessed downloads:
1 In the Administrator window, select the file by clicking the file’s name.
2 Click the Delete File button, or if you have more that one file, click Delete All.
The file(s) will be permanently deleted.
Using Help | Contents | Index
47
Shadow Tracker ™ Professional
Premier Base - Help
DATABASE MAINTENANCE
Using Help | Contents | Index
48
Administrator
DATABASE MAINTENANCE
It is recommended that you delete unused GPS data from the database on a periodic basis. Doing
this will assure efficient data processing and program response. In most cases, data downloaded
from your Tracking Units make up around 85% of the size of your database. Your database cannot
extend beyond 2 GB in size or damage to the database structure and/or data will occur.
To ensure you are viewing the true size of your database, you can perform a Compact operation
on the database at any time. This will delete any unused space and reduce the database to its
smallest size.
If you wish to save your GPS data records for future reference, make a backup of your database
first. That way you will always have these records available in the future. Later, you can connect
to your archived database using the Connect Utility to view the records.
Performing regular database maintenance is an important part of safeguarding your data. Using the
Database Maintenance Utilities makes it easy to perform routine database operations quickly and
safely, as well as keeping your Shadow Tracker Professional program organized and optimized.
• Compact Utility - removes unused space from the database, reducing the database to its
smallest possible size.
• Repair Utility – performs a series of routine repair operations on the database.
• Purge Utility - allows you to permanently delete data records from the database.
• Backup Utility - allows you to create a copy of the database and places it in a designated
location. With the Backup utility, you can easily create a database archive
where all of your data records can be safely stored for future access.
Using Help | Contents | Index
48
Shadow Tracker ™ Professional
Premier Base - Help
DATABASE MAINTENANCE
Using Help | Contents | Index
49
Administrator
Database Size
Shadow Tracker Professional includes a feature that continually monitors the size of your database.
Allowing a database to become too large increases the risk of GPS data records becoming
permanently corrupted. Therefore, when your database reaches 1.5 GB in size, you will begin to
receive promptings urging you to perform a Purge and Compact operation and/or to archive the
database.
If these promptings are ignored and the database is allowed to reach a size of 1.8 GB, the database’s
status will automatically be converted to read-only. If this occurs, no data will be lost, but the
database will be rendered incapable of accepting any more data. To correct this, the database will
need to be reduced in size by performing a Purge/Compact operation. This is done to ensure that
your GPS data records will never be corrupted due to database size.
NOTE: Before performing any data maintenance, it is recommended that you first make a backup
copy of your database.
Compact Utility
Data in your program is constantly being added, evaluated and rearranged. As a result, your database
can become fragmented and use disk space inefficiently. Compacting the database makes a copy of
the database and then rearranges how the data file is stored on disk. You can perform a compact on
your database at anytime to release disk space, so your program runs more efficiently.
To compact the database:
Close all other Shadow Tracker Professional programs, i.e. Shadow Tracker, Premier Base
Extractor, Wireless Grabber or Data Processor.
1 In the Administrator window, select Database > Compact.
2 In the DB Compact Utility window, click the Start Compact Procedure button.
When the compact operation has completed, you will receive a confirmation message in the
Status window: Compacting operation was successful.
3 Click Exit to close the DB Compact Utility window.
Using Help | Contents | Index
49
Shadow Tracker ™ Professional
Premier Base - Help
DATABASE MAINTENANCE
Using Help | Contents | Index
50
Administrator
Purge Utility
When using the Purge Utility you can permanently remove GPS data from the currently connected
database based on an Employee or Vehicle name, or based on a Date Range.
When data is purged based on a Date Range, all GPS records previous to the selected # of day(s)
are permanently deleted. Use the up/down arrow keys to scroll until the appropriate # of day(s)
are displayed in the text box. The corresponding date and number of database records to be
deleted will be displayed in the lower portion of the Delete GPS tab.
When data is purged based on an Employee or Vehicle name, all GPS records associated with the
selected entry are permanently deleted. The records are selected by choosing an Employee or
Vehicle name from the drop-down list.
To purge database records:
Close all other Shadow Tracker Professional programs, i.e. Shadow Tracker, Premier Base
Extractor, Wireless Grabber or Data Processor.
1 In the Administrator window, select Database > Purge.
2 In the Database Record Maintenance window, select one of the following tabs:
• Delete Employee
• Delete Vehicle
• Delete GPS
3 Select the records to be deleted.
4 Click the corresponding Delete button, and follow the screen prompts.
When the purge operation has successfully completed, you will receive a confirmation message:
Clearing of records has been completed.
5 Click OK to confirm.
6 Click Close, to close the Database Record Maintenance window.
Using Help | Contents | Index
50
Shadow Tracker ™ Professional
Premier Base - Help
DATABASE MAINTENANCE
Using Help | Contents | Index
51
Administrator
Backup Utility
Before performing any routine data maintenance, it is recommended that you always make a
backup copy of your database first in case you encounter an unexpected problem.
To backup a database:
Close all other Shadow Tracker Professional programs, i.e. Shadow Tracker, Premier Base
Extractor, Wireless Grabber or Data Processor.
1 In the Administrator window, select Database > Backup.
The Database Backups portion of the Administrator will be displayed in the lower half of the
Administrator window.
2 To select a location for the Backup database to be placed, click the Select button and
navigate to the appropriate folder.
NOTE: Double-clicking a folder, will cause the folders tree view to expand or retract.
3 When the correct path is displayed in the Database Backup Location, click the Set button.
4 Click the Backup button.
5 You will receive a confirmation message informing you that the Backup was successfully
created. Click OK.
Backup databases are always saved with the file extension “.ar#”, where ‘#’ is a sequentially
incremented number.
IMPORTANT: Backup, or archived, databases are not editable, once created no changes or
modifications to the data are allowed. Please contact ATTI Technical Support if it should become
necessary to edit a Backup database.
Using Help | Contents | Index
51
Shadow Tracker ™ Professional
Premier Base - Help
DATABASE MAINTENANCE
Using Help | Contents | Index
52
Administrator
Database Backup Reminder
To help you in managing the size of your database, the Administrator allows an automatic reminder
to be set that will automatically prompt you to backup your database.
To set a database backup reminder:
1 In the Administrator window, select Database > Backup.
The Database Backups portion of the Administrator will be displayed in the lower half of the
Administrator window.
2 Select the Remind Me Daily or Remind Me Weekly radio button.
3 Choose a Time for the reminder by selecting a time from the drop-down list.
4 Click the Set Reminder button.
You will receive a confirmation message that the Reminder was successfully set.
5 Click OK.
The database backup reminder will be displayed in the Message Board of the Administrator at
the scheduled time interval.
Verify DataBase Link
Shadow Tracker Professional uses two databases that are linked together to store your GPS and other
data. Sometimes in the course of interchanging archived databases this linking can be disturbed. The
verify DataBase Link Utility can be used to re-establish this connection or to simply confirm that the
databases are correctly linked.
To verify database linking:
1 In the Administrator window, select Database > Verify Database Link.
You will receive a message confirming the database link.
Using Help | Contents | Index
52
Shadow Tracker ™ Professional
Premier Base - Help
TRACKING UNIT MAINTENANCE
Using Help | Contents | Index
53
Administrator
TRACKING UNIT MAINTENANCE
The Tracker Maintenance window it is where all functionality related to managing your Tracking
Units is centralized. This includes adding and removing Tracking Units from the database, as well
as erasing and obtaining Tracking Unit information.
Tracking Unit Maintenance functionality is also available in and accessible from the Administrator
program. By including Tracking Unit Maintenance in both the Shadow Tracker and Administrator
programs, the System Administrator has the option of creating Users who can access this
functionality without having to be given Administrator user status.
NOTE: Access to the Base Unit Configuration utility is available only in the Administrator Tracking
Unit Maintenance.
Establishing Communications
An important step in configuring your Shadow Tracker Professional System is to synchronize
communications between your computer, the Tracking Units and your software. This is done by
verifying, and if necessary adjusting, the COM Port setting in your Shadow Tracker Professional
software and by learning how to correctly connect your Tracking Units to the computer.
Setting the COM Port
IMPORTANT: The COM Port instructions below are for the Shadow Tracker Jr., Shadow Tracker
Pro, Shadow Tracker Performer and Shadow Tracker 2000 Tracking Units, which use a serial
COM Port to connect to the computer.
The Shadow Tracker j2 Tracking Unit uses a USB Port connection which is configured
automatically.
The COM Port is the communications port on your computer that Shadow Tracker Professional
will use to connect to and interact with your Tracking Units.
To set the COM Port:
If you know the COM Port # the Tracking Unit will be connected to;
1 From the menu, click Shadow Tracker > Set Communications Port.
2 In the Com Port Settings window, click the Edit button and select the correct COM
Port # from the drop-down list.
Using Help | Contents | Index
53
Shadow Tracker ™ Professional
Premier Base - Help
TRACKING UNIT MAINTENANCE
Using Help | Contents | Index
54
Administrator
3 Click Save, and then click Close.
If you do not know the COM Port # the Tracking Unit will be connected to, use the Detect
feature to determine the COM Port.
To detect the COM Port:
1 Connect a Tracking Unit to the computer. Click a Tracking Unit listed below for instructions.
• Shadow Tracker Jr., j2, Pro, or Performer
• Shadow Tracker Premier
2 From the menu, click Shadow Tracker > Set Communications Port.
3 In the Com Port Settings window, click the Detect button.
Shadow Tracker Professional will attempt to connect to the Tracking Unit. When the COM
Port has been detected, the message: Communication Port has been set! will be displayed and
the setting will automatically be saved.
If the connection is not achieved, you will receive a message explaining the reason and further
information on how to fix the problem.
The Set COM Port at low speed check box is left unchecked by default. This should be
changed only if there is a communication problem. Change this value only under instructions
of an ATTI Tech Support representative.
4 Click the Close button.
Adding a Tracking Unit to the Database
NOTE: The Shadow Tracker j2 model # ST-760 Tracking Unit is supported in the following
operating systems only: Windows 2000, Windows XP and Windows Server 2003.
Before you can begin downloading and processing GPS data collected with your Tracking Units,
each Unit must be validated to the Shadow Tracker Professional software. Validating a Tracking
Unit adds that Unit to your database. This enables the Shadow Tracker Professional software to
recognize your Unit and correctly classify the GPS data when downloaded.
Each Tracking Unit is equipped with an unchangeable serial number. When a Unit is added, or
validated, the Tracking Unit’s serial number is retrieved and added to your database. In a separate
process, the Tracking Unit must then be assigned to a Vehicle Record.
Using Help | Contents | Index
54
Shadow Tracker ™ Professional
Premier Base - Help
TRACKING UNIT MAINTENANCE
Using Help | Contents | Index
55
Administrator
IMPORTANT: Whenever a new Shadow Tracker Premier Tracking Unit is added to your System, the
Number of Units value in the Base Unit Configuration must be incremented to reflect the total
number of Premier units being monitored by the Premier Base. See Base Radio Configuration
To add a tracking unit:
1 Connect a Tracking Unit to the computer. Click a Tracking Unit listed below for instructions.
• Shadow Tracker Jr., j2, Pro, or Performer
• Shadow Tracker Premier
2 From the menu, select Shadow Tracker > Maintenance.
3 In the Tracker Maintenance window, click the Add Shadow Tracker button.
If your Tracking Unit is EVM enabled place a check in the True checkbox.
4 Click the Add button.
When the operation has successfully completed you will receive a confirmation message: This
Unit has been authorized for operation.
5 Click OK.
!
TIP: Although not required for the Shadow Tracker Jr., j2, Pro or Performer Tracking Units, once
these manually downloaded Units has been added to the database, you have the option of assigning
the Tracking Unit to an existing Vehicle Record. After this has been done the Vehicle Record
can then be used to create a Vehicle Issue Record. A Vehicle Issue Record joins an Employee
Record to a Vehicle Record. Then each time the Tracking Unit is downloaded the GPS data will be
automatically associated with the Vehicle and Employee Records used to create the Vehicle Issue
Record. See Vehicle Issue. If you choose not to create a Vehicle Issue Record, you will be prompted
to select the Vehicle and Employee Record to assign the downloaded GPS data to each time the
Unit is downloaded.
Determining Tracking Unit Memory
If at anytime you need to know the amount of a Tracking Unit’s memory currently being utilized,
this can be determined by using the Memory utility.
To determine amount of tracking unit memory used:
1 Connect the Tracking Unit to the computer.
Using Help | Contents | Index
55
Shadow Tracker ™ Professional
Premier Base - Help
TRACKING UNIT MAINTENANCE
Using Help | Contents | Index
56
Administrator
2 From the menu, select Shadow Tracker > Maintenance.
3 In the Tracker Maintenance window, click Add Shadow Tracker.
4 Click the Memory button.
When the operation has successfully completed you will receive a confirmation message
displaying the amount of memory currently being used.
5 Click OK.
Retrieving Tracking Unit Settings
This utility allows you to retrieve important information from your Tracking Unit, such as the Serial
Number and the current GPS Collection Rate.
To retrieve tracking unit settings:
1 Connect the Tracking Unit to the computer.
2 From the menu, select Shadow Tracker > Maintenance.
3 In the Tracker Maintenance window, click Get Shadow Tracker Information.
The Unit’s settings will be retrieved and displayed in the Tracker Maintenance window.
Removing a Tracking Unit from the Database
Tracking Units do not need to be connected to your computer to be removed from your database
but, please note, once a Tracking Unit is removed, all GPS data related to that Unit will be deleted
from the database. Once deleted, these records cannot be recovered.
To remove a tracking unit:
1 From the menu, select Shadow Tracker > Maintenance.
2 In the Tracker Maintenance window, click the Remove Shadow Tracker button.
3 Select the Tracking Unit by double-clicking it in the Active Shadow Trackers list.
Using Help | Contents | Index
56
Shadow Tracker ™ Professional
Premier Base - Help
TRACKING UNIT MAINTENANCE
Using Help | Contents | Index
57
Administrator
4 Click the Remove Tracker button.
5 You will receive a confirmation message; click Yes to remove the Unit.
Erasing a Tracking Unit
After a Tracking Unit is downloaded, the Unit’s GPS data is automatically erased. There may be
times when you have collected GPS data that you do not wish to download and process into the
database. In order to clear the GPS data from the Unit, you will need to use the erase utility.
To erase data from a unit:
1 Connect the Tracking Unit to the computer.
2 From the menu, select Shadow Tracker > Maintenance.
3 In the Tracker Maintenance window, click the Erase Shadow Tracker button.
4 You will receive a confirmation message; click Yes to erase the Unit.
When complete, you will be prompted with a message indicating whether or not the erase
utility was successful. If the Unit was erased, you can disconnect the Unit from your computer
and begin collecting GPS data. Otherwise, use the erase utility again.
Adjusting the GPS Collection Rate
The Shadow Tracker Premier does not have an adjustable GPS collection rate. But, if you have
Shadow Tracker Jr., j2, Pro or Performer Tracking Units validated to your System, the GPS collection
rate on these Units can be adjusted. The collection rate setting determines how often the Tracking
Unit will collect and record GPS coordinates. In other words, the time interval between recorded
GPS coordinates. The default collection rate setting is 10 seconds, but you can change this at any
time to one of the following settings:
•
•
•
•
•
3 seconds
7 seconds
10 seconds
15 seconds
20 seconds
Using Help | Contents | Index
•
•
•
•
•
30 seconds
45 seconds
60 seconds
90 seconds
120 seconds
57
Shadow Tracker ™ Professional
Premier Base - Help
TRACKING UNIT MAINTENANCE
Using Help | Contents | Index
58
Administrator
To change the GPS collection rate:
1 Connect the Tracking Unit to the computer.
2 From the menu, select Shadow Tracker > Maintenance.
3 Click the Get Shadow Tracker Information button.
4 Select a new collection rate from the drop-down list, and click the Set button.
5 Click the Close button.
Using Help | Contents | Index
58
Shadow Tracker ™ Professional
Premier Base - Help
Using Help | Contents | Index
BASE RADIO CONFIGURATION
59
Administrator
BASE RADIO CONFIGURATION
The Base Radio Configuration Utility allows you to view and manage various connection and
operating settings for the Premier Base Radio. If the Quick Start Setup instructions were followed
correctly, it should not be necessary to adjust any of these settings. ATTI recommends not making
any changes to the Base Radio Configuration, unless instructed to do so by ATTI Technical Support
or these Help Files.
Base Radio Configuration Window
Packet Size – Sets the minimum packet size required by the Premier Base Radio to download a
Shadow Tracker Premier Tracking Unit.
NOTE: This setting should be left at “70”, unless instructed to adjust by ATTI Technical
Support.
COM Port – Sets the COM Port on the computer that is used to connect to the Premier Base
Radio.
Number of Units – The number of Shadow Tracker Premier Tracking Units included in your
System.
Radio Group – The Radio Group number listed in your Premier Base System documentation.
Radio Address – The Base Radio Address number listed in your Premier Base System
documentation.
IMPORTANT: Whenever a new Shadow Tracker Premier Tracking Unit is added to your System, the
Number of Units value must be incremented to reflect the total number of Premier Unit’s being
monitored by the Premier Base.
Premier Base COM Port
In order to establish communications you will need to set the COM Port # that the computer
will be using to connect to the Premier Base. In a Client/Server System the Premier Base will be
connected to the Server computer.
To set the Premier Base COM Port:
1 Connect and power the Premier Base to your computer. See Connecting the Premier Base.
Using Help | Contents | Index
59
Shadow Tracker ™ Professional
Premier Base - Help
BASE RADIO CONFIGURATION
Using Help | Contents | Index
60
Administrator
2 From the Administrator program click Shadow Tracker > Maintenance > Base Unit
Configuration.
3 Select the COM Port # used to connect the Premier Base to the computer from the dropdown list. All other settings can be left at the default values for now.
IMPORTANT: Be sure to connect the RS-232 Serial connection cable to the same COM Port
connection you used to add the Tracking Units.
4 Click Set Base Configuration to save your changes.
5 Click Close and Exit to return to the Administrator program.
Premier Base Configuration Settings
To set or adjust base radio configuration settings:
1 In the Administrator window, select Shadow Tracker > Maintenance.
2 In the Tracker Maintenance window, click the Base Unit Configuration button.
3 Make the necessary setting adjustments.
IMPORTANT: When setting up the Premier Base Radio for the first time, after setting the COM
Port, the following entries must be made in order to establish communications between the Base
Radio and Tracking Units. Enter the following values listed on the Hardware Inventory Sheet
(included with your packing list):
• Radio Group
• Radio Address
• Number of Units
(total number of Tracking Units in your System)
4 Click Set Base Configuration.
5 You will recieve a confirmation message, click OK.
6 To close the Tracker Maintenance window, click the Cancel button.
Using Help | Contents | Index
60
Shadow Tracker ™ Professional
Premier Base - Help
USER ADMINISTRATION/SECURITY
Using Help | Contents | Index
61
Administrator
USER ADMINISTRATION / SECURITY
Shadow Tracker Professional requires a User Name and Password in order to access the
program. This feature allows the person designated as Administrator, to exercise complete
control over employee access to Shadow Tracker Professional. Security is useful when needing
to prevent unauthorized persons from viewing, modifying or deleting your database records. The
Administrator has full control and access to all program functionality. By defining the specific
permissions assigned to a User’s account, the Administrator can protect database records from
being unintentionally viewed or altered.
IMPORTANT: The standard permissions applied to a User or User Group account, allow only for
minimal program access. It is the Administrator’s responsibility to further define which areas of
Shadow Tracker Professional each User will be allowed to access. Then, when a User opens the
program, they will have access only to those areas of the program for which they have permission.
The areas they have not been given access to, will be disabled.
NOTE: Only the Administrator and those User’s who have been granted Administrator status, can
make changes to User permissions.
User versus User Group Security
User and User Group security is defined by assigning rights to specific areas of program functionality.
Security permissions can be defined for each individual User, or for a User Group. Depending on
the number of Users who will be accessing the program, creating a User Group is the most efficient
way to establish security for multiple Users. If you choose this method of setting permissions,
create and define the User Group permissions before defining individual User permissions.
User Licenses
Each copy of Shadow Tracker Professional software comes equipped with a one User License. So
while there is no limit to the number of User accounts that may be created for program access, only
one User will be allowed to access the Shadow Tracker Professional program at any given time.
If you have purchased additional User License’s, they need to be added to the System before
multiple Users will be able to access the Shadow Tracker Professional program simultaneously.
To add a user license:
1 In the Administrator window, select Tools > User Administration.
2 In the User Administration window, select the Add User Licenses button.
Using Help | Contents | Index
61
Shadow Tracker ™ Professional
Premier Base - Help
USER ADMINISTRATION/SECURITY
Using Help | Contents | Index
62
Administrator
3 In the Add a User License window, enter the User License Authentication Code you received
from ATTI in the space provided.
4 Click OK.
The additional licenses will be added to the database, and the Licenses Available listing will be
updated in the Administrator window.
To review user licenses:
1 In the Administrator window, select Tools > User Administration.
2 In the User Administration window, select the Review Licenses button.
User Groups
A User Group is a grouping of individual User’s, who share a common set of security permissions.
To create a user group:
1 In the Administrator window, select Tools > User Administration.
2 In the User Administration window, select the Add a User Group button.
3 In the Add a User Group window, under User Group Name, enter a name for the
Group and click Add.
4 Click Cancel to close the Add a User Group window.
To define user group security:
User Group security is defined by assigning rights to specific areas of program functionality.
1 In the Administrator window, select Tools > User Administration.
2 In the User Administration window, select the Set Group Security button.
3 Select a User Group Name from the drop-down list.
Using Help | Contents | Index
62
Shadow Tracker ™ Professional
Premier Base - Help
USER ADMINISTRATION/SECURITY
Using Help | Contents | Index
63
Administrator
4 Select a category in the Shadow Tracker Modules list.
The Rights available for the selected category will be displayed to the right as follows:
•
•
•
•
•
Add – allow a User to add new records to the database
Modify – allow a User to make changes to a record in the database
Delete – allow a User to delete records from the database
View – allow a User to view all records
Print – allow a User to send items to the printer
NOTE: By default, a User Group is given no rights for any category. Also, the rights available vary
between categories.
5 Select each category you wish to modify, and check each right you wish to allow the User
Group permission to access.
6 When finished, click the Close button.
The next time a User assigned to this User Group accesses the program, the permissions will
be applied.
To view user group members:
1 In the Administrator window, select Tools > User Administration.
2 In the User Administration window, select the View Group Members button.
3 In the View Groups window, select a User Group Name from the drop-down list.
The current members for the Group will be displayed.
4 Click OK to close.
To remove a user group:
1 In the Administrator window, select Tools > User Administration.
2 In the User Administration window, select the Remove User Group button.
3 In the Remove User Groups window, select the User Group from the Current User
Groups list, and click the Remove button.
Using Help | Contents | Index
63
Shadow Tracker ™ Professional
Premier Base - Help
USER ADMINISTRATION/SECURITY
Using Help | Contents | Index
64
Administrator
4 You will receive a confirmation message; click OK to remove the User Group.
5 Click Cancel to close the Remove a User Group window.
User Accounts
A User account is comprised of a User Name and Password, created for someone who will be
accessing the Shadow Tracker Professional program. Security permissions for a User account can
be defined specifically for each User, or the User may be assigned to a User Group, in which case
the User will inherit the User Group’s security permissions.
To create a user account:
1 In the Administrator window, select Tools > User Administration.
2 In the User Administration window, select the Add a User button.
3 In the Add a User window, select an Employee record from the drop-down list.
4 Enter a User Name next to Assigned User Name.
!
TIP: To assign the User to a User Group, double-click a User Group name to move it into the
Assigned User Groups column.
NOTE: User Group security permissions override individual User permissions.
5 Click the Create User button.
6 Click Close to close the Add a User window.
To define user security:
User permissions are defined by assigning rights to specific areas of program functionality.
1 In the Administrator window, select Tools > User Administration.
2 In the User Administration window, select the Set User Security button.
3 In the User Security window, select a User Name from the drop-down list.
Using Help | Contents | Index
64
Shadow Tracker ™ Professional
Premier Base - Help
USER ADMINISTRATION/SECURITY
Using Help | Contents | Index
65
Administrator
4 Click on a category in the Shadow Tracker Modules list.
The Rights available for the selected category will be displayed to the right as follows:
•
•
•
•
•
Add – allow a User to add new records to the database
Modify – allow a User to make changes to a record in the database
Delete – allow a User to delete records from the database
View – allow a User to view all records
Print – allow a User to send items to the printer
NOTE: By default, a User is given no rights for any category. Also, the rights available vary between
categories.
5 Select each category you wish to modify, and check each right you wish to allow the User
Group permission to access.
!
TIP: By placing a check in the Administrator checkbox, you can allow a User full control and access
to all program functionality.
6 When you are finished, click the Close button.
The next time the User accesses the program the permissions will be applied.
To add a user to a user group:
1 In the Administrator window, select Tools > User Administration.
2 In the User Administration window, select the Modify a User button.
3 In the Modify a User window, select an Employee from the drop-down list, and doubleclick a User Group name to move it to the Assigned User Groups column.
4 Click the Submit Changes button.
5 Click Close to close the Modify a User window.
To remove a user from a user group:
1 In the Administrator window, select Tools > User Administration.
Using Help | Contents | Index
65
Shadow Tracker ™ Professional
Premier Base - Help
USER ADMINISTRATION/SECURITY
Using Help | Contents | Index
66
Administrator
2 In the User Administration window, select the Modify a User button.
3 In the Modify a User window, double-click the User Group name listed in the Assigned
User Groups column to remove it.
4 Click the Submit Changes button.
5 Click Close to close the Modify a User window.
To remove a user:
1 In the Administrator window, select Tools > User Administration.
2 In the User Administration window, select the Remove a User button.
3 In the Remove a User window, select a User from the drop-down list and click the
Remove User button.
4 You will receive a confirmation message; click Yes to remove the User.
5 Click Close to close the Remove a User Group window.
Changing User Names and Passwords
User’s not assigned Administrator status, are able to change their User Name and/or Password in
the Shadow Tracker program. The Administrator is able to change a User Name or Password as
needed. By default, whenever a new User is created, a password identical to the User Name, is
automatically generated and registered in the System.
To change a user’s user name:
1 In the Administrator window, select Tools > User Administration.
2 In the User Administration window, select the Set User Security button.
3 Select a User Name from the drop-down list.
4 Click the Change button.
5 In the User Name / Password window, enter the new User Name and click OK.
Using Help | Contents | Index
66
Shadow Tracker ™ Professional
Premier Base - Help
USER ADMINISTRATION/SECURITY
Using Help | Contents | Index
67
Administrator
To change a user’s password:
1 In the Administrator window, select Tools > User Administration.
2 In the User Administration window, select the Set User Security button.
3 Select the User Name from the drop-down list.
4 Click the Password button.
5 In the User Name / Password window, enter and confirm the new password. Click OK.
Using Help | Contents | Index
67
Shadow Tracker ™ Professional
Premier Base - Help
FILE VIEWER / SCHEDULER
Using Help | Contents | Index
68
Administrator
FILE VIEWER / SCHEDULER
The File Viewer / Scheduler is used to regulate the activity of the Wireless Grabber and Data
Processor programs. The File Viewer / Scheduler window is divided into two areas, Data
Download and Data Processing.
Data Download and Data Processing each have three possible settings; Continual, Timed and On
Demand.
• Continual - enables the program to execute, approximately, every 60 seconds.
• Timed – allows the program to execute at a specific time or time interval.
• On Demand – restricts a programs’ execution until specifically requested.
Data Download
Data Download is used to regulate how often the Wireless Grabber program connects to the Premier
Base Radio to check for downloaded GPS data files. If any GPS data files are present, the Wireless
Grabber program will transfer them from the Premier Base Radio to the computer for final processing
with the Data Processor program.
To adjust data download settings:
1 In the Administrator window, select Tools > File Viewer / Scheduler
2 In the File Viewer / Scheduler window, under Data Download, select either the
Continual, Timed or On Demand radio button.
• If Timed is selected, choose a predetermined time-interval from the drop-down list or
select Daily. If in turn Daily is selected, enter the specific time in the Time: space using
the 24-hour military format.
3 Click Close to close the File Viewer / Scheduler window.
Using Help | Contents | Index
68
Shadow Tracker ™ Professional
Premier Base - Help
FILE VIEWER / SCHEDULER
Using Help | Contents | Index
69
Administrator
Data Processing
Data Processing is used to control when the Data Processor program will process GPS data files
into the database.
To adjust data processing settings:
1 In the Administrator window, select Tools > File Viewer / Scheduler
2 In the File Viewer / Scheduler window, under Data Processing, select either the
Continual, Timed or On Demand radio button.
• If Timed is selected, choose a predetermined time-interval from the drop-down list or
select Daily. If in turn Daily is selected, enter the specific time in the Time: space using
the 24-hour military format.
3 Click Close to close the File Viewer / Scheduler window.
NOTE: Selecting the Continual setting for Data Processing allows GPS files to be processed
immediately after download.
Using Help | Contents | Index
69
Shadow Tracker ™ Professional
Premier Base - Help
TROUBLESHOOTING
Using Help | Contents | Index
70
Administrator
GPS Data Collection
Minimum requirements for Shadow Tracker Premier Unit mounted in vehicle.
1 Constant 12 volt DC power to the RED wire. This can be verified by looking at the LED
lights on the front of the Unit. Are any LED’s lit?
2 GPS satellite signal acquisition. This can be verified by looking at the GPS LED. The
LED will be RED when the Unit has not acquired a signal, and it will be GREEN when the
Unit has acquired a signal. If the GPS LED is RED, check the location of the GPS antenna
on the vehicle, try moving it to another location. Keep in mind that when first powered
on, the Unit may take up to 15 minutes to acquire a GPS satellite signal.
3 Switched ignition power to the BLUE reference wire. This can be verified by connecting
the direct connect harness to the Harness Tester, and verifying the RED LED is on when
the vehicle’s ignition is on and the vehicle is running.
NOTE: Some vehicle circuits are on timers, meaning they will supply power for a time, and then
remove power. On problem vehicles, we recommend actually driving the vehicle for at least two
minutes, while monitoring the LED lights on the Harness Tester.
4 Vehicle speed must be above 6 miles per hour. This minimum speed is adjustable, but
this should only be a concern on vehicles such as street sweepers or other slow moving
vehicles. Contact ATTI Technical Support for help if you must adjust this setting.
GPS Data Transmission
Minimum requirements from the Shadow Tracker Premier Unit to the Premier Base.
1 The Shadow Tracker Premier Tracking Unit must simply be able to connect wirelessly
with the Premier Base. If the Tracking Unit contains Historical data and a radio link can
be made between the Tracking Unit and the Premier Base, it will download.
To determine if a radio link is currently possible, the Premier Base can be put into monitor mode.
This is done by running the PBase Activity Monitor Utility program, which can be found at: C:\
Program Files\Strt\Inboundwire\PbasMon.exe.
While in monitor mode, note the Radio ID numbers displayed on screen in the PBase Activity
Monitor program window. If the Radio ID is followed by wireless error, then the Premier Base
is not currently able to connect wirelessly with the Tracking Unit. Try moving the Tracking Unit
closer to the Premier Base.
Using Help | Contents | Index
70
Shadow Tracker ™ Professional
Premier Base - Help
Using Help | Contents | Index
TROUBLESHOOTING
71
Administrator
If the Radio ID number of the Tracking Unit still does not appear in the PBase Activity Monitor
program screen, then the Premier Base may not be configured to search for the correct
number of Tracking Units.
The Premier Base can search for up to thirty Radio ID’s beyond it’s own.
EXAMPLE: If the Premier Base Radio ID is 9000001 it will search for the next sequential Radio
ID of 9000002 and so on, up to 9000031. To save download time, the Premier Base can be
configured to search for a limited number of Radio ID’s.
To adjust the number of Radio ID’s the Premier Base will search for, see Base Radio Configuration.
The current setting will be displayed next to Number of Units. This setting should match the
number of Tracking Units that you have. If you change this setting, it will only be updated in
the Premier Base after the PbasWcfg.exe program is run. The PbasWcfg program is used to
configure the Premier Base. This program is executed automatically whenever you make
changes to the Base Radio Configuration and click the Set Base Configuration button. The
PbasWcfg program can also be found in the InboundWire folder.
Data Flow
The Premier Base wirelessly downloads and stores the Historical data from the Shadow Tracker
Premier Units independently, without the need for a computer. The Historical data remains in
non-volatile memory in the Premier Base until a download is requested by the Shadow Tracker
Professional software program.
When a download is either requested or scheduled from the Premier Base, the Wireless Grabber
executes the PBase Data Extractor program, which handles the communications and data
transfer between the Computer and the Premier Base.
The PBase Data Extractor program downloads the data from the Premier Base and writes a
binary file for each Unit, with a .BIN extension, into the InboundWire folder, then the Premier
Base is erased. The binary file is then decompressed into a text file, with a .GPS extension, which
is placed into the same InboundWire folder.
After this GPS file is written the PBase Data Extractor program will close and the Wireless
Grabber program will pickup the file and run it against several validation checks for data integrity.
If the GPS file passes the validation checks it is replicated and placed into the Processing folder
with a .FP and .GPP extension. Once the files are placed into the Processing folder and the Data
Processor program is requested to Process Files, it picks up the file and processes it line by line
into the database.
If either the Wireless Grabber or Data Processor programs encounter a problem with the file it will
be moved to the Unprocessed folder and an error will be written into the database for this file.
Using Help | Contents | Index
71
Shadow Tracker ™ Professional
Premier Base - Help
TROUBLESHOOTING
Using Help | Contents | Index
72
Administrator
Unprocessed GPS Files
If you are seeing downloads from certain Shadow Tracker 2000 Unit’s in the Premier Base Extractor
program, signified by exclamation points building across the Premier Base Extractor program
window, but are not able to view Historical data for that vehicle, then it may be that the files have been
placed in the Unprocessed folder. Unprocessed files can be viewed in the Administrator program. By
clicking on the file name in the Unprocessed Downloads list, a message will display the reason why
the file did not process. The three most common reasons that a file does not process successfully are:
• The file contains no GPS data to process.
• The Tracking Unit has not been validated or added to the database.
• The Tracking Unit is not associated with a Vehicle Issue Record.
Contact ATTI Technical Support for help with identifying the cause of download errors. Once
the cause of the download error is identified, and the problem corrected, you can click on the
file name in the Unprocessed Downloads list, and click Re-Submit File. The file will be placed
back into the Processing folder where the Data Processor program will attempt to process the
file again. If the problem was corrected prior to resubmitting, the file will be processed into the
database, and upon completion the vehicles data will be available for viewing.
If these steps are not clear to you or you have any questions please contact ATTI Technical Support for help.
Tracking Units
Problem:
Tracking Unit LED will not turn on.
Solution:
• Make sure the DC Power Adapter is properly connected to the Tracking Unit.
• Make sure the DC Power Adapter is properly connected into the power port or cigarette
lighter socket in the vehicle.
• Check the fuse for the power port or cigarette lighter socket in the vehicle’s fuse box.
• If you are using a Direct Connect cable, make sure the in-line fuse is properly seated
and/or has not blown.
Problem:
Tracking Unit LED will not turn green. (Unable to obtain GPS acquisition)
Solution:
• Check GPS Antenna connection.
• Make sure the GPS Antenna cable is not crimped or cut.
• Reposition the antenna.
Using Help | Contents | Index
72
Shadow Tracker ™ Professional
Premier Base - Help
TROUBLESHOOTING
Using Help | Contents | Index
73
Administrator
Historical Track Display
GPS limitations
Upon viewing a Historical Track plotted on your map, you may notice a slight inaccuracy in
coordinate identification known as wandering. This inaccuracy is due to atmospheric conditions
and/or other irregularities. This can occur when the Tracking Unit has GPS acquisition, but remains
stationary for an extended period of time. While in motion, accuracy is within approximately 60
meters.
Wandering can be determined whenever movement is indicated in the Track within a 100meter circumference, but it is apparent that the Tracking Unit was motionless. Testing indicates
that wandering is more noticeable when the Tracking Unit is static for long periods of time. In
addition, the GPS navigation signal may be periodically unreliable due to circumstances beyond
our control
Lost acquisition of a GPS signal can also be a cause for inaccurate data. Lost acquisition usually
displays as:
• A straight line drawn between two points that show as GPS stops.
• Tracks that obviously does not follow the roadway.
• Stops are an average of less than two-minute intervals.
Another way to determine lost acquisition is if a route shows no Track between two points. The
Track cannot be displayed if the coordinates are not consistent with the route.
NOTE: Upon viewing the Tracks, if you notice that the travel times are not accurate you should check
the system time on your computer to make sure that it is set for the appropriate time zone.
Technical Support
If you encounter any other problems, please contact ATTI Technical Support.
Technical Support is available Monday – Friday from 8AM – 5PM Central Time*
Tech:
Fax:
E-mail:
(713) 353-6020
(713) 353-6045
[email protected]
* Hours subject to change without notice.
Using Help | Contents | Index
73
Shadow Tracker ™ Professional
Premier Base - Help
Using Help | Contents | Index
PREMIER BASE EXTRACTOR
74
PREMIER BASE EXTRACTOR
The Premier Base Extractor program is used to transfer GPS data files from the Premier Base
Radio to the computer for final processing by the Data Processor program. The Premier Base
Extractor is regulated by the Wireless Grabber program, and is automatically executed whenever
the Wireless Grabber initiates a data download sequence. See Data Download.
When the download sequence is initiated, the Premier Base Extractor window will open as
it attempts to establish a connection with the Premier Base Radio. A GPS data file download is
signified by exclamation points building across the Premier Base Extractor program window.
Each exclamation point represents 512 bytes of data transmitted.
When all of the GPS data files have been transfered from the Premier Base Radio to the computer
the download sequence is complete, and the Premier Base Extractor will automatically be
closed.
Using Help | Contents | Index
74
Shadow Tracker ™ Professional
Premier Base - Help
Using Help | Contents | Index
WIRELESS GRABBER
75
WIRELESS GRABBER
The Wireless Grabber program is used to manage and monitor the processes involved in
transfering GPS data from the Premier Base Radio to the computer for final processing. See
Data Flow.
The Wireless Grabber can be used to download the Premier Base Radio manually on an as needed
basis, or it can be scheduled to download automatically. In either case, the Wireless Grabber
is used to initiate and manage the download. To schedule Wireless Grabber to download the
Premier Base Radio automatically, see File Viewer / Scheduler.
By default the Wireless Grabber program is enabled to run in the background whenever your
computer is started. Whenever the program is running, the Wireless Grabber icon will be visible
in the bottom right portion the Windows Desktop taskbar.
As well as managing the download process Wireless Grabber performs several validation checks
on the downloaded GPS data files to ensure data integrity. If the GPS file passes the validation
checks, it is replicated and placed into the Processing folder. If the GPS file does not pass the
validation check, it is placed into the Unprocessed folder. See Unprocessed Downloads.
To start wireless grabber:
1 From the Windows desktop, click Start > Programs > Shadow Tracker Professional >
Wireless Grabber.
The Wireless Grabber icon will appear in the bottom right portion the Windows Desktop
To close wireless grabber:
1 From the Windows desktop, click the Wireless Grabber icon.
2 Left-click inside the Wireless Grabber window.
3 Click Exit.
To display the wireless grabber window:
1 From the Windows desktop, click the Wireless Grabber icon.
2 Left-click inside the Wireless Grabber window.
3 Click Restore.
The Wireless Grabber program window will be displayed and enable you to monitor activity.
Using Help | Contents | Index
75
Shadow Tracker ™ Professional
Premier Base - Help
WIRELESS GRABBER
Using Help | Contents | Index
76
To clear wireless grabber messages:
1 From the Windows desktop, click the Wireless Grabber icon.
2 Left-click inside the Wireless Grabber window.
3 Select Clear Messages.
To manually initiate a download:
1 From the Windows desktop, click the Wireless Grabber icon.
2 Left-click inside the Wireless Grabber window.
3 Select Download.
To check the premier base radio memory:
1 From the Windows desktop, click the Wireless Grabber icon.
2 Left-click inside the Wireless Grabber window.
3 Select Memory Check.
The amount of data currently stored on the Premier Base Radio will be displayed.
Using Help | Contents | Index
76
Shadow Tracker ™ Professional
Premier Base - Help
Using Help | Contents | Index
DATA PROCESSOR
77
DATA PROCESSOR
The Data Processor program is used to process GPS files into the database, and continually
monitors the Processing folder for files placed there by the Wireless Grabber program. When
files will be processed, is determined by the settings for Data Processing, which are located in the
File Viewer / Scheduler. The Data Processor can be set to process GPS data files manually, on
an as needed basis, or scheduled to process files at a specific time. The Data Processor can even
be confiqured to process files immediately, whenever a file is placed into the Processing folder. For
information on how to adjust these settings, see File Viewer / Scheduler.
The Data Processor window allows you view the number of Historical and RealTime GPS data
files waiting to be processed into the database as well as any files that have been placed into the
Unprocessed folder. When files are processed the Data Procesor picks up the file and processes
it line by line into the database. During processing, the files name is displayed in the lower portion
on the Data Processor window along with a status bar which increments from left to right
indicating processing progress. If the Data Procesor encounters a problem with the file, it will
be placed into the Unprocessed folder, and an error will be written into the database for the file.
See Unprocessed Downloads.
By default the Data Procesor program is enabled to run in the background whenever your
computer is started. Whenever the program is running, the Data Procesor icon will be visible in
the bottom right portion the Windows Desktop taskbar.
To start data processor:
1 From the Windows desktop, click Start > Programs > Shadow Tracker Professional
> Data Processor.
The Data Processor icon will appear in the bottom right portion the Windows Desktop
To close data processor:
1 On the Base Computer, from the Windows desktop, click the Data Processor icon.
2 Left-click inside the Data Processor window.
3 Click Exit.
Using Help | Contents | Index
77
Shadow Tracker ™ Professional
Premier Base - Help
Using Help | Contents | Index
DATA PROCESSOR
78
To display the data processor window:
1 From the Windows desktop, click the Data Processor icon.
2 Left-click inside the Data Processor window.
3 Click Restore.
To clear messages from data processor:
1 From the Windows desktop, click the Data Processor icon.
2 Left-click inside the Data Processor window.
3 Click Clear Messages.
To process data:
1 From the Windows desktop, click the Data Processor icon.
2 Left-click inside the Data Processor window.
3 Click Process Data.
Using Help | Contents | Index
78
Shadow Tracker ™ Professional
Premier Base - Help
Using Help | Contents | Index
PREMIER BASE RADIO
79
Premier Base Radio
The Premier Base Radio unit is designed to communicate with, and download GPS data from your
Shadow Tracker Premier Tracking Units. Whenever a Tracking Unit comes within range of the
Premier Base Radio a download sequence is initiated. As long as radio contact is uniterrupted, the
Tracking Unit’s GPS data is downloaded and stored on the Premier Base Radio. This is refered to
as a wireless-download. Once the data is safely downloaded and stored, the Premier Base radio will
automatically erase the Tracking Unit memory and it will be ready to begin collecting more GPS data.
All GPS data is stored on the Premier Base Radio until it is downloaded by the Wireless Grabber
program.
Front Panel LED’s
PC
RED: Premier Base is receiving data without the aid of a computer.
GREEN: Premier Base is connected to a computer and downloading data into the software.
Mobile
OFF: Listening for Shadow Tracker Premier Tracking Units.
BLINKING: Extracting data from Tracking Unit.
Mem
RED: Indicates that the Premier Base memory is full.
GREEN: Operating normally.
Mode
RED: Premier Base is in Update mode.
GREEN: Operating normally.
Using Help | Contents | Index
79
Shadow Tracker ™ Professional
Premier Base - Help
PREMIER BASE RADIO
Using Help | Contents | Index
80
Connections
Firmware
update
button
Radio antenna
Serial
Connection
Power
Specifications
Length
Width
Height
Weight
Transmission Rate
Peak Current
Memory
Wireless Data Download Rate
A/C Adapter
Input
Output
7.3 inches
5.0 inches
1.6 inches
12 ounces
902-908 mHZ
350mA
8 MB/800 travel hours maximum
115200 baud
120V AC 60Hz 9W
12V DC 500mA
Features
•
•
•
•
Automatic Historical data download
Supports up to 30 vehicles
Cost effective
Shadow Tracker Professional software supported
Using Help | Contents | Index
80
Shadow Tracker ™ Professional
Premier Base - Help
PREMIER BASE RADIO
Using Help | Contents | Index
81
Premier Base Accessories
AC Power Supply
PN# A-40103
RS-232 cable
PN# G-40120
Radio Antenna
PN# G-39271
NOTE: Depending on your specific needs, ATTI offers a variety of antenna packages and options
that may increase or improve your coverage area.
For more information contact ATTI Sales.
Using Help | Contents | Index
81
Shadow Tracker ™ Professional
Premier Base - Help
PREMIER BASE RADIO
Using Help | Contents | Index
82
Connecting the Premier Base
To connect the Premier Base to the Computer:
1 Connect the Dipole Radio Antenna (PN# G-39271) into the back of the Premier Base at
the connection marked Ant. Tighten securely.
2 Connect the appropriate end of the 6 ft. RS-232 Serial Cable (PN# G-40120) to an open
9-pin serial connection on the computer. Tighten securely
Connect the other end to the connection marked Com on the back of the Premier Base.
Tighten securely.
3 Plug one end of the A/C Power Supply 12v (PN# A-40103) into a 120V wall socket.
Connect the other end to the connection marked Power on the back of the Premier Base.
When you first power up the Premier Base you will see the LED lights flicker ON and OFF.
This is a normal part of the start up cycle.
Using Help | Contents | Index
82
Shadow Tracker ™ Professional
Premier Base - Help
SHADOW TRACKER JR., J2, PRO AND PERFORMER
Using Help | Contents | Index
83
SHADOW TRACKER JR., J2, PRO AND PERFORMER
The Shadow Tracker Jr., j2, Pro and Performer Tracking Units are each compatible with your
Shadow Tracker Professional software program. They are designed to monitor and record the
travel activities of your vehicle’s by utilizing Global Positioning System (GPS) technology. GPS uses
a stationary system of satellites placed in orbit around the globe to calculate an objects position
anywhere on earth. This GPS system is maintained by the U.S. Department of Defense.
Each Tracking Unit is equipped with a GPS receiver and a memory module. By utilizing the
attached GPS antenna, the Unit’s GPS receiver is used to calculate the Tracking Unit’s exact GPS
coordinates at any given time. This GPS data is then stored in the Tracking Unit’s memory until
it is downloaded and processed using the Shadow Tracker Professional software. Each of these
tracking units is downloaded manually. See Manual Downloading and Processing
NOTE: Before GPS data can be processed, the Tracking Unit must be validated to the Shadow
Tracker Professional software.
Connections and Specifications
Each Shadow Tracker Jr., j2, Pro and Performer Tracking Unit has the following three connections:
• Power – used to connect the AC and DC Power Adapters. These adapters supply power
to the Unit while it is in the vehicle or is being downloaded to the computer.
• Data - used to connect the Tracking Unit to the computer using the Download/Validation
Cable. This connection is used for adding Tracking Units to the database, downloading
Tracking Units and monitoring a vehicle’s position in Real Time mode.
• GPS Antenna - used to connect the supplied GPS Antenna to the Tracking Unit.
To view the connections and specifications for a specific Tracking Unit, select the model name
from the list below.
•
•
•
•
Shadow
Shadow
Shadow
Shadow
Tracker
Tracker
Tracker
Tracker
Jr.
j2
Pro
Performer
Using Help | Contents | Index
83
Shadow Tracker ™ Professional
Premier Base - Help
SHADOW TRACKER JR., J2, PRO AND PERFORMER
Using Help | Contents | Index
84
Shadow Tracker Jr.
Connections
GPS antenna
Data
Power
GPS acquistion / Power LED
Specifications
Height:
Width:
Length:
Weight:
Tracking Unit
GPS Antenna
DC power cord
Current draw :
Allowable voltage range:
Normal operating voltage:
Data download rate:
On board memory:
Operating temperature range:
Approximate data storage time:
*
0.98 in.
2.00 in.
3.38 in.
2.8 oz
2.6 oz.
1.8 oz
120ma @ 12v
9v to 18v DC
12v DC
115K Baud
512k
-20 to 70 C
300 Hrs.
Using a 120 second GPS collection rate. See GPS
Using Help | Contents | Index
Collection Rate for details on adjusting this setting.
84
Shadow Tracker ™ Professional
Premier Base - Help
SHADOW TRACKER JR., J2, PRO AND PERFORMER
Using Help | Contents | Index
85
Shadow Tracker j2
Connections
GPS antenna
Data - USB
Power
GPS acquistion / Power LED
Specifications
Height:
Width:
Length:
Weight:
Tracking Unit
GPS Antenna
DC power cord
Current draw:
Allowable voltage range:
Normal operating voltage:
Data download rate:
On board memory:
Operating temperature range:
Approximate data storage time:
Supported Operating Systems:
*
0.60 in.
2.00 in.
3.00 in.
1.4 oz
2.6 oz.
1.8 oz
75ma @ 12v
3.6v to 18v DC
12v DC
921 Kbs
512k
-20 to 70 C
360 Hours*
Windows 2000, Windows XP, and Windows Server 2003
Using a 120 second GPS collection rate. See GPS
Using Help | Contents | Index
Collection Rate for details on adjusting this setting.
85
Shadow Tracker ™ Professional
Premier Base - Help
SHADOW TRACKER JR., J2, PRO AND PERFORMER
Using Help | Contents | Index
86
Shadow Tracker Pro
Connections
Ignition connector
GPS antenna
Data
Power
GPS acquistion / Power LED
Specifications
Height:
Width:
Length:
Weight:
Tracking Unit
GPS Antenna
DC power cord
Current draw :
Allowable voltage range:
Normal operating voltage:
Data download rate:
On board memory:
Operating temperature range:
Approximate data storage time:
*
0.98 in.
2.00 in.
3.38 in.
2.8 oz
2.6 oz.
1.8 oz
120ma @ 12v
9v to 18v DC
12v DC
115K Baud
2 MB
-40 to 70 C
1200 Hrs.
Using a 120 second GPS collection rate. See GPS
Using Help | Contents | Index
Collection Rate for details on adjusting this setting.
86
Shadow Tracker ™ Professional
Premier Base - Help
SHADOW TRACKER JR., J2, PRO AND PERFORMER
Using Help | Contents | Index
87
Shadow Tracker Performer
Connections
GPS acquistion / Power LED
Power
GPS antenna
Data
Specifications
Height:
Width:
Length:
Weight:
Tracking Unit
GPS Antenna
DC power cord
Current draw :
Allowable voltage range:
Normal operating voltage:
Data download rate:
On board memory:
Operating temperature range:
Approximate data storage time:
*
1.15 in.
3.4 in.
6.1 in.
2.8 oz
2.6 oz.
1.8 oz
100ma @ 12v
9v to 18v DC
12v DC
115K Baud
1 MB
-40 to 70 C
600 Hrs.
Using a 120 second GPS collection rate. See GPS
Using Help | Contents | Index
Collection Rate for details on adjusting this setting.
87
Shadow Tracker ™ Professional
Premier Base - Help
SHADOW TRACKER JR., J2, PRO AND PERFORMER
Using Help | Contents | Index
88
Understanding the Status LED’s
Shadow Tracker Jr., Pro, and Performer
• When the Units are first powered on the status LED will be solid RED.
• Once GPS acquisition is achieved, the LED will change to solid GREEN.
• If the Unit’s memory becomes full, the LED will display a slow-blinking RED and GPS
recording will stop.
Shadow Tracker j2
• When the Unit is first powered on, the status LED will alternately blink RED and
GREEN as the Unit conducts a series of self tests. When testing is completed, the LED
will change to a slow-blinking RED as the Unit attempts to achieve GPS acquistion.
• Once GPS acquisition is achieved, the status LED will display a slow-blinking GREEN
whenever the vehicle is stopped, and a solid GREEN when the vehicle is in motion.
• If the Unit’s memory becomes full, the LED will change to a fast-blinking RED and GPS
recording will stop.
Using Help | Contents | Index
88
Shadow Tracker ™ Professional
Premier Base - Help
SHADOW TRACKER JR., J2, PRO AND PERFORMER
Using Help | Contents | Index
89
Tracking Unit Accessories
AC Power Supply
Shadow Tracker Jr., j2, and Pro
PN# A-40104
Shadow Tracker Performer
PN# A-40103
Using Help | Contents | Index
89
Shadow Tracker ™ Professional
Premier Base - Help
SHADOW TRACKER JR., J2, PRO AND PERFORMER
Using Help | Contents | Index
90
DC Power Adapter
Shadow Tracker Jr., j2, and Pro
PN# A-40105
Shadow Tracker Performer
PN# A-40102
Using Help | Contents | Index
90
Shadow Tracker ™ Professional
Premier Base - Help
SHADOW TRACKER JR., J2, PRO AND PERFORMER
Using Help | Contents | Index
91
Power Up - Backup Battery (optional)
Battery Connect cable
Power
Power LED
PN# ASM-000043-01
NOTE: The Power Up Backup Battery can be used only with the j2 Tracking Unit.
Power Up - battery connect cable
PN# A-40116
Power Up - clamp shell
PN# ZSM-70300
Using Help | Contents | Index
91
Shadow Tracker ™ Professional
Premier Base - Help
SHADOW TRACKER JR., J2, PRO AND PERFORMER
Using Help | Contents | Index
92
DC Direct-Connect Cable - (optional)
Installation instructions
Shadow Tracker Jr., j2, and Pro
PN# A-40254
Shadow Tracker Performer
PN# A-40286
Using Help | Contents | Index
92
Shadow Tracker ™ Professional
Premier Base - Help
SHADOW TRACKER JR., J2, PRO AND PERFORMER
Using Help | Contents | Index
93
Download/ Validation Cable
Shadow Tracker Jr. and Pro
PN# D-38014
Shadow Tracker Performer
PN# D-38105
Using Help | Contents | Index
93
Shadow Tracker ™ Professional
Premier Base - Help
SHADOW TRACKER JR., J2, PRO AND PERFORMER
Using Help | Contents | Index
94
Download/Validation cable
Shadow Tracker j2
PN# A-40117
NOTE: The USB connection type can be used only with the j2 Tracking Unit.
GPS Antenna
PN# G-39112
Using Help | Contents | Index
94
Shadow Tracker ™ Professional
Premier Base - Help
SHADOW TRACKER JR., J2, PRO AND PERFORMER
Using Help | Contents | Index
95
Connecting a Tracking Unit to the Computer
There are 3 scenarios that require the Tracking Unit to be connected to the computer;
• Validating a Tracking Unit to the Shadow Tracker Professional software
• Downloading GPS data for processing
• Adjusting a Tracking Unit’s GPS collection rate
In order for the Tracking Unit to communicate with the Shadow Tracker Professional program on
your computer, it must be connected to a power supply. Whenever the Unit is connected to the
computer, it is to be powered using the AC Power Adapter supplied with the Unit. Do not use an
AC Power Adapter other than the one supplied by ATTI.
To connect a tracking unit to the computer:
Shadow Tracker Jr., Pro, Performer
1 Plug the AC Power Adapter into a standard 120 Volt AC wall outlet.
2 Connect the other end into the power connection labeled
, located on the side of
the Tracking Unit. The status LED on the front of the Unit will turn RED.
3 Connect the Download/Validation Cable to a standard 9-pin serial COM Port connection
on the computer. Then connect the other end into the connection labeled “DATA” ,
located on the side of the Tracking Unit.
Shadow Tracker j2
Connect the Download/Validation Cable to a USB Port connection on the computer. Then
connect the other end into the connection labeled “USB”, located on the side of the Tracking
Unit.
NOTE: Do not connect any other cable or device to the DATA connector on the Tracking Unit or
damage will result. If you cannot locate a Serial COM or USB Port connection on your computer
you should consult your computer retailer or manufacturer for assistance.
Using Help | Contents | Index
95
Shadow Tracker ™ Professional
Premier Base - Help
SHADOW TRACKER JR., J2, PRO AND PERFORMER
Using Help | Contents | Index
96
Connecting the Shadow Tracker j2 for the first time:
Whenever a Shadow Tracker j2 Tracking Unit is connected to the computer for the first time, the
Found New Hardware Wizard utility will automatically open. Follow the instructions for your
operating system to install the device and software drivers.
Windows 2000
Windows will automatically find and install the device and software drivers.
Windows XP
1 In the Found New Hardware Wizard window, when prompted, “Can Windows connect
to Windows Update to search for software?”, select “No, not this time” and click Next.
2 When prompted, “What do you want the wizard to do?”, select “Install the software
automatically (Recommended)” and click Next.
3 Click Finish to close the wizard.
4 When the Found New Hardware Wizard window appears the second time, repeat
steps 1-3 to complete the installation.
NOTE: In Windows XP, the first Hardware Wizard installs the Shadow Tracker j2’s hardware
device drivers, the second installs the software drivers.
Using Help | Contents | Index
96
Shadow Tracker ™ Professional
Premier Base - Help
SHADOW TRACKER JR., J2, PRO AND PERFORMER
Using Help | Contents | Index
97
Connecting a Tracking Unit in a Vehicle
Mounting and Placement
The Shadow Tracker Tracking Units are not weather-proof, and are to be mounted inside the
vehicle’s passenger compartment. The recommended placement location is under the dashboard
or in the glove compartment, but the Unit may be placed anywhere inside the vehicles passenger
compartment, as long as it is kept out of direct sunlight.
GPS Antenna Placement
The GPS Antenna requires an unobstructed view of the sky to obtain GPS satellite acquisition;
therefore, antenna placement is critical to achieve consistent performance. The GPS Antenna
supplied with your Tracking Unit is equipped with a magnetic mount.
Recommended placement for the GPS Antenna is on top of the vehicle, with a clear view of the
sky. You may choose to mount the antenna out of sight. Keep in mind that the antenna will obtain a
stronger, less disrupted signal, if it is mounted under plastic or glass rather than covered by metal.
Wherever you decide to mount the antenna, you must make sure that the Unit is able to acquire
an adequate GPS signal from the satellites. After installing the Unit, monitor the status LED light
on the front of the Tracking Unit to determine whether you have GPS acquisition.
NOTE: Be aware, if the Unit has been powered off for 12 hours or more, it may take up to 5
minutes, from the time the GPS Antenna is connected and the Unit is powered on, for the Unit to
obtain GPS acquisition. If it takes longer than 5 minutes to acquire a signal, the antenna should be
moved to a more suitable location. Experiment to find the best location. This will help to ensure
accurate and uninterrupted GPS data collection.
To connect the GPS antenna:
Connect the antenna to the connection labeled “ANTENNA” or “ANT.”; located on the side
of the Tracking Unit.
IMPORTANT: Be careful not to bend the antenna connector when connecting or disconnecting the
GPS Antenna from the Tracking Unit. Also, do not connect a GPS Antenna, other than the one
supplied by ATTI, or damage to the Tracking Unit and/or antenna will result.
Using Help | Contents | Index
97
Shadow Tracker ™ Professional
Premier Base - Help
SHADOW TRACKER JR., J2, PRO AND PERFORMER
Using Help | Contents | Index
98
Connecting Power
The Shadow Tracker Tracking Unit must remain connected to a continuous power supply during
vehicle movement for accurate GPS collection and storage. The battery on the vehicle serves as the
power source for the Tracking Unit. However, if a Unit is left on for an extended period in which
the vehicle is not running, the Unit may drain the vehicle battery to the point that the vehicle cannot
be started.
DC Power Adapter
To connect the DC power adapter:
Shadow Tracker Jr., Pro, Performer
1 Plug the DC Power Adapter into a 12-volt power port or cigarette lighter socket in the
vehicle.
2 Plug the other end into the power connection labeled
Tracking Unit. The LED on the front of the Unit will turn RED.
, located on the side of the
Shadow Tracker j2
1 Plug the DC Power Adapter into a 12-volt power port or cigarette lighter socket in the
vehicle.
2 Plug the other end into the power connection labeled “P.I.”, located on the back of the
Tracking Unit. The LED on the front of the Unit will turn RED.
IMPORTANT: The Unit should only be connected to a ‘12-volt center positive’ power port. Damage
to the Unit will result if connected to a reversed polarity or higher voltage outlet. If you are unsure
whether the power outlet is ‘12-volt center positive’, do not connect the Shadow Tracker Unit at
this time. Refer to the vehicle’s owner manual or have the outlet checked by a local automotive
electronics expert before making the connection.
NOTE: If the Unit does not successfully power up, refer to the trouble shooting section of the help
files. The Unit’s power cable should be unplugged when left for extended periods of time.
Shadow Tracker Pro Ignition Cable
The Shadow Tracker Pro Tracking Unit is equipped with an ignition sensor, which enables the
recording of a vehicle’s ignition activity. As an added feature, GPS data recording occurs only
when the vehicles ignition is turned on.
Using Help | Contents | Index
98
Shadow Tracker ™ Professional
Premier Base - Help
SHADOW TRACKER JR., J2, PRO AND PERFORMER
Using Help | Contents | Index
99
To connect the ignition cable:
1 Connect the Ignition Cable into the Ignition Cable connector on the Tracking Unit. The
Ignition Cable connector is the 3” wire protruding from the back of the Unit.
2 Next, connect the Ignition Cable’s RED wire into the vehicles ignition system.
IMPORTANT: To work properly, Step 2 must be made at a place where active voltage is on only
when the ignition is on.
DC Direct Connect Cable
Instead of using the DC Power Adapter, you might prefer to have the Tracking Unit connected
directly to the vehicle’s power supply. If this is the case, an optional DC Direct-Connect Cable
is available. Installing a Direct Connect Cable is referred to as hardwiring. Hardwiring eliminates
the possibility of GPS data not being collected due to a loose DC Power Adapter connection, or
because an employee simply forgets to plug the adapter in.
To install the direct connect cable:
Shadow Tracker Jr., Pro, Performer
1 Connect the DC Direct-Connect Cable’s BLACK w/
positive power source.
stripe wire to a 12-volt
IMPORTANT: This connection must be made at a place where power is supplied even when the
vehicle is turned off.
2 Connect the cable’s remaining black wire to a ground source.
3 Connect the other end of the DC Direct Connect Cable into the power connection labeled
, located on the side of the Tracking Unit.
Shadow Tracker j2
1 Connect the DC Direct-Connect Cable’s BLACK w/
positive power source.
stripe wire to a 12-volt
IMPORTANT: This connection must be made at a place where power is supplied even when the
vehicle is turned off.
Using Help | Contents | Index
99
Shadow Tracker ™ Professional
Premier Base - Help
SHADOW TRACKER JR., J2, PRO AND PERFORMER
Using Help | Contents | Index
100
2 Connect the cable’s remaining BLACK wire to a ground source.
3 Connect the other end of the DC Direct Connect Cable into the power connection labeled
“P.I.”, located on the back of the Tracking Unit.
Power Up - Backup Battery - (optional)
The Power Up is a battery equipped with a built in charger, designed for use with the Shadow
Tracker j2 Tracking Unit.. When connected, it simultaneously supplies power to the Tracking
Unit, and keeps itself recharged through the vehicle’s electrical system. The Power Up’s failsafe functionality is designed to supply backup power to the Tracking Unit whenever the primary
supply of power is disrupted.
For example: if the DC Direct-Connect Cable were to blow a fuse, or the DC Power Adapter
became disconnected, the Tracking Unit would normally stop GPS recording. But, connected to
the Power Up, the Tracking Unit would continue to recieve power, and GPS recording would be
uninterupted.
The PowerUp‘s battery is charged using the DC Direct-Connect Cable or the DC Power
Adapter. During normal operation the battery is charged whenever the vehicle is in motion, and
power is delivered to the Tracking Unit via the Battery Connect Cable. When fully charged, the
Power Up allows the Tracking Unit to operate for up to 28 hours, before re-charging.
When the Power Up is connected to a charging voltage, the status LED is GREEN when fully
charged, and GREEN/RED when charging.
NOTE: The Power Up battery is not shipped with a full charge. The battery can be fully charged
in approximately 4 hours using the optional AC Power Adapter, or once installed into a vehicle, the
battery will reach a full charge in approximately 5-7 hours, depending on vehicle motion.
To install the power up backup battery:
1 Connect a power source, either the DC Direct-Connect Cable or the DC Power Adapter,
into the vehicle
2 Assemble the Tracking Unit and the Power Up Unit together using the Power Up Clamp
Shell. See Figure 1
3 Plug the RED end of the Battery Connect Cable into the Power Up Unit at the connection
labeled “P.O.”.
Using Help | Contents | Index
100
Shadow Tracker ™ Professional
Premier Base - Help
SHADOW TRACKER JR., J2, PRO AND PERFORMER
Using Help | Contents | Index
101
4 Connect the GREEN end of the Battery Connect Cable into the Tracking Unit. at the
connection labeled “P.I.”.
5 Place and mount the GPS Antenna, then connect it to the Tracking Unit at the connection
labeled “ANT.”
6 Plug the remaining power source connector into the Power Up Unit at the connection
labeled “P.I.”.
7 Securely mount this assembly into the vehicle.
Tracking Unit
Clamp Shell
Power Up
Figure 1
Using Help | Contents | Index
101
Shadow Tracker ™ Professional
Premier Base - Help
SHADOW TRACKER JR., J2, PRO AND PERFORMER
Using Help | Contents | Index
102
Disconnecting a Tracking Unit from a Vehicle
Unless you are using the ATTI Tracker Extractor or Palm® Extractor utility programs, the
Tracking Unit must be disconnected from your vehicle in order for the GPS data to be downloaded
for processing. Once a Tracking Unit’s memory is full, it is unable to continue collecting and
recording GPS data, until it has been downloaded and the memory has been cleared. The memory
is cleared automatically after each download.
To disconnect the tracking unit:
1 Disconnect the DC Power Adapter from the Unit. If you have a Pro Tracking Unit, also
disconnect the Ignition Cable.
2 Disconnect the GPS Antenna.
The Unit can now be connected to your computer and downloaded into your Shadow Tracker
Lite software. After the GPS data has been downloaded, reconnect the Tracking Unit to the
vehicle to continue collecting data.
Safety and Care
Please follow these guidelines to ensure the safe and trouble-free operation of your Tracking
Unit(s).
Safety
•
•
•
•
•
•
•
•
•
•
•
Do not place the Unit near a heating device.
Do not place the Unit in direct sunlight.
Do not place anything heavy on the Unit.
Do not place where spills can occur on the Unit.
Do not subject the Unit to electrical shock.
Do not apply any physical pressure to the Unit.
Do not open or disassemble the Unit or any of its components.
Do not scratch, twist or push the surface of the LED.
Do not use the Unit when temperatures are below -40C / -40 F) or above 70C /158 F.
Use only the GPS antenna provided by ATTI.
Use only the AC or DC Power Adapter supplied with the Unit to avoid the risk of fire or
damage to the Unit.
Using Help | Contents | Index
102
Shadow Tracker ™ Professional
Premier Base - Help
SHADOW TRACKER JR., J2, PRO AND PERFORMER
Using Help | Contents | Index
103
Care
Occasionally the Shadow Tracker Unit may need to be cleaned. Use the following precautions.
To clean the tracking unit:
•
•
•
•
Use a soft cloth to wipe the exterior.
Do not use an alkaline detergent.
Do not use alcohol on the Unit case.
Avoid excessive moisture when cleaning the Unit.
Caring for the GPS Antenna:
• Do not crimp or cut the GPS Antenna Cable.
• Do not place heavy objects on the antenna.
• Do not pull on the antenna connections or connectors.
Federal Communications Commission (FCC) Notice
This equipment has been tested and found to comply with the limits for a Class A digital device,
pursuant to part 15 of the FCC Rules. These limits are designed to provide reasonable protection
against harmful interference when the equipment operates in a commercial environment.
This equipment generates, uses, and can radiate radio frequency energy and, if not installed
and used in accordance with the instruction manual, may cause harmful interference to radio
communications.
Operation of this equipment in a residential area is likely to cause harmful interference in which
case the user will be required to correct the interference at his own expense.
Only peripherals certified to comply with the Class A limits may be attached to this device.
Operation with non-certified peripherals or peripherals not recommended by Advanced Tracking
Technologies, Inc. are likely to result in interference to radio and television reception.
Properly shielded and grounded cables, and connectors must be used in order to meet FCC
emission limits.
ADVANCED TRACKING TECHNOLOGIES, INC. is not responsible for any radio or television
interference caused by using other than recommended cables and connectors or by unauthorized
changes or modifications to this equipment.
Using Help | Contents | Index
103
Shadow Tracker ™ Professional
Premier Base - Help
SHADOW TRACKER PREMIER
Using Help | Contents | Index
104
SHADOW TRACKER PREMIER
The Shadow Tracker Premier Tracking Unit is designed to monitor and record the travel activities
of your vehicles by utilizing Global Positioning System (GPS) technology. GPS uses a stationary
system of satellites placed in orbit around the globe to calculate an objects position anywhere on
earth. This GPS system is maintained by the U.S. Department of Defense.
Each Tracking Unit is equipped with a radio antenna, GPS receiver and a memory module. By
utilizing the attached GPS antenna, the Unit’s GPS receiver is used to calculate the Tracking
Unit’s exact GPS coordinates at any given time. This GPS data is then stored in the Tracking
Unit’s memory. When the Tracking Unit comes within range of the Premier Base Radio and
communication is established, the GPS data is automatically downloaded and processed into the
Shadow Tracker Professional database.
NOTE: The Shadow Tracker Premier Tracking Unit must be validated to the Shadow Tracker
Professional software, assigned to a Vehicle record and included in a Vehicle Issue record before
GPS data can be processed.
Connections and Specifications
Each Shadow Tracker Premier Tracking Unit has the following six connections:
• Power – used to connect the AC and DC Power Adapters. These adapters supply power to
the Unit while it is in the vehicle or is being downloaded to the computer.
• Data - used to connect the Tracking Unit to the computer using the Download/Validation
Cable.
• GPS Antenna - used to connect the supplied GPS Antenna.
• Serial 2 - used to connect to Time Traveler keypad or EVM Sensor Cable.
• Radio antenna - used to connect the supplied Radio Antenna.
• DGPS - not currently used.
Using Help | Contents | Index
104
Shadow Tracker ™ Professional
Premier Base - Help
SHADOW TRACKER PREMIER
Using Help | Contents | Index
105
Shadow Tracker Premier
Connections
Power/Transmit LED
GPS acquistion LED
Power
GPS antenna
Data
Specifications
Height:
1.23 in.
Width:
3.50 in.
Length:
6.18 in.
Weight:
Shadow TrackerPremier Unit
10.00 oz
Magnetic mount antenna for transceiver
12.40 oz
GPS Antenna
2.6 oz.
Current draw transmitting:
350ma @ 12v
Current draw receiving:
300ma @ 12v
Allowable voltage range:
9v to 18v DC
Normal operating voltage:
12v DC
Data download rate:
56K Baud
On board memory:
512K
Operating temperature range:
-20 to 70 C
Approximate data storage time:
1440 Hrs.
Line of Sight:*
Up to 1/2 mile
Frequency Range:
902-928 Mhz
*With unity gain omni-directional antenna. Ranges may be increased with varied antenna
configurations, terrain and antenna heights.
Using Help | Contents | Index
105
Shadow Tracker ™ Professional
Premier Base - Help
Using Help | Contents | Index
SHADOW TRACKER PREMIER
106
Tracking Unit Accessories
AC Power Supply
PN# A-40106
Download/ Validation cable
PN# D-38105
GPS Antenna
PN# G-39112
Using Help | Contents | Index
106
Shadow Tracker ™ Professional
Premier Base - Help
Using Help | Contents | Index
SHADOW TRACKER PREMIER
107
DC Direct-Connect Cable kit
Installation Instructions
PN# A-40266
Using Help | Contents | Index
107
Shadow Tracker ™ Professional
Premier Base - Help
SHADOW TRACKER PREMIER
Using Help | Contents | Index
108
Connecting a Shadow Tracker Premier to a Computer
In order for the Tracking Unit to communicate with the Shadow Tracker Professional program on
your computer, it must be connected to a power supply. Whenever the Unit is connected to the
computer, it is to be powered using the AC Power Adapter supplied with the Unit. Do not use an
AC Power Adapter other than the one supplied by ATTI.
To connect a Shadow Tracker Premier to the computer:
1 Plug the AC Power Adapter into a standard 120 Volt AC wall outlet.
2 Connect the other end of the AC Power Adapter into the power connector labeled Power,
located on the side or back of the Tracking Unit. The LED light on the front of the Unit
will turn RED.
3 Connect the Download/Validation Cable to a standard 9-pin serial COM Port connection
on the computer. Then connect the other end of the cable into the connector labeled
Terminal, located on the back of the Tracking Unit.
NOTE: Do not connect any other cable or device to the Terminal connector on the Tracking Unit
or damage will result. If you cannot locate a standard 9-pin serial COM Port connection on your
computer you should consult your computer retailer or manufacturer for assistance.
Using Help | Contents | Index
108
Shadow Tracker ™ Professional
Premier Base - Help
SHADOW TRACKER PREMIER
Using Help | Contents | Index
109
Connecting a Shadow Tracker Premier in a Vehicle
Mounting and Placement
The Shadow Tracker Premier Tracking Units are not weather-proof, and are to be mounted inside
the vehicle’s passenger compartment. The recommended placement location is under the
dashboard or in the glove compartment, but the Unit may be placed anywhere inside the vehicles
passenger compartment, as long as it is kept out of direct sunlight.
NOTE: The Shadow Tracker Premier comes equipped with an internal radio antenna
Connecting Power
The Tracking Unit must remain connected to a continuous power supply during vehicle movement
for accurate GPS collection and storage. The battery on the vehicle serves as the power source
for the Shadow Tracker Premier Unit. However, if a Unit is left on for an extended period in
which the vehicle is not running, the Unit may drain the vehicle battery to the point that the vehicle
cannot be started.
To install the DC Direct-Connect Cable:
1 Connect the RED wire to a constant 12-volt positive power source. This connection must
be made at a place where the Unit will have power even when the vehicle is turned off.
2 Connect the BLUE wire to a switched 12-volt positive power source. This connection
must be made at a place where the Unit will have power only when the vehicle is running,
and not when the vehicle is turned off. This tells the Shadow Tracker Premier Unit that the
vehicle is turned off, and that the vehicle is stopped.
If you can not locate a switched power source, then the BLUE wire must be connected to the
same constant power source as the RED wire.
NOTE: If the BLUE wire is connected to a continuous power source then the stop reporting may
not be as accurate. The BLUE wire must be connected to a power source, either constant or
switched, or the Tracking Unit will not collect GPS data.
3 Connect the BLACK wire to a 12-volt ground source.
IMPORTANT: Damage to the Unit will result if connected to a reversed polarity or higher voltage
connection. If you are unsure how to correctly make these connections, ATTI recommends having
the Tracking Unit installed by a local automotive electronics professional familiar with your vehicle.
Using Help | Contents | Index
109
Shadow Tracker ™ Professional
Premier Base - Help
SHADOW TRACKER PREMIER
Using Help | Contents | Index
110
Status Indicator LED’s
Once power is properly connected, the Power and GPS LED lights located on the front panel
of the Shadow Tracker Premier will illuminate. The Power LED will be RED when the Unit is
receiving power.
When the Unit is downloading the Transmit LED indicator will blink.
The GPS LED will be GREEN whenever the Tracking Unit has GPS satellite acquisition. The GPS
LED will be RED whenever satellites are not visible, and the Unit is unable to successfully pinpoint
it’s position. If this occurs on a regular basis you may need to reposition the GPS Antenna.
Upon the initial power up, or after extended periods of non-use, it may take up to 10 minutes for
the Tracking Unit to obtain GPS acquisition. Once the Unit has achieved acquisition, if power is
turned off and on, the acquisition time will normally be less than one minute.
NOTE: If the Unit does not successfully power up, refer to the troubleshooting section of the Help
files. The Unit’s power cable should be unplugged when left for extended periods of time.
GPS Antenna Placement
The GPS Antenna requires an unobstructed view of the sky to obtain GPS satellite acquisition;
therefore antenna placement is critical to achieve consistent performance. The GPS Antenna
supplied with your Tracking Unit is equipped with a magnetic mount.
Recommended placement for the GPS Antenna is on top of the vehicle with a clear view of the
sky. You may choose to mount the antenna out of sight. Keep in mind that the antenna will obtain a
stronger, less disrupted signal if it is mounted under plastic or glass rather than covered by metal.
Wherever you decide to mount the antenna, you must make sure that the Unit is able to acquire
an adequate GPS signal from the satellites. After installing the Unit, monitor the LED light on
the front of the Tracking Unit to determine whether you have GPS acquisition. The LED will be
RED when the Unit is powered on, but does not have GPS acquisition. The LED will be GREEN
whenever the Unit has GPS acquisition.
NOTE: Be aware, if the Unit has been powered off for 12 hours or more, it may take up to 5
minutes, from the time the GPS Antenna is connected and the Unit is powered on, for the Unit to
obtain GPS acquisition. If it takes longer than 5 minutes to acquire a signal, the antenna should be
moved to a more suitable location. Experiment to find the best location. This will help to ensure
accurate and uninterrupted GPS data collection.
Using Help | Contents | Index
110
Shadow Tracker ™ Professional
Premier Base - Help
Using Help | Contents | Index
SHADOW TRACKER PREMIER
111
To connect the GPS antenna:
Connect the antenna to the connection labeled Antenna; located on the rear of the
Tracking Unit. Tighten securely.
When connecting or disconnecting the GPS Antenna, be careful not to bend the antenna connector
when connecting or disconnecting it from the Shadow Tracker Unit. Also, do not connect a GPS
antenna other than the one supplied by ATTI, or damage to the Tracking Unit and /or antenna will
result.
Safety and Care
Please follow these guidelines to ensure the safe and trouble-free operation of your Tracking
Unit(s).
Safety
•
•
•
•
•
•
•
•
•
•
•
Do not place the Unit near a heating device.
Do not place the Unit in direct sunlight.
Do not place anything heavy on the Unit.
Do not place where spills can occur on the Unit.
Do not subject the Unit to electrical shock.
Do not apply any physical pressure to the Unit.
Do not open or disassemble the Unit or any of its components.
Do not scratch, twist or push the surface of the LED.
Do not use the Unit when temperatures are below -40C / -40 F) or above 70C /158 F.
Use only the GPS Antenna provided by ATTI.
Use only the AC or DC Power Adapter supplied with the Unit to avoid the risk of fire or
damage to the Unit.
Care
Occasionally the Shadow Tracker Unit may need to be cleaned. Use the following precautions.
To clean the tracking unit:
•
•
•
•
Use a soft cloth to wipe the exterior.
Do not use an alkaline detergent.
Do not use alcohol on the Unit’s case.
Avoid excessive moisture when cleaning the Unit.
Using Help | Contents | Index
111
Shadow Tracker ™ Professional
Premier Base - Help
SHADOW TRACKER PREMIER
Using Help | Contents | Index
112
Caring for the GPS antenna:
• Do not crimp or cut the GPS Antenna cable.
• Do not place heavy objects on the antenna.
• Do not pull on the antenna connections or connectors.
Federal Communications Commission (FCC) Notice
This equipment has been tested and found to comply with the limits for a Class A digital device,
pursuant to part 15 of the FCC Rules. These limits are designed to provide reasonable protection
against harmful interference when the equipment operates in a commercial environment.
This equipment generates, uses, and can radiate radio frequency energy and, if not installed
and used in accordance with the instruction manual, may cause harmful interference to radio
communications.
Operation of this equipment in a residential area is likely to cause harmful interference in which
case the user will be required to correct the interference at his own expense.
Only peripherals certified to comply with the Class A limits may be attached to this device.
Operation with non-certified peripherals or peripherals not recommended by Advanced Tracking
Technologies, Inc. are likely to result in interference to radio and television reception.
Properly shielded and grounded cables, and connectors must be used in order to meet FCC
emission limits.
ADVANCED TRACKING TECHNOLOGIES, INC. is not responsible for any radio or television
interference caused by using other than recommended cables and connectors or by unauthorized
changes or modifications to this equipment.
Using Help | Contents | Index
112
Shadow Tracker ™ Professional
Premier Base - Help
TRADEMARKS
Using Help | Contents | Index
113
TRADEMARKS
This publication may be printed or copied by the software licensee for reference purposes only.
ATTI, Advanced Tracking Technologies, Shadow Tracker, Shadowtracker, MobilEyes, TravelEyes,
TravelEyes2, Vision and Geobound are either registered trademarks or trademarks of Advanced
Tracking Technologies, Inc.
Adobe, the Adobe logo, and Reader are either registered trademarks or trademarks of Adobe
Systems Incorporated in the United States and/or other countries.
Microsoft, Windows and the Windows logo are either registered trademarks or trademarks of
Microsoft Corporation in the United States and/or other countries.
Pentium is the registered trademark of Intel Corporation in the United States and/or other countries.
The Palm logo, HotSync, Palm OS, Palm, Palm Powered and the Palm Powered logo are trademarks of PalmSource, Inc. and its affiliates.
All other trademarks and brand names are the property of their respective proprietors.
Protected by US Patent 6,718,263. Other patents pending.
© 2005 Advanced Tracking Technologies, Inc. All rights reserved.
www.advantrack.com
Using Help | Contents | Index
113
Shadow Tracker ™ Professional
Premier Base - Help
Using Help | Contents | Index
USING HELP
114
USING HELP
Shadow Tracker Professional includes complete documentation in an accessible PDF-based help
system.
The Help System includes:
• The Quick Start Setup, which provides step-by-step instructions on how to quickly get
your Shadow Tracker Professional System up and running.
• Hardware documentation, which provides detailed information for each of the tracking units
that is compatible with your System, including installation and connection instructions.
• Easy to understand explanations and instructions, covering every aspect of Shadow Tracker
Professional application functionality.
• Troubleshooting tips
The Help Files can be viewed using the Adobe Reader® application which was included on your
installation CD. Adobe Reader® is free software that lets you view and print Adobe Portable
Document Format® (PDF) files. Because the Help Files are PDF-based this enables you to take full
advantage of the bookmarking, highlighting and navigational tools included with Adobe Reader®.
Please refer to the Adobe Reader® Help files for instructions on using these features.
Viewing the Help Files
Shadow Tracker Professional Help will open with Adobe Reader® in a new document window with
the bookmark pane open. If the bookmark pane is not open, choose Window > Bookmarks,
or press F5. You can navigate the Help document using bookmarks or by using the Contents
navigation links.
To view the help files:
From within the Shadow Tracker or Administrator program, select Help > Help Topics
Using Help | Contents | Index
114
Shadow Tracker ™ Professional
Premier Base - Help
Using Help | Contents | Index
USING HELP
115
Using Bookmarks
The contents of Shadow Tracker Professional Help is displayed as bookmarks in the Bookmark
pane. To view a subtopic, click the plus sign next to a topic. The topic will expand to display the
subtopics it contains.
Each bookmark is a hyperlink to the associated section of the Help document. To view the
contents, click the bookmark. As you view the contents in the document pane, the bookmark
associated with that content will be highlighted in the bookmark pane to help you identify where
you are in the document.
Using the Navigation Bar
A navigation bar is provided at the top and bottom of each page of the Help document. Click
Using Help at any time to return to this document. Click Contents to view the Table of Contents.
The navigation bar also provides the Next Page and Previous Page navigation arrows before and
after each page number. This allows you to move through the document one page at a time.
Printing the Help File
You can print out the entire Help File or select specific portions of the file.
To print the help file:
Select File > Print and select the entire document or a page range.
Using Help | Contents | Index
115
Shadow Tracker ™ Professional
Premier Base - Help
CONTENTS
Using Help | Contents | Index
Quick Start Setup
2
116
GETTING STARTED
Step 1 - Install the Shadow Tracker Professional Software on your Computer
Step 2 - Configure the Software and Tracking Units
2
Step 3 - Setup and Connect the Premier Base Radio
2
Step 4 - Install the Tracking Unit into aVehicle
2
OVERVIEW
What is Shadow Tracker Professional?
3
How does the Shadow Tracker Professional System work?
Benefits
3
DATABASE RECORDS
Building your Database
4
Database Record Security
4
Using the Data Entry Forms
4
Assigning Record ID’s
5
Creating, Editing, and Deleting Database records
Company and Branch Information
5
To add company information:
6
To add branch information:
6
To edit branch information:
6
To delete branch information:
7
Customer Records
7
To create a customer record:
7
To edit a customer record:
7
To delete a customer record:
8
To search for a customer record:
8
Employee Records
8
To create an employee record:
8
To delete an employee record:
9
Vehicle Records
9
Groups
9
To create a group:
9
To edit a group:
10
To create a vehicle record:
10
Using Help | Contents | Index
2
3
5
116
Shadow Tracker ™ Professional
Premier Base - Help
CONTENTS
Using Help | Contents | Index
117
To assign a tracking unit to a vehicle record:
To edit a vehicle record:
10
To delete a vehicle record:
11
Vehicle Issue
11
To create a vehicle issue record:
11
To edit a vehicle issue record:
12
Fixed Location Records
12
To create a fixed location record:
12
10
MAP FUNCTIONALITY
Map Display Settings
13
Map Properties
13
To change map properies:
13
Map Legend
13
To display the map legend:
13
Startup Map Display
14
To change the Startup Map Display:
14
To go to the Startup Map
14
Adjusting the Map Display
15
Basic Controls
15
To zoom in:
15
To zoom out:
15
To draw a zoom box:
15
To use the pan feature:
15
To use center map:
15
Finding a Location on the Map
16
To find a location based on GPS coordinates:
To find a street location:
16
To find a city location:
16
To find a zip code location:
17
Routing
16
17
To create a route:
To clear a route:
Print Current Map
17
18
18
To print the current map:
Using Help | Contents | Index
18
117
Shadow Tracker ™ Professional
Premier Base - Help
CONTENTS
Using Help | Contents | Index
118
MAP LOCATIONS
Creating a Map Location
19
Mapping Target Area
20
To create a map location:
20
Displaying Map Locations
21
To display a map location:
21
To clear a map location:
21
Locating a Map Location
22
To locate a map location:
22
Understanding and Adjusting Track Display
Stop Interval
23
Speed Display
24
Viewing Historical Tracks
24
Single Track
24
To load and view a single track:
24
Multiple Tracks
25
To load and view multiple tracks:
25
Clearing Historical Tracks
25
To clear a track:
25
Printing Historical Tracks
26
To print a track:
26
Track Details
26
Track Details Window
26
To display or hide track details:
26
Track Playback
27
Track Playback Controls
27
To view a track using playback:
To close playback:
28
23
28
REPORTS
Understanding Reporting Parameters
29
Beginning / Ending Time
29
Stops Exceeding Duration
30
Max Speed
30
Target Area Deviation for Reports
30
Using Help | Contents | Index
118
Shadow Tracker ™ Professional
Premier Base - Help
CONTENTS
Using Help | Contents | Index
Understanding Reporting Results
Map Locations
30
Stops
31
Power and Ignition Events
31
Report Types
31
Tracking Reports
31
GPS Tracking Activity
32
Time Graphs
32
Ignition Comparison
32
119
30
33
To create a GPS tracking report or graph:
Other Reports
33
To create a report:
34
Vehicle Reports
34
To create a vehicle report:
34
Map Locations
35
To create a map location report:
35
Printing Reports
36
To print a report:
36
To adjust the page setup margin settings:
36
TRACKING UNIT MAINTENANCE
Establishing Communications
37
Setting the COM Port
37
To set the COM Port:
37
To detect the COM Port:
38
Adding a Tracking Unit to the Database
38
To add a tracking unit:
39
Manual Downloading and Processing
39
39
To manually download and process GPS data:
40
Determining Tracking Unit Memory
To determine amount of tracking unit memory used:
Retrieving Tracking Unit Settings
40
41
41
Removing a Tracking Unit from the Database
To remove a tracking unit:
41
Erasing a Tracking Unit
41
To erase data from a unit:
42
To retrieve tracking unit settings:
Using Help | Contents | Index
41
119
Shadow Tracker ™ Professional
Premier Base - Help
CONTENTS
Using Help | Contents | Index
120
42
Adjusting the GPS Collection Rate
To change the GPS collection rate:
42
IMPORT
Creating an Import File
43
To create an import file:
43
Import File Checklist
44
Importing Data to the Database
45
45
To import a comma-delimited text file:
ADMINISTRATOR
To open the Administrator:
46
The Administrator Window
46
Unprocessed Downloads
47
To resubmit a file for processing:
47
To delete a file from unprocessed downloads:
Database Size
Compact Utility
49
DATABASE MAINTENANCE
49
To compact the database:
Purge Utility
49
50
50
To purge database records:
Backup Utility
47
51
To backup a database:
51
Database Backup Reminder
52
To set a database backup reminder:
Verify DataBase Link
52
52
To verify database linking:
52
TRACKING UNIT MAINTENANCE
Establishing Communications
53
Setting the COM Port
53
To set the COM Port:
53
To detect the COM Port:
54
Using Help | Contents | Index
120
Shadow Tracker ™ Professional
Premier Base - Help
CONTENTS
Using Help | Contents | Index
121
Adding a Tracking Unit to the Database
54
To add a tracking unit:
55
Determining Tracking Unit Memory
55
55
To determine amount of tracking unit memory used:
Retrieving Tracking Unit Settings
56
56
Removing a Tracking Unit from the Database
To remove a tracking unit:
56
Erasing a Tracking Unit
57
To erase data from a unit:
57
Adjusting the GPS Collection Rate
57
To change the GPS collection rate:
58
To retrieve tracking unit settings:
56
BASE RADIO CONFIGURATION
Base Radio Configuration Window
59
Premier Base COM Port
59
To set the Premier Base COM Port:
59
Premier Base Configuration Settings
60
To set or adjust base radio configuration settings:
60
USER ADMINISTRATION / SECURITY
User versus User Group Security
61
User Licenses
61
To add a user license:
61
To review user licenses:
62
User Groups
62
To create a user group:
62
To define user group security:
62
To view user group members:
63
To remove a user group:
63
User Accounts
64
To create a user account:
64
To define user security:
64
To add a user to a user group:
65
To remove a user from a user group:
65
To remove a user:
66
Using Help | Contents | Index
121
Shadow Tracker ™ Professional
Premier Base - Help
CONTENTS
Using Help | Contents | Index
122
66
Changing User Names and Passwords
To change a user’s user name:
To change a user’s password:
66
67
FILE VIEWER / SCHEDULER
Data Download
68
To adjust data download settings:
68
Data Processing
69
To adjust data processing settings:
69
GPS Data Collection
GPS Data Transmission
Data Flow
71
Unprocessed GPS Files
Tracking Units
72
Historical Track Display
GPS limitations
73
Technical Support
73
TROUBLESHOOTING
70
70
72
73
PREMIER BASE EXTRACTOR
WIRELESS GRABBER
To start wireless grabber:
75
To close wireless grabber:
75
To display the wireless grabber window:
75
To clear wireless grabber messages:
76
To manually initiate a download:
76
To check the premier base radio memory:
76
DATA PROCESSOR
To start data processor:
77
To close data processor:
77
To display the data processor window:
To clear messages from data processor:
To process data:
78
Using Help | Contents | Index
78
78
122
Shadow Tracker ™ Professional
Premier Base - Help
CONTENTS
Using Help | Contents | Index
Premier Base Radio
Front Panel LED’s
Connections
80
Specifications
80
Features
80
123
PREMIER BASE RADIO
79
79
Premier Base Accessories
AC Power Supply
81
RS-232 cable
81
Radio Antenna
81
Connecting the Premier Base
81
82
To connect the Premier Base to the Computer:
82
SHADOW TRACKER JR., J2, PRO AND PERFORMER
Connections and Specifications
83
Shadow Tracker Jr.
84
Shadow Tracker j2
85
Shadow Tracker Pro
86
Shadow Tracker Performer
87
Understanding the Status LED’s
88
Tracking Unit Accessories
89
AC Power Supply
89
DC Power Adapter
90
Power Up - Backup Battery (optional)
91
DC Direct-Connect Cable - (optional)
92
Download/ Validation Cable
93
GPS Antenna
94
Connecting a Tracking Unit to the Computer
95
To connect a tracking unit to the computer:
95
Connecting the Shadow Tracker j2 for the first time:
Connecting a Tracking Unit in a Vehicle
Mounting and Placement
97
GPS Antenna Placement
97
To connect the GPS antenna:
97
Using Help | Contents | Index
96
97
123
Shadow Tracker ™ Professional
Premier Base - Help
CONTENTS
Using Help | Contents | Index
124
Connecting Power
98
DC Power Adapter
98
To connect the DC power adapter:
98
Shadow Tracker Pro Ignition Cable
98
To connect the ignition cable:
99
DC Direct Connect Cable
99
To install the direct connect cable:
99
Power Up - Backup Battery - (optional)
100
To install the power up backup battery:
100
Disconnecting a Tracking Unit from a Vehicle
To disconnect the tracking unit:
102
102
SHADOW TRACKER PREMIER
Connections and Specifications
104
Tracking Unit Accessories
106
AC Power Supply
106
Download/ Validation cable
106
GPS Antenna
106
DC Direct-Connect Cable kit
107
Connecting a Shadow Tracker Premier to a Computer
108
To connect a Shadow Tracker Premier to the computer:
108
Connecting a Shadow Tracker Premier in a Vehicle
109
Mounting and Placement
109
Connecting Power
109
To install the DC Direct-Connect Cable:
109
Status Indicator LED’s
110
GPS Antenna Placement
110
To connect the GPS antenna:
111
Safety and Care
111
Safety
111
Care
111
To clean the tracking unit:
111
Caring for the GPS antenna:
112
Federal Communications Commission (FCC) Notice
112
Using Help | Contents | Index
124
Shadow Tracker ™ Professional
Premier Base - Help
Using Help | Contents | Index
CONTENTS
125
TRADEMARKS
USING HELP
Viewing the Help Files
114
To view the help files:
114
Using Bookmarks
115
Using the Navigation Bar
115
Printing the Help File
115
To print the help file:
115
Using Help | Contents | Index
125