1
OBJ_BUCH-1267-001.book Page 26 Monday, July 26, 2010 12:03 PM
26 | English
Setting/Storing Radio Stations
Press the “Source” button 34 until n “FM” is indicated for the ultra-short wave reception range
or “AM” for the medium wave reception range.
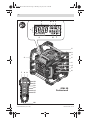
To set a certain radio frequency, turn the
“Tune” adjustment knob 30 clockwise to increase the frequency, and anticlockwise to decrease it. During setting, the frequency is indicated in display section o, then in j.
To scan for radio stations with a high signal
strength, press and briefly hold the “– Seek”
button 35 to scan down and the “Seek +” button 33 to scan up the frequency scale. The frequency of the found radio station is briefly indicated in display o and then in j.
When the reception of a suitable signal is sufficiently strong, the radio charger automatically
switches to stereo reception. The indicator for
stereo reception i appears on the display.
To store a set station, press the “Memory” button 27. The “PRESET” indicator e flashes in the
display and the number of the last preset in d.
To select a preset, press the “– Seek” button 35
to scan down and the “Seek +” button 33 to
scan up, until the desired preset is displayed in
indicator d. Press the memory button 27 again
to store the set station as the selected preset.
The indicators e and d no longer flash.
A total of 20 FM and 10 AM stations can be preset. Please note that an already occupied preset
is overwritten when a new radio station is assigned to it.
For playback of a preset station, briefly press
the “– Seek” button 35 to scan down or the
“Seek +” button 33 to scan up, until the desired
preset is displayed in indicator d and “PRESET”
is displayed in e.
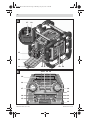
Connecting External Audio Sources
(see figure C)
Apart from the integrated radio, various external
audio sources can be played.
plug of the provided or of another matching AUX
cable into the socket. Connect the AUX cable to
an appropriate audio source.
After removing the AUX cable, reattach the protective cap of the “AUX 1 IN” socket 40 to protect against dirt/debris.
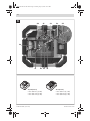
For external audio sources via the following connections, open locking latch 19 and open lid 20
of the “Digital Media Bay”.
– SD/MMC connection: Insert a SD or MMC
card into the SD/MMC slot 46. The labelling
of the card must face toward the fuse cap 43.
Playback of the card can be started as soon
as the track number as well as the number of
available tracks on the card are displayed in
indicator d. To remove the card, briefly press
on the card, which is then ejected.
– USB connection: Insert a USB stick (or the
USB plug of an appropriate audio source) into USB port 45. Playback of the USB stick can
be started as soon as the track number as
well as the number of available tracks on the
stick are displayed in indicator d. To remove
the USB stick, pull it out of the USB port.
– AUX-In connection 2: AUX-In connection 2 is
particularly suitable for audio sources that
can be placed inside of the digital media bay
(e.g. a MP3 player). Insert the 3.5 mm plug of
the provided AUX cable into the “AUX 2 IN”
socket 47. Connect the AUX cable to an appropriate audio source.
When small enough, the connected external audio source can be fastened into the digital media bay using the Velcro strap of the holder 48.
After connecting the external audio source,
close the Media/connections flap 20 if possible,
to protect against damage and debris.
For playback of the connected audio source,
press the “Source” button 34 until the indicator
n for the desired audio source appears on the
display.
AUX-In connection 1: The AUX-In connection 1
is particularly suitable for audio sources to be
placed outside of the digital media bay (e.g. a
CD player). Remove the protective cap of the
“AUX 1 IN” socket 40 and insert the 3.5 mm
1 609 929 W38 | (26.7.10)
Bosch Power Tools