1
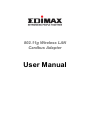
802.11g Wireless LAN
Cardbus Ada pter
User Manual
Vers ion: 1 .1
(June, 2 005)
COPYRIGHT
Co p yrigh t © 2 005 /2006 b y this compan y. All rig hts rese rved . No pa rt o f th is
pu blication ma y be repro duce d, transmitted , transcribe d, s tore d in a re trie val
s ystem, or transla ted in to an y langu age or compu ter la nguage , in an y fo rm o r
b y an y means , electroni c, me chani cal , magne tic, op ti cal , chemical , manual o r
o the rwise , wi thou t the p rior w ri tten pe rmission o f this compan y
This compan y ma kes n o rep resen ta tions or wa rra nties, ei the r e xpressed or
implie d, w ith respect to the con ten ts he reo f and spe ci fica ll y disclaims an y
wa rra n ties, merchan tab ili ty o r fitness for an y parti cula r pu rpose. An y so ftware
describe d in this manual is sold or li censed "as is ". Shoul d th e prog rams
p ro ve de fecti ve follow ing thei r purchase , th e bu ye r (a nd no t this compan y, i ts
dis tri bu tor, o r its deal er) assumes the en ti re cos t of a ll necessary servi cing ,
repai r, and an y inci den tal o r conseque ntial damages resul ting from an y de fe ct
in the so ftware. Fu rther, this compan y reserves th e righ t to re vise this
pu blication and to make changes from time to time in the con te nts he reo f
wi th ou t obliga ti on to no ti fy an y person o f such re vision o r ch anges .
All b rand and p roduct name s mentioned in thi s manual a re tra demarks and/o r regi ste red
t radema rks o f thei r re specti ve holde rs.
Fe deral Communication Commission
Inte rference Statement
This equipmen t has been tested and found to compl y wi th the l imits fo r a
Class B digi ta l de vi ce , pu rsuant to Part 15 o f FCC Rul es. These l imits are
design ed to pro vide reasonable p ro te ction agai nst ha rmful in te rference in a
residen tial ins talla ti on . Th is equ ipment g enerates, uses, and can ra dia te radio
frequen cy en erg y and , i f no t insta lled and used in a ccorda nce w ith th e
ins tru ctions , ma y cause ha rmful in te rference to radio communica tions .
How e ve r, there is no gua ran tee tha t in te rference w ill no t occu r in a parti cula r
ins talla ti on . If this equipmen t does cause ha rmful i nterfe rence to radio or
tele vision recep ti on , which can be d etermined b y turni ng the equipmen t o ff
an d on , th e user is en cou raged to try to co rre ct the in terfe ren ce b y one or
more o f the foll owing measures :
1. Reorient or relocate the receiving antenna.
2. Increase the separation between the equipment and receiver.
3. Connect the equipment into an outlet on a circuit different from that to which the
receiver is connected.
4. Consult the dealer or an experienced radio technician for help.
FCC Caution
This equipmen t must be ins talled a nd ope ra ted in a cco rdan ce wi th p ro vi ded
ins tru ctions and a minimum 5 cm spacin g must b e pro vided b etween
computer moun ted an ten na and pe rson’s bo d y (e xcludin g e xtremities o f
ha nds, w rist and fee t) during wi reless modes o f op era tio n.
This de vice complies w ith Pa rt 1 5 of the FCC R ules. Ope ra tion is subject to
the foll owing two condi tio ns: (1 ) this d e vi ce ma y no t ca use ha rmfu l
in te rference , an d (2 ) th is de vice must a ccep t an y in te rference recei ve d,
in clud ing in te rferen ce tha t ma y ca use un desired op era tio n.
An y changes or modi fi ca tions no t e xp ressl y app ro ve d b y the pa rty responsible
fo r complian ce could void the au tho ri ty to ope ra te equ ipment.
Federal Communication Commission (FCC) Radiation Exposure Statement
This equipmen t complies wi th FCC radia ti on e xp osure set fo rth fo r an
un con trolled e n vi ronmen t. In o rde r to a voi d th e possibility o f e xceedi ng the
FCC radio frequen cy e xposure l imits, h uman p ro ximity to th e an tenna shall
no t be l ess th an 20cm (8 i nches) d urin g normal ope ra tion .
R&TTE Compliance Statement
This equipmen t complies wi th a ll the req uiremen ts of D IR EC TIVE 1999 /5 /C E
OF TH E EUR OPEAN PARL IAMEN T AND TH E C OUNC IL o f Ma rch 9, 1 999 on
radio eq uipmen t and tele communica tion te rminal Equ ipment a nd the mutu al
reco gni tion o f thei r con fo rmity (R &TTE)
The R &TTE Di recti ve re peals and re places in the di re cti ve 98 /1 3/EEC
(Te lecommuni ca tions Te rminal Equipmen t and Satelli te Earth Sta ti on
Equipmen t) As o f April 8 , 20 00 .
Safety
This equipmen t is designed wi th the u tmost care fo r th e sa fe ty o f those who
ins tall an d use i t. Howe ve r, spe cial a tten tion must be p aid to the dang ers of
el ectric shock and sta ti c ele ctri ci ty wh en working w ith electrical equipmen t. Al l
gu idelin es o f this a nd o f th e compu ter manu fa cture must the re fore be allo wed
a t all times to ensu re the safe use o f the equipmen t.
EU Countries Intended for Use
The ETSI ve rsion o f th is de vice is in ten ded for home and o ffi ce use in Aus tri a,
Belgium , Denmark, Fi nland , Fra nce , German y, Gree ce , Irelan d, Ital y,
Lu xembou rg , th e Ne therlands, Portu gal , Spa in , Swed en , and the Uni te d
Kingdom .
The ETSI ve rsion o f th is de vice is also au tho ri zed for use in EFTA member
states: Icel and , Lie ch tenste in , Norw a y, and Swi tze rlan d.
EU Countries Not intended for use
No ne .
CONTENTS
1 I NTRODUCTION. . . . . . . . . . . . . . . . . . . . . . . . . . . . . . . . . . . . . . . . . . . . . . . . . . . . . . . . . . . . . 1
1.1
1.2
1.3
FEATURES........................................................................................ 1
SPEC IFICATIONS ................................................................................ 1
P ACKAGE CONTENTS .......................................................................... 2
2 I NSTALLATI ON PROCEDURE . . . . . . . . . . . . . . . . . . . . . . . . . . . . . . . . . . . . . . . . . . 3
3 CONFI GURATION UTI LI TY . . . . . . . . . . . . . . . . . . . . . . . . . . . . . . . . . . . . . . . . . . . 10
3.1
3.2
3.3
3.4
W IR ELESS C ONNECTION STATUS ......................................................... 10
PROF ILE M ANAGEMENT .................................................................... 11
D IAGNOSTICS ................................................................................. 12
SEC URITY ...................................................................................... 13
3.4. 1 WPA S etting. . . . . . . . . . . . . . . . . . . . . . . . . . . . . . . . . . . . . . . . . . . . . . . . . . . . . . . . . . . . . . . . . . . . . . . . . . . . . . . . 15
3.4. 2 Usin g WPA Pas sph ras e S ecuri ty. . . . . . . . . . . . . . . . . . . . . . . . . . . . . . . . . . . . . . . . . . . . . . . . . . . . . . . . . 22
3.4. 3 Pre-Shared En cryp ti on K eys . . . . . . . . . . . . . . . . . . . . . . . . . . . . . . . . . . . . . . . . . . . . . . . . . . . . . . . . . . . . . . 23
O VERWRITING AN EXISTING STATIC WEP K EY .............................................. 24
D ISABLING STATIC WEP .......................................................................... 24
4 TROUBLESHOOTI NG . . . . . . . . . . . . . . . . . . . . . . . . . . . . . . . . . . . . . . . . . . . . . . . . . . . . 25
1 Introduction
Than k you fo r pu rcha sing th e 802.11g Wirele ss L AN Ca rbu s Adap te r. Thi s A dapte r i s
de sign ed to comply with IEEE 802.11g Wi rele ss LA N standa rd and ea sy to carry with the
Mini size . I t i s suitable fo r any La ptop o r De skt op compu te rs.
Thi s adap te r sup port s 64/128/15 2-bit WEP da ta en cryption that p ro tect s you r wirele ss
net wo rk f rom ea ve sd ropping. It al so suppo rt s WPA (Wi -Fi P ro tect ed A cce ss) f eatu re th at
combine s I EEE 802 .1x a nd TKIP (Tempo ral Key Integ rit y P rot ocol ) te chnologie s. Client
u sers a re requi red to auth ori ze befo re acce ssin g to AP s or AP Rout ers, a nd the data
t ran smitted in the net wo rk i s en cryp ted/de crypted by a dyn amically cha nged secret ke y.
I t sup port s the Supe rG mode f eatu re to enhan ce the data rate to rea ch t o 108Mbp s, it can
enhan ce th e data ra te when it conne ct with Supe r G p rodu ct .
Thi s adap te r i s with the versatile fe atu re s; it i s the be st solution f or you to build your
wi rele ss n et work.
1.1
Features
•
•
•
•
•
•
•
•
1.2
Complies with the IEEE 802.11b and IEEE 802.11g 2.4GHz standards.
Up to 54Mbps high data transfer rate. ( 108M : Super G mode enabled)
Support 64/128/152-bit WEP, WPA, IEEE 802.1x high level of security.
Complies with IEEE 802.11d country roaming standard.
Support the most popular operating system: Windows 98SE/Me/2000/XP.
Supports Standard 32bit Cardbus interface.
Portable and Compact-size design.
Suitable for Any Notebook.
Specifications
•
•
•
•
Standard: IEEE 802.11g/b
Bus Type: 32-bit Cardbus
Frequency Band: 2.4000~2.4835GHz (Industrial Scientific Medical Band)
Modulation: OFDM with BPSK, QPSK, 16QAM, 64QAM (11g)
BPSK, QPSK, CCK (11b)
•
•
•
•
•
•
Data Rate: 54/48/36/24/18/12/11/9/6/5.5/2/1Mbps auto fallback (108Mbps: Super G enabled)
Security: 64/128/152-bit WEP Data Encryption, WPA , IEEE 802.1x
Antenna: Internal Antenna
Drivers: Windows 98SE/Me/2000/XP/2003 Server
LED: Link, Activity
Transmit Power: 16 ~18 dBm (Typical)
1
•
•
•
•
1.3
Dimension: 8(H) x 118(W) x 54(D) mm
Temperature: 32~131°F (0 ~55°C)
Humidity: 0-95% (NonCondensing)
Certification: FCC, CE
Package Contents
Be fore you begin the in stallation, plea se check the item s o f your package. The package
sh ould include t he following item s:
•
•
•
One PC Card
One CD (Driver/Utility/User’s Manual.)
One Quick Guide
I f a ny of the a bove i tems is m issi ng, c ontac t y our s uppl ier a s soon as possi ble.
2
2 Installation Procedure
Be fore you p roceed with the in stallation, plea se notice following de scription s.
Note1: The following installation was operated in Windows XP. (Procedures are similar for
Windows 98SE/Me/2000)
Note2: If you have installed the Wireless PC Card driver & utility before, please uninstall the
old version first.
Note3: For Windows 98SE please make sure your copy of windows is fully updated with the
latest hotfixes by going to http://windowsupdate.microsoft.com
This chapte r de scribes using the Athe ros installe r to install the Athe ros wi re le ss
ne t wo rk adapte r dri ve r.
Installation
Note: P lease ensure th e Su per- G cardbu s adapter is firm ly
inserted to th e cardbus slot before startin g the setu p
program .
To
1.
2.
3.
insta ll the A CU a nd dev ice dr ive r:
Inse rt the de vice into the com pute r, and inse rt the installation C D.
O pen the Insta llShie ld W izard (setup.exe ).
The Athe ros C lient Installation installe r ope ns. Se le ct the language you wish
the installation program to proce ed in. C lick Ne x t.
4. The Athe ros lice nse a gre eme nt window a ppea rs. R ea d a nd a cce pt the
agre em ent to continue . C li ck Ne x t.
5. The Installation Program windo w appears wi th th re e se tup options.
To install the clie nt ut ili tie s and drive r, se le ct the appropriate installation type
(se e Table (2-1) and cli ck Nex t.
3
Table 2-1. I ns ta ller I nsta llat ion Se lect ions
Radio Button
Descr ipti on
In stall Client
Utilitie s and
Dri ve r
(recommended )
In stall s the d rive r an d client u tilities. Thi s i s the re commend s
option .
In stall Dri ve r Only In stall s o nly the d rive r without in stalling the client utilitie s.
Ma ke Driver
In stallation
Di ske tte (s)
Create s d rive r in stallation di ske tte s.
6. A p rompt appe ars warning that the install re quire s the system to be re boote d
at the e nd of the installation proce ss. C lick Ye s to continue .
7. C hoose the se tup dire ctory. The de fault is C:\Pro gra m F ile s \ A the ros .
C li ck Ne x t.
8. C hoose the program folde r for the sta rt me nu. The de fault is A the ros . C lick
Ne x t.
9. Fo r a windo ws XP installation, the ne x t scree n de fine s the W indo ws Ze ro
C onfiguration. W indo ws XP Ze ro C onfiguration provide s functionalit y to
automaticall y t ry to conne ct the station to available wi re le ss ne t wo rk s. For
com ple te information on W indo ws Ze ro C onfiguration, se e the Microsoft we b
site .
10.In this installation, se le ct the Athe ros C lie nt Utili ty and Supplicant.
C li ck Ne x t. The installe r automaticall y installs the dri ve r.
11.Make sure that the USB de vice is inse rte d. If it is not, inse rt it, the n cance l
the found Ne w Hard wa re W izard if i t appe ars. Proce e d wi th the installation.
C li ck O K.
4
12.W indows m ay display a W indo ws Logo e rror for the USB bootloade r. C li ck
C ontinue Any way.
The installe r continue s installation.
13.W indows m ay display a W indo ws Logo e rror for the W LA N drive r. C li ck C lick
C ontinue Any way.
The installe r continue s installation.
14.C li ck O K at the prom pt to re boot and com ple te the installation.
5
Installing the Atheros USB Wireless Network
Adapter
To install the USB drive r and the Athe ros C lient Uti lit y, see “To install the ACU
and USB de vice dri ve r:” on page 2-1.
To install the USB De vi ce Drive r se parate ly:
1. Inse rt the USB de vi ce into the compute r: The Found Ne w Ha rd ware W izard
ope ns. C hoose advance d installation and cli ck Ne x t.
2. C hoose Se arch fo r dri ve r in the se locations. The drive r is locate d in the
Ndis5x \2KXP dire ctory. ( For W indo ws 98SE/M E com pute rs, the drive r is locate d
in the Ndis5x \98ME).
3. W indows m ay display a W indo ws Logo e rror for the bootloade r. C li ck C ontinue
An y way. The installe r will continue with the installation.
6
4. C li ck Finish to close the Found Ne w Hard wa re W izard and comple te installation
of the USB de vice bootloade r.
5. The Found Ne w Ha rd ware W izard ope ns to install soft wa re for the USB de vice .
C li ck Ne x t to continue .
6. C hoose Se arch fo r dri ve r in the se locations. The drive r is locate d in the
Ndis5x \2KXP dire ctory. ( For W indo ws 98SE/M E com pute rs, the drive r is locate d
in the Ndis5x \98ME).
7
7. W indows m ay display a W indo ws Logo e rror for the W LAN drive r. C li ck
C ontinue Any way. The installe r wi ll continue the installation.
8. C li ck Finish to close the Found Ne w Hard wa re W izard and comple te installation
of the Athe ros USB Ne t wo rk Adapte r.
8
Use the ACU to configure the de vice dri ve r. The AC U provide s ex te nsive online
he lp to aid in configuring the de vi ce . Acce ss the ACU by right-cli ck ing the tray
i con and choosing Athe ros C lie nt Utili ty.
III. Us ing the Configurat ion Ut ility
To setup t he USB adap te r, double -click the icon in the system tra y.
For Windows XP , the re i s a “Windo ws Ze ro Con figura tion Tool” b y def ault fo r you to se tup
wi rele ss client s. If you wan t to u se the Utility o f the USB adap ter, plea se follow one of the
ways a s belo w.
A. Double -click the i con.
B. Cli ck “Ad van ce ”.
C . Unche ck “Use Windo ws to
configu re my wi rele ss
net wo rk se tting s”.
9
3 Configuration Utility
The Client Utility i s a u ser-mode utility de sign ed to edit and ad d p rofile s fo r, a s well a s
di spla y and diagno stics pe rtaining to a selecte d wirele ss USB adapte r.
3.1
Wireless Connection Status
When you ope n the Con figura tion Utility, the system will scan all t he ch annel s t o find all the
a cce ss p oint s/ station s within the acce ssi ble ra nge of you r ca rd and automatically conne ct to
the wi rele ss de vice with the highe st signal st rengt h. From the screen , you may kno w all the
infom ration abou t the wi rele ss connection.
10
3.2
Profile Management
Pa ramete r
De scription
New
To add a ne w con figura tion p rofile, click Ne w on the P ro file
Management tab. To modify a con figura tion p rofile, sele ct the
configu ration f rom the P rofile li st and click the Modify button .
Modify
In the Atheros Client Utility, access the General tab by clicking New or
Modify on the Profile Management tab.
Edit the fields in the General tab to configure the configuration
profile. Make sure to also edit the Security and Advanced tabs.
Remove
Impo rt
E xpo rt
Sele ct the p rofile to remo ve f rom the li st of configu ration p rofile s.
1.
From the P ro file Management tab , clic k the Impo rt button .
The Impo rt P rofile windo w ap pears.
2.
B ro wse to the di recto ry whe re the p rofile i s lo cated.
3.
Hig hlight the p ro file name.
4.
Cli ck Open. The impo rted p rofile appea rs in the p ro file s
li st.
1.
From the P ro file Management tab , highlight the p rofile to
e xpo rt.
2.
Cli ck the E xpo rt bu tton. The Expo rt P rofile window
appea rs.
11
O rde r Pro file s
3.3
3.
B ro wse to the di recto ry to expo rt the p ro file to.
4.
Cli ck Save . The p rofile i s e xpo rted to th e spe cified
loca tion.
In cluding a p rofile in t he auto selection fea ture allows the wi rele ss
adap ter to au tomatically select tha t p rofile f rom the li st o f p rofile s
and u se it to connect to the ne twork.
Diagnostics
The client utility include s a number of tool s t o di splay cu rrent diagno sti cs a nd statu s
info rmation.
Pa ramete r
Adap te r Info rmation
De scription
The Adap te r Info rmation button con tain s gene ral info rmation
abou t the net work inte rf ace ca rd (the wi rele ss net wo rk adapte r)
and the ne two rk d rive r inte rfa ce specifi cation (NDIS ) d rive r.
Ad vanced Sta ti stics
The Diagno sti cs tab of the Athe ro s Client Utility p rovide s butt on s
u sed to re t rieve re ceive and t ran smit sta ti stics. The Diagno stics
tab doe s not requi re an y configu ration
12
3.4
Security
Thi s Chapte r de scribe s setting up se cu rity u sing th e Athe ro s Client Utility(A CU).
While u sing the A the ro s USB wi rele ss ne two rk adapte r, encryption da ta can p rote ct it s a s it
i s t ran smitted th rough the wirele ss net wo rk.
While using the Atheros USB wireless network adapter, encrypting data can
protect its privacy as it is transmitted through the wireless network.
The ACU allows connection profiles of:
z
No security (not recommended)
Link encryption/decryption is disabled, no keys are installed.
z
WPA security
Enables the use of Wi-Fi Protected Access (WPA). This option requires IT
administration. This option includes the EAP (with dynamic WEP keys)
security protocols: EAP, PEAP, and LEAP.
WPA is a standard-based, interoperable security enhancement that
provides data protection and access control for wireless LAN systems. It
is derived from and is forward-compatible with the upcoming IEEE
802.11i standard. WPA leverages Temporal Key Integrity Protocol (TKIP)
and Michael message integrity check (MIC) for data protection, and
802.1X for authenticated key management.
WPA supports two mutually exclusive key management types: WPA and
WPA passphrase (also known as WPA-Pre Shared Key (PSK)). Using
WPA, clients and the authentication server authenticate to each other
using an EAP authentication method, and the client and server generate a
pairwise master key (PMK). The server generates the PMK dynamically
and passes it to the access point.
z
WPA-PSK security
Enables WPA passphrase security (also known as WPA-Pre Shared Key
(PSK)).
z
802.1x security
Enables 802.1x security. This option requires IT administration. This
option includes the EAP (with dynamic WEP keys) security protocols:
EAP, PEAP, and LEAP.
802.1x is the standard for wireless LAN security defined by IEEE as 802.1x
for 802.11, or simply 802.1x. An access point that supports 802.1x and its
protocol, Extensible Authentication Protocol (EAP), acts as the interface
between a wireless client and an authentication server such as a RADIUS
server, to which the access point communicates over the wired network.
z
Pre-Shared Key security (Static WEP)
Static WEP enables the use of up to four pre-shared (static wired equivalent privacy
(WEP)) keys that are defined on both the access point and the client station.
These keys are stored in an encrypted format in the registry of the
Windows device. When the driver loads and reads the USB device's
registry parameters, it also finds the static WEP keys, decrypts them, and
stores them in volatile memory on the USB device.
If a device receives a packet that is not encrypted with the appropriate key,
the device discards the packet and never delivers it to the intended recipient.
13
This is because the WEP keys of all devices that are to communicate with each
other must match.
Authentication Process
Enabling EAP on the access point and configuring the USB device to LEAP,
EAP-TLS, PEAP (EAP-GTC), or PEAP (EAP-MSCHAP V2) authentication to
the network occurs in the following sequence:
1. The client associates to an access point and begins authentication.
2. Communicating through the access point, the client and RADIUS server
complete authentication with the password (LEAP and PEAP) or
certificate (EAP-TLS). The password is never transmitted during the
process.
3. After successful authentication, the client and RADIUS server derive a
dynamic WEP key unique to the client.
4. The RADIUS server transmits the key to the access point using a secure
channel on the wired LAN.
5. For the length of a session the access point and the client use this key to
encrypt or decrypt all unicast packets (and broadcast packets).
Ove rv ie w Of the Sec ur ity Co nf ig ur ation O pt io ns I n A CU
Radio Button
WPA
Descr ipti on
Enable s the u se of Wi -Fi P ro tecte d Acce ss (WPA ).
Choo sing WPA open s the WPA EAP d rop -do wn menu. The
option s include:
EA P-TLS
EA P-TTLS
PE AP (EAP -GT C)
PE AP (EAP -MS CHAP V2 )
LEA P
WPA
Pass phras e
Enable s WPA Pa ssph ra se se curit y.
802.1x
Enable s 802.1 x secu rit y. Thi s option requi re s IT admini st ration.
Cli c k o n the Con figure button and fill in the WPA Pa ssp hra se.
Choo sing 802.1 x open s the 802.1 x EAP typ e d rop -down
menu. The option s include:
EA P-TLS
EA P-TTLS
PE AP (EAP -GT C)
PE AP (EAP -MS CHAP V2 )
LEA P
I f the acce ss point tha t the wirele ss adapte r i s a sso ciating to ha s
WEP set to Optional and the client ha s WEP en abled, ma ke sure
14
tha t Allow A sso ciation to Mixed Cell s i s checked on the S ecu rit y
Tab to allow a sso ciation.
Pr e- Shar ed
Key (Static
WEP)
Enable s the u se of p re -sha red keys tha t a re de fined on bo th th e
a cce ss p oint and the station.
To define p re-sha red en cryp tion ke ys, choo se the Pre -Sh ared Ke y
radio but ton and click th e Configu re but ton to fill in the De fine
P re -Sha red Keys window.
I f the acce ss point tha t the wirele ss adapte r i s a sso ciating to ha s
WEP set to Optional and the client ha s WEP en abled, ma ke sure
tha t Allow A sso ciation to Mixed Cell s i s checked on the S ecu rit y
Tab to allow a sso ciation.
None
No secu rit y (not re commended ).
3 .4 .1 WPA Sec ur ity Se ttings
EAP Security
To use EAP se curity, access the Se curity tab in Profile Management.
1. In the ACU, edit the se curity se ttings by click ing Ne w or Modify on the
Profile Management tab.
2. Choose a profile to edit, or name the ne w profile in the Profile
Management window. Ente r the SSID of the access point the station
conne cts to.
3. On the Se curity tab, choose the WPA radio button.
OR: On the Se curity tab, choose the 802.1x radio button.
4. Choose EAP-TLS or EAP-TTLS from the drop-down menu
15
Us ing EAP-TLS Sec ur ity
Im portant Note : To u se EAP -TTLS se cu rity, the ma chine mu st alre ady ha ve the EA PTTLS ce rtifi cate s do wnloaded onto it f rom a Ce rtificate Autho rity (CA ). Plea se che ck with
your IT admini st rato r.
To u se EAP -TLS secu rit y In the Athe ro s Client Utility, acce ss the Se cu rity tab in th e P rofile
Management windo w.
1.
On the S ecu rity tab, choo se t he WPA radio b utton .
O R: On t he Se curit y tab, choo se the 8 02.1x radio butto n.
2.
Choo se EAP -TLS f rom the d rop -do wn menu.
E nabli ng EAP-TLS sec ur ity:
Im portant Note : To u se EAP -TTLS se cu rity, the ma chine mu st alre ady ha ve the EA PTTLS ce rtifi cate s do wnloaded onto it f rom a Ce rtificate Autho rity (CA ). Plea se che ck with
your IT admini st rato r.
1.
I f EAP -TLS i s supp orted, choo se EAP -TLS from the d rop -do wn menu on the righ t,
then clic k the Con figure butt on.
2.
Sele ct the app rop riate certificate autho rit y f rom the li st. The se rve r/domain name
and the login name a re filled in automatically f rom the ce rtifica te info rmation. Click
OK .
3.
Cli ck OK.
4.
A ctiva te the pro file.
16
Us ing EAP-TTLS Sec ur ity
Im portant Note : To u se EAP -TTLS se cu rity, the ma chine mu st alre ady ha ve the EA PTTLS ce rtifi cate s do wnloaded onto it f rom a Ce rtificate Autho rity (CA ). Plea se che ck with
your IT admini st rato r.
To u se EAP se cu rity In the Athe ro s Client Utility, a cce ss the S ecu rity tab in the P rofile
Management windo w.
1.
On the S ecu rity tab, choo se t he WPA radio b utton .
O R: On t he Se curit y tab, choo se the 8 02.1x radio butto n.
2.
Choo se EAP -TTLS f rom the d rop -down menu.
E nabli ng EAP-TTLS securi ty:
1.
I f EAP -TTLS i s suppo rted , ch oo se EAP -TTLS f rom the drop -do wn menu on t he right,
then clic k the Con figure butt on.
2.
Sele ct the app rop riate certificate f rom the d rop-down li st and click OK .
3.
Spe cify a u ser name fo r EAP au thentica tion:
4.
o
Check Use Windows Use r Name to u se the Windo ws u ser name a s the EAP
u ser name.
o
O R: Ente r a EAP u se r name in the Use r Name field to u se a sepa rate u se r
name and pa ssword and sta rt the E AP authe ntication pro ce ss.
Cli ck Advan ced and :
o
Lea ve the se rver name field blan k fo r the client to a ccep t a ce rtifica te f rom
an y se rve r with a ce rtifica te signed by the au tho rity li sted in the Ne twork
Ce rtificat e Autho rit y d rop -do wn li st . (rec om mende d)
o
En ter the domain n ame of the serve r f rom which the client will accep t a
certificate .
o
Change the login name if needed.
5.
Cli ck OK.
6.
Enable the p rofile.
17
Us ing PEAP-GTC Sec ur ity
I mpor ta nt Note ! To use PE AP (E AP -G TC) securi ty, the se rv er m us t hav e WP A-PE AP
ce rtifica tes, a nd the Ce r ti fica te Authori ty (CA) serv er pr oper ties must alrea dy be se t
up. Please che ck w ith your I T a dm inistra tor.
To use PEAP security, access the Security tab in the Profile Management
window.
1. In the ACU, edit the security settings by clicking New or Modify on the
Profile Management tab.
2. Choose a profile to edit, or name the new profile in the Profile
Management window. Enter the SSID of the access point the client computer
connects to.
3. On the Security tab, choose the WPA radio button.
OR: On the Security tab, choose the 802.1x radio button.
4. Choose PEAP (EAP-GTC) or PEAP (EAP-MSCHAP V2) from the
drop-down menu.
z
PEAP (EAP-GTC) authentication is designed to support one-time Password (OTP), Windows
2000 domain, and L DAP user databases over a wireless LAN. It is based on EAP-TLS
authentication but uses a password instead of a client certificate for authentication. PEAP
(EAPGTC) uses a dynamic session-based WEP key derived from the USB device and RADIUS
server to encrypt data.
Networks that use an OTP user database require entering a hardware or software token
password to start the PEAP (EAP-GTC) authentication process and to gain access to the
network. Networks that use a Windows 2000 domain user database or an L DAP user database
(such as NDS) require entering a username, password, and domain name in order to start the
PEAP (EAP-GTC) authentication process.
z
The PEAP (EAP-MSCHAP V2) authentication type is based on EAPTLS authentication, but uses
password instead of a client certificate for authentication. PEAP (EAP-MSCHAP V2) uses a
dynamic session-based WEP key, which is derived from the USB device and RADIUS server, to
encrypt data.
To u se PEA P-GTC secu rit y In the A the ro s Client Utility, acce ss the Se cu rity tab in the
P rofile Management windo w.
1.
On the S ecu rity tab, choo se t he WPA radio b utton .
2.
O R: On t he Se curit y tab, choo se the 8 02.1x radio butto n.
3.
Choo se PEAP (EAP -GTC) f rom the dro p-d own menu.
4.
Cli ck the Configu re bu tton.
5.
Sele ct the app rop riate ne two rk ce rtificate autho rity f rom the dro p-d own li st.
6.
Spe cify a u ser name fo r inne r PEAP tunnel authen tication:
–
Check Use Windows Use r Name to u se the Windo ws u ser name a s the PEAP
u ser name.
–
O R: Ente r a PEAP u se r name in the User Name field to u se a sepa rat e u se r
name and start the PEAP authenti cation p ro ce ss.
18
7.
Choo se To ken o r Static Pa sswo rd, depe nding on th e u se r databa se.
Note that To ken u se s a ha rdwa re to ken devi ce o r t he Se cu re Computing SofTo ken
p rog ram (ve rsi on 1.3 or late r) to ob tain and en te r a one -time pa sswo rd during
auth entication .
8.
Cli ck Advan ced and :
–
Lea ve the se rver name field blan k fo r the client to a ccep t a ce rtifica te f rom
an y se rve r with a ce rtifica te signed by the au tho rity li sted in the Ne twork
Ce rtificat e Autho rit y d rop -do wn li st . (rec om mende d)
–
En ter the domain n ame of the serve r f rom which the client will accep t a
certificate .
9.
The login name u sed fo r PEAP tunnel aut hentica tion, fill s in au tomatically a s PE AP xxxxxxxxxxxx, whe re xxxxxxxxxxxx i s the compute r' s MA C add re ss. Change th e
login name if needed.
10.
Cli ck OK.
11.
Enable the p rofile.
Us ing PEAP-MSCHAP V2 Sec ur ity
Im portant Note ! To u se PEAP (E AP -MSCHAP V2 ) secu rity, the se rve r mu st have WPA PE AP certificate s, and the se rve r pro pertie s mu st al ready be set. Che ck with the IT
manage r.
To u se PEA P-MS CHAP V2 se cu rity In the Ath ero s Client Utility, acce ss the Secu rit y tab in
the P rofile Management windo w.
1.
On the S ecu rity tab, choo se t he WPA radio b utton .
O R: On t he Se curit y tab, choo se the 8 02.1x radio butto n.
2.
Choo se PEAP (EAP -MS CHA P V2 ) from the d rop -do wn menu .
3.
Cli ck the Configu re bu tton.
4.
Sele ct the app rop riate certificate f rom the d rop-down li st.
19
5.
6.
Spe cify a u ser name fo r inne r PEAP tunnel authen tication:
–
Check Use Windows Use r Name to u se the Windo ws u ser name a s the PEAP
u ser name.
–
O R: Ente r a PEAP u se r name in the User Name field to u se a sepa rat e u se r
name and start the PEAP authenti cation p ro ce ss.
Cli ck Advan ced and :
–
Lea ve the se rver name field blan k fo r the client to a ccep t a ce rtifica te f rom
an y se rve r with a ce rtifica te signed by the au tho rity li sted in the Ne twork
Ce rtificat e Autho rit y d rop -do wn li st . (rec om mende d)
–
En ter the domain n ame of the serve r f rom which the client will accep t a
certificate .
–
The login name u sed fo r PEAP tunnel aut hentica tion, fill s in au tomatically a s
PE AP -xxxxxxxxxxxx, whe re xxxxxxxxxxxx i s the compute r' s MA C
add re ss. Change t he login name if ne eded.
7.
Cli ck OK.
8.
Enable the p rofile.
20
Us ing LEAP Sec ur ity
Im portant Note ! LEAP se curit y requi re s that all infra st ructu re de vice s (e.g. acce ss
point s and se rve rs) a re configu red fo r LEAP au thentica tion. Check with the IT manage r.
To u se se cu rity In t he Athe ro s Client Utility, acce ss the Secu rit y tab in the Pro file
Management windo w.
Confi guri ng LE AP :
The LEAP authentication type uses Cisco Key Integrity Protocol (CKIP) and MMH message integrity
check (MIC) for data protection. The USB device uses the username and password to perform mutual
authentication with the RADIUS server through the access point. To use LEAP security, access the
Security tab in Profile Management.
1. In the ACU, edit the security settings by clicking New or Modify on the
Profile Management tab.
2. Choose a profile to edit, or name the new profile in the Profile
Management window. Enter the SSID of the access point the station
connects to.
3. On the Security tab, choose the WPA radio button.
OR: On the Security tab, choose the 802.1x radio button.
4. Choose LEAP from the drop-down menu.
1.
Cli ck the Configu re bu tton.
2.
Spe cify a u ser name and p a sswo rd:
Sele ct to Use Tempo ra ry User Name and Pa sswo rd b y choo sing the radio bu tton:
21
o
Check Use Windows Use r Name to u se the Windo ws u ser name a s the L EAP
u ser name.
o
O R: Che c k Manually P rompt fo r LEAP Use r Name and Pa ssword to manually
login and sta rt the LE AP au thentica tion p roce ss.
Sele ct to Use Sa ved User Name and Pa sswo rd b y choo sing the radio bu tton:
o
Spe cify the LE AP u se r name, p a sswo rd, and domain to sa ve and u se .
3.
En ter the u se r name an d pa sswo rd.
4.
Confi rm the pa sswo rd .
5.
Spe cify a domain name:
o
Check th e In clude Windows Logon Domain with Use r Name se tting to pa ss
the Windows login domain and u se r name to the RADIUS se rve r. (defaul t)
o
O R: Ente r a spe cific domain name .
6.
I f de si red, che ck No Ne two rk Conne ction Unle ss Use r I s Logg ed In to fo rce th e
wi rele ss a dapte r to di sa sso ciate af te r logging off .
7.
En ter the L EAP au thentica tion timeout time (be twe en 30 and 500 second s) to spe cify
ho w long L EAP should wait befo re decla ring authe ntication failed, and sending an
e rro r me ssage. The default i s 90 se cond s.
8.
Cli ck OK.
9.
Enable the p rofile.
3 .4 .2 Us ing WPA Pass phrase Sec ur ity
To u se WPA Pa ssph ra se se curit y I n the Athe ro s Client Utility, a cce ss the Se cu rity tab in the
P rofile Management windo w.
1. In the ACU, edit the security settings by clicking New or Modify on the Profile Management
tab.
2. Choose a profile to edit, or name the new profile in the Profile Management window. Enter
the SSID of the access point the client computer connects to.
3. On the Security tab, choose WPA Passphrase.
4. Click on the Security tab, and choose the WPA-PSK radio button. Click the
Configure button.
.
22
5. En ter the WP A pa ssph ra se (fo r A SCII te xt, ente r 8 -63 cha ra cte rs, fo r he xade cimal,
ente r 64 chara cte rs). Click OK.
6. Click O K and enable the p rofile.
3 .4 .3 Pre-Share d Enc r yption Ke ys
To use Pre-Shared Key (static WEP) security In the Atheros Client Utility, access the Security tab in
the Profile Management window.
1. In the ACU, edit the security settings by clicking New or Modify on the Profile Management tab.
2. Choose a profile to edit, or name the new profile in the Profile Management window. Enter the SSID
of the access point the client computer connects to.
3. On the Security tab, choose Pre-Shared Key (Static WEP).
Defining pre-shared encryption keys:
1.
Cli ck the Define P re -Sha red Keys radio bu tton on the S ecu rit y tab.
2.
Cli ck o n Configu re.
3.
Fill in the fields in the WEP Encryption keys dialog box:
Ke y Button
Descr ipti on
Ke y En try
Dete rmine s the ent ry method fo r an encryption key:
he xadecimal (0 -9, A -F), o r ASCII text (all keyb oard cha ra cte rs
e xcept spa ce s).
En cryption Keys
Sele ct s the de fault en cryption ke ys u sed. Only allo ws the
sele ction for a shared Fi rst, Second , Third, o r Fourth key
who se co rre sponding field ha s been completed.
WEP Keys (1 -4 )
Define s a set of sha red encryption keys fo r ne two rk
23
configu ration secu rity. At lea st one Sha red Key field mu st be
populated to ena ble se cu rity u sing a sha red key.
Cli ck o n the radio button to set the key a s t he default
en cryption key.
WEP Key Size
4.
Define s the size fo r each encryption key. The option s include:
o
64 - bit (e nte r 10 digit s fo r h exade cimal, 5 AS CI I
characte rs)
o
128 - bit (ente r 26 digit s fo r hexade cimal, 13
digit s fo r AS CI I )
o
152 -bit (en ter 32 digit s hexa decimal, 16 digit s
fo r AS CII )
Click OK for the changes to take effect.
Overwriting an Existing Static W EP Key
1.
Cli ck the Define P re -Sha red Keys radio bu tton on the S ecu rit y tab.
2.
Cli ck o n Configu re.
3.
In the windo w, all e xi sting static WEP keys a re di splayed a s a ste ri sks fo r secu rity
rea son s. Click in th e field of the exi sting st atic WE P ke y t o ove rwrite.
4.
Delete t he a ste ri sks in th at field.
5.
En ter a ne w key.
6.
Ma ke su re to select the T ran smit K ey bu tton to the left o f thi s ke y i s selec ted fo r the
ke y to t ran smit packet s.
7.
Cli ck OK.
Disabling Static W EP
To di sable sta tic WEP fo r a pa rticular p rofile, choo se None on t he P rofile
Management tab and click OK .
O R: Select any othe r secu rit y option on the Pro file Management t ab to automatically
di sable sta tic WEP .
24
4 Troubleshooting
Thi s chapte r p ro vide s solution s to p roblem s u sually encoun tered du ring the in stallation and
ope ration of the adapte r.
1. For Wi ndow s 98SE c om pute rs, i f the Ather os Cli ent Util ity fails to loa d
a fter pr operl y i ns talla ti on, cl ick on the w i ndow s “S tar t” button on your
tool bar , selec t the “r un” button, a nd enter
“C:\ Window s\s ys tem \aegis2.exe ” i nto the dia log box, then pr ess e nte r, a
dial og box w ill pop up, pl ease sele ct “i ns tal l” then press “ente r”.
2. For Wi ndow s XP or Window s XP SP1, please upda te your w indow s w i th
the fol low i ng hotfix http://s uppor t. micr os oft.com/ ?sci d=k b%3 Benus %3 B822603 &x=10 &y =13 i f your c opy of Window s XP has been upda te d
w ith S erv ice Pack 2 (SP2 ), you do not nee d to a ppl y this hotfix.
3. To Uni ns tall the Ather os Clie nt Utili ty, please double c lick on “se tup” on
your driv er i ns talla tion CD, then selec t the uni ns tal l opti on, the n press
e nter.
4. I n Wi ndow s ME, i f you receiv e an err or about IP HLPAPI. DLL, pl ease
l ogoff your acc ount, a nd re -logi n your acc ount.
5. I n Wi ndow s 98SE /ME, E rr ors ma y be e nc ountere d w he n the driv ers are
i ns talle d thr ough the “ Found New Har dw are Wiza rd” by c hoosi ng “ Don’t
sea rch. I w ill choose the driv er to i nsta ll ”. To prev ent this err or , please
foll ow page 7 of this user’s ma nua l.
Fr e que ntly Aske d Que stions (FAQ)
1. What is the I EEE 802 .11g s tandar d?
802. 11g i s the ne w I EEE standa rd fo r high -speed wi rele ss LA N communication s that
p rovide s fo r up to 54 Mbp s data ra te in the 2.4 GHz band . 802.11 g i s qui ckly becoming
the next main st ream wi rele ss LA N te chnology fo r the home, o ffice and public ne tworks.
802. 11g define s the u se of th e same OFDM modulation technique spe cified in IE EE
802. 11a fo r the 5 GHz f requ ency band an d applie s it in the same 2.4 G Hz f requency
band a s IEEE 8 02.11b. The 802.11g stan dard require s ba ckwa rd compatibility with
802. 11b.
The standa rd specifi cally call s fo r:
A. A new physi cal laye r fo r the 802.11 Medium A cce ss Cont rol (MAC) in the 2. 4 G Hz
f requen cy band, kno wn a s the extended rate P HY (E RP ). The E RP add s OFDM a s
a manda to ry ne w coding scheme fo r 6, 12 and 2 4 Mbp s (manda to ry speed s), and
18, 36, 48 and 54 Mbp s (op tional speed s). The E RP in clude s the modulation
25
scheme s found in 802.11b including CCK fo r 11 and 5.5 Mbp s a nd Ba rke r code
modulation f or 2 and 1 Mbp s.
B. A pro tection mechani sm called RTS/CTS that gove rn s ho w 802.1 1g devi ce s and
802. 11b de vice s inte rope rate.
2. What is the I EEE 802 .11b s tandar d?
The IE EE 802 .11b Wirele ss LA N standa rd subcommittee , which f ormulate s th e
st anda rd f or the indu st ry. The objective i s to enable wi rele ss LA N ha rd wa re f rom
diffe ren t manufa ctu re s to communicate .
3. What does IEEE 8 02.11 fea ture s uppor t?
The p rodu ct suppo rt s the following I EEE 802 .11 fun ction s:
z CSMA/ CA
plu s A ckno wledge P ro tocol
Roaming
z Au tomatic Rate Selection
z RTS /CTS Fea ture
z Multi-Channel
z Fra gmentation
z Po we r
Management
4. What is Ad-hoc?
An Ad -hoc in tegrated wirele ss LA N i s a g roup of compute rs, e ach ha s a Wirele ss LA N
adap ter, Connected a s an independ ent wirele ss LA N. Ad hoc wi rele ss LA N i s
applicable a t a depa rtmental scale fo r a b ranch o r SO HO ope ration.
5. What is Infr astruc ture?
An integ rated wi rele ss and wirele ss and wired LA N i s called an In f ra st ru ctu re
configu ration. Inf ra stru ctu re i s applicable to ente rp ri se scale fo r wirele ss acce ss to
cent ral databa se, or wi rele ss applica tion fo r mobile worke rs.
6. What is BSS I D?
A spe cific Ad hoc LAN i s called a Ba si c Se rvice S et (BSS ). Compute rs in a BSS mu st
be configu red with the same BSS I D.
7. What is WE P?
WEP i s Wi red Equivalent P riva cy, a dat a p riva cy me chani sm ba sed on a 40 bit sha red
ke y algo rithm, a s de scribed in the IEEE 802 .11 standa rd .
8. What is TKIP ?
TKIP i s a qui ck-fi x method to quickly o ve rcome the inhe rent wea kne sse s in WEP
se cu rity, e specially t he reu se of en cryp tion ke ys. TKIP i s involved in the IEEE 802.11i
WLA N secu rit y standa rd, an d the spe cification might be of ficially relea sed b y ea rly
2003 .
9. What is AES ?
AE S (Advan ced Encryp tion Stan dard ), a chip-ba sed securit y, h a s bee n developed to
en su re the highe st deg ree of se cu rity and authen ticity fo r digital info rmation, whe re ve r
26
and howe ve r communicated o r sto red , while ma king mo re ef ficient u se of ha rdware
and/ or sof tware than p re viou s encryption standa rd s. It i s al so included in IEEE 802.11i
st anda rd. Compa re with AES, TK IP i s a tempo ra ry p rotocol fo r replacing WE P se cu rity
until manufa ctu re rs implement AES at th e ha rd ware level.
10. Can Wire less pr oduc ts s uppor t pri nter sha ri ng?
Wirele ss product s pe rf orm the same fun ction a s LA N p rodu ct s. The refo re, Wi rele ss
p rodu ct s can wo rk with Net wa re, Windo ws 2000, o r othe r LA N op era ting system s to
su ppo rt p rinte r o r file sha ring.
11. Woul d the i nforma ti on be i nterce pted w hile trans mi tting on ai r?
WLA N f eatu re s t wo-fold p rote ction in secu rit y. On the h ard wa re side, a s with Direct
Sequen ce S prea d Spe ct rum te chnology, it ha s the inhere nt secu rit y feat ure of
scrambling. On the soft wa re si de, WLA N se rie s o ffe r the encryption fu nction (WE P) to
enhan ce secu rit y and A cce ss Cont rol. Use rs can se t it up depending upon thei r need s.
12. What is DSS S?Wha t is FHSS? And w ha t are thei r di ffere nces?
Fre quency-hopping sp read -spect rum (FHSS ) u se s a na rro wband ca rrie r that change s
f requen cy in a pat te rn tha t i s kno wn to both t ran smitte r and recei ve r. P rope rly
syn chronized, the ne t eff ect i s to maintain a single logi cal channel. To an unintende d
recei ve r, FHSS appea rs to be short -du ration impul se noi se. Dire ct -sequence sp read sp ect rum (DSSS ) gene rate s a redundan t bit pa tte rn f or each bit to be t ran smitted. Thi s
bit pa tte rn i s called a chip (o r chipping code ). The longer the chip i s, the gre ate r the
p robability that the o riginal data can be re covered . E ven if o ne o r mo re bit s in the chip
a re damaged du ring t ran smi ssion, sta ti stical technique s embedded in the radio can
reco ve r th e o riginal data without -the need for ret ran smi ssion. To an unintended
recei ve r, DSSS appea rs a s lo w po we r wideband noi se and i s rejected (ignored ) by
mo st na rro wband recei ve rs.
13. What is Spread Spec trum?
Sp read Spectrum tech nology i s a wideband radio f requ ency te chnique de veloped by
the military fo r u se in reliable, se cu re, mi ssion -critical communication system s. I t i s
de sign ed to t rade of f band width e fficiency for reliability, integ rity, and secu rit y. I n othe r
wo rd s, more band width i s con sumed tha n in the ca se of na rro wband t ran smi ssion, bu t
the t rade o ff p rodu ce s a signal that i s, in ef fect, loude r and thu s ea sie r to dete ct,
p rovided that the re ceive r knows the pa ramete rs of the spread-spe ct rum signal being
b road ca st . I f a re ceive r i s not t uned to the right f requency, a sp read – spe ct rum sign al
loo ks li ke b ackgro und noi se . There a re t wo main alte rna tive s, Dire ct Sequence Sp read
Spe ct rum (DSSS ) and Frequen cy Ho pping Sp read Sp ect rum (FHSS ).
27