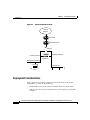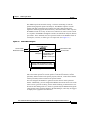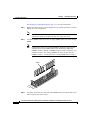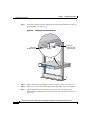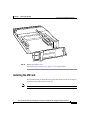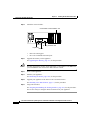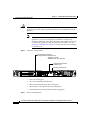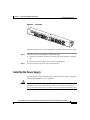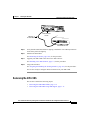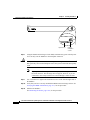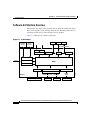
1
Cisco Intrusion Detection System
Appliance and Module Installation
and Configuration Guide
Version 4.1
Corporate Headquarters
Cisco Systems, Inc.
170 West Tasman Drive
San Jose, CA 95134-1706
USA
http://www.cisco.com
Tel: 408 526-4000
800 553-NETS (6387)
Fax: 408 526-4100
Customer Order Number: DOC-7815597=
Text Part Number: 78-15597-02
THE SPECIFICATIONS AND INFORMATION REGARDING THE PRODUCTS IN THIS MANUAL ARE SUBJECT TO CHANGE WITHOUT
NOTICE. ALL STATEMENTS, INFORMATION, AND RECOMMENDATIONS IN THIS MANUAL ARE BELIEVED TO BE ACCURATE BUT
ARE PRESENTED WITHOUT WARRANTY OF ANY KIND, EXPRESS OR IMPLIED. USERS MUST TAKE FULL RESPONSIBILITY FOR
THEIR APPLICATION OF ANY PRODUCTS.
THE SOFTWARE LICENSE AND LIMITED WARRANTY FOR THE ACCOMPANYING PRODUCT ARE SET FORTH IN THE INFORMATION
PACKET THAT SHIPPED WITH THE PRODUCT AND ARE INCORPORATED HEREIN BY THIS REFERENCE. IF YOU ARE UNABLE TO
LOCATE THE SOFTWARE LICENSE OR LIMITED WARRANTY, CONTACT YOUR CISCO REPRESENTATIVE FOR A COPY.
The following information is for FCC compliance of Class A devices: This equipment has been tested and found to comply with the limits for a Class
A digital device, pursuant to part 15 of the FCC rules. These limits are designed to provide reasonable protection against harmful interference when
the equipment is operated in a commercial environment. This equipment generates, uses, and can radiate radio-frequency energy and, if not installed
and used in accordance with the instruction manual, may cause harmful interference to radio communications. Operation of this equipment in a
residential area is likely to cause harmful interference, in which case users will be required to correct the interference at their own expense.
The following information is for FCC compliance of Class B devices: The equipment described in this manual generates and may radiate
radio-frequency energy. If it is not installed in accordance with Cisco’s installation instructions, it may cause interference with radio and television
reception. This equipment has been tested and found to comply with the limits for a Class B digital device in accordance with the specifications in
part 15 of the FCC rules. These specifications are designed to provide reasonable protection against such interference in a residential installation.
However, there is no guarantee that interference will not occur in a particular installation.
Modifying the equipment without Cisco’s written authorization may result in the equipment no longer complying with FCC requirements for Class
A or Class B digital devices. In that event, your right to use the equipment may be limited by FCC regulations, and you may be required to correct
any interference to radio or television communications at your own expense.
You can determine whether your equipment is causing interference by turning it off. If the interference stops, it was probably caused by the Cisco
equipment or one of its peripheral devices. If the equipment causes interference to radio or television reception, try to correct the interference by
using one or more of the following measures:
• Turn the television or radio antenna until the interference stops.
• Move the equipment to one side or the other of the television or radio.
• Move the equipment farther away from the television or radio.
• Plug the equipment into an outlet that is on a different circuit from the television or radio. (That is, make certain the equipment and the television
or radio are on circuits controlled by different circuit breakers or fuses.)
Modifications to this product not authorized by Cisco Systems, Inc. could void the FCC approval and negate your authority to operate the product.
The Cisco implementation of TCP header compression is an adaptation of a program developed by the University of California, Berkeley (UCB) as
part of UCB’s public domain version of the UNIX operating system. All rights reserved. Copyright © 1981, Regents of the University of California.
NOTWITHSTANDING ANY OTHER WARRANTY HEREIN, ALL DOCUMENT FILES AND SOFTWARE OF THESE SUPPLIERS ARE
PROVIDED “AS IS” WITH ALL FAULTS. CISCO AND THE ABOVE-NAMED SUPPLIERS DISCLAIM ALL WARRANTIES, EXPRESSED
OR IMPLIED, INCLUDING, WITHOUT LIMITATION, THOSE OF MERCHANTABILITY, FITNESS FOR A PARTICULAR PURPOSE AND
NONINFRINGEMENT OR ARISING FROM A COURSE OF DEALING, USAGE, OR TRADE PRACTICE.
IN NO EVENT SHALL CISCO OR ITS SUPPLIERS BE LIABLE FOR ANY INDIRECT, SPECIAL, CONSEQUENTIAL, OR INCIDENTAL
DAMAGES, INCLUDING, WITHOUT LIMITATION, LOST PROFITS OR LOSS OR DAMAGE TO DATA ARISING OUT OF THE USE OR
INABILITY TO USE THIS MANUAL, EVEN IF CISCO OR ITS SUPPLIERS HAVE BEEN ADVISED OF THE POSSIBILITY OF SUCH
DAMAGES.
CCSP, the Cisco Square Bridge logo, Follow Me Browsing, and StackWise are trademarks of Cisco Systems, Inc.; Changing the Way We Work, Live,
Play, and Learn, and iQuick Study are service marks of Cisco Systems, Inc.; and Access Registrar, Aironet, ASIST, BPX, Catalyst, CCDA, CCDP, CCIE,
CCIP, CCNA, CCNP, Cisco, the Cisco Certified Internetwork Expert logo, Cisco IOS, Cisco Press, Cisco Systems, Cisco Systems Capital, the Cisco
Systems logo, Cisco Unity, Empowering the Internet Generation, Enterprise/Solver, EtherChannel, EtherFast, EtherSwitch, Fast Step, FormShare,
GigaDrive, GigaStack, HomeLink, Internet Quotient, IOS, IP/TV, iQ Expertise, the iQ logo, iQ Net Readiness Scorecard, LightStream, Linksys,
MeetingPlace, MGX, the Networkers logo, Networking Academy, Network Registrar, Packet, PIX, Post-Routing, Pre-Routing, ProConnect, RateMUX,
ScriptShare, SlideCast, SMARTnet, StrataView Plus, SwitchProbe, TeleRouter, The Fastest Way to Increase Your Internet Quotient, TransPath, and VCO
are registered trademarks of Cisco Systems, Inc. and/or its affiliates in the United States and certain other countries.
All other trademarks mentioned in this document or Website are the property of their respective owners. The use of the word partner does not imply a
partnership relationship between Cisco and any other company. (0411R)
Cisco Intrusion Detection System Appliance and Module Installation and Configuration Guide
Copyright © 2004 Cisco Systems, Inc. All rights reserved.
C O N T E N T S
Preface xvii
Audience xvii
Conventions xviii
Related Documentation xix
Obtaining Documentation xix
Cisco.com xix
Ordering Documentation xx
Documentation Feedback xx
Obtaining Technical Assistance xxi
Cisco Technical Support Website xxi
Submitting a Service Request xxii
Definitions of Service Request Severity xxii
Obtaining Additional Publications and Information xxiii
CHAPTER
1
Introducing the Sensor 1-1
Appliances 1-1
Introducing the Appliance 1-2
How the Appliance Functions 1-3
Your Network Topology 1-4
Placing an Appliance on Your Network 1-6
Deployment Considerations 1-8
Appliance Restrictions 1-9
Setting Up a Terminal Server 1-9
Cisco Intrusion Detection System Appliance and Module Installation and Configuration Guide Version 4.1
78-15597-02
v
Contents
Modules 1-12
Introducing the Cisco Intrusion Detection System Network Module 1-12
Introducing the Cisco Catalyst 6500 Series Intrusion Detection System
Services Module 1-14
Supported Sensors 1-16
Setting the Time on Sensors 1-18
Installation Preparation 1-20
Working in an ESD Environment 1-21
CHAPTER
2
Installing the IDS-4210 2-1
Front Panel Features and Indicators 2-1
Upgrading the Memory 2-3
Installing the IDS-4210 2-5
Installing the Accessories 2-8
Accessories Package Contents 2-8
Installing and Removing the Bezel 2-9
Installing Center Mount Brackets 2-9
Installing Front Mount Brackets 2-11
CHAPTER
3
Installing the IDS-4215 3-1
Front and Back Panel Features 3-2
Specifications 3-4
Accessories 3-5
Surface Mounting 3-6
Rack Mounting 3-7
Installing the IDS-4215 3-9
vi
Cisco Intrusion Detection System Appliance and Module Installation and Configuration Guide Version 4.1
78-15597-02
Contents
Removing and Replacing the Chassis Cover 3-12
Removing the Chassis Cover 3-13
Replacing the Chassis Cover 3-15
Removing and Replacing the IDE Hard-Disk Drive 3-17
Removing the Hard-Disk Drive 3-18
Replacing the Hard-Disk Drive 3-20
Removing and Replacing the Compact Flash Device 3-21
Removing the Compact Flash Device 3-21
Replacing the Compact Flash Device 3-23
Removing and Installing the 4FE Card 3-25
Removing the 4FE Card 3-25
Installing the 4FE Card 3-27
CHAPTER
4
Installing the IDS-4220 and IDS-4230 4-1
Front and Back Panel Features 4-2
Recommended Keyboards and Monitors 4-4
Upgrading the IDS-4220-E and IDS-4230-FE to 4.x Software 4-5
Installing the IDS-4220 and IDS-4230 4-6
CHAPTER
5
Installing the IDS-4235 and IDS-4250 5-1
Front-Panel Features and Indicators 5-2
Back-Panel Features and Indicators 5-4
Specifications 5-5
Installing Spare Hard-Disk Drives 5-6
Upgrading the BIOS 5-7
Using the TCP Reset Interface 5-8
Installing the IDS-4235 and IDS-4250 5-9
Cisco Intrusion Detection System Appliance and Module Installation and Configuration Guide Version 4.1
78-15597-02
vii
Contents
Installing the Accessories 5-11
Accessories Package Contents 5-12
Installing and Removing the Bezel 5-12
Installing the Power Supply 5-13
Installing Optional PCI Cards 5-16
Disconnecting the XL Card Fiber Ports 5-19
Removing and Replacing the SCSI Hard-Disk Drive 5-20
Removing the SCSI Hard-Disk Drive 5-21
Replacing the SCSI Hard-Disk Drive 5-22
Four-Post Rack Installation 5-23
Recommended Tools and Supplies 5-23
Rack Kit Contents 5-23
Installing the Slide Assemblies 5-24
Installing the Appliance in the Rack 5-26
Installing the Cable-Management Arm 5-28
Routing the Cables 5-32
Two-Post Rack Installation 5-34
Recommended Tools and Supplies 5-35
Rack Kit Contents 5-35
Marking the Rack 5-35
Installing the Slide Assemblies in the Rack 5-36
CHAPTER
6
Installing the IPS-4240 and IPS-4255 6-1
Front and Back Panel Features 6-2
Specifications 6-5
Accessories 6-6
Rack Mounting 6-7
Installing the IPS-4240 and IPS-4255 6-9
viii
Cisco Intrusion Detection System Appliance and Module Installation and Configuration Guide Version 4.1
78-15597-02
Contents
CHAPTER
7
Installing the NM-CIDS 7-1
Specifications 7-1
Software and Hardware Requirements 7-2
Hardware Architecture 7-4
Front Panel Features 7-5
Interfaces 7-5
Installation and Removal Instructions 7-6
Required Tools 7-7
Installing the NM-CIDS 7-7
Installing the NM-CIDS Offline 7-7
Installing an NM-CIDS Using OIR Support 7-10
Removing the NM-CIDS 7-11
Removing the NM-CIDS Offline 7-12
Removing the NM-CIDS Using OIR Support 7-13
Blank Network Module Panels 7-14
CHAPTER
8
Installing the IDSM-2 8-1
Specifications 8-1
Software and Hardware Requirements 8-2
Supported IDSM-2 Configurations 8-3
Using the TCP Reset Interface 8-4
Front Panel Description 8-4
Installation and Removal Instructions 8-5
Required Tools 8-6
Slot Assignments 8-6
Installing the IDSM-2 8-7
Verifying the IDSM-2 Installation 8-11
Removing the IDSM-2 8-13
Cisco Intrusion Detection System Appliance and Module Installation and Configuration Guide Version 4.1
78-15597-02
ix
Contents
CHAPTER
Obtaining Software 9-1
9
Obtaining Cisco IDS Software 9-1
IDS Software Versioning 9-3
IDS Software Image Naming Conventions 9-3
4.x Software Release Examples 9-6
Upgrading Cisco IDS Software from Version 4.0 to 4.1 9-8
Using the Recovery/Upgrade CD with the Appliance 9-9
Applying for a Cisco.com Account with Cryptographic Access 9-11
IDS Bulletin 9-12
CHAPTER
10
Configuring the Sensor Using the CLI 10-1
Sensor Initial Configuration Tasks 10-2
Initializing the Sensor 10-2
Assigning and Enabling the Sensing Interface 10-9
Sensing Interfaces 10-11
Creating the Service Account 10-12
Logging in to the Sensor 10-14
Changing a Password 10-15
Adding a User 10-16
Removing a User 10-17
Adding Trusted Hosts 10-18
Adding Known Hosts to the SSH Known Hosts List 10-19
Configuring the Sensor to Use an NTP Server as its Time Source 10-21
Configuring a Cisco Router to be an NTP Server 10-22
Sensor Administrative Tasks 10-24
Displaying the Current Version and Configuration Information 10-24
Creating and Using a Backup Configuration File 10-28
Displaying and Clearing Events 10-28
Rebooting or Powering Down the Appliance 10-30
x
Cisco Intrusion Detection System Appliance and Module Installation and Configuration Guide Version 4.1
78-15597-02
Contents
Displaying Tech Support Information 10-31
Displaying and Clearing Statistics 10-33
Sensor Configuration Tasks 10-35
Configuring Signatures 10-35
Configuring Alarm Channel System Variables 10-35
Configuring Alarm Channel Event Filters 10-37
Viewing Signature Engine Parameters 10-39
Configuring Virtual Sensor System Variables 10-42
Tuning Signature Engines 10-45
IP Logging 10-50
Manual IP Logging for a Specific IP Address 10-51
Automatic IP Logging for a Specific Signature 10-53
Disabling IP Logging 10-55
Copying IP Log Files to Be Viewed 10-56
Configuring Blocking 10-57
Understanding Blocking 10-57
Before Configuring Blocking 10-59
Supported Blocking Devices 10-59
Configuring Blocking Properties 10-60
Configuring Addresses Never to Block 10-65
Configuring Logical Devices 10-66
Configuring Blocking Devices 10-67
Configuring the Sensor to be a Master Blocking Sensor 10-73
Obtaining a List of Blocked Hosts and Connections 10-75
How to Set up Manual Blocking and How to Unblock 10-76
NM-CIDS Configuration Tasks 10-77
Configuring Cisco IDS Interfaces on the Router 10-78
Establishing Cisco IDS Console Sessions 10-80
Using the Session Command 10-80
Suspending a Session and Returning to the Router 10-81
Cisco Intrusion Detection System Appliance and Module Installation and Configuration Guide Version 4.1
78-15597-02
xi
Contents
Closing an Open Session 10-81
Using Telnet 10-82
Rebooting the NM-CIDS 10-83
Setting Up Packet Capture 10-84
Checking the Status of the Cisco IDS Software 10-85
Supported Cisco IOS Commands 10-86
IDSM-2 Configuration Tasks 10-87
Configuring the Catalyst 6500 Series Switch for Command and Control
Access to the IDSM-2 10-88
Catalyst Software 10-89
Cisco IOS Software 10-89
Copying IDS Traffic 10-90
Using SPAN for Capturing IDS Traffic 10-90
Configuring VACLS to Capture IDS Traffic 10-92
Using the mls ip ids Command for Capturing IDS Traffic 10-96
Miscellaneous Tasks 10-98
Enabling a Full Memory Test 10-99
Resetting the IDSM-2 10-101
Catalyst Software Commands 10-103
Cisco IOS Software Commands 10-106
Reimaging Appliances and Modules 10-110
Reimaging the Appliance 10-110
Recovering the Application Partition Image 10-111
Upgrading the Recovery Partition Image 10-112
Installing the IDS-4215 System Image 10-113
Installing the IPS-4240 and IPS-4255 System Image 10-116
Reimaging the NM-CIDS Application Partition 10-119
Reimaging the IDSM-2 10-124
Reimaging the IDSM-2 10-125
Reimaging the Maintenance Partition 10-127
xii
Cisco Intrusion Detection System Appliance and Module Installation and Configuration Guide Version 4.1
78-15597-02
Contents
APPENDIX
A
Intrusion Detection System Architecture A-1
System Overview A-1
Software Architecture Overview A-2
Show Version Command Output A-4
User Interaction A-5
New Features in Version 4.x A-6
System Components A-7
MainApp A-8
SensorApp A-11
AuthenticationApp A-12
Authenticating Users A-12
Configuring Authentication on the Sensor A-13
Managing TLS and SSH Trust Relationships A-14
LogApp A-15
NAC A-16
About NAC A-17
NAC-Controlled Devices A-19
NAC Features A-19
ACLs and VACLs A-22
Maintaining State Across Restarts A-23
Connection-Based and Unconditional Blocking A-24
Blocking with the PIX Firewall A-25
Blocking with the Catalyst 6000 A-27
TransactionSource A-28
WebServer A-29
CLI A-29
User Account Roles A-30
Service Account A-31
CLI Behavior A-32
Regular Expression Syntax A-34
Cisco Intrusion Detection System Appliance and Module Installation and Configuration Guide Version 4.1
78-15597-02
xiii
Contents
EventStore A-36
About the EventStore A-36
Major Data Structures A-38
IDS Events A-39
System Architectural Details A-44
Communications A-45
IDAPI A-46
RDEP A-47
Sensor Directory Structure A-48
Summary of Applications A-49
APPENDIX
B
Troubleshooting B-1
Preventive Maintenance B-1
Disaster Recovery B-2
Troubleshooting the 4200 Series Appliance B-4
Communication B-4
Cannot Access the Sensor Through the IDM or Telnet and/or SSH B-5
IDM Cannot Access the Sensor B-7
Access List Misconfiguration B-10
Duplicate IP Address Shuts Interface Down B-10
SensorApp and Alerting B-11
Sensing Process Not Running B-11
Physical Connectivity, SPAN, or VACL Port Issue B-12
Unable to See Alerts B-14
Sensor Not Seeing Packets B-15
Cleaning Up a Corrupted SensorApp Configuration B-16
Running SensorApp in Single CPU Mode B-17
Bad Memory on the IDS-4250-XL B-18
xiv
Cisco Intrusion Detection System Appliance and Module Installation and Configuration Guide Version 4.1
78-15597-02
Contents
Blocking B-18
Verifying NAC is Running B-19
Verifying NAC is Connecting B-20
Device Access Issues B-22
Verifying the Interfaces/Directions on the Network Device B-23
Enabling SSH Connections to the Network Device B-24
Blocking Not Occurring for a Signature B-25
Verifying the Master Blocking Sensor Configuration B-26
Logging B-28
Enabling Debug Logging B-28
Zone Names B-31
Directing cidLog Messages to SysLog B-31
NTP B-33
Verifying that the Sensor is Synchronized with the NTP Server B-34
NTP Server Connectivity Problem B-35
NTP Reconfiguration Defect B-35
TCP Reset B-37
Reset Not Occurring for a Signature B-37
Using the TCP Reset Interface B-39
Software Upgrade B-39
IDS-4235 and IDS-4250 Hang During A Software Upgrade B-40
Which Updates to Apply and in Which Order B-40
Issues With Automatic Update B-41
Verifying the Version of the IDSM-2 and NM-CIDS 4.1(4) Images B-42
Updating a Sensor with the Update Stored on the Sensor B-43
Troubleshooting the IDSM-2 B-44
Diagnosing IDSM-2 Problems B-44
Switch Commands for Troubleshooting B-46
Status LED Off B-46
Status LED On But IDSM-2 Does Not Come Online B-48
Cisco Intrusion Detection System Appliance and Module Installation and Configuration Guide Version 4.1
78-15597-02
xv
Contents
Cannot Communicate With IDSM-2 Command and Control Port B-49
Using the TCP Reset Interface B-51
Connecting a Serial Cable to the IDSM-2 B-51
Gathering Information B-52
show tech-support Command B-52
show tech-support Command B-53
Displaying Tech Support Information B-53
show tech-support Command Output B-55
show version Command B-56
show version Command B-57
Displaying the Current Version B-57
show configuration/more current-config Command B-60
show statistics Command B-61
show statistics Command B-61
Displaying Statistics B-62
show statistics Command Output B-63
show interfaces Command B-64
show interfaces Command B-64
show interfaces Command Output B-65
show events Command B-66
Sensor Events B-67
show events Command B-67
Displaying and Clearing Events B-68
show events Command Output B-69
cidDump Script B-70
Uploading and Accessing Files on the Cisco FTP Site B-71
GLOSSARY
INDEX
xvi
Cisco Intrusion Detection System Appliance and Module Installation and Configuration Guide Version 4.1
78-15597-02
Preface
This guide describes how to install appliances and modules and provides basic
configuration procedures using the CLI.
This preface contains the following topics:
•
Audience, page xvii
•
Conventions, page xviii
•
Related Documentation, page xix
•
Obtaining Documentation, page xix
•
Documentation Feedback, page xx
•
Obtaining Technical Assistance, page xxi
•
Obtaining Additional Publications and Information, page xxiii
Audience
This guide is intended for audiences who need to do the following:
•
Install appliances and modules.
•
Secure their network with sensors.
•
Detect intrusion on their networks and monitor subsequent alarms.
Cisco Intrusion Detection System Appliance and Module Installation and Configuration Guide Version 4.1
78-15597-02
xvii
Preface
Conventions
Conventions
This guide uses the following conventions:
Note
Caution
Warning
xviii
Item
Convention
Commands and keywords
boldface font
Variables for which you supply values
italic font
Displayed session and system information
screen
Information you enter
boldface screen font
Variables you enter
italic screen
Menu items and button names
boldface font
Selecting a menu item
Option > Network Preferences
font
font
Means reader take note. Notes contain helpful suggestions or references to
material not covered in the guide.
Means reader be careful. In this situation, you might do something that could
result in equipment damage or loss of data.
This warning symbol means danger. You are in a situation that could cause
bodily injury. To see translations of the warnings that in this publication, refer
to the Regulatory Compliance and Safety Information document that
accompanied this device.
Cisco Intrusion Detection System Appliance and Module Installation and Configuration Guide Version 4.1
78-15597-02
Preface
Related Documentation
Related Documentation
Note
We sometimes update the printed and electronic documentation after original
publication. Therefore, you should also review the documentation on Cisco.com
for any updates.
The following product documentation is available:
•
Cisco Intrusion Detection System (IDS) Hardware and Software Version 4.1
Documentation Guide
•
Quick Start Guide for the Cisco Intrusion Detection System Version 4.1
•
Regulatory Compliance and Safety Information for the Cisco Intrusion
Detection System 4200 Series Appliance Sensor
•
Installing and Using the Cisco Intrusion Detection System Device Manager
and Event Viewer Version 4.1
•
Cisco Intrusion Detection System Command Reference Version 4.1
•
Release Notes for Cisco Intrusion Detection System Version 4.1
Refer to the Cisco Intrusion Detection System (IDS) Hardware and Software
Version 4.1 Documentation Guide for information on how to access this
documentation.
Obtaining Documentation
Cisco documentation and additional literature are available on Cisco.com. Cisco
also provides several ways to obtain technical assistance and other technical
resources. These sections explain how to obtain technical information from Cisco
Systems.
Cisco.com
You can access the most current Cisco documentation at this URL:
http://www.cisco.com/univercd/home/home.htm
Cisco Intrusion Detection System Appliance and Module Installation and Configuration Guide Version 4.1
78-15597-02
xix
Preface
Documentation Feedback
You can access the Cisco website at this URL:
http://www.cisco.com
You can access international Cisco websites at this URL:
http://www.cisco.com/public/countries_languages.shtml
Ordering Documentation
You can find instructions for ordering documentation at this URL:
http://www.cisco.com/univercd/cc/td/doc/es_inpck/pdi.htm
You can order Cisco documentation in these ways:
•
Registered Cisco.com users (Cisco direct customers) can order Cisco product
documentation from the Ordering tool:
http://www.cisco.com/en/US/partner/ordering/index.shtml
•
Nonregistered Cisco.com users can order documentation through a local
account representative by calling Cisco Systems Corporate Headquarters
(California, USA) at 408 526-7208 or, elsewhere in North America, by
calling 1 800 553-NETS (6387).
Documentation Feedback
You can send comments about technical documentation to [email protected].
You can submit comments by using the response card (if present) behind the front
cover of your document or by writing to the following address:
Cisco Systems
Attn: Customer Document Ordering
170 West Tasman Drive
San Jose, CA 95134-9883
We appreciate your comments.
xx
Cisco Intrusion Detection System Appliance and Module Installation and Configuration Guide Version 4.1
78-15597-02
Preface
Obtaining Technical Assistance
Obtaining Technical Assistance
For all customers, partners, resellers, and distributors who hold valid Cisco
service contracts, Cisco Technical Support provides 24-hour-a-day,
award-winning technical assistance. The Cisco Technical Support Website on
Cisco.com features extensive online support resources. In addition, Cisco
Technical Assistance Center (TAC) engineers provide telephone support. If you
do not hold a valid Cisco service contract, contact your reseller.
Cisco Technical Support Website
The Cisco Technical Support Website provides online documents and tools for
troubleshooting and resolving technical issues with Cisco products and
technologies. The website is available 24 hours a day, 365 days a year, at this
URL:
http://www.cisco.com/techsupport
Access to all tools on the Cisco Technical Support Website requires a Cisco.com
user ID and password. If you have a valid service contract but do not have a user
ID or password, you can register at this URL:
http://tools.cisco.com/RPF/register/register.do
Note
Use the Cisco Product Identification (CPI) tool to locate your product serial
number before submitting a web or phone request for service. You can access the
CPI tool from the Cisco Technical Support Website by clicking the Tools &
Resources link under Documentation & Tools. Choose Cisco Product
Identification Tool from the Alphabetical Index drop-down list, or click the
Cisco Product Identification Tool link under Alerts & RMAs. The CPI tool
offers three search options: by product ID or model name; by tree view; or for
certain products, by copying and pasting show command output. Search results
show an illustration of your product with the serial number label location
highlighted. Locate the serial number label on your product and record the
information before placing a service call.
Cisco Intrusion Detection System Appliance and Module Installation and Configuration Guide Version 4.1
78-15597-02
xxi
Preface
Obtaining Technical Assistance
Submitting a Service Request
Using the online TAC Service Request Tool is the fastest way to open S3 and S4
service requests. (S3 and S4 service requests are those in which your network is
minimally impaired or for which you require product information.) After you
describe your situation, the TAC Service Request Tool provides recommended
solutions. If your issue is not resolved using the recommended resources, your
service request is assigned to a Cisco TAC engineer. The TAC Service Request
Tool is located at this URL:
http://www.cisco.com/techsupport/servicerequest
For S1 or S2 service requests or if you do not have Internet access, contact the
Cisco TAC by telephone. (S1 or S2 service requests are those in which your
production network is down or severely degraded.) Cisco TAC engineers are
assigned immediately to S1 and S2 service requests to help keep your business
operations running smoothly.
To open a service request by telephone, use one of the following numbers:
Asia-Pacific: +61 2 8446 7411 (Australia: 1 800 805 227)
EMEA: +32 2 704 55 55
USA: 1 800 553-2447
For a complete list of Cisco TAC contacts, go to this URL:
http://www.cisco.com/techsupport/contacts
Definitions of Service Request Severity
To ensure that all service requests are reported in a standard format, Cisco has
established severity definitions.
Severity 1 (S1)—Your network is “down,” or there is a critical impact to your
business operations. You and Cisco will commit all necessary resources around
the clock to resolve the situation.
Severity 2 (S2)—Operation of an existing network is severely degraded, or
significant aspects of your business operation are negatively affected by
inadequate performance of Cisco products. You and Cisco will commit full-time
resources during normal business hours to resolve the situation.
xxii
Cisco Intrusion Detection System Appliance and Module Installation and Configuration Guide Version 4.1
78-15597-02
Preface
Obtaining Additional Publications and Information
Severity 3 (S3)—Operational performance of your network is impaired, but most
business operations remain functional. You and Cisco will commit resources
during normal business hours to restore service to satisfactory levels.
Severity 4 (S4)—You require information or assistance with Cisco product
capabilities, installation, or configuration. There is little or no effect on your
business operations.
Obtaining Additional Publications and Information
Information about Cisco products, technologies, and network solutions is
available from various online and printed sources.
•
Cisco Marketplace provides a variety of Cisco books, reference guides, and
logo merchandise. Visit Cisco Marketplace, the company store, at this URL:
http://www.cisco.com/go/marketplace/
•
The Cisco Product Catalog describes the networking products offered by
Cisco Systems, as well as ordering and customer support services. Access the
Cisco Product Catalog at this URL:
http://cisco.com/univercd/cc/td/doc/pcat/
•
Cisco Press publishes a wide range of general networking, training and
certification titles. Both new and experienced users will benefit from these
publications. For current Cisco Press titles and other information, go to Cisco
Press at this URL:
http://www.ciscopress.com
•
Packet magazine is the Cisco Systems technical user magazine for
maximizing Internet and networking investments. Each quarter, Packet
delivers coverage of the latest industry trends, technology breakthroughs, and
Cisco products and solutions, as well as network deployment and
troubleshooting tips, configuration examples, customer case studies,
certification and training information, and links to scores of in-depth online
resources. You can access Packet magazine at this URL:
http://www.cisco.com/packet
•
iQ Magazine is the quarterly publication from Cisco Systems designed to
help growing companies learn how they can use technology to increase
revenue, streamline their business, and expand services. The publication
Cisco Intrusion Detection System Appliance and Module Installation and Configuration Guide Version 4.1
78-15597-02
xxiii
Preface
Obtaining Additional Publications and Information
identifies the challenges facing these companies and the technologies to help
solve them, using real-world case studies and business strategies to help
readers make sound technology investment decisions. You can access iQ
Magazine at this URL:
http://www.cisco.com/go/iqmagazine
•
Internet Protocol Journal is a quarterly journal published by Cisco Systems
for engineering professionals involved in designing, developing, and
operating public and private internets and intranets. You can access the
Internet Protocol Journal at this URL:
http://www.cisco.com/ipj
•
World-class networking training is available from Cisco. You can view
current offerings at this URL:
http://www.cisco.com/en/US/learning/index.html
xxiv
Cisco Intrusion Detection System Appliance and Module Installation and Configuration Guide Version 4.1
78-15597-02
C H A P T E R
1
Introducing the Sensor
This chapter introduces the sensor and provides information you should know
before you install the sensor. In this guide, the term “sensor” refers to all models
unless specifically noted otherwise. See Supported Sensors, page 1-16, for a
complete list of supported sensors and their model numbers.
This chapter contains the following topics:
•
Appliances, page 1-1
•
Modules, page 1-12
•
Supported Sensors, page 1-16
•
Setting the Time on Sensors, page 1-18
•
Installation Preparation, page 1-20
•
Working in an ESD Environment, page 1-21
Appliances
This section describes the appliance and contains the following topics:
•
Introducing the Appliance, page 1-2
•
How the Appliance Functions, page 1-3
•
Your Network Topology, page 1-4
•
Placing an Appliance on Your Network, page 1-6
•
Deployment Considerations, page 1-8
Cisco Intrusion Detection System Appliance and Module Installation and Configuration Guide Version 4.1
78-15597-02
1-1
Chapter 1
Introducing the Sensor
Appliances
•
Appliance Restrictions, page 1-9
•
Setting Up a Terminal Server, page 1-9
Introducing the Appliance
The appliance is a high-performance, plug-and-play device. The appliance is a
component of the Intrusion Detection System (IDS), a network-based, real-time
intrusion detection system. See Supported Sensors, page 1-16, for a list of
supported appliances.
You can use the Command Line Interface (CLI), IDS Device Manager, or
Management Center for IDS Sensors to configure the appliance. Refer to your
IDS manager documentation. To access IDS documentation on Cisco.com, refer
to Cisco Intrusion Detection System (IDS) Hardware and Software Version 4.1
Documentation Guide that shipped with your appliance.
You can configure the appliance to respond to recognized signatures as it captures
and analyzes network traffic. These responses include logging the event,
forwarding the event to the IDS manager, performing a TCP reset, generating an
IP log, capturing the alert trigger packet, and/or reconfiguring a router.
After being installed at key points in the network, the appliance monitors and
performs real-time analysis of network traffic by looking for anomalies and
misuse based on an extensive, embedded signature library. When the system
detects unauthorized activity, appliances can terminate the specific connection,
permanently block the attacking host, log the incident, and send an alert to the IDS
manager. Other legitimate connections continue to operate independently without
interruption.
Appliances can also monitor and analyze syslog messages from Cisco routers to
detect and report network security policy violations.
Appliances are optimized for specific data rates and are packaged in Ethernet,
Fast Ethernet, and Gigabit Ethernet configurations. In switched environments,
appliances must be connected to the switch’s Switched Port Analyzer (SPAN) port
or VLAN Access Control list (VACL) capture port.
1-2
Cisco Intrusion Detection System Appliance and Module Installation and Configuration Guide Version 4.1
78-15597-02
Chapter 1
Introducing the Sensor
Appliances
How the Appliance Functions
This section explains how the appliance captures network traffic.
Each appliance comes with at least two interfaces. In a typical installation, one
interface monitors (sniffs) the desired network segment, and the other interface
(command and control) communicates with the IDS manager and other network
devices. The monitoring interface is in promiscuous mode, meaning it has no IP
address and is not visible on the monitored segment.
Note
With the addition of the 4-port Fast Ethernet NIC card, the IDS-4235, IDS-4250,
and the IDS-4215 have six interfaces. With the addition of the 2-port XL card, the
IDS-4250 has four interfaces. With the addition of the SX card, the IDS-4250 has
three interfaces.
The command and control interface is always Ethernet. This interface has an
assigned IP address, which allows it to communicate with the IDS manager
workstation or network devices (typically a Cisco router). Because this interface
is visible on the network, you should use encryption to maintain data privacy.
Secure Shell (SSH) is used to protect the Command Line Interface (CLI) and the
Transaction Layer Security/Secure Sockets Layer (TLS/SSL) is used to protect
the IDS manager workstation. Both SSH and TLS/SSL are enabled by default on
the IDS manager workstations.
When responding to attacks, the appliance can do the following:
•
Insert TCP resets via the monitoring interface.
Note
•
The TCP reset action is only appropriate as an action selection on
those signatures that are associated with a TCP-based service. If
selected as an action on non-TCP-based services, no action is taken.
Additionally, TCP resets are not guaranteed to tear down an offending
session because of limitations in the TCP protocol. On the
IDS-4250-XL, TCP resets are sent through the TCP Reset interface.
Make access control list (ACL) changes on routers that the appliance
manages.
Cisco Intrusion Detection System Appliance and Module Installation and Configuration Guide Version 4.1
78-15597-02
1-3
Chapter 1
Introducing the Sensor
Appliances
Note
•
ACLs may block only future traffic, not current traffic.
Generate IP session logs
IP session logs are used to gather information about unauthorized use. IP log
files are written when a certain event or events occur that you have configured
the appliance to look for.
Because the appliance is not in the data path, it has a negligible impact on network
performance. However, there are limitations on the data speeds it can monitor.
Your Network Topology
Before you deploy and configure your appliances, you should understand the
following about your network:
•
The size and complexity of your network.
•
Connections between your network and other networks (and the Internet).
•
The amount and type of network traffic on your network.
This knowledge will help you determine how many appliances are required, the
hardware configuration for each appliance (for example, the size and type of
network interface cards), and how many IDS managers are needed.
The appliance monitors all traffic across a given network segment. With that in
mind, you should consider all the connections to the network you want to protect.
These connections fall into four categories, or locations, as illustrated in
Figure 1-1 on page 1-5.
1-4
Cisco Intrusion Detection System Appliance and Module Installation and Configuration Guide Version 4.1
78-15597-02
Chapter 1
Introducing the Sensor
Appliances
Figure 1-1
Major Types of Network Connections
1
3
Appliance
Appliance
Dial-up
server
Internet
E-commerce
network
Appliance
Appliance
2
4
83874
Research and
Development
network
Business
partner
In location one, the appliance is placed to monitor traffic between the
E-commerce (protected) network and the Internet. This is referred to as perimeter
protection and is the most common deployment for an appliance. This location
can be shared with firewall protection and is discussed in Placing an Appliance on
Your Network, page 1-6.
In location two, the appliance is monitoring an extranet connection with a
business partner. Although most companies have defined policies on the use and
security of this type of connection, there is no guarantee that the network of a
partner is adequately protected. Consequently, an outsider may enter your
network through this type of connection. These extranet connections may have
firewalls as well.
In location three, the appliance is monitoring the network side of a remote access
server. Although this connection may be only for employee use, it could be
vulnerable to external attack.
In location four, the appliance is monitoring an intranet connection. For example,
the protected network of one department may contain an e-commerce site where
all the access types described so far are required. The network of another
department may contain company-specific research and development or other
engineering information and should be given additional protection.
Cisco Intrusion Detection System Appliance and Module Installation and Configuration Guide Version 4.1
78-15597-02
1-5
Chapter 1
Introducing the Sensor
Appliances
Determine which segments of the network you want to monitor to determine the
location for the appliance. Remember, each appliance maintains a security policy
configured for the segment it is monitoring. The security policies can be standard
across the organization or unique for each appliance. You may consider changing
your network topology to force traffic across a given monitored network segment.
There are always operational trade-offs when going through this process. The end
result should be a rough idea of the number of appliances required to protect the
desired network.
Placing an Appliance on Your Network
You can place an appliance in front of or behind a firewall. Each position has
benefits and drawbacks.
Placing an appliance in front of a firewall allows the appliance to monitor all
incoming and outgoing network traffic. However, when deployed in this manner,
the appliance does not detect traffic that is internal to the network. An internal
attacker taking advantage of vulnerabilities in network services would remain
undetected by the external appliance (see Figure 1-2 on page 1-7).
1-6
Cisco Intrusion Detection System Appliance and Module Installation and Configuration Guide Version 4.1
78-15597-02
Chapter 1
Introducing the Sensor
Appliances
Figure 1-2
Appliance in Front of a Firewall
Hostile
network
ISP router
Outermost router
Monitoring interface
IDS Appliance
Protected network
Control interface
Management host
97331
Firewall
Placing an appliance behind a firewall allows it to monitor internal traffic, but it
cannot monitor any policy violations that the firewall rejects (see Figure 1-3 on
page 1-8).
Cisco Intrusion Detection System Appliance and Module Installation and Configuration Guide Version 4.1
78-15597-02
1-7
Chapter 1
Introducing the Sensor
Appliances
Figure 1-3
Appliance Behind a Firewall
Hostile
network
ISP router
Outermost router
Firewall
Monitoring interface
Control interface
Appliance
Management network
Management
host
97332
Protected net
Deployment Considerations
For the appliance to effectively defend a network with a router and firewall
configuration, you must do the following:
1-8
•
Enable SSH services on the router if available, otherwise, enable Telnet.
•
Add the router to the device management list of the appliance (via the IDS
manager).
Cisco Intrusion Detection System Appliance and Module Installation and Configuration Guide Version 4.1
78-15597-02
Chapter 1
Introducing the Sensor
Appliances
•
Configure the firewall to permit the following traffic:
– SSH or Telnet traffic from the control interface of the appliance to the
router.
– Syslog (UDP port 514) traffic from the router to the appliance.
Note
To capture policy violations on the router, the appliance must also
be configured to accept syslog messages.
– Communications (TCP ports 443 for TLS/SSL and 22 for SSH) between
the appliance and any IDS manager workstation, if the firewall comes
between them.
Essentially, the firewall implements policy filtering. The appliance captures
packets between the Cisco router and the firewall, and can dynamically
update the ACLs of the Cisco router to deny unauthorized activity.
Note
You can also configure the appliance to manage a PIX Firewall
instead of the Cisco router.
Appliance Restrictions
The following restrictions apply to using and operating the appliance:
•
The appliance is not a general purpose workstation.
•
Cisco Systems prohibits using the appliance for anything other than operating
Cisco IDS.
•
Cisco Systems prohibits modifying or installing any hardware or software in
the appliance that is not part of the normal operation of the Cisco IDS.
Setting Up a Terminal Server
A terminal server is a router with multiple, low speed, asynchronous ports that are
connected to other serial devices. You can use terminal servers to remotely
manage network equipment, including appliances.
Cisco Intrusion Detection System Appliance and Module Installation and Configuration Guide Version 4.1
78-15597-02
1-9
Chapter 1
Introducing the Sensor
Appliances
To set up a Cisco terminal server with RJ-45 or hydra cable assembly connections,
follow these steps:
Step 1
Connect to a terminal server using one of the following methods:
•
For the IDS-4215, IPS-4240, and IPS-4255:
– For RJ-45 connections, connect a 180/rollover cable from the console
port on the appliance to a port on the terminal server.
– For hydra cable assemblies, connect a straight-through patch cable from
the console port on the appliance to a port on the terminal server.
•
For all other appliances, connect the M.A.S.H. adapter (part number
29-4077-01) to COM1 on the appliance and:
– For RJ-45 connections, connect a 180/rollover cable from the M.A.S.H.
adapter to a port on the terminal server.
– For hydra cable assemblies, connect a straight-through patch cable from
the M.A.S.H. adapter to a port on the terminal server.
Step 2
Configure the line/port on the terminal server as follows:
a.
In enable mode, type the following configuration, where # is the line number
of the port to be configured:
config t
line #
login
transport input all
stopbits 1
flowcontrol hardware
speed 9600
exit
exit
wr mem
b.
If you are configuring a terminal server for an IDS-4215, IPS-4240, or
IPS-4255, skip to Step 3.
Otherwise, for all other supported appliances, to direct all output to the
terminal server, log in to the IDS CLI and type the following commands:
sensor# configure terminal
sensor(config)# display-serial
1-10
Cisco Intrusion Detection System Appliance and Module Installation and Configuration Guide Version 4.1
78-15597-02
Chapter 1
Introducing the Sensor
Appliances
Output is directed to the serial port. Use the no display-serial command to
redirect output to the keyboard/monitor.
Step 3
Note
You can set up a terminal server and use the IDS CLI display-serial
command to direct all output from the appliance to the serial port.
This option enables you to view system messages on a console
connected to the serial port, even during the boot process. When you
use this option, all output is directed to the serial port and any local
keyboard/monitor connection is disabled. However, BIOS and POST
messages are still displayed on the local keyboard/monitor.
Note
There is only one console port on an IDS-4215, IPS-4240, and
IPS-4255; therefore, the display-serial and no display-serial
commands do not apply to those platforms.
Be sure to properly close a terminal session to avoid unauthorized access to the
appliance.
If a terminal session is not stopped properly, that is, if it does not receive an exit(0)
signal from the application that initiated the session, the terminal session can
remain open. When terminal sessions are not stopped properly, authentication is
not performed on the next session that is opened on the serial port.
Tip
Caution
Always exit your session and return to a login prompt before terminating
the application used to establish the connection.
If a connection is dropped or terminated by accident, you should reestablish the
connection and exit normally to prevent unauthorized access to the appliance.
Cisco Intrusion Detection System Appliance and Module Installation and Configuration Guide Version 4.1
78-15597-02
1-11
Chapter 1
Introducing the Sensor
Modules
Modules
This section describes the modules and contains the following topics:
•
Introducing the Cisco Intrusion Detection System Network Module,
page 1-12
•
Introducing the Cisco Catalyst 6500 Series Intrusion Detection System
Services Module, page 1-14
Introducing the Cisco Intrusion Detection System Network
Module
The Cisco Intrusion Detection System Network Module (NM-CIDS) integrates
the Cisco IDS functionality into a branch office router. With the NM-CIDS, you
can implement full-featured IDS at your remote branch offices. You can install the
NM-CIDS in any one of the network module slots on the Cisco 2600, 3600, and
3700 series routers. The NM-CIDS can monitor up to 45 Mbps of network traffic.
See Software and Hardware Requirements, page 7-2, for a list of supported
routers. Only one NM-CIDS is supported per router. Figure 1-4 on page 1-13
shows the IDS router in a branch office environment.
1-12
Cisco Intrusion Detection System Appliance and Module Installation and Configuration Guide Version 4.1
78-15597-02
Chapter 1
Introducing the Sensor
Modules
Figure 1-4
NM-CIDS in the Branch Office Router
Hacker A
outside
HQ
26xx/36xx/37/NG
Branch
Untrusted
network
Command
and control
Hacker B
Employee
87947
IDS network
module
The NM-CIDS has one internal 10/100 Ethernet port that connects to the router’s
backplane. There is also one external 10/100-based Ethernet port that is used for
device management (management of other routers and/or PIX Firewalls to
perform shunning) and command and control of the NM-CIDS by IDS managers.
The NM-CIDS communicates with the router to exchange control and state
information for bringing up and shutting down the NM-CIDS and to exchange
version and status information. The NM-CIDS processes packets that are
forwarded from selected interfaces on the router to the IDS interface on the
NM-CIDS. The NM-CIDS analyzes the captured packets and compares them
against a rule set of typical intrusion activity called signatures. If the captured
packets match a defined intrusion pattern in the signatures, the NM-CIDS can take
one of two actions: it can make ACL changes on the router to block the attack, or
it can send a TCP reset packet to the sender to stop the TCP session that is causing
the attack.
Cisco Intrusion Detection System Appliance and Module Installation and Configuration Guide Version 4.1
78-15597-02
1-13
Chapter 1
Introducing the Sensor
Modules
In addition to analyzing captured packets to identify malicious activity, the
NM-CIDS can also perform IP session logging that can be configured as a
response action on a per-signature basis. When the signature fires, session logs are
created over a specified time period in a TCPDump format. You can view these
logs using Ethereal or replay the IP session using tools such as TCP Replay.
Note
The NM-CIDS does not support sending syslog messages to a syslog server if
there is an intrusion event, nor does it support Simple Network Management
Protocol (SNMP) traps.
You can manage and retrieve events from the NM-CIDS through the CLI or
through one of these IDS managers—IDS Device Manager or Management
Center for IDS Sensors. For instructions on accessing IDS documentation on
Cisco.com, refer to Cisco Intrusion Detection System (IDS) Hardware and
Software Version 4.1 Documentation Guide that shipped with your NM-CIDS.
The IDS requires a reliable time source. All the events (alerts) must have the
correct time stamp, otherwise, you cannot correctly analyze the logs after an
attack. You cannot manually set the time on the NM-CIDS. The NM-CIDS gets
its time from the Cisco router in which it is installed. Routers do not have a battery
so they cannot preserve a time setting when they are powered off. You must set
the router’s clock each time you power up or reset the router, or you can configure
the router to use NTP time synchronization. We recommend NTP time
synchronization. You can configure either the NM-CIDS itself or the router it is
installed in to use NTP time synchronization. See Setting the Time on Sensors,
page 1-18, for more information.
Introducing the Cisco Catalyst 6500 Series Intrusion Detection
System Services Module
The Cisco Catalyst 6500 Series Intrusion Detection System Services Module
(IDSM-2) is a switching module that performs intrusion detection in the Catalyst
6500 series switch. You can use the CLI, IDS Device Manager, or Management
Center for IDS Sensors to configure the IDSM-2. For instructions on accessing the
IDS documentation on Cisco.com, refer to the Cisco Intrusion Detection System
(IDS) Hardware and Software Version 4.1 Documentation Guide that shipped
with your IDSM-2.
1-14
Cisco Intrusion Detection System Appliance and Module Installation and Configuration Guide Version 4.1
78-15597-02
Chapter 1
Introducing the Sensor
Modules
The IDSM-2 performs network sensing—real-time monitoring of network
packets through packet capture and analysis. The IDSM-2 captures network
packets and then reassembles and compares the packet data against attack
signatures indicating typical intrusion activity. Network traffic is either copied to
the IDSM-2 based on security VLAN access control lists (VACLs) in the switch
or is copied to the IDSM-2 through the switch’s Switched Port Analyzer (SPAN)
port feature. These methods route user-specified traffic to the IDSM-2 based on
switch ports, VLANs, or traffic type to be inspected. (See Figure 1-5.)
Figure 1-5
IDSM-2 Block Diagram
Cisco 6500 switch
Source traffic
Destination traffic
Destination traffic
Source traffic
Switch
backplane Copied VACL traffic
or SPAN traffic to
IDSM-2 monitor port
IDSM-2
IDS Management Console
83877
Alarms and configuration through
IDS Module command and control port
The IDSM-2 searches for patterns of misuse by examining either the data portion
and/or the header portion of network packets. Content-based attacks contain
potentially malicious data in the packet payload, whereas, context-based attacks
contain potentially malicious data in the packet headers.
You can configure the IDSM-2 to generate an alert when it detects potential
attacks. Additionally, you can configure the IDSM-2 to transmit TCP resets on the
source VLAN, generate an IP log, and/or initiate blocking countermeasures on a
firewall or other managed device. Alerts are generated by the IDSM-2 through the
Catalyst 6500 series switch backplane to the IDS manager, where they are logged
or displayed on a graphical user interface.
Cisco Intrusion Detection System Appliance and Module Installation and Configuration Guide Version 4.1
78-15597-02
1-15
Chapter 1
Introducing the Sensor
Supported Sensors
Supported Sensors
Table 1-1 lists the sensors (appliances and modules) that are supported in this
document and that are supported by the most recent Cisco IDS software.
Note
Caution
For instructions on how to obtain the most recent Cisco IDS software, see
Obtaining Cisco IDS Software, page 9-1.
Installing the most recent Cisco IDS software (version 4.1) on unsupported
sensors may yield unpredictable results. We do not support software installed on
unsupported platforms.
Table 1-1
Supported Sensors
Model Name
Part Number
Optional Interfaces
IDS-4210
IDS-4210
IDS-4210-K9
IDS-4210-NFR
—
—
—
IDS-4215
IDS-4215-K9
IDS-4FE-INT=
IDS-4215-4FE-K9
—
IDS-4220
IDS-4220-E
—
IDS-4230
IDS-4230-FE
—
IDS-4235
IDS-4235-K9
IDS-4FE-INT=
IDS-4250
IDS-4250-TX-K9
IDS-4FE-INT=,
IDS-4250-SX-INT=,
IDS-XL-INT=
IDS-4250-SX-K9
IDS-XL-INT=
IDS-4250-XL-K9
—
IPS-4240-K9
—
Appliances
IPS-4240
1-16
Cisco Intrusion Detection System Appliance and Module Installation and Configuration Guide Version 4.1
78-15597-02
Chapter 1
Introducing the Sensor
Supported Sensors
Table 1-1
Supported Sensors (continued)
Model Name
Part Number
Optional Interfaces
IPS-4255-K9
—
NM-CIDS-K9
—
WS-SVC-IDSM2-K9
—
Appliances
IPS-4255
Network Modules
NM-CIDS
Services Modules
IDSM-2
Note
The IDS-4215-4FE-K9 is the IDS-4215-K9 with the optional 4FE card
(IDS-4FE-INT=) installed at the factory.
The following IDS appliance models are legacy models and are not supported in
this document:
•
NRS-2E
•
NRS-2E-DM
•
NRS-2FE
•
NRS-2FE-DM
•
NRS-TR
•
NRS-TR-DM
•
NRS-SFDDI
•
NRS-SFDDI-DM
•
NRS-DFDDI
•
NRS-DFDDI-DM
•
IDS-4220-TR
•
IDS-4230-SFDDI
•
IDS-4230-DFDDI
Cisco Intrusion Detection System Appliance and Module Installation and Configuration Guide Version 4.1
78-15597-02
1-17
Chapter 1
Introducing the Sensor
Setting the Time on Sensors
Note
The WS-X6381, the IDSM, is a legacy model and is not supported in this
document.
Note
The IDS-4210 and IDS-4220-E require memory upgrades to support the latest
IDS software. See Upgrading the Memory, page 2-3, for more information.
Setting the Time on Sensors
The sensor requires a reliable time source. All events (alerts) must have the
correct GMT and local time stamp, otherwise, you cannot correctly analyze the
logs after an attack. When you initialize your sensor, you set up the time zones
and summer time settings. See Initializing the Sensor, page 10-2, for more
information.
Here is a summary of ways to set the time on sensors:
•
For appliances
– Use the clock set command to set the time. This is the default.
Refer to Cisco Intrusion Detection System Command Reference Version
4.1 for information on the clock set command.
– Use Network Timing Protocol (NTP).
You can configure your appliance to get its time from an NTP time
synchronization source. See Configuring a Cisco Router to be an NTP
Server, page 10-22. You will need the NTP server IP address, the NTP
key ID, and the NTP key value. You can set up NTP on the appliance
during initialization or you can configure NTP later. See Configuring the
Sensor to Use an NTP Server as its Time Source, page 10-21, for more
information.
Note
1-18
We recommend that you use an NTP time synchronization
source.
Cisco Intrusion Detection System Appliance and Module Installation and Configuration Guide Version 4.1
78-15597-02
Chapter 1
Introducing the Sensor
Setting the Time on Sensors
•
For IDSM-2
– The IDSM-2 can automatically synchronize its clock with the switch
time. This is the default.
Note
Caution
The GMT time is synchronized between the switch and the
IDSM-2. The time zone and summer time settings are not
synchronized between the switch and the IDSM-2.
Be sure to set the time zone and summertime settings on both the switch and the
IDSM-2 to ensure that the GMT time settings are correct. The IDSM2’s local time
will be incorrect if the timezone and/or summertime settings do not match
between the IDSM-2 and the switch.
– Use NTP.
You can configure your IDSM-2 to get its time from an NTP time
synchronization source. See Configuring a Cisco Router to be an NTP Server,
page 10-22. You will need the NTP server IP address, the NTP key ID, and
the NTP key value. You can configure the IDSM-2 to use NTP during
initialization or you can set up NTP later. See Configuring the Sensor to Use
an NTP Server as its Time Source, page 10-21, for more information.
Note
•
We recommend that you use an NTP time synchronization source.
For NM-CIDS
– The NM-CIDS can automatically synchronize its clock with the clock in
the router chassis in which it is installed (parent router). This is the
default.
Note
The GMT time is synchronized between the parent router and the
NM-CIDS. The time zone and summer time settings are not
synchronized between the parent router and the NM-CIDS.
Cisco Intrusion Detection System Appliance and Module Installation and Configuration Guide Version 4.1
78-15597-02
1-19
Chapter 1
Introducing the Sensor
Installation Preparation
Caution
Be sure to set the time zone and summertime settings on both the parent router
and the NM-CIDS to ensure that the GMT time settings are correct. The
NM-CIDS’s local time will be incorrect if the timezone and/or summertime
settings do not match between the NM-CIDS and the router.
– Use NTP.
You can configure your NM-CIDS to get its time from an NTP time
synchronization source, such as a Cisco router other than the parent router.
See Configuring a Cisco Router to be an NTP Server, page 10-22. You will
need the NTP server IP address, the NTP key ID, and the NTP key value. You
can configure the NM-CIDS to use NTP during initialization or you can set
up NTP later. See Configuring the Sensor to Use an NTP Server as its Time
Source, page 10-21, for more information.
Note
We recommend that you use an NTP time synchronization source.
Installation Preparation
To prepare for installing sensors, follow these steps:
Step 1
Review the safety precautions outlined in the Regulatory Compliance and Safety
Information for the Cisco Intrusion Detection System 4200 Series Appliance
Sensor that shipped with your sensor.
Step 2
To familiarize yourself with the location of IDS documentation on Cisco.com,
read the Cisco Intrusion Detection System (IDS) Hardware and Software Version
4.1 Documentation Guide that shipped with your sensor.
Step 3
Obtain the Release Notes for the Cisco Intrusion Detection System Version 4.1
from Cisco.com and completely read them before proceeding with the
installation.
Step 4
Unpack the sensor.
Step 5
Place the sensor in an ESD-controlled environment.
See Working in an ESD Environment, page 1-21, for the procedure.
1-20
Cisco Intrusion Detection System Appliance and Module Installation and Configuration Guide Version 4.1
78-15597-02
Chapter 1
Introducing the Sensor
Working in an ESD Environment
Step 6
Place the sensor on a stable work surface.
Step 7
Refer to the chapter that pertains to your sensor model.
Working in an ESD Environment
Work on ESD-sensitive parts only at an approved static-safe station on a grounded
static dissipative work surface, for example, an ESD workbench or static
dissipative mat.
To remove and replace components in a sensor, follow these steps:
Step 1
Remove all static-generating items from your work area.
Step 2
Use a static dissipative work surface and wrist strap.
Note
Step 3
Disposable wrist straps, typically those included with an upgrade part, are
designed for one time use.
Attach the wrist strap to your wrist and to the terminal on the work surface. If you
are using a disposable wrist strap, connect the wrist strap directly to an unpainted
metal surface of the chassis.
Cisco Intrusion Detection System Appliance and Module Installation and Configuration Guide Version 4.1
78-15597-02
1-21
Chapter 1
Introducing the Sensor
Working in an ESD Environment
24304
Copper foil
100 Mbps Link
PIX-515
DO NOT INSTALL INTERFACE
CARDS WITH POWER APPLIED
FDX
10/100 ETHERNET 0/0
Step 4
Caution
FAILOVER
FDX
10/100 ETHERNET 0/0
CONSOLE
Connect the work surface to the chassis using a grounding cable and alligator clip.
Always follow ESD-prevention procedures when removing, replacing, or
repairing components.
Note
1-22
100 Mbps Link
If you are upgrading a component, do not remove the component from the
ESD packaging until you are ready to install it.
Cisco Intrusion Detection System Appliance and Module Installation and Configuration Guide Version 4.1
78-15597-02
C H A P T E R
2
Installing the IDS-4210
This chapter describes the IDS-4210 and how to install it and its accessories.
Note
IDS-4215 replaces the IDS-4210, which will no longer be sold after July 2003.
Note
If you purchased an IDS-4210 before July 2003, you must upgrade the memory to
256 MB to install Cisco IDS 4.1. See Upgrading the Memory, page 2-3 for more
information. If you purchase an IDS-4210 during July, it comes from the factory
with the memory upgrade and version 4.1 installed.
This chapter contains the following sections:
•
Front Panel Features and Indicators, page 2-1
•
Upgrading the Memory, page 2-3
•
Installing the IDS-4210, page 2-5
•
Installing the Accessories, page 2-8
Front Panel Features and Indicators
Figure 2-1 on page 2-2shows the front panel indicators on the IDS-4210.
Cisco Intrusion Detection System Appliance and Module Installation and Configuration Guide Version 4.1
78-15597-02
2-1
Chapter 2
Installing the IDS-4210
Front Panel Features and Indicators
Front Panel Features
87951
Figure 2-1
LAN 1 activity/link
indicator
LAN 2 activity/link
indicator
System fault indictor
Power indicator
1
2
Hard-disk drive
activity indicator
Table 2-1 describes the appearance and function of the front panel indicators.
Table 2-1
2-2
Front Panel Indicators
Indicator
Color
Function
Power
Green
Lights up when the system is connected to
an AC power source; blinks when the
system is in sleep mode.
System fault
Amber
Blinks during system startup or when a
system fault is detected.
Hard-disk drive activity Green
Blinks when hard-disk drive activity
occurs.
LAN1 activity/link
Amber
Lights up when the LAN1 connector is
linked to an Ethernet port; blinks when
activity occurs on this channel.
LAN2 activity/link
Amber
Lights up when the LAN2 connector is
linked to an Ethernet port; blinks when
activity occurs on this channel.
Cisco Intrusion Detection System Appliance and Module Installation and Configuration Guide Version 4.1
78-15597-02
Chapter 2
Installing the IDS-4210
Upgrading the Memory
Upgrading the Memory
The IDS-4210, IDS-4210-K9, IDS-4210-NFR, and IDS-4220-E sensors must
have 512 MB RAM to support Cisco IDS 4.1 software. If you are upgrading an
existing IDS-4210, IDS-4210-K9, IDS-4210-NFR, or IDS-4220-E sensor to
version 4.1, you must insert additional Dual In-line Memory Modules (DIMMs)
(see part numbers below for supported DIMMs) to upgrade the memory to the
required 512 MB minimum.
The following DIMMs are supported:
Note
Caution
•
For IDS-4210 sensors, you insert one additional 256 MB DIMM (Part number
IDS-4210-MEM-U) for a total of 512 MB.
•
For the IDS-4220-E sensor, you insert two additional 128 MB DIMMs (Part
number IDS-4220-MEM-U) for a total of 512 MB.
Do not install an unsupported DIMM. Doing so nullifies your warranty.
Be sure to read the safety warnings in the Regulatory Compliance and Safety
Information for the Cisco Intrusion Detection System 4200 Series Appliance
Sensor and follow proper safety procedures when performing these steps.
To upgrade the memory, follow these steps:
Step 1
Log in to the CLI.
Step 2
Prepare the appliance to be powered off:
sensor# reset powerdown
Wait for the power down message before continuing with Step 3.
Note
You can also power down the sensor from IDM or IDS MC.
Step 3
Power off the appliance.
Step 4
Remove the power cord and other cables from the appliance.
Step 5
Place the appliance in an ESD-controlled environment.
Cisco Intrusion Detection System Appliance and Module Installation and Configuration Guide Version 4.1
78-15597-02
2-3
Chapter 2
Installing the IDS-4210
Upgrading the Memory
See Working in an ESD Environment, page 1-21, for more information.
Step 6
Remove the chassis cover by unscrewing the screw(s) on the front of the cover and
sliding the cover straight back.
Note
Step 7
IDS-4210 sensors have a single screw on the front cover. IDS-4220
sensors have three screws spaced evenly across the front cover.
Locate the DIMM sockets and select an empty DIMM socket next to the existing
DIMM.
Note
On IDS-4210 sensors, the existing DIMM is installed in socket 0. The
angled position of the DIMM sockets make installing an additional
DIMM in socket 1 difficult if a DIMM occupies socket 0. Therefore, you
should first remove the existing DIMM from socket 0, place the new
DIMM in socket 1, and then place the existing DIMM back in socket 0.
B
a
B nk
an 3
B k
a
B nk 2
an 1
k
0
41167
DIMM
Step 8
2-4
Locate the ejector tabs on either side of the DIMM socket. Press down and out on
tabs to open the slot in the socket.
Cisco Intrusion Detection System Appliance and Module Installation and Configuration Guide Version 4.1
78-15597-02
Chapter 2
Installing the IDS-4210
Installing the IDS-4210
Step 9
Install the new DIMM (one at a time if you are installing more than one), by
positioning the DIMM into the socket and pressing it into place.
Note
Do not force the DIMM into the socket. Alignment keys on the DIMM
ensure that it only fits in the socket one way. If you need additional
leverage, you can gently press down on the DIMM with your thumbs
while pulling up on the ejector tabs.
Step 10
Replace the chassis cover and reconnect the power.
Step 11
Power on the sensor and ensure the new memory total is correct.
Note
If the memory total does not reflect the added DIMMs, repeat Steps 1
through 4 to ensure the DIMMs are seated correctly in the socket.
Installing the IDS-4210
Warning
Caution
Note
Only trained and qualified personnel should be allowed to install, replace, or
service this equipment. Statement 1030
Be sure to read the safety warnings in the Regulatory Compliance and Safety
Information for the Cisco Intrusion Detection System 4200 Series Appliance
Sensor and follow proper safety procedures when performing these steps.
If you purchased an IDS-4210 before July 2003, you must upgrade the memory to
256 MB to install Cisco IDS 4.1. See Upgrading the Memory, page 2-3, for more
information. If you purchase an IDS-4210 during July, it comes from the factory
with the memory upgrade and version 4.1 installed.
Cisco Intrusion Detection System Appliance and Module Installation and Configuration Guide Version 4.1
78-15597-02
2-5
Chapter 2
Installing the IDS-4210
Installing the IDS-4210
To install the IDS-4210 on your network, follow these steps:
Step 1
Position the appliance on the network.
See Placing an Appliance on Your Network, page 1-6 for information on the best
places to position an appliance.
Step 2
Attach the power cord to the appliance and plug it in to a power source (a UPS is
recommended).
Note
Step 3
When you first plug an IDS-4210 into a power source, it powers on
momentarily and then powers off leaving the Network Interface Card
(NIC) link lights lit. This is normal behavior. Press the power switch to
boot the system into operation.
Use the dual serial communication cable (PN 72-1847-01, included in the
accessory kit) to attach a laptop to the COM1 port of the IDS appliance (see
Table 2-2 for a list of the terminal settings), or connect a keyboard and monitor to
the appliance.
Table 2-2
Caution
2-6
Terminal Settings
Terminal
Setting
Bits per second
9600
Data bits
8
Parity
None
Stop bits
1
Flow control
Hardware or RTS/CTS
We recommend that you use the dual serial communication cable (PN
72-1847-01, included in the accessory kit) rather than a keyboard and monitor,
because some keyboards and monitors may be incompatible with the appliance.
Cisco Intrusion Detection System Appliance and Module Installation and Configuration Guide Version 4.1
78-15597-02
Chapter 2
Installing the IDS-4210
Installing the IDS-4210
Note
Step 4
You can use a 180/rollover or straight-through patch cable to connect the
appliance to a port on a terminal server with RJ-45 or hydra cable
assembly connections. Use a M.A.S.H adapter (part number 29-4077-02)
to connect the appropriate cable to a port on the terminal server. See
Setting Up a Terminal Server, page 1-9 for the instructions for setting up
a terminal server.
Attach the network cables.
Command
and Control
interface: int1
Mouse
(unused)
COM1
83723
AC power
Keyboard
Step 5
USB
(unused)
Sniffing
interface: int0
•
int0 is the sensing port.
•
int1 is the command and control port.
Video
Upgrade the memory on the appliance.
See Upgrading the Memory, page 2-3, for the procedure.
Caution
You must upgrade the memory on the IDS-4210 to a minimum of 512 MB before
you can install the most recent Cisco IDS software version.
Step 6
Power on the appliance.
Step 7
Initialize your appliance.
See Initializing the Sensor, page 10-2, for the procedure.
Step 8
Upgrade your appliance to the latest Cisco IDS software.
See Obtaining Cisco IDS Software, page 9-1, for the procedure.
Cisco Intrusion Detection System Appliance and Module Installation and Configuration Guide Version 4.1
78-15597-02
2-7
Chapter 2
Installing the IDS-4210
Installing the Accessories
Step 9
Assign the interfaces.
See Assigning and Enabling the Sensing Interface, page 10-9, for the procedure.
You are now ready to configure intrusion detection on your appliance.
Installing the Accessories
You can install a bezel, and center or front mounting brackets for your IDS-4210.
This section contains the following topics:
•
Accessories Package Contents, page 2-8
•
Installing and Removing the Bezel, page 2-9
•
Installing Center Mount Brackets, page 2-9
•
Installing Front Mount Brackets, page 2-11
Accessories Package Contents
The following items are shipped in the accessories package for the IDS-4210:
2-8
•
Cisco IDS-4210 bezel
•
Power cable
•
Network patch cable
•
Computer interconnection cable
•
Dual serial communication cable
•
Rack mounting brackets
Cisco Intrusion Detection System Appliance and Module Installation and Configuration Guide Version 4.1
78-15597-02
Chapter 2
Installing the IDS-4210
Installing the Accessories
•
Documentation and software
– Cisco IDS recovery/upgrade CD
– Cisco Documentation CD
– Cisco Intrusion Detection System (IDS) Hardware and Software Version
4.1 Documentation Guide
– Regulatory Compliance and Safety Information for the Cisco Intrusion
Detection System 4200 Series Appliance Sensor
Installing and Removing the Bezel
You can install a Cisco bezel for the IDS-4210.
To install and remove the bezel on the IDS-4210, follow these steps:
Step 1
Step 2
To insert the bezel on the appliance, follow these steps:
a.
Align the bottom tabs on the bezel with the slots on the appliance.
b.
Align the side tabs on the bezel with the slots on the appliance.
c.
Press the bezel into the appliance.
To remove the bezel from the appliance, press the side tabs and pull.
Installing Center Mount Brackets
You need the following tools and supplies to install the brackets in a two-post,
open-frame relay rack:
•
#2 Phillips screwdriver
•
Masking tape or felt-tip pen to mark the mounting holes to be used
To install the center mount brackets in a two-post, open-frame relay rack, follow
these steps:
Step 1
Determine where you want to place your appliance.
Step 2
Mark the upper and lower mounting positions on the two posts.
Cisco Intrusion Detection System Appliance and Module Installation and Configuration Guide Version 4.1
78-15597-02
2-9
Chapter 2
Installing the IDS-4210
Installing the Accessories
Step 3
Locate one of the two brackets and align it over the two threaded holes on the side
of the appliance (see Figure 2-2).
Figure 2-2
Installing Center Mount Brackets
Pan-head
Phillips screws
(2 per bracket)
Pan-head
Phillips screws
0 1 2
3
LINK 100Mbp
s LINK 100Mbp
s
DRIVE 0
CONS ETHER
NET
0 ETHER
NET
DRIVE 1
1
SCSI LVD ONLY
DRIVE 0
50623
DRIVE 1
2-10
Step 4
Secure the bracket to the appliance chassis using two screws (see Figure 2-2).
Step 5
Repeat Step 4 to install the remaining bracket on the other side of the appliance.
Step 6
Lift the appliance into position between the two posts with the hole in the
mounting bracket aligned one hole above the mark you made in the two posts (see
Figure 2-2).
Cisco Intrusion Detection System Appliance and Module Installation and Configuration Guide Version 4.1
78-15597-02
Chapter 2
Installing the IDS-4210
Installing the Accessories
Step 7
Secure the appliance to the rack using a screw through the mounting bracket to
the front of the left and right posts (see Figure 2-2 on page 2-10).
Installing Front Mount Brackets
Make sure you have the following supplies (found in the front mount bracket
assembly kit) and tools to install the front mount brackets in a two-post,
open-frame relay rack:
Note
•
Two chassis support brackets
•
Two rack-mounting brackets
•
Six screws
•
#2 Phillips screwdriver
The front mount bracket assembly is not intended for use as a slide rail system.
The server must be firmly attached to the rack, as shown in Figure 2-3 on
page 2-12.
Cisco Intrusion Detection System Appliance and Module Installation and Configuration Guide Version 4.1
78-15597-02
2-11
Chapter 2
Installing the IDS-4210
Installing the Accessories
Figure 2-3
Front Mount Brackets
Pan-head
Phillips screws
Pan-head
Phillips screws
(to rack)
0 1 2
3
LINK 100Mbp
s
LINK 100Mbp
s
DRIVE 0
CONS ETHER
NET
0 ETHER
NET
DRIVE 1
1
SCSI LVD ONLY
DRIVE 0
55150
DRIVE 1
Caution
2-12
The chassis support brackets included in this kit are rated for 50 pounds of load
per pair of brackets for general use for 10,000 cycles of opening and closing.
Higher cycles or frequency will lower the load rating. The chassis support
brackets are meant to support the weight of only one appliance.
Cisco Intrusion Detection System Appliance and Module Installation and Configuration Guide Version 4.1
78-15597-02
Chapter 2
Installing the IDS-4210
Installing the Accessories
To install the front mount brackets, follow these steps:
Step 1
Make sure the appliance is turned off and is not plugged in to an electrical outlet.
Step 2
Use the screws provided to attach one chassis support bracket to each side of the
appliance. Use three screws on each side.
Step 3
Use the screws provided with the rack to attach the rack mounting brackets to the
rack.
Step 4
Slide the chassis support brackets on the appliance into the rack mounting
brackets attached to the rack.
Step 5
Use the bolts provided with the rack to fasten the appliance’s front flanges to the
rack.
Note
When you are done, the appliance should not slide on the channel bar.
Cisco Intrusion Detection System Appliance and Module Installation and Configuration Guide Version 4.1
78-15597-02
2-13
Chapter 2
Installing the IDS-4210
Installing the Accessories
2-14
Cisco Intrusion Detection System Appliance and Module Installation and Configuration Guide Version 4.1
78-15597-02
C H A P T E R
3
Installing the IDS-4215
The Cisco IDS-4215 can monitor up to 80 Mbps of aggregate traffic and is
suitable for T1/E1 and T3 environments. With the addition of the four-port fast
Ethernet (4FE) card, the IDS-4215 supports five monitoring interfaces
(10/100BASE-TX), which provide simultaneous protection for multiple subnets.
Note
The 80-Mbps performance for the IDS-4215 is based on the following conditions:
aggregation of traffic from all five monitoring interfaces, 800 new TCP
connections per second, 800 HTTP transactions per second, average packet size
of 445 bytes, system running Cisco IDS 4.1 sensor software.
The monitoring interfaces and the command and control interface are all
10/100BASE-TX.
This chapter describes the IDS-4215 and how to install it. It also describes the
accessories and how to install them.
This chapter contains the following sections:
•
Front and Back Panel Features, page 3-2
•
Specifications, page 3-4
•
Accessories, page 3-5
•
Surface Mounting, page 3-6
•
Rack Mounting, page 3-7
•
Installing the IDS-4215, page 3-9
•
Removing and Replacing the Chassis Cover, page 3-12
Cisco Intrusion Detection System Appliance and Module Installation and Configuration Guide Version 4.1
78-15597-02
3-1
Chapter 3
Installing the IDS-4215
Front and Back Panel Features
•
Removing and Replacing the IDE Hard-Disk Drive, page 3-17
•
Removing and Replacing the Compact Flash Device, page 3-21
•
Removing and Installing the 4FE Card, page 3-25
Front and Back Panel Features
This section describes the IDS-4215 front and back panel features and indicators.
Figure 3-1 shows the front view of the IDS-4215.
Figure 3-1
IDS-4215 Front Panel Features
CISCO IDS-4215
Intrusion Detection Sensor
ACT NETWORK
87925
POWER
Table 3-1 describes the front panel indicators on the IDS-4215.
Table 3-1
3-2
Front Panel Indicators
Indicator
Description
POWER
Lights up when power supply is running.
ACT
Lights up when the unit has completed power-up self-test
and has started the operating system and application
software loading process.
NETWORK
Blinks when network traffic is passing over either of the two
built-in Ethernet ports; does not indicate traffic on any of the
four ports of the 4FE card.
Cisco Intrusion Detection System Appliance and Module Installation and Configuration Guide Version 4.1
78-15597-02
Chapter 3
Installing the IDS-4215
Front and Back Panel Features
Figure 3-2 shows the back view of the IDS-4215.
IDS-4215 Back Panel Features
Empty PCI
slot
USB
(unused)
10/100 ETHERNET 0
int2
int3
10/100 ETHERNET 1
CONSOLE
int1
int0
int5
USB
87926
Figure 3-2
Off/on
Console
int4
Power
connector
The built-in Ethernet ports have three indicators per port and the 4FE card has two
indicators per port. Figure 3-3 shows the back panel indicators.
IDS-4215
Indicators
Indicators
100Mbps ACT
LINK 100Mbps ACT
10/100 ETHERNET 0
LINK
10/100 ETHERNET 1
USB
CONSOLE
119585
Figure 3-3
Table 3-2 lists the back panel indicators.
Table 3-2
Back Panel Indicators
Indicator
Description
Built-in Ethernet
—
100 Mbps
Lights up when the port is running in 100-Mbps mode;
off when it is running in 10-Mbps mode.
Link
Lights up when the port is connected to another Ethernet
port and traffic can be passed between them.
ACT
Blinks when network traffic is being received on the port.
Cisco Intrusion Detection System Appliance and Module Installation and Configuration Guide Version 4.1
78-15597-02
3-3
Chapter 3
Installing the IDS-4215
Specifications
Table 3-2
Back Panel Indicators (continued)
Indicator
Description
4FE Card
—
LINK/activity
Lights up when the port is connected to another
operational Ethernet port but no traffic is being passed
between them; blinks off when Ethernet packets are being
received.
100 Mbps
Lights up when the port is running in 100-Mbps mode;
off when the port is running in 10-Mbps mode.
Specifications
Table 3-3 lists the specifications for the IDS-4215.
Table 3-3
IDS-4215 Specifications
Dimensions and Weight
Height
1.72 in. (4.37 cm)
Width
16.8 in. (42.72 cm)
Depth
11.8 in. (29.97 cm)
Weight
11.5 lb (4.11 kg)
Form factor
1 RU, standard 19-inch rack-mountable
Expansion
Two 32-bit/33-MHz PCI slots
Power
3-4
Autoswitching
100V to 240V AC
Frequency
50 to 60 Hz, single phase
Operating current
1.5 A
Steady state
50W
Maximum peak
65W
Maximum heat dissipation
410 BTU/hr, full power usage (65W)
Cisco Intrusion Detection System Appliance and Module Installation and Configuration Guide Version 4.1
78-15597-02
Chapter 3
Installing the IDS-4215
Accessories
Table 3-3
IDS-4215 Specifications (continued)
Environment
Temperature
Operating +41°F to +104°F (+5°C to +40°C)
Nonoperating -13°F to +158°F (-25°C to +70°C)
Relative humidity
Operating 5% to 95% (noncondensing)
Nonoperating 5% to 95% (noncondensing)
Altitude
Operating 0 to 9843 ft (3000 m)
Nonoperating 0 to 15,000 ft (4750 m)
Shock
Operating 1.14 m/sec (45 in./sec) 1/2 sine input
Nonoperating 30 G
Note
Vibration
0.41 Grms2 (3-500 Hz) random input
Acoustic noise
54 dBa maximum
Only one PCI expansion slot can be used for the 4FE card. We recommend you
install the 4FE card in the lower PCI expansion slot.
Accessories
Warning
IMPORTANT SAFETY INSTRUCTIONS
This warning symbol means danger. You are in a situation that could cause
bodily injury. Before you work on any equipment, be aware of the hazards
involved with electrical circuitry and be familiar with standard practices for
preventing accidents. Use the statement number provided at the end of each
warning to locate its translation in the translated safety warnings that
accompanied this device. Statement 1071
SAVE THESE INSTRUCTIONS
Cisco Intrusion Detection System Appliance and Module Installation and Configuration Guide Version 4.1
78-15597-02
3-5
Chapter 3
Installing the IDS-4215
Surface Mounting
Warning
Only trained and qualified personnel should be allowed to install, replace, or
service this equipment. Statement 1030
The IDS-4215 accessories kit contains the following:
•
DB25 connector
•
DB9 connector
•
Rubber mounting feet
•
Rack mounting kit—screws, washers, and metal bracket
•
RJ45 console cable
•
6-ft Ethernet cable
Surface Mounting
If you are not rack mounting the IDS-4215, you must attach the rubber feet to the
bottom of the IDS-4215 as shown in Figure 3-4 on page 3-7. The rubber feet are
shipped in the accessories kit.
3-6
Cisco Intrusion Detection System Appliance and Module Installation and Configuration Guide Version 4.1
78-15597-02
Chapter 3
Installing the IDS-4215
Rack Mounting
Figure 3-4
Surface Mounting the IDS-4215
24301
Fan
Unused
Caution
For proper cooling and reliability, the rubber feet must be installed on the
IDS-4215 when it is on a flat surface. The rubber feet allow proper airflow around
the IDS-4215 and they also absorb vibration so that the hard-disk drive is less
impacted.
Rack Mounting
Warning
To prevent bodily injury when mounting or servicing this unit in a rack, you must
take special precautions to ensure that the system remains stable. The
following guidelines are provided to ensure your safety: This unit should be
mounted at the bottom of the rack if it is the only unit in the rack. When
mounting this unit in a partially filled rack, load the rack from the bottom to the
Cisco Intrusion Detection System Appliance and Module Installation and Configuration Guide Version 4.1
78-15597-02
3-7
Chapter 3
Installing the IDS-4215
Rack Mounting
top with the heaviest component at the bottom of the rack. If the rack is provided
with stabilizing devices, install the stabilizers before mounting or servicing the
unit in the rack.
If you are installing the 4FE card in the IDS-4215, do not install the mounting
brackets until after you have installed the 4FE card.
Note
You must remove the chassis cover of the IDS-4215 to properly install or remove
the 4FE card. See Removing and Replacing the Chassis Cover, page 3-12, for
information on how to remove and replace the chassis cover. See Installing the
4FE Card, page 3-27, for information on installing the 4FE card in the IDS-4215.
To rack mount the IDS-4215, follow these steps:
Step 1
Use the supplied screws to attach the bracket to the appliance.
You can attach the brackets to the holes near the front of the appliance.
CISCO
IDS-42
Detectio
15
n Senso
r
104185
Intrusion
Step 2
3-8
Attach the appliance to the equipment rack.
Cisco Intrusion Detection System Appliance and Module Installation and Configuration Guide Version 4.1
78-15597-02
Chapter 3
Installing the IDS-4215
Installing the IDS-4215
POWE
R
ACT
NETWO
RK
CISCO
IDS-42
15
104186
Intrusion
Detection
Sensor
Installing the IDS-4215
Warning
Caution
Only trained and qualified personnel should be allowed to install, replace, or
service this equipment. Statement 1030
Be sure to read the safety warnings in the Regulatory Compliance and Safety
Information for the Cisco Intrusion Detection System 4200 Series Appliance
Sensor and follow proper safety procedures when performing these steps.
Cisco Intrusion Detection System Appliance and Module Installation and Configuration Guide Version 4.1
78-15597-02
3-9
Chapter 3
Installing the IDS-4215
Installing the IDS-4215
To install the IDS-4215 on your network, follow these steps:
Step 1
Position the appliance on the network.
See Placing an Appliance on Your Network, page 1-6, for information on the best
places to position an appliance.
Step 2
Attach the power cord to the appliance and plug it into a power source (a UPS is
recommended).
Step 3
Connect the cable so that you have either a DB-9 or DB-25 connector on one end
as required by the serial port for your computer, and the other end is the RJ-45
connector.
USB
CONSOLE
Console
port (RJ-45)
RJ-45 to
DB-9 or DB-25
serial cable
(null-modem)
Note
3-10
Computer serial port
DB-9 or DB-25
97386
10/100 ETHERNET 1
Use the console port to connect to a computer to enter configuration
commands. Locate the serial cable from the accessory kit. The serial cable
assembly consists of a 180/rollover cable with RJ-45 connectors (DB-9
connector adapter PN 74-0495-01 and DB-25 connector adapter PN
29-0810-01).
Cisco Intrusion Detection System Appliance and Module Installation and Configuration Guide Version 4.1
78-15597-02
Chapter 3
Installing the IDS-4215
Installing the IDS-4215
Note
You can use a 180/rollover or straight-through patch cable to connect the
appliance to a port on a terminal server with RJ-45 or hydra cable
assembly connections. Connect the appropriate cable from the console
port on the appliance to a port on the terminal server. See Setting Up a
Terminal Server, page 1-9, for the instructions for setting up a terminal
server.
Step 4
Connect the RJ-45 connector to the console port and connect the other end to the
serial port connector on your computer.
Step 5
Attach the network cables.
Empty PCI
slot
10/100 ETHERNET 0
int2
int3
int5
int0
int4
10/100 ETHERNET 1
USB
87926
USB
(unused)
CONSOLE
int1
Off/on
Console
Power
connector
•
int0 is the sensing port.
•
int1 is the command and control port.
•
int2 through int5 are the optional sensing ports available if you have the 4FE
card installed.
Step 6
Power on the appliance.
Step 7
Initialize your appliance.
See Initializing the Sensor, page 10-2, for the procedure.
Step 8
Upgrade your appliance to the most recent Cisco IDS software.
See Obtaining Cisco IDS Software, page 9-1, for the procedure.
Step 9
Assign the interfaces:
See Assigning and Enabling the Sensing Interface, page 10-9, for the procedure.
Cisco Intrusion Detection System Appliance and Module Installation and Configuration Guide Version 4.1
78-15597-02
3-11
Chapter 3
Installing the IDS-4215
Removing and Replacing the Chassis Cover
Note
The interfaces are disabled by default.
You are now ready to configure intrusion detection on your appliance.
Removing and Replacing the Chassis Cover
3-12
Warning
This product relies on the building’s installation for short-circuit (overcurrent)
protection. Ensure that the protective device is rated not greater than 120 VAC,
20 A U.S. (240 VAC, 16-20 A International). Statement 1005
Warning
This equipment must be grounded. Never defeat the ground conductor or
operate the equipment in the absence of a suitably installed ground conductor.
Contact the appropriate electrical inspection authority or an electrician if you
are uncertain that suitable grounding is available. Statement 1024
Warning
Blank faceplates and cover panels serve three important functions: they
prevent exposure to hazardous voltages and currents inside the chassis; they
contain electromagnetic interference (EMI) that might disrupt other equipment;
and they direct the flow of cooling air through the chassis. Do not operate the
system unless all cards, faceplates, front covers, and rear covers are in place.
Statement 1029
Warning
This unit might have more than one power supply connection. All connections
must be removed to de-energize the unit. Statement 1028
Cisco Intrusion Detection System Appliance and Module Installation and Configuration Guide Version 4.1
78-15597-02
Chapter 3
Installing the IDS-4215
Removing and Replacing the Chassis Cover
Caution
Be sure to read the safety warnings in the Regulatory Compliance and Safety
Information for the Cisco Intrusion Detection System 4200 Series Appliance
Sensor and follow proper safety procedures when removing and replacing the
chassis cover.
This section describes how to remove and replace the IDS-4215 chassis cover.
This section contains the following topics:
•
Removing the Chassis Cover, page 3-13
•
Replacing the Chassis Cover, page 3-15
Removing the Chassis Cover
Note
Removing the appliance chassis cover does not affect your Cisco warranty.
Upgrading the appliance does not require any special tools and does not create any
radio frequency leaks.
To remove the chassis cover, follow these steps:
Step 1
Log in to the CLI.
Step 2
Prepare the appliance to be powered off:
sensor# reset powerdown
Wait for the power down message before continuing with Step 3.
Note
You can also power down the sensor using IDM or IDS MC.
Step 3
Power off the appliance.
Step 4
Remove the power cord and other cables from the appliance.
Step 5
Place the appliance in an ESD-controlled environment.
See Working in an ESD Environment, page 1-21, for more information.
Step 6
Remove the screws from the rear of the chassis.
Cisco Intrusion Detection System Appliance and Module Installation and Configuration Guide Version 4.1
78-15597-02
3-13
Chapter 3
Installing the IDS-4215
Removing and Replacing the Chassis Cover
24305
Top panel screws (4)
100 Mbps Link
PIX-515
DO NOT INSTALL INTERFACE
CARDS WITH POWER APPLIED
FDX
10/100 ETHERNET 0/0
Step 7
100 Mbps Link
FAILOVER
FDX
10/100 ETHERNET 0/0
CONSOLE
With the front of the unit facing you, push the top panel back one inch.
Intrusion Detection Sensor
Step 8
3-14
ACT
NETWORK
104180
CISCO IDS-4215
POWER
Pull the top panel up and put it in a safe place.
Cisco Intrusion Detection System Appliance and Module Installation and Configuration Guide Version 4.1
78-15597-02
Chapter 3
Installing the IDS-4215
Removing and Replacing the Chassis Cover
Intrusion Detection Sensor
ACT
NETWORK
104181
CISCO IDS-4215
POWER
Replacing the Chassis Cover
Caution
Do not operate the IDS-4215 without the chassis cover installed. The chassis
cover protects the internal components, prevents electrical shorts, and provides
proper air flow for cooling the electronic components.
To replace the chassis cover, follow these steps:
Step 1
Place the chassis on a secure surface with the front panel facing you.
Step 2
Hold the top panel so the tabs at the rear of the top panel are aligned with the
chassis bottom.
Cisco Intrusion Detection System Appliance and Module Installation and Configuration Guide Version 4.1
78-15597-02
3-15
Chapter 3
Installing the IDS-4215
Removing and Replacing the Chassis Cover
Intrusion Detection Sensor
ACT
NETWORK
104182
CISCO IDS-4215
POWER
Step 3
Lower the front of the top panel onto the chassis, making sure that the top panel
side tabs fit under the chassis side panels.
Step 4
Slide the top panel toward the front, making sure that the top panel tabs fit under
the chassis back panel and the back panel tabs fit under the top panel.
Intrusion Detection Sensor
Step 5
3-16
ACT
NETWORK
104183
CISCO IDS-4215
POWER
Fasten the top panel with the screws you set aside earlier.
Cisco Intrusion Detection System Appliance and Module Installation and Configuration Guide Version 4.1
78-15597-02
Chapter 3
Installing the IDS-4215
Removing and Replacing the IDE Hard-Disk Drive
24305
Top panel screws (4)
100 Mbps Link
PIX-515
DO NOT INSTALL INTERFACE
CARDS WITH POWER APPLIED
FDX
10/100 ETHERNET 0/0
Step 6
100 Mbps Link
FAILOVER
FDX
10/100 ETHERNET 0/0
CONSOLE
Reinstall the chassis on a rack, desktop, or table.
See Rack Mounting, page 3-7, if you are reinstalling in a rack.
Step 7
Reinstall the network interface cables.
See Installing the IDS-4215, page 3-9, for the procedure.
Removing and Replacing the IDE Hard-Disk Drive
Warning
Only trained and qualified personnel should be allowed to install, replace, or
service this equipment. Statement 1030
Caution
Only use the replacement IDE hard-disk drive from Cisco. We cannot guarantee
that other hard-disk drives will operate properly with the IDS.
Caution
Be sure to read the safety warnings in the Regulatory Compliance and Safety
Information for the Cisco Intrusion Detection System 4200 Series Appliance
Sensor and follow proper safety procedures when removing and replacing the
hard-disk drive.
Cisco Intrusion Detection System Appliance and Module Installation and Configuration Guide Version 4.1
78-15597-02
3-17
Chapter 3
Installing the IDS-4215
Removing and Replacing the IDE Hard-Disk Drive
This section describes how to remove and replace the IDE hard-disk drive.
This section contains the following topics:
•
Removing the Hard-Disk Drive, page 3-18
•
Replacing the Hard-Disk Drive, page 3-20
Removing the Hard-Disk Drive
To remove the hard-disk drive from the IDS-4215, follow these steps:
Step 1
Log in to the CLI.
Step 2
Prepare the appliance to be powered off:
sensor# reset powerdown
Wait for the power down message before continuing with Step 3.
Note
You can also power down the sensor using IDM or IDS MC.
Step 3
Power off the appliance.
Step 4
Remove the power cord and other cables from the appliance.
Step 5
Place the appliance in an ESD-controlled environment.
See Working in an ESD Environment, page 1-21, for more information.
Step 6
Remove the chassis cover.
See Removing the Chassis Cover, page 3-13, for the procedure.
Step 7
3-18
Loosen the two captive screws from the hard-disk drive carrier.
Cisco Intrusion Detection System Appliance and Module Installation and Configuration Guide Version 4.1
78-15597-02
Chapter 3
Installing the IDS-4215
Removing and Replacing the IDE Hard-Disk Drive
87927
Hard
drive
Step 8
Grasp the hard-disk drive and pull straight backwards until it is free of the riser
card connector. Do not lift or wiggle the hard-disk drive side to side until it is
completely free of the connector.
Cisco Intrusion Detection System Appliance and Module Installation and Configuration Guide Version 4.1
78-15597-02
3-19
Chapter 3
Installing the IDS-4215
Removing and Replacing the IDE Hard-Disk Drive
Replacing the Hard-Disk Drive
To replace the hard-disk drive in the IDS-4215, follow these steps:
Step 1
Place the appliance in an ESD-controlled environment.
See Working in an ESD Environment, page 1-21, for more information.
Step 2
Align the hard-disk drive connector with the two guide pins on the riser card.
87961
Hard
drive
Step 3
3-20
Push the hard-disk drive straight into the riser card connector. Do not lift or
wiggle the hard-disk drive side to side. Push carefully until the hard-disk drive is
seated.
Cisco Intrusion Detection System Appliance and Module Installation and Configuration Guide Version 4.1
78-15597-02
Chapter 3
Installing the IDS-4215
Removing and Replacing the Compact Flash Device
Step 4
Tighten the two captive screws.
Step 5
Replace the chassis cover.
See Replacing the Chassis Cover, page 3-15, for the procedure.
Removing and Replacing the Compact Flash Device
Warning
Caution
Only trained and qualified personnel should be allowed to install, replace, or
service this equipment. Statement 1030
Be sure to read the safety warnings in the Regulatory Compliance and Safety
Information for the Cisco Intrusion Detection System 4200 Series Appliance
Sensor and follow proper safety procedures when removing and replacing the
compact flash.
This section describes how to remove and replace the compact flash device in the
IDS-4215.
This section contains the following topics:
•
Removing the Compact Flash Device, page 3-21
•
Replacing the Compact Flash Device, page 3-23
Removing the Compact Flash Device
To remove the compact flash device from the IDS-4215, follow these steps:
Step 1
Log in to the CLI.
Step 2
Prepare the appliance to be powered off:
sensor# reset powerdown
Wait for the power down message before continuing with Step 3.
Cisco Intrusion Detection System Appliance and Module Installation and Configuration Guide Version 4.1
78-15597-02
3-21
Chapter 3
Installing the IDS-4215
Removing and Replacing the Compact Flash Device
Note
You can also power down the sensor using IDM or IDS MC.
Step 3
Power off the appliance.
Step 4
Remove the power cord and other cables from the appliance.
Step 5
Place the appliance in an ESD-controlled environment.
See Working in an ESD Environment, page 1-21, for more information.
Step 6
Remove the chassis cover.
See Removing the Chassis Cover, page 3-13, for the procedure.
Step 7
Remove the hard-disk drive.
See Removing the Hard-Disk Drive, page 3-18, for the procedure.
Step 8
3-22
Grasp the compact flash device and carefully remove it from the connector on the
riser card.
Cisco Intrusion Detection System Appliance and Module Installation and Configuration Guide Version 4.1
78-15597-02
Chapter 3
Installing the IDS-4215
Removing and Replacing the Compact Flash Device
87928
Compact Flash
memory card
Replacing the Compact Flash Device
To replace the compact flash device in the IDS-4215, follow these steps:
Step 1
Place the appliance in an ESD-controlled environment.
See Working in an ESD Environment, page 1-21 for more information.
Step 2
Align the compact flash device with the connector on the riser card.
Cisco Intrusion Detection System Appliance and Module Installation and Configuration Guide Version 4.1
78-15597-02
3-23
Chapter 3
Installing the IDS-4215
Removing and Replacing the Compact Flash Device
87962
Compact Flash
memory card
Step 3
Press until the compact flash device is fully seated in the connector.
Step 4
Replace the hard-disk drive.
See Replacing the Hard-Disk Drive, page 3-20, for the procedure.
Step 5
Replace the chassis cover.
See Replacing the Chassis Cover, page 3-15, for the procedure.
3-24
Cisco Intrusion Detection System Appliance and Module Installation and Configuration Guide Version 4.1
78-15597-02
Chapter 3
Installing the IDS-4215
Removing and Installing the 4FE Card
Removing and Installing the 4FE Card
Warning
Only trained and qualified personnel should be allowed to install, replace, or
service this equipment. Statement 1030
Caution
Be sure to read the safety warnings in the Regulatory Compliance and Safety
Information for the Cisco Intrusion Detection System 4200 Series Appliance
Sensor and follow proper safety procedures when installing and removing the 4FE
card.
You can order the IDS-4215 with the 4FE card already installed or you can
upgrade your IDS-4215 with the 4FE card to have four additional interfaces.
This section contains the following topics:
•
Removing the 4FE Card, page 3-25
•
Installing the 4FE Card, page 3-27
Removing the 4FE Card
To remove the 4FE card, follow these steps:
Step 1
Log in to the CLI.
Step 2
Prepare the appliance to be powered off:
sensor# reset powerdown
Wait for the power down message before continuing with Step 3.
Note
You can also power down the sensor using IDM or IDS MC.
Step 3
Power off the appliance.
Step 4
Remove the power cord and other cables from the appliance.
Step 5
Place the appliance in an ESD-controlled environment.
Cisco Intrusion Detection System Appliance and Module Installation and Configuration Guide Version 4.1
78-15597-02
3-25
Chapter 3
Installing the IDS-4215
Removing and Installing the 4FE Card
See Working in an ESD Environment, page 1-21, for more information.
Step 6
Remove the chassis cover.
See Removing the Chassis Cover, page 3-13, for the procedure.
Loosen the single captive screw that holds the 4FE card’s connecting flange to the
back cover plate.
Step 8
Loosen the two captive screws from the back cover on the left and put the back
cover aside.
Step 9
Grasp the 4FE card and pull it out of the slot and through the cage opening.
Step 10
Replace the lower slot cover from the back cover plate.
Step 11
Replace the back cover plate and tighten the two captive screws.
87948
Step 7
3-26
Cisco Intrusion Detection System Appliance and Module Installation and Configuration Guide Version 4.1
78-15597-02
Chapter 3
Installing the IDS-4215
87949
Removing and Installing the 4FE Card
Step 12
Replace the chassis cover.
See Replacing the Chassis Cover, page 3-15, for the procedure.
Installing the 4FE Card
We recommend that you install the 4FE card in the bottom slot. We do not support
installation of the 4FE card in the top slot.
Note
Only one 4FE card is supported on the IDS-4215.
Cisco Intrusion Detection System Appliance and Module Installation and Configuration Guide Version 4.1
78-15597-02
3-27
Chapter 3
Installing the IDS-4215
Removing and Installing the 4FE Card
To install a 4FE card in the IDS-4215, follow these steps:
Step 1
Prepare the appliance to be powered off:
sensor# reset powerdown
Wait for the power down message before continuing with Step 2.
Step 2
Power off the appliance.
Step 3
Remove the power cord and other cables from the appliance.
Step 4
Place the appliance in an ESD-controlled environment.
See Working in an ESD Environment, page 1-21, for more information.
Step 5
Remove the chassis cover.
See Removing the Chassis Cover, page 3-13, for the procedure.
3-28
Step 6
Loosen the two captive screws from the back cover plate on the left and put the
back cover plate aside.
Step 7
Insert the 4FE card through the cage opening and into the lower slot.
Cisco Intrusion Detection System Appliance and Module Installation and Configuration Guide Version 4.1
78-15597-02
Chapter 3
Installing the IDS-4215
61904
Removing and Installing the 4FE Card
Note
When you insert a 4FE card in the slot, the end of the card’s connector
extends past the end of the slot. This does not affect the use or operation
of the card.
Step 8
Remove the lower slot cover from the back cover plate.
Step 9
Attach the back cover plate making sure that the connecting flange on the 4FE
card goes through the slot on the back cover plate.
Cisco Intrusion Detection System Appliance and Module Installation and Configuration Guide Version 4.1
78-15597-02
3-29
Chapter 3
Installing the IDS-4215
61905
Removing and Installing the 4FE Card
Step 10
Tighten the single captive screw to hold the 4FE card’s connecting flange to the
back cover plate, and tighten the captive screws to attach the back cover plate to
the appliance.
Step 11
Replace the chassis cover.
See Replacing the Chassis Cover, page 3-15, for the procedure.
You will need to assign the new interfaces (int2, int3, int4, and int5). See
Assigning and Enabling the Sensing Interface, page 10-9, for the procedure.
3-30
Cisco Intrusion Detection System Appliance and Module Installation and Configuration Guide Version 4.1
78-15597-02
C H A P T E R
4
Installing the IDS-4220 and IDS-4230
This chapter describes the IDS-4220 and IDS-4230 and how to install them. It also
describes the accessories and how to install them.
Note
You must upgrade the memory on the IDS-4220 to a minimum of 512 MB before
you can install the most recent Cisco IDS software version. See Upgrading the
Memory, page 2-3, for more information.
Note
If you are upgrading an IDS-4220-E or IDS-4230-FE appliance to 4.x software,
you must swap the command and control interface cable with the sensing interface
cable before you upgrade the software. See Upgrading the IDS-4220-E and
IDS-4230-FE to 4.x Software, page 4-5, for more information.
This chapter contains these sections:
•
Front and Back Panel Features, page 4-2
•
Recommended Keyboards and Monitors, page 4-4
•
Upgrading the IDS-4220-E and IDS-4230-FE to 4.x Software, page 4-5
•
Installing the IDS-4220 and IDS-4230, page 4-6
Cisco Intrusion Detection System Appliance and Module Installation and Configuration Guide Version 4.1
78-15597-02
4-1
Chapter 4
Installing the IDS-4220 and IDS-4230
Front and Back Panel Features
Front and Back Panel Features
Figure 4-1 shows the front panel features of the IDS-4220 and IDS-4230.
Figure 4-1
Front Panel Features
Power
indicator
Power
switch
Cisco 4220
POWER
97356
RESET
Hard drive Reset
indicator switch
Table 4-1 describes the appearance of the front panel indicators on the IDS-4220
and IDS-4230.
Table 4-1
Front Panel Indicators
Indicator
Color
Status
Power
Green
Lights up when system is powered on; off
when system is powered down.
Hard-disk drive activity
Amber
Blinks during hard-disk drive activity; off
when system is idle or powered off.
Figure 4-2 on page 4-3 shows the back panel features (the onboard NIC and the
SMC9432FTX network card indicators) of the IDS-4220 and IDS-4230.
4-2
Cisco Intrusion Detection System Appliance and Module Installation and Configuration Guide Version 4.1
78-15597-02
Chapter 4
Installing the IDS-4220 and IDS-4230
Front and Back Panel Features
Back Panel Features
87952
SMC9432TX
Figure 4-2
Onboard
Transmit/Receive
NIC
Valid Link
Table 4-2 describes the appearance of the onboard NIC (the monitoring port)
indicators for the IDS-4220 and 4230.
Table 4-2
On-board NIC Indicators
Indicator Color
Status
Orange
Lights up when there is a 100 Mbps connection; off when
there is a 10 Mbps network connection.
Green
Lights up when linked to the network and there is no network
traffic; blinks when linked to the network and sending or
receiving data; off when it is not linked to network.
The SMC9432FTX network card includes four status indicators.
Cisco Intrusion Detection System Appliance and Module Installation and Configuration Guide Version 4.1
78-15597-02
4-3
Chapter 4
Installing the IDS-4220 and IDS-4230
Recommended Keyboards and Monitors
Table 4-3 describes the appearance of the SMC NIC indicators.
Table 4-3
SMC NIC Indicators
Indicator
Color
Status
LNK
Green
Lights up to indicate a valid 10BASE-T,
100BASE-TX, or 100BASE-FX link; off when power
is off or connection is not valid.
T/R
Amber
Blinks to indicate the network card is transmitting or
receiving data.
100
Green
Lights up to indicate a 100 Mbps connection to the
network card.
FDX
Amber
Lights up to indicate the network card is operating in
full-duplex mode.
Recommended Keyboards and Monitors
Some keyboards and monitors are not compatible with the IDS-4220 and
IDS-4230. This incompatibility could cause them to boot improperly.
Note
You can also use a serial cable to connect to the appliance’s console port.
The following keyboards and monitors have been tested with the IDS-4220 and
IDS-4230:
•
Keyboards
– KeyTronic E03601QUS201-C
– KeyTronic LT DESIGNER
•
Monitors
– MaxTech XT-7800
– Dell D1025HT
4-4
Cisco Intrusion Detection System Appliance and Module Installation and Configuration Guide Version 4.1
78-15597-02
Chapter 4
Installing the IDS-4220 and IDS-4230
Upgrading the IDS-4220-E and IDS-4230-FE to 4.x Software
Caution
Note
The appliance does not function properly with some HP keyboards and with IBM
model G50 monitors.
Other monitors and keyboards may be compatible with the appliance.
Upgrading the IDS-4220-E and IDS-4230-FE to 4.x
Software
If you are upgrading an IDS-4220-E or IDS-4230-FE appliance to 4.x software,
you must swap the command and control interface cable with the sensing interface
cable before you upgrade the software. For IDS software 4.x, the former
command and control interface is now the sensing interface as shown in
Figure 4-3.
Figure 4-3
IDS-4220-E and IDS-4230-FE Interface Cables
Command & Control Interface: int1
83722
I
O
COM 1
Sniffing Interface: int0
Keyboard
Monitor
Caution
If the cables on the IDS-4220-E or IDS-4230-FE are not swapped, you may not
be able to connect to your appliance through the network.
Cisco Intrusion Detection System Appliance and Module Installation and Configuration Guide Version 4.1
78-15597-02
4-5
Chapter 4
Installing the IDS-4220 and IDS-4230
Installing the IDS-4220 and IDS-4230
Note
The PCI-based card that was used as the sensing interface for the IDS-4220-E and
the IDS-4230-FE does not support the monitoring of dot1q trunk packets and the
tracking of the 993 Dropped Packet alarm. The performance is also lower with the
PCI-based card compared to the onboard NIC. For these reasons, the PCI card is
now used as the command and control interface and the onboard NIC is used for
sensing.
If you are upgrading from version 3.1, see Upgrading the IDS-4220-E and
IDS-4230-FE to 4.x Software, page 4-5, for the procedure for upgrading your
IDS-4220 and IDS-4230 to version 4.x software. If you have already swapped the
cables and upgraded to 4.0, see Obtaining Cisco IDS Software, page 9-1, for the
procedure for obtaining the 4.1 software.
Installing the IDS-4220 and IDS-4230
Warning
Caution
Only trained and qualified personnel should be allowed to install, replace, or
service this equipment. Statement 1030
Be sure to read the safety warnings in the Regulatory Compliance and Safety
Information for the Cisco Intrusion Detection System 4200 Series Appliance
Sensor and follow proper safety procedures when performing these steps.
To install the IDS-4220 and IDS-4230 on your network, follow these steps:
Step 1
Position the appliance on the network.
See Placing an Appliance on Your Network, page 1-6, for information on the best
places to position an appliance.
Step 2
4-6
Attach the power cord to the appliance and plug it in to a power source (a UPS is
recommended).
Cisco Intrusion Detection System Appliance and Module Installation and Configuration Guide Version 4.1
78-15597-02
Chapter 4
Installing the IDS-4220 and IDS-4230
Installing the IDS-4220 and IDS-4230
Step 3
Use the dual serial communication cable (PN 72-1847-01, included in the
accessory kit) to attach a laptop to the COM1 port of the appliance (see Table 4-4
for a list of the terminal settings), or connect a keyboard and monitor to the
appliance.
Table 4-4
Caution
Terminal Settings
Terminal
Setting
Bits per second
9600
Data bits
8
Parity
None
Stop bits
1
Flow control
Hardware or RTS/CTS
We recommend that you use the dual serial communication cable (PN
72-1847-01, included in the accessory kit) rather than a keyboard and monitor,
because some keyboards and monitors are incompatible with the appliance. See
Recommended Keyboards and Monitors, page 4-4, for a list of compatible
monitors and keyboards.
Note
You can use a 180/rollover or straight-through patch cable to connect the
appliance to a port on a terminal server with RJ-45 or hydra cable
assembly connections. Use a M.A.S.H adapter (part number 29-4077-02)
to connect the appropriate cable to a port on the terminal server. See
Setting Up a Terminal Server, page 1-9, for the instructions for setting up
a terminal server.
Cisco Intrusion Detection System Appliance and Module Installation and Configuration Guide Version 4.1
78-15597-02
4-7
Chapter 4
Installing the IDS-4220 and IDS-4230
Installing the IDS-4220 and IDS-4230
Step 4
Attach the network cables.
Command & Control Interface: int1
83722
I
O
COM 1
Sniffing Interface: int0
Keyboard
Monitor
Step 5
•
int0 is the sensing port.
•
int1 is the command and control port.
Upgrade the memory on the appliance.
See Upgrading the Memory, page 2-3, for the procedure.
Caution
You must upgrade the memory on the IDS-4220 to a minimum of 512 MB before
you can install the most recent Cisco IDS software version.
Step 6
Power on the appliance.
Step 7
Initialize your appliance.
See Initializing the Sensor, page 10-2, for the procedure.
Step 8
Upgrade your appliance to the most recent Cisco IDS software.
See Obtaining Cisco IDS Software, page 9-1, for the procedure.
Step 9
Assign the interfaces.
See Assigning and Enabling the Sensing Interface, page 10-9, for the procedure.
You are now ready to configure intrusion detection on your appliance.
4-8
Cisco Intrusion Detection System Appliance and Module Installation and Configuration Guide Version 4.1
78-15597-02
C H A P T E R
5
Installing the IDS-4235 and IDS-4250
You can deploy the Cisco IDS-4235 at 250 Mbps to provide protection in switched
environments and on multiple T3 subnets. With the support of 10/100/1000
interfaces you can also deploy it on partially utilized gigabit links. The monitoring
interface and the command and control interface are both 10/100/1000BASE-TX.
You can install the 4FE card to provide an additional four sensing interfaces. See
Installing Optional PCI Cards, page 5-16, for the procedure for installing optional
PCI cards.
Note
The 250-Mbps performance for the IDS-4235 is based on the following
conditions: 2500 new TCP connections per second, 2500 HTTP transactions per
second, average packet size of 445 bytes, system running Cisco IDS 4.1 sensor
software.
The Cisco IDS-4250 supports a 500-Mbps speed and can be used to protect
gigabit subnets and traffic traversing switches that are being used to aggregate
traffic from numerous subnets. The monitoring interface and the command and
control interface are both 10/100/1000BASE-TX. The optional interface is
1000BASE-SX (fiber). In addition, you can upgrade the IDS-4250 to full line-rate
gigabit performance with the IDS Accelerator (XL) card. You can also install the
4FE card to provide an additional four sensing interfaces. See Installing Optional
PCI Cards, page 5-16, for the procedure for installing optional PCI cards.
Cisco Intrusion Detection System Appliance and Module Installation and Configuration Guide Version 4.1
78-15597-02
5-1
Chapter 5
Installing the IDS-4235 and IDS-4250
Front-Panel Features and Indicators
Note
The 500-Mbps performance for the IDS-4250 is based on the following
conditions: 2700 new TCP connections per second, 2700 HTTP transactions per
second, average packet size of 595 bytes, system running Cisco IDS 4.1 sensor
software.
Or you can order the IDS-4250-XL with the XL card already installed. At 1 Gbps,
the IDS 4250-XL provides customized hardware acceleration to protect fully
saturated gigabit links as well as multiple partially utilized gigabit subnets.
Note
The 1000-Mbps performance for the IDS-4250-XL is based on the following
conditions: 5000 new TCP connections per second, 5000 HTTP transactions per
second, average packet size of 595 bytes, system running Cisco IDS 4.1 sensor
software.
This chapter describes the IDS-4235 and IDS-4250 and how to install them. It also
describes the accessories and how to install them.
This chapter contains the following sections:
•
Front-Panel Features and Indicators, page 5-2
•
Back-Panel Features and Indicators, page 5-4
•
Specifications, page 5-5
•
Installing Spare Hard-Disk Drives, page 5-6
•
Upgrading the BIOS, page 5-7
•
Using the TCP Reset Interface, page 5-8
•
Installing the IDS-4235 and IDS-4250, page 5-9
•
Installing the Accessories, page 5-11
Front-Panel Features and Indicators
Figure 5-1 on page 5-3 shows the controls, indicators, and connectors located
behind the bezel on the front panel of the IDS-4235 and IDS-4250.
5-2
Cisco Intrusion Detection System Appliance and Module Installation and Configuration Guide Version 4.1
78-15597-02
Chapter 5
Installing the IDS-4235 and IDS-4250
Front-Panel Features and Indicators
Front-Panel Features and Indicators
1
(Not used)
87958
Figure 5-1
2
System
status indicator
(blue and amber)
CD drive
NIC1 indicator
Diskette drive
Hard drive
NIC2 indicator
1
2
Hard drive indicator
Latch for
System door
Keyboard connector
Identification button
Power button
Video connector
The power button controls the AC power input to the appliance’s power supplies.
You can use the identification buttons on the front and back panels to locate a
particular appliance in a rack. When you push one of these buttons, the blue
system status indicator on the front and back blinks until you push one of the
buttons again.
The front panel also has a video connector for connecting a monitor and a PS/2
connector for connecting a keyboard.
Table 5-1 on page 5-4 describes the appearance of the front panel indicators for
the IDS-4235 and IDS-4250.
Cisco Intrusion Detection System Appliance and Module Installation and Configuration Guide Version 4.1
78-15597-02
5-3
Chapter 5
Installing the IDS-4235 and IDS-4250
Back-Panel Features and Indicators
Table 5-1
Front-Panel Indicators
LED Indicator
Icon
Description
Blue and amber
system status
indicator
The blue system status indicator lights up during normal system
operation. The amber system status indicator flashes when the
system needs attention due to a problem with power supplies, fans,
system temperature, or hard drives.1
NIC1 and NIC2
link and activity
indicators
The link and activity indicators for the two integrated NICs light up
when the NICs are in use.
1
Hard-disk drive
indicator
The green hard-disk drive activity indicator flashes when the
hard-disk drive is in use.
Power button
The power button lights up when the system power is on.
1. If the system is connected to AC power and an error has been detected, the amber system status indicator will flash regardless
of whether the system has been powered on
Back-Panel Features and Indicators
Figure 5-2 on page 5-5 shows the controls, indicators, and connectors located on
the appliance’s back panel.
Note
Caution
5-4
Appliances with only one power supply should connect the power cable to
connector PS1.
You can use only one PCI slot for either the SX card, the XL card, or the 4FE card.
Only one card is supported per chassis.
Cisco Intrusion Detection System Appliance and Module Installation and Configuration Guide Version 4.1
78-15597-02
Chapter 5
Installing the IDS-4235 and IDS-4250
Specifications
Figure 5-2
Back-Panel Features and Indicators
PCI expansion card slots
Sensing interface: 4250-SX: int2
4250-XL: int2, int3
4250-4FE: int2, int3, int4, int5
SCSI interface (unused)
System status indicator (blue and amber)
Command and Control
interface: int1
Sensing interface: int0
Mouse connector (unused)
83724
Serial connector (Com1)
Redundant
power
(optional)
Main power
Video connector
Keyboard connector
System status indicator
connector
System identification button
Specifications
Table 5-2 on page 5-6 lists the IDS-4235 and IDS-4250 specifications.
Cisco Intrusion Detection System Appliance and Module Installation and Configuration Guide Version 4.1
78-15597-02
5-5
Chapter 5
Installing the IDS-4235 and IDS-4250
Installing Spare Hard-Disk Drives
Table 5-2
IDS-4235 and IDS-4250 Specifications
Dimensions and Weight
Height
1.67 in. (4.24 cm)
Width
17.6 in. (44.70 cm)
Depth
27.0 in. (68.58 cm)
Weight
35 lb (15.88 kg)
Form factor
1 RU, standard 19-inch rack-mountable
Power
Autoswitching
110V to 220 VAC
Frequency
50 to 60 Hz, single phase
Operating current
2.7A at 115V
1.3A at 220V
Maximum heat dissipation
983 Btu/hr (maximum)
Environment
Temperature
Operating +50° to +95°F (+10° to +35°C)
Nonoperating -40° to 149°F (-40° to 65°C)
Relative humidity
Operating 8 to 80% (noncondensing)
Nonoperating 5 to 95% (noncondensing)
Installing Spare Hard-Disk Drives
Do not install a second hard-disk drive in the IDS-4235 and IDS-4250. The spare
hard-disk drives are meant to replace the original hard-disk drives and are not
meant to be used in conjunction with the original hard-disk drive. If you install
two hard-disk drives in the appliance, the appliance may not recognize the
recover command used to reimage the appliance.
If the original hard-disk drive becomes unusable, remove the hard-disk drive and
insert the replacement hard-disk drive. See Removing and Replacing the SCSI
Hard-Disk Drive, page 5-20, for the procedure.
The replacement hard-disk drive is shipped blank from the factory. You must
reimage it. See Reimaging the Appliance, page 10-110, for the procedure.
5-6
Cisco Intrusion Detection System Appliance and Module Installation and Configuration Guide Version 4.1
78-15597-02
Chapter 5
Installing the IDS-4235 and IDS-4250
Upgrading the BIOS
Upgrading the BIOS
If your BIOS version is earlier than A04, you must upgrade the BIOS on your
IDS-4235 and IDS-4250 appliances before you install version 4.x software.
Caution
Do not apply this BIOS upgrade to appliance models other than the IDS-4235 and
IDS-4250.
Check your BIOS version before performing the following procedure. Reboot the
appliance and watch for the BIOS version number. The following example shows
BIOS version A03:
Phoenix ROM BIOS PLUS Version 1.10 A03
Cisco Systems IDS-4235/4250
www.cisco.com
Testing memory. Please wait.
If your version is A01, A02, or A03, you must upgrade the BIOS to version A04.
To create and boot the IDS-4235 or IDS-4250 BIOS upgrade diskette, follow these
steps:
Step 1
Copy BIOS_A04.exe to a Windows system.
You can find the file in the /BIOS directory on the recovery/upgrade CD, or you
can download it from Cisco.com. See Obtaining Cisco IDS Software, page 9-1,
for the procedure for downloading IDS software from the Software Center on
Cisco.com.
Note
You must have a Cisco.com account with cryptographic access before you
can download software from the Software Center. See Applying for a
Cisco.com Account with Cryptographic Access, page 9-11, for the
procedure.
Step 2
Insert a blank 1.44-MB diskette in the Windows system.
Step 3
Double-click the downloaded BIOS update file, BIOS_A04.exe, on the Windows
system to generate the BIOS update diskette.
Step 4
Insert the newly created BIOS update diskette in your IDS-4235 or IDS-4250.
Cisco Intrusion Detection System Appliance and Module Installation and Configuration Guide Version 4.1
78-15597-02
5-7
Chapter 5
Installing the IDS-4235 and IDS-4250
Using the TCP Reset Interface
Caution
Do not power off or manually reboot the appliance during Step 5.
Caution
You cannot upgrade the BIOS from a console connection. You must connect a
keyboard and monitor to the appliance so that you can see the output on the
monitor.
Step 5
Boot the appliance and follow the on-screen instructions.
Step 6
Remove the BIOS update diskette from the appliance while the appliance is
rebooting, otherwise the BIOS upgrade will be started again.
Using the TCP Reset Interface
The IDS-4250-XL has a TCP reset interface—INT0. The IDS-4250-XL has a
specific TCP reset interface because it cannot send TCP resets on its monitoring
ports.
If you have reset problems with the IDS-4250-XL, try the following:
•
Make sure the TCP reset interface of the IDS-4250-XL (int0) is connected to
the same switch as the sensing ports (int2 and int3) of the XL card.
•
If the sensing ports are access ports (a single VLAN), you need to configure
the reset port to be in the same VLAN.
Note
•
5-8
If the two XL ports are access ports for different VLANs, you can
only configure the reset port for one of these VLANs. You can use
dot1q trunk ports to overcome this limitation.
If the sensing ports are dot1q trunk ports (multi-VLAN), the sensing ports and
reset port all need to have the same native VLAN, and the reset port needs to
trunk all the VLANs being trunked by both the sensing ports.
Cisco Intrusion Detection System Appliance and Module Installation and Configuration Guide Version 4.1
78-15597-02
Chapter 5
Installing the IDS-4235 and IDS-4250
Installing the IDS-4235 and IDS-4250
Installing the IDS-4235 and IDS-4250
Warning
Caution
Only trained and qualified personnel should be allowed to install, replace, or
service this equipment. Statement 1030
Be sure to read the safety warnings in the Regulatory Compliance and Safety
Information for the Cisco Intrusion Detection System 4200 Series Appliance
Sensor and follow proper safety procedures when performing these steps.
To install the IDS-4235 and IDS-4250 on your network, follow these steps:
Step 1
Position the appliance on the network.
See Placing an Appliance on Your Network, page 1-6, for information on the best
places to position an appliance.
Step 2
Attach the power cord to the appliance and plug it in to a power source (a UPS is
recommended).
Step 3
Use the dual serial communication cable (PN 72-1847-01, included in the
accessory kit) to attach a laptop to the COM1 (serial) port of the appliance (see
Table 5-3 for a list of the terminal settings), or connect a keyboard and monitor to
the appliance.
Table 5-3
Terminal Settings
Terminal
Setting
Bits per second
9600
Data bits
8
Parity
None
Stop bits
1
Flow control
Hardware or RTS/CTS
Cisco Intrusion Detection System Appliance and Module Installation and Configuration Guide Version 4.1
78-15597-02
5-9
Chapter 5
Installing the IDS-4235 and IDS-4250
Installing the IDS-4235 and IDS-4250
Caution
We recommend that you use the dual serial communication cable included in the
accessory kit, because some keyboards and monitors are incompatible with the
appliance.
Note
Step 4
You can use a 180/rollover or straight-through patch cable to connect the
appliance to a port on a terminal server with RJ-45 or hydra cable
assembly connections. Use a M.A.S.H adapter (part number 29-4077-02)
to connect the appropriate cable to a port on the terminal server. See
Setting Up a Terminal Server, page 1-9, for the instructions for setting up
a terminal server.
Attach the network cables.
PCI expansion card slots
Sensing interface: 4250-SX: int2
4250-XL: int2, int3
4250-4FE: int2, int3, int4, int5
Command and Control
interface: int1
119584
Sensing interface: int0
Step 5
5-10
•
int0 is the sensing port.
•
int1 is the command and control port.
•
int2 is the optional SX (fiber NIC) sensing port.
•
int2 and int3 are the optional XL card sensing ports.
•
int2 through int5 are the optional 4FE card sensing ports.
Power on the appliance.
Cisco Intrusion Detection System Appliance and Module Installation and Configuration Guide Version 4.1
78-15597-02
Chapter 5
Installing the IDS-4235 and IDS-4250
Installing the Accessories
Caution
Step 6
If your BIOS version is earlier than A04, you must apply the BIOS upgrade before
installing the version 4.x software on the IDS-4235 and IDS-4250. See Upgrading
the BIOS, page 5-7.
Initialize your appliance.
See Initializing the Sensor, page 10-2, for the procedure.
Step 7
Upgrade your appliance to the most recent Cisco IDS software.
See Obtaining Cisco IDS Software, page 9-1, for the procedure.
Step 8
Assign the interfaces.
See Assigning and Enabling the Sensing Interface, page 10-9, for the procedure.
You are now ready to configure intrusion detection on your appliance.
Installing the Accessories
This section describes the contents of the IDS-4235 and the IDS-4250 accessories
package and how to install the accessories.
This section contains these topics:
•
Accessories Package Contents, page 5-12
•
Installing and Removing the Bezel, page 5-12
•
Installing the Power Supply, page 5-13
•
Installing Optional PCI Cards, page 5-16
•
Disconnecting the XL Card Fiber Ports, page 5-19
•
Removing and Replacing the SCSI Hard-Disk Drive, page 5-20
•
Four-Post Rack Installation, page 5-23
•
Two-Post Rack Installation, page 5-34
Cisco Intrusion Detection System Appliance and Module Installation and Configuration Guide Version 4.1
78-15597-02
5-11
Chapter 5
Installing the IDS-4235 and IDS-4250
Installing the Accessories
Accessories Package Contents
The following items are shipped in the accessories package for the IDS-4235 and
IDS-4250:
•
Cisco IDS-4235 or IDS-4250 bezel
•
Power cable
•
Network patch cable
•
Dual serial communication cable
•
Serial extension adapter
•
M.A.S.H adapter
•
Documentation and software
– Cisco IDS recovery/upgrade CD
– Cisco Documentation CD
– Cisco Intrusion Detection System (IDS) Hardware and Software Version
4.1 Documentation Guide
– Regulatory Compliance and Safety Information for the Cisco Intrusion
Detection System 4200 Series Appliance Sensor
Installing and Removing the Bezel
Figure 5-3 on page 5-13 shows the Cisco bezel that you can install on your
IDS-4235 or IDS-4250.
5-12
Cisco Intrusion Detection System Appliance and Module Installation and Configuration Guide Version 4.1
78-15597-02
Chapter 5
Installing the IDS-4235 and IDS-4250
Installing the Accessories
Figure 5-3
Cisco Bezel
2
87953
1
To install and remove the bezel on the IDS-4235 or IDS-4250, follow these steps:
Step 1
Step 2
To insert the bezel in the appliance, follow these steps:
a.
Align the right side tab on the bezel with the slot on the appliance mounting
tab.
b.
Press the left side of the bezel into place on the appliance.
To remove the bezel, press the left side tab and pull.
Installing the Power Supply
You can install a second, redundant power supply and power-supply cooling fan
(part number IDS-PWR=) in your appliance.
Caution
Be sure to read the safety warnings in the Regulatory Compliance and Safety
Information for the Cisco Intrusion Detection System 4200 Series Appliance
Sensor and follow proper safety procedures when performing the following steps.
Cisco Intrusion Detection System Appliance and Module Installation and Configuration Guide Version 4.1
78-15597-02
5-13
Chapter 5
Installing the IDS-4235 and IDS-4250
Installing the Accessories
To install a power supply and fan, follow these steps:
Step 1
Log in to the CLI.
Step 2
Prepare the appliance to be powered off:
sensor# reset powerdown
Wait for the power down message before continuing with Step 3.
Note
You can also power down the sensor from IDM or IDS MC.
Step 3
Power off the appliance.
Step 4
Remove the power cord and other cables from the appliance.
Step 5
Place the appliance in an ESD-controlled environment.
See Working in an ESD Environment, page 1-21, for more information.
Step 6
Step 7
Remove the cover.
a.
Remove the single screw at the front of the chassis.
b.
Press the chassis release button to release the left side of the cover.
c.
Lift the left side of the cover using the tab at the back of the appliance.
d.
Lift the right side of the cover using the tab at the back of the appliance.
Place the new power supply cooling fan in the back of the power supply bay (see
Figure 5-4 on page 5-15).
Note
5-14
Ensure that the finger guard on the fan faces the back of the appliance and
that the fan power cable is pointing toward the fan power connector on the
system board (see Figure 5-4 on page 5-15).
Step 8
Route the fan power cable through the rectangular opening in the power supply
bay partition, and then connect the cable to the fan power connector on the system
board (see Figure 5-4 on page 5-15).
Step 9
To install the new power supply, align the stud on the side of the power supply
with the corresponding notch in the chassis, and then lower the power supply into
the chassis (see Figure 5-4 on page 5-15).
Cisco Intrusion Detection System Appliance and Module Installation and Configuration Guide Version 4.1
78-15597-02
Chapter 5
Installing the IDS-4235 and IDS-4250
Installing the Accessories
Warning
Step 10
Slide the power supply toward the PDB until the power-supply edge connector is
fully seated in the PDB connector (see Figure 5-4).
Power Supply and Power-Supply Cooling Fan
78106
Figure 5-4
The connectors on the Power Distribution Board (PDB) contain high voltages.
Do not remove the metal cover from the PDB or touch the connectors on the PDB
or power supplies.
Cisco Intrusion Detection System Appliance and Module Installation and Configuration Guide Version 4.1
78-15597-02
5-15
Chapter 5
Installing the IDS-4235 and IDS-4250
Installing the Accessories
Step 11
Step 12
Close the cover.
a.
Close the right side of the cover.
b.
Close the left side of the cover, and press firmly along the edge to lock in
place.
c.
Replace the screw at the front of the chassis.
Connect the new system power cable to the power-supply 2 cable connector (PS2)
on the back panel of the appliance.
Installing Optional PCI Cards
You can install the following optional PCI cards in the IDS-4235 and IDS-4250.
The optional PCI cards provide additional sensing interfaces.
•
SX card (1000BASE-SX sensing interface, part number,
IDS-4250-SX-INT=)
You can install the SX card in the upper PCI slot on the IDS-4250 series
appliances.
•
XL card (accelerated 1000BASE-SX interface with MTRJ, part number
IDS-XL-INT=)
You can install the XL card in the upper PCI slot in the IDS-4250 series
appliances. The XL card accelerates the performance of the IDS-4250 up to
1 Gbps. You can use an MTRJ cable (part number
CAB-MTRJ-SC-MM-3M=) to connect the fiber port on the XL card to the
switch on the network. You can order this cable when you order the XL card.
See Disconnecting the XL Card Fiber Ports, page 5-19, for information about
disconnecting the fiber ports the first time you boot the IDS-4250 after
upgrading with the XL card.
•
4FE card (four-port 10/100BASE-TX fast Ethernet sensing interface, part
number IDS-4FE-INT=)
You can install the 4FE card in the lower PCI slot in the IDS-4235 and
IDS-4250 series appliances.
5-16
Cisco Intrusion Detection System Appliance and Module Installation and Configuration Guide Version 4.1
78-15597-02
Chapter 5
Installing the IDS-4235 and IDS-4250
Installing the Accessories
Caution
Note
Caution
Be sure to read the safety warnings in the Regulatory Compliance and Safety
Information for the Cisco Intrusion Detection System 4200 Series Appliance
Sensor and follow proper safety procedures when performing the following steps.
None of the PCI cards are supported as a command and control interface.
The IDS-4250 supports only one of the following cards in a PCI slot: the SX card
(upper PCI slot), the XL card (upper PCI slot), or the 4FE card (lower PCI slot).
The IDS-4235 supports only the 4FE card in the lower PCI slot.
To install the PCI card, follow these steps:
Step 1
Log in to the CLI.
Step 2
Prepare the appliance to be powered off:
sensor# reset powerdown
Wait for the power down message before continuing with Step 3.
Note
You can also power down the sensor from IDM or IDS MC.
Step 3
Power off the appliance.
Step 4
Remove the power cord and other cables from the appliance.
Step 5
Place the appliance in an ESD-controlled environment.
See Working in an ESD Environment, page 1-21, for more information.
Step 6
Remove the cover.
a.
Remove the single screw at the front of the chassis.
b.
Press the chassis release button to release the left side of the cover.
c.
Use the tab at the rear of the system to lift the left side of the cover.
d.
Use the tab at the rear of the system to lift the right side of the cover.
Cisco Intrusion Detection System Appliance and Module Installation and Configuration Guide Version 4.1
78-15597-02
5-17
Chapter 5
Installing the IDS-4235 and IDS-4250
Installing the Accessories
Step 7
Remove the PCI slot cover.
a.
Pull the slot release pin at the back of the chassis to unlock the PCI slot covers
and pull the slot release toward you.
b.
Remove the PCI slot cover.
Step 8
Insert the PCI card into the proper PCI slot of the riser card (according to which
card you have), using enough pressure so that the card pops securely into place.
Caution
Be sure to support the riser card while inserting the PCI card, otherwise, you could
cause the riser card to flex and damage the riser card or main board.
Caution
The IDS-4250 supports only one of the following cards in a PCI slot: the SX card
(upper PCI slot), the XL card (upper PCI slot), or the 4FE card (lower PCI slot).
The IDS-4235 supports only the 4FE card in the lower PCI slot.
Step 9
Check the back of the chassis to be sure the card is flush with the PCI slot, and
then return the PCI slot release to its original position to lock the PCI slot card in
place.
Step 10
Close the cover.
Step 11
a.
Close the right side of the cover.
b.
Close the left side of the cover, and press firmly along the edge to lock in
place.
c.
Replace the screw at the front of the chassis.
Replace the power and network connections.
Note
Step 12
Caution
5-18
The monitoring interface connector is now on the XL card.
Reboot the appliance.
Make sure the fiber ports are not connected the first time you boot the appliance
after you have installed the XL card. For more information, see Disconnecting the
XL Card Fiber Ports, page 5-19.
Cisco Intrusion Detection System Appliance and Module Installation and Configuration Guide Version 4.1
78-15597-02
Chapter 5
Installing the IDS-4235 and IDS-4250
Installing the Accessories
Step 13
Assign the new interfaces:
•
SX card—int2
•
XL card—int2 and int3
•
4FE card—in2 through int5
See Assigning and Enabling the Sensing Interface, page 10-9, for the
procedure.
Disconnecting the XL Card Fiber Ports
When you upgrade the IDS-4250-TX and IDS-4250-SX with the XL card, the
appliances may not boot up the first time if the fiber ports are connected.
Disconnect the fiber ports before you boot up the appliance. After the appliance
starts for the first time, the firmware version is upgraded and the problem is not
seen again.
Note
You will not experience this problem if you order the IDS-4250-XL—with the XL
card already installed—because the appliance is rebooted at the factory.
To allow the appliance to reboot after installing the XL card, follow these steps:
Step 1
Log in to the CLI.
Step 2
Prepare the appliance to be powered off:
sensor# reset powerdown
Wait for the power down message before continuing with Step 3.
Note
You can also power down the sensor from IDM or IDS MC.
Step 3
Power off the appliance.
Step 4
Remove the fiber connections from the XL card.
Cisco Intrusion Detection System Appliance and Module Installation and Configuration Guide Version 4.1
78-15597-02
5-19
Chapter 5
Installing the IDS-4235 and IDS-4250
Installing the Accessories
Step 5
Boot up the appliance.
Wait until the appliance has completed bootup and you see a login prompt.
Step 6
Plug the fiber connections back into the XL card.
Step 7
During the startup of the IDS applications, the XL card is upgraded to the latest
firmware.
Removing and Replacing the SCSI Hard-Disk Drive
The IDS-4235 and IDS-4250 have a removable SCSI hard-disk drive. You can
replace the hard-disk drive in case of drive failure. Or you can order a spare drive
(part number IDS-SCSI=), apply your configuration, and ship the drive to a
remote site. The administrator at the remote site can then install the configured
drive.
Caution
Be sure to read the safety warnings in the Regulatory Compliance and Safety
Information for the Cisco Intrusion Detection System 4200 Series Appliance
Sensor and follow proper safety procedures when removing and replacing the
hard-disk drive.
Caution
Do not install a second hard-disk drive in the IDS-4235 and IDS-4250. The spare
hard-disk drives are meant to replace the original hard-disk drives and are not
meant to be used with the original hard-disk drive. If you install two hard-disk
drives in the appliance, the appliance may not recognize the recover command
used to reimage the appliance.
Figure 5-5 on page 5-21 shows the SCSI hard-disk drive indicators.
5-20
Cisco Intrusion Detection System Appliance and Module Installation and Configuration Guide Version 4.1
78-15597-02
Chapter 5
Installing the IDS-4235 and IDS-4250
Installing the Accessories
SCSI Hard-Disk Drive
87959
Figure 5-5
Drive power-on (green)
Green drive-activity indicator
When you have installed the new hard-disk drive, you must reimage it with the
recovery/upgrade CD. See Using the Recovery/Upgrade CD with the Appliance,
page 9-9, for the procedure.
This section contains these topics:
•
Removing the SCSI Hard-Disk Drive, page 5-21
•
Replacing the SCSI Hard-Disk Drive, page 5-22
Removing the SCSI Hard-Disk Drive
To remove the SCSI hard-disk drive, follow these steps:
Step 1
Log in to the CLI.
Step 2
Prepare the appliance to be powered off:
sensor# reset powerdown
Wait for the power down message before continuing with Step 3.
Note
You can also power down the sensor from IDM or IDS MC.
Step 3
Power off the appliance by pressing the power button.
Step 4
Remove the front bezel.
See Installing and Removing the Bezel, page 5-12, for the procedure.
Cisco Intrusion Detection System Appliance and Module Installation and Configuration Guide Version 4.1
78-15597-02
5-21
Chapter 5
Installing the IDS-4235 and IDS-4250
Installing the Accessories
Step 5
Open the hard-disk drive handle to release the drive.
Step 6
Slide the hard-disk drive out until it is free of the drive bay.
Replacing the SCSI Hard-Disk Drive
To replace the SCSI hard-disk drive, follow these steps:
Step 1
Log in to the CLI.
Step 2
Prepare the appliance to be powered off:
sensor# reset powerdown
Wait for the power down message before continuing with Step 3.
Note
You can also power down the sensor from IDM or IDS MC.
Step 3
Power off the appliance by pressing the power button.
Step 4
Remove the front bezel.
See Installing and Removing the Bezel, page 5-12 for the procedure.
Step 5
Open the hard-disk drive handle.
Step 6
Insert the hard-disk drive into the drive bay.
Step 7
Close the hard-disk drive handle to lock the drive into place.
Step 8
Power on the appliance by pressing the power button.
Step 9
Replace the front bezel.
See Installing and Removing the Bezel, page 5-12 for the procedure.
Note
5-22
Replacement drives are shipped without an image. You must reimage the
hard-disk drive. See Reimaging the Appliance, page 10-110, for more
information.
Cisco Intrusion Detection System Appliance and Module Installation and Configuration Guide Version 4.1
78-15597-02
Chapter 5
Installing the IDS-4235 and IDS-4250
Installing the Accessories
Four-Post Rack Installation
You can install your appliance in a four-post rack (part number IDS-RAIL-4=).
Caution
Do not install rack kit components designed for another system. Use only the rack
kit for your appliance. Using the rack kit for another system may damage the
appliance and cause injury to yourself and others.
This section contains these topics:
•
Recommended Tools and Supplies, page 5-23
•
Rack Kit Contents, page 5-23
•
Installing the Slide Assemblies, page 5-24
•
Installing the Appliance in the Rack, page 5-26
•
Installing the Cable-Management Arm, page 5-28
•
Routing the Cables, page 5-32
Recommended Tools and Supplies
You need these tools and supplies to install the appliance in a four-post rack
cabinet:
•
#2 Phillips screwdriver
•
Masking tape or felt-tip pen for marking the mounting holes to be used
Rack Kit Contents
The four-post rack kit includes these items:
•
One pair of slide assemblies
•
One cable-management arm
•
One stop block
•
One status-indicator cable assembly
•
Ten 10-32 x 0.5-inch flange-head Phillips screws
•
Releaseable tie wraps
Cisco Intrusion Detection System Appliance and Module Installation and Configuration Guide Version 4.1
78-15597-02
5-23
Chapter 5
Installing the IDS-4235 and IDS-4250
Installing the Accessories
Installing the Slide Assemblies
The rack is measured in rack units (RU). An RU is equal to 44 mm or 1.75 inches.
To install the slide assemblies, follow these steps:
Step 1
Remove the rack doors according to the documentation provided with the rack
cabinet.
Step 2
Place a mark on the rack’s front vertical rails where you want to locate the bottom
of the appliance that you are installing in the rack cabinet.
Note
Step 3
Place a mark 44 mm (1.75 inches) above the original mark you made (or count up
three holes) and mark the rack’s front vertical rails to indicate where the
appliance’s upper edge will be located on the vertical rails.
Note
Step 4
5-24
Mark 1 RU (44 mm or 1.75 inches) of vertical space for each appliance
you install in the rack.
At the front of the rack cabinet, position one of the slide assemblies so that its
mounting-bracket flange fits between the marks you made on the rack (see
Figure 5-6 on page 5-25).
Note
Step 5
The bottom of each 1-RU space is at the middle of the narrowest metal
area between holes (marked with a horizontal line on some rack cabinets).
The three holes on the front of the mounting bracket should align with the
3 holes between the marks you made on the vertical rails.
Install two 10-32 x 0.5-inch flange-head Phillips screws in the mounting flange’s
top and bottom holes to secure the slide assembly to the front vertical rail (see
Figure 5-6 on page 5-25).
Cisco Intrusion Detection System Appliance and Module Installation and Configuration Guide Version 4.1
78-15597-02
Chapter 5
Installing the IDS-4235 and IDS-4250
Installing the Accessories
Slide Assemblies
78109
Figure 5-6
Step 6
At the back of the cabinet, pull back on the mounting-bracket flange until the
mounting holes align with their respective holes on the back vertical rail.
Cisco Intrusion Detection System Appliance and Module Installation and Configuration Guide Version 4.1
78-15597-02
5-25
Chapter 5
Installing the IDS-4235 and IDS-4250
Installing the Accessories
Step 7
Install three 10-32 x 0.5-inch flange-head Phillips screws in the mounting flange’s
holes to secure the slide assembly to the back vertical rail.
Step 8
Repeat Steps 3 through 6 for the remaining slide assembly on the other side of the
rack.
Step 9
Ensure that the slide assemblies are mounted at the same position on the vertical
rails on each side of the rack.
Installing the Appliance in the Rack
If you are installing more than one appliance, install the first appliance in the
lowest available position in the rack.
Caution
Never pull more than one component out of the rack at a time.
To install the appliance in the rack, follow these steps:
Step 1
5-26
Pull the two slide assemblies out of the rack until they lock in the fully extended
position.
Caution
Because of the size and weight of the appliance, never attempt to install the
appliance in the slide assemblies by yourself.
Step 2
Remove the appliance front bezel by pressing the left side tab and pulling.
Step 3
Lift the appliance into position in front of the extended slides.
Step 4
Place one hand on the front-bottom of the appliance and the other hand on the
back-bottom of the appliance.
Step 5
Tilt the back of the appliance down while aligning the back shoulder screws on
the sides of the appliance with the back slots on the slide assemblies.
Step 6
Engage the back shoulder screws into their slots.
Step 7
Lower the front of the appliance and engage the front shoulder screws in the front
slot behind the appliance release latch (see Figure 5-7 on page 5-27).
Cisco Intrusion Detection System Appliance and Module Installation and Configuration Guide Version 4.1
78-15597-02
Chapter 5
Installing the IDS-4235 and IDS-4250
Installing the Accessories
The appliance release latch moves forward and then snaps back as the shoulder
screw passes into the front slot.
Note
Installing the Appliance in the Rack
78110
Figure 5-7
Use the appliance release latch when you want to remove the appliance
from the slide assemblies.
Cisco Intrusion Detection System Appliance and Module Installation and Configuration Guide Version 4.1
78-15597-02
5-27
Chapter 5
Installing the IDS-4235 and IDS-4250
Installing the Accessories
Step 8
Press the slide release latch at the side of each latch to slide the appliance
completely into the rack (see Figure 5-7 on page 5-27).
Step 9
Push in and turn the captive thumbscrews on each side of the front chassis panel
to secure the appliance to the rack.
Installing the Cable-Management Arm
You can install the cable-management arm on the right or left of the rack cabinet.
This procedure describes installing the cable-management arm in the right side of
the rack cabinet, as viewed from the back.
Tip
If you are installing several appliances in the rack, consider installing the cable
management arms on alternating sides of the rack for ease in cable routing.
To install the cable-management arm, follow these steps:
Step 1
Facing the back of the rack cabinet, locate the latch on the end of the right slide
assembly that you secured to the back vertical rail.
Step 2
Push the tab on the back end of the cable-management arm into the latch on the
end of the slide assembly (see Figure 5-8 on page 5-29).
Note
Step 3
Push the tab on the remaining free end (the front) into a mating latch on the inner
segment of the slide assembly (see Figure 5-8 on page 5-29).
Note
Step 4
5-28
The latch clicks when locked.
The latch clicks when locked.
Install a stop block on the latch on the end of the opposite slide assembly (see
Figure 5-8 on page 5-29).
Cisco Intrusion Detection System Appliance and Module Installation and Configuration Guide Version 4.1
78-15597-02
Chapter 5
Installing the IDS-4235 and IDS-4250
Installing the Accessories
The stop block prevents the backward travel of the cable-management
arm and supports the weight of the arm with its load of installed cables.
Note
The two-post rack kit has two stop blocks: one for right-side mounting,
and one for left-side mounting. You can only install the proper stop block.
Cable-Management Arm
78111
Figure 5-8
Note
Step 5
Install the status-indicator cable plug into its connector (see Figure 5-9 on
page 5-30).
Cisco Intrusion Detection System Appliance and Module Installation and Configuration Guide Version 4.1
78-15597-02
5-29
Chapter 5
Installing the IDS-4235 and IDS-4250
Installing the Accessories
Step 6
Open the wire covers on the cable-management arm by lifting the center of the
wire over the top of the embossed round button on the front of the forward part of
the arm, and lifting the wire over the top of a similar round button on the back part
of the arm.
The wire cover swings open to enable cables to be routed within the arm.
Step 7
Installing the Cable-Management Arm
78112
Figure 5-9
Route the status-indicator end of the cable assembly through the
cable-management arm, and install the indicator in its slot at the back end of the
cable-management arm (see Figure 5-9).
Step 8
5-30
Connect the power cords to their receptacles on the back panel.
Cisco Intrusion Detection System Appliance and Module Installation and Configuration Guide Version 4.1
78-15597-02
Chapter 5
Installing the IDS-4235 and IDS-4250
Installing the Accessories
Note
Although the strain-relief can accommodate power cords with a bend
radius of up to 19 millimeters (0.75 inch), use only the power cords
provided with the appliance.
Step 9
Install a tie-wrap through the slot on the strain-relief tab (see Figure 5-10).
Step 10
Bend the power cords back beside the power receptacle housing and form a tight
loop. Install the strain-relief tie-wrap loosely around the looped power cord (see
Figure 5-10).
78113
Figure 5-10 Power Cord Strain Relief
Cisco Intrusion Detection System Appliance and Module Installation and Configuration Guide Version 4.1
78-15597-02
5-31
Chapter 5
Installing the IDS-4235 and IDS-4250
Installing the Accessories
Routing the Cables
To route the cables, follow these steps:
Step 1
Attach the I/O cable connectors to their respective connectors on the appliance
back panel.
For details on the cable connections, see Installing the IDS-4235 and IDS-4250,
page 5-9.
Step 2
Route the power and I/O cables through the cable-management arm, using four
loosely secured releaseable tie-wraps (two in the middle and on each end of the
cable-management arm).
Note
5-32
Do not fully tighten the tie-wraps at this time (see Figure 5-11 on
page 5-33). Allow some cable slack in the cable-management arm to
prevent damage to the cables.
Cisco Intrusion Detection System Appliance and Module Installation and Configuration Guide Version 4.1
78-15597-02
Chapter 5
Installing the IDS-4235 and IDS-4250
Installing the Accessories
78104
Figure 5-11 Routing Cables
Step 3
Secure the cables to the cable-management arm:
a.
After connecting the cables to the appliance, unscrew the thumbscrews that
secure the front of the appliance to the front vertical rail.
b.
Slide the appliance forward to the fully extended position.
c.
Route the cables along the cable-management arm, making any adjustments
to the cable slack at the hinge positions, and secure the cables to the
cable-management arm with the releaseable tie-wraps and the wire covers
over the cable-management arm.
Note
As you pull the appliance out to its farthest extension, the slide
assemblies lock in the extended position. To push the appliance back
into the rack, press the slide release latch on the side of the slide, and
then slide the appliance completely into the rack.
Cisco Intrusion Detection System Appliance and Module Installation and Configuration Guide Version 4.1
78-15597-02
5-33
Chapter 5
Installing the IDS-4235 and IDS-4250
Installing the Accessories
Step 4
Slide the appliance in and out of the rack to verify that the cables are routed
correctly and do not bind, stretch, or pinch with the movement of the
cable-management arm.
Step 5
Make any necessary adjustments to ensure that the cable slack is neither too tight
nor too loose, yet keeps the cables in place as the appliance is moved in and out
of the rack.
Step 6
Replace the rack doors.
Note
Warning
Refer to the procedures for replacing the rack doors in the documentation
provided with your rack cabinet.
Because of the size and weight of the rack cabinet doors, never attempt to
remove or install them by yourself.
Two-Post Rack Installation
You can install the two-post rack (part number IDS-RAIL-2=) in a center-mount
or flush-mount configuration. The two-post kit incorporates slide assemblies that
enable the appliance to be pulled out of the rack for servicing.
You must properly secure the two-post, open frame relay rack to the floor, the
ceiling or upper wall, and where applicable, to adjacent racks, using floor and wall
fasteners and bracing specified or approved by the rack manufacturer.
Warning
Do not attempt to install the appliance into a two-post, open-frame relay rack
that has not been securely anchored in place. Damage to the appliance and
injury to yourself and to others may result.
This section contains these topics:
5-34
•
Recommended Tools and Supplies, page 5-35
•
Rack Kit Contents, page 5-35
Cisco Intrusion Detection System Appliance and Module Installation and Configuration Guide Version 4.1
78-15597-02
Chapter 5
Installing the IDS-4235 and IDS-4250
Installing the Accessories
•
Marking the Rack, page 5-35
•
Installing the Slide Assemblies in the Rack, page 5-36
Recommended Tools and Supplies
You need the following tools and supplies to install the appliance in a two-post,
open-frame relay rack:
•
#2 Phillips screwdriver
•
11/32-inch wrench or nut driver (if changing bracket to flush-mount
configuration)
•
Masking tape or felt-tip pen to mark the mounting holes
Rack Kit Contents
The two-post rack kit includes:
•
One pair of slide assemblies (two-post)
•
One cable-management arm
•
One status-indicator cable assembly
•
Two stop blocks
•
Eight 12-24 x 0.5-inch pan-head Phillips screws
•
Releaseable tie wraps
Marking the Rack
You must allow 1 RU (44 mm or 1.75 inches) of vertical space for each appliance
you install in the two-post rack.
Cisco Intrusion Detection System Appliance and Module Installation and Configuration Guide Version 4.1
78-15597-02
5-35
Chapter 5
Installing the IDS-4235 and IDS-4250
Installing the Accessories
To mark the rack, follow these steps:
Step 1
Place a mark on the rack’s front vertical rails where you want to locate the bottom
of the appliance that you are installing in the two-post rack.
Note
Step 2
The bottom of each 1-RU space is at the middle of the narrowest metal
area between holes.
Place a mark 44 mm (1.75 inches) above the original mark you made.
Note
Each 1 RU (44 mm, or 1.75 inches) of vertical space on a rack with
universal-hole spacing has three holes with center-to-center spacing
between the holes (beginning at the top of a 1-RU space) of 15.9 mm, 15.9
mm, and 12.7 mm (0.625 inches, 0.625 inches, and 0.5 inches).
Installing the Slide Assemblies in the Rack
You can install the slide assemblies in a two-post, open-frame relay rack having
either universal-hole spacing or wide-hole spacing. You can install the 1-RU slide
assemblies in either a flush-mount or center-mount configuration.
This section contains these topics:
•
Center-Mount Installation, page 5-36
•
Flush-Mount Installation, page 5-39
Center-Mount Installation
The two-post rack kit is shipped with brackets configured for center-mount
installation.
5-36
Cisco Intrusion Detection System Appliance and Module Installation and Configuration Guide Version 4.1
78-15597-02
Chapter 5
Installing the IDS-4235 and IDS-4250
Installing the Accessories
To install the center-mount brackets, follow these steps:
Step 1
Locate the right slide assembly and push the back bracket toward the back of the
slide assembly (see Figure 5-12 on page 5-38).
Step 2
Position the right slide assembly in the two-post rack at the location you marked,
push the back bracket forward against the vertical two-post rack, and secure the
front and rear center-mounting brackets to the rack with two 12-24 x 0.5-inch
pan-head Phillips screws (Figure 5-12 on page 5-38).
Step 3
Repeat Steps 1 and 2 to install the left side assembly in the rack.
Cisco Intrusion Detection System Appliance and Module Installation and Configuration Guide Version 4.1
78-15597-02
5-37
Chapter 5
Installing the IDS-4235 and IDS-4250
Installing the Accessories
78105
Figure 5-12 Slide Assemblies for Center-Mount Configuration
5-38
Cisco Intrusion Detection System Appliance and Module Installation and Configuration Guide Version 4.1
78-15597-02
Chapter 5
Installing the IDS-4235 and IDS-4250
Installing the Accessories
Flush-Mount Installation
To install the flush-mount brackets, follow these steps:
Step 1
Locate the two slide assemblies and place them, side by side, on a smooth work
surface, with the front ends of the slide assemblies toward you. Position both slide
assemblies so that the center brackets are facing upward (see Figure 5-13 on
page 5-40).
Note
To prepare the slides for flush-mount installation, remove the front
mounting bracket, rotate it 180 degrees, and reinstall it on the opposite
slide assembly.
Step 2
Using a #2 Phillips screwdriver and an 11/32-inch wrench or nut driver, remove
two 12-24 x 0.5-inch pan-head Phillips screws, two nuts, and two shoulder
washers from each front center bracket (see Figure 5-13 on page 5-40).
Step 3
Remove the front bracket from both slide assemblies.
Step 4
Place the bracket from one slide assembly onto the threaded studs on the opposite
slide assembly, with the bracket turned 180 degrees so that the mounting flange
faces forward (see Figure 5-13 on page 5-40).
Step 5
Secure each front center mount bracket (by its nuts and shoulder washers) and
tighten them by hand on their opposite slide assemblies using the two shoulder
washers and two nuts you removed in Step 2 (see Figure 5-13 on page 5-40).
Step 6
Join the front brackets you just installed to the bracket on the slide assembly with
the two 12-24 x 0.5-inch pan-head Phillips screws you removed in Step 2 (see
Figure 5-13 on page 5-40).
The joined bracket becomes the new extended rear bracket.
Cisco Intrusion Detection System Appliance and Module Installation and Configuration Guide Version 4.1
78-15597-02
5-39
Chapter 5
Installing the IDS-4235 and IDS-4250
Installing the Accessories
78107
Figure 5-13 Rotating the Front-Mounting Bracket for Flush-Mount Installation
5-40
Step 7
Repeat Steps 4 though 6 to configure the other slide assembly.
Step 8
Holding the left slide assembly into position in the two-post rack at the location
you marked, adjust the extended rear bracket tightly against the back of the
vertical two-post rack and secure it to the two-post rail with two 12-24 x 0.5-inch
pan-head Phillips screws (see Figure 5-14 on page 5-41).
Step 9
Secure the front bracket on the slide assembly to the two-post rail with two 12-24
x 0.5-inch pan-head Phillips screws (see Figure 5-14 on page 5-41).
Step 10
Repeat Steps 8 and 9 to install the right slide assembly in the rack.
Step 11
Use and 11/32-inch wrench or nut driver to fully tighten the nuts on the mounting
brackets on both slide assemblies that you tightened with your fingers.
Cisco Intrusion Detection System Appliance and Module Installation and Configuration Guide Version 4.1
78-15597-02
Chapter 5
Installing the IDS-4235 and IDS-4250
Installing the Accessories
78108
Figure 5-14 Installing the Slide Assemblies for Flush-Mount Configuration
Cisco Intrusion Detection System Appliance and Module Installation and Configuration Guide Version 4.1
78-15597-02
5-41
Chapter 5
Installing the IDS-4235 and IDS-4250
Installing the Accessories
5-42
Cisco Intrusion Detection System Appliance and Module Installation and Configuration Guide Version 4.1
78-15597-02
C H A P T E R
6
Installing the IPS-4240 and IPS-4255
The Cisco Intrusion Prevention System (IPS) sensors, the IPS-4240 and the
IPS-4255, deliver high port density in a small form factor. They use a compact
flash device for storage rather than the hard-disk drives used in other sensor
models.
The IPS-4240 monitors up to 250 Mbps of aggregate network traffic on multiple
sniffing interfaces and is inline ready. It replaces the IDS-4235. There are four
10/100/1000 copper sniffing interfaces.
Note
The 250-Mbps performance for the IPS-4240 is based on the following
conditions: 2500 new TCP connections per second, 2500 HTTP transactions per
second, average packet size of 445 bytes, system running Cisco IDS 4.1 sensor
software. The 250-Mbps performance is traffic combined from all four sniffing
interfaces.
The IPS-4255 monitors up to 600 Mbps of aggregate network traffic on multiple
sniffing interfaces and is also inline ready. It replaces the IDS-4250-TX. There are
four 10/100/1000 copper sniffing interfaces.
Note
The IDS-4250-SX and the IDS-4250-XL are not being replaced by the IPS-4255
at this time.
Cisco Intrusion Detection System Appliance and Module Installation and Configuration Guide Version 4.1
78-15597-02
6-1
Chapter 6
Installing the IPS-4240 and IPS-4255
Front and Back Panel Features
Note
The 600-Mbps performance for the IPS-4255 is based on the following
conditions: 6000 new TCP connections per second, 6000 HTTP transactions per
second, average packet size of 445 bytes, system running Cisco IDS 4.1 sensor
software. The 600-Mbps performance is traffic combined from all four sniffing
interfaces.
Note
The IPS-4240 and the IPS-4255 do not support redundant power supplies.
This chapter describes the IPS-4240 and the IPS-4255 and how to install them. It
also describes the accessories and how to install them.
This chapter contains the following topics:
•
Front and Back Panel Features, page 6-2
•
Specifications, page 6-5
•
Accessories, page 6-6
•
Rack Mounting, page 6-7
•
Installing the IPS-4240 and IPS-4255, page 6-9
Front and Back Panel Features
This section describes the IPS-4240 and IPS-4255 front and back panel features
and indicators.
Note
6-2
Although the graphics show the IPS-4240, the IPS-4255 has the same front and
back panel features and indicators.
Cisco Intrusion Detection System Appliance and Module Installation and Configuration Guide Version 4.1
78-15597-02
Chapter 6
Installing the IPS-4240 and IPS-4255
Front and Back Panel Features
Figure 6-1 shows the front view of the IPS-4240.
Figure 6-1
IPS-4240 Front Panel Features
Cisco IPS 4240
PWR STATUS
Power
FLASH
114003
series
Intrusion Prevention Sensor
Flash
Status
Table 6-1 describes the front panel indicators on the IPS-4240.
Table 6-1
Front Panel Indicators
Indicator
Description
Power
Off indicates no power. Green when the power supply is running.
Status
Blinks green while the power-up diagnostics are running or the
system is booting. Green when the system has passed power-up
diagnostics. Amber when the power-up diagnostics have failed.
Flash
Off when the compact flash device is not being accessed. Blinks
green when the compact flash device is being accessed.
Cisco Intrusion Detection System Appliance and Module Installation and Configuration Guide Version 4.1
78-15597-02
6-3
Chapter 6
Installing the IPS-4240 and IPS-4255
Front and Back Panel Features
Figure 6-2 shows the back view of the IPS-4240.
IPS-4240 Back Panel Features
External
Serial
compact
flash device console
port
(not used)
Command and
control port
Indicator
light
USB2 USB1
CONSOLE
MGMT
FLASH
Sensing
interfaces
Power
indicator
FL
A
SH
PO
W
ER
ST
AT
U
S
AUX
LINK SPD LINK SPD LINK SPD LINK SPD
2
1
0
3
USB ports
(not used)
Power
switch
114002
Figure 6-2
Status
indicator
Auxiliary
port
(not used)
Power
connector
Compact
flash device
indicator
Figure 6-3 shows the four built-in Ethernet ports, which have two indicators per
port.
Figure 6-3
Ethernet Port Indicators
MGMT
USB1
6-4
114417
USB2
LINK SPD LINK SPD LINK SPD LINK SPD
2
1
0
3
Cisco Intrusion Detection System Appliance and Module Installation and Configuration Guide Version 4.1
78-15597-02
Chapter 6
Installing the IPS-4240 and IPS-4255
Specifications
Table 6-2 lists the back panel indicators.
Table 6-2
Back Panel Indicators
Indicator
Color
Description
Left side
Green solid
Green blinking
Physical link
Network activity
Right side
Not lit
Green
Amber
10 Mbps
100 Mbps
1000 Mbps
Specifications
Table 6-3 lists the specifications for the IPS-4240 and IPS-4255.
Table 6-3
IPS-4240/IPS-4255 Specifications
Dimensions and Weight
Height
1.72 in. (4.3688 cm)
Width
17.25 in. (43.815 cm)
Depth
14.5 in. (36.83 cm)
Weight
11.5 lb (4.11 kg)
Form factor
1 RU, standard 19-inch rack-mountable
Expansion
One chassis expansion slot (not used)
Power
Autoswitching
100V to 240V AC
Frequency
50 to 60 Hz, single phase
Operating current
1.5 A
Steady state
50 W
Maximum peak
65 W
Maximum heat dissipation
410 BTU/hr, full power usage (65 W)
Cisco Intrusion Detection System Appliance and Module Installation and Configuration Guide Version 4.1
78-15597-02
6-5
Chapter 6
Installing the IPS-4240 and IPS-4255
Accessories
Table 6-3
IPS-4240/IPS-4255 Specifications (continued)
Environment
Temperature
Operating +32°F to +104°F (+0°C to +40°C)
Nonoperating -13°F to +158°F (-25°C to +70°C)
Relative humidity
Operating 5% to 95% (noncondensing)
Nonoperating 5% to 95% (noncondensing)
Altitude
Operating 0 to 9843 ft (3000 m)
Nonoperating 0 to 15,000 ft (4750 m)
Shock
Operating 1.14 m/sec (45 in./sec) ½ sine input
Nonoperating 30 G
Vibration
0.41 Grms2 (3 to 500 Hz) random input
Acoustic noise
54 dBa (maximum)
Accessories
Warning
IMPORTANT SAFETY INSTRUCTIONS
This warning symbol means danger. You are in a situation that could cause
bodily injury. Before you work on any equipment, be aware of the hazards
involved with electrical circuitry and be familiar with standard practices for
preventing accidents. Use the statement number provided at the end of each
warning to locate its translation in the translated safety warnings that
accompanied this device. Statement 1071
SAVE THESE INSTRUCTIONS
Warning
6-6
Only trained and qualified personnel should be allowed to install, replace, or
service this equipment. Statement 1030
Cisco Intrusion Detection System Appliance and Module Installation and Configuration Guide Version 4.1
78-15597-02
Chapter 6
Installing the IPS-4240 and IPS-4255
Rack Mounting
The IPS-4240/IPS-4255 accessories kit contains the following:
•
DB25 connector
•
DB9 connector
•
Rack mounting kit—screws, washers, and metal bracket
•
RJ45 console cable
•
Two 6-ft Ethernet cables
Rack Mounting
To rack mount the IPS-4240/IPS-4255, follow these steps:
Step 1
Attach the bracket to the appliance using the supplied screws.
You can attach the brackets to the holes near the front of the appliance.
Cisco
IPS 42
4
Intru 0
n Sens
or
114016
se
sion Pr ries
eventio
Cisco Intrusion Detection System Appliance and Module Installation and Configuration Guide Version 4.1
78-15597-02
6-7
Chapter 6
Installing the IPS-4240 and IPS-4255
Rack Mounting
Note
Step 2
The bottom hole in the bracket is a banana jack you can use for ESD
grounding purposes when you are servicing the system. You can use the
two threaded holes to mount a ground lug to ground the chassis.
Use the supplied screws to attach the appliance to the equipment rack.
Cisco
PWR STAT
US
ASA 424
Intrusion 0
Detection
Sensor
114017
FLASH
Step 3
6-8
To remove the appliance from the rack, remove the screws that attach the
appliance to the rack, and then remove the appliance.
Cisco Intrusion Detection System Appliance and Module Installation and Configuration Guide Version 4.1
78-15597-02
Chapter 6
Installing the IPS-4240 and IPS-4255
Installing the IPS-4240 and IPS-4255
Installing the IPS-4240 and IPS-4255
Warning
Caution
Only trained and qualified personnel should be allowed to install, replace, or
service this equipment. Statement 1030
Be sure to read the safety warnings in the Regulatory Compliance and Safety
Information for the Cisco Intrusion Detection System 4200 Series Appliance
Sensor and follow proper safety procedures when performing these steps.
To install the IPS-4240 and IPS-4255 on your network, follow these steps:
Step 1
Position the appliance on the network.
See Placing an Appliance on Your Network, page 1-6, for information on the best
places to position an appliance.
Step 2
Place the appliance in a rack, if you are rack mounting it.
See Rack Mounting, page 6-7, for the procedure.
Step 3
Attach the power cord to the appliance and plug it in to a power source (a UPS is
recommended).
Step 4
Connect the cable as shown in so that you have either a DB-9 or DB-25 connector
on one end as required by the serial port for your computer, and the other end is
the RJ-45 connector.
Note
Use the console port to connect to a computer to enter configuration
commands. Locate the serial cable from the accessory kit. The serial cable
assembly consists of a 180/rollover cable with RJ-45 connectors (DB-9
connector adapter PN 74-0495-01 and DB-25 connector adapter PN
29-0810-01).
Cisco Intrusion Detection System Appliance and Module Installation and Configuration Guide Version 4.1
78-15597-02
6-9
Chapter 6
Installing the IPS-4240 and IPS-4255
Installing the IPS-4240 and IPS-4255
Note
Step 5
You can use a 180/rollover or straight-through patch cable to connect the
appliance to a port on a terminal server with RJ-45 or hydra cable
assembly connections. Connect the appropriate cable from the console
port on the appliance to a port on the terminal server. See Setting Up a
Terminal Server, page 1-9, for the instructions for setting up a terminal
server.
Connect the RJ-45 connector to the console port and connect the other end to the
DB-9 or DB-25 connector on your computer.
CONSOLE
FLASH
FL
A
SH
RJ-45 to
DB-9 or DB-25
serial cable
(null-modem)
Step 6
6-10
Computer serial port
DB-9 or DB-25
114418
ST
AT
U
S
PO
W
ER
AUX
Console
port (RJ-45)
Attach the network cables.
Cisco Intrusion Detection System Appliance and Module Installation and Configuration Guide Version 4.1
78-15597-02
Chapter 6
Installing the IPS-4240 and IPS-4255
Installing the IPS-4240 and IPS-4255
MGMT
USB1
•
INT0 through INT3 are sensing ports.
•
MGMT is the command and control port.
Step 7
Power on the appliance.
Step 8
Initialize your appliance.
114417
USB2
LINK SPD LINK SPD LINK SPD LINK SPD
2
1
0
3
See Initializing the Sensor, page 10-2, for the procedure.
Step 9
Upgrade your appliance with the most recent Cisco IDS software.
See Obtaining Cisco IDS Software, page 9-1, for the procedure.
Step 10
Assign the interfaces:
See Assigning and Enabling the Sensing Interface, page 10-9, for the procedure.
Note
The interfaces are disabled by default.
You are now ready to configure intrusion detection on your appliance.
Cisco Intrusion Detection System Appliance and Module Installation and Configuration Guide Version 4.1
78-15597-02
6-11
Chapter 6
Installing the IPS-4240 and IPS-4255
Installing the IPS-4240 and IPS-4255
6-12
Cisco Intrusion Detection System Appliance and Module Installation and Configuration Guide Version 4.1
78-15597-02
C H A P T E R
7
Installing the NM-CIDS
This chapter lists the software and hardware requirements of the NM-CIDS, and
describes how to install and remove it.
Note
In Cisco IOS documentation, the NM-CIDS is referred to as the Cisco IDS
network module.
This chapter contains the following sections:
•
Specifications, page 7-1
•
Software and Hardware Requirements, page 7-2
•
Front Panel Features, page 7-5
•
Installation and Removal Instructions, page 7-6
Specifications
Table 7-1 lists the specifications for the NM-CIDS.
Table 7-1
NM-CIDS Specifications
Specification
Description
Dimensions (H x W x D)
1.55 x 7.10 x 7.2 in. (3.9 x 18.0 x 19.3 cm)
Weight
1.5 lb (0.7 kg) (maximum)
Operating temperature
32° to 104°F (0° to 40°C)
Cisco Intrusion Detection System Appliance and Module Installation and Configuration Guide Version 4.1
78-15597-02
7-1
Chapter 7
Installing the NM-CIDS
Software and Hardware Requirements
Table 7-1
NM-CIDS Specifications (continued)
Specification
Description
Nonoperating temperature
–40° to 185°F (–40° to 85°C)
Humidity
5% to 95% noncondensing
Operating altitude
0 to 10,000 ft (0 to 3,000 m)
Software and Hardware Requirements
The NM-CIDS has the following software and hardware requirements.
The NM-CIDS supports the following software:
Caution
•
Cisco IOS software 12.2(15)ZJ or later
•
Cisco IOS software 12.3(4)T or later
•
Cisco IDS software 4.1 or later
Do not confuse Cisco IOS IDS (a software-based intrusion-detection application
that runs in the Cisco IOS) with the IDS that runs on the NM-CIDS. The
NM-CIDS runs Cisco IDS version 4.1. Because performance can be reduced and
duplicate alarms can be generated, we recommend that you do not run Cisco IOS
IDS and Cisco IDS 4.1 simultaneously.
The NM-CIDS supports the following feature sets:
7-2
•
IOS IP/FW/IDS
•
IOS IP/FW/IDS PLUS IPSEC 56
•
IOS IP/FW/IDS PLUS IPSEC 3DES
•
IOS IP/IPX/AT/DEC/FW/IDS PLUS
•
IOS ENTERPRISE/FW/IDS PLUS IPSEC 56
•
IOS ENTERPRISE/FW/IDS PLUS IPSEC 3DES
•
IOS Advanced Security
•
IOS Advanced IP
•
IOS Advanced Enterprise
Cisco Intrusion Detection System Appliance and Module Installation and Configuration Guide Version 4.1
78-15597-02
Chapter 7
Installing the NM-CIDS
Software and Hardware Requirements
Table 7-2 lists supported and unsupported platforms for the NM-CIDS.
Table 7-2
Note
Supported and Unsupported Platforms
Router
NM-CIDS
Cisco 2600 series
No
Cisco 2600XM series
Yes
Cisco 2691
Yes
Cisco 3620
No
Cisco 3631
No
Cisco 3640, Cisco 3640A
No
Cisco 3660
Yes
Cisco 3725
Yes
Cisco 3745
Yes
The supported Cisco series routers only support one NM-CIDS per chassis.
Table 7-3 lists the hardware specifications for the NM-CIDS.
Table 7-3
Hardware Requirements
Feature
Description
Processor
500 Mhz Intel Mobile Pentium III
Default SDRAM
512 MB
Maximum DSRAM
512 MB
Internal disk storage
NM-CIDS 20-GB IDE
Cisco Intrusion Detection System Appliance and Module Installation and Configuration Guide Version 4.1
78-15597-02
7-3
Chapter 7
Installing the NM-CIDS
Hardware Architecture
Hardware Architecture
The NM-CIDS has the following hardware architecture:
•
Back-to-back Ethernet, which provides interface-level connectivity to the
router.
•
100-Mbps full-duplex interface between the router and the module.
•
Back-to-back UART, which provides console access from router side.
•
Console access to the module from the router.
•
External FE interface, which provides a command and control interface.
Figure 7-1 shows the hardware architecture of the NM-CIDS.
Figure 7-1
NM-CIDS Hardware Architecture
Router
Console
Memory
Router
CPU
Interfaces
Controlled by IOS
Flash
Router PCI Bus
Fast Ethernet
Fast Ethernet 1
UART
NM-CIDS Console
Content CPU
Controlled by IDS
NM-CIDS
7-4
Flash
Memory
Fast Ethernet 0
119517
Disk
Cisco Intrusion Detection System Appliance and Module Installation and Configuration Guide Version 4.1
78-15597-02
Chapter 7
Installing the NM-CIDS
Front Panel Features
Front Panel Features
Figure 7-2 shows the front panel features of the NM-CIDS.
Figure 7-2
Front Panel Features
DISK LINK
ACT
NM-CIDS
DISK
LINK
EN
97349
PWR
ACT
FastEthernet 0
PWR
EN
Status Indicators
Table 7-4 describes the NM-CIDS states as indicated by the status indicators.
Table 7-4
Status Indicators
Indicator
Description
ACT
Activity on the fast ethernet connection.
DISK
Activity on the IDS hard-disk drive.
EN
NM-CIDS has passed self-test and is available to the router.
LINK
Fast Ethernet connection is available to the NM-CIDS.
PWR
Power is available to the NM-CIDS.
Interfaces
The router-side fast ethernet interface is known as interface IDS-Sensor. This
interface name appears in the show interface and show controller commands.
You must assign the IP address to the interface to get console access to the IDS.
Cisco Intrusion Detection System Appliance and Module Installation and Configuration Guide Version 4.1
78-15597-02
7-5
Chapter 7
Installing the NM-CIDS
Installation and Removal Instructions
Caution
We recommend that you assign a loopback address on the monitoring interface,
otherwise if the IP address is advertised through routing updates, the monitoring
interface can become vulnerable to attacks.
See Configuring Cisco IDS Interfaces on the Router, page 10-78 for the procedure
for assigning the IP address to gain access to the console and for setting up a
loopback address.
Installation and Removal Instructions
You must install the NM-CIDS offline in Cisco 2650XM, 2651XM, and 2961
series routers.
Caution
To avoid damaging the NM-CIDS, you must turn OFF electrical power and
disconnect network cables before you insert the NM-CIDS into a chassis slot or
remove the NM-CIDS from a chassis slot.
Cisco 3660 and Cisco 3700 series routers allow you to replace network modules
without switching off the router or affecting the operation of other interfaces.
Online insertion and removal (OIR) provides uninterrupted operation to network
users, maintains routing information, and ensures session preservation.
Note
Caution
Cisco 2600, 3600, and 3700 series routers support only one NM-CIDS per chassis.
Unlike other network modules, the NM-CIDS uses a hard-disk drive. Online
removal of hard-disk drives without proper shutdown can result in file system
corruption and might render the hard-disk drive unusable. The operating system
on the NM-CIDS must be shut down in an orderly fashion before it is removed.
This section contains the following topics:
7-6
•
Required Tools, page 7-7
•
Installing the NM-CIDS, page 7-7
Cisco Intrusion Detection System Appliance and Module Installation and Configuration Guide Version 4.1
78-15597-02
Chapter 7
Installing the NM-CIDS
Installation and Removal Instructions
•
Removing the NM-CIDS, page 7-11
•
Blank Network Module Panels, page 7-14
Required Tools
You need the following tools and equipment to install an NM-CIDS in a Cisco
modular router chassis slot:
•
#1 Phillips screwdriver or small flat-blade screwdriver
•
ESD-preventive wrist strap
•
Tape for DC circuit breaker handle
Installing the NM-CIDS
This section contains the following topics:
•
Installing the NM-CIDS Offline, page 7-7
•
Installing an NM-CIDS Using OIR Support, page 7-10
Installing the NM-CIDS Offline
You can install the NM-CIDS in the chassis either before or after mounting the
router, whichever is more convenient.
Warning
Only trained and qualified personnel should be allowed to install or replace this
equipment. To see translations of the warnings that appear in this publication,
refer to the Regulatory Compliance and Safety Information document that
accompanied this device.
Caution
ESD can damage equipment and impair electrical circuitry. Always follow ESD
prevention procedures when removing and replacing cards. See Working in an
ESD Environment, page 1-21, for more information.
Cisco Intrusion Detection System Appliance and Module Installation and Configuration Guide Version 4.1
78-15597-02
7-7
Chapter 7
Installing the NM-CIDS
Installation and Removal Instructions
To install the NM-CIDS, follow these steps:
Turn OFF electrical power to the router.
Step 1
To channel ESD voltages to ground, do not unplug the power cable.
Remove all network interface cables, including telephone cables, from the back
panel. The following warning applies to routers that use a DC power supply:
Step 2
Warning
Before performing any of the following procedures, ensure that power is
removed from the DC circuit. To ensure that all power is OFF, locate the circuit
breaker on the panel board that services the DC circuit, switch the circuit
breaker to the OFF position, and tape the switch handle of the circuit breaker in
the OFF position.
Step 3
Using either a #1 Phillips screwdriver or a small flat-blade screwdriver, remove
the blank filler panel from the chassis slot where you plan to install the NM-CIDS.
Save the blank panel for future use.
Align the NM-CIDS with the guides in the chassis and slide it gently into the slot.
ACT
Step 4
WO
119583
SERIAL
ASYNC
15
11
14
10
13
ETHERNET 0
ASYNC 24-31
9
12
8
15
11
14
10
13
9
12
8
ASYNC 8-15
7
3
6
2
5
1
4
0
7
3
6
2
5
1
4
0
ASYNC 16-23
ASYNC 0-7
EN
Router
Network module
7-8
Step 5
Push the NM-CIDS into place until you feel its edge connector mate securely with
the connector on the motherboard.
Step 6
Fasten the captive mounting screws of the NM-CIDS into the holes in the chassis,
using a Phillips or flat-blade screwdriver.
Step 7
If the router was previously running, reinstall the network interface cables and
turn ON power to the router.
Cisco Intrusion Detection System Appliance and Module Installation and Configuration Guide Version 4.1
78-15597-02
Chapter 7
Installing the NM-CIDS
Installation and Removal Instructions
NM-CE-BP
DISK
LINK
PWR
ACT
EN
FastEthernet 0
Fast Ethernet
RJ-45
72347
Category 5
or UTP cable
CF
Fast Ethernet hub
The following warning applies to routers that use a DC power supply:
Warning
After wiring the DC power supply, remove the tape from the circuit breaker
switch handle and reinstate power by moving the handle of the circuit breaker
to the ON position.
Step 8
Connect the command and control port to a hub or switch.
Step 9
Check that the NM-CIDS indicators light up, and that the Active/Ready indicators
on the front panel also light up.
Step 10
Initialize the NM-CIDS.
See Initializing the Sensor, page 10-2, for the procedure.
Step 11
Upgrade your NM-CIDS to the latest Cisco IDS software.
See Obtaining Cisco IDS Software, page 9-1, for the procedure.
Step 12
Assign the interfaces.
See Assigning and Enabling the Sensing Interface, page 10-9, for the procedure.
You are now ready to configure intrusion detection on your NM-CIDS.
Cisco Intrusion Detection System Appliance and Module Installation and Configuration Guide Version 4.1
78-15597-02
7-9
Chapter 7
Installing the NM-CIDS
Installation and Removal Instructions
Installing an NM-CIDS Using OIR Support
To install the NM-CIDS using OIR support, follow these steps:
Align the NM-CIDS with the guides in the chassis slot and slide it gently into the
slot (see Figure 7-3).
Step 1
Figure 7-3
Online Insertion of the NM-CIDS
VCC OK
SYSTEM
FDX
LINK
100Mbps
FDX
LINK
100Mbps
1
0
HIGH SPEED SERIAL
1HSSI
V0
H
TC
EN
TD
LB/CN
SEE MANUAL BEFORE INSTALLATION 0
RC
1
RD
VIC
FXS
V1
IN USE
IN USE
VOICE
2V
ETHERNET
4E
SERIAL
4T
ETH 3
SERIAL 3
SERIAL 2
ETH 2
ETH 1
3 2 1
SERIAL 1
0
ETH 0
LINK
SERIAL 0
ACT
RXD
TXC
TXD
CN/LP RXC
RXD
TXC
TXD
CN/LP RXC
EN
RXD
TXC
TXD
CN/LP RXC
RXD
TXC
TXD
18031
CN/LP RXC
7-10
Step 2
Push the NM-CIDS into place until you feel its edge connector mate securely with
the connector on the backplane.
Step 3
Tighten the two captive screws on the faceplate.
Step 4
Connect the command and control port to a hub or switch.
Cisco Intrusion Detection System Appliance and Module Installation and Configuration Guide Version 4.1
78-15597-02
Chapter 7
Installing the NM-CIDS
Installation and Removal Instructions
NM-CE-BP
DISK
LINK
PWR
ACT
EN
FastEthernet 0
Fast Ethernet
RJ-45
72347
Category 5
or UTP cable
CF
Fast Ethernet hub
Step 5
Verify that the NM-CIDS indicators light up, and that the Active/Ready indicators
on the front panel also light up.
Step 6
Initialize the NM-CIDS.
See Initializing the Sensor, page 10-2, for the procedure.
Step 7
Upgrade your NM-CIDS to the latest Cisco IDS software.
See Obtaining Cisco IDS Software, page 9-1, for the procedure.
Step 8
Assign the interfaces.
See Assigning and Enabling the Sensing Interface, page 10-9, for the procedure.
You are now ready to configure intrusion detection on your NM-CIDS.
Removing the NM-CIDS
This section contains the following topics:
•
Removing the NM-CIDS Offline, page 7-12
•
Removing the NM-CIDS Using OIR Support, page 7-13
Cisco Intrusion Detection System Appliance and Module Installation and Configuration Guide Version 4.1
78-15597-02
7-11
Chapter 7
Installing the NM-CIDS
Installation and Removal Instructions
Removing the NM-CIDS Offline
You must turn off all power to the router before removing the NM-CIDS.
To remove the NM-CIDS from the router chassis, follow these steps:
Prepare the NM-CIDS to be powered off by entering:
Step 1
Router# service-module IDS-Sensor
Trying 10.10.10.1, 2129 ... Open
slot_number/0
shutdown
Wait for the shutdown message before continuing with Step 2:
%SERVICEMODULE-5-SHUTDOWN2:Service module IDS-Sensor1/0 shutdown
complete
Turn OFF electrical power to the router.
Step 2
To channel ESD voltages to ground, do not unplug the power cable.
Unplug the command and control network interface cable from the NM-CIDS.
Step 4
Loosen the two captive screws holding the NM-CIDS in the chassis slot.
ACT
Step 3
WO
119583
SERIAL
ASYNC
ETHERNET 0
15
11
14
10
13
9
12
8
15
11
14
10
13
9
12
8
ASYNC 24-31
ASYNC 8-15
7
3
6
2
5
1
4
0
7
3
6
2
5
1
4
0
ASYNC 16-23
ASYNC 0-7
EN
Router
Network module
Step 5
Slide the NM-CIDS out of the slot.
Note
7-12
Either install a replacement NM-CIDS (see Installing the NM-CIDS
Offline, page 7-7, for the procedure) or install a blank panel (see Blank
Network Module Panels, page 7-14, for the procedure).
Cisco Intrusion Detection System Appliance and Module Installation and Configuration Guide Version 4.1
78-15597-02
Chapter 7
Installing the NM-CIDS
Installation and Removal Instructions
Removing the NM-CIDS Using OIR Support
Cisco 3660 and Cisco 3700 series routers support OIR with similar modules only.
If you remove an NM-CIDS, install another NM-CIDS in its place.
Caution
To remove an NM-CIDS with OIR support, follow these steps:
Prepare the NM-CIDS to be powered off by entering:
Step 1
Router# service-module IDS-Sensor
Trying 10.10.10.1, 2129 ... Open
slot_number/0
shutdown
Wait for the shutdown message before continuing with Step 2:
%SERVICEMODULE-5-SHUTDOWN2:Service module IDS-Sensor1/0 shutdown
complete
Step 2
Unplug the command and control network interface cable from the NM-CIDS.
Step 3
Loosen the two captive screws holding the NM-CIDS in the chassis slot.
VCC OK
SYSTEM
FDX
LINK
100Mbps
FDX
LINK
100Mbps
1
0
HIGH SPEED SERIAL
1HSSI
V0
H
TC
EN
TD
LB/CN
SEE MANUAL BEFORE INSTALLATION 0
RC
1
RD
VIC
FXS
V1
IN USE
IN USE
VOICE
2V
ETHERNET
4E
SERIAL
4T
ETH 3
SERIAL 3
SERIAL 2
ETH 2
ETH 1
3 2 1
SERIAL 1
0
ETH 0
LINK
SERIAL 0
ACT
RXD
TXC
TXD
CN/LP RXC
RXD
TXC
TXD
CN/LP RXC
EN
RXD
TXC
TXD
CN/LP RXC
RXD
TXC
TXD
18031
CN/LP RXC
Step 4
Slide the NM-CIDS out of the slot.
Cisco Intrusion Detection System Appliance and Module Installation and Configuration Guide Version 4.1
78-15597-02
7-13
Chapter 7
Installing the NM-CIDS
Installation and Removal Instructions
Note
Either install a replacement NM-CIDS (see Installing an NM-CIDS Using
OIR Support, page 7-10, for the procedure), or install a blank panel (see
Blank Network Module Panels, page 7-14, for the procedure).
Blank Network Module Panels
If the router is not fully configured with network modules, make sure that blank
panels fill the unoccupied chassis slots to provide proper airflow as shown in
Figure 7-4:
Blank Network Module Panel
H6552
Figure 7-4
7-14
Cisco Intrusion Detection System Appliance and Module Installation and Configuration Guide Version 4.1
78-15597-02
C H A P T E R
8
Installing the IDSM-2
This chapter lists the software and hardware requirements of the IDSM-2, and
describes how to remove and install it.
This chapter contains the following sections:
•
Specifications, page 8-1
•
Software and Hardware Requirements, page 8-2
•
Supported IDSM-2 Configurations, page 8-3
•
Front Panel Description, page 8-4
•
Installation and Removal Instructions, page 8-5
Specifications
Table 8-1 lists the specifications for the IDSM-2.
Table 8-1
IDSM-2 Specifications
Specification
Description
Dimensions (H x W x D)
1.18 x 15.51 x 16.34 in (30 x 394 x 415 mm)
Weight
Minimum: 3 lb (1.36 kg)
Maximum: 5 lb (2.27 kg)
Operating temperature
32° to 104°F (0° to 40°C)
Cisco Intrusion Detection System Appliance and Module Installation and Configuration Guide Version 4.1
78-15597-02
8-1
Chapter 8
Installing the IDSM-2
Software and Hardware Requirements
Table 8-1
IDSM-2 Specifications (continued)
Specification
Description
Nonoperating temperature
–40° to 167°F (–40° to 75°C)
Humidity
10% to 90%, noncondensing
Software and Hardware Requirements
The following are the IDSM-2 software and hardware requirements:
8-2
•
Catalyst software release 7.5(1) or later with supervisor engine 1a with
MSFC2
•
Catalyst software release 7.5(1) or later with supervisor engine 2 with
MSFC2 or PFC2
•
Cisco IOS software release 12.2(14)SY with supervisor engine 2 with
MSFC2
•
Cisco IOS software release 12.1(19)E or later with supervisor engine 2 with
MSFC2
•
Cisco IOS software release 12.1(19)E1 or later with supervisor engine 1a
with MSFC2
•
Cisco IOS software release 12.2(14)SX1 with supervisor engine 720
•
Cisco IDS software release 4.0 or later
•
Any Catalyst 6500 series switch chassis or 7600 router
Cisco Intrusion Detection System Appliance and Module Installation and Configuration Guide Version 4.1
78-15597-02
Chapter 8
Installing the IDSM-2
Supported IDSM-2 Configurations
Supported IDSM-2 Configurations
Table 8-2 lists the supported configurations for the IDSM-2.
Table 8-2
Supported Configurations
Supervisor
SPAN/
RSPAN
VACL
Capture
VACL
RACL
Blocking Blocking
Catalyst
Software
Cisco IOS
Software
Supervisor 1A
X
Supervisor 1A with PFC1
X
X
X
Supervisor 1A with PFC1 or X
MSFC1
X
X1
X
7.5(1)
2
Supervisor 1A-PFC2 or
MSFC2
X
X
X3
X
7.5(1)
12.1(19)E1
Supervisor 2 with PFC2
X
X
X
7.5(1)
Supervisor 2 with PFC2 or
MSFC2
X
X
X
Supervisor 720 (integrated
PFC3 and MSFC3)
X
X
5
7.5(1)
7.5(1)
4
X
X
7.5(1)
12.1(19)E,
12.2(14)SY
12.2(14)SX1
1. VACL blocking by the IDSM-2 is supported on Catalyst software and not on Cisco IOS for this configuration.
2. Cisco IOS is supported on Supervisor 1A with PFC1 or MSFC1; however, the IDSM-2 is not supported on this configuration.
3. VACL blocking by the IDSM-2 is supported on Catalyst software and not on Cisco IOS for this configuration.
4. VACL blocking by the IDSM-2 is supported on Catalyst software and not on Cisco IOS for this configuration.
5. Supervisor 720 with Cisco IOS supports VACL deny statements; however, the IDSM-2 cannot block with Cisco IOS-style
VACLs
Caution
The Supervisor 1A with PFC2 combination is not supported. Supervisor 2 alone
(without PFC2 or MSFC2) is not supported by Catalyst software or Cisco IOS
software.
Cisco Intrusion Detection System Appliance and Module Installation and Configuration Guide Version 4.1
78-15597-02
8-3
Chapter 8
Installing the IDSM-2
Using the TCP Reset Interface
Using the TCP Reset Interface
The IDSM-2 has a TCP reset interface—port 1. The IDSM-2 has a specific TCP
reset interface because it cannot send TCP resets on its sensing ports.
If you have reset problems with the IDSM-2, try the following:
•
If the sensing ports are access ports (a single VLAN), you need to configure
the reset port to be in the same VLAN.
•
If the sensing ports are dot1q trunk ports (multi-VLAN), the sensing ports and
reset port all must have the same native VLAN, and the reset port must trunk
all the VLANs being trunked by both the sensing ports.
Front Panel Description
The IDSM-2 (see Figure 8-1) has a status indicator and a Shutdown button.
Figure 8-1
IDSM-2 Front Panel
SHUTDOWN
INTRUSION DETECTION MODULE
83832
ST
AT
U
S
WS-SVC-IDSM2
Status Indicator
Table 8-3 describes the IDSM-2 states as indicated by the status indicator.
8-4
Table 8-3
Status Indicator
Color
Description
Green
All diagnostics tests pass—IDSM-2 is operational.
Red
A diagnostics test other than an individual port test failed.
Amber
The IDSM-2 is running through its boot and self-test diagnostics
sequence, or the IDSM-2 is disabled, or the IDSM-2 is in the
shutdown state.
Off
The IDSM-2 power is off.
Cisco Intrusion Detection System Appliance and Module Installation and Configuration Guide Version 4.1
78-15597-02
Chapter 8
Installing the IDSM-2
Installation and Removal Instructions
Shutdown Button
To prevent corruption of the IDSM-2, you must use the shutdown command to
shut it down properly. See Step 1 of Removing the IDSM-2, page 8-13, for
instructions on properly shutting down the IDSM-2. If the IDSM-2 does not
respond, firmly press the Shutdown button on the faceplate and wait for the Status
indicator to turn amber. The shutdown procedure may take several minutes.
Caution
Do not remove the IDSM-2 from the switch until the module shuts down
completely. Removing the module without going through a shutdown procedure
can corrupt the application partition on your module and result in data loss.
Installation and Removal Instructions
All Catalyst 6500 series switches support hot swapping, which lets you install,
remove, replace, and rearrange modules without turning off the system power to
the switch. When the system detects that a module has been installed or removed,
it runs diagnostic and discovery routines, acknowledges the presence or absence
of the module, and resumes system operation with no operator intervention.
Caution
You must first shut down the IDSM-2 before removing it from a Catalyst 6500
series switch. See Removing the IDSM-2, page 8-13, for the procedure for
removing an IDSM-2 from a Catalyst 6500 series switch.
This section contains the following topics:
•
Required Tools, page 8-6
•
Slot Assignments, page 8-6
•
Installing the IDSM-2, page 8-7
•
Removing the IDSM-2, page 8-13
Cisco Intrusion Detection System Appliance and Module Installation and Configuration Guide Version 4.1
78-15597-02
8-5
Chapter 8
Installing the IDSM-2
Installation and Removal Instructions
Required Tools
Note
You must have at least one supervisor engine running in the Catalyst 6500 series
switch with the IDSM-2. Refer to the Catalyst 6500 Series Switch Installation
Guide for more information.
You need the following tools to install the IDSM-2 in the Catalyst 6500 series
switches:
•
Flat-blade screwdriver
•
Wrist strap or other grounding device
•
Antistatic mat or antistatic foam
Whenever you handle the IDSM-2, always use a wrist strap or other
grounding device to prevent serious damage from electrostatic discharge
(ESD). See Working in an ESD Environment, page 1-21, for more
information.
Warning
Only trained and qualified personnel should be allowed to install, replace, or
service this equipment. Statement 1030
Slot Assignments
The Catalyst 6006 and 6506 switch chassis each have six slots. The Catalyst 6009
and 6509 switch chassis each have nine slots. The Catalyst 6513 switch chassis
has 13 slots.
Note
8-6
The Catalyst 6509-NEB switch has vertical slots numbered 1 to 9 from right to
left. Install the IDSM-2 with the component side facing to the right.
•
You can install the IDSM-2 in any slot that is not used by the supervisor
engine.
•
You can install up to eight IDSM-2s in a single chassis.
Cisco Intrusion Detection System Appliance and Module Installation and Configuration Guide Version 4.1
78-15597-02
Chapter 8
Installing the IDSM-2
Installation and Removal Instructions
Caution
Install module filler plates (blank module carriers) in the empty slots to maintain
consistent airflow through the switch chassis.
Note
The IDSM-2 works with any supervisor engine using SPAN, but the copy capture
feature with security VACLs requires that the supervisor engine has the Policy
Feature Card (PFC) or the Multi-Layer Switch Feature Card (MSFC) option.
Installing the IDSM-2
To install the IDSM-2 in the Catalyst 6500 series switch, follow these steps:
Step 1
Warning
Make sure that you take necessary ESD precautions.
During this procedure, wear grounding wrist straps to avoid ESD damage to the
card. Do not touch the backplane with your hand or any metal tool, or you could
shock yourself.
See Working in an ESD Environment, page 1-21, for more information.
Step 2
Choose a slot for the IDSM-2.
Note
You can install the IDSM-2 in any slot that is not reserved for a supervisor
engine or other module. Refer to your switch documentation for
information about which slots are reserved for the supervisor engine or
other modules.
Step 3
Remove the installation screws (use a screwdriver, if necessary) that secure the
filler plate to the desired slot.
Step 4
Remove the filler plate by prying it out carefully.
Cisco Intrusion Detection System Appliance and Module Installation and Configuration Guide Version 4.1
78-15597-02
8-7
Chapter 8
Installing the IDSM-2
Installation and Removal Instructions
WS-X6K-SUP1
ST
1
AT
US
SY
ST
EM
TI
VE
AC
R
M
G
M
Switch
100%
T
RES
PW
Load
DTE/
DCE
ET
PORT 1
CONSOLE
SUPERVISOR I
1%
PCMCIA
PORT 2
NK
EJECT
LI
EJECT
NK
LI
LI
NK
WS-X6K-SUP1
Switch
100%
T
M
G
US
EM
M
VE
ET
AT
R
ST
TI
ST
SY
AC
PW
RES
2
Load
DTE/
DCE
PORT 1
CONSOLE
SUPERVISOR I
1%
PCMCIA
PORT 2
NK
LI
WS-X6408
2
AT
US
1
3
4
5
6
7
LI
NK
LI
NK
LI
NK
LI
NK
LI
NK
LI
NK
8
LI
NK
8 PORT GIGABIT ETHERNET
LI
NK
ST
3
1
2
3
4
5
6
7
8
US
WS-X6408
LI
NK
LI
NK
LI
NK
LI
NK
LI
NK
LI
NK
LI
NK
8 PORT GIGABIT ETHERNET
LI
NK
ST
AT
4
1
2
3
4
5
6
7
8
LI
NK
LI
NK
LI
NK
LI
NK
LI
NK
LI
NK
8 PORT GIGABIT ETHERNET
LI
NK
ST
5
LI
NK
AT
US
WS-X6408
WS-X6224
ST
7
US
AT
1
2
24 PORT 100FX
NK
3
NK
LI
4
NK
LI
5
NK
LI
6
NK
LI
NK
LI
NK
LI
LI
NK
LI
10
NK
11
NK
LI
12
NK
LI
13
NK
LI
14
NK
LI
15
NK
LI
16
NK
LI
8
ST
US
AT
1
24 PORT 100FX
FAN
LED
2
NK
LI
3
NK
LI
4
NK
LI
5
NK
LI
6
NK
LI
7
NK
LI
8
NK
LI
9
NK
LI
10
NK
LI
11
NK
LI
12
NK
LI
13
NK
LI
14
NK
LI
15
NK
LI
17
NK
LI
16
NK
LI
18
NK
LI
LI
WS-X6224
17
NK
LI
21
NK
NK
LI
23
NK
LI
NK
NK
NK
LI
LI
24
NK
LI
22
NK
LI
24
23
NK
LI
21
NK
LI
23
22
NK
LI
20
NK
LI
22
LI
NK
NK
20
NK
LI
19
NK
LI
21
LI
19
NK
LI
18
NK
LI
20
NK
NK
19
LI
LI
NK
18
WS-X6224
LI
17
LI
NK
16
LI
LI
NK
15
NK
NK
14
LI
13
LI
NK
9
12
NK
8
LI
LI
7
11
NK
10
LI
NK
9
LI
8
LI
LI
NK
7
NK
6
NK
5
NK
NK
4
LI
3
LI
LI
NK
2
NK
1
LI
US
LI
AT
LI
ST
24 PORT 100FX
NK
6
LI
24
NK
LI
NK
LI
9
o
FAN
OK
OUTPUT
FAIL
INPUT
OK
Warning
Step 5
8-8
FAN
OK
OUTPUT
FAIL
104184
o
INPUT
OK
Blank faceplates and cover panels serve three important functions: they
prevent exposure to hazardous voltages and currents inside the chassis; they
contain electromagnetic interference (EMI) that might disrupt other equipment;
and they direct the flow of cooling air through the chassis. Do not operate the
system unless all cards, faceplates, front covers, and rear covers are in place.
Statement 1029
Hold the IDSM-2 with one hand, and place your other hand under the IDSM-2
carrier to support it.
Cisco Intrusion Detection System Appliance and Module Installation and Configuration Guide Version 4.1
78-15597-02
Chapter 8
Installing the IDSM-2
Installation and Removal Instructions
Caution
Step 6
Do not touch the printed circuit boards or connector pins on the IDSM-2.
Place the IDSM-2 in the slot by aligning the notch on the sides of the IDSM-2
carrier with the groove in the slot.
WS-X6K-SUP1
ST
1
AT
US
SY
ST
EM
AC
TI
VE
R
M
G
M
Switch
100%
T
RES
PW
Load
DTE/
DCE
ET
PORT 1
CONSOLE
1%
SUPERVISOR I
PCMCIA
PORT 2
NK
EJECT
LI
EJECT
NK
LI
LI
NK
WS-X6K-SUP1
Switch
100%
T
M
G
US
EM
M
VE
ET
AT
R
ST
TI
ST
SY
AC
PW
RES
2
Load
DTE/
DCE
PORT 1
CONSOLE
1%
SUPERVISOR I
PCMCIA
PORT 2
NK
LI
WS-X6408
6
7
8
LI
NK
LI
NK
2
LI
NK
LI
NK
1
5
LI
NK
4
LI
NK
3
LI
NK
8 PORT GIGABIT ETHERNET
LI
NK
2
AT
US
1
ST
3
6
7
8
LI
NK
2
LI
NK
LI
NK
1
5
LI
NK
4
LI
NK
LI
NK
8 PORT GIGABIT ETHERNET
LI
NK
3
ST
AT
4
LI
NK
US
WS-X6408
6
7
8
LI
NK
LI
NK
5
LI
NK
4
LI
NK
LI
NK
LI
NK
8 PORT GIGABIT ETHERNET
LI
NK
3
ST
5
LI
NK
AT
US
WS-X6408
WS-X6224
US
AT
ST
7
1
2
24 PORT 100FX
NK
3
NK
LI
4
NK
LI
5
NK
LI
6
NK
LI
7
NK
LI
8
NK
LI
9
NK
LI
10
NK
LI
11
NK
LI
12
NK
LI
13
NK
LI
14
NK
LI
15
NK
LI
16
NK
LI
AT
ST
8
US
1
24 PORT 100FX
FAN
LED
2
NK
LI
3
NK
LI
4
NK
LI
5
NK
LI
6
NK
LI
7
NK
LI
8
NK
LI
9
NK
LI
10
NK
LI
11
NK
LI
12
NK
LI
13
NK
LI
14
NK
LI
15
NK
LI
17
NK
LI
LI
WS-X6224
16
NK
LI
18
NK
17
NK
LI
18
NK
LI
NK
NK
NK
NK
LI
23
NK
LI
NK
LI
LI
24
NK
LI
22
NK
LI
24
23
NK
LI
21
NK
LI
23
22
NK
LI
20
NK
LI
22
21
NK
LI
19
NK
LI
NK
20
NK
LI
21
LI
19
NK
LI
20
LI
WS-X6224
LI
19
NK
LI
NK
18
LI
LI
NK
17
NK
16
LI
NK
15
NK
LI
NK
14
LI
NK
13
NK
LI
LI
12
LI
11
NK
LI
10
LI
9
NK
NK
8
NK
7
NK
NK
6
LI
5
LI
NK
4
LI
3
LI
LI
NK
2
NK
1
LI
US
LI
AT
LI
ST
24 PORT 100FX
NK
6
LI
24
NK
LI
NK
LI
9
WS-SVC-IDSM2
STA
TU
S
INTRUSION DETECTION
MODULE
SHUTDOWN
o
FAN
OK
OUTPUT
FAIL
INPUT
OK
Step 7
83833
o
INPUT
OK
FAN
OK
OUTPUT
FAIL
Keeping the IDSM-2 at a 90-degree orientation to the backplane, carefully push
it into the slot until the notches on both ejector levers engage the chassis sides.
Cisco Intrusion Detection System Appliance and Module Installation and Configuration Guide Version 4.1
78-15597-02
8-9
Chapter 8
Installing the IDSM-2
Installation and Removal Instructions
ST
AT
U
S
WS-SVC-IDSM2
SHUTDOWN
83834
INTRUSION DETECTION MODULE
Ejector lever
Captive
installation
screws
Step 8
Using the thumb and forefinger of each hand, simultaneously pivot in both ejector
levers to fully seat the IDSM-2 in the backplane connector.
Caution
Always use the ejector levers when installing or removing the IDSM-2. A module
that is partially seated in the backplane causes the system to halt and subsequently
crash.
Note
If you perform a hot swap, the console displays the message “Module x
has been inserted.” This message does not appear, however, if you are
connected to the Catalyst 6500 series switch through a Telnet session.
Step 9
Use a screwdriver to tighten the installation screws on the left and right ends of
the IDSM-2.
Step 10
Verify that you have correctly installed the IDSM-2 and can bring it online. See
Verifying the IDSM-2 Installation, page 8-11, for the procedure.
Step 11
Initialize the IDSM-2.
See Initializing the Sensor, page 10-2, for the procedure.
8-10
Cisco Intrusion Detection System Appliance and Module Installation and Configuration Guide Version 4.1
78-15597-02
Chapter 8
Installing the IDSM-2
Installation and Removal Instructions
Step 12
Configure the switch for command and control access to the IDSM-2.
See Configuring the Catalyst 6500 Series Switch for Command and Control
Access to the IDSM-2, page 10-88.
Step 13
Upgrade your IDSM-2 to the most recent Cisco IDS software.
See Obtaining Cisco IDS Software, page 9-1, for the procedure.
Step 14
Assign the interfaces.
See Assigning and Enabling the Sensing Interface, page 10-9, for the procedure.
See Using the TCP Reset Interface, page 8-4, for information on the TCP reset
interface.
Step 15
Set up the IDSM-2 to capture IDS traffic.
See Copying IDS Traffic, page 10-90, for the procedure.
You are now ready to configure the IDSM-2 for intrusion detection.
Verifying the IDSM-2 Installation
Verify that the switch acknowledges the new IDSM-2 and has brought it online.
To verify the installation, follow these steps:
Step 1
Log in to the console.
Step 2
For Catalyst software, verify that the IDSM-2 is online by typing the following:
cat6k> enable
console> (enable) show module
Mod Slot Ports Module-Type
--- ---- ----- ----------------------1
1
2
1000BaseX Supervisor
15 1
1
Multilayer Switch Featu
2
2
48
10/100BaseTX Ethernet
3
3
2
Intrusion Detection Sys
4
4
8
1000BaseX Ethernet
5
5
2
Intrusion Detection Sys
6
6
0
FlexWAN Module
7
7
2
Intrusion Detection Sys
9
9
8
Intrusion Detection Sys
Mod Module-Name
Model
----------------WS-X6K-SUP2-2GE
WS-F6K-MSFC2
WS-X6548-RJ-45
WS-X6381-IDS
WS-X6408-GBIC
WS-X6381-IDS
WS-X6182-2PA
WS-x6381-IDS
WS-SVC-IDSM2
Sub
--yes
no
no
no
no
no
no
no
yes
Status
----ok
ok
ok
faulty
ok
ok
ok
ok
ok
Serial-Num
Cisco Intrusion Detection System Appliance and Module Installation and Configuration Guide Version 4.1
78-15597-02
8-11
Chapter 8
Installing the IDSM-2
Installation and Removal Instructions
--- -------------------- ----------1
SAD044409HJ
15
SAD044509KZ
2
SAD060304VG
3
SAD04130DZ4
4
JAB04040859
5
SAD044508PH
6
SAD06450316
7
SAD04130DZ9
9
SAD063803KK
Mod MAC-Address(es)
--- -------------------------------------1
00-01-63-d0-73-20 to 00-01-63-d0-73-21
00-01-63-d0-73-1e to 00-01-63-d0-73-1f
00-04-de-43-ec-00 to 00-04-de-43-ef-ff
15 00-04-9a-12-3b-40 to 00-04-9a-12-3b-7f
2
00-01-63-d4-a0-aa to 00-01-63-d4-a0-d9
3
00-d0-97-38-74-71 to 00-d0-97-38-74-72
4
00-30-a3-38-9a-30 to 00-30-a3-38-9a-37
5
00-30-f2-70-d8-5e to 00-30-f2-70-d8-5f
6
00-09-7c-be-37-80 to 00-09-7c-be-37-bf
7
00-50-3e-7e-70-62 to 00-50-3e-7e-70-63
9
00-03-fe-aa-c0-d8 to 00-03-fe-aa-c0-df
Mod Sub-Type
--- ----------------------1
L3 Switching Engine II
9
IDS 2 accelerator board
console> (enable)
Step 3
Hw
Fw
Sw
------ ---------- -----------1.1
6.1(3)
8.2(2)
1.1
4.0
0.301
2.3
1.2
1.5
0.301
0.102
Sub-Model
------------------WS-F6K-PFC2
WS-SVC-IDSUPG
12.1(22)E1
6.3(1)
5.3(1)
4.2(0.24)V
4B4LZ0XA
12.1(22)E1
4B4LZ0XA
7.2(1)
Sub-Serial
----------SAD044302BP
.
12.1(22)E1
8.2(2)
8.2(2)
8.2(2)
3.0(7)S82
12.1(22)E1
3.0(7)S82
4.1(4)S91
Sub-Hw Sub-Sw
------ -----1.0
2.0
For Cisco IOS software, verify that the IDSM-2 is online by typing the following:
Router# show module
Mod Ports Card Type
Model
--- ----- -------------------------------------- -----------------1
2 Catalyst 6000 supervisor 2 (Active)
WS-X6K-SUP2-2GE
2
48 SFM-capable 48 port 10/100/1000mb RJ45 WS-X6548-GE-TX
5
8 8 port 1000mb ethernet
WS-X6408-GBIC
6
2 Intrusion Detection System
WS-X6381-IDS
7
0 2 port adapter FlexWAN
WS-X6182-2PA
9
8 Intrusion Detection System
WS-SVC-IDSM2
Mod MAC addresses
Hw
Fw
--- ---------------------------------- ------ -----------1 0002.7e38.7630 to 0002.7e38.7631
3.2
7.1(1)
2 000e.8336.d730 to 000e.8336.d75f
6.0
7.2(1)
5 0030.961a.b194 to 0030.961a.b19b
2.6
5.4(2)
6 0002.7ef9.9c80 to 0002.7ef9.9c81
1.1
4B4LZ0XA
7 0008.7cd5.2340 to 0008.7cd5.237f
1.5
12.1(19)E1
9 0001.0002.0003 to 0001.0002.000a
0.102 7.2(1)
Mod
--1
1
9
8-12
Sub-Module
--------------------------Policy Feature Card 2
Cat6k MSFC 2 daughterboard
IDS 2 accelerator board
Model
--------------WS-F6K-PFC2
WS-F6K-MSFC2
WS-SVC-IDSUPG
Serial No.
----------SAD060300AR
SAD074806XS
SAD03380401
SAD052106AX
SAD064502WY
SAD060301T4
Sw
-----------12.1(19)E1
7.6(1.6)T195
7.6(1.6)T195
3.0(6)S42
12.1(19)E1
4.1(4)S91
Status
------Ok
Ok
Ok
Ok
Ok
Ok
Serial
Hw
Status
--------------- ------- ------SAD060300XG
3.0
Ok
SAD060102D7
1.3
Ok
.
2.0
Ok
Cisco Intrusion Detection System Appliance and Module Installation and Configuration Guide Version 4.1
78-15597-02
Chapter 8
Installing the IDSM-2
Installation and Removal Instructions
Mod Online Diag Status
--- ------------------1 Pass
2 Pass
5 Pass
6 Not Supported
7 Not Supported
9 Pass
router#
Note
It is normal for the status to read “other” when the IDSM-2 is first
installed. After the IDSM-2 completes the diagnostics routines and comes
online, the status reads “ok.” Allow up to 5 minutes for the IDSM-2 to
come online.
See Enabling a Full Memory Test, page 10-99, for information on enabling a full
memory test after verifying the IDSM-2 installation.
Removing the IDSM-2
This procedure describes how to remove the IDSM-2 from the Catalyst 6500
series switch.
Warning
Only trained and qualified personnel should be allowed to install, replace, or
service this equipment. Statement 1030
Caution
Before removing the IDSM-2, be sure to perform the shutdown procedure. If the
IDSM-2 is not shut down correctly, you could corrupt the software.
Warning
During this procedure, wear grounding wrist straps to avoid ESD damage to the
card. Do not touch the backplane with your hand or any metal tool, or you could
shock yourself.
Cisco Intrusion Detection System Appliance and Module Installation and Configuration Guide Version 4.1
78-15597-02
8-13
Chapter 8
Installing the IDSM-2
Installation and Removal Instructions
See Working in an ESD Environment, page 1-21, for more information.
To remove the IDSM-2, follow these steps:
Step 1
Shut down the IDSM-2 by one of these methods:
•
Log in to the IDSM-2 CLI and type reset powerdown.
•
Log in to the switch CLI and type one of the following commands:
– For Catalyst software, type:
set module shutdown
module_number
– For Cisco IOS software, type:
hw-module module
•
Shut down the IDSM-2 through IDM or IDS MC.
•
Press the Shutdown button.
Note
8-14
module_number shutdown
Shutdown may take several minutes.
Caution
If the IDSM-2 is removed from the switch chassis without first being shut down,
or the chassis loses power, you may need to reset the IDSM-2 more than once. See
Resetting the IDSM-2, page 10-101, for the procedure. If the module fails to
respond after three reset attempts, boot the maintenance partition, and perform the
instructions for restoring the application partition. See Reimaging the IDSM-2,
page 10-124, for the procedure.
Step 2
Verify that the IDSM-2 shuts down. Do not remove the IDSM-2 until the status
indicator is amber or off.
Step 3
Use a screwdriver to loosen the installation screws at the left and right sides of the
IDSM-2.
Step 4
Grasp the left and right ejector levers and simultaneously pull the left lever to the
left and the right lever to the right to release the IDSM-2 from the backplane
connector.
Step 5
As you pull the IDSM-2 out of the slot, place one hand under the carrier to support
it.
Cisco Intrusion Detection System Appliance and Module Installation and Configuration Guide Version 4.1
78-15597-02
Chapter 8
Installing the IDSM-2
Installation and Removal Instructions
Caution
Step 6
Do not touch the printed circuit boards or connector pins.
Carefully pull the IDSM-2 straight out of the slot, keeping your other hand under
the carrier to guide it.
Note
Keep the IDSM-2 at a 90-degree orientation to the backplane (horizontal
to the floor).
Step 7
Place the IDSM-2 on an antistatic mat or antistatic foam.
Step 8
If the slot is to remain empty, install a filler plate (part number 800-00292-01) to
keep dust out of the chassis and to maintain proper airflow through the module
compartment.
Warning
Blank faceplates and cover panels serve three important functions: they
prevent exposure to hazardous voltages and currents inside the chassis; they
contain electromagnetic interference (EMI) that might disrupt other equipment;
and they direct the flow of cooling air through the chassis. Do not operate the
system unless all cards, faceplates, front covers, and rear covers are in place.
Statement 1029
Cisco Intrusion Detection System Appliance and Module Installation and Configuration Guide Version 4.1
78-15597-02
8-15
Chapter 8
Installing the IDSM-2
Installation and Removal Instructions
8-16
Cisco Intrusion Detection System Appliance and Module Installation and Configuration Guide Version 4.1
78-15597-02
C H A P T E R
9
Obtaining Software
This chapter provides information on obtaining Cisco IDS software for the
sensors.
This chapter contains the following sections:
•
Obtaining Cisco IDS Software, page 9-1
•
IDS Software Versioning, page 9-3
•
Upgrading Cisco IDS Software from Version 4.0 to 4.1, page 9-8
•
Using the Recovery/Upgrade CD with the Appliance, page 9-9
•
Applying for a Cisco.com Account with Cryptographic Access, page 9-11
•
IDS Bulletin, page 9-12
Obtaining Cisco IDS Software
You can find IDS Event Viewer, signature updates, service pack updates, BIOS
upgrades, Readmes, and other software updates at Downloads on Cisco.com.
Note
You must be logged into Cisco.com to access Downloads.
Periodic signature updates, which also contain Network Security Database
(NSDB) updates, are posted to Cisco.com approximately every two weeks.
Service packs are posted to Cisco.com as needed. Major and minor feature
releases are also posted periodically.
Cisco Intrusion Detection System Appliance and Module Installation and Configuration Guide Version 4.1
78-15597-02
9-1
Chapter 9
Obtaining Software
Obtaining Cisco IDS Software
You must have an active IDS maintenance contract and a Cisco.com password to
download updates. See Applying for a Cisco.com Account with Cryptographic
Access, page 9-11, for information on obtaining a Cisco.com account with
cryptographic access.
Check Cisco.com regularly for the latest IDS software updates.
To access Downloads on Cisco.com, follow these steps:
Step 1
Go to Cisco.com.
Step 2
Log in to Cisco.com.
Step 3
Select Technical Support > Downloads.
Step 4
Under Software Products & Downloads, click Cisco Secure Software.
Step 5
Under Cisco Secure Software, click Cisco Intrusion Detection System (IDS).
Step 6
On the Software Center (Downloads) page, locate your sensor, and then under
Version 4.x, click the applicable software link, for example, Latest Service Pack,
Minor, and Major Updates.
For BIOS upgrades, click Firmware.
Step 7
On the Software Download page, click the file you need.
To sort by Filename, Release, Date, or Size, select the option in the menu and
click Go.
Note
Step 8
You must type your Cisco.com username and password again.
Note
9-2
See IDS Software Image Naming Conventions, page 9-3, for an
explanation of the IDS file versioning scheme.
The first time you download a file from Cisco.com, you must fill in the
Encryption Software Export Distribution Authorization form before you
can download the software and click Submit.
Step 9
Click the file you are downloading.
Step 10
Follow the instructions in the Readme to install the update.
Cisco Intrusion Detection System Appliance and Module Installation and Configuration Guide Version 4.1
78-15597-02
Chapter 9
Obtaining Software
IDS Software Versioning
If the software upgrade fails for any reason, and leaves the sensor in an unusable
condition, you may need to recover the system. See Reimaging Appliances and
Modules, page 10-110, for more information.
Note
Major version upgrades, minor version upgrades, service packs, and
signature updates are the same for all sensors. System image files,
recovery files, and application files are unique per platform.
IDS Software Versioning
This section describes how to interpret IDS software versioning.
This section contains the following topics:
•
IDS Software Image Naming Conventions, page 9-3
•
4.x Software Release Examples, page 9-6
IDS Software Image Naming Conventions
When you download IDS software images from Cisco.com, you should
understand the versioning scheme so that you know which files are base files,
which are cumulative, and which are incremental.
Note
You can determine which software version is installed on your sensor by using the
show version command.
Figure 9-1 on page 9-4 illustrates what each part of the IDS software file
represents:
Cisco Intrusion Detection System Appliance and Module Installation and Configuration Guide Version 4.1
78-15597-02
9-3
Chapter 9
Obtaining Software
IDS Software Versioning
Figure 9-1
IDS Software File Name
IDS-maj-w.x-y-Sz.rpm.pkg
Update Type
Major Version Level
Minor Version Level
Service Pack Level
Signature Level
IDS-sig-4.0-2-S44.rpm.pkg–Signature Update
IDS-K9-min-4.1-1-S50.rpm.pkg–Minor Version Update
IDS-K9-maj-5.0-1-S60.rpm.pkg–Major Version Update
119518
IDS-K9-sp-4.0-2-S42.rpm.pkg–Service Pack Update
A major version upgrade contains new functionality or an architectural change in
the product. For example, beginning with the IDS 4.0 base version release, future
major version upgrades (5.0, 6.0, and so forth) include everything since the
previous major release (the minor version features, service pack fixes, and
signature updates) plus any new changes.
A minor version upgrade is incremental to the major version. Minor version
upgrades are also base versions for service packs. The first minor version upgrade
for 4.0 is 4.1(1)Sx. Minor version upgrades are released for minor enhancements
to the product. Minor version upgrades contain all previous minor features,
service pack fixes, and signature updates since the last major version, and the new
minor features being released.
Service packs are cumulative following a base version release (minor or major).
Service packs are used for the release of defect fixes with no new enhancements.
Service packs contain all service pack fixes and signature updates since the last
base version (minor or major) and the new defect fixes being released.
Signature updates are cumulative and increment by one with each new release (for
example, S45, S46, S47). Signature updates include every signature since the
initial signature release (S1) in addition to the new signatures being released.
9-4
Cisco Intrusion Detection System Appliance and Module Installation and Configuration Guide Version 4.1
78-15597-02
Chapter 9
Obtaining Software
IDS Software Versioning
A signature update is the most dependent software file. To install the most recent
signature update, you must have the most recent service pack. Service packs are
dependent on the most recent minor version, which is dependent on the most
recent major version.
Note
See 4.x Software Release Examples, page 9-6, for a table listing the types of files
with examples of filenames and corresponding software releases.
In addition there are system image files for the IDS-4215, IPS-4240, and
IPS-4255, a recovery partition file for the appliances, application partition files
for the IDSM-2 and NM-CIDS, a maintenance partition file for the IDSM-2, and
a helper image for the NM-CIDS:
•
System image files (IDS-4215, IPS-4240, IPS-4255 only)—Full IDS
application and recovery image used for reimaging an entire sensor.
•
Recovery partition image file (appliances only)—A recovery partition image
file is a hard-disk drive partition on appliances that contains a full IDS
application image to be used for recovery.
•
Application partition image file (IDSM-2 and NM-CIDS)—An application
partition image file is a full IDS application image that can be used to reimage
the application partition of the IDSM-2 and the NM-CIDS. Application
partition image files are released when new major or minor version upgrades
are released. Application partition image files are usually not released for
service pack or signature updates. A service pack may be released to address
defects identified in existing application partition images, but new
application partition images will not be produced for subsequently released
service packs.
•
Maintenance partition image file (IDSM-2 only)—A maintenance partition
image file is used to reimage the maintenance partition of the IDSM-2.
Maintenance partition files are released when new major or minor versions of
the maintenance partition are released. Maintenance partition image files are
not released for service packs to the maintenance partition. A service pack
may be released to address defects identified in existing maintenance
partition images, but new maintenance partition images are not produced for
subsequently released service packs.
Cisco Intrusion Detection System Appliance and Module Installation and Configuration Guide Version 4.1
78-15597-02
9-5
Chapter 9
Obtaining Software
IDS Software Versioning
Note
•
The maintenance partition image file does not contain a signature
designator.
Helper image and bootloader—The helper image is used to reimage the
NM-CIDS hard-disk drive. You boot the helper image from the NM-CIDS
firmware, which includes the BIOS and the bootloader. The bootloader
supports booting from a TFTP server and booting an image from the
hard-disk drive. After this image is booted, it provides support for TFTP and
SSH. You can use either protocol to load the application image and write it to
the hard-disk drive. Helper image and bootloader files are released as needed.
4.x Software Release Examples
Table 9-1 lists platform-independent IDS 4.x software release examples. Refer to
Readmes that accompany the software files for detailed instructions on how to
install the files. See Obtaining Cisco IDS Software, page 9-1, for instructions on
how to access these files on Cisco.com.
Table 9-1
Platform-Independent Release Examples
Target Frequency Identifier
Supported
Platform
Example File Name
Bi-weekly
sig
All
IDS-sig-4.0-1-S30.rpm.pkg
Semi-annually
or as needed
sp
All
IDS-K9-sp-4.0-2-S29.rpm.pkg
Minor version3
Annually
min
All
IDS-K9-min-4.1-1-S29.rpm.pkg
Major version4
Annually
maj
All
IDS-K9-maj-4.0-1-S29.rpm.pkg
Release
Signature update1
Service
pack2
1. Signature updates include the latest cumulative IDS signatures and the NSDB.
2. Service packs include defect fixes.
3. Minor versions include new features and/or functionality (for example, signature engines).
4. Major versions include new functionality or new architecture.
9-6
Cisco Intrusion Detection System Appliance and Module Installation and Configuration Guide Version 4.1
78-15597-02
Chapter 9
Obtaining Software
IDS Software Versioning
Table 9-2 describes the platform-dependent release examples.
Table 9-2
Platform-Dependent Release Examples
Release
Target
Frequency
Identifier
Supported
Platform
Example File Name
System image1 Semi-annually sys
IDS-4215
IPS-4240
IPS-4255
IPS-4240-K9-sys-1.1-a-4.0-1-S29.img
Application
partition
image2
Semi-annually a
IDSM-2
WS-SVC-IDSM2-K9-a-4.0-1-S29.bin.gz
NM-CIDS
NM-CIDS-K9-a-4.1-1-S29.bin.gz
Maintenance
partition
image3
Annually
Full image for
recovery
partition
(IDS/IPS
appliances
only)4
Semi-annually r
Boot loader5
Helper
image6
Recovery and
upgrade CD7
mp
IDSM-2 only mp-2-1-1.bin.gz
IDS-4210
IDS-4220
IDS-4230
IDS-4235
IDS-4250
IDS-42XX-K9-r-1.1-a-4.0-1-S29.tar.pkg
IDS-4215
IDS-4215-K9-r-1.1-a-4.1-1-S29.tar.pkg
IPS-4240
IPS-4255
IPS-4240-K9-r-1.1-a-4.1.1-S29.tar.pkg
As needed
bl
NM-CIDS
servicesengine-bl-1.0-4.bin
As needed
helper
NM-CIDS
NM-CIDS-K9-helper-1.0-1.bin
Annually
cd
IDS-4210
IDS-4220
IDS-4230
IDS-4235
IDS-4250
IDS-42XX-K9-cd-1.1-a-4.0-1-S29.iso
1. The system image includes the combined recovery and application image used to reimage an entire sensor.
2. The application partition image includes the full image for the application partition.
Cisco Intrusion Detection System Appliance and Module Installation and Configuration Guide Version 4.1
78-15597-02
9-7
Chapter 9
Obtaining Software
Upgrading Cisco IDS Software from Version 4.0 to 4.1
3. The maintenance partition image includes the full image for the maintenance partition. The file is platform specific. If you
have to recover the IDSM-2 from the maintenance partition, the application partition reflects the applicable 4.0 version after
the recovery operation has been completed.
4. The r 1.1 can be revised to r 1.2 if it is necessary to release a new recovery image that contains the same underlying application
image. If there are defect fixes for the installer, for example, the underlying application version may still be 4.0(1)S29, but
the recovery partition image will be r 1.2.
5. Bootloader is used for reimaging the NM-CIDS.
6. The helper image reimages the NM-CIDS hard-disk drive.
7. This CD is used for recovery or upgrade of an IDS appliance. The cd 1.1 can be revised to cd 1.2 if it is necessary to release
a new CD that contains the same underlying application image. If there is a defect fix for the installer, for example, the
underlying application version may still be 4.0(1)S29, but the recovery partition image will be cd 1.2.
Upgrading Cisco IDS Software from Version 4.0 to 4.1
Note
The newest IDS platforms, the IDS-4215 and the NM-CIDS, ship with Cisco IDS
4.1 installed. The new IPS platforms, the IPS-4240 and the IPS-4255, ship with
Cisco IDS 4.1 installed.
Note
You cannot upgrade the IDSM (WS-X6381) to Cisco IDS 4.1. You must replace
your IDSM (WS-X6381) with the IDSM-2 (WS-SVC-IDSM2-K9), which
supports version 4.x.
The upgrade from Cisco IDS software version 4.0 to 4.1 is available as a download
from Cisco.com. See Obtaining Cisco IDS Software, page 9-1, for the procedure
for accessing the Software Center on Cisco.com.
After downloading the 4.1 upgrade file, refer to the accompanying Readme for the
procedure for installing the 4.1 upgrade file using the upgrade command.
If you configured Auto Update for your sensor, copy the 4.1 upgrade file to the
directory on the server that your sensor polls for updates. Refer to Installing and
Using the Cisco Intrusion Detection System Device Manager and Event Viewer
Version 4.1 for the procedure for configuring Auto Update through IDS Device
Manager.
9-8
Cisco Intrusion Detection System Appliance and Module Installation and Configuration Guide Version 4.1
78-15597-02
Chapter 9
Obtaining Software
Using the Recovery/Upgrade CD with the Appliance
If you install an upgrade on your sensor and the sensor is unusable after it reboots,
you must recover the system image of your sensor. Upgrading a sensor from any
Cisco IDS version before 4.0 also requires you to use the recover command or the
recovery/upgrade CD.
You can recover the system image of your sensor in the following ways:
•
For IDS appliances with a CD-ROM drive, use the recovery/upgrade CD.
See Using the Recovery/Upgrade CD with the Appliance, page 9-9, for the
procedure.
•
For the IDS/IPS appliance, use the recover command.
See Recovering the Application Partition Image, page 10-111, for the
procedure.
•
For the IPS appliances, use the ROMMON to restore the system image.
See Installing the IDS-4215 System Image, page 10-113, and Installing the
IPS-4240 and IPS-4255 System Image, page 10-116, for the procedures.
•
For NM-CIDS, use the bootloader.
See Reimaging the NM-CIDS Application Partition, page 10-119, for the
procedure.
•
For IDSM-2, use the recover command.
See Reimaging the IDSM-2, page 10-124, for the procedure.
Caution
When you recover the system image for your sensor, all accounts are removed and
the default account and password are reset to cisco.
Using the Recovery/Upgrade CD with the Appliance
Caution
You are installing a new software image. All configuration data is overwritten.
After you recover the system image with the recovery/upgrade CD, you must use
the setup command to initialize the appliance. You will need your configuration
information. You can obtain this information by generating a diagnostics report
through IDM.
Cisco Intrusion Detection System Appliance and Module Installation and Configuration Guide Version 4.1
78-15597-02
9-9
Chapter 9
Obtaining Software
Using the Recovery/Upgrade CD with the Appliance
Signature updates, which include the Network Security Database (NSDB), occur
approximately every two weeks. The most recent signature update will not be on
the recovery/upgrade CD that shipped with your appliance. Download the most
recent signature update and apply it after you have recovered the system image.
To recover the system image with the recovery/upgrade CD, follow these steps:
Step 1
Obtain your configuration information from IDM:
a.
To access IDM, point your browser to the appliance you are upgrading.
b.
Select Administration > Diagnostics.
The Diagnostics panel appears.
c.
Click Run Diagnostics.
Running the diagnostics may take a while.
d.
Click View Results.
The results are displayed in a report.
e.
To save the diagnostics report, select Menu > Save As in your browser.
Step 2
Insert the recovery/upgrade CD into the CD-ROM drive.
Step 3
Power off the appliance and then power it back on.
The boot menu appears, which lists important notices and boot options.
IDS-4220/4230 customers:
Sniffing and Command-and-Control interfaces have been swapped in CIDS
4.0. Reference the 4.0 software documentation before proceeding.
IDS-4235/4250 customers: BIOS version "A04" or later is required to
run CIDS 4.0 on your appliance. Reference the 4.0 software
documentation before proceeding.
- To recover the Cisco IDS 4.0 Application using
keyboard/monitor, type: k <ENTER>. (WARNING: ALL
BE LOST)
- To recover the Cisco IDS 4.0 Application using
type: s <ENTER>, or just press <ENTER> (WARNING:
WILL BE LOST)
Step 4
9-10
a local
DATA ON DISK 1 WILL
a serial connection,
ALL DATA ON DISK 1
Type k if you are installing from a keyboard, or type s if you are installing from
a serial connection.
Cisco Intrusion Detection System Appliance and Module Installation and Configuration Guide Version 4.1
78-15597-02
Chapter 9
Obtaining Software
Applying for a Cisco.com Account with Cryptographic Access
Note
Step 5
Log in to the appliance by using a serial connection or with a monitor and
keyboard.
Note
Step 6
A blue screen is displayed for several minutes without any status
messages while the files are being copied from the CD to your appliance.
The default username and password are both cisco.
You are prompted to change the default password.
Note
Passwords must be at least eight characters long and be strong, that is, not
be a dictionary word.
After you change the password, the sensor# prompt appears.
Step 7
Type the setup command to initialize the appliance.
See Initializing the Sensor, page 10-2, for the procedure.
Step 8
Install the most recent service pack and signature update.
See Obtaining Cisco IDS Software, page 9-1, for the procedure.
Applying for a Cisco.com Account with
Cryptographic Access
To download software updates, you must have a Cisco.com account with
cryptographic access.
Cisco Intrusion Detection System Appliance and Module Installation and Configuration Guide Version 4.1
78-15597-02
9-11
Chapter 9
Obtaining Software
IDS Bulletin
To apply for cryptographic access, follow these steps:
Step 1
If you have a Cisco.com account, skip to Step 2. If you do not have a Cisco.com
account, register for one by going to the following URL:
http://tools.cisco.com/RPF/register/register.do
Step 2
Go to the following URL:
http://www.cisco.com/pcgi-bin/Software/Crypto/crypto_main.pl
The Enter Network Password dialog box appears.
Step 3
Log in with your Cisco.com account.
The Encryption Software Export Distribution Authorization Form page appears.
Step 4
Select your software from the list box and click Submit.
The Encryption Software Export Distribution Authorization Form appears.
Step 5
Review and complete the Encryption Software Export Distribution Authorization
form and click Submit.
The “Cisco Encryption Software: Crypto Access Granted” message appears.
Note
It takes approximately 4 hours to process your application. You cannot
download the software until the entitlement process is complete. You will
not receive notification.
IDS Bulletin
You can subscribe to Cisco IDS Active Update Bulletin on Cisco.com to receive
e-mails when signature updates and service pack updates occur.
9-12
Cisco Intrusion Detection System Appliance and Module Installation and Configuration Guide Version 4.1
78-15597-02
Chapter 9
Obtaining Software
IDS Bulletin
To receive notification about updates, follow these steps:
Step 1
Go to the following URL: http://www.cisco.com/offer/newsletter/123668_4/
Step 2
Fill out the required information, as follows:
a.
Would you like to receive IDS Active Update Bulletin? Select Yes or No from
menu.
b.
Type your first name in the First Name box.
c.
Type your middle name or initial in the Middle Name/Initial box.
d.
Type your last name in the Last Name/Surname box.
e.
Type the name of your organization in the Organization box.
f.
Select your country from the menu.
g.
Type your e-mail address in the E-mail box.
Step 3
Select the check box if you would like to receive further information about Cisco
products and offerings by e-mail.
Step 4
Select the e-mail format you prefer from the menu.
Step 5
Fill in the optional information if desired.
Step 6
a.
Select your job function from the menu.
b.
Select your job level from the menu.
c.
Select your industry or business type from the menu.
d.
Select how many people your organization employs worldwide from the
menu.
e.
Select your company or organization type from the menu.
Click Submit Form.
You will receive e-mail notifications of updates when they occur and instructions
on how to obtain them.
Cisco Intrusion Detection System Appliance and Module Installation and Configuration Guide Version 4.1
78-15597-02
9-13
Chapter 9
Obtaining Software
IDS Bulletin
9-14
Cisco Intrusion Detection System Appliance and Module Installation and Configuration Guide Version 4.1
78-15597-02
C H A P T E R
10
Configuring the Sensor Using the CLI
The command line interface (CLI) for IDS version 4.1 is the user interface that
enables you to access the sensor through Telnet, SSH, and serial interface
connections.
This chapter provides basic configuration procedures using the CLI. You can also
use an IDS manager to configure your sensor. For information on using IDS
Device Manager or Management Center for IDS Sensors to configure your sensor,
refer to the documentation on Cisco.com. Refer to the Cisco Intrusion Detection
System (IDS) Hardware and Software Version 4.1 Documentation Guide that
shipped with your sensor for information on how to access IDS documentation.
Note
When procedures apply to all IDS sensors, the term “sensor” is used. When a
procedure applies to a specific appliance or module, it is indicated in the
procedures.
This chapter contains the following sections:
•
Sensor Initial Configuration Tasks, page 10-2
•
Sensor Administrative Tasks, page 10-24
•
Sensor Configuration Tasks, page 10-35
•
NM-CIDS Configuration Tasks, page 10-77
•
IDSM-2 Configuration Tasks, page 10-87
•
Reimaging Appliances and Modules, page 10-110
Cisco Intrusion Detection System Appliance and Module Installation and Configuration Guide Version 4.1
78-15597-02
10-1
Chapter 10
Configuring the Sensor Using the CLI
Sensor Initial Configuration Tasks
Sensor Initial Configuration Tasks
This section describes the configuration tasks you need to perform before
configuring intrusion detection on your sensor.
This section contains the following topics:
•
Initializing the Sensor, page 10-2
•
Assigning and Enabling the Sensing Interface, page 10-9
•
Sensing Interfaces, page 10-11
•
Creating the Service Account, page 10-12
•
Logging in to the Sensor, page 10-14
•
Changing a Password, page 10-15
•
Adding a User, page 10-16
•
Removing a User, page 10-17
•
Adding Trusted Hosts, page 10-18
•
Adding Known Hosts to the SSH Known Hosts List, page 10-19
•
Configuring the Sensor to Use an NTP Server as its Time Source, page 10-21
•
Configuring a Cisco Router to be an NTP Server, page 10-22
Initializing the Sensor
After you have installed the sensors on your network, you must initialize them
using the setup command.
10-2
Note
If you have an IDS-4235 or IDS-4250, check to see what version BIOS you have.
If it is earlier than A04, you must apply the BIOS upgrade before installing
version 4.1 software. See Upgrading the BIOS, page 5-7, for the procedure.
Note
For support reasons, you should set up the service account after initializing the
sensor. See Creating the Service Account, page 10-12, for the procedure.
Cisco Intrusion Detection System Appliance and Module Installation and Configuration Guide Version 4.1
78-15597-02
Chapter 10
Configuring the Sensor Using the CLI
Sensor Initial Configuration Tasks
Note
After you have initialized your sensor, you must assign the interfaces. See
Assigning and Enabling the Sensing Interface, page 10-9, for the procedure.
To initialize the sensor, follow these steps:
Step 1
Log in to the CLI.
The default username and password are both cisco.
a.
Session in to the IDSM-2:
•
For Catalyst software, type the following:
Console> enable
Console> (enable) session
•
For Cisco IOS software, type the following:
Router# session slot
b.
module_number
slot_number processor
Session in to the NM-CIDS by typing the following:
Router# service-module IDS-Sensor
c.
slot_number/port_number session
Log in to the appliance by using a serial connection or with a monitor and
keyboard.
Note
Step 2
1
You cannot use a monitor and keyboard with the IDS-4215, the
IPS-4240, or the IPS-4255.
You are prompted to change the default password.
Passwords must be at least eight characters long and be strong, that is, not be a
dictionary word.
Caution
If you forget your password, you may have to reimage your sensor (see Reimaging
Appliances and Modules, page 10-110), unless there is another user with
administrator privileges. The other administrator can log in and assign a new
password to the user who forgot the password. Or, if you have created the service
account, you can have TAC create a password. See Creating the Service Account,
page 10-12, for more information.
Cisco Intrusion Detection System Appliance and Module Installation and Configuration Guide Version 4.1
78-15597-02
10-3
Chapter 10
Configuring the Sensor Using the CLI
Sensor Initial Configuration Tasks
After you change the password, the sensor# prompt appears.
Step 3
Type
setup
to initialize the sensor.
The System Configuration Dialog is displayed.
Note
The System Configuration Dialog is an interactive dialog. The default
settings are displayed.
--- System Configuration Dialog --At any point you may enter a question mark '?' for help.
User ctrl-c to abort configuration dialog at any prompt.
Default settings are in square brackets '[]'.
Current Configuration:
networkParams
ipAddress 10.89.146.110
netmask 255.255.255.0
defaultGateway 10.89.146.254
hostname sensor
telnetOption disabled
accessList ipAddress 10.0.0.0 netmask 255.0.0.0
exit
timeParams
summerTimeParams
active-selection none
exit
exit
service webServer
general
ports 443
exit
exit
Current time: Sat May 15 02:52:09 1993
Step 4
Press the spacebar to get to the following question:
Continue with configuration dialog?[yes]:
Press the spacebar to show one page at a time. Press Enter to show one line at a
time.
10-4
Cisco Intrusion Detection System Appliance and Module Installation and Configuration Guide Version 4.1
78-15597-02
Chapter 10
Configuring the Sensor Using the CLI
Sensor Initial Configuration Tasks
Step 5
Type yes to continue.
Step 6
Specify the hostname.
The hostname is a case-sensitive character string up to 256 characters. Numbers,
“_” and “-” are valid, but spaces are not acceptable. The default is sensor.
Step 7
Specify the IP address.
An IP address is a 32-bit address written as four octets separated by periods,
X.X.X.X, where X=0-255. The default is 10.1.9.201.
Step 8
Specify the netmask.
The netmask is a 32-bit address written as four octets separated by periods,
X.X.X.X, where X=0-255. The default for a Class C address is 255.255.255.0.
Step 9
Specify the default gateway.
The default gateway is the default router IP address for the sensor. The default is
10.1.9.1.
Step 10
Specify the Telnet server status.
You can disable or enable Telnet services. The default is disabled.
Step 11
Specify the web server port.
The web server port is the TCP port used by the web server (1 to 65535). The
default is 443.
Note
Step 12
If you change the web server port, you must specify the port in the URL
address of your browser when you connect to IDS Device Manager in the
format https://sensor ip address:port (for example,
https://10.1.9.201:1040).
Type yes to modify the network access list.
a.
Press Enter to get to the Permit line.
b.
Specify the IP address and netmask of the network you want to add to the
access list.
Specify the netmask if the IP address is a network address (as opposed to a
host address).
c.
Repeat Step b until you have entered all networks that you want to add to the
access list.
Cisco Intrusion Detection System Appliance and Module Installation and Configuration Guide Version 4.1
78-15597-02
10-5
Chapter 10
Configuring the Sensor Using the CLI
Sensor Initial Configuration Tasks
Step 13
Type yes to modify the system clock settings.
a.
Type yes if you want to use NTP.
You will need the NTP server IP address, the NTP key ID, and the NTP key
value. If you do not have those at this time, you can configure NTP later. See
Configuring the Sensor to Use an NTP Server as its Time Source, page 10-21,
for the procedure.
b.
Type yes to modify summertime settings.
Note
c.
Summertime is also known as Daylight Savings Time (DST). If your
location does not use Summertime, go to Step h.
Type recurring, date, or disable to specify how you want to configure
summertime settings.
The default is recurring.
d.
If you typed recurring, type the month you want to start summertime settings.
The default is apr.
Valid entries are jan, feb, mar, apr, may, jun, jul, aug, sep, oct, nov, and dec.
e.
Specify the week you want to start summertime settings.
The default is first.
Valid entries are first, second, third, fourth, fifth, and last.
f.
Specify the day you want to start summertime settings.
The default is sun.
Valid entries are sun, mon, tue, wed, thu, fri, and sat.
g.
Specify the time you want to start summertime settings.
The default is 02:00:00.
Note
10-6
The default recurring summertime parameters are correct for time
zones in the United States. The default values specify a start time of
2 a.m. on the first Sunday in April, and a stop time of 2 a.m. on the
fourth Sunday in October. The default summertime offset is 60
minutes.
Cisco Intrusion Detection System Appliance and Module Installation and Configuration Guide Version 4.1
78-15597-02
Chapter 10
Configuring the Sensor Using the CLI
Sensor Initial Configuration Tasks
h.
Specify the month you want summertime settings to end.
The default is oct.
Valid entries are jan, feb, mar, apr, may, jun, jul, aug, sep, oct, nov, and dec.
i.
Specify the week you want the summertime settings to end.
The default is last.
Valid entries are first, second, third, fourth, fifth, and last.
j.
Specify the day you want the summertime settings to end.
The default is sun.
Valid entries are sun, mon, tue, wed, thu, fri, and sat.
k.
Specify the time you want summertime settings to end.
The default is 02:00:00.
l.
Specify the DST zone.
The zone name is a character string up to 128 characters long.
m.
Specify the summertime offset.
The default is 60.
Specify the summertime offset from UTC in minutes (negative numbers
represent time zones west of the Prime Meridian).
n.
Type yes to modify the system time zone.
o.
Specify the standard time zone name.
The zone name is a character string up to 128 characters long.
p.
Specify the standard time offset.
The default is 60.
Your configuration appears with the following options:
[0] Go to the command prompt without saving this config.
[1] Return back to the setup without saving this config.
[2] Save this configuration and exit setup.
Step 14
Type 2 to save the configuration.
Enter your selection[2]: 2
Configuration Saved.
Cisco Intrusion Detection System Appliance and Module Installation and Configuration Guide Version 4.1
78-15597-02
10-7
Chapter 10
Configuring the Sensor Using the CLI
Sensor Initial Configuration Tasks
Step 15
Modify the current system date and time.
Note
Step 16
This option is not available on modules. The modules get their time from
the router or switch in which they are installed.
a.
Type yes to modify the system date and time.
b.
Specify the local date.
c.
Specify the local time.
Type 2 to save the configuration.
Enter your selection[2]: 2
Configuration Saved.
Warning: The node must be rebooted for the changes to go into effect.
Continue with reboot? [yes]:
Step 17
Type yes to reboot the sensor.
Step 18
Display the self-signed X.509 certificate (needed by TLS) by typing the following
command:
sensor# show tls fingerprint
MD5: C1:9F:DE:2A:7D:D9:9A:EE:C9:19:76:D8:0F:96:8D:EC SHA1:
DC:06:71:57:90:C7:2A:E4:6E:FE:22:78:B0:33:0F:5A:F2:4A:13:59
Step 19
Write down the certificate fingerprints.
You will need these to check the authenticity of the certificate when connecting
to this sensor with a web browser.
Step 20
Apply the most recent signature update.
See Obtaining Cisco IDS Software, page 9-1, for information on how to obtain the
most recent software. The Readme explains how to apply the most recent software
update.
Step 21
Assign the interfaces.
See Assigning and Enabling the Sensing Interface, page 10-9, for the procedure.
You are now ready to configure your sensor for intrusion detection.
10-8
Cisco Intrusion Detection System Appliance and Module Installation and Configuration Guide Version 4.1
78-15597-02
Chapter 10
Configuring the Sensor Using the CLI
Sensor Initial Configuration Tasks
Assigning and Enabling the Sensing Interface
An interface group provides a way to group sensing interfaces into one logical
virtual sensor. Only one interface group, 0, is supported. Depending on the
configuration of your sensor, you may need to assign the sensing interface to
interface group 0 and enable the interface.
Review the following guidelines:
•
If you purchased a new sensor that shipped with Cisco IDS version 4.1:
– The sensor detects the available sensing (monitoring) interfaces during
the bootup process and adds those interfaces to interface group 0.
Note
If the XL card is present, only the XL interfaces are added to
interface group 0. If the XL card is not present, all Ethernet
100/1000 interfaces (except the command and control interface)
are added to interface group 0.
– By default, all interfaces the sensor detects and adds to interface group 0
are disabled. You need to use the IDS CLI or other IDS manager to enable
the appropriate interfaces.
Note
•
When you enable an interface the change takes effect
immediately. The sensor does not need to reboot.
If you upgrade an existing sensor to Cisco IDS version 4.1:
– The sensor detects the available interfaces during startup but does not
modify the existing interface group 0.
– You must use the IDS CLI or other IDS manager to add the unassigned
interfaces to interface group 0.
Note
If you add or remove interfaces of different types (such as adding
an XL interface and removing an Ethernet 100/1000 interface)
the sensor reboots.
Cisco Intrusion Detection System Appliance and Module Installation and Configuration Guide Version 4.1
78-15597-02
10-9
Chapter 10
Configuring the Sensor Using the CLI
Sensor Initial Configuration Tasks
Warning
If you are using the command and control interface as the sensing interface, you
receive an error the first time Cisco IDS 4.1 boots. The sensor detects that the
command and control interface is an invalid interface for interface group 0. You
must use the IDS CLI or other IDS manager to remove the command and control
interface from interface group 0 and add a valid sensing interface.
To assign and enable sensing interfaces, follow these steps:
Step 1
Log in to the CLI using an account with administrator privileges.
Step 2
Enter configuration mode:
sensor# configure terminal
Step 3
To add an interface to or remove an interface from interface group 0, follow these
steps:
a.
Enter interface group configuration mode for interface group 0:
sensor(config)# interface group 0
b.
Remove an interface:
sensor(config-ifg)# no sensing-interface
name
Where name is the logical name of the sensing interface, such as int0.
See Sensing Interfaces, page 10-11, for a list of interface names per platform.
c.
Add an interface:
sensor(config-ifg)# sensing-interface
name
For example, to add int0 and int3 to interface group 0, type the following
command:
sensor(config-ifg)# sensing-interface int0,int3
Note
10-10
There is no space after the comma in the previous example. When
typing more than one interface, you do not need to add a space
between the comma and the next interface name.
Cisco Intrusion Detection System Appliance and Module Installation and Configuration Guide Version 4.1
78-15597-02
Chapter 10
Configuring the Sensor Using the CLI
Sensor Initial Configuration Tasks
d.
Exit interface group configuration mode:
sensor(config-ifg)# exit
Step 4
To enable or disable an interface, follow these steps:
a.
Enter sensing interface configuration mode for the interface:
sensor(config)# interface sensing
name
Where name is the logical name of the sensing interface, such as int0.
b.
Enable the interface:
sensor(config-ifs)# no shutdown
c.
Verify the interface is enabled:
sensor(config-ifs)# exit
sensor(config)# exit
sensor# show interface
d.
Disable the interface:
sensor# configure terminal
sensor(config)# interface sensing name
sensor(config-ifs)# shutdown
e.
Exit sensing interface configuration mode:
sensor(config-ifs)# exit
sensor(config)# exit
sensor#
Note
Enabling or disabling the interface group enables or disables all
sensing interfaces contained in the group.
Sensing Interfaces
Table 10-1 on page 10-12 lists the sensing interfaces for each IDS platform.
Cisco Intrusion Detection System Appliance and Module Installation and Configuration Guide Version 4.1
78-15597-02
10-11
Chapter 10
Configuring the Sensor Using the CLI
Sensor Initial Configuration Tasks
Table 10-1 Sensing Interfaces
IDS Platform
Sensing Interface
IDS-4210
int0
IDS-4215
int0
IDS-4215-4FE
int0, int2, int3, int4, int5
IDS-4220 and IDS-4230
int0
IDS-4235
int0
IDS-4235-4FE
int0, int2, int3, int4, int5
IDS-4250
int0
IDS-4250-SX
int0, int2
IDS-4250-XL
int0, int2, int3
IDS-4250-4FE
int0, int2, int3, int4, int5
IDSM-2
int7 and int8
IPS-4240
int0, int1, int2, int3
IPS-4255
int0, int1, int2, int3
NM-CIDS
int1
Creating the Service Account
You can create a service account for TAC to use during troubleshooting. Although
more than one user can have access to the sensor, only one user can have service
privileges on a sensor. The service account is for support purposes only.
Caution
10-12
Do not make modifications to the sensor through the service account except under
the direction of TAC. If you use the service account to configure the sensor, your
configuration is not supported by TAC. Adding services to the operating system
through the service account affects proper performance and functioning of the
other IDS services. TAC does not support a sensor on which additional services
have been added.
Cisco Intrusion Detection System Appliance and Module Installation and Configuration Guide Version 4.1
78-15597-02
Chapter 10
Configuring the Sensor Using the CLI
Sensor Initial Configuration Tasks
To create the service account, follow these steps:
Step 1
Log in to the CLI using an account with administrator privileges.
Step 2
Enter configuration mode:
sensor# configure terminal
Step 3
Specify the parameters for the service account:
sensor(config)# privilege service
A valid username contains 1-32 alphanumeric characters. You can also use an
underscore (_) or dash (-) in the username.
Step 4
Specify a password when prompted.
If a service account already exists for this sensor, the following error is displayed
and no service account is created:
Error: Only one service account allowed in UserAccount document
Step 5
Exit configuration mode:
sensor(config)# exit
sensor#
When you use the service account to log in to the CLI, you receive the following
warning:
************************ WARNING *********************************
UNAUTHORIZED ACCESS TO THIS NETWORK DEVICE IS PROHIBITED. This account
is intended to be used for support and troubleshooting purposes only.
Unauthorized modifications are not supported and will require this
device to be reimaged to guarantee proper operation.
******************************************************************
Cisco Intrusion Detection System Appliance and Module Installation and Configuration Guide Version 4.1
78-15597-02
10-13
Chapter 10
Configuring the Sensor Using the CLI
Sensor Initial Configuration Tasks
Logging in to the Sensor
To log in to the sensor, follow these steps:
Step 1
Do one of the following:
a.
SSH or Telnet to the appliance:
ssh
user@ip_address
telnet
b.
ip_address
SSH, Telnet, or console log in to the IDSM-2:
– For Catalyst Software:
ssh ip_address
session slot_number
telnet ip_address
session slot_number
Console>(enable) session
slot_number
– For Cisco IOS software:
ssh ip_address
session slot_number processor 1
telnet ip_address
session slot_number processor 1
Router# session slot
c.
10-14
slot_number processor processor_number
SSH or Telnet to the NM-CIDS:
ssh ip_address
service-module IDS-Sensor
slot_number/0
session
telnet ip_address
service-module IDS-Sensor
slot_number /0
session
Cisco Intrusion Detection System Appliance and Module Installation and Configuration Guide Version 4.1
78-15597-02
Chapter 10
Configuring the Sensor Using the CLI
Sensor Initial Configuration Tasks
Step 2
Type your username and password at the login prompt:
Note
The default is cisco.
login: cisco
Password: cisco
If you are logging in for the first time, you are prompted to change your password.
Changing a Password
The password command updates the password on the local sensor. You can also
use this command to change the password for an existing user or to reset the
password for a locked account.
To change the password, follow these steps:
Step 1
To change the password for another user or reset the password for a locked
account, follow these steps:
a.
Log in to the CLI using an account with administrator privileges.
b.
Enter configuration mode:
sensor# configure terminal
c.
Change the password for a specific user:
sensor(config)# password tester
Enter New Login Password: ******
Re-enter New Login Password: ******
Note
This example modifies the password for the user “tester.”
Cisco Intrusion Detection System Appliance and Module Installation and Configuration Guide Version 4.1
78-15597-02
10-15
Chapter 10
Configuring the Sensor Using the CLI
Sensor Initial Configuration Tasks
Step 2
To change your password, follow these steps:
a.
Log in to the CLI.
b.
Enter configuration mode:
sensor# configure terminal
c.
Change your password:
sensor(config)# password
Enter Old Login Password:************
Enter New Login Password: ************
Re-enter New Login Password: ************
Adding a User
You can add a new user, set the privilege level—administrator, operator,
viewer—and set the password for the new user. Use the username command to
create users on the local system. Use the no form of this command to remove a
user from the system.
The username command provides username and password authentication for
login purposes only. You cannot use this command to remove a user who is logged
into the system. If you do not specify a password, the system prompts you for one.
Use the password command to change the password for existing users. Use the
privilege command to change the privilege for existing users.
Note
You cannot use the privilege command to give a user service privileges. If you
want to give an existing user service privileges, you must remove that user and
then use the username command to create the service account. See “Creating the
Service Account” section on page 10-12.
To add a user, follow these steps:
Step 1
Log in to the CLI using an account with administrator privileges.
Step 2
Enter configuration mode:
sensor# configure terminal
10-16
Cisco Intrusion Detection System Appliance and Module Installation and Configuration Guide Version 4.1
78-15597-02
Chapter 10
Configuring the Sensor Using the CLI
Sensor Initial Configuration Tasks
Step 3
Specify the parameters for the user:
username password password privilege
administrator/operator/viewer
sensor(config)# username
A valid username contains 1-32 alphanumeric characters. You can also use an
underscore (_) or dash (-) in the username.
For example, to add the user “tester” with a privilege level of administrator and
the password “testpassword,” type the following command:
sensor(config)# username tester privilege administrator
Enter Login Password: *****
Re-enter Login Password: *****
If you do not specify a privilege level for the user, the user is assigned the
default viewer privilege.
Note
Step 4
Verify that the user has been added:
a.
Exit configuration mode:
sensor(config)# exit
b.
View a list of all users:
sensor# show users all
A list of users is displayed.
Removing a User
You can delete a user and thus prevent access to the sensor.
To remove a user, follow these steps:
Step 1
Log in to the CLI using an account with administrator privileges.
Step 2
Enter configuration mode:
sensor# configure terminal
Cisco Intrusion Detection System Appliance and Module Installation and Configuration Guide Version 4.1
78-15597-02
10-17
Chapter 10
Configuring the Sensor Using the CLI
Sensor Initial Configuration Tasks
Step 3
Remove the user:
sensor(config)# no username
name
The username is now removed from the sensor.
Step 4
Verify that the user has been removed.
a.
Exit configuration mode:
sensor(config)# exit
b.
View a list of all users:
sensor# show users all
A list of all user accounts is displayed. The user you removed no longer
appears in the list.
Adding Trusted Hosts
You can identify hosts (trusted hosts) that are allowed to connect to the sensor.
To add a trusted host, follow these steps:
Step 1
Log in to the CLI using an account with administrator or operator privileges.
Step 2
Enter configuration mode:
sensor# configure terminal
Step 3
Enter Service host mode:
sensor(config)# service host
Step 4
Enter configuration mode for network parameters:
sensor(config-Host)# networkParams
Step 5
Specify the allowed host:
sensor(config-Host-net)# accessList ipAddress
ip_address
The IP address is now in the list of trusted hosts.
10-18
Cisco Intrusion Detection System Appliance and Module Installation and Configuration Guide Version 4.1
78-15597-02
Chapter 10
Configuring the Sensor Using the CLI
Sensor Initial Configuration Tasks
Step 6
You can type an optional netmask to specify allowed networks.
sensor(config-Host-net)# accessList ipAddress
ip_address netmask
netmask
Step 7
Exit configuration mode for network parameters:
sensor(config-Host-net)# exit
sensor(config-Host)# exit
You are prompted to apply the changes:
Apply Changes?:[yes]:
Step 8
Type yes to apply the changes.
After the sensor has finished processing the configuration changes, the
sensor(config)# prompt is displayed.
Adding Known Hosts to the SSH Known Hosts List
You must add hosts to the SSH known hosts list so that the sensor can recognize
the hosts that it can communicate with through SSH. These hosts are SSH servers
that the sensor needs to connect to for upgrades and file copying, and other hosts,
such as Cisco routers, PIX Firewalls, and Catalyst switches.
To add a host to the SSH known hosts list, follow these steps:
Step 1
Log in to the CLI using an account with administrator or operator privileges.
Step 2
Enter configuration mode:
sensor# configure terminal
Step 3
Specify an SSH known host:
sensor(config)# ssh host-key
ip_address
For example, to add the remote host 10.16.0.0 to the SSH known hosts list, type
the following command:
sensor(config)# ssh host-key
10.16.0.0
Cisco Intrusion Detection System Appliance and Module Installation and Configuration Guide Version 4.1
78-15597-02
10-19
Chapter 10
Configuring the Sensor Using the CLI
Sensor Initial Configuration Tasks
The MD5 fingerprint appears. You are prompted to add it to the known hosts table:
Would you like to add this to the known hosts table for this
host?[yes]
Step 4
Type yes to have the fingerprint added to the known hosts list.
Step 5
To view the list of SSH known hosts, type the following command:
sensor# show ssh host-keys ip-address
The SSH known hosts information (similar to the following) appears:
1024 35
1393062135418352403853329222539688146856845235200641319978399051136401
2021781686969670872170463132284429207385173056504487908267067755415793
7058485203995572114631296604552161309712601068614812749969593513740598
3313931548849883023021829223533351526538605891636519449978428745836278
83277460138506084043415861927
MD5: 49:3F:FD:62:26:58:94:A3:E9:88:EF:92:5F:52:6E:7B
Bubble Babble:
xebiz-vykyk-fekuh-rukuh-cabaz-paret-gosym-serum-korus-fypop-huxyx
Step 6
To remove an entry, type the following command:
sensor(config)# no ssh host-key
ip_address
For example, to remove host 10.16.0.0 from the list of SSH known hosts, type the
following command:
sensor(config-SshKnownHosts)# no ssh host-key 10.16.0.0
The host is removed from the SSH known hosts list. You can verify the removal
by typing the following command:
sensor(config-SshKnownHosts)# show settings
The SSH known hosts information (similar to the following) appears:
rsa1Keys (min: 0, max: 500, current: 0)
Step 7
Exit service mode for SSH known hosts:
sensor(config-SshKnownHosts)# exit
You are prompted to apply the changes:
Apply Changes:?[yes]:
10-20
Cisco Intrusion Detection System Appliance and Module Installation and Configuration Guide Version 4.1
78-15597-02
Chapter 10
Configuring the Sensor Using the CLI
Sensor Initial Configuration Tasks
Step 8
Type yes to apply the changes.
Step 9
Exit configuration mode:
sensor(config)# exit
sensor#
Configuring the Sensor to Use an NTP Server as its Time Source
The sensor requires a consistent time source. We recommend that you use an NTP
server. Use the following procedure to configure the sensor to use the NTP server
as its time source.
Note
You must obtain the NTP server IP address, NTP server key ID, and the key value
from the NTP server. See Configuring a Cisco Router to be an NTP Server,
page 10-22, for more information.
To configure the sensor to use an NTP server as its time source, follow these steps:
Step 1
Log in to the CLI using an account with administrator privileges.
Step 2
Enter configuration mode:
sensor# configure terminal
Step 3
Enter service host mode:
sensor(config)# service host
Step 4
Enter time configuration parameters mode:
sensor(config-Host)# timeParams
Step 5
Type the NTP server’s IP address:
sensor(config-Host-tim)# ntp ipAddress
ip_address
For example:
sensor(config-Host-tim)# ntp ipAddress 10.16.0.0
Cisco Intrusion Detection System Appliance and Module Installation and Configuration Guide Version 4.1
78-15597-02
10-21
Chapter 10
Configuring the Sensor Using the CLI
Sensor Initial Configuration Tasks
Step 6
Type the NTP server’s key ID:
sensor(config-Host-tim-ntp)# keyId
key_ID
The key ID is a number between 1 and 65535. This is the key ID that you already
set up on the NTP server. See Step 3 of Configuring a Cisco Router to be an NTP
Server, page 10-22.
For example:
sensor(config-Host-tim-ntp)# keyId 100
Step 7
Type the NTP server’s key value:
sensor(config-Host-tim-ntp)# md5
key-value
The key value is text (numeric or character). This is the key value that you already
set up on the NTP server. See Step 3 of Configuring a Cisco Router to be an NTP
Server, page 10-22.
For example:
sensor(config-Host-tim-ntp)# keyValue
Step 8
attack
Exit NTP configuration mode:
sensor(config-Host-tim-ntp)# exit
sensor(config-Host-tim)# exit
sensor(config-Host)# exit
Step 9
Save the changes by typing yes:
Apply Changes:?[yes]
Configuring a Cisco Router to be an NTP Server
The sensor requires an authenticated connection with an NTP server if it is going
to use the NTP server as its time source. The sensor supports only the MD5 hash
algorithm for key encryption. Use the following procedure to activate a Cisco
router to act as an NTP server and use its internal clock as the time source.
10-22
Cisco Intrusion Detection System Appliance and Module Installation and Configuration Guide Version 4.1
78-15597-02
Chapter 10
Configuring the Sensor Using the CLI
Sensor Initial Configuration Tasks
Note
Remember the NTP server’s key ID and key values. You will need them along
with the NTP server’s IP address when you configure the sensor to use the NTP
server as its time source. See Configuring the Sensor to Use an NTP Server as its
Time Source, page 10-21, for this procedure.
To set up a Cisco router to act as an NTP server, follow these steps:
Step 1
Log in to the router.
Step 2
Enter configuration mode:
router# configure terminal
Step 3
Create the key ID and key value:
router(config)# ntp authentication-key
key-ID
md5
key-value
The key ID can be a number between 1 and 65535. The key value is text (numeric
or character). It is later encrypted.
For example:
router(config)# ntp authentication-key 100 attack
Step 4
Note
The sensor only supports MD5 keys.
Note
Keys may already exist on the router. Use the show running
configuration command to check for other keys. You can use those values
for the trusted key in Step 4.
Designate the key you just created in Step 3 as the trusted key (or use an existing
key):
router(config)# ntp trusted-key
key-ID
The trusted key ID is the same number as the key ID in Step 3. For example:
router(config)# ntp trusted-key 100
Step 5
Type the interface on the router that the sensor will communicate with:
Cisco Intrusion Detection System Appliance and Module Installation and Configuration Guide Version 4.1
78-15597-02
10-23
Chapter 10
Configuring the Sensor Using the CLI
Sensor Administrative Tasks
router(config)# ntp source
interface-name
For example:
router(config)# ntp source FastEthernet 1/0
Step 6
Type the NTP master stratum number to be assigned to the sensor:
router(config)# ntp master
stratum-number
For example:
router(config)# ntp master 6
The NTP master stratum number identifies the server’s relative position in the
NTP hierarchy. You can choose a number between 1 and 15. It is not important to
the sensor which number you choose.
Sensor Administrative Tasks
This section describes the administrative tasks for the sensor.
This section contains the following topics:
•
Displaying the Current Version and Configuration Information, page 10-24
•
Creating and Using a Backup Configuration File, page 10-28
•
Displaying and Clearing Events, page 10-28
•
Rebooting or Powering Down the Appliance, page 10-30
•
Displaying Tech Support Information, page 10-31
•
Displaying and Clearing Statistics, page 10-33
Displaying the Current Version and Configuration Information
You can display the IDS software version and sensor configuration. Use the show
version command to display version information for all installed operating
system (OS) packages, signature packages, and IDS processes running on the
system. To view the configuration for the entire system, use the more
current-config command.
10-24
Cisco Intrusion Detection System Appliance and Module Installation and Configuration Guide Version 4.1
78-15597-02
Chapter 10
Configuring the Sensor Using the CLI
Sensor Administrative Tasks
To display the version and configuration, follow these steps:
Step 1
Log in to the CLI.
Step 2
View version information:
sensor# show version
The following examples show sample version output for the appliance and the
NM-CIDS.
Sample version output for the appliance:
sensor# show version
Application Partition:
Cisco Systems Intrusion Detection Sensor, Version 4.1(3)S61
OS Version 2.4.18-5smpbigphys
Platform: IDS-4235
Sensor up-time is 20 days.
Using 214319104 out of 921522176 bytes of available memory (23% usage)
Using 596M out of 15G bytes of available disk space (5% usage)
MainApp
AnalysisEngine
Authentication
Logger
NetworkAccess
TransactionSource
WebServer
CLI
2003_Oct_10_11.16
2003_Oct_10_11.16
2003_Oct_10_11.16
2003_Oct_10_11.16
2003_Oct_10_11.16
2003_Oct_10_11.16
2003_Oct_10_11.16
2003_Oct_10_11.16
(Release)
(Release)
(Release)
(Release)
(Release)
(Release)
(Release)
(Release)
2003-10-10T11:01:13-0500
2003-10-10T11:01:13-0500
2003-10-10T11:01:13-0500
2003-10-10T11:01:13-0500
2003-10-10T11:01:13-0500
2003-10-10T11:01:13-0500
2003-10-10T11:01:13-0500
2003-10-10T11:01:13-0500
Running
Running
Running
Running
Running
Running
Running
Upgrade History:
* IDS-K9-min-4.1-1-S47
IDS-K9-sp-4.1-3-S61.rpm.pkg
12:00:00 UTC Thu Jun 30 2005
14:14:55 UTC Fri Feb 20 2004
Recovery Partition Version 1.2 - 4.1(1)S47
Note
If the —MORE— prompt is displayed, press the spacebar to see more
information or Ctrl-C to cancel the output and get back to the CLI
prompt.
Cisco Intrusion Detection System Appliance and Module Installation and Configuration Guide Version 4.1
78-15597-02
10-25
Chapter 10
Configuring the Sensor Using the CLI
Sensor Administrative Tasks
Sample version output for the NM-CIDS:
Router# show version
Application Partition:
Cisco Systems Intrusion Detection Sensor, Version 4.1(0.3)S42(0.3)
OS Version 2.4.18-5
Platform: NM-CIDS
Sensor up-time is 3 days.
Using 256172032 out of 260788224 bytes of available memory (98% usage)
Using 530M out of 17G bytes of available disk space (4% usage)
MainApp
AnalysisEngine
Authentication
Logger
NetworkAccess
TransactionSource
WebServer
CLI
2003_May_09_06.00
2003_May_09_06.00
2003_May_09_06.00
2003_May_09_06.00
2003_May_09_06.00
2003_May_09_06.00
2003_May_09_06.00
2003_May_09_06.00
(Release)
(Release)
(Release)
(Release)
(Release)
(Release)
(Release)
(Release)
2003-05-09T06:09:22-0500
2003-05-09T06:09:22-0500
2003-05-09T06:09:22-0500
2003-05-09T06:09:22-0500
2003-05-09T06:09:22-0500
2003-05-09T06:09:22-0500
2003-05-09T06:09:22-0500
2003-05-09T06:09:22-0500
Running
Running
Running
Running
Running
Running
Running
Upgrade History:
No upgrades installed
Step 3
View configuration information:
Note
You can use the more current-config or show configuration commands.
sensor# more current-config
Configuration information (similar to the following) appears:
sensor# more current-config
! -----------------------------service Authentication
general
methods method Local
exit
exit
exit
! -----------------------------service Host
networkParams
10-26
Cisco Intrusion Detection System Appliance and Module Installation and Configuration Guide Version 4.1
78-15597-02
Chapter 10
Configuring the Sensor Using the CLI
Sensor Administrative Tasks
ipAddress 10.89.146.110
defaultGateway 10.89.146.254
hostname firesafe
telnetOption enabled
accessList ipAddress 10.0.0.0 netmask 255.0.0.0
accessList ipAddress 10.89.0.0 netmask 255.255.0.0
accessList ipAddress 10.16.0.0 netmask 255.255.0.0
accessList ipAddress 10.89.149.31 netmask 255.255.255.255
exit
optionalAutoUpgrade
active-selection none
exit
timeParams
timeParams
summerTimeParams
active-selection recurringParams
recurringParams
summerTimeZoneName CST
exit
exit
ntpServers ipAddress 10.89.147.99
keyId 2
keyValue test
exit
exit
exit
! -----------------------------service Logger
masterControl
enable-debug false
exit
zoneControl zoneName Cid
severity debug
exit
zoneControl zoneName AuthenticationApp
severity warning
exit
zoneControl zoneName Cli
--MORE--
Cisco Intrusion Detection System Appliance and Module Installation and Configuration Guide Version 4.1
78-15597-02
10-27
Chapter 10
Configuring the Sensor Using the CLI
Sensor Administrative Tasks
Creating and Using a Backup Configuration File
To protect your configuration, you can back up the current configuration and then
display it to confirm that is the configuration you want to save. If you need to
restore this configuration, you can merge the backup configuration file with the
current configuration or overwrite the current configuration file with the backup
configuration file.
To back up your current configuration, follow these steps:
Step 1
Log in to the CLI using an account with administrator privileges.
Step 2
Save the current configuration:
sensor# copy current-config backup-config
The current configuration is saved in a backup file.
Step 3
Display the backup configuration file:
sensor# more backup-config
The backup configuration file is displayed.
Step 4
You can either merge the backup configuration with the current configuration, or
you can overwrite the current configuration.
•
To merge the backup configuration into the current configuration:
sensor# copy backup-config current-config
•
To overwrite the current configuration with the backup configuration:
sensor# copy/erase backup-config current-config
Displaying and Clearing Events
Use the show events command to display the local event log. You can display new
events or events from a specific time or of a specific severity, and you can delete
all events.
10-28
Cisco Intrusion Detection System Appliance and Module Installation and Configuration Guide Version 4.1
78-15597-02
Chapter 10
Configuring the Sensor Using the CLI
Sensor Administrative Tasks
The show events command displays the requested event types beginning at the
requested start time. If no start time is entered, the selected events are displayed
beginning at the current time. If no event types are entered, all events are
displayed. Events are displayed as a live feed. You can cancel the live feed by
pressing Ctrl-C.
Note
The show events command waits until a specified event is available. It continues
to wait and display events until you exit by pressing the Ctrl-C.
To display and clear events, follow these steps:
Step 1
Log in to the CLI.
Step 2
Display new events:
sensor# show events
Use the regular expression | include shunInfo to view the shun information,
including source address, for the event.
New events are displayed as they occur.
Step 3
Display events from a specific time:
sensor# show events
hh:mm month day year
For example, show events 14:00 September 2 2002 displays all events since 2:00
p.m. September 2, 2002.
Note
Time is specified in 24-hour format. You can use single digit numbers for
the date.
Events from the specified time are displayed.
Step 4
Display events since a specified time for a specified alert level:
sensor# show events alert
level hh:mm month day year
For example, show events alert high 10:00 September 22 2002 displays all high
severity events since 10:00 a.m. September 22, 2002.
Events from the specified time are displayed.
Step 5
Show events that began in the past:
Cisco Intrusion Detection System Appliance and Module Installation and Configuration Guide Version 4.1
78-15597-02
10-29
Chapter 10
Configuring the Sensor Using the CLI
Sensor Administrative Tasks
sensor# show events past
hh:mm:ss
The following example displays all events beginning 30 seconds in the past.
sensor# show events past 00:00:30
Step 6
Delete events from the event store:
sensor# clear events
Warning: Executing this command will remove all events currently
stored in the event store.
Continue with clear? :
Step 7
Type yes to clear all events from the EventStore.
Rebooting or Powering Down the Appliance
The reset command stops the applications running on the appliance and reboots
it. If the powerdown option is included, the appliance is powered off if possible
or left in a state where the power can be turned off after the applications are
stopped.
Shutdown (stopping the applications) begins immediately after the command is
executed. Because shutdown may take a little time, you can continue to access
CLI commands (access is not denied) but access can be terminated without
warning.
See Rebooting the NM-CIDS, page 10-83, and Resetting the IDSM-2,
page 10-101, for the procedure for the modules.
To reboot or power down the appliance, follow these steps:
Step 1
Log into the CLI using an account with administrator privileges.
Step 2
To stop all applications and reboot the appliance, follow these steps:, otherwise,
to power down the appliance, skip to Step 3.
a.
Reset the appliance:
sensor# reset
A warning appears:
10-30
Cisco Intrusion Detection System Appliance and Module Installation and Configuration Guide Version 4.1
78-15597-02
Chapter 10
Configuring the Sensor Using the CLI
Sensor Administrative Tasks
Warning: Executing this command will stop all applications and
reboot the node. Continue with reset?:
b.
Type yes to continue the reset.
The appliance reboots.
Step 3
To stop all applications and power down the appliance, follow these steps:
a.
Power down the appliance:
sensor# reset powerdown
A warning appears:
Warning: Executing this command will stop all applications and
reboot the node if possible. If the node cannot be powered off, it
will be left in a state that is safe to manually power down.
Continue with reset?:
b.
Type yes to continue the reset.
Broadcast message from root (Sat May 15 05:25:09 1993):
A system reboot has been requested. The reboot may not start for
90 seconds.
Request Succeeded.
sensor#
Broadcast message from root (Sat May 15 05:25:12 1993):
The system is going down for reboot NOW!
You are prompted to turn off the power switch on the appliance.
Displaying Tech Support Information
You can display system information on the screen or have it sent to a specific URL
to use as a troubleshooting tool with TAC.
To display tech support information, follow these steps:
Step 1
Log in to the CLI using an account with administrator privileges.
Step 2
View the optional parameters for the show tech-support command:
sensor# show tech-support ?
Cisco Intrusion Detection System Appliance and Module Installation and Configuration Guide Version 4.1
78-15597-02
10-31
Chapter 10
Configuring the Sensor Using the CLI
Sensor Administrative Tasks
The following parameters are optional:
Step 3
•
page—Displays the output, one page of information at a time.
•
password—Leaves passwords and other security information in the output.
•
destination—Indicates the information should be formatted as HTML and
sent to the destination that follows this command. If you do not specify this
parameter, the output appears on the screen.
•
destination-url—Indicates the information should be formatted as HTML.
The URL specifies where the information should be sent.
View the output on the screen:
sensor# show tech-support page
The system information appears on the screen, one page at a time. Press the space
bar to view the next page or press Ctrl-C to return to the prompt.
Step 4
To send the output (in HTML format) to a file, follow these steps:
a.
Type the following command, followed by a valid destination:
sensor# show tech-support destination-url
You can specify the following destination types:
•
ftp:—Destination URL for File Transfer Protocol (FTP) network server.
The syntax for this prefix is
ftp:[[//username@location]/relativeDirectory]/filename or
ftp:[[//username@location]//absoluteDirectory]/filename.
•
scp:—Destination URL for the Secure Copy Protocol (SCP) network
server. The syntax for this prefix is
scp:[[//username@]location]/relativeDirectory]/filename or
scp:[[//username@]location]//absoluteDirectory]/filename.
For example, to send the tech support output to the file
/absolute/reports/sensor1Report.html, type the following command:
sensor# show tech support dest
ftp://[email protected]//absolute/reports/sensor1Report.html
The password: prompt appears.
10-32
Cisco Intrusion Detection System Appliance and Module Installation and Configuration Guide Version 4.1
78-15597-02
Chapter 10
Configuring the Sensor Using the CLI
Sensor Administrative Tasks
b.
Type the password for this user account.
The Generating
report:
message is displayed.
Displaying and Clearing Statistics
You can use the show statistics command to display the statistics of the service
you are interested in. You can use the clear option to clear the statistics.
To display and clear the statistics of the service you are interested in, follow these
steps:
Step 1
Log in to the CLI.
Step 2
View the optional parameters of the show statistics command:
sensor# show statistics
Authentication
Display
EventServer
Display
EventStore
Display
Host
Display
Logger
Display
NetworkAccess
Display
TransactionServer
Display
TransactionSource
Display
WebServer
Display
Note
Step 3
authentication statistics
event server statistics
event store statistics
host statistics
logger statistics
network access controller statistics
transaction server statistics
transaction source statistics
web server statistics
The clear option is not available for Host or NetworkAccess statistics.
Show the statistics of the service you are interested in:
sensor# show statistics {Authentication
| EventServer | EventStore | Host |
Logger | NetworkAccess | TransactionServer | TransactionSource | WebServer }
[ clear ]
For example, here are the statistics for the EventStore:
sensor# show statistics EventStore
Event store statistics
General information about the event store
The current number of open subscriptions = 0
The number of events lost by subscriptions and queries = 0
Cisco Intrusion Detection System Appliance and Module Installation and Configuration Guide Version 4.1
78-15597-02
10-33
Chapter 10
Configuring the Sensor Using the CLI
Sensor Administrative Tasks
The number of queries issued = 0
The number of times the circular buffer has wrapped = 0
Number of events of each type currently stored
Debug events = 0
Status events = 7
Log transaction events = 118
Shun request events = 0
Error events, warning = 44
Error events, error = 0
Error events, fatal = 0
Alert events, informational = 0
Alert events, low = 0
Alert events, medium = 0
Alert events, high = 0
Step 4
Clear the statistics:
Note
The clear option is not available for Host or NetworkAccess statistics.
sensor# show statistics EventStore clear
Event store statistics
General information about the event store
The current number of open subscriptions = 0
The number of events lost by subscriptions and queries = 0
The number of queries issued = 0
The number of times the circular buffer has wrapped = 0
Number of events of each type currently stored
Debug events = 0
Status events = 7
Log transaction events = 119
Shun request events = 0
Error events, warning = 44
Error events, error = 0
Error events, fatal = 0
Alert events, informational = 0
Alert events, low = 0
Alert events, medium = 0
Alert events, high = 0
The next time you want to see the statistics for EventStore, the counters are reset.
10-34
Cisco Intrusion Detection System Appliance and Module Installation and Configuration Guide Version 4.1
78-15597-02
Chapter 10
Configuring the Sensor Using the CLI
Sensor Configuration Tasks
Sensor Configuration Tasks
This section describes the main configuration tasks for the sensor.
This section contains the following topics:
•
Configuring Signatures, page 10-35
•
IP Logging, page 10-50
•
Configuring Blocking, page 10-57
Configuring Signatures
This section describes how to configure signatures on the sensor.
This section contains the following topics:
•
Configuring Alarm Channel System Variables, page 10-35
•
Configuring Alarm Channel Event Filters, page 10-37
•
Viewing Signature Engine Parameters, page 10-39
•
Configuring Virtual Sensor System Variables, page 10-42
•
Tuning Signature Engines, page 10-45
Configuring Alarm Channel System Variables
The tune-alarm-channel command enables you to configure system variables for
the alarm aggregation process. The items and menus in this configuration depend
on the contents of the configuration file and are built dynamically based on the
configuration retrieved when the command is executed. The modifications made
in this mode and any submodes contained within it are applied when you exit
tune-alarm-channel mode.
You can change the value of an alarm channel system variable, but you cannot add
variables or delete variables. You also cannot change the name, type, or
constraints of a variable. If you use a variable in a filter, you must use a dollar sign
(for example, $SIG1) in front of the variable to indicate that the string you have
entered represents a variable.
Cisco Intrusion Detection System Appliance and Module Installation and Configuration Guide Version 4.1
78-15597-02
10-35
Chapter 10
Configuring the Sensor Using the CLI
Sensor Configuration Tasks
You use system variables when configuring alarm channel event filters. When you
want to use the same value within multiple filters, use a variable. When you
change the value of a variable, the variables in all the filters are updated. This
prevents you from having to change the variable repeatedly as you configure
alarm filters. See Configuring Alarm Channel Event Filters, page 10-37, for more
information.
For example, if you had an IP address space that applied to your engineering
group and there were no Windows systems in that group, and you were not
worried about any Windows-based attacks, you could set up a USER-ADDR1 to
be the engineering group’s IP address space. You could then use this variable on
the Event Filters page to set up the filter to ignore all Windows-based attacks for
USER-ADDR1.
To configure alarm channel system variables, follow these steps:
Step 1
Log in to the CLI using an account with administrator or operator privileges.
Step 2
Enter configuration mode:
sensor# configure terminal
Step 3
Enter alarm channel configuration mode:
sensor(config)# service alarm-channel-configuration virtualAlarm
Step 4
Enter tune alarm channel submode:
sensor(config-acc)# tune-alarm-channel
Step 5
Enter system variable submode:
sensor(config-acc-virtualAlarm)# systemVariables
Step 6
View the current system variable settings:
sensor(config-acc-virtualAlarm-sys)# show settings
A list of alarm channel system variables is displayed.
Step 7
Type the name of the system variable you want to configure, followed by a valid
value for that variable.
For example, to set the value of system variable SIG1 to 2001-2006, type the
following command:
sensor(config-acc-virtualAlarm-sys)# SIG1 2001-2006
10-36
Cisco Intrusion Detection System Appliance and Module Installation and Configuration Guide Version 4.1
78-15597-02
Chapter 10
Configuring the Sensor Using the CLI
Sensor Configuration Tasks
To type more than one signature range, use a comma (no space) between the
ranges.
Step 8
View your changes:
sensor(config-acc-virtualAlarm-sys)# show settings
The settings for the system variables are displayed. In the example above, the
settings for the SIG1 variable would appear as SIG1: 2001-2006.
Step 9
Exit system variable submode:
sensor(config-acc-virtualAlarm-sys)# exit
sensor(config-acc-virtualAlarm)# exit
Apply Changes?:[yes]:
Step 10
Type yes to apply the changes.
The Processing
Step 11
config:
message is displayed.
Exit alarm channel configuration mode:
sensor(config-acc)# exit
sensor(config)#
Configuring Alarm Channel Event Filters
The tune-alarm-channel command allows you to configure event filters for the
aggregation process. The items and menus in this configuration depend on the
contents of the configuration file and are built dynamically based on the
configuration retrieved when the command is executed. The modifications made
in this mode and any submodes contained within it are applied when you exit
tune-alarm-channel mode.
You can configure event filters that are based on source and destination addresses
for specified signatures. You can use the alarm channel system variables that you
have defined to group addresses for your filters. See Configuring Alarm Channel
System Variables, page 10-35, for more information. If you use a variable in a
filter, you must use a dollar sign ($) in front of the variable (for example, $SIG1)
to indicate that the string you have entered represents a variable.
Cisco Intrusion Detection System Appliance and Module Installation and Configuration Guide Version 4.1
78-15597-02
10-37
Chapter 10
Configuring the Sensor Using the CLI
Sensor Configuration Tasks
To configure alarm channel event filters, follow these steps:
Step 1
Log in to the CLI using an account with administrator or operator privileges.
Step 2
Enter configuration mode:
sensor# configure terminal
Step 3
Enter alarm channel configuration mode:
sensor(config)# service alarm-channel-configuration virtualAlarm
Step 4
Enter tune alarm channel submode:
sensor(config-acc)# tune-alarm-channel
Step 5
Enter event filter submode:
sensor(config-acc-virtualAlarm)# eventFilter
Step 6
Type the following command to configure a filter:
sensor(config-acc-virtualAlarm-Eve)# Filters SIGID signature-id SubSig
sub-id SourceAddrs ipaddress DestAddrs ipaddress Exception true | false
The following options apply to the command:
10-38
•
SIGID—Signature IDs of events to which this filter should be applied. You
can use a list (2001,2004), or a range (2001–2004), an asterisk (*) for all
signatures, or one of the SIG variables if you defined them. If you use a
variable, you must use a dollar sign ($SIG1) in front of the variable. See
Configuring Alarm Channel System Variables, page 10-35, for more
information.
•
SubSig—SubSignature IDs of events to which this filter should be applied.
•
Exception—Specifies if this filter identifies an exception to an existing filter.
By default, the exception value is False to indicate that this filter does not
identify an exception to another filter.
•
SourceAddrs—Source addresses of events to which this filter should be
applied. You can use one of the DMZ or USER-ADDR variables if you
defined them. If you use a variable, you must use a dollar sign
($USER-ADDRS1) in front of the variable. See Configuring Alarm Channel
System Variables, page 10-35, for more information.
Cisco Intrusion Detection System Appliance and Module Installation and Configuration Guide Version 4.1
78-15597-02
Chapter 10
Configuring the Sensor Using the CLI
Sensor Configuration Tasks
•
Step 7
DestAddrs—Destination addresses of events to which this filter should be
applied. You can use one of the DMZ or USER-ADDR variables if you
defined them. If you use a variable, you must use a dollar sign
($USER-ADDRS1) in front of the variable. See Configuring Alarm Channel
System Variables, page 10-35, for more information.
View your changes:
sensor(config-acc-virtualAlarm-eve)# show settings
The settings for the filters are displayed.
Step 8
Exit event filter submode:
sensor(config-acc-virtualAlarm-eve)# exit
sensor(config-acc-virtualAlarm)# exit
Apply Changes?:[yes]:
Step 9
Type yes to apply the changes.
The Processing
Step 10
config:
message is displayed.
Exit the alarm channel configuration mode:
sensor(config-acc)# exit
sensor(cofig)#
Viewing Signature Engine Parameters
You can display settings for individual signature engines.
To view signature engine settings, follow these steps:
Step 1
Log in to the CLI using an account with administrator or operator privileges.
Step 2
Enter configuration mode:
sensor# configure terminal
Step 3
Enter service virtual sensor configuration mode:
sensor(config)# service virtual-sensor-configuration virtualSensor
Step 4
Enter tune micro-engines mode:
sensor(config-vsc)# tune-micro-engines
Cisco Intrusion Detection System Appliance and Module Installation and Configuration Guide Version 4.1
78-15597-02
10-39
Chapter 10
Configuring the Sensor Using the CLI
Sensor Configuration Tasks
Step 5
Display the list of signature engines:
sensor(config-vsc-virtualSensor)# ?
A list of all signature engine names and a description of each is displayed.
sensor(config-vsc-virtualSensor)# ?
ATOMIC.ARP
Layer 2 ARP signatures.
ATOMIC.ICMP
Simple ICMP alarms based on Type, Code,
Seq, Id
ATOMIC.IPOPTIONS
Simple L3 Alarms based on Ip Options
ATOMIC.L3.IP
Simple L3 IP Alarms.
ATOMIC.TCP
Simple TCP packet alarms based on TCP
Flags, ports (both sides), and single
packet regex. Use SummaryKey to define
the address view for MinHits and
Summarize counting. For best
performance, use a StorageKey of xxxx.
ATOMIC.UDP
Simple UDP packet alarms based on Port,
Direction and DataLength.
exit
Exit service configuration mode
FLOOD.HOST.ICMP
Icmp Floods directed at a single host
FLOOD.HOST.UDP
UDP Floods directed at a single host
FLOOD.NET
Multi-protocol floods directed at a
network segment. Ip Addresses are
wildcarded for this inspection.
FragmentReassembly
Fragment Reassembly configuration tokens
IPLog
Virtual Sensor IP log configuration
tokens
OTHER
This engine is used to group generic
signatures so common parameters may be
changed. It defines an interface into
common signature parameters.
SERVICE.DNS
DNS SERVICE Analysis Engine
SERVICE.FTP
FTP service special decode alarms
SERVICE.GENERIC
Custom service/payload decode and
analysis based on our quartet tuple
programming language. EXPERT use only.
SERVICE.HTTP
HTTP protocol decode based string search
Engine. Includes anti-evasive URL
deobfuscation
SERVICE.IDENT
Ident service (client and server)
alarms.
SERVICE.MSSQL
Microsoft (R) SQL service inspection
engine
SERVICE.NTP
Network Time Protocol based signature
engine
SERVICE.RPC
RPC SERVICE analysis engine
10-40
Cisco Intrusion Detection System Appliance and Module Installation and Configuration Guide Version 4.1
78-15597-02
Chapter 10
Configuring the Sensor Using the CLI
Sensor Configuration Tasks
SERVICE.SMB
SERVICE.SMTP
SERVICE.SNMP
SERVICE.SSH
SERVICE.SYSLOG
show
ShunEvent
STATE.STRING.CISCOLOGIN
STATE.STRING.LPRFORMATSTRING
StreamReassembly
STRING.ICMP
STRING.TCP
STRING.UDP
SWEEP.HOST.ICMP
SWEEP.HOST.TCP
SWEEP.MULTI
SWEEP.OTHER.TCP
SWEEP.PORT.TCP
SWEEP.PORT.UDP
systemVariables
TRAFFIC.ICMP
TROJAN.BO2K
TROJAN.TFN2K
TROJAN.UDP
Step 6
SMB Service decode inspection.
SMTP Protocol Inspection Engine
Inspects SNMP traffic
SSH header decode signatures.
Engine to process syslogs,
Display system settings and/or history
information
Shun Event configuration tokens
Telnet based Cisco Login Inspection
Engine
LPR Protocol Inspection Engine
Stream Reassembly configuration tokens
Generic ICMP based string search Engine
Generic TCP based string search Engine.
Generic UDP based string search Engine
ICMP host sweeps from a single attacker
to many victims.
TCP-based Host Sweeps from a single
attacker to multiple victims.
UDP and TCP combined port sweeps.
Odd sweeps/scans such as nmap
fingerprint scans.
Detects port sweeps between two nodes.
Detects UDP connections to multiple
destination ports between two nodes.
User modifiable system variables
Identifies ICMP traffic irregularities.
BackOrifice BO2K trojan traffic
TFN2K trojan/ddos traffic
Detects BO/BO2K UDP trojan traffic.
Type the name of engine you want to see.
For example, to see the settings for the engine that inspects the Network Time
Protocol (NTP):
sensor(config-vsc-virtualSensor)# service.ntp
The prompt changes to indicate which signature engine you are in. In the example
above, the prompt would be: sensor(config-vsc-virtualSensor-SER)#.
Step 7
View the parameters for that specific signature engine:
sensor(config-vsc-virtualSensor-SER)# show settings
SERVICE.NTP
----------------------------------------------version: 4.0 <protected>
signatures (min: 0, max: 1000, current: 1)
-----------------------------------------------
Cisco Intrusion Detection System Appliance and Module Installation and Configuration Guide Version 4.1
78-15597-02
10-41
Chapter 10
Configuring the Sensor Using the CLI
Sensor Configuration Tasks
SIGID: 4056 <protected>
SubSig: 0 <protected>
AlarmDelayTimer:
AlarmInterval:
AlarmSeverity: high <defaulted>
AlarmThrottle: FireOnce <defaulted>
AlarmTraits:
CapturePacket: False <defaulted>
ChokeThreshold:
ControlOpCode: 2 <defaulted>
Enabled: True <defaulted>
EventAction:
FlipAddr:
MaxInspectLength:
MaxSizeOfControlData: 468 <defaulted>
MaxTTL:
MinHits:
Mode: 6 <defaulted>
Protocol: UDP <defaulted>
ResetAfterIdle: 15 <defaulted>
SigComment:
SigName: NTPd readvar overflow <protected>
SigStringInfo:
SigVersion: S37 <defaulted>
StorageKey: AaBb <defaulted>
SummaryKey: AaBb <defaulted>
ThrottleInterval: 15 <defaulted>
WantFrag:
isInvalidDataPacket:
isNonNtpTraffic:
-------------------------------------------------------------------------------------------------------------------------------------------
Step 8
Press the spacebar to page through all the settings. Press Ctrl-C to return to the
prompt.
Configuring Virtual Sensor System Variables
You can change the value of a system variable but you cannot add or delete
variables. You cannot change the name or type of a variable. Only one virtual
sensor is supported; therefore, you cannot select the virtual sensor.
10-42
Cisco Intrusion Detection System Appliance and Module Installation and Configuration Guide Version 4.1
78-15597-02
Chapter 10
Configuring the Sensor Using the CLI
Sensor Configuration Tasks
The virtual sensor system variables establish the default values that are referenced
when you tune signatures. See Tuning Signature Engines, page 10-45, for more
information.
To configure virtual sensor system variables, follow these steps:
Step 1
Log in to the CLI using an account with administrator or operator privileges.
Step 2
Enter configuration mode:
sensor# configure terminal
Step 3
Enter virtual sensor configuration mode:
sensor(config)# service virtual-sensor-configuration virtualSensor
Step 4
Enter tune micro-engines submode:
sensor(config-vsc)# tune-micro-engines
Step 5
Enter system variable submode:
sensor(config-vsc-virtualSensor)# systemVariables
Step 6
View the current system variable settings:
sensor(config-vsc-virtualSensor-sys)# show settings
systemVariables
----------------------------------------------WEBPORTS: 80,3128,8000,8010,8080,8888,24326 <defaulted>
Ports1:
Ports2:
Ports3:
Ports4:
Ports5:
Ports6:
Ports7:
Ports8:
Ports9:
IPReassembleMaxFrags: 10000 <defaulted>
-----------------------------------------------
Step 7
Type the name of the system variable you want to configure, followed by a valid
value for that variable.
For example, to change the maximum number of fragments the system will queue
from the default value (10000) to 5000, type the following command:
sensor(config-vsc-virtualSensor-sys)# IPReassembleMaxFrags 5000
Cisco Intrusion Detection System Appliance and Module Installation and Configuration Guide Version 4.1
78-15597-02
10-43
Chapter 10
Configuring the Sensor Using the CLI
Sensor Configuration Tasks
Note
Step 8
You can view a list of all system variables by typing a question mark (?)
at the sensor(config-vsc-virtualSensor-sys)# prompt.
•
WEBPORTS—WEBPORTS is a predefined set of ports where web servers
are running. The default value for this variable includes the following ports:
80, 3128, 8000, 8010, 8080, 8888, 24326. This variable is referenced by all
web server signatures.
•
Ports1, Ports2, Ports3, Ports4—You can set up a list of ports to apply to
particular signatures.
•
ADDRS1, ADDRS2, ADDRS3, ADDRS4—You can set up this variable with
a list of addresses to use anywhere you can use IP addresses.
•
IPReassembleMaxFrags—You can define the total number of fragments you
want the system to queue. You can define a number between 1000 and 50,000.
The default is 10,000.
View your changes:
sensor(config-vsc-virtualSensor-sys)# show settings
The settings for the system variables are displayed. In the example above, the
settings for the IPReassembleMaxFrags variable appear as
IPReassembleMaxFrags: 5000 default: 10000 .
Step 9
To return any value to the default setting, type the keyword default before the
variable name.
For example, to return the IPReassembleMaxFrags to 10000 (the default value),
type the following command:
sensor(config-vsc-virtualSensor)# default IPReassembleMaxFrags
The IPReassembleMaxFrags value is returned to the default value and settings for
the IPReassembleMaxFrags appear as IPReassembleMaxFrags: 10000
<defaulted>.
Step 10
Exit system variable mode:
sensor(config-vsc-virtualSensor-sys)# exit
sensor(config-vsc-virtualSensor)# exit
Apply Changes?:[yes]:
10-44
Cisco Intrusion Detection System Appliance and Module Installation and Configuration Guide Version 4.1
78-15597-02
Chapter 10
Configuring the Sensor Using the CLI
Sensor Configuration Tasks
Step 11
Type yes to apply the changes.
The Processing
Step 12
config:
message is displayed.
Exit virtual sensor configuration mode:
sensor(config-vsc)# exit
sensor(config)#
Tuning Signature Engines
To tune parameters in a signature engine, follow the procedure for viewing
signature engines (see Viewing Signature Engine Parameters, page 10-39). When
you have chosen a signature engine to tune and are in its mode, you can choose
the parameters you want to change. For example, if you want to capture the
Base64-encoded trigger packet for an alert, you must set the capturePacket
parameter to true for that signature.
Note
Refer to the IDS Event Viewer documentation for more information on viewing
the captured packet.
The tune-micro-engines command enables you to configure standard signatures
and create custom signatures for the sensor micro-engines. The items and menus
in this configuration depend upon the contents of the configuration file and are
built dynamically based on the configuration retrieved when the command is
executed. The modifications made in this mode and any submodes contained
within it are applied to the system when you exit tune-micro-engines mode.
To tune parameters in signature engines, follow these steps:
Step 1
Log in to the CLI using an account with administrator or operator privileges.
Step 2
Enter configuration mode:
sensor# configure terminal
Step 3
Enter virtual sensor configuration mode:
sensor(config)# service virtual-sensor-configuration virtualSensor
Cisco Intrusion Detection System Appliance and Module Installation and Configuration Guide Version 4.1
78-15597-02
10-45
Chapter 10
Configuring the Sensor Using the CLI
Sensor Configuration Tasks
Step 4
Enter tune micro-engines submode:
sensor(config-vsc)# tune-micro-engines
Step 5
Type the name of the signature engine that you want to tune.
Note
You can view a list of all signature engines by typing a question mark (?)
at the sensor(config-vsc-virtualSensor)# prompt.
For example, to tune a simple UDP packet alarm, type the following command:
sensor(config-vsc-virtualSensor)# ATOMIC.UDP
Step 6
View the signature settings:
sensor(config-vsc-virtualSensor-ATO)# show settings
A summary of the signatures and settings is displayed.
sensor(config-vsc-virtualSensor-ATO)# show settings
ATOMIC.UDP
----------------------------------------------version: 4.0 <protected>
signatures (min: 0, max: 1000, current: 13)
----------------------------------------------SIGID: 9019 <protected>
SubSig: 0 <protected>
AlarmDelayTimer:
AlarmInterval:
AlarmSeverity: informational <defaulted>
AlarmThrottle: FireOnce <defaulted>
AlarmTraits:
CapturePacket: False <defaulted>
ChokeThreshold: 100 <defaulted>
DstIpAddr:
DstIpMask:
DstPort: 2140 <defaulted>
Enabled: False <defaulted>
EventAction:
FlipAddr:
MaxInspectLength:
MaxTTL:
MinHits:
MinUDPLength:
Protocol: UDP <defaulted>
ResetAfterIdle: 15 <defaulted>
ShortUDPLength:
10-46
Cisco Intrusion Detection System Appliance and Module Installation and Configuration Guide Version 4.1
78-15597-02
Chapter 10
Configuring the Sensor Using the CLI
Sensor Configuration Tasks
SigComment:
SigName: Back Door (UDP 2140) <protected>
SigStringInfo: UDP 2140 (backdoor) <defaulted>
SigVersion: S37 <defaulted>
SrcIpAddr:
SrcIpMask:
SrcPort:
StorageKey: xxxx <defaulted>
SummaryKey: AxBx <defaulted>
ThrottleInterval: 30 <defaulted>
WantFrag:
----------------------------------------------SIGID: 9020 <protected>
SubSig: 0 <protected>
AlarmDelayTimer:
AlarmInterval:
AlarmSeverity: informational <defaulted>
AlarmThrottle: FireOnce <defaulted>
AlarmTraits:
CapturePacket: False <defaulted>
ChokeThreshold: 100 <defaulted>
DstIpAddr:
DstIpMask:
DstPort: 47262 <defaulted>
Enabled: False <defaulted>
EventAction:
FlipAddr:
MaxInspectLength:
MaxTTL:
MinHits:
MinUDPLength:
Protocol: UDP <defaulted>
ResetAfterIdle: 15 <defaulted>
ShortUDPLength:
SigComment:
SigName: Back Door (UDP 47262) <protected>
SigStringInfo: UDP 47262 (backdoor) <defaulted>
SigVersion: S37 <defaulted>
SrcIpAddr:
SrcIpMask:
SrcPort:
StorageKey: xxxx <defaulted>
SummaryKey: AxBx <defaulted>
ThrottleInterval: 30 <defaulted>
WantFrag:
-----------------------------------------------
Cisco Intrusion Detection System Appliance and Module Installation and Configuration Guide Version 4.1
78-15597-02
10-47
Chapter 10
Configuring the Sensor Using the CLI
Sensor Configuration Tasks
Step 7
Look through the list of settings for this signature engine and chose the signature
ID that you want to tune. Type the following command to configure the
parameters for a specific signature:
sensor(config-vsc-virtualSensor-ATO)# signature SIGID
signature ID
For example, to tune signature ID 9019, type the following command:
sensor(config-vsc-virtualSensor-ATO)# signature sigID 9019
Step 8
Type ? at the prompt to see a list of configurable parameters.
sensor (config-vsc-virtualSensor-ATO-sig)# ?
AlarmDelayTimer
Number of seconds to delay further signature
inspection after an alarm.
AlarmInterval
Special Handling for timed events. Use
AlarmInterval Y with MinHits X for X alarms
in Y second interval.
AlarmSeverity
The severity of this alert reported in the
alarm.
AlarmThrottle
Technique used to limit alarm firings. FireAll
sends all alarms. FireOnce sends the firstalarm
then deletes the inspector. Summarize sends an
IntervalSummary alarm. GlobalSummarize sends
a GlobalSummary alarm.
AlarmTraits
User-defined traits further describing this
signature.
CapturePacket
Set to True to include the offending packet in
the alarm.
ChokeThreshold
Threshold value of alarms-per-interval to
auto-switch Alarm
Throttle modes
If ChokeThreshold is defined the sensor will
automatically switch AlarmThrottle modes when
a large volume of alarms is seen in the
ThrottleInterval.
default
Set the value back to the system default
setting
DstIpAddr
IP address (or network) to match on the
IP packet's destination address. Must be used
with DstIpMask.
DstIpMask
IP netmask used with DstIpAddr to match on the
IP packet's destination address. Must be used
with DstIpAddr.
DstPort
A single Destination Port to match.
Enabled
True to Enable the Sig. False to Disable
the Sig.
EventAction
What action(s) to perform when the alarm is
fired.
exit
Exit signatures configuration submode
10-48
Cisco Intrusion Detection System Appliance and Module Installation and Configuration Guide Version 4.1
78-15597-02
Chapter 10
Configuring the Sensor Using the CLI
Sensor Configuration Tasks
FlipAddr
MaxInspectLength
MaxTTL
MinHits
MinUDPLength
Protocol
ResetAfterIdle
ShortUDPLength
show
SigComment
SigStringInfo
SigVersion
SrcIpAddr
SrcIpMask
SrcPort
StorageKey
SummaryKey
ThrottleInterval
WantFrag
Step 9
True if address (and ports) Source and
Destination are swapped in the alarm message.
False for no swap (normal).
Maximum number of bytes to inspect.
Maximum number of seconds to inspect a
logical stream. The inspector is deleted after X
seconds of being active.
Minimum number of signature hits before the
alarm message is sent. This a limiter for
firing the alarm only after X times of seeing
the signature on the address key.
Fire alarm when packet UDP LENGTH is less
than this.
Protocol of interest for this inspector.
Number of seconds to wait to reset signature
counters after the host(s) were idle.
Fire alarm when IP Data length is less than
UDP Header Length
Display system settings and/or history
information
USER NOTES - miscellaneous information about
this signature
Extra information included in the alarm message.
Signature update version of signature
IP address (or network) to match on the IP
packet's source address. Must be used with
SrcIpMask.
IP netmask used with SrcIpAddr to match on
the IP packet's destination address. Must be
used with SrcIpAddr.
A single Source Port to match.
Type of Address Key used to store persistent
data.
The Storage Type on which to summarize this
signature.
Number of seconds defining an Alarm Throttle
interval. This is used with the AlarmThrottle
parameter to tune special alarm limiters.
True if a fragment is desired. False if a
fragment is not desired. Any for either.
Type the name of the parameter that you want to configure and add or change the
values.
For example, to change the destination port for signature ID 9019 from the default
2140 to 2139, type the following command:
sensor(config-vsc-virtualSensor-ATO-sig)# dstport 2139
Cisco Intrusion Detection System Appliance and Module Installation and Configuration Guide Version 4.1
78-15597-02
10-49
Chapter 10
Configuring the Sensor Using the CLI
Sensor Configuration Tasks
Step 10
View your changes:
sensor(config-vsc-virtualSensor-ATO-sig)# show settings
The settings for this signature are displayed. In the example above, the settings
for the destination port parameter would appear as DstPort: 2139 default:
2140.
Step 11
To return any value to the default setting, type the keyword default before the
parameter name.
For example, to return the destination port to 2140 (the default value), type the
following command:
sensor(config-vsc-virtualSensor-ATO-sig)# default dstport
The port value is returned to the default value and settings for the destination port
parameter appear as DstPort: 2140 <defaulted>.
Step 12
Exit tuning mode for this signature:
sensor(config-vsc-virtualSensor-ATO-sig)# exit
sensor(config-vsc-virtualSensor-ATO)# exit
sensor(config-vsc-virtualSensor)# exit
Apply Changes?:[yes]:
Step 13
Type yes to apply the changes.
The Processing
Step 14
config:
message is displayed.
Exit virtual sensor configuration mode:
sensor(config-vsc)# exit
sensor(config)#
IP Logging
You can manually configure the sensor to capture all IP traffic associated with a
host you specify by IP address. You can specify in minutes how long you want the
IP traffic to be logged at the IP address, and/or how many packets you want
logged, and/or how many bytes you want logged. The sensor stops logging IP
traffic at the first parameter you specify.
10-50
Cisco Intrusion Detection System Appliance and Module Installation and Configuration Guide Version 4.1
78-15597-02
Chapter 10
Configuring the Sensor Using the CLI
Sensor Configuration Tasks
You can also have the sensor automatically log IP packets every time a particular
signature is fired. You can specify how long you want the sensor to log IP traffic
(the default is 30 seconds), and/or now many packets and bytes you want logged.
Note
Turning on IP logging affects system performance.
Note
You cannot delete or manage IP log files. The no iplog command does not delete
IP logs, it only stops more packets from being recorded for that IP log. The IP logs
are stored in a circular buffer that is never filled because new IP logs overwrite the
old ones.
This section contains the following topics:
•
Manual IP Logging for a Specific IP Address, page 10-51
•
Automatic IP Logging for a Specific Signature, page 10-53
•
Disabling IP Logging, page 10-55
•
Copying IP Log Files to Be Viewed, page 10-56
Manual IP Logging for a Specific IP Address
You can log IP packets manually for a specific IP address. To stop logging IP
packets for a specific IP address, see Disabling IP Logging, page 10-55. To
automatically log IP packets as an event associated with a signature, see
Automatic IP Logging for a Specific Signature, page 10-53. To copy and view an
IP log file, see Copying IP Log Files to Be Viewed, page 10-56.
To manually log packets for a specific IP address, follow these steps:
Step 1
Log in to the CLI using an account with administrator or operator privileges.
Step 2
Start IP logging for a specific IP address:
sensor# iplog group-id ip-address [duration
numPackets] [bytes numBytes]
Note
minutes ]
[packets
There is only one interface group, 0.
Cisco Intrusion Detection System Appliance and Module Installation and Configuration Guide Version 4.1
78-15597-02
10-51
Chapter 10
Configuring the Sensor Using the CLI
Sensor Configuration Tasks
•
minutes—Duration the logging should be active, in minutes (0-60). The
default is 10 minutes.
•
numPackets—Maximum number of packets to log (0-4294967295). The
default is 1000 packets.
•
numBytes—Maximum number of bytes to log (0-4294967295).
Note
These parameters are optional, you do not have to specify all three.
However, if you include more than one parameter, the sensor continues
logging only until the first threshold is reached. For example, if you set
the duration to 5 minutes and the number of packets to 1000, the sensor
stops logging after the 1000th packet is captured, even if only 2 minutes
have passed.
Example:
sensor# iplog 0 10.16.0.0 duration 5
Logging started for group 0, IP address 10.16.0.0, Log ID 137857506
Warning: IP Logging will affect system performance.
The example shows the sensor logging all IP packets for 5 minutes to and from
the IP address 10.16.0.0.
Note
Step 3
Make note of the Log ID for future reference.
Monitor the IP log status by executing the iplog-status command:
sensor# iplog-status
Log ID:
137857506
IP Address:
10.16.0.0
Group:
0
Status:
added
Bytes Captured:
0
Packets Captured:
0
Log ID:
137857512
IP Address:
10.16.0.0
Group:
0
Status:
completed
Start Time:
1070363599443768000
End Time:
1070363892909384000
Bytes Captured:
30650
Packets Captured:
263
Log ID:
137857513
10-52
Cisco Intrusion Detection System Appliance and Module Installation and Configuration Guide Version 4.1
78-15597-02
Chapter 10
Configuring the Sensor Using the CLI
Sensor Configuration Tasks
IP Address:
Group:
Status:
Start Time:
End Time:
Bytes Captured:
Packets Captured:
10.16.0.0
0
completed
1070438601052865000
1070439201267043000
5104
46
Automatic IP Logging for a Specific Signature
You can assign IP logging as an event for the EventAction of a signature so that
every time the signature fires, IP packets are captured for that signature. To turn
off automatic IP logging for a signature, use the default keyword (see Step 8). To
copy and view an IP log file, see Copying IP Log Files to Be Viewed, page 10-56.
To automatically log IP packets for a specific signature, follow these steps:
Step 1
Log in to the CLI using an account with administrator or operator privileges.
Step 2
Enter configuration mode:
sensor# configure terminal
Step 3
Enter virtual sensor configuration mode:
sensor(config)# service virtual-sensor-configuration virtualSensor
Step 4
Enter tune micro-engines submode:
sensor(config-vsc)# tune-micro-engines
Step 5
Type the name of the signature engine that you want to tune.
Note
You can view a list of all signature engines by typing a question mark (?)
at the sensor(config-vsc-virtualSensor)# prompt.
For example, to tune a simple UDP packet alarm, type the following command:
sensor(config-vsc-virtualSensor)# ATOMIC.UDP
Cisco Intrusion Detection System Appliance and Module Installation and Configuration Guide Version 4.1
78-15597-02
10-53
Chapter 10
Configuring the Sensor Using the CLI
Sensor Configuration Tasks
Step 6
Type the following command to configure the parameters for a specific signature
and subsignature:
sensor(config-vsc-virtualSensor-ATO)# signature SIGID
SubSig SubSig ID
signature ID
For example, to tune signature ID 9019, type the following command:
sensor(config-vsc-virtualSensor-ATO)# signature sigID 9019 SubSig 0
Step 7
View the signature settings:
sensor(config-vsc-virtualSensor-ATO)# show settings
A summary of the signatures and settings is displayed.
Step 8
Set the EventAction parameter to log.
sensor(config-vsc-virtualSensor-ATO-sig)# EventAction log
Step 9
Note
If in Step 7 you saw other actions set for EventAction, you can combine
these with the log action by placing the | between the actions, for example
log|shunHost. Do not use spaces between | and the actions.
Note
To return any value to the default setting, type the keyword default before
the parameter name. For example, to remove IP logging from this
signature, type the following command: default EventAction.
View your changes:
sensor(config-vsc-virtualSensor-ATO-sig)# show settings
The settings for this signature are displayed. In the example above, the settings
for the EventAction parameter would appear as EventAction: log.
Step 10
Exit tuning mode for this signature:
sensor(config-vsc-virtualSensor-ATO-sig)# exit
sensor(config-vsc-virtualSensor-ATO)# exit
sensor(config-vsc-virtualSensor)# exit
Apply Changes?:[yes]:
Step 11
Type yes to apply the changes.
The Processing
10-54
config:
message is displayed.
Cisco Intrusion Detection System Appliance and Module Installation and Configuration Guide Version 4.1
78-15597-02
Chapter 10
Configuring the Sensor Using the CLI
Sensor Configuration Tasks
Step 12
Exit Virtual Sensor Configuration mode:
sensor(config-vsc)# exit
sensor(config)#
Step 13
Look for the alerts generated by the signature and look for the IP Log ID
associated with the alert.
Step 14
Repeat Steps 1 through 15 for other signatures and subsignatures.
Disabling IP Logging
You can disable one or all IP logging sessions.
To disable one or all IP logging sessions, follow these steps:
Step 1
Log in to the CLI using an account with administrator or operator privileges.
Step 2
To disable a particular IP logging session:
a.
Find the log ID of the session you want to disable by using the iplog-status
command:
sensor# iplog-status
Log ID:
137857512
IP Address:
10.16.0.0
Group:
0
Status:
started
Start Time:
1070363599443768000
Bytes Captured:
30650
Packets Captured:
263
b.
Disable the IP log session:
sensor# no iplog 137857512
Step 3
To disable all IP logging sessions:
sensor# no iplog
sensor#
Cisco Intrusion Detection System Appliance and Module Installation and Configuration Guide Version 4.1
78-15597-02
10-55
Chapter 10
Configuring the Sensor Using the CLI
Sensor Configuration Tasks
Copying IP Log Files to Be Viewed
You can copy IP log files to an FTP or SCP server so that you can view them with
a sniffing tool such as Ethereal or TCP Dump.
To copy IP log files to an FTP or SCP server, follow these steps:
Step 1
Log in to the CLI using an account with administrator or operator privileges.
Step 2
Monitor the IP log status by executing the iplog-status command until you see
that the status reads completed for the log ID of the log file that you want to copy:
sensor# iplog-status
Log ID:
IP Address:
Group:
Status:
Start Time:
End Time:
Bytes Captured:
Packets Captured:
Step 3
137857506
10.16.0.0
0
completed
1070363599443768000
1070363892909384000
30650
263
Copy the IP log to your FTP or SCP server:
sensor# copy iplog 137857506 ftp://[email protected]/user/iplog1
Password: ******** Connected to 10.16.0.0 (10.16.0.0). 220
linux.machine.com FTP server (Version wu-2.6.0(1) Mon Feb 28 10:30 :36
EST 2000) ready. ftp> user (username) root 331 Password required for
root. Password:230 User root logged in. ftp> 200 Type set to I. ftp>
put iplog.8518.tmp iplog1 local: iplog.8518.tmp remote: iplog1 227
Entering Passive Mode (2,4,6,8,179,125) 150 Opening BINARY mode data
connection for iplog1. 226 Transfer complete. 30650 bytes sent in
0.00246 secs (1.2e+04 Kbytes/sec) ftp>
Step 4
Open the IP log using a sniffer program such as Ethereal or TCPDUMP.
For more information on Ethereal go to http://www.ethereal.com. For more
information on TCPDUMP, go to http://www.tcpdump.org/.
10-56
Cisco Intrusion Detection System Appliance and Module Installation and Configuration Guide Version 4.1
78-15597-02
Chapter 10
Configuring the Sensor Using the CLI
Sensor Configuration Tasks
Configuring Blocking
This section describes how to set up blocking using the CLI.
This section contains the following topics:
•
Understanding Blocking, page 10-57
•
Before Configuring Blocking, page 10-59
•
Supported Blocking Devices, page 10-59
•
Configuring Blocking Properties, page 10-60
•
Configuring Addresses Never to Block, page 10-65
•
Configuring Logical Devices, page 10-66
•
Configuring Blocking Devices, page 10-67
•
Configuring the Sensor to be a Master Blocking Sensor, page 10-73
•
Obtaining a List of Blocked Hosts and Connections, page 10-75
•
How to Set up Manual Blocking and How to Unblock, page 10-76
Understanding Blocking
NAC, the blocking application on the sensor, starts and stops blocks on routers,
switches, and PIX firewalls. NAC blocks the IP address on the devices it is
managing. It sends the same block to all the devices it is managing, including any
other master blocking sensors. NAC monitors the time for the block and removes
the block after the time has expired.
For a more detailed discussion of blocking, see NAC, page A-16.
There are two types of blocks:
Note
•
Host block—Blocks all traffic from a given IP address
•
Connection block—Blocks traffic from a given source IP address to a given
destination IP address and destination port
Multiple connection blocks from the same source IP address to either a different
destination IP address or destination port automatically switch the block from a
connection block to a host block.
Cisco Intrusion Detection System Appliance and Module Installation and Configuration Guide Version 4.1
78-15597-02
10-57
Chapter 10
Configuring the Sensor Using the CLI
Sensor Configuration Tasks
On Cisco routers and Catalyst 6500 series switches NAC creates blocks by
applying ACLs or VACLs. ACLs and VACLs permit or deny passage of data
packets through interface ports. Each ACL or VACL contains permit and deny
conditions that apply to IP addresses. The PIX Firewall does not use ACLs or
VACLs. The built-in shun/no shun command is used.
You need the following information for NAC to manage a device:
•
Login user ID
•
Login password
•
Enable password (not needed if the user has enable privileges)
•
Interfaces to be managed (for example, ethernet0, vlan100)
•
Any existing ACL information you want applied at the beginning (Pre-ACL)
or end (Post-ACL) of the ACL that will be created
Note
Tip
10-58
This does not apply to a PIX Firewall because the PIX Firewall does
not use ACLs to block.
•
Whether you are using Telnet or SSH to communicate with the device
•
IP addresses (host or range of hosts) you never want blocked
•
How long you want the blocks to last
To check the status of NAC, type show statistics networkAccess at the sensor#.
The output shows the devices you are managing, any active blocks, and the status
for all the devices.
Cisco Intrusion Detection System Appliance and Module Installation and Configuration Guide Version 4.1
78-15597-02
Chapter 10
Configuring the Sensor Using the CLI
Sensor Configuration Tasks
Before Configuring Blocking
To sum up, before you configure blocking, make sure you understand the
following:
•
Caution
You need to analyze your network topology to understand which devices
should be blocked by which sensor, and which addresses should never be
blocked.
Two sensors cannot control blocking on the same device.
•
You need to gather the usernames, device passwords, modal passwords, and
connections types (Telnet or SSH) needed to log in to each device.
•
You need to know the interface names on the devices.
•
You need to know the names of the pre-ACL and post-ACLs if needed.
•
You need to understand which interfaces should and should not be blocked.
You do not want to accidentally shut down an entire network.
Supported Blocking Devices
The NAC service supports up to 250 devices in any combination. The following
devices are supported by NAC:
•
Cisco series routers using Cisco IOS 11.2 or later (ACLs):
– Cisco 1600 series router
– Cisco 1700 series router
– Cisco 2500 series router
– Cisco 2600 series router
– Cisco 3600 series router
– Cisco 7200 series router
– Cisco 7500 series router
•
Catalyst 5000 switches with RSM/RSFC with IOS 11.2(9)P or later (ACLs)
•
Catalyst 6000 switches with IOS 12.1(13)E or later (ACLs)
Cisco Intrusion Detection System Appliance and Module Installation and Configuration Guide Version 4.1
78-15597-02
10-59
Chapter 10
Configuring the Sensor Using the CLI
Sensor Configuration Tasks
•
Catalyst 6000 switches with Catalyst software version 7.5(1) or later
(VACLs)
– Sup1A
– Sup1A/PFC
– Sup1A/MSFC1
– Sup1A/MFSC2
– Sup2/MSFC2 required
•
PIX Firewall with version 6.0 or later (shun command)
– 501
– 506E
– 515E
– 525
– 535 required
You configure blocking using either ACLs, VACLS, or the shun command. All
PIX Firewall models support the shun command.
Configuring Blocking Properties
You can change the default blocking properties through the CLI. It is best to use
the default properties, but if you need to change them, use these procedures.
This section contains the following topics:
10-60
•
Allowing the Sensor to Block Itself, page 10-61
•
Disabling Blocking, page 10-62
•
Setting Maximum Block Entries, page 10-63
•
Setting the Block Time, page 10-64
Cisco Intrusion Detection System Appliance and Module Installation and Configuration Guide Version 4.1
78-15597-02
Chapter 10
Configuring the Sensor Using the CLI
Sensor Configuration Tasks
Allowing the Sensor to Block Itself
Caution
We recommend that you do not permit the sensor to block itself, because it may
stop communicating with the blocking device. You can configure this option if
you can ensure that if the sensor creates a rule to block its own IP address, it will
not prevent the sensor from accessing the blocking device.
To allow the sensor to block itself, follow these steps:
Step 1
Log in to the CLI using an account with administrator privileges.
Step 2
Enter configuration mode:
sensor# configure terminal
Step 3
Enter network access mode:
sensor(config)# service networkAccess
Step 4
Enter general submode:
sensor(config-NetworkAccess)# general
Step 5
Configure the sensor to block itself:
sensor(config-NetworkAccess-gen)# allow-sensor-shun true
By default, this value is false.
Step 6
Exit general submode:
sensor(config-NetworkAccess-gen)# exit
sensor(config-NetworkAccess)# exit
Apply Changes:?[yes]:
Step 7
Type yes to apply changes.
Note
To reverse this procedure, follow the steps but change the value in Step 5
from true to false.
Cisco Intrusion Detection System Appliance and Module Installation and Configuration Guide Version 4.1
78-15597-02
10-61
Chapter 10
Configuring the Sensor Using the CLI
Sensor Configuration Tasks
Disabling Blocking
By default, blocking is enabled on the sensor. If NAC is managing a device and
you need to manually configure something on that device, you should disable
blocking first. You want to avoid a situation in which both you and NAC could be
making a change at the same time on the same device. This could cause the device
and/or NAC to crash.
To disable blocking, follow these steps:
Step 1
Log in to the CLI using an account with administrator privileges.
Step 2
Enter configuration mode:
sensor# configure terminal
Step 3
Enter network access mode:
sensor(config)# service networkAccess
Step 4
Enter general submode:
sensor(config-NetworkAccess)# general
Step 5
Disable blocking on the sensor:
sensor(config-NetworkAccess-gen)# shun-enable false
By default, this value is true.
Step 6
Exit general submode:
sensor(config-NetworkAccess-gen)# exit
sensor(config-NetworkAccess)# exit
Apply Changes:?[yes]:
Step 7
Type yes to apply changes.
Note
10-62
To enable blocking, follow the steps but change the value in Step 5 from
false to true.
Cisco Intrusion Detection System Appliance and Module Installation and Configuration Guide Version 4.1
78-15597-02
Chapter 10
Configuring the Sensor Using the CLI
Sensor Configuration Tasks
Setting Maximum Block Entries
You can set how many blocks are to be maintained simultaneously (0 to 65,535).
The default value is 250.
Caution
We do not recommend nor support setting the maximum block entries higher than
250.
Note
The number of blocks will not exceed the maximum block entries. If the
maximum is reached, new blocks will not occur until existing blocks time out and
are removed.
To change the maximum block entries, follow these steps:
Step 1
Log in to the CLI using an account with administrator privileges.
Step 2
Enter configuration mode:
sensor# configure terminal
Step 3
Enter network access mode:
sensor(config)# service networkAccess
Step 4
Enter general submode:
sensor(config-NetworkAccess)# general
Step 5
Change the maximum number of block entries:
sensor(config-NetworkAccess-gen)# shun-max-entries
Step 6
value
Exit general submode:
sensor(config-NetworkAccess-gen)# exit
sensor(config-NetworkAccess)# exit
Apply Changes:?[yes]:
Step 7
Type yes to apply changes.
Cisco Intrusion Detection System Appliance and Module Installation and Configuration Guide Version 4.1
78-15597-02
10-63
Chapter 10
Configuring the Sensor Using the CLI
Sensor Configuration Tasks
Setting the Block Time
You can change the amount of time the block lasts. The default is 30 minutes.
Note
If you change the default block time, you are changing a signature parameter,
which affects all signatures. Because it affects all signatures, saving the change
can take a while.
To change the default block time, follow these steps:
Step 1
Log in to the CLI using an account with administrator privileges.
Step 2
Enter configuration mode:
sensor# configure terminal
Step 3
Enter virtual sensor configuration mode:
sensor(config)# service virtual-sensor-configuration virtualSensor
Step 4
Enter tuning submode:
sensor(config-vsc)# tune
Step 5
Enter the shun event submode:
sensor(config-vsc-VirtualSensor)# shunevent
Step 6
Configure the shun time:
sensor(config-vsc-VirtualSensor-Shu)# shuntime
value
The value is the time duration of the shun event in minutes (0-4294967295).
Step 7
Exit shun event submode:
sensor(config-vsc-VirtualSensor-Shu)# exit
sensor(config-vsc-VirtualSensor)# exit
Apply Changes:?[yes]:
10-64
Cisco Intrusion Detection System Appliance and Module Installation and Configuration Guide Version 4.1
78-15597-02
Chapter 10
Configuring the Sensor Using the CLI
Sensor Configuration Tasks
Step 8
Type yes to apply changes.
Note
There is a time delay while the signatures are updated.
Configuring Addresses Never to Block
You must tune your sensor to identify hosts and networks that should never be
blocked, not even manually, because you may have a trusted network device
whose normal, expected behavior appears to be an attack. Such a device should
never be blocked, and trusted, internal networks should never be blocked.
You can specify a single host or an entire network.
If you specify a netmask, this is the netmask of the network that should never be
blocked. If no netmask is specified, only the IP address you specify will never be
blocked.
To set up addresses never to be blocked by blocking devices, follow these steps:
Step 1
Log in to the CLI using an account with administrator privileges.
Step 2
Enter configuration mode:
sensor# configure terminal
Step 3
Enter network access mode:
sensor(config)# service networkAccess
Step 4
Enter general submode:
sensor(config-NetworkAccess)# general
Cisco Intrusion Detection System Appliance and Module Installation and Configuration Guide Version 4.1
78-15597-02
10-65
Chapter 10
Configuring the Sensor Using the CLI
Sensor Configuration Tasks
Step 5
Define the address that should never be blocked:
•
For a single host:
sensor(config-NetworkAccess-gen)# never-shun-hosts ip-address
ip_address
•
For an entire network:
sensor(config-NetworkAccess-gen)# never-shun-networks ip-address
ip_address netmask netmask
Step 6
Exit general submode:
sensor(config-NetworkAccess-gen)# exit
sensor(config-NetworkAccess)# exit
Apply Changes:?[yes]:
Step 7
Type yes to apply changes.
Configuring Logical Devices
You must set up logical devices for the other hardware that the senor will manage.
The logical devices contain userid, password and enable password information.
For example, routers that all share the same passwords and usernames can be
under one logical device name.
Caution
You MUST have a logical device created before configuring the blocking device.
To set up logical devices, follow these steps:
Step 1
Log in to the CLI using an account with administrator privileges.
Step 2
Enter configuration mode:
sensor# configure terminal
Step 3
Enter Network Access mode:
sensor(config)# service networkAccess
10-66
Cisco Intrusion Detection System Appliance and Module Installation and Configuration Guide Version 4.1
78-15597-02
Chapter 10
Configuring the Sensor Using the CLI
Sensor Configuration Tasks
Step 4
Create the logical device name:
sensor(config-NetworkAccess)# shun-device-cfg name
Step 5
logical_device_name
Type the username for that logical device:
sensor(config-NetworkAccess-shu)# username
username
Type none if there is no username.
Step 6
Specify the password for the user:
sensor(config-NetworkAccess-shu)# password
Enter password[]: ****
Re-enter password
Type none if there is no password.
Step 7
Specify the enable password for the user:
sensor(config-NetworkAccess-shu)# enable-password
Enter enable-password[]: ****
Re-enter enable-password
Type none if there is no enable password.
Step 8
Exit shun device configuration submode:
sensor(config-NetworkAccess-shu)# exit
sensor(config-NetworkAccess)# exit
Apply Changes:?[yes]:
Step 9
Type yes to apply changes.
Configuring Blocking Devices
NAC uses ACLs on Cisco routers and switches to manage those devices. These
ACLs are built as follows:
1.
A permit line with the sensor’s IP address, or if specified, the NAT address
Note
If you permit the sensor to be blocked, this line does not appear in the
ACL.
Cisco Intrusion Detection System Appliance and Module Installation and Configuration Guide Version 4.1
78-15597-02
10-67
Chapter 10
Configuring the Sensor Using the CLI
Sensor Configuration Tasks
2.
PreShun ACL (if specified)
This ACL must already exist on the device.
3.
Any active blocks
4.
Either:
– PostShun ACL (if specified)
This ACL must already exist on the device.
Note
Make sure the last line in the ACL is permit
ip any any.
– permit ip any any (not used if a PostShun ACL is specified)
NAC uses two ACLs to manage devices. Only one is active at any one time. It uses
the offline ACL name to build the new ACL, then applies it to the interface. NAC
then reverses the process on the next cycle.
Caution
A single sensor can manage multiple devices, but you cannot use multiple sensors
to control a single device. In this case, use a master blocking sensor. See
Configuring the Sensor to be a Master Blocking Sensor, page 10-73, for more
information.
This section contains the following topics:
•
Configuring the Sensor to Manage a Cisco Router, page 10-68
•
Configuring the Sensor to Manager a Catalyst 6500 Series Switch,
page 10-70
•
Configuring the Sensor to Manage a Cisco PIX Firewall, page 10-72
Configuring the Sensor to Manage a Cisco Router
To configure a sensor to manager a Cisco router, follow these steps:
Step 1
Log in to the CLI using an account with administrator privileges.
Step 2
Enter configuration mode:
sensor# configure terminal
10-68
Cisco Intrusion Detection System Appliance and Module Installation and Configuration Guide Version 4.1
78-15597-02
Chapter 10
Configuring the Sensor Using the CLI
Sensor Configuration Tasks
Step 3
Enter network access mode:
sensor(config)# service networkAccess
Step 4
Set the IP address for the router controlled by NAC:
sensor(config-NetworkAccess)# router-devices ip-address
Step 5
ip_address
Type the logical device name that you created in Configuring Logical Devices,
page 10-66.
sensor(config-NetworkAccess-rou)# shun-device-cfg
logical_device_name
NAC accepts anything you type. It does not check to see if the logical device
exists.
Step 6
Designate the method used to access the sensor:
sensor(config-NetworkAccess-rou)# communication
telnet/ssh-des/ssh-3des
If unspecified, SSH 3DES is used.
Note
Step 7
If you are using DES or 3DES, you must use the command ssh host-key
ip_address to accept the key or NAC cannot connect to the device.
Specify the sensor’s NAT address:
sensor(config-NetworkAccess-rou)# nat-address
Note
Step 8
nat_address
This changes the IP address in the first line of the ACL from the sensor’s
address to the NAT address.
Set the interface direction:
sensor(config-NetworkAccess-rou-shu)# shun-interfaces direction
out interface-name interface name you want ACL attached to
Step 9
Add the preShun ACL name (optional):
sensor(config-NetworkAccess-rou-shu)# pre-acl-name
Step 10
in or
pre_shun_acl_name
Add the postShun ACL name (optional):
sensor(config-NetworkAccess-rou-shu)# post-acl-name
post_shun_acl_name
Cisco Intrusion Detection System Appliance and Module Installation and Configuration Guide Version 4.1
78-15597-02
10-69
Chapter 10
Configuring the Sensor Using the CLI
Sensor Configuration Tasks
Step 11
Exit shun interfaces submode:
sensor(config-NetworkAccess-rou-shu)# exit
sensor(config-NetworkAccess-rou)# exit
sensor(config-NetworkAccess)# exit
sensor(config)# exit
Apply Changes:?[yes]:
Note
Step 12
You receive an error if the logical device name does not exist.
Type yes to apply changes.
Configuring the Sensor to Manager a Catalyst 6500 Series Switch
To configure the sensor to manage a Catalyst 6500 series switch, follow these
steps:
Step 1
Log in to the CLI using an account with administrator privileges.
Step 2
Enter configuration mode:
sensor# configure terminal
Step 3
Enter network access mode:
sensor(config)# service networkAccess
Set the IP address for the router controlled by NAC:
sensor(config-NetworkAccess)# cat6k-devices ip-address
Step 4
ip_address
Type the logical device name that you created in Configuring Logical Devices,
page 10-66.
sensor(config-NetworkAccess-cat)# shun-device-cfg
logical_device_name
NAC accepts anything you type. It does not check to see if the logical device
exists.
Step 5
Designate the method used to access the sensor:
sensor(config-NetworkAccess-cat)# communication
telnet/ssh-des/ssh-3des
If unspecified, SSH 3DES is used.
10-70
Cisco Intrusion Detection System Appliance and Module Installation and Configuration Guide Version 4.1
78-15597-02
Chapter 10
Configuring the Sensor Using the CLI
Sensor Configuration Tasks
Note
Step 6
If you are using DES or 3DES, you must use the command ssh host-key
ip_address to accept the key or NAC cannot connect to the device.
Specify the sensor’s NAT address:
sensor(config-NetworkAccess-cat)# nat-address
Note
Step 7
nat_address
This changes the IP address in the first line of the ACL from the sensor’s
address to the NAT address.
Specify the VLAN number:
sensor(config-NetworkAccess-cat)# shun-interfaces vlan
Step 8
Add the preShun ACL name (optional):
sensor(config-NetworkAccess-cat-shu)# pre-acl-name
Step 9
pre_shun_acl_name
Add the postShun ACL name (optional):
sensor(config-NetworkAccess-cat-shu)# post-acl-name
Step 10
vlan_number
post_shun_acl_name
Exit shun device configuration submode:
sensor(config-NetworkAccess-cat-shu)# exit
sensor(config-NetworkAccess-cat)# exit
sensor(config-NetworkAccess)# exit
sensor(config)# exit
Apply Changes:?[yes]:
Note
Step 11
You receive an error if the logical device name does not exist.
Type yes to apply changes.
Cisco Intrusion Detection System Appliance and Module Installation and Configuration Guide Version 4.1
78-15597-02
10-71
Chapter 10
Configuring the Sensor Using the CLI
Sensor Configuration Tasks
Configuring the Sensor to Manage a Cisco PIX Firewall
To configure the sensor to manage a Cisco PIX Firewall, follow these steps:
Step 1
Log in to the CLI using an account with administrator privileges.
Step 2
Enter configuration mode:
sensor# configure terminal
Step 3
Enter network access mode:
sensor(config)# service networkAccess
Step 4
Set the IP address for the router controlled by NAC:
sensor(config-NetworkAccess)# pix-devices ip-address
Step 5
ip_address
Type the logical device name that you created in Configuring Logical Devices,
page 10-66.
sensor(config-NetworkAccess-pix)# shun-device-cfg
logical_device_name
NAC accepts anything you type. It does not check to see if the logical device
exists.
Step 6
Designate the method used to access the sensor:
sensor(config-NetworkAccess-pix)# communication
telnet/ssh-des/ssh-3des
If unspecified, SSH 3DES is used.
Note
Step 7
If you are using DES or 3DES, you must use the command ssh host-key
ip_address to accept the key or NAC cannot connect to the device.
Specify the sensor’s NAT address:
sensor(config-NetworkAccess-pix)# nat-address
Note
10-72
nat_address
This changes the IP address in the first line of the ACL from the sensor’s
address to the NAT address.
Cisco Intrusion Detection System Appliance and Module Installation and Configuration Guide Version 4.1
78-15597-02
Chapter 10
Configuring the Sensor Using the CLI
Sensor Configuration Tasks
Step 8
Exit shun device configuration submode:
sensor(config-NetworkAccess-pix)# exit
sensor(config-NetworkAccess)# exit
sensor(config)# exit
Apply Changes:?[yes]:
Note
Step 9
You receive an error if the logical device name does not exist.
Type yes to apply changes.
Configuring the Sensor to be a Master Blocking Sensor
Multiple sensors (blocking forwarding sensors) can forward blocking requests to
a specified master blocking sensor (MBS), which controls one or more devices.
The MBS is the NAC running on a sensor that controls blocking on one or more
devices on behalf of one or more other sensors. The NAC on an MBS controls
blocking on devices at the request of the NACs running on other sensors.
On the blocking forwarding sensor, identify which remote host serves as the
MBS; on the MBS you must add the blocking forwarding sensors to its allowed
host configuration.
Note
Caution
Typically the MBS is configured to manage the network devices. Blocking
forwarding sensors are not normally configured to manage network devices,
although doing so is permissible.
Only one sensor should control all blocking interfaces on a device.
Cisco Intrusion Detection System Appliance and Module Installation and Configuration Guide Version 4.1
78-15597-02
10-73
Chapter 10
Configuring the Sensor Using the CLI
Sensor Configuration Tasks
To configure the NAC on a sensor to forward blocks to an MBS, follow these
steps:
Step 1
Log in to the CLI using an account with administrator privileges.
Step 2
Enter configuration mode:
sensor# configure terminal
Step 3
Configure the NAC of the blocking forwarding sensor to accept the TLS/SSL
X.509 certificate of the MBS remote host (in configuration mode):
sensor(config)# tls trusted-host ip-address
Note
MBS_ip_address
You are prompted to accept the certificate based on the certificate’s
fingerprint. Sensors provide only self-signed certificates (instead of
certificates signed by a recognized certificate authority). You can verify
the MBS host sensor’s certificate by logging in to the host sensor and
typing the show tls fingerprint command to see that the host certificate’s
fingerprints match.
Step 4
Accept the certificates for all MBS hosts that the NAC will connect with.
Step 5
Enter network access mode:
sensor(config)# service networkAccess
Step 6
Enter general submode:
sensor(config-NetworkAccess)# general
Step 7
Add an MBS entry:
sensor(config-networkAccess-gen)# master-blocking-sensors
mbs-ipaddress mbs_host_ip_address
Step 8
Specify the username for an administrative account on the MBS host:
sensor(config-networkAccess-gen-mas)# mbs-username
Step 9
username
Specify the password for the user:
sensor(config-networkAccess-gen-mas)# mbs-password
Enter mbs-password []: *****
Re-enter mbs-password []: *****
10-74
Cisco Intrusion Detection System Appliance and Module Installation and Configuration Guide Version 4.1
78-15597-02
Chapter 10
Configuring the Sensor Using the CLI
Sensor Configuration Tasks
Step 10
Specify the port number for the host’s HTTP communications.
sensor(config-networkAccess-gen-mas)# mbs-port
port_number
The default is 80/443 if not specified.
Step 11
Set the status of whether or not the host uses TLS/SSL:
sensor(config-networkAccess-gen-mas)# mbs-tls
Note
Step 12
true/false
If you set the value to true, you need to use the command tls trusted-host
ip-address mbs_ip_address.
Exit master blocking sensor submode:
sensor(config-NetworkAccess-gen-mas)# exit
sensor(config-NetworkAccess-gen)# exit
sensor(config-NetworkAccess)# exit
sensor(config)# exit
Apply Changes:?[yes]:
Step 13
Type yes to apply changes.
Obtaining a List of Blocked Hosts and Connections
You can obtain a list of blocked hosts and blocked connections by using the show
statistics command for NetworkAccess.
To obtain a list of blocked hosts and connections, follow these steps:
Step 1
Log in to the CLI.
Step 2
Check the statistics for NAC:
sensor# show statistics networkAccess
Current Configuration
AllowSensorShun = false
ShunMaxEntries = 250
NetDevice
Type = Cisco
IP = 10.89.150.160
NATAddr = 0.0.0.0
Communications = telnet
Cisco Intrusion Detection System Appliance and Module Installation and Configuration Guide Version 4.1
78-15597-02
10-75
Chapter 10
Configuring the Sensor Using the CLI
Sensor Configuration Tasks
ShunInterface
InterfaceName = ethernet1
InterfaceDirection = in
State
ShunEnable = true
NetDevice
IP = 10.89.150.160
AclSupport = uses Named ACLs
State = Active
ShunnedAddr
Host
IP = 10.16.0.0
ShunMinutes = 15
MinutesRemaining = 15
Host
IP = 192.168.16.0
ShunMinutes = 10
MinutesRemaining = 10
The last two Host entries indicate which hosts are being blocked and how long the
blocks are.
How to Set up Manual Blocking and How to Unblock
If you have blocking configured, you can manually block a host. You can also
view a list of hosts that are being blocked.
Note
Caution
10-76
Manual blocks in the CLI are actually changes to the configuration, so they are
permanent. You cannot do a timed manual block. You cannot use the IDSM or IDS
MC to delete blocks created by the CLI. Manual blocks have to be removed in the
CLI.
We recommend that you use manual blocking on a very limited basis, if at all.
Cisco Intrusion Detection System Appliance and Module Installation and Configuration Guide Version 4.1
78-15597-02
Chapter 10
Configuring the Sensor Using the CLI
NM-CIDS Configuration Tasks
To manually block a host, follow these steps:
Step 1
Log in to the CLI using an account with administrator privileges.
Step 2
Enter configuration mode:
sensor# configuration terminal
Step 3
Enter network access mode:
sensor(config)# service networkAccess
Step 4
Enter general mode:
sensor (config-NetworkAccess)# general
Step 5
Start the manual block for a host IP address:
sensor (config-NetworkAccess-gen)# shun-hosts ip-address
Note
Step 6
ip_address
You must end the manual block in the CLI or it is permanent.
To end the manual block:
sensor (config-NetworkAccess-gen)# no shun-hosts ip-address
Step 7
ip_address
Exit general submode:
sensor (config-NetworkAccess-gen)# exit
sensor (config-NetworkAccess)# exit
sensor(config)# exit
sensor#
NM-CIDS Configuration Tasks
This section describes the tasks you need to perform to set up the NM-CIDS and
get it ready to receive traffic. After that you are ready to configure intrusion
detection.
Cisco Intrusion Detection System Appliance and Module Installation and Configuration Guide Version 4.1
78-15597-02
10-77
Chapter 10
Configuring the Sensor Using the CLI
NM-CIDS Configuration Tasks
This section contains the following topics:
•
Configuring Cisco IDS Interfaces on the Router, page 10-78
•
Establishing Cisco IDS Console Sessions, page 10-80
•
Rebooting the NM-CIDS, page 10-83
•
Setting Up Packet Capture, page 10-84
•
Checking the Status of the Cisco IDS Software, page 10-85
•
Supported Cisco IOS Commands, page 10-86
Configuring Cisco IDS Interfaces on the Router
The NM-CIDS differs from a standalone appliance because it does not have an
external console port. Console access to the NM-CIDS is enabled when you issue
the command service-module ids-module slot_number/0 session on the router, or
when you initiate a Telnet connection into the router with the port number
corresponding to the NM-CIDS slot. The lack of an external console port means
that the initial bootup configuration is possible only through the router.
When you issue the command service-module ids-sensor slot_number/0 session,
you create a console session with the NM-CIDS, in which you can issue any IDS
configuration commands. After completing work in the session and exiting the
IDS CLI, you are returned to Cisco IOS CLI.
The session command starts a reverse Telnet connection using the IP address of
the ids-sensor interface. The ids-sensor interface is an interface between the
NM-CIDS and the router. You must assign an IP address to the ids-sensor
interface before invoking the session command. Assigning a routable IP address
can make the IDS interface itself vulnerable to attacks. To counter that
vulnerability, a loopback IP address is assigned to the ids-sensor interface.
To set up the NM-CIDS interfaces, follow these steps:
Step 1
Confirm the NM-CIDS slot number in your router:
Router # show interfaces ids-sensor
Note
10-78
slot_number/0
You can also use the show run command. Look for “IDS-Sensor” and the
slot number.
Cisco Intrusion Detection System Appliance and Module Installation and Configuration Guide Version 4.1
78-15597-02
Chapter 10
Configuring the Sensor Using the CLI
NM-CIDS Configuration Tasks
Note
Step 2
Cisco IOS gives the NM-CIDS the name “IDS-Sensor.” In this example,
1 is the slot number and 0 is the port number, because there is only one
port.
Enable the CEF switching path:
Router# configuration terminal
Router(config)# ip cef
Router(config)# exit
Step 3
Create a loopback interface:
Router# configure terminal
Router(config)# interface loopback 0
Step 4
Assign an IP address and netmask to the loopback interface:
Router(config-if)# ip address 10.16.0.0 255.255.0.0
Note
Step 5
You must assign an IP address to the NM-CIDS’s internal interface to
session into the NM-CIDS. Choose a network that does not overlap with
any networks assigned to the other interfaces in the router. It does not
have to be a “real” IP address, because you will not be using this address
to access the NM-CIDS.
Assign an unnumbered loopback interface to the ids-sensor interface. Use slot 1
for this example.
Router(config)# interface ids-sensor 1/0
Router(config-if)# ip unnumbered loopback 0
Step 6
Activate the port:
Router(config-if)# no shutdown
Step 7
Exit configuration mode:
Router(config-if)# end
Cisco Intrusion Detection System Appliance and Module Installation and Configuration Guide Version 4.1
78-15597-02
10-79
Chapter 10
Configuring the Sensor Using the CLI
NM-CIDS Configuration Tasks
Step 8
Write the configuration to NVRAM:
Router# write memory
Building configuration
[OK]
Establishing Cisco IDS Console Sessions
You can establish and disconnect sessions between the router and the NM-CIDS
using one of the following:
•
The session command
•
CTRL-Shift-6 x and the disconnect command
•
Telnet
This section contains the following topics:
•
Using the Session Command, page 10-80
•
Suspending a Session and Returning to the Router, page 10-81
•
Closing an Open Session, page 10-81
•
Using Telnet, page 10-82
Using the Session Command
Use the session command to establish a session in the NM-CIDS (in slot 1 in this
example):
Router# service-module ids-sensor 1/0 session
A Telnet session is initiated:
Trying 10.16.0.0, 2033 ... Open
10-80
Cisco Intrusion Detection System Appliance and Module Installation and Configuration Guide Version 4.1
78-15597-02
Chapter 10
Configuring the Sensor Using the CLI
NM-CIDS Configuration Tasks
Suspending a Session and Returning to the Router
When you are finished with a session, you need to return to the router to establish
the association between a session (the IDS application) and the router interfaces
you want to monitor.
To toggle between connections in a Telnet session, follow these steps:
Step 1
Hold CTRL-Shift simultaneously, and then press 6. Release all keys, and then
press x.
This command takes you from a session prompt to a router prompt, and vice versa.
Step 2
Type the following at the prompt:
Router# disconnect
Step 3
Press Enter when prompted as follows:
Closing connection to 10.16.0.0 [confirm] <Enter>
Note
Caution
Telnet clients vary. In some cases, you may have to press CTRL-6 + x.
The control character is specified as ^^, CTRL-^, or ASCII value 30 (hex
1E).
Failing to close a session properly makes it possible for others to exploit a
connection that is still in place. Remember to type exit at the Router# prompt to
close the Cisco IOS session completely. See Closing an Open Session,
page 10-81, for the procedure.
Closing an Open Session
If you use the Telnet disconnect command to leave the session, the session
remains running. The open session can be exploited by someone wanting to take
advantage of a connection that is still in place.
Cisco Intrusion Detection System Appliance and Module Installation and Configuration Guide Version 4.1
78-15597-02
10-81
Chapter 10
Configuring the Sensor Using the CLI
NM-CIDS Configuration Tasks
To close on open session to the NM-CIDS, follow these steps:
Step 1
Exit the session:
sensor# exit
Step 2
Suspend and close the session to the NM-CIDS by holding CTRL-Shift and
pressing 6. Release all keys, and then press x.
Step 3
Disconnect from the router:
Router# disconnect
Step 4
Press Enter to confirm the disconnection:
Router# Closing connection to 10.16.0.0 [confirm] <Enter>
Step 5
Exit the session:
Router# exit
Using Telnet
You can also telnet directly into the router with the port number corresponding to
the NM-CIDS slot. Use the address you established when configuring the
loopback 0 interface in Configuring Cisco IDS Interfaces on the Router,
page 10-78.
The port number is determined by the following formula: 2001 + 32 x slot number.
For example, for slot 1, the port number is 2033, for slot 2, it is 2065, and so forth.
To use Telnet to invoke a session to port 2033:
Router# telnet 10.16.0.0 2033
10-82
Cisco Intrusion Detection System Appliance and Module Installation and Configuration Guide Version 4.1
78-15597-02
Chapter 10
Configuring the Sensor Using the CLI
NM-CIDS Configuration Tasks
Rebooting the NM-CIDS
The Cisco IOS provides the following commands to control the NM-CIDS:
shutdown, reload, and reset:
•
shutdown—Brings the operating system down gracefully:
Router# service-module ids-sensor slot_number/0 shutdown
Caution
Make sure you execute a shutdown command before you remove the hard-disk
drive from the NM-CIDS. Failing to do so can lead to the loss of data or the
corruption of the hard-disk drive.
•
reload—Performs a graceful halt and reboot of the operating system on an
NM-CIDS:
Router# service-module ids-sensor slot_number/0 reload
•
reset—Resets the hardware on the NM-CIDS. Typically this command is used
to recover from a shutdown.
Router# service-module ids-sensor slot_number/0 reset
The following warning appears:
Router# service-module ids-sensor 1/0 reset
Use reset only to recover from shutdown or failed state
Warning: May lose data on the hard disc!
Do you want to reset?[confirm]
Caution
Hard-disk drive data loss only occurs if you issue the reset command without first
shutting down the NM-CIDS. You can use the reset command safely in other
situations.
Cisco Intrusion Detection System Appliance and Module Installation and Configuration Guide Version 4.1
78-15597-02
10-83
Chapter 10
Configuring the Sensor Using the CLI
NM-CIDS Configuration Tasks
Setting Up Packet Capture
You will need to enable the desired interfaces (including subinterfaces) on the
router for packet monitoring. You can select any number of interfaces or
subinterfaces to be monitored. The packets sent and received on these interfaces
are forwarded to the NM-CIDS for inspection. The enabling and disabling of the
interfaces is configured through the router CLI (Cisco IOS).
To set up packet capture on the NM-CIDS, follow these steps:
Step 1
View your interface configuration:
Router# show run
Step 2
Identify the interfaces or subinterfaces that you want to monitor, for example,
FastEthernet0/0.
Note
Step 3
You can choose more than one interface or subinterface to monitor, but
you can only edit one interface at a time.
Enter configuration mode:
Router# configure terminal
Step 4
Specify the interface:
Router(config)# interface FastEthernet0/0
Note
Step 5
The traffic comes from one of the router’s interfaces.
Configure the interface to copy network traffic to the NM-CIDS:
Router(config-if)# ids-service-module monitoring
Note
10-84
Use the command no ids-service-module monitoring to turn off
monitoring.
Cisco Intrusion Detection System Appliance and Module Installation and Configuration Guide Version 4.1
78-15597-02
Chapter 10
Configuring the Sensor Using the CLI
NM-CIDS Configuration Tasks
Step 6
Exit interface mode:
Router(config-if)# exit
Step 7
Repeat Steps 3 though 6 for each interface or subinterface that you want to
monitor.
Step 8
Exit configuration mode:
Router(config)# exit
Step 9
Verify that the NM-CIDS is analyzing network traffic.
a.
Open a TFTP or SSH session to the external interface on the NM-CIDS.
Note
SSH requires known hosts. See Adding Known Hosts to the SSH
Known Hosts List, page 10-19, for the procedure.
b.
Log in as cisco.
c.
View the interface group:
Router# show interface group 0
d.
If the output shows the sensing interface is down, repeat Steps 3 through 6.
e.
Repeat Step c to see the counters gradually increasing. This indicates that the
NM-CIDS is receiving network traffic.
Checking the Status of the Cisco IDS Software
To check the status of the Cisco IDS software running on the router:
Router# service-module ids-sensor slot_number/0 status
Something similar to the following output appears:
Router# service-module ids-sensor1/0 status
Service Module is Cisco IDS-Sensor1/0
Service Module supports session via TTY line 33
Service Module is in Steady state
Getting status from the Service Module, please wait..
Service Module Version information received,
Major ver = 1, Minor ver= 1
Cisco Intrusion Detection System Appliance and Module Installation and Configuration Guide Version 4.1
78-15597-02
10-85
Chapter 10
Configuring the Sensor Using the CLI
NM-CIDS Configuration Tasks
Cisco Systems Intrusion Detection System Network Module
Software version: 4.1(1)S42(0.3)
Model: NM-CIDS
Memory: 254676 KB
Supported Cisco IOS Commands
The following Cisco IOS command is new to support the NM-CIDS:
service-module ids-sensor
slot_number/0
The slot number can vary, but the port is always 0. These options are available:
•
reload
•
reset
•
session
•
shutdown
•
status
The following Cisco IOS commands are supported on the NM-CIDS:
•
Privileged mode EXEC
– Router# service-module ids-sensor slot_number/0 reload
Reloads the operating system on the NM-CIDS.
– Router# service-module ids-sensor slot_number/0 reset
Provides a hardware reset to the NM-CIDS.
– Router# service-module ids-sensor slot_number/0 session
Entering Console for IDS sensor Module in slot slot_number.
The session command allows you access to the IDS console.
10-86
Cisco Intrusion Detection System Appliance and Module Installation and Configuration Guide Version 4.1
78-15597-02
Chapter 10
Configuring the Sensor Using the CLI
IDSM-2 Configuration Tasks
– Router# service-module ids-sensor slot_number/0 shutdown
Shuts down the IDS applications running on the NM-CIDS.
Caution
Removing the NM-CIDS without proper shutdown can result in the hard-disk
drive being corrupted. After successful shutdown of the NM-CIDS applications,
Cisco IOS prints a message indicating that you can now remove the NM-CIDS.
– Router# service-module ids-sensor slot_number/0 status
Provides information on the status of the Cisco IDS software.
•
Configure interfaces mode
Router(config-if)# ids-service-module monitoring
You can enable IDS monitoring on a specified interface (or subinterface).
Both inbound and outbound packets on the specified interface are forwarded
for monitoring.
IDSM-2 Configuration Tasks
Perform the following tasks to configure the IDSM-2:
1.
Initialize the IDSM-2.
Run the setup command to initialize the IDSM-2.
See Initializing the Sensor, page 10-2, for more information.
2.
Configure the Catalyst 6500 series switch for command and control access to
the IDSM-2.
See Configuring the Catalyst 6500 Series Switch for Command and Control
Access to the IDSM-2, page 10-88, for the procedure.
3.
Assign the interfaces.
See Assigning and Enabling the Sensing Interface, page 10-9, for the
procedure. See Using the TCP Reset Interface, page 8-4, for information on
the TCP reset interface.
4.
Configure the IDSM-2 to capture traffic for intrusion detection analysis.
See Capturing IDS Traffic, page 10-90, for the procedures.
Cisco Intrusion Detection System Appliance and Module Installation and Configuration Guide Version 4.1
78-15597-02
10-87
Chapter 10
Configuring the Sensor Using the CLI
IDSM-2 Configuration Tasks
5.
Perform the other initial tasks, such as adding users, trusted hosts,
configuring the sensor to use an NTP server as a time source, and so forth.
See Sensor Initial Configuration Tasks, page 10-2, for more information.
6.
Configure intrusion detection.
See Sensor Configuration Tasks, page 10-35, and IDS manager
documentation. See the Cisco Intrusion Detection System (IDS) Hardware
and Software Version 4.1 Documentation Guide that shipped with your
IDSM-2 for instructions on how to locate these documents.
7.
Perform miscellaneous tasks to keep your IDSM-2 running smoothly.
See Sensor Administrative Tasks, page 10-24, and Miscellaneous Tasks,
page 10-98, for more information.
8.
Upgrade the IDS software with new signature updates and service packs.
See Obtaining Cisco IDS Software, page 9-1, for more information.
9.
Reimage the application partition and the maintenance partition when
needed.
See Reimaging the IDSM-2, page 10-124.
This section contains the following topics:
•
Configuring the Catalyst 6500 Series Switch for Command and Control
Access to the IDSM-2, page 10-88
•
Capturing IDS Traffic, page 10-90
•
Miscellaneous Tasks, page 10-98
Configuring the Catalyst 6500 Series Switch for Command and
Control Access to the IDSM-2
After you initialize the IDSM-2, you must configure the Catalyst 6500 series
switch to have command and control access to the IDSM-2.
10-88
Cisco Intrusion Detection System Appliance and Module Installation and Configuration Guide Version 4.1
78-15597-02
Chapter 10
Configuring the Sensor Using the CLI
IDSM-2 Configuration Tasks
This section contains the following topics:
•
Catalyst Software, page 10-89
•
Cisco IOS Software, page 10-89
Catalyst Software
To configure the Catalyst 6500 series switch to have command and control access
to the IDSM-2, follow these steps:
Step 1
Log in to the console.
Step 2
Enter privileged mode:
Console> enable
Step 3
Put the command and control port into the correct VLAN:
Console> (enable) set vlan command_and_control_vlan_number
module_slot_number/command_and_control_port_number
Example:
Console> (enable) set vlan 147 8/2
Step 4
Verify that you have connectivity by sessioning into the IDSM-2:
Console> session slot module_number
ping network_ip_address
Cisco IOS Software
To configure the Catalyst 6500 series switch to have command and control access
to the IDSM-2, follow these steps:
Step 1
Log in to the console.
Step 2
Enter configuration mode:
Router# configure terminal
Cisco Intrusion Detection System Appliance and Module Installation and Configuration Guide Version 4.1
78-15597-02
10-89
Chapter 10
Configuring the Sensor Using the CLI
IDSM-2 Configuration Tasks
Step 3
Put the command and control port into the correct VLAN:
Router (config)# intrusion-detection-module
management-port access-vlan vlan_number
module_number
Example:
Router (config)# intrusion-detection-module 5 management-port
access-vlan 146
Step 4
Verify that you have connectivity by sessioning into the IDSM-2:
Router# session slot module_number processor 1
ping network_ip_address
Capturing IDS Traffic
Traffic is captured for intrusion detection analysis on the IDSM-2 through SPAN,
VACL capture, or by using the mls ip ids command. Port 1 is used as the TCP
reset port, port 2 is the command and control port, and ports 7 and 8 are the
monitoring ports. You can configure one of the monitoring ports as a SPAN or
VACL monitoring port.
This section contains the following topics:
•
Using SPAN for Capturing IDS Traffic, page 10-90
•
Configuring VACLS to Capture IDS Traffic, page 10-92
•
Using the mls ip ids Command for Capturing IDS Traffic, page 10-96
Using SPAN for Capturing IDS Traffic
The IDSM-2 can analyze Ethernet VLAN traffic from Ethernet or Fast Ethernet
SPAN source ports, or you can specify an Ethernet VLAN as the SPAN source.
This section describes how to use SPAN to capture IDS traffic.
The section contains the following topics:
10-90
•
Catalyst Software, page 10-91
•
Cisco IOS Software, page 10-91
Cisco Intrusion Detection System Appliance and Module Installation and Configuration Guide Version 4.1
78-15597-02
Chapter 10
Configuring the Sensor Using the CLI
IDSM-2 Configuration Tasks
Catalyst Software
To enable SPAN on the IDSM-2, follow these steps:
Step 1
Log in to the console.
Step 2
Enter privileged mode:
Console> enable
Step 3
Enable SPAN to the IDSM-2 from a source port:
Console> (enable) set span [source_module/source_port]
idsm_module/port_number [rx | tx | both] [filter vlans...]
Note
Step 4
Use the filter keyword and variable to monitor traffic on specific VLANs
on source trunk ports.
Enable SPAN to the IDSM-2 from a VLAN:
Console> (enable) set span
Step 5
[vlan] idsm_module/port_number [rx | tx | both]
Disable all SPAN traffic to the IDSM-2:
Console> (enable) set span disable
Note
idsm_module/port_number
Refer to Catalyst 6500 Series Switch Command Reference for more
information on SPAN.
Cisco IOS Software
To enable SPAN on the IDSM-2, follow these steps:
Step 1
Log in to the console.
Step 2
Enter configuration mode:
Router# configure terminal
Cisco Intrusion Detection System Appliance and Module Installation and Configuration Guide Version 4.1
78-15597-02
10-91
Chapter 10
Configuring the Sensor Using the CLI
IDSM-2 Configuration Tasks
Step 3
Set the source interfaces/VLANs for the monitor session:
Router (config)# monitor session {session_number} {source {interface
type slot_number/port_number } | {vlan vlan_ID}} [, | - | rx | tx |
both]
Step 4
Enable an IDSM-2 data port as a SPAN destination:
Router (config)# monitor session {session_number} {destination
intrusion-detection-module module_number data-port data_port_number
Step 5
If you want to disable the monitor session:
Router (config)# no monitor session
Step 6
session_number
To filter the SPAN session so that only certain VLANs are seen from switch port
trunks (optional):
Router (config)# monitor session {session_number} {filter {vlan_ID } [,
| - ]}
Step 7
Exit configuration mode:
Router (config)# exit
Step 8
To show current monitor sessions:
Router # show monitor session
Note
session_number
Refer to the Catalyst 6500 Series Cisco IOS Command Reference for
more information on SPAN.
Configuring VACLS to Capture IDS Traffic
You can set VACLs to capture traffic for IDS from a single VLAN or from
multiple VLANs. This section describes how to configure VACLs to capture IDS
traffic.
This section contains the following topics:
10-92
•
Catalyst Software, page 10-93
•
Cisco IOS Software, page 10-94
Cisco Intrusion Detection System Appliance and Module Installation and Configuration Guide Version 4.1
78-15597-02
Chapter 10
Configuring the Sensor Using the CLI
IDSM-2 Configuration Tasks
Catalyst Software
Port 1 is set as the TCP reset port. Ports 7 and 8 are the sensing ports and can be
configured as security ACL capture ports. By default, ports 7 and 8 are configured
as trunk ports and trunk all VLANs on which a security ACL has been applied
with the capture feature. If you want to monitor traffic from specific VLANs only,
you need to clear the VLANs that you do not want to monitor so that they are not
trunked to ports 7 and 8.
To set VACLs to capture IDS traffic on VLANs, follow these steps:
Step 1
Log in to the console.
Step 2
Enter privileged mode.
console> enable
Step 3
Set the VACL to capture traffic:
console> (enable) set security acl ip
Step 4
acl name permit
(...) capture
Commit the VACL:
console> (enable) commit security acl
Step 5
Map the VACL to the VLANs:
console> (enable) set security acl map
Step 6
acl name [vlans]
Add the IDSM-2 monitoring port (port 7 or 8) to the VACL capture list:
console> (enable) set security acl capture
module_number/port_number
This example shows how to capture IDS traffic on VLANs:
Console> (enable) show security acl info all
set security acl ip webacl2
—————————————————————————permit tcp any host 10.1.6.1 eq 21 capture
permit tcp host 10.1.6.1 eq 21 any capture
permit tcp any host 10.1.6.1 eq 80 capture
permit tcp any host 10.1.6.2 eq 80 capture
deny ip any host 10.1.6.1
deny ip any host 10.1.6.2
permit ip any any
Cisco Intrusion Detection System Appliance and Module Installation and Configuration Guide Version 4.1
78-15597-02
10-93
Chapter 10
Configuring the Sensor Using the CLI
IDSM-2 Configuration Tasks
Note
Refer to Catalyst 6500 Series Switch Command Reference for more
information on trunk ports and ACLs.
Cisco IOS Software
To set VACLs to capture IDS traffic on VLANs, follow these steps:
Step 1
Log in to the console.
Step 2
Enter privileged mode.
Router# configure terminal
Step 3
Define the ACL:
Router (config)# ip access-list {standard |
extended} acl_name
Create ACL entries through the permit and/or deny statements:
Router(config-ext-nacl)# ?
Ext Access List configuration commands:
default
Set a command to its defaults
deny
Specify packets to reject
dynamic
Specify a DYNAMIC list of PERMITs or DENYs
evaluate
Evaluate an access list
exit
Exit from access-list configuration mode
no
Negate a command or set its defaults
permit
Specify packets to forward
remark
Access list entry comment
Router(config-ext-nacl)# exit
Step 4
Define the VLAN access map:
Router(config)# vlan access-map
Step 5
map_name
[0-65535]
Configure a match clause in a VLAN access map sequence:
Router (config-access-map)# match {ip address {1-199 | 1300-2699 |
acl_name}
10-94
Cisco Intrusion Detection System Appliance and Module Installation and Configuration Guide Version 4.1
78-15597-02
Chapter 10
Configuring the Sensor Using the CLI
IDSM-2 Configuration Tasks
Step 6
Configure an action clause in the VLAN access map sequence to accompany the
preceding match clause:
Router(config-access-map)# action forward capture
Step 7
Apply the VLAN access-map to the specified VLANs:
Router (config)# vlan filter
Step 8
map_name
vlan-list
vlan_list
Configure the IDSM-2 data ports to capture the captured-flagged traffic:
Router (config)# intrusion-detection module module_number data-port
data_port_number capture allowed-vlan capture_vlans
Step 9
Enable the capture function on the IDSM-2:
Router (config)# intrusion-detection module
data_port_number capture
Caution
module_number data-port
You should not configure an IDSM-2 data port as both a SPAN destination port
and a capture port.
This example shows the output from the show run command:
Router# show run
intrusion-detection module 4 data-port 1 capture allowed-vlan
450,1002-1005
intrusion-detection module 4 data-port 1 capture
.
.
.
vlan access-map CAPTUREALL 10
match ip address MATCHALL
action forward capture
.
.
.
ip access-list extended MATCHALL
permit ip any any
Cisco Intrusion Detection System Appliance and Module Installation and Configuration Guide Version 4.1
78-15597-02
10-95
Chapter 10
Configuring the Sensor Using the CLI
IDSM-2 Configuration Tasks
Using the mls ip ids Command for Capturing IDS Traffic
This section describes how to use the mls ip ids command to capture IDS traffic.
This section contains the following topics:
•
Catalyst Software, page 10-96
•
Cisco IOS Software, page 10-97
Catalyst Software
When you are running the Cisco IOS Firewall on the Multilayer Switch Feature
Card (MSFC), you cannot use VACLs to capture traffic for the IDSM-2, because
you cannot apply VACLs to a VLAN in which you have applied an IP inspect rule
for the Cisco IOS Firewall. However, you can use the mls ip ids command to
designate which packets are captured. Packets that are permitted by the ACL are
captured. Those denied by the ACL are not captured. The permit/deny parameter
does not affect whether a packet is forwarded to destination ports. Packets coming
into that router interface are checked against the IDS ACL to determine if they
should be captured. The mls ip ids command is applied as part of the MSFC
configuration instead of the supervisor configuration. The mls ip ids command
only captures incoming traffic. You will need to use the mls ip ids command on
both the client side router interface and server side router interface, so that both
directions of the connection will be captured.
To use the mls ip ids command to capture IDS traffic, follow these steps:
Step 1
Log in to the MSFC.
Step 2
Enter privileged mode:
Router> enable
Step 3
Enter configuration mode:
Router# configure terminal
Step 4
Configure an ACL to designate which packets will be captured:
Router(config)# ip access-list extended
Step 5
Select the interface that carries the packets to be captured:
Router(config)# interface
10-96
word
interface_name
Cisco Intrusion Detection System Appliance and Module Installation and Configuration Guide Version 4.1
78-15597-02
Chapter 10
Configuring the Sensor Using the CLI
IDSM-2 Configuration Tasks
Step 6
Apply the ACL created in Step 4 to the interface selected in Step 5:
Router(config-if)# mls ip ids
Step 7
Log in to the supervisor engine.
Step 8
Enter privileged mode.
word
Console> enable
Step 9
On the supervisor engine, add the IDSM-2 monitoring port (port 7 or 8) to the
VACL capture list:
Console> (enable) set security acl capture
Caution
idsm_module/port_number
For the IDSM-2 to capture all packets marked by the mls ip ids command, port 7
or 8 of the IDSM-2 must be a member of all VLANs to which those packets are
routed.
Cisco IOS Software
When you are using ports as router interfaces rather than switch ports, there is no
VLAN on which to apply a VACL.
You can use the mls ip ids command to designate which packets will be captured.
Packets that are permitted by the ACL will be captured. Those denied by the ACL
will not be captured. The permit/deny parameter does not affect whether a packet
is forwarded to destination ports. Packets coming into that router interface are
checked against the IDS ACL to determine if they should be captured.
To use the mls ip ids command to capture IDS traffic, follow these steps:
Step 1
Log in to the console.
Step 2
Enter privileged mode:
Router> enable
Step 3
Enter configuration mode:
Router# configure terminal
Cisco Intrusion Detection System Appliance and Module Installation and Configuration Guide Version 4.1
78-15597-02
10-97
Chapter 10
Configuring the Sensor Using the CLI
IDSM-2 Configuration Tasks
Step 4
Configure an ACL to designate which packets will be captured:
Router(config)# ip access-list extended
Step 5
Select the interface that carries the packets to be captured:
Router(config)# interface
Step 6
word
interface_name
Apply the ACL created in Step 4 to the interface selected in Step 5:
Router(config-if)# mls ip ids
word
Enable the capture function on the IDSM-2 data ports so that packets
with the capture bit set are received by the interface:
Router(config)# intrusion-detection module 4 data-port 1 capture
Router(config)# intrusion-detection module 4 data-port 2 capture
Caution
For the IDSM-2 to capture all packets marked by the mls ip ids command, data
port 1 or data port 2 of the IDSM-2 must be a member of all VLANs to which
those packets are routed.
Miscellaneous Tasks
This section contains procedures such as resetting the IDSM-2 and lists of
Catalyst and Cisco IOS software commands.
Note
For more detailed information on Catalyst and Cisco IOS software commands,
refer to the command references found on Cisco.com. See the Cisco Intrusion
Detection System (IDS) Hardware and Software Version 4.1 Documentation
Guide that shipped with your IDSM-2 for instructions on how to locate these
documents.
This section contains the following topics:
10-98
•
Enabling a Full Memory Test, page 10-99
•
Resetting the IDSM-2, page 10-101
Cisco Intrusion Detection System Appliance and Module Installation and Configuration Guide Version 4.1
78-15597-02
Chapter 10
Configuring the Sensor Using the CLI
IDSM-2 Configuration Tasks
•
Cisco IOS Software Commands, page 10-106
•
Cisco IOS Software Commands, page 10-106
Enabling a Full Memory Test
When the IDSM-2 initially boots, by default it runs a partial memory test. You can
enable a full memory test in Catalyst software and Cisco IOS software.
This section contains the following topics:
•
Memory and Boot Time, page 10-99
•
Catalyst Software, page 10-99
•
Cisco IOS Software, page 10-100
Memory and Boot Time
Table 10-2 lists the memory and approximate boot time for a long memory test.
Table 10-2 Memory and Boot Time
Memory Size
Boot Time
256 MB
1.5 minutes
512 MB
3 minutes
1 GB
6 minutes
1.5 GB
9 minutes
2 GB
12 minutes
Catalyst Software
You can enable a full memory test when you use the set boot device bootseq
module_number mem-test-full command. The long memory test takes about 12
minutes.
Cisco Intrusion Detection System Appliance and Module Installation and Configuration Guide Version 4.1
78-15597-02
10-99
Chapter 10
Configuring the Sensor Using the CLI
IDSM-2 Configuration Tasks
To enable a full memory test, follow these steps:
Step 1
Log in to the console.
Step 2
Type the following commands:
Console> set boot device cf:1 4
mem-test-full
Console> show boot device 4
The set boot device command can either contain cf:1 or hdd:1.
The following output appears:
Device BOOT variable = cf:1
FAST BOOT Enabled
Step 3
Reset the IDSM-2.
See Resetting the IDSM-2, page 10-101, for the procedure.
The full memory test runs.
Note
A full memory test takes more time to complete than a partial memory
test.
Cisco IOS Software
You can enable a full memory test when you use the set boot device bootseq
module_number mem-test-full command. The long memory test takes about 12
minutes.
To enable a full memory test, follow these steps:
Step 1
Log in to the console.
Step 2
Type the following commands:
Router# set boot device cf:1 4 mem-test-full
Router# show boot device 4
The set boot device command can either contain cf:1 or hdd:1.
10-100
Cisco Intrusion Detection System Appliance and Module Installation and Configuration Guide Version 4.1
78-15597-02
Chapter 10
Configuring the Sensor Using the CLI
IDSM-2 Configuration Tasks
Step 3
The following output appears:
Device BOOT variable = cf:1
FAST BOOT Enabled
Step 4
Reset the IDSM-2.
See Resetting the IDSM-2, page 10-101, for the procedure.
The full memory test runs.
A full memory test takes more time to complete than a partial memory
test.
Note
Resetting the IDSM-2
If for some reason you cannot communicate with the IDSM-2 through SSH,
Telnet, or the switch session command, you must reset the IDSM-2 from the
switch console. The reset process requires several minutes. This section describes
how to reset the IDSM-2.
The section contains the following topics:
•
Catalyst Software, page 10-101
•
Cisco IOS Software, page 10-102
Catalyst Software
To reset the IDSM-2 from the CLI, follow these steps:
Step 1
Log in to the console.
Step 2
Enter privileged mode:
Console> enable
Step 3
Reset the IDSM-2 to the application partition or the maintenance partition:
Console> (enable) reset
module_number
[hdd:1/cf:1]
Cisco Intrusion Detection System Appliance and Module Installation and Configuration Guide Version 4.1
78-15597-02
10-101
Chapter 10
Configuring the Sensor Using the CLI
IDSM-2 Configuration Tasks
Note
If you do not specify either the application partition (hdd:1 the default) or
the maintenance partition (cf:1), the IDSM-2 uses the boot device
variable.
The following example shows the output of the reset command:
Console> (enable) reset 3
2003 Feb 01 00:18:23 %SYS-5-MOD_RESET: Module 3 reset from console//
Resetting module 3... This may take several minutes.
2003 Feb 01 00:20:03 %SYS-5-MOD_OK: Module 3 is online.
Console> (enable)
Caution
If the IDSM-2 is removed from the switch chassis without first being shut down,
or the chassis loses power, you may need to reset the IDSM-2 more than once. If
the IDSM-2 fails to respond after three reset attempts, boot the maintenance
partition, and perform the instructions for restoring the application partition. See
Reimaging the IDSM-2, page 10-124, for the procedure.
Cisco IOS Software
Note
The reset process requires several minutes.
To reset the IDSM-2 from the CLI, follow these steps:
Step 1
Log in to the console.
Step 2
Enter privileged mode:
Router# configure terminal
Step 3
Reset the IDSM-2:
Router# hw-module module
module_number reset
[hdd:1/cf:1]
This example shows the output of the reset command:
Router# hw-module module 8 reset
10-102
Cisco Intrusion Detection System Appliance and Module Installation and Configuration Guide Version 4.1
78-15597-02
Chapter 10
Configuring the Sensor Using the CLI
IDSM-2 Configuration Tasks
Device BOOT variable for reset =
Warning: Device list is not verified.
Proceed with reload of module? [confirm]
% reset issued for module 8
Catalyst Software Commands
This section lists supported and unsupported Catalyst Software Commands. For
more information, refer to the Catalyst 6500 Series Command References found
on Cisco.com.
This section contains the following topics:
•
Supported Supervisor Engine Commands, page 10-103
•
Unsupported Supervisor Engine Commands, page 10-105
Supported Supervisor Engine Commands
The IDSM-2 also supports the following supervisor engine CLI commands, which
are described in more detail in the Catalyst 6500 Series Command References.
•
clear config module_number
Clears the configuration on the supervisor engine that is associated with the
specified IDSM-2.
•
clear log module_number
Deletes all entries in the error log for the specified IDSM-2.
•
session slot_number
Logs in to the console of the IDSM-2 from the switch console.
•
set module commands (all other set module commands return an error
message):
– set module name module_number
Sets the name of the module.
– set module power module_number up | down
Enables or disables power to the specified IDSM-2.
Cisco Intrusion Detection System Appliance and Module Installation and Configuration Guide Version 4.1
78-15597-02
10-103
Chapter 10
Configuring the Sensor Using the CLI
IDSM-2 Configuration Tasks
•
set port name module_number
Configures the name for the specified IDSM-2 port.
•
set span
Configures port 1 as a SPAN destination port. You cannot use port 1 on the
IDSM-2 as a SPAN source port.
•
set trunk
Configures trunk ports.
•
set vlan
Configures VLAN capture ports.
•
show config
Displays the supervisor engine NVRAM configurations.
•
show log
Displays the error logs for the specified IDSM-2.
•
show mac module_number
Displays the MAC counters for the specified IDSM-2.
•
show module module_number
With an IDSM-2 installed, displays “Intrusion Detection System Module”
under Module-Type.
•
show port module_number
Displays the port status for the specified IDSM-2.
•
show port capabilities [module | module_number]
Displays the capabilities of the module and ports.
•
show test
Displays the errors reported from the diagnostic tests for both the SPAN port
(port 1) and the management port (port 2) and the BIOS and CMOS boot
results.
10-104
Cisco Intrusion Detection System Appliance and Module Installation and Configuration Guide Version 4.1
78-15597-02
Chapter 10
Configuring the Sensor Using the CLI
IDSM-2 Configuration Tasks
Unsupported Supervisor Engine Commands
The following supervisor engine CLI commands are not supported by the
IDSM-2:
•
set module {enable|disable} module_number
•
set port broadcast
•
set port channel
•
set port cops
•
set port disable
•
set port enable
•
set port flowcontrol
•
set port gmrp
•
set port gvrp
•
set port host
•
set port inlinepower
•
set port jumbo
•
set port membership
•
set port negotiation
•
set port protocol
•
set port qos
•
set port rsvp
•
set port security
•
set port speed
•
set port trap
•
set protocolfilter
•
set rgmp
•
set snmp
•
set spantree
•
set udld
•
set vtp
Cisco Intrusion Detection System Appliance and Module Installation and Configuration Guide Version 4.1
78-15597-02
10-105
Chapter 10
Configuring the Sensor Using the CLI
IDSM-2 Configuration Tasks
Cisco IOS Software Commands
This section lists the Cisco IOS software commands that the IDSM-2 supports.
These commands are grouped according to mode.
For more detailed information on Cisco IOS software commands, refer to the
command references found on Cisco.com. See the Cisco Intrusion Detection
System (IDS) Hardware and Software Version 4.1 Documentation Guide that
shipped with your sensor for instructions on how to locate these documents.
This section contains the following topics:
•
EXEC Commands, page 10-106
•
Configuration Commands, page 10-108
EXEC Commands
The following commands are all performed in EXEC mode:
•
clock read-calendar
Updates the clock time to the calendar time.
•
clock set time date
Sets the current time and date.
•
clock update-calendar
Updates the calendar time to the clock time.
•
hw-module module slot_number reset
Resets the IDSM-2 into the partition specified by the boot device variable; if
the boot device variable has not been set, the IDSM-2 is reset to the
application partition by default. Use the command show boot device module
module_number to view the current setting of the boot device variable.
•
hw-module module slot_number reset cf:1
Resets the module into the maintenance partition.
•
hw-module module slot_number shutdown
Shuts down the module so that it can be safely removed from the chassis.
•
reload
Reloads the entire switch.
10-106
Cisco Intrusion Detection System Appliance and Module Installation and Configuration Guide Version 4.1
78-15597-02
Chapter 10
Configuring the Sensor Using the CLI
IDSM-2 Configuration Tasks
•
session slot slot_number processor processor_number
Logs in to the console of the IDSM-2 from the switch console.
•
show intrusion-detection module module_number data-port
data_port_number state
Displays the state of the specified IDSM-2 data port.
•
show intrusion-detection module module_number data-port
data_port_number traffic
Displays traffic statistics for the IDSM-2 data port traffic.
•
show intrusion-detection module module_number management-port state
Displays the state of the IDSM-2 management port.
•
show intrusion-detection module module_number management-port
traffic
Displays traffic statistics for the IDSM-2 management port.
•
show ip access-lists
Displays the current access lists.
•
show module
Displays the installed modules, versions, and states.
•
show running-config
Displays the configuration that is currently running.
•
show startup-config
Displays the saved configuration.
•
show vlan access-map
Displays all current VLAN access maps.
Cisco Intrusion Detection System Appliance and Module Installation and Configuration Guide Version 4.1
78-15597-02
10-107
Chapter 10
Configuring the Sensor Using the CLI
IDSM-2 Configuration Tasks
Configuration Commands
The following configuration commands are all performed in either global
configuration mode, interface configuration mode, or VACL configuration
submode:
•
Global configuration mode
– clock calendar valid
Sets the current calendar time as the switch time on bootup.
– clock summer-time zone recurring
Sets the switch to use the summertime settings.
– clock timezone zone offset
Sets the timezone for the switch/IDSM-2.
– intrusion-detection module module_number management-port
access-vlan access_vlan_number
Configures the access vlan for the IDSM-2 command and control port.
– intrusion-detection module module_number data-port
data_port_number capture allowed-vlan allowed_capture_vlan(s)
Configures the VLAN(s) for VACL capture.
– intrusion-detection module module_number data-port
data_port_number capture
Enables VACL capture for the specified IDSM-2 data port.
– ip access-list extended word
Creates access lists for use in the VACL maps.
– monitor session session {destination {interface interface
interface-number} [ , | -] {vlan vlan-id}}
Sets the destination for a SPAN session.
– monitor session session {source {interface interface interface-number}
| {vlan vlan-id}} [ , | - | rx | tx | both]
Sets the sources for a SPAN session.
– no power enable module slot_number
Shuts down the IDSM-2 and removes power.
10-108
Cisco Intrusion Detection System Appliance and Module Installation and Configuration Guide Version 4.1
78-15597-02
Chapter 10
Configuring the Sensor Using the CLI
IDSM-2 Configuration Tasks
– power enable module slot_number
Turns on the power for the IDSM-2 if it is not already on.
– vlan access-map map_name_sequence
Creates the VACL maps.
– vlan filter map_name vlan-list vlans
Maps the VACL maps to VLANs.
•
Interface configuration mode
– switchport
Sets the interface as a switch port.
– switchport access vlan vlan
Sets the access VLAN for the interface.
– switchport capture
Sets the interface as a capture port.
– switchport mode access
Sets the interface as an access port.
– switchport mode trunk
Sets the interface as a trunk port.
– switchport trunk allowed vlan vlans
Sets the allowed VLANs for trunk.
– switchport trunk encapsulation dot1q
Sets dot1q as the encapsulation type.
– switchport trunk native vlan vlan
Sets the native VLAN for the trunk port.
•
VACL configuration submode
– action forward capture
Designates that matched packets should be captured.
– match ip address {1-199 | 1300-2699 | acl_name}
Specifies filtering in the VACL.
Cisco Intrusion Detection System Appliance and Module Installation and Configuration Guide Version 4.1
78-15597-02
10-109
Chapter 10
Configuring the Sensor Using the CLI
Reimaging Appliances and Modules
Reimaging Appliances and Modules
This section provides procedures for reimaging the sensor image. When you
reimage the sensor, all accounts are removed and the default cisco account is reset
to use the default password “cisco”. After reimage, you must initialize the sensor
again. See Initializing the Sensor, page 10-2, for the procedure.
After you initialize your sensor, upgrade your sensor with the most recent
signature updates and service packs. See Obtaining Cisco IDS Software, page 9-1,
for the procedure.
You must also reassign the interfaces. See Assigning and Enabling the Sensing
Interface, page 10-9, for the procedure.
This section contains the following topics:
•
Reimaging the Appliance, page 10-110
•
Reimaging the NM-CIDS Application Partition, page 10-119
•
Reimaging the IDSM-2, page 10-124
Reimaging the Appliance
When you use the recover command, you are booting to the recovery partition,
which automatically reimages the application partition on your appliance. You
can use the upgrade command to download and install a recovery partition image,
which reimages the recovery partition. You can also install the system image on
the IDS-4215, IPS-4240, or IPS-4255 by using the ROMMON to TFTP the system
image onto the compact flash device. Installing the system image reimages both
the recovery partition and application partition.
This section contains the following topics:
10-110
•
Recovering the Application Partition Image, page 10-111
•
Upgrading the Recovery Partition Image, page 10-112
•
Installing the IDS-4215 System Image, page 10-113
•
Installing the IPS-4240 and IPS-4255 System Image, page 10-116
Cisco Intrusion Detection System Appliance and Module Installation and Configuration Guide Version 4.1
78-15597-02
Chapter 10
Configuring the Sensor Using the CLI
Reimaging Appliances and Modules
Recovering the Application Partition Image
You can recover the application partition image for the appliance if it becomes
unusable. Using the recover application-partition command, you can reinstall
the original factory image that resides on the recovery partition.
Note
If you have upgraded your recovery partition to the most recent version before you
recover the application partition image, you can install the most up-to-date
software image. See Upgrading the Recovery Partition Image, page 10-112, for
the procedure for upgrading the recovery partition to the most recent version.
Note
You can also use the recovery/upgrade CD to reinstall both the recovery and
application partitions. See Using the Recovery/Upgrade CD with the Appliance,
page 9-9, for the procedure.
To recover the application partition image, follow these steps:
Step 1
Log in to the sensor CLI.
Step 2
Enter configuration mode:
sensor# configure terminal
Step 3
Recover the application partition image:
sensor(config)# recover application-partition
You are asked whether you want to proceed.
All configuration changes except for the network settings will be
reset to default. Continue with recovery?
Step 4
Type yes to continue.
The application partition is reimaged with the original factory image from the
recovery partition. You must now initialize the appliance with the setup
command. See Initializing the Sensor, page 10-2, for the procedure.
Cisco Intrusion Detection System Appliance and Module Installation and Configuration Guide Version 4.1
78-15597-02
10-111
Chapter 10
Configuring the Sensor Using the CLI
Reimaging Appliances and Modules
Note
The IP address, netmask, access lists, time zone, and offset are saved and
applied to the reimaged application partition. If you executed the recover
application-partition command remotely, you can SSH to the sensor
with the default username and password (cisco/cisco) and then initialize
the sensor again with the setup command.
Note
If you cannot access the CLI to execute the recover
application-partition command, you can reboot the sensor and select the
option during the bootup process. This enables you to boot to the recovery
partition and reimage the application partition.
Upgrading the Recovery Partition Image
You can upgrade the image on the recovery partition with the most recent version
so that it is ready if you need to recover the application partition on your
appliance.
To upgrade the recovery partition image, follow these steps:
Step 1
Obtain the recovery partition image file from Software Center on Cisco.com and
copy it to an SCP or FTP server.
See Obtaining Cisco IDS Software, page 9-1, for instructions on how to access the
Software Center on Cisco.com.
Step 2
Log in to the sensor CLI.
Step 3
Enter configuration mode:
sensor# configure terminal
Step 4
Upgrade the recovery partition:
sensor(config)# upgrade
scp://user@server_ipaddress//upgrade_path /recovery_partition_file
The recovery partition image filename looks similar to this:
IDS-42XX-K9-r-1.1-a-4.0-1-S37.tar.pkg
10-112
Cisco Intrusion Detection System Appliance and Module Installation and Configuration Guide Version 4.1
78-15597-02
Chapter 10
Configuring the Sensor Using the CLI
Reimaging Appliances and Modules
Step 5
Type the SCP or FTP server’s password.
After the recovery partition image file has been downloaded, you are asked if you
want to proceed with the upgrade:
Warning: Executing this command will reimage the recovery partition.
The system may be rebooted to complete the upgrade.
Continue with upgrade?
Step 6
Type yes to continue with the reimaging.
The recovery partition has been upgraded with the new image.
Installing the IDS-4215 System Image
You can install the IDS-4215 system image by using the ROMMON on the
appliance to TFTP the system image onto the compact flash device.
Note
Other IDS appliances use the recovery/upgrade CD rather than the system image.
Caution
Before installing the system image, you must first upgrade the IDS-4215 BIOS to
version 5.1.7 and the ROMMON to version 1.4 using the upgrade utility file
IDS-4215-bios-5.1.7-rom-1.4.bin available for download at the following URL:
http://www.cisco.com/cgi-bin/tablebuild.pl/ids-firmware
We recommend the following TFTP servers:
•
For Windows:
Tftpd32 version 2.0, available at:
http://membres.lycos.fr/phjounin/P_tftpd32.htm
•
For UNIX:
Tftp-hpa series, available at:
http://www.kernel.org/pub/software/network/tftp/
Cisco Intrusion Detection System Appliance and Module Installation and Configuration Guide Version 4.1
78-15597-02
10-113
Chapter 10
Configuring the Sensor Using the CLI
Reimaging Appliances and Modules
To install the system image, follow the steps:
Note
You lose all user configuration settings when you install the system image. Before
trying to recover the sensor by installing the system image, try to recover by using
the recover application-partition command or by selecting the Recovery
Partition during sensor bootup. See Recovering the Application Partition Image,
page 10-111, for the procedure.
To install the IDS-4215 system image, follow these steps:
Step 1
Download the IDS-4215-K9-sys-4.1-4-S91a.img file to the TFTP root directory
of a TFTP server that is accessible from your IDS-4215.
The file is available for download at the following URL:
http://www.cisco.com/cgi-bin/tablebuild.pl/ids4-app-recovr
Make sure you can access the TFTP server location from the network connected
to your IDS-4215 Ethernet port.
Step 2
Boot the appliance.
Step 3
Press CTRL-R at the following prompt while the system is booting:
Evaluating Run Options...
Note
You have five seconds to press CTRL-R.
The console displays information such as the following:
CISCO SYSTEMS IDS-4215
Embedded BIOS Version 5.1.7 05/12/03 10:18:14.84
Compiled by ciscouser
Evaluating Run Options ...
Cisco ROMMON (1.4) #0: Mon May 12 10:21:46 MDT 2003
Platform IDS-4215
0: i8255X @ PCI(bus:0 dev:13 irq:11)
1: i8255X @ PCI(bus:0 dev:14 irq:11)
Using 1: i82557 @ PCI(bus:0 dev:14 irq:11), MAC: 0000.c0ff.ee01
Use ? for help.
rommon>
10-114
Cisco Intrusion Detection System Appliance and Module Installation and Configuration Guide Version 4.1
78-15597-02
Chapter 10
Configuring the Sensor Using the CLI
Reimaging Appliances and Modules
Step 4
Verify that the sensor is running BIOS version 5.1.7 or later and ROMMON
version 1.4 or later.
The current versions are shown in the console display information identified in
Step 3.
Step 5
Select the interface port number to be used for the TFTP download:
Note
The port in use is listed just before the rommon prompt. In the example,
port 1 is being used as noted by the text, Using 1: i82557 @ PCI(bus:0
dev:14 irq:11), MAC: 0000.c0ff.ee01 .
rommon> interface <port_number>
Note
Step 6
Ports 0 and 1 are labeled on the back of the chassis.
Set an IP address for the local port on the IDS-4125:
rommon> ip_address <ip_address>
Note
Step 7
Select an unused IP address on the sensor’s local network that can access
the TFTP server.
Set the TFTP server IP address:
rommon> server <ip_address>
Step 8
Set the gateway IP address:
rommon> gateway <ip_address>
Step 9
Verify that you have access to the TFTP server by pinging it from your local
defined Ethernet port using one of the following commands:
rommon> ping <ip_address>
rommon> ping server
Step 10
Define the path and filename on the TFTP file server from which you are
downloading the image:
rommon> file <path/filename>
Cisco Intrusion Detection System Appliance and Module Installation and Configuration Guide Version 4.1
78-15597-02
10-115
Chapter 10
Configuring the Sensor Using the CLI
Reimaging Appliances and Modules
For example, for UNIX:
rommon> file /tftpboot/IDS-4215-K9-sys-4.1-4-S91a.img
For example, for Windows:
rommon> file C:\<tftpboot_directory>\IDS-4215-K9-sys-4.1-4-S91a.img
Step 11
Download and install the system image:
rommon> tftp
Note
The sensor reboots several times during the reimaging process. Do not
remove power from the sensor during the update process or the upgrade
can become corrupted.
Installing the IPS-4240 and IPS-4255 System Image
You can install the IPS-4240 and IPS-4255 system image by using the ROMMON
on the appliance to TFTP the system image onto the compact flash device.
Note
Other IDS appliances use the recovery/upgrade CD rather than the system image.
We recommend the following TFTP servers:
•
For Windows:
Tftpd32 version 2.0, available at:
http://membres.lycos.fr/phjounin/P_tftpd32.htm
•
For UNIX:
Tftp-hpa series, available at:
http://www.kernel.org/pub/software/network/tftp/
10-116
Cisco Intrusion Detection System Appliance and Module Installation and Configuration Guide Version 4.1
78-15597-02
Chapter 10
Configuring the Sensor Using the CLI
Reimaging Appliances and Modules
To install the system image, follow these steps:
Step 1
Download the IPS-4240-K9-sys-4.1-4-S91a.img file to the TFTP root directory of
a TFTP server that is accessible from your IDS-4240.
The file is available for download at the following URL:
http://www.cisco.com/cgi-bin/tablebuild.pl/ids4-app-recovr
Make sure you can access the TFTP server location from the network connected
to your IDS-4240 Ethernet port.
Step 2
Boot the appliance.
Step 3
Press Break or ESC at the following prompt while the system is booting:
Evaluating Run Options...
Note
You have ten seconds to press Break or ESC.
The system enters ROMMON mode. The rommon> prompt appears.
The console displays information such as the following:
ROMMON Variable Settings:
ADDRESS=10.1.9.201
SERVER=10.1.8.1
GATEWAY=10.1.9.254
PORT=Management0/0
VLAN=untagged
IMAGE=IPS-4240-K9-sys-4.1-4-S91.img
CONFIG=
Note
Not all values are required to establish network connectivity. The address,
server, gateway, and image values are required. If you are not sure of the
settings needed for your local environment, contact your system
administrator.
The variables have the following definitions:
•
Address—Local IP address of the sensor
•
Server—TFTP server IP address where the application image is stored
•
Gateway—Gateway IP address used by the sensor
Cisco Intrusion Detection System Appliance and Module Installation and Configuration Guide Version 4.1
78-15597-02
10-117
Chapter 10
Configuring the Sensor Using the CLI
Reimaging Appliances and Modules
Step 4
•
Port—Ethernet interface port used for sensor management
•
VLAN—VLAN ID number (leave as 0)
•
Image—System image file path/name
Select the interface port number to be used for the TFTP download:
rommon> interface <port_number>
Step 5
Set an IP address for the local port on the IDS-4240:
rommon> ip_address <ip_address>
Note
Step 6
Select an unused IP address on the sensor’s local network that can access
the TFTP server.
Set the TFTP server IP address:
rommon> server <ip_address>
Step 7
Set the gateway IP address:
rommon> gateway <ip_address>
Step 8
Type set and press Enter to verify the network settings.
Step 9
Verify that you have access to the TFTP server by pinging it from your local
defined Ethernet port using one of the following commands:
rommon> ping <ip_address>
rommon> ping server
Note
Step 10
You can type the sync command to store these settings in NVRAM so they
are maintained across boots. Otherwise, this information must be typed
each time you want to boot an image from ROMMON.
Download and install the system image:
rommon> tftp
10-118
Cisco Intrusion Detection System Appliance and Module Installation and Configuration Guide Version 4.1
78-15597-02
Chapter 10
Configuring the Sensor Using the CLI
Reimaging Appliances and Modules
Note
The sensor reboots several times during the reimaging process. Do not
remove power from the sensor during the update process or the upgrade
can become corrupted.
If the network settings are correct, the system downloads and boots the specified
IMAGE on the sensor. Be sure to use a valid sensor image.
Reimaging the NM-CIDS Application Partition
You use the helper image file to replace the application partition on the NM-CIDS.
The helper image is booted over the network using a TFTP server.
To reimage the NM-CIDS application partition, follow these steps:
Step 1
Obtain the helper image file on Cisco.com.
See Obtaining Cisco IDS Software, page 9-1, for the procedure for accessing the
Software Center on Cisco.com.
a.
Locate a TFTP server on your network.
Remember the IP address of your TFTP server. You will need it later to copy
the software files.
b.
Put the IDS helper image file on the TFTP server.
c.
Locate an SSH or TFTP server on your network.
Remember the IP address of your SSH or TFTP server. You will need it later
to copy the software files.
d.
Copy the helper image file to the /tftpboot directory on your TFTP server:
# scp
user@host:/path/NM-CIDS-K9-helper-1.0-1.bin /tftpboot
The following example shows what a helper image file looks like:
NM-CIDS-K9-helper-1.0-1.bin
Note
Most TFTP servers offer the directory /tftpboot to TFTP clients.
Cisco Intrusion Detection System Appliance and Module Installation and Configuration Guide Version 4.1
78-15597-02
10-119
Chapter 10
Configuring the Sensor Using the CLI
Reimaging Appliances and Modules
Step 2
Session in to the NM-CIDS:
Router# service-module IDS-Sensor
Step 3
slot_number/0
session
Suspend the session by pressing Shift-CTRL-6 x.
You will see the router# prompt. If you do not see this prompt, try Ctrl-6 x.
Step 4
Reset the NM-CIDS:
Router# service-module IDS-Sensor
slot_number/0
reset
You are prompted to confirm the reset command.
Step 5
Press Enter to confirm.
Step 6
Resume the suspended session by pressing Enter.
After displaying its version, the bootloader displays the following prompt for 15
seconds:
Please enter ’***’ to change boot configuration:
If you type *** during the 15-second delay or there is no default boot device
configured, you enter the bootloader CLI.
Step 7
Session in to the NM-CIDS:
ServicesEngine boot-loader>
Step 8
Set up the bootloader network parameters:
Note
You only have to configure the bootloader once.
ServicesEngine boot-loader> config
TFTP server [10.1.2.5] > Gateway [10.1.2.254] > Default Helper-file []
>NM-CIDS-K9-helper-1.0-1.bin Ethernet interface [external] > Default
Boot [none] >disk
You are prompted for each value line by line.
a.
Specify the IP address.
The IP address applies to the external fast Ethernet port on the NM-CIDS.
This must be a real IP address on your network.
10-120
Cisco Intrusion Detection System Appliance and Module Installation and Configuration Guide Version 4.1
78-15597-02
Chapter 10
Configuring the Sensor Using the CLI
Reimaging Appliances and Modules
b.
Specify the subnet mask.
The netmask applies to the external fast Ethernet port on the NM-CIDS. This
must be a real IP address on your network.
c.
Specify the TFTP server IP address.
d.
Specify the gateway IP address.
e.
Specify the default helper file.
f.
Specify the Ethernet interface.
The Ethernet interface is external.
g.
Specify the default boot device.
The default boot device is disk.
Step 9
Boot the helper file:
ServicesEngine boot-loader> boot helper
Probing...EEPRO100Found Intel EtherExpressPro100 at x00000000 ROM
address 0x 00000000
Ethernet addr: 01:23:45:67:89:AB
Me: 10.1.2.3, Server: 10.1.2.5, Gateway: 10.1.2.254
Loading NM-CIDS-K9-helper-1.0-1.bin
Note
If you want to boot a helper image different from the one you configured
as your default helper, you can type its name here. For example: boot
helper some_other_helper
Note
The bootloader brings up the external interface and locates the TFTP
server host, which may take a while. You can press keys during the TFTP
load process to affect the bootloader’s behavior. Press p to see a printout
of the ARP table. You should see three entries: the Me address from the
example above, the Server address, and the Gateway address. If this
process seems to take too long and nothing changes for a long time, you
may have network configuration or connectivity problems.
When the TFTP load actually begins, a spinning character is displayed to indicate
packets arriving from the TFTP server.
Cisco Intrusion Detection System Appliance and Module Installation and Configuration Guide Version 4.1
78-15597-02
10-121
Chapter 10
Configuring the Sensor Using the CLI
Reimaging Appliances and Modules
Note
After the helper image is loaded, the bootloader checks that it downloaded
correctly. The bootloader will not run a helper if it was received
incorrectly or it was not signed by Cisco. The following message
indicates the helper is valid: Image signature verified successfully.
The Helper utility is launched:
Cisco Systems, Inc.
Services engine helper utility for NM-CIDS
Version 1.0(1) [200305011547]
——Main menu
1 - Download application image and write to HDD
2 - Download bootloader and write to flash
3 - Display software version on HDD
4 - Display total RAM size
5 - Change file transfer method (currently secure shell)
Change file transfer method (currently secure shell)
r - Exit and reset Services Engine
h - Exit and shutdown Services Engine
Selection [1234rh]:
Step 10
Step 11
Step 12
Chose the transfer method:
a.
For SSH, go to Steps 11 and 12.
b.
For TFTP, go to Steps 13 and 14.
Set SSH as the transfer method:
a.
Type 5.
b.
Type 1 to change to secure shell.
c.
Type r to return to the Main menu.
Reimage the hard-disk drive:
a.
Type 1.
b.
Type the secure shell server username.
c.
Type the secure shell server IP address.
d.
Type the full pathname of recovery image:
full pathname of recovery image: /path /NM-CIDS-K9-a-4.1-1-S42.bin
10-122
Cisco Intrusion Detection System Appliance and Module Installation and Configuration Guide Version 4.1
78-15597-02
Chapter 10
Configuring the Sensor Using the CLI
Reimaging Appliances and Modules
e.
Type y to continue:
Ready to begin
Are you sure? y/n
You receive the following message:
The authenticity of host 10.1.2.10 (10.1.2.10) can’t be
established. RSA key fingerprint is
7b:90:3b:16:5f:a1:34:92:ff:94:54:19:82:dc:73:ba. Are you sure you
want to continue connecting (yes/no)?
f.
Type yes.
g.
Specify the server password:
user@ip_address password
./
./ptable
.....
Disk restore was successful
The operation was successful.
Writing kernel signature to boot flash device
Read 174 bytes from vmlinuz-2.4.18-5-module.u64md5
bflash-write: After bfwrite The operation was successful
You are returned to the main menu with the Selection
Continue with Step 15.
Step 13
Step 14
[1234rh]:
prompt.
Set TFTP as the transfer method:
a.
Type 5.
b.
Type 2 to change to TFTP.
c.
Type r to return to the Main menu.
Reimage the hard-disk drive:
a.
Type 1.
b.
Type the TFTP server IP address.
c.
Type the full pathname of recovery image:
full pathname of recovery image: /path /NM-CIDS-K9-a-4.1-1-S42.bin
d.
Type y to continue.
Ready to begin
Are you sure? y/n
Cisco Intrusion Detection System Appliance and Module Installation and Configuration Guide Version 4.1
78-15597-02
10-123
Chapter 10
Configuring the Sensor Using the CLI
Reimaging Appliances and Modules
You receive the following message:
The authenticity of host 10.1.2.10 (10.1.2.10) can’t be
established.
RSA key fingerprint is
7b:90:3b:16:5f:a1:34:92:ff:94:54:19:82:dc:73:ba.
Are you sure you want to continue connecting (yes/no)?
e.
Step 15
Type yes.
Reboot the NM-CIDS:
Selection [1234rh]: r
About to exit and reset Services Engine.
Are you sure? [y/N]
Step 16
Type y to reboot.
You must initialize your NM-CIDS with the setup command. See Initializing the
Sensor, page 10-2.
Reimaging the IDSM-2
If your application partition becomes unusable, you can reimage it from the
maintenance partition. After you reimage the application partition of the IDSM-2,
you must initialize the IDSM-2 using the setup command.
See Initializing the Sensor, page 10-2, for the procedure.
When there is a new maintenance partition image file, you can reimage the
maintenance partition from the application partition.
This section describes how to reimage the application partition and maintenance
partition for Catalyst software and Cisco IOS software.
This section contains the following topics:
10-124
•
Reimaging the IDSM-2, page 10-125
•
Reimaging the Maintenance Partition, page 10-127
Cisco Intrusion Detection System Appliance and Module Installation and Configuration Guide Version 4.1
78-15597-02
Chapter 10
Configuring the Sensor Using the CLI
Reimaging Appliances and Modules
Reimaging the IDSM-2
This section contains the following topics:
•
Catalyst Software, page 10-125
•
Cisco IOS Software, page 10-126
Catalyst Software
To reimage the application partition, follow these steps:
Step 1
Obtain the application partition file from Software Center on Cisco.com and copy
it to an FTP server.
See Obtaining Cisco IDS Software, page 9-1, for instructions on how to access the
Software Center on Cisco.com.
Step 2
Log in to the switch CLI.
Step 3
Boot the IDSM-2 to the maintenance partition:
cat6k> (enable) reset
Step 4
module_number cf:1
Log in to the maintenance partition CLI:
login: guest
Password: cisco
Step 5
Reimage the application partition:
[email protected]# upgrade ftp://user@ftp
server IP/directory
path/image file
Step 6
Specify the FTP server password.
After the application partition file has been downloaded, you are asked if you
want to proceed:
Upgrading will wipe out the contents on the hard disk. Do you want to
proceed installing it [y|n]:
Step 7
Type y to continue.
When the application partition file has been installed, you are returned to the
maintenance partition CLI.
Step 8
Exit the maintenance partition CLI and return to the switch CLI.
Cisco Intrusion Detection System Appliance and Module Installation and Configuration Guide Version 4.1
78-15597-02
10-125
Chapter 10
Configuring the Sensor Using the CLI
Reimaging Appliances and Modules
Step 9
Reboot the IDSM-2 to the application partition:
cat6k> (enable) reset
module_number hdd:1
Step 10
When the IDSM-2 has rebooted, check the software version.
Step 11
Log in to the application partition CLI and initialize the IDSM-2.
See Initializing the Sensor, page 10-2, for the procedure.
Cisco IOS Software
To reimage the application partition, follow these steps:
Step 1
Obtain the application partition file from Software Center on Cisco.com and copy
it to an FTP server.
See Obtaining Cisco IDS Software, page 9-1, for instructions on how to access the
Software Center on Cisco.com.
Step 2
Log in to the switch CLI.
Step 3
Boot the IDSM-2 to the maintenance partition:
cat6k# hw-module module
Step 4
cf:1
Session in to the maintenance partition CLI:
cat6k# session slot
Step 5
module_number reset
slot_number processor
1
Log in to the maintenance partition CLI:
login: guest
Password: cisco
Step 6
Reimage the application partition:
[email protected]# upgrade
ftp://user@ftp_server_IP_address/directory_path/image_file
—install
Step 7
Specify the FTP server password.
After the application partition file has been downloaded, you are asked if you
want to proceed:
Upgrading will wipe out the contents on the hard disk.
Do you want to proceed installing it [y|n]:
10-126
Cisco Intrusion Detection System Appliance and Module Installation and Configuration Guide Version 4.1
78-15597-02
Chapter 10
Configuring the Sensor Using the CLI
Reimaging Appliances and Modules
Step 8
Type y to continue.
When the application partition file has been installed, you are returned to the
maintenance partition CLI.
Step 9
Exit the maintenance partition CLI and return to the switch CLI.
Step 10
Reboot the IDSM-2 to the application partition:
cat6k# hw-module module
Step 11
module_number reset
hdd:1
Verify that the IDSM-2 is online and that the software version is correct and that
the status is ok:
cat6k# show module
module_number
Session in to the IDSM-2 application partition CLI:
cat6k# session slot slot_number processor 1
Step 12
Initialize the IDSM-2.
See Initializing the Sensor, page 10-2, for the procedure.
Reimaging the Maintenance Partition
This section contains the following topics:
•
Catalyst Software, page 10-127
•
Cisco IOS Software, page 10-128
Catalyst Software
To reimage the maintenance partition, follow these steps:
Step 1
Obtain the maintenance partition file from Software Center on Cisco.com and
copy it to an SCP or FTP server.
See Obtaining Cisco IDS Software, page 9-1, for instructions on how to access the
Software Center on Cisco.com.
Step 2
Log in to the IDSM-2 CLI.
Cisco Intrusion Detection System Appliance and Module Installation and Configuration Guide Version 4.1
78-15597-02
10-127
Chapter 10
Configuring the Sensor Using the CLI
Reimaging Appliances and Modules
Step 3
Enter configuration mode:
sensor# configure terminal
Step 4
Reimage the maintenance partition:
sensor# upgrade
ftp://user@ftp_server_IP_address/directory_path/image_file
You are asked whether you want continue.
Step 5
Type y to continue.
The maintenance partition file is upgraded.
Cisco IOS Software
To reimage the maintenance partition, follow these steps:
Step 1
Obtain the maintenance partition file from Software Center on Cisco.com and
copy it to an SCP or FTP server.
See Obtaining Cisco IDS Software, page 9-1, for instructions on how to access the
Software Center on Cisco.com.
Step 2
Log in to the switch CLI.
Step 3
Session in to the application partition CLI:
cat6k# session slot
Step 4
slot_number processor
1
Enter configuration mode:
cat6k# configure terminal
Step 5
Reimage the maintenance partition:
cat6k(config)# upgrade
ftp://user@ftp_server_IP_address/directory_path/image_file
10-128
Cisco Intrusion Detection System Appliance and Module Installation and Configuration Guide Version 4.1
78-15597-02
Chapter 10
Configuring the Sensor Using the CLI
Reimaging Appliances and Modules
Step 6
Specify the FTP server password:
Password: ********
You are prompted to continue:
Continue with upgrade? :
Step 7
Type yes to continue.
Cisco Intrusion Detection System Appliance and Module Installation and Configuration Guide Version 4.1
78-15597-02
10-129
Chapter 10
Configuring the Sensor Using the CLI
Reimaging Appliances and Modules
10-130
Cisco Intrusion Detection System Appliance and Module Installation and Configuration Guide Version 4.1
78-15597-02
A P P E N D I X
A
Intrusion Detection System
Architecture
This appendix describes the IDS 4.x system architecture and contains the
following sections:
•
System Overview, page A-1
•
Summary of Applications, page A-49
•
System Architectural Details, page A-44
•
Summary of Applications, page A-49
System Overview
You can install Cisco IDS software on two platforms: the appliances and the
modules (see Supported Sensors, page 1-16, for a list of current appliances and
modules).
This section contains the following topics:
•
Software Architecture Overview, page A-2
•
Show Version Command Output, page A-4
•
User Interaction, page A-5
•
New Features in Version 4.x, page A-6
Cisco Intrusion Detection System Appliance and Module Installation and Configuration Guide Version 4.1
78-15597-02
A-1
Appendix A
Intrusion Detection System Architecture
System Overview
Software Architecture Overview
IDS software runs on the Linux operating system. We have hardened the Linux
OS by removing unnecessary packages from the OS, disabling unused services,
restricting network access, and removing access to the shell.
Figure A-1 illustrates the software architecture:
Figure A-1
System Design
FTP/SCP
Server
Router
NTP
Server
Switch
PIX
Telnet/SSH(3DES)
Sensor
Syslog
Alarm Channel
LoggerApp
NAC
EventStore
MainApp
Telnet
SSH/SCP
CLI
IDAPI
AuthenticationApp
CT Source
EventServer/CT Server/IDM
NotificationApp
Sensor
RDEP-HTTP/SSL
Master Blocking Sensor
A-2
IEV/MDC/...
HTTP/SSL
Browsers
SNMP
Traps
119095
Web Server
SNMP Server
Cisco Intrusion Detection System Appliance and Module Installation and Configuration Guide Version 4.1
78-15597-02
Appendix A
Intrusion Detection System Architecture
System Overview
IDS software includes the following IDS applications:
Note
Each application has its own configuration file in XML format.
•
MainApp—Initializes the system, starts and stops the other applications,
configures the OS, and performs updates.
•
SensorApp (Analysis Engine)—Performs packet capture and analysis.
•
Authentication (AuthenticationApp)—Verifies that users are authorized to
perform CLI, IDM, or Remote Data Exchange Protocol (RDEP) actions.
•
LogApp (Logger)—Writes all the application’s log messages to the log file
and the application’s error messages to the EventStore.
•
NAC (NetworkAccess)—Manages remote network devices (PIX Firewall,
routers, and switches) to provide blocking capabilities when an alert event has
occurred. NAC (Network Access Controller) creates and applies Access
Control Lists (ACLs) on the controlled network device, or uses the shun
command (PIX Firewall) to another RDEP server.
•
ctlTransSource (TransactionSource)—Allows sensors to send control
transactions. This is used to enable the NAC’s master blocking sensor (MBS)
capability.
•
cidwebserver (WebServer)—Provides a web interface and communication
with other IDS devices through RDEP using several servlets to provide IDS
services. These servlets are shared libraries that are loaded into the
cidWebserver process at run-time:
– IDM—Provides the IDM web-based management interface.
– Event server—Used to serve events to external management applications
such as Security Monitor.
– Transaction server—Allows external management applications such as
the IDS MC to send control transactions to the sensor.
– IP log server—Used to serve IP logs to external systems.
Cisco Intrusion Detection System Appliance and Module Installation and Configuration Guide Version 4.1
78-15597-02
A-3
Appendix A
Intrusion Detection System Architecture
System Overview
•
cidcli (CLI)—The interface that is run when you successfully log in to the
sensor through Telnet or SSH. All accounts created through the CLI will use
the CLI as their shell (except the service account—only one service account
is allowed). Allowed CLI commands depend on what the privilege of the user
is.
•
EventStore—An indexed store used to store IDS events (error, status, and
alert system messages) that is accessible through the CLI, IDM, or RDEP.
See Show Version Command Output, page A-4, for an example of the output from
the show version command, which lists the sensor applications and shows their
status.
All IDS applications communicate with each other through a common API
(IDAPI). Remote applications (other sensors, management applications, and
third-party software) communicate with sensors through the RDEP and Intrusion
Detection Interchange and Operations Messages (IDIOM) protocols.
The sensor has the following partitions:
•
Application partition—A full IDS system image.
•
Maintenance partition—A special purpose IDS image used to reimage the
application partition of the IDSM-2. All configuration is lost.
•
Recovery partition—A special purpose image used for recovery of the
appliance. Booting into the recovery partition enables you to completely
reimage the application partition. Network settings are preserved, but all
other configuration is lost.
Note
IDSM-2 and NM-CIDS do not have recovery partitions.
Show Version Command Output
The following is a sample output from the show version command. All the
sensor’s applications are displayed with their current status.
sensor# show version
Application Partition:
Cisco Systems Intrusion Detection Sensor, Version 4.1(3)S61
OS Version 2.4.18-5smpbigphys
Platform: IDS-4235
A-4
Cisco Intrusion Detection System Appliance and Module Installation and Configuration Guide Version 4.1
78-15597-02
Appendix A
Intrusion Detection System Architecture
System Overview
Sensor up-time is 20 days.
Using 214319104 out of 921522176 bytes of available memory (23% usage)
Using 596M out of 15G bytes of available disk space (5% usage)
MainApp
AnalysisEngine
Authentication
Logger
NetworkAccess
TransactionSource
WebServer
CLI
2003_Oct_10_11.16
2003_Oct_10_11.16
2003_Oct_10_11.16
2003_Oct_10_11.16
2003_Oct_10_11.16
2003_Oct_10_11.16
2003_Oct_10_11.16
2003_Oct_10_11.16
(Release)
(Release)
(Release)
(Release)
(Release)
(Release)
(Release)
(Release)
2003-10-10T11:01:13-0500
2003-10-10T11:01:13-0500
2003-10-10T11:01:13-0500
2003-10-10T11:01:13-0500
2003-10-10T11:01:13-0500
2003-10-10T11:01:13-0500
2003-10-10T11:01:13-0500
2003-10-10T11:01:13-0500
Running
Running
Running
Running
Running
Running
Running
Upgrade History:
* IDS-K9-min-4.1-1-S47
IDS-K9-sp-4.1-3-S61.rpm.pkg
12:00:00 UTC Thu Jun 30 2005
14:14:55 UTC Fri Feb 20 2004
Recovery Partition Version 1.2 - 4.1(1)S47
User Interaction
You can configure IDS through the CLI, the IDM, the IDS MC, or another
application using RDEP.
You can interact with IDS software in the following ways:
•
Configure sensor parameters.
You generate the initial configuration for the IDS—setting network
parameters, time, and allowed hosts—by using the setup command in the
CLI. You usually have to do this only once with a new sensor.
•
Configure blocking and interfaces.
•
Tune the configuration.
You will want to make modifications to the default configuration, primarily
the sensing engine (SensorApp), which is the portion of the application that
monitors network traffic. After initially installing the IDS on the network,
you can tune it until it is operating efficiently and only producing information
you think is useful.
Cisco Intrusion Detection System Appliance and Module Installation and Configuration Guide Version 4.1
78-15597-02
A-5
Appendix A
Intrusion Detection System Architecture
System Overview
•
Update IDS.
You can schedule automatic updates or request that updates be applied
immediately to the applications and signature data files.
•
Retrieve information.
You can retrieve data (status, error, and alert messages) and iplogs from the
system. You can also retrieve statistics and diagnostic information.
New Features in Version 4.x
The following new features appear in the IDS 4.x system architecture:
•
XML documents replace tokens and configuration files.
Sensor configuration, control, log, and event information are communicated
and stored in XML documents as directed by the IDIOM specification.
•
RDEP replaces postoffice protocol.
RDEP uses HTTP/HTTPS protocol to deliver XML documents between the
sensor and external systems. postoffice operated by pushing alarms and
queuing up to 1000 on each sensor. The RDEP client pulls alerts from the
sensor and there is less of a chance of missing alerts.
•
Version 4.x is now an open system.
Note
“Open” refers to the fact that we provide specifications so that you
can write applications to configure the sensor and/or monitor the
events generated by the sensor.
Alarms and configuration are communicated using RDEP and IDIOM, which
are based on the HTTP/HTTPS and XML open standards. Providing a secure,
open system that uses standard communication protocols allows greater
internal and third party integration.
•
Version 4.x offers the following scalability enhancements:
– Provides gigabit sensing
– Addresses the scaling and performance limitations that are inherent in the
postoffice architecture
A-6
Cisco Intrusion Detection System Appliance and Module Installation and Configuration Guide Version 4.1
78-15597-02
Appendix A
Intrusion Detection System Architecture
System Components
– Changes from a push to a pull model that enables management consoles
to support more sensors
– Provides better support for large scale sensor deployment and
management
•
Version 4.x has the following security enhancements:
– The CLI replaces the OS shell access.
– Multi-user support with multi-level permissions (administrator, operator,
viewer, service) replaces the former single netrangr account.
•
The hardened Linux OS replaces the Solaris OS.
•
A memory-mapped circular buffer EventStore replaces log files and log file
maintenance (no more sapd).
•
Supported Cisco management options are the CLI, the IDM or IDS MC,
which replace CSPM and the UNIX Director.
•
The following reliability enhancements:
– Alarms are not lost because of communication failures.
– CLI configuration instead of native shell configuration decreases the
possibility of misconfiguration. The sensor has become a true appliance
rather than a group of applications running on a workstation.
•
Version 4.x builds an infrastructure to support the future IDS roadmap, which
includes:
– Multiple interfaces and VLANs per sensor
– AAA authentication
– False positive reduction
– Inline intrusion prevention
System Components
This section describes IDS components in more detail.
This section contains the following topics:
•
MainApp, page A-8
•
SensorApp, page A-11
Cisco Intrusion Detection System Appliance and Module Installation and Configuration Guide Version 4.1
78-15597-02
A-7
Appendix A
Intrusion Detection System Architecture
System Components
•
Authenticating Users, page A-12
•
LogApp, page A-15
•
NAC, page A-16
•
TransactionSource, page A-28
•
WebServer, page A-29
•
CLI, page A-29
•
EventStore, page A-36
MainApp
MainApp has the following responsibilities:
•
Initialize and start all IDS components and applications.
MainApp is started by the operating system. It starts the applications in the
following sequence:
1.
Read and validate contents of dynamic and static configurations.
2.
Write dynamic configuration data to system files to make sure the two
representations of data are in sync (for example, the IP address in the
dynamic configuration must match the system network files).
3.
Create the shared system components—EventStore and IDAPI.
4.
Open status event subscription.
5.
Start the IDS applications (the order is specified in the static
configuration).
6.
Wait for an initialization status event from each application.
If after waiting 60 seconds all status events have not been received,
MainApp generates an error event identifying all applications that did not
start.
A-8
7.
Close status event subscription.
8.
Start the upgrade scheduler.
9.
Register for control transaction requests, and service them as received.
Cisco Intrusion Detection System Appliance and Module Installation and Configuration Guide Version 4.1
78-15597-02
Appendix A
Intrusion Detection System Architecture
System Components
•
Schedule, download, and install software upgrades.
Note
•
The legacy application is idsupdate.
Configure the communications network interface.
MainApp sets the hostname, IP address, netmask, and default gateway for the
sensor’s command and control interface. It also configures the network access
list.
Note
•
The legacy application is sysconfig-sensor.
Manage the system clock.
There are three clock management modes:
– NTP—Uses an NTP server to synchronize the sensor’s clock.
– Manual—Used only on the appliance, this mode relies on the sensor’s
system clock.
– Switch/Router—Used only on the IDSM-2 and the NM-CIDS.
The IDSM-2 uses switch control protocol to synchronize its clock with
the switch supervisor’s clock. The NM-CIDS uses router/blade control
protocol to synchronize its clock to the parent router’s clock.
Note
•
We recommend that you use NTP time because it is more reliable.
See Setting the Time on Sensors, page 1-18. for more
information.
Shut itself down and cleanly shut down all IDS components and applications.
MainApp shuts itself and all IDS components and applications down in the
following sequence:
1.
Deregister control transaction requests.
2.
Stop the update scheduler.
3.
Open evStatus event subscription.
Cisco Intrusion Detection System Appliance and Module Installation and Configuration Guide Version 4.1
78-15597-02
A-9
Appendix A
Intrusion Detection System Architecture
System Components
4.
Stop IDS applications in the reverse order specified in static
configuration.
An interrupt signal is sent to each application telling it to shut down.
5.
Wait for an exit evStatus event from each application.
If after waiting 60 seconds all status events have not been received,
mainApp generates an error message and continues.
6.
Close evStatus event subscription.
7.
Start the utility that waits for MainApp to exit before triggering the OS
to shut down.
8.
Destruct shared system components—EventStore and IDAPI.
9.
Exit MainApp.
10.
Reboot the operating system.
Note
A system reboot is functionally the same as a system shutdown
except the OS is triggered to reboot.
MainApp responds to the show version command by displaying the following
information:
•
Sensor build version
•
MainApp version
•
Version of each running application
•
Version and timestamp of each installed upgrade
•
Next downgrade version of each installed upgrade
•
Platform version (for example, IDS-4240, WS-SVC-IDSM2)
•
Version of sensor build on the other partition
MainApp also gathers the host statistics.
A-10
Cisco Intrusion Detection System Appliance and Module Installation and Configuration Guide Version 4.1
78-15597-02
Appendix A
Intrusion Detection System Architecture
System Components
SensorApp
SensorApp, the sensing engine, is made up of two major components, the
VirtualSensor and the VirtualAlarm, which in turn are made up of nine major
functional units:
Note
Although VirtualSensor allows you to run multiple virtual sensors on the same
appliance and to configure each with different signature behavior and traffic
feeds, at this time IDS 4.x only supports one virtual sensor.
Note
The legacy application is packetd.
•
Kernel memory management module (KMMM)—Maintains ring and data
integrity by mediating access to the ring buffer.
•
Packet capture module (PCM)—Captures packets and places them in a
kernel/user shared memory ring buffer for further processing.
•
L2/L3/L4 parser (L2/L3/L4P)—Parses the L2/3/4 packet information and
puts the required information into the IDS header. If needed, the IDS header
of the packet is marked for reassembly by the fragment reassembly unit.
•
Fragment reassembly unit (FRU)—Processes packets that are marked for it.
The FRU has a separate ring buffer for the reassembly process.
•
TCP stream reassembly unit (SRU)—Determines if a packet belongs to a
known stream or if it is the first packet in a new stream. The SRU follows
predefined stream reassembly constraints to determine if the packet should be
queued for processing downstream or dropped.
•
Regular expression string search engine (RSSE)—Used for analysis of stream
and packet payloads for the existence of certain patterns that when combined
with other data may indicate the presence of an attack underway.
•
Signature micro-engines (SME)—Supports many signatures in a certain
category. An engine is composed of a parser and an inspector. Each engine
has a set of legal parameters that have allowable ranges or sets of values.
Cisco Intrusion Detection System Appliance and Module Installation and Configuration Guide Version 4.1
78-15597-02
A-11
Appendix A
Intrusion Detection System Architecture
System Components
•
Alert generation module (AGM)—Processes all requests for alert event
generation. The AGM then generates the appropriate alert messages and
presents them to the IDAPI interface. The AGM also issues TCP resets,
routing of packets to be logged for IP session logins, and notification to the
Network Access Controller (NAC) for blocks.
•
Configuration management module (CMM)—Maintains the sensor’s
configuration.
AuthenticationApp
AuthenticationApp has the following responsibilities:
•
To authenticate a user’s identity
•
To administrate the user’s accounts, privileges, keys, and certificates
•
To configure which authentication methods are used by AuthenticationApp
and other access services on the sensor
This section contains the following topics:
•
Authenticating Users, page A-12
•
Configuring Authentication on the Sensor, page A-13
•
Managing TLS and SSH Trust Relationships, page A-14
Authenticating Users
When a user tries to access the sensor through a service such as the WebServer or
the CLI, the user’s identity must be authenticated and the user’s privileges must
be established. The service that is providing access to the user initiates an
execAuthenticateUser control transaction request to AuthenticationApp to
authenticate the user’s identity. The control transaction request typically includes
the username and a password, or the user’s identity can be authenticated using an
SSH authorized key.
AuthenticationApp responds to the execAuthenticateUser control transaction
request by attempting to authenticate the user’s identity. AuthenticationApp
returns a control transaction response that contains the user’s authentication status
and privileges. If the user’s identity cannot be authenticated, AuthenticationApp
returns an unauthenticated status and anonymous user privileges in the control
transaction response. The control transaction response also indicates if the
A-12
Cisco Intrusion Detection System Appliance and Module Installation and Configuration Guide Version 4.1
78-15597-02
Appendix A
Intrusion Detection System Architecture
System Components
account’s password has expired. User interface applications that authenticate
users by initiating an execAuthenticateUser control transaction prompt the user to
change the password.
AuthenticationApp uses the underlying operating system to confirm a user’s
identity. All the IDS applications send control transactions to AuthenticationApp,
which then uses the operating system to form its responses.
Remote shell services, Telnet and SSH, are not IDS applications. They call the
operating system directly. If the user is authenticated, it launches the IDS CLI. In
this case, CLI send a special form of the execAuthenticateUser control transaction
to determine the privilege level of the logged-in user. The CLI then tailors the
commands it makes available based on this privilege level.
Configuring Authentication on the Sensor
You must configure authentication on the sensor to establish appropriate security
for user access. When you install a sensor, an initial cisco account with an expired
password is created. A user with administrative access to the sensor accesses the
sensor through the CLI or an IDS manager by logging in to the sensor using the
default administrative account (cisco). In the CLI, the administrator is prompted
to change the password. IDS managers initiate a
setEnableAuthenticationTokenStatus control transaction to change the account’s
password.
Through the CLI or an IDS manager, the administrator configures which
authentication method is used, such as username and password or an SSH
authorized key. The application servicing the administrator initiates a
setAuthenticationConfig control transaction to establish the authentication
configuration.
The authentication configuration includes a login attempt limit value that is used
to specify how account locking is handled. Account locking is invoked when the
number of consecutive failed login attempts for a given account exceeds the login
attempt limit value. After an account is locked, all further attempts to log in to that
account are rejected. The account is unlocked by resetting the account’s
authentication token using the setEnableAuthenticationTokenStatus control
transaction. The account locking feature is disabled when the login attempt limit
value is set to zero.
The administrator can add additional user accounts either through the CLI or an
IDS manager. See User Account Roles, page A-30, for more information.
Cisco Intrusion Detection System Appliance and Module Installation and Configuration Guide Version 4.1
78-15597-02
A-13
Appendix A
Intrusion Detection System Architecture
System Components
Managing TLS and SSH Trust Relationships
Encrypted communications over IP networks provide data privacy by making it
impossible for a passive attacker to discover from the packets exchanged alone the
secret key needed to decrypt the data in the packets.
However, an equally dangerous attack vector is for an imposter to pretend to be
the server end of the connection. All encryption protocols provide a means for
clients to defend themselves from these attacks. IDS supports two encryption
protocols, SSH and TLS, and AuthenticationApp helps manage trust when the
sensor plays either the client or server role in encrypted communications.
The IDS WebServer and SSH server are server endpoints of encrypted
communications. They protect their identities with a private key and offer a public
key to clients that connect to them. For TLS this public key is included inside an
X.509 certificate, which includes other information. Remote systems that connect
to the sensor should verify that the public key received during connection
establishment is the one it expects.
Clients must maintain a list of trusted public keys to protect themselves from
man-in-the-middle attacks. The exact procedure by which this trust is established
varies depending on the protocol and client software. In general, the client
displays a fingerprint of 16 or 20 bytes. The human operator who is configuring
the client to establish trust should use an out-of-band method to learn the server`s
key fingerprints before attempting to establish trust. If the fingerprints match, the
trust relationship is established and henceforth the client can automatically
connect with that server and be confident that the remote server is not an imposter.
You can use the show ssh server-key and show tls fingerprint to display the
sensor’s key fingerprints. By recording the output of these commands when
directly connected to the sensor console, you can reliably use this information to
confirm the sensor’s identity over the network later when establishing trust
relationships.
For example, when initially connecting to an sensor through the Microsoft
Internet Explorer (MSIE) web browser, a security warning dialog box is displayed
that indicates that the certificate is not trusted. Using MSIE’s user interface, you
can inspect the certificate thumbprint, a value that should exactly match the SHA1
fingerprint displayed by the show tls fingerprint command. After verifying this,
add this certificate to the browser’s list of trusted Certificate Authorities (CAs) to
establish permanent trust.
A-14
Cisco Intrusion Detection System Appliance and Module Installation and Configuration Guide Version 4.1
78-15597-02
Appendix A
Intrusion Detection System Architecture
System Components
Each TLS client (IEV, IDS Security Monitor, and so forth) has different
procedures for establishing this trust. The sensor itself includes a TLS client that
is used to send control transactions to other sensors and download upgrades and
configuration files from other TLS web servers. Use the tls trusted-host
command to establish trust of the TLS servers with which the sensor
communicates.
Similarly, the sensor includes an SSH client that is used to communicate with
managed network devices, download upgrades, and copy configurations and
support files to remote hosts. Use the ssh host-key command to establish trust
relationships with the SSH servers the sensor will contact.
You can manage the list of TLS trusted certificates and SSH known hosts through
the commands service TrustedCertificates and service SshKnownHosts.
X.509 certificates include additional information that can increase the security of
the trust relationship; however, these can lead to confusion. For example, an
X.509 certificate includes a validity period during which the certificate can be
trusted. Typically this is a period of a number of years starting at the moment the
certificate is created. To ensure that an X.509 certificate is valid at the moment it
is being used requires that the client system maintain an accurate clock.
X.509 certificates are also tied to a particular network address. Sensors fill this
field with the IP address of the sensor’s command and control interface.
Consequently, if you change the command and control IP address of the sensor,
the server’s X.509 certificate is regenerated. You must reconfigure all clients on
the network that trusted the old certificate to locate the sensor at its new IP address
and trust the new certificate.
By using the SSH known hosts and TLS trusted certificates services in
AuthenticationApp, you can operate sensors at a high level of security.
LogApp
The sensor logs all events (alert, error, status, and debug messages) in a persistent,
circular buffer. The sensor also generates IP logs. The messages and IP logs are
accessible through the CLI, IDM, and RDEP clients.
Note
The legacy applications are loggerd and sapd.
Cisco Intrusion Detection System Appliance and Module Installation and Configuration Guide Version 4.1
78-15597-02
A-15
Appendix A
Intrusion Detection System Architecture
System Components
The IDS applications use LogApp to log messages. LogApp sends log messages
at any of five levels of severity: debug, timing, warning, error, and fatal. LogApp
writes the log messages to /usr/cids/idsRoot/log/main.log, which is a circular text
file. New messages overwrite older messages when the file reaches its maximum
size, therefore the last message written may not appear at the end of the main.log.
Search for the string “= END OF FILE =” to locate the last line written to the
main.log.
The main.log is included in the show tech support command output. If the
message is logged at warning level or above (error or fatal), LogApp converts the
message to an evError event (with the corresponding error severity) and inserts it
in the EventStore.
Note
See Displaying Tech Support Information, page 10-31, for the procedure for
displaying tech support information. See Displaying and Clearing Events,
page 10-28, for the procedure for displaying events.
LogApp receives all syslog messages, except cron messages, that are at the level
of informational and above (*.info;cron.none), and inserts them into the
EventStore as evErrors with the error severity set to Warning. LogApp and
application logging are controlled through the service logger commands.
LogApp can control what log messages are generated by each application by
controlling the logging severity for different logging zones. You would only
access the individual-zone-control of the logger service at the request and
supervision of a TAC engineer or developer. For troubleshooting purposes, TAC
might request that you turn on debug logging. See Enabling Debug Logging,
page B-28, for more information.
NAC
This section describes NAC, which is the IDS application that starts and stops
blocks on routers, switches, and PIX Firewalls. A block is an entry in a device’s
configuration or ACL to block incoming/outgoing traffic for a specific host IP
address or network address.
Note
A-16
The legacy application is managed.
Cisco Intrusion Detection System Appliance and Module Installation and Configuration Guide Version 4.1
78-15597-02
Appendix A
Intrusion Detection System Architecture
System Components
This section contains the following topics:
•
About NAC, page A-17
•
NAC-Controlled Devices, page A-19
•
NAC Features, page A-19
•
ACLs and VACLs, page A-22
•
Maintaining State Across Restarts, page A-23
•
Connection-Based and Unconditional Blocking, page A-24
•
Blocking with the PIX Firewall, page A-25
•
Blocking with the Catalyst 6000, page A-27
About NAC
The NAC application’s main responsibility is to block events. When it responds
to a block, it either interacts with the devices it is managing directly to enable the
block or it sends a block request through the Control Transaction Server to a
master blocking sensor. The WebServer on the master blocking sensor receives
the control transaction and passes it to the Control Transaction Server, which
passes it to the NAC application. The NAC application on the master blocking
sensor then interacts with the devices it is managing to enable the block.
Figure A-2 illustrates the NAC application.
Cisco Intrusion Detection System Appliance and Module Installation and Configuration Guide Version 4.1
78-15597-02
A-17
Appendix A
Intrusion Detection System Architecture
System Components
Figure A-2
NAC Application
Sensor
Routers-PIX Firewalls
Block
Subscription
IDAPI
Block Event
EventStore
Block CT
Block CT
Block CT
Response
Block CT
Response
CT Source
Master Blocking Sensor
Block CT
Routers-PIX Firewalls
Block CT
Block CT
NAC
IDAPI
Block CT
Response
Note
Block CT
Response
Block CT
Response
Web Server
CT Server
119097
NAC
Block Event
Block
Subscription
A NAC application instance can control 0, 1, or many network devices. NAC does
not share control of any network device with other NAC applications, IDS
management software, other network management software, or system
administrators. Only one NAC application instance is allowed to run on a given
sensor.
NAC initiates a block in response to one of the following:
A-18
•
An alert event generated from a signature that is configured with a block
action
•
A block configured manually through the CLI, IDM, or the IDS MC
•
A block configured permanently against a host or network address
Cisco Intrusion Detection System Appliance and Module Installation and Configuration Guide Version 4.1
78-15597-02
Appendix A
Intrusion Detection System Architecture
System Components
When you configure NAC to block a device, NAC initiates either a Telnet or SSH
connection with the device. The NAC maintains the connection with each device.
After the block is initiated, the NAC pushes a new set of configurations or ACLs
(one for each interface direction) to each controlled device. When a block is
completed, all configurations or ACLs are updated to remove the block.
NAC-Controlled Devices
NAC can control the following devices:
•
Cisco routers running Cisco IOS 11.2 or later
•
Catalyst 5000 with Supervisor Engine software 5.3(1) or later running on the
supervisor engine, and IOS 11.2(9)P or later running on the RSM.
Note
You must have the RSM because blocking is performed on the RSM.
•
Catalyst 6000 with PFC installed running Catalyst software 5.3 or later
•
Catalyst 6000 MSFC2 with Catalyst software 5.4(3) or later and Cisco
IOS 12.1(2)E or later on the MSFC2
NAC Features
NAC has the following features:
•
Communication through Telnet and SSH 1.5 with 3DES (the default) or DES
encryption
Only the protocol specified in the NAC configuration for that device is
attempted. If the connection fails for any reason, NAC attempts to reestablish
it.
•
Preexisting ACLs on routers and VACLs on switches
If a preexisting ACL exists on a router interface/direction that is controlled
by NAC, you can specify that this ACL be merged into the NAC-generated
configuration, either before any blocks by specifying a preblock ACL or after
any blocks by specifying a postblock ACL. The Catalyst 6000 VACL device
types can have a preblock and postblock VACL specified for each interface
Cisco Intrusion Detection System Appliance and Module Installation and Configuration Guide Version 4.1
78-15597-02
A-19
Appendix A
Intrusion Detection System Architecture
System Components
that NAC controls. The PIX Firewall device type uses a different API to
perform blocks and the NAC does not have any effect on preexisting ACLs on
the PIX Firewall.
Note
Catalyst 5000 RSM and Catalyst 6000 MSFC2 network devices are
supported in the same way as Cisco routers.
See ACLs and VACLs, page A-22, for more information.
•
Forwarding blocks to a list of remote sensors
NAC can forward blocks to a list of remote sensors, so that multiple sensors
can in effect collectively control a single network device. Such remote
sensors are referred to as master blocking sensors. See Configuring the
Sensor to be a Master Blocking Sensor, page 10-73, for more information on
master blocking sensors.
•
Specifying blocking interfaces on a network device
You can specify the interface/directions where blocking is performed in the
NAC configuration for routers. You can specify the interface where blocking
is performed in the VACL configuration.
Note
The PIX Firewall does not block based on interface or direction, so
this configuration is never specified for the PIX Firewall.
NAC can simultaneously control up to 250 interfaces.
•
Blocking hosts or networks for a specified time
NAC can block a host or network for a specified number of minutes or
indefinitely. NAC determines when a block has expired and unblocks the host
or network at that time.
•
Logging important events
NAC writes a confirmation event when block or unblock actions are
completed successfully or if any errors occur. NAC also logs important events
such as loss and recovery of a network device communication session,
configuration errors, and errors reported by the network device.
See NAC Events, page A-42, for more information.
A-20
Cisco Intrusion Detection System Appliance and Module Installation and Configuration Guide Version 4.1
78-15597-02
Appendix A
Intrusion Detection System Architecture
System Components
•
Maintaining the blocking state across NAC restarts
NAC reapplies blocks that have not expired when a shutdown/restart occurs.
NAC removes blocks that have expired while it was shut down.
Note
NAC can only maintain the blocking state successfully if no one
changes the system time while the application is shut down.
See Maintaining State Across Restarts, page A-23, for more information.
•
Maintaining blocking state across network device restarts
NAC reapplies blocks and removes expired blocks as needed whenever a
network device is shut down and restarted. NAC is not affected by
simultaneous or overlapping shutdowns and restarts of NAC.
•
Authentication and authorization
NAC can establish a communications session with a network device that uses
AAA authentication and authorization including the use of remote TACACS+
servers.
•
Two types of blocking
NAC supports host blocks and network blocks. Host blocks are connection
based or unconditional. Network blocks are always unconditional.
See Connection-Based and Unconditional Blocking, page A-24, for more
information.
•
NAT addressing
NAC can control network devices that use a Native Address Translation
(NAT) address for the sensor. If you specify a NAT address when you
configure a network device, that address is used instead of the local IP address
when the sensor address is filtered from blocks on that device.
•
Single point of control
NAC does not share control of network devices with administrators or other
software. If you must update a configuration, shut down NAC until the change
is complete. You can enable/disable NAC through the IDS CLI or any IDS
manager. When NAC is reenabled, it completely reinitializes itself, including
rereading the current configuration for each controlled network device.
Cisco Intrusion Detection System Appliance and Module Installation and Configuration Guide Version 4.1
78-15597-02
A-21
Appendix A
Intrusion Detection System Architecture
System Components
Note
•
We recommend that you disable NAC from blocking when you are
configuring any network device, including the PIX Firewall.
Up to 250 active blocks at any given time
NAC can maintain up to 250 active blocks at a time. Although NAC can
support up to 65535 blocks, we recommend that you configure no more than
250 at a time.
Note
The number of blocks is not the same as the number of
interface/directions.
ACLs and VACLs
If you want to filter packets on an interface/direction that NAC controls, you can
configure NAC to apply an ACL before any blocks (preblock ACL) and to apply
an ACL after any blocks (postblock ACL). These ACLs are configured on the
network device as inactive ACLs. You can define preblock and postblock ACLs
for each interface and direction. NAC retrieves and caches the lists and merges
them with the blocking Access Control Entries (ACE) whenever it updates the
active ACL on the network device. In most cases, you will want to specify a
preexisting ACL as the postblock ACL so that it does not prevent any blocks from
taking effect. ACLs work by matching a packet to the first ACE entry found. If
this first ACE entry permits the packet, a subsequent deny statement will not be
found.
You can specify different preblock and postblock ACLs for each
interface/direction, or you can reuse the same ACLs for multiple
interface/directions. If you do not want to maintain a preblock list, you can use
the never block option and always block hosts and networks by using existing
configuration statements. A forever block is a normal block with a timeout value
of -1.
NAC only modifies ACLs that it owns. NAC does not modify ACLs that you have
defined. The ACLs maintained by NAC have a specific format that should not be
used by user-defined ACLs. The naming convention is
IDS_<ifname>_[in|out]_[0|1]. <ifname> corresponds to the name of the
blocking interface as given in the NAC configuration.
A-22
Cisco Intrusion Detection System Appliance and Module Installation and Configuration Guide Version 4.1
78-15597-02
Appendix A
Intrusion Detection System Architecture
System Components
For Catalyst switches it is a blocking interface VLAN number. Do not use these
names for preblock and postblock ACLs.
For Catalyst 6000 VACLs, you can specify a preblock and postblock VACL and
only the interface is specified (direction is not used in VLANs).
For PIX Firewalls, you cannot use preblock or postblock ACLS because the PIX
Firewall uses a different API for blocking. Instead you must create ACLs directly
on the PIX Firewall. See Blocking with the PIX Firewall, page A-25, for more
information.
Maintaining State Across Restarts
When the blocked host list or blocked network list changes, the new lists (with
starting timestamps) are written to a local file (nac.shun.txt) that is maintained by
NAC. When NAC starts, this file is used to determine if any block updates should
occur at the controlled network devices. Any unexpired blocks found in the file
are applied to the network devices at startup. When NAC shuts down, no special
actions on the ACLs are taken even if outstanding blocks are in effect. The
nac.shun.txt file is accurate only if the system time is not changed while NAC is
not running.
Caution
Do not make manual changes to the nac.shun.txt file.
The following scenarios demonstrate how NAC maintains state across restarts.
Scenario 1
There are two blocks in effect when NAC stops and one of them expires before
NAC restarts. When NAC restarts, it first reads the nac.shun.txt file. It then reads
the preblock and postblock ACLs or VACLs. The active ACL or VACL is built in
the following order:
1.
The allow sensor_ ip_address command (unless the allow sensor shun
command has been configured)
2.
Preblock ACL
3.
The always block command entries from the configuration
4.
Unexpired blocks from nac.shun.txt
5.
Postblock ACL
Cisco Intrusion Detection System Appliance and Module Installation and Configuration Guide Version 4.1
78-15597-02
A-23
Appendix A
Intrusion Detection System Architecture
System Components
When a host is specified as never block in the NAC configuration, it does not get
translated into permit statements in the ACL. Instead, it is cached by NAC and
used to filter incoming addShunEvent events and addShunEntry control
transactions.
Scenario 2
There are no preblock or postblock ACLs specified, but there is an existing active
ACL. The new ACL is built in the following order:
1.
The allow sensor_ ip_address command (unless the allow sensor shun
command has been configured)
2.
The always block command entries from the configuration
3.
Unexpired blocks from nac.shun.txt
4.
The permit IP any any command
Connection-Based and Unconditional Blocking
NAC supports two types of blocking for hosts and one type of blocking for
networks. Host blocks are connection based or unconditional. Network blocks are
always unconditional.
When a host block is received, NAC checks for the connectionShun attribute on
the host block. If connectionShun is set to true, NAC performs connection
blocking. Any host block can contain optional parameters, such as destination IP
address, source port, destination port, and protocol. For a connection block to take
place, at least the source IP address must be present.
Under the following conditions, NAC forces the block to be unconditional
converting the block from connection type if necessary:
•
A block of any type is active for a specified source IP address
•
A new block of any type is received for that source IP address
•
The new block differs in any of its optional parameters (except the source
port) from the old block
When a block is updated (for example, when a new block arrives while an existing
block for that source IP address or network is already in effect), the remaining
minutes of the existing block is determined. If the time for the new block is less
than or equal to the remaining minutes, no action is taken. Otherwise, the new
block timeout replaces the existing block timeout.
A-24
Cisco Intrusion Detection System Appliance and Module Installation and Configuration Guide Version 4.1
78-15597-02
Appendix A
Intrusion Detection System Architecture
System Components
Caution
The PIX Firewall does not support connection blocking of hosts. When a
connection block is applied, the PIX Firewall treats it like an unconditional block.
The PIX Firewall also does not support network blocking. NAC never tries to
apply a network block to a PIX Firewall.
Blocking with the PIX Firewall
This sections describes the PIX Firewall and blocking.
This section contains the following topics:
•
The shun Command, page A-25
•
The PIX Firewall and AAA, page A-26
•
Address Translation and Blocking, page A-26
The shun Command
NAC performs blocks on the PIX Firewall using the shun command. The shun
command has the following formats:
•
To block an IP address:
shun srcip [destip
•
sport dport [port]]
To unblock an IP address:
no shun ip
•
To clear all blocks:
clear shun
•
To show active blocks or to show the global address that was actually
blocked:
show shun [ip_address]
NAC uses the response to the show shun command to determine whether the
block was performed.
The shun command does not replace existing ACLs, conduits, or outbound
commands, so there is no need to cache the existing PIX Firewall configuration,
nor to merge blocks into the PIX configuration.
Cisco Intrusion Detection System Appliance and Module Installation and Configuration Guide Version 4.1
78-15597-02
A-25
Appendix A
Intrusion Detection System Architecture
System Components
Caution
Do not perform manual blocks or modify the existing PIX Firewall configuration
while NAC is running.
If the block command specifies only the source IP address, existing active TCP
connections are not broken, but all incoming packets from the blocked host are
dropped.
When NAC first starts up, the active blocks in the PIX Firewall are compared to
an internal blocking list. Any blocks that do not have a corresponding internal list
entry are removed.
See Configuring Blocking Devices, page 10-67, for more information.
The PIX Firewall and AAA
NAC supports authentication on the PIX Firewall using local usernames or a
TACACS+ server. If you configure the PIX Firewall to authenticate using AAA
but without the TACACS+ server, NAC uses the reserved username pix for
communications with the PIX Firewall.
If the PIX Firewall uses a TACACS+ server for authentication, you use a
TACACS+ username. In some PIX Firewall configurations that use AAA logins,
you are presented with 3 password prompts: the initial PIX Firewall password, the
AAA password, and the enable password. NAC requires that the initial PIX
Firewall password and the AAA password be the same.
Address Translation and Blocking
If you configure a PIX Firewall to use NAT or PAT and the sensor is checking
packets on the PIX Firewall outside network, if you detect a host attack that
originates on the PIX Firewall inside network, the sensor tries to block the
translated address provided by the PIX Firewall. If you are using dynamic NAT
addressing, the block can be ineffective or cause innocent hosts to be blocked. If
you are using PAT addressing, the PIX Firewall could block the entire inside
network. To avoid these situations, position your sensor on the inside interface or
do not configure the sensor to block.
A-26
Cisco Intrusion Detection System Appliance and Module Installation and Configuration Guide Version 4.1
78-15597-02
Appendix A
Intrusion Detection System Architecture
System Components
Blocking with the Catalyst 6000
A Catalyst 6000 switch with a PFC card filters packets using VACLs. VACLs filter
all packets between VLANs and within a VLAN.
MSFC router ACLs are supported when WAN cards are installed and you want the
sensor to control the interfaces through the MSFC2.
Note
Caution
An MSFC2 card is not a required part of a Catalyst 6000 configuration for
blocking with VACLs.
When you configure NAC for the Catalyst 6000, do not specify a direction with
the controlled interface. The interface name is a VLAN number. Preblock and
postblock lists should be VACLs.
The following commands apply to the Catalyst 6000 VACLs:
•
To view an existing VACL:
show security acl info {aclname}
•
To block an address (address spec is the same as used by router ACLs):
set security acl ip {aclname} deny {address
•
spec}
To activate VACLs after building the lists:
commit security acl all
•
To clear a single VACL:
clear security acl map {aclname}
•
To clear all VACLs:
clear security acl map all
•
To map a VACL to a VLAN:
set sec acl {aclname } {vlans }
See Configuring Blocking Devices, page 10-67, for more information.
Cisco Intrusion Detection System Appliance and Module Installation and Configuration Guide Version 4.1
78-15597-02
A-27
Appendix A
Intrusion Detection System Architecture
System Components
TransactionSource
TransactionSource is an application that forwards locally initiated remote control
transactions to their remote destinations using the RDEP and HTTP protocols.
TransactionSource initiates either TLS or non-TLS connections and
communicates remote control transactions to HTTP servers over these
connections.
TransactionSource must establish sufficient credentials on the remote HTTP
server to execute a remote control transaction. TransactionSource establishes its
credentials by presenting an identity to the HTTP server on the remote node in the
form of a username/password (basic authentication). Once authenticated, the
requestor is assigned a cookie containing a user authentication that must be
presented with each request on that connection.
The transactionHandlerLoop method in the CtlTransSource serves as a proxy for
remote control transaction. When a local application initiates a remote control
transaction, IDAPI initially directs the transaction to TransactionSource. The
transactionHandlerLoop method is a loop that waits on remote control
transactions that are directed to TransactionSource. Figure A-3 shows the
transactionHandlerLoop method in the CtlTransSource.
Figure A-3
CtlTransSource
CtlTransSource
IDAPI
HttpClient
119595
+CtlTransSource0
+transaction HandlerLoop(in exitEventPtr)
When the transactionHandlerLoop receives a remotely addressed transaction, it
tries to forward the remote control transaction to its remote destination. The
transactionHandlerLoop formats the transaction into an RDEP control transaction
message. The transactionHandlerLoop uses the HttpClient classes to issue the
RDEP control transaction request to the HTTP server on the remote node. The
remote HTTP server handles the remote control transaction and returns the
A-28
Cisco Intrusion Detection System Appliance and Module Installation and Configuration Guide Version 4.1
78-15597-02
Appendix A
Intrusion Detection System Architecture
System Components
appropriate RDEP response message in an HTTP response. If the remote HTTP
server is a CIDS WebServer, the WebServer uses the Transaction Server servlet to
process the remote control transactions.
The transactionHandlerLoop returns either the RDEP response or a failure
response as the control transaction’s response to the remote control transaction’s
initiator. If the HTTP server returns an unauthorized status response (indicating
the HTTP client has insufficient credentials on the HTTP server), the
transactionHandlerLoop reissues the transaction request using
TransactionSource’s designated username and password to authenticate the
requestor’s identity. The transactionHandlerLoop continues to loop until it
receives a control transaction that directs it to exit or until its exit event is
signaled.
WebServer
The WebServer provides configuration support for IDM. It also provides IDS
RDEP, which enables the sensor to report security events, receive IDIOM
transactions, and serve IP logs.
The WebServer supports HTTP 1.0 and 1.1. The communications with the
WebServer often include sensitive information, such as passwords, that would
severely compromise the security of the system if an attacker were able to
eavesdrop. For this reason, sensors ship with TLS enabled. The TLS protocol is
an encryption protocol that is compatible with SSL.
CLI
The CLI provides the sensor user interface for all direct node access such as
Telnet, SSH, and serial interface. You configure the sensor applications with the
CLI. Direct access to the underlying OS is allowed through the service role.
This section contains the following topics:
•
User Account Roles, page A-30
•
CLI Behavior, page A-32
•
Service Account, page A-31
•
Regular Expression Syntax, page A-34
Cisco Intrusion Detection System Appliance and Module Installation and Configuration Guide Version 4.1
78-15597-02
A-29
Appendix A
Intrusion Detection System Architecture
System Components
User Account Roles
User accounts have roles that are associated with them and determine which
operations the user is allowed to perform. There are four roles that can be assigned
to an account:
•
Administrator—This user role has the highest level of privileges.
Administrators can perform all functions on the sensor including the
following:
– Add users and assign passwords
– Enable and disable control of physical interfaces and interface groups
– Assign physical sensing interfaces to interface groups
– Modify the list of hosts allowed to connect to the sensor as configuring
or viewing agents
– Modify sensor address configuration
– Tune signatures
– Assign virtual sensor configuration to interface groups
– Manage routers
•
Operator—This user role has the second highest level of privileges.
Operators can perform all viewing and some administrative operations on a
sensor including the following:
– Modify their passwords
– Tune signatures
– Manage routers
A-30
Cisco Intrusion Detection System Appliance and Module Installation and Configuration Guide Version 4.1
78-15597-02
Appendix A
Intrusion Detection System Architecture
System Components
•
Viewer—This user role has the lowest level of privileges.
Viewers can perform all viewing operations such as viewing events and
viewing some configuration files. Their only available administrative
operation is changing their passwords.
Tip
Monitoring applications only require viewer access to the sensor. You can use the
CLI to set up a user account with viewer privileges and then configure the
monitoring application to use this account to connect to the sensor.
•
Service—This user role does not have direct access to the CLI. Service
account users are logged directly into a bash shell rather than the CLI shell.
See Service Account, page A-31, for more information.
Service Account
The service account is a support and troubleshooting tool that enables TAC to log
in to a native operating system shell rather than the CLI shell. It does not exist on
the sensor by default. You must create it so that it available for TAC to use for
troubleshooting your sensor. See Creating the Service Account, page 10-12, for
the procedure to create the service account.
Only one service account is allowed per sensor and only one account is allowed a
service role. When the service account’s password is set or reset, the root
account’s password is set to the same password. This allows the service account
user to su to root using the same password. When the service account is removed,
the root account’s password is locked.
The service account is not intended to be used for configuration purposes. Only
modifications made to the sensor through the service account under the direction
of TAC are supported. Cisco Systems does not support the addition and/or running
of an additional service to the operating system through the service account,
because it affects proper performance and proper functioning of the other IDS
services. TAC does not support a sensor on which additional services have been
added.
You can track logins to the service account by checking the log file /var/log/.tac,
which is updated with a record of service account logins.
Cisco Intrusion Detection System Appliance and Module Installation and Configuration Guide Version 4.1
78-15597-02
A-31
Appendix A
Intrusion Detection System Architecture
System Components
CLI Behavior
The IDS CLI has the following behavior:
Prompts
•
You cannot change the prompt displayed for the CLI commands.
•
User interactive prompts occur when the system displays a question and waits
for user input. The default input is displayed inside brackets [ ]. To accept the
default input, press Enter.
Help
•
To display the help for a command, type ? after the command. You can also
type ? after an incomplete token to view the valid tokens that complete the
command. Refer to the following examples to compare the two outputs.
sensor# configure
?
terminal Configure from the terminal
sensor# configure
sensor (config)# ip n ?
name-server nat
sensor (config)# ip n
Note
•
If you type a space between the incomplete token and the ?, as in ip
n ?, the system returns the error % Ambiguous command: ip n.
Only commands available in the current mode are displayed by help.
Tab Completion
A-32
•
If you are unsure of the complete syntax for a command, you can type a
portion of the command and press Tab to complete the command.
•
If multiple commands match for tab completion, nothing is displayed, the
terminal repeats the current line you typed.
•
Only commands available in the current mode are displayed by tab complete
and help.
Cisco Intrusion Detection System Appliance and Module Installation and Configuration Guide Version 4.1
78-15597-02
Appendix A
Intrusion Detection System Architecture
System Components
Recall
•
To recall the commands entered in a mode, use the Up Arrow or Down Arrow
keys or press the Control key (Ctrl) simultaneously with the p key (Ctrl-p) or
n (Ctrl-n) key.
Note
•
Help and tab complete requests are not reported in the recall list.
A blank prompt indicates the end of the recall list.
Case Sensitivity
•
The CLI is not case sensitive, but it does echo back the text in the same case
you typed it. For example, if you type:
sensor#
CONF and press Tab, the sensor displays:
sensor# CONFigure
Display Options
•
—More— is an interactive prompt that indicates that the terminal output exceeds
the allotted display space. To display the remaining output, press the
Spacebar to display the next page of output or press Enter to display the
output one line at a time.
•
To clear the current line contents and return to a blank command line, press
the Control key (Ctrl) simultaneously with the c key (Ctrl-c) or press the q
key.
Keywords
•
In general, use the no form of a command to disable a feature or function. Use
the command without the keyword no to enable a disabled feature or function.
For example, the command shutdown disables an interface, the command no
shutdown enables the interface. Refer to the Cisco Intrusion Detection
System Command Reference Version 4.1for a list of individual commands and
a complete description of what the no form of that command does for each.
•
Configuration commands that specify a default value in the configuration
files, such as service and tune-micro-engines, can have a default form. The
default form of a command returns the command setting to the default value.
Cisco Intrusion Detection System Appliance and Module Installation and Configuration Guide Version 4.1
78-15597-02
A-33
Appendix A
Intrusion Detection System Architecture
System Components
Regular Expression Syntax
Regular expressions are text patterns that are used for string matching. Regular
expressions are strings that contains a mix of plain text and special characters to
indicate what kind of matching to do. For example, if you are looking for a
numeric digit, the regular expression to search for is “[0-9]”. The brackets
indicate that the character being compared should match any one of the characters
enclosed within the bracket. The dash (-) between 0 and 9 indicates that it is a
range from 0 to 9. Therefore, this regular expression matches any character
between 0 and 9, that is, any digit. To search for a specific special character, you
must use a backslash before the special character. For example, the single
character regular expression “\*” matches a single asterisk.
The regular expressions defined in this section are similar to a subset of the
POSIX Extended Regular Expression definitions. In particular, “[..]”, “[==]”, and
“[::]” expressions are not supported. Also, escaped expressions representing
single characters are supported.
•
^ Beginning of the string—The expression “^A” matches an “A” only at the
beginning of the string.
•
^ Immediately following the left-bracket ([)—Excludes the remaining
characters within brackets from matching the target string. The expression
“[^0-9]” indicates that the target character should not be a digit.
•
$—The dollar sign ($) matches the end of the string. The expression “abc$”
matches the sub-string “abc” only if it is at the end of the string.
•
|—The alternation character (|) allows the expression on either side to match
the target string. The expression “a|b” matches “a” as well as “b”.
•
.—The dot (.) matches any character.
•
*—The asterisk (*) indicates that the character to the left of the asterisk in the
expression should match 0 or more times.
The following example matches any number of occurrences of the letter a,
including none:
a*
•
A-34
+—The plus (+) is similar to asterisk but there should be at least one match
of the character to the left of the + sign in the expression.
Cisco Intrusion Detection System Appliance and Module Installation and Configuration Guide Version 4.1
78-15597-02
Appendix A
Intrusion Detection System Architecture
System Components
The following pattern requires that at least one letter a be in the string to be
matched:
a+
•
?—The question mark (?) matches the character to its left 0 or 1 times.
The following pattern matches the string bb or bab:
ba?b
•
()—The parenthesis affects the order of pattern evaluation and also serves as
a tagged expression that can be used when replacing the matched substring
with another expression.
•
[]—Brackets ([ and ]) enclosing a set of characters indicates that any the
enclosed characters can match the target character.
•
\—The escape character specifies a character that would otherwise be
interpreted as special. \xHH represents the character whose value is the same
as the value represented by (HH) hexadecimal digits [0-9A-Fa-f]. The value
must be non-zero. BEL is the same as \x07, BS is \x08, FF is \x0C, LF is \x0A,
CR is \x0D, TAB is \x09, and VT is \x0B. For any other character ‘c’, ‘\c’ is
the same a ‘c.’
The following string matches any number of asterisks (*):
\**
To use multipliers with multiple-character patterns, you enclose the pattern in
parentheses. In the following example, the pattern matches any number of the
multiple-character string ab:
(ab)*
The following pattern matches one or more instances of alphanumeric pairs, but
not none (that is, an empty string is not a match):
([A-Za-z][0-9])+
The order for matches using multipliers (*, +, or ?) is to put the longest construct
first. Nested constructs are matched from outside to inside. Concatenated
constructs are matched beginning at the left side of the construct. Thus, the
regular expression matches A9b3, but not 9Ab3 because the letters are specified
before the numbers.
Cisco Intrusion Detection System Appliance and Module Installation and Configuration Guide Version 4.1
78-15597-02
A-35
Appendix A
Intrusion Detection System Architecture
System Components
You can also use parentheses around a single- or multiple-character pattern to
instruct the software to remember a pattern for use elsewhere in the regular
expression. To create a regular expression that recalls a previous pattern, you use
parentheses to indicate memory of a specific pattern and a backslash (\) followed
by a digit to reuse the remembered pattern. The digit specifies the occurrence of
a parentheses in the regular expression pattern. If you have more than one
remembered pattern in your regular expression, \1 indicates the first remembered
pattern, and \2 indicates the second remembered pattern, and so on. The following
regular expression uses parentheses for recall:
a(.)bc(.)\1\2
This regular expression matches an a followed by any character, followed by bc
followed by any character, followed by the first any character again, followed by
the second any character again. For example, the regular expression can match
aZbcTZT. The software remembers that the first character is Z and the second
character is T and then uses Z and T again later in the regular expression.
EventStore
This section describes the EventStore and its responsibilities.
This section contains the following topics:
•
About the EventStore, page A-36
•
Major Data Structures, page A-38
•
IDS Events, page A-39
About the EventStore
Each IDS event is stored in EventStore with a time stamp and a unique,
monotonic, ascending ID. This time stamp is the primary key used to index the
event into the fixed-size, indexed EventStore. When the circular EventStore has
reached its configured size, the oldest event or events are overwritten by the new
event being stored. SensorApp is the only application that writes alert events into
the EventStore. All applications write log, status, and error events into the
EventStore.
A-36
Cisco Intrusion Detection System Appliance and Module Installation and Configuration Guide Version 4.1
78-15597-02
Appendix A
Intrusion Detection System Architecture
System Components
The fixed-sized, indexed EventStore allows simple event queries based on the
time, type, priority, and a limited number of user-defined attributes. If each
intrusion event is assigned a priority of low, medium, or high, a single event query
can specify a list of desired event types, intrusion event priorities, and a time
range.
Table A-1 shows some examples:
Table A-1
IDS Event Examples
IDS Event
Types
Intrusion Event
Priorities
Start Time
Stamp Value
Stop Time
Stamp Value
status
—
0
Maximum value Get all status events that are
stored.
error, status
—
0
65743
status
—
65743
Maximum value Get status events that were
stored at or after time 65743.
intrusion,
network access
low
0
Maximum value Get all intrusion and network
access events with low priority
that are stored.
4123000000
4123987256
network access, medium, high
error, status,
intrusion
Meaning
Get all error and status events
that were stored before time
65743.
Get network access, error, status,
and intrusion events with
medium or high priority that
were stored between time
4123000000 and 4123987256.
The size of the EventStore allows sufficient buffering of the IDS events when the
sensor is not connected to an IDS event consumer. Sufficient buffering depends
on your requirements and the capabilities of the nodes in use. The oldest events
in the circular buffer are replaced by the newest events.
Cisco Intrusion Detection System Appliance and Module Installation and Configuration Guide Version 4.1
78-15597-02
A-37
Appendix A
Intrusion Detection System Architecture
System Components
Major Data Structures
The various functional units communicate the following seven types of data:
•
Intrusion events—Produced by SensorApp. The sensor detects intrusion
events.
•
Error events—Caused by hardware or software malfunctions.
•
Status events—Reports of a change in the application’s status, for example,
that its configuration has been updated.
•
Control transaction log events—The sensor logs the result of a control
transaction.
•
Network access events—Actions for the NAC, for example, a block request.
•
Debug events—Highly detailed reports of a change in the application’s status
used for debugging.
•
Control transaction data—Data associated with control transactions, for
example, diagnostic data from an application, session logs, and configuration
data to or from an application.
All seven types of data are referred to collectively as IDS data. The six event
types—intrusion, error, status, control transaction log, network access, and
debug—have similar characteristics and are referred to collectively as IDS events.
IDS events are produced by the several different applications that make up the IDS
and are subscribed to by other IDS applications. IDS events have the following
characteristics:
•
They are spontaneously generated by the application instances configured to
do so. There is no request from another application instance to generate a
particular event.
•
They have no specific destination. They are stored and then retrieved by one
or more application instances.
Control transactions involve the following types of requests:
A-38
•
Request to update an application instance’s configuration data
•
Request for an application instance’s diagnostic data
•
Request to reset an application instance’s diagnostic data
•
Request to restart an application instance
•
Request for the NAC, such as a block request
Cisco Intrusion Detection System Appliance and Module Installation and Configuration Guide Version 4.1
78-15597-02
Appendix A
Intrusion Detection System Architecture
System Components
Control transactions have the following characteristics:
•
They always consist of a request followed by a response. The request and
response may have an arbitrary amount of data associated with them. The
response always includes at least a positive or negative acknowledgment.
•
They are point-to-point transactions. They are sent by one application
instance (the initiator) to another application instance (the responder).
IDS data is represented in XML format as an XML document. The system stores
user configurable parameters in several XML files.
IDS Events
IDS applications generate IDS events to report the occurrence of some stimulus.
The events are the data, such as the alerts generated by sensorApp or errors
generated by any application. Events are stored in a local database known as the
EventStore.
There are five types of events:
•
evAlert—Alert event messages that report when a signature is triggered by
network activity.
•
evStatus—Status event messages that report the status and actions of the IDS
applications.
•
evError— Error event messages that report errors that occurred while
attempting response actions.
•
evLogTransaction—Log transaction messages that report the control
transactions processed by each sensor application.
•
evShunRqst—Shun request messages that report when NAC issues a shun
request.
You can view the status and error messages using the CLI, IDM, and the IEV.
SensorApp and NAC log response actions (TCP resets, IP logging start and stop,
blocking start and stop, trigger packet) as status messages.
This section contains the following topics:
•
Alert Events, page A-40
•
Status Events, page A-40
•
Error Events, page A-41
Cisco Intrusion Detection System Appliance and Module Installation and Configuration Guide Version 4.1
78-15597-02
A-39
Appendix A
Intrusion Detection System Architecture
System Components
•
Alert Events, page A-40
•
NAC Events, page A-42
•
Event Actions, page A-43
Alert Events
Alert events provide notification of some suspicious activity that may indicate an
intrusion attack is in process or has been attempted. Alert events are generated by
the SensorApp application whenever an IDS signature is triggered by network
activity.
The following is an example of an alert event:
evAlert: eventId=1066276939791336085 severity=informational
originator:
hostId: sensor
appName: sensorApp
appInstanceId: 3627
time: 2003/10/16 16:50:11 2003/10/16 11:50:11 CDT
interfaceGroup: 0
vlan: 0
signature: sigId=1001 sigName=Record Packet Rte subSigId=0 version=S37
participants:
attack:
attacker: proxy=false
addr: locality=OUT 4.1.1.2
victim:
addr: locality=OUT 10.2.1.2
alertDetails: Traffic Source: int0 ;
Note
The alertDetails field shows the specific interface that the alert is coming from.
Status Events
Status events are generated by IDS applications whenever certain application state
changes occur. The content of evStatus is an element that defines what aspect of
the application’s state changed and the new state value. The state information that
may be reported varies by application, and many of the state elements are specific
to a single application.
A-40
Cisco Intrusion Detection System Appliance and Module Installation and Configuration Guide Version 4.1
78-15597-02
Appendix A
Intrusion Detection System Architecture
System Components
Note
Errors and warnings are not considered state information and are reported using
evError rather than evStatus.
The following elements are contained in an evStatus event message:
•
applicationStarted—The originating application has started running and has
completed its initialization. This event message provides the application’s
version and confirms that the application successfully started.
•
applicationStopped—The specified application has been intentionally shut
down. This event message is sent by a management application that is
responsible for shutting down the application, rather than by the application
that is shutting down.
•
certificatesChanged—Indicates that the host’s X.509v3 certificates were
changed.
•
configChanged—Indicates that a configuration file has been modified by a
setConfig control transaction request.
•
ipLogAdded—A new IP logging session has been requested. This event
message also contains the address being logged, the time that it was initiated,
and the identifier for the newly created logging session.
•
ipLogCompleted—An IP logging session has ended (because of packet count
or timeout exceeded). The event message contains the log session’s identifier.
•
ipLogRemoved—An IP logging document is no longer available for retrieval.
For reference purposes the event message contains the original logging
session’s identifier, although this identifier is no longer valid because the
document was deleted.
•
ipLogStarted—An IP logging session has been started and at least one packet
has been logged. The event document contains the address being logged, the
time that it was initiated, and the log session’s identifier.
•
loginAction—A login action, such as a user logging in or logging out, has
occurred.
Error Events
Error events are generated by an IDS application when the application detects an
error or warning condition. The evError event contains error code and a textual
description of the error.
Cisco Intrusion Detection System Appliance and Module Installation and Configuration Guide Version 4.1
78-15597-02
A-41
Appendix A
Intrusion Detection System Architecture
System Components
Caution
Do not confuse evError with the <error> element. evError is a type of event that
is part of the events document that is returned upon successful completion of an
event retrieval operation. The <error> element is a document root element that is
returned in the response to a failed operation (such as a control transaction).
The following is an example of an error event:
evError: eventId=1077226078696330133 severity=warning
originator:
hostId: firesafe
appName: login(pam_unix)
appInstanceId: 7475
time: 2004/03/03 17:05:56 2004/03/03 17:05:56 UTC
errorMessage: name=errSyslog session opened for user cisco by (uid=0)
Log Events
Log events provide notification anytime control transactions are processed by
sensor applications.
The following is an example of a log event:
evLogTransaction: command=getVersion eventId=1077226078696330135
successful=true
originator:
hostId: sensor
appName: mainApp
appInstanceId: 1048
time: 2004/03/03 17:05:56 2004/03/03 17:05:56 UTC
requestor:
user: cids
application:
hostId: CONSOLE
appName: -cidcli
appInstanceId: 7476
NAC Events
NAC communicates with other IDS applications through IDIOM control
transactions and events. NAC generates evStatus events when the internal state
changes and evError events when errors are detected.
A-42
Cisco Intrusion Detection System Appliance and Module Installation and Configuration Guide Version 4.1
78-15597-02
Appendix A
Intrusion Detection System Architecture
System Components
The following is an example of an evShunRqst NAC event:
evShunRqst: eventId=1094239199791041344
originator:
deviceName: Sensor1
appName: NetworkAccessControllerApp
appInstance: 654
time: 2004/09/21 18:43:10 1988/05/20 22:21:38
shunEntry:
shunInfo:
host: connectionShun=false
srcAddr: 1.1.1.1
destAddr: 0
srcPort: 0
destPort: 0
protocol: numericType=0 other
timeoutMinutes: 70
evAlertRef: hostId=esendHost 123456789012345678
Event Actions
The following actions can be triggered by an alert event:
Note
You can configure these actions through the CLI, IDM, or IDS MC.
•
IP logging—Provides the ability to capture raw unaltered packets related to
the participants of an event. Information from the logs are used for
confirmation, damage assessment, and forensic evidence.
The IP logging system allocates all of its storage at startup time. This data
store is then split into equal size pages. When logs are written, they are stored
in the pages. When all available pages are filled, the oldest page is
overwritten. A master list of pages and the page contents is maintained by the
system. As old pages are used by new logs, the master list is updated to show
a new start time for the log that was overwritten.
•
TCP reset—Provides the ability to reset an ongoing TCP connection in
response to an alert event detected in that connection.
TCP resetting is performed by SensorApp. 100 reset packets are sent in each
direction as a result of an event that is configured to perform resetting. Alerts
that have been configured for resetting that do not use TCP protocol are
ignored.
Cisco Intrusion Detection System Appliance and Module Installation and Configuration Guide Version 4.1
78-15597-02
A-43
Appendix A
Intrusion Detection System Architecture
System Architectural Details
•
Blocking—Provides the ability to modify ACLs on routers and other devices
to dynamically affect the access policy on a network as the result of an event.
A block request is sent to the NAC. To avoid the performance impact and
delay of a control transaction, the request is in the form of a event.
•
CapturePacket—Provides the ability to capture the alert trigger packet. The
offending packet is included in the evAlert. You configure the signature to
perform this action by setting the master engine parameter CapturePacket to
True. If set to True, and the alert is not a SummaryAlarm, the current packet
is appended to the evAlert message.
You will not be able to query the IP log system and get only packets from a
specific time inside the log. If you supply a time range, you receive a single
file made up of all internal blocks that contain the time range requested.
Further refinement of the log file must be done on a separate platform,
because filtering the packets puts an undue burden on the sensor platform.
There are many tools available that allow you to filter and otherwise
manipulate the IP log files.
An interface must be active to activate a log from that interface. There is no
provision for erasing IP logs or sanitizing the sensor. You must reimage the
sensor if you want to remove all log files.
Note
The IDS management systems cannot display IP log information, but
through the CLI you can print the HEX and ASCII Base64 decoded
version of the CapturePacket field.
System Architectural Details
This section provides information about other system architecture details.
This section contains the following topics:
A-44
•
Communications, page A-45
•
IDAPI, page A-46
•
RDEP, page A-47
•
Sensor Directory Structure, page A-48
Cisco Intrusion Detection System Appliance and Module Installation and Configuration Guide Version 4.1
78-15597-02
Appendix A
Intrusion Detection System Architecture
System Architectural Details
Communications
IDS applications use an interprocess communication API called Intrusion
Detection Application Program Interface (IDAPI) to handle internal
communications. IDAPI reads and writes event data and provides a mechanism
for control transactions. See IDAPI, page A-46, for an illustration of how IDAPI
operates.
External communications use RDEP. RDEP is an application-level
communications protocol used to exchange IDS event, IP log, configuration, and
control messages between IDS clients and IDS servers. RDEP communications
consist of request and response messages. RDEP clients initiate request messages
to RDEP servers. RDEP servers respond to request messages with response
messages. See RDEP, page A-47, for an illustration of how RDEP operates.
RDEP defines three classes of request/response messages: event, IP log, and
transaction messages. Event messages include IDS alert, status, and error
messages. Clients use IP log requests to retrieve IP log data from servers.
Transaction messages are used to configure and control IDS servers.
RDEP utilizes the industry standards HTTP, TLS/SSL and XML to provide a
standardized interface between RDEP agents. The RDEP protocol is a subset of
the HTTP/1.1 protocol. All RDEP messages are legal HTTP/1.1 messages. RDEP
uses HTTP’s message formats and message exchange protocol to exchange
messages between RDEP agents.
You use the IDS manager to specify which hosts are allowed to access the sensor
through the network. Sensors accept connections from 1 to 10 RDEP clients
simultaneously. Clients selectively retrieve data by time range, type of event
(alert, error, or status message) and level (alert = high, medium, low, or
informational; error = high, medium, low). Events are retrieved by a query (a
single bulk get) or subscription (a real-time persistent connection) or both.
Communications are secured by TLS or SSL.
Note
The following legacy applications have been replaced by RDEP: postofficed,
fileXferd, and IPSec.
IDIOM is a data format standard that defines the event messages that are reported
by the IDS as well as the operational messages that are used to configure and
control intrusion detection systems. These messages consist of XML documents
that conform to the IDIOM XML schema.
Cisco Intrusion Detection System Appliance and Module Installation and Configuration Guide Version 4.1
78-15597-02
A-45
Appendix A
Intrusion Detection System Architecture
System Architectural Details
IDIOM supports two types of interactions: event and control transaction. Event
interactions are used to exchange IDS events such as alerts. IDIOM uses two types
of messages for event interactions: event and error messages. Control transactions
provide a means for one host to initiate an action in, change the state of, or read
the state of another host. Control transactions utilize four types of IDIOM
messages: request, response, configuration, and error messages. Events and
control transactions that are communicated between application instances within
a host are known as local events or local control transactions, or collectively, local
IDIOM messages. Events and control transactions that are communicated
between different hosts using the RDEP protocol are known as remote events and
remote control transactions, or collectively, remote IDIOM messages.
IDAPI
IDAPI is the interface through which all the applications communicate.
SensorApp captures and analyzes the network traffic on its interfaces. When a
signature is matched, SensorApp generates an alert, which is stored in the
EventStore. If the signature is configured to perform the blocking response action,
SensorApp generates a block event, which is also stored in the EventStore.
Figure A-4 on page A-46 illustrates the IDAPI interface.
IDAPI
Alert
SensorApp
Block
request
Alert
IDAPI
Block
request
EventStore
119096
Figure A-4
Each application registers to the IDAPI to send and receive events and control
transactions. IDAPI provides the following services:
•
Control transactions
– Initiates the control transaction.
– Waits for the inbound control transaction.
– Responds to the control transaction.
A-46
Cisco Intrusion Detection System Appliance and Module Installation and Configuration Guide Version 4.1
78-15597-02
Appendix A
Intrusion Detection System Architecture
System Architectural Details
•
IDS events
– Subscribes to remote IDS events, which are stored in the local EventStore
when received.
– Reads IDS events from the local EventStore.
– Writes IDS events to the local EventStore.
IDAPI provides the necessary synchronization mechanisms to guarantee atomic
data accesses.
RDEP
Remote applications can retrieve events from the sensor through RDEP. The
remote client sends an RDEP event request to the sensor’s WebServer, which
passes it to the EventServer. The EventServer queries the EventStore through
IDAPI and then returns the result. Figure A-5 on page A-47 shows remote
applications retrieving events from the sensor through RDEP.
Figure A-5
Retrieving Events Through RDEP
IEV, IDS-MC, Third Party Event
Management Applications
RDEP
Client
Sensor
HTTP GET
EventStore
IDAPI
Event
Event
Request
Event
WebServer
EventServer
119098
Event
Request
Events
Cisco Intrusion Detection System Appliance and Module Installation and Configuration Guide Version 4.1
78-15597-02
A-47
Appendix A
Intrusion Detection System Architecture
System Architectural Details
Remote applications can send commands to the sensor through RDEP. The remote
client sends an RDEP control transaction to the sensor’s WebServer, which passes
it to the Control Transaction Server. The Control Transaction Server passes the
control transaction through IDAPI to the appropriate application, waits for the
application’s response, and then returns the result. Figure A-6 shows remote
applications sending commands to the sensor through RDEP.
Figure A-6
Sending Commands Through RDEP
IEV, IDS-MC, Third Party Event
Management Applications
RDEP
Client
HTTP
POST
CT Request
CT Request
Application
IDAPI
CT Response
CT Response
CT
Response
WebServer
CT Server
119107
Sensor
Sensor Directory Structure
IDS 4.x has the following directory structure:
A-48
•
/usr/cids/idsRoot—Main installation directory.
•
/usr/cids/idsRoot/shared—Stores files used during system recovery.
•
/usr/cids/idsRoot/var—Stores files created dynamically while the sensor is
running.
•
/usr/cids/idsRoot/var/updates—Stores files and logs for update installations.
•
/usr/cids/idsRoot/var/virtualSensor—Stores files used by SensorApp to
analyze regular expressions.
Cisco Intrusion Detection System Appliance and Module Installation and Configuration Guide Version 4.1
78-15597-02
Appendix A
Intrusion Detection System Architecture
Summary of Applications
•
/usr/cids/idsRoot/var/eventStore—Contains the EventStore application.
•
/usr/cids/idsRoot/var/core—Stores core files that are created during system
crashes.
•
/usr/cids/idsRoot/var/iplogs—Stores iplog file data.
•
/usr/cids/idsRoot/bin—Contains the binary executables.
•
/usr/cids/idsRoot/bin/authentication—Contains the authentication
application.
•
/usr/cids/idsRoot/bin/cidDump—Contains the script that gathers data for tech
support.
•
/usr/cids/idsRoot/bin/cidwebserver—Contains the WebServer application.
•
/usr/cids/idsRoot/bin/cidcli—Contains the CLI application.
•
/usr/cids/idsRoot/bin/nac—Contains the NAC application.
•
/usr/cids/idsRoot/bin/logApp—Contains the logger application.
•
/usr/cids/idsRoot/bin/mainApp—Contains the main application.
•
/usr/cids/idsRoot/bin/sensorApp—Contains the sensor application.
•
/usr/cids/idsRoot/bin/falcondump—Contains the application for getting
packet dumps on the sensing ports of the IDS-4250-XL and IDSM-2.
•
/usr/cids/idsRoot/etc—Stores sensor configuration files.
•
/usr/cids/idsRoot/htdocs—Contains the IDM and NSDB files for the
WebServer.
•
/usr/cids/idsRoot/lib—Contains the library files for the sensor applications.
•
/usr/cids/idsRoot/log—Contains the log files for debugging.
•
/usr/cids/idsRoot/tmp—Stores the temporary files created during run time of
the sensor.
Summary of Applications
Table A-2 gives a summary of the applications that make up IDS.
Cisco Intrusion Detection System Appliance and Module Installation and Configuration Guide Version 4.1
78-15597-02
A-49
Appendix A
Intrusion Detection System Architecture
Summary of Applications
Table A-2
A-50
Summary of Applications
Application
Description
AuthenticationApp
Authorizes and authenticates users based on IP
address, password, and/or digital certificates.
CLI
Accepts command line input and modifies the
local configuration using IDAPI.
IDS Event Viewer (IEV)1
Subscribes to intrusion, network access, status,
and error events and displays the event
information in a GUI.
EventServer2
Accepts RDEP request for events from remote
clients.
MainApp
Reads the configuration and starts
applications, handles starting and stopping of
applications and node reboots, handles
software upgrades.
NetworkAccessControllerApp
(NAC)3
A NAC is run on every sensor. Each NAC
subscribes to network access events from its
local EventStore. The NAC configuration
contains a list of sensors and the network
access devices that its local NAC controls. If a
NAC is configured to send network access
events to a master blocking sensor, it initiates
a network access control transaction to the
remote NAC that controls the device. These
network access action control transactions are
also used by IDS managers to issue occasional
network access actions.
SensorApp4
Captures and analyzes traffic on the monitored
network and generates intrusion and network
access events. Responds to IP logging control
transactions that turn logging on and off and
that send and delete IP log files.
Cisco Intrusion Detection System Appliance and Module Installation and Configuration Guide Version 4.1
78-15597-02
Appendix A
Intrusion Detection System Architecture
Summary of Applications
Table A-2
Summary of Applications (continued)
Application
Description
Control Transaction Server (CT Accepts control transactions from a remote
Server)5
RDEP client, initiates a local control
transaction, and returns the response to the
remote client.
Control Transaction Source
(CT Source)6
Waits for control transactions directed to
remote applications, forwards the control
transactions to the remote node using RDEP,
and returns the response to the initiator.
IDS Device Manager (IDM)
The WebServer servlet that provides an HTML
IDS management interface.
WebServer
Waits for remote HTTP client requests and
calls the appropriate servlet application.
Syslog Monitoring Application Captures and analyzes syslog and SNMP
events generating intrusion and network access
events.
Alarm Channel Application
Filters and correlates the alerts before sending
them to the EventStore.
1. This is a remote application.
2. This is a WebServer servlet.
3. NAC is formerly known as managed in the legacy IDS.
4. SensorApp is formerly known as packetd in the legacy IDS.
5. This is a WebServer servlet.
6. This is a remote control transaction proxy.
Cisco Intrusion Detection System Appliance and Module Installation and Configuration Guide Version 4.1
78-15597-02
A-51
Appendix A
Intrusion Detection System Architecture
Summary of Applications
A-52
Cisco Intrusion Detection System Appliance and Module Installation and Configuration Guide Version 4.1
78-15597-02
A P P E N D I X
B
Troubleshooting
This appendix contains troubleshooting tips and procedures for sensors and
software.
This appendix contains the following sections:
•
Preventive Maintenance, page B-1
•
Disaster Recovery, page B-2
•
Troubleshooting the 4200 Series Appliance, page B-4
•
Troubleshooting the IDSM-2, page B-44
•
Gathering Information, page B-52
Preventive Maintenance
The following actions will help you maintain your sensor:
•
Create a service account.
You can use the service account when you need to work with the TAC to
troubleshoot your sensor.
See Creating the Service Account, page 10-12, for the procedure.
•
You should back up a good configuration. If your current configuration
becomes unusable, you can replace it with the backup version.
See Creating and Using a Backup Configuration File, page 10-28, for the
procedure.
Cisco Intrusion Detection System Appliance and Module Installation and Configuration Guide Version 4.1
78-15597-02
B-1
Appendix B
Troubleshooting
Disaster Recovery
•
Save your backup configuration to a remote system.
•
Always back up your configuration before you do a manual upgrade. If you
have auto upgrades configured, make sure you do periodic backups.
Disaster Recovery
The following section provides recommendations and steps to take if you need to
to recover your sensor after a disaster.
Follow these recommendations so that you are ready in case of a disaster:
•
If you are using the CLI or IDM for configuration, copy the current
configuration from the sensor to an FTP or SCP server any time a change has
been made.
See Creating and Using a Backup Configuration File, page 10-28, for the
procedure.
•
B-2
Note
You should note the specific software version for that configuration.
You can apply the copied configuration only to a sensor of the same
version.
Note
You also need the list of user IDs that have been used on that sensor.
The list of user IDs and passwords are not saved in the configuration.
If you are using IDS MC, the current configuration is saved in the IDS MC
database and a separate copy is not needed.
Note
The list of user IDs is not saved in the IDS MC database. You must
make a note of the user IDs.
Note
You should note the specific software version for that configuration.
You can push the copied configuration only to a sensor of the same
version.
Cisco Intrusion Detection System Appliance and Module Installation and Configuration Guide Version 4.1
78-15597-02
Appendix B
Troubleshooting
Disaster Recovery
When a disaster happens and you need to recover the sensor, try the following:
1.
Reimage the sensor.
See Reimaging Appliances and Modules, page 10-110, for the procedures for
appliances and modules.
2.
Log in to the sensor with the default user ID and password—cisco.
Note
3.
You are be prompted to change the cisco password.
Run the setup command.
See Initializing the Sensor, page 10-2, for the procedure.
4.
Upgrade the sensor to the IDS software version it had when the configuration
was last saved and copied.
See Obtaining Cisco IDS Software, page 9-1, for more information on
obtaining IDS software versions and how to install them.
Warning
Trying to copy the saved configuration without getting the sensor back to the
same IDS software version it had before the disaster can cause configuration
errors.
5.
Copy the last saved configuration to the sensor.
See Creating and Using a Backup Configuration File, page 10-28, for the
procedure.
6.
Update clients to use the new key/certificate of the sensor.
Reimaging changes the sensor’s SSH keys and HTTPS certificate. See
Adding Known Hosts to the SSH Known Hosts List, page 10-19, for the
procedure.
7.
Create previous users.
See Adding a User, page 10-16, for the procedure.
Cisco Intrusion Detection System Appliance and Module Installation and Configuration Guide Version 4.1
78-15597-02
B-3
Appendix B
Troubleshooting
Troubleshooting the 4200 Series Appliance
Troubleshooting the 4200 Series Appliance
This section pertains to troubleshooting the 4200 series appliance.
Tip
Before troubleshooting the appliance, check the Caveats section of the Readme
for the software version you have installed on your sensor to see if you are dealing
with a known issue.
This section contains the following topics:
•
Communication, page B-4
•
SensorApp and Alerting, page B-11
•
Blocking, page B-18
•
Logging, page B-28
•
NTP, page B-33
•
TCP Reset, page B-37
•
Software Upgrade, page B-39
Communication
This section helps you troubleshoot communication problems with the 4200 series
sensor.
This section contains the following topics:
B-4
•
Cannot Access the Sensor Through the IDM or Telnet and/or SSH, page B-5
•
IDM Cannot Access the Sensor, page B-7
•
Access List Misconfiguration, page B-10
•
Duplicate IP Address Shuts Interface Down, page B-10
Cisco Intrusion Detection System Appliance and Module Installation and Configuration Guide Version 4.1
78-15597-02
Appendix B
Troubleshooting
Troubleshooting the 4200 Series Appliance
Cannot Access the Sensor Through the IDM or Telnet and/or SSH
If you cannot access the sensor through the IDM or through Telnet and/or SSH,
follow these steps:
Step 1
Ping the sensor’s IP address:
•
The ping fails. Go to Step 2.
sensor# ping 10.89.149.81
PING 10.89.149.81 (10.89.149.81) from 10.89.149.56 : 56(84) bytes
of data.
From 10.89.149.56 icmp_seq=1 Destination Host Unreachable
From 10.89.149.56 icmp_seq=2 Destination Host Unreachable
From 10.89.149.56 icmp_seq=3 Destination Host Unreachable
—- 10.89.149.81 ping statistics —3 packets transmitted, 0 received, +3 errors, 100% loss, time
2013ms , pipe 3
•
The ping succeeds. Go to Step 4.
sensor# ping 10.89.149.81
PING 10.89.149.81 (10.89.149.81) from 10.89.149.110 : 56(84) bytes
of data.
64 bytes from 10.89.149.81: icmp_seq=1 ttl=254 time=0.273 ms
64 bytes from 10.89.149.81: icmp_seq=2 ttl=254 time=0.176 ms
64 bytes from 10.89.149.81: icmp_seq=3 ttl=254 time=0.178 ms
64 bytes from 10.89.149.81: icmp_seq=4 ttl=254 time=0.187 ms
—- 10.89.149.81 ping statistics —4 packets transmitted, 4 received, 0% loss, time 3001ms rtt
min/avg/max/mdev = 0.176/0.203/0.273/0.042 ms
Step 2
Run a trace route to the sensor to find out where the route is broken.
sensor# traceroute to 172.21.172.24 (172.21.172.24), 30 hops max, 40
byte packets 1 171.69.162.2 (171.69.162.2) 1.25 ms 1.37 ms 1.58 ms 2
172.21.172.24 (172.21.172.24) 0.77 ms 0.66 ms 0.68 ms
sensor#
Step 3
Make sure the sensor’s IP address and default gateway are set correctly. Make sure
the router, switch, and/or the firewall are configured to interface with the sensor.
sensor# setup
—- System Configuration Dialog —At any point you may enter a question mark ’?’ for help.
Cisco Intrusion Detection System Appliance and Module Installation and Configuration Guide Version 4.1
78-15597-02
B-5
Appendix B
Troubleshooting
Troubleshooting the 4200 Series Appliance
User ctrl-c to abort configuration dialog at any prompt.
Default settings are in square brackets ’[]’.
Current Configuration:
networkParams
ipAddress 10.89.146.110
netmask 255.255.255.0
defaultGateway 10.89.146.254
hostname firesafe
telnetOption enabled
accessList ipAddress 10.0.0.0 netmask 255.0.0.0
accessList ipAddress 10.89.0.0 netmask 255.255.0.0
accessList ipAddress 64.101.0.0 netmask 255.255.0.0
accessList ipAddress 10.89.149.31 netmask 255.255.255.255
accessList ipAddress 64.102.0.0 netmask 255.255.0.0
exit
timeParams
summerTimeParams
active-selection none
exit
ntpServers ipAddress 10.89.147.99
keyId 2
keyValue test
exit
exit
service webServer
general
ports 443
exit
exit
The network configuration is correct.
Step 4
Verify that the sensor does not have an IP address conflict with another host on
the network.
Note
Linux prevents the command and control Ethernet port from activating if
it detects an address conflict with another host.
sensor# show interfaces
command-control is up
Internet address is 10.89.146.110, subnet mask is 255.255.255.0,
telnet is enabled.
Hardware is eth1, tx
B-6
Cisco Intrusion Detection System Appliance and Module Installation and Configuration Guide Version 4.1
78-15597-02
Appendix B
Troubleshooting
Troubleshooting the 4200 Series Appliance
Note
Step 5
If the output says command-control
an IP address conflict.
is down,
there is a hardware issue or
SSH fails to connect or the connection is refused:
a.
Make sure the sensor’s access list is configured to accept your IP address.
sensor# show configuration | include accessList
accessList ipAddress 10.0.0.0 netmask 255.0.0.0
accessList ipAddress 10.89.0.0 netmask 255.255.0.0
accessList ipAddress 64.101.0.0 netmask 255.255.0.0
accessList ipAddress 10.89.149.31 netmask 255.255.255.255
accessList ipAddress 64.102.0.0 netmask 255.255.0.0
b.
If the sensor’s access list is correct, make sure the sensor’s SSH and/or Telnet
and web server ports are open in the firewall.
sensor# configure terminal
sensor(config)# service WebServer
sensor(config-WebServer)# show settings
general
----------------------------------------------enable-tls: true <defaulted>
ports: 443 <defaulted>
server-id: HTTP/1.1 compliant <defaulted>
-----------------------------------------------
Step 6
Verify that the network cabling for the appliances is correct and operational, and
that the routers and switches are operational for the modules.
IDM Cannot Access the Sensor
If the IDM cannot access the sensor, follow these steps:
Step 1
If you can access the sensor through SSH, verify that you are accessing the correct
port on the sensor and that you are making the correct HTTP versus HTTPs
selection.
You are correctly addressing the sensor.
Cisco Intrusion Detection System Appliance and Module Installation and Configuration Guide Version 4.1
78-15597-02
B-7
Appendix B
Troubleshooting
Troubleshooting the 4200 Series Appliance
Step 2
Verify that the Web server is still running:
a.
Use the show version command to check the status of the WebServer:
sensor# show version
Application Partition:
Cisco Systems Intrusion Detection Sensor, Version 4.1(3)S61
OS Version 2.4.18-5smpbigphys
Platform: IDS-4235
Sensor up-time is 20 days.
Using 214319104 out of 921522176 bytes of available memory (23% usage)
Using 596M out of 15G bytes of available disk space (5% usage)
MainApp
AnalysisEngine
Authentication
Logger
NetworkAccess
TransactionSource
WebServer
CLI
2003_Oct_10_11.16
2003_Oct_10_11.16
2003_Oct_10_11.16
2003_Oct_10_11.16
2003_Oct_10_11.16
2003_Oct_10_11.16
2003_Oct_10_11.16
2003_Oct_10_11.16
(Release)
(Release)
(Release)
(Release)
(Release)
(Release)
(Release)
(Release)
2003-10-10T11:01:13-0500 Running
2003-10-10T11:01:13-0500 Running
2003-10-10T11:01:13-0500 Running
2003-10-10T11:01:13-0500 Running
2003-10-10T11:01:13-0500 Running
2003-10-10T11:01:13-0500 Running
2003-10-10T11:01:13-0500 Running
2003-10-10T11:01:13-0500
WebServer
CLI
2003_Oct_10_11.16
2003_Oct_10_11.16
(Release)
(Release)
2003-10-10T11:01:13-0500
2003-10-10T11:01:13-0500
Running
Upgrade History:
* IDS-K9-min-4.1-1-S47
IDS-K9-sp-4.1-3-S61.rpm.pkg
12:00:00 UTC Thu Jun 30 2005
14:14:55 UTC Fri Feb 20 2004
Recovery Partition Version 1.2 - 4.1(1)S47
The Web server is still running. Go to Step 4
b.
The web server is still not running:
sensor# show version
Application Partition:
Cisco Systems Intrusion Detection Sensor, Version 4.1(3)S61
OS Version 2.4.18-5smpbigphys
Platform: IDS-4235
Sensor up-time is 20 days.
Using 214319104 out of 921522176 bytes of available memory (23% usage)
Using 596M out of 15G bytes of available disk space (5% usage)
B-8
Cisco Intrusion Detection System Appliance and Module Installation and Configuration Guide Version 4.1
78-15597-02
Appendix B
Troubleshooting
Troubleshooting the 4200 Series Appliance
MainApp
AnalysisEngine
Authentication
Logger
NetworkAccess
TransactionSource
WebServer
CLI
2003_Oct_10_11.16
2003_Oct_10_11.16
2003_Oct_10_11.16
2003_Oct_10_11.16
2003_Oct_10_11.16
2003_Oct_10_11.16
2003_Oct_10_11.16
2003_Oct_10_11.16
(Release)
(Release)
(Release)
(Release)
(Release)
(Release)
(Release)
(Release)
2003-10-10T11:01:13-0500
2003-10-10T11:01:13-0500
2003-10-10T11:01:13-0500
2003-10-10T11:01:13-0500
2003-10-10T11:01:13-0500
2003-10-10T11:01:13-0500
2003-10-10T11:01:13-0500
2003-10-10T11:01:13-0500
Running
Running
Running
Running
Running
Running
Not Running
Upgrade History:
* IDS-K9-min-4.1-1-S47
IDS-K9-sp-4.1-3-S61.rpm.pkg
12:00:00 UTC Thu Jun 30 2005
14:14:55 UTC Fri Feb 20 2004
Recovery Partition Version 1.2 - 4.1(1)S47
Step 3
If the Web server is not running, follow these steps:
a.
Run diagnostics, save the output, and send the output file to the TAC.
See Displaying Tech Support Information, page 10-31, for the procedure.
b.
Restart the Web server:
sensor# reset
Warning: Executing this command will stop all applications and
reboot the node.
Continue with reset?:yes
Request Succeeded.
sensor#
Note
Step 4
The reset command shuts down the applications running on the
sensor, reboots the appliance, and restarts all the applications.
If the Web server is still running, verify that the firewall has an open port for the
sensor.
Cisco Intrusion Detection System Appliance and Module Installation and Configuration Guide Version 4.1
78-15597-02
B-9
Appendix B
Troubleshooting
Troubleshooting the 4200 Series Appliance
Access List Misconfiguration
To correct a misconfigured access list, follow these steps:
Step 1
Log in to the CLI.
Step 2
View your configuration to see the access list:
sensor# show configuration | include accessList
accessList ipAddress 10.0.0.0 netmask 255.0.0.0
accessList ipAddress 10.89.0.0 netmask 255.255.0.0
accessList ipAddress 64.101.0.0 netmask 255.255.0.0
accessList ipAddress 10.89.149.31 netmask 255.255.255.255
accessList ipAddress 64.102.0.0 netmask 255.255.0.0
Step 3
Verify that the client IP address is listed in the allowed networks. If it is not, add it:
sensor# configure terminal
sensor(config)# service Host
sensor(config-Host)# networkParams
sensor(config-Host-net)# accessList ipAddress
value netmask value
Duplicate IP Address Shuts Interface Down
If you have two newly imaged sensors with the same IP address that come up on
the same network at the same time, the interface shuts down. Linux prevents the
command and control interface Ethernet port from activating if it detects an
address conflict with another host.
B-10
Cisco Intrusion Detection System Appliance and Module Installation and Configuration Guide Version 4.1
78-15597-02
Appendix B
Troubleshooting
Troubleshooting the 4200 Series Appliance
To verify that the sensor in question does not have an IP address conflict with
another host on the network, follow these steps:
Step 1
Log in to the CLI.
Step 2
Determine whether the interface is up:
sensor# show interfaces
command-control is up
If the output says command-control
address conflict. Go to Step 3.
Step 3
is down ,
there is a hardware issue or an IP
Make sure the sensor’s cabling is correct.
Refer to the chapter for your sensor in this hardware guide.
Step 4
Run the setup command to make sure the IP address is correct.
See Initializing the Sensor, page 10-2, for the procedure.
SensorApp and Alerting
This section helps you troubleshoot issues with SensorApp and alerting.
This section contains the following topics:
•
Sensing Process Not Running, page B-11
•
Physical Connectivity, SPAN, or VACL Port Issue, page B-12
•
Unable to See Alerts, page B-14
•
Sensor Not Seeing Packets, page B-15
•
Cleaning Up a Corrupted SensorApp Configuration, page B-16
•
Running SensorApp in Single CPU Mode, page B-17
•
Bad Memory on the IDS-4250-XL, page B-18
Sensing Process Not Running
The sensing process (SensorApp) should always be running. If it is not, you do
not receive any alerts.
Cisco Intrusion Detection System Appliance and Module Installation and Configuration Guide Version 4.1
78-15597-02
B-11
Appendix B
Troubleshooting
Troubleshooting the 4200 Series Appliance
To make sure the sensing process is running, follow these steps:
Step 1
Log in to the CLI.
Step 2
Determine the status of the AnalysisEngine service:
sensor# show version
AnalysisEngine 2003_Oct_10_11.16 (Release) 2003-10-10T11:01:13-0500
Not Running
Step 3
If the SensorApp is not running, look for any errors connected to it:
sensor# show events error | sensorApp | hh:mm:ss month
evError: eventId=1077219258696330005 severity=warning
day year
originator:
hostId: sensor
appName: sensorApp
appInstanceId: 1045
time: 2004/02/19 19:34:20 2004/02/19 19:34:20 UTC
errorMessage: name=errUnclassified Generating new Analysis Engine
configuration file.
Note
Step 4
hh:mm:ss month day year is the date and time of the last restart.
Make sure you have the latest software updates:
sensor# show version
Upgrade History:
* IDS-K9-min-4.1-1-S47 12:00:00 UTC Thu Jun 30 2005
IDS-K9-sp-4.1-3-S61.rpm.pkg 14:14:55 UTC Fri Feb 20 2004
Recovery Partition Version 1.2 - 4.1(1)S47
If you do not have the latest software updates, download them from Cisco.com.
See Obtaining Cisco IDS Software, page 9-1, for the procedure.
Step 5
Read the Readme that accompanies the software upgrade for any known DDTS
for SensorApp or AnalysisEngine.
Physical Connectivity, SPAN, or VACL Port Issue
If the sensor is not connected properly, you do not receive any alerts.
B-12
Cisco Intrusion Detection System Appliance and Module Installation and Configuration Guide Version 4.1
78-15597-02
Appendix B
Troubleshooting
Troubleshooting the 4200 Series Appliance
To make sure the sensor is connected properly, follow these steps:
Note
If you have an IDS-4230 or IDS-4220, make sure you have swapped the
interfaces. See Upgrading the IDS-4220-E and IDS-4230-FE to 4.x Software,
page 4-5, for the procedure.
Step 1
Log in to the CLI.
Step 2
Make sure the interfaces are up and that the packet count is increasing:
sensor# show interface sensing
Sensing int0 is down
Hardware is eth0, TX
Reset port
Step 3
If the interface is down, make sure the sensing port is connected properly:
a.
Make sure the sensing port is connected properly on the appliance.
See the chapter on your appliance in the Cisco Intrusion Detection System
Appliance and Module Installation and Configuration Guide Version 4.1.
b.
Make sure the sensing port is connected to the correct SPAN or VACL capture
port on the IDSM-2.
See the chapter on the IDSM-2 in the Cisco Intrusion Detection System
Appliance and Module Installation and Configuration Guide Version 4.1.
Step 4
Verify the interface configuration:
a.
Make sure you have the interfaces configured properly.
Refer to Assigning and Enabling the Sensing Interface, page 10-9, for the
procedure.
b.
Verify the SPAN and VACL capture port configuration on the Cisco switch.
Refer to your switch documentation for the procedure.
Step 5
Verify again that the interfaces are up and that the packet count is increasing.
sensor# show interface sensing
Sensing int0 is up
Hardware is eth0, TX
Reset port
Cisco Intrusion Detection System Appliance and Module Installation and Configuration Guide Version 4.1
78-15597-02
B-13
Appendix B
Troubleshooting
Troubleshooting the 4200 Series Appliance
Unable to See Alerts
If you cannot see alerts, the following:
•
Make sure the signature is enabled.
•
Make sure the sensor is seeing packets.
•
Make sure that alerts are being generated.
•
Make sure Event Viewer can communicate with the sensor.
To make sure you can see alerts, follow these steps:
Step 1
Log in to the CLI.
Step 2
Make sure the signature is enabled:
a.
Enter configuration mode:
sensor# configure terminal
b.
Enter virtual sensor mode:
sensor(config)# service virtual-sensor-configuration virtualSensor
c.
Make sure the signature is enabled:
sensor(config-vsc)# tune-micro-engines
sensor(config-vsc-virtualSensor# atomic.icmp
sensor(config-vsc-virtualSensor-ATO)# sig sigid 2000
sensor(config-vsc-virtualSensor-ATO-sig)# show settings
SIGID: 2000 <protected>
SubSig: 0 <protected>
AlarmDelayTimer:
AlarmInterval:
AlarmSeverity: informational <defaulted>
AlarmThrottle: Summarize <defaulted>
AlarmTraits:
CapturePacket: False <defaulted>
ChokeThreshold: 100 <defaulted>
DstIpAddr:
DstIpMask: Enabled: False <defaulted>
B-14
Cisco Intrusion Detection System Appliance and Module Installation and Configuration Guide Version 4.1
78-15597-02
Appendix B
Troubleshooting
Troubleshooting the 4200 Series Appliance
Step 3
Make sure the sensor is seeing packets:
sensor# show interface sensing
Sensing int0 is up
Hardware is eth0, TX
Reset port
Step 4
Check for alerts:
sensor# show events alert
evAlert: eventId=1080048367680474106 severity=informational
originator:
hostId: sensor
appName: sensorApp
appInstanceId: 1102
time: 2004/06/24 13:21:33 2004/06/24 13:21:33 EST
interfaceGroup: 0
vlan: 0
signature: sigId=7102 sigName=Reply-to-Broadcast subSigId=0
version=S37
participants:
attack:
attacker: proxy=false
addr: locality=OUT 10.89.146.24
victim:
addr: locality=OUT 10.89.146.24
alertDetails: Traffic Source: int0 ;
Sensor Not Seeing Packets
If your sensor is not seeing any packets on the network, you could have the
interfaces set up incorrectly.
If your sensor is not seeing packets, follow these steps:
Step 1
Log in to the CLI.
Step 2
Make sure the interfaces are up and receiving packets:
sensor# show interfaces sensing
Sensing int0 is down
Hardware is eth0, TX
Reset port
Cisco Intrusion Detection System Appliance and Module Installation and Configuration Guide Version 4.1
78-15597-02
B-15
Appendix B
Troubleshooting
Troubleshooting the 4200 Series Appliance
Step 3
If the interfaces are not up, do the following:
a.
Check the cabling.
See the chapter that pertains to your sensor for information on installing the
sensor properly.
b.
Bring the interface up.
sensor# configure terminal
sensor(config)# interface sensing int0
sensor(config-ifs)# no shutdown
sensor(config-ifs)# e100: eth0 NIC Link is Up 100 Mbps Half duplex
sensor(config)# exit
sensor(config)# exit
sensor# show interfaces sensing
Sensing int0 is up
Hardware is eth0, TX
Reset port
MAC statistics from the Fast Ethernet Interface int0
Missed Packet Percentage = 0
Link Status = Up
Total Packets Received = 75077
Total Bytes Received = 398
Total Receive Errors = 0
...
Cleaning Up a Corrupted SensorApp Configuration
If your SensorApp configuration has become corrupted and SensorApp cannot
run, you must delete it entirely and restart SensorApp.
To delete SensorApp, follow these steps:
Step 1
Log in to the service account.
Step 2
Su to root.
Step 3
Stop the IDS applications:
/etc/init.d/cids stop
B-16
Cisco Intrusion Detection System Appliance and Module Installation and Configuration Guide Version 4.1
78-15597-02
Appendix B
Troubleshooting
Troubleshooting the 4200 Series Appliance
Step 4
Replace the virtual sensor file:
cp /usr/cids/idsRoot/etc/defVirtualSensorConfig.xml
/usr/cids/idsRoot/etc/VS-Config/virtualSensor.xml
Step 5
Remove the cache files:
rm /usr/cids/idsRoot/var/virtualSensor/*.pmz
Step 6
Exit the service account.
Step 7
Log in to an account with administrator privileges.
Step 8
Reboot the sensor:
sensor# reset
Warning: Executing this command will stop all applications and reboot
the node.
Continue with reset? [yes]:yes
Request Succeeded.
sensor#
Running SensorApp in Single CPU Mode
SensorApp can crash or consume the CPU when running on a dual CPU sensor
with IP logging turned on for the stream-based signatures. You should change to
single processor mode or turn off IP logging for the stream-based signatures. See
CSCed32093 for the more information.
To change the sensor to single processor mode, follow these steps:
Step 1
Change to single processor mode:
a.
vi ~cids/idsRoot/etc/mainApp.conf
b.
Add the following lines at the end of AnalysisEngine section:
Arg01=-t
Arg02=single
This forces the sensorApp to run in single processor mode.
Note
Running SensorApp in single processor mode can cause a drop in
packet-processing performance.
Cisco Intrusion Detection System Appliance and Module Installation and Configuration Guide Version 4.1
78-15597-02
B-17
Appendix B
Troubleshooting
Troubleshooting the 4200 Series Appliance
Note
Step 2
Running the SensorApp in single processor mode is the preferred
workaround. You should use this workaround unless you see
Signature 993 missed packet alarms after you apply the workaround.
If you do, go to Step 2.
Turn off EventAction log and use CapturePacket True instead in the stream-based
signatures.
Bad Memory on the IDS-4250-XL
Some IDS-4250-XLs were shipped with faulty DIMMs on the XL cards. The
faulty DIMMs cause the sensor to hang or SensorApp to stop functioning and
generate a core file.
See the Partner Field 52563 for the procedure for checking the IDS-4250-XL for
faulty memory.
Step 3
Display events since a specified time for a specified alert level:
sensor# show events alert
level hh:mm month day year
For example, show events alert high 10:00 September 22 2002 displays all high
severity events since 10:00 a.m. September 22, 2002.
Events from the specified time are displayed.
Blocking
After you have configured NAC, you can verify if NAC is running properly by
using the show version command. To verify that NAC is connecting to the
network devices, use the show statistics networkAccess command.
To troubleshoot NAC, follow these steps:
1.
Verify that NAC is running.
See Verifying NAC is Running, page B-19, for the procedure.
2.
Verify that NAC is connecting to the network devices.
See Verifying NAC is Connecting, page B-20, for the procedure.
B-18
Cisco Intrusion Detection System Appliance and Module Installation and Configuration Guide Version 4.1
78-15597-02
Appendix B
Troubleshooting
Troubleshooting the 4200 Series Appliance
3.
Verify that the EventAction is set to shunHost for specific signatures.
See Blocking Not Occurring for a Signature, page B-25, for the procedure.
4.
Verify that the MBS is properly configured.
See Verifying the Master Blocking Sensor Configuration, page B-26.
Note
See NAC, page A-16, for a discussion of NAC architecture.
This section provides troubleshooting help for blocking and the NAC service.
This section contains the following topics.
•
Verifying NAC is Running, page B-19
•
Verifying NAC is Connecting, page B-20
•
Device Access Issues, page B-22
•
Verifying the Interfaces/Directions on the Network Device, page B-23
•
Enabling SSH Connections to the Network Device, page B-24
•
Blocking Not Occurring for a Signature, page B-25
•
Verifying the Master Blocking Sensor Configuration, page B-26
Verifying NAC is Running
To verify that NAC is running, use the show version command.
Step 1
Log in to the CLI.
Step 2
Verify that NAC is running:
sensor# show version
Application Partition:
Cisco Systems Intrusion Detection Sensor, Version 4.1(3)S61
OS Version 2.4.18-5smpbigphys
Platform: IDS-4235
Sensor up-time is 20 days.
Using 214319104 out of 921522176 bytes of available memory (23% usage)
Using 596M out of 15G bytes of available disk space (5% usage)
Cisco Intrusion Detection System Appliance and Module Installation and Configuration Guide Version 4.1
78-15597-02
B-19
Appendix B
Troubleshooting
Troubleshooting the 4200 Series Appliance
MainApp
AnalysisEngine
Authentication
Logger
NetworkAccess
TransactionSource
WebServer
CLI
2003_Oct_10_11.16
2003_Oct_10_11.16
2003_Oct_10_11.16
2003_Oct_10_11.16
2003_Oct_10_11.16
2003_Oct_10_11.16
2003_Oct_10_11.16
2003_Oct_10_11.16
(Release)
(Release)
(Release)
(Release)
(Release)
(Release)
(Release)
(Release)
2003-10-10T11:01:13-0500
2003-10-10T11:01:13-0500
2003-10-10T11:01:13-0500
2003-10-10T11:01:13-0500
2003-10-10T11:01:13-0500
2003-10-10T11:01:13-0500
2003-10-10T11:01:13-0500
2003-10-10T11:01:13-0500
Running
Running
Running
Running
Running
Running
Running
Upgrade History:
* IDS-K9-min-4.1-1-S47
IDS-K9-sp-4.1-3-S61.rpm.pkg
12:00:00 UTC Thu Jun 30 2005
14:14:55 UTC Fri Feb 20 2004
Recovery Partition Version 1.2 - 4.1(1)S47
Step 3
If NetworkAccess display Not
Running,
NAC has failed. You must contact TAC.
Verifying NAC is Connecting
Step 1
Log in to the CLI.
Step 2
Verify that NAC is connecting:
Check the State section of the output to verify that all devices are connecting.
sensor# show statistics networkAccess
Current Configuration
AllowSensorShun = false
ShunMaxEntries = 100
NetDevice
Type = PIX
IP = 7.7.7.7
NATAddr = 0.0.0.0
Communications = telnet
NetDevice
Type = Cisco
IP = 5.5.5.5
NATAddr = 0.0.0.0
Communications = ssh-des
ShunInterface
InterfaceName = fa0/0
InterfaceDirection = in
InterfacePreShun = preAcl
B-20
Cisco Intrusion Detection System Appliance and Module Installation and Configuration Guide Version 4.1
78-15597-02
Appendix B
Troubleshooting
Troubleshooting the 4200 Series Appliance
NeverShun
IP = 3.3.3.1
IP = 3.3.3.2
IP = 3.3.3.3
IP = 11.0.0.0
MasterBlockingSensor
SensorIp = 1.2.3.4
SensorPort = 8080
UseTls = 1
State
ShunEnable = true
NetDevice
IP = 7.7.7.7
AclSupport = Does not use ACLs
State = Connecting
NetDevice
IP = 5.5.5.5
AclSupport = uses Named ACLs
State = Connecting
sensor#
Step 3
If NAC is not connecting, look for recurring errors:
sensor# show events error NAC
Step 4
hh:mm:ss month day year
Make sure you have the latest software updates:
sensor# show version
Upgrade History:
* IDS-K9-min-4.1-1-S47
12:00:00 UTC Thu Jun 30 2005
IDS-K9-sp-4.1-3-S61.rpm.pkg
14:14:55 UTC Fri Feb 20 2004
Recovery Partition Version 1.2 - 4.1(1)S47
If you do not have the latest software updates, download them from Cisco.com.
See Obtaining Cisco IDS Software, page 9-1, for the procedure.
Step 5
Read the Readme that accompanies the software upgrade for any known DDTS
for NetworkAccess.
Step 6
Make sure the configuration settings for each device are correct (the username,
password, and IP address).
See Device Access Issues, page B-22, for the procedure.
Step 7
Make sure the interface/directions for each network device are correct.
See Verifying the Interfaces/Directions on the Network Device, page B-23, for the
procedure.
Cisco Intrusion Detection System Appliance and Module Installation and Configuration Guide Version 4.1
78-15597-02
B-21
Appendix B
Troubleshooting
Troubleshooting the 4200 Series Appliance
Step 8
If the network device is using SSH-DES or SSH-3DES, make sure the you have
enabled SSH connections to the device.
See Enabling SSH Connections to the Network Device, page B-24, for the
procedure.
Step 9
Verify that each interface/direction on each controlled device is correct.
See Verifying the Interfaces/Directions on the Network Device, page B-23, for the
procedure.
Device Access Issues
NAC may not be able to access the devices it is managing. Make sure the you have
the correct IP address and username and password for the managed devices and
the correct interface/direction configured.
To troubleshoot device access issues, follow these steps:
Step 1
Log in to the CLI.
Step 2
Enter configuration mode:
sensor# configure terminal
Step 3
Enter service configuration mode for NetworkAccess:
sensor (config)# service NetworkAccess
Step 4
Verify the IP address for the managed devices:
sensor(config-NetworkAccess)# show settings
cat6k-devices (min: 0, max: 100, current: 1)
communication:
ip-address: 172.21.172.151
nat-address:
shun-device-cfg: groupa shun-interfaces (min: 0, max: 100, current: 2)
post-vacl-name: testPostACL
pre-vacl-name: testPreACL vlan: 1 units: none post-vacl-name:
pre-vacl-name:
lan: 5 units: none
general
————————————
allow-sensor-shun: false
enable-acl-logging: false
B-22
Cisco Intrusion Detection System Appliance and Module Installation and Configuration Guide Version 4.1
78-15597-02
Appendix B
Troubleshooting
Troubleshooting the 4200 Series Appliance
master-blocking-sensors (min: 0, max: 100, current: 0)
never-shun-hosts (min: 0, max: 100, current: 0)
Step 5
Step 6
Manually connect to the device to make sure you have used the correct username,
password, and enable password, and to ensure that the device is reachable from
the sensor.
a.
Log in to the service account.
b.
Telnet or SSH to the network device to verify the configuration.
c.
Make sure you can reach the device.
d.
Verify the username and password.
Verify that each interface/direction on each network device is correct.
See Verifying the Interfaces/Directions on the Network Device, page B-23, for the
procedure.
Step 7
Look for the ACL on the router:
sensor# interface Ethernet0
ip address 172.16.171.28 255.255.255.192
ip access-group IDS_ethernet0_in_0 in!
ip access-list extended IDS_ethernet0_in_0d
deny ip host 172.16.171.14 any
permit ip any any
Verifying the Interfaces/Directions on the Network Device
To verify that each interface/direction on each controlled device is correct, you
can send a manual block to a bogus host and then check to see if deny entries exist
for the blocked addresses in the router’s ACL.
Note
You can also perform a manual block from the IDM by selecting Administration
> Manual Blocking > Host Manual Blocks.
To initiate a manual block to a bogus host, follow these steps:
Step 1
Enter configuration mode:
sensor# configure terminal
Cisco Intrusion Detection System Appliance and Module Installation and Configuration Guide Version 4.1
78-15597-02
B-23
Appendix B
Troubleshooting
Troubleshooting the 4200 Series Appliance
Step 2
Enter the NAC’s service configuration mode:
sensor(config)# service NetworkAccess
Step 3
Enter general NAC configuration mode:
sensor(config-NetworkAccess)# general
Step 4
Start the manual block of the bogus host IP address:
sensor(config-NetworkAccess-gen)# shun-hosts ip-address 10.16.0.0
Step 5
Exit and accept changes:
sensor(config-NetworkAccess-gen-shu)# exit
sensor(config-NetworkAccess-gen)# exit
sensor(config-NetworkAccess)# exit
Apply Changes:? [yes]: yes
Step 6
Telnet to the router and verify that a deny entry for the blocked address exists in
the router’s ACL.
Refer to the router documentation for the procedure.
Step 7
Remove the manual block by repeating Steps 1-5 except in Step 4 place no in front
of the command:
sensor(config-NetworkAccess-gen)# no shun-hosts ip-address 10.16.0.0
Enabling SSH Connections to the Network Device
If you are using SSH-DES or SSH-3DES as the communication protocol for the
network device, you must make sure you have enabled it on the device.
To enable SSH connections to the network device, follow these steps:
Step 1
Log in to the CLI.
Step 2
Enter configuration mode:
sensor# configure terminal
B-24
Cisco Intrusion Detection System Appliance and Module Installation and Configuration Guide Version 4.1
78-15597-02
Appendix B
Troubleshooting
Troubleshooting the 4200 Series Appliance
Step 3
Enable SSH:
sensor(config)# ssh host
Step 4
blocking_device_ip_ address
Type yes when prompted to accept the device.
Blocking Not Occurring for a Signature
If blocking is not occurring for a specific signature, check that the EventAction is
set to shunHost.
To make sure blocking is occurring for a specific signature, follow these steps:
Step 1
Log in to the CLI.
Step 2
Enter configuration mode:
sensor# configure terminal
Step 3
Enter virtual sensor mode:
sensor(config)# service virtual-sensor-configuration virtualSensor
Step 4
Make sure the EventAction is set to shunHost:
sensor(config-vsc)# tune-micro-engines
sensor(config-vsc-virtualSensor)# atomic.icmp
sensor(config-vsc-virtualSensor-ATO)# sig sigid 2000
sensor(config-vsc-virtualSensor-ATO-sig)# show settings
SIGID: 2000 <protected>
SubSig: 0 <protected>
AlarmDelayTimer:
AlarmInterval:
AlarmSeverity: informational <defaulted>
AlarmThrottle: Summarize <defaulted>
AlarmTraits:
CapturePacket: False <defaulted>
ChokeThreshold: 100 <defaulted>
DstIpAddr:
DstIpMask:
Enabled: False <defaulted>
EventAction: shunHost
Cisco Intrusion Detection System Appliance and Module Installation and Configuration Guide Version 4.1
78-15597-02
B-25
Appendix B
Troubleshooting
Troubleshooting the 4200 Series Appliance
Verifying the Master Blocking Sensor Configuration
To verify that a master blocking sensor (MBS) is set up properly or to troubleshoot
an MBS that is not set up properly, you can use the show statistics
networkAccess command. Make sure that the forwarding sensor is set up as TLS
trusted host if the remote MBS is using TLS for web access.
To verify a sensor’s NAC MBS configuration, follow these steps:
Step 1
View the NAC’s statistics and verify that the MBS entries are in the statistics:
sensor# show statistics networkAccess
Current Configuration
AllowSensorShun = false
ShunMaxEntries = 250
MasterBlockingSensor
SensorIp = 10.89.149.46
SensorPort = 443
UseTls = 1
State
ShunEnable = true
ShunnedAddr
Host
IP = 122.122.122.44
ShunMinutes = 60
MinutesRemaining = 59
Step 2
If the MBS does not show up in the statistics, you need to add it.
See Configuring the Sensor to be a Master Blocking Sensor, page 10-73, for the
procedure.
Step 3
Initiate a manual block to a bogus host IP address to make sure the MBS is
initialing blocks:
a.
Enter configuration mode:
sensor# configure terminal
b.
Enter the NAC’s service configuration mode:
sensor(config)# service NetworkAccess
c.
Enter general NAC configuration mode:
sensor(config-NetworkAccess)# general
B-26
Cisco Intrusion Detection System Appliance and Module Installation and Configuration Guide Version 4.1
78-15597-02
Appendix B
Troubleshooting
Troubleshooting the 4200 Series Appliance
d.
Start the manual block for a bogus host IP address:
sensor(config-NetworkAccess-gen)# shun-hosts ip-address 10.16.0.0
e.
Exit and accept changes:
sensor(config-NetworkAccess-gen-shu)# exit
sensor(config-NetworkAccess-gen)# exit
sensor(config-NetworkAccess)# exit
Apply Changes:? [yes]: yes
sensor(config)# exit
sensor#
Step 4
Verify that the block shows up in the NAC’s statistics:
sensor# show statistics networkAccess
Current Configuration
AllowSensorShun = false
ShunMaxEntries = 100
State
ShunEnable = true
ShunnedAddr
Host
IP = 10.16.0.0
ShunMinutes =
Step 5
Log in to the MBS host’s CLI and, using the show statistics networkAccess
command, verify that the block also shows up in the MBS NAC’s statistics.
sensor# show statistics networkAccess
Current Configuration
AllowSensorShun = false
ShunMaxEntries = 250
MasterBlockingSensor
SensorIp = 10.89.149.46
SensorPort = 443
UseTls = 1
State
ShunEnable = true
ShunnedAddr
Host
IP = 10.16.0.0
ShunMinutes = 60
MinutesRemaining = 59
Cisco Intrusion Detection System Appliance and Module Installation and Configuration Guide Version 4.1
78-15597-02
B-27
Appendix B
Troubleshooting
Troubleshooting the 4200 Series Appliance
Step 6
If the remote MBS sensor is using TLS for web access, make sure the forwarding
sensor is configured as a TLS host:
a.
Enter configuration mode:
sensor# configure terminal
b.
Make the forwarding sensor a TLS host:
sensor(config)# tls trust ip
master_blocking_sensor_ip_address
Logging
TAC may suggest that you turn on debug logging for troubleshooting purposes.
LogApp controls what log messages are generated by each application by
controlling the logging severity for different logging zones. By default, debug
logging is not turned on.
If you enable individual zone control, each zone uses the level of logging that it
is configured for. Otherwise, the same logging level is used for all zones.
This section contains the following topics:
•
Enabling Debug Logging, page B-28
•
Zone Names, page B-31
•
Directing cidLog Messages to SysLog, page B-31
Enabling Debug Logging
Caution
B-28
Enabling debug logging seriously affects performance and should only be done
when instructed by TAC.
Cisco Intrusion Detection System Appliance and Module Installation and Configuration Guide Version 4.1
78-15597-02
Appendix B
Troubleshooting
Troubleshooting the 4200 Series Appliance
To enable debug logging, follow these steps:
Step 1
Log in to the service account.
Step 2
Edit the log.conf file to increase the size of the log to accommodate the additional
log statements:
vi /usr/cids/idsRoot/etc/log.conf
Step 3
Change the fileMaxSizeInK=500 to fileMaxSizeInK=5000.
Step 4
Locate the zone/CID section of the file and set the severity to debug:
severity=debug
Step 5
Save the file, exit the vi editor, and exit the service account.
Step 6
Log in to the CLI as administrator.
Step 7
Enter configuration mode:
sensor# configure terminal
Step 8
Enter service logger mode:
sensor(config)# service logger
Step 9
Enter master-control submode:
sensor(config-Logger)# masterControl
Step 10
Turn individual zone control on:
sensor(config-Logger-mas)# individual-zone-control true
Step 11
Exit master zone control:
sensor(config-Logger-mas)# exit
Step 12
View the zone names:
sensor(config-Logger)# show settings
masterControl
----------------------------------------------enable-debug: false default: false
individual-zone-control: true default: false
----------------------------------------------zoneControl (min: 0, max: 999999999, current: 8)
----------------------------------------------zoneName: Cid default: Cid
severity: debug default: debug
Cisco Intrusion Detection System Appliance and Module Installation and Configuration Guide Version 4.1
78-15597-02
B-29
Appendix B
Troubleshooting
Troubleshooting the 4200 Series Appliance
----------------------------------------------zoneName: AuthenticationApp default: Cid
severity: warning default: debug
----------------------------------------------zoneName: Cli default: Cid
severity: warning default: debug
----------------------------------------------zoneName: ctlTransSource default: Cid
severity: warning default: debug
----------------------------------------------zoneName: IdapiCtlTrans default: Cid
severity: warning default: debug
----------------------------------------------zoneName: IdsEventStore default: Cid
severity: warning default: debug
----------------------------------------------zoneName: MpInstaller default: Cid
severity: warning default: debug
----------------------------------------------zoneName: tls default: Cid
severity: warning default: debug
---------------------------------------------------------------------------------------------
See Zone Names, page B-31, for a list of what each zone name refers to.
Step 13
To adjust the logging level for a particular zone:
sensor(config-Logger)# zoneControl zoneName csi
sensor(config-Logger-zon)#
csi now appears as a zone name.
sensor(config-Logger)# show setttings IdsEventStore
----------------------------------------------zoneName: csi default: Cid
severity: warning default: debug
---------------------------------------------------------------------------------------------
Step 14
Enter the submode for a specific zone, for example, the EventStore:
sensor(config-Logger)# zoneControl zoneName IdsEventStore
Step 15
Turn on debugging for the EventStore:
sensor(config-Logger-zon)# severity debug
B-30
Cisco Intrusion Detection System Appliance and Module Installation and Configuration Guide Version 4.1
78-15597-02
Appendix B
Troubleshooting
Troubleshooting the 4200 Series Appliance
Step 16
Exit the submode for the individual zone:
sensor(config-Logger-zon)# exit
sensor(config-Logger)# exit
Step 17
Type
yes
to apply the changes:
Apply Changes:?[yes]: yes
sensor(config)#
Zone Names
Table B-1 lists the debug logger zone names:
Table B-1
Debug Logger Zone Names
Zone Name
Description
AuthenticationApp
Authentication zone
Cid
General logging zone
Cli
CLI zone
IdapiCtlTrans
All control transactions zone
IdsEventStore
EventStore zone
MpInstaller
IDSM-2 master partition installer zone
ctlTransSource
Outbound control transactions zone
tls
SSL/TLS zone
Directing cidLog Messages to SysLog
It might be useful to direct cidLog messages to syslog.
Cisco Intrusion Detection System Appliance and Module Installation and Configuration Guide Version 4.1
78-15597-02
B-31
Appendix B
Troubleshooting
Troubleshooting the 4200 Series Appliance
To direct cidLog messages to syslog, follow these steps:
Step 1
Go to the idsRoot/etc/log.conf file.
Step 2
Make the following changes:
a.
Set [logApp] enabled=false
Comment out the enabled=true because enabled=false is the default.
b.
Set [drain/main] type=syslog
The following example shows the logging configuration file:
timemode=local
;timemode=utc
[logApp]
;enabled=true
;-------- FIFO parameters -------fifoName=logAppFifo
fifoSizeInK=240
;-------- logApp zone and drain parameters -------zoneAndDrainName=logApp
fileName=main.log
fileMaxSizeInK=500
[zone/Cid]
severity=warning
drain=main
[zone/IdsEventStore]
severity=debug
drain=main
[drain/main]
type=syslog
The syslog output is sent to the syslog facility local6 with the following
correspondence to syslog message priorities:
B-32
LOG_DEBUG,
// debug
LOG_INFO,
//
timing
LOG_WARNING, //
warning
LOG_ERR,
//
error
LOG_CRIT
//
fatal
Cisco Intrusion Detection System Appliance and Module Installation and Configuration Guide Version 4.1
78-15597-02
Appendix B
Troubleshooting
Troubleshooting the 4200 Series Appliance
Note
Caution
Make sure that your /etc/syslog.conf has that facility enabled at the proper
priority.
The syslog is much slower than logApp (on the order of 50 messages per second
as opposed to 1000 or so). We recommend that you enable debug severity on one
zone at a time.
NTP
When you configure an NTP server to provide the time for the sensor, the sensor
runs the ntpdate utility to synchronize with the NTP server. A defect exists that
lets the sensor do this without authenticating. If you have not correctly typed the
NTP authentication key ID and values, the sensor NTP updates still appear to be
working. However, the long term updates from the NTP server will not occur if
the authentication key ID and values are not correctly configured.
Also, if you are trying to configure NTP on the sensor and receive the following
error, there are two possible causes:
Error: Could not run ntpdate utility. Fatal Error has occurred. Node
MUST be rebooted to enable alarming.
Either there is a connectivity problem or you have encountered an NTP
reconfiguration defect.
This section contains the following topics:
•
Verifying that the Sensor is Synchronized with the NTP Server, page B-34
•
NTP Server Connectivity Problem, page B-35
•
NTP Reconfiguration Defect, page B-35
Cisco Intrusion Detection System Appliance and Module Installation and Configuration Guide Version 4.1
78-15597-02
B-33
Appendix B
Troubleshooting
Troubleshooting the 4200 Series Appliance
Verifying that the Sensor is Synchronized with the NTP Server
To verify that the sensor is synchronized with the NTP server, follow these steps:
Step 1
Log in to the service account.
Step 2
Check to see if the sensor can communicate with the NTP server by running
/usr/sbin/ntpg -p:
sensor# /usr/sbin/ntpq -p
remote
refid
st t when poll reach delay offset jitter
10.89.147.99 CHU_AUDIO(1) 6 u 47
64
0
0.410 19.457 0.740
LOCAL(0)
LOCAL(0)
5 l 59
64
0
0.000 0.000 0.004
In the servers’s IP address line, if the value in the reach column is 0, the sensor
either cannot communicate with the NTP server or the keys do not match.
Step 3
Make sure the sensor can contact the NTP server by running /usr/sbin/ntptrace:
sensor# /usr/sbin/ntptrace
Step 4
server_ip_address
If this is the output, the sensor can contact the NTP server but the key ID or value
is most likely incorrect:
10.89.147.99: stratum 6, offset 0.025372, synch distance 0.00003
Step 5
If this is the output, there is most likely a network connectivity or access problem:
10.89.147.99: ‘Timeout’
Step 6
If you can contact the NTP server, make sure the sensor can authenticate the NTP
server:
sensor# /usr/sbin/ntpq -c assoc
Step 7
In this output, the auth column has ok, indicating that the sensor was able to
authenticate the NTP server. If the auth column has bad most likely the key ID or
key value configured on the sensor does not match the value configured on the
server.
ind assID status conf reach auth condition
1
1052 f614
yes yes
ok
sys.peer
2
1053 9014
yes yes
none reject
B-34
last_event cnt
reachable 1
reachable 1
Cisco Intrusion Detection System Appliance and Module Installation and Configuration Guide Version 4.1
78-15597-02
Appendix B
Troubleshooting
Troubleshooting the 4200 Series Appliance
NTP Server Connectivity Problem
If you are receiving the Could
not run ntpdate utility. Fatal Error has
occurred. Node MUST be rebooted to enable alarming ,
you may have a
problem with connectivity and the NTP server.
To look for problems with connectivity to the NTP server, follow these steps:
Step 1
Log in to the sensor service account.
Step 2
Su to root using the service account password:
bash-2.05a$ su root
Password:
Step 3
Type the following command to shut down the NTP daemon:
[root@sensor]# killall -INT ntpd
Step 4
To synchronize the sensor’s time with the NTP server’s (if the NTP configuration
is correct), type the following command:
[root@sensor]# ntpdate -u ntp_server_ip_address
Step 5
Look for errors in the output.
If there are no errors, you have encountered the NTP Reconfiguration defect. See
NTP Reconfiguration Defect, page B-35, for more information.
If the error is cannot reach server or server is not running, see your server
documentation for information on how to correctly connect the NTP server.
NTP Reconfiguration Defect
If you are receiving the Could
not run ntpdate utility. Fatal Error has
occurred. Node MUST be rebooted to enable alarming ,
and you do not have
NTP server connectivity problem, you have encountered the NTP reconfiguration
defect (CSCed84480).
Cisco Intrusion Detection System Appliance and Module Installation and Configuration Guide Version 4.1
78-15597-02
B-35
Appendix B
Troubleshooting
Troubleshooting the 4200 Series Appliance
Note
The error occurs when ntpdate is running while ntpd is running. The defect is that
MainApp should shut ntpd down every time the NTP configuration is changed so
that ntpdate can be run to immediately synchronize with the NTP server.
To correct the NTP reconfiguration defect, follow these steps:
Step 1
Log in to the sensor service account.
Step 2
Su to root using the service account password.
bash-2.05a$ su root
Password:
Step 3
Type the following command:
[root@sensor]# killall -INT ntpd
Step 4
Log out of the service account.
Step 5
Log in to the sensor CLI.
Step 6
Enter configuration mode:
sensor# configure terminal
Step 7
Enter service Host mode:
sensor(config)# service Host
Step 8
Enter time parameters submode:
sensor(config-Host)# timeParams
Step 9
Set up NTP (NTP server IP address, key ID, and key value):
sensor(config-Host-tim)# ntpServers ipAddress
sensor(config-Host-tim-ntp)# keyid number
sensor(config-Host-tim-ntp)# keyvalue name
ntp_server_ip_address
Here is an example of an NTP configuration:
sensor(config-Host-tim)# ntpServers ipAddress 10.87.126.52
sensor(config-Host-tim-ntp)# keyid 10
sensor(config-Host-tim-ntp)# keyvalue cisco
B-36
Cisco Intrusion Detection System Appliance and Module Installation and Configuration Guide Version 4.1
78-15597-02
Appendix B
Troubleshooting
Troubleshooting the 4200 Series Appliance
Step 10
Exit NTP submode:
sensor(config-Host-tim-ntp)# exit
sensor(config-Host-tim)# exit
sensor(config-Host)# exit
Apply Changes:?[yes]:
Step 11
Type yes to apply the changes.
TCP Reset
This section helps you troubleshoot issues with TCP reset.
This section contains the following topics:
•
Reset Not Occurring for a Signature, page B-37
•
Using the TCP Reset Interface, page B-39
Reset Not Occurring for a Signature
If you do not have the EventAction set to reset, the TCP reset does not occur for
a specific signature.
To troubleshoot a reset not occurring for a specific signature, follow these steps:
Step 1
Log in to the CLI.
Step 2
Make sure the EventAction is set to reset:
a.
Enter configuration mode:
sensor# configure terminal
b.
Enter virtual sensor mode:
sensor(config)# service virtual-sensor-configuration virtualSensor
c.
Check the EventAction parameter:
sensor(config-vsc)# tune-micro-engines
sensor(config-vsc-virtualSensor# string.tcp
sensor(config-vsc-virtualSensor-/STR)# sig sigid 20000
sensor(config-vsc-virtualSensor-STR-sig)# show settings
Cisco Intrusion Detection System Appliance and Module Installation and Configuration Guide Version 4.1
78-15597-02
B-37
Appendix B
Troubleshooting
Troubleshooting the 4200 Series Appliance
SIGID: 20000 <protected>
SubSig: 0 <defaulted>
AlarmDelayTimer:
AlarmInterval:
AlarmSeverity: medium <defaulted>
AlarmThrottle: Summarize <defaulted>
AlarmTraits:
CapturePacket: False <defaulted>
ChokeThreshold:
Direction: toService <defaulted>
Enabled: True <defaulted>
EventAction: reset
Step 3
Make sure the correct alarms are being generated:
sensor# show events
evAlert: eventId=1047575239898467370 severity=medium
originator:
hostId: sj_4250_40
appName: sensorApp
appInstanceId: 1004
signature: sigId=20000 sigName=STRING.TCP subSigId=0 version=Unknown
addr: locality=OUT 172.16.171.19
port: 32771
victim:
addr: locality=OUT 172.16.171.13 port: 23
actions:
tcpResetSent: true
Step 4
Make sure the switch is allowing incoming TCP reset packet from the sensor.
Refer to your switch documentation for the procedure.
Step 5
Make sure the resets are being sent:
root# ./tcpdump -i eth0 src host 172.16.171.19
tcpdump: WARNING: eth0: no IPv4 address assigned
tcpdump: listening on eth0
13:58:03.823929 172.16.171.19.32770 > 172.16.171.13.telnet:
ack 62 win 0
13:58:03.823930 172.16.171.19.32770 > 172.16.171.13.telnet:
ack 62 win 0
13:58:03.823930 172.16.171.19.32770 > 172.16.171.13.telnet:
ack 62 win 0
13:58:03.823930 172.16.171.19.32770 > 172.16.171.13.telnet:
ack 62 win 0
B-38
R 79:79(0)
R 80:80(0)
R 80:80(0)
R 80:80(0)
Cisco Intrusion Detection System Appliance and Module Installation and Configuration Guide Version 4.1
78-15597-02
Appendix B
Troubleshooting
Troubleshooting the 4200 Series Appliance
Using the TCP Reset Interface
The IDS-4250-XL has a TCP reset interface—INT0. The IDS-4250-XL has a
specific TCP reset interface because it cannot send TCP resets on its monitoring
ports.
If you have reset problems with the IDS-4250-XL, try the following:
•
Make sure the TCP reset interface of the IDS-4250-XL (int0) is connected to
the same switch as the sensing ports (int2 and int3) of the XL card.
•
If the sensing ports are access ports (a single VLAN), you must configure the
reset port to be in the same VLAN.
Note
•
If the two XL ports are access ports for different VLANs, you can
only configure the reset port for one of these VLANs. You can use
dot1q trunk ports to overcome this limitation.
If the sensing ports are dot1q trunk ports (multi-VLAN), the sensing ports and
reset port all need to have the same native VLAN, and the reset port needs to
trunk all the VLANs being trunked by both the sensing ports.
Software Upgrade
This section helps in troubleshooting software upgrades.
This section contains the following topics:
•
IDS-4235 and IDS-4250 Hang During A Software Upgrade, page B-40
•
Which Updates to Apply and in Which Order, page B-40
•
Issues With Automatic Update, page B-41
•
Verifying the Version of the IDSM-2 and NM-CIDS 4.1(4) Images,
page B-42
•
Updating a Sensor with the Update Stored on the Sensor, page B-43
Cisco Intrusion Detection System Appliance and Module Installation and Configuration Guide Version 4.1
78-15597-02
B-39
Appendix B
Troubleshooting
Troubleshooting the 4200 Series Appliance
IDS-4235 and IDS-4250 Hang During A Software Upgrade
If the BIOS of the IDS-4235 and IDS-4250 is at A03, you must upgrade it to A04
before applying the latest IDS software, otherwise, the appliances will hang
during the software upgrade process. Refer to Upgrading the BIOS, page 5-7, for
the procedure for upgrading the BIOS. Refer to Obtaining Cisco IDS Software,
page 9-1, for the procedure for applying the latest IDS software.
Which Updates to Apply and in Which Order
You must have the correct service pack and minor/major version of the software.
If you are having trouble with applying new software, make sure that you are
applying the proper updates in the proper order:
•
Signature updates require correct service packs.
•
Service packs require the correct minor version.
•
Minor versions require the correct major version.
•
Major versions require the previous major version.
Figure B-1 demonstrates how to interpret the IDS software filenames.
Figure B-1
IDS Software File Name
IDS-maj-w.x-y-Sz.rpm.pkg
Update Type
Major Version Level
Minor Version Level
Service Pack Level
Signature Level
IDS-sig-4.0-2-S44.rpm.pkg–Signature Update
IDS-K9-min-4.1-1-S50.rpm.pkg–Minor Version Update
IDS-K9-maj-5.0-1-S60.rpm.pkg–Major Version Update
B-40
119518
IDS-K9-sp-4.0-2-S42.rpm.pkg–Service Pack Update
Cisco Intrusion Detection System Appliance and Module Installation and Configuration Guide Version 4.1
78-15597-02
Appendix B
Troubleshooting
Troubleshooting the 4200 Series Appliance
For example, the software updates are dependent on one another:
•
To install IDS-maj-5.0-1-S90.rpm.pkg requires that the sensor be at version
4.x(y)Sz
•
To install IDS-min-4.2-1-S90.rpm.pkg requires that the sensor be at version
4.0(y)Sz or 4.1(y)Sz
•
To install IDS-sp-4.0-3-S90.rpm.pkg requires that the sensor be at version
4.0(1)Sz or 4.0(2)Sz
•
To install IDS-sig-4.0-3-S81.rpm.pkg requires that the sensor be at version
4.0(3)Sz where the z is smaller than 81
Issues With Automatic Update
The following list provides suggestions for troubleshooting automatic update:
•
Run tcpDump
– Create a service account. Su to root and run tcpDump on the command
and control interface to capture packets between the sensor and the FTP
server.
See Creating the Service Account, page 10-12, for the procedure.
– Use the upgrade command to manually upgrade the sensor.
See Reimaging Appliances and Modules, page 10-110, for the procedure.
– Look at the tcpDump output for errors coming back from the FTP server.
•
Make sure the sensor is in the correct directory.
The directory must be specified correctly. This has caused issues with
Windows FTP servers. Sometimes an extra “/” or even two “/” are needed in
front of the directory name.
To verify this, use the same FTP commands you see in the tcpDump output
through your own FTP connection.
•
Make sure you have not modified the FTP server to use custom prompts.
If you modify the FTP prompts to give security warnings, for example, this
causes a problem, because the sensor is expecting a hard-coded list of
responses.
Cisco Intrusion Detection System Appliance and Module Installation and Configuration Guide Version 4.1
78-15597-02
B-41
Appendix B
Troubleshooting
Troubleshooting the 4200 Series Appliance
Note
Not modifying the prompt only applies to versions before 4.1(4).
•
You must use the Windows FTP server setup option to emulate UNIX file
structure and not MS-DOS file structure.
•
If you are using SCP, make sure you have added the SSH host key to the
known hosts list.
See Adding Known Hosts to the SSH Known Hosts List, page 10-19, for the
procedure.
Try the manual upgrade command before attempting the automatic update. If it
works with the upgrade command and does not work with the automatic update,
try the following:
•
Determine which IDS software version your sensor has (see Displaying the
Current Version, page B-57, for the procedure).
Version 4.0(1) has a known problem with automatic update. Upgrade
manually to 4.1(1) before trying to configure and use automatic update.
•
Make sure the passwords configured for automatic update. Make sure they
match the same passwords used for manual update.
•
Make sure that the filenames in the FTP server are exactly what you see on
Downloads on Cisco.com. This includes capitalization.
Some Windows FTP servers allow access to the file with the incorrect
capitalization but the sensor ultimately rejects the file because the name has
changed.
•
If necessary, run tcpDump on automatic update. You can compare the
successful manual update with the unsuccessful automatic update and
troubleshoot from there.
Verifying the Version of the IDSM-2 and NM-CIDS 4.1(4) Images
The 4.1(4) application partition files for the IDSM-2 and the NM-CIDS have been
repackaged. The following new files exist:
B-42
•
IDSM-2—WS-SVC-IDSM2-K9-a-4.1-4-S91a.bin.gz
•
NM-CIDS—NM-CIDS-K9-a-4.1-4-S91a.bin
Cisco Intrusion Detection System Appliance and Module Installation and Configuration Guide Version 4.1
78-15597-02
Appendix B
Troubleshooting
Troubleshooting the 4200 Series Appliance
After you install the new files, you cannot see the “a” in the filename when you
use the show version command.
To verify that you have applied the repackaged application partition file for the
IDSM-2, log in to the service account and verify that the /sbin/hdparm file exists.
To verify that you have applied the repackaged application partition file for the
NM-CIDS, run the show version command and verify that the recovery partition
is 2.4. The version of the recovery partition in the original 4.1 (4) image file was
2.3.
Updating a Sensor with the Update Stored on the Sensor
You can store the update package in the /var directory on the sensor and update
the sensor from there if you need to.
To update the sensor with an update stored on the sensor, follow these steps:
Step 1
Log in to the service account.
Step 2
Obtain the update package file from Cisco.com.
Refer to Obtaining Cisco IDS Software, page 9-1, for the procedure.
Step 3
FTP or SCP the update file to the sensor’s /usr/cids/idsRoot/var directory.
Step 4
Set the file permissions:
chmod 644
IDS_package_file_name
Step 5
Exit the service account.
Step 6
Log in to the sensor using an account with administrator privileges.
Step 7
Store the sensor’s host key:
sensor# configure terminal
sensor(config)# ssh host-key
Step 8
sensor_ip_address
Upgrade the sensor:
sensor(config)# upgrade
scp://service@sensor_ip_address /upgrade/IDS_package_file_name
Enter password: *****
Re-enter password: *****
Cisco Intrusion Detection System Appliance and Module Installation and Configuration Guide Version 4.1
78-15597-02
B-43
Appendix B
Troubleshooting
Troubleshooting the IDSM-2
Troubleshooting the IDSM-2
The IDSM-2 has the same software architecture as the 4200 series sensors. You
can use the same troubleshooting tools as outlined in Troubleshooting the 4200
Series Appliance, page B-4.
This section pertains specifically to troubleshooting the IDSM-2.
This section contains the following topics:
•
Diagnosing IDSM-2 Problems, page B-44
•
Switch Commands for Troubleshooting, page B-46
•
Status LED Off, page B-46
•
Status LED On But IDSM-2 Does Not Come Online, page B-48
•
Cannot Communicate With IDSM-2 Command and Control Port, page B-49
•
Using the TCP Reset Interface, page B-51
•
Connecting a Serial Cable to the IDSM-2, page B-51
Diagnosing IDSM-2 Problems
Use the following list to diagnose IDSM-2 problems:
•
The ribbon cable between the IDSM-2 and the motherboard is loose.
During physical handling of the module, the connector can come loose from
the base card, and cause the daughter card and the base card to lose contact
with each other. A loose ribbon cable connector causes an on-line diagnostic
error on ports 7 and 8. The module cannot operate when this condition exists.
See Partner Field Notice 52816 for more information.
•
Some IDSM-2s were shipped with faulty DIMMs.
See the Partner Field 52563 for the procedure for checking the IDSM-2 for
faulty memory.
B-44
Cisco Intrusion Detection System Appliance and Module Installation and Configuration Guide Version 4.1
78-15597-02
Appendix B
Troubleshooting
Troubleshooting the IDSM-2
•
The hard-disk drive fails to read or write.
When the hard-disk drive has been in constant use for extended periods of
time (for more than 2 weeks), multiple symptoms, such as the following, can
occur:
– An inability to log in
– I/O errors to the console when doing read/write operations (the ls
command)
– Commands do not execute properly (cannot find the path to the
executable)
The switch reports that the module is ok, but if you log in to the service
account and try to execute commands, you see that the problem exists. The
4.1(4) service pack alleviates this problem, but if you reimage the IDSM-2
with the 4.1(4) application partition image, you must apply the 4.1(4b) patch.
See CSCef12198 for more information.
•
SensorApp either crashes or takes 99% of the CPU when IP logging is
enabled for stream-based signatures (1300 series). See CSCed32093 for the
workaround.
•
The IDSM-2 appears to lock up and remote access is prohibited (SSH. Telnet,
IDM, event server, control transaction server, IP log server).
This defect is related to using SWAP. The IDSM-2 responds to pings. Apply
the 4.1(4) service pack to resolve this issue. See CSCed54146 for more
information.
•
Shortly after you upgrade the IDSM-2 or you tune a signature with VMS, the
IDSM-2 becomes unresponsive and often produces a sensorApp core file.
Apply the 4.1(4b) patch to fix this issue.
•
Confirm that your IDSM-2 has the supported configurations.
See Supported IDSM-2 Configurations, page 8-3.
•
If you have confirmed that the IDSM-2 does not suffer from any of the
problems listed above and yet it appears unresponsive, for example, you
cannot log in to the modules via SSH or Telnet, nor can you session to the
switch. Determine if the IDSM-2 responds to pings and if you can log in
through the service account. If you can log in, obtain a cidDump and any core
files and contact TAC.
Cisco Intrusion Detection System Appliance and Module Installation and Configuration Guide Version 4.1
78-15597-02
B-45
Appendix B
Troubleshooting
Troubleshooting the IDSM-2
Switch Commands for Troubleshooting
The following switch commands help you troubleshoot the IDSM-2:
•
show module (Cisco Catalyst Software and Cisco IOS Software)
•
show version (Cisco Catalyst Software and Cisco IOS Software)
•
show port (Cisco Catalyst Software)
•
show trunk (Cisco Catalyst Software)
•
show span (Cisco Catalyst Software)
•
show security acl (Cisco Catalyst Software)
•
show intrusion-detection module (Cisco IOS Software)
•
show monitor (Cisco IOS Software)
•
show vlan access-map (Cisco IOS Software)
•
show vlan filter (Cisco IOS Software)
Status LED Off
If the status LED is off on the IDSM-2, you need to turn power on to the module.
To determine status of the module, follow these steps:
Step 1
Log in to the console.
Step 2
Verify that the IDSM-2 is online:
For Catalyst Software (in enable mode):
console>
Mod Slot
--- ---1
1
15 1
2
2
4
4
5
5
6
6
7
7
9
9
B-46
(enable) show module
Ports Module-Type
----- ----------------------2
1000BaseX Supervisor
1
Multilayer Switch Featu
48
10/100BaseTX Ethernet
8
1000BaseX Ethernet
2
Intrusion Detection Sys
0
FlexWAN Module
2
Intrusion Detection Sys
8
Intrusion Detection Sys
Model
----------------WS-X6K-SUP2-2GE
WS-F6K-MSFC2
WS-X6548-RJ-45
WS-X6408-GBIC
WS-X6381-IDS
WS-X6182-2PA
WS-x6381-IDS
WS-SVC-IDSM2
Sub
--yes
no
no
no
no
no
no
yes
Status
----ok
ok
ok
ok
ok
ok
ok
ok
Cisco Intrusion Detection System Appliance and Module Installation and Configuration Guide Version 4.1
78-15597-02
Appendix B
Troubleshooting
Troubleshooting the IDSM-2
Mod Module-Name
--- -------------------1
15
2
4
5
6
7
9
Serial-Num
----------SAD044409HJ
SAD044509KZ
SAD060304VG
JAB04040859
SAD044508PH
SAD06450316
SAD04130DZ9
SAD063803KK
Mod MAC-Address(es)
--- -------------------------------------1
00-01-63-d0-73-20 to 00-01-63-d0-73-21
00-01-63-d0-73-1e to 00-01-63-d0-73-1f
00-04-de-43-ec-00 to 00-04-de-43-ef-ff
15 00-04-9a-12-3b-40 to 00-04-9a-12-3b-7f
2
00-01-63-d4-a0-aa to 00-01-63-d4-a0-d9
4
00-30-a3-38-9a-30 to 00-30-a3-38-9a-37
5
00-30-f2-70-d8-5e to 00-30-f2-70-d8-5f
6
00-09-7c-be-37-80 to 00-09-7c-be-37-bf
7
00-50-3e-7e-70-62 to 00-50-3e-7e-70-63
9
00-03-fe-aa-c0-d8 to 00-03-fe-aa-c0-df
Mod Sub-Type
--- ----------------------1
L3 Switching Engine II
9
IDS 2 accelerator board
console> (enable)
Hw
Fw
Sw
------ ---------- -----------1.1
6.1(3)
8.2(2)
1.1
4.0
2.3
1.2
1.5
0.301
0.102
Sub-Model
------------------WS-F6K-PFC2
WS-SVC-IDSUPG
For Cisco IOS software:
router# show module
Mod Ports Card Type
--- ----- -------------------------------------1
2 Catalyst 6000 supervisor 2 (Active)
2
48 SFM-capable 48 port 10/100/1000mb RJ45
5
8 8 port 1000mb ethernet
6
2 Intrusion Detection System
7
0 2 port adapter FlexWAN
9
8 Intrusion Detection System
12.1(22)E1
6.3(1)
4.2(0.24)V
4B4LZ0XA
12.1(22)E1
4B4LZ0XA
7.2(1)
Sub-Serial
----------SAD044302BP
.
12.1(22)E1
8.2(2)
8.2(2)
3.0(7)S82
12.1(22)E1
3.0(7)S82
4.1(4)S91
Sub-Hw Sub-Sw
------ -----1.0
2.0
Model
-----------------WS-X6K-SUP2-2GE
WS-X6548-GE-TX
WS-X6408-GBIC
WS-X6381-IDS
WS-X6182-2PA
WS-SVC-IDSM2
Mod MAC addresses
Hw
Fw
--- ---------------------------------- ------ -----------1 0002.7e38.7630 to 0002.7e38.7631
3.2
7.1(1)
2 000e.8336.d730 to 000e.8336.d75f
6.0
7.2(1)
5 0030.961a.b194 to 0030.961a.b19b
2.6
5.4(2)
6 0002.7ef9.9c80 to 0002.7ef9.9c81
1.1
4B4LZ0XA
7 0008.7cd5.2340 to 0008.7cd5.237f
1.5
12.1(19)E1
Serial No.
----------SAD060300AR
SAD074806XS
SAD03380401
SAD052106AX
SAD064502WY
SAD060301T4
Sw
-----------12.1(19)E1
7.6(1.6)T195
7.6(1.6)T195
3.0(6)S42
12.1(19)E1
Status
------Ok
Ok
Ok
Ok
Ok
Cisco Intrusion Detection System Appliance and Module Installation and Configuration Guide Version 4.1
78-15597-02
B-47
Appendix B
Troubleshooting
Troubleshooting the IDSM-2
9
Mod
--1
1
9
0001.0002.0003 to 0001.0002.000a
Sub-Module
--------------------------Policy Feature Card 2
Cat6k MSFC 2 daughterboard
IDS 2 accelerator board
0.102 7.2(1)
Model
--------------WS-F6K-PFC2
WS-F6K-MSFC2
WS-SVC-IDSUPG
4.1(4)S91
Ok
Serial
Hw
Status
--------------- ------- ------SAD060300XG
3.0
Ok
SAD060102D7
1.3
Ok
.
2.0
Ok
Mod Online Diag Status
--- ------------------1 Pass
2 Pass
5 Pass
6 Not Supported
7 Not Supported
9 Pass
router#
Note
Step 3
It is normal for the status to read “other” when the IDSM-2 is first
installed. After the IDSM-2 completes the diagnostics routines and comes
online, the status reads “ok.” Allow up to 5 minutes for the IDSM-2 to
come online.
If the status does not read ok, turn the module on:
router# set module power up
module_number
Status LED On But IDSM-2 Does Not Come Online
If the status LED is on, but the module does not come online, try the following
troubleshooting tips:
•
Reset the module.
•
Make sure the module is installed properly in the switch.
•
If the hard-disk drive status has failed, reimage the application partition.
To enable the module, follow these steps:
Step 1
B-48
Log in to the console.
Cisco Intrusion Detection System Appliance and Module Installation and Configuration Guide Version 4.1
78-15597-02
Appendix B
Troubleshooting
Troubleshooting the IDSM-2
Step 2
Make sure the module is enabled:
router# show module
Step 3
If the status does not read ok, enable the module:
router# set module enable
Step 4
module_number
If the module still does not come online, reset the module:
router# reset
module_number
Wait for about 5 minutes for the module to come online.
Step 5
If the module still does not come online, make sure the hardware and operating
system are ok:
router# show test
module_number
Step 6
If the port status reads fail, make sure the module is firmly connected in the
switch.
Step 7
If the
hdd
status reads fail, you must reimage the application partition.
See Reimaging Appliances and Modules, page 10-110, for the procedure.
Cannot Communicate With IDSM-2 Command and Control Port
If you cannot communicate with the IDSM-2 command and control port, the
command and control port may not be in the correct VLAN.
To communicate with the command and control port of the IDSM-2, follow these
steps:
Step 1
Log in to the console.
Step 2
Make sure you can ping the command port from any other system.
Step 3
Make sure the IP address, mask, and gateway settings are correct:
router# show configuration
Cisco Intrusion Detection System Appliance and Module Installation and Configuration Guide Version 4.1
78-15597-02
B-49
Appendix B
Troubleshooting
Troubleshooting the IDSM-2
Step 4
Make sure the command and control port is in the correct VLAN:
For Catalyst software:
console> (enable) show port 9/2
* = Configured MAC Address
Port Name
Status
Vlan
Duplex Speed
Type
----- ------------ ---------- ------- ------ --------- -----------9/2
connected 146
full
1000
Intrusion De
Port Broadcast-Limit Multicast Unicast Total-Drop
Action
----- --------------- --------- ------- -------------- -----------9/2
0
drop-packets
Port
---9/2
Status
---------connected
ErrDisable Reason
------------------
Port ErrDisableTimeout
---------------------Enable
Action on Timeout
----------------No Change
Port Align-Err FCS-Err
Xmit-Err
Rcv-Err
UnderSize
----- ---------- ---------- ---------- ---------- --------9/2 0
0
0
0
0
Port Single-Col Multi-Coll Late-Coll Excess-Col Carri-Sen Runts
Giants
----- ---------- ---------- ---------- ---------- --------- --------- --------9/2 0
0
0
0
0
0
0
Port Last-Time-Cleared
----- -------------------------9/2 Mon Jul 19 2004, 09:58:55
Idle Detection
--------------console> (enable)
For Cisco IOS software:
router# show intrusion-detection module 6 management-port state
Intrusion-detection module 6 management-port:
Switchport: Enabled
Administrative Mode: dynamic desirable
Operational Mode: static access
Administrative Trunking Encapsulation: negotiate
Operational Trunking Encapsulation: native
Negotiation of Trunking: On
B-50
Cisco Intrusion Detection System Appliance and Module Installation and Configuration Guide Version 4.1
78-15597-02
Appendix B
Troubleshooting
Troubleshooting the IDSM-2
Access Mode VLAN: 146 (10.89.149.0/25_QA_Sensors)
Trunking Native Mode VLAN: 1 (default)
Trunking VLANs Enabled: ALL
Pruning VLANs Enabled: 2-1001
Vlans allowed on trunk:146
Vlans allowed and active in management domain: 146
Vlans in spanning tree forwarding state and not pruned:
146
Access Vlan = 146
Using the TCP Reset Interface
The IDSM-2 has a TCP reset interface—port 1. The IDSM-2 has a specific TCP
reset interface because it cannot send TCP resets on its sensing ports.
If you have reset problems with the IDSM-2, try the following:
•
If the sensing ports are access ports (a single VLAN), you must configure the
reset port to be in the same VLAN.
•
If the sensing ports are dot1q trunk ports (multi-VLAN), the sensing ports and
reset port all must have the same native VLAN, and the reset port must trunk
all the VLANs being trunked by both the sensing ports.
Connecting a Serial Cable to the IDSM-2
You can connect a serial cable directly to the serial console port on the IDSM-2.
This lets you bypass the switch and module network interfaces.
To connect a serial cable to the IDSM-2, follow these steps:
Step 1
Locate the two RJ-45 ports on the IDSM-2.
You can find them approximately in the center of the mother board. If you are
facing the module faceplate, the RJ-45 port on the right is the serial console port.
Step 2
Connect a straight-through cable to the right port on the IDSM-2, and then
connect the other end of the cable to a terminal server port.
Step 3
Configure the terminal server port to be 19200 baud, 8 bits, no parity.
Cisco Intrusion Detection System Appliance and Module Installation and Configuration Guide Version 4.1
78-15597-02
B-51
Appendix B
Troubleshooting
Gathering Information
You can now log directly in to the IDSM-2.
Note
Connecting a serial cable to the IDSM-2 works only if there is no module located
about the IDSM-2 in the switch chassis, because the cable has to come out through
the front of the chassis.
Gathering Information
You can use the following CLI commands and scripts to gather information and
diagnose the state of the sensor when problems occur. You can use the show
tech-support command to gather all the sensor’s information, or you can use the
other individual commands listed in this section for specific information.
This section contains the following topics:
•
show tech-support Command, page B-52
•
show version Command, page B-56
•
show configuration/more current-config Command, page B-60
•
show statistics Command, page B-61
•
show interfaces Command, page B-64
•
show events Command, page B-66
•
cidDump Script, page B-70
•
Uploading and Accessing Files on the Cisco FTP Site, page B-71
show tech-support Command
The show tech-support command is useful for capturing all the sensor’s status
and configuration information.
This section contains the following topics:
B-52
•
show tech-support Command, page B-53
•
Displaying Tech Support Information, page B-53
Cisco Intrusion Detection System Appliance and Module Installation and Configuration Guide Version 4.1
78-15597-02
Appendix B
Troubleshooting
Gathering Information
•
show tech-support Command Output, page B-55
show tech-support Command
The show tech-support command captures all status and configuration
information on the sensor and includes the current configuration, version
information, and cidDump information. The output can be large, over 1 MB. You
can transfer the output to a remote system. See Displaying Tech Support
Information, page B-53, for the procedure for copying the output to a remote
system.
Note
You can get the same information from IDS Device Manager by selecting
Administration > Support > System Information.
Note
Always run the show tech-support command before contacting TAC.
Displaying Tech Support Information
You can display system information on the screen or have it sent to a specific URL
to use as a troubleshooting tool with TAC.
To display tech support information, follow these steps:
Step 1
Log in to the CLI using an account with administrator privileges.
Step 2
View the optional parameters for the show tech support command:
sensor# show tech-support ?
The following parameters are optional:
•
page—Displays the output, one page of information at a time.
•
password—Leaves passwords and other security information in the output.
Cisco Intrusion Detection System Appliance and Module Installation and Configuration Guide Version 4.1
78-15597-02
B-53
Appendix B
Troubleshooting
Gathering Information
Step 3
•
destination—Indicates the information should be formatted as HTML and
sent to the destination that follows this command. If you do not specify this
parameter, the output appears on the screen.
•
destination-url—Indicates the information should be formatted as HTML.
The URL specifies where the information should be sent.
View the output on the screen:
sensor# show tech-support page
The system information appears on the screen, one page at a time. Press the space
bar to view the next page or press Ctrl-C to return to the prompt.
Step 4
To send the output (in HTML format) to a file, follow these steps:
a.
Type the following command, followed by a valid destination:
sensor# show tech-support destination-url
You can specify the following destination types:
•
ftp:—Destination URL for File Transfer Protocol (FTP) network server.
The syntax for this prefix is
ftp:[[//username@location]/relativeDirectory]/filename or
ftp:[[//username@location]//absoluteDirectory]/filename.
•
scp:—Destination URL for the Secure Copy Protocol (SCP) network
server. The syntax for this prefix is
scp:[[//username@]location]/relativeDirectory]/filename or
scp:[[//username@]location]//absoluteDirectory]/filename.
For example, to send the tech support output to the file
/absolute/reports/sensor1Report.html, type the following command:
sensor# show tech support dest
ftp://[email protected]//absolute/reports/sensor1Report.html
The password: prompt appears.
b.
Type the password for this user account.
The Generating
B-54
report:
message is displayed.
Cisco Intrusion Detection System Appliance and Module Installation and Configuration Guide Version 4.1
78-15597-02
Appendix B
Troubleshooting
Gathering Information
show tech-support Command Output
The following is an example of the show tech-support command output:
Note
This output example shows the first part of the command and lists the information
for the Authentication, Host, and Logger services.
sensor# show tech-support page
IDS 4.1 System Status Report
!! Warning output may contain Passwords !!
This Report was generated on Tues June 23 01:00:11 1994.
Output from more current-config
! ———————————————
service Authentication
general
methods method Local
exit
exit
exit
! ———————————————
service Host
networkParams
ipAddress 1.1.1.1
netmask 255.255.255.0
defaultGateway 10.89.146.254
hostname sensor
telnetOption enabled
accessList ipAddress 10.0.0.0 netmask 255.0.0.0
accessList ipAddress 1.2.3.4 netmask 255.255.0.0
accessList ipAddress 64.101.0.0 netmask 255.255.0.0
accessList ipAddress 5.6.7.8 netmask 255.255.255.255
accessList ipAddress 9.10.11.12 netmask 255.255.0.0
exit
optionalAutoUpgrade
active-selection none
exit
timeParams
summerTimeParams
active-selection none
exit
ntpServers ipAddress 10.10.10.10
keyId 2
keyValue none
exit
exit
exit
Cisco Intrusion Detection System Appliance and Module Installation and Configuration Guide Version 4.1
78-15597-02
B-55
Appendix B
Troubleshooting
Gathering Information
! ———————————————
service Logger
masterControl
enable-debug false
exit
zoneControl zoneName
AuthenticationApp
severity warning
exit
zoneControl zoneName
severity warning
exit
zoneControl zoneName
severity warning
exit
zoneControl zoneName
severity warning
exit
zoneControl zoneName
severity warning
exit
zoneControl zoneName
severity warning
exit
zoneControl zoneName
severity warning
exit
exit
! ———————————————
Cid severity debug exit zoneControl zoneName
Cli
ctlTransSource
IdapiCtlTrans
IdsEventStore
MpInstaller
tls
show version Command
The show version command is useful for establishing the general health of the
sensor.
This section contains the following topics:
B-56
•
show version Command, page B-57
•
Displaying the Current Version, page B-57
Cisco Intrusion Detection System Appliance and Module Installation and Configuration Guide Version 4.1
78-15597-02
Appendix B
Troubleshooting
Gathering Information
show version Command
The show version command shows the general health of the sensor and can
indicate where a failure is occurring. It gives the following information:
Note
•
Which applications are running
•
Versions of the applications
•
Disk and memory usage
•
Upgrade history of the applications
You can get the same information from IDS Device Manager by selecting
Administration > Support > Diagnostics.
Displaying the Current Version
You can display the IDS software version. Use the show version command to
display version information for the OS, signature packages, and IDS processes
running on the system.
To display the version and configuration, follow these steps:
Step 1
Log in to the CLI.
Step 2
View version information:
sensor# show version
The following examples show sample version output for the appliance and the
NM-CIDS.
Sample version output for the appliance:
sensor# show version
Application Partition:
Cisco Systems Intrusion Detection Sensor, Version 4.1(3)S61
OS Version 2.4.18-5smpbigphys
Platform: IDS-4235
Sensor up-time is 20 days.
Using 214319104 out of 921522176 bytes of available memory (23% usage)
Using 596M out of 15G bytes of available disk space (5% usage)
Cisco Intrusion Detection System Appliance and Module Installation and Configuration Guide Version 4.1
78-15597-02
B-57
Appendix B
Troubleshooting
Gathering Information
MainApp
AnalysisEngine
Authentication
Logger
NetworkAccess
TransactionSource
WebServer
CLI
2003_Oct_10_11.16
2003_Oct_10_11.16
2003_Oct_10_11.16
2003_Oct_10_11.16
2003_Oct_10_11.16
2003_Oct_10_11.16
2003_Oct_10_11.16
2003_Oct_10_11.16
(Release)
(Release)
(Release)
(Release)
(Release)
(Release)
(Release)
(Release)
2003-10-10T11:01:13-0500
2003-10-10T11:01:13-0500
2003-10-10T11:01:13-0500
2003-10-10T11:01:13-0500
2003-10-10T11:01:13-0500
2003-10-10T11:01:13-0500
2003-10-10T11:01:13-0500
2003-10-10T11:01:13-0500
Running
Running
Running
Running
Running
Running
Running
Upgrade History:
* IDS-K9-min-4.1-1-S47
IDS-K9-sp-4.1-3-S61.rpm.pkg
12:00:00 UTC Thu Jun 30 2005
14:14:55 UTC Fri Feb 20 2004
Recovery Partition Version 1.2 - 4.1(1)S47
Note
If the —MORE— prompt is displayed, press the spacebar to see more
information or Ctrl-C to cancel the output and get back to the CLI
prompt. You can also disable the more prompt (so that output is
continuous) by using the terminal length 0 command.
Sample version output for the NM-CIDS:
Router# show version
Application Partition:
Cisco Systems Intrusion Detection Sensor, Version 4.1(0.3)S42(0.3)
OS Version 2.4.18-5
Platform: NM-CIDS
Sensor up-time is 3 days.
Using 256172032 out of 260788224 bytes of available memory (98% usage)
Using 530M out of 17G bytes of available disk space (4% usage)
MainApp
AnalysisEngine
Authentication
Logger
NetworkAccess
TransactionSource
WebServer
CLI
B-58
2003_May_09_06.00
2003_May_09_06.00
2003_May_09_06.00
2003_May_09_06.00
2003_May_09_06.00
2003_May_09_06.00
2003_May_09_06.00
2003_May_09_06.00
(Release)
(Release)
(Release)
(Release)
(Release)
(Release)
(Release)
(Release)
2003-05-09T06:09:22-0500
2003-05-09T06:09:22-0500
2003-05-09T06:09:22-0500
2003-05-09T06:09:22-0500
2003-05-09T06:09:22-0500
2003-05-09T06:09:22-0500
2003-05-09T06:09:22-0500
2003-05-09T06:09:22-0500
Running
Running
Running
Running
Running
Running
Running
Cisco Intrusion Detection System Appliance and Module Installation and Configuration Guide Version 4.1
78-15597-02
Appendix B
Troubleshooting
Gathering Information
Upgrade History:
No upgrades installed
Cisco Intrusion Detection System Appliance and Module Installation and Configuration Guide Version 4.1
78-15597-02
B-59
Appendix B
Troubleshooting
Gathering Information
show configuration/more current-config Command
To view the configuration for the entire system, use the show configuration or
more current-config command.
Step 1
Log in to the CLI.
Step 2
View configuration information:
Note
You can use the more current-config or show configuration commands.
sensor# more current-config
Configuration information (similar to the following) appears:
! ———————————————
service Authentication
general
attemptLimit 0
methods method Local
exit
exit
exit
! ———————————————
service Host
networkParams
ipAddress 10.89.147.31
netmask 255.255.255.128
defaultGateway 10.89.147.126
hostname sensor31
telnetOption disabled
accessList ipAddress 10.0.0.0 netmask 255.0.0.0
accessList ipAddress 10.16.0.0 netmask 255.255.0.0
exit
optionalAutoUpgrade
active-selection
autoUpgradeParams autoUpgradeParams
schedule
active-selection calendarUpgrade
calendarUpgrade
timesOfDay time 14:40:00
daysOfWeek day wed
exit
exit
B-60
Cisco Intrusion Detection System Appliance and Module Installation and Configuration Guide Version 4.1
78-15597-02
Appendix B
Troubleshooting
Gathering Information
ipAddress 10.89.149.10
directory var/relupdates
username netrangr
password 12345
fileCopyProtocol ftp
exit
exit
timeParams
offset -360
standardTimeZoneName CST
summerTimeParams
active-selection none
exit
exit
exit
show statistics Command
The show statistics command is useful for examining the state of the sensor’s
services.
This section contains the following topics:
•
show statistics Command, page B-61
•
Displaying Statistics, page B-62
•
show statistics Command Output, page B-63
show statistics Command
The show statistics command provides a snapshot of the current state of the
sensor’s services. Use the show statistics ?command to list the following services
that provide the statistics:
•
Authentication
•
EventServer
•
EventStore
•
Host
•
Logger
Cisco Intrusion Detection System Appliance and Module Installation and Configuration Guide Version 4.1
78-15597-02
B-61
Appendix B
Troubleshooting
Gathering Information
Note
•
NetworkAccess
•
TransactionSource
•
TransactionServer
•
WebServer
You can get the same information from IDS Device Manager by selecting
Monitoring > Statistics.
Displaying Statistics
You can use the show statistics command to display the statistics of the service
you are interested in.
To display the statistics of the service you are interested in, follow these steps:
Step 1
Log in to the CLI.
Step 2
View the services that you can display statistics on:
sensor# show statistics ?
Authentication
Display
EventServer
Display
EventStore
Display
Host
Display
Logger
Display
NetworkAccess
Display
TransactionServer
Display
TransactionSource
Display
WebServer
Display
Step 3
authentication statistics
event server statistics
event store statistics
host statistics
logger statistics
network access controller statistics
transaction server statistics
transaction source statistics
web server statistics
Show the statistics of the service you are interested in:
sensor# show statistics {Authentication
| EventServer | EventStore | Host |
Logger | NetworkAccess | TransactionServer | TransactionSource | WebServer }
[ clear ]
For example, here are statistics for the EventStore:
sensor# show statistics EventStore
Event store statistics
General information about the event store
The current number of open subscriptions = 0
B-62
Cisco Intrusion Detection System Appliance and Module Installation and Configuration Guide Version 4.1
78-15597-02
Appendix B
Troubleshooting
Gathering Information
The number of events lost by subscriptions and queries = 0
The number of queries issued = 0
The number of times the event store circular buffer wrapped = 0
Number of events of each type currently stored
Debug events = 0
Status events = 0
Log transaction events = 4
Shun request events = 0
Error events, warning = 3
Error events, error = 0
Error events, fatal = 0
Alert events, informational = 0
Alert events, low = 0
Alert events, medium = 0
Alert events, high = 0
show statistics Command Output
The following is an example of the show statistics command output for the
EventStore service:
sensor# show statistics EventStore
Event store statistics
General information about the event store
The current number of open subscriptions = 1
The number of events lost by subscriptions and queries = 0
The number of queries issued = 0
The number of times the event store circular buffer has
wrapped = 0
Number of events of each type currently stored
Debug events = 0
Status events = 21
Log transaction events = 226
Shun request events = 0
Error events, warning = 414
Error events, error = 10
Error events, fatal = 1
Alert events, informational = 0
Alert events, low = 0
Alert events, medium = 0
Alert events, high = 0
The following is an example of the show statistics command output for the
Logger service:
Cisco Intrusion Detection System Appliance and Module Installation and Configuration Guide Version 4.1
78-15597-02
B-63
Appendix B
Troubleshooting
Gathering Information
sensor# show statistics Logger
The number of Log interprocessor FIFO overruns = 0
The number of syslog messages received = 120
The number of <evError> events written to the event store by severity
Fatal Severity = 0
Error Severity = 0
Warning Severity = 120
TOTAL = 120
The number of log messages written to the message log by severity
Fatal Severity = 0
Error Severity = 0
Warning Severity = 0
Timing Severity = 0
Debug Severity = 3
Unknown Severity = 189
TOTAL = 192
show interfaces Command
The show interfaces command is useful for gathering information on the sensing
and command and control interfaces.
This section contains the following topics:
•
show interfaces Command, page B-64
•
show interfaces Command Output, page B-65
show interfaces Command
You can learn the following information from the show interfaces command:
B-64
•
Whether the interface is up or down
•
Whether or not packets are being seen, and on which interfaces
•
Whether or not packets are being dropped by SensorApp
•
Whether or not there are errors being reported by the interfaces that can result
in packet drops
Cisco Intrusion Detection System Appliance and Module Installation and Configuration Guide Version 4.1
78-15597-02
Appendix B
Troubleshooting
Gathering Information
The show interfaces command displays statistics for all system interfaces. Or you
can use the individual commands to display statistics for the command and control
interface (show interfaces command-control), the sensing interface (show
interfaces sensing) and all interfaces in an interface group (show interfaces
group).
show interfaces Command Output
The following examples show the output from the show interfaces commands.
sensor# show interfaces sensing
Sensing int0 is down
Hardware is eth0, TX
Reset port
If the sensing interface is down, the sensor does not receive traffic. Use the no
shutdown command to enable the interface.
sensor# configure terminal
sensor(config)# interface sensing int0
sensor(config-ifs)# no shutdown
sensor(config-ifd)# exit
sensor(config)# exit
sensor# show interfaces command-control
command-control is up
Internet address is 10.89.146.110, subnet mask is 255.255.255.0,
telnet is enabled.
Hardware is eth1, tx
Network Statistics
eth1 Link encap:Ethernet HWaddr 00:06:5B:EC:69:A0
inet addr:10.89.146.110 Bcast:10.89.146.255
Mask:255.255.255.0
UP BROADCAST RUNNING MULTICAST MTU:1500 Metric:1
RX packets:1536664 errors:37 dropped:0 overruns:0 frame:37
TX packets:12606 errors:0 dropped:0 overruns:0 carrier:0
collisions:88 txqueuelen:100
RX bytes:143231073 (136.5 Mb) TX bytes:1783147 (1.7 Mb)
Interrupt:16 Base address:0xdcc0 Memory:feb20000-feb40000
The command and control port is up. You are receiving packets and none are being
dropped.
Cisco Intrusion Detection System Appliance and Module Installation and Configuration Guide Version 4.1
78-15597-02
B-65
Appendix B
Troubleshooting
Gathering Information
show events Command
You can use the show events command to view the alerts generated by SensorApp
and errors generated by an application.
B-66
Cisco Intrusion Detection System Appliance and Module Installation and Configuration Guide Version 4.1
78-15597-02
Appendix B
Troubleshooting
Gathering Information
This section contains these topics:
•
Sensor Events, page B-67
•
show events Command, page B-67
•
Displaying and Clearing Events, page B-68
•
show events Command Output, page B-69
Sensor Events
There are five types of events:
•
evAlert—Intrusion detection alerts
•
evError—Application errors
•
evStatus—Status changes, such as an IP log being created
•
evLogTransaction—Record of control transactions processed by each sensor
application
•
evShunRqst—Block requests
Events remain in the EventStore until they are overwritten by newer events.
show events Command
The show events command is useful for troubleshooting event capture issues in
which you are not seeing events in IDS Event Viewer or Security Monitor. You
can use the show events command to determine which events are being generated
on the sensor to make sure events are being generated and that the fault lies with
the monitoring side.
You can clear all events from EventStore by using the clear events command.
Here are the parameters for the show events command:
sensor# show events
<cr>
alert
Display
error
Display
hh:mm[:ss]
Display
log
Display
local system alerts
error events
start time
log events
Cisco Intrusion Detection System Appliance and Module Installation and Configuration Guide Version 4.1
78-15597-02
B-67
Appendix B
Troubleshooting
Gathering Information
nac
past
status
|
Display NAC shun events
Display events starting in the past specified time
Display status events
Output modifiers
Displaying and Clearing Events
Use the show events command to display the local event log. You can display new
events or events from a specific time or of a specific severity, and you can delete
all events.
The show events command displays the requested event types beginning at the
requested start time. If no start time is entered, the selected events are displayed
beginning at the current time. If no event types are entered, all events are
displayed. Events are displayed as a live feed. You can cancel the live feed by
pressing Ctrl-C.
Note
The show events command waits until a specified event is available. It continues
to wait and display events until you exit by pressing Ctrl-C.
To display and clear events, follow these steps:
Step 1
Log in to the CLI.
Step 2
Display new events:
sensor# show events
Use the regular expression | include shunInfo to view the shun information,
including source address, for the event.
New events are displayed as they occur.
Step 3
Display events from a specific time:
sensor# show events
hh:mm month day year
For example, show events 14:00 September 2 2002 displays all events since
2:00 p.m. September 2, 2002.
B-68
Cisco Intrusion Detection System Appliance and Module Installation and Configuration Guide Version 4.1
78-15597-02
Appendix B
Troubleshooting
Gathering Information
Note
Time is specified in 24-hour format. You can use single digit numbers for
the date.
Events from the specified time are displayed.
Step 4
Show events that began in the past:
sensor# show events past
hh:mm:ss
The following example displays all events beginning 30 seconds in the past.
sensor# show events past 00:00:30
Step 5
Delete events from the event store:
sensor# clear events
Warning: Executing this command will remove all events currently
stored in the event store.
Continue with clear? :
Step 6
Type yes to clear all events from the EventStore.
show events Command Output
The following is an example of the show events command output:
sensor# show events
evAlert: eventId=1080048367680474106 severity=informational
originator:
hostId: sensor
appName: sensorApp
appInstanceId: 1102
time: 2004/06/24 13:21:33 2004/06/24 13:21:33 EST
interfaceGroup: 0
vlan: 0
signature: sigId=7102 sigName=Reply-to-Broadcast subSigId=0
version=S37
participants:
attack:
attacker: proxy=false
addr: locality=OUT 10.89.146.24
victim:
addr: locality=OUT 10.89.146.24
Cisco Intrusion Detection System Appliance and Module Installation and Configuration Guide Version 4.1
78-15597-02
B-69
Appendix B
Troubleshooting
Gathering Information
alertDetails: Traffic Source: int0 ;
evAlert: eventId=1080048367680474107 severity=informational
originator:
hostId: sensor
appName: sensorApp
appInstanceId: 1102
time: 2004/06/24 13:21:33 2004/06/24 13:21:33 EST
interfaceGroup: 0
vlan: 0
signature: sigId=7102 sigName=Reply-to-Broadcast subSigId=0
version=S37
participants:
attack:
attacker: proxy=false
addr: locality=OUT 10.89.146.24
victim:
addr: locality=OUT 10.89.146.24
alertDetails: Traffic Source: int5 ;
cidDump Script
If you do not have access to IDM or the CLI, you can run the underlying script
cidDump from the service account by logging in as root and running
/usr/cids/idsRoot/bin/cidDump. The cidDump file’s path is
/usr/cids/idsRoot/htdocs/private/cidDump.html.
cidDump is a script that captures a large amount of information including the IDS
processes list, log files, OS information, directory listings, package information,
and configuration files.
To run the cidDump script, follow these steps:
B-70
Step 1
Log in to the sensor service account.
Step 2
Su to root using the service account password.
Step 3
Type cidDump /usr/cids/idsRoot/bin/cidDump.
Cisco Intrusion Detection System Appliance and Module Installation and Configuration Guide Version 4.1
78-15597-02
Appendix B
Troubleshooting
Gathering Information
Step 4
Compress the resulting /usr/cids/idsRoot/log/cidDump.html file:
gzip /usr/cids/idsRoot/log/cidDump.html
Step 5
Send the resulting HTML file to TAC or the IDS developers in case of a problem.
See Uploading a File to the Cisco FTP Site for the procedure.
Uploading and Accessing Files on the Cisco FTP Site
You can upload large files, for example, cidDump.html, the show tech-support
command output, and cores, to the ftp-sj server.
To upload and access files on the Cisco FTP site, follow these steps:
Step 1
Log in to ftp-sj.cisco.com as anonymous.
Step 2
Change to the /incoming directory.
Step 3
Use the put command to upload the files.
Make sure to use the binary transfer type.
Step 4
To access uploaded files, log in to an ECS-supported host.
Step 5
Change to the /auto/ftp/incoming directory.
Cisco Intrusion Detection System Appliance and Module Installation and Configuration Guide Version 4.1
78-15597-02
B-71
Appendix B
Troubleshooting