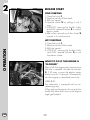
1
RS 4T 400 - 450 - 520
Thanks for you preference, and have a good time! This handbook contains the information you need to properly operate and
maintain your motorcycle.
The data and specifications provided in this manual does not constitute an
engagement on the part of BETAMOTOR S.p.A. BETAMOTOR reserves the
right to make any changes and improvements to its models at any moment
and without notice.
1
USA
IMPORTANT
We recommend you to check all the tightenings after the first one
or two hours’ ride over rough ground. Special attention should
be paid to the following parts:
•
•
•
•
•
•
•
•
•
•
rear sprocket
ensure that the footrests are properly fixed
front/rear brake levers/calipers/discs
check that the plastics are properly fastened
engine bolts
shock absorber bolts/swingarm
wheel hubs/spokes
rear frame
pipe connections
tensioning the chain
IMPORTANT
For any servicing requirements, please get in contact with Betamotor’s authorized service network.
USA
2
CONTENTS
Operating instructions............................................................................. 5
Ecologic guide ....................................................................................... 5
Riding safety ......................................................................................... 6
CHAPTER 2 OPERATION .................................................................. 25
Checks to be performed before each ride ............................................... 26
Running-in ........................................................................................... 27
Engine start ......................................................................................... 28
Refuelling ............................................................................................ 29
Fuel tank cap ....................................................................................... 29
Fuel cock ............................................................................................ 29
CHAPTER 3 CHECKS AND MAINTENANCE ..................................... 31
Oil circuit ............................................................................................ 32
Changing the gear and clutch oil ........................................................... 35
Brakes ................................................................................................ 36
Tyres................................................................................................... 39
Hydraulic clutch ................................................................................... 40
Fork oil ............................................................................................... 41
Air Filter .............................................................................................. 44
Spark plug .......................................................................................... 45
Carburettor ......................................................................................... 47
Coolant .............................................................................................. 48
Chain ................................................................................................. 49
Battery ................................................................................................ 50
Cleaning the vehicle ............................................................................. 51
Scheduled maintenance vehicle ............................................................. 52
Prolonged inactivity .............................................................................. 54
3
CONTENTS
CHAPTER 1 GENERAL INFORMATION .............................................. 7
Vehicle identification data ....................................................................... 8
Tools kit .............................................................................................. 10
Steering lock ....................................................................................... 11
Familiarizing with the vehicle................................................................. 12
Moto-GPS “Voyager” (Trail Tech) ............................................................ 16
Specifications ...................................................................................... 17
Electrical system ................................................................................... 20
Recommended lubricants and liquid ....................................................... 24
USA
CHAPTER 4 ADJUSTMENTS.............................................................. 55
Adjusting the home position of the front brake lever.................................. 56
Adjusting the home position of the brake pedal ....................................... 56
Adjusting the home position of the clutch lever ......................................... 56
Adjusting the handlebars ...................................................................... 56
Gas control adjustment ......................................................................... 57
Checking and adjusting the steering play ................................................ 57
Adjusting fork ...................................................................................... 58
Shock absorber.................................................................................... 59
Tensioning the chain ............................................................................. 60
Adjusting the idle speed........................................................................ 61
CONTENTS
CHAPTER 5 REPLACEMENTS ............................................................ 63
Replacing the brake pads ..................................................................... 64
Replacing the headlight bulbs ................................................................ 66
Tail light .............................................................................................. 66
USA
CHAPTER 6 TROUBLESHOOTING .................................................... 67
Troubleshooting ................................................................................... 68
4
OPERATING INSTRUCTIONS
• The vehicle must be accompanied by: number-plate, registration document, tax
disc and insurance.
• Do not carry animals, pets or loose objects that can stick out from the vehicle.
• Riding without a crash helmet is forbidden.
• Always ride with the low beam on.
• Any modifications of the engine or other parts resulting in a power and/or speed
increase are punishable by severe sanctions including the confiscation of the vehicle.
• To protect your safety and that of others, always drive carefully and with your helmet
on.
WARNING
Any modifications and tampering with the vehicle during the warranty period exempt
the manufacturer from all responsibility and invalidate warranty.
ECOLOGIC GUIDE
• Every vehicle powered by an internal combustion engine produces an amount of
noise (noise pollution) and gases (air pollution) which varies with the riding style.
• The abatement of noise and air pollution levels is the duty of everybody. Avoid
full-throttle starts, sudden acceleration and abrupt braking. This will reduce noise
emission as well as the wear and tear of the tyres and mechanical parts, and will
also allow a considerable reduction in fuel consumption.
5
USA
RIDING SAFETY
• Observe the Highway Code.
• Always put on and fasten a homologated helmet.
• Always ride with the low beam on.
• Always keep the crash helmet visor clean.
• Avoid wearing garments with hanging ends.
• Do not keep sharp or brittle objects in your pockets while riding.
• Properly adjust the rearview mirrors.
• Always ride in a seated position, with both hands on the handlebars and both feet
on the footrests.
• Always pay attention and do not allow anything to distract you while riding.
• Do not eat, drink, smoke, use a mobile phone, etc. while riding.
• Do not wear headphones to listen to music while riding.
• Never ride abreast with other vehicles.
• Do not tow and avoid being towed by other vehicles.
• Always keep a safe distance from other vehicles.
• Do not sit on the vehicle when it is on its stand.
• Do not start off while the vehicle is on its stand.
• Do not pull out the stand when the vehicle is facing downhill.
• Avoid swaying and wheelies as they are extremely dangerous for your own and
other people’s safety as well as for your vehicle.
• Always apply both brakes on dry roads with no gravel and sand. Using one brake
may be dangerous and cause uncontrolled skidding.
• To reduce the braking distance, always apply both brakes.
• On wet roads and in off-road riding, drive with care and at moderate speed. Take
special care in applying the brakes.
• Do not start the engine in closed places.
USA
6
CONTENTS
Vehicle identification data ....................................................................... 8
Frame identification ........................................................................... 8
Engine identification .......................................................................... 8
Label location ................................................................................... 9
Tools kit .............................................................................................. 10
Steering lock ....................................................................................... 11
Familiarizing with the vehicle................................................................. 12
Main parts:..................................................................................... 12
Clutch lever .................................................................................... 13
Front brake lever ............................................................................. 13
Gearchange lever............................................................................ 13
Brake pedal .................................................................................... 13
Lights and key-switch........................................................................ 14
RH switch ....................................................................................... 14
LH switch ........................................................................................ 14
Kickstart ......................................................................................... 15
Side stand ...................................................................................... 15
Canister filter system ........................................................................ 15
Moto-GPS “Voyager” (Trail Tech) ............................................................ 16
Removing the lithium battery ............................................................. 16
Specifications ...................................................................................... 17
Weight ........................................................................................... 17
Dimensions ..................................................................................... 17
Tyres .............................................................................................. 17
Capacities ...................................................................................... 17
Front suspension .............................................................................. 17
Rear suspension .............................................................................. 18
Front brake ..................................................................................... 18
Rear brake ..................................................................................... 18
Engine ........................................................................................... 18
Electrical system ................................................................................... 20
Electrical diagram ........................................................................... 20
Legend electrical diagram ................................................................ 21
Battery ........................................................................................... 22
Fuse ............................................................................................... 23
Recommended lubricants and liquid ....................................................... 24
7
1
GENERAL INFORMATION
CHAPTER 1 GENERAL INFORMATION
USA
1
VEHICLE IDENTIFICATION
DATA
GENERAL INFORMATION
A
USA
FRAME IDENTIFICATION
Frame identification data A are stamped
on the right side of the steering head tube.
ENGINE IDENTIFICATION
Engine identification data B are stamped
in the area shown in the figure.
B
WARNING:
Tampering with the identification numbers
is severely punished by law.
8
1
LABEL LOCATION
2
1
3
6
2
4
Label RS4T:
1 – Warnings plate
GENERAL INFORMATION
5
This BETA exhaust system 2204185 meets U.S.EPA
noise emission requirements of 80dBa for model specific
code Beta 3867700497, 3867710497, 3867660497,
3867670497 and 3867680497
Installation of this exhaust system on motorcycles not
specified may violate U.S. federal law. USFS approved
spark arrester-Screen type ARROW screen type 5205007
2 – Brake oil plate
3 – Technical plate and vapour recovery diagram
4 – Eco-plate
5 – Noise limit
6 – Liquid level check
9
USA
GENERAL INFORMATION
1
TOOLS KIT
The following items are supplied as standard: operation and maintenance manual,
tool kit (see photo).
To take the tool kit, push the button 1 to
get off the saddle. Pull back the saddle.
Pull the rear side panel 2 to disassemble it.
1
2
4
Get off the male end wrenches and hexagon socket 3.
With these is possible to unscrew the
screw 4.
3
5
6
Pull the left cover of rear fender and unhook
two rubber band 5. Now the toolkit 6 is
accessible.
5
USA
10
STEERING LOCK
The vehicle is supplied with one key and
a spare to be used for the steering lock.
1
To engage the steering lock, fully turn the
handlebars to the left, insert the key, press
and turn it fully anticlockwise and then
release it.
11
GENERAL INFORMATION
WARNING:
Do not keep the spare keys in the vehicle.
Keep the keys in a safe and easy-to-reach
place. The code number stamped on the
keys should be copied on this manual (or
elsewhere) so it can be used to ask for
duplicates should both keys be lost.
USA
1
FAMILIARIZING WITH THE VEHICLE
1
2
5
19
20
11
GENERAL INFORMATION
8
14
12
9
21
6
3
7
21
22
17
13
16
18
9
MAIN PARTS:
1 - Fuel tank
2 - Tank cap
3 - Silencer
4 - Rear shock absorber
5 - Headlight
6 - Rear light
7 - Side stand
8 - Fork
9 - Rider’s footrests
USA
4
15
10
10 - Lower bumper
(Bumper kit)
11 - Saddle
12 - Engine
13 - Front mudguard
14 - Number-plate holder
15 - Kick-start
16 - Front side panel
17 - Rear side panel
12
18
19
20
21
22
-
Fork covers
Rear mudguard
Cover air filter
Blinkers
Key-switch
CLUTCH LEVER
Clutch lever 1 is fitted to the left-hand side
of the handlebars. Screw A can be used
to alter the home position of the lever (see
Adjustments).
1
1
FRONT BRAKE LEVER
Front brake lever 2 is fitted to the right-hand
side of the handlebars. Screw B can be
used to adjust the home position of the
lever (see Adjustments).
B
GEARCHANGE LEVER
Gearchange lever 3 is fitted to the left side
of the engine.
The positions corresponding to the different
gears are shown in the figure.
The neutral position is between the 1st and
2nd gears.
2
4
56
3
2
1
3
GENERAL INFORMATION
A
BRAKE PEDAL
Brake pedal 4 is located in front of the
right-hand footrest.
The position of the pedal can be adjusted
to suit the requirements of the driver (see
Adjustments).
4
13
USA
1
1
A
0
LIGHTS AND KEY-SWITCH
To switch on the engine, turn the the keyswitch on 1 position. To switch off, turn on
the 0 position. The A light is for the high
beam light. The B light is for the blinker.
B
RH SWITCH
GENERAL INFORMATION
2
Starte button 1 is located on the right-hand
side of the handlebars and operate the
electri engine starter. Push the button until
the engine sterts.
Do not press the button 1 while the engine
is running.
While button 2 turns off the engine.
1
ON
5
3
OFF
LH SWITCH
B
A
6
USA
Caution:
Before turning it on, make sure the switch
2 is on ON.
4
Dip switch 3 has two positions:
A = Low beam on
B = High beam on
Button 4 is for the horn.
Button 5 is for the flasher
Shifting lever 6 on the left or right activates
the left or right inidcators. When released,
the returns to the central position. Press it
to switch off the indicators.
14
1
KICKSTART
Kickstart 6 is fitted to the right-hand side
of the engine.
The upper part of the kickstart can be
oriented.
8
SIDE STAND
Press down side stand 7 with the foot and
lean the vehicle against it.
Ensure that the ground is solid and the
vehicle stands steadily.
If the vehicle is used off-road, the closed
stand can be further fastened by means of
rubber band 8.
Betamotor S.p.A has always been sensitive to environmental protection, and
all vehicles comply with the applicable
regulations on harmful gas emissions and
sound pollution.
7
1
CANISTER FILTER SYSTEM
The extra system with a Canister 1 emission filter and vacuum valve 2 prevent the
release of vapours into the atmosphere.
GENERAL INFORMATION
6
2
15
USA
GENERAL INFORMATION
1
MOTO-GPS “VOYAGER” (TRAIL TECH)
The dashboard user guide and the “RideLeader GPS File Editor” are available in the
CD-ROM “TRAIL TECH” provided with the vehicle.
NOTE
The circumference of the front wheel is 219mm (8.62in).
REMOVING THE LITHIUM
BATTERY
To remove the lithium battery on the
dashboard (see the dashboard user guide
available in the CD-ROM “TRAIL TECH”
provided with the vehicle) follow this steps:
1) unhook the rubber bands 1 and
remove the front mask 2;
2) remove the two fixing screws 3;
3) disconnect the dashboard connectors to the electrical system;
4) remove the dashboard.
To refit, perform the above steps in
reverse order.
1
3
2
USA
16
1
SPECIFICATIONS
WEIGHT
Dry weight RR 400 ................................... 113 kg (front 55 Kg; rear 58 Kg)
Dry weight RR 450 - 520 .................... 113,5 kg (front 55 Kg; rear 58,5 Kg)
maximum length......................................................................... 2180
maximum width ........................................................................... 807
overall height ............................................................................ 1270
wheelbase................................................................................. 1490
saddle height............................................................................... 940
ground clearance ......................................................................... 320
footrest height .............................................................................. 413
mm
mm
mm
mm
mm
mm
mm
FRAME ............ molybdenum steel with double cradle split above exhaust port
TYRES
Dimensions
Front tyre
90/90-21
Pressure [Bar]
Rear tyre
Front tyre
Rear tyre
1,5 (road use)
1,8 (road use)
1 (off-road use)
1 (off-road use)
140/80-18
front rim ........................................................................ 21x1,6 - 36 holes
rear rim ...................................................................... 18x2,15 - 36 holes
CAPACITIES
fuel tank ..........................................................................................8 liter
fuel type........petrol unleaded, with a minimum octane number of 95 (R.O.N.)
including reserve...........................................................................1,3 liter
coolant circuit ...............................................................................1,3 liter
motor oil ....................................................................................0,85 liter
gear oil.................................. 1 liter (10W - 40) - about details see page 35
17
GENERAL INFORMATION
DIMENSIONS
USA
1
FRONT SUSPENSION
“SACHS” hydraulic upside-down fork (Ø48 mm shafts)
spring ............................................................................................. K 4,8
oil type ................................................................... Motul Factory Line 5wt
oil quantity (from the top, without spring and with fork compressed) ... 110 mm
GENERAL INFORMATION
REAR SUSPENSION
Single shock absorber with compound lever
spring ............................................................................................. K
precharge (spring in its seat) ......................................................... 247
shock absorber stroke ................................................................... 135
rear wheel stroke ......................................................................... 290
5,2
mm
mm
mm
FRONT BRAKE
Ø 260 mm disc and dual-piston floating caliper
REAR BRAKE
Ø240 mm disc and single-piston floating caliper
ENGINE
Type ................................................. Single cylinder, 4-stroke, liquid-cooled
with countershaft and electric starting
Bore x stroke RR 400 ........................................................... 95 x 56,2 mm
Bore x stroke RR 450 ........................................................... 95 x 63,4 mm
Bore x stroke RR 520 ......................................................... 100 x 63,4 mm
Displacement (cm3) RR 400 ...........................................................398 cm3
Displacement (cm3) RR 450 ........................................................449,4 cm3
Displacement (cm3) RR 520 ........................................................497,9 cm3
Compression ratio RR 400 .............................................................. 12,4:1
Compression ratio RR 450 ............................................................ 11,95:1
Compression ratio RR 520 .............................................................. 12,0:1
Fuel system ............................................................................... carburetor
USA
18
Carburator type
RR 400
RR 450
RR 520
Keihin FCR-MX 39
Keihin FCR-MX 39
Keihin FCR-MX 39
Main jet
175
175
180
Idling jet
45
45
45
Starter jet
85
85
85
OBDTS
OBDVS
OBDVS
Needle
Needle position (from above)
Main air jet
Idling air jet
Mixture control screw
5°
4°
4°
200
200
200
100
100
100
1 + 1/2
1 + 1/2
1 + 1/2
(from fully closed)
Intake jet
50
40
40
Stop
NO
NO
NO
* - This change makes the vehicle not complying with the Highway Code. Use should be limited to private circuits and
routes closed to traffic.
Lubrication ............................................................................. 2 oil pumps
Cooling system ......................................... forced liquid circulation by pump
Spark plug .................................................................... NGK LKAR 8A - 9
Clutch .................................................................................. wet, multidisc
Transmission .................................................. 6-speed with front claw clutch
Version
RR 400
RR 450
RR 520
Primary drive
28/76
31/73
31/73
Gear ratio 1 gear
12/31
12/31
12/31
Gear ratio 2nd gear
15/28
15/28
15/28
Gear ratio 3rd gear
19/28
19/28
19/28
Gear ratio 4th gear
20/24
20/24
20/24
Gear ratio 5 gear
27/27
27/27
27/27
Gear ratio 6th gear
28/24
28/24
28/24
Final drive
15/48
15/48
15/48
st
th
1
GENERAL INFORMATION
Carburetor
Valve gear .................................................................................. 4 valves
Ignition ................................................................ DC-CDI without trembler,
with digital variable spark advance, Kokusan-type
Starting .............................................................electric starter and kickstart
19
USA
ELECTRICAL SYSTEM
ELECTRICAL DIAGRAM
GENERAL INFORMATION
1
USA
20
1
LEGEND ELECTRICAL DIAGRAM
FRONT RIGHT TURNING LIGHT WITH 12V 10W LAMP
FRONT STOP SWITCH
ENGINE STOP
STARTER SWITCH
KEY SWITCH
WHEEL RPM SENSOR
JOYSTICK
ENTER BUTTON
TRAILTECH GPS
MENU/POWER BUTTON
BACK BUTTON
TEMPERATURE SENSOR
4700 UF CAPACITOR
TURNING LIGHTS INDICATOR
HIGH BEAM INDICATOR
HORN BUTTON
BEAM SWITCH
TURNING LIGHTS SWITCH
FRONT CONTROL SWITCH UNIT
FRONT LEFT TURNING LIGHT WITH 12V -10W LAMP
12V RECTIFIER
FAN
THERMOSWITCH
INTERMITTENCE
REAR LEFT TURNING LIGHT WITH 12V 10W LAMP
REAR LED LIGHT
PLATE LIGHT
REAR RIGHT TURNING LIGHT WITH 12V 10W LAMP
REAR STOP SWITCH
FUSE 10A
STARTER
ENGINE START RELAY
12V - 4AH BATTERY
GENERATOR
TPS
ECU
COIL
IGNITION SENSOR
SPARK PLUG
FRAME GROUND
PARKING LIGHT WITH 12V 5W LAMP
HEADLIGHT WITH 12V - 60/55W LAMP
12 HORN
Key to colours
Bi = White
Ve = Green
Ma = Brown
Vi = Purple
Bl = Blue
Ne = Black
Gi = Yellow
Rs = Red
21
GENERAL INFORMATION
1)
2)
3)
4)
5)
6)
7)
8)
9)
10)
11)
12)
13)
14)
15)
16)
17)
18)
19)
20)
21)
22)
23)
24)
25)
26)
27)
28)
29)
30)
31)
32)
33)
34)
35)
36)
37)
38)
39)
40)
41)
42)
43)
Ar
Az
Ro
Gr
= Orange
= Sky-blue
= Pink
= Grey
USA
1
1
GENERAL INFORMATION
2
BATTERY
Battery 1 is located under the saddle and
requires no maintenance.
It is not necessary to check the level of the
electrolyte or top up with water.
Keep the battery terminals clean and,
if necessary, protect them with a small
quantity of vaseline technique.
Removing the battery
Remove the saddle and disconnect the
battery. Be sure to disconnect the negative
terminal first and then the positive terminal.
Release rubber band 2.
Remove the battery.
When fitting the battery, insert it with the
terminals at the front (see figure). Lastly connect the negative terminal to the battery.
WARNING
To avoid damaging rubber band 2, take
care not to pass it over the edge of the
battery.
WARNING
Extreme caution should be exercised if the electrolyte (sulphuric acid) should spill out
of the battery. The electrolyte can cause severe burns. In case of contact with the
skin, rinse generously with water.
Should the electrolyte come into contact with the eyes, rinse with water for at least
15 minutes and immediately seek medical assistance.
Although the battery is sealed, there is a possibility that explosive gases might leak out.
Keep sparks and open flames away from the battery.
Keep exhausted batteries out of the reach of children and dispose of them as prescribed by law.
Do not remove the protections.
When installing the battery, take care to observe the polarity of the connections.
INACTIVITY
If the vehicle is left unused for a long period, remove the battery and charge it with
a suitable charger every 15 days. Keep the battery in a dry place at a temperature
of 5-35°C and out of the reach of children.
USA
22
1
FUSE
Fuse 3 is located in starting relay 4 placed
under the saddle and front the battery.
To gain access to the fuse remove the
saddle.
The fuse protects the following devices:
•electric starter
•horn
•indicators
•instrument panel
4
3
The starting relay also contains spare fuse
5 (10 amperes).
Always replace a blown fuse with another
of the same type.
If the new fuse should also burn out when
fitted, immediately contact a specialized
BETAMOTOR workshop.
The fuse has a capacity of 10 amperes.
WARNING
Do not on any account fit a larger capacity
fuse or attempt to fix a broken fuse.
Unskilled operations could cause a breakdown of the entire electrical system.
23
GENERAL INFORMATION
5
USA
GENERAL INFORMATION
1
USA
RECOMMENDED LUBRICANTS AND LIQUID
To maximize the vehicle’s performance and ensure many years of trouble-free operation, we recommend using the following products:
Engine Oil:
850cc
Motul 7100 10w40
(For Racing use Motul 300V 10w40)
Transmission Oil
1000cc
Motul Transoil Expert 10w40
Brake Fluid
Motul RBF 600
Coolant/Antifreeze
Motul Motocool Expert
Fork Oil
Motul Factory Line 5 wt.
Air Filter Oil
Motul Air Filter Oil
Air Filter Cleaner
Motul Air Filter Clean
Grease
Motul Tech 300
Note:
It is essential that all renewals should be performed with the products listed in the
table above.
24
2
CHAPTER 2 OPERATION
OPERATION
CONTENTS
Checks to be performed before each ride ............................................... 26
Running-in ........................................................................................... 27
Engine start ......................................................................................... 28
Cold starting ................................................................................... 28
Hot starting ..................................................................................... 28
What to do if the engine is “flooded” ................................................ 28
Refuelling ............................................................................................ 29
Fuel tank cap ....................................................................................... 29
Fuel cock ............................................................................................ 29
25
USA
OPERATION
2
CHECKS TO BE PERFORMED BEFORE EACH RIDE
The vehicle can be used only if it is in perfect condition from a technical point of
view. To ensure maximum safety, it is advisable to carry out a general inspection of
the motorcycle before each ride. The checks to be performed are described below.
1 CHECK THE ENGINE OIL LEVEL
Insufficient oil levels lead to early wear and, in the long run, to engine damage.
2 FUEL
Check the level of the fuel in the tank, arrange the breather pipe so that it has no
kinks and fit the fuel tank cap.
3 DRIVE CHAIN
A slack chain can come out of the chainring and sprocket. An overtight chain
can break or damage the other components of the final drive. A dirty or poorly
lubricated chain can cause premature wear of the parts.
4 TYRES
Thoroughly check the tyre tread. If a tyre presents cuts or bulges, replace it. The
thickness of the tread must be as prescribed by law. Check the tyre pressure.
Wear and unsuitable pressure adversely affect road holding.
5 BRAKES
Check the operation of the brakes and the level of the brake fluid. If the brake
fluid level falls below the minimum, check the brake pads for wear and the braking system for possible leaks. If an oil leak is found, have the braking system
overhauled by a specialized BETAMOTOR workshop.
6 CABLE CONTROLS
Check the adjustment and the operation of all the cable controls.
7 COOLANT
Check the level of the coolant when the engine is cold.
8 ELECTRICAL SYSTEM
With the engine running, check the operation of the headlight, the rear and brake
lights, the indicators, the warning lights and the horn.
9 SPOKES
Check that the spokes are properly tightened.
10 NUTS AND BOLTS
Inspect all the nuts and bolts.
Note
Check the presence of the vehicle identification papers.
In cold weather, it is advisable to warm up the engine by letting it idle a few minutes
before starting it off. Each time the vehicle is used cross-country, it is necessary to
wash carefully, dry it and then lubricate.
USA
26
RUNNING-IN
The running-in period lasts approximately 15 hours, during which it is advisable to:
1 During the first 3 hours of operation the engine should only be used to approximately 50 percent of its power. In addition, the engine speed should not exceed
7,000 rpm.
2 For the next 12 hours of operation the engine should only be used to about 75
percent of its power.
3 Use the vehicle after properly warming up the engine.
4 Avoid travelling at constant speed (changing the speed causes the different components to bed in evenly and more quickly).
This procedure should be followed each time piston, piston rings, cylinder, crankshaft
or crankshaft bearings are replaced.
2
• Always use high-octane unleaded petrol.
• After using the vehicle on rough ground for the first time, carefully check the
tightening of all nuts and bolts.
27
OPERATION
WARNING
After the first 3 hours or 20 litres of petrol change the engine and gear oil.
USA
2
ENGINE START
COLD STARTING
1 Open fuel cock 1.
2 Take the vehicle off the stand.
3 Shift into neutral.
4 Operate choke 2 by pulling it until it
stops.
5 WITHOUT opening the throttle, firmly
and FULLY operate kickstart 3 or use the
electric starter.
6 After a few seconds push the choke 2
inwards in its initial position.
1
2
HOT STARTING
OPERATION
1
2
3
4
Open fuel cock 1.
Take the vehicle off the stand.
Shift into neutral.
WITHOUT opening the throttle, firmly
and FULLY operate kickstart 3 or use
the electric starter.
WHAT TO DO IF THE ENGINE IS
“FLOODED”
3
After a fall, the engine may receive more
fuel than is needed. Actuate the kickstart
3, 5-10 times or press the electric starter
button twice for 5 seconds. Subsequently
start the engine as described previously.
WARNING
The carburettor is equipped with an accelerating pump.
When starting the engine, do not open the
throttle fully more than once as the engine
might get flooded.
USA
28
REFUELLING
FUEL TANK CAP
2
1
2
Open: Turn tank cap 1 anticlockwise.
Close: Replace the tank cap and turn it
clockwise.
Arrange tank breather pipe 2 so that it
forms no kinks.
3
OFF Fuel cock 3 is closed.
ON Before using the vehicle, turn the knob
to ON. This allows the fuel to flow to
the carburettor. When the fuel cock
is in the ON position the fuel tank
empties until only the reserve fuel is
left.
RES The reserve fuel is used only if the
knob is in the RES position. Do not
forget to bring the knob back to the
ON position after refuelling.
The fuel tank capacity is shown on page 17.
Immediately wipe off any fuel spills from the bodywork and other parts of the vehicle.
Stop the engine before refuelling.
Petrol is highly flammable. Take care not to spill it from the tank while refuelling.
Keep open flames and lighted cigarettes away from the tank filler: danger of fire.
Avoid inhaling harmful vapours.
Fuel expands under the action of heat. It is therefore recommended not to fill the
tank to the brim.
29
OPERATION
FUEL COCK
USA
USA
30
CONTENTS
Oil circuit ............................................................................................ 32
Checking the engine oil level ............................................................ 32
Changing the engine oil and filters extraction ..................................... 33
Changing the gear and clutch oil ........................................................... 35
Brakes ................................................................................................ 36
Check the level of the front brake fluid ............................................... 36
Restoring the level of the front brake fluid ........................................... 36
Bleeding the front brake ................................................................... 36
Check the level of the rear brake fluid ................................................ 37
Restoring the level of the rear brake fluid ............................................ 37
Bleeding the rear brake .................................................................... 37
Front brake lining control .................................................................. 38
Rear brake lining control .................................................................. 38
Tyres................................................................................................... 39
Hydraulic clutch ................................................................................... 40
Check oil level ................................................................................ 40
Bleeding the hydraulic clutch............................................................. 40
Fork oil ............................................................................................... 41
Air Filter .............................................................................................. 44
Spark plug .......................................................................................... 45
Carburettor ......................................................................................... 47
Carburettor wear guidelines.............................................................. 47
Draining the carburettor float chamber ............................................... 47
Checking the float level (float height) ................................................. 48
Coolant .............................................................................................. 48
Chain ................................................................................................. 49
Drive chain maintenance .................................................................. 49
Drive chain wear ............................................................................. 49
Battery ................................................................................................ 50
Charging the battery........................................................................ 50
Cleaning the vehicle ............................................................................. 51
Scheduled maintenance vehicle ............................................................. 52
Prolonged inactivity .............................................................................. 54
After prolonged inactivity ................................................................. 54
31
3
CHECKS AND MAINTENANCE
CHAPTER 3 CHECKS AND MAINTENANCE
USA
CHECKS AND MAINTENANCE
3
OIL CIRCUIT
The pump 1 (high pressure) push oil to crank mechanism 4, to piston oil jet 5, to
stretcher 6, to head jet 7. The valve 2 control the pressure and the paper filter 3
scrubs the oil from subtle impurity.
When oil has lubricated the head and has pushed the chain stretcher, the oil goes in
generator room A. When oil has lubricated the crank mechanism and piston-cylinder
coupling, goes in the crank mechanism room B. Pump 1 sucks the oil from room B
across the wire netting filer 11 and the pump push the oil to room A.
The valve 10 controls the pressure between room A and room B.
CHECKING THE ENGINE OIL
LEVEL
A
The engine oil level can be checked when
the engine is cold or hot.
Place the vehicle in an upright position (not
on the side stand) on level ground.
When the engine is cold, the oil should
reach the lower edge of sight A.
When the engine is hot, the oil should
reach the upper edge of the sight.
Top up as necessary.
WARNING
The use of insufficient quantities of oil or
of oil of inferior quality results in premature
wear of the engine.
USA
32
3
CHANGING THE ENGINE OIL
AND FILTERS EXTRACTION
Before performing this operation, remove
the lower bumper A, after underscrewing
the three screws B as shown in the figure.
B
A
WARNING
When at operating temperature, the engine and the oil it contains are very hot.
Take special care to avoid burns.
Park the motorcycle on level ground,
remove screw C and let the oil drain in
a container.
Thoroughly clean the screw and wire
netting filter. After the oil has drained completely, clean the sealing surface, replace
screw C with the seal ring and wire netting
filter and tighten at 20 Nm.
In order to let the oil drain it’s necessary to
unscrew just the screw C.
Don’t disassemble for any reason screw
D which is part of the engine oil pressure
adjustment valve.
In case the screw D was removed or the
spring 42, ball 43, washer 41 were extracted reassemble all the parts following
the order showed in attached picture (applying to the screw D a torque of 20 Nm).
The working of the engine without one of
the mentioned elements would compromise the engine integrity since the engine
project conditions would not be respected
any more.
B
C
CHECKS AND MAINTENANCE
Whenever the oil is changed, is necessary
to change the paper filter and to clean the
wire netting filter.
The oil must be changed when the engine
is at operating temperature.
C
Pressure adjustment valve:
C - Oil drain plug
25 - O-ring 27x2
26 - O-ring 20x1,5
27 - Oil filter
D - Screw
41 - Washer
42 - Spring
43 - Ball
D
33
USA
3
To change the paper filter, remove the oil
tap form engine unscrewing the two screws
E. Using special seeger ring pliers, pull the
paper oil filter.
CHECKS AND MAINTENANCE
E
Mount the new paper filter, close the oil
tap to engine, tighten the screws at 6 Nm.
Remove screw fastener from left carter
and pour in 800 ml engine oil PANOLIN
OFF ROAD 4T RACE 10W/50. Start
the engine and let it idle for five minutes,
checking for oil leaks. Stop the engine
and after five minutes check the level oil
through window.
ATTENTION:
Used oil contains hazardous to the environment. For the replacement must be
prepared for disposal in compliance with
the law.
USA
34
3
CHANGING THE GEAR AND
CLUTCH OIL
Before performing this operation, remove
the lower bumper A after unscrewing the
three screws B as shown in the picture.
The oil must be changed when the engine
is at operating temperature.
B
Park the motorcycle on level ground,
remove the screw C and let oil drain in
a container.
Thoroughly clean the screw and sealing
surface, put in screw C with the seal ring
and tighten at 20 Nm.
Remove screw fastner from right carter and
pour in gear oil PANOLIN OFF ROAD 4T
SYNTH 10W/40. To check the oil level,
unscrew the check bolt D. The oil level must
arrive to the lower edge of check hole.
Under conditions with high engine temperatures and intense clutch use (deep
sand and mud) it is recommended to use
an increased clutch/gearbox oil quantity
of 1000 ml.
CHECKS AND MAINTENANCE
A
B
C
ATTENTION:
To check the gear oil level, it is necessary
to use the vehicle for five minutes.
D
Tighten the check bolt.
ATTENTION:
Used oil contains hazardous to the environment. For the replacement must be
prepared for disposal in compliance with
the law.
35
USA
3
BRAKES
CHECK THE LEVEL OF THE FRONT
BRAKE FLUID
Check the level of the brake fluid through
sight A. The level of the fluid should never
fall below the mark in the sight.
CHECKS AND MAINTENANCE
A
1
2
WARNING
We recommend using DOT 4 brake fluid.
Should this fluid be unavailable, use DOT
5.1 fluid instead. Do not on any account
use DOT 5 brake fluid. This is a purple fluid
with a base of silicone oil which requires
special seals and tubes.
WARNING
The brake fluid is extremely corrosive. Take
care not to spill it on the paintwork.
C
USA
RESTORING THE LEVEL OF THE
FRONT BRAKE FLUID
To restore the level of the brake fluid, loosen
the two screws 1, lift cap 2 and add brake
fluid until its level is 5 mm below the upper
rim of the reservoir.
B
BLEEDING THE FRONT BRAKE
To bleed air from the front brake circuit,
proceed as follows:
•Remove the rubber cap B from the valve C.
•Open the sump cap.
•Insert one end of a transparent tube into
a container.
•Pump with the brake lever 2/3 times and
keep the lever pressed.
•Unscrew the valve and let the oil drain.
•If are still visible in the tube repeat above
operation until obtaining a continuous
outflow of oil within no air bubbles.
•Close the valve and release the lever.
NOTE:
during this procedure, continuously top up
the brake pump thank to replace the oil that
is out flowing.
•Remove the tube.
•Replace the rubber cap.
36
3
CHECK THE LEVEL OF THE REAR
BRAKE FLUID
Check the level of the brake fluid through
sight D. The level of the fluid should never
fall below the mark in the sight.
3
D
WARNING
We recommend using DOT 4 brake fluid.
Should this fluid be unavailable, use DOT
5.1 fluid instead. Do not on any account
use DOT 5 brake fluid. This is a purple fluid
with a base of silicone oil which requires
special seals and tubes.
WARNING
The brake fluid is extremely corrosive. Take
care not to spill it on the paintwork.
BLEEDING THE REAR BRAKE
To bleed air from the rear brake circuit,
proceed as follows:
• Remove the rubber cap E from the valve F.
•Open the sump cap.
•Insert one end of a transparent tube into
a container.
•Pump with the brake lever 2/3 times and
keep the lever pressed.
•Unscrew the valve and let the oil drain.
•If are still visible in the tube repeat above
operation until obtaining a continuous
outflow of oil within no air bubbles.
•Close the valve and release the lever.
NOTE:
during this procedure, continuously top uo
the brake pump thank to replace the oil that
is out flowing.
•Remove the tube.
•Replace the rubber cap.
37
F
E
CHECKS AND MAINTENANCE
RESTORING THE LEVEL OF THE
REAR BRAKE FLUID
To restore the level of the brake fluid, unscrew cap 3 and pour in brake fluid until
the level reaches the mark in sight D.
USA
3
FRONT BRAKE LINING CONTROL
In order to verify the wear condition of front
brake is enough to view the pincer from the
bottom, where is possible to glimpse the
brake lining tails which will have to show
a brake of 2 mm in thickness. If the stratum
is lesser let’s start replacing them.
CHECKS AND MAINTENANCE
Note
Perform the check according to the times
shown in the table on page 52.
2
REAR BRAKE LINING CONTROL
In order to verify the wear condition of rear
brake is enough to view the pincer from the
back side, where is possible to glimpse the
brake lining tails which will have to show
a brake of 2 mm in thickness. If the stratum
is lesser let’s start replacing them.
Note
Perform the check according to the times
shown in the table on page 52.
2
USA
WARNING
Failure to promptly replace the brake pads
can result in a considerable reduction of
the braking action and in damage to the
brake disc.
WARNING
Failure to promptly replace the brake pads
can result in a considerable reduction of
the braking action and in damage to the
brake disc.
38
Only fit tyres approved by BETAMOTOR.
Unsuitable tyres can adversely affect the
road holding of the vehicle.
• To protect your safety, immediately replace any damaged tyres.
• Slick tyres adversely affect the road
holding of the vehicle, especially on wet
roads and in off-road riding.
• Insufficient pressure results in abnormal
wear and overheating of the tyres.
• The front and rear tyres must have the
same tread design.
• Always measure the inflating pressures
when the tyres are cold.
• Keep the tyre pressures within the prescribed range.
39
3
CHECKS AND MAINTENANCE
TYRES
USA
3
1
CHECKS AND MAINTENANCE
2
HYDRAULIC CLUTCH
CHECK OIL LEVEL
To check the oil level in the clutch pump,
first remove cover 2.
Remove the two screws 1 and take off
cover 2 together with the rubber bellows.
With the clutch pump in a horizontal position, the level of the oil should be 5 mm
below the upper rim.
If necessary top up with (DOT 5.1) hydraulic oil, which is available from your
BETAMOTOR dealer.
Use the liquid indicated on page 24 in
the “Recommended lubricants and liquids”
table.
3
BLEEDING THE HYDRAULIC
CLUTCH
To bleed air from the rear clutch pump,
proceed as follows:
•Open the sump cap.
•Insert one end of a transparent tube into
a container.
•Pump with the clutch lever 2/3 times and
keep the lever pressed.
•Unscrew the valve and let the oil drain.
•If are still visible in the tube repeat above
operation until obtaining a continuous
outflow of oil within no air bubbles.
•Close the valve and release the lever.
NOTE:
The pump is suitable for bleeding in depression. During this procedure, continuously
top up the clutch pump thank to replace
the oil that is out flowing.
•Remove the tube.
USA
40
3
FORK OIL
Right/left-hand rod
The procedure for changing the oil in
the forks is provided only for information.
We recommend having the operation
performed by a BETAMOTOR authorized
workshop.
A
• Remove the cable gland U-bolt A
• Remove the screws B that fix the brake
caliper to the left leg and remove the
brake caliper.
D
• Remove cap C, loosen the screws D,
slide the wheel pin out and remove the
front wheel.
• Loosen the screws E and F that block the
legs of the of the fork to the plate and
slide the fork legs out.
B
C
• Place the legs vertically with cap 1 facing
upwards. Loosen the upper cap 1.
E
CHECKS AND MAINTENANCE
• Rest the motor on a central stand, lift it
making sure that it is stable.
1
F
41
USA
3
• Loosen the counter-nut 2 and remove cap 1.
1
CHECKS AND MAINTENANCE
2
• Extract the spring 3 and overturn the pipe,
making the oil escape.
3
• Move the pumping unit and drain the
remaining oil. When the oil has been
drained completely, introduce the amount
of new oil described in chapter 1.
1
• Bleed the pumping unit of air, making it
rise and fall until complete loading.
Introduce the spring and screw the cap 1
until it is completely inserted on the pumping rod. Block the cap to the pumping
rod via the counter-nut 2.
2
USA
42
3
• Insert the legs into the plates. Once the
leg has been positioned at the desired
extension, tighten screws E at 17Nm and
F at 12Nm, after the screws have been
greased.
CHECKS AND MAINTENANCE
• Tighten the cap to the completely extended leg.
E
17Nm
12Nm
F
• Apply the wheel complete with spacers,
pin and cap C, which will be tightened to
50Nm. Tighten the screws D to 10Nm.
Apply the brake caliper and apply threadlock of average intensity onto screws B.
Tighten to 35Nm.
Apply the cable gland U-bolt and tighten
the screws A to 1.5 Nm.
1,5Nm
10Nm
A
D
C
50Nm
35Nm
B
43
USA
3
AIR FILTER
CHECKS AND MAINTENANCE
A dirty air filter hinders the passage of air,
reduces engine power and increases fuel
consumption. For these reasons it is essential to clean the air filter on a regular basis.
1
Follow these steps to gain access to the
air filter.
•Pull the cover air filter.
•Release filter fastener 1.
•Soundproof shell removal
•Pull out air filter 2.
•Carefully wash the filter with soap (or
special detergent) and water.
•Dry the filter.
•Wet the filter with filter oil and then
remove the excess oil to prevent it from
dripping.
WARNING
To avoid corroding the filter, do not clean
it in foam containing petrol or petroleum.
Never use the vehicle if the air filter is not
in place. The infiltration of dust and dirt can
cause damage and considerable wear.
2
2
•If necessary clean the inside of the filter
box.
•Replace the filter taking special care to
ensure the seal of the rubber gasket.
•Attach filter fastener 1.
WARNING:
After each operation check that no object
is left in the filter box.
Clean the filter every time the vehicle is
used over rough ground.
1
USA
44
SPARK PLUG
A
To accede to spark plug, is necessary to
take off saddle and the fuel tank.
To remove the fuel tank proceed as follows.
Unscrew the two screws A, unscrew the
screw B (both side). Close the fuel tap (OFF
position) and disconnect the pipe fuel C
from the fuel tap.
Keeping the spark plug in good condition makes for reduced consumption and
optimum engine performance.
It is advisable to remove the spark plug
when the engine is hot (and naturally off)
because the carbon formation and the
colour of the insulator provide important
information on carburetion, lubrication,
and the general condition of the engine.
Note
Black spark plug = mixture is rich
Light brown spark plug = mixture is correct
White spark plug = mixture is lean
This operation must be performed with the
utmost care to avoid severe hand burns.
Always wear protective gloves.
To carry out the check, simply remove the
current cap and then unscrew the spark
plug using the spanner provided.
Carefully clean the electrodes using a
wire brush. Blow the spark plug with compressed air to prevent any residues from
getting into the engine.
45
C
CHECKS AND MAINTENANCE
B
Lift the fuel tank.
3
USA
3
Measure the spark gap with a thickness
gauge. The gap should be 0.8÷0.9 mm.
If the gap is not as specified, restore the
proper gap by bending the earth electrode.
CHECKS AND MAINTENANCE
Check that the insulator is not cracked
and that the electrodes are not corroded,
in which case the spark plug should be
immediately replaced.
USA
Conduct the check by referring to the table
on page 52.
Lubricate the spark plug thread, and then
(when the engine is cold) screw in the spark
plug by hand to its abutting end. Finally
tighten the spark plug with the spanner.
Note:
- Always use NGK LKAR 8A-9 spark plugs.
46
3
CARBURETTOR
CARBURETTOR WEAR GUIDELINES
DRAINING THE CARBURETTOR
FLOAT CHAMBER
The carburettor float chamber can be
drained by following the procedure described below while the engine is cold.
Close the fuel cock and place tube 4 in a
container to gather the fuel that flows out.
Open drain screw 5 and drain the fuel.
Close the drain screw, open the fuel cock
and check the seal of the system.
5
4
WARNING
Fuel is flammable and toxic and must be handled with great care. Never work on
the fuel system near heat sources or open flames. Always allow the engine to cool
down before working on the fuel system. Wipe off any excess fuel with a rag. Materials soaked in fuel are also flammable. In case of ingestion or contact with sensitive
parts of the body immediately seek medical attention. Fuel is to be disposed of as
prescribed by law.
47
CHECKS AND MAINTENANCE
The throttle valve, the needle valve and the needle jet are subject to heavy wear
due to engine vibrations.
This can result in carburettor malfunctions (e.g. mixture enrichment).
USA
CHECKS AND MAINTENANCE
3
CHECKING THE FLOAT LEVEL
(FLOAT HEIGHT)
3
Remove the carburettor and the float
chamber. Tilt the carburettor so that the
float touches the float needle valve without
pressing it too hard.
In this position the float edge should be
parallel with the float chamber sealing
surface (see figure).
If the float height does not correspond to
the nominal value, check the float needle
valve and if necessary replace it.
If the needle valve is in working order,
adjust the float height by bending float
lever 3.
Fit the float chamber, install the carburettor
and adjust the idle speed.
COOLANT
A
The level of the coolant must be checked
when the engine is cold. Use the following
procedure:
•Unscrew cap A and visually check the
level of the liquid. When the engine is
cold, the radiator fins should be immersed
in the liquid for about 10 mm.
•Top up if the coolant does not cover the
radiator fins (see table on page 24).
The capacity of the circuit is shown in the
table on page 17.
WARNING
To avoid scalds, never unscrew the radiator
filler cap when the engine is hot.
WARNING
Check the liquid level after every use.
USA
48
3
CHAIN
DRIVE CHAIN MAINTENANCE
Take special care in preventing the lubricant from coming into contact with the rear
tyre or brake disc, otherwise the tyre grip and the action of the brake would be
greatly reduced, making it very difficult to control the vehicle.
DRIVE CHAIN WEAR
To check the wear of the drive chain use
the procedure described below.
Shift into neutral, pull up the upper stretch
of the chain with a force of 10 - 15 kg (see
figure). Measure the length of 18 links on
the lower stretch of the chain. If the length
is ≥ 272 mm, replace the chain. Chains
do not always wear evenly. For this reason
it is important that the measurement is taken
at different points along the chain.
10 -15 Kg
18 steps
OK < 272
CHECKS AND MAINTENANCE
The life of the drive chain largely depends on its maintenance. Chains without Xrings must be periodically cleaned in petroleum and then immersed in hot chain oil
or treated with a chain spray.
X-ring chains require very little maintenance. The best way to clean them is rinsing them
generously with water. Never use brushes or solvents to clean an X-ring chain. Once
the chain has dried, you can use a chain spray specially designed for X-ring chains.
When fitting a new chain, be sure to replace the chainring and sprocket as well.
New chains wear more quickly if fitted on
old and worn sprockets. After replacing
the chain, adjust its tension as described
on page 60.
49
USA
CHECKS AND MAINTENANCE
3
USA
BATTERY
CHARGING THE BATTERY
Remove the battery and check its charge.
Using an open-circuit multimeter (10-12
hours after the activation), check that the
voltage is greater than 12.6 V. If it is lower,
it is advisable to recharge the battery.
Based on the type of charger available,
charge the battery using either of the following procedures:
• Constant voltage (14.4-15 V) - Charge
the battery for about 12 hours. Check
the voltage 10-12 hours after the end of
recharge as described above.
• Constant current: Charge battery at
0.5-0.8 A until the voltage between the
terminals stabilizes at ~14.5 V.
WARNING
The battery is sealed. When recharging it,
do not remove the seal nor add any liquid.
WARNING
When recharging, first connect the battery
to the battery charger and then turn on the
charger.
If the battery is charged in a closed room,
take care to ensure proper ventilation as
during the charge the battery produces
explosive gases.
50
CLEANING THE VEHICLE
WARNING: Do not clean your vehicle with a high-pressure device with a strong jet
of water. Excessive pressure can reach electrical components, connectors, flexible
cables, bearings, etc and can damage or destroy them.
3
When cleaning, avoid direct exposure to sunlight.
Close off the exhaust system to prevent water from entering.
Use water jet to soften the dirt and mud accumulated on the paintwork, then remove
them with a soft bodywork sponge soaked in water and shampoo. Subsequently
rinse well with water, and dry with air and cloth or suede leather.
Proceed to the emptying of the filter box using the appropriate ventilation and drying.
Detergents pollute water. Always wash the vehicle in areas equipped for collection
and purification of the washing liquids.
After cleaning, ride a short distance until the engine reaches operating temperature.
WARNING: braking effect is reduced with wet brakes. Operate the brakes cautiously to allow them to dry.
Push back the handlebar control covers, so that water can evaporate.
When the bike is completely dry and cooled down, lubricate all moving parts.
Treat all plastic and painted components with non-aggressive detergents or products
that are specific for the care of the motorcycle.
To prevent malfunction of the electrical system, treat electric contacts and switches
with electrical contact spray.
51
CHECKS AND MAINTENANCE
WARNING: Wash motorbikes frequently that are used near the sea (salty air) and
on roads subject to salt spreading in winter. Cover with a film of oil or silicone spray
unpainted parts and the most exposed parts such as wheels, forks and swingarm.
Do not treat rubber parts and brakes.
USA
Coupon 2 - 60 hours
Coupon 3 - 90 hours
Coupon 4 - 120 hours
Coupon 5 - 150 hours
Coupon 6 - 180 hours
CHECKS AND MAINTENANCE
Engine
Coupon 1 - 30 hours
SCHEDULED MAINTENANCE VEHICLE
End of running-in - 3 hours
3
Engine oil
S
S
S
S
S
S
S
Paper filter oil
S
S
S
S
S
S
S
Wire netting filter oil
P
P
P
P
P
P
P
Gear and clutch oil
S
S
S
S
S
S
S
Engine clamping screws
C
C
C
C
C
C
C
Kick start and gearchange lever screws
C
C
C
C
C
C
C
Spark plug cap
P
P
P
P
P
P
Spark plug
C
Breather pipe
C
S
C
C
S
C
C
P
S
C
C
Countershaft bearings
S
S
Crankshaft bearings
S
S
Connecting rod
S
S
Piston and segments
S
S
Cylinder
C
C
Cylinder head bolt torque
C
Surface appearance of the cams
C
Valve clearance
C
C
C
C
C
C
C
C
Valves
C
C
Valve guide wear
C
C
Valve spring
C
Clutch disc wear
C
C
Clutch springs
C
Clutch hub - basket wear
C
S
S
C
C
S
C
S
C
C
S
C
C
C
C
C
Gearbox bearing (crankcase side)
S
S
Surface appearance of the gearbox
C
C
Water pump seals
S
S
Oil pump control gears
S
S
Key
C
S
R
P
T
Check (Clean, adjust, lubricate, replace as necessary)
Replace/renew
Adjust
Clean
Tighten
The required engine maintenance is strongly depending on the level of use and on the accordingly done
periodic checks and service.
The below mentioned maintenance intervals are for standard competition use, subject to the condition that
the engine was never running under extraordinary conditions and the periodic service was done accurately.
USA
52
Coupon 1 - 30 hours
Coupon 2 - 60 hours
Coupon 3 - 90 hours
Coupon 4 - 120 hours
Coupon 5 - 150 hours
Coupon 6 - 180 hours
C
C
C
C
C
C
C
C
C
C
C
C
C
Fuel pipe
C
C
C
C
C
C
C
Breather pipe
C
C
C
C
C
C
C
C
C
C
C
C
C
C
C
C
C
C
C
C
C
Drives sliding and regulation
C
C
C
C
C
C
C
Liquid level clutch pump
C
C
C
C
C
C
C
Airbox and air filter
P
P
P
P
P
P
P
Chain, plate wheel and pinion
C
C
C
C
C
C
C
Assembling Coolant system tightness and coolant level
groups
Exhaust manifold tightness
Cycling
Wheels
Liquid level, pads thickness
C
C
C
C
C
C
C
Disc thickness
C
C
C
C
C
C
C
Pipe tightness
C
C
C
C
C
C
C
Idle travel levers and drives sliding
C
C
C
C
C
C
C
Shock absorber and telescopic fork tightness
C
C
C
C
C
C
C
Dust seal
P
P
P
P
P
P
P
Bearings of stearing
C
C
C
C
C
C
C
Bolts
T
T
T
T
T
T
T
Wheel spokes and rim coaxiality
C
C
C
C
C
C
C
Tyres (wear and pressure)
C
C
C
C
C
C
C
Bearings clearance
C
C
C
C
C
C
C
Key
C
S
R
P
T
Check (Clean, adjust, lubricate, replace as necessary)
Replace/renew
Adjust
Clean
Tighten
CHECKS AND MAINTENANCE
End of running-in - 3 hours
C
Idling setting
Carburetor Tightness
Brake
3
WARNING:
For any service requirements, please contact Betamotor’s Authorized Service Network.
53
USA
CHECKS AND MAINTENANCE
3
PROLONGED INACTIVITY
A few simple operations should be performed to keep the vehicle in good condition
whenever it is to remain inactive for a long period (e.g. during the winter):
• Thoroughly clean the vehicle.
• Reduce the tyre pressures by approximately 30 percent, and if possible raise the
tyres off the ground.
• Remove the spark plug and pour a few drops of engine oil into the spark plug hole.
Make the engine turn a few times by operating the kick-start (where available) and
then replace the spark plug.
• Cover the unpainted parts, excepting the brakes and the rubber parts, with a film
of oil or spray silicone.
• Remove the battery and keep it in a dry place. Charge the battery every 15 days.
A
• Protect the vehicle with a dust cover.
• Drain the carburetor float chamber by
loosening screw A. The fuel drained from
the chamber through a suitable pipe must
be collected in a container and poured
into the fuel tank. Do not dispose of the
fuel in the environment.
• Retighten the screw.
AFTER PROLONGED INACTIVITY
• Reinstall the battery.
• Restore the tyre inflating pressures.
• Check the tightening of all the screws having an important mechanical function.
Note:
Periodically check the tightening of the screws.
• Start the vehicle for the first time by means of the kick-start.
USA
54
CONTENTS
Adjusting the home position of the front brake lever.................................. 56
Adjusting the home position of the brake pedal ....................................... 56
Adjusting the home position of the clutch lever ......................................... 56
Adjusting the handlebars ...................................................................... 56
Gas control adjustment ......................................................................... 57
Checking and adjusting the steering play ................................................ 57
Adjusting fork ...................................................................................... 58
Adjusting the rebound damper .......................................................... 58
Adjusting the compression damper .................................................... 58
Shock absorber.................................................................................... 59
Adjusting the hydraulic compression damper (high and low speeds) ...... 59
Adjusting the spring preload ............................................................. 59
Adjusting the hydraulic rebound damper ............................................ 60
Tensioning the chain ............................................................................. 60
Adjusting the idle speed........................................................................ 61
55
ADJUSTMENTS
4
CHAPTER 4 ADJUSTMENTS
USA
4
ADJUSTING THE HOME
POSITION OF THE FRONT
BRAKE LEVER
The home position of brake lever 2 can be
adjusted by means of screw 1.
1
2
ADJUSTING THE HOME
POSITION OF THE BRAKE
PEDAL
ADJUSTMENTS
3
The home position of brake pedal 3 can
be altered by turning adjusting screw 5 after loosening the counternut located under
dust cap 4. Loosen the counternut and turn
the adjusting screw until the desired height
is obtained. Retighten the counternut after
completing the operation.
4
5
ADJUSTING THE HOME
POSITION OF THE CLUTCH
LEVER
7
The adjustment screw 6 allows adjustment
of the distance of lever 7 from the knob.
The empty run is recovered automatically.
6
1
ADJUSTING THE
HANDLEBARS
2
3
2
4
3
The lower bracket 1 can be mounted on
the holes nr. 2, 3 or 4 respectively, while
the handlebar can be rotated by 180° in
order to meet the driver’s specific driving
needs.
4
USA
56
10
11
12
The throttle control cable should always
have a 3-5 mm play. In addition, the idle
speed should not change when the handlebars are fully rotated to the left or right. Push
back protective cap 10. Loosen counternut
11 and turn adjusting screw 12. Turning
the screw anticlockwise decreases the idle
travel; turning it clockwise increases it.
Tighten the counternut and check that the
throttle twist grip turns smoothly.
CHECKING AND ADJUSTING
THE STEERING PLAY
Periodically check the play of the steering
head tube by moving the forks backwards
and forwards as shown in the figure. If
any play is felt, carry out the adjustment
by following these steps:
• Loosen the four screws 13 and screw
14.
• Recover the play by intervening on screw
15.
• Tighten the screws 13 to 17Nm.
• Tighten the screw 14 to 20 Nm.
15
14
4
ADJUSTMENTS
GAS CONTROL ADJUSTMENT
NOTE:
Proper adjustment must leave no play and
cause no stiffness, and allow the steering to
rotate smoothly. Check the fitting direction
of the clevises as it can alter the geometry
of the handlebar.
13
57
USA
4
ADJUSTING FORK
A
ADJUSTING THE REBOUND
DAMPER
The hydraulic rebound damper determines
the behaviour of the telescopic fork during
extension and can be adjusted by means
of screw A. Turning the screw clockwise
(towards the + sign) increases the action
of the rebound damper; turning it anticlockwise (towards the – sign) decreases the
action of the rebound damper.
ADJUSTMENTS
Standard adjustment:
12 clicks from the completely closed position
ADJUSTING THE COMPRESSION
DAMPER
The hydraulic compression damper determines the behaviour of the telescopic fork
during compression and can be adjusted
by means of screw B located at the lower
end of the fork legs. Turning the screw
clockwise increases the action of the compression damper; turning it anticlockwise
decreases the action of the compression
damper.
Standard adjustment:
12 clicks from the completely closed
position
USA
58
B
ADJUSTING THE HYDRAULIC
COMPRESSION DAMPER (HIGH
AND LOW SPEEDS)
The shock absorber can be adjusted for
both high and low speeds. The terms ‘high’
and ‘low’ refer to the compression speed of
the shock absorber, not to the speed of the
vehicle. The low-speed adjustment affects
the behaviour of the shock absorber during
low-speed compression; conversely the
high-speed adjustment affects its behaviour
during high-speed compression.
C
Low-speed adjustment
• Using a screwdriver, loosen screw C
by turning it clockwise to increase the
hydraulic compression damper.
Standard adjustment:
22 clicks from fully closed
High-speed adjustment:
• Turn knob D anticlockwise to decrease
the hydraulic compression damper.
Standard adjustment:
22 clicks from fully closed
D
WARNING
Starting from the standard position, turn
the knob anticlockwise (with a closing action), the center screw will have an integral
movement, then will rotate with the knob.
4
ADJUSTMENTS
SHOCK ABSORBER
ADJUSTING THE SPRING PRELOAD
E
F
To adjust the spring preload, use the procedure described below. Loosen counter-ring
E, Rotate ring F clockwise to increase
the spring preload (and consequently the
shock absorber preload) or anticlockwise
to decrease it. After obtaining the desired
preload, turn counter-ring E until it stops
against adjusting ring F.
59
USA
4
ADJUSTING THE HYDRAULIC
REBOUND DAMPER
Turn screw G to adjust the hydraulic rebound damper.
Turning the screw anticlockwise (out) decreases the damping effect.
G
Standard adjustment:
18 clicks from the completely closed position
ADJUSTMENTS
TENSIONING THE CHAIN
To ensure the drive chain a longer life, it is
advisable to periodically check its tension.
Always maintain the chain clean and
lubricated.
If the chain play exceeds 30÷35 mm,
tension the chain by following these steps.
30÷35 mm
•Loosen wheel spindle nut 1.
•Loosen counternuts A on either side of
the fork
A
•Turn adjusting screws B on either side until
the desired chain tension is obtained.
•Tighten counternuts A on either side of
the fork
B
•Tighten nut 1.
A
1
USA
60
B
1
Engine starting is strongly affected by the
idle speed adjustment. In other words, an
engine whose slow running is properly
adjusted is easier to start than an engine
with an unsuitably tuned up engine.
The idle speed is adjusted by means of
adjusting knob 1 and mixture adjusting
screw 2. The adjusting knob regulates
the base position of the throttle valve. By
turning the knob clockwise increases the
rotation speed and counter-clockwise to
lower it. The mixture control screw adjusts
the amount of the mixed fuel with air for
the idle speed. Rotating the screw clockwise decreases the quantity of fuel (lean
mixture); rotating in anticlockwise increases
the quantity of fuel (rich mixture).
2
To properly adjust the idle speed, follow these steps:
• Turn in mixture adjusting screw 2 until it stops, then turn it until you obtain the basic
adjustment recommended by BETAMOTOR (see engine specifications on page
23).
4
ADJUSTMENTS
ADJUSTING THE IDLE SPEED
• Warm up the engine.
•Turn adjusting knob 1 to obtain the standard idle speed (1500-1600 rpm).
• Slowly turn mixture adjusting screw 2 clockwise until the idle speed begins to lower.
Remember this position, then slowly turn the mixture adjusting screw anticlockwise
until the engine speed lowers again. Determine the point between the two positions
where the highest idle speed is obtained. Should the engine speed increase considerably, decrease the engine speed to the standard level and repeat the above
procedure. If you make a markedly sporting use of your vehicle, which increases
the heating of the engine, choose a leaner mixture by turning the adjusting screw
approximately 1/4 of a turn clockwise from the ideal setting.
Refer to the specifications carburetor or refer website www.betamotor.com.
61
USA
4
NOTE
Failure to successfully complete the above procedure can be the result of an improperly sized idling jet.
a) If the mixture adjusting screw is turned until it stops and no changes in the idle
speed are observed, a smaller idling jet is required.
b) If the engine stalls when the adjusting screw is still two turns open, a larger idling
jet is needed.
Naturally, after replacing the jet the adjusting procedure will have to be restarted
from the beginning.
•Turn the adjusting knob until you obtain the desired idle speed.
ADJUSTMENTS
•The idle speed will have to be adjusted again in case of marked changes in the
outside temperature and riding altitude.
USA
62
CHAPTER 5 REPLACEMENTS
REPLACEMENTS
CONTENTS
Replacing the brake pads ..................................................................... 64
Front .............................................................................................. 64
Rear............................................................................................... 65
Replacing the headlight bulbs ................................................................ 66
Tail light .............................................................................................. 66
5
63
USA
5
REPLACING THE BRAKE
PADS
The procedure for replacing the brake
pads is provided only for information.
We recommend having the operation
performed by a BETAMOTOR authorized
workshop.
REPLACEMENTS
A
USA
B
FRONT
Follow these steps to replace the pads:
•Push the brake caliper towards the disc
so that the pistons reach their home
positions.
•Unscrew dowel A.
•Pull out pin B, while supporting the two
pads as shown in the figure.
•Remove the brake pads taking care not
to drop the leaf spring located under
the pads.
•To reassemble, follow the reverse procedure. When fitting the pads, ensure that
the leaf spring is properly in place.
WARNING
The brake disc must always be kept free
from oil and grease. An oily or greasy disc
strongly reduces the braking action.
After work has been carried out on the
braking system, pull the brake lever to bring
the pads into contact with the disc. This
will allow the correct pressure point to be
restored, thus ensuring proper operation
of the braking system.
64
5
REAR
Follow these steps to replace the pads:
WARNING
The brake disc must always be kept free
from oil and grease. An oily or greasy disc
strongly reduces the braking action.
After work has been carried out on the
braking system, pull the brake lever to
bring the pads into contact with the disc.
This will allow the correct pressure point to
be restored, thus ensuring proper operation
of the braking system.
65
A
B
REPLACEMENTS
•Push the brake caliper towards the disc
so that the pistons reach their home
positions.
•Unscrew dowel A.
•Pull out pin B, while supporting the two
pads as shown in the figure.
•Remove the brake pads taking care not
to drop the leaf spring located above
the two pads.
•To reassemble, follow the reverse procedure. When fitting the pads, ensure that
the leaf spring is properly in place.
USA
5
2
REPLACING THE
HEADLIGHT BULBS
Release both spring washers and move
forward the lamp holder front cowl.
1
3
Carefully remove the headlight bulb 1
together with lamp holder. To replace the
high beam / low beam, lift the rubber
cover 2, release connector, push on the
spring 3 and remove the lamp holder and
replace the light bulb with a new one. Be
careful not to touch the bulb so as not to
compromise its efficiency.
REPLACEMENTS
To refit, follow the procedure above but in
reverse order.
Fasten the lamp holder front cowl to the
supporting pins and fix it with the two
elastics.
TAIL LIGHT
Keep the headlight glass clean at all times
(see page 51).
The LED tail light is sealed. In the case of
burnout of one or more LEDs it is necessary
to replace the entire group.
To replace, contact authorised Betamotor
customer service.
USA
66
CHAPTER 6 TROUBLESHOOTING
TROUBLESHOOTING
INDICE ARGOMENTI
Troubleshooting ................................................................................... 68
Alphabetical index ............................................................................... 69
6
67
USA
6
TROUBLESHOOTING
PROBLEM
TROUBLESHOOTING
Engine does not start
Engine misfires
Engine knocks
Engine overheats and
loses power
Front braking poor
Rear braking poor
USA
CAUSE
REMEDY
- Fuel system clogged (fuel lines, fuel Clean the system.
tank, fuel cock).
- Air filter dirty.
Proceed as described on page 44
- No current supplied to spark plug.
Clean or replace the spark plug.
If the problem persists, contact a BETAMOTOR dealer.
- Engine flooded.
Operate the start-up pedal 5-10 times or
the electrical starter pushbutton 2 times
every 5 seconds. If the vehicle does not
start, remove and dry the spark plug.
- Spark gap wrongly adjusted.
Restore the spark gap.
- Spark plug dirty.
Clean or replace the spark plug.
- Spark advance excessive.
Check CDI: contact a BETAMOTOR
dealer.
- Carbon formation in cylinder
or on spark plug.
Contact a BETAMOTOR dealer.
- Silencer partly clogged.
Contact a BETAMOTOR dealer.
- Exhaust port clogged.
Contact a BETAMOTOR dealer.
- Ignition delayed.
Check CDI: contact a BETAMOTOR
dealer
- Brake pads worn.
Follow the procedure described on page 64
- Air or humidity in the hydraulic
circuit.
Follow the procedure described on page
- Brake pads worn.
Follow the procedure described on page 65
- Air or humidity in the hydraulic
circuit.
Follow the procedure described on page 37
68
36
ALPHABETICAL INDEX
Adjusting fork ...................................................................................... 58
Adjusting the handlebars ...................................................................... 56
Adjusting the home position of the brake pedal ....................................... 56
Adjusting the home position of the clutch lever ......................................... 56
Adjusting the home position of the front brake lever.................................. 56
Adjusting the idle speed........................................................................ 61
Air Filter .............................................................................................. 44
Carburettor ......................................................................................... 47
Chain ................................................................................................. 49
Changing the gear and clutch oil ........................................................... 35
Checking and adjusting the steering play ................................................ 57
Checks to be performed before each ride ............................................... 26
Cleaning the vehicle ............................................................................. 51
Coolant .............................................................................................. 48
Ecologic guide ....................................................................................... 5
Electrical system ................................................................................... 20
Engine start ......................................................................................... 28
INDEX
Battery ................................................................................................ 50
Brakes ................................................................................................ 36
Familiarizing with the vehicle................................................................. 12
Fork oil ............................................................................................... 41
Fuel cock ............................................................................................ 29
Fuel tank cap ....................................................................................... 29
Gas control adjustment ......................................................................... 57
Hydraulic clutch ................................................................................... 40
Moto-GPS “Voyager” (Trail Tech) ............................................................ 16
Oil circuit ............................................................................................ 32
Operating instructions............................................................................. 5
Prolonged inactivity .............................................................................. 54
69
USA
Recommended lubricants and liquid ....................................................... 24
Refuelling ............................................................................................ 29
Replacing the brake pads ..................................................................... 64
Replacing the headlight bulbs ................................................................ 66
Riding safety ......................................................................................... 6
Running-in ........................................................................................... 27
INDEX
Scheduled maintenance vehicle ............................................................. 52
Shock absorber.................................................................................... 59
Spark plug .......................................................................................... 45
Specifications ...................................................................................... 17
Steering lock ....................................................................................... 11
USA
Tail light .............................................................................................. 66
Tensioning the chain ............................................................................. 60
Tools kit .............................................................................................. 10
Troubleshooting ................................................................................... 68
Tyres................................................................................................... 39
Vehicle identification data ....................................................................... 8
70