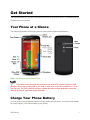
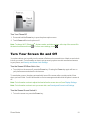
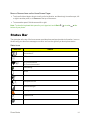
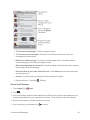
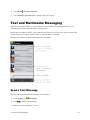
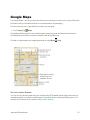
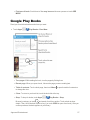
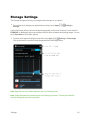
1
 Available applications and services are subject to change at any time.
Table of Contents
Get Started
1
Your Phone at a Glance
1
Charge Your Phone Battery
1
Activation and Service
2
Register Your Phone on Sprint Prepaid
2
Activate Your Phone
3
Manage Your Account
3
Sprint Prepaid Payment Options
4
Complete the Setup Screens
4
Set Up Voicemail
6
Retrieve Data from Your Old Phone
6
Phone Basics
8
Your Phone’s Layout
8
Turn Your Phone On and Off
9
Turn Your Screen On and Off
10
Adjust the Sound Volume
11
Find Your Phone Number
12
Touchscreen Navigation
12
Your Home Screen
12
Status Bar
14
Active Notifications
15
App List
16
Search
16
Google Now
17
Motorola Assist
18
Enter Text
18
Touchscreen Keyboard
19
Text Entry Settings and Dictionary
20
Tips for Editing Text
21
Voice Typing
22
Phone Calls
Make Phone Calls
Call Using the Phone Dialer
23
23
23
i
Call from History
24
Call from Contacts
24
Call a Number in a Text Message or Email Message
25
Call from Favorites
25
Call Emergency Numbers
25
Receive Phone Calls
26
Voicemail
27
Visual Voicemail
27
Set Up Visual Voicemail
28
Review Visual Voicemail
28
Visual Voicemail Settings
30
Change Your Main Greeting via the Voicemail Menu
31
Edit the Display Name via the Voicemail Menu
31
Phone Call Options
32
Make a 3-Way Call
33
Contacts
34
Access Contacts
34
Add a Contact
35
Save a Phone Number
35
Edit a Contact
35
Sync or Transfer Contacts
36
Call or Text Contacts
36
Make Groups
37
Accounts and Messaging
Gmail and Google
38
38
Create a Google Account
38
Sign in to Your Google Account
39
Use Gmail
39
Email
41
Add an Email Account
41
Compose and Send Email
42
Manage Your Email
43
Text and Multimedia Messaging
44
Send a Text Message
44
Send a Multimedia Message (MMS)
45
Save and Resume a Draft Message
45
New Messages Notification
46
ii
Message Options
46
Social Networking Accounts
47
Facebook
47
Chat Using Hangouts
48
Wireless Emergency Alerts
48
Apps and Entertainment
Google Play Store
49
49
Find and Install an App
49
Create a Google Wallet Account
50
Request a Refund for a Paid App
50
Manage or Remove Apps
51
Download Apps from the Web
51
Google Maps
52
Google Play Music
54
Get Music
55
Tips and Tricks
55
Watch on Google Play
56
Google Play Games
56
Google Play Books
57
Google Play Newstand
58
FM Radio
58
YouTube
58
Web and Data
59
Wi-Fi
59
Chrome Browser
60
Voice Search on the Home Screen
Virtual Private Networks (VPN)
63
64
Prepare Your Phone for VPN Connection
64
Add a VPN Connection
64
Connect to or Disconnect from a VPN
64
Camera and Video
Take Photos
66
66
Photo Options
67
Edit, Share or Delete Photos
67
Record Videos
68
Capture Your Screen
68
View Photos and Videos
68
iii
Edit Your Gallery Photos
69
Share Photos and Videos
70
Tools and Calendar
71
Calendar
71
Clock
72
Calculator
72
Quickoffice
73
Update Your Phone
74
Update Your Profile
74
Voice Commands
74
Google Drive
75
Bluetooth Connections
76
Turn Bluetooth On or Off
77
Connect New Devices
77
Reconnect Devices
78
Disconnect Devices
78
Rename the Phone
78
Rename a Paired Device
78
Motorola Assist
79
Connect Your Phone to Your Computer
79
Settings
81
Wireless and Network Settings
81
Airplane Mode
81
Wi-Fi Settings
82
Bluetooth Settings
82
VPN Settings
82
Call Settings
82
Voicemail Settings
82
Other Call Settings
82
Sound Settings
84
Display Settings
85
Storage Settings
86
Battery Settings
87
Battery Usage
87
Battery Capacity
87
Charging the Battery
87
Apps Settings
88
iv
Location Settings
88
Security and Screen Lock Settings
89
Set Up Screen Lock
89
Encryption
92
Passwords
92
Device Administration
92
Credential Storage
93
Language and Input Settings
93
Language Settings
93
Keyboard and Input Method Settings
93
Voice Search
95
Text-to-speech Output
95
Mouse/Trackpad
96
Privacy Settings
96
Backup and Restore
96
Reset Your Phone
97
Account Settings
97
System Update
98
Date and Time Settings
98
Accessibility Settings
98
TalkBack
99
Caller ID for Talkback
100
Zoom
101
Touchscreen and Key Settings for Accessibility
101
Messages
101
Hearing Aids
102
TTY
102
Braille
103
Apps for Accessibility
103
About Phone
103
Copyright Information
105
Safety, Regulatory & Legal
106
Battery Use & Safety
106
Battery Charging
106
Third Party Accessories
106
Driving Precautions
107
Seizures, Blackouts & Eyestrain
107
v
Caution About High Volume Usage
107
Repetitive Motion
108
Children
108
Glass Parts
108
Use and Care
108
Operational Warnings
109
Potentially Explosive Areas
109
Symbol Key
109
Radio Frequency (RF) Energy
110
Regulatory Information
111
Specific Absorption Rate (FCC & IC)
111
European Union Directives Conformance Statement
111
FCC Notice to Users
112
Industry Canada Notice to Users
113
Software Notices
113
Location Services
113
Navigation
114
Privacy & Data Security
114
Disposal & Recycling
115
Hearing Aid Compatibility in the US
116
Software Copyright
117
Content Copyright
117
Open Source Software Information
117
Product Registration
118
Service & Repairs
118
How to Obtain Service or Other Information
118
Motorola Mobility LLC Limited Global Warranty
120
What does this Limited Warranty cover?
120
What is not covered?
120
My Product is defective, what should I do?
122
Index
123
vi
Get Started
The following topics give you all the information you need to set up your Moto G™ phone and Sprint Prepaid service the first time.
Your Phone at a Glance
The following illustration outlines your phone’s primary external features and buttons.
Note: Your phone may look a little different.
This product meets the applicable national or international RF exposure guidance (SAR guideline) when used normally against your head or, when worn or carried, at a distance of 1.5 cm from the body. The SAR guideline includes a considerable safety margin designed to assure the safety of all persons, regardless of age and health.
Charge Your Phone Battery
You may need to charge the phone battery to begin setting up your phone. Your phone may already be partly charged. (Your SIM is already in your phone). Get Started
1
Caution: Before using your phone, please read the safety, regulatory and legal information provided with your product.
1. Plug the USB connector into the charger/accessory jack on the bottom of your phone.
2. Plug the AC adapter into an electrical outlet. Fully charging a battery may take up to three hours. Your phone may turn on when you connect the AC adapter to the outlet—this is normal.
Note: Your phone’s battery should have enough charge for the phone to turn on and find a signal, run the setup application, set up voicemail, and make a call. You should fully charge the battery as soon as possible.
Note: Don't try to remove or replace the battery yourself—doing so may damage the battery and could cause burning and injury. If your phone becomes unresponsive, try a reboot—press and hold the Power key until the screen goes dark, and your phone restarts.
Any time you want to see what's using up phone battery power, touch Apps Battery. To set automatic rules to save power, touch Apps > > Settings > Assist.
Activation and Service
The following topics guide you through setting your phone up on Sprint Prepaid, activating your phone, and getting help and information about your Sprint Prepaid service.
Register Your Phone on Sprint Prepaid
Before using your phone, you must register it online with Sprint Prepaid. 1. Get your numbers
You will need the phone’s MEID (DEC) number to activate your phone. The MEID (DEC) can be located on the box that the phone came in. The MEID is an 18-digit number.
2. Get activated
Go to sprint.com/prepaidactivate. During the activation process you can choose to get a new number or use an existing number.
Get Started
2
3. Finalize your activation
You’ll receive a message from Sprint letting you know that your phone number and account is ready to go.
Activate Your Phone
After setting up your account on sprint.com/prepaidactivate, simply turn your device on. Your device is designed to activate automatically. If you are swapping from another Sprint device to a new one, be sure to turn off the old device before swapping the serial number (MEID). Once the MEID swap is complete, turn on the new device and the programming information will be pushed to your device automatically.
n Press and hold the Power key to turn the phone on. l If your phone is activated, it will turn on, search for service, and begin the setup process. See Complete the Setup Screens.
You can also start the activation process manually.
n Touch Apps > Settings > Activate Device.
Note: Before the activation process can begin, the device will prompt the TalkBack voice navigation feature for visually impaired users. Touch Next to bypass this feature. For more information on TalkBack, see TalkBack.
Manage Your Account
Access information about your account. You can:
n Add money to your account.
n Change plans.
n And more.
Get Started
3
From Your Phone
Access account information and other self-service tools right from your phone:
n Dial to make a payment. n Dial to access Sprint customer service or get answers to other questions. From Your Computer
n Log in with your wireless phone number and account PIN at sprint.com/prepaidmysprint.
From Any Other Phone
n Sprint Prepaid Customer Care: 1-855-639-4644.
Sprint Prepaid Payment Options
Sprint makes it easy to add money to your account. You decide exactly how and where you want to pay. Keep your account active by using your phone and adding money to your account.
Pay with Cash
Find an Authorized Sprint Retailer near you. Pick up a Sprint Pay Card or recharge for as low as $10 at the register, where available.
Pay Anytime with a Credit/Debit Card
Dial to add money from your phone or visit sprint.com/prepaidreload to do it online. Securely register your credit/debit card with Sprint for more convenient one-time payments or to set up easy Sprint Auto payments.
Set Up Worry-Free Payments with Sprint AutoPay
It’s the easiest way to make sure your account stays on and active. Use a credit card, debit card or bank account—whatever’s best for you.
Visit sprint.com/prepaidmysprint to get the details on all your payment options.
Complete the Setup Screens
The setup screens help you set up certain features and preferences on your phone. Once your phone has been turned on, you will see a Welcome message. You can then complete the setup process.
Note: You may be able to complete the setup screens before your phone has been activated on your account.
Get Started
4
1. If you haven't already done so, press and hold the Power key to turn the phone on.
2. From the Welcome screen, select a language (if prompted) and touch Next to get started.
Note: On the Welcome screen, there may also be an Accessibility button. If you are visually impaired or hard of hearing, touch Accessibility to change the accessibility settings.
3. Follow the onscreen instructions to complete each section. You can skip any topic and continue to the next screen by touching Next or Skip.
Note: You do not need to sign up for a Google Account to use your phone. However, to download apps from the Google Play Store app, you must link your phone to a Google Account.
l Got Google? – Touch Yes and complete the steps to sign in to your current Google Account, or touch No and then touch Get an account (to set up a new Google Account) or Not now to skip Google setup. The following options may apply depending on your selection:
o Sign in – Enter your Gmail address and password and touch Sign in or the right arrow to sign in to your current Google Account.
o Get an account – Follow the instructions to sign up for a new Google Account. There will be screens to enter your first and last names, create an email address (Gmail), create a password, enter recovery information (including a backup email address and recovery question), an option to join Google+, and an option to enable purchases from the Google Play Store app. Touch Next between each screen.
o Use Google location – Select your Google location options and then touch Next.
l Wi-Fi – If prompted, follow the prompts to sign in to an available Wi-Fi network. For secured Wi-Fi networks, you will need to enter a password. See Wi-Fi for more details.
Get Started
5
l This phone belongs to… – If applicable, enter your first and last name and touch Next. This information is used by the phone to personalize certain apps.
l Sign in – Touch the right arrow to go to the next screen.
l Motorola Migrate – You can migrate content from your previous Android phone or iPhone device to your new phone or do it later.
4. Touch Finish. Your setup is now complete and you can test it by making a phone call. Follow the onscreen instructions to learn about basic touch menu navigation, view tutorials, or just get started. Note: During or after setup, you may be prompted to install the Sprint Prepaid Default ID. Follow the prompts to download and install the ID.
Tip: You can quickly access Google+ anytime on your phone, touch Apps > Google+.
Set Up Voicemail
You should set up your Sprint voicemail and personal greeting as soon as your phone is activated. Always use a password to protect against unauthorized access. Your phone automatically transfers all unanswered calls to your voicemail, even if your phone is in use or turned off.
If your screen is locked, press the Power key to turn on the screen and then flick the lock symbol on the screen to the right to unlock it.
1. Touch > (the number 1 on the dialpad) or touch Apps > Voicemail.
2. Follow the prompts to:
l Create your password.
l Record your name announcement.
l Record your greeting.
Important: Voicemail Password – It is strongly recommended that you create a password when setting up your voicemail to protect against unauthorized access. Without a password, anyone who has access to your phone is able to access your voicemail messages.
For more information about voicemail, see Voicemail or Visual Voicemail.
Retrieve Data from Your Old Phone
Moving your photos, music, text and call history, photos, contacts and more from your old Android™ or old iPhone phone is quick and painless. You can keep using your phone while you are migrating.
Get Started
6
Note: If your old phone was also Android and you used the Android Backup and Reset feature, your contacts automatically appear on your new phone. Not all music can be copied.
To move your old Android phone data to your new phone:
1. On your old Android phone, download the Motorola Migrate app on Google Play™.
2. On your new phone, touch Apps > Motorola Migrate > Android.
3. Follow the on screen prompts to complete the transfer.
To move your old iPhone data to your new phone:
1. On your new phone, touch . touch Apps > Motorola Migrate > iPhone.
2. Follow the on screen prompts to complete the transfer.
Note: Your transferred photos are placed in the Gallery, but to copy them to your PC go to the DCIM > Camera folder.
Note: No data connection is needed after the application is loaded on the old phone. The Motorola Migrate app uses Wi-Fi to transfer the data.
Tip: While you’re migrating, you can keep using your phone.
Get Started
7
Phone Basics
Your phone is packed with features that simplify your life and expand your ability to stay connected to the people and information that are important to you. The following topics will introduce the basic functions and features of your phone.
Tip: Phone Software Upgrades – Updates to your phone’s software may become available from time to time. Updates are pushed to your phone over-the-air. You can also use the menu to check for and download updates. Touch Apps > Settings > System Update > Update Motorola
software to search for and download available updates.
Your Phone’s Layout
The illustrations and descriptions below outline your phone’s basic layout.
Tip: Find answers to your questions about your new phone right on your phone. Touch Apps > Help.
Tip: The menu icon will sometimes be shown. Touch Menu to show options or settings.
Phone Basics
8
Key Functions
n Headphone Jack allows you to plug in an optional headset for convenient, hands-free conversations. n Front Camera Lens takes pictures and records videos while facing the screen, and allows you to video conference. n Power key lets you turn the phone on or off or turn the screen on or off, or switch your phone to silent mode, vibration mode, or airplane mode. n Volume keys allow you to adjust the ringtone or media volume or adjust the voice volume during a call. n Micro USB/Charger Jack allows you to connect the phone charger or a USB cable (included). n Microphone transmits your voice for phone calls or records your voice or ambient sounds for voice recordings and videos. n Flash (on back) helps illuminate subjects in low-light environments when the camera is focusing and capturing a picture or video. n Photo/Video Camera (both front and back) lets you take pictures and videos. n Return n Home or Back closes an option menu or returns you to the previous screen.
returns you to the Home screen.
n Recent Apps shows a list of the last apps you opened.
CAUTION! Inserting an accessory into the incorrect jack may damage the phone.
Turn Your Phone On and Off
The instructions below explain how to turn your phone on and off.
Turn Your Phone On
n Press and hold the Power key.
Phone Basics
9
Turn Your Phone Off
1. Press and hold the Power key to open the phone options menu. 2. Touch Power off to turn the phone off.
Note: To change Wi-Fi, Bluetooth®, Airplane mode, and other settings, at the top of the screen flick the status bar down and touch . For even more settings, touch .
Turn Your Screen On and Off
Your phone allows you to quickly turn the screen off when not in use and to turn it back on and unlock it when you need it. For information on how to set up security options to avoid unauthorized access to your phone, see Security and Screen Lock Settings.
Turn the Screen Off When Not in Use
n To quickly turn the screen off, press the Power key. Pressing the Power key again will turn on your phone screen and show the lock screen.
To save battery power, the phone automatically turns off the screen after a certain period of time when you leave it idle. You will still be able to receive messages and calls while the phone’s screen is off.
Note: For information on how to adjust the time before the screen turns off, see Display Settings.
Note: For information on how to set up a screen lock, see Security and Screen Lock Settings.
Turn the Screen On and Unlock It
1. To turn the screen on, press the Power key.
Phone Basics
10
2. To unlock the screen, touch and flick to the outer circle that appears.
l If you have set up a screen lock, you will be prompted to draw the pattern or enter the password or PIN. See Set Up Screen Lock.
l To answer an incoming call with a locked screen, touch l To ignore an incoming call with a locked screen, touch and flick to the right. and flick to the left. Note: During a call, your screen might stay dark if the sensor just above the top of the screen is covered. Don't use covers or screen protectors (even clear ones) that cover this sensor.
Adjust the Sound Volume
Your volume keys control the sound for the current feature you have open on your phone.
n Ringer volume: Press the keys in the home screen, or press them when your phone is ringing to silence it.
n Earpiece volume: Press the keys during a call.
Phone Basics
11
n Music/video volume: Press the keys during a song or video.
Note: When you connect a headset a pop-up tells you it is connected.
Find Your Phone Number
You can verify your phone number.
n Touch Apps > Settings > About phone > Status > My phone number.
Touchscreen Navigation
Your phone’s touchscreen lets you control actions through a variety of touch gestures.
n Touch: Choose an icon or listed option by simply touching it.
n Touch and Hold: Position your finger on an item until it opens or lists the options related to an item (such as Contacts).
n Swipe (or drag): Press an item and then slide it to a new location and release.
n Flick: Use light, quick strokes in a vertical or horizontal direction, such as when scrolling through contacts or messages lists.
Tip: To stop a quickly scrolling list, touch the screen.
n Pinch and Spread: "Pinch" the screen using your thumb and forefinger to zoom out or "spread" the screen to zoom in when viewing a picture or a Web page. (Move fingers inward to zoom out and outward to zoom in.)
n Twist: Twist a map with two fingers to rotate it, and pull two fingers down to tilt it.
n Panels: To add or show other panels of shortcuts and widgets, flick the home screen left or right.
n Return: To close an option menu or return to a previous screen, touch on the screen.
or depending n Menu: To show options or settings touch Menu .
Your Home Screen
The home screen is the starting point for your phone’s applications, functions, and menus. You can customize your home screen by adding application icons, shortcuts, folders, widgets, and more. Note: Touch Phone Basics
to return to the main home screen from any other screen.
12
Home Screen Overview
Your home screen extends beyond the initial screen. Swipe the screen left or right to display additional screens. Flick it down from the top to see settings and notifications.
Note: Your home screen might look a little different.
Add Items to the Home Screen Learn how to add, move, or remove items from the home screen pages.
n Wallpaper: Touch and hold an empty spot on your home screen to choose your wallpaper.
n Widgets and Shortcuts: Touch Apps , touch and hold the widget or shortcut and drag it to one of your home screen panels. To see all your apps, shortcuts, and widgets, touch Apps
and flick the menu to the left, or touch APPS or WIDGETS at the top.
Tip: You can resize some widgets—touch and hold a widget until you feel a vibration, then release. Drag the blue circles at the edges to resize.
n Shortcut groups: Drag one app shortcut onto another to create a shortcut group on your home screen to organize them. Add more app shortcuts by dragging them onto the first shortcut. To name the group, touch it and enter a name below the listed shortcuts.
Phone Basics
13
Move or Remove Items on the Home Screen Pages
n Touch and hold a widget or shortcut until you feel a vibration, and then drag it to another spot, left or right to another panel, or to Remove at the top of the screen.
n To see another panel, flick the screen left or right.
Note: To close the keyboard that opens for you to type text, touch Back bottom of your phone. or touch at the Status Bar
The status bar at the top of the home screen provides phone and service status information. Icons on the left notify you about new messages or events. Icons on the right tell you about phone status.
Status Icons
TableText
Status
Bluetooth® on/connected
Bluetooth® off
GPS active
Wi-Fi on/connected
Wi-Fi on/not connected
downloading
vibrate
silent
Microphone on/off
Network strength
Warning
airplane mode
sync active
Phone Basics
14
TableText
Status
alarm set battery (charging)
battery (full charge)
Active Notifications
At the top of the screen, icons on the left notify you about new messages or events. If you don’t know what an icon means, flick the bar down to find out.
To view Active Notification alerts, touch the status bar and flick or drag down. You can also choose to send notification text messages and other information to your computer using Motorola Connect. To delete alerts individually or clear the entire list:
n Touch the status bar and flick or drag down to see your alerts.
l To clear all the Active Notification alerts, and touch .
l To remove individual alerts, swipe a message to the right or left.
Phone Basics
15
App List
The app menu shows you all of your applications. To open it from the home screen, touch Apps .
Flick left and right to see all of your apps pages. Any new apps that you download (see Google Play Store) are added to the app menu.
Tip: Flick left or touch WIDGETS at the top to see the widgets you can place on your Home screen.
To close the app menu, touch Home or Back .
Recent Apps Touch Recent Apps to see the last few apps you used, and then touch the app you want. Touch Home or Back to return to the home screen.
Search
You can use the search widget on the top of the Home screen to search your phone or the Web.
Phone Basics
16
Touch the Google search widget for a text search. As you type, suggestions appear below the search field. n To search by using the suggestion, touch the suggestion.
n To search for your text in the search field, touch on the keyboard.
Google Now
Google Now™ uses your search history, location history, and Google™ services to provide the information you need, when you need it. The service is always working for you in the background—
you don’t have to ask for anything. Google automatically notifies you when new information is available.
If you set up a Google Account when you initially set up your phone, get started with Google Now:
n Touch and hold Phone Basics
and then drag up into the home screen to the Google Now icon .
17
To turn Google Now on/off or set your preferences for notifications, open Google Now, and scroll to the bottom of the screen:
n Touch Menu > Settings > Google Now.
Motorola Assist
Your phone can reply to texts when you’re driving, silence your ringer during meetings, and conserve your battery when it runs low with Motorola Assist. Motorola Assist suggests actions to automate based on how you use your phone. When you see a suggestion in the status bar, flick the bar down to accept or delete it.
n To start Motorola Assist, touch Apps > Assist.
Enter Text
You use the touchscreen keyboard to enter text on your phone.
Phone Basics
18
Touchscreen Keyboard
The keyboard appears automatically onscreen when you touch a text entry field, and is used in either portrait or landscape mode. Your phone gives you many options to make entering text easier, including copying, cutting, and pasting text, using voice-to-text input, continuous key (gesture) input, customizing the user dictionary, suggesting predictive text, and more.
You can use the following options to enter text on your touchscreen keypad.
n Type: Enter letters by touching them one at a time. n Gesture: Enter a word by tracing a continuous path through the letters. When you lift your finger after the last letter of a word, a space is automatically added.
Phone Basics
19
n Word completion/correction: Whether you type or use gestures to add part of a word to the text box, suggestions for the word appear below the text box in the word list. Touch a suggested word to replace your partial entry or typo.
n Word suggestion: After you enter a space in your message, the next word is suggested for you in the bar below the message.
n Close the keypad: Touch Back or touch at the bottom of your phone.
Note: Your touchscreen keyboard looks slightly different depending on whether you’re entering a text message, email, or other text. You can also use the Google Voice typing option to enter text using your voice (see Voice Typing for details).
Text Entry Settings and Dictionary
You can change the preferences when using your keyboard, voice entry options, and edit the dictionary of words your phone suggests.
To change the settings, touch Apps n To change preferences, touch associated options.
> Settings > Language & input:
next to the setting name or touch the setting name to see its n To add or edit the words that your phone suggests and recognizes, touch Personal dictionary. You can also add words to the dictionary from your typed entries.
Tip: You can assign a shortcut for commonly used words or groups of words in the dictionary settings after you add the word or phrase to the dictionary.
Phone Basics
20
Tips for Editing Text
You can cut, copy, and paste names, phone numbers, addresses, quotes, or anything else in a text box. You can cut, copy and paste within the same message or between apps. You use the icons at the top of an app screen or select screen options that guide you when you touch the typed words in your message.
Tip: Touch and hold icons to show their description label.
To…
Instructions
Enter alternate characters
Touch and hold the letter to enter its associated number, or touch to enter numbers or =\< to enter symbols.
Enter one capital letter
Touch Enter only capital letters
Touch twice and type. Touch typing lowercase.
Select text
Double tap a word to select it. To select more than one word drag the cursors on each side of the selected word and touch the letter.
again to return to to either end of the text. To select all words, touch Cut or Copy selected text
Move the cursor
Paste cut or copied text
Select text and then choose Cut or copy text from one app to another. . Copy. You can Touch a spot in the text you have typed to place the cursor, then drag the arrow under the cursor to move it.
Touch and hold location to paste, then touch Paste or . Double letters: When entering text using a gesture instead of typing, circle a letter to enter two of them.
Adding words to the dictionary from your text
You can add an often used word to the dictionary. As you enter a word, it appears in the word list below the text entry box. Double-tap the word in the word list to add it to your dictionary.
Delete a character
Touch Phone Basics
Delete.
21
Voice Typing
You can use your voice to enter a message, email, or text in other applications. Your speech is converted to text. Add any punctuation by saying the name of the punctuation mark, such as “period”, “exclamation point”, or “comma”. To use voice entry in a message, email or other text box:
1. Touch the text box, and then touch on the keyboard. 2. Begin speaking clearly, saying the name of the punctuation mark where needed.
3. Touch to pause or restart.
4. To edit the text, touch Phone Basics
to return to the keyboard.
22
Phone Calls
With the Nationwide Sprint Network and your phone’s calling features, you can enjoy clear phone calls across the country.
Note: During a call, your touchscreen goes dark to avoid accidental touches. To wake it up, move it away from your face or press the Power key.
Make Phone Calls
There are several convenient ways to place calls from your phone. You can call using the dialpad, from the History list, or from the contact list. Tip: You can multi-task while you’re on a call. Touch Home to hide the call display and look up a phone number, address, or open other apps. To reopen the call display, flick down the status bar and touch Ongoing call.
Call Using the Phone Dialer
The most “traditional” way to place a call is by using the phone’s dialer screen. 1. Touch to open the phone app. If you don't see the dialpad, touch to display it.
2. Touch the number keys on the dialpad to enter the phone number.
l As you enter digits, your phone searches for contacts that match. If you see the number you want to dial, touch it to place the call.
3. Touch Phone Calls
to call the number.
23
4. To end the call, touch .
Call from History
The History list lets you quickly place calls to recent incoming, outgoing, or missed numbers.
1. Touch to open the phone app.
2. Touch to display the History call list.
3. To call a number in the list, touch on the right.
l For additional options and call details, touch the name or number.
Tip: You can clear the list by touching Menu > Clear call log.
Call from Contacts
You can place phone calls directly to your contacts from entries in your People list.
Phone Calls
24
1. Touch Apps > People to display the contacts list.
2. Touch a contact to see its information.
3. Touch a phone number to place a call.
l You can also send a text message, an instant message, or an email from a contact page.
l For additional information, see Contacts.
Call a Number in a Text Message or Email Message
While viewing a text message or email message, you can place a call to a number that is in the body of the message. 1. Touch Messaging, Gmail or Email.
2. Touch the message with the phone number, and then touch the phone number.
3. The phone dialpad opens with the phone number automatically filled in and ready to be dialed.
4. Touch to place the call.
Call from Favorites
You can also place calls from the Favorites list.
n Touch Apps > People > Favorites.
l To call, text, email, or view contact information, touch the contact and touch a contact number or address.
l To edit, share, delete, or set a ringtone for a contact, touch the contact, then touch Menu . You can also place the Favorite on the Home Screen for quick access.
Call Emergency Numbers
You can place calls to 9-1-1 even if the phone’s screen is locked or your account is restricted.
To call the 9-1-1 emergency number when your phone's screen is locked with a sceen lock or when your account is restricted:
1. Press the Power key to turn on the screen. For more information, see Turn Your Screen On and Off.
2. Touch Emergency call on the screen.
Phone Calls
25
3. Touch .
Enhanced 9-1-1 (E 9-1-1) Information
This phone features an embedded Global Positioning System (GPS) chip necessary for utilizing E 91-1 emergency location services where available.
When you place an emergency 9-1-1 call, the GPS feature of your phone seeks information to calculate your approximate location. Depending on several variables, including availability and access to satellite signals, it may take up to 30 seconds or more to determine and report your approximate location.
Important: Always report your location to the 9-1-1 operator when placing an emergency call. Some designated emergency call takers, known as Public Safety Answering Points (PSAPs), may not be equipped to receive GPS location information from your phone. Your pre-programmed emergency number(s) may not work in all locations, and sometimes an emergency call cannot be placed due to network, environmental, or interference issues. See Location Services in the Important and Safety Information.
Receive Phone Calls
The following information lets you know how to answer incoming calls, mute the ringer on incoming calls, reject incoming calls, and more.
When you receive a phone call from a contact, the Incoming call screen appears and displays the caller ID icon, name, and phone number of the calling party. When you receive a phone call from someone who is not stored in People, only the default caller ID icon and phone number appear on the Incoming call screen.
Note: If your phone is turned off, all calls automatically go to voicemail.
Answer an Incoming Call
n To answer a call touch and drag to . Silence the Ringing Sound
n To silence the ringer without rejecting the call, press the Volume key. Reject an Incoming Call
n To send an incoming call to your voicemail, touch and drag to . Answer a Call with a Text Message
You can automatically send a text message to an incoming caller.
1. To send an incoming call a text message, touch Phone Calls
and drag to.
26
2. Touch one of the quick response messages or touch Custom and type a new message. For more information, see Text message Reply in Other Call Settings.
Tip: You can edit or create your own quick response messages. Touch Apps > Phone > Menu > Settings > Quick responses, and then touch a message to edit it.
Voicemail
You should set up your voicemail and personal greeting as soon as your phone is activated. Always use a password to protect against unauthorized access. Your phone automatically transfers all unanswered calls to your voicemail, even if your phone is in use or turned off.
Note: Your phone also supports the Visual Voicemail app. For information on setting up and using Visual Voicemail, see Visual Voicemail.
Set Up Voicemail Account n To set up your voicemail, see Set Up Voicemail.
Important: Voicemail Password – It is strongly recommended that you create a password when setting up your voicemail to protect against unauthorized access. Without a password, anyone who has access to your phone is able to access your voicemail messages.
Tip: For information on using the Visual Voicemail app, see Set Up Visual Voicemail.
Voicemail Notification
When you have a new voicemail, shows at the top of your screen.
Note: When you are off network, you may not receive notification of new voicemail messages. It is recommended that you periodically check your voicemail by dialing 1 + area code + your wireless phone number. When your voicemail answers, touch and enter your password.
Note: Your phone accepts messages even when it is turned off. However, your phone notifies you of new messages only when it is turned on and you are in a network service area.
Retrieve Your Voicemail Messages
When you have a new voicemail, n To hear the message, touch shows at the top of your screen. Phone to open the dial screen, and then touch and hold .
Visual Voicemail
Visual Voicemail gives you a quick and easy way to access your voicemail. Now you can find exactly the message you are looking for without having to listen to every voicemail message first. This new Phone Calls
27
feature periodically goes out to your voicemail, and gathers the caller information from all of the current voicemails. It then populates a list with the caller name and number, along with the length of time and priority level of the voicemail message. Set Up Visual Voicemail
Setting up Visual Voicemail follows many of the same procedures as setting up traditional voicemail. You should set up your voicemail and personal greeting as soon as your phone is activated. Your phone automatically transfers all unanswered calls to your voicemail, even if your phone is in use or turned off.
Note: To set up your traditional voicemail box, see Set Up Voicemail.
To set up your Visual Voicemail:
1. Touch Apps > Voicemail. 2. Touch Personalize now and follow the instructions to: l Create a password (part of the standard voicemail). l Record your name. l Record your greeting. 3. When prompted to enter information, touch to show the phone dialpad to enter numbers.
4. When finished, return to the voicemail page (see step 1). 5. Touch the Welcome to Voicemail message on the screen to play a brief explanation of voicemail services.
Important: Voicemail Password – It is strongly recommended that you create a password when setting up your voicemail to protect against unauthorized access. Without a password, anyone who has access to your phone is able to access your voicemail messages.
Review Visual Voicemail
Visual Voicemail lets you easily access and select which messages you want to review. You can choose to listen to all unheard messages or one at a time. Text and voice messages remain stored for later review.
To listen to all unheard messages played back in sequence, last message first: 1. Touch Apps > Voicemail to open the list of calls in the voicemail inbox.
2. To listen to all unheard messages, touch Phone Calls
.
28
To listen to one message: 1. Touch Apps 2. Touch > Voicemail to open the list of calls in the voicemail inbox.
Play in a message picture box to hear the message.
– or –
Touch a message to open it, play it, read it, and respond to it.
Features available while reviewing messages include:
n Timeline: Provides a visual time detail for the current message. Touch and drag the bar to move to different points in the message.
l Touch Pause to pause the playback. Touch Play to resume.
n Speaker Off/On: Turn the speakerphone on or off during playback. If the speakerphone feature was enabled within your Voicemail settings menu, the speakerphone will always be automatically enabled during voicemail playback. Phone Calls
29
n Call
: Call the person who left the voicemail message.
n Share
: Share your voicemail message via Bluetooth, text message, Gmail™, or email. You can then reply to the sender or forward the message to anyone with an email account or phone number. This allows you to send a voicemail message to several recipients at the same time.
n Delete: Delete the current voicemail message.
n Reply
: Reply to the message sender. l Touch SMS message or Audio message, compose or record your reply, and then touch to deliver the message.
n Menu :
l Archive: Save the message.
l Settings: Set up Visual Voicemail settings.
l Help: Open online help.
l Send feedback: Provide feedback about the app.
Visual Voicemail Settings
The Visual Voicemail settings menu lets you access settings for notifications, pictures, greetings, and more.
Note: Settings and availability are subject to change.
1. Touch Apps
> Voicemail.
2. Touch > Settings and select from the following list to change settings:
l Manage subscription to manage your Visual Voicemail subscription.
l Data consent agreement to choose whether or not to send speech data to help improve the Visual Voicemail service.
l Auto forward to email to forward voicemail messages to your email.
l Personalize voicemail to adjust your voicemail greeting.
l Notifications to determine how you are notified of new voicemails. Choose from: Select
sound and Vibrate.
l Delete Messages to select when messages are permanently deleted from the Trash folder.
Phone Calls
30
l Display name to enter a name or a number that is attached to your outgoing voicemails as part of an identification string.
l Speakerphone to set the default your messages to be read to you or muted.
l Themes to choose the color scheme for your phone.
l View quick tips tutorial to view a tutorial about Visual Voicemail.
l Help to view the online help for Visual Voicemail.
l Send feedback to provide feedback about the app.
l Updates to search for an upgrade to your visual message software.
l About Voicemail to view information about the Visual Voicemail application, such as the version.
Change Your Main Greeting via the Voicemail Menu
Your main greeting can be changed using the Visual Voicemail system. 1. Touch Apps
> Voicemail.
2. Touch Menu > Settings > Personalize voicemail.
3. Touch OK to connect to the Sprint voicemail system. Follow the prompts to change your current greeting.
Edit the Display Name via the Voicemail Menu
From your Visual Voicemail menu, you can quickly change the name or number attached to your voice messages.
1. Touch Apps
> Voicemail.
2. Touch Menu > Settings > Display name.
3. Touch the existing identification field and enter a new identifying name or number (used to identify you to recipients of your voice messages).
4. Touch OK to save your information.
Phone Calls
31
Phone Call Options
Your phone application provides many useful features and options to help you make the most of your calling experience.
Note: Using a mobile phone or accessory while driving may cause distraction and may be illegal. Always obey the laws and drive safely.
In-call Options
While you’re on a call, you will see a number of on-screen options. Touch an option to select it.
During a call:
n To mute a call, touch Mute .
n To use the speakerphone, touch Speaker .
Note: Your phone includes a proximity sensor. When you hold the phone to your ear, the display goes dark to prevent accidental touches. When you move your phone away from your ear, the display lights up again.
Warning: Because of higher volume levels, do not place the phone near your ear during speakerphone use.
Phone Calls
32
Make a 3-Way Call
With 3-way calling, you can talk to two people at the same time. When using this feature, the normal airtime rates will be charged for each of the two calls.
n To start a conference call, call the first number. After the call connects, touch Add Call . Dial the next number, or select it from contacts or favorites. When the next number answers, touch Merge calls Phone Calls
.
33
Contacts
Your phone's Contacts application, called "People," lets you store and manage contacts from a variety of sources, including contacts you enter and save directly in your phone as well as contacts synchronized with your Google™ Account.
Access Contacts
There are a few ways to find a contact.
n Touch Apps > People.
Tip: To search the list, begin typing a name.
n Touch Menu to show options:
l Contacts to display: Filter and sort your contact list.
l Import/Export: Import or export contacts from a memory card.
l Accounts: Touch Auto-sync app data to keep the contact information in your apps up to date or touch the individual accounts to synchronize them.
l Settings: Change the way your contacts names are listed or how your contact list is sorted.
Contacts
34
Add a Contact
You can add contacts from your phone’s People application or from the dialpad. Enter details such as name, phone numbers, email addresses, mailing addresses, and more.
1. Touch Apps
> People and touch .
2. Fill in as much or as little information as you'd like.
3. When you’re finished, touch DONE.
Note: To select a type (label) for a phone number, email address, or postal address (such as Mobile, Home, Work, etc.), touch to the right of the field and touch your selection.
Save a Phone Number
You can save a phone number to Contacts directly from the phone dialpad.
1. Touch Phone.
2. Enter the phone number and touch Menu > Add to contacts.
3. To add the number to a new contact, touch CREATE NEW CONTACT. To add the number to an existing contact, search or scroll for the contact and touch it.
4. For an existing contact, select a number type for the new number by touching OK.
, and then touch – or –
For a new contact, enter the first and last name and any additional information, and then touch DONE.
Edit a Contact
After you add a contact, you can edit the information, assign a caller ID picture, customize with a unique ringtone, and more.
1. Touch Apps
> People.
2. Touch the contact you want to change, touch Menu and select from the following menu items:
l Edit: Touch any field you want to add or change. When you are finished, touch Contacts
DONE.
35
l Share: To share a contact’s information with another app, touch the app and follow the app instructions, or touch Bluetooth to send the information to another Bluetooth enabled device. For more on Bluetooth, see Bluetooth Connections.
l Delete: Touch OK if you are sure you want to delete the contact.
l Set ringtone: Touch the ringtone you want to hear when this contact calls you and touch OK.
l All calls to voicemail: All calls from this contact are automatically sent to voicemail until you reset this option.
l Place on Home screen: A contact widget is added to your Home screen so you can quickly access this contact. 3. To assign a picture to a contact, touch the picture icon at the top of the contact page and touch an option:
l Take new photo: Your camera opens. Touch the touchscreen to take the photo. Touch Checkmark to continue. Crop the photo (touch and drag the square to crop the picture) and touch OK.
l Select new photo from Gallery: Choose the app to use to get the saved photo and choose from Always or Just once. Select Camera or Gallery and then touch a photo to select it. Crop the photo (touch and drag the square to crop the picture) and touch SAVE.
Sync or Transfer Contacts
When you change one of your contacts, your phone automatically updates your other accounts providing the Auto-sync app data option turned on. For additional information see Edit a Contact.
Get all your contacts, all in one place. Here are a few helpful hints:
n Use Gmail™: All your Gmail contacts are automatically synced to your phone. Various computer applications for mobile phones and email accounts allow you to export your contacts as a “.CSV” file. You can then use Gmail™ to import the file. For details, see motorola.com/transfercontacts or log in to your Gmail account on your computer and select “Help.”
n More: Find other methods and tools to help you at motorola.com/transfercontacts.
Call or Text Contacts
You can call or text a contact directly from the People app.
1. Touch Apps
Contacts
> People.
36
2. Touch a contact, touch the number you want to call or touch to send a text message.
Make Groups
You can set up groups in Contacts for Group Connect calls or for quick messaging. 1. Touch. Apps
2. Touch > People > Groups .
to start a new group.
3. Type a name for your group.
4. Type a name to search for people to add to the group. When the list of People entries pops up, touch a name to add that person to the group.
5. Touch DONE.
Note: You may see different options based on the information you have saved for your contact.
Contacts
37
Accounts and Messaging
With Sprint service and your phone’s messaging capabilities, you have the opportunity to share information through many different channels and accounts, including Gmail™ (Google), personal and corporate email, text and multimedia messaging, social networking accounts, and Google Hangouts™.
Gmail and Google
You will need a Google Account to access several phone features such as Gmail, Google Maps™, Google Hangouts, and the Google Play™ Store apps. Before you are able to access Google applications, you must enter your account information. These applications sync between your phone and your online Google Account.
Create a Google Account
If you do not already have a Google Account, you can create one online or using your computer or phone.
Note: You can also create and sign in to your Google/Gmail account through your phone’s Setup application.
Note: Although you need a Gmail account to use certain features of your phone, such as Google Play, you do not need to use Gmail as the default account for your phone.
Create a Google Account Online
1. On your computer, launch a browser and go to google.com.
2. Click Sign in > SIGN UP and follow the instructions to create your free account.
3. Check your email for a message from Google confirming your account. Respond to the email to activate your account.
Create a Google Account Using Your Phone
1. Touch Apps > Settings and scroll to Accounts. 2. Touch Add Account and then touch Google > New.
3. Follow the prompts to enter your name and select a Gmail address.
4. When prompted, enter and reenter your password.
5. Create a security question and answer, and then enter a secondary email address to help you recover your password if you ever lose it.
Accounts and Messaging
38
Note: When setting up a new Google Account, you will be prompted to add a secondary email address. Enter a second email address from which you currently send and receive email. This address is used to authenticate your account should you have problems or forget your password. This is recommended so you can regain access to Google services and purchases on your phone.
6. Follow the prompts to read and accept the Google terms of service.
7. After your phone connects with Google servers, select the items you want to sync with your phone, and then touch .
8. Touch Finish setup.
Sign in to Your Google Account
If you already have a Google Account, you can sign in to add the account to your phone.
Note: You can also create and sign in to your Google/Gmail account through your phone’s Setup application.
1. Touch Apps > Settings and scroll to Accounts.
2. Touch Google and then touch Existing.
3. Enter your Gmail address and password, and then touch .
4. After your phone connects with Google servers, select the items you want to sync with your phone, and then touch .
5. Touch Finish setup.
Use Gmail
Once you have set up your Gmail account, you can use it to check your Gmail, reply to messages, set account options, and more.
Access Gmail
n Touch Apps > Gmail.
Accounts and Messaging
39
l To view an email message: Touch a message in the list.
l To view more email messages: If the inbox is full, flick up the screen to view more messages and conversations.
l Read a new email message: Touch the unread message or the conversation with an unread message (just-arrived items appear in bold).
l Select messages and conversations: To select multiple emails in the list without opening the message, touch the messages.
l View the Inbox of your other Gmail account: Touch Inbox at the top of the screen and choose an account.
l Archive: To quickly archive a message, flick the message to the right.
l Refresh the inbox: Touch Menu > Refresh.
Send a Gmail Message
1. Touch Apps
2. Touch > Gmail.
.
3. Enter the message recipient’s email address in the To field. As you enter email addresses, any matching addresses from your contacts list are shown. Touch a match to enter that address.
4. Enter the email subject, and then compose your email.
5. After composing your message, touch Accounts and Messaging
to send it.
40
Read and Reply to Gmail Messages
1. Touch Apps
> Gmail.
2. Touch a message.
l To Reply, touch and enter an additional message.
l To Reply to all, touch Menu (located on top right on the message) > Reply all, and enter your message.
l To Forward a message, touch Menu > Forward, enter or select recipients, and then enter your message.
3. After composing your message, touch to send it.
Email
Use the Email application to send and receive email from your webmail or other accounts, using POP3 or IMAP. You can also access your Corporate Sync email and other features on your phone.
Add an Email Account
You can add several types of personal email accounts, such as POP3 and IMAP accounts, to your phone.
Add an Email Account 1. Touch Apps > Settings and scroll to Accounts.
2. Touch Add Account and then touch Email.
3. Enter your email address and password.
Touch Next.
– or –
Touch Manual setup to set up your account manually.
4. Enter the account settings and touch Done.
Note: You may need to check with your service provider for any connection details.
Add a Corporate Sync Account
You can also add a corporate email account to your phone.
Accounts and Messaging
41
Important: Before setting up a Microsoft Exchange ActiveSync Account, contact your company’s Exchange Server administrator for required account settings information.
1. Touch Apps > Settings and scroll to Accounts.
2. Touch Add Account and then touch Corporate.
3. Enter the Corporate Exchange account details and then touch Next.
4. Select the type of information you want to synchronize and touch Done.
Compose and Send Email
Compose and send email using any account you have set up on your phone. Increase your productivity by attaching files such as pictures, videos, or documents to your email messages.
1. Touch Apps 2. Touch > Email.
.
3. Enter the message recipient’s email address in the To field. As you enter email addresses, any matching addresses from your contacts list are shown. Touch a match to enter that address.
4. Enter the email subject, and then compose your email.
l To add an attachment, touch Menu .> Attach picture or Attach video.
5. Touch to send the message immediately, or Menu > Save draft to send it later.
View and Reply to Email
1. Touch Apps > Email.
2. Touch a message.
l To Reply, touch and enter an additional message.
l To Reply to all, touch Menu (located on top right on the message) > Reply all, and enter your message.
l To Forward a message, touch Menu > Forward, enter or select recipients, and then enter your message.
3. After composing your message, touch Accounts and Messaging
to send it.
42
Manage Your Email
Use the email menu options to change what you see, refresh accounts, delete items, edit settings, and more.
1. Touch Apps > Email.
2. Touch in the upper right corner to view or filter your accounts:
l Touch the name of an email account.
l INBOX - Touch Inbox for the currently selected account.
l RECENT FOLDERS - Folders you recently viewed.
l ALL FOLDERS - Touch a folder name to filter your emails. 3. Touch to return to the email Inbox.
Refresh an Email Account
Whatever your automatic synchronization settings are, you can synchronize your email messages manually at any time.
n While in the account you want to synchronize, touch Menu > Refresh.
Archive Email Messages
n Swipe the email message to the right.
Delete Email Messages
n Touch the email message you want to delete and touch Menu > Delete.
Edit Email Account Settings
You can edit settings for your individual email accounts, such as email address and password, name shown and signature, frequency of retrieval, and more.
From the email inbox: n Touch Menu > Settings and then touch an account to change its settings, or touch General
settings to change general email settings.
Delete an Email Account
1. Touch Apps > Accounts and Messaging
Settings > Email, and select the account you want to delete.
43
2. Touch Menu > Remove account.
3. Touch Remove account again to delete it from your phone.
Text and Multimedia Messaging
With Text Messaging (SMS), you can send and receive instant text messages between your wireless phone and another messaging-ready phone.
Multimedia messages, or MMS, can contain text and pictures, recorded voice, audio or video files, picture slideshows, contact cards (vCard), or appointments (vCalendar).
See your service plan for applicable charges for messaging.
Send a Text Message
Quickly compose and send text messages on your phone.
1. Touch Apps
2. Touch > Messaging.
to start a new message.
3. Add one or more recipients. You can:
Accounts and Messaging
44
l Enter phone numbers directly in the To field. If you’re sending the message to several phone numbers, separate the phone numbers with a comma.
l Enter a contact from your list by beginning to type the contact’s name. Touch the contact’s name to enter it. You can also add contact groups as recipients. 4. Touch the Type message field and compose your message.
Note: If a text message goes over 160 characters, or if it is addressed to multiple recipients, it is automatically converted to an MMS message.
5. When done, touch Send .
Send a Multimedia Message (MMS)
When you need to add a little more to a text message, you can send a multimedia message (MMS) with pictures, voice recordings, audio or video files, contact cards (vCard), or appointments (vCalendar).
1. Touch Apps 2. Touch > > Messaging.
to start a new message.
3. Add one or more recipients. You can:
l Enter phone numbers directly in the To field. If you’re sending the message to several phone numbers, separate the phone numbers with a comma.
l Enter a contact from your list by beginning to type the contact’s name. Touch the contact’s name to enter it. You can also add contact groups as recipients. Note: You can add a subject line by touching Menu > Add subject.
4. Touch the Type message field and compose your message.
5. Touch and select a media type from the list.
6. Touch Send .
Save and Resume a Draft Message
Any message that you do not send is automatically saved as a draft unless you delete it.
To resume composing the message:
1. In the messages list, touch the message marked with Draft that you want to resume editing.
2. When you are finished, touch Send Accounts and Messaging
.
45
New Messages Notification
Depending on your notification settings, the phone plays a ringtone, vibrates, or shows an icon in the status bar when you receive a new text or multimedia message. To change the notification for new text and multimedia messages, see Text and Multimedia Messaging for details.
To open the message, slide the status bar down to open the Notifications panel. Touch the new message to open and read it. Message Options
Change your text and MMS options.
n Touch Apps > Messaging > Menu > Settings.
l SMS Enabled: Touch SMS Enabled and then touch Default SMS app to select an alternate messaging app (such as Google Hangouts).
Note: If you choose a default messaging app other than Messaging (for example, Google Hangouts), you will not be able to use the Messaging app unless you restore it as the default messaging app.
l Storage
o Delete old messages: Check to delete messages as limits are reached.
o Text message limit: Touch to change the maximum number of text messages to store in each conversation thread. (This does not include locked messages.)
o Multimedia message limit: Touch to change maximum messages per conversation.
l Multimedia (MMS) messages
o Group messaging: Touch to choose if MMS is used to send a single message when there are multiple recipients.
o Auto-retrieve: Touch to let your phone automatically retrieve MMS messages.
o Roaming auto retrieve: Touch to let your phone retrieve messages when out of your network coverage area.
l Notifications: Touch to have phone message notifications appear in the status bar.
l Sound: Touch to choose the notification ringtone from a list.
l Vibrate: Touch to have your phone to vibrate when it receives a message.
Accounts and Messaging
46
Social Networking Accounts
Stay in touch on the go with all your social networking accounts. Post updates on Facebook® and Twitter®, review your LinkedIn contacts, see what everyone’s talking about from YouTube™, and more.
Facebook
Post updates, read what your friends are up to, upload pictures and check-ins, and more with onthe-go Facebook access.
Install the Facebook App on Your Phone Before you use Facebook on your phone, you must download and install the app from the Google Play Store app. 1. From home, touch Apps 2. Touch Search > Play Store . and search for "facebook". 3. Touch Facebook from the results list. 4. Touch Install, and then touch Accept. 5. When the download has completed, touch Open. Note: To open the app from the home screen, touch Apps > Facebook. Sign in to Your Facebook Account from Account Settings You can sign in to your Facebook account when you launch the app, or you can sign in from the account setting menu.
1. From the home screen, touch Apps 2. Touch > Settings > Add account. Facebook.
3. Read the disclaimer and touch I accept to continue. 4. Enter your Facebook username and password and touch Next. 5. Touch Done.
Accounts and Messaging
47
Chat Using Hangouts
Hangouts is Google's instant messaging app that uses your Google account to keep you in touch with friends and family. It can also be used as your phone's default text messaging app.
n Touch Apps > Hangouts.
l Start a new hangout: Touch (or swipe left), touch a name in your list of friends, and then follow the prompts to invite the user to a hangout. l Message via hangout: Touch an existing hangout and enter a message in the Send a
message field. Touch for a video chat.
l Change settings: Touch Menu to see your old Hangouts, change your profile pic, other settings and more. l Chat from a computer: You can chat from a computer too. Find out more at google.com/hangouts. Wireless Emergency Alerts
Read the following information about Wireless Emergency Alerts and your phone.
Wireless Emergency Alerts, also known as CMAS or PLAN, is a U.S. national emergency alert system. Emergency alerts can pop up to tell you about a national or local crisis. After you close an alert, you can reopen it by touching Apps > Messaging > Menu > Emergency alerts.
Tip: Emergency alerts have a special sound and vibration that is two seconds long, followed by one second, then another one second.
n To choose which types of alerts you receive, touch Apps Emergency alerts. > Settings > More > The U.S. and local governments send these alerts through your service provider. So you will always receive alerts for the area where you are, and you will not receive alerts if you are outside the U.S.
For more, visit ctia.org/consumer_info/safety/.
Accounts and Messaging
48
Apps and Entertainment
All your phone’s features are accessible through the Apps list.
Note: Like all apps, downloaded apps will use up memory, data, battery, and processing power—
some more than others. For example, a simple battery level widget will use less than a streaming music player app. After installing an app, if you're not happy with how much memory, data, battery or processing power it's using, uninstall it. You can always install it again later. If you doubt the safety of an app, don't install it. Note: Available applications and services are subject to change at any time.
Google Play Store
The Google Play Store is the place to go to find new apps for your phone. Choose from a wide variety of free and paid apps ranging from productivity apps to games. When you find an app you want, you can easily download and install it on your phone.
Note: You must first connect to the Internet using your phone’s Wi-Fi or data connection and you must set up a Google™ Account (see Accounts and Messaging) in order to buy and download apps from the Google Play Store.
n Touch Apps > Play Store.
Get all the fun games and cool apps you want. The Google Play Store provides access to applications created by developers worldwide, so you can find the app you want. If you need help or have questions about the Google Play Store, touch Menu > Help.
Important: Third-party applications may access your personal information or require Sprint to disclose your customer information to the third-party application provider. To find out how a thirdparty application will collect, access, use, or disclose your personal information, check the application provider’s policies, which can usually be found on their website. If you aren’t comfortable with the third-party application’s policies, don’t use the application.
Find and Install an App
Search for and download apps for your phone.
1. Touch Apps > Play Store.
2. When you open the Google Play Store for the first time, you must agree to the terms of service. Touch Accept to continue and touch Apps.
3. To browse, flick the screen left or right to locate different types of apps:
Apps and Entertainment
49
l CATEGORIES: Touch a category, for example, Games, Entertainment, or Finance. Once you have chosen a category, flick through the pages such as TOP PAID, TOP FREE, TOP
NEW PAID, and more.
l FEATURED: Take a look through some great apps: touch the Sprint logo for Sprint Featured Apps, or check out Staff Picks, Games, or Editor’s Choice when you open the Google Play Store.
l Search by name: Touch Search on the Google Play Store home screen, type in the name or kind of app you’re looking for and then touch box. Or, touch the microphone icon Search to the right of the search to start a Voice Search.
4. Touch the app you want to install. Then, touch Install (if app is free) or touch the price.
5. If an app you are downloading requires access to your data or control of functions on your phone, you’ll be asked to give your permission. After selecting Install, the app will download. After touching the price, you may be asked to sign in to an additional Google Account. Sign in and select Accept to proceed. Follow the on-screen instructions. To see the download progress, open the notifications window.
After you download an app, touch Apps and the icon for that app.
Note: You need a Google Wallet™ account to purchase items on Google Play. See Create a Google Wallet Account to set up an account if you do not have one.
Warning: Read the notification carefully! Be especially cautious with applications that have access to many functions or a significant amount of your data. Once you touch OK on this screen, you are responsible for the results of using this item on your phone.
Create a Google Wallet Account
You need a Google Wallet™ Account to purchase items from the Google Play Store.
n On your computer, go to wallet.google.com to create a Google Wallet Account.
– or –
The first time you use your phone to buy an item from the Google Play Store, you’re prompted to enter your billing information to set up a Google Wallet Account.
Request a Refund for a Paid App
If you are not satisfied with an application, you can ask for a refund within 24 hours of the purchase. Your credit card is not charged and the application is uninstalled from your phone.
Apps and Entertainment
50
If you change your mind, you can install the application again, but you can’t request a refund a second time.
1. Touch Apps > Settings > Apps > Downloaded.
2. Touch the application to uninstall.
3. Touch Uninstall & refund. Your application is uninstalled and the charge is cancelled.
4. Touch the reason for removing the app, and then touch OK.
Manage or Remove Apps
Manage or remove the apps installed on your phone.
1. Touch Apps > Settings > Apps.
2. Touch an app in the list, and then touch Uninstall (for apps you downloaded), Clear cache, or other options.
Note: To reinstall any downloaded items, touch Apps > Play Store.
Download Apps from the Web
You can also download apps from the Web.
Warning: Apps downloaded from unknown sources can include spyware, phishing, or viruses that affect your phone, phone performance, and personal data. For security, download apps only from trusted sites, like Play Store.
Note: Downloaded apps are stored in your phone’s memory.
1. To allow your phone to download apps from any Web page, touch Apps Security > Unknown sources > OK.
2. To launch the browser, touch Apps > > Settings > Chrome.
3. Find the app you want to download and touch the download link.
Tip: Choose your apps and updates carefully, as some may impact your phone’s performance.
Note: When installing an app, make sure you read the alerts that tell you what information the app will access. If you don’t want the app to have access to this information, cancel the installation.
Apps and Entertainment
51
Google Maps
Use Google Maps™ to help you figure out where you are and get you where you’re going. Share this information with your friends and family on a real time basis or by messaging.
Find out where you are, or get directions to where you are going.
n Touch Apps > Maps.
Google Maps offers powerful, user-friendly mapping technology and local business information—
including business locations, contact information, and driving directions.
For help or to personalize your mapping experience, touch Menu > Help.
Set Your Location Sources
You can set your phone to determine your location using GPS satellite signals (highly accurate, but uses battery power) or using the mobile network (less accurate, but conserves battery power). You can also turn off access to your location. See Location Settings.
Apps and Entertainment
52
Share and Report Your Location You can fine tune the location settings allowed for family and friends and the frequency of location reporting:
n Touch Apps > Maps > > Settings.
Find Any Location
1. Touch Apps > Maps > Search .
2. Enter text in the search box, such as an address, business, or city, and then touch Search.
Tip: If it’s an address you have visited before, select it from the list.
3. Touch the location you’re searching for in the results list.
Get Directions and Navigation Options
1. Touch Apps > Maps > .
2. Enter a starting point address or touch 3. Enter an end point address or touch and say address.
and say address.
4. Select your mode of transport (car, public transport, bicycle or walk).
l To view your directions on a list, touch estimated time/miles.
– or –
To have your phone provide turn by turn driving directions, touch Start. 5. For more options, touch > Settings.
l More from your history: If you have already used maps or navigation on your phone, you can choose from a list of previously searched for locations.
Select Map Mode
On a map, touch to touch and add one or more information types to your map view:
l Traffic (map with traffic conditions)
l Public transit (public transportation routes)
Note: Options for public transportation include bus, subway, train, tram/light rail, all.
l Bicycling (map with bike lanes) l Satellite (map with photos)
Apps and Entertainment
53
l Google Earth (geographical data)
Tip: To turn and tilt the map, rotate two fingers on map to turn it or drag down/up to tilt.
Google Play Music
Listen and create playlists anytime with music on your phone.
To play music on your phone:
n Touch Apps
> Play Music.
l Go back: When you open a song or artist list, touch in the top left to go back.
l Shuffle or repeat: During a song, touch the empty space next to the music controls to show shuffle and repeat at the bottom. Touch once to repeat the current song list, or twice to repeat only the current song.
l Volume: Press the volume keys.
l File types: Your phone can play MP3, M4A, AAC, AAC+, MIDI, and WAV files.
l During a flight: Press and hold the Power key and then touch Airplane mode to turn off all your network and wireless connections and listen to music during a flight.
Apps and Entertainment
54
Get Music
There are several ways to load music on your phone.
Note: Copyright – do you have the right? Always follow the rules. See Content Copyright.
Transferring Music from a Windows Computer
1. Using a USB cable, connect your phone to your computer.
2. Flick down the status bar, and make sure that your phone’s USB connection is set to Media
device (MTP).
Note: If the USB connection options do not appear, you can change the settings by touching Apps
> Settings > Storage > Menu > USB computer connection > Media device (MTP).
3. Your phone’s internal storage appears on your computer as a drive. You can copy music files on to your phone’s storage as you would to any other drive.
4. When finished, disconnect your phone from your computer.
Transferring Music from a Macintosh® Computer
Note: Mac OS does not natively support Media device (MTP) file transfer. To transfer media files between your phone and a Mac, you will need to use Android File Transfer. For more information on Android File Transfer see www.android.com/filetransfer.
1. Install Android File Transfer, and then open it.
Note: Once you have used Android File Transfer for the first time, you will no longer need to open it before connecting your phone. It will open automatically when you connect your phone to your computer.
2. Using a USB cable, connect your phone to your computer.
3. A window showing the contents of your phone appears. You can then copy music files on to your phone.
4. When finished, disconnect your phone from your computer.
Tips and Tricks
Check out these tips and tricks to make the most of your music.
n Hide the music player: To use another app while your music plays, touch Home to the music player, flick down the status bar and touch the song title.
. To return Tip: Control music playback from the Home screen by adding the Google Play™ Music widget.
Apps and Entertainment
55
n Playlists: Touch next to a song in your library to add it to a playlist or show other options. To edit, delete and rename a playlist, touch and hold its name in the music library.
n Get Help: To get help or access your Google Play Music with a computer visit www.google.com/music.
Watch on Google Play
Find and rent movies to watch on your phone, tablet, or computer. n Touch Apps > Play Movies & TV.
To shop, rent, or watch, go to www.google.com/play and choose “Movies & TV”.
Google Play Games
Download and play the latest fun games.
n Touch Apps > Play Games > Play Games.
l Challenge friends: You can play against people in your Google+ circles. Scroll down to Players and choose a person or touch Add friends.
Apps and Entertainment
56
l Find more friends: Scroll down to You may know and choose a person or touch SEE
MORE.
Google Play Books
Read your favorite books when and where you want.
n Touch Apps > Play Books > Read Now. l Turn pages: While reading the book, turn the pages by flicking them.
l Recent page: When you open a book, it shows the page you were reading last.
l Table of contents: Touch a book page, then touch Menu to open the table of contents or to change the view.
l Close: To return to your book list, touch the book title at the top.
l Shop: To shop for books, touch Apps > Play Books > Shop.
Browse by category or touch and search for a title or author. Touch a book to show details. Then, touch the book’s price to buy it (or touch OPEN to open a free book). After you confirm purchase, the book appears in your library.
Apps and Entertainment
57
Google Play Newstand
Read your favorite magazines and newspaper when and where you want.
n Touch Apps > Play Newsstand.
FM Radio
Listen to your favorite radio stations when and where you want.
n Touch Apps > FM Radio.
Tip: To listen to FM radio, you must plug in wired headphones. The headphones act as an antenna to pick up the radio signals.
YouTube
Share videos with YouTube™ users everywhere. You don’t need a YouTube account to browse and view videos. If you set up your Google™ Account (see Create a Google Account) you will be automatically signed in to YouTube™.
n Touch Apps > YouTube.
Note: If you want a YouTube account, go to youtube.com. Click Sign in, then click CREATE AN
ACCOUNT.
Apps and Entertainment
58
Web and Data
Your phone’s data capabilities let you wirelessly access the Internet or your corporate network through a variety of connections, including Wi-Fi, Data Services (3G Network), and Virtual Private Networks (VPN).
The following topics address your phone’s data connections and the built-in Web browser. Additional data-related features can be found in Accounts and Messaging, Apps and Entertainment, and Tools and Calendar.
Wi-Fi
Wi-Fi provides wireless Internet access over distances of up to 300 feet.
The availability and range of the Wi-Fi signal depends on a number of factors, including infrastructure and other objects through which the signal passes.
Note: Your phone supports Wi-Fi modes 802.11 b, g, and n.
Turn Wi-Fi On or Off
Use the Wi-Fi settings menu to enable your phone’s Wi-Fi radio and connect to an available Wi-Fi network.
n Touch Apps Web and Data
> Settings > Wi-Fi, and then touch ON or OFF.
59
Note: To extend battery life, turn off Wi-Fi power when not in use.
Tip: You can turn off Wi-Fi notifications. Touch Menu > Advanced and uncheck the box next to Network notification.
Wi-Fi Search and Connect
To find networks in your range, follow the instructions below.
1. Touch Apps > Settings > Wi-Fi.
2. Turn on Wi-Fi to scan for available networks. If Wi-Fi is already on, touch Wi-Fi to see the list of networks your phone finds within range.
Tip: To see your phone’s MAC address or other Wi-Fi details, touch Menu > Advanced.
3. Touch a network to connect.
4. If necessary, enter Network SSID, Security, and Wireless password, and touch Connect. When your phone is connected to the network, the wireless indicator appears in the status bar.
Tip: When you are in range and Wi-Fi is on, you will automatically reconnect to available networks you’ve connected to before.
Chrome Browser
The Chrome browser combines minimal design with sophisticated technology to make the Web faster, safer, and easier.
Web and Data
60
n Touch Apps > Chrome.
l Go to a webpage: Touch the address bar at the top of a page and enter a webpage address. Tip: Touch Search to open the search window, and then enter a webpage address in the Google text box at the top of the screen.
Note: If you can’t connect, contact Sprint.
l Create or open bookmarks: Open the address bar (if you do not see the address bar at the top, drag the page down) then touch Menu > Bookmarks.
l Mobile sites: Some websites automatically show you a “mobile” version of their page—if you want to show the standard computer versions of all websites, touch Menu > Request
desktop site.
l Reload: If a page doesn’t load correctly, try touching .
l Clear history: In the browser, touch Menu > Settings > Content settings > Website
settings. Then touch the Web site you want to clear and touch Clear stored data.
Tip: For more about Google Chrome, visit support.google.com/chrome/.
Web and Data
61
Connect Your phone uses the mobile phone network (over the air) or a Wi-Fi connection to automatically access the Web.
Note: Your service provider may charge to surf the Web or download data over your mobile phone network.
To use a Wi-Fi connection: n Touch Apps > Settings > Wi-Fi, and then touch ON. Touch Wi-Fi to see a list of nearby wireless networks. Touch a network to connect.
Select Links
When you touch a link in the browser, your phone outlines it and goes to that page. If you touch and hold the link, your phone shows a list of options, such as Open in new tab or Save link.
See Browser Options
n Touch Menu with the browser open to choose these options.
Options
Description
New tab
Open a new tab.
New incognito tab
Pages you view in this tab are not added to your browser or search history.
Bookmarks
See your bookmarks.
Other devices
See recent websites you explored on any devices you have related to your phone such as your computer.
History
See all websites you explored on any devices you have related to your phone organized by date.
Share Share page by using Bluetooth, Email, and more or save the URL address to the clipboard.
Find in page
Provide a search word to locate on the current Web page.
Request desktop site
Website appears as it would on a computer instead of in a mobile format.
Settings
Open page and privacy settings.
Help
Go to a Web help guide.
Web and Data
62
Adjust Browser Settings
You can change the page settings for your browser, including default zoom level, preferred search engine, pop-up blocking, display options, and more.
1. Touch Chrome > Menu > Settings.
2. Choose from these options:
l [Google Account]: Set Chrome options for your Google Account (if you are signed in to a Google Account).
l Search engine: Choose your preferred search engine.
l Autofill forms: Allows you to store personal and credit card information to automatically fill in this information for you on the Web.
l Save passwords: Lists all the sites for which you have stored an access password.
l Privacy: Manage the browser’s navigation and network settings.
l Accessibility: Set browser accessibility features such as comfortable text size and forced zoom. For additional Accessibility options and features, see Accessibility Settings. l Content settings: Manage internet features such as blocking pop-ups, accepting cookies, and clearing cached (stored) Website data.
l Bandwidth management: Choose condition to enable preloading of WebPages.
l About Chrome: View Chrome app version, phone OS version, and other information.
Voice Search on the Home Screen
Use the Google Search bar on your Home screen to quickly search with voice or text. n Touch the Google Search bar and start typing search words or touch and begin speaking.
Tip: If searching with voice, the microphone turns red while it is listening to you. If it is gray, touch it again to change or speak new search words.
Note: With Google Voice search, you can also narrow search results to images, places, news, and more. After initial search, choose an option from the slider bar at the bottom of the screen.
Web and Data
63
Virtual Private Networks (VPN)
From your phone, you can add, set up, and manage virtual private networks (VPNs) that allow you to connect and access resources inside a secured local network, such as your corporate network.
Prepare Your Phone for VPN Connection
Depending on the type of VPN you are using at work, you may be required to enter your login credentials or install security certificates before you can connect to your company’s local network. You can get this information from your network administrator.
Before you can initiate a VPN connection, your phone must first establish a Wi-Fi or data connection. For information about setting up and using these connections on your phone, see Wi-Fi.
Add a VPN Connection
Use the Wireless & networks settings menu to add a VPN connection to your phone.
1. Touch Apps > Settings > More… > VPN.
2. Touch Add VPN network , and then enter the information for the VPN you want to add.
l Information may include Name, Type, Server address, PPP encryption (MPPE), and advanced options.
l Set up all options according to the security details you have obtained from your network administrator.
3. Touch Save.
The VPN is then added to the VPNs section of the VPN settings screen.
Connect to or Disconnect from a VPN
Once you have set up a VPN connection, connecting and disconnecting from the VPN is easy.
Connect to a VPN
1. Touch Apps > Settings > More… > VPN.
2. In the VPNs section, touch the VPN that you want to connect to.
Web and Data
64
3. When prompted, enter your login credentials, and then touch Connect. When you are connected, a VPN connected icon appears in the notification area.
4. Open the Web browser to access resources such as intranet sites on your corporate network. (For more information about browsing the Web, see Chrome Browser.)
Disconnect from a VPN
1. Drag the title bar down to open the Notifications panel.
2. Touch the VPN connection to return to the VPN settings screen, and then touch the VPN connection to disconnect from it. When your phone has disconnected from the VPN, you will see a VPN disconnected icon in the notification area of the title bar.
Web and Data
65
Camera and Video
Use your phone’s camera and video camera to take and share pictures and videos.
Take Photos
Take super clear photos and share them.
To take a photo:
1. Touch Apps > Camera. l To zoom the photo, drag up or down with one finger.
l For a widescreen view, turn the phone sideways.
l Touch to switch the camera to the front to take a picture of yourself.
2. To take a single photo, touch anywhere on the screen.
– or –
For a quick burst of multi shot photos, touch and hold the screen.
Camera and Video
66
After you take a photo, the photo is stored and you are ready to snap another. If you want to quickly check your last shots from within the camera mode, swipe the camera image left to open the Gallery. Touch Back to return to the camera.
Tip: To view your photos later in the Gallery, touch Apps > Gallery.
Photo Options
You can make adjustments to optimize your shot. Before snapping your photo, drag the screen right to see the wheel with these options:
Note: To see previous photos you’ve taken, drag the screen left.
n
HDR: Turn on HDR (High-dynamic-range) effect for better pictures in challenging lighting situations.
n
Flash: Set On, Off, or Auto.
n
Touch to Focus: Set the camera to focus on the object you touch in the screen.
n
n
Slow Motion: Take a slow motion video.
Panorama: Take a wide-angle shot. Use the on-screen guide to slowly pan while you are taking the photo. n
Location: Tag your photos with a location.
n
Widescreen: Take widescreen photos.
n
Shutter click: Set shutter click On or Off.
Edit, Share or Delete Photos
Touch any open photo to wake the available options for editing, sharing, or deletion.
n To share the photo, touch Share > and then touch a share method such as Messaging, Bluetooth, Hangouts, or Email. Touch See all to see a full list of sharing options.
n To post the photo on Google Drive, touch Share >See all > Drive.
n To delete the photo, touch .
n To edit the photo, touch .
n For additional options, touch Menu .
Camera and Video
67
Record Videos
Record high-quality videos using your phone’s video camera.
1. Touch Apps > Camera and then touch . l The camera starts recording right away.
2. Touch to stop the recording.
3. Swipe left on the screen to open the Gallery:
l To play the video, touch .
l To send the video in a message or post it online, and then touch .
l To delete the video, touch .
4. For additional options, touch Menu .
Capture Your Screen
Share a screen capture of your favorite playlist, your new high score, or a friend’s contact information. If you can show it on your phone, you can share it with your friends. Your screenshot is saved in the Gallery.
n To capture your phone’s screen, press and hold the Power and Volume Down keys at the same time. l To open the Gallery to see your screenshot, touch Apps l To share the screenshot, touch Share > Gallery > Screenshot.
.
Tip: You can edit your screenshot using the photo editing tools. Touch the photo to show the tools and touch .
View Photos and Videos
Using the Gallery application, you can view photos and watch videos that you’ve taken with your phone’s camera, downloaded, or copied onto your storage card.
Camera and Video
68
You can do basic editing, such as rotating and cropping, on your saved photos. You can also make a photo your contact picture or wallpaper and share photos with your friends.
n Touch Apps > Gallery and touch a folder, Camera, or Screenshot.
n Touch a photo thumbnail to view, edit, and send. Tip: To select multiple files for sharing or deletion, open a folder, touch and hold a photo, then touch others.
Edit Your Gallery Photos
Many options are available to make changes to your photos while you view your photos.
1. While you’re viewing a photo, touch the photo to see options.
2. Touch Menu .
3. Choose from these options:
l Slideshow: Play a slideshow of your photos.
l Rotate left: Rotate the photo 90 degrees to the left.
l Rotate right: Rotate the photo 90 degrees to the right.
Camera and Video
69
l Crop: Touch None to select from a list of preset reduction ratios or you can drag the grid to manually reset the size. This option also opens the full set of editing tools.
l Set picture as: Set the photo as a Contact photo or Wallpaper.
l Details: See the recorded information for this photo, such as Title, Time, Width, Height, Exposure, Storage path, and more. l Print: Touch the name of your device (the top option) to choose a printer. Touch any other option to set up your printing.
Share Photos and Videos
Send your photos to friends, family or to your favorite social media from the Gallery. The Gallery stores all your screenshots, photos and videos.
1. Touch Apps > Gallery.
2. Touch a folder to open it.
3. Touch a photo or video, and then touch Share and select an option.
Tip: To learn how to copy photos to/from a computer, go to Connect Your Phone to Your Computer.
Camera and Video
70
Tools and Calendar
Learn how to use many of your phone’s productivity-enhancing features.
Calendar
Create and manage events, meetings, and appointments. n Touch Apps > Calendar.
Touch the date to view your calendar events by Day, Week, Month, or Agenda. When you highlight an event, more details appear.
Tip: You can set up multiple calendars by using your Gmail™ account so you can access them from your phone wherever you go.
Add Calendar Events
1. From any view, touch Menu > New event. Enter the event name, location, start time, and other details. You can even set a reminder so you don’t forget about the event. (When you set the reminder time to 0 minutes, it plays at the event start time.) 2. When you finish entering event details, touch Tools and Calendar
DONE.
71
Manage Calendar Events
n To edit an event, touch it, and then touch . If it is a recurring event, select whether to edit only this event, this and future events, or all events. When you’re finished, touch DONE.
n To delete an event, touch it, and then touch and OK. If it is a recurring event, select whether to remove only this event, this and future events, or all events.
n To find a specific event, touch Menu > Search and enter in the event name. Touch touch the event to view details.
and Tip: Add a Calendar widget to your home screen. Touch Apps > WIDGETS (at the top), then touch and hold the Calendar widget to add it to your home screen.
Clock
Use your phone as an alarm clock, timer, or stopwatch.
n Touch Apps > Clock.
l To turn an alarm on or off, touch Set alarm to see the list of existing alarms, and then touch OFF or ON next to the alarm.
l When an alarm rings, touch minutes.
l To add an alarm, touch and drag to to turn it off or drag to to snooze for ten and enter alarm details. Touch DONE when you are finished.
l Settings: To change your alarm sound, snooze delay, or other settings, touch Menu > Settings.
l Timer: For a timer, touch .
l Stopwatch: For a stopwatch, touch .
Tip: To set your current date, time, time zone, and formats, touch Apps & time.
> Settings > Date
Calculator
Your phone comes with a handy calculator.
n Touch Apps Tools and Calendar
> Calculator.
72
Your calculator has basic and advanced views. n To change views, touch Menu > Advanced panel/Basic panel. n To clear history, touch Menu > Clear history.
Quickoffice
With the Quickoffice® app, you can edit or create documents, spreadsheets, or presentations. You can also view documents downloaded to your phone including Adobe Acrobat® PDF files.
n Touch Apps > Quickoffice.
Quickoffice Options
n Recent files: Lists all recently viewed documents you created and saved or downloaded.
n
Lists all files you downloaded or saved to the download folder.
n
New document: Use to create and edit documents.
n
New spreadsheet: Use to create and edit spreadsheets.
n
New presentation: Use to create and edit presentations.
Tip: For help, open your document and touch Menu > Help & feedback.
Create a New File
n To create a new file, touch New document, New spreadsheet, or New presentation and begin creating your document. Save your file by touching Tip: In documents or presentations, touch and then touching .
to add stored images or photos from your camera. Open a Document
n To open an existing file, touch Open file or touch the name of the document in Recent Files.
Quickoffice Tips
n Place your cursor by touching the text.
n Select text by double-tapping it.
n To choose formatting, save the file, or to choose other options, touch Menu .
Tools and Calendar
73
Update Your Phone
From time to time, updates may become available for your phone. n Using your phone:
l You may get an automatic notification of an available update on your phone. Simply follow the instructions to download and install.
l To manually check for updates, touch the Apps Update Motorola software.
> Settings > System Update > l Your phone downloads updates over your Wi-Fi connection (if available) or mobile network. We recommend that you download updates over a Wi-Fi connection. Remember, these updates can be quite large (25MB or more) and may not be available in all countries. If the mobile network updates are not available in your country, update using a computer.
n Using your computer:
l On your computer, go to sprint.com/support, search for your phone model, and check the “Software” links. If an update is available, follow the installation instructions.
Update Your Profile
This option allows you to automatically update your online user profile information. If you choose to change your user name and select a new one online, you must then update the user name on your phone.
1. Touch Apps > Settings > System Update > Update Profile. 2. Follow the onscreen instructions.
Note: If your data services or account syncing ever seems to go out unexpectedly, use this feature to reconnect with the network.
Voice Commands
You can control your phone by speaking to it.
Use voice actions to perform functions such as making a call dictating text in a message or email or searching the Web. To access Voice Search, touch Apps Tools and Calendar
> Voice Search.
74
n To begin a voice search while on the home screen, touch begins immediately.
and begin speaking. Your search Note: If you’re writing a text message, touch Voice to begin dictation mode. Your phone recognizes words you speak and enters them into your message.
n Or, touch Voice in the Google Search app or widget and speak. For example, you can say one of the following commands:
To…
Say…
Map a route
“navigate to”
Send a text message
“send text”
Make a call
“call”
Send email
“send email”
Find local businesses
“map of...”
Browse the Web
“go to”
Make a voice note
“note to self”
Get directions
“directions to”
Google Drive
Use Google Drive to store all of your photos, videos, documents, and more safely in one place, all private unless you choose to share. You can use Google Drive from all your devices.
You have 50 GB of extra storage for the next two years on top of the 15 GB you already get from Google. Touch Apps
offer.
Tools and Calendar
> Drive within 30 days of activating your phone to redeem this special 75
Bluetooth Connections
Bluetooth is a short-range communications technology that allows you to connect wirelessly to a number of Bluetooth devices, such as headsets and hands-free car kits, and Bluetooth-enabled handhelds, computers, printers, and wireless phones. The Bluetooth communication range is approximately 30 feet.
Tools and Calendar
76
Turn Bluetooth On or Off
Use the Bluetooth settings menu to enable or disable your phone’s Bluetooth capabilities.
n Touch Apps > Settings > Bluetooth and touch ON or OFF.
Note: To extend battery life, turn Bluetooth power off when not in use.
Connect New Devices
Use the Bluetooth settings menu to connect new devices to your phone.
Note: This feature requires an optional accessory.
Standard Method
To connect with a new device, you need to pair with it. You only need to do this once for each device. To connect again, just turn on the device.
1. Make sure the device you are pairing with is in discoverable mode.
Note: Refer to the guide that came with the device for details.
2. Touch Apps Tools and Calendar
> Settings > Bluetooth.
77
3. Touch ON to turn on and scan. If Bluetooth power is already on, touch SEARCH FOR
DEVICES.
4. Touch a device to connect.
5. If necessary, touch OK or Pair, or enter the device passkey (like 0000) to connect to the device. When the device is connected, the Bluetooth indicator appears in the status bar.
Note: Using a mobile device or accessory while driving may cause distraction and may be illegal. Always obey the laws and drive safely.
Reconnect Devices
Once you have paired a Bluetooth device with your phone reconnecting it is simple.
n To automatically reconnect your phone with a paired device, simply turn on the device.
n To manually reconnect your phone with a paired device, touch the device name in the Bluetooth devices list.
Disconnect Devices
When you are not using a Bluetooth device, you can disconnect it from your phone.
n To automatically disconnect your phone from a paired device, simply turn off the device.
n To manually disconnect your phone from a paired device, touch the device name in the devices list, and then touch OK.
Rename the Phone
You can change the device name for your phone.
n Touch Apps > Settings > Bluetooth > Menu > Rename phone. Edit the existing name, or enter a new name, then touch Rename.
Rename a Paired Device
You can change the name of a device paired to your phone.
1. Touch Apps 2. Touch > Settings > Bluetooth.
next to the paired device name and then touch Rename. 3. Edit the existing name or enter a new name, then touch OK.
Tools and Calendar
78
Motorola Assist
You can create Motorola Assist rules to automatically reply to texts when you’re driving, silence your ringer during meetings, dim the screen to conserve your battery when it runs low and more. You can even set a different wallpaper for when you're at home.
Motorola Assist suggests actions to automate, based on how you use your phone. When you see a suggestion in the status bar, drag the bar down to accept or delete it. If you are tired of doing the same tasks over and over again, let Motorola Assist do them for you.
n Touch Apps > Assist.
For more information, open the Motorola Assist app and touch Menu .
Connect Your Phone to Your Computer
You can connect your phone to a computer by using a USB cable.
Note: The first time you use a USB connection, your computer may indicate that drivers are being installed. Follow any prompts you see to complete the installation. This may take a few minutes.
1. Connect a Motorola micro USB data cable from your phone’s micro USB port to a USB port on your computer. Your phone should show in the status bar.
Note: Make sure to connect the phone to a high power USB port. Typically, these are located directly on your computer.
2. On your phone, flick down the status bar and touch the USB notification to see the USB connection options.
Note: If the USB connection options do not appear, you can change the settings by touching Apps > Settings > Storage > Menu and then touch USB computer connection > Media
device (MTP).
3. Touch an option:
l Media device (MTP): Transfer media files between your phone and computer.
Note: To transfer media files between your phone and a Mac, you will need to use Android™ File Transfer. For more information on Android File Transfer see android.com/filetransfer.
l Camera (PTP): Transfer photos using camera software, and transfer any files that do not support MTP.
Tools and Calendar
79
Tip: You can use Google Drive to upload files to the Web so you can access them from a computer or other Android devices. See Google Drive.
Tools and Calendar
80
Settings
The following topics provide an overview of items you can change using your phone’s Settings menus.
Note: Your phone’s settings menus may differ.
Wireless and Network Settings
This group of settings lets you control your phone’s wireless network settings, Wi-Fi settings, Bluetooth, and more.
n To quickly see frequently viewed settings, swipe down the top of your screen to open your Notifications and touch .
Airplane Mode
Airplane Mode turns off all your wireless connections and allows you to use many of your phone’s features when you are in an airplane or in any other area where calls and data are prohibited. When you set your phone to Airplane Mode, it cannot send or receive any calls or access online information.
n Press and hold the Power key and then touch Airplane mode.
Settings
81
Wi-Fi Settings
Your phone lets you take advantage of Wi-Fi connections. For details on your phone’s Wi-Fi features and settings, see Wi-Fi. n Touch Apps > Settings > Wi-Fi.
Bluetooth Settings
Your phone’s Bluetooth capabilities let you use wireless headsets, send and receive pictures and files, and more. For details on your phone’s Bluetooth settings, see Bluetooth Connections.
n Touch Apps > Settings > Bluetooth.
VPN Settings
You can set up a Virtual Private Network (VPN). Select either basic or advanced options.
n Touch Apps > Settings > More… > VPN.
Call Settings
Your phone’s Call Settings menu lets you set up your voicemail options and a number of other settings.
Voicemail Settings
If you need to adjust your voicemail provider or access settings, use the Voicemail settings menu.
n Touch Apps > Voicemail > Menu > Settings.
For more about voicemail, see Voicemail or Visual Voicemail.
Other Call Settings
Options under the Call Settings menu include Voicemail, Dial Pad touch tones, Quick responses (editable text to send to callers), Auto-retry, Hearing Aids, TTY mode, DTMF tones, and Voice Privacy.
Settings
82
n Touch Phone > Menu > Settings to access your call settings.
TTY Mode
TTY (also known as a TDD or Text Telephone) is a telecommunications device that allows people who are deaf, hard of hearing, or who have speech or language disabilities to communicate by telephone.
To turn TTY Mode on or off:
n Touch Phone > Menu > Settings > TTY mode.
Your phone is compatible with select TTY devices. Please check with the manufacturer of your TTY device to ensure that it is compatible with digital cell phones. Your phone and TTY device will connect via a special cable that plugs into your phone’s headset jack. If this cable was not provided with your TTY device, contact your TTY device manufacturer to purchase the connector cable.
Note: If you need to charge your phone at the same time, make sure to first plug in your TTY device so that your phone can properly connect to it. Then plug in the charger.
Warning: 9-1-1 Emergency Calling:
It is recommended that TTY users make emergency calls by other means, including Telecommunications Relay Services (TRS), analog cellular, and landline communications. Wireless TTY calls to 9-1-1 may be corrupted when received by public safety answering points (PSAPs), rendering some communications unintelligible. The problem encountered appears related to software used by PSAPs. This matter has been brought to the attention of the FCC, and the wireless industry and the PSAP community are currently working to resolve this.
Hearing Aid Settings
If you wear a hearing aid, select this setting for compatibility.
n Touch Phone > Menu >Settings > Hearing Aids.
Text Message Reply
When you ignore an incoming call, your phone can automatically send a text message to the caller.
n To send a text message to an ignored call, slide from the list or create a new one.
n To edit the outgoing messages, touch and touch a quick response to edit it.
up to and touch a stored text message Phone > Menu > Settings > Quick responses, Voice Privacy
Turn on enhanced privacy mode to make it harder for devices to pick up your frequency. n Touch Settings
Phone > Menu > Settings > Voice privacy.
83
Sound Settings
Control your phone’s audio, from ringtones and alerts to touch tones and notifications.
Volume
n To set volume, just press the volume buttons in the home screen (ringtone volume), during a call (earpiece volume), or while playing music or a video (media volume).
Phone Ringtone
n To set a ringtone for incoming phone calls, or silence the ringtone, touch Apps > Settings > Sound > Phone ringtone. Select a ringtone, and touch OK.
Vibrate When Ringing
n To add a vibration to Silent mode, touch Apps ringing.
> Settings > Sound > Vibrate when
System Settings
The System settings menu lets you select whether you hear tones when touching numbers on the dialpad, selecting on-screen options, and more.
n Touch Apps > Settings > Sound.
l Default notification sound: Select from various tones to play when you get a notification, or select None. l Dial pad touch tones: Play tones when using the dialpad.
l Touch sounds: Play sounds when making an on-screen selection.
l Screen lock sound: Play sounds when locking or unlocking the screen.
l Vibrate on touch: Vibrate when touching keys and during certain other instances.
l Emergency tone: Set to Off, Alert or Vibrate.
Settings
84
Display Settings
Adjusting your phone’s display settings not only helps you see what you want, it can also help increase battery life. To set display brightness, see the following:
Brightness
n To set display brightness, touch Apps > Settings > Display > Brightness. Slide the dimmer switch setting left or right, or touch Auto to have the phone automatically set the brightness.
Auto-Rotate Screen
n To set the screen to rotate automatically when you rotate the phone from portrait to landscape mode, touch Apps > Settings > Display > Auto-rotate screen.
Display Timeout Delay
n To set the number of minutes before your screen goes dark, touch Apps Display > Sleep and select the number of minutes.
> Settings > Note: To save battery charge, make your phone go to sleep quicker.
Font Size
n To set the font size, touch Apps > Settings > Display > Font size.
Daydream
n To set up a screen saver when docked or charging, touch Apps > Settings > Display > Daydream.
Wallpaper Settings
To apply a new wallpaper:
1. Touch and hold an empty spot on your home screen.
– or –
Touch Apps > Settings > Display > Wallpaper.
2. Touch Gallery, ID wallpapers, Live wallpapers, Photos, or Wallpapers and choose a wallpaper.
3. Touch Set wallpaper.
Settings
85
Storage Settings
The Storage settings menu lets you manage internal storage on your phone.
n To see how much storage your applications are using, touch Apps Storage.
> Settings > A bar at the bottom tells you how much app storage space you have left. At the top, touch the list of RUNNING, or ALL apps, then touch an app in the list to show its details and storage usage. You can touch Clear data or touch other options.
n To show which apps are using the most data, touch Apps > Settings > Data usage. Flick up the screen to see the individual apps with their data usage below.
Note: Apps that use a lot of data might also use a lot of battery power.
Note: Usage information is provided to help you manage your phone. This may not match the amounts charged by your service provider.
Settings
86
Battery Settings
Monitor your phone’s battery usage through this settings menu. View which functions are consuming your battery’s charge and at what percentage.
Battery Usage
Check your battery usage.
n To see battery usage statistics, touch Apps > Settings > Battery.
Warning: Use only Sprint-approved or Motorola chargers with your phone. The failure to use a Sprint-approved or Motorola charger may increase the risk that your phone will overheat, catch fire, or explode, resulting in serious bodily injury, death, or property damage.
Sprint-approved or Motorola accessories can be found at Sprint Stores or through Motorola; or call Sprint Customer Care. They’re also available at sprint.com.
Battery Capacity
Your phone is equipped with a battery that allows you to recharge it before it is fully drained. Note: Searching for service, vibrate mode, browser use, and other variables may reduce the battery’s talk and standby times.
Tip: Watch your phone’s battery level indicator and charge the battery before it runs out of power.
Warning: Don't try to remove or replace the battery yourself—doing so may damage the battery and could cause burning and injury. If your phone becomes unresponsive, try a reboot—press and hold both the Power and the Volume Down keys until the screen goes dark, and your phone restarts.
Charging the Battery
Keeping track of your battery’s charge is important. If your battery level becomes too low, your phone automatically turns off, and you will lose any information you were just working on. Always use a Sprint-approved or Motorola desktop charger, travel charger, or vehicle power adapter to charge your battery.
1. Insert the small end of the USB cord into the charger/accessory jack on the left side of your phone. 2. Insert the larger end of the USB cord into the AC adapter.
Settings
87
3. Plug the AC adapter into an electrical outlet and charge for at least three hours.
With the Sprint-approved Li-Ion battery, you can recharge the battery before it becomes completely run down. Apps Settings
This menu lets you control your application settings, including allowing installation of non-Google Play™ Store applications, managing, and viewing running services.
Unknown Sources
You can set a warning to show before you install applications from vendors other than the Google Play Store.
n Touch Apps > Settings > Security > Verify Apps.
Manage Apps
Remove, stop, and manage your apps. 1. Apps > Settings > Apps.
2. Touch an app for more options.
3. To remove an app, touch Uninstall > OK.
Running Services
View apps that are currently running. n Touch Apps > Settings > Apps > RUNNING.
l To stop an app, touch the app and then touch Stop.
Location Settings
You Location settings menu lets you select how your phone determines its location (using the wireless network, GPS satellites, both, or neither). For more information on using maps and navigation, see Google Maps.
These features allow the network to detect your position. Turning Access to my location off will hide your location from everyone, except 9-1-1.
Note: Turning Access to My Location on will allow the network to detect your position, making some Sprint applications and services easier to use. Turning Access to My Location off will disable sharing for all purposes except 9-1-1, but will not hide your general location based on the cell Settings
88
site serving your call. No application or service may use your location without your request or permission. GPS-enhanced 9-1-1 is not available in all areas.
1. To choose the options for your phone’s location settings, touch Apps Location.
> Settings > 2. Touch the On/Off switch beside Location to turn the service on.
3. To select your Location options, touch Mode and then touch an option.
l High accuracy to use all available methods (GPS, Wi-Fi, and mobile network) to determine location.
l Battery saving to use only Wi-Fi and mobile networks.
l Device only to use only GPS to determine location. 4. To select your Location Services options, touch Google Location Reporting and select your Google location reporting options for each account you've added to your phone.
Security and Screen Lock Settings
The Security settings menus let you set phone security, lock codes, passwords, administrator settings, and more.
Set Up Screen Lock
You can increase the security of your phone by creating a screen lock. When enabled, you have to draw the correct unlock pattern on the screen, slide an icon, pose for face recognition, or enter the correct PIN or password to unlock the phone’s control keys and touchscreen.
n Touch Apps Settings
> Settings > Security. 89
Note: You can make emergency calls on a locked phone (see Call Emergency Numbers). A locked phone still rings, but you need to unlock it to answer.
n To lock the screen, press the Power key on the right side of the phone.
n To unlock the screen, press the Power key. Then, drag the lock to the outer circle to unlock your screen.
Slide Lock Slide an icon to open the phone.
n To set the slide lock, touch Apps When the screen is locked, touch > Settings > Security > Screen lock > Slide.
and drag to the outer circle that appears.
Pattern Lock Draw a pattern to unlock your phone:
1. To set the lock pattern, touch Apps > Settings > Security > Screen lock > Pattern.
2. Follow the instructions to draw your lock pattern, and then touch Continue.
3. When prompted, draw the pattern to unlock the phone, and then touch Confirm.
If you fail to draw the correct unlock pattern on the screen after five attempts, you will be prompted to wait for 30 seconds before you can try again.
Settings
90
PIN Lock
Enter four to sixteen digits to unlock your phone:
1. Touch Apps > Settings > Security > Screen lock > PIN.
2. Enter a numeric PIN, and then confirm it.
3. When prompted, enter PIN to unlock the phone.
If you fail to enter the correct PIN after five attempts, you will be prompted to wait for 30 seconds before you can try again.
Password Lock
Enter four to sixteen letters, digits, or symbols to unlock your phone:
1. Touch Apps > Settings > Security > Screen lock > Password.
2. Enter password, and then confirm it.
3. When prompted, enter the password to unlock the phone.
If you fail to enter the correct password after five attempts, you will be prompted to wait for 30 seconds before you can try again.
Face Unlock Use face recognition software to unlock your phone:
Note: This feature is less secure than a pattern, PIN, or password.
1. Touch Apps > Settings > Security > Screen lock > Face Unlock > Set it up.
2. Hold your phone at eye level, look into the front camera, and follow the instructions on the screen.
3. When the face capture is complete, you will be prompted to choose a pattern or PIN as a backup security measure you can use when the phone cannot see your face clearly.
Tip: To unlock the phone: When the screen is dark, press the Power key, and then frame your face in the square at the bottom to unlock.
Disable the Screen Lock
1. Touch Apps > Settings > Security > Screen Lock.
2. Draw your unlock screen pattern, use face recognition, or enter password or a numeric PIN, as prompted.
3. Choose None or set up another type of screen lock.
Note: If you forget your pattern, password, or your PIN, contact Sprint. Settings
91
Security Lock Timer
n Touch Apps > Settings > Security > Automatically lock, and then select a length of time your phone is idle before it locks.
Note: Security lock timer is only available if you have a screen lock enabled.
Allow Bluetooth Bypass
Allow your phone to remain unlocked when your Bluetooth device is connected. If your Bluetooth device is disconnected then your phone locks using the locking method you set up. n Touch Apps > Settings > Security > Trusted devices > Yes, I'm in.
Encryption
Encrypt the data stored on your phone and/or SIM card.
Encrypt Your Phone
1. To encrypt data on your phone, first set up a screen lock (see Set Up Screen Lock).
2. Touch Apps
> Settings > Security > Encrypt phone. 3. Select Encrypt phone to encrypt all personal data on your phone.
Note: Your phone must be fully charged and plugged into a charger to begin the encryption process. The entire process can take more than an hour to complete.
Passwords
Select whether to show passwords as you enter them instead of ******.
n Touch Apps > Settings > Security > Make passwords visible.
Device Administration
Activate the device administrator role so that you can have further control over erasing phone data, changing passwords, setting password rules, monitoring failed screen unlock attempts, and locking the screen.
n Touch Apps Settings
> Settings > Security > Device administrators.
92
Credential Storage
Use secure credential information from memory storage. n Touch Apps > Settings > Security and select from the following options:
l Trusted credentials: show trusted CA certificates.
l Install from storage: install credentials from storage.
l Clear credentials: clear all credential storage and reset the password.
Language and Input Settings
Your phone’s Language settings let you select a language for the phone’s screens and menus, as well as manage a personal user dictionary. The Keyboard settings let you select a preferred input method, control keyboard settings, and more.
Language Settings
The language settings menu lets you select an on-screen language and add custom words to your phone’s user dictionary.
Select Language
Set your menu language and region:
n Touch Apps Español.
> Settings > Language & input > Language and select English or Personal Dictionary
Add words to your personal dictionary so they appear as suggestions when you enter text.
1. Touch Apps > Settings > Language & input > Personal dictionary.
2. To add a word, touch , type the word, and touch Done.
Keyboard and Input Method Settings
The keyboard settings menu lets you set the input method for the touchscreen keyboard (Android keyboard or voice) and set options for each method.
Settings
93
Android Keyboard
Your phone’s touchscreen input method is the default multi-touch keyboard.
n Touch Apps > Settings > Language & input > set the following options:
to the right of Google Keyboard to l Input languages: Choose an input language.
l General
o Auto-capitalization: Automatically capitalize the next word after a period.
o Vibrate on keypress: Vibrate when you press a key.
o Sound on keypress: Make a sound when you press a key.
o Popup on keypress: Keys pop up as you touch them.
o Voice input key: Select where voice input key appears on keyboard.
l Text Correction
o Personal dictionary: Create your own dictionary.
o Add-on dictionaries: Install additional dictionaries.
o Block offensive words: Stop offensive words being used.
o Auto correction: Spacebar and punctuation automatically correct mistyped words.
o Show correction suggestions: Show word suggestions as you type.
l Gesture Typing
o Enable gesture typing: Input a word by sliding through the letters.
o Dynamic floating preview: See the suggested word while gesturing.
o Show gesture trail: Show letters already selected with a gesture.
o Phrase gesture: Adds spaces during a gesture addition of a word.
l Other options
o Next-word suggestions: Uses the previous word to offer next word options.
o Advanced settings: Additional options you may choose after you are familiar with your phone,
o Send feedback: Send your feedback about Google Keyboard.
o About Google Keyboard: Google Keyboard version data and links to see licenses, privacy policy, version, and bug reporting.
Settings
94
Google Voice Typing Google voice typing is automatic.
n Touch Apps > Settings > Language & input > to set the following options:
to the right of Google voice typing l General
o Block offensive words: Hide recognized offensive text.
o Offline speech recognition: Enables voice input while offline.
Voice Search
Set up the options your phone uses when you search by using voice commands or when it can respond to you with text-to-voice. n Touch Apps > Settings > Language & input > Voice Search to set the following settings for voice recognition:
l Language: Select a language.
l Speech output: Select Always, Informative only, or Hands-free only.
l Block offensive words: Hide recognized offensive text.
l Hotword detection: Say “OK Google” to launch voice search.
l Offline speech recognition: Enables voice input while offline.
l Personalized recognition: Improve speech recognition accuracy.
l Google Account dashboard: Manage your collected data.
l Bluetooth headset: Records audio through Bluetooth headset if available.
Text-to-speech Output
Set up your phone’s speech synthesis engine and speech rate.
n Touch Apps > following settings:
Settings > Language & input > Text-to-speech output for the l Google Text-to-speech Settings (touch ).
o Language: Sets the language for the spoken voice.
Settings
95
o Settings for Google Text to speech: Choose to auto update voices and use Wi-Fi only to update voices.
o Install voice data: Downloaded voice data is required for speech synthesis.
l Speech rate: Speed at which the text is spoken.
l Listen to an example: Play a short demonstration of speech synthesis that matches the settings you select in Speech rate.
Mouse/Trackpad
n Touch Apps > Settings > Language & input > Pointer speed. Use the slider to adjust the speed of a pointer device.
Privacy Settings
Your phone’s privacy settings allow you to back up the data on your phone and to reset its settings back to factory defaults.
Backup and Restore
Save yourself time and effort. Use Backup and Restore to save your personal data. If your phone is ever reset, your passwords and settings will automatically be restored.
Back Up My Data
Select whether to back up your personal data (passwords and settings) to Google servers.
n Touch Apps > Settings > Backup & reset > Back up my data.
Backup Account
Select an account to set as backup account.
n Touch Apps > Settings > Backup & reset > Backup account.
Automatic Restore
Set whether to automatically restore backed up data if you reinstall an app.
n Touch Apps Settings
> Settings > Backup & reset > Automatic restore.
96
Reset Your Phone
Selecting Reset phone resets all phone settings back to their default values and clears all information (text messages, contacts, emails, etc.) and downloaded apps.
1. Touch Apps > Settings > Backup & reset > Factory data reset.
2. Read the prompt and touch Erase everything to complete the reset. (Touch Back cancel.)
to Warning: All data on your phone will be deleted. Account Settings
The Accounts menu lets you add and manage all your email, social networking, and picture and video sharing accounts.
Set Up a New Account
1. Touch Apps > Settings > Add account.
2. Touch an account type:
l Corporate, Email, Facebook or Google.
3. Enter your account information and touch Next.
l Depending on the account type, you may need to enter an email address or user address, password, domain name, or other information. For Corporate accounts, contact your server administrator to determine what information you will need.
4. Touch Done when you are finished.
Manage Existing Accounts
1. Touch Apps > Settings.
2. Touch an account to manage its settings.
l Touch a field to edit it.
l Touch Menu > Remove account to delete it from your phone.
3. Touch Back Settings
when you are finished.
97
System Update
The System Update menu lets you manually search for and apply important phone and system updates.
n Touch Apps > Settings > System Update.
Date and Time Settings
Use the Date & Time settings menu either to select time and date format options.
Changing the Date & Time
To set date and time formats:
n Touch Apps format.
> Settings > Date & time > Use 24-hour format or Choose date
Accessibility Settings
The Accessibility menu lets you enable and manage accessibility-related applications. Accessibility features are there for everyone, helping to make things easier.
Note: For general information, accessories, apps, and more, visit motorola.com/accessibility.
You can customize your phone with more accessible features such as large text, power button to end call, text-to-speech output, and more.
n To access the accessibility options, touch Apps > Settings > Accessibility.
Accessibility Shortcut
Set an accessibility shortcut to use simple gestures to quickly activate Talkback and other accessibility features on your phone. n Touch Apps > Settings > Accessibility > Accessibility shortcut.
Sound Volume and Vibrate Settings
n You can choose the volume and the vibration settings for the various phone features. See Adjust the Sound Volume.
Settings
98
Display Brightness for Accessibility Your phone automatically adjusts the screen brightness when you’re in bright or dark places, but you can set your own brightness level instead. To set display brightness, see Display Settings.
Note: Setting brightness to a high level decreases your phone’s battery life. To maximize battery life, select Automatic brightness.
TalkBack
Use TalkBack to read out loud your navigation, your selections, even your books. Talkback reads all of the text you type except for passwords.
n To turn on TalkBack, touch Apps touch ON.
> Settings > Accessibility > TalkBack, and then Note: You might need to download a text-to-speech app.
TalkBack features make your phone more useable:
n Menus and screens: Touch an item in a menu or screen and your phone speaks the name.
n Dialer and text entry: Start typing, and your phone speaks each number or letter.
n Notifications: Flick the status bar down and your phone speaks all of the notifications.
n Books & more: Open a book, a file, a message, and more and the contents are read out loud (this feature is app dependent).
n Browsers: Enable Web pages in your browser to be read out loud (see support.google.com/chrome) Move between pages, paragraphs, lines, words, or characters.
You can navigate through your apps and menus to hear how voice readouts work on your phone. When in TalkBack mode, your phone may read out an item when you first touch it and may require you to touch it again to perform the action. n To pause/resume TalkBack:
l Wave your hand over the proximity sensor at the top of the phone. To activate this feature, touch Apps sensor.
> Settings > Accessibility > TalkBack > Settings > Use proximity
l When Explore by Touch is on, swipe down then right to open the global context menu, then use the menu to pause TalkBack.
Note: When you turn on Talkback, it allows you to add Explore by Touch.
Settings
99
Explore by Touch
You use Explore by touch to expand the functions of TalkBack. Your touches are read out loud as you move your finger around the screen.
n To turn on Explore by touch, when TalkBack is active, touch Apps Accessibility > TalkBack > Explore by touch.
> Settings > Tip: When you turn on TalkBack for the first time, your phone asks if you want to Enable Explore
by Touch? Touch OK to turn it on.
Explore by touch changes some touch gestures slightly so that the location of your touches can be read out loud.
n Touch something on the screen to hear a description or text readout.
n Double-touch anywhere on the screen to open or activate the last touched item.
n Swipe using two fingers to scroll through lists or between screens.
Shortcut gestures let you navigate your phone with simple swipe gestures (for example, swipe up then left in a single motion to go to the Home screen). n To verify or change these shortcuts, touch Apps TalkBack > Settings > Manage gestures.
n To learn about Explore by Touch, touch Apps Settings > Launch “Explore by touch” tutorial. > > Settings > Accessibility > Settings > Accessibility > TalkBack > n To turn off Explore by Touch when TalkBack is active, touch Apps > Settings > Accessibility > TalkBack > Settings, and uncheck Explore by touch.
Caller ID for Talkback
Do the following when you want to hear who is calling.
n To have your caller announced out loud, touch Apps Talkback > SETTINGS > Speak Caller ID.
> n To assign a unique ringtone to a contact, touch Apps > Settings > Accessibility > People, touch the contact, and then touch Menu > Set ringtone.
Settings
100
Zoom
Get a closer look at the screen with a few simple options. You can zoom in on maps, Web pages, and photos, magnify the screen with taps, and increase the size of text throughout your phone. You can also modify your browser for easier reading.
n To pinch to zoom in, touch the screen with two fingers and then drag them apart.
n To zoom out, touch the screen with two fingers and drag your fingers together.
Tip: To zoom in, you can also double-tap.
n To set up screen magnification so you can use tapping, touch Apps Accessibility > Magnification gestures. > Settings > l Triple tap the screen for full screen magnification, or triple tap and hold to temporarily magnify the screen.
n To show larger text throughout your phone, touch Apps Large text.
> Settings > Accessibility > n To set zoom, text size, contrast, and other accessibility options for your browser, touch Apps > Chrome > Menu >Settings > Accessibility. Tip: Use Force enable zoom to allow zooming on all webpages.
Touchscreen and Key Settings for Accessibility
You can optionally hear or feel when you touch or lock the screen.
n To hear or feel when you touch the screen, touch Apps from the following options:
> Settings > Sound and choose l To hear screen touches (clicks), select Touch sounds.
l To feel screen keyboard touches (vibrate), select Vibrate on touch.
l To hear when you lock or unlock the screen (click), select Screen lock sound.
Messages
To make text entry in messages even easier, use features like auto-complete, auto-correct, and auto-punctuate.
Settings
101
n To set the auto text features, touch Apps > Settings > Language & input, then touch next to a keyboard type.
Note: If you don’t want to type at all, then use your voice by touching keyboard.
on the touchscreen Hearing Aids
To help get a clear sound when using a hearing aid or cochlear implant, your phone may have been rated for use with hearing aids. If your phone’s box has “Rated for Hearing Aids” printed on it, then please read the following guidance.
Note: Ratings are not a guarantee of compatibility (visit motorola.com/hacphones). You may also want to consult your hearing health professional, who should be able to help you get the best results.
n To choose hearing aid options, touch Phone > Menu > Settings > Hearing aids.
n To change call volume during a call, press the side volume keys to set a call volume that works for you.
n To choose best phone position, hold the phone to your ear as normal during a call, and then rotate/move it to get the best position for speaking and listening.
TTY
You can use your phone in TTY mode with standard teletype machines. n To choose the TTY setting, touch Phone mode you need:
> Menu > Settings > TTY mode and select the l TTY full: Type and read text on your TTY device.
l TTY HCO: Hearing-Carry-Over – type text on your TTY device and listen to voice replies on your phone’s speaker.
l TTY VCO: Voice-Carry-Over – speak into your phone and read text replies on your TTY device.
Note: You’ll need a cable/adapter to connect your TTY device to the headset jack on your phone. If
you need to charge your phone at the same time, make sure to first plug in your TTY
devices so that your phone can properly connect to it. Then plug in the charger.
Tip: Refer to your TTY device guide for mode and usage information.
Settings
102
Braille
Combine your Braille display with TalkBack for braille and speech feedback.
1. To download the BrailleBack app from the Google Play™ Store, touch Apps Store to search and install it on your phone.
2. Touch Apps > > Play Settings > Accessibility > BrailleBack.
3. Turn on your Braille display and put it in Bluetooth® pairing mode.
4. On your phone, touch Apps > power switch to turn it and scan.
Settings > Bluetooth, then touch the Bluetooth ON 5. Touch the name of your Braille display to pair it with the phone.
Apps for Accessibility
Google Play Store™ provides access to thousands of apps, many with useful accessibility features.
n Touch Apps > Play Store. About Phone
The About Phone menu lets you access important phone information, search for and apply updates, and view legal, safety, and other information.
Status
View battery status, phone number, network information, and more:
n Touch Apps > Settings > About phone > Status.
Legal Information
Access the Legal Information menu to view important license and legal information.
1. Touch Apps > Settings > About phone > Legal information.
2. Select the information you wish to review:
l Motorola Terms and Conditions
l Open source licenses
Settings
103
l Google legal
l Carrier legal
Settings
104
Copyright Information
© 2014 Sprint Worldwide, Inc., Sprint, the Logo, and Sprint Prepaid are trademarks of Sprint Worldwide, Inc. Other marks are property of their respective owners.
Copyright & Trademarks
Motorola Mobility LLC
Consumer Advocacy Office
600 N US Hwy 45
Libertyville, IL 60048
www.motorola.com
Note: Do not ship your product to the above address. If you need to return your product for repairs, replacement, or warranty service, please contact the Motorola Customer Support Center at:
1-800-734-5870 (United States)
1-888-390-6456 (TTY/TDD United States for hearing impaired)
1-800-461-4575 (Canada)
Certain features, services and applications are network dependent and may not be available in all areas; additional terms, conditions and/or charges may apply. Contact your service provider for details.
All features, functionality, and other product specifications, as well as the information contained in this guide, are based upon the latest available information and believed to be accurate at the time of printing. Motorola reserves the right to change or modify any information or specifications without notice or obligation.
Note: The images in this guide are examples only.
MOTOROLA and the Stylized M Logo are trademarks or registered trademarks of Motorola Trademark Holdings, LLC. Android, Google and other trademarks are owned by Google Inc. The Android robot is reproduced or modified from work created and shared by Google and used according to terms described in the Creative Commons 3.0 Attribution License. All other product or service names are the property of their respective owners. © 2014 Motorola Mobility LLC. All rights reserved.
Caution: Motorola does not take responsibility for changes/modification to the transceiver.
Product ID: Moto G (Model XT1031) Manual Number: 68017657001-A
Copyright Information
105
Safety, Regulatory & Legal
The following topics concern important safety and legal information.
Battery Use & Safety
Warning: Your mobile device contains a battery that should only be removed by a Motorola approved service center or recycler.
n Don’t try to remove or replace the battery yourself. Attempting to remove or replace the battery may damage the battery and may cause burning and injury.
n Don’t try to take apart or fix your phone. Attempting to take apart or fix your phone may damage the battery and may cause burning and injury.
n Don’t crush, bend, or expose your phone to heat or liquid. This may damage the battery and may cause burning and injury.
Battery Charging
Notes for charging your product’s battery:
n During charging, keep your mobile device and charger near room temperature for efficient battery charging.
n New batteries are not fully charged.
n New batteries or batteries stored for a long time may take more time to charge.
n Motorola batteries and charging systems have circuitry that protects the battery from damage from overcharging.
Third Party Accessories
Using third party accessories, including but not limited to batteries, chargers, headsets, covers, cases, screen protectors, and memory cards, may impact your mobile device’s performance. Using a non-Motorola battery or charger may present a risk of fire, explosion, leakage, or other hazard. Motorola’s warranty doesn’t cover damage to the phone caused by non-Motorola batteries and/or chargers. For a list of Motorola accessories, visit motorola.com/accessories (in English only).
Safety, Regulatory & Legal
106
Driving Precautions
Responsible and safe driving is your primary responsibility when driving a vehicle. Making calls or using applications while driving may cause distraction, and may be prohibited or restricted in certain areas—always obey local laws and regulations for the use of mobile devices and accessories in the vehicle.
While driving, ALWAYS: n Keep your eyes on the road.
n Use a handsfree device if available or required by law in your area.
n Enter destination information into a navigation device before driving.
n Use voice activated features (such as voice dial) and speaking features (such as audible directions), if available.
n Concentrate on driving, and stop using the mobile device if you can’t concentrate.
Pull over safely before using your mobile device to send messages, surf the Web, or use other applications.
Seizures, Blackouts & Eyestrain
To reduce eyestrain and avoid headaches, it is always a good idea to hold the screen a comfortable distance from your eyes, use in a well-lit area, and take frequent breaks.
Some people may be susceptible to seizures or blackouts (even if they have never had one before) when exposed to flashing lights or light patterns, such as when playing video games, or watching videos with flashing-light effects.
Discontinue use and consult a physician if any of the following symptoms occur: seizures, blackout, convulsion, eye or muscle twitching, loss of awareness, or disorientation.
Caution About High Volume Usage
Exposure to loud noise from any source for extended periods of time may affect your hearing. The louder the sound, the less time is required before your hearing could be affected. To protect your hearing: n Limit the amount of time you use headsets or headphones at high volume.
n Avoid turning up the volume to block out noisy surroundings.
n Turn the volume down if you can’t hear people speaking near you.
Safety, Regulatory & Legal
107
If you experience hearing discomfort, including the sensation of pressure or fullness in your ears, ringing in your ears, or muffled speech, you should stop listening to the device through your headset or headphones and have your hearing checked.
Repetitive Motion
When you repetitively perform actions, such as pressing keys, you may experience discomfort in your hands, arms, shoulders, neck, or other parts of your body. If you continue to have discomfort during or after such use, stop use and see a physician.
Children
Keep your mobile device and its accessories away from small children. These products are not toys and may be hazardous to small children. For example, a choking hazard may exist for small, detachable parts.
Supervise access. If a child does use your mobile device, monitor their access to help prevent loss of data or unexpected charges for data or application purchases.
Glass Parts
Some parts of your mobile device may be made of glass. This glass may break if the product receives a substantial impact. If glass breaks, don’t attempt to service the device yourself. Stop using your mobile device until the glass is replaced by a qualified service center.
Use and Care
To care for your Motorola mobile device, please observe the following:
Liquids
Drying
Don’t expose your mobile device to water, rain, extreme humidity, sweat, or other liquids.
Don’t try to dry your mobile device using a microwave oven, conventional oven, or dryer.
Safety, Regulatory & Legal
108
Extreme heat or
cold
Don’t store or use your mobile device in temperatures below -10°C (14°F) or above 60°C (140°F). Don’t recharge your mobile device in temperatures below 0°C (32°F) or above 45°C (113°F).
Don’t expose your mobile device to dust, dirt, sand, food, or similar materials.
Dust and dirt
To clean your mobile device, use only a dry soft cloth. Don’t use alcohol or other cleaning solutions.
Cleaning
Don’t drop your mobile device or expose it to strong vibration.
Shock and
vibration
To help protect your mobile device, always make sure that all connector and compartment covers are closed and secure, and avoid carrying it with hard objects such as keys or coins.
Protection
Operational Warnings
Obey all posted signs when using mobile devices in public areas.
Potentially Explosive Areas
Potentially explosive areas are often, but not always, posted and can include blasting areas, fueling stations, fueling areas (such as below decks on boats), fuel or chemical transfer or storage facilities, or areas where the air contains chemicals or particles, such as grain dust, or metal powders.
Turn off your mobile device before entering such an area, and do not charge batteries. In such areas, sparks can occur and cause an explosion or fire.
Symbol Key
Your charger, mobile device, device display, user’s guide, or packaging may contain symbols, defined as follows:
Symbol
Definition
Important safety information follows.
Your battery or mobile device may require recycling in accordance with local laws. Contact your local regulatory authorities for more information.
Safety, Regulatory & Legal
109
Symbol
Definition
Do not dispose of your battery or mobile device with your household waste. See Disposal & Recycling for more information.
For indoor use only.
Listening at high volume to music or voice through a headset may damage your hearing.
Radio Frequency (RF) Energy
Exposure to RF Energy & Device Operation
Your mobile device contains a transmitter and receiver of RF energy. It is designed to comply with regulatory requirements concerning human RF exposure.
For optimal device performance, and to stay within the RF exposure guidelines:
n Hold your mobile phone like a landline when talking on it.
n When using the mobile phone next to your body (other than in your hand or against your head), maintain a distance of 1.5 cm (3/4 inch) from your body to be consistent with how the mobile phone is tested for compliance with RF exposure requirements.
n If you use your mobile phone with an accessory case or holder, make sure the accessory is free of metal.
Follow Instructions to Avoid Interference Problems
Turn off your mobile device in any location where posted notices instruct you to do so, such as hospitals or health care facilities.
In an aircraft, turn off your mobile device whenever instructed to do so by airline staff. If your mobile device offers an airplane mode or similar feature, consult airline staff about using it in flight.
Medical Devices
If you use an implantable pacemaker or defibrillator, consult your healthcare provider and the device manufacturer’s directions before using this mobile device.
Persons with a pacemaker or defibrillator should observe the following precautions:
n ALWAYS keep the mobile device more than 20 centimeters (8 inches) from the pacemaker or defibrillator when the mobile device is turned ON.
n Use the ear opposite the pacemaker or defibrillator to minimize the potential for interference.
Safety, Regulatory & Legal
110
n Turn OFF the mobile device immediately if you have any reason to suspect that interference is taking place.
Regulatory Information
Your Motorola mobile device is designed to comply with national and international regulatory requirements. For full compliance statements and details, please refer to the regulatory information in your printed product guide.
Specific Absorption Rate (FCC & IC)
YOUR MOBILE DEVICE MEETS FCC AND IC LIMITS FOR EXPOSURE TO RADIO WAVES.
Your mobile device is a radio transmitter and receiver. It is designed not to exceed the limits for exposure to radio waves (radio frequency electromagnetic fields) adopted by the Federal Communications Commission (FCC) and Industry Canada (IC). These limits include a substantial safety margin designed to assure the safety of all persons, regardless of age and health.
The radio wave exposure guidelines use a unit of measurement known as the Specific Absorption Rate, or SAR. The SAR limit for mobile devices is 1.6 W/kg. Tests for SAR are conducted using standard operating positions with the device transmitting at its highest certified power level in all tested frequency bands. The highest SAR values under the FCC and IC guidelines for your device model are listed below:
Head SAR
CDMA 1900 MHz, WiFi, Bluetooth 1.56 W/kg
Body-worn SAR
CDMA 1900 MHz, WiFi, Bluetooth
1.24 W/kg
During use, the actual SAR values for your device are usually well below the values stated. This is because, for purposes of system efficiency and to minimize interference on the network, the operating power of your mobile device is automatically decreased when full power is not needed for the call. The lower the power output of the device, the lower its SAR value.
If you are interested in further reducing your RF exposure then you can easily do so by limiting your usage or simply using a hands-free kit to keep the device away from the head and body.
Additional information can be found at www.motorola.com/rfhealth.
European Union Directives Conformance
Statement
The following CE compliance information is applicable to Motorola mobile devices that carry one of the following CE marks:
Safety, Regulatory & Legal
111
:
Hereby, Motorola declares that this product is in compliance with:
n The essential requirements and other relevant provisions of Directive 1999/5/EC
n All other relevant EU Directives
For products that support Wi-Fi 802.11a (as defined in your product information): This device is restricted to indoor use when operating in the 5.15 to 5.25 GHz (802.11a) Wi-Fi frequency band.
The following gives an example of a typical Product Approval Number: You can view your product’s Declaration of Conformity (DoC) to Directive 1999/5/EC (to R&TTE Directive) at motorola.com/hacphones (in English only). To find your DoC, enter the Product Approval Number from your product’s label in the “Search” bar on the website.
FCC Notice to Users
The following statement applies to all products that bear the FCC logo and/or FCC ID on
the product label.
This equipment has been tested and found to comply with the limits for a Class B digital device, pursuant to part 15 of the FCC Rules. See 47 CFR Sec. 15.105(b). These limits are designed to provide reasonable protection against harmful interference in a residential installation. This equipment generates, uses and can radiate radio frequency energy and, if not installed and used in accordance with the instructions, may cause harmful interference to radio communications. However, there is no guarantee that interference will not occur in a particular installation. If this equipment does cause harmful interference to radio or television reception, which can be determined by turning the equipment off and on, the user is encouraged to try to correct the interference by one or more of the following measures:
n Reorient or relocate the receiving antenna.
n Increase the separation between the equipment and the receiver.
n Connect the equipment to an outlet on a circuit different from that to which the receiver is connected.
n Consult the dealer or an experienced radio/TV technician for help.
Safety, Regulatory & Legal
112
This device complies with part 15 of the FCC Rules. Operation is subject to the following two conditions: (1) This device may not cause harmful interference, and (2) this device must accept any interference received, including interference that may cause undesired operation. See 47 CFR Sec. 15.19(a)(3).
Motorola has not approved any changes or modifications to this device by the user. Any changes or modifications could void the user’s authority to operate the equipment. See 47 CFR Sec. 15.21.
For products that support Wi-Fi 802.11a (as defined in product information): In the United States, do not use your device outdoors while connected to an 802.11a Wi-Fi network. The FCC prohibits such outdoor use since frequencies 5.15-5.25 GHz can cause interference with Mobile Satellite Services (MSS). Public Wi-Fi access points in this range are optimized for indoor use.
Industry Canada Notice to Users
This device complies with Industry Canada license-exempt RSS standard(s). Operation is subject to the following two conditions: (1) This device may not cause interference and (2) This device must accept any interference, including interference that may cause undesired operation of the device. See RSS-Gen, Section 7.1.3. This device complies with ICES-003 requirements for Class BITE (Information Technology Equipment). CANICES-3(B)/NMB-3(B).
Software Notices
Warning against unlocking the bootloader or altering a product's operating system
software: Motorola strongly recommends against altering a product's operating system, which includes unlocking the bootloader, rooting a device or running any operating software other than the approved versions issued by Motorola and its partners. Such alterations may permanently damage your product, cause your product to be unsafe and/or cause your product to malfunction. In such cases, neither the product nor any damage resulting therefore will be covered by warranty.
Important FCC information: You must not make or enable any changes to the product that will impact its FCC grant of equipment authorization. The FCC grant is based on the product's emission, modulation, and transmission characteristics, including: power levels, operating frequencies and bandwidths, SAR levels, duty-cycle, transmission modes (e.g., CDMA, GSM), and intended method of using the product (e.g., how the product is held or used in proximity to the body). A change to any of these factors will invalidate the FCC grant. It is illegal to operate a transmitting product without a valid grant.
Location Services
Motorola mobile devices can provide information about their approximate location to applications, using sources including GPS, AGPS, and Wi-Fi. GPS (Global Positioning System) uses government-operated satellites that are subject to changes implemented in accordance with Safety, Regulatory & Legal
113
Department of Defense policy and the Federal Radio Navigation Plan. These changes may affect the performance of location technology on your mobile device. AGPS (Assisted Global Positioning System) uses your wireless service provider’s network to improve GPS performance. Airtime, data fees, and/or additional charges may apply in accordance with your service plan. Contact your wireless service provider for details. Your mobile device can also use Wi-Fi signals to determine your approximate location, using information from known and available Wi-Fi networks.
Mobile devices transmit location-based information when connected to a wireless network or when using other location technologies like GPS. If you use applications that require location-based information such as driving directions, your mobile device will provide location information to them. These applications may share location information with third parties, including your wireless service provider, applications providers, Motorola, and other third parties providing services.
Emergency Calls
When you make an emergency call, the cellular network may activate the AGPS technology in your mobile device to tell the emergency responders your approximate location.
AGPS has limitations and might not work in your area. Therefore:
n Always tell the emergency responder your location to the best of your ability; and
n Remain on the phone for as long as the emergency responder instructs you.
Navigation
If your Motorola mobile device provides navigation features, note that mapping information, directions, and other navigational data may contain inaccurate or incomplete data. In some countries, complete information may not be available. Therefore, you should visually confirm that the navigational instructions are consistent with what you see. All drivers should pay attention to road conditions, closures, traffic, and all other factors that may impact driving. Always obey posted road signs.
Privacy & Data Security
Motorola understands that privacy and data security are important to everyone. Because some features of your mobile device may affect your privacy or data security, please follow these recommendations to enhance protection of your information:
n Monitor access: Keep your mobile device with you and don’t leave it where others may have unmonitored access. Use your device’s security and lock features, where available.
n Keep software up to date: If Motorola or a software/application vendor releases a patch or software fix for your mobile device that updates the device’s security, install it as soon as possible.
Safety, Regulatory & Legal
114
n Secure Personal Information: Your mobile device can store personal information in various locations, including your SIM card, memory card, and phone memory. Be sure to remove or clear all personal information before you recycle, return, or give away your device. You can also backup your personal data to transfer to a new device.
Note: For information on how to backup or wipe data from your mobile device, go to motorola.com/support.
n Online accounts: Some mobile devices provide a Motorola online account. Go to your account for information on how to manage the account, and how to use security features such as remote wipe and device location (where available).
n Applications and updates: Choose your apps and updates carefully, and install from trusted sources only. Some apps can impact your mobile device’s performance and/or have access to private information including account details, call data, location details, and network resources.
n Wireless: For mobile devices with Wi-Fi features, only connect to trusted Wi-Fi networks. This precaution will help prevent unauthorized access to your device.
n Location-based information: Mobile devices enabled with location based technologies such as GPS, AGPS or Wi-Fi, can transmit location-based information. See “Location Services” for more details.
n Other information your device may transmit: Your mobile device may also transmit testing and other diagnostic (including location-based) information, and other non-personal information to Motorola or other third-party servers. This information is used to help improve products and services offered by Motorola.
If you have further questions about how using your mobile device may impact your privacy or data security, please contact Motorola at [email protected], or contact your service provider.
Disposal & Recycling
Mobile Devices & Accessories
Please don’t dispose of mobile devices or electrical accessories (such as chargers, headsets, or batteries) with your household waste.
Warning: Never dispose of batteries, either separately or within a mobile device, in a fire because they may explode. Mobile devices or electrical accessories should be disposed of in accordance with the national collection and recycling schemes operated by your local or regional authority. Or, you may return unwanted Motorola mobile devices and electrical accessories to any Motorola Approved Service Center in your region. For details on approved national recycling schemes and Motorola recycling activities, go to motorola.com/recycling/.
Packaging & Product Guides
Product packaging and product guides should only be disposed of in accordance with national collection and recycling requirements. Please contact your regional authorities for more details.
Safety, Regulatory & Legal
115
Hearing Aid Compatibility in the US
In the US, specific hearing aid compatibility (HAC) performance ratings can help clarify how certain wireless phones and hearing aids may perform together. HAC compliant wireless phones are capable of working with hearing aids that have a minimal immunity rating of at least 2. The immunity rating indicates how susceptible a hearing aid is to picking up interference from a digital wireless phone. It can rate the performance of the hearing aid for either microphone and/or telecoil coupling. Some hearing aids are more immune than others to this interference noise, and phones also vary in the amount of interference they generate. The US performance rating system for HAC compliant wireless phones is as follows:
The “M” (microphone) indicates that the product has been tested and rated for acoustic coupling. The "T" (telecoil) represents that the product has been tested and rated for inductive coupling. The higher the "M" or "T" rating, the less likely the hearing aid user will experience interference when the hearing aid is set to the respective microphone or telecoil mode. The highest values to date are 3 and 4 (e.g., “M4” or “M3/T3”).
To determine if a product is rated for HAC, please look for the HAC rating or logo on the phone’s packaging. For a list of current HAC models, visit motorola.com/hacphones.
Results will vary depending on the user’s hearing aid and hearing loss. If your hearing aid happens to be vulnerable to interference, you may not be able to use a rated phone successfully. Trying out the phone with your hearing device is the best way to evaluate it for your personal needs. To couple the device to your telecoil equipped hearing aid, switch your hearing aid to the “T” or telecoil setting. Then, enable the ‘Hearing Aid’ mode feature on your Motorola phone with the following sequence: Apps > Phone > Menu > Settings > Hearing aids.
Motorola Mobility hearing aid compatible phones have been tested and rated for use with hearing aids for some of the wireless technologies that it uses. However, there may be some newer wireless technologies used in this phone that have not been tested yet for use with hearing aids. It is important to try the different features of this phone thoroughly and in different locations, using your hearing aid or cochlear implant, to determine if you hear any interfering noise. Contact your service provider or Motorola for information on hearing aid compatibility. If you have questions about return or exchange policies, contact your service provider or phone retailer.
Safety, Regulatory & Legal
116
Software Copyright
Motorola products may include copyrighted Motorola and third-party software stored in semiconductor memories or other media. Laws in the United States and other countries preserve for Motorola and third-party software providers certain exclusive rights for copyrighted software, such as the exclusive rights to distribute or reproduce the copyrighted software. Accordingly, any copyrighted software contained in Motorola products may not be modified, reverse-engineered, distributed, or reproduced in any manner to the extent allowed by law. Furthermore, the purchase of Motorola products shall not be deemed to grant either directly or by implication, estoppel, or otherwise, any license under the copyrights, patents, or patent applications of Motorola or any thirdparty software provider, except for the normal, non-exclusive, royalty-free license to use that arises by operation of law in the sale of a product.
Content Copyright
The unauthorized copying of copyrighted materials is contrary to the provisions of the Copyright Laws of the United States and other countries. This device is intended solely for copying noncopyrighted materials, materials in which you own the copyright, or materials which you are authorized or legally permitted to copy. If you are uncertain about your right to copy any material, please contact your legal advisor.
Open Source Software Information
For instructions on how to obtain a copy of any source code being made publicly available by Motorola related to software used in this Motorola mobile device, you may send your request in writing to the address below. Please make sure that the request includes the model number and the software version number.
MOTOROLA MOBILITY LLC
OSS Management
1000 Enterprise Way
Sunnyvale, CA 94043
USA
The Motorola website opensource.motorola.com (in English only) also contains information regarding Motorola's use of open source.
Motorola has created the opensource.motorola.com website to serve as a portal for interaction with the software community-at-large.
To view additional information regarding licenses, acknowledgments and required copyright notices for open source packages used in this Motorola mobile device, please go to Apps Safety, Regulatory & Legal
> Settings 117
> About phone > Legal information > License. In addition, this Motorola device may include selfcontained applications that present supplemental notices for open source packages used in those applications.
Export Law Assurances
This product is controlled under the export regulations of the United States of America and Canada. The Governments of the United States of America and Canada may restrict the exportation or reexportation of this product to certain destinations. For further information contact the U.S. Department of Commerce or the Canadian Department of Foreign Affairs and International Trade.
Product Registration
Product registration is an important step toward enjoying your new Motorola product. Registering permits us to contact you for product or software updates and allows you to subscribe to updates on new products or special promotions. Registration is not required for warranty coverage.
Please retain your original dated sales receipt for your records. For warranty service of your Motorola product you will need to provide a copy of your dated sales receipt to confirm warranty status.
Thank you for choosing a Motorola product.
Service & Repairs
If you have questions or need assistance, we're here to help.
Go to motorola.com/support, where you can select from a number of customer care options. You can also contact the Motorola Customer Support Center at 1-800-734-5870 (United States), 1-888390-6456 (TTY/TDD United States for hearing impaired), or 1-800-461-4575 (Canada).
How to Obtain Service or Other
Information
1. Please access and review the online Customer Support section of Motorola's consumer website prior to requesting warranty service.
2. If the Product is still not functioning properly after making use of this resource, please contact the Warrantor listed at the Motorola website or the contact information for the corresponding location.
3. A representative of Motorola, or of a Motorola Authorized Repair Center, will help determine whether your Product requires service. You may be required to download, or otherwise obtain Safety, Regulatory & Legal
118
and accept software updates from Motorola or a Motorola Authorized Repair Center. You are responsible for any applicable carrier service fees incurred while obtaining the required downloads. Complying with the warranty process, repair instructions and accepting such software updates is required in order to receive additional warranty support.
4. If the software update doesn’t fix the problem, you will receive instructions on how to ship the Product to a Motorola Authorized Repair Center or other entity.
5. To obtain warranty service, as permitted by applicable law, you are required to include: (a) a copy of your receipt, bill of sale or other comparable proof of purchase; (b) a written description of the problem; (c) the name of your service provider, if applicable; (d) your address and telephone number. In the event the Product is not covered by the Motorola Limited Warranty, Motorola will inform the consumer of the availability, price and other conditions applicable to the repair of the Product.
To obtain service or other information, please access and review the online Customer
Support section of Motorola's consumer website at motorola.com.
Safety, Regulatory & Legal
119
Motorola Mobility LLC Limited
Global Warranty
See the following topics for details.
What does this Limited Warranty cover?
Motorola Mobility LLC ("Motorola") promises to the original purchaser ("you") that this Mobile Phone, and any in-box accessories which accompany it (the "Products"), will be free of defects for a period of 12 months from the date of original purchase ("Warranty Period") provided that the Products are used for normal [consumer/end user] purposes (the "Limited Warranty"). This Limited Warranty covers only a purchase of new Products from Motorola or an authorized reseller or distributor of Motorola Products and accompanied in-box by this written Limited Warranty. This Limited Warranty is personal to you and not transferable. Claims under this Limited Warranty may only be made in the country of purchase. If, following a repair, there are fewer than 90 days remaining in the Warranty Period, the Warranty Period will be extended to end 90 days from the date of repair.
THE PROMISES MADE TO YOU IN THIS LIMITED WARRANTY ARE IN ADDITION TO, AND DO NOT REDUCE OR OTHERWISE AFFECT, YOUR STATUTORY RIGHTS.
What will we do if you make a claim under this Limited Warranty?
If you make a valid claim under this Limited Warranty, Motorola will (at its discretion) either (1) repair the Product using new, used or reconditioned replacement parts; or (2) replace the Product with a new or 'as new' reconditioned Product; or (3) refund the purchase price. Any refunded or replaced Product shall become the property of Motorola.
What is not covered?
This Limited Warranty does not cover the following unless they occurred because of a defect in materials or workmanship:
(a) Batteries or any protective coatings the performance of which naturally deteriorates over time. (b) Cosmetic damage, including scratches, dents, cracks or other cosmetic damage from normal wear and tear.
(c) Damage caused by use with non-Motorola products. Defects or damage that result from the use of non-Motorola branded or certified compatible products, accessories or other peripheral equipment and/or software.
(d) Damage caused beyond the reasonable control of Motorola, including damage caused by (i) accident, abuse, misuse; (ii) operating a Product outside its permitted or intended uses as defined in Motorola Mobility LLC Limited Global Warranty
120
the Products' User Manual, Quick Start Guide, Online Tutorials, and other documentation provided to you[, including use of the Products for [commercial rental] purposes]; (iii) improper storage (e.g. subjecting the Product to extreme temperatures), abuse or neglect (e.g. broken/bent/missing clips/fasteners/connectors); impact damage (e.g. dropping the Product) (iv) contact with liquids, water, rain, extreme humidity, unusually heavy perspiration or other moisture; sand, food, dirt or similar substances (except for Products sold as resistant to such substances, but then only to the extent the damage was not caused by incorrectly securing the phone’s protective elements or subjecting a Product to conditions beyond its stated specifications or limits); or (v) flood, fire, earthquake, tornado or other acts of God not within Motorola's reasonable control.
(e) Unauthorized service. Defects or damage resulting from someone other than Motorola or a Motorola authorized service center servicing, testing, adjusting, installing, maintaining, altering, or tampering with the Products.
(f) Products that have been modified in any manner without the written permission of Motorola. including (i) serial numbers, date tags or other manufacturer coding that has been removed, altered or obliterated; (ii) mismatched or duplicated serial numbers; (iii) broken seals or other evidence of tampering; or (iv) which have been modified or show evidence of attempts to modify them.
IMPORTANT: IT IS ILLEGAL TO USE THIS PRODUCT IF IT CEASES TO COMPLY WITH THE GOVERNMENT AUTHORIZATIONS THAT APPROVED ITS RELEASE. THEREFORE, YOU MUST NOT MAKE CHANGES TO THE PRODUCT AFFECTING ITS EMISSION, MODULATION, TRANSMISSION CHARACTERISTICS, INCLUDING POWER LEVELS, OPERATING FREQUENCIES AND BANDWIDTHS, SAR LEVELS, DUTY-CYCLE, TRANSMISSION MODES AND THE INTENDED METHOD OF THE PRODUCT.
(g) Normal wear and tear or otherwise due to the normal aging of the Product. (h) Defects, damages, or the failure of the Product due to any third party communication service or network you subscribe to or use with the Product.
(i) Software
TO THE EXTENT PERMITTED BY APPLICABLE LAW, MOTOROLA DOES NOT GIVE ANY WARRANTIES OR MAKE ANY REPRESENTATIONS, EXPRESS OR IMPLIED, IN RELATION TO THE PRODUCTS. IN PARTICULAR, MOTOROLA DOES NOT WARRANT OR REPRESENT THAT THE PRODUCTS WILL MEET YOUR REQUIREMENTS, WORK IN COMBINATION WITH ANY THIRD PARTY HARDWARE OR SOFTWARE OR SERVICES, PROVIDE UNINTERRUPTED OR ERROR-FREE SERVICE, OR OPERATE WITHOUT RISK OF DATA LOSS.
YOU SHOULD BE AWARE THAT NO RETAILER OR OTHER THIRD PARTY IS AUTHORIZED TO MAKE ANY REPRESENTATIONS ON BEHALF OF MOTOROLA OR TO MODIFY THIS LIMITED WARRANTY.
TO THE EXTENT PERMITTED BY APPLICABLE LAW, MOTOROLA SPECIFICALLY DISCLAIMS ANY STATUTORY WARRANTIES WHICH MIGHT OTHERWISE APPLY.
TO THE EXTENT PERMITTED BY APPLICABLE LAW, MOTOROLA SPECIFICALLY DISCLAIMS LIABILITY, WHETHER IN CONTRACT, TORT OR UNDER OTHER LEGAL Motorola Mobility LLC Limited Global Warranty
121
THEORY (INCLUDING NEGLIGENCE), FOR DAMAGES IN EXCESS OF THE PURCHASE PRICE OF THE PRODUCTS, OR FOR ANY INDIRECT, INCIDENTAL, SPECIAL OR CONSEQUENTIAL DAMAGES OF ANY KIND, OR LOSS OF REVENUE OR PROFITS; LOSS OF BUSINESS; BUSINESS INTERRUPTION; LOSS OF OPPORTUNITY; LOSS OF GOODWILL; LOSS OF REPUTATION; LOSS OF, DAMAGE TO, OR CORRUPTION OF INFORMATION, DATA, SOFTWARE OR APPLICATIONS (INCLUDING ANY COSTS ASSOCIATED WITH RECOVERING, PROGRAMMING, OR REPRODUCING ANY INFORMATION, DATA, SOFTWARE OR APPLICATIONS STORED ON OR USED WITH MOTOROLA PRODUCTS); OR OTHER FINANCIAL LOSS ARISING OUT OF OR IN CONNECTION WITH THE ABILITY OR INABILITY TO USE THE PRODUCTS OR SERVICES PROVIDED UNDER THIS LIMITED WARRANTY. BY MAKING A CLAIM UNDER THIS LIMITED WARRANTY YOU ACKNOWLEDGE THAT YOU UNDERSTAND THAT.
SOME JURISDICTIONS DO NOT ALLOW THE LIMITATION OR EXCLUSION OF CERTAIN DAMAGES SO THE DISCLAIMERS MAY NOT LIMIT YOUR LEGAL RIGHTS AGAINST MOTOROLA. THIS WARRANTY GIVES YOU SPECIFIC LEGAL RIGHTS. YOU MAY ALSO HAVE OTHER RIGHTS THAT VARY FROM JURISDICTION TO JURISDICTION. THIS LIMITED WARRANTY DOES NOT SEEK TO TAKE THOSE RIGHTS AWAY UNLESS THE APPLICABLE LAW ALLOWS YOU TO CONTRACT OUT OF THOSE RIGHTS.
My Product is defective, what should I do?
Review the online Motorola customer support website at www.motorola.com for troubleshooting information.
If the Product is still not functioning properly after you have followed troubleshooting instructions suggested on this website, please contact Motorola using the contact details provided on the customer support website at motorola.com/support.
If your Product is covered by this Limited Warranty, you may be required to download, or otherwise obtain and accept software updates. You are responsible for any third party data costs incurred when obtaining the downloads.
Before we can provide any further support under this Limited Warranty you must first comply with the warranty processes (1), (2) and (3), repair instructions and accept any necessary software updates.
If the software update does not fix the problem, you will receive instructions on how and where to ship the Product for assessment. We will generally need: (i) proof of purchase; (ii) a written description of the problem; (iii) the name of your mobile network service provider, if applicable; (iv) your address and telephone number. We will only use this information for the purposes of processing your claim under this Limited Warranty.
If the Product is not covered by this Limited Warranty (and you do not have any other statutory rights in your place of usual residence), Motorola will inform you of the availability, price and other conditions applicable to the repair, replacement or refund of the Product.
Motorola Mobility LLC Limited Global Warranty
122
Index
3
YouTube 58
Automate Actions 18
3-way Call 33
B
A
Access to My Location 88
Accessibility
Braille reader pairing 103
Caller ID for Talkback 100
Explore by Touch 100
Hear and feel keys 101
Hearing Aids 102
Set screen brightness 99
Set volume or vibrate 98
Settings 98
Talkback 99
TTY 102
Web Settings 63
Zoom 101
Accessibility Apps 103
Accounts 38
Gmail 38
Google 38
Google Wallet 50
Settings 97
Activate Your Phone 3
Activation 2
Active Notifications 15
Airplane Mode 81
Answer a Call 26
App Shortcut 13
Applications 49
Downloading from the Web 51
Manage or Remove 51
Request a Refund 50
Apps 49
Calculator 72
Calendar 71
Chrome Browser” 60
Clock 72
Find and install 49
List 16
Motorola Assist 79
Quickoffice 73
Recent 16
Index
Battery
Capacity 87
Charging 87
Install 1
Saving power 87
Bluetooth
Connect New Devices 77
Disconnect Devices 78
Reconnect Devices 78
Rename a Paired Device 78
Rename the Phone 78
Turn On or Off 77
Books 56-57
Browser
Adjust Settings 63
Connect to the Web 62
Open Chrome Browser” 60
Options 62
Select Links 62
C
Calendar
Add Events 71
Manage Events 72
Call from Favorites 25
Camera 66
Photo Options 67
Capture screen 68
Charge Battery 1
Chrome
Bookmarks 61
Clear browsing history 61
Go to a Webpage 61
Mobile sites 61
Chrome Browser” 60
Conference Call 33
Connect Phone to Computer 79
Contacts 34
Add contact 35
Assign a picture 35
Assign a ringtone 35
123
Call or Text 36
Edit 35
Make call from 24
Make Groups 37
Move to New Phone 6
Save a phone number 35
Share 35
Sync or Transfer 36
D
Data 59
Dictionary 20
Display Settings
Auto-Rotate Screen 85
Display Timeout Delay 85
Wallpaper 85
Drag 12
E
Edit, Share or Delete Photos 67
Editing
Gallery 69
Text 21
Email 41
Add a Corporate Sync Account 41
Add account 41
Add an Email Account 41
Compose and Send 42
Delete an Email Account 43
Delete Messages 43
Edit AccountSettings 43
Manage Your Inbox 43
Refresh an Account 43
View and Reply 42
Email Message
Make call from 25
Emergency Alerts 48
Emergency Calls 114
Emergency Numbers 25
Enhanced 9-1-1 (E 9-1-1) 26
Enter Text 18
Entertainment 66
F
Facebook 47
Install 47
Sign In 47
Flick 12
Index
G
Gestures 12
Gmail
Access Account 39
Create account 38
Read and Reply to Messages 41
Send Message 40
Google Account
Create 38
Sign In 39
Google Drive 75
Google Maps 52
Google Now 17
Google Play 54
Books 56-57
Find and install apps 49
Magazines 58
Movies & TV 56
Store 49
Google Wallet Account 50
H
Hangouts Messaging 48
Hearing Aid Settings 83
History
Make call from 24
Home Screen 12
Add Items 13
Move or remove items 14
I
In-call Options 32
Incoming Call
Answer 26
Reject 26
K
Keyboard
Close Keyboard 14
Input 93
Settings 93
Touchscreen 19
L
Language and Input Settings 93
Legal Information 103
124
Location
Find 53
Get Directions 53
Select Map Mode 53
M
Magazines 58
Manage Your Account 3
Messages 101
Messaging
Hangouts 48
Messaging Types 38
MMS
Send messages 45
MMS and Text Options 46
Model Number 105
Motorola Assist 18
Motorola Migrate 6
Activation 6
Movies & TV
Google Play 56
Music
Copy from computer 55
Macintosh copy 55
My Location 88
My Number 12
N
Notifications 14
Q
Quickoffice
Create a New File 73
Open a Document 73
Programs 73
Tips 73
R
Register Your Phone on Sprint Prepaid 2
Reject Incoming Call 26
Ringtones Assigned to Contacts 35
S
O
Other Call Settings 82
P
People 34
Phone
About Phone 103
Dialer 23
Software Update 74
Phone Call Options 32
Phone Calls 23
Conference Call 33
Emergency numbers 25
From email messages 25
From text messages 25
Make calls 23
Receive 26
Using Call Logs 24
Index
Using contacts 24
Using People list 24
Using phone keypad 23
Phone Illustration 1
Phone Layout (illustration) 8
Phone Update
Profile 74
Photos and Videos
Share 70
View 68
Pictures Assigned to Contacts 35
Play Store 49
Find and install apps 49
Power Off 10
Power On 9
Privacy Settings 96
Save a Phone Number 35
Screenshots 68
Search 16
Send Messages to Your Computer 15
Service and repairs 118
Settings 81
Accounts 97
Add New Accounts 97
Airplane Mode 81
Allow Bluetooth bypass 92
Android Keyboard 94
Apps 88
Automatic Restore (Privacy) 96
Backup Account (Privacy) 96
Backup and Restore (Privacy) 96
Battery Settings 87
Battery Usage 87
Bluetooth 82
125
Browser 63
Call 82
Credential Storage 93
Data Backup (Privacy) 96
Date and Time 98
Device Administration 92
Disable the Screen Lock 91
Display 85
Email Account 43
Encryption 92
Face Unlock 91
Forgot Pattern or Passcode 91
Gallery 69
Google Voice Typing 95
GPS 88
Hearing Aids 83
Hotword 95
Keyboard and Input 93
Language 93
Location Access 88
Location Sources 52
Lock Pattern 90
Lock Slide 90
Manage Accounts 97
Managing Apps 88
Mouse or Trackpad 96
Notification Sounds 84
Password Lock 91
Passwords 92
Personal Dictionary 93
Phone Status 103
PIN Lock 91
Quick Responses 83
Reset Your Phone 97
Ringtone 84
Running Services (Applications) 88
Security and Screen Lock 89
Security Lock Timer 92
Select Language 93
Set Up Screen Lock 89
Share Location 53
Silence Ringtone 84
Sound 84
System Update 98
Text-tospeech output 95
Text Message Reply 83
TTY Mode 83
Unknown Application Sources 88
Voice Output 95
Index
Voice Privacy 83
Voice Response 95
Voice Search 95
Voicemail 82
VPN 82
Wi-Fi 82, 88
Wireless and Network 81
Setup
Screen Lock 89
Setup Screens 4
Share contacts 35
Social Networking Accounts 47
Sound Settings
Adjust Volume 11
Audible touch tones 84
Ringtone 84
System 84
Vibrate 84
Volume 84
Sprint Prepaid Payment Options 4
Status Bar 14
Status Icons 14
Storage Settings 86
T
Talkback Caller ID 100
Text and Multimedia Messaging 44
Text Editing 21
Text Entry 18
Text Entry Settings 20
Text Messages
Make call from 25
New Messages Notification 46
Options 46
Save and Resume a Draft Message 45
Send messages 44
Three Way Call 33
Tips and Tricks 55
Tools 71
Touch 12
Touch and Hold 12
Touchscreen
Keyboard 19
Navigation 12
Turn off 10
Turn on 10
TTY 83, 102
TTY Mode
Turn on or Turn off 83
126
Turn Device Off 10
Turn Device On 9
Turn Phone Off 9
Turn Phone On 9
Turn Screen Off 10
Turn Screen On 10
Twist 12
Typing 18
Z
Zoom in 12
Zoom out 12
U
Use Gmail 39
V
Video Camera
Record video 68
Videos
Record 68
Visual Voicemail 27
Playback messages 28
Respond 29
Review 28
Set up 28
Settings 30
Voice
Commands 74
Typing 22
Voicemail 27
Display name 31
Greeting 31
Notification 27
Retrieve messages 27
Set up 27
Setup 6
VPN 64
Add connection 64
Connect or disconnect 64
Prepare for connection 64
W
Web 59
Wi-Fi 59
Find networks in range 60
Search and Connect 60
Widget 13
Y
Your Number 12
Index
127