1
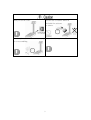
Operating Manual
Model : SI-100W
1st Edition April. 2007
Prefare
Acom Inc. would like to thank you for your choosing our model SI-100W Smart
Bench Scale. We are committed to creating high quality low maintenance
products and supplying our customers with diligent customer service.
This manual contains information how to assemble and use the scale properly.
Specification
Model
SI-100W
Capacity
60kg
60kg
150kg
150kg
300kg
300kg
Minimum graduation
20g
10g,20g
50g
20g,50g
100g
50g,100g
Maximum tare
Full Tare
9 times / second
A/D conversion speed
Display (digit)
VFD or LCD weight (5)
Maximum counting
3,000 pcs
Zero, Net, Stable,(g,lb)
Designators
(g
version)
Mode
Power source
Normal, Counting, Limit, Pound (option)
DC adaptor 9V 300mA or Dry battery DM1.5V x 6ea (choose one)
Power consumption
Products size (mm)
Weighing Pan Size
(mm)
Approximately 1.3W
60kg / 150kg
(W)400 x (D)675 x (H)850
300kg
(W)510 x (D)790 x (H)850
60kg / 150kg
(W)400 x (D)525
300kg
(W)510 x (D)635
2
Precaution before assembling and using
Warning / Caution
It means that improper using will be directly connected
with serious injury or decease.
It means that improper using will be directly connected
with serious injury or materialistic damage.
Marks
Must not be done.
Prohibit of disassembling.
Must be followed the indication.
Plug must be separated with power condenser.
3
The power cable must be prevented
Do not remanufacture
from any harmfulness.
intentionally.
Must turn off the power and
Must be careful of
plug in the adaptor.
moisture and water.
Place the scale on a flat and rigid desk
Place the scale out of direct sunlight.
that is free of vibrations.
Do not use a radio device which
Do not apply sudden impact to the
emits strong electromagnetic
platter.
fields nearby.
4
Do not use a cleaner which is
Always level the scale.
included the solvent
or sinner.
Put the gloves on whenever carrying Must take the regular calibration.
on or assembling.
5
Assembling
Unwrap the package from the scale.
Place the scale on the flat place.
Using the cord-stopper, adjust the wire under
the pole likely the photo.
Insert the bracket into the pole.
Tighten the each bolt (4ea).
6
Make the load cell’s and adaptor’s wire out top
of the pole.
Inset the necktie.
After put the load cell jack into the connector,
fix it using by the load cell fixed parts.
The back side indicator, which is round shape
of groove needs to be posited likely photo.
Put the adaptor’s secondary plug into the
indicator jack.
7
Name of the parts Key and function
Key and function
This key is used to restore as “0” on the weighing display.
It can be worked when the “STABLE” is shown at the designators.
This key is used to set or remove the tare weighing
It can be worked when the “STABLE” is shown at the designators.
8
This key is used to change the mode.
This key is used to set the unit weight of sample in the count mode.
Furthermore, it is used to set the Max. and Min. in the limit mode.
This key is used to extend the function as a spare key. It is used
to set the user parameter simply. It is also very convenient to
measure the livestock or unstable material.
Designators
NAME
Zero
Stable
FUNCTION
It indicates the centered zero.
It indicates the stable status of weighing
Tare
It indicates the tare set.
Batt.
It indicates the battery’s discharge.
9
Operating
1.
Mode function
Press the
MODE
key, it will be changed likely as below ordering.
Normal
Count
Normal
MODE
Press the Key. (Count)
MODE
Press the Key. (Limit)
MODE
Press the key, the scale will be restored the
“Normal” Mode
2.
General weighing
Before using, please check the “Zero” on the designator.
After “stable” is marked on, read weighing value.
3.
Place the commodity on the platter.
Read the weighing value after “stable” is marked on.
Remove the commodity.
Weighing with tare
Place the tare on the platter.
10
Limit
Press the
Tare
key, the tare weighing will be set.
The weighing display will be marked on “0”.
The designator will be marked “net”.
4.
Place the commodity into the tare.
After “stable” is marked on, read weighing value.
Remove the commodity.
Remove the tare and press the
Tare
key.
Counting mode
The possible counting quantity shall be 10, 20, 50, and 100.
Please refer the table 1-1.
MODE
SET
Press the key. (Count)
Press the key. (Set 10)
Place 10pcs of samples which are need to be measured.
After the “Stable” is marked on, press the
SET
key.
* When the “SET 20” or above quantity is marked on, the total
sample weighing is smaller. So, more quantities are needed.
Start to count.
* The set sample’s weighing will be saved in the memory, it can be
memorized even when the mode is changed or the power supply is off.
When the power is on, the previous counting mode can be set automatically.
11
Item
SI-100W
60kg
120kg
150kg
300kg
Min. unit weight
20g
40g
50g
100g
Min. sample weight
2kg
4kg
5kg
10kg
Max. counting
5.
3,000 PCS
Limit mode
MODE
SET
Press the key. (Limit)
Press the key. (Lo)
After place the commodity on the platter, which is need to be
set the min. value,
SET
press the
SET
press the key. (SEt)
key. (Hi)
After place the commodity on the platter, which is
need to be
set the max. value,
SET
press
the key. (SEt)
Scale makes the buzzer when the weighing value is not
matched with min. or max value in the limit mode.
12
6.
Auto shut off
This function is used to prevent the unnecessary discharging when the battery
power is using. The power will be shut off automatically (it will be functioned after
a certain period of setting time) when the measuring is worked. While the pressing
the
*
key, the power must be turned on(OFF TIME).
Press the
*
Using the
SET
key.
key, you can choose one of them
(15,30~180sec).Then, press the
*
key.
* The scale has been set as “0” when it is dispatch
If the weighing indicates “0”, the power will be turned off
after setting time. When the scale has to be reacted, it
needs to be turned off/on.
7.
Back Light
While the pressing the
*
key, the power must be
turned on( OFF TIME)
Press the
SET
Press the
*
Using the
SET
key. (bl mode)
key.
key, one key must be chosen.
0 : Turn off
1 : Turn on if the weighing is on
2 : No using
3 : Turn on constantly
4 : Turn on without expectations
5 : Using the
*
key to get out
13
<<Working>>
If the actual back light function is needed after setting, press the
*
key
about 3 second (Weighing status “0”).
The main propose of this function is for optional working in the darkness
while battery operating.
8.
Errors table
Error
Meaning
Zero
Initial zero error
Treatment
Remarks
Remove weight on the
Same problem still goes
platter and restart the
on, call the service.
scale
EEP
Memory element has a
Call the service
problem on main PCB
AdC
Analogy PCB has a
Call the service
problem
PArA
Memory problem
Call the service
BAtt
Battery discharge
Replacement
14
Optional
Head office / Factory
#679-1, Yugo-Ri,Gunnae-Myun, Pocheon-si,
Kyunggi-Do 487-872 Korea
Tel : +82-31-531-2205
Fax : +82-31-531-9199
http://www.acominc.co.kr
15
16