1
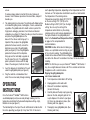
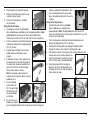
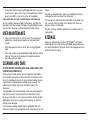
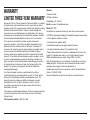
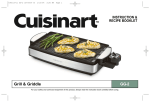
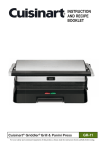
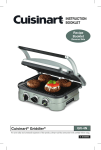
INSTRUCTION BOOKLET CuisinartTM GriddlerTM Grill Centro Recipe Booklet Included GC-17NC For your safety and continued enjoyment of this product, always read the instruction book carefully before using. Important SafeguardS 1. READ ALL INSTRUCTIONS. 2. Unplug from outlet when not in use and before cleaning. Allow to cool before putting on or taking off parts, and before cleaning appliance. 3. Do not touch hot surfaces; use handles or knobs. 4.To protect against fire, electric shock, and injury to persons, DO NOT IMMERSE CORD OR PLUG in water or other liquids. 5.Close supervision is necessary when any appliance is used by or near children. 6.Do not operate any appliance with a damaged cord or plug, or after the appliance has malfunctioned or has been damaged in any manner. 7.The use of accessory attachments not recommended by Cuisinart may result in fire, electrical shock, or risk of injury to persons. 8. Do not use outdoors. 9.Do not let power cord hang over edge of table or counter, or touch hot surfaces. 10.Do not place on or near hot gas or electric burners, or in a heated oven. 11. Unplug the unit when finished using. 12. Do not use appliance for other than intended use. 13.Extreme caution must be exercised when moving an appliance containing hot oil or other hot liquids. 14.To disconnect, turn temperature control dial to Off setting, then remove plug from wall outlet. 15. WARNING: TO REDUCE THE RISK OF FIRE OR ELECTRIC SHOCK, ONLY AUTHORIZED PERSONNEL SHOULD DO REPAIRS. 16.Do not operate your appliance in an appliance garage or under a wall cabinet. When storing in an appliance garage always unplug the unit from the electrical outlet. Not doing so could 2 create a risk of fire, especially if the appliance touches the walls of the garage or the door touches the unit as it closes. SAVE THESE INSTRUCTIONS FOR HOUSEHOLD USE ONLY SPecial cord set instructions A short power-supply cord is provided to reduce the risks resulting from becoming entangled in or tripping over a longer cord. Longer extension cords are available and may be used if care is exercised in their use. If a long extension cord is used, the marked electrical rating of the extension cord should be at least as great as the electrical rating of the appliance, and the longer cord should be arranged so that it will not drape over the countertop or tabletop where it can be pulled on by children or animals, or tripped over. CONTENTS Important Safeguards . . . . . . . . . . . . . . . . . . . . . . . . . . . . . . . . . . . . 2 Parts and Features . . . . . . . . . . . . . . . . . . . . . . . . . . . . . . . . . . . . . . 3 Before the First Use, Assembly Instructions . . . . . . . . . . . . . . . . . . . 3 Operating Instructions . . . . . . . . . . . . . . . . . . . . . . . . . . . . . . . . . . . . 4 User Maintenance . . . . . . . . . . . . . . . . . . . . . . . . . . . . . . . . . . . . . . . 6 Cleaning and Care, Storage . . . . . . . . . . . . . . . . . . . . . . . . . . . . . . . 6 Warranty . . . . . . . . . . . . . . . . . . . . . . . . . . . . . . . . . . . . . . . . . . . . . . . 7 PARTS AND FEATURES 1. Base – Elegant brushed stainless steel. 2. Reversible die-cast grill/griddle plate – Extra-large 9½" x 16" (24 cm x 40 cm) nonstick cooking surface. One side is a grill surface; the other side is a griddle surface. 3. 10-piece kebab skewer set 4. 10-piece hot dog roller set 5. Two pull-out kebab drawers with handles 6. Drip cup – Collects grease from grill/griddle. 7. Temperature control dial – Off, Low, Medium, High positions. 8. Kebab motor control switch. 9. BPA-Free – All parts that come in contact with food are BPA-Free. before the first use Remove all packaging materials and any promotional labels or stickers from your CuisinartTM GriddlerTM Grill Centro. Be sure all parts (listed in, Parts and Features) of your new appliance have been included before discarding any packaging materials. You may want to keep the box and packing materials for use at a later date. Before using your CuisinartTM GriddlerTM Grill Centro for the first time, remove any dust from shipping by wiping the base and temperature control dial with a damp cloth. Thoroughly clean both sides of the reversible grill/griddle plate, as well as the drip cup, kebab drawers, skewers and hot dog rollers. The grill/griddle plate, skewers, hot dog rollers, heat shield, drip cup and kebab drawers can be handwashed or placed in the dishwasher for cleaning. Never place the housing. Always use a damp cloth to clean these parts. assembly instructions 2. 1. 7. 8. 6. 5. 3. 4. 1.Place base on a clean, flat surface where you intend to cook. 2.One end of the base has an opening A. provided for the drip cup. With the metal spout tilted slightly forward, slide the drip cup into the base and push in until the tab is locked (see figure A). 3.Insert kebab drawer by sliding the top rim of the back wall of drawer over the small round tabs on either B. C. side of opening. Push drawer back until front is securely in place behind round tabs. Push S TAB drawer into unit, lifting it over the retaining bar to 3 secure. To remove drawer, allow to cool for 30 minutes. Remove all skewers, then lift drawer up and over the round tabs, and pull it towards you. 4.The cooking plate has two sides: The grill side with ribbed surface is intended for grilling steaks, hamburgers, chicken, seafood and vegetables. The griddle side with smooth surface is perfect for frying bacon and eggs, pancakes, French toast and toasted sandwiches (see figure C). Choose the side you intend to cook on and place the grill/griddle plate on the base with the chosen side facing up. It is important that you place the grill/griddle C. plate onto the base correctly. Locate the drip hole on one end of the grill/griddle plate (see figure D). Place the grill/griddle plate onto the base with the drip holes D. lining up over the metal drip cup spout on the left side of the unit. If the grill/griddle plate is placed on the base with the drip holes at the wrong end, it will not sit level. 5.Insert the drawers on the bottom of the unit under the grill/griddle plate (see figure E). 6.Plug the cord into a standard electrical outlet. You are now ready to begin cooking. E. OPERATING INSTRUCTIONS Once the CuisinartTM GriddlerTM Grill Centro is assembled properly and you are ready to begin cooking, turn the temperature control dial to the desired temperature setting – High, Medium or Low (see figure F). The indicator light on the top of the unit will illuminate to indicate that the unit is operating (see figure G). It may take 10 to 12 minutes to 4 reach operating temperature, depending on the temperature level that has been set. The temperature control dial is used to set and maintain the temperature of the cooking surface. F. Temperatures range from about 250°F (120°C) on the Low setting, 375˚F (190°C) on the Medium setting to 450°F (230°C) on the High setting. You can vary the setting of the temperature control dial at any time during cooking, and may wish to do so depending on the types of foods on the grill/griddle plate. Refer to the Cooked Food Temperature Chart G. on page 3 of the recipe booklet for recommendations. CAUTION: Handles will become hot during use. Always use a pot holder when touching any part of the unit when cooking. The grill/griddle plate should not be removed from the base or flipped over while hot. Allow unit to cool down for at least 30 minutes before handling. NOTE: The first time you use your CuisinartTM GriddlerTM Grill Centro, it may have a slight odour and smoke a bit. This is normal and common to appliances with a nonstick surface. Flipping the grill/griddle plate over to use reverse side 1.Turn temperature control dial to Off setting. 2. Unplug appliance from wall outlet. 3.Allow unit to cool down completely (at least 30 minutes). 4.Carefully slide out the drip cup by pressing H. down on the tab, and gently pull out the cup to dispose of its contents (see figure H). Clean cup and replace in base. (See Cleaning and Care, page 6.) 5.Thoroughly clean grill/griddle plate. (See Cleaning and Care.) 6.Flip the plate over, and return to base. I. 7. Make sure that drip hole in plate lines up over drip cup (see figure I). 8.Reconnect the plug into a standard electrical outlet. Using the kebab feature 1.Assemble the unit with the grill/griddle plate, kebab drawers, and drip cup in their proper positions. Note: grill/griddle plate must be on unit when using kebab feature. Please keep in mind that it is very hot when the unit is operating. 2.Turn the temperature control dial to desired temperature and preheat for approximately 10 to 12 minutes. 3.Prepare food according to your favorite kebab recipe and slide pieces onto skewers. 4.Pull drawers to open. Place skewers into the skewer slots so the star-like shape at the end of each handle is inserted into a gear slot in the front end of the kebab drawer. Close drawer securely. Note: If using large cubes of meat or seafood, you may only be able to cook six kebabs at once. 5.Press the kebab control switch to ON. The switch light will illuminate to let you know kebabs are rotating. 6.To check to see if kebabs are cooked, press the kebab control switch to stop skewers from turning and remove a kebab with a potholder. If more time is needed replace the skewer and press the kebab control switch to resume cooking. Using the hot dog feature 1.Assemble the unit with the grill/griddle plate, kebab drawers, and drip cup in proper positions. Note: The grill/griddle plate must be on unit when using hot dog feature. Please keep in mind that it is very hot when the unit is operating. 2.Turn the temperature control dial to desired temperature and preheat for approximately 10 to 12 minutes. 3.Assemble the hot dog rollers by slipping the kebab skewers through the holes in each end of the hot dog roller caps. 4.Pull drawers to open. Place skewers with hot dog rollers into the skewer slots so the star-like shape at the end of each handle is inserted into a gear slot in the front end of the kebab drawer. 5.Using tongs, position the hot dogs in between two of the hot dog rollers. Four hot dogs will fit over each of the drawers. Close drawer securely. 5 5.Please note: Whether using the grill/griddle plate or not, you must always have it in place when using just the kebab feature. Please keep in mind that it is very hot when the unit is operating. Using both kebab and grill or griddle feature simultaneously You may use both cooking methods simultaneously. Just follow the operating instructions on page 4 for flipping the grill/griddle plate and the instructions above for using the kebab and hot dog features. User Maintenance • • • ever use metal utensils, as they will scratch the nonstick grill/ N griddle plate. Instead, use only wooden or heat-proof plastic utensils. Never leave plastic utensils in contact with the hot grill/griddle plate. After using, scrape excess food buildup through drip hole and into drip cup, then wipe off any residue with a paper towel before proceeding with next recipe. CLEANING AND CARE CAUTION: BEFORE CLEANING APPLIANCE, MAKE SURE IT HAS COOLED DOWN COMPLETELY. Once you have finished cooking, turn the temperature control dial to the Off position and unplug the power cord from the wall outlet. Allow the unit to cool down for at least 30 minutes before handling. Dispose of grease from the kebab drawers and drip cup once cooled. The kebab drawers and drip cup can be cleaned by hand or in the dishwasher. The grill/griddle plate can be washed by hand, using a soft sponge or cloth and hot water. It may be washed in the dishwasher, as well. Do not use metal objects such as knives or forks for cleaning the grill/ griddle plate. Do not use a scouring pad for cleaning. The nonstick coating can be damaged. If you have been cooking seafood, wipe the grill/griddle plate with lemon juice to prevent the seafood flavour from transferring to the next 6 recipe. The drip cup, debab drawers, skewers and hot dog rollers may be submerged in water or washed in the dishwasher. The housing base, and temperature control dial can be wiped clean with a soft, dry cloth. For tough stains, dampen cloth. Never use abrasive cleaners or harsh pads. Any other servicing should be performed by an authorized service representative. STORAGE Always dry and assemble your CuisinartTM GriddlerTM Grill Centro before storing. Ensure that the base, grill/griddle plate and drip trays are correctly positioned. The power cord can be wrapped around the back of the base for storing. WARRANTY Limited Three-Year Warranty We warrant that this Cuisinart product will be free of defects in materials or workmanship under normal home use for 3 years from the date of original purchase. This warranty covers manufacturer’s defects including mechanical and electrical defects. It does not cover damage from consumer abuse, unauthorized repairs or modifications, theft, misuse, or damage due to transportation or environmental conditions. Products with removed or altered identification numbers will not be covered. This warranty is not available to retailers or other commercial purchasers or owners. If your Cuisinart product should prove to be defective within the warranty period, we will repair it or replace it if necessary. For warranty purposes, please register your product online at www.cuisinart.ca to facilitate verification of the date of original purchase and keep your original receipt for the duration of the limited warranty. This warranty excludes damage caused by accident, misuse or abuse, including damage caused by overheating, and it does not apply to scratches, stains, discolouration or other damage to external or internal surfaces that does not impair the functional utility of the product. This warranty also expressly excludes all incidental or consequential damages. Your Cuisinart product has been manufactured to the strictest specifications and has been designed for use only in 120 volt outlets and only with authorized accessories and replacement parts. This warranty expressly excludes any defects or damages caused by attempted use of this unit with a converter, as well as use with accessories, replacement parts or repair service other than those authorized by Cuisinart. Address: Cuisinart Canada 100 Conair Parkway Woodbridge, Ont. L4H 0L2 Email: [email protected] Model: GC-17NC To facilitate the speed and accuracy of your return, please enclose: • $10.00 for shipping and handling of the product (cheque or money order) • Return address and phone number • Description of the product defect • Product date code*/copy of original proof of purchase • Any other information pertinent to the product’s return * Product date code can be found on the underside of the base of the product. The product date code is a 4 or 5 digit number. Example, 90630 would designate year, month & day (2009, June 30th). Note: We recommend you use a traceable, insured delivery service for added protection. Cuisinart will not be held responsible for in-transit damage or for packages that are not delivered to us. To order replacement parts or accessories, call our Customer Service Centre at 1-800-472-7606. For more information, please visit our website at www.cuisinart.ca If the appliance should become defective within the warranty period, do not return the appliance to the store. Please contact our Customer Service Centre: Toll-free phone number: 1-800-472-7606 7 Recipe Bookle∑ CuisinartTM GriddlerTM Grill Centro GC-17NC RECIPES Cooking Guide and Food Temperature Chart . . . . . . . . . . . . . . . . . . 10 Breakfast Banana Buttermilk Pancakes . . . . . . . . . . . . . . . . . . . . . . . . . . . . . . 11 Country Breakfast . . . . . . . . . . . . . . . . . . . . . . . . . . . . . . . . . . . . . . . 11 Hors D’Oeuvres Chicken Satay with Peanut Dipping Sauce . . . . . . . . . . . . . . . . . . . 12 Grilled Vegetable Salad . . . . . . . . . . . . . . . . . . . . . . . . . . . . . . . . . . . 13 Shrimp and Vegetable Quesadillas . . . . . . . . . . . . . . . . . . . . . . . . . . 13 Entrées Grilled Rib-Eye Steaks . . . . . . . . . . . . . . . . . . . . . . . . . . . . . . . . . . . 14 Sliders . . . . . . . . . . . . . . . . . . . . . . . . . . . . . . . . . . . . . . . . . . . . . . . . 14 Parmesan Turkey Burgers . . . . . . . . . . . . . . . . . . . . . . . . . . . . . . . . . 15 Middle Eastern Spiced Chicken and Vegetable Kebabs . . . . . . . . . 15 Scallops with Lemon Herb Butter . . . . . . . . . . . . . . . . . . . . . . . . . . . 16 Desserts Grilled Fruit . . . . . . . . . . . . . . . . . . . . . . . . . . . . . . . . . . . . . . . . . . . . 16 Grilled Strawberry Shortcakes . . . . . . . . . . . . . . . . . . . . . . . . . . . . . 17 9 Cooking Guide and Food Temperature Chart Following are suggested grilling times for the CuisinartTM GriddlerTM Grill Centro, using the grill side of the plates. Times are approximate and will vary with temperature of items being grilled. Only boneless poultry, meat and seafood should be grilled. Preheat the CuisinartTM GriddlerTM Grill Centro according to instructions before grilling. Meat Grill/Griddle/ Skewer/Roller Suggested Grilling Temperatures and Times Bacon Grill/Griddle Place bacon on cold grill/griddle plate. Cook on High until desired doneness Beef, hamburgers Grill Cook on High to degree of desired doneness. It is recommended that ground meat is cooked to an internal temperature of 160˚F (71°C) (nearly well done) which takes about 4 to 5 minutes per side. 135 to 140˚F (60°C) - medium rare; 145 to 150˚F (63 to 65°C) - medium; 150 to 155˚F (65 to 68°C) - medium well; 165 to 170˚F (74° to 76°C) - well done. Marinades can be used, but draining is suggested before placing on the hot Griddler. An instant-read thermometer or a probe-type thermometer is a handy tool for checking the internal temperature of foods grilled. Meat Grill/Griddle/ Skewer/Roller Suggested Grilling Temperatures and Times Breakfast Links (small), uncooked Rollers 8 sausages fit on the Rollers. Cook on High for about 10 minutes, or until fully cooked through and browned. Boneless Chicken Grill Pounded to ½ to ¾-inch (1.25 to 2 cm) in height. Cook on High for 8 to 10 minutes per side. (An internal temperature of 170˚F (77°C) - and juices run clear when pierced.) Boneless Chicken Skewers For skewers, cut into 1- to 2-inch (2.5 - 5 cm) pieces and thread on 6 of the provided skewers. Cook on High for about 20 minutes, or until fully cooked through and browned. Fish Steaks Grill ¾- to 1-inch (2 to 2.5 cm) thick. Cook on High for 6 to 7 minutes per side. Sea Scallops Skewers Remove tough “foot” (muscle) and discard. Pat dry and thread alternately with lemon wedges on 6 of the provided skewers. Cook on High for about 20 minutes, or until opaque throughout. Beef, boneless steak, ¾- to 1-inch (2-2.5 cm) thick Grill Pat steaks dry before cooking. Preheat Grill on High. Cook about 3 to 4 minutes per side, or until desired doneness. Beef, boneless steak Skewers Cut into 1- to 2-inch (2.5 - 5 cm) pieces and thread on 6 of the provided skewers. Cook on High until desired doneness (about 15 minutes for medium). Hot Dogs Rollers 8 hot dogs fit on the Rollers. Cook on High for about 20 minutes, or until fully cooked through and browned. Sea Scallops Grill Precooked Sausage Links Rollers 8 sausages fit on the Rollers. Cook on High for about 20 minutes, or until nicely browned. Prepare as above. Cook on High, about 2 to 3 minutes per side. Shrimp Skewers Sausage Links, uncooked Rollers 8 sausages fit on the Rollers. Cook on High for about 20 minutes, or until fully cooked through and browned. Shell and devein, dry well. Thread onto 6 of the provided skewers. Cook on High for 6 to 8 minutes, or until opaque throughout. Shrimp Grill Prepare as above. Cook on High, about 1 to 2 minutes per side. 10 Breakfast Banana Buttermilk Pancakes A crispy exterior gives these pancakes a delightful texture. Serves 8 people (16 pancakes) 1¾ ¼ ¼ 1 ½ ¼ ¼ 1½ 2 ¾ ¼ 2 cups (425 ml) unbleached, all-purpose flour cup (50 ml) granulated sugar cup (50 ml) light brown sugar teaspoon (5 ml) baking soda teaspoon (2 ml) baking powder teaspoon (1 ml) table salt teaspoon (1 ml) ground cinnamon cups (375 ml) buttermilk large eggs teaspoon (3.75 ml) pure vanilla extract cup (50 ml) unsalted butter, melted ripe bananas (½ mashed, 1½ cut into thin slices) 1.Preheat the CuisinartTM GriddlerTM Grill Centro, fitted with the griddle plate, to Medium. 2.Prepare the pancake batter. Put the flour, sugars, baking soda, baking powder, salt and cinnamon into a medium bowl. Stir with a whisk to blend. Reserve. 3.In a separate bowl, whisk together the buttermilk, eggs and vanilla. Add to the flour mixture; whisk to combine. 4.Stir in the melted butter and then fold in the mashed banana. Be careful not to overmix. 5.Once griddle has preheated for 10 minutes, drop batter evenly onto the griddle plate using a ¼-cup (50 ml) measure. Place 2 to 3 banana slices on each pancake. Cook pancakes until bubbles form, about 3 to 4 minutes; flip and cook until done, about 2 minutes longer. 6.Transfer to warm plates to serve. As you finish each batch of pancakes, you can keep them warm on a wire rack placed on a baking sheet in a low oven (200°F [95°C]). Repeat until all the batter is used. Note: For a complete breakfast put 8 breakfast sausages on the rollers to cook once the grill is preheated. Once they have been cooking for 5 minutes start cooking the pancakes. Nutritional Information per serving (2 pancakes): Calories 199 (34% from fat) • carb. 27g • pro. 6g • fat 8g • sat. fat 4g • chol. 71mg • sod. 306mg • calc 81mg • fiber 1g Country Breakfast A little bit of everything in this hearty start to the day. Makes four servings 1pound (500 g) potatoes (new red or Yukon gold, or a mix of both), scrubbed and not peeled 1½ to 2 tablespoons (25 to 30 ml) melted unsalted butter or olive oil ¹⁄8 teaspoon (0.5 ml) sea salt ¼ teaspoon (1 ml) freshly ground black pepper pinch dried thyme ¼ small onion, finely chopped (about ¼ cup chopped) 8pre-cooked turkey breakfast sausage links or uncooked, thin breakfast sausage links 8 large eggs 1.Put the potatoes into a large saucepan filled with salted water. Cover and bring to a boil. Cook until potatoes are just fork-tender. Reserve to cool. 2.Preheat the CuisinartTM GriddlerTM Grill Centro, fitted with the griddle plate and the rollers on the bottom of the grill, to High. 3.While Grill Centro is preheating (about 10 minutes), cut the cooled potatoes into ½-inch (1.25 cm) pieces and put into a medium mixing bowl. Toss with the melted butter/oil, salt, pepper, thyme and onion. 4.Place the sausages on the rollers as instructed on page 5 of the instruction booklet and put the potato mixture on the griddle plate. 11 Cook the potatoes for about 10 minutes, tossing occasionally, or until fully cooked. Taste and adjust seasonings as desired. Once fully cooked, push to the right side of the griddle plate to keep warm. Reduce the temperature to Medium. 5.While the sausages are still cooking, break four of the eggs onto the griddle plate. Let cook for about 2 minutes per side, or until desired doneness. Repeat with remaining eggs. Serve immediately with the sausages. Nutritional information per serving (2 eggs, 2 sausage links and ¼ of potatoes): Calories 408 (57% from fat) • carb. 20g • pro. 95g • fat 25g • sat. fat 8g • chol. 457mg • sod. 541mg • calc. 84mg • fiber 2g Hors D’Oeuvres Chicken Satay with Peanut Dipping Sauce Makes 6 to 8 servings Chicken Satay: 1 garlic clove 1 green onion, cut into 1-inch (2.5 cm) pieces 1 one-inch (2.5 cm) piece fresh ginger, peeled and halved 1one-inch (2.5 cm) piece of lemongrass, halved, or about 1½ teaspoons (7 ml) chopped ¼ cup (50 ml) fresh cilantro 1 can (14 ounces [420 ml]) coconut milk 1 pound (500 g) boneless chicken breast, cut into 1-inch (2.5 cm) pieces Peanut Sauce:* 1 jalapeño pepper, halved and seeded 1 garlic clove 1 one-inch (2.5 cm) piece fresh ginger, peeled 1 cup (250 ml) roasted, unsalted peanuts 6 tablespoons (90 ml) creamy peanut butter ½ cup (125 ml) coconut milk 2 tablespoons (30 ml) tamari soy sauce 12 1 1 1 2 to 3 teaspoon (5 ml) Thai red chili paste teaspoon (5 ml) fresh lime juice teaspoon (5 ml) fish sauce tablespoons (30 to 45 ml) water *This recipe of Peanut Sauce makes 1½ cups (375 ml), more than you will need for this dish, but it keeps well for up to 2 weeks when wrapped and stored in the refrigerator. Great in a stir-fry too! 1.Insert the metal chopping blade into a Cuisinart® Food Processor. Put the garlic, green onion, ginger and lemongrass in the work bowl and process until finely chopped. Put the chopped ingredients into a medium mixing bowl. Add cilantro to the food processor bowl and pulse to roughly chop. Add to the mixing bowl and whisk in the coconut milk. Put the chicken into the satay marinade. Cover with plastic and refrigerate for no more than two hours. 2.While chicken is marinating, prepare the peanut sauce. With the food processor running, drop the jalapeño, garlic and ginger through the feed tube; process until finely chopped. Add the roasted peanuts and pulse until peanuts are well processed. Add the peanut butter, coconut milk, tamari, chili paste, lime juice, and fish sauce and process until smooth. To thin out sauce, add a tablespoon of water at a time while the machine is running. 3.Ten minutes before chicken has finished marinating, preheat the CuisinartTM GriddlerTM Grill Centro to High. Thread six of the skewers with the marinated chicken. Fit skewers into place as instructed on page 5 of the instruction booklet. Let cook until fully cooked through, about 20 minutes. 4. Serve immediately with the peanut sauce on the side for dipping. Nutritional information per serving (based on 8 servings, with 2 tablespoons of the peanut sauce): Calories 343 (64% from fat) • carb. 9g • pro. 24g • fat 26g • sat. fat 15g • chol. 44mg • sod. 190mg • calc. 25mg • fiber 2g Grilled Vegetable Salad A salad composed of grilled vegetables makes a beautiful and simple first course. Makes four to five 1-cup (250 ml) servings 1medium red pepper, approximately 6 ounces (170 g), cut into ¼-inch (7 mm) slices widthwise 1small zucchini, approximately 6 ounces (170 g), ends trimmed, halved widthwise and cut into ¼-inch (7 mm) slices lengthwise ½ bunch asparagus, approximately 8 ounces (230 g) , ends peeled ½small eggplant, approximately 3 ounces (85 g), ends trimmed, cut into ¼-inch (7 mm) rounds 1small fennel bulb, approximately 4 ounces (115 g), cut into ¼-inch (7 mm) slices 2 green onions, cut into 1-inch (2.5 cm) pieces 3 garlic cloves, crushed 2 tablespoons (30 ml) plus 1 teaspoon extra virgin olive oil, divided 1 teaspoon (5 ml) kosher salt, divided ½ teaspoon (2 ml) freshly ground black pepper, divided 6 leaves basil, sliced thinly 1 teaspoon (5 ml) fresh lemon juice or balsamic vinegar 1.Preheat CuisinartTM GriddlerTM Grill Centro, fitted with the grill plate, to Medium. 2.While grill is heating, place all vegetables in a large mixing bowl. Toss with garlic, 2 tablespoons (30 ml) extra-virgin olive oil, ½ teaspoon (2 ml) of kosher salt and ¼ teaspoon (1 ml) of black pepper. 3.Once preheated (about 10 minutes), put vegetables onto grill in a single layer. Grill vegetables until tender, approximately 4 to 5 minutes per side. Vegetables should be cooked in at least 2 batches. 4.Once all vegetables are grilled, put back in mixing bowl and toss with remaining teaspoon of olive oil, ¼ teaspoon (1 ml) of salt, ¼ teaspoon (1 ml) of pepper, basil, and lemon juice or vinegar. 5.Taste and adjust seasoning accordingly. Serve immediately, warm or at room temperature. Nutritional information per 1-cup serving (based on five servings): Calories 99 (56% from fat) • carb. 10g • pro. 3g • fat 7g • sat. fat 1g • chol. 0mg • sod. 456mg • calc. 50mg • fiber 4g Shrimp and Vegetable Quesadillas Makes 4 quesadillas 1 ¼ 1 1 ¼ 2 1½ 1 1 1 ¾ 1 8 2 6 pound (500 g) large shrimp, deveined and shelled, rinsed well cup (50 ml) cilantro, roughly chopped jalapeño pepper, deseeded and sliced garlic clove, crushed teaspoon (1 ml) freshly ground black pepper teaspoons (10 ml) fresh lime juice tablespoons (25 ml) olive oil large bell pepper, cut into ¼-inch (7 mm) slices jalapeno pepper, deseeded and thinly sliced medium red onion, about 6 ounces (170 g), thinly sliced teaspoon (3.75 ml) kosher salt, divided tablespoon (15 ml) olive oil small flour or corn tortillas teaspoons (10 ml) vegetable oil ounces (170 g) Queso Fresco, shredded 1.Toss the first seven ingredients together in a medium-large mixing bowl. Cover and refrigerate for about 30 minutes. 2.In a separate mixing bowl, combine the peppers, onion, ½ teaspoon (2 ml) salt and olive oil. Reserve. 3.Ten minutes before shrimp have finished marinating, preheat the CuisinartTM GriddlerTM Grill Centro, fitted with the grill plate, to High. 13 4.Remove the shrimp from the marinade and sprinkle with the remaining ¼ teaspoon (1 ml) salt. Thread shrimp onto 4 of the provided skewers (about 3 shrimp per skewer, depending on the size of the shrimp). Fit skewers into place as instructed on page 5 of the instruction booklet. Grill shrimp until fully cooked and opaque throughout, about 6 to 8 minutes. 5.While shrimp are cooking underneath, put the onions and peppers on the preheated grill top. Toss frequently and cook until softened, about 8 to 10 minutes. Remove and reserve. 1. Preheat the CuisinartTM GriddlerTM Grill Centro, fitted with the grill plate, to High. 2. Coat each steak with ½ tablespoon (7 ml) of olive oil. Season with the salt and pepper. 3. Once the grill has preheated, for 10 minutes, place the steaks on the hot grill plate. 4. Grill the steaks 4 to 5 minutes per side, or until desired doneness. Nutritional information per serving: Calories 682 (76% from fat) • carb. 0g • pro. 40g • fat 57g • sat. fat 21g • chol. 154mg • sod. 260mg • calc. 24mg • fiber 0g 6.While shrimp and vegetables are cooking, brush one side of each tortilla with the vegetable oil. 7.Once shrimp and vegetables have fully cooked, remove from grill. Reserve. 8.Place 2 tortillas on the grill, oiled side down. On each tortilla place ¹⁄8 of the cheese, ¼ of the vegetables, ¼ of the shrimp, and another ¹⁄8 of the cheese. Top with tortilla oiled side up. Grill quesadillas 2 to 3 minutes per side, until the cheese has melted, vegetables warmed through, and the tortillas are crispy. Repeat. 9.Cut each quesadilla into quarters. Serve with sides of salsa, sour cream, and guacamole. Nutritional information per quesadilla: Calories 588 (47% from fat) • carb. 40g • pro. 38g • fat 31g • sat. fat 11g • chol. 217mg • sod. 1432mg • calc. 438mg • fiber 3g Entrées Grilled Rib-Eye Steaks Sliders Makes about 8 servings 2 1¼ 1 ½ pounds (1 kg) ground beef teaspoons (6 ml) sea salt teaspoon (5 ml) freshly ground black pepper teaspoon (2 ml) garlic powder 1.Preheat the CuisinartTM GriddlerTM Grill Centro, fitted with the grill plate, to High. 2.While the grill is preheating (about 10 minutes), add all ingredients to a large mixing bowl. Very gently mix together by hand. Form into 2-ounce (60 g) patties, about ¼-cup (50 ml) each (you should get about 16 patties). Makes 2 servings 3.Grill for about 2 to 3 minutes per side. Serve immediately with any of our suggested toppings. 2 1 1 8 / ¼ Nutritional information per slider: Calories 145 (72% from fat) • carb. 0g • pro. 10g • fat 4g • sat. fat 4g • chol. 40mg • sod. 205mg • calc. 11mg • fiber 0gthe remaining half. Let cook until fully softened and fragrant, an additional 10 minutes. boneless rib-eye steaks (about 8 to 10 ounces [230g to 290g]each) tablespoon (15 ml) extra virgin olive oil, divided teaspoon (7.5 ml) kosher salt, divided teaspoon (1 ml) freshly ground black pepper, divided 3.Before serving, sprinkle the Gruyère on top of the mushrooms to melt. 14 • chol. 55mg • sod. 203mg • calc. 50mg • fiber 0g Nutritional information per serving (2 tablespoons): Calories 61 (66% from fat) • carb. 2g • pro. 4g • fat 5g • sat. fat 2g • chol. 8mg • sod. 71mg • calc. 75mg • fiber 0g Parmesan Turkey Burgers A healthy alternative to the beef burger. Makes 6 burgers 1¾ ¹∕³ ¹∕³ ½ ¼ ½ ½ pounds (795 g) ground turkey (7% fat works best) cup (75 ml) finely chopped green onion cup (75 ml) finely chopped Italian parsley cup (125 ml) freshly ground Reggiano Parmesan or Asiago teaspoon (1 ml) freshly ground black pepper teaspoon (2 ml) garlic powder teaspoon (2 ml) sea salt, divided 1.Put the turkey into a large bowl with the onion, parsley, cheese, and black pepper. Using clean hands, stir to combine and mix well, but do not overwork the meat. Divide into 12 equal portions (3 ounces [85 g] each) and shape into 4-inch (10 cm) burgers (about ¹∕³ cup [75 ml] each). Sprinkle each side with the garlic powder and salt. Refrigerate if not grilling immediately. 2.Preheat the CuisinartTM GriddlerTM Grill Centro, fitted with the grill plate, to High. 3.Once the grill is hot (about 10 minutes), arrange half of the burgers evenly spaced on the grill. Cook for about 4 minutes per side, until well grilled and juices run clear. Internal temperature of meat should be 165°F (74°C) when tested with an instant-read thermometer. 4.Serve hot on grilled buns or English muffins. Buns can be toasted concurrently with burgers. To do so, fit skewers as instructed on page 5 of the instruction booklet. Open buns flat and place on top of skewers, with motor off. A medium color takes about 1½ minutes. Nutritional information per burger: Calories 115 (52% from fat) • carb. 1g • pro. 13g • fat 6g • sat. fat 2g Middle Eastern Spiced Chicken and Vegetable Kebabs Makes 6 servings Spice Rub ¾ teaspoon (3.75 ml) ground cumin ¼ teaspoon (1 ml) ground coriander ½ teaspoon (2 ml) ground cinnamon pinch cayenne ½ teaspoon (2 ml) sea or kosher salt ¼ teaspoon (1 ml) freshly ground black pepper ¾ 1 6 6 ¼ 2½ pound (375 g) skinless, boneless chicken, cut into 12 two-inch (5 cm) pieces medium bell pepper, cut into 12 one-inch (2.5 cm) pieces ounces (170 g) winter squash, cut into 12 one-inch (2.5 cm) pieces small mushrooms (1 to 2 inches [2.5 to 5 cm] in diameter) cup (50 ml) olive oil tablespoons (40 ml) fresh lime juice 1.Prepare spice rub. Put all spice rub ingredients into a small bowl. Stir to combine. 2.Use immediately or contain in a sealed glass jar. Store in a dry, cool place. 3.Rinse the chicken and pat dry with paper towels. Put into a large mixing bowl and toss with the vegetables, oil, lime juice and rub. Cover the bowl with plastic wrap; let marinate in the refrigerator for 1 to 2 hours. 4.Ten minutes before chicken has completed marinating, preheat the CuisinartTM GriddlerTM Grill Centro to High. Thread the chicken and vegetables onto six of the provided skewers. Fit skewers into place as instructed on page 5 of the instruction booklet. 15 5.Let skewers cook for 24 to 26 minutes, or until chicken is fully cooked. Nutritional information per serving: Calories 161 (56% from fat) • carb. 4g • pro. 14g • fat 10g • sat. fat 2g • chol. 33mg • sod. 217mg • calc. 25mg • fiber 1g Scallops with Lemon Herb Butter The butter makes this dish rich and luxurious, but if you’re looking for a lighter meal, substitute extra virgin olive oil for the butter and serve on the side. Makes 3 main course servings, or 6 first course servings 2 tablespoons (30 ml) fresh lemon juice ¾ teaspoon (3.75 ml) sea salt ½ teaspoon (2 ml) freshly ground black pepper 2 tablespoons (30 ml) extra virgin olive oil 12 large sea scallops, rinsed well and patted dry 6tablespoons (90 ml) unsalted butter, room temperature and cut into ½-inch (1.25 cm) pieces ¹∕³ cup (75 ml) parsley 1 teaspoon (5 ml) lemon zest 2 lemons, cut into 24 small wedges 1.In a small bowl, whisk the lemon juice together with the salt and pepper. Gradually whisk in the olive oil. Put the scallops into a large mixing bowl and toss with the lemon juice mixture. Cover the bowl with plastic wrap; let marinate in the refrigerator for about 1 hour. 2.About 10 minutes before the scallops have completed marinating, preheat the CuisinartTM GriddlerTM Grill Centro to High. 3.Thread four of the provided skewers, alternating with the lemon wedges and marinated scallops, starting with one lemon wedge and then a scallop. You should have 3 scallops and 4 lemon wedges per skewer. Fit skewers as instructed on page 5 of the instruction booklet. 16 4.Cook for about 20 minutes, or until scallops are fully opaque. 5.While the scallops are cooking, put the butter, parsley and lemon zest into the work bowl of a Cuisinart® Mini Chopper fitted with the chopping blade. Process until thoroughly combined; reserve. 6.To serve, place the scallops on a serving tray and dot with the lemon herb butter. You can also melt the butter and serve as a dipping sauce or drizzle over the tops of the scallops. Nutritional information per serving: Calories 339 (84% from fat) • carb. 3g • pro. 10g • fat 32g • sat. fat 15g • chol. 80mg • sod. 633mg • calc. 26mg • fiber 0g Desserts Grilled Fruit Grilled fresh fruit makes a wonderful base for vanilla ice cream. You may drizzle it with a little rum or liqueur and add a sprinkling of chopped toasted nuts for a grilled fruit sundae. Makes 6 to 8 servings ½medium fresh pineapple, peeled, cored, cut into ½- to ¾-inch (1.25 to 2 cm) slices* 2 bananas, halved and then cut into 4 pieces 1 large peach, pitted and quartered 1 mango, peeled, pitted and cut into 4 pieces water (enough to cover the fruit) juice of 1 lemon 2 tablespoons (30 ml) unsalted butter, melted pinch ground cinnamon 1.Put the fruit into a large mixing bowl. Add enough water to the bowl to fully cover the fruit. Stir in the lemon juice. Cover and refrigerate for 20 to 30 minutes. 2.While the fruit is chilling, prepare the cinnamon butter. Stir the butter and cinnamon together in a small bowl. Reserve. 3.Ten minutes before the fruit has completed soaking, preheat the CuisinartTM GriddlerTM Grill Centro, fitted with the grill plate, to High. 4.Remove the fruit from the lemon water and pat dry. Brush both sides of the fruit with the cinnamon butter. 5.The peach should take about 2½ to 3½ minutes to grill. The pineapple and mango should take about 2½ minutes. The bananas only take about 1 to 1½ minutes. When grilling the fruit, carefully flip half-way through cooking, As always with fruit, cooking times vary depending on the ripeness of the fruit. *Many grocery stores sell peeled and cored pineapples in the produce section. Nutritional information per serving (based on 8 servings): Calories 87 (29% from fat) • carb. 16g • pro. 1g • fat 3g • sat fat 2g • chol. 8mg • sod. 1mg • calc. 9mg • fiber 2g for about 2 minutes, until softened and fragrant. Remove and reserve, scraping as much of the sugar off of the grill plate as possible. 4.While the strawberries are cooking, brush the pound cake with the softened butter. Place on the hot grill plate and cook about 1½ to 2 minutes per side, until medium grill marks are achieved. 5.While the pound cake is grilling, prepare the whipped cream. Put the cream and sugar into a chilled mixing bowl. Using a Cuisinart® Hand Mixer, whip the cream to medium-stiff peaks. Reserve. 6.To assemble: Top the grilled pound cake with the whipped cream and then finish with the strawberries. Nutritional information per serving: Calories 208 (57% from fat) • carb. 21g • pro. 2g • fat 13g • sat. fat 8g • chol. 97mg • sod. 154mg • calc. 27mg • fiber 1g Grilled Strawberry Shortcakes A great dessert for the summer months and it only takes 15 minutes. Makes 10 servings 1 1 1 1 2 ½ ½ pound (500 g) strawberries, hulled and halved teaspoon (5 ml) granulated sugar pinch sea salt teaspoon (5 ml) chopped fresh mint pound (500 g) cake (about 11 ounces [300 g]), cut into 10 slices tablespoons (30 ml) unsalted butter, softened cup (125 ml) heavy cream, chilled teaspoon (2 ml) granulated sugar 1.Preheat the CuisinartTM GriddlerTM Grill Centro, fitted with the grill plate, to Medium. 2.While the grill is preheating, put the strawberries into a medium mixing bowl with sugar, salt and mint; toss to combine. 3.Once the grill has preheated, for about 10 minutes, spoon the strawberry mixture onto the grill plate. Cook, tossing occasionally, 17 Coffeemakers Cafetières Food Processors Robots de cuisine Toasters Grille-pain Blenders Mélangeurs Cookware Utensiles de cuisson Ice Cream Makers Sorbetières Cuisinart® offers an extensive assortment of top quality products to make life in the kitchen easier than ever. Try some of our other countertop appliances and cookware, and Savor the Good Life . ® CuisinartMD offre une vaste gamme de produits de grande qualité qui facilitent la vie dans la cuisine comme jamais auparavant. Essayez nos autres appareils de comptoir et ustensiles de cuisson et savourez la bonne vieMD. www.cuisinart.ca Any trademarks or service marks of third parties used herein are the trademarks or service marks of their respective owners. Toutes les autres marques de commerce ou de service utilisées dans le présent document appartiennent à leurs propriétaires respectifs. ©2012 Cuisinart Canada 100 Conair Parkway Woodbridge, ON L4H 0L2 Consumer Call Centre E-mail:/ Centre d’appel des consommateurs [email protected] 1-800-472-7606 Printed in China/ Imprimé en Chine 12CC129287 IB-10341-CAN-A