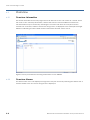
1
SBD75e Series Demodulator L-Band Satellite Demodulator 32 k – 45 M Symbol BPSK/QPSK/OQPSK/8PSK/16QAM/32APSK Installation and Operation Manual Version 1.0 November 2008 Copyright © 2008 AdvantechAMT. All rights reserved. Preliminary Pages Preface Thank you for purchasing a Demodulator from Advantech AMT. These products build on the success of the SL/QD series, the industry’s first L-band digital satellite modems. Advantech Advanced Microwave Technology is an international company specializing in the development of satellite communication systems. The following information provides the document part number, revision, the copyright notices, along with the pertinent FCC, English, German, and French compliance, and the serviceability of the Demodulator. Document Revision ii Revision Date Content/Modifications 1.0 November 2008 First Issue. 1.1 November 2009 Added De-Concentrator functionality SBD75e Series Demodulator Installation and Operation Manual Preliminary Pages Copyright Notice Copyright © 2004-2008 AdvantechAMT. All rights reserved. This manual may not be reproduced or disclosed in whole or in part by any means without the written consent of AdvantechAMT, Inc. Customer Support The staff at Advantech AMT is committed to producing the highest quality products and may be contacted for product service, support and assistance at the following locations: Head Office Advantech Wireless 657 Orly Avenue Dorval, Quebec H9P 1G1 Tel: 1 (514) 420 0045 Fax: 1 (514) 420 0073 Email : [email protected] The following offices also provide technical support for the Demodulator and other RF products: U.S. Office Advantech Wireless Inc. 4710 E. Elwood Street Suite 14 Phoenix, AZ, 85040 European Office AdvantechAMT Ltd. 39 Edison Road St. Ives, Huntingdon Cambridgeshire, PE27 3LF Tel: 1 (480) 784-4646 Fax: 1 (480) 784-1010 Tel: 44 (1480) 357 600 Fax: 44 (1480) 357 601 You can also visit our website at http://www.advantechwireless.com SBD75e Series Demodulator Installation and Operation Manual iii Preliminary Pages Warranty and Service Advantech AMT warrants to the Purchaser that the Products and any Repaired Products (Repairs) will be free from defects in material and workmanship for a period of two years from the date of shipment to the Purchaser. Advantech AMT’s obligation under this warranty is limited to replacing or repairing, at ADVANTECH AMT’s option, Products or Repairs found by Advantech AMT to be defective within the warranty period. All such replacements and repairs shall be performed at facilities designated by ADVANTECH AMT and shall be performed only after the customer has received a Return Material Authorization (RMA) number from Advantech AMT and has returned the Product to Advantech AMT, shipping and insurance prepaid by Purchaser. The returned Product must be accompanied by the customer's name, address and telephone number, the model and serial number of the Product, a statement of the purchase date and a detailed description of the problem. Products and Repairs returned by Purchaser shall be repaired by ADVANTECH AMT using new or refurbished parts and shall be returned to Purchaser by ADVANTECH AMT, shipping prepaid by ADVANTECH AMT. This warranty shall immediately become null and void if, in ADVANTECH AMT’s sole judgement, the Product has been subject to unauthorised modification, misuse, abuse, neglect, accident, improper installation or application, alteration or neglect in use, storage, transportation or handling, or if the serial number and/or other Product markings have been removed, defaced or altered. ADVANTECH AMT may, at its discretion, perform out-of-warranty repairs at ADVANTECH AMT facilities in exchange of customary charges, or offer a written agreement extending the terms of this warranty at a price stated in such agreement. All repairs performed out of warranty or pursuant to an extended warranty agreement shall be subject to all of the applicable limitations and procedures of this Agreement. The above warranties are in lieu of all other warranties, expressed, implied, or statutory or arising by custom of trade usage, including any warranty of merchantability of fitness for any unique, special or express purpose, and of all other obligations of liabilities whether in contract, tort or otherwise including, without limitation, liability for damages (whether general or special, direct or indirect, consequential, incidental, exemplary) or any claim for the loss of profits or business or for damage to goodwill. Extended Warranty Options Please contact Customer Service or your reseller for information on optional extended warranties. Service To return a Product for service or repair, obtain an RMA number from ADVANTECH AMT’s Customer Service Department. The following information will be requested: Customer name, address, telephone number Model number Serial number Detailed description of problem All customer-returned units must be shipped to ADVANTECH AMT freight prepaid, in the original carton or equivalent. ADVANTECH AMT is not responsible for damage in transit. ADVANTECH AMT will accept only completely assembled units for repair. iv SBD75e Series Demodulator Installation and Operation Manual Preliminary Pages Safety Notices Radio Frequency (RF) Interference This equipment generates, uses and can radiate radio frequency energy, and, if not installed in accordance with the instructions contained herein, may cause interference to radio communications. It has been tested and found to comply with the limits for a Class A computing device pursuant to Subpart J of Part 15 of the Federal Communications Commission rules, which are designed to provide reasonable protection against such interference, when operating in a commercial environment. Operation of this equipment in a residential area is likely to cause interference. In this case, the user is required to take whatever measures are necessary to correct the interference at the user’s expense. If radio frequency interference is encountered after the installation of this equipment, corrective measures are required to reduce the interference. Information on recommended measures can be obtained from the manufacturer. United Kingdom WARNING 1. TO ENSURE ADEQUATE COOLING OF THE EQUIPMENT, A 2.0-INCH UNOBSTRUCTED SPACE MUST BE PROVIDED AROUND ALL SIDES OF THE UNIT. 2. THE AC POWER SOCKET SHALL BE INSTALLED NEAR THE EQUIPMENT AND SHALL BE EASILY ACCESSIBLE. 3. REMOVE POWER PLUG FROM THE POWER SOCKET BEFORE PERFORMING ANY SERVICE WORK ON THE UNIT. 4. ONLY FACTORY AUTHORIZED SERVICE PERSONNEL SHOULD PERFORM SERVICE ON THIS UNIT. FAILURE TO OBSERVE THIS WARNING CAN RESULT IN MALFUNCTION TO THE UNIT AS WELL AS ELECTROCUTION TO PERSONNEL. France AVERTISSEMENT 1. AFIN DE NE PAS NUIRE AU PROCESSUS DE REFROIDISSEMENT, IL EST NÉCESSAIRE DE LAISSER UN ESPACE D’ENVIRON 5 CM DE CHAQUE CÔTÉ DE L’APPAREIL. 2. PLACEZ L’APPAREIL PRÈS D’UNE PRISE DE COURANT FACILEMENT ACCESSIBLE. 3. DÉBRANCHEZ L’APPAREIL AVANT DE L’OUVRIR. 4. CET APPAREIL NE PEUT ÊTRE EXAMINÉ OU RÉPARÉ QUE PAR UN EMPLOYÉ AUTORISÉ DU FABRICANT. SI CETTE CONSIGNE N’EST PAS RESPECTÉE, IL Y A RISQUE DE PANNE ET/OU D’ÉLECTROCUTION. Germany VORSICH 1. UM DIE KÜHLUNG DES GERÄTES NICHT ZU BEEINTRÄCHTIGEN, IST ES NOTWENDIG, AN ALLEN SEITEN DES GERÄTES CA. 5 CM RAUM ZU LASSEN. 2. STELLEN SIE DAS GERÄT IN DER NÄHE EINES GEERDETEN SCHUTZKONTAKTSTECKERS SO AUF, DASS DER STECKER LEICHT ERREICHBAR UND ZUGÄNGLICH IST. 3. VORM ÖFFNEN DES GERÄTES MUSS DER NETZSTECKER VOM STROMNETZ GETRENNT WERDEN. 4. DIESES GERÄT DARF NUR DURCH DAS BEVOLLMÄCHTIGTE KUNDENDIENSTPERSONAL DER FABRIK INSTANDGEHALTEN WERDEN. DIE NICHTBEACHTUNG DIESER VORSCHRIFT KANN ZU FEHLFUNKTIONEN DES GERÄTES FÜHREN UND DAS PERSONAL DURCH STROMSCHLÄGE GEFÄHRDEN. SBD75e Series Demodulator Installation and Operation Manual v Preliminary Pages Contents Chapter 1 Getting Started Describes the function of the equipment and its purpose within the system. It also provides a guided tour of the base unit front and rear panel controls, indicators and connectors. Chapter 2 Installation Details the procedures for installing the equipment, including important safety information, details the base unit connectors and cables. Chapter 3 Front Panel Monitoring & Control Describes how to configure the unit using the front panel display. Chapter 4 Web GUI Monitoring & Control Describes how to configure the unit using the Web Graphical User Interface. Appendix A Technical Specification Details the technical specification for the equipment, including performance, signals, power, physical, environmental and standards compliance. Appendix B Glossary Provides a description of the abbreviations ands terms used in this manual. vi SBD75e Series Demodulator Installation and Operation Manual CHAPTER 1: Getting Started List of Contents List of Figures 1.1 1.1.1 1.1.2 1.1.3 1.1.4 1.1.4.1 Scope of this Manual ............................................... 1-2 Who Should Use This Manual ................................... 1-2 Version Information ................................................... 1-2 Equipment Covered by this Manual ...................... 1-2 RF Interface Options ................................................. 1-2 L Band Input (950-2150 MHz) ................................... 1-2 Figure 1.1: SBD75e Demodulator Block Diagram ..................... 1-3 Figure 1.2: SBD75e Demodulator Front Panel ........................... 1-4 Figure 1.3: Front Panel LED Indicators ........................................ 1-4 Figure 1.4: Front Panel Keypad ................................................... 1-5 Figure 1.5: SBD75e Demodulator Rear Panel ........................... 1-6 Figure 1.6: Demodulator Signal Interconnections ................... 1-7 1.2 1.2.1 Summary of Features ................................................ 1-3 Overview .................................................................... 1-3 1.3 1.3.1 1.3.2 1.3.2.1 1.3.2.2 1.3.2.3 1.3.3 Guided Tour ............................................................... 1-3 Enclosure .................................................................... 1-3 Front Panel ................................................................. 1-3 Vacuum Fluorescent Display (VFD) ....................... 1-4 LED Indicators ............................................................ 1-4 Keypad ....................................................................... 1-5 Rear Panel .................................................................. 1-6 1.4 Typical System Setup ................................................ 1-7 SBD75e Series Demodulator Installation and Operation Manual List of Tables Table 1.1: SBD75e Front Panel LEDs ............................................ 1-4 Table 1.2: Front Panel Keypad Functions .................................. 1-5 1-1 Getting Started 1.1 Scope of this Manual 1.1.1 Who Should Use This Manual This manual is intended for operators/users of the SBD75e series of Network L-Band Satellite Demodulators to assist in the installation, operation, fault-finding and maintenance of the equipment. Throughout this manual, this product is referred to as the ‘SBD75e Demodulator ’. WARNING DO NOT REMOVE THE COVERS OF THIS EQUIPMENT. HAZARDOUS VOLTAGES ARE PRESENT WITHIN THIS EQUIPMENT AND MAY BE EXPOSED IF THE COVERS ARE REMOVED. ONLY ADVANTECH AMT TRAINED PERSONNEL AND APPROVED SERVICE ENGINEERS ARE PERMITED TO SERVICE THIS EQUIPMENT. Caution Unauthorised maintenance or the use of non-approved replacements may affect the equipment specification and invalidate any warranties. This Installation and Operation Manual does not include any procedures which require the removal of any equipment covers. 1.1.2 Version Information This manual has been written to cover Software Version 2.5.3 and later. 1.1.3 Equipment Covered by this Manual This manual covers the SBD75e L-Band Satellite Demodulator. 1.1.4 RF Interface Options The SBD75e Demodulator has two RF L-Band Inputs (950-2150 MHz). 1.1.4.1 L Band Input (950-2150 MHz) The Demodulator is capable of being used in conjunction with most C-Band or Ku-Band LNBs or BDCs, with L-Band RF frequencies in the range of 950-2150 MHz. For L-Band operation, the Demodulator has two separate L-Band inputs and a separate L-Band N-Type output, accessed at the rear of the unit. There are two inputs to the Demodulator, useful for receiving from two different polarizations or two different satellites. One is on Channel 1 (Type F female, 75 Ω), and the other is on Channel 2 (Type F female, 75 Ω). Either can be connected directly to the Receive IF connector of the appropriate LNB/BDC. The cable loss should be considered when selecting the cable. The Demodulator can additionally provide dc power (+13/+18 V, 0.4 A), a 22 kHz tone or a 10 MHz reference on the same cable as the L-Band receive carrier. The ON/OFF state of the LNB power is indicated by an LED on the Front Panel. 1-2 SBD75e Series Demodulator Installation and Operation Manual Getting Started Caution With LNB power enabled, there is a potentially damaging dc voltage applied to the Demodulator input. When connecting test equipment, or a local modulator (or any dc coupled devices), always use appropriate dc blocks, and disable LNB powering. The following commands are available to provide dc, tone or reference to the LNB/BDC: 1.2 Summary of Features 1.2.1 Overview The SBD75e Demodulator supports all the major satellite standards, both Intelsat and DVB, in a one rack unit chassis, if the appropriate options are enabled. Receiver and Radio Frequency (RF) to Intermediate Frequency (IF) carrier frequency conversion. Recovers data symbols and timing from the IF carrier. Uses Forward Error Correction (FEC) code bits, added to data symbols, to check and correct errors in the received data symbols. Ensures signal reception/ synchronisation. Descrambles randomized data to assure energy dispersal and assist timing recovery circuits. De-multiplexes the data signal into required streams for the output interface. Data interface to terrestrial equipment, depending on system requirements. Demodulator ASI 1 RF Input Channel 1 (L-Band) RF Input Channel 2 (L-Band) RF Down converter IF Demodulator (BPSK/QPSK/ 8PSK/QAM/ 16QAM) BB FEC Decoder ReedSoloman/ LDPC/TCM/ Sequential ALARM Differential Decoder M&C DEMOD Descrambler RS232 Demux Data Terminal Equipment (DTE) Interfaces ASI (270 Mbit/s) ASI 2 ASI 3 ASI 4 RS232 M&C Figure 1.1: SBD75e Demodulator Block Diagram 1.3 Guided Tour 1.3.1 Enclosure The SBD75e Demodulator can be fitted into a 1U high enclosure and may be used on a desktop or rack mounted. 1.3.2 Front Panel The SBD75e Demodulator is provided with a Vacuum Fluorescent Display (VFD), 7 status LEDs and a 16 button keypad. An RS-232 port is also provided and further details of this connector can be found in Chapter 2, Installation. SBD75e Series Demodulator Installation and Operation Manual 1-3 Getting Started RS232 M&C Connector VFD LED Indicators Keypad Figure 1.2: SBD75e Demodulator Front Panel 1.3.2.1 Vacuum Fluorescent Display (VFD) The VFD can display two lines of up to 40 characters each and has a wide viewing angle. 1.3.2.2 LED Indicators The LEDs on the front panel indicate the summary status of major Demodulator conditions. LEDs that illuminate GREEN indicate that the function is in operation. LEDs that illuminate RED indicate a fault condition. Figure 1.3: Front Panel LED Indicators Table 1.1: SBD75e Front Panel LEDs 1-4 LED Name Colour Function BUC Power Green Indicates that the BUC power is enabled LNB Power Green Indicates that the LNB power is enabled Transmit On Green Indicates that the modulator is transmitting Receive 1 Fault Red Indicates that the Demodulator channel is not locked to a received signal Receive 2 Fault Red Reserved Transmit Fault Red Indicates that the modulator is not transmitting due to a fault (or user intervention) Prime Power Green Indicates that the power supply current is being received by the management card SBD75e Series Demodulator Installation and Operation Manual Getting Started 1.3.2.3 Keypad The front panel 16-button keypad allows for navigation of the VFD and data input. Figure 1.4: Front Panel Keypad Table 1.2: Front Panel Keypad Functions Keys Function ENTER This key will enter a submenu or enter an editing mode of a parameter. The Parameter is only set once ENTER is pressed again otherwise changes will not be saved. Commands such as reconfigure and reset will activate once the ENTER key is pressed. CLEAR This Key will return to the previous display or exit out of an editing mode without changing the parameter. ST These keys are used to navigate the menus. The → symbol on the display is used to point to the current selection. The ↓↑symbols on the display indicate options above and below. On some menus with a large number of options then the selection will wrap around. These keys can also be used when editing parameters either from a list or numerically incrementing or decrementing values including hexadecimal. When a parameter requires a +/- indicator then these keys are used to toggle between them. WX These keys are used to navigate a parameter value once it has been selected. The X key may also be used to enter a submenu in the same way as the ENTER key. 0 to 9 When editing a parameter field with a numerical value, these keys allow the number to be entered directly. Note If a parameter is changed and the CLEAR key pressed before ENTER, the parameter change will be cancelled and the display returned to parameter selection mode. SBD75e Series Demodulator Installation and Operation Manual 1-5 Getting Started 1.3.3 Rear Panel The SBD75e Demodulator rear panel provides a number of connectors. Further details, including pin-outs are described in Chapter 2, Installation. AC Power Connector ON/OFF Switch RF INPUT CHANNEL 1/2 Connectors RS232 Connector ASI 1/2/3/4 Connectors ALARM Connector M&C DEMOD Connector Figure 1.5: SBD75e Demodulator Rear Panel 1-6 SBD75e Series Demodulator Installation and Operation Manual Getting Started 1.4 Typical System Setup The following diagram shows a typical system setup and signal interconnections. For detailed connector information, see Chapter 2, Installation. Figure 1.6: Demodulator Signal Interconnections SBD75e Series Demodulator Installation and Operation Manual 1-7 Getting Started 1-8 SBD75e Series Demodulator Installation and Operation Manual CHAPTER 2: Installation List of Contents 2.1 2.1.1 2.1.2 2.1.2.1 2.1.2.2 2.1.3 2.1.3.1 2.1.3.2 Introduction ............................................................... 2-2 Read This First! ............................................................ 2-2 Site Requirements ..................................................... 2-2 Power Supplies .......................................................... 2-2 Environment ............................................................... 2-2 EMC Compliance Statements ................................ 2-2 EN 55022 ..................................................................... 2-2 FCC ............................................................................. 2-2 2.2 2.2.1 2.2.2 Preliminary Checks ................................................... 2-3 Mechanical Inspection ............................................ 2-3 Moving the Equipment Safely ................................. 2-3 2.3 2.3.1 2.3.2 Unpacking and Inspection ...................................... 2-3 Unpacking .................................................................. 2-3 Inventory..................................................................... 2-4 2.4 2.4.1 2.4.2 2.4.3 2.4.4 Installing the Equipment .......................................... 2-4 Modem Rack Mounting Support Kit....................... 2-4 Cable Routing ........................................................... 2-5 Equipment Access .................................................... 2-5 Ventilation .................................................................. 2-5 2.5 2.5.1 2.5.2 2.5.2.1 2.5.2.2 2.5.2.3 Power Requirements and Earthing ........................ 2-6 Power Cables ............................................................ 2-6 AC Power and Fuse .................................................. 2-7 Connecting the SBD75e Demodulator to the AC power Supply ...................................................... 2-7 General ...................................................................... 2-7 Protective Earth/Technical Earth............................ 2-8 2.6 2.6.1 Signal Connections ................................................... 2-9 M&C Connector - RS232 .......................................... 2-9 SBD75e Series Demodulator Installation and Operation Manual 2.6.2 2.6.3 2.6.4 2.6.5 M&C Connector - 10/100BaseT Ethernet .............. 2-9 Alarms Connector ................................................... 2-10 RF (L-Band) Input Connector................................. 2-10 ASI Output Connector ............................................ 2-10 2.7 Configuring the Demodulator for Best Performance ............................................................ 2-11 Demodulator Acquisition Tips ................................ 2-11 BER Measurement ................................................... 2-12 2.7.1 2.7.2 List of Figures Figure 2.1: Rack Mount Support Kit ............................................ 2-5 Figure 2.2: Air Path through the Enclosure ................................ 2-6 Figure 2.3: Location of AC power connector .......................... 2-7 Figure 2.4: Location of Technical Earth Signal Connections ................................................................. 2-8 List of Tables Table 2.1: Demodulator Modem Rack Mounting Support Kits .................................................................................. 2-4 Table 2.2: Supply Cable Wiring Colours ..................................... 2-7 Table 2.3: Non Standard Supply Cord Wire Colours ................ 2-8 Table 2.4: M&C Connector - RS232 ............................................ 2-9 Table 2.5: M&C Connector - 10/100BaseT Ethernet ................ 2-9 Table 2.6: Alarms Connector..................................................... 2-10 Table 2.7: RF (L-Band) Input Connector .................................. 2-10 Table 2.8: ASI Output Connector ............................................. 2-11 2-1 Installation 2.1 Introduction This chapter describes the unpacking, inspection and installation considerations. Advantech AMT personnel normally perform installation of the SBD75e Demodulator. This chapter provides configuration and connection information for planning installations, checking the final set-up in the event of a fault, modifying the requirements or moving the equipment to another location. In the event of problems, contact Customer Support. 2.1.1 Read This First! The SBD75e Demodulator must be handled carefully and thoughtfully to prevent safety hazards and damage. Ensure the personnel designated to install the unit have the appropriate skills and knowledge. If in any doubt, contact Advantech AMT Customer Support. Follow the instructions for installation and only use installation accessories recommended by the manufacturers. 2.1.2 Site Requirements 2.1.2.1 Power Supplies See Appendix A, Technical Specification for a full specification. 2.1.2.2 Environment See Appendix A, Technical Specification for a full specification. Do not install this product in areas of high humidity or where there is danger of water ingress. The installation site should be compatible with the location used for other electronic equipment. That is, the building should be free from excessive dust and moisture. The room should not exceed the recommended temperature range (defined in Appendix B Technical Specifications). The installation location should allow for ample airflow. Also, allow extra room for service access to cables and wiring. 2.1.3 EMC Compliance Statements 2.1.3.1 EN 55022 1 This equipment is a Class A product. In a domestic environment this product may cause radio interference in which case the user may be required to take adequate measures. 2.1.3.2 FCC This equipment has been tested and found to comply with the limits for a Class A digital device, pursuant to Part 15 of the FCC Rules. These limits are designed to provide reasonable protection against harmful interference when the equipment is operated in a commercial environment. This equipment generates, uses, and can radiate radio frequency energy and, if not installed and used in accordance with the instruction manual, may cause harmful interference to radio communications. Operation of this equipment in a residential area is likely to cause harmful interference in which case the user will be required to correct the interference at his own expense. 1 The EMC information was correct at the time of manufacture. The EMC tests were performed with the Technical earth attached. 2-2 SBD75e Series Demodulator Installation and Operation Manual Installation 2.2 Preliminary Checks 2.2.1 Mechanical Inspection When taking delivery of an SBD75e Demodulator, check the equipment items delivered against the enclosed delivery note. Inspect the equipment for damage in transit. If in doubt, contact Customer Support (see Preliminary Pages). NOTE… Do not remove the covers of this equipment as doing so may invalidate any warranties, cause a safety hazard and/or affect the EMC performance. It may also invalidate any safety tests. Check with Customer Support beforehand. 2.2.2 Moving the Equipment Safely Do not place this product on an unstable cart, stand, bracket, or table. The product may fall, causing serious injury and serious damage to the product. Use only with a cart, stand, bracket or table recommended by Advantech AMT An appliance and cart combination should be moved with care. Quick stops, excessive force, and uneven surfaces may cause the appliance and cart combination to overturn. Do not move or carry the equipment whilst it is still connected to the supply or other leads, is live or is in operation. 2.3 Unpacking and Inspection Check for damage to the outside and the inside of the shipping container. If there is any damage, contact Customer Service and the shipping carrier to report it. 2.3.1 Unpacking To insure safety and proper operation of this equipment, use the following unpacking and repackaging guidelines: The equipment is shipped in a high-quality cardboard container and packed with high-density moulded foam. This type of packing material can withstand impairments such as vibration and impact associated with long-distance shipment. The packing box and foam is the only suitable type of packing that should be used for shipping the equipment. While unpacking, observe how the equipment is packed. In order to avoid damage, it must be repackaged in exactly the same manner if you need to ship the unit to another location or return it to the factory. The packing consists of one large cardboard box, two foam side caps, and one accessory box. Please retain these items for future use SBD75e Series Demodulator Installation and Operation Manual 2-3 Installation 2.3.2 Inventory Take inventory of the complete package to ensure that all necessary parts are present. A quick review of your pre-installation site survey form, purchase order, and shipping list should reveal any discrepancies. The box should contain the modem, a power cord, a fan filter kit, and this manual. If any additional kits have been ordered such as the Rear Support Kit verify the contents using the packing slip. 2.4 Installing the Equipment Move the unit to the location where it will be installed. Ideally, the unit will be installed into an equipment rack or a shelf. Prior to installing the SBD75e Demodulator, determine the depth of the supporting structure. A Rack Mount Support Kit may be required (if this has not been supplied with your modem when purchased, see Preliminary Pages for ordering information. Follow the additional precautions shown below: 2.4.1 Do not block the air holes or the fan cut outs at the back panel of the unit. These openings must be kept clear for the proper cooling of the equipment. Do not place the units beside each other or on top of each other. The exhaust from one unit can be drawn into the air intake of another. Make sure the room is properly cooled. Normal cooling may not be sufficient for locations where the electrical equipment is installed. Always make sure the unit top cover is installed and secured in place. If it has not already been done, label each cable that will be attached to the unit. This will prevent confusion and ensures proper connection. Modem Rack Mounting Support Kit Rack support kits are available to secure the SBD75e Demodulator securely into the supporting structure. See Table 2.1 for details of the kit required for various rack sizes. Table 2.1: Demodulator Modem Rack Mounting Support Kits 2-4 Rack Depth Kit 600 mm 19A-230001-001 700 mm 19A-230021-001 800 mm 19A-230011-001 SBD75e Series Demodulator Installation and Operation Manual Installation Figure 2.1: Rack Mount Support Kit The left and right mounting kit supports are attached to the SBD75e Demodulator with two #6-32 x 5/16” Phillips countersunk screws. Each angle is attached to a support by one #8-32 x ½” screw, one #8 lock washer, one#8 flat washer 3/8” OD, one #8 flat washer ½” OD and one #8-32 hexagonal nut. Do not use this product as a support for any other equipment. 2.4.2 Cable Routing Power supply cables should be routed so that they are not likely to be walked on or pinched by items placed upon or against them. Pay particular attention to cables at plugs, convenience receptacles, and the point where they exit from the appliance. Do not run AC power cables in the same duct as signal leads. 2.4.3 Equipment Access Ensure that the SBD75e Demodulator is installed in such a way as to allow access to the rear of the unit and the connectors. 2.4.4 Ventilation WARNING... NEVER PUSH OBJECTS OF ANY KIND INTO THIS EQUIPMENT THROUGH OPENINGS AS THEY MAY TOUCH DANGEROUS VOLTAGE POINTS OR SHORT-OUT PARTS THAT COULD RESULT IN A FIRE OR ELECTRIC SHOCK. NEVER SPILL LIQUID OF ANY KIND ON THE PRODUCT. Cautions 1. Openings in the cabinet are provided for ventilation and to ensure reliable operation of the product and to protect it from overheating, and these openings must not be blocked or covered. This product should never be placed near or over a radiator or heat register. This product should not be placed in a built-in installation such as a rack unless proper ventilation is provided or the instructions have been adhered to. SBD75e Series Demodulator Installation and Operation Manual 2-5 Installation 2. Do not install equipment so that the air intake of one aligns with the outlet on another. Provide baffles and adequate spacing. 3. The fans contained within this unit are not fitted with a dust/insect filter. Pay particular attention to the environment in which it is to be used. The unit is designed for stationary or fixed use only. Ensure it is firmly and safely located and has an adequate through-flow of air. Allow at least 50 mm free air-space at each side of the equipment. Units in racks can be stacked without ventilation panels between. Racks containing stacked equipment may need to be forced-air cooled to reduce the operating ambient temperature. For stacking constraints contact Advantech Customer Support. Warm air is exhausted via side vents Cool air is brought into the unit via fans Figure 2.2: Air Path through the Enclosure 2.5 Power Requirements and Earthing Caution This product should be operated only from the type of power source indicated on the marking label. If you are not sure of the type of power supply to your business, consult a qualified electrical engineer or your local power company. The SBD75e Demodulator is available as an AC powered unit which may be operated with any regular worldwide office or domestic supply. 2.5.1 Power Cables WARNINGS 2-6 1. THIS UNIT MUST BE CORRECTLY EARTHED THROUGH THE MOULDED PLUG SUPPLIED. IF THE LOCAL MAINS SUPPLY DOES NOT HAVE AN EARTH CONDUCTOR DO NOT CONNECT THE UNIT. CONTACT CUSTOMER SUPPORT FOR ADVICE. 2. BEFORE CONNECTING THE UNIT TO THE SUPPLY, CHECK THE SUPPLY REQUIREMENTS IN ANNEX B, TECHNICAL SPECIFICATION. SBD75e Series Demodulator Installation and Operation Manual Installation 2.5.2 AC Power and Fuse AC power is supplied to the Demodulator via socket JP1 (IEC 320(M) on the rear panel. WARNING UNDER NO CIRCUMSTANCES SHOULD THE EARTHING PIN OF A 3-PIN PLUG BE REMOVED TO OPERATE WITH A 2-PIN SOCKET. Caution The SBD75e Demodulator series are shipped with a North American standard 3-pin power cable that is designed to work with 100-120V power supplies only. If you are in a country or territory that does not support this power cable design or voltage supply, please provide your own appropriate 3-pin power cable for powering the unit. Figure 2.3: Location of AC power connector The Demodulator requires a supply voltage in the range 96-263 VAC 47-63 Hz. Demodulators power supply will produce up to 30 W loading on the AC supply. 2.5.2.1 Connecting the SBD75e Demodulator to the AC power Supply WARNINGS 1. DO NOT OVERLOAD WALL OUTLETS AND EXTENSION CABLES AS THIS CAN RESULT IN FIRE OR ELECTRIC SHOCK 2. AS NO MAINS SWITCH IS FITTED TO THIS UNIT, ENSURE THE LOCAL AC POWER SUPPLY IS SWITCHED OFF BEFORE CONNECTING THE POWER CABLE. 3. THIS UNIT IS NOT FITTED WITH AN ON/OFF SWITCH. ENSURE THAT THE SOCKET OUTLET IS INSTALLED NEAR THE EQUIPMENT SO THAT IT IS EASILY ACCESSIBLE. FAILURE TO ISOLATE THE EQUIPMENT CORRECTLY MAY CAUSE A SAFETY HAZARD. To connect the unit to the local AC power supply: 2.5.2.2 1. Ensure the local AC supply is switched OFF. 2. Ensure the correct fuse type and rating has been fitted to both the equipment and the AC power cables. 3. Connect the AC power leads to the SBD75e Demodulator mains input connector and then to the local mains supply. General Check that the AC power cable is suitable for the country in which the unit is to be used. The unit is supplied with a detachable mains-supply cable fitted with a moulded plug suitable for the USA, UK or Europe as appropriate. The wires in the mains-supply cable are coloured in accordance with the wire colour code shown in Table 2.2. Table 2.2: Supply Cable Wiring Colours SBD75e Series Demodulator Installation and Operation Manual 2-7 Installation UK (BS 1363) EUROPE (CEE 7/7) USA (NEMA 5-15P) Earth: Green-and-yellow Green-and-yellow Green Neutral: Blue Blue White Live: Brown Brown Black If the colours do not correspond with the coloured markings identifying the terminals in a locally supplied plug, proceed as in Table 2.3 (included for reference). Table 2.3: Non Standard Supply Cord Wire Colours 2.5.2.3 Wire Colour (UK) Action Green-and-yellow Must be connected to the terminal in the plug which is marked with the letter E or the safety earth symbol or coloured green or green-and-yellow. Blue Must be connected to the terminal in the plug which is marked with the letter N or coloured black. Brown Must be connected to the terminal in the plug which is marked with the letter L or coloured red. Protective Earth/Technical Earth Connect the SBD75e Demodulator Technical earth to a suitable point. WARNINGS 1. THIS UNIT MUST BE CORRECTLY EARTHED THROUGH THE MOULDED PLUG SUPPLIED. IF THE LOCAL MAINS SUPPLY DOES NOT HAVE AN EARTH CONDUCTOR DO NOT CONNECT THE UNIT. CONTACT CUSTOMER SUPPORT FOR ADVICE. 2. BEFORE CONNECTING THE UNIT TO THE SUPPLY, CHECK THE SUPPLY REQUIREMENTS IN ANNEX B, TECHNICAL SPECIFICATION. The unit has a Technical earth terminal (marked with ) located adjacent to the rear-panel mains inputs. Its use is recommended. This is NOT a Protective earth for electric shock protection. The terminal is provided to: Ensure all equipment chassis fixed within a rack are at the same Technical earth potential. To do this, connect a wire between the Technical earth terminal and a suitable point on the rack. Eliminate the migration of stray charges when connecting between equipment. Figure 2.4: Location of Technical Earth Signal Connections 2-8 SBD75e Series Demodulator Installation and Operation Manual Installation 2.6 Signal Connections The majority of signal connectors are located on the rear panel of the SBD75e Demodulator, except for one monitor and control connector located on the front panel. Note Always use the specified cables supplied for signal integrity and compliance with EMC requirements (see appendix A, Technical Specification). 2.6.1 M&C Connector - RS232 An RS-232 connector, provided at the rear panel, supports the connection of ANSII 3.64 VT-100 terminals (including hand-held) similar to the front panel RJ-11 connector. Table 2.4: M&C Connector - RS232 2.6.2 Item Specification Connector type: 9-way, D-type, Female Connector designation: M&C RS232 Standard: RS232 Configuration: DCE Pin-outs: 1 Not Used 6 Not Used 2 Tx Data 7 Not Used 3 Rx Data 8 Not Used 4 Not Used 9 +5 VDC @ 100 mA 5 Ground 5 1 6 9 M&C Connector - 10/100BaseT Ethernet There is one 10/100BaseT Ethernet M&C ports which is labelled M&C Demod. Table 2.5: M&C Connector - 10/100BaseT Ethernet Item Specification Connector type: RJ-45 socket Connector designation: M&C Demod Standard: 10/100BaseT Configuration: - 1 8 Pin-outs: RJ-45 Pin Number Description Wire Color Codes Crossover Cable Pins 1 TX + White W/Orange 3 2 TX - Orange 6 3 RX + White W/Green 1 4 Blue 5 White W/Blue SBD75e Series Demodulator Installation and Operation Manual 2-9 Installation 2.6.3 Item Specification 6 RX - Green 7 White W/Brown 8 Brown 2 Alarms Connector An RS-232 15-pin connector, provided at the rear panel, enables Form C relay outputs of the Demodulator status. Table 2.6: Alarms Connector Item Specification Connector type: 9-way, D-sub type, Female Connector designation: ALARMS Standard: Custom Configuration: - Relay 1: 1 Common 6 Normally Closed 8 Normally Open 2 Common 7 Normally Closed 3 Normally Open 5 Common 4 Normally closed 9 Normally Open Relay 2 Relay 3: 2.6.4 5 1 9 6 RF (L-Band) Input Connector One or more RF inputs may be provided on the rear panel, labelled as Channel 1, Channel 2, etc., to receive RF signals from the antenna LNB. For signal specification, see Appendix A: Technical Specification. Table 2.7: RF (L-Band) Input Connector 2.6.5 Item Specification Connector type: F-type 75 Ω female socket Connector designation: RF Input Channel 1 RF Input Channel 2 Pin-outs: Centre RF Signal Shield Ground/Chassis ASI Output Connector One or more ASI outputs may be provided on the rear panel, labelled as ASI 1, ASI 2, etc., to receive transport streams. For signal specification, see Appendix A: Technical Specification. 2-10 SBD75e Series Demodulator Installation and Operation Manual Installation Table 2.8: ASI Output Connector Item Specification Connector type: BNC 75 Ω socket Connector designation: ASI OUT 1 ASI OUT 2 ASI OUT 3 ASI OUT 4 Pin-outs: Centre Video Signal Shield Ground/Chassis 2.7 Configuring the Demodulator for Best Performance 2.7.1 Demodulator Acquisition Tips This section is a useful checklist for debugging the Demodulator acquisition process, with some tips for getting the best performance. To debug the Demodulator acquisition process: 1. Check the input connection. The L-Band connection must be connected to the correct input and the correct input selected under software control. Input 1 is closest to the Ethernet connector. 2. Check the LNB control signals. The 22 kHz switching tone is switched off by default. 3. Check the L-Band frequency. 4. Check the Demodulator configuration. The spectrum sense may be true or inverted. The symbol rate, alpha, modulation and coding must be correctly configured. The frequency acquisition range must be correctly configured – this is described below. The frequency acquisition range is dependant upon symbol rate, the use of FFT assistance and use of the frequency sweep. As a basic rule without FFT assistance the frequency acquisition range can be assumed to be 2% of symbol rate for QPSK and 1% for 8PSK. If Spectral Analysis (FFT assistance) is enabled – then the acquisition range for all modulation types can be assumed to be 10% of symbol rate. For example at 64 ksymbol acquisition would be +/- 7 kHz. To increase the acquisition range it is possible to set a frequency sweep using the sweep range and step size settings. Therefore, to increase the 64 kSymbol acquisition range to +/-30 kHz the sweep range could be set to 30,000 Hz and the sweep step size set to 12 kHz. Note It is not recommended to use the Spectral Analysis (FFT assisted acquisition) above 3MSymbols as this will significantly slow signal acquisition. The command which enables or disables FFT assistance is set to auto by default; in this case the FFT is only enabled when the bit rate is less than 1.5 Mbps. SBD75e Series Demodulator Installation and Operation Manual 2-11 Installation 2.7.2 BER Measurement Note The SBD-75e provides two means of analyzing link error rate performance. When the Demodulator is operating in PRBS Mode the front panel menu shows the real Bit Error Rate measured from errors detected on the PRBS sequence. The BER can be reset by via the front panel. Note The displayed Bit Error Rate value is invalid when the Demodulator is receiving real data traffic. There is also an Estimated BER, which is useful when the Demodulator is operating with real data. This is displayed on the front panel menu. 2-12 SBD75e Series Demodulator Installation and Operation Manual CHAPTER 3: Front Panel Monitoring & Control List of Contents 3.1 Introduction ............................................................... 3-2 3.2 Powering up the Demodulator ............................... 3-3 3.3 3.3.1 3.3.2 3.3.2.1 3.3.2.1.1 3.3.2.2 3.3.2.2.1 3.3.2.2.2 3.3.2.2.3 Basic Front Panel Operation ................................... 3-3 Overview .................................................................... 3-3 Select Board .............................................................. 3-3 Status........................................................................... 3-4 Status........................................................................... 3-4 Configure ................................................................... 3-5 Profiles ......................................................................... 3-5 Inputs........................................................................... 3-7 Coding ........................................................................ 3-7 SBD75e Series Demodulator Installation and Operation Manual List of Tables Table 3.1: Top Level Menu ........................................................... 3-3 Table 3.2: Select Board Menu ..................................................... 3-4 Table 3.3: Status Sub-menu ......................................................... 3-4 Table 3.4: Status: Status Sub-menu ............................................. 3-4 Table 3.5: Configure Sub-menu .................................................. 3-5 Table 3.6: Profiles Sub-menu ........................................................ 3-5 Table 3.7: Inputs Sub-menu ......................................................... 3-7 Table 3.8: Coding Types ............................................................... 3-7 Table 3.9: Coding Options ........................................................... 3-8 3-1 Front Panel Monitoring & Control 3.1 Introduction The SBD75e Demodulator is equipped with an active front panel (LCD screen and keypad) which provides an easy way to setup the Demodulator without the need for a PC or generic control system. This chapter is intended to allow maintenance personnel or users to quickly set up the Demodulator for initial use. Switch On Advantech AMTTM Overview : Press any key to continue..... Overview : (para. 5.3.1) Select Board > (para. 5.3.2) Chassis Info > (para. 5.3.3) Set Brightness : (para. 5.3.4) Chassis Info > Set Brightness : 3-2 Select Board > Status > (para. 5.3.2.1) Est. SNR : Actual Baud Rate : Est. Signal Power : Demod Freq : Prog Baud Rate : Prog Bit Rate : Actual Bit Rate : Spectrum: Est. EBNO: Est. BER : BERT BER : Status (para. 5.3.2.1.1) FPGA : Signal Level : AGC : Timing : Carrier : SDF : Coding : ALL : Configure > (para. 5.3.2.2) Profiles > (para. 5.3.2.2.1) Load Profile > Create Profile > Delete Profile > Inputs > (para. 5.3.2.2.2) Input : LNB Power : LNB Polarization : LNB 22KHz : Spectrum : Alpha : Search Range : Search Step : Spectral Analysis : Coding > (para. 5.3.2.2.3) DVB DVB_SNG DVB-S2S DVB-S2N Intelsat Modulation : Data Rate : Frequency : Freq Offset : Descrambler : Pilots : Outer RS : Diff. Decoding : Equalizer : Remove Mark : Unframed ASI : PLS Seed : Output X ISI : Output X Mode : Reconfigure : System Setup > SBD75e Series Demodulator Installation and Operation Manual Front Panel Monitoring & Control 3.2 Powering up the Demodulator When power is applied to the Demodulator (in accordance with the instructions given in Chapter 2, Installation), approximately 90 seconds should be allowed for the system to boot-up, complete internal checks, for the internal crystal oven to reach operating temperature and the frequency of the crystal to stabilize. The following screen is then displayed: Advantech AMTTM Press any key to continue..... 3.3 Basic Front Panel Operation When the Demodulator has completed the boot-up process, pressing any key will cause the top level menu to be displayed. The options available from this menu are shown in Table 3.1. Note When a key is pressed following start-up, the start-up screen will not be displayed again unless the unit undergoes a power cycle. Table 3.1: Top Level Menu 3.3.1 Menu Item Operations Overview : This is a monitor function which reports the overall status of the unit. This will report unlocked if any of the cards within the chassis is unlocked. Select Board > This will list all available cards with the user specified names. From this menu these units can be monitored and controlled. At present each card has an individual network address which is set within this menu. Chassis Info > General chassis information which is not specific to a card is displayed here such as Fan speeds etc. Tests such as LED tests are also set within this menu. Set Brightness: Allows the user to adjust the brightness of the display. Overview This lists an overall summary of the system. At present, if any card is unlocked then it will report as unlocked. 3.3.2 Select Board The Chassis has been designed to be highly configurable and can be used with a range of modulators, Demodulators and miscellaneous interface cards. These cards can have user specified names which are set within the GUI. The Select Board functions may be viewed by clicking on the Select Board option from the Overview screen. The options available from this menu are detailed in Table 3.2. SBD75e Series Demodulator Installation and Operation Manual 3-3 Front Panel Monitoring & Control Table 3.2: Select Board Menu 3.3.2.1 Menu Item Operations Status > Lists the status of the input and configuration. All parameters in this menu are read only. Configure > Allows configuration of various parameters within the unit. System Setup > Allows configuration of card Ethernet address. Status The Status parameters may be viewed by selecting the Status option from the Select Board menu. The read-only parameters displayed are detailed in Table 3.3. Table 3.3: Status Sub-menu 3.3.2.1.1 Menu Item Operations Status > Internal lock status Est. SNR : Estimated Signal to Noise Ratio in dB. Actual Baud Rate : The Actual Baud rate which is required to match the incoming bit rate. Est. Signal Power: Estimated Signal power in dBm. Demod Freq: Received Frequency offset in Hz of the incoming carrier. Prog Baud Rate: The Programmed Baud rate. Prog Bit Rate : The Programmed Bit rate. This is not always relevant in DVB-S2 when in an automatic mode or ACM/VCM and there is no conversion factor. This will be displayed as 0. Actual Bit Rate: This is a calculated bit rate from the actual baud rate. In certain S2 modes this will be displayed as 0 when there is no conversion factor. Spectrum: The Spectrum can be inverted or Normal. Est. EBNO: Estimated EbNo. Est. BER: Estimated BER, this is not available in all modes at present. BERT BER: This is an actual BER when used in conjunction with a PRBS source. In normal operation this will report Unlocked. Status This further option is available from the Status sub-menu but is only required if the is a problem with acquisition. The parameters available from this selection are displayed in Table 3.4. Table 3.4: Status: Status Sub-menu 3-4 Menu Item Operations FPGA : If the FPGA has been programmed correctly it will report OK. Signal Level: The signal level will be reported as Low / OK / High. AGC: This will report locked or unlocked. Timing: This will report locked or unlocked. Carrier: This will report locked or unlocked. SDF: This is the framing and is not relevant in all modes. This will report locked or unlocked. SBD75e Series Demodulator Installation and Operation Manual Front Panel Monitoring & Control 3.3.2.2 Menu Item Operations Coding: This will report locked or unlocked. ALL: This will report locked or unlocked. Configure All options selected within this menu are pending settings and will not take effect until the unit is reconfigured. The settings are only saved when the unit is reconfigured and will be lost if the user exits out of the configure menu or the unit is power cycled. The options under this Menu will vary and depend upon the chosen coding scheme; this is stated in the list below. It is recommended that the entry be done from top to bottom then only applicable menus will be displayed. The Configure sub-menu may be viewed by selecting the Configure option from the Select Board menu. The options available are detailed in Table 3.5. Table 3.5: Configure Sub-menu 3.3.2.2.1 Menu Item Operations Profiles > Different operational profiles can be saved and loaded via this submenu. Inputs > Input selection and LNB control. Spectrum: The required spectrum can be set as Normal or Inverted, if known, otherwise Auto can be used which may increase acquisition time. Alpha: The values available for roll-off are: 0.15, 0.20, 0.25, 0.30 and 0.35 Search Range: The Search range can be set from 0 to 20 MHz. This should be set depending upon the amount of uncertainty of the carrier. Search Step: The Step size of the search can be set from 0 to 500 KHz. Spectral Analysis: The setting of this value will be ON, OFF or Auto. If enabled then a FFT will be performed to aid acquisition. Coding: The coding scheme is chosen from a list which is dependant upon the feature keys that are installed. Profiles The user can store and recall configurations with clear user-definable names. The stored file is shared by all user interfaces so the GUI could be used to clone a configuration to several units and the front panel could retrieve this setting. The Profiles sub-menu allows the user to access these configurations. Note The front panel is slightly more restrictive than the GUI due to the limited display and key entry system but is still easy to use. To load, delete or create profiles: 1. Select the Profiles option from the Configure sub-menu. The options displayed are detailed in Table 3.6. Table 3.6: Profiles Sub-menu Menu Item Load Profile > Operations This option will only be displayed if there are stored profiles. SBD75e Series Demodulator Installation and Operation Manual 3-5 Front Panel Monitoring & Control Menu Item Operations Create Profile > This submenu will allow a name to be created and the configuration to be stored to non-volatile memory on the card. Delete Profile > This submenu is only displayed if profiles have been stored. It will allow unwanted profiles to be deleted. A profile should first be loaded then it can be deleted from the memory on the card. 2. Select the Load Profile option. The following screen is displayed. MUX_A: MUX_B: Note The down arrow indicates that there are more profiles available. 10 profiles are currently supported. 3. Select the required profile. The following warning screen is displayed. Loading Profile: MUX_A ENTER = Confirm : CLEAR = Cancel The new configuration will be pending until the unit is reconfigured. To create and save a new profile: 1. Select the Create Profile option from the Profiles sub-menu. The following screen is displayed. Name Profile: Save Profile: Note Until a profile has been named, it cannot be saved and will not appear on the menu. 2. Select the Name Profile option. The following screen is displayed. MUX_B ABCDEFGHIJKLMNOPQRSTUVWXYZ Delete Select 3. Use the left and right arrows to navigate to the character required or use the numeric pad 0-9 to enter numbers. 4. Press the down arrow to select the character and the up arrow to delete. 5. When the name entry is complete, press the ENTER key. Note A total of 30 upper case characters can be entered on the front panel display. When using the GUI, up to 64 upper and lower case characters may be entered. 6. Select the Save option. The following screen is displayed. Saving Profile: MUX_B ENTER = Confirm : CLEAR = Cancel 3-6 SBD75e Series Demodulator Installation and Operation Manual Front Panel Monitoring & Control To delete a profile: 1. Select the Delete option from the Profiles sub-menu. The following screen is displayed. Deleting Profile: MUX_B ENTER = Confirm : CLEAR = Cancel 3.3.2.2.2 Inputs To select inputs and control the LNB, the Inputs option should be selected from the Configure sub-menu. The options available are detailed in Table 3.7. Table 3.7: Inputs Sub-menu 3.3.2.2.3 Menu Item Operations Input: For selection of L-Band input. The choice is input 1 or input 2. LNB Power: The selected input will have 13v/18v at up to 0.4A to power the LNB, the other input will receive no power. LNB Polarization: The selection is Horizontal or Vertical which will modify the LNB DC power level. LNB 22KHz: The selection is ON or OFF. This is used for universal LNBs and if present will use a LO of 10.6Ghz (“High Band”) otherwise it will use 9.75GHz (“Low Band”) Coding When Coding is selected, the coding type is highlighted. By using the up and down arrows this coding type can be altered. The options are dependant upon the feature keys installed but the possible list is detailed in Table 3.8. Table 3.8: Coding Types Coding Type Remarks Supported Code rates DVBS DVB-S 1 /2 2/3, 3/4 5/6, 7/8 DSNG DVB-DSNG 2 /3, 3/4, 5/6, 7/8, 8/9 DVBS2S DVB-S2, Short Frames (16K) 1 /4, 1/3, 2/5, 1/2, 3/5, 2/3, 3/4, 4/5, 5/6, 8/9, ACM DVBS2N DVB-S2, Normal Frames (64K) 1 /4, 1/3, 2/5, 1/2, 3/5, 2/3, 3/4, 4/5, 5/6, 8/9, 9/10, ACM Intelsat IESS 308 / 310 1 /2, 2/3, 3/4, 7/8 To view and alter the coding type: 1. Select Coding from the Configure sub-menu. One of the following screens is displayed: Coding: [DVBS2N 9/10] Coding: [DVBS2N 9/10] 2. Using the right arrow highlight the required code rate. 3. Using the up and down arrows, select the required code rate. 4. Press ENTER. A list of options, detailed in Table 3.9 is displayed. SBD75e Series Demodulator Installation and Operation Manual 3-7 Front Panel Monitoring & Control Note When selecting a code rate, note that only legal values are selectable. ACM is a special case for DVBS2. Table 3.9: Coding Options Menu Item Modulation : Operations This option does not appear if ACM has been selected. Only the possible combinations for the chosen code type and rate will appear. This may also be limited by the feature keys installed. The possible range is BPSK, QPSK, 8PSK, 16QAM, 16APSK and 32APSK. This sets either the data rate in bits per second or symbol rate in symbols per second. The data rate can either be set by the numerical value or by the up/down arrows. Once the value is set then the units can be changed from BPS to SPS by moving the cursor to the end and then using the up/down arrows. For ACM the value must be set as SPS. Data Rate : -> Data Rate: [199000000 BPS] -> Data Rate: [199000000 BPS] Frequency: The carrier frequency can be set from 950 MHz to 2150 MHz. This is a convenient way to offset the frequency. In the example shown below the actual carrier frequency will be 100 Hz lower than that stated in the frequency setting. Freq Offset: -> Freq offset: [199000000 Hz] Descrambler: This option is only available if Intelsat is selected. The options are ON or OFF. Pilots: This entry will only appear when DVBS2S or DVBS2N is selected and not ACM. This enables or disables pilot insertion. Outer RS: This option is only available if Intelsat is selected. The options are off (no Outer RS), 219 (RS of 219,201) and 126 (RS of 126,112). Diff. Decoding: This option is only available if Intelsat is selected. The options are ON or OFF Equalizer: This option is only available if DVB-S2 is selected. The options are the number of taps required which is off, 6,8,10,12….32 Remove Mark: This option is only available if DVB-S or DSNG is selected. It will remove the MPEG Sync mark from the transport stream. This is used if Non-MPEG traffic is transmitted using these coding schemes. The option is ON or OFF. Unframed ASI: This option is only available if DVB-S, DSNG or Intelsat is selected. If OFF, only data that conforms to standard transport streams will be transmitted i.e. 188 Byte packets with 0x47 Sync Marks. When ON, all data will be output. PLS Seed: 3-8 Physical Layer Scrambling Seed is only available in DVB-S2 modes. This should be used with caution and the default value is 0. The range for this value is 0 to 262141 and the value is entered in decimal. The Modulator will have to use the same seed value to lock otherwise the transmitted modulation and code rate will not be decoded. SBD75e Series Demodulator Installation and Operation Manual Front Panel Monitoring & Control Menu Item Operations Output X ISI: This option is only selectable if DVB-S2 ACM is selected. Only select streams with the correct ISI value. The range is 0 to 255. Output X Mode: This option is only selectable if DVB-S2 is selected. If Normal is selected then just data is output, if TFrame is selected then whole Baseband frames are output. This is used if post-processing is required. Reconfigure: This button will activate all the pending options described above. When all of the options in Table 5.9 have been set: 1. Select Reconfigure. The following screen is displayed: Reconfigure? ENTER = Confirm : CLEAR = cancel 2. Select ENTER. The unit is reconfigured with the pending settings; this will cause a break in the reception. All the pending settings are then stored and will be re-used if a power cycle occurs. If the unit was not reconfigured then the pending settings are discarded if the unit is power cycled or the user exits out of the CONFIGURE menu. SBD75e Series Demodulator Installation and Operation Manual 3-9 Front Panel Monitoring & Control 3-10 SBD75e Series Demodulator Installation and Operation Manual CHAPTER 4: Web List of Contents 4.1 Introduction ............................................................... 4-3 4.2 4.2.1 Requirements for Accessing the GUI ..................... 4-3 Accessing the GUI .................................................... 4-3 4.3 4.3.1 4.3.2 4.3.3 Overview .................................................................... 4-4 Overview: Information.............................................. 4-4 Overview: Alarms ...................................................... 4-4 Overview: Status ....................................................... 4-6 4.4 4.4.1 4.4.1.1 4.4.1.2 4.4.1.3 4.4.1.4 SBD75e: Information ................................................. 4-7 Information ................................................................. 4-7 Setting the Unit Name .............................................. 4-8 Version ........................................................................ 4-8 MAC Address ............................................................. 4-8 Supported Features .................................................. 4-9 4.5 SBD75e: Status ........................................................... 4-9 4.6 4.6.1 4.6.1.1 4.6.1.2 4.6.1.3 4.6.1.4 4.6.1.5 4.6.1.6 4.6.1.7 4.6.2 4.6.2.1 4.6.2.2 4.6.2.3 4.6.2.4 4.6.2.5 4.6.3 4.6.4 4.6.5 SBD75e: Alarms ........................................................ 4-10 General .................................................................... 4-11 Lock State ................................................................ 4-11 LNB Over-Current .................................................... 4-11 FPGA Loading Failed .............................................. 4-11 SRAM2 Failure .......................................................... 4-11 Board Temperature ................................................ 4-11 FPGA Temperature ................................................. 4-11 Dummy Frames Only .............................................. 4-12 Output Alarms ......................................................... 4-12 Output Fault ............................................................. 4-12 Output N ISI is Not Present ..................................... 4-12 Output N ESR Level ................................................. 4-12 Output N SESR Level ............................................... 4-13 Output N BBER Level ............................................... 4-13 Setting Alarms .......................................................... 4-13 Setting Warnings ..................................................... 4-13 Alarm Status ............................................................. 4-13 4.7 4.7.1 4.7.2 SBD75e: Analyzer .................................................... 4-14 Play/Pause ............................................................... 4-14 Analyzer Pane format ............................................ 4-15 SBD75e Series Demodulator Installation and Operation Manual GUI Monitoring & Control 4.7.3 4.7.3.1 4.7.3.1.1 4.7.3.1.2 4.7.3.2 4.7.3.2.1 4.7.3.2.2 4.7.3.3 4.7.3.4 4.7.3.4.1 4.7.3.5 4.7.3.5.1 4.7.3.5.2 4.7.3.5.3 4.7.3.5.4 4.7.3.5.5 4.7.3.5.6 4.7.3.5.7 4.7.3.5.8 4.7.3.6.4 4.7.3.6.5 4.7.3.6.6 4.7.3.6.7 Analyzer Information Icons .................................... 4-15 Spectrum Analyzer .................................................. 4-15 Averaging ON/Off Button ...................................... 4-16 Cursors ....................................................................... 4-16 Signal Constellation ................................................ 4-16 Number of Points ..................................................... 4-17 Persistence ............................................................... 4-17 Equaliser Frequency Domain Response .............. 4-17 Physical Layer Statistics .......................................... 4-18 Interpretation ........................................................... 4-19 Baseband Header Statistics ................................... 4-19 ID ................................................................................ 4-19 Age ............................................................................ 4-19 User Packet Length (UPL) ....................................... 4-20 Sync Byte .................................................................. 4-20 MA Type .................................................................... 4-20 Modcod .................................................................... 4-20 Sort By ........................................................................ 4-20 Effects of Uncorrected Base-band Header Errors .......................................................................... 4-20 Effects of Stream Isolation ...................................... 4-21 Output Interface Statistics ..................................... 4-21 ISI ................................................................................ 4-21 Full, Empty, ISSY and Lock Flags ............................ 4-21 Packet Count, Error Count & Packet Error Rate (PER) ................................................................. 4-21 Bit Rate ...................................................................... 4-22 Errored Second Rate (ESR)..................................... 4-22 Severely Errored Second Rate (SESR) ................... 4-22 Background Block Error Rate (BBER) .................... 4-22 4.8 4.8.1 4.8.2 4.8.3 4.8.4 4.8.5 4.8.6 4.8.7 4.8.8 4.8.9 SBD75e: BISS Decryption ......................................... 4-22 BISS Mode Selection ............................................... 4-23 Off .............................................................................. 4-24 BISS-0 ......................................................................... 4-24 BISS-1 ......................................................................... 4-24 BISS-E.......................................................................... 4-25 Odd/Even-1.............................................................. 4-25 Odd/Even-E.............................................................. 4-25 User-1 ......................................................................... 4-26 User-E ......................................................................... 4-26 4.7.3.5.9 4.7.3.6 4.7.3.6.1 4.7.3.6.2 4.7.3.6.3 4-1 Web GUI Monitoring & Control 4.8.10 4.8.11 BISS Insertion Period ................................................ 4-26 Encrypted Session Word Generator ..................... 4-27 4.9 4.9.1 4.9.2 4.9.2.1 4.9.2.2 4.9.2.3 4.9.2.3.1 4.9.2.4 4.9.3 4.9.3.1 4.9.3.2 4.9.3.3 4.9.4 4.9.4.1 4.9.4.2 4.9.4.3 4.9.4.4 4.9.5 4.9.5.1 4.9.5.2 4.9.5.3 4.9.5.3.1 4.9.5.3.2 4.9.5.4 4.9.5.5 4.9.5.6 SBD75e: Configuration ........................................... 4-27 Main .......................................................................... 4-27 Stream Isolation ....................................................... 4-28 Automatic Mode .................................................... 4-29 ISI Assignment Function – Deactivated ............... 4-30 Manual Mode .......................................................... 4-32 MODCOD Filter ........................................................ 4-33 ISI Assignment Function – Activated .................... 4-34 Advanced ................................................................ 4-36 Padding Support ..................................................... 4-37 VCM Guard Mode .................................................. 4-37 PLS Seed ................................................................... 4-38 Profiles ....................................................................... 4-38 Saving and Overwriting Profiles ............................ 4-38 Loading Existing Profiles ......................................... 4-39 Downloading a Profile............................................ 4-40 Uploading a Profile ................................................. 4-42 Output ...................................................................... 4-42 Enable/Disable ........................................................ 4-42 Output ISI .................................................................. 4-42 Output Mode........................................................... 4-43 Normal Mode .......................................................... 4-43 Transport Mode ....................................................... 4-43 Stats Integration Time ............................................. 4-43 Modulation and Coding ........................................ 4-43 DVB-S De-concentration ....................................... 4-44 List of Figures Figure 4.1: SBD75e Login Window............................................... 4-3 Figure 4.2: Entry Level Window showing Information for one SBD75e ................................................................... 4-4 Figure 4.3: Alarms and Warnings Monitoring Window............. 4-5 Figure 4.4: Changing Alarm Monitoring Window ..................... 4-6 Figure 4.5: Status Window ............................................................ 4-7 Figure 4.6: SBD75e Management Window ............................... 4-8 Figure 4.7: Setting the Unit Name Window ............................... 4-8 Figure 4.8: SBD75e Status Window ............................................ 4-10 Figure 4.9: Alarms and Warnings Monitoring Window........... 4-11 Figure 4.10: Output Alarms Window ......................................... 4-12 Figure 4.11: Analyzer Window ................................................... 4-14 Figure 4.12: Analyzer Pane Displayed as three Sub-Panes .. 4-15 Figure 4.13: Spectrum Analyzer Window ................................. 4-16 Figure 4.14: Signal Constellation Window ............................... 4-17 Figure 4.15: Equalizer Frequency Domain Response Window ....................................................................... 4-18 Figure 4.16: Physical Layer Statistics Window ......................... 4-18 Figure 4.17: Baseband Header Statistics Window.................. 4-19 Figure 4.18: Output Interface Statistics Window .................... 4-21 Figure 4.19: BISS Window ............................................................ 4-23 Figure 4.20: BISS Mode Selection Window .............................. 4-24 Figure 4.21: Odd/Even-E Selected ........................................... 4-25 Figure 4.22: Encrypted Word Session Generator Window .... 4-27 Figure 4.23: Configuration Main Window ................................ 4-28 Figure 4.24: Stream Isolation Window ...................................... 4-29 Figure 4.25: Stream Isolation Window in Automatic Mode .. 4-30 Figure 4.26: Stream Isolation - Assignment ISI Deactivated.. 4-31 Figure 4.27: Stream Isolation – Output 0 Enabled .................. 4-31 Figure 4.28: Stream Isolation – Output 1 Enabled .................. 4-32 Figure 4.29: Manual Mode......................................................... 4-33 Figure 4.30: Stream Isolation – Selection of MODCOD Rates ............................................................................ 4-34 Figure 4.31: Stream Isolation - Assignment ISI Activated ...... 4-35 Figure 4.32: Stream Isolation – Configuration Example ......... 4-36 Figure 4.33: Advanced Functions Main Window ................... 4-37 Figure 4.34: Profiles Main Window ............................................ 4-38 Figure 4.35: Saving a New Profile.............................................. 4-39 Figure 4.36: Loading an Existing Profile .................................... 4-40 Figure 4.37: Downloading a Profile .......................................... 4-41 Figure 4.38: Downloaded Profiles List ....................................... 4-41 Figure 4.39: Choose file Window .............................................. 4-42 Figure 4.40: Output Interface Configuration Panel ............... 4-42 Figure 4.41: Modulation and Coding Control ........................ 4-43 Figure 4.42: Configuring Output Interface to Accept All Base-band Data Frames ........................................... 4-43 Figure 4. 43 De-Concentration control .................................... 4-44 List of Tables Table 4.1: Optional Supported Features ................................... 4-9 Table 4.2: MA Type Flags ........................................................... 4-20 Table 4.3: BISS Status ................................................................... 4-26 4-2 SBD75e Series Demodulator Installation and Operation Manual Web GUI Monitoring & Control 4.1 Introduction This chapter is provided to guide the user through the functions of the Graphical User Interface (GUI). Following the information given for accessing the GUI, those web pages which deal specifically with chassis functions will be described. Subsequent sections focus specifically on the operation of the SBD75e in DVB-S2 modes. 4.2 Requirements for Accessing the GUI Any of the following popular web browsing clients have been tested for accessing the GUI: Microsoft Internet Explorer (Version 6 or 7) Mozilla Firefox (Version 1.0, 1.5 or 2.0) Safari (Version 2.0) Opera (Version 9.0) 4.2.1 Accessing the GUI To access the GUI: 1. Enter the IP address or name of the SBR to be controlled in the browser address bar. Note The web server of the SBD75e can be found at the default address http://port followed by the port number i.e. port 80. The following window is displayed. Figure 4.1: SBD75e Login Window 2. Enter the default Username: sbr 75 and the default Password: sbr 75. A window similar to that shown in Figure 4.2 is displayed. The alarm status of the chassis and each installed functional unit is shown in the monitor bar on the left-hand side of the window. Note If a green tick is displayed in the ‘Overview’ tab of the monitor bar, this indicates that all equipment is working correctly. SBD75e Series Demodulator Installation and Operation Manual 4-3 Web GUI Monitoring & Control 4.3 Overview 4.3.1 Overview: Information This section describes those web pages which are relevant to the unit chassis as a whole. These are used to view summary information, alarms and status for each installed functional unit. Unit information may be viewed by selecting the Overview tab from the entry level screen monitor bar. A window, similar to that shown in Figure 4.2, is displayed. In this example the single SBD75e is indicating a locked alarm and is loaded with software version V0.1.3. Figure 4.2: Entry Level Window showing Information for one SBD75e 4.3.2 Overview: Alarms The alarm status of the unit displayed in Figure 4.2 may be viewed by selecting the Alarms tab. A window similar to the one shown in Figure 4.3 is displayed. 4-4 SBD75e Series Demodulator Installation and Operation Manual Web GUI Monitoring & Control Figure 4.3: Alarms and Warnings Monitoring Window In this window each of the properties listed may be monitored on two levels - alarm or warning. The thresholds of some of these properties are adjustable by the user. The Status column shows that the ‘Fan Fault’ alarm status is satisfactory i.e. warning monitoring is not being performed for this property, and that ‘Board Temp’ alarm and warning monitoring are also satisfactory. An example is given below to illustrate the process of applying monitoring to other properties on the window. To apply ‘Fan too fast’ monitoring to fan number 2: 1. Check the Alarm and Warning boxes in the appropriate row of the window shown above. 2. Check the ‘Monitor Fan 2’ box. 3. Select the ‘Update Monitor’ tab on the top right-hand side of the window. A window similar to the one shown in Figure 4.4 is displayed. SBD75e Series Demodulator Installation and Operation Manual 4-5 Web GUI Monitoring & Control Figure 4.4: Changing Alarm Monitoring Window Additional information has now appeared in the ‘Status’ column, indicating that the ‘Fan too fast’ alarm is clear (shown by the green tick), and that the ‘Fan too fast’ warning has been asserted (shown by the yellow cross). The ‘Overview’ tab in the monitor bar on the left of the main panel now reflects this new warning state (shown by a yellow cross and a yellow fan symbol). 4.3.3 Overview: Status The summary status information for installed functional units, may be viewed by selecting the status tab from the Alarm and Monitoring window. A window, similar to that shown in Figure 4.5 is displayed. 4-6 SBD75e Series Demodulator Installation and Operation Manual Web GUI Monitoring & Control Figure 4.5: Status Window 4.4 SBD75e: Information The following web page menus are provided to enable the user to view and change the various properties of the SBD75e functional unit. 4.4.1 Information By selecting the SBD75e tab from the monitor bar on the left-hand side of the main panel, the user is able to set the name of the unit, check the software version and available optional features or capture a system snapshot. When the tab is selected, a window similar to that shown in Figure 4.6 is displayed. SBD75e Series Demodulator Installation and Operation Manual 4-7 Web GUI Monitoring & Control Figure 4.6: SBD75e Management Window 4.4.1.1 Setting the Unit Name The default name of the functional unit is SBD75e. The name of the unit may be changed by entering the desired name in the ‘Name’ box and selecting the ‘Update’ tab. The new name should appear in the monitor bar on the left-hand side of the main panel as shown in the example in Figure 4.7. Figure 4.7: Setting the Unit Name Window 4.4.1.2 Version The relevant software version number is shown in this window. 4.4.1.3 MAC Address The external MAC address of the Ethernet Interface of the SBD75e is displayed below the version number in standard 6 octet format. 4-8 SBD75e Series Demodulator Installation and Operation Manual Web GUI Monitoring & Control 4.4.1.4 Supported Features A list of optional features supported by the unit is shown below the MAC address and are detailed in Table 4.1. Table 4.1: Optional Supported Features 4.5 Feature Operations Third ASI Output If the text ‘Third ASI Output’ is displayed, the SBD75e will support up to three distinct ASI output streams. Analyzer Tool If the text ‘Analyzer Tool’ is displayed, the advanced demodulation analyzer is available, allowing the user to observe many detailed aspects of the demodulator performance. DVB-s If the text ‘DVB-S’ is displayed, this indicates that the SBD75e is able to operate in DVB-S mode. DVB-S (QPSK, 8PSK) If the text ‘DVB-S (QPSK, 8PSK)’ is displayed, this indicates that the SBD75e is able to operate in this mode. BISS (Basic Interoperable Scrambling System) If the text ‘BISS’ is displayed, this indicates that the SBD75e is able to operated in this mode. SBD75e: Status A basic summary of the operation of the SBD75e may be viewed by selecting the Status Tab from the window shown in Figure 4.6. A window, similar to that shown in Figure 4.8 is displayed. SBD75e Series Demodulator Installation and Operation Manual 4-9 Web GUI Monitoring & Control Figure 4.8: SBD75e Status Window 4.6 SBD75e: Alarms From the ‘Alarms’ window the user may configure alarms and/or warnings based on the behaviour and status of the demodulator. Warnings are displayed to the user while alarms initiate the alarm relay. Alarms or warnings may be viewed by selecting the Alarms tab on the window shown above. A window, similar to that shown in Figure 4.9 is displayed. 4-10 SBD75e Series Demodulator Installation and Operation Manual Web GUI Monitoring & Control Figure 4.9: Alarms and Warnings Monitoring Window 4.6.1 General The following paragraphs detail the general alarms shown in Figure 4.9. 4.6.1.1 Lock State Allows an alarm or warning to be raised if the demodulator is unlocked. 4.6.1.2 LNB Over-Current Allows an alarm or warning to be raised if the LNB supply current exceeds the design limit. 4.6.1.3 FPGA Loading Failed Allows an alarm or warning to be raised if one or more of the FPGA devices in the demodulator fails to configure correctly. 4.6.1.4 SRAM2 Failure Allows an alarm or warning to be raised if one of the SRAM devices on the demodulator board fails to program correctly. 4.6.1.5 Board Temperature Allows an alarm or warning to be raised if the temperature of the demodulator board exceeds the user specified temperature limit. 4.6.1.6 FPGA Temperature Allows an alarm or warning to be raised if the core temperature of one or more of the FPGA devices exceeds the design limit. SBD75e Series Demodulator Installation and Operation Manual 4-11 Web GUI Monitoring & Control 4.6.1.7 Dummy Frames Only Allows an alarm or warning to be raised if only dummy PL frames have been received in the preceding user specified interval. 4.6.2 Output Alarms There are a number of alarms which pertain to the functions of specific output interfaces. These alarms may be viewed by selecting the appropriate output tab. A window, similar to that shown in Figure 4.10 is displayed. Figure 4.10: Output Alarms Window 4.6.2.1 Output Fault This event allows an alarm or warning to be raised if the Nth output interface is not operating correctly. 4.6.2.2 Output N ISI is Not Present This event allows an alarm or warning to be raised if the Input Stream Identifier (ISI) associated with the Nth output interface has not been observed in the preceding user specified interval. 4.6.2.3 Output N ESR Level This event allows an alarm or warning to be raised if the Errored Second Rate (ESR) associated with the Nth output interface has exceeded the user specified threshold. The length of the time window over which the ESR is computed is also programmable by the user (See Para 4.9.5.4). An ‘Errored Second’ is defined as an interval of one second in which one or more of the received blocks contain un-correctable errors. 4-12 SBD75e Series Demodulator Installation and Operation Manual Web GUI Monitoring & Control 4.6.2.4 Output N SESR Level This event allows an alarm or warning to be raised if the Severely Errored Second Rate (SESR) associated with the Nth output interface has exceeded the user specified threshold. The length of the time window over which the SESR is computed is the same as that used to compute ESR, and is programmable by the user (See Para 4.9.5.4). A ‘Severely Errored Second’ is defined as an interval of one second in which at least 30% of the received blocks contain un-correctable errors. 4.6.2.5 Output N BBER Level This event allows an alarm or warning to be raised if the Background Block Error Rate (BBER) associated with the Nth output interface has exceeded the user specified threshold. The length of the time window over which the BBER is computed is the same as that used to compute ESR and SESR, and is programmable by the user (See Para 4.9.5.4). The BBER is defined as the percentage of the received blocks containing un-correctable errors. Blocks received during all ‘Severely Errored Seconds’ are excluded from this calculation. 4.6.3 Setting Alarms To set an alarm: 1. Check the ‘Alarm Monitoring’ box next to the property on which you wish to generate an alarm. 2. Change the default alarm threshold, if required. The units of the threshold are displayed to the right of the text entry box. Note Some alarms have no user threshold. 4.6.4 3. Repeat steps 2 and 3 to add all required alarms 4. Select the ‘Update Monitor’ tab. Setting Warnings To set a Warning: 1. Check the ‘Warning Monitoring’ box next to the property on which you wish to generate a warning. 2. Change the default warning threshold, if required. The units of the threshold are displayed to the right of the text entry box. Note Some warnings have no user threshold. 4.6.5 3. Repeat steps 2 and 3 to add all required warnings. 4. Select the ‘Update Monitor’ tab. Alarm Status A summary of the alarm and warning status is visible at all times in the monitor bar at the left side of the main panel. If no warnings or alarms are active, the summary for the relevant functional unit should appear as a green tick as shown below. SBD75e Series Demodulator Installation and Operation Manual 4-13 Web GUI Monitoring & Control If any alarms are present, the green tick will be replaced by a red cross and the alarm relay will be activated. If any warnings are present, the green tick will be replaced by a cross, which will be yellow if no alarms are indicated. 4.7 SBD75e: Analyzer The analyzer may be started by selecting the ‘Analyzer’ tab on the main window. When the analyzer is started for the first time, a default window, similar to the one shown in Figure 4.11, will be displayed, showing an input signal spectrum in a single window. Note In the example shown there is no input signal and the user has configured a BER alarm and a Lock warning. Figure 4.11: Analyzer Window 4.7.1 Play/Pause To the right of the display pane is a ‘Pause’ symbol. Clicking on this symbol will freeze the display in the analyser pane although other signal statistics such as symbol rate, frequency offset and SNR will be updated as normal. Once the analyser has been paused, the ‘Pause’ symbol will be replaced by a ‘Play’ symbol. Clicking on this symbol will make the analyser pane live again. 4-14 SBD75e Series Demodulator Installation and Operation Manual Web GUI Monitoring & Control 4.7.2 Analyzer Pane format To the right of the ‘Play’/’Pause’ symbol are two rows of icons. The top row of four icons enables the user to customise the format of the analyser pane. The pane can be split into two, three or four sub-panes, each of which can be used to display a different aspect of the demodulator performance. The bottom row of seven icons enables the user to choose the type of information to be displayed in each sub-pane. An example of the analyzer pane split into three sub-panes is shown in Figure 4.12. The top left sub-pane (which is highlighted with a blue border) is currently configured to display the demodulator spectrum (second row icon highlighted in blue). Figure 4.12: Analyzer Pane Displayed as three Sub-Panes To change the configuration of the analyzer: 4.7.3 1. Select the analyzer sub-pane you wish to reconfigure. It should now be highlighted with a blue border. 2. Select the icon representing the type of information you wish to display in the current analyser sub-pane. If the analyser is not paused, then the new display selection should be effective immediately. Analyzer Information Icons The functions of the bottom row of seven icons, shown on the Analyzer window, are described in the following paragraphs. 4.7.3.1 Spectrum Analyzer The Spectrum Analyzer function may be opened by selecting the first icon, in the row of seven. A window, similar to that displayed in Figure 4.13 is displayed with the selected icon highlighted in blue. SBD75e Series Demodulator Installation and Operation Manual 4-15 Web GUI Monitoring & Control Figure 4.13: Spectrum Analyzer Window The spectrum displayed is that of the signal present at the input to the matched (root raised cosine) filter. This complex signal is sampled at twice the symbol rate of the demodulator, so the extent of the frequency axis is also twice the symbol rate of the demodulator. 4.7.3.1.1 Averaging ON/Off Button By default, the averaging function is turned on. This slows the response of the displayed spectrum to rapid input signal changes. Turning averaging off, and then on again, will restart the averaging process. 4.7.3.1.2 Cursors The window in Figure 4.13 shows the spectrum display with a valid input signal. The symbol rate is 27 Mbaud, and the red and green cursors have been positioned symmetrically either side of the local oscillator, spaced by the symbol rate. The absolute frequencies of the red and green cursor positions are displayed in the bottom left hand corner of the spectrum pane. The frequency spacing between the cursors (in kHz), and the amplitude difference between the cursors (in dB) are displayed to the right. The position of the red cursor can be moved to any other point along the frequency axis by simply clicking at the desired point in the spectrum pane. 4.7.3.2 Signal Constellation To select the Signal Constellation function: Select the second icon, in the row of seven. A window, similar to that displayed in Figure 4.14is displayed with the selected icon highlighted in blue. 4-16 SBD75e Series Demodulator Installation and Operation Manual Web GUI Monitoring & Control Figure 4.14: Signal Constellation Window The image displayed above is that of the demodulated signal constellation. The displayed constellation is 16APSK, at 13.5 M baud. When the demodulator is receiving an ACM or VCM physical layer signal, the displayed constellation may be a composite of any of the modulation types present, i.e. QPSK, 8PSK, 16APSK, 32APSK or pilots symbols (from dummy PL frames). 4.7.3.2.1 Number of Points A drop-down box allows the user to choose the number of points to be used in the image, from 1024 points (default) to 8192 points in octave steps. This setting controls the density of the displayed constellation. 4.7.3.2.2 Persistence If the persistence box is checked, successive constellation images are superimposed upon each other. 4.7.3.3 Equaliser Frequency Domain Response To select the Equaliser Frequency Domain Response function: 1. Select the fourth icon, in the row of seven. A window, similar to that displayed in Figure 4.15 is displayed with the selected icon highlighted in blue. Notes 1. The equaliser frequency domain tool is only available when the equaliser is enabled. This is only possible in DVB-2 modes. 2. Outside of the region occupied by the wanted signal, the frequency response of the equaliser is indeterminate and will vary in a dynamic fashion. In this window, the extent of the frequency axis is once again equal to twice the symbol rate of the demodulated signal. SBD75e Series Demodulator Installation and Operation Manual 4-17 Web GUI Monitoring & Control Figure 4.15: Equalizer Frequency Domain Response Window 4.7.3.4 Physical Layer Statistics The physical layer statistics function may be selected by clicking on the fifth icon, in the row of seven. A window, similar to that displayed in Figure 4.16 is displayed with the selected icon highlighted in blue. Figure 4.16: Physical Layer Statistics Window 4-18 SBD75e Series Demodulator Installation and Operation Manual Web GUI Monitoring & Control The MODCOD histogram, shown in Figure 4.17, displays the statistical composition of the physical layer signal. In this example the display shows that the demodulator is detecting that approximately 49.9% of the symbols received are part of physical layer (PL) frames transmitted using 8PSK rate 3/4 (short FEC, with pilots). Less than 0.1% of the symbols received are part of dummy PL frames, while the remainder (approximately 50%) are part of PL frames transmitted using 16APSK rate 3/4 (short FEC, with pilots). 4.7.3.4.1 Interpretation By default, the percentage frequencies in the histogram are expressed in terms of symbols. By using the drop-down box, the user may change this analysis to compute the percentage frequencies in terms of PL frames, or payload bits. 4.7.3.5 Baseband Header Statistics The baseband header statistics function may be selected by clicking on the sixth icon, in the row of seven. A window, similar to that displayed in Figure 4.18 is displayed with the selected icon highlighted in blue. Figure 4.17: Baseband Header Statistics Window The base-band header statistics display comprises a table. Each row of the table represents a base-band stream, referred to by its stream identifier, or ISI. The column headings of the table are described in the following paragraphs. 4.7.3.5.1 ID This is the Input Stream Identifier (ISI). 4.7.3.5.2 Age The interval since a PL frame, corresponding to a particular ISI, was last received at the demodulator, expressed in seconds (s) or minutes (m). SBD75e Series Demodulator Installation and Operation Manual 4-19 Web GUI Monitoring & Control 4.7.3.5.3 User Packet Length (UPL) The length of the user packet, corresponding to a particular ISI, expressed in bits. If the UPL is 0, then the stream in question is not packetised. 4.7.3.5.4 Sync Byte The value of the packet sync byte, corresponding to a particular ISI. This is only valid for packetised streams. 4.7.3.5.5 MA Type The value of the first byte of the DVB-S2 base-band header, corresponding to a particular ISI. This byte contains the flags as described in Table 4.19. Table 4.2: MA Type Flags Bit Field Name Description Value Interpretation 7:6 TS/GS Transport Stream Input or Generic Stream Input 00 Generic packetised 01 Generic continuous 10 Reserved 11 Transport 0 Multiple 1 Single 0 ACM (VCM) 1 CCM 0 ISSY field absent 1 ISSY field present 0 Inactive 1 Active 00 0.35 01 0.25 10 0.20 11 Reserved SIS/MI S Single Input Stream or Multiple Input Stream CCM/A CM Constant Coding and Modulation or Adaptive Coding and Modulation 3 ISSYI Input Stream Synchronisation Indicator 2 NPD Null-packet deletion 5 4 1:0 4.7.3.5.6 RO Transmission roll-off factor Modcod The modulation type and coding rate being used, corresponding to a particular ISI. In the case of ACM, this may change dynamically. 4.7.3.5.7 Sort By The rows in the table may be sorted by any of the columns described in Table 4.19, using the drop-down box to select the sort parameter. By default, the rows are sorted by age. 4.7.3.5.8 Effects of Uncorrected Base-band Header Errors Any un-correctable transmission errors can lead to apparently strange behaviour in the baseband header statistics. Most commonly, spurious streams can appear. Such spurious streams arise through sporadic corruption of the ISI value in the base-band header. Operation of the system under such circumstances may lead to unexpected performance degradation. 4-20 SBD75e Series Demodulator Installation and Operation Manual Web GUI Monitoring & Control 4.7.3.5.9 Effects of Stream Isolation The SBD75e demodulator incorporates an optional ‘stream isolation’ function to mitigate against un-correctable transmission errors in some circumstances. If this function is engaged, then the base-band header statistics may not give a complete picture of the content of the physical layer, with respect to the streams contained within. 4.7.3.6 Output Interface Statistics The output interface statistics function may be selected by clicking on the seventh icon, in the row of seven. A window, similar to that displayed in Figure 4.19 is displayed with the selected icon highlighted in blue. Figure 4.18: Output Interface Statistics Window In the window shown above, each of the output interfaces is represented by a separate subtable, entitled ‘Output 0’, Output 1, and ‘Output 2’. If an interface is disabled (see ***) then the relevant table is greyed out. 4.7.3.6.1 ISI The title row of each sub-table indicates the ISI currently bound to that output (see ***). 4.7.3.6.2 Full, Empty, ISSY and Lock Flags These four flags are normally green to indicate healthy operation of the output interface. If any, or all, of the flags are red, then an error has been detected, such as buffer under/over flow (Empty and Full), stream synchronisation (ISSY), or buffer initialisation (Lock). 4.7.3.6.3 Packet Count, Error Count & Packet Error Rate (PER) The ‘Packet Count’ field displays the number of user packets received since the interface was configured. The ‘Error Count’ field displays the number of user packets received with erroneous CRC bytes. The ‘PER’, or Packet Error Rate, is the ratio of the latter metrics. SBD75e Series Demodulator Installation and Operation Manual 4-21 Web GUI Monitoring & Control 4.7.3.6.4 Bit Rate The bit rate field indicates the estimated bit rate of the stream being processed. When the demodulator is configured for ACM/VCM, then the rate displayed is currently incorrect; the correct bit rate may be obtained by scaling the displayed rate by the ratio between the symbol rate and the maximum symbol rate (45 M baud). In this case, the scaling factor to be applied is 13.5/45.0, or 30%. 4.7.3.6.5 Errored Second Rate (ESR) The Errored Second Rate is a measure of the number of one second intervals that have been affected by an uncorrected transmission error in the preceding time window (see***). 4.7.3.6.6 Severely Errored Second Rate (SESR) The Severely Errored Second Rate is a measure of the number of one second intervals that have been affected by many transmission errors (>30% of received blocks) in the preceding time window (see ***). 4.7.3.6.7 Background Block Error Rate (BBER) The Background Block Error Rate is a measure of the rate of un-correctable base-band blocks, averaged over the preceding time window (see ***). Severely Errored Seconds are discounted from this computation. 4.8 SBD75e: BISS Decryption Basic Interoperable Scrambling System (BISS) is a satellite signal scrambling system developed by the European Broadcasting Union and a consortium of hardware manufacturers. When using BISS the transmission is protected by a 12 digit "session word" that is agreed by the transmitting and receiving parties prior to transmission. The key is entered into both the encoder and decoder, this key then forms part of the encryption of the digital TV signal and only receivers with the correct key will decrypt the signal. The rapid increase in the use of Digital Satellite News Gathering (DSNG) technology resulted in the availability of digital codec equipment from a number of vendors. At the same time, the absence of standard methods for the securing and scrambling of DSNG broadcasts spawned the development of several different proprietary security mechanisms. The widespread acceptance of DVB standards made it possible to propose and provide a security mechanism that offered interoperability between the equipment of different DSNG vendors. This enabled broadcasters to combine equipment from several vendors, while making systems more futureproof. BISS is based on the DVB-CSA specification, and the use of fixed clear keys called Session Words (SWs). BISS specification Mode 1 is used for DSNG. BISS specification Mode E (BISS with Encrypted keys – referred to as BISS-E) introduces an additional mechanism to accept the insertion of Encrypted Session Words (ESWs) while, at the same time, conserving interoperability. This mechanism is backward compatible with BISS specification Mode 1. The BISS option will appear on the tabs if the feature key is installed and may be viewed by selecting the BISS tab. A window similar to the shown in Figure 4.20 is displayed. The BISS window can be split into 3. The top is for selecting the BISS mode, the middle is a status view and the bottom is an application for generating Encrypted Session words. 4-22 SBD75e Series Demodulator Installation and Operation Manual Web GUI Monitoring & Control Figure 4.19: BISS Window 4.8.1 BISS Mode Selection The options for the BISS mode are Off, Mode-0, Mode-1, Mode-E, Odd/Even-1, Odd/Even-E, User1 and User-E. Depending upon the selection, the available options will change within this section of the window. SBD75e Series Demodulator Installation and Operation Manual 4-23 Web GUI Monitoring & Control Figure 4.20: BISS Mode Selection Window Note All session words, injected ID and Encrypted session words cannot be read back and are not echoed back to the display. These values are also not stored in the profiles but will be reused after a power cycle. To comply with the specification the keys cannot be changed more than ten times in a 5-minute period and that there is a minimum of 10 seconds between changes. The keys are transmitted in the clear via the GUI so should be used with caution, perhaps by setting the Injected ID up only on the front panel and never via the GUI. 4.8.2 Off BISS is fully disabled and the transport stream will be unmodified. If BISS is subsequently enabled then the modification in the transport stream may cause a momentary glitch in the video. It is preferable to use BISS-0 which will modify the transport stream without decrypting the video. 4.8.3 BISS-0 The transport stream will not decrypt in this mode but is modified to remove signalling about BISS. In this mode decryption can be enabled seamlessly. 4.8.4 BISS-1 The transport stream is decrypted using the session word which is a 12 digit hex value. If the key is not present then the last entered value will be used. This session word is independent from the key generated when using BISS-E and will be retained. 4-24 SBD75e Series Demodulator Installation and Operation Manual Web GUI Monitoring & Control 4.8.5 BISS-E The transport stream is decrypted by a calculated session word. This session word is generated from an injected ID and an Encrypted session word. This is fundamentally more secure as both the Injected ID and Encrypted session words are required for decryption and each receiver could have a unique Encrypted session word. The Injected ID is a 14 digit Hex value and the Encrypted Session Word (ESW) is a 16 digit hex value. If the key or the ID is not present then the last entered values will be used. 4.8.6 Odd/Even-1 This mode is not part of the BISS standard but has been successfully interoperated with other manufacturers who have similar variants. Each MPEG packet has a field in the header which indicates if it is in the clear, encrypted using an ODD key or encrypted using an even key. While BISS only uses the one key, this mode allows two independent keys. The advantage of this mode is that it allows keys to be programmed offline while using the other key for decryption. Both the odd and the even session word will require a 12 digit hex value. The even key is the same key as that used for BISS-1. 4.8.7 Odd/Even-E Odd/Even-E also uses the odd and even keys in the same way as Odd/Even-1 mode but each key is encrypted using the same Injected Id. The Injected Id will require a 14 digit hex value and the ESWs will both require 16 digit hex values. The even key is the same key as used for BISS-E. Figure 4.21: Odd/Even-E Selected SBD75e Series Demodulator Installation and Operation Manual 4-25 Web GUI Monitoring & Control 4.8.8 User-1 This enables a specific user mode where specific PIDs are decrypted. The SI information is not altered so this mode is not BISS compliant. The actual PIDs to be decrypted are specified only on the command line. A 12 digit hex value is required for the session word. The even key is the same key as used for BISS-1. This mode is used to guarantee that the decrypted transport stream will match the original. 4.8.9 User-E This is identical to the User-1 mode except a 16 digit hex value is required for the ESW and a 14 digit hex value is required for the injected ID. The even key is the same key as used for BISS-E. 4.8.10 BISS Insertion Period This sets the frequency that the Program Association Table (PAT), Programme Map Table (PMT) and Conditional Access Table (CAT) will be inserted into the stream. The default is 200 ms and this value should be suitable in most circumstances. Table 4.3: BISS Status Property Status Description Uninitialized Error condition, BISS failure Idle : illegal in this mode BISS cannot be used in this mode Idle BISS is turned off Configured BISS is active, this will include BISS-0 Mode Active SI extraction is active Inactive no SI extraction Keys OK Valid keys present, this should always be OK stream info PAT not found The PAT is not detected, critical failure Corrupted tables At least one of the PMT listed in the PAT cannot be extracted or At least one of the PMT has a bad structure or a CRC error No CAT detected CAT is not found, this can be normal OK Transport stream is OK Ciphering The block cipher is engaged and ciphering Unciphering The block cipher is engaged and deciphering None The block cipher is not engaged Too many PMT(s) too many PMT(s) are received for the playout RAM (overflow) Incorrect PMT(s) A PMT cannot be modified to add/remove BISS SI (PIDs listed in the PMT would not be ciphered/deciphered) Missing PMT(s) A PMT listed in the PAT could not be retrieved OK All is OK State Extraction processing PMT info 4-26 SBD75e Series Demodulator Installation and Operation Manual Web GUI Monitoring & Control 4.8.11 Encrypted Session Word Generator The Encrypted Session Word generator is an application which runs locally on the web browser and requires no network access. Consequently, the generated keys will have to be manually programmed into the unit via the front panel, GUI, SNMP or CLI. A 12 digit Hex value is entered in the Clear Session Word field and a 14 digit hex value is entered in the injected ID field. Clicking on the Generate ESW Key will produce a 16 digit hex value. Note This process requires a random seed which will produce a different ESW every time it is generated. It is not deterministic. No keys are stored in this process. Figure 4.22: Encrypted Word Session Generator Window 4.9 SBD75e: Configuration 4.9.1 Main The Configuration Main window allows the user to set the conventional demodulator parameters such as: Carrier frequency and spectrum direction Symbol rate Modulation and FEC modes Carrier acquisition options Equaliser settings SBD75e Series Demodulator Installation and Operation Manual 4-27 Web GUI Monitoring & Control LNB power supply options PL scrambling seed The Configuration window may be viewed by selecting the ‘Configuration’ tab on the main window. A window, similar to that shown in Figure 4.23 is displayed. Figure 4.23: Configuration Main Window 4.9.2 Stream Isolation Stream Isolation is an optional feature designed to improve the tolerance of the receiver to uncorrectable transmission errors, in certain circumstances. Stream isolation consists of two principal components: MODCOD filter ISI Assignment The status of the stream isolation function may be viewed by selecting the ‘Stream Isolation’ tab from the Configuration Main window. A window, similar to that shown in Figure 4.24 is displayed. Note By default, the stream isolation feature is set to manual mode and disabled. 4-28 SBD75e Series Demodulator Installation and Operation Manual Web GUI Monitoring & Control Figure 4.24: Stream Isolation Window 4.9.2.1 Automatic Mode The mode of operation my be changed to automatic by opening the ‘Behaviour’ pull-down menu and selecting ‘auto’. A window, similar to the one shown in Figure 4.25 is displayed. Notes 1. When configured for operation in automatic mode, the table becomes coloured (instead of grey, as it is when in manual mode). 2. Changes to the modulation and coding parameter of an output interface will have an effect on the configuration of the stream isolation function (See ***). These changes will be reflected graphically in the table of modulation and code rates. SBD75e Series Demodulator Installation and Operation Manual 4-29 Web GUI Monitoring & Control Figure 4.25: Stream Isolation Window in Automatic Mode In the example above, only ‘Output 0’ is enabled. As the output interface modulation and coding parameter is currently set to ANY, then all the legal MODCOD values are ‘Not Filtered’, meaning that they are allowed through the MODCOD filter to the output interface. 4.9.2.2 ISI Assignment Function – Deactivated The configuration of the ISI Assignment function may be viewed by opening the ‘Current View’ drop-down box and selecting Assign ISI. A window, similar to that shown in Figure 4.26 is displayed. In this example, no ISI assignment has been activated because there are no constraints on the delivery of the stream with ISI 1 to the demodulator. 4-30 SBD75e Series Demodulator Installation and Operation Manual Web GUI Monitoring & Control Figure 4.26: Stream Isolation - Assignment ISI Deactivated A further example is given in Figures 4.27 and 4.28 in which output interfaces ‘Output 0’ and ‘Output1’ have been enabled. Both output interfaces have been configured to use specific modulation and coding; 16APSK rate 2/3 in the case of ‘Output 0’ and QPSK 8/9 in the case of ‘Output 1’. Figure 4.27: Stream Isolation – Output 0 Enabled SBD75e Series Demodulator Installation and Operation Manual 4-31 Web GUI Monitoring & Control Figure 4.28: Stream Isolation – Output 1 Enabled The status of the MODCOD filter now shows that only two MODCOD are allowed, as shown by the green wording ‘Not filtered’. Base-band frames arriving at the demodulator on all other MODCOD bearers will be discarded. Examination of the status of the ISI assignment shows that base-band frames arriving in QPSK rate 8/9 PL frames will be associated with an ISI of 2, and base-band frames arriving in 16APSK rate 2/3 PL frames will be associated with an ISI of 1. The received ISI values will be ignored. 4.9.2.3 Manual Mode Relying on automatic configuration makes the stream isolation function easier to use, but there are circumstances which may require more advanced tactics. For example, one stream may be borne by a discrete subset of MODCOD values, using an adaptive scheme. For situations such as this, manual configuration is possible. The mode of operation may be changed to manual by opening the ‘Behaviour’ pull-down menu and selecting ‘manual’. A window, similar to the one shown in Figure 4.29 is displayed. 4-32 SBD75e Series Demodulator Installation and Operation Manual Web GUI Monitoring & Control Figure 4.29: Manual Mode 4.9.2.3.1 MODCOD Filter To activate the MODCOD filter: 1. Check the ‘Activate’ box. The table now appears coloured (instead of grey as it was when the feature was inactive. Initially, there is no selectivity, and all legal MODCODs are ‘Not filtered’, i.e. they will be passed through to the output interfaces. 2. Use check boxes above each column, and to the left of each row, to activate the filter for specific modulation types or code rates. Alternatively, check individual combinations to toggle the state of the filter between ‘Not filtered’ and ‘filtered’. In the example shown in Figure 4.30, the user has allowed only QPSK MODCODs from rate 3/5 to rate 8/9, inclusive. Base-band frames transmitted on all other MODCODs will be discarded. SBD75e Series Demodulator Installation and Operation Manual 4-33 Web GUI Monitoring & Control Figure 4.30: Stream Isolation – Selection of MODCOD Rates 4.9.2.4 ISI Assignment Function – Activated The configuration of the ISI Assignment function may be viewed by opening the ‘Current View’ drop-down box and selecting Assign ISI. A window, similar to that shown in Figure 4.31 is displayed. In this example, the ISI assignment is activated as the ‘Activate’ box is checked and the table appears coloured (instead of grey as it was when the feature was inactive). 4-34 SBD75e Series Demodulator Installation and Operation Manual Web GUI Monitoring & Control Figure 4.31: Stream Isolation - Assignment ISI Activated When the feature is active, the user can enter ISI values in any of the legal MODCOD boxes. ISI values in the range 0 to 255 inclusive may be entered. In the example shown in Figure 4.32, the user has configured one stream, ISI=1, to occupy a range of QPSK MODCODs, from rate 3/5 to 8/9 inclusive. A second stream, ISI=2, is only expected in base-band frames transmitted using the 16APSK rate 3/4 MODCOD. Notes 1. All base-band frames transmitted using 16APSK rate 3/4 will be treated as belonging to stream ISI=2. 2. The QPSK code rates from 3/5 to 8/9 can only be used to transmit stream ISI=1. SBD75e Series Demodulator Installation and Operation Manual 4-35 Web GUI Monitoring & Control Figure 4.32: Stream Isolation – Configuration Example 4.9.3 Advanced The advanced configuration functions may be viewed by selecting the ‘Advanced’ tab from the Configuration Main window. A window, similar to that shown in Figure 4.33 is displayed. Note Users should be aware that the controls on the ‘Advanced’ panel must be used with extreme caution, as they can have quite deleterious effects except under certain very specific circumstances. 4-36 SBD75e Series Demodulator Installation and Operation Manual Web GUI Monitoring & Control Figure 4.33: Advanced Functions Main Window 4.9.3.1 Padding Support The DVB-S2 specification provides for the use of padding to achieve certain link operation goals. Unfortunately, the use of padding makes the link behaviour very vulnerable to un-correctable transmission errors. By default, padding support is disabled. In this case, the field of the base-band header, which is used to implement padding (DFL), is ignored. If, despite the serious system issues engendered by the use of padding support, it is still required, the Padding Support box on the advanced window may be checked. Note The padding support control applies to all streams. 4.9.3.2 VCM Guard Mode The DVB-S2 specification makes allowance for the concentration of multiple base-band streams, to be transmitted using a variety of modulation and coding modes. Unfortunately, the robustness of the stream concentration mechanism is very low when subjected to un-correctable transmission errors. By default, VCM guard mode is disabled. In this case, all received base-band frames, including those with un-correctable transmission errors, are forwarded for stream de-concentration. The VCM Guard Mode may be enabled by checking the VCM Guard Mode box on the advanced window. When VCM guard mode is engaged, all received base-band frames containing un-correctable transmission errors are discarded. SBD75e Series Demodulator Installation and Operation Manual 4-37 Web GUI Monitoring & Control Consequently, streams borne on frames with less robust modulation and/or coding may be prevented from contaminating other more robust streams. But it must be remembered that occasional un-corrected transmission errors on a robust stream will result in the loss of entire baseband frames. 4.9.3.3 PLS Seed The DVB-S2 physical layer specification makes provision for the application of user specific physical layer scrambling. User specific physical layer scrambling may be applied by entering the appropriate value in the PLS Seed Text box on the advanced window. The value of the seed entered must match the value of the seed employed at the corresponding modulator. 4.9.4 Profiles This option allows the user to save and recall a variety of operational profiles and exchange profiles between different chassis via a host computer. This facility may be used by selecting the Profiles tab from the main configuration window. A window, similar to that shown in Figure 4.34 is displayed. Figure 4.34: Profiles Main Window 4.9.4.1 Saving and Overwriting Profiles When demodulator configuration is complete, the user can save the configuration into a named profile. To create a new profile: 4-38 1. Select the ‘New Profile’ option from the list shown in Figure 4.34. 2. Enter a profile name (e.g. MuxA) in the adjacent text box. 3. Select ‘Save’. The new profile will appear in the profile list as shown in Figure 4.35. SBD75e Series Demodulator Installation and Operation Manual Web GUI Monitoring & Control Figure 4.35: Saving a New Profile To overwrite an existing profile: 4.9.4.2 1. Select the profile to be overwritten from the main Profiles window. 2. Enter a new profile name (e.g. MuxA) in the adjacent text box. 3. Select ‘Save’. Loading Existing Profiles To load an existing named profile: 1. Select the profile to be loaded from the main Profiles window. A window similar to that shown in Figure 4.36 is displayed. 2. Select ‘Load’. 3. Select ‘Configure’ to activate the profile. SBD75e Series Demodulator Installation and Operation Manual 4-39 Web GUI Monitoring & Control Figure 4.36: Loading an Existing Profile 4.9.4.3 Downloading a Profile Occasionally it is necessary to clone a profile, or a set of profiles, amongst a family of units. To clone a profile: 1. 4-40 Select the profile to be cloned from the profiles main window. A window similar to that shown in Figure 4.37 is displayed. SBD75e Series Demodulator Installation and Operation Manual Web GUI Monitoring & Control Figure 4.37: Downloading a Profile 2. Select the Download link. A window similar to that shown in Figure 4.38 is displayed. Figure 4.38: Downloaded Profiles List 3. Select all displayed files and save to a network file. SBD75e Series Demodulator Installation and Operation Manual 4-41 Web GUI Monitoring & Control 4.9.4.4 Uploading a Profile Uploading is essentially the second stage in cloning a profile. To upload a profile: 1. Select the ‘Browse’ button. A window similar to that shown in Figure 4.39 is displayed. Figure 4.39: Choose file Window 4.9.5 2. Select the file selected in the download operation. 3. Select ‘Send’ to upload the file and create a new profile. Output At the bottom of the Configuration panel is the area used to configure the output interfaces (See figure 4.40). These interfaces are labelled ‘Output 0’, ‘Output 1’ and ‘Output 2’. Figure 4.40: Output Interface Configuration Panel To view the configuration information for a particular output interface: 4.9.5.1 1. Select the relevant output interface. The configuration details are displayed. 2. Change any parameters as required. 3. Select the configure button to activate the changes. Enable/Disable Each interface may be independently enabled or disabled using the check box. At present, the ASI output data will continue to flow in the disabled state, but the control will be relevant to the configuration of the stream isolation function. 4.9.5.2 Output ISI Each output stage may be programmed to process one stream of the received DVB-S2 multiplex. The stream to be processed is determined by the Input Stream Identifier, or ISI, which may be set to a number in the range 0 to 255. 4-42 SBD75e Series Demodulator Installation and Operation Manual Web GUI Monitoring & Control 4.9.5.3 Output Mode The output Mode drop-down box has two settings which are described in the following paragraphs. 4.9.5.3.1 Normal Mode In normal mode, the data in the stream specified by the programmed ISI is presented at the relevant ASI output. If the demodulator is operating in CCM mode, the output data will appear at a constant rate. If the demodulator is operating in ACM/VCM mode, the output data will appear at a constant rate as long as the modulator inserted Input Stream Synchronisation (ISSY) time-stamps. 4.9.5.3.2 Transport Mode In transport mode, the raw base-band data stream, including base-band headers, is output for subsequent external processing. Each base-band frame is preceded by a synchronisation byte, MODCOD/TYPE, receiver SNR and physical layer (PL) frame ID. This mode is only valid in DVB-S2. 4.9.5.4 Stats Integration Time The Errored Second Rate (ESR), Severely Errored Second Rate (SESR) and the Background Block Error Rate (BBER) are all computed based on the Stats Integration time which may be set independently for each output interface. The integration period defaults to 60 seconds. 4.9.5.5 Modulation and Coding This control parameter is only displayed if the user has engaged automatic stream isolation (see paragraph 4.8.2.1). In this case the output panel is displayed similarly to that shown in Figure 4.41. Figure 4.41: Modulation and Coding Control The default setting for this parameter is ‘ANY’. This means that base-band data frames destined for this output could originate on any MODCOD. If any one or more of the enabled output interfaces is set to ‘ANY’, then stream isolation filtering is not possible, and a warning message at the bottom of the window (as shown in Figure 4.41) is displayed. Alternatively, the user may configure the output interface to accept all base-band data frames received on a specific MODCOD. In the example shown in Figure 4.42, interface ‘Output 0’ has been configured so that it is associated with the MODCOD for 16APSK rate 2/3. All frames received on this MODCOD will pass to ‘Output 0’ for processing. Figure 4.42: Configuring Output Interface to Accept All Base-band Data Frames SBD75e Series Demodulator Installation and Operation Manual 4-43 Web GUI Monitoring & Control Selecting this mode overrides the ISI received in the base-band header, and all 16APSK rate 2/3 frames will be treated as though ISI is set to 1. In this example, the user must ensure that only one stream (ISI 1) is transmitted using 16APSK rate 2/3. Failure to do this will result in output interface malfunction, as two or more streams become incorrectly aggregated. In this case a warning message at the bottom of the window (as shown in Figure 4.42) is displayed. Note ALL output stages must be programmed to a specific ‘Modulation and Coding’ value in order for stream isolation to be effective. 4.9.5.6 DVB-S De-concentration In DVB-S there is a method of de-concentrating multiple transport streams. In total two individual transport streams can de-multiplexed from a bundle of 31. To enable this mode select Deconcentrate. Figure 4. 43 De-Concentration control For each output (0, 1, 2), A valid Stream ID between 1 and 31 is entered. This stream is then output on that port. There can be two unique outputs and the other is a copy of one of the other two. Output 3 is always a copy of output 0. If all 3 outputs are unique then configuration will fail and this will clearly be stated. This mode is only valid in DVB-S and DVB-DSNG and not in DVB-S2 as it is now part of the standard. 4-44 SBD75e Series Demodulator Installation and Operation Manual APPENDIX A: Technical Specification List of Contents List of Tables A.1 Introduction ............................................................... A-2 Table A.1: Technical Specification ............................................ A-2 A.2 Technical Specification ........................................... A-2 A.3 Standards Compliance............................................ A-4 SBD75e Series Demodulator Installation and Operation Manual A-1 Technical Specification A.1 Introduction This appendix details the technical specification and the standards with which it is compliant. A.2 Technical Specification The following table details the technical specification. Table A.1: Technical Specification Description Specification Demodulator Modulation Schemes QPSK, 8PSK, 16QAM, 16APSK (32APSK future) Baud Rate 16kBaud to 45MBaud DVB-S 128kBaud to 45MBaud DVB-S2 / DVB-DSNG Frequency Selectivity 950 to 2150MHz in 10 Hz steps Wanted: Unwanted ACI (Adjacent Channel Interference) Must be less than 30dBc FEC Output Input Control A-2 DVB-S with QPSK {1/2, 2/3, 3/4, 5/6, 7/8} DVB-DSNG 8PSK {2/3, 5/6 and 8/9} DVB-DSNG 16QAM {3/4 and 7/8} DVB-S2 SHORT Block {QPSK, 8PSK, 16APSK} DVB-S2 NORMAL Block {QPSK, 8PSK, 16APSK} 8 bits data and clock (LVCMOS compatible level via the DIN-41612 96 pin HARTING Type 0903 196 6951 Female Edge Connector) Clock also available as LVDS. DVB-ASI Electrical Output via BNC connector L-Band down-converter integral to the Card 2 x 75Ω F-Type InputsLNB Control: 22 ±4 KHz tone, Amp 0.6 ±0.2 Vpp DC Power (13v or 18v) up to 450mA Max 10/100 Base T Ethernet and RS232 All Parameters will be controllable Timing, Carrier, FEC lock, AGC all monitored Physical Euro-card standard Height: (mm/in) 16 / 0.59 Width: (mm/in) 100 / 3.94 Length: (mm/in) 220 / 8.6 Environmental Operating Temperature 0 to 45° C. Forced airflow across SBR-75 required. SBD75e Series Demodulator Installation and Operation Manual Technical Specification Description Power Supply Specification +5V dc via 96 pin HARTING Type 0903 196 6951 Female Edge Connector 3.5Amps Max when not supplying LNB Power 5.8Amps Max when supplying LNB Power SBD75e Series Demodulator Installation and Operation Manual A-3 Technical Specification A.3 Standards Compliance The SBD75e Demodulator is compliant to the following Telecommunication Interface Standards: IEEE RS-422 / RS-449 / RS-530 and CCITT/ITU V.35 interface standards ITU G.703: Physical Electrical Characteristics of Hierarchical Digital Interface. 10/100Base-T Ethernet: IEEE Standard for Information technology--Telecommunications and information exchange between systems--Local and metropolitan area networks--Specific requirements--Part 3: Carrier Sense Multiple Access with Collision Detection (CSMA/CD) Access Method and Physical Layer Specifications HSSI Design Specification, written by John T. Chapman and Mitri Halabi, Revision 2.11, dated March 16, 1990 and Addendum Issue #1, dated January 23, 1991. DVB-DSNG: ETSI Standards EN310 210 v1.1.1 Digital Video Broadcasting (DVB); Framing structure, channel coding and modulation for Digital Satellite News Gathering (DSNG) and other contribution applications by satellite Intelsat Earth Station Standards (IESS) Documents (IESS 308/309/310/315): “Performance Characteristics for Intermediate Data Rate Digital Carriers using Convolutional Encoder / Viterbi Decoding and QPSK, 8PSK modulations.” A-4 SBD75e Series Demodulator Installation and Operation Manual Technical Specification SBD75e Series Demodulator Installation and Operation Manual A-5 APPENDIX B: Glossary List of Contents B.1 Introduction ............................................................... B-2 B.2 Abbreviations and Technical Terms ....................... B-2 SBD75e Series Demodulator Installation and Operation Manual List of Tables Table B.1: Glossary ........................................................................ B-2 B-1 Glossary B.1 Introduction This appendix provides a brief explaination of the abbreviations and technical terms used in this manual B.2 Abbreviations and Technical Terms The following table details the glossary. Table B.1: Glossary B-2 Term Description 16-QAM 16 Quadrature Amplitude Modulation: A modulation scheme used for the transmission of digital data, which modifies the amplitude and phase of an RF sinusoidal carrier frequency to represent data symbols. 4 different phases and 4 different amplitudes are used for a total of 16 possible symbols. 8-PSK 8 Phase Shift Keying: A modulation scheme used for the transmission of digital data, which modifies the phase of an RF sinusoidal carrier frequency to represent data symbols. 8 different phases are used for a total of 8 possible symbols. ASI Asynchronous Serial Interface. A streaming data format which often carries an MPEG Transport Stream (MPEG-TS). It is electrically identical to an SDI signal and is always 270 Mbit/s. There are two transmission formats commonly used by the ASI interface, the 188 byte format (more common) and the 204 byte format (optional data included). baud rate The rate of transfer of digital data when the data comprises information symbols that may consist of a number of possible states. Equivalent to bitrate when the symbols only have two states (1 and 0). Measured in Baud. BDC Block Down-Converter: A component of a dish antenna that downconverts the output of a LNA to a suitable frequency to communicate to an Receiver, Demodulator or IRD (typically L-BAND 950 MHz - 1600 MHz). BER Bit Error Rate: A measure of transmission quality. The number of erroneous bits received divided by the total number of bits transmitted over a link. It is generally shown as a negative exponent, (e.g., BER = 10-7 means that 1 in 10,000,000 bits are in error). BISS Basic Interoperable Scrambling System: A satellite signal scrambling system developed by the European Broadcasting Union and a consortium of hardware manufacturers. EBU (Tech3290). Using BISS the transmission is protected by a 12 digit "session key" that is agreed by the transmitting and receiving parties. The key is entered into both the encoder and decoder, this key then forms part of the encryption of the digital TV signal and only receivers with the correct key will decrypt the signal. Bit-rate The rate of transfer of digital data when the data comprises two logic states, 1 and 0. Measured in bit/s. SBD75e Series Demodulator Installation and Operation Manual Glossary Term Description BPSK Binary Phase Shift Keying: A modulation technique used to communicate data over long distances by altering the phase of a carrier signal according to the data binary states. The simplest form of phase shift keying, it uses two phases which are separated by 180° and so can also be termed 2-PSK. Sometimes called PRK, Phase Reversal Keying. BW Bandwidth: The transmission capacity of an electronic line such as (among others) a communications network, computer bus, or broadcast link. It is expressed in bits per second, bytes per second or in Hertz (cycles per second). When expressed in Hertz, the frequency may be a greater number than the actual bits per second, because the bandwidth is the difference between the lowest and highest frequencies transmitted. High bandwidth allows fast transmission or high-volume transmission. CA Conditional Access: The technology used to control the access to viewing services to authorised subscribers through the transmission of encrypted signals and the programmable regulation of their decryption by a system such as viewing cards. C-Band The portion of the electromagnetic spectrum, which spans the frequency range of approximately 5.250-5.925 GHz (as defined by the ITU). Used by communications satellites and preferred in tropical climates because it is not susceptible to fading. CRC Cyclic Redundancy Check: An error-detecting code use to check the accuracy of transmitted, or stored, data. An algorithm computes a numerical value based on the data bits in a block of data. This number is then added to the block of data as check bits and transmitted across the link. The receiver uses the check bits, and the same algorithm, to check the accuracy of the received data by comparing the results of the algorithm and the data received. If a mismatch occurs, an error in transmission is presumed. dB Decibels: A ratio of one quantity to another using logarithmic scales to give results related to human aural or visual perception. dB is a ratio whereas dBm, for example, is an absolute value, quoted as a ratio to a fixed point of 0 dBm. 0 dBm is 1 mW at 1 kHz terminated in 600Ω. 0 dBmV is 1 mV terminated in 75Ω. DCE Data Communications Equipment: A classification of equipment used by the RS-232 standard (and others) to identify equipment types and their communications interface requirements. It establishes, maintains and terminates a session on a network but is not the source (see DTE) or destination (transmission circuit) of signals. A DCE device may typically be a modem, a codec, or convert signals to comply with the transmission path (network) format. DCT Discrete Cosine Transform: A technique for expressing a waveform as a weighted sum of cosines. Raw video data is not readily compressible. DCT is not in itself a compression technique but is used to process the video data so that it is compressible by an encoder. DCT processes the picture on an 8x8-pixel block basis, converting the data from an uncompressible X Y form (as displayed by an oscilloscope) to a compressible frequency domain form (as displayed by a spectrum analyser). Can be forward DCT or inverse DCT. SBD75e Series Demodulator Installation and Operation Manual B-3 Glossary B-4 Term Description Decoder A unit containing the electronic circuitry necessary to decode encrypted signals. Some Decoders are separate from the receiver but in satellite TV broadcasting, the term is often used interchangeably as a name for an Integrated Receiver Decoder (IRD). The term IRD, or IRD / Decoder, is usually associated with satellite TV broadcasting while Cable systems are based on Converters or on Set-Top Boxes / Converters. Differential Coding Method of coding using the difference between the value of a sample and a predicted value. DIL Dual In Line: The most common type of package for small and medium scale integrated circuits. The pins hang vertically from the two long sides of the rectangular package, spaced at intervals of 0.1 inch. DIN Deutsches Institut für Normung: German Standards Institute. Downlink The part of the satellite communications circuit that extends from the satellite to an Earth station. Downconverter A unit containing the electronic circuitry necessary to transform the carrier frequency of a broadcast transport stream from a high (radio) frequency - suitable for long-distance transmission - to a low (intermediate) frequency - suitable for extraction of the data. DSNG Digital Satellite News-Gathering. DTE Data circuit Terminating Equipment: A classification of equipment used by the RS-232 standard (and others) to identify equipment types and their communications interface requirements. A communications device that originates (is the source) or is the end receiving unit (destination) of signals on a network. It is typically a terminal or computer. DTH Direct-To-Home. The term used to describe uninterrupted transmission from the satellite directly to the subscriber, that is, no intermediary cable or terrestrial network utilised. DVB Digital Video Broadcasting: A European project which defines transmission standards for digital broadcasting systems using satellite (DVB-S), cable (DVB-C) and terrestrial (DVB-T) medium, created by the EP-DVB group and approved by the ITU. It specifies modulation, error correction, etc. (see EN 300 421 for satellite, EN 300 429 for cable and EN 300 744 for terrestrial). DVB-S2 Digital Video Broadcasting – Satellite – Second Generation: An enhanced specification to replace the DVB-S standard, developed in 2003 and ratified by ETSI (EN 302307) in March 2005. The development of DVB-S2 coincided with the introduction of HDTV and H.264 (MPEG-4 AVC) video codecs. The system allows transmission of one or more MPEG-2 audio/video streams, using QPSK or 8PSK or MAPSK (M-ary amplitude and phase shift keying) modulation with concatenated encoding. DVB SI Digital Video Broadcasting Service Information. DVB-PI DVB-Professional Interfaces: TTV Lan search shows – DVB Physical Interfaces SBD75e Series Demodulator Installation and Operation Manual Glossary Term Description Earth Technical Earth: A connection that ensures all equipment chassis within a rack are at the same potential (“commoned”), usually by connecting a wire between the technical earth terminal and a suitable point on the rack. Also called a Functional Earth. Protective Earth: A connection that ensures all exposed conductive surfaces are at the same electrical potential as the surface of the Earth, to avoid the risk of electrical shock if a person touches a device in which an insulation fault has occurred. In the vent of an insulation fault (a “short circuit”), a very high current flows, which triggers an overcurrent protection device (fuse, circuit breaker, etc.) that disconnects the power supply. Also called a Safety Earth. EBU European Broadcast Union. EIA Electronics Industries Association (USA). EMC Electromagnetic Compatibility. Encryption Encoding of a transmission to prevent access without the appropriate decryption equipment and authorisation. Ethernet The most widely used local area network (LAN) defined by the IEEE as the 802.3 standard. Transmission speeds vary according to the configuration. Ethernet uses copper or fibre-optic cables. ETSI European Telecommunications Standards Institute. Body created in 1988, responsible for standardization of Information and Communication Technologies (ICT) within Europe. These technologies include telecommunications and broadcasting. FCC Federal Communications Commission. A US government agency, established by the Communications Act of 1934 and is responsible for regulating all non-Federal Government use of the radio spectrum (including radio and television broadcasting), and all interstate telecommunications (wire, satellite and cable) as well as all international communications that originate or terminate in the United States. FDM Frequency Division Multiplex: A common communication channel for a number of signals, each with its own allotted frequency. FEC Forward Error Correction: A method of detecting and correcting errors in a transmission. The data to be transmitted is processed through an algorithm that generates code bits that are added to the message. The code bits are used at the receiving end to check the accuracy of the transmission and correct any errors. Footprint The area of the Earth’s surface covered by a satellite’s downlink transmission. Also (generally) the area from which the satellite can receive uplink transmissions. FTP File Transfer Protocol: A protocol used to transfer files over a TCP/IP network (Internet, UNIX, etc.). For example, after developing the HTML pages for a Web site on a local machine, they are typically uploaded to the Web server, using FTP. Unlike e-mail programs in which graphics and program files have to be attached, FTP is designed to handle binary files directly and does not add the overhead of encoding and decoding the data. G.703 The ITU-T standard which defines the physical and electrical characteristics of hierarchical digital interfaces. SBD75e Series Demodulator Installation and Operation Manual B-5 Glossary B-6 Term Description GUI Graphical User Interface: The use of pictures rather than just words to represent the input and output of a program. A program with a GUI runs under a windowing system and has a screen interface capable of displaying graphics in the form of icons, drop-down menus and a movable pointer. The on-screen information is usually controlled / manipulated by a mouse or keyboard. HSSI High Speed Serial Interface: A differential ECL serial interface standard developed by Cisco Systems and T3plus Networking primarily for use in WAN router connections. It is capable of speeds up to 52 Mbit/s with cables up to 50 feet in length. While HSSI uses 50-pin connector physically similar to that used by SCSI-2, it requires a cable with an impedance of 11 Ω (as opposed to the 75 Ω of a SCSI-2 cable). IEC International Electrotechnical Committee. IF Intermediate Frequency: A frequency, commonly 70/140 MHz, to which a carrier frequency is shifted as an intermediate step in transmission or reception. The intermediate frequency is created by mixing the carrier signal with a local oscillator signal, resulting in a signal at the difference frequency. IP Internet Protocol: The IP part of TCP/IP. IP implements the network layer (layer 3) of the protocol, which contains a network address and is used to route a message to a different network or sub-network. IP accepts packets from the layer 4 transport protocol (TCP or UDP), adds its own header to it and delivers a datagram to the layer 2 data link protocol. It may also break the packet into fragments to support the Maximum Transmission / Transfer Unit (MTU) of the network. IRD Integrated Receiver Decoder: The Receiver with an internal MPEG Decoder, which is connected to the subscriber’s TV. The IRD is responsible for receiving and de-multiplexing all signals. The unit receives the incoming signal and if CA is active, decodes the signal when provided with a control word by the viewing card. Domestic IRDs are also known as Set-Top Units or Set-Top Boxes. ISDN Integrated Services Digital Network: The basic ISDN service is BRI (Basic Rate Interface), which is made up of two 64 kbit/s B channels and one 16 kbit/s D channel (2B+D). If both channels are combined into one, called bonding, the total data rate becomes 128 kbit/s and is four and a half times the bandwidth of a V.34 modem (28.8 kbit/s). The ISDN high-speed service is PRI (Primary Rate Interface). It provides 23 B channels and one 64 kbit/s D channel (23B+D), which is equivalent to the 24 channels of a T1 line. When several channels are bonded together, high data rates can be achieved. For example, it is common to bond six channels for quality videoconferencing at 384 kbit/s. In Europe, PRI includes 30 B channels and one D channel, equivalent to an E1 line. ISO International Standards Organisation. ITU-R International Telecommunications Union - Radiocommunications Study Groups (was CCIR). ITU-T International Telecommunications Union - Telecommunications Standardisation Sector (was CCITT). SBD75e Series Demodulator Installation and Operation Manual Glossary Term Description JPEG Joint Photographic Experts Group: ISO/ITU standard for compressing still images. It has a high compression capability. Using discrete cosine transform, it provides user specified compression ratios up to around 100:1 (there is a trade-off between image quality and file size). kbit/s 1000 bits per second. Kbit 1024 bits, usually refers to memory capacity or allocation. Ku-band ITU-defined frequency range from 12 GHz to 18 GHz. Used by communications satellites, this range of frequency is less susceptible to interference. LAN Local Area Network: A network, which provides facilities for communications within a defined building or group of buildings in close proximity. L-Band ITU-defined frequency range from 950 MHz to 2150 MHz. The normal input-frequency-range of a domestic IRD. The incoming signal from the satellite is down-converted to L-band by the LNB. LCD Liquid Crystal Display. A thin, flat display device made up of any number of colour or monochrome pixels arrayed in front of a light source or reflector. Often utilized in battery-powered electronic devices because it uses very small amounts of electric power. LED Light Emitting Diode. A semiconductor diode that emits light when an electric current is applied in the forward direction of the device. Link Budget The accounting of all of the gains and losses from the transmitter, through the medium (free space, cable, waveguide, fiber, etc.) to the receiver in a telecommunication system. It accounts for the attenuation of the transmitted signal due to propagation, as well as the antenna gains, feedline and miscellaneous losses. Randomly varying channel gains such as fading are taken into account by adding some margin depending on the anticipated severity of its effects. The amount of margin required can be reduced by the use of mitigating techniques such as antenna diversity or frequency hopping. LNA Low-Noise Amplifier: A component of a dish antenna that amplifies the weak signals received from a satellite (or microwave transmitter). It is often located very close to, or on, the antenna (immediately behind the feed horn) so that further losses, due to the signal travelling down the feed line, are minimised. LNB Low-Noise Block Down-Converter: A combination of Low Noise Amplifier (LNA) and a Block Down-Converter (BDC) usually mounted on a dish antenna to enable it to amplify and downconvert the received signal to a suitable frequency to communicate to a Receiver, Demodulator or IRD (typically L-BAND 950 MHz - 1600 MHz). LNBF Low-Noise Block Down-Converter and Feed: A combination of Low Noise Amplifier, Block Down-Converter and Feed, mounted on a dish antenna. LO Local Oscillator. LVDS Low Voltage Differential Signal: LVDS is a generic multi-purpose Interface standard for high speed / low power data transmission. It was standardised in ANSI/TIA/EIA-644-1995 Standard (aka RS-644). M&C Monitor and Control. SBD75e Series Demodulator Installation and Operation Manual B-7 Glossary Term Description Mbit/s Million bits per second. MCPC Multiple Channels Per Carrier. MIB Management Information Base: A type of database used to manage the devices in a communications network. It comprises a collection of objects in a (virtual) database used to manage entities (such as routers and switches) in a network. MP@ML Main Profile at Main Level: A subset of the MPEG-2 standard, which supports digital video storage (DVD etc.) and transmissions up to 15 Mbit/s over various mediums. MP@HL Main Profile at High Level: A subset of the MPEG-2 standard, which supports digital video storage (DVD etc.) and transmissions up to 80 Mbit/s over various mediums. MPEG Moving Pictures Experts Group: The name of the ISO/IEC working group which sets up the international standards for digital television source coding. MPEG-2 Industry standard for video and audio source coding using compression and multiplexing techniques to minimise video signal bit-rate in preparation for broadcasting. Specified in ISO/IEC 13818. The standard is split into layers and profiles defining bit-rates and picture resolutions. Msymbol/s (Msym/s) Mega (million) Symbols per second (106 Symbols per second). Multiplex A number of discrete data streams (typically 8 to 12), from encoders, that are compressed together in a single DVB compliant transport stream for delivery to a Modulator. Mux Multiplexer: Transmission Multiplexer: receives EMMs from the ACC, ECMs from the BCC, video/audio data from the encoders, and the SI stream from the SIC. It then multiplexes them all into a single DVB-compliant transport stream, and delivers the signal to the uplink after modulation. The Multiplexer also contains the cypher card, which scrambles the services according to the control words supplied by the BCC. B-8 NTSC National Television Systems Committee: The group, which developed analogue standards used in television broadcast systems in the United States. Also adopted in other countries (e.g. Mexico, Canada, Japan). This system uses 525 picture lines and a 59.97 Hz field frequency. NVOD Near Video On Demand: Method of offering multiple showings of movies or events. The showings are timed to start at set intervals, determined by the broadcaster. Each showing of a movie or event can be sold to subscribers separately. ODU Outdoor Unit OFDM Orthogonal Frequency Division Multiplex: A modulation technique used for digital TV transmission in Europe, Japan and Australia; more spectrally efficient than FDM. In OFDM, data is distributed over a large number of carriers spaced apart at precise frequencies. The carriers are arranged with overlapping sidebands in such a way that the signals can be received without adjacent channel interference. OPPV Order ahead Pay Per View: An advance purchase of encrypted onetime events with an expiry date. SBD75e Series Demodulator Installation and Operation Manual Glossary Term Description OQPSK Offset Quadrature Phase Shift Keying: A variant of phase-shift keying modulation using 4 different values of the phase to transmit. It is sometimes called Staggered quadrature phase-shift keying (SQPSK). OSD On-screen display: Messages and graphics, typically originating from the SMS, and displayed on the subscriber’s TV screen by the IRD, to inform the subscriber of problems or instruct the subscriber to contact the SMS. PCM Pulse Code Modulation: A process in which a signal is sampled, each sample is quantised independently of other samples, and the resulting succession of quantised values is encoded into a digital signal. PCR Program Clock Reference: A time-stamp in the transport stream from which the Decoder timing is derived. PES Packetised Elementary Stream: A sequential stream of data bytes that has been converted from original elementary streams of audio and video access units and transported as packets. Each PES packet consists of a header and a payload of variable length and subject to a maximum of 64 kbytes. A time-stamp is provided by the MPEG-2 systems layer to ensure correct synchronisation between related elementary streams at the Decoder. PID Packet Identifier: The header on a packet in an elementary data stream, which identifies that data stream. An MPEG-2 / DVB standard. PLL Phase-Locked Loop. A phase-locked loop is a control system which controls the rotation of an object by comparing its rotational position (phase) with another rotating object as in the case of a sine wave or other repeating signal. This type of control system can synchronise not only the speed, but also the angular position of two waveforms that are not derived from the same source. Program PC - A sequence of instructions for a computer. TV - A concept having a precise definition within ISO 13818-1 (MPEG-2). For a transport stream, the timebase is defined by the PCR. The use of the PCR for timing information creates a virtual channel within the stream. Programme A linking of one or more events under the control of a broadcaster. For example, football match, news, film show. In the MPEG-2 concept, the collection of elementary streams comprising the programme, have a common start and end time. A series of programmes are referred to as events. PS Program Stream: A combination of one or more PESs with a common timebase. PSK Phase Shift Keying: A method of modulating digital signals particularly suited to satellite transmission. PSR Professional Satellite Receiver: See also: IRD. PSU Power Supply Unit. QAM Quadrature Amplitude Modulation: A method of modulating digital signals, which uses combined techniques of phase modulation and amplitude modulation. It is particularly suited to cable networks. SBD75e Series Demodulator Installation and Operation Manual B-9 Glossary B-10 Term Description QPSK Quadrature Phase Shift Keying: A modulation technique used to communicate data over long distances by altering the phase of a carrier signal according to the four data states. Sometimes known as quaternary or quadriphase PSK, 4-PSK, or 4-QAM. RF Radio Frequency. RS Reed-Solomon coding: An error detection and correction, coding system. 16 bytes of Reed-Solomon Forward Error Correction code are appended to the packet before transmission bringing the packet length to 204 bytes. The 16 bytes are used at the receiving end to correct any errors. Up to eight corrupted bytes can be corrected. RLC Run Length Coding: Minimisation of the length of a bit-stream by replacing repeated characters with an instruction of the form ‘repeat character x y times’. RX Receive or Receiver. SCPC Single Channel Per Carrier. Use of a single signal at a given frequency and bandwidth. Most often, this is used on broadcast satellites to indicate that radio stations are not multiplexed as subcarriers onto a single video carrier, but instead independently share a transponder. It may also be used on other communications satellites, or occasionally on non-satellite transmissions Scrambling Alteration of the characteristics of a television signal in order to prevent unauthorised reception of the information in clear form. SDI Serial Digital Interface. SELV Safety Extra Low Voltage (EN 60950). STB Set-Top Box: A box that sits on top of a television set and is the interface between the home television and the cable TV company. New technologies evolving for set-top boxes are video-on-demand, video games, educational services, database searches, and home shopping. The cable equivalent of the IRD. SFN Single Frequency Network: The SFN technique allows large geographic areas to be served with a common transmission multiplex. All transmitters in the network are synchronously modulated with the same signal and they all radiate on the same frequency. Due to the multi-path capability of the multi-carrier transmission system (COFDM), signals from several transmitters arriving at a receiving antenna may contribute constructively to the total wanted signal. The SFN technique is not only frequency efficient but also power efficient because fades in the field strength of one transmitter may be filled by another transmitter. SNG Satellite News-Gathering. SNMP Simple Network Management Protocol. A ‘layered’ protocol used in software applications that facilitates the exchange of management information between network devices. It is part of the Transmission Control Protocol/Internet Protocol (TCP/IP) protocol suite. SNMP enables network administrators to manage network performance and resolve network problems. SBD75e Series Demodulator Installation and Operation Manual Glossary Term Description Spectral Scrambling A process (in digital transmission) used to combine a digital signal with a pseudo-random sequence, producing a randomised digital signal that conveys the original information in a form optimised for a broadcast channel. TCP / IP Transmission Control Protocol/Internet Protocol: A set of communications protocols used to connect different computers over networks (in particular the internet). TCP/IP consists of four layers: from lowest to highest, these are the Link Layer, the Internet Layer, the Transport Layer, and the Application Layer. TS Transport Stream. A multiplex of video, audio and data (elementary) streams combined (packetized) into a single synchronous transmission bit stream. It is defined by the MPEG-2 compression and multiplexing standard for the transmission of digital broadcast streams over satellite links, terrestrial networks, and cable networks. These Packetised Elementary Streams (PES) and System Information (SI) streams may comprise more than one programme, but with common synchronisation and error protection. The data structure is defined in ISO/IEC 13818-1 [1] and is the basis of the ETSI Digital Video Broadcasting (DVB) standards. TX Transmit or Transmitter. U 44.45 mm (rack height standard). Upconverter A unit containing the electronic circuitry necessary to transform the carrier frequency of a broadcast transport stream from a low (intermediate) frequency to a high (radio) frequency - suitable for longdistance transmission. Uplink The part of the communications satellite circuit that extends from the Earth to the satellite. UPS Uninterruptable Power Supply: A method of supplying backup power when the electrical power fails or drops to an unacceptable voltage level. Small UPS systems provide battery power for a few minutes; enough to power down the computer in an orderly manner. This is particularly important where write back cache is used. Write back cache is where modified data intended for the disk is temporarily stored in RAM and can be lost in the event of a power failure. Sophisticated systems are tied to electrical generators that can provide power for days. UPS systems typically provide surge suppression and may provide voltage regulation. UTC Universal Time Co-ordinate: An internationally agreed basis for timekeeping introduced in 1972 and based on international atomic time (corresponds to Greenwich Mean Time or GMT). SBD75e Series Demodulator Installation and Operation Manual B-11 Glossary B-12 SBD75e Series Demodulator Installation and Operation Manual